

How to Measure Feet & Calculate Sock Size for Knitting
September 5, 2025
How to Knit a Classic Heel Flap & Turn (Sock Heel Tutorial)
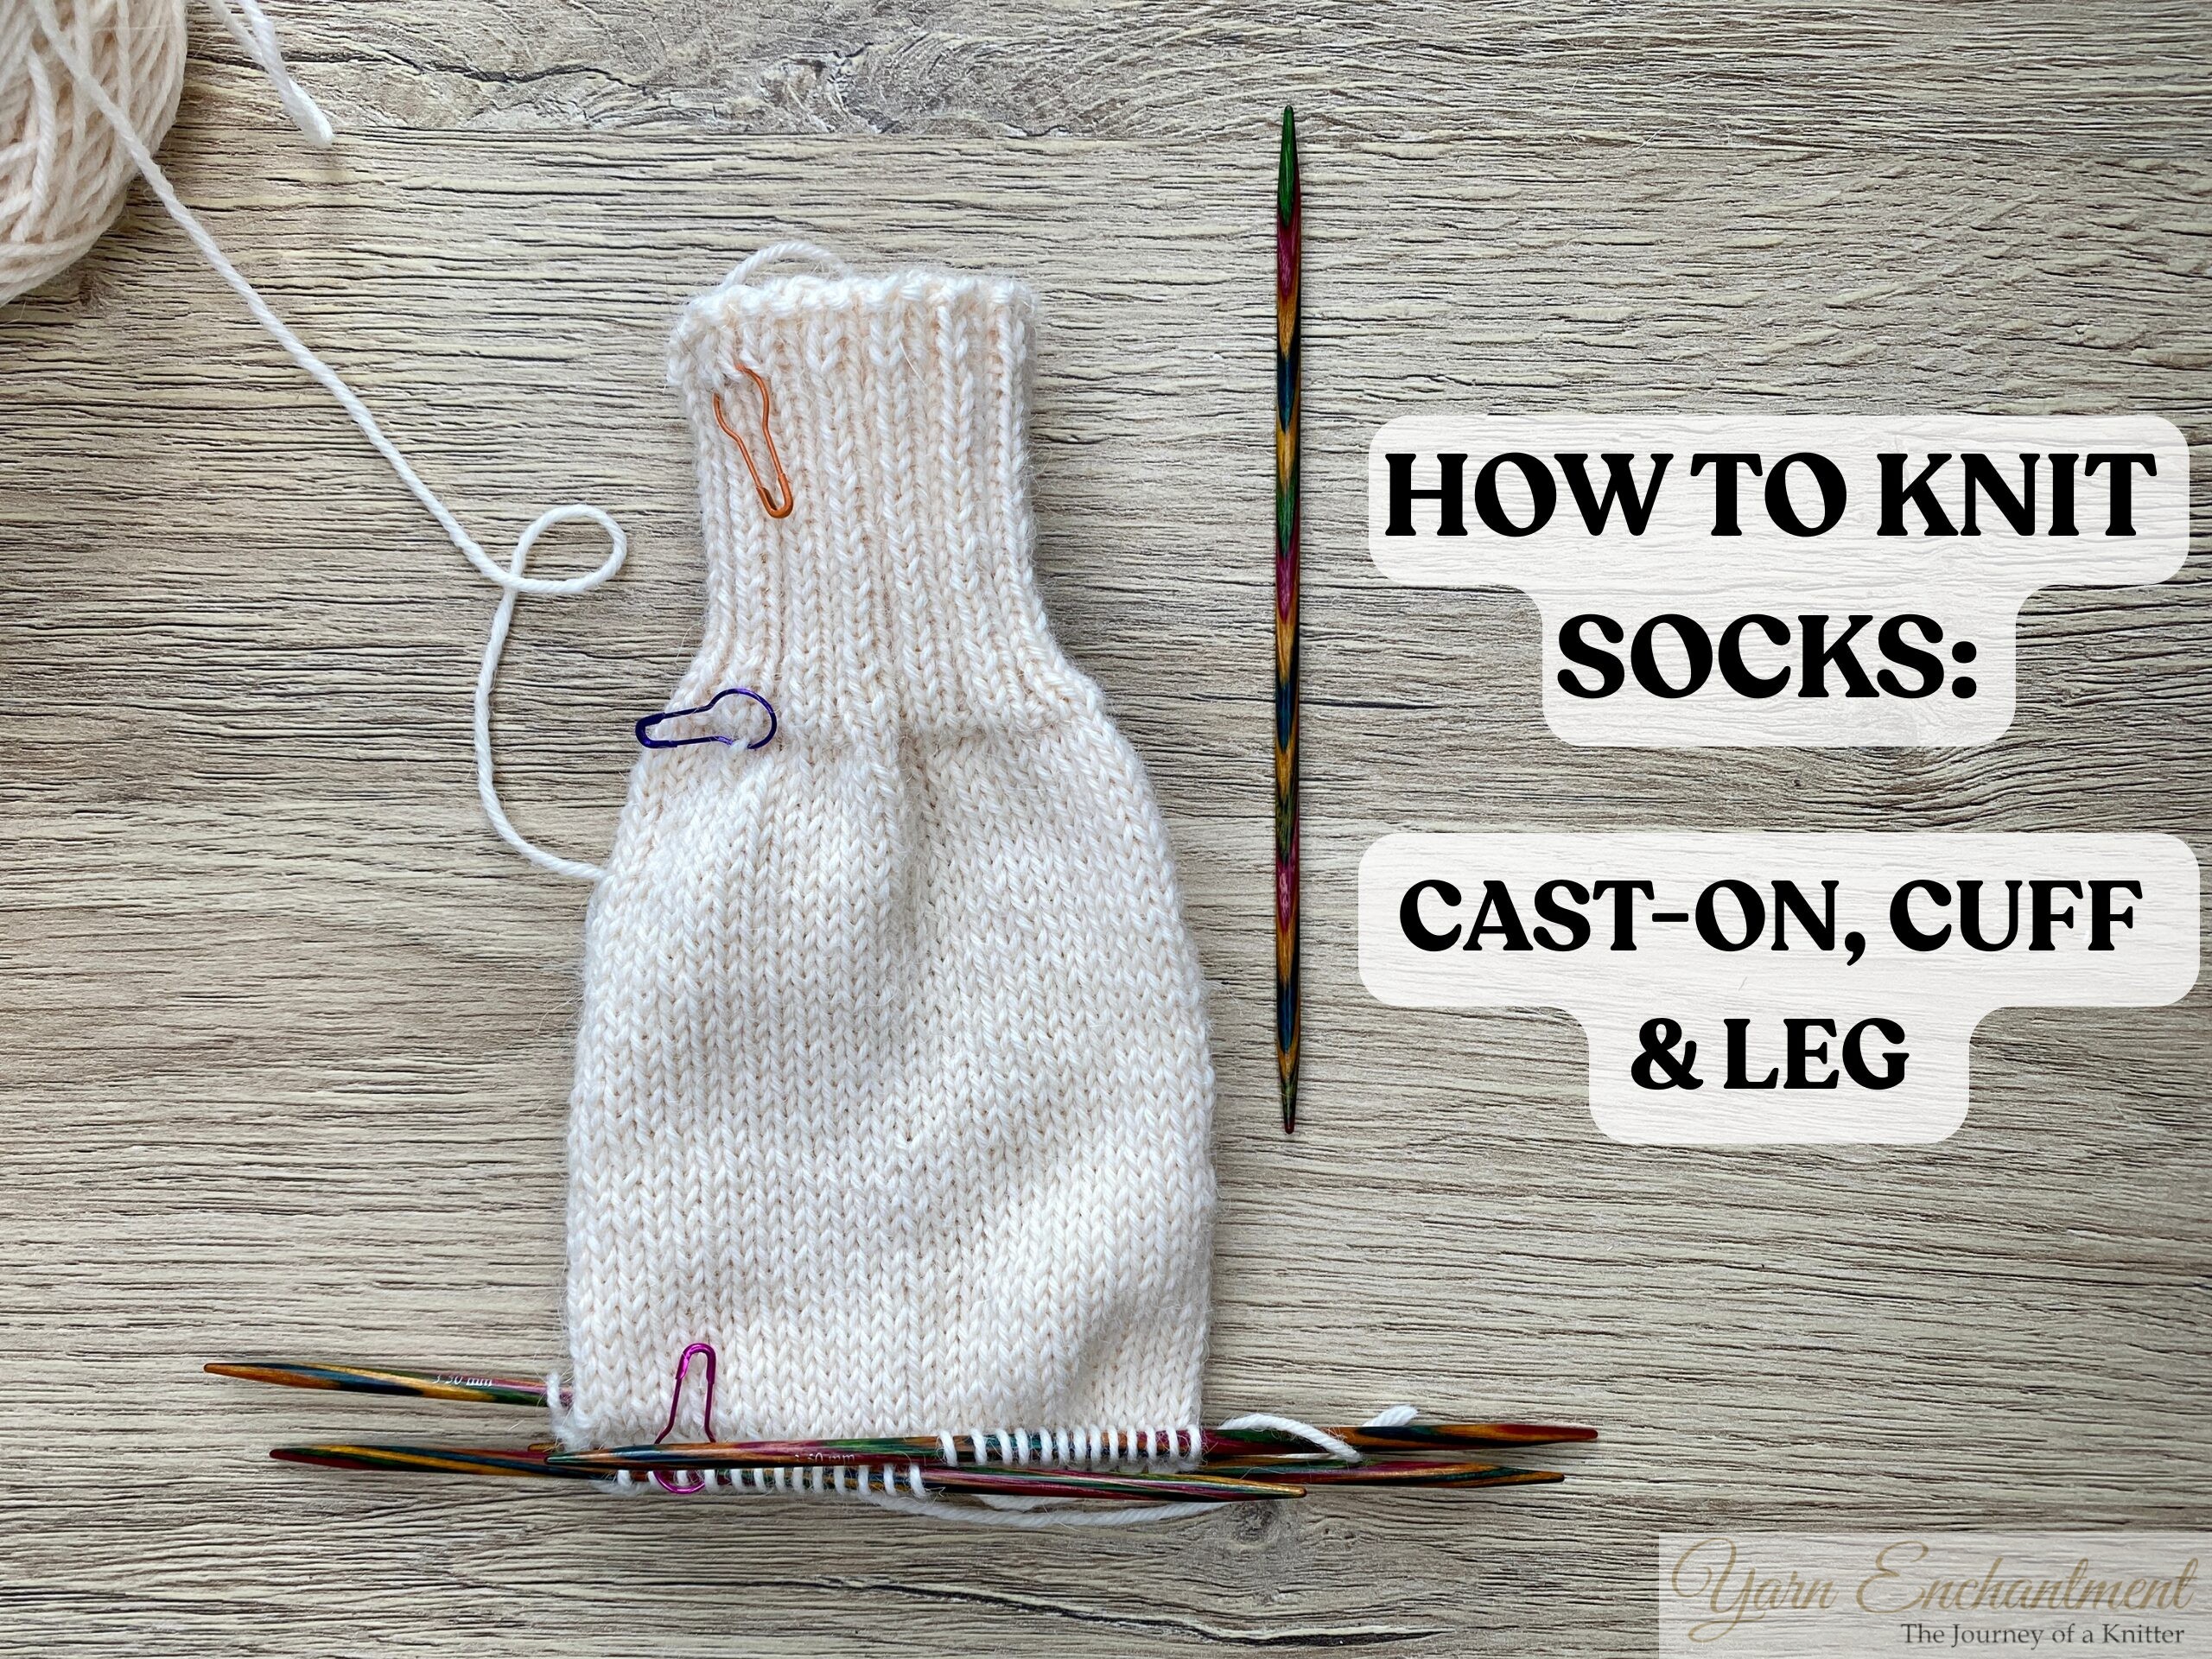
September 16, 2025How to Knit Socks with Double Pointed Needles: Complete Beginner Guide

Originally published on September 14, 2025
After a bit of foundational theory, we finally get to the fun part. In today’s blog post, let’s walk through casting on, working the cuff, and knitting up the leg of a sock. This guide will focus on using double pointed needles (DPNs) - a timeless, flexible approach that’s especially handy for small, circular projects like socks. DPNs are a favorite for knitters who want something portable, and there’s a certain charm in sticking with this classic sock-making tradition.
If you’re comfortable already, I have a previous post all about casting on with double pointed needles (DPNs) without any twists or gaps. For this beginner-friendly guide, though, I’ll show you another simple cast-on method for DPNs. This technique does leave a small gap at the join, which we’ll tidy up later, but I wanted to give you more than one way to get started.
Watch the full video tutorial here
 | How to Knit Socks: Complete Beginner Guide |
Table of Contents
- Why Use Double Pointed Needles for Socks?
- Materials Needed
- How to Prepare Sock Yarn
- Step-by-Step: Knit Beginners Socks
- Tips for Success
- FAQs for Sock Knitting Beginners
- What’s Next? The Sock Heel & More + Video Tutorial
Why Use Double Pointed Needles for Socks?
Sock knitting comes with many techniques - magic loop, short circulars - but today, I want to give the spotlight to DPNs. I do plan to explore those other methods in the future, but for now, let’s celebrate the traditional way. If DPNs seem a bit awkward at first (some say it’s like "wrestling a hedgehog"), don’t worry - just a little practice makes a world of difference, and you’ll soon find your own rhythm and ease.
Materials Needed
- Double pointed needles (set of 4 or 5, typically 2.5mm for standard 4-ply sock yarn or 3.5mm needles for 6-ply yarn)
- 4-ply or 6-ply sock yarn (about 100g - 150 per pair)
- Stitch marker
- Crochet Hook
- Measuring Tape
- Stitch Stopper
- Scissors
- Yarn needle
- Sock Knitting Progress Tracker (optional)
 | Materials Needed |

How to Prepare Sock Yarn
Before diving into casting on, let me share a favorite prep step that’s become part of my sock-knitting ritual: preparing the yarn itself. If you have a yarn hank, you’ll need to do this step to wind it into a yarn cake. However, if you already have a yarn skein, this step is completely optional - so feel free to skip it.
I like to divide my sock yarn skein into two equal portions right from the start. For example, my current project uses a lovely 154-gram skein, so I wind it into two separate balls of about 75 grams each. Why? Working with smaller balls feels much more manageable in my hands, especially during cozy evening knitting sessions. Plus, it’s like having a built-in progress tracker, making it easy to see exactly how much yarn remains for the foot.
What You’ll Need:
All you really need is a kitchen scale and either a ball winder or your hands for winding. I’ve wound plenty of yarn balls by hand over the years - while it takes a bit longer, there’s something meditative and calming about the process. If you’re winding a yarn hank into a cake and have a yarn swift, it makes things even smoother. If not, simply drape your hank over two chairs - crafters are always resourceful!
Quick tip: If you don’t have a kitchen scale handy, check your yarn label, most show the total weight - so you can estimate halfway through your winding process.
This simple preparation step has saved me from countless “Will I run out of yarn?” moments, and it keeps everything tidy in my project bag. Try it on your next pair - you might find it becomes part of your own sock-knitting ritual, too!
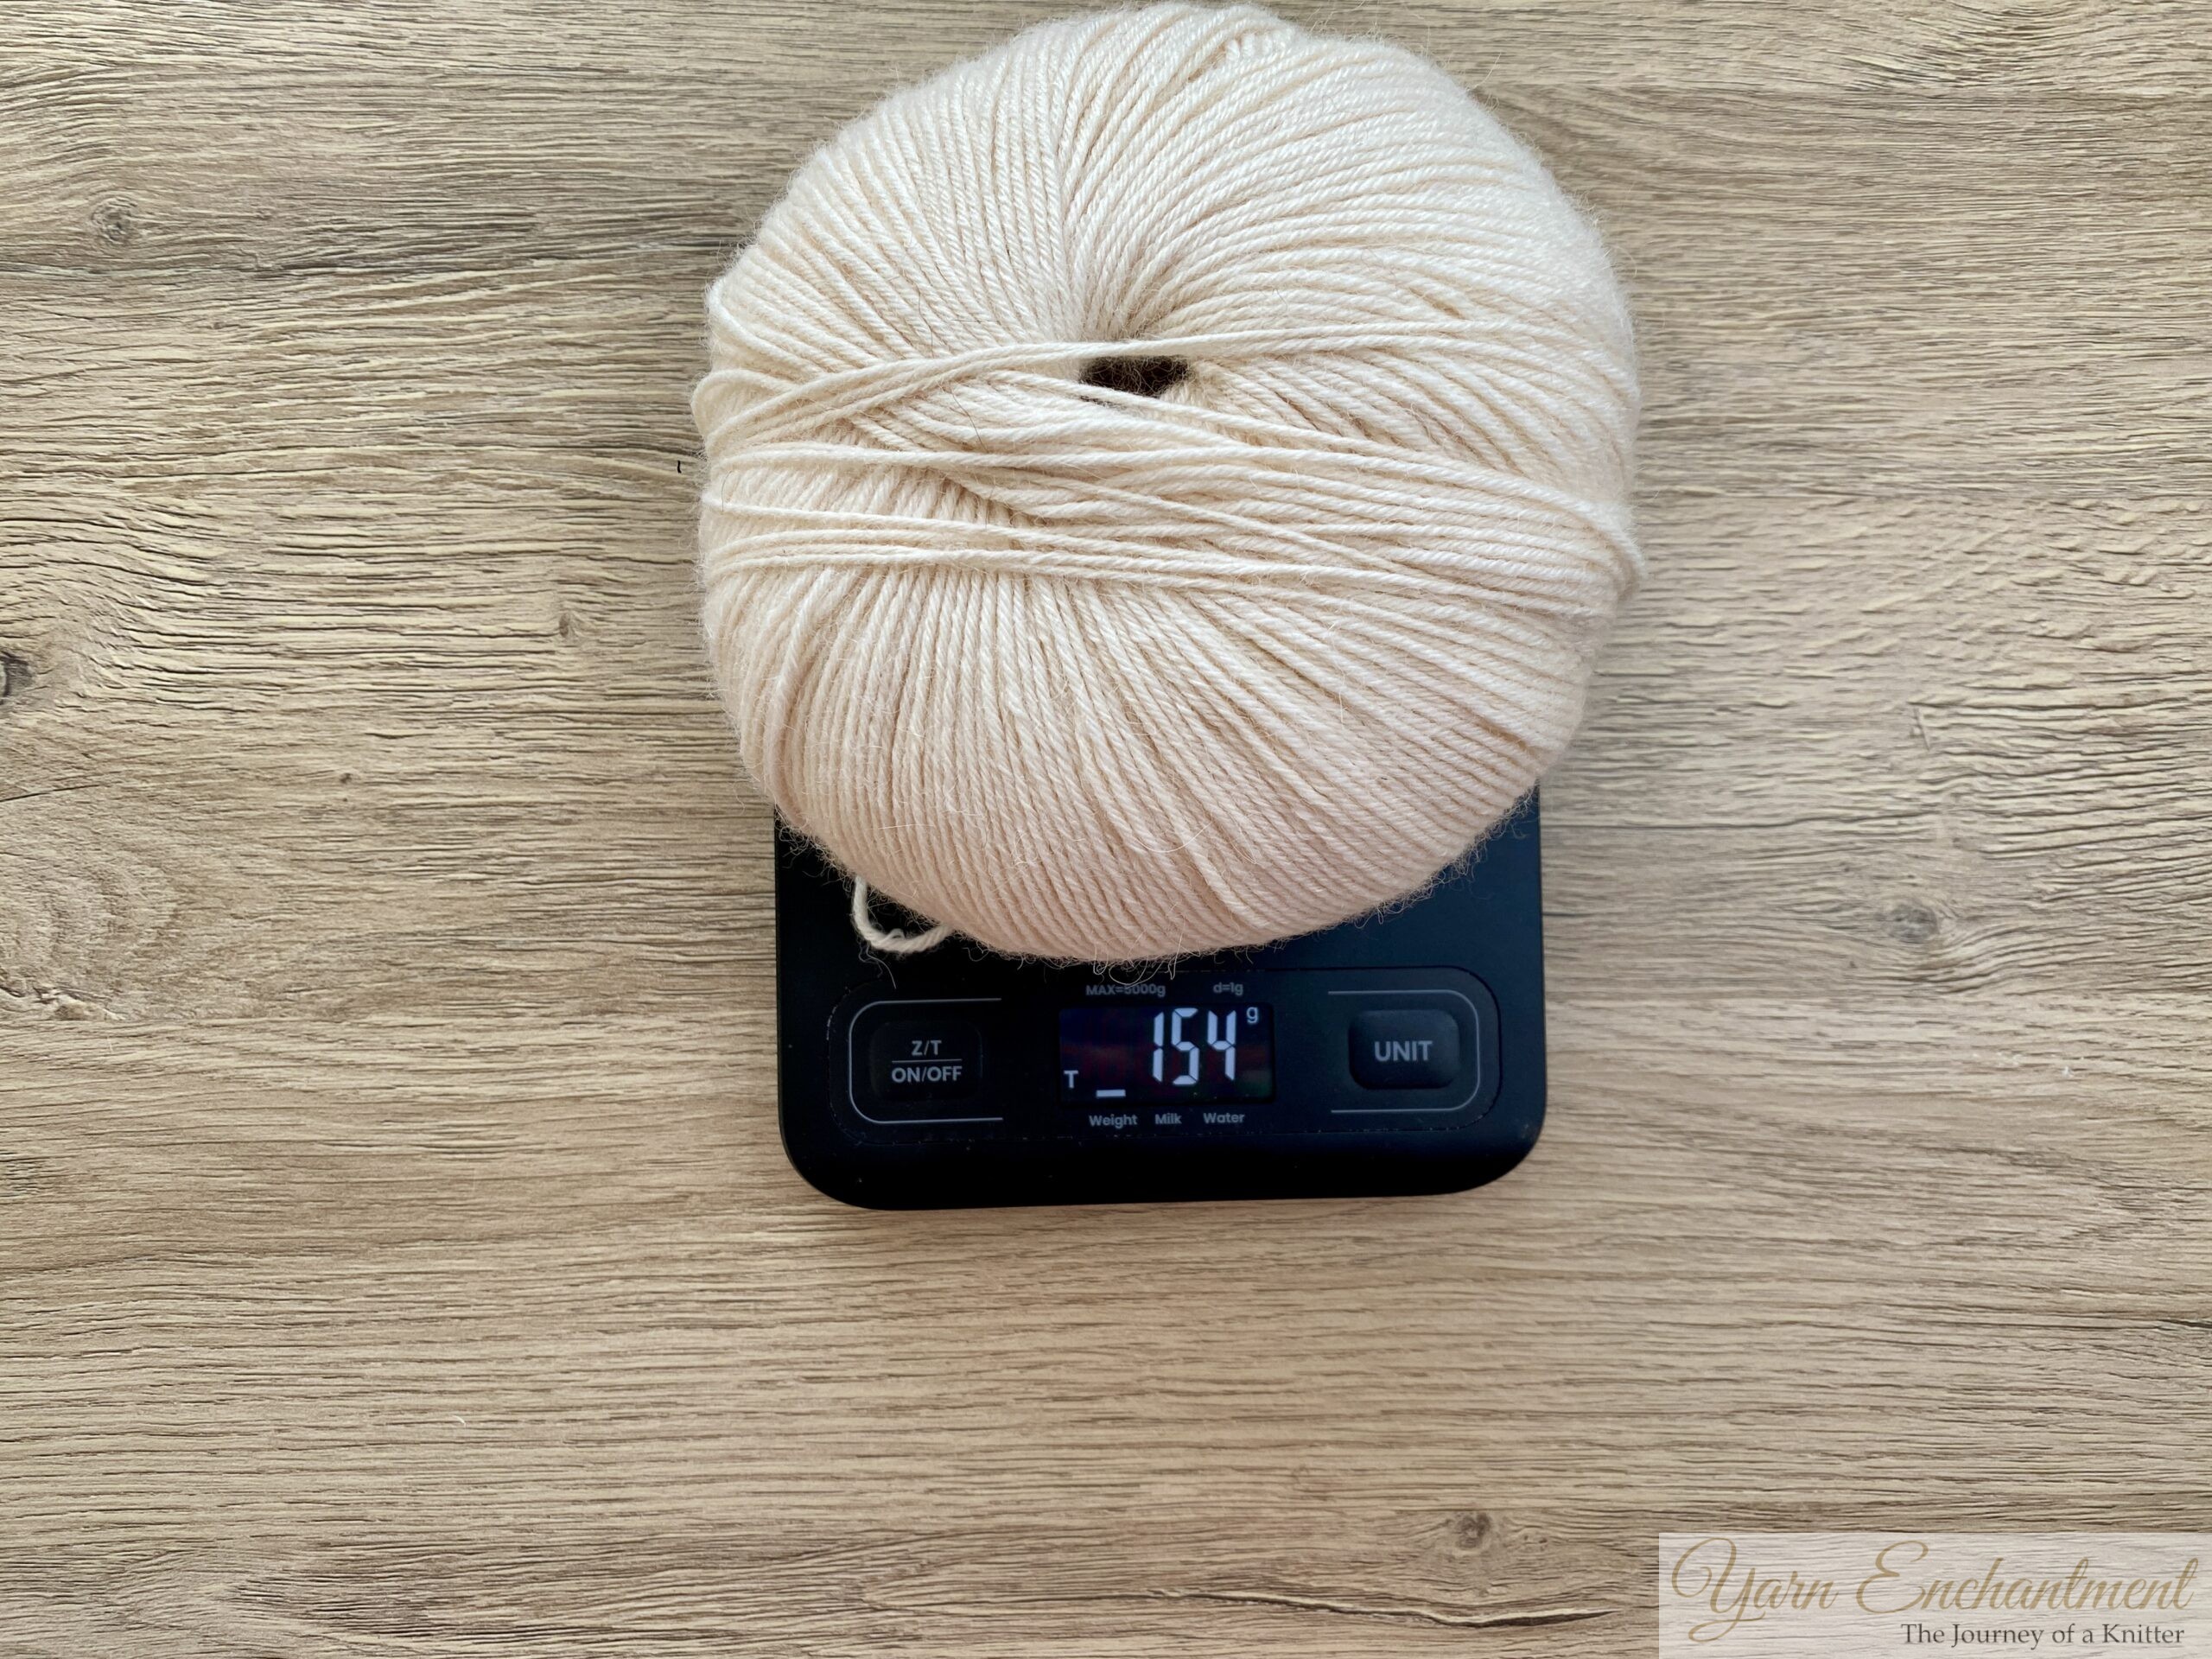 | 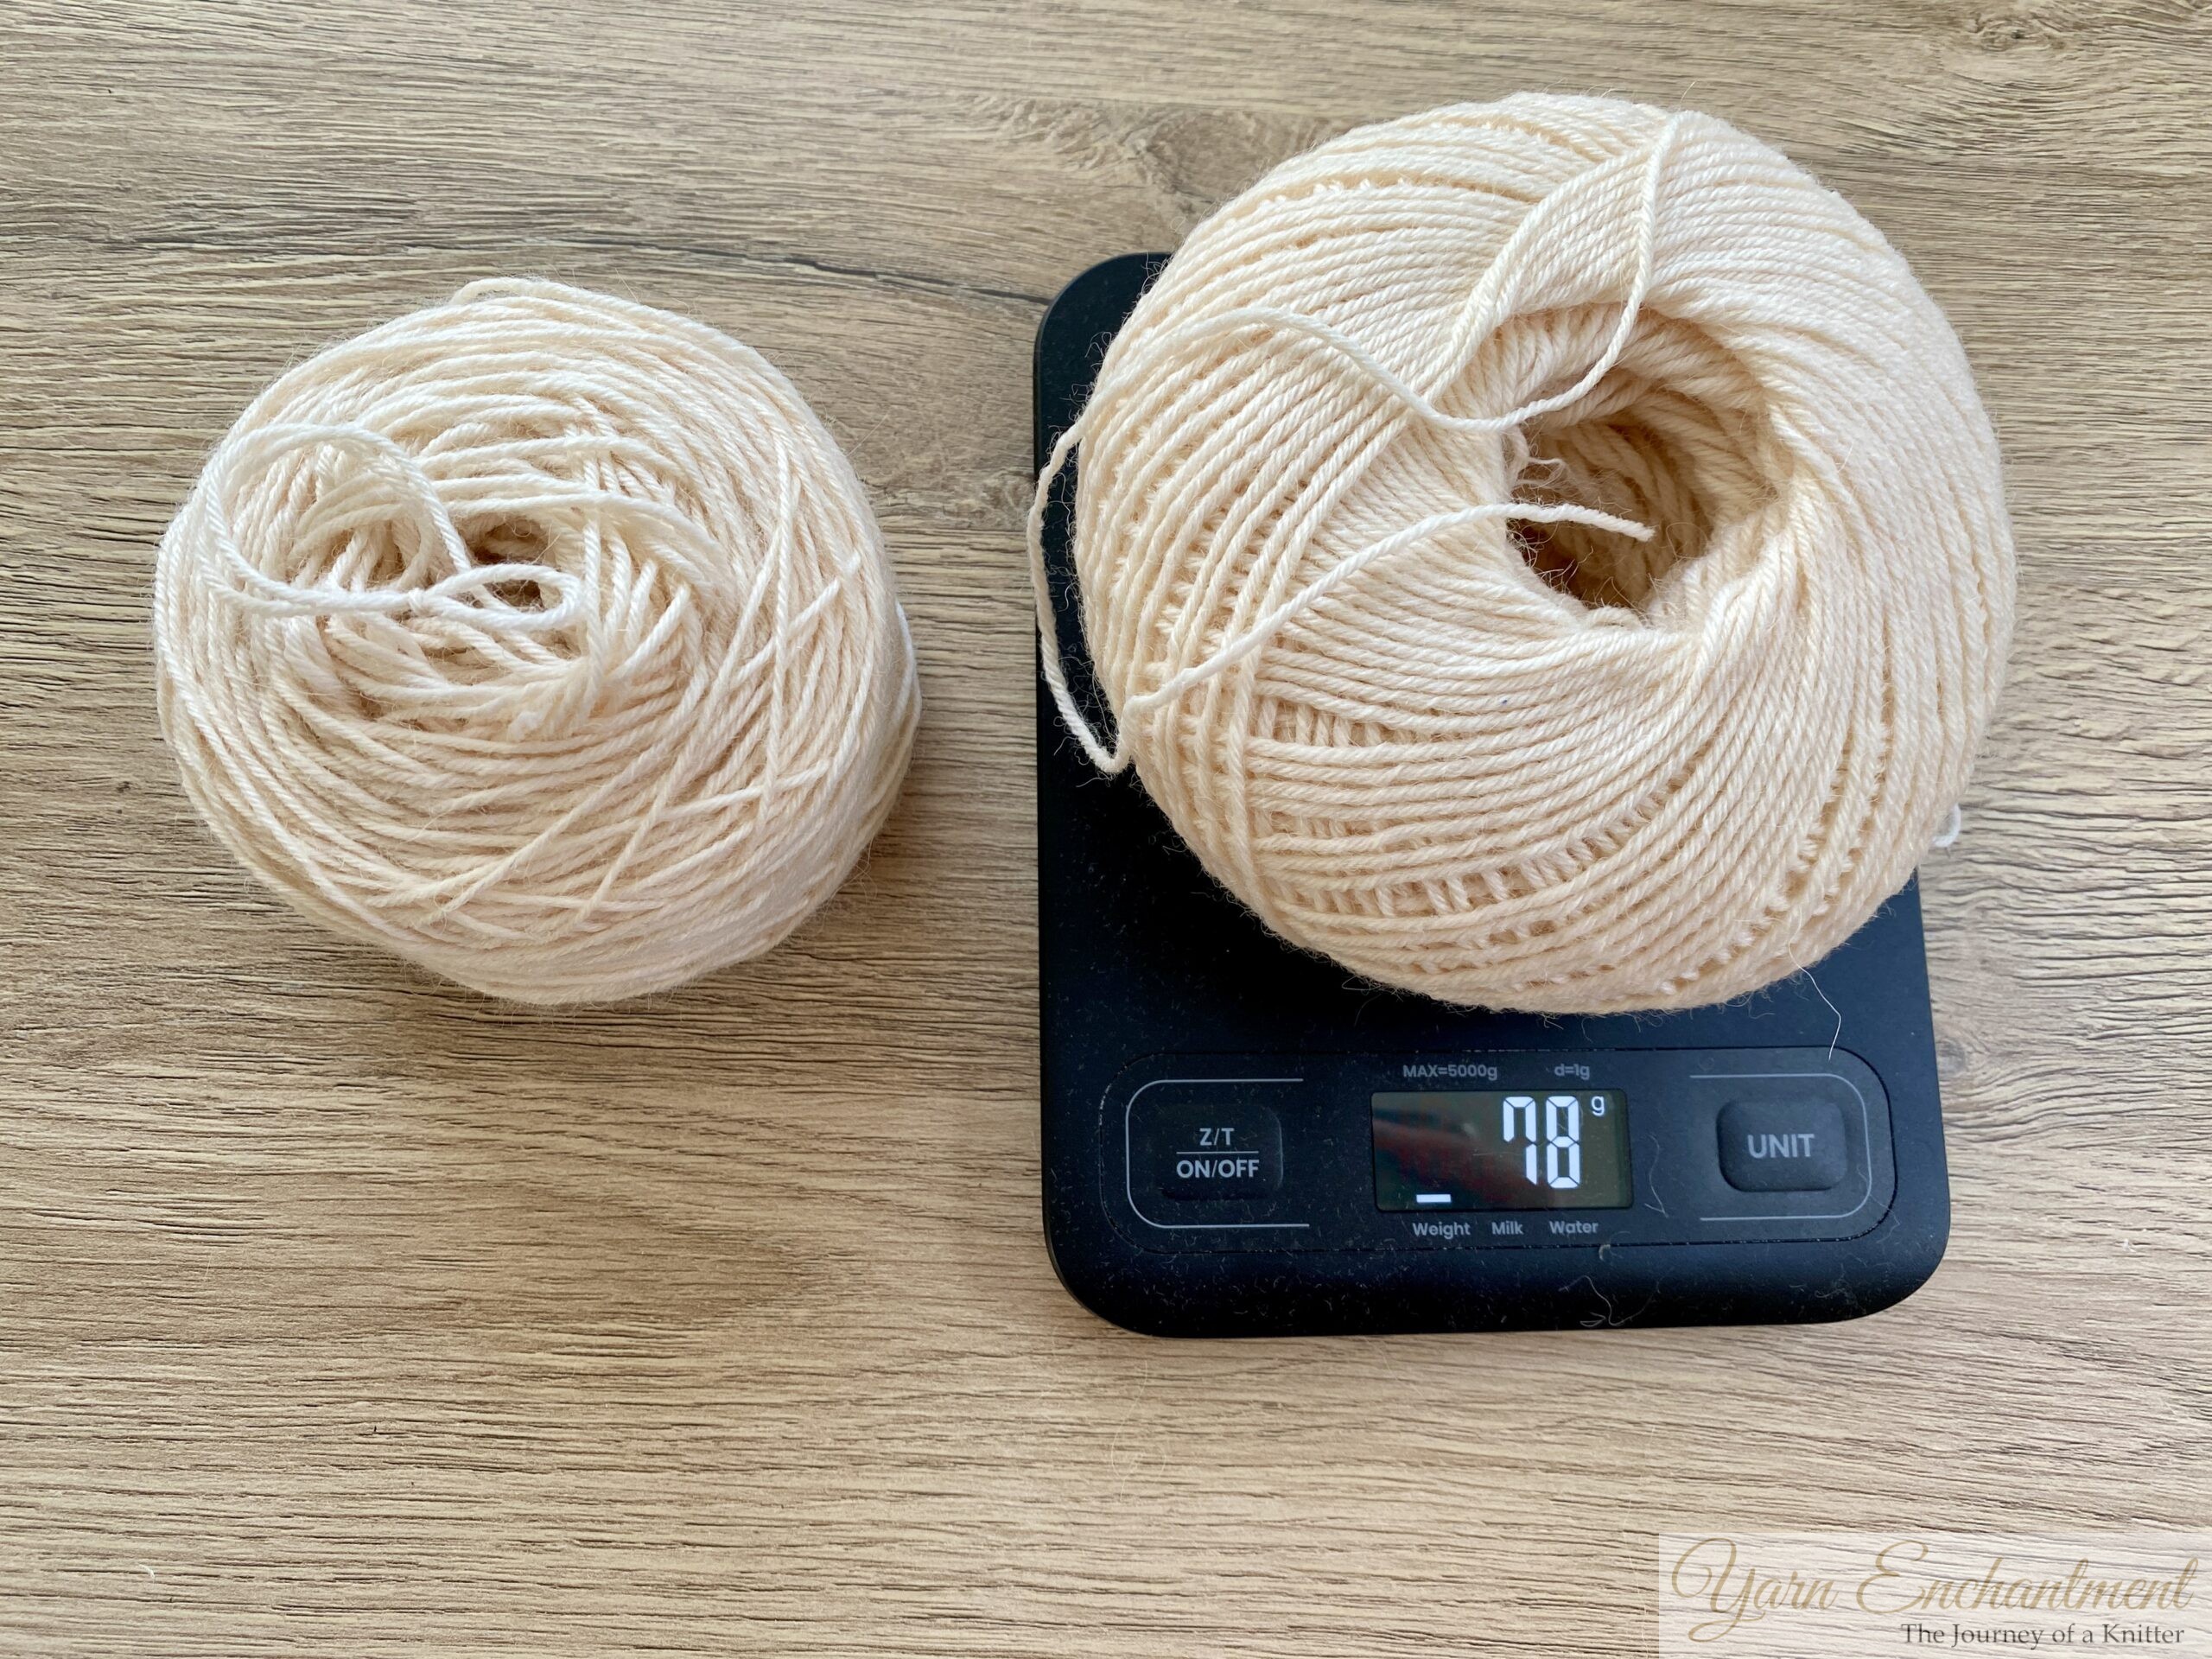 | My yarn skein weighs 154 grams. | I used my yarn winder and wound it into two separate, approximately 78-gram skeins. |


Step-by-Step: Knit Beginners Socks
Casting On & Ribbing
Begin by casting on the number of stitches required for your sock size. (If you missed last week’s post, be sure to check it out for tips on measuring and calculating your ideal cast-on - it’s key to a perfect fit!)
For a more comfortable, stretchy edge, cast on with a needle one size larger than the one you’ll use for the cuff or ribbing. For example, when knitting with 6-ply sock yarn, my main needle for the leg is 3.5 mm and I use 2.5 mm needles for a snug ribbed cuff. For the cast-on, I either use a 4 mm needle or hold two 2.5 mm needles together. This keeps the cast-on edge flexible and prevents it from feeling tight. A stretchy cast-on method, such as the knitted cast-on or long-tail cast-on, works especially well for socks.
Note: If you are knitting with a 4-ply yarn, you might need other needle sizes such as 2.00 mm needles for the cuff (ribbing) and 3.00 mm needles for the leg.
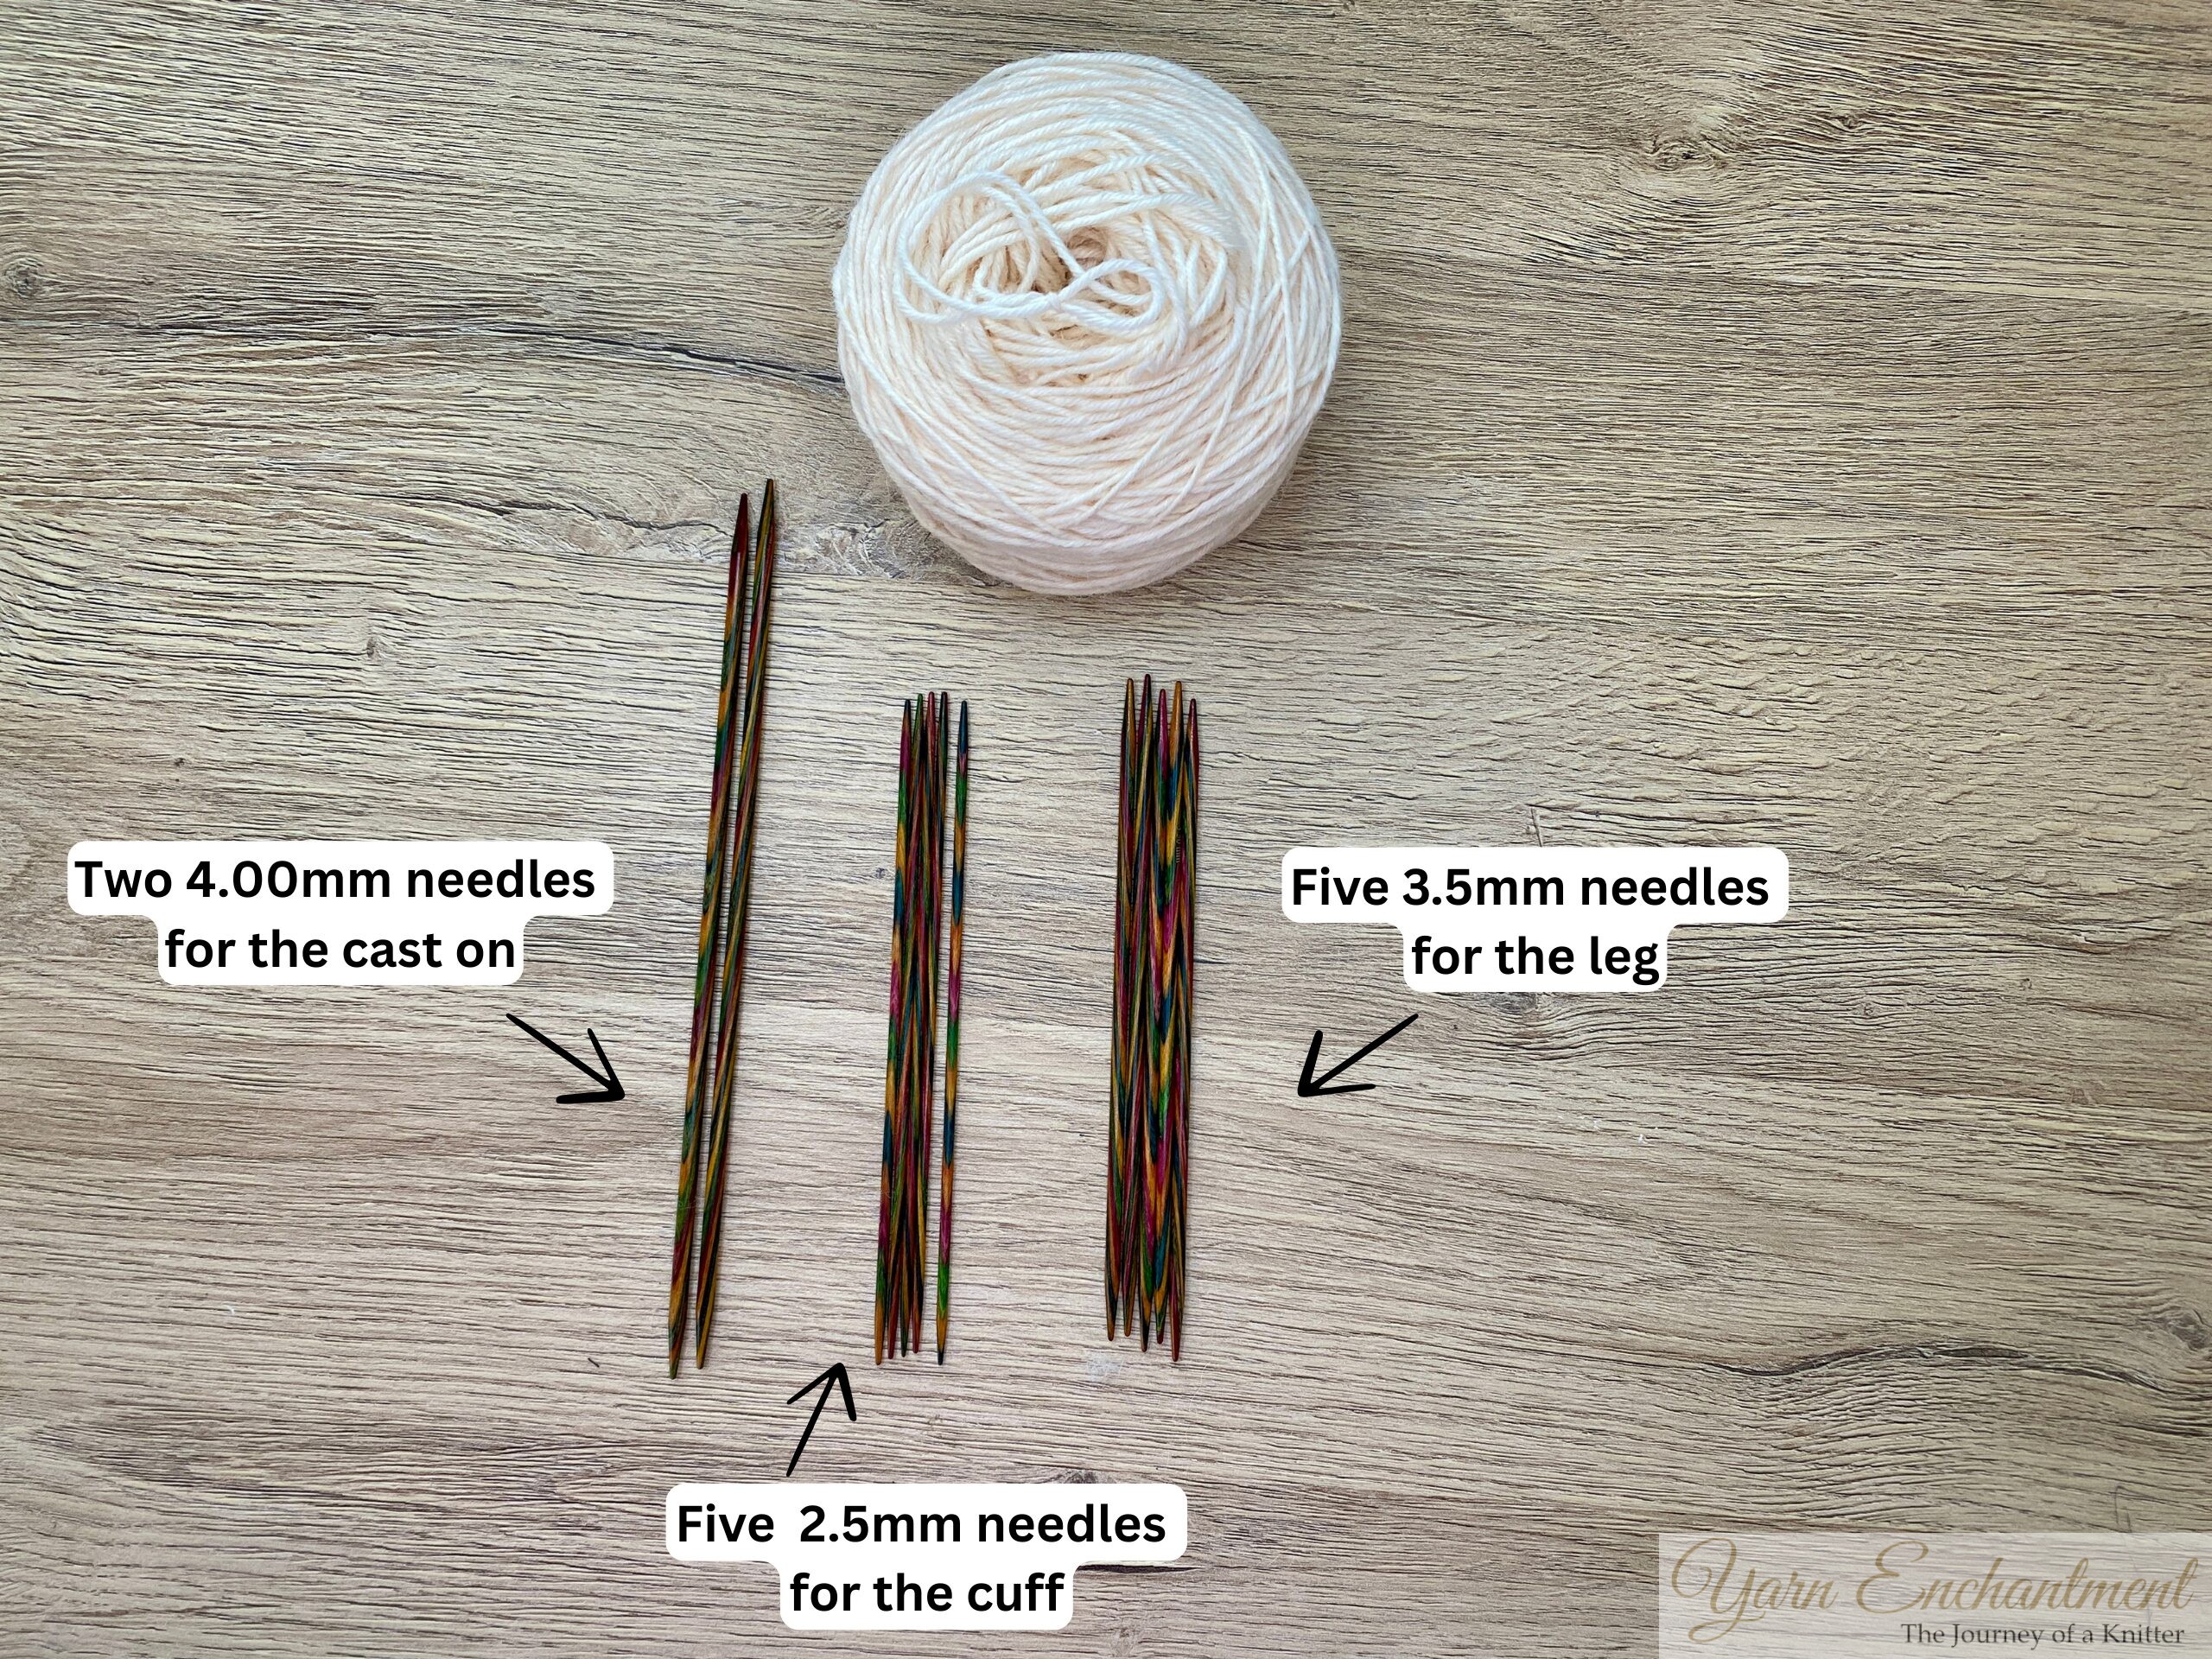 | For my sock, I use three different needle sizes. If you don’t have a larger needle handy, you can simply hold the two smaller ones together instead. I’ll be making a full video tutorial for each step! |

Cast on the required number of stitches onto one needle. Next, work two rows flat in a 2x2 ribbing pattern:
-
Row 1: Knit 2, purl 2; repeat to the end of the row, finishing with two knit stitches. Turn your work.
-
Row 2: Knit 2, purl 2; repeat to the end of the row, finishing with two purl stitches.
After completing these two rows, your foundation is set for easily distributing the stitches evenly onto four double pointed needles
 |  | Cast on the number of stitches you need onto one needle | Next, work two rows flat in a 2x2 ribbing pattern. |


Distributing Stitches & Joining
Once you’ve knitted two rows, evenly distribute your stitches across four needles. For instance, with 60 stitches, you might split them as 16/14/16/14; with 52 stitches, place 13 stitches on each needle.
Use the fifth needle to knit in the round. If your set includes only four double pointed needles, simply divide the stitches among three needles and knit with the fourth.
Note: If you have an uneven number of stitches, you might want to divide them the following way: 62 ÷ 4 = 15.5, which gives you 16/15/16/15 stitches on the four needles.
 |  |  | Turn your work around. Now we’re going to knit the stitches onto our double-pointed needles. Don’t forget to continue working in ribbing - knit two, then purl two. | Knit your first stitches (for me, that’s 13) onto your first double-pointed needle. | Grab your second double-pointed needle and knit the next set of stitches onto it. |


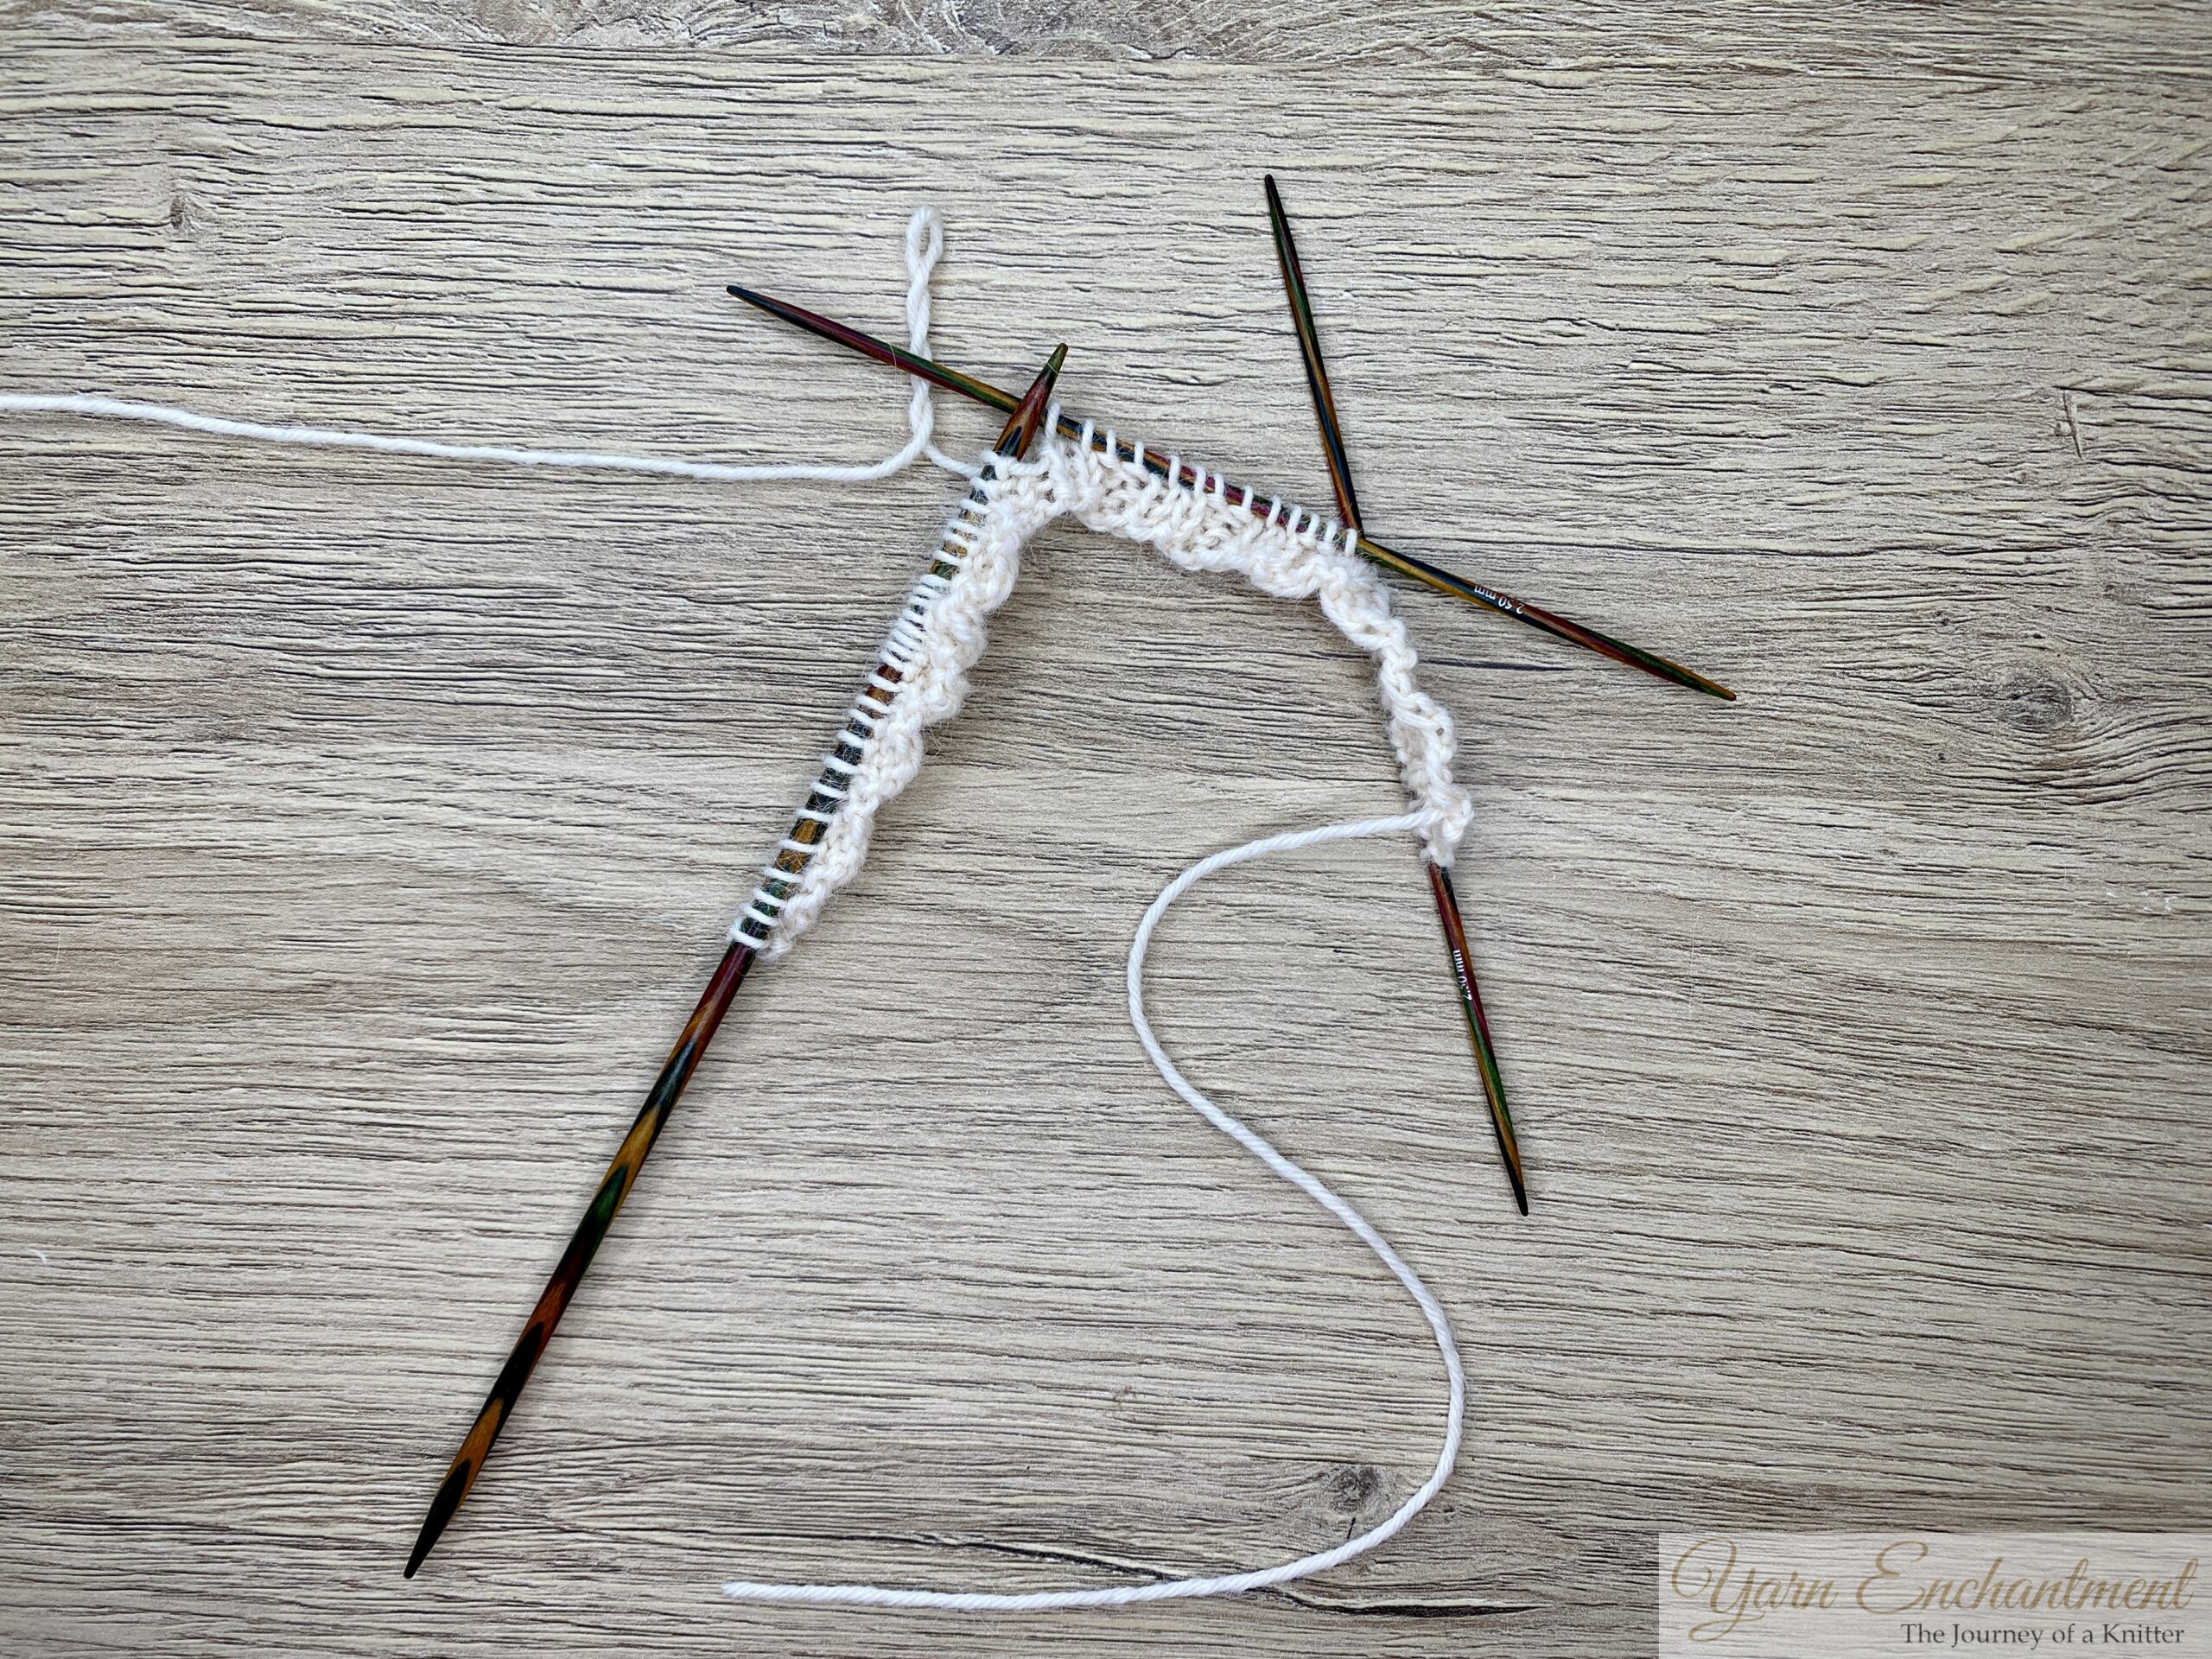
 |  | 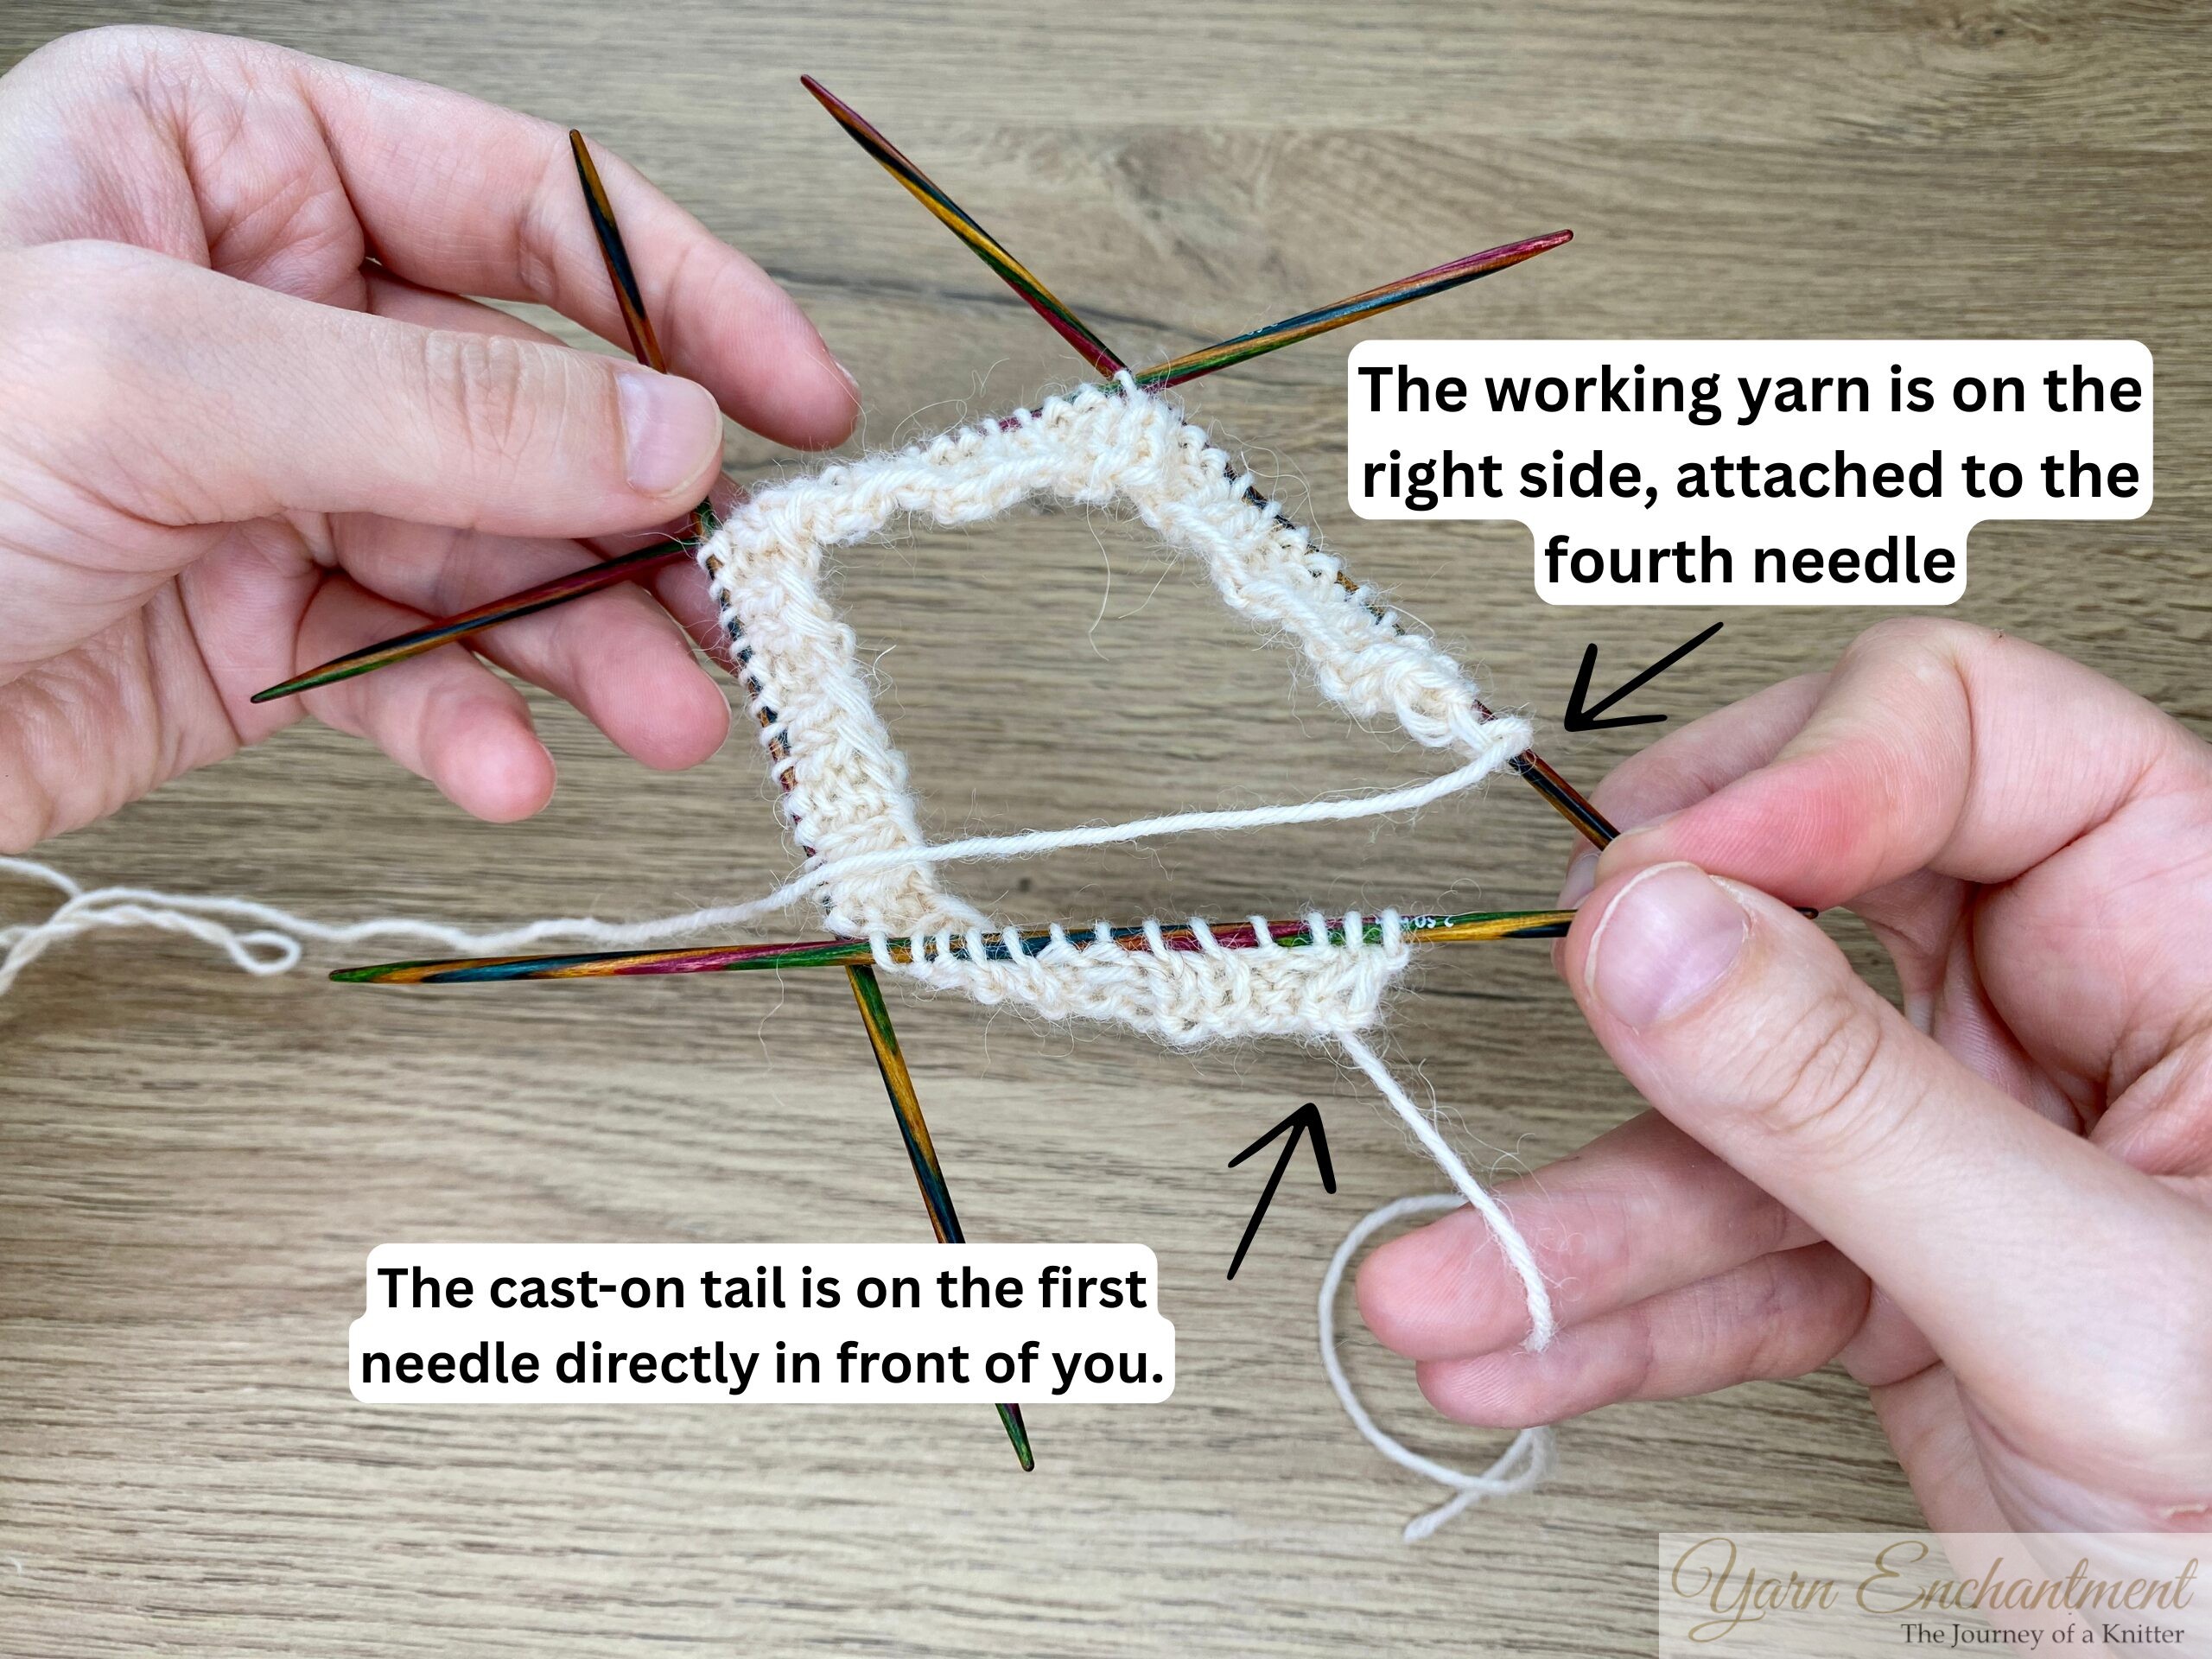 | Continue working this way... | until you have distributed all of your stitches evenly across your double-pointed needles. | The working yarn is on the right side, attached to the fourth needle, while the cast-on tail is on the first needle on the left. This shows the correct setup for joining in the round with double-pointed needles, with the starting tail marking the beginning of the round and the working yarn ready for the next stitch. |


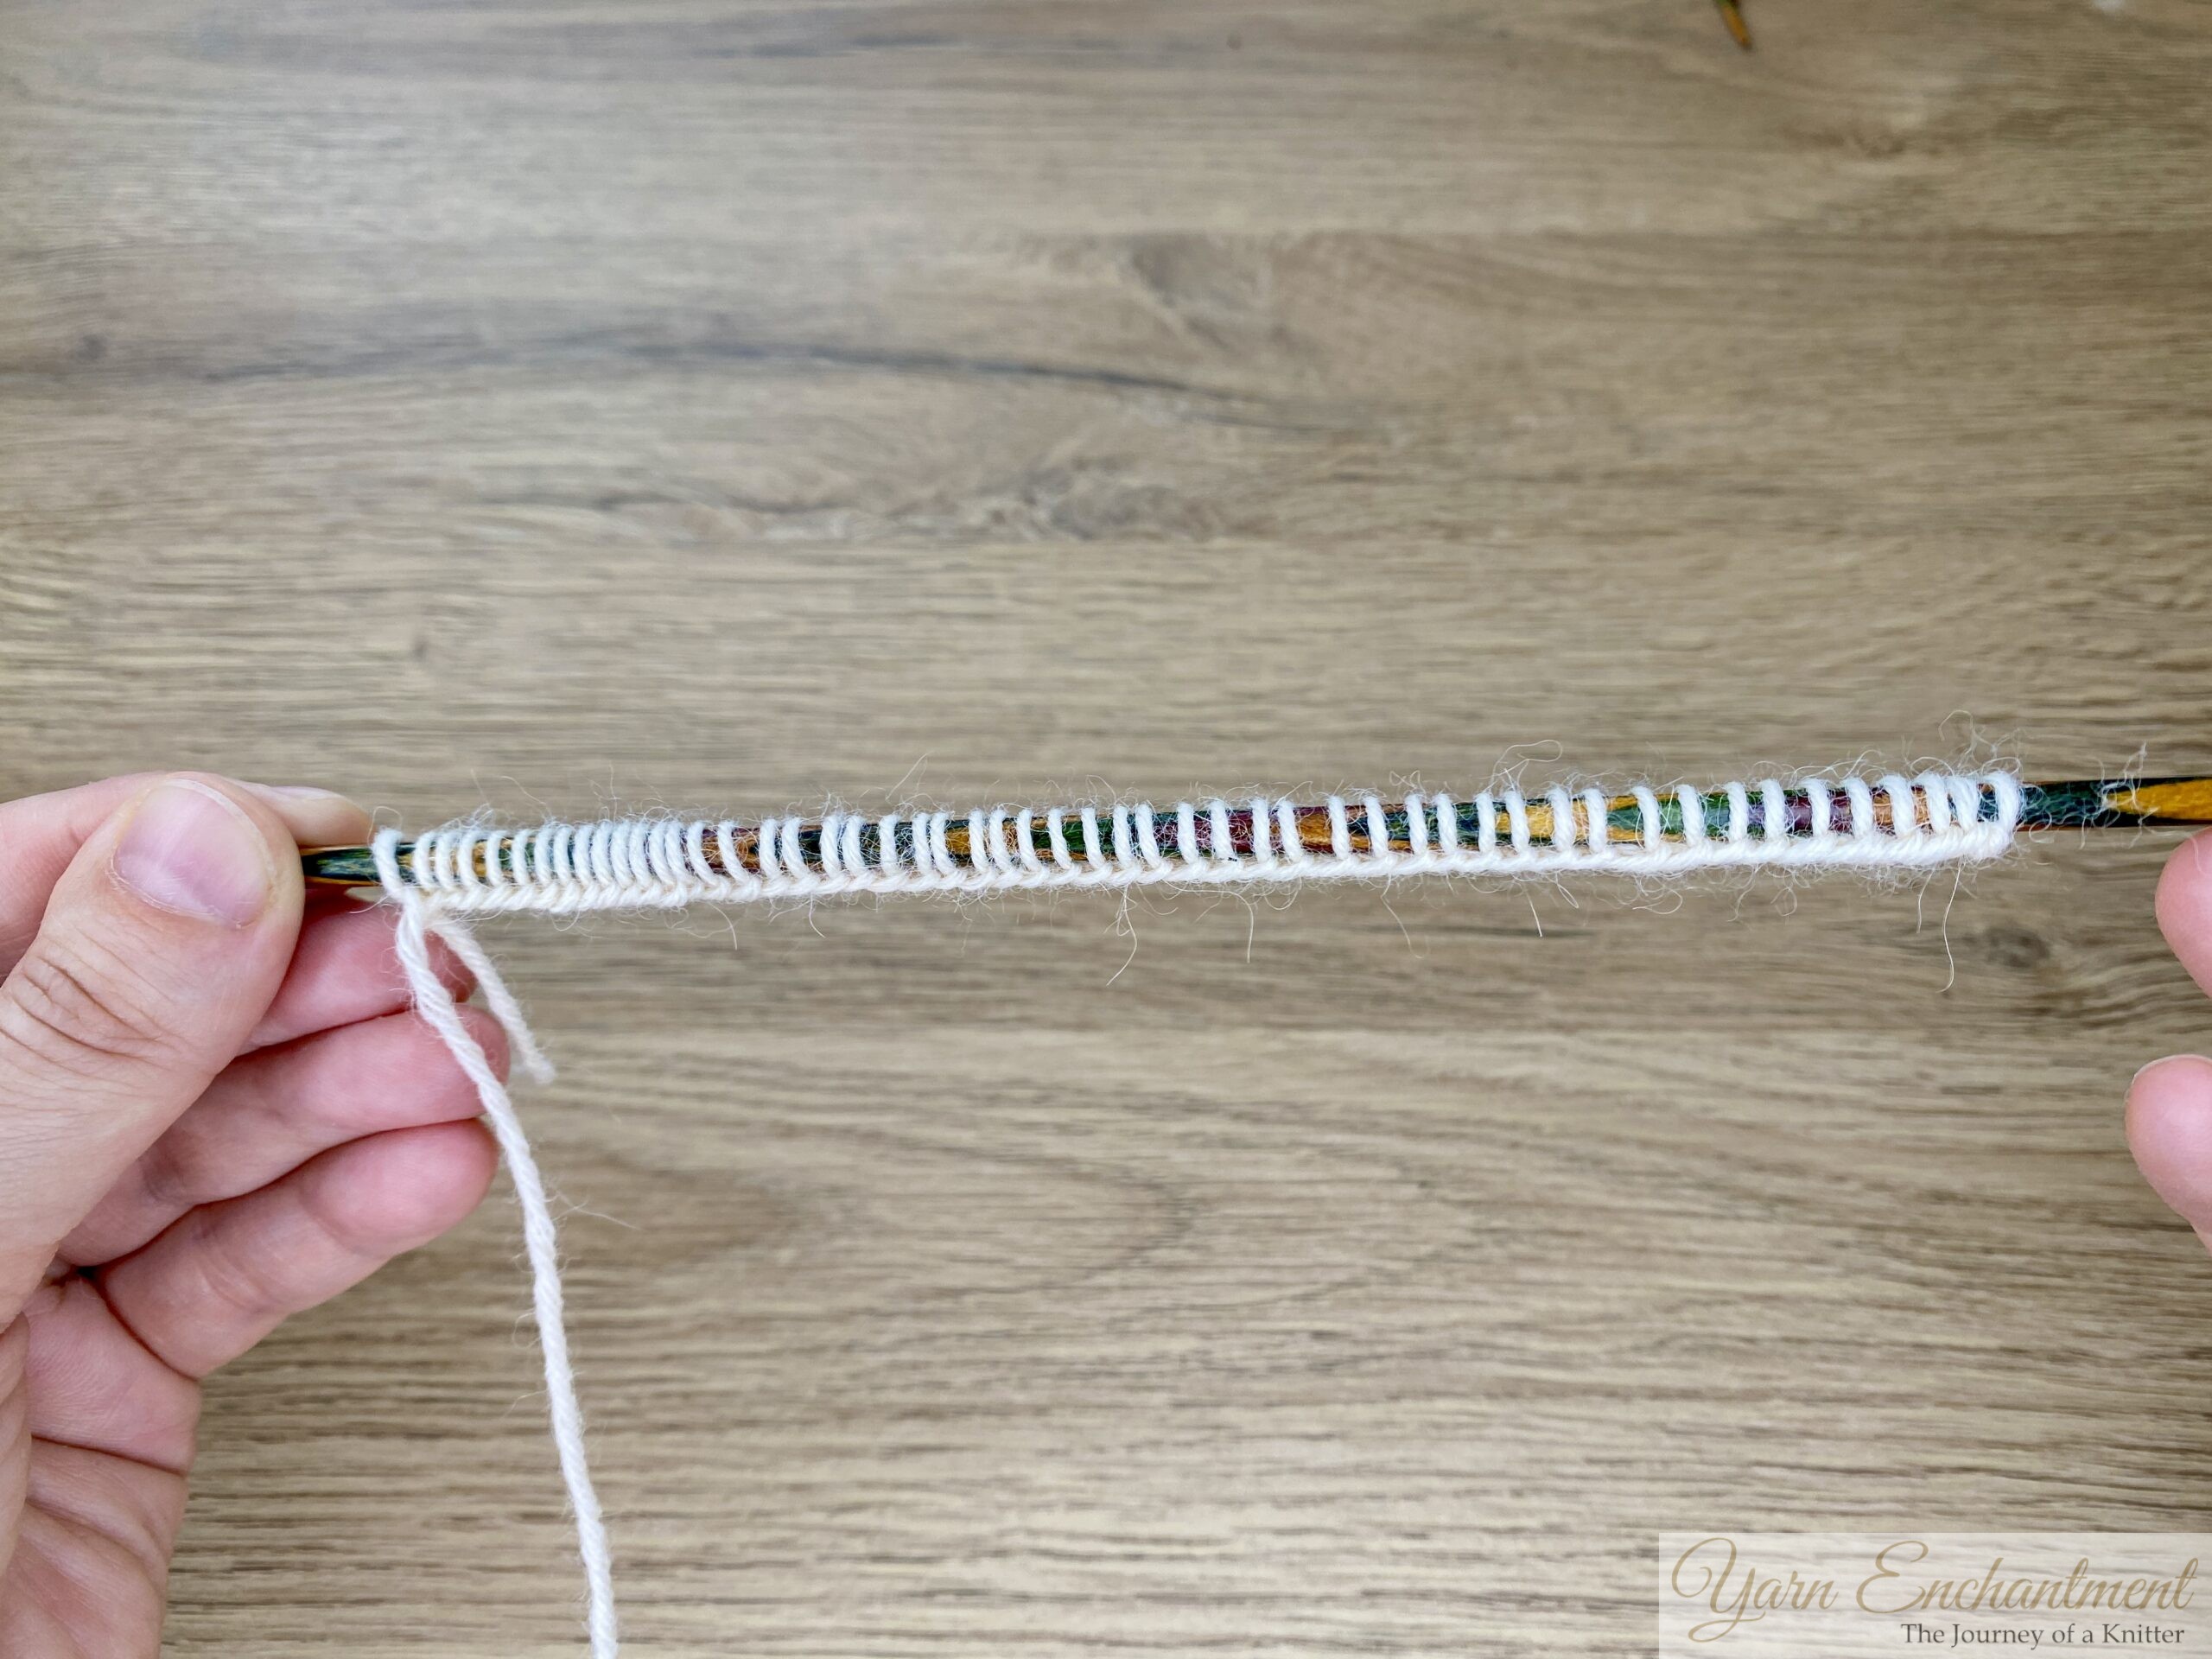
To join in the round, begin by knitting the first stitch on needle one using the working yarn from the last needle. This action naturally closes the circle. Pull the first couple of stitches snug to help prevent small gaps, sometimes called “ladders,” at the transitions between needles.
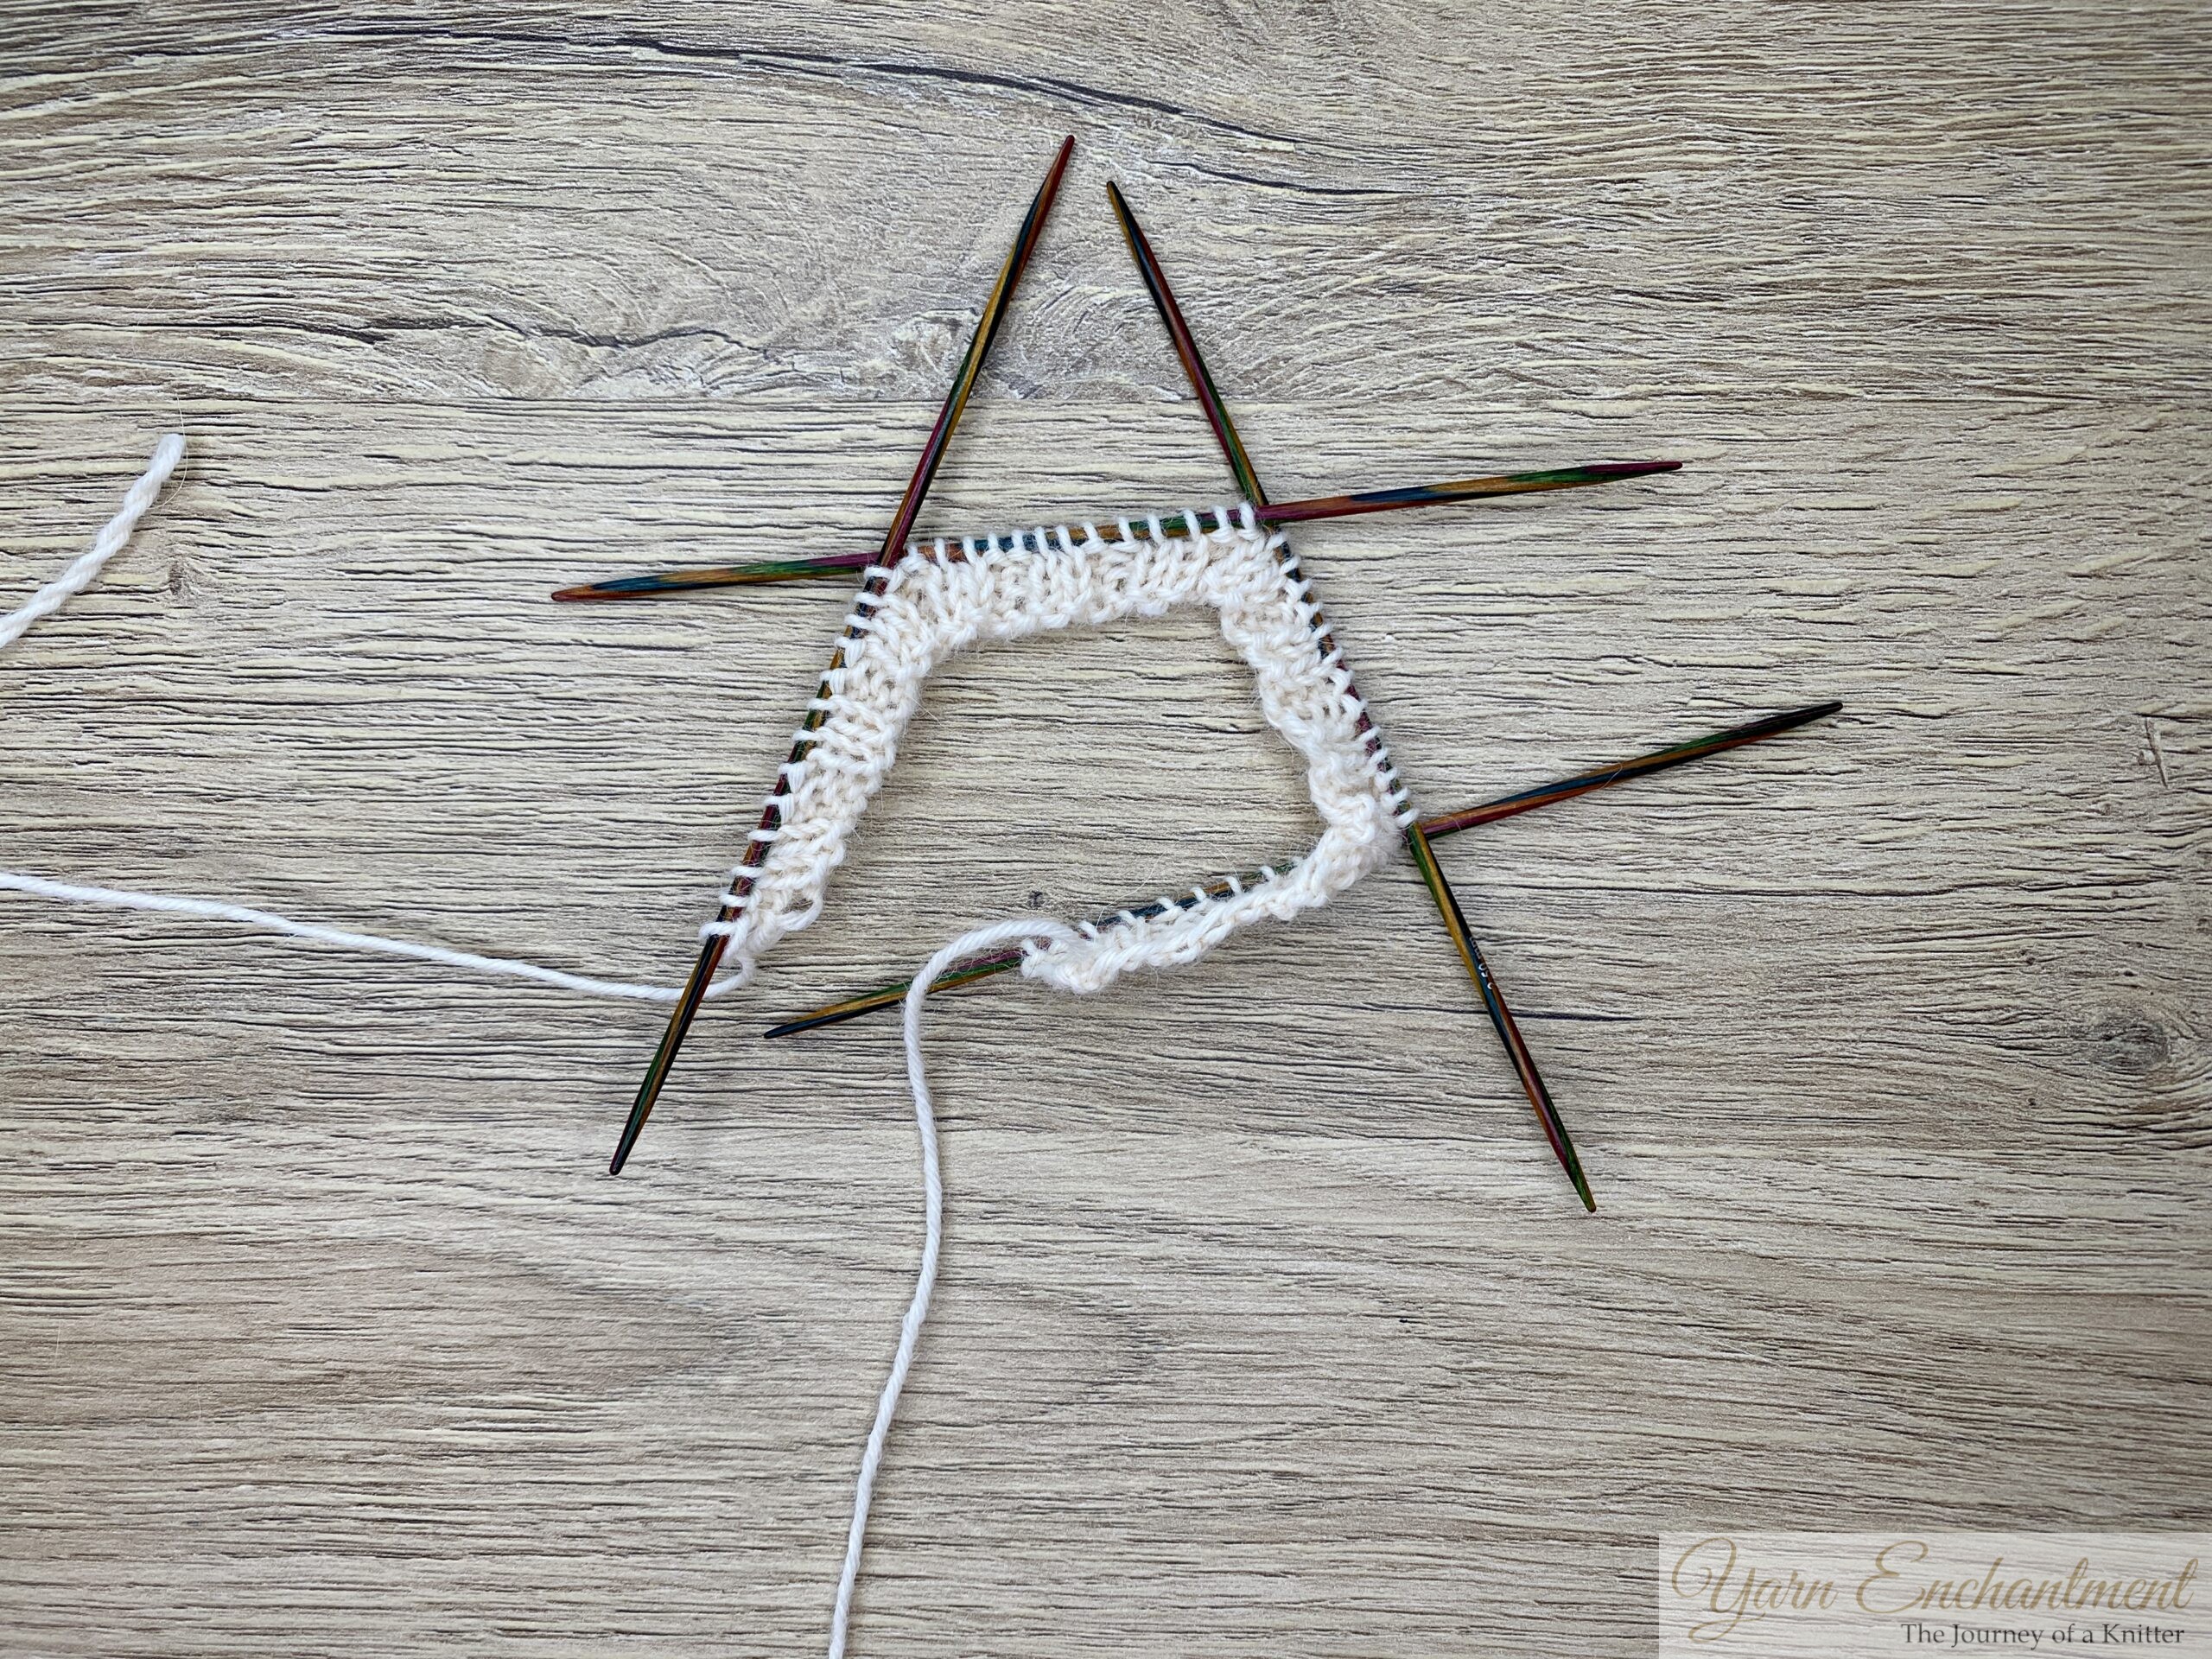
Note: Always double-check your work before joining to ensure nothing is twisted. Your cast-on edge should form a smooth, flat circle without crossing over itself, this step makes spotting twists easy and ensures a clean start for knitting in the round.
 | 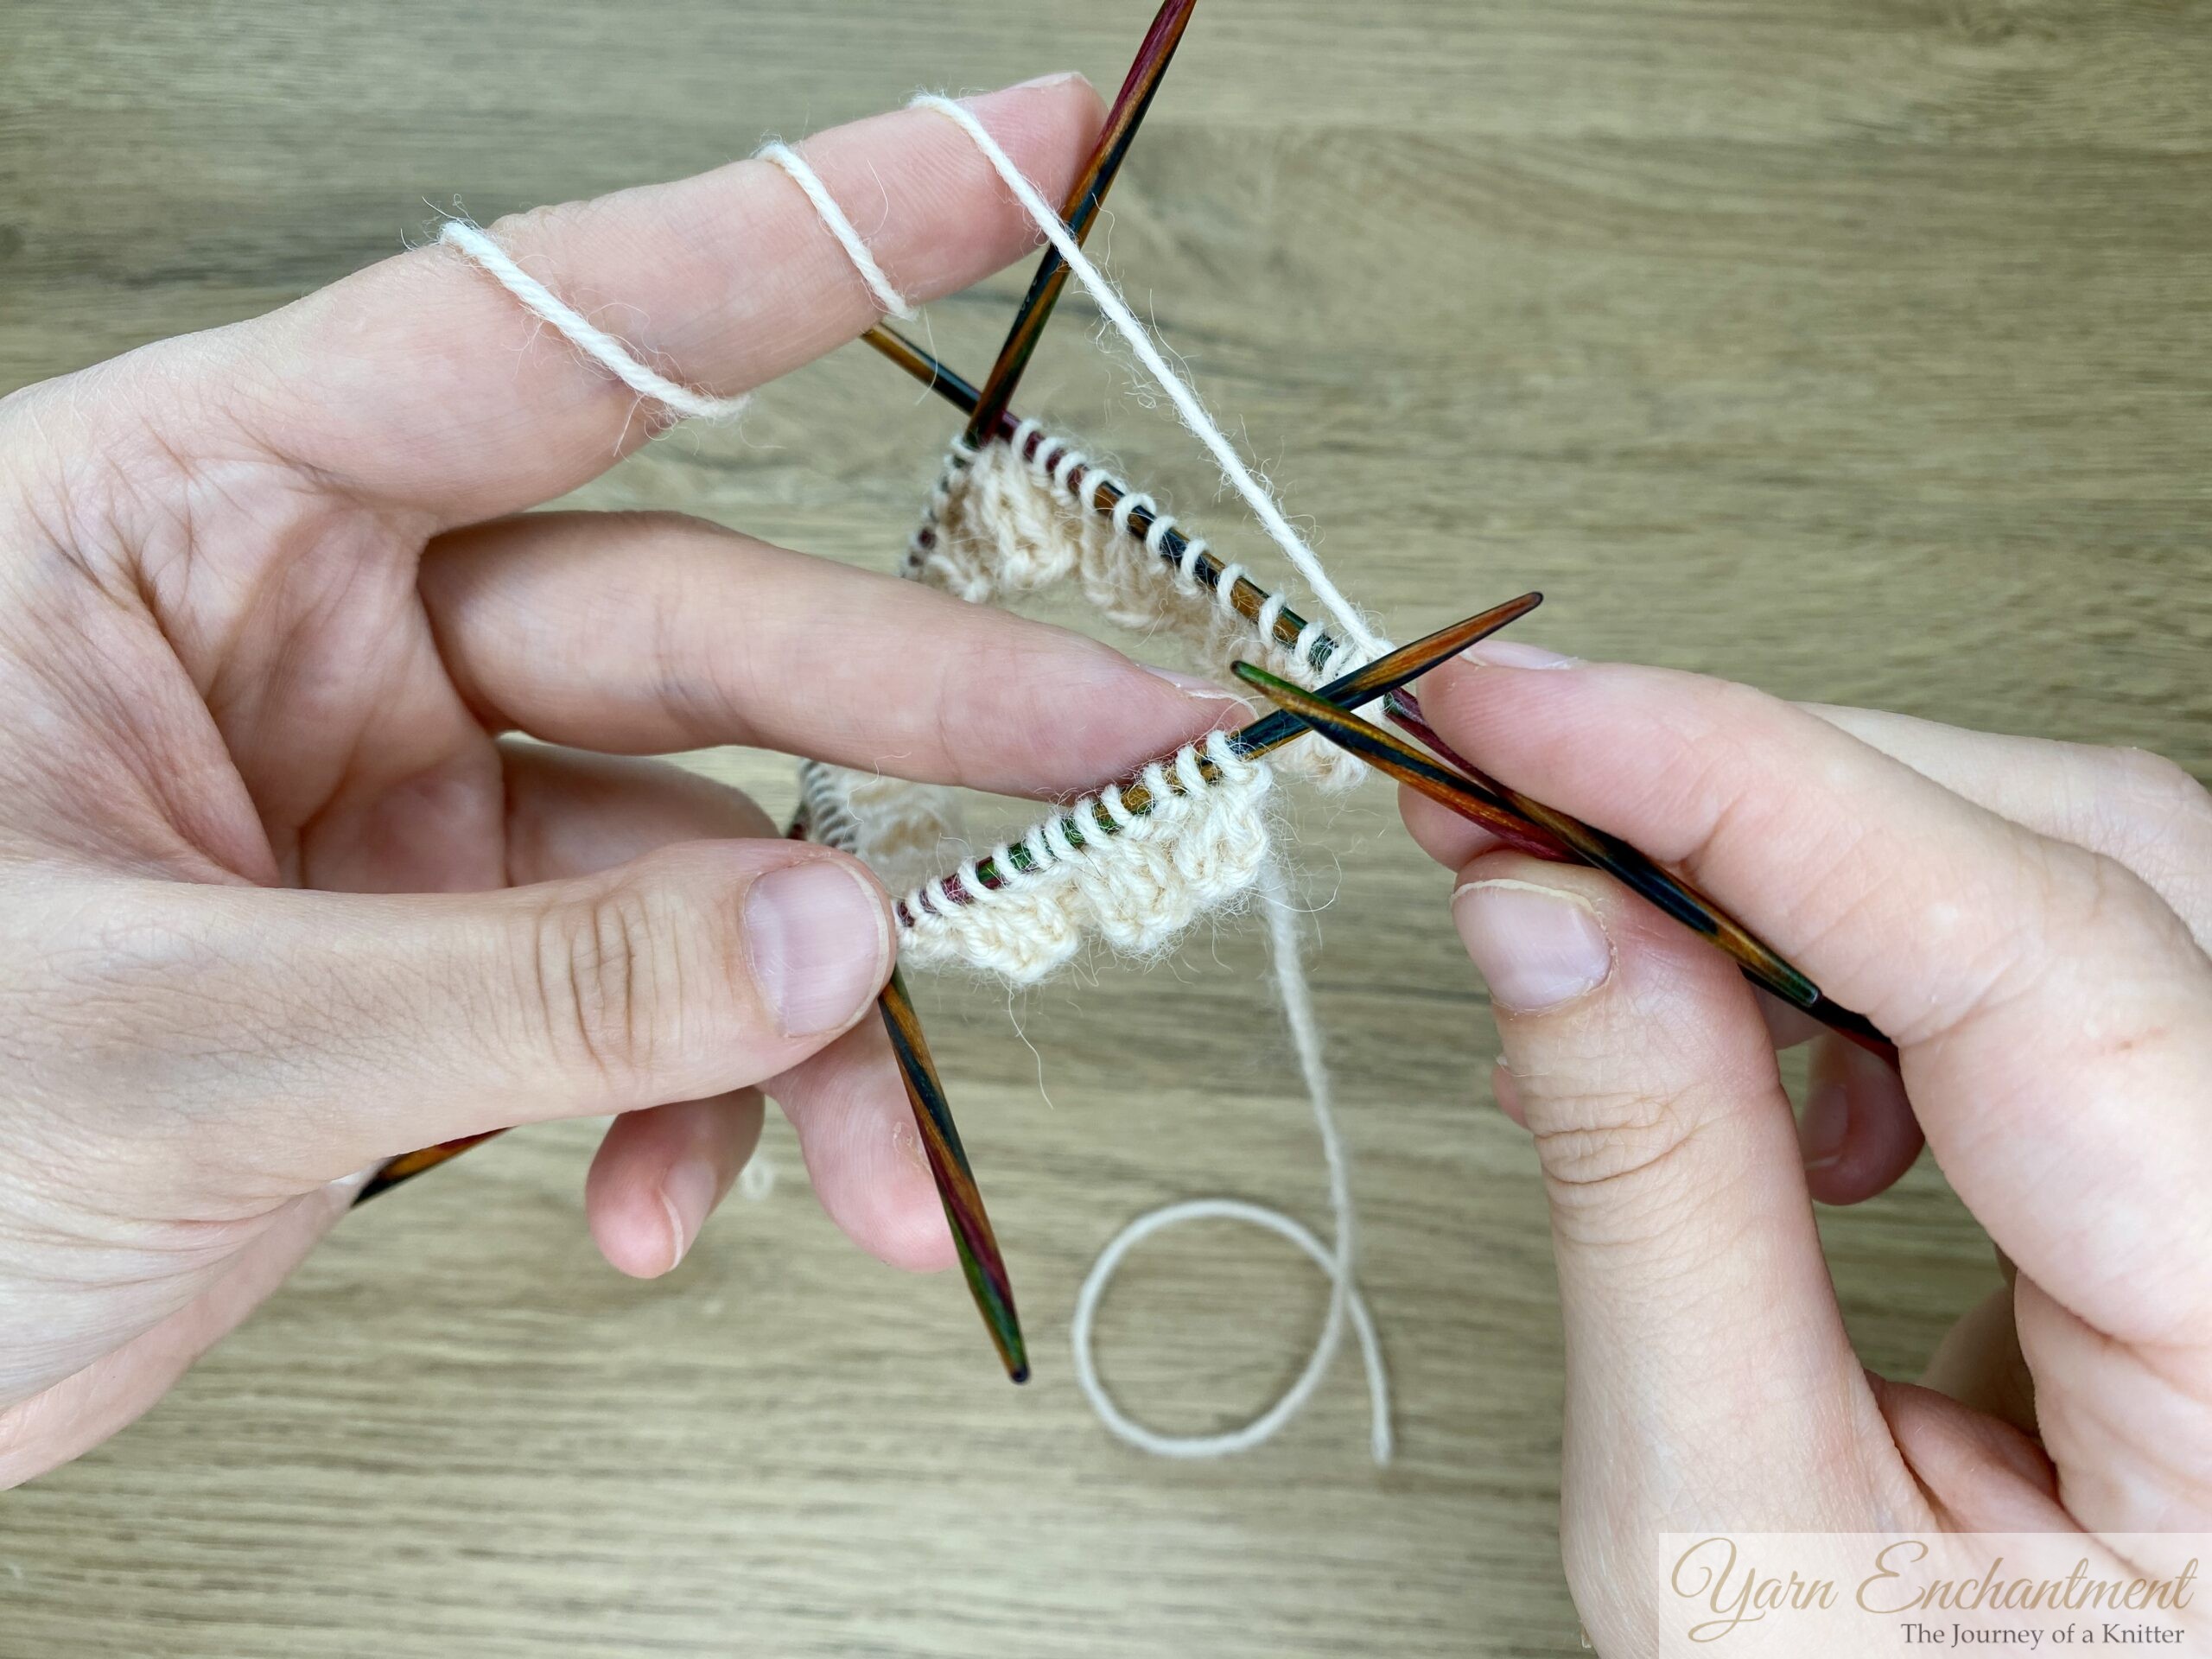 | 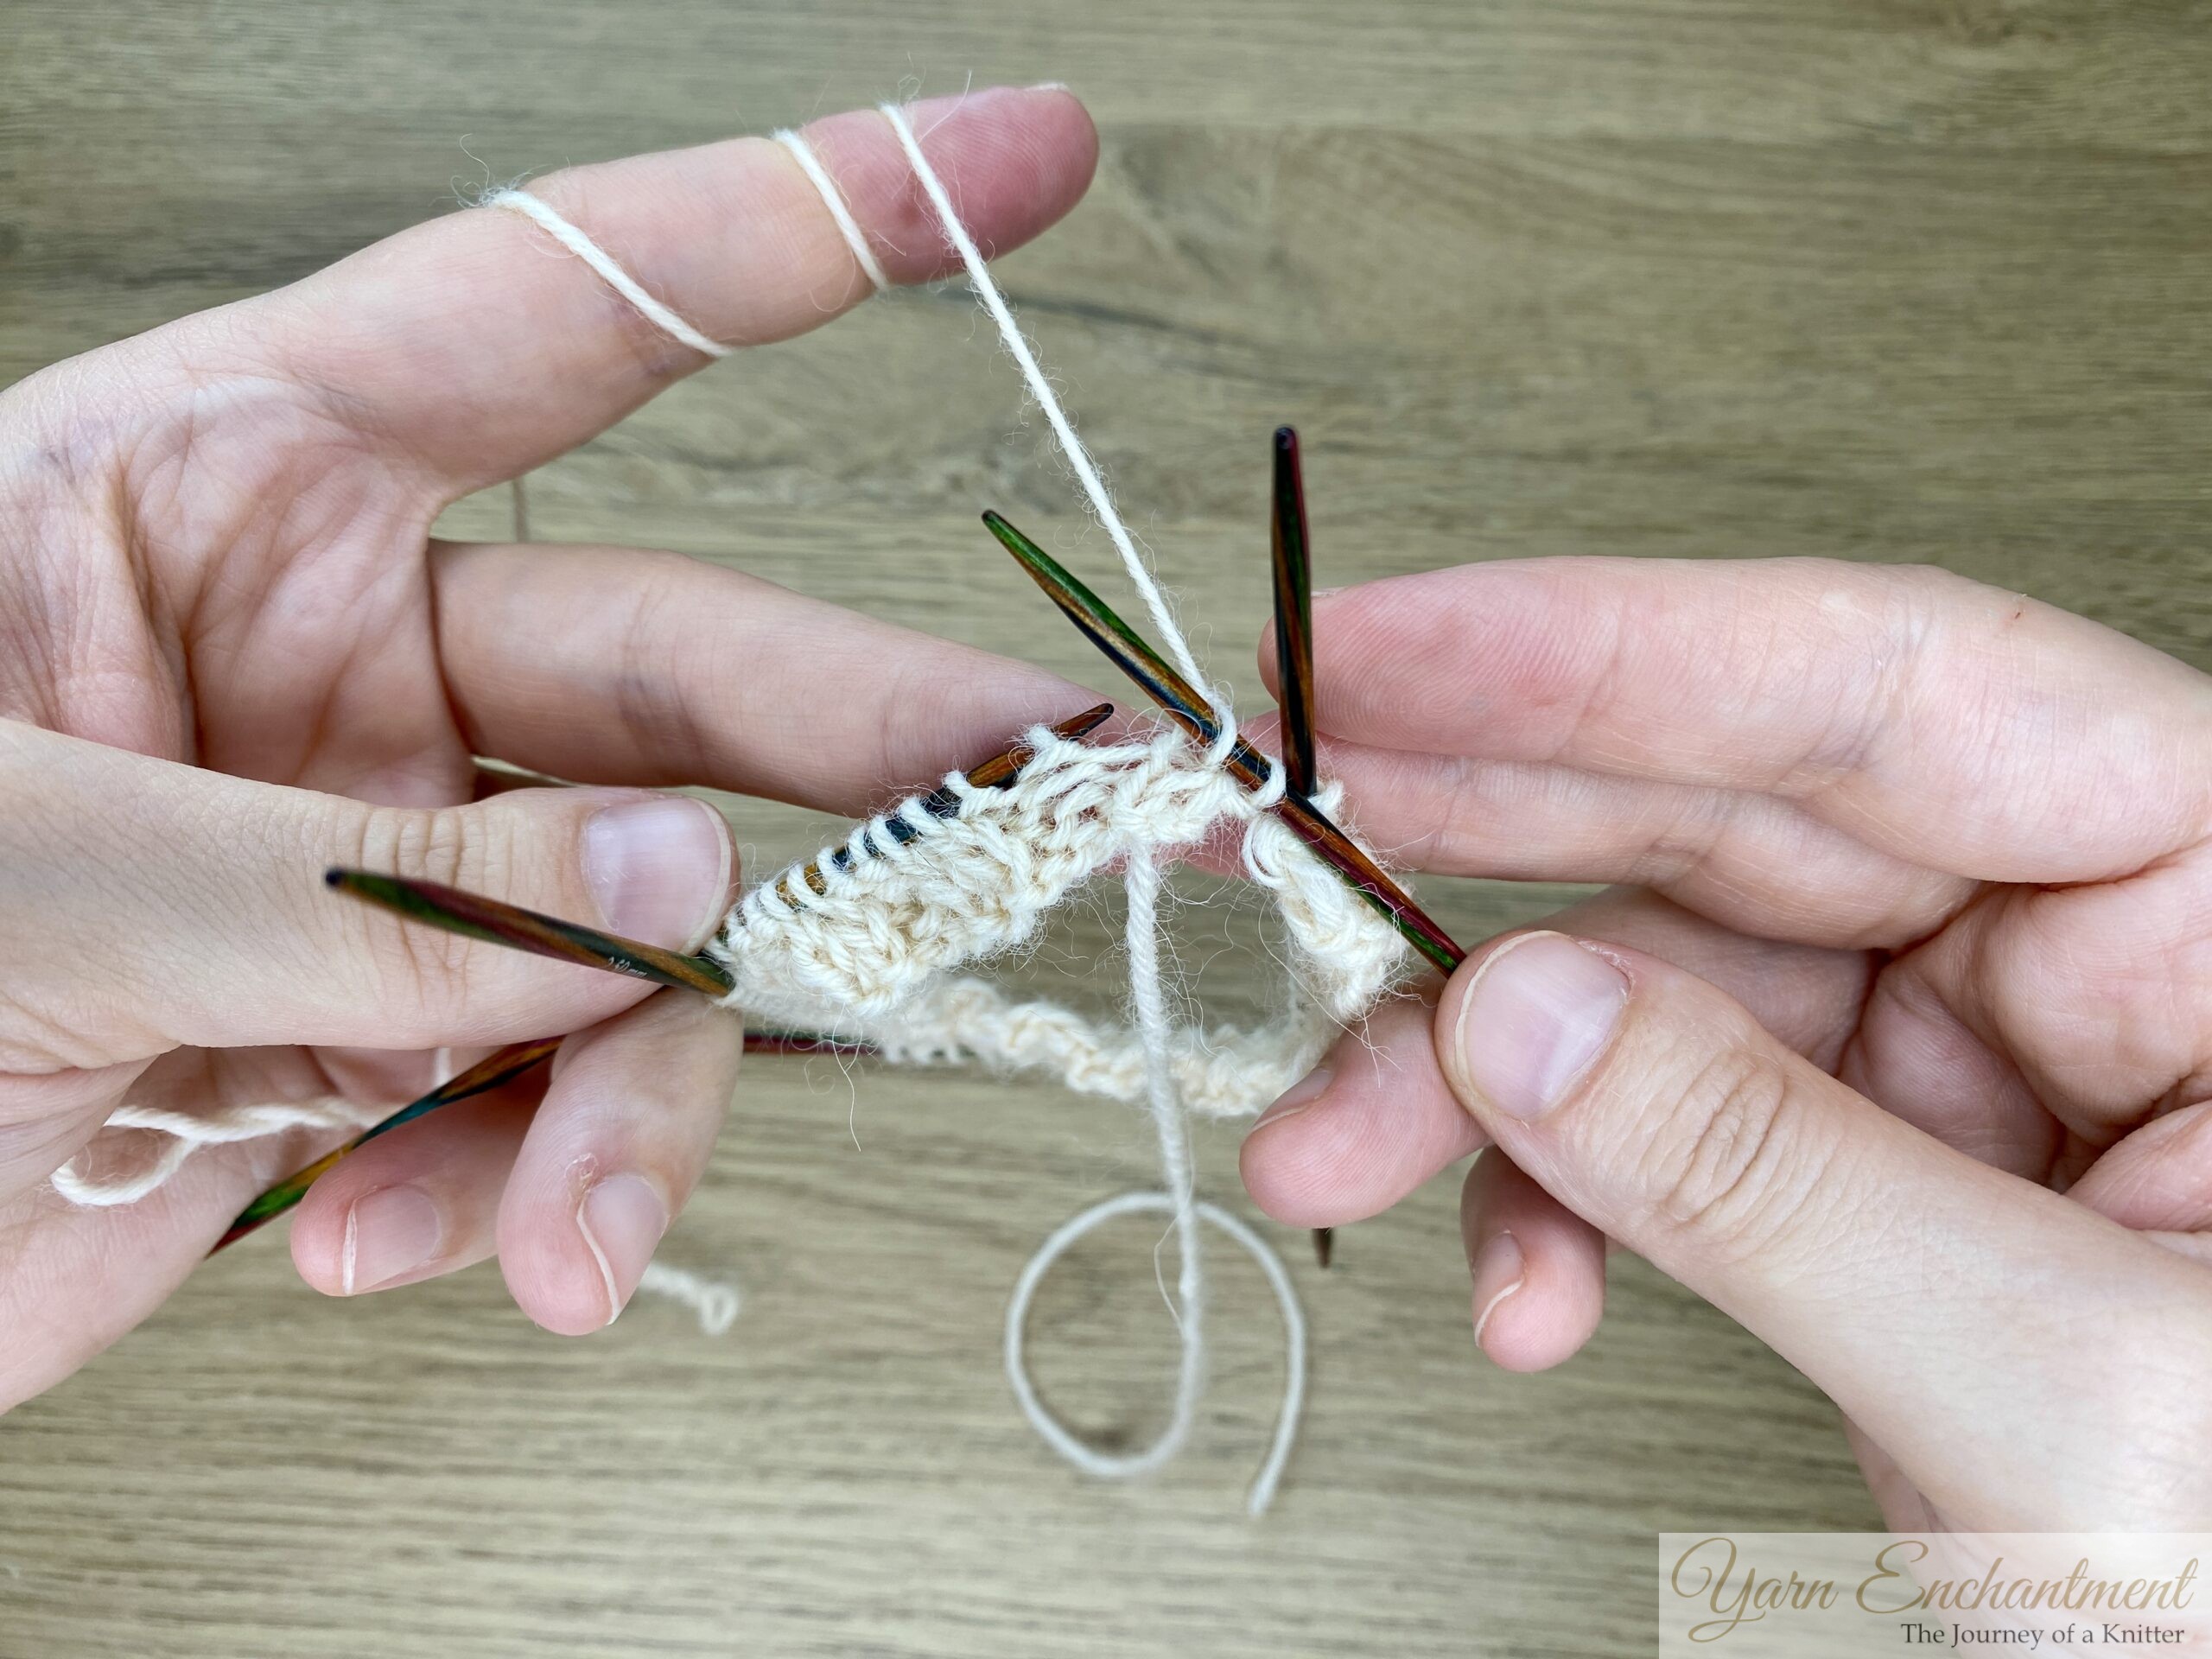 | Make sure your cast-on edge forms a smooth, circle without crossing over itself before you start knitting in the round. | Hold all the needles comfortably in your hands, arranging them in a square. To stop the fourth needle from slipping or moving around, use your right-hand fingers to lightly hold it in place while you work the first two stitches. | Work in your pattern, and be sure to pull the first two stitches of the round snugly to avoid any gaps (but not so tight that you break the yarn, no need for superhero strength! :D) |


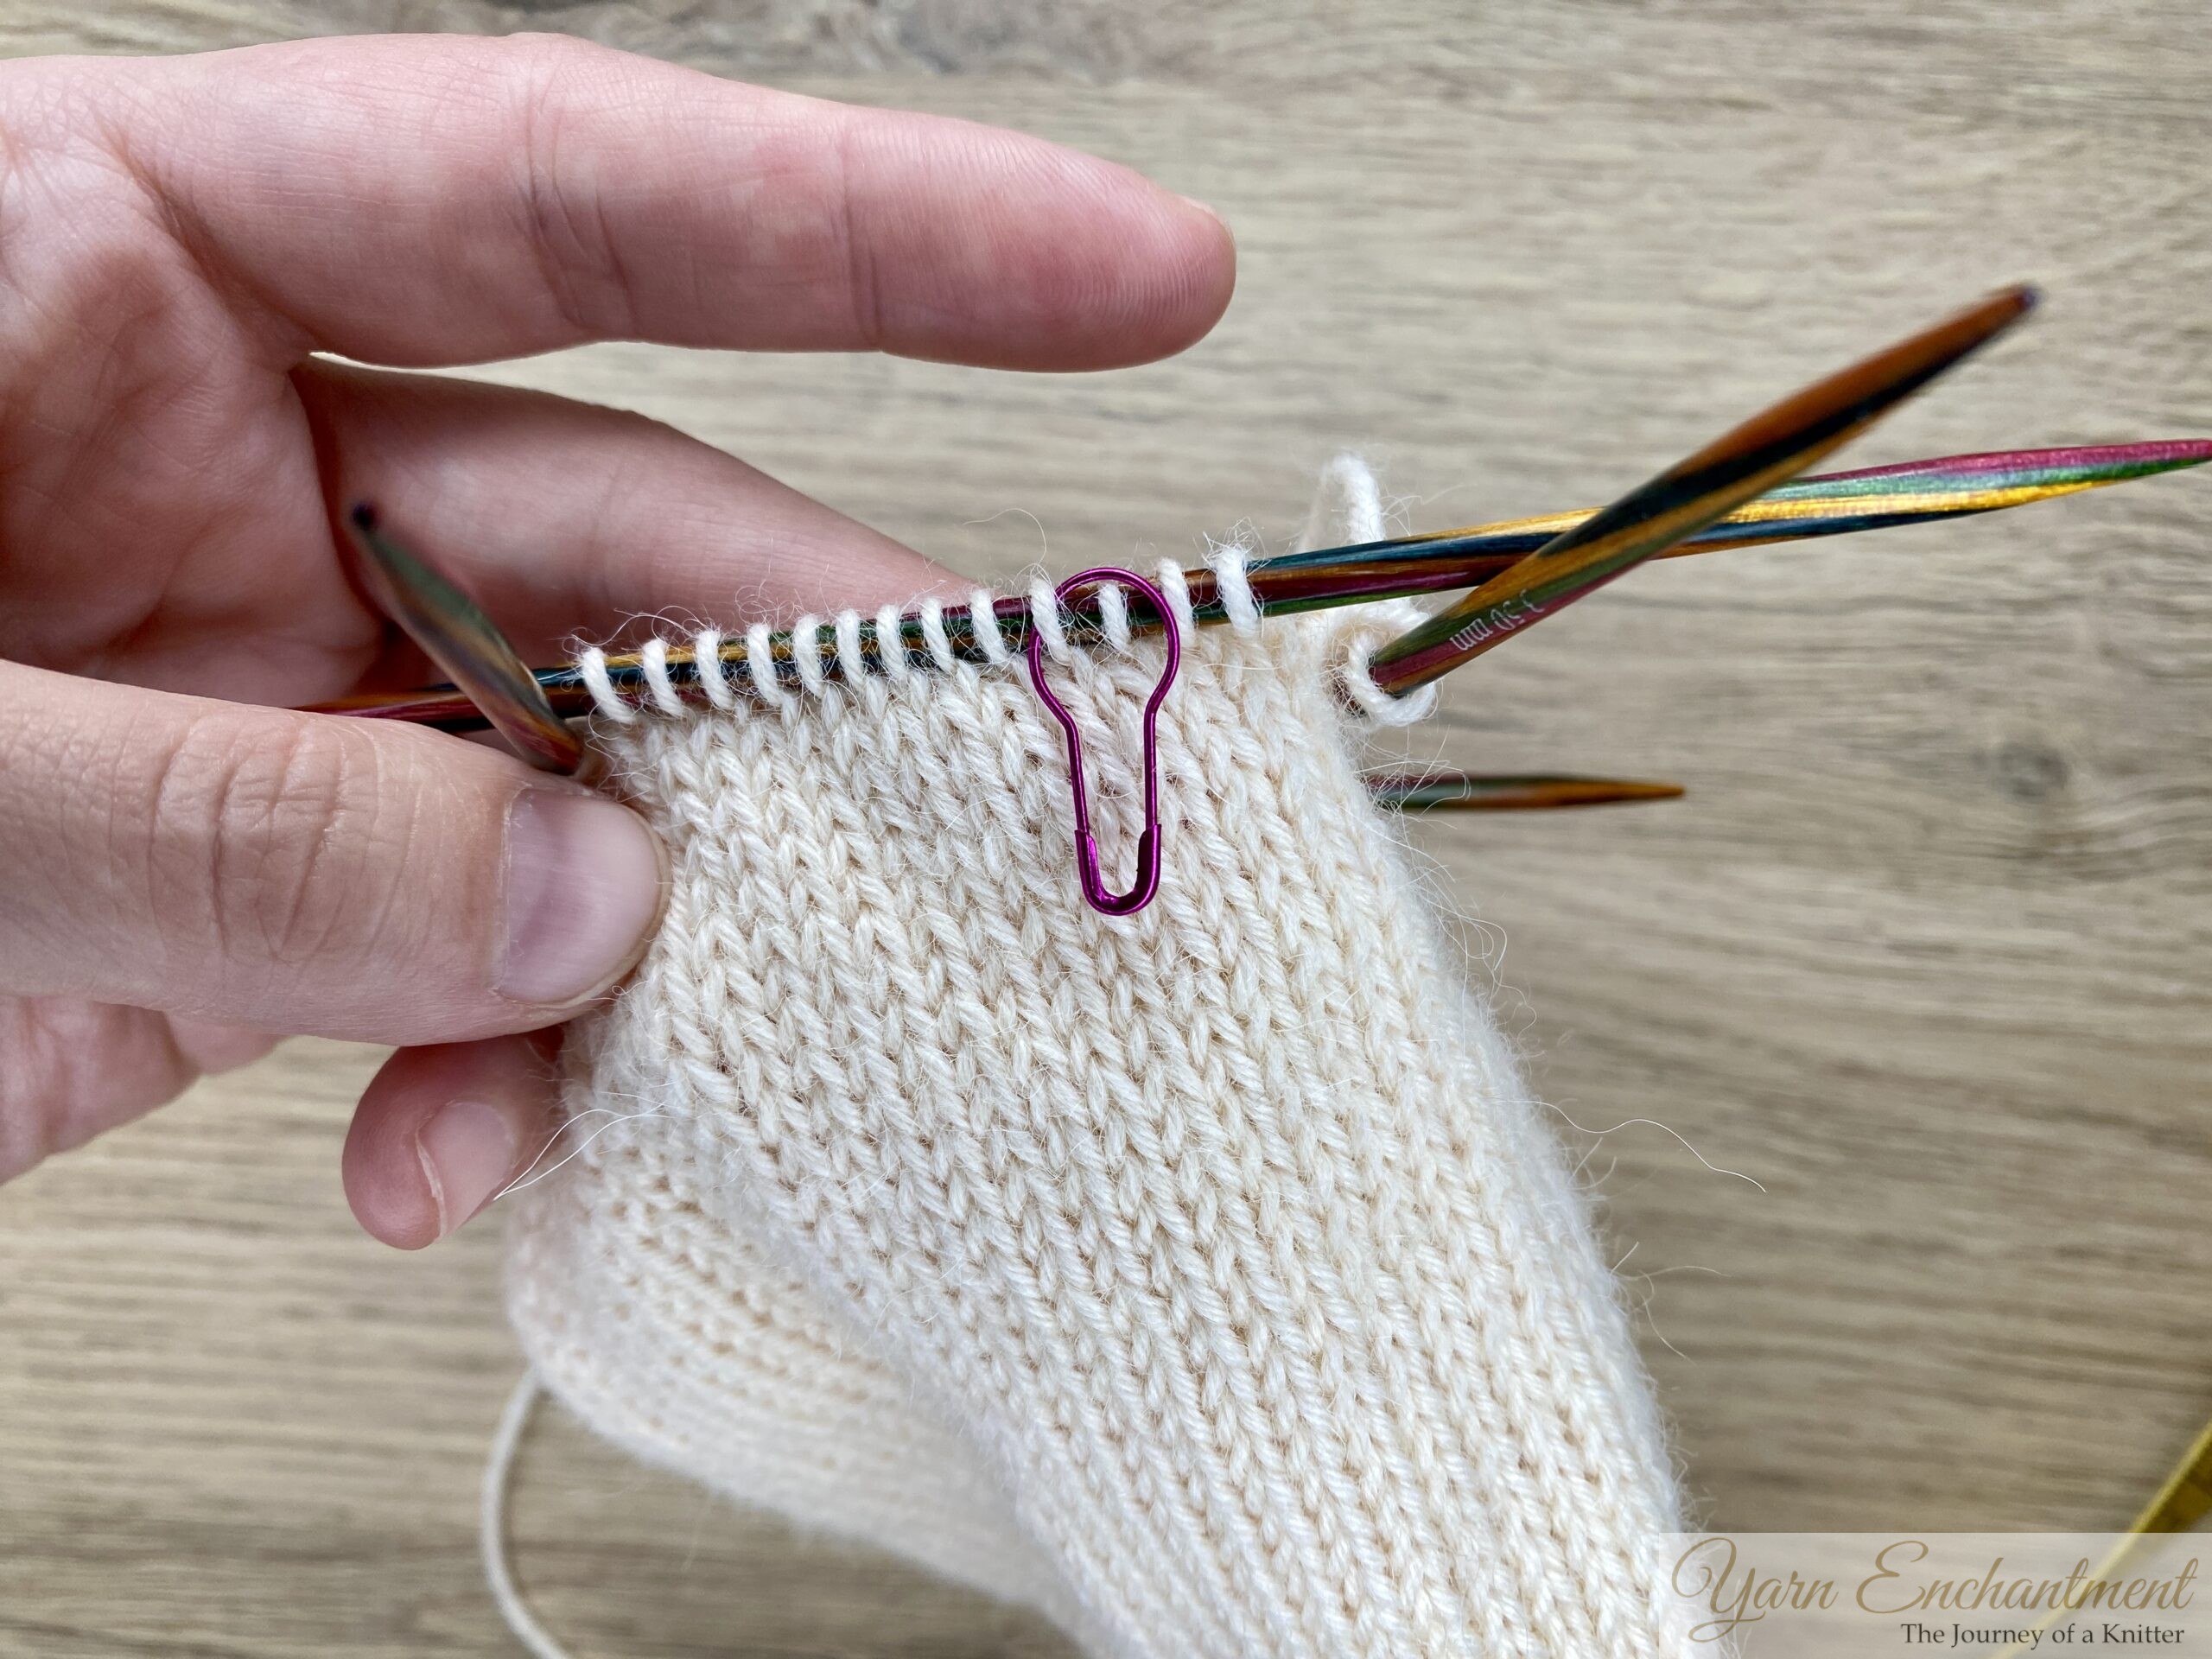
After knitting your first needle, place a stitch marker to mark it, this marks the first needle and the beginning of the round. The cast-on tail typically aligns with the back of your sock. Later, when shaping the heel, you’ll use stitches from both the first and fourth needles. Marking the first needle now ensures you always know where each round begins and which needles to use for the heel.
With double pointed needles, you’ll refer to the needles as Needle 1, Needle 2, Needle 3, and Needle 4, counting clockwise from your stitch marker. The top or “instep” stitches are usually on Needles 2 and 3, while Needles 1 and 4 handle the “heel” or back of the sock. Most sock knitting patterns use phrases like “work the heel over Needles 1 and 4” or “the instep is on Needles 2 and 3.”
Don’t feel pressured to memorize these terms- just remember: Needles 2 and 3 are the front (instep), and Needles 1 and 4 are the heel side. This will make sock shaping much simpler down the line.
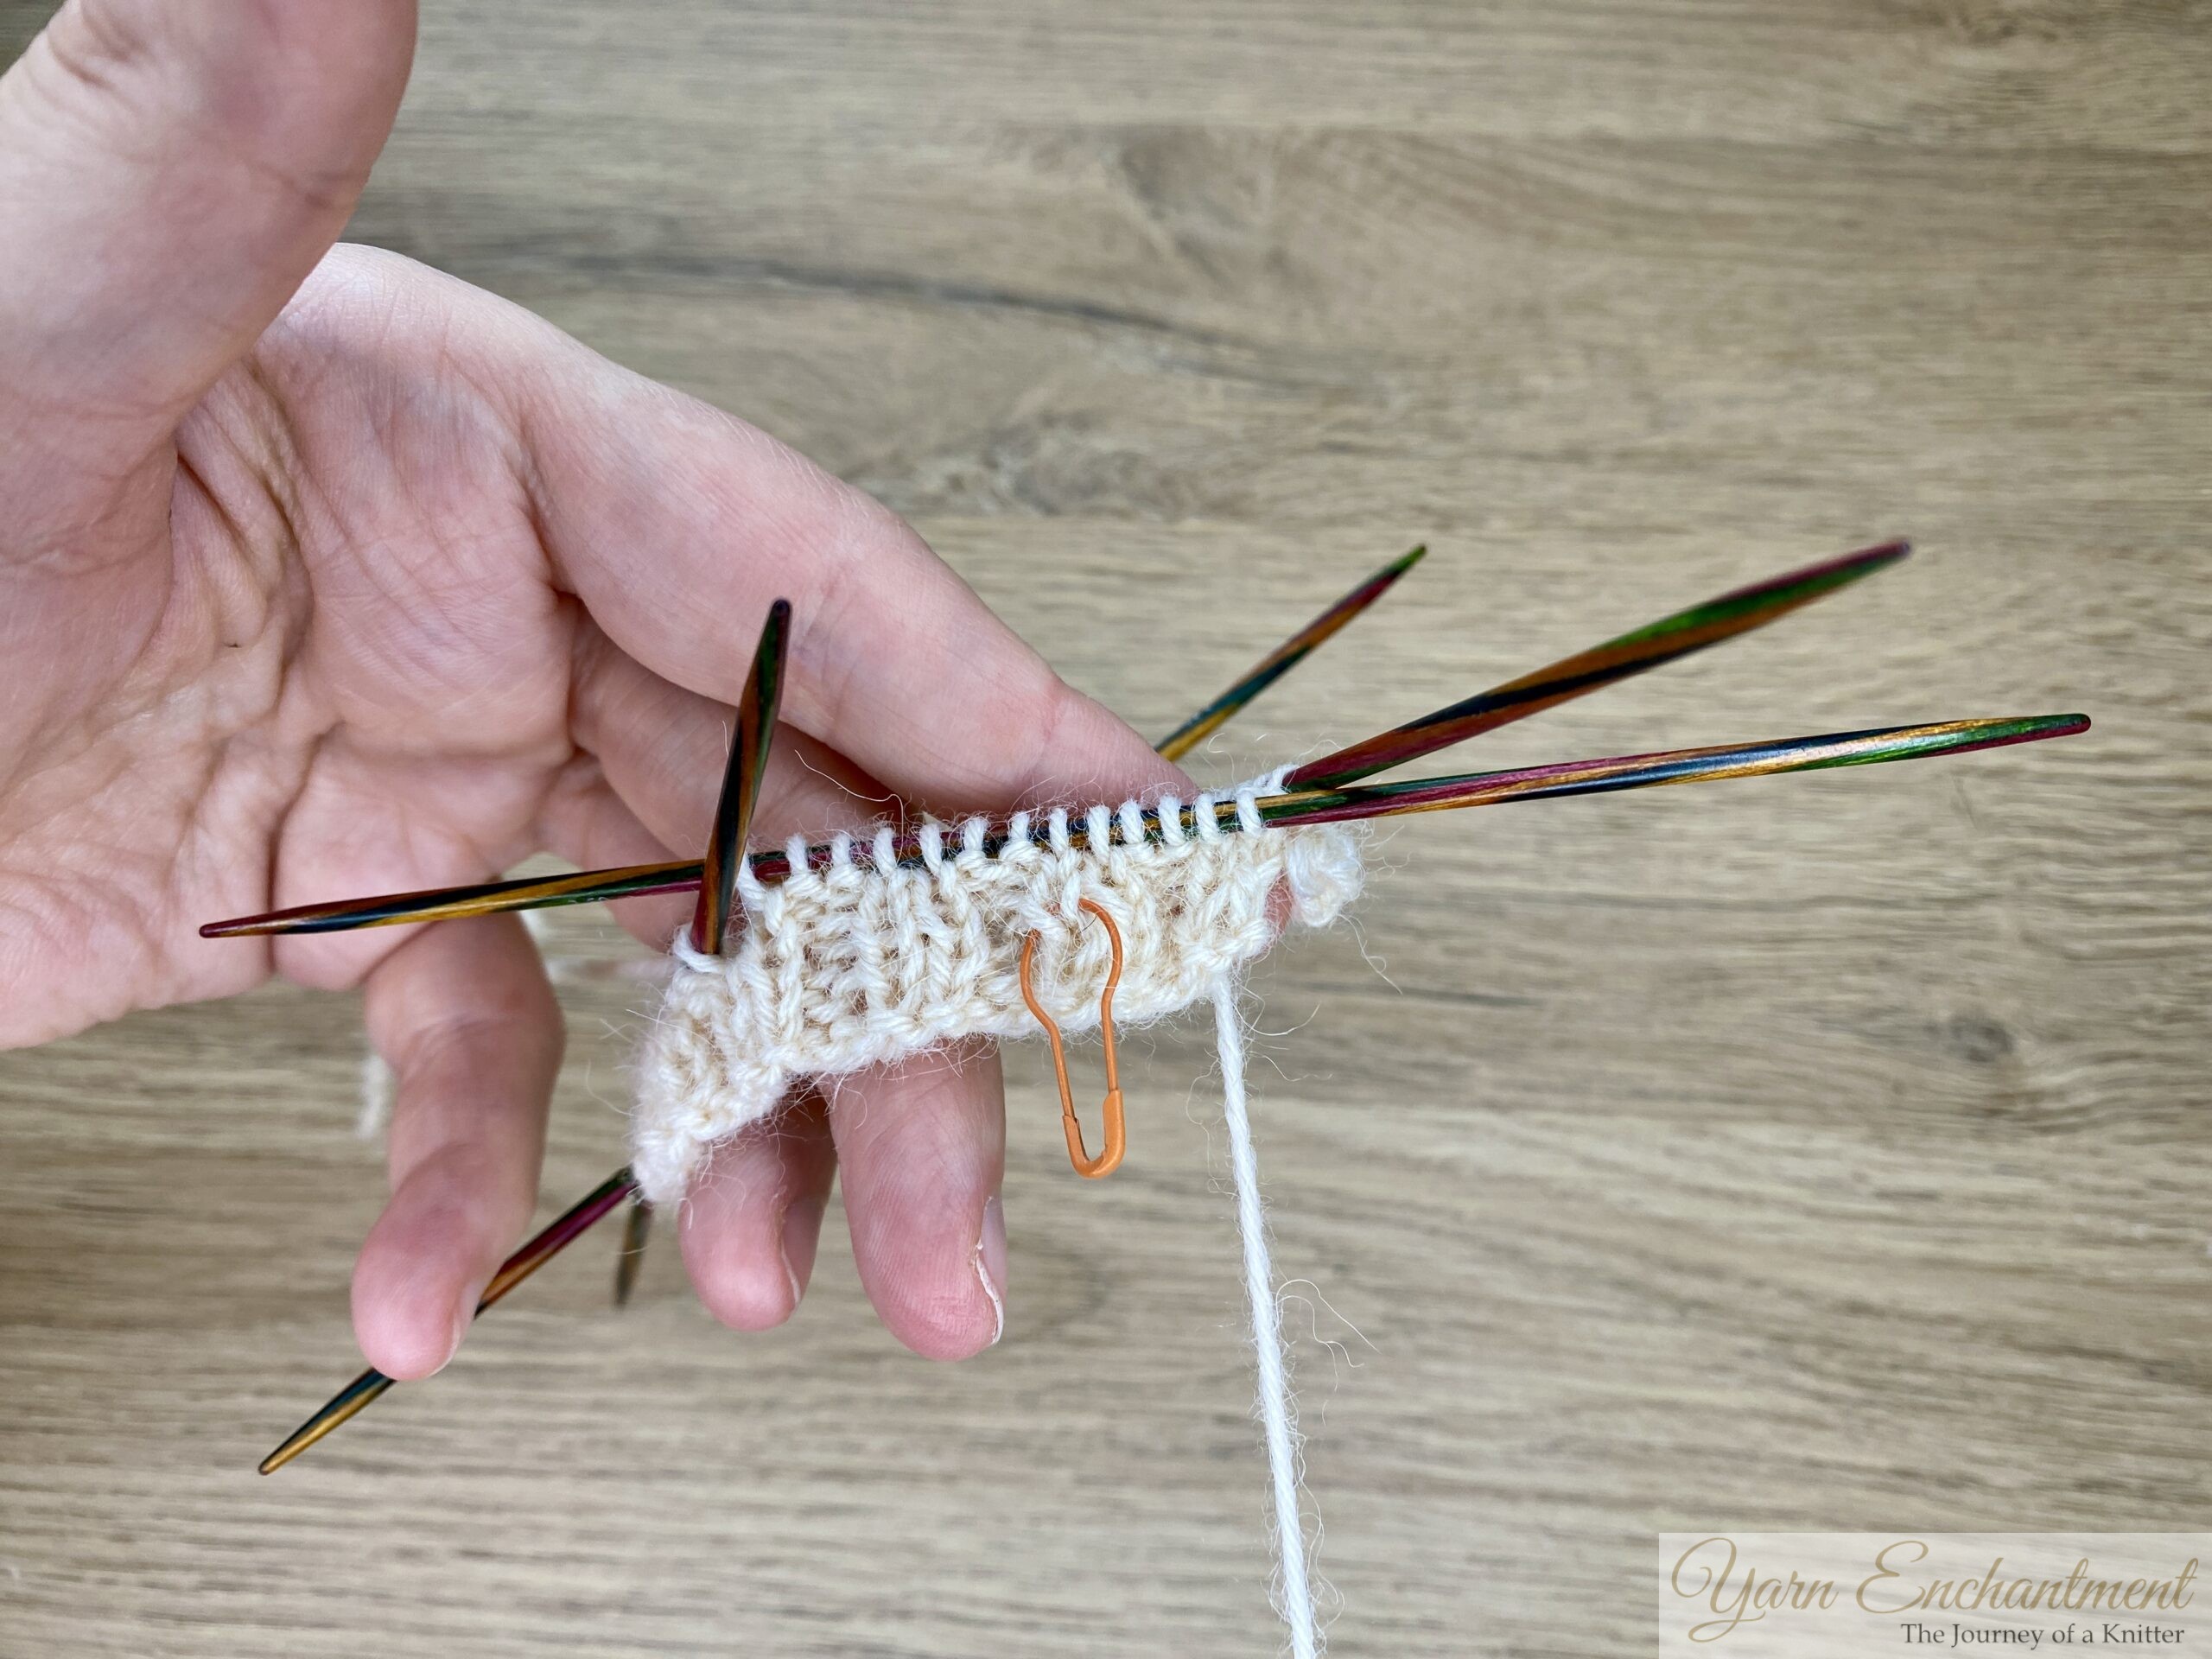 | 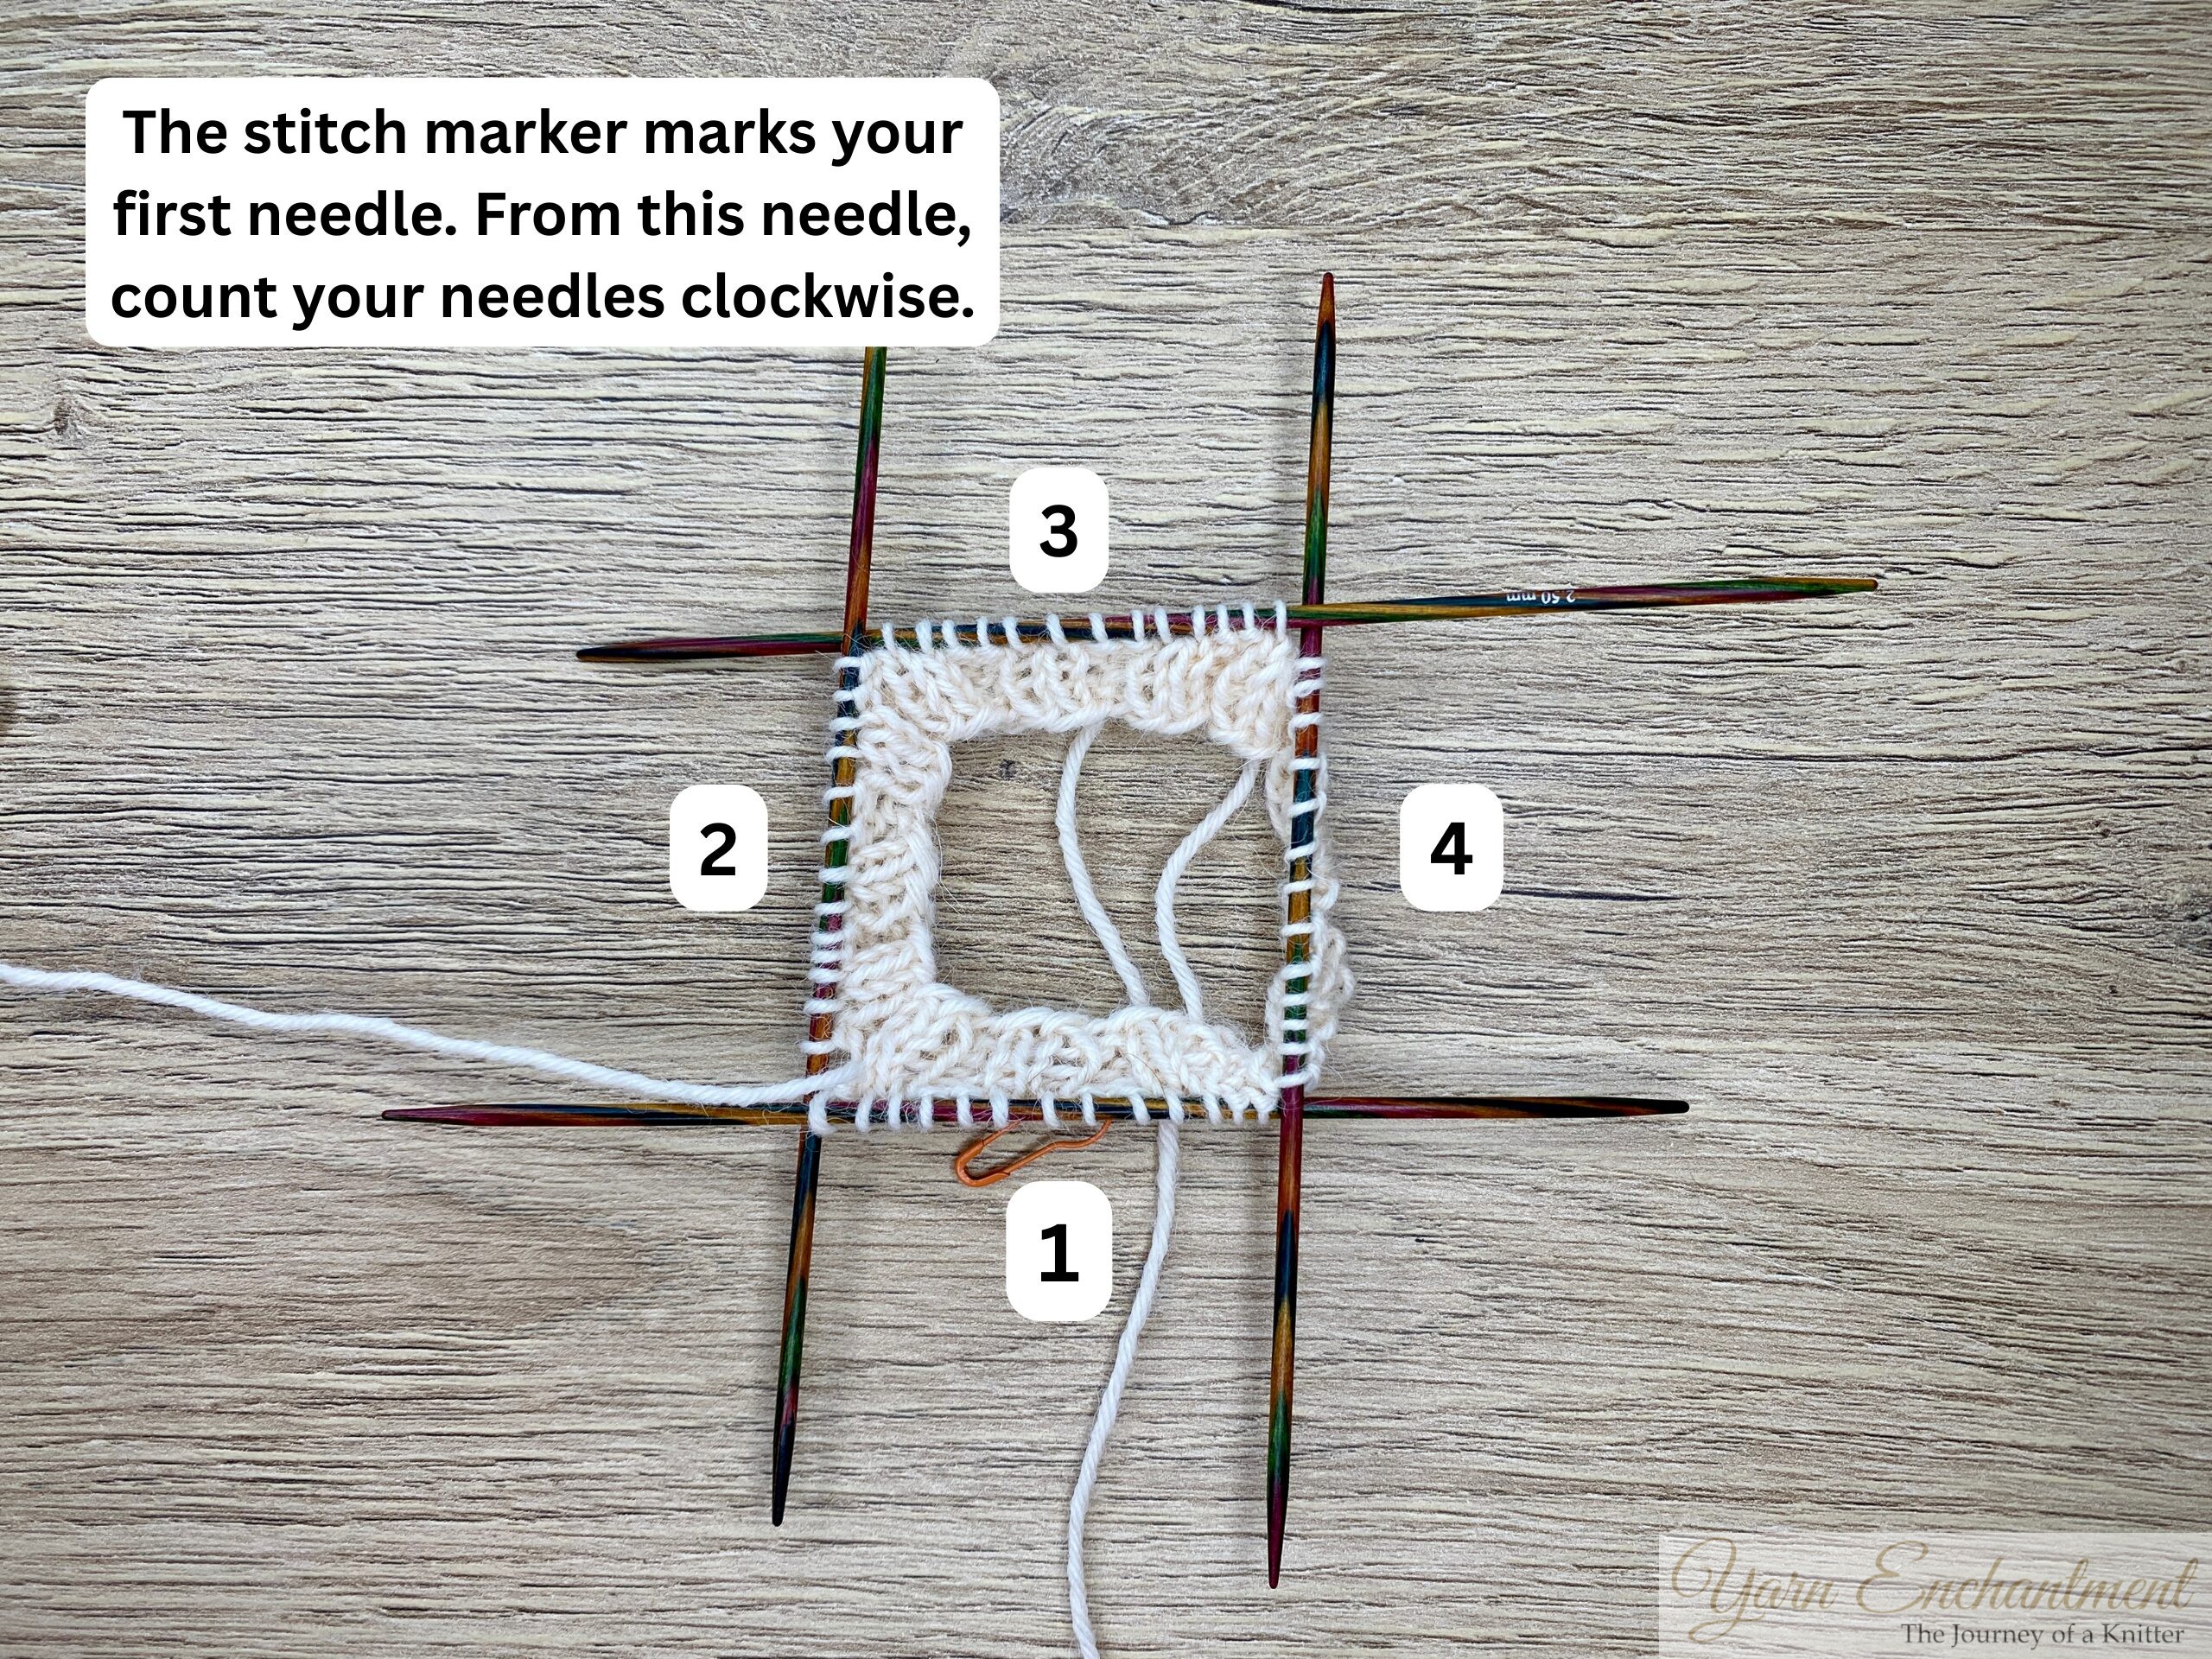 | Take a moment to mark your first needle with a stitch marker | Starting with your first needle, count your needles clockwise. The first and fourth needles will form the back of your sock, while the second and third needles will make up the front of your sock. |


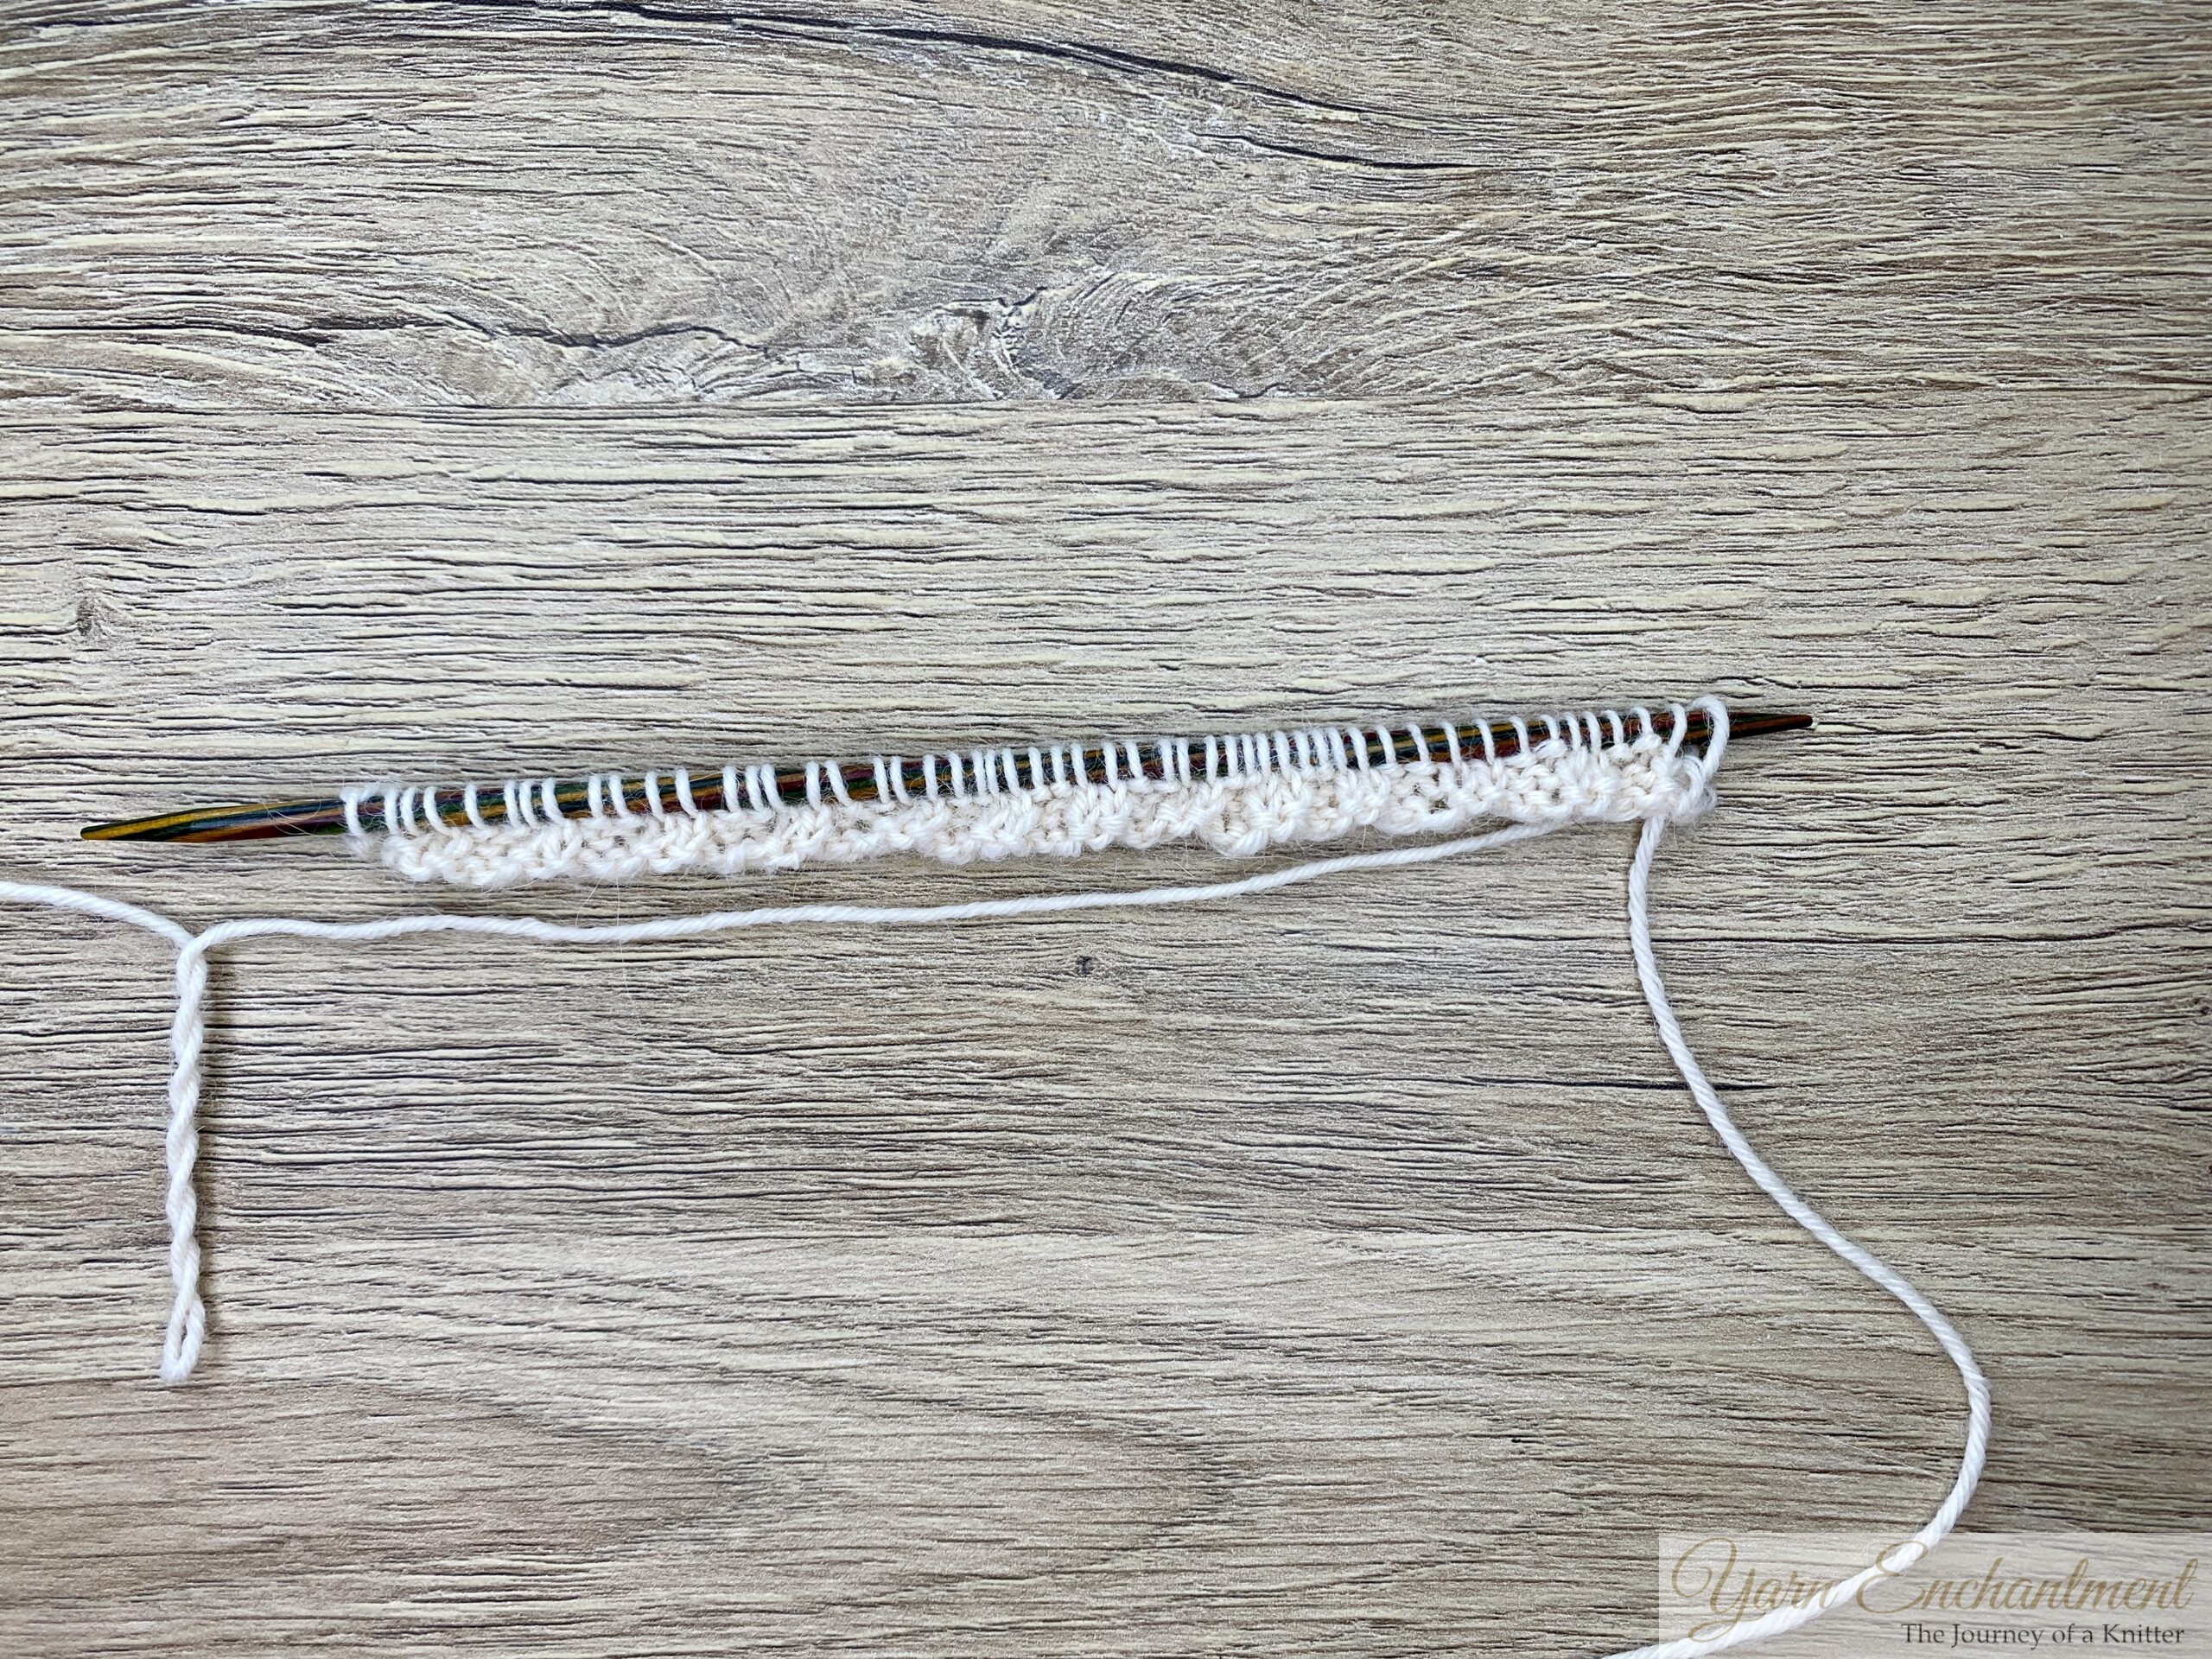
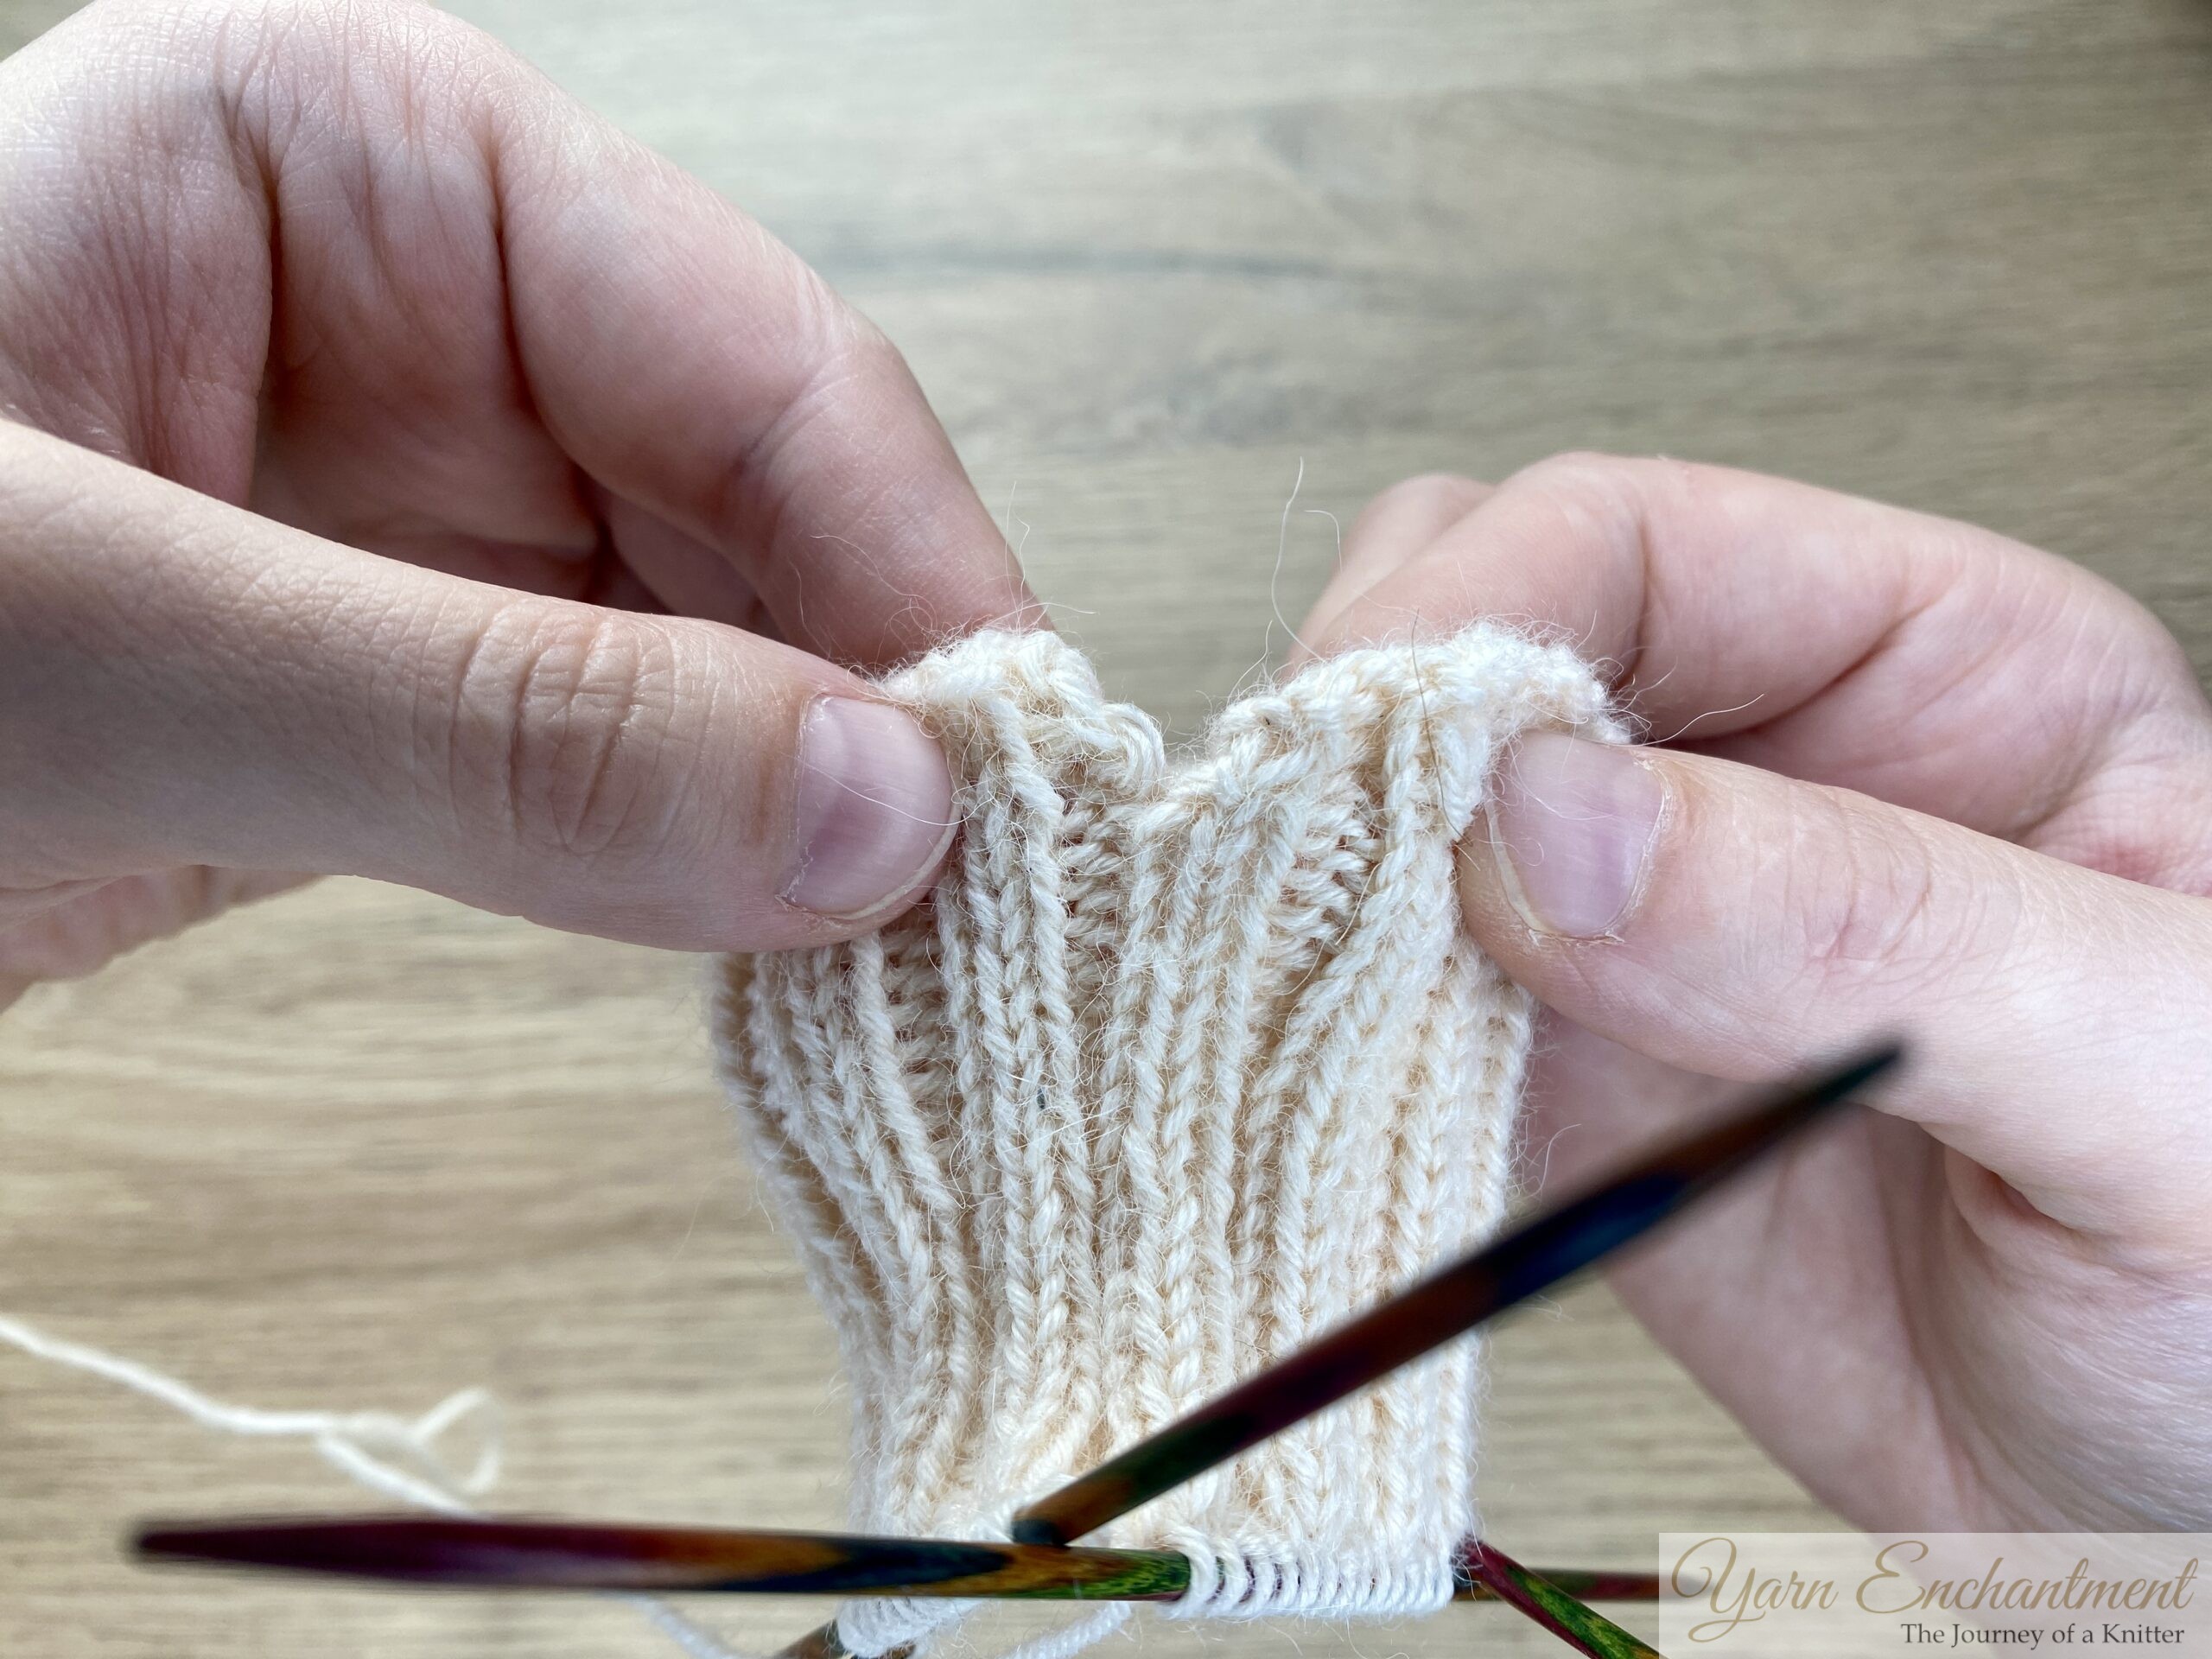
Continue working in a K2, P2 ribbing pattern for about 4 - 6 cm, depending on how long you’d like your sock cuff to be. It’s helpful to jot down how many rounds you knit; this makes it much easier to keep both socks matching in your pair. Ribbing adds stretch and helps your socks stay up, while it’s fun to experiment, skipping ribbing can result in a very loose top edge and is usually not recommended.
For a classic K2, P2 rib, just repeat (knit 2, purl 2) all the way around the cuff. If you’d like a different texture, try K1, P1 or K3, P1 ribbing for a little variety!
In a separate blog post, I’ll share how to fix cast-on gaps in sock knitting. This can be done by using a different cast-on method to prevent gaps, or simply by weaving in the yarn ends neatly after finishing your sock for a seamless look.
Note: This guide is here to help you knit your first sock - but feel free to make it your own! You can work ribbing all the way down your sock or try out different techniques as you go.
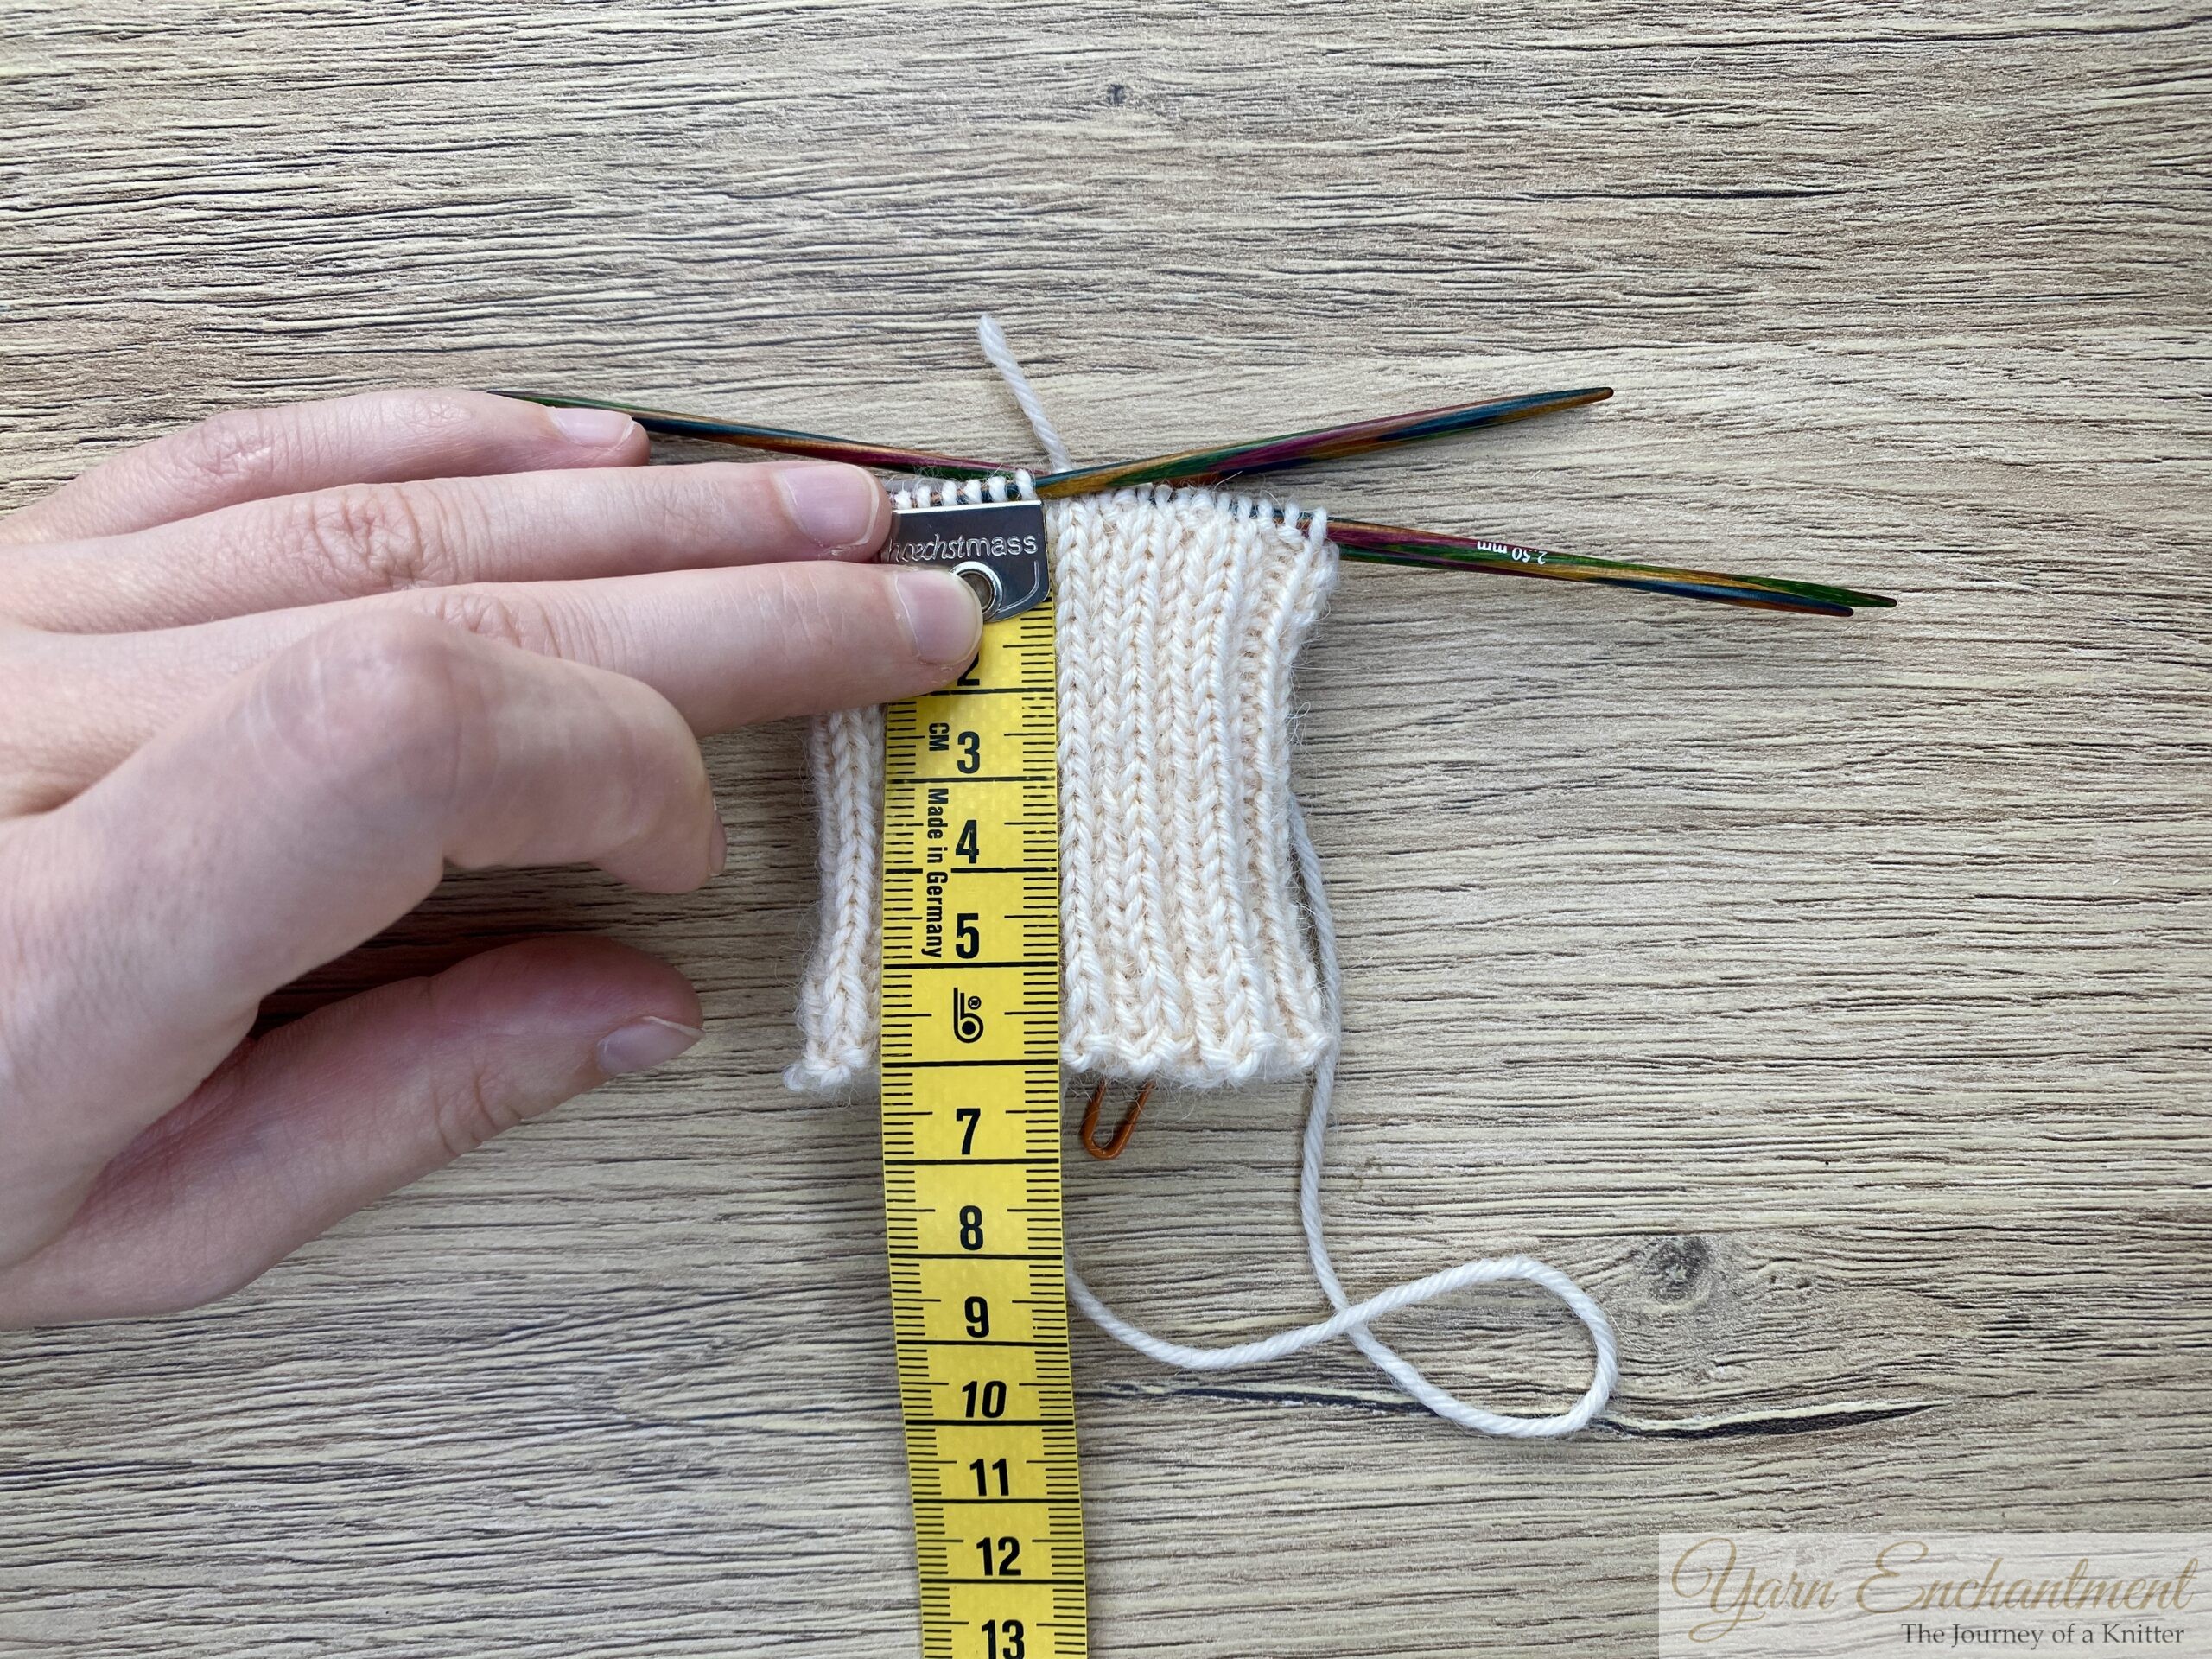 |  | I knitted my cuff to a length of 6 cm (that’s 25 rounds, including the first two rows before joining in the round). | You’ll notice a small gap where you joined your knitting in the round. Don’t worry about it, later in the course, I’ll show you an easy way to close it up neatly. |


Knitting the Sock Leg
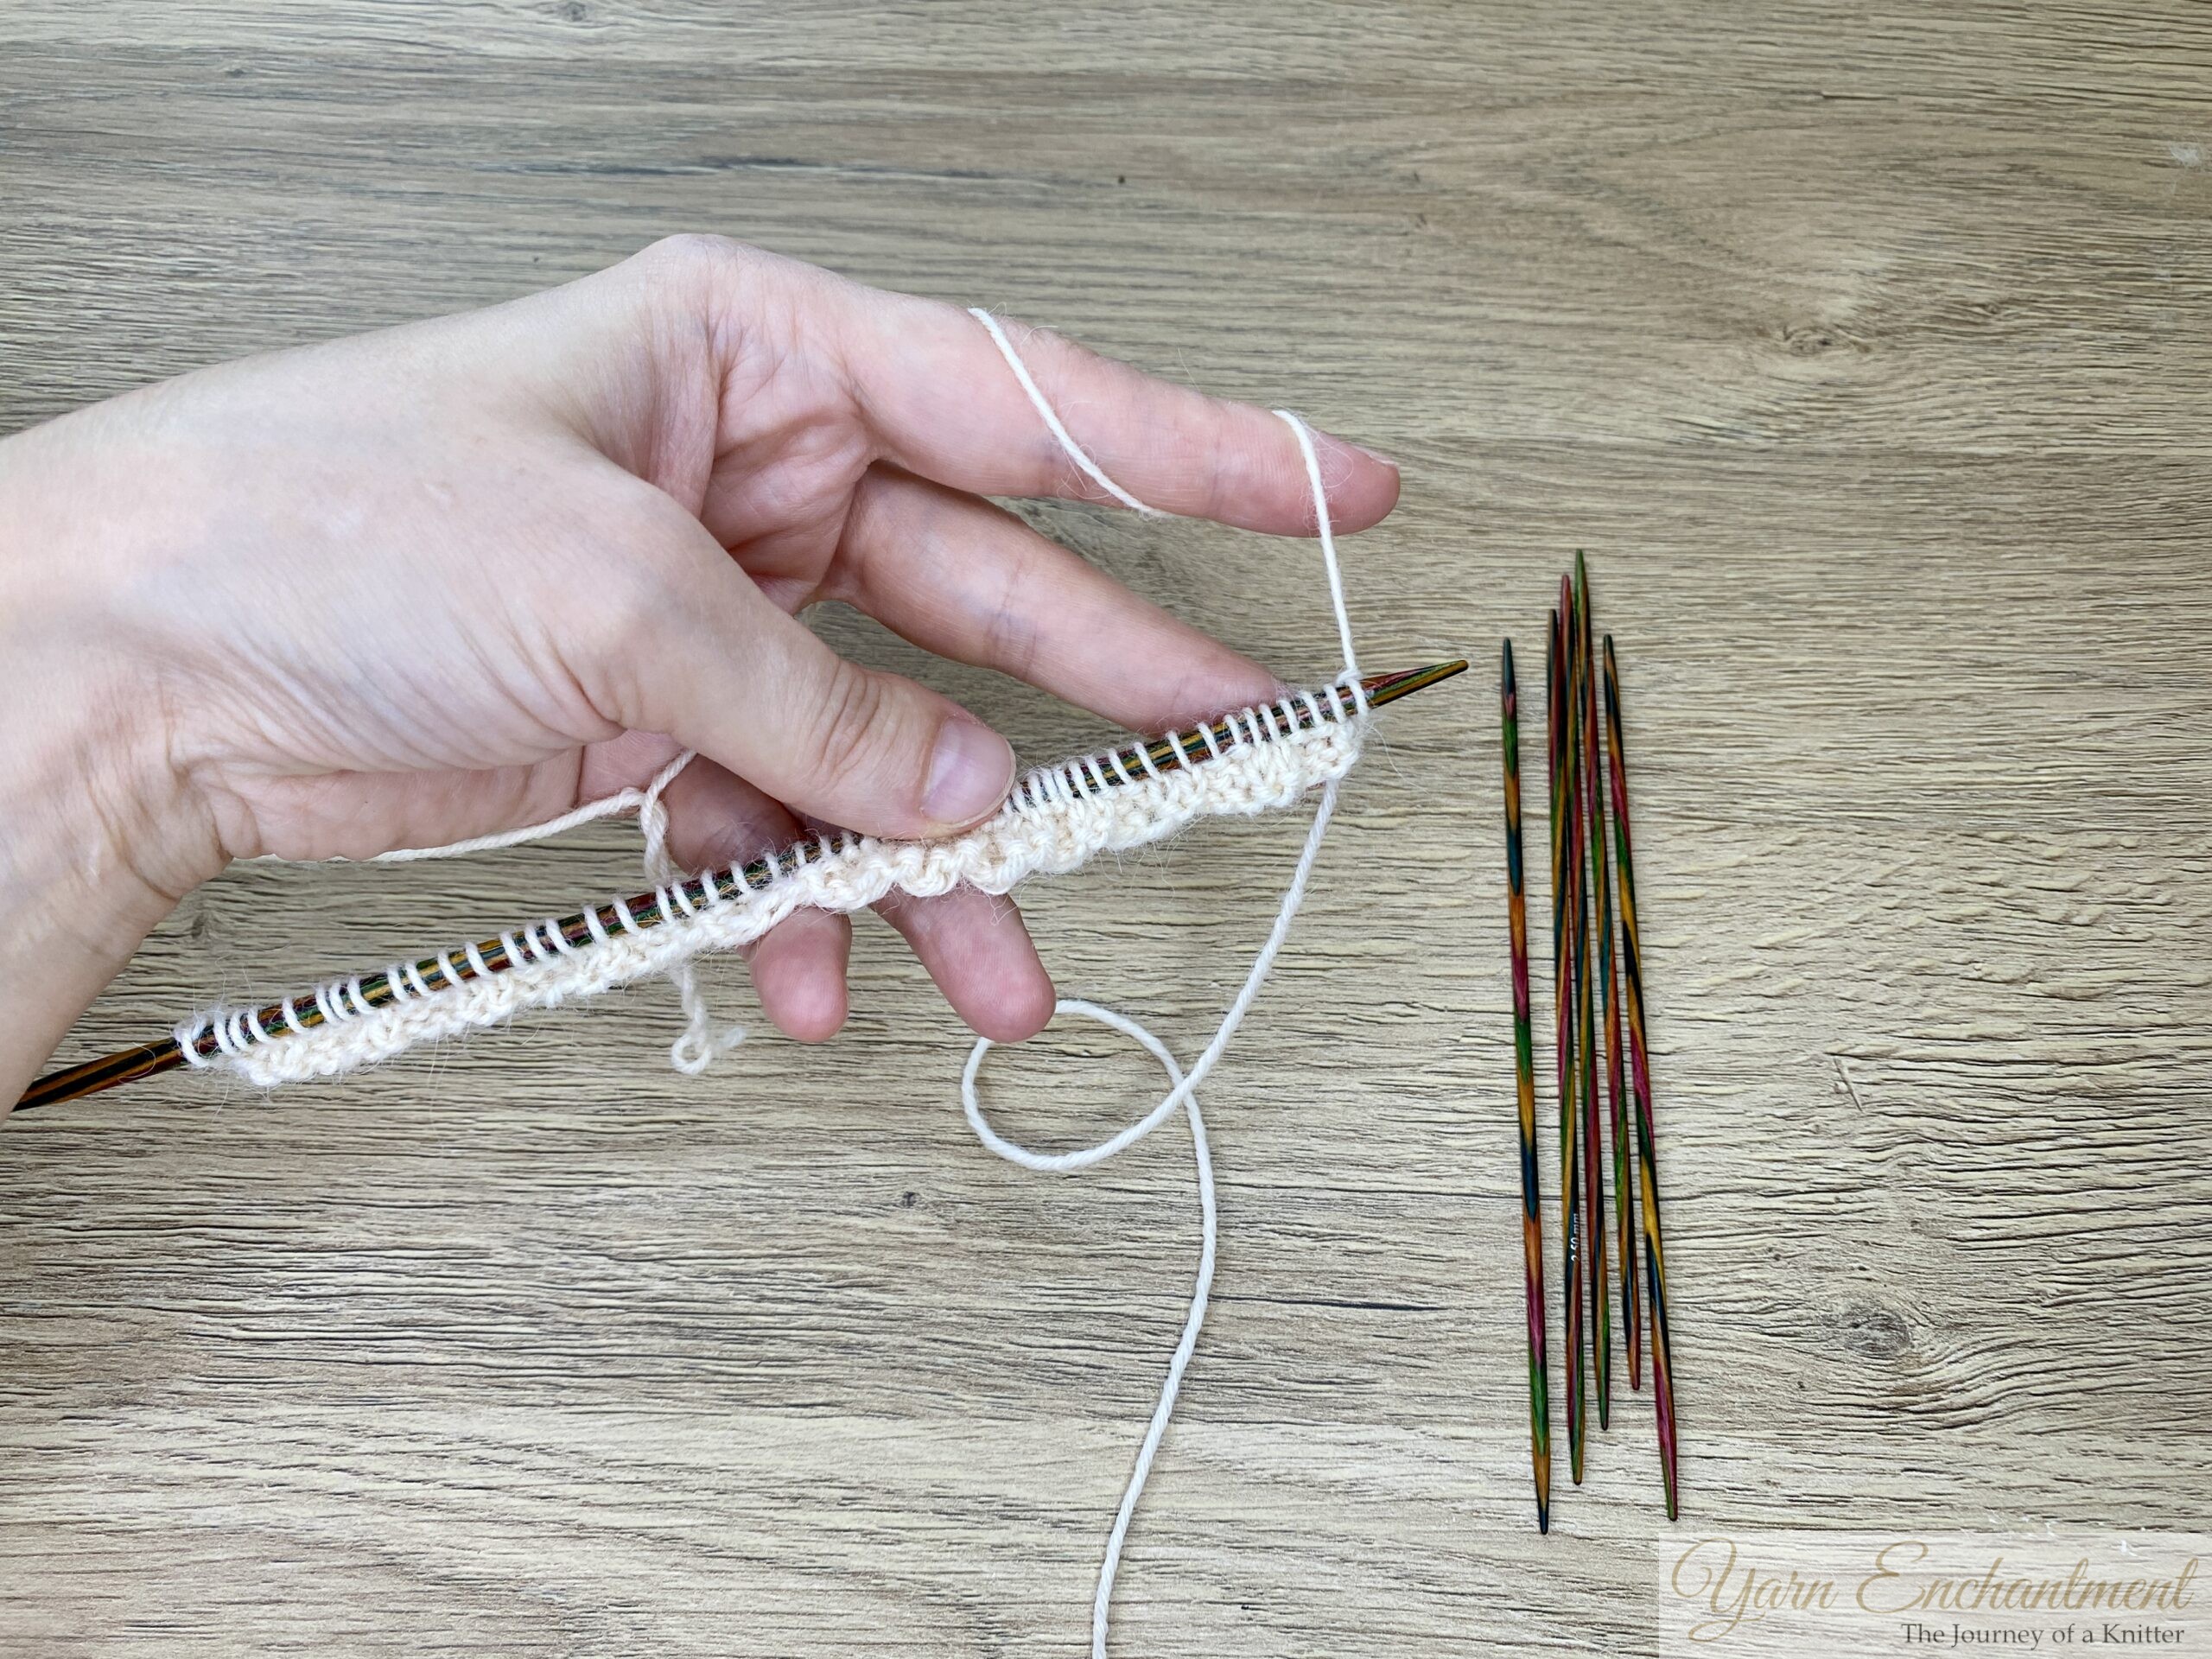
After finishing the cuff, switch to stockinette stitch by knitting every stitch of every round. The leg length is completely up to personal preference. As a general guideline, knit about as many rounds as you have stitches on your needles - for example, with 52 stitches, knit 52 rounds. Many knitters choose to work 60 - 75 rounds (including the ribbing) before starting the heel. Remember to keep track of your round count so your second sock matches. Don’t hesitate to try the sock on as you go for a custom fit.
💡Before I switch to my larger needles, I like to knit the first stockinette round with my smaller needles. In my experience, this creates a much smoother, neater transition between the purl bumps and the knit stitches. Placing a stitch marker in your first round can also help you easily keep track of your rounds as you knit.
 | 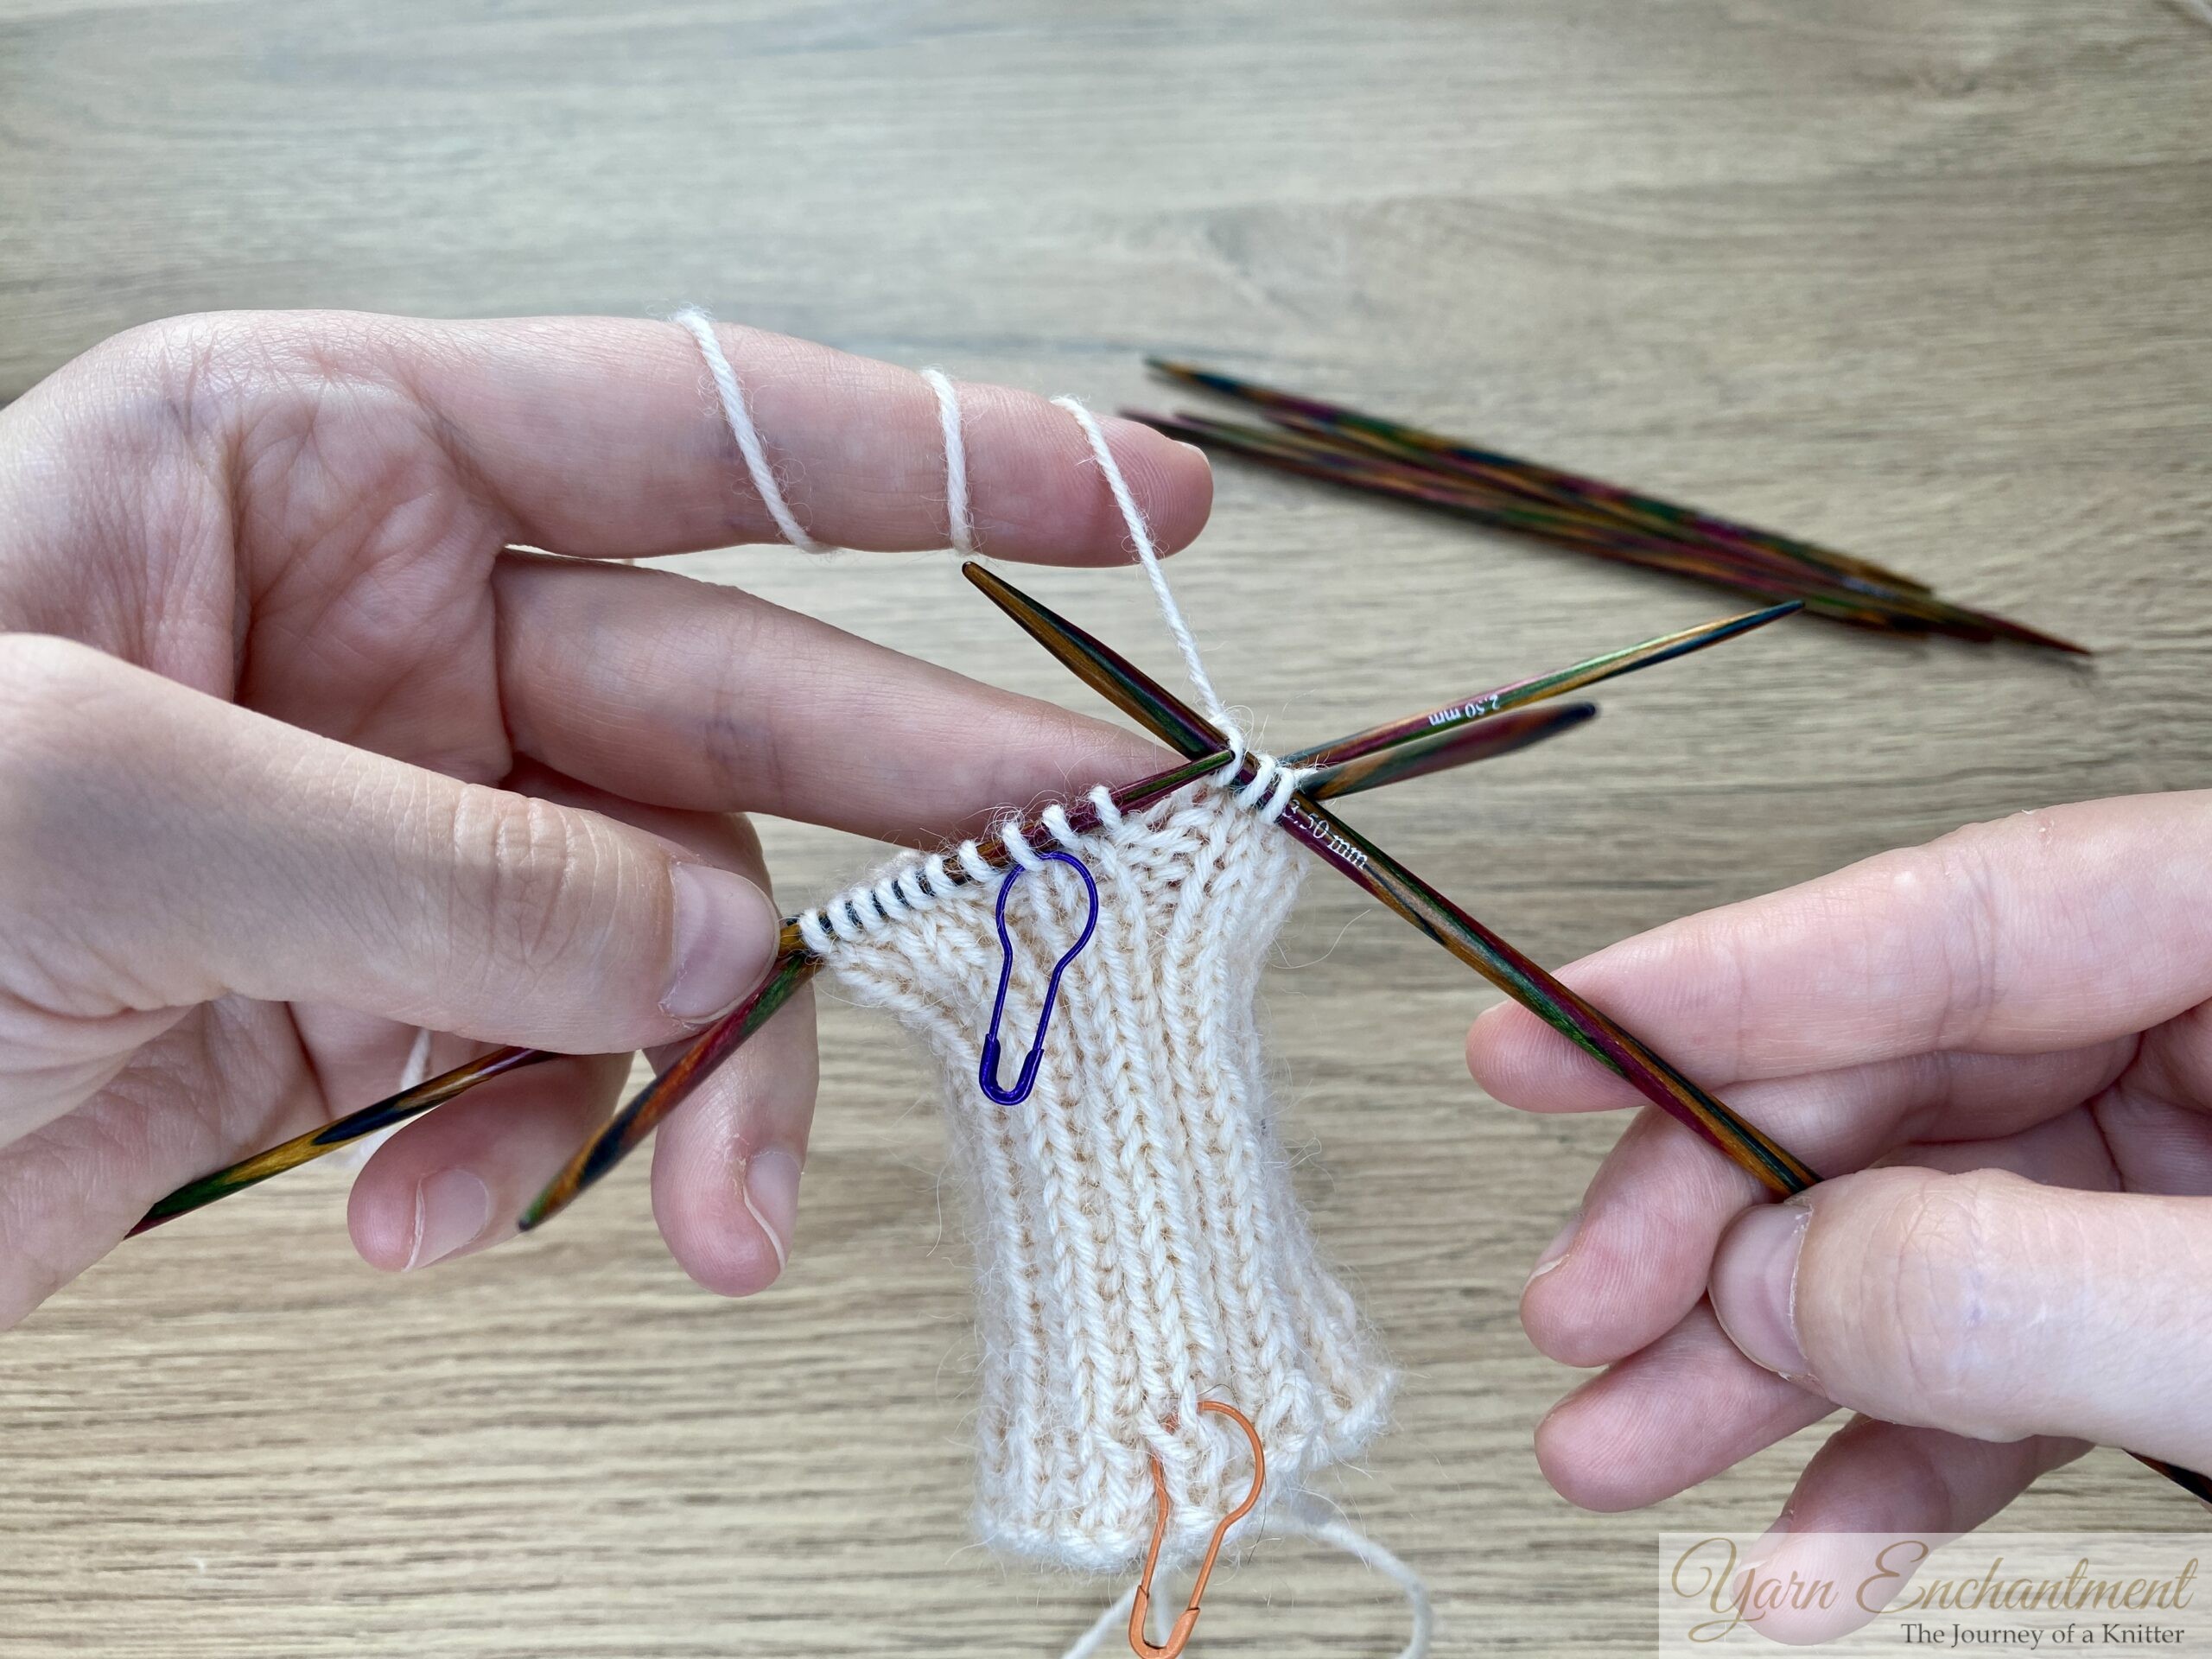 | Start knitting the first round of your sock leg. I like to use my smaller needles for this round to keep the transition between purl and knit stitches neat. I also mark the first knit round of the leg with a stitch marker - this makes it much easier to count rows later on. | On the second round, I switch to my 3.5 mm needles. (This step is optional - you can start using your larger needles right after finishing the cuff, if you prefer.) |


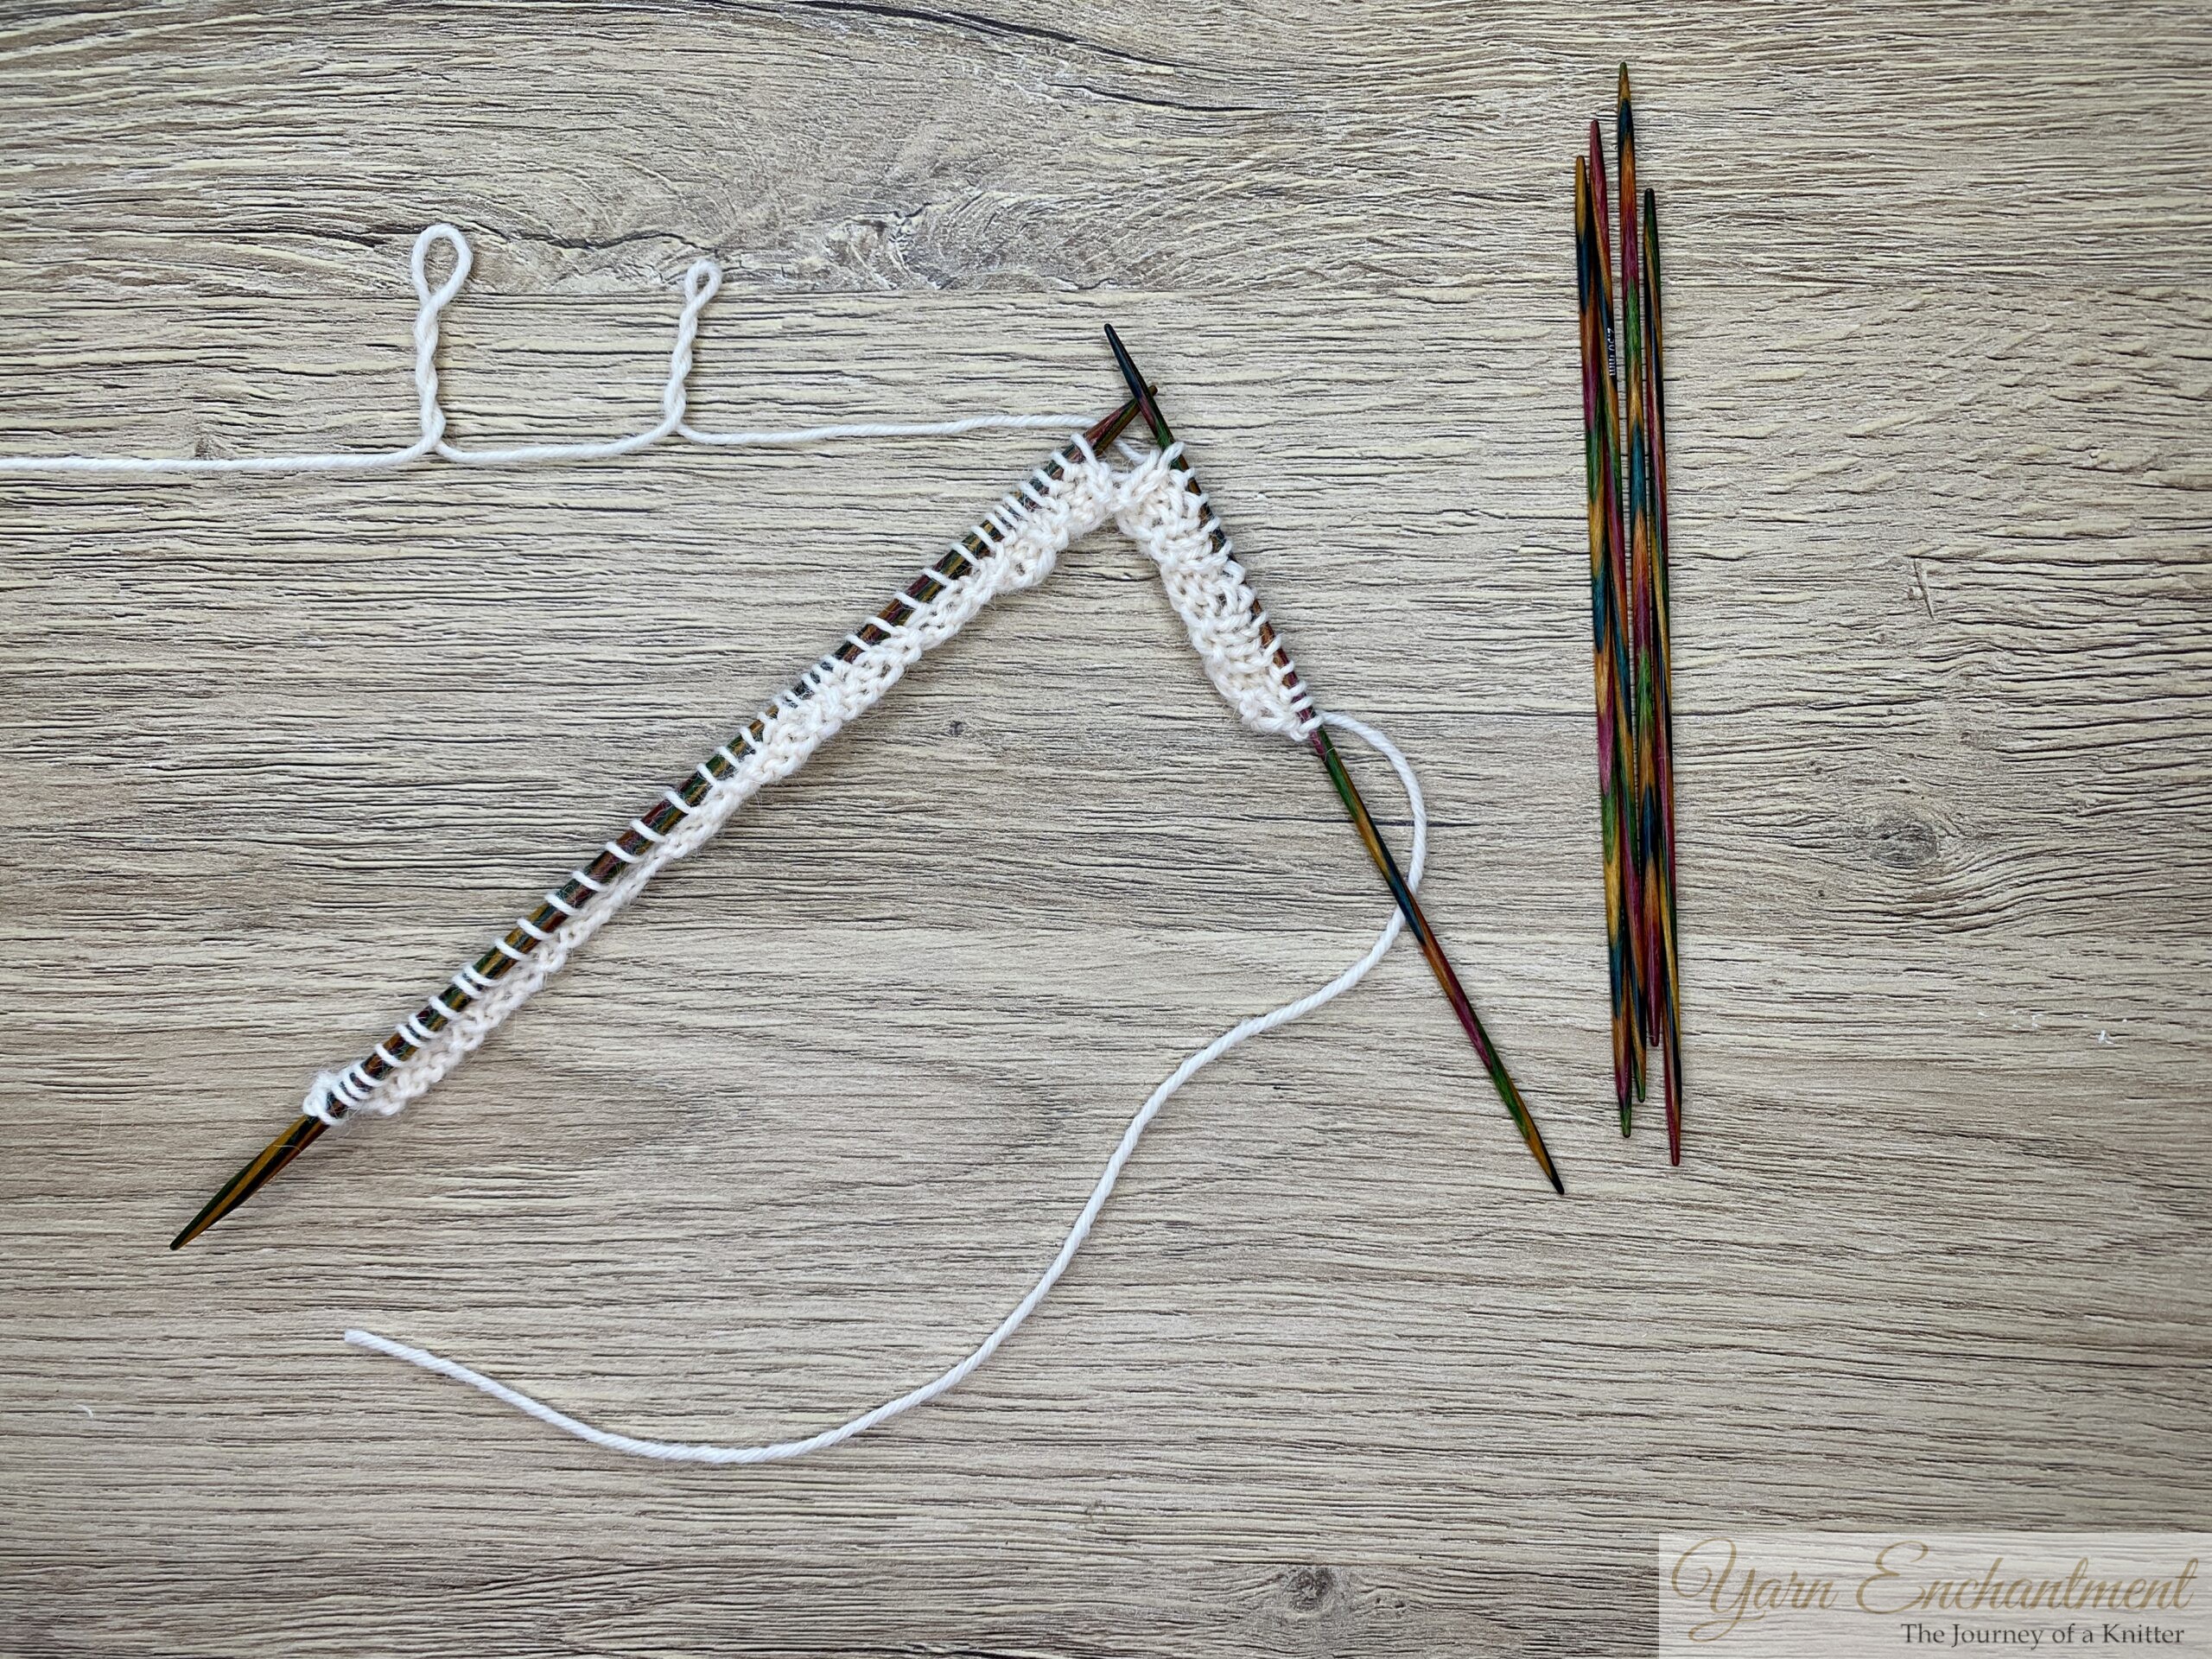
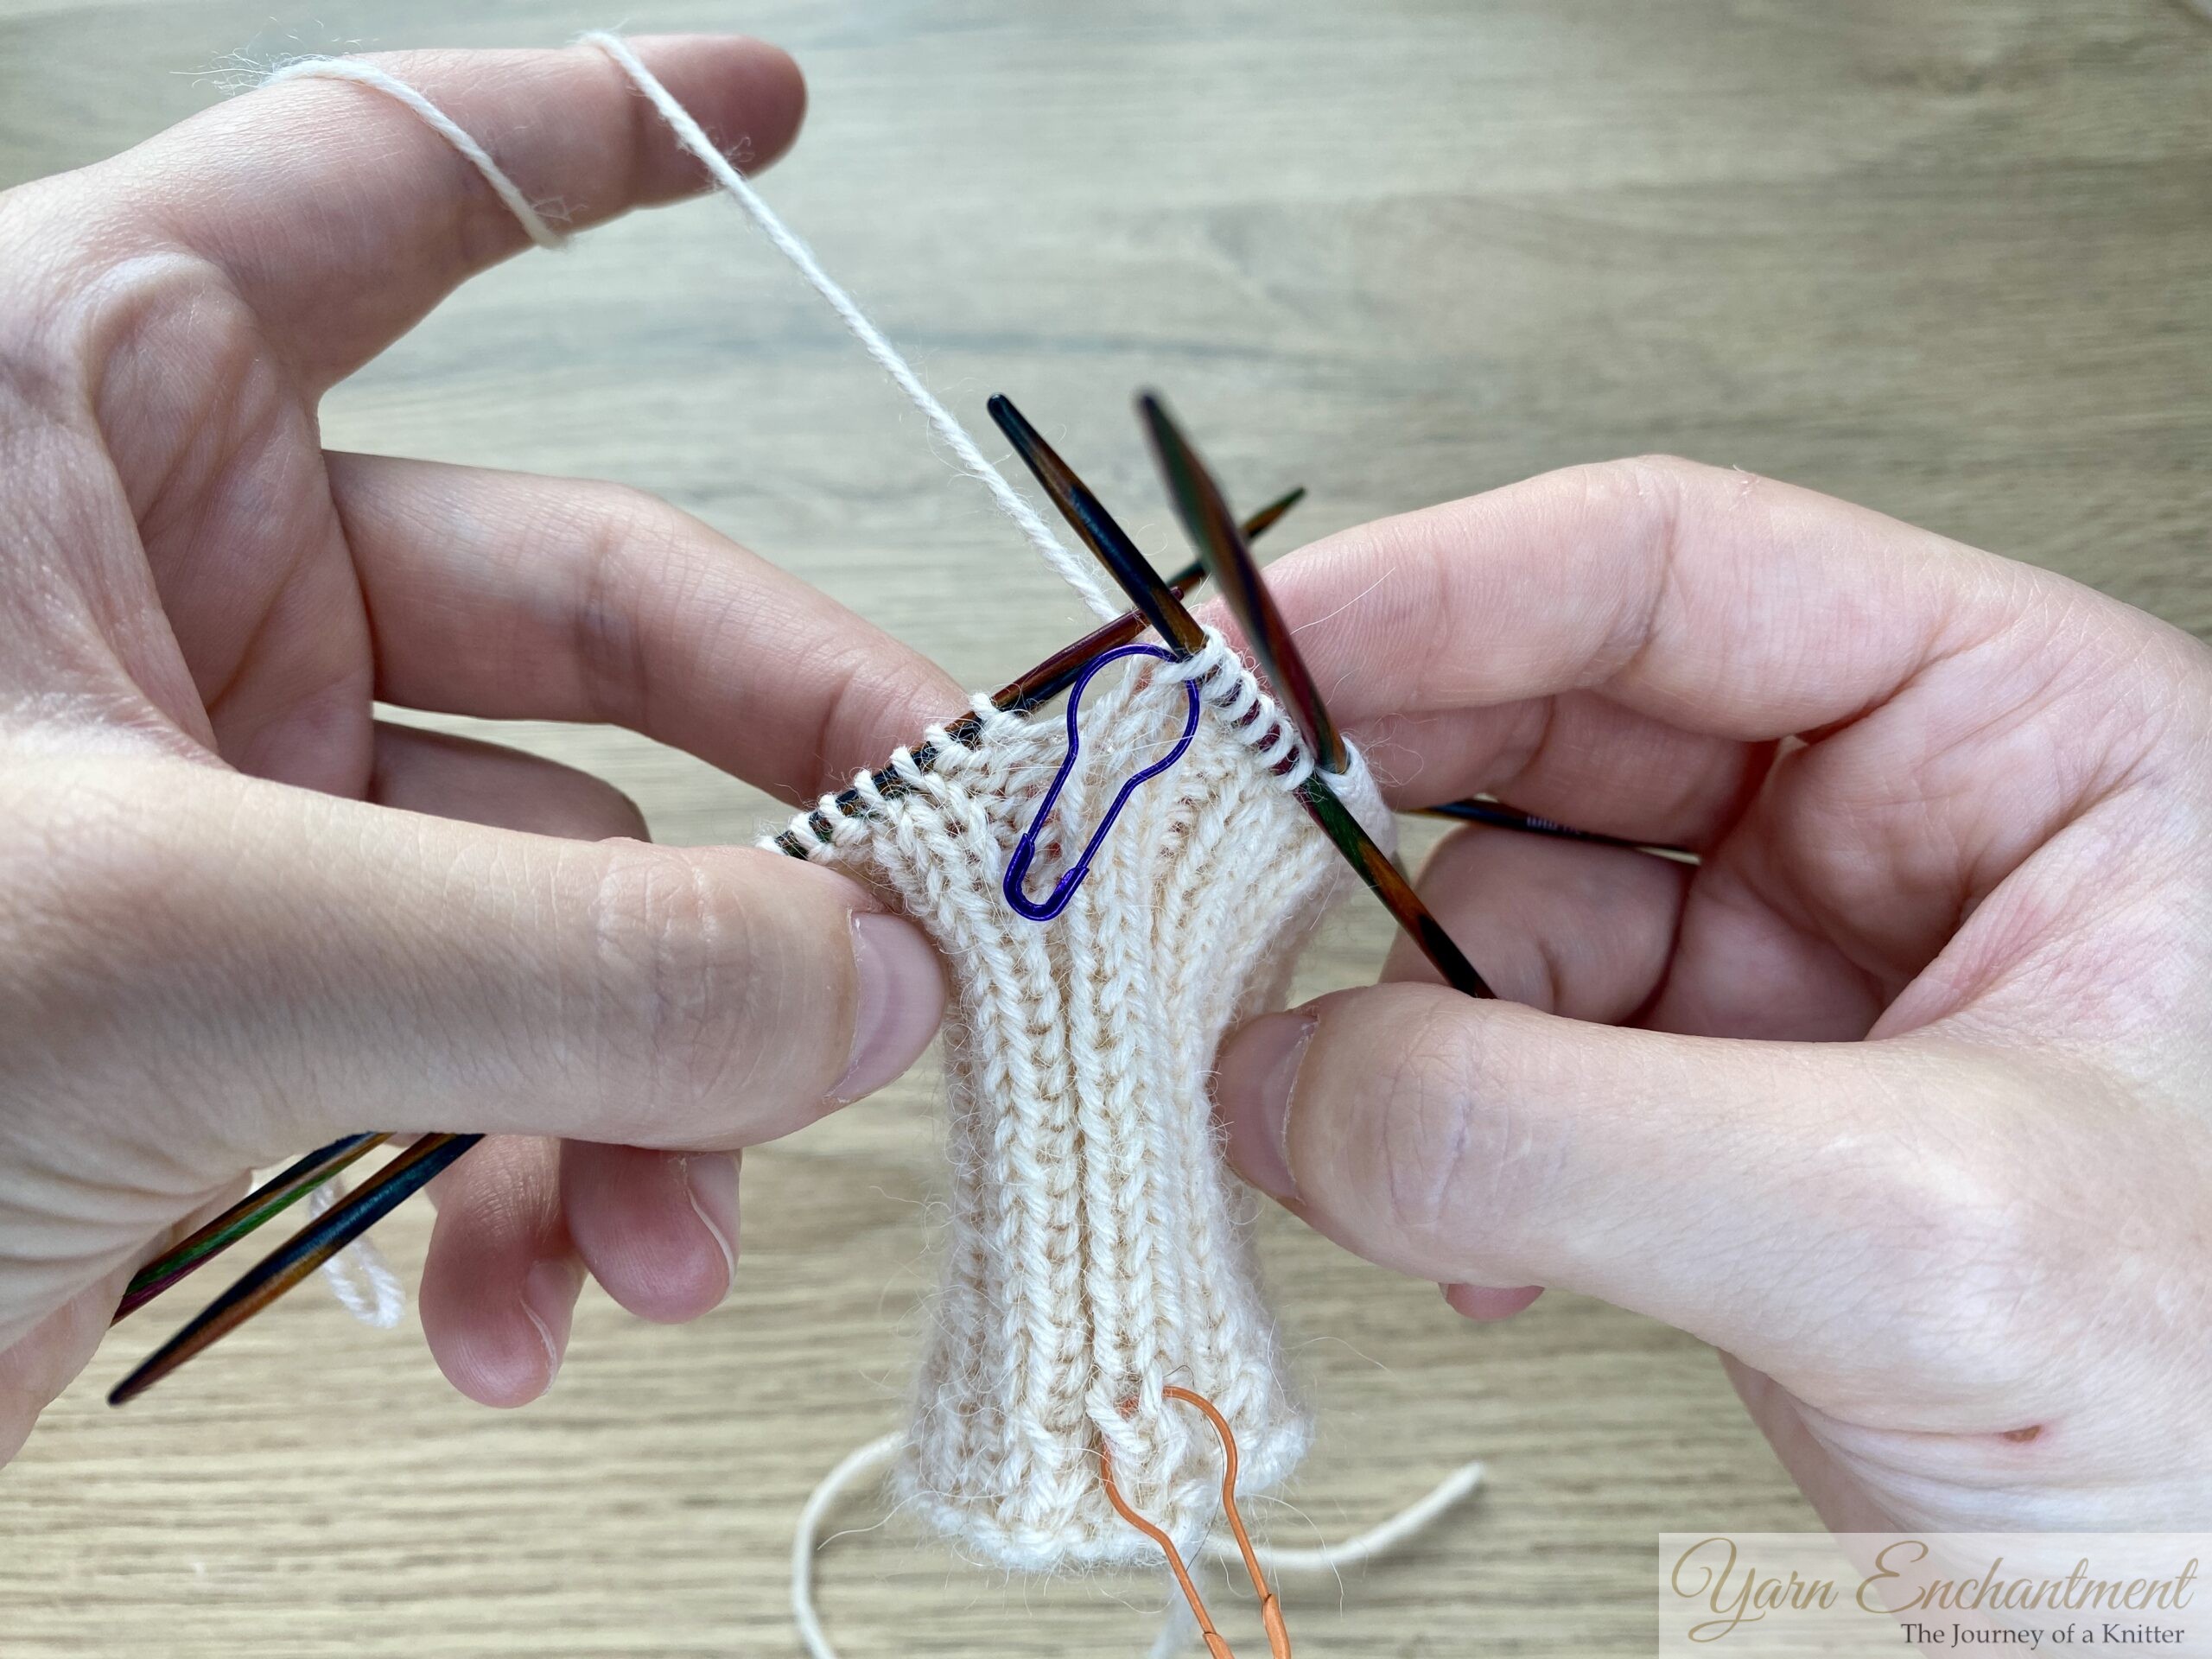
After finishing the leg of your sock, take a moment to make some notes. Record exactly how many rounds you knitted and the length in centimeters or inches. This information will make it much easier to knit the second sock to match - but it’s also useful if you want to make another pair in the future without guessing your measurements.
Once you’ve written down the leg length, place a stitch marker on your needle to clearly mark the end of the leg section. This marker makes it simple to match the second sock perfectly and keeps your project organized.
 | 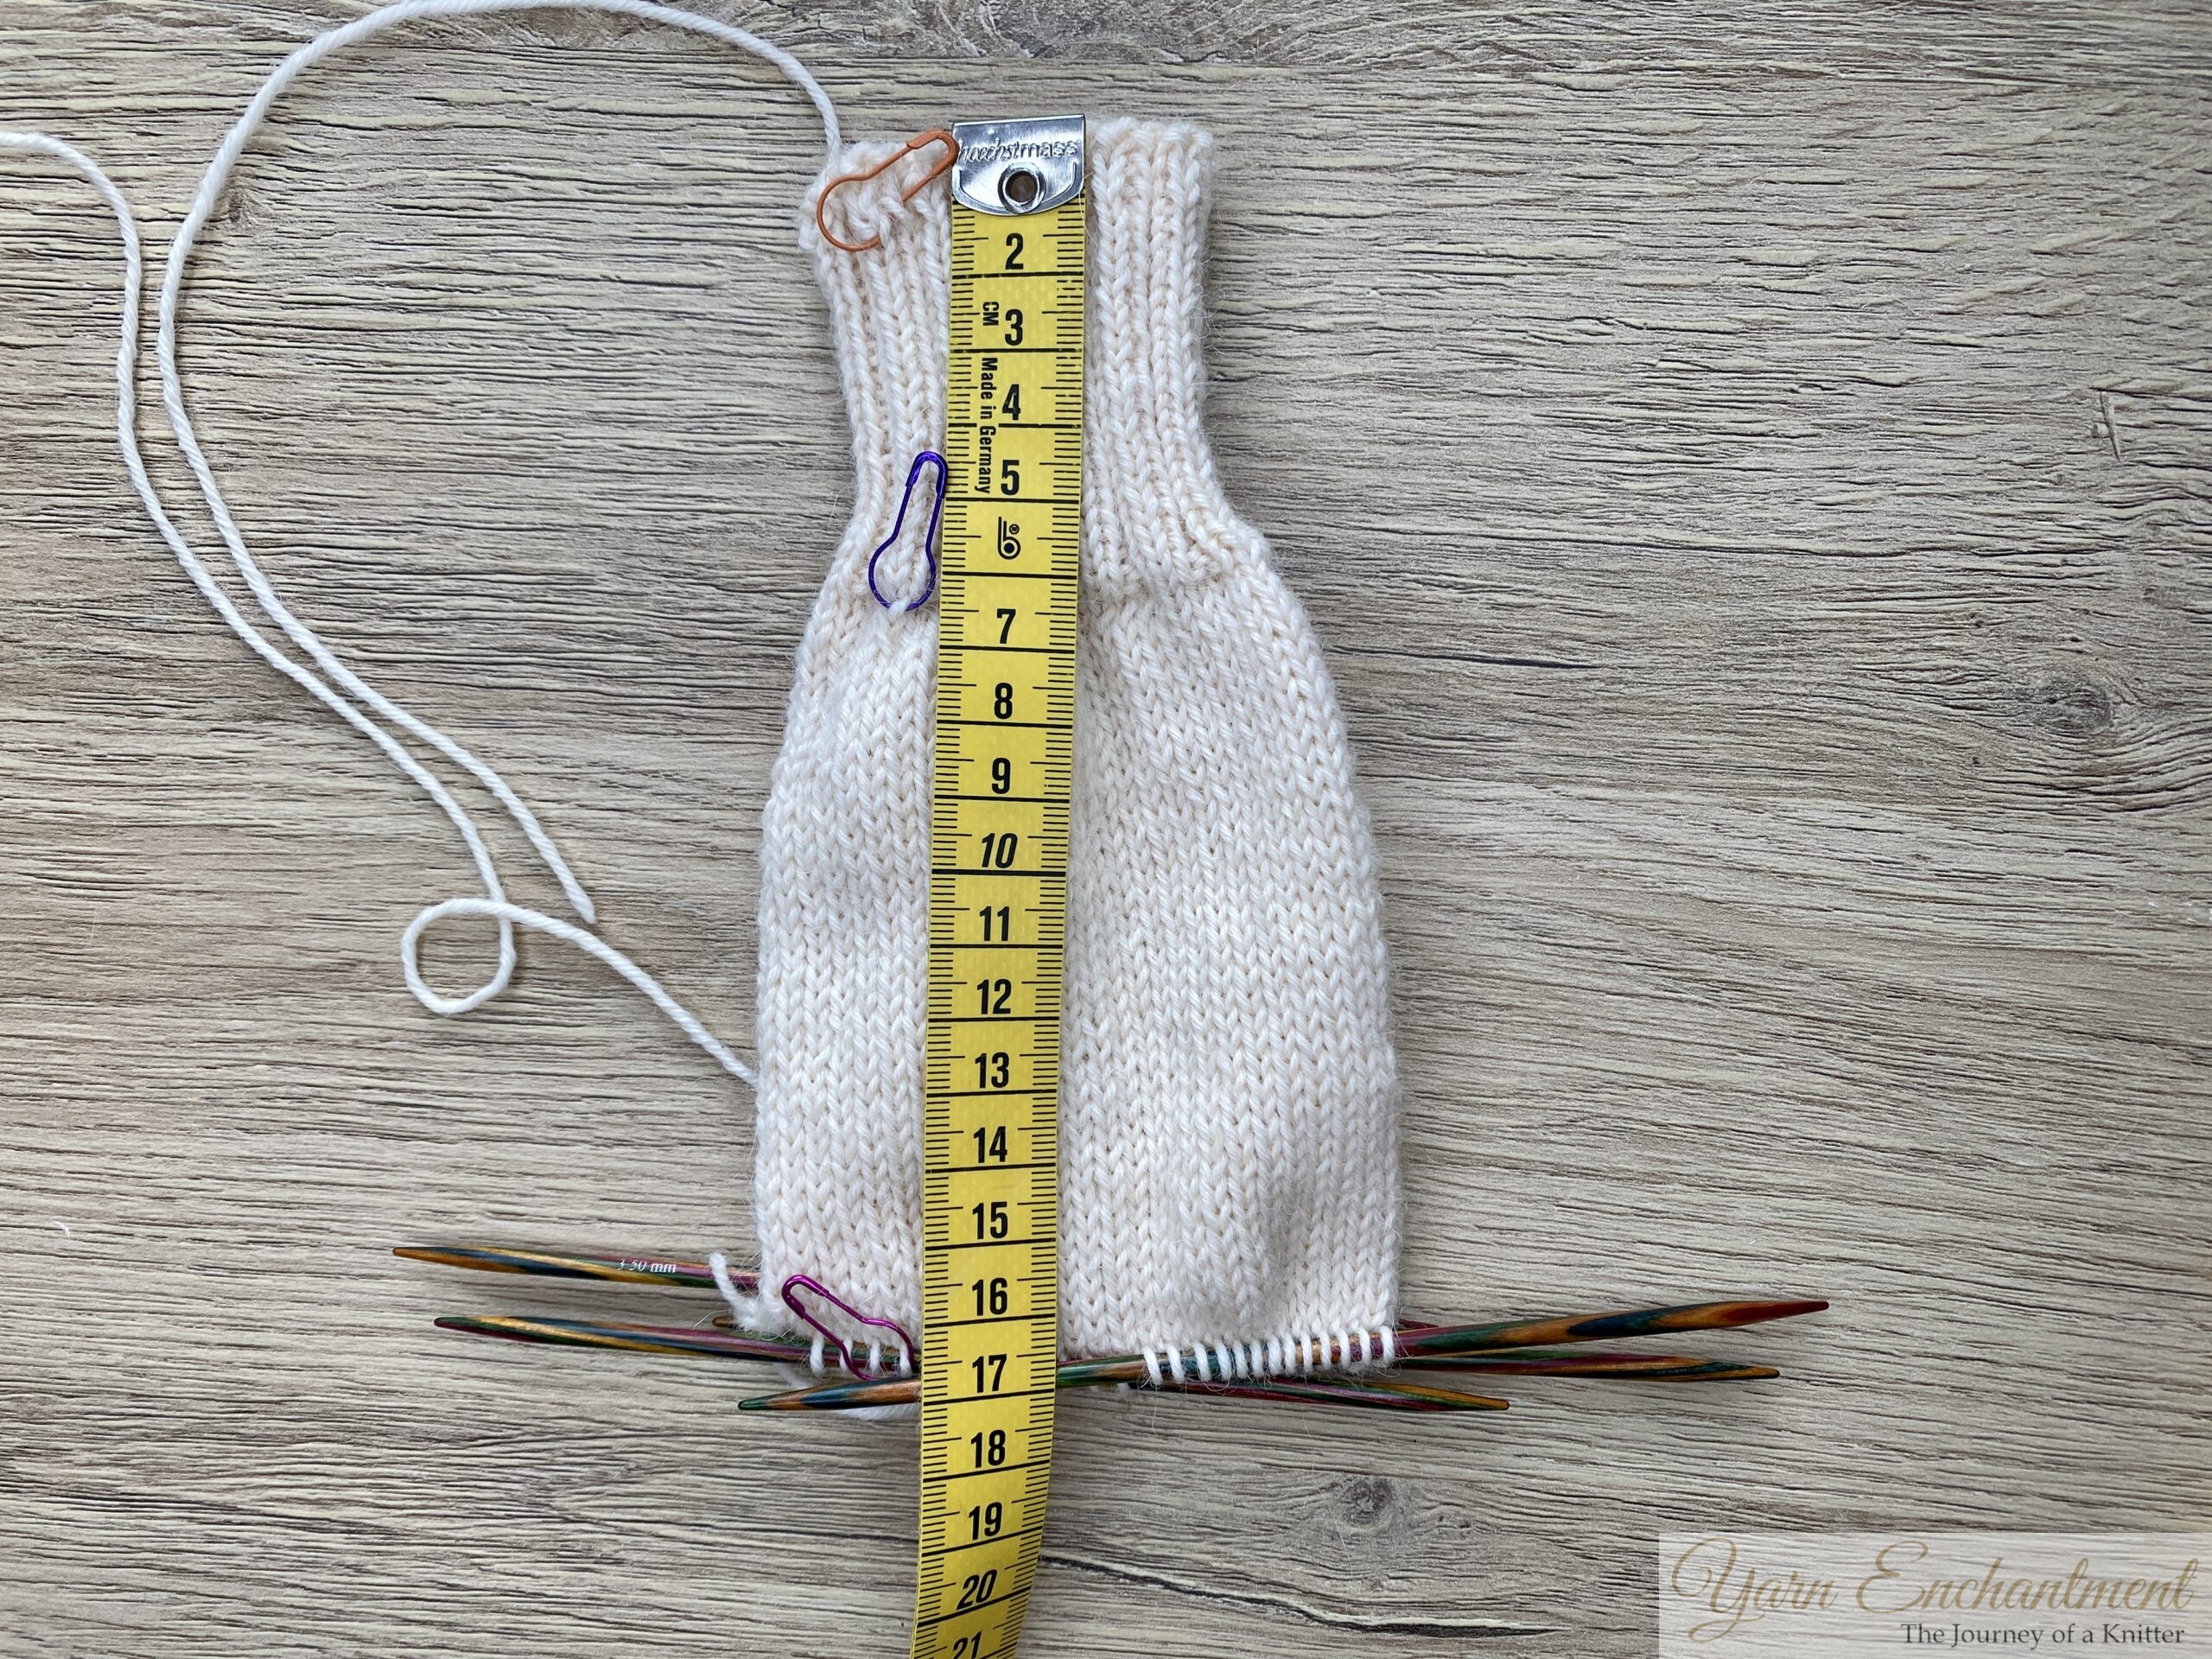 | Place a marker in the last knitted round | Take a moment to make some notes, write down exactly how many rows or how many centimeters you knitted for the leg section. |


Tips for Success
-
Keep yarn tension snug at needle transitions to avoid “ladders” - those loose gaps that can form between double pointed needles.
-
If your knitting turns inside out, simply push the fabric through so the right side faces out. This is a common and completely normal experience for beginners.
-
Don’t rely on measurements alone, as rulers or tape measures can be inconsistent and may not ensure both socks are the same length. For best results, use a row counter, notepad, or digital tracker to record the exact number of rounds you knit. This habit ensures consistent socks and helps avoid errors when making pairs.
-
Don’t worry about small mistakes; uneven tension or minor flaws will usually even out after washing and blocking your socks.
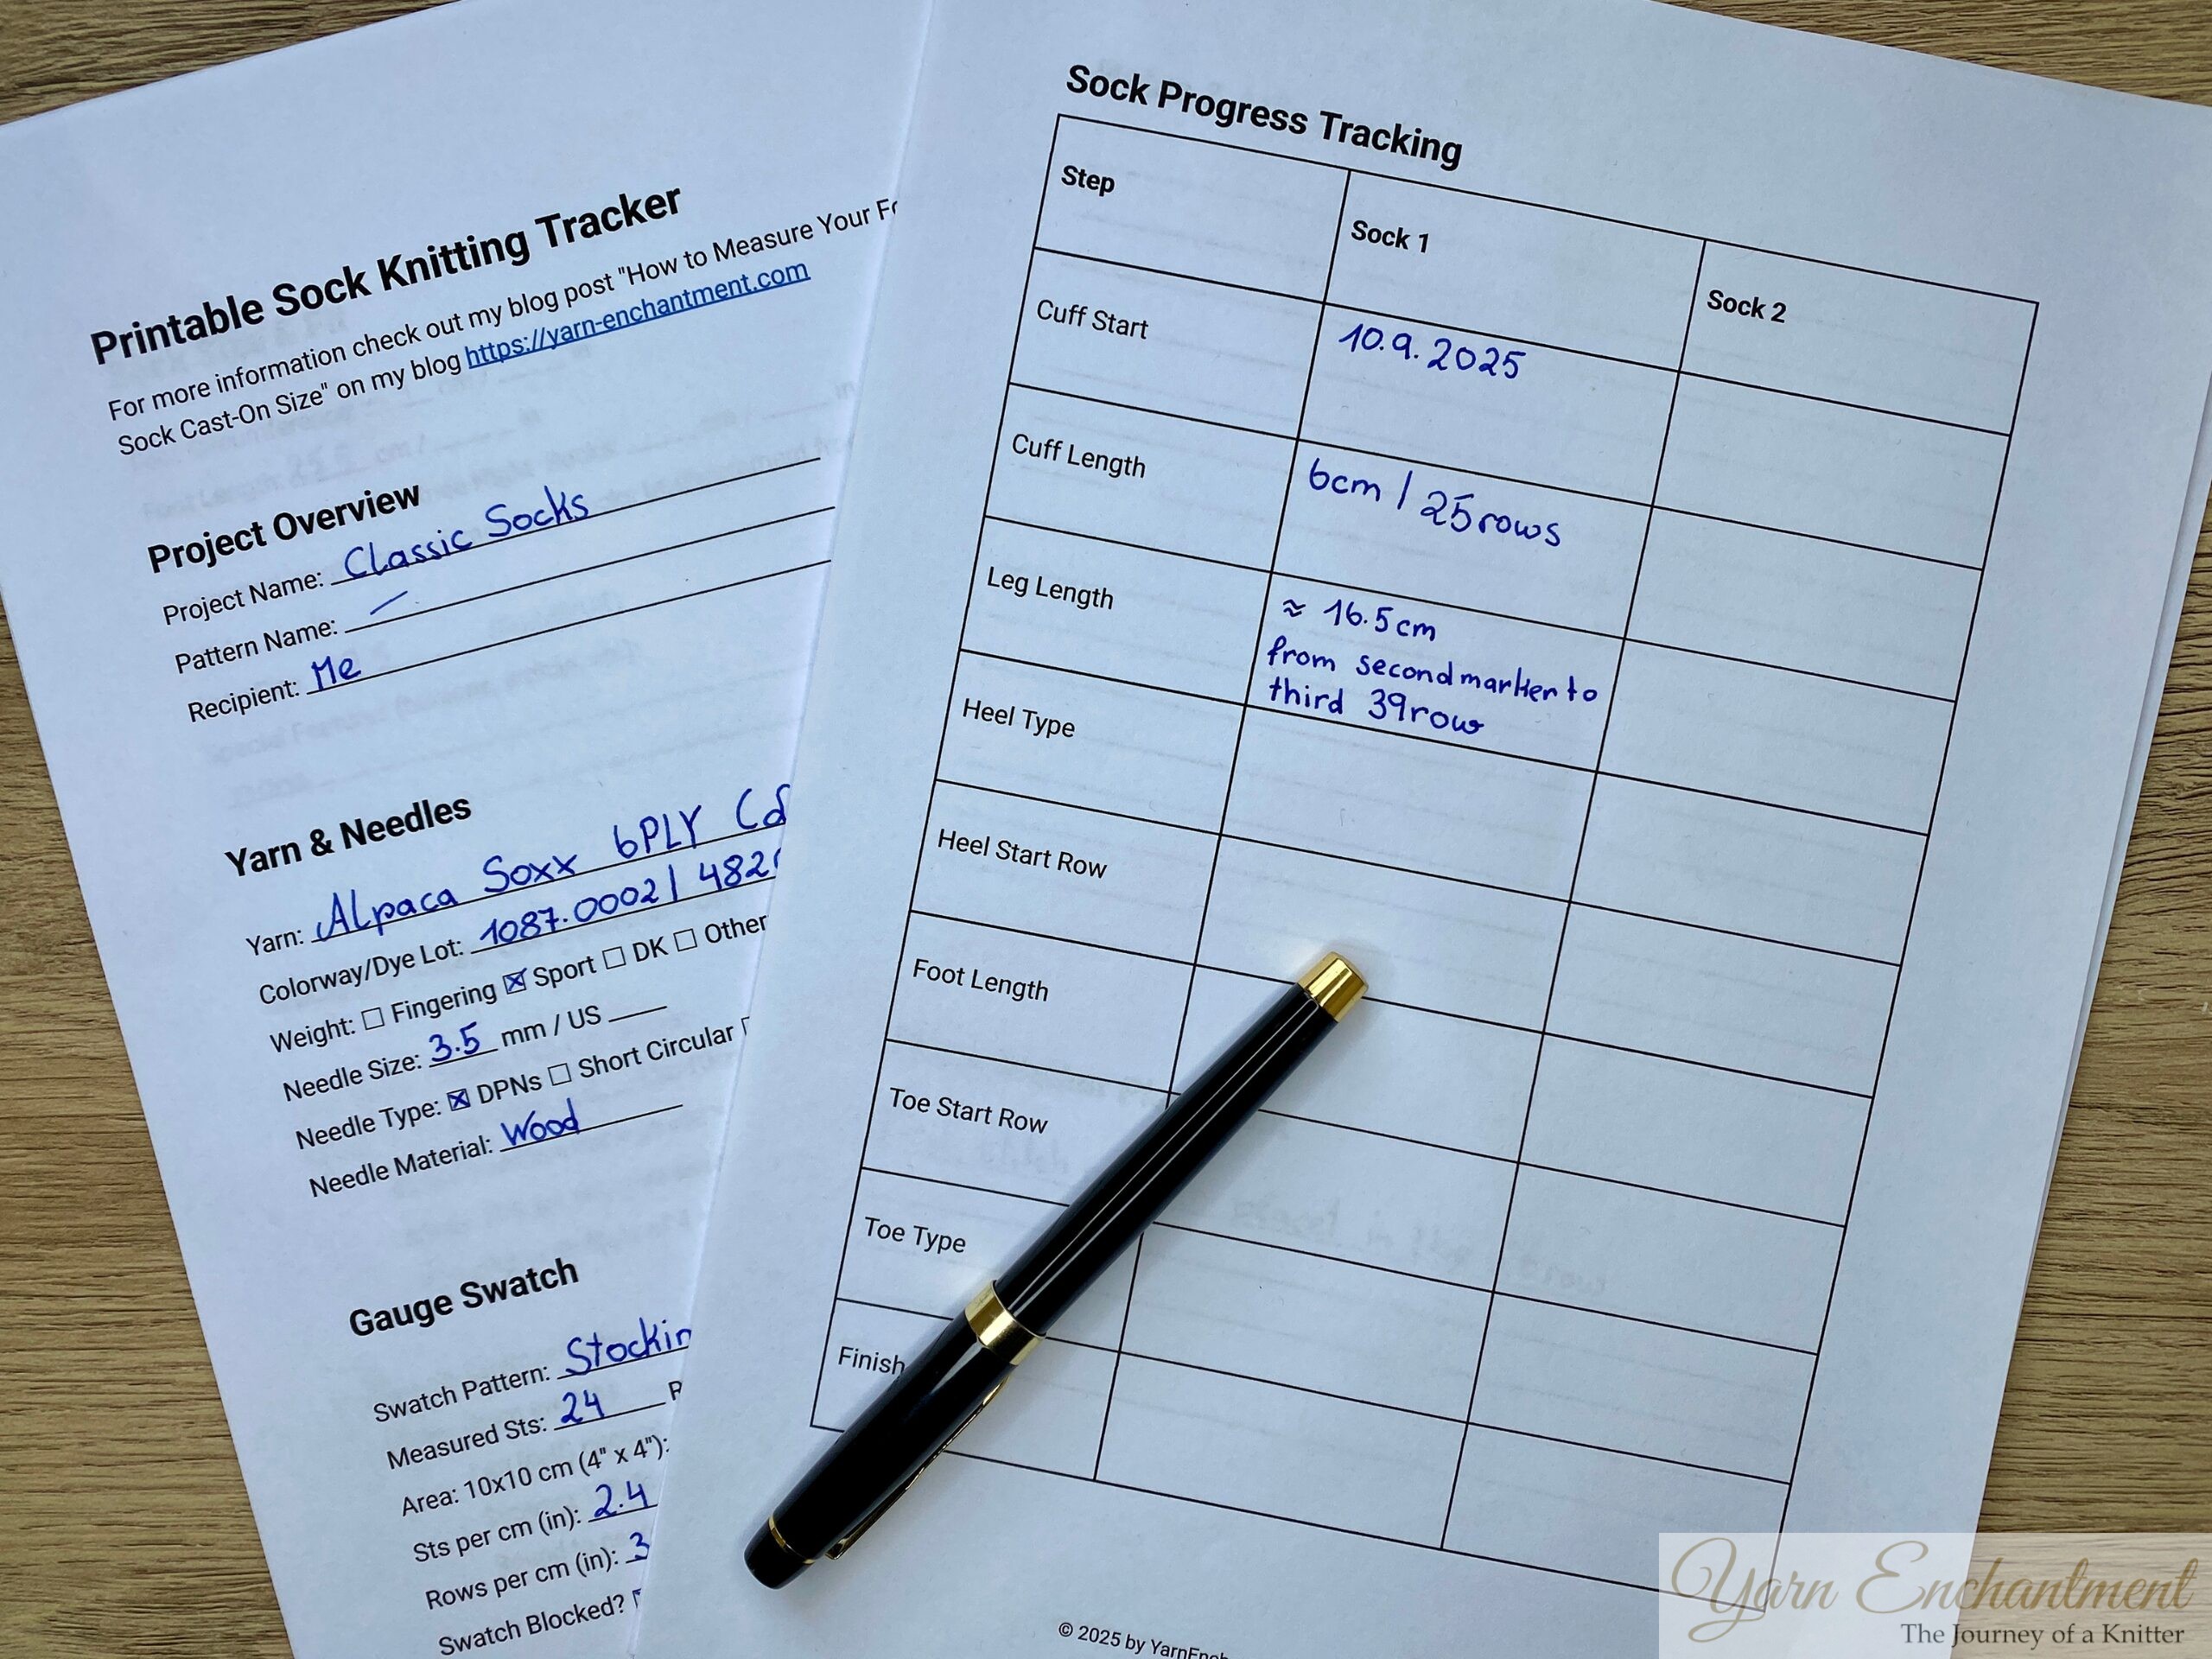 | I use my Progress Tracker to keep all the important details organized while knitting socks. You can download a free copy of the tracker right here on my blog to help keep your own projects on track |

FAQs for Sock Knitting Beginners
What size double pointed needles should I use for socks?
When working with 4-ply sock yarn, needle sizes typically range from 2.25mm to 3.00mm. However, you may find success with needles anywhere from 2.0mm to 3.5mm, depending on your individual knitting tension. For 6-ply yarn, start with 3.5mm for the leg and 2.5mm for tight ribbing. Always check your yarn label and knit a gauge swatch first.
Do I need 4 or 5 double pointed needles for socks?
You can use either! With 4 DPNs, divide stitches among 3 needles and use the 4th to knit. With 5 DPNs, distribute stitches across 4 needles and use the 5th to knit. Many beginners find 5 needles easier as it creates smaller sections with fewer stitches per needle.
Why does my cast-on have a gap when joining in the round?
This is normal with the beginner-friendly method shown in this tutorial! I deliberately chose a technique that creates a small gap because it's easier to learn, and less fiddlier. At the end I will show you how to weave in your yarn tail in order to close the gab.
How many stitches should I cast on for adult socks?
For average adult socks: 64 - 72 stitches for men's large, 60 stitches for women's medium, and 56 stitches for women's small. Always check the measurement guide from last week's post for precise calculations based on foot circumference.
How long should I make the sock cuff?
Knit 4-6cm (1.5-2.5 inches) of ribbing for a standard cuff. Longer cuffs (up to 8cm) work well if you want the socks to stay up higher on your leg. Keep track of your row count so both socks match!
Can I use 1x1 ribbing instead of 2x2 ribbing?
Absolutely! K1, P1 ribbing creates a tighter, stretchier cuff that's great for socks. K2, P2 ribbing (shown in my tutorial) is more decorative and slightly looser. Choose based on your preference and yarn weight.
How do I prevent "ladders" (loose stitches) between needles?
Pull your working yarn snug when transitioning between needles, and give the first two stitches on each needle an extra tug. Some knitters also shift stitches by one position every few rounds to avoid consistent tension points. But keep in mind that this is handmade and little imperfections are allowed.
My knitting keeps turning inside out - what's wrong?
This is completely normal for beginners! Simply push the fabric through so the right side faces out. It happens because you're working in such a small circumference. As your sock grows, this problem will disappear.
How do I know when my sock leg is long enough?
A good rule of thumb is to knit about as many rounds as you have stitches on your needles, but typically 60-75 rounds total (including ribbing). Try the sock on as you go - the leg should reach from your ankle to where you want the sock to sit on your calf.
What if I run out of yarn during the leg?
Join new yarn at the beginning of a needle (not mid-needle) and weave in ends securely.
I dropped a stitch - is my sock ruined?
Not at all! Use a crochet hook to pick up dropped stitches. For stockinette stitch (the leg section), hook the stitch up through each row. You can learn how to fix dropped stitches on my blog!
Next Steps: Knitted Sock Heels
Once you finish knitting the leg section, you’re ready to move on to the next stages: heel flap, heel turn, gusset, foot, and toe. Mastering the cast-on, cuff, and leg is already a major accomplishment - these skills make up more than half the challenge of knitting socks with double pointed needles, and completing them is something to truly celebrate.
Next week, the focus will shift to the heel flap and heel turn. The tutorial will guide you step by step through these essential techniques, including how to work a reinforced slip-stitch heel for extra durability and better fit. This classic heel construction will prepare your socks for everyday wear while giving you a professional finish.
Until next time, happy knitting!
Feeling ready for more sock fun?
Jump into the next parts of my Free Sock Knitting Course! Explore topics like:
-
Sock Knitting Needles & Accessories: Complete Guide for Beginners
- How to Measure Your Foot & Calculate Sock Cast-On Size (Knitting Tutorial)
- How to Knit Socks for Beginners: Cast-On to Leg with DPNs
- How to Knit a Classic Heel Flap & Turn
- Hole-Free Gusset Pick Up and Decreases for Perfectly Fitting Socks
- Complete Foot and Wedge Toe Sock Guide: Measuring, Sizing & Decreasing
A Little Way to Say Thanks
You Might Also Like


 |
|
Join the Cozy Corner Newsletter!
Hey there, creative soul! Welcome to the Yarn Enchantment Newsletter, where we celebrate all things cozy, crafty, and full of heart. Think of this as your friendly crafting companion - a little dose of inspiration delivered straight to your inbox, just for you. Inside, you’ll find: ✨ Exclusive patterns & tutorials - ideas you won’t find anywhere else (just for us!) 📚 Bookish crafts that bring your favorite stories to life 🧶 Tips and tricks to make your crafting journey smoother (and more fun!) 💌 Heartfelt musings on life, creativity, and the magic of making something with your own two hands Whether you’re knitting by the fire, brainstorming your next DIY project, or just looking for a little creative pick-me-up, this newsletter is here to cheer you on. Because let’s be honest - crafting isn’t just about the finished project; it’s about the joy, peace, and stories we create along the way. So grab a cup of tea, cozy up, and join me. Together, we’ll weave a little magic into everyday life - one stitch, one story, and one email at a time. P.S. I’m so glad you’re here. Let’s make something beautiful together! (Note: If you're using an ad blocker, you may encounter issues subscribing to the newsletter. To subscribe, please consider disabling your ad blocker.)
|
