

How to Fix a Dropped Stitch in Knitting (Stockinette Stitch)
July 7, 2025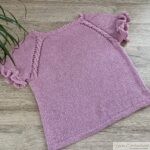
Rosy Ruffle Tee: Handmade Knitted Top to Match the Skeeter Skirt
July 19, 2025How to Cast On Double Pointed Needles Without Twisting Your Stitches

Originally published on July 14, 2025
Let me tell you - I’m so excited about this blog post because it’s the start of something new! I’m kicking off a series where I’ll walk you through knitting basic socks step by step. We’ll cover everything from casting on without twisting your stitches to create a cuff knit the leg, working a classic heel, picking up gusset stitches, decreasing, and finishing with the toe. But for today? We’re starting at the very beginning: how to cast on stitches using double-pointed needles.
Now, let me take you back to my early knitting days. The first time I tried knitting in the round was when I decided to make a hat. The lovely owner of my local craft store handed me some yarn and double-pointed needles, and off I went. At the time, I didn’t even know circular needles were an option! So there I was, sitting at home, trying to cast on my stitches… for hours. No matter what I did, my stitches kept twisting, or there was this massive gap when I joined them into the round. Frustrating? Oh, absolutely. There may have even been a few tears involved.
But then, I stumbled across a YouTube tutorial by Nadelspiel.com. Elisabeth, the creator, showed this exact method I’m about to share with you today. Sadly, Elisabeth has since passed away, but her tutorials helped so many knitters - including me - and I want to honor her by linking her video here.
At the end of this blog post, you’ll also find a YouTube tutorial from me to guide you step by step!
 | How to cast on stitches using double-pointed needles |
Table of Contents
- Understanding Knitting in the Round with Double Pointed Needles
- Step-by-Step Guide to Casting On Without Twisting
- Tips for Success
- Conclusion
Understanding Knitting in the Round with Double Pointed Needles
So, what exactly does “knitting in the round” mean? Well, it’s just a fancy way of saying you’re knitting in a circle - or more accurately, in a spiral. Instead of working back and forth on straight needles (where you knit one row, then purl back the next), you use tools like double pointed needles (DPNs) to create seamless tubes of fabric. Think socks, hats, sleeves - anything that’s round and doesn’t need a seam.
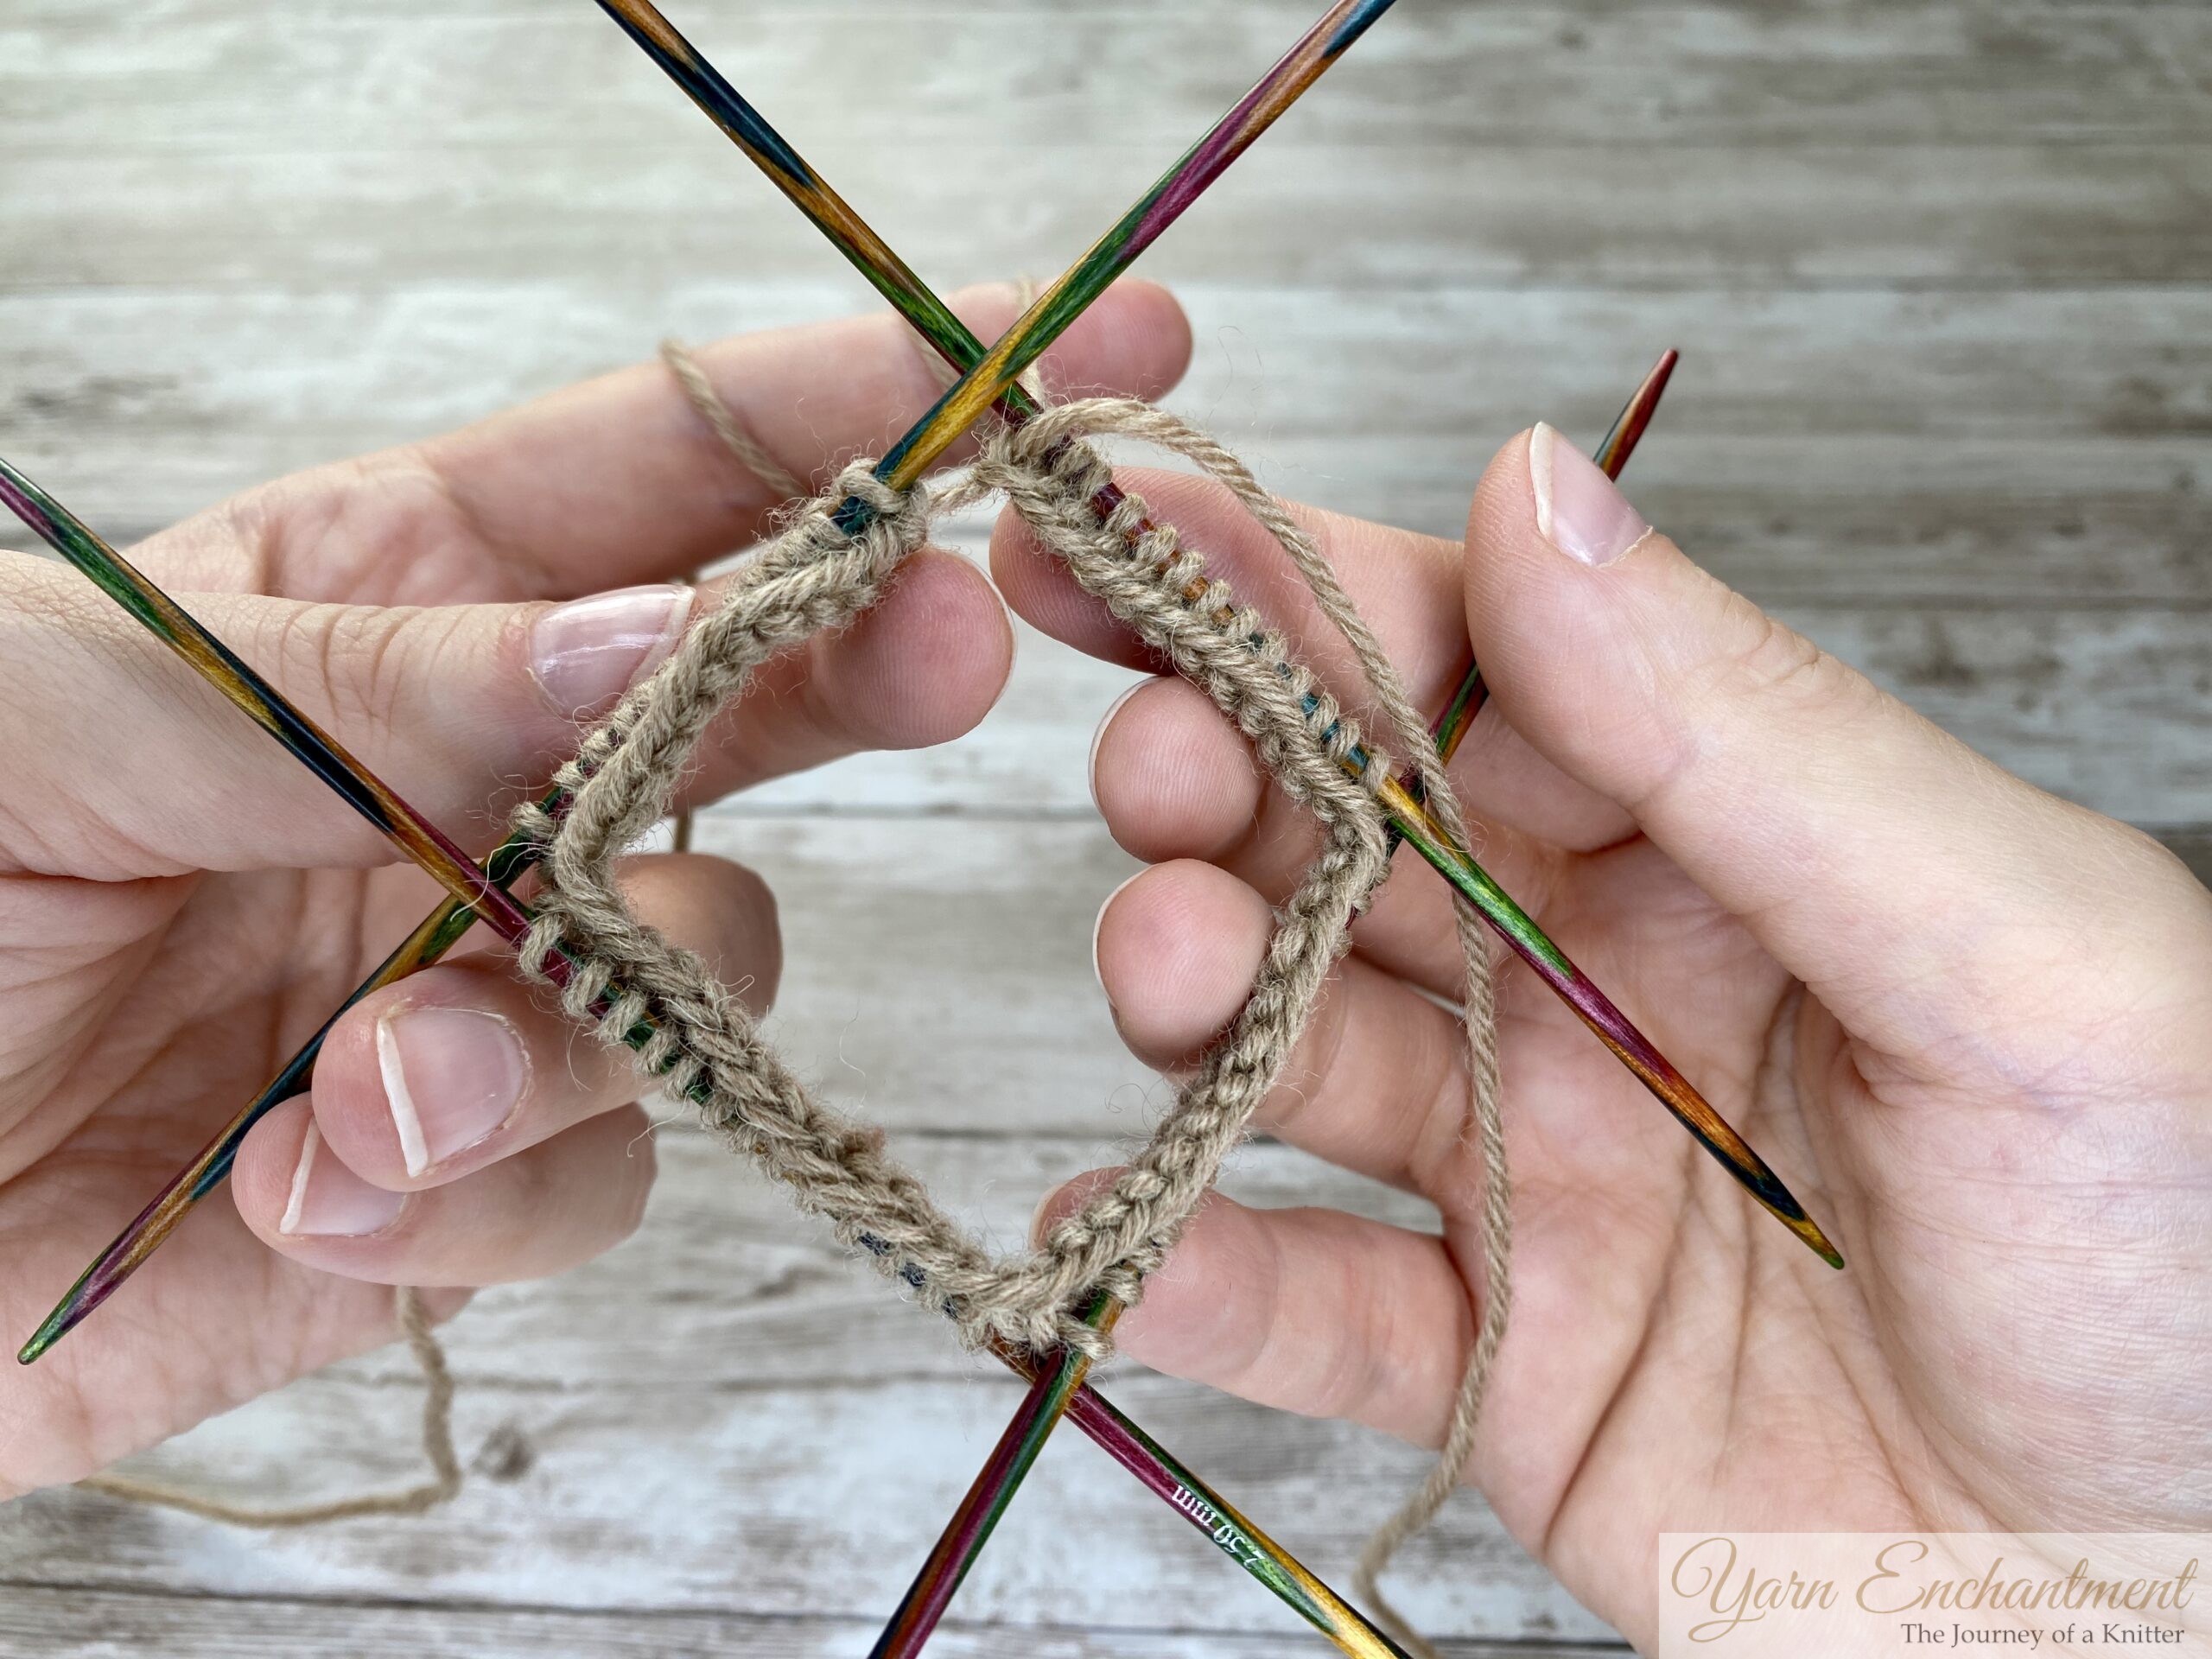
When you’re knitting in the round with DPNs, you’ll usually spread your stitches across four needles while using a fifth needle to do the actual knitting. To help you visualize this, here’s a picture of how the needles are typically arranged on a table before you begin:
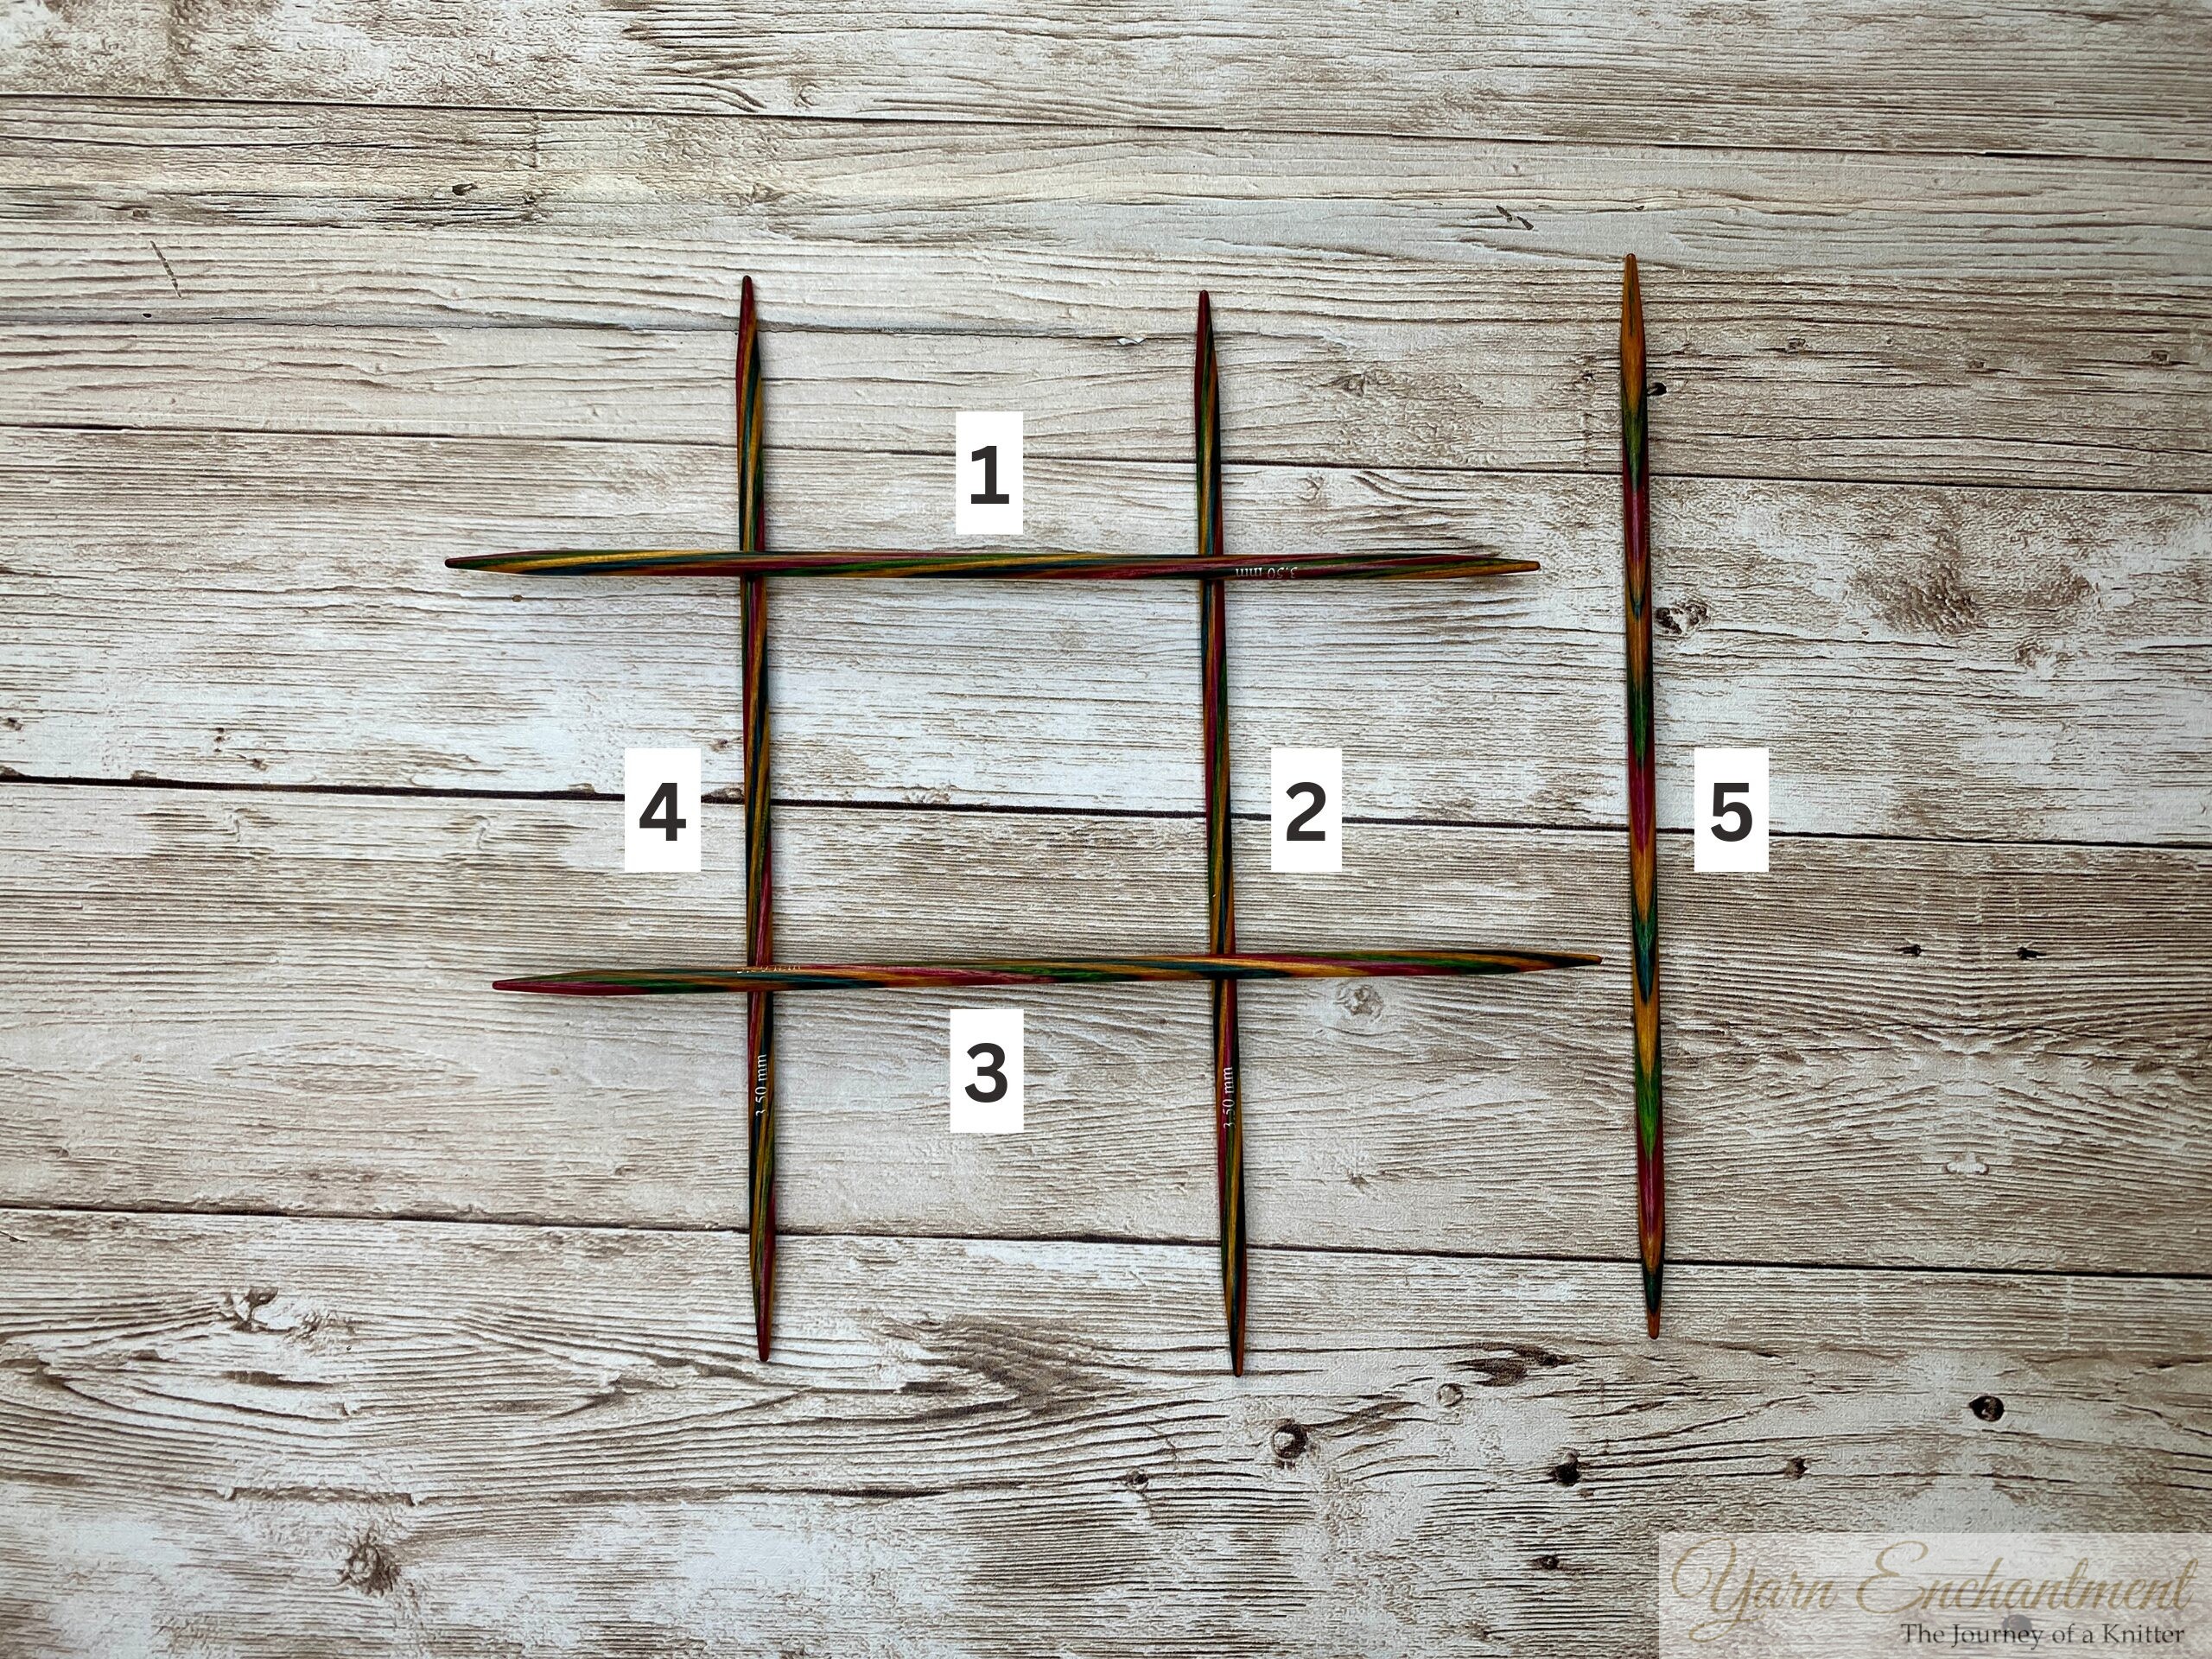 | When you are finsihed with your cast on you will have somthing that look like a square. Four needles hold the stitches, while the fifth is used for knitting. |

If you want to knit a Möbius shawl, where the twist is intentional and totally on purpose, go for it! That’s a creative and beautiful project. But if you’re aiming for a sock or a hat, an accidental twist will leave you with a wonky tube that just doesn’t work.
That’s why I’m so excited to share this method with you today. It’s a foolproof way to cast on your stitches without twisting them, so you can start your project smoothly and avoid all those beginner frustrations I went through. With a little practice you’ll be knitting in the round like a pro in no time.
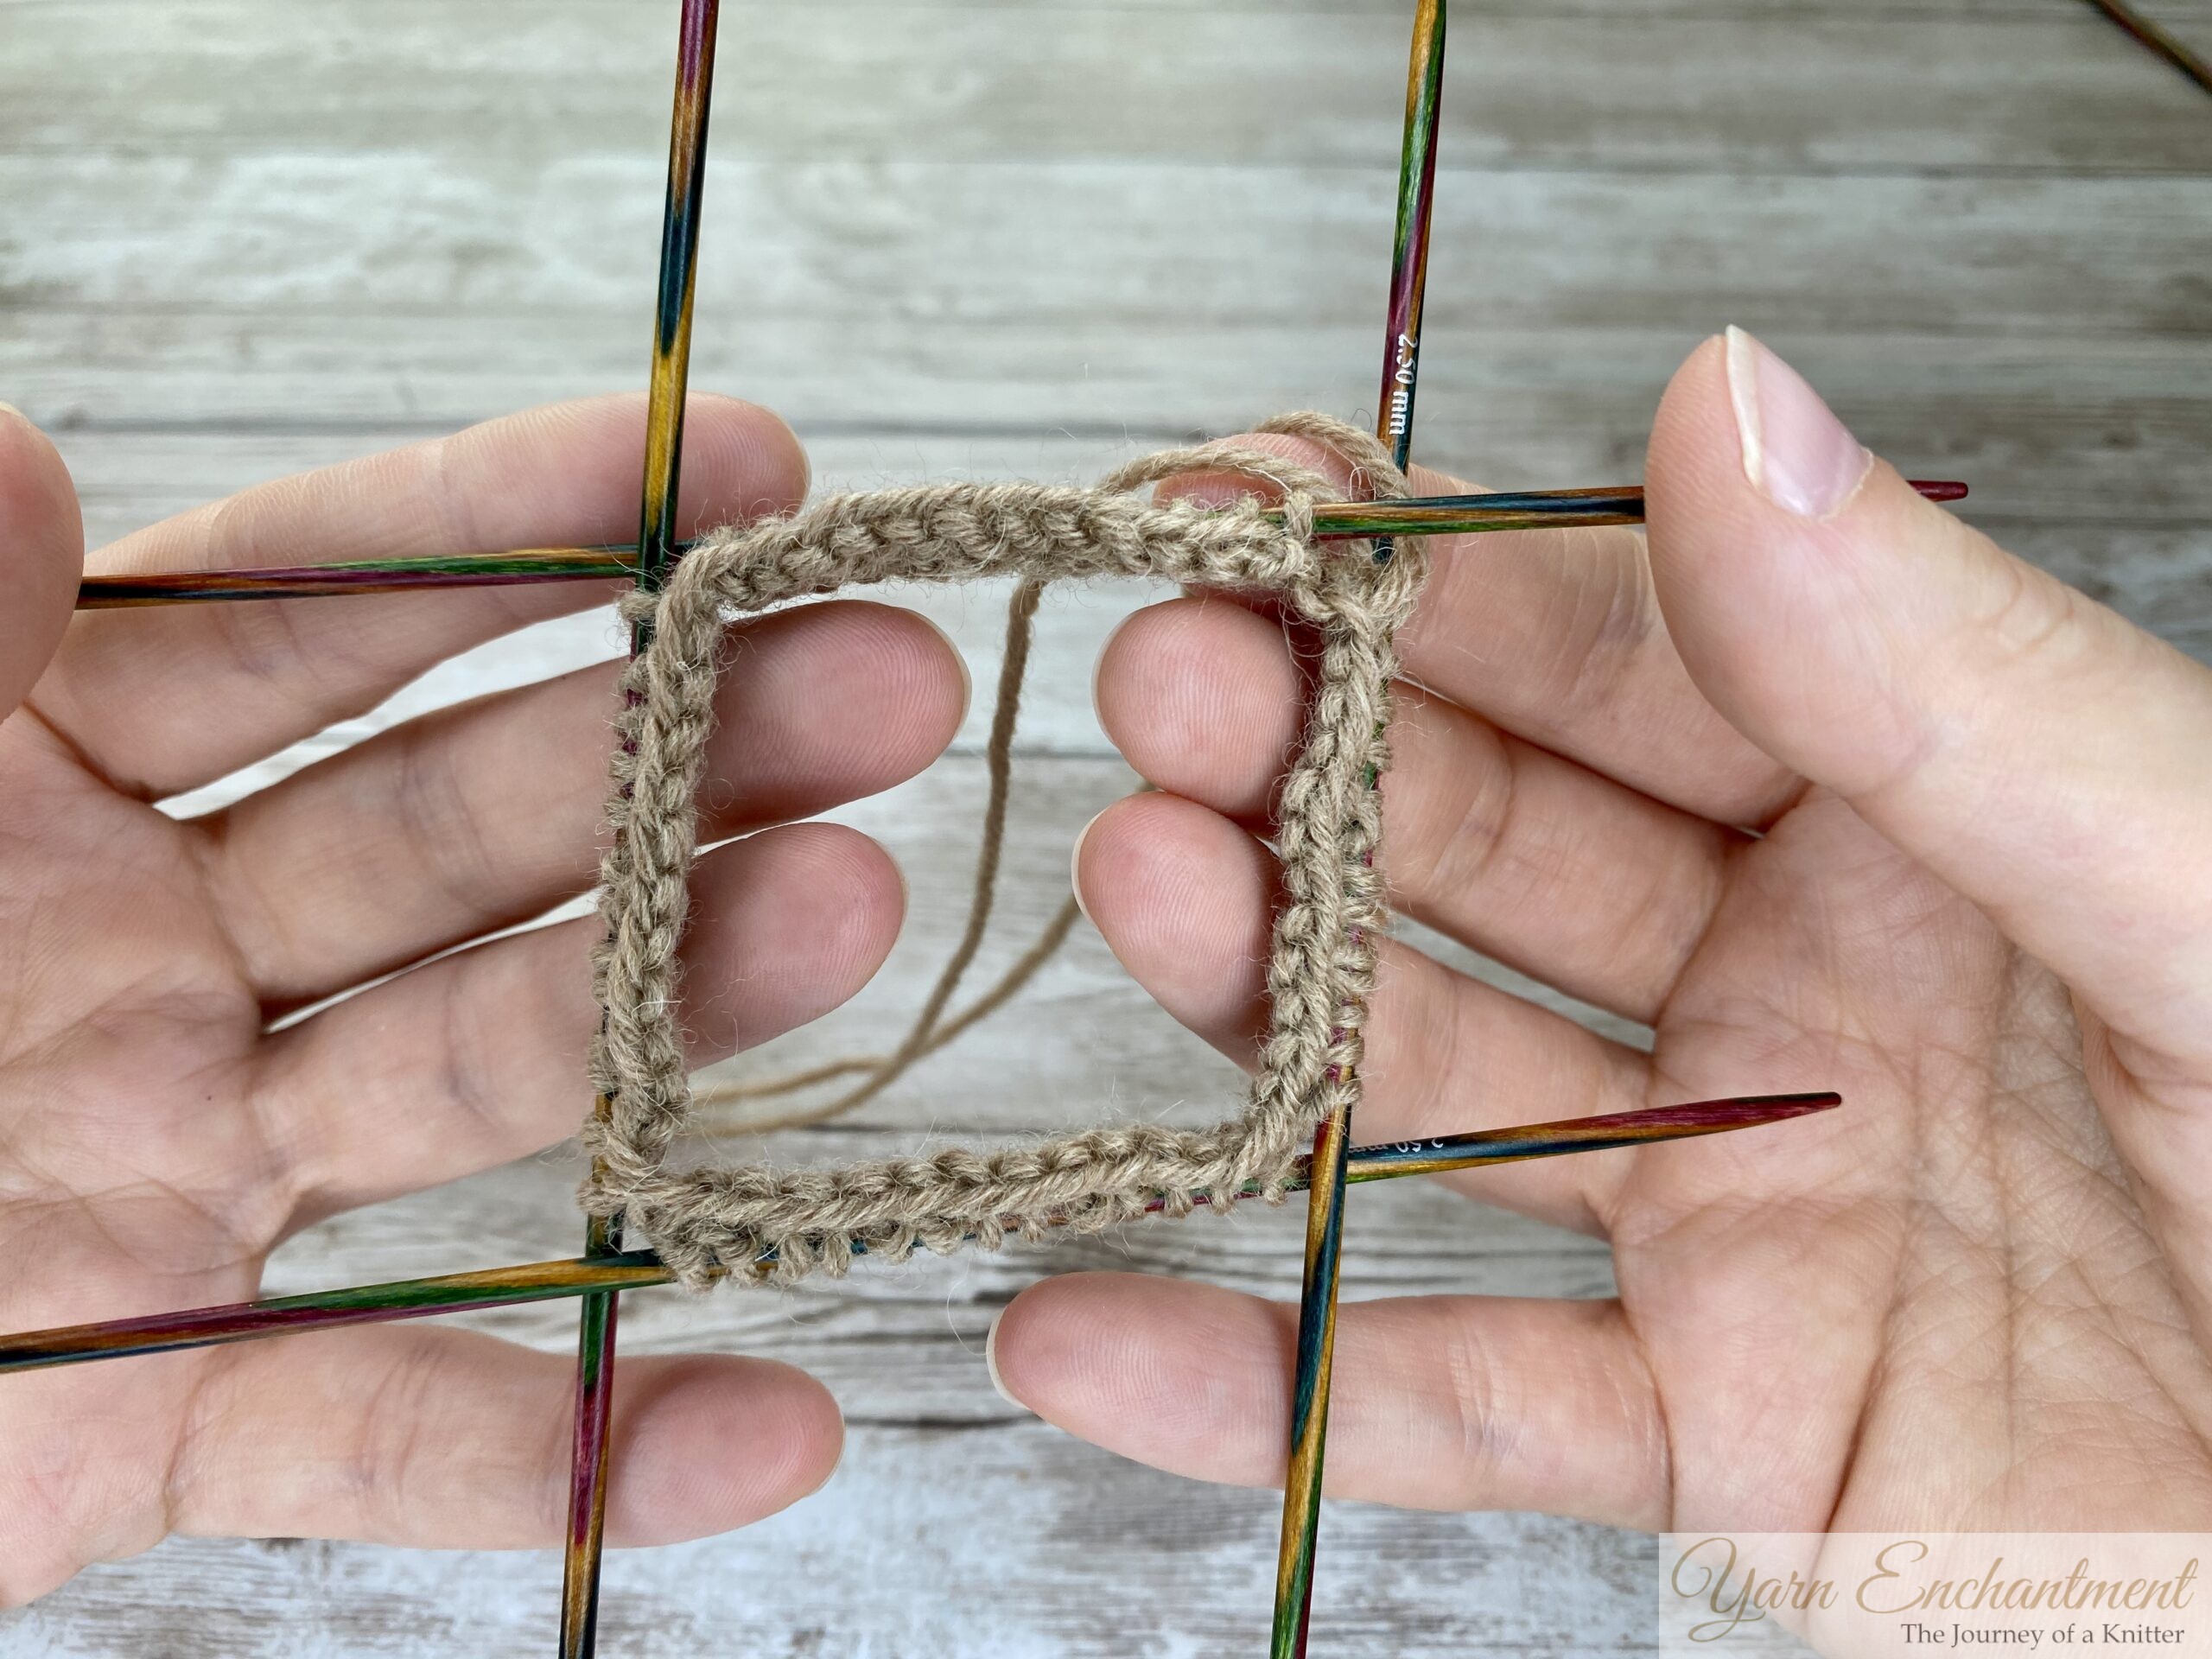 | A finished cast on |

Step-by-Step Guide to Casting On Without Twisting
Step 1: Choosing the Right Cast-On Method
Before you begin, it’s important to choose a cast-on method that suits your project. For knitting in the round, a stretchy cast-on is essential, especially for items like socks or hats. Here are two popular options:
Long Tail Cast-On
The long tail cast-on is versatile and creates an elastic edge. It’s beginner-friendly and works well with all yarn weights. By holding two smaller-sized needles together or sizing up a whole needle size, you can ensure that this cast-on is very stretchy.
German Twist Cast-On
This method is even stretchier than the long tail cast-on and is ideal for projects requiring maximum elasticity, such as sock cuffs.
For this tutorial, we’ll focus on using the long tail cast-on, but feel free to experiment with the German twist if you prefer.
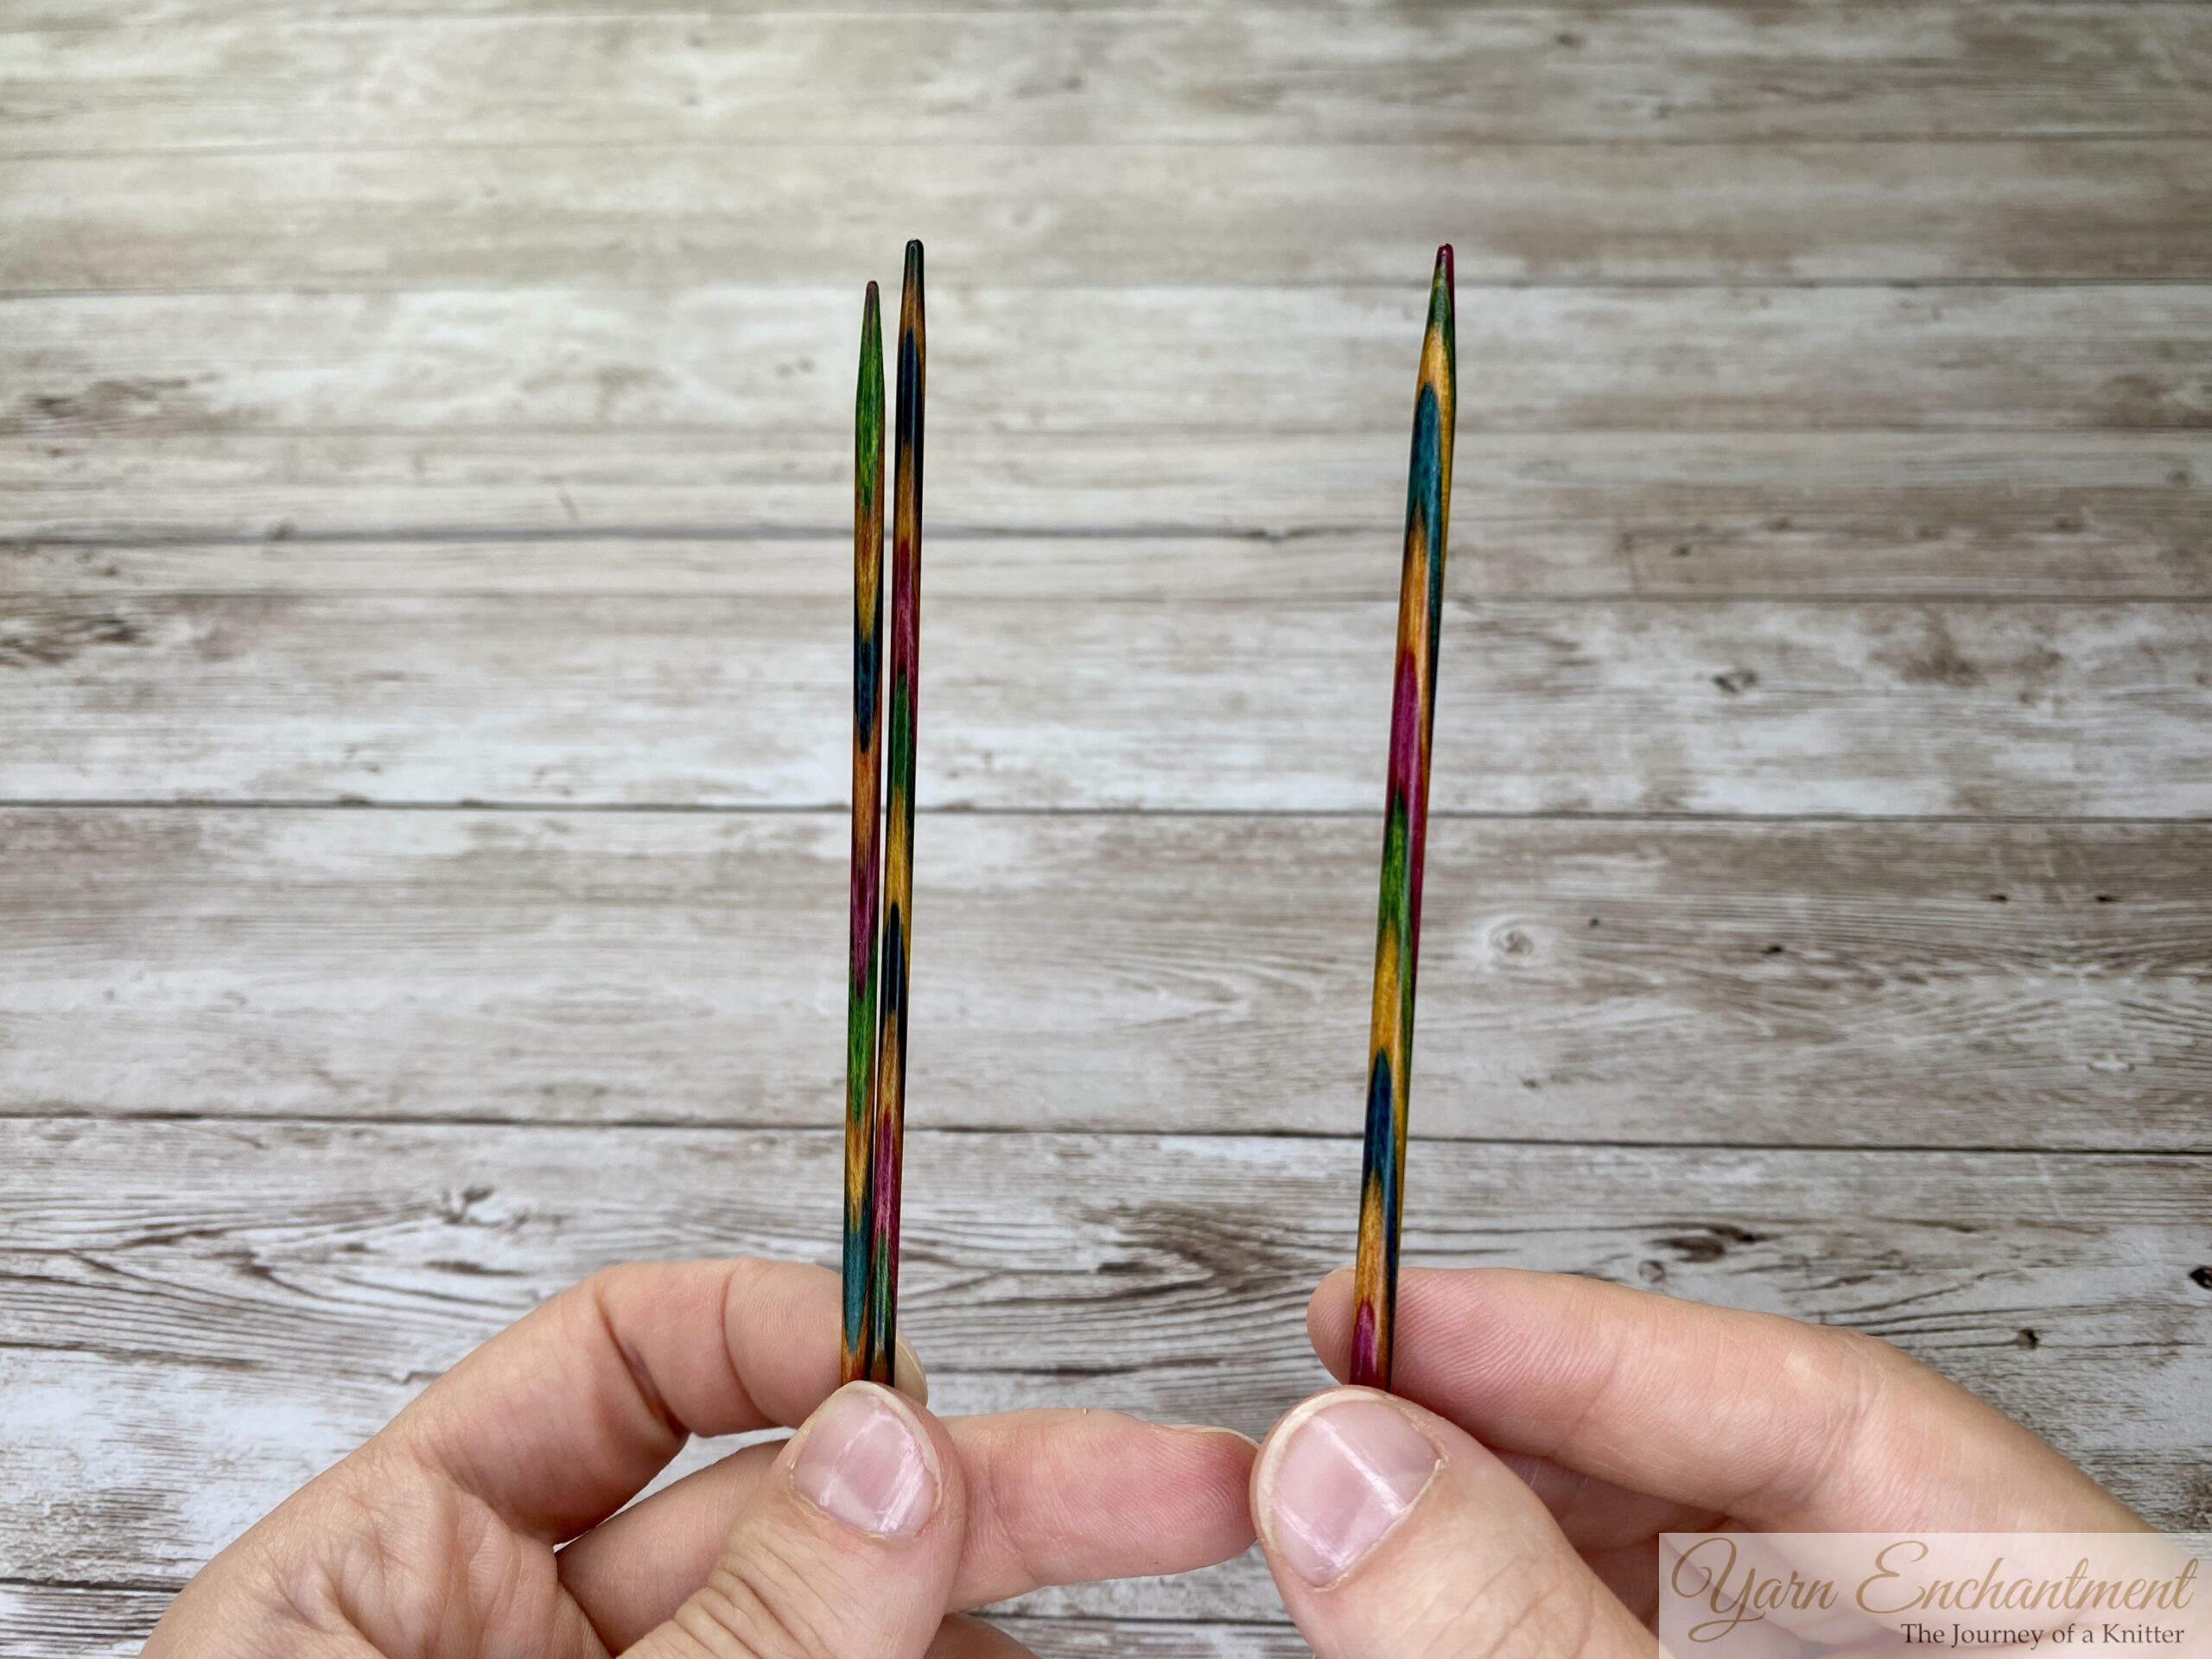 | On the left side, I’m holding two smaller-sized needles (2.5 mm), and on the right side, I’m holding a larger 3.5 mm needle. For this tutorial, we’ll use the 3.5 mm needle. |

Step 2: Casting On Without Twisting Your Stitches
To cast on without twisting, follow these steps:
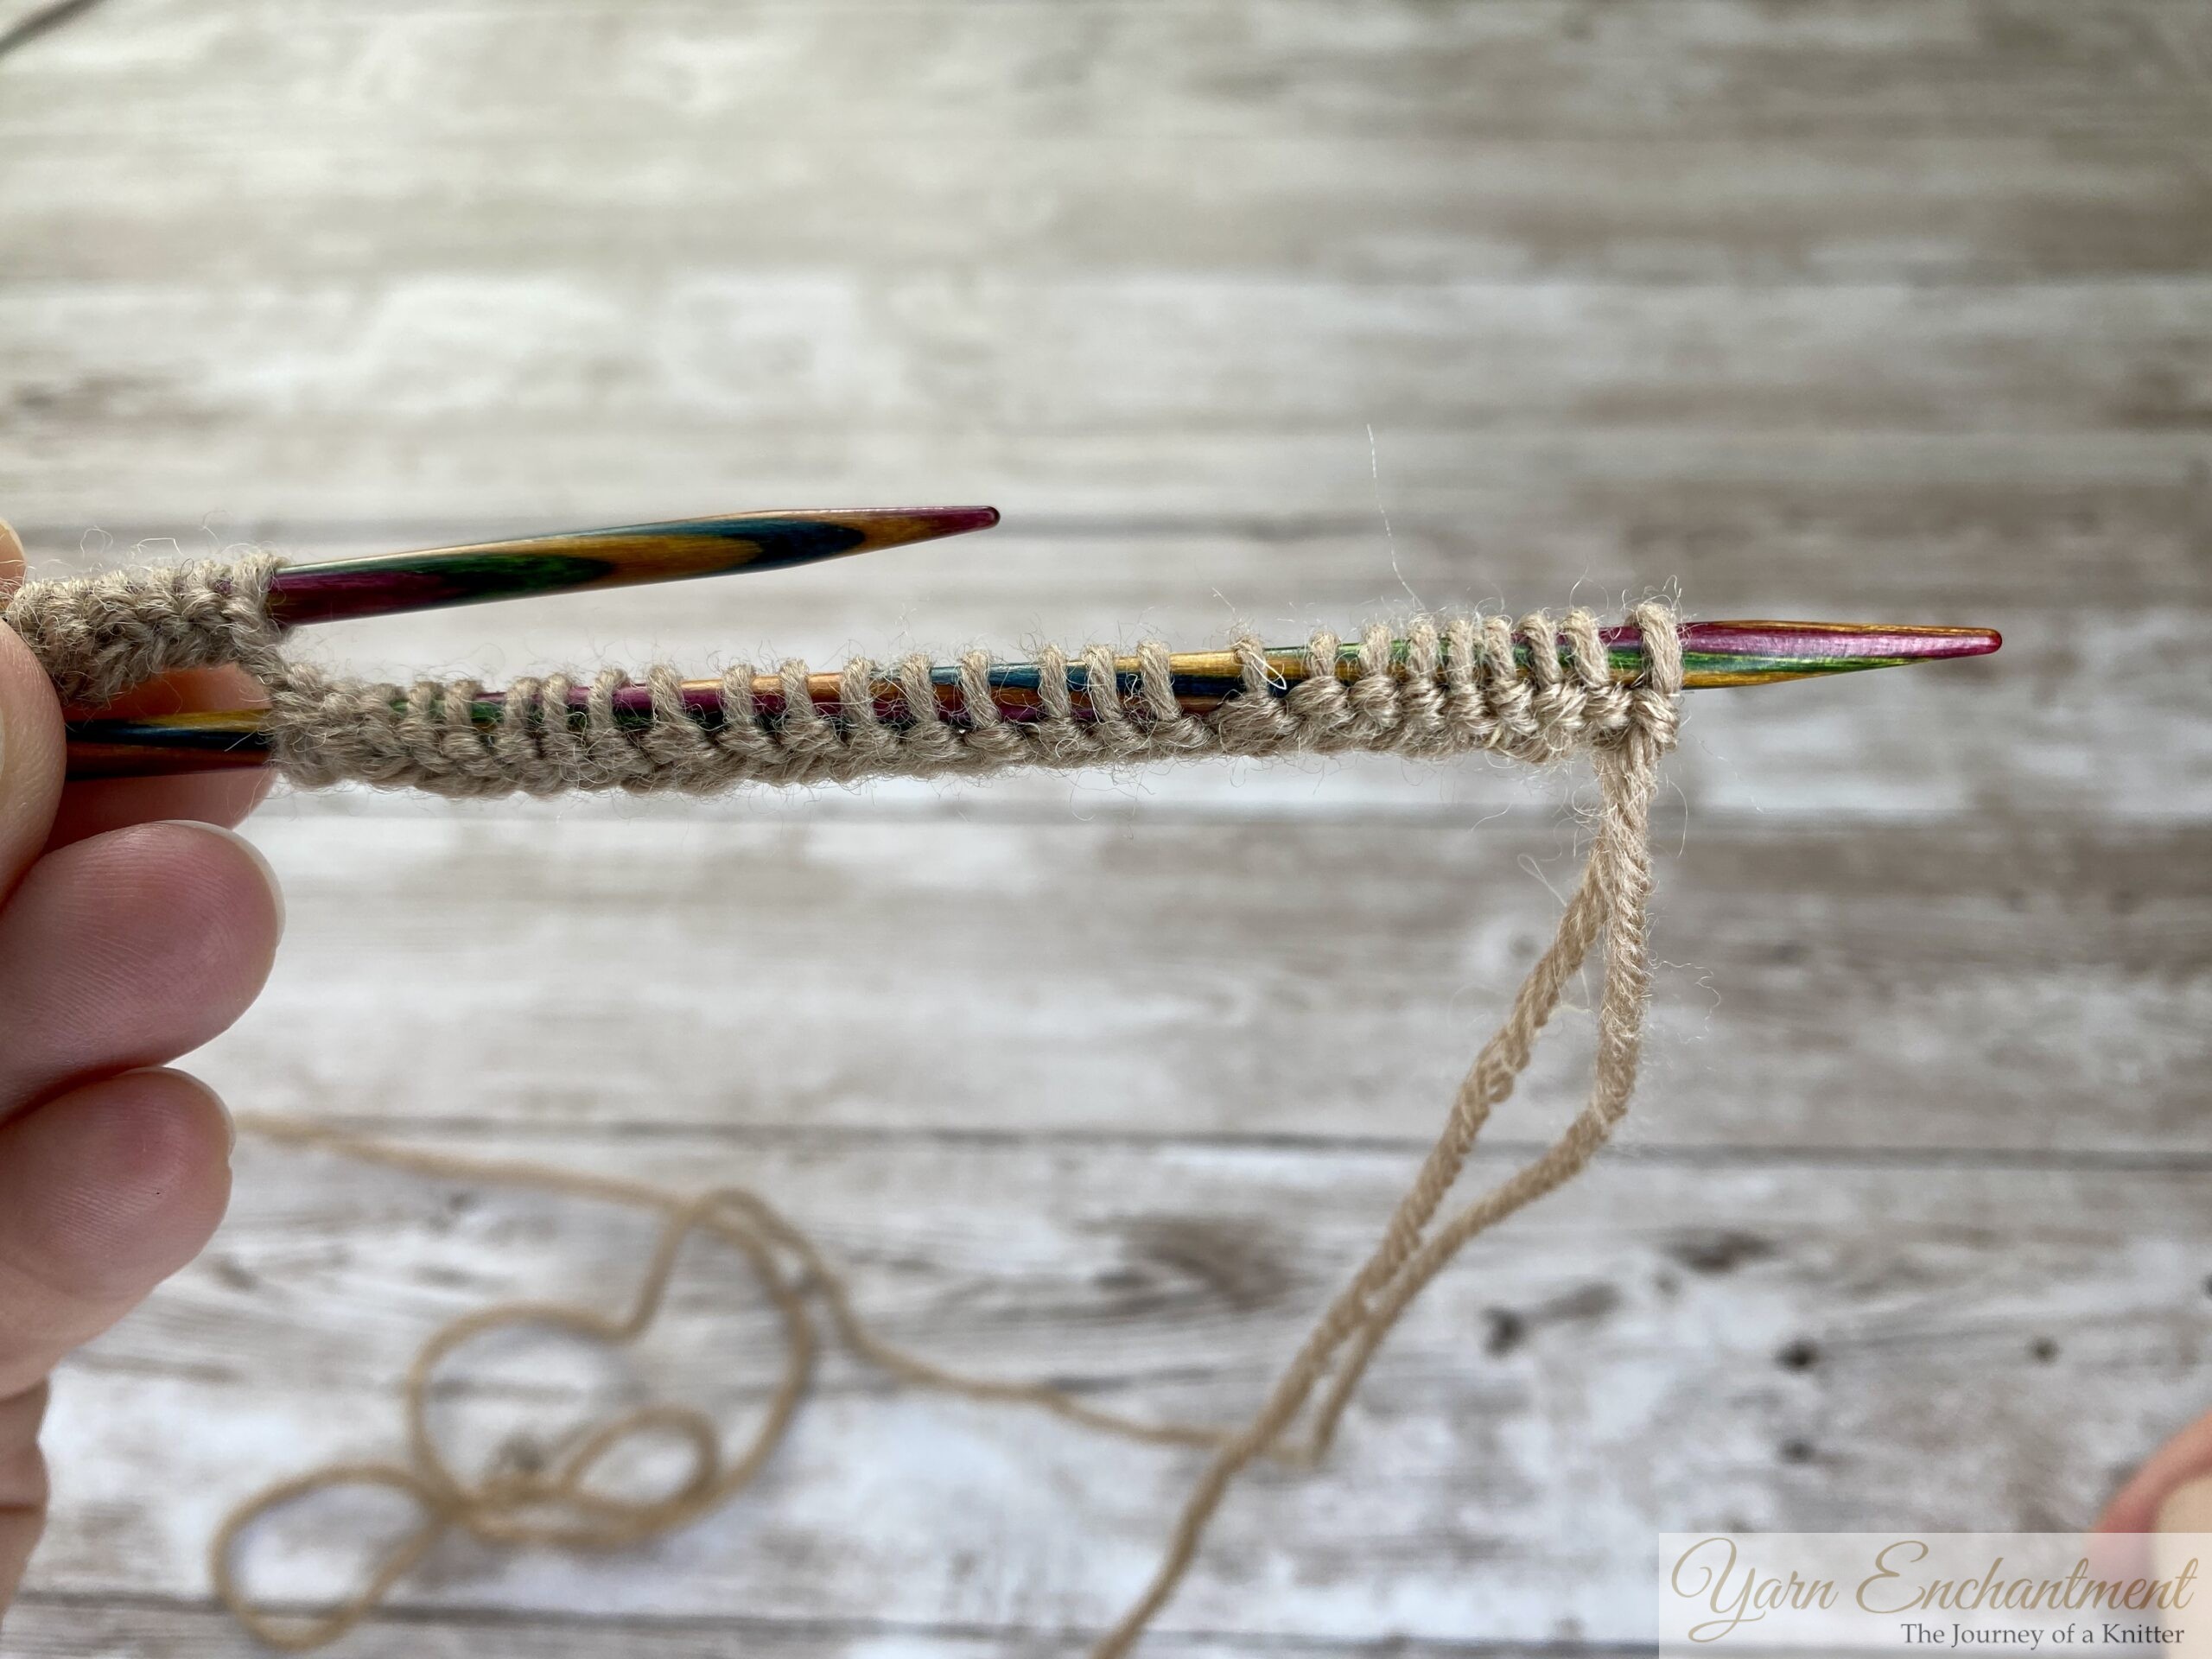
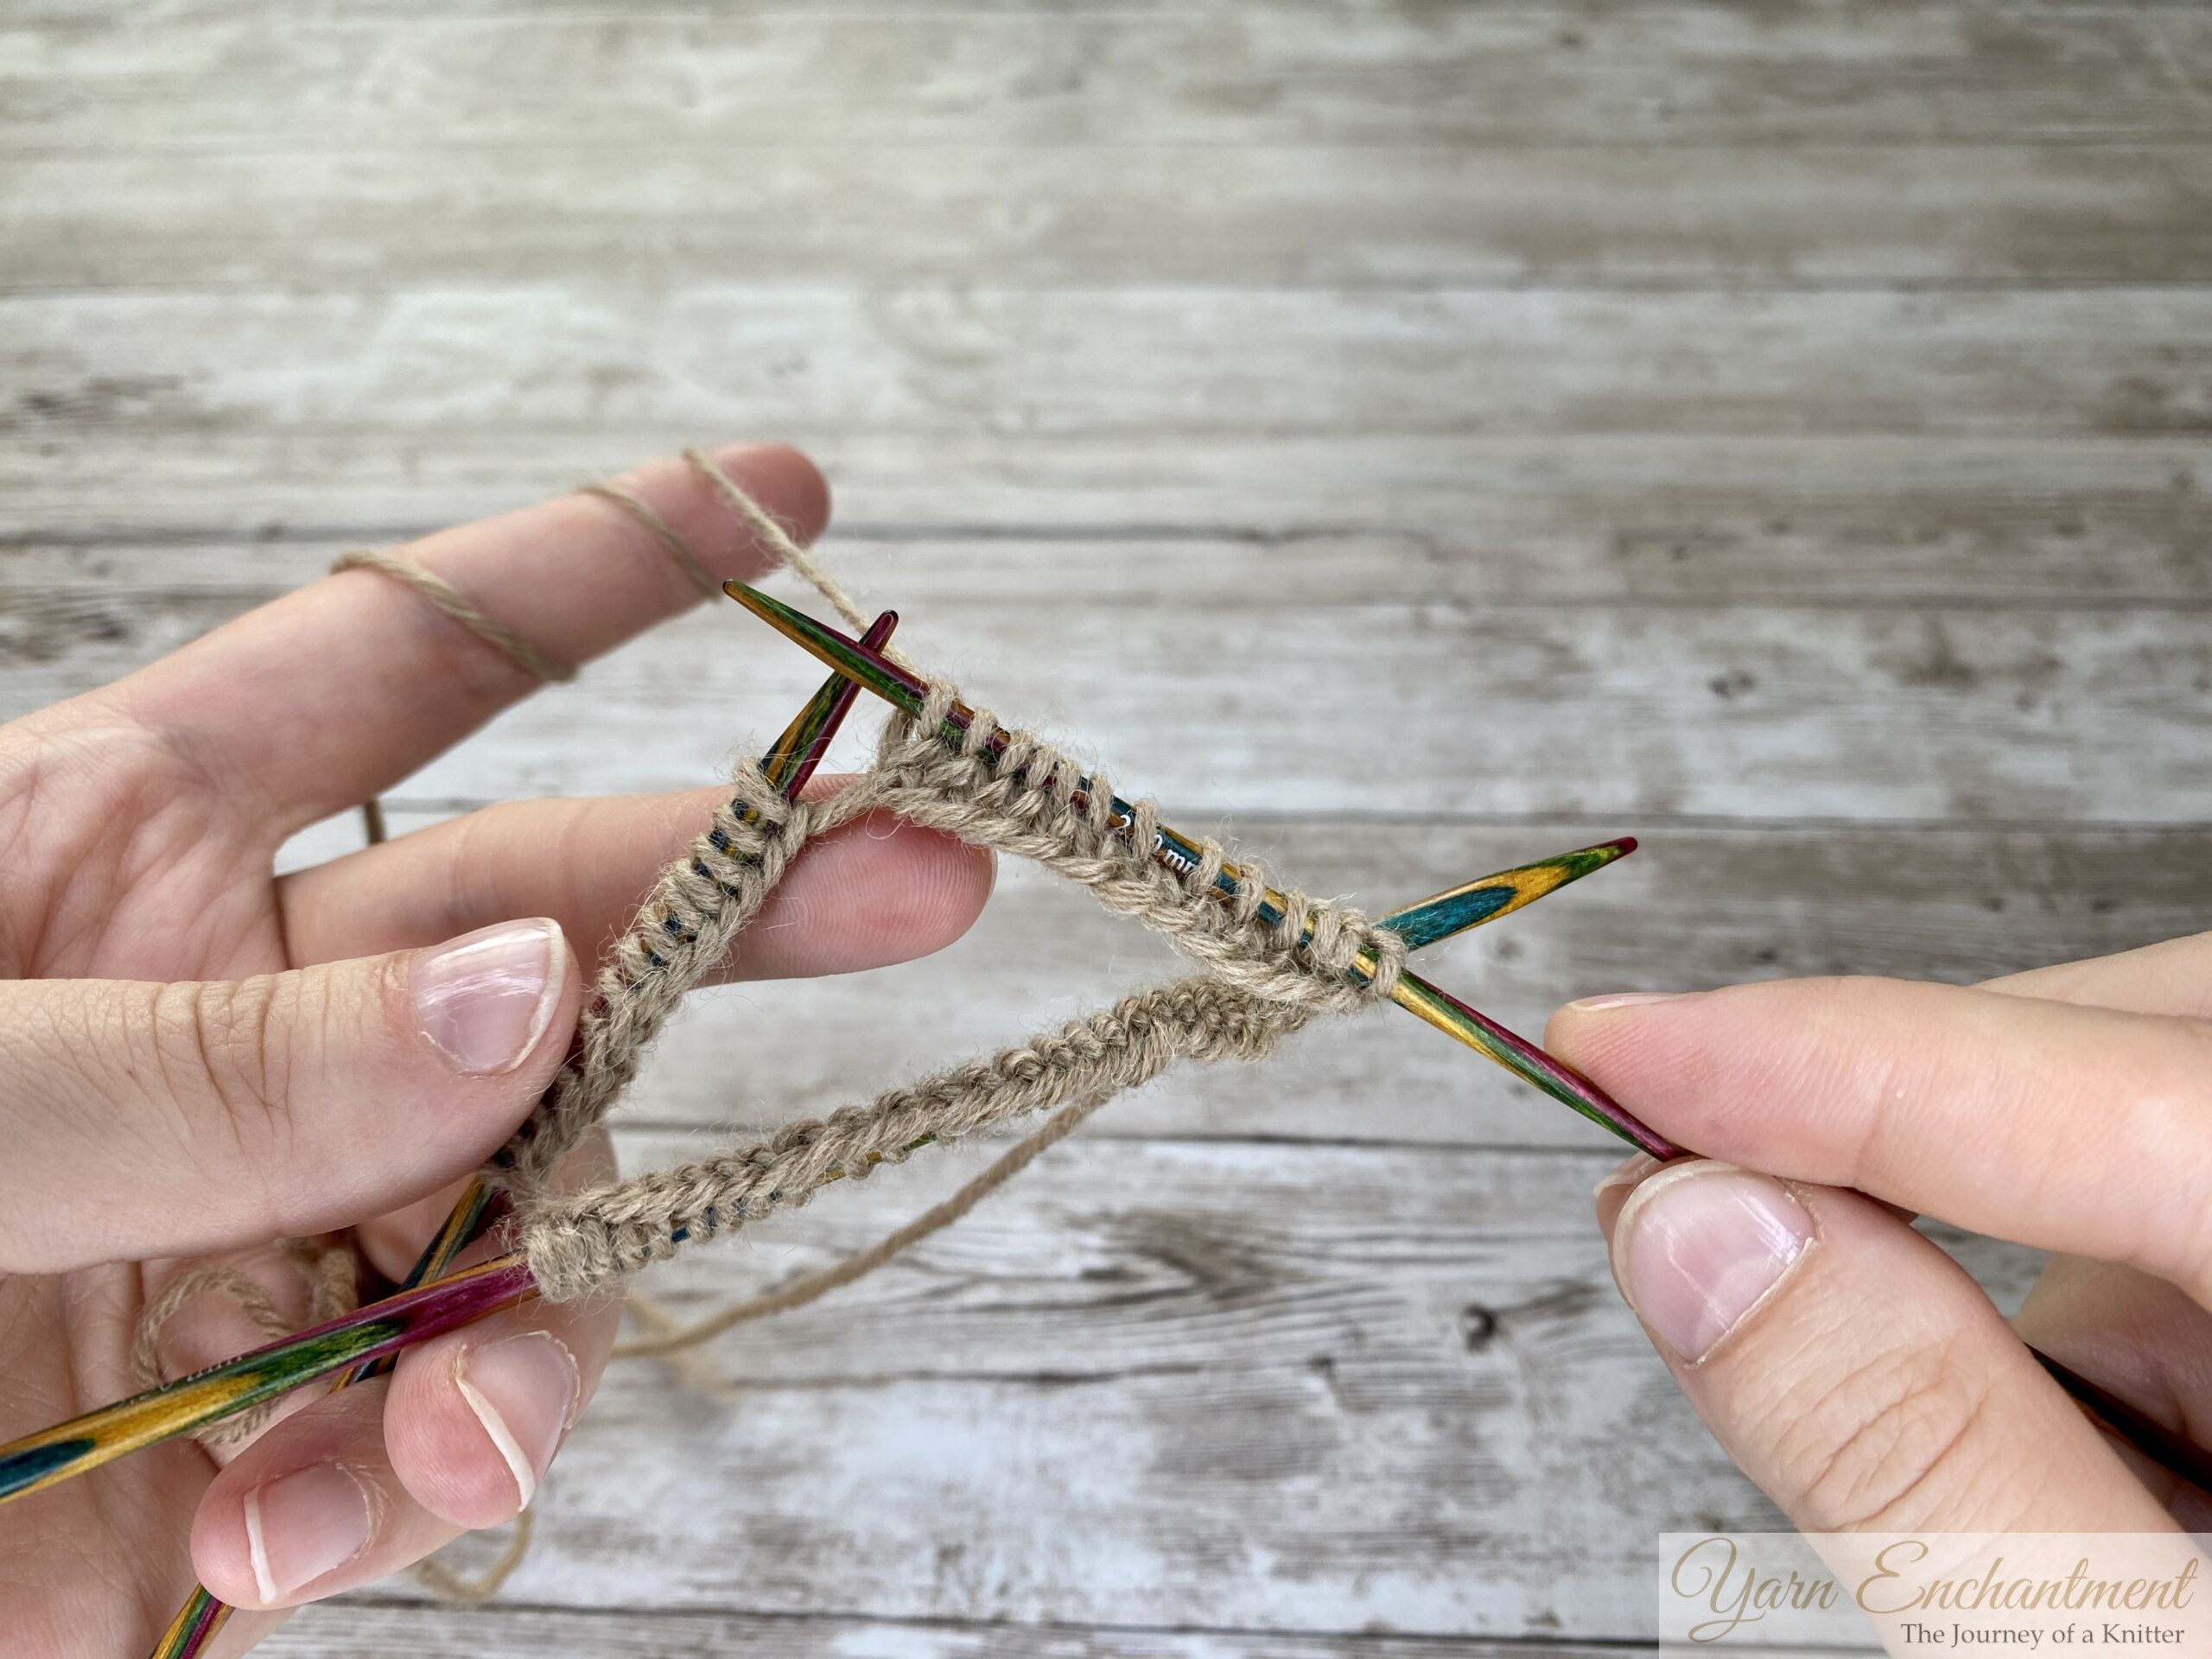
1. Divide Your Stitches Across Two Needles
Instead of casting all your stitches onto one needle or all four needles, divide them evenly between two needles. For example, my pattern calls for 52 stitches, I will cast 26 stitches onto each needle. This makes it easier to arrange your work later.
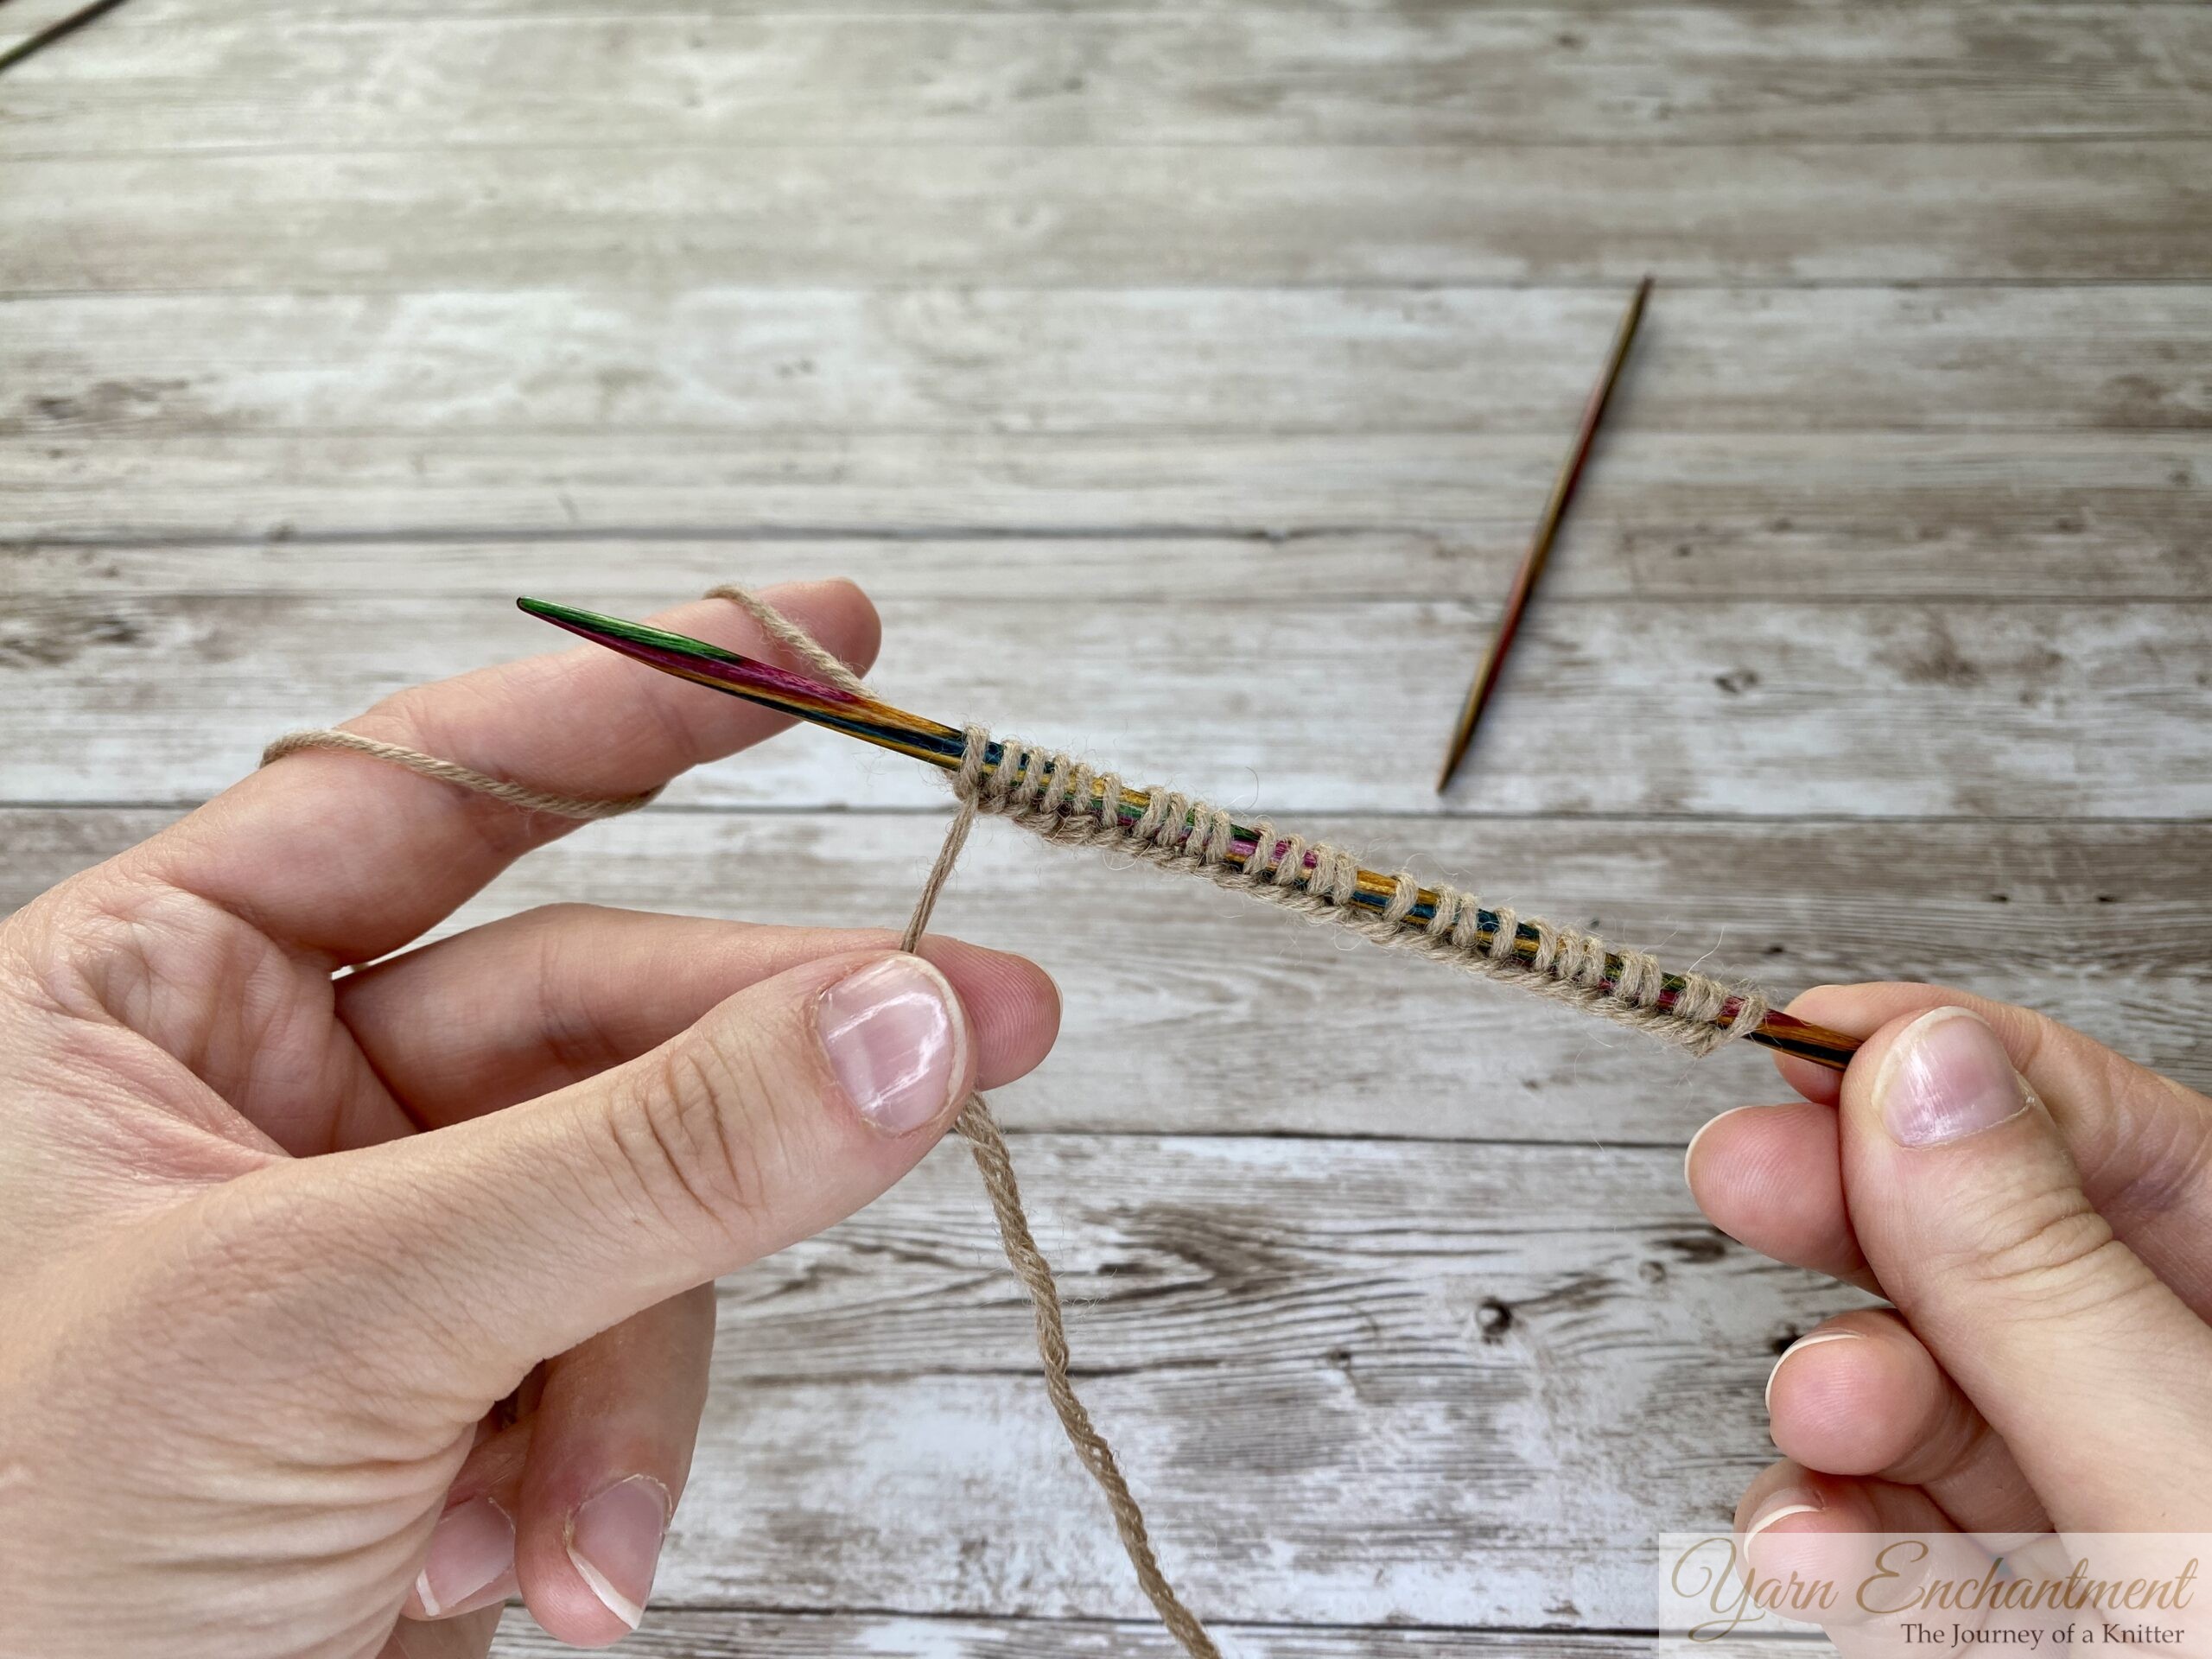 |  |  | Use the longtail cast-on to cast your first 26 stitches onto the first needle. | Grab your second needle and bring it in front of your first needle | Cast the remaining 26 stitches onto it. Make sure that you pull the first stitch really tight |


Note: These little waves are showing you that this is the right side of your knitting project. And the purl bumps are showing you that you are on the wrong side of your knitting project.
Take a moment to inspect your cast-on edge. The “right side” will have smooth, wave-like stitches, while the “wrong side” will have little bumps. Folding the needles correctly ensures your right side stays visible.


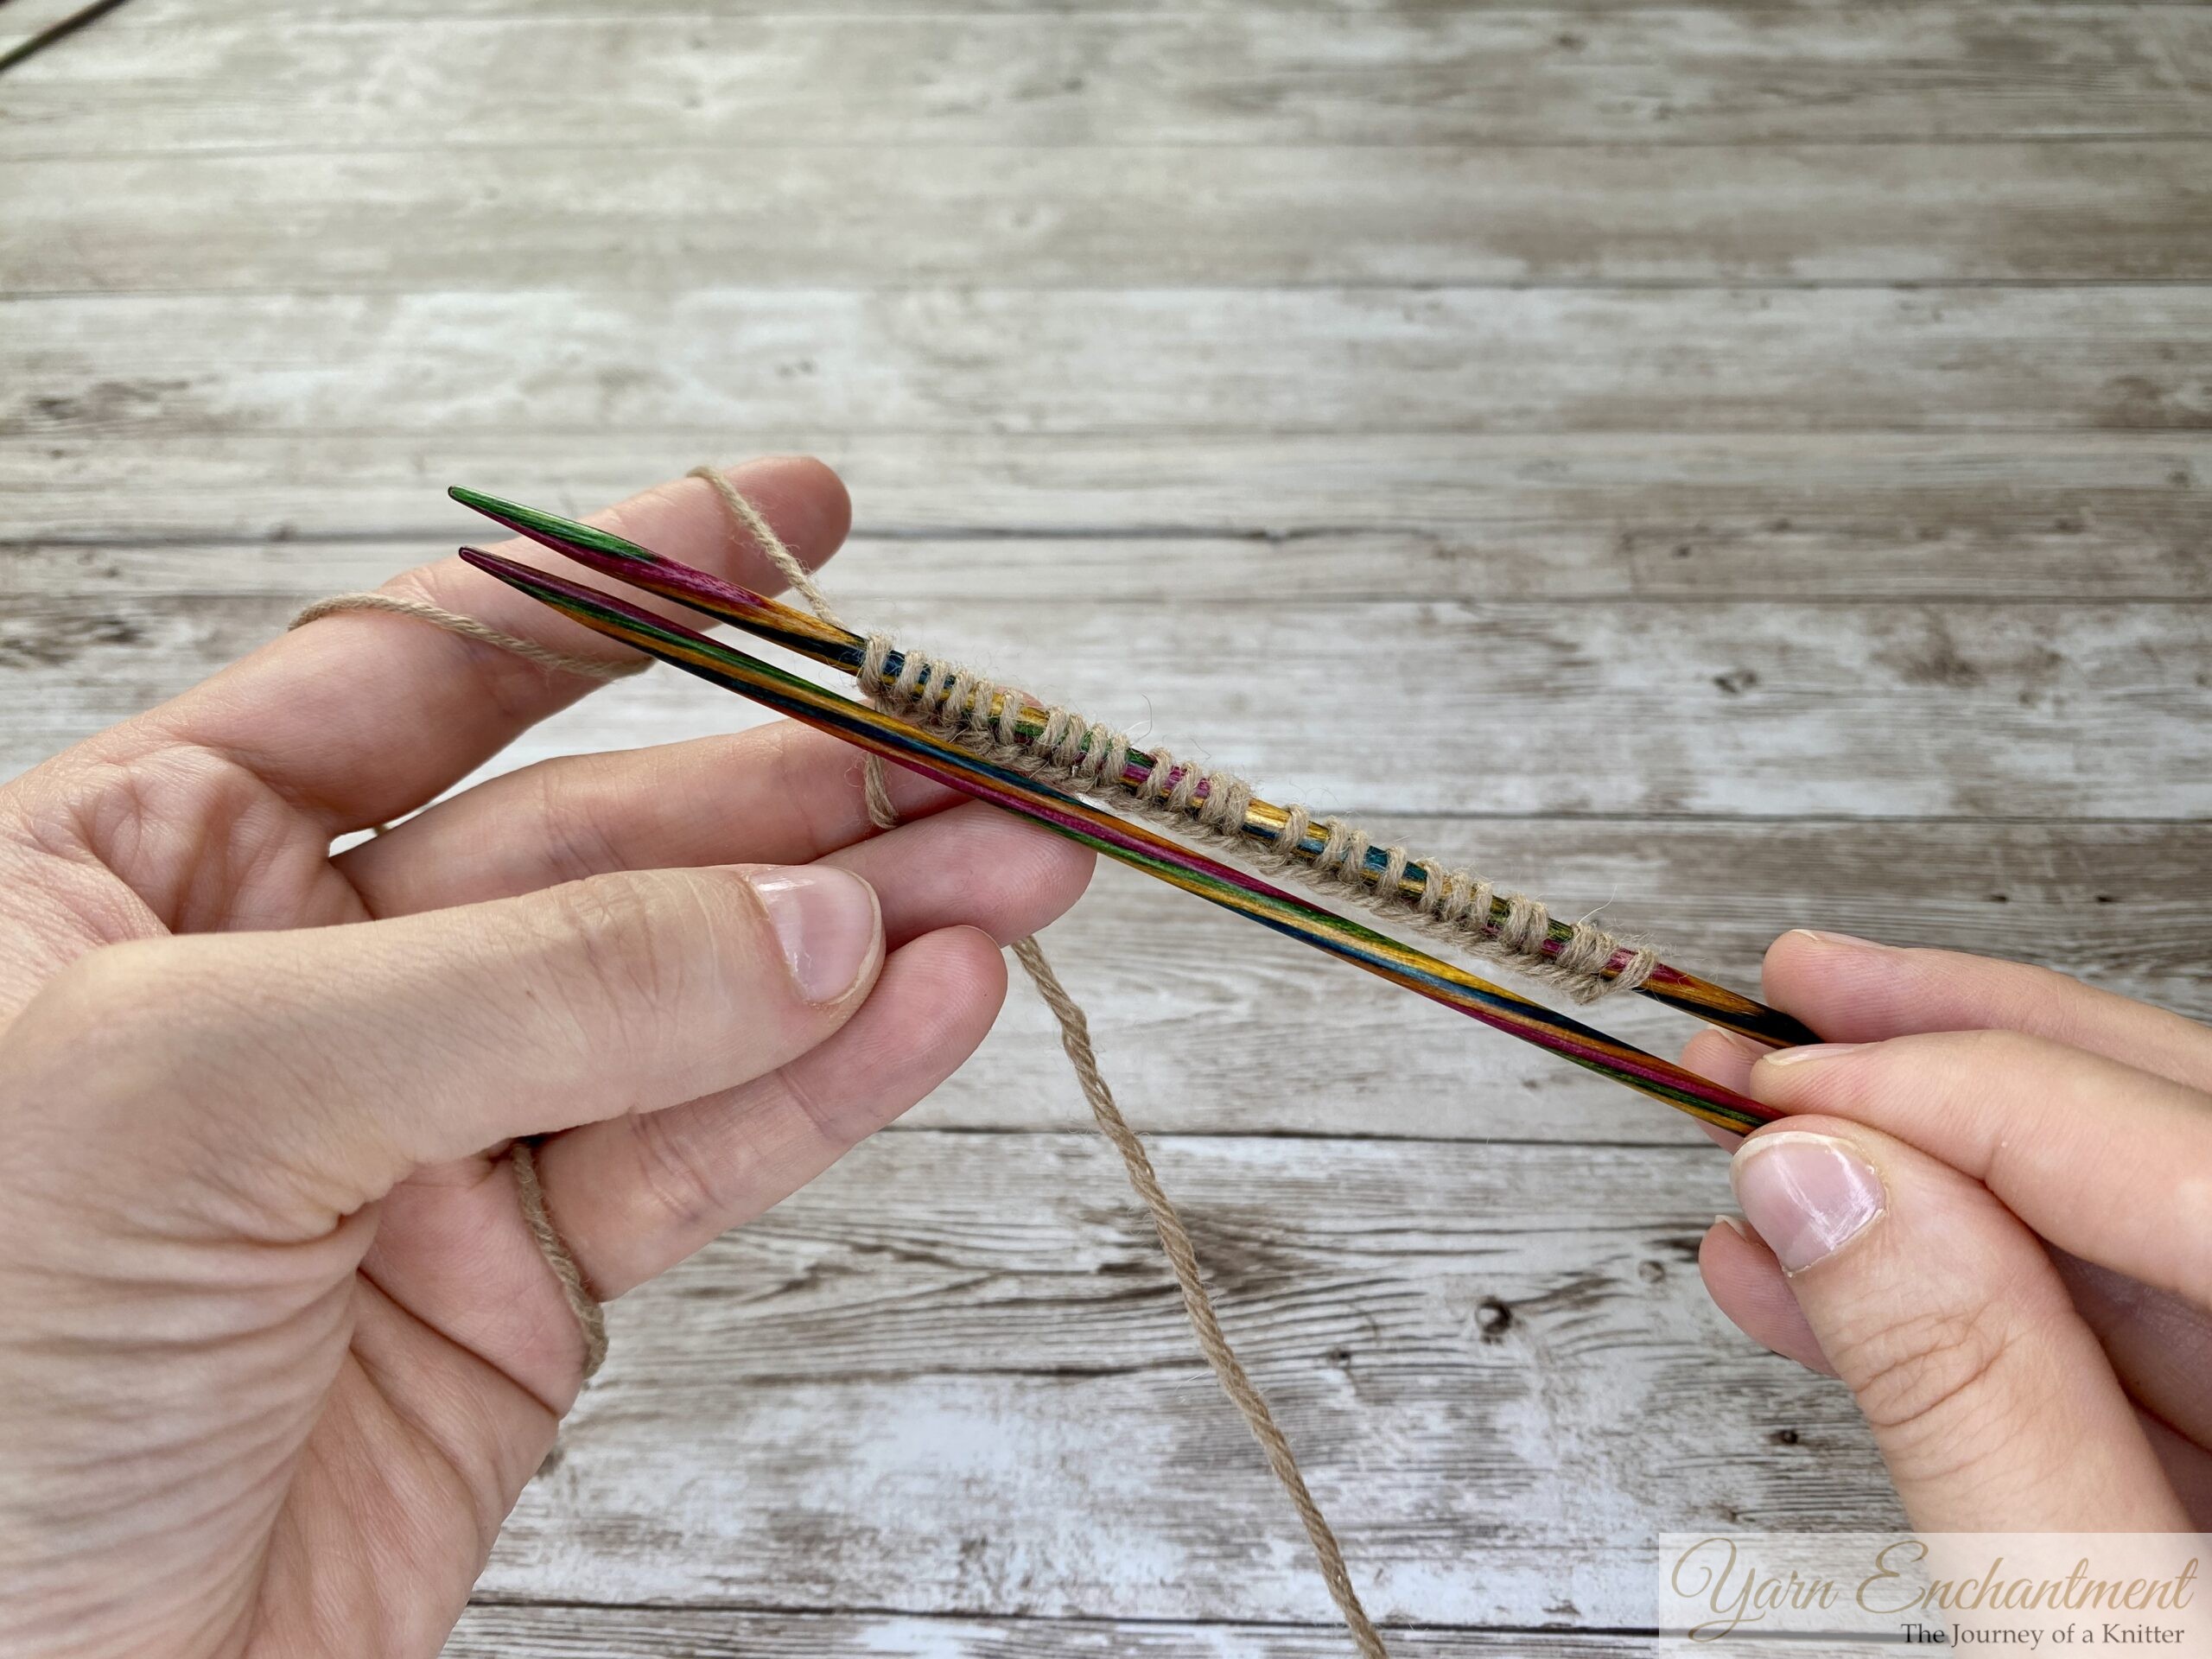
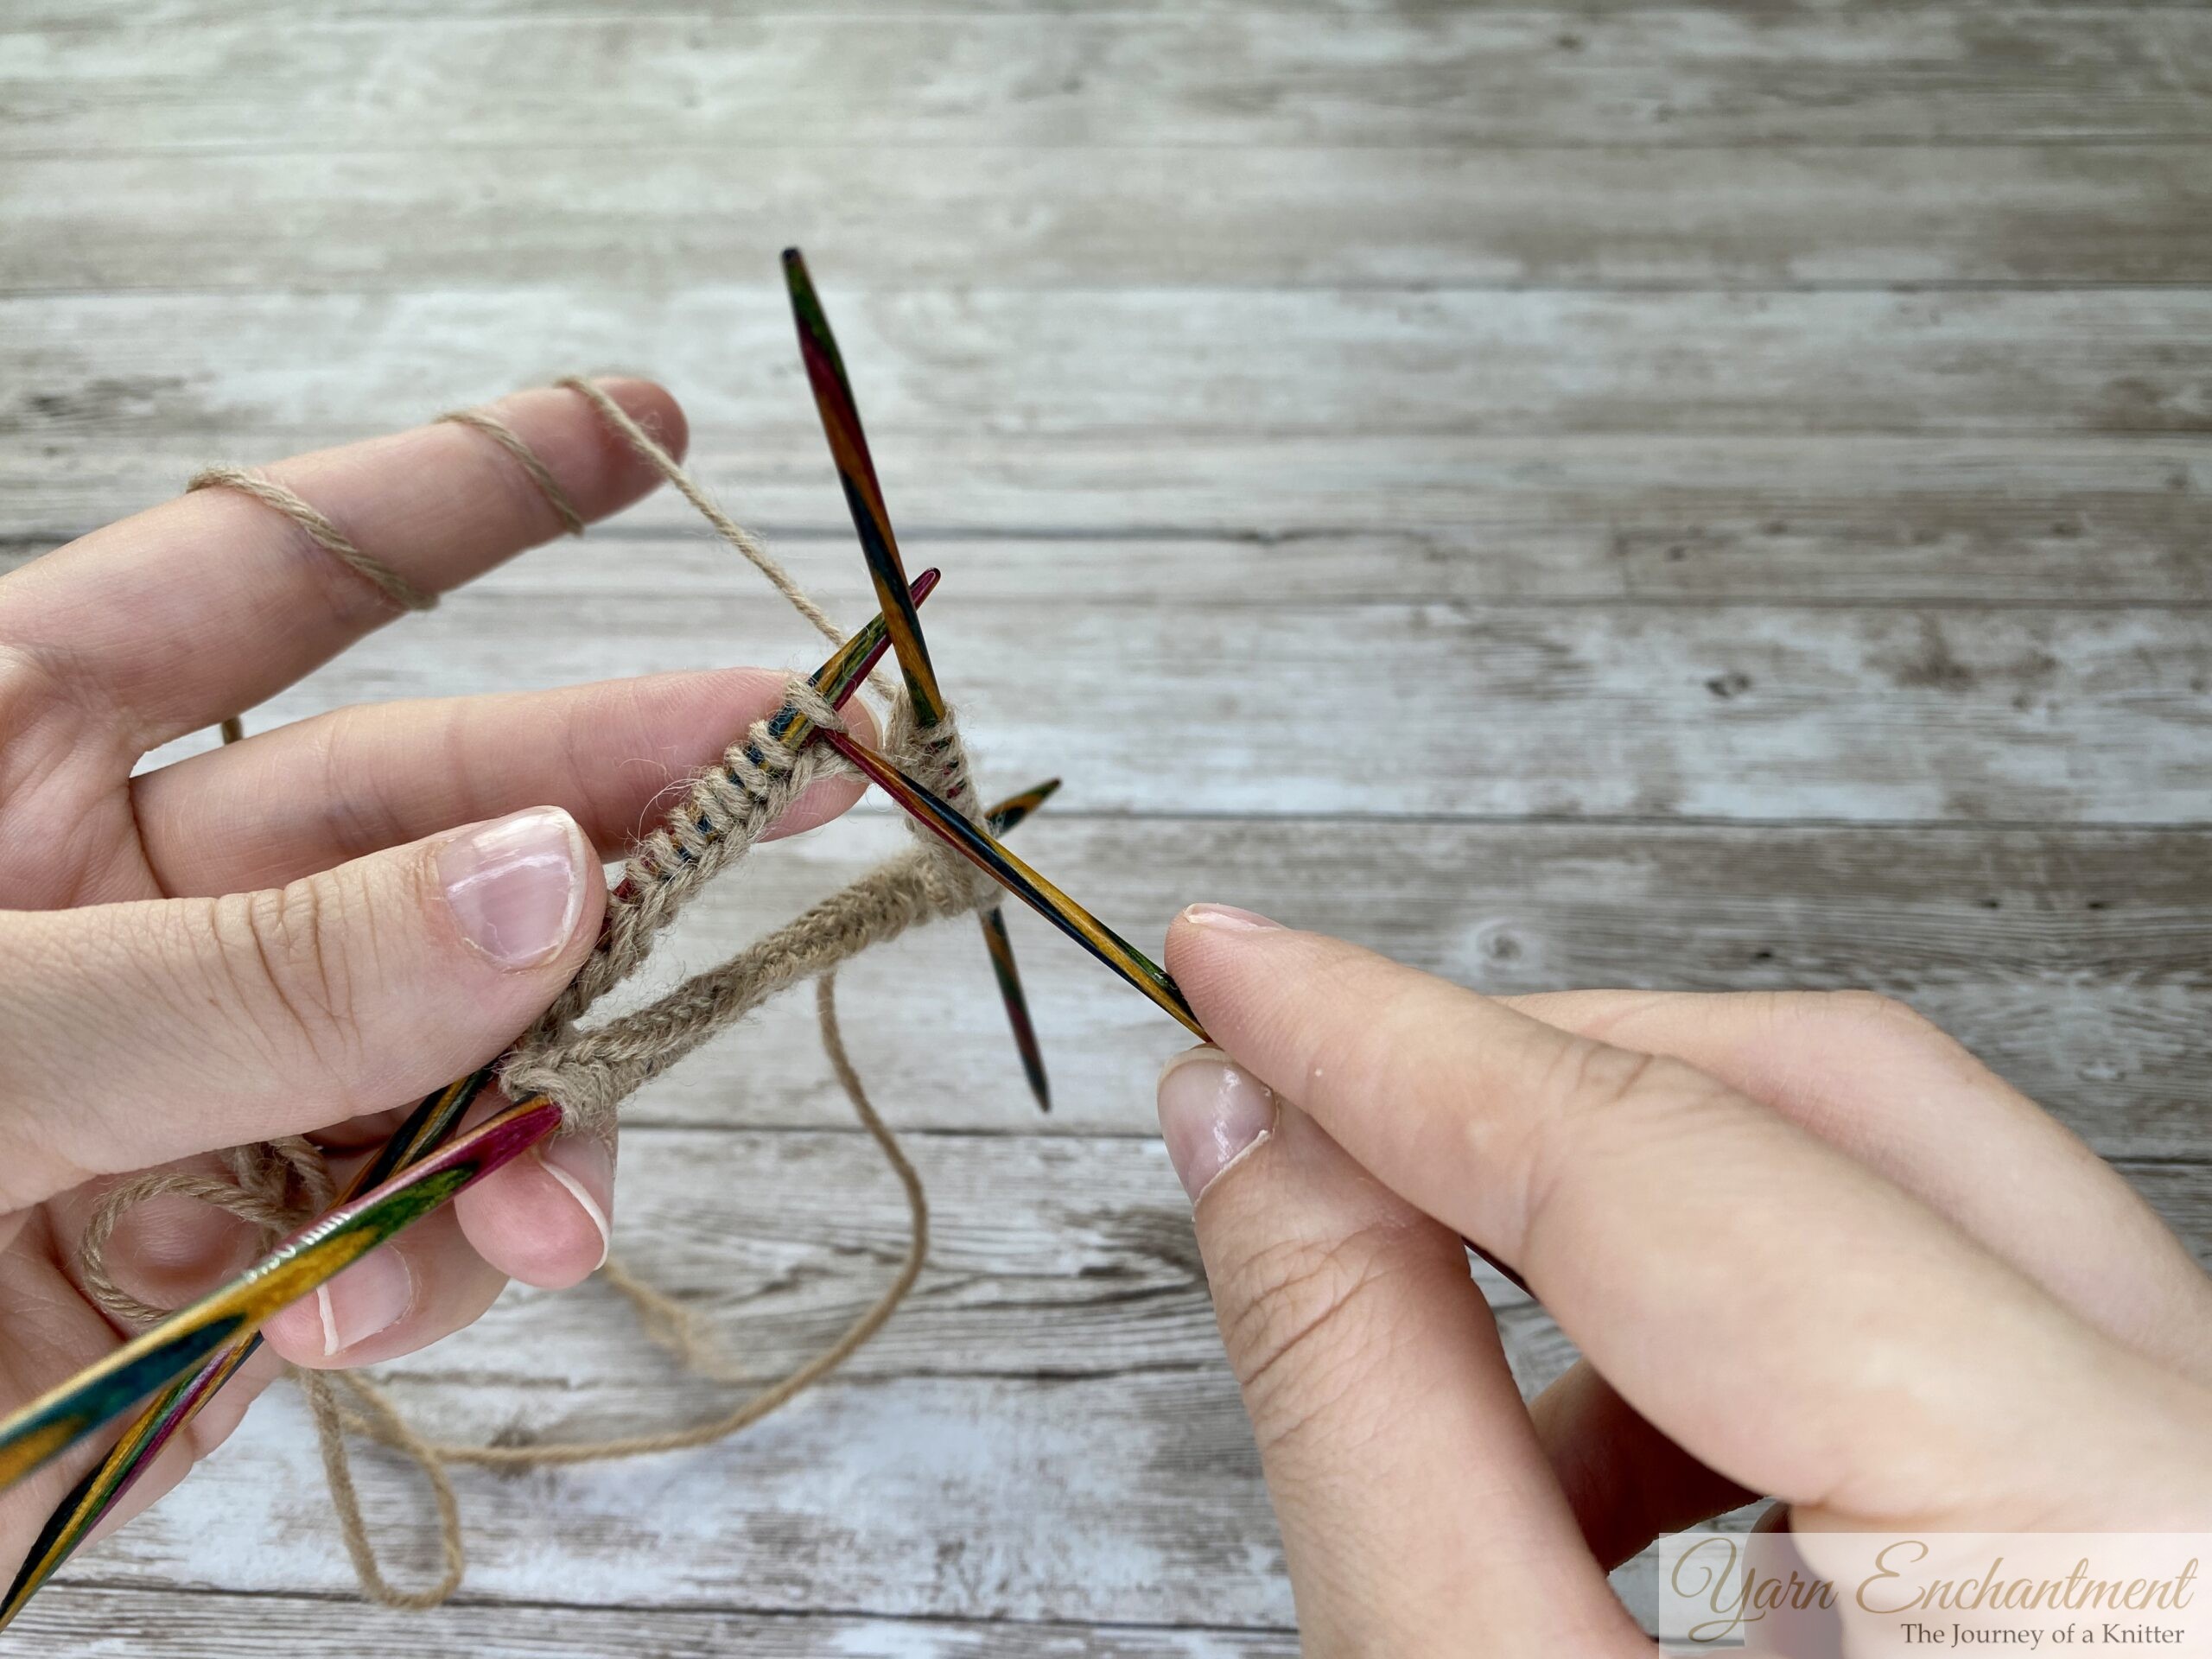
2. Fold Your Needles Away from You
Once you’ve finished casting on, fold your needles away from you so the wrong sides (the bumpy side of your stitches) face each other. This ensures your stitches aren’t twisted when you begin knitting in the round.
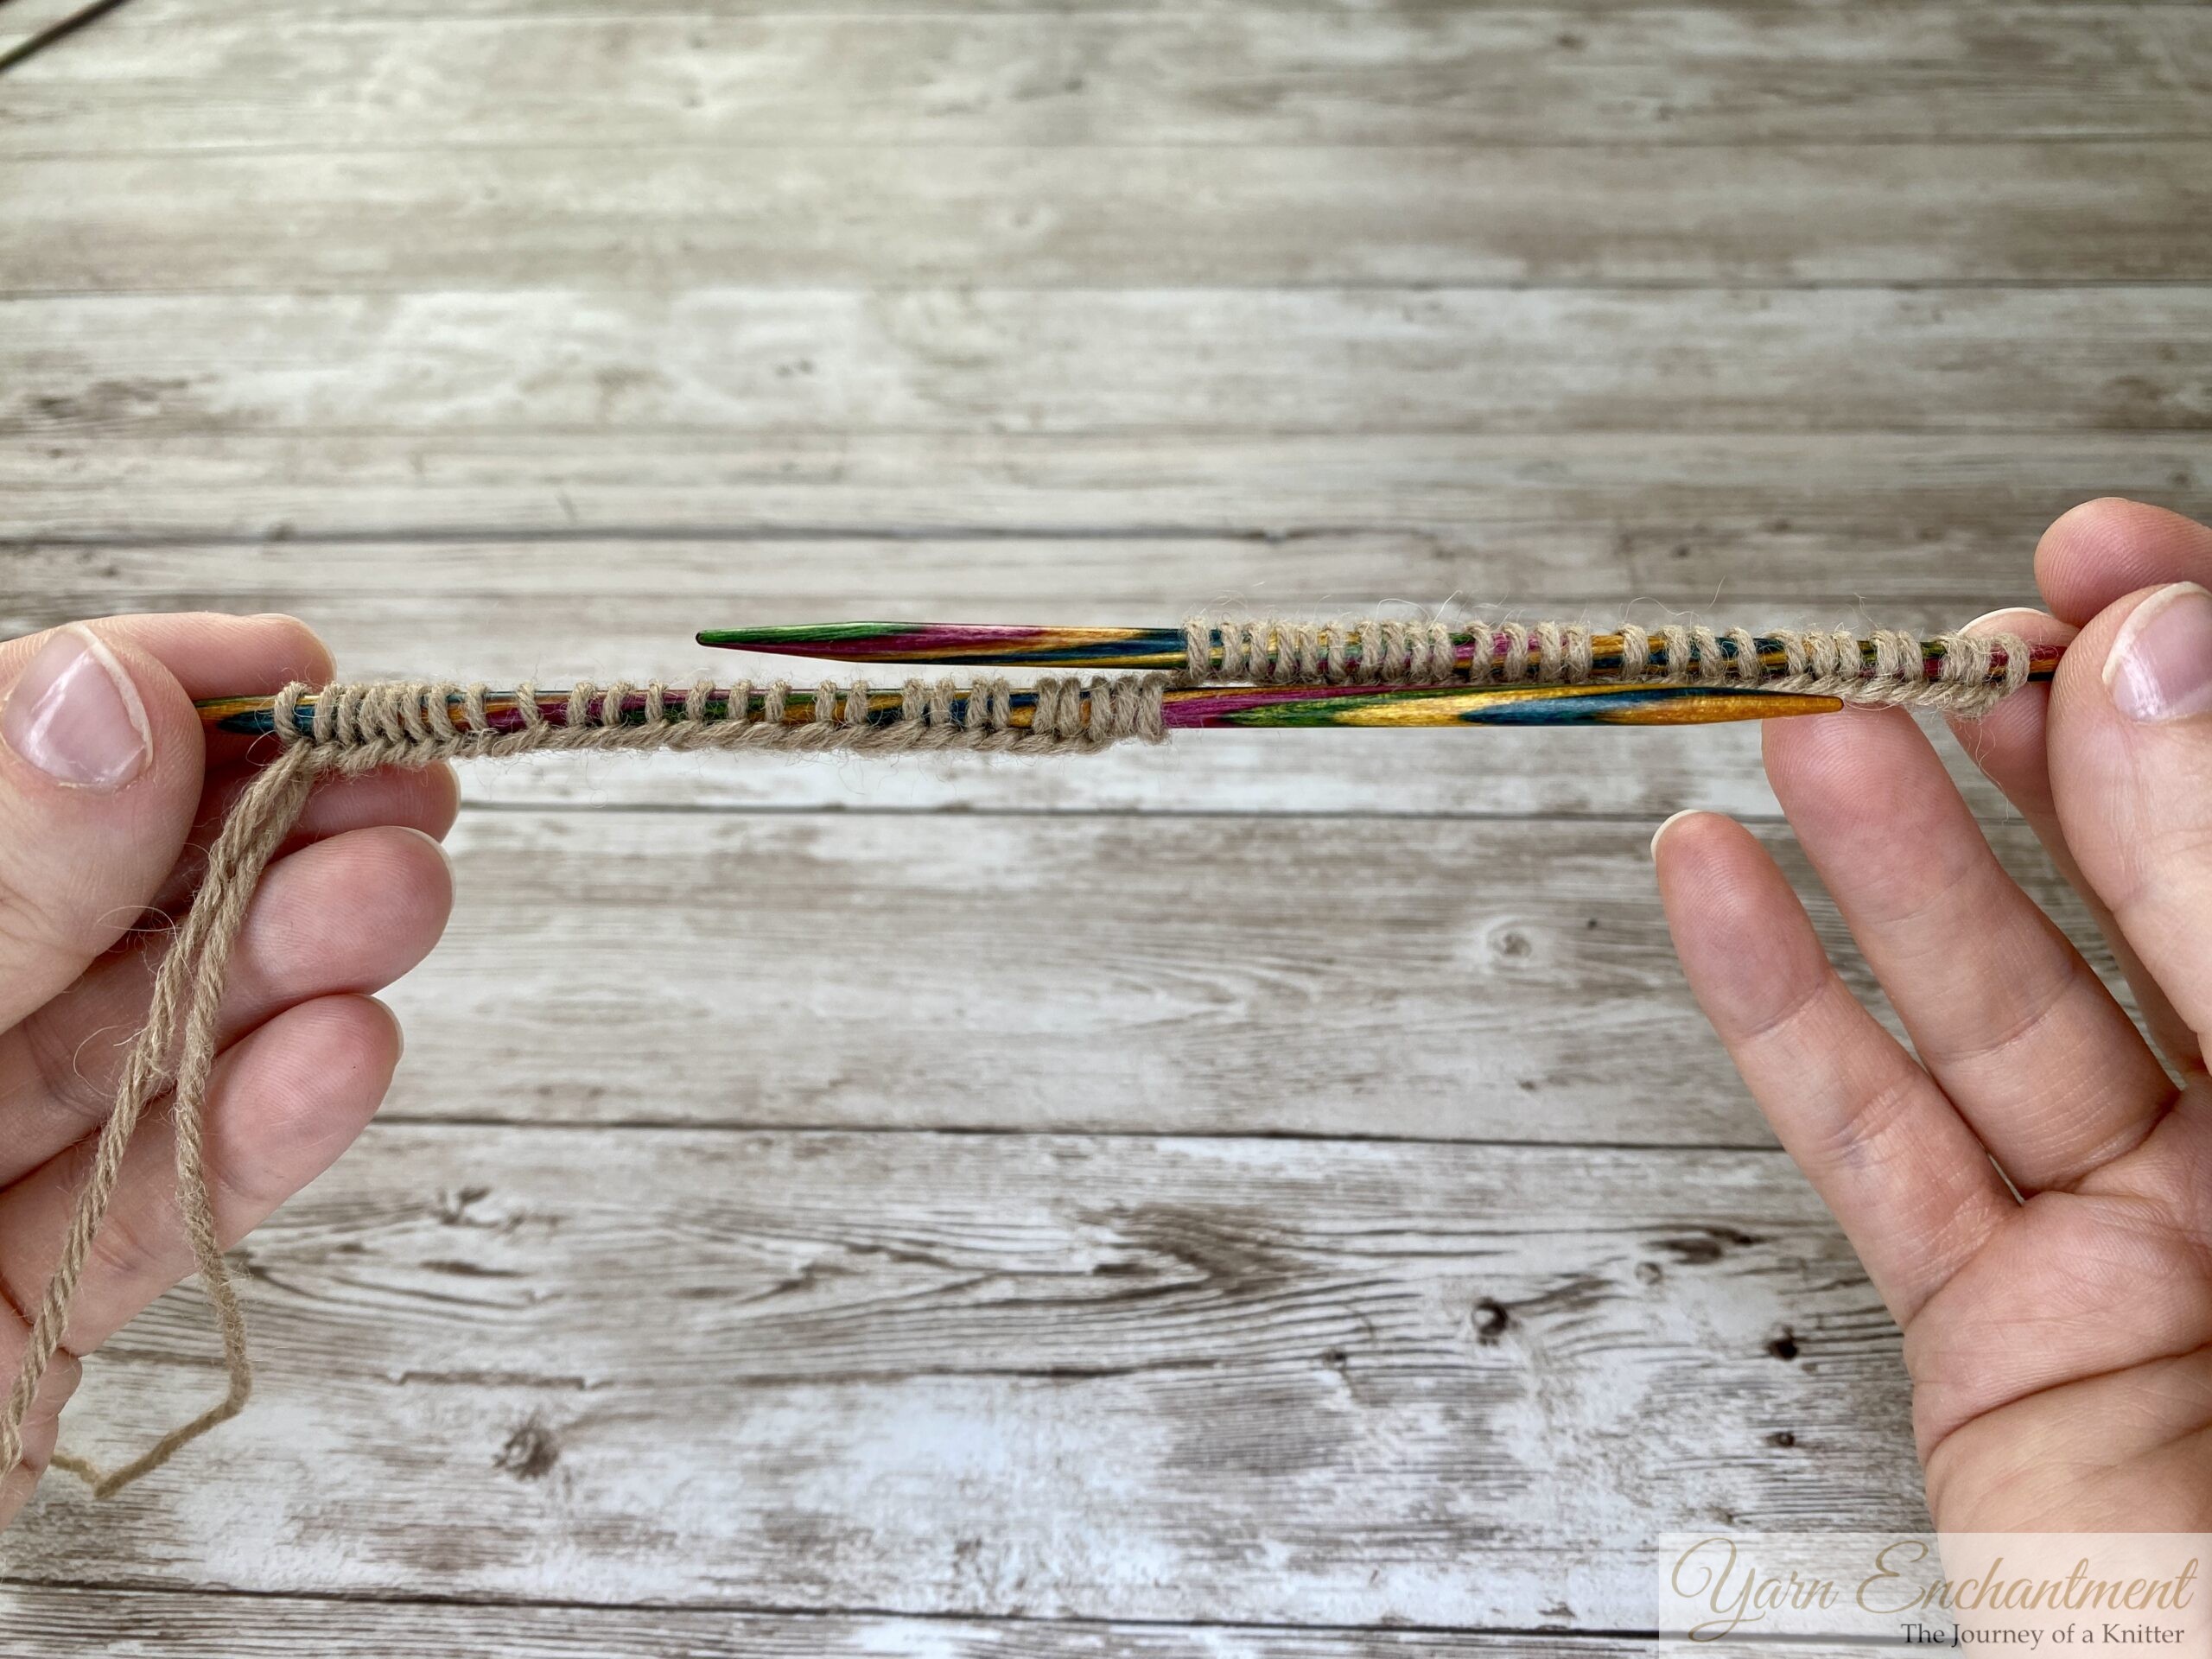 |  |  | Once you are finished with your cast-on, your stitches will already be correctly on the needles - you don’t need to adjust anything. | All you need to do now is fold both needles away from you | So that the wrong side (with the purl bumps) is facing each other. your working yarn should be at the back needle |


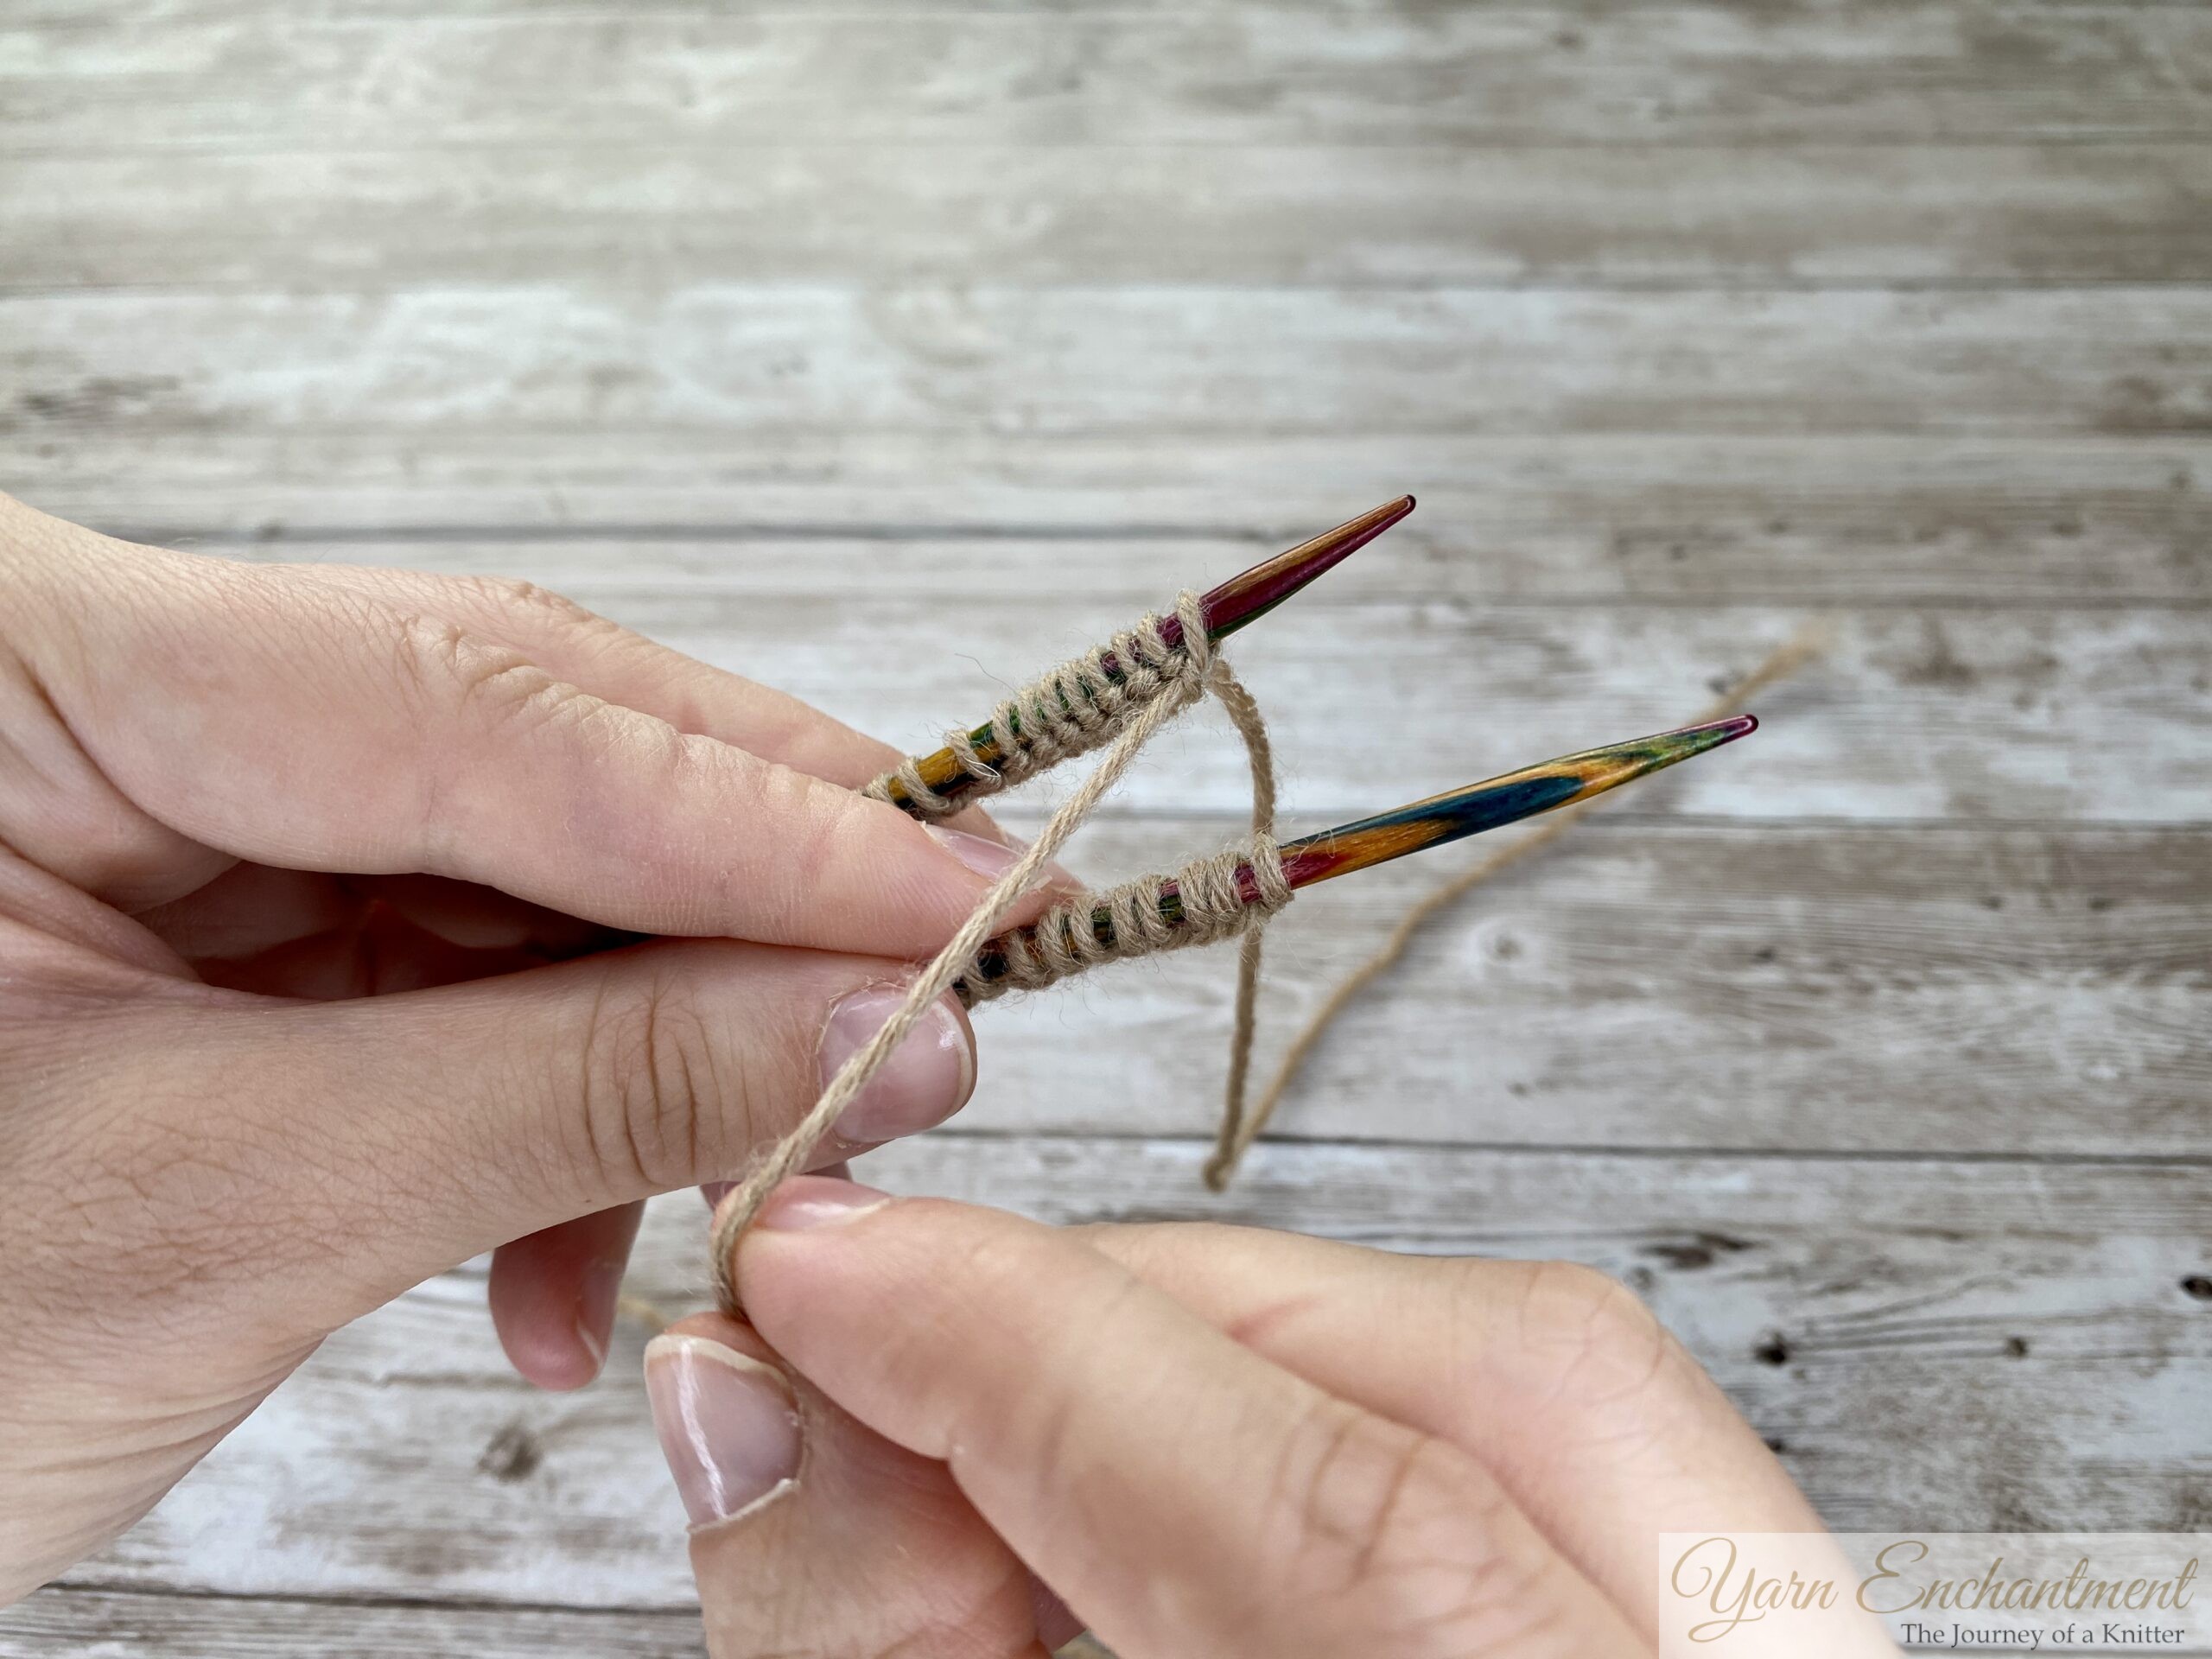
💡 Gaps between needles are another common issue when knitting in the round. To avoid them: Pull the First Two Stitches Tight When you begin knitting your first round, pull the first two stitches on each needle tightly. This draws the stitches together and prevents gaps from forming.
Tip:
Preventing Gaps Between Needles
Step 3: Starting Your First Round of Knitting
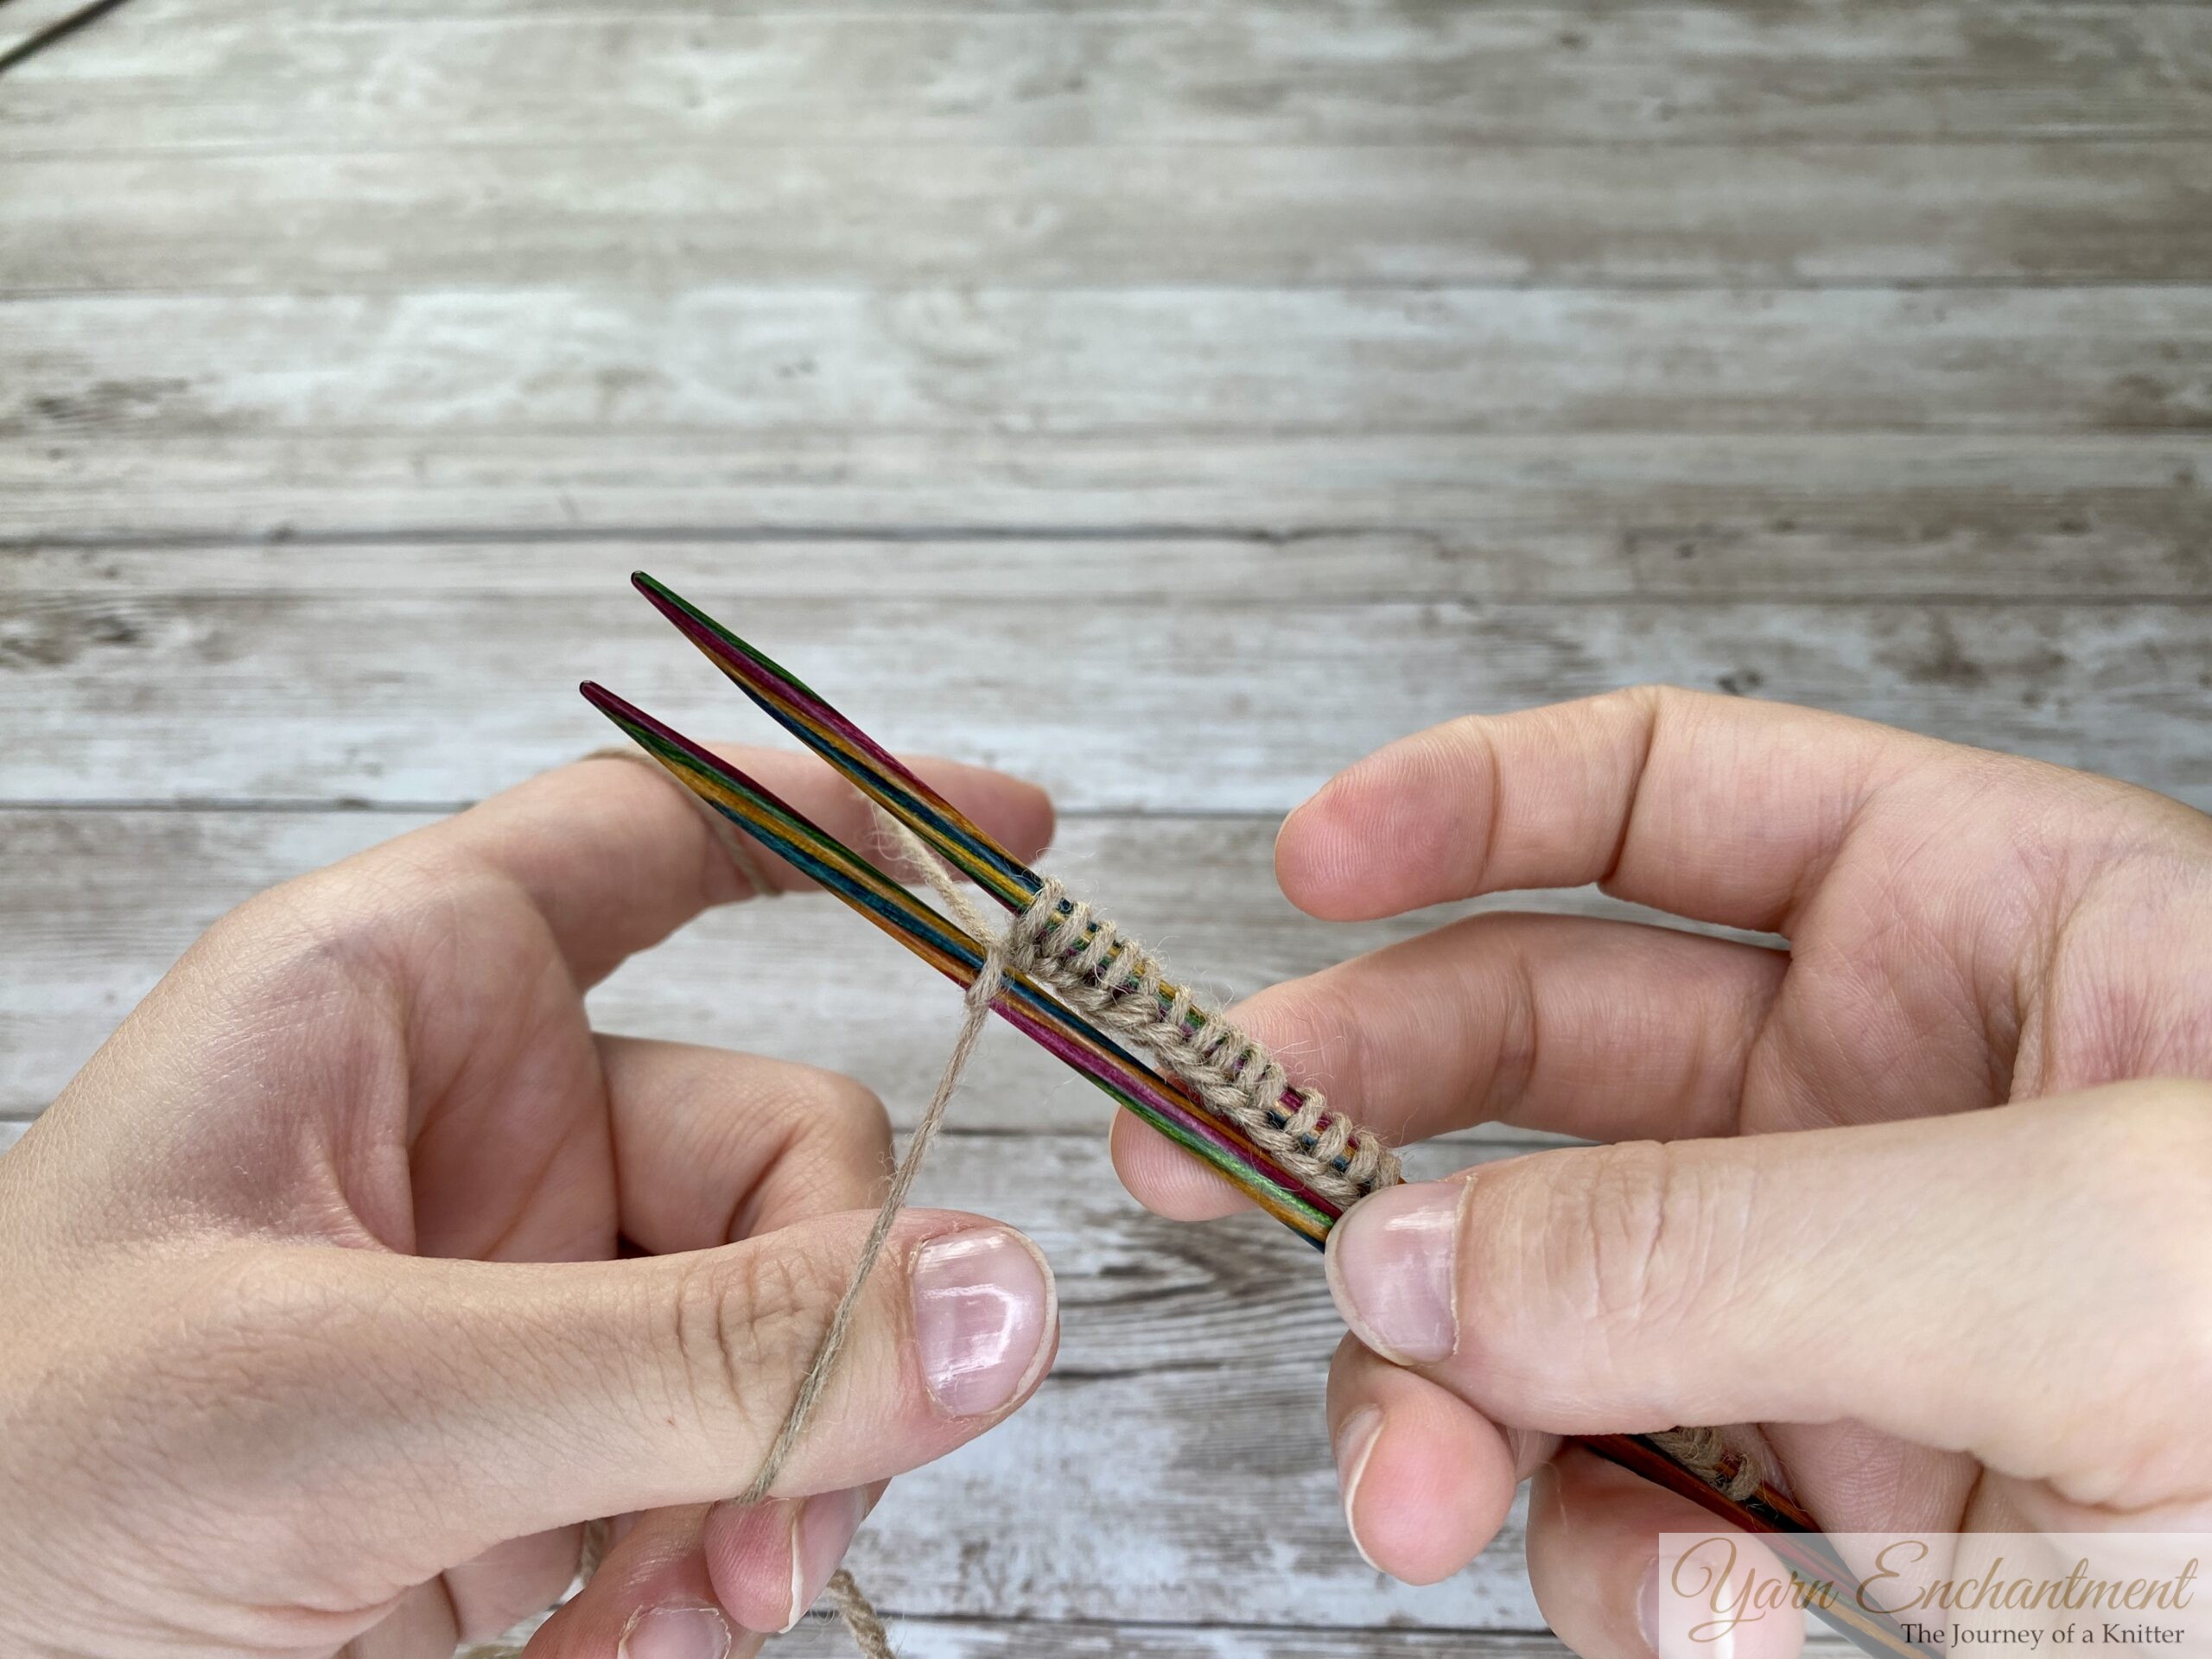
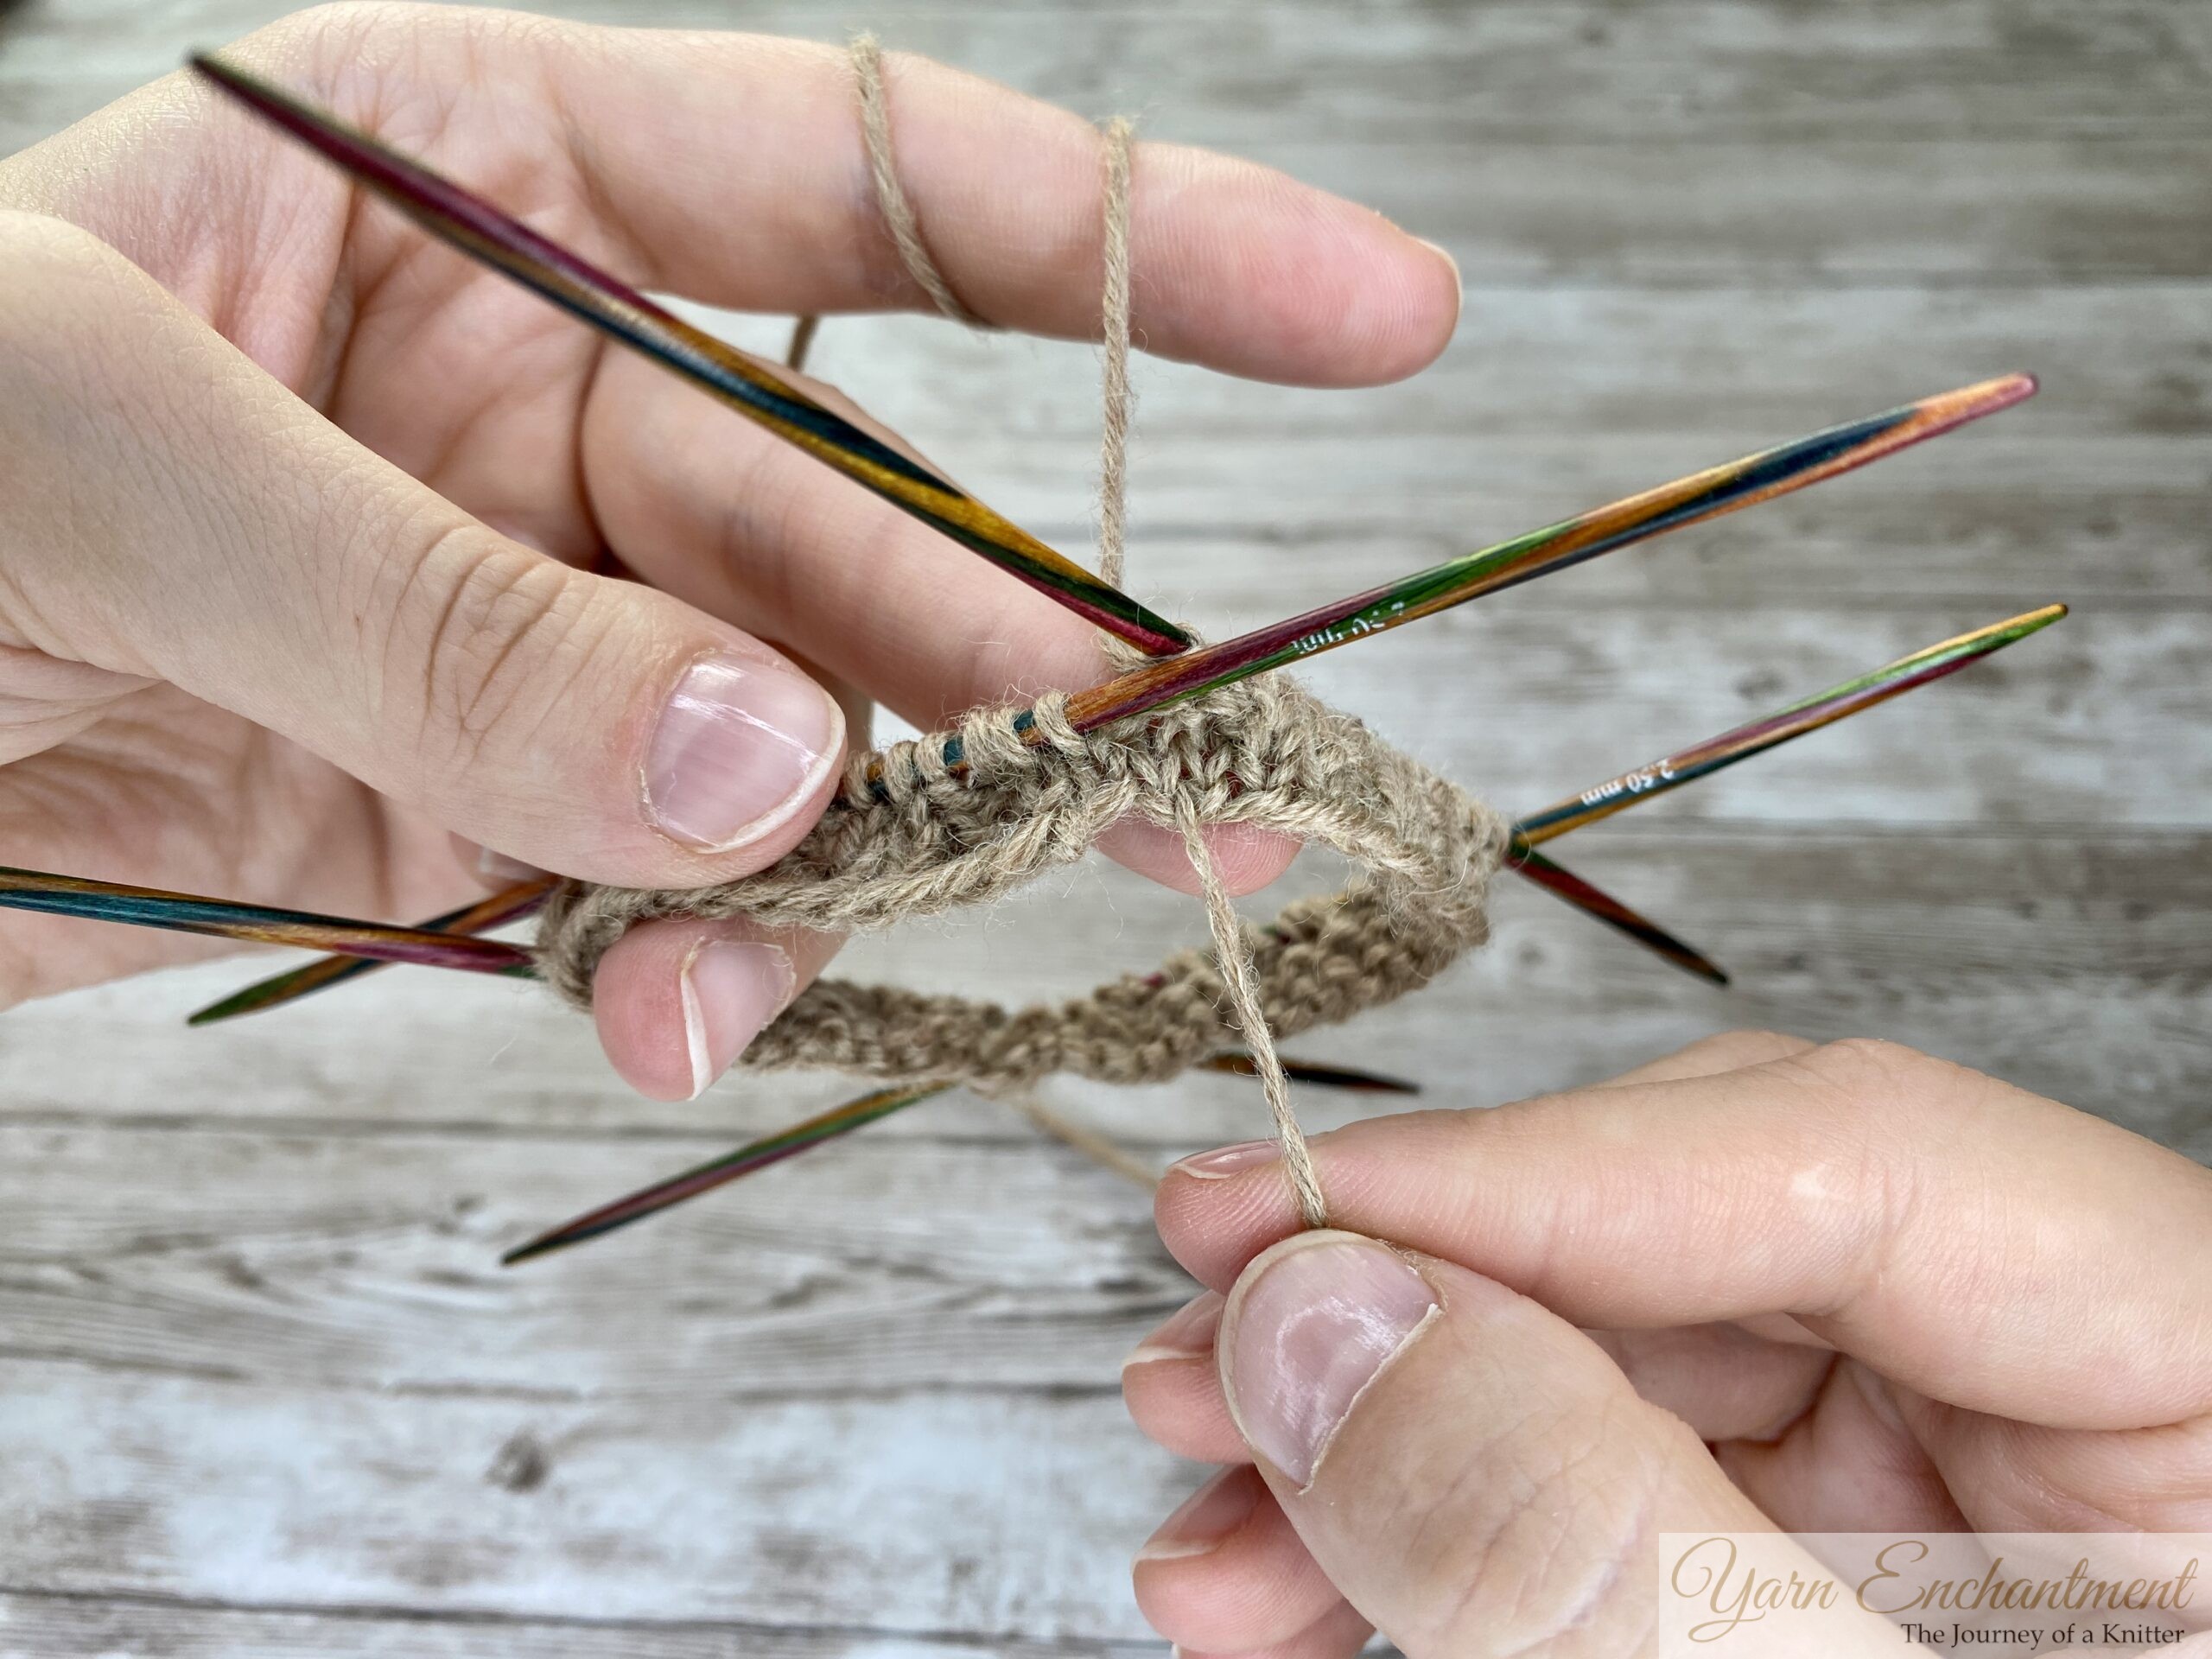
Now that your stitches are cast on and arranged correctly, it’s time to start knitting. Your first round will only have knit stitches. With your working yarn at the back, make sure to bring it in between the front and back needles.
- Grab Your Smaller Needles: If you used larger needles for your cast-on (to ensure stretchiness), switch to smaller needles for the rest of your project. If you're used to smaller sized needles and hold them together, you need to carefully pull one needle out.
- Knit the First Two Stitches Tightly: As mentioned earlier, pull the first stitches on each needle tight to prevent gaps.
 |  |  | Bring your working yarn in front of the back needle so that it is positioned between the two needles. This step is really important to close the round without any loose stitches. | Grab your smaller-sized needle and start knitting the first stitch. | Make sure to pull it really tight. |


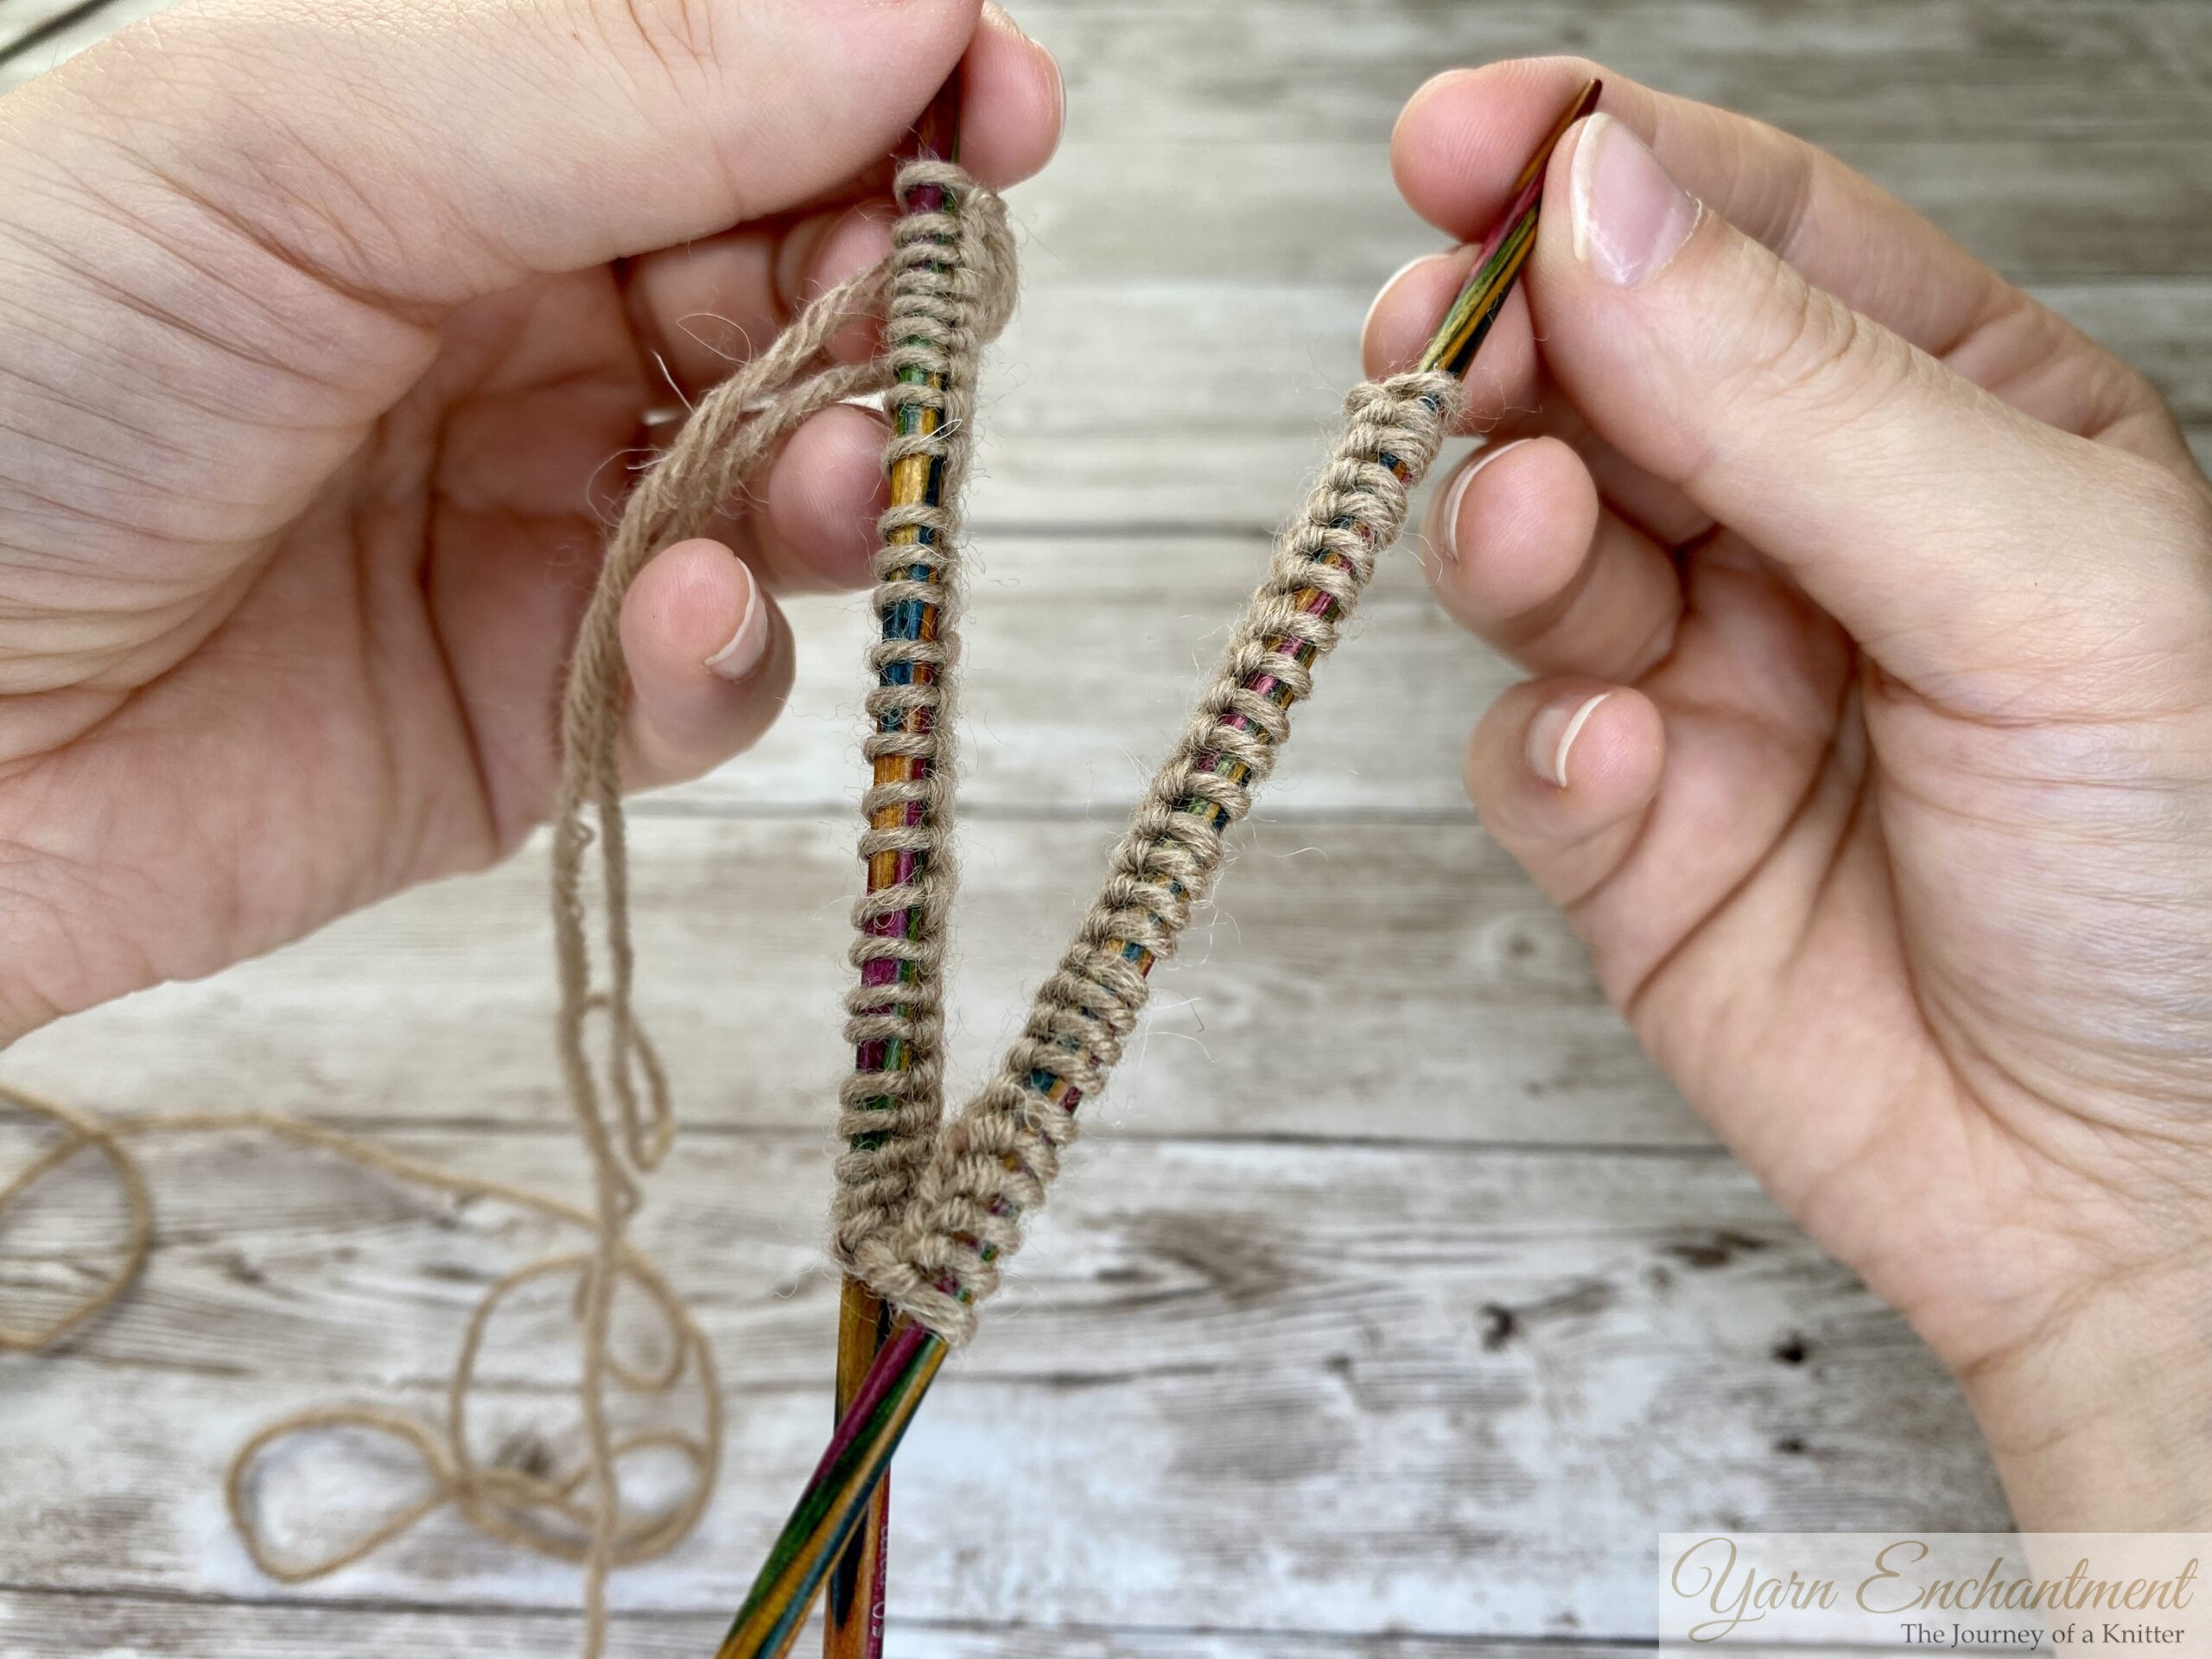
Step 4: Distribute Stitches Evenly Across Four Needles
Now after knitting the first two stitches it’s time to distribute the rest of them evenly across four double-pointed needles.
-
Knit the First Needle:
Using your smaller-sized needle, knit the first set of stitches (e.g., 13 stitches if you’re working with 52 total stitches). These stitches will now rest on the first needle. (Once you’ve knitted the first two stitches, you can let go of the back needle and focus on holding just the front needle. This will make everything much easier.) -
Repeat for the Remaining Needles:
Grab a new needle and knit the next set of stitches (another 13 stitches). Repeat this process until all four needles hold an equal number of stitches. Remember to pull the first two stitches on each needle really tightly. -
Check Your Work:
Take a moment to ensure that your stitches are distributed evenly. Each needle should have roughly the same number of stitches, and the wrong side (purl bumps) should still be facing inward. Ideally, your stitches should not be twisted.
 |  |  | Once you’ve knitted the first two stitches, you can let go of the back needle and focus on holding just the front needle. This will make everything much easier. | Using your smaller-sized needle, knit the first set of stitches. In my example, there are 13 stitches. | Grab the second smaller size needle and knit the next set of stitches on it. |


Once you’re finished and have evenly distributed your stitches, your work should look like this (See Picture). You’ll notice a small gap at the beginning of the round, but don’t worry - this gap will close itself after knitting a few rounds. In the second round, you can start knitting your ribbing, but always remember to pull the first two stitches really tight.
 |  | Once you’re finished and have evenly distributed your stitches, your work should look like this. You’ll notice a small gap at the beginning of the round. | In the second round, I began working on the ribbing, and as you can see, the gap has almost disappeared. |


Tips for Stretchy Cast-Ons and Smooth Transitions
-
Use Larger Needles or Hold Two Smaller-Sized Needles Together for the Cast-On
To achieve a stretchy and elastic edge, consider using larger needles for the cast-on or holding two smaller-sized needles together. This ensures your cast-on is flexible and comfortable, especially for projects like socks or hats. -
Weave in Ends Carefully
When weaving in your ends, take care to hide any loose threads near the join. This step ensures a seamless and professional finish. (We’ll talk more about this in a separate blog post!) -
Practice Makes Perfect
If you’re new to double-pointed needles (DPNs), take some time to practice casting on and knitting a few rows before starting your actual project. Practicing builds confidence and helps reduce frustration, setting you up for success.
 | Once all the ends are woven in, you’ll notice that the gap at the beginning of the round has completely disappeared. |

Conclusion
And that’s it - casting on double-pointed needles without twisting or gaps is totally doable, even if you’re just starting out. By following these simple steps, you’ll have a smooth beginning to your knitting project. And trust me, there’s nothing quite like the satisfaction of seeing those neat, even stitches come together.
Sure, there are plenty of fancy techniques out there for achieving a perfectly seamless join, but I wanted to keep this tutorial beginner-friendly and straightforward. Pulling the first two stitches tight is not only easy to remember but also far simpler than many of the other methods you might come across. Sometimes, the best solutions are the ones that have been around for centuries - they’re classics for a reason!
I really hope this guide helps you feel more confident when casting on for your next project. If you try it out, let me know how it goes, I’d love to hear your thoughts or any tips you’ve picked up along the way. And if you want to see these steps in action, don’t forget to check out my YouTube tutorial for a full walkthrough. Remember: we all start somewhere, so give yourself grace and enjoy the process!
If you’d like to follow along with my latest knitting adventures and tutorials, don’t forget to subscribe to my newsletter!
Until then, happy knitting!
A Little Way to Say Thanks
You Might Also Like


 |
|
Join the Cozy Corner Newsletter!
Hey there, creative soul! Welcome to the Yarn Enchantment Newsletter, where we celebrate all things cozy, crafty, and full of heart. Think of this as your friendly crafting companion - a little dose of inspiration delivered straight to your inbox, just for you. Inside, you’ll find: ✨ Exclusive patterns & tutorials - ideas you won’t find anywhere else (just for us!) 📚 Bookish crafts that bring your favorite stories to life 🧶 Tips and tricks to make your crafting journey smoother (and more fun!) 💌 Heartfelt musings on life, creativity, and the magic of making something with your own two hands Whether you’re knitting by the fire, brainstorming your next DIY project, or just looking for a little creative pick-me-up, this newsletter is here to cheer you on. Because let’s be honest - crafting isn’t just about the finished project; it’s about the joy, peace, and stories we create along the way. So grab a cup of tea, cozy up, and join me. Together, we’ll weave a little magic into everyday life - one stitch, one story, and one email at a time. P.S. I’m so glad you’re here. Let’s make something beautiful together! (Note: If you're using an ad blocker, you may encounter issues subscribing to the newsletter. To subscribe, please consider disabling your ad blocker.)
|
