Sock Knitting Needles & Best Accessories: A Complete Guide
August 31, 2025
How to Knit Socks for Beginners: Cast-On to Leg with DPNs
September 14, 2025
How to Measure Your Foot & Calculate Sock Cast-On Size (Knitting Tutorial)

Originally published on September 5, 2025
After you’ve chosen the right yarn and your needles, you’re ready for the next (and most important!) step. And this is the last step we need to do before we can start knitting our socks. You want to knit socks that fit just right? The secret is in knitting a gauge swatch, taking a few simple measurements and making a few easy calculations! Whether crafting for yourself or someone special, starting with accurate foot measurements guarantees a perfect fit and all-day comfort, making your handknit socks truly unique.
If you don’t have measurements on hand or want to surprise a loved one with socks, I’ve created a handy sock size chart ranging from child sizes to really large feet for both 4ply and 6ply yarns. You can download the sock size chart here, absolutely free, right on this blog.
I also created a free progress keeper for sock knitting. Here, you can write down your measurements and calculate everything directly on the Sock Knitting Progress Tracker. You can also use it to make notes and track your sock knitting progress.
Watch the full video tutorial here
  |
How to Measure Your Foot & Calculate Cast-On Size for Socks |
Table of Contents
Must-Have Tools for Knitting Perfect-Fit Socks
Measuring tape
A soft measuring tape is one of the most useful tools for sock knitting. You’ll use it to measure foot and leg circumferences, which are the key numbers for getting a comfortable, personalized fit. Accurate measurements really do make all the difference.
Notebook & Pen
It’s a good idea to keep a notebook and pen nearby while you knit. You can use them to jot down measurements, sketch out ideas, note your stitch counts, or record any little adjustments you make to the pattern. Future-you will be glad for the notes when it’s time to knit another pair that turns out just as perfectly.
Gauge Swatch
A gauge swatch is simply a small practice square you knit with your chosen yarn and needles. It shows how many stitches you’re actually getting per inch (or centimeter). Taking this step is the key to making socks that truly fit, instead of socks that almost fit.
Knitting Needles
Socks are usually knit on double-pointed needles (DPNs) or circulars, whether fixed or interchangeable. The best option really depends on the yarn weight, your preferred method, and what feels most comfortable in your hands. For most sock yarns, needle sizes US 1.5–3 (2.5–3.25 mm) work well, but it’s always a good idea to check your gauge before you start.
Sock Yarn
Pick a sturdy, springy yarn that can handle regular wear. A wool/nylon blend is a reliable choice since it’s both durable and comfortable. The yarn weight will depend on your pattern, but classic “sock yarn” (fingering weight) works well for most projects. I’ve also put together a full Sock Yarn Handbook if you’d like more details.
Calculator
It’s easier to use a calculator or your phone to work out all your measurements for the right fit.
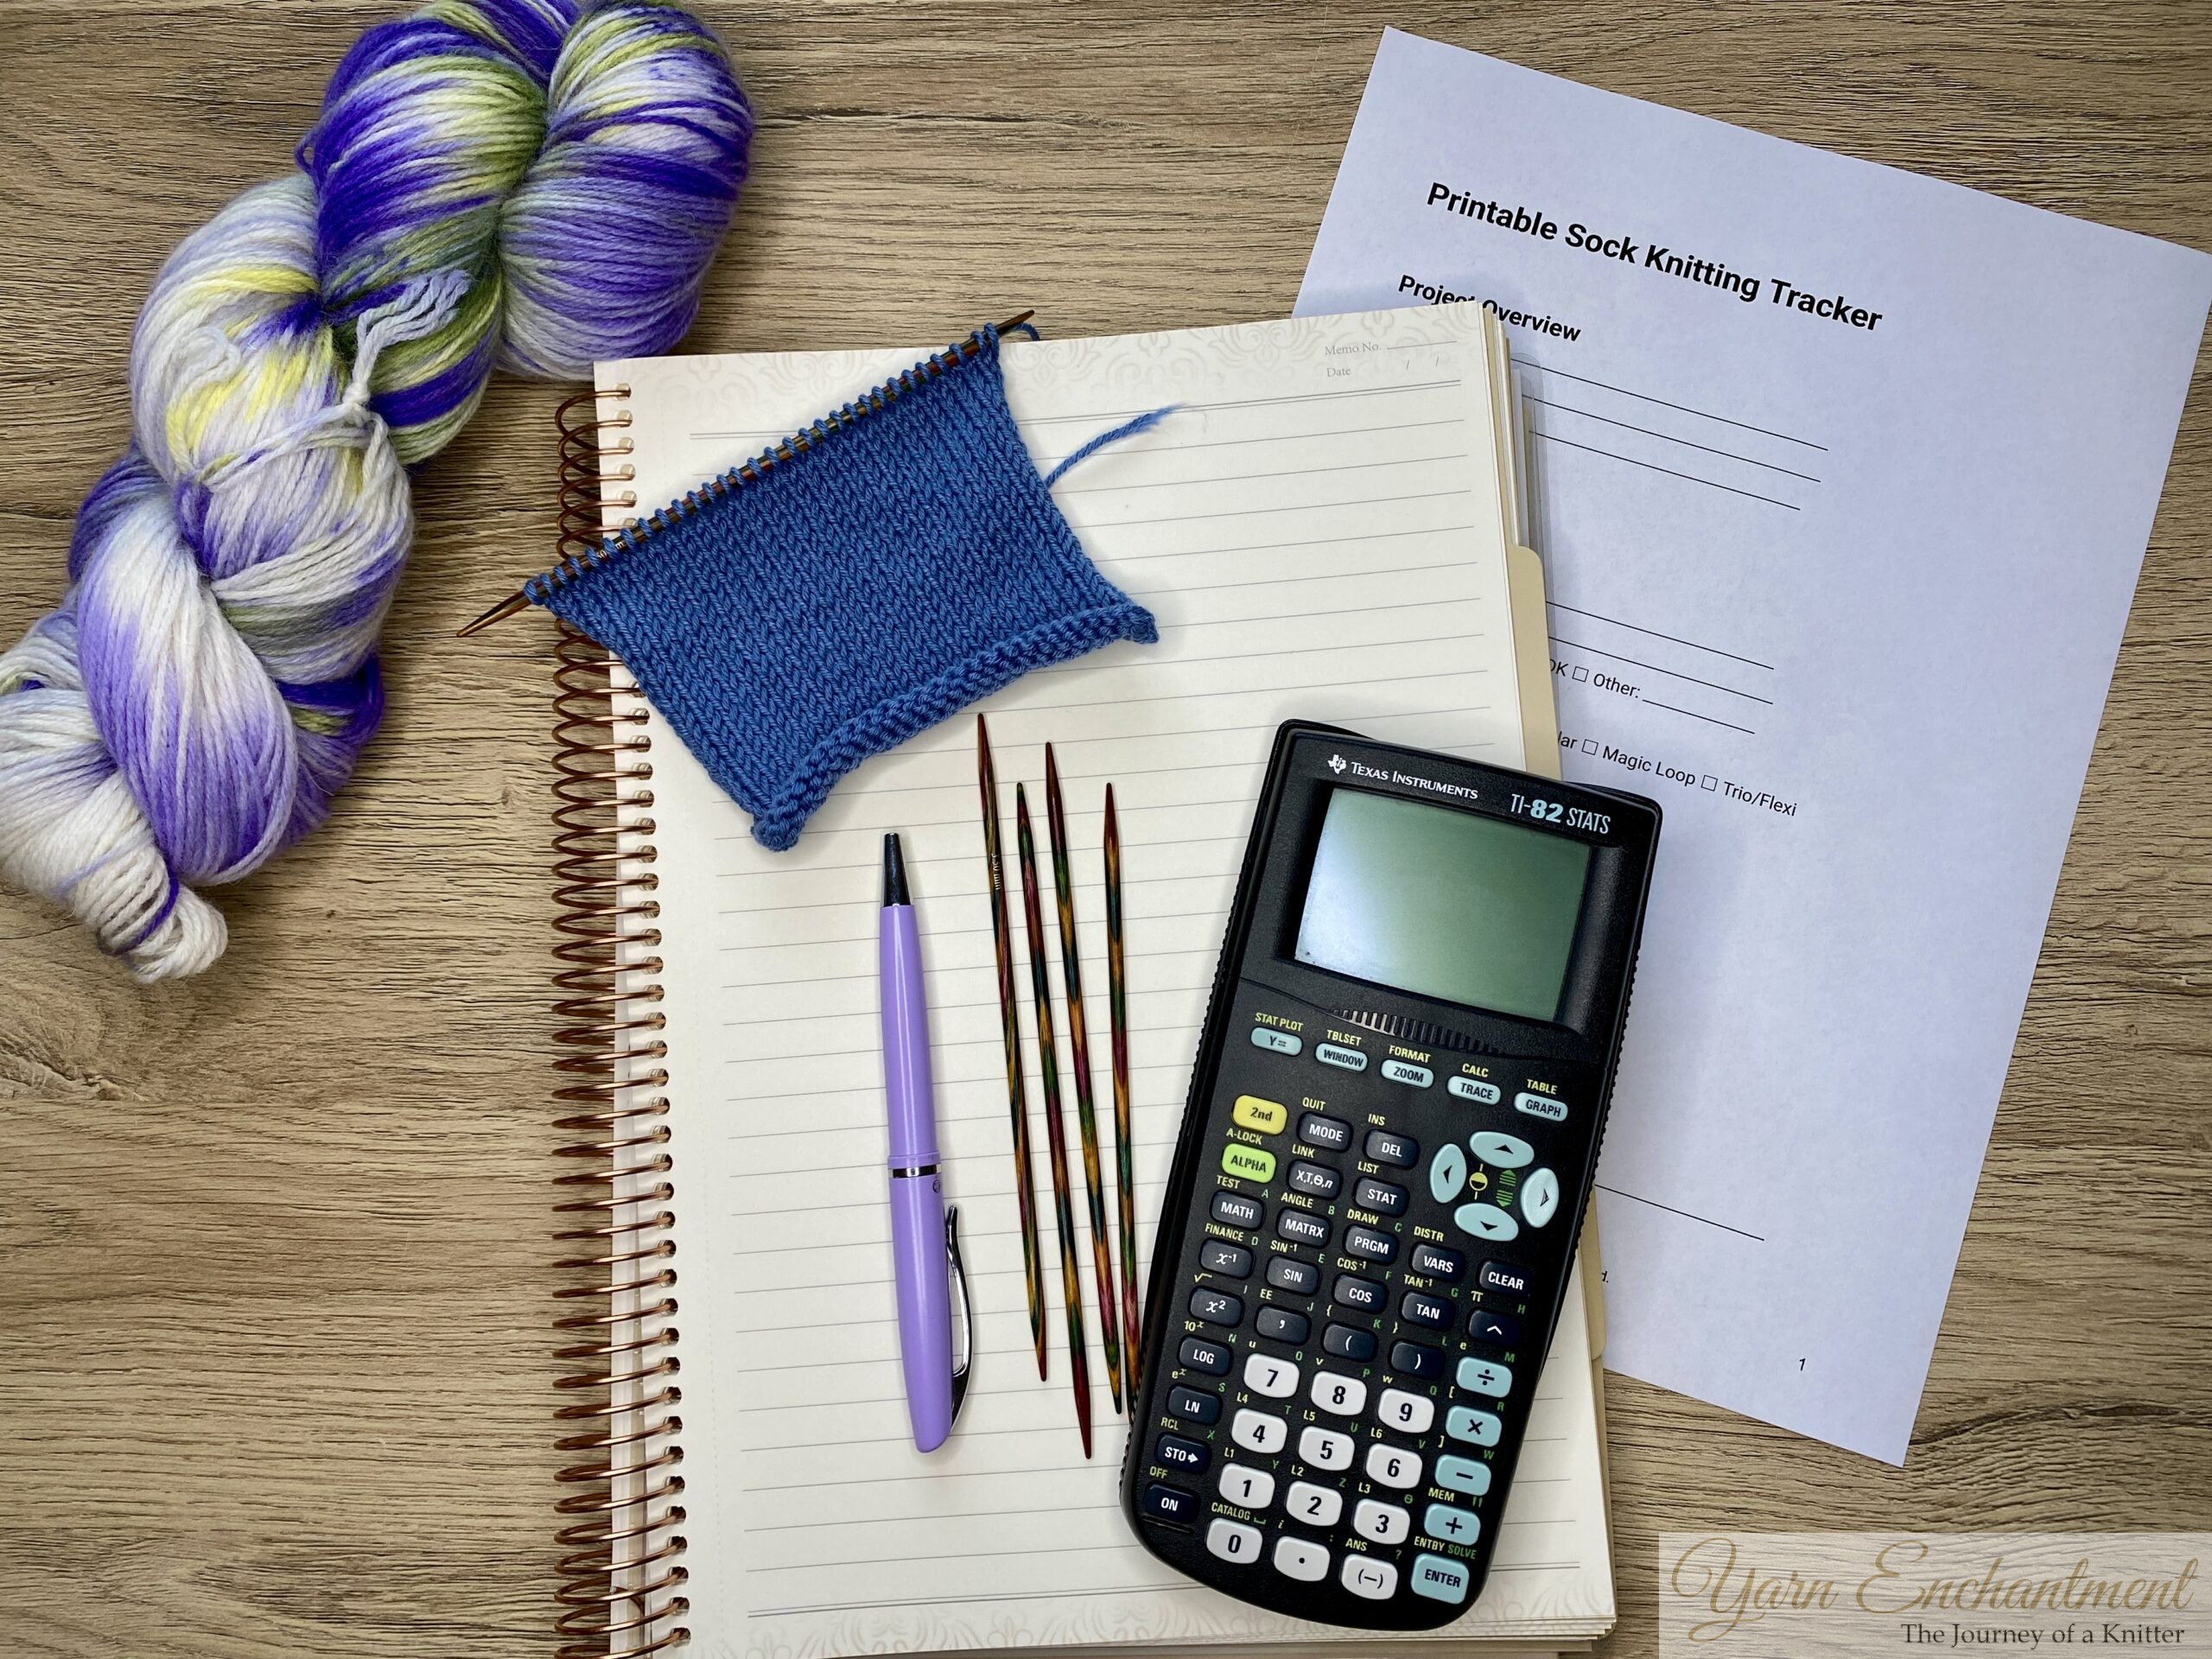  |
Essential Tools for Custom-Fit Socks |
Free Printable Sock Knitting Progress Tracker PDF
Keep your sock projects tidy and organized with my free printable Sock Knitting Progress Tracker. This worksheet is designed for recording all the details that matter - measurements, calculations, notes on yarn and needles, and anything you might tweak for the perfect fit next time. No more searching through scraps of paper or forgetting just how you worked that last heel.
-
Write down foot and leg measurements, stitch counts, and swatch info as you go.
-
Calculate your cast-on size, decreases, and more directly on the worksheet.
-
Keep track of yarns, needle sizes, and tick off every project milestone.
-
Stay organized for future pairs, with everything in one handy place.
[Download your free PDF Sock Knitting Tracker here!]
If you’re searching for a knit sock project organizer, printable knitting worksheet, or a knitting journal page, this tracker should be just what you need.
How to Measure Your Foot for Sock Knitting
Measuring Foot Circumference
While barefoot and relaxed, wrap a measuring tape snugly (not tight) around the widest part of your foot - usually the ball, just behind your toes. If your feet have bunions or other unique shapes, include them in the measurement. Write this number down; it’s the starting point for custom-fit socks.
  |   |
Wrap the measuring tape snugly (not tight) around the widest part of your foot - usually the ball, just behind your toes. try not to wrap it too tight. | I have also created a graphic where I marked the widest part of the foot. Measure around this area, for the most accurate foot circumference. |
Foot Length
Place your bare foot on a piece of paper with your heel touching the wall behind you. (For the sake of the pictures, I positioned my foot this way, but if you find it more comfortable, you can also place your foot on the paper without using the wall.) Mark the tip of your longest toe and the back of your heel. Measure the distance from the wall to the toe mark (or from mark to mark) - that’s your foot length!
But don’t forget: you can always try your sock on as you knit and adjust the length as needed.
  |   |   |
Place your bare foot on a piece of paper, and mark the tip of your longest toe... |
...and the back of your heel.
Tip: For accuracy, hold the pencil as straight as possible. | Measure from wall (or from mark to mark) to that mark - that’s your foot length! |
How to Measure for Knee-High Socks
If you want to adjust the length of your sock and knit mid-calf, or knee-high styles, simply wrap your tape measure around your leg at the widest part of your calf. This extra measurement ensures your handmade socks won’t squeeze or roll down uncomfortably - they’ll fit like a dream from toe to cuff!
Remember, when knitting socks by hand, the fit is always calculated using the width (the circumference at the ball of your foot or the calf width) - not just the overall length. That’s because it’s much easier to adjust the sock’s length later than to change your cast-on stitches for width. This way, your socks will always fit comfortably and stay put, no matter the foot size.
  |
For knee-high socks, it’s important to measure both the circumference of the ball of your foot and your calf. If you want the socks to go even higher, such as thigh-highs, you’ll need the measurement around your thigh - this depends on how long you want your socks to be. To calculate the decreases needed for a good fit, measure the length from where you want the top of your sock to sit down to where your low-calf socks would start. These measurements will help shape your socks so they fit comfortably and stay in place. Find more information on how to calculate long socks in the section Cast On Calculations with “knee-high socks” |
How to Knit a Gauge Swatch for Socks in the Round
I know, I know: Swatching can feel like a chore. But I promise - taking a few minutes here means fewer headaches and less “frogging” later. Even a little swatch will let you measure your stitches per inch (or cm) accurately - it doesn’t need to be huge!
When we look at our yarn label, we’ll find a gauge section showing the number of stitches and rows you should achieve with a certain needle size - usually over a 10 x 10 cm (4 x 4 in) swatch. To knit a gauge swatch, it’s best to cast on more stitches than this gauge number when you make your swatch. This gives you enough fabric to measure your gauge accurately, so you can determine the perfect stitch count for your cast-on later.
Tip: If your fabric feels stiff, try a bigger needle. Too loose? Go down a size!
Step-by-Step Instructions
To knit a fake gauge swatch in the round, follow these clear step-by-step instructions to accurately mimic your circular knitting tension. A “fake gauge” (sometimes called a flat swatch for circular knitting) lets knitters check their gauge without having to knit a full tube.
Cast On Stitches
Cast on the number of stitches you need for a 10x10 cm (4x4 in) swatch, plus a few extra (typically about 10 more). The edges are quite loose so we want to avoid them while measuring
  |   |
Take a look at the yarn label and use this needle size number as starting point for your gauge | With needle size 3.5 mm and using the long tail cast on, I cast on 40 stitches (a few extra in case the floats across the back pull tight and affect my tension). |
Prepare for “Fake Round” Knitting
Knit your row as usual.
At the end of the row, instead of turning the work, slide all stitches back to the right-hand needle tip without turning. The right side of the work always faces you.
  |   |
Knit your first row as you normally would, but instead of turning your work at the end, keep the right side facing you for the next step. | Simply slide all the stitches back to the right end of your needle, keeping the right side facing you. |
Carry Yarn Loosely Behind
Bring the working yarn loosely across the back of the work to the right edge, don’t pull tight.
Knit the next row from right to left, letting the loose strand drape behind your work. Be careful not to pull on the working yarn as you knit the first two stitches - if you do, it will automatically tighten your float, and we want to keep it nice and loose.
  |   |   |
Bring the working yarn loosely across the back of the work to the right edge | Be sure to let the float hang loosely across the back of your work. | Knit the next row from right to left, letting the loose strand drape behind your work. Be careful not to pull on the working yarn as you knit the first two stitches - if you do, it will automatically tighten your float, and we want to keep it nice and loose. |
Continue Swatching
Repeat this process: knit a row, slide stitches, carry the yarn loosely across the back.
Always knit on the right side - never purl. This mimics how you’d only knit in the round.
  |   |
Repeat this process: knit a row, slide stitches, carry the yarn loosely across the back. | The last stitch appears loose, which is normal and nothing to worry about when making a fake in-the-round gauge swatch. |
Make the Swatch Large Enough
Work your swatch to at least 5 cm (2 in) in height and a little more than 10 cm in width. This way, you’ll have enough fabric to comfortably measure your stitch gauge. The length of your project can be adjusted, but it’s important for the width to be accurate, this is essential for perfectly fitting socks that aren’t too loose or too tight.
  |   |
I made my swatch about 7 cm (2.75 in) high and 14 cm (5.5 in) wide. | At the back, you’ll see all the floats. |
Bind Off
Bind off loosely (using an elastic bind off). Don’t cut the floats at the back. You also don’t need to cut the working yarn - just place a stitch marker in the last loop to keep it from unraveling. If you’d like, you can unravel your swatch later and use the yarn in your sock, or keep the swatch for reference; the choice is yours.
  |   |
Bind off loosely (using an elastic bind off) | You also don’t need to cut the working yarn; just place a stitch marker in the last loop to keep it from unraveling. If you’d like, you can unravel your swatch later and use the yarn in your sock, or keep the swatch for reference; the choice is yours. |
How to Wash and Block Your Gauge Swatch
Wash or spray your swatch with lukewarm water, pin it in place (without stretching it too much), and let it dry completely. Once your swatch is dry, you can measure it.
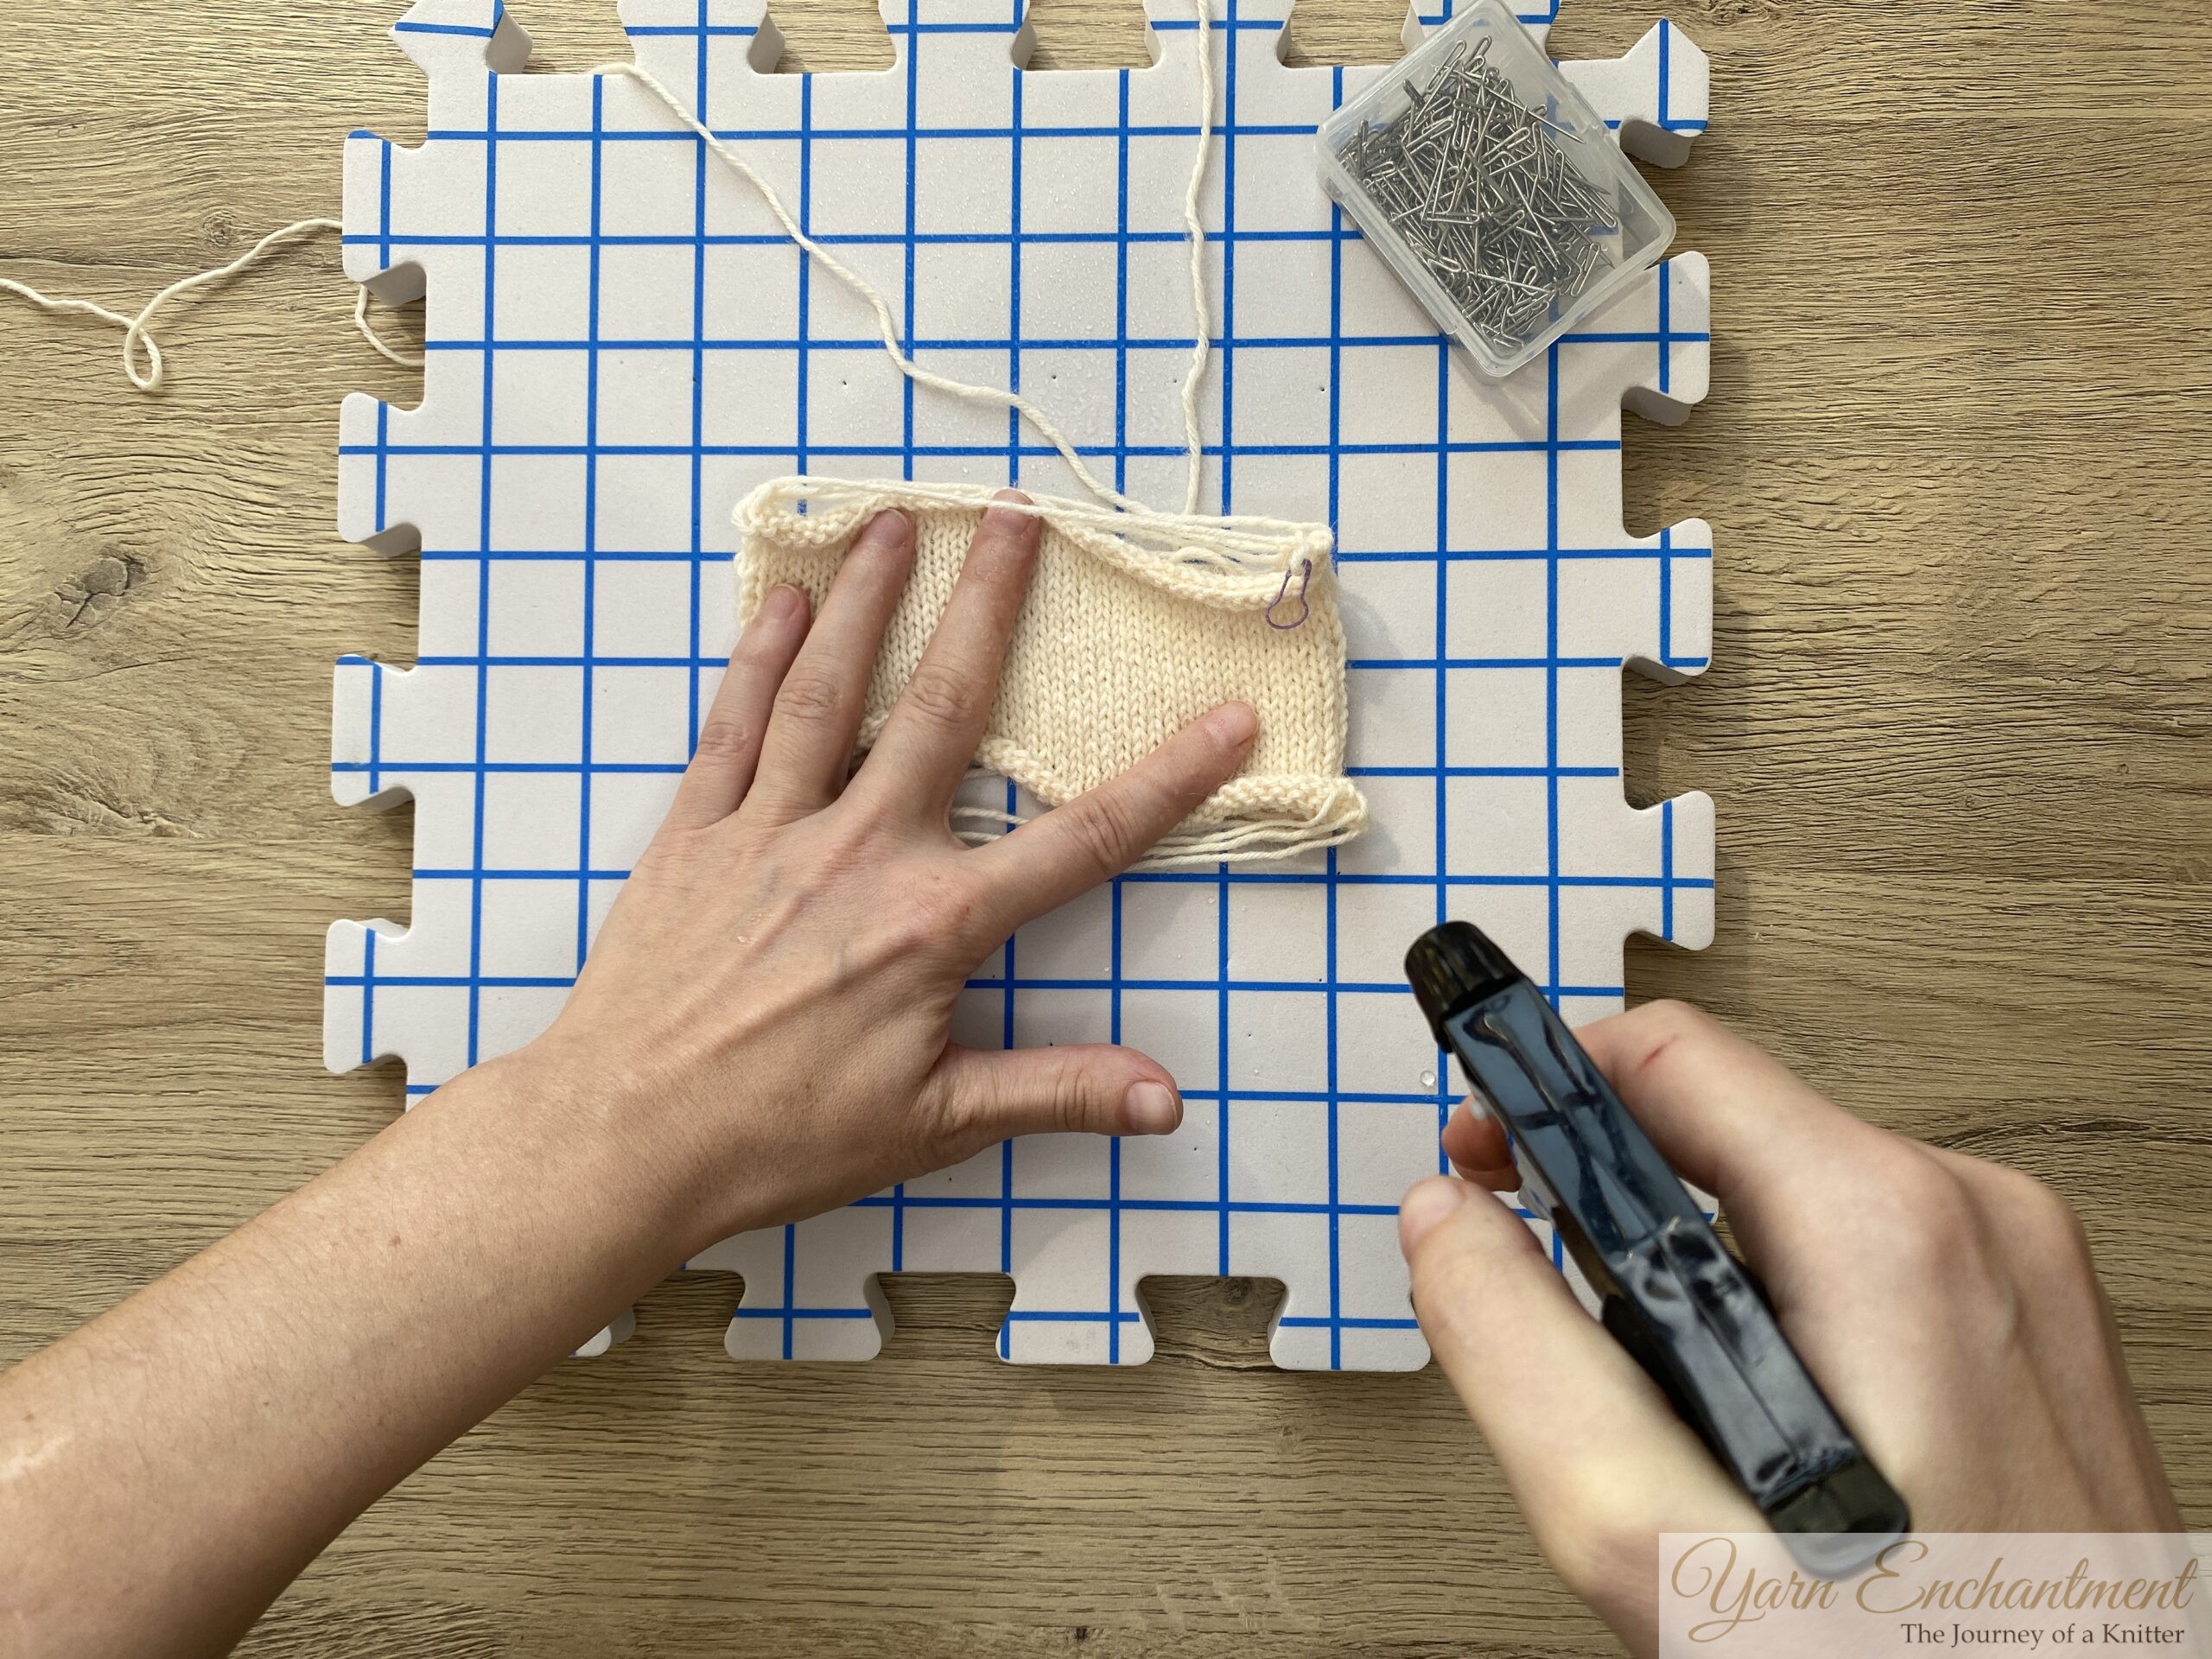  | 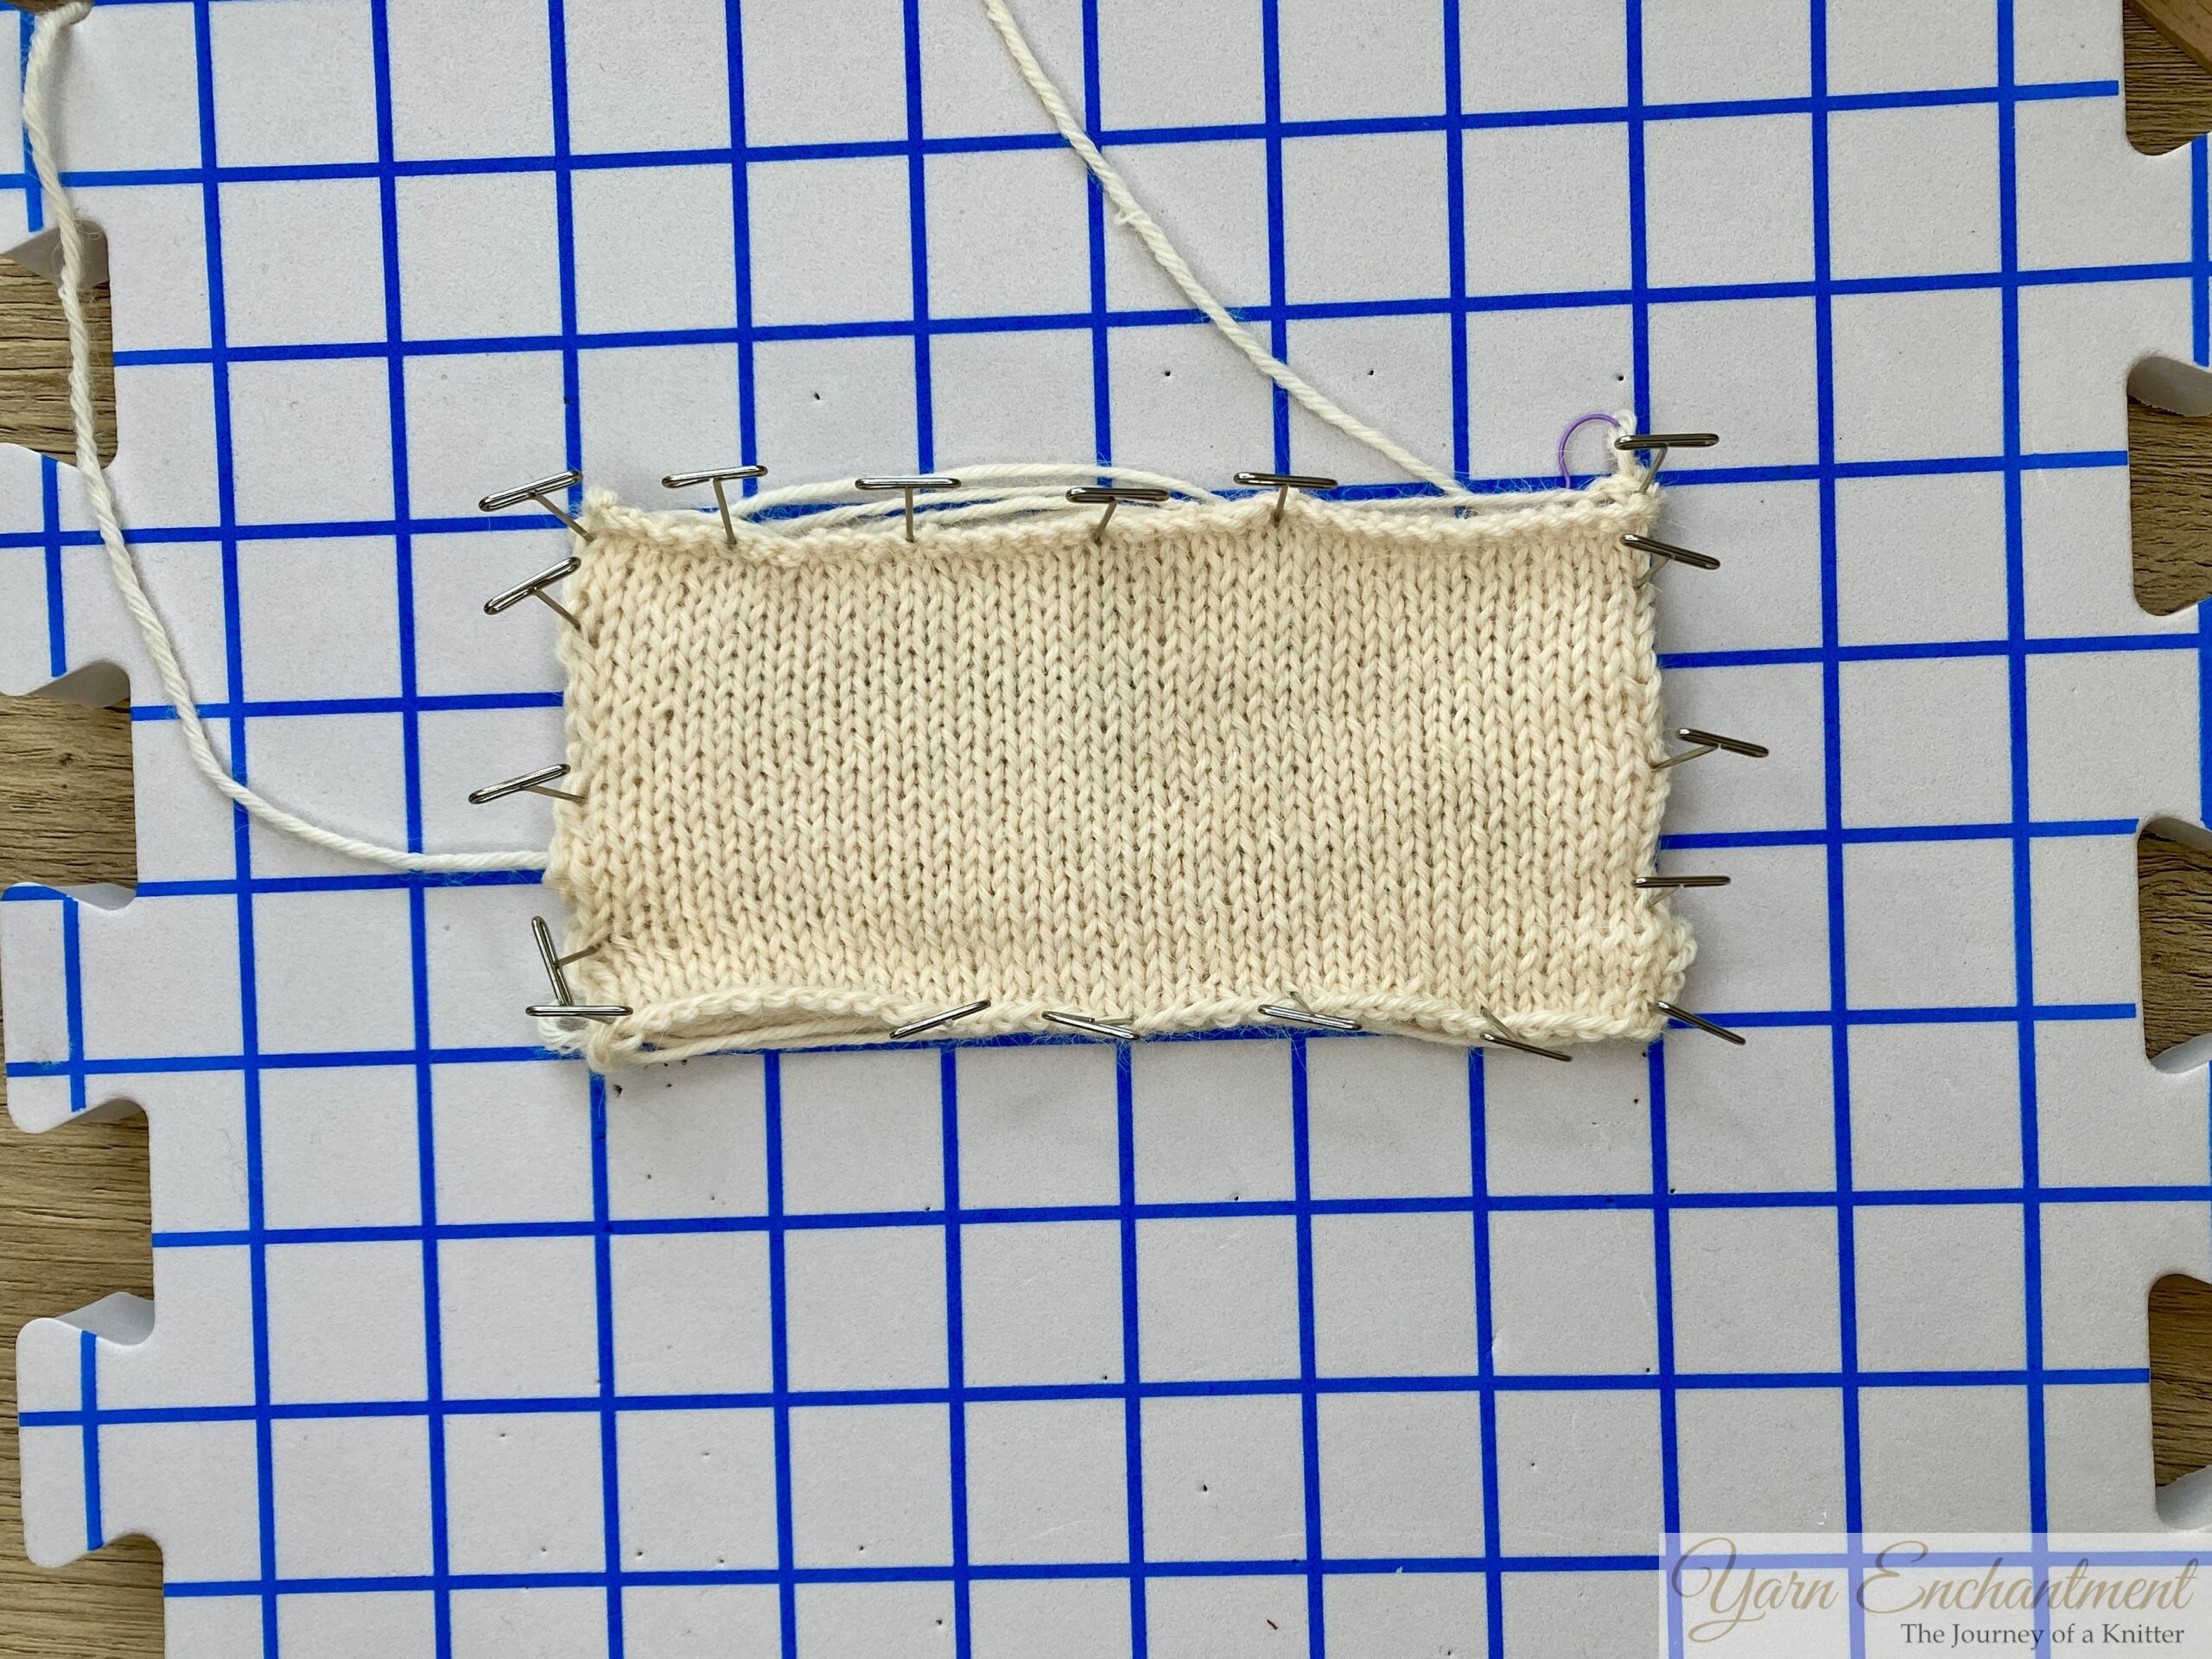  |
I used a spray bottle filled with lukewarm water to gently mist my swatch. | And I pinned it to my blocking board; before I had a blocking board, I used to pin my swatches to a towel. |
Measure “In the Middle”
Measure your gauge over the center of the swatch, avoiding the edge stitches and ignoring the loose floating strands at the back. Place needles or pins along each side of your swatch to make counting stitches a bit easier.
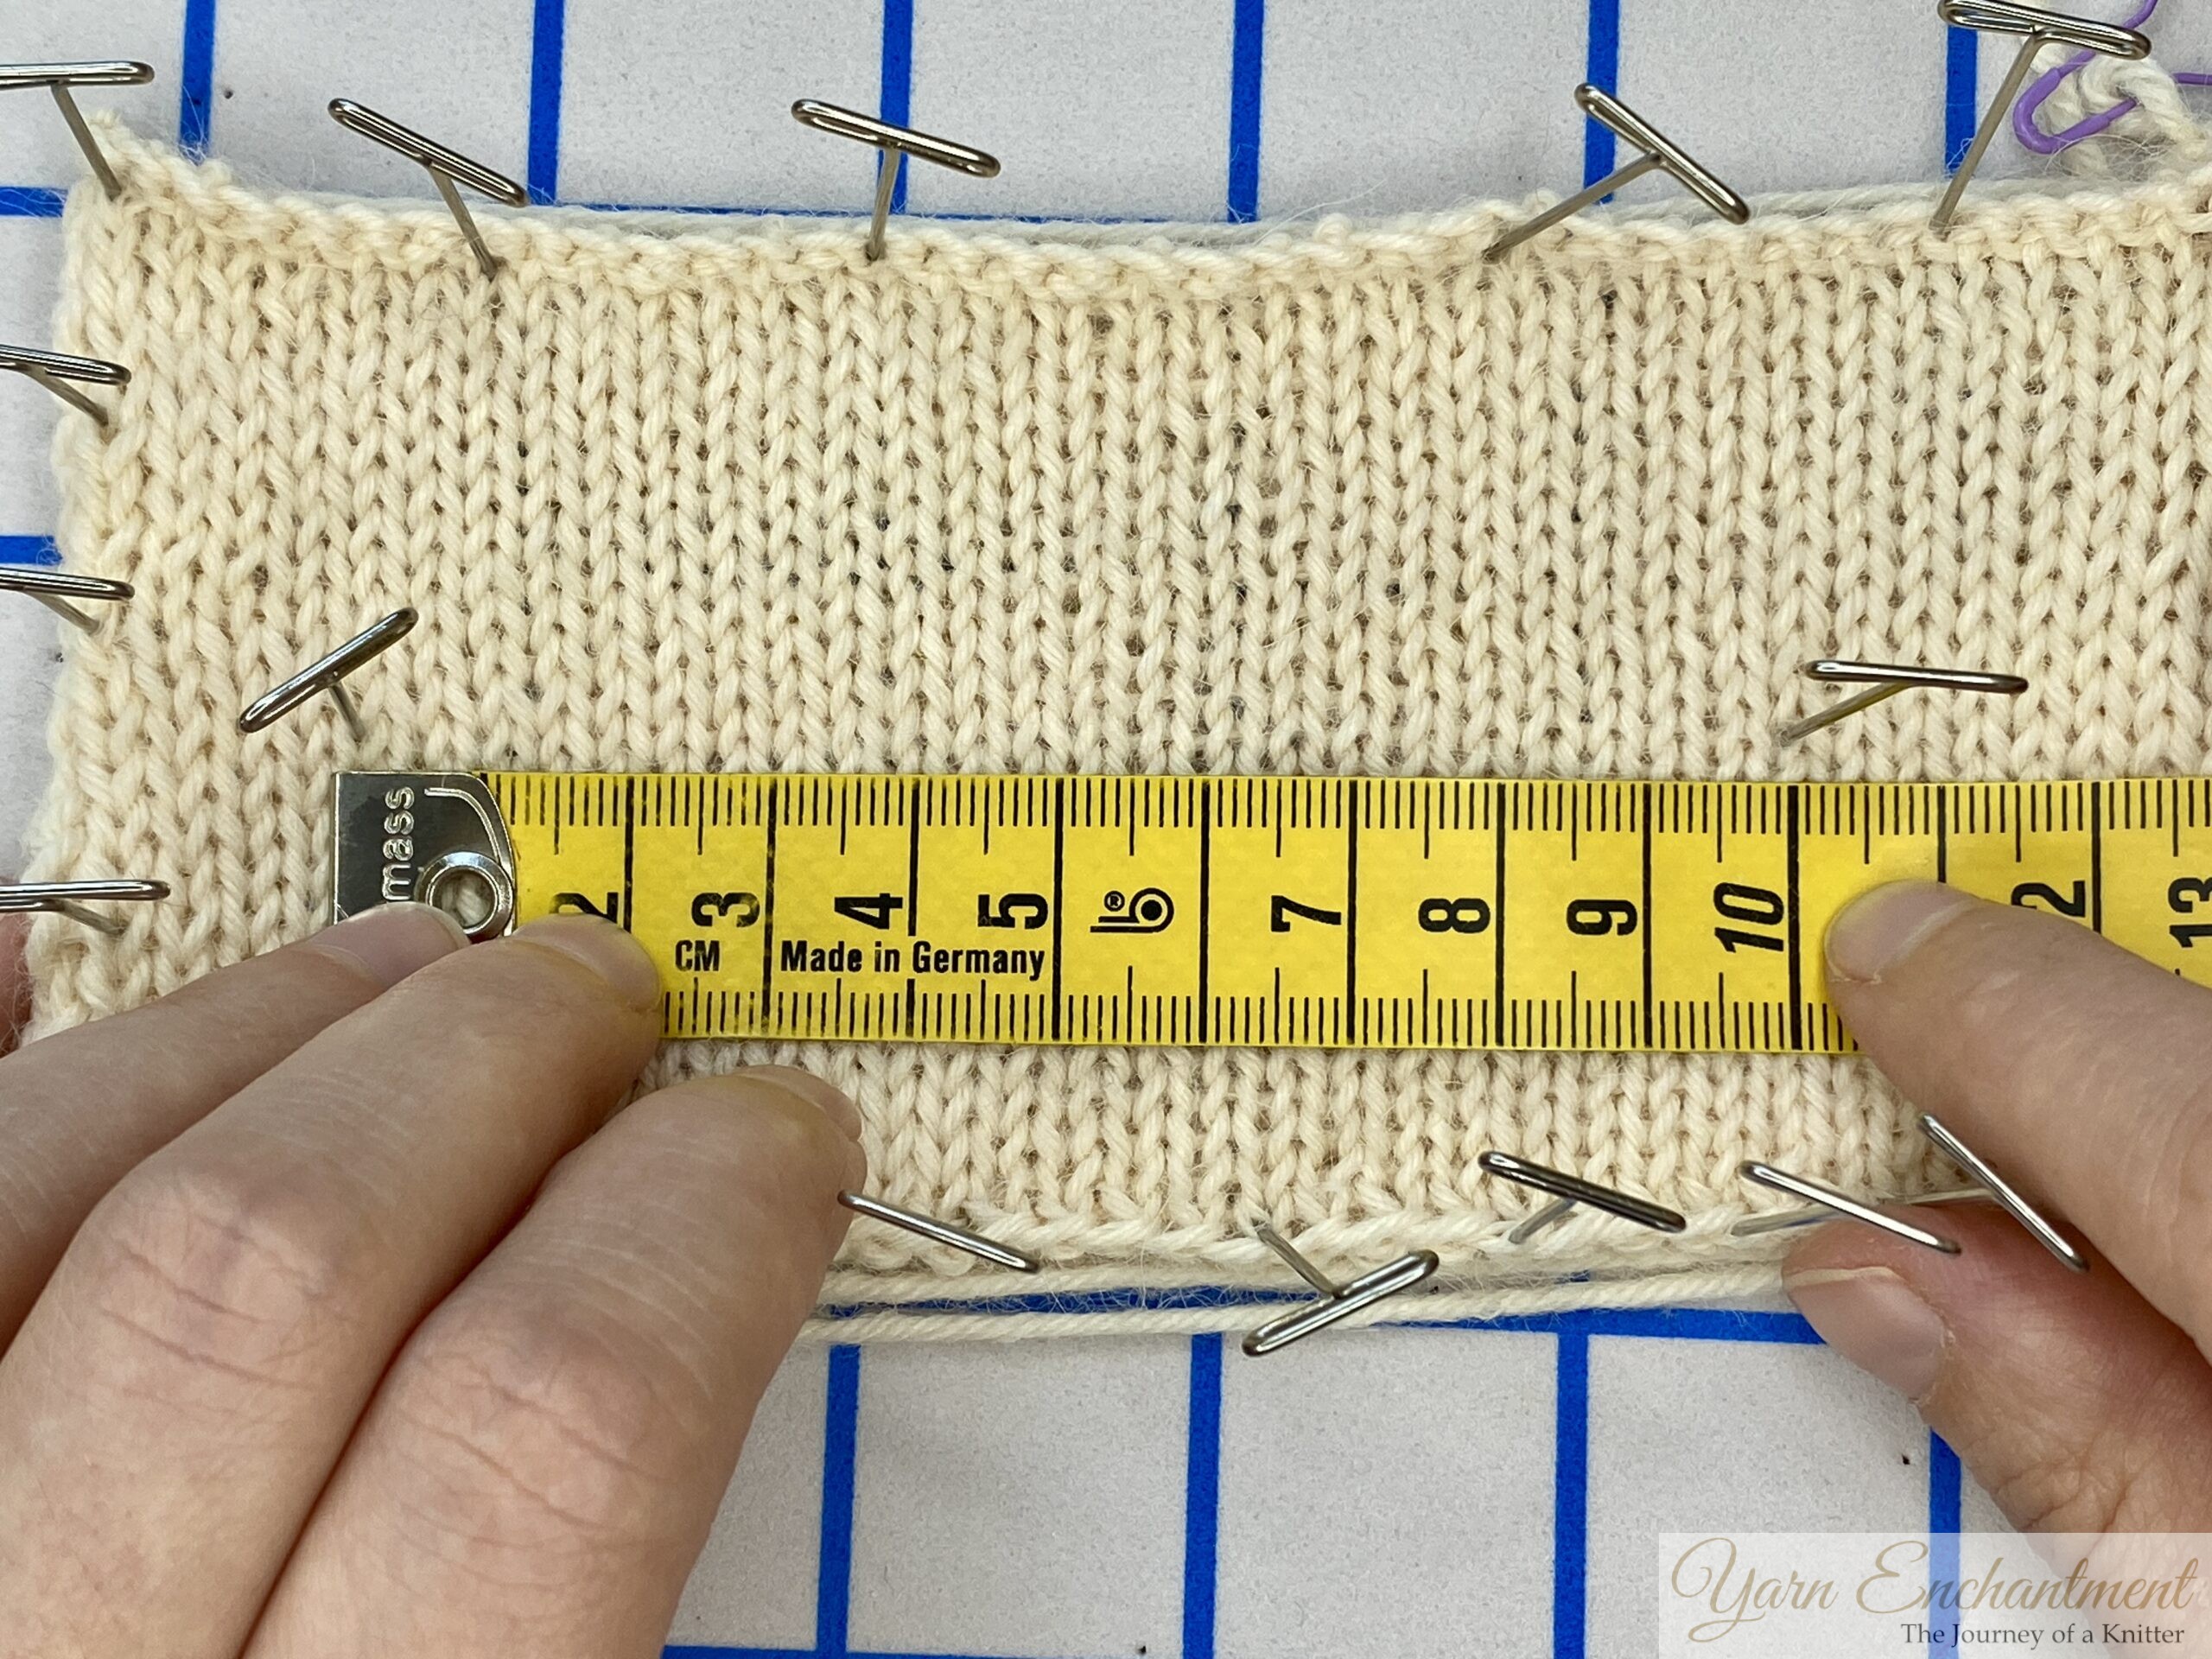  |   |
Measure 10 cm (4 inches) in the middle of your swatch, and mark the beginning and the end with pins. This makes it easier to count your stitches accurately. That’s why you should work your swatch a little wider, so your stitch count is precise. | You don’t need to knit a full 10 x 10 cm (4 x 4 inch) swatch every time. Here, I knitted just over 5 cm (about 2 inches), which allows me to accurately count rows over 5 cm. To get the total row count for 10 cm, simply double the number of rows from the smaller swatch. This saves time while ensuring accurate gauge measurement. |
Tip: When you plan to use a yarn frequently, it’s a great idea to write down your gauge measurements and needle size. That way, next time you won’t have to knit a swatch again - I do this all the time! 😊
How to Calculate the Cast-On Number for Handknitted Socks
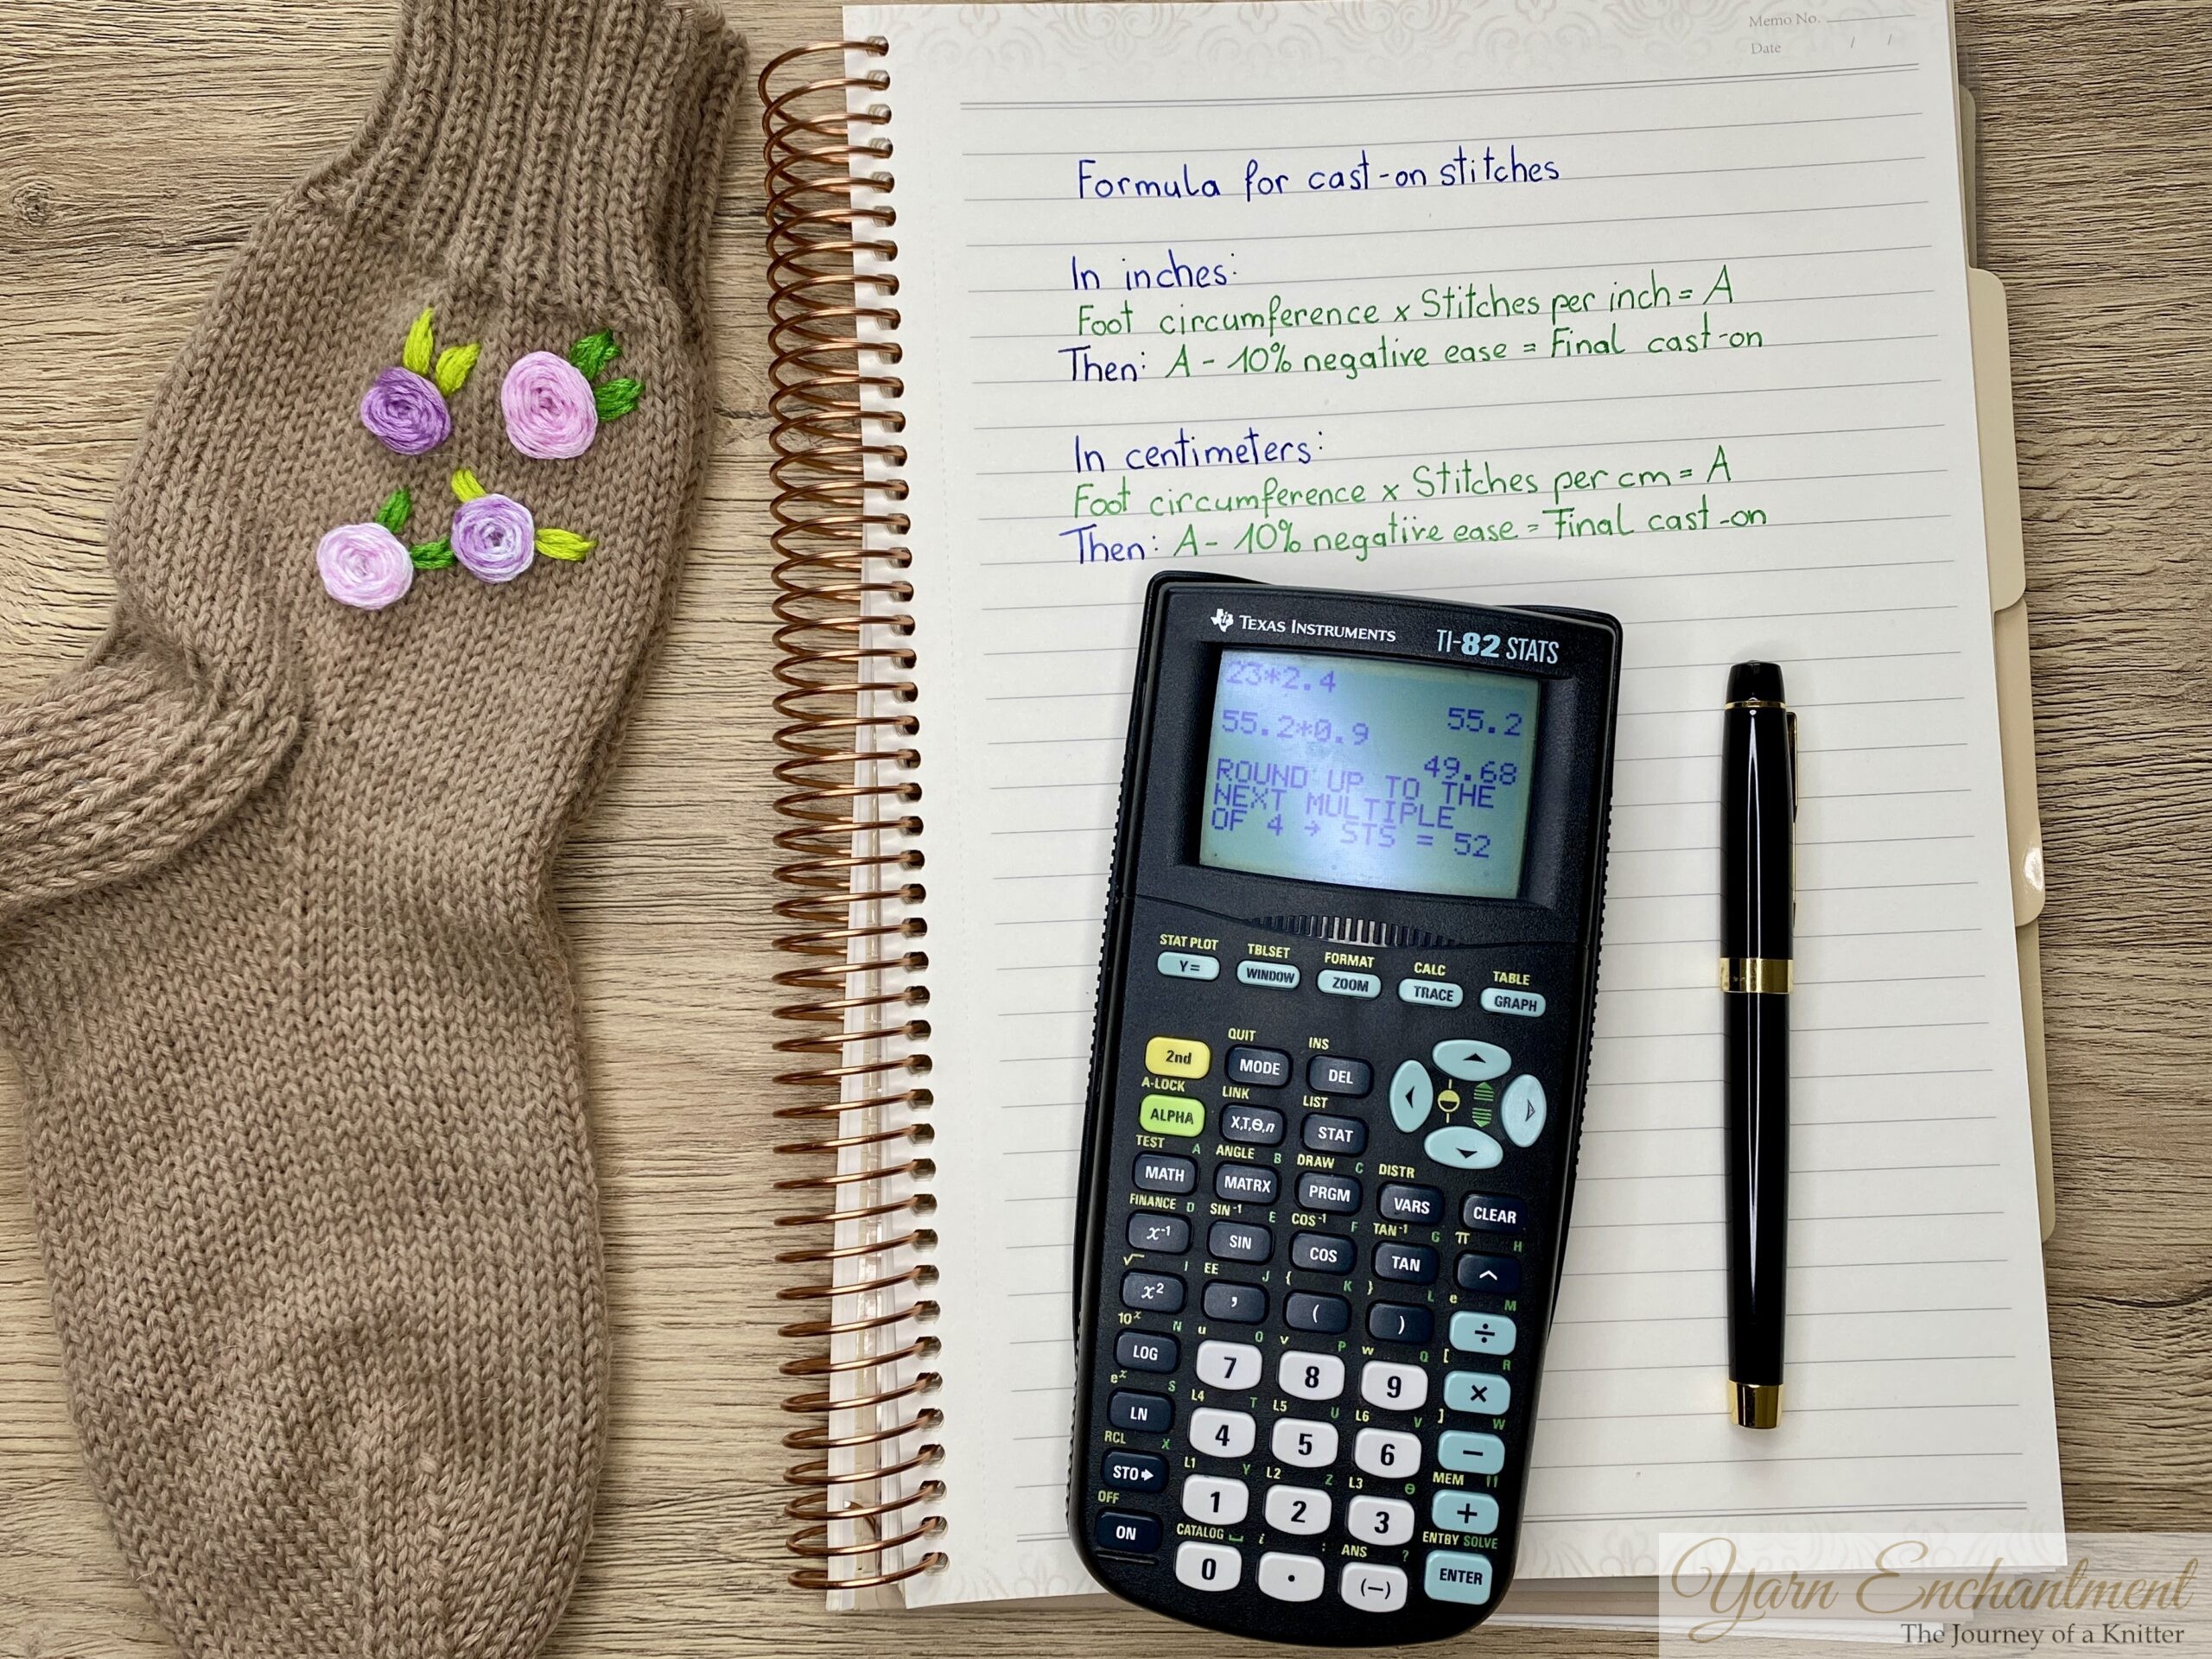
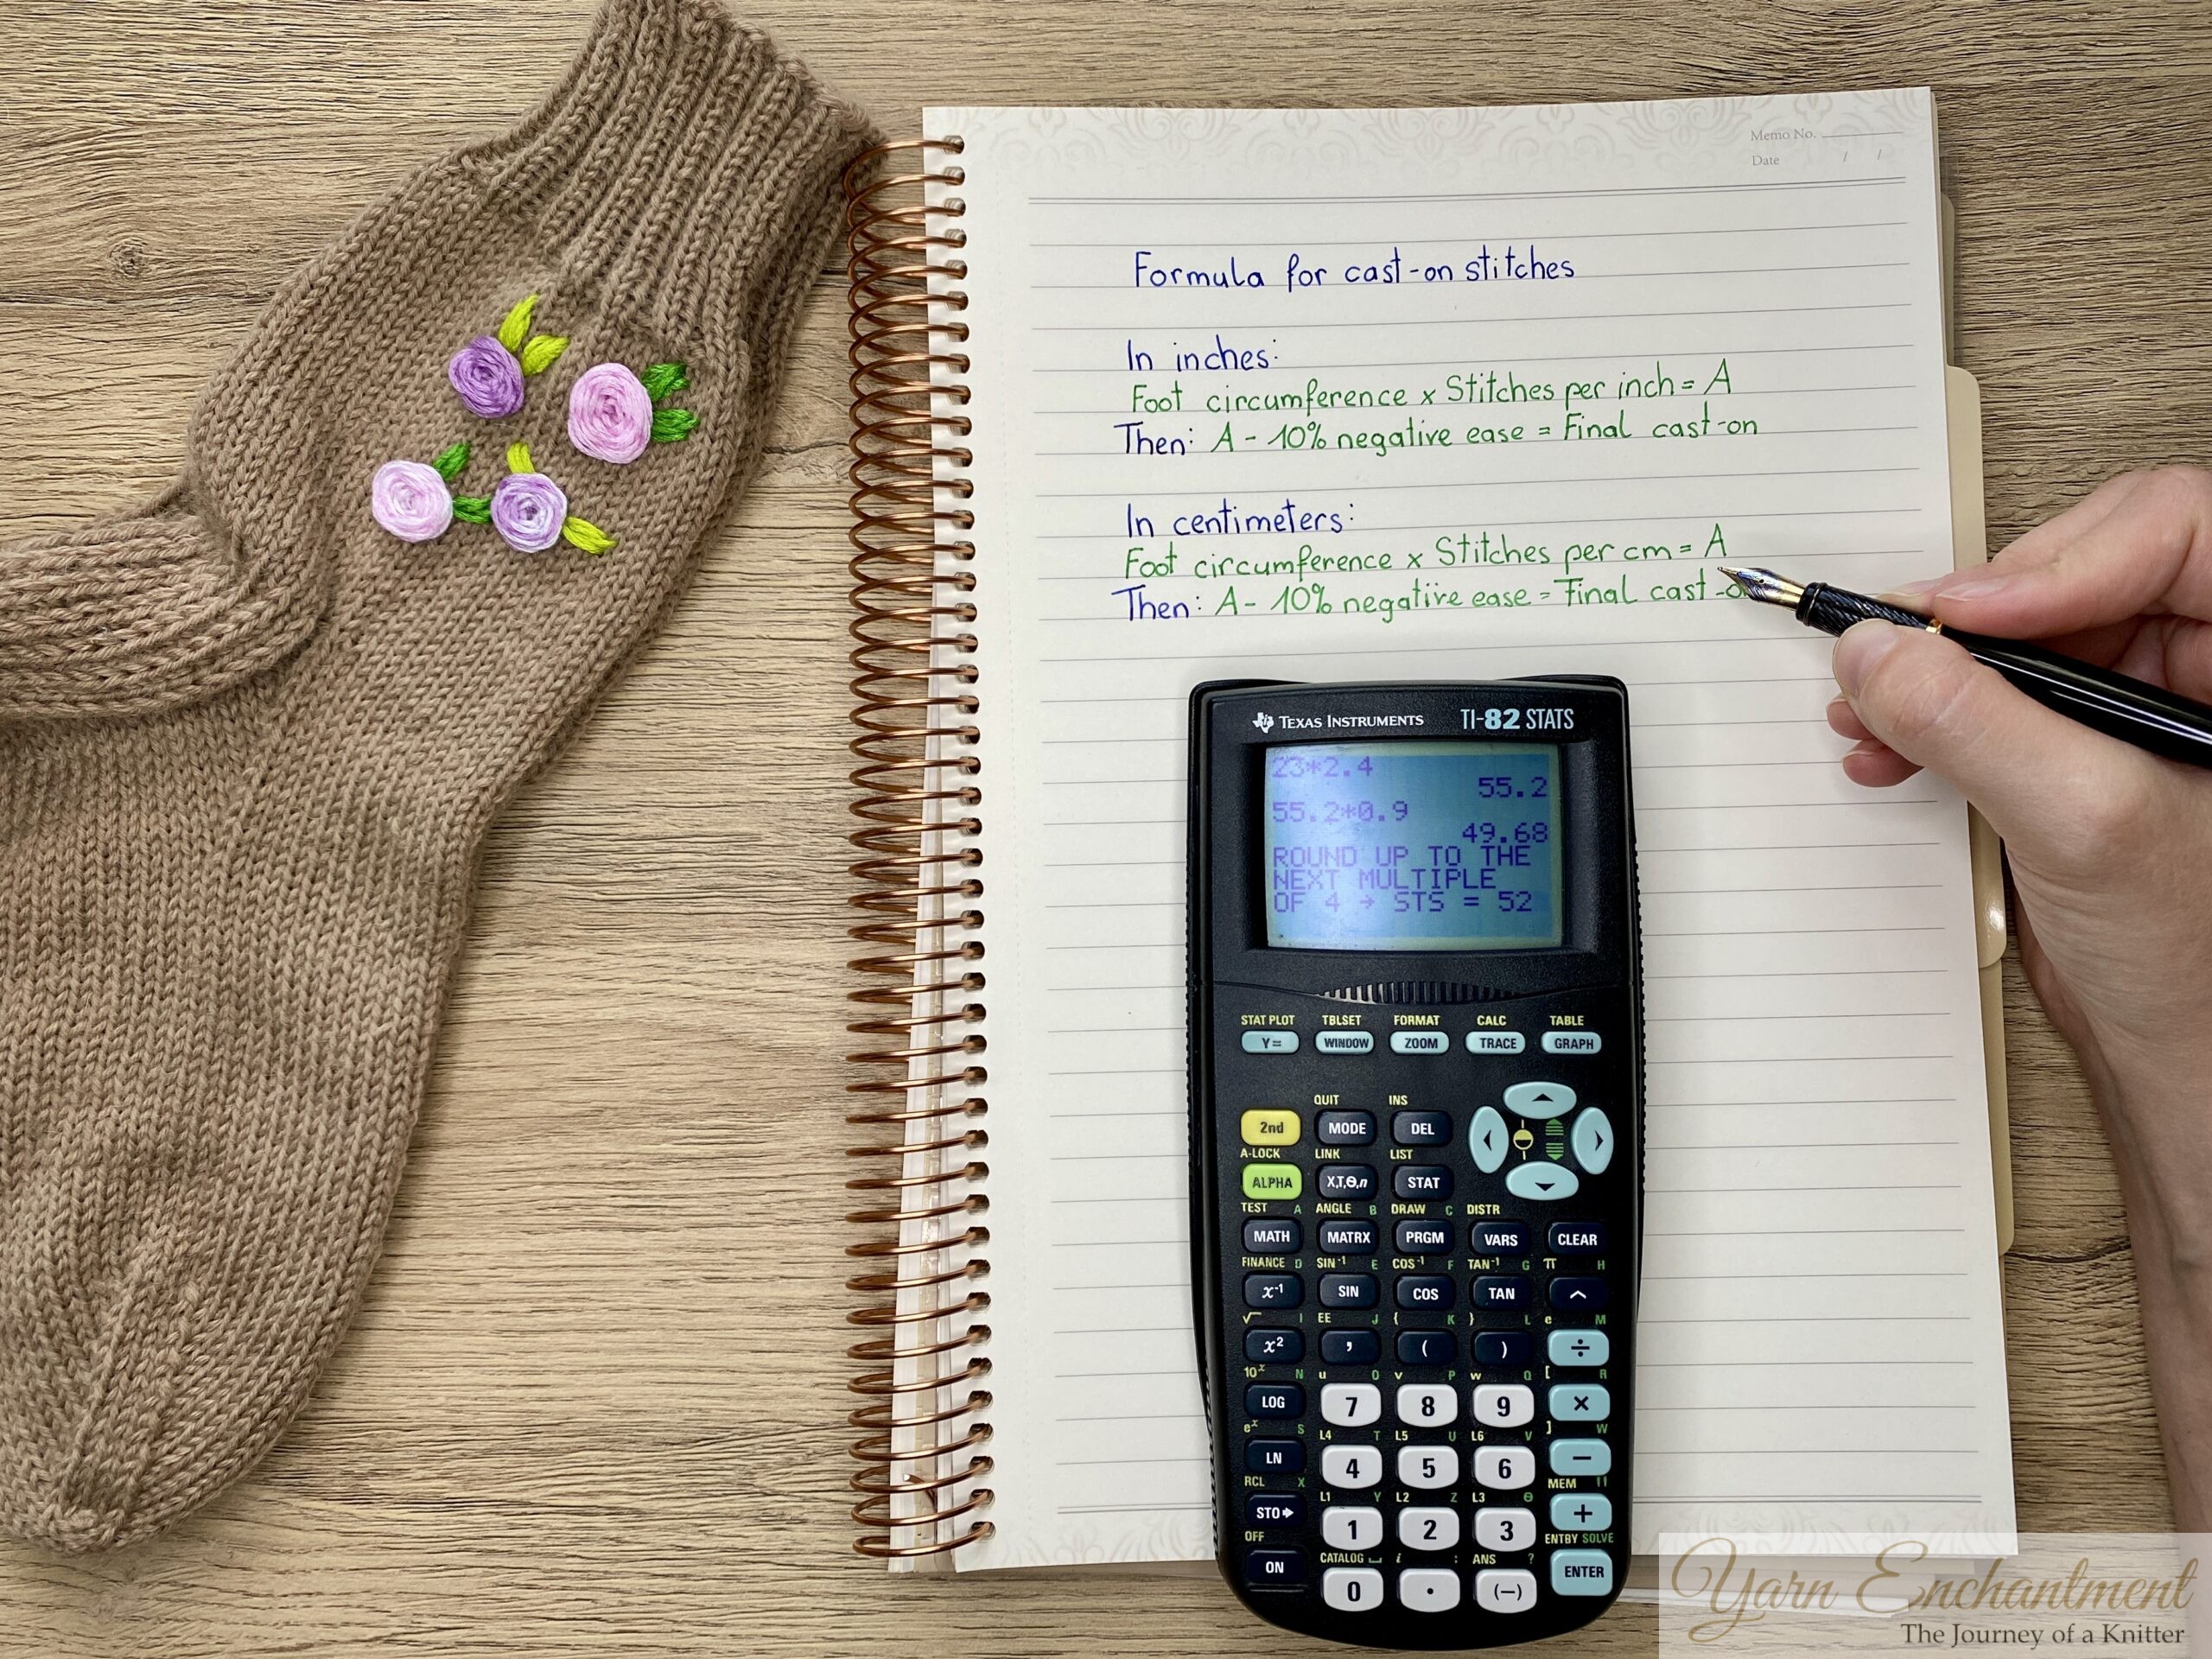
Time for a little bit of “knitting math” to get your perfect sized knit socks - don't worry it’s easy, I promise. This is how you translate measurements into a sock that just fits you right. Keep in mind that we need a multiple of 4 to knit the 2x2 ribbing for our cuffs later on. And if you have any questions or need help with the calculations, let me know in comments down below. (See below for both cm and inch examples.)
- Measure around the ball of your foot (inches or cm).
- Multiply by your stitches per inch (or cm) from the swatch.
Formula for cast-on stitches for Classic Socks:
For calculations in cm:
Foot circumference (cm) × Stitches per cm = A
A × 0.9 (for negative ease) = Final cast-on
For calculations in inch:
Foot circumference (inch) × Stitches per inch = A
A × 0.9 (for negative ease) = Final cast-on
The × 0.9 part gives negative ease, which means your sock will be slightly smaller than your foot. This helps it stretch nicely and fit without sagging.
Example: Classic Low-Calf Sock Sizing
I am knitting with a 6-ply sock yarn and needle size 3.5 mm. My gauge is 24 stitches in 10 cm (4 inch) and my foot circumference is 24 cm (9.45 inches)
So my calculation would look like this - I’ll show it both in inches and centimeters for clarity!
In Centimeters
Measurements:
- Foot circumference: 24 cm
- Gauge: 24 stitches per 10 cm (so, 24 stitches ÷ 10 cm = 2.4 stitches )
Calculation
Final cast-on = 24 cm × 2.4 stitches/cm × 0.9 = 51.84 stitches
Round to the nearest multiple of 4:
48 or 52 stitches (choose the best fit - usually 52 for a slightly roomier sock).
In Inches
Measurements:
- Foot circumference: 9.45 inches
- Gauge: 24 stitches per 3.937 inch = 6.1 stitches per inch
- (10 cm = 3.937 inches, so 24 ÷ 3.937 ≈ 6.1 stitches/inch)
Calculation:
9.45 in × 6.1 stitches/in × 0.9 = 51.84 stitches
Round to nearest multiple of 4:
48 or 52 stitches (choose the best fit - usually 52 for a slightly roomier sock).
So for this Sock I need to cast on 52 stitches!
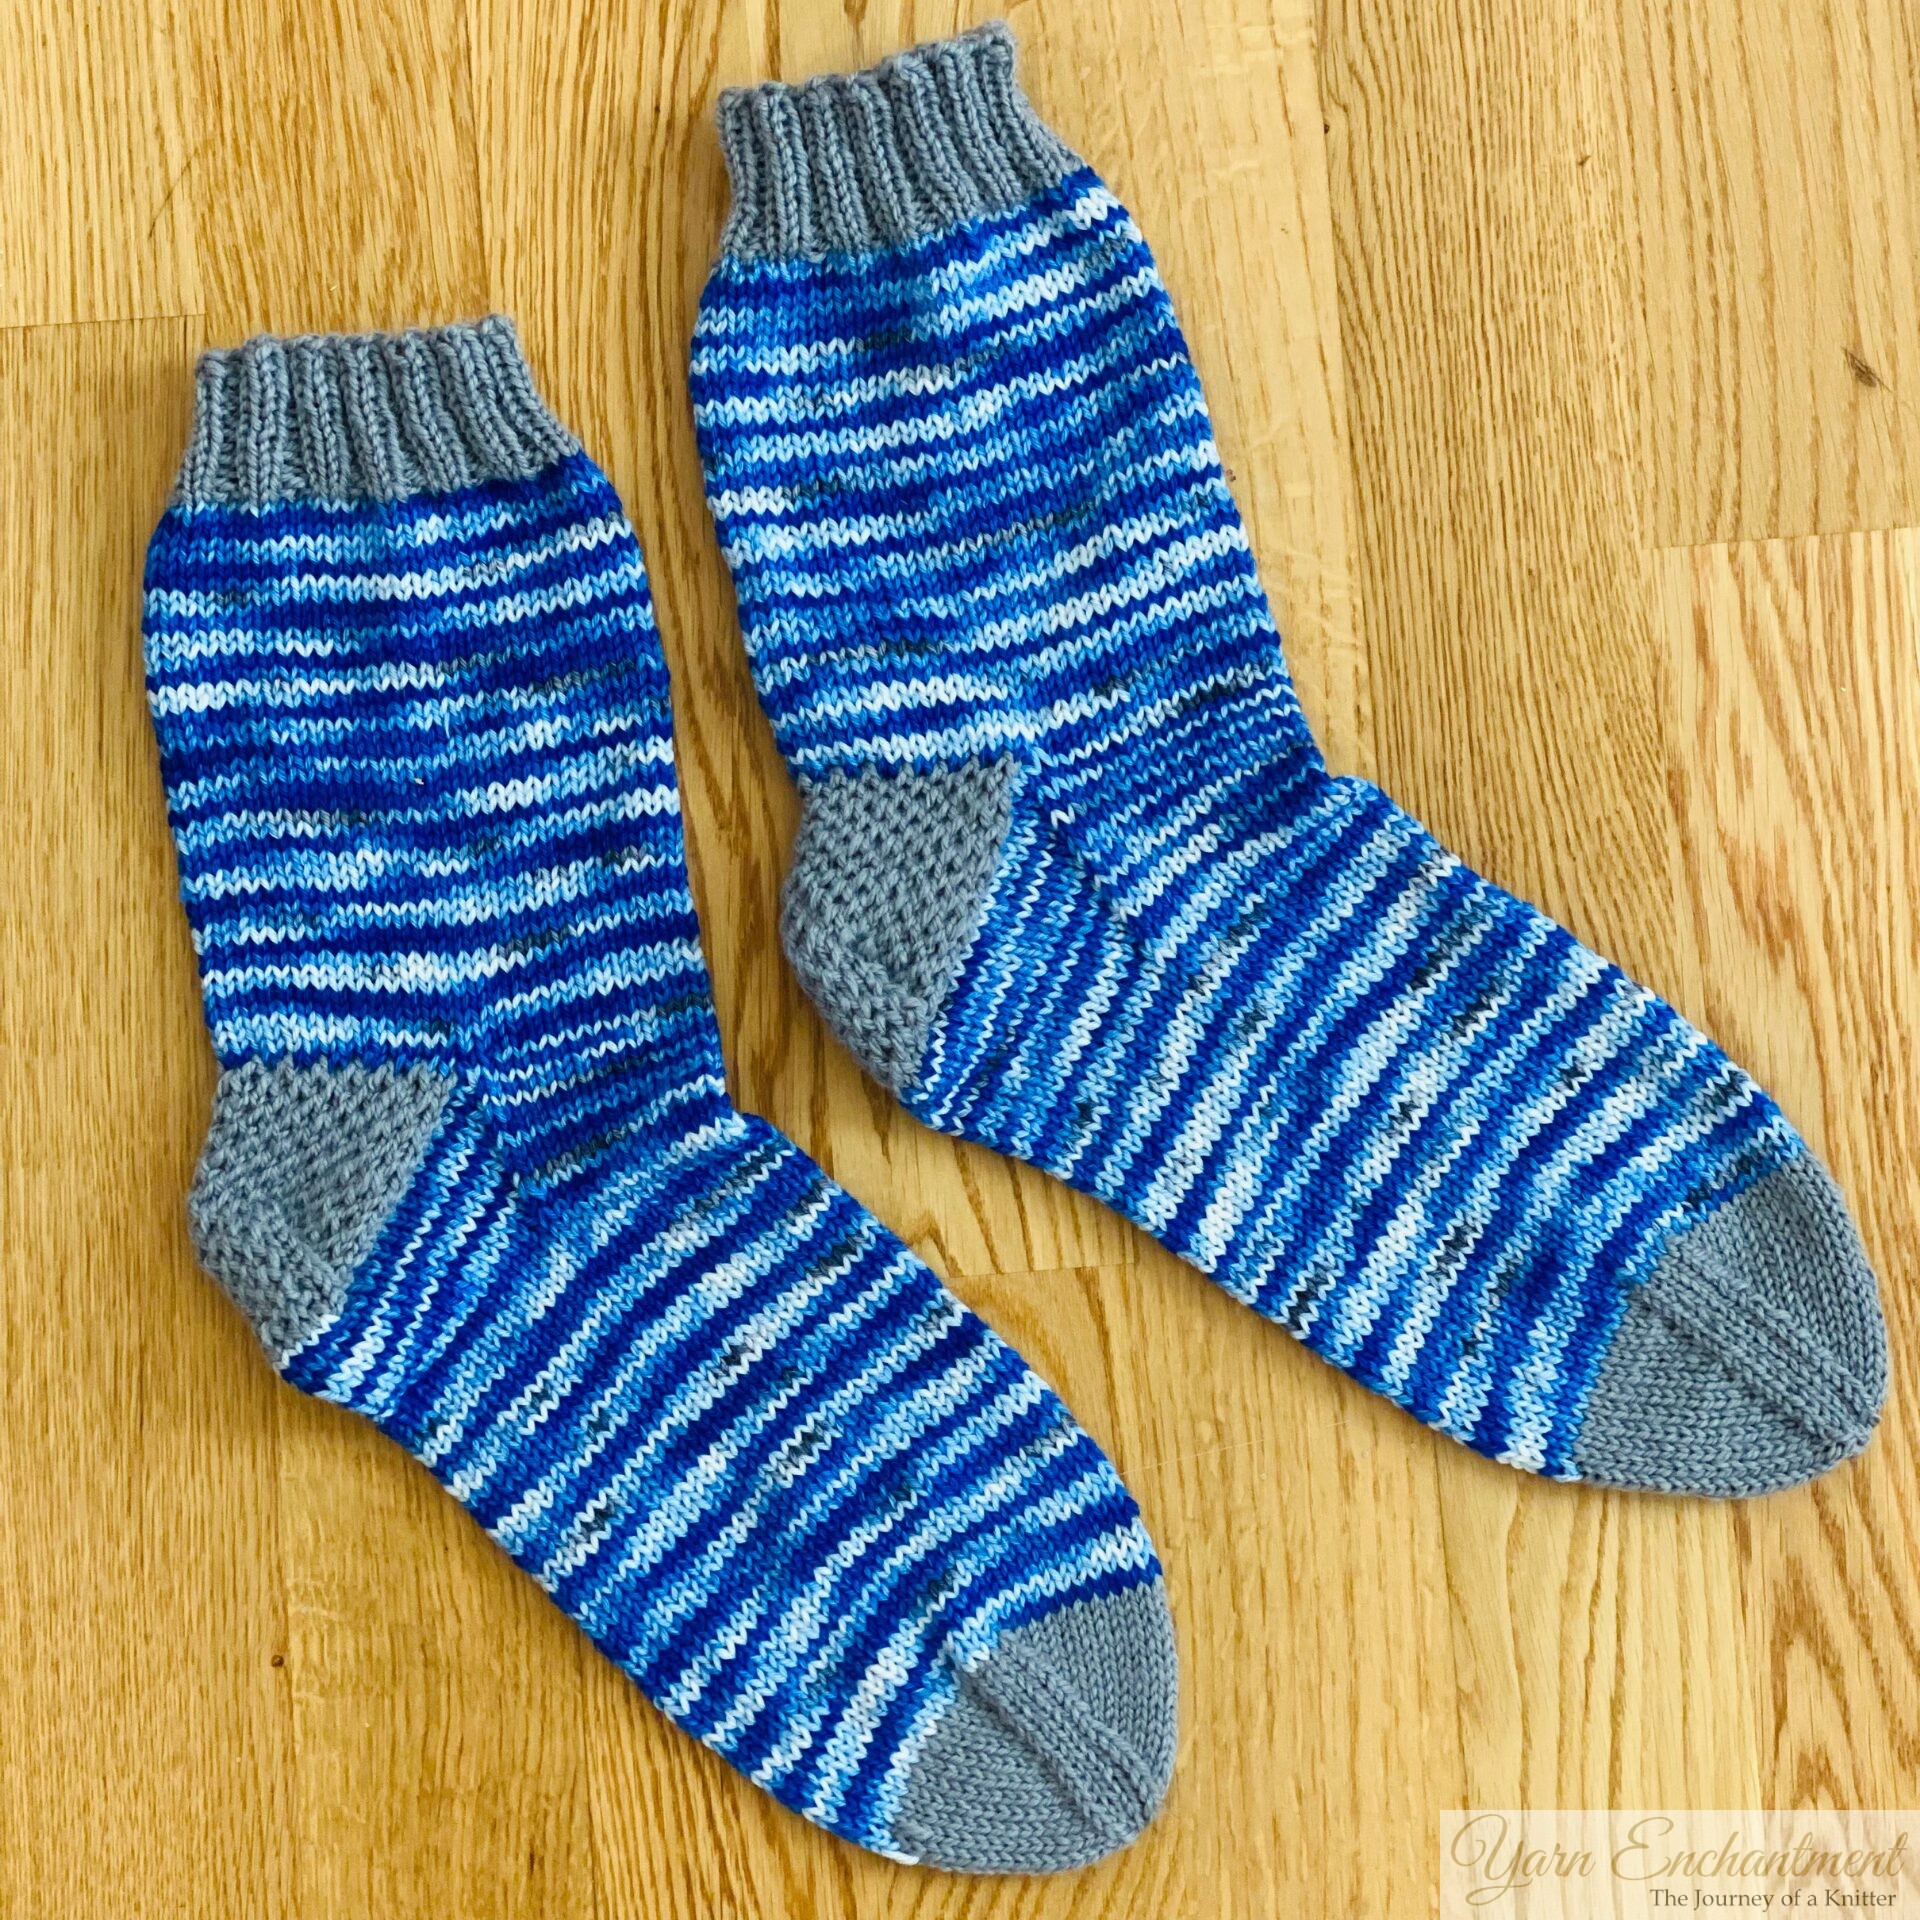  | 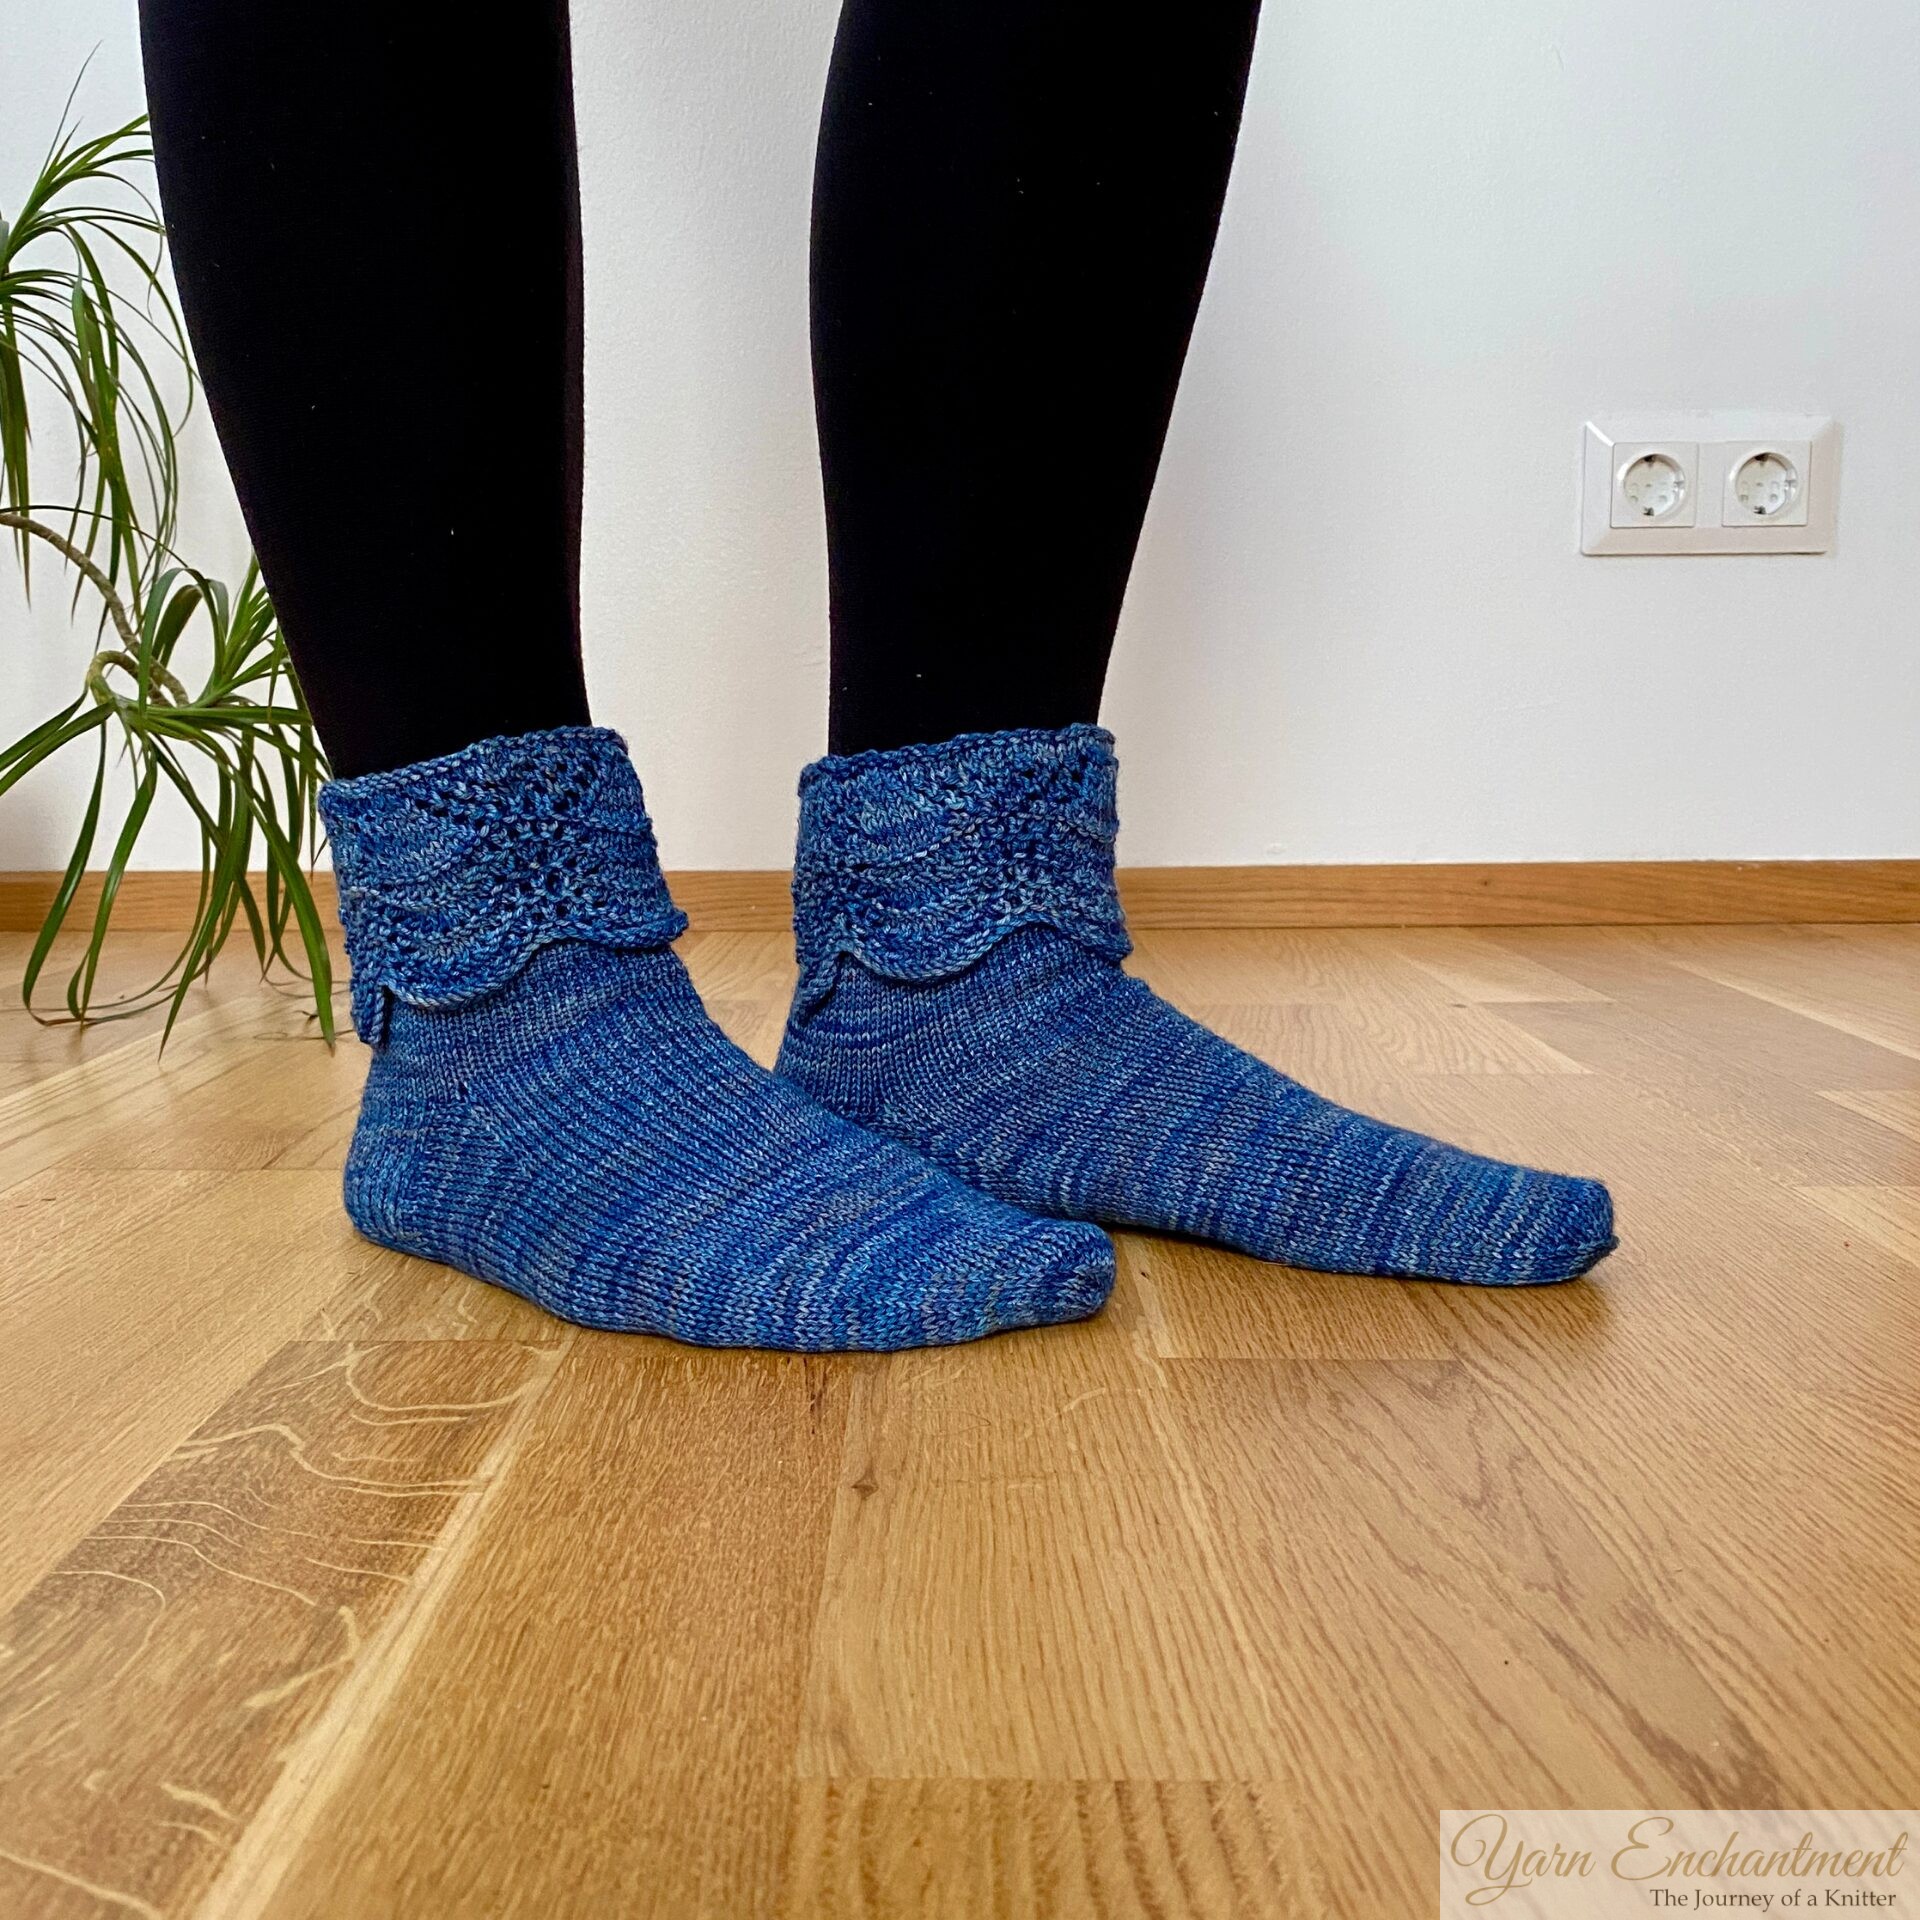  |
These are classic low calf socks, knitted with a 6-ply hand-dyed yarn to keep my husband's feet warm. I designed them with a reinforced heel for added durability, and used a contrasting color for the cuff, heel, and toes. | This is my pattern, Lacy Charms. First, you knit the lace border, then join it in the round before working a classic sock pattern. By simply adding the lace border at the beginning, you achieve a completely different and unique look for classic socks. |
Example Calculations (with “knee-high sock” example)
Are you still with me? Ok, then lets also talk about the calculation for Knee high socks. To calculate the stitch count for longer socks or knee-highs, you first need the circumference measurement from the widest part of your calf.
Remember, if you’re not planning to knit knee-high socks, you can skip this calculation. I included it here just in case anyone wants to make them in the future. I like having everything in one place so you don’t have to search through multiple blog posts to find what you need.
Formula for Cast-On Stitches (Knee Socks)
For calculations in cm:
Calf circumference (cm) × Stitches per cm = A
A × 0.9 (for negative ease) = Final cast-on
For calculations in inch:
Calf circumference (inch) × Stitches per inch = A
A × 0.9 (for negative ease) = Final cast-on
Always round to the nearest multiple of 4 for easy division on needles.
- Calf Circumference: Measure at the widest part of the calf.
- Stitches per cm (Inch): Determined by your knitting gauge swatch.
- Negative Ease: Subtract about 10% to make sure the sock fits snugly and stays up.
Example High Knee Sock Sizing Calculation
In Centimeters
Measurements:
- Calf circumference: 36 cm
- Gauge: 2.4 stitches per cm
Calculation:
36 cm × 2.4 stitches/cm × 0.9 = 77.76 stitches
Round to the nearest multiple of 4:
76 stitches (round down for a snug fit, or use 80 for a bit more ease
In Inches:
Measurements:
- Calf circumference: 14.17 inches
- Gauge: 6.1 stitches per inch
Calculation:
14.17 in × 6.1 stitches/in × 0.9 = 77.8 stitches
Round to the nearest multiple of 4:
76 stitches (or 80 for a looser fit)
For knee-high socks, you’ll need the circumference of your calf or thigh to determine how many stitches to cast on. But how do you handle the decreases? Let me show you how it works.
Calculating Decreases for Knee-High Socks
After casting on for your Socks, you’ll need to decrease stitches as you knit down the leg, so the sock fits snugly at your ankle. To do this, you need:
- Your cast-on stitch count (at the calf)
- Your target stitch count at the ankle (the classic socks)
- The distance (in cm or rows) from calf to ankle
Note: Subtract about 3–6 cm (1–2 inches) from the total height you want for your knee-high or over-the-knee socks. This length will be used for the cuff. Begin the decreases only after you have finished knitting the cuff.
For example: If you want your sock to be 26 cm (10 inches) high, subtract 3 cm (1 inch) for the cuff.
|
To calculate the decreases needed for a good fit, measure the length from where you want the top of your sock to sit down to where your low-calf socks would start. It doesn’t have to be perfectly accurate, but it should give you a good idea in how many rounds you’ll need to make your decreases. |
Step-by-Step Method
- Calculate the total stitches to decrease:
Calf cast-on stitches – Ankle stitches = Total decreases needed- How many decreases per decrease round?
Usually, decreases are made in pairs (2 stitches per decrease round for symmetry at the back of the leg).- Find out how many decrease rounds you need:
Total decreases needed ÷ 2 = Number of decrease rounds- Find your shaping length:
Measure from the cast on point to the ankle point- Calculate frequency of decreases:
Shaping length (in rows/that were the row gauge is important) ÷ Number of decrease rounds = Rows between decreases
For example:
Target at ankle: 52 stitches Total to decrease: 76 – 52 = 24 stitches Decrease rounds needed: 24 ÷ 2 = 12 rounds Shaping length: 23 cm (9 inch) Row gauge: 34 rows per 10 cm (4 inch) Rows over shaping length: Rows between decrease rounds:
23 cm × (34 rows ÷ 10 cm (4 inch)) = 78.2 rows
78.2 rows ÷ 12 rounds ≈ 6.5 rows
So, you’d decrease 2 stitches every 6–7 rows.
Distribute your 12 decrease rounds as evenly as possible within these 78 rows for a smooth leg shape.
Example Calculation for Over-the-Knee Socks
For over-the-knee socks, take the measurement from your thighs. In my case, this is 45 cm. Now I calculate my cast-on using my gauge, which is 2.4 stitches per cm. Next, I calculate the cast-on for my calf measurement and also measure the length, so I know how many stitches I need to decrease before reaching the widest part of my calf. From there, you continue decreasing towards the ankle. This way, you make sure the socks always have the best possible fit.
Formula for Cast-On Stitches (Over-the-Knee Socks)
For calculations in cm:
Thigh circumference (cm) × Stitches per cm = A
A × 0.9 (for negative ease) = Final cast-on
For calculations in inch:
Thigh circumference (inch) × Stitches per inch = A
A × 0.9 (for negative ease) = Final cast-on
Always round to the nearest multiple of 4 for easy division on needles.
- Thigh Circumference: Measure at the widest part of the thighs, or were you want your socks to sit
- Stitches per cm (Inch): Determined by your knitting gauge swatch.
- Negative Ease: Subtract about 10% to make sure the sock fits snugly and stays up.
Example Over-the-Knee Sock Sizing Calculation
In Centimeters
Thigh circumference: 45 cm
Gauge: 2.4 stitches per cm
Calculation:
45 cm × 2.4 stitches/cm × 0.9 = 97.2 stitches
Round to the nearest multiple of 4:
96 stitches (round down for a snug fit, or use 100 for a bit more ease)
In Inches
Thigh circumference: 17.72 inches
Gauge: 6.1 stitches per inch
Calculation:
17.72 in × 6.1 stitches/in × 0.9 = 97.2 stitches
Round to the nearest multiple of 4:
96 stitches (round down for a snug fit, or use 100 for a bit more ease)
Calculating Decreases for Over-the-Knee Socks
When knitting over-the-knee socks, shaping usually happens in two steps for a better fit. First, decrease stitches until the sock fits comfortably around the widest part of your calf. Then, continue decreasing as you work your way down to the ankle.
Calculate the total stitches to decrease:
Thigh cast-on stitches – Calf stitches = Total decreases neededHow many decreases per decrease round?
Usually, decreases are made in pairs (2 stitches per decrease round for symmetry at the back of the leg).Find out how many decrease rounds you need:
Total decreases needed ÷ 2 = Number of decrease roundsFind your shaping length:
Measure from the cast-on point to the calf pointCalculate frequency of decreases:
Shaping length (in rows, with row gauge applied) ÷ Number of decrease rounds = Rows between decreases
For example:
Cast-on at thigh: 96 stitches
Target at widest calf: 76 stitches
Total to decrease: 96 – 76 = 20 stitches
Decrease rounds needed: 20 ÷ 2 = 10 rounds (decrease 2 stitches per decrease round)
Shaping length: 27 cm
Row gauge: 34 rows per 10 cm
Rows over shaping length:
27 cm × (34 rows ÷ 10 cm) = 91.8 rows (round to 92 rows)
Rows between decrease rounds:
92 rows ÷ 10 decrease rounds = 9.2 rows (about every 9 rows)
After reaching the widest part of your calf, continue decreasing stitches towards the ankle. The length you’ll use for this section will be slightly less than for standard knee-high socks, since you’ve already shaped the upper leg. Measure from your calf point down to your ankle, and use the same calculation method to determine how many stitches to decrease, how many decrease rounds are needed, and how to space them evenly for a smooth fit.
You can also work the decreases all the way down and regularly try the sock on to check the fit around the calf. However, I recommend aiming to reach approximately the right number of stitches for your calf width, so your socks will always have the best fit.
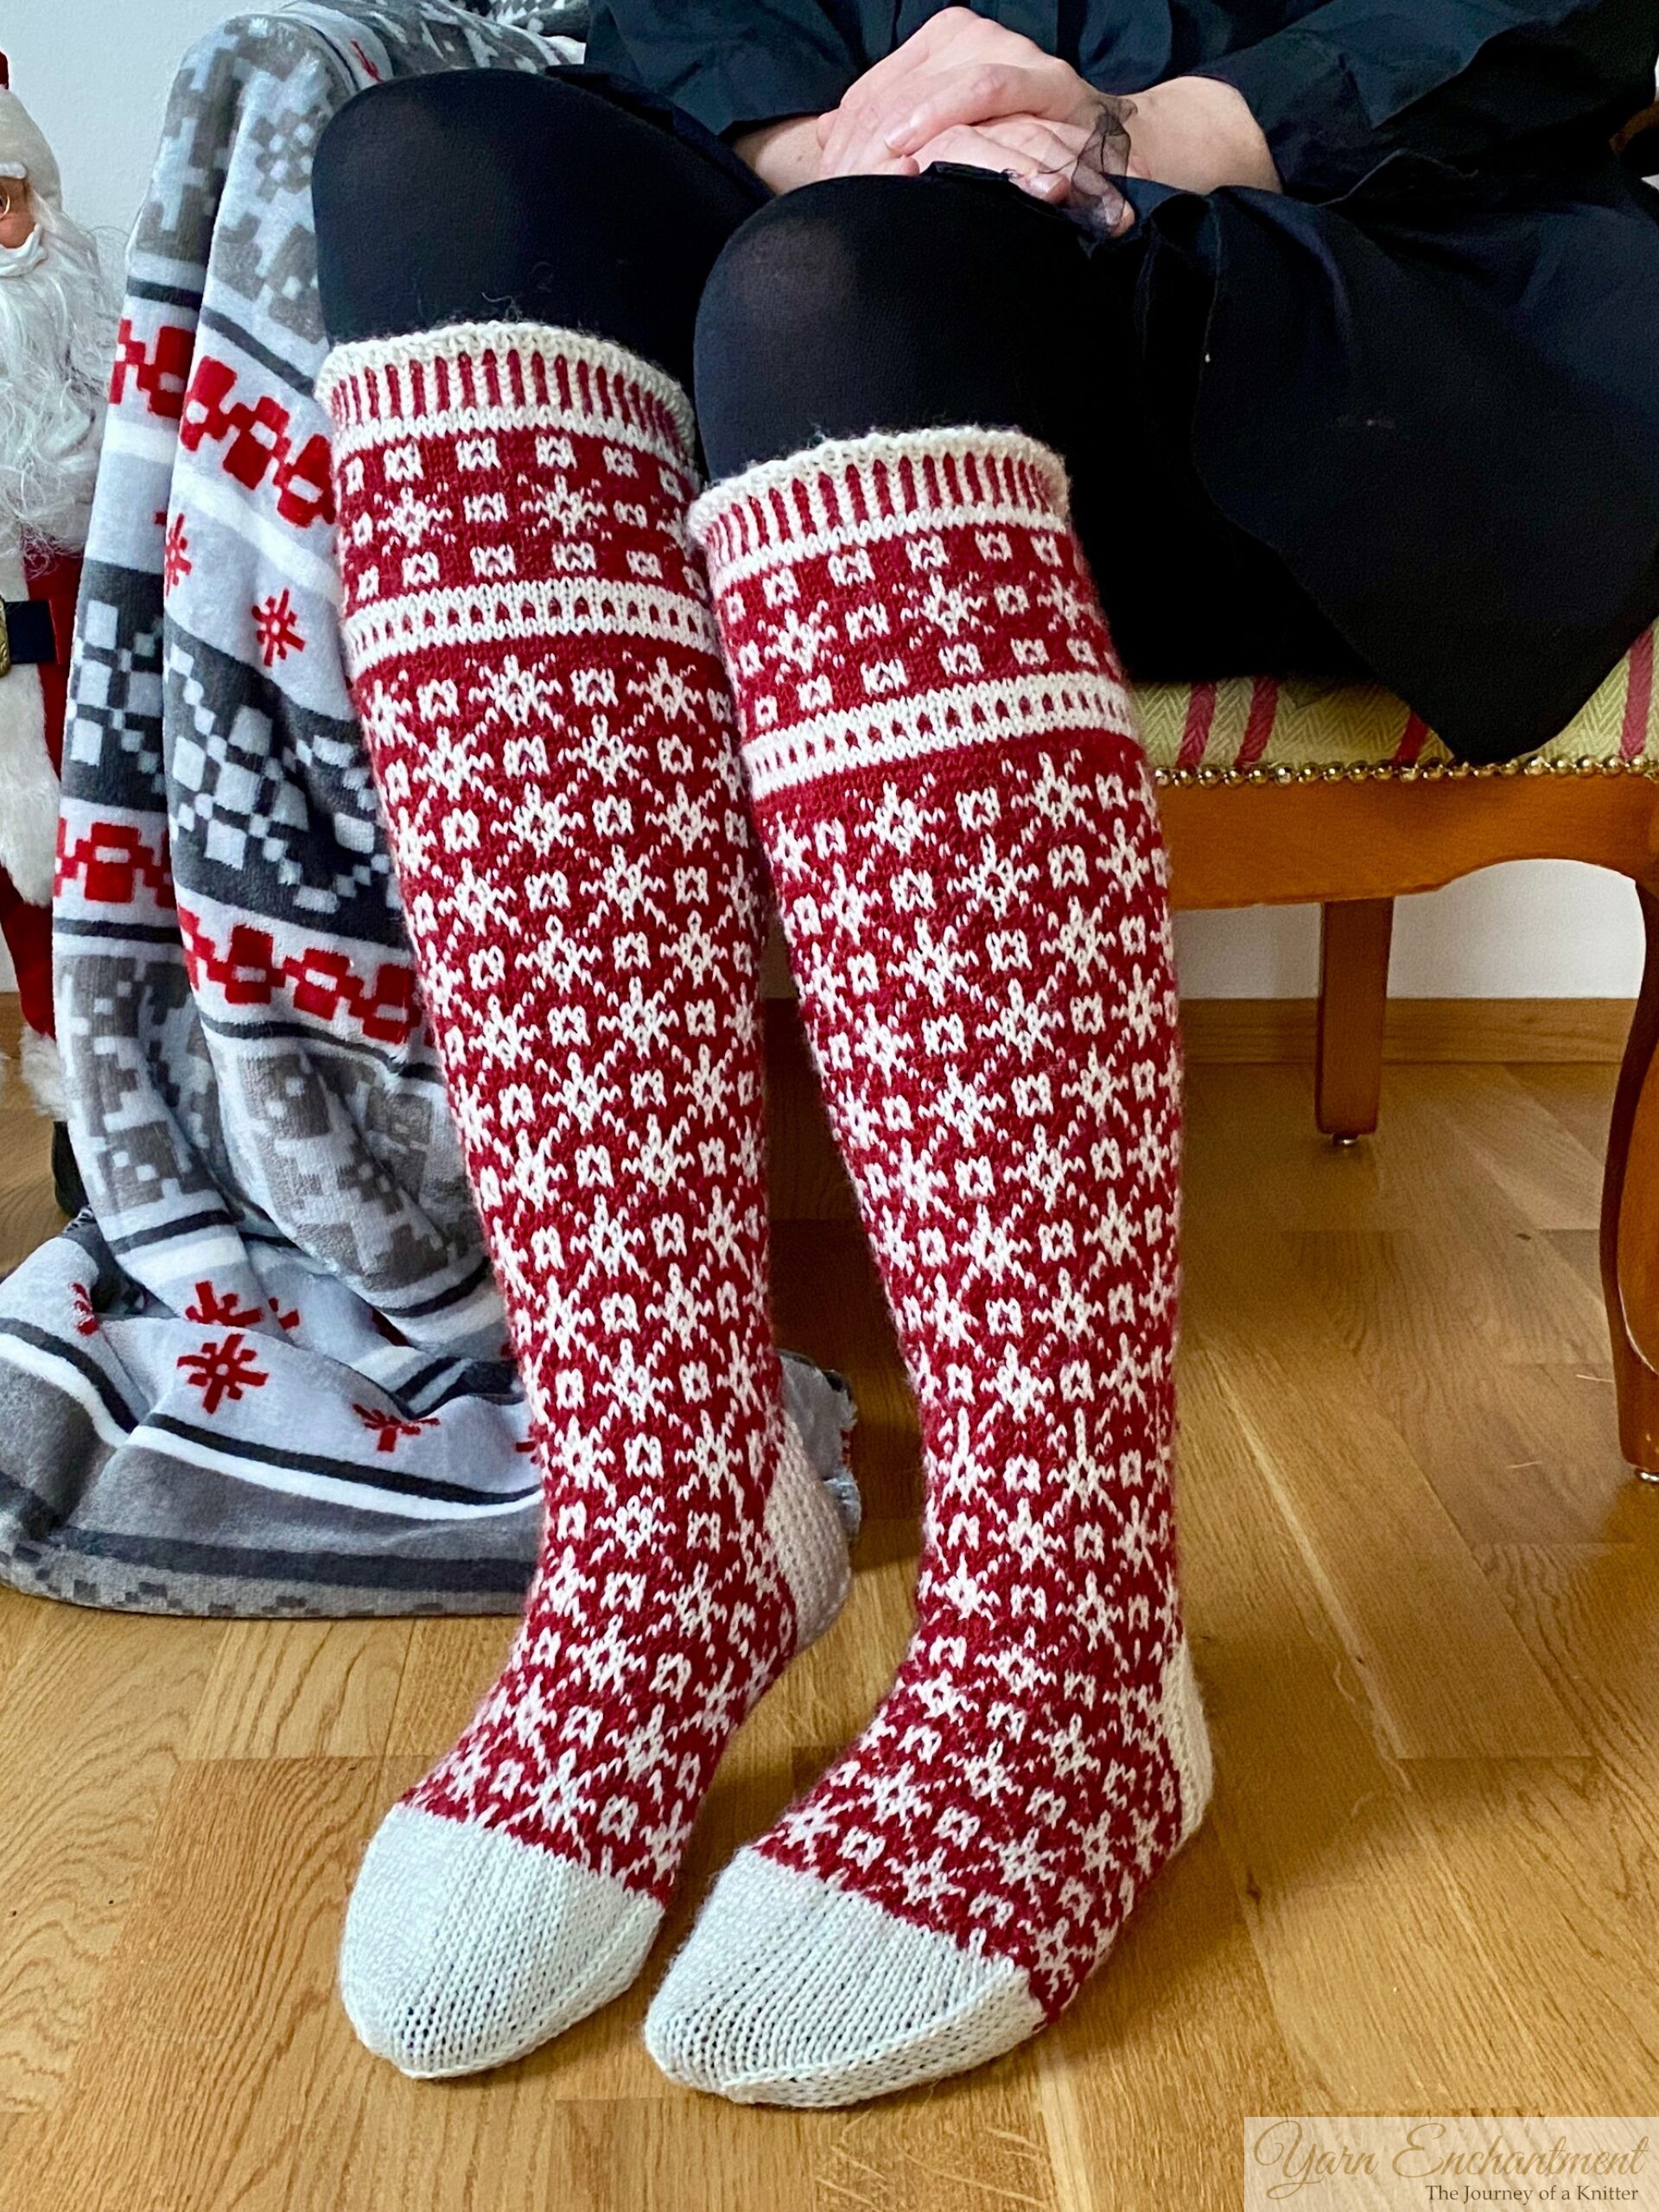  |   |
These socks were made from a pattern, but the pattern wasn’t in my actual size, so I had to recalculate the decreases to make sure the socks wouldn’t be too thigh for me. | These socks were knitted freestyle because I wanted a pair of over-the-knee socks. I used the same calculation shown here. I’d really love to share this pattern with you, these socks are incredibly warm and snug! The only thing I would do differently next time is to incorporate an elastic thread into the ribbing for better hold. |
Free Sock Size Chart (4ply & 6ply Yarn)
A quick note: This size chart is meant to be a friendly guide, not a perfect rulebook. Every pair of feet has its own personality, different in length, width, and shape, so the best fit always comes from taking a moment to measure the actual foot, double-checking your gauge, and adjusting for your yarn and style. Think of the chart as a jumping-off point, but let careful measuring (and a little trying-on) be your true compass!
Download your free Sock Size Chart for 4-ply yarn here.
Download your free Sock Size Chart for 6-ply yarn here.
Top Tips for Knitting Socks That Fit Perfectly
- For gifts, if possible try to get real foot measurements instead of using shoe sizes. Foot shapes and sock preferences really do vary, measure twice, knit once!
- Apply negative ease (reduce by about 10%) for that snug, stay-up fit.
- Measure both feet; use the larger for comfort. Most people have one slightly bigger foot!
- If your pattern calls for special repeats (like ribbing), make sure your stitch count matches (e.g., divisible by 4 for double-pointed needles).
- If you’re unsure, round up for more room, the good thing is you can always try it on as you go, this is all part of our journey!
- You can always adjust your knitting as you go, handknits are wonderfully forgiving! I gained a little weight over the last year, and a friend told me, “Don’t worry, your sweater will grow with you!” 😄 It made me laugh, sometimes our stitches really do rise to the occasion!
Sock Knitting FAQ: Sizing, Fitting & Customization
How do I know how many stitches to cast on for socks?
To calculate your cast-on, multiply your foot’s measured circumference (in inches or cm) by your swatch’s stitch gauge, then reduce by 10% for a snug fit. Always round to the nearest multiple of 4, and double-check with your own gauge swatch for best results.
Should I wash and block my gauge swatch for socks?
For most sock projects, simply measure your swatch right off the needles before blocking. If you’re using yarns known to relax or stretch significantly, consider washing the swatch as you’ll treat the finished socks. I like to lightly mist mine with a spray bottle so that my edges don't curl.
What is “negative ease” and why is it important for socks?
Negative ease means making your sock slightly smaller than your foot’s actual measurement (about 10% less). This ensures your socks fit snugly and don’t slip down during wear.
What if my feet are different sizes?
Always use the measurements from your larger foot when calculating your cast-on and sock length, most people have one foot slightly bigger than the other.
Can I knit socks without exact foot measurements?
If you’re gifting socks and don’t have precise measurements, reference a reliable sock size chart based on shoe size, or use average measurements for the recipient’s age/gender. Still, custom measurements will always yield the best fit.
How do I adjust a pattern for knee-high or calf-length socks?
Knit a gauge swatch, measure the full circumference of both ankle and widest calf, and use the same cast-on formula for the calf. Plan gradual decreases from calf to ankle for a smooth fit, spacing them evenly down the leg length.
Why does my sock pattern say “multiple of 4” for cast-on?
Many sock patterns use a 2x2 rib cuff, which requires the stitch count to be divisible by 4 for the ribbing to work evenly around the leg and maintain stretchiness.
What yarn and needles make the most durable socks?
Choose a classic sock yarn blend (often wool with nylon for strength), and select needles that give you a dense, but flexible fabric (most fingering-weight socks use 2–2.5mm needles; heavier yarns use larger sizes).
Conclusion
This blog post might have leaned a little on the theoretical side, but my goal was to make sure you have everything you need to knit any type of socks - whether they’re knee-highs, mid-calf, or ankle socks. The good news is that you’re now all set to knit your very first pair, so get ready for next week when we’ll cast on together! With all the essentials in one spot, you can spend less time worrying over stitch counts or decreases and more time enjoying your project. I hope this helps make sock-knitting smoother for you down the road!
If any questions pop up, just let me know - I'm always happy to help, and I make sure every message gets a reply.
Until then, happy knitting!
A little update! 🧦 A few of you asked if I could put the whole course into one printable PDF - so I did! If you'd like everything in one place, you can find The Enchanted Sock Workbook right here: [The Ultimate Printable Sock Workbook] And don't worry - the blog and videos will always stay free. This is just for those who love having a printed copy by their knitting chair.
Feeling ready for more sock fun?
Jump into the next parts of my Free Sock Knitting Course! Explore topics like:
-
Sock Knitting Needles & Accessories: Complete Guide for Beginners
-
How to Measure Your Foot & Calculate Sock Cast-On Size (Knitting Tutorial)
- How to Knit Socks for Beginners: Cast-On to Leg with DPNs
- How to Knit a Classic Heel Flap & Turn
- Hole-Free Gusset Pick Up and Decreases for Perfectly Fitting Socks
- Complete Foot and Wedge Toe Sock Guide: Measuring, Sizing & Decreasing
A Little Way to Say Thanks
Yarn Enchantment is my cozy hobby corner on the internet. If something here made your knitting day easier or you simply enjoy reading my posts and would like to say thank you, you can leave a small Ko-fi tip - but only if you truly want to.
My patterns and tutorials stay free for everyone, always. Every little tip just goes toward new yarn and a cup of tea for my cozy knitting evenings.
☕ Support me on Ko-fi
You Might Also Like


 |
|
Join the Cozy Corner Newsletter
Hello, creative soul. Welcome to the Yarn Enchantment Newsletter, a little space where we celebrate all things cozy, crafty, and full of heart. Think of this as your friendly crafting companion, a soft dose of inspiration delivered straight to your inbox, just for you. Each newsletter brings you: ✨ Notifications about new patterns and tutorials – easy knitting patterns and beginner crochet projects you won’t find anywhere else 🧶 Practical yarn tips for new crafters, plus advice on the best yarn for fall, blankets, and handmade gifts 💌 Small stories and adventures from my own workbench, because crafting is as much about the journey as the finished piece Whether you’re knitting by the fire, looking for your next creative spark, or simply wanting a quiet moment with your hooks and needles, this newsletter is here to cheer you on. Crafting isn’t just about the final project. It’s about the joy, the peace, and the stories we weave along the way. So grab a cup of tea or coffee, settle in, and join me. Together we’ll make a little magic, one stitch and one story at a time. I’m so glad you’re here. Let’s create something beautiful together. Sign up below to receive your first email, and feel free to leave a comment on the blog if there’s a topic you’d love to see covered. Your ideas might just become our next newsletter feature. |