

How to Knit a Classic Heel Flap & Turn (Sock Heel Tutorial)
September 16, 2025
Complete Foot and Wedge Toe Sock Guide: Measuring, Sizing & Decreasing
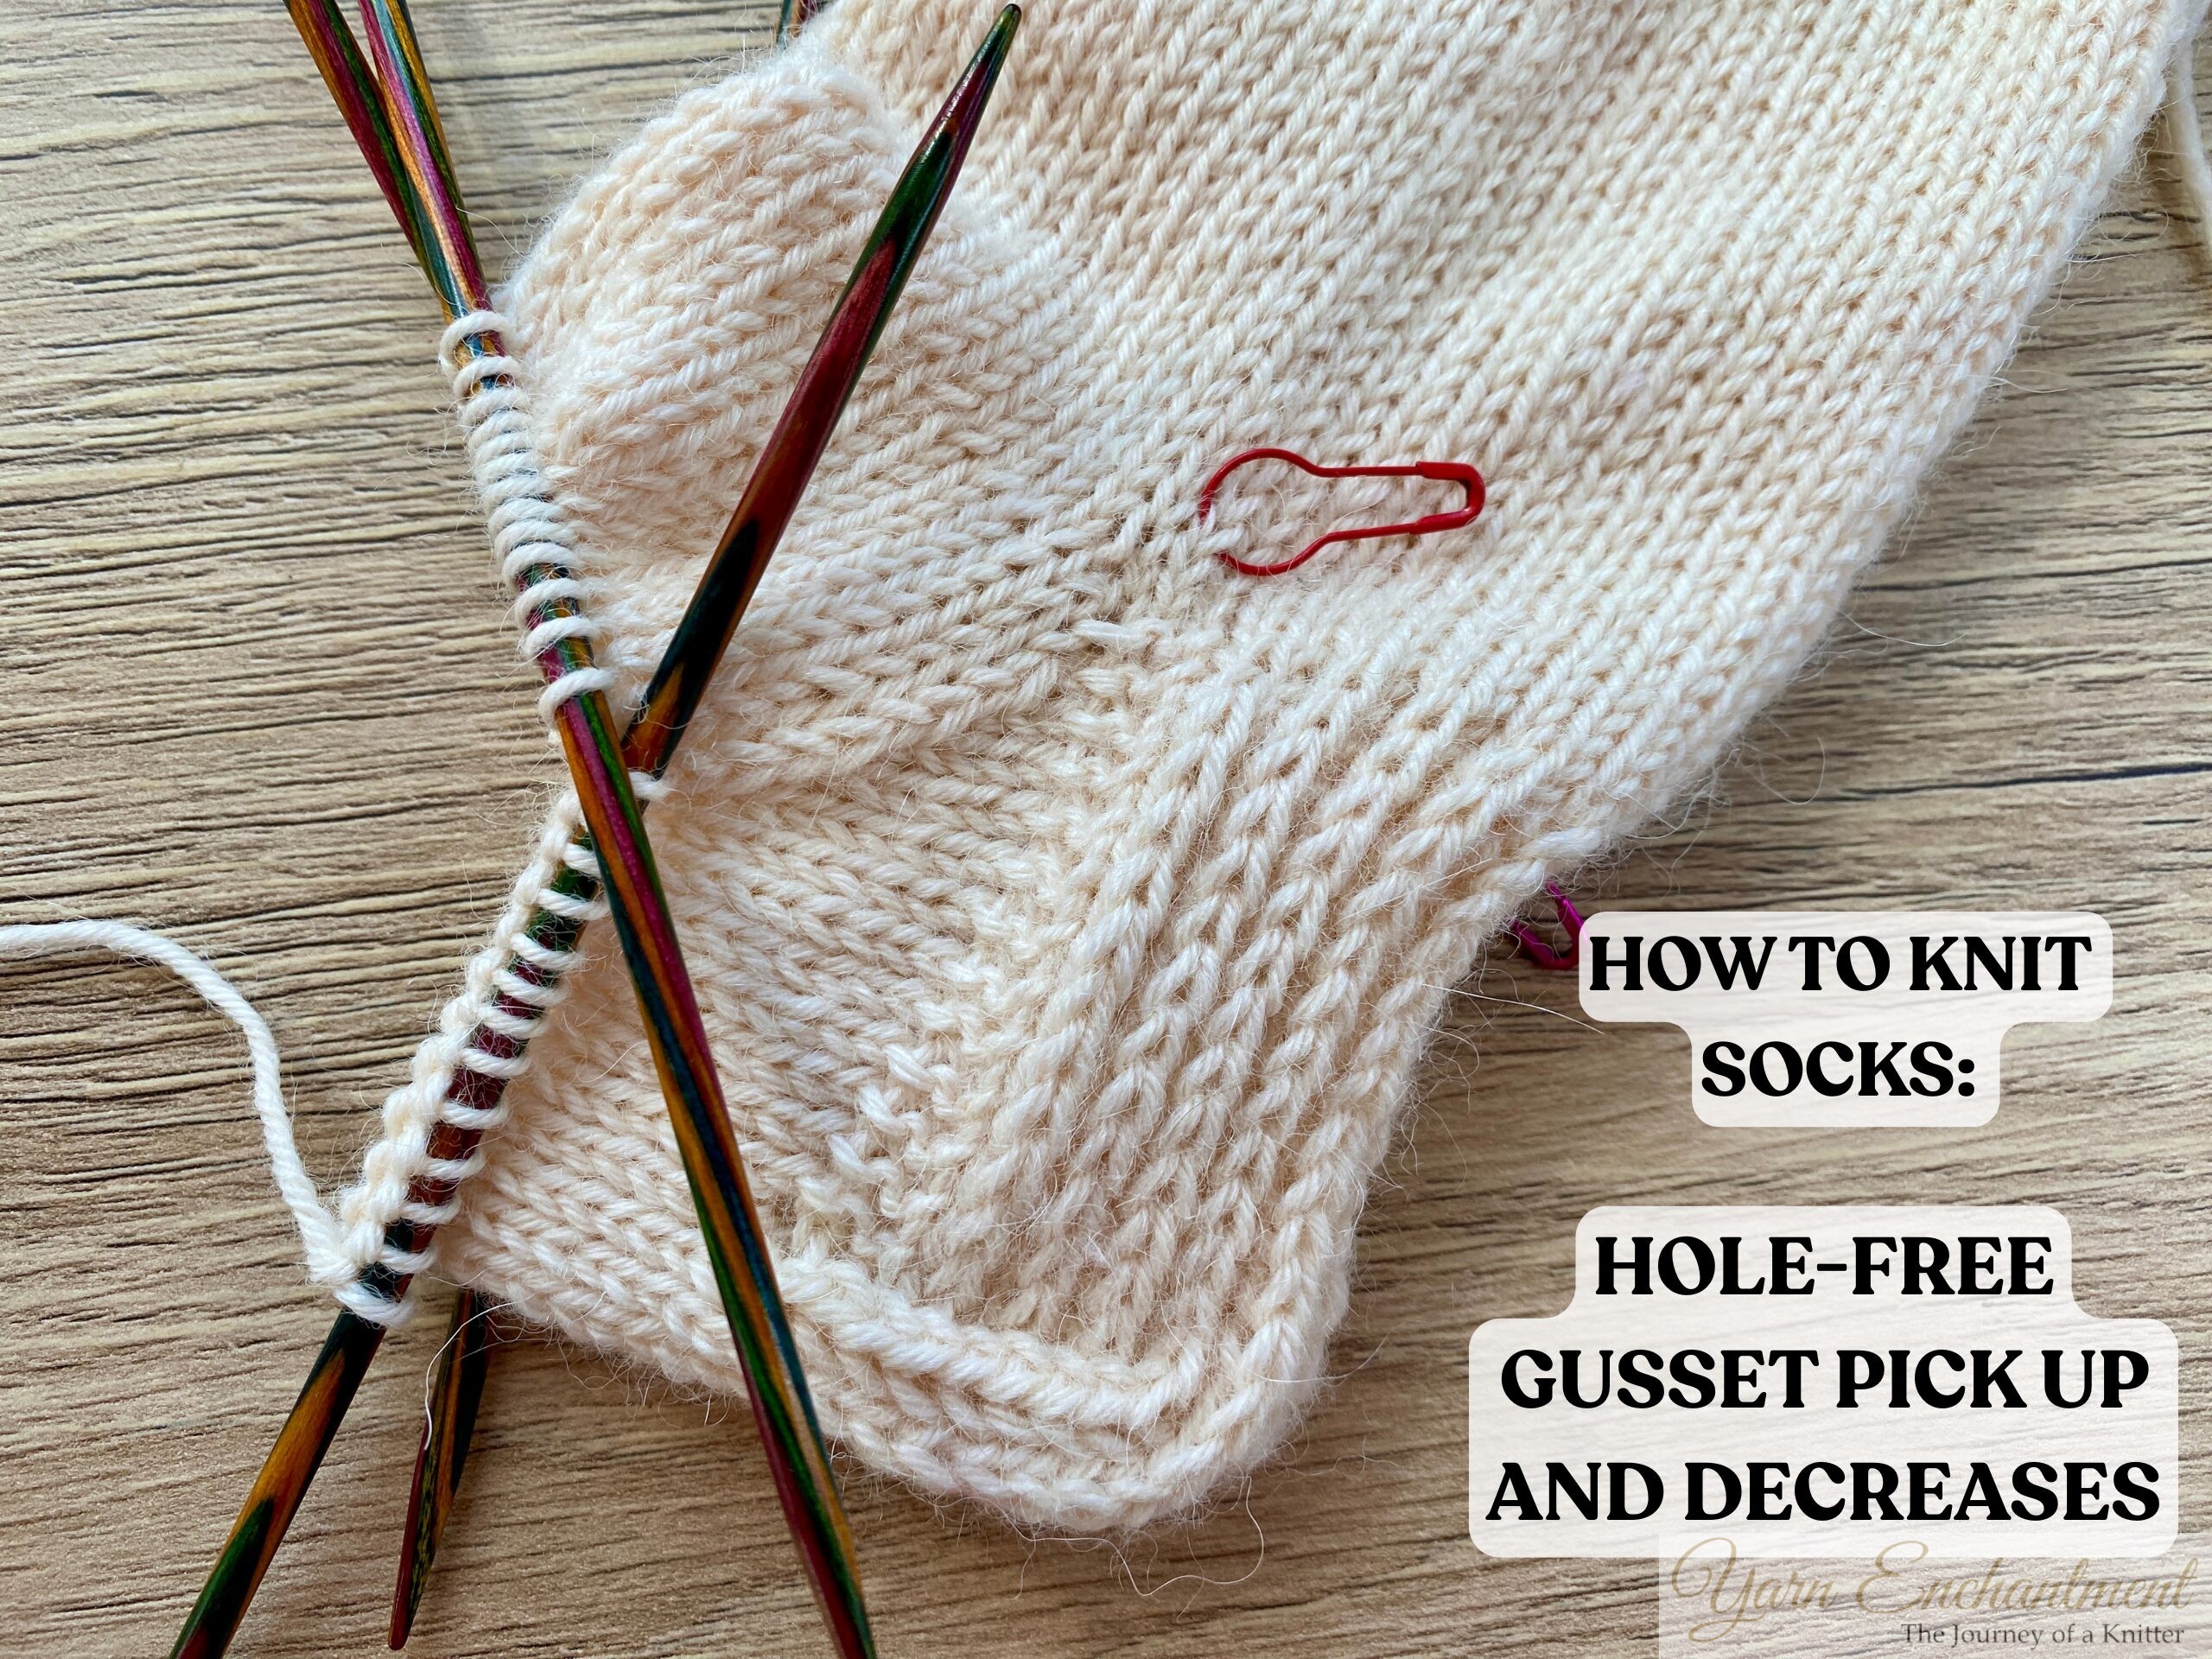
September 25, 2025Hole-Free Gusset Pick Up and Decreases for Perfectly Fitting Socks

Originally published on September 22, 2025
This week I wanted to talk about gusset pick ups, and I wanted to show three different techniques to close the hole in between the needles. The first one is widely known and shown by everyone, but I am not fond of this method because not only do you have a little hole, you also have a really long stitch from pulling the stitch out several rows below. The second method is a more advanced method, but it is invisible; I learned it from my granny, and I am not sure if this method is known. And the third method is also very easy and beginner-friendly. Both methods guarantee a hole-free pickup in your sock knitting, no more pesky gaps!" If you’re making your very first socks, I encourage you to give it a try. I’ll be sharing a step-by-step video tutorial soon, so you can easily follow along and knit with confidence at every stage
I always do my best to write my tutorials so that everything is clear and easy to follow on its own, without needing a video. But for this part, I’ve shared a few extra tips and tricks in my video tutorial that you might find especially helpful. If you have a moment, I really recommend giving it a watch as well, it might make those little details even clearer and give you an extra boost of confidence as you knit!
Watch the full video tutorial here
 | How to Pick Up Gusset Stitches Without Holes in Sock Knitting |

Table of Contents
Picking Up Gusset Stitches from Garter Stitch Edge
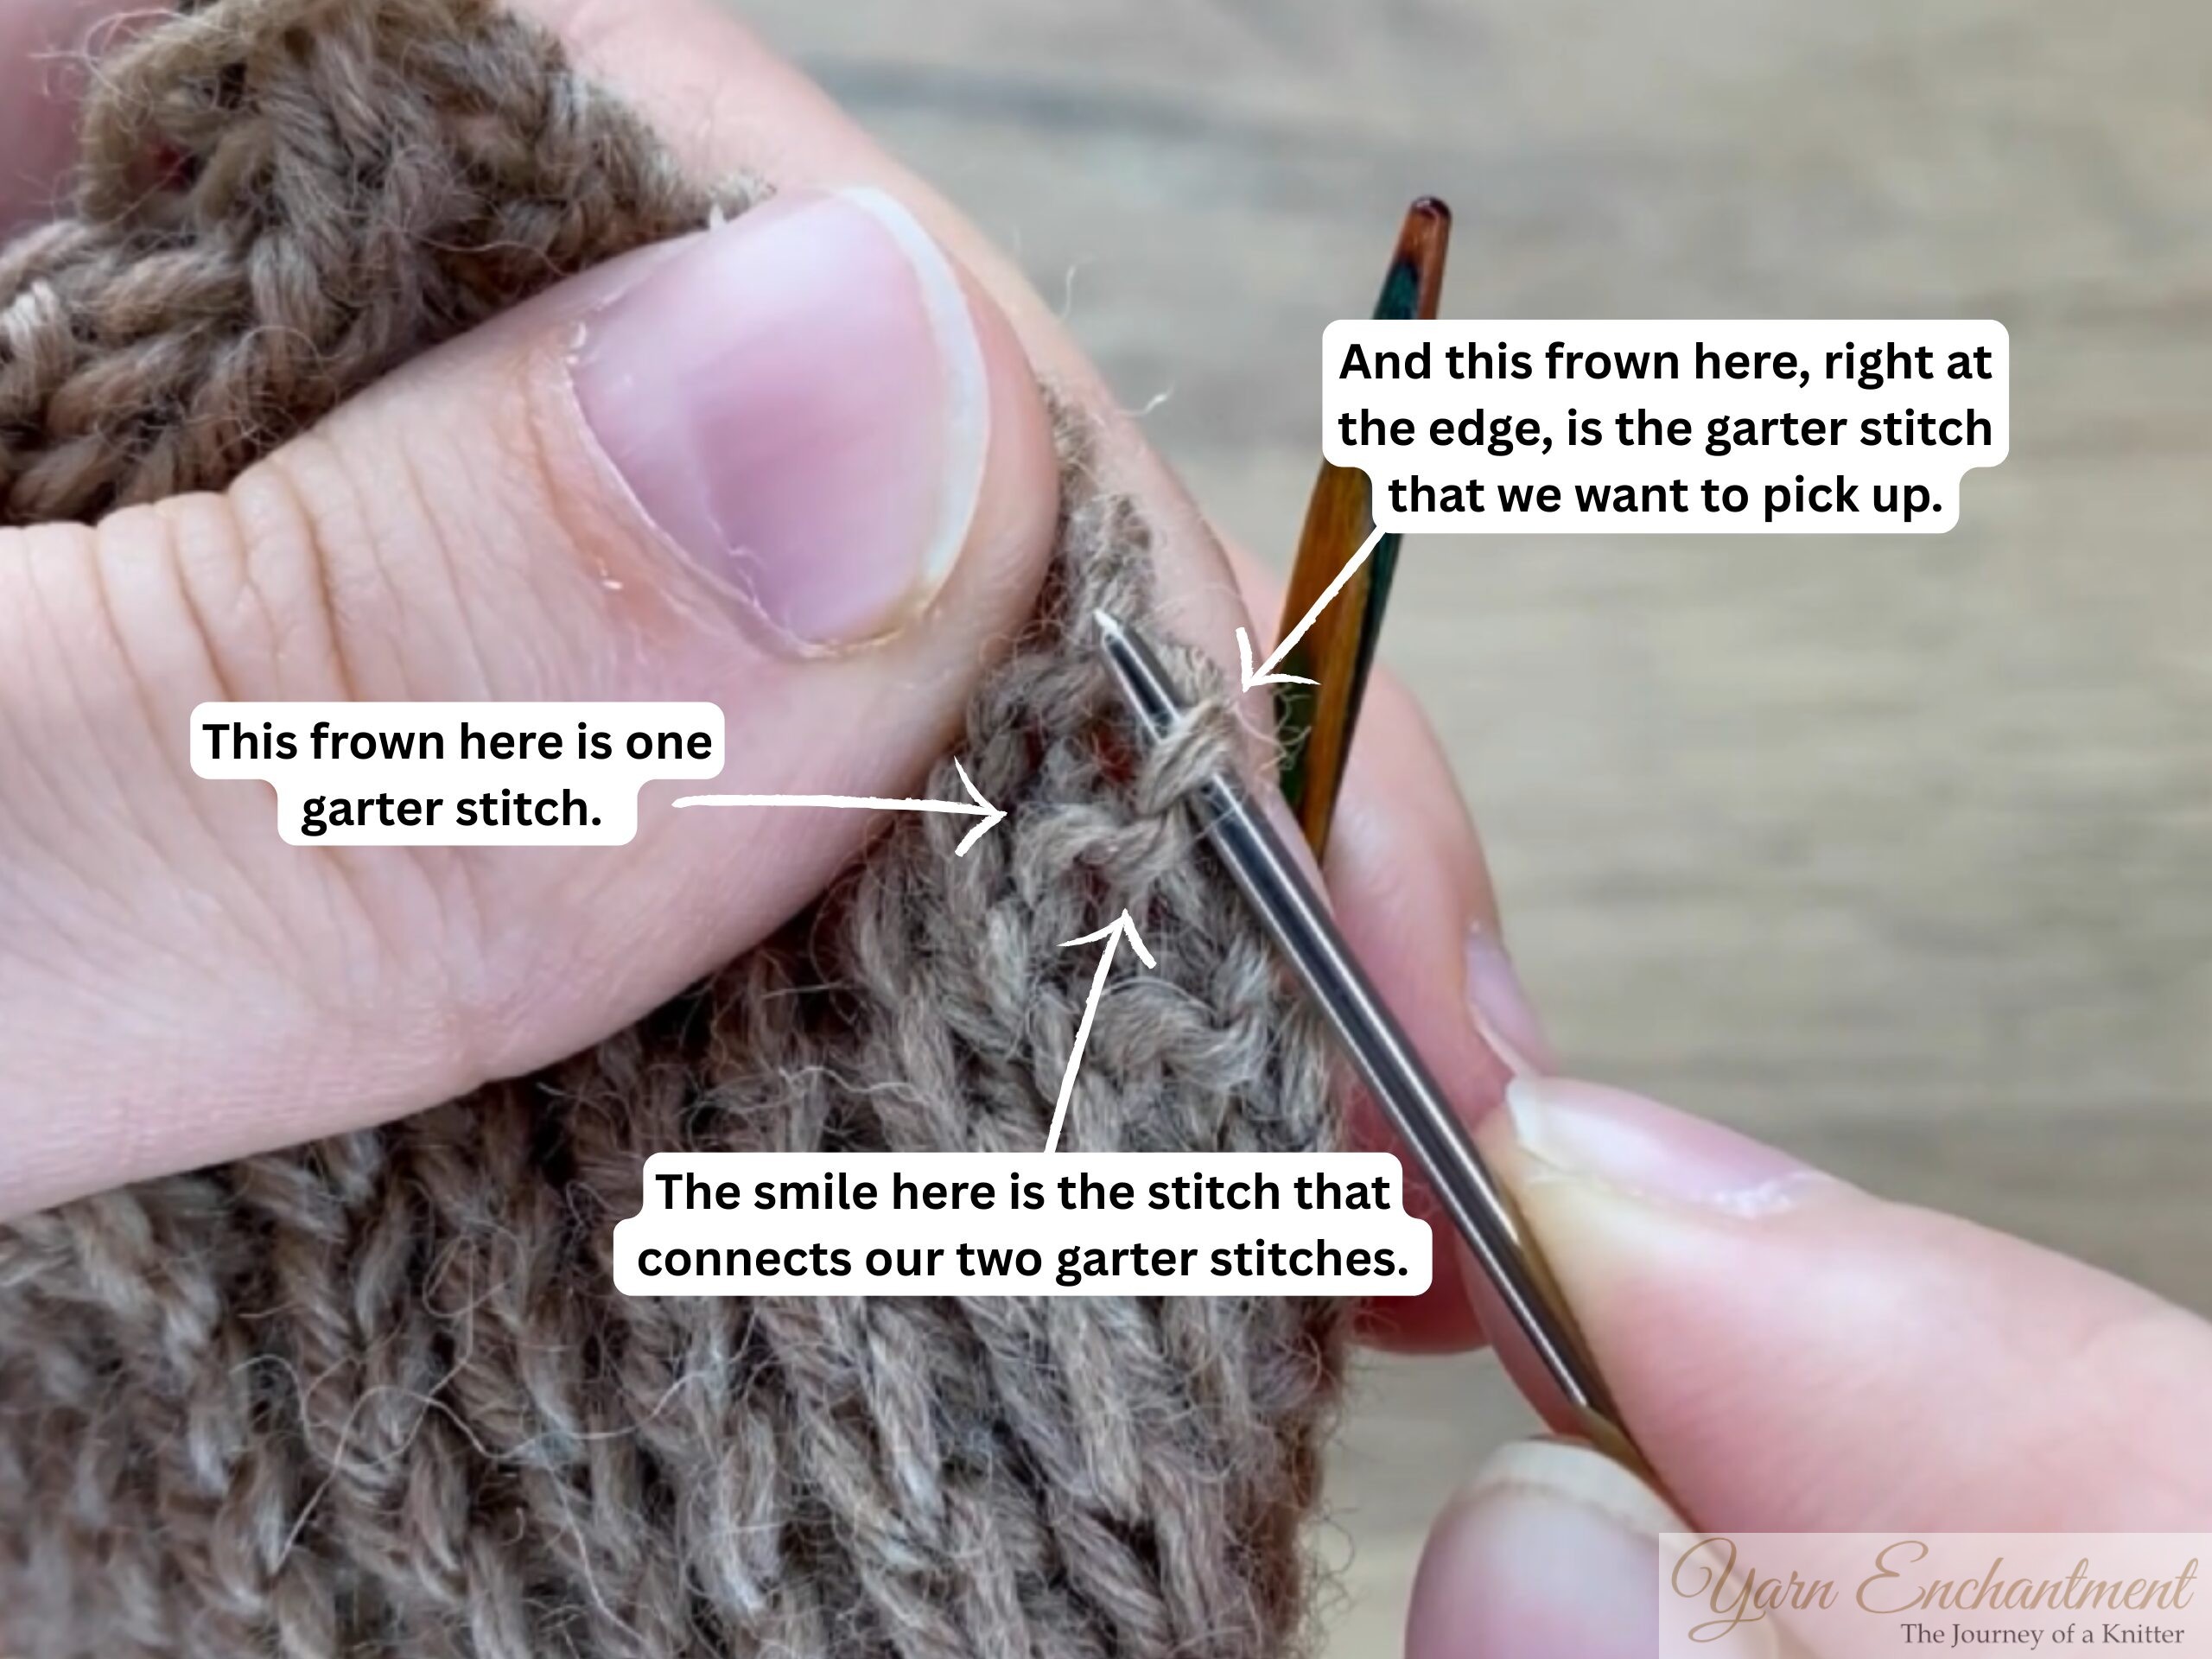
In this sock course I did not show you the slip stitch edge - I showed you the garter stitch edge, because picking up the gusset stitches is actually quite straightforward, and the texture makes it easy to spot where the new stitches should go. Each garter ridge forms a neat little “bump” at the edge, so you simply work your way up, picking up one stitch under each of those bumps.
Pick your smaller needles, the ones you used for the cuff, and slide your needle under the horizontal purl bump at the edge of every garter ridge. Do this for each bump along the flap. I have knitted 26 heel flap rows, which means I have 13 garter stitch ridges, no tricky counting or guessing needed.
If there’s a visible gap at the corner (where your heel flap meets the instep), grab an extra stitch from that intersection to keep the edge snug. This tiny adjustment helps prevent holes, leaving your gusset join looking just as tidy as the rest of the sock.
In my opinion, garter stitch edges are forgiving and intuitive: if the pick-up feels tight, gently stretch the work, and if it looks loose, you can correct it with a bit of tension in the first few rounds. And best of all, the final result blends right into your sock, smooth, flat, and you don’t feel a seam against your feet.
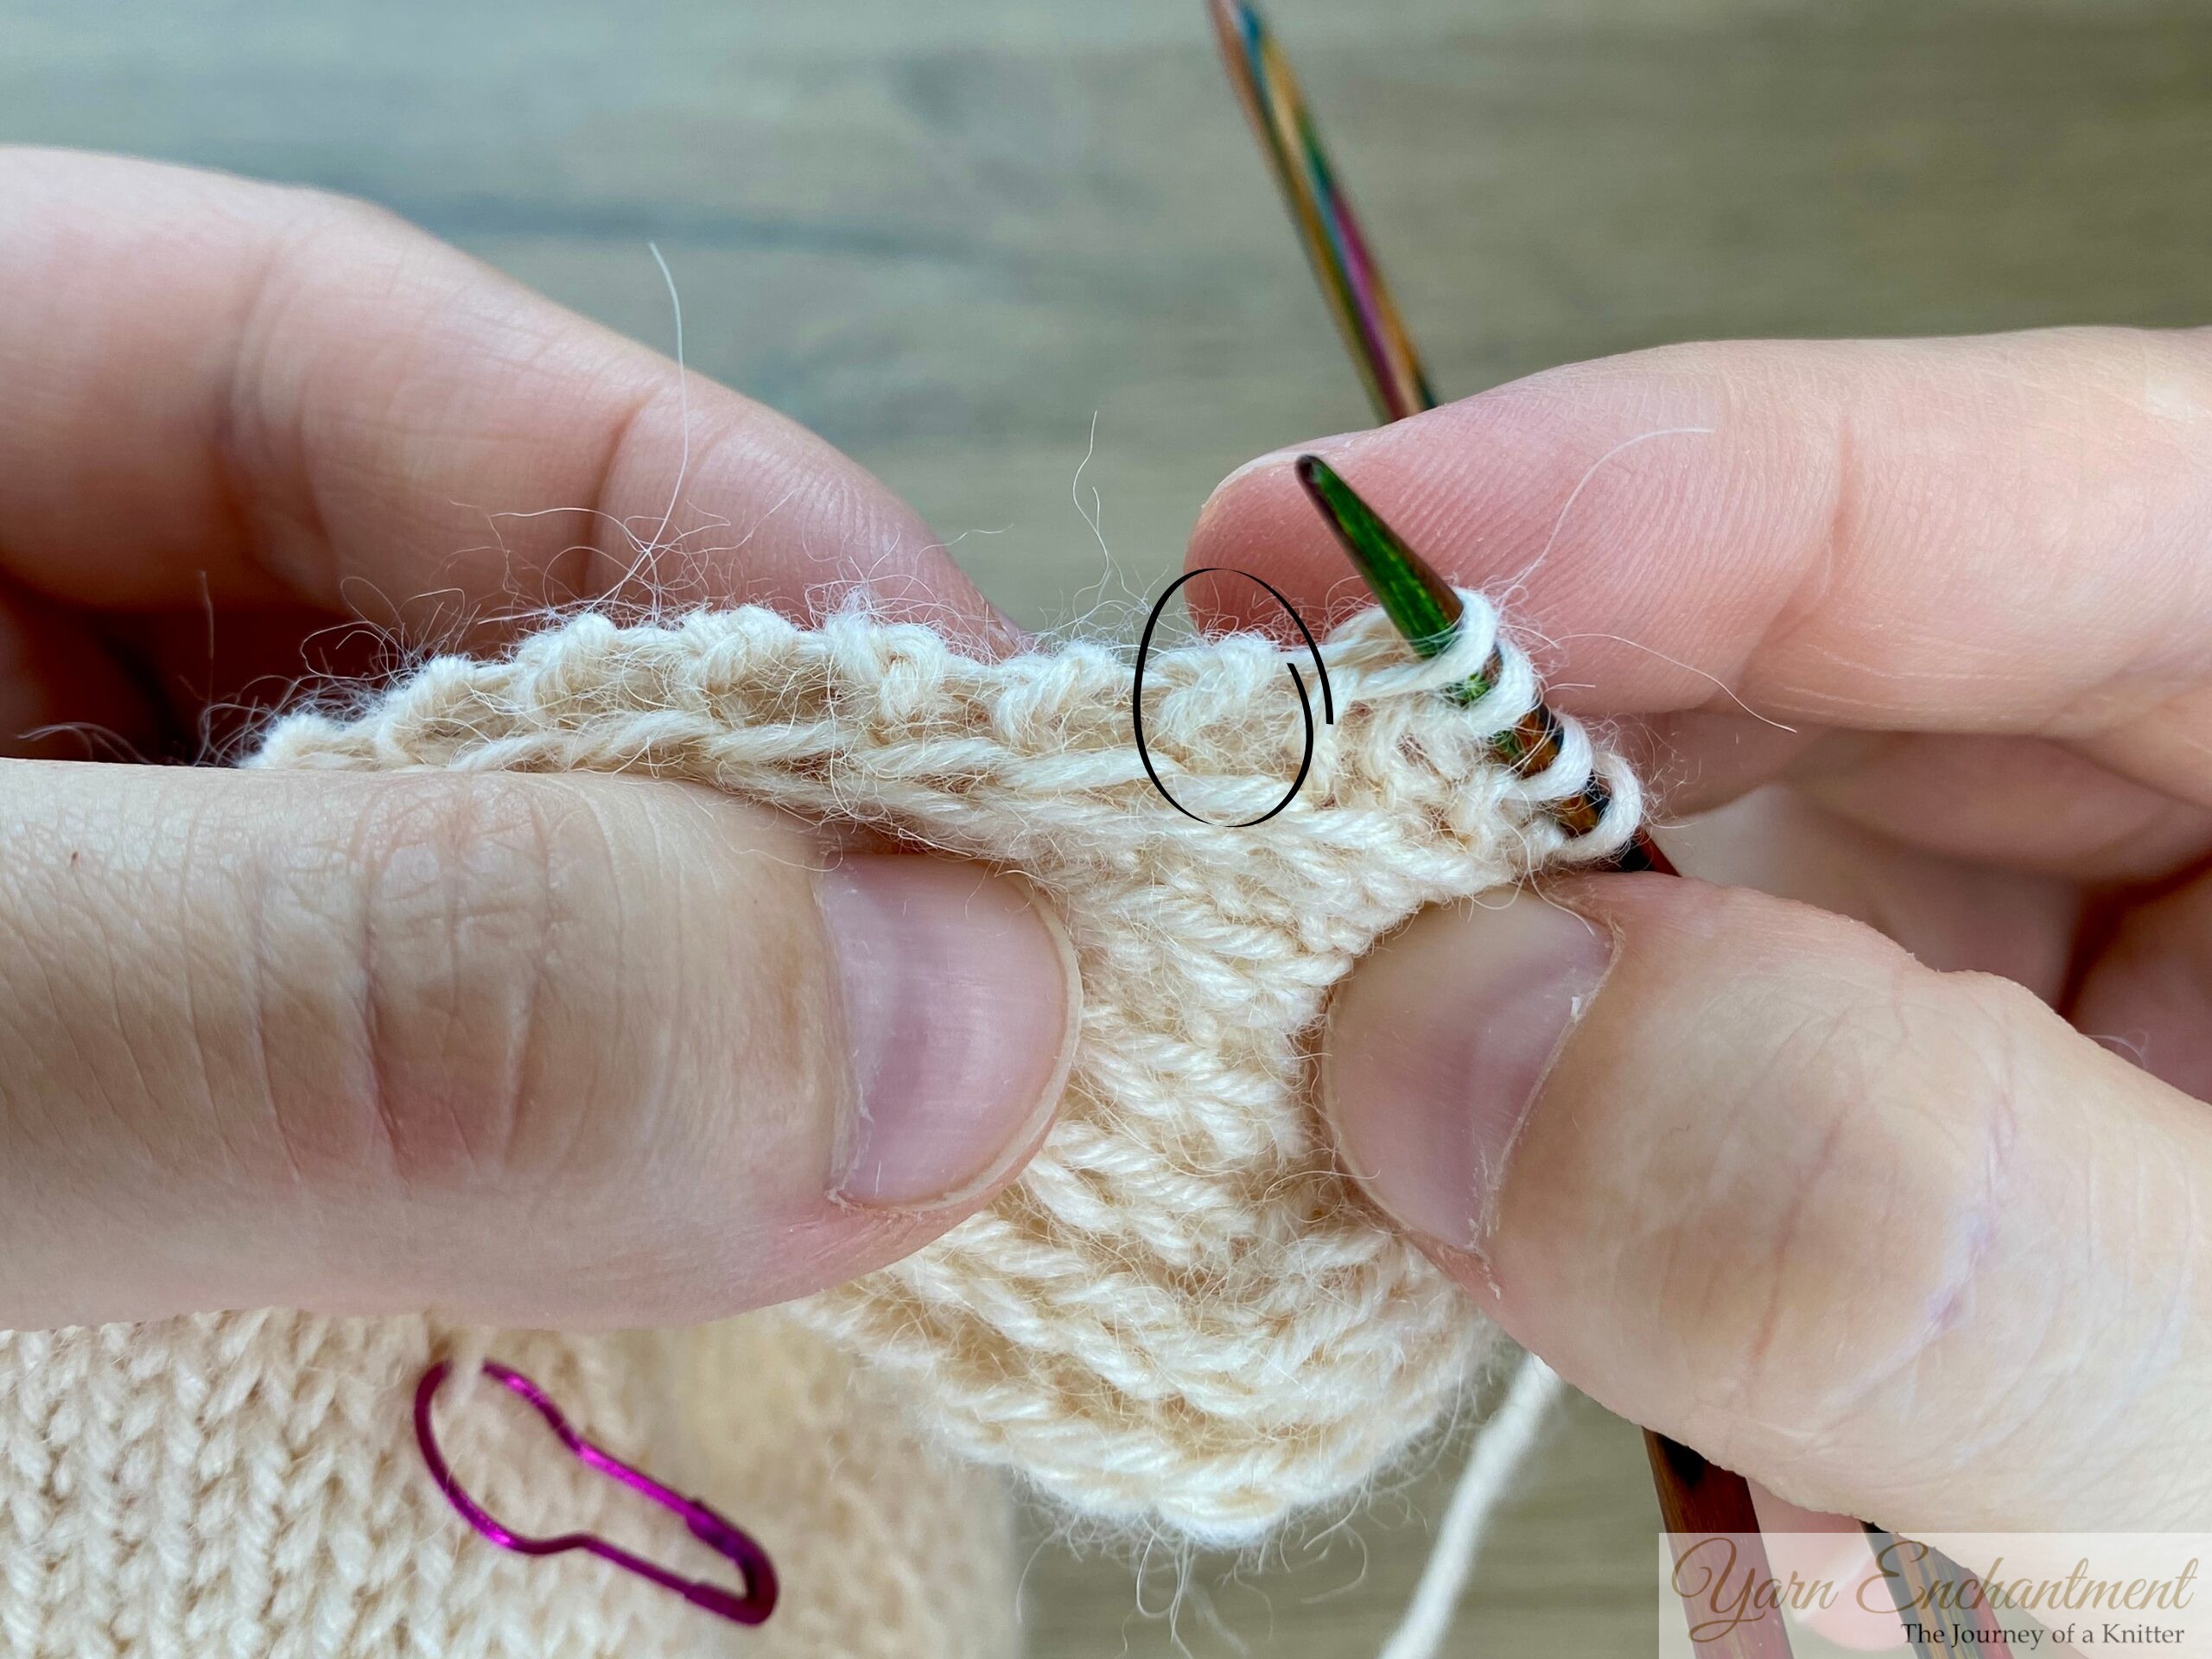 |  | You can see that each garter stitch forms its own little bump, this is exactly where you’ll pick up your stitches. In my opinion, this is the easiest way for beginners to find their pick-up spots, making the process simple and intuitive. |
The "frown" shape on the left side represents a single garter stitch. |


Step-by-Step: How to Pick Up Gusset Stitches
Here’s exactly how I do it:
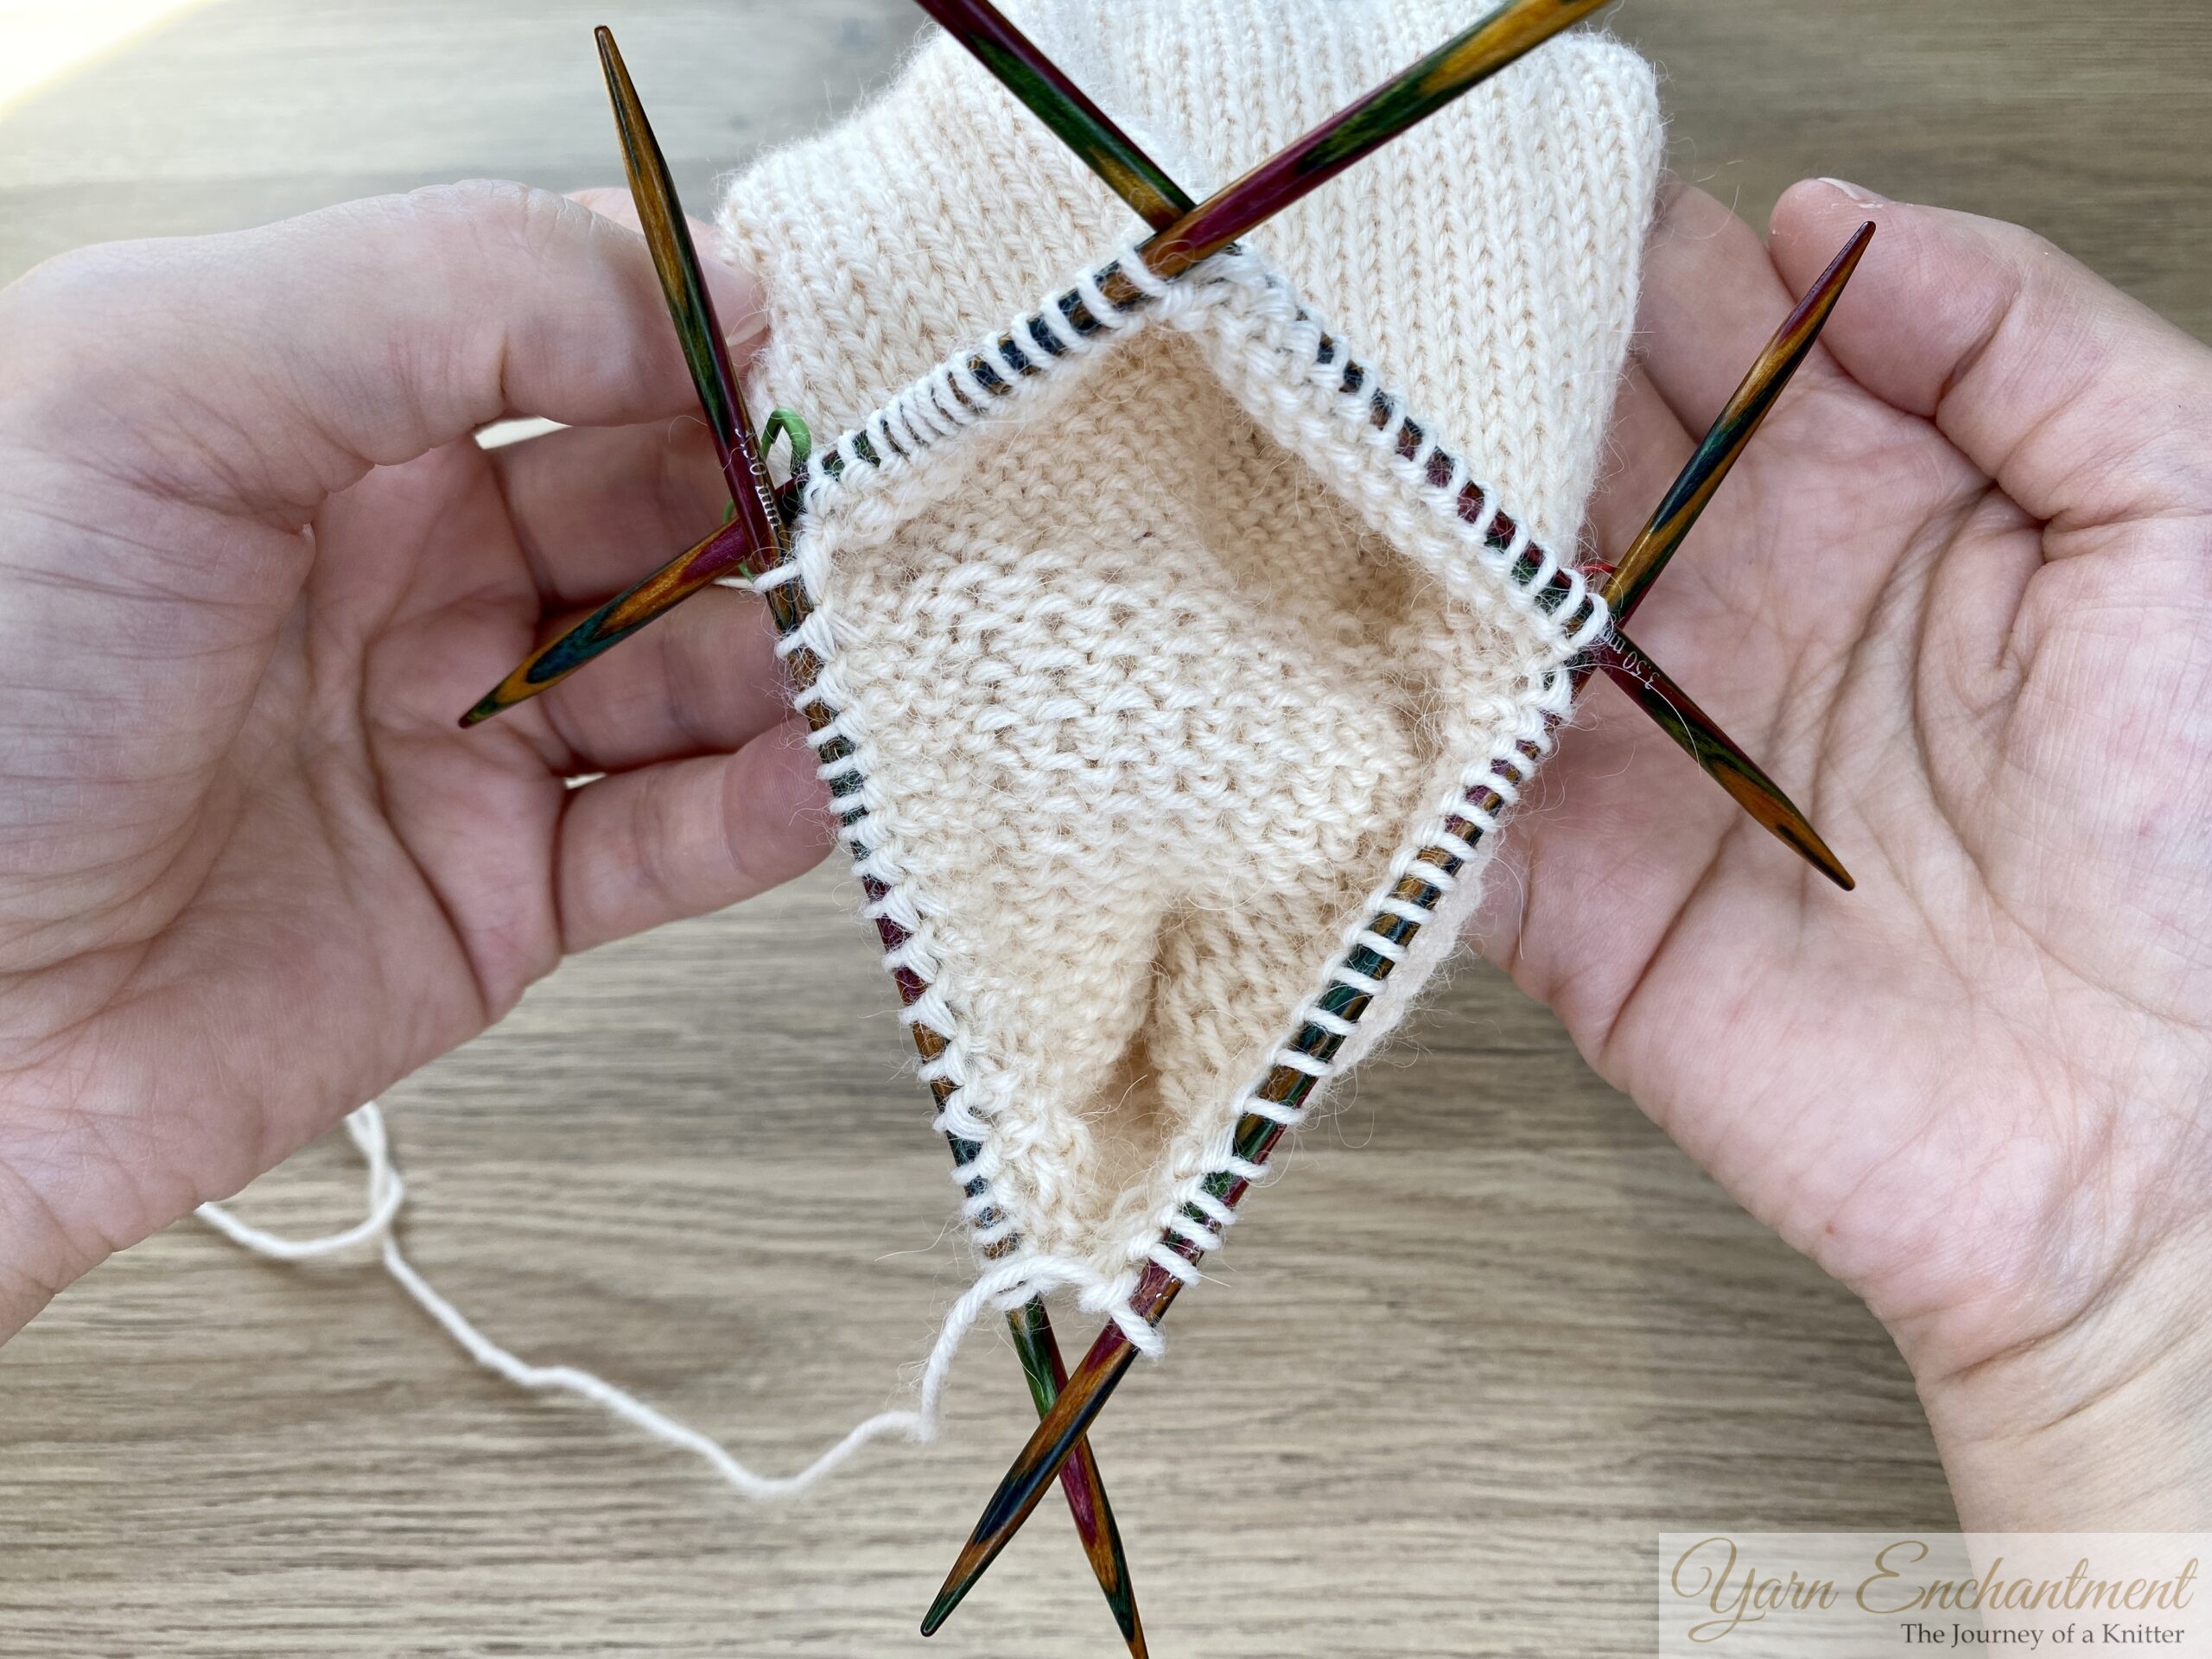
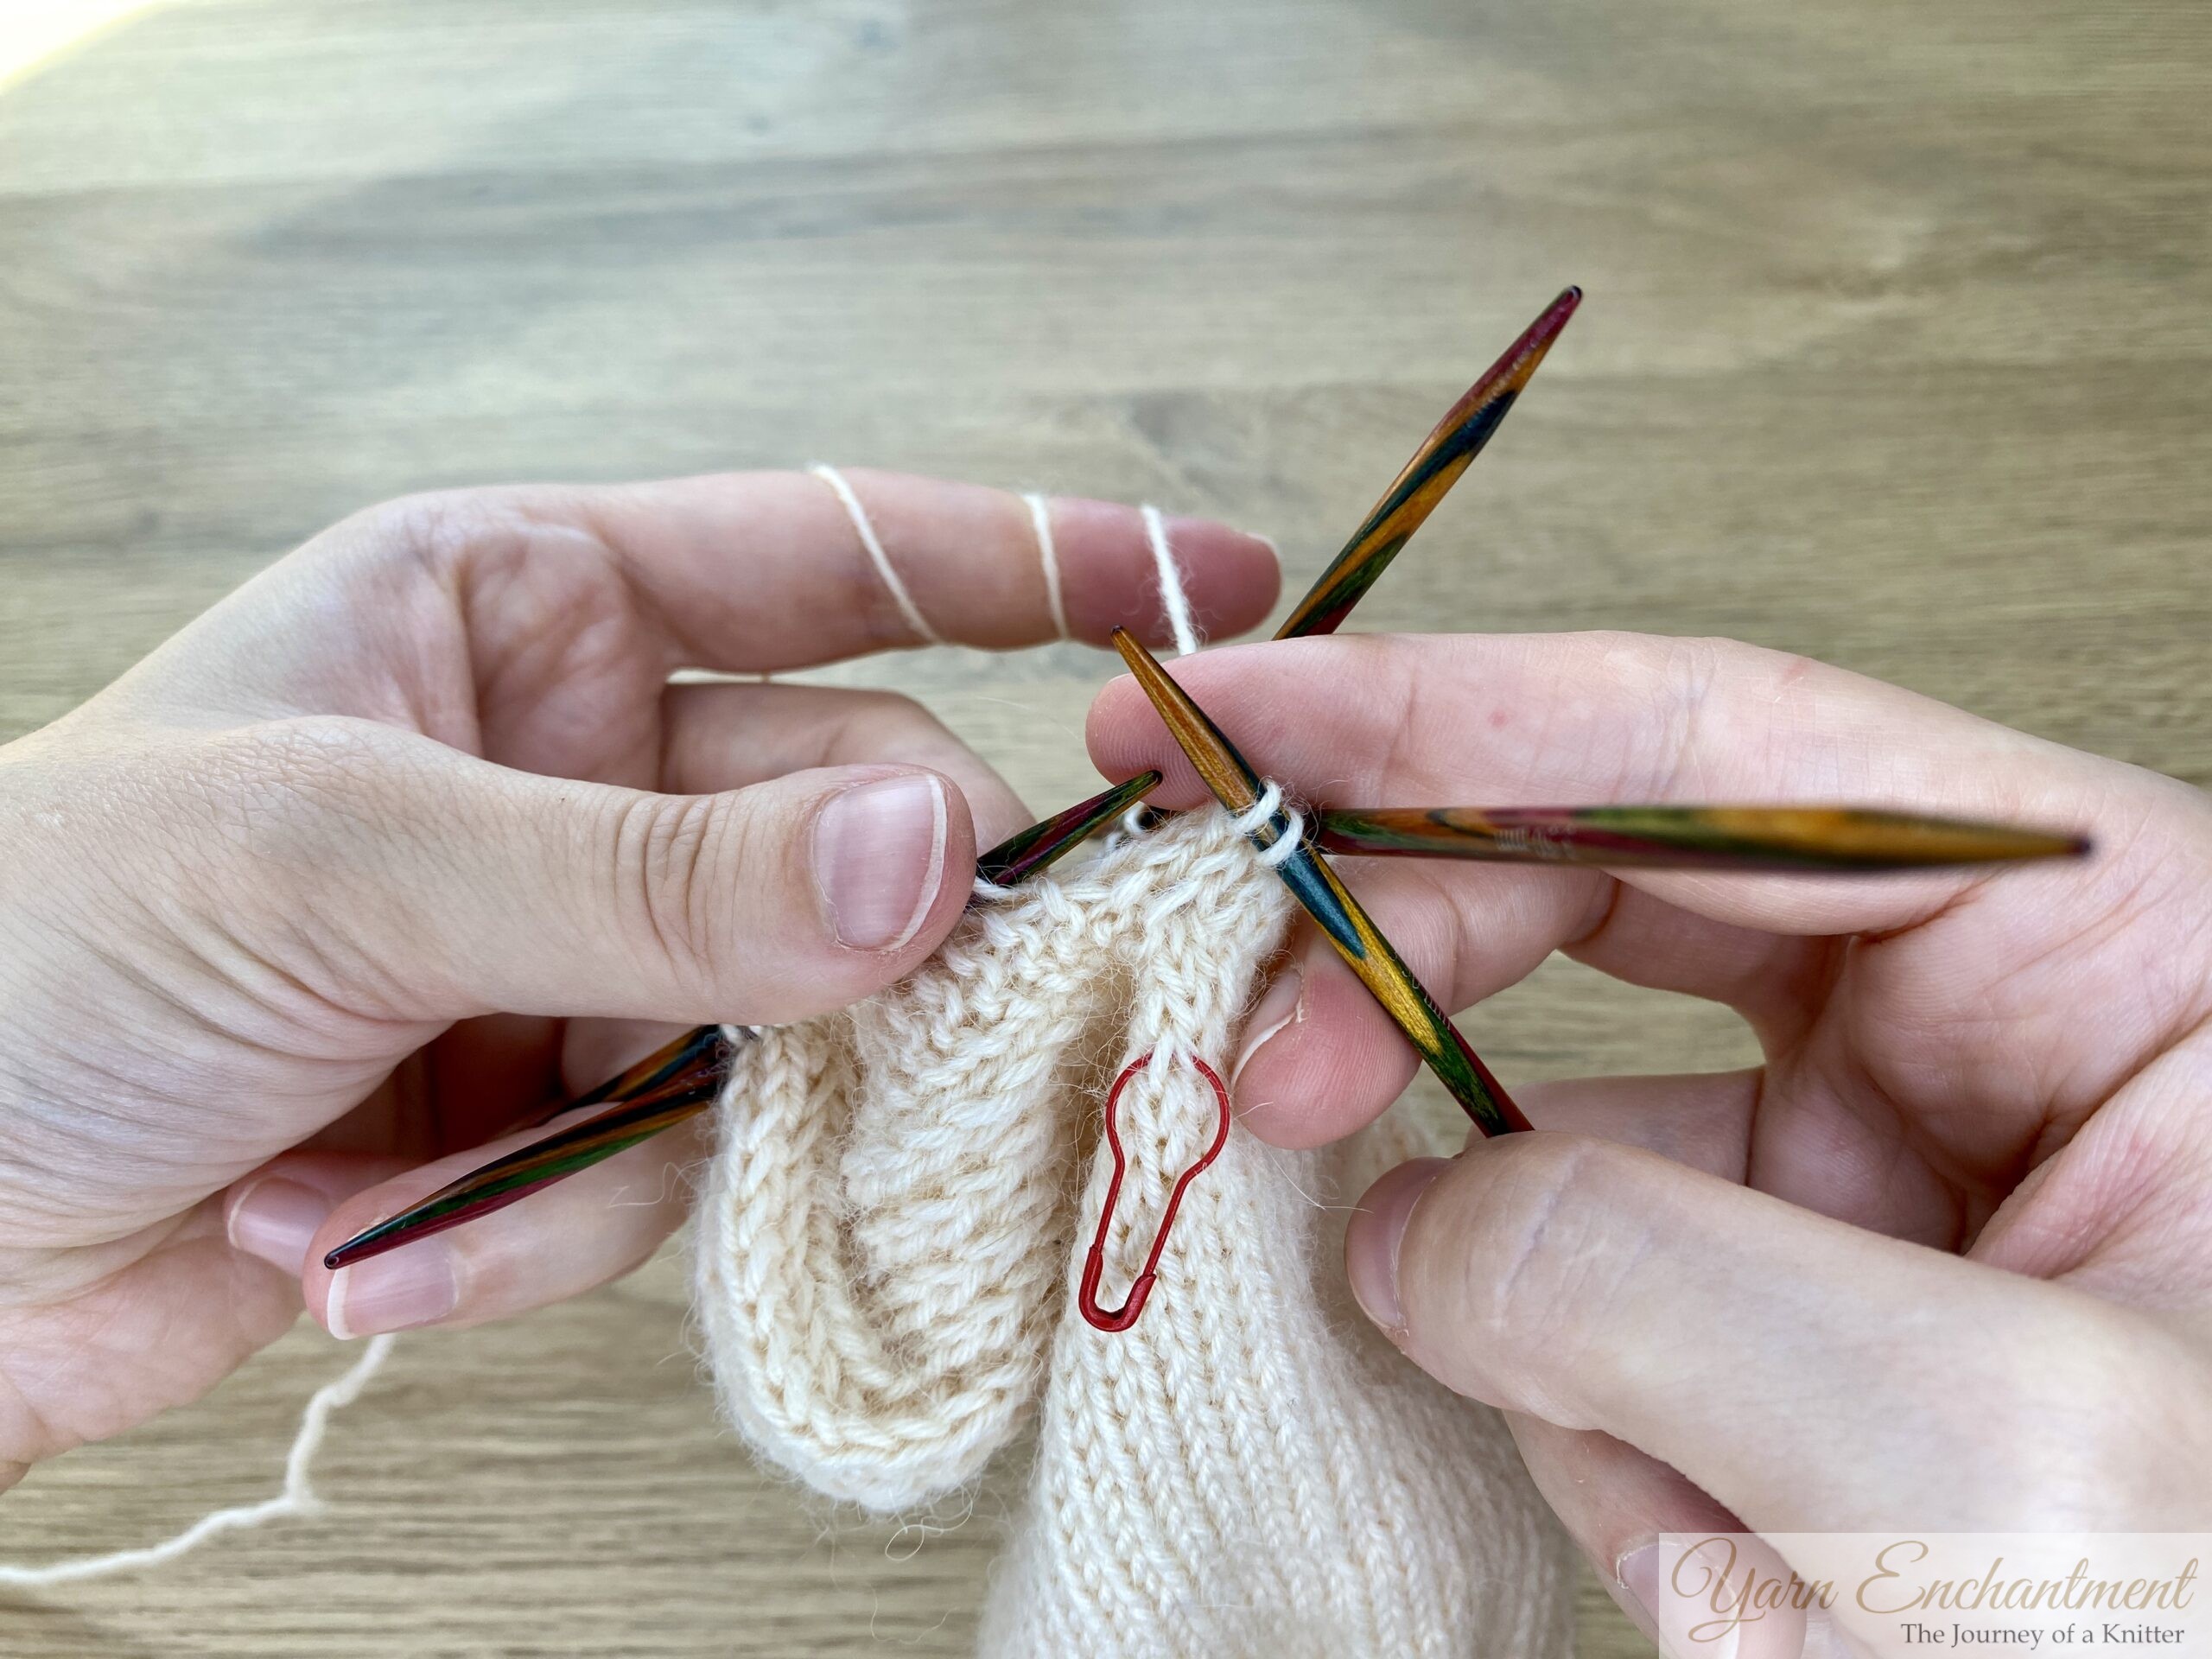
Before we start, we need to divide the remaining stitches from the heel back onto needles 1 and 4.
 | 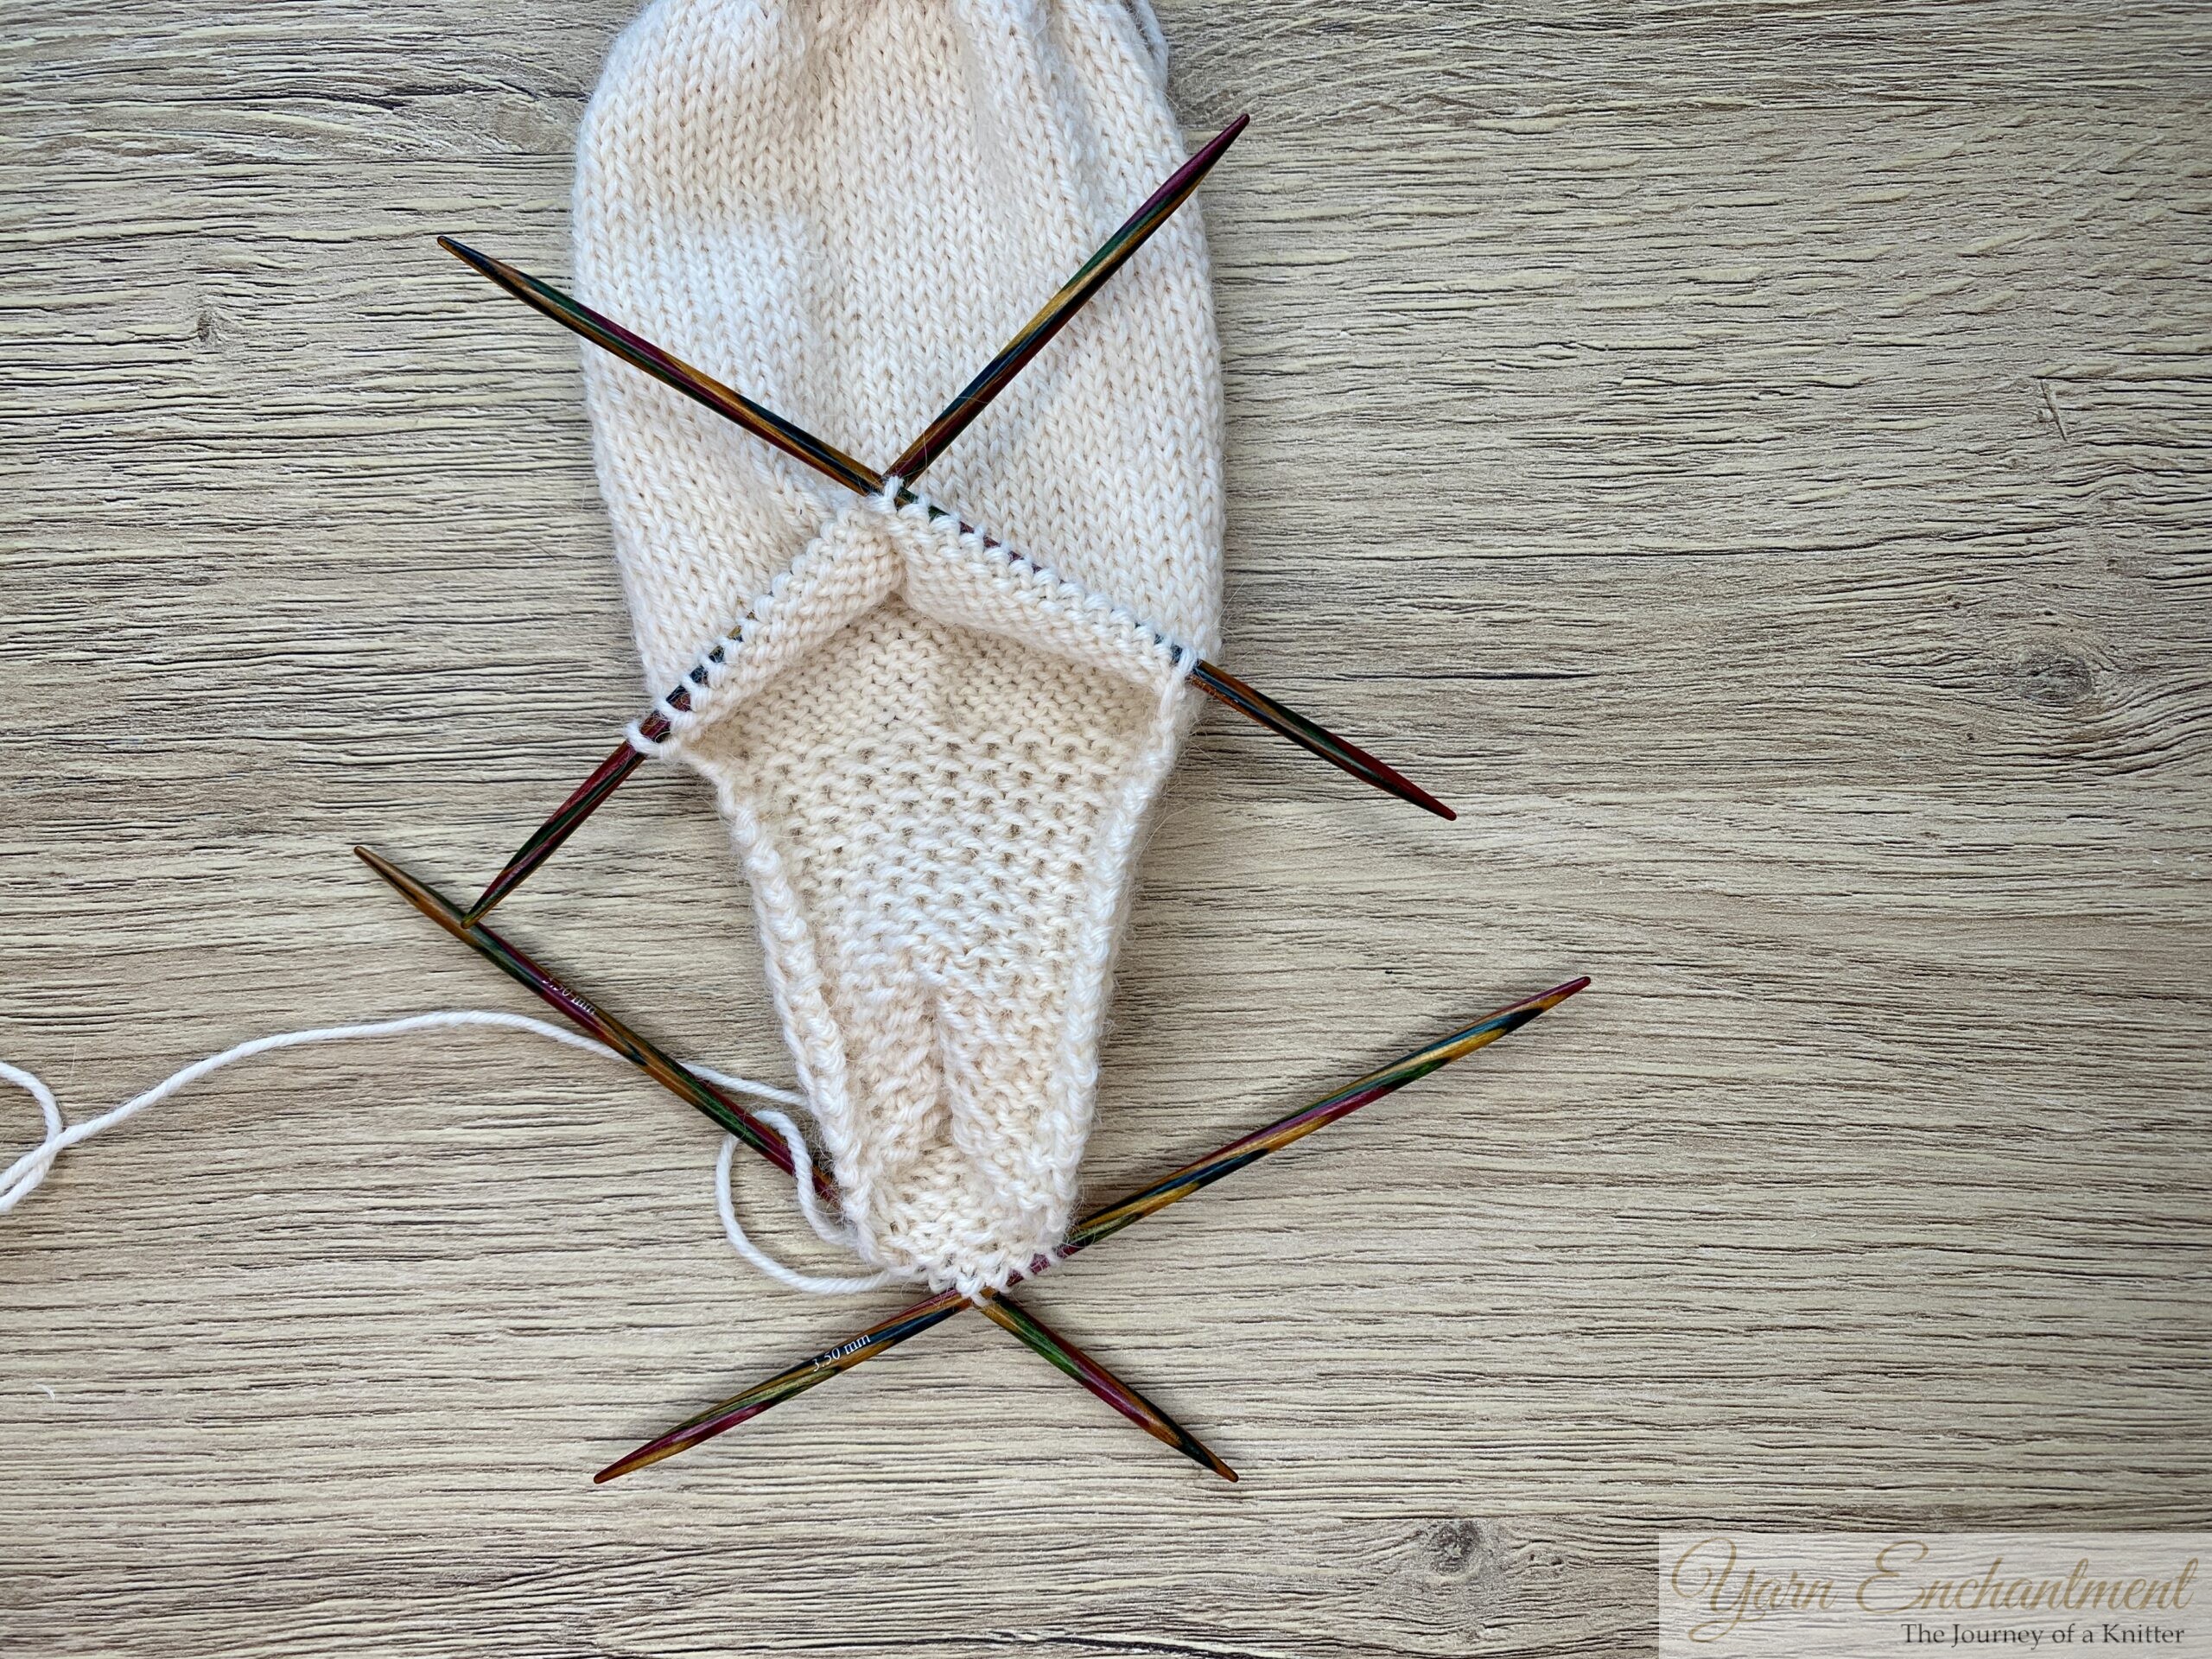 | Knit half of the stitches on needle number 4, and the rest of the stitches will be on needle number 1 | I have now divided my heel stitches in half; for me, that means I have four stitches on needle 1 and four stitches on needle 4. |


Gusset Pick up Needle one
The next step is to pick up your gusset stitches. Use a smaller needle, the same size you used for the cuff, as this makes picking up the stitches much easier.
 |  |  | The first stitch to pick up - right next to your needle - can sometimes leave a small hole between the cast-on stitches and the picked-up stitches. To avoid this, pick up the garter stitch that sits directly beside your heel stitches, not the stitch right at the edge on the right side of your smile stitches. Instead, pick up the stitch to the left of the smile stitches, right at the start of your heel flap (see video tutorial). | Insert your needle through the left garter stitch bump to pick up the stitch, then either knit it right away or place it onto a smaller spare needle to knit later. | As you can see, the result is really neat and tidy without any holes. |


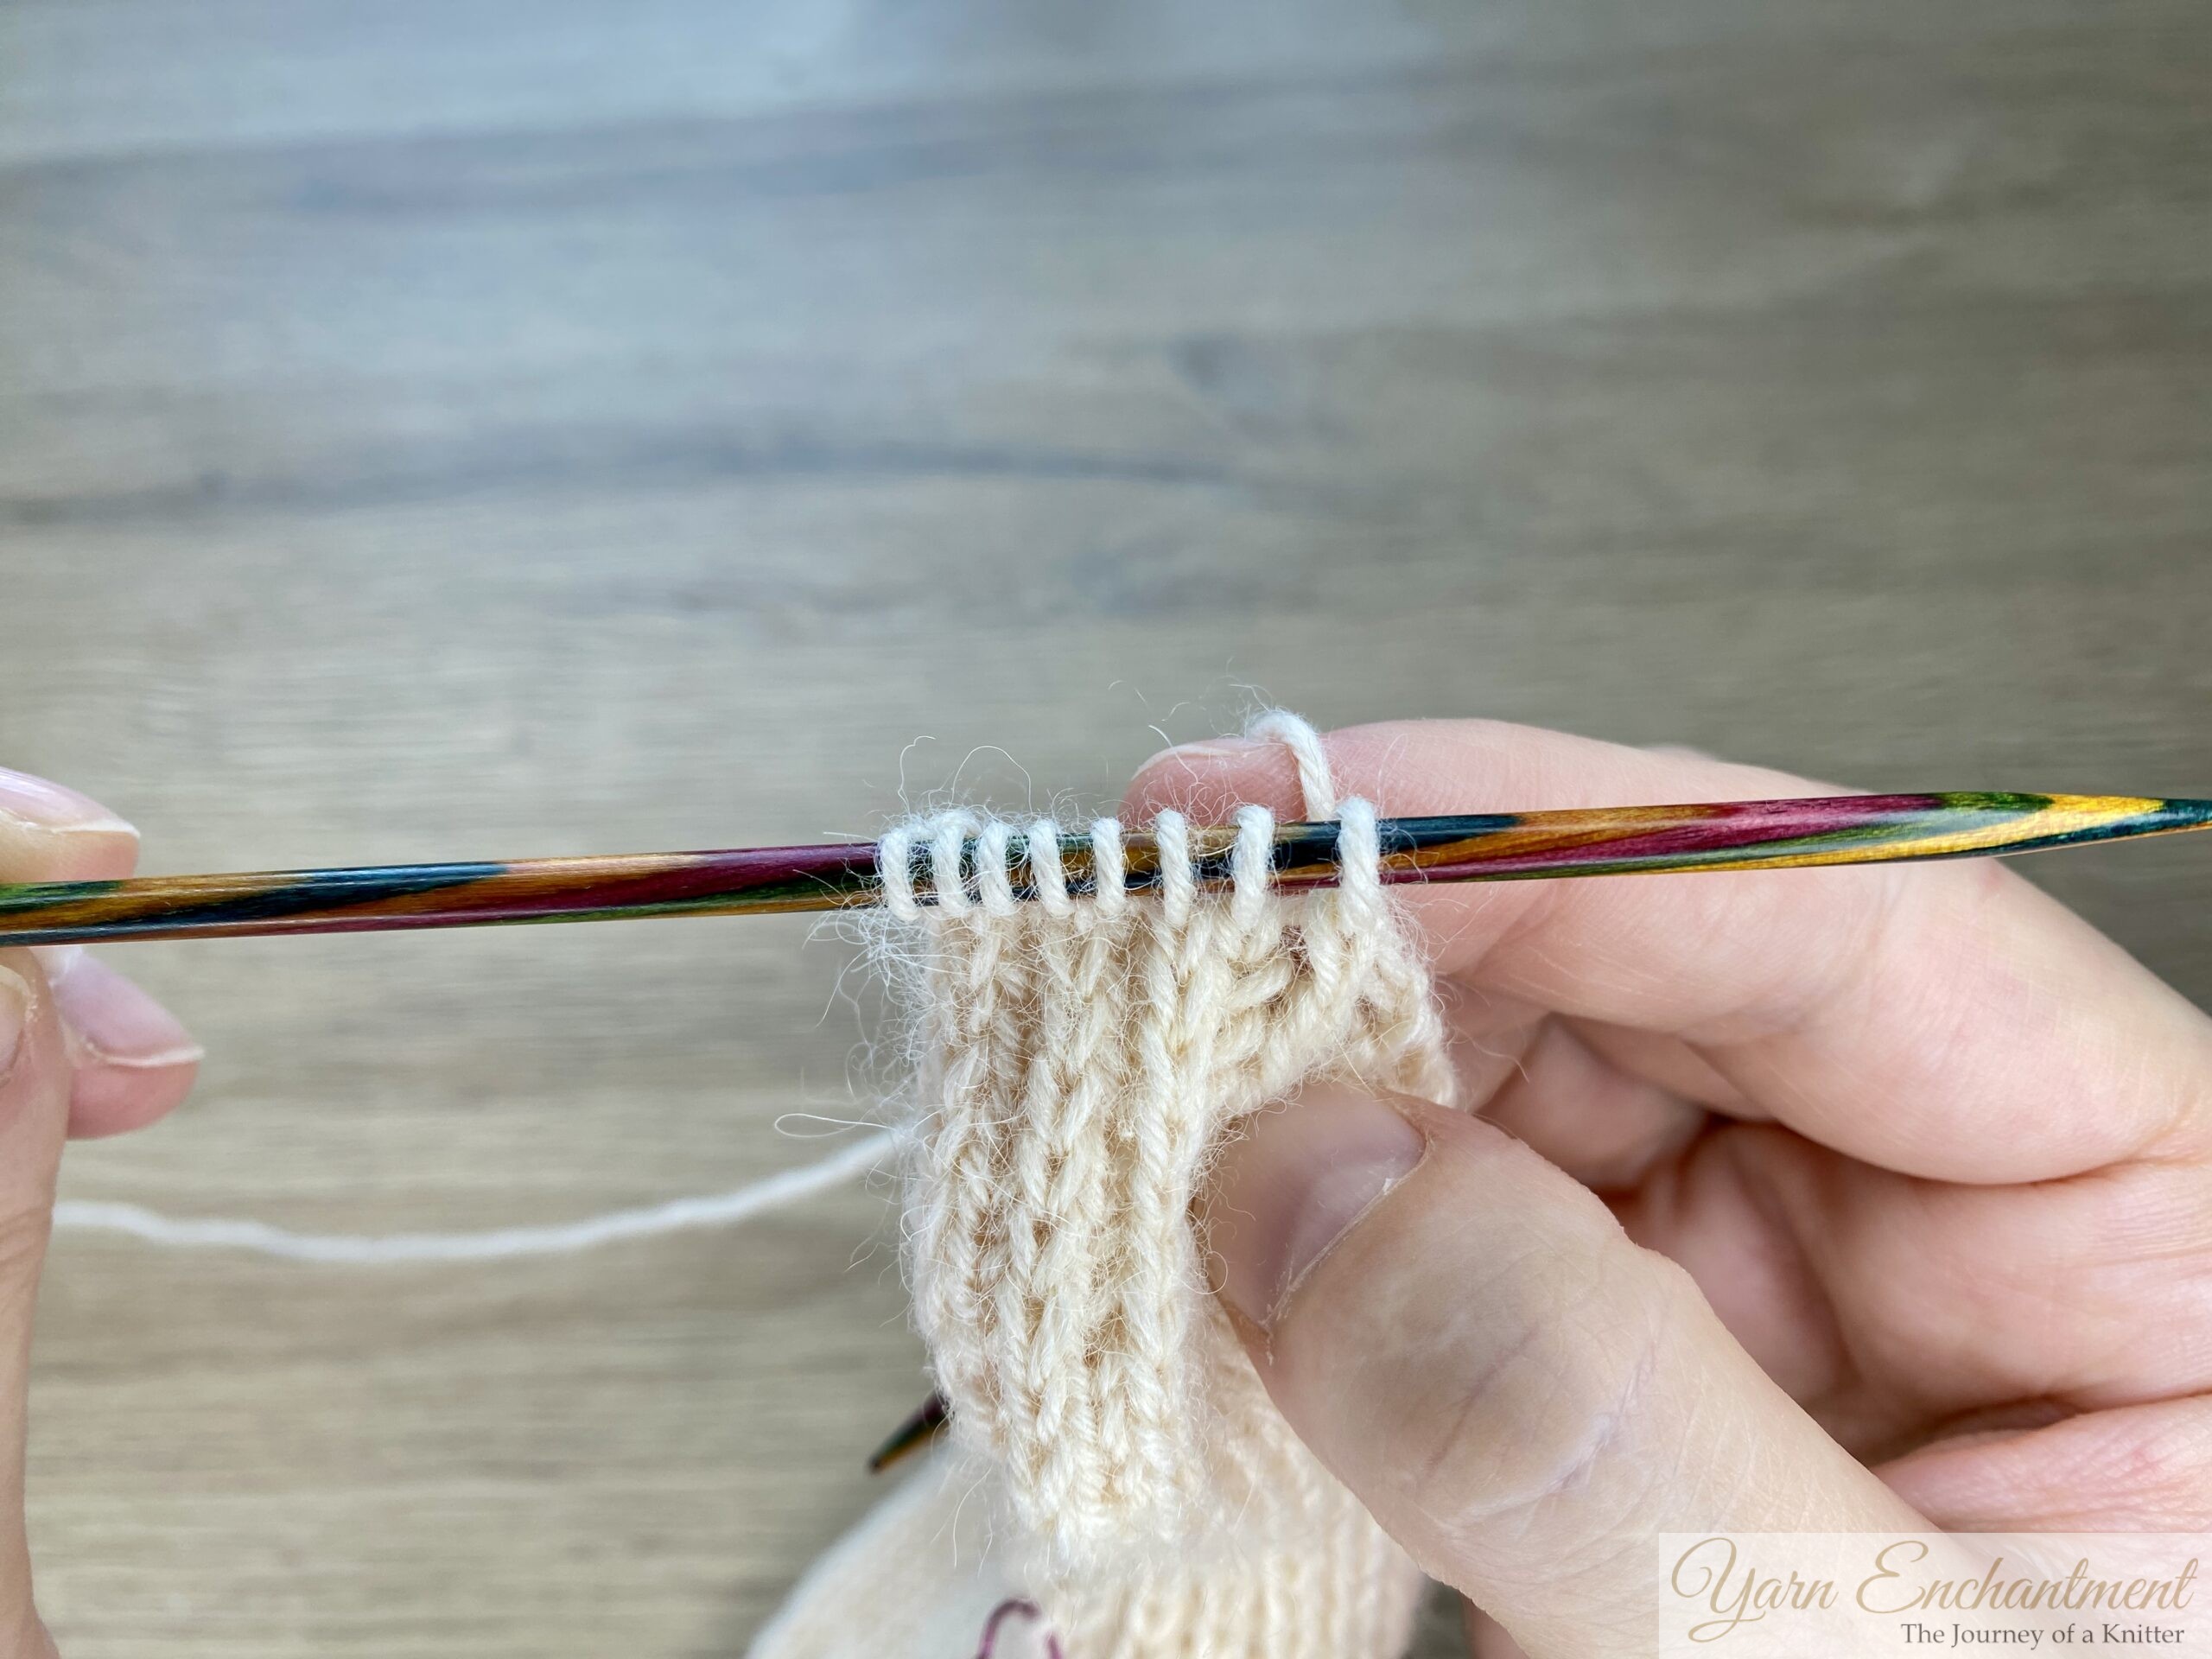
 |  |  | Next, insert your needle under the second garter stitch at the edge and pick up a stitch there as well. | Continue picking up a stitch from each garter stitch ridge until you have worked all the way to the end and there are no ridges left. | When you have picked up all the stitches, there should be half as many stitches on your needles as the number of rows you knitted for your heel flap (for example, 26 heel flap rows = 13 garter stitch ridges). |


If you are happy with your picked-up stitches, you can now knit all of them onto needle 1. Slide the stitches to the right side and start knitting them with needle 1 - you already have 4 stitches on that needle to begin with.
 | Slide the stitches to the right side and start knitting them with needle 1, you already have 4 stitches on that needle to begin with. |

Closing the Pesky Gap Between the Needles: Two Techniques Compared
After you have finished knitting needle one and are ready to start with needle two, you’ll want to close the little gap between these two needles. When it comes to closing those infamous corner holes in sock knitting, I’ve tried every method, and I want to share my honest opinion about them.
Picking Up Between the Stitches (First Method)
This is the “quick fix”, just poke your needle or crochet hook into the gap and pull up a stitch. It does close the hole, but that new stitch almost always looks bigger and a bit messy compared to the rest. On finished socks, you can definitely see it! (I’ll show you a photo later so you know exactly what I mean.)
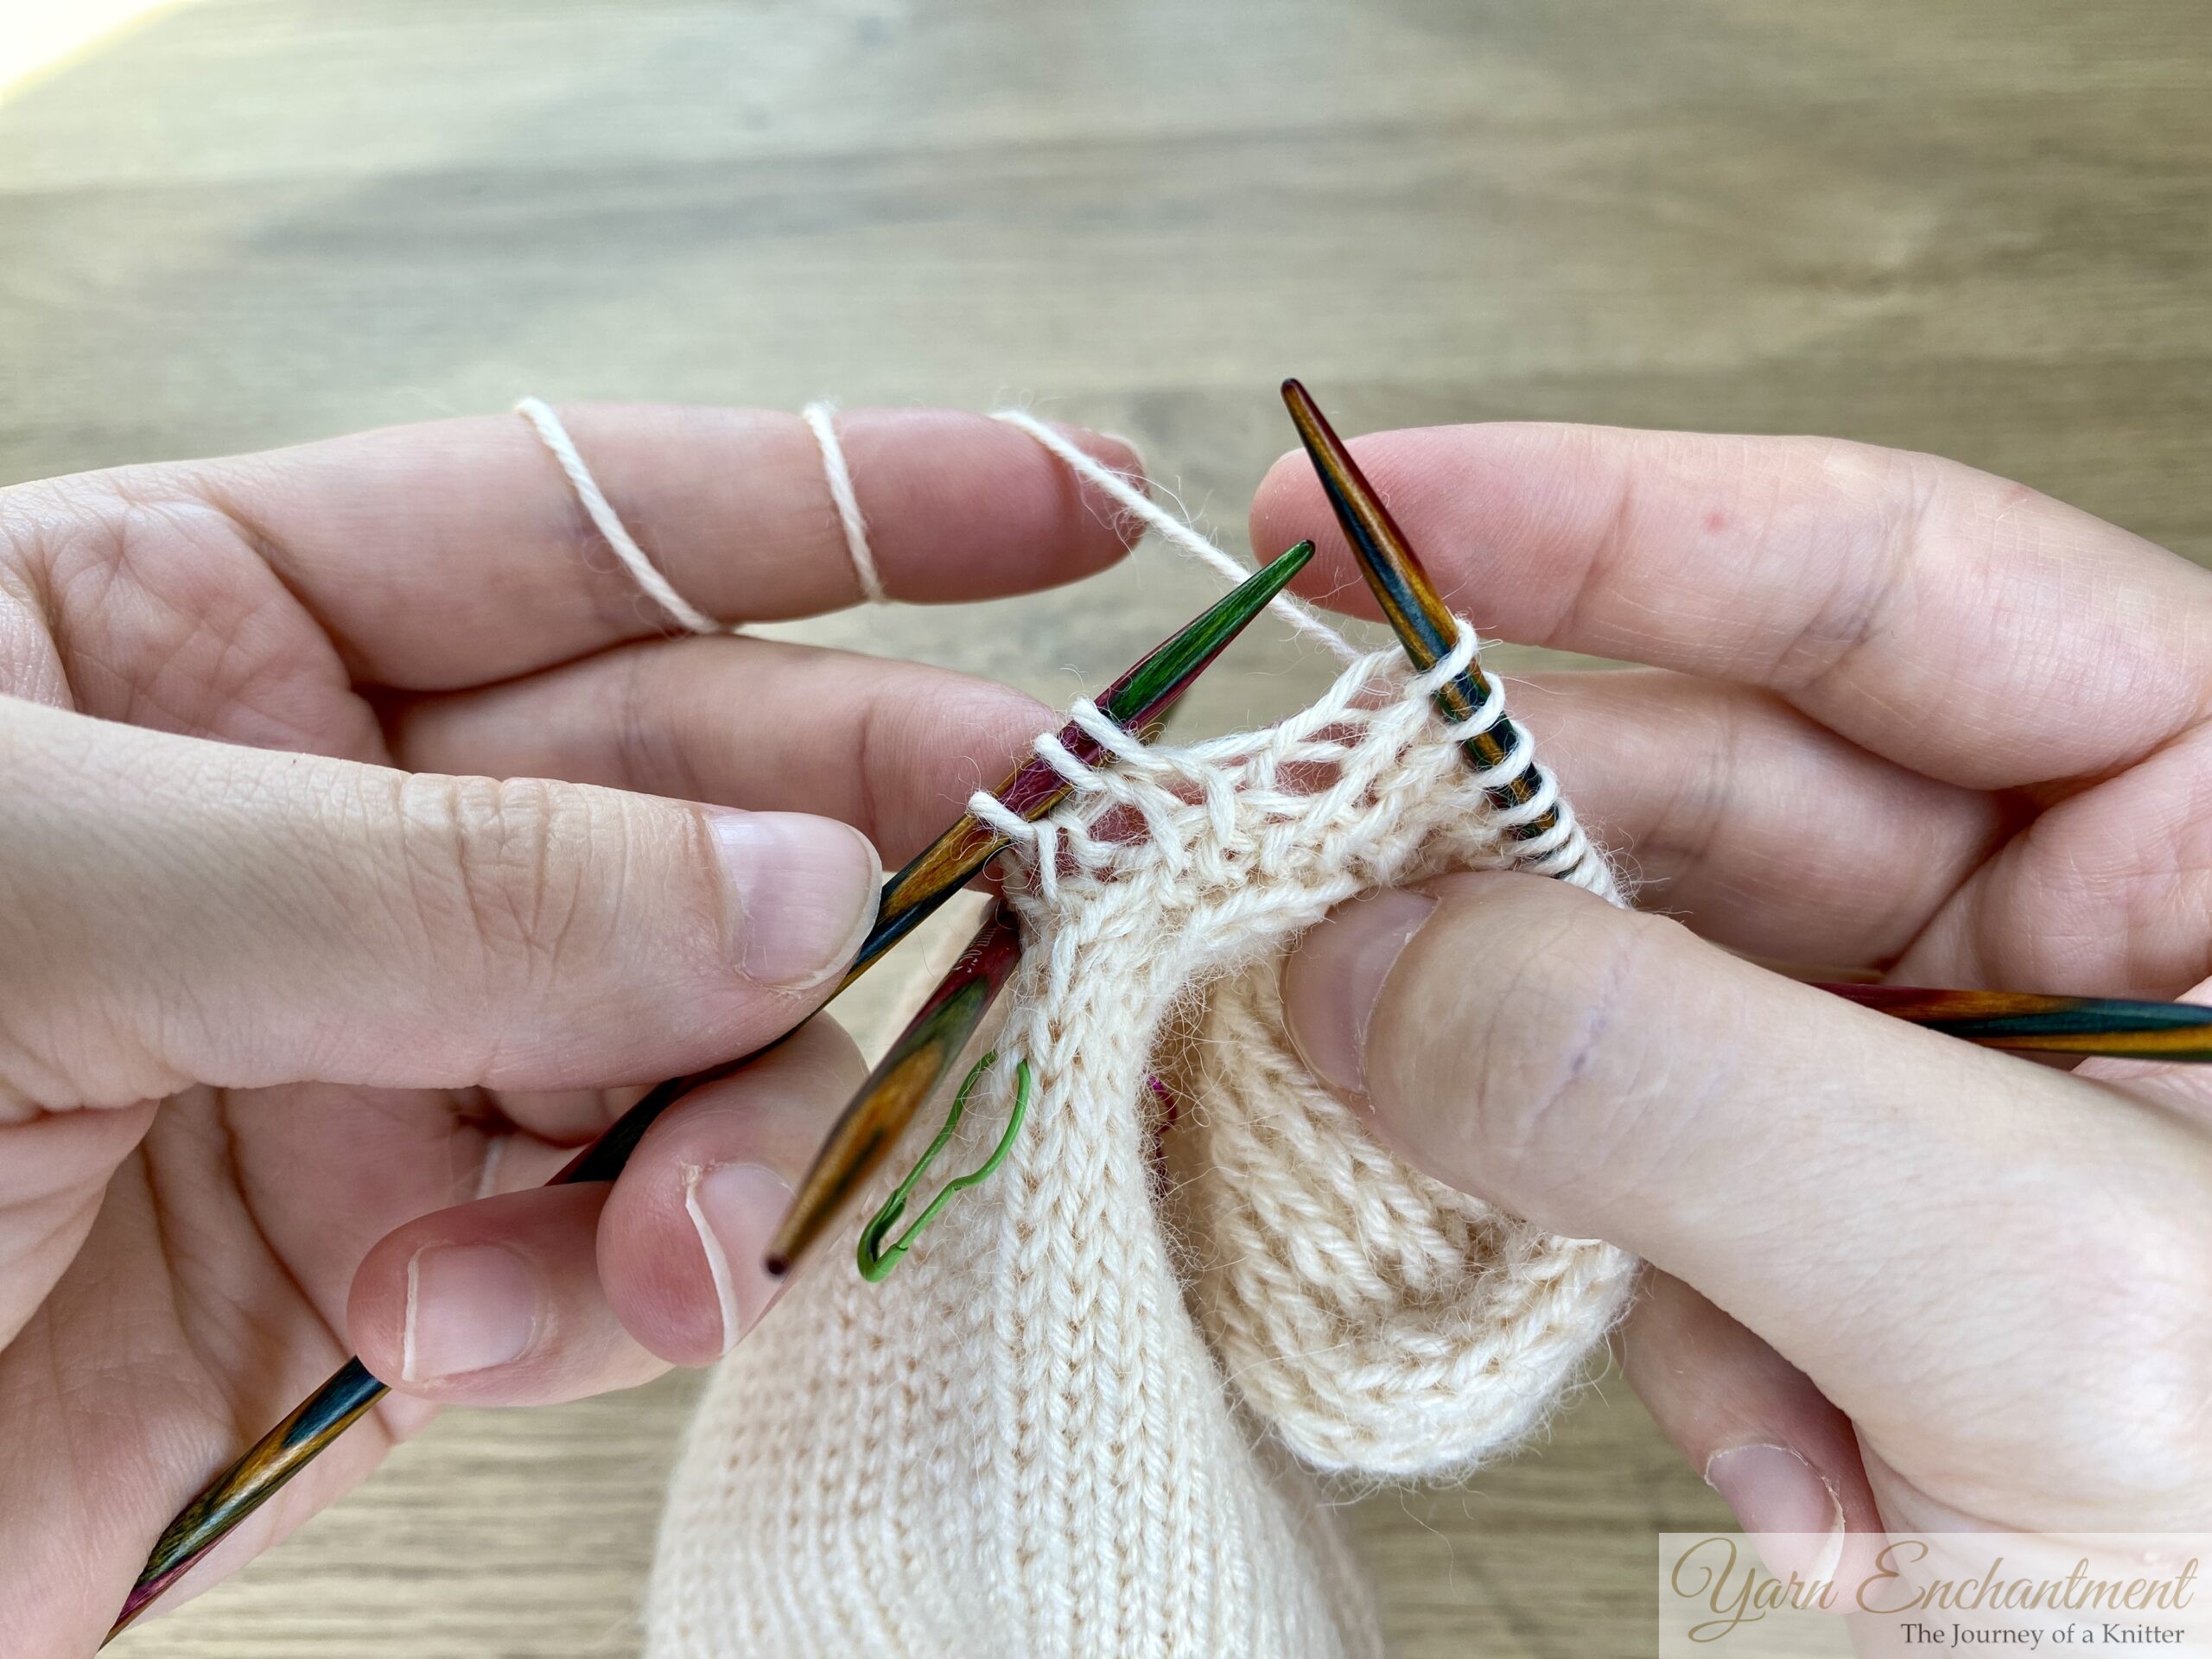
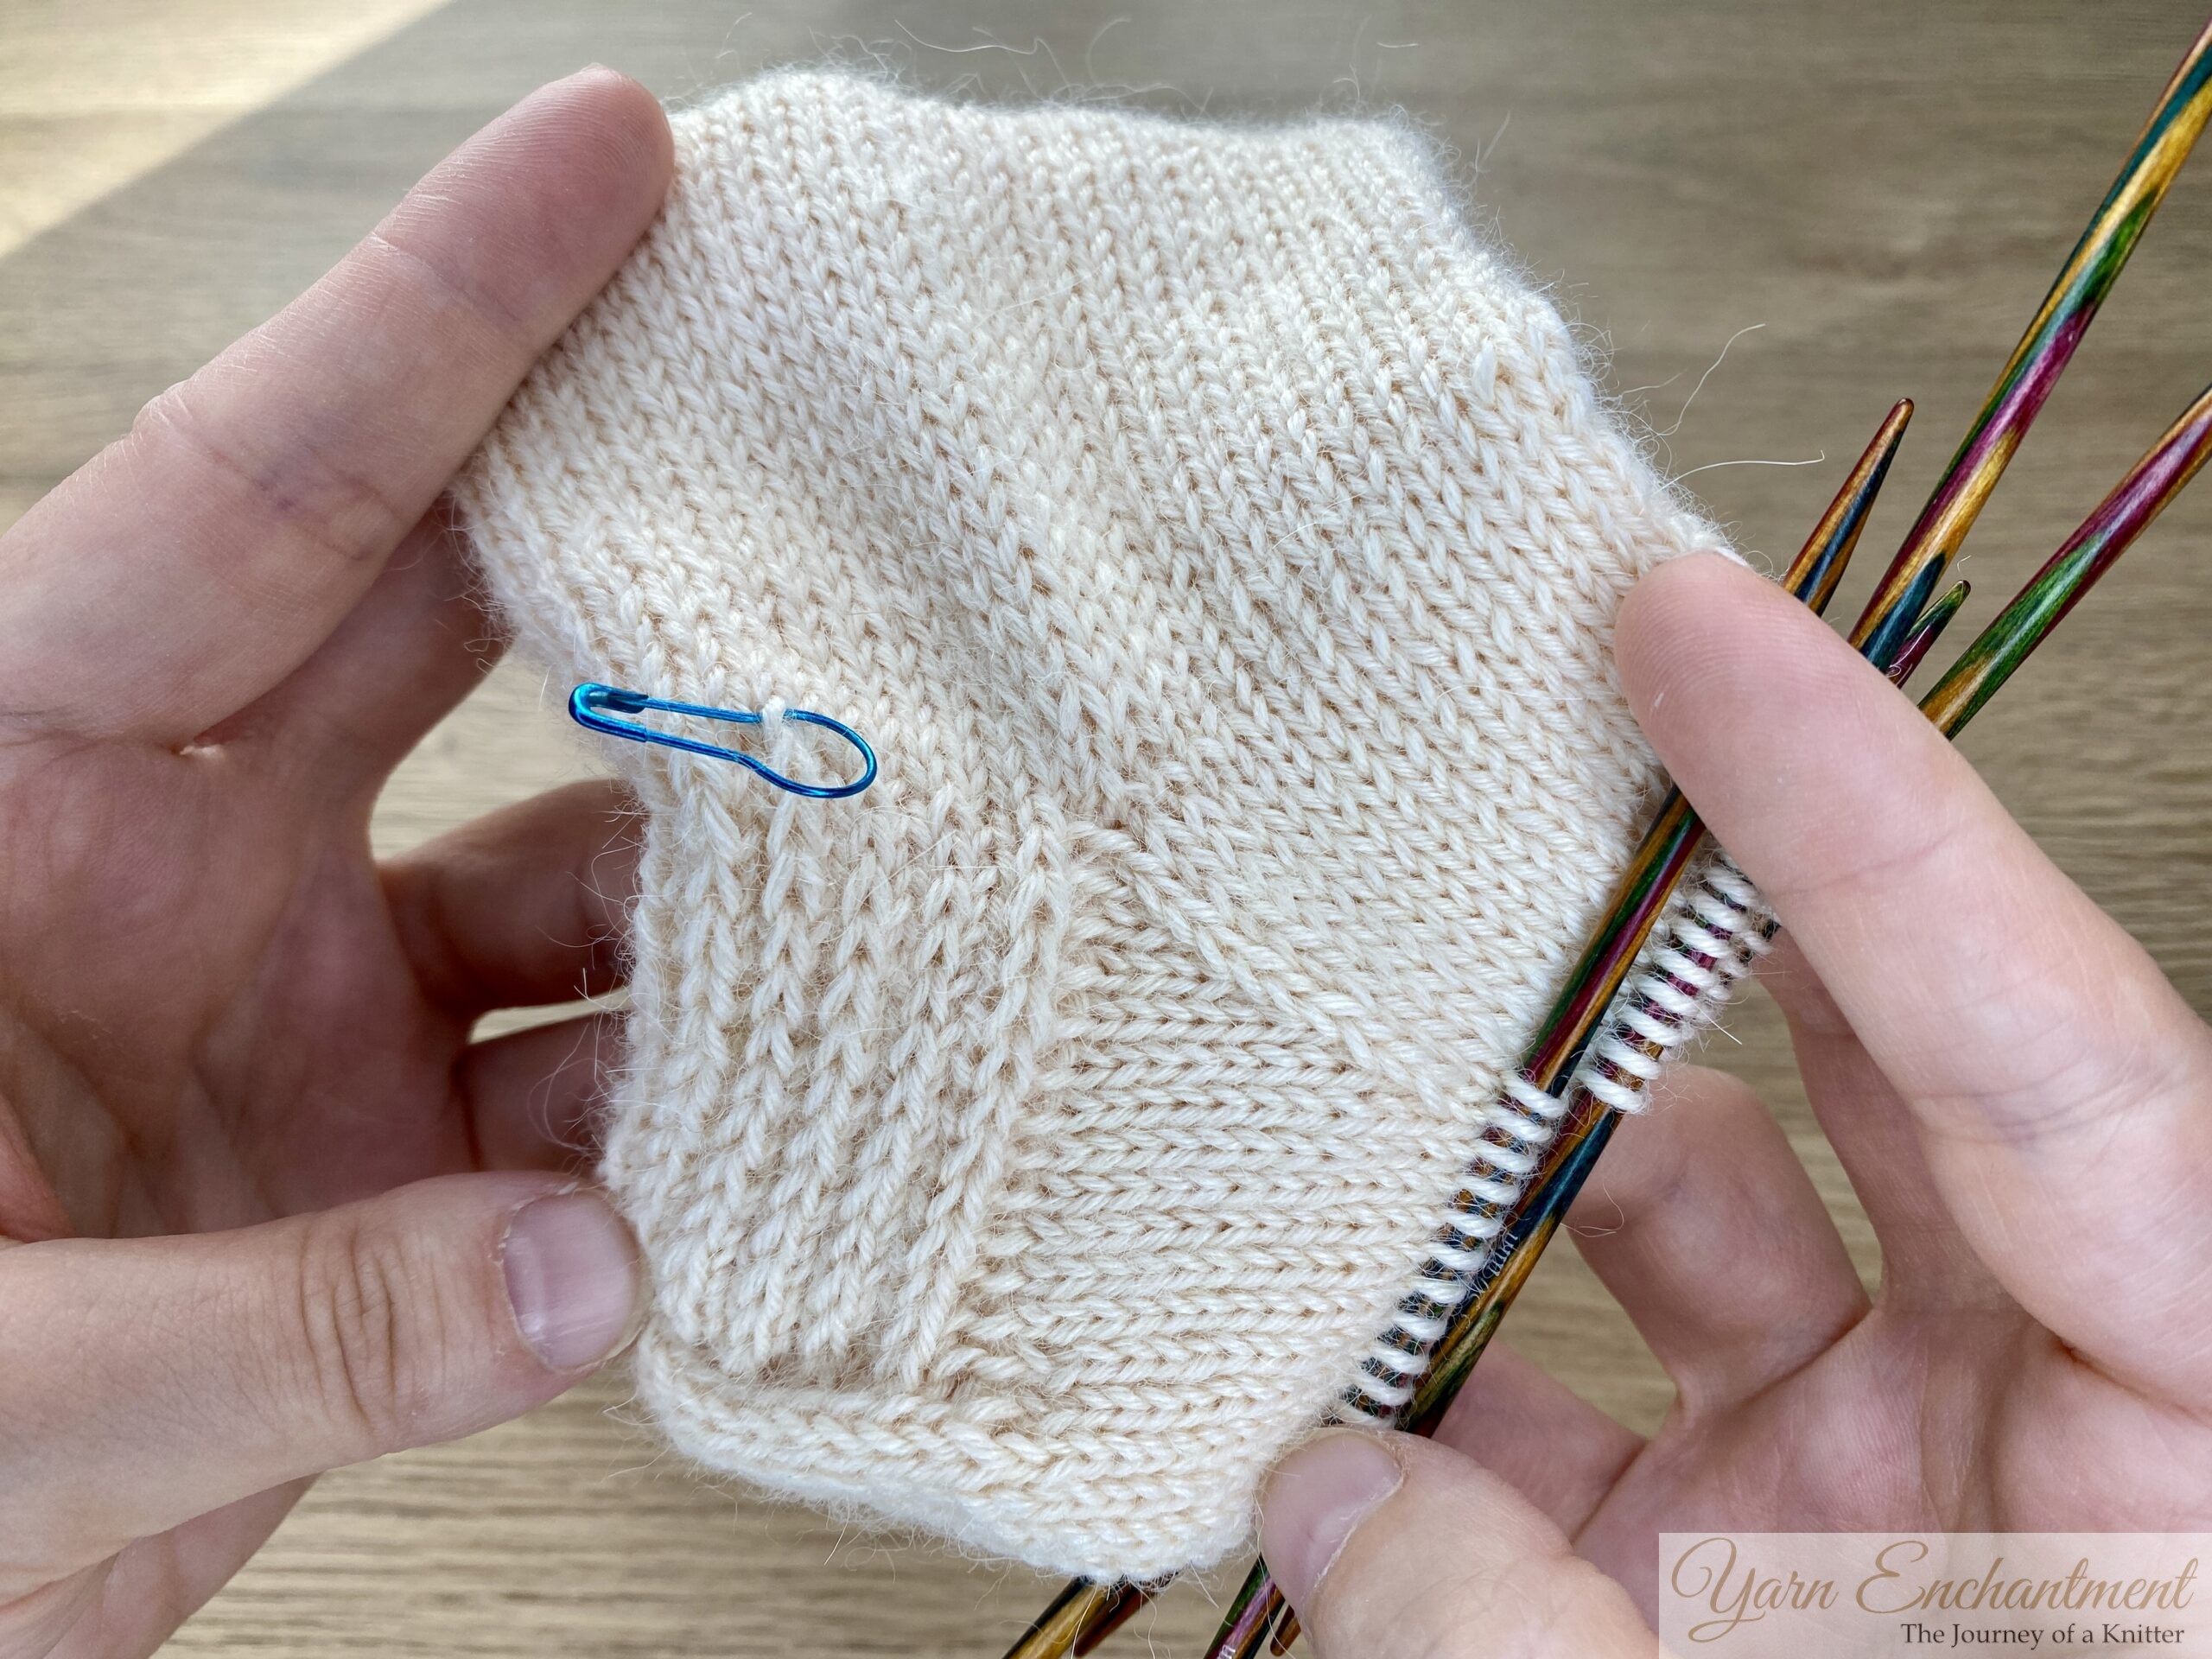
 |  |  | Identify the gap between your needles | You’ll notice there are “ladders” running between your stitches, but don’t use the very first one - picking that up would make the hole even bigger. | Instead, count down to the second ladder... |


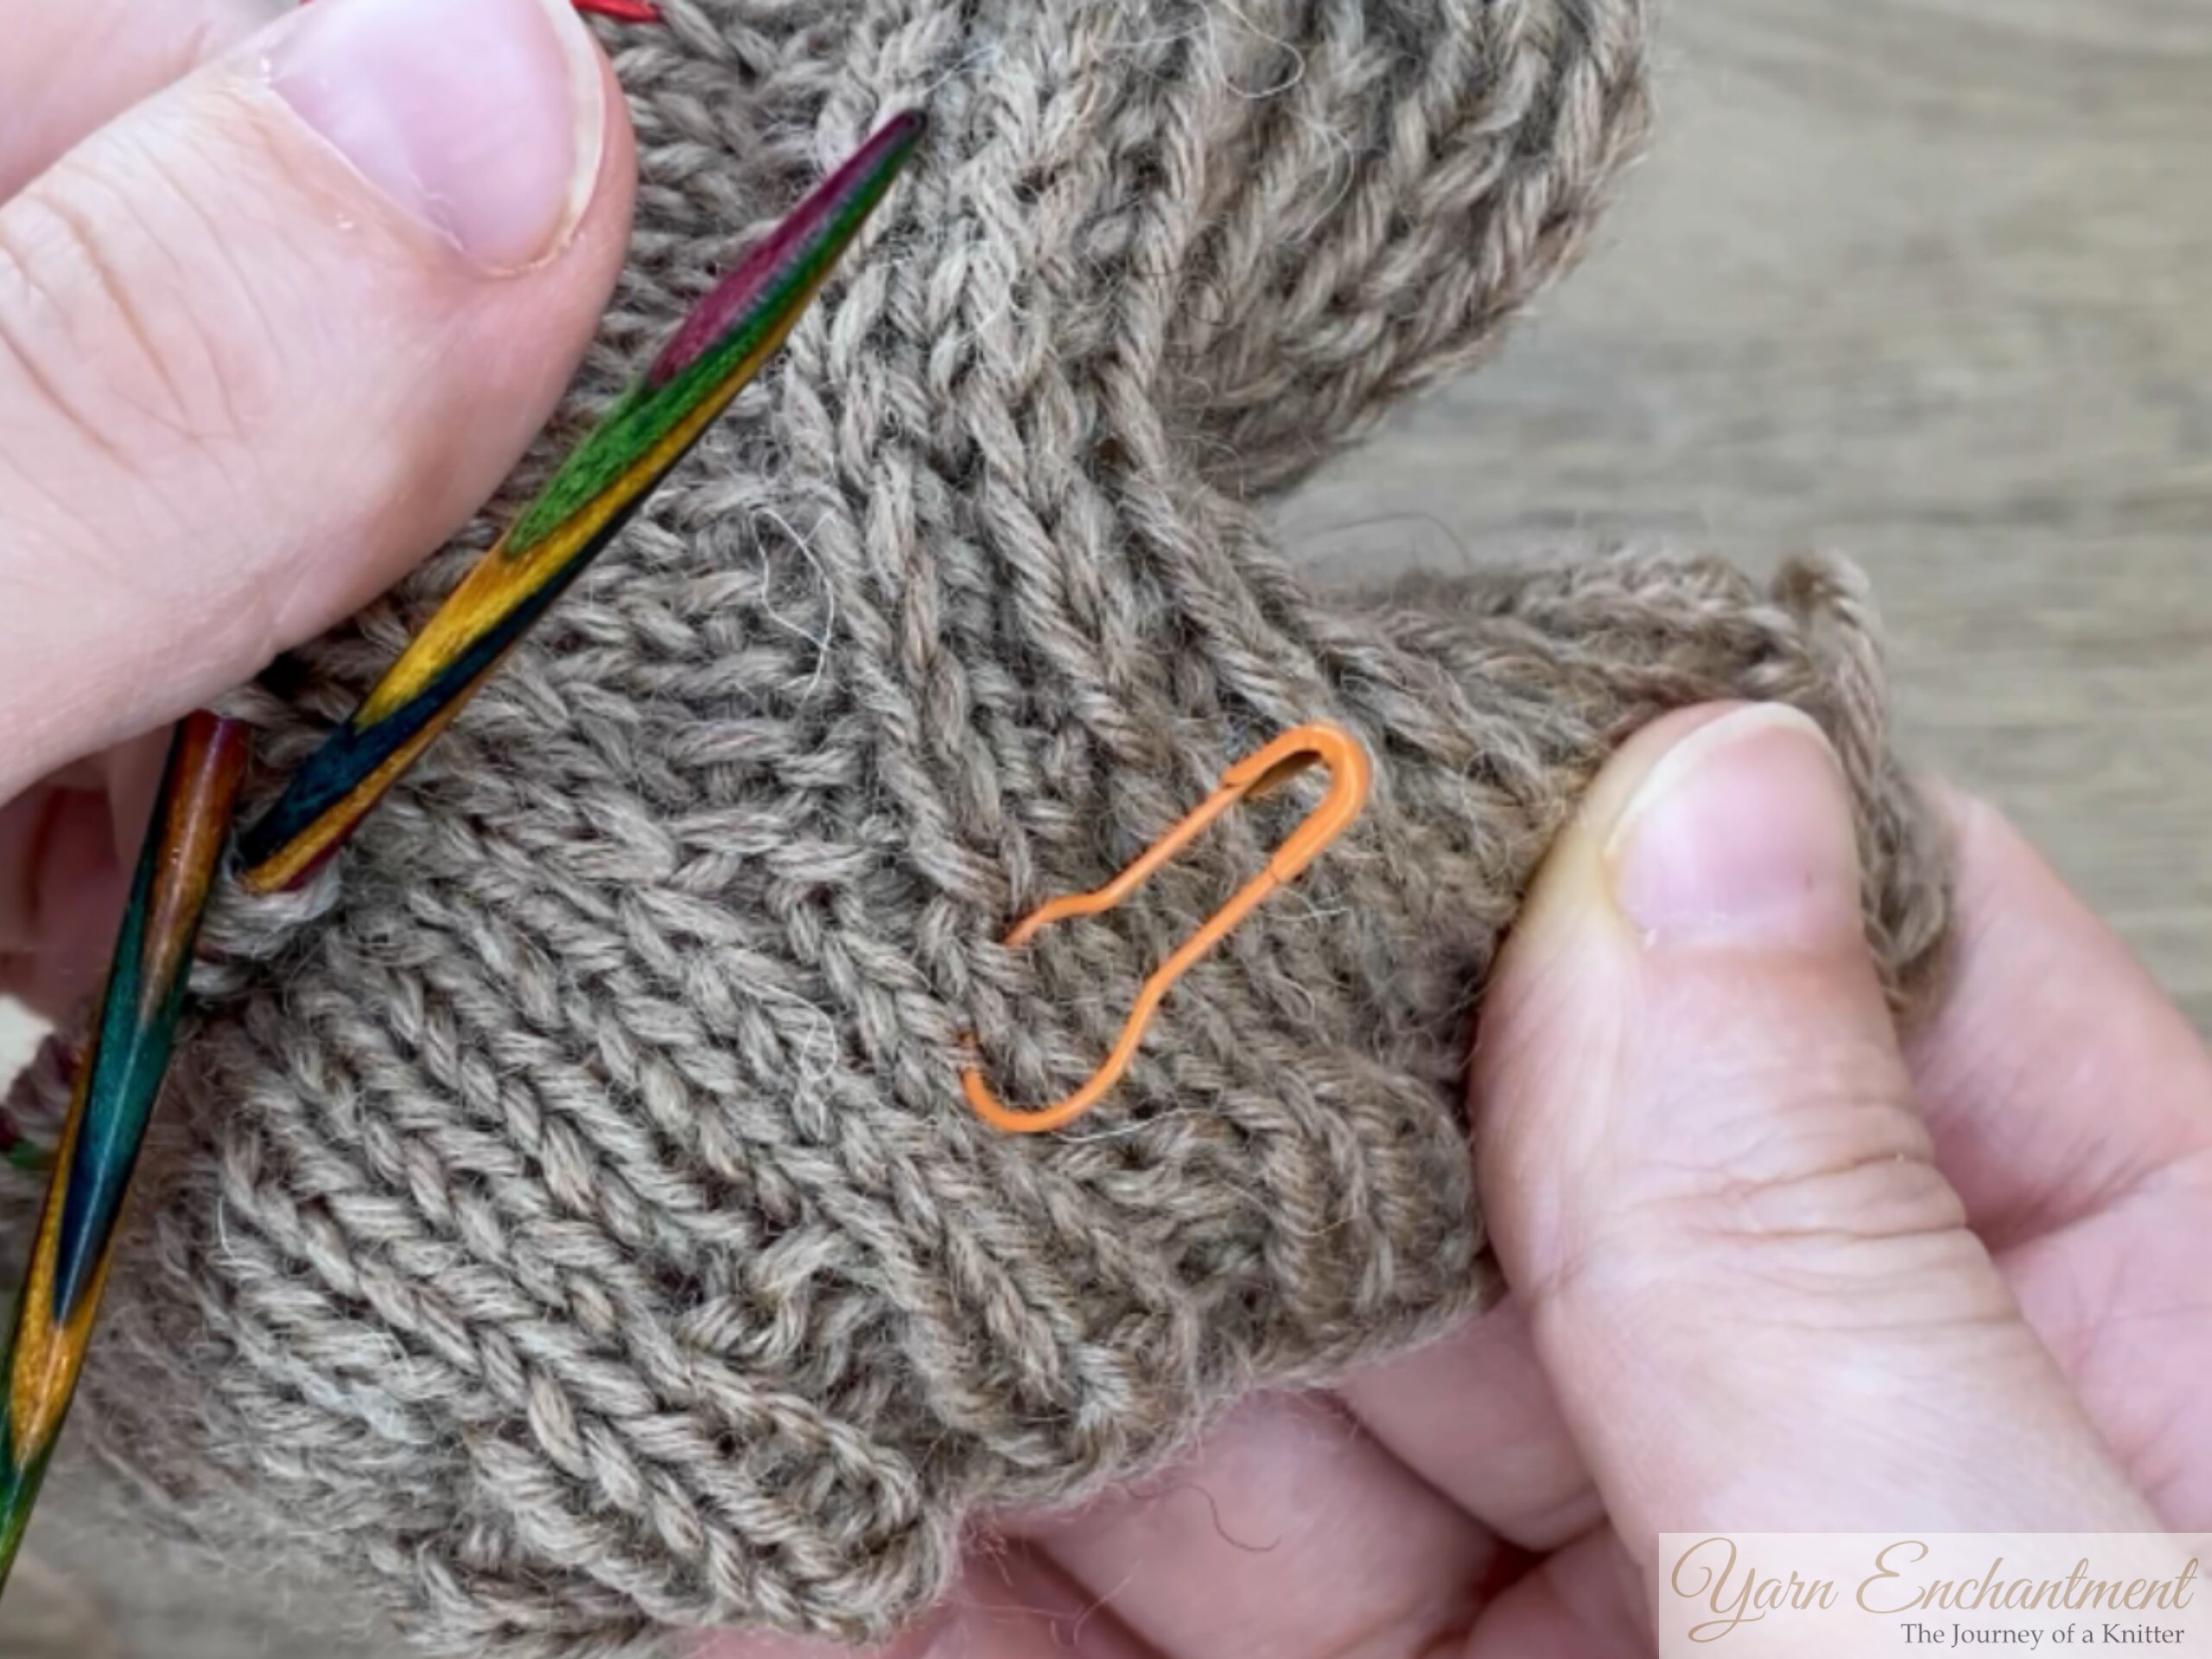
 |  | 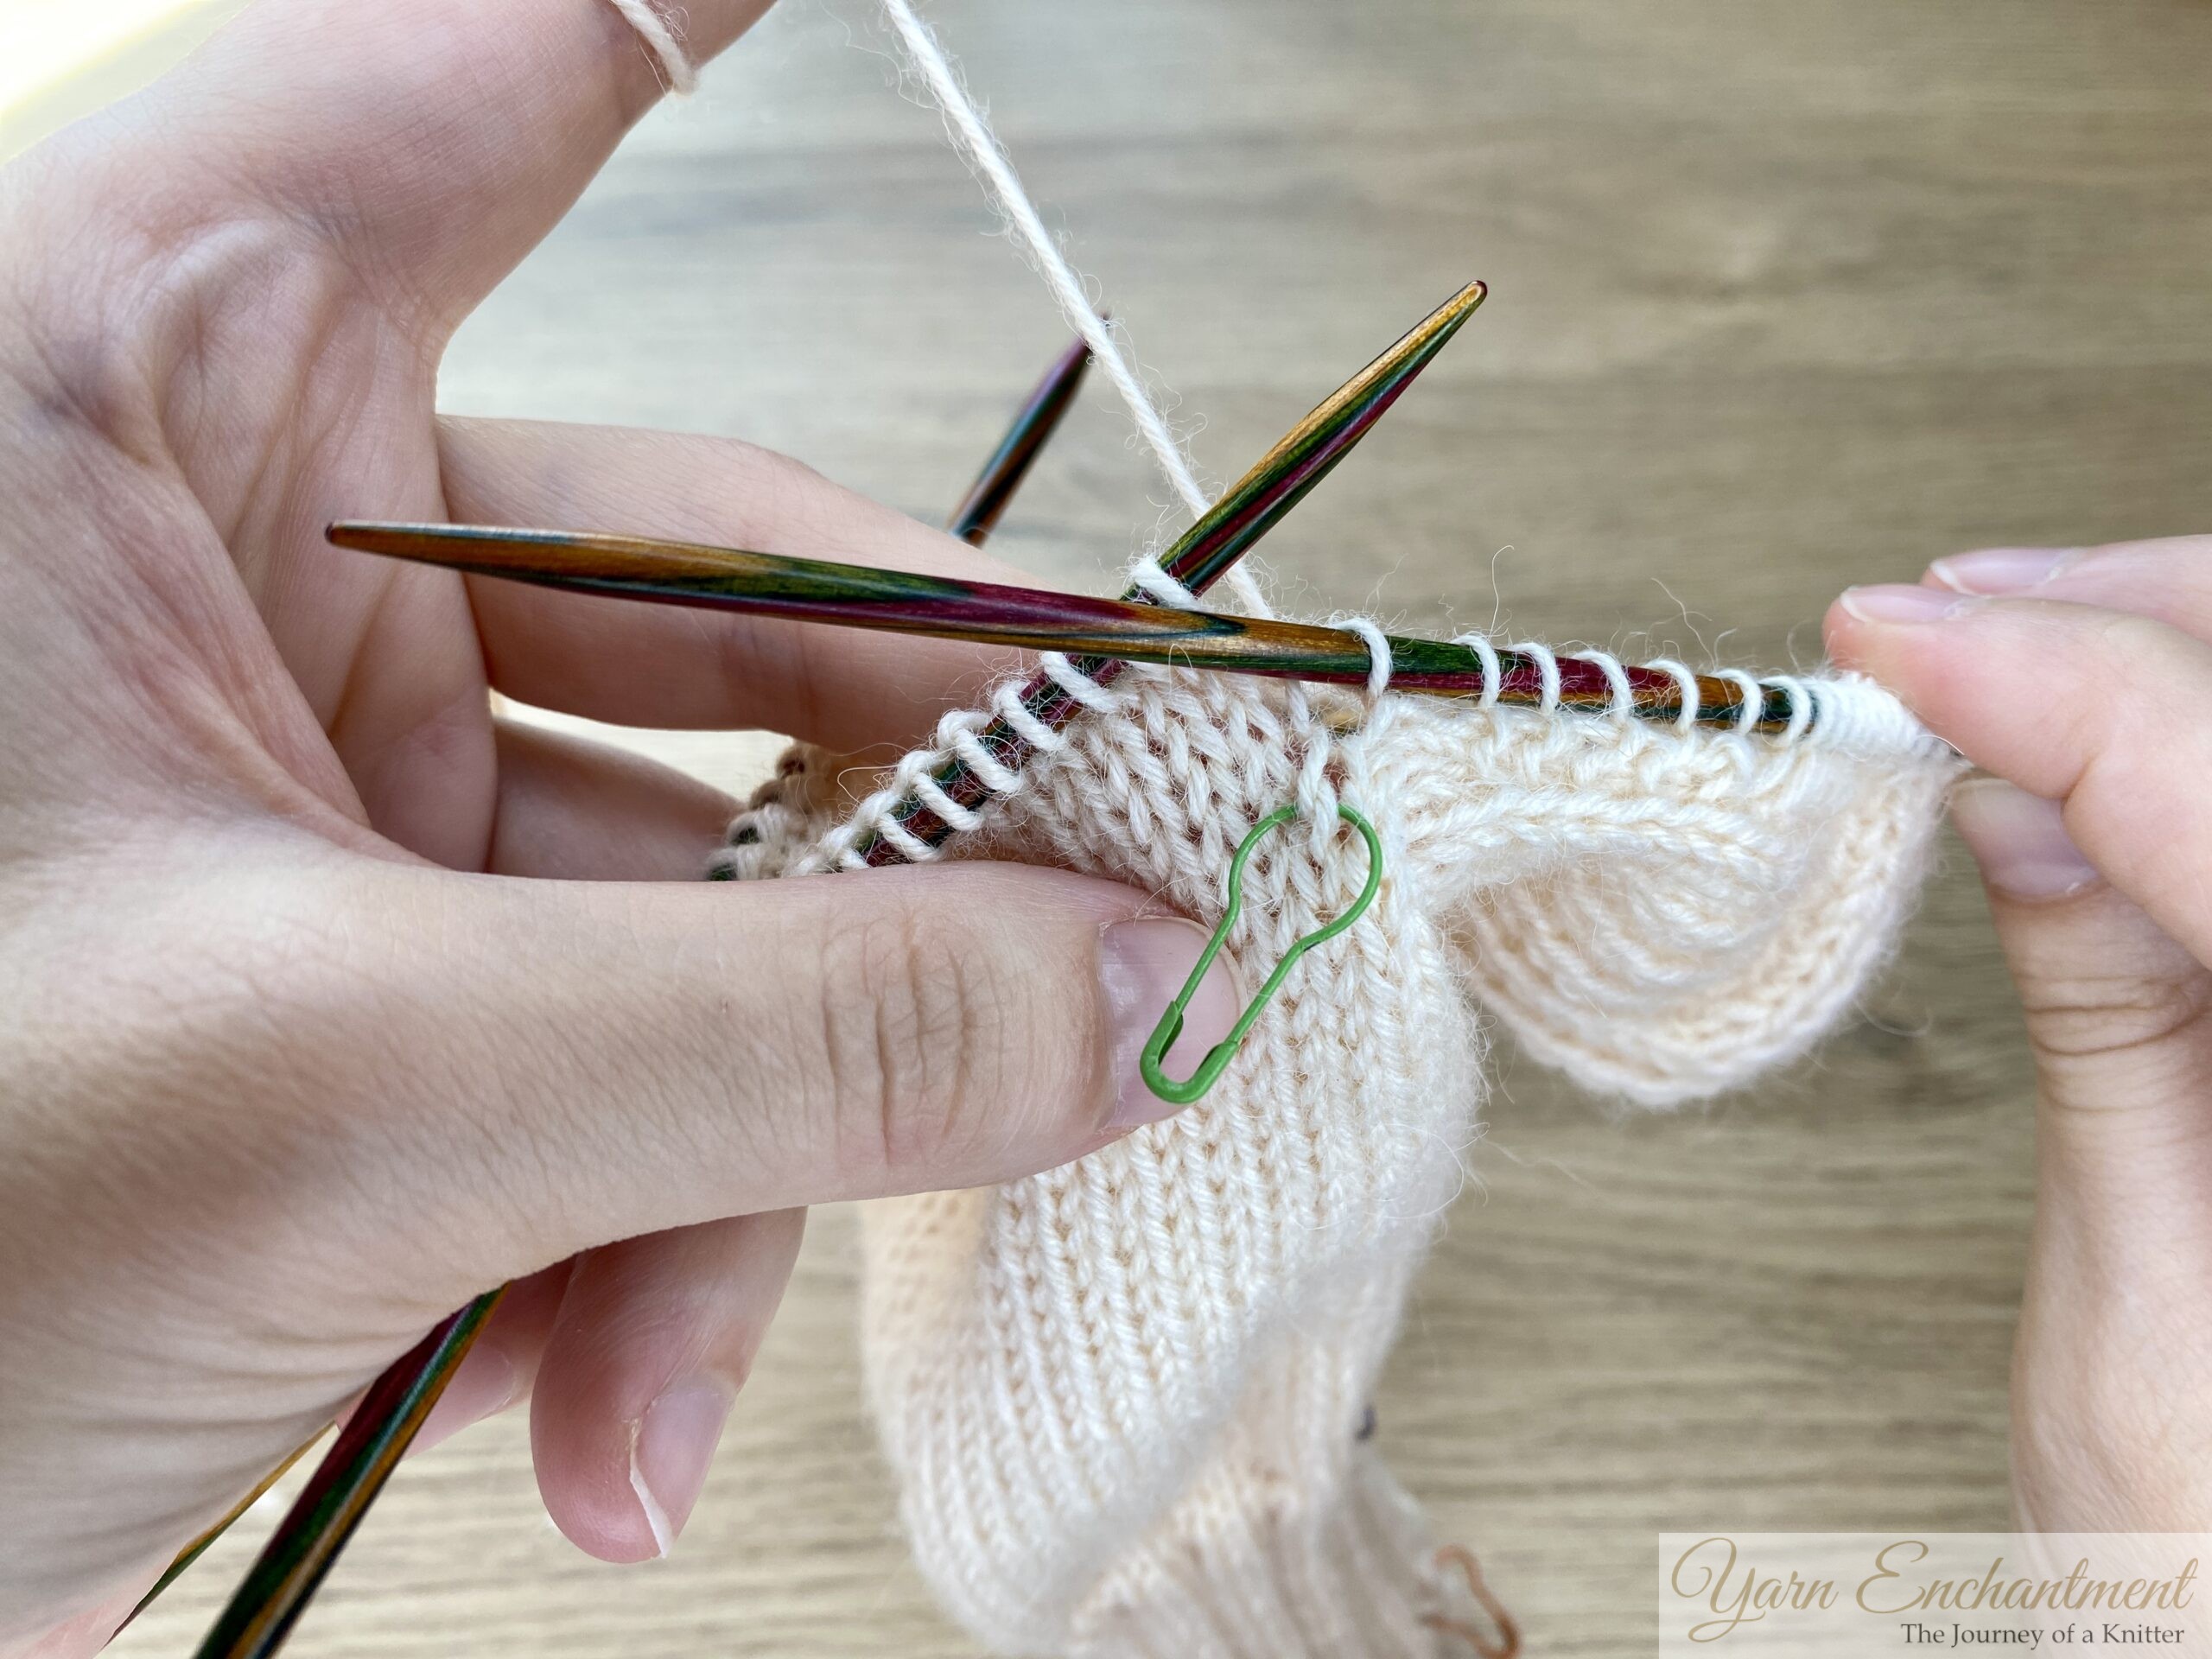 | ...and then to a third one below that. | Insert your needle through this third ladder and pull up a loop there. (Honestly, I probably could have gone even one ladder further down!) | To compare these two techniques later, I’ll place a green stitch marker here. |


Twisted Ladder Pickup (Second Method and My Favorite!)
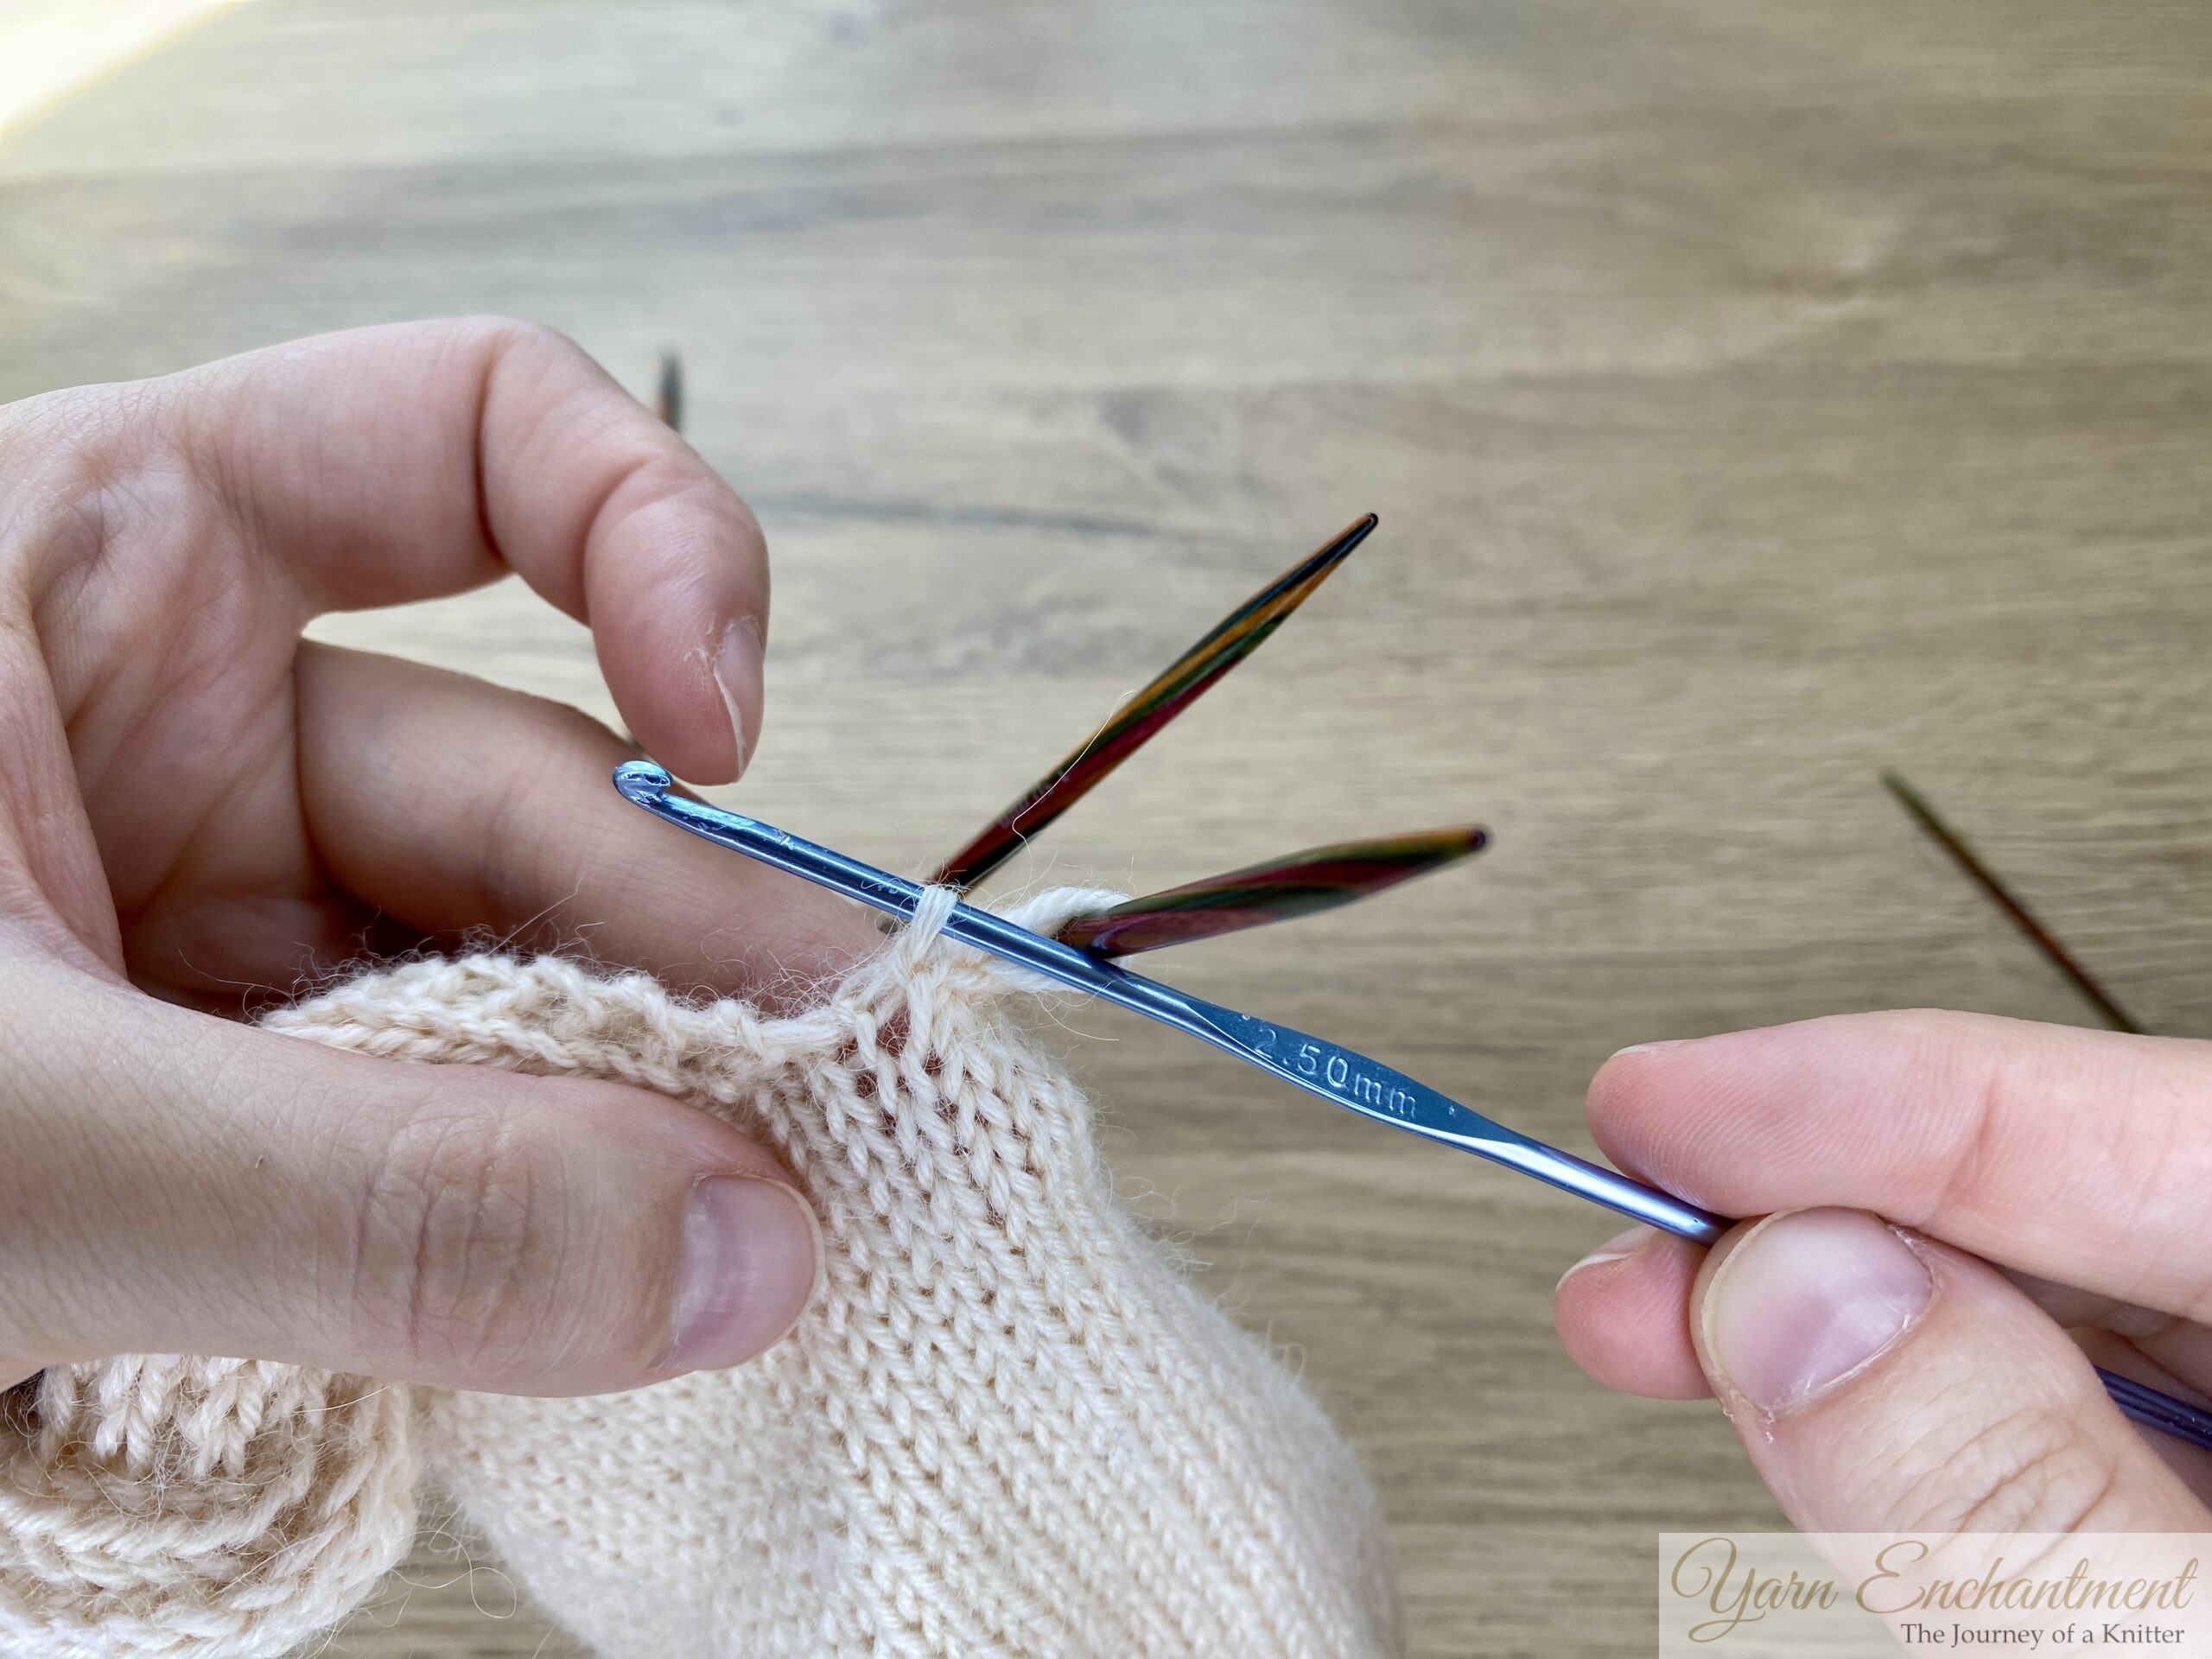
I am not really certain that this is the correct name, if there even is a specific name for this method. It works in the same way as rescuing a dropped or forgotten M1 increase. The result is almost invisible: using a crochet hook, twist the ladder, picking up each rung one at a time. It’s a little more fiddly, but the seamless effect is worth it, the gusset blends smoothly into the rest of the sock.
 | |  | First, pick up the gap stitch before starting with the gusset pickups. | As before, count down the ladders, in my case, there were three. | Insert your crochet hook downwards into the third ladder and twist it clockwise to create a new stitch. |


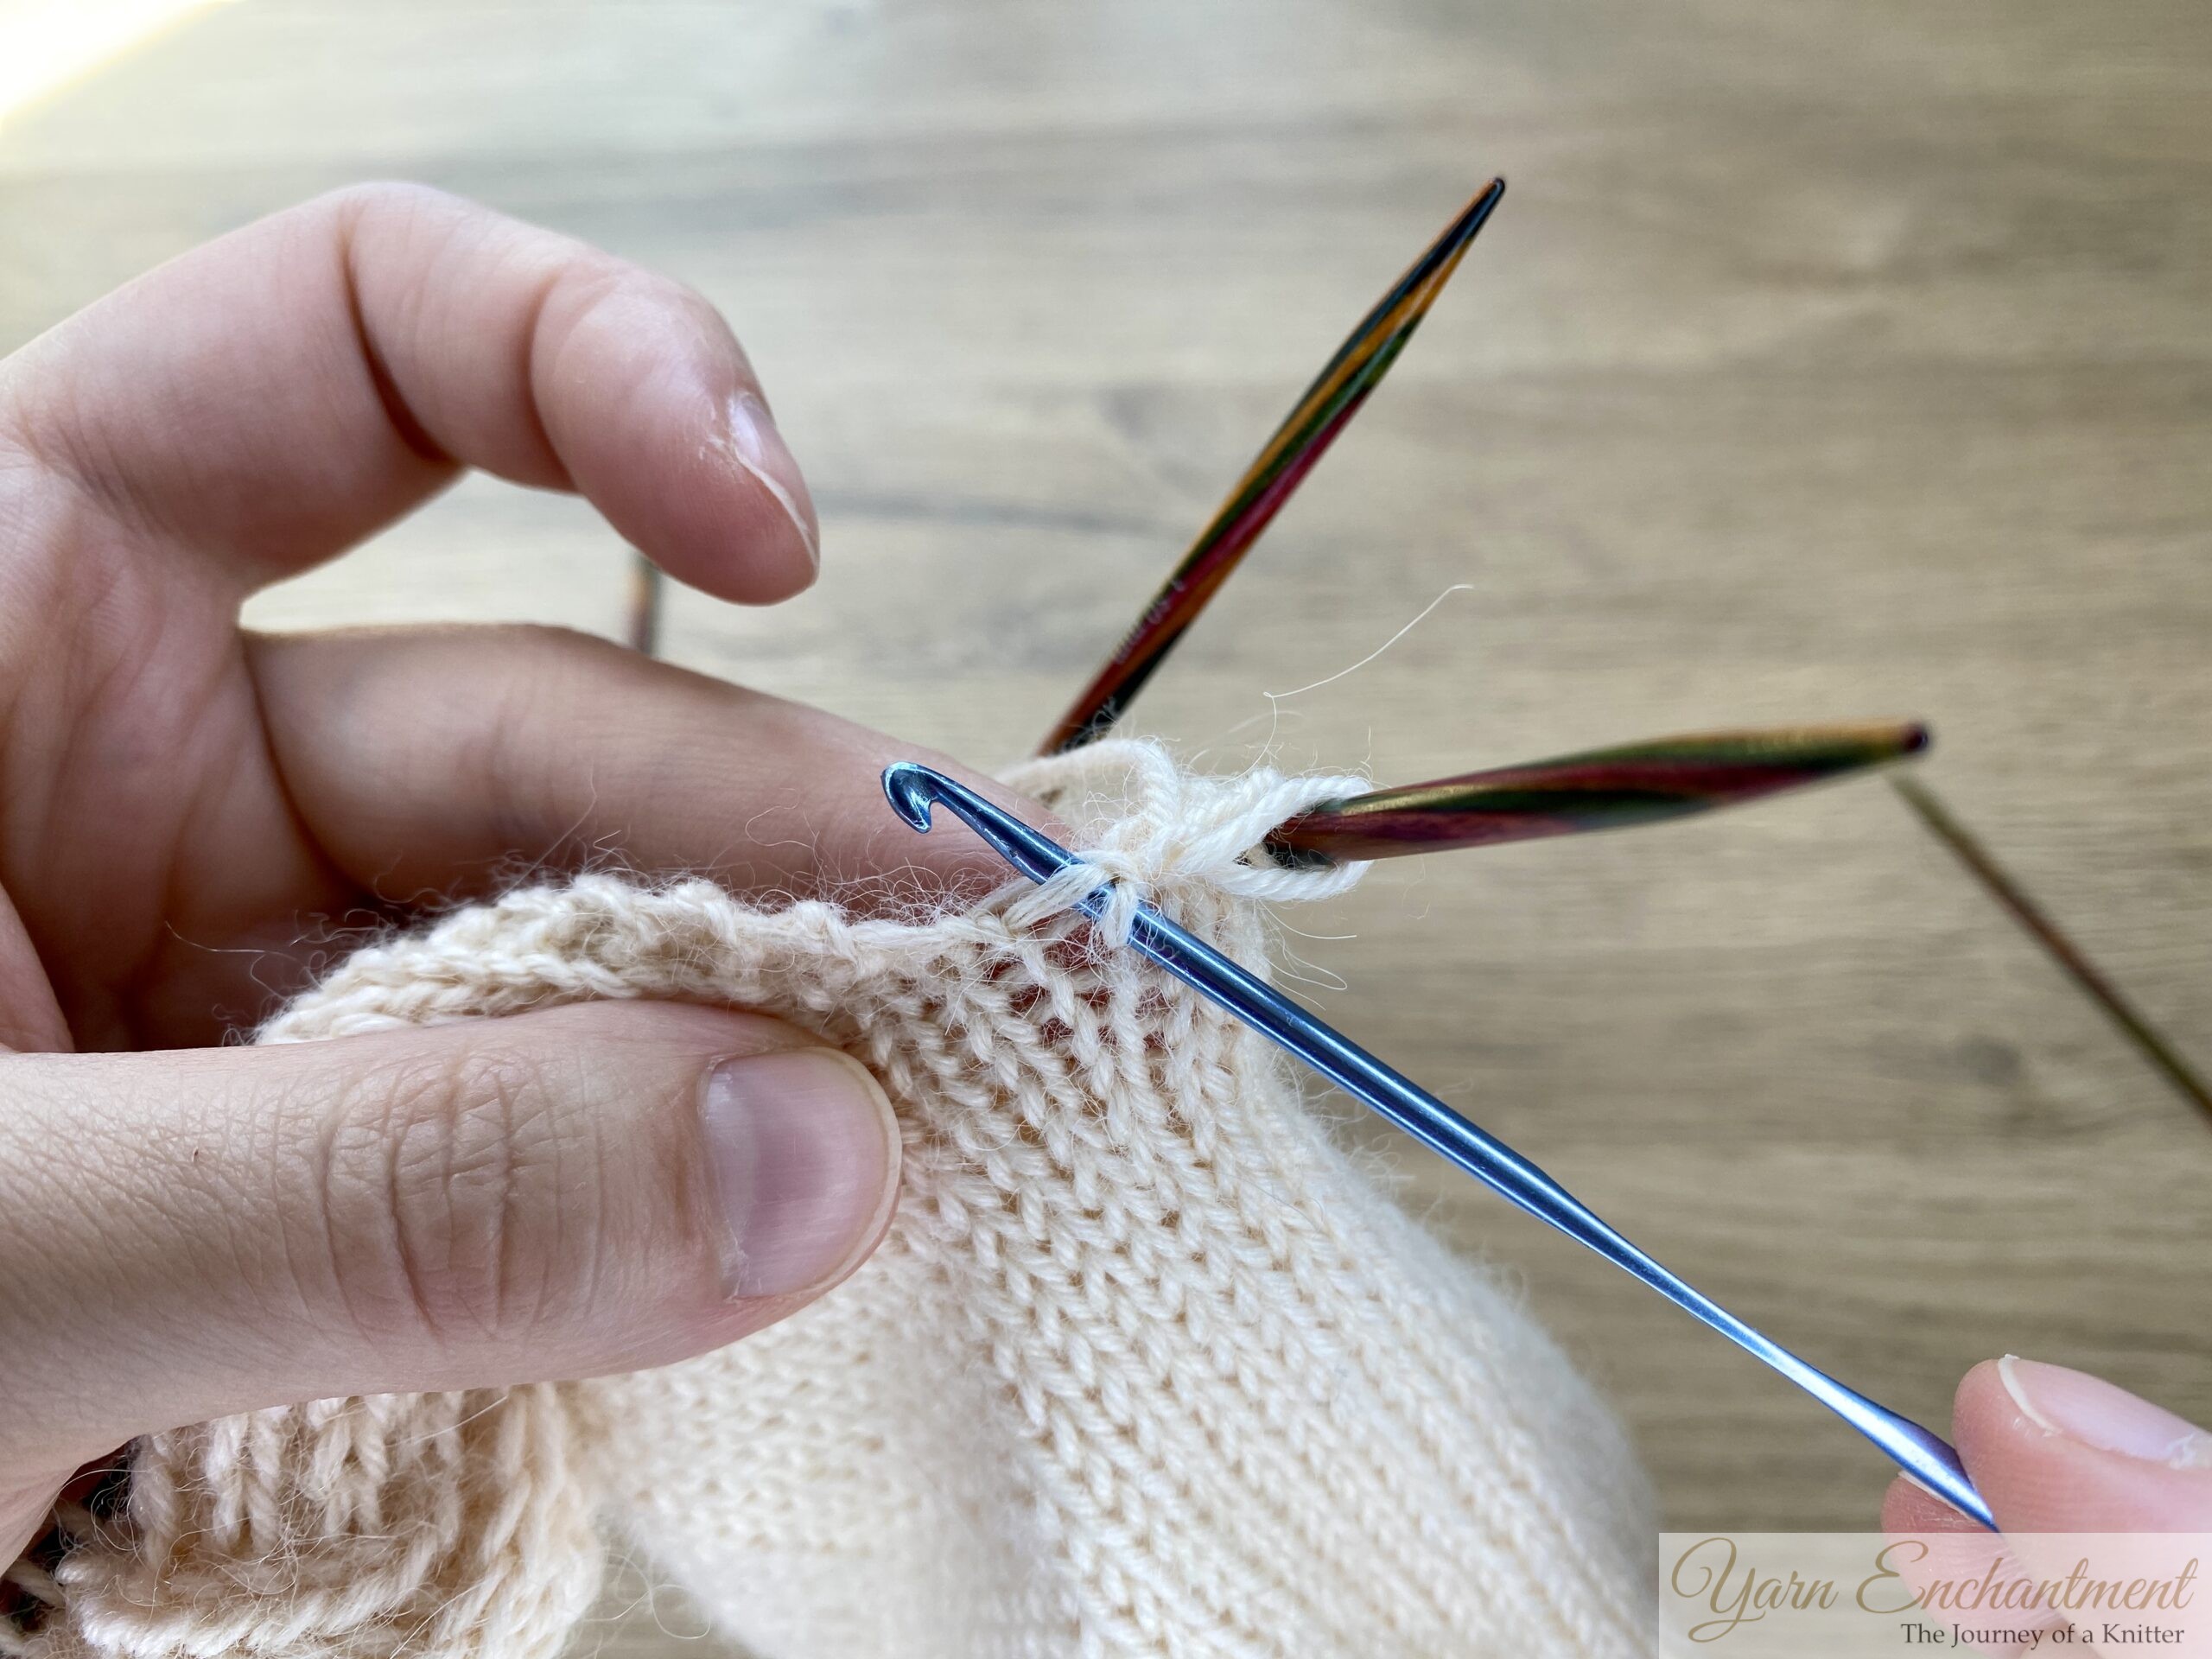 |  | 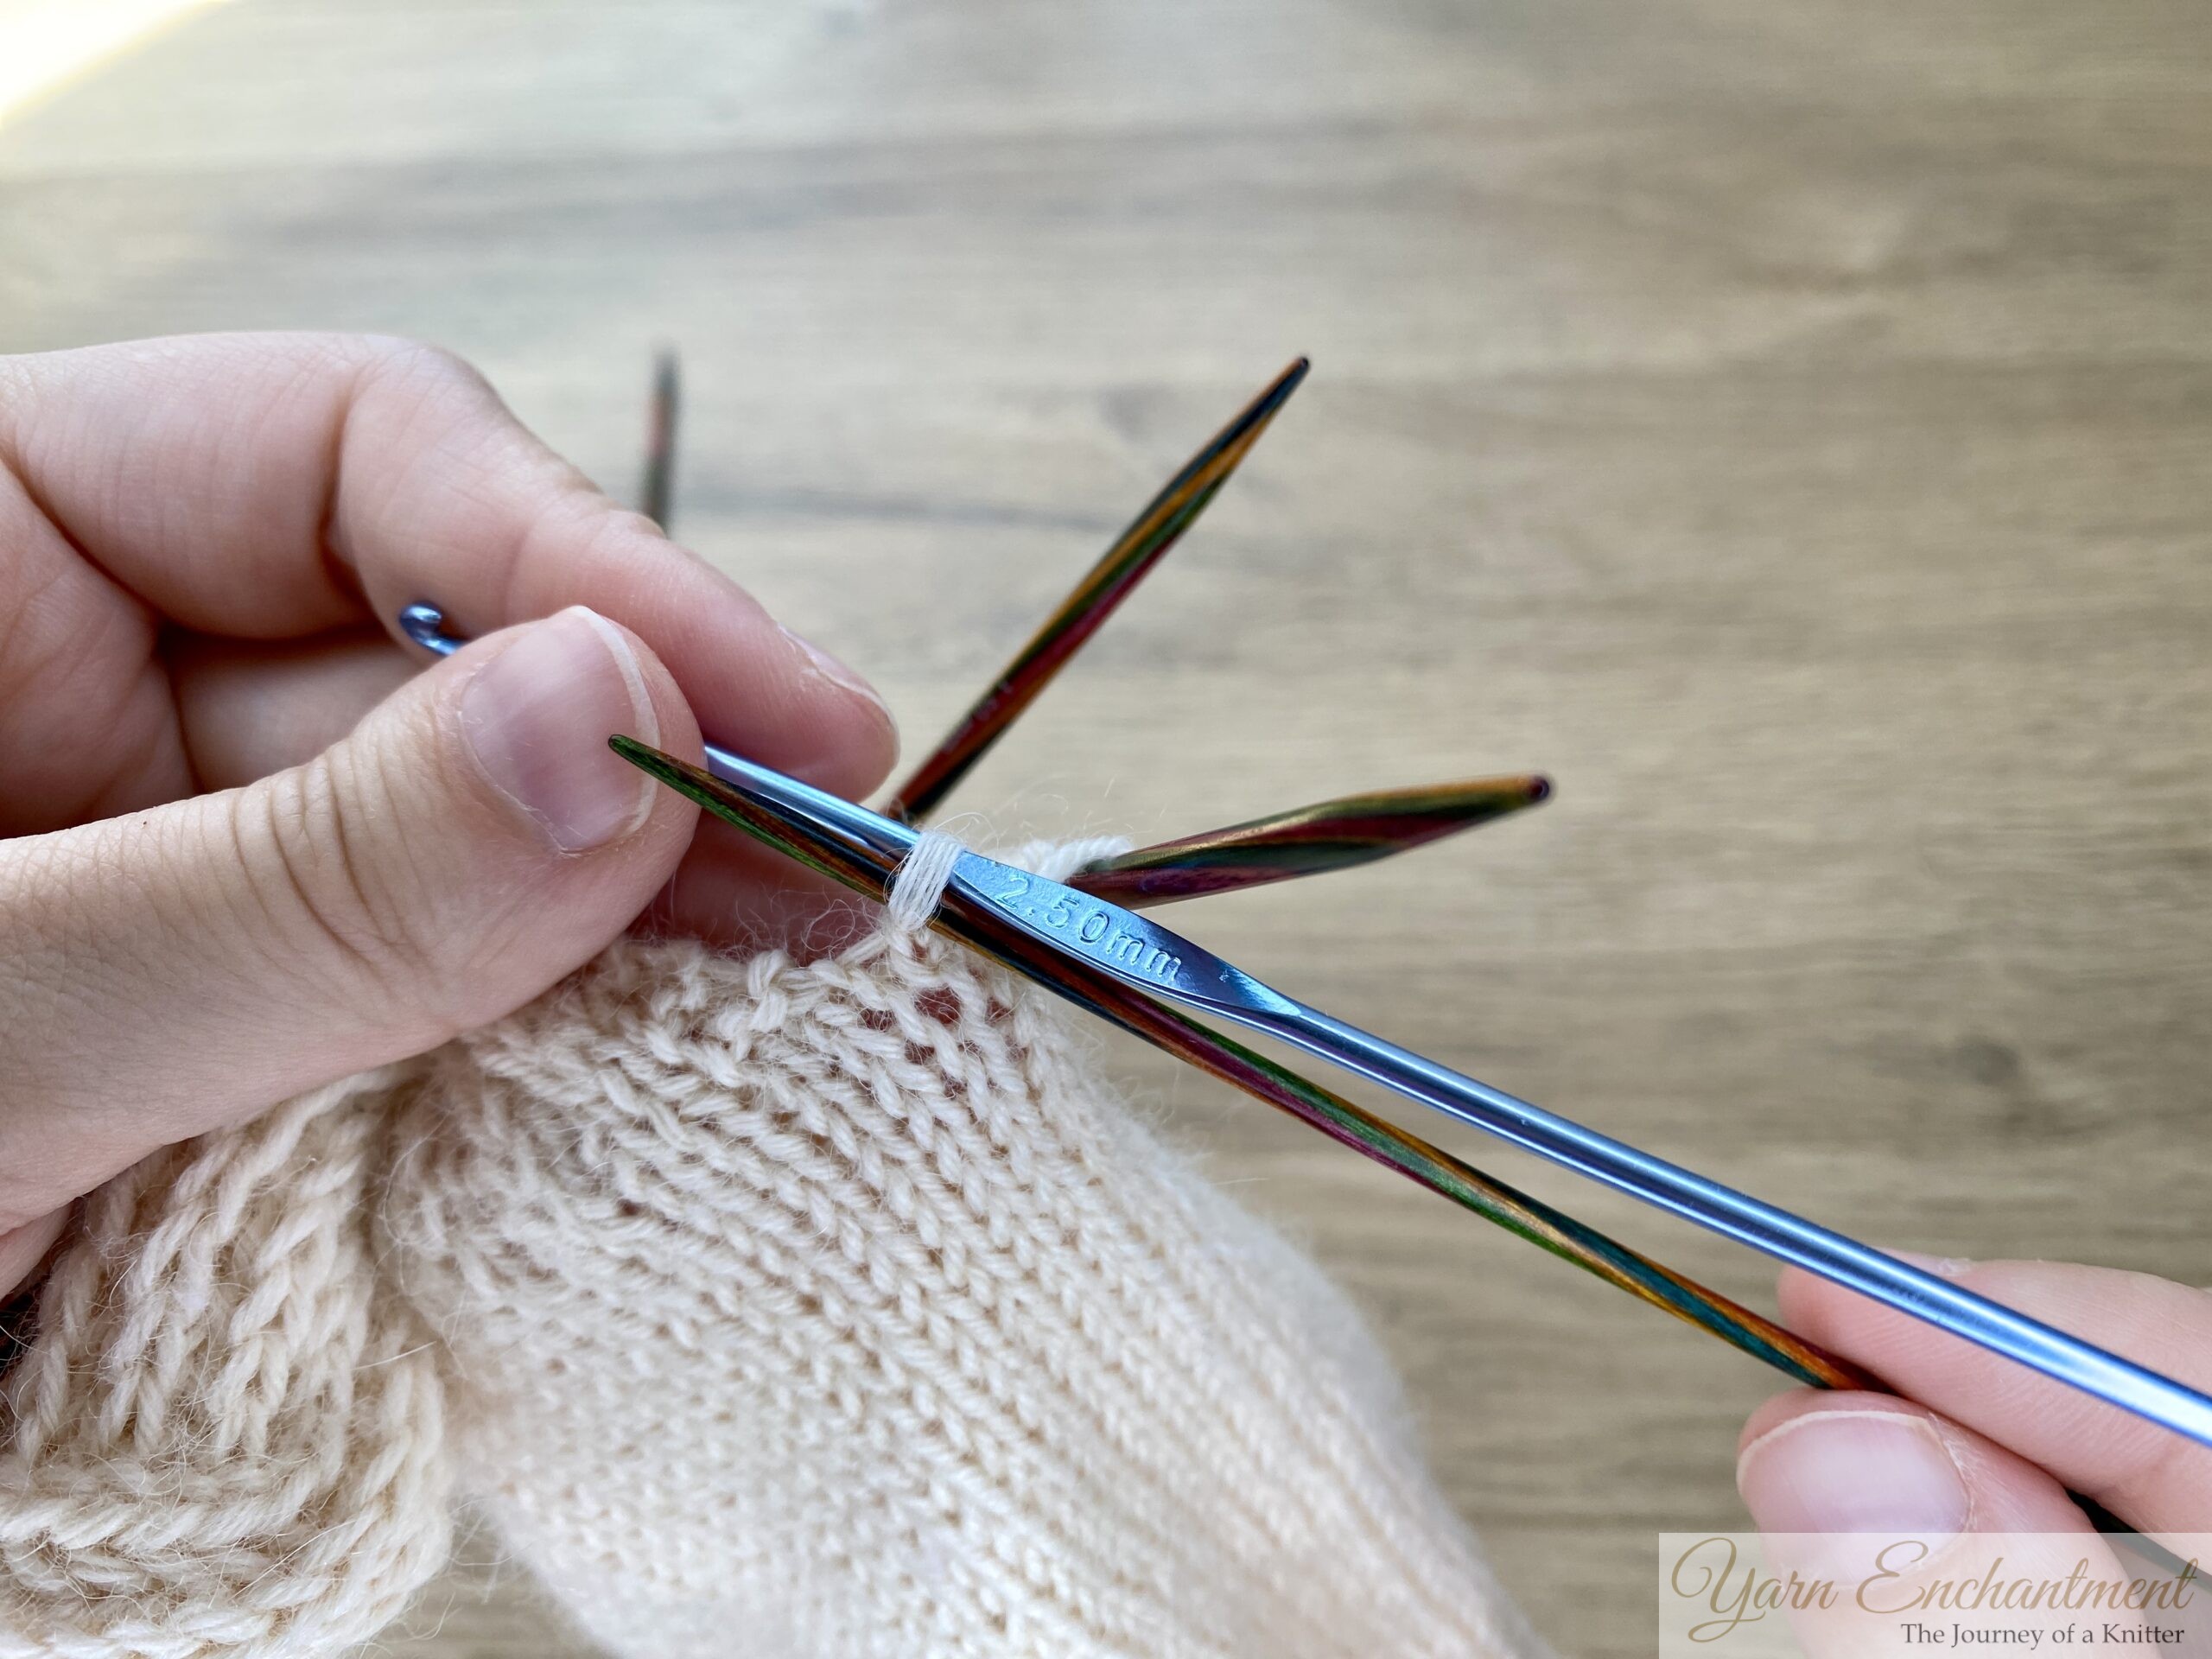 | Find the next ladder, and work your way up... | ...pulling each ladder through the stitch already on your crochet hook. | When you’re finished, transfer the stitch onto your smaller needle (the cuff needle). |


Closing the Hole – Method 3
While filming the video tutorial, I remembered another easy way to close the small gap between the needles after picking up stitches for the gusset. This method isn’t quite as invisible as Method 2, but it still works beautifully and is especially beginner-friendly. It’s a simple and reliable technique you can use to achieve a neat finish when closing the gusset hole in your socks.
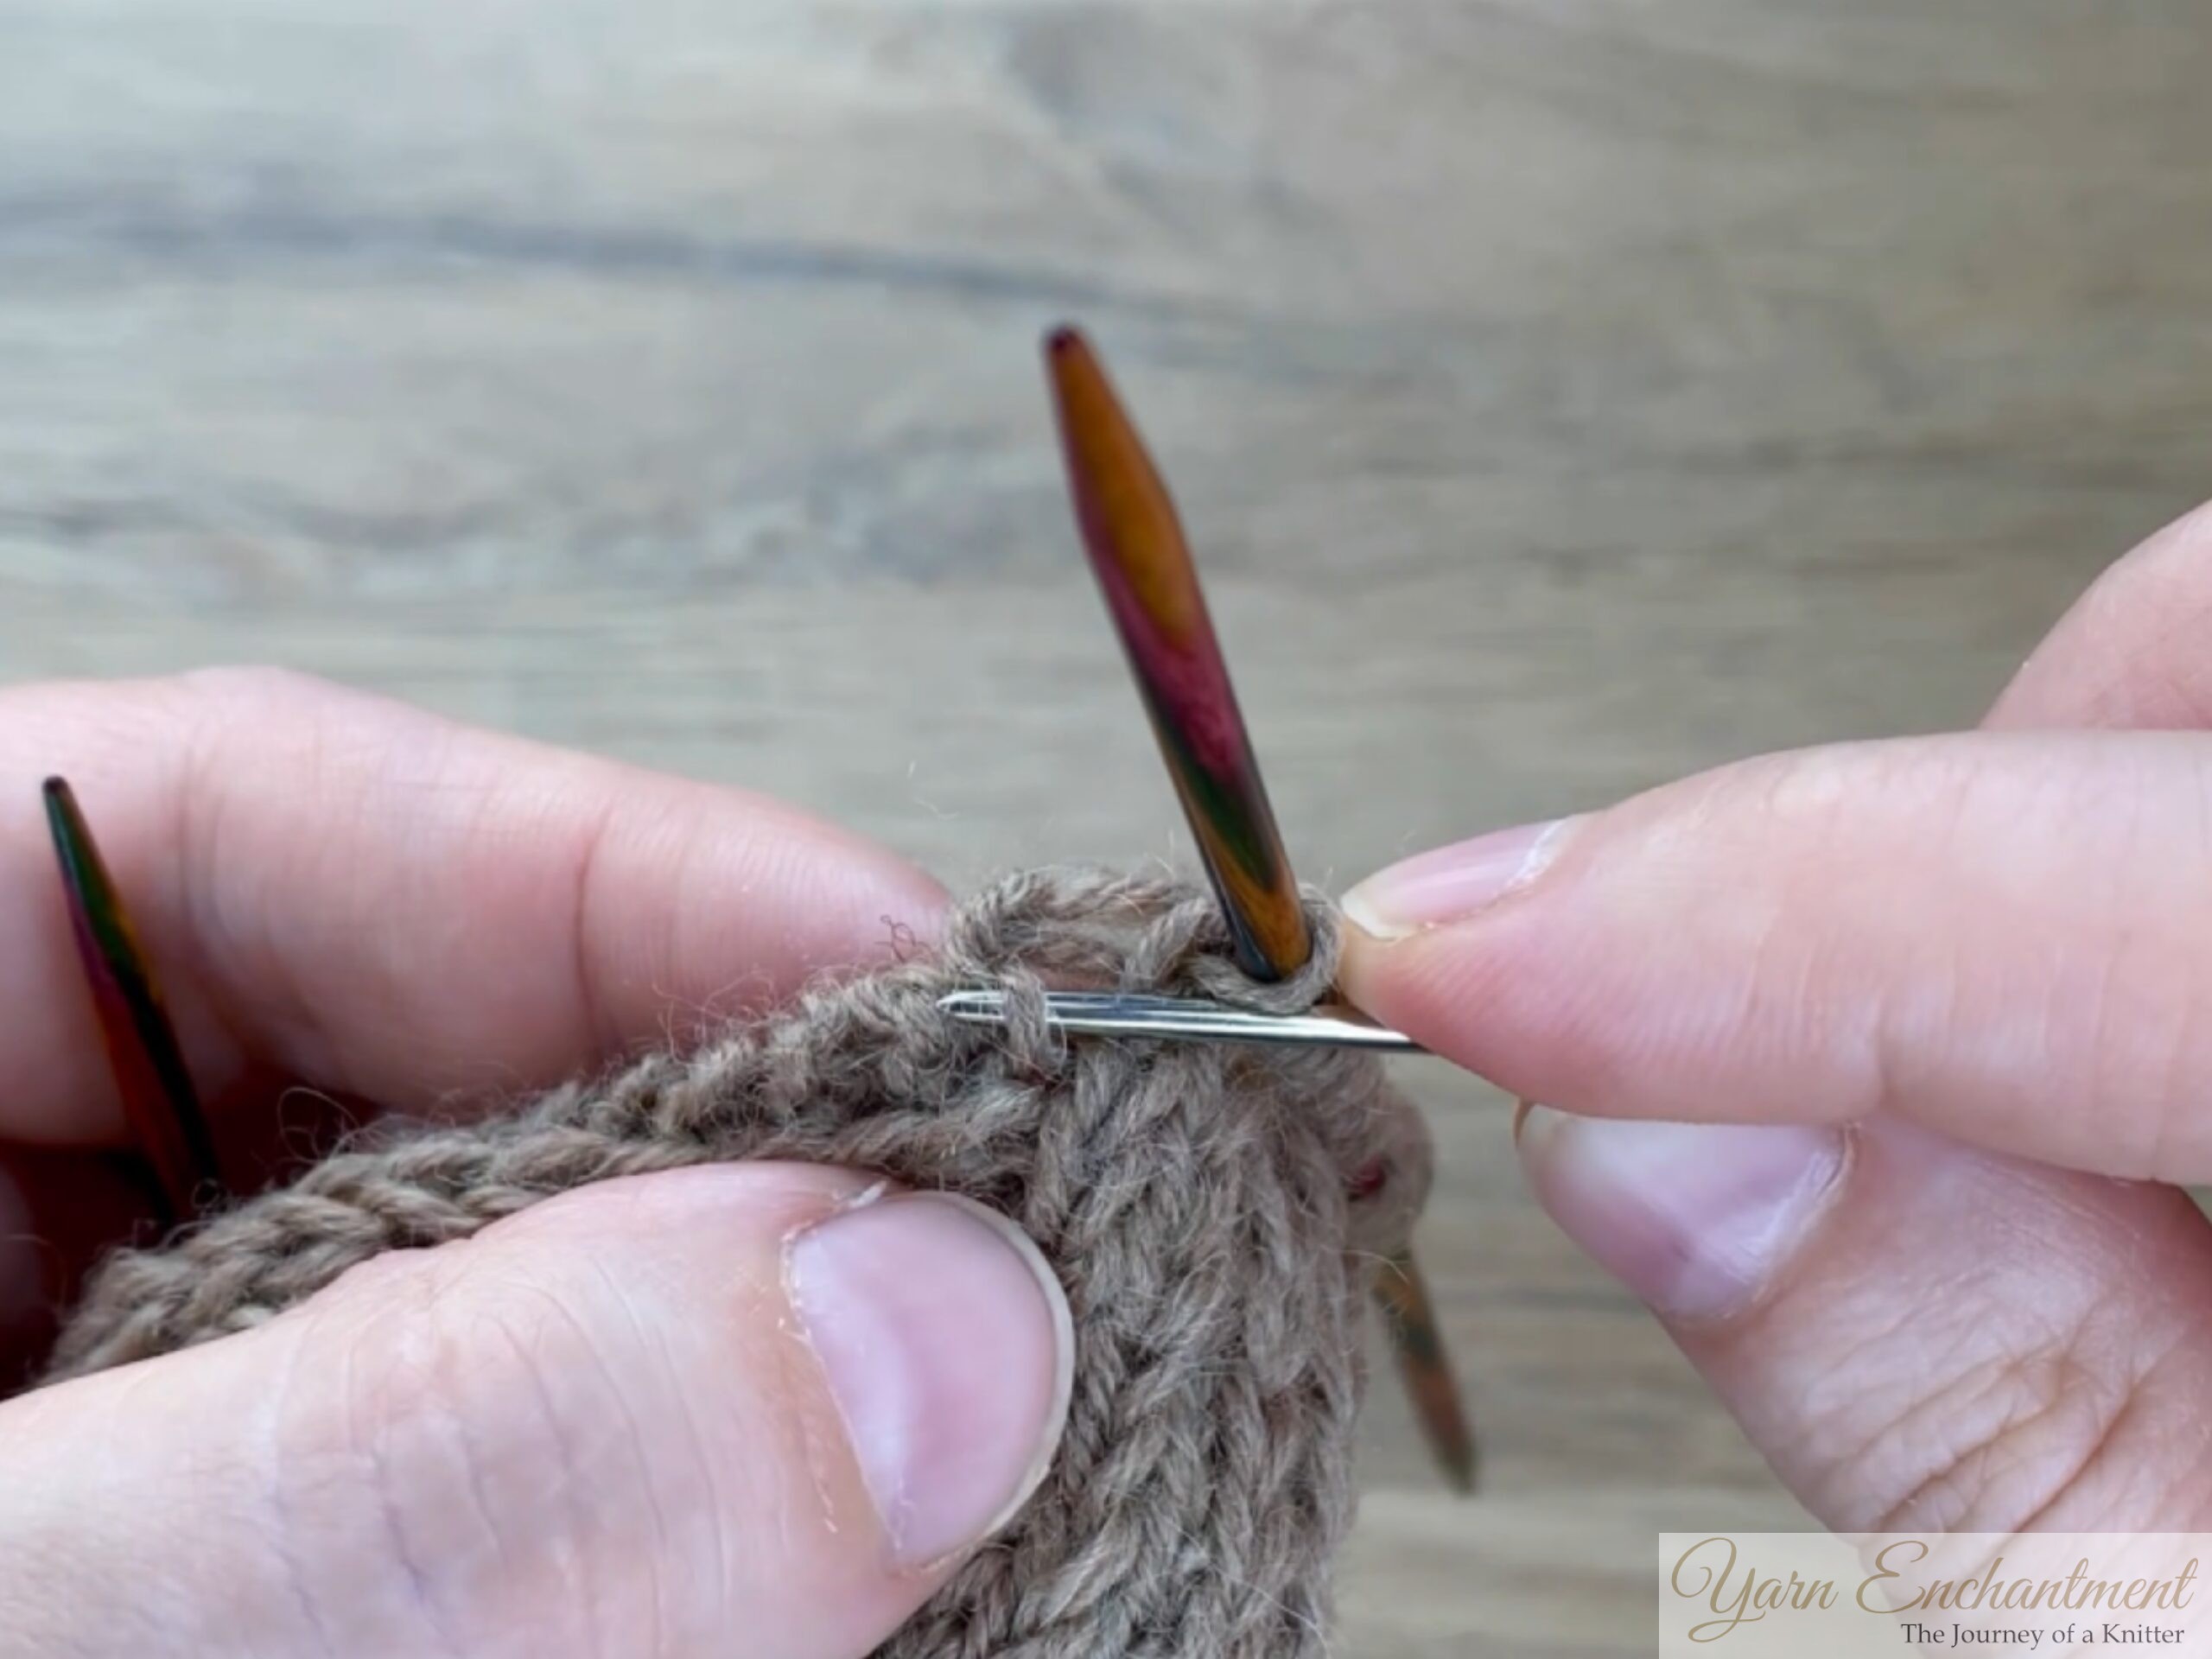
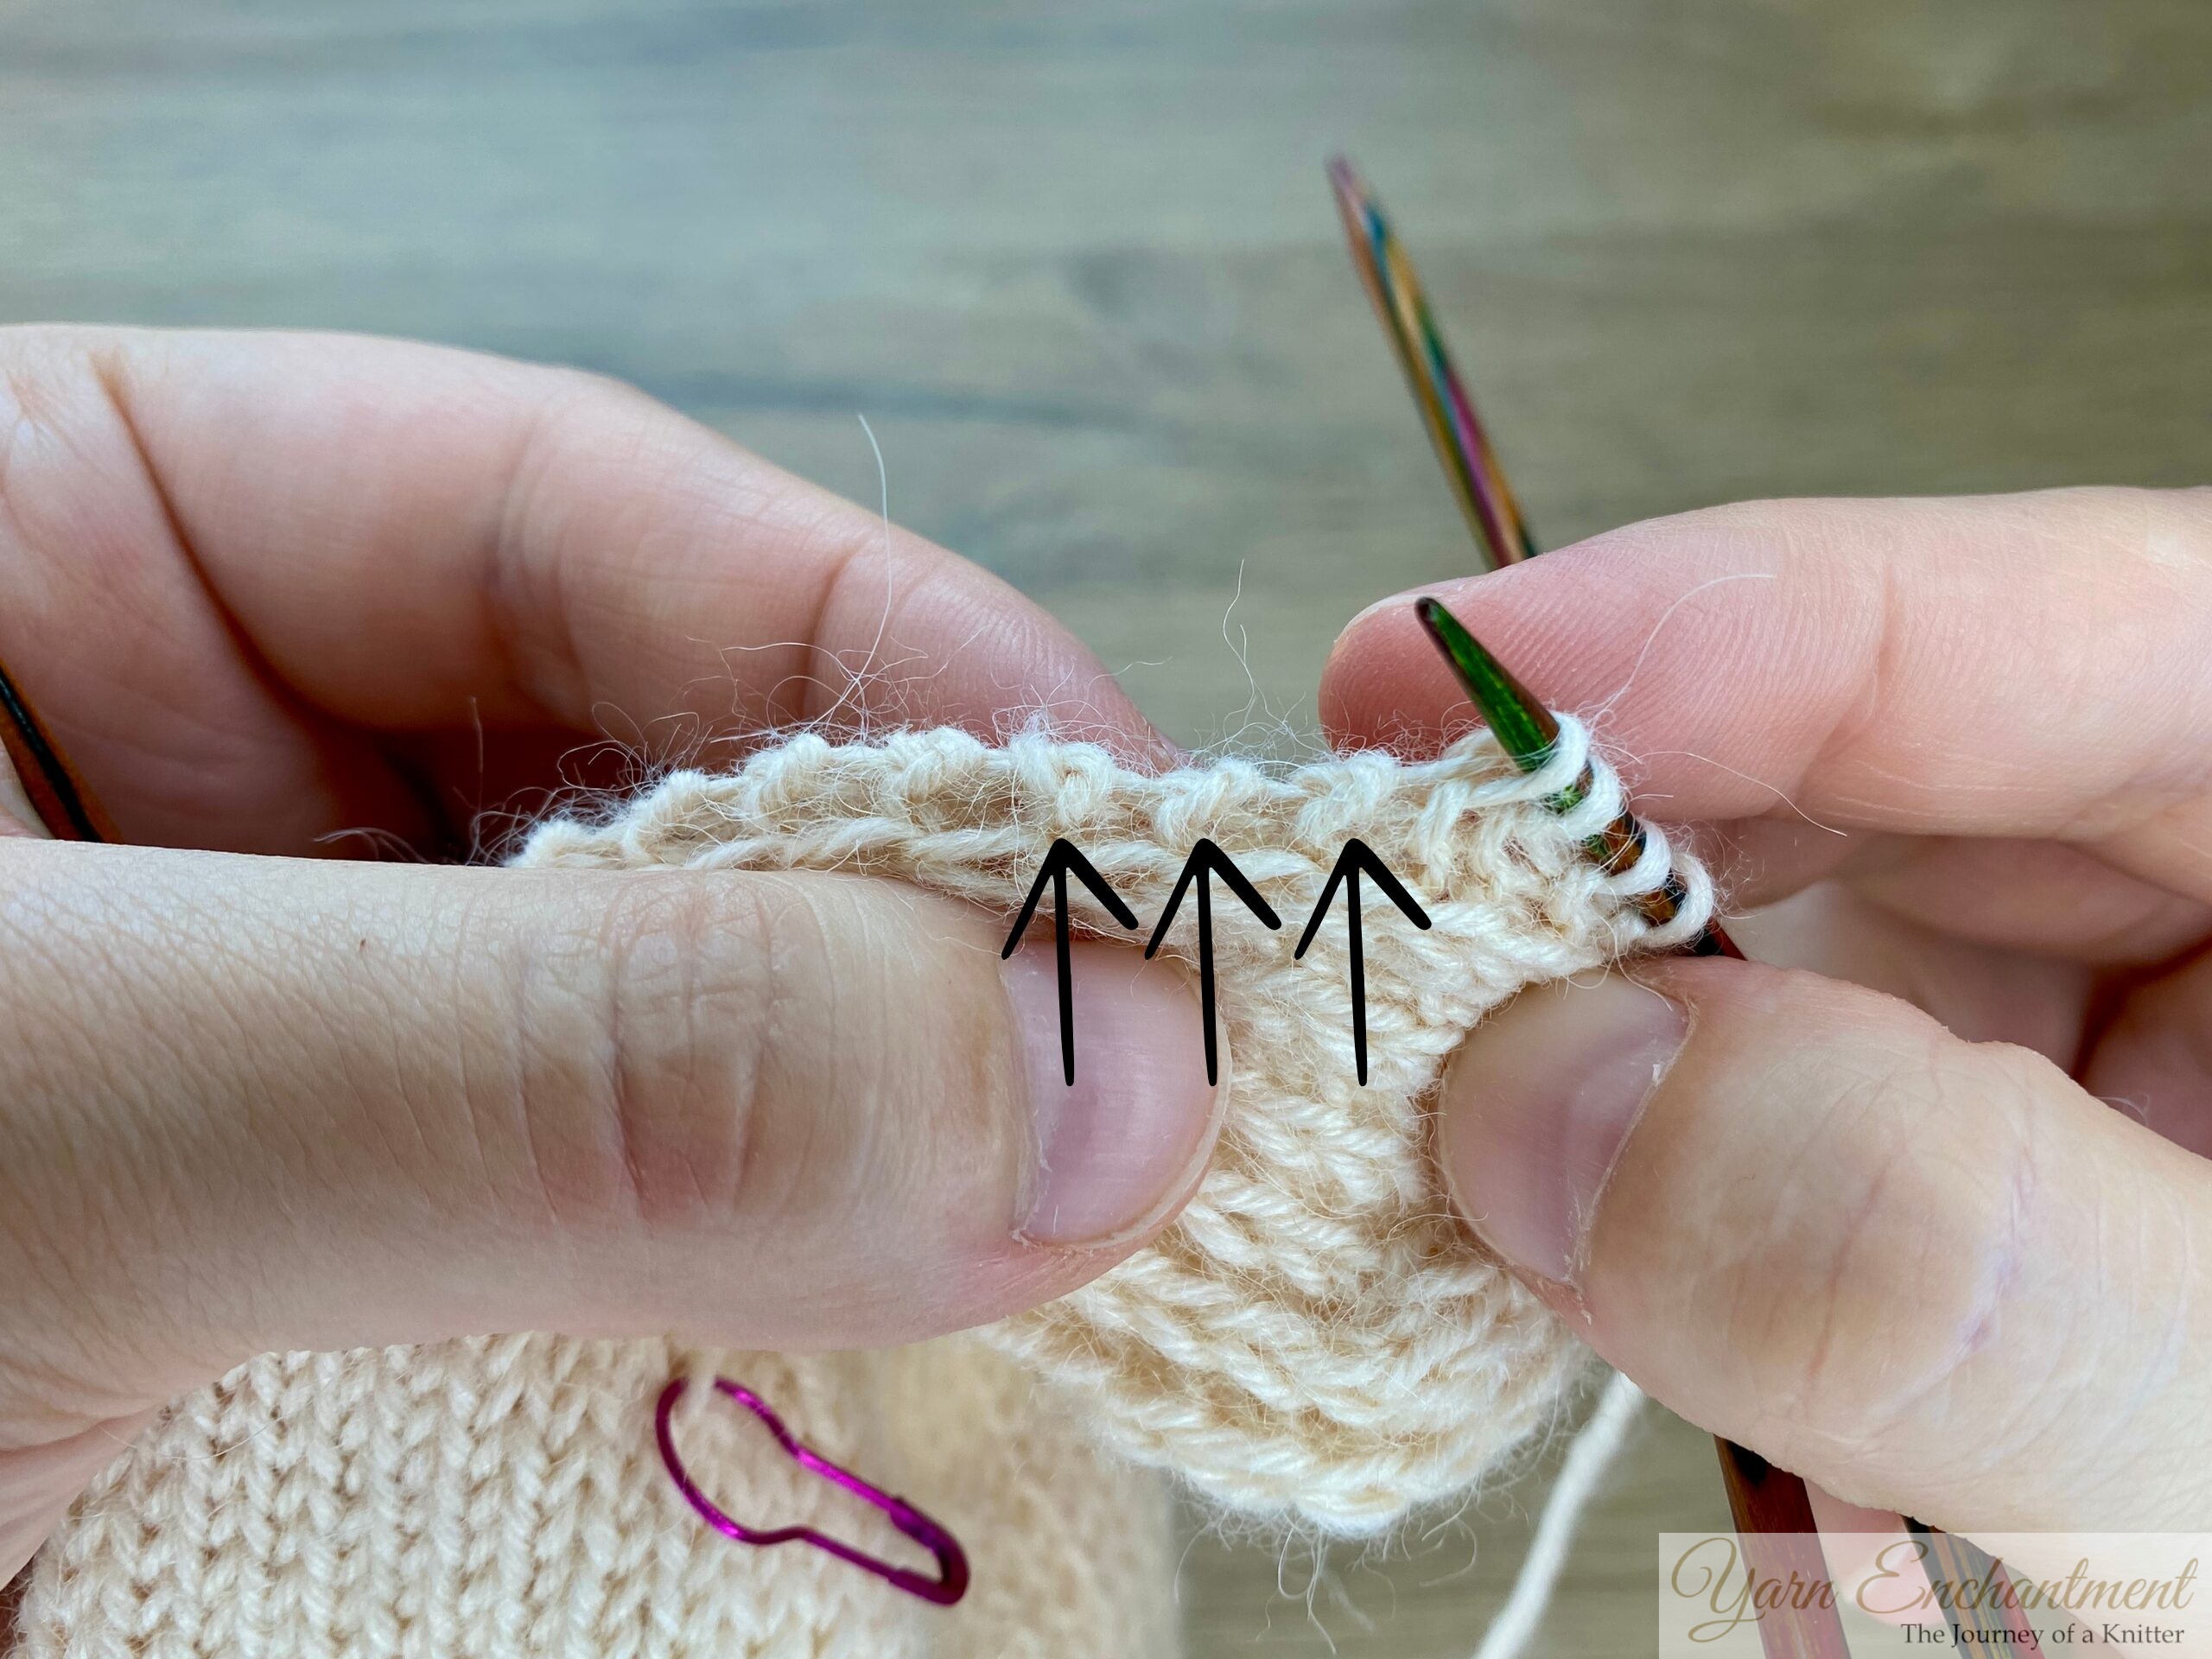
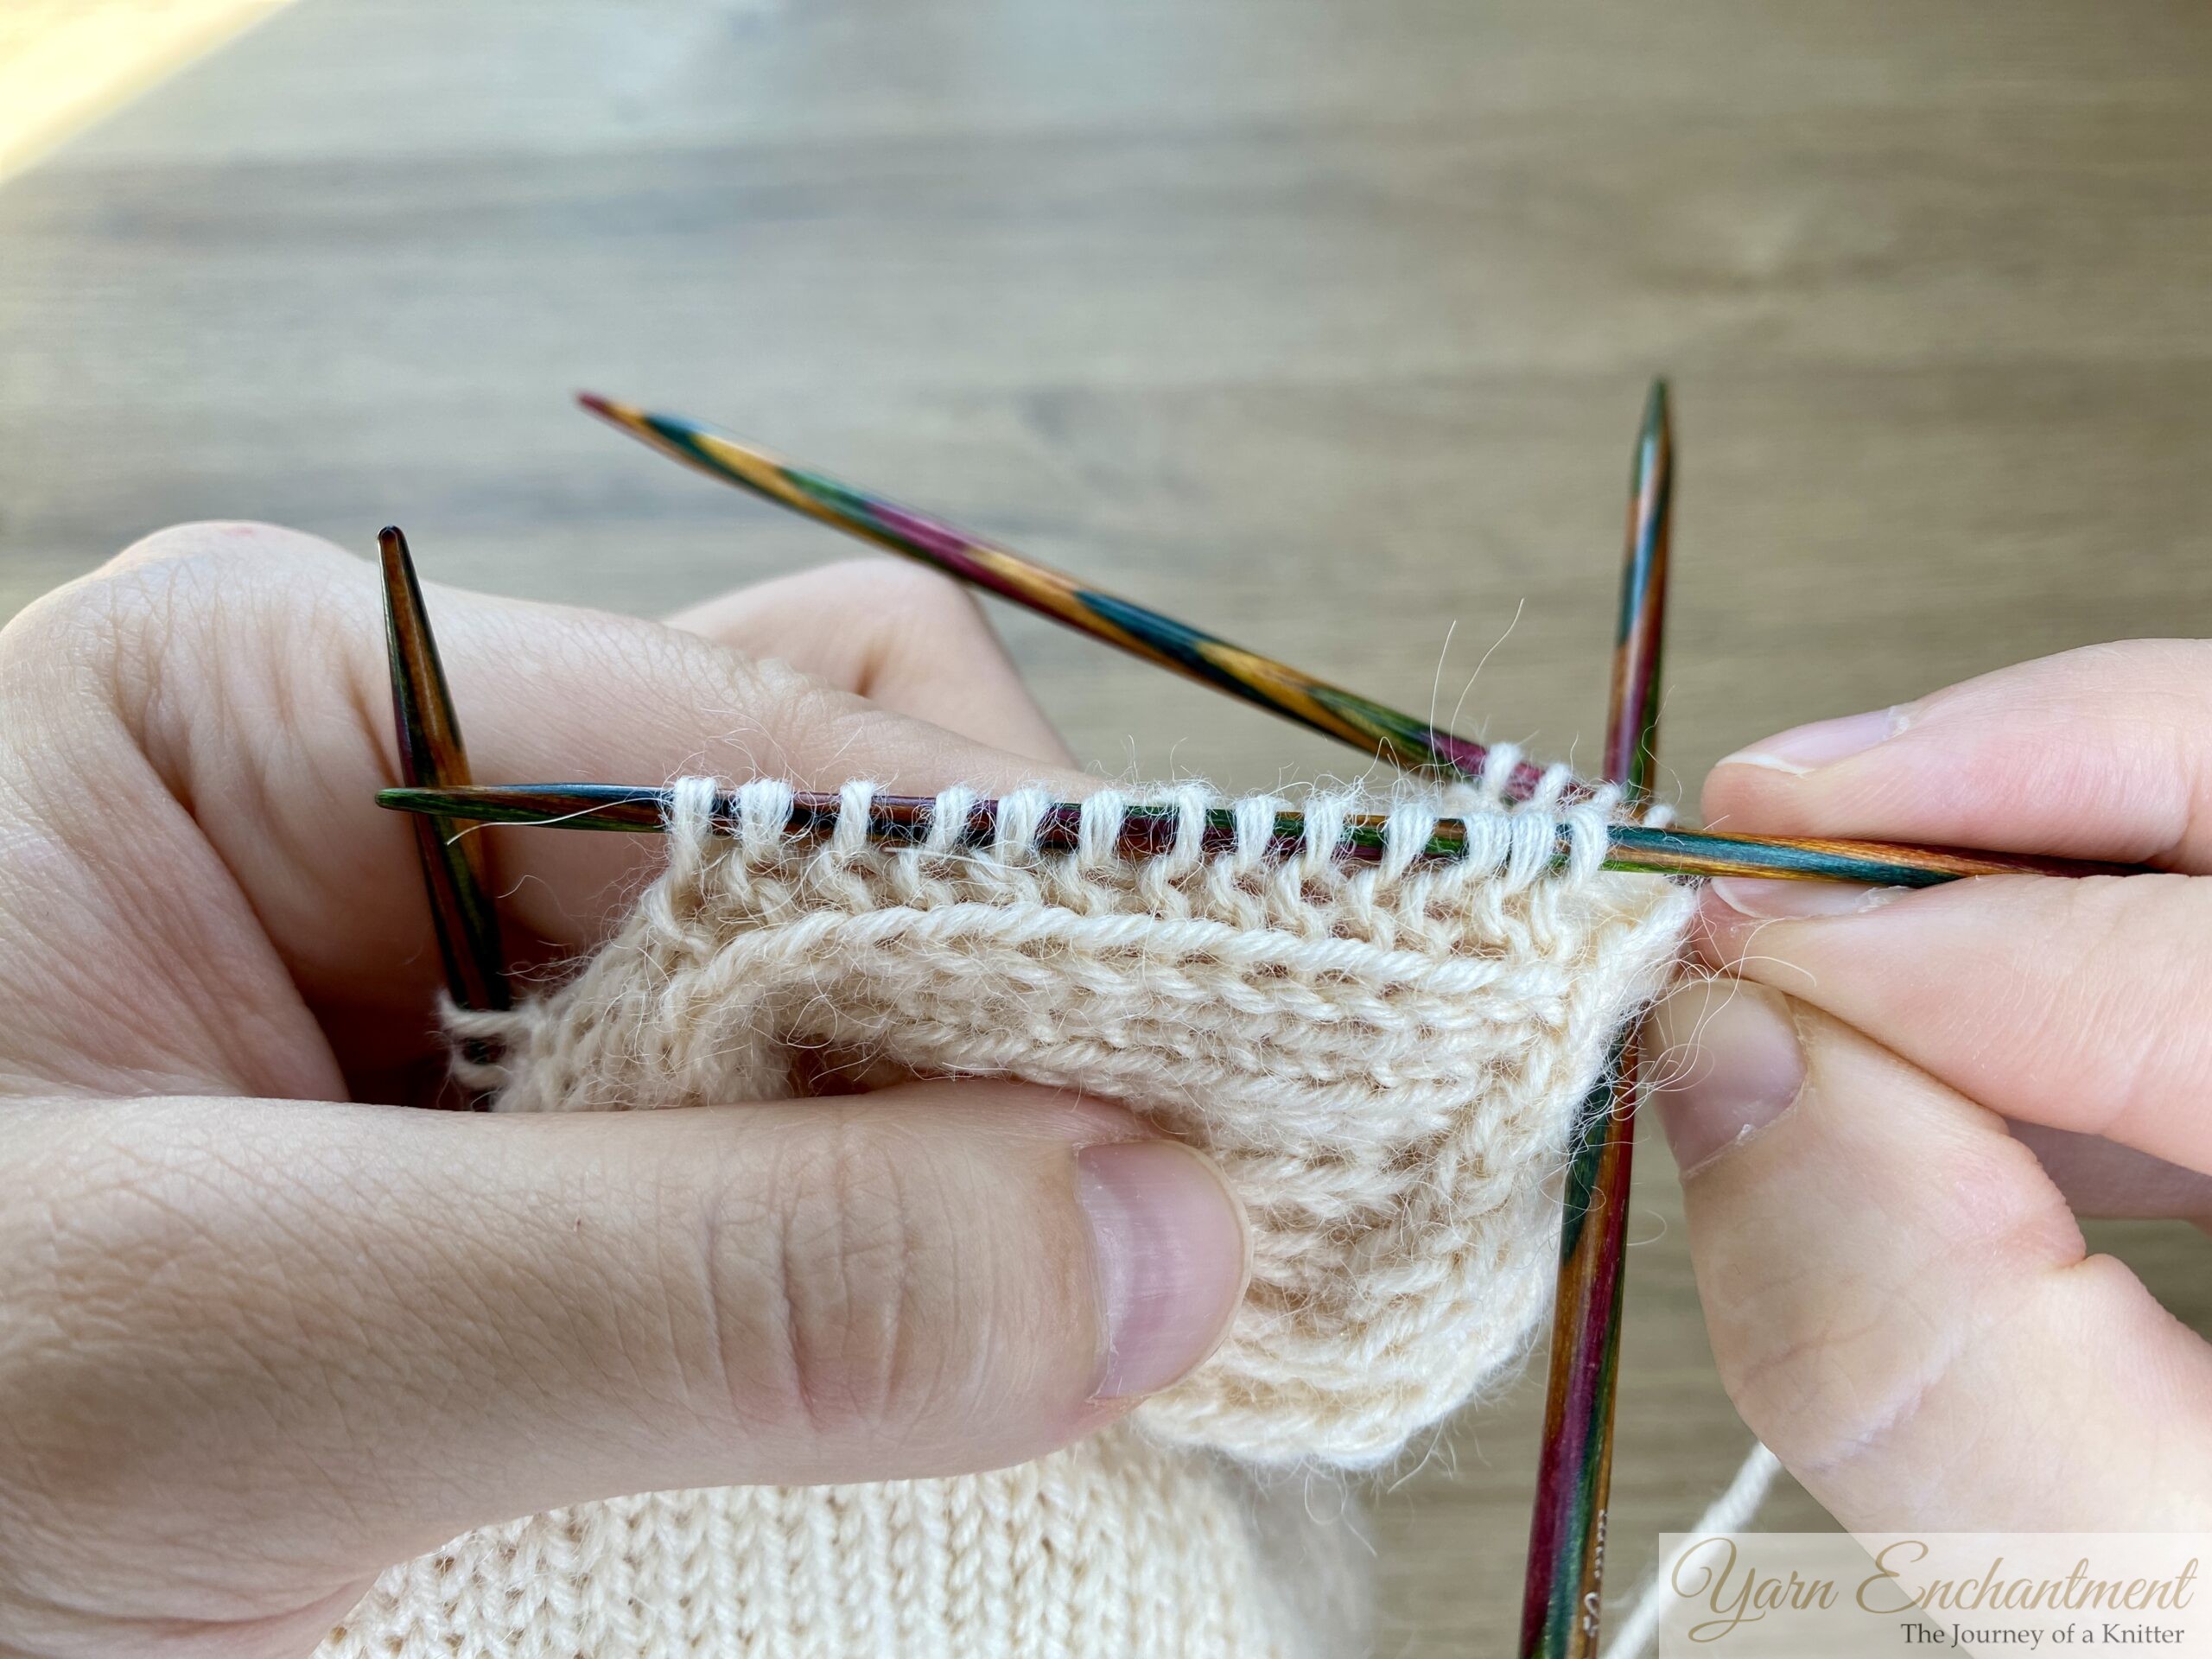
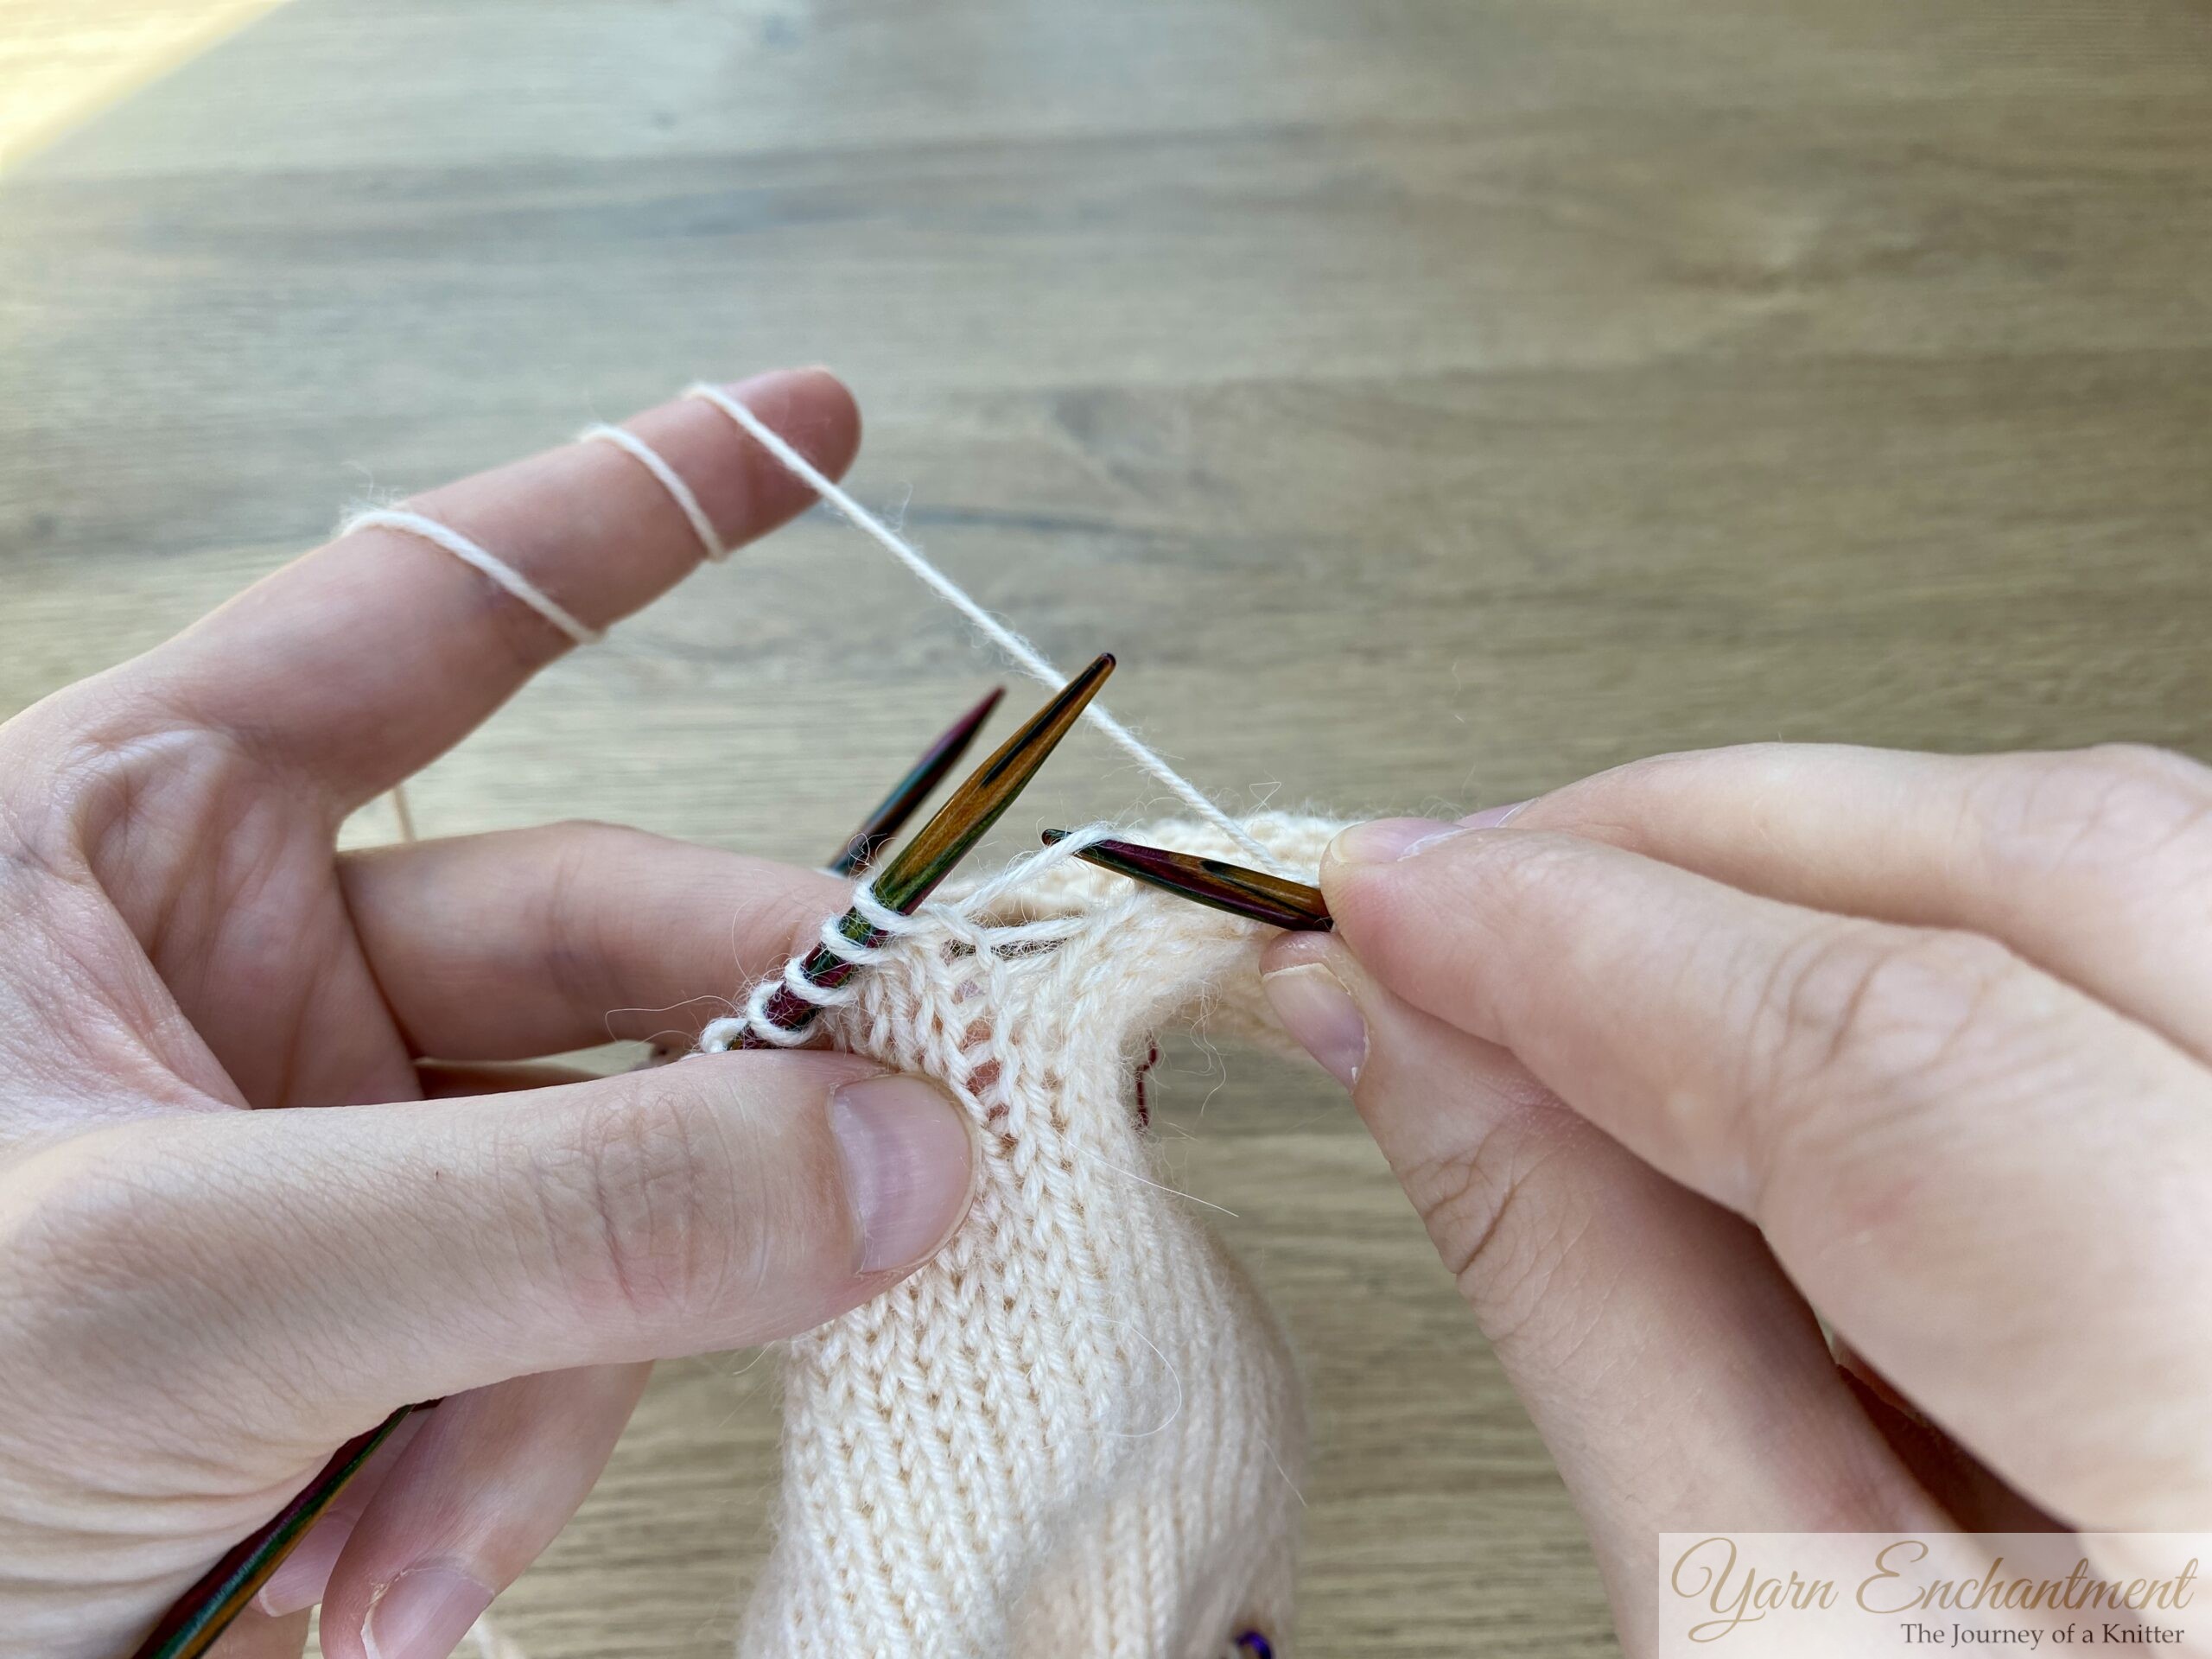
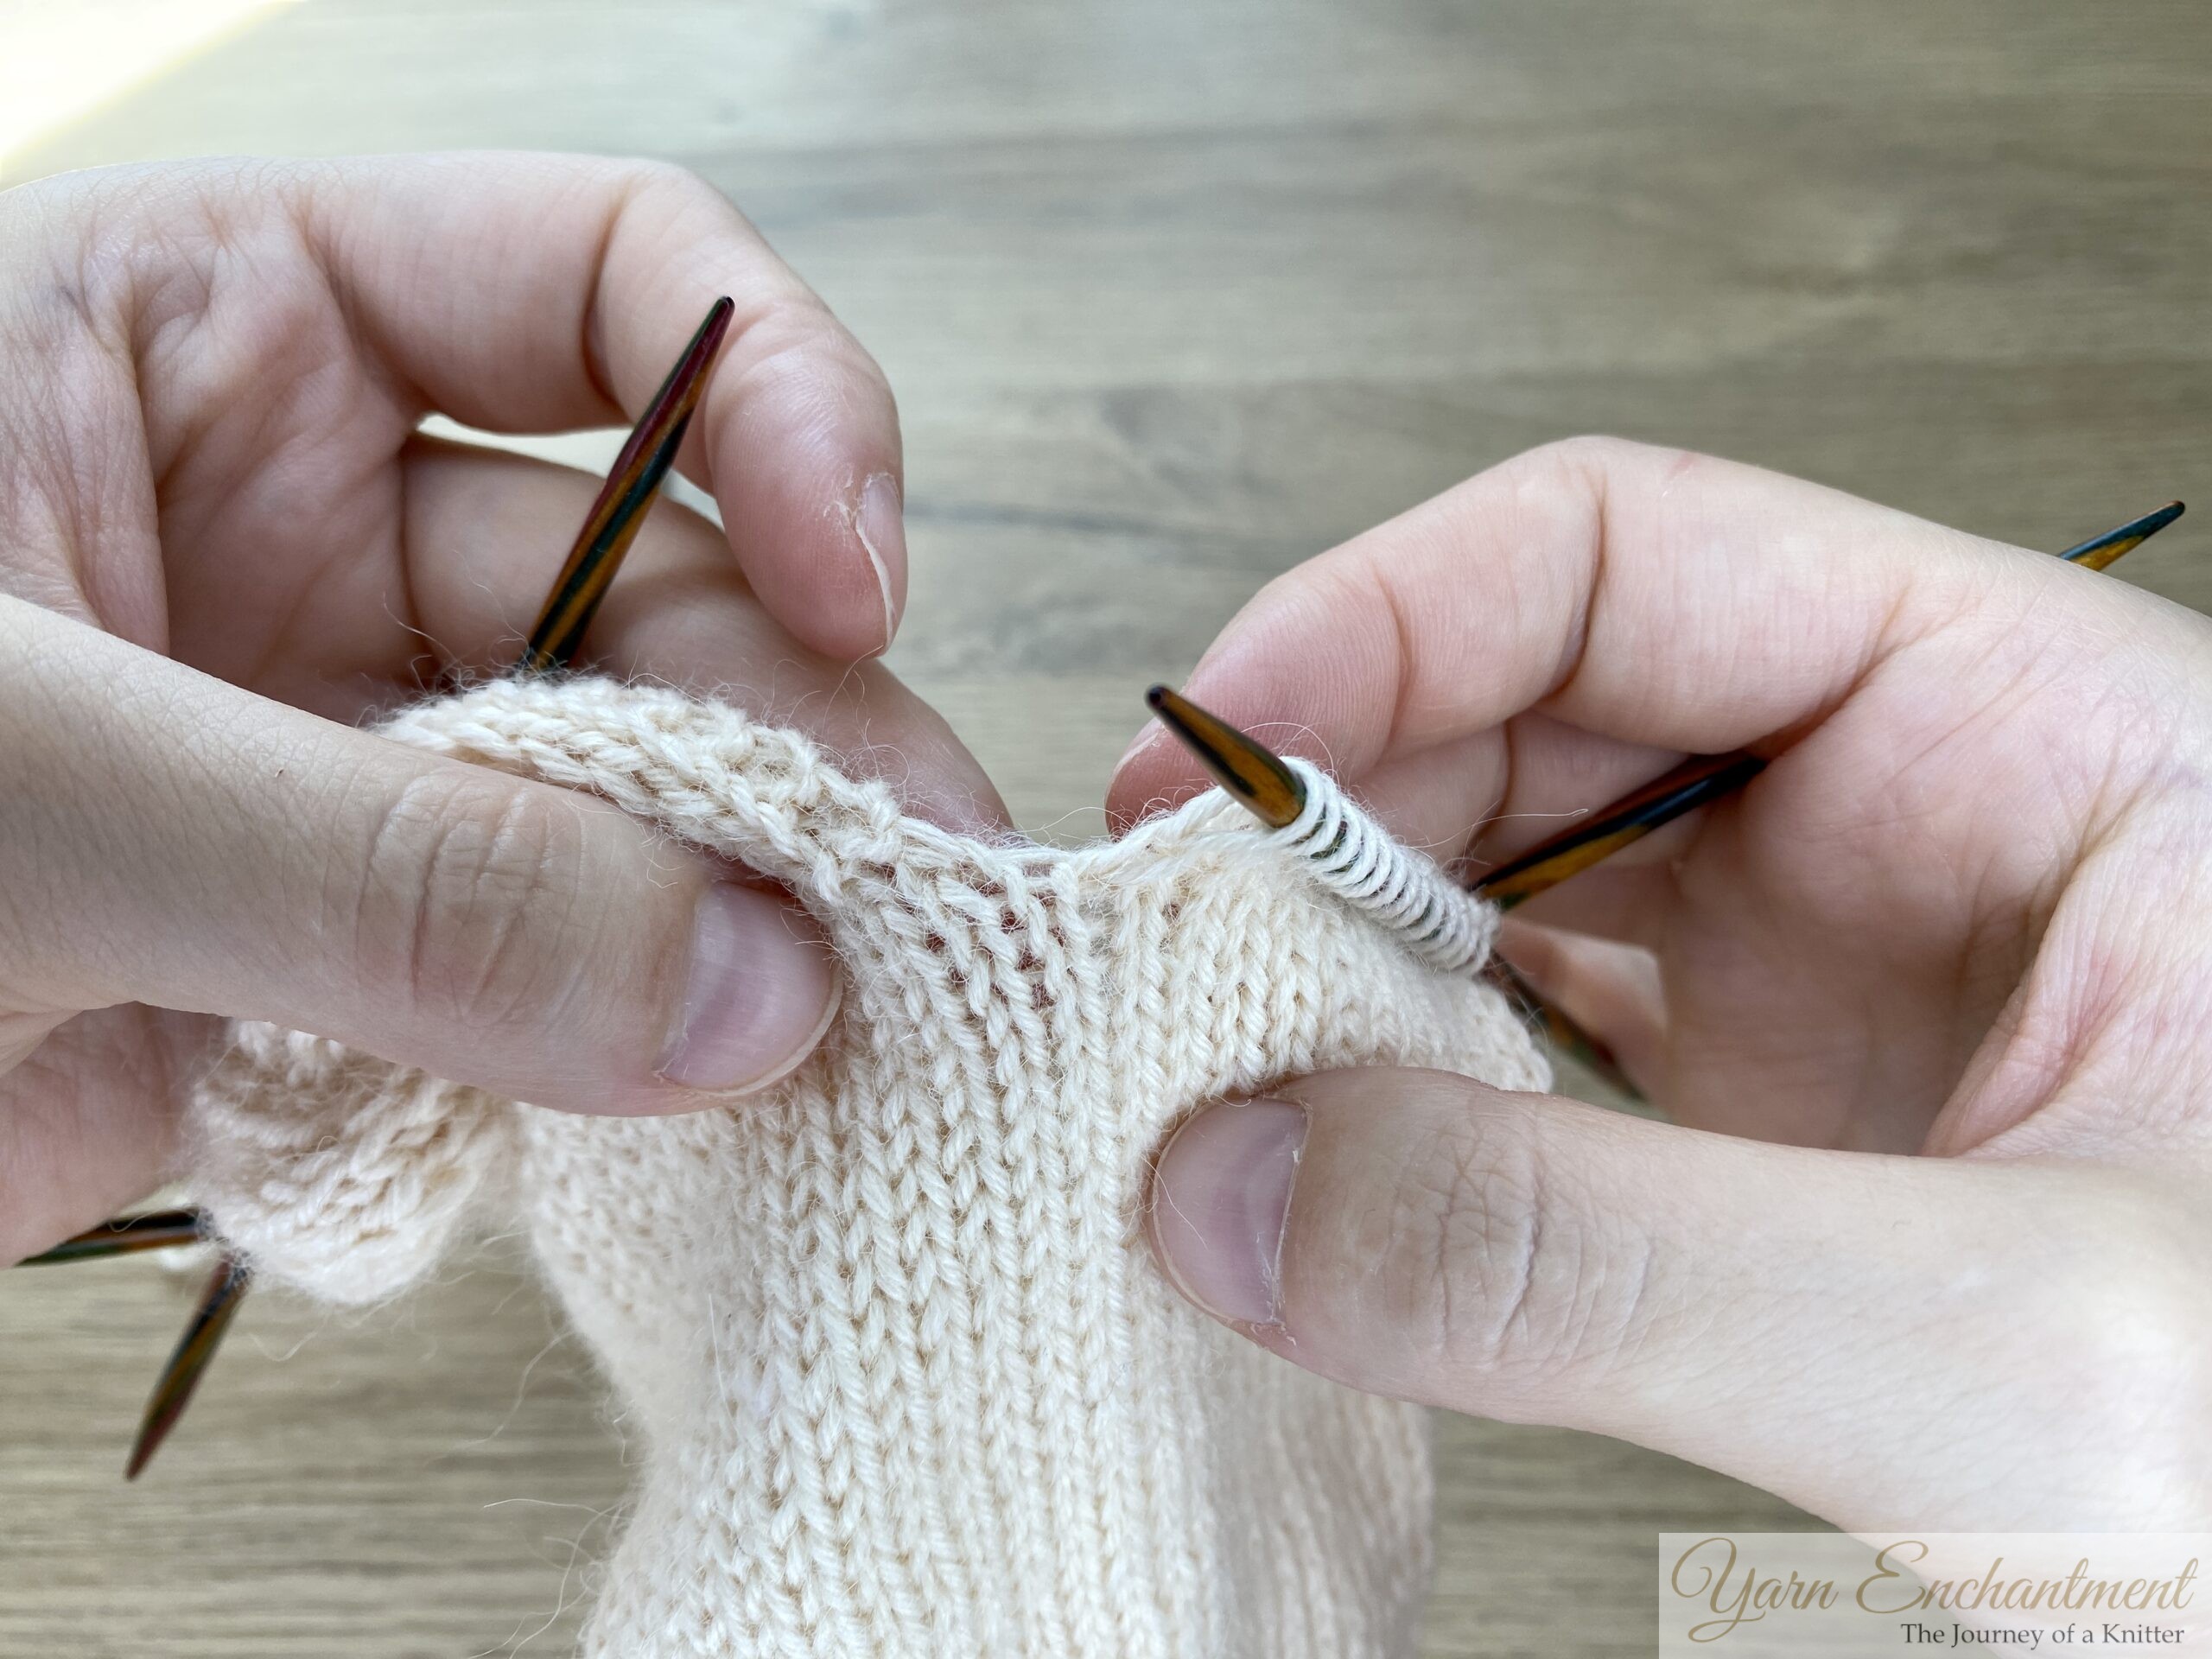
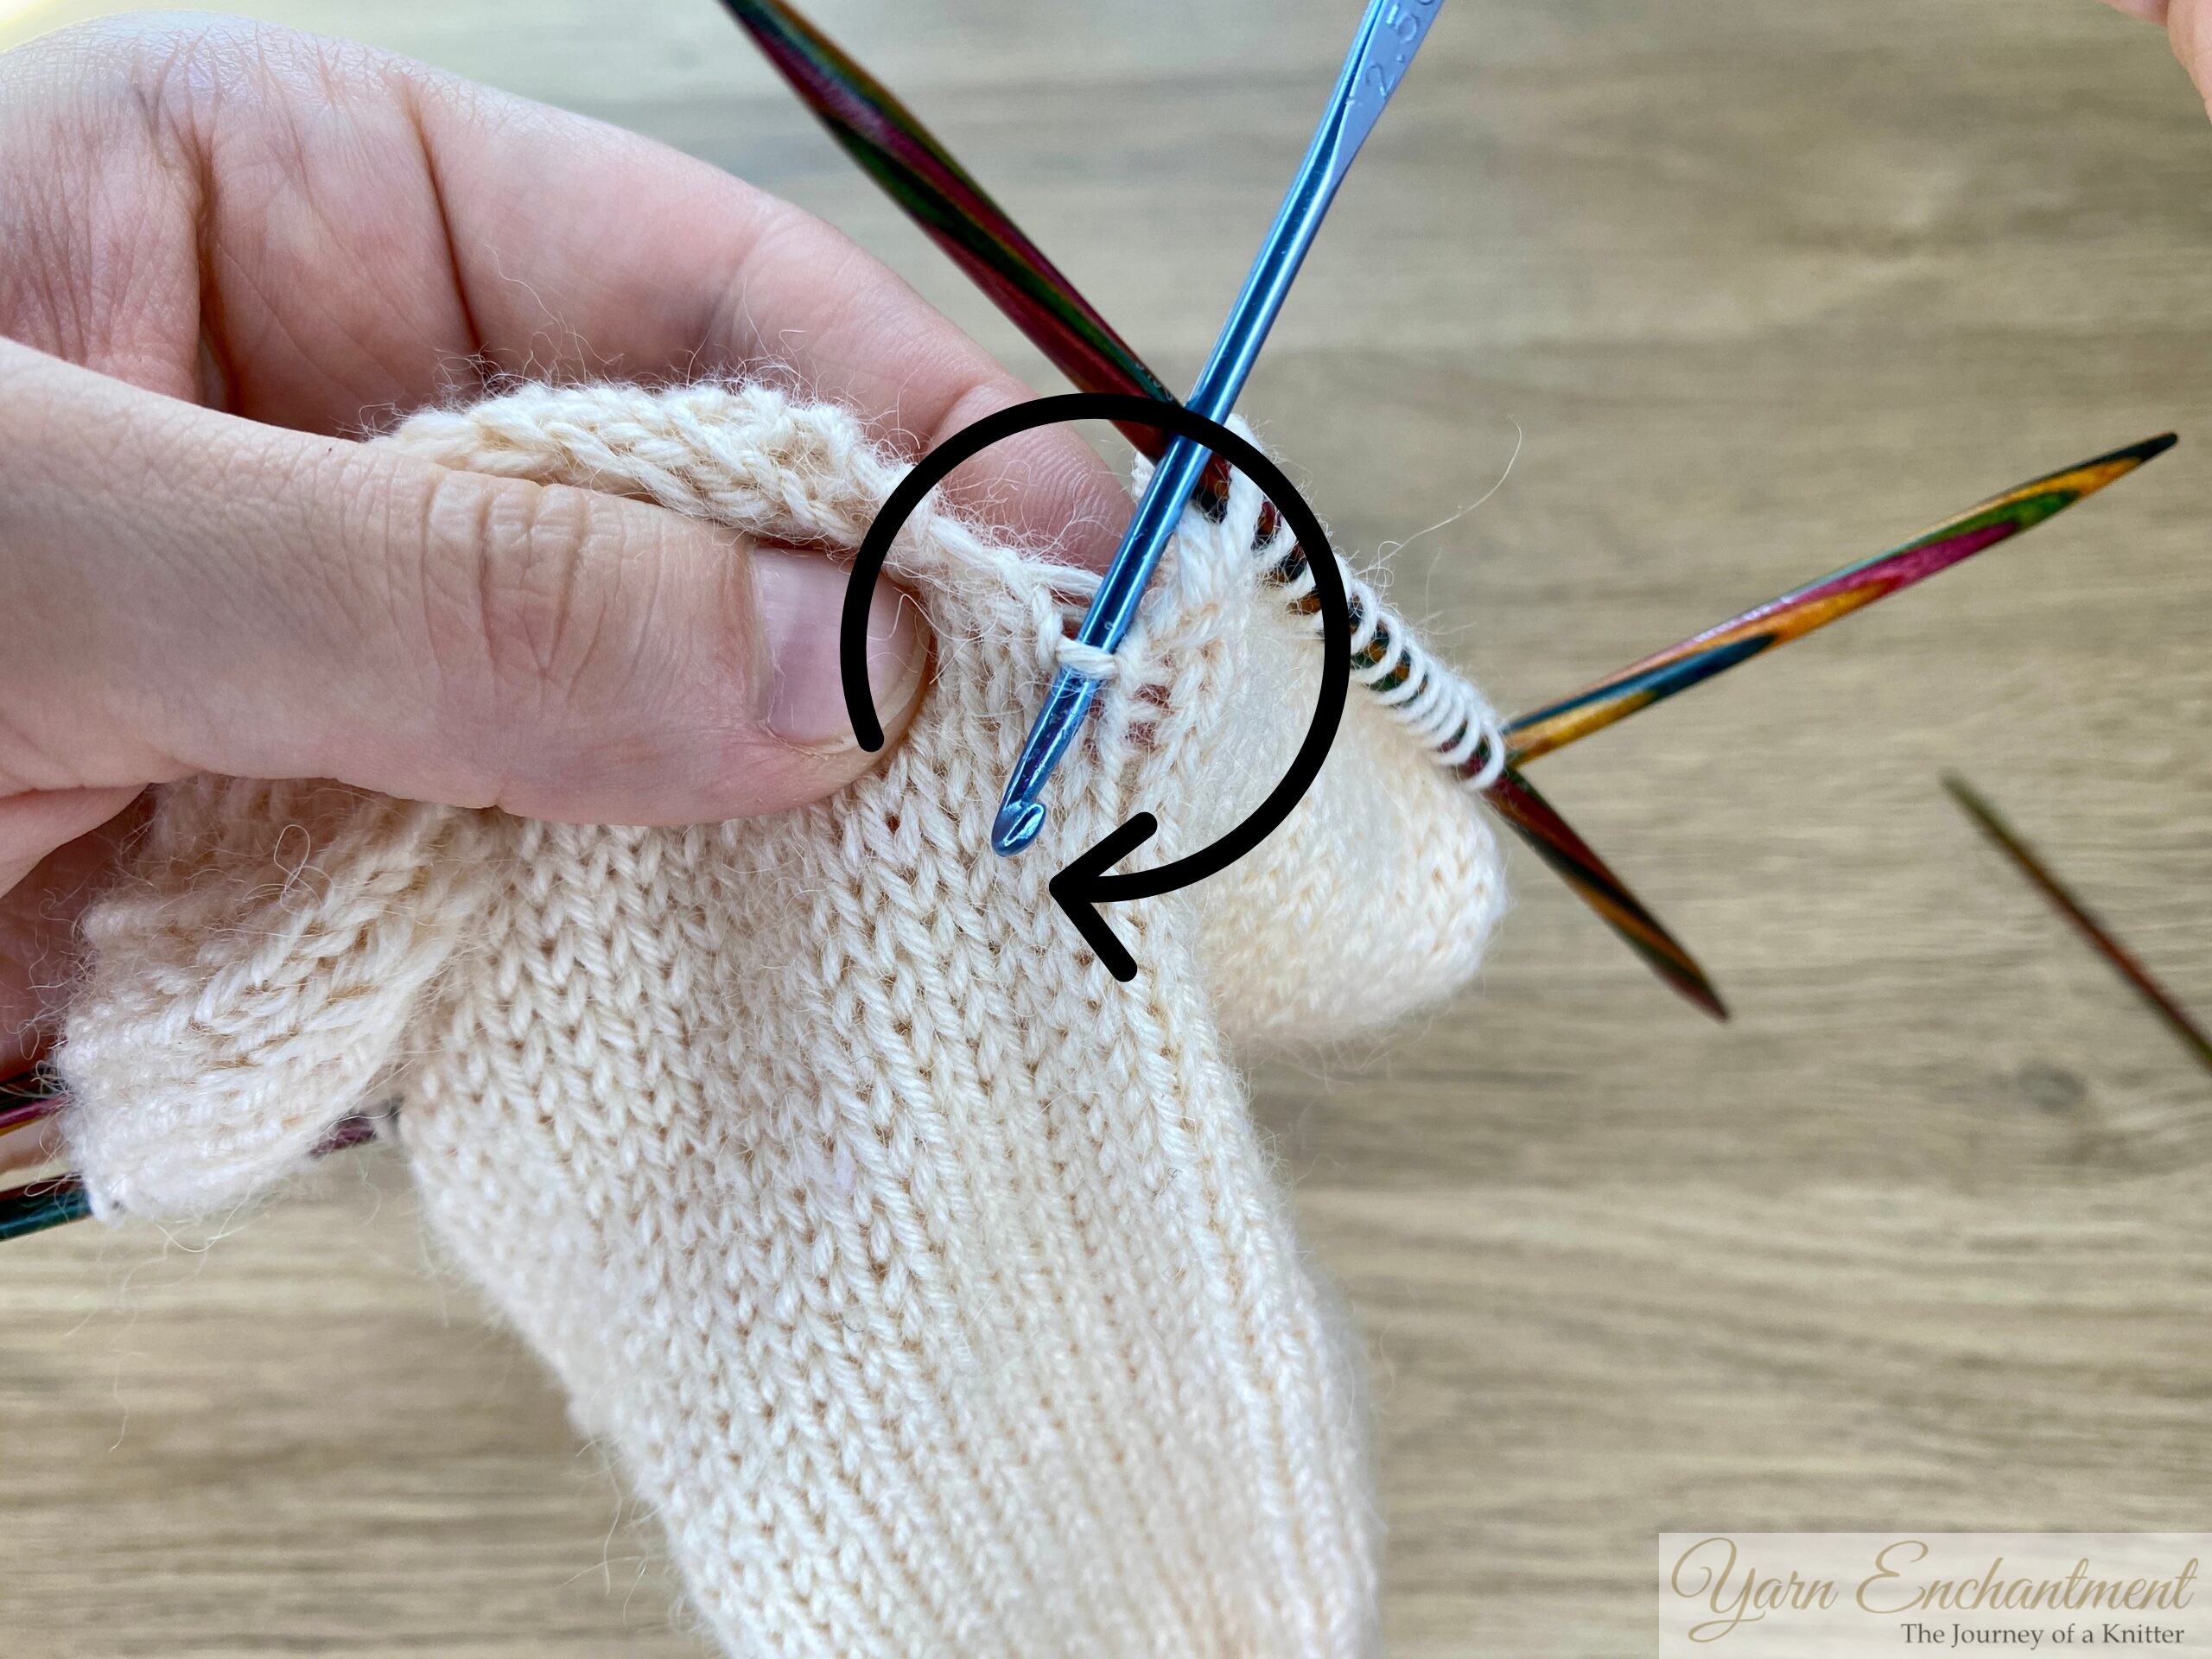
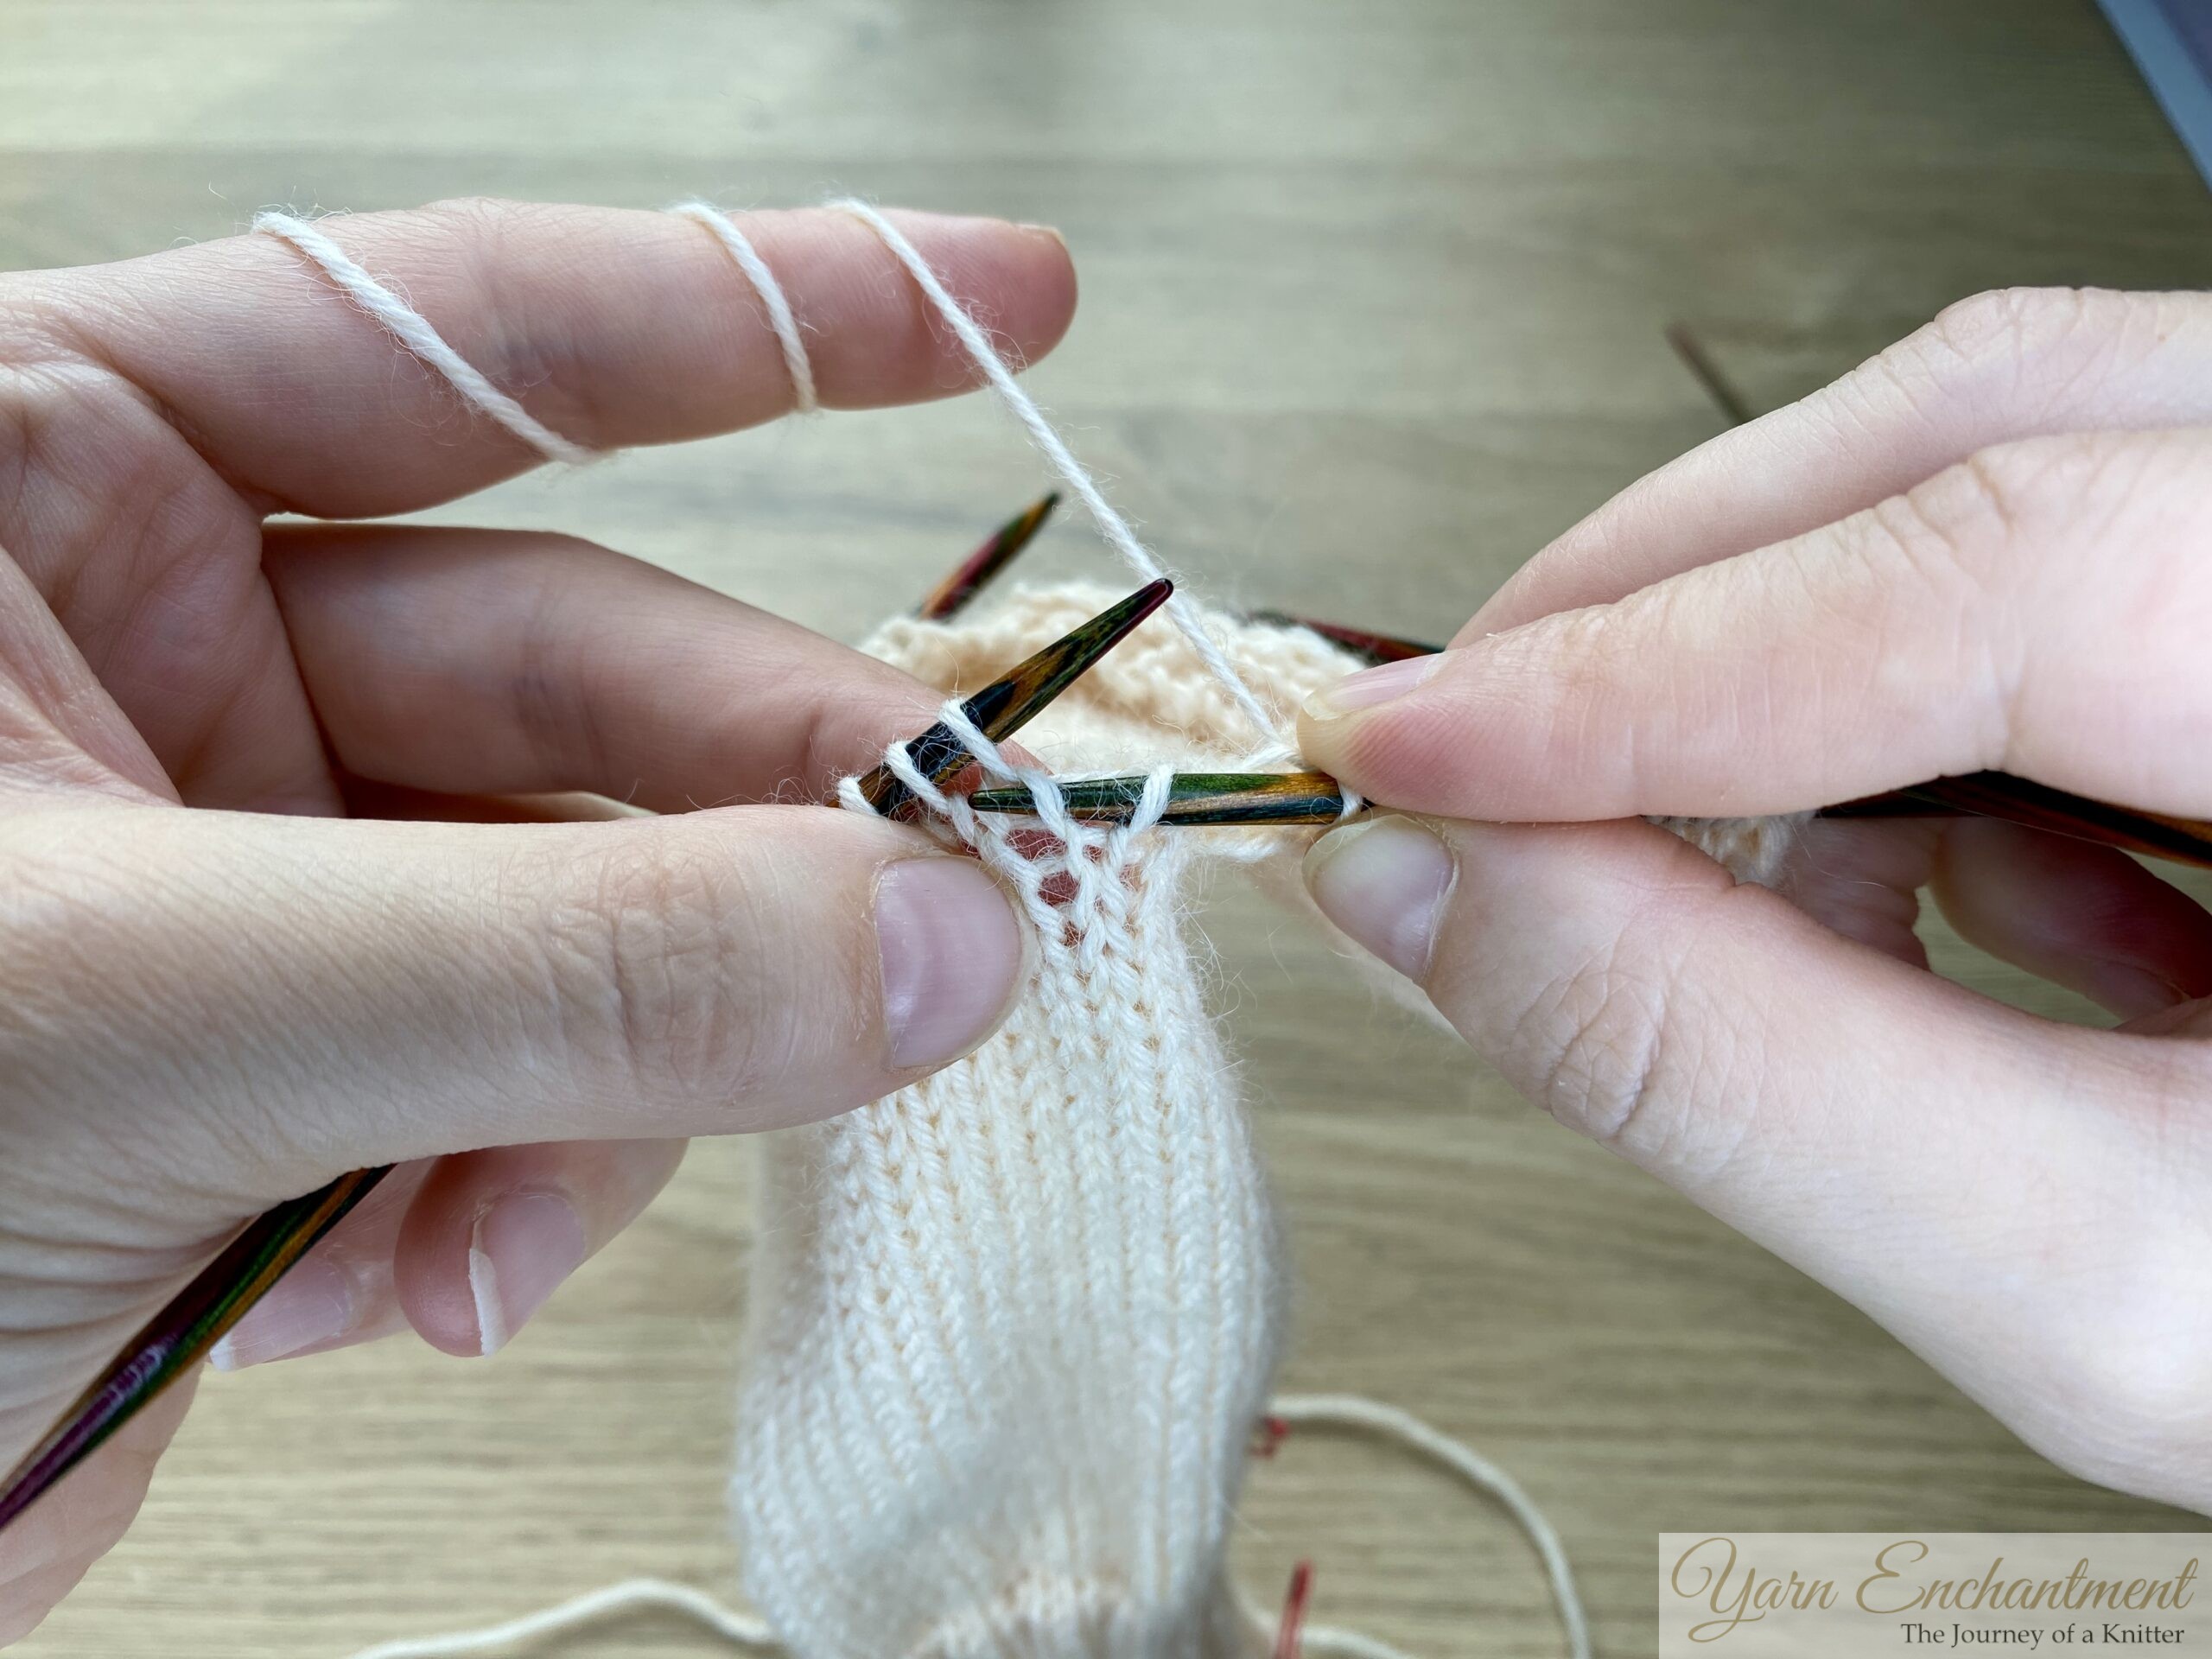
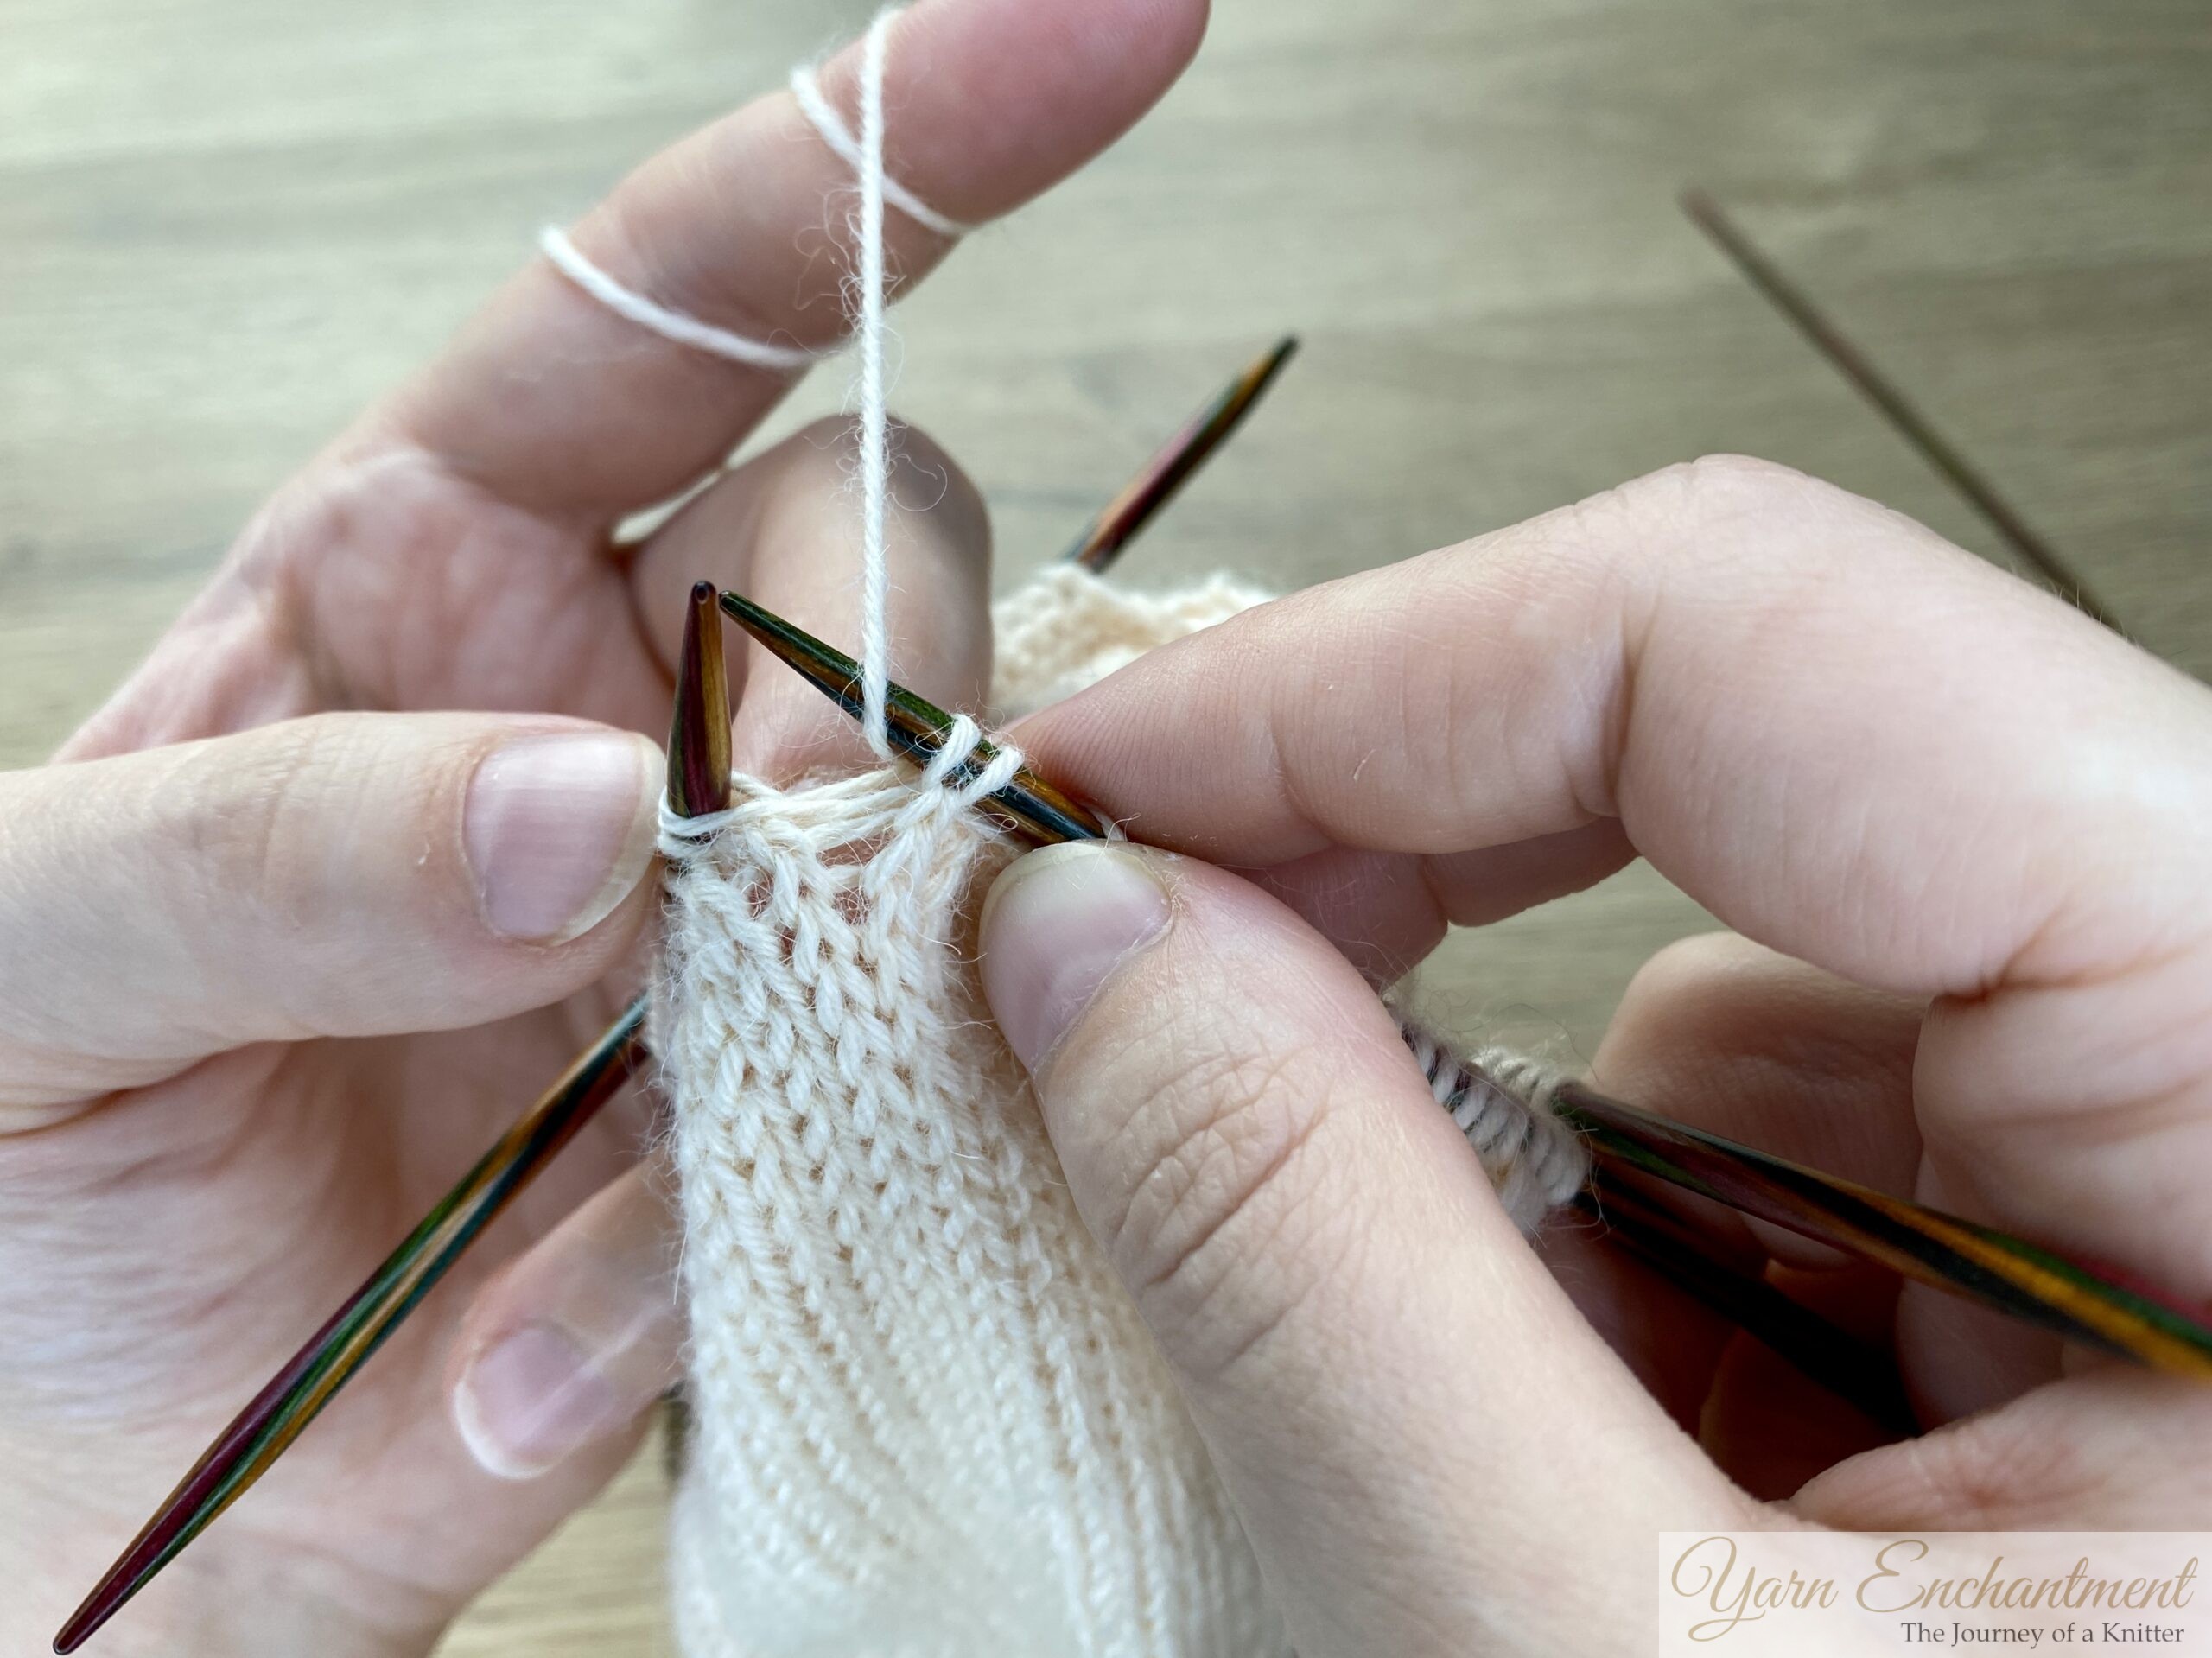
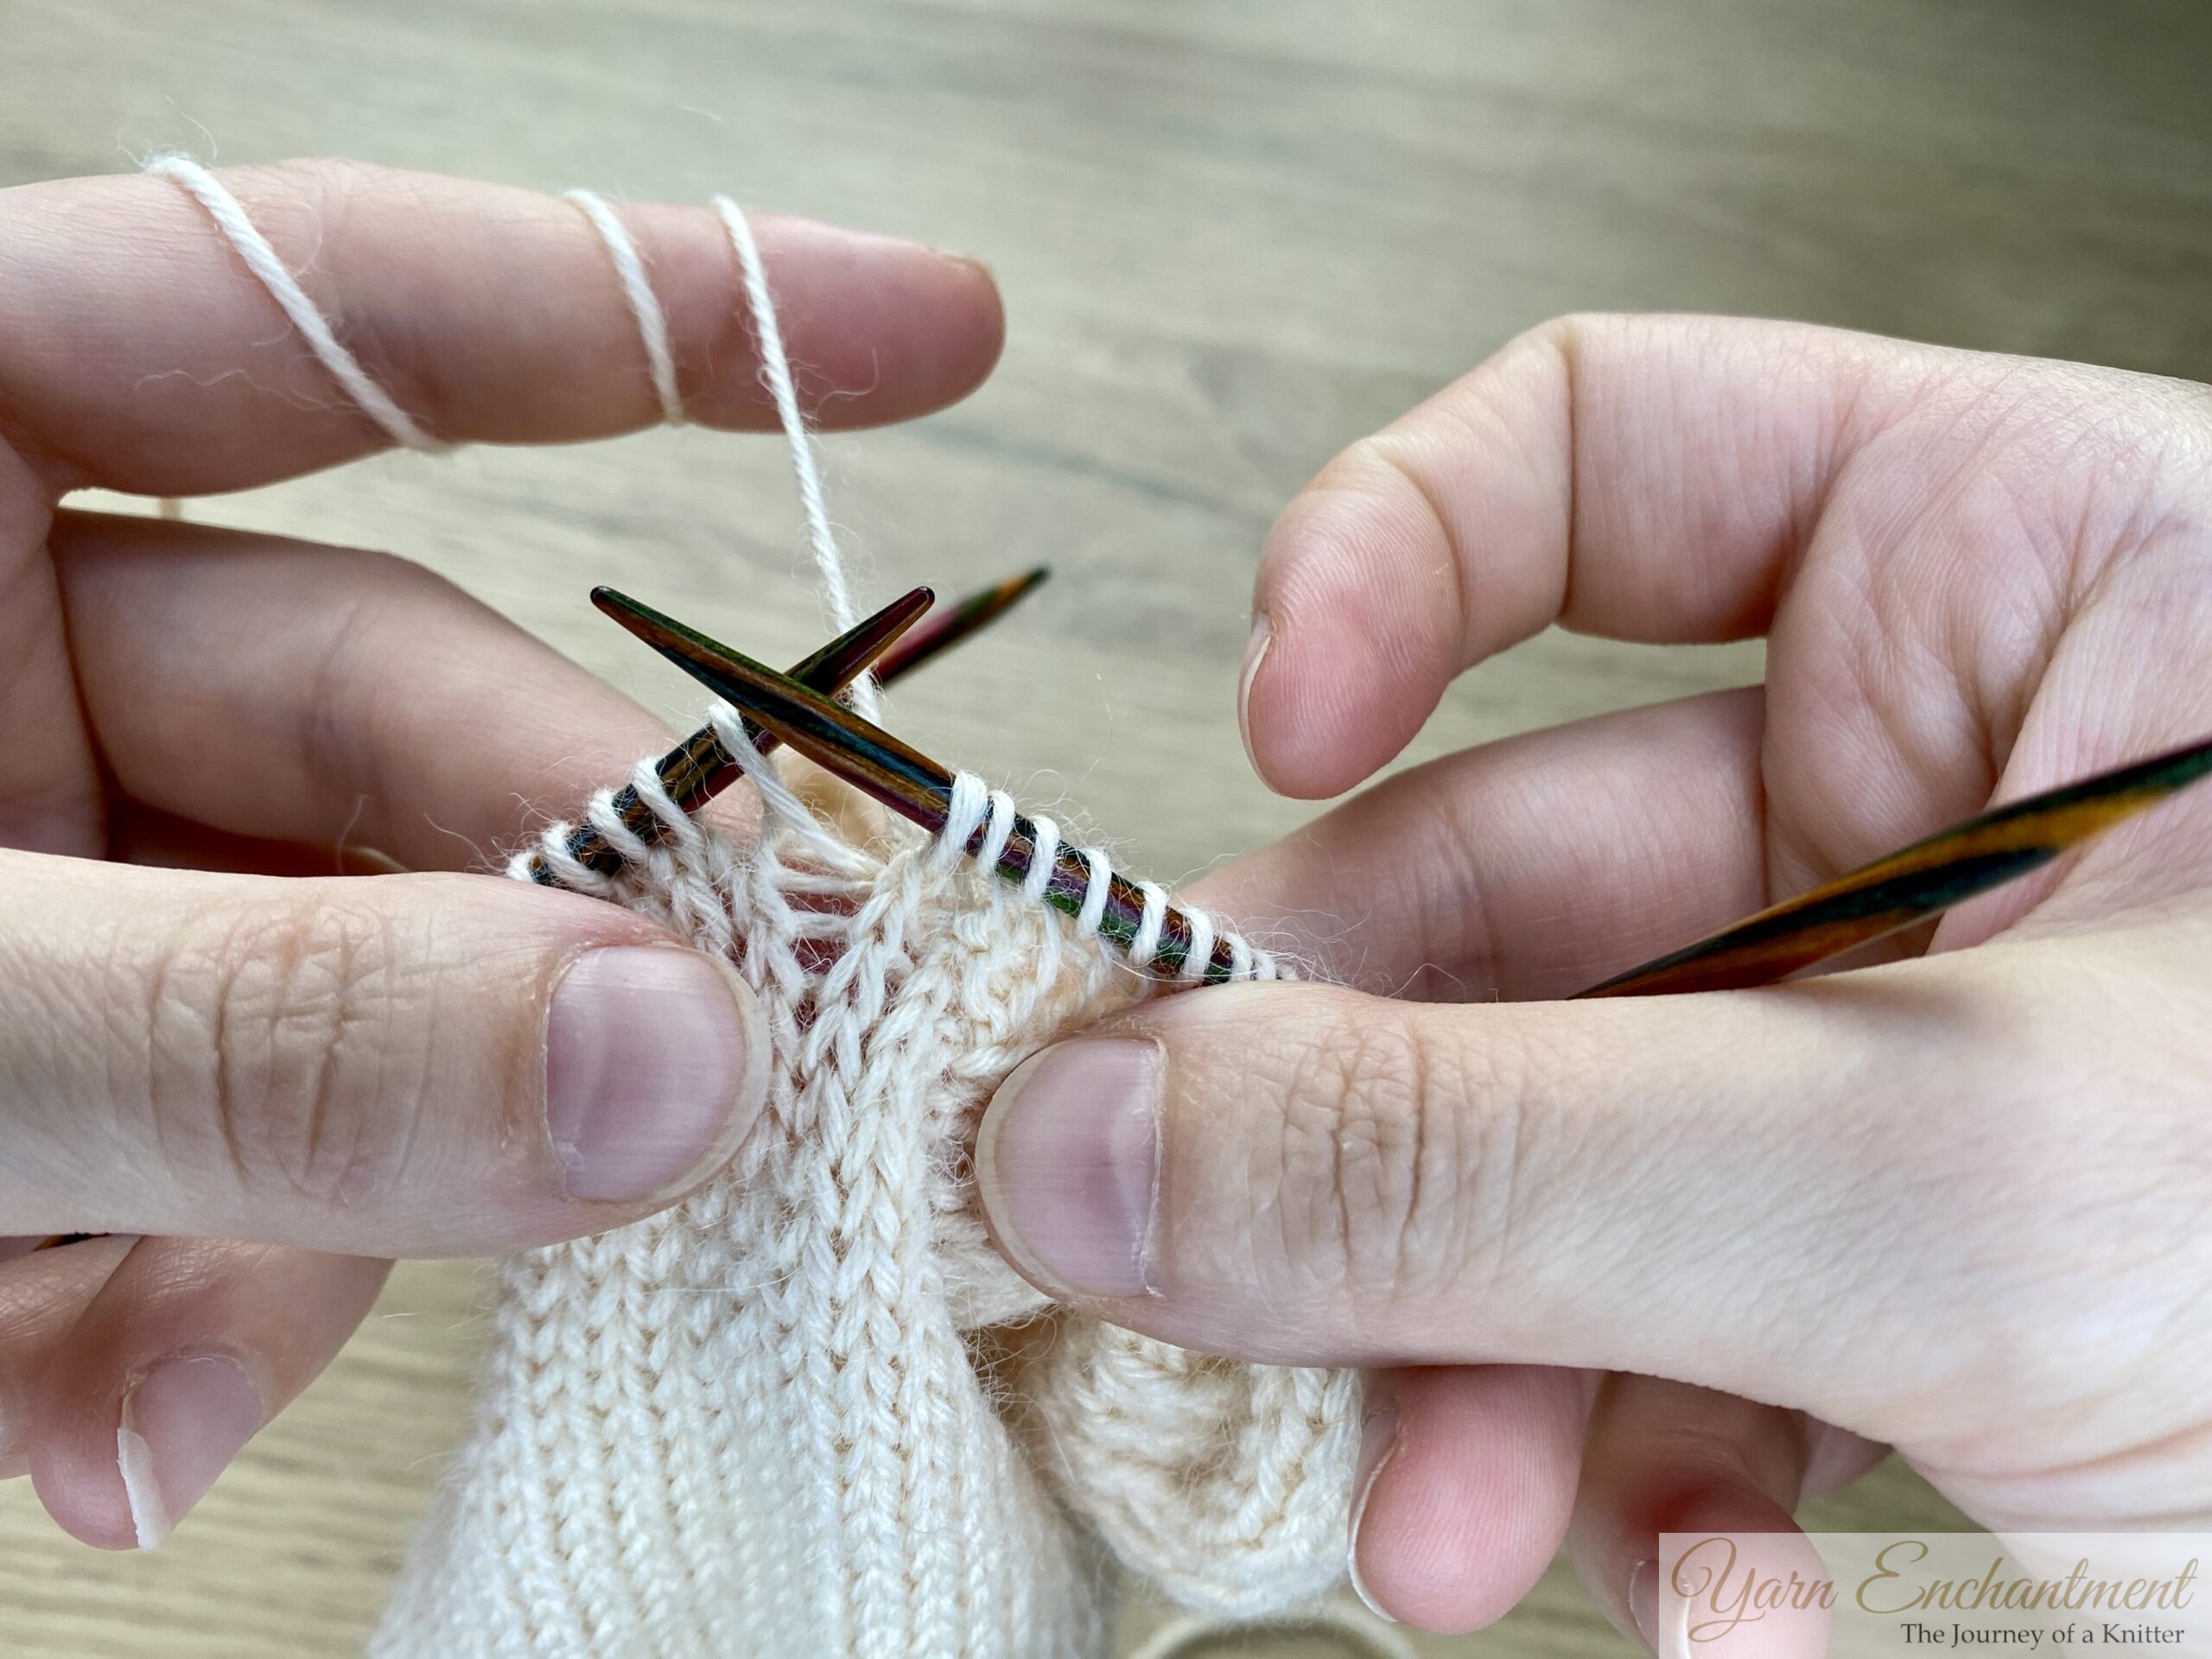
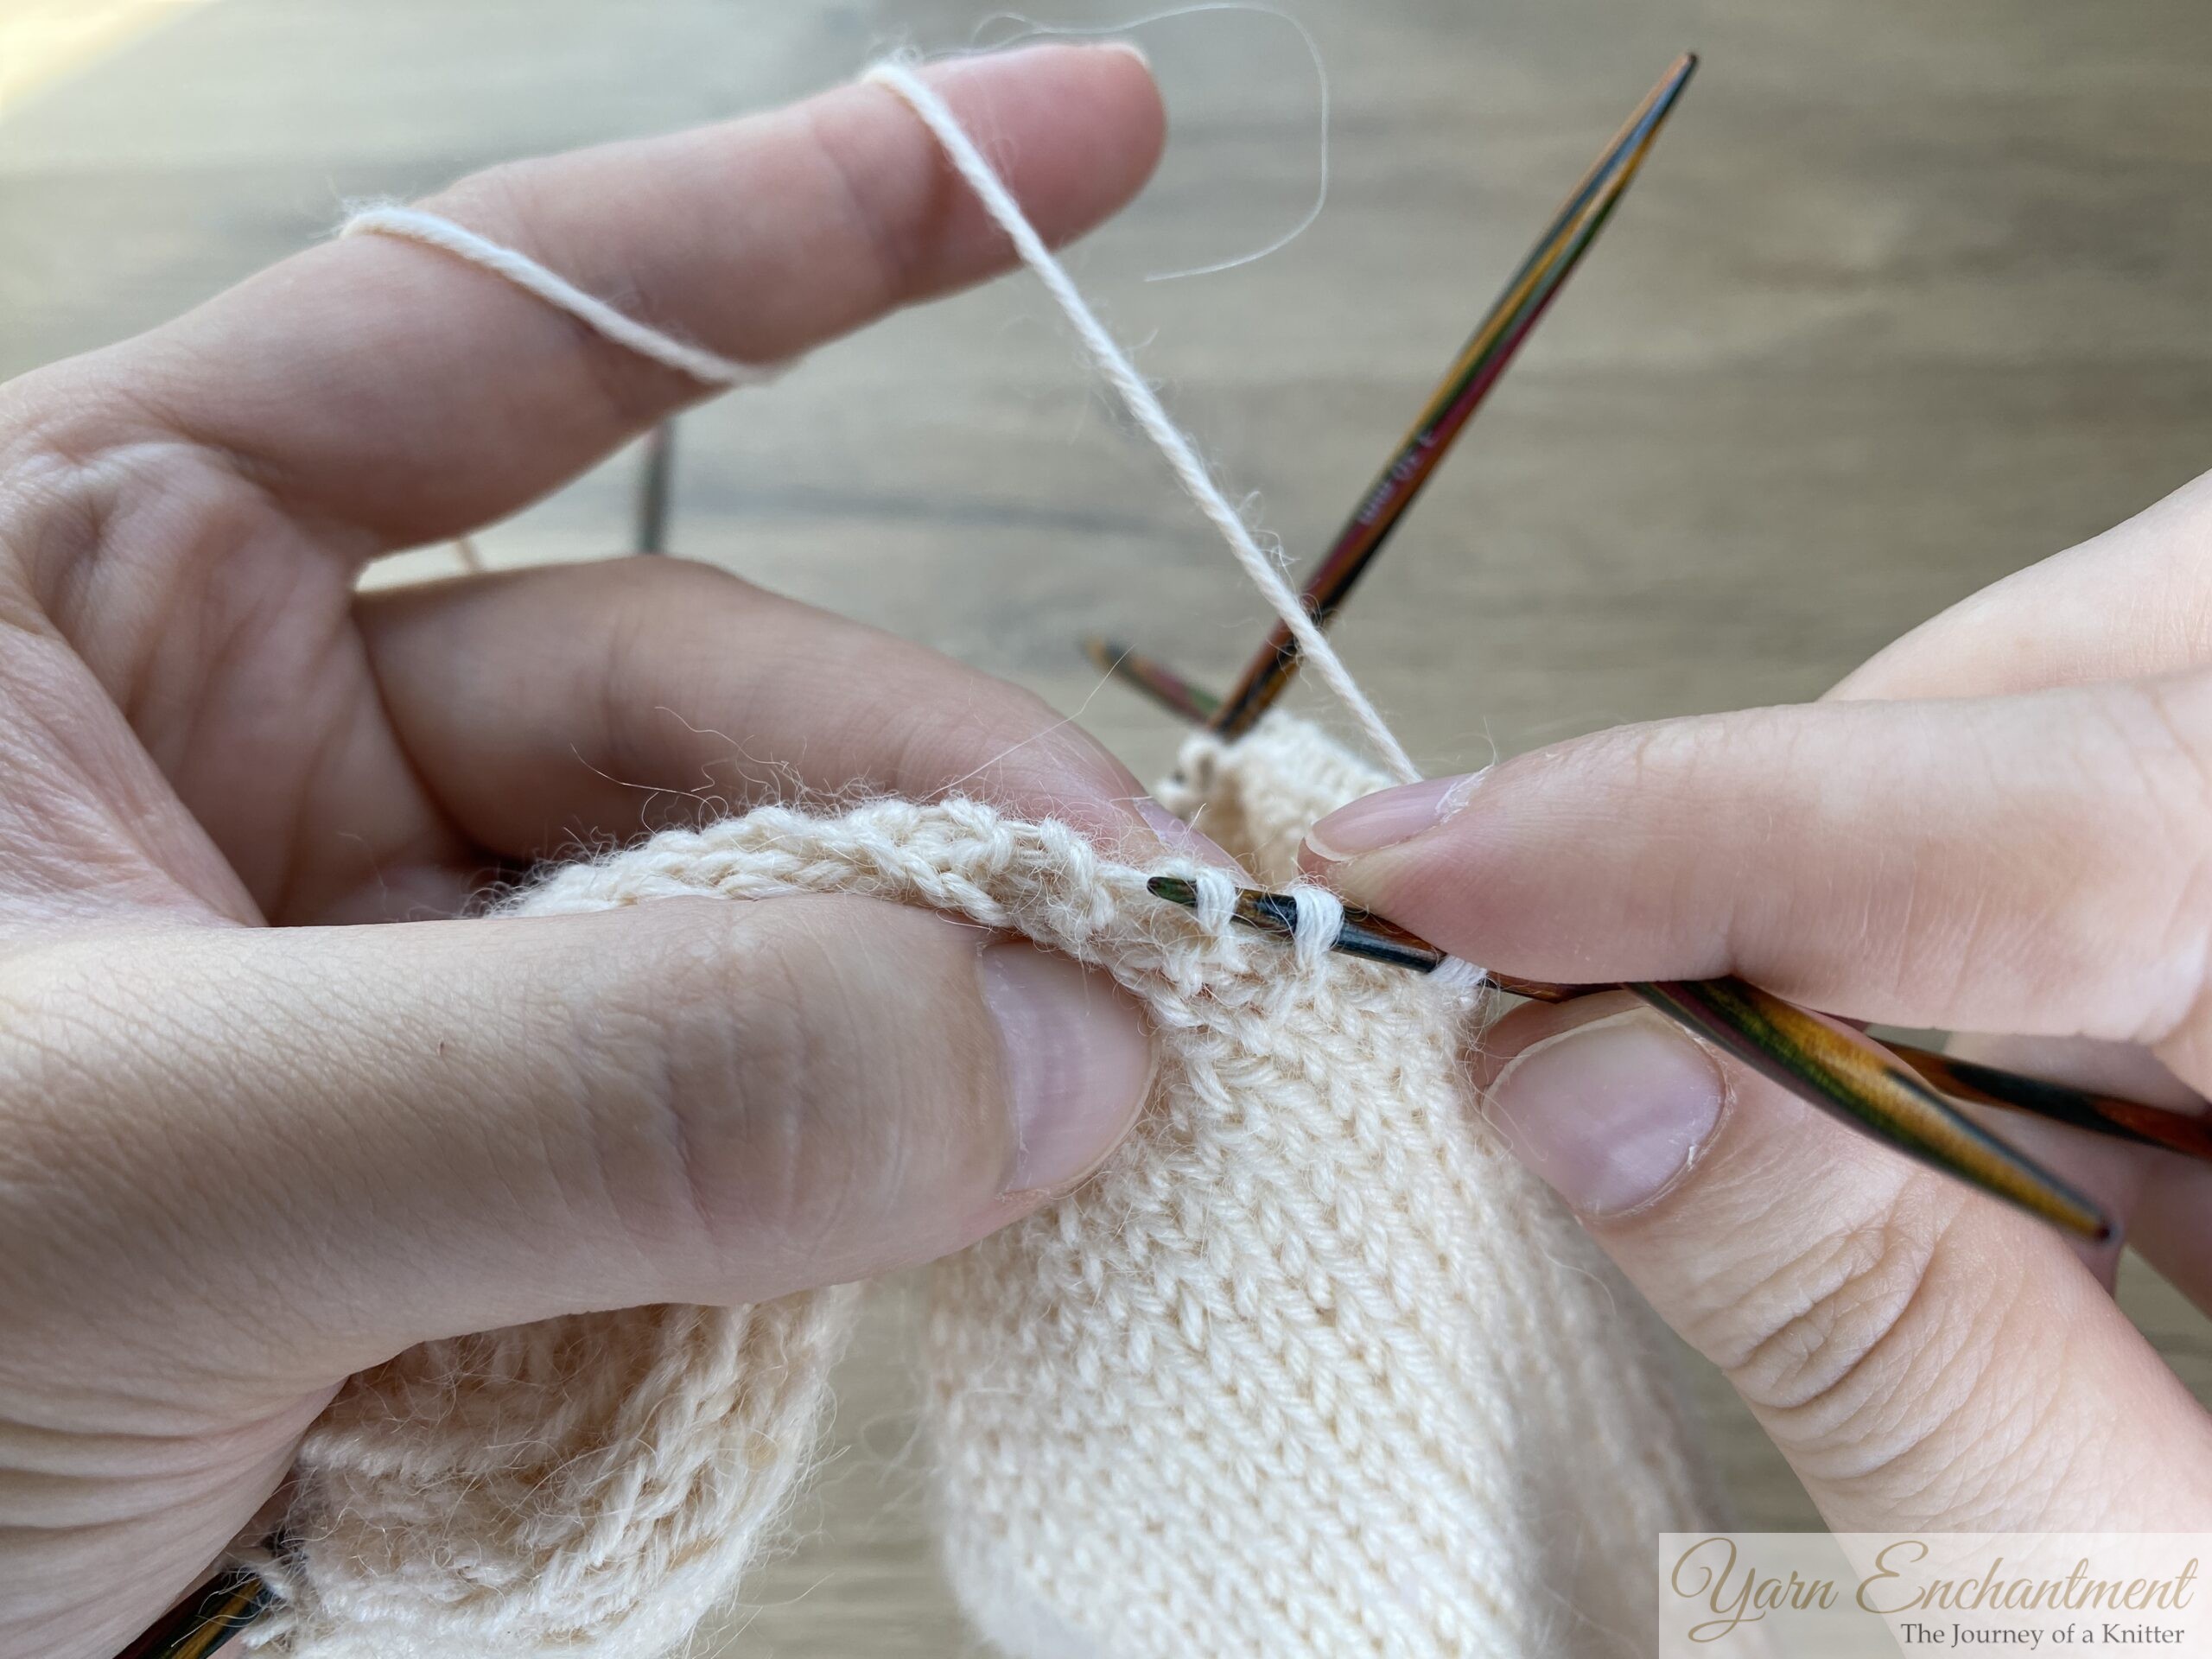
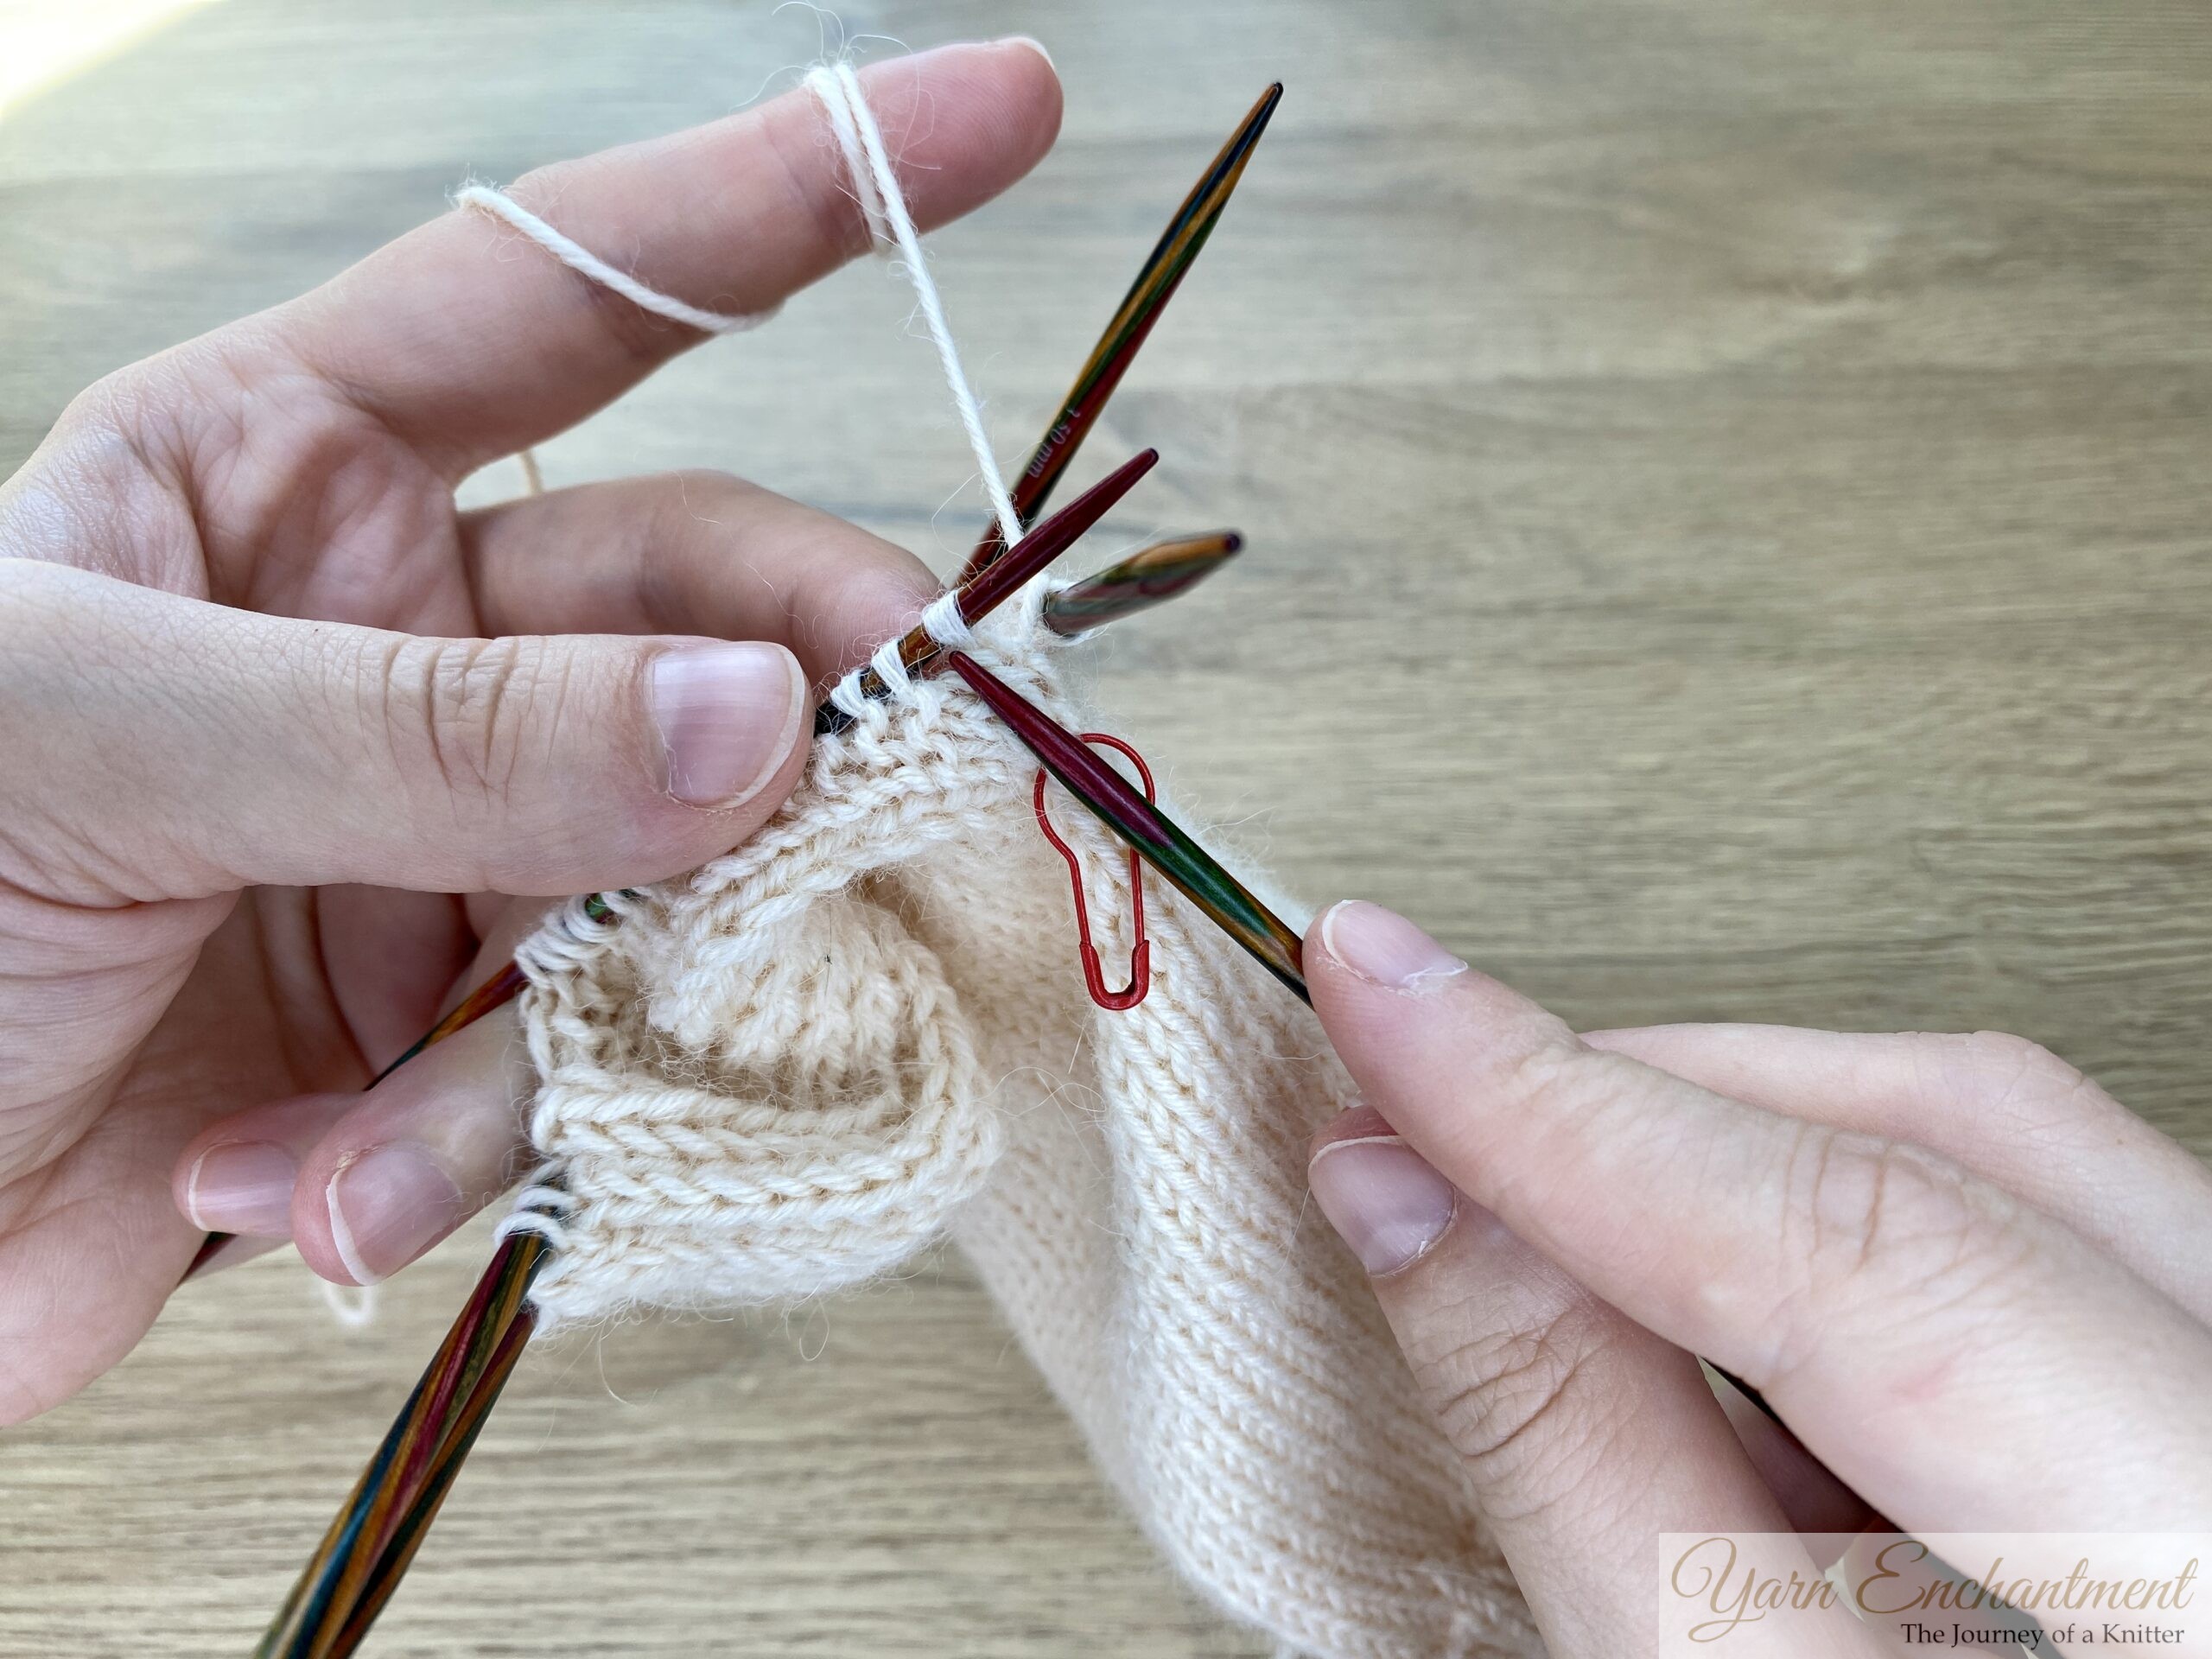
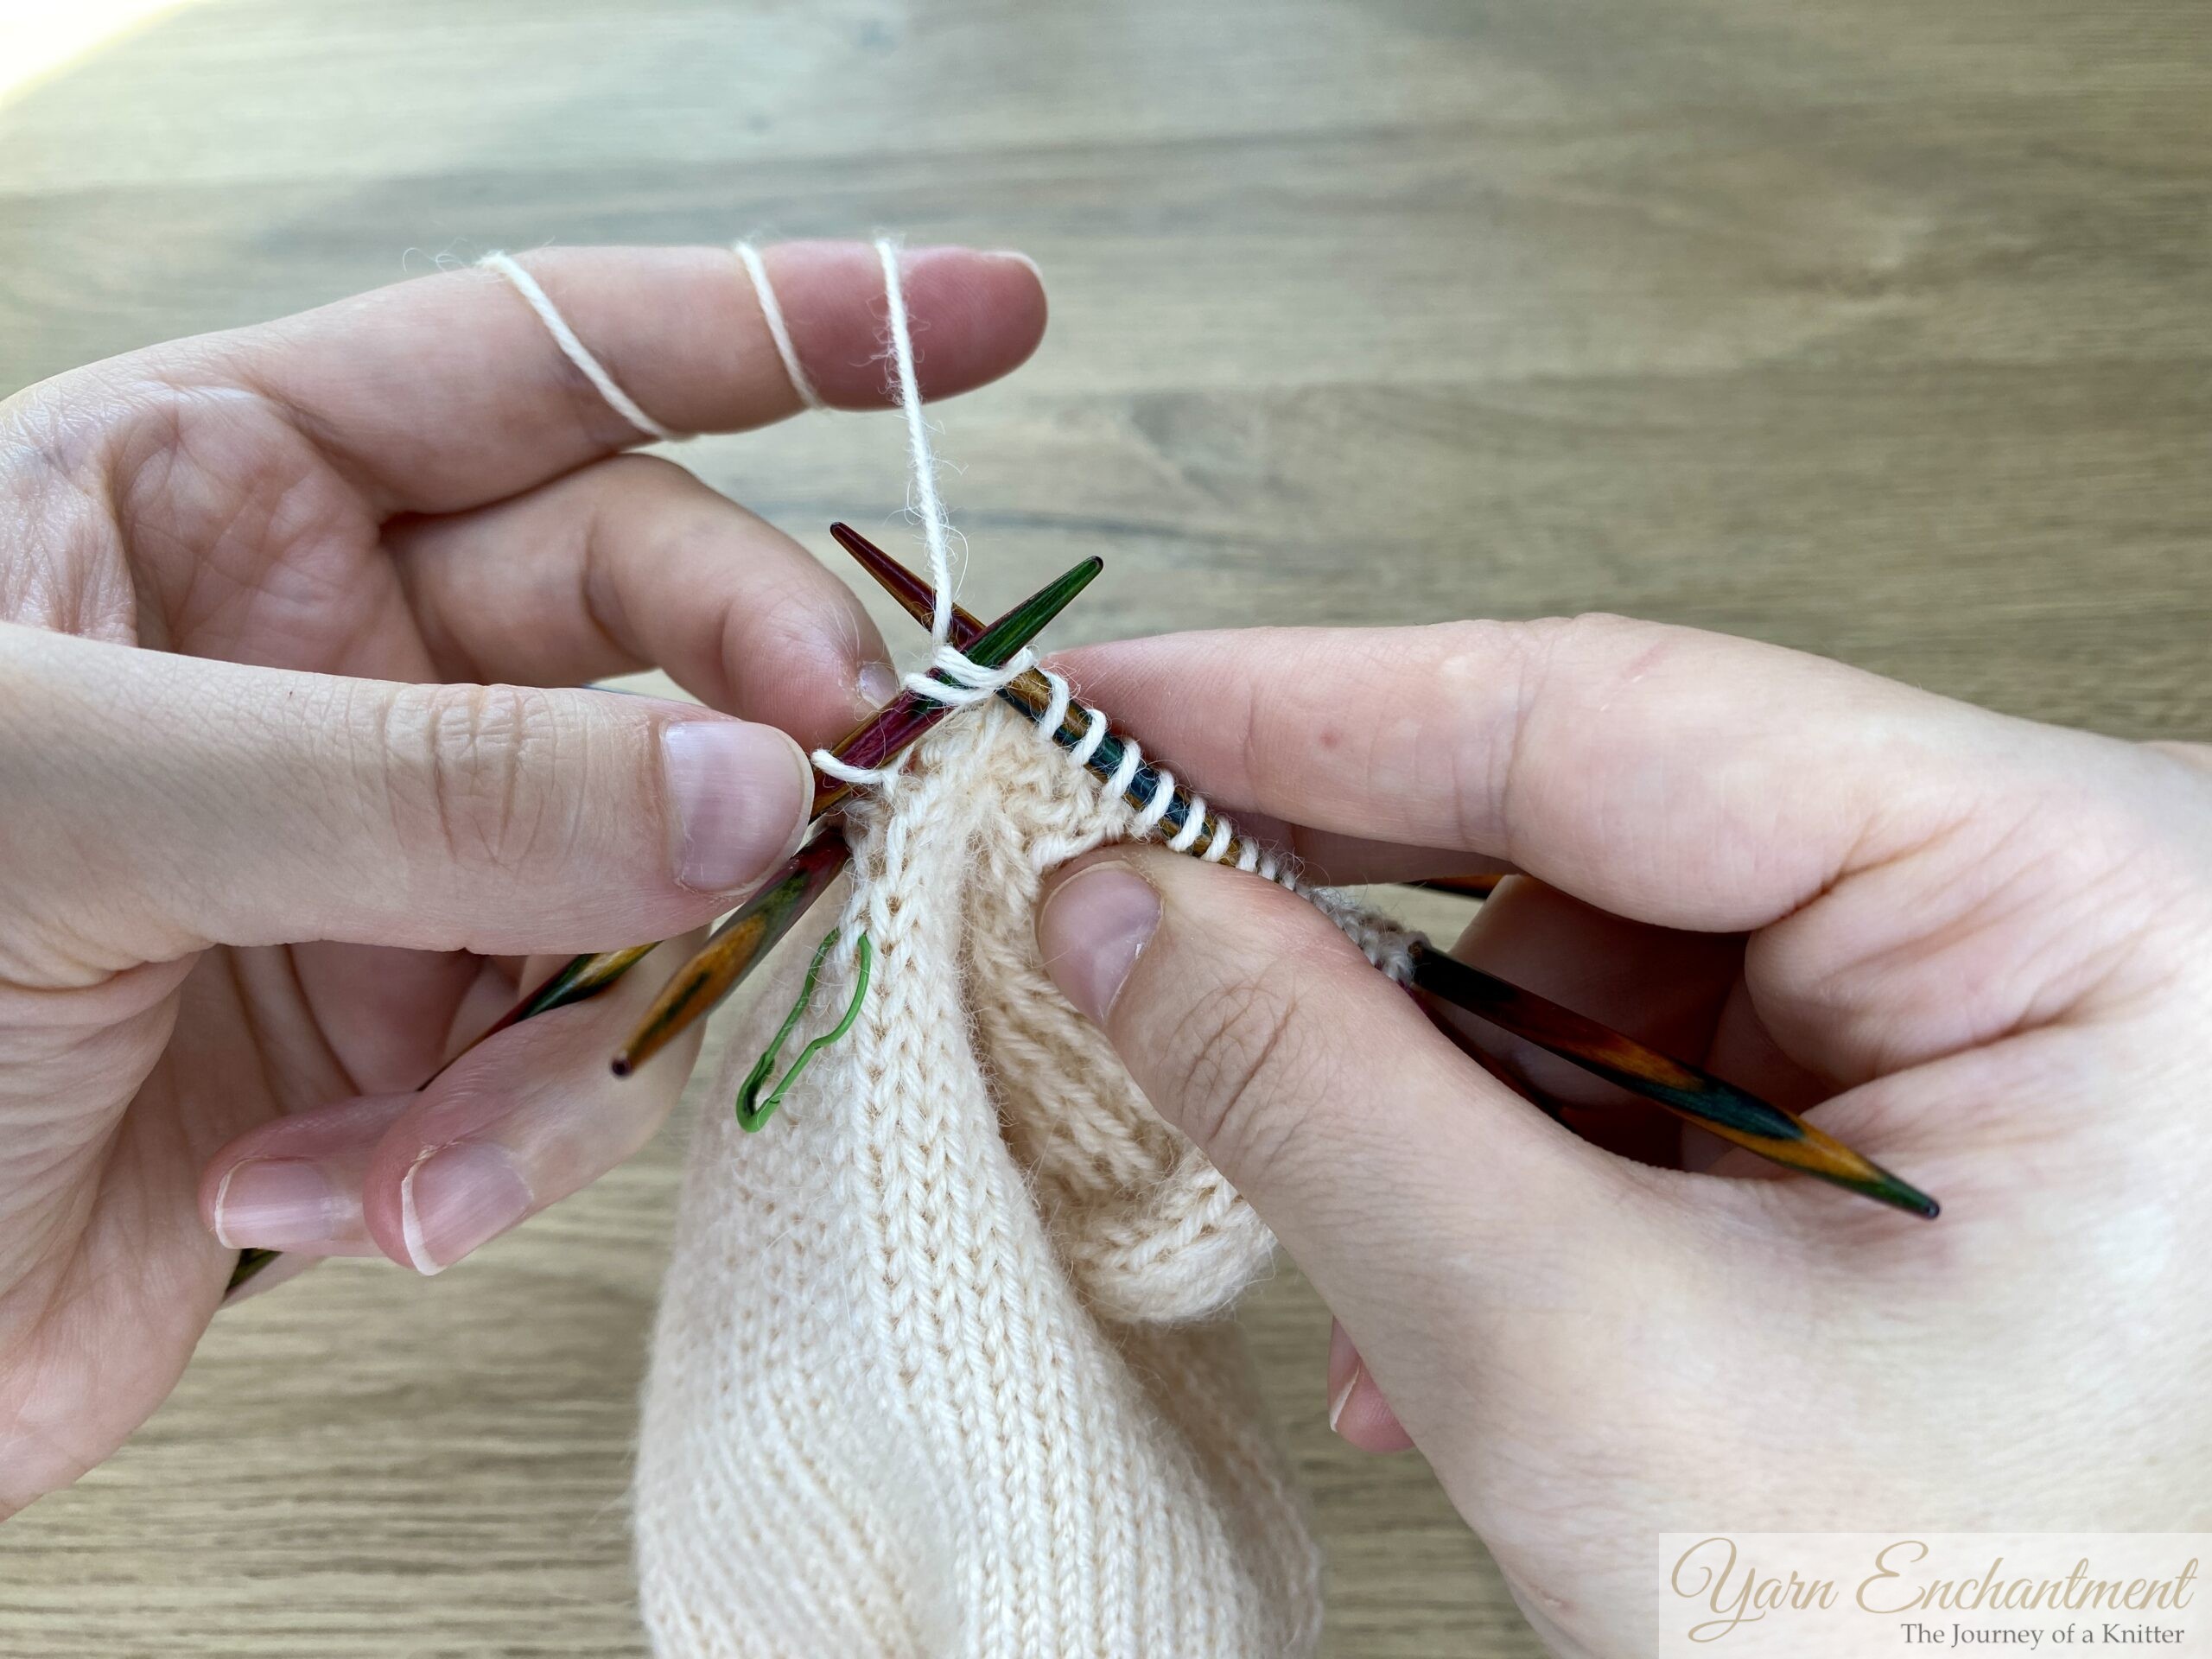
If you’re closing the gusset hole using this method, here’s what to do: pick up the right leg of the stitch from your left needle and the left leg from the stitch on your right needle. I’ve marked those stitch legs with arrows in the photo, so you can spot them right away. Just look for the first horizontal bar spanning the gap, once you see that, it’s easy to find exactly where to pick up your stitches and close the hole neatly.
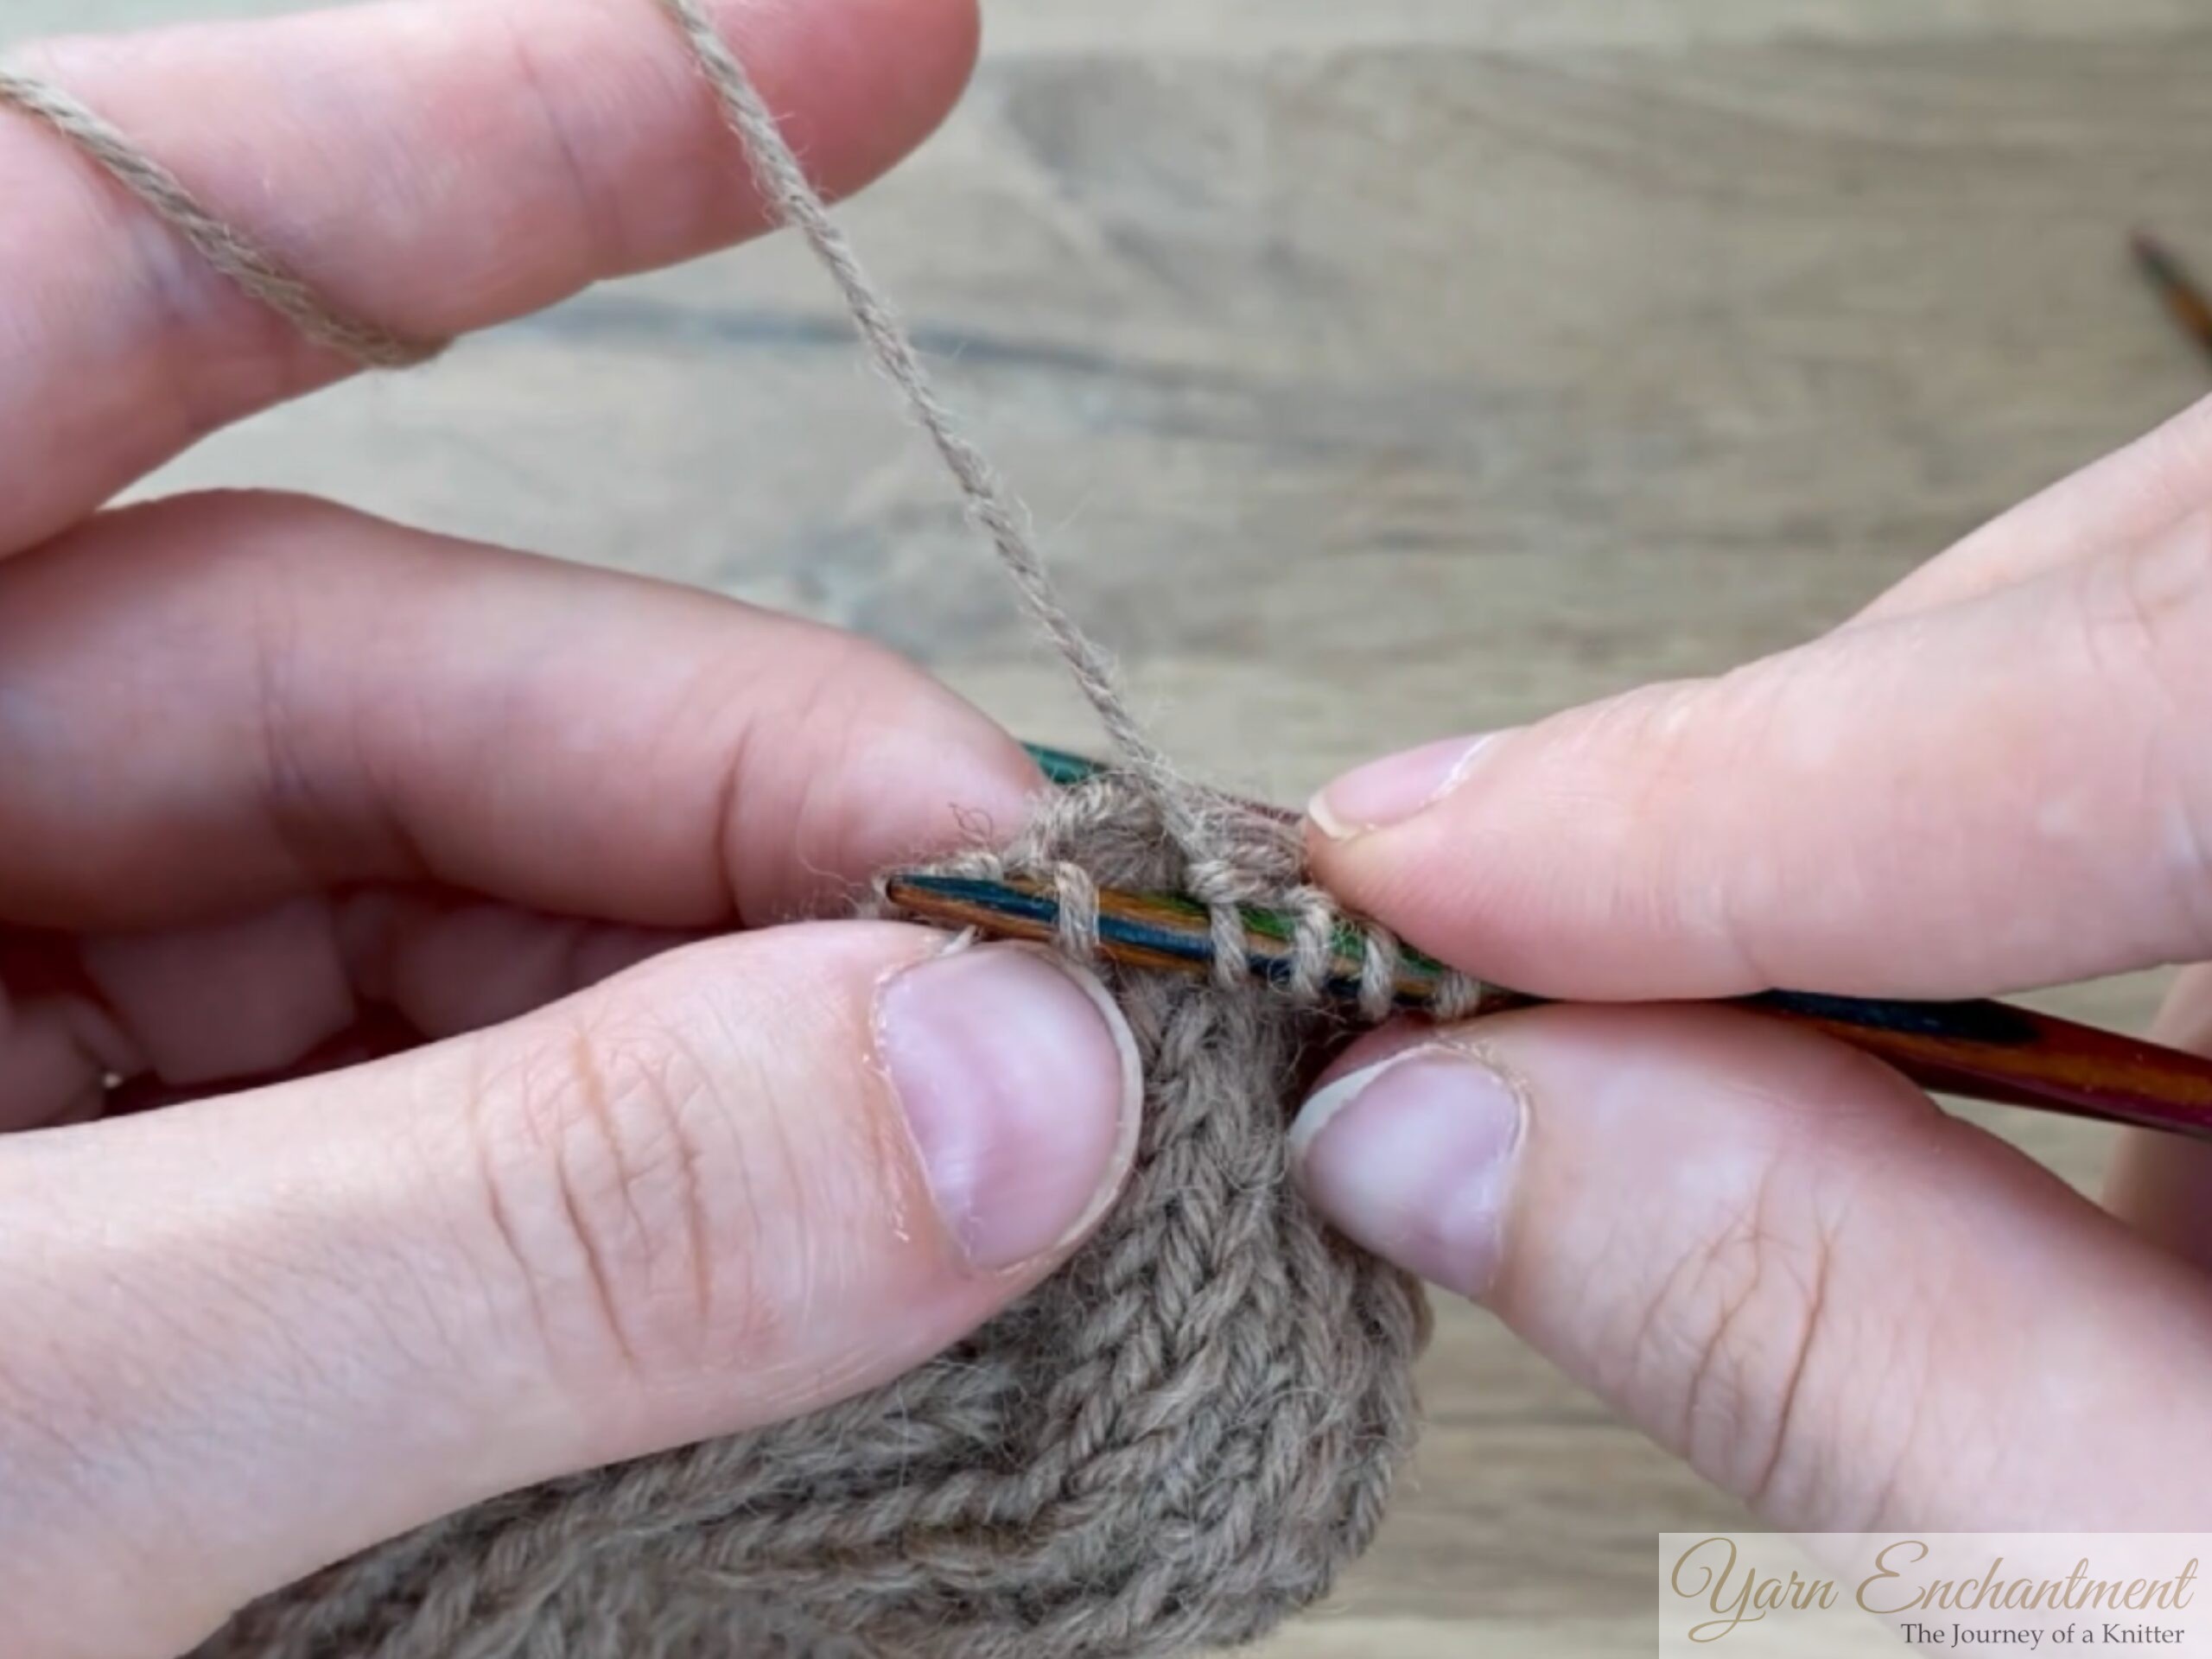
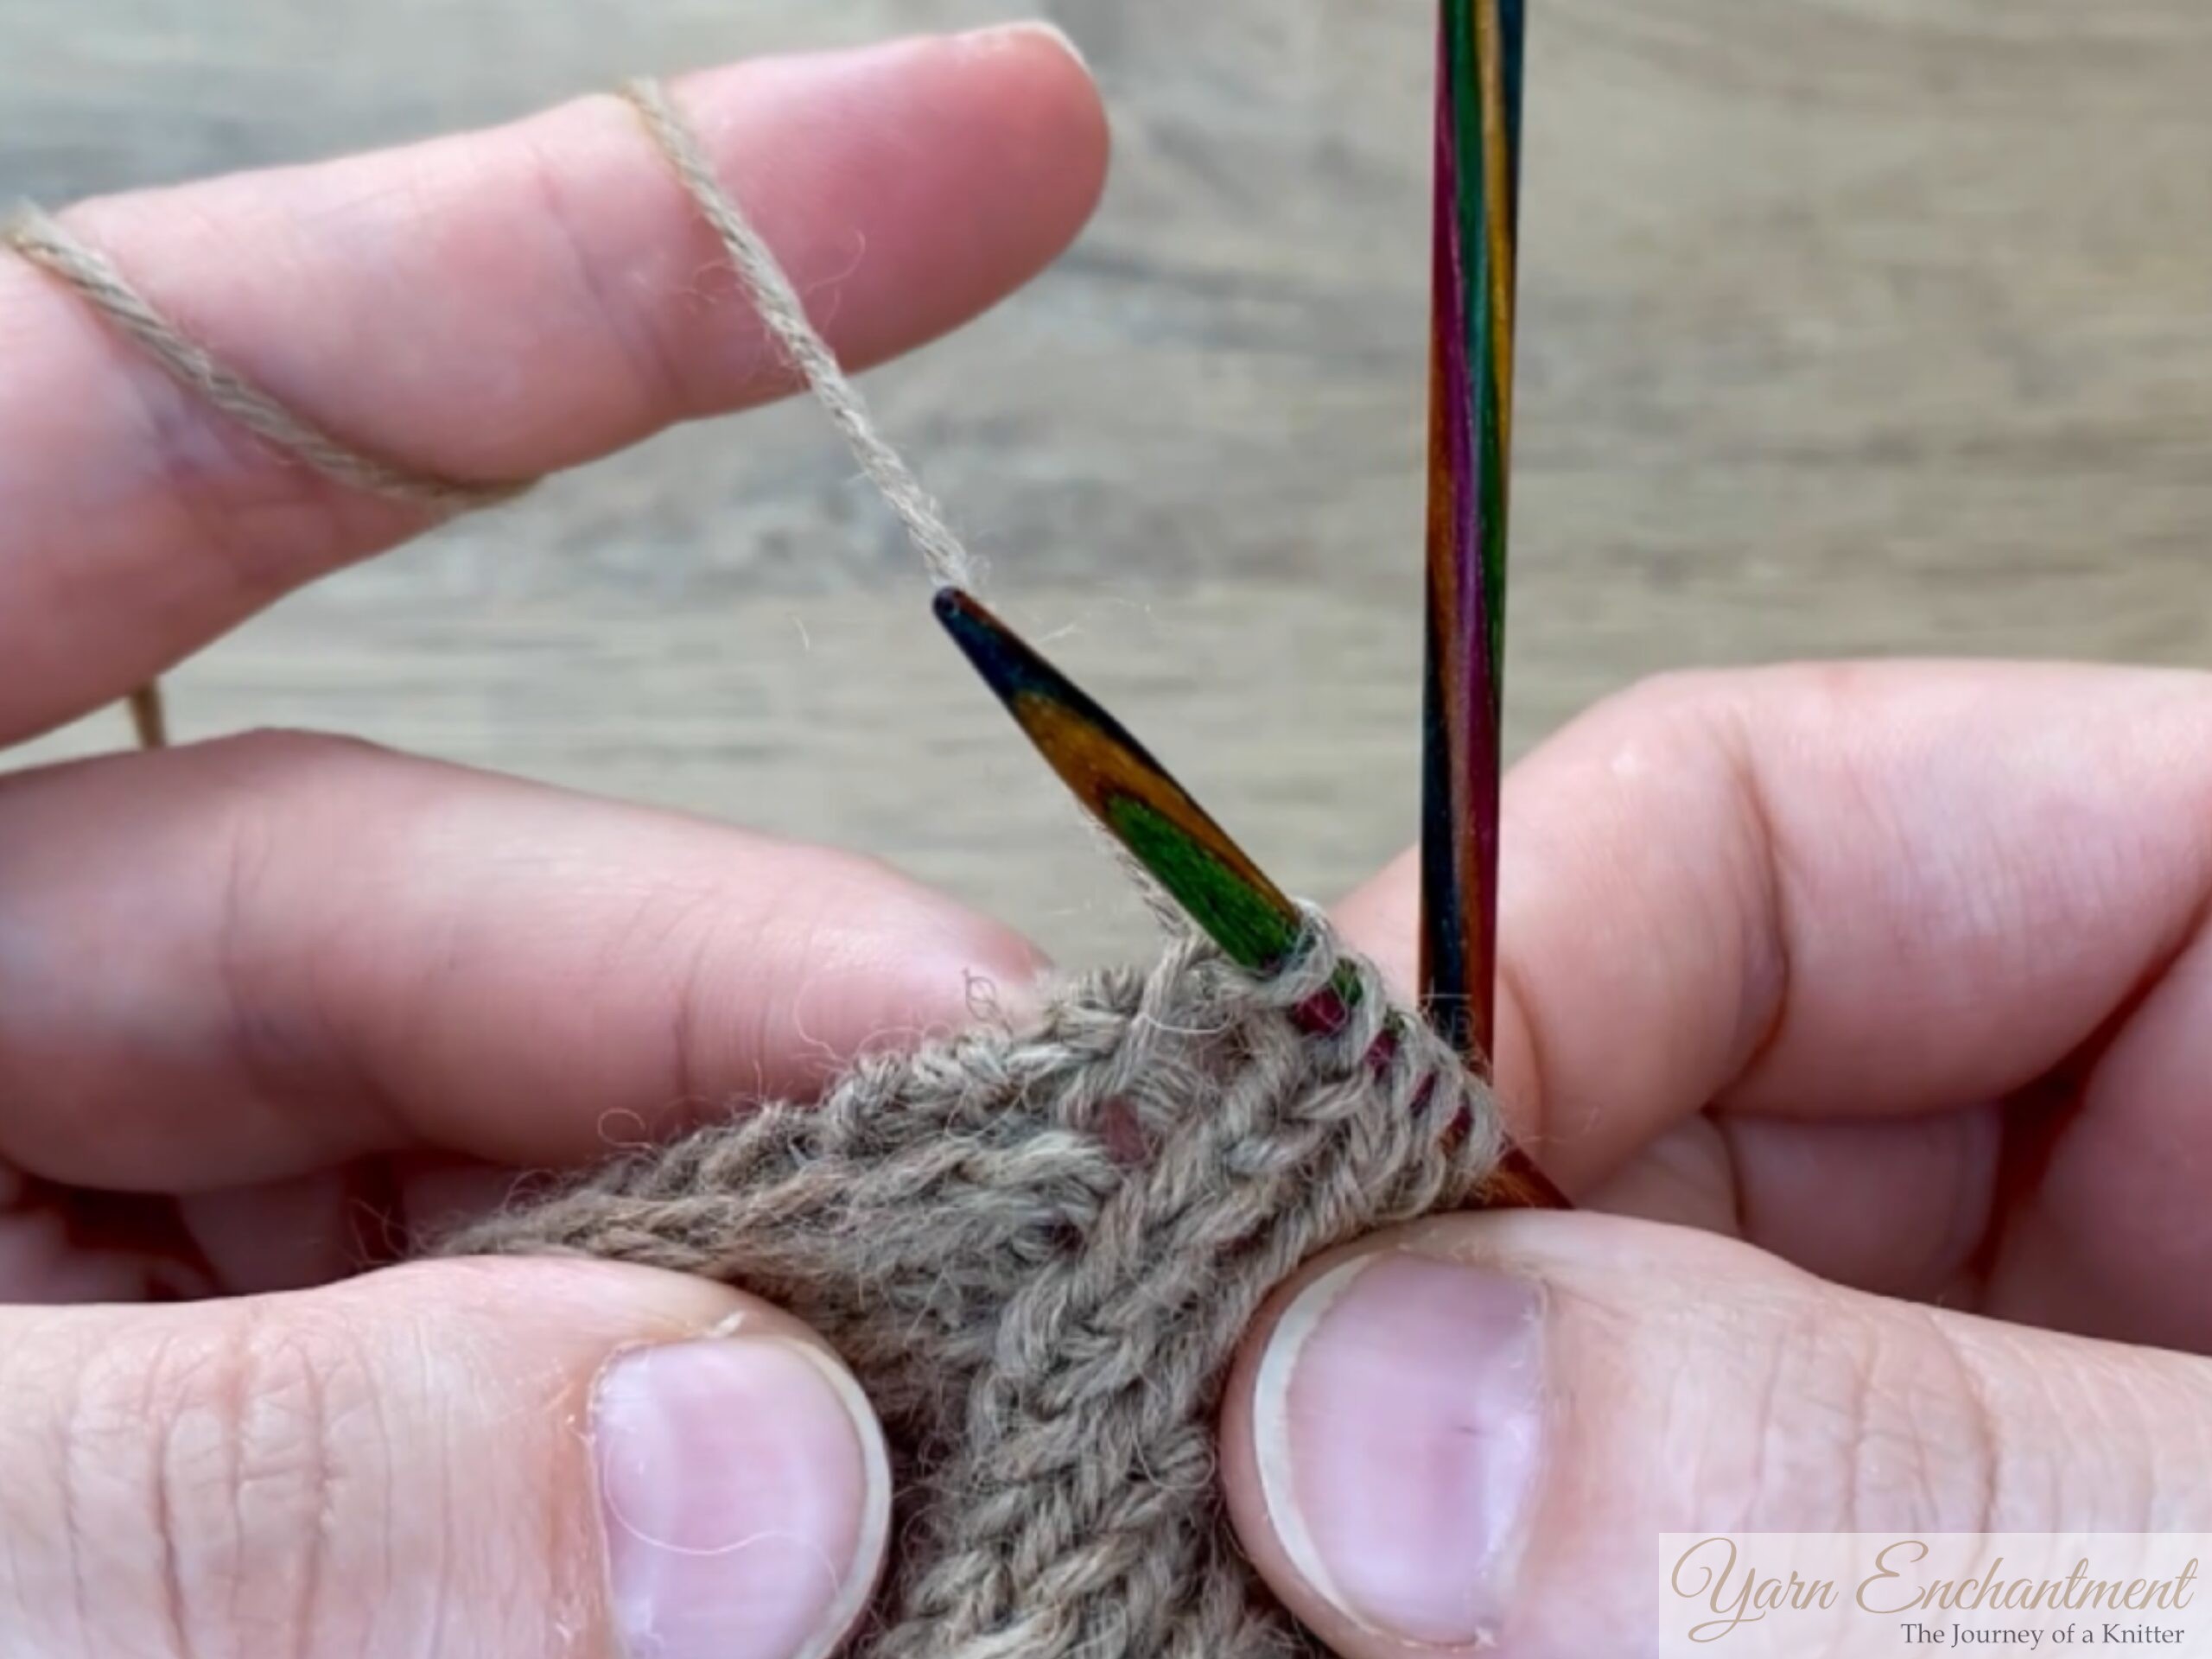
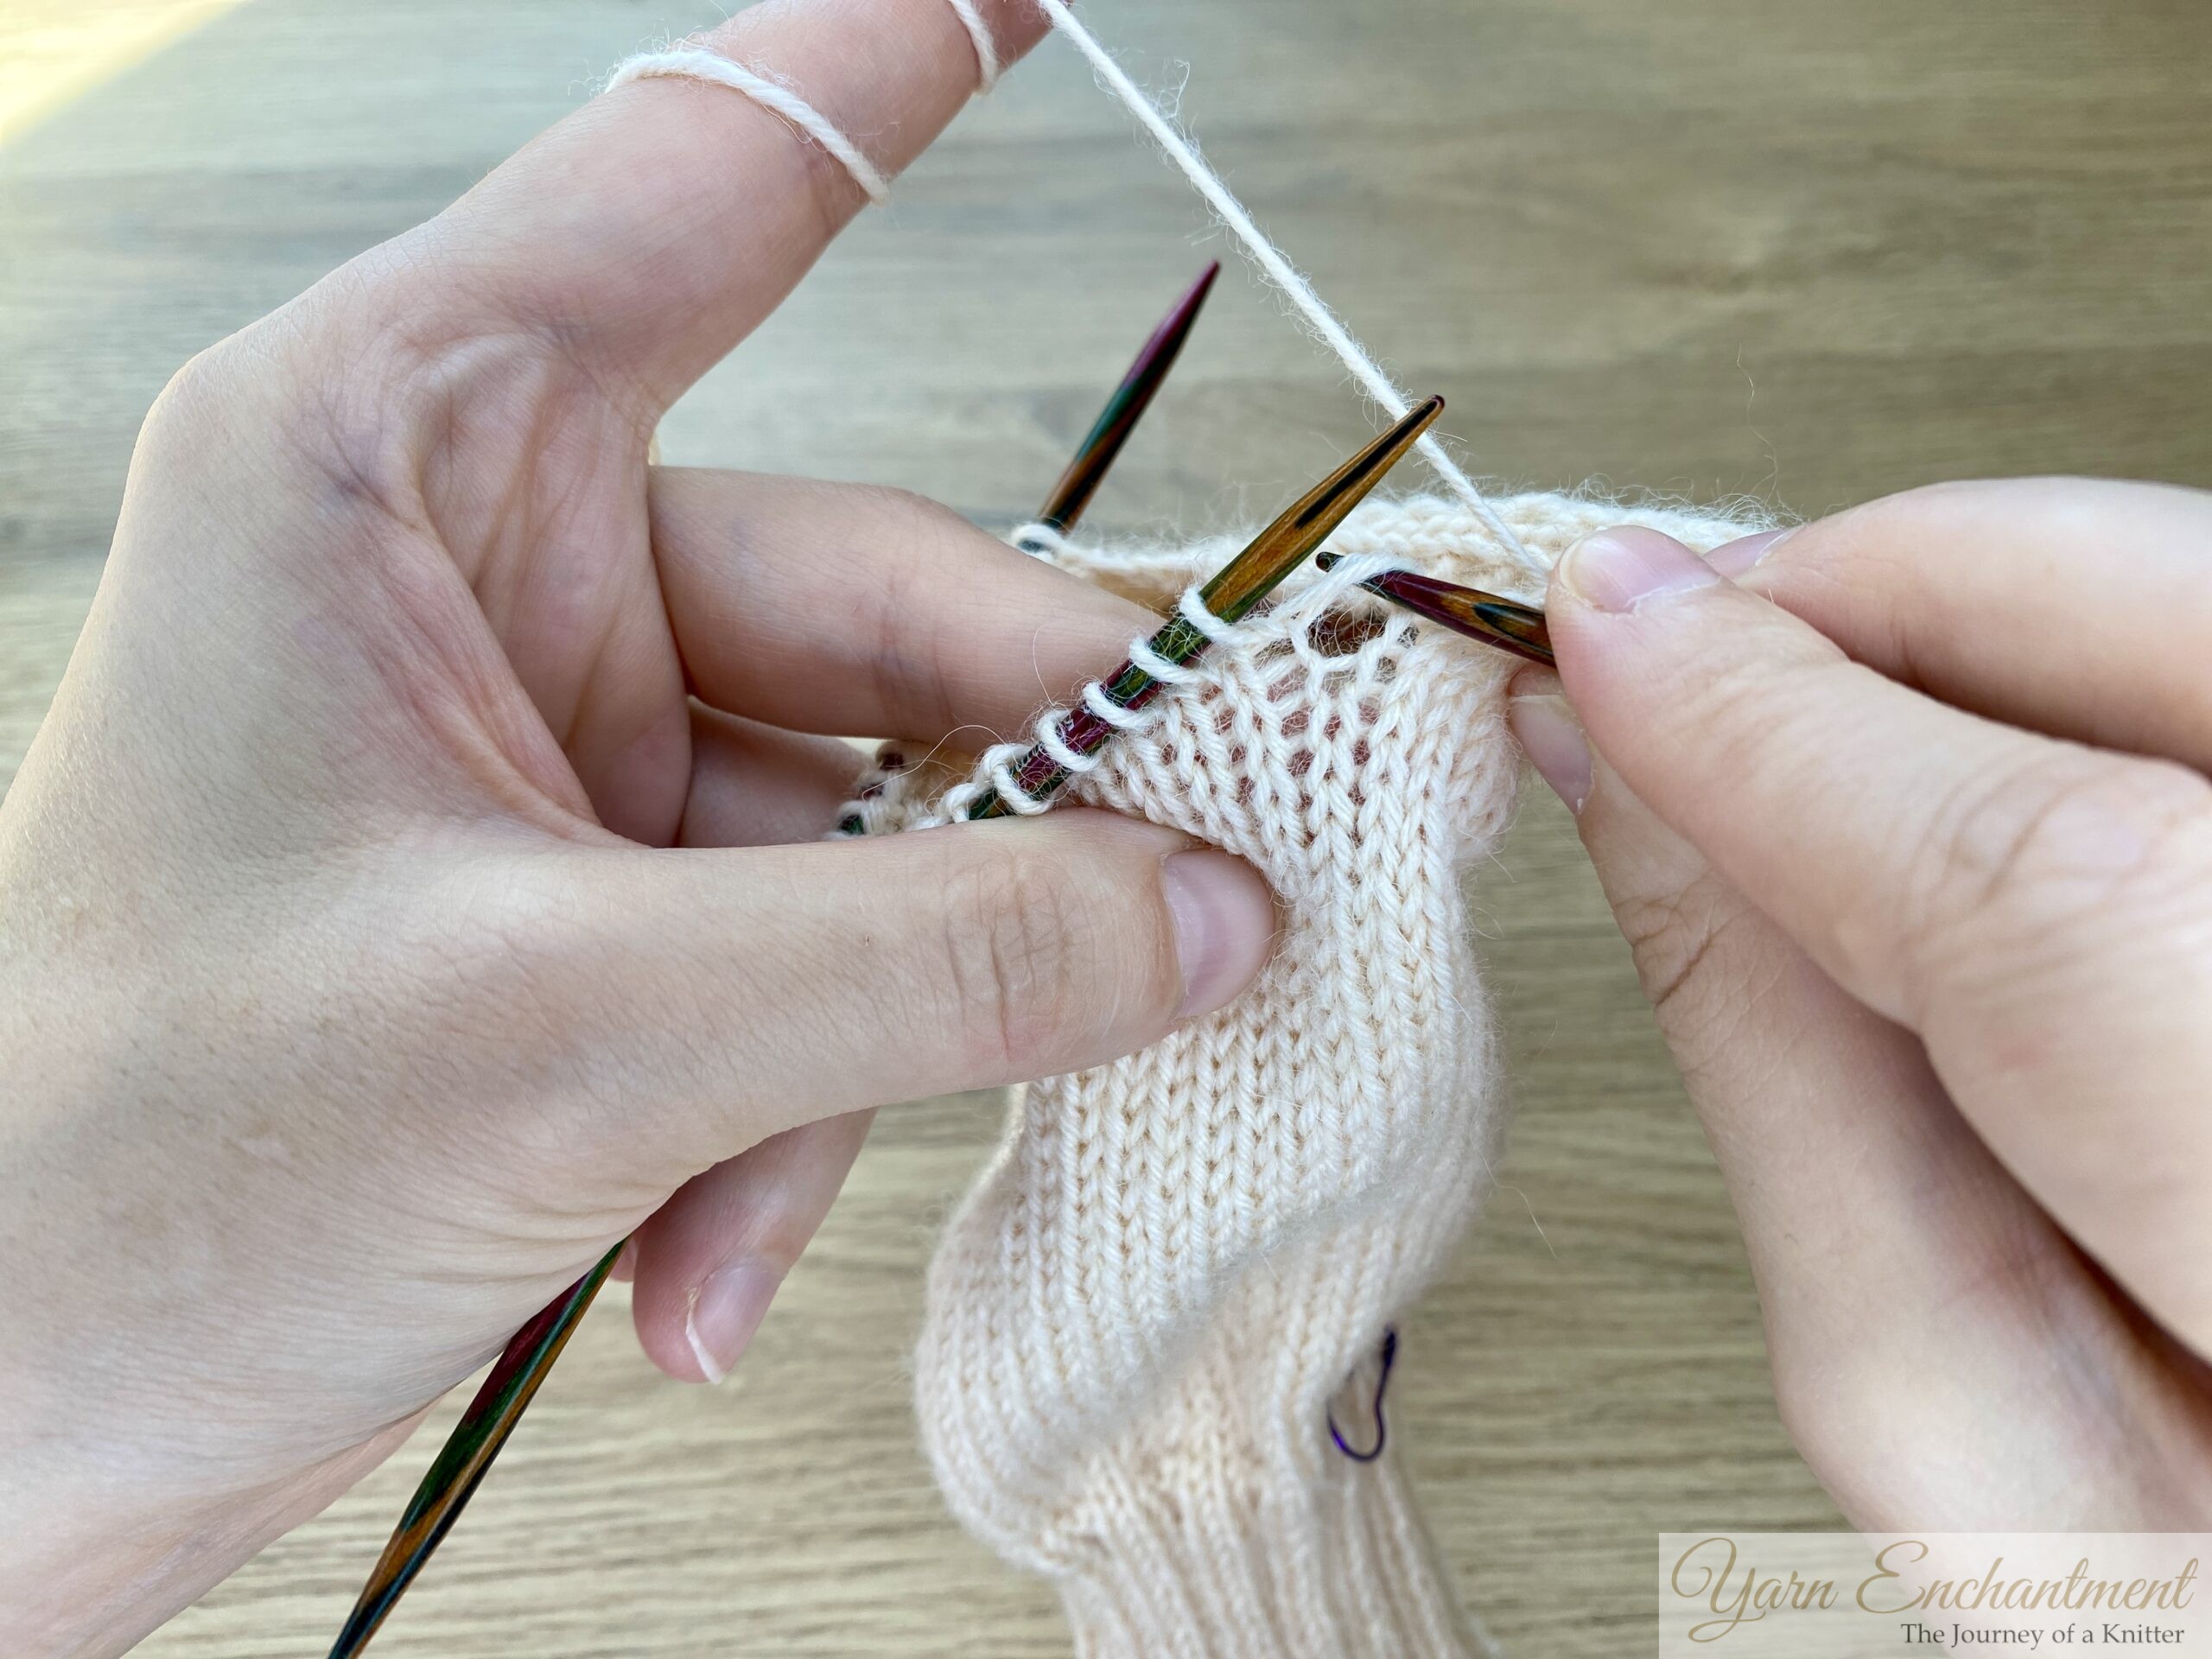
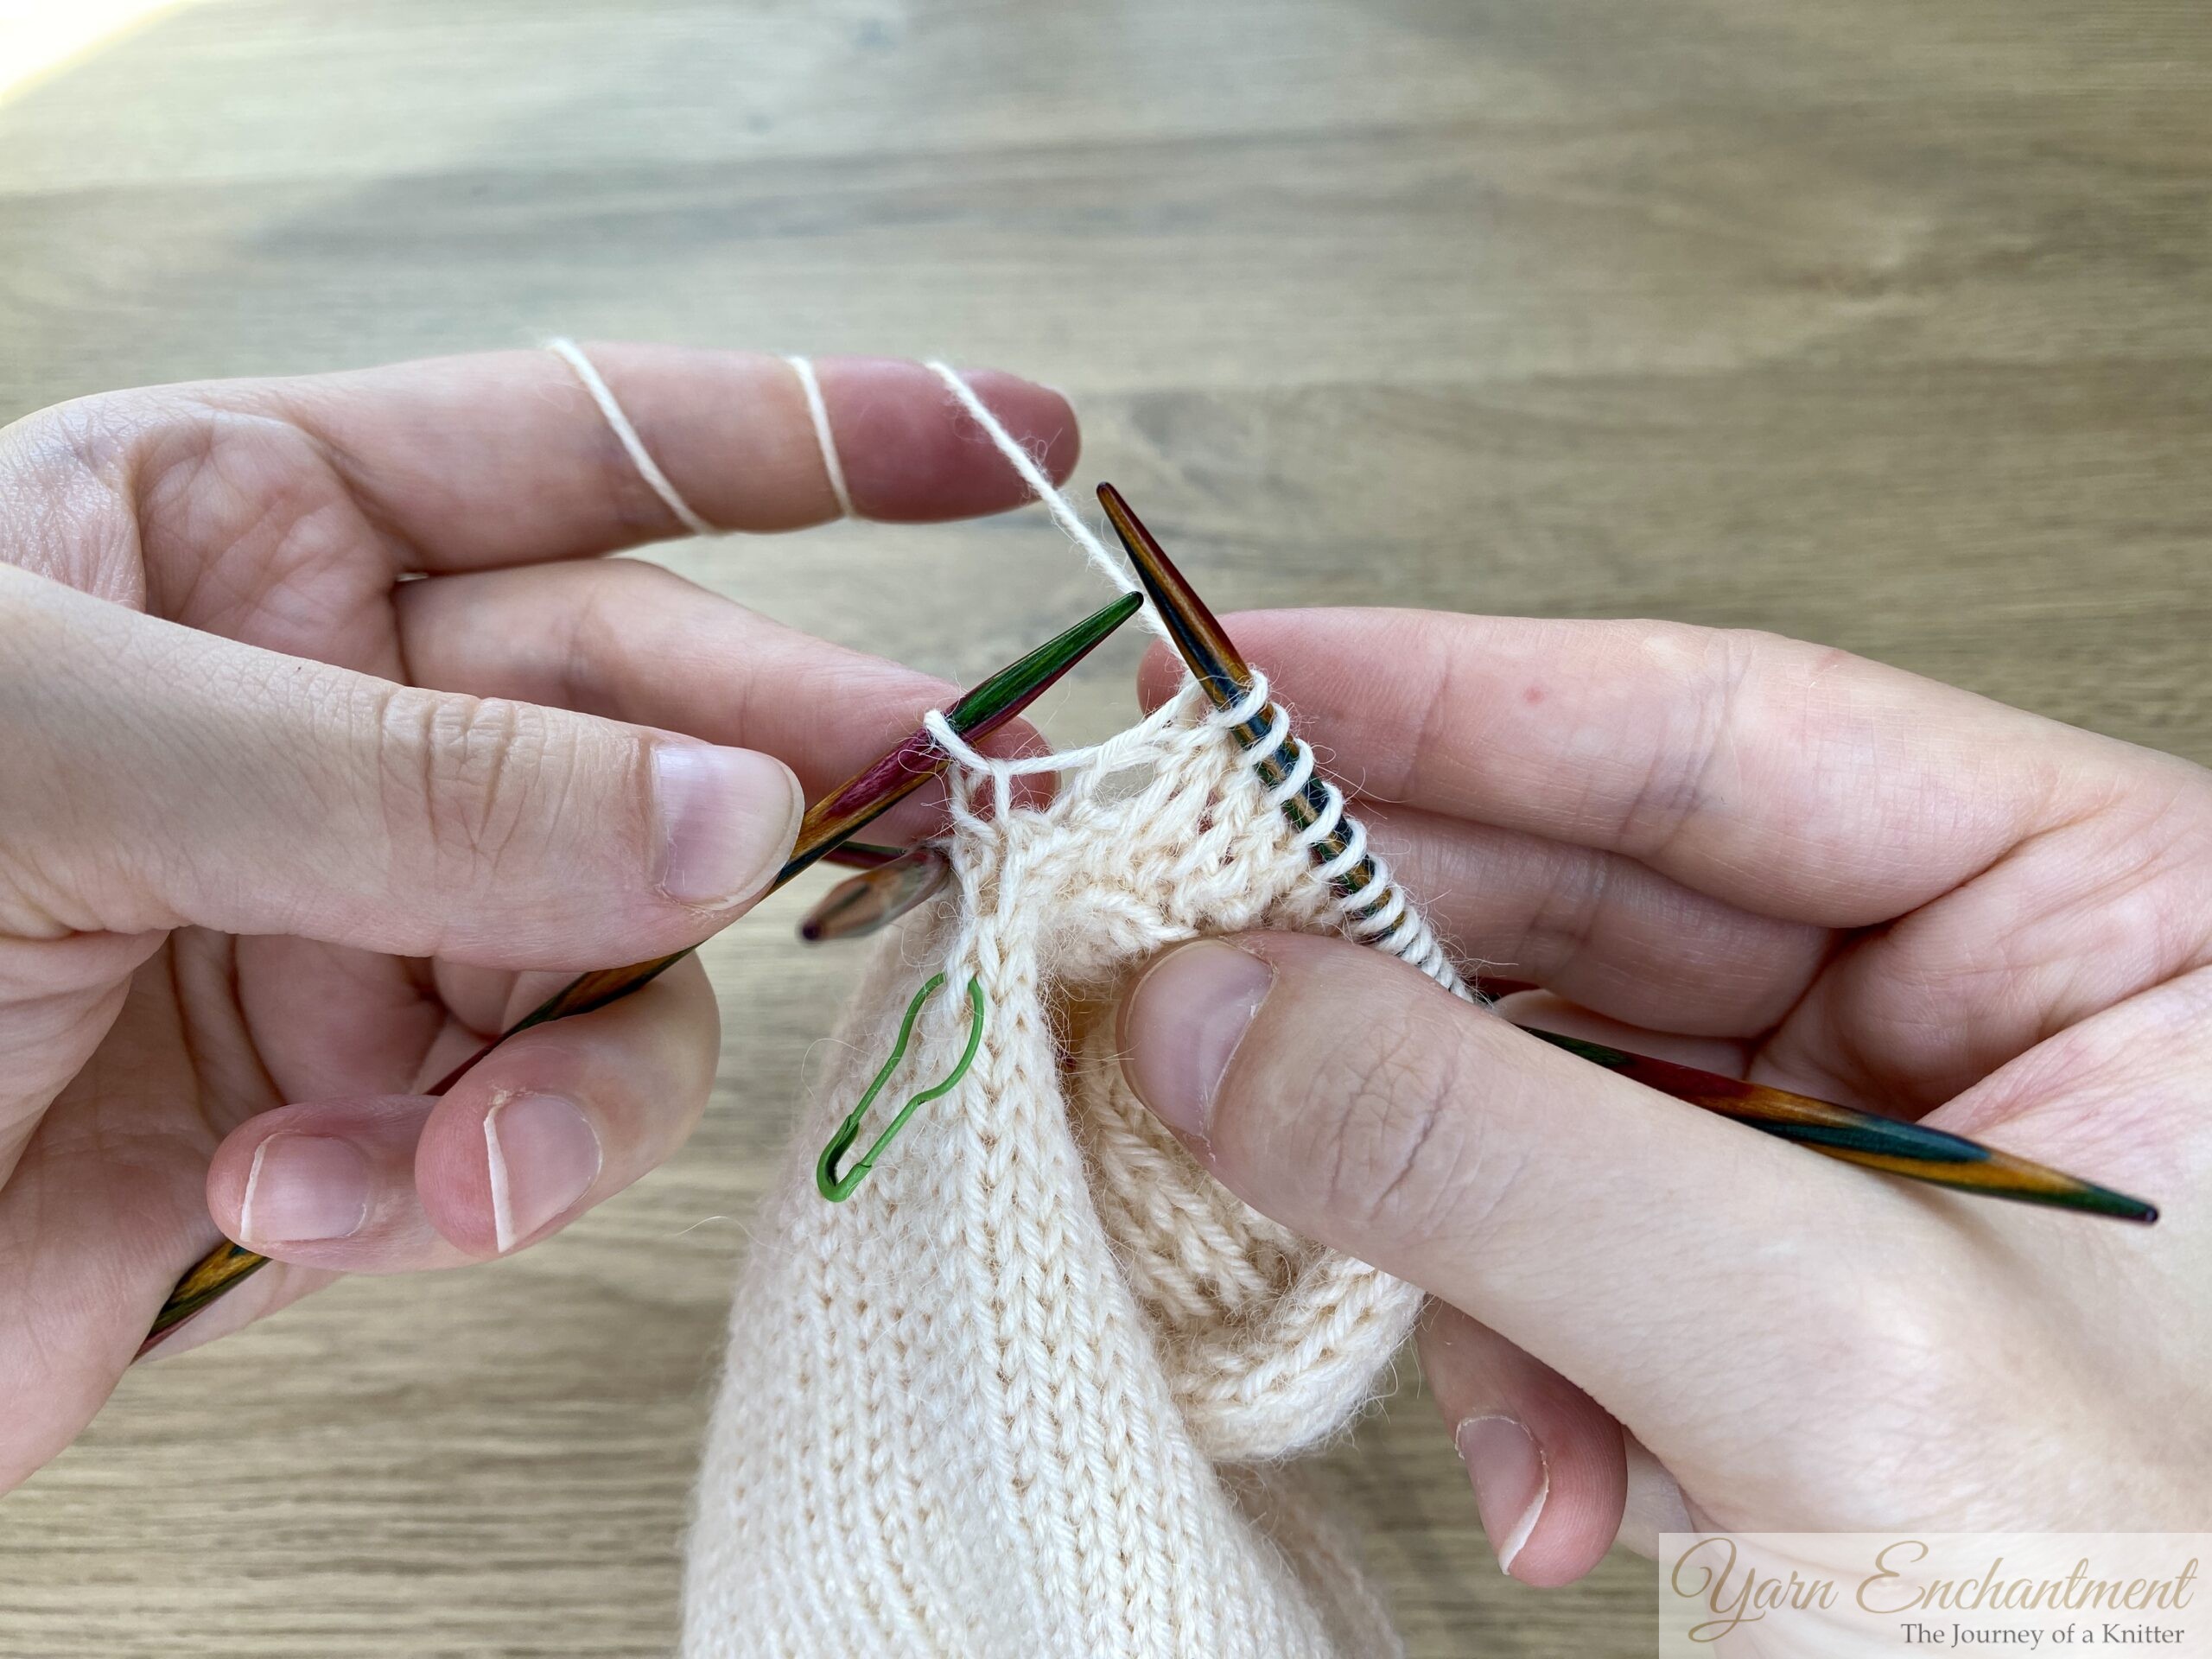
Insert your needle first through the left leg of the stitch on the right side.
Then insert your needle through the right leg of the stitch on the left side.
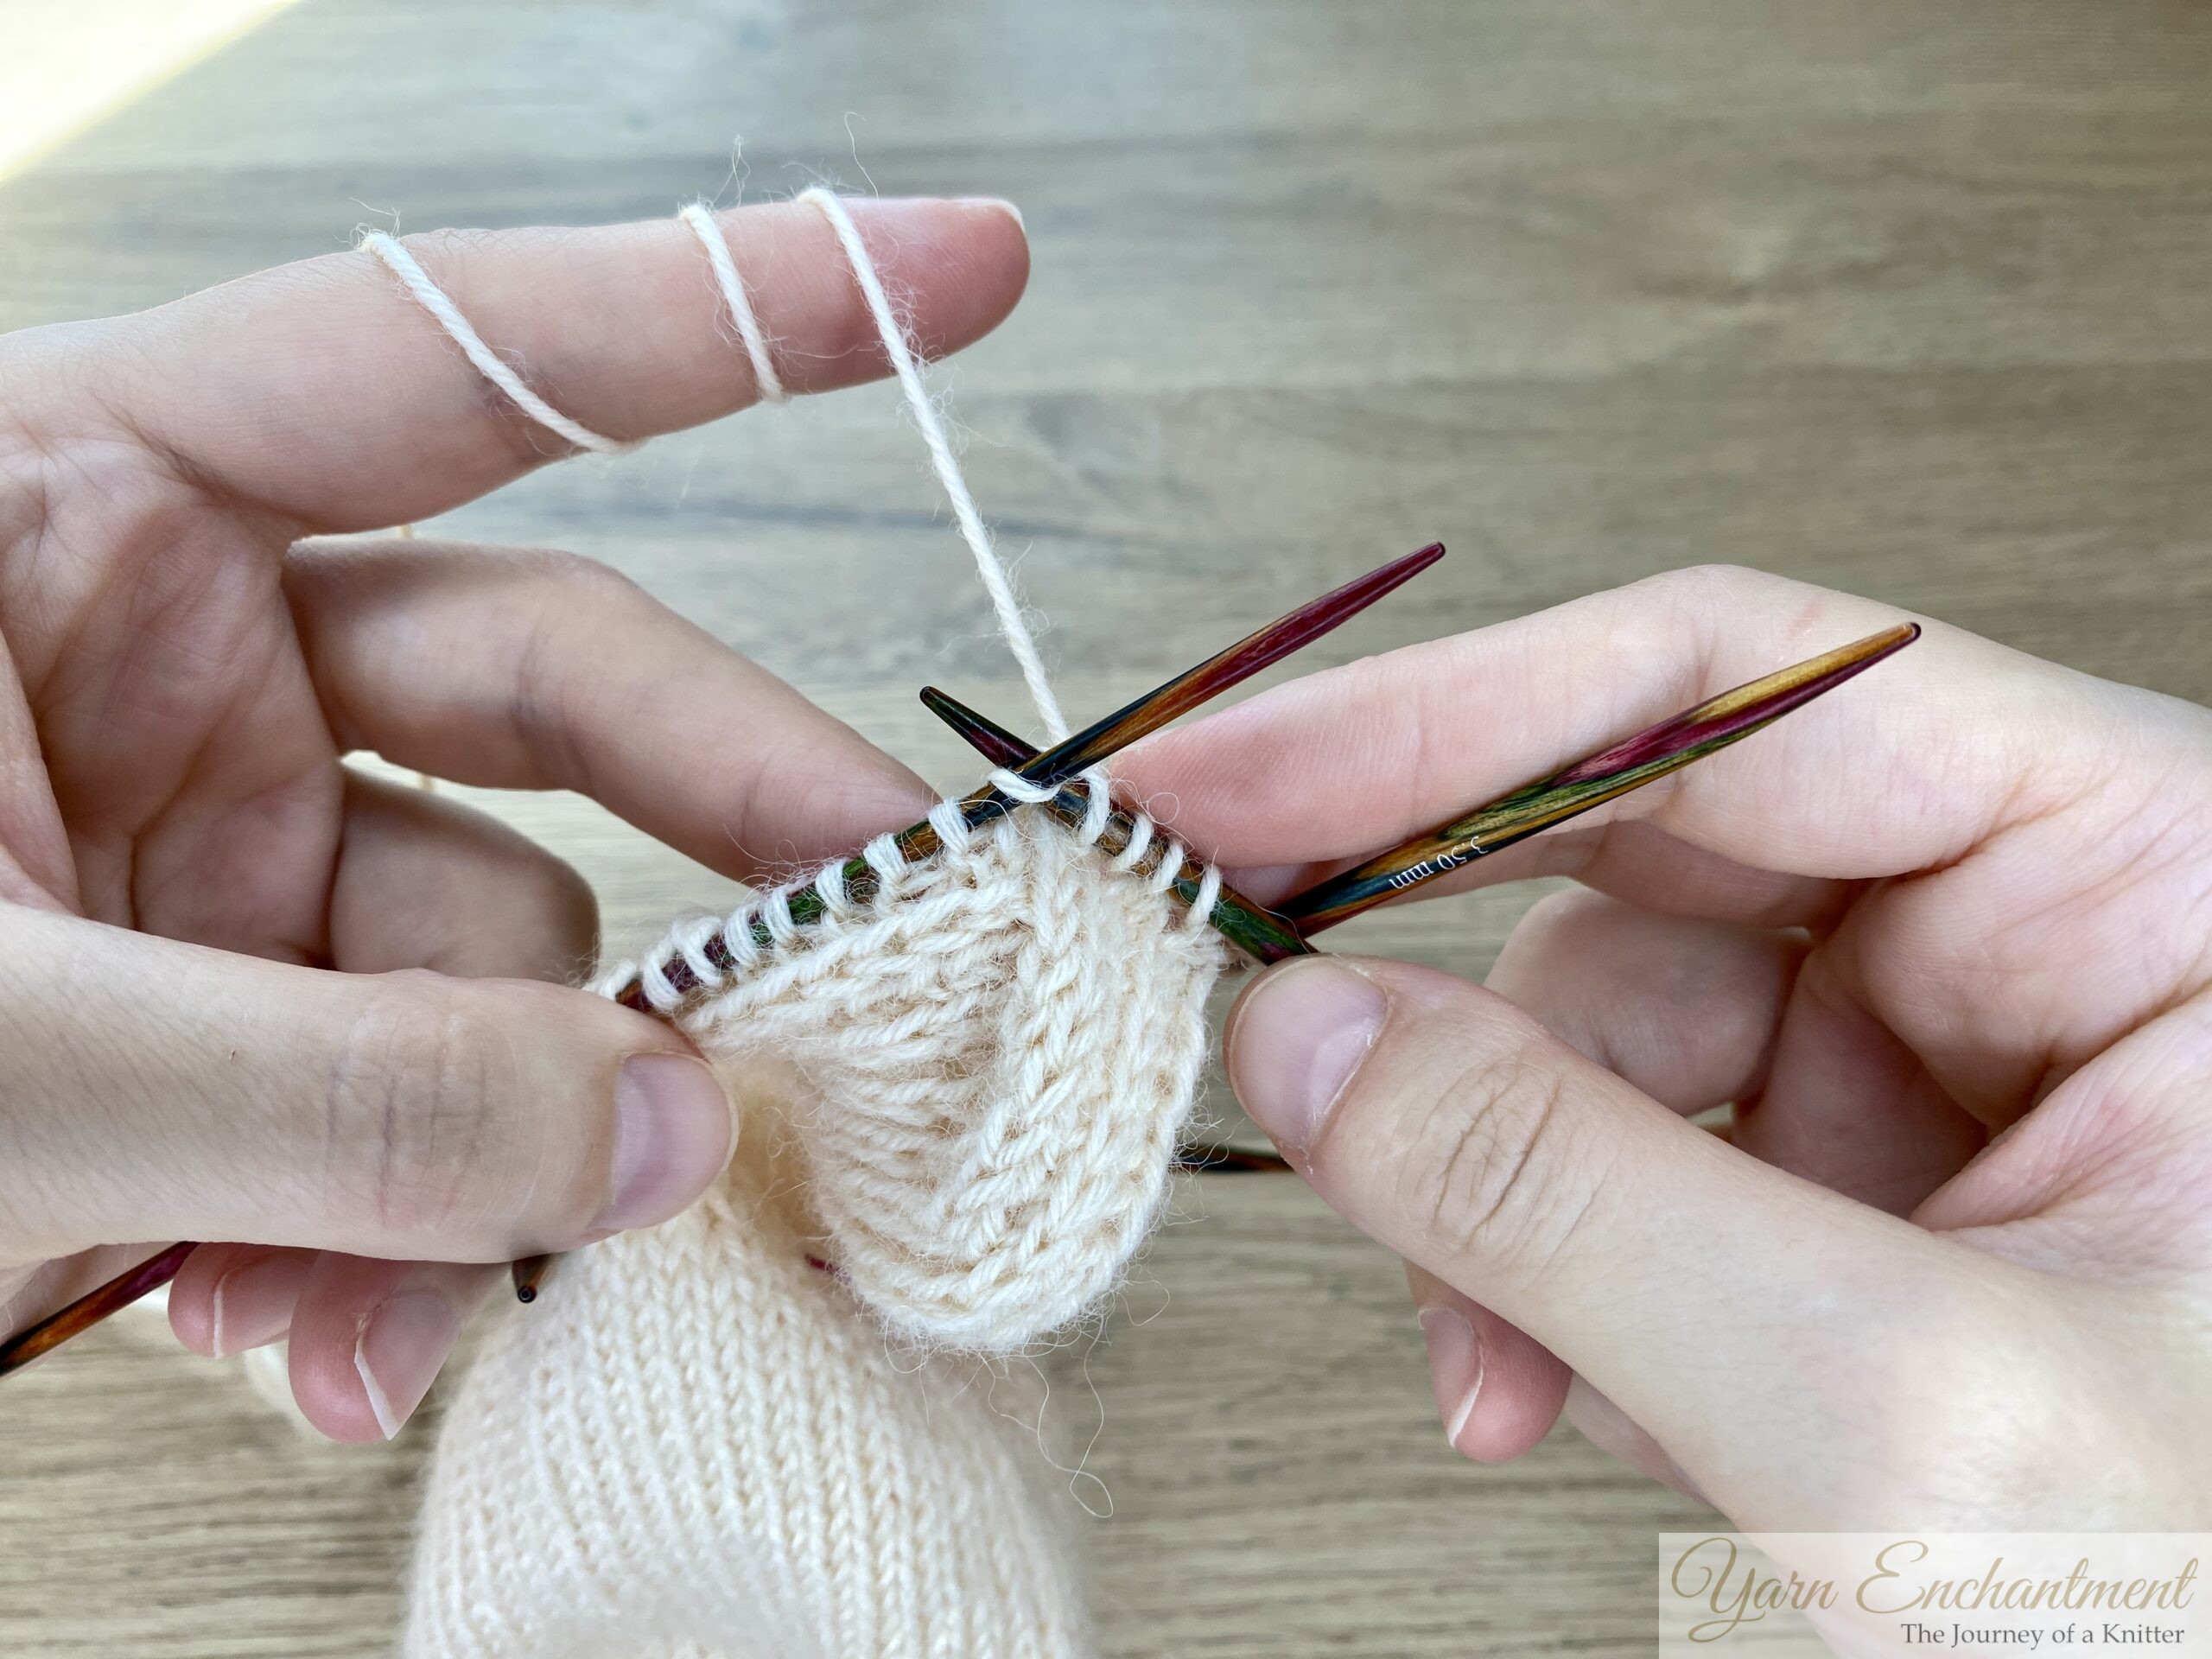
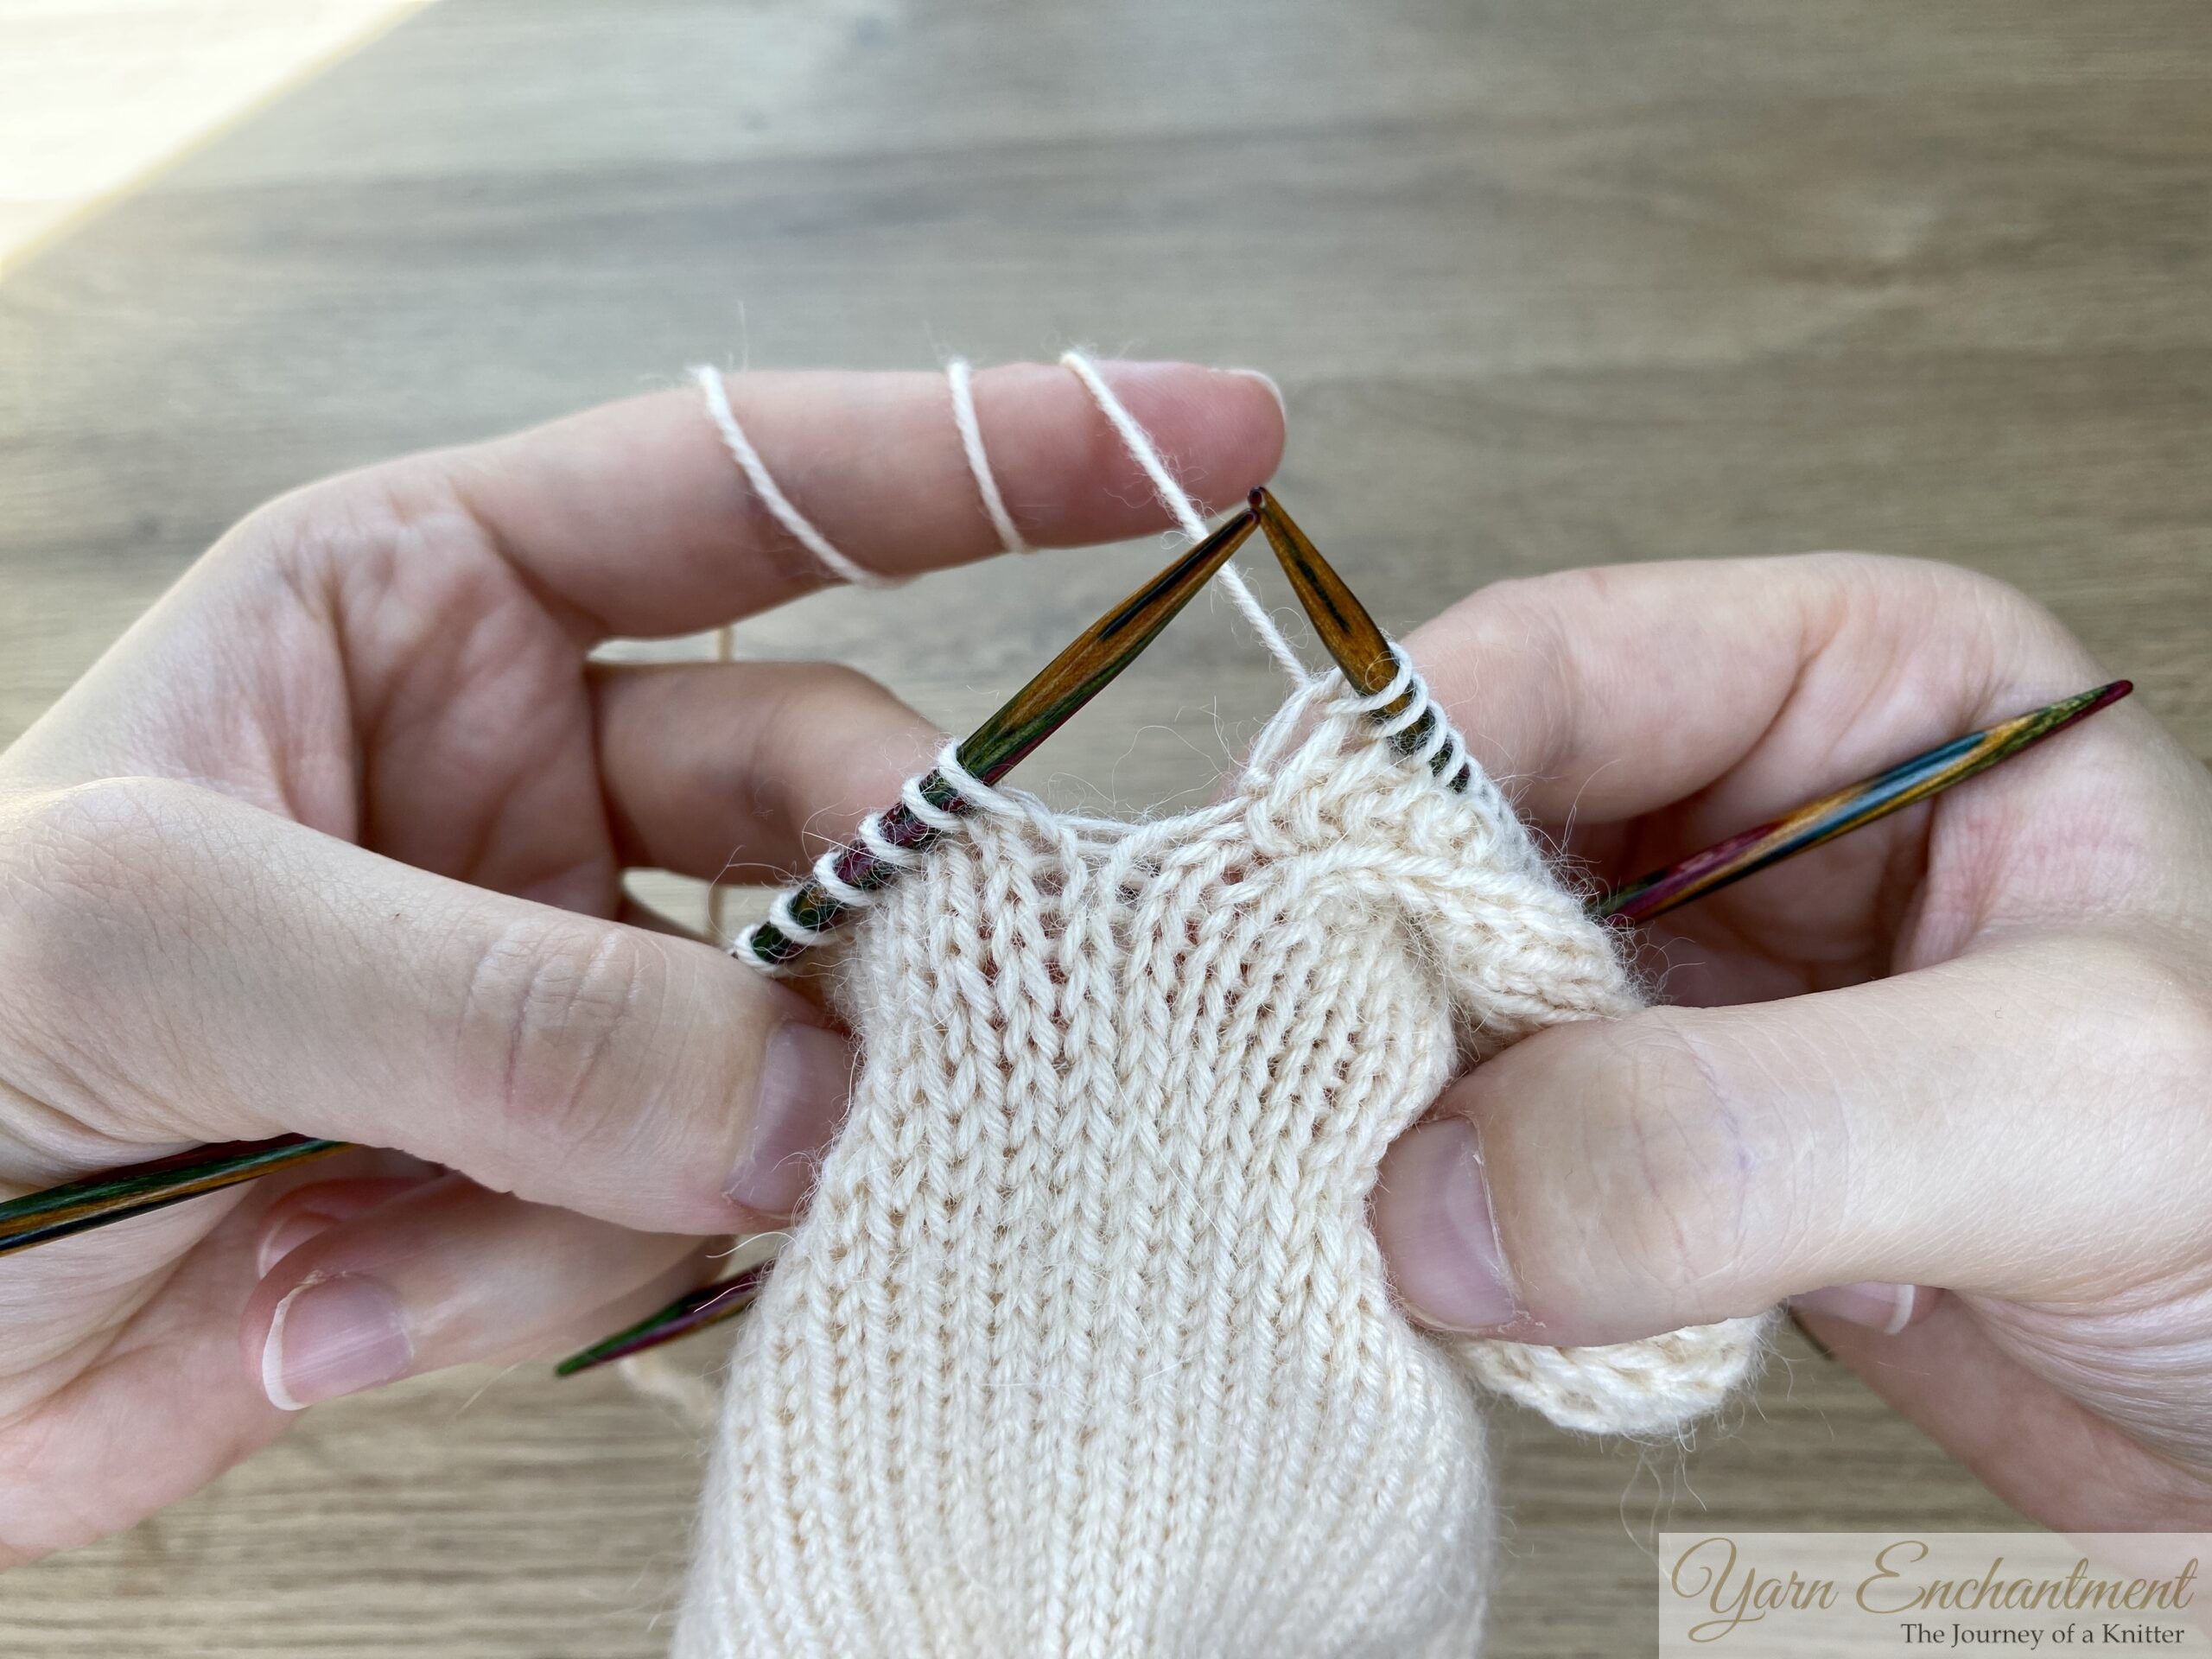
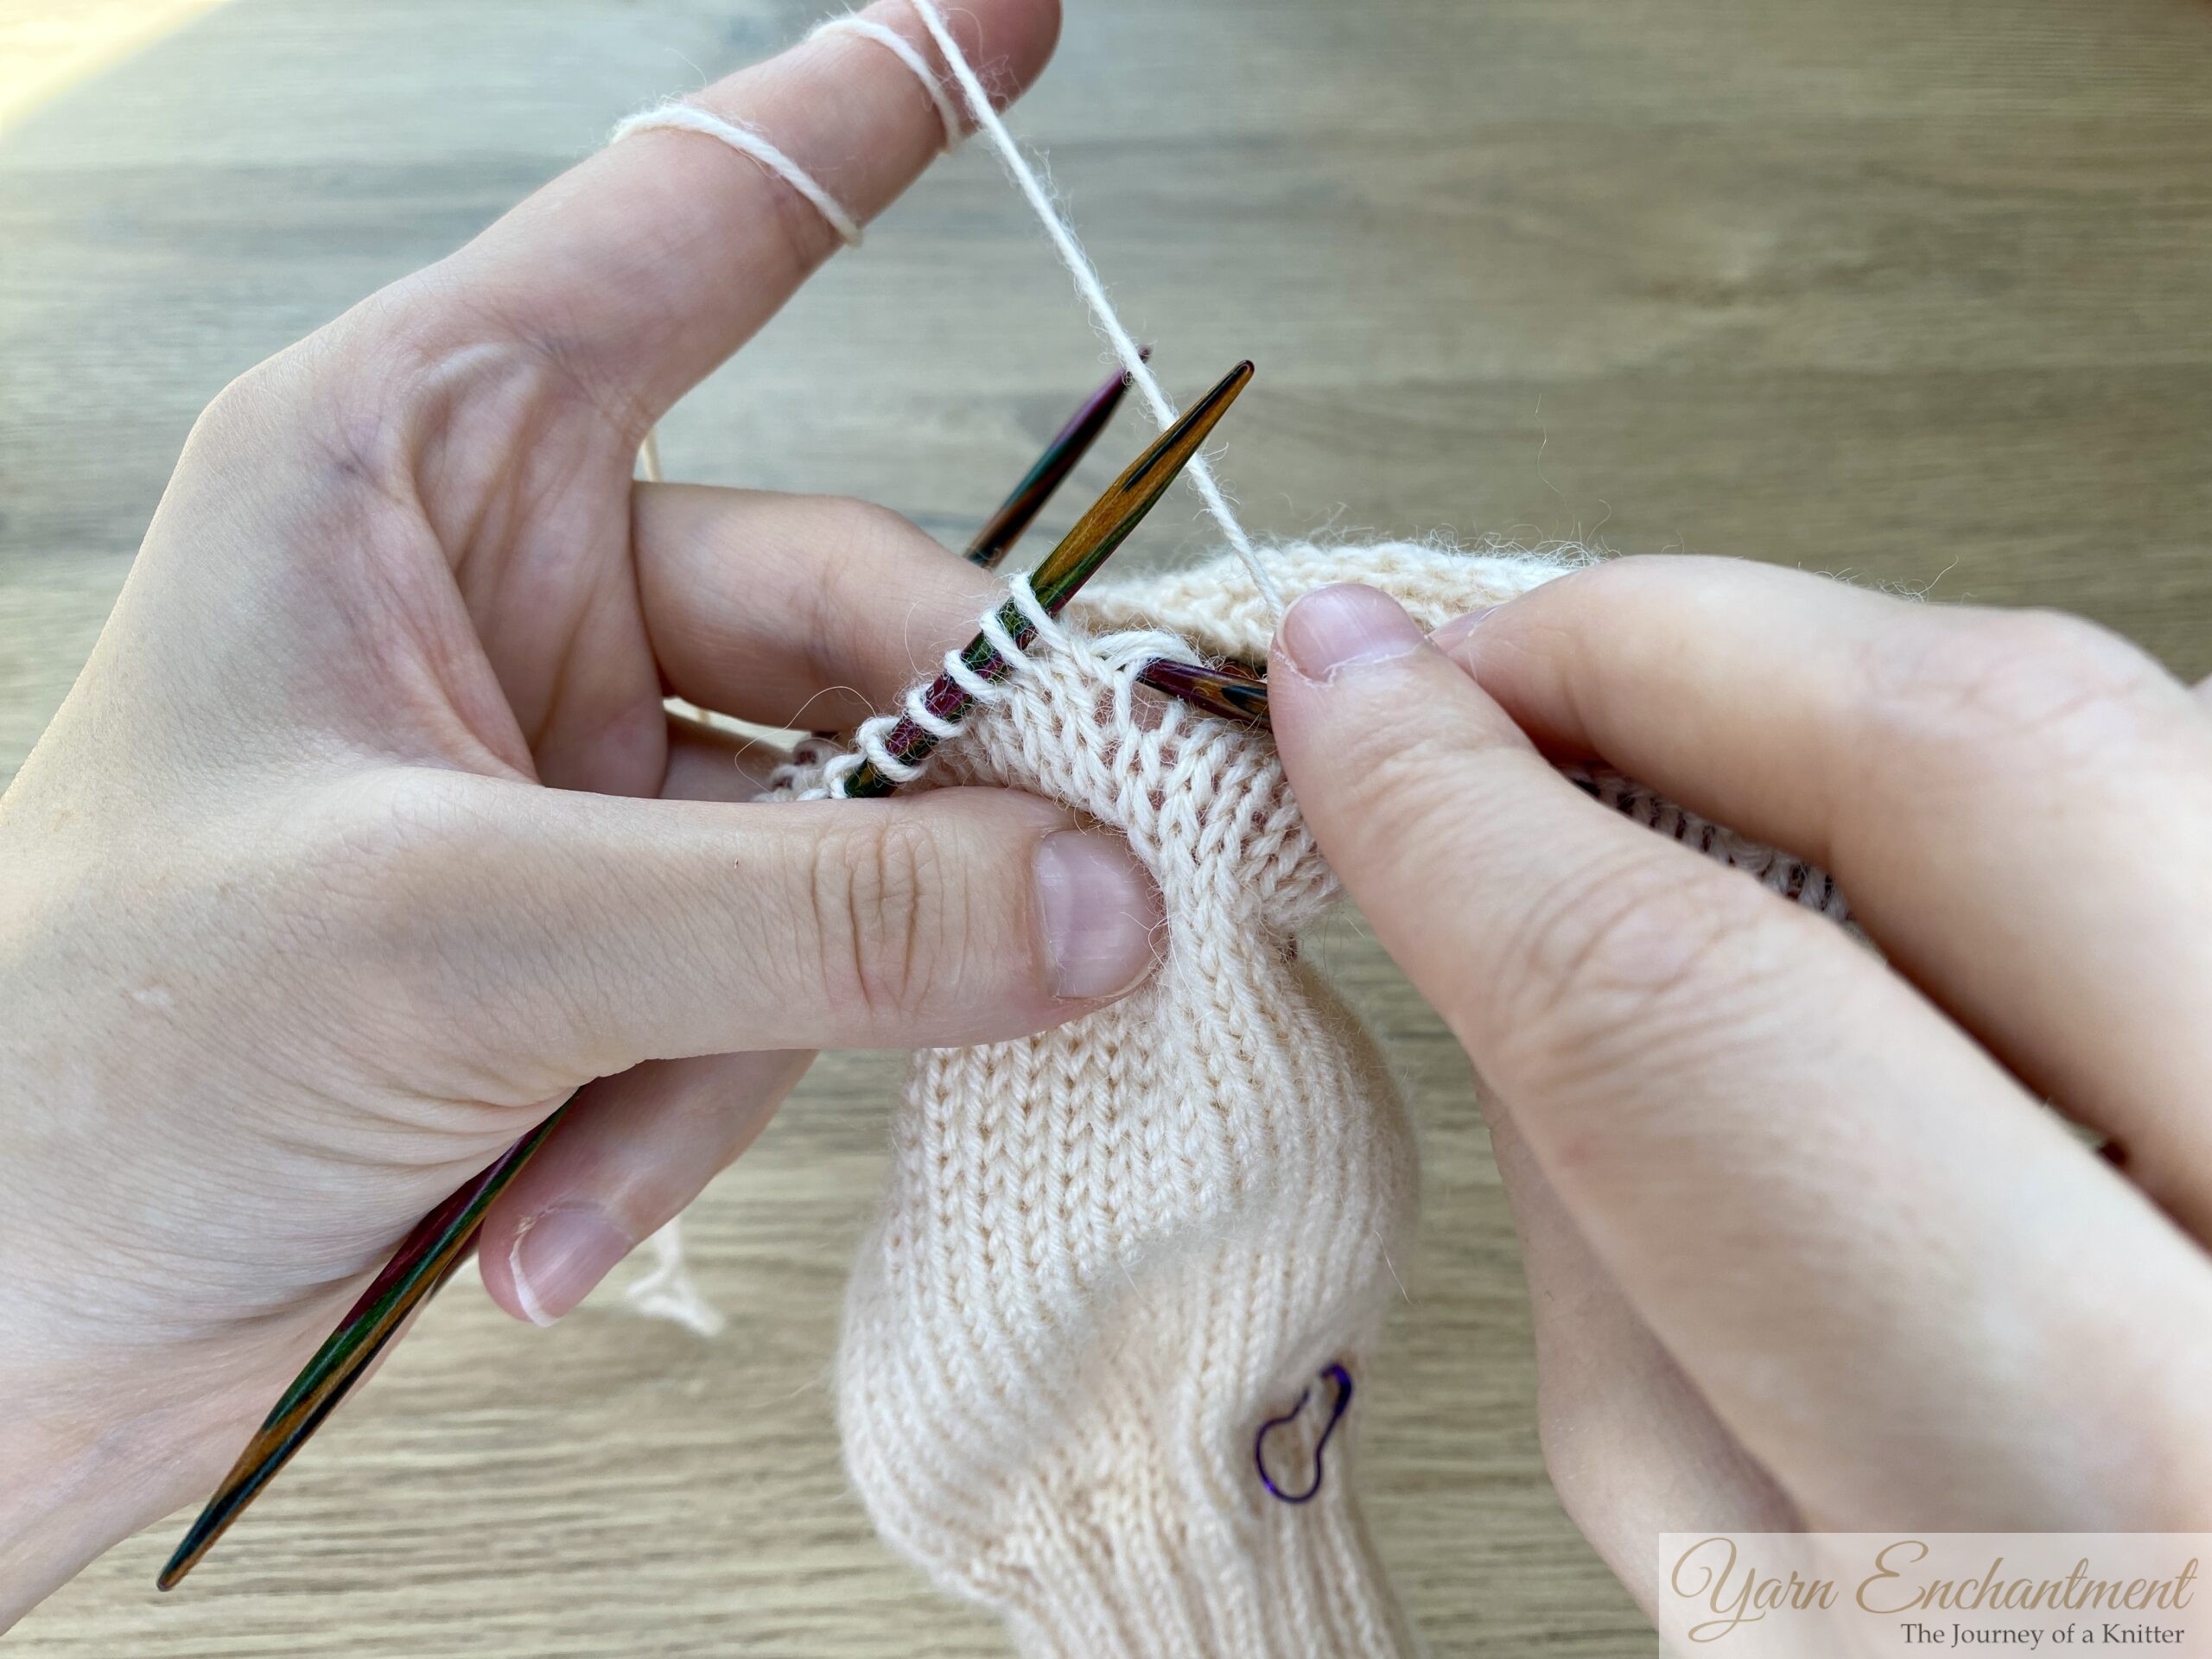
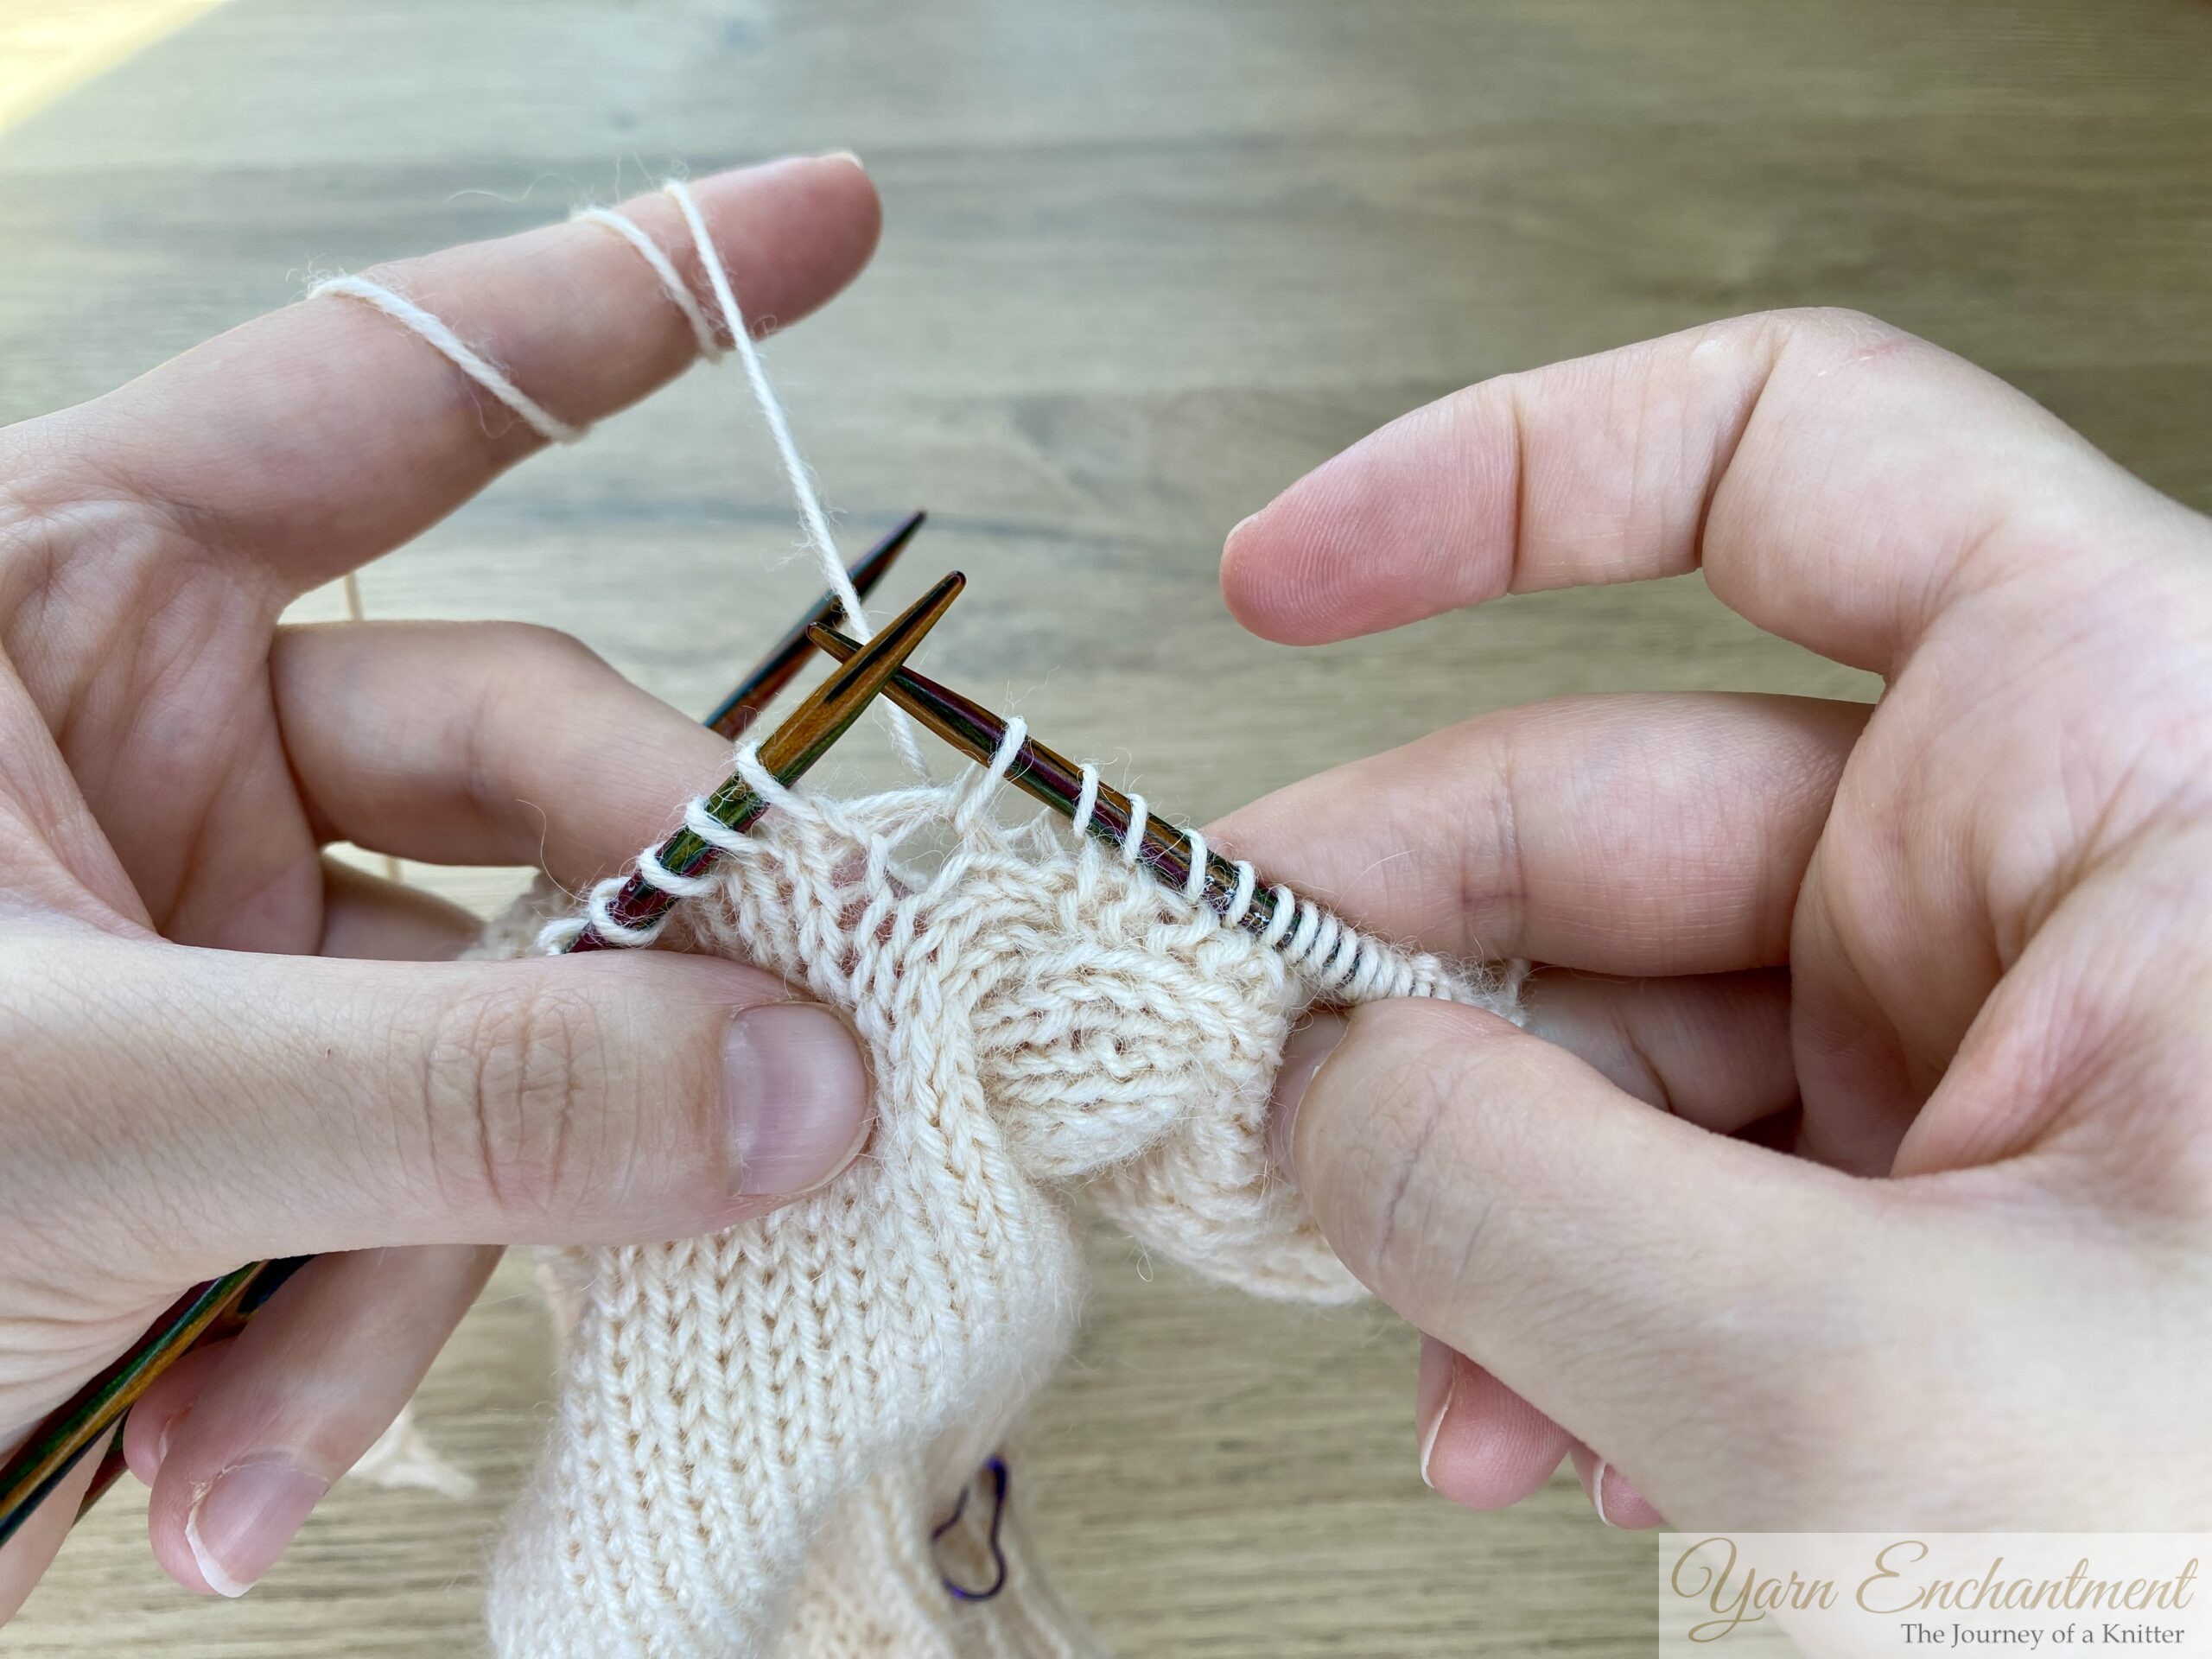
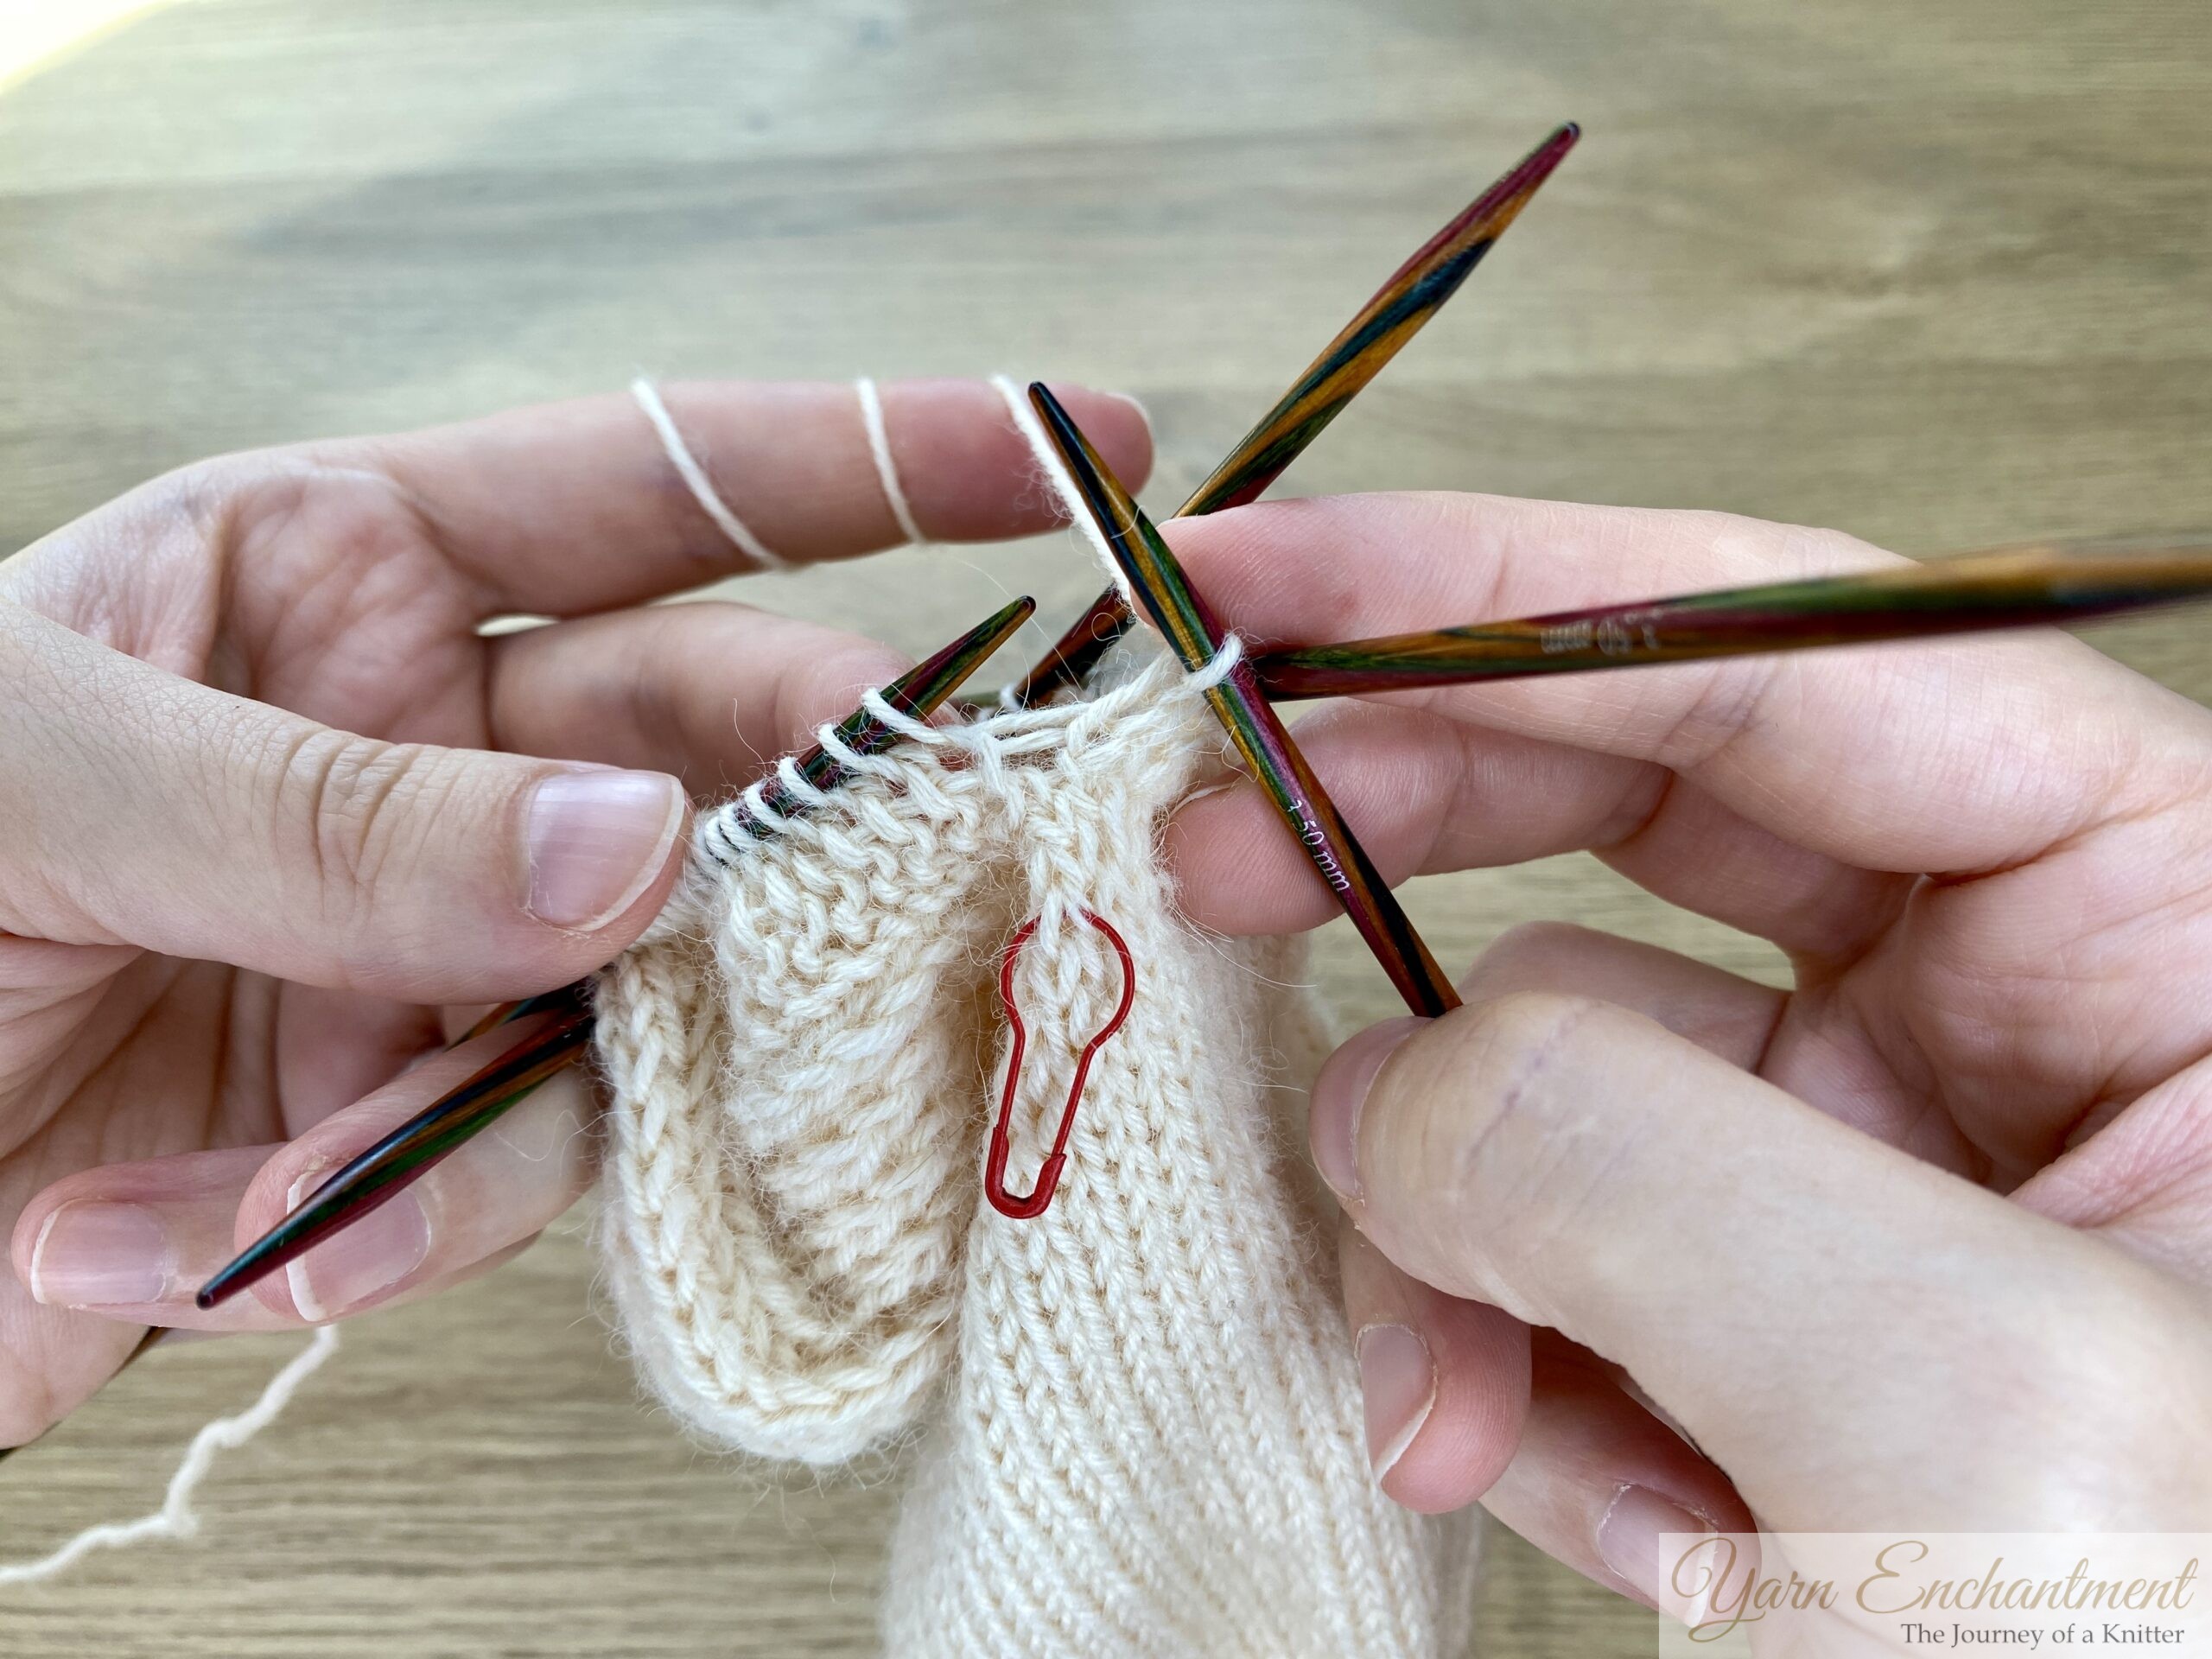
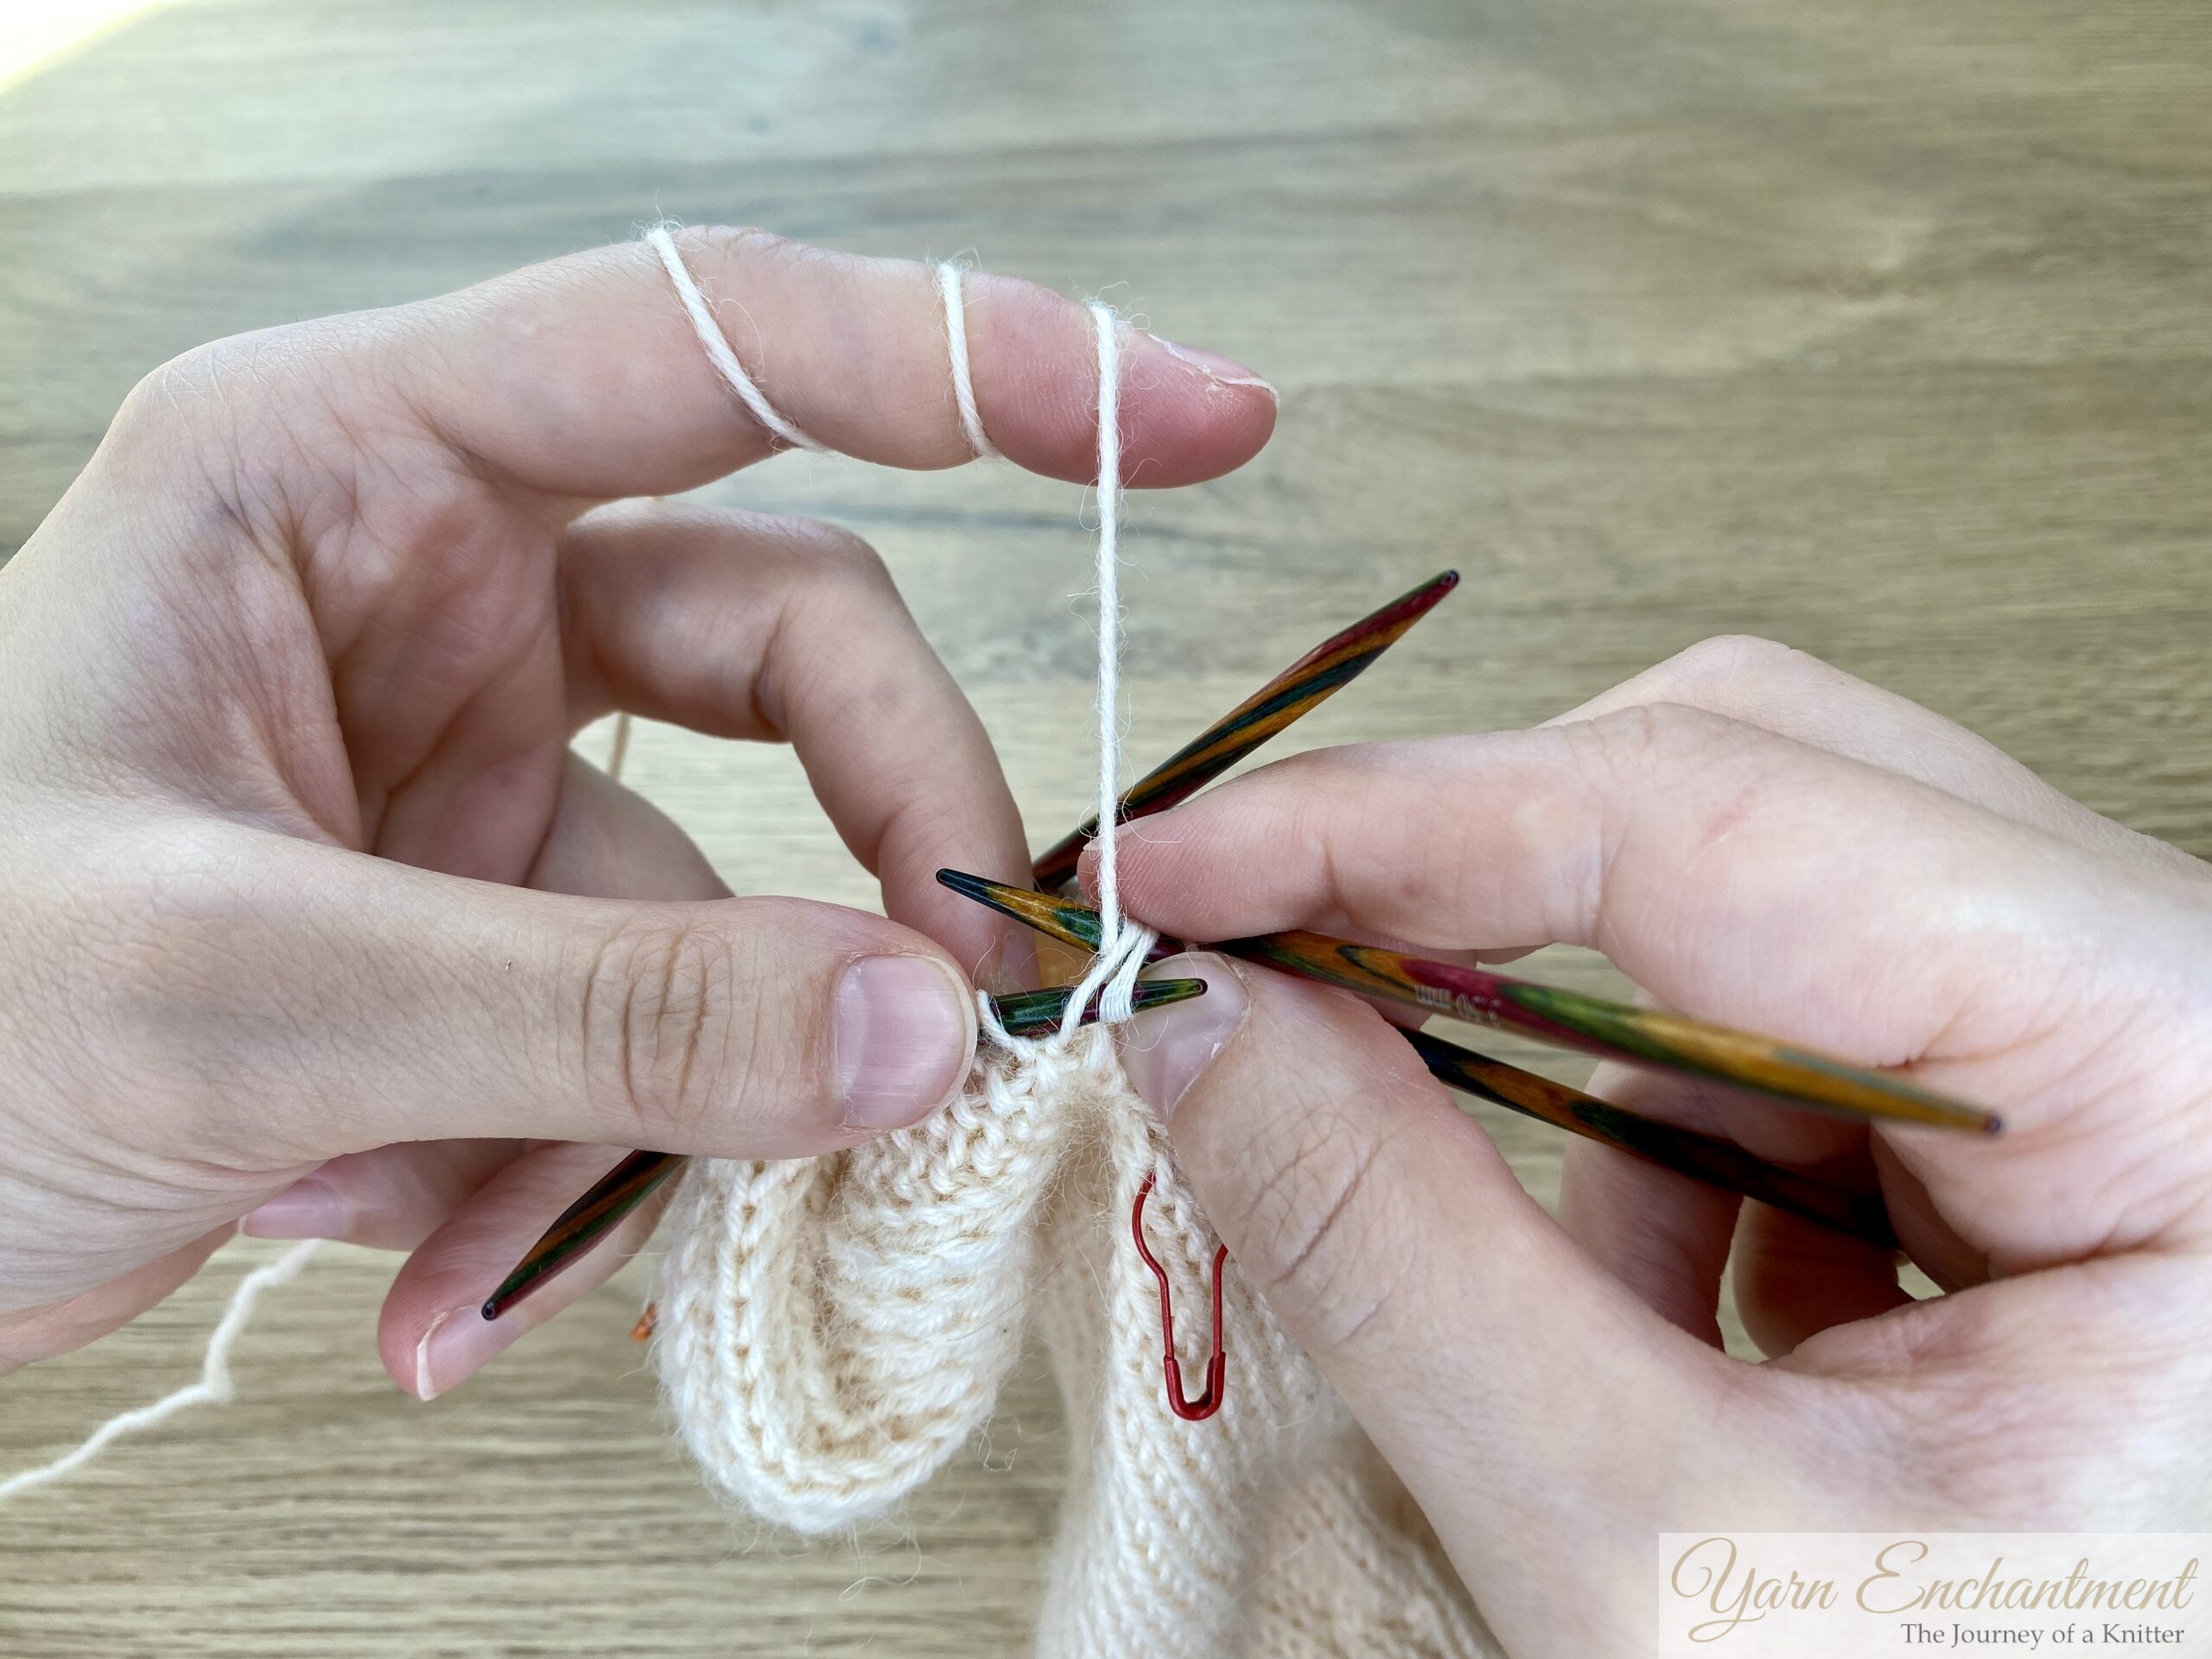
Then knit both legs together as if they were a single stitch.
Give your working yarn a gentle tug to tighten everything up. I’ll show exactly how this looks, in the video tutorial


Gusset Pickup for Needle Four
After closing the gap, just pick up the gusset stitches onto your smaller needles like before. When you’re done picking up, knit across the picked-up stitches and the four stitches you already have, using your regular needles.
 |  | 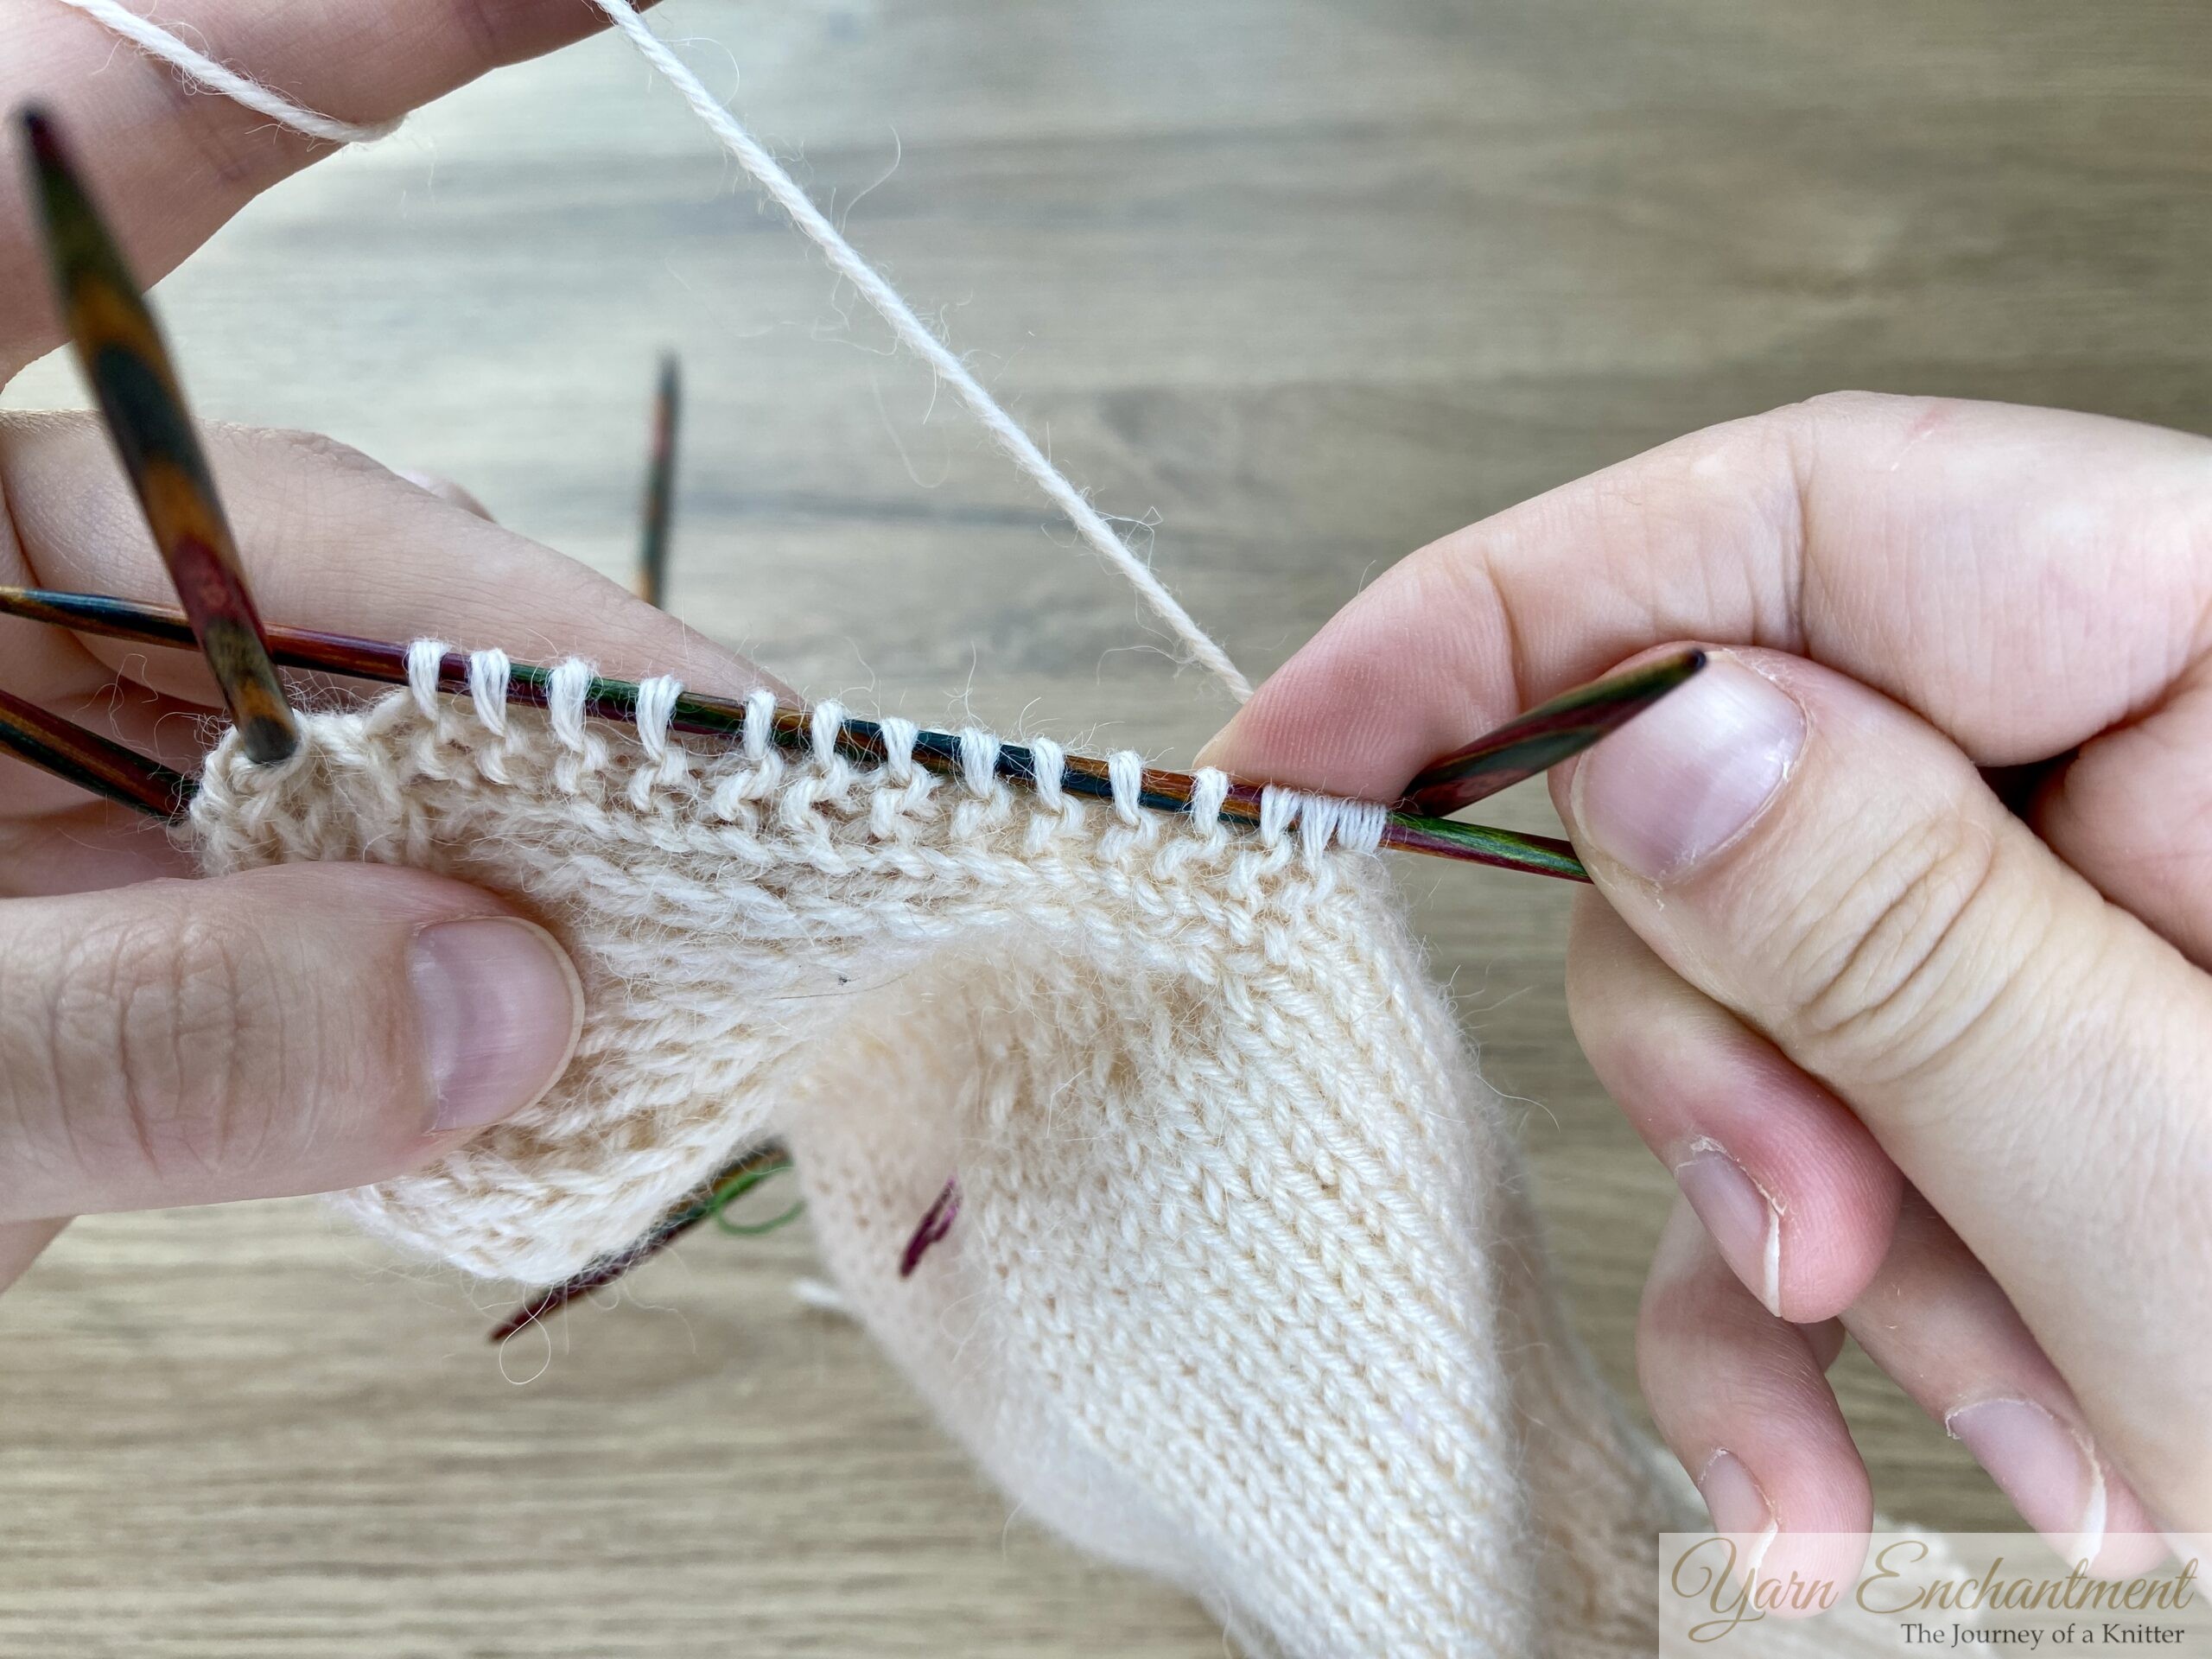 | Insert your smaller needle underneath the first ridge of your garter stitch, ... | ...and pick up a stitch | Continue picking up a stitch from each garter stitch ridge until you have worked all the way to the end and there are no ridges left. When you reach the last garter stitch ridge, pick up the stitch that is closest to your heel, not the edge stitch, but the stitch to the left of your smile stitches. This method helps prevent any holes between your cap stitches and the gusset pick-up stitch (see video tutorial). |


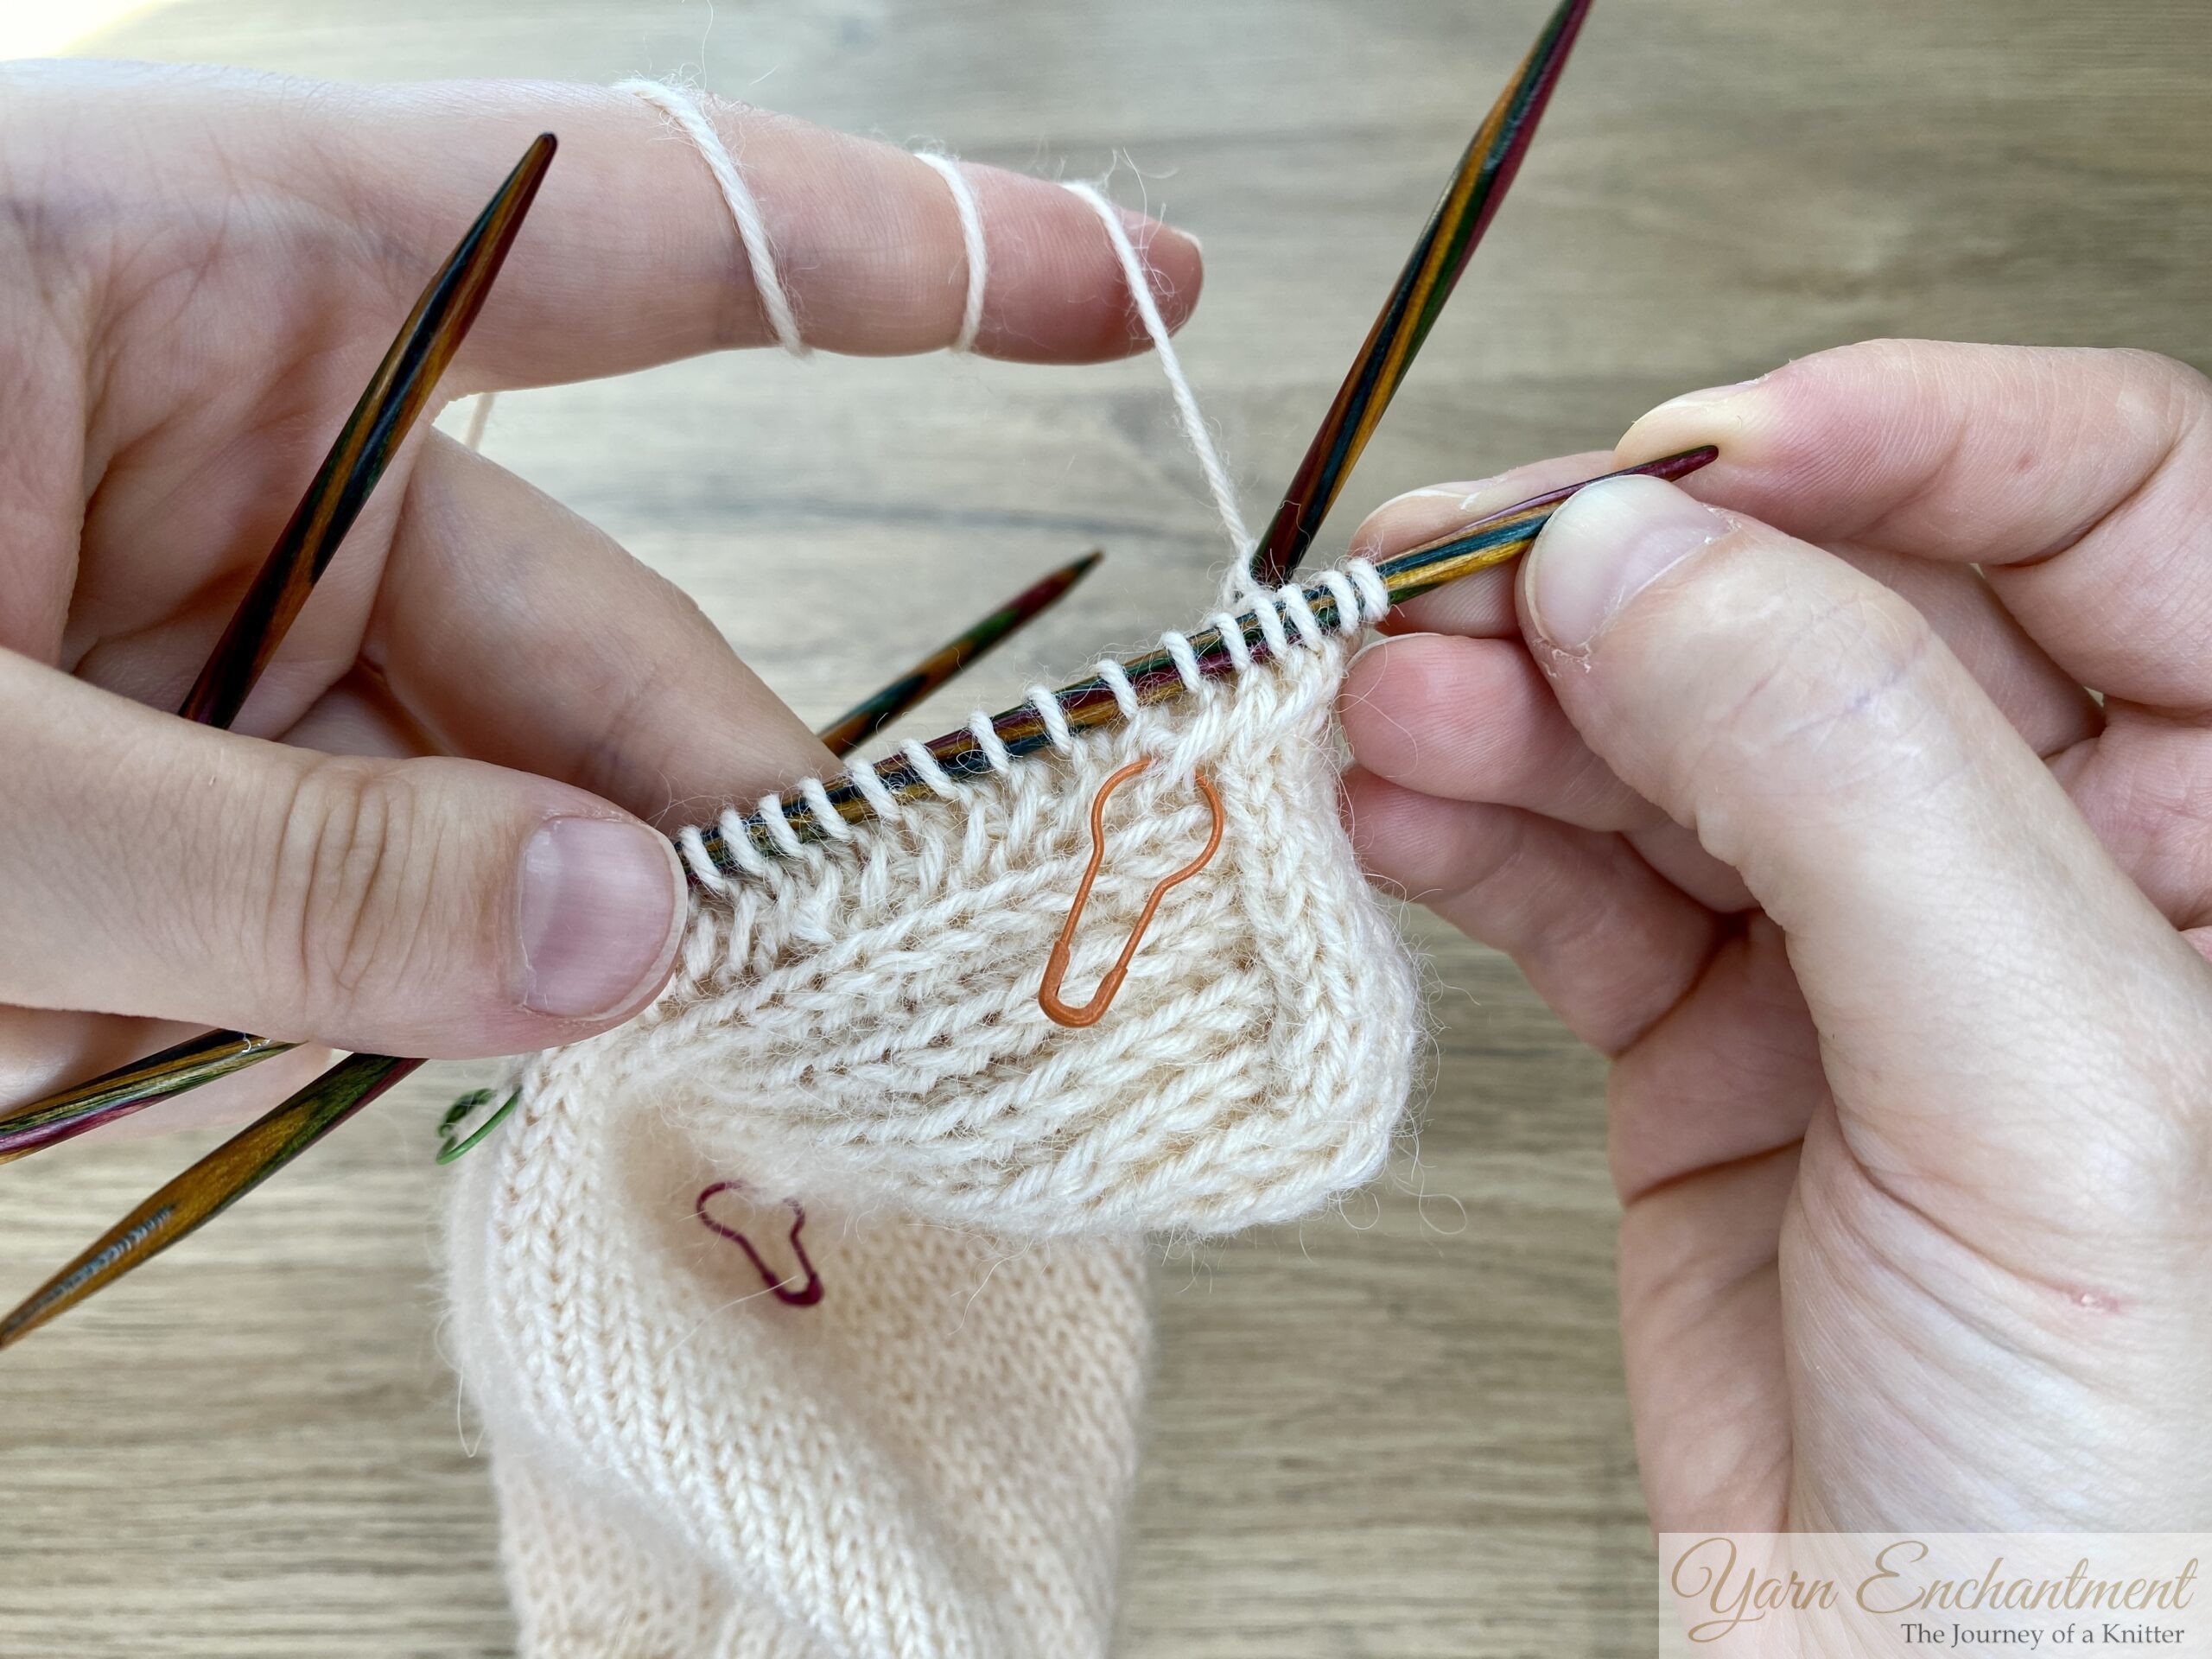
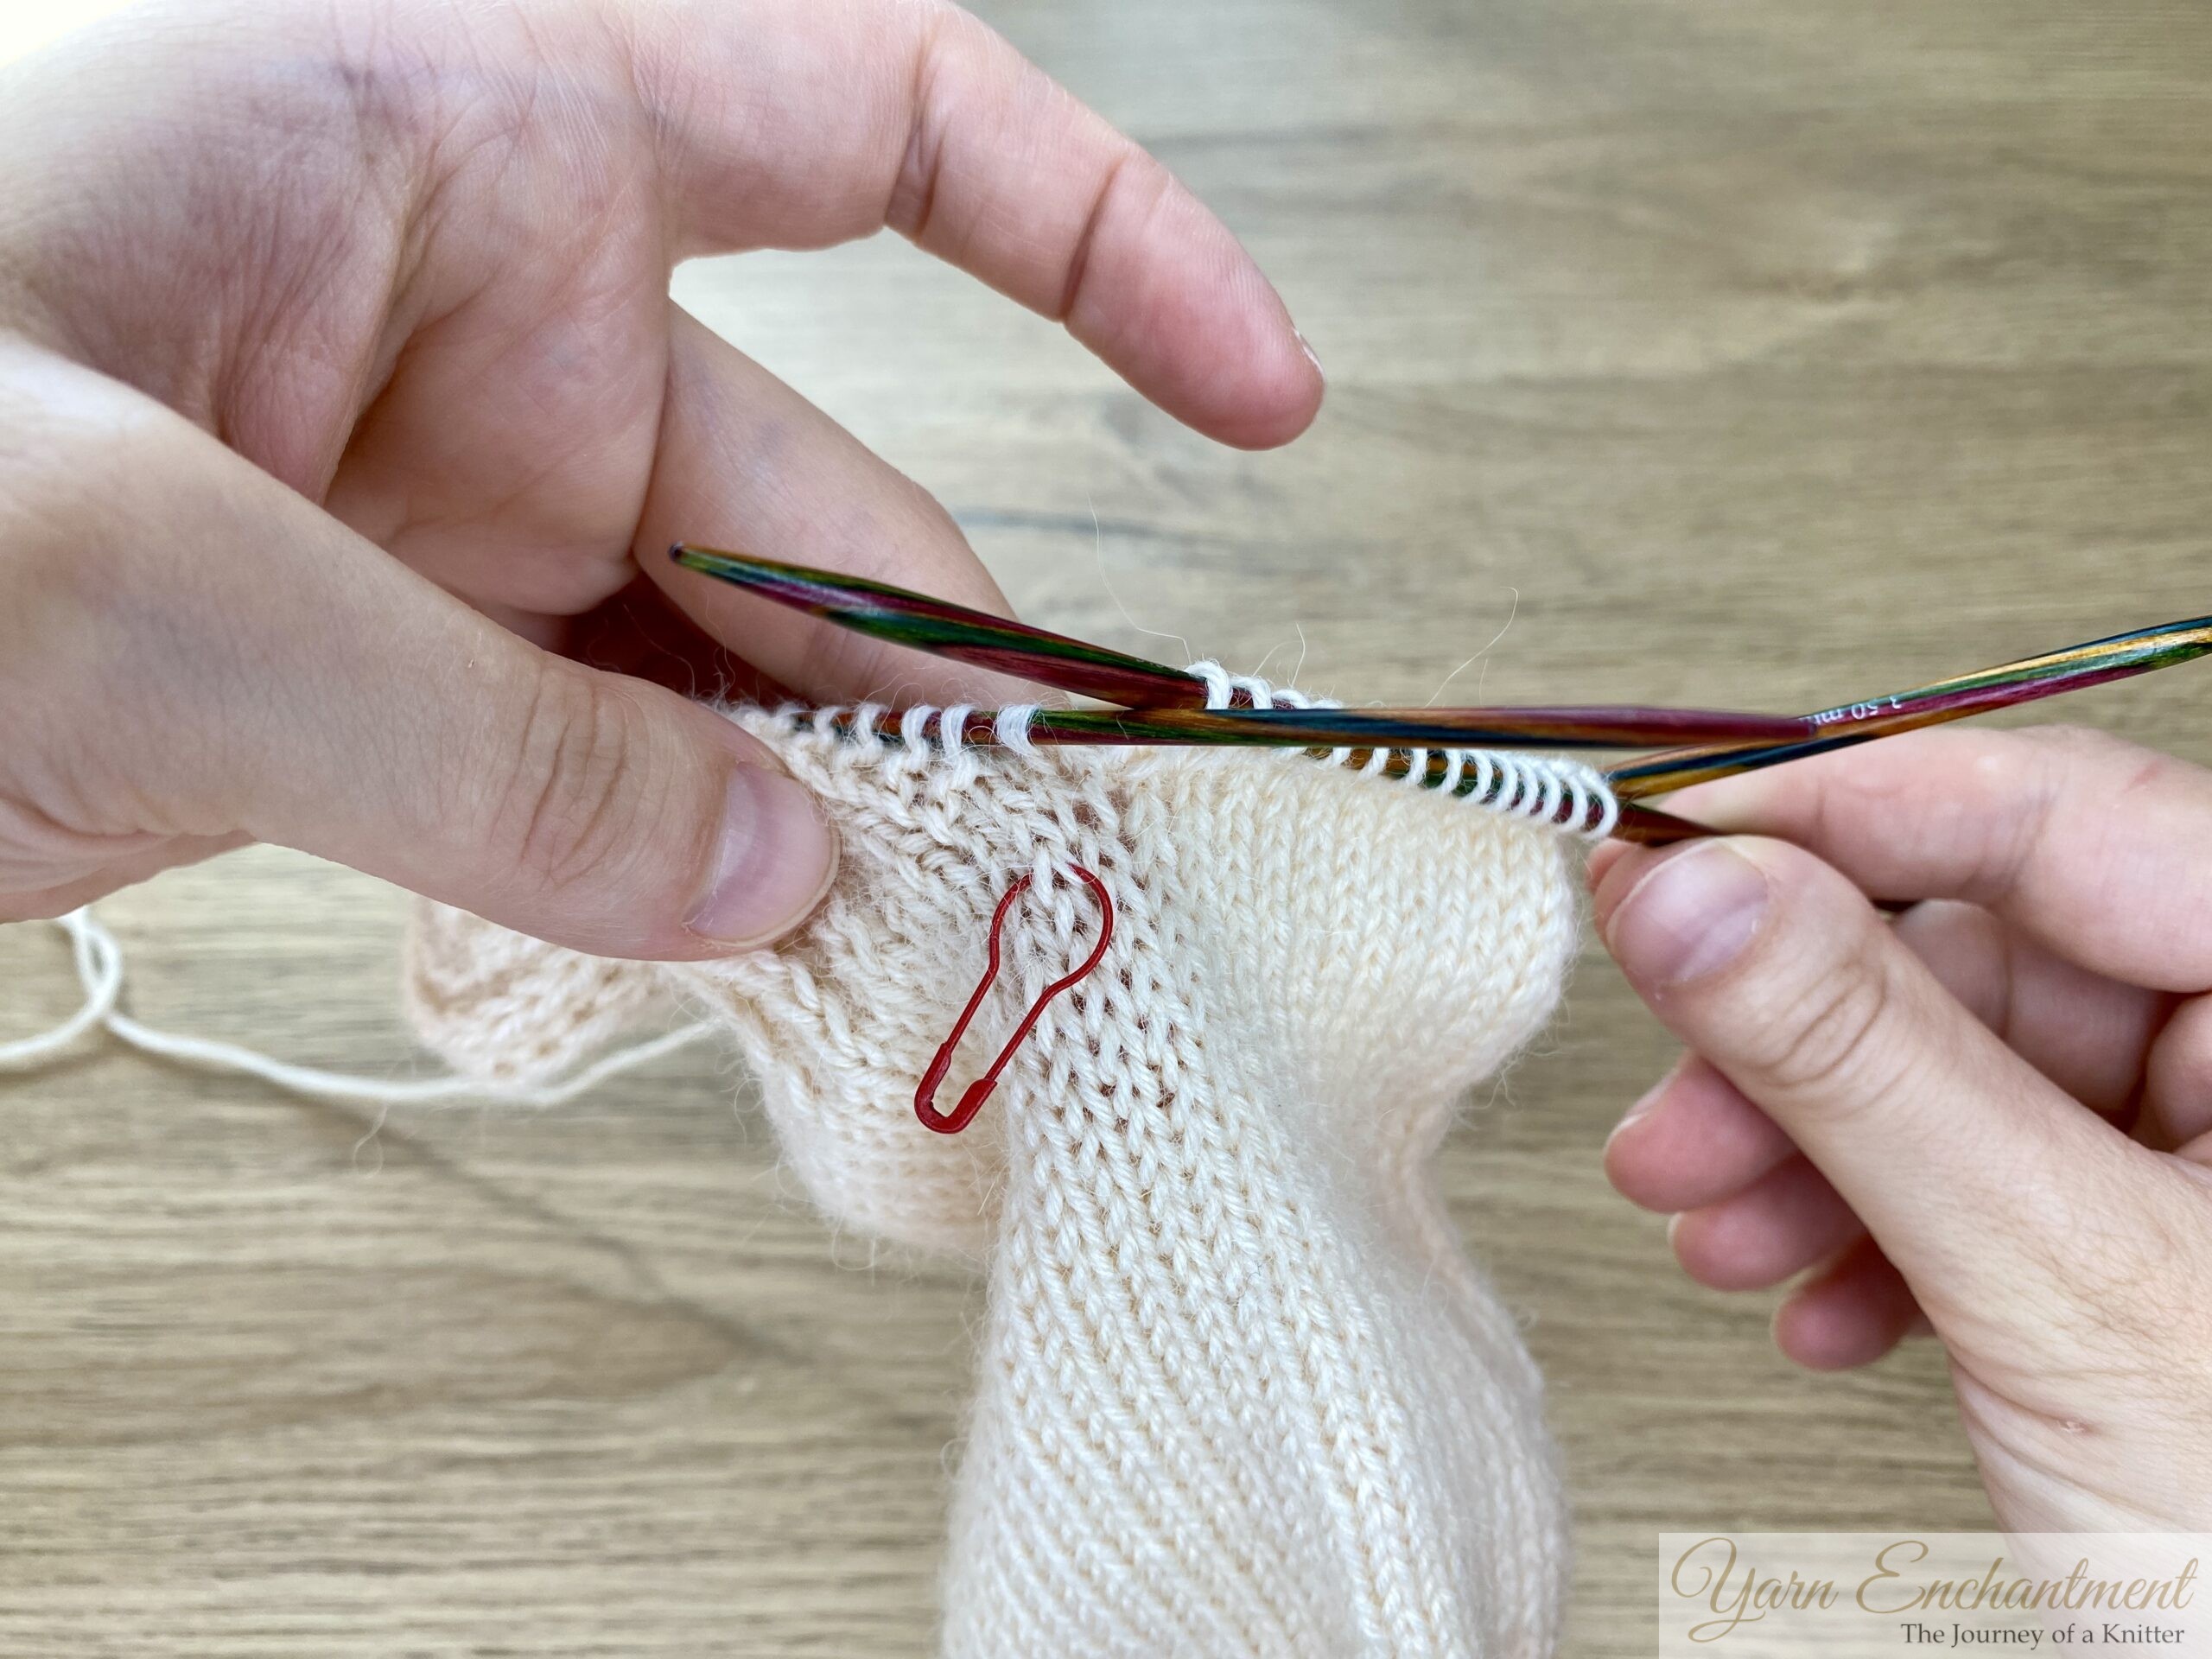 |  |  | For this corner, I use a red stitch marker so we can compare our picked-up stitches from the gap later on. | With your bigger needle, start knitting over the picked-up stitches. | When you reach the end of the needle, knit across the last four stitches you already had from your heel turn. |


Knitting the Perfect Gusset Decrease: Step-by-Step Sock Guide
Once you’ve picked up your gusset stitches, you’ll notice you have a higher stitch count on Needle 1 & Needle 4. In my example, that’s 4 stitches from the heel, 13 picked-up stitches, and 1 corner stitch, so I end up with 18 stitches on each of those needles. From here, I want to decrease back down to 13 stitches, so everything lines up perfectly with the rest of the sock.
 | Needle 1 and needle 4 have more stitches than the other two needles. Now we need to work our decreases to get back to the original stitch count. |

Place your stitch marker to mark the start of the round. For this next part, simply knit one complete round across all needles without working any decreases.
 | Place your stitch marker at the start of the round, and knit one complete round without making any decreases. |

Sock Gusset Decreases - Needle 1 (K2tog Method)
On the next round, begin the gusset decreases: knit across needle one until three stitches remain, then knit two together (k2tog), followed by one last knit stitch.
 |  |  | Knit until three stitches remain on your needle. | Then, work a knit two together (k2tog) decrease, ... | and finish by knitting the last stitch. |


Working the Instep Stitches
For the instep stitches on needle 2 and needle 3, simply knit across all the stitches as usual. These are the stitches on the top of your sock - so just keep working them in your regular pattern (whether you’re knitting plain or following a design). You don’t need to work any decreases here; the decreases happen only on the gusset needles.
Sock Gusset Decreases – Needle 4 (SSK Method)
On needle 4, begin by knitting one stitch. Then, work a slip-slip-knit (SSK) decrease, and knit the remaining stitches to finish the round.
 |  |  | Knit the first stitch | Then work an SSK decrease by slipping the next two stitches knitwise, one at a time, and then knitting them together through the back loop. | Knit the remaining stitches to finish the round. |


After each decrease round, knit one plain round (no decreases). Alternate these rounds until you’re back to your starting stitch count. Markers and counting help keep everything neat.
If SSK isn’t really your thing, go ahead and experiment - knitting two together through the back loop (k2tog tbl) or trying other decrease methods can create the same nice, left-leaning line. I actually wrote an entire blog post about left-leaning decreases and why SSK sometimes looks bigger - or less tidy - than you’d like. Inside, you’ll find some great alternatives that help keep your gusset looking neat. So don’t stress! Play around and pick whichever decrease looks and feels best in your sock knitting - you really can make it your own.
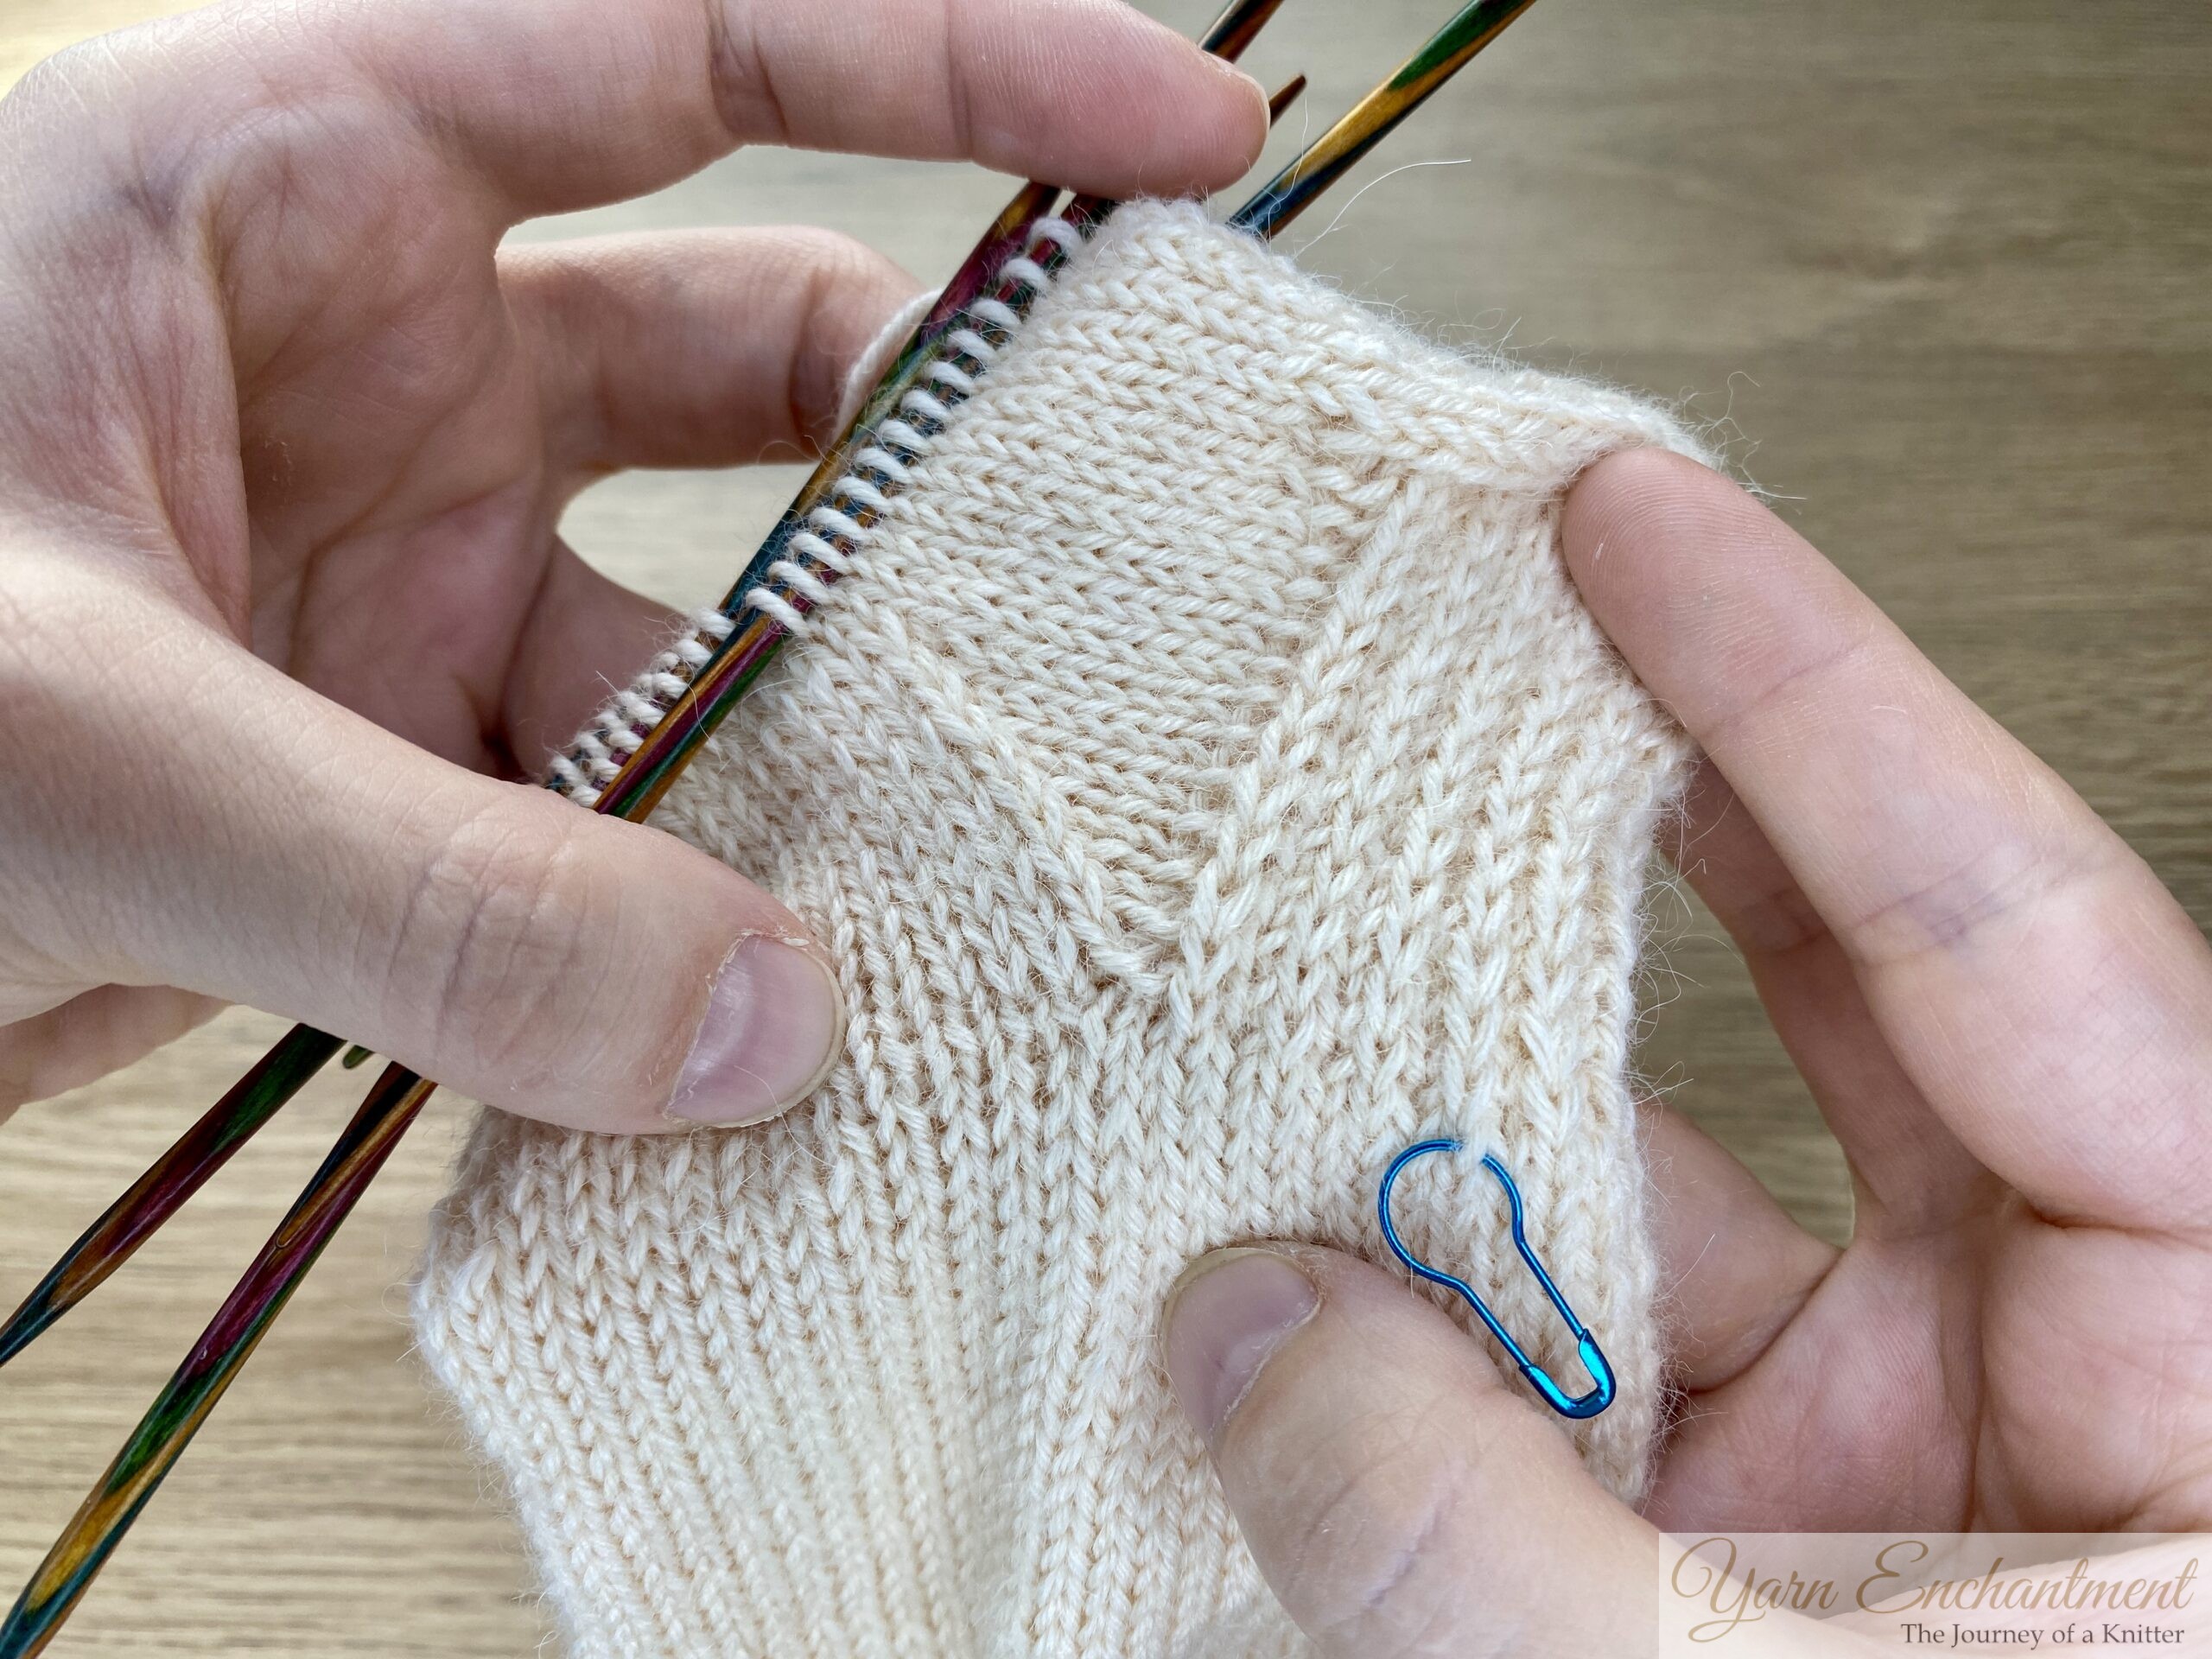
 | This is what the gusset looks like after finishing all the decreases. |

Comparing Gusset Pick-Up Methods in Socks
With the first pick-up method, you’ll usually notice a little hole or a stretched-out stitch right at the corner where the gusset joins the instep. This happens because the stitch is picked up right in the gap, without actually twisting or properly anchoring the surrounding yarn, which can leave it loose and open.
The second pick-up method is much tidier. Here, a new stitch is literally created, which snugly fills in that gap and pulls everything together. There’s no noticeable hole, and the transition between the gusset and the sock body looks much smoother and cleaner.
The third method also works really well and closes the hole neat and tidy. Ultimately, it is up to you and your yarn which technique you want to use. That's why I always try to offer more than one technique so you can find the right one for yourself.
So basically:
- The first method can leave holes or long stitches, especially if your yarn is thin or your tension is a bit loose.
- The second method closes the gap securely and blends in so well you can’t even tell it’s there.
- And the third method also looks really nice and tidy.
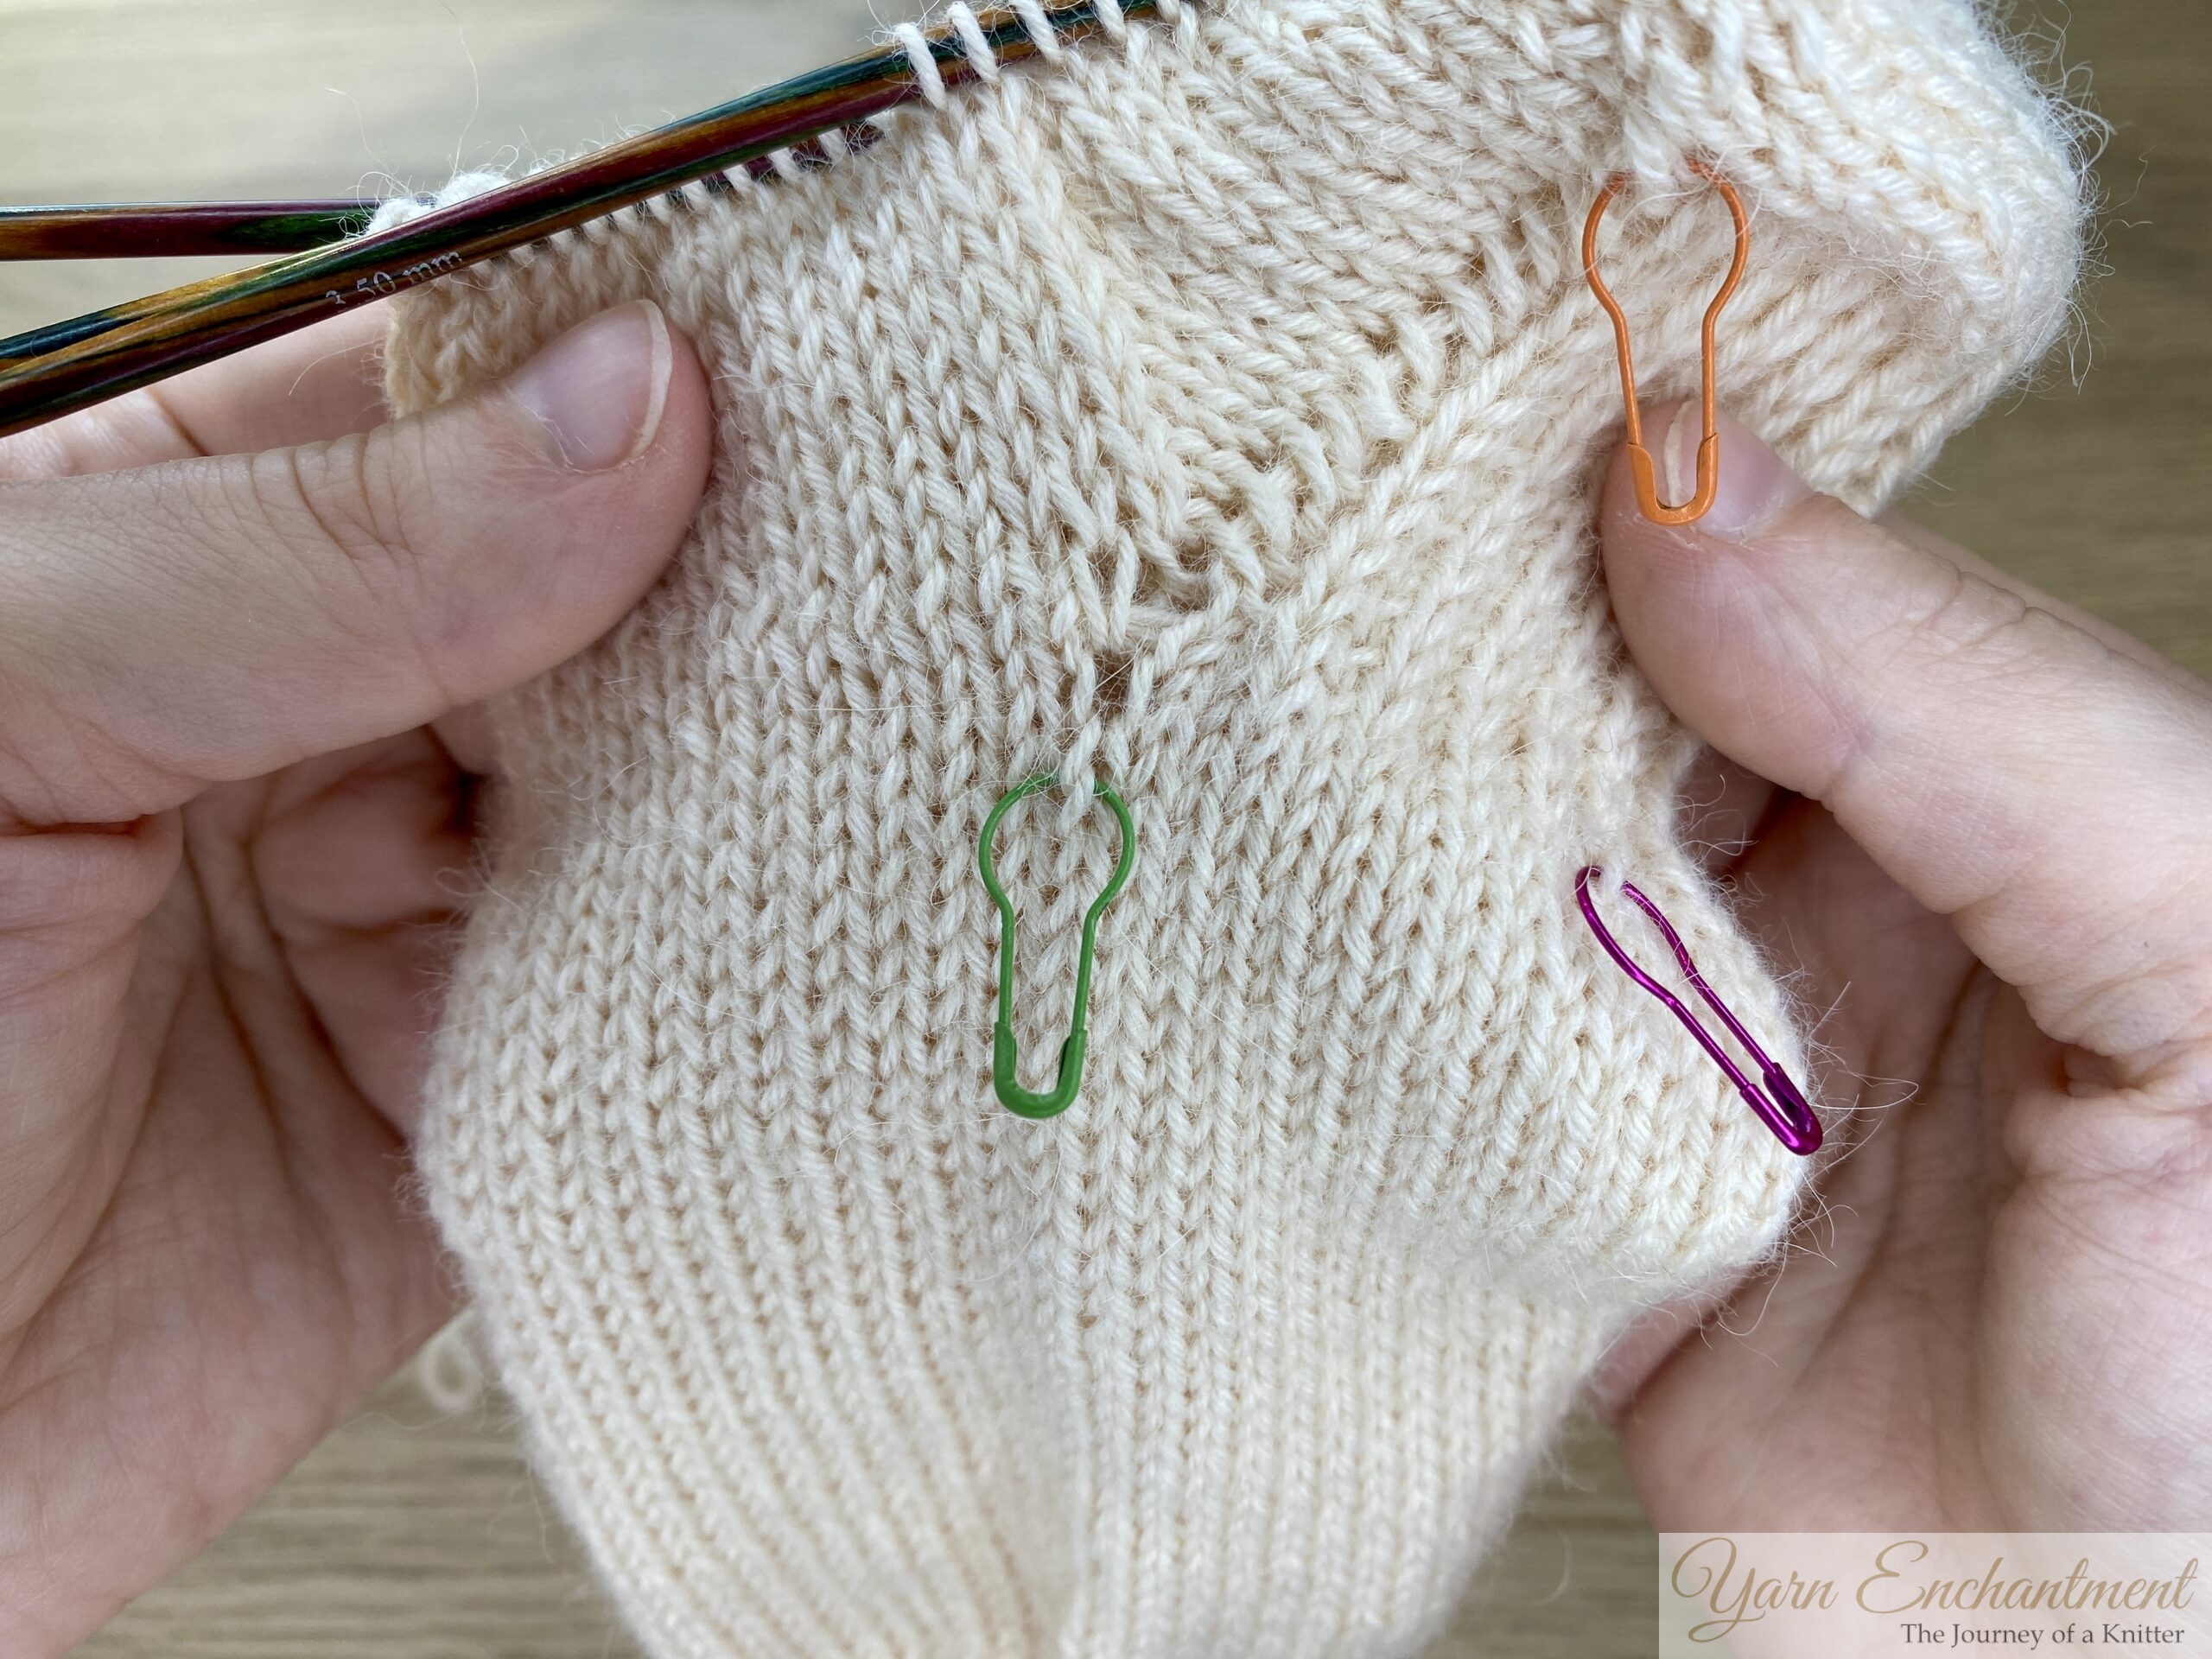 |  |  | When you look at the first method, you can clearly see a small hole where the needle went in to pick up a stitch. The picked-up stitch also turns out noticeably longer than the surrounding stitches. | When we look at the second method, there is no hole at all. It really creates the smoothest transition between our needles. The reason for this is that we literally created another stitch in order to close the hole. | As you can see, I knitted my swatch with 80% virgin wool and 20% polyamide; it looks really amazing and closed the hole very well. However, I did not like the outcome with the 70% alpaca and 30% polyamide blend, it closed the hole, but I believe it doesn't look as tidy as the one from the swatch. |


Please Note for This Course:
The yarn I use in this course contains 70% alpaca fiber. Alpaca is wonderfully soft and creates beautifully warm socks, but it behaves a bit differently from standard merino or wool blends. Because alpaca is more slippery and less elastic, stitches like the ones pulled up through a ladder may look less tidy and uniform compared to merino. Alpaca yarn is also less forgiving - mistakes are harder to fix, and the fabric has less "bounce back" if stretched or if the tension isn’t perfectly even.
Choosing this yarn for my sock course was most likely not the best idea, but the finished socks will be incredibly soft and luxuriously comfortable.
It’s also a perfect opportunity to mention that being fixated on one particular technique isn’t always ideal - sometimes it’s best to choose methods that fit our yarn’s unique needs.
Tips for a Neat, Hole-Free Gusset
- Always pick up extra stitches in both gusset corners - they’re easily decreased later and really do prevent gaps.
- Focus on tension consistency during pick-up and first rounds.
- Experiment with different decrease methods for even gusset lines.
- Remember, it gets easier every time. Practice turns this into second nature, and the results are worth it, trust me.
FAQs about Gusset Pick-Ups in Sock Knitting
How do I pick up gusset stitches without leaving holes?
The best way is to create a new stitch when closing the gap, rather than just pulling up. This tighter method fills the space and blends seamlessly into your sock fabric.
Why do I always get holes at the gusset corners?
Holes usually appear because the picked-up stitch comes directly from the gap and isn’t twisted or anchored. Loose tension around the corners also makes matters worse, but both issues can be fixed with the hole-free method.
Should I pick up an extra stitch in the gusset corner?
Yes! Picking up an extra stitch at the corner is a simple trick to prevent gaps. You can always decrease it away in later rounds, so the fit of the sock isn’t affected.
What’s the difference between the quick pick-up and the twisted ladder pick-up?
The quick pick-up (first method) is fast but often leaves a visible hole or stretched stitch. The twisted ladder method (second method) takes a little longer but fills the gap securely and disappears into the fabric.
Do I need special needles for gusset pick-ups?
Not at all. It helps to use a smaller needle size when picking up stitches (like the one used for the cuff), and then continue knitting with your regular sock needles. This makes the edges easier to grab and keeps the stitches snug.
Can loose tension create gusset holes, even with the right technique?
Yes. Even the best method won’t look clean if your tension varies at the corner. Try pulling the first two or three stitches on the new needle a bit tighter to keep everything neat.
What decreases should I use after gusset pick-ups?
The classic choice is k2tog (right-leaning) on one side and SSK (left-leaning) on the other. If your SSKs look sloppy, try k2tog tbl or experiment until you find a clean left-leaning decrease.
Is the hole-free pick-up method beginner-friendly?
Absolutely. It may look fiddly at first, but with a crochet hook or smaller needle it becomes second nature. Once you try it, you’ll likely never go back to the quick method because the results are so clean.
Does yarn type affect gusset holes?
Yes. Thinner yarns and looser plies can make gaps more noticeable. The twisted ladder method works especially well with fine sock yarn since it creates a tighter join.
Sock Knitting Next Steps
That’s all there is to it! Once you get the hang of picking up a tidy gusset and working the decrease, the rest of the sock feels so much easier. So give yourself some credit - With a working heel and the gusset you’ve just tackled one of the trickiest parts.
From here on, it’s pretty much smooth knitting down the foot. I can only imagine how excited you must be! The only things left are knitting the foot and working the toe decreases, so I decided to bring out this tutorial a little bit faster. I’ll walk you through how long to knit before starting your toe decreases, and share a clever way to finish off those ends.
Remember, every sock is a small adventure, each pair teaches you something new and brings you closer to your perfect fit. So pause for a second, admire your work, and don’t forget to enjoy the process. You’re so close to your first finished sock, and that’s absolutely worth celebrating!
Until next time, happy knitting!
Feeling ready for more sock fun?
Jump into the next parts of my Free Sock Knitting Course! Explore topics like:
-
Sock Knitting Needles & Accessories: Complete Guide for Beginners
- How to Measure Your Foot & Calculate Sock Cast-On Size (Knitting Tutorial)
-
Hole-Free Gusset Pick Up and Decreases for Perfectly Fitting Socks
- Complete Foot and Wedge Toe Sock Guide: Measuring, Sizing & Decreasing
A Little Way to Say Thanks
You Might Also Like


 |
|
Join the Cozy Corner Newsletter!
Hey there, creative soul! Welcome to the Yarn Enchantment Newsletter, where we celebrate all things cozy, crafty, and full of heart. Think of this as your friendly crafting companion - a little dose of inspiration delivered straight to your inbox, just for you. Inside, you’ll find: ✨ Exclusive patterns & tutorials - ideas you won’t find anywhere else (just for us!) 📚 Bookish crafts that bring your favorite stories to life 🧶 Tips and tricks to make your crafting journey smoother (and more fun!) 💌 Heartfelt musings on life, creativity, and the magic of making something with your own two hands Whether you’re knitting by the fire, brainstorming your next DIY project, or just looking for a little creative pick-me-up, this newsletter is here to cheer you on. Because let’s be honest - crafting isn’t just about the finished project; it’s about the joy, peace, and stories we create along the way. So grab a cup of tea, cozy up, and join me. Together, we’ll weave a little magic into everyday life - one stitch, one story, and one email at a time. P.S. I’m so glad you’re here. Let’s make something beautiful together! (Note: If you're using an ad blocker, you may encounter issues subscribing to the newsletter. To subscribe, please consider disabling your ad blocker.)
|

1 Comment
I knit my socks toe up using Magic loop. I also use the Fleegle heel so I never have to pick up stitches from the gusset.