

WIPs and UFOs: My Current Knitting and Crochet Projects
March 23, 2025
Quick Tip: Never Run Out of Yarn While Casting On
March 27, 2025How to Work the Long Tail Cast-On

Originally published on March 24, 2025
The long tail cast-on is a fundamental technique in knitting that every knitter should know. It's a versatile method that creates a neat, stretchy edge, making it perfect for a wide range of projects, from scarves to sweaters. In this post, I will break down the long tail cast-on into simple, easy-to-follow steps, and provide tips and tricks to help you learn this essential technique.
 | Long Tail Cast-on |

What is the Long Tail Cast-On?
The long tail cast-on is a method of casting on stitches that uses both the working yarn and a long tail of yarn. This technique creates a foundation row and the first row of knitting simultaneously, making it a quick and efficient way to start your project.
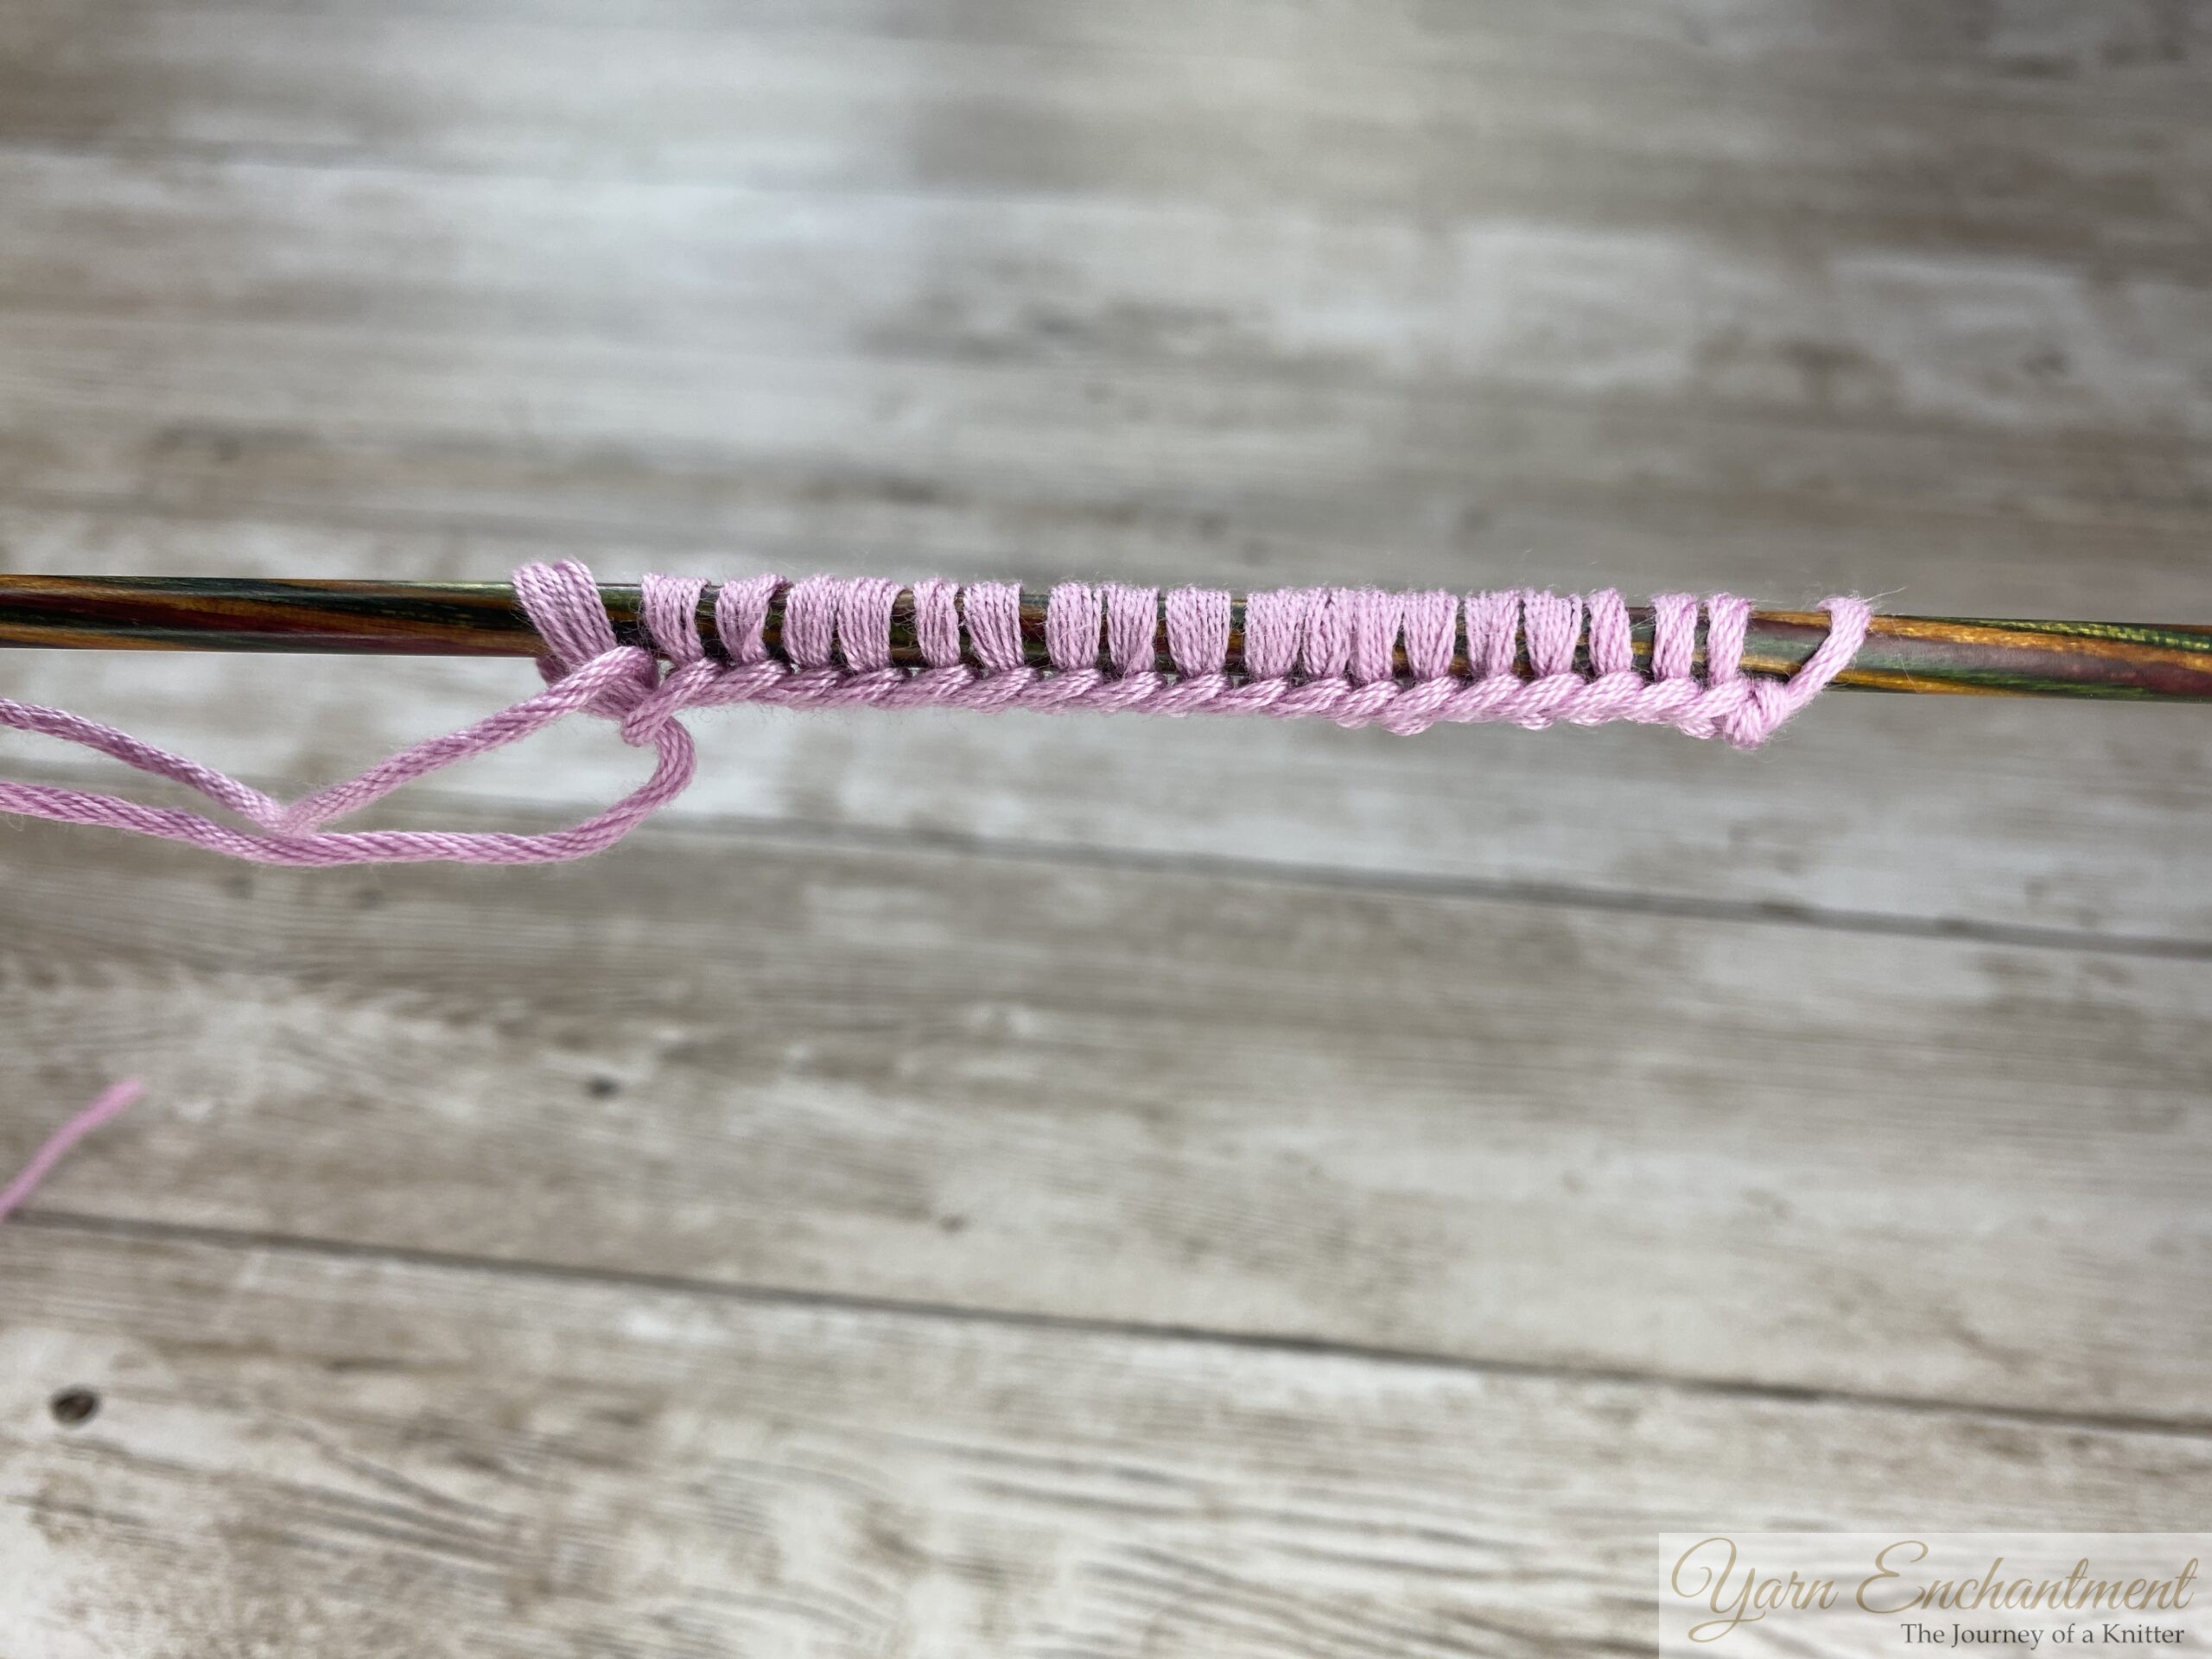
As you cast on, you're also knitting the first row of your project. This means that the stitches you create already have a right side and a wrong side.
For example, if your pattern says, “Cast on and knit 15 cm,” the next row after casting on would actually be a wrong-side row, meaning you should purl it.
There are also different ways of starting the long tail cast-on. At the end of this post, you can also find a video tutorial about the different techniques!
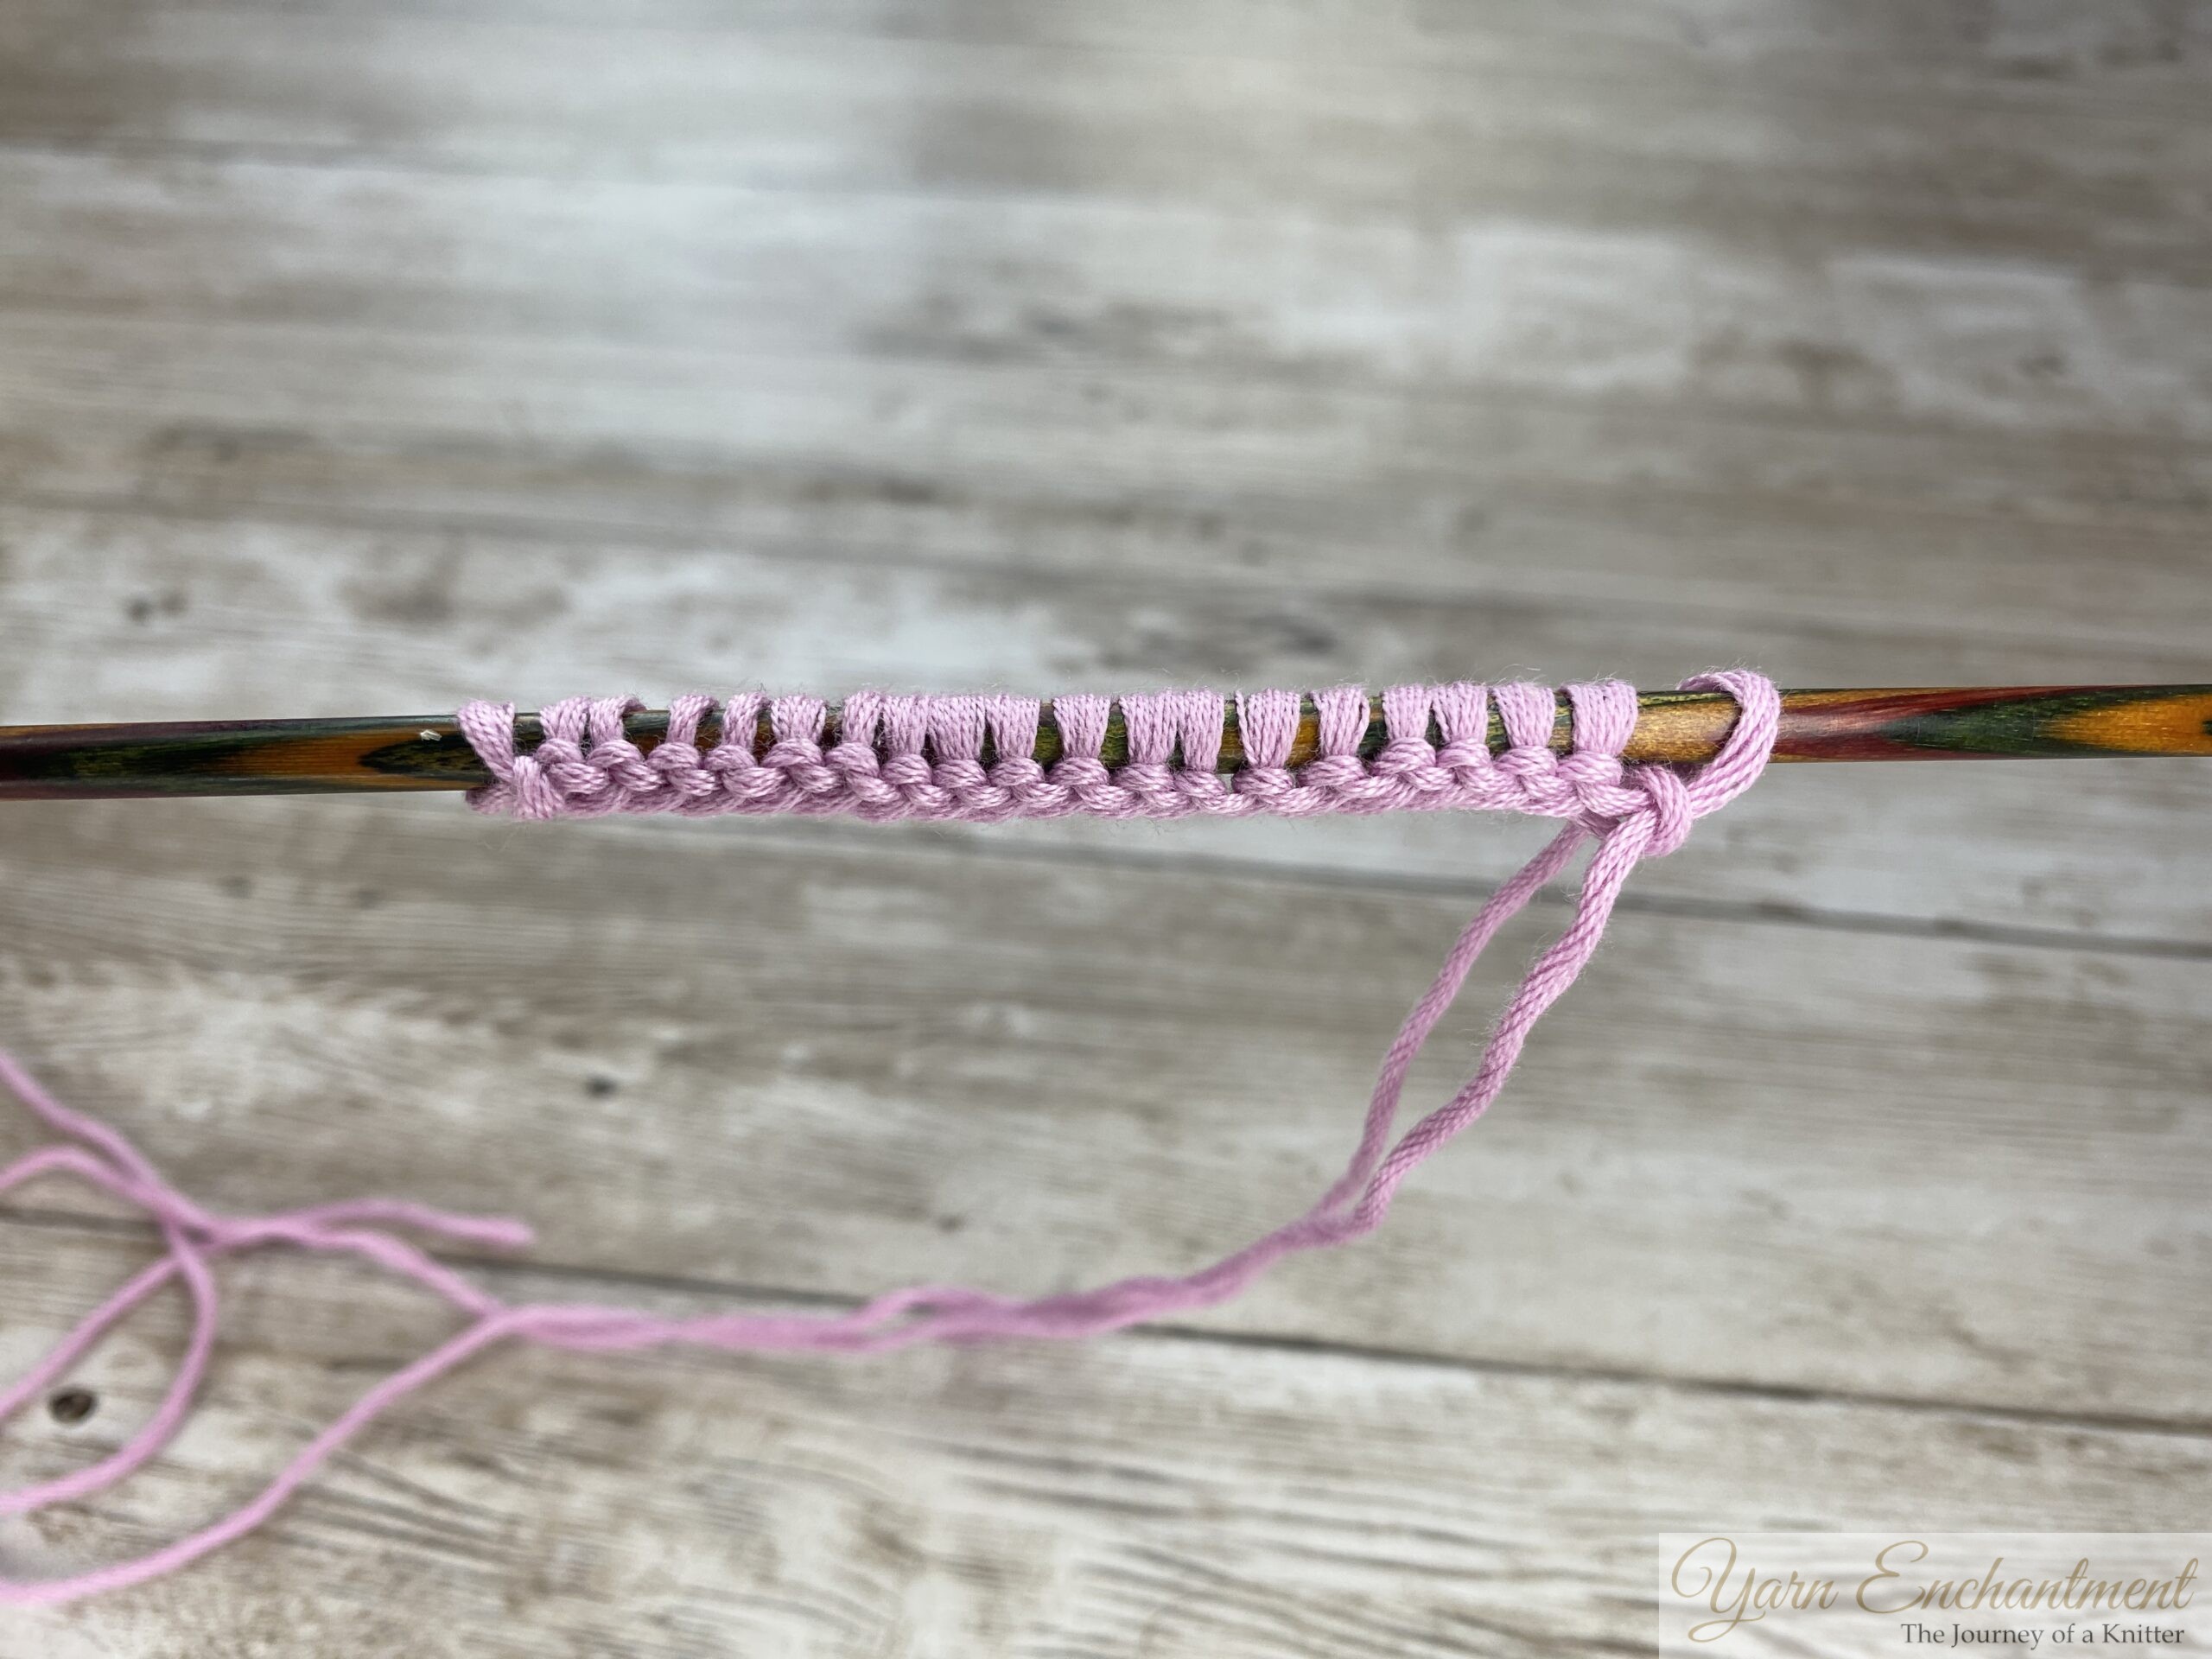 |  | The wrong side (purl side) | The right side (knit side) |


Why Use the Long Tail Cast-On?
The long tail cast-on is a popular choice among knitters for several reasons:
- Neat and Tidy Edge: The long tail cast-on creates a smooth, even edge. It is also very easy to pick up stitches from a long tail cast-on.
- Stretchy Edge: The moderate stretch of this cast-on makes it ideal for projects like hats, socks, and sweater necklines. For socks, you typically hold two needles together.
- Quick and Easy: Once you get the hang of it, the long tail cast-on is a fast and efficient way to cast on stitches.
Step-by-Step Guide to the Long Tail Cast-On
Prepare Your Yarn
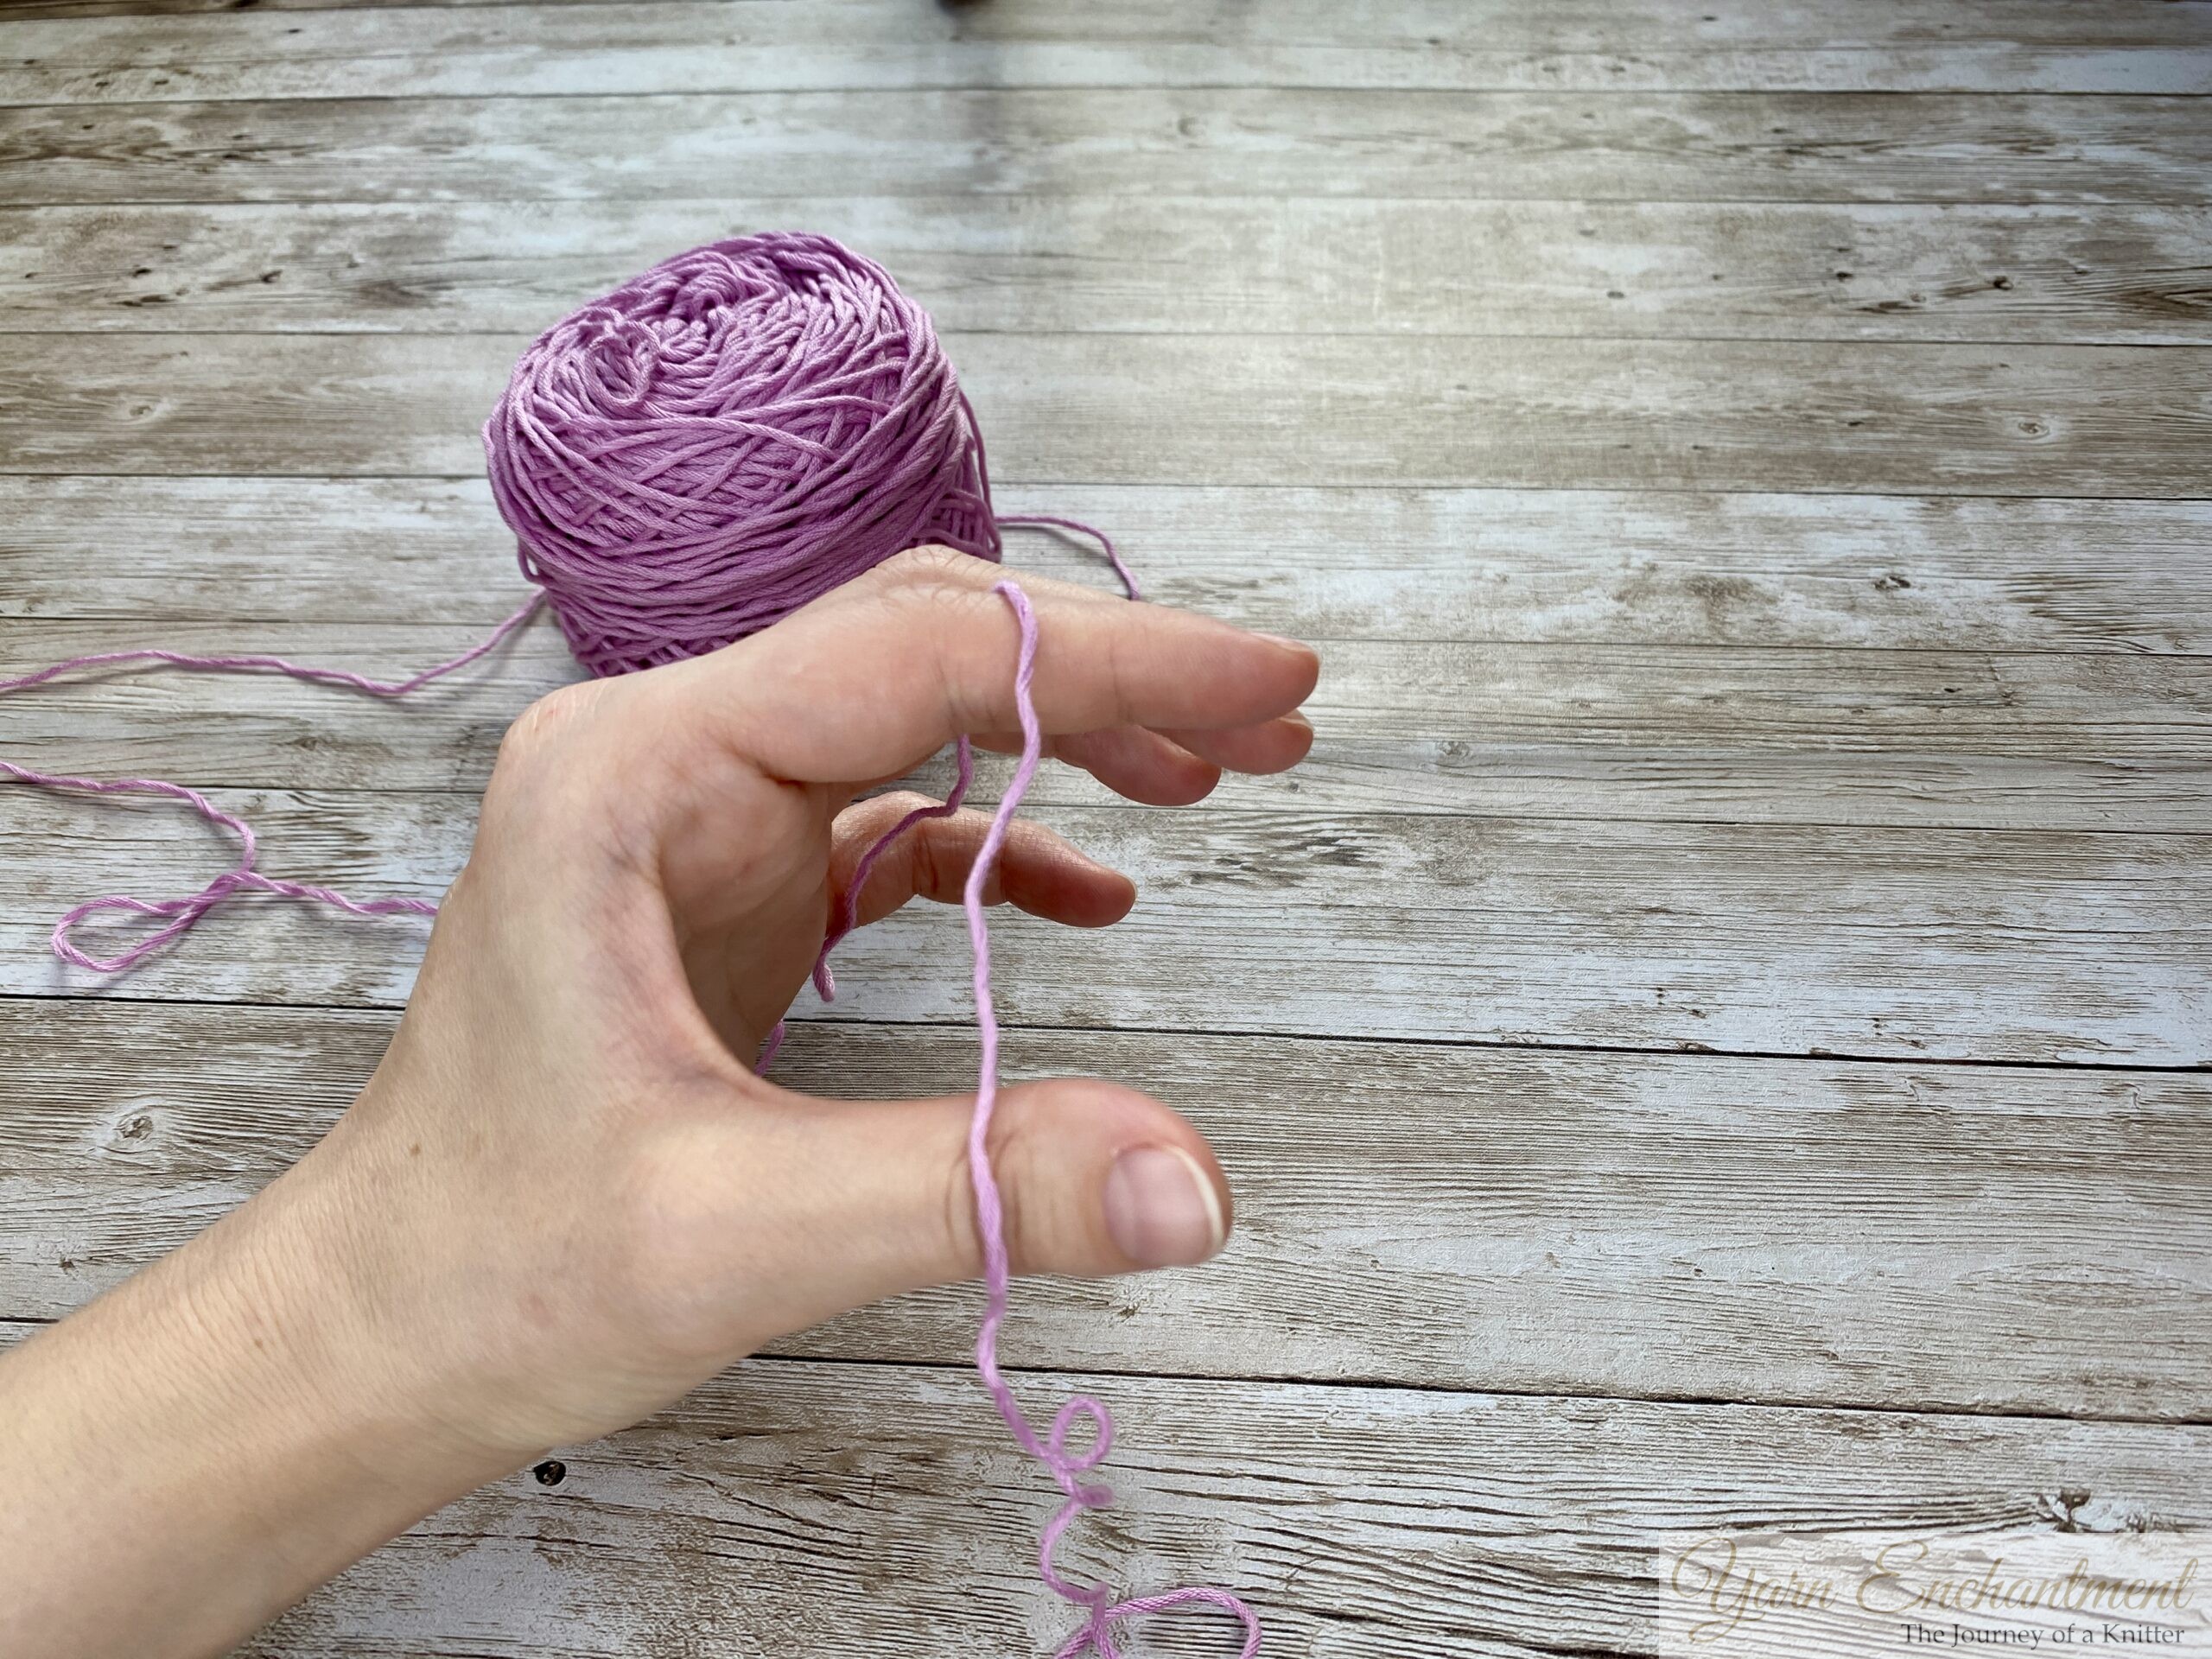
Start by leaving a long tail of yarn. A good rule of thumb is to measure out four times the width of your finished project. For example, if your project is 25 cm (10 inches) wide, leave about 1 meter (40 inches) of yarn for the tail. This ensures you have enough yarn for the cast-on and weaving in the ends later.
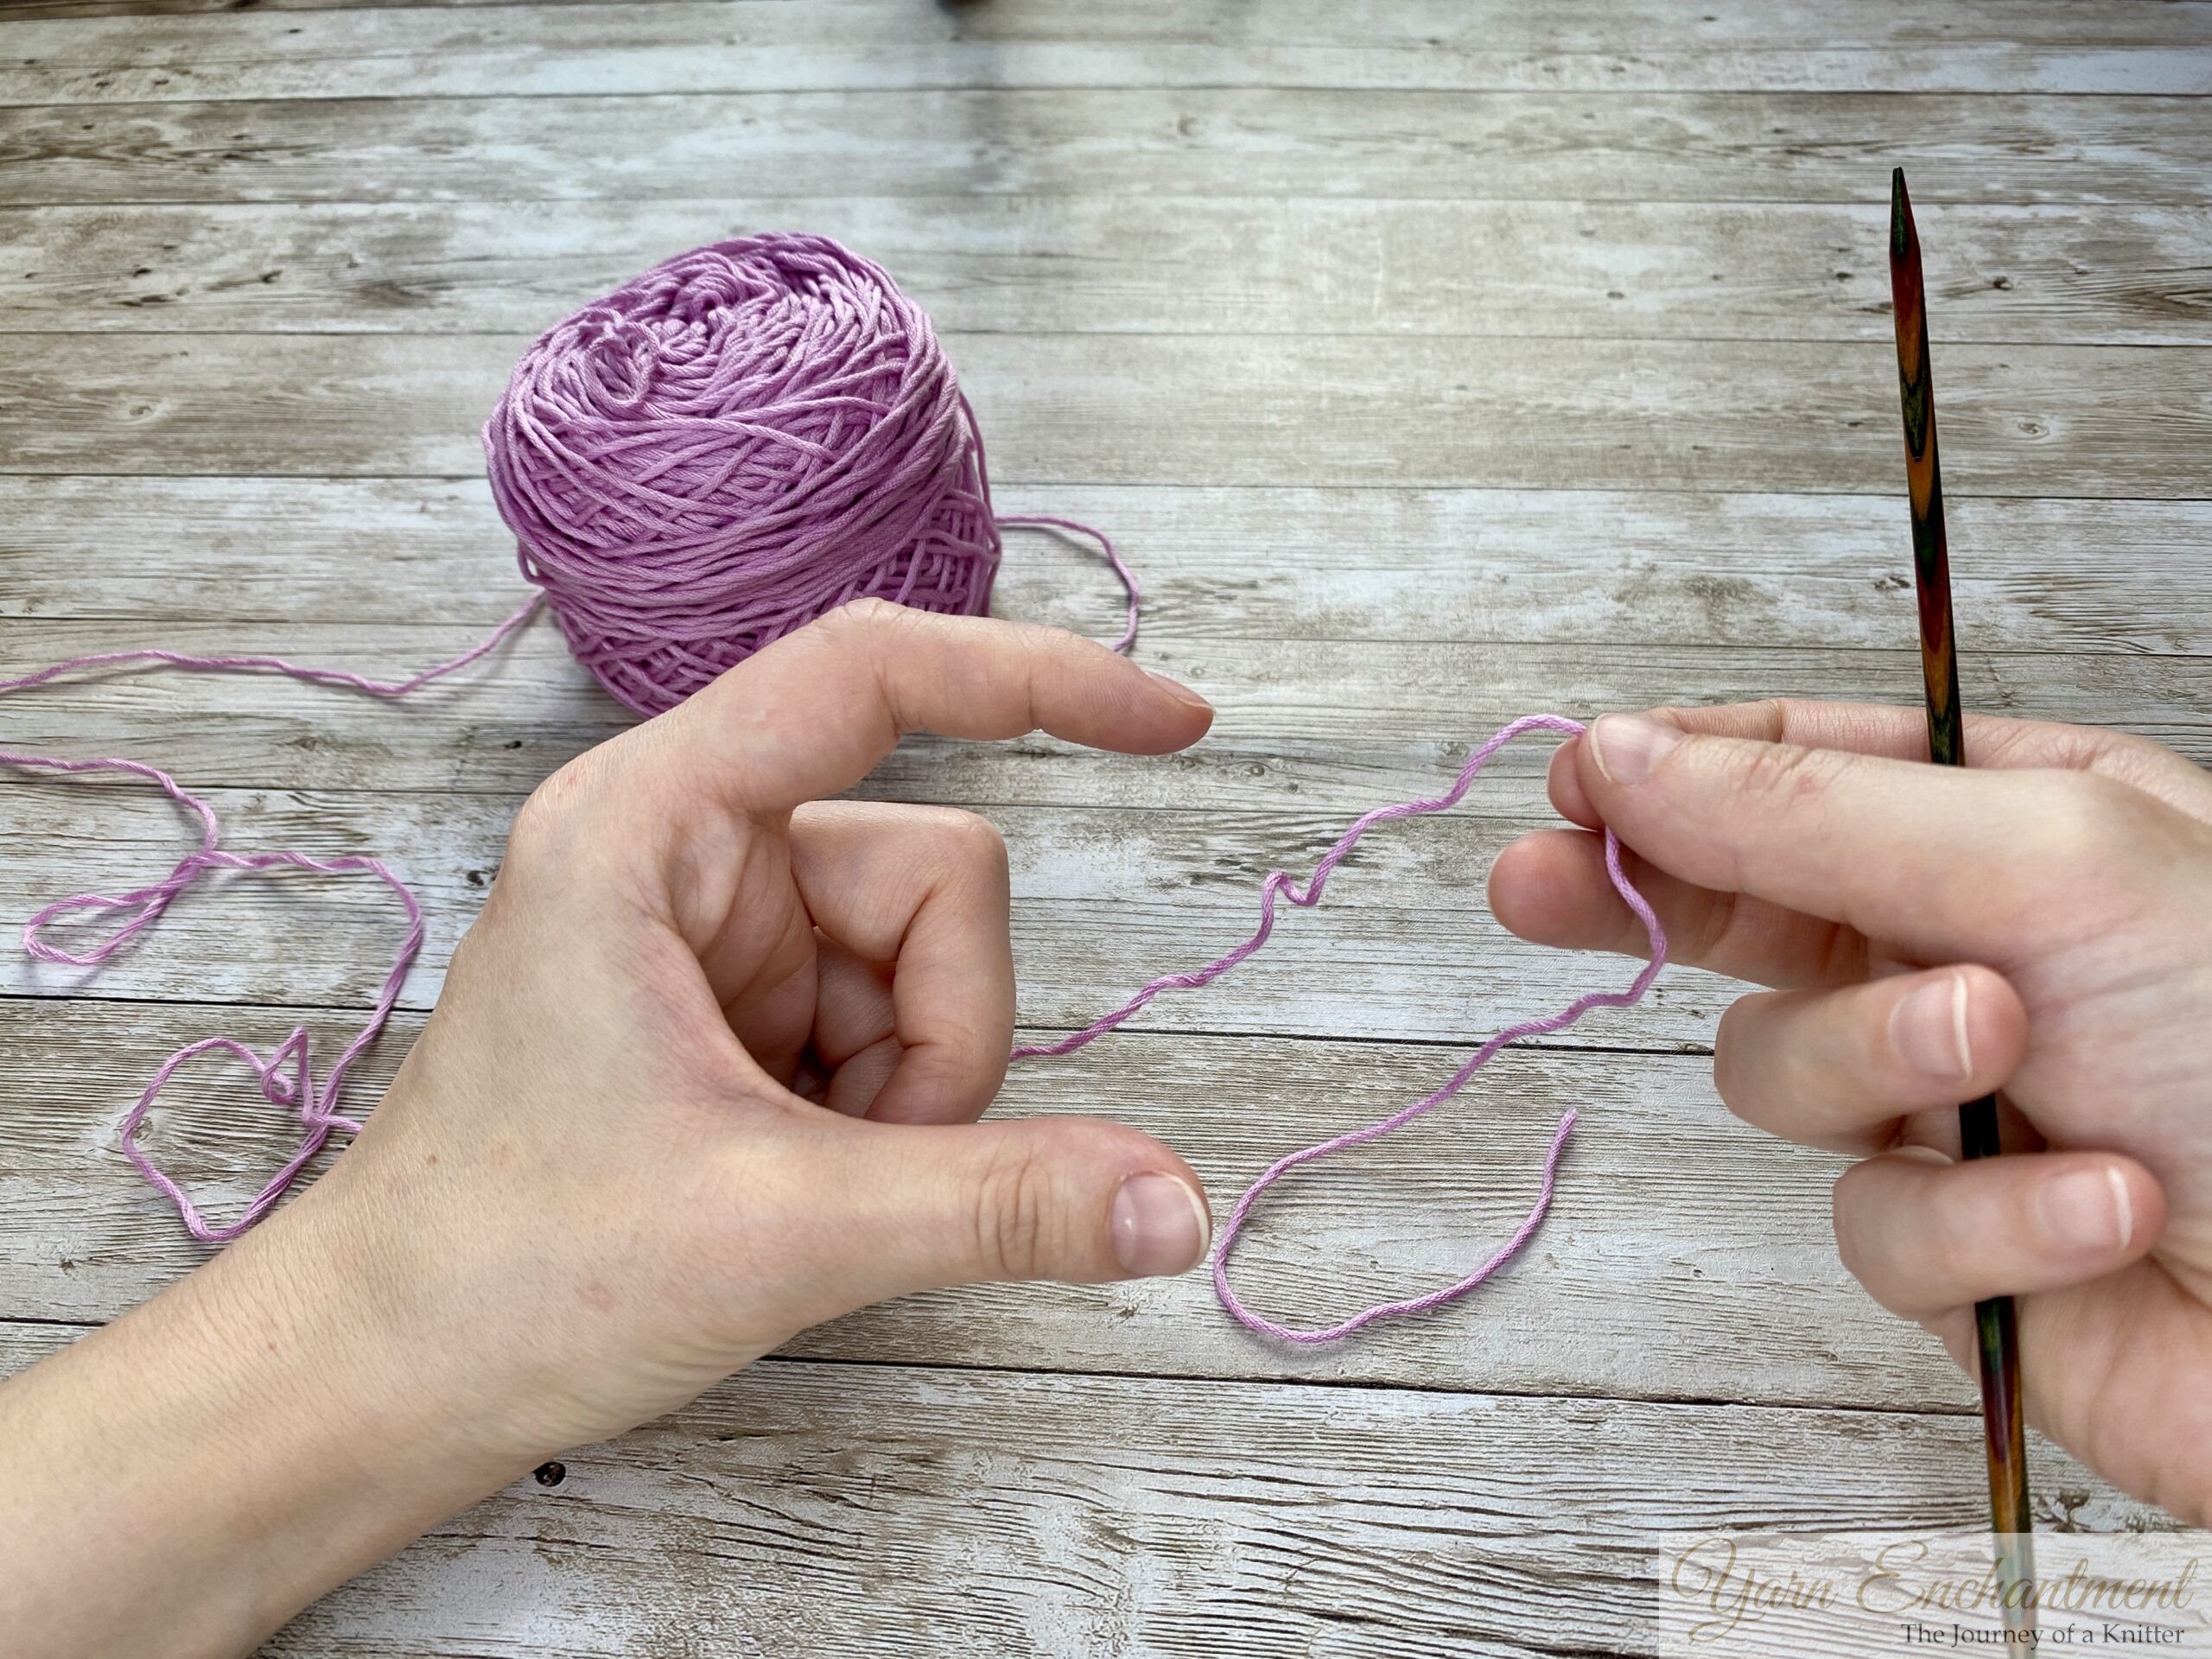
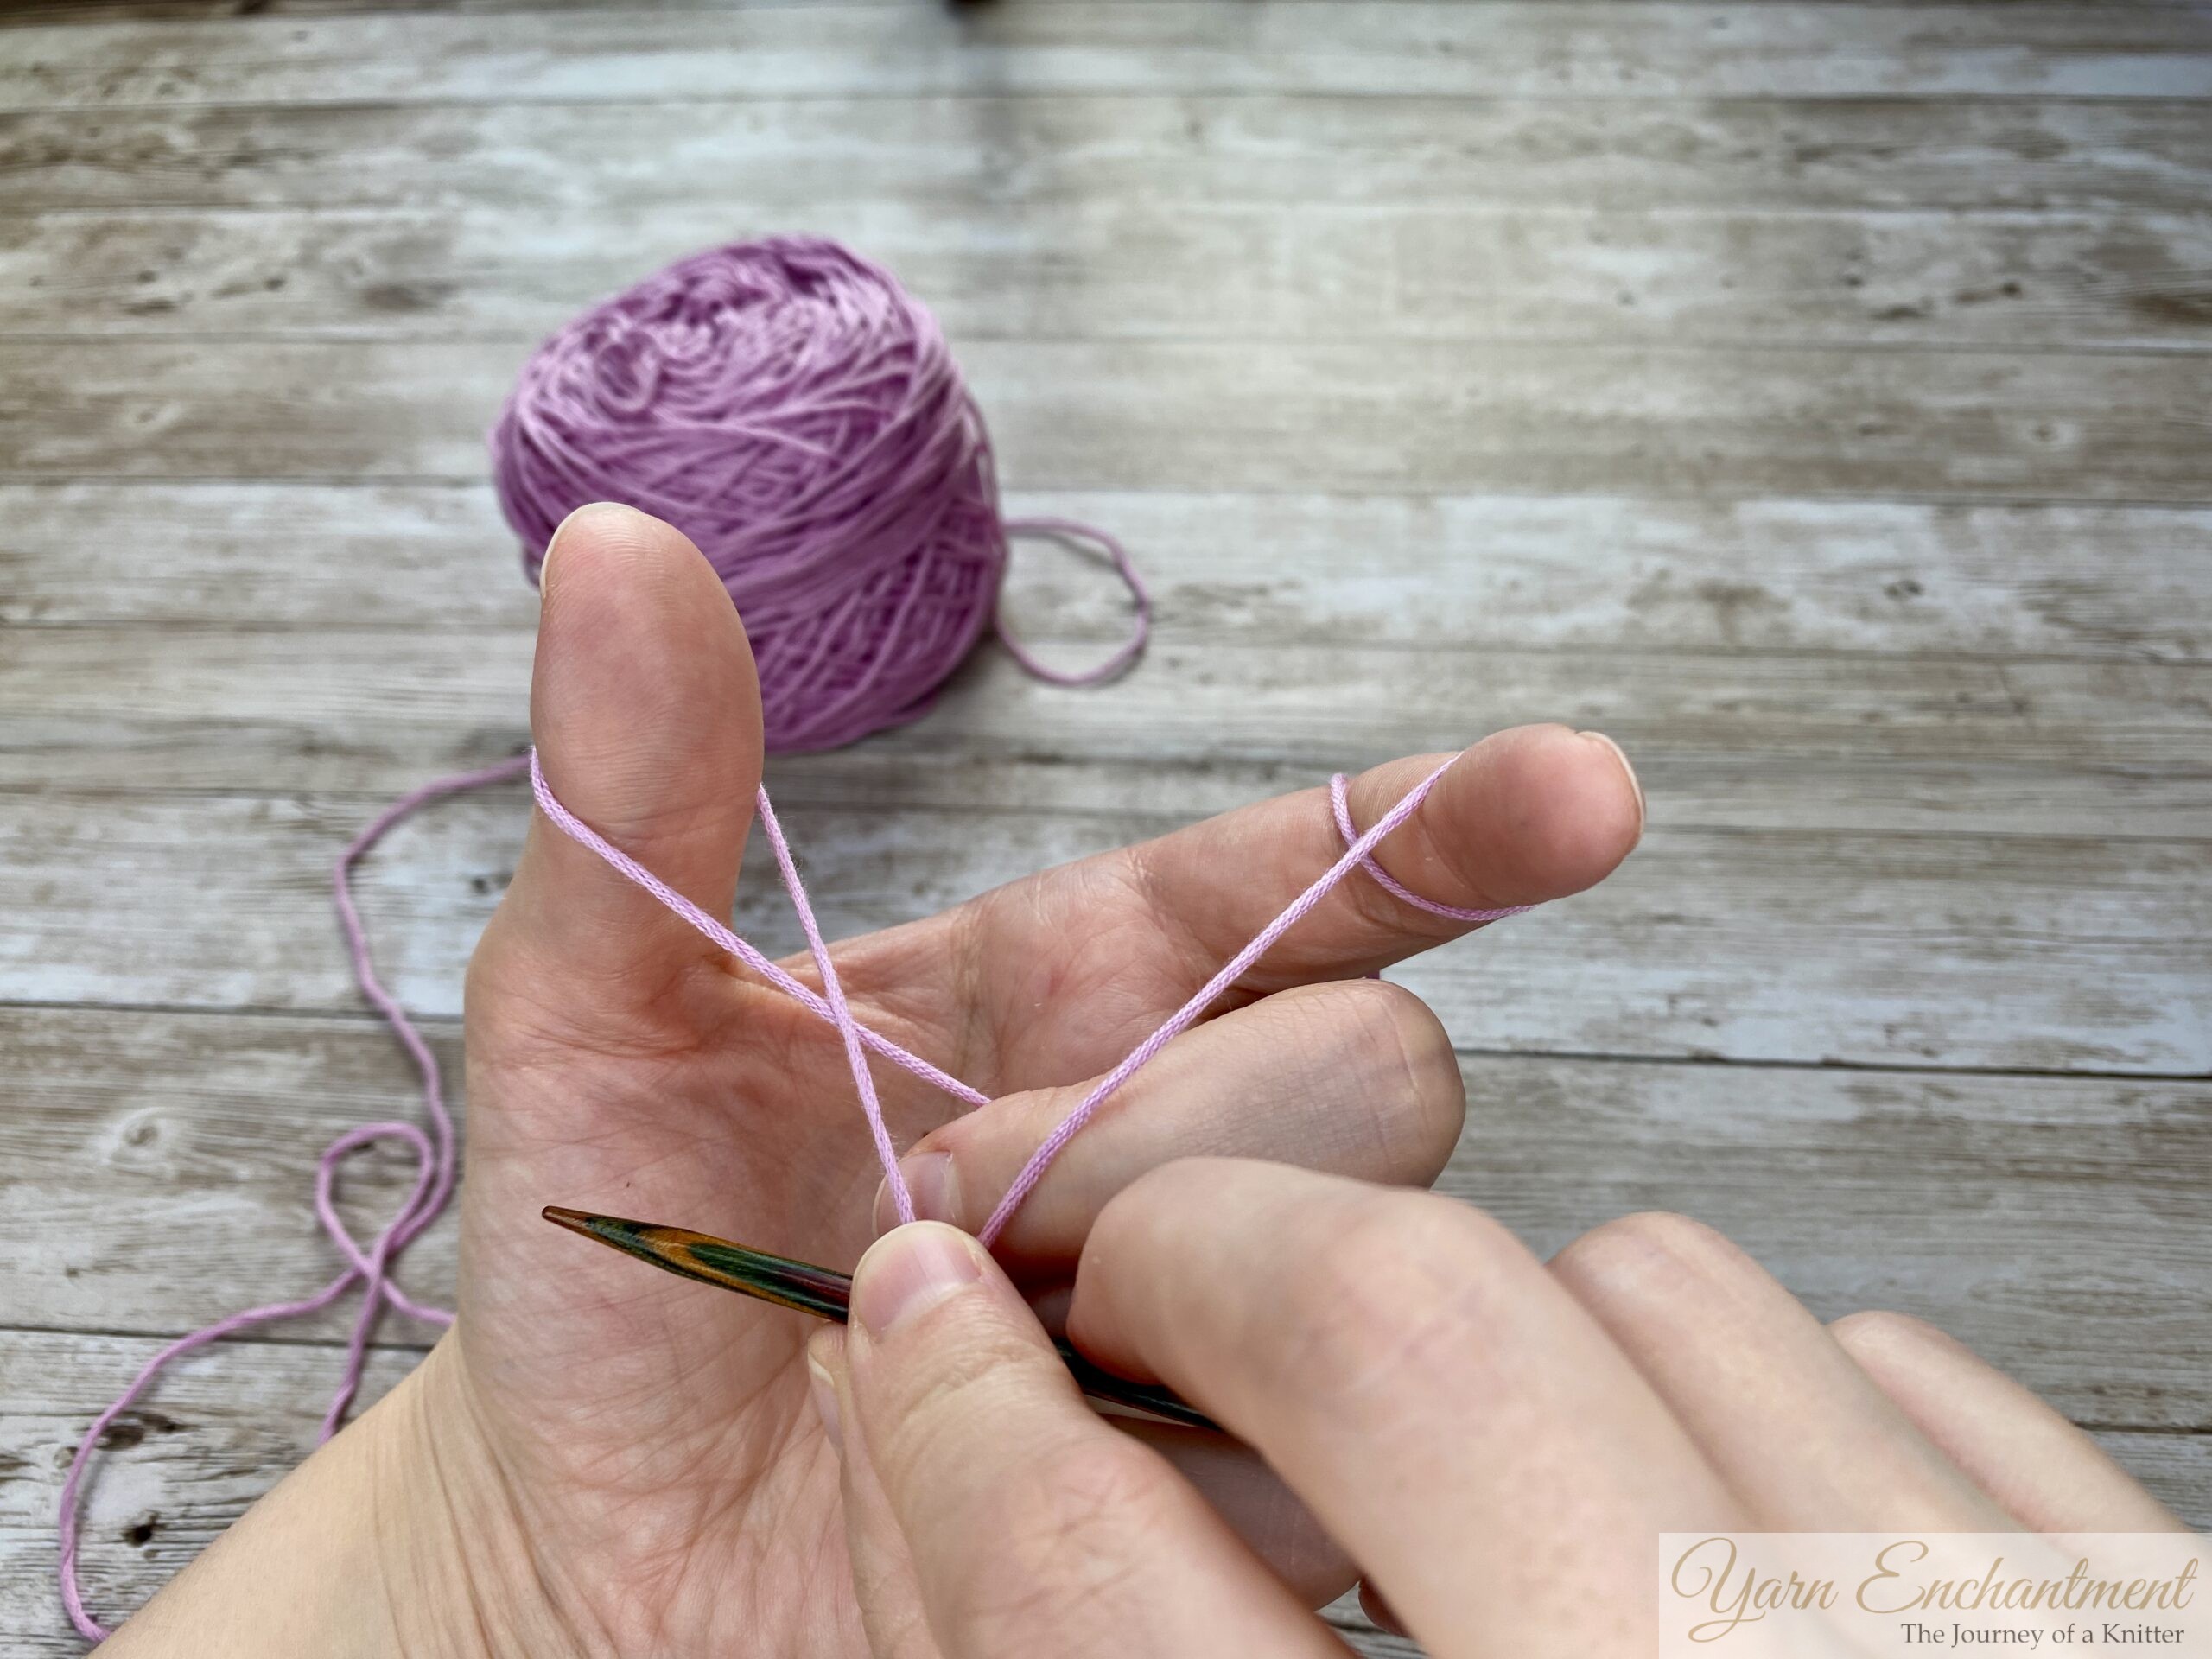
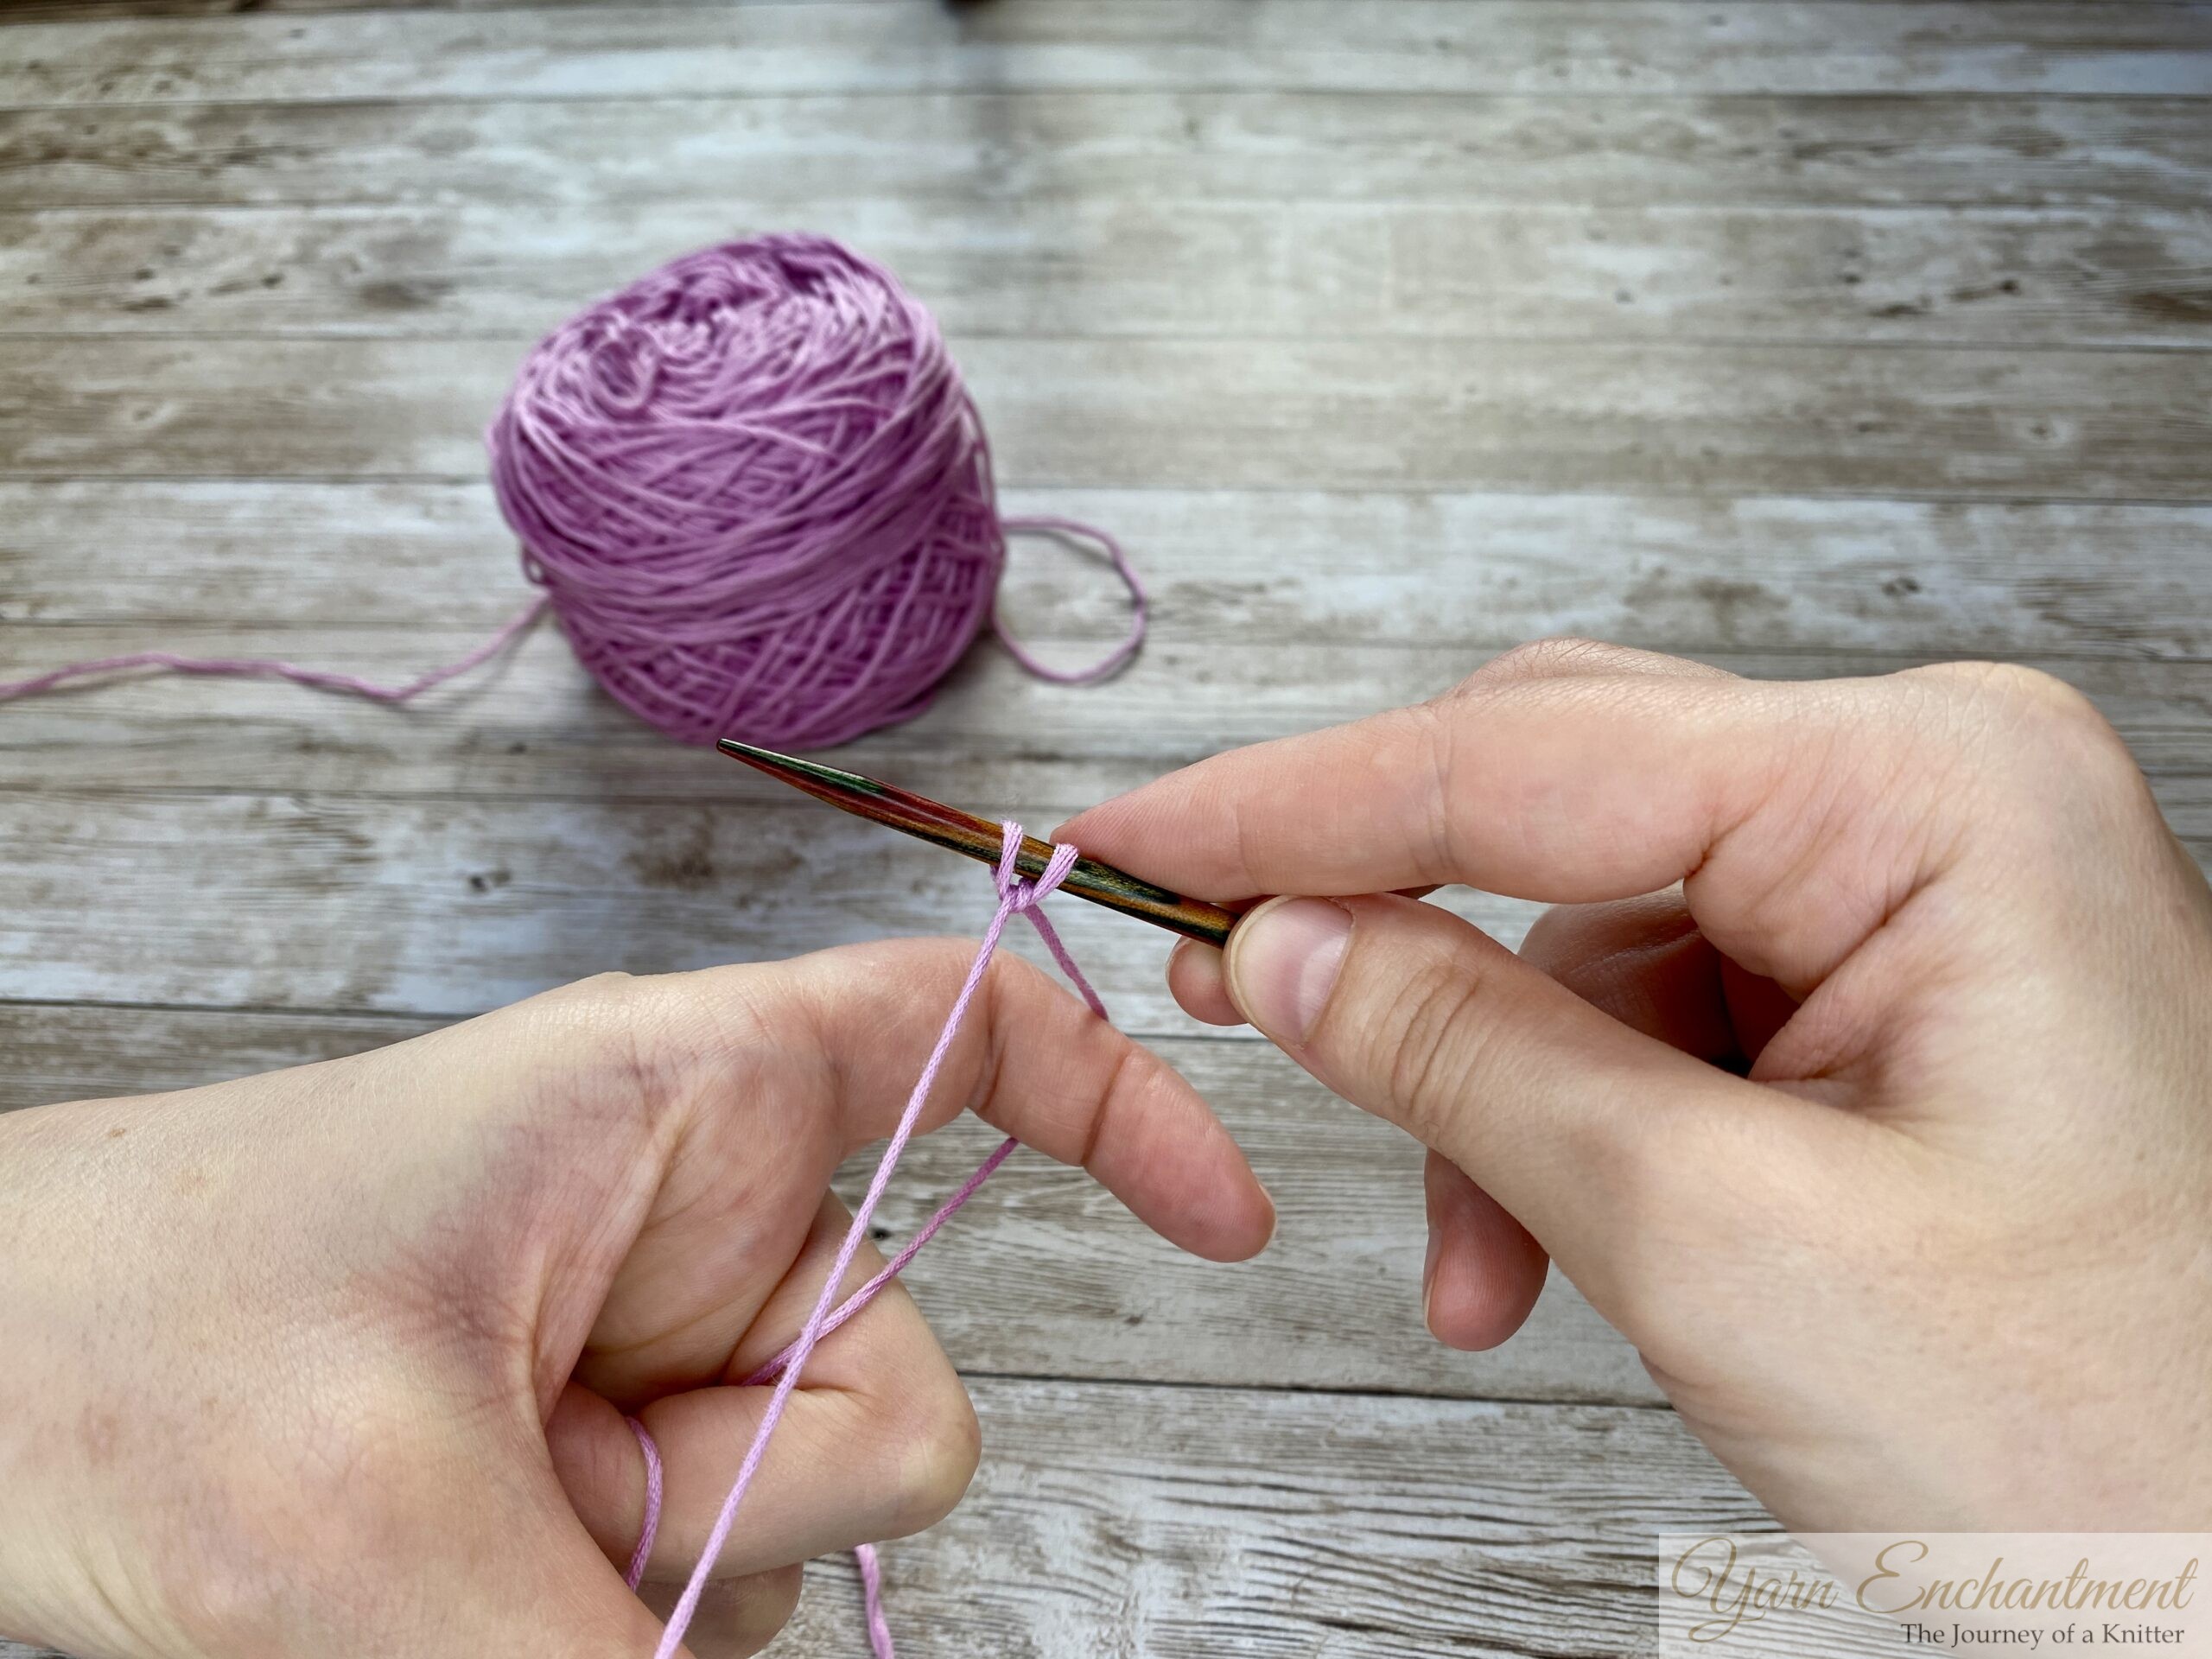
Create the Slingshot Position
- Bring your left-hand thumb and index finger to a "C" form together and drape the yarn over the thumb and your index finger.
- The tail yarn should hang in the front, so over the thumb, and the working yarn, which is connected to the ball, should hang in the back, so over the index finger
- Use your other fingers to get a hold of your strands against your palm. Keep a light grip to it, just enough to hold it in place!
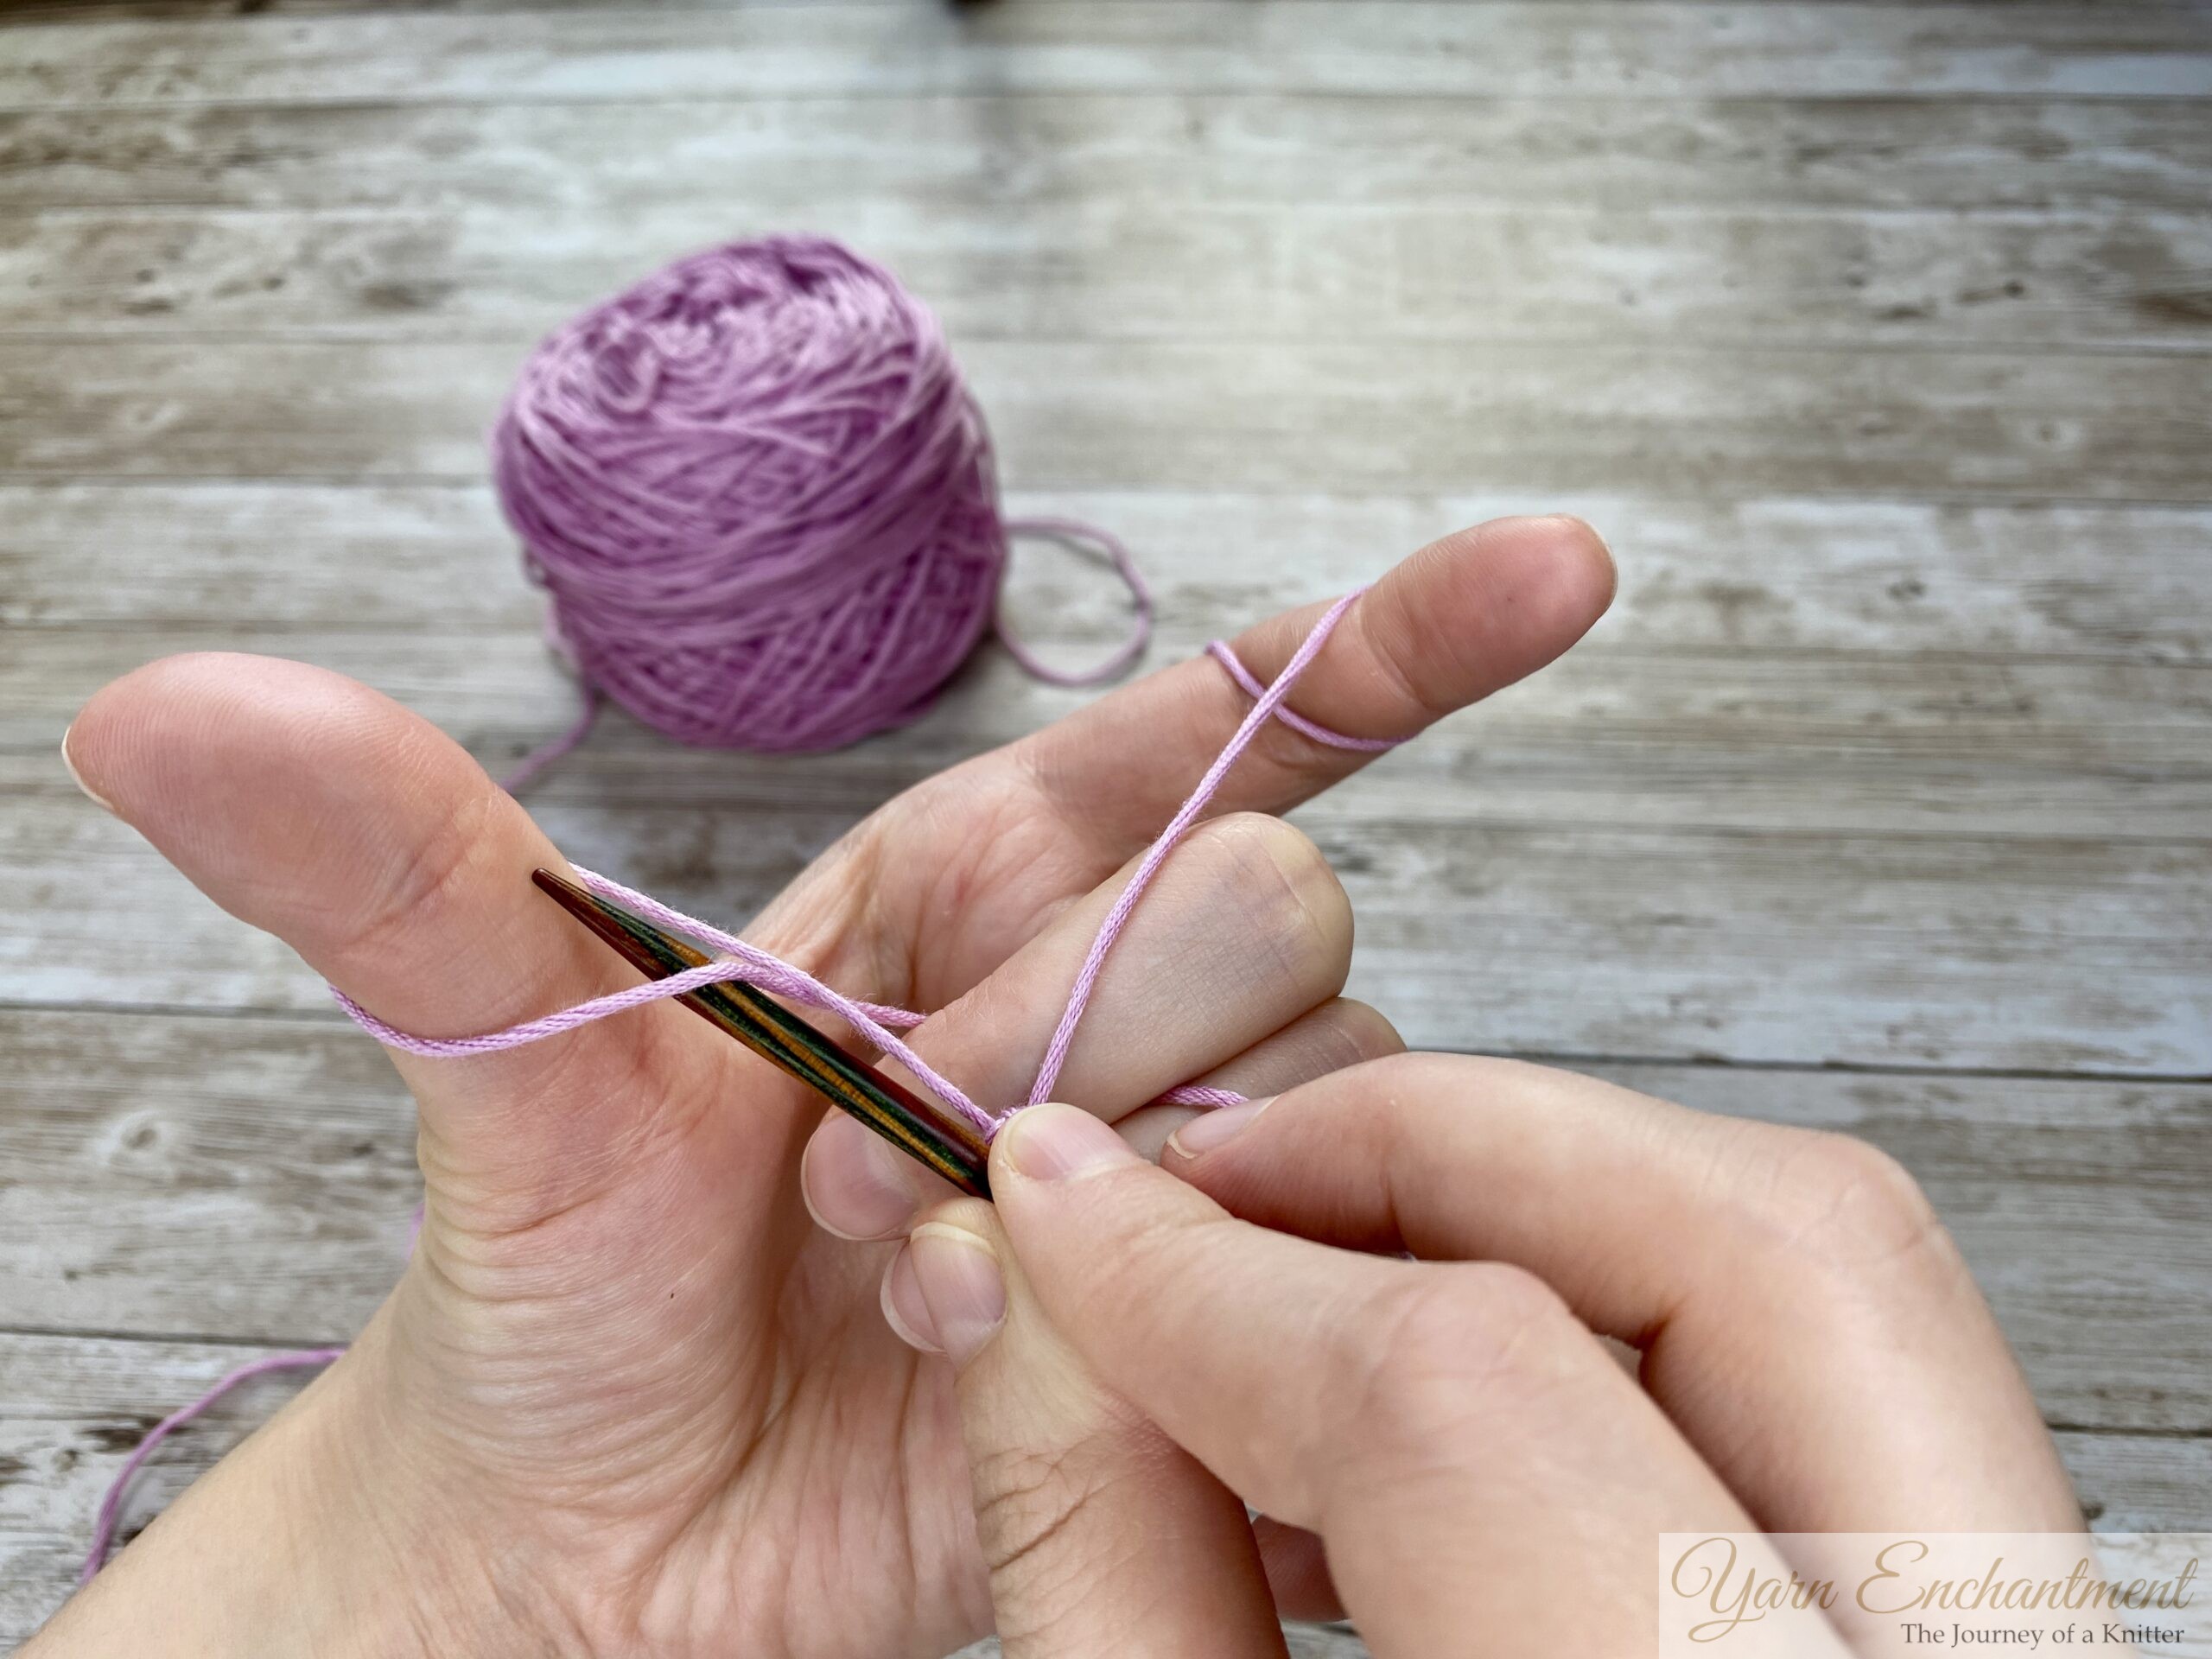
- Insert your needle from behind and then twist it clockwise to create your first twisted stitch.
- Instead of twisting your stitch you can also start with a slip knot; in that case, you position your yarn as usual, the tail yarn should hang in the front, so over the thumb, and the working yarn, which is connected to the ball, should hang in the back.
 |  | 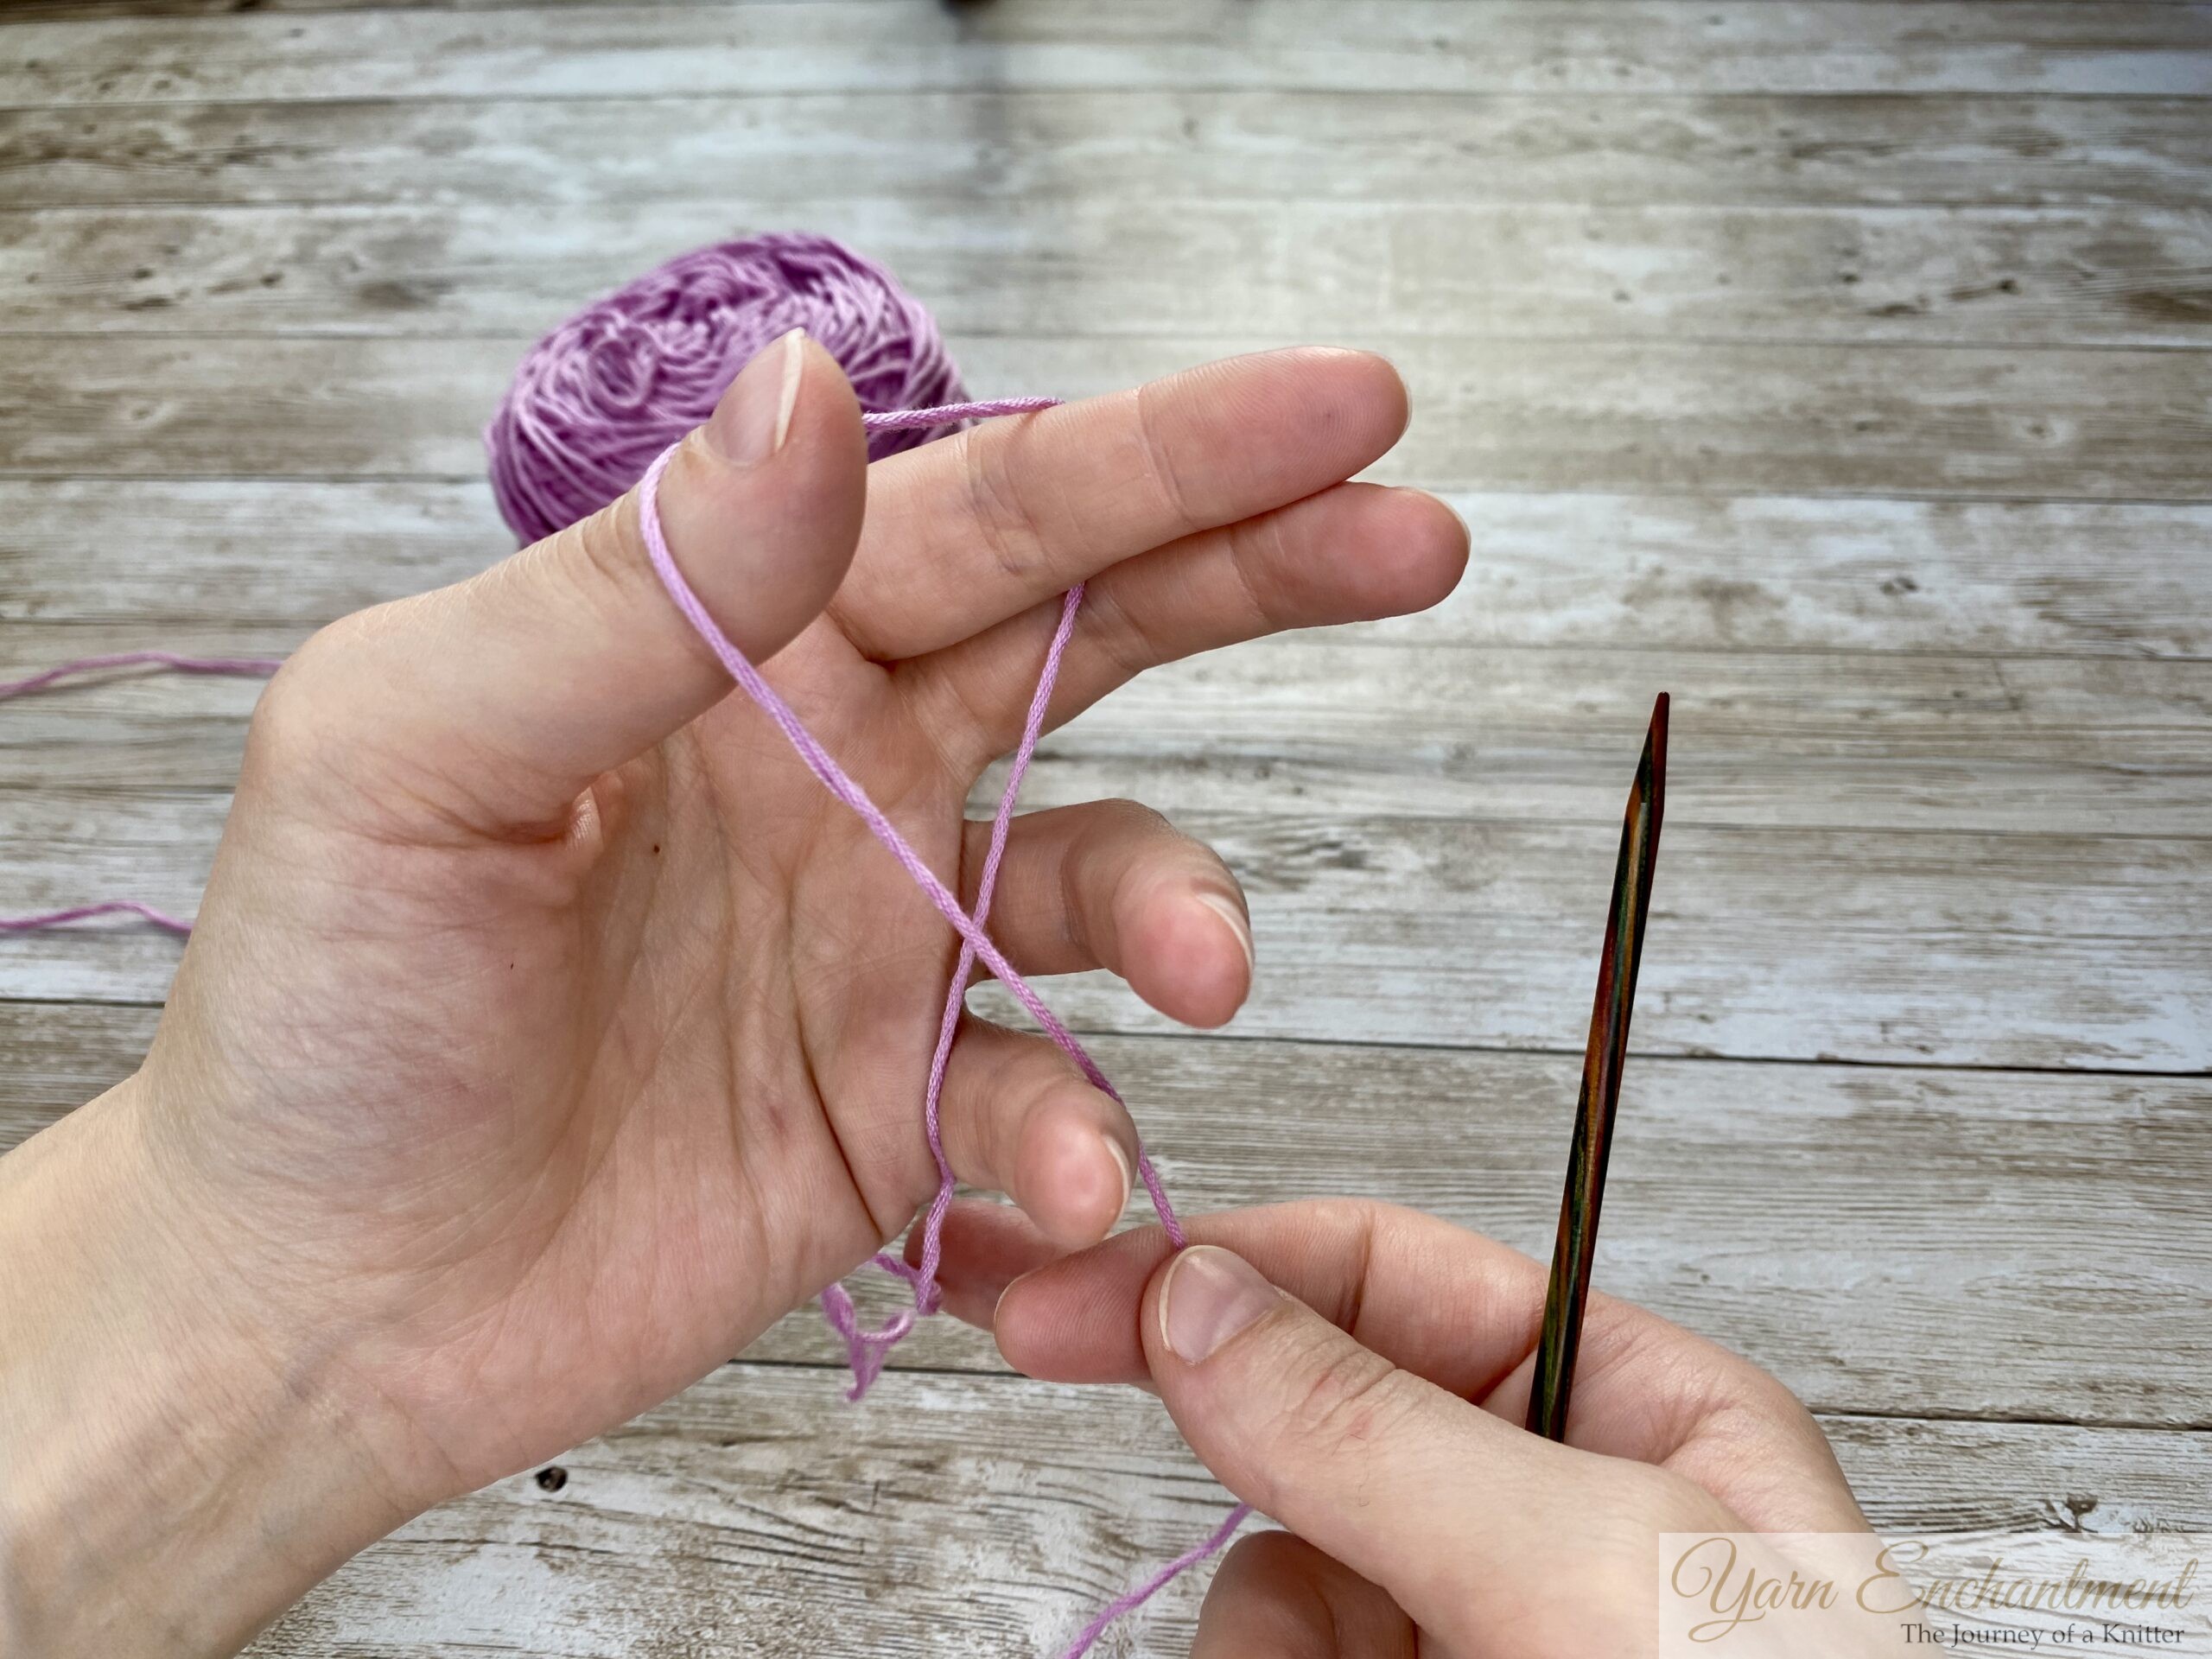 | I like to form a "C" with my thump and my index finger | Drape your yarn over your index finger and over your thumb (The tail yarn should hang in the front, so over the thumb, and the working yarn, which is connected to the ball, should hang in the back, so over the index finger) | Use your other fingers to hold the strands in place |


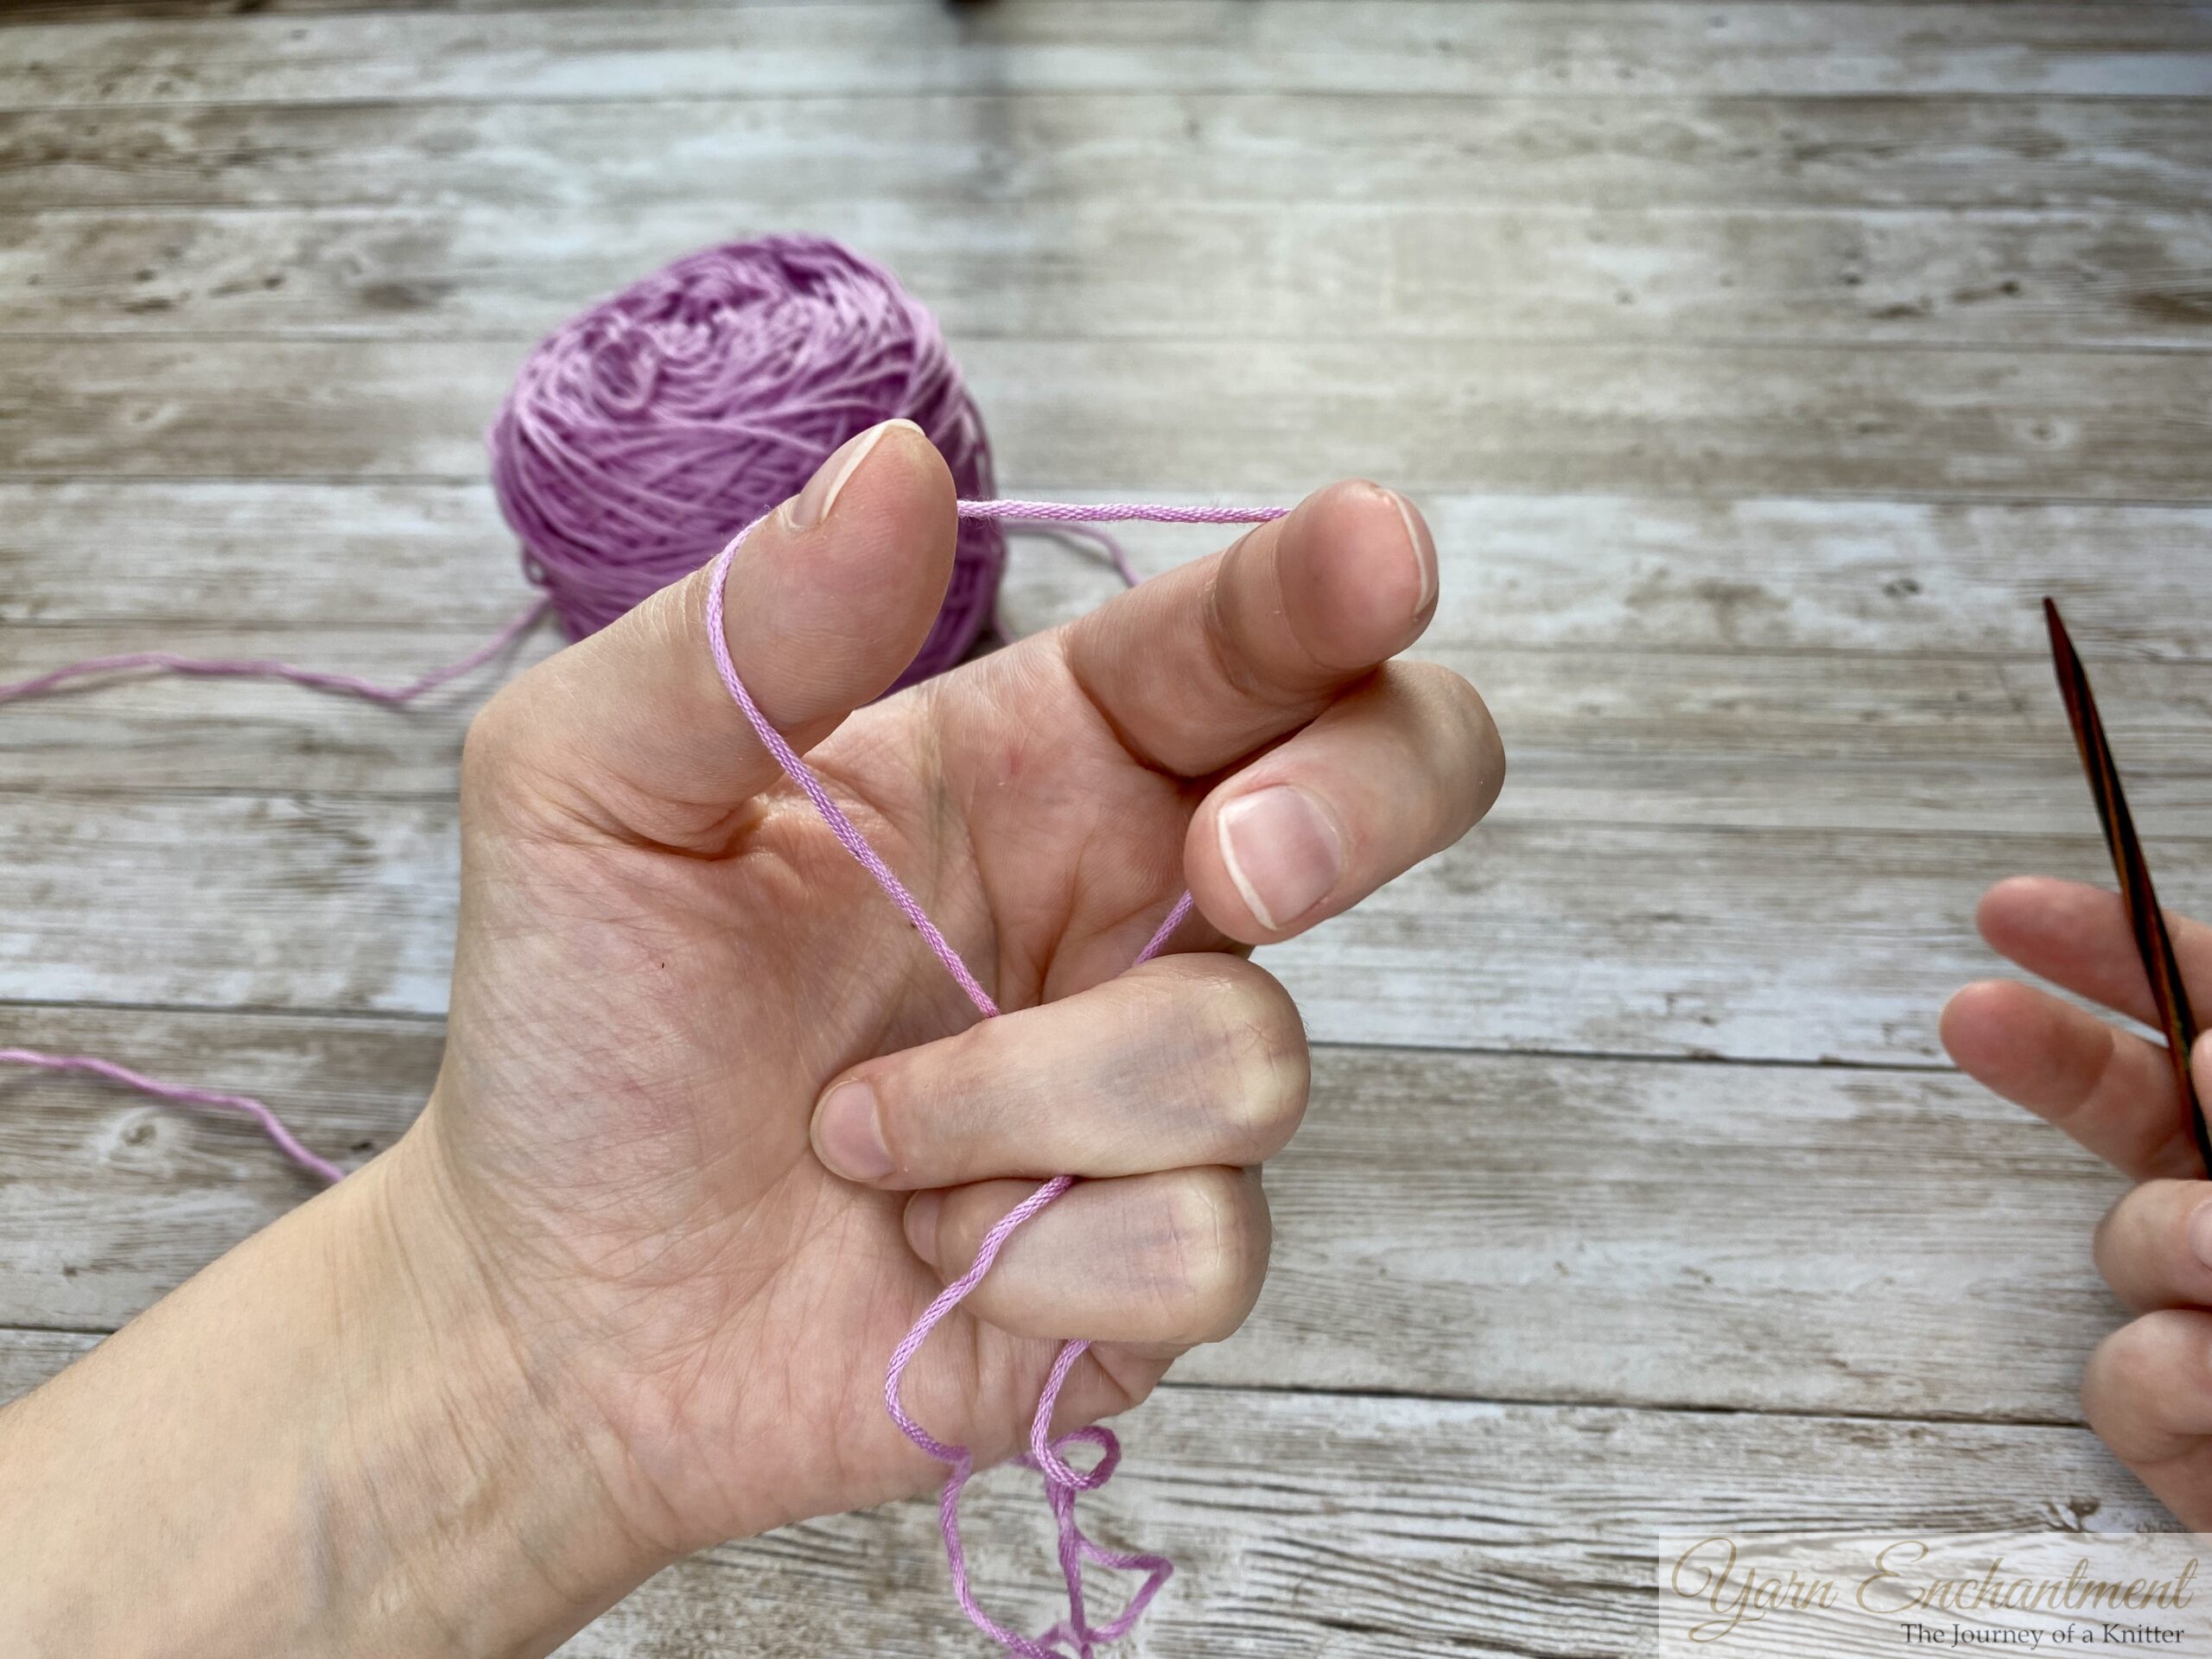 |  |  | Use your other fingers to get a hold of your strands against your palm. Keep a light grip, just enough to hold it in place! | Insert your needle from behind and then twist it clockwise to create... | ...your first twisted stitch |


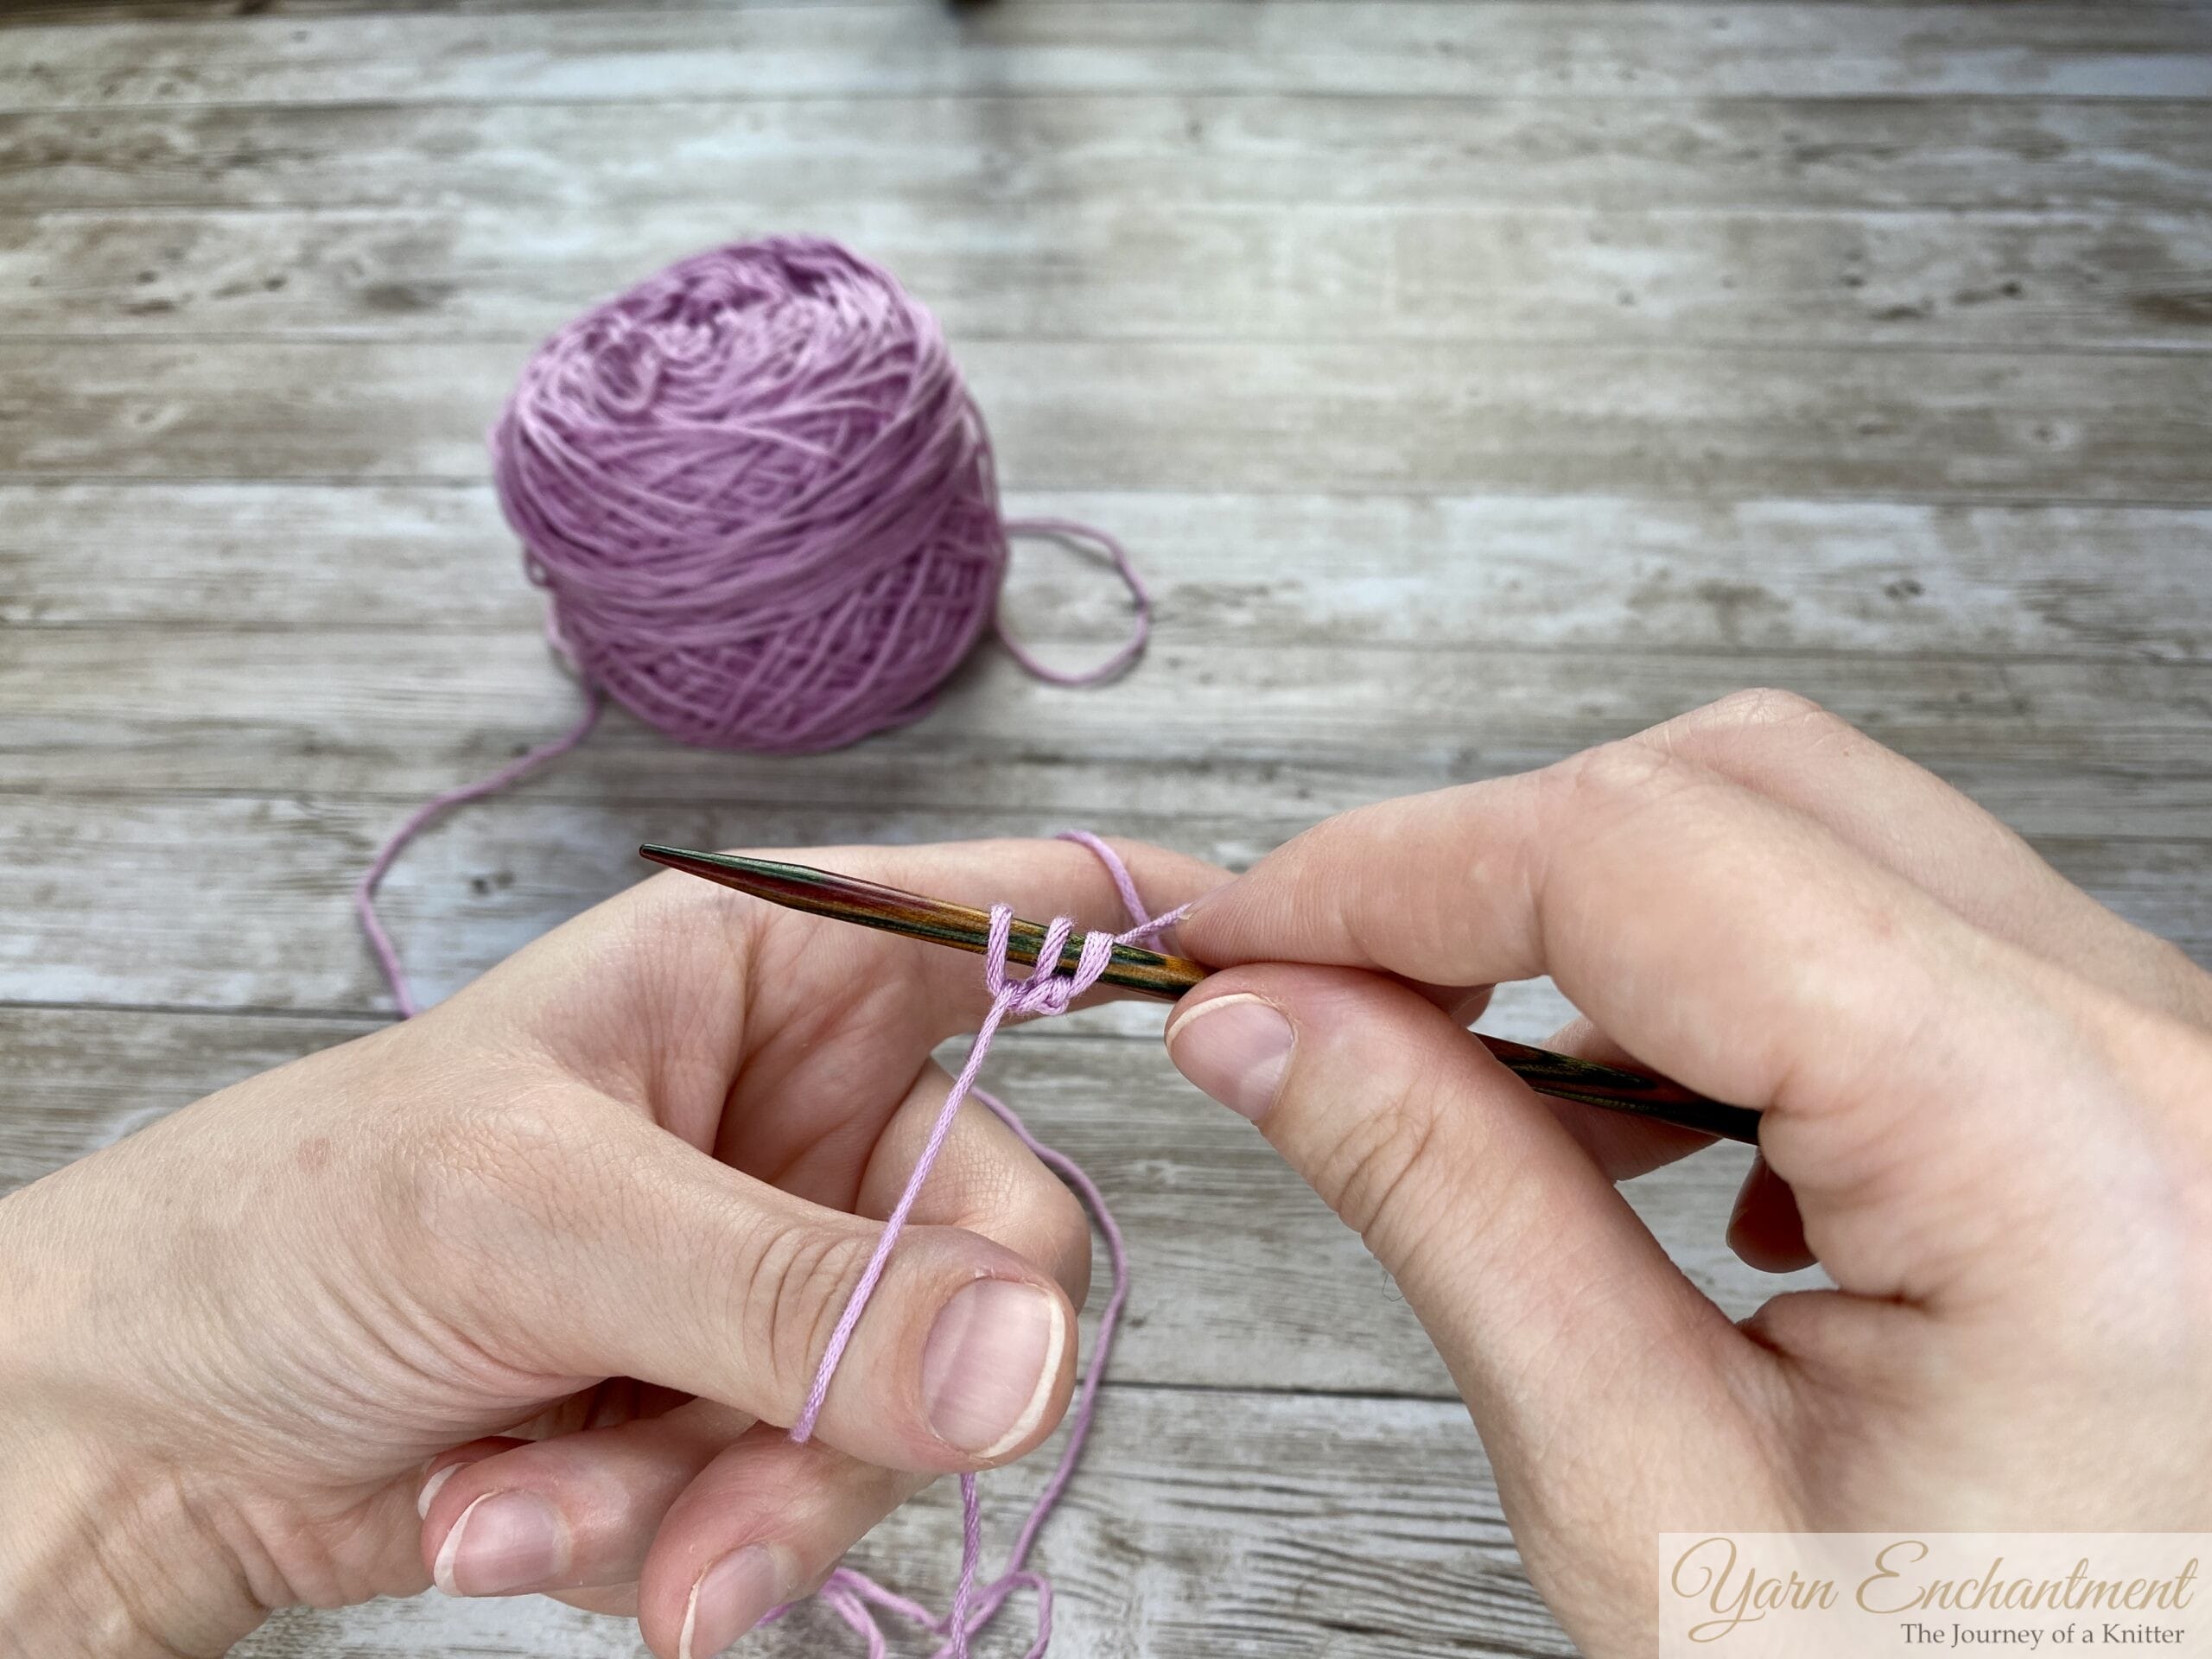
Work your First Stitch
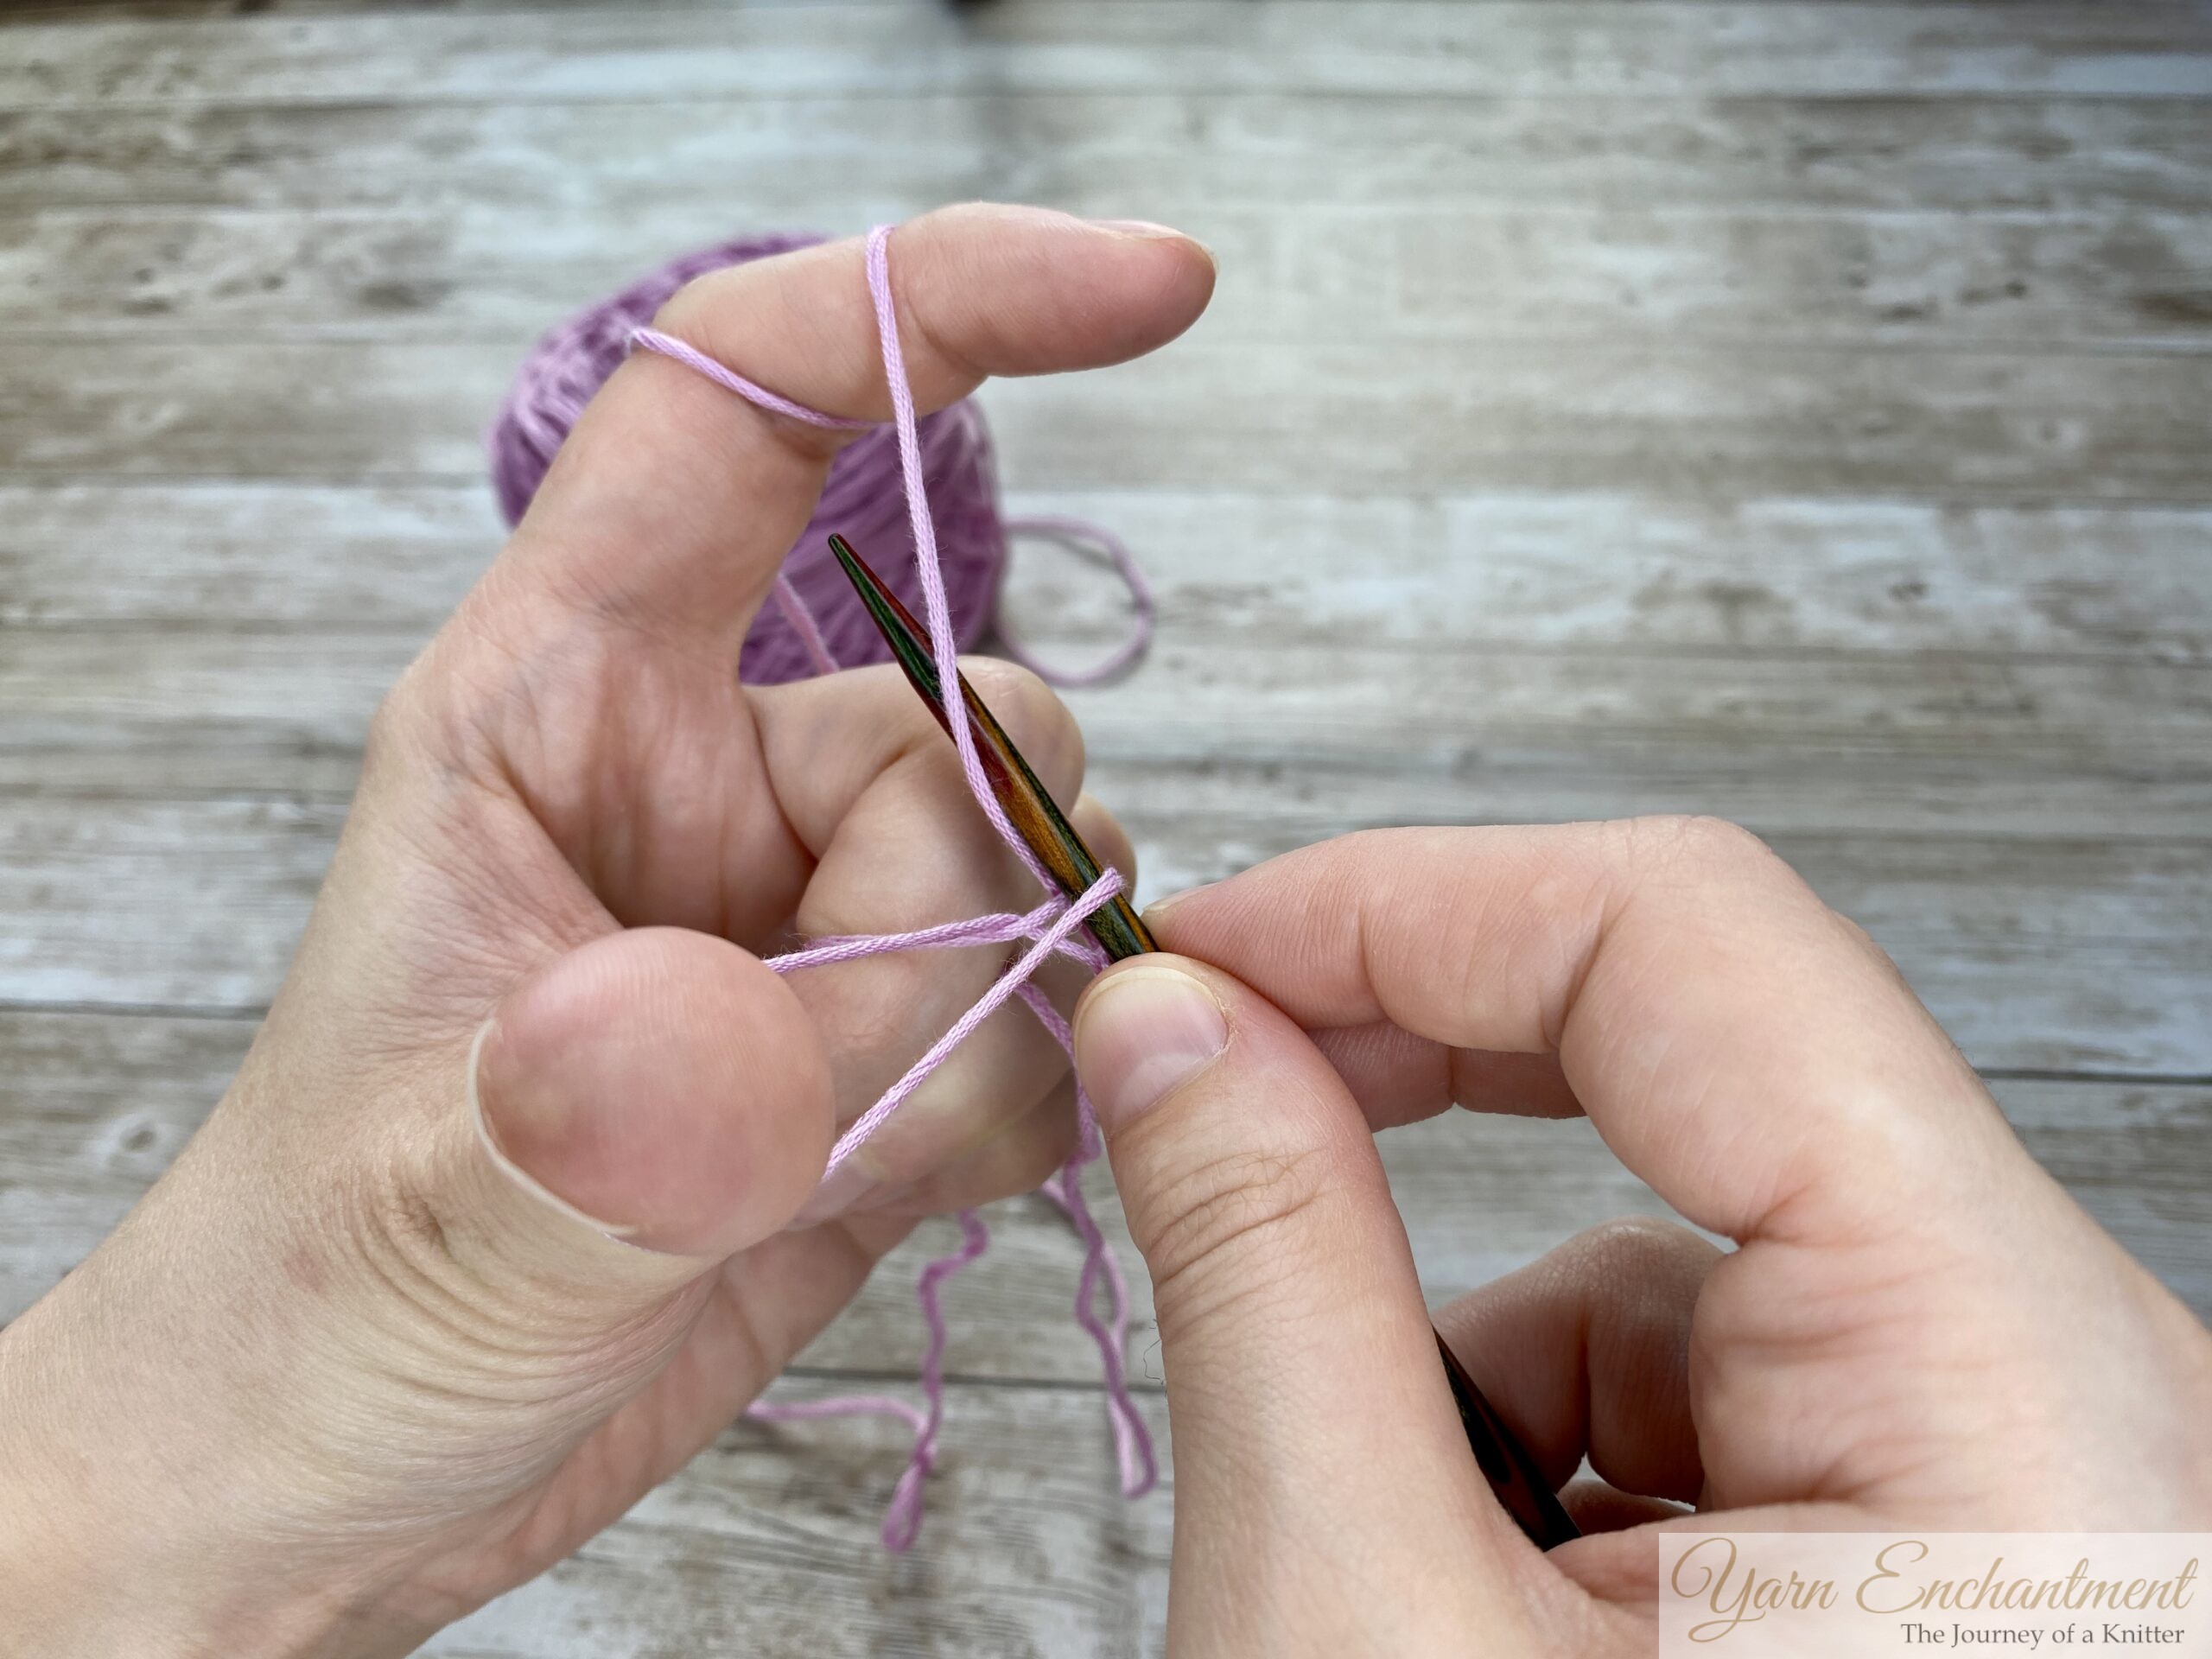
- Lean the needle to the back, you can see we have formed a slingshot here. This position is the starting point for our longtail cast-on.
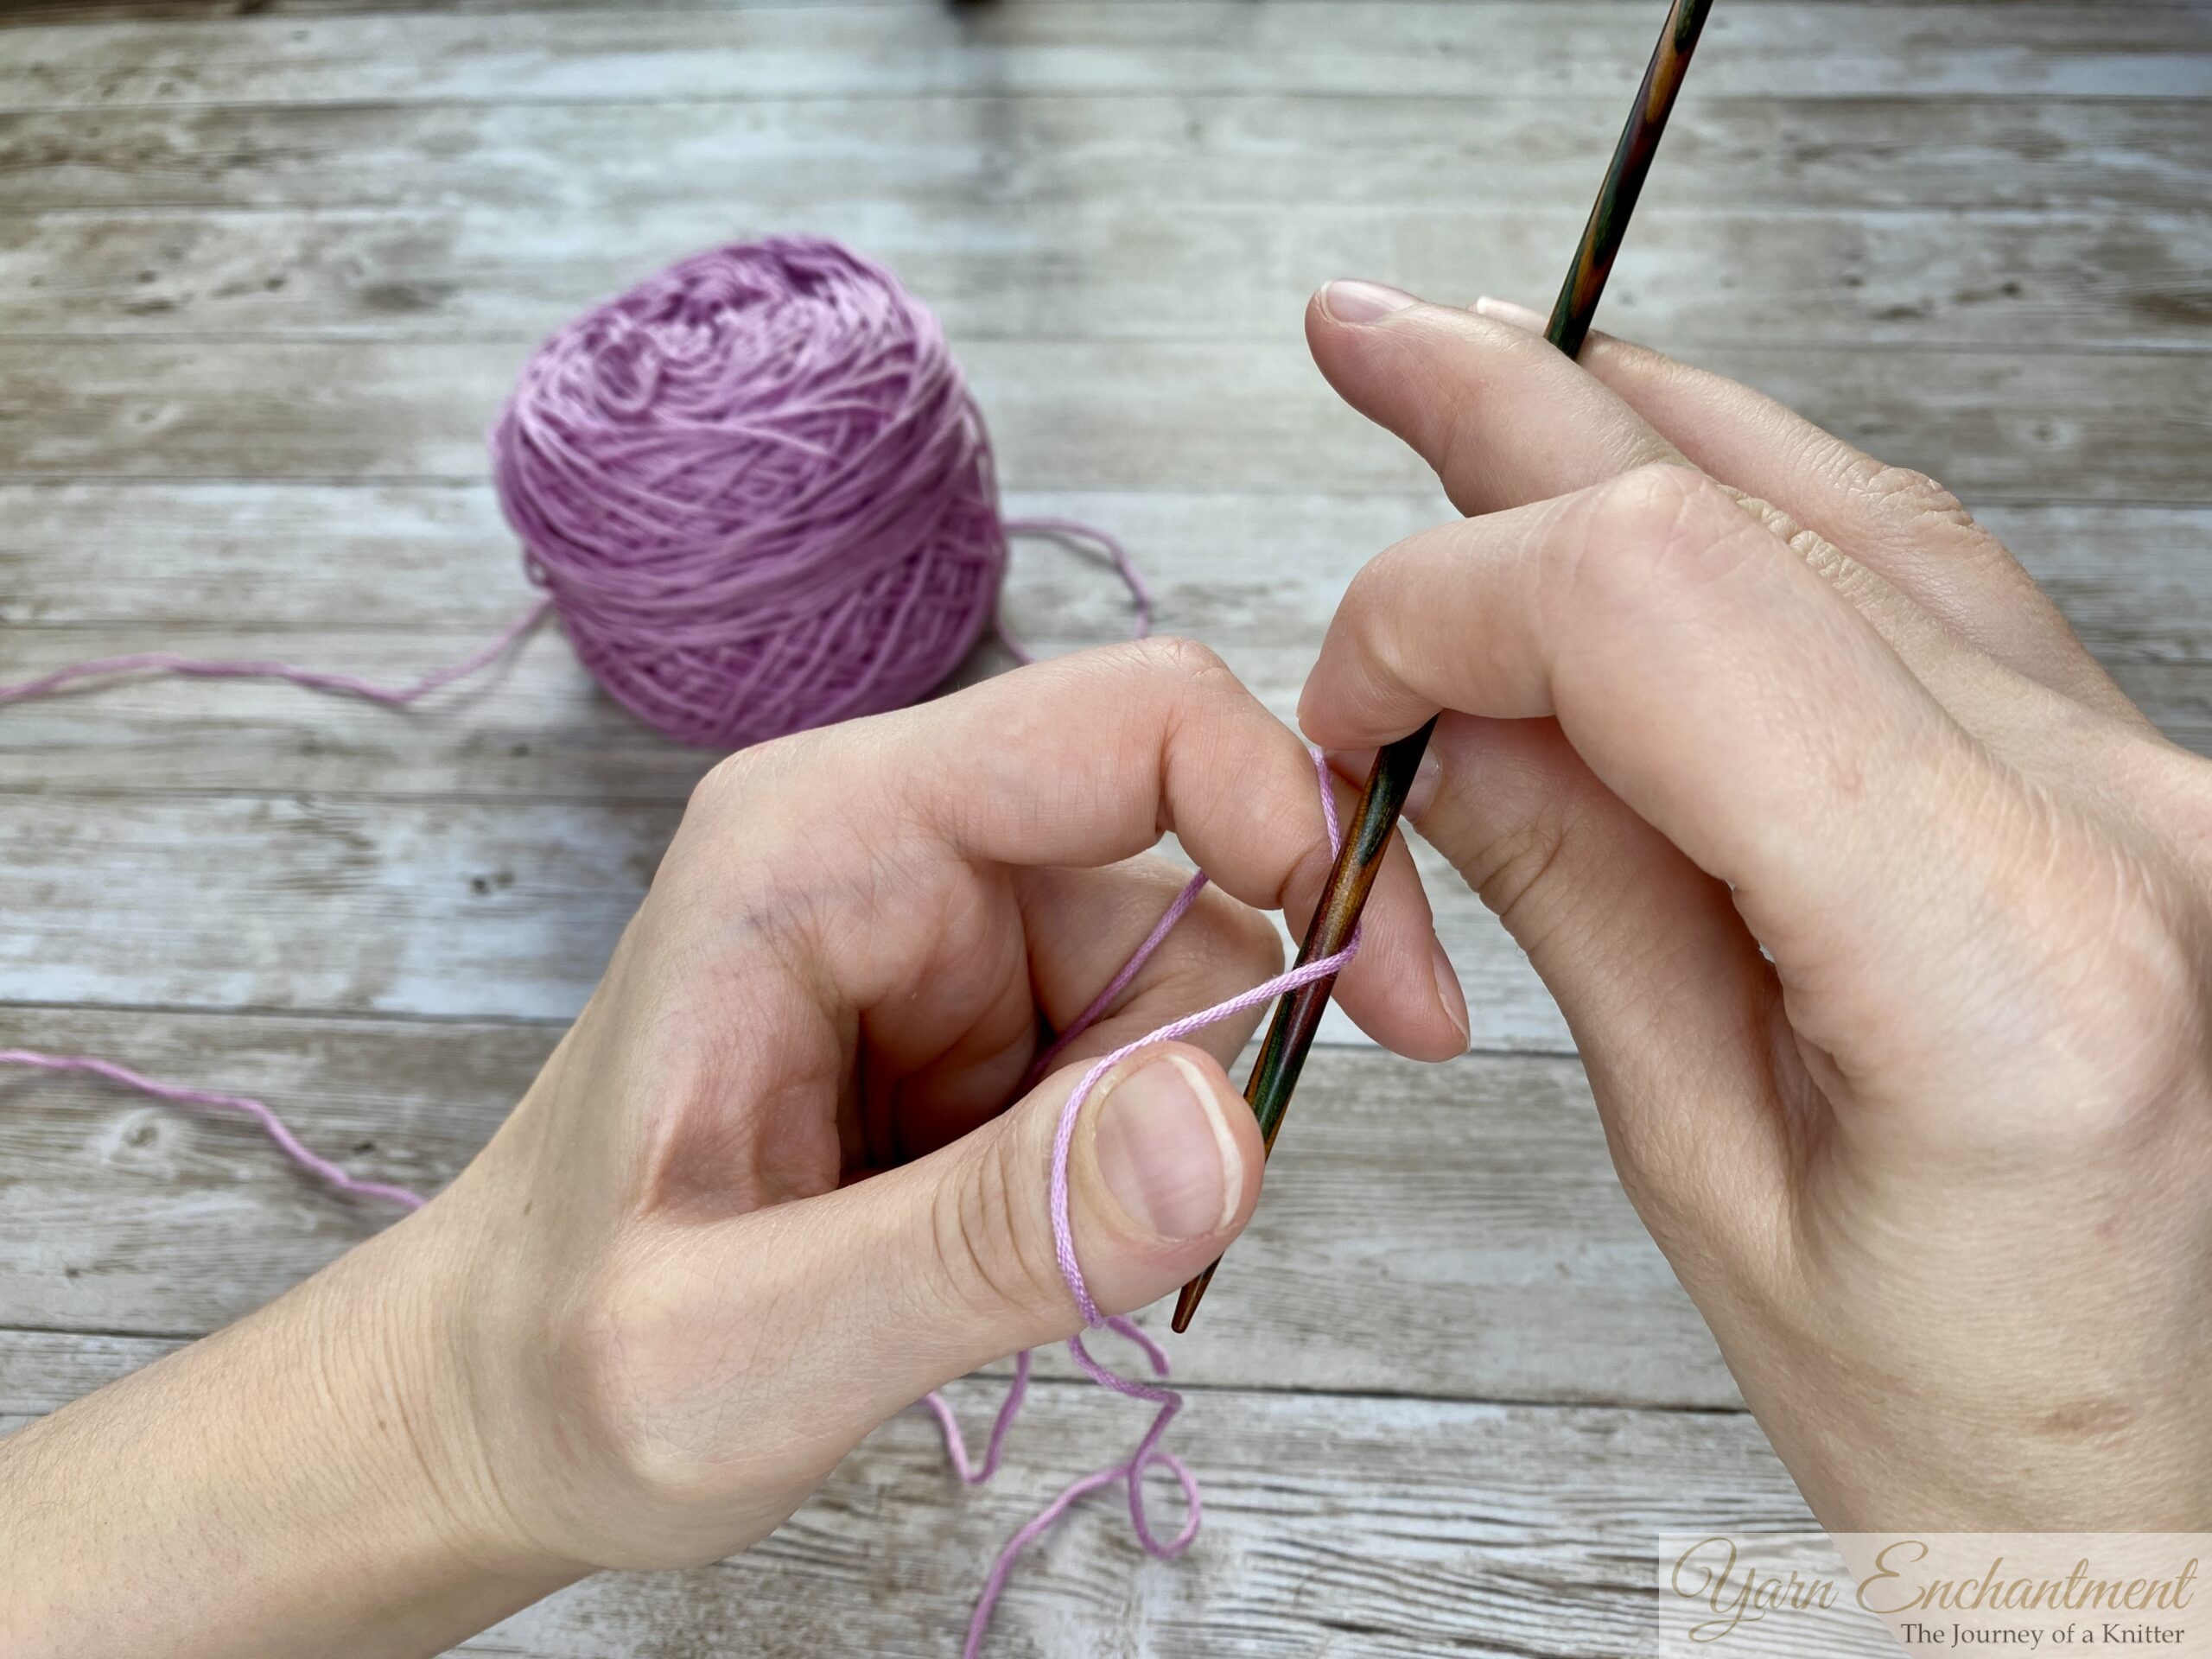
- Insert your needle through the loop on your thumb
- Grab the yarn from your index finger
- Pull the yarn through the thumb loop to create your first stitch
- To pull this first stitch tight, release the loop from your thumb and tighten the stitch slightly by pulling on your yarn slightly with your thumb.
 |  |  | Lean the needle to the back | We have formed a slingshot here. This position is the starting point for our longtail cast-on. | Insert your needle through the loop on your thumb |


 | 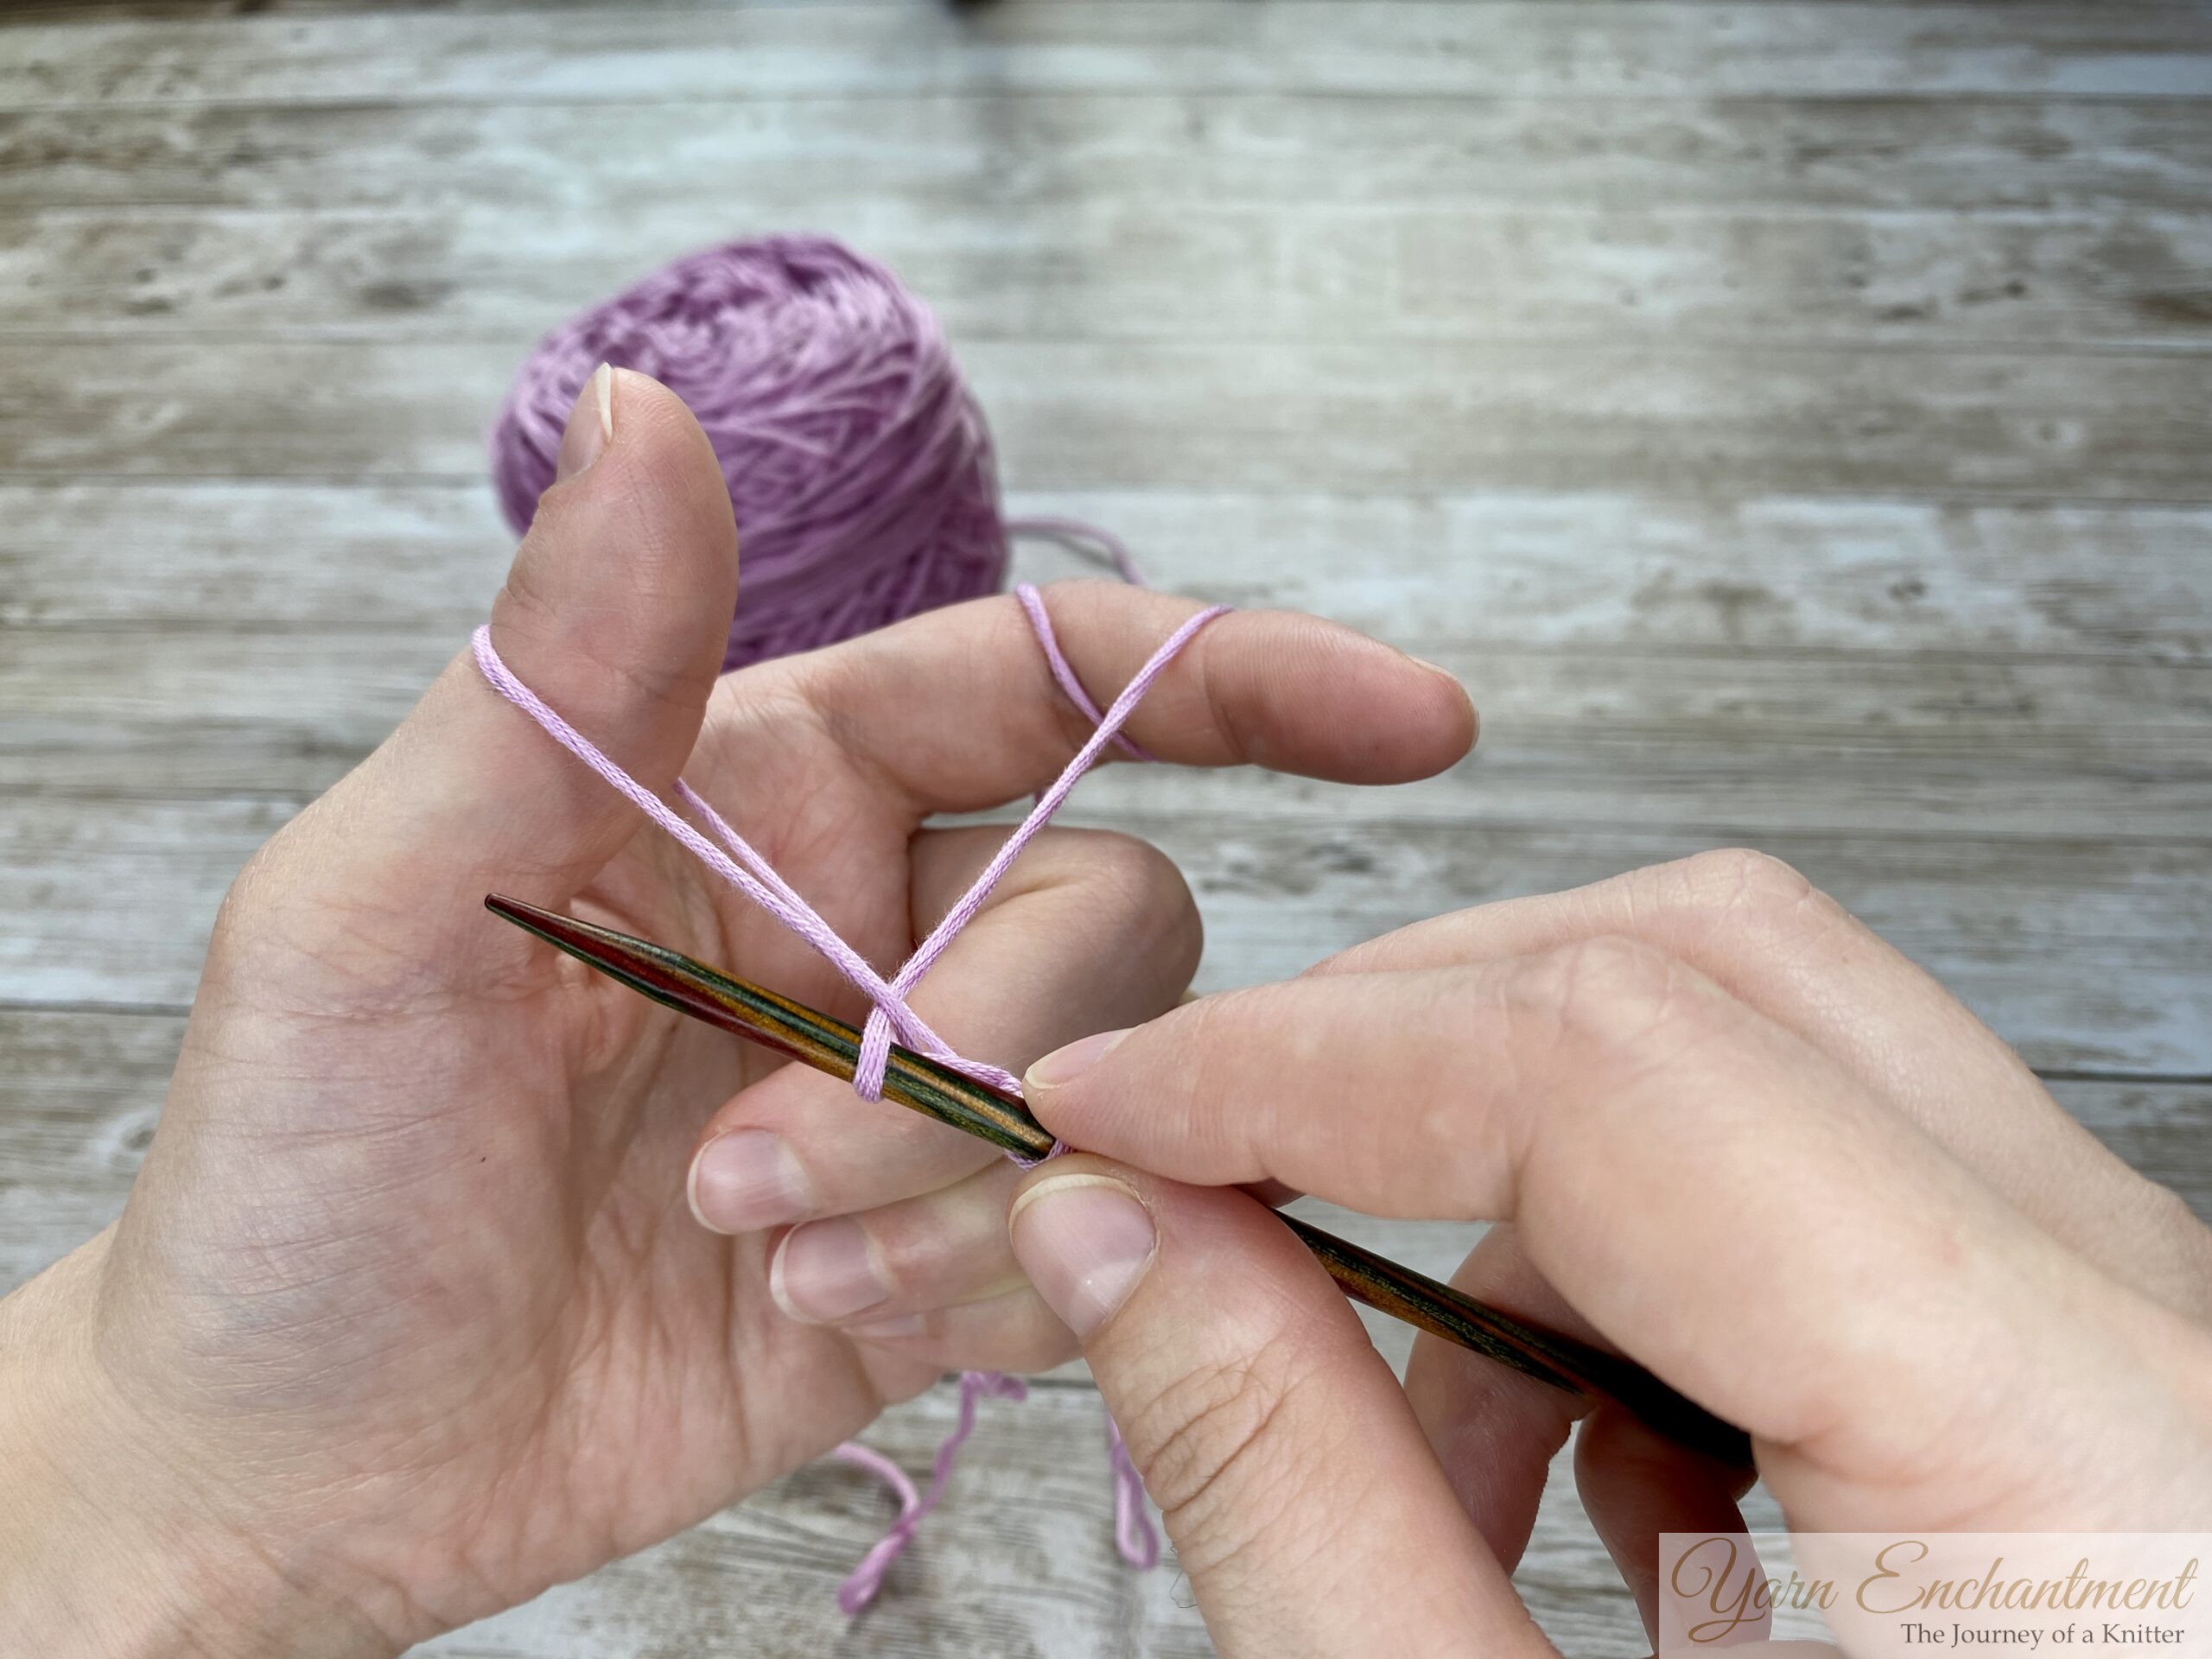 |  | Grab the yarn from your index finger | Pull the yarn through the thumb loop | To pull this first stitch tight, release the loop from your thumb... |


 | ...and tighten the stitch slightly by pulling on your yarn slightly with your thumb. |

Repeat the Process
- Reposition the yarn on your thumb and index finger to recreate the slingshot shape.
- Insert the needle through the loop on your thumb, grab the yarn from your index finger, and pull it through the loop.
- Release the loop from your thumb and tighten the stitch.
- Continue this process until you have the desired number of stitches on your needle.
Tips and Tricks
- Use the Right Amount of Yarn: Leave a tail that's about four times the width of your project, plus a few extra inches for weaving in later.
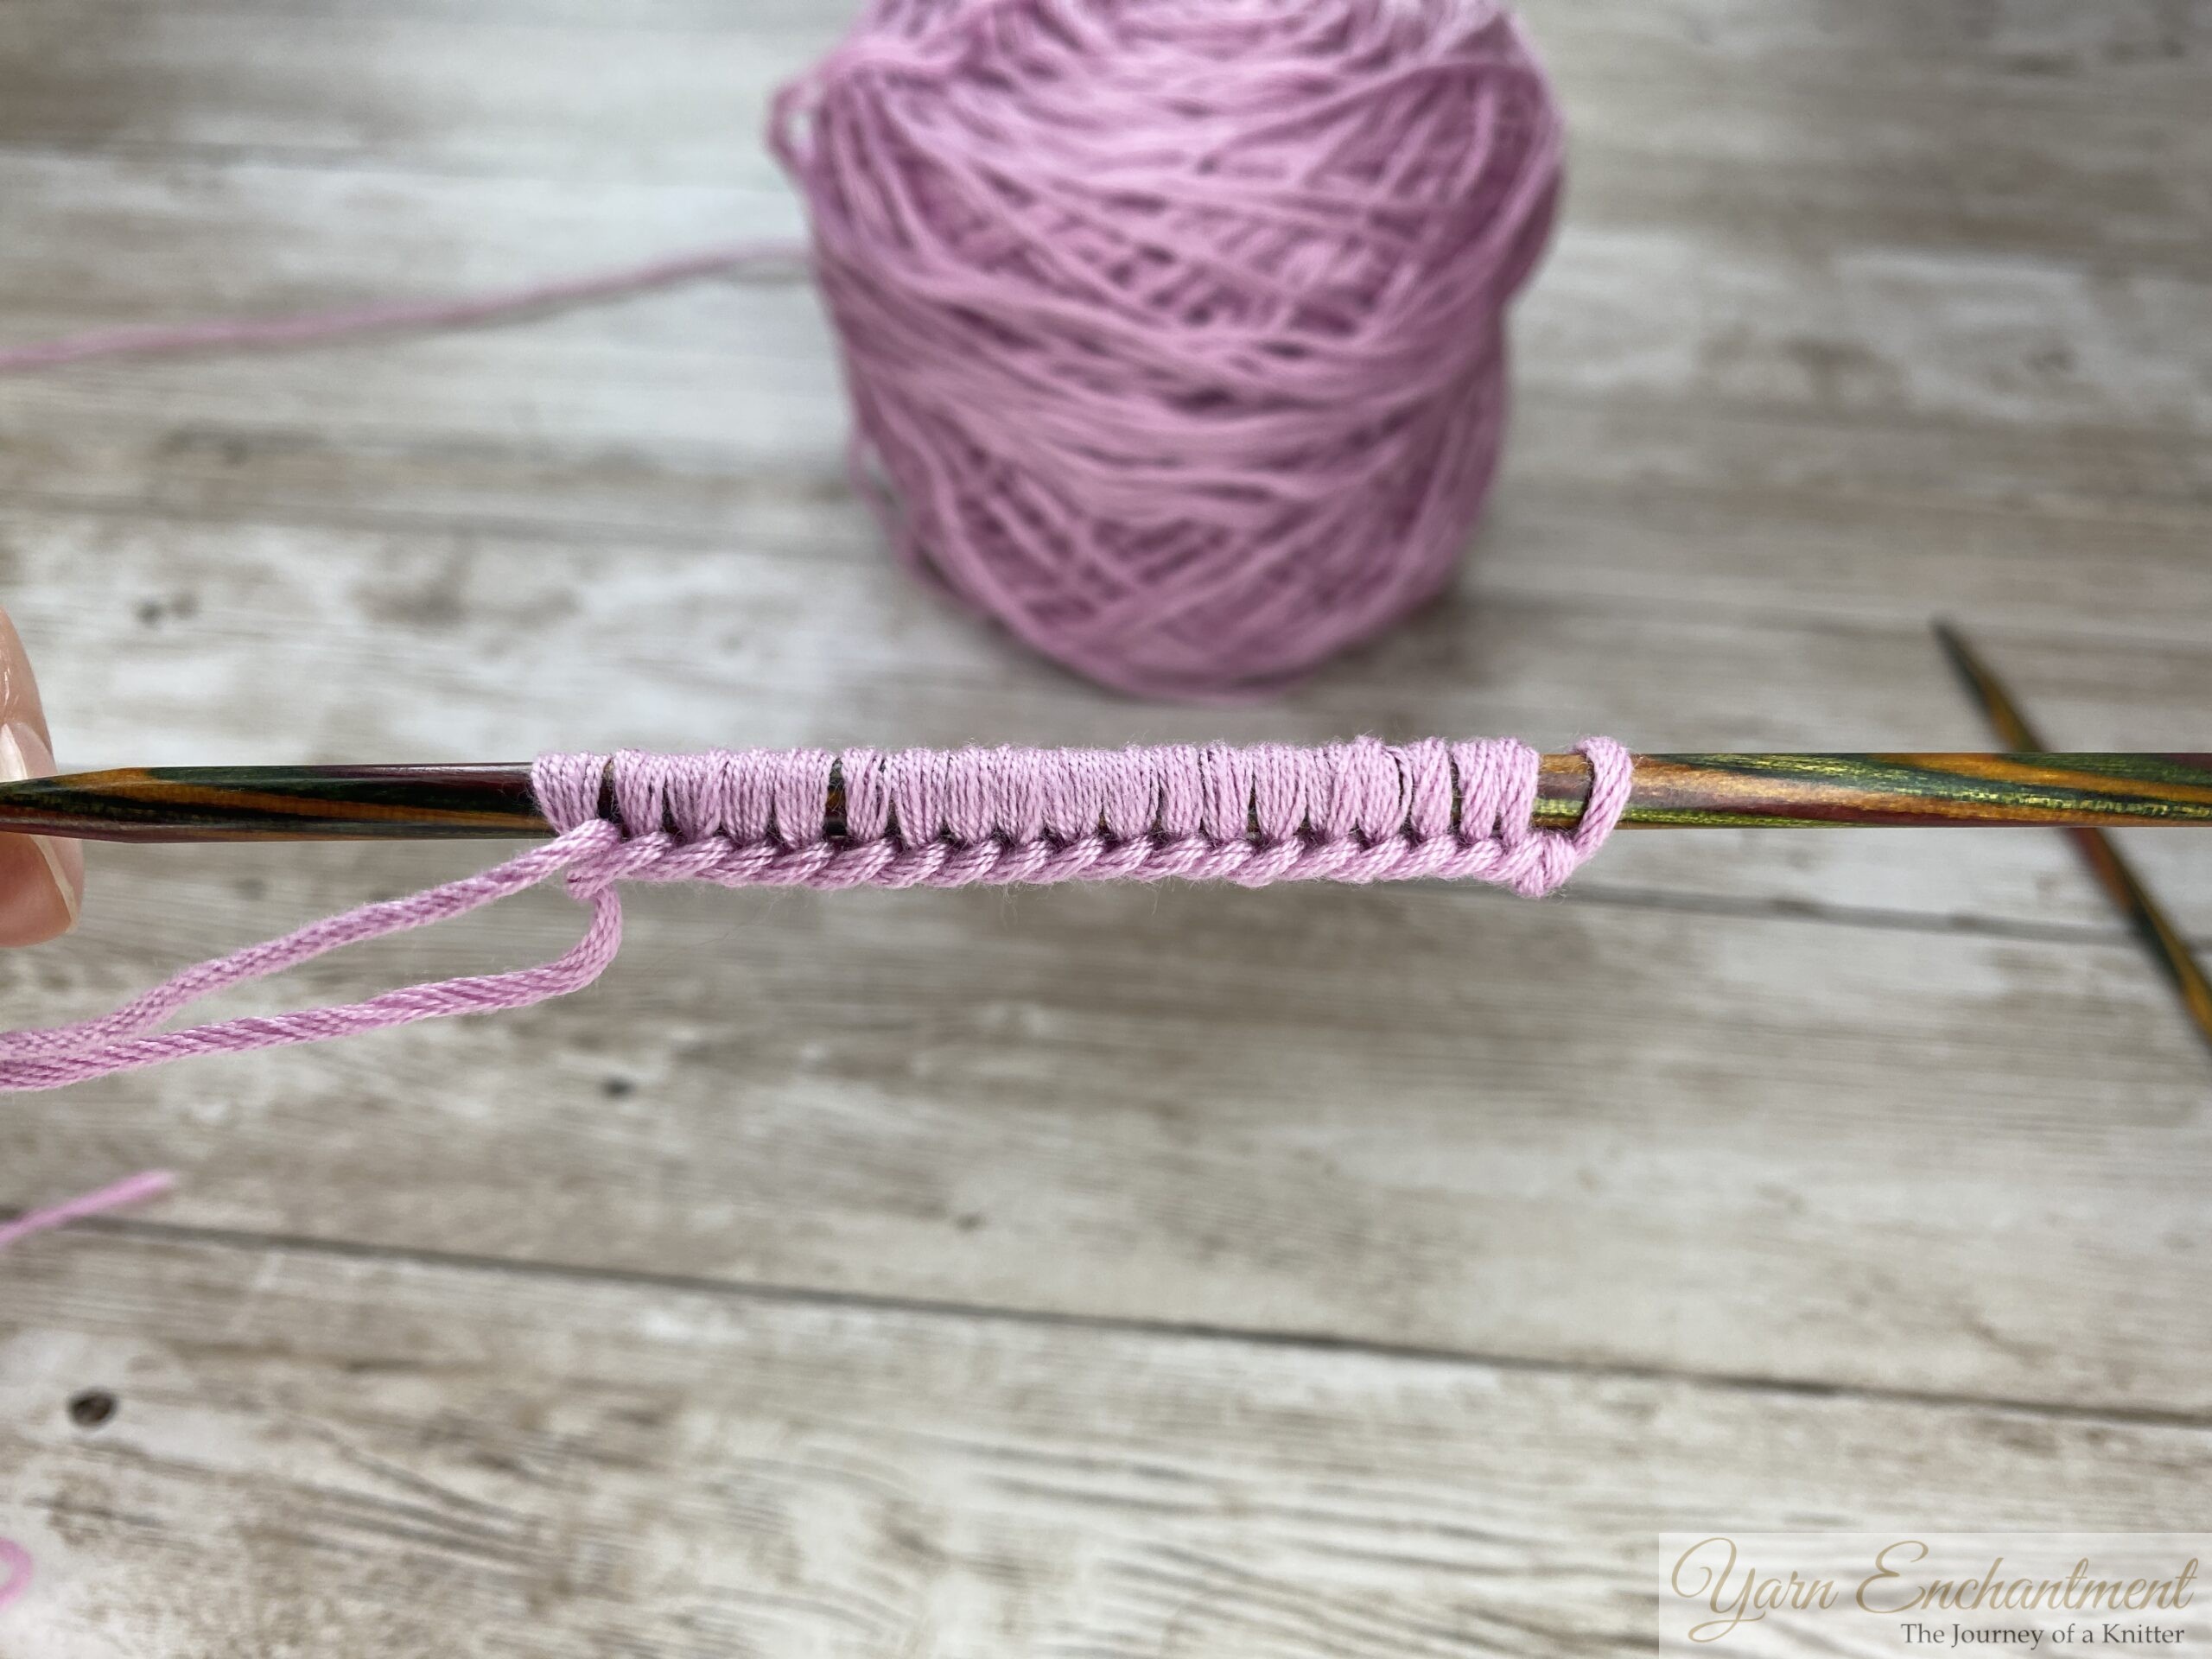
- Keep the Tension Even: Try to keep the tension even as you cast on, as this will affect the fit of your project. When you're working your cast-on or your stitch, before pulling it tight, place your finger in between the last two stitches to ensure that there is a space in between the stitches. This way, you have enough stretch between the stitches, or enough yarn to ensure stretch. (More details in the video)
 | Space in between the stitches |
Conclusion
The long tail cast-on is a fundamental technique that every knitter should know. With practice and patience, you'll be able to learn this technique in not time at all. Remember to keep the tension even, don't pull the yarn too tight, and use the right amount of yarn.
Until then, happy knitting!
A Little Way to Say Thanks
You Might Also Like


 |
|
Join the Cozy Corner Newsletter!
Hey there, creative soul! Welcome to the Yarn Enchantment Newsletter, where we celebrate all things cozy, crafty, and full of heart. Think of this as your friendly crafting companion - a little dose of inspiration delivered straight to your inbox, just for you. Inside, you’ll find: ✨ Exclusive patterns & tutorials - ideas you won’t find anywhere else (just for us!) 📚 Bookish crafts that bring your favorite stories to life 🧶 Tips and tricks to make your crafting journey smoother (and more fun!) 💌 Heartfelt musings on life, creativity, and the magic of making something with your own two hands Whether you’re knitting by the fire, brainstorming your next DIY project, or just looking for a little creative pick-me-up, this newsletter is here to cheer you on. Because let’s be honest - crafting isn’t just about the finished project; it’s about the joy, peace, and stories we create along the way. So grab a cup of tea, cozy up, and join me. Together, we’ll weave a little magic into everyday life - one stitch, one story, and one email at a time. P.S. I’m so glad you’re here. Let’s make something beautiful together! (Note: If you're using an ad blocker, you may encounter issues subscribing to the newsletter. To subscribe, please consider disabling your ad blocker.)
|
