
When Someone Doesn’t Appreciate a Handmade Gift
October 1, 2026
What Is Socktober? The Heartwarming Story Behind It
October 16, 2026How to Knit a Cute Ruffle Sock Cuff (Step-by-Step Tutorial & Size Chart)
)
Originally published on October 7, 2026
It's Socktober, and I have a little confession: I'm completely obsessed with cute sock details.
Recently I wanted to knit a pair of socks for my daughter and stumbled across this adorable ruffle edge for sock cuffs on Pinterest. It was love at first sight. That soft, flared edge turns a plain sock into something really special, and I knew I had to share it with you.
I already have a full sock knitting tutorial on my blog and I also have a tutorial that shows you how to cast on for socks on DPNs without twisting your stitches. And yes, I've filmed a little video for this ruffle cast-on too, so you can watch it in action. Grab a cozy drink and let's cast on together!
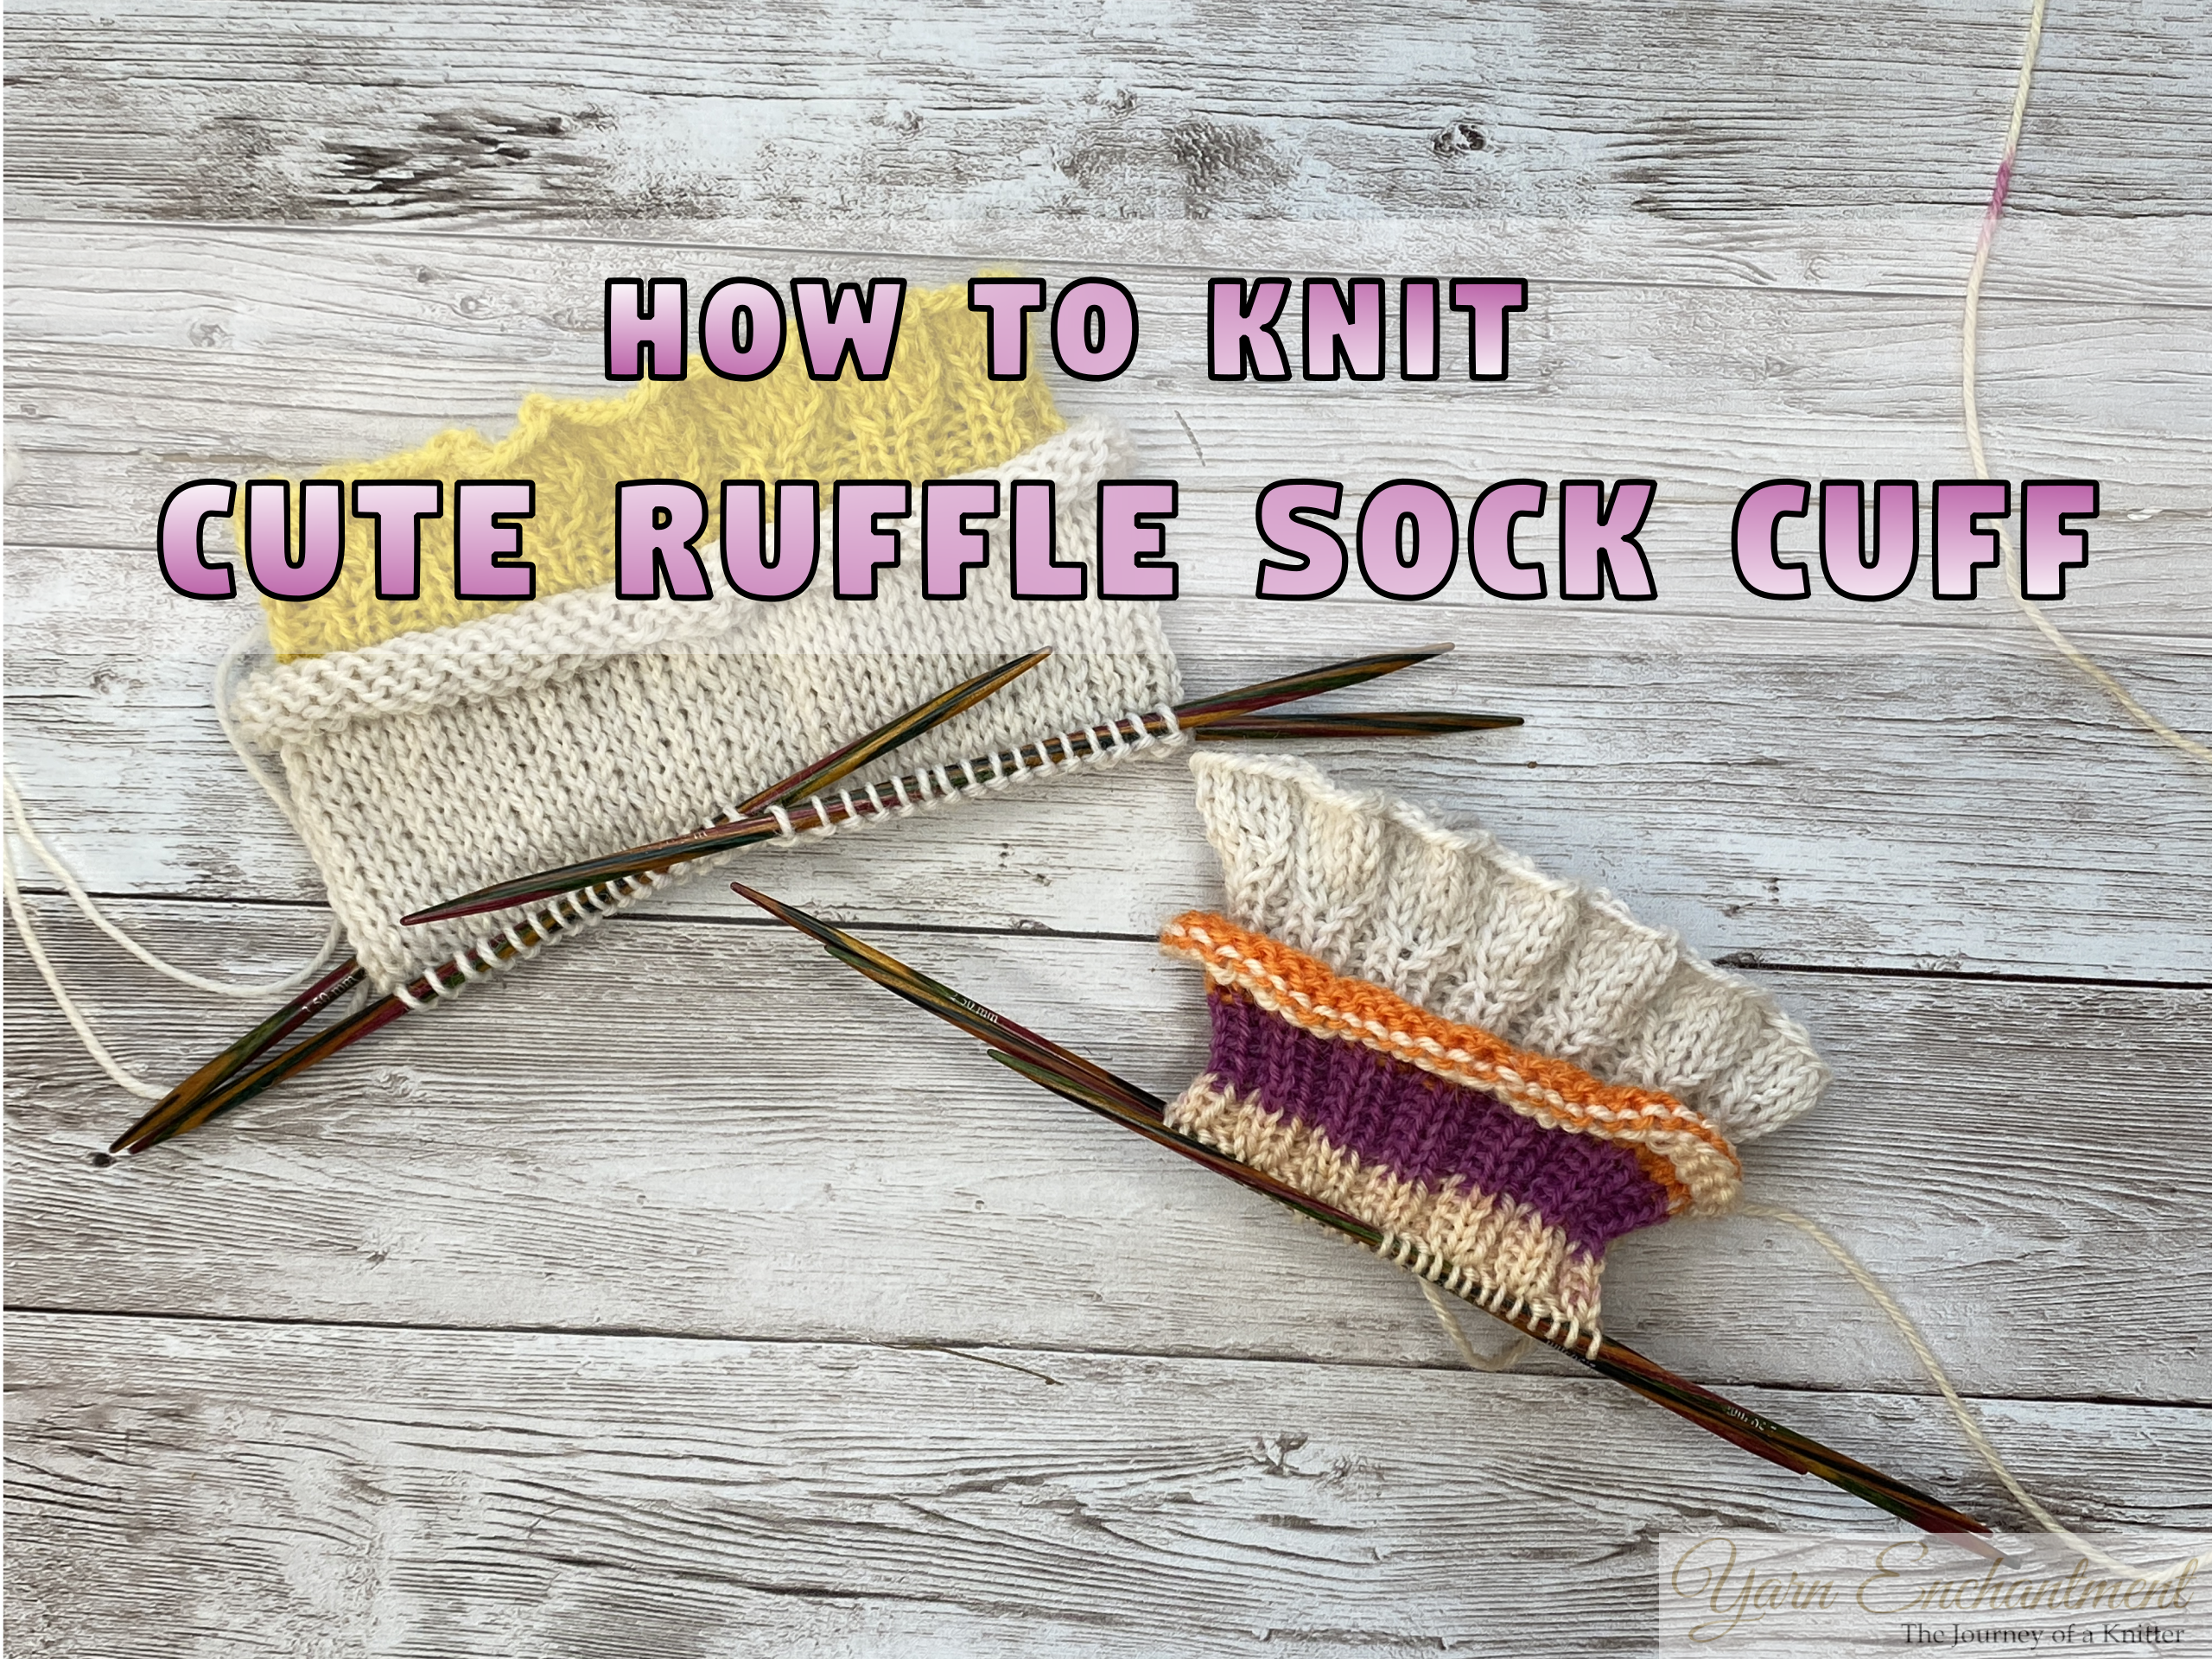
How to Knit a Cute Ruffle Sock Cuff

Why Add a Ruffle Edge to Your Hand-Knit Socks?
This little ruffle might look fancy, but honestly? It's just clever ribbing and decreases.
-
It's so cute and feminine. That soft, flared edge turns plain stockinette into something special. It's perfect for little girls, and honestly, for us grown-ups too. Who says ruffles are just for kids?
-
It's perfect for scrap yarn. You only need a small amount of contrast fingering weight for the ruffle. It's a great way to use up those leftover bits you can't bear to throw away.
-
It's easier than it looks, I promise. If you can knit, purl, SSK, and K2tog, you're set. The pattern is simple and repetitive, and before you know it, you'll have a beautiful ruffle.
-
It works for every size, from tiny baby socks to grown-up pairs. The math stays exactly the same, and I've included a full size chart below so you can make them for anyone.
Materials & Yarn You'll Need
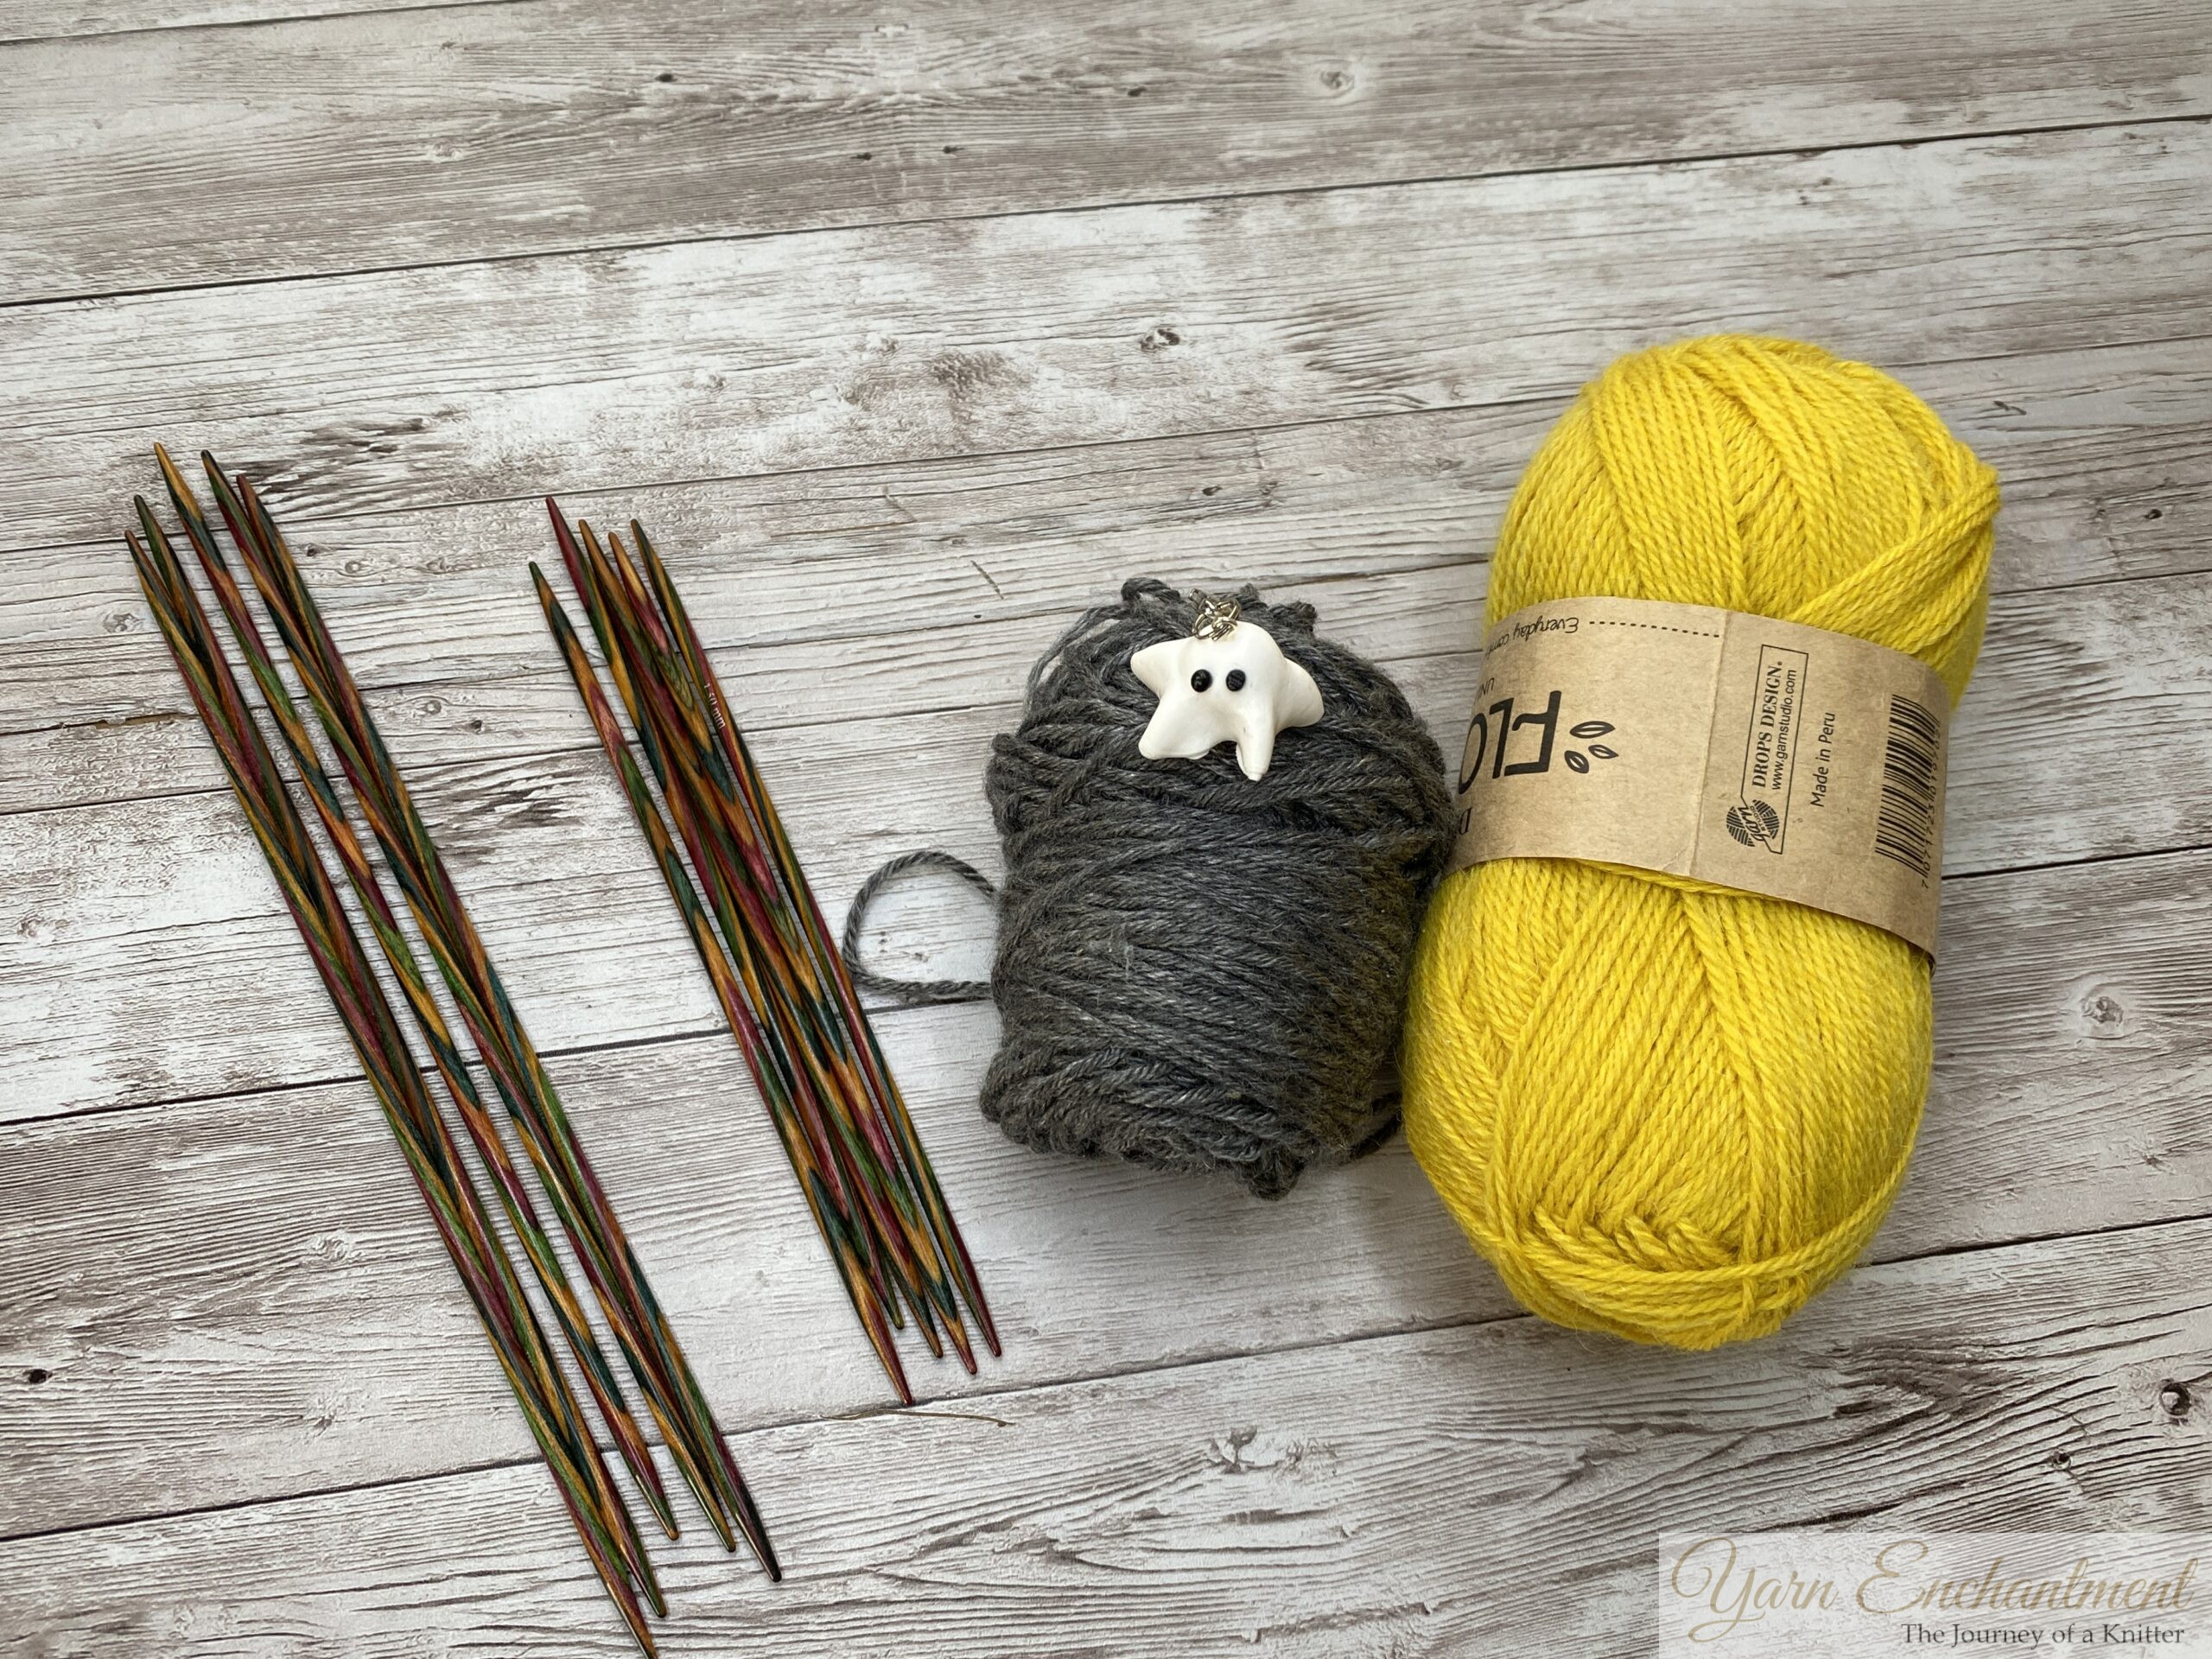
You don't need anything fancy for this one, just your usual sock kit plus a pop of contrast color.
-
Main sock yarn: Fingering weight / 4-ply sock yarn. I used Meilenweit from Lana Grossa, 75% wool / 25% polyamide, 100 g / 420 m.
-
Contrast yarn for the ruffle: Fingering weight. I used Drops Fabel from my stash.
-
Needles: 3.5 mm DPNs, or size to get gauge. Two sets make life much easier, so you can hold both live layers at once. If you prefer, you can also use short circular needles to knit it, you will need two in the same size.
-
Notions: Stitch markers, scissors, tapestry needle.
A little tip from my needle basket: wood or bamboo DPNs grip the stitches nicely for that first join round, when things can feel a bit wiggly.
Sock yarn, contrast yarn for the ruffles, Two sets in the same size DPN,

Knitted Ruffle Sock Sizing Chart (Baby to Adult)
Here’s a handy chart for all sizes. Your ruffle cast-on is always double your sock stitch count.
The ruffle is worked in repeats of 8 stitches. After two decrease rounds you’ll land right back on your original sock count. So if your sock calls for 64 stitches, you’ll cast on 128 for the ruffle. Easy to remember, right?
This chart assumes you’re working on 4 DPNs. If you use Magic Loop, just divide by 2 instead of 4 for stitches per needle.
Abbreviations
-
K - knit
-
P - purl
-
K2tog - knit 2 stitches together (right-leaning decrease)
-
SSK - slip, slip, knit (left-leaning decrease)
-
Rep - repeat
-
Rnd(s) - round(s)
-
St(s) - stitch(es)
Step-by-Step Tutorial
Part 1: The Ruffle Cuff
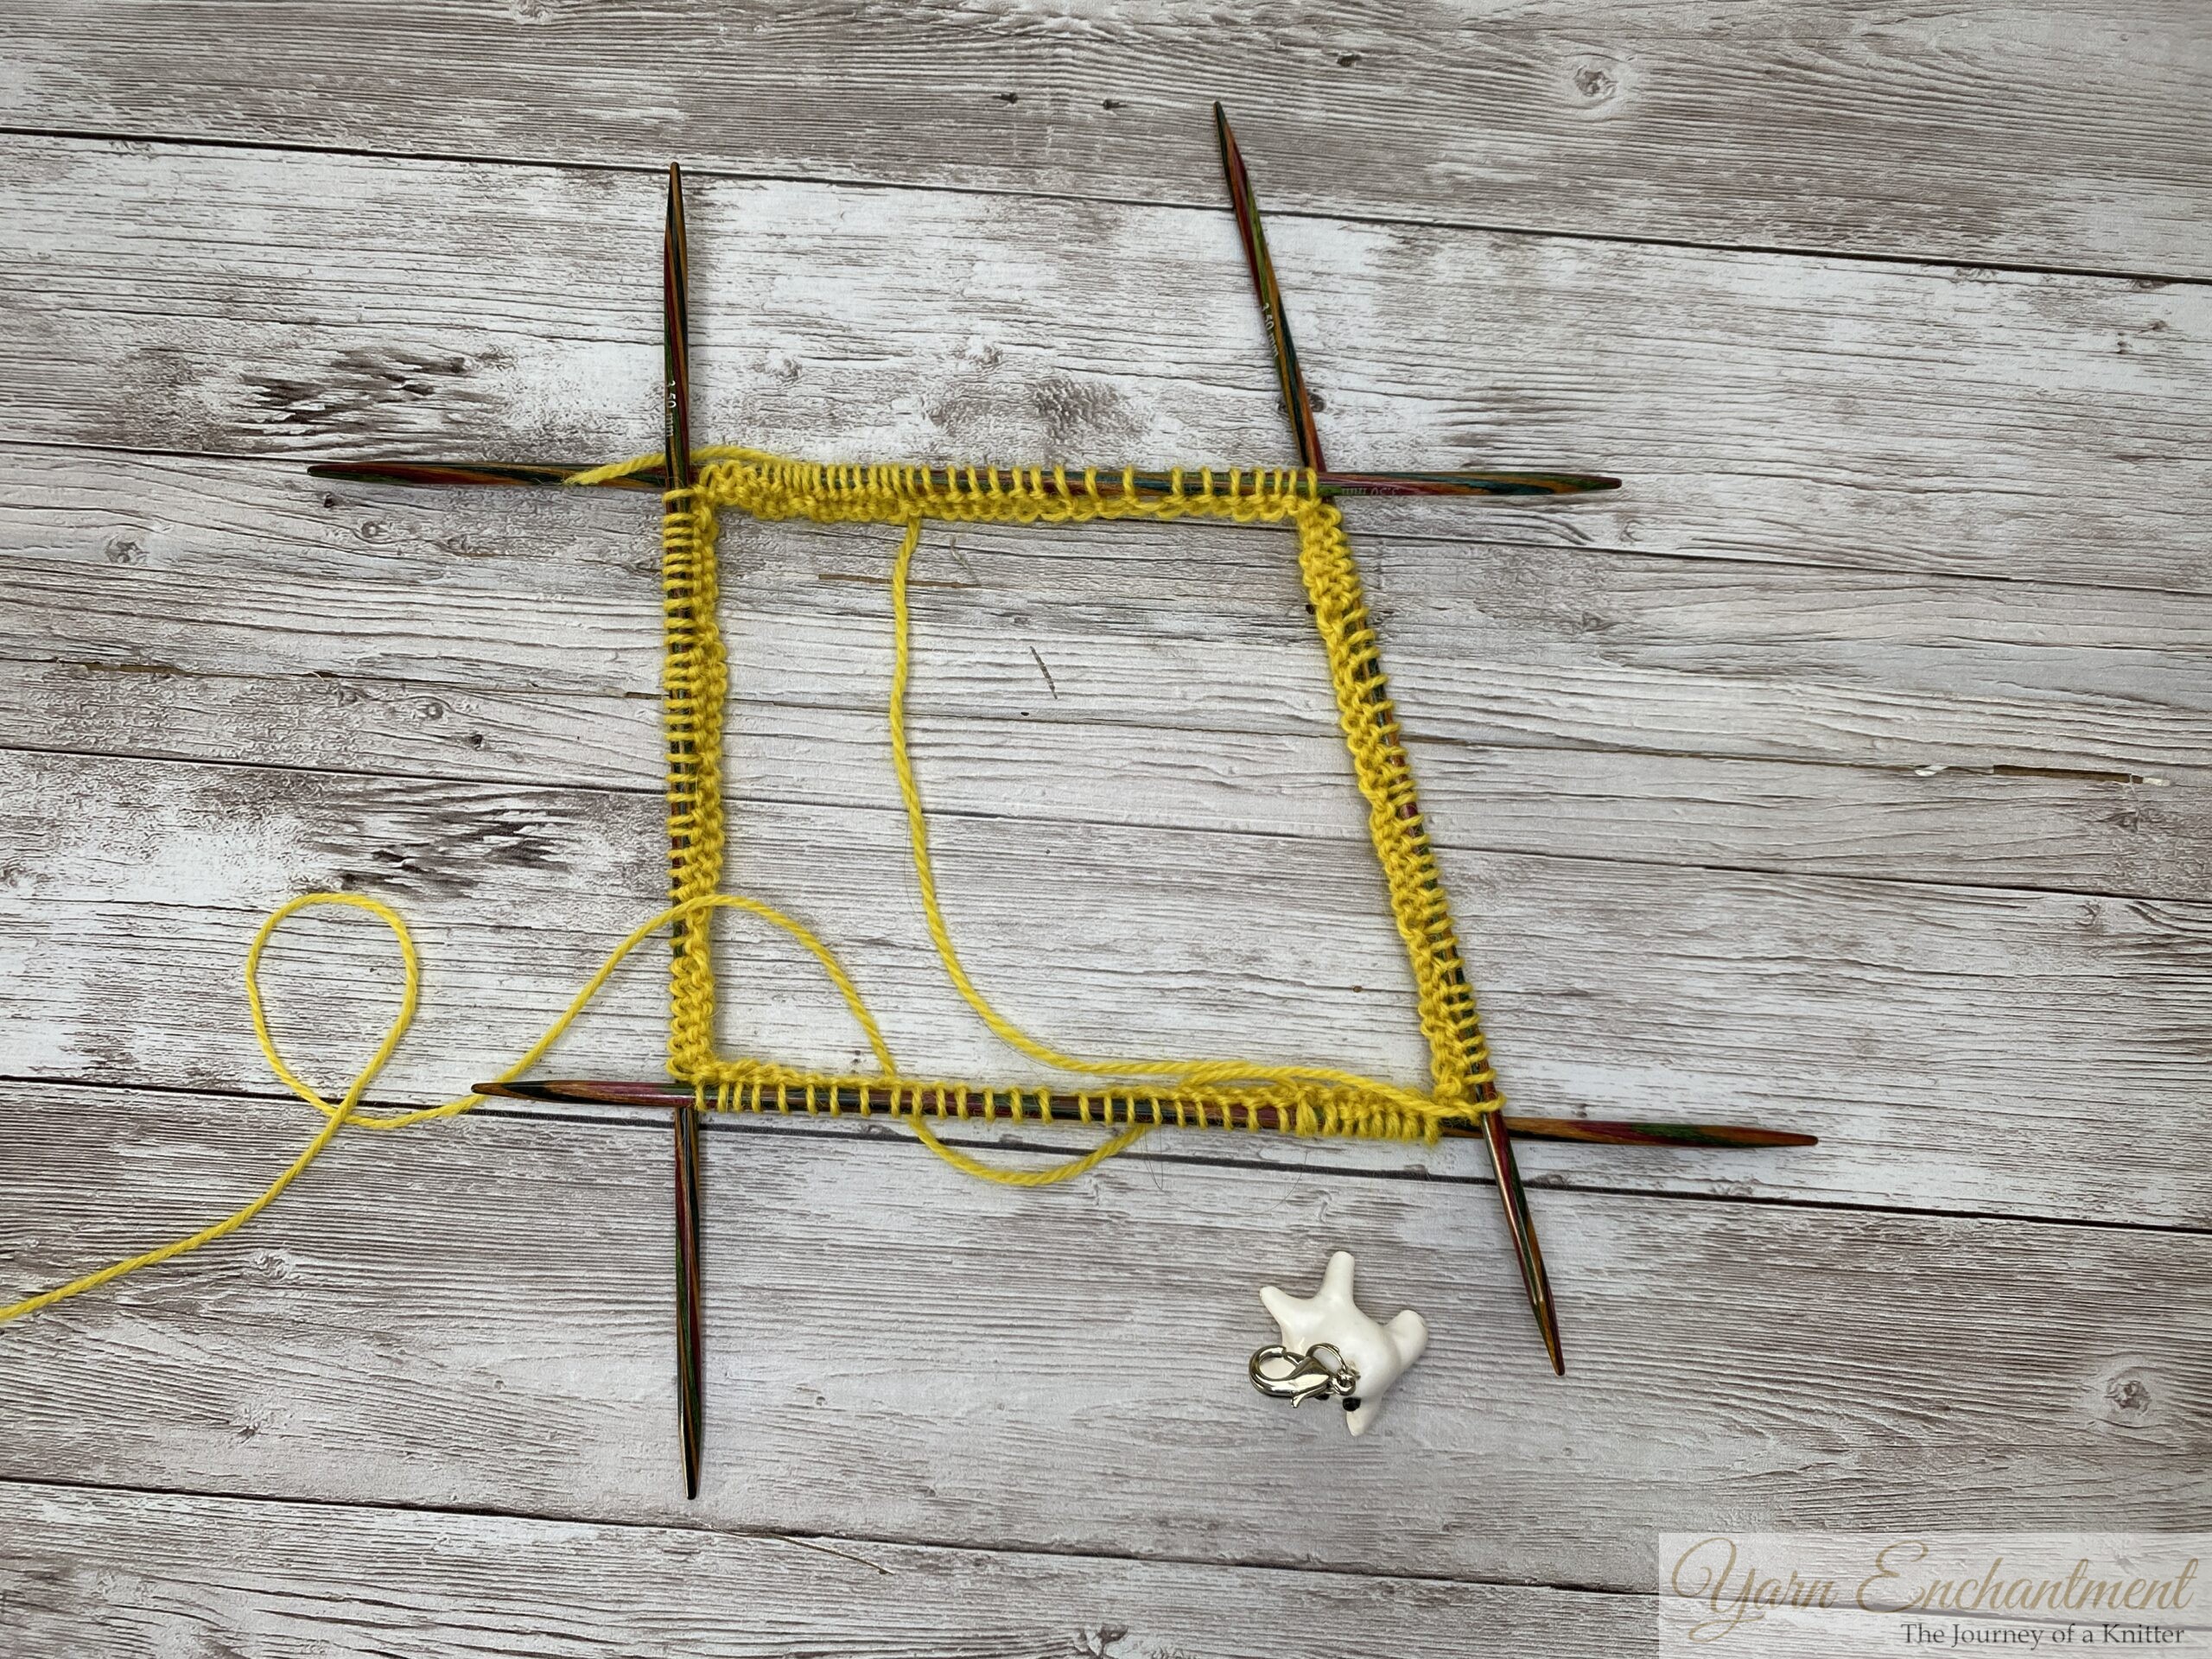
With your contrast yarn, cast on the ruffle cast-on number (double S). Divide evenly across 4 needles. Join in the round, being careful not to twist.
Cast on the number for your ruffles

Rnds 1–3: K6, P2 rep to end.
Rounds 1–3: knit 6, purl 2, all the way around. This is what the ribbing should look like before the first decreases.
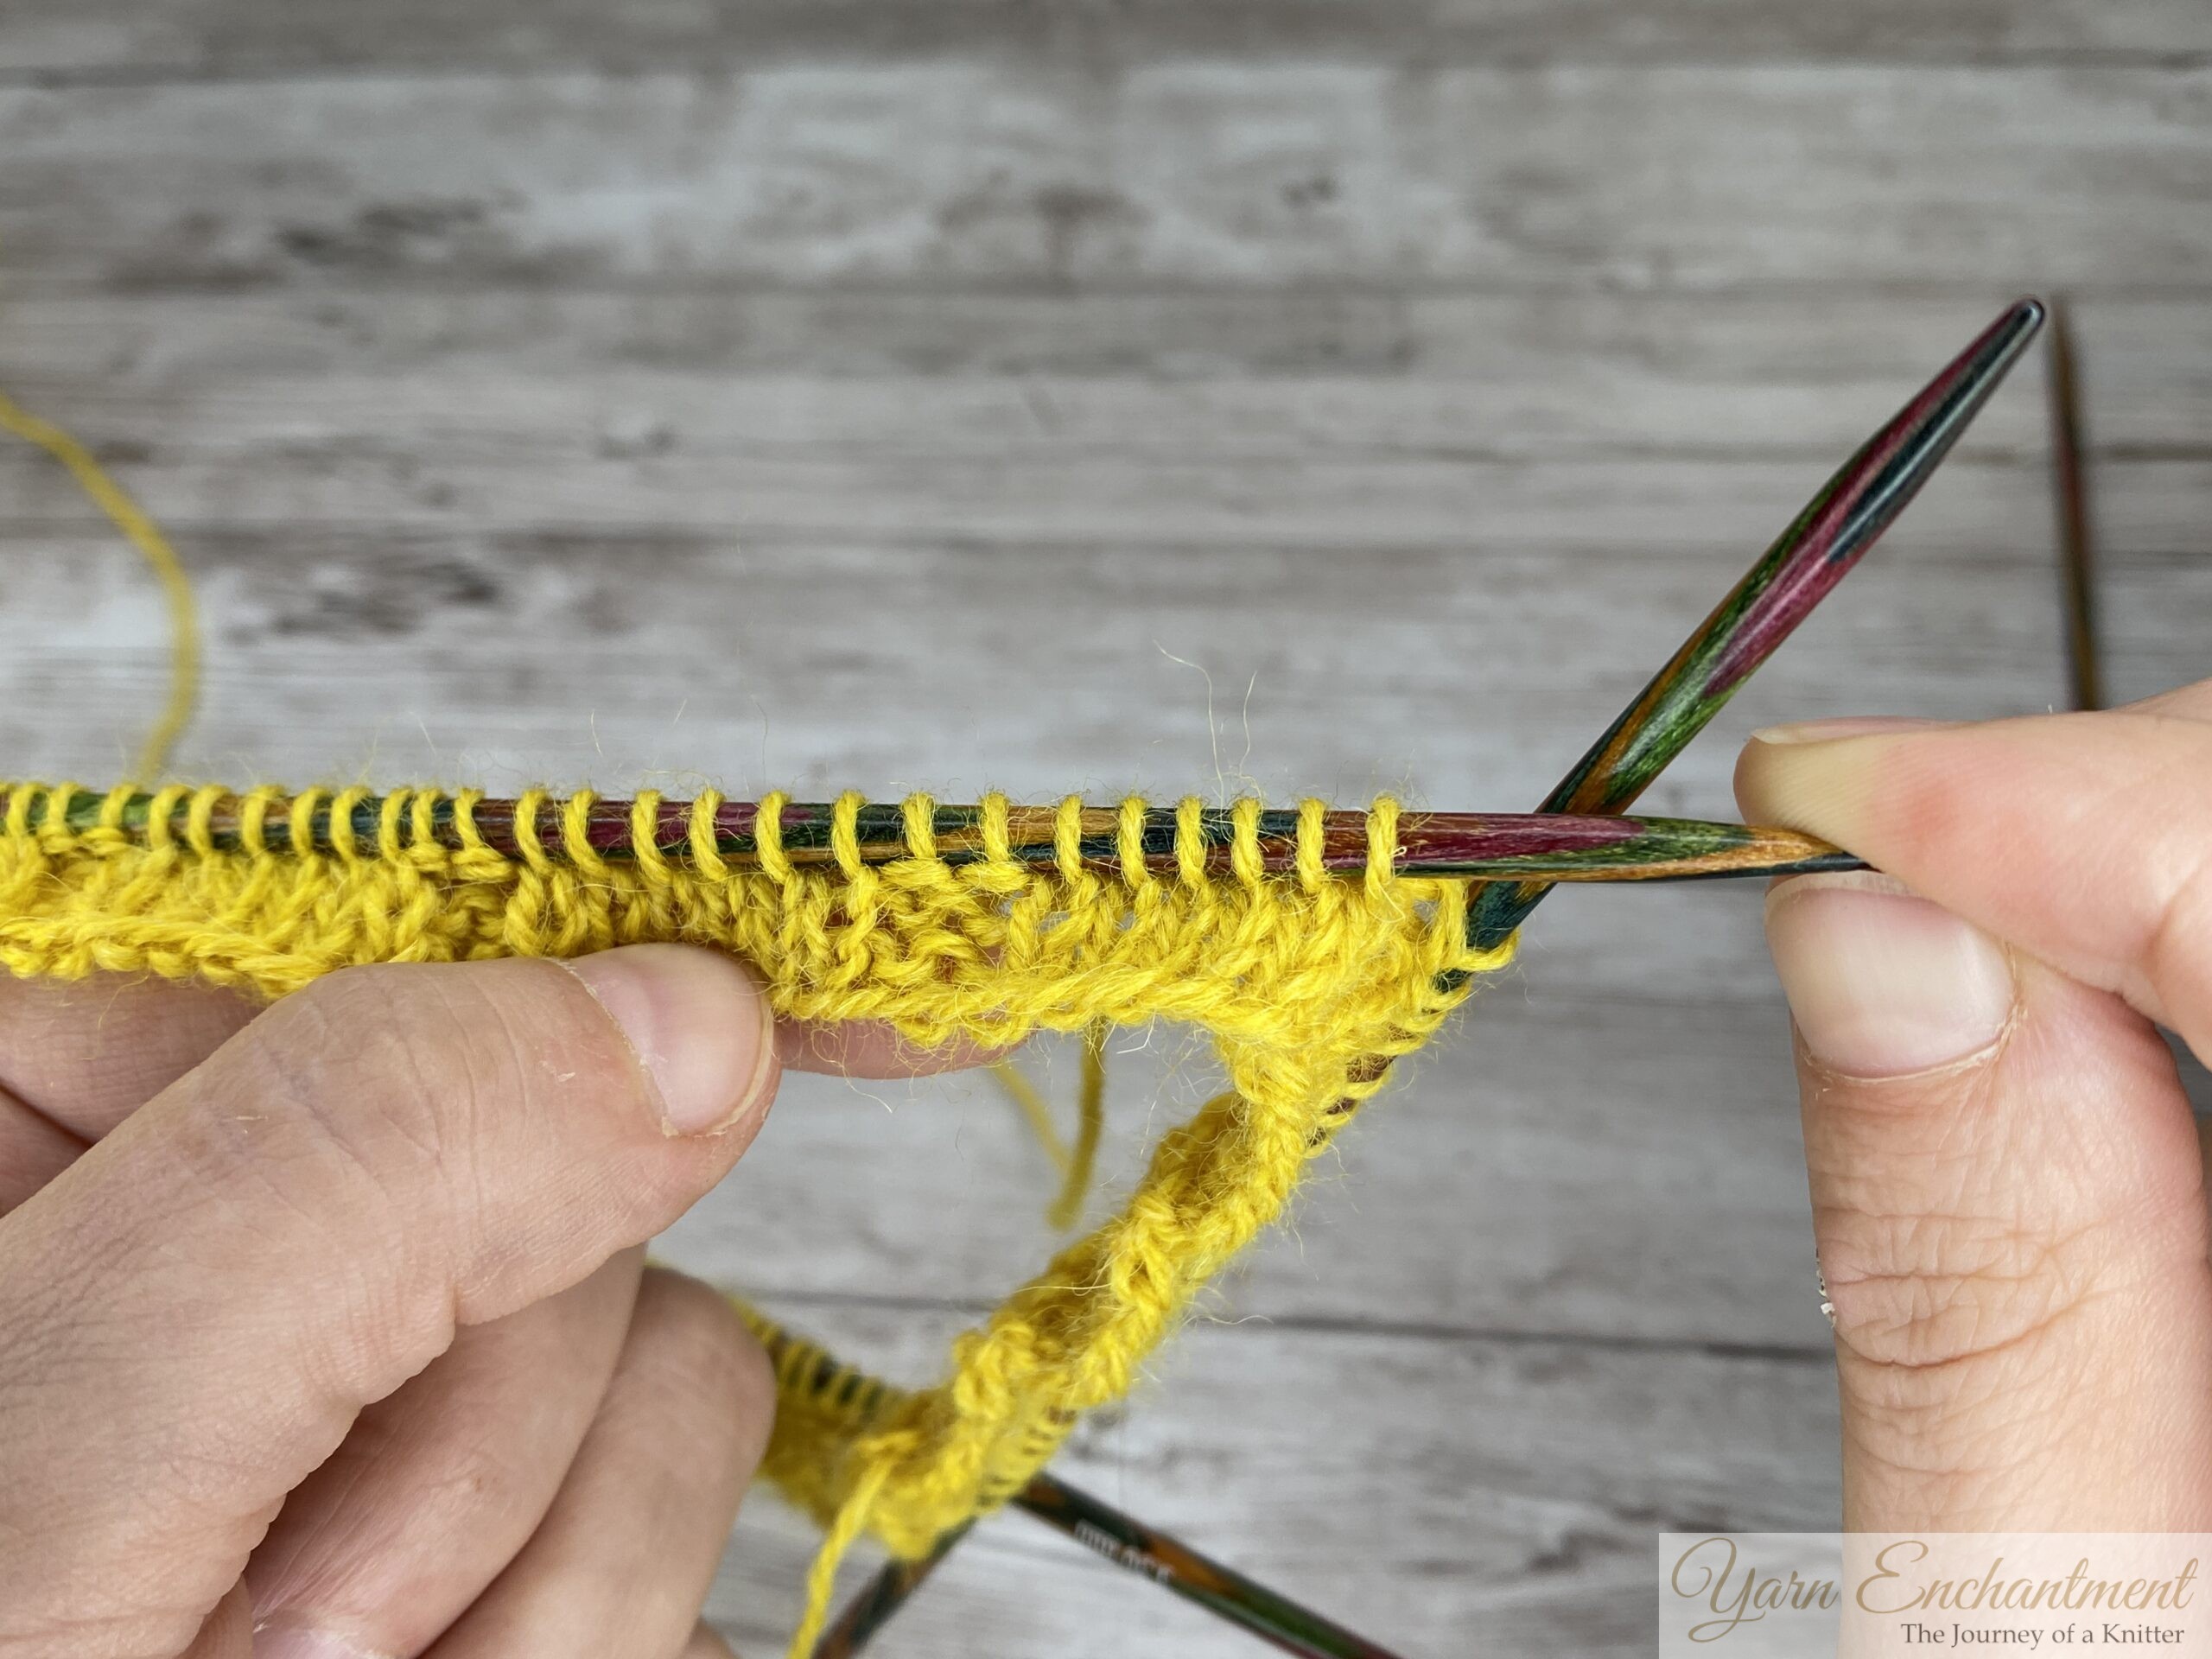

Rnd 4: SSK, K2, K2tog, P2 rep to end.
(See the decrease chart below for your stitch count.)
Work an SSK over the first two stitches: slip two stitches knitwise, one at a time, to the right needle, then insert the left needle into the front of both slipped stitches....
...and knit them together through the back loop.
Knit the next two stitches.
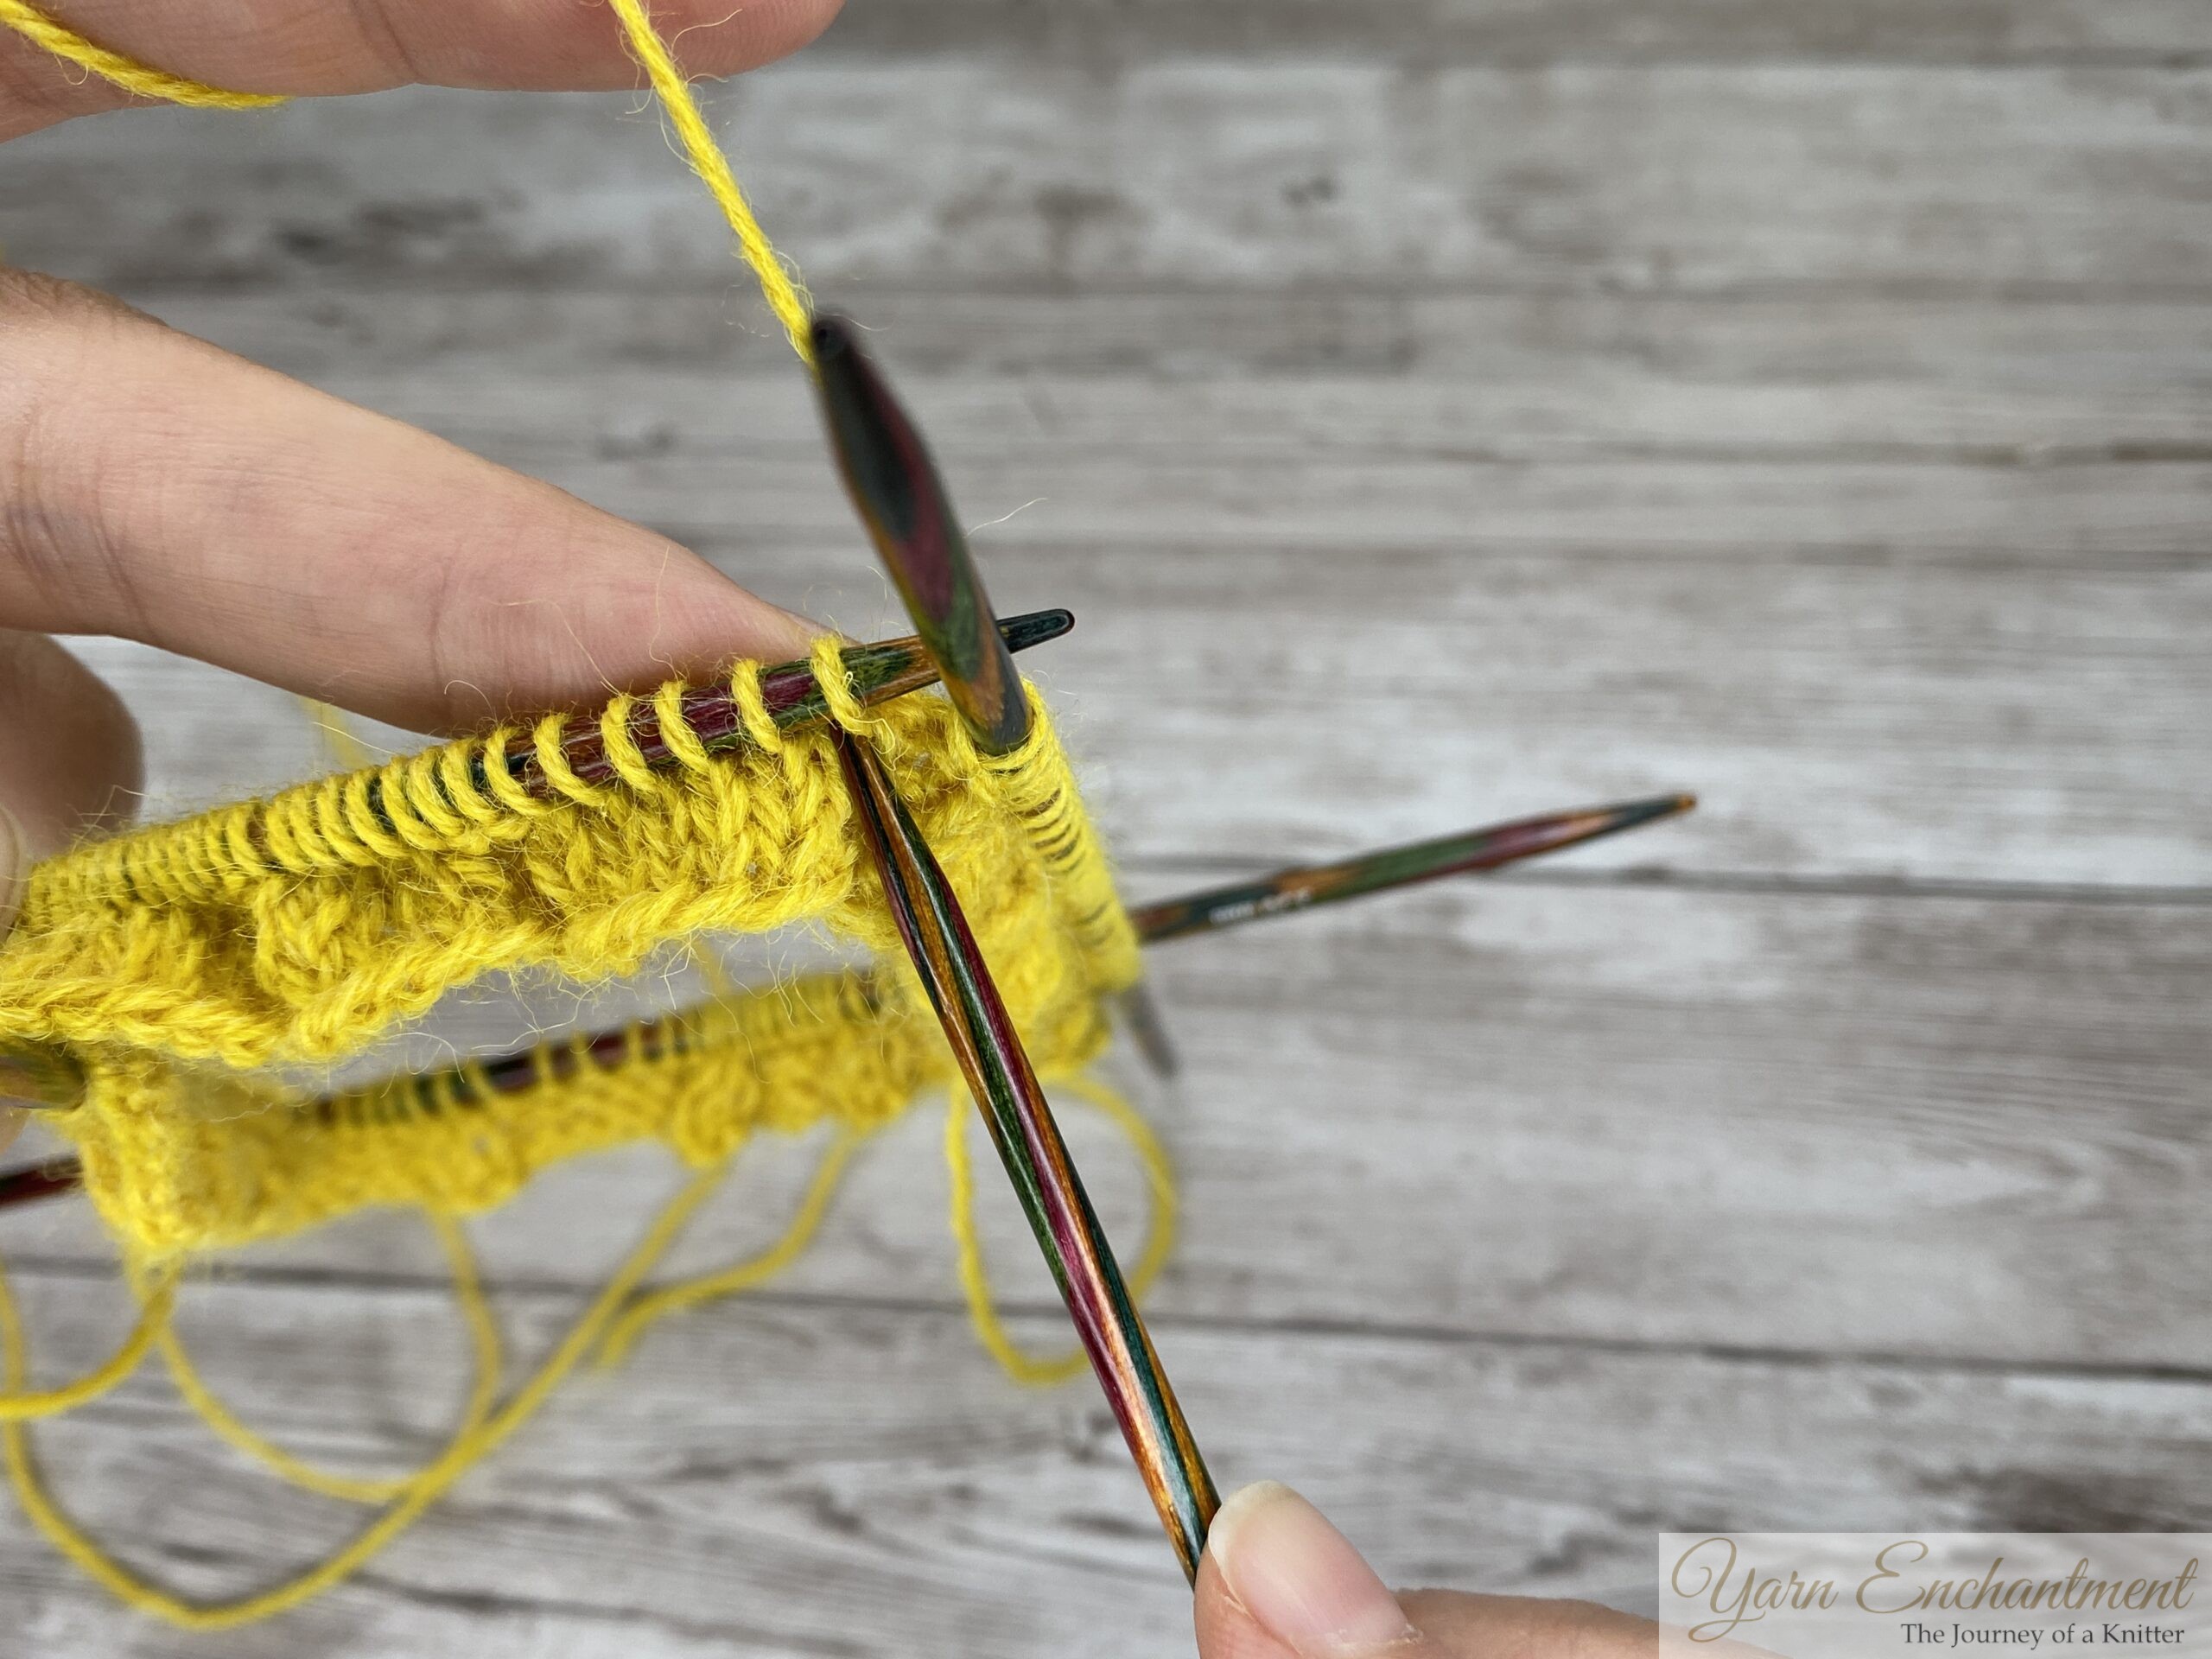

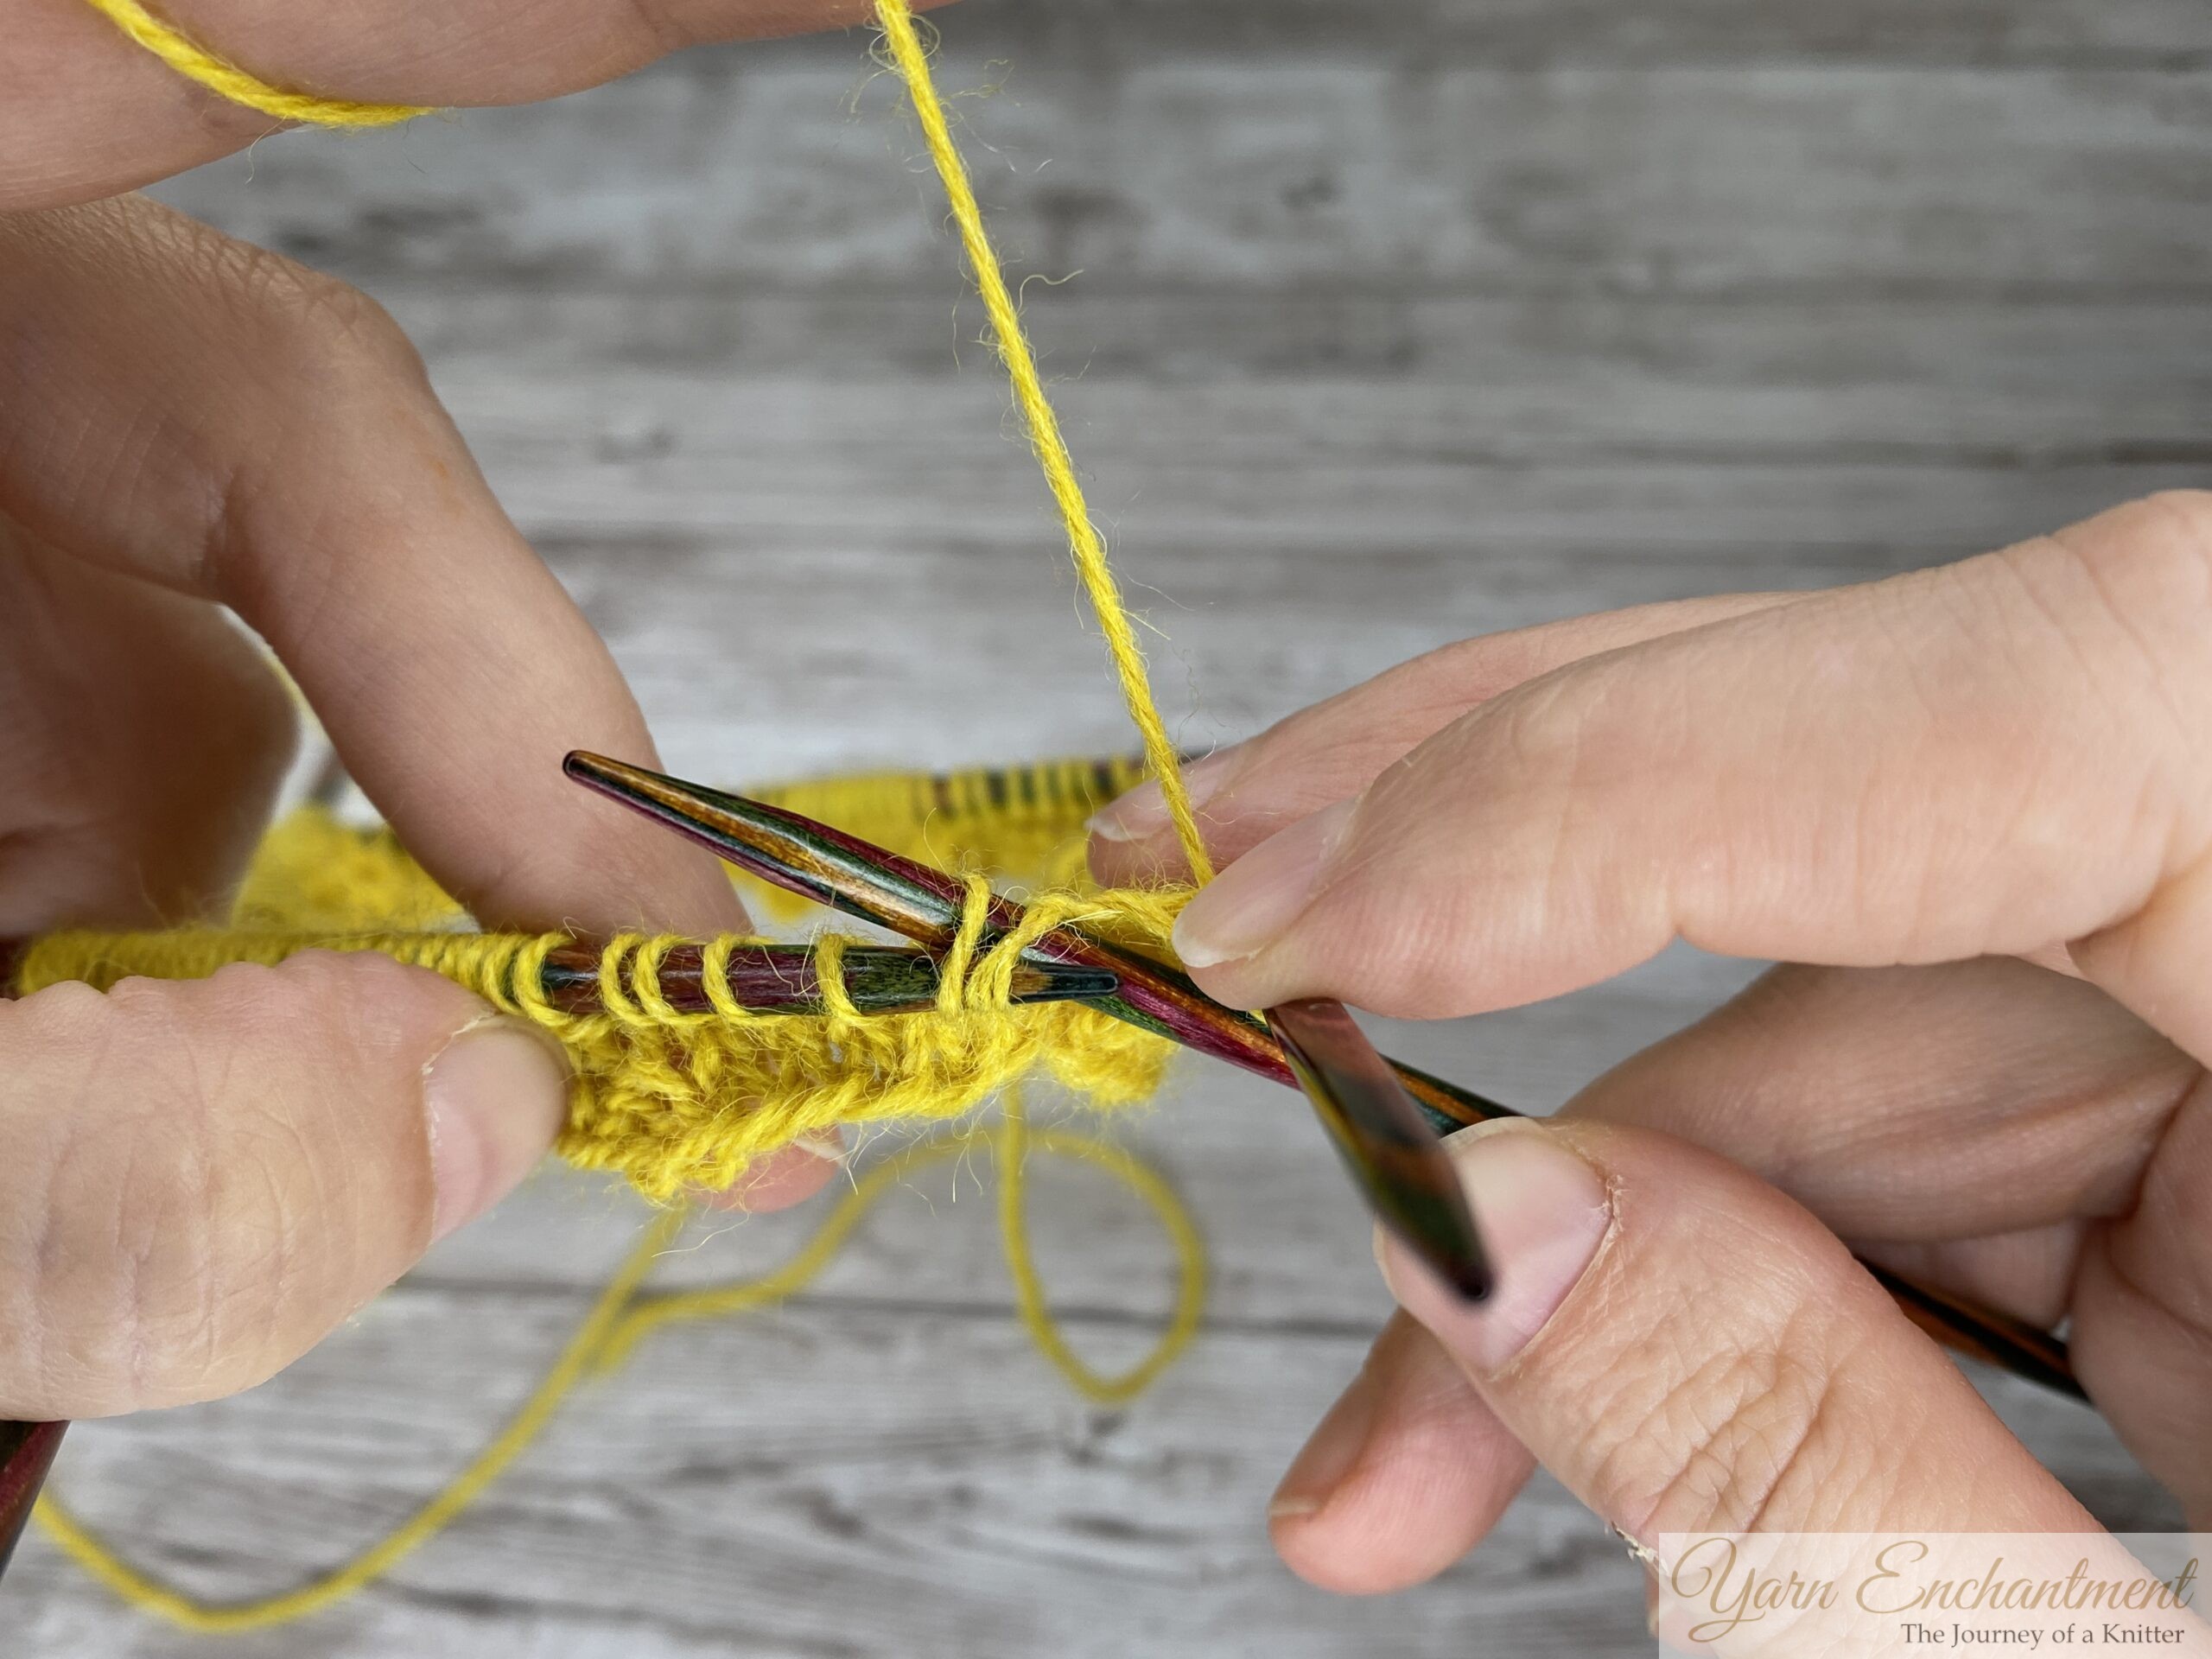

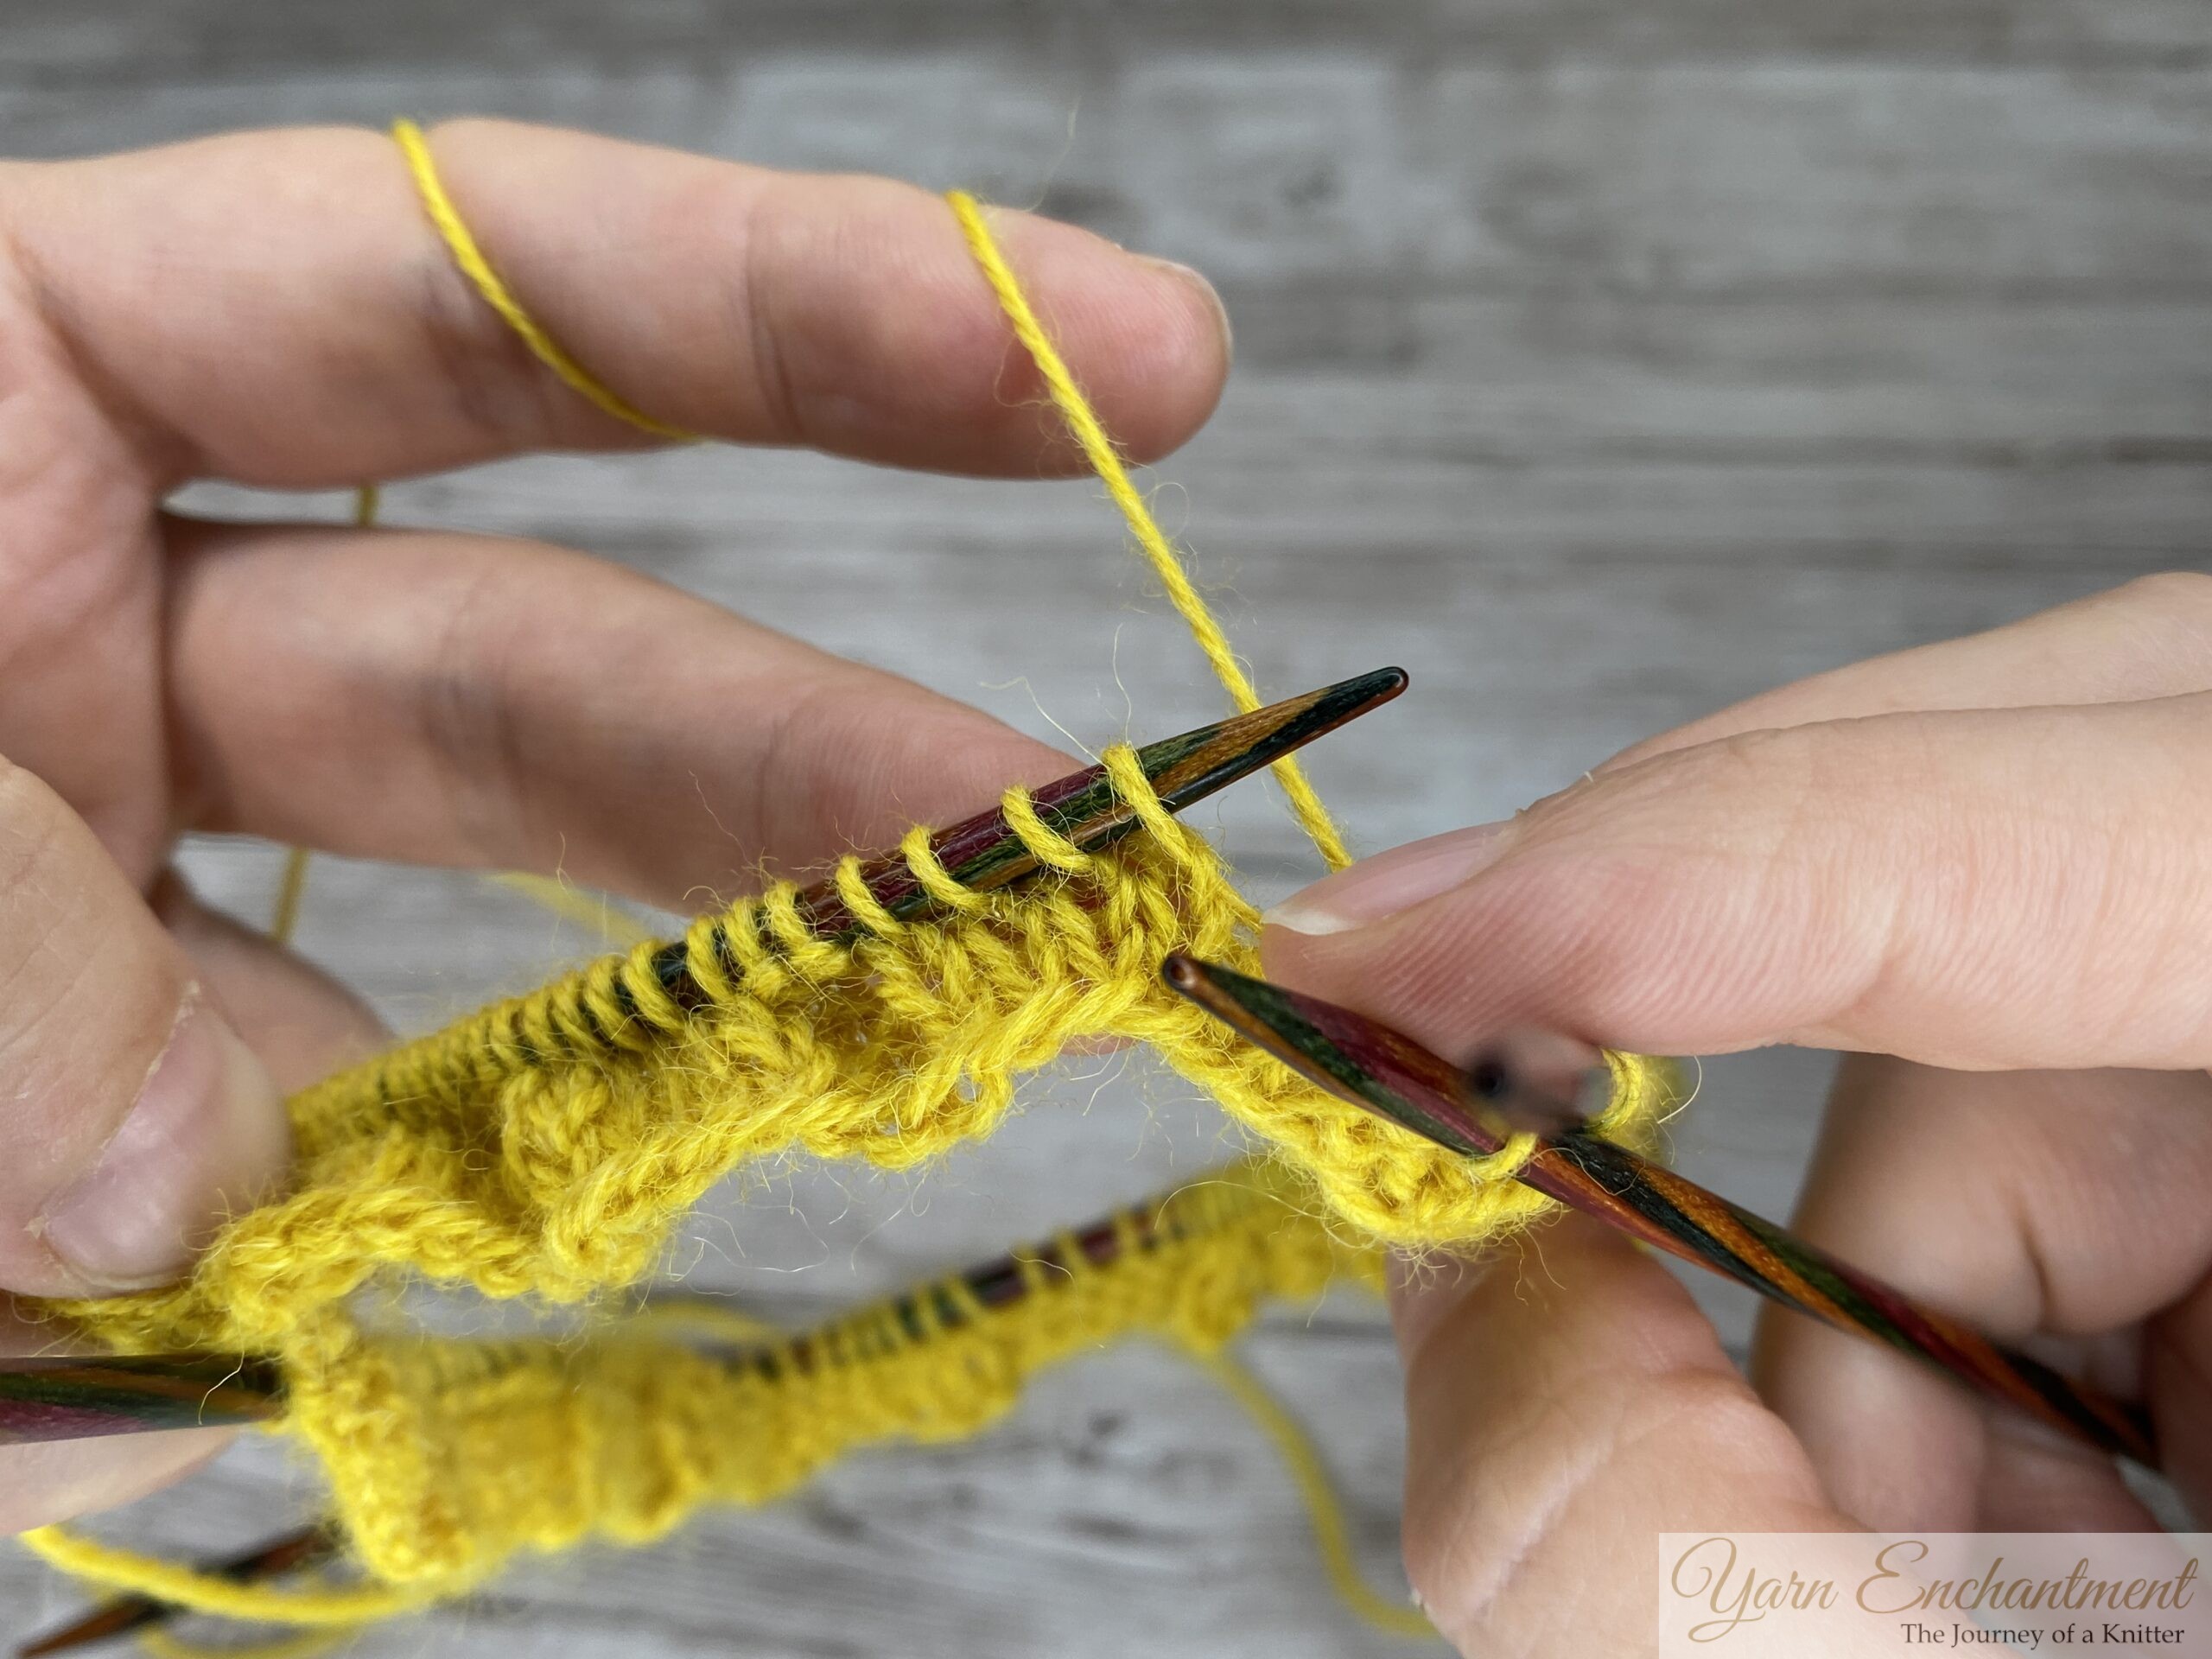

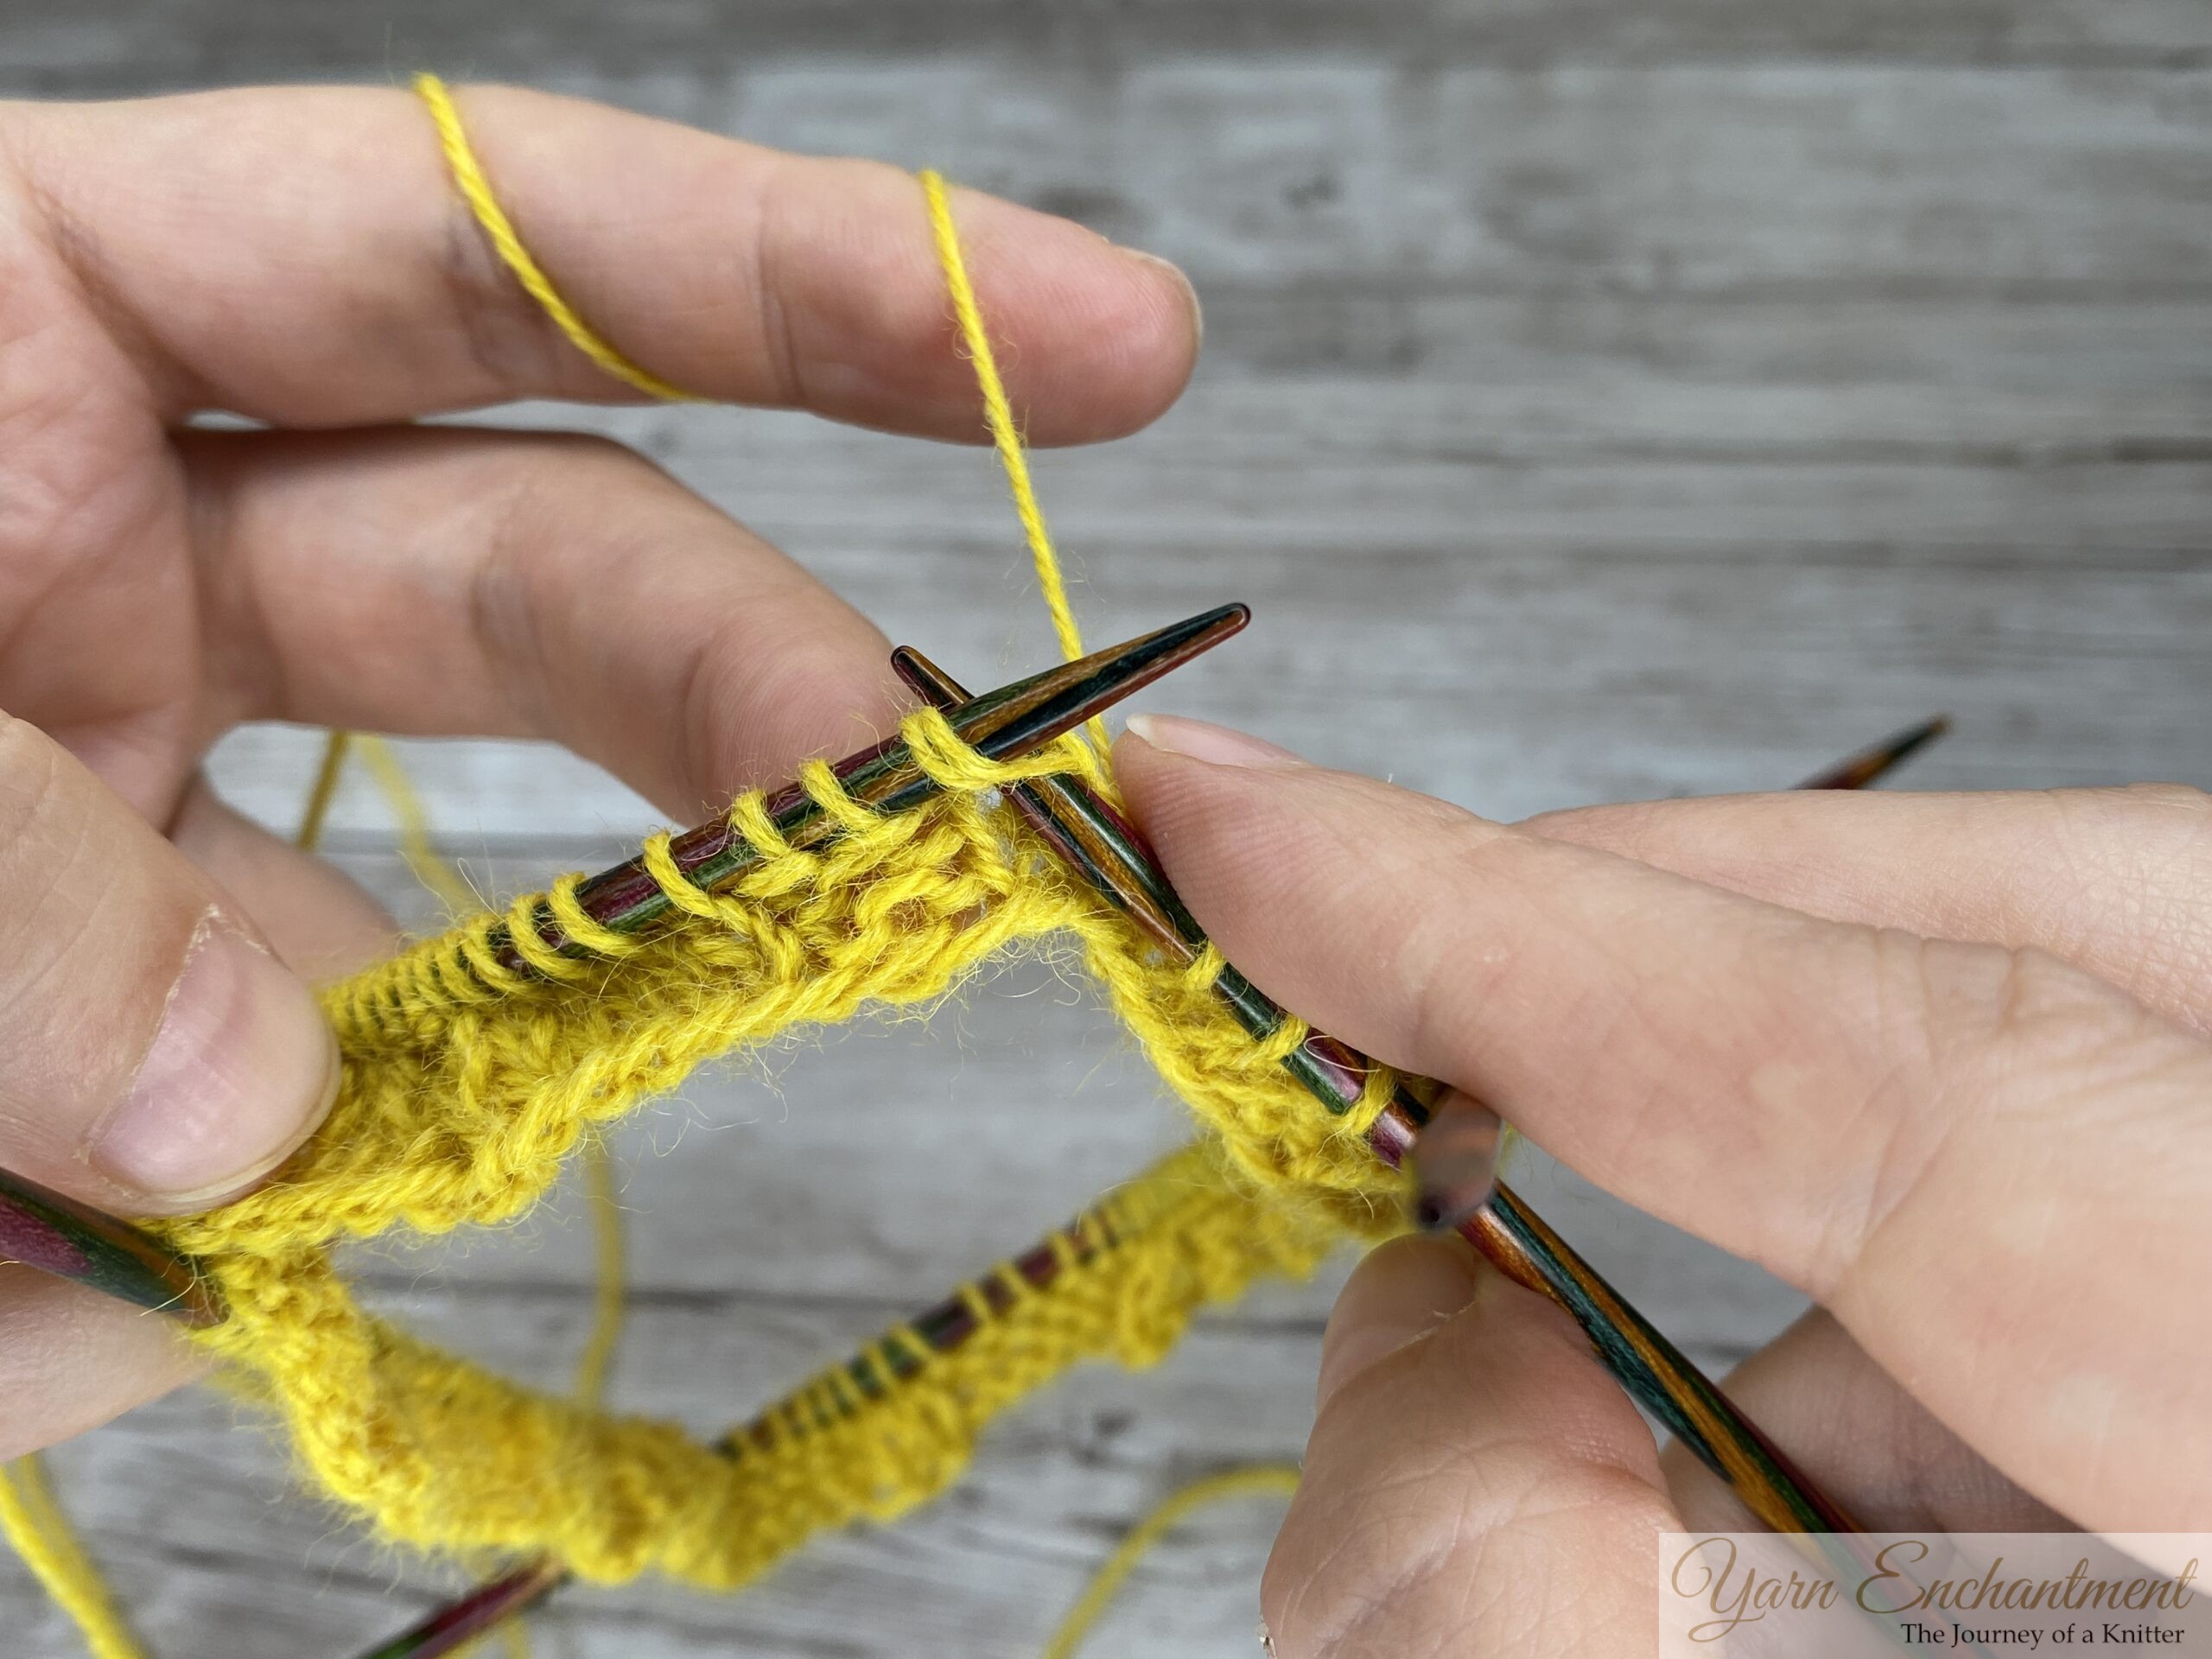  | 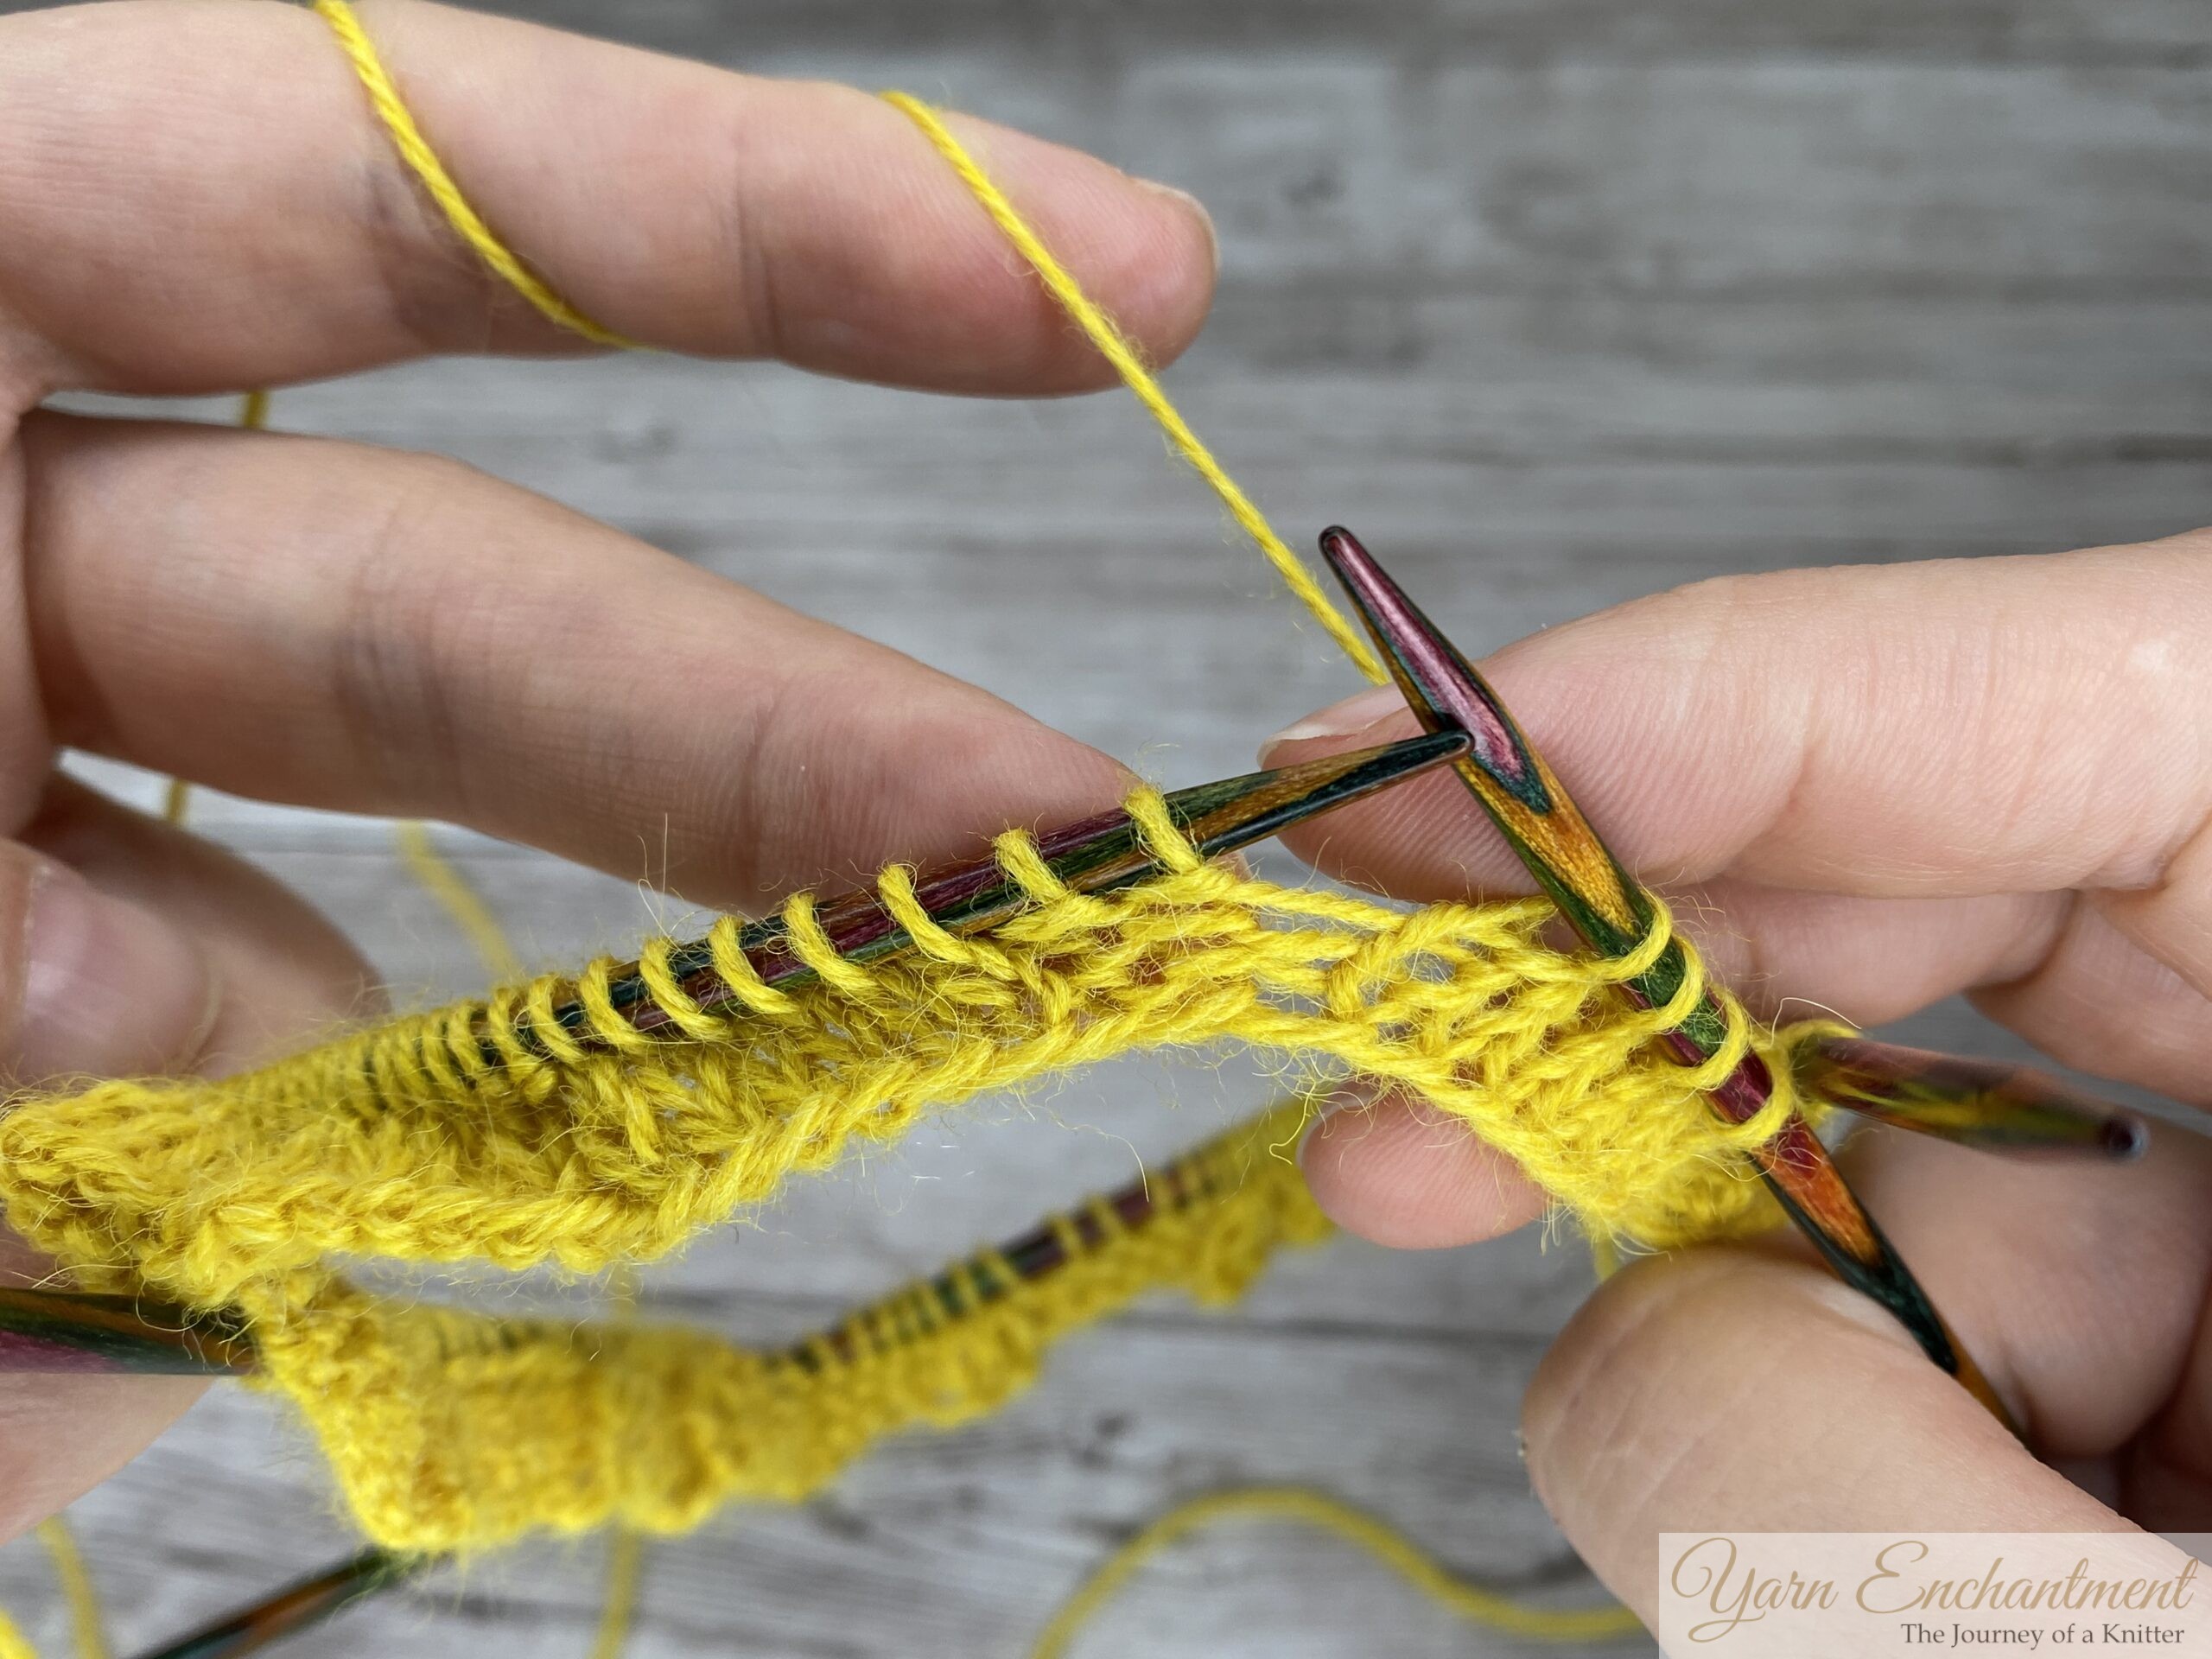  | 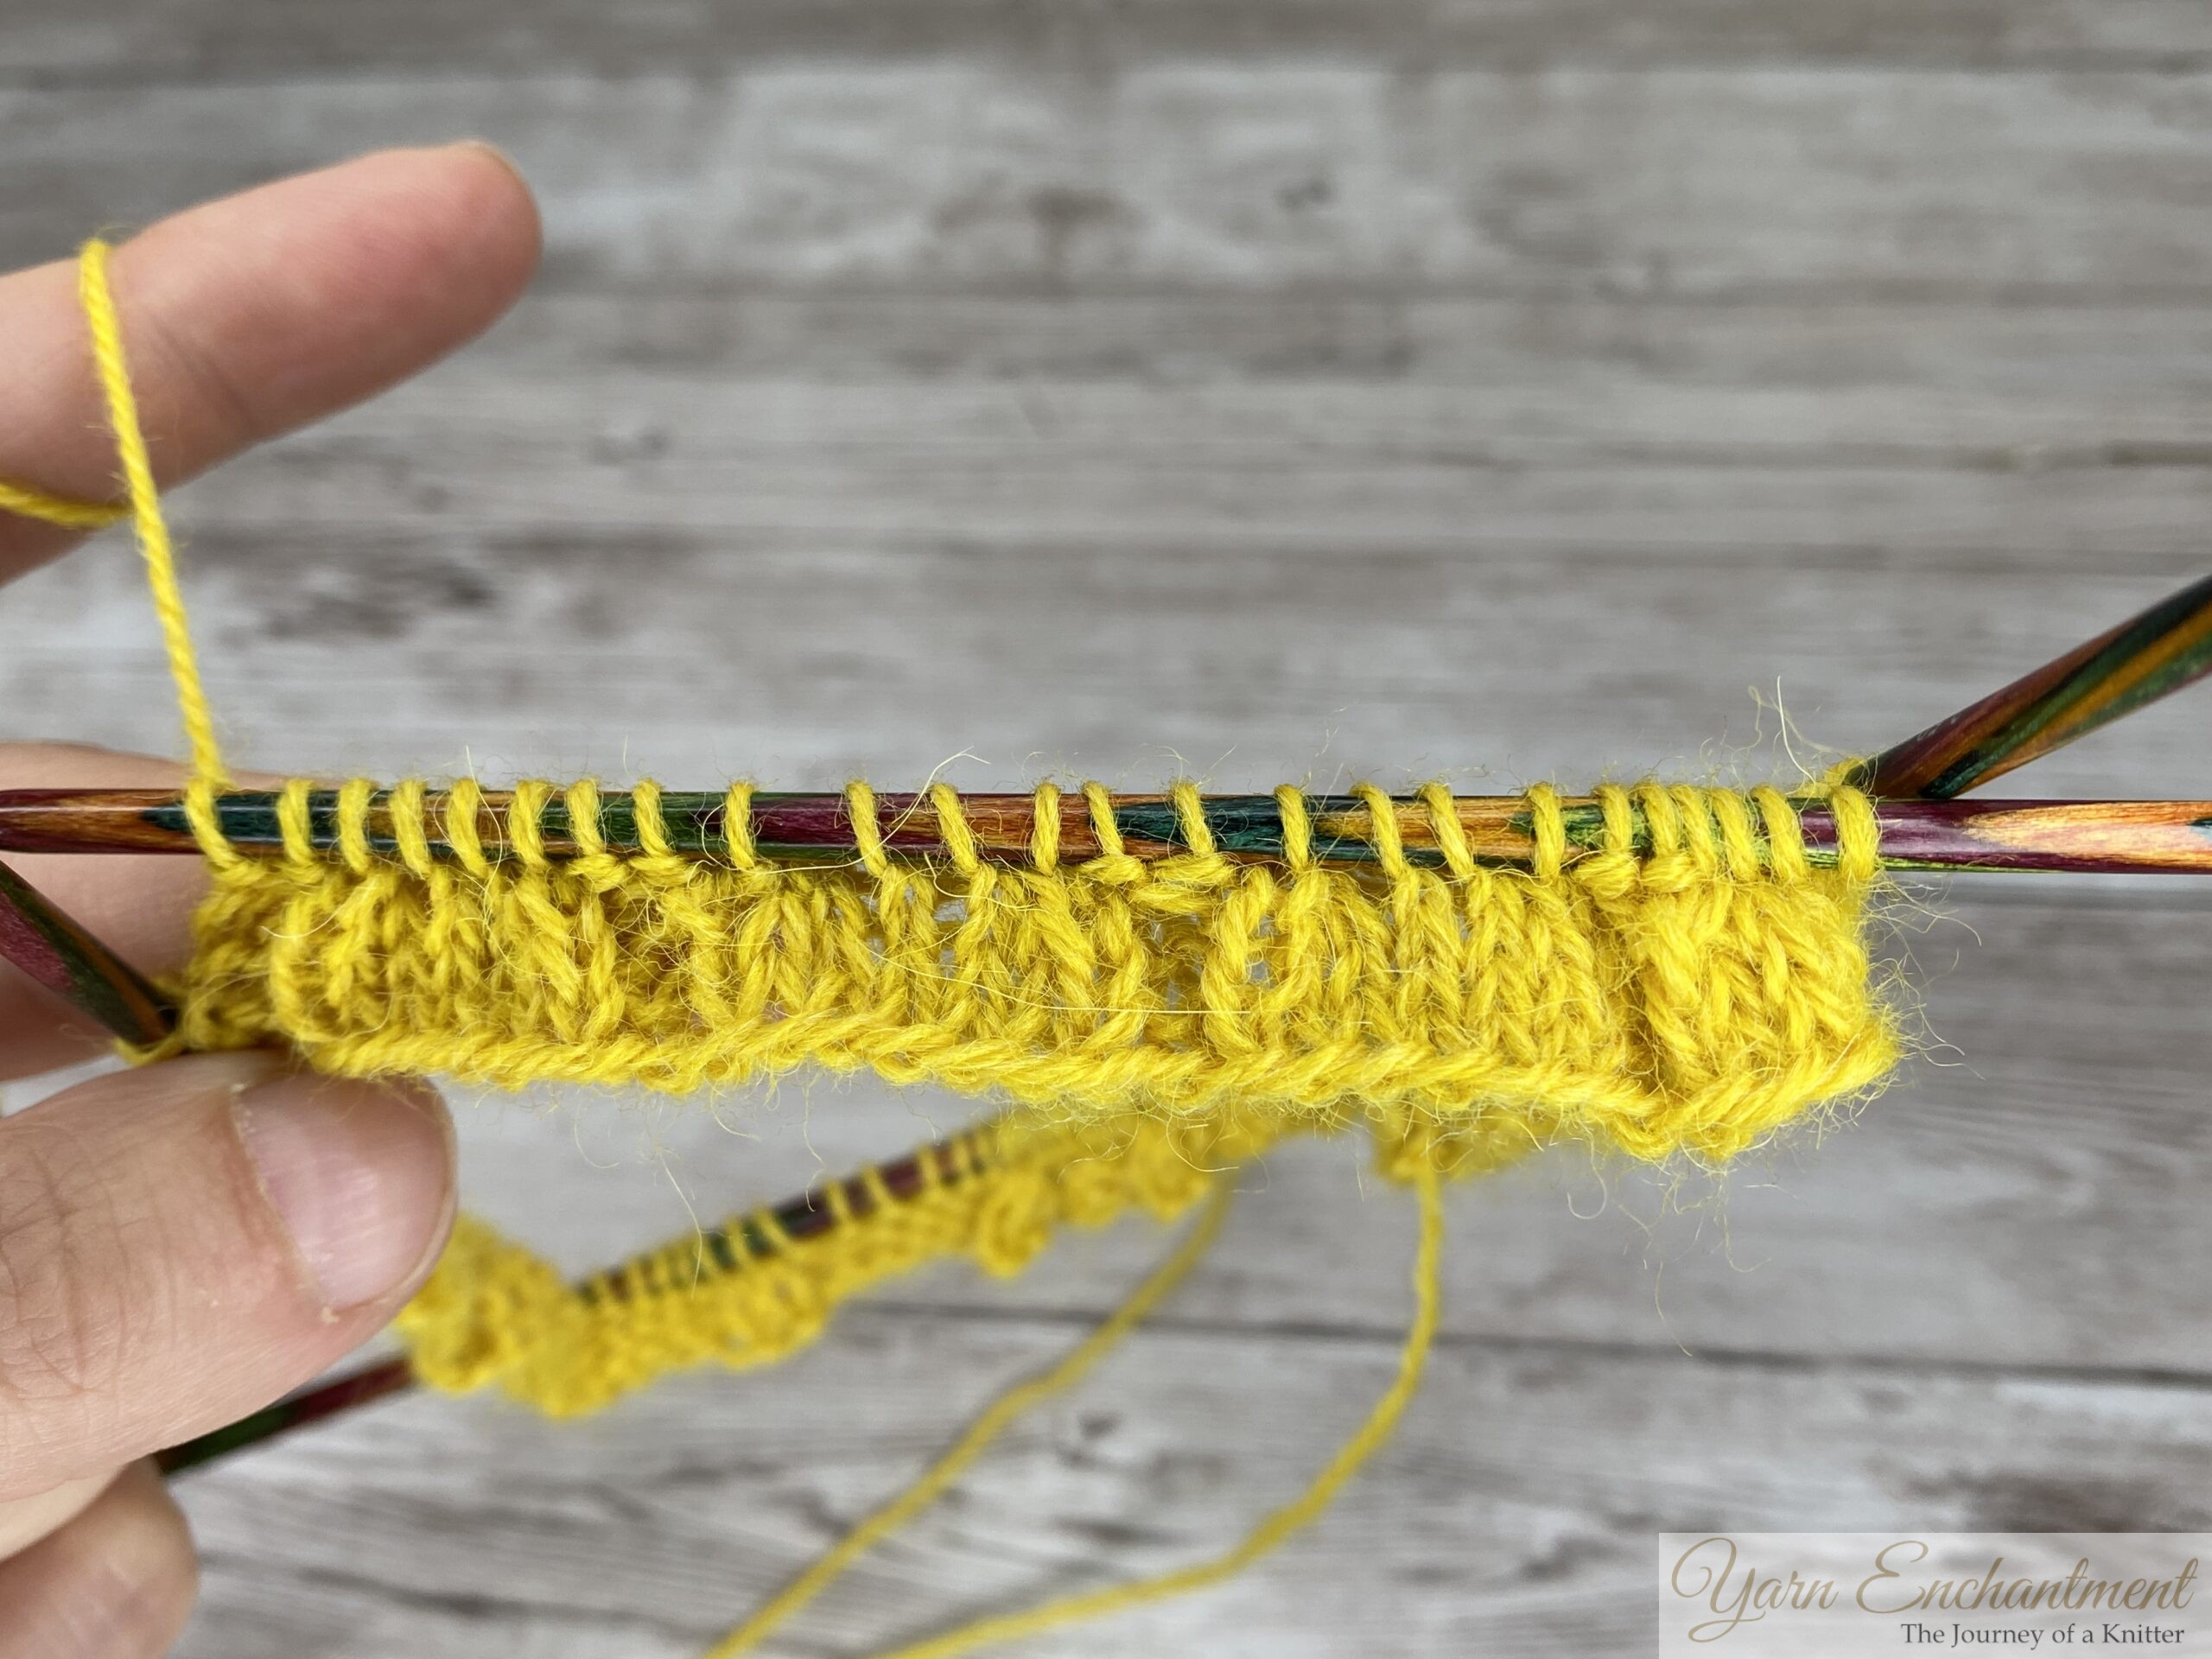  |
And then work a k2tog over the next two knit stitches. | Purl the next two stitches, then SSK, K2, K2tog, P2; repeat to end. | After the first decrease round, you should have 4 knit stitches followed by 2 purl stitches. |
Rnd 5: K4, P2 rep to end.
After completing your plain round, your work should look like this. You should see four knit stitches followed by two purl stitches (K4, P2)
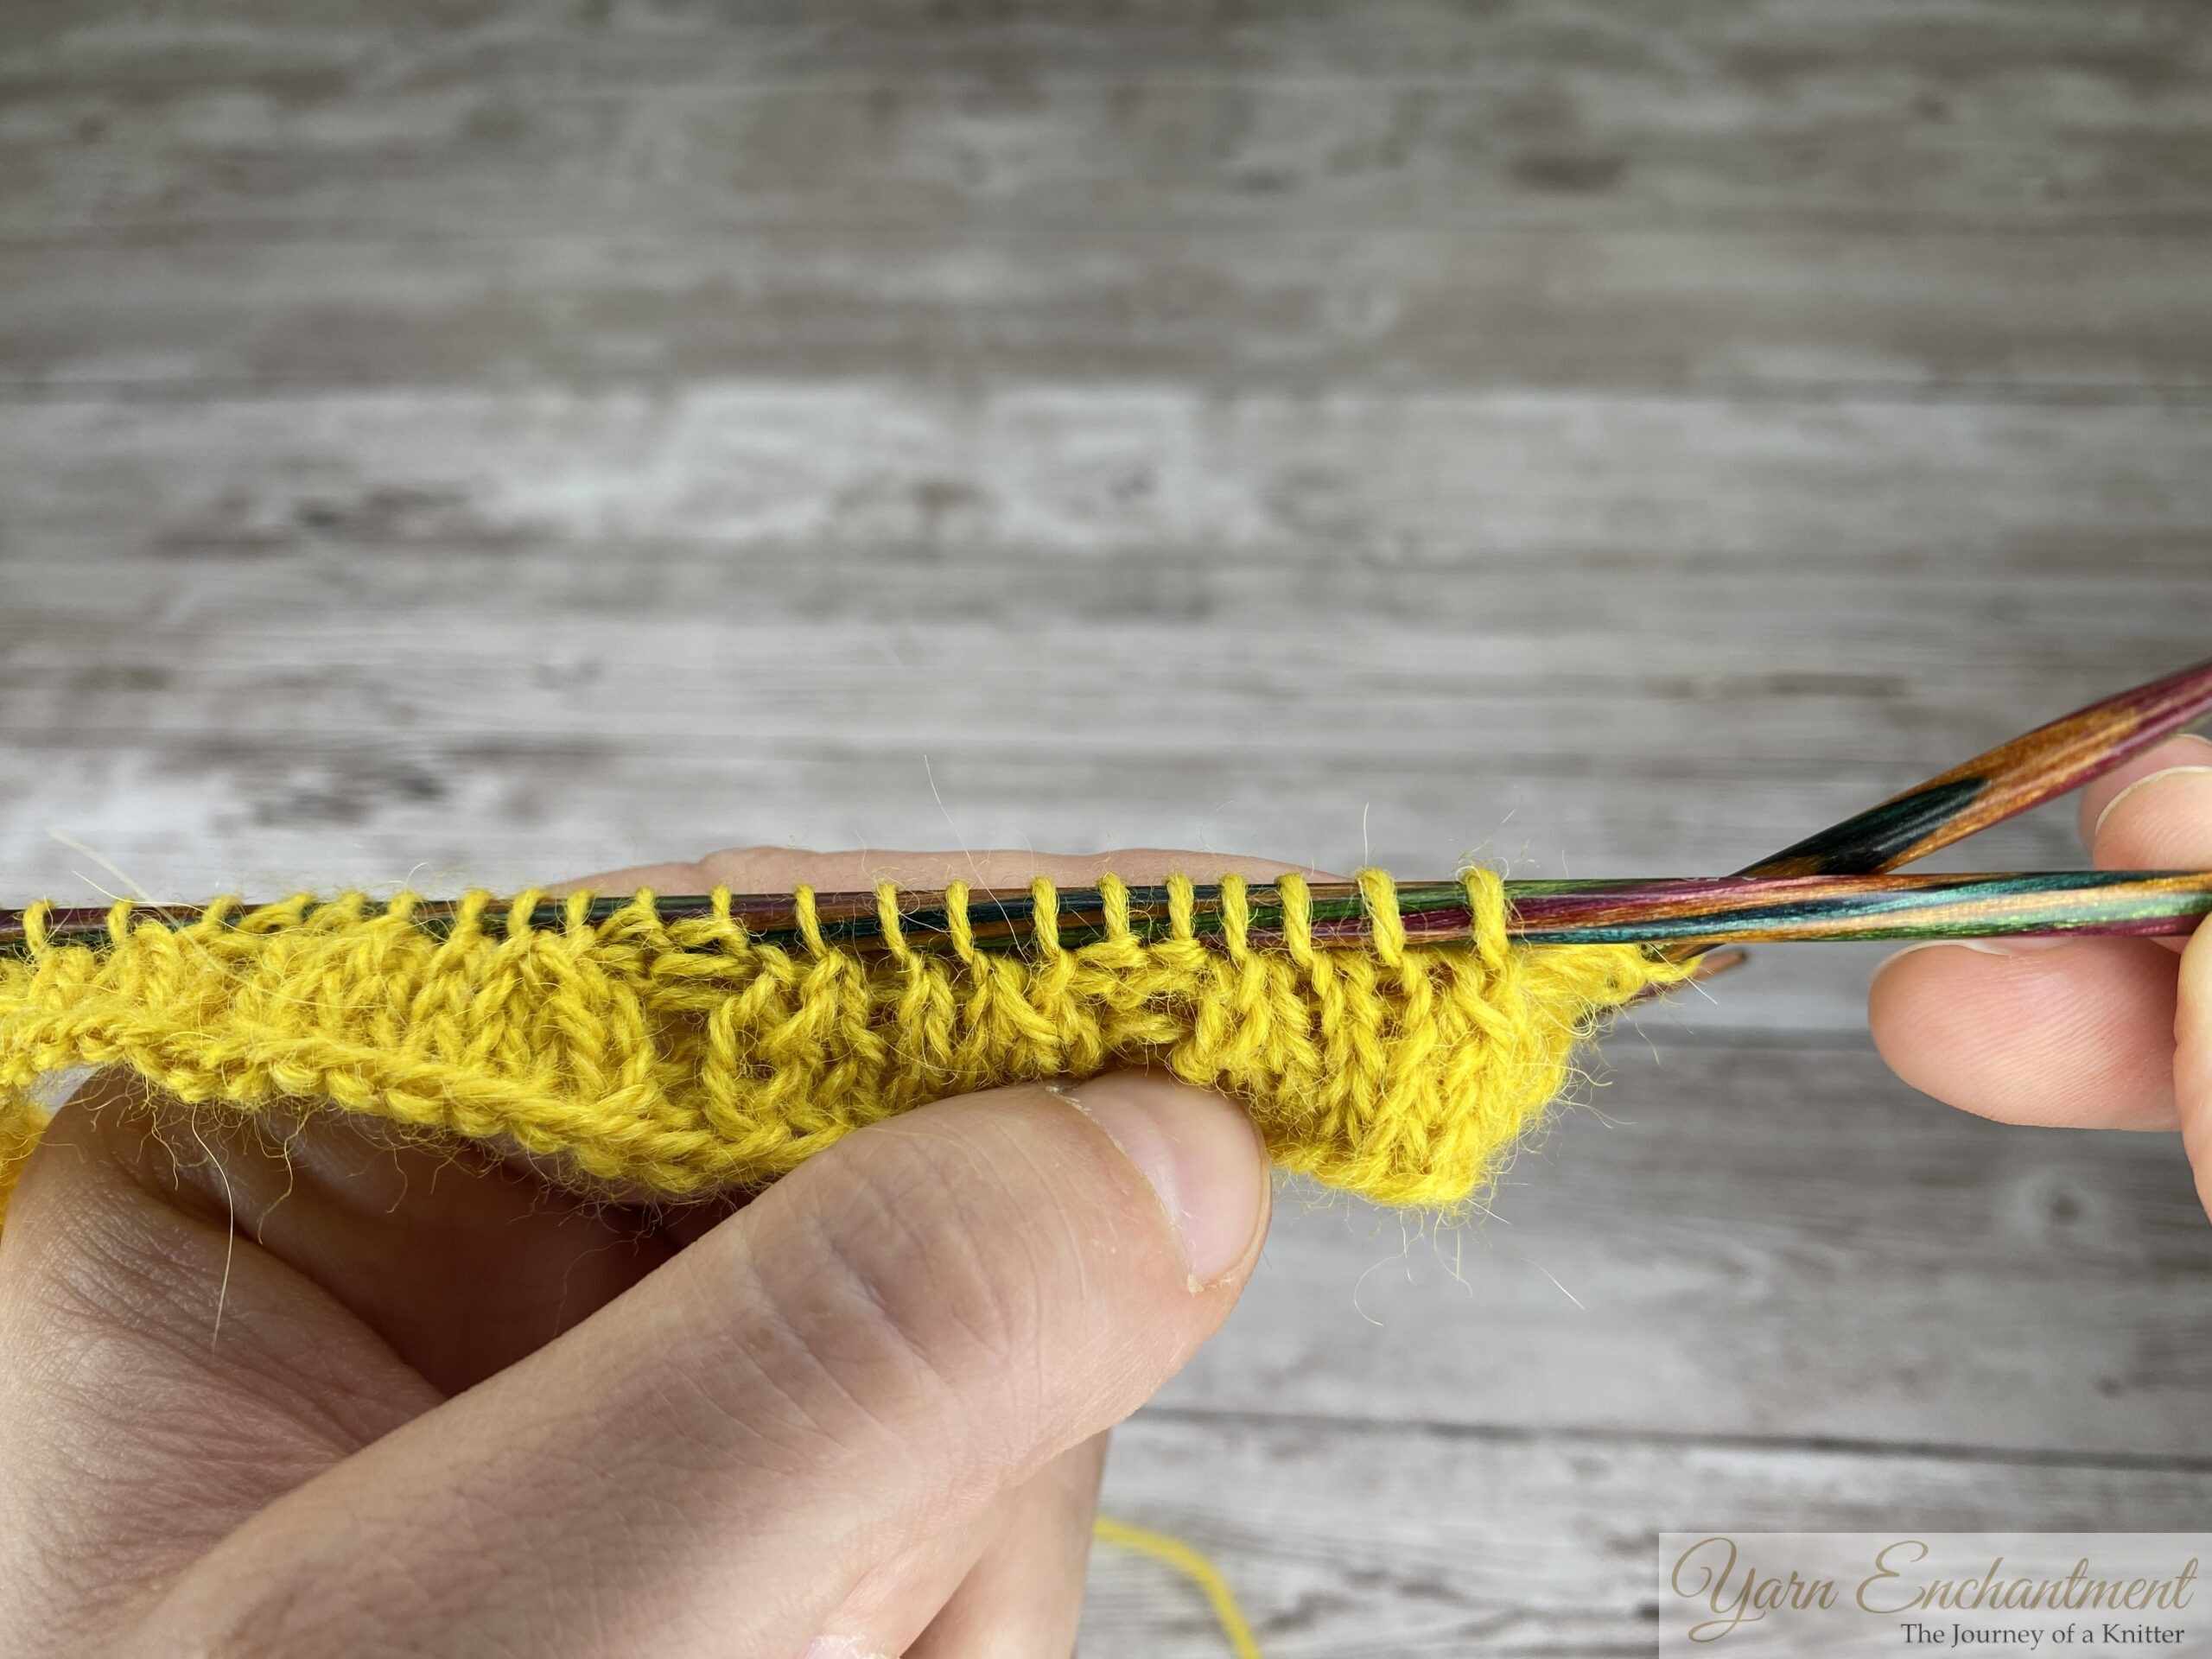

Rnd 6: SSK, K2tog, P2 rep to end.
(See the decrease chart below for your stitch count.)
Work an SSK over the first two stitches, ...
...then work a K2tog over the next two stitches,...
...purl the next two stitches; repeat until the beginning of the round.
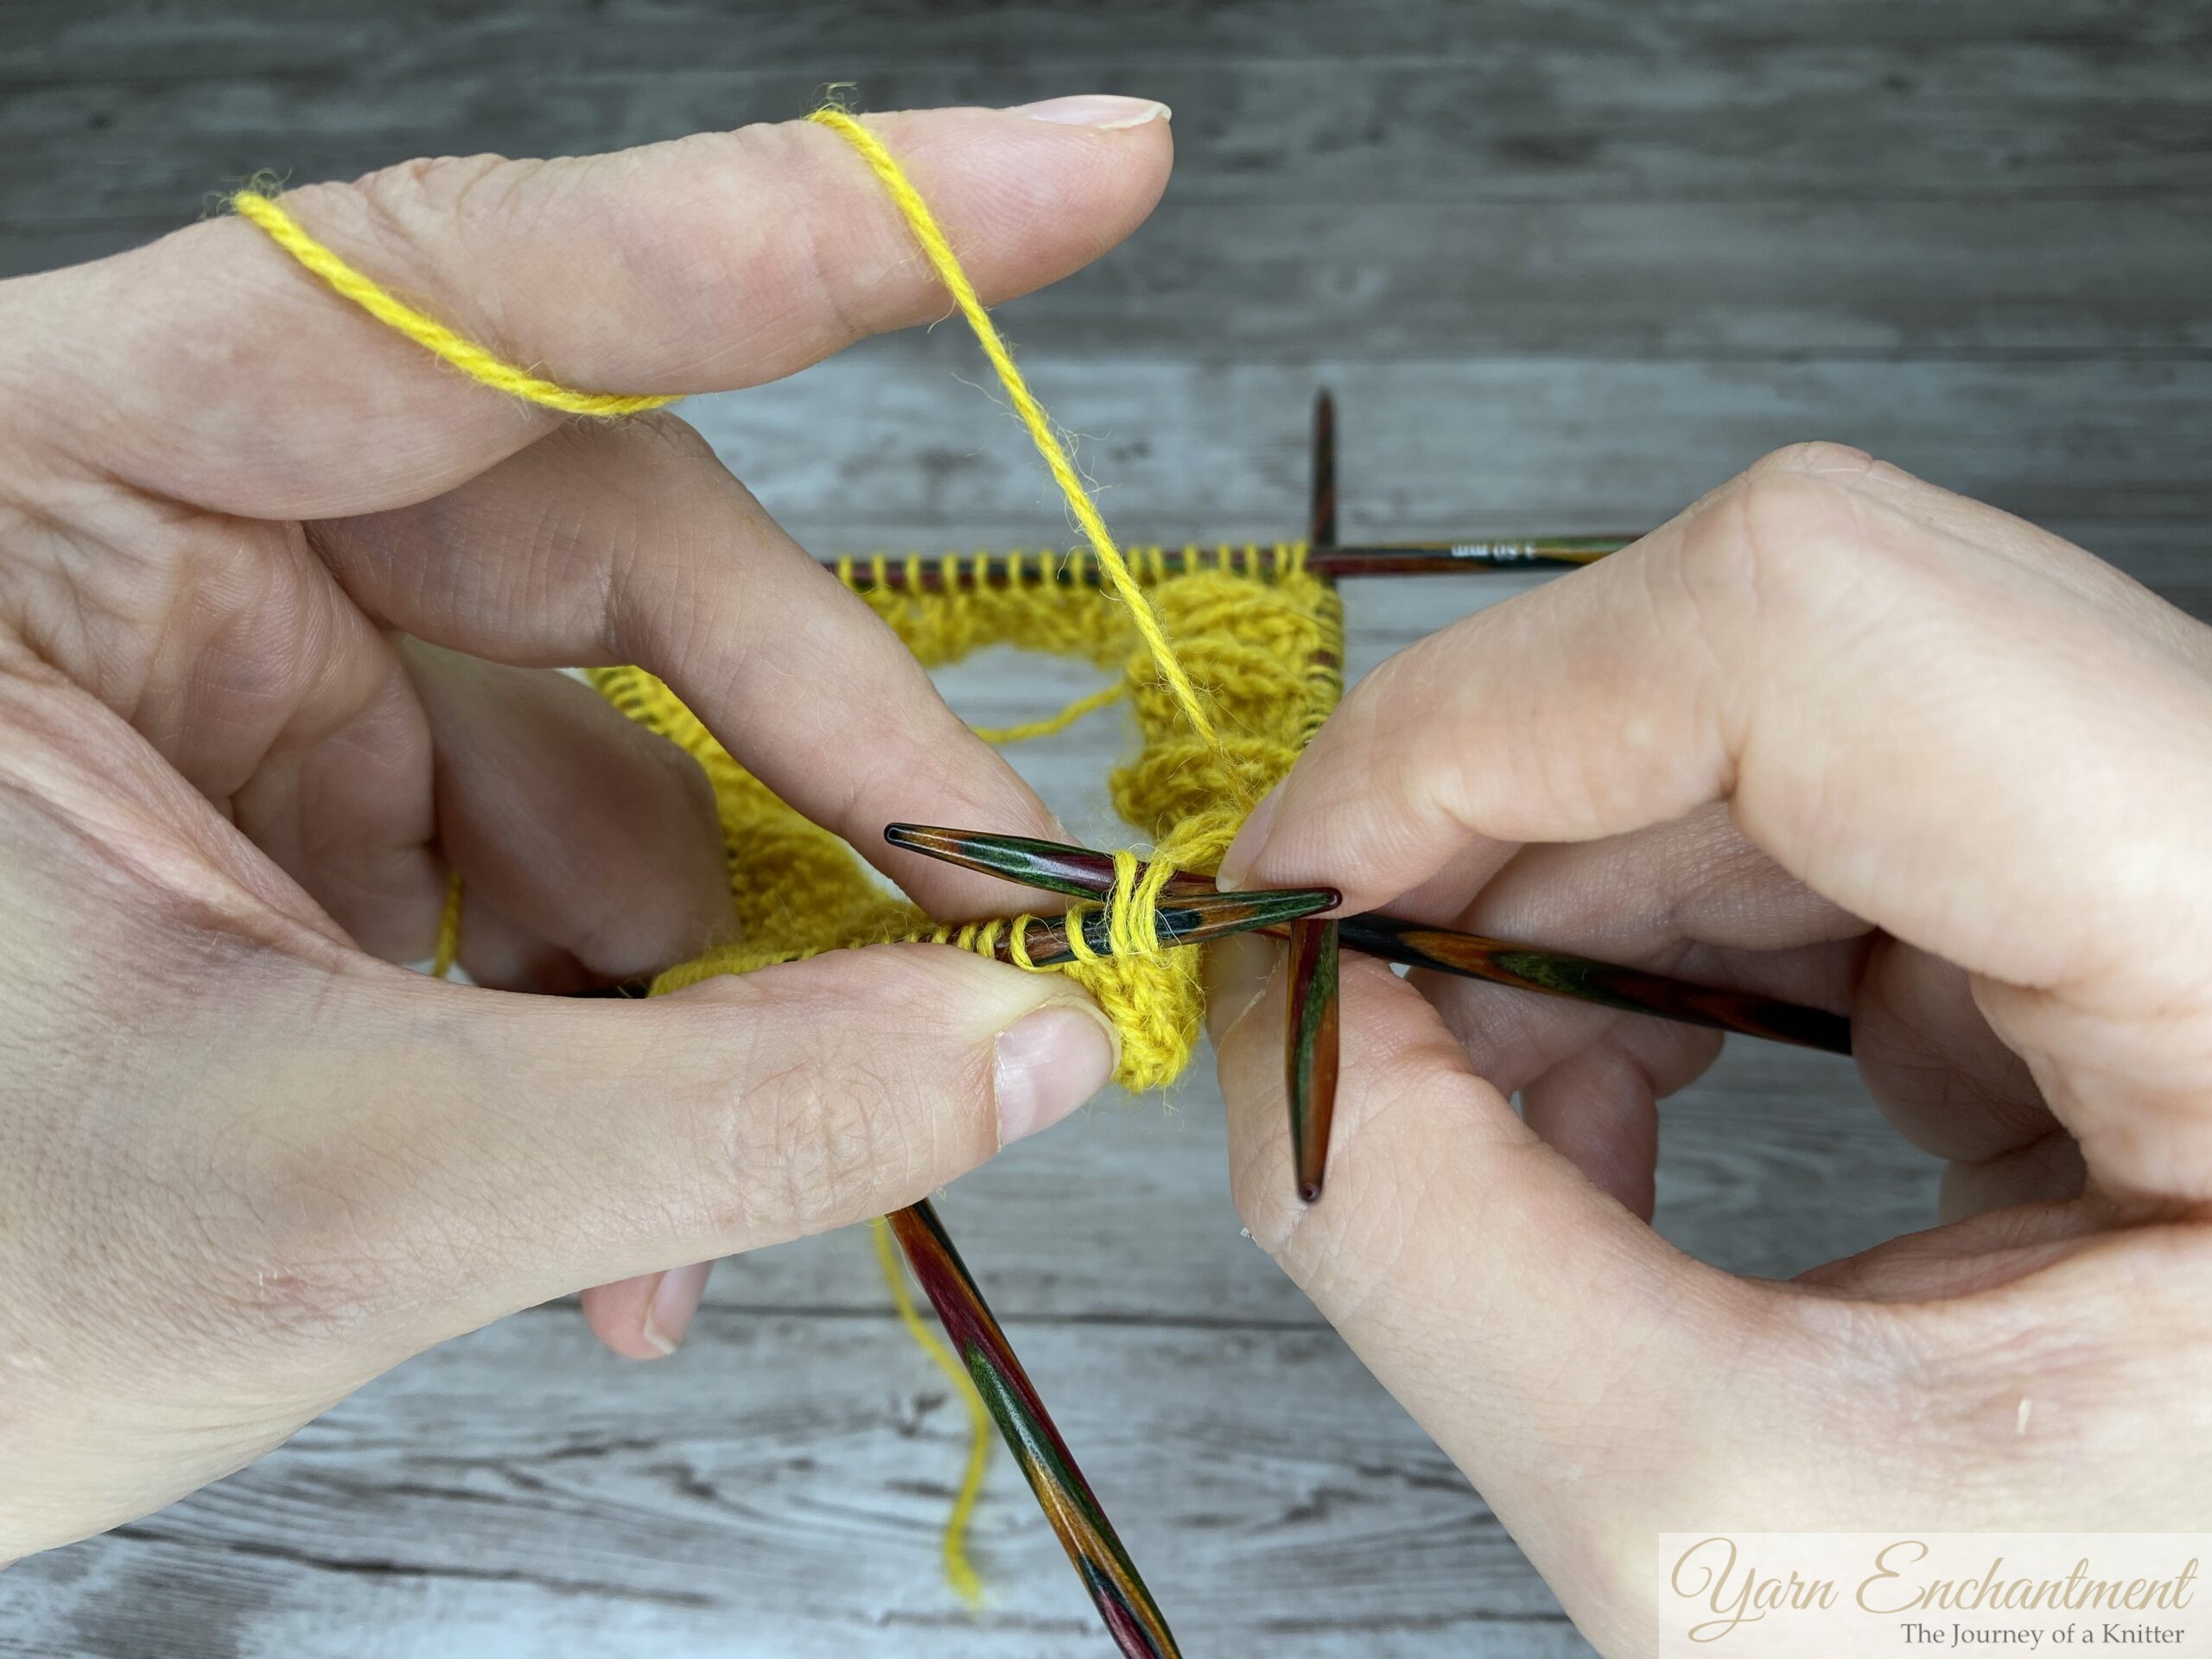

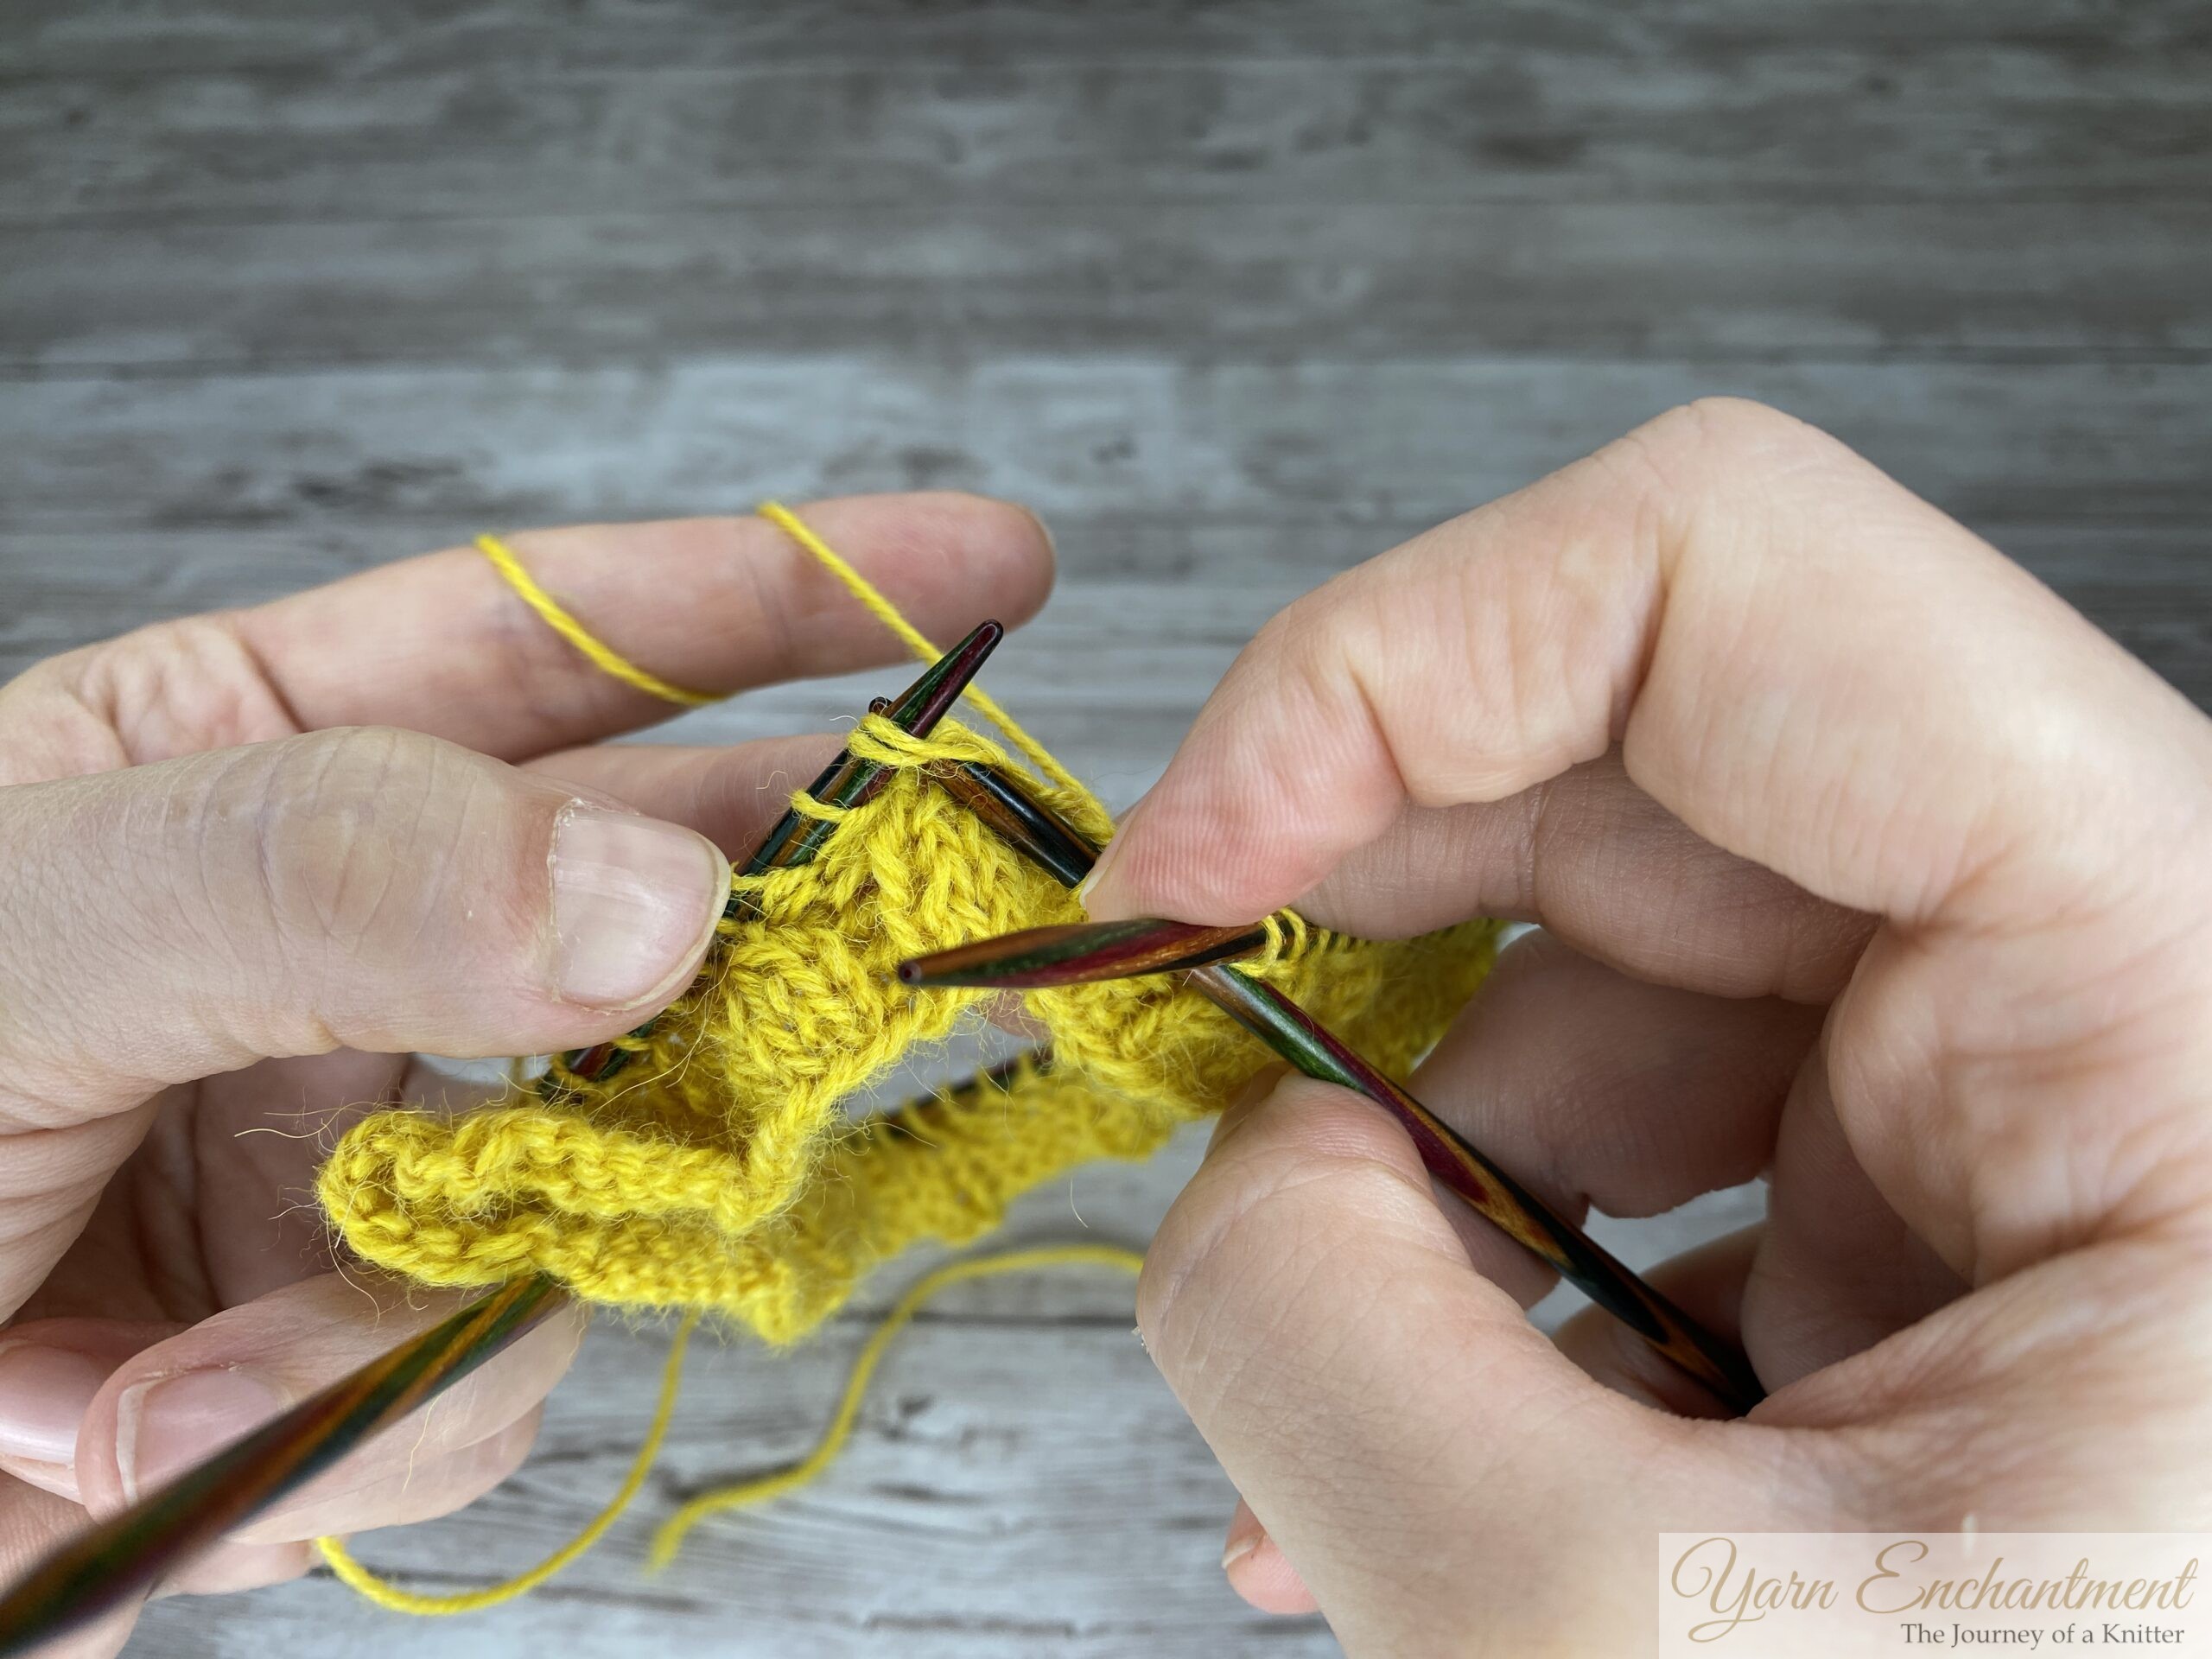

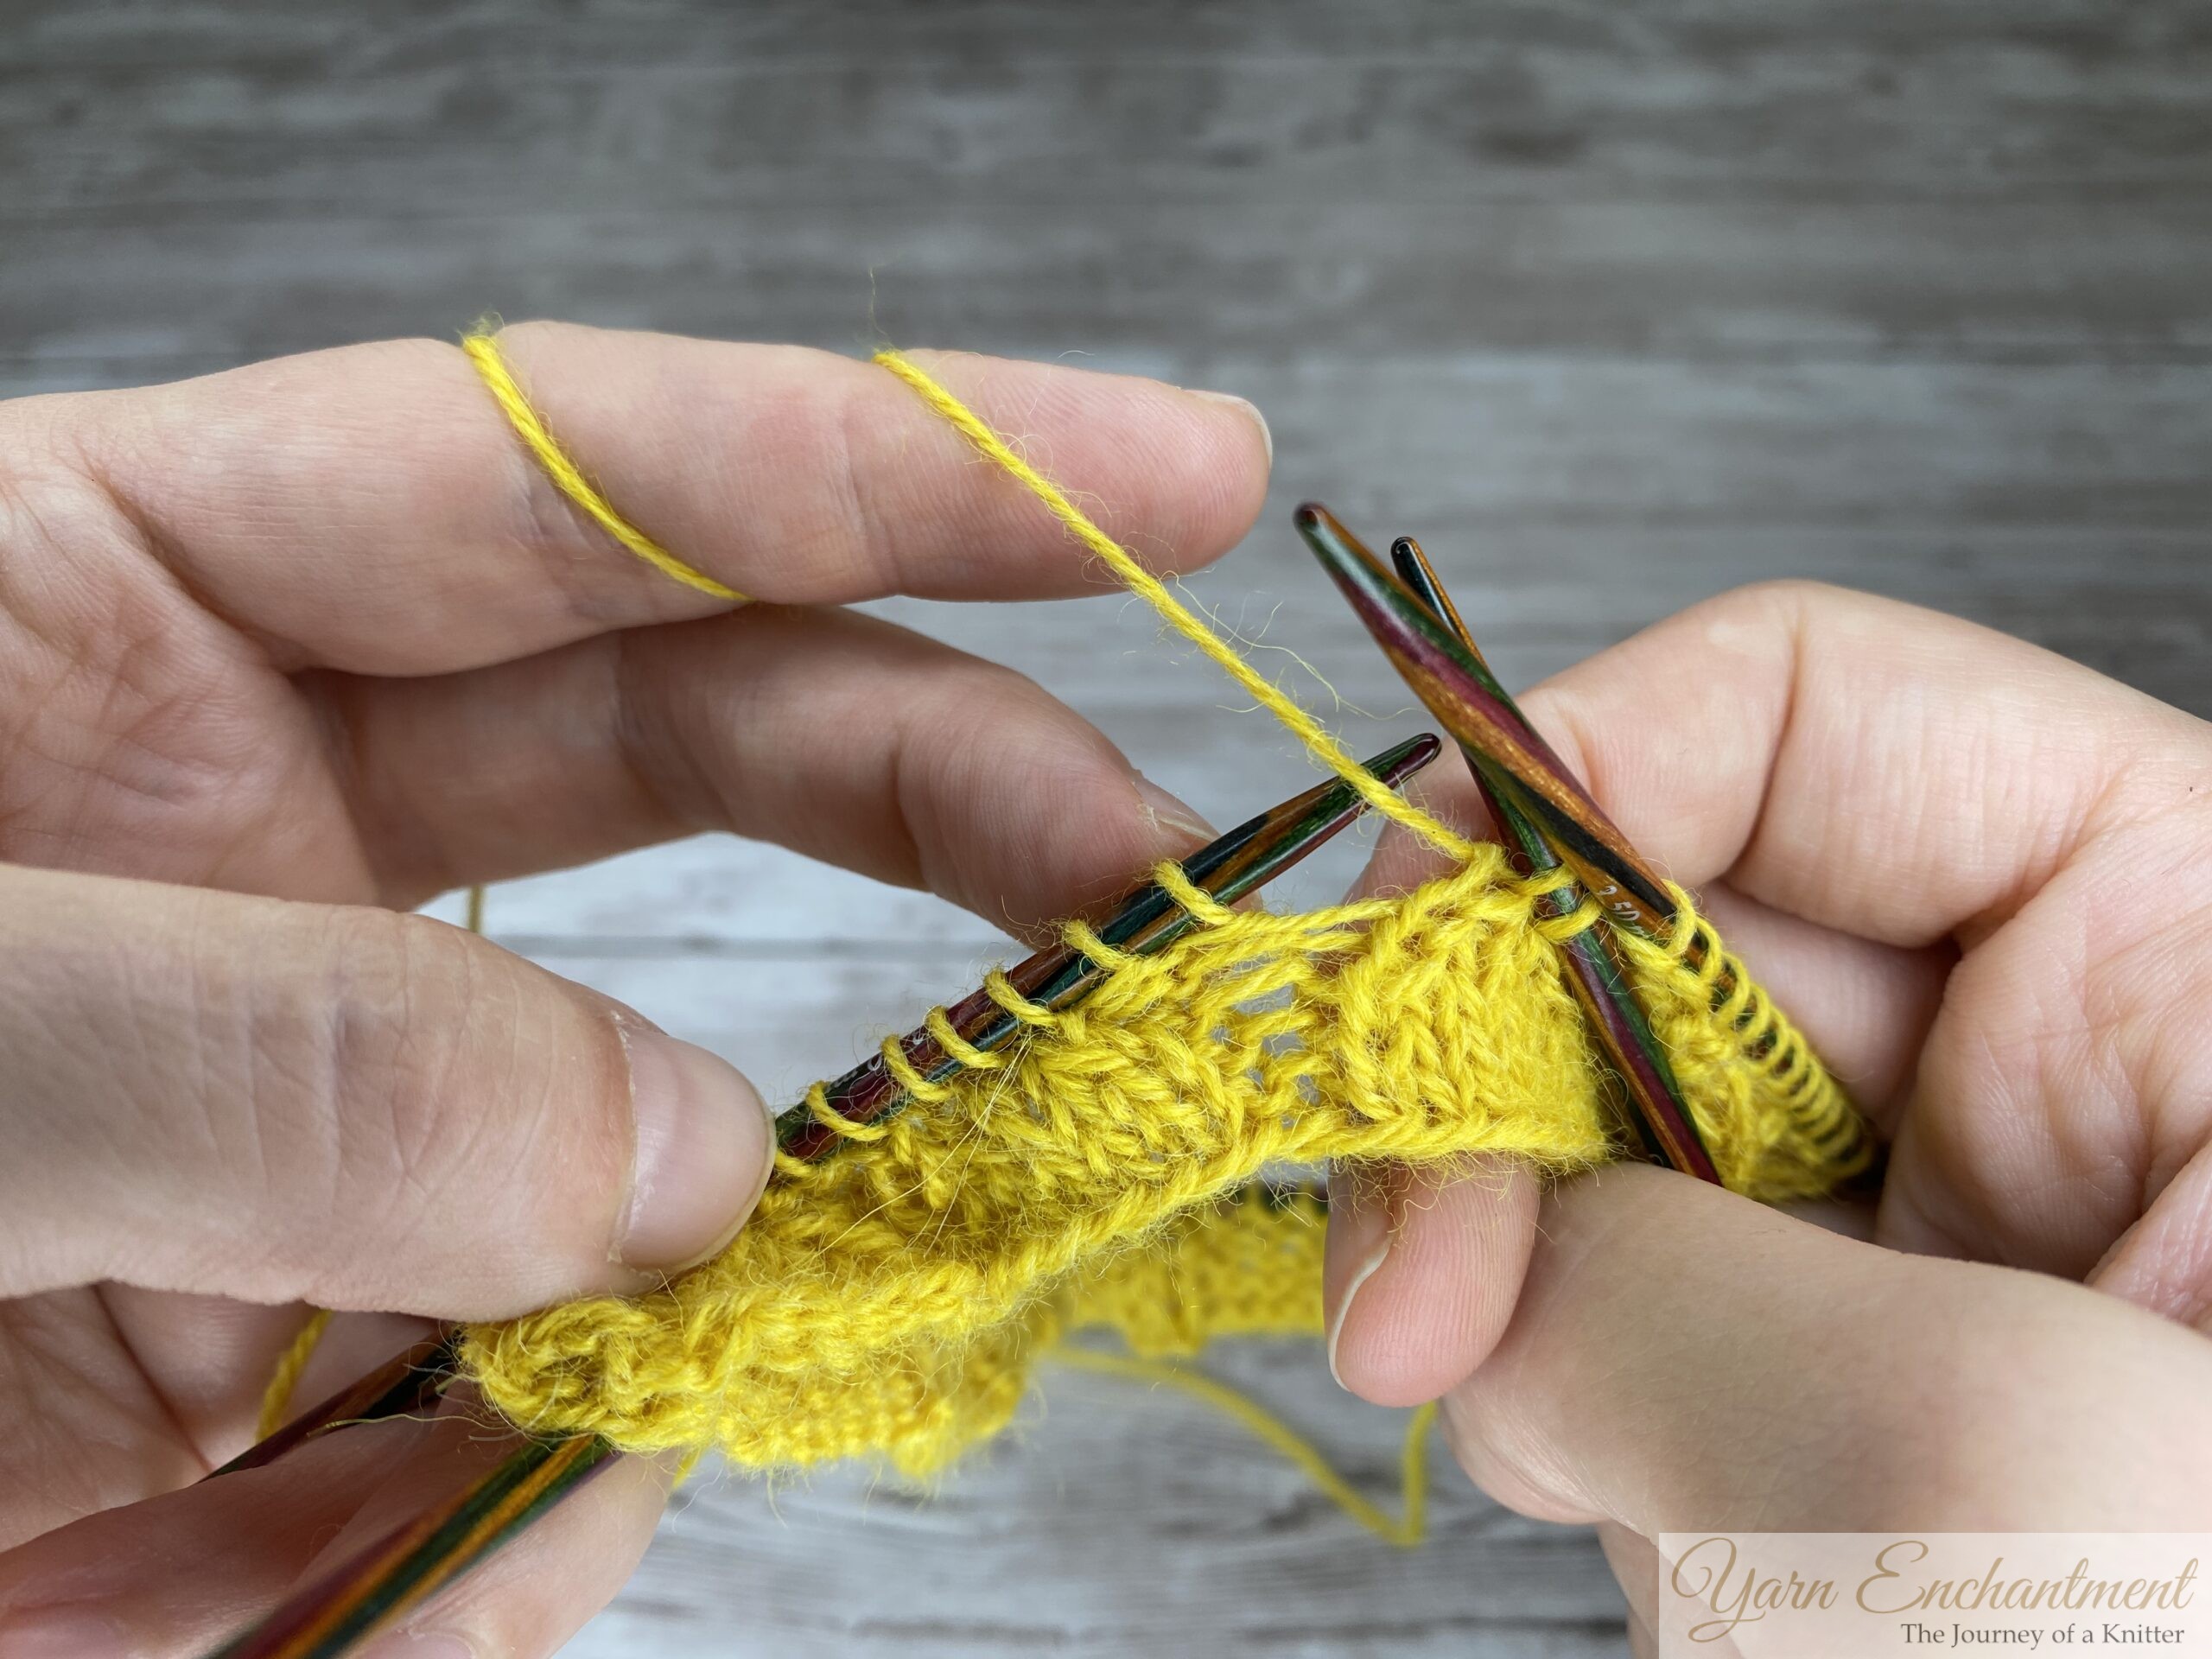

Rnds 7–9: K2, P2 rep to end. Cut the contrast yarn, leaving a tail. Leave the stitches live on the needles.
After completing rounds 7 - 9, cut the yarn and set the ruffles aside (you will need them later). Double-check that you have the same number of stitches on your needle as your sock cast-on.
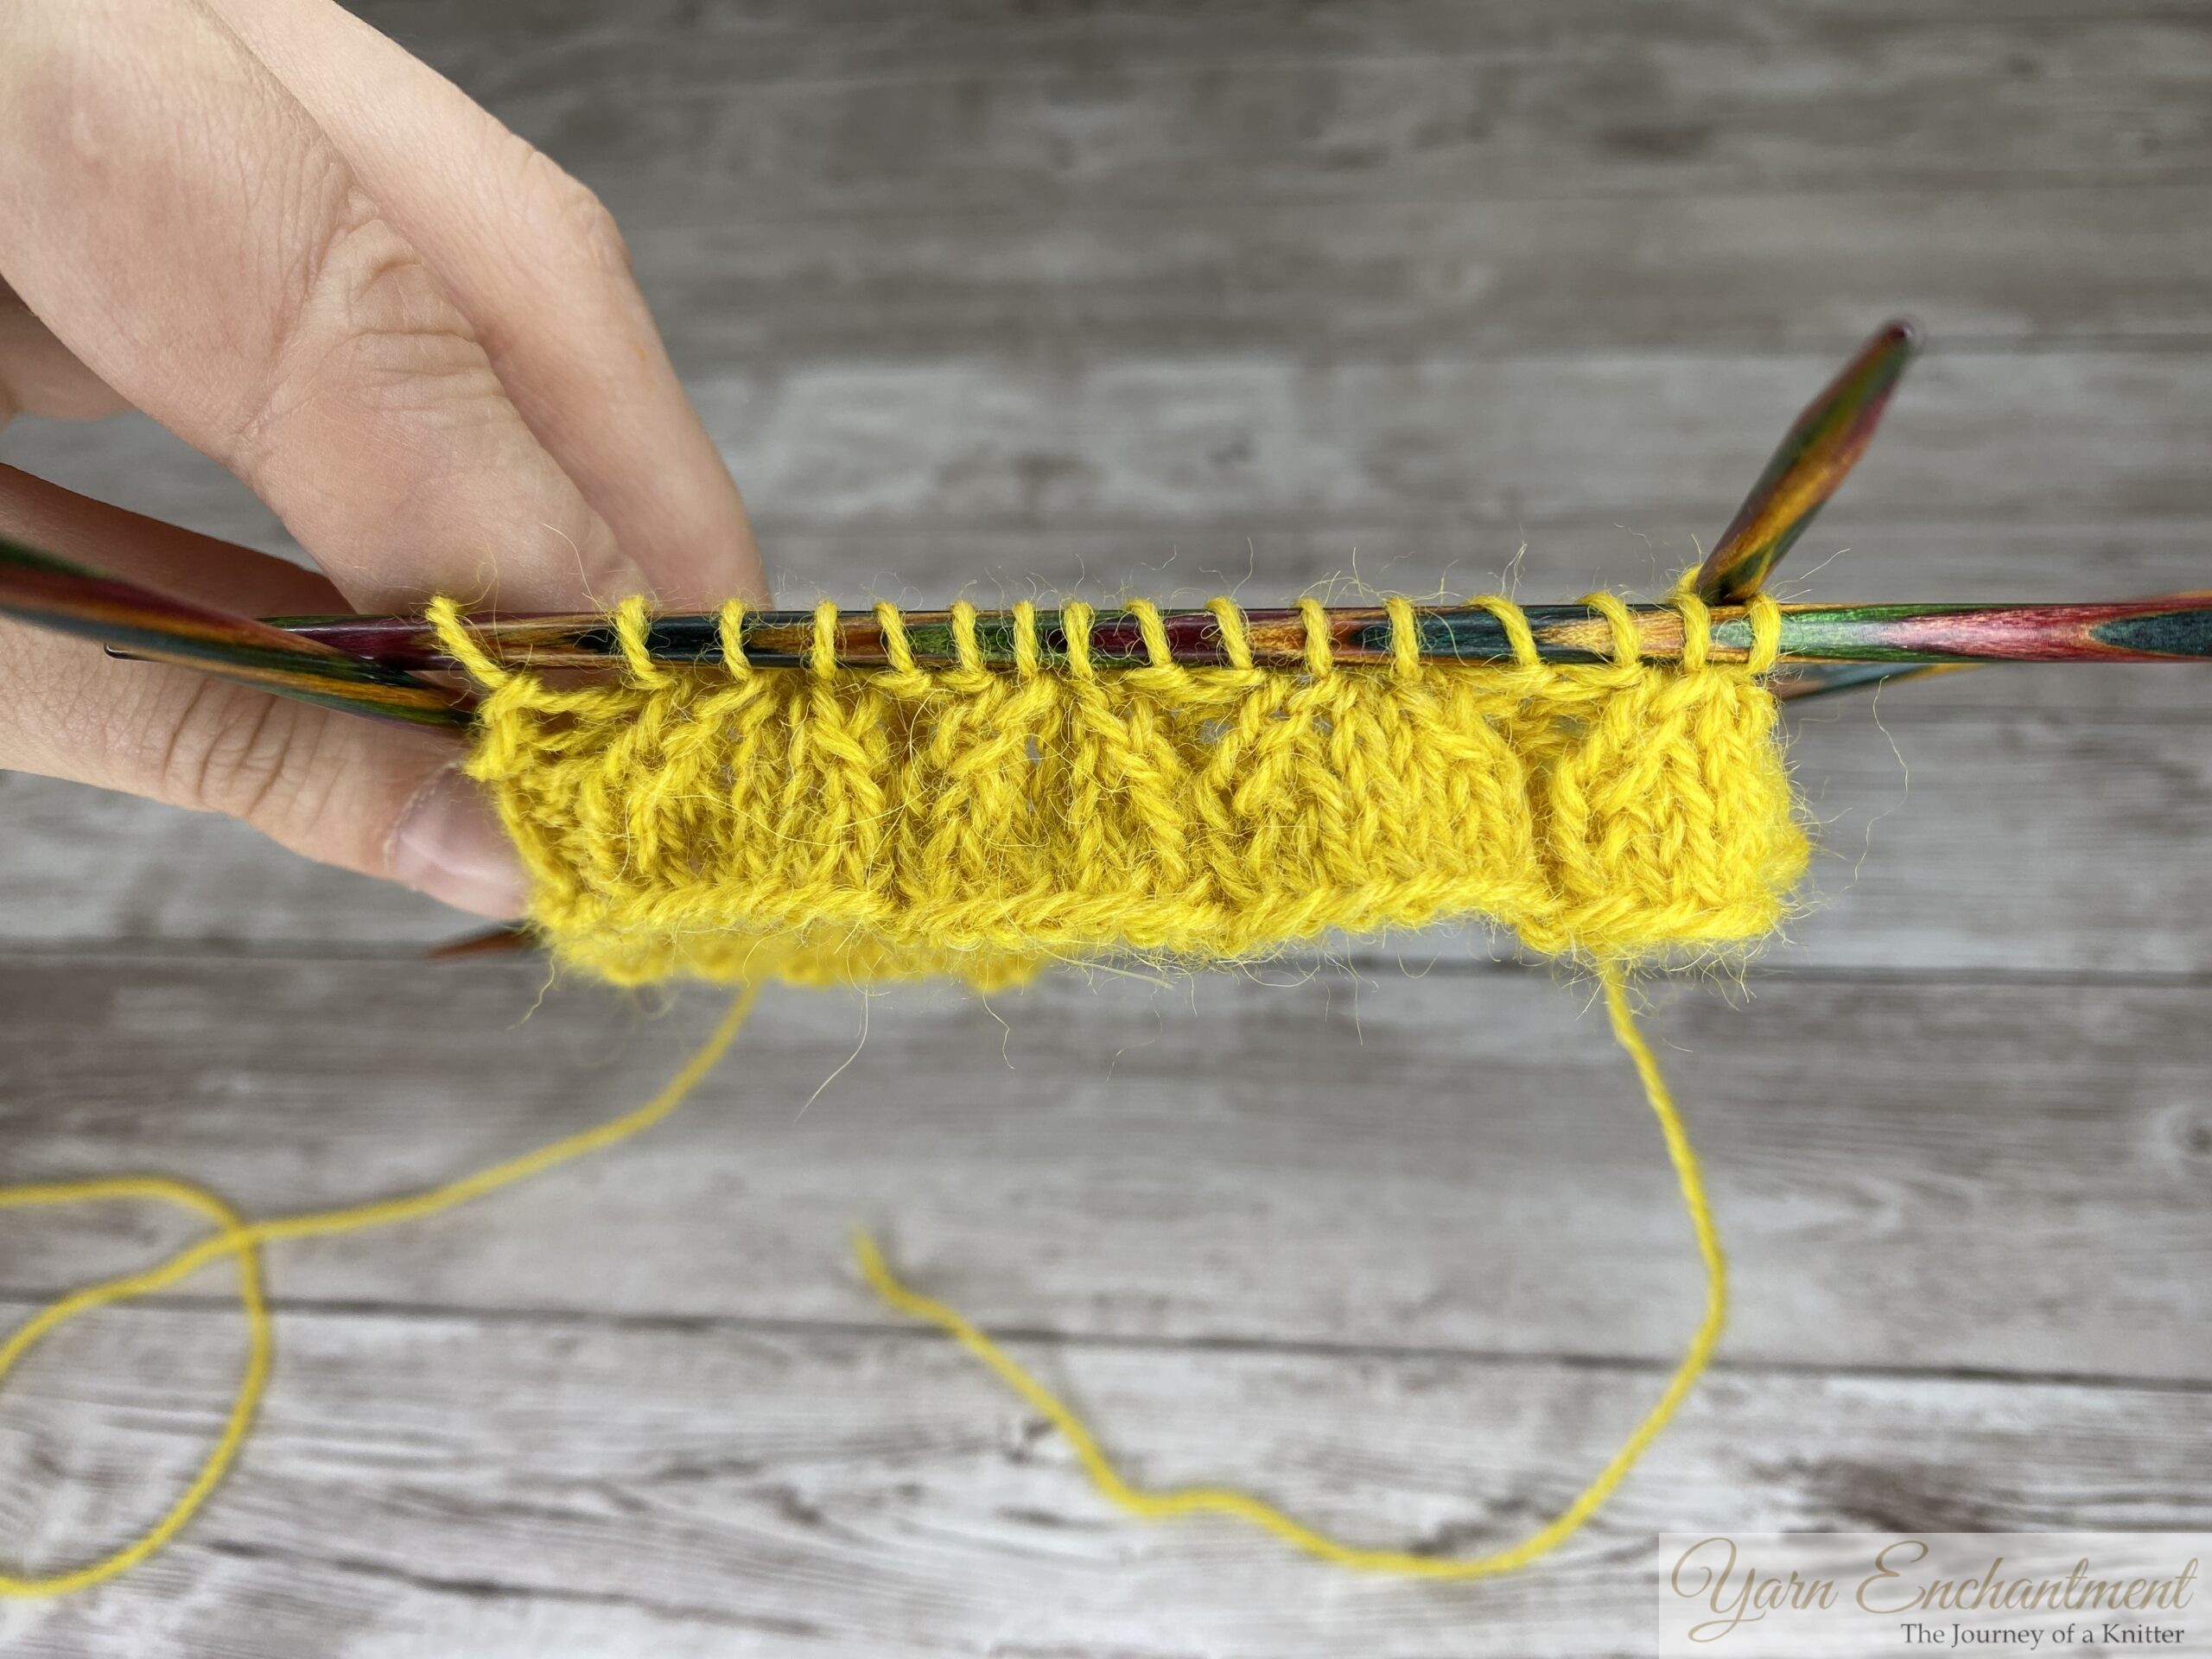

Check Your Stitch Counts as You Decrease
Use this quick check to stay on track. After Rnd 4 you should have 1.5 times your sock stitch count left on the needles. After Rnd 6 you’ll be right back at your original sock count.
Part 2: The Main Sock Tube
With your main color, cast on the number you need for your sock. Divide evenly across 4 needles. Join in the round.
Knit 7 rounds in stockinette stitch (all knit).
Cast on the required number of stitches for your sock, ...
...then knit 7 rounds in plain stockinette stitch.


Part 3: Join the Layers
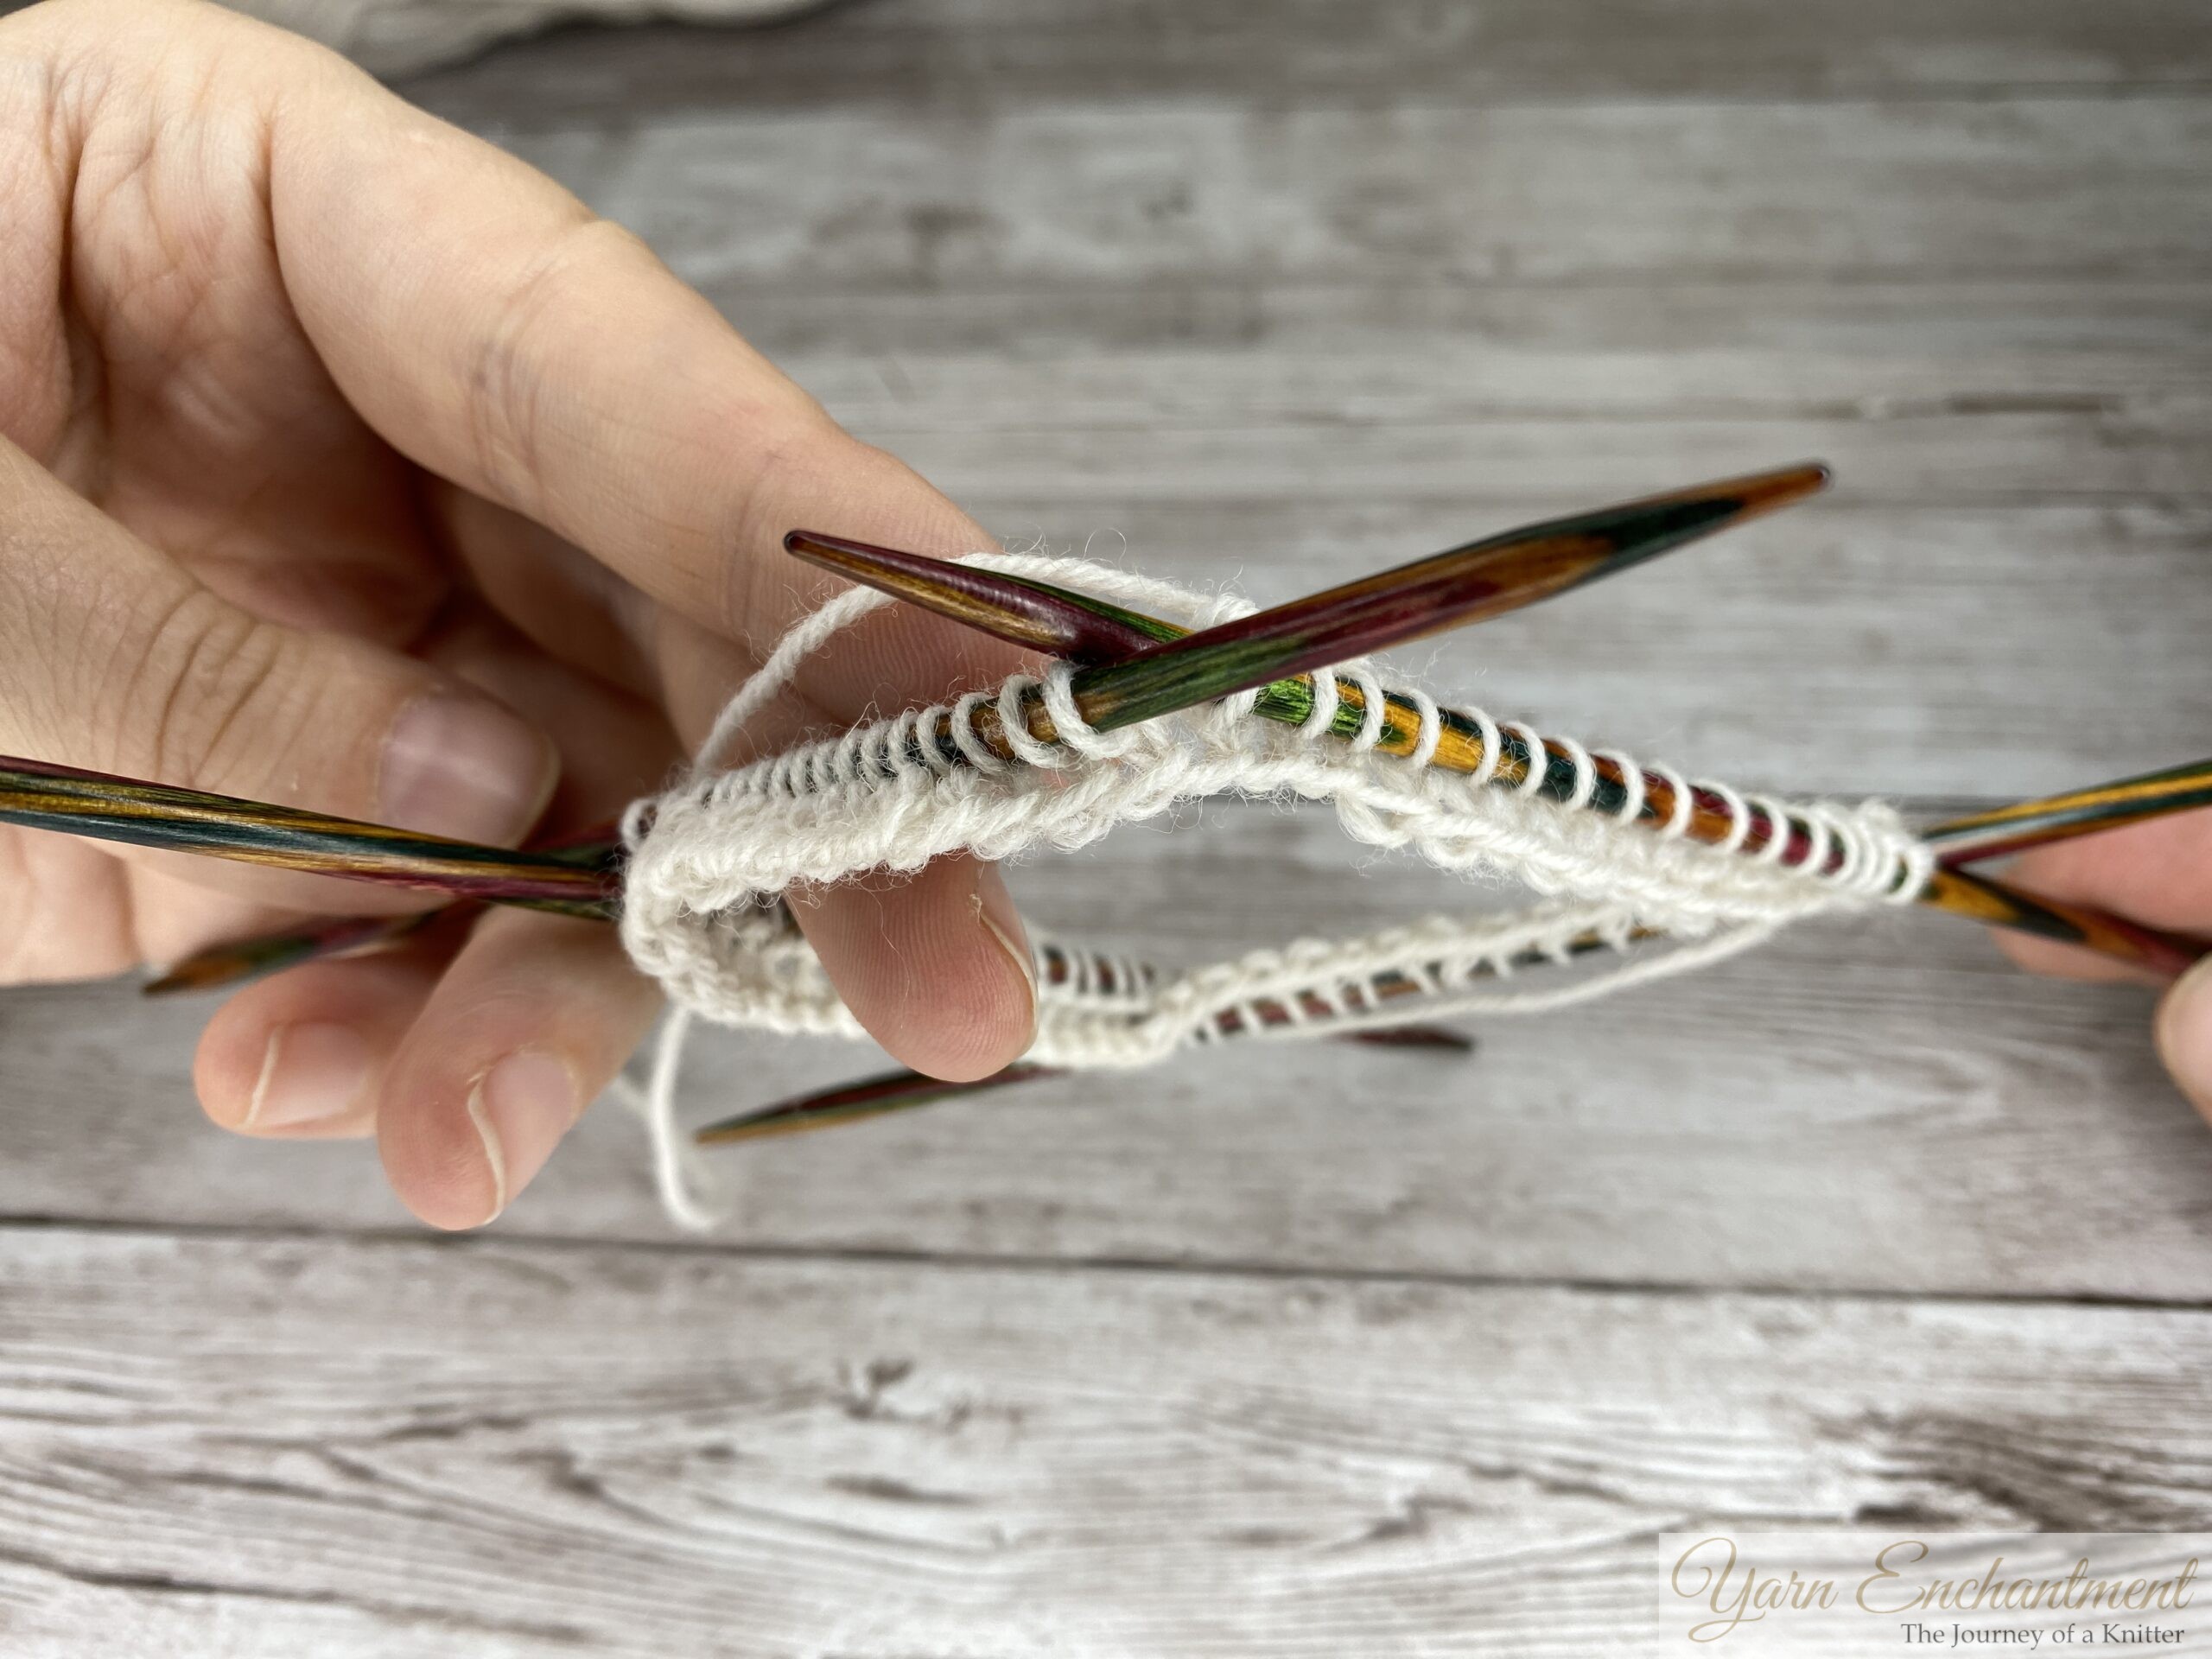
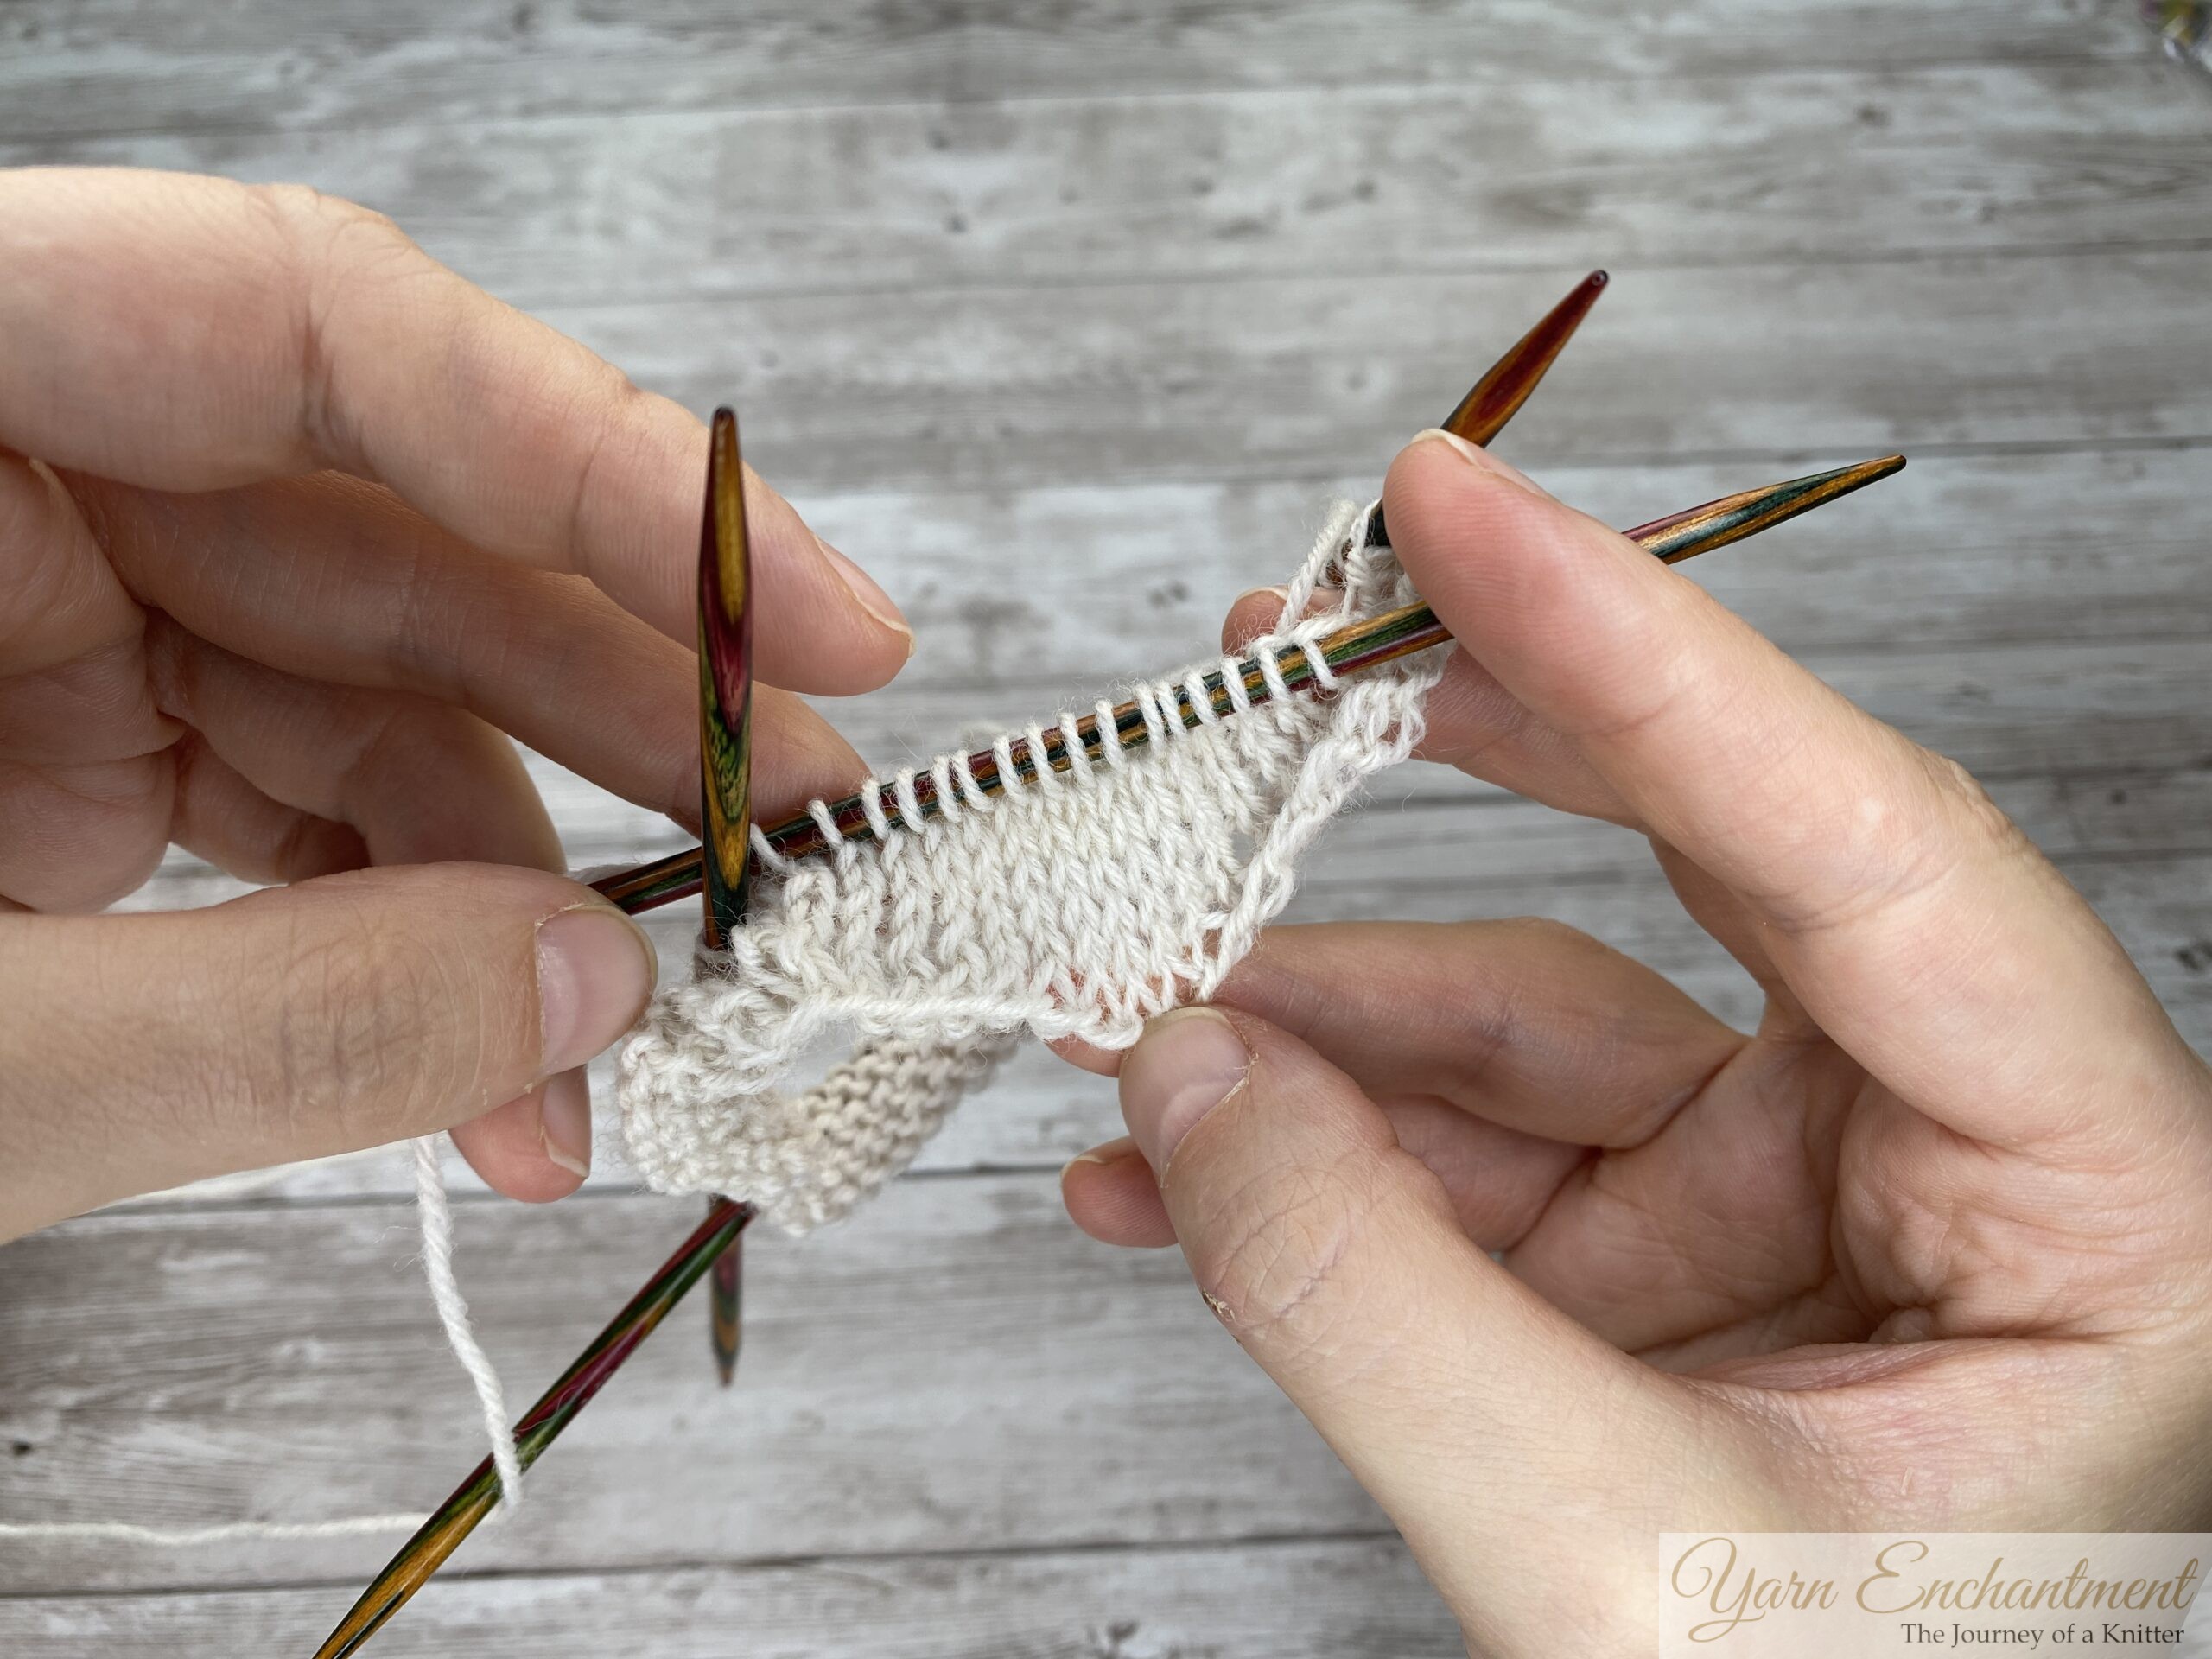
Hold the main sock tube on top of the ruffle cuff, with the right sides facing out (the main tube should be outside, ruffle inside). Align the beginning of the round.
Now take your ruffle and your main sock. Make sure they both have the same number of stitches on each needle. Then line them up so that the beginning of the round on both pieces, that's needle one, are facing each other.
Now tuck the ruffle inside the main sock tube.
Now all four needles are facing their matching needle. I’ve lined them up so that needle 1 of the main sock is paired with needle 1 of the ruffle.
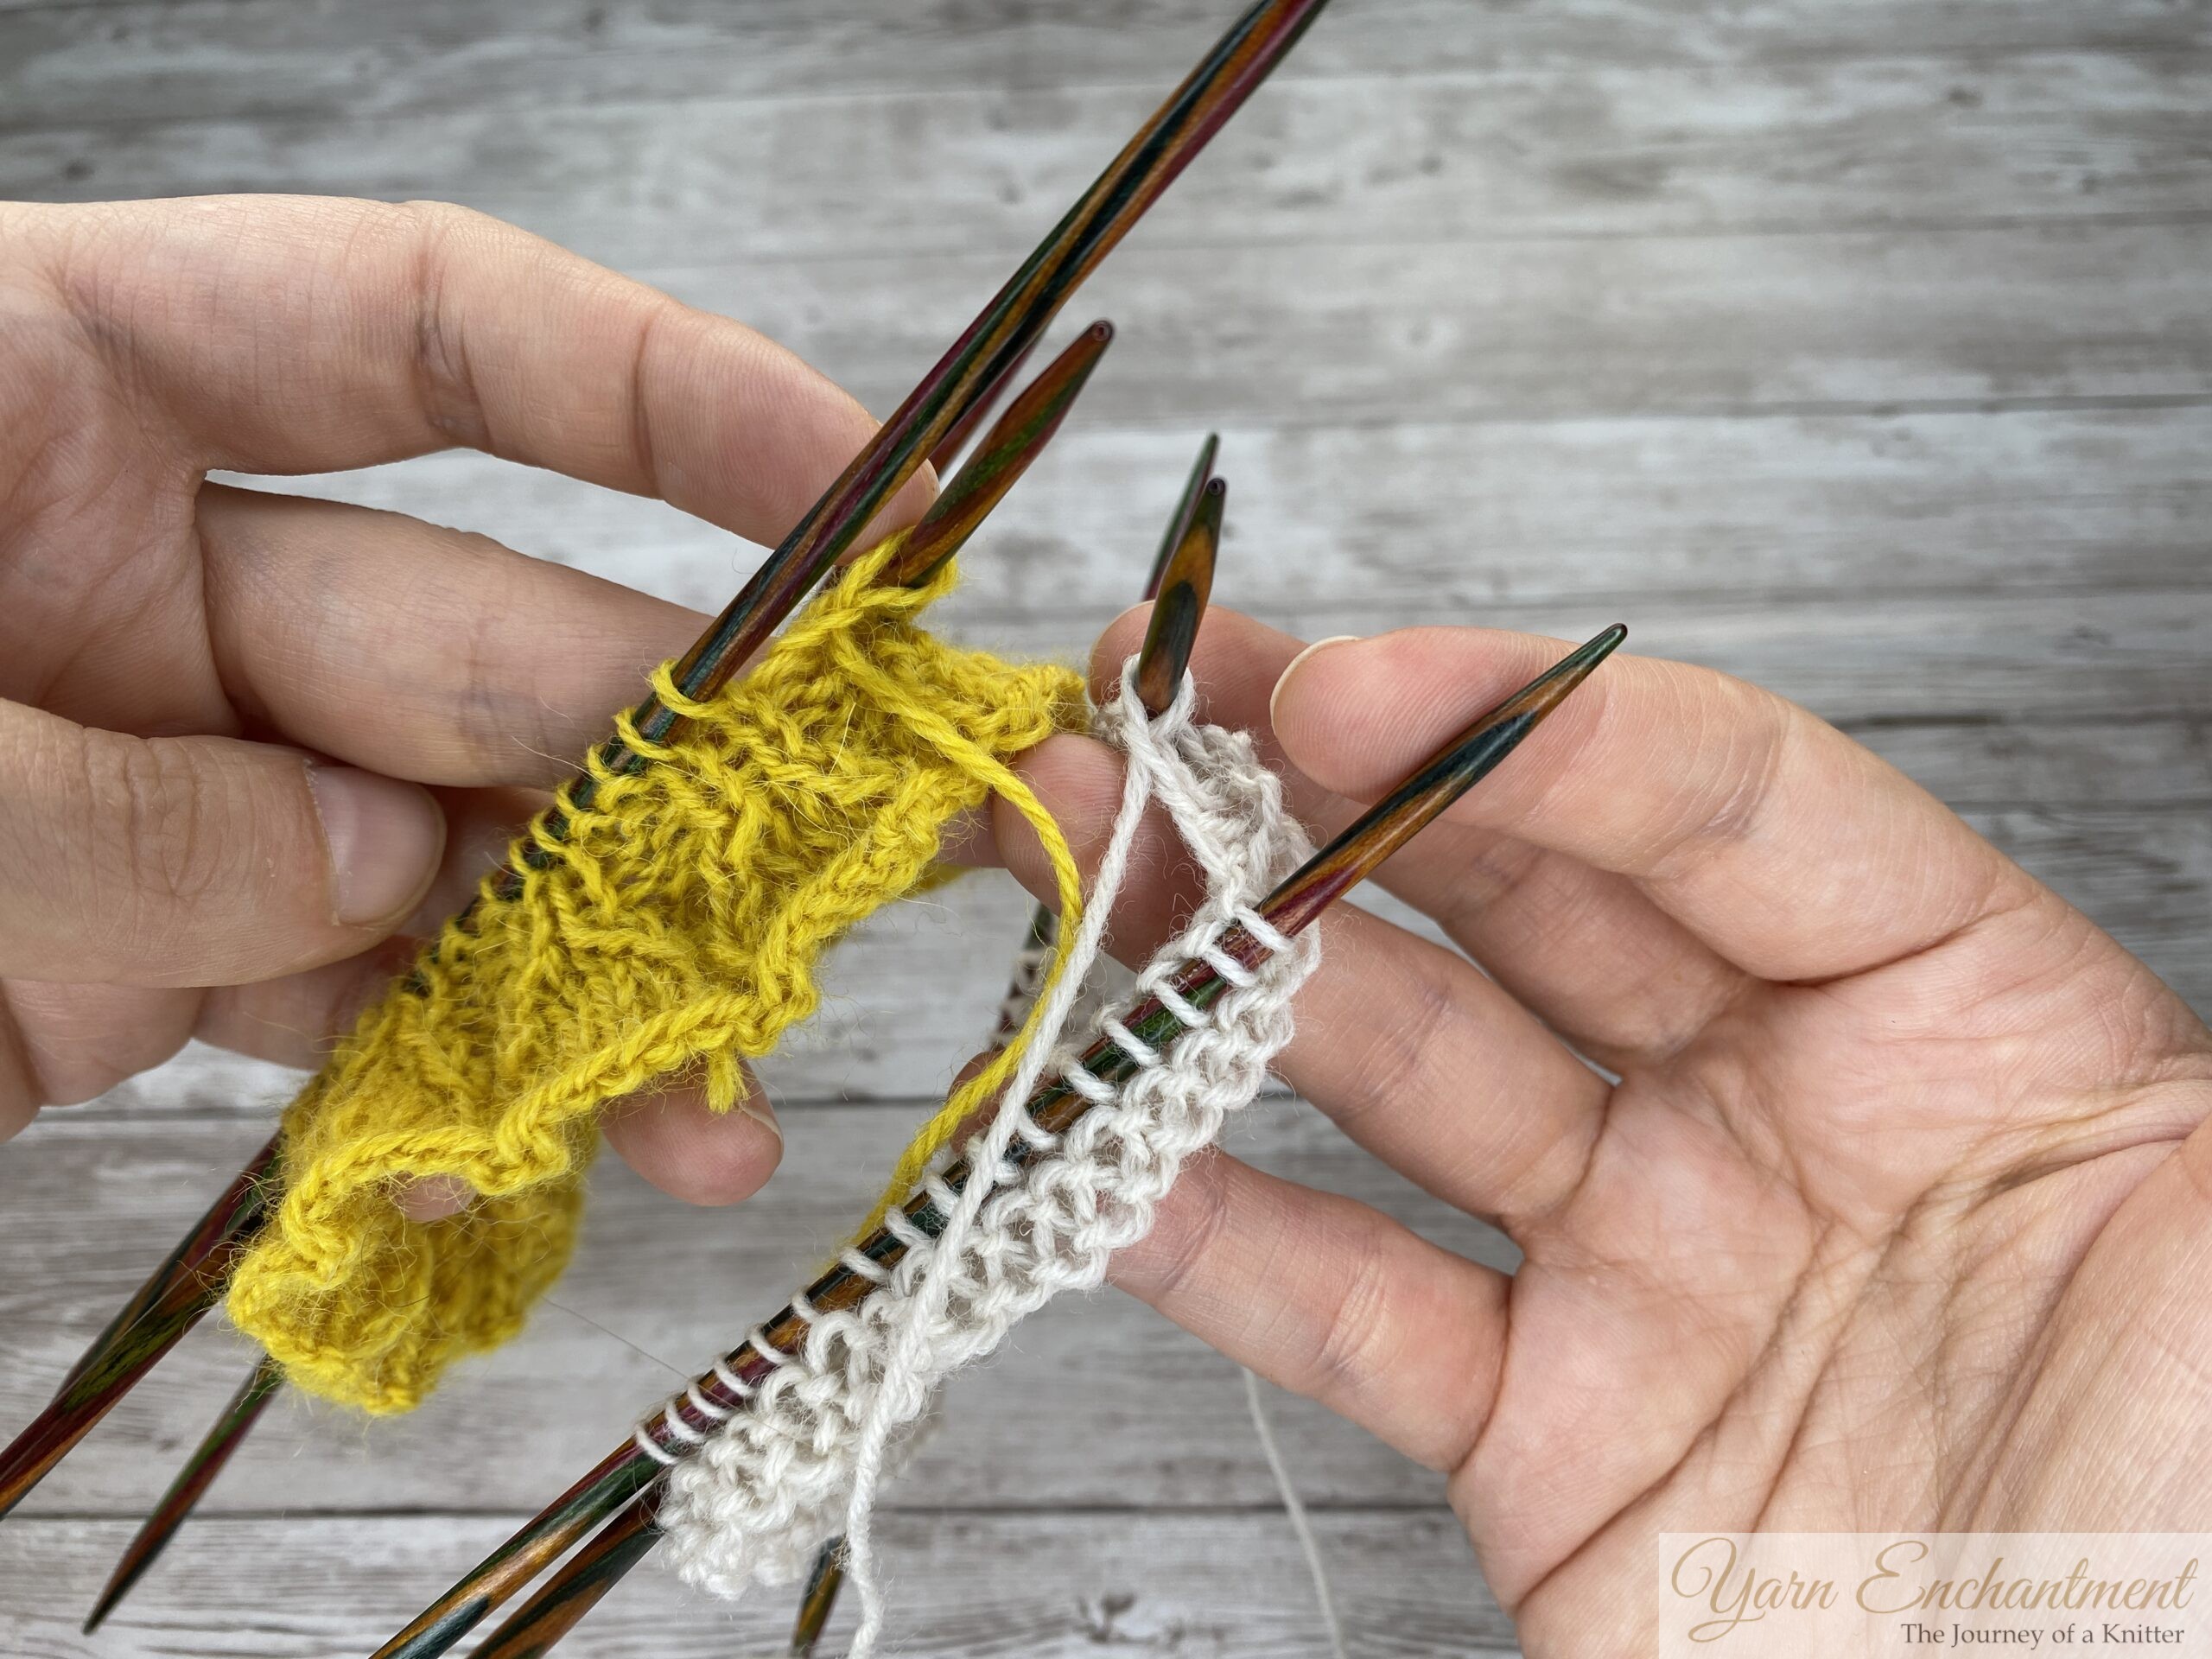

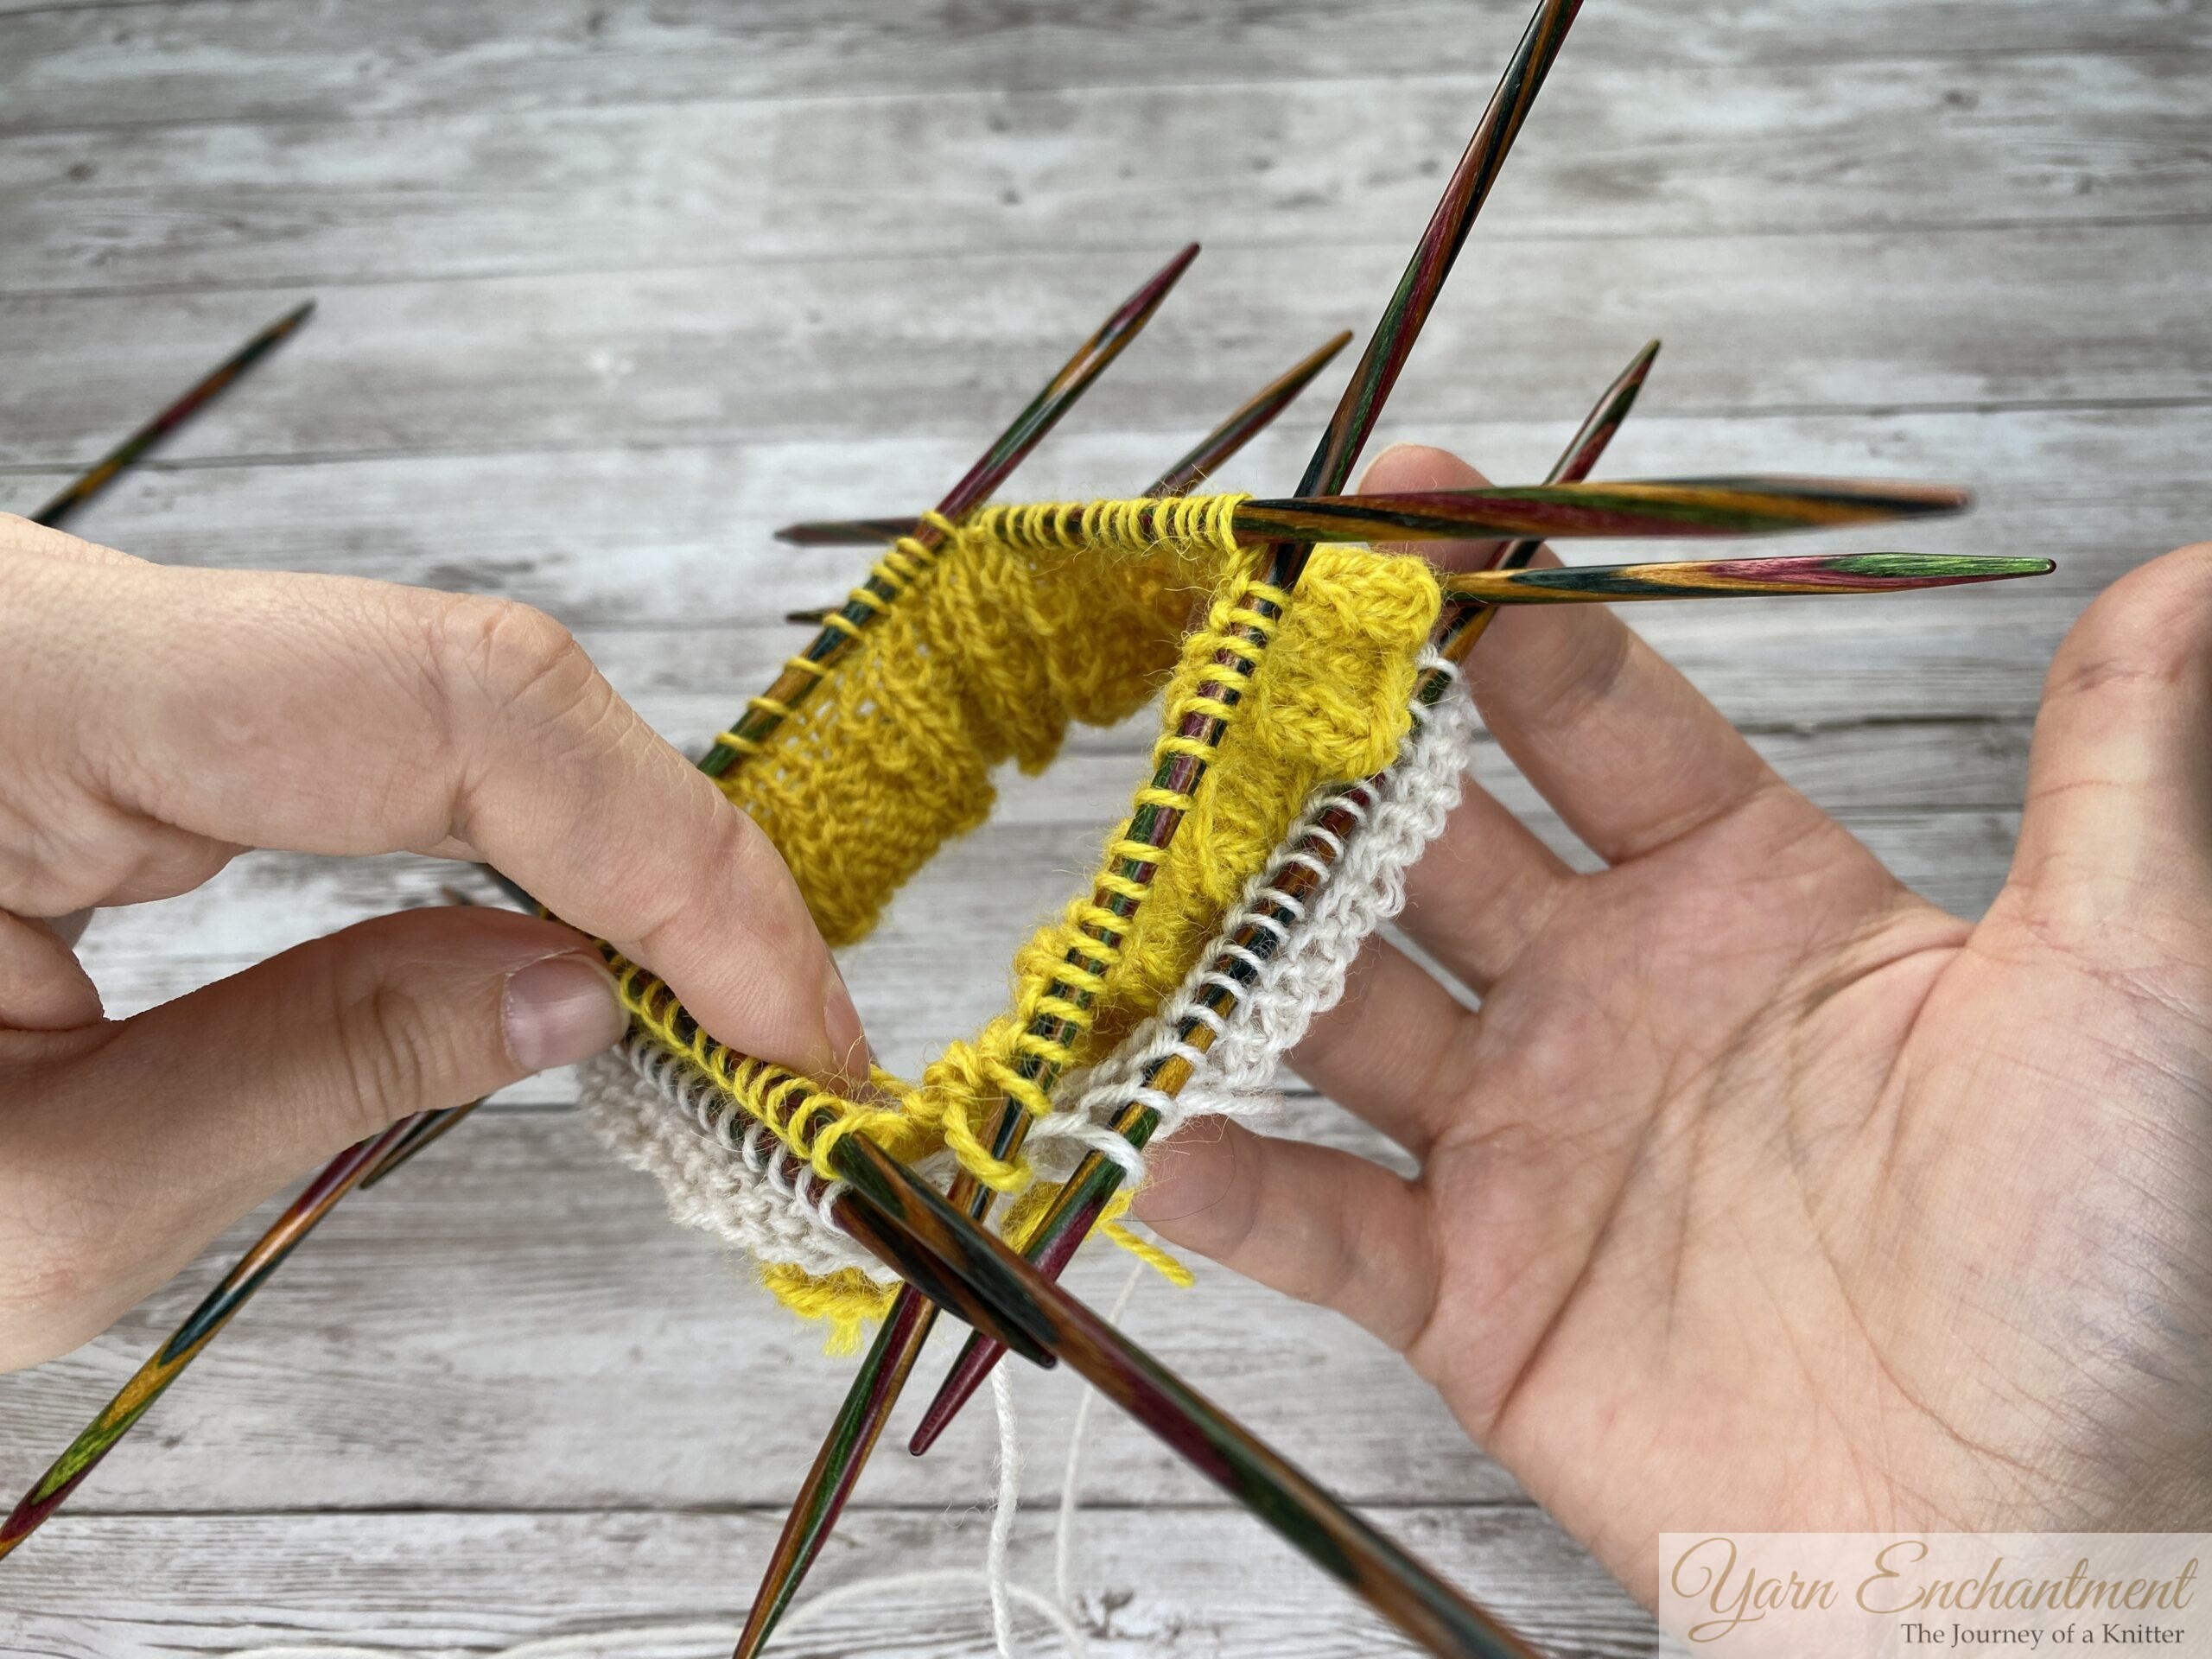

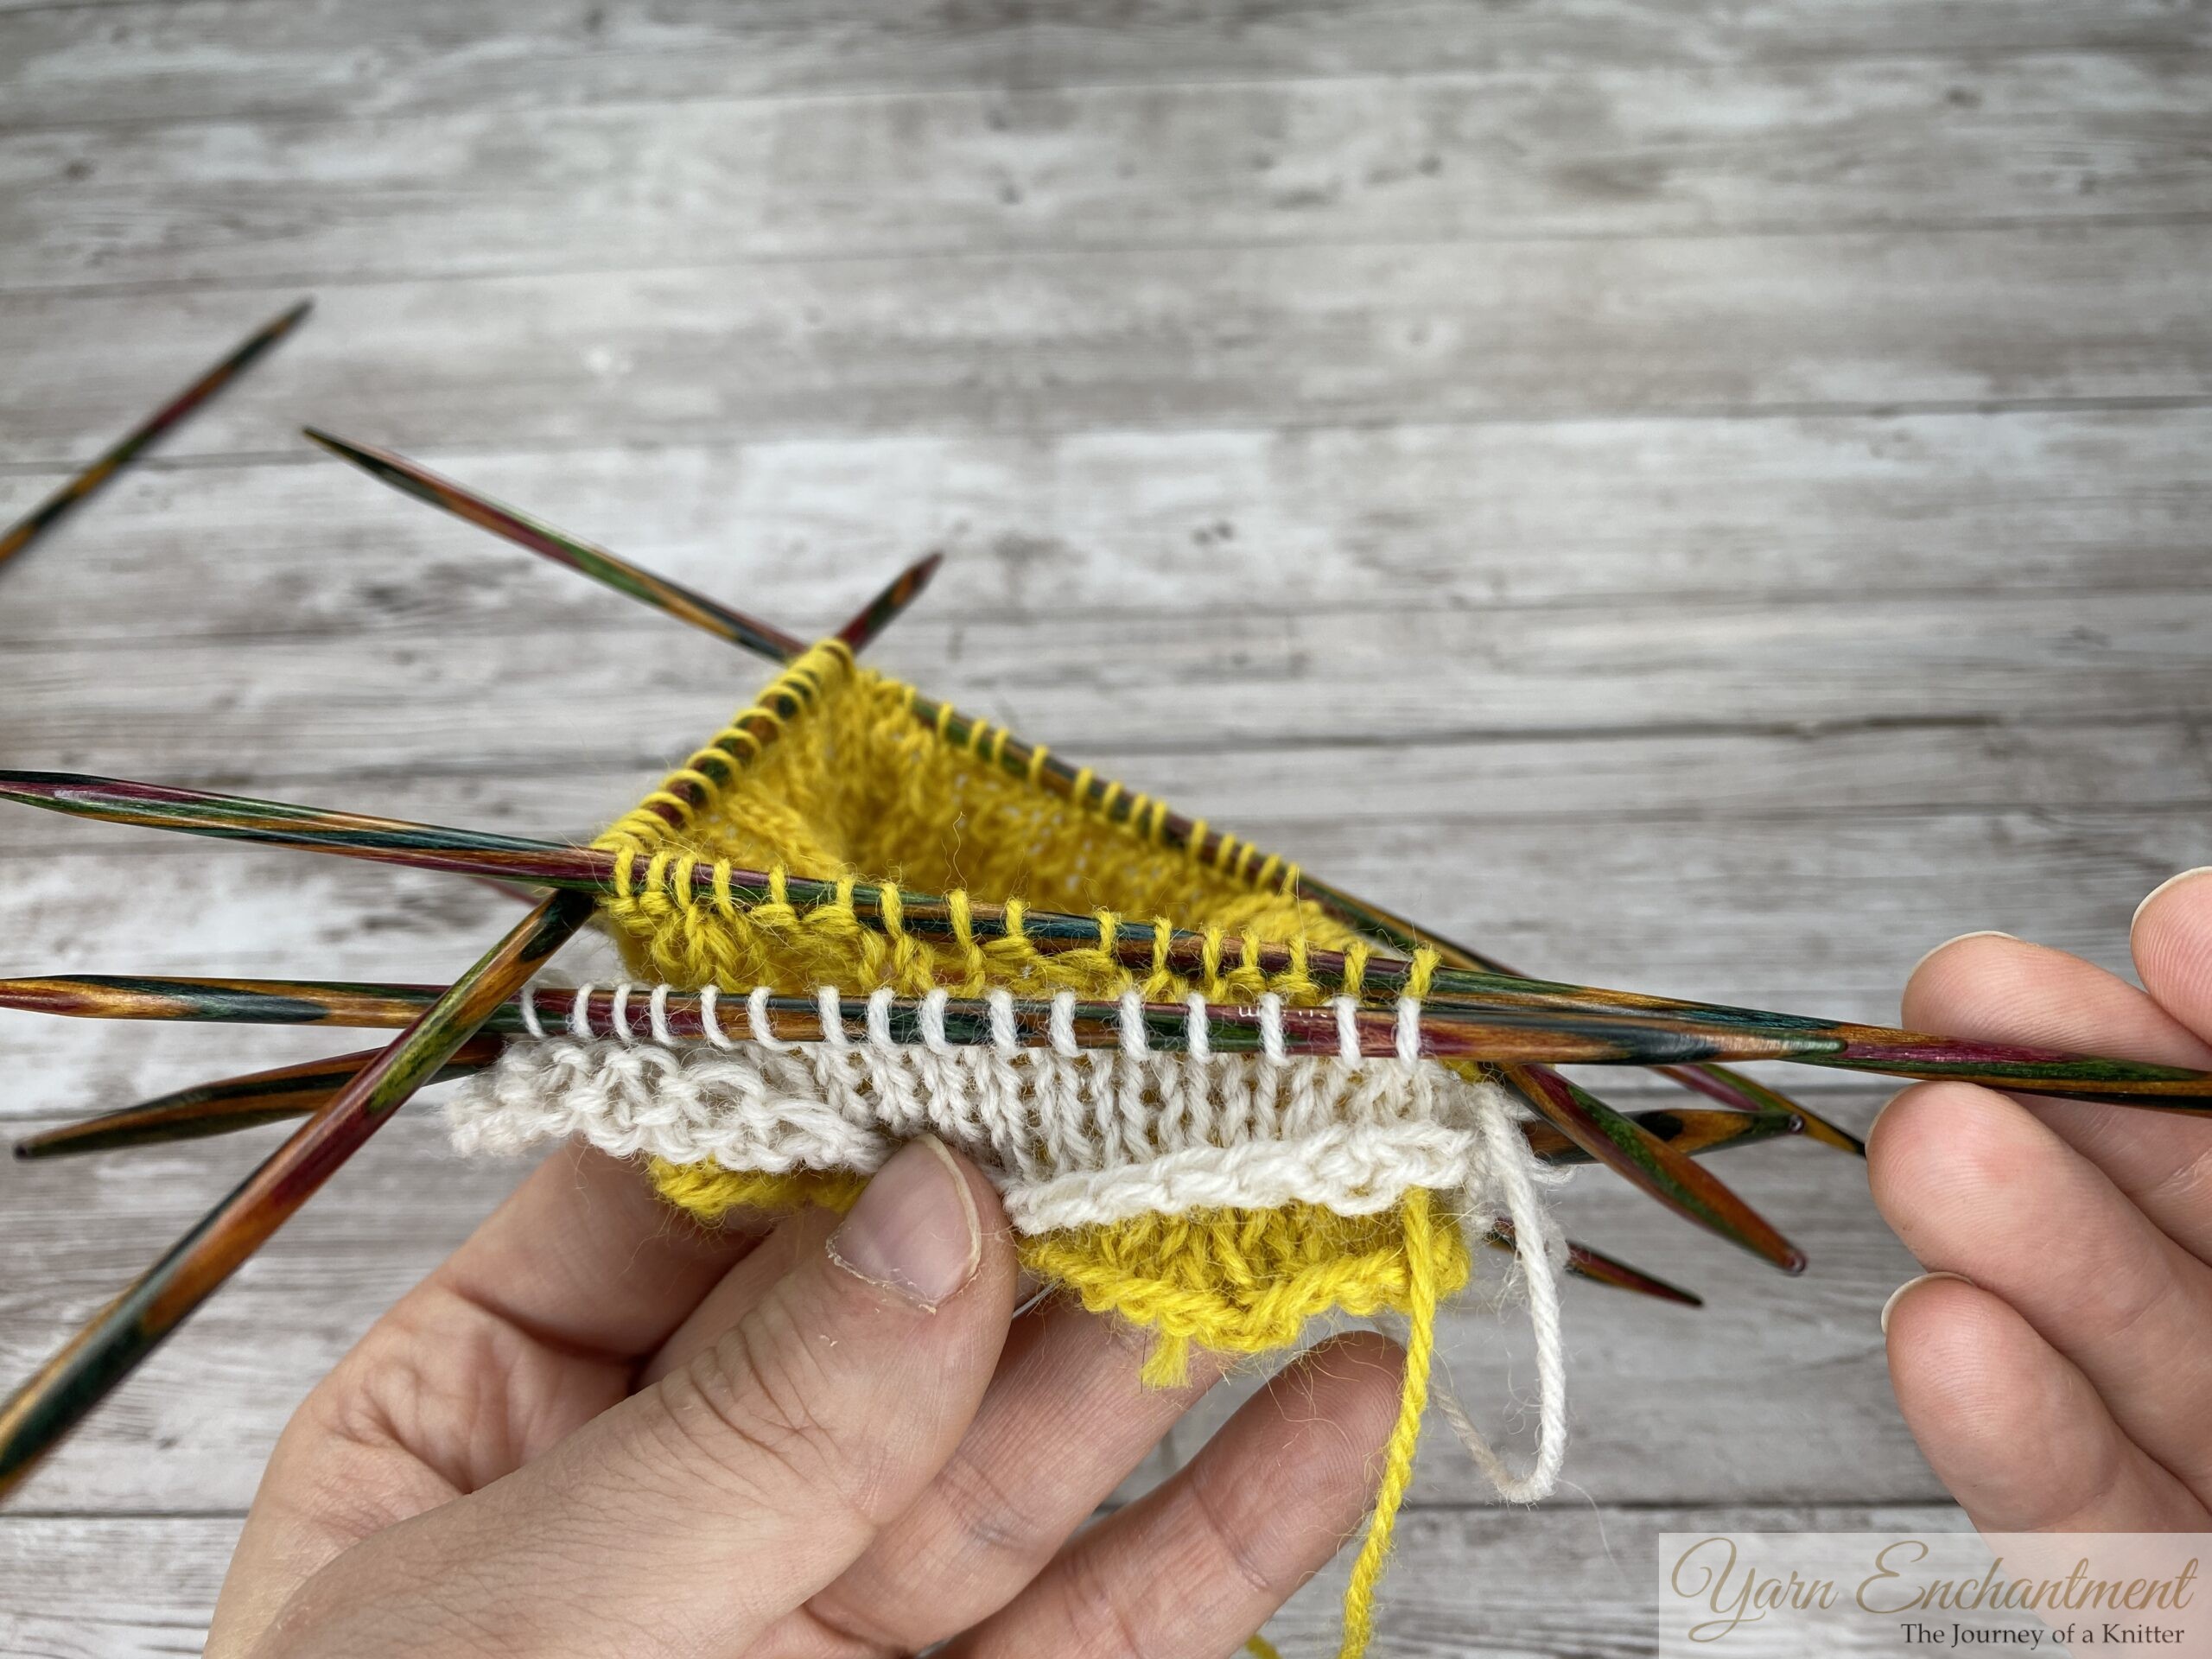

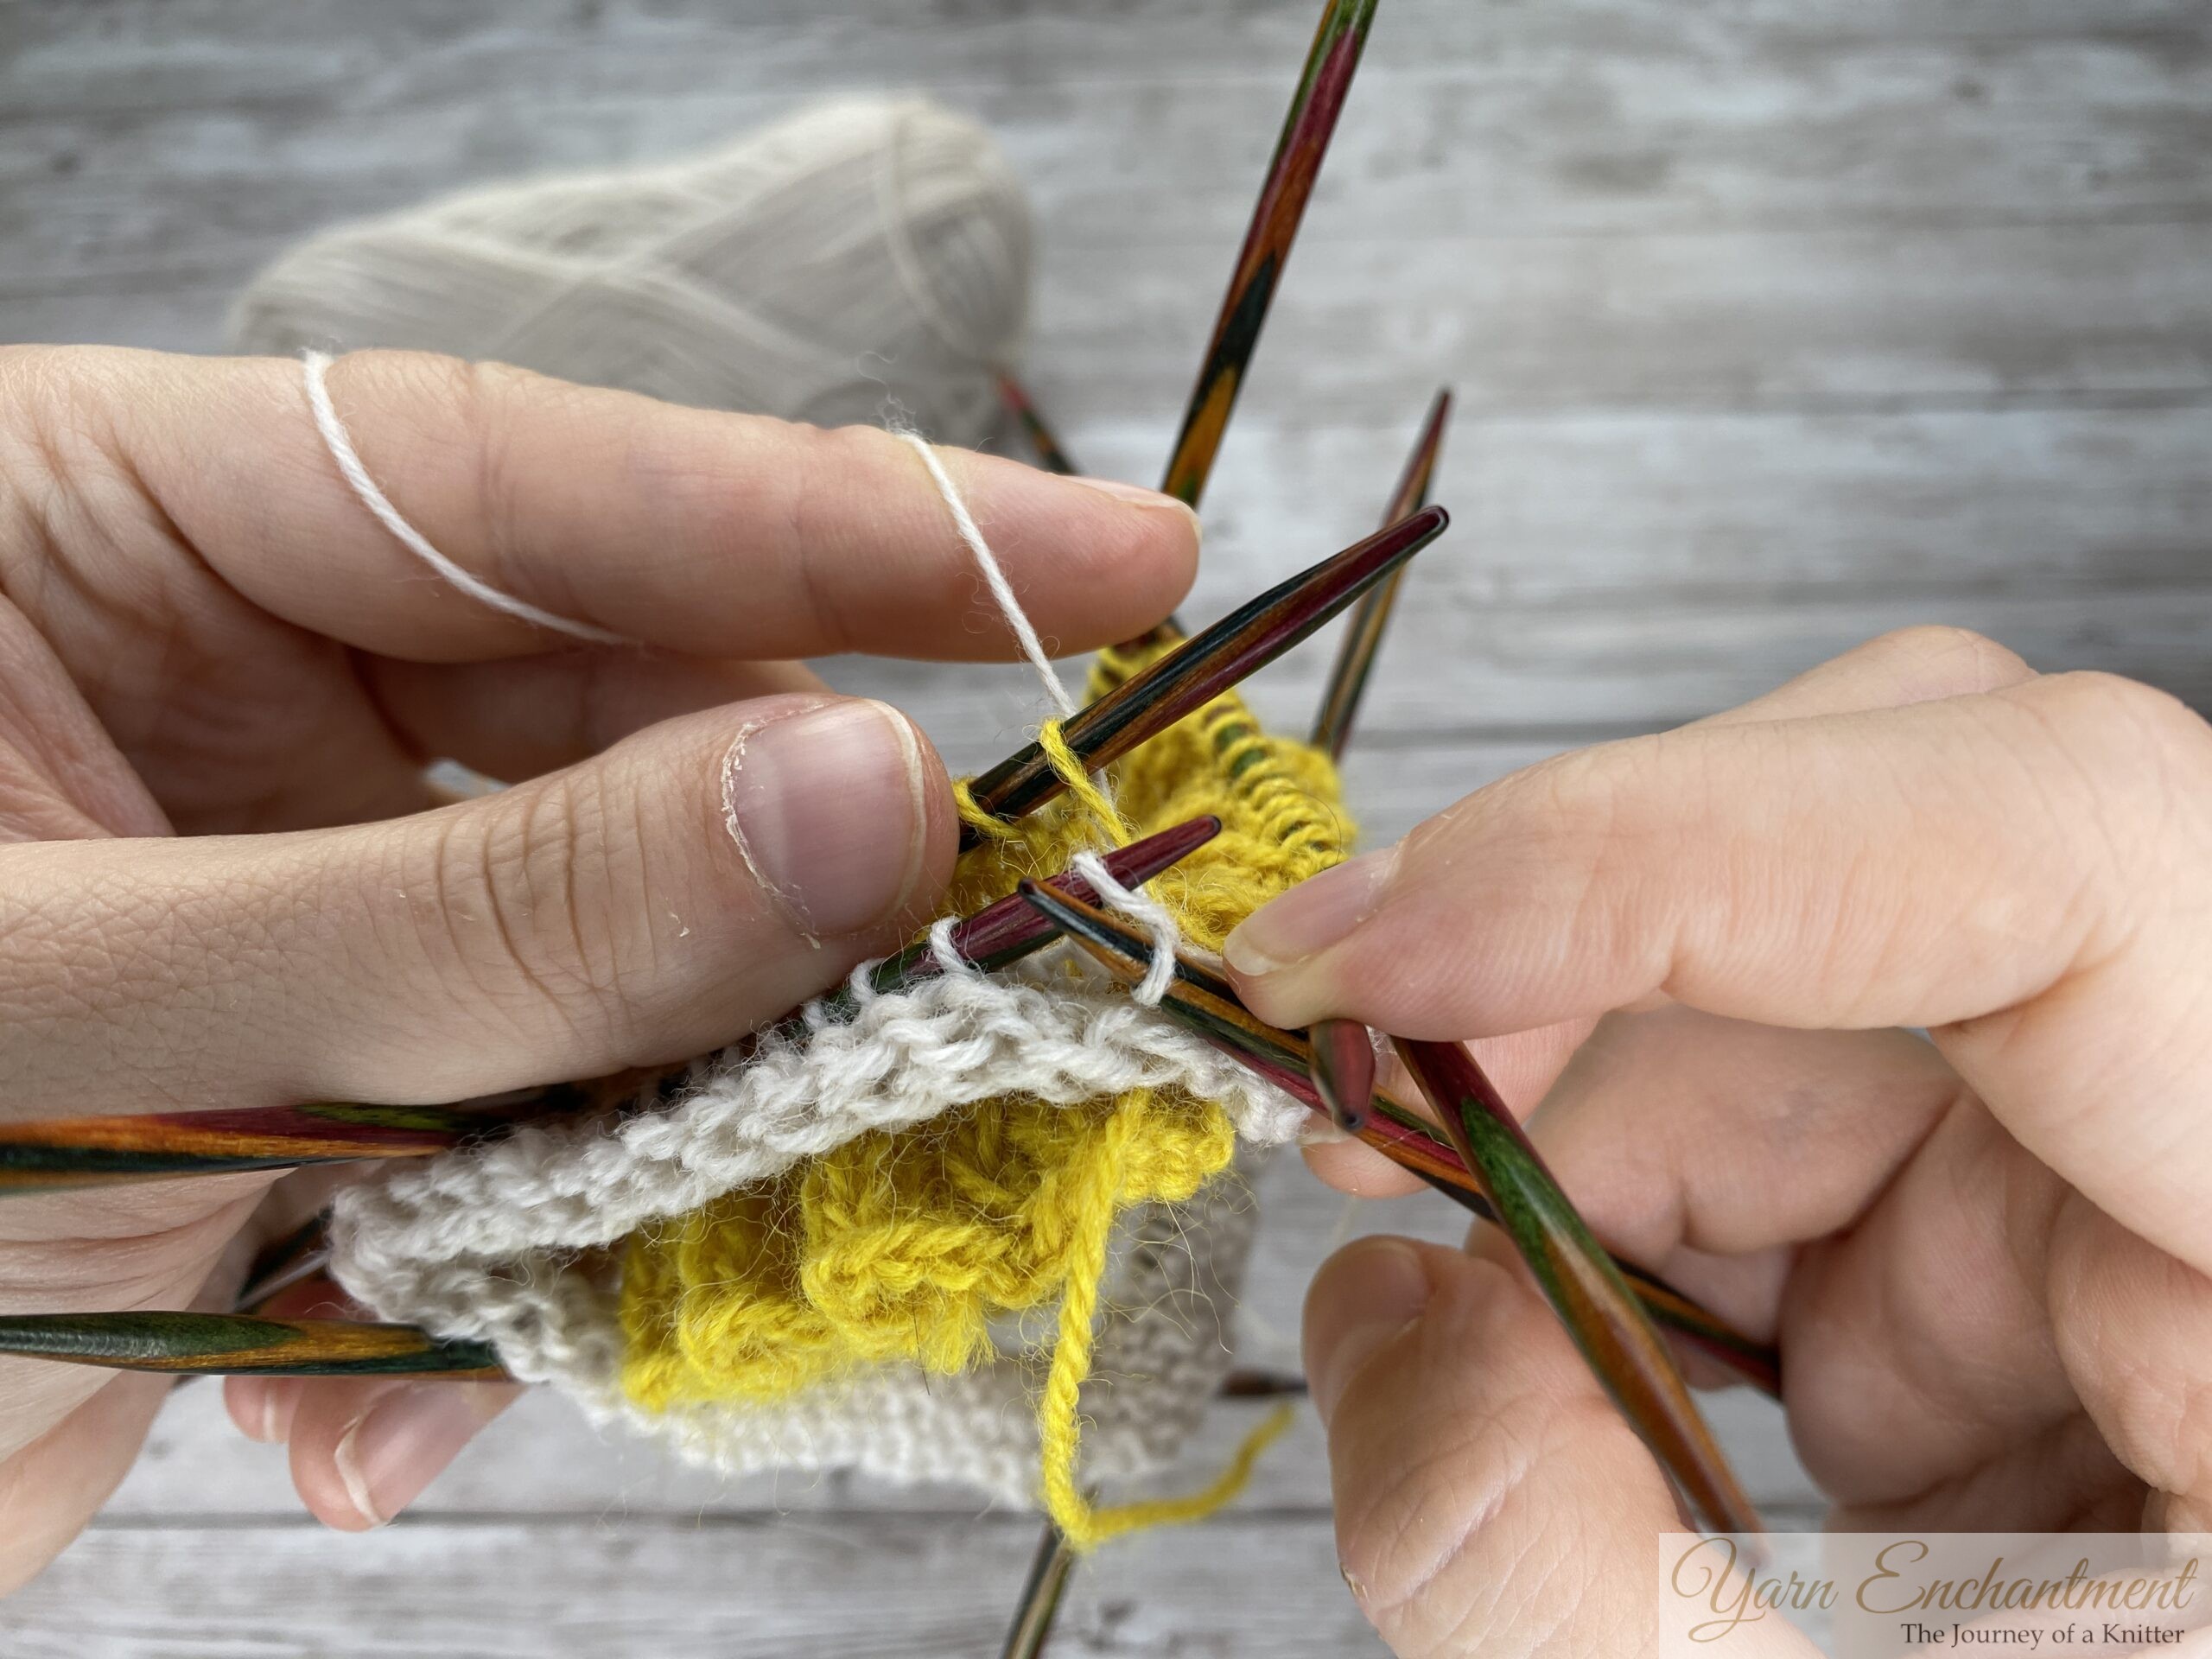
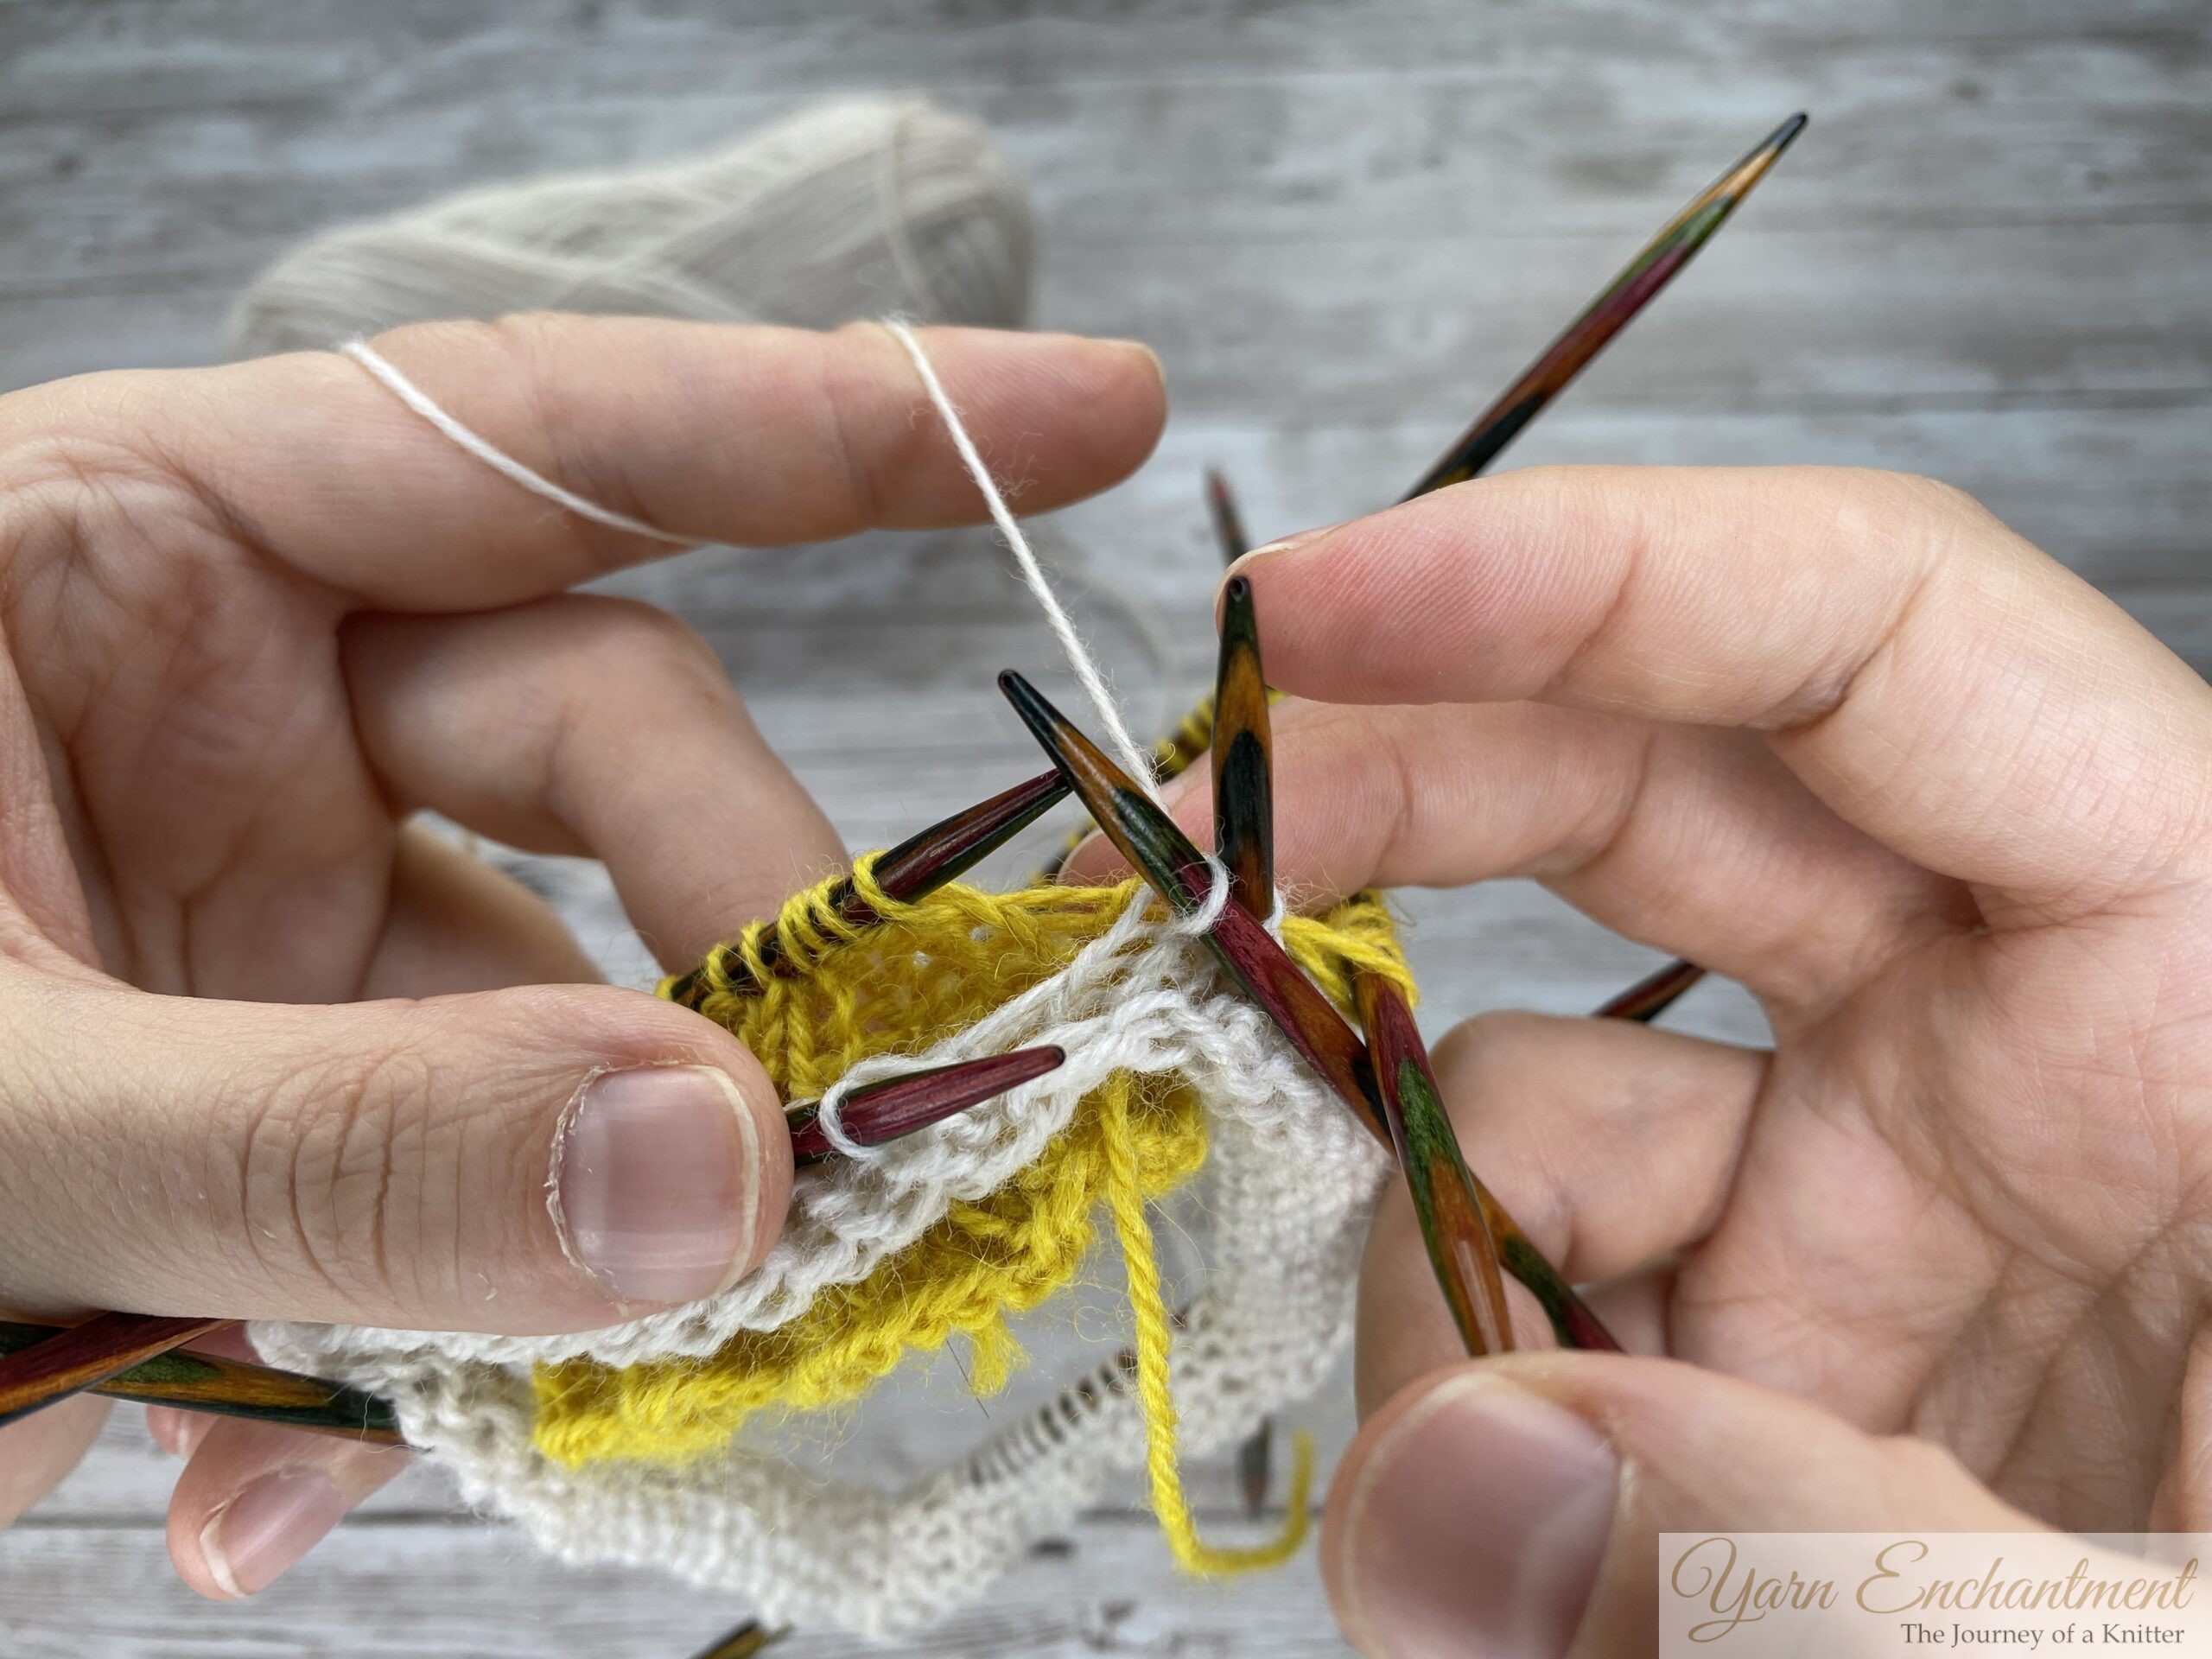
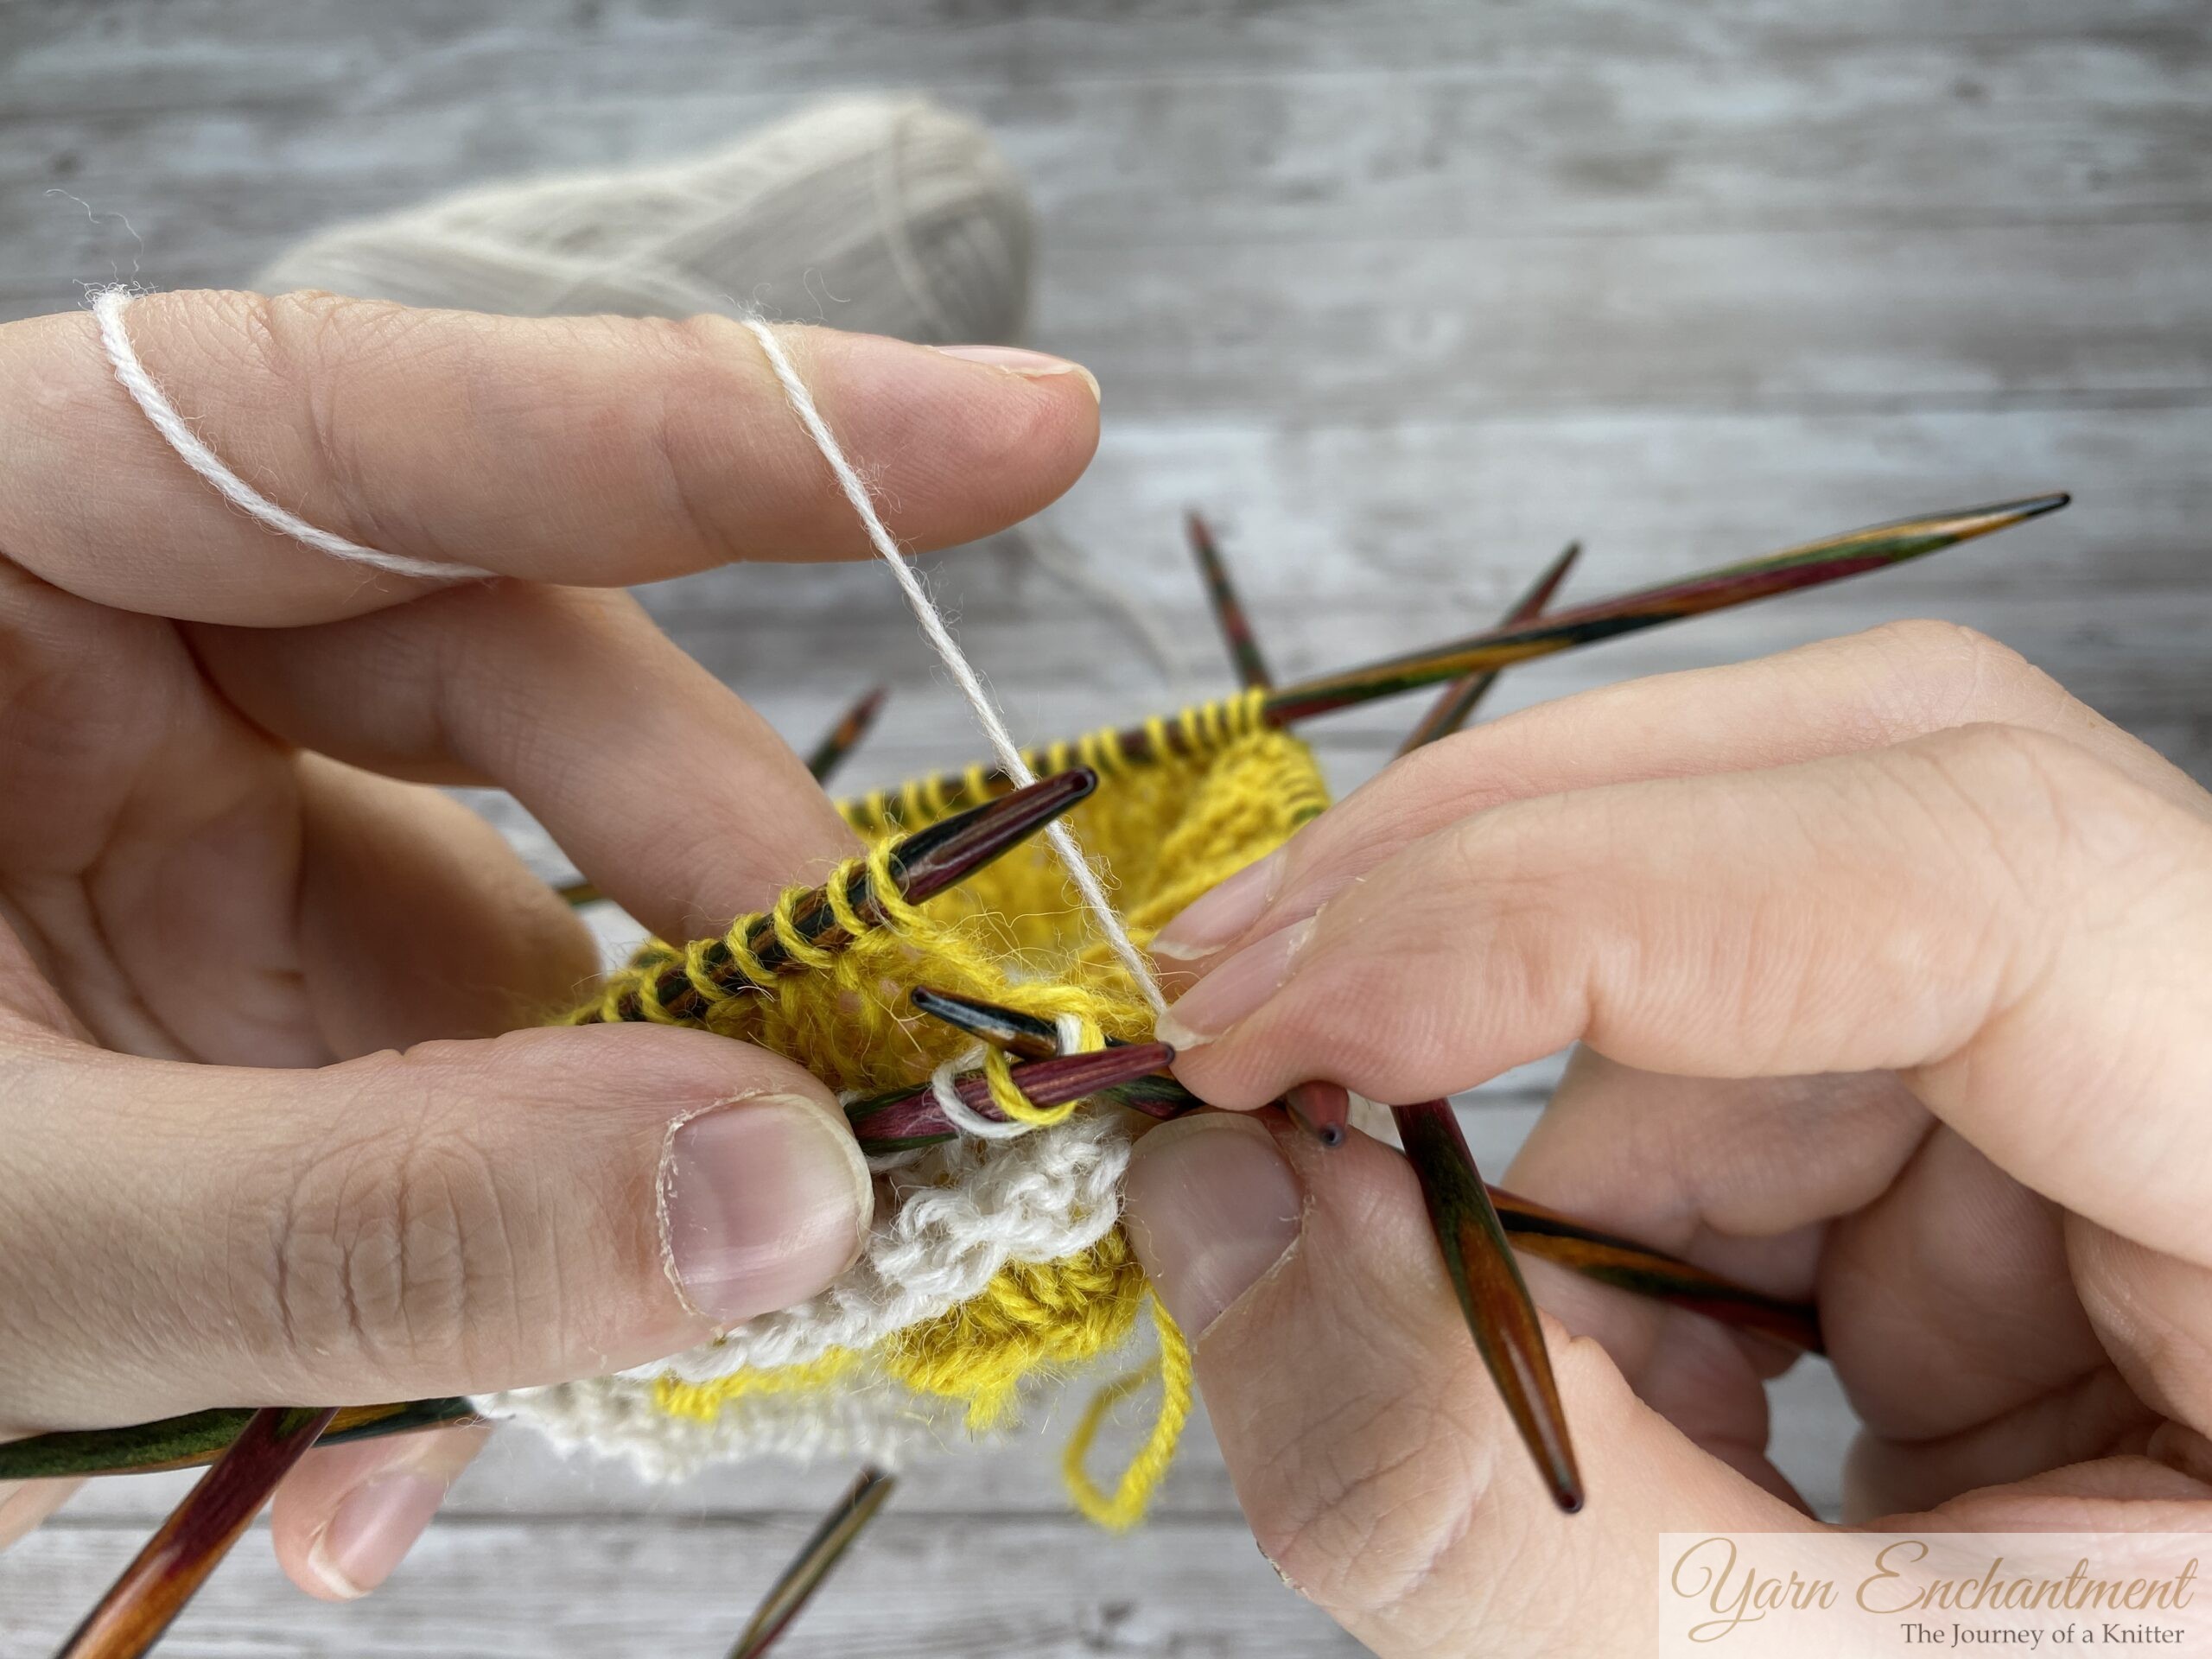
Bring your working yarn to the back and start knitting the stitch from your front needle together with the first one from your back needle. This can be a little bit fiddly at the beginning, as you are working with 9 needles at the same time, but don’t give up. And if you need a little extra help, don’t forget to watch the video.
With the main color, knit one stitch from the main tube together with one stitch from the ruffle cuff (K2tog) all the way around. You’ll end up with the stitches you need for you sock
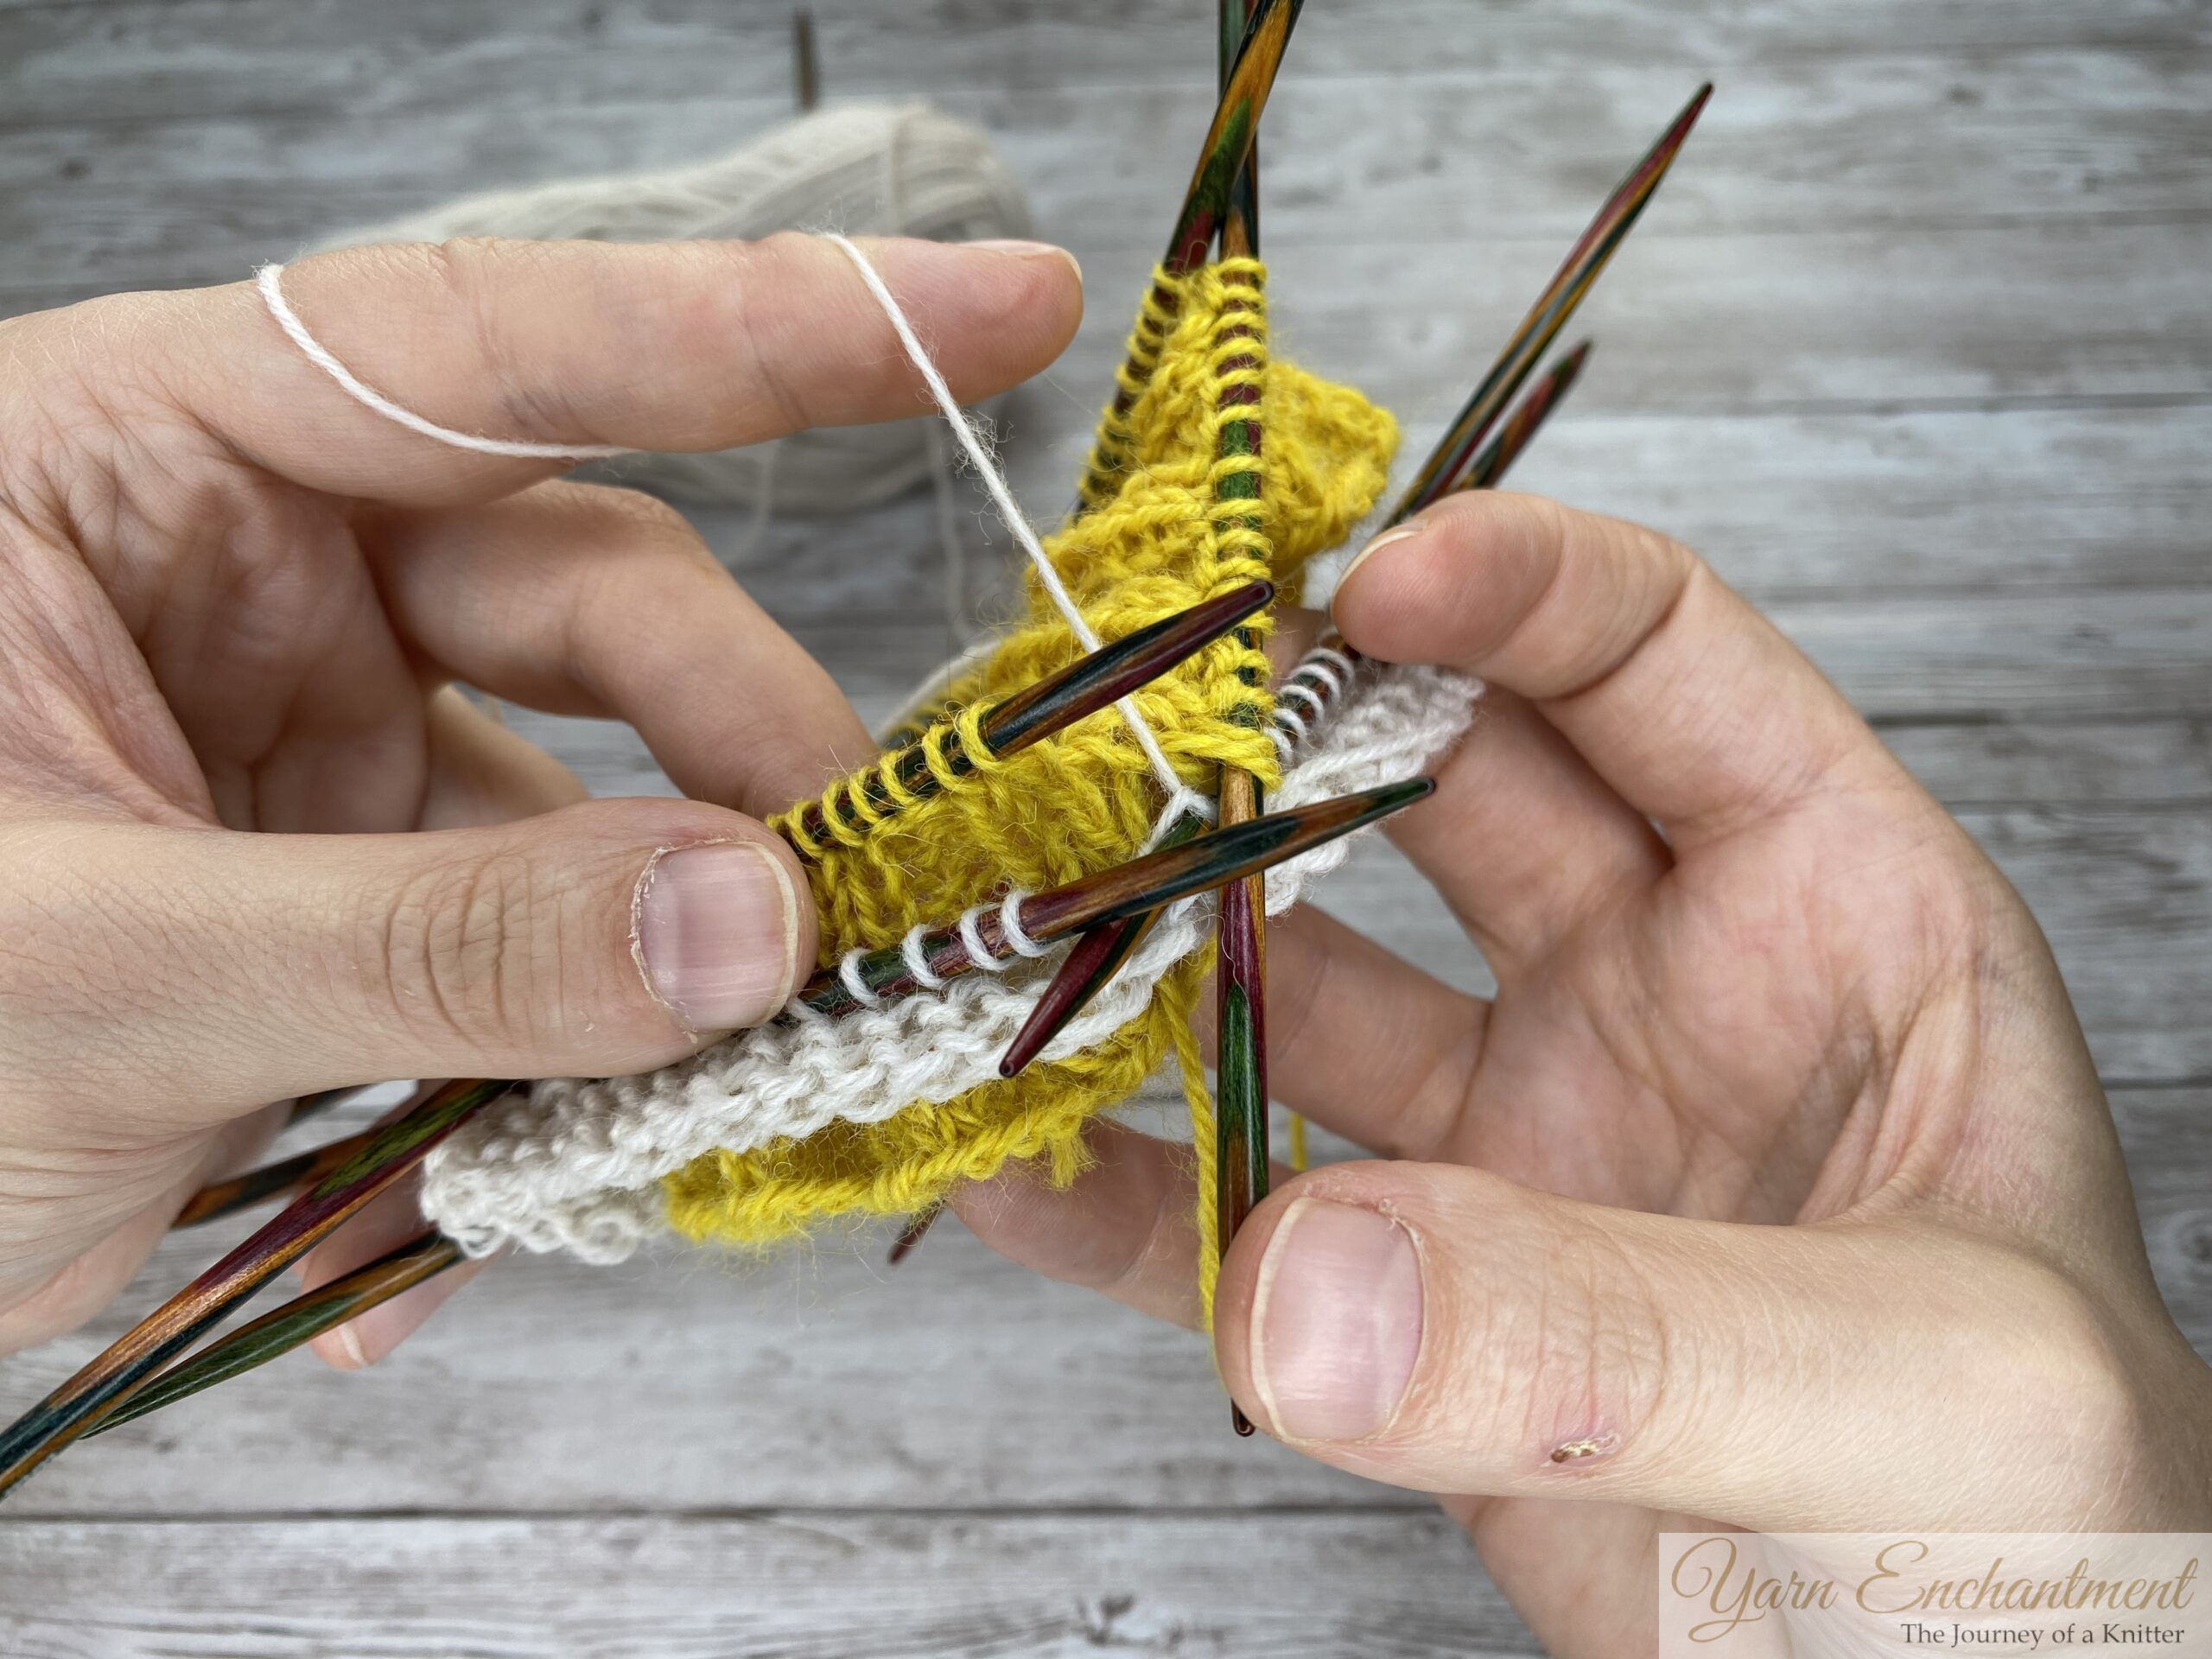  | 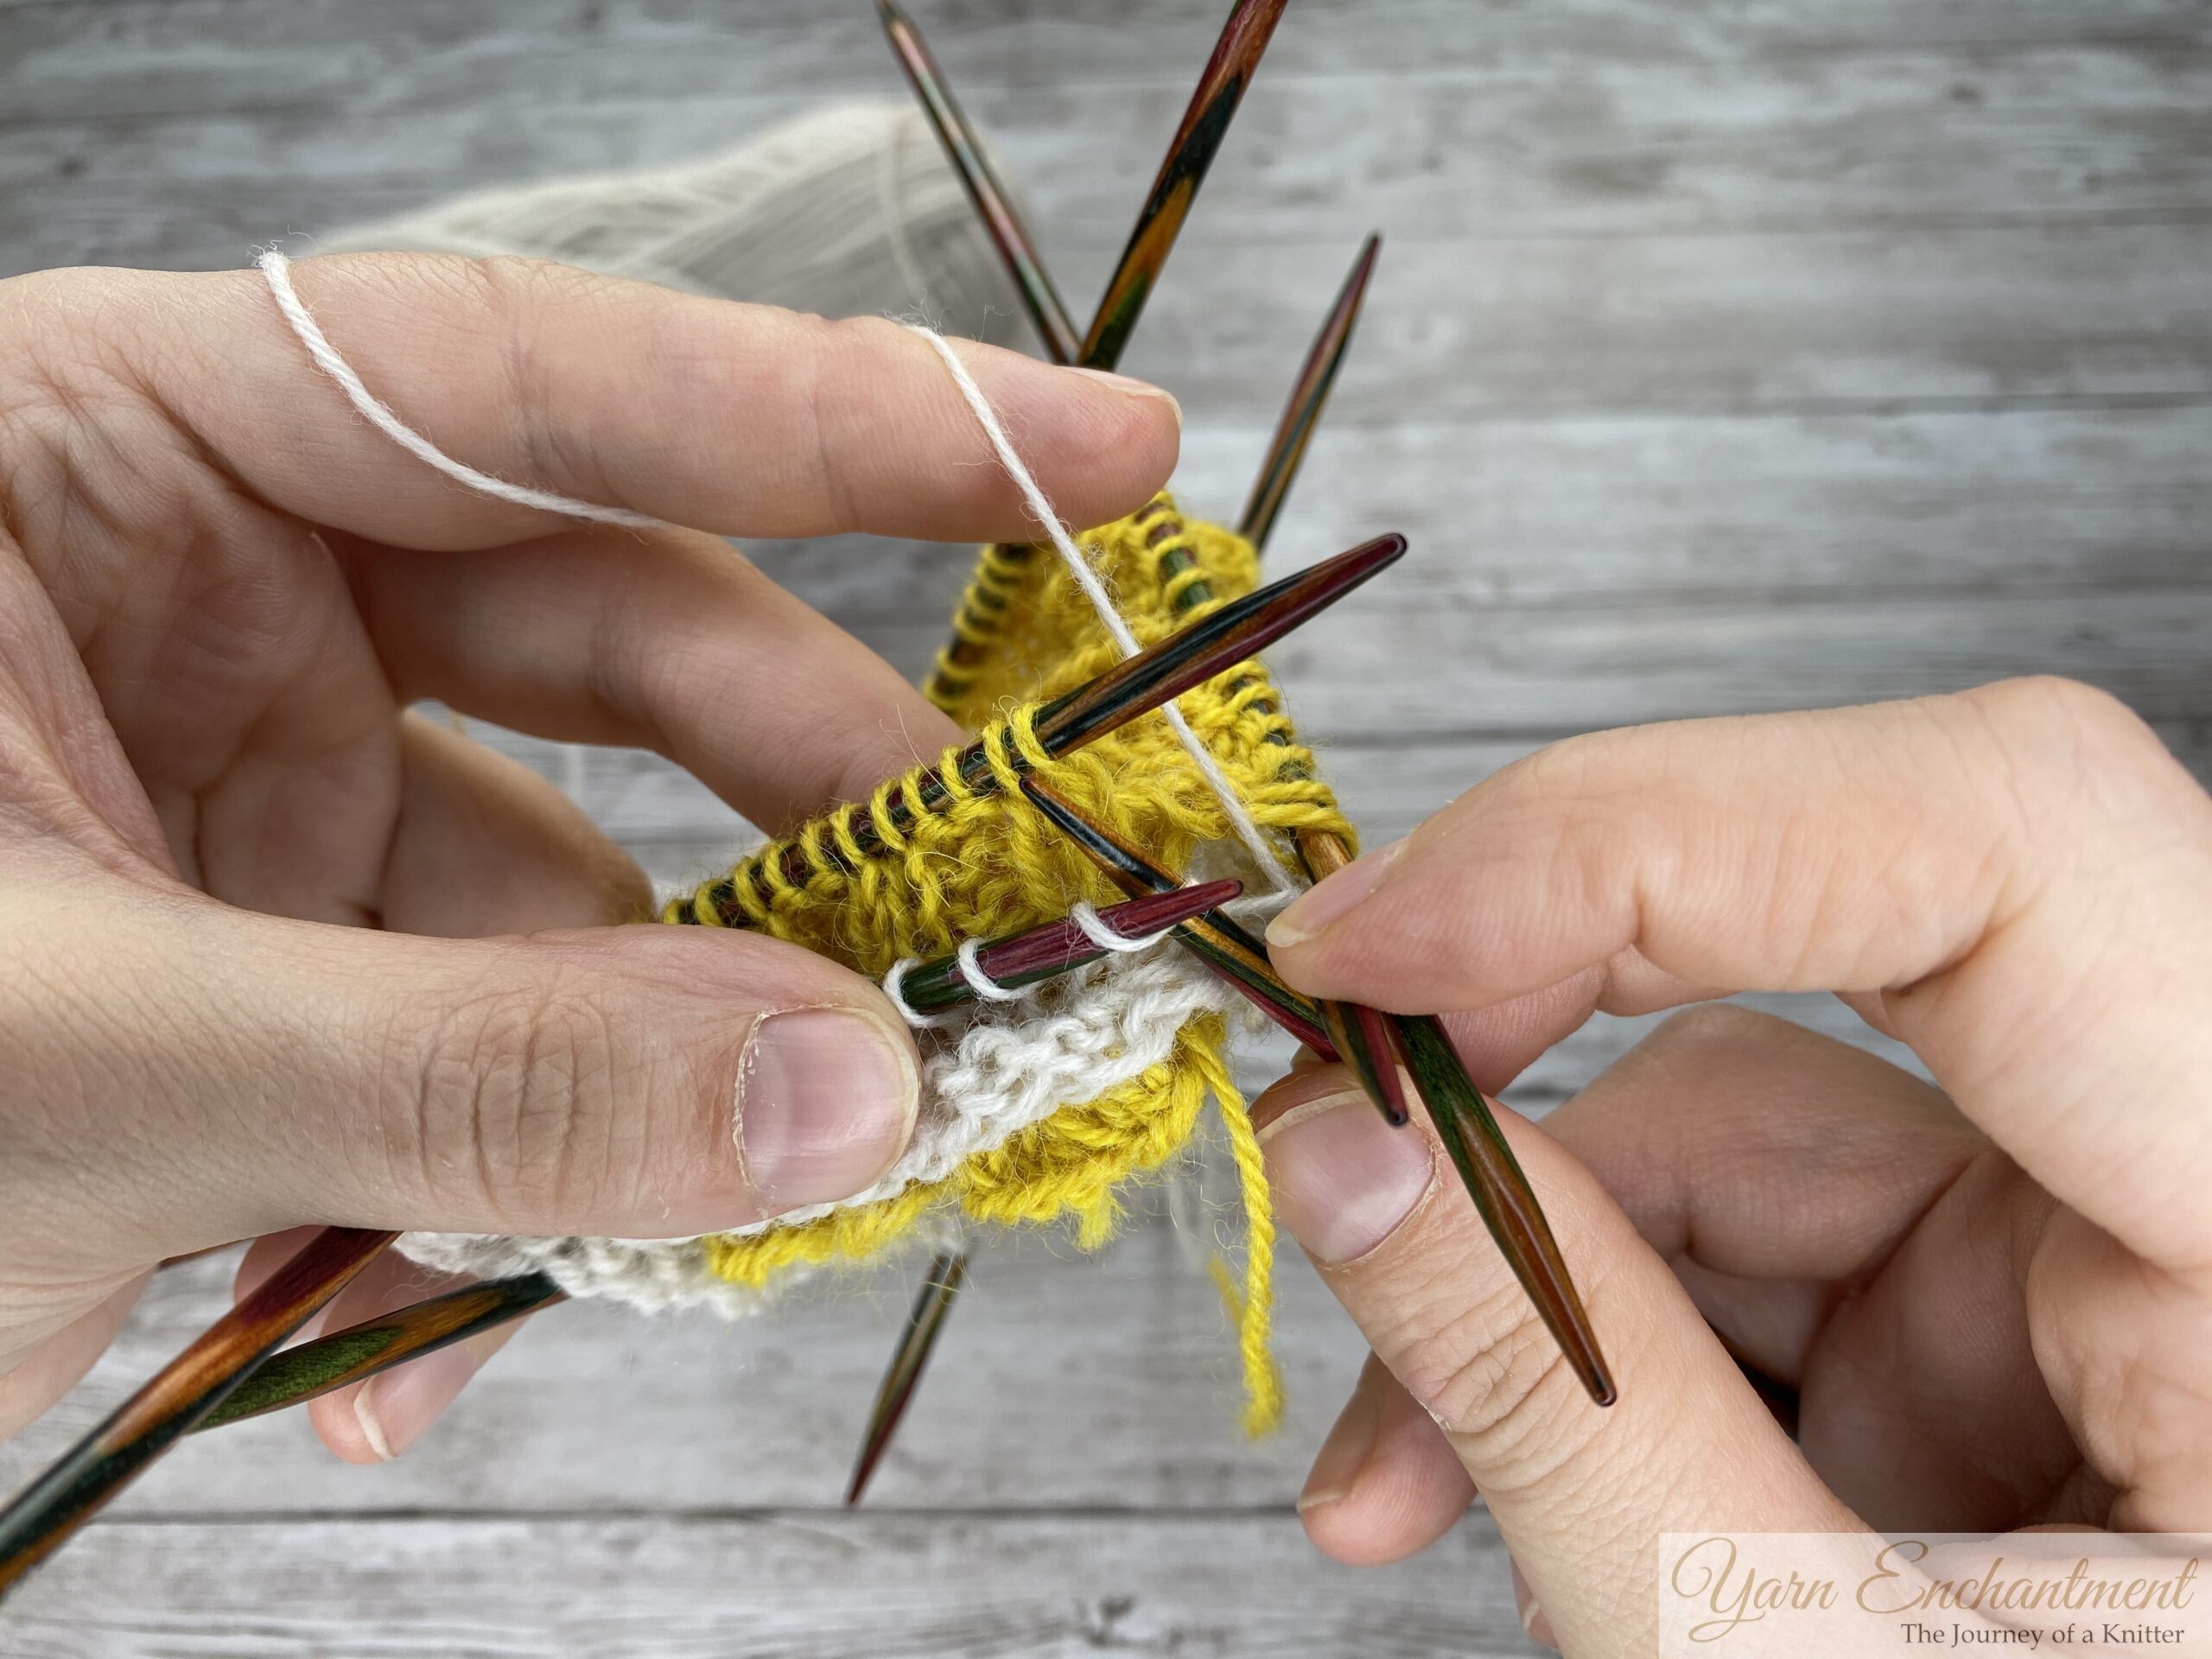  | 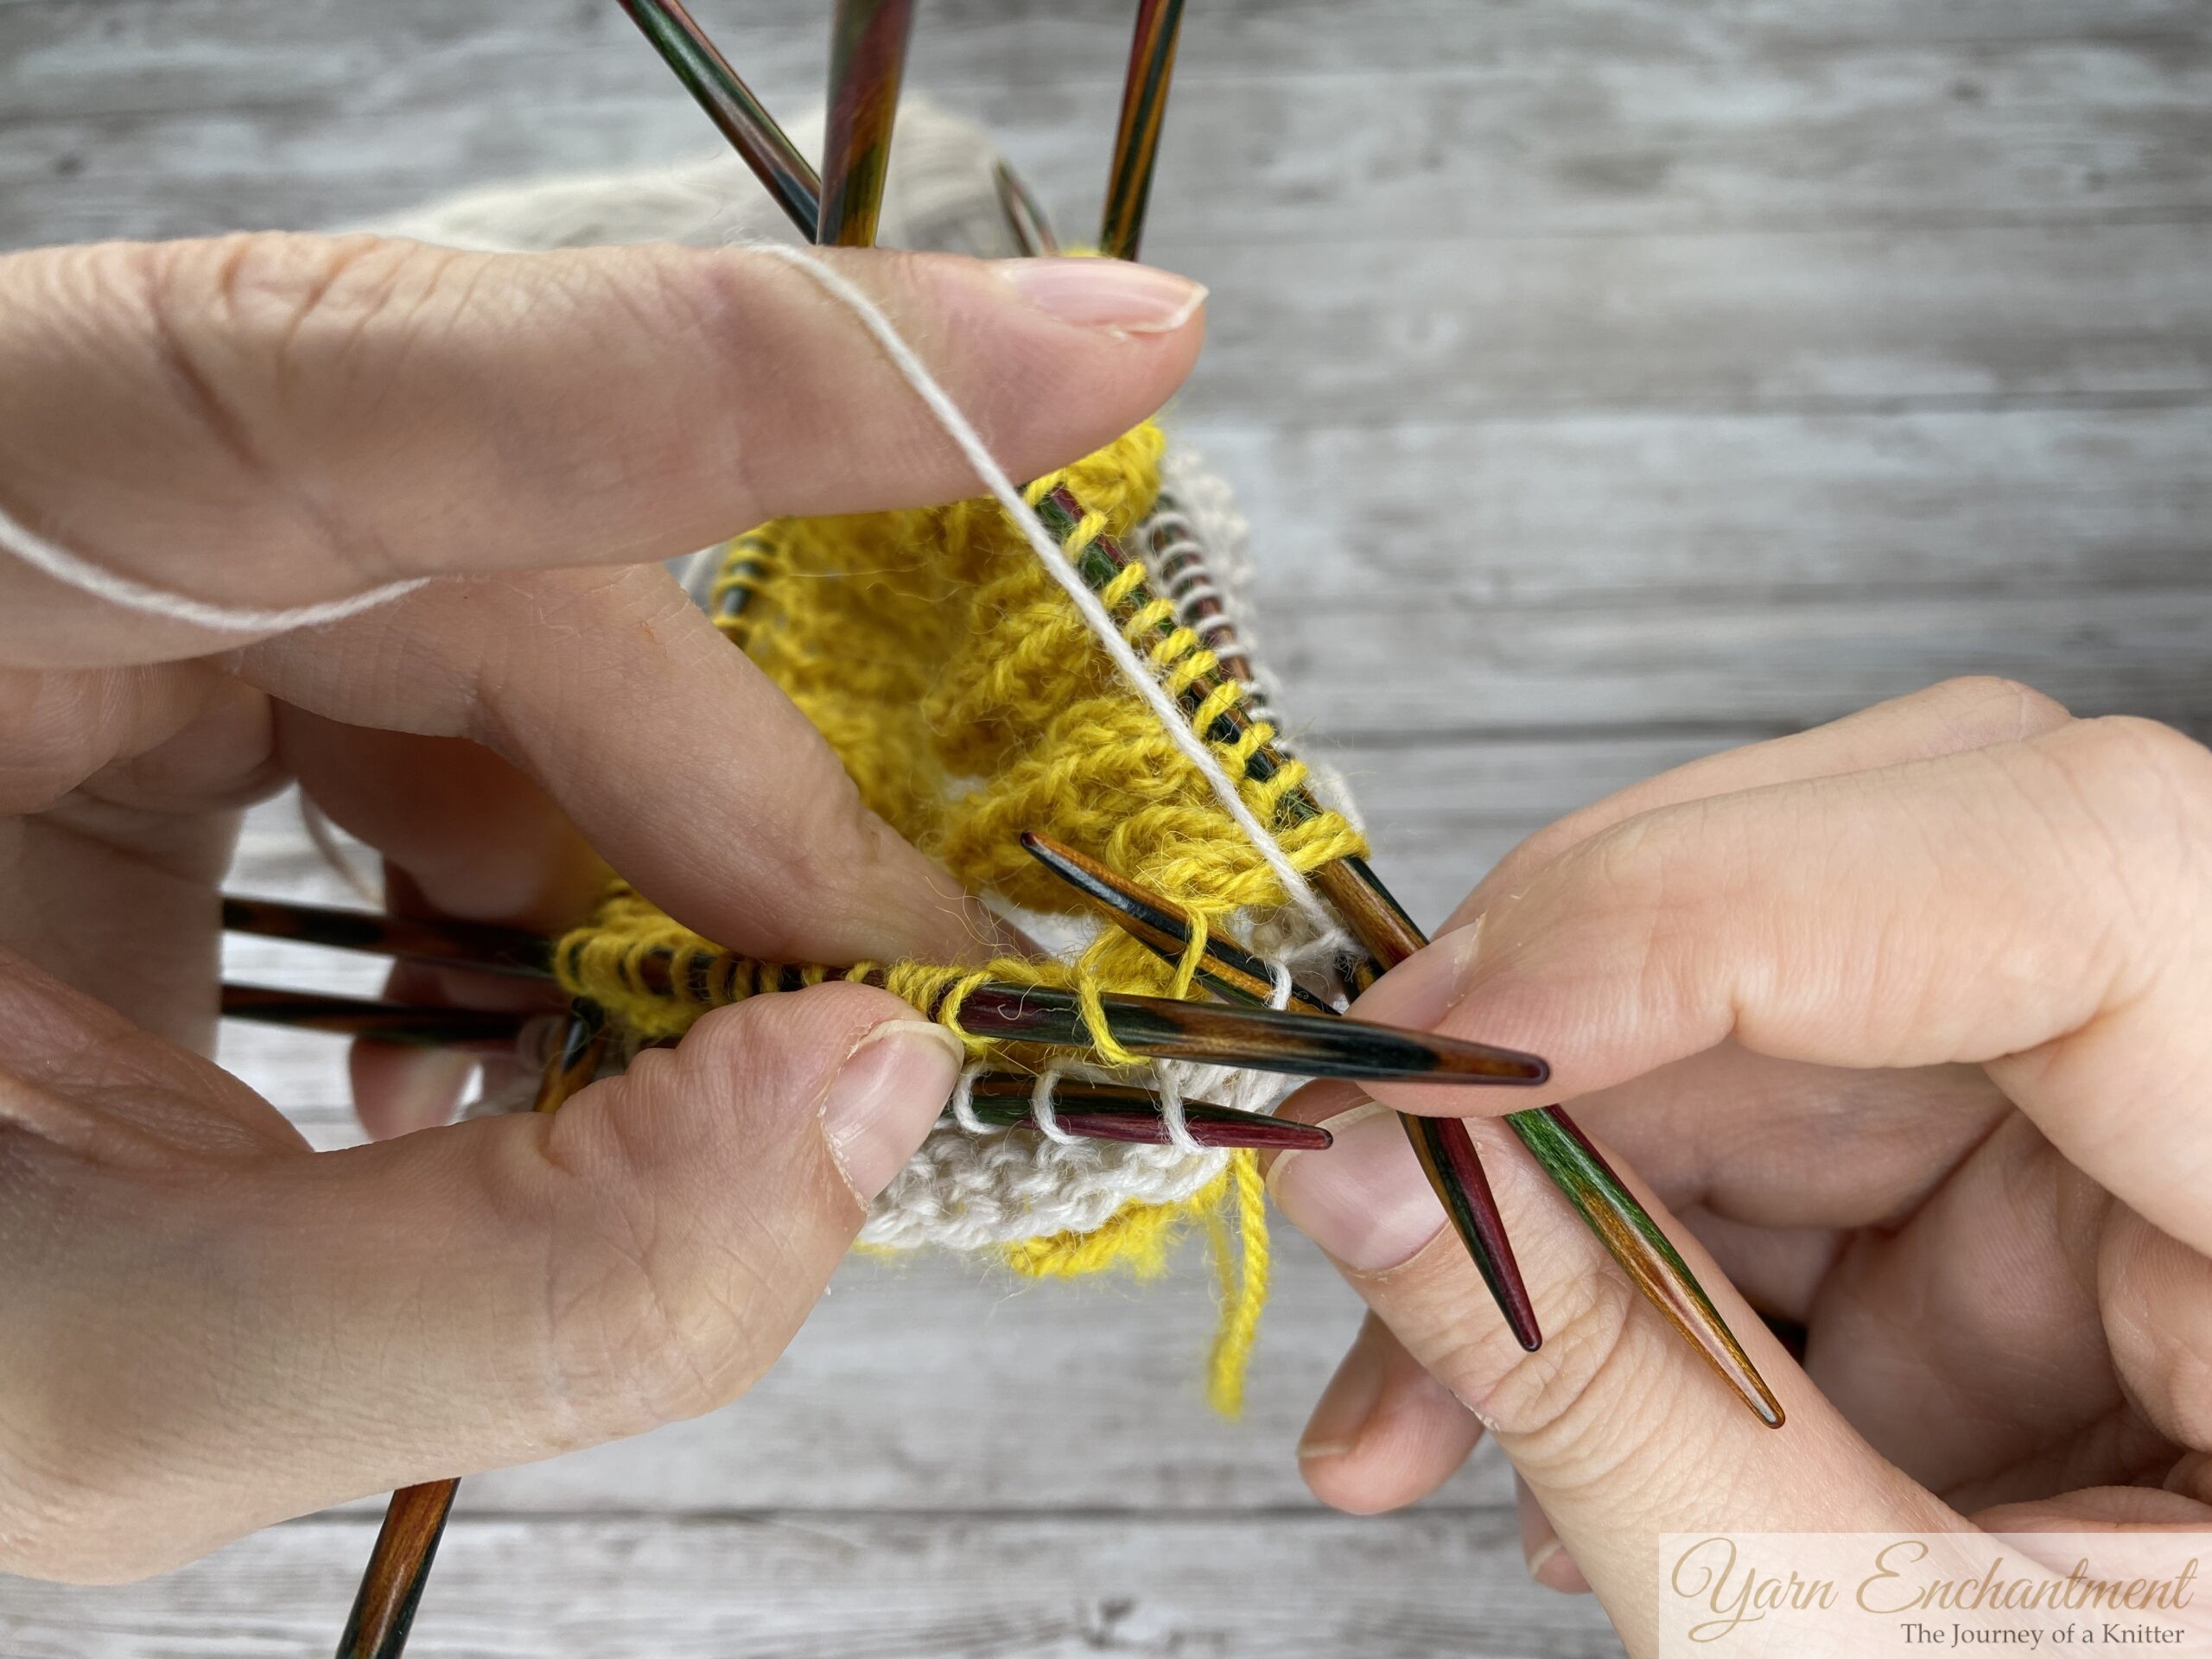  |
Bring your working yarn to the back of the work. | Take your needle and insert it knitwise into the first stitch of your main sock, that’s the front needle. Don’t slip it off yet. | Now insert the needle knitwise into the first stitch on your back needle, that’s the ruffle. |
Wrap your working yarn around the needle and pull it through both stitches.
Then slip both stitches off the needle together. You’ve just knit them together as one


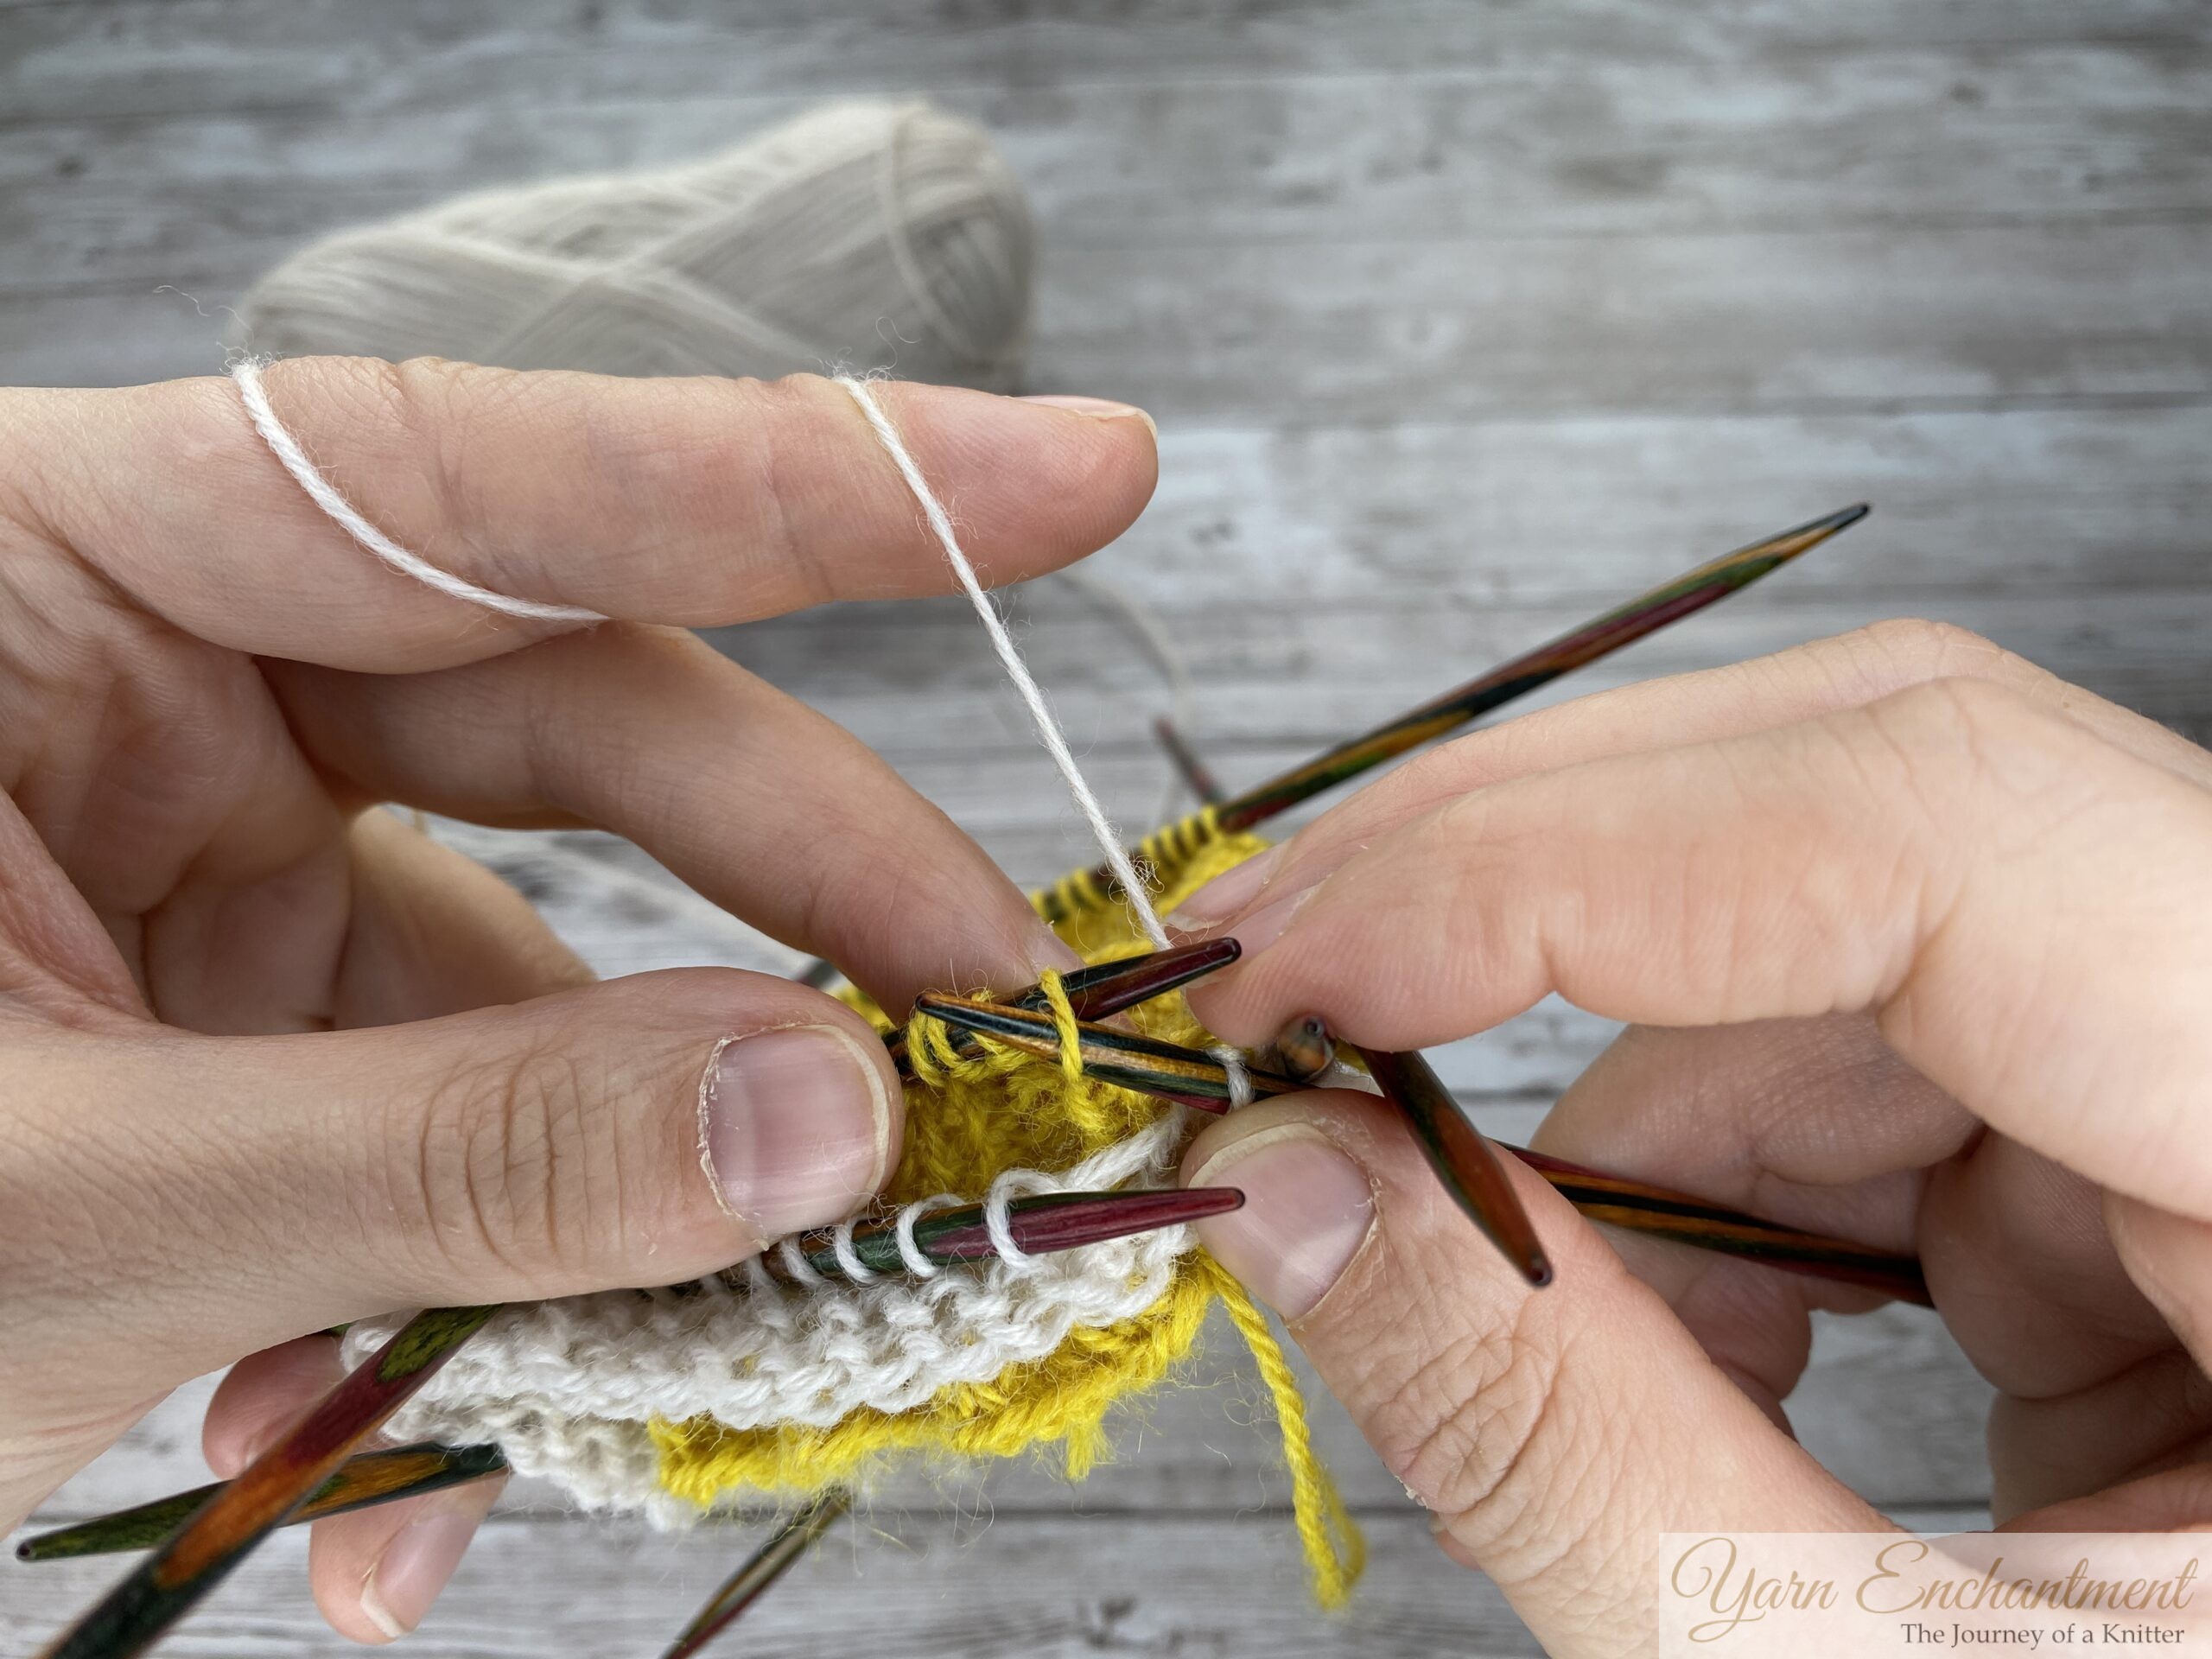
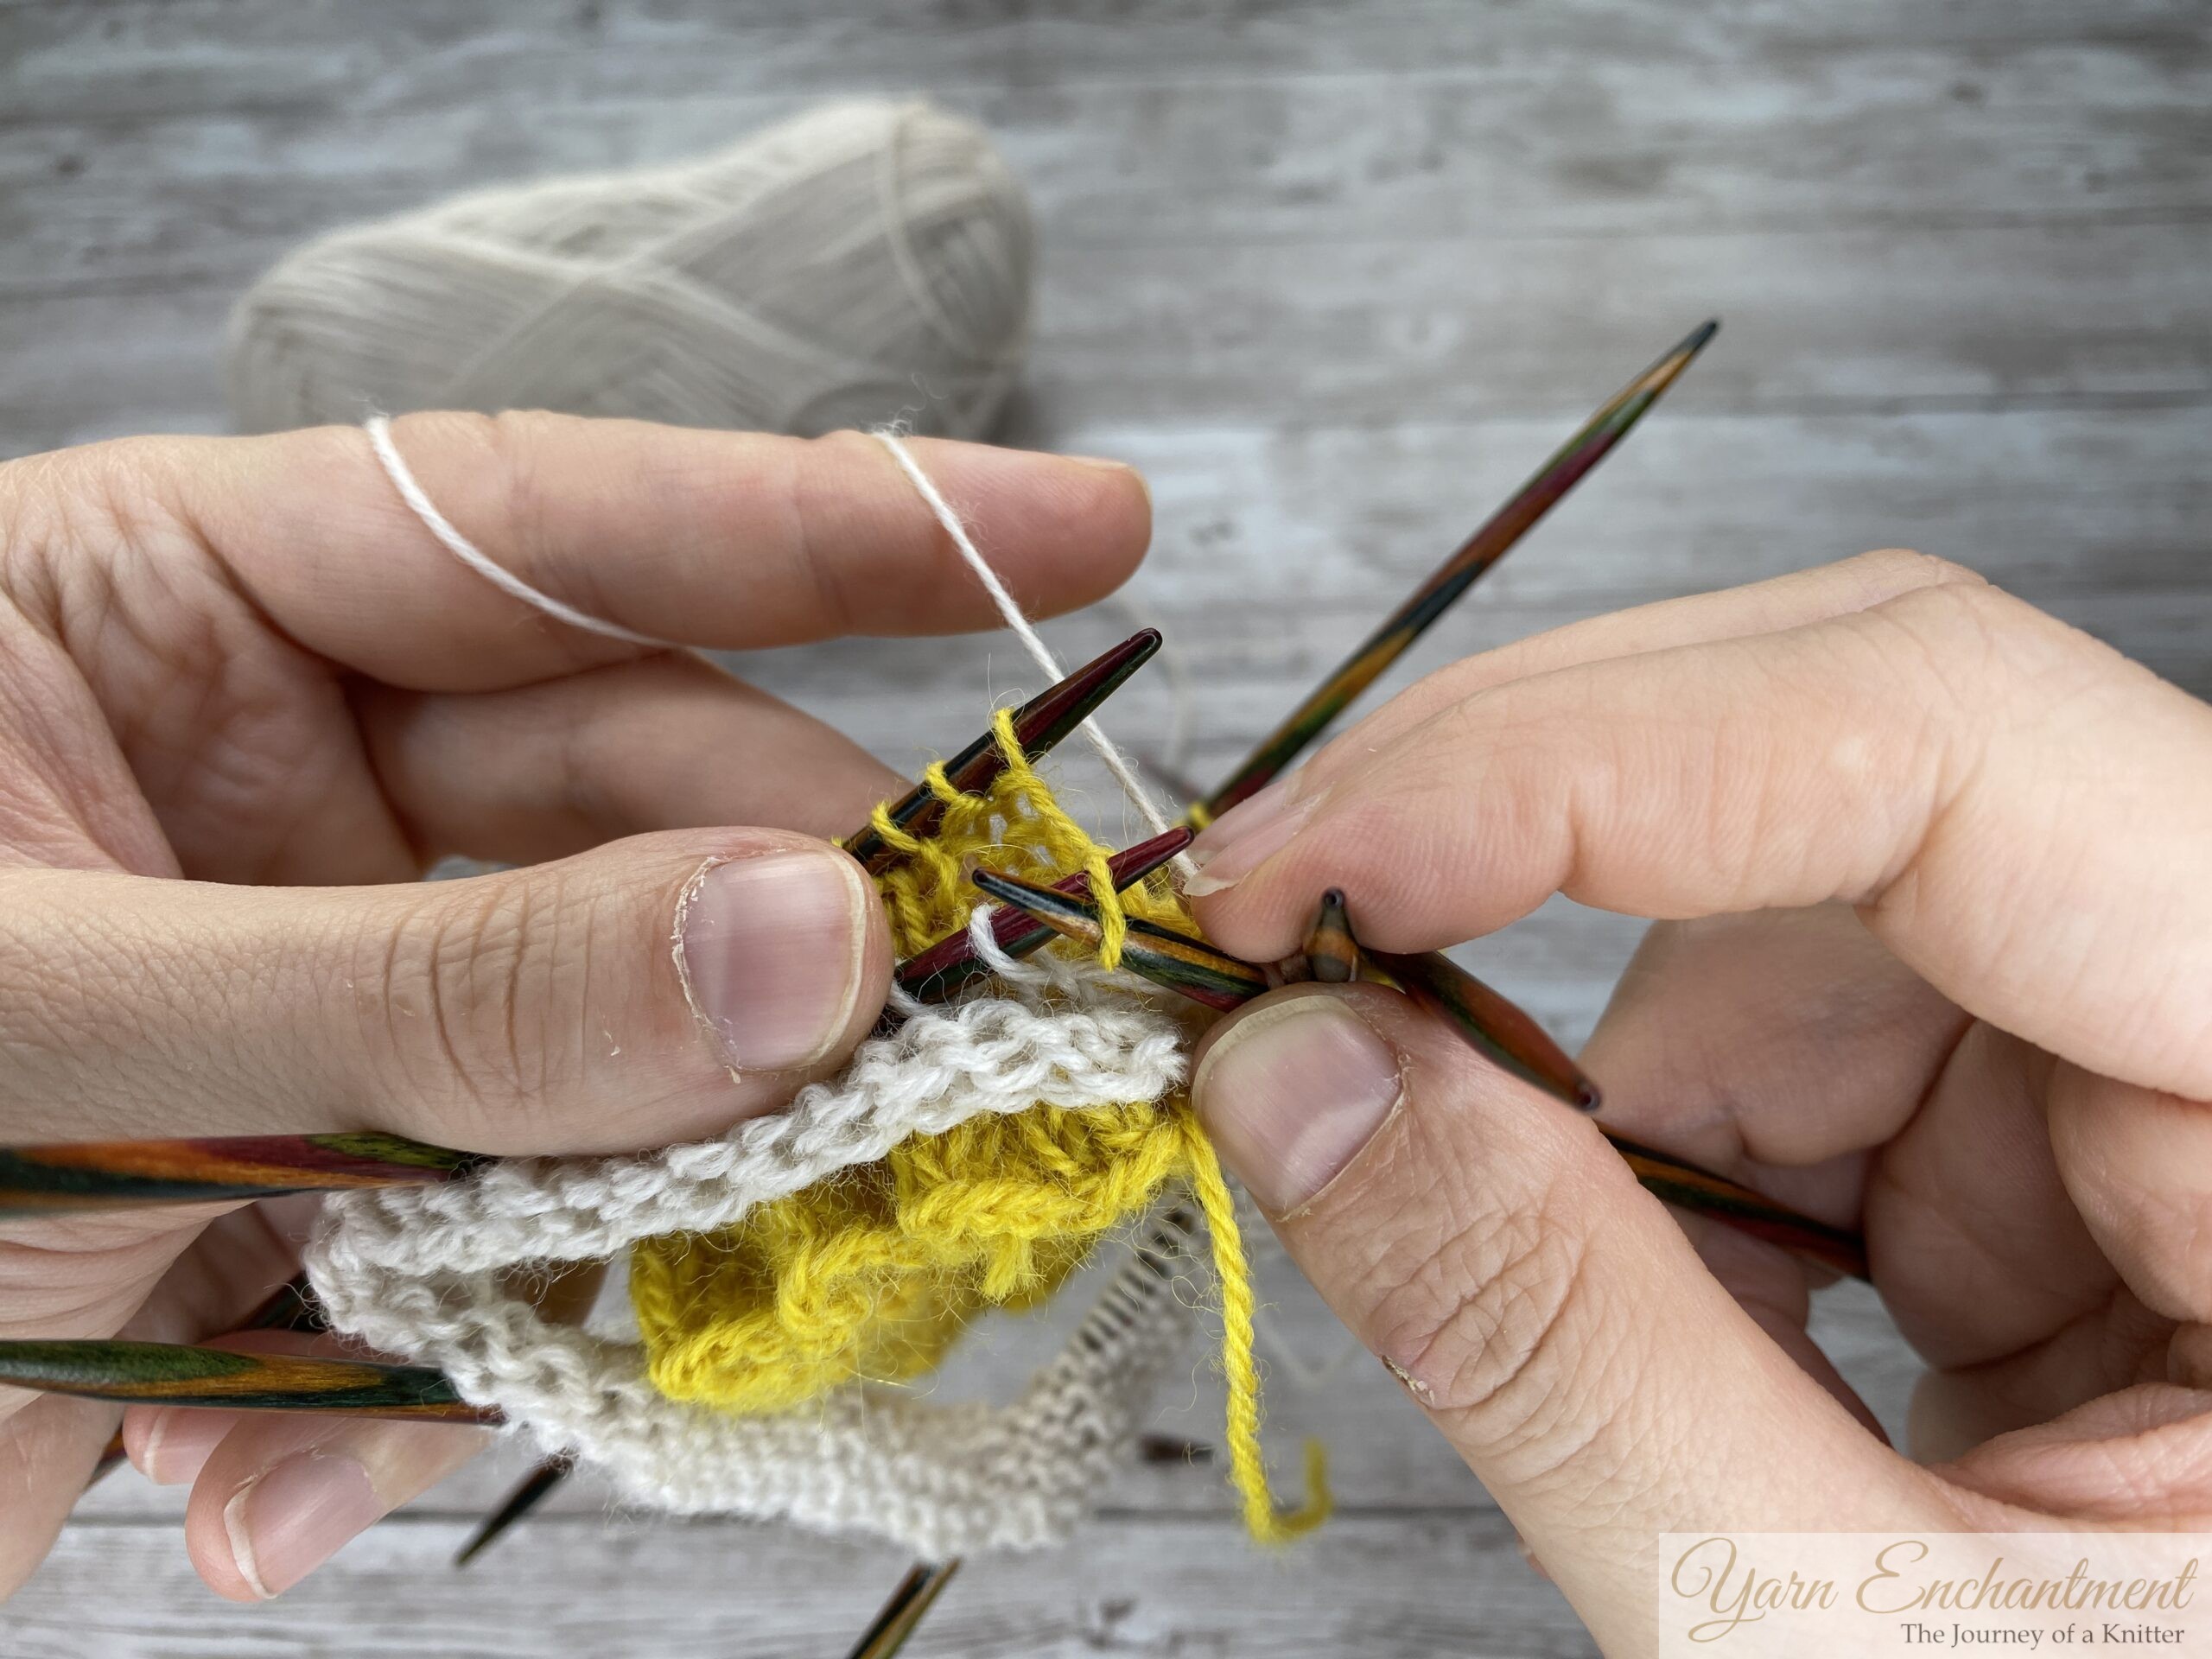
If you are finding it tricky to knit the stitches together across your needles, try this method instead:
Take the first stitch from your back needle and slip it over to the front. Then, knit that stitch and the first stitch on your front needle together as one.
Slip the first stitch from your back needle, that’s the ruffle, purlwise.
Bring it over to your front needle, and slip it back purlwise.
Then just knit the two stitches together as one.



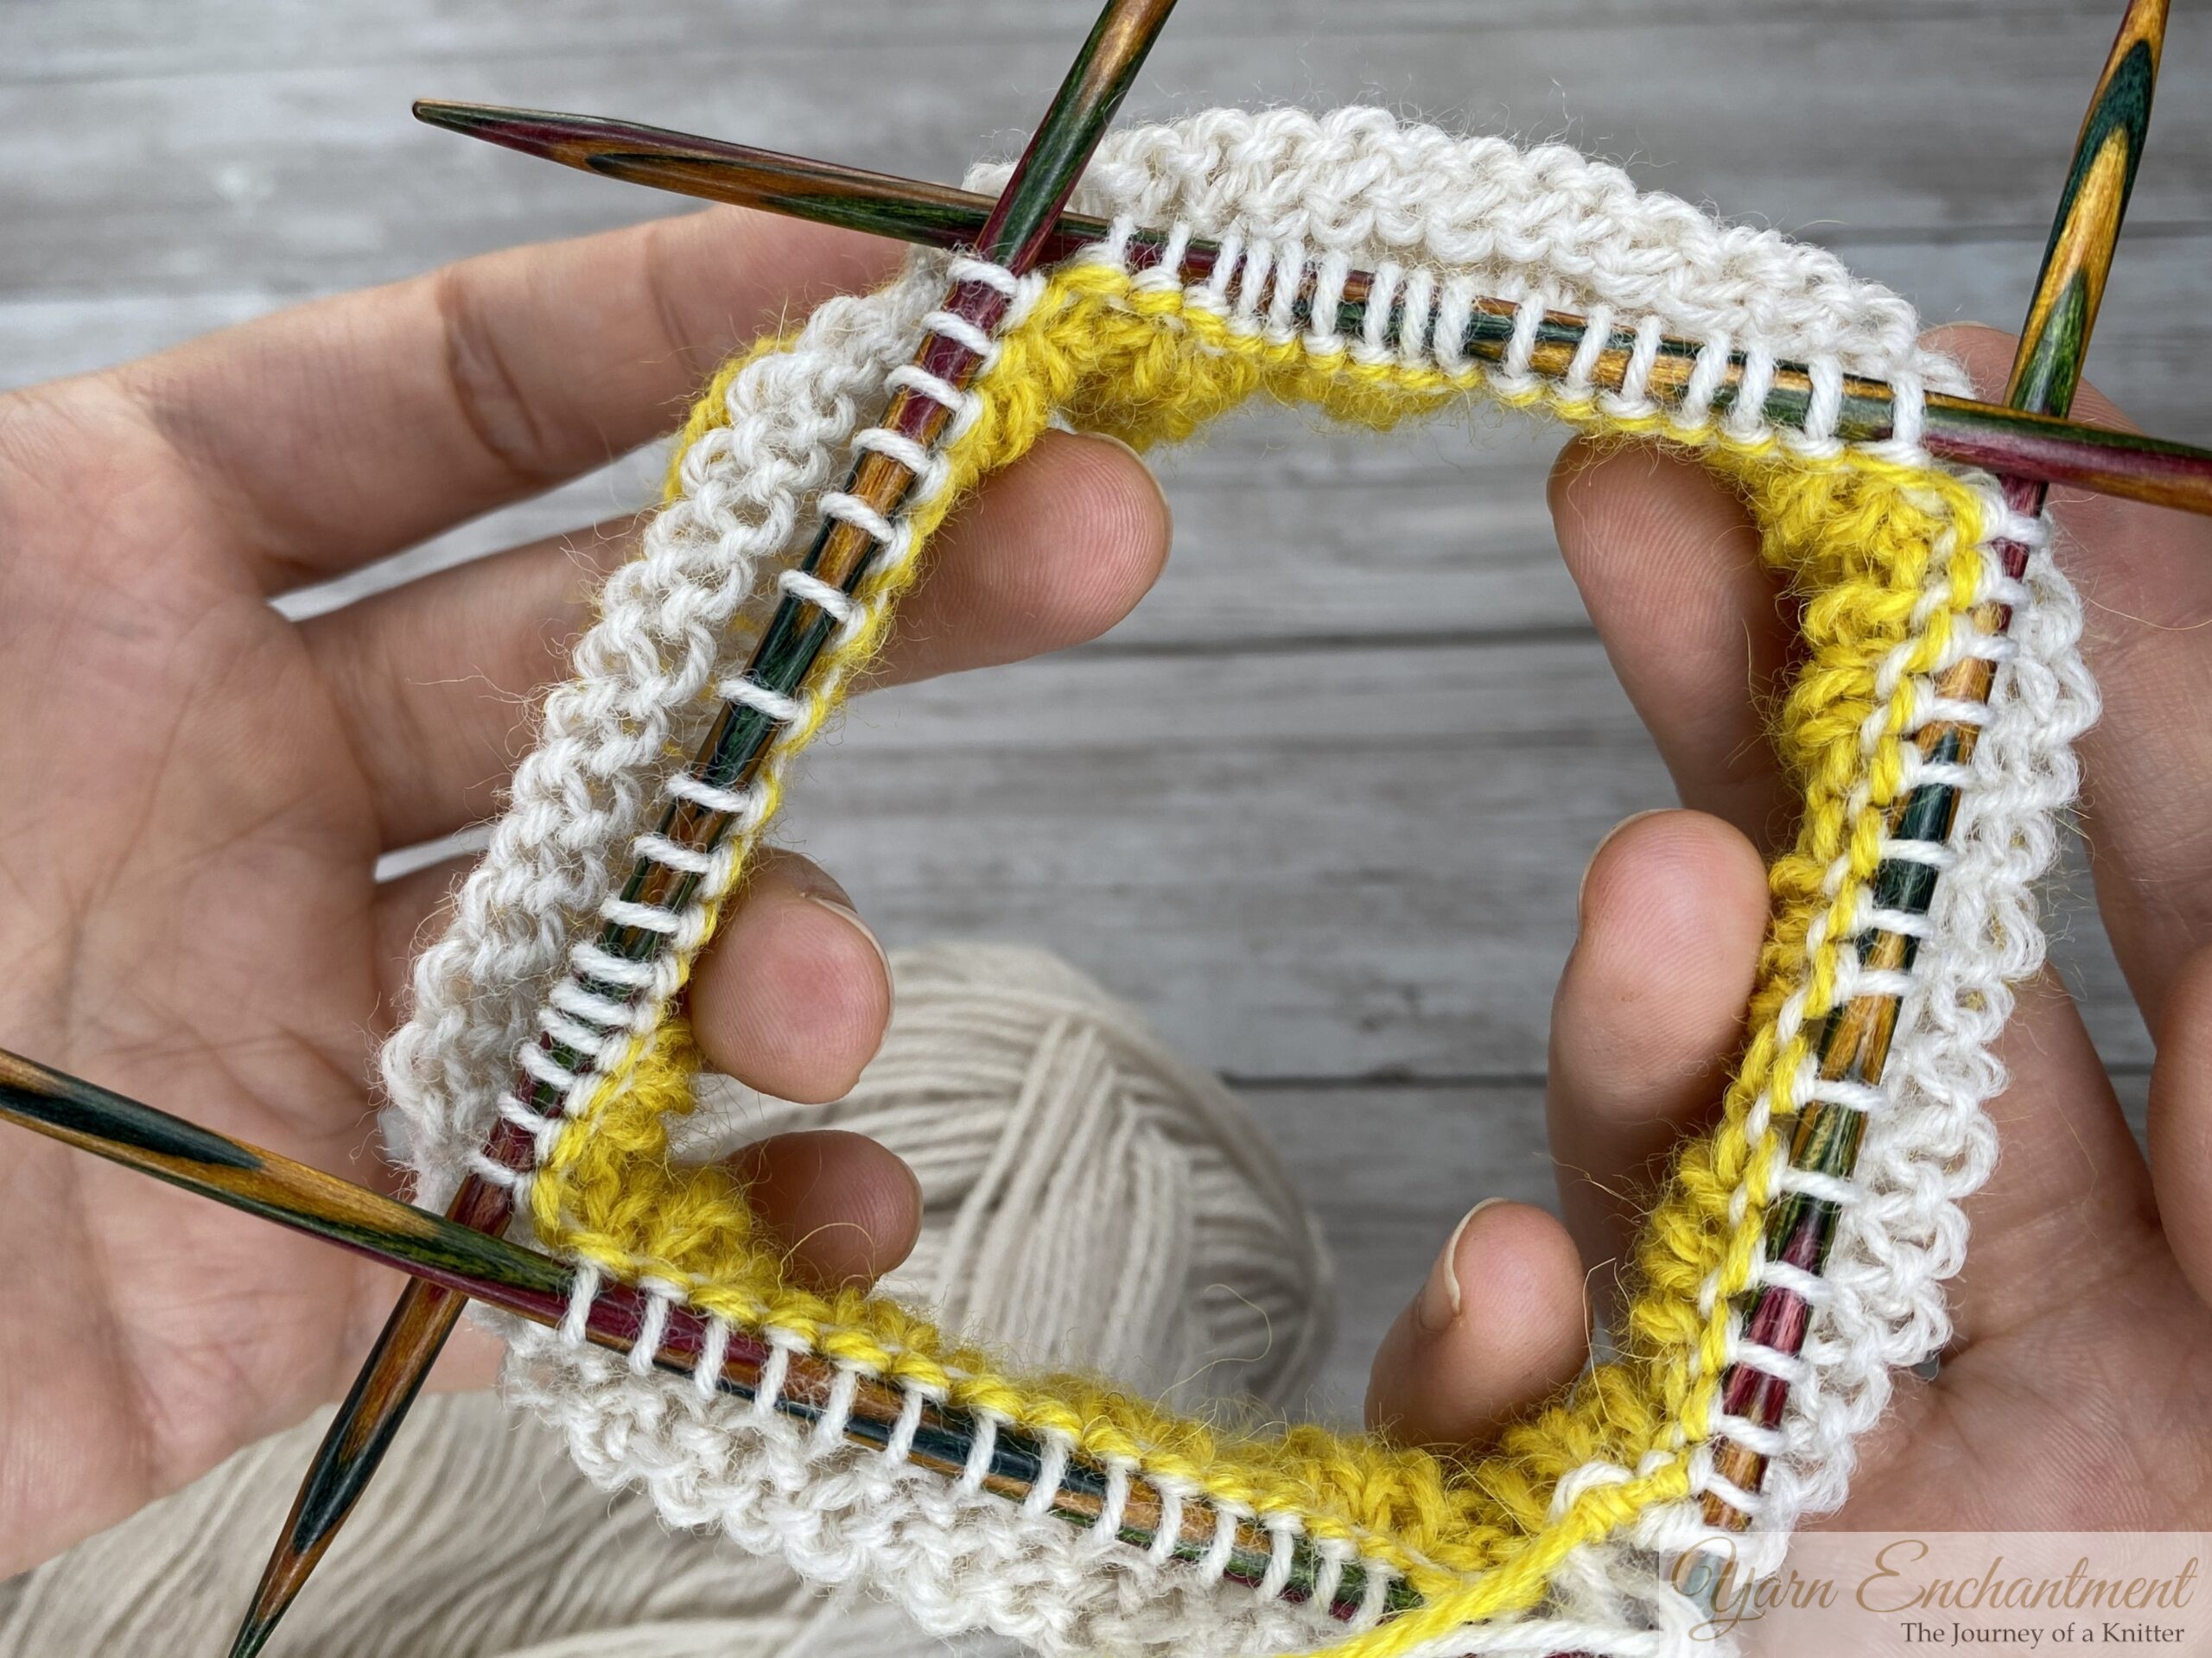
Once you have knit all the stitches together, your project should look like this.
You can see that we've joined both pieces together into one. You should now have your original sock stitch count back on your needles.
From the outside, you get that cute ruffle detail with a lovely rolled edge.

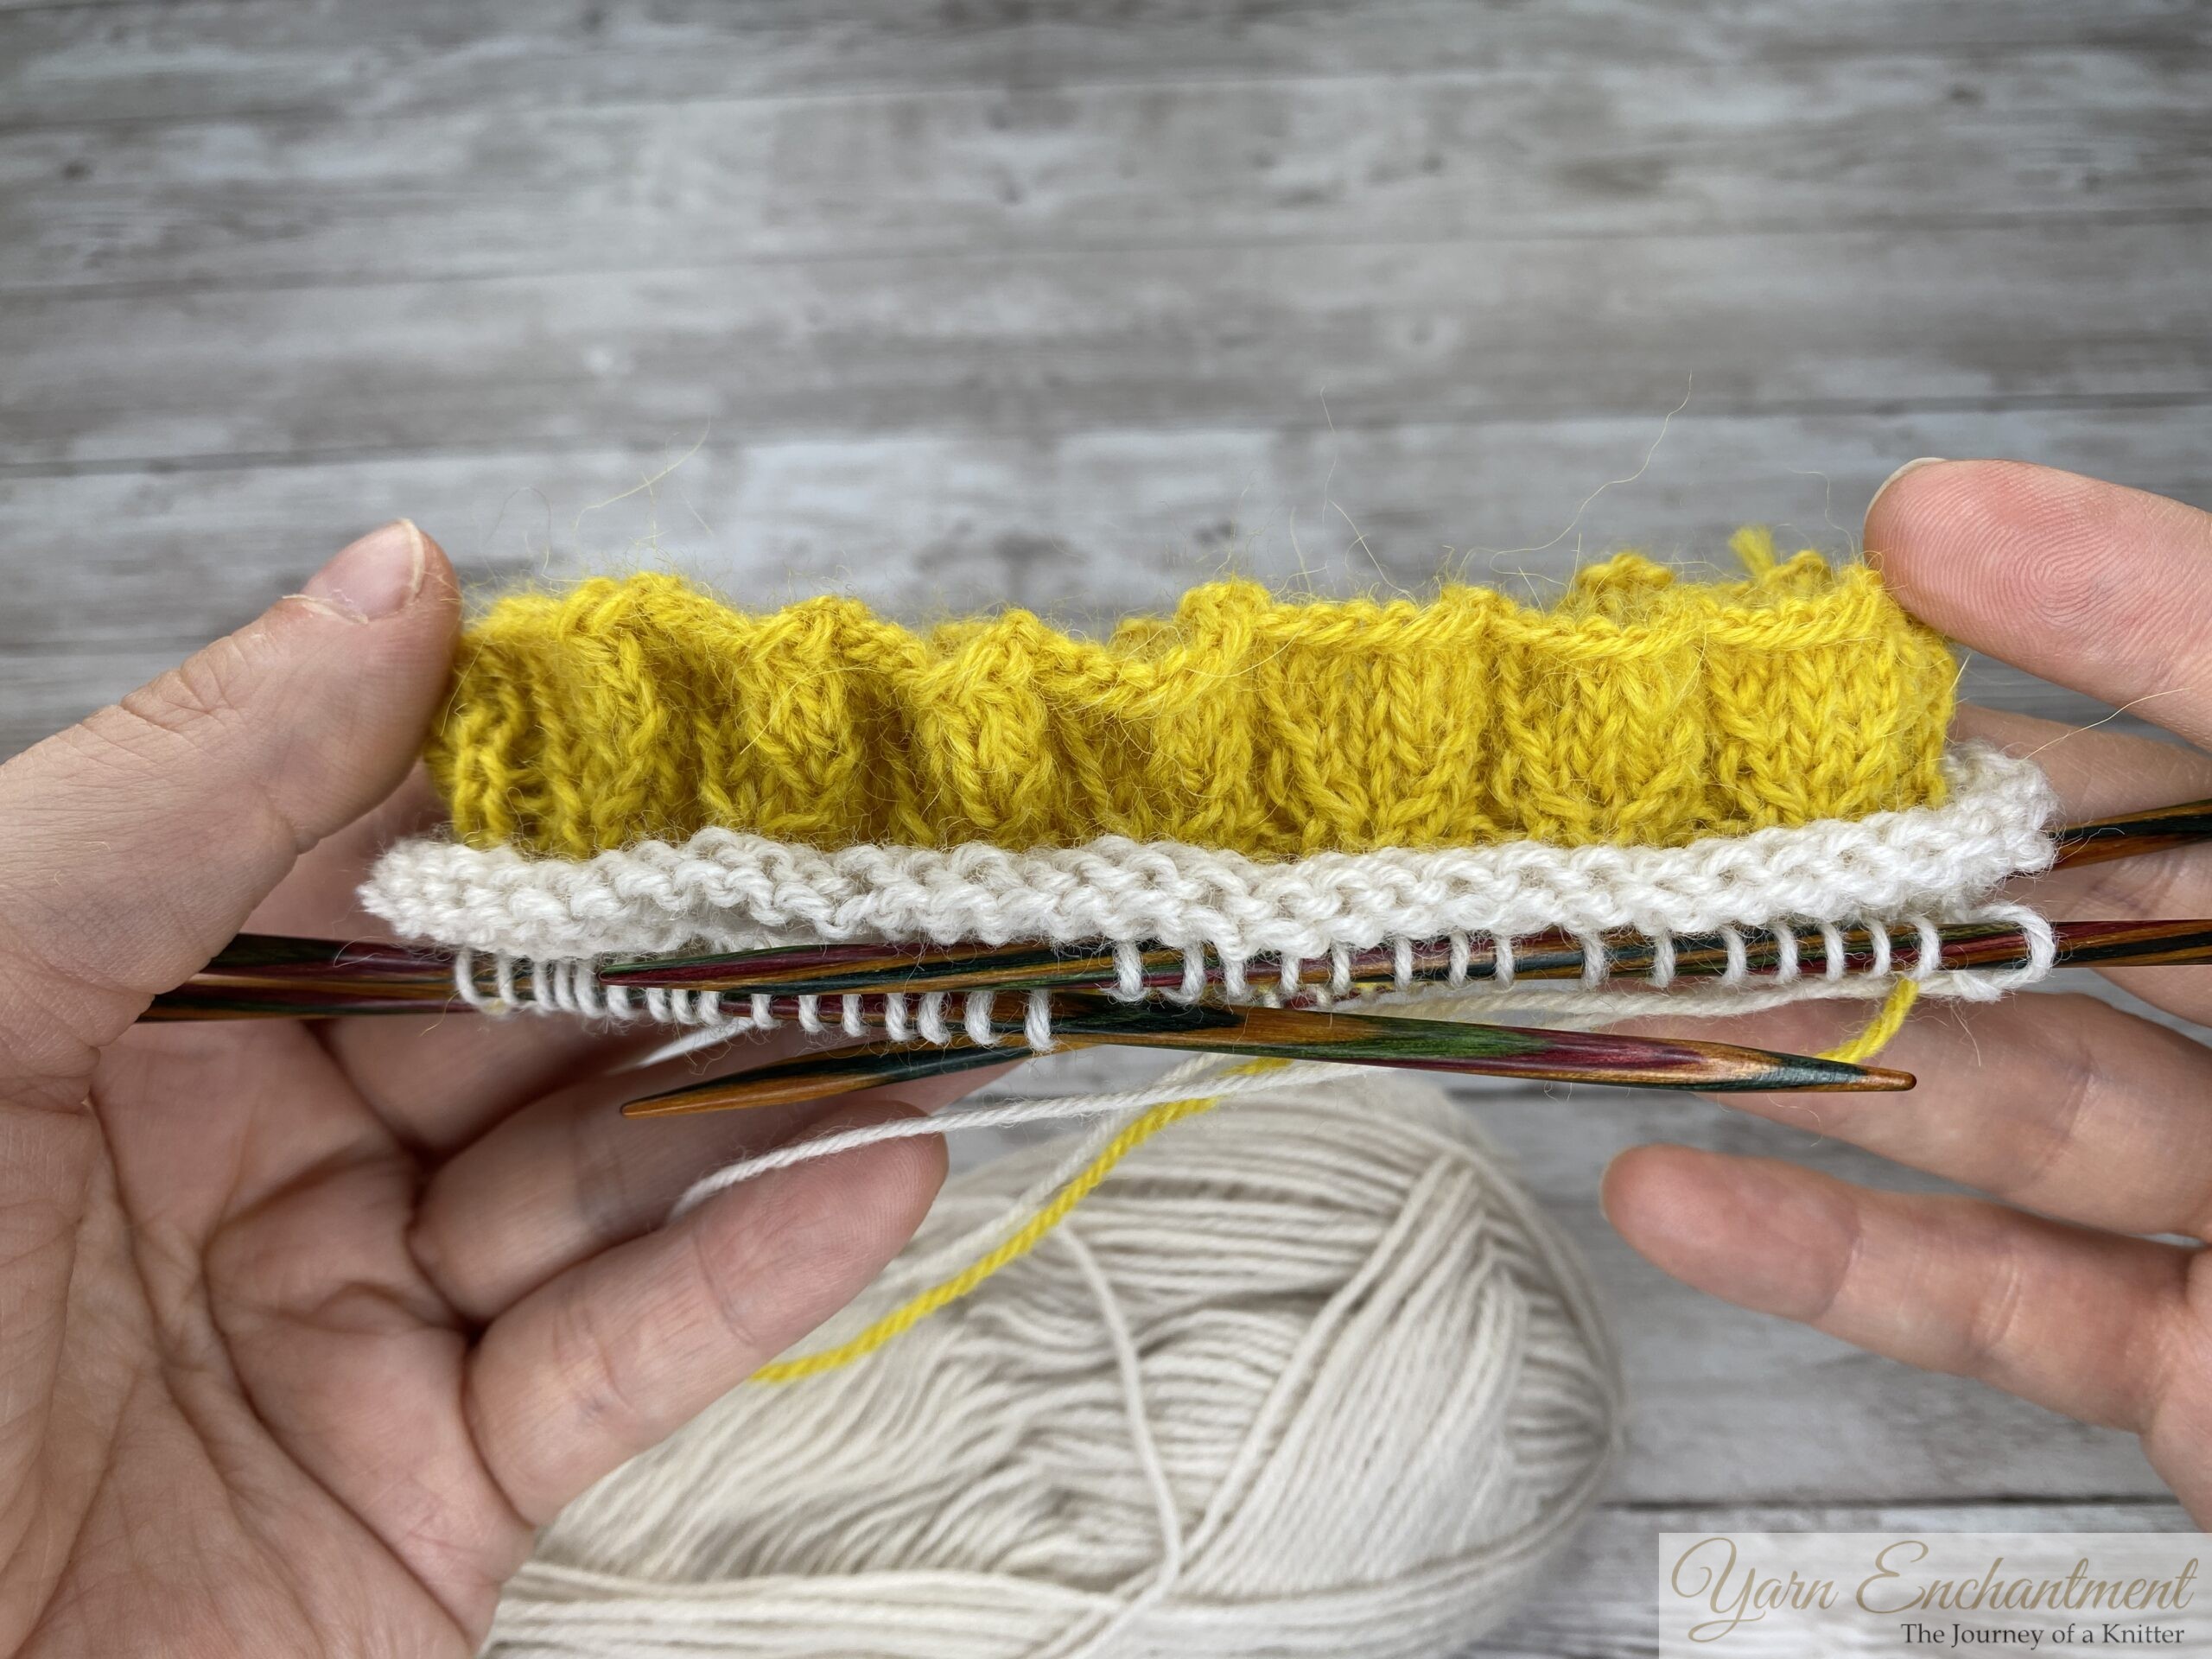

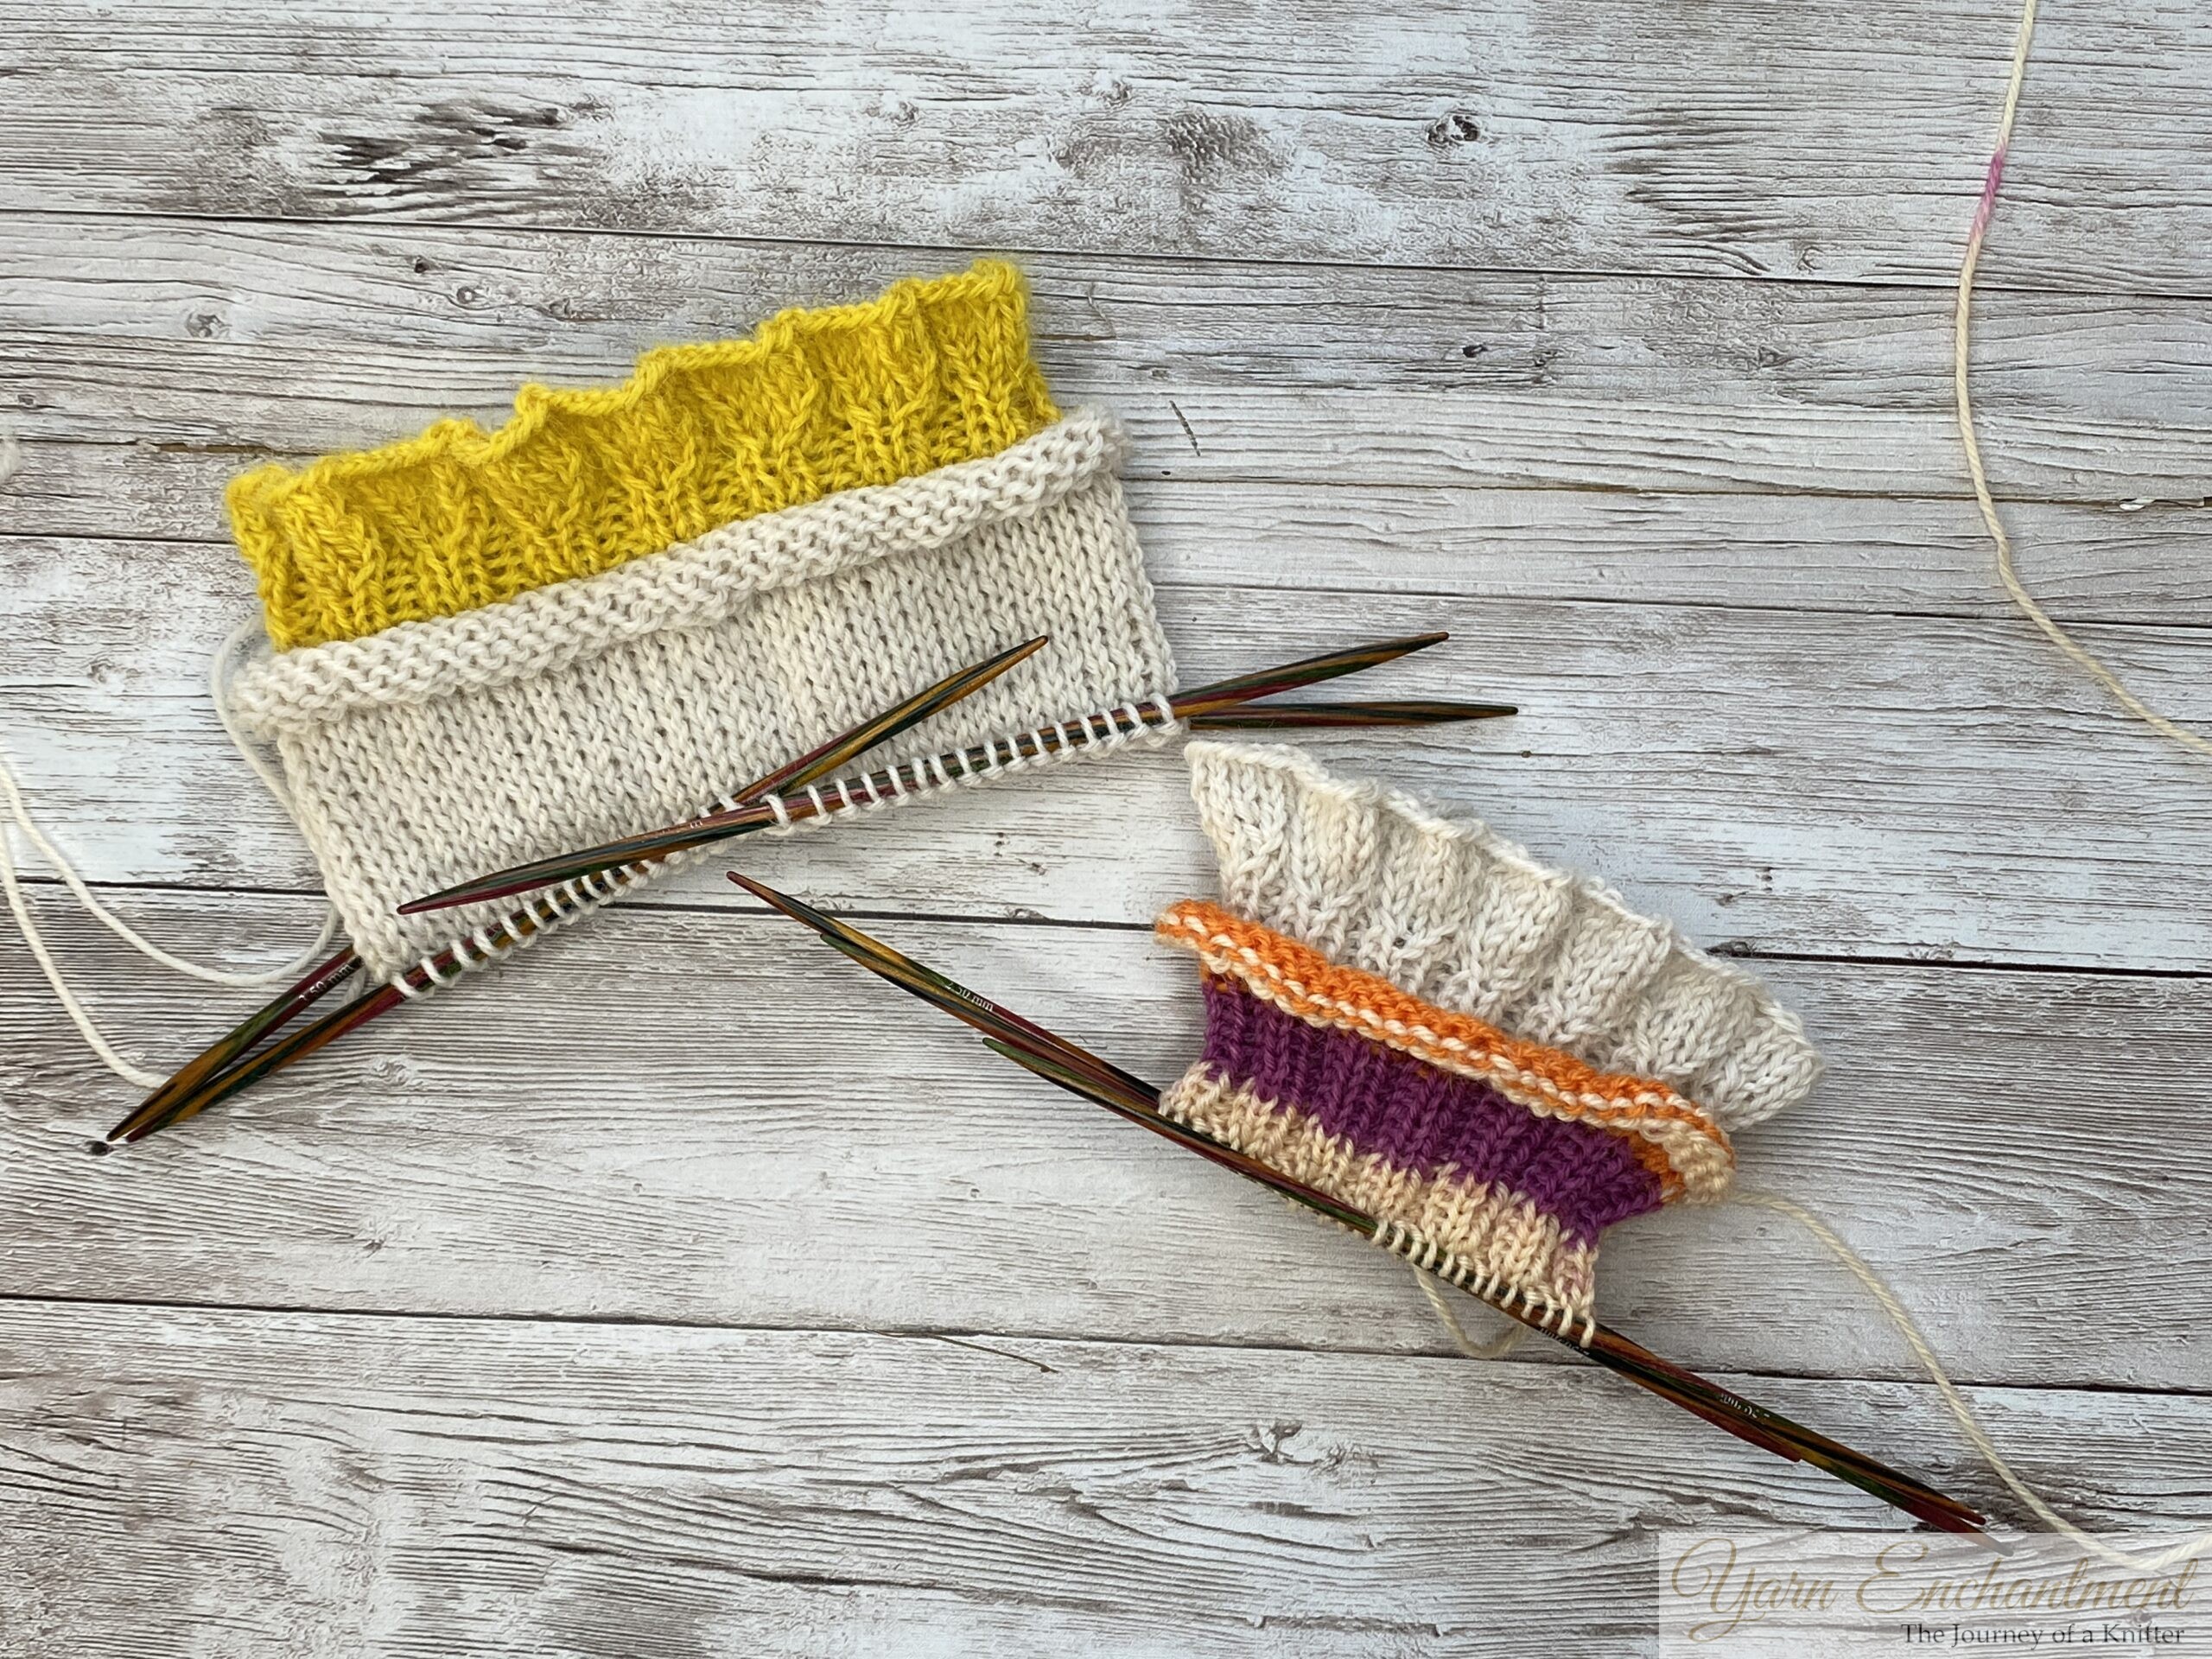
Tip: I recommend switching to smaller needles for the cuff ribbing. I tried knitting in stockinette stitch after the join with the larger needles, but the cuff ended up way too loose and slipped down. For my daughter’s socks, I switched to smaller needles and worked a 2x2 ribbing instead, and the cuff now has a really nice, snug fit around the leg.
For the yellow and white sock, I kept the larger needles throughout, and you can see how wide the cuff turned out. When I tried it on, it slipped right off, not a great fit. But for the sock on the right, which is for my daughter, I switched to smaller needles just for the cuff. It fits snugly around her leg and stays put. I decided to stick with the 2x2 ribbing because I really liked how it looked on that sock.

Video Tutorial
I’ve created a video for this ruffle cast on. You can watch it here.
Final Thoughts
I hope you love this ruffle edge as much as I do. It’s such a sweet detail for Socktober, and it works for every size, from tiny baby socks to grown-up pairs. Whether you’re knitting for a little one or treating yourself, that soft flared cuff adds a lovely touch to an otherwise simple sock.
If you’re new to sock knitting, don’t forget to check out my full sock knitting tutorial for casting on DPNs without twisting your stitches. And if you prefer to see the ruffle in action, the video tutorial is linked above.
If you knit a pair, I’d love to see them! You can share them in the comments below. And if you want to keep knitting along, be sure to subscribe to the blog so you don’t miss the next part, where we’ll tackle the heel, foot, and toe.
Until next time, happy knitting!
By the way: if sock knitting is on your bucket list, don't miss my free step-by-step sock knitting course - it takes you from your very first cast-on all the way to a finished pair. Struggling with twisted stitches on DPNs? I wrote a beginner-friendly guide just for that.
You Might Also Like


 |
|
Join the Cozy Corner Newsletter
Hello, creative soul. Welcome to the Yarn Enchantment Newsletter, a little space where we celebrate all things cozy, crafty, and full of heart. Think of this as your friendly crafting companion, a soft dose of inspiration delivered straight to your inbox, just for you. Each newsletter brings you: ✨ Notifications about new patterns and tutorials – easy knitting patterns and beginner crochet projects you won’t find anywhere else 🧶 Practical yarn tips for new crafters, plus advice on the best yarn for fall, blankets, and handmade gifts 💌 Small stories and adventures from my own workbench, because crafting is as much about the journey as the finished piece Whether you’re knitting by the fire, looking for your next creative spark, or simply wanting a quiet moment with your hooks and needles, this newsletter is here to cheer you on. Crafting isn’t just about the final project. It’s about the joy, the peace, and the stories we weave along the way. So grab a cup of tea or coffee, settle in, and join me. Together we’ll make a little magic, one stitch and one story at a time. I’m so glad you’re here. Let’s create something beautiful together. Sign up below to receive your first email, and feel free to leave a comment on the blog if there’s a topic you’d love to see covered. Your ideas might just become our next newsletter feature. |


