

Free Sock Knitting Masterclass: Step-by-Step Guide & Videos
October 20, 2025
How to Knit I-Cords: Neat Results with 2–7 Stitches
November 4, 2025Free Knitted Pumpkin Pattern: Easy DIY Fall Decor

Originally published on October 28, 2025
Honestly, I wondered if I was posting this pattern too late. Christmas decorations are already popping up everywhere, whether you’re in the supermarket or browsing online. But autumn always feels like a fresh start to me. Those first cool days, when the leaves begin to change and the air smells like woodsmoke, always make me want to nest, knit, and gather a few cozy touches around the house.
Just yesterday, I was on a walk with my family when my daughter handed me the prettiest leaf she’d found. It was a little reminder not to rush: every season deserves to be enjoyed for what it brings. What do you think, is it ever really "too late" to get cozy and celebrate autumn?
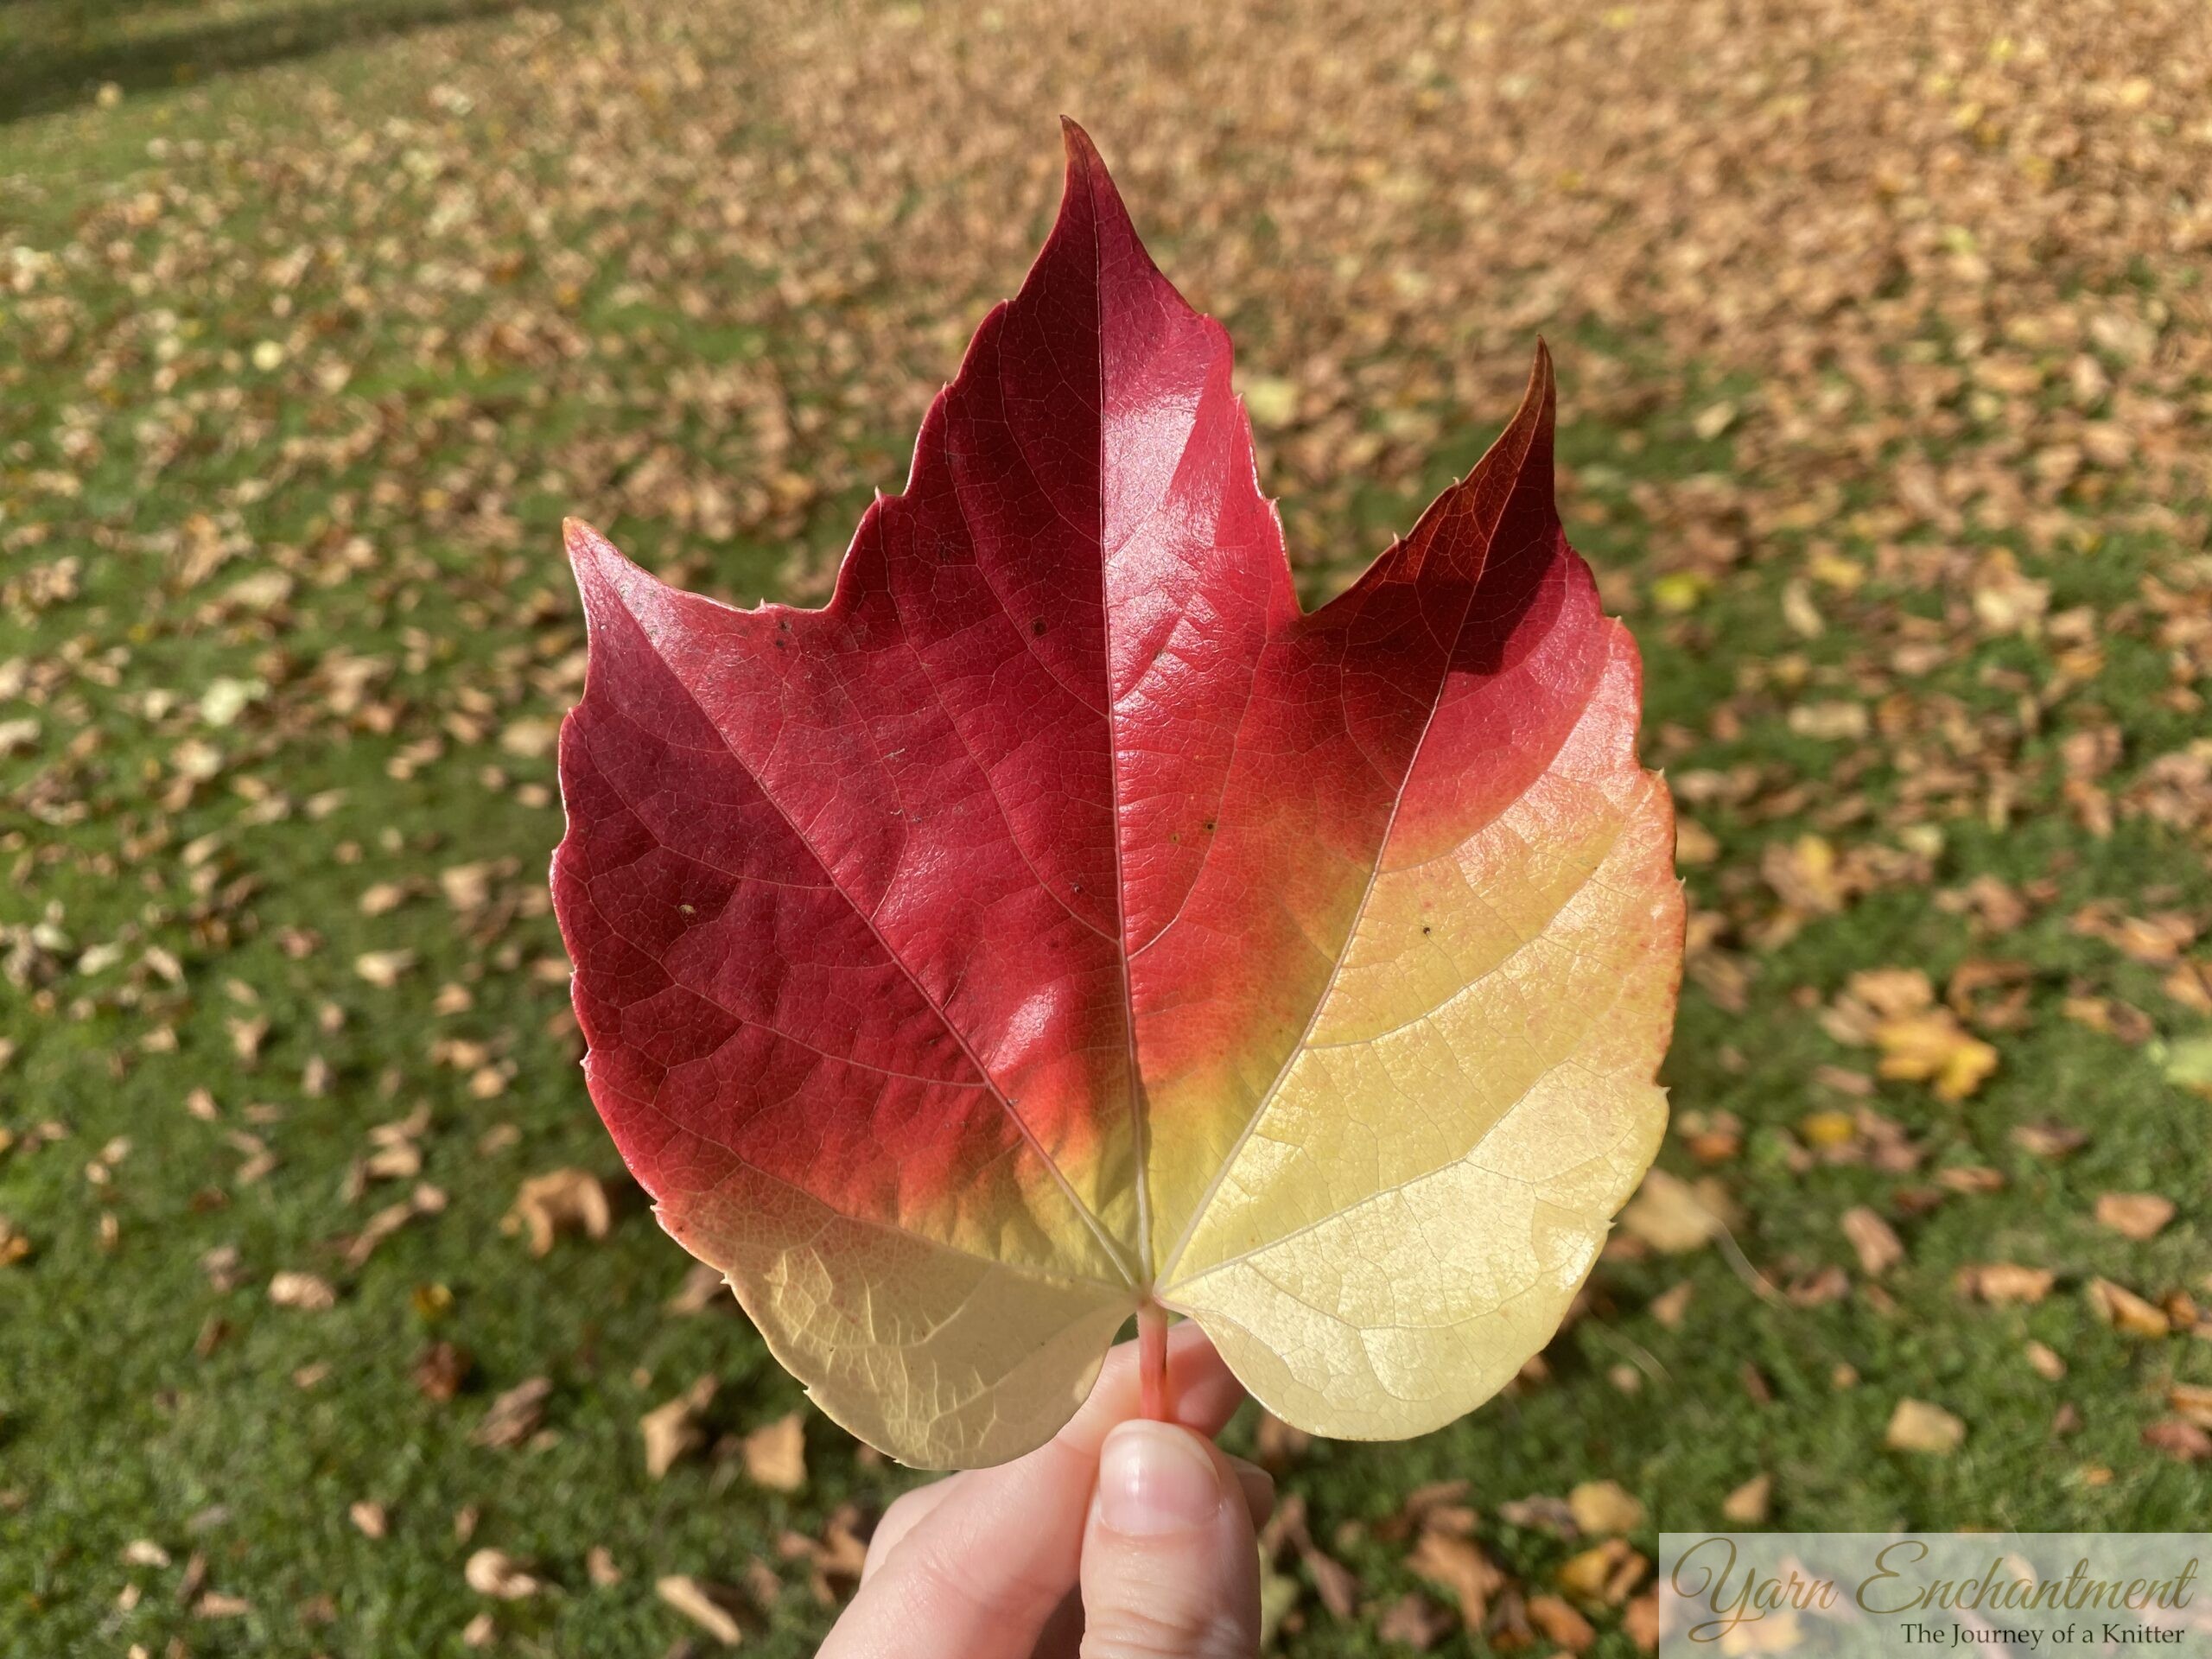 | In Austria, we call this plant "Wilder Wein." I’m not an expert on English plant names, but my research shows it's called Virginia creeper. In autumn, this plant turns the most beautiful shades of red and yellow, adding vibrant color to walls and fences. |

Why Knit Pumpkins for Fall?
This easy autumn knitting pattern was born out of that feeling. I love how something so small can capture all the warmth and color of my favorite season. It’s an easy project, perfect for using up scraps or for those evenings when you just want to make something simple and cheerful with your hands.
I hope this easy knit pumpkin brings a bit of autumn magic into your home. Enjoy the process, put on some good music, make a cup of tea, and let’s celebrate the cozy season together, stitch by stitch.
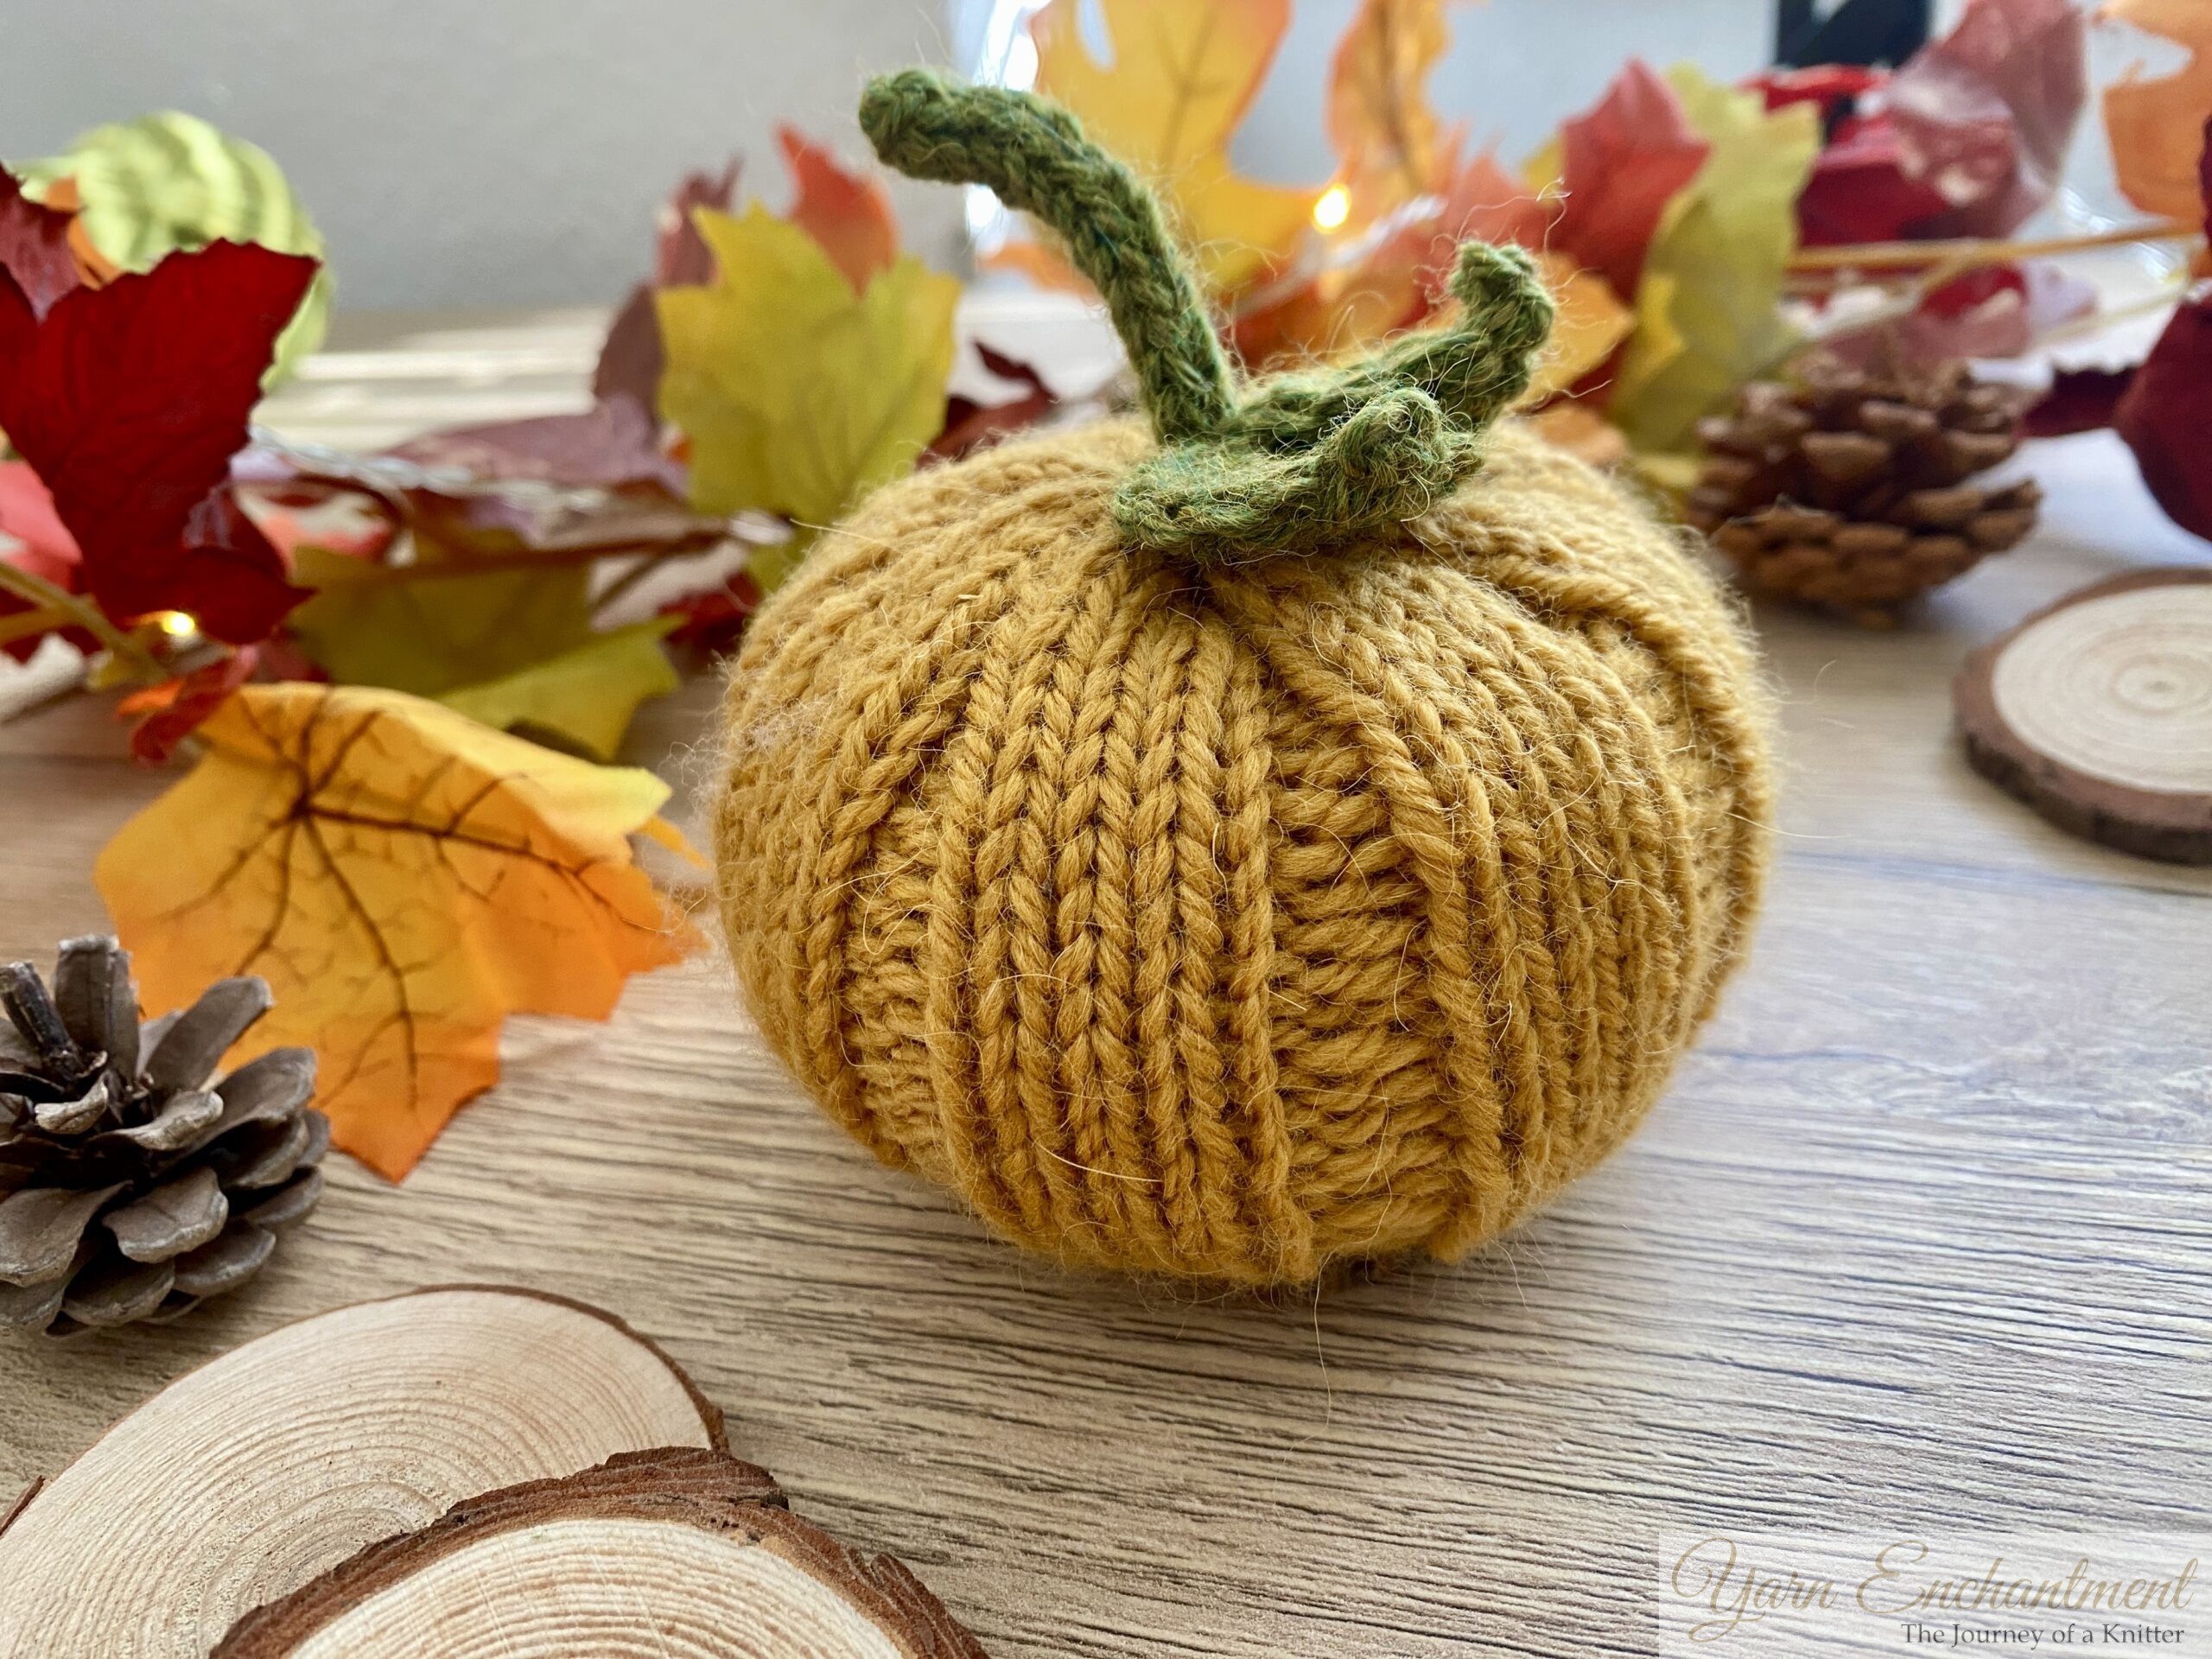
 | Free Knitted Pumpkin Pattern |

Pattern Overview
You’ll knit this pumpkin in the round, which means less seaming and no escaping stuffing. I like to use needles a little smaller than the yarn label suggests, so the filling stays put and the pumpkin looks plump and neat. Simply cast on and work in a [k4, p2] rib until your pumpkin is as tall as you want. After a quick decrease round, you’ll close up the bottom, add your stuffing, and finish off the top. You can use your yarn tail to shape it into a classic pumpkin with lovely indents, or leave it a bit rounder if you prefer. Leaves and stems are an easy extra, knit or crochet them, or leave them out entirely if you like things simple. And don’t worry about a gauge swatch; just know that using a smaller needle will help keep your pumpkin nice and tidy, no matter what yarn you grab from your stash.
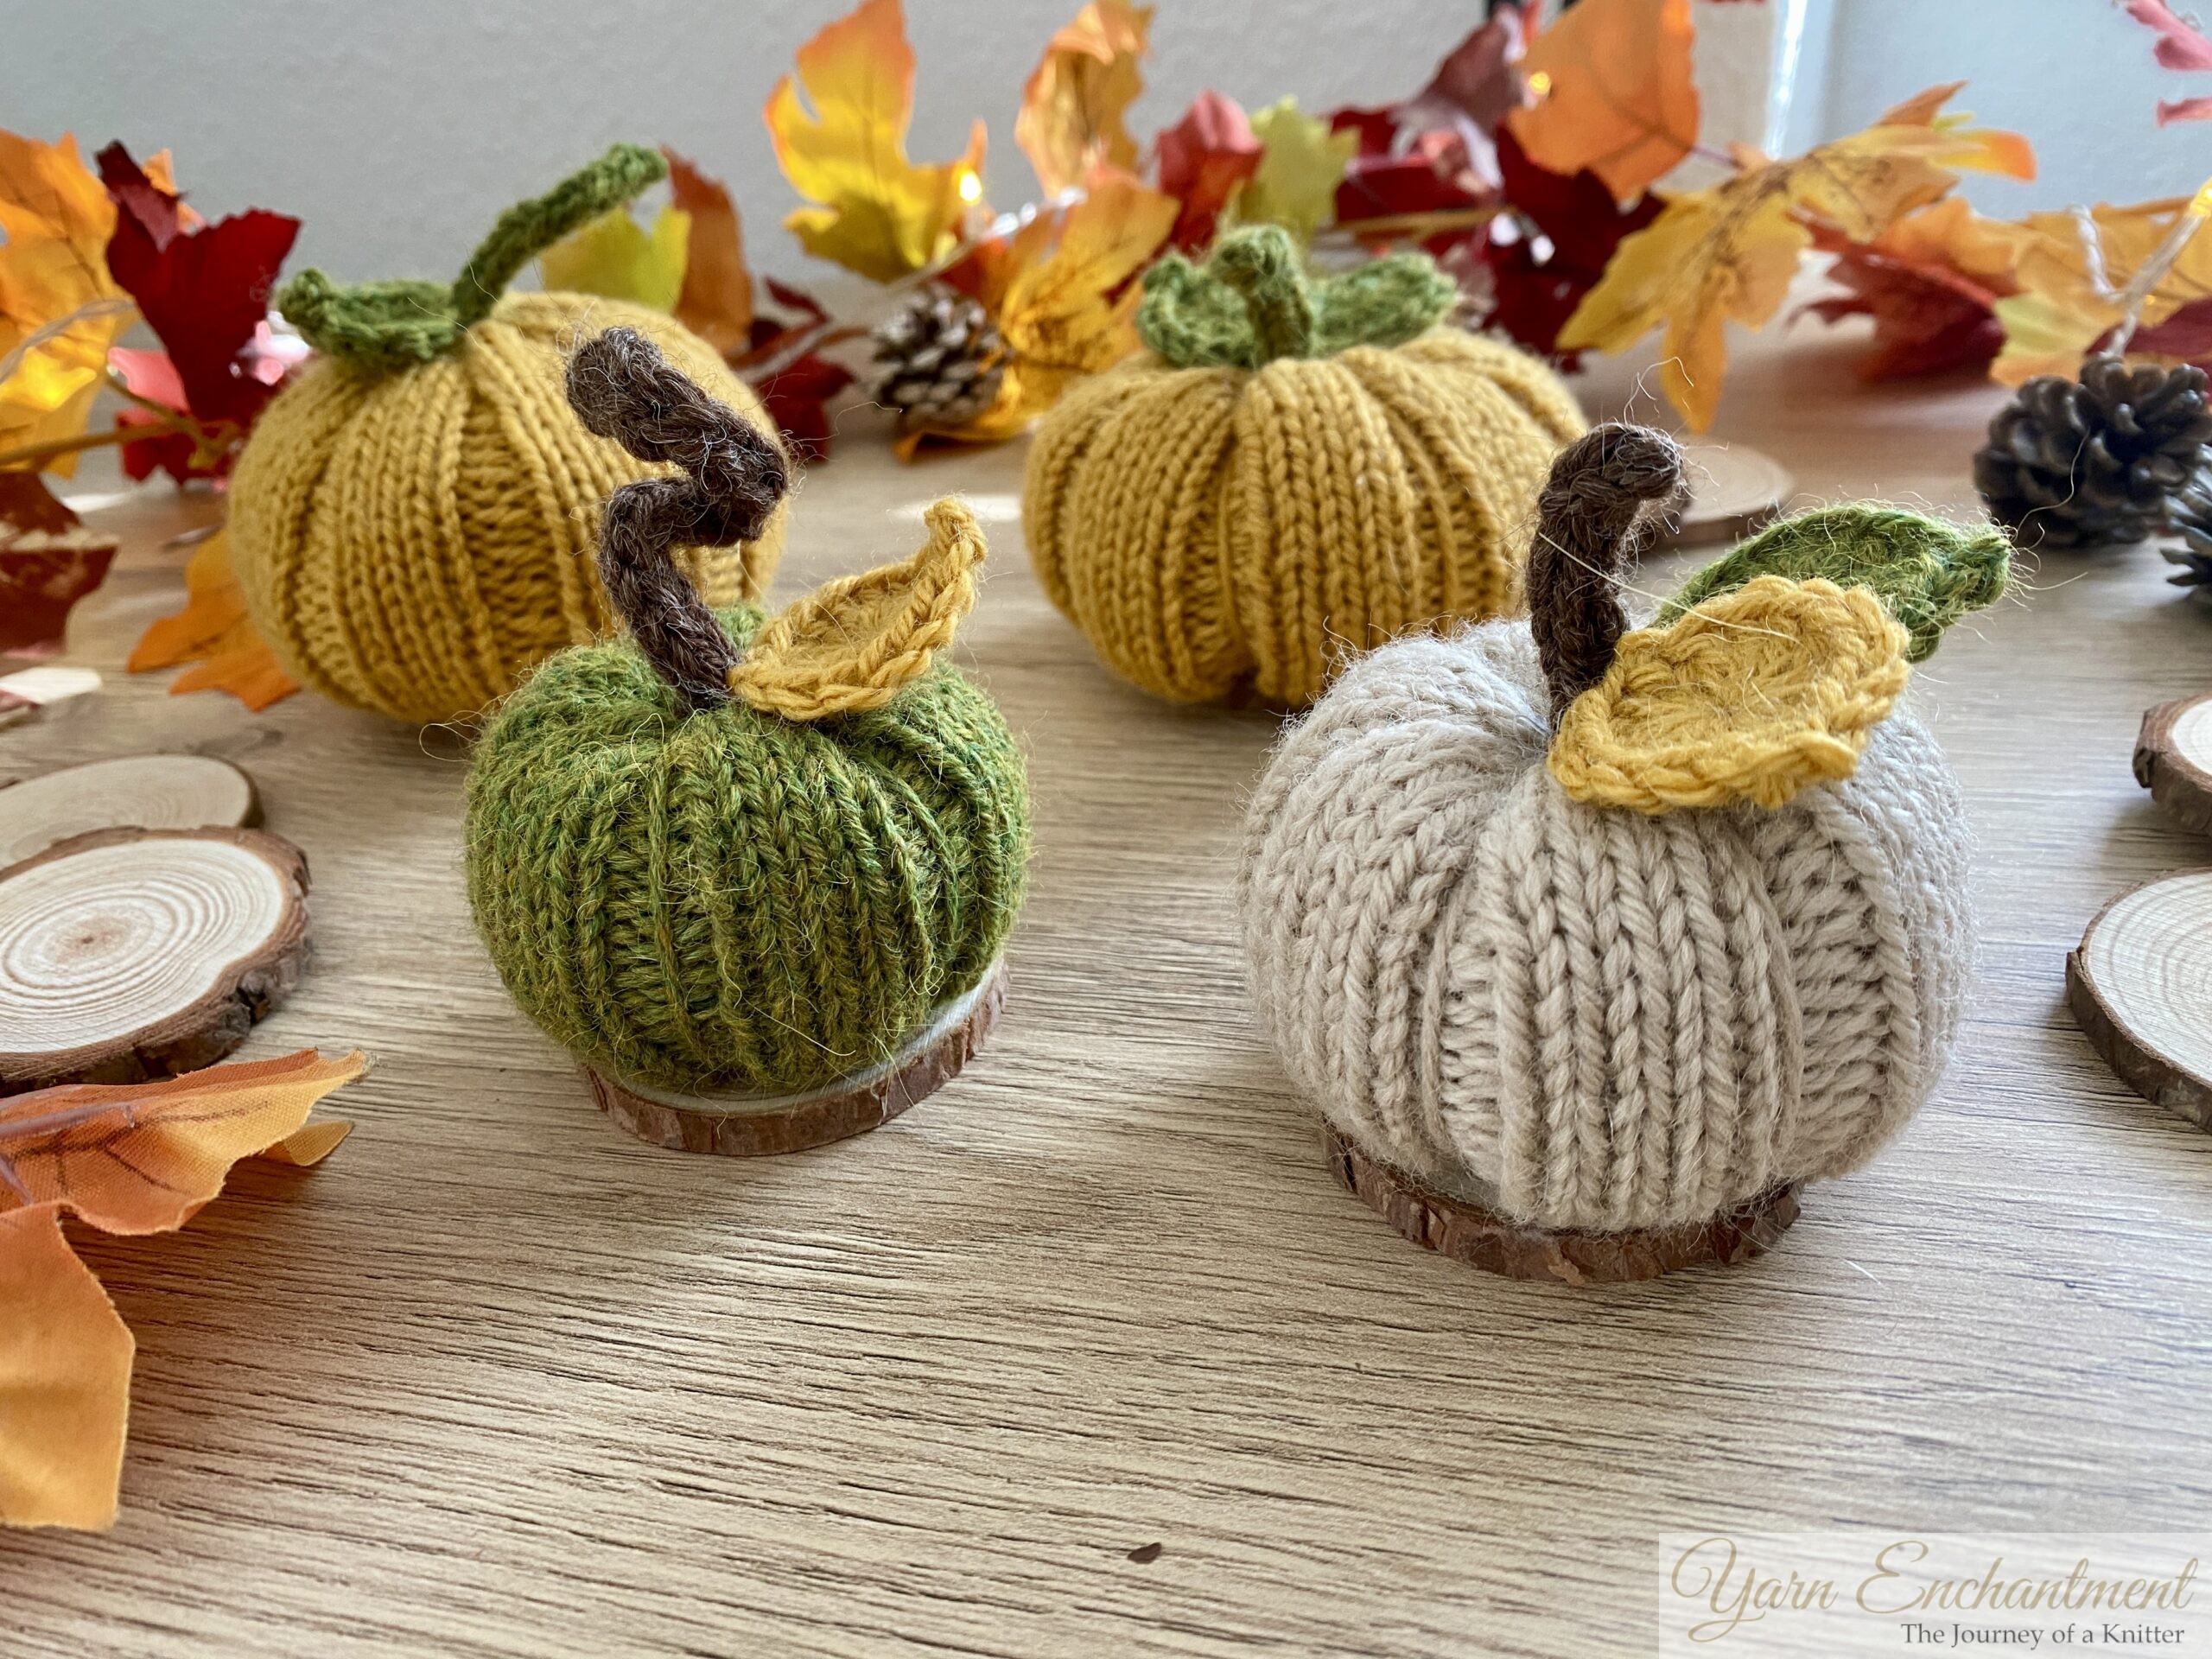 | Free Knitted Pumpkin Pattern: Easy DIY Fall Decor |

Materials Needed for the Pumpkin Pattern
To knit these free pumpkins, you'll need:
-
Drops Nepal yarn (or any Aran weight/10-ply yarn) - about 20g for the pumpkin body, plus small scraps for the leaves and stem.
-
Drops Lima for the small green pumpkin (so you can see how a different yarn weight affects the pumpkin’s size).
-
4 mm (US 6) double-pointed or circular needles for knitting in the round. (for the Aran weight yarn
- 3.5mm neelde for the DK weight yarn
-
Yarn needle.
-
Scissors.
-
Polyester fiberfill or wool stuffing.
-
A small amount of green yarn for the stem and leaves.
-
Optional: hot glue gun.
- Optional: wooden disk
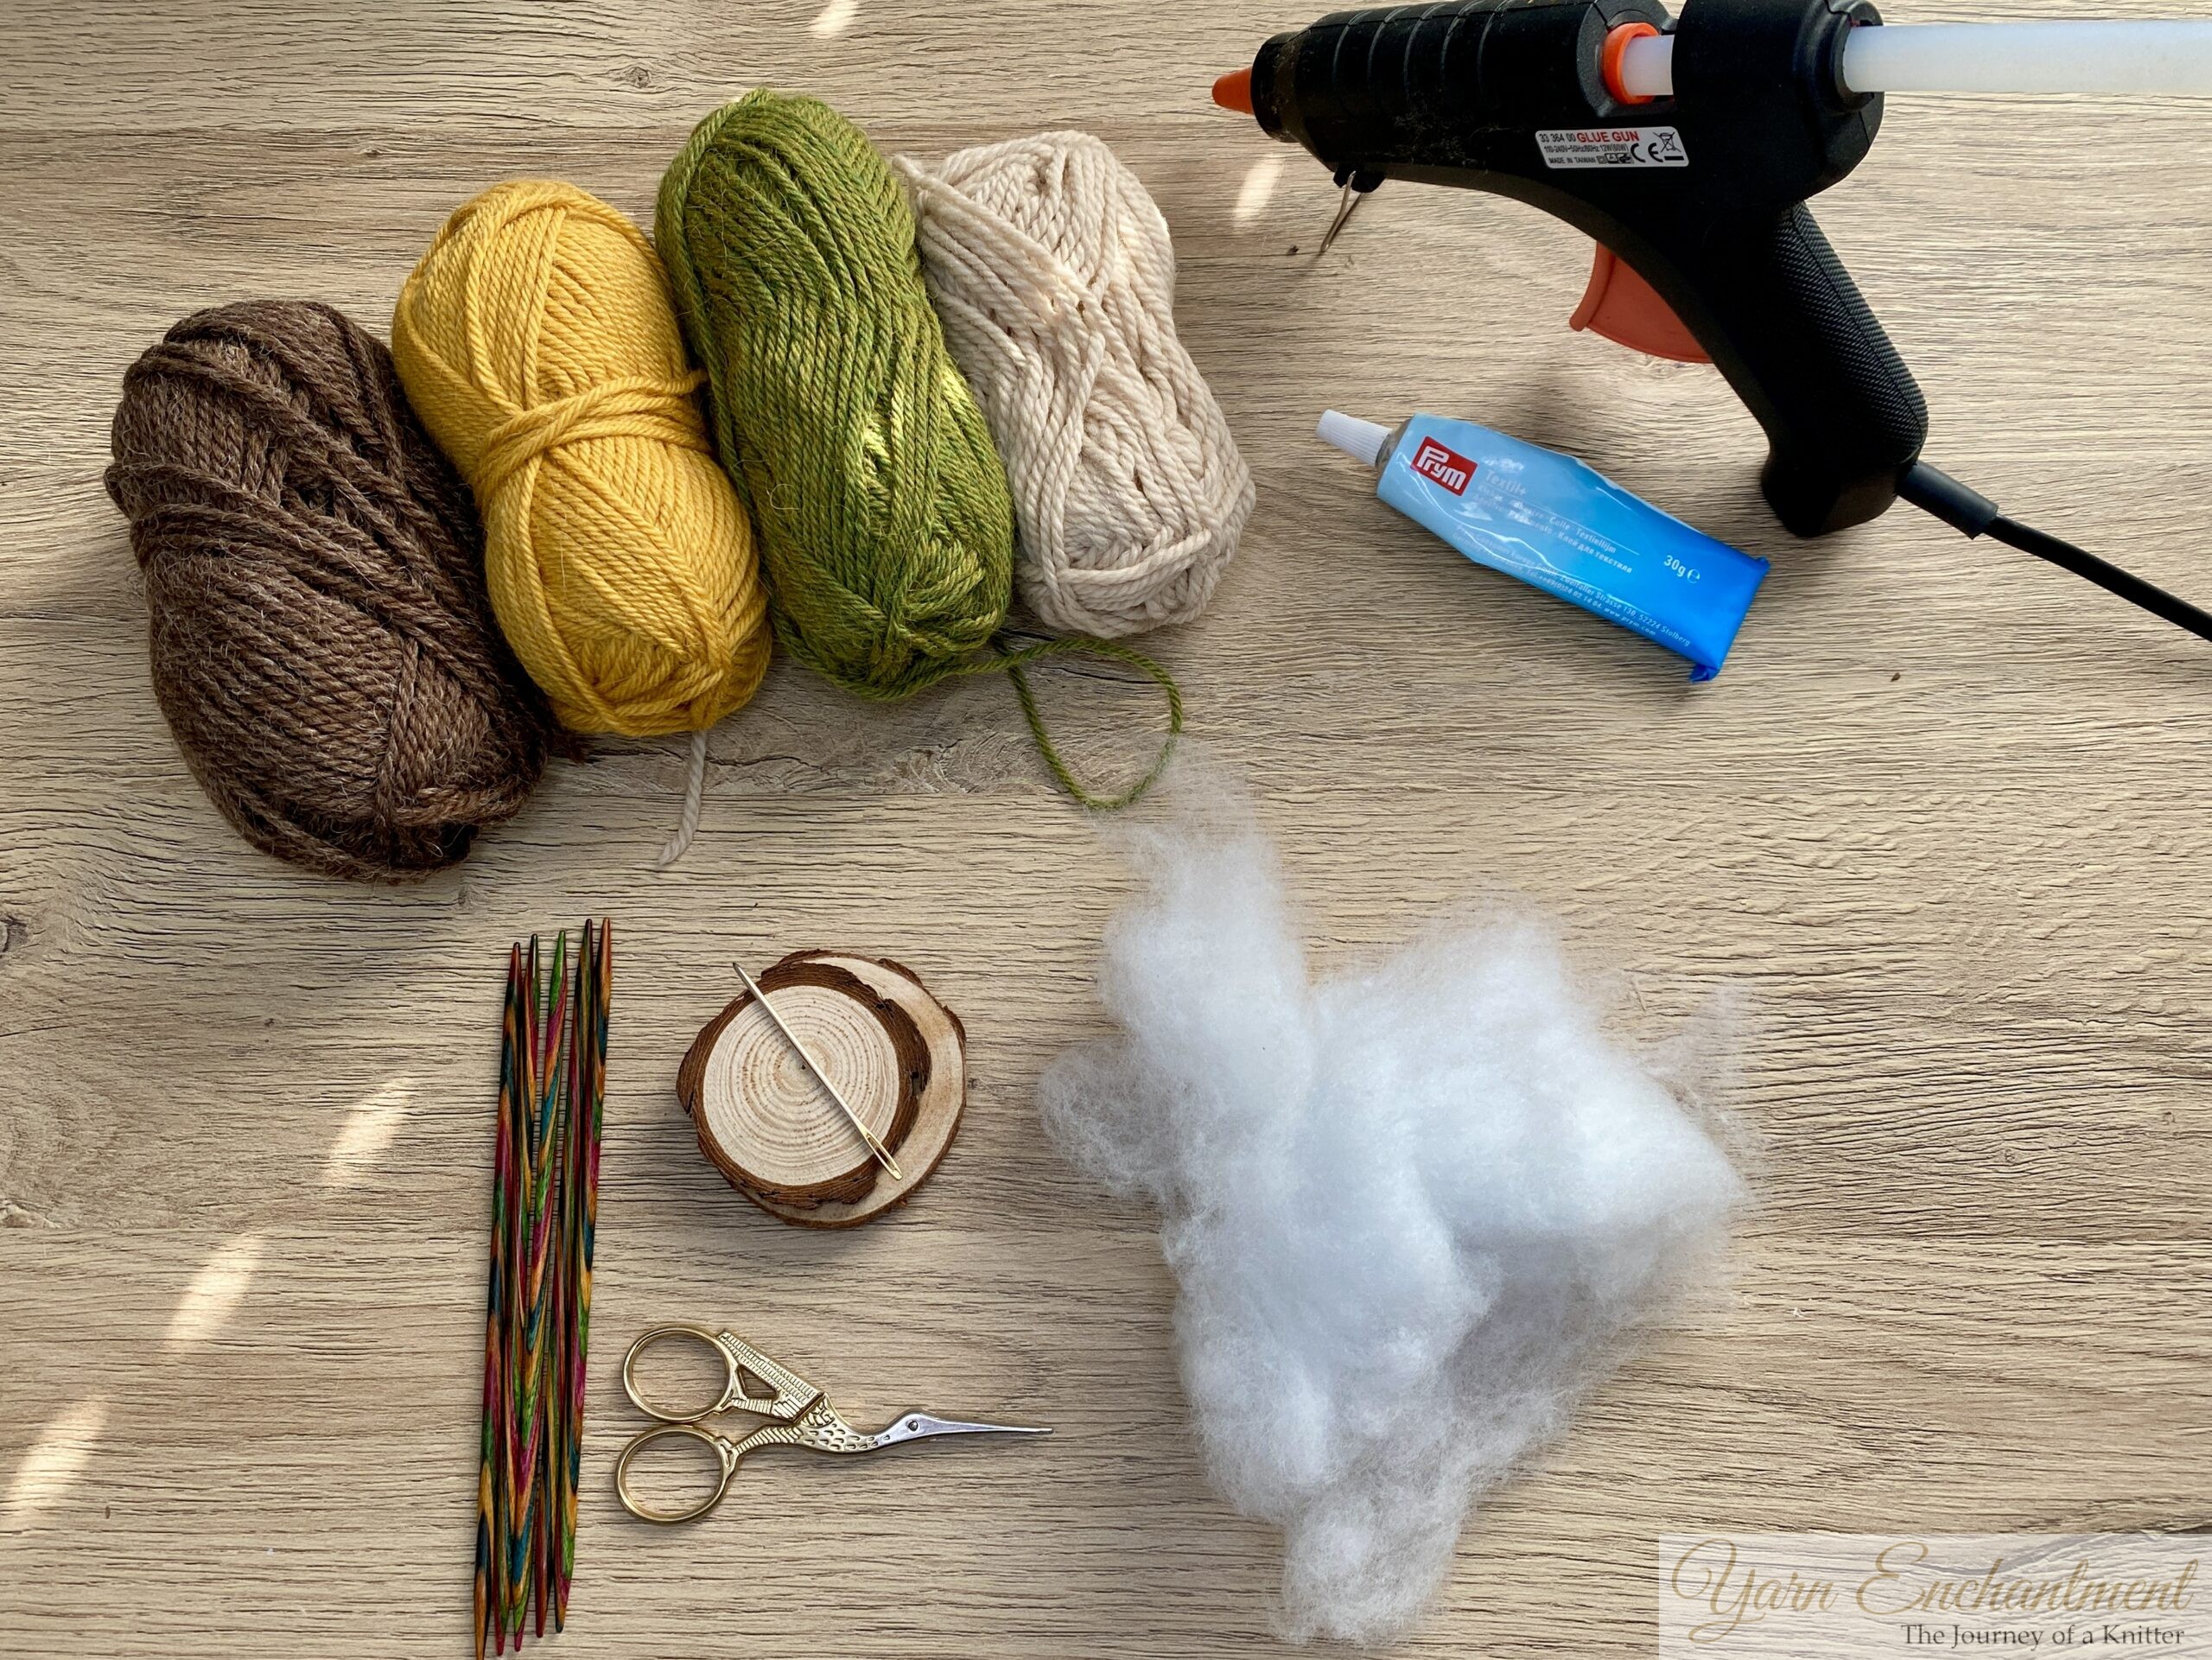 | Materials used for a knitted pumpkin; the wire, wooden disk, and glue are optional. |

Abbreviations
CO - cast on
k - knit
p - purl
st or sts - stitch or stitches
k2tog - knit two stitches together
p2tog - purl two stitches together
rep - repeat
rnd - round
RS - right side
WS - wrong side
BO - bind off or cast off
dc - double crochet (US term)
Pattern Notes
- This pumpkin is knit in the round to minimize seaming and keep the stuffing neatly contained.
- There’s no need to knit a gauge swatch; you can use any weight yarn you have on hand or from your stash. However, working with smaller needles than recommended will help prevent the filling from showing through.
- The crocheted leaves are optional, you can knit them, crochet them, or leave them out entirely, according to your preference
Free Pumpkin Knitting Pattern - Step-by-Step
Large Pumpkin:
-
Cast on 48 stitches. Place a marker and join to knit in the round.
-
Any method for knitting in the round (double-pointed, magic loop, or short circular needle) can be used.
-
Continue in this rib every round until the piece measures 11 cm (4⅓ inches) from the cast-on edge.
Small Pumpkin:
-
Cast on 36 stitches. Place a marker and join to knit in the round.
-
Any method for knitting in the round is suitable.
-
Continue in this rib every round until the piece measures 8 cm (about 3¼ inches) from the cast-on edge.
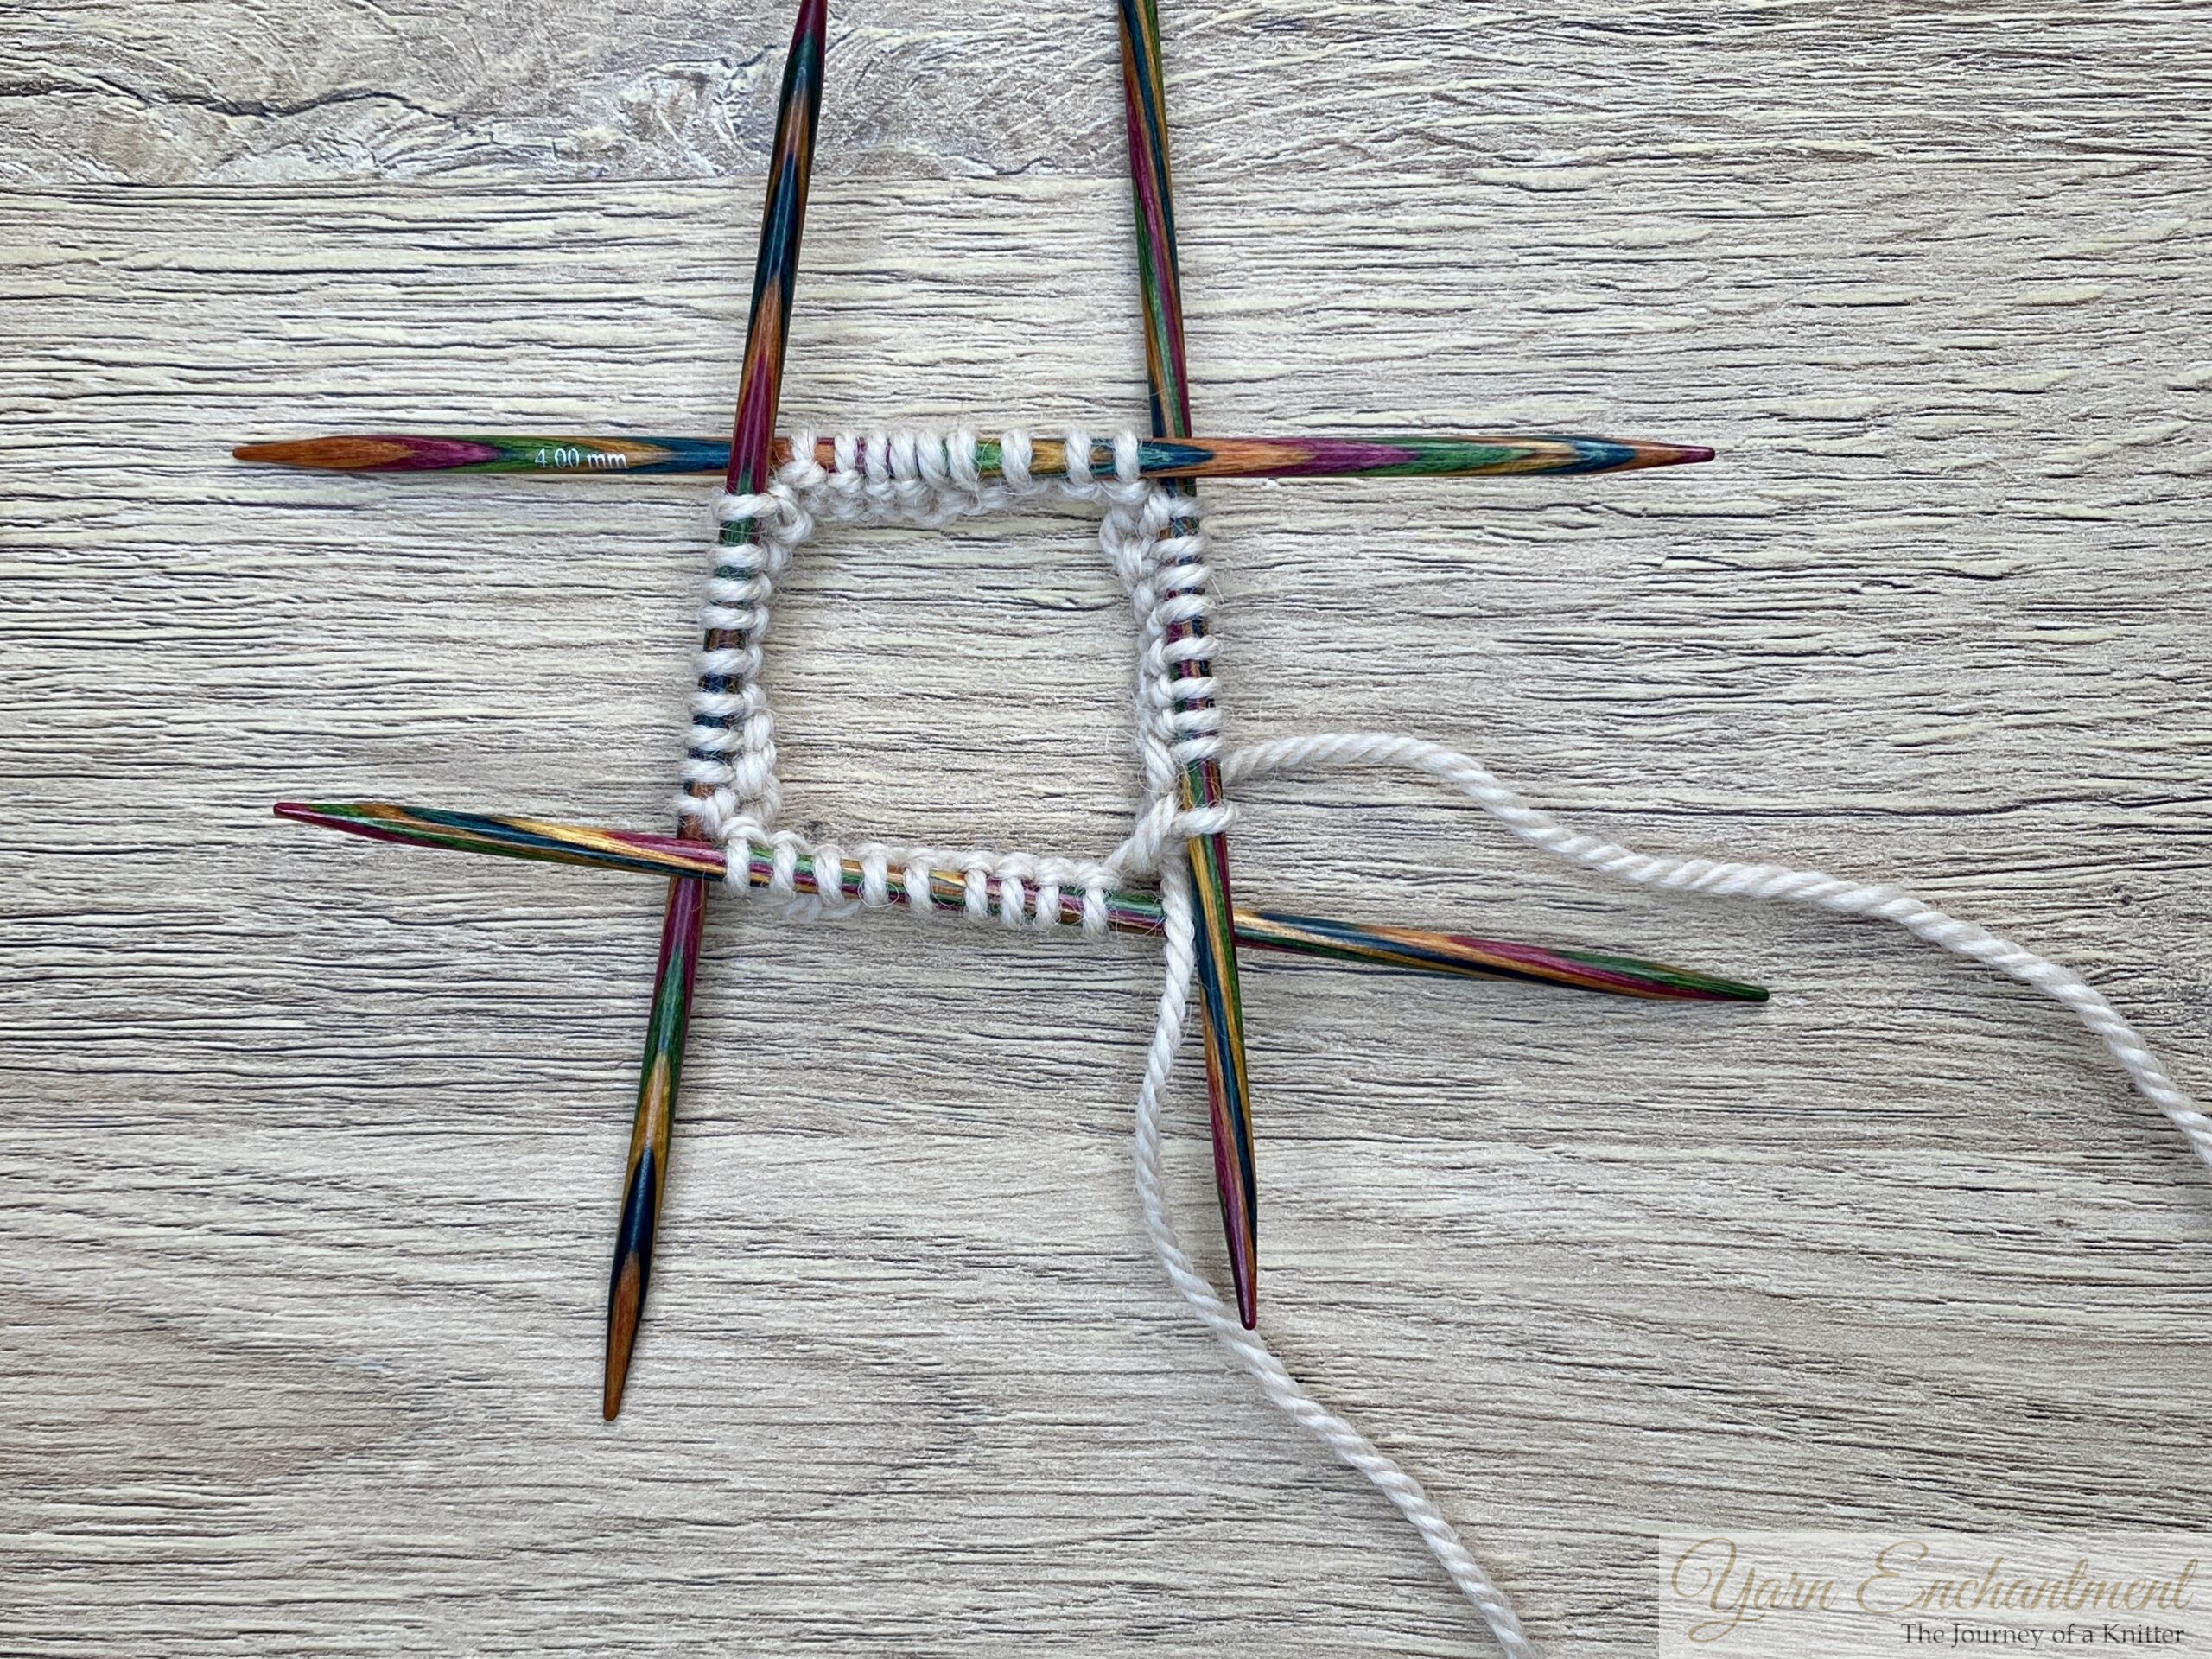 | 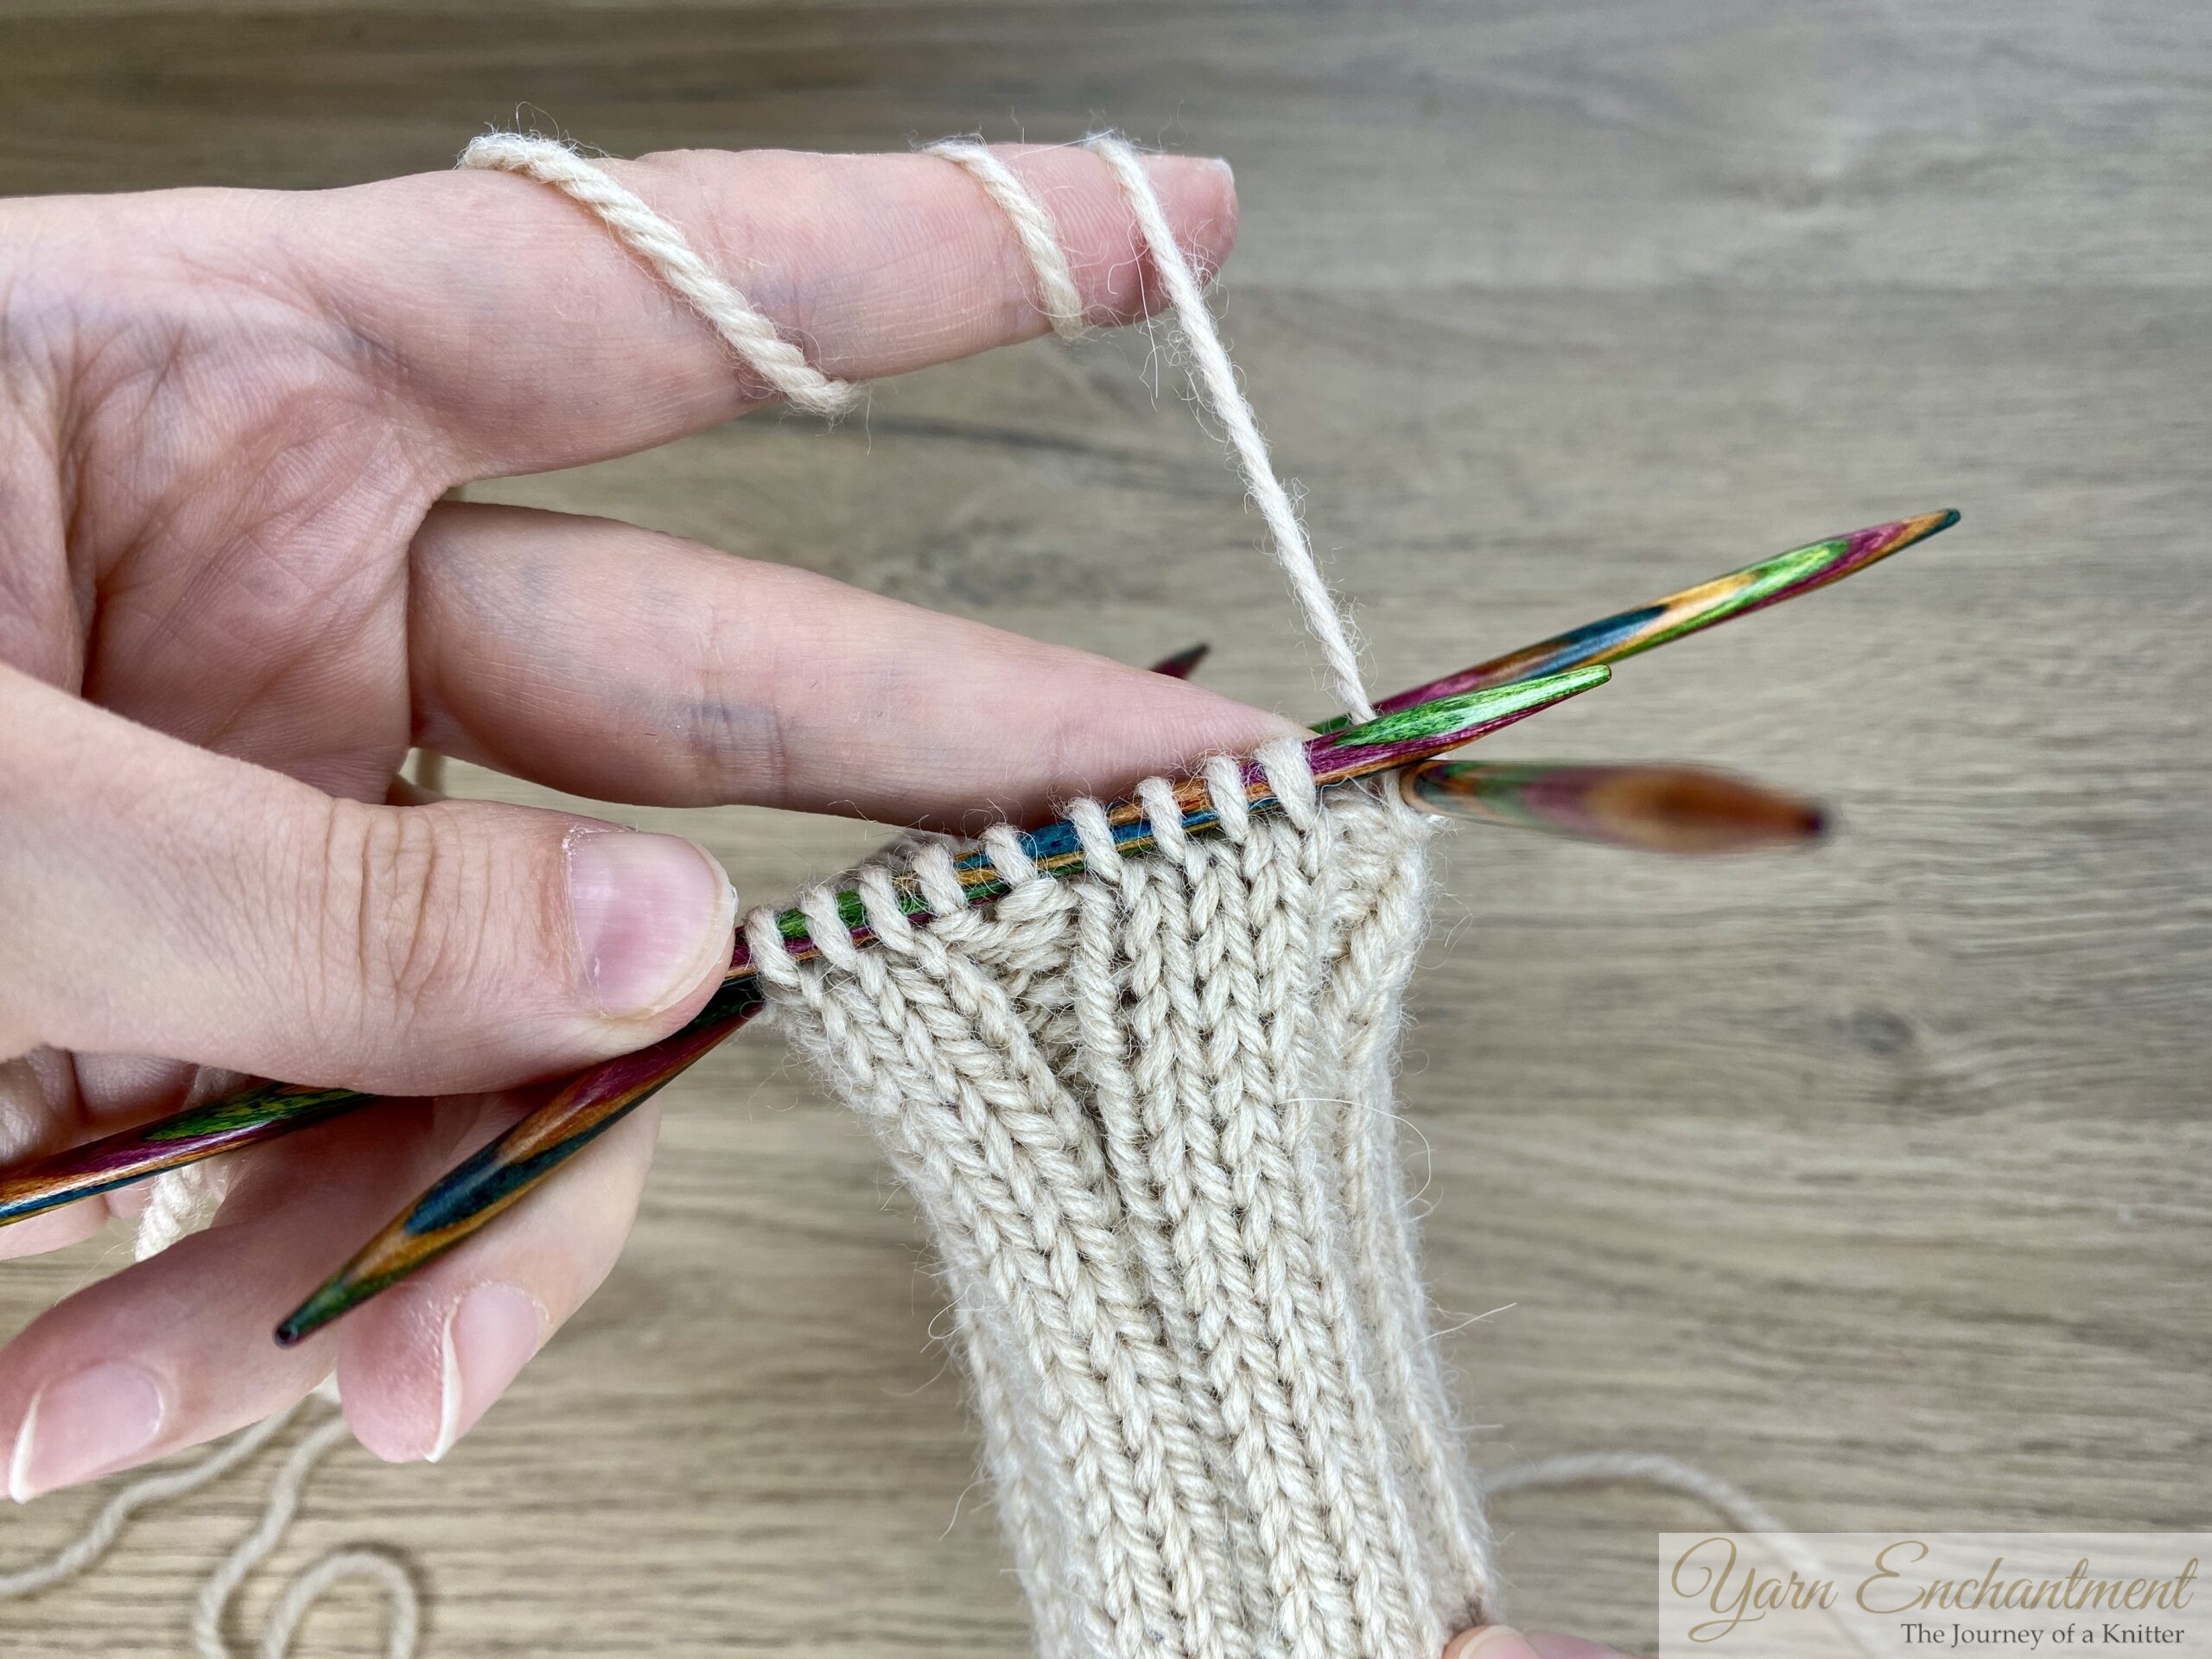 | Cast on 48 stitches for the big one or 36 stitches for the small one | Continue in the ribbing pattern (knit 4, purl 2) until your piece measures 11 cm (4⅓ inches) for the large pumpkin, and 8 cm (about 3¼ inches) for the small pumpkin. |


Shaping the Top of the Pumpkin
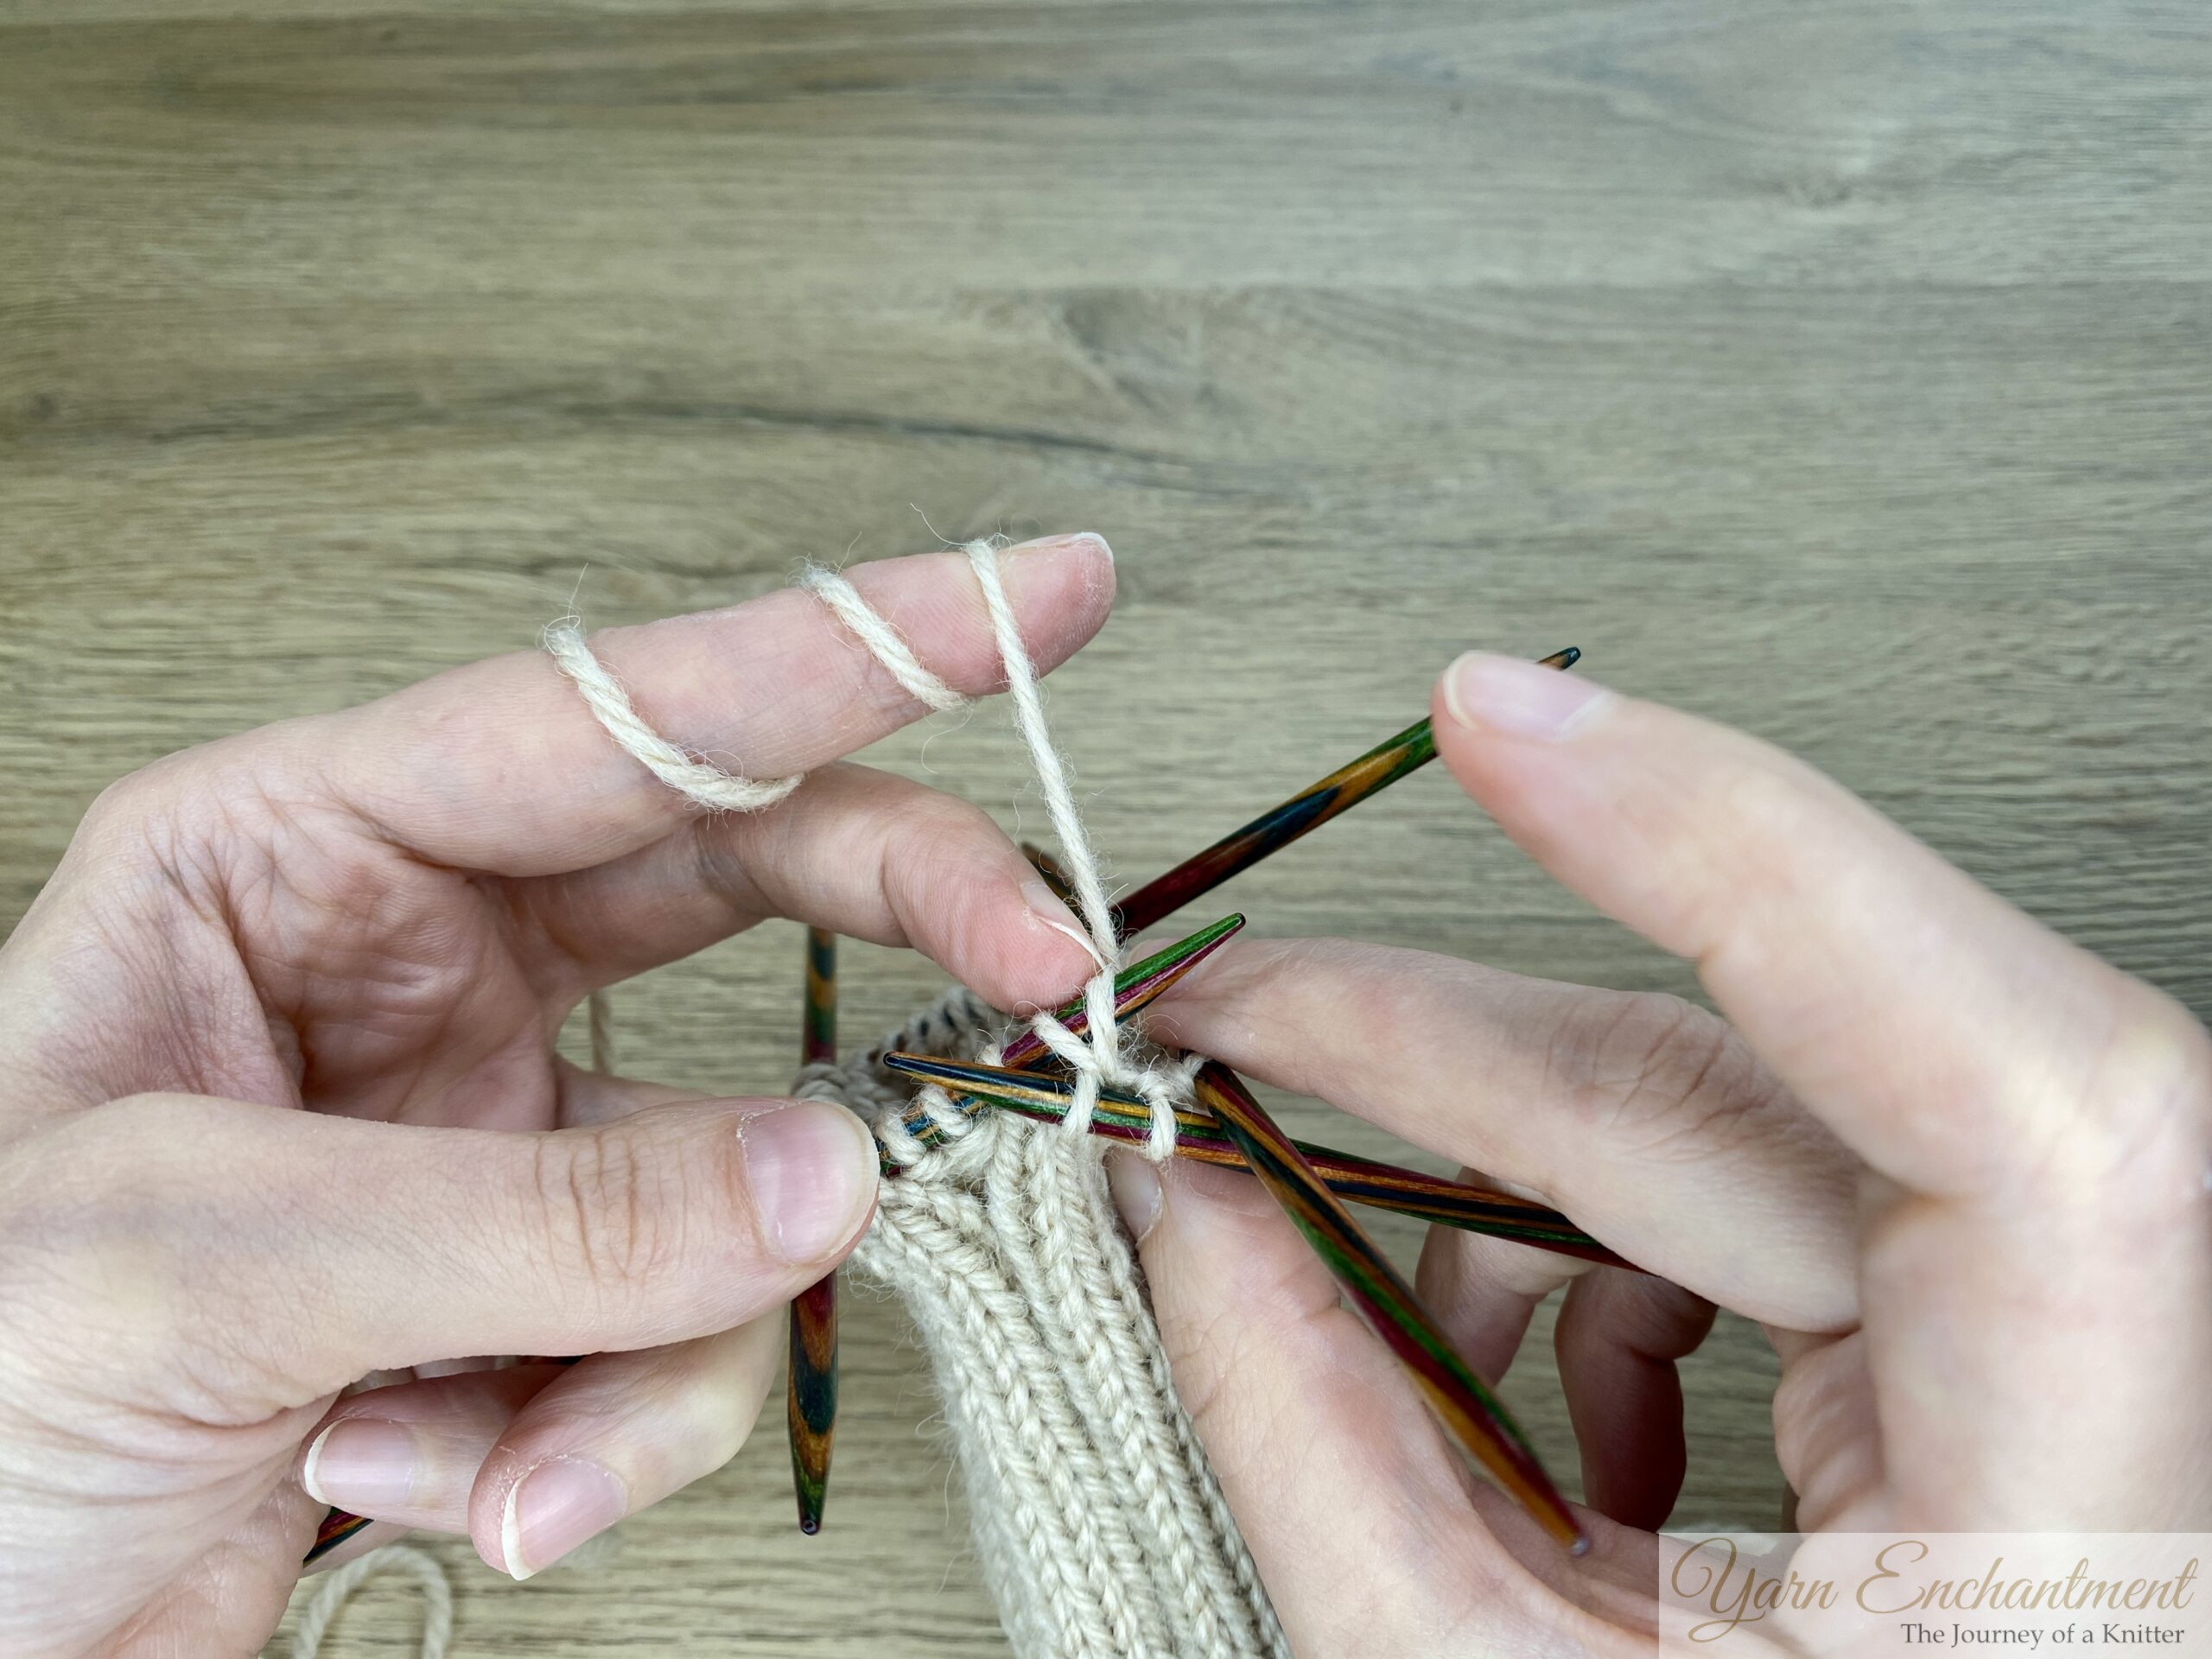
- Decrease round: [k1, k2tog, k1, p2tog] – repeat to end of round (you will have fewer stitches).
- Do not bind off.
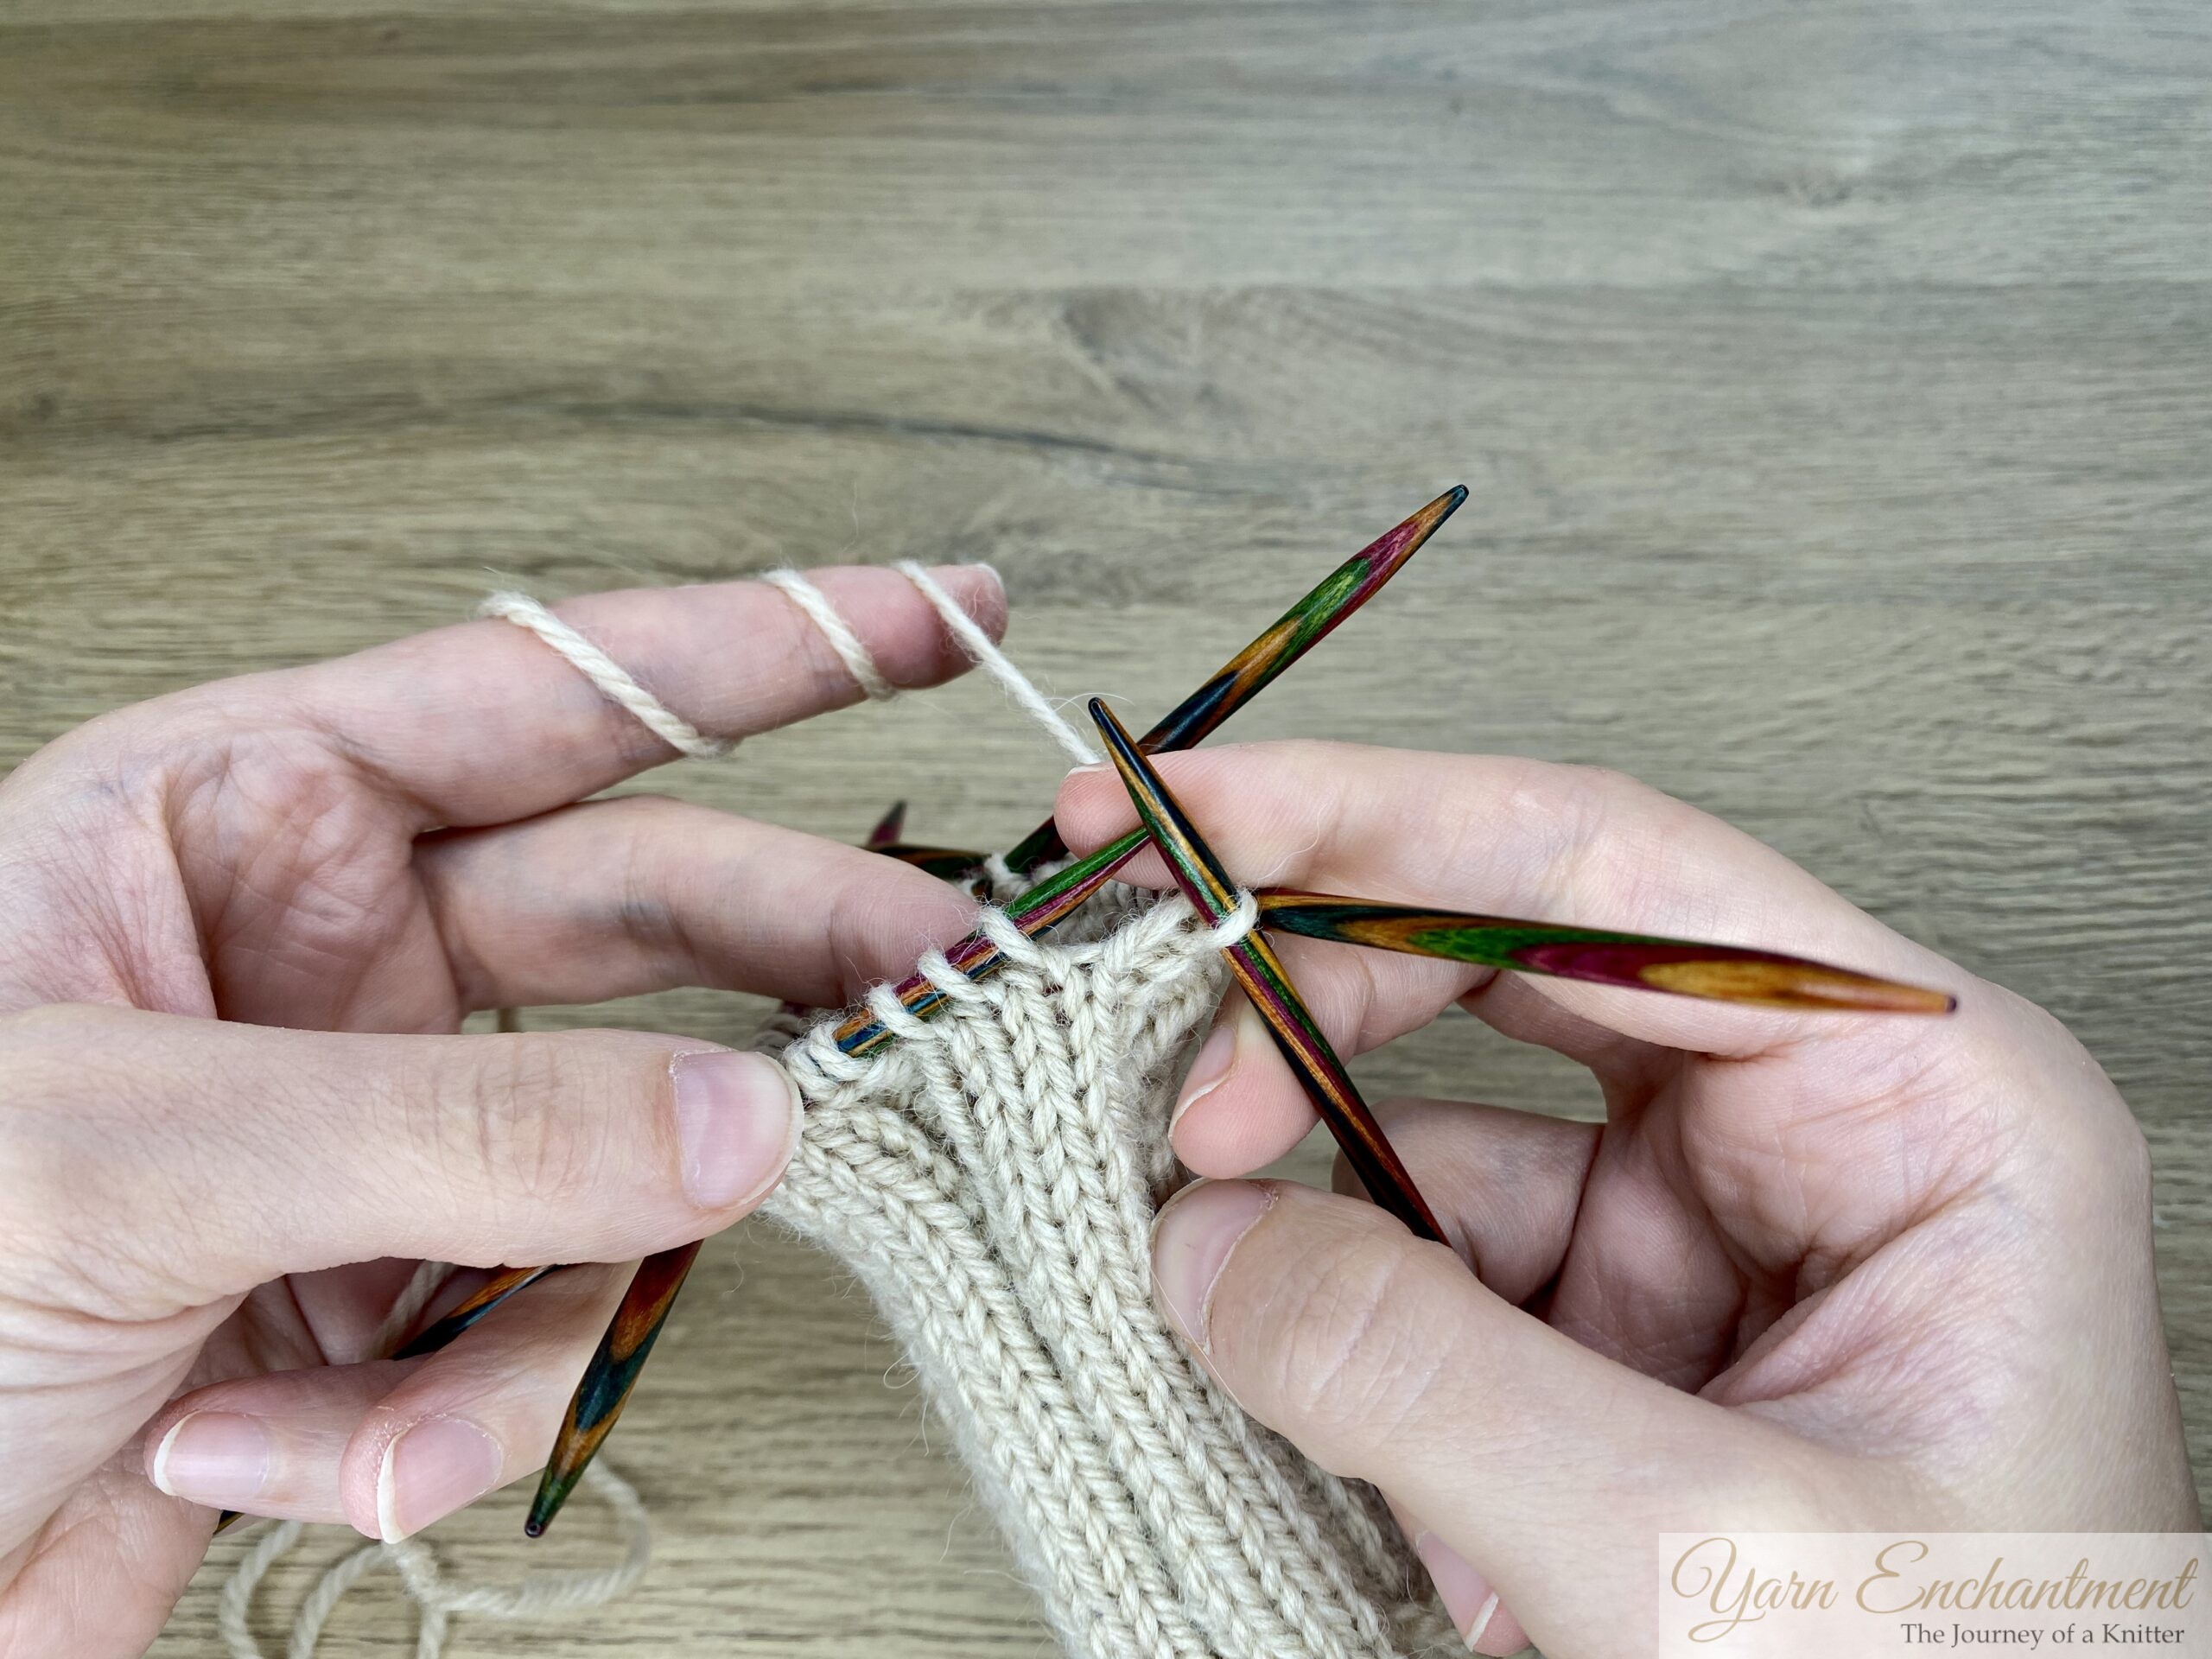 |  | Knit the first stitch | Then knit the next two stitches together. |


 |  | Knit the next stitch... | ... and purl the next two stitches together |


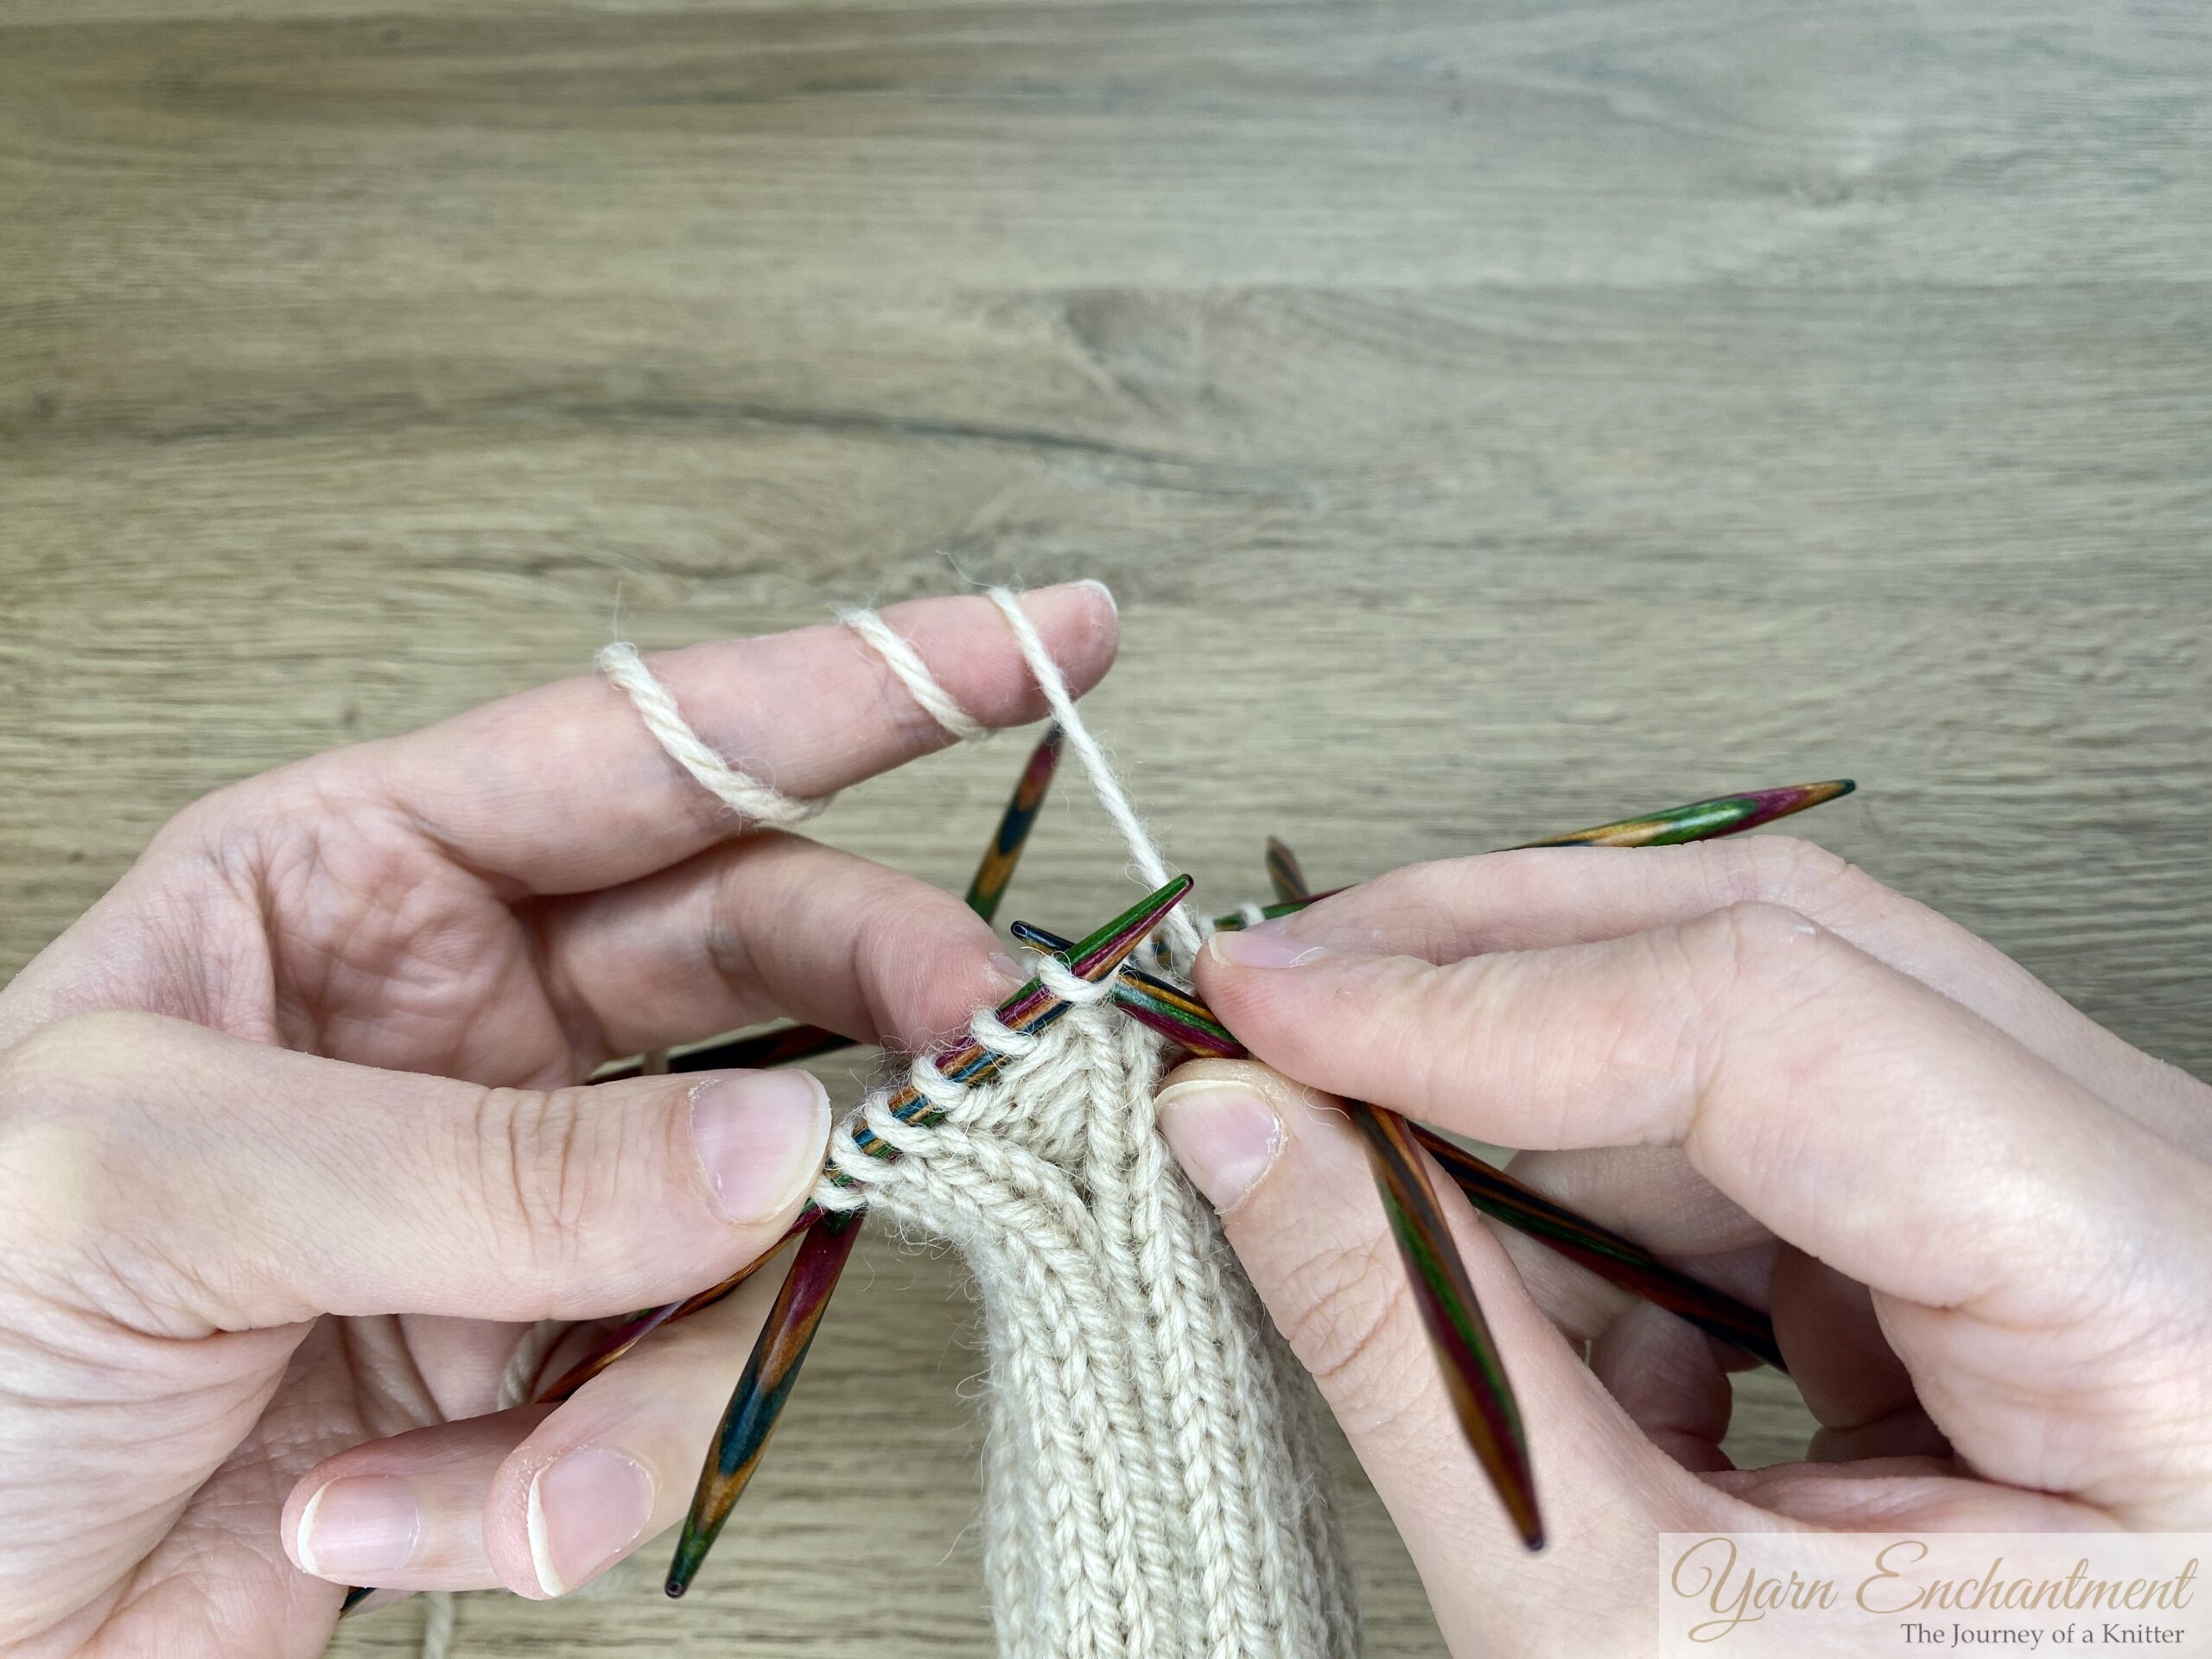
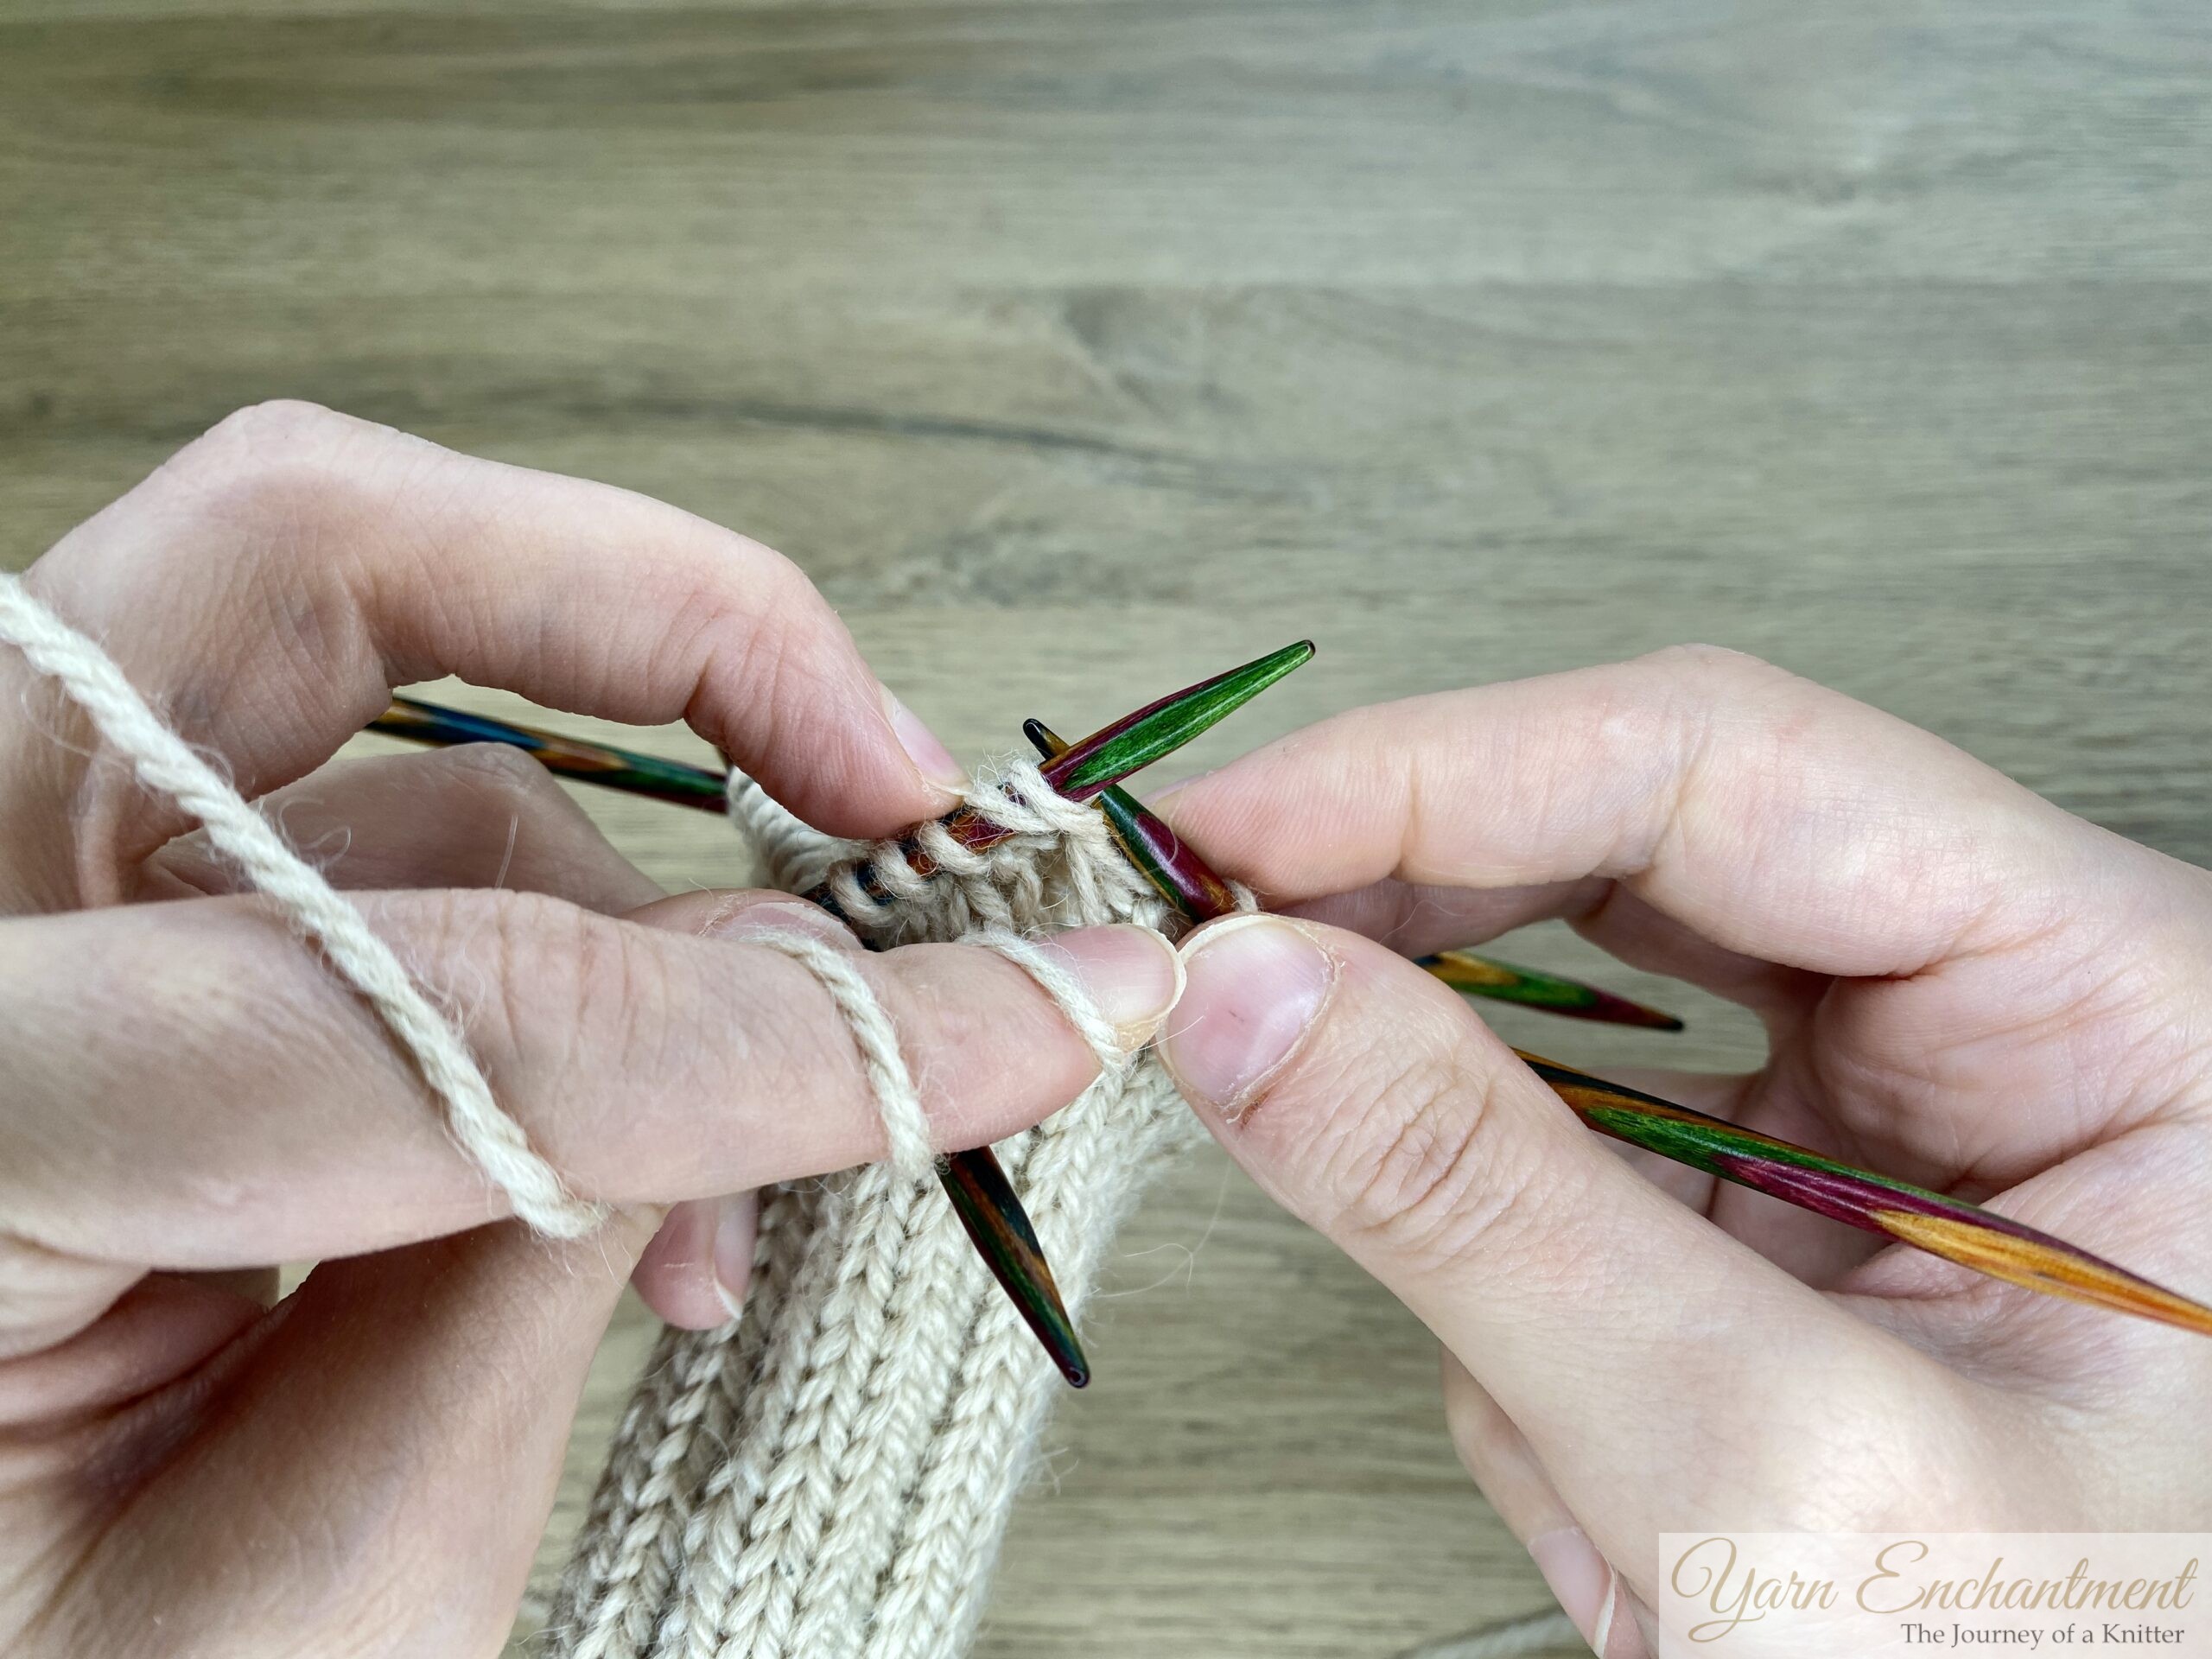
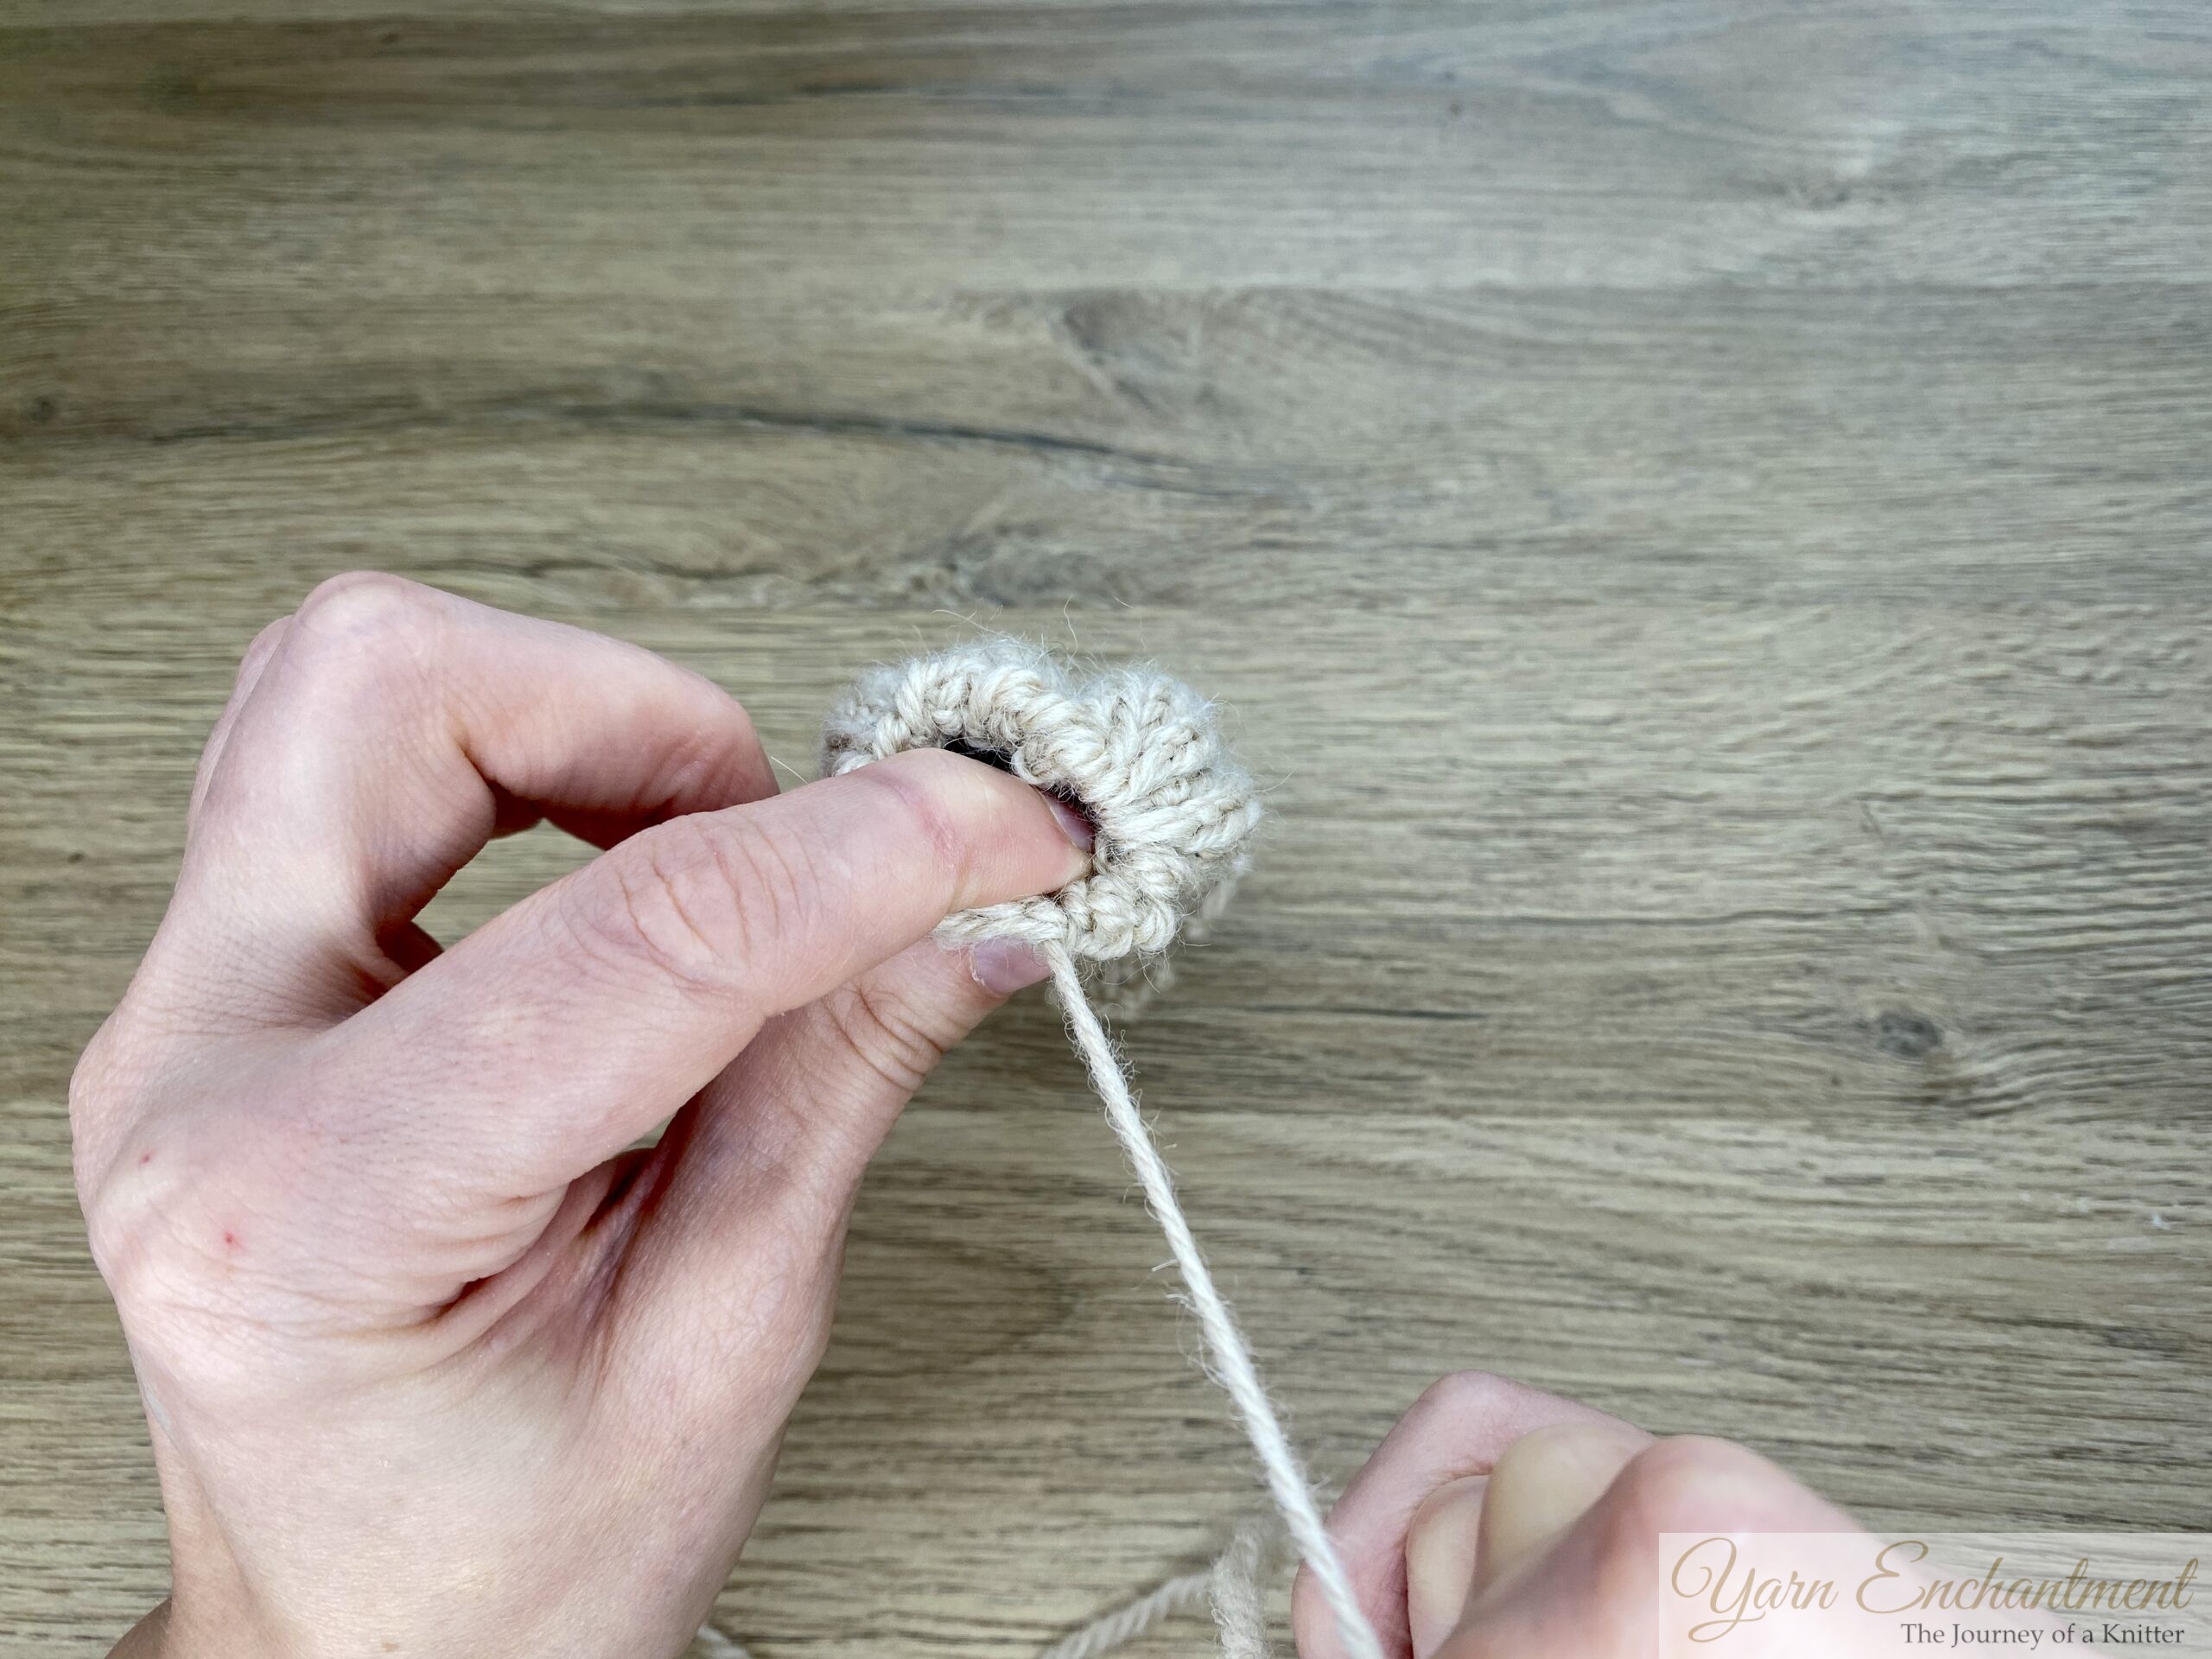
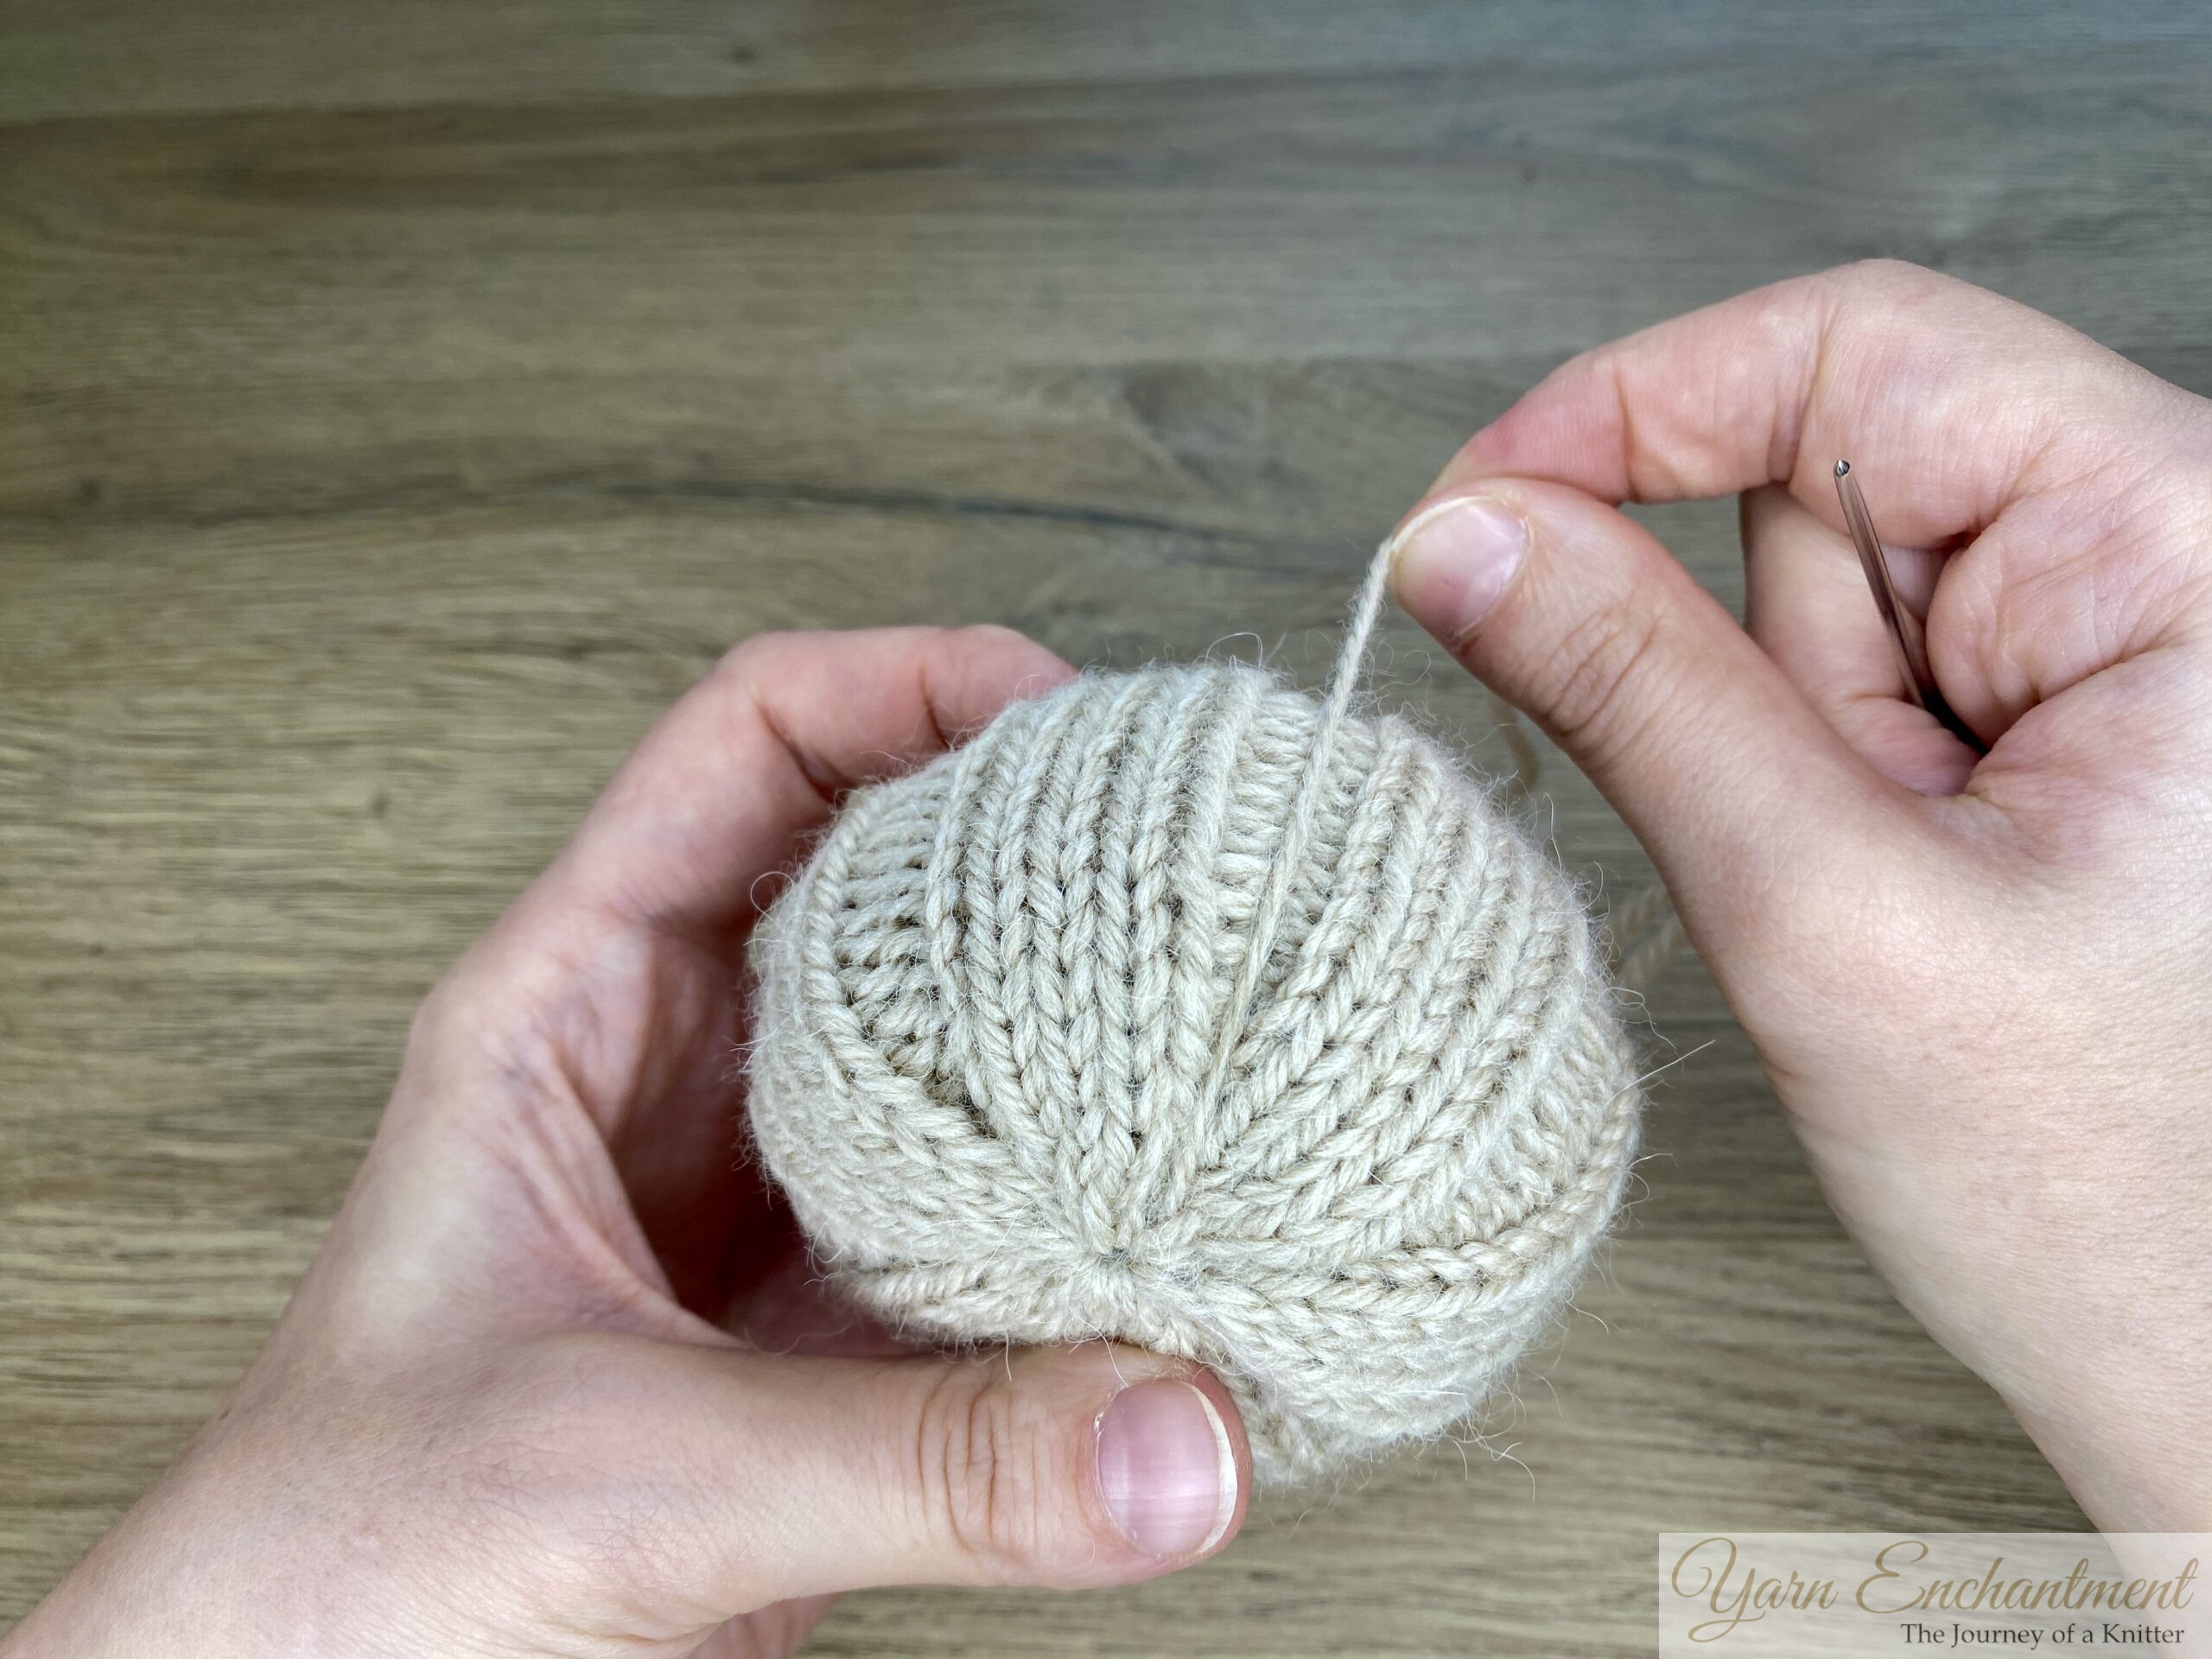
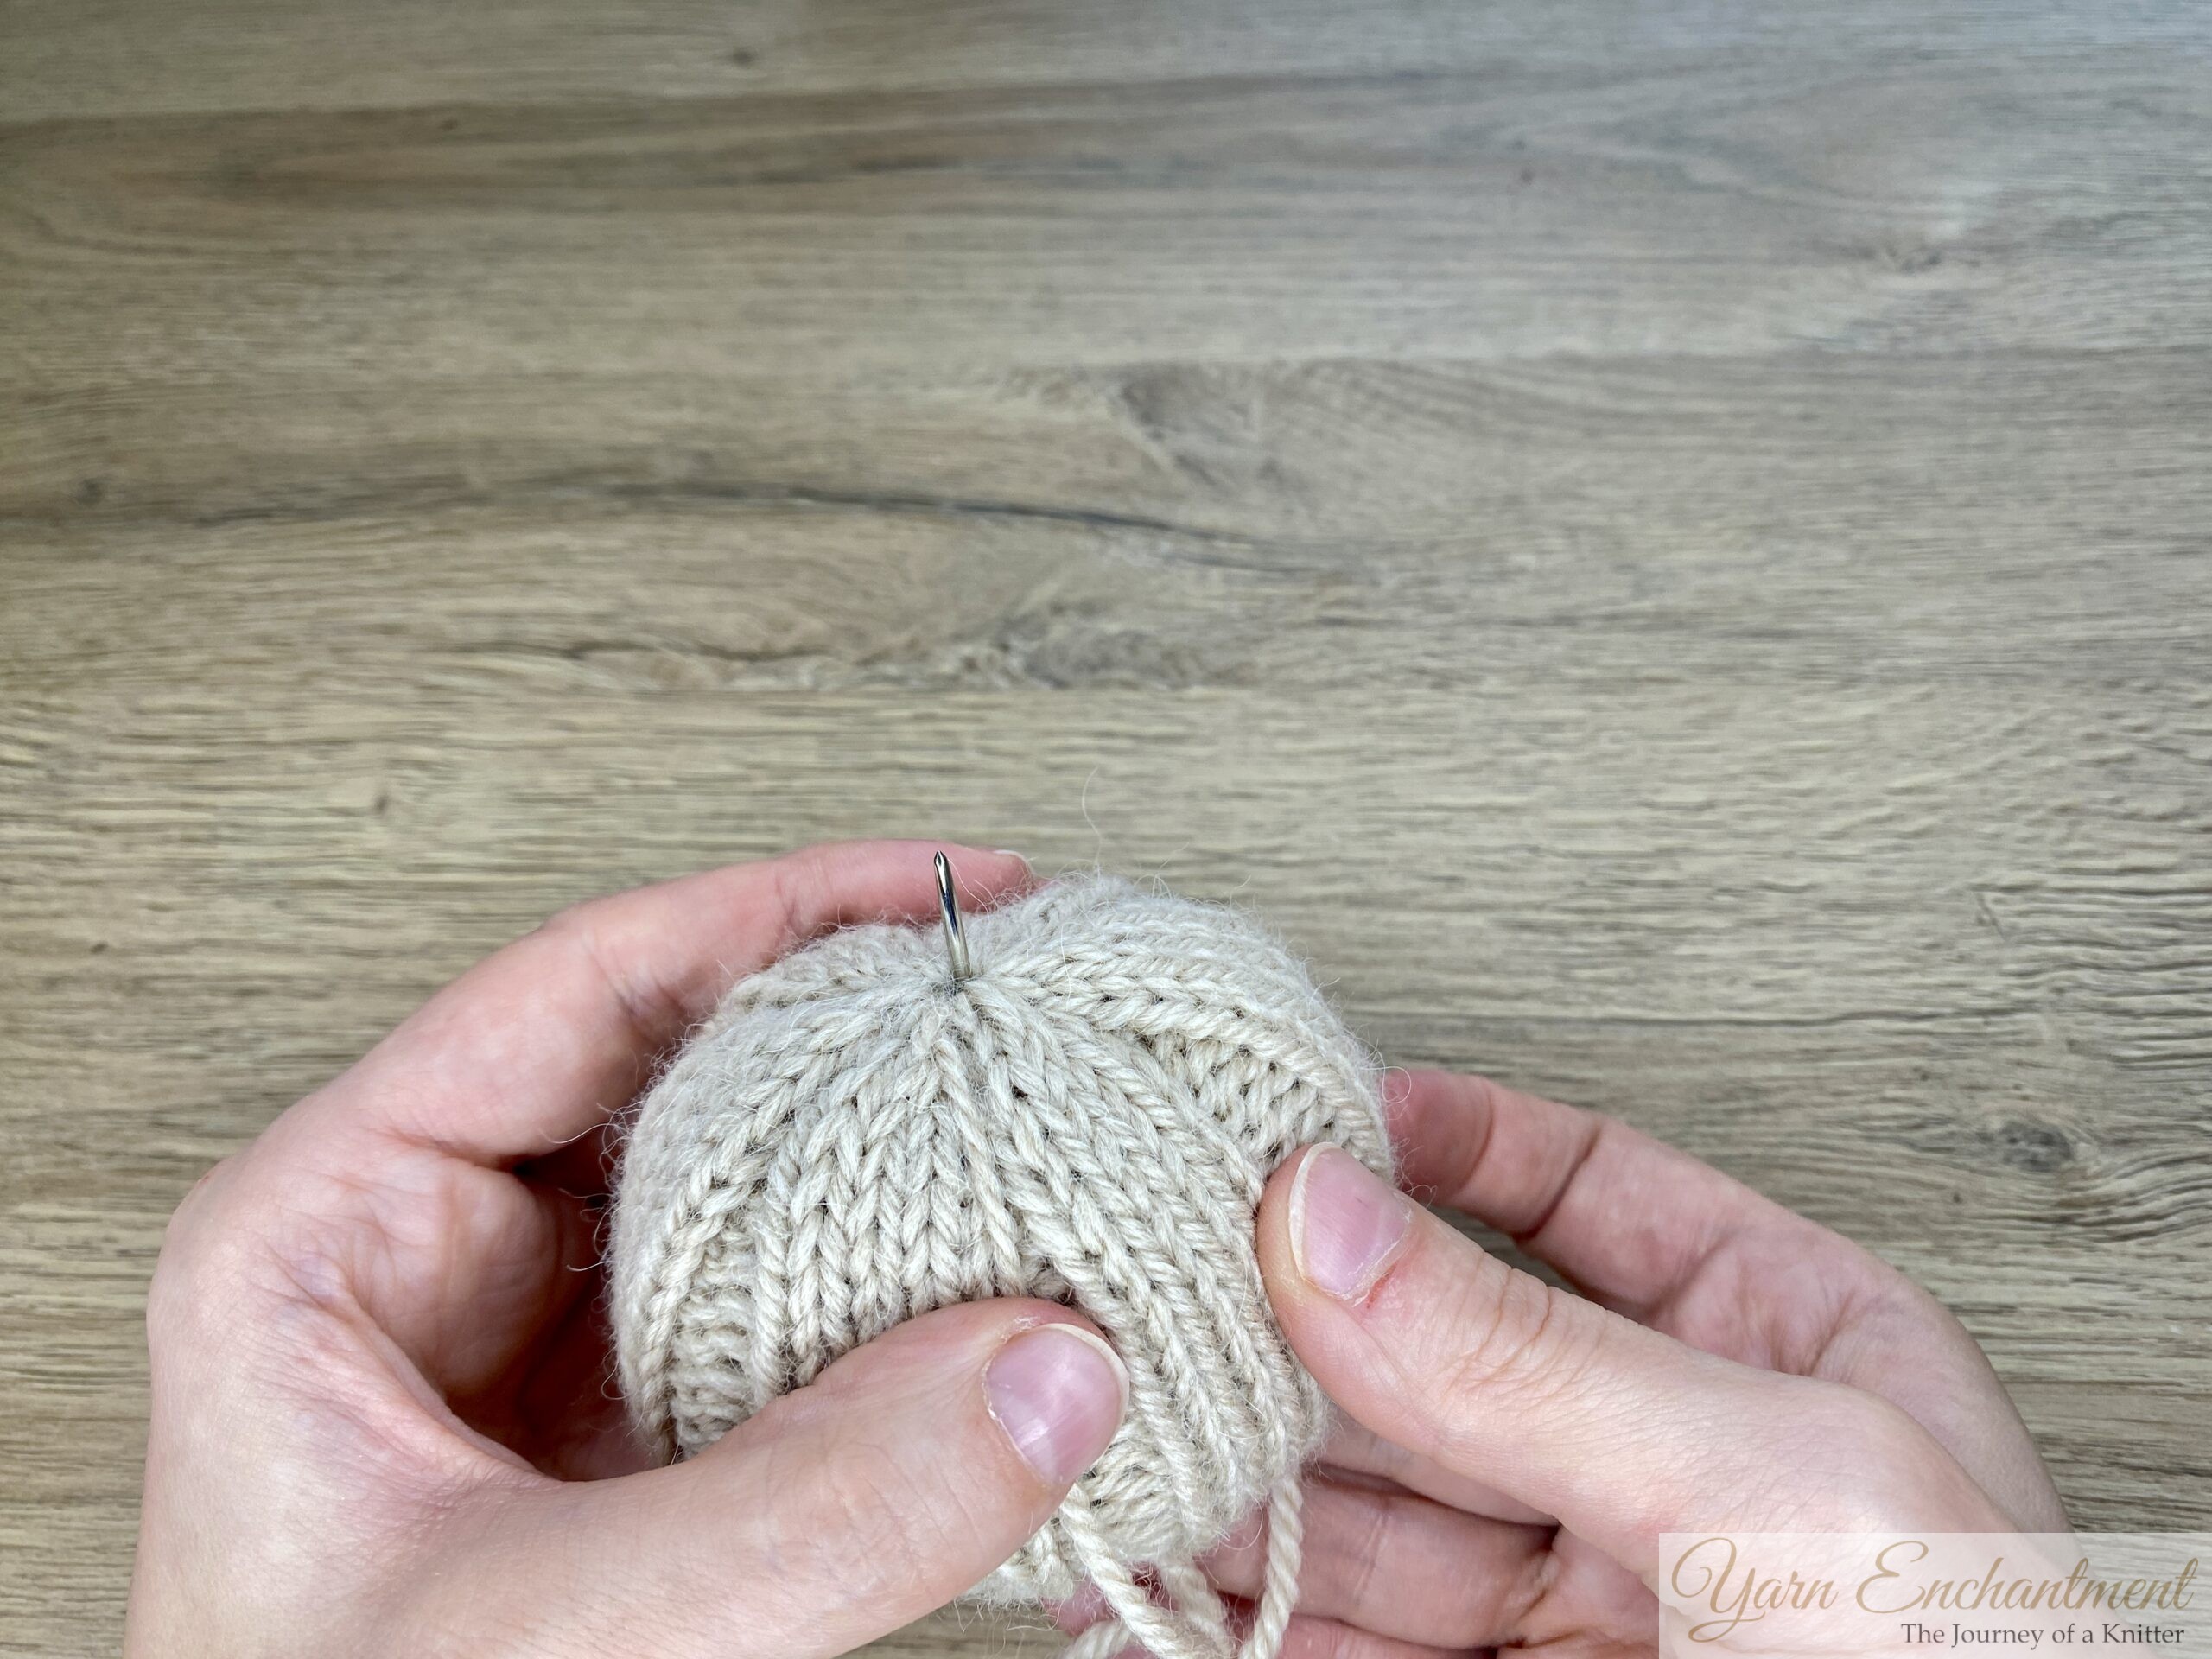
Cut yarn, leaving a long tail. Use a blunt yarn needle to thread through the remaining stitches, but do not cinch it up, you need to leave the stitches open in order to fill the pumpkin later.
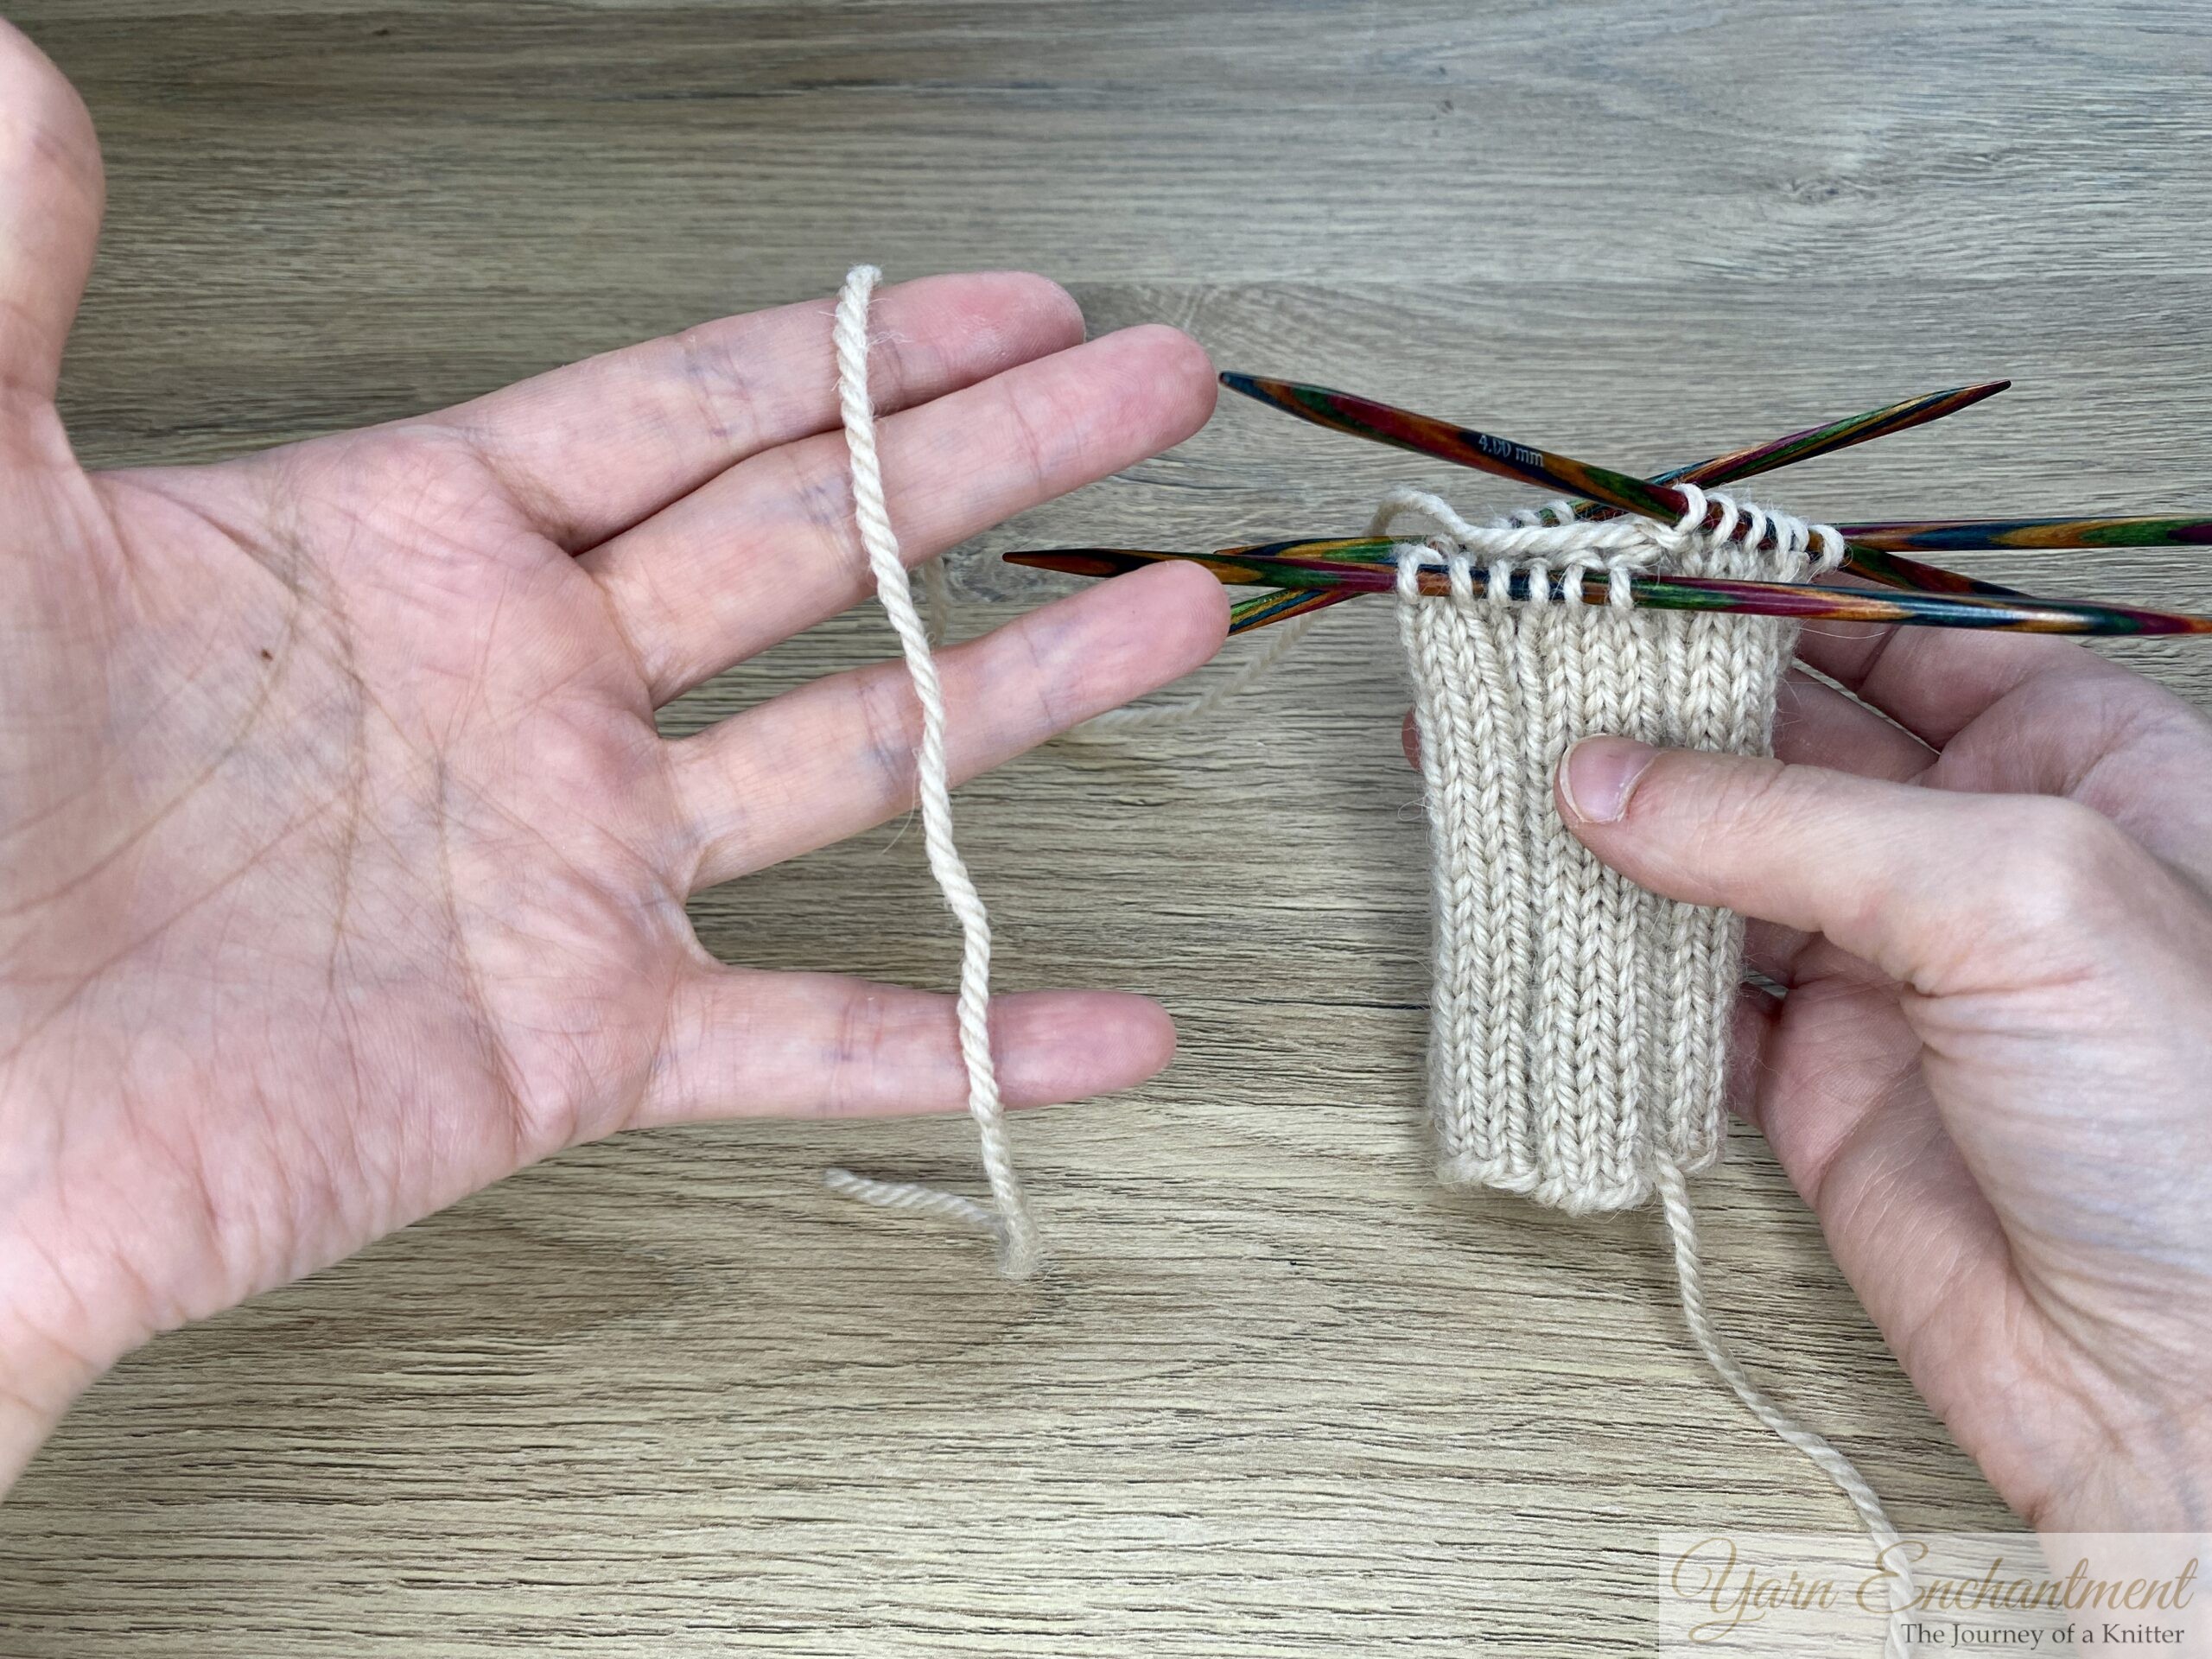 | 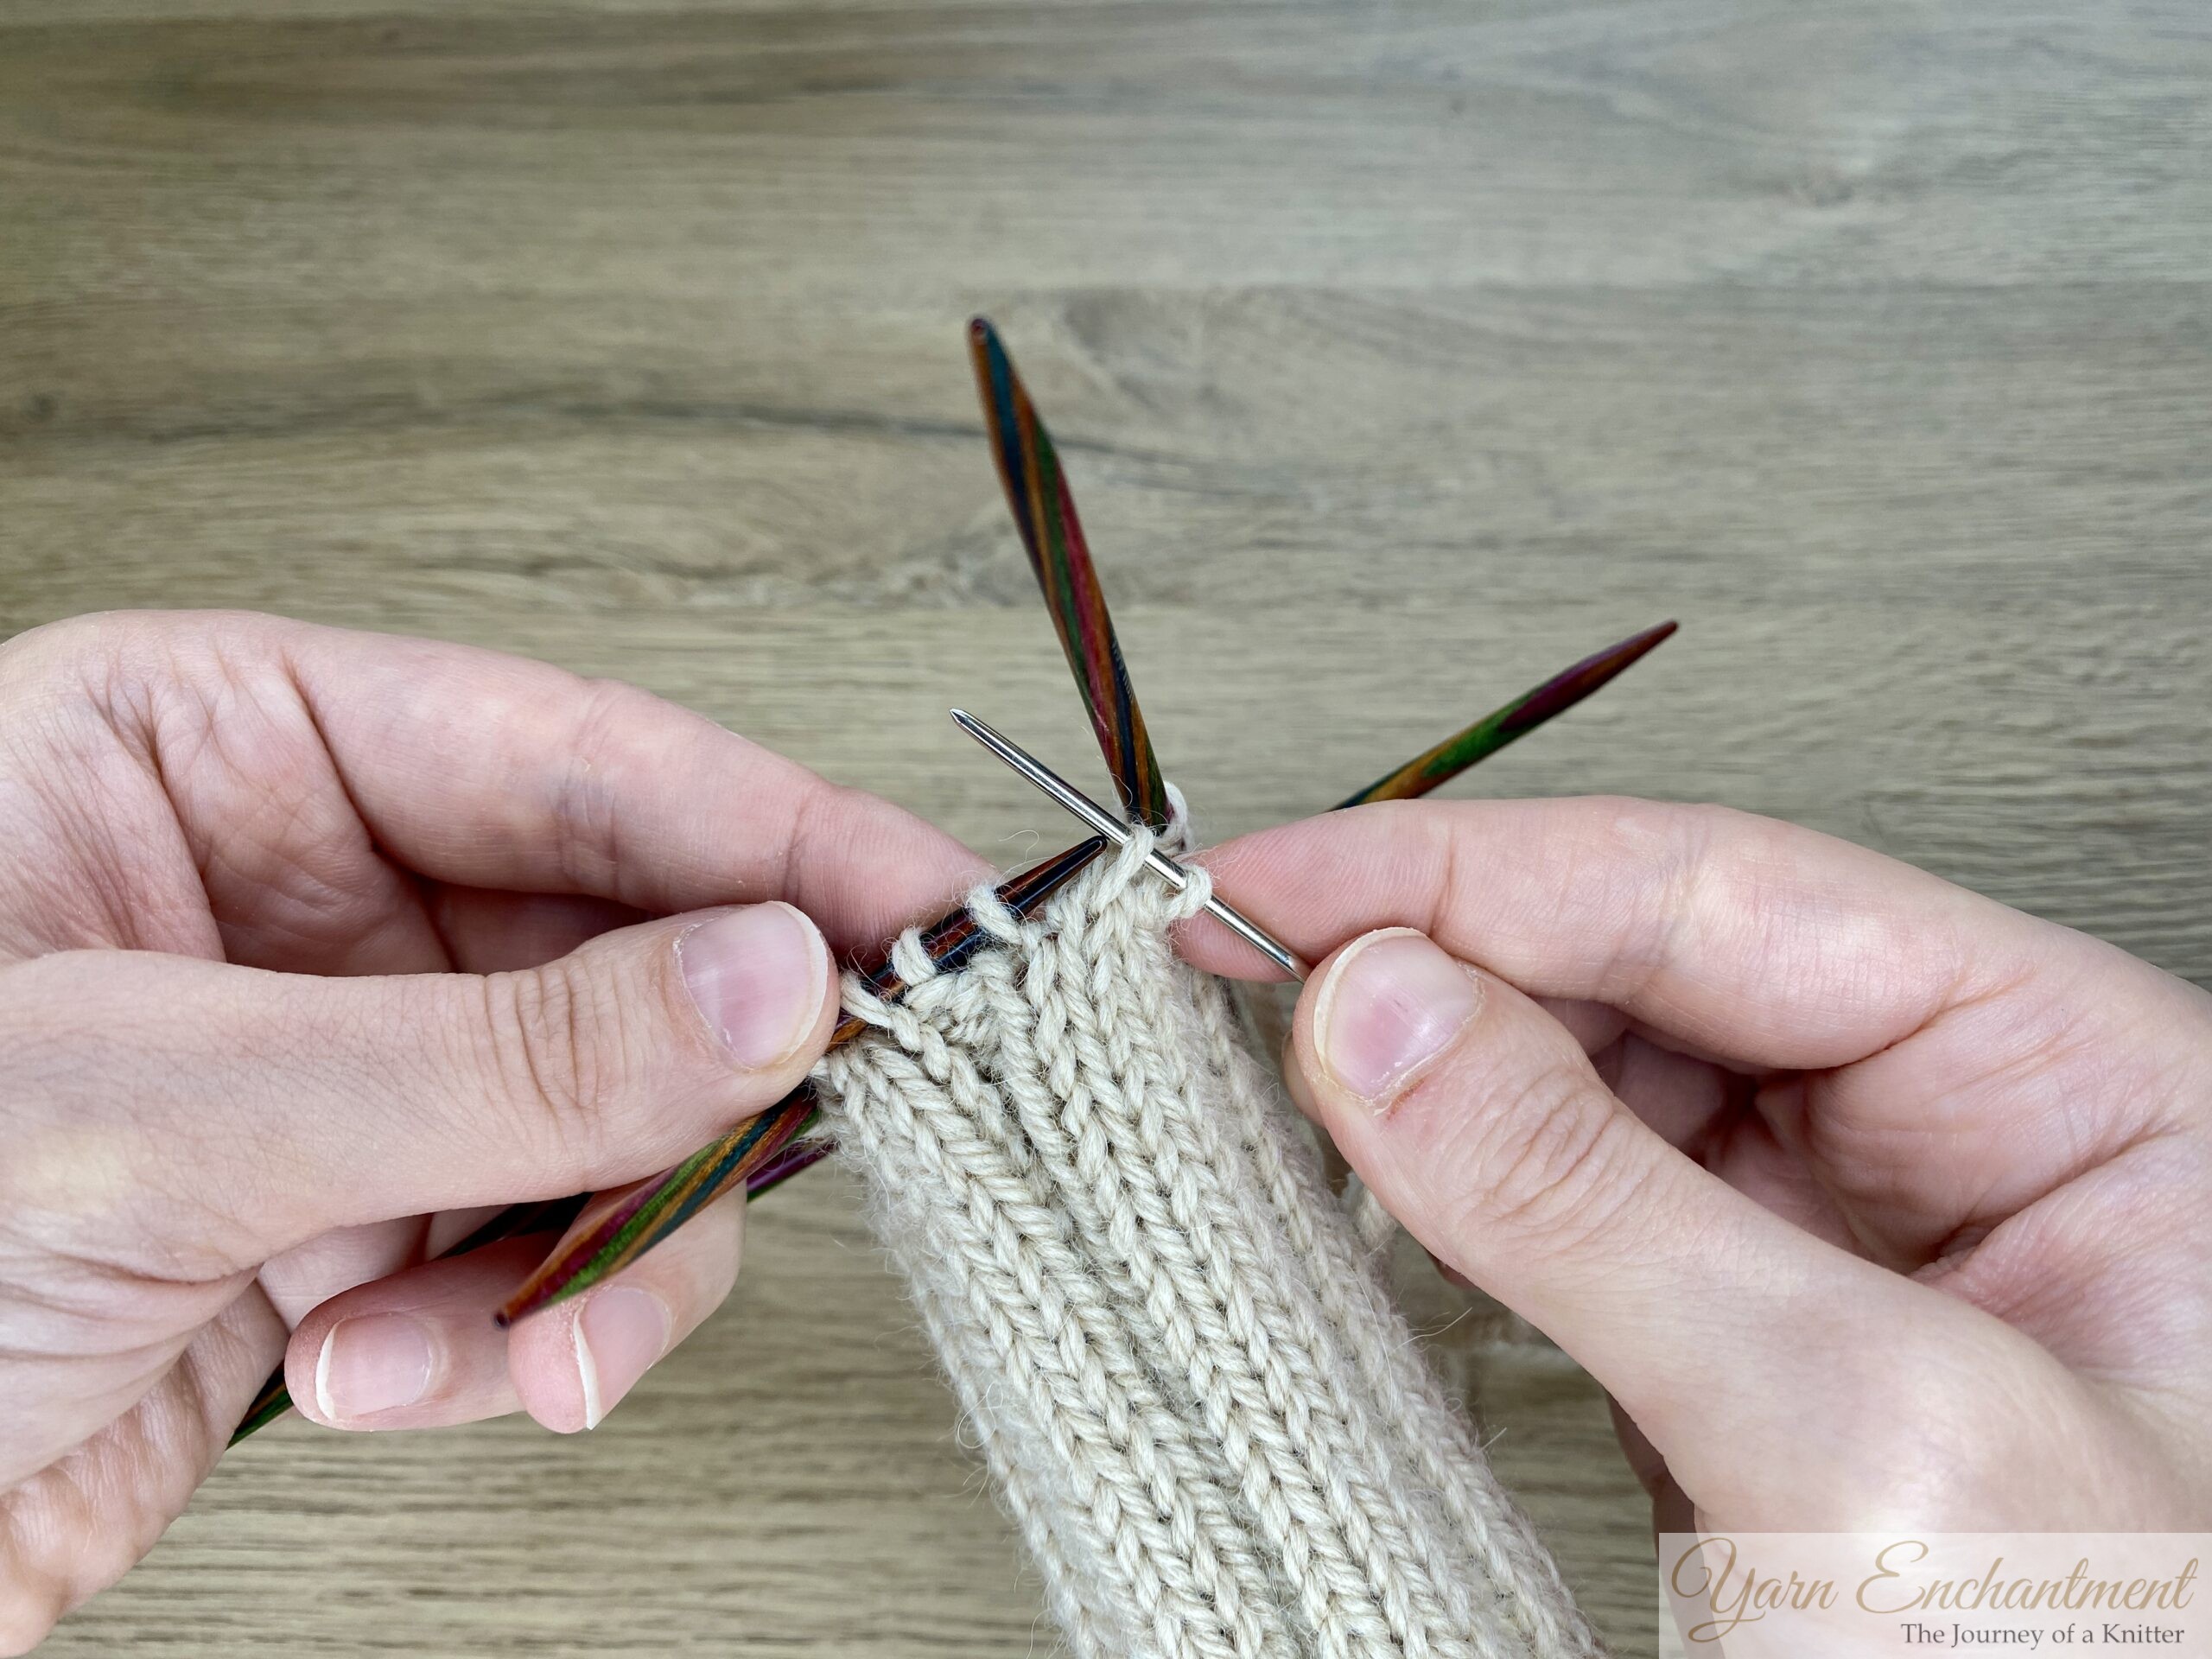 | 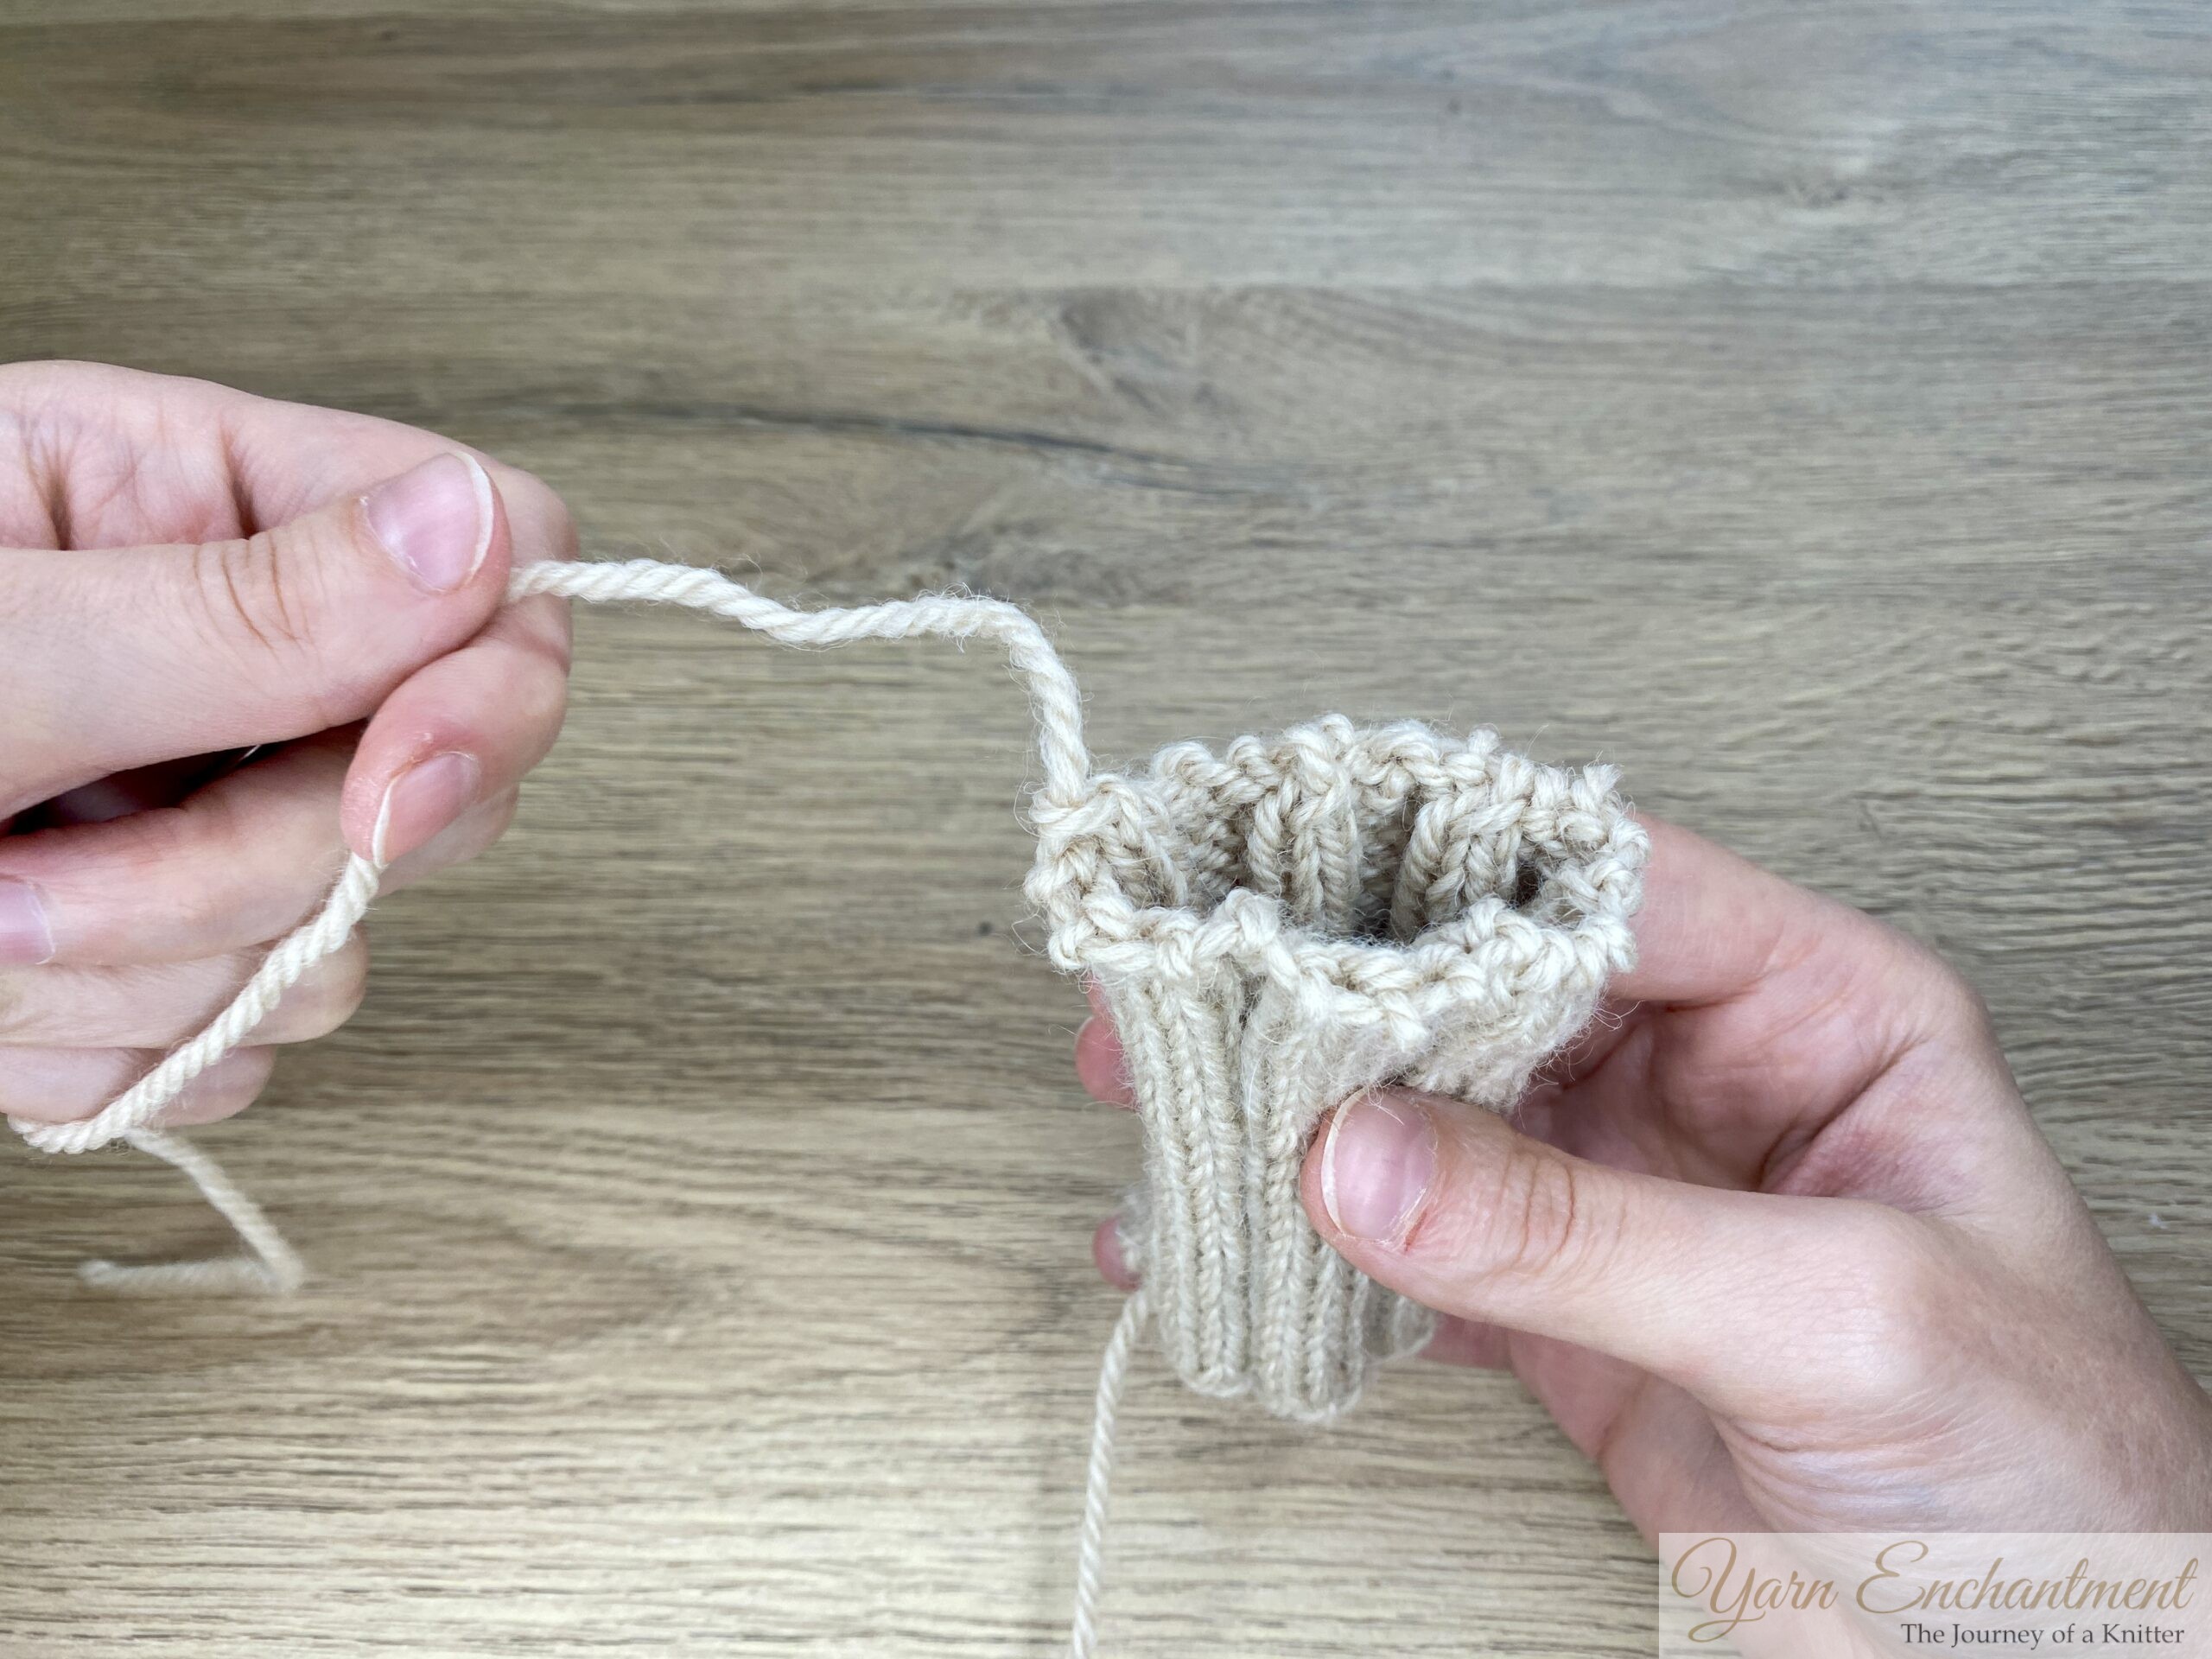 | Cut the yarn and make sure to leave a tail that’s long. | Thread your tail onto a blunt needle and draw all the stitches onto it. | Do not cinch it up, you need to leave the stitches open in order to fill the pumpkin later. |


Closing the Bottom
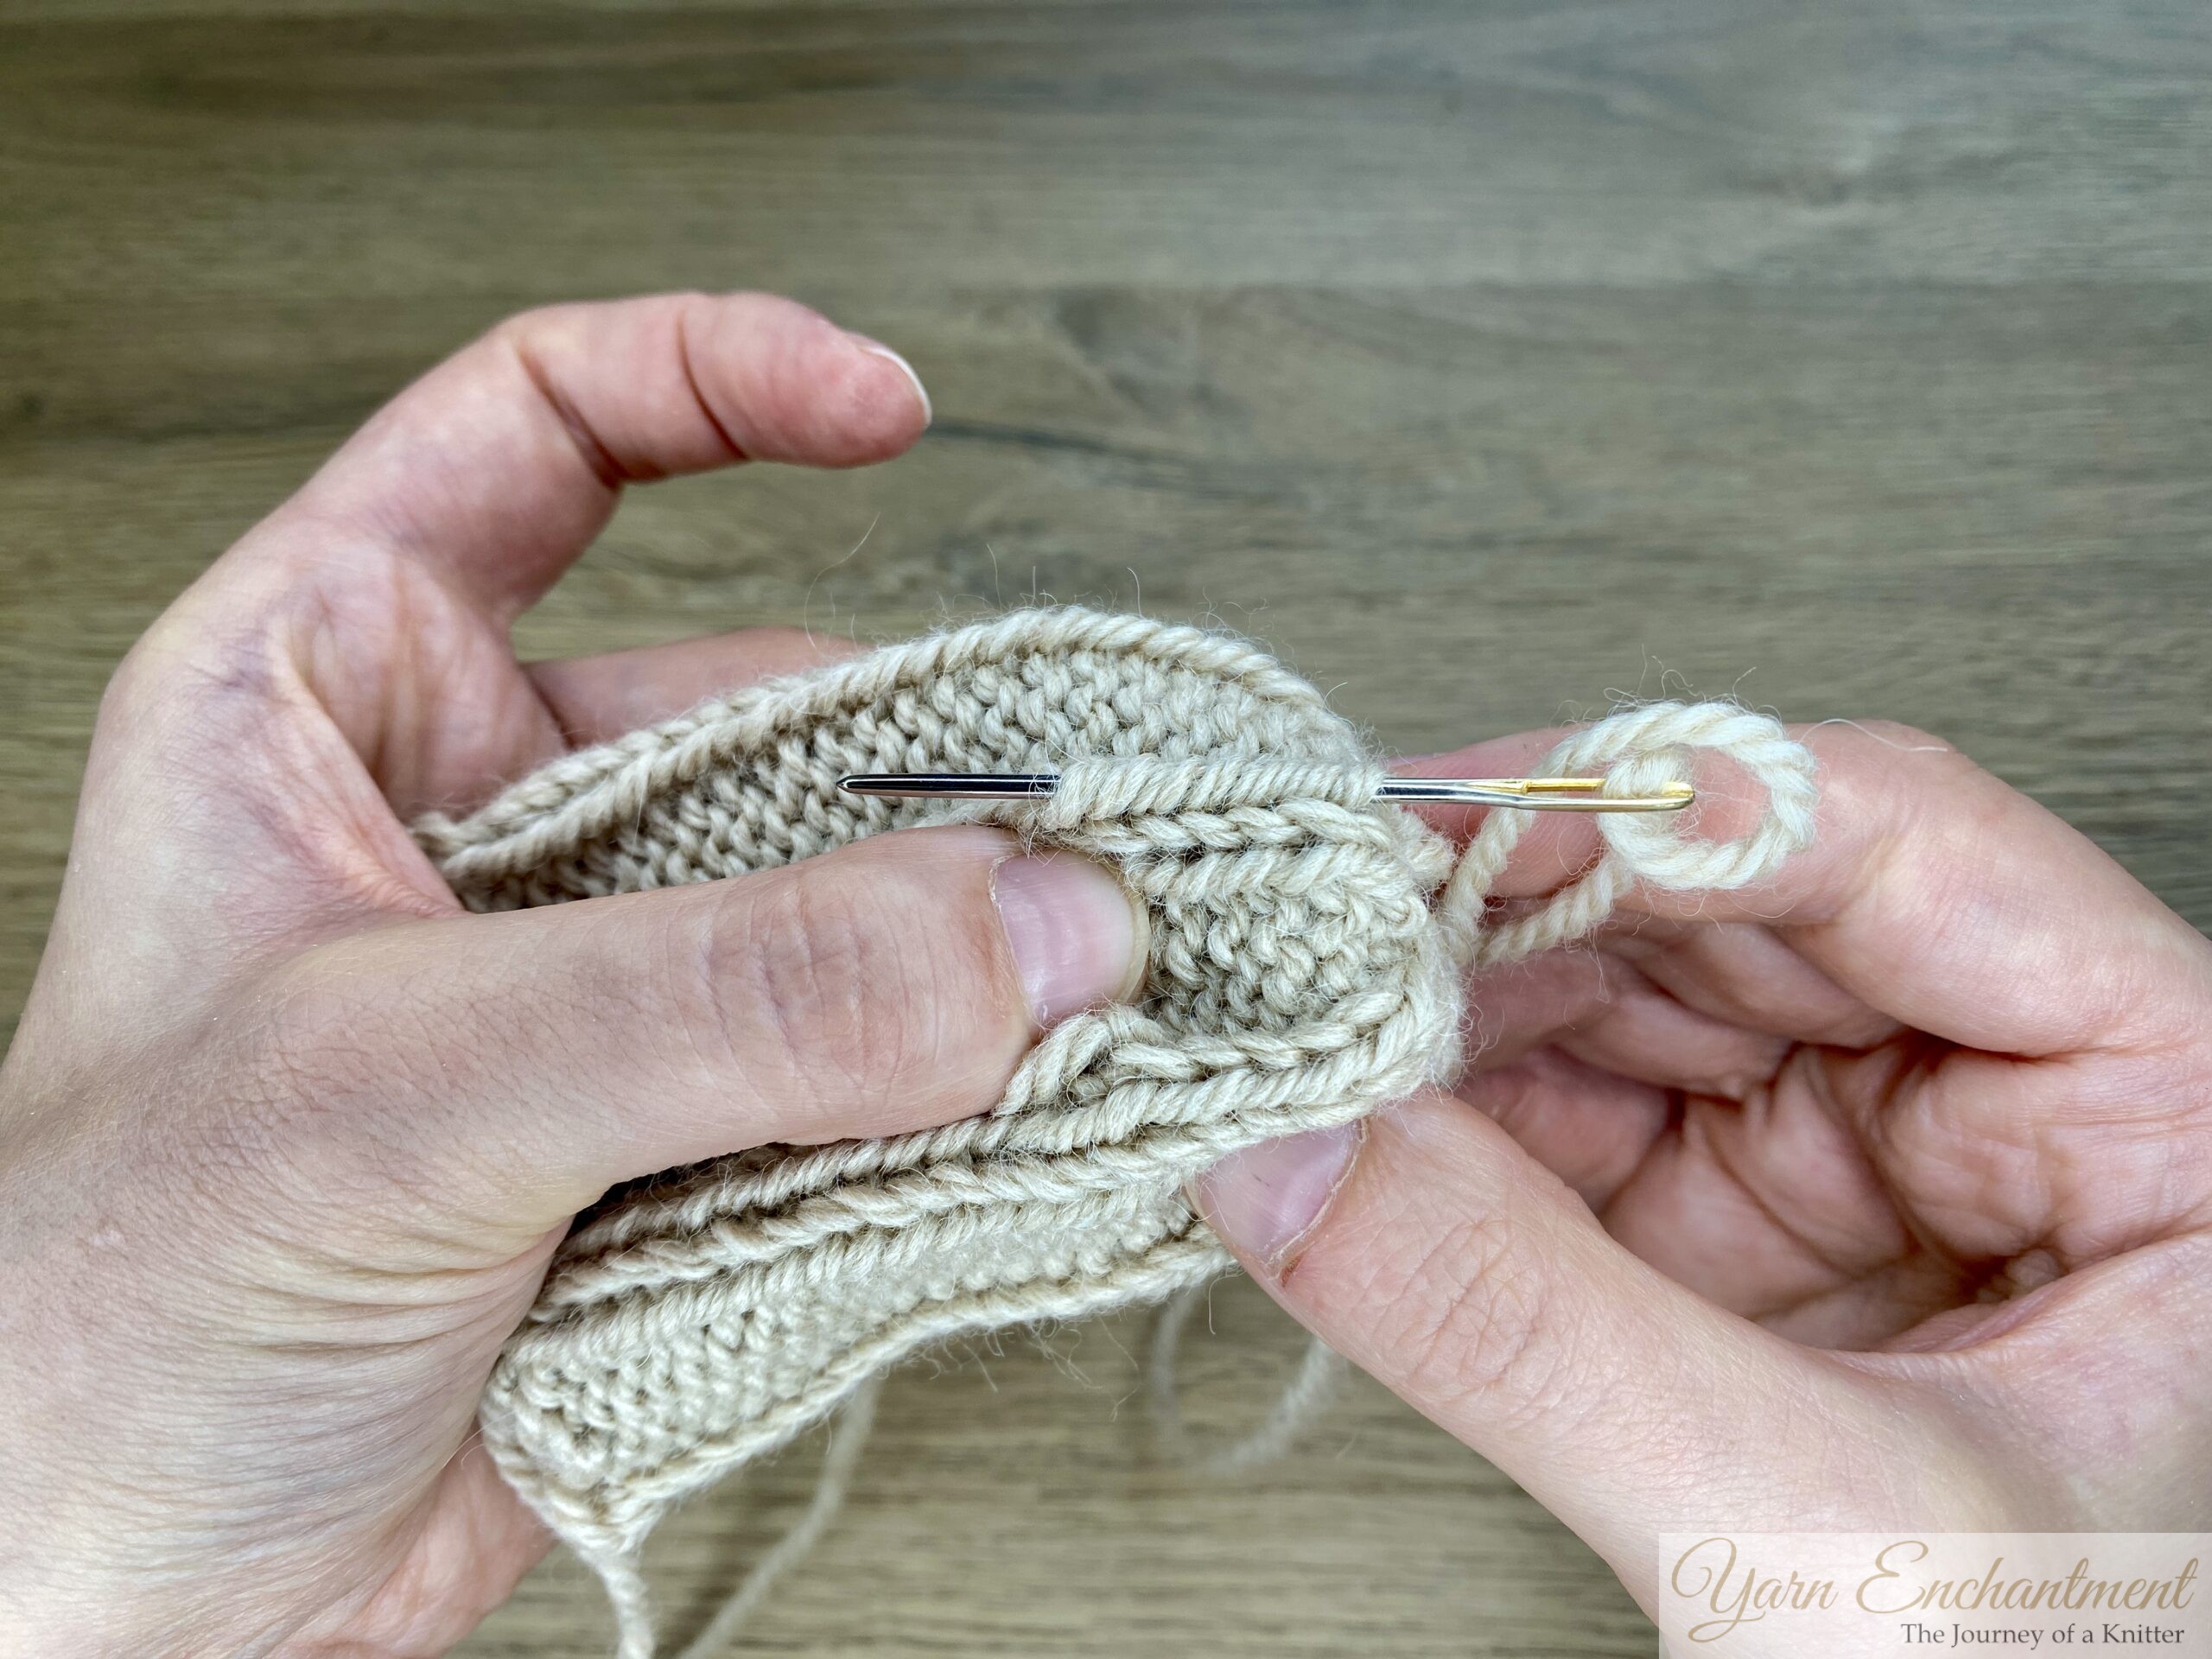
Turn your work around and thread your cast-on tail onto a yarn needle. Weave through the cast-on edge and pull tight to close the bottom. make sure to catch each stitch. Secure on the inside, and leave tail for shaping if desired.
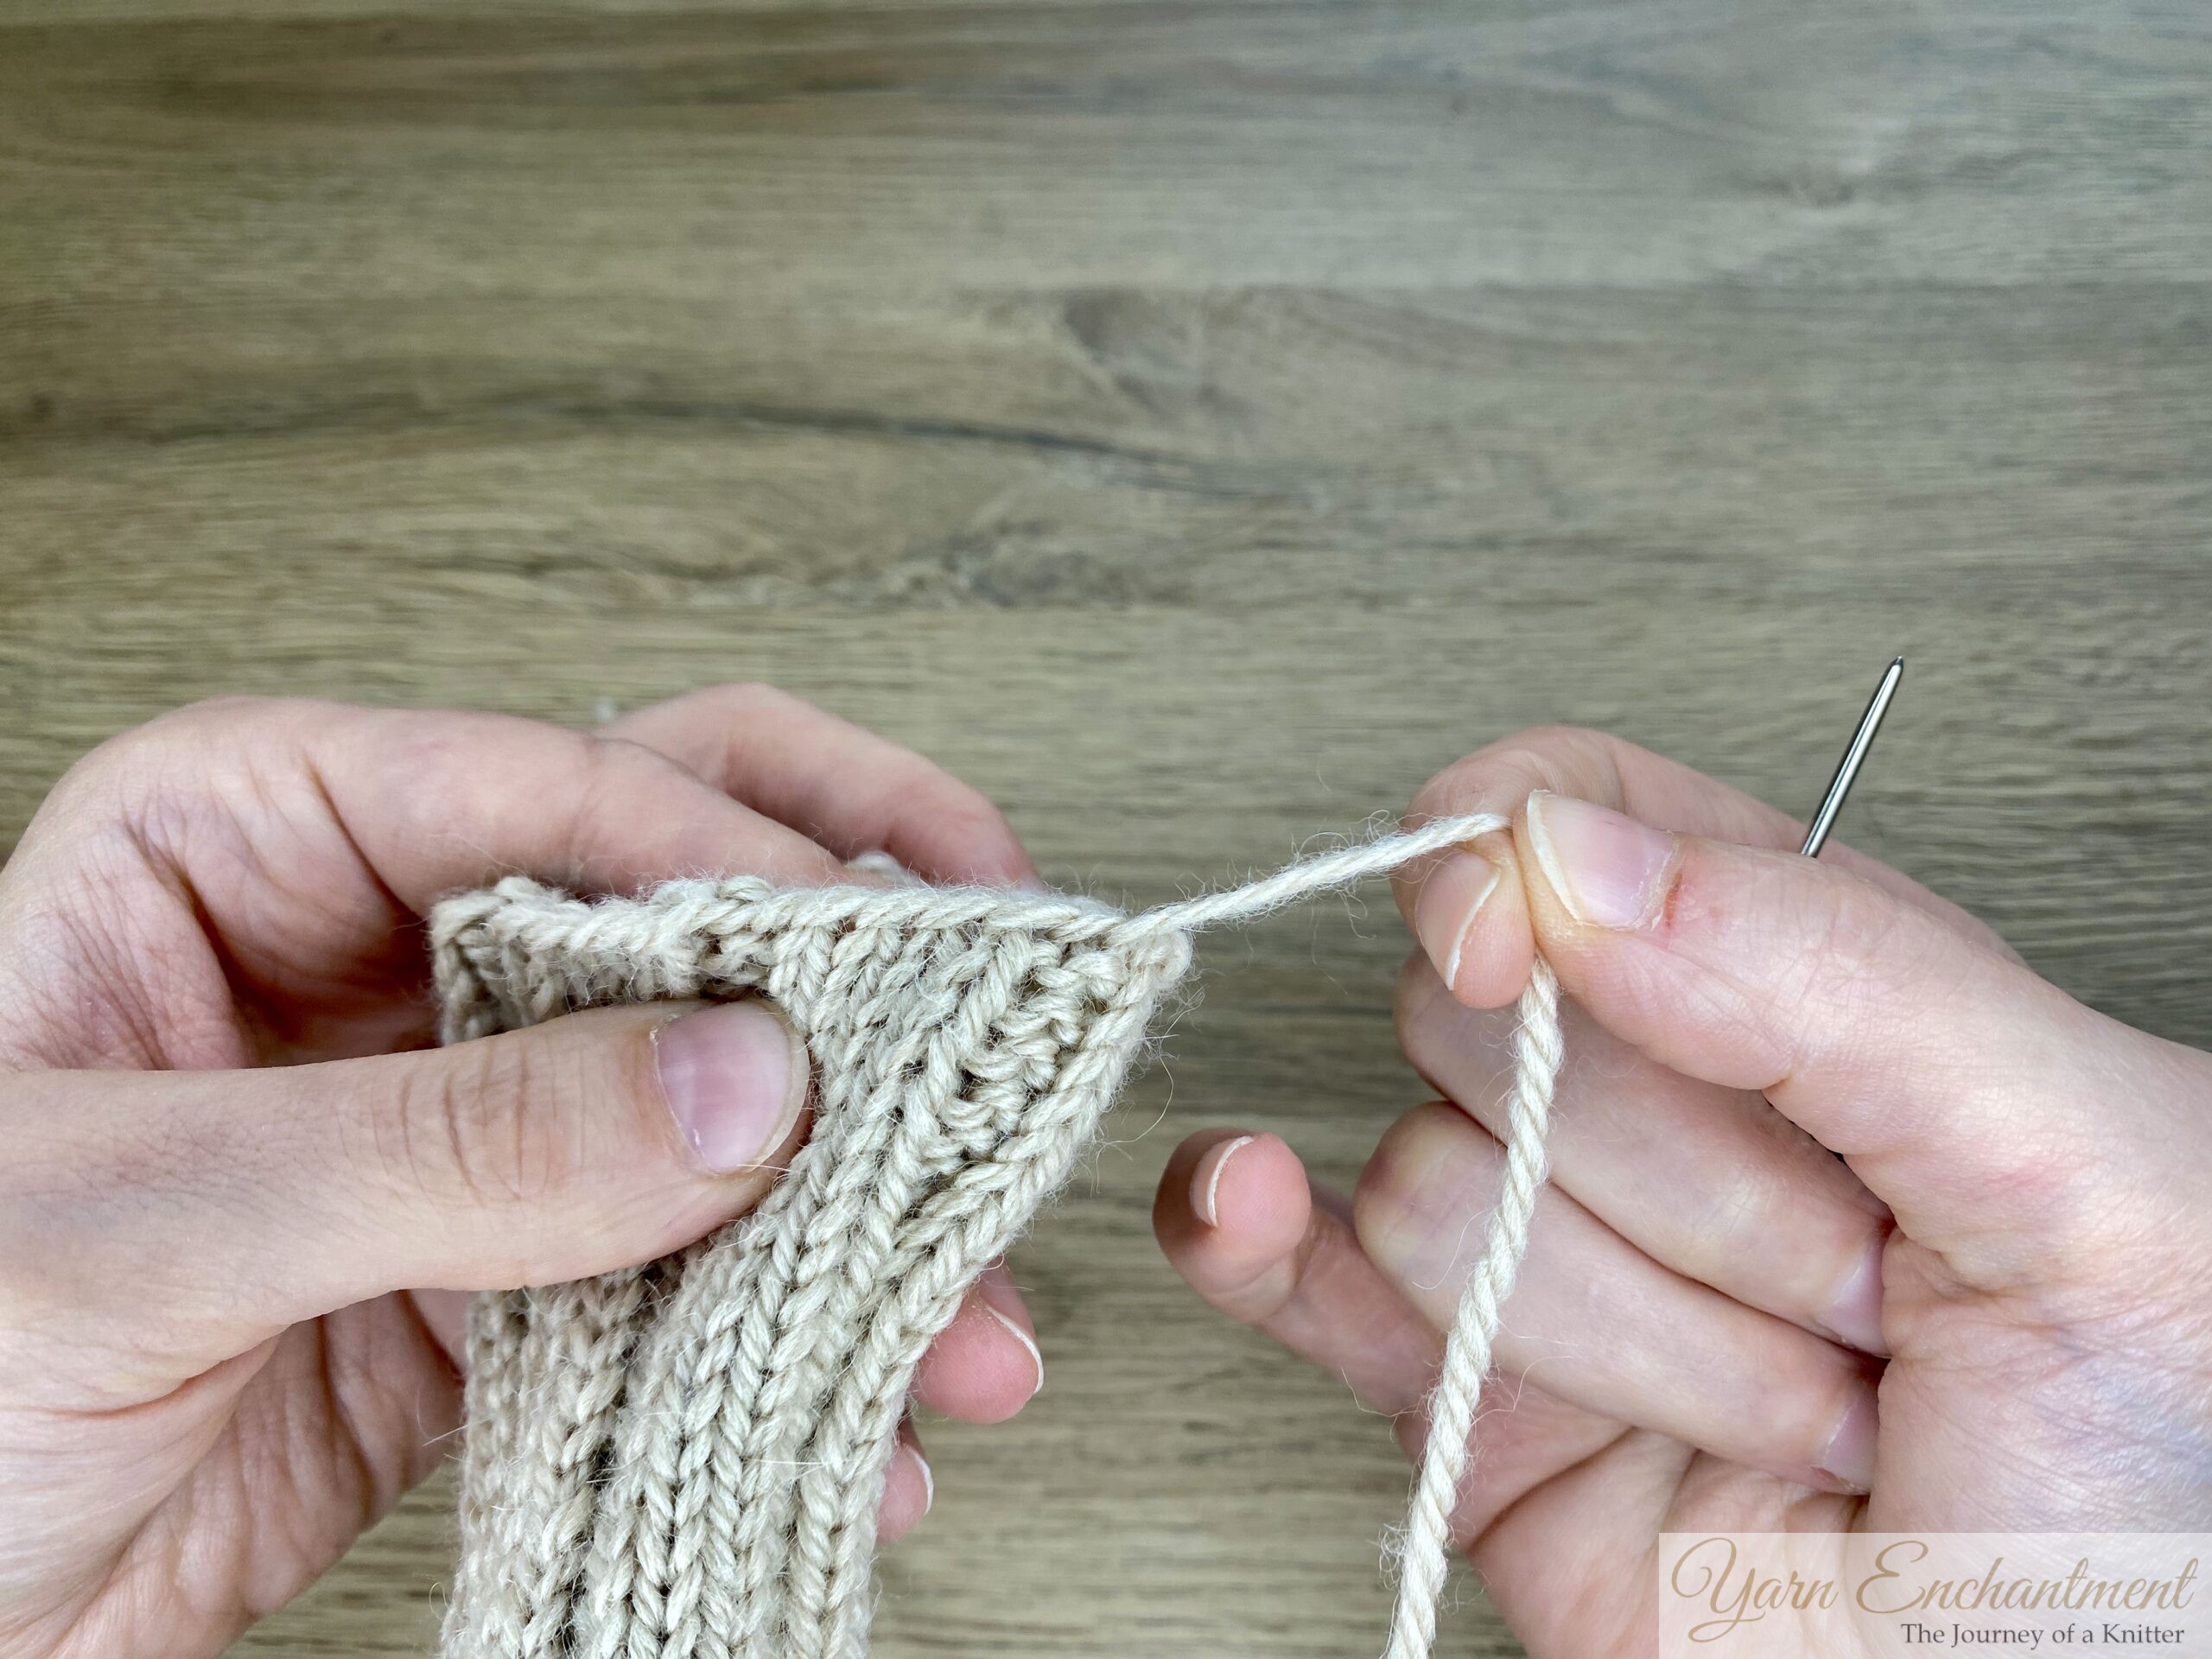 | 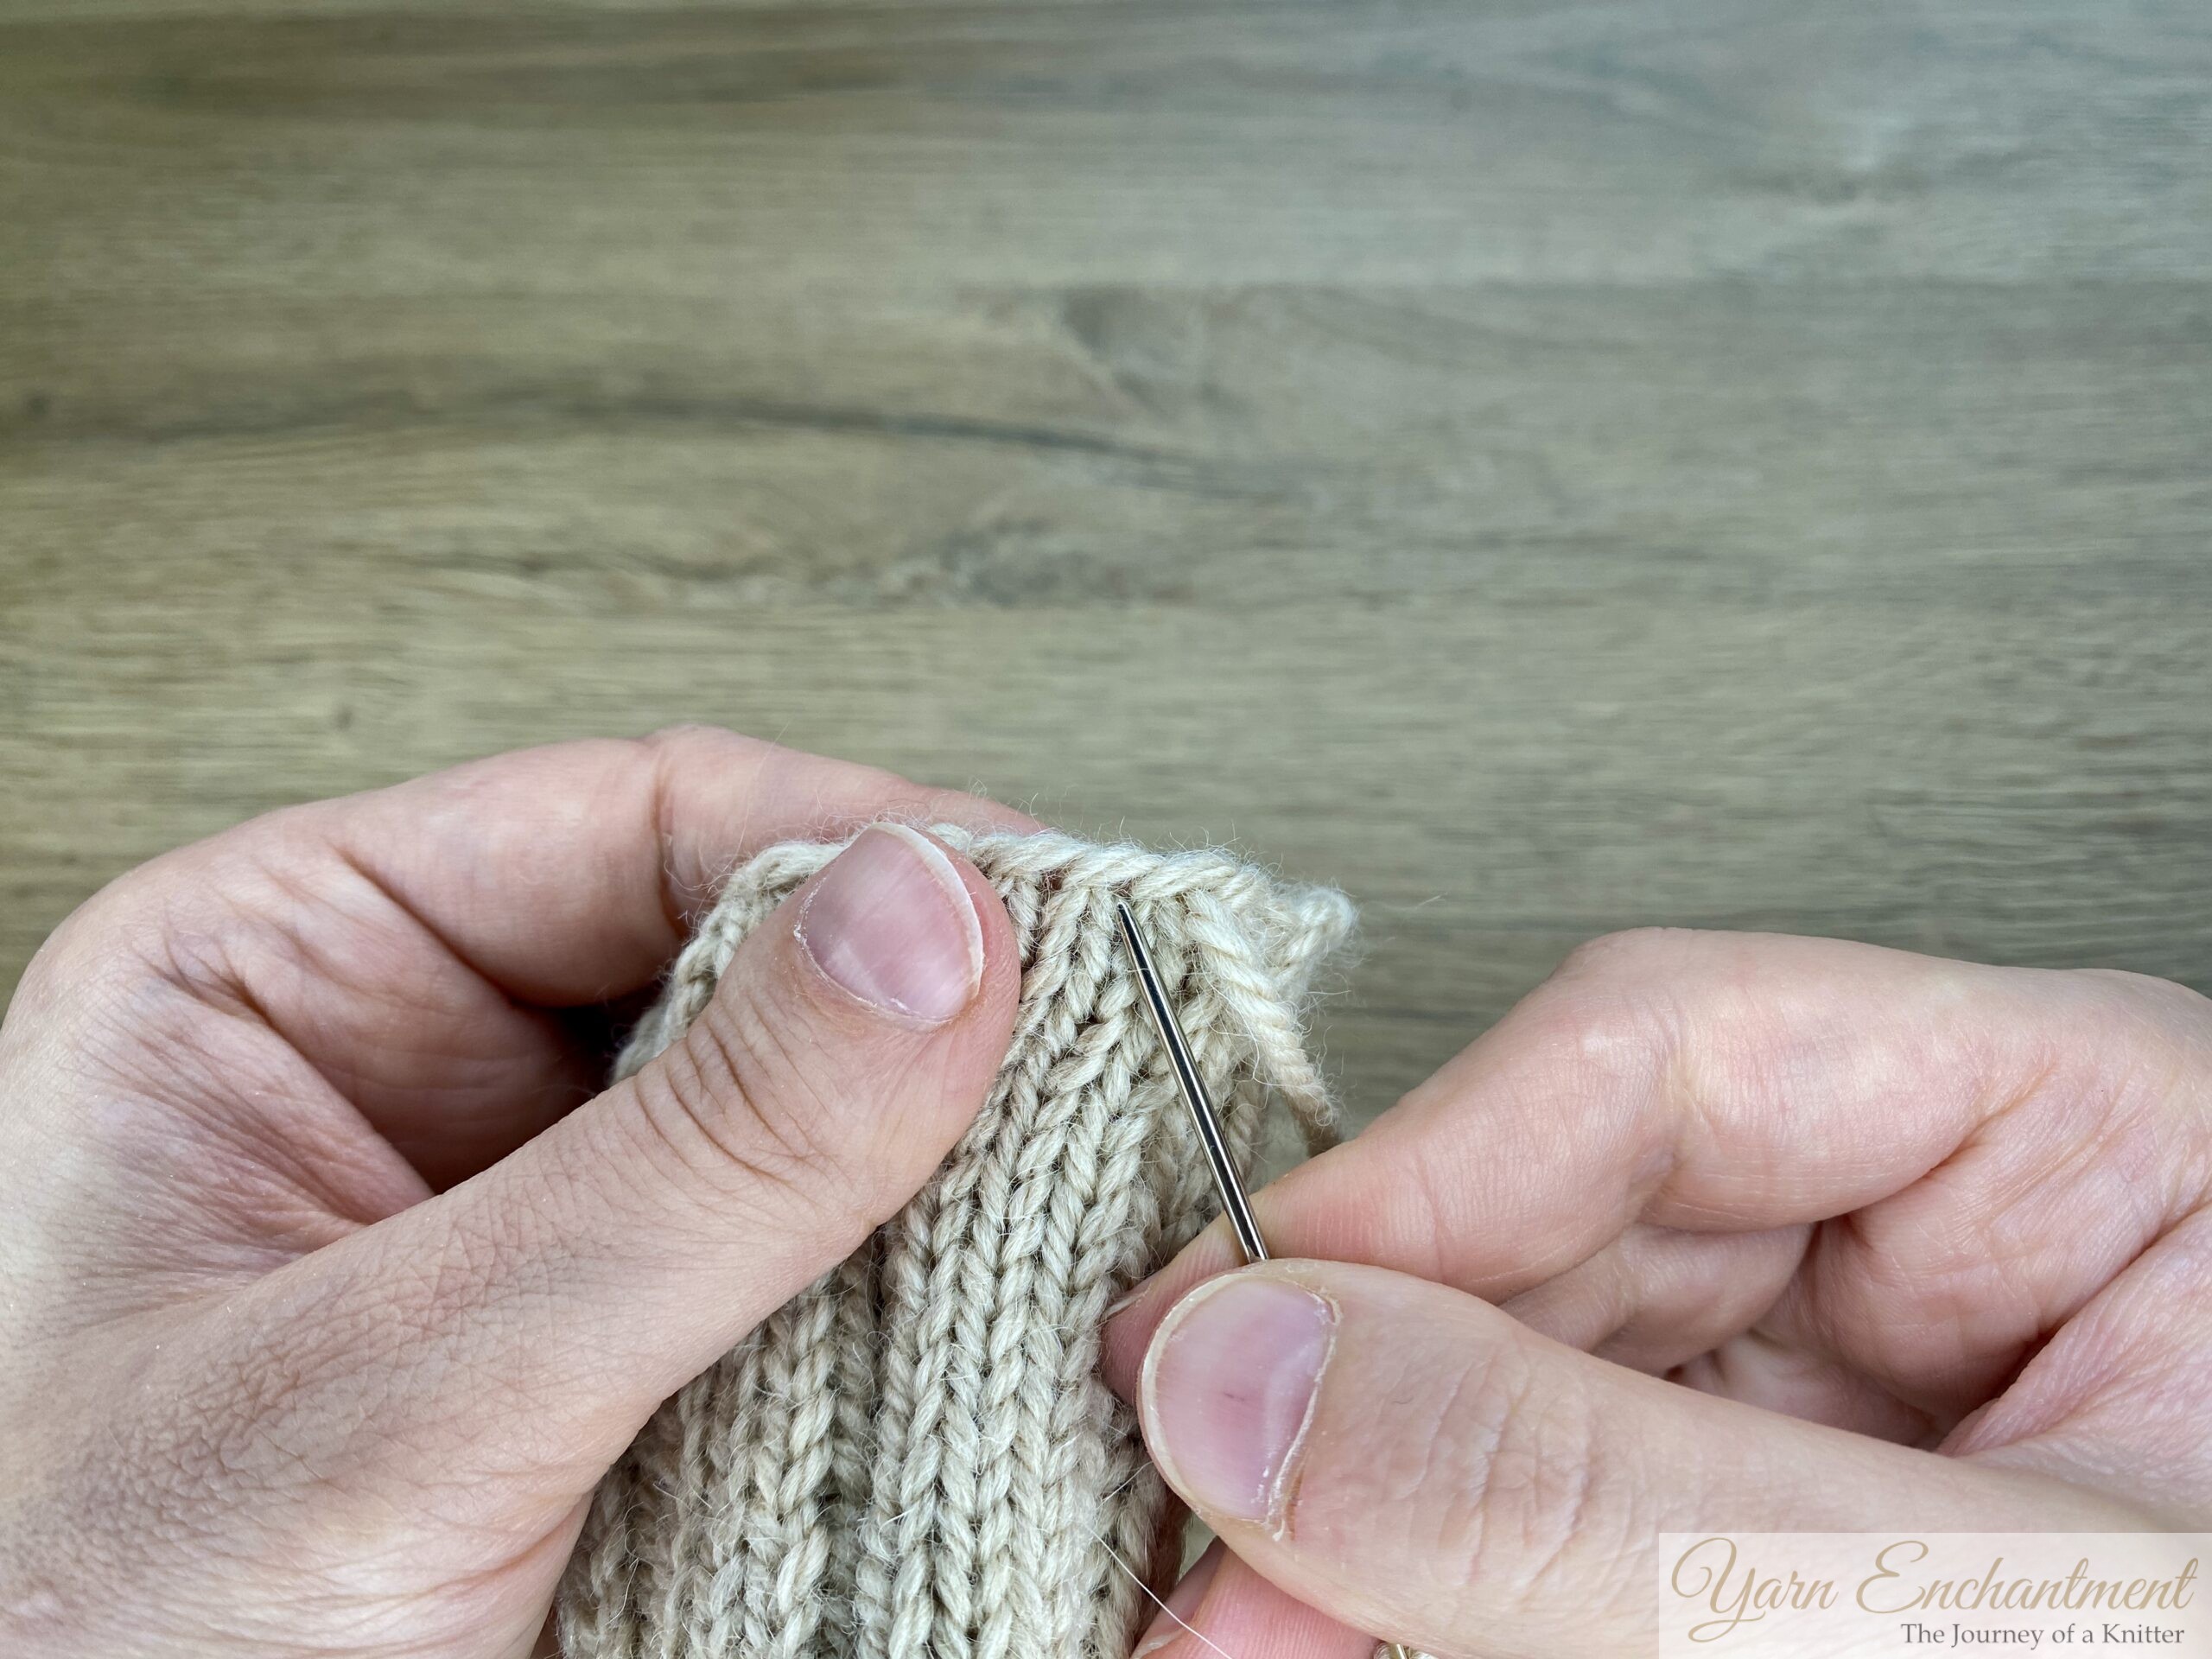 | 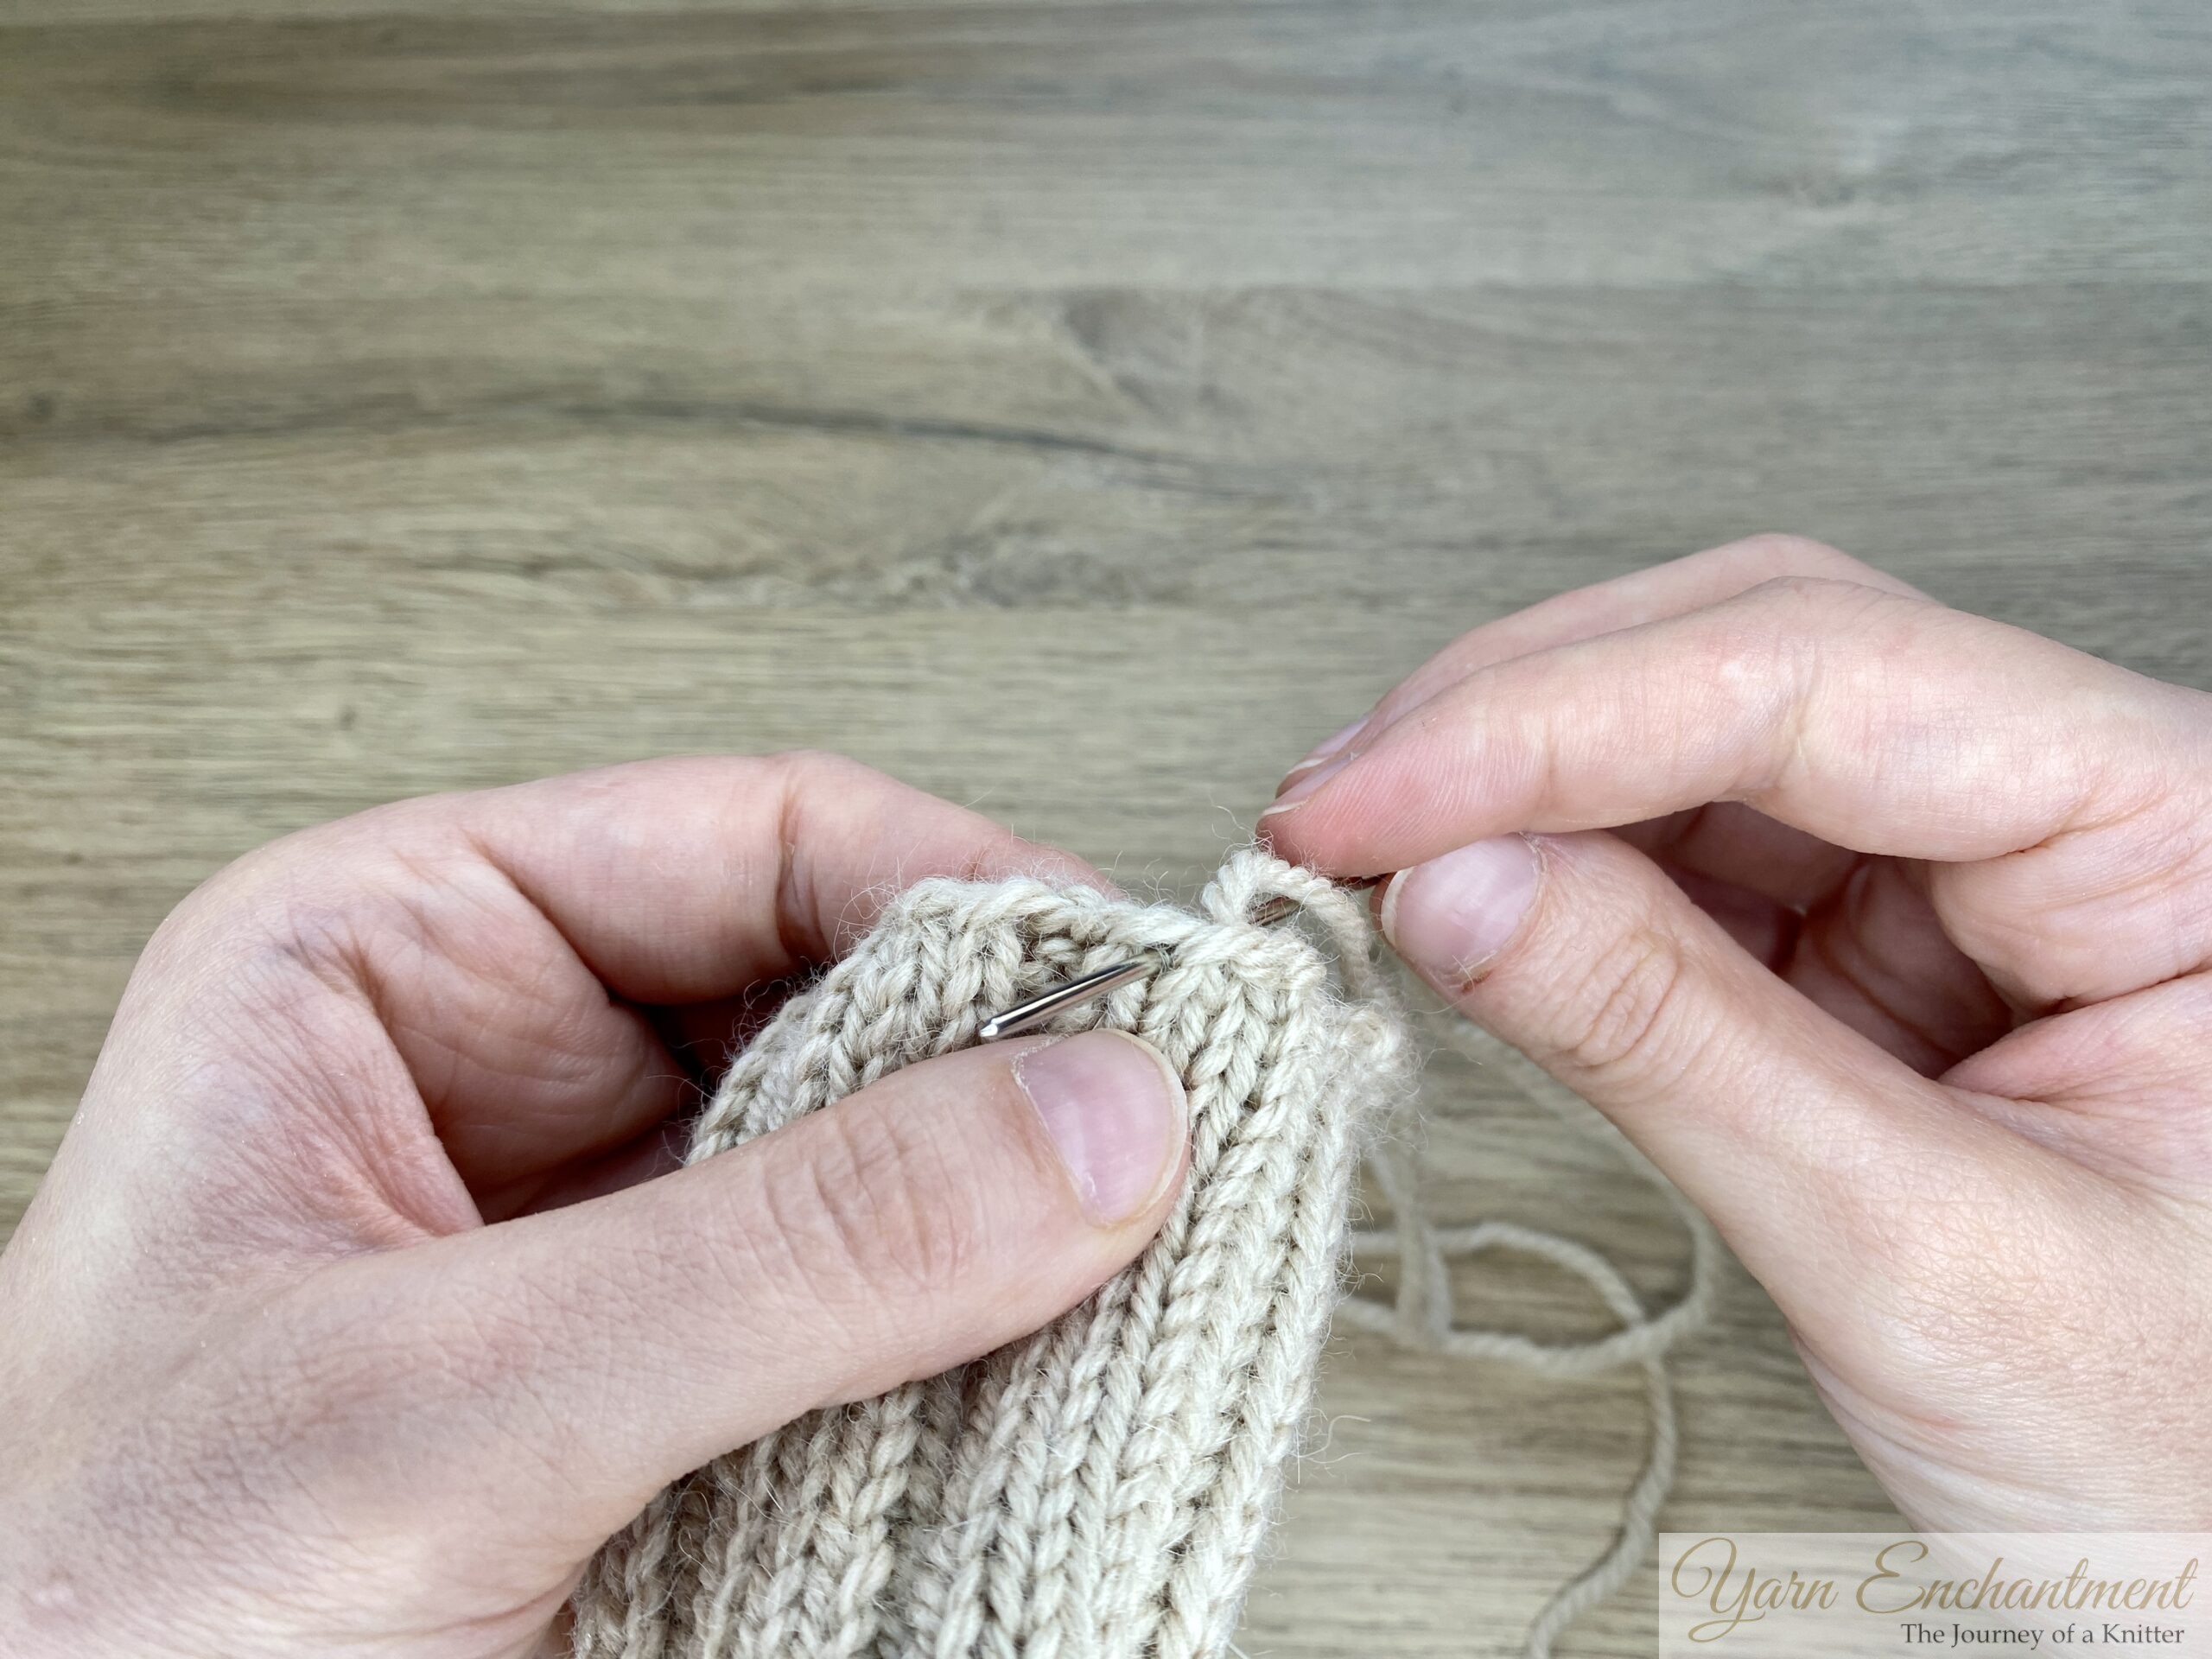 | Thread your yarn tail onto a blunt yarn needle. | Working along the cast-on edge, insert the needle from front to back, and pull the yarn tail all the way through. | Insert the needle from back to front through. and pulling the tail through. Continue around the entire edge until all stitches are threaded onto the yarn. |


 |  | Close the bottom of the pumpkin by gathering and tightening the stitches with your yarn tail. | Secure the yarn tail by weaving it into the inside of the pumpkin to keep it neatly fastened and hidden and secure your yarn tail a |


Filling the Pumpkin
Add stuffing, but be careful not to overfill, the pumpkin still needs to be shaped, and dense filling can make shaping more difficult. Gently pull the opening closed.
 | 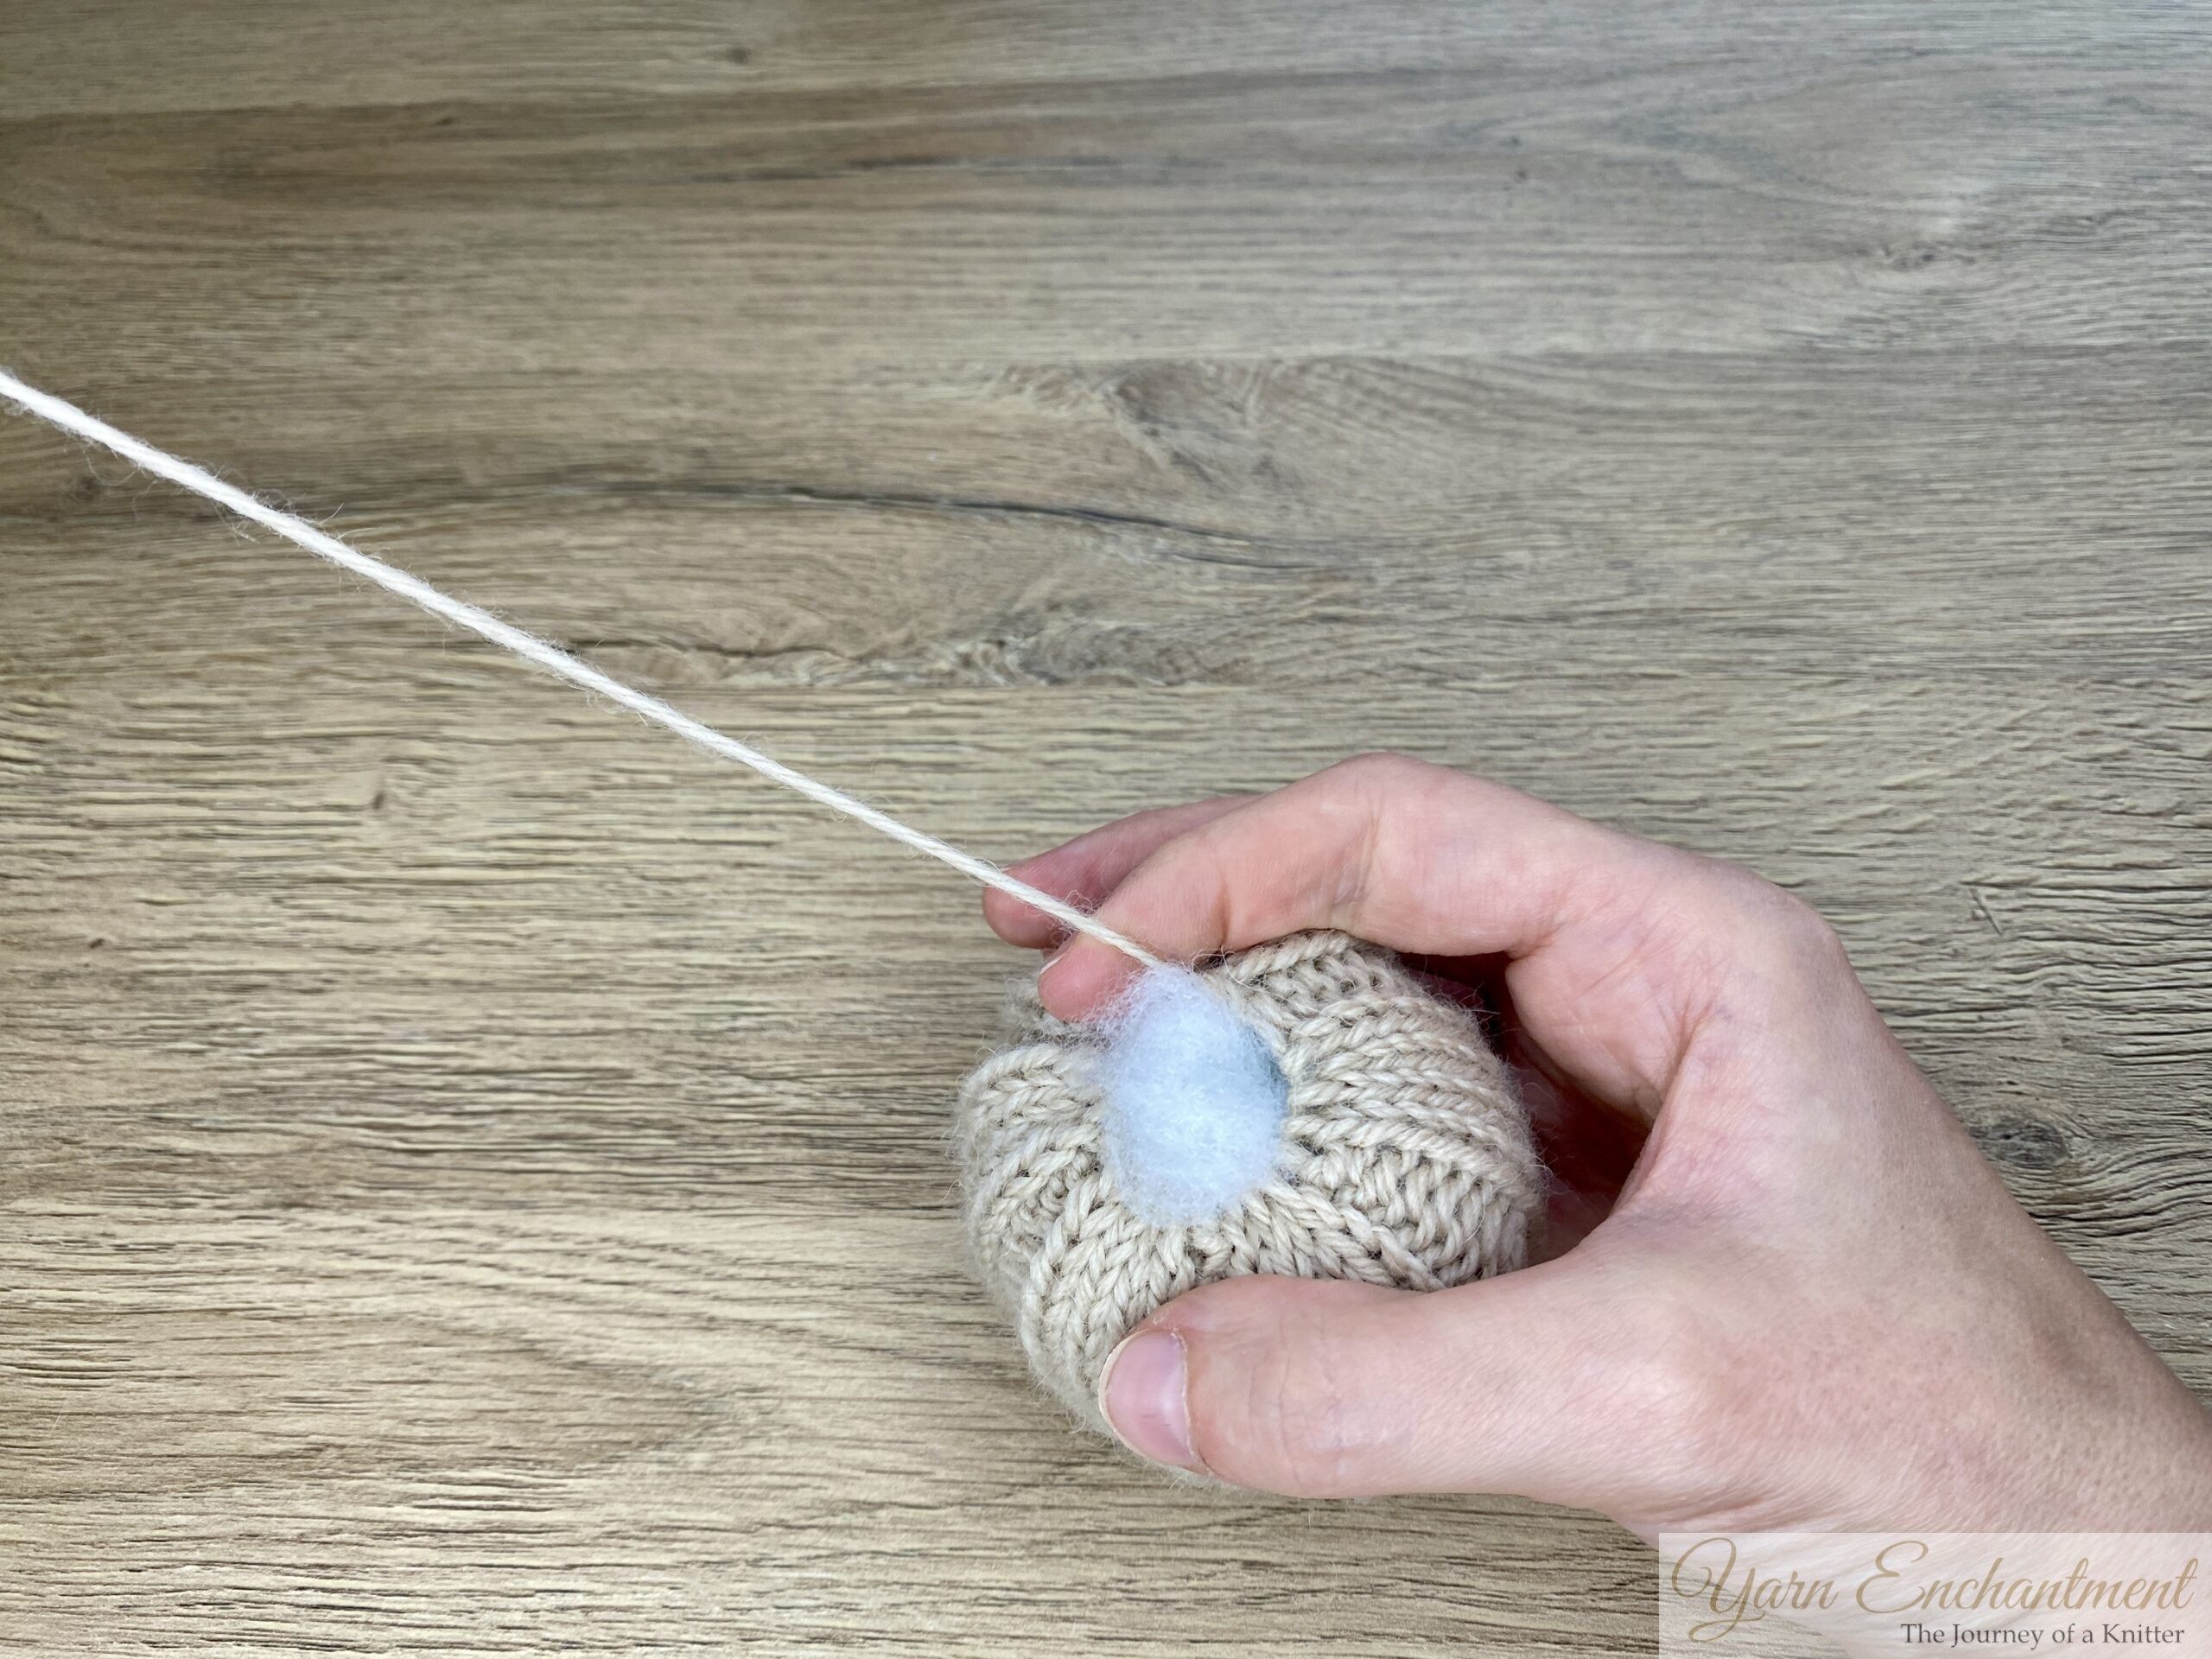 |  | Add stuffing | Gently pull the opening closed | We will now start to shape our pumpkin |


Tips for Perfect Pumpkin Shaping
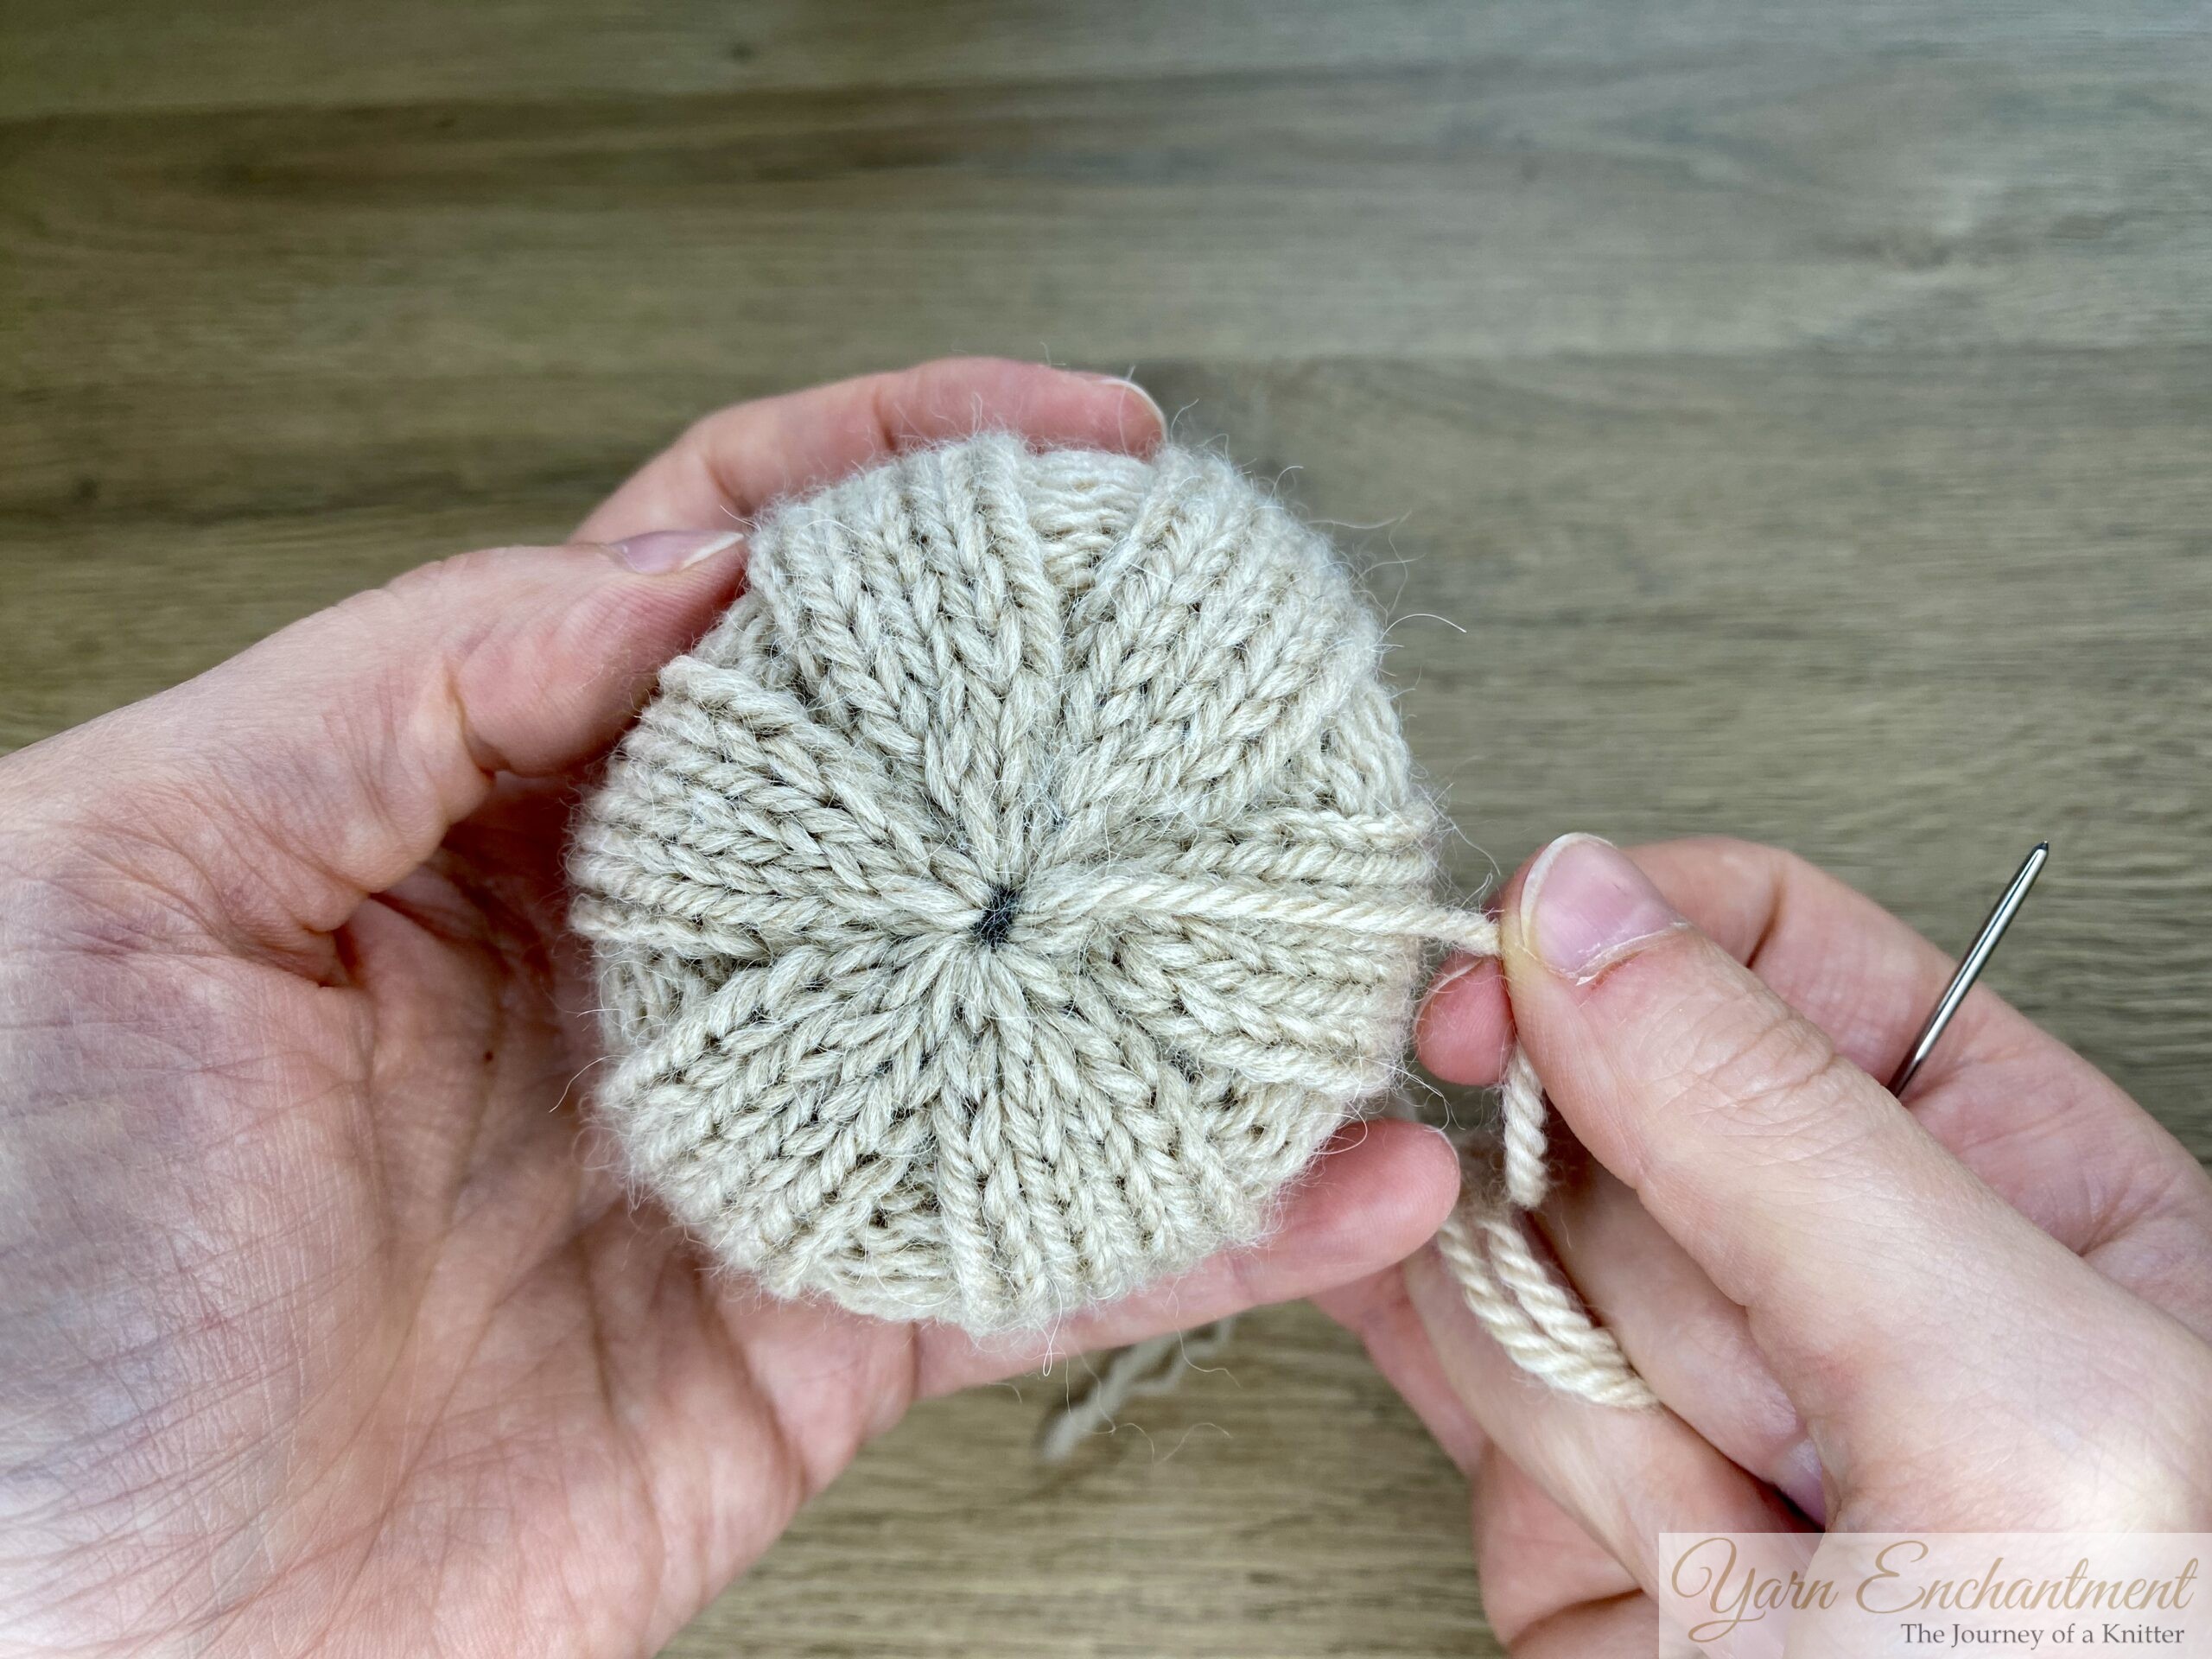
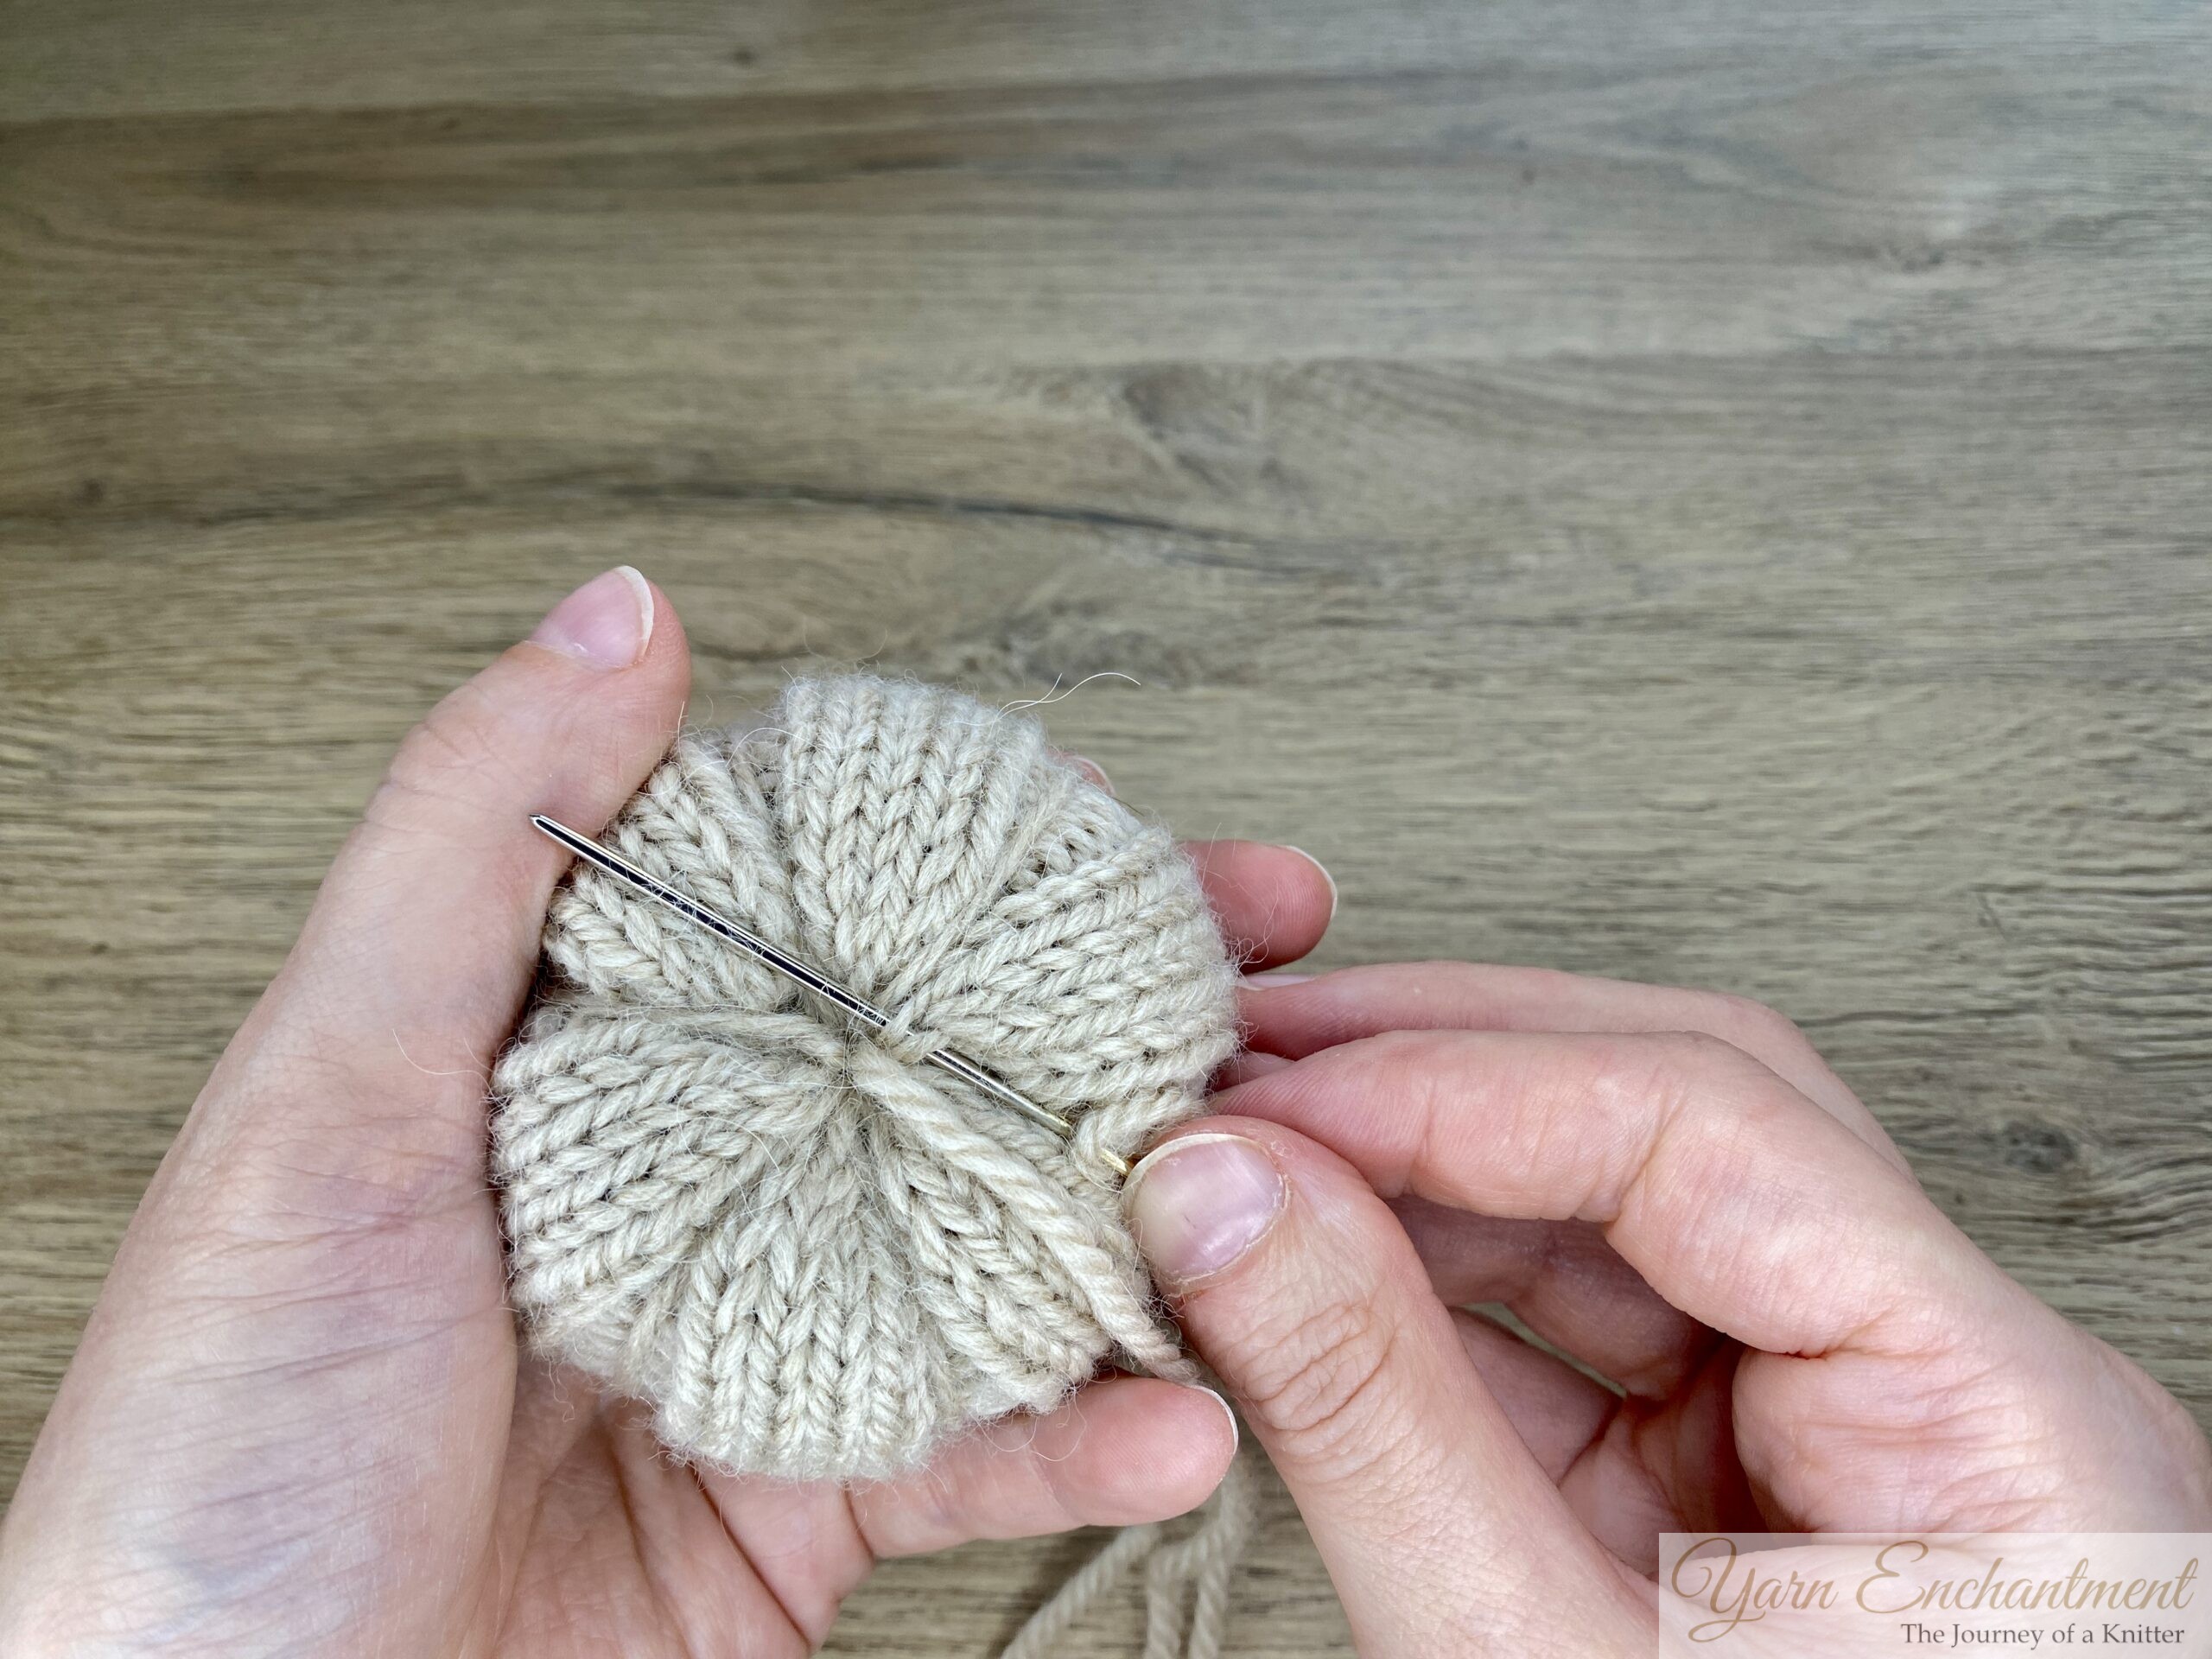
To shape your knitted pumpkin, use the long yarn tail and a blunt needle. Bring the yarn down along the purl columns, inserting the needle through the center of the pumpkin’s bottom, then passing it up through the center top. Pull the yarn tightly to squash the pumpkin into a round, squat shape. For a more realistic look, repeat this process, bringing the yarn over the side ridges (following the purl columns) and pulling snug to form distinct pumpkin segments. After shaping, secure the yarn and adjust the stuffing as needed for a smooth, rounded finish.
 |  | 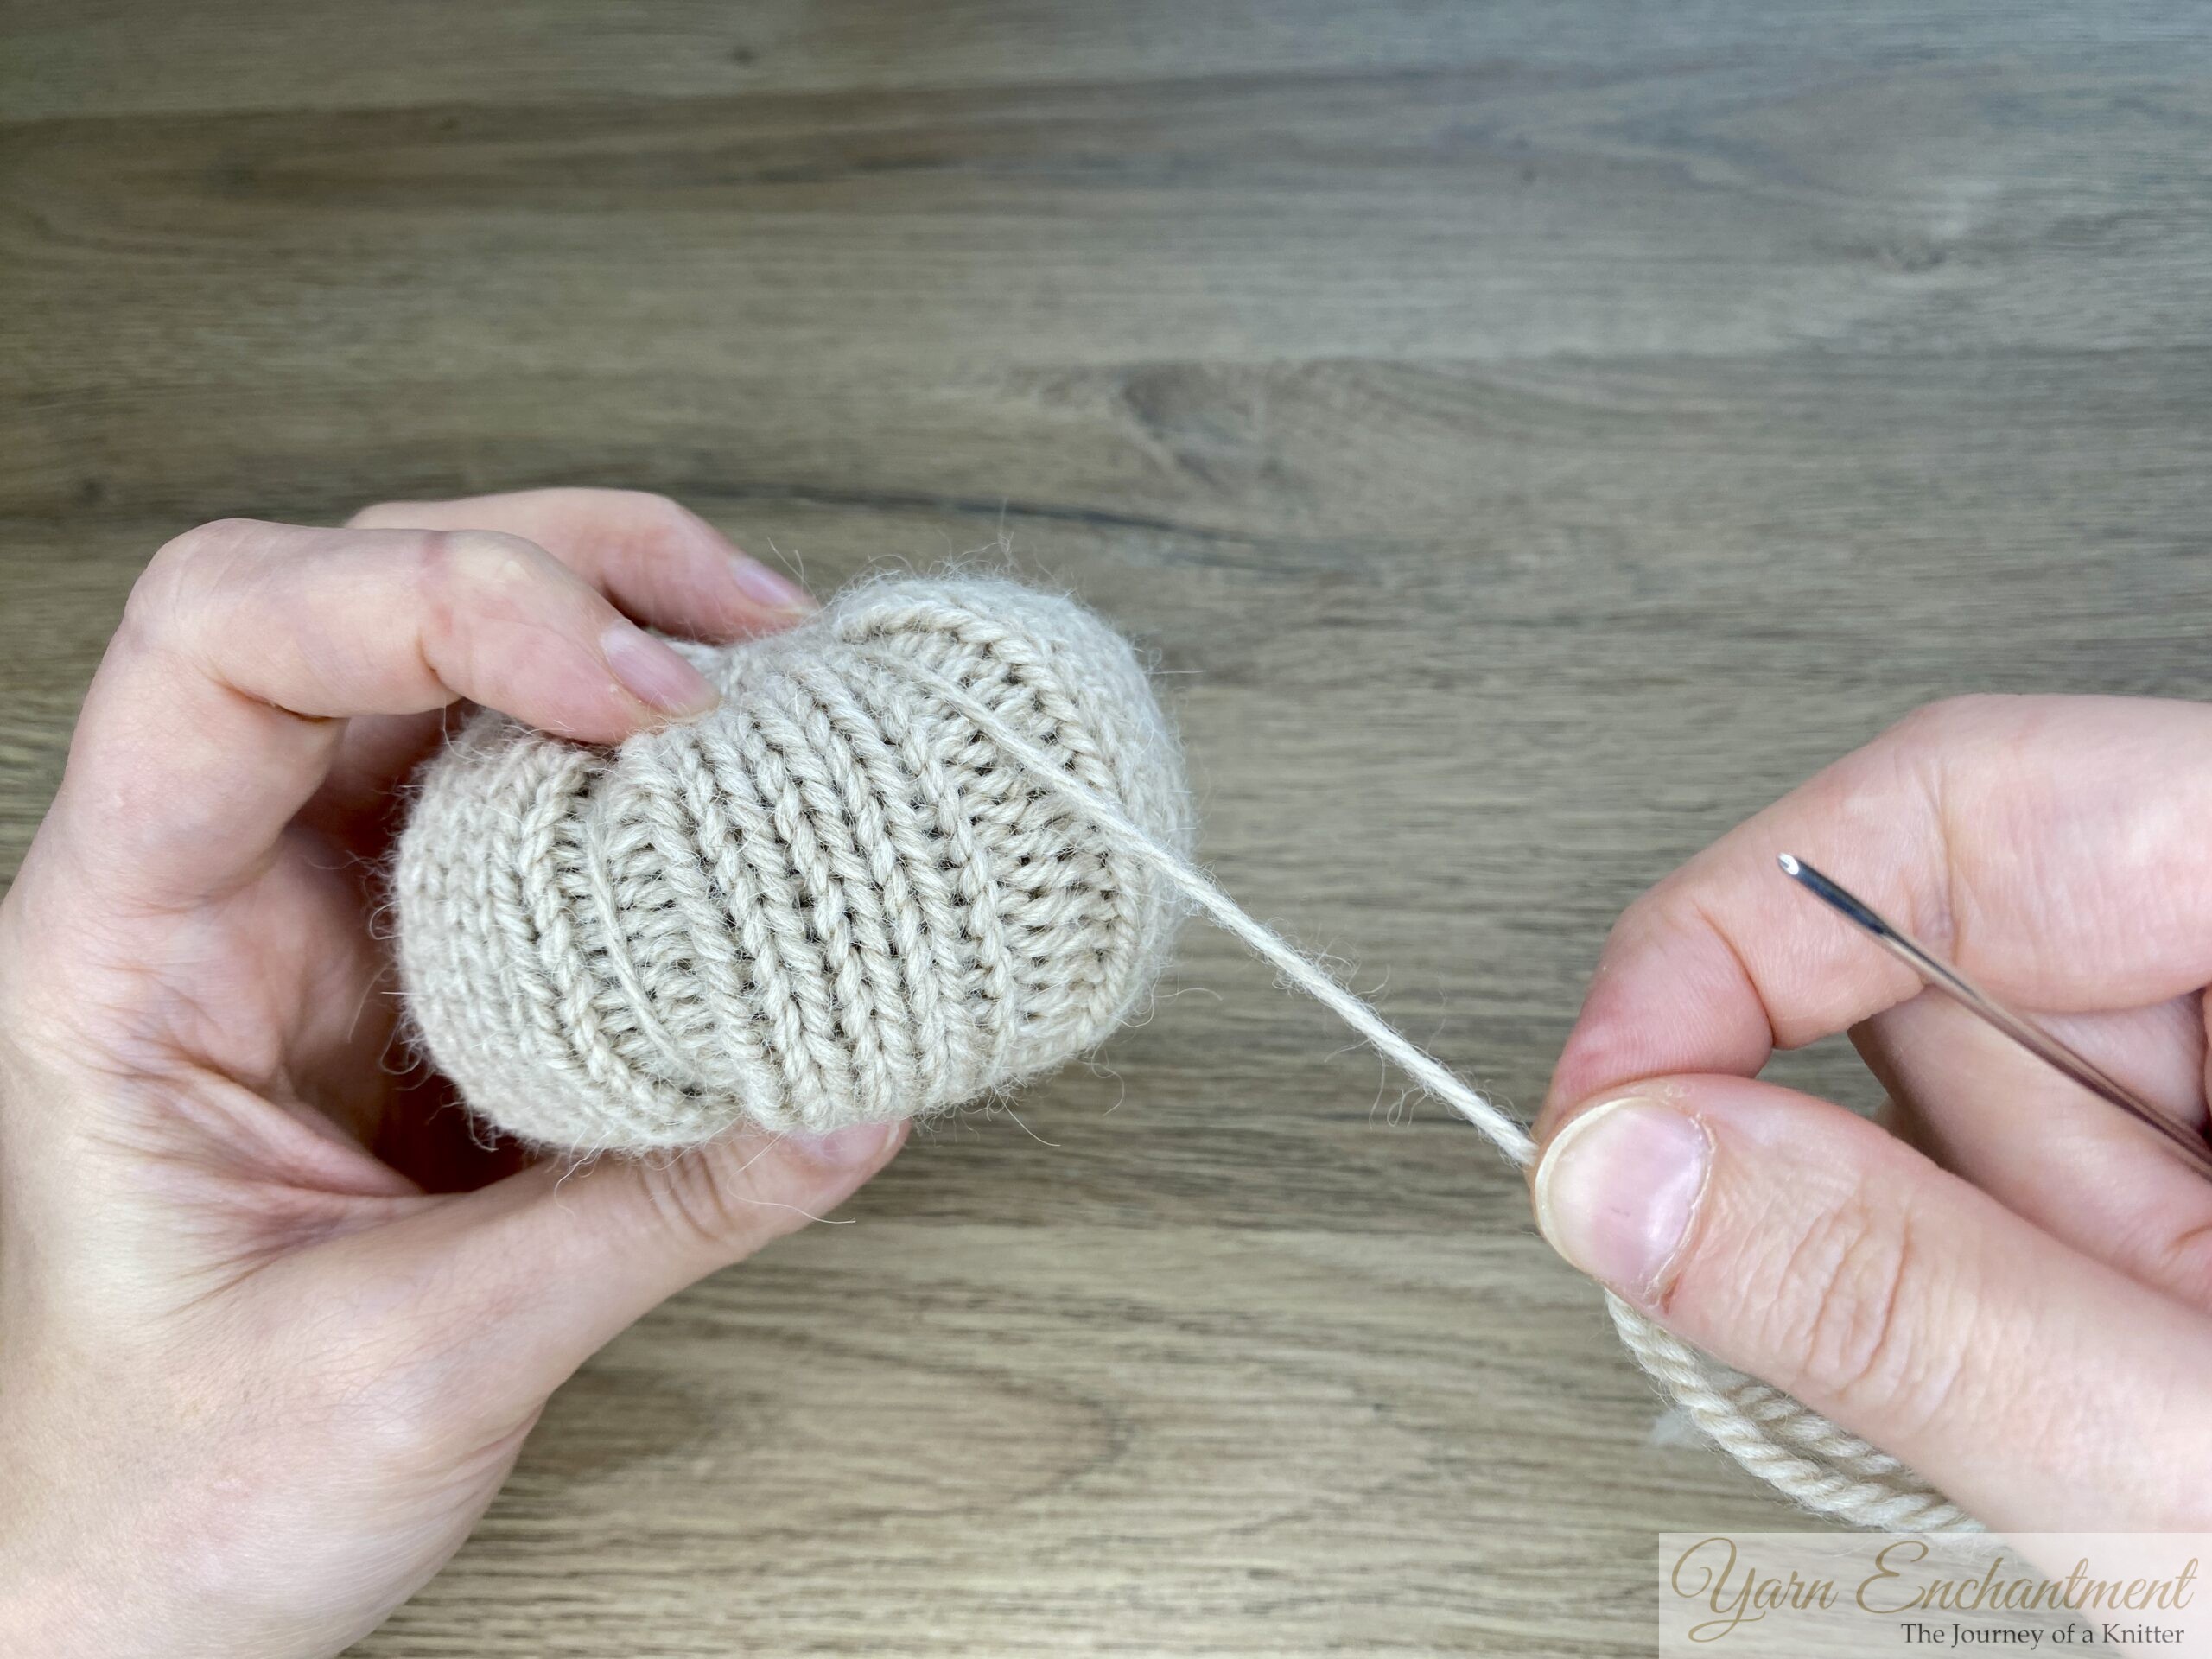 | Bring the yarn down along the purl columns | Insert the needle through the center of the pumpkin’s bottom, then pass it up through the center top. | Pull the yarn tightly to squash the pumpkin into a round, squat shape. Repeat this process, bringing the yarn over the side ridges (following the purl columns) and pulling snug to form distinct pumpkin segments. |


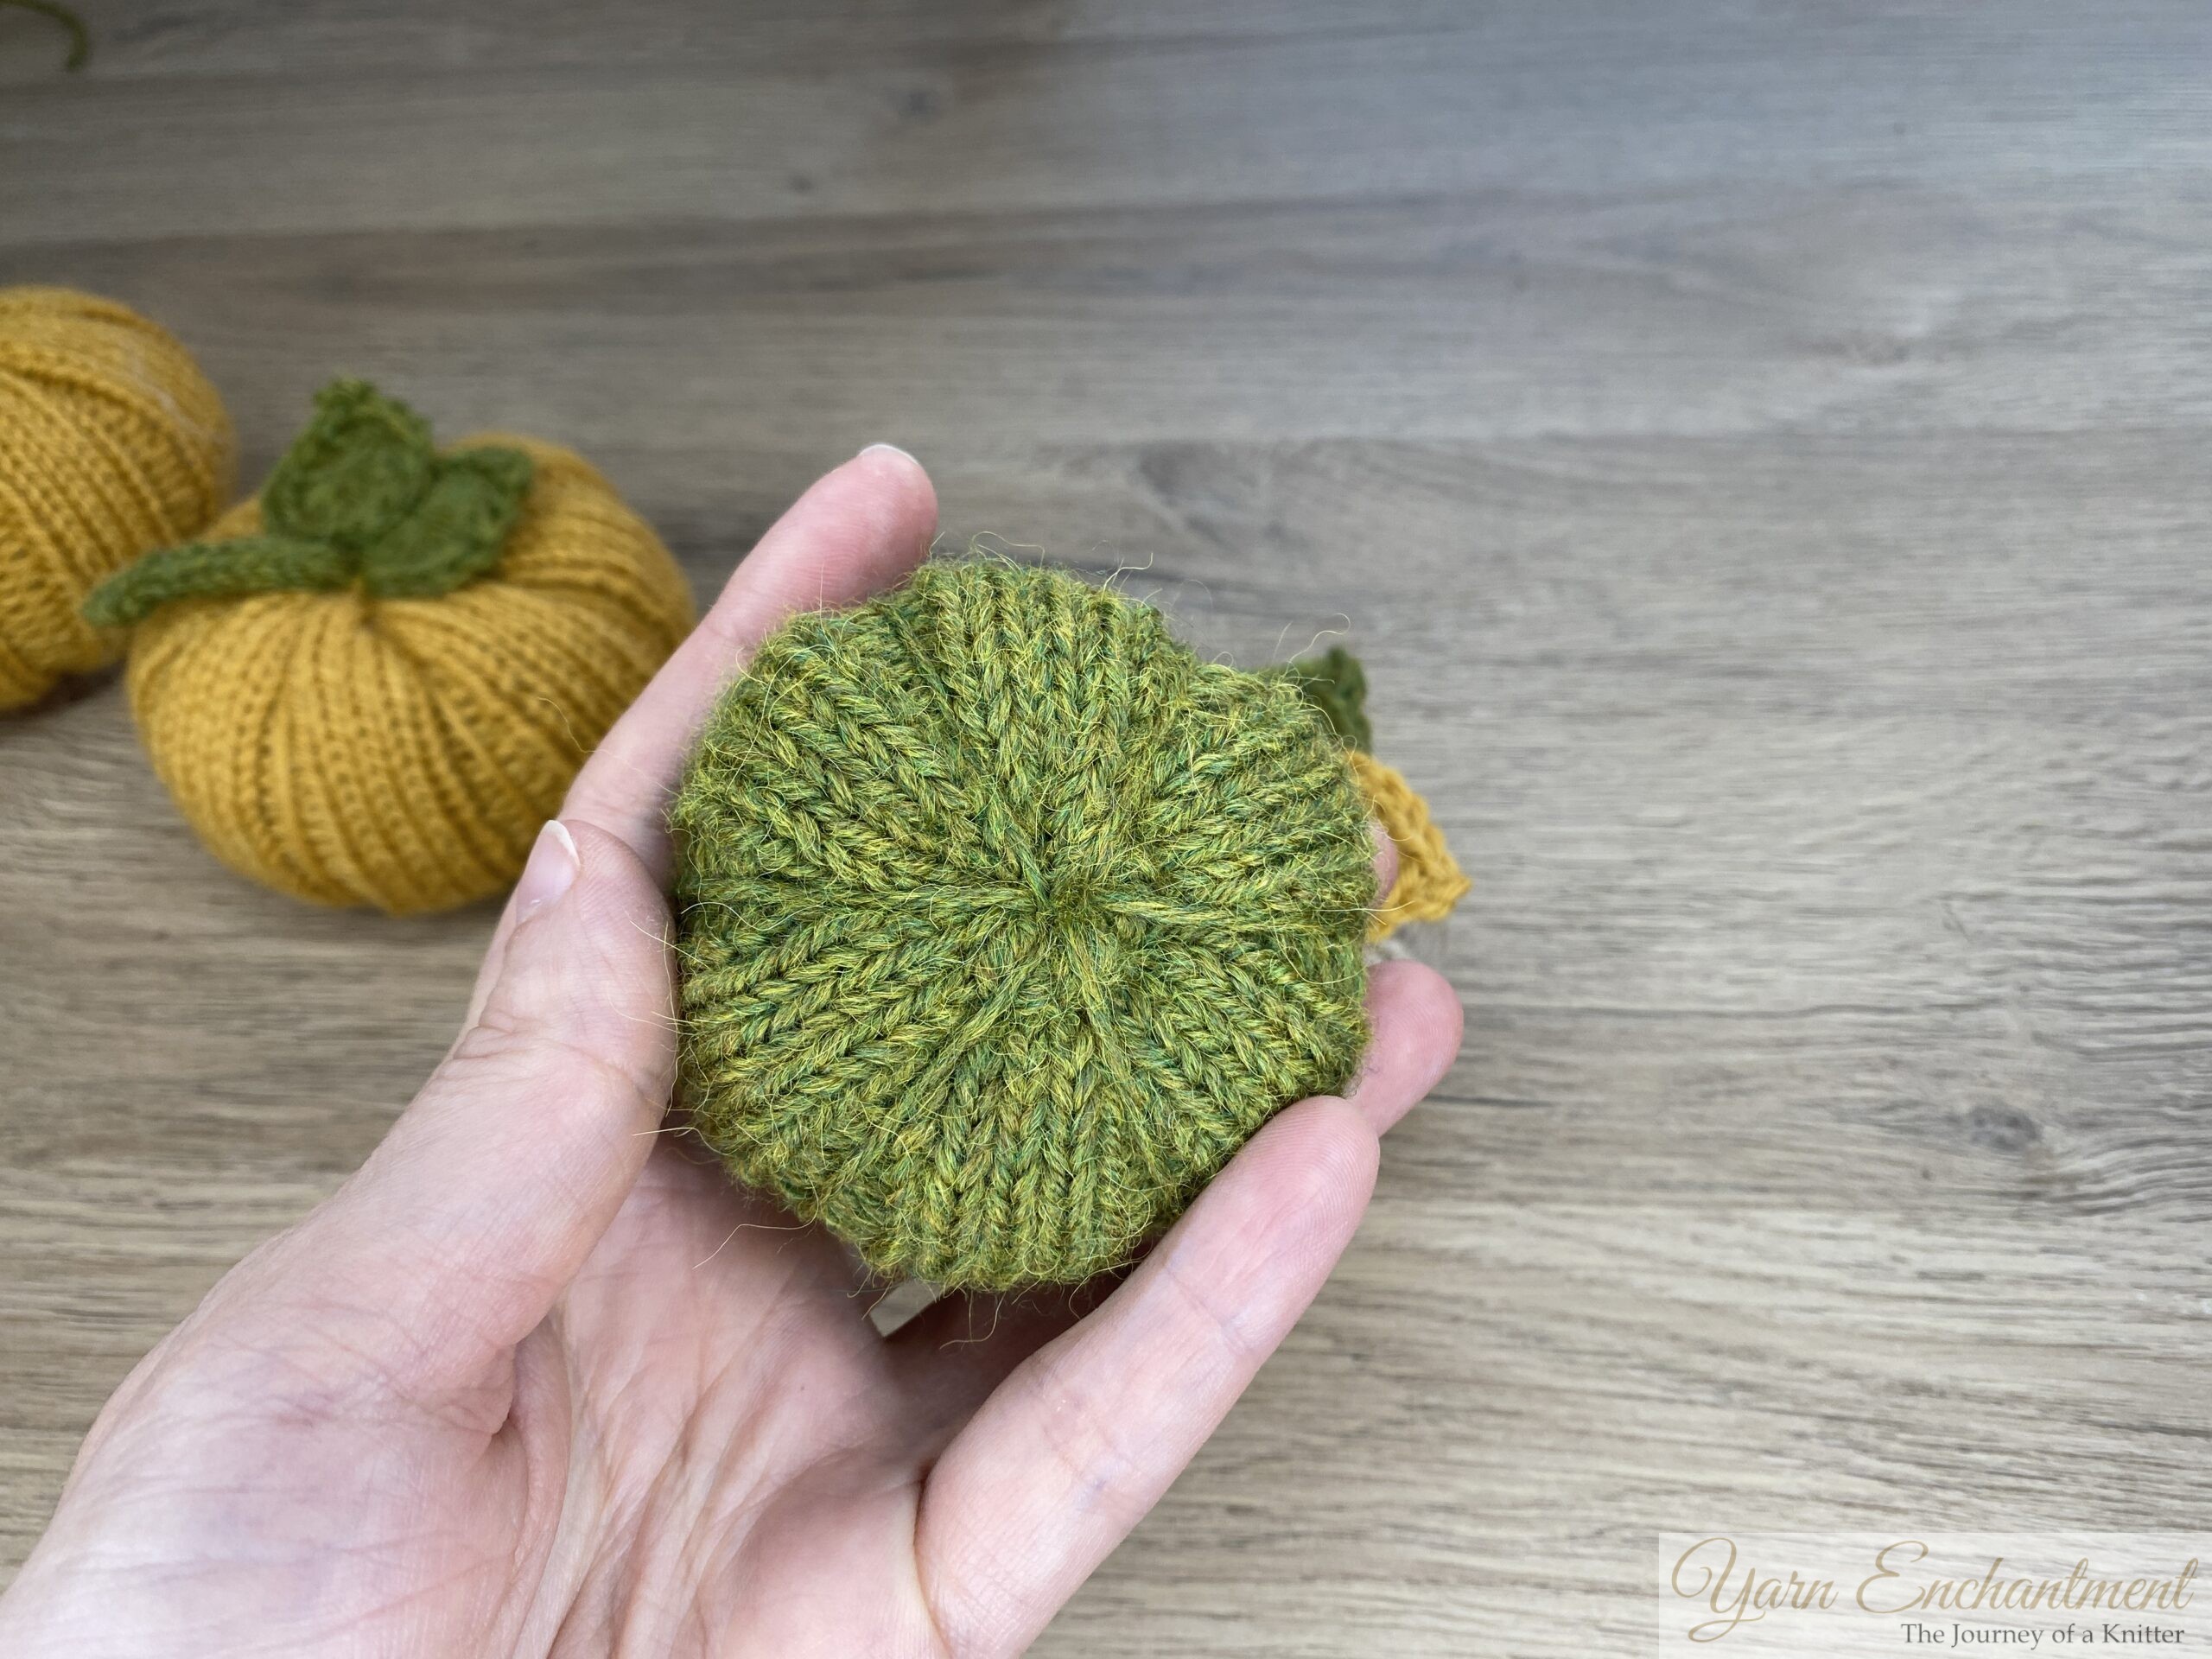
When you finish your last wrap, your yarn will be at the top center. I like to anchor the yarn in one of the nearby stitches to secure it, then thread the needle down through the center to the bottom and trim the yarn. Your pumpkin body is now complete!
 | 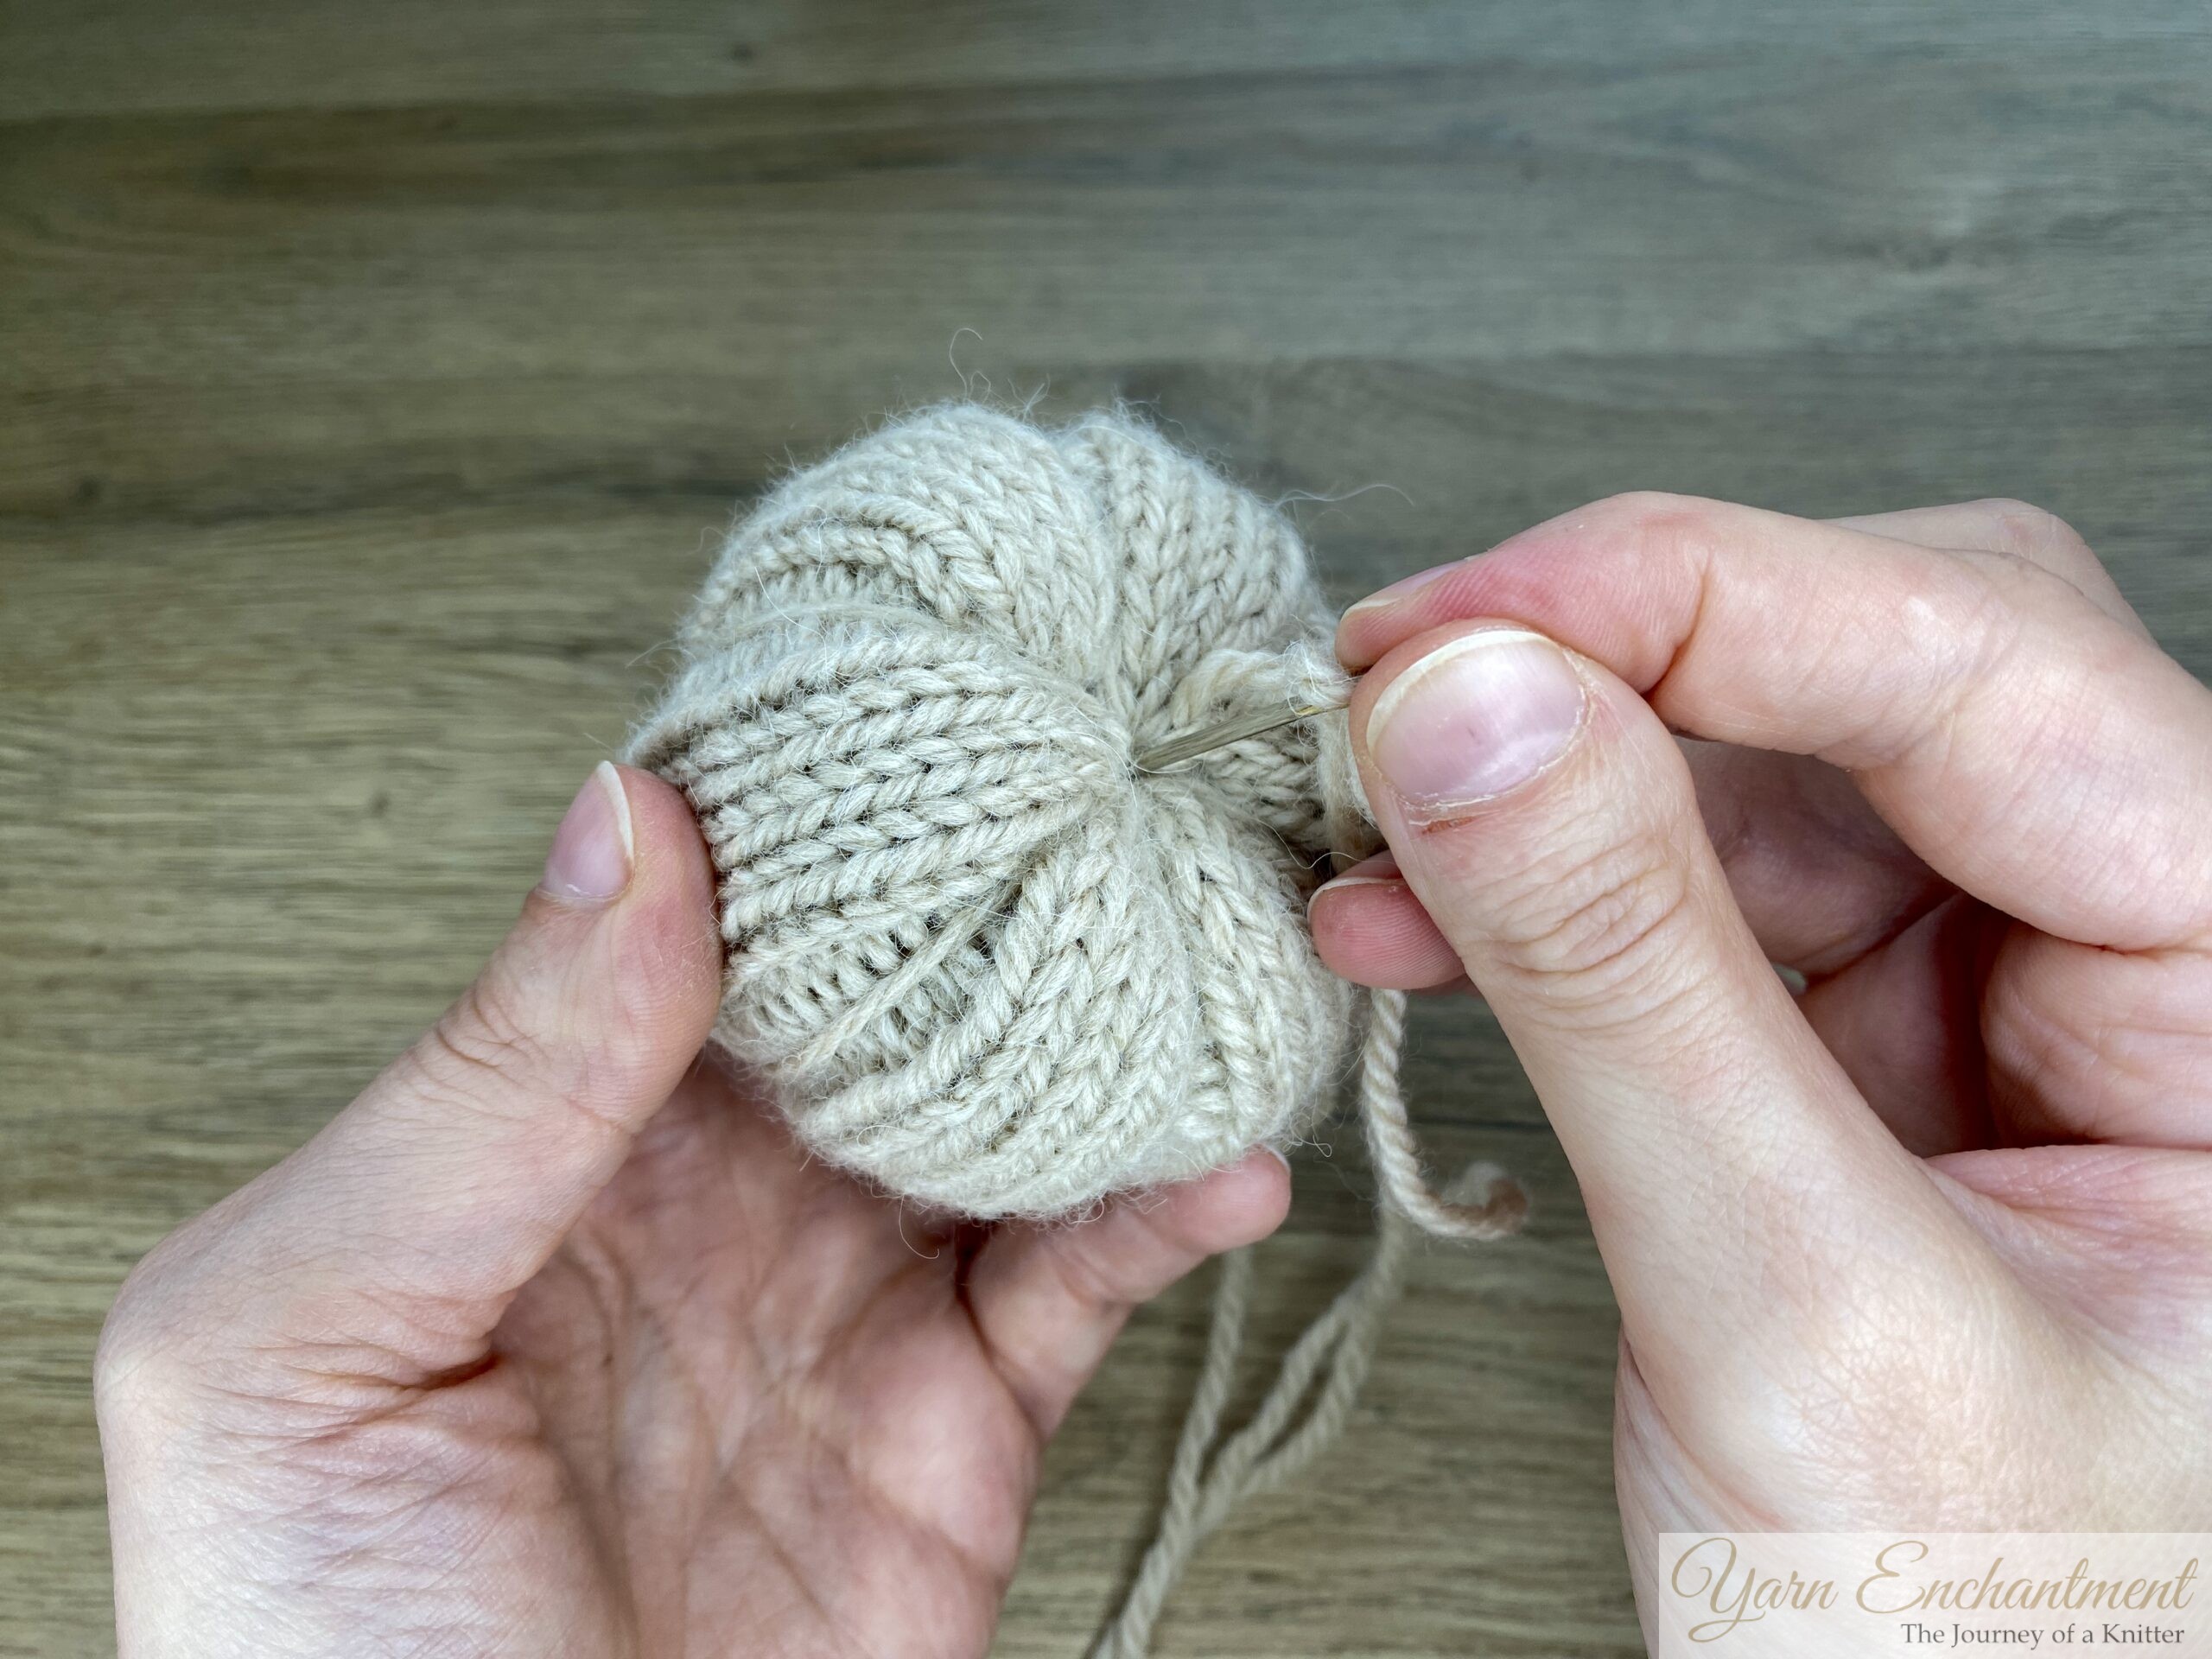 | Anchor your yarn in one of the top center stitches. | Then bring the yarn down through the center to the bottom. You can cut your yarn now, and don’t worry, nothing will come undone |


You can decorate it right away by adding a small stick for a rustic stem, or for a handmade touch, knit a simple 3-stitch I-cord for the stem and add a pair of crocheted leaves.
Customize Your Knit Pumpkin
Knit or Crochet Leaves and Stems
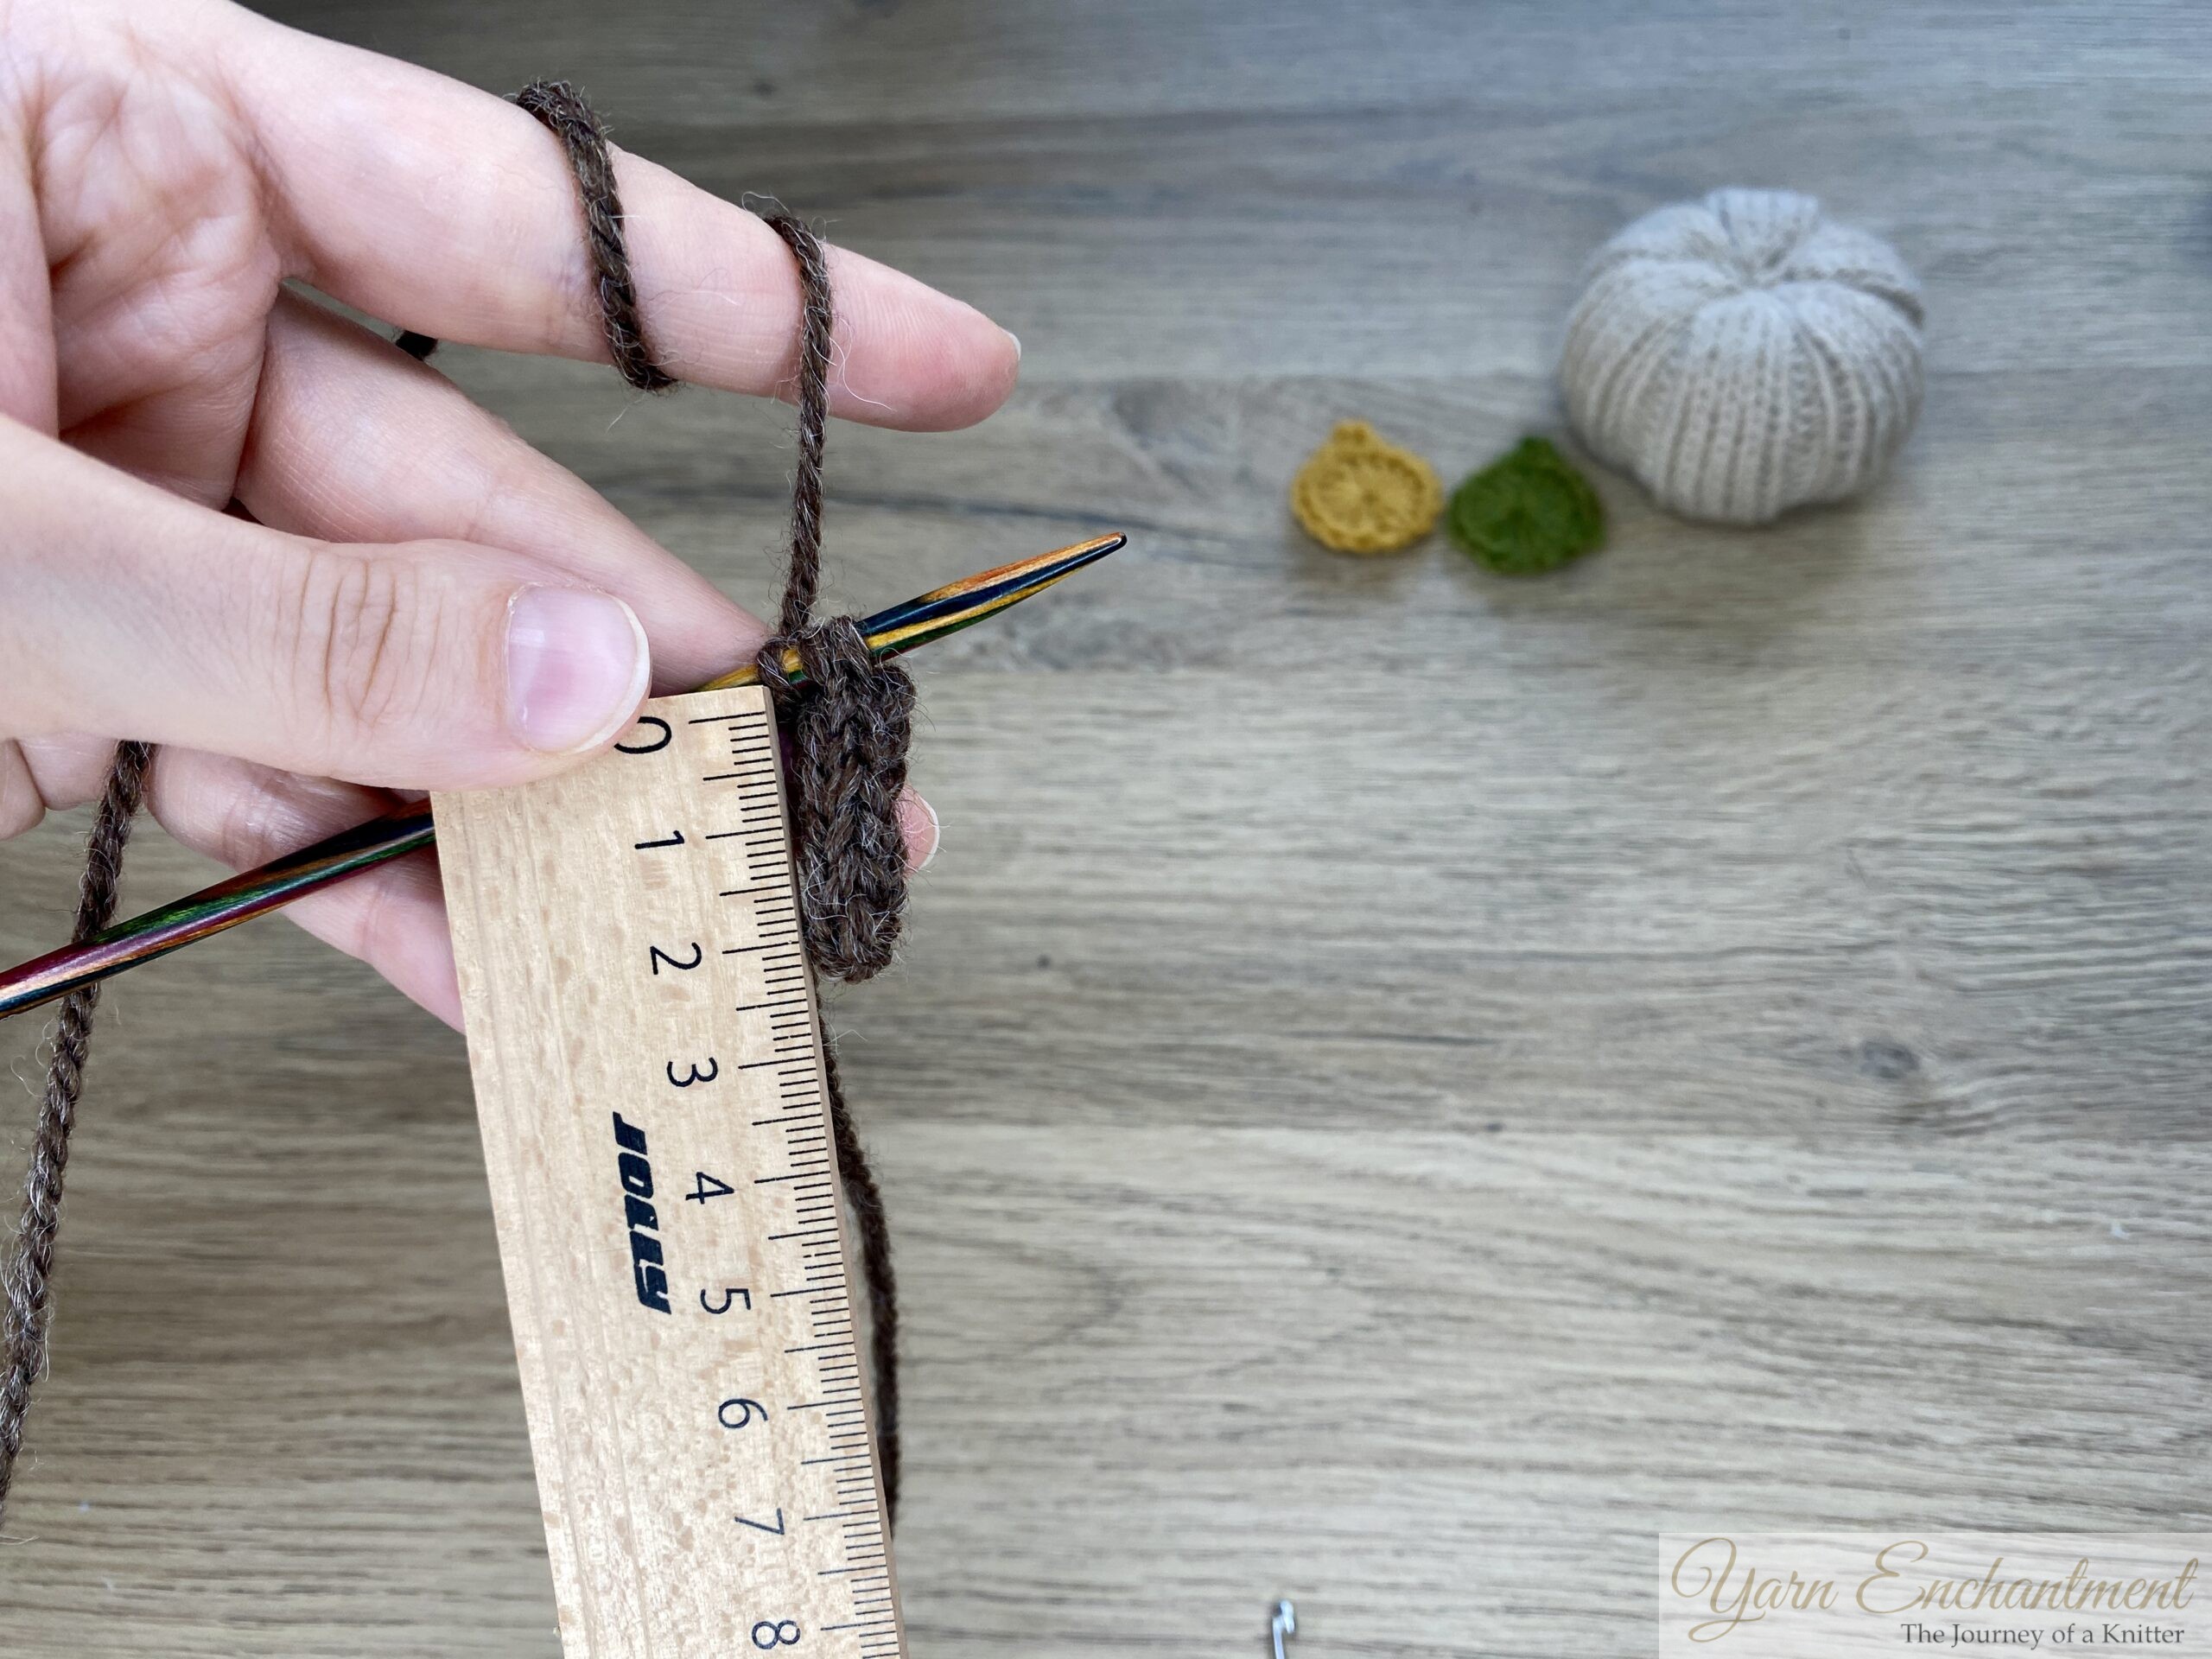
Stem (I-cord)
- With green or brown yarn, cast on 3 stitches.
- To knit the I-cord, slide the cast-on stitches to the right end of your needle, and knit all stitches. Repeat these steps until the tube measures about 2 cm (or your preferred length). For added character, you can make the stem longer and insert a wire to twist it playfully.
- Bind off, and sew in the yarn tail.
- Finally, attach the stem securely to the top of your pumpkin.
Tip: I’m still using a needle size much smaller than what the yarn recommends because this makes the I-cord stem firmer and helps it stand upright on its own.
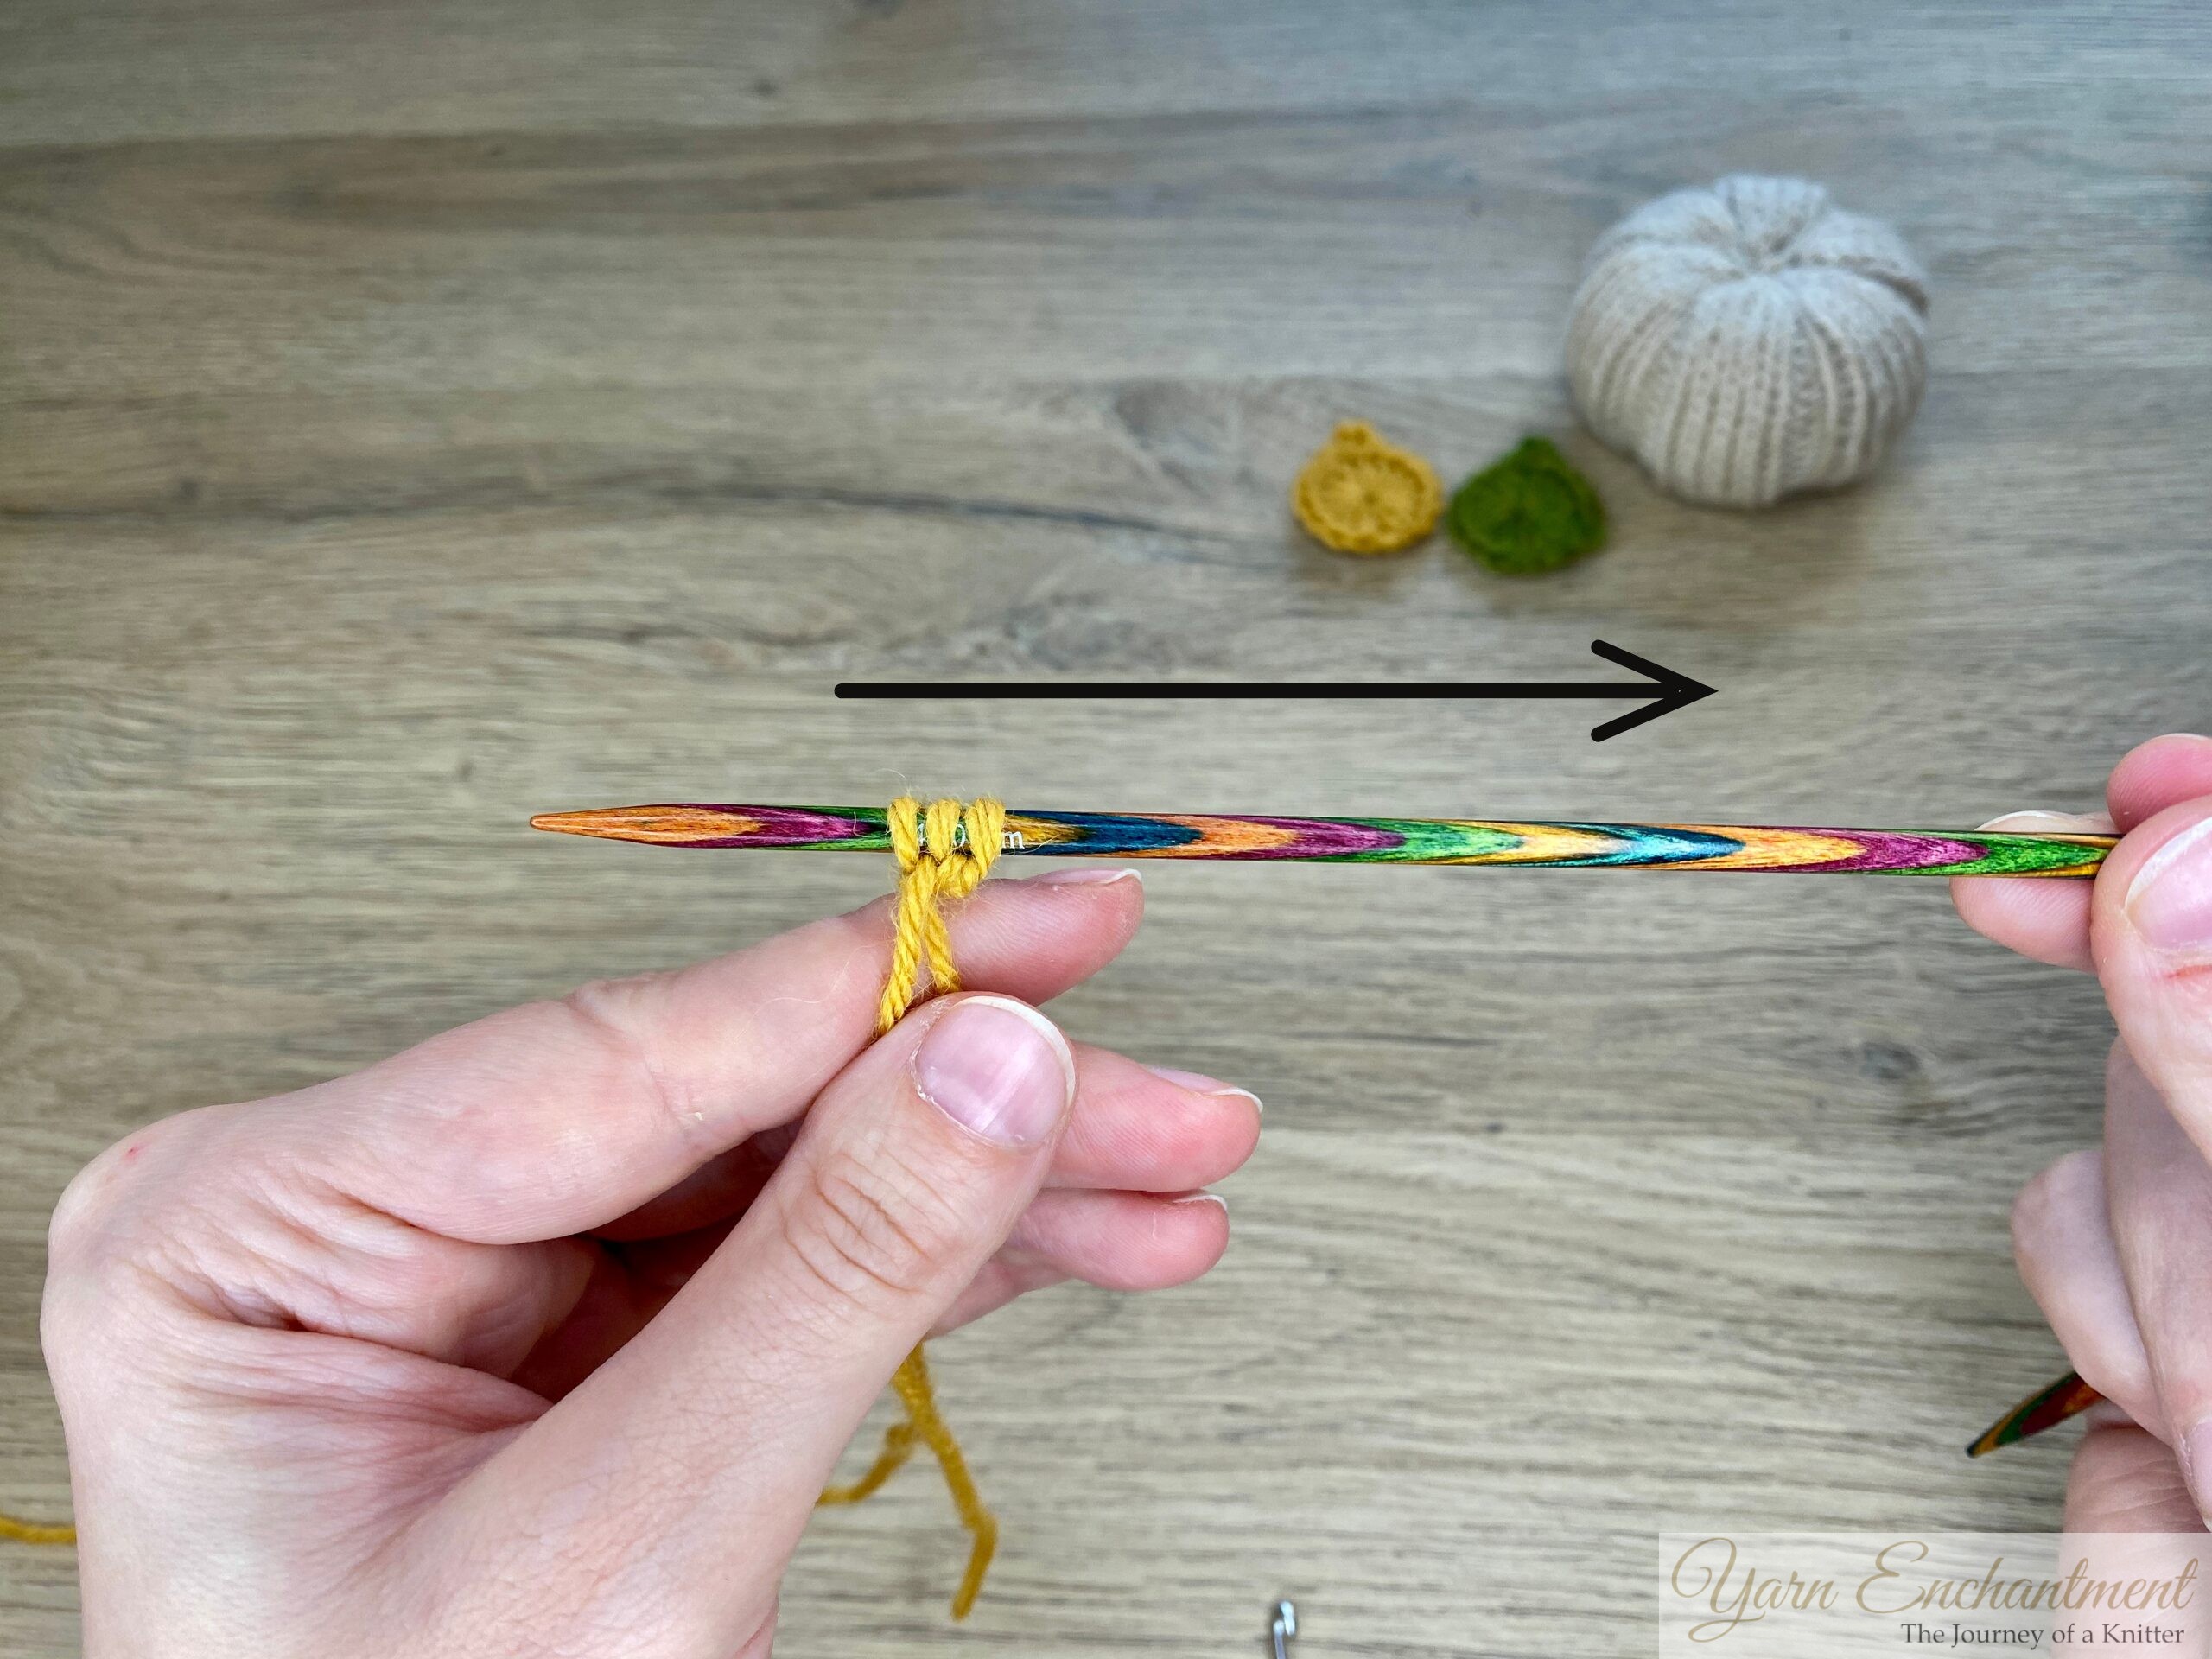 | 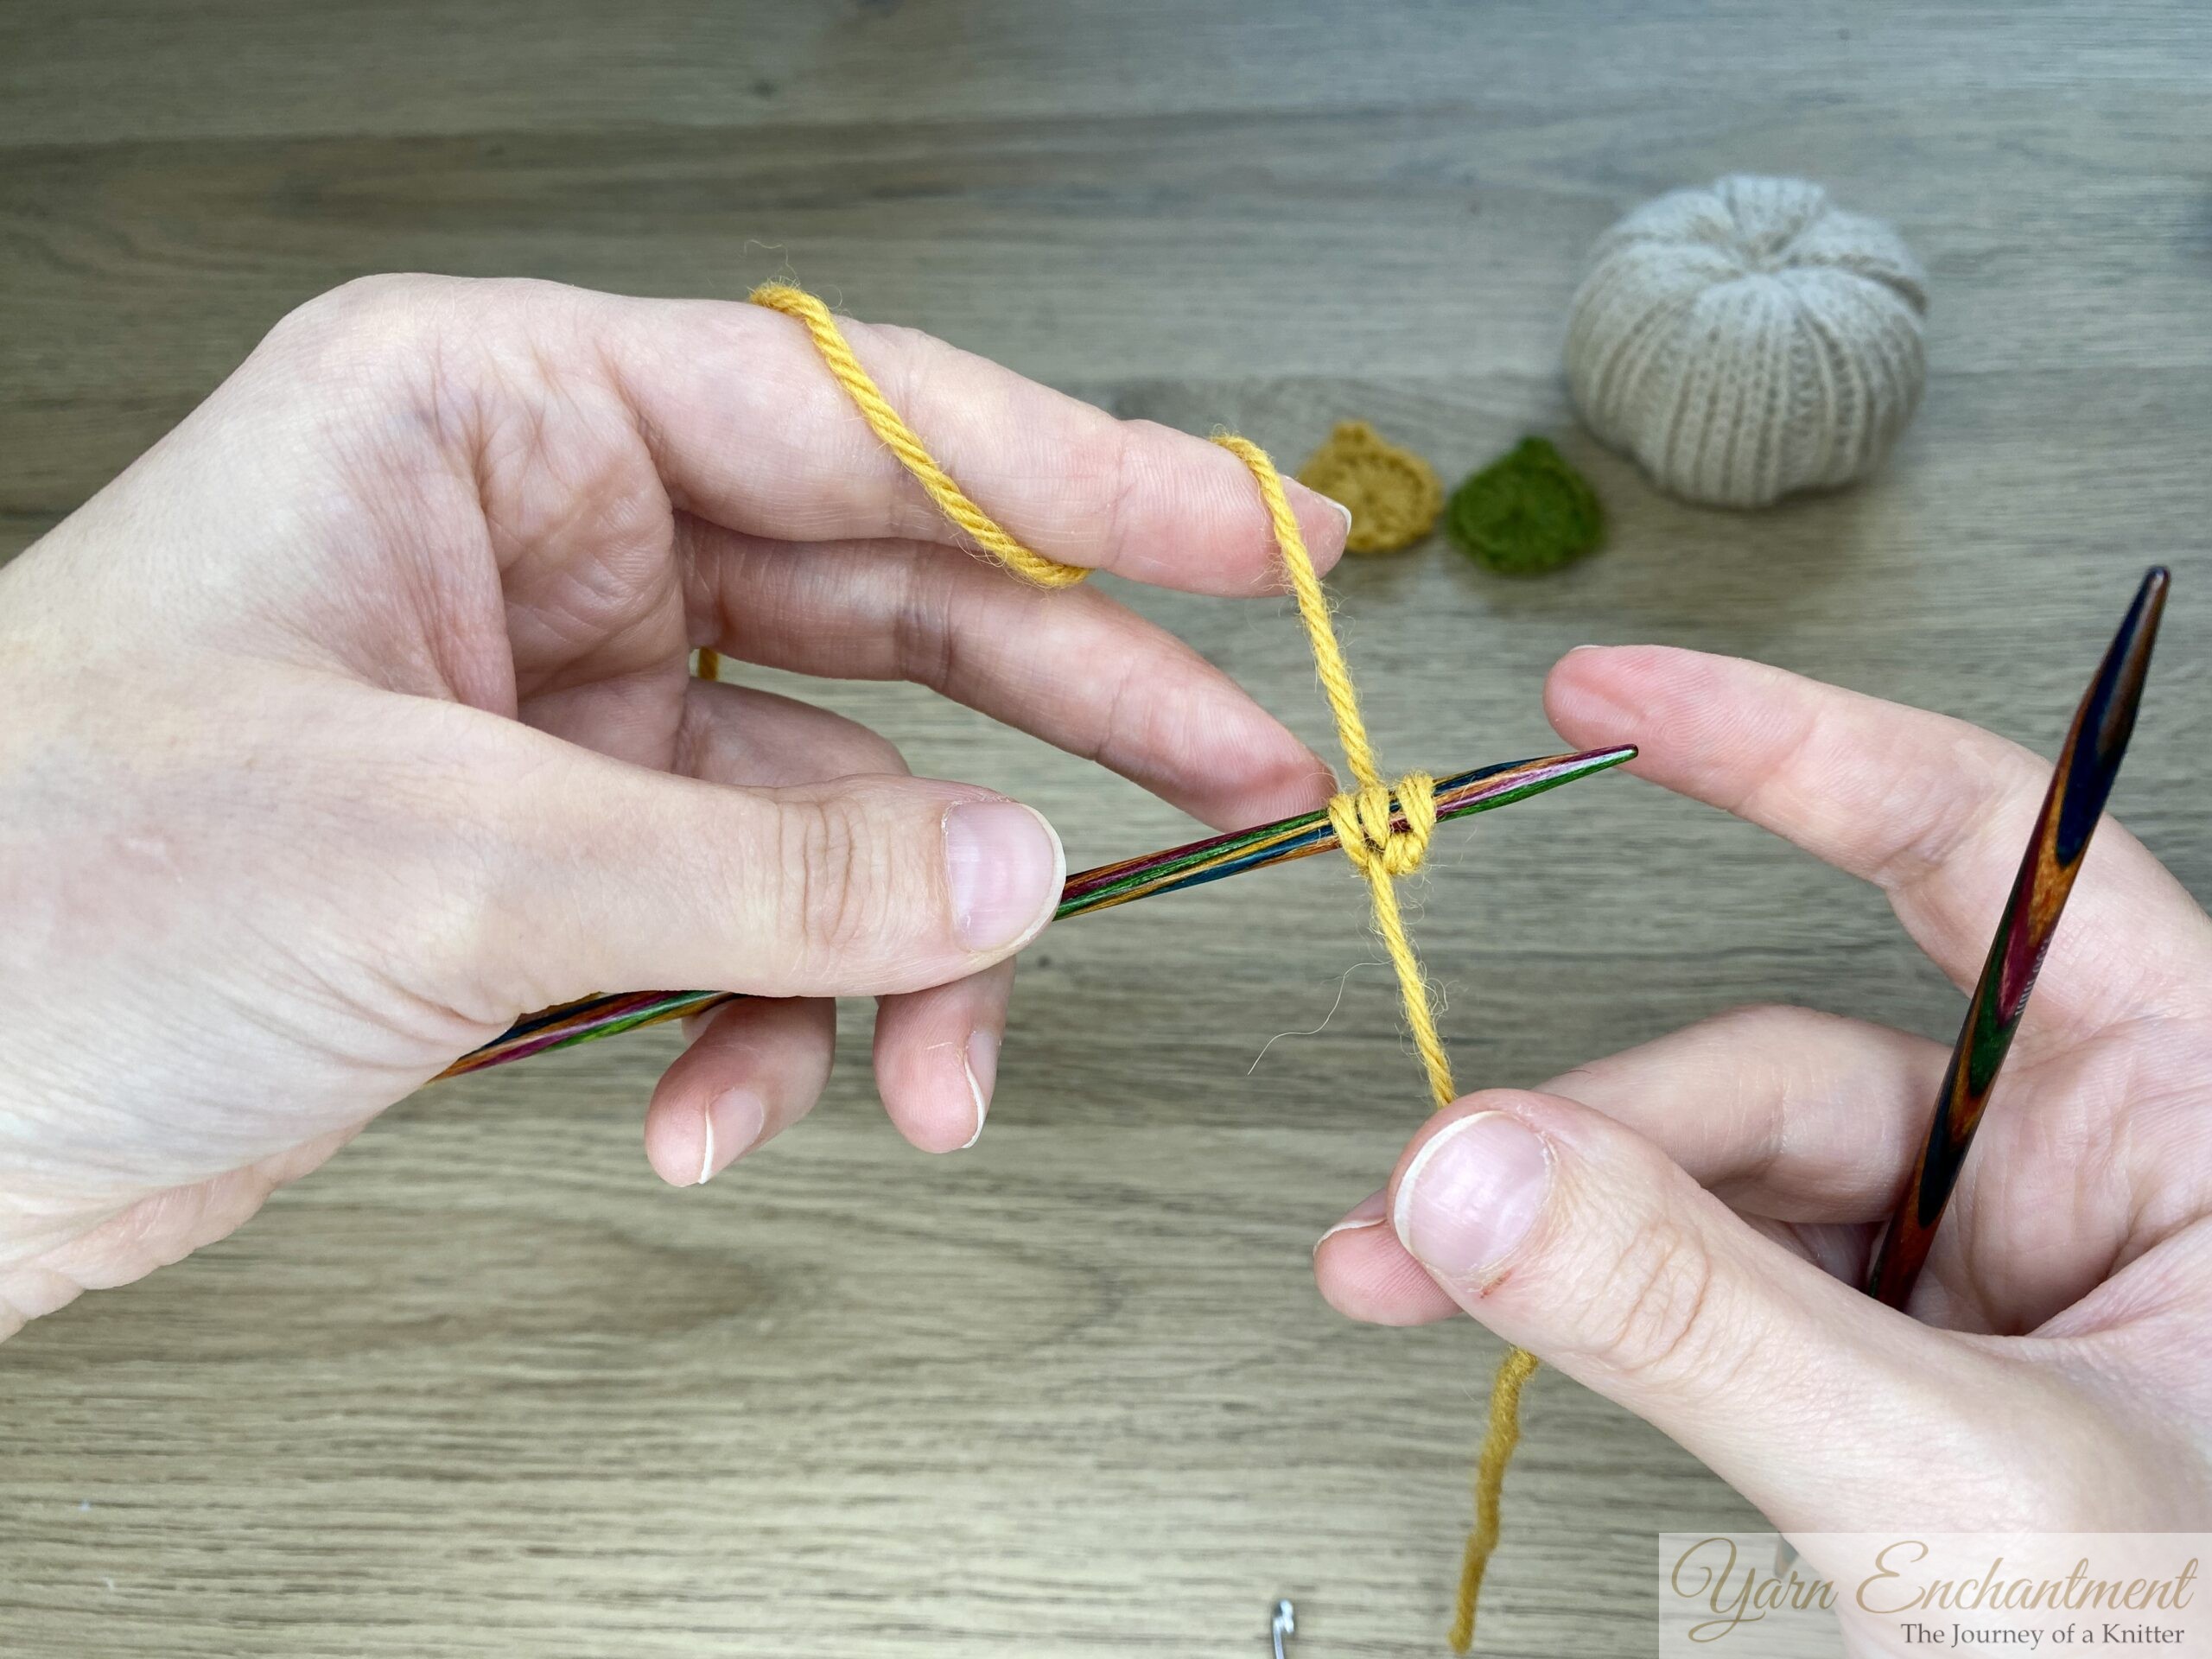 | 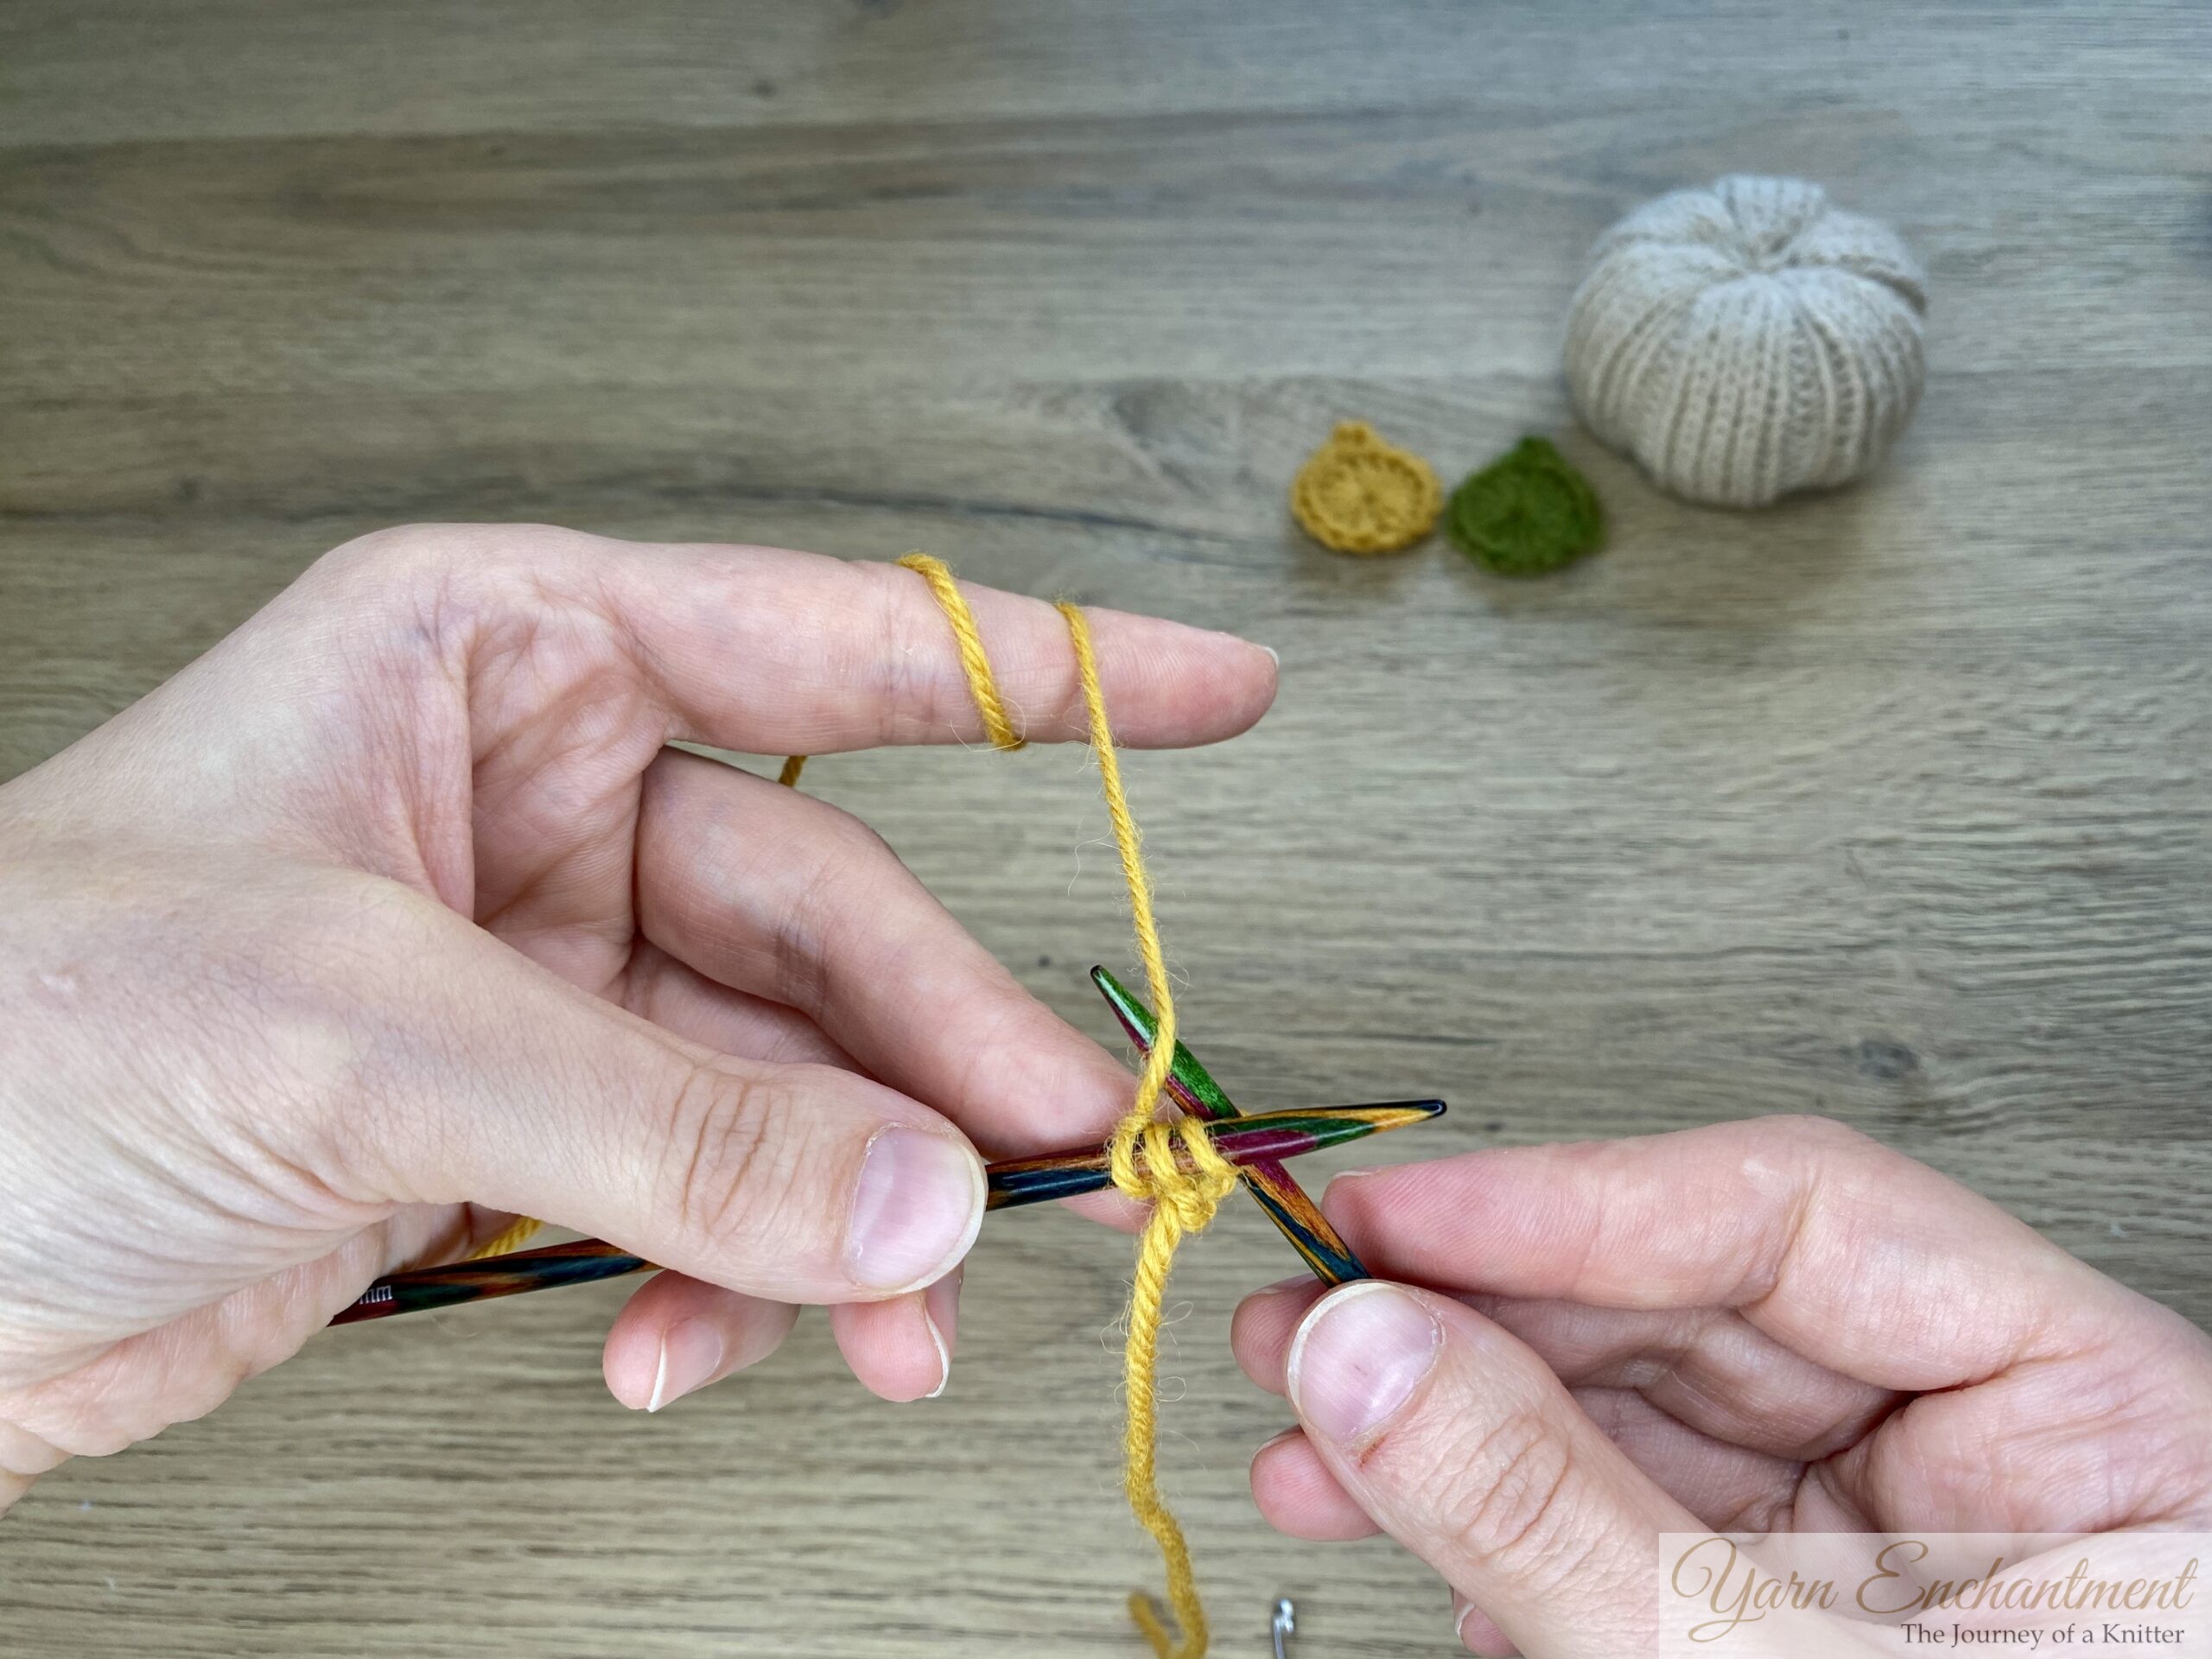 | Cast on 3 stitches | To knit the I-cord, slide the cast-on stitches to the right end of your needle... | ...and knit all stitches.You don’t need to pull the yarn aggressively to make the I-cord curl - thanks to the tension, it will curl on its own. In a separate tutorial, I’ll share a few tips on how I always achieve even tension. |


 |  |  | Repeat these steps until the tube measures about 2 cm (or your preferred length) | Slide the stitches to the right end of the needle and bind off all of them. | Weave in all your yarn ends and cut the yarn. Since the stem will be glued to the pumpkin, there’s no need to keep a yarn tail, but if you prefer, you can also attach the stem by sewing it on. |


Crochet Leaves
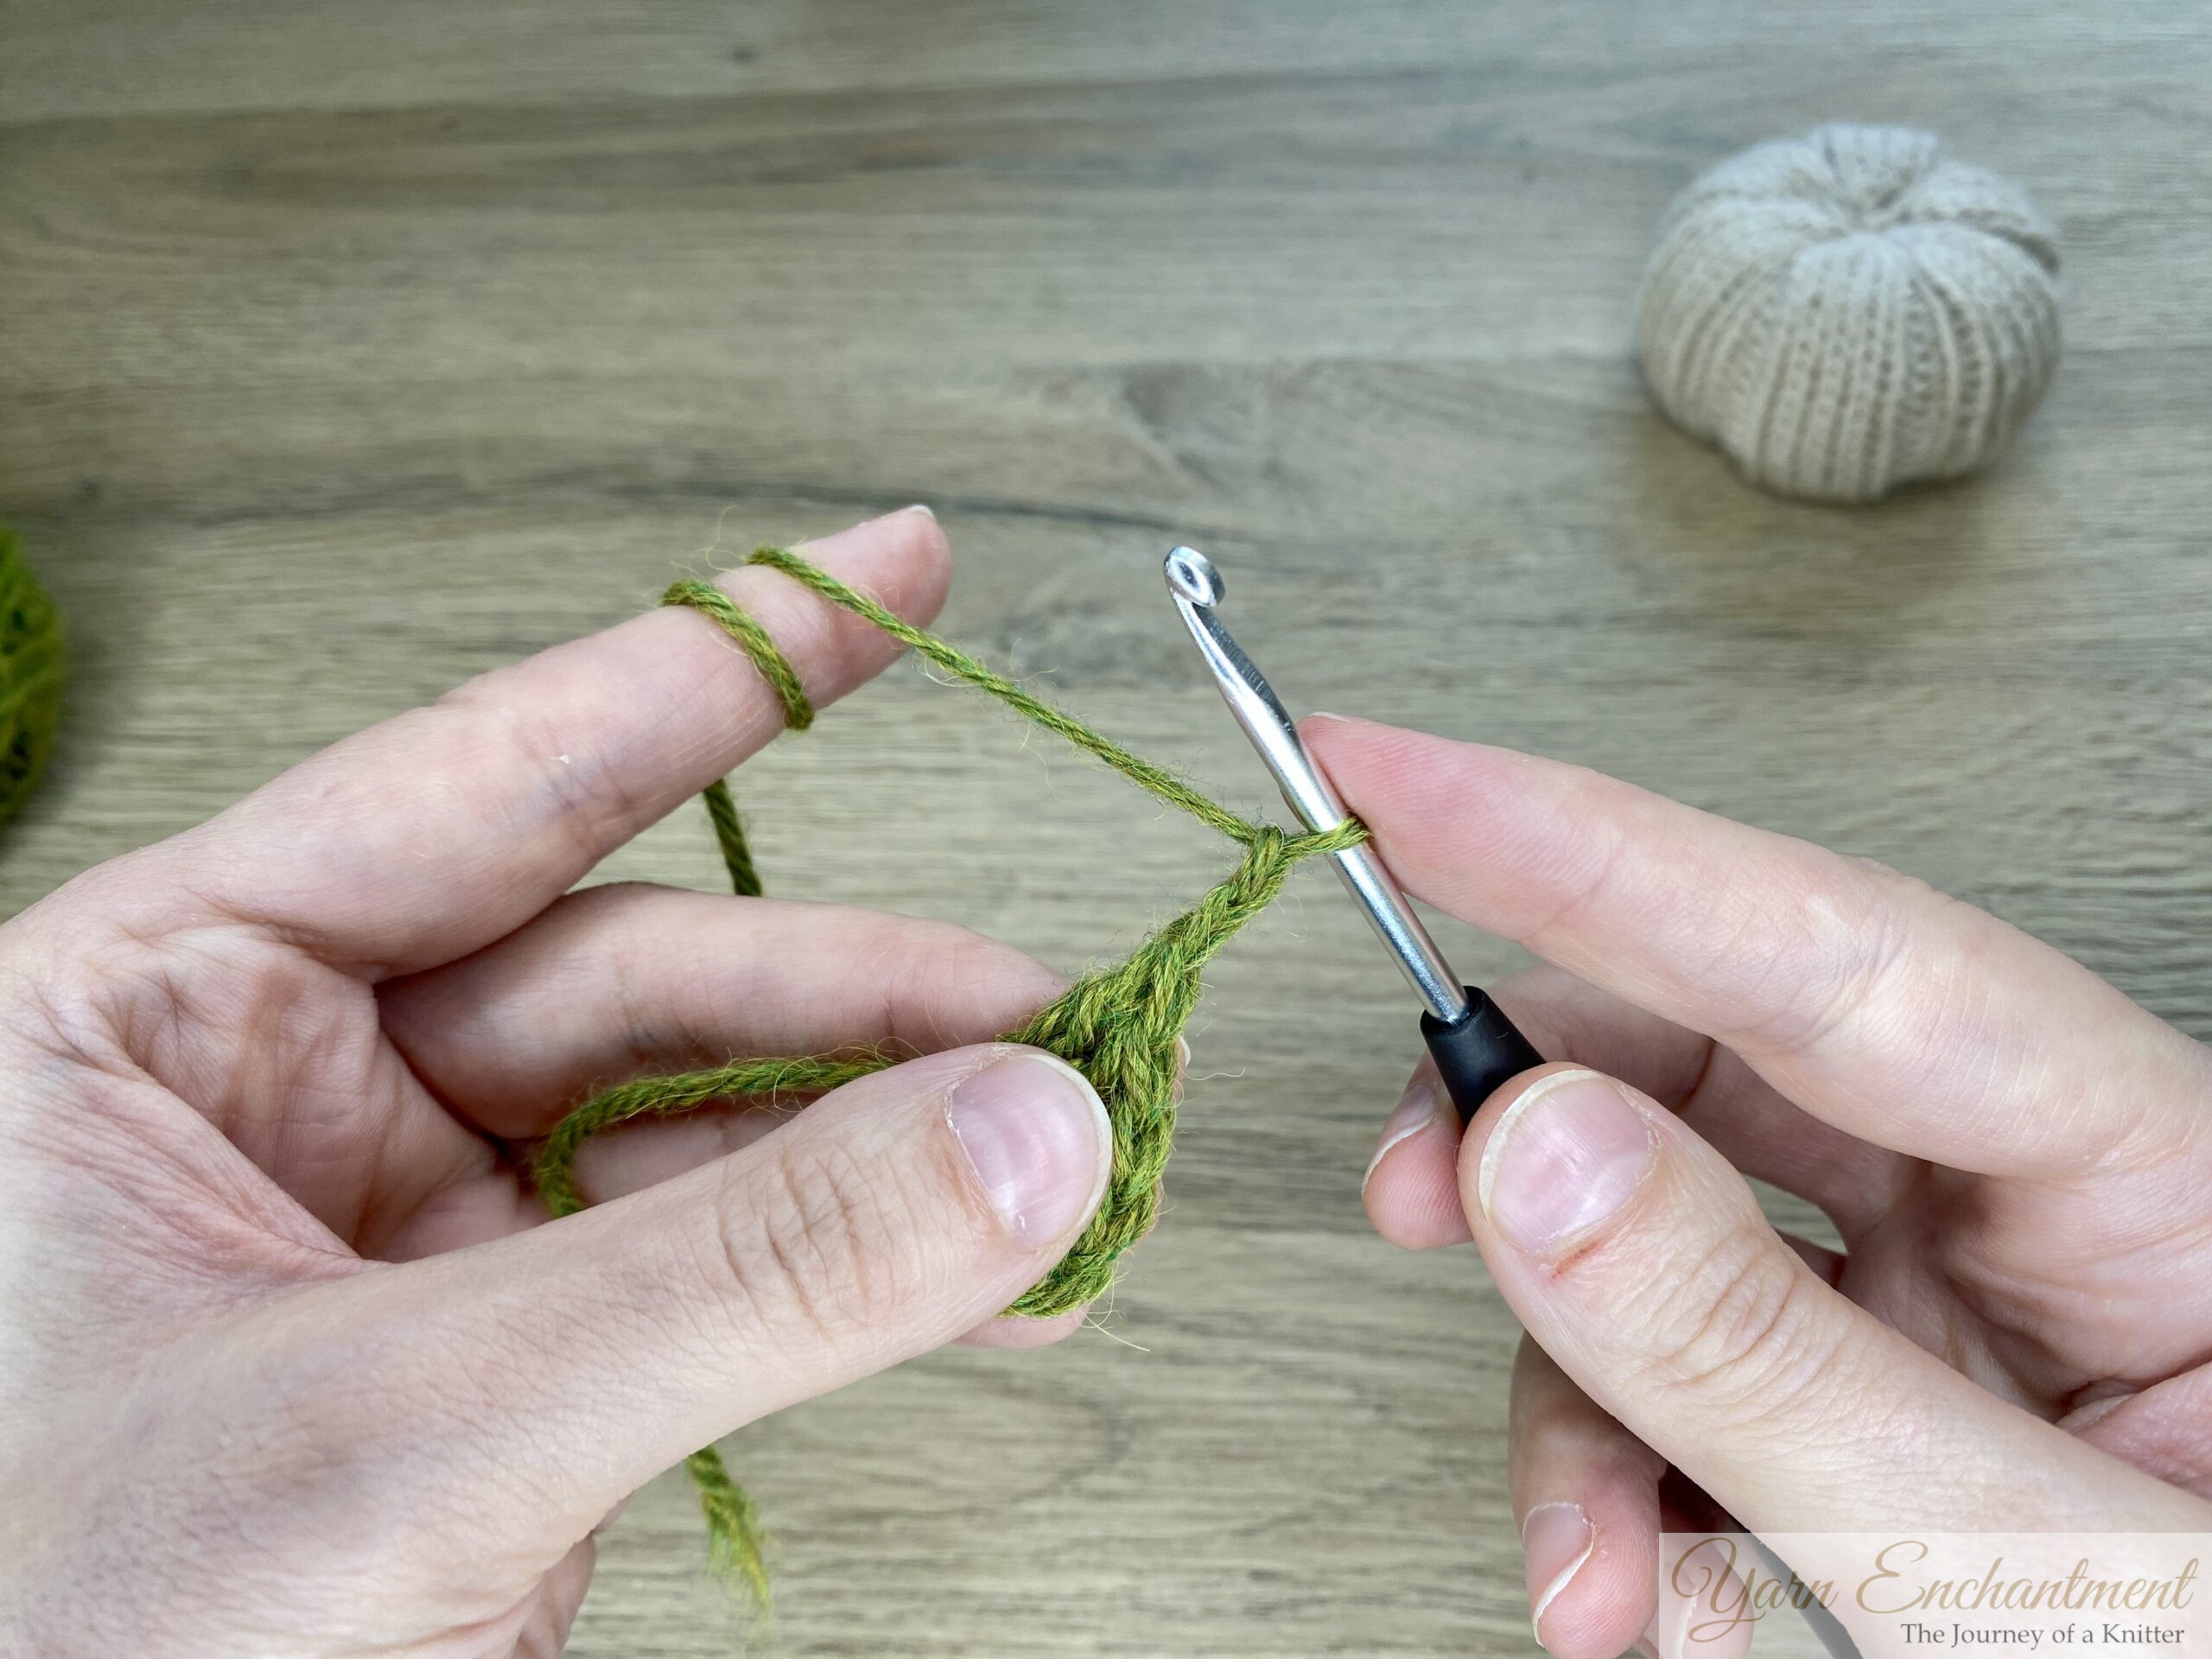
- With green yarn, form a magic ring (alternatively, ch 4, join with sl st to make a ring, or work into the first chain from your hook).
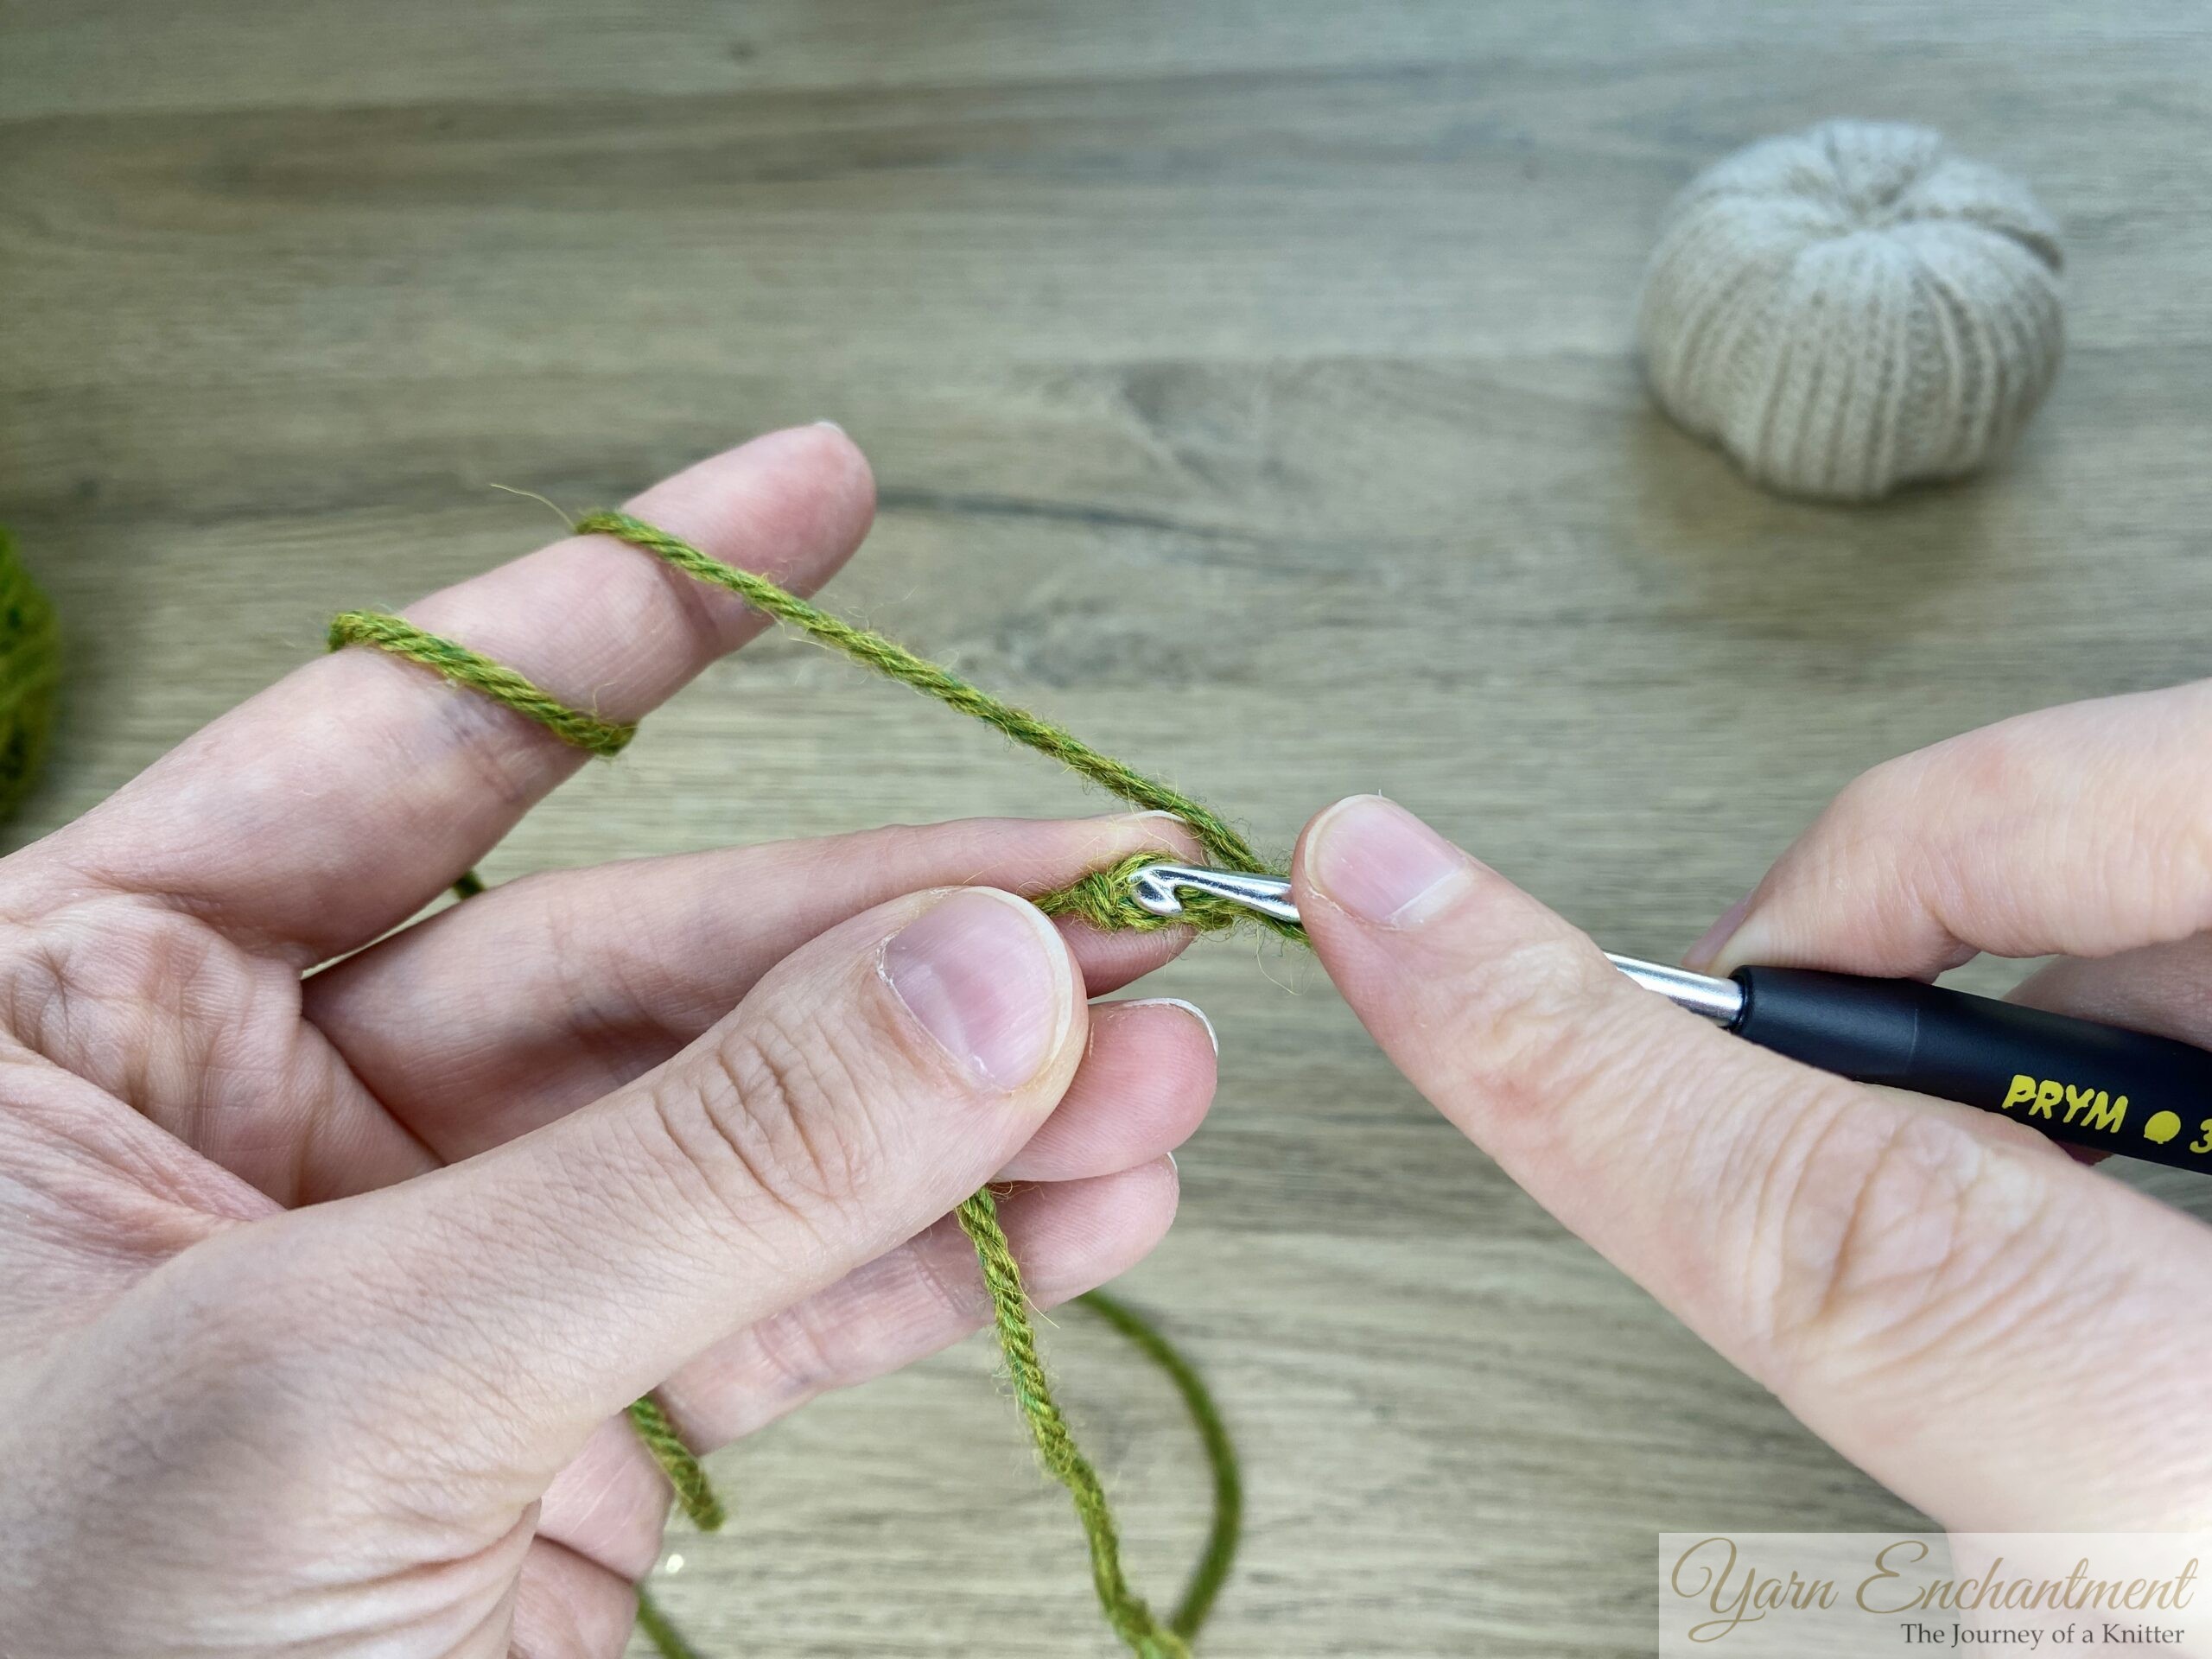
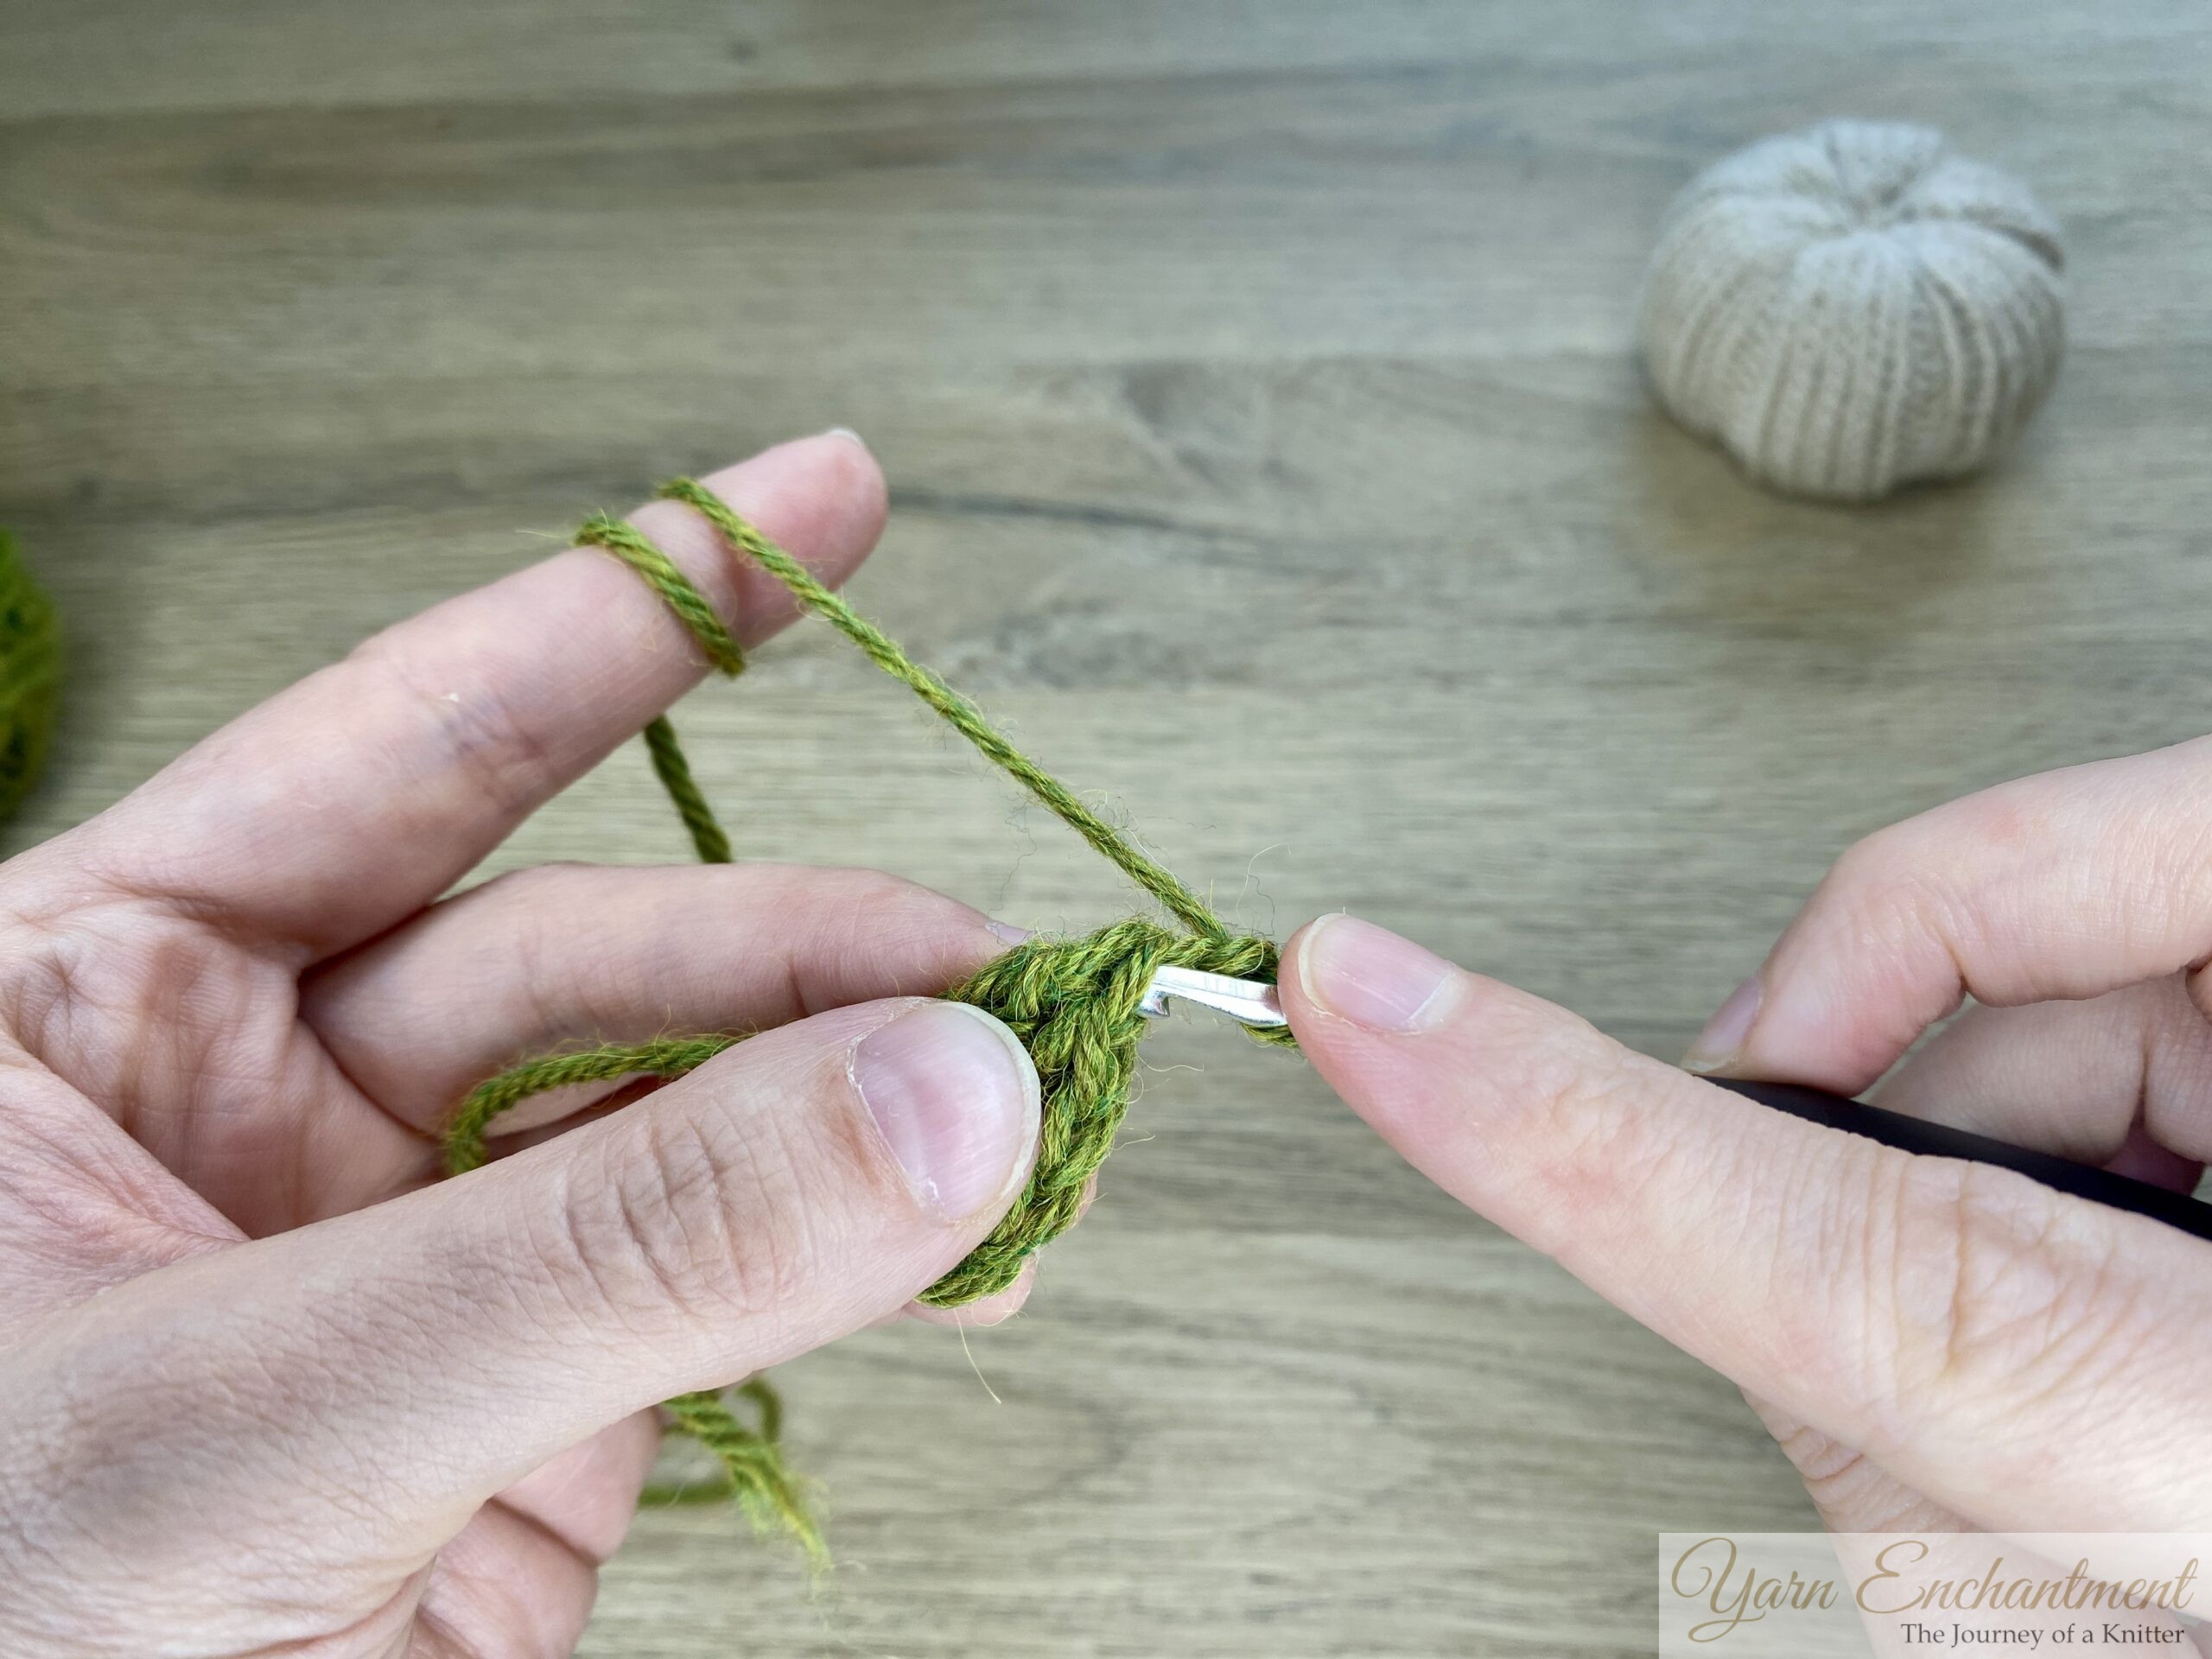
- Work 7 dc, ch 2, sl st in first chain, 8 dc into ring.
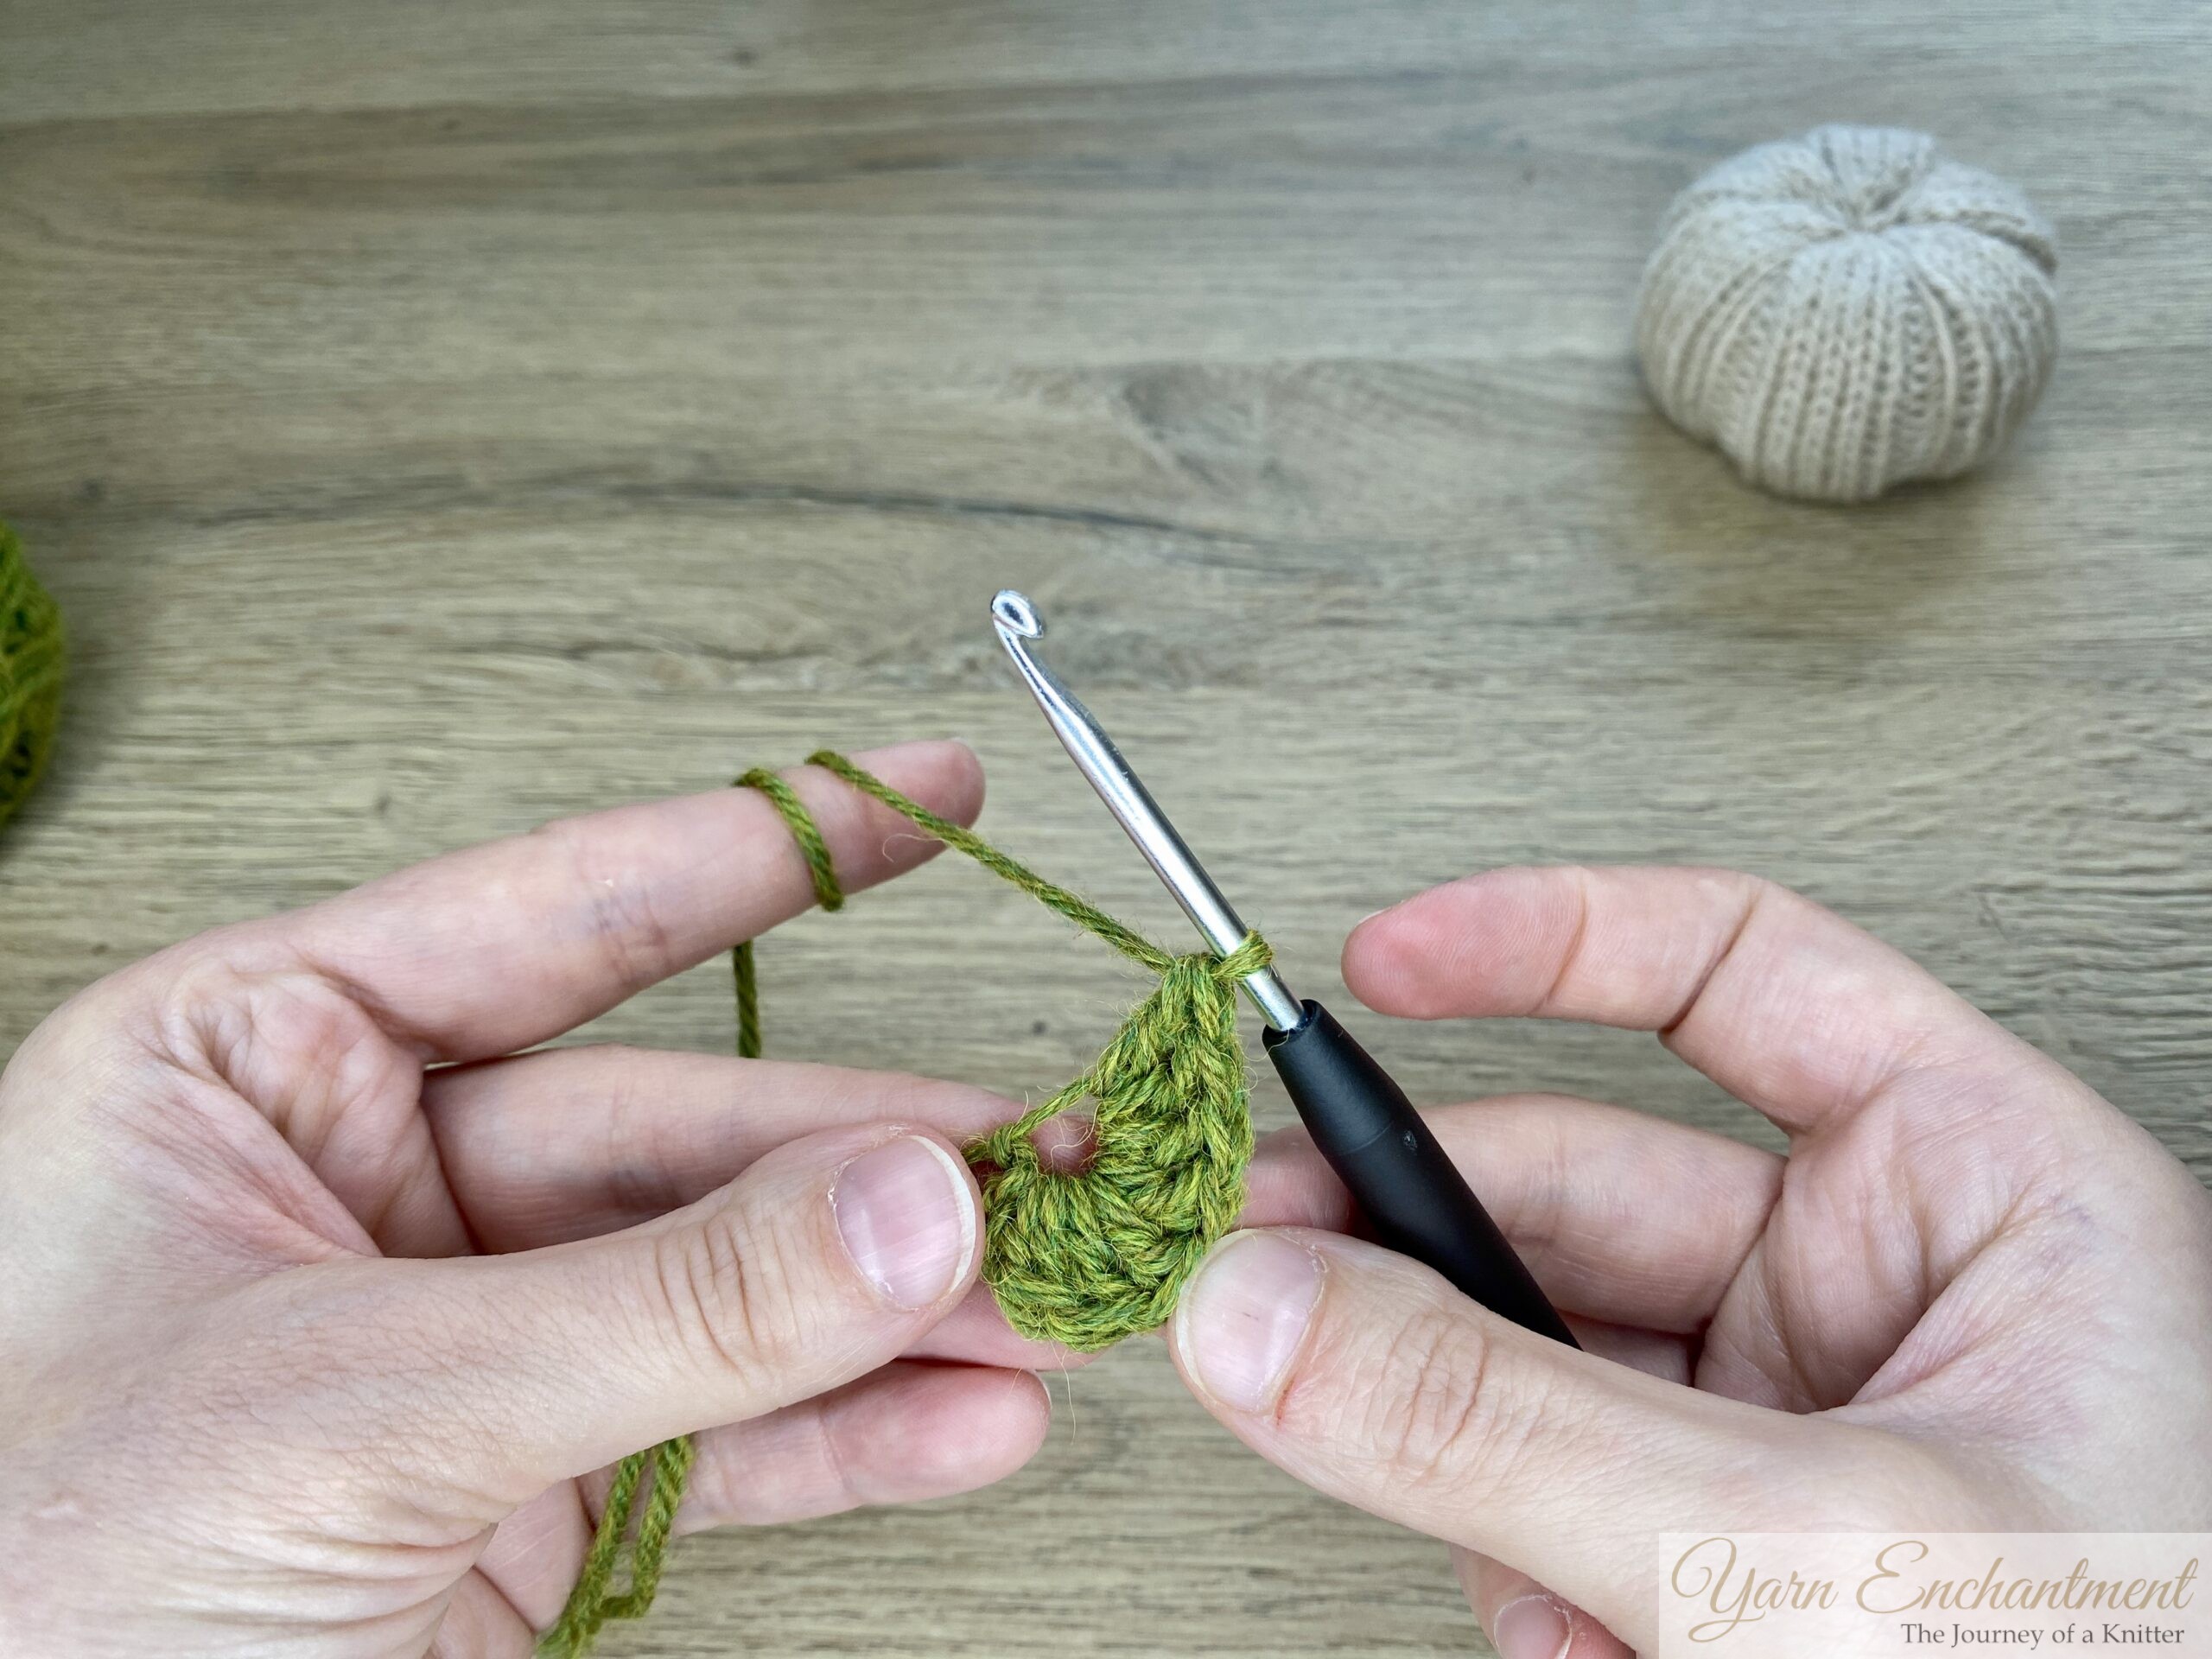
- Pull tight and fasten off.
- Sew or glue leaves next to the stem.
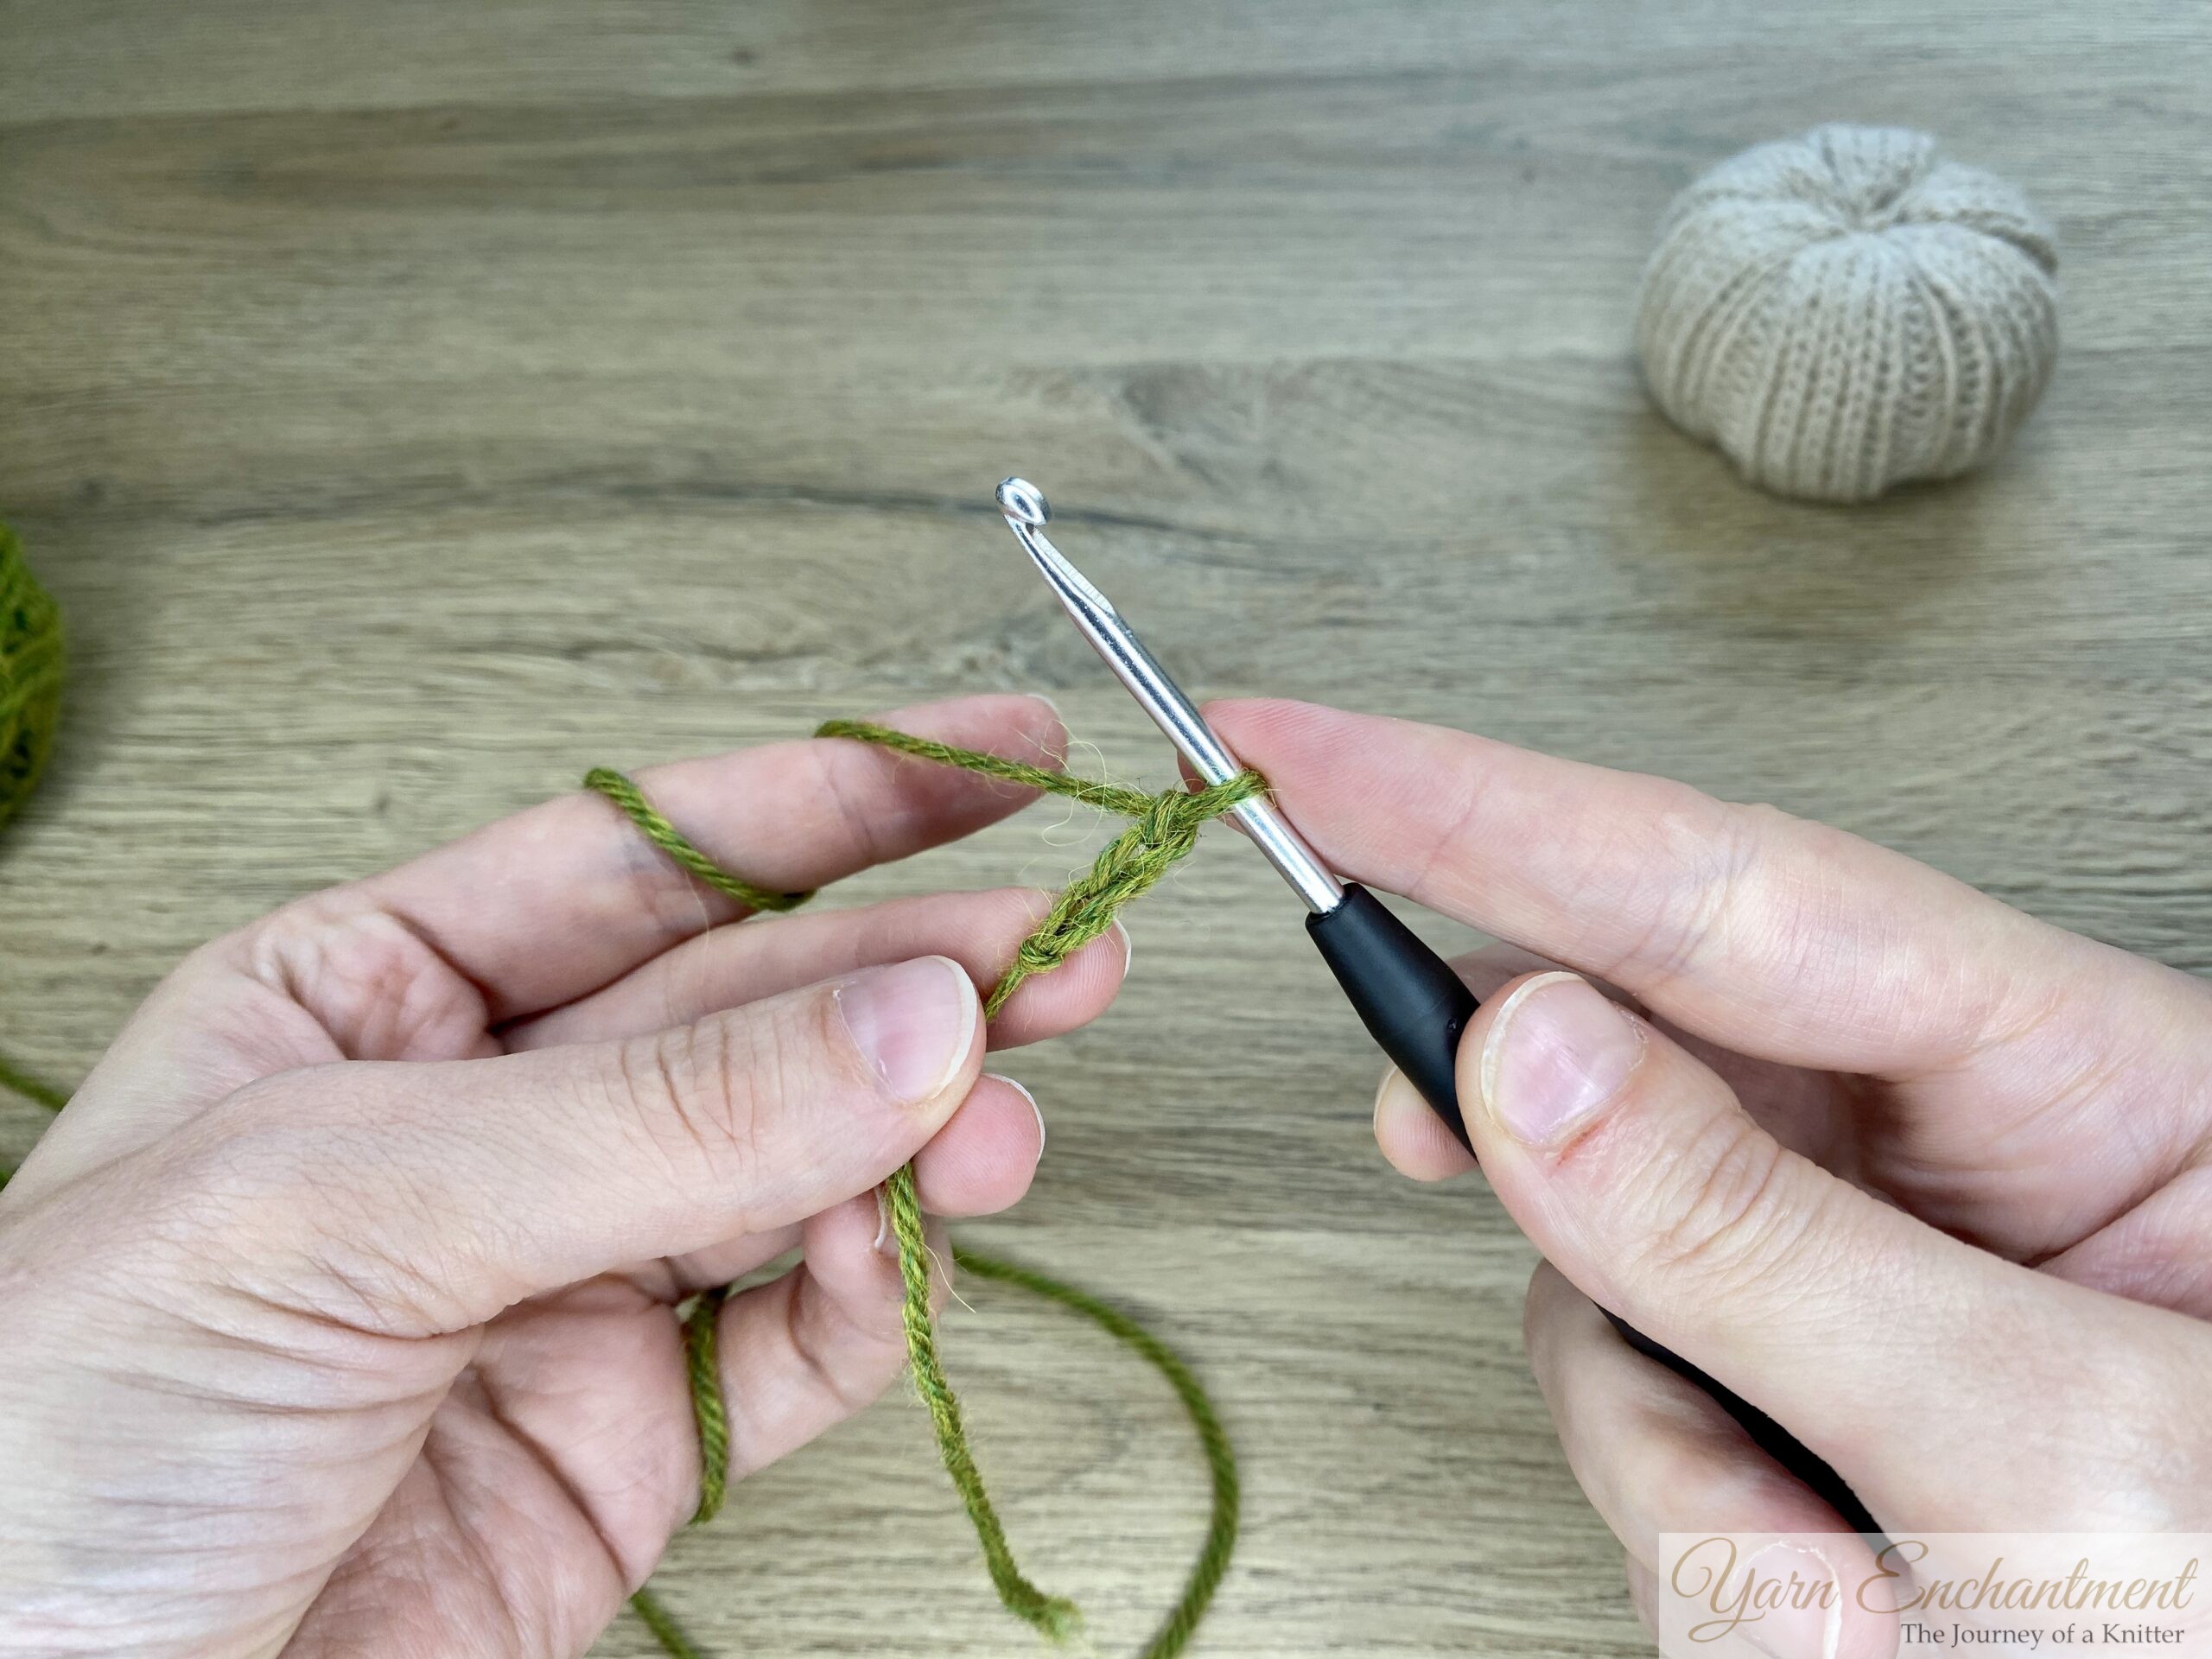 |  |  | Chain 4 | We’ll work into the first chain; the three chains count as your first double crochet. | Work 7 more double crochets into the first chain. |


 |  | 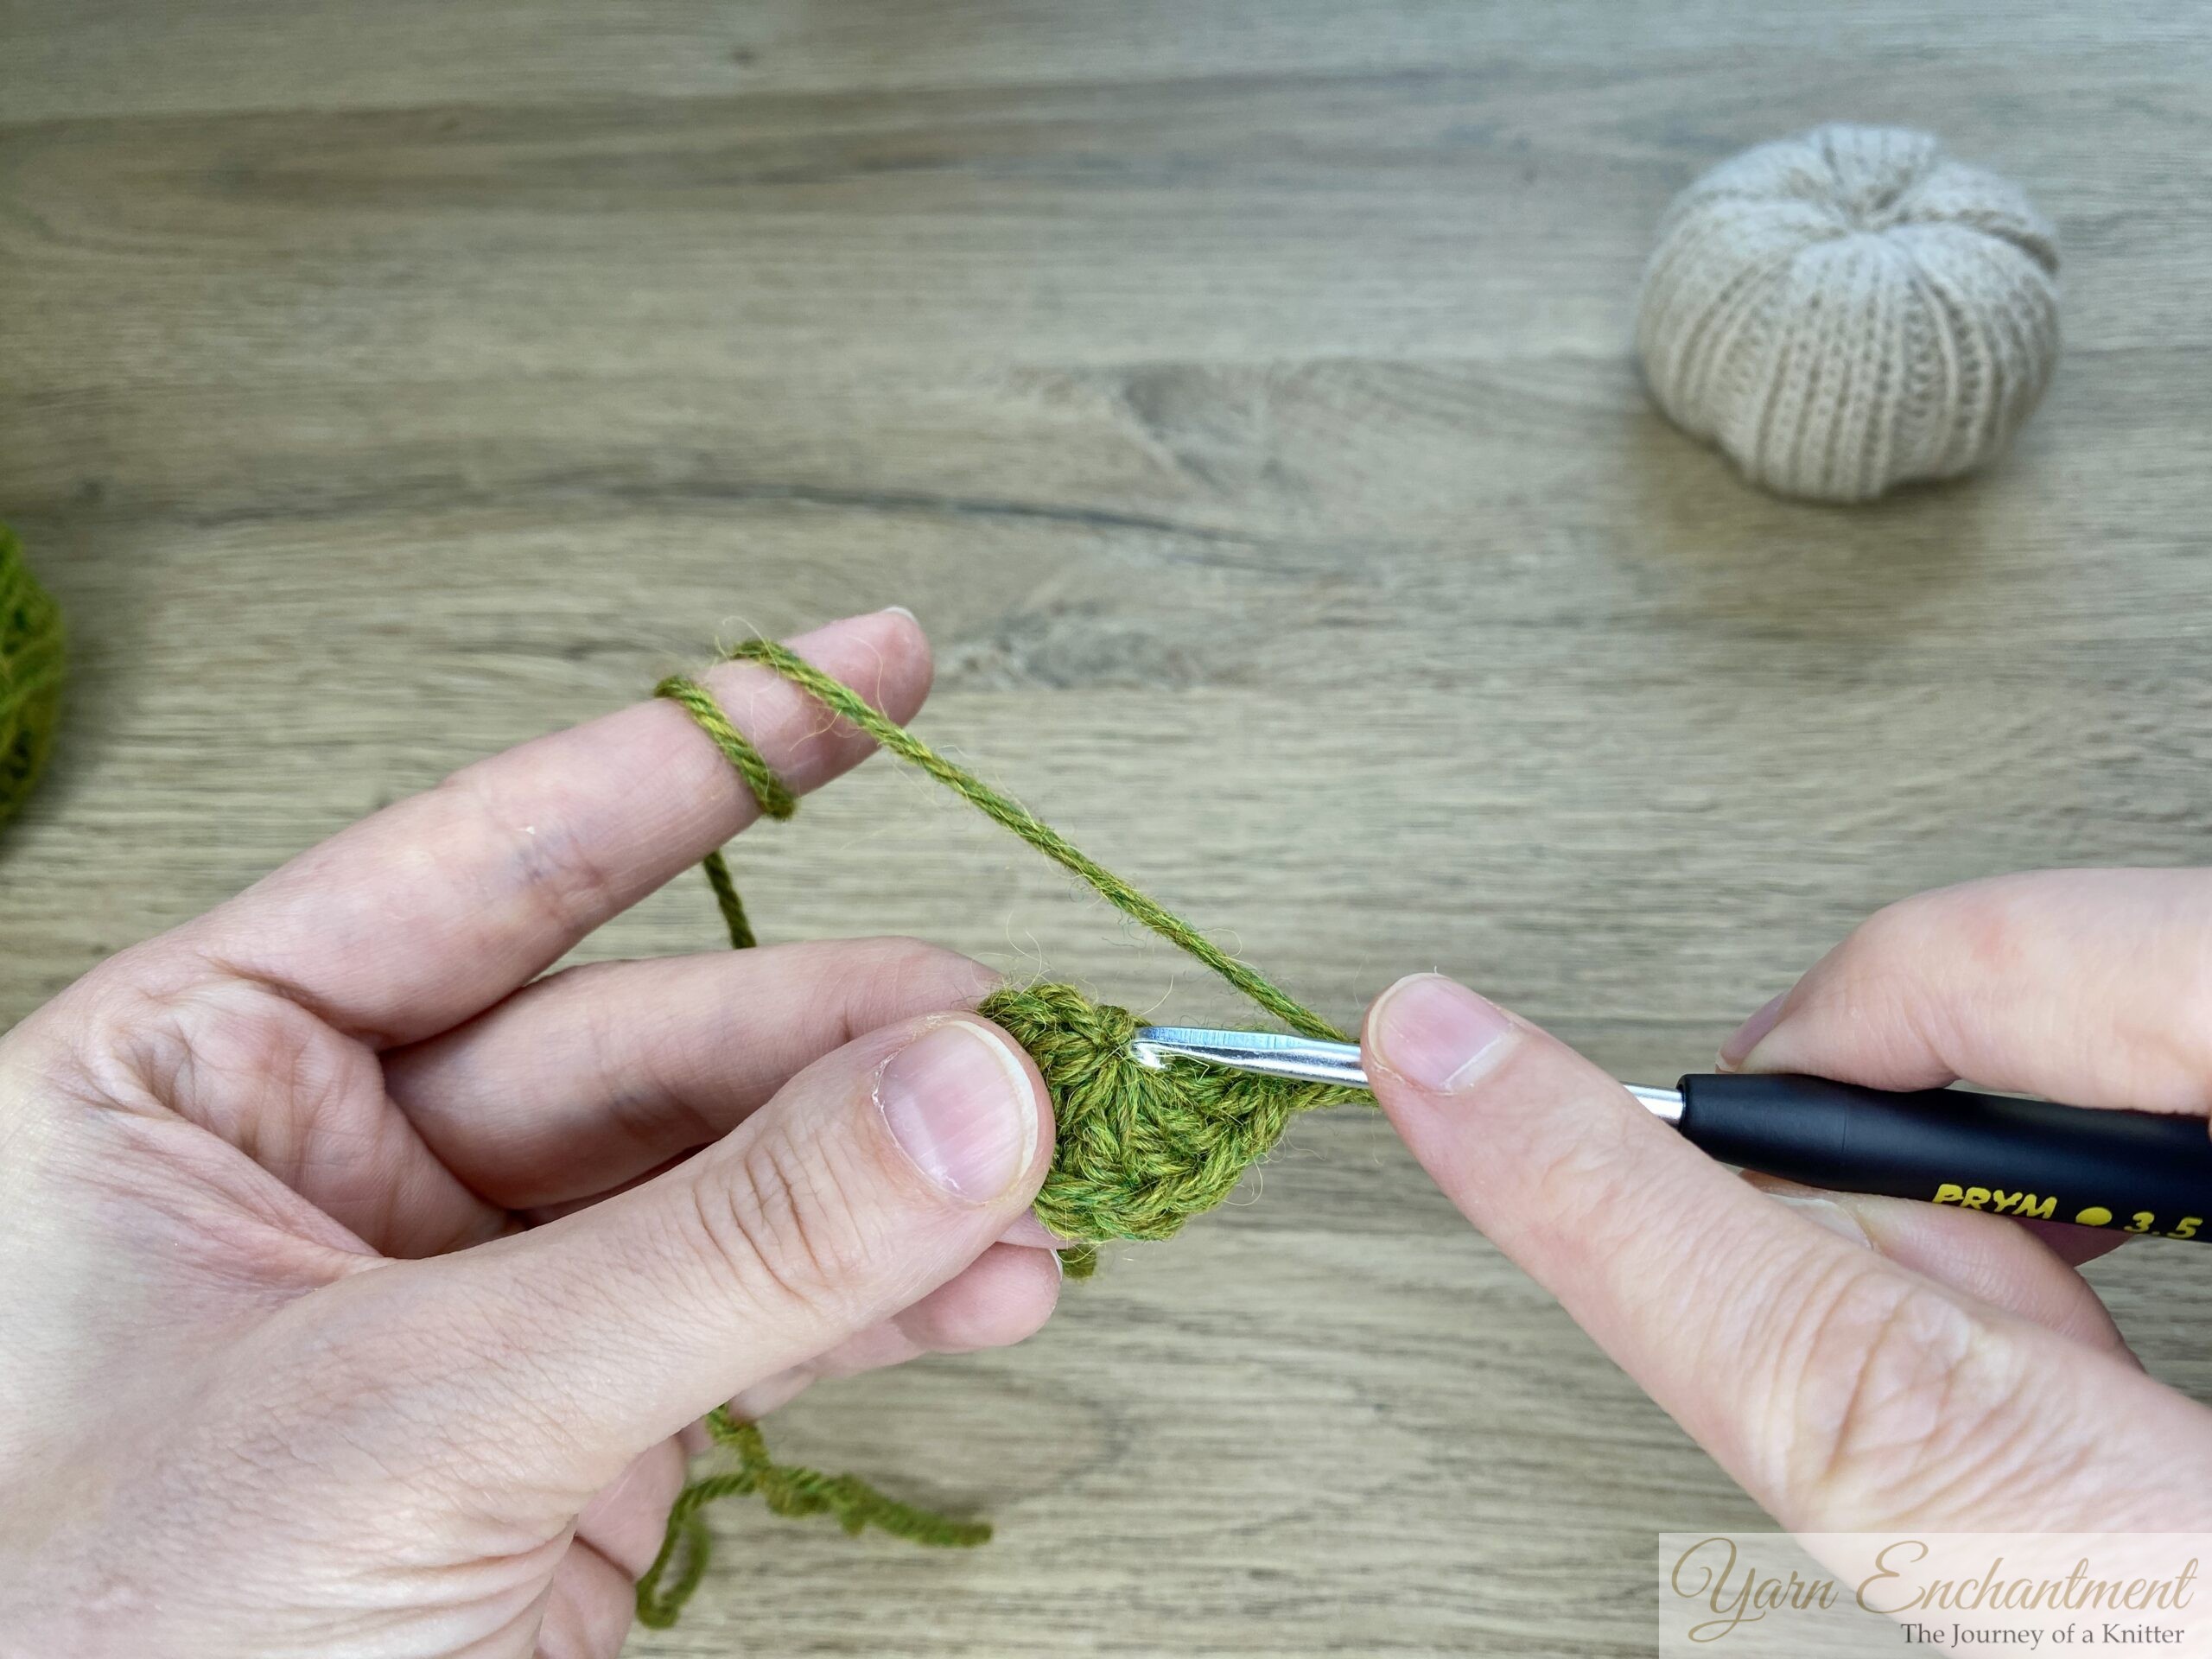 | To create a small picot, chain 2 and slip stitch into the bottom of the chain to anchor the picot. | Slip stitch into the bottom of the chain to anchor the picot. | Work 8 more double crochets into the same ring. |


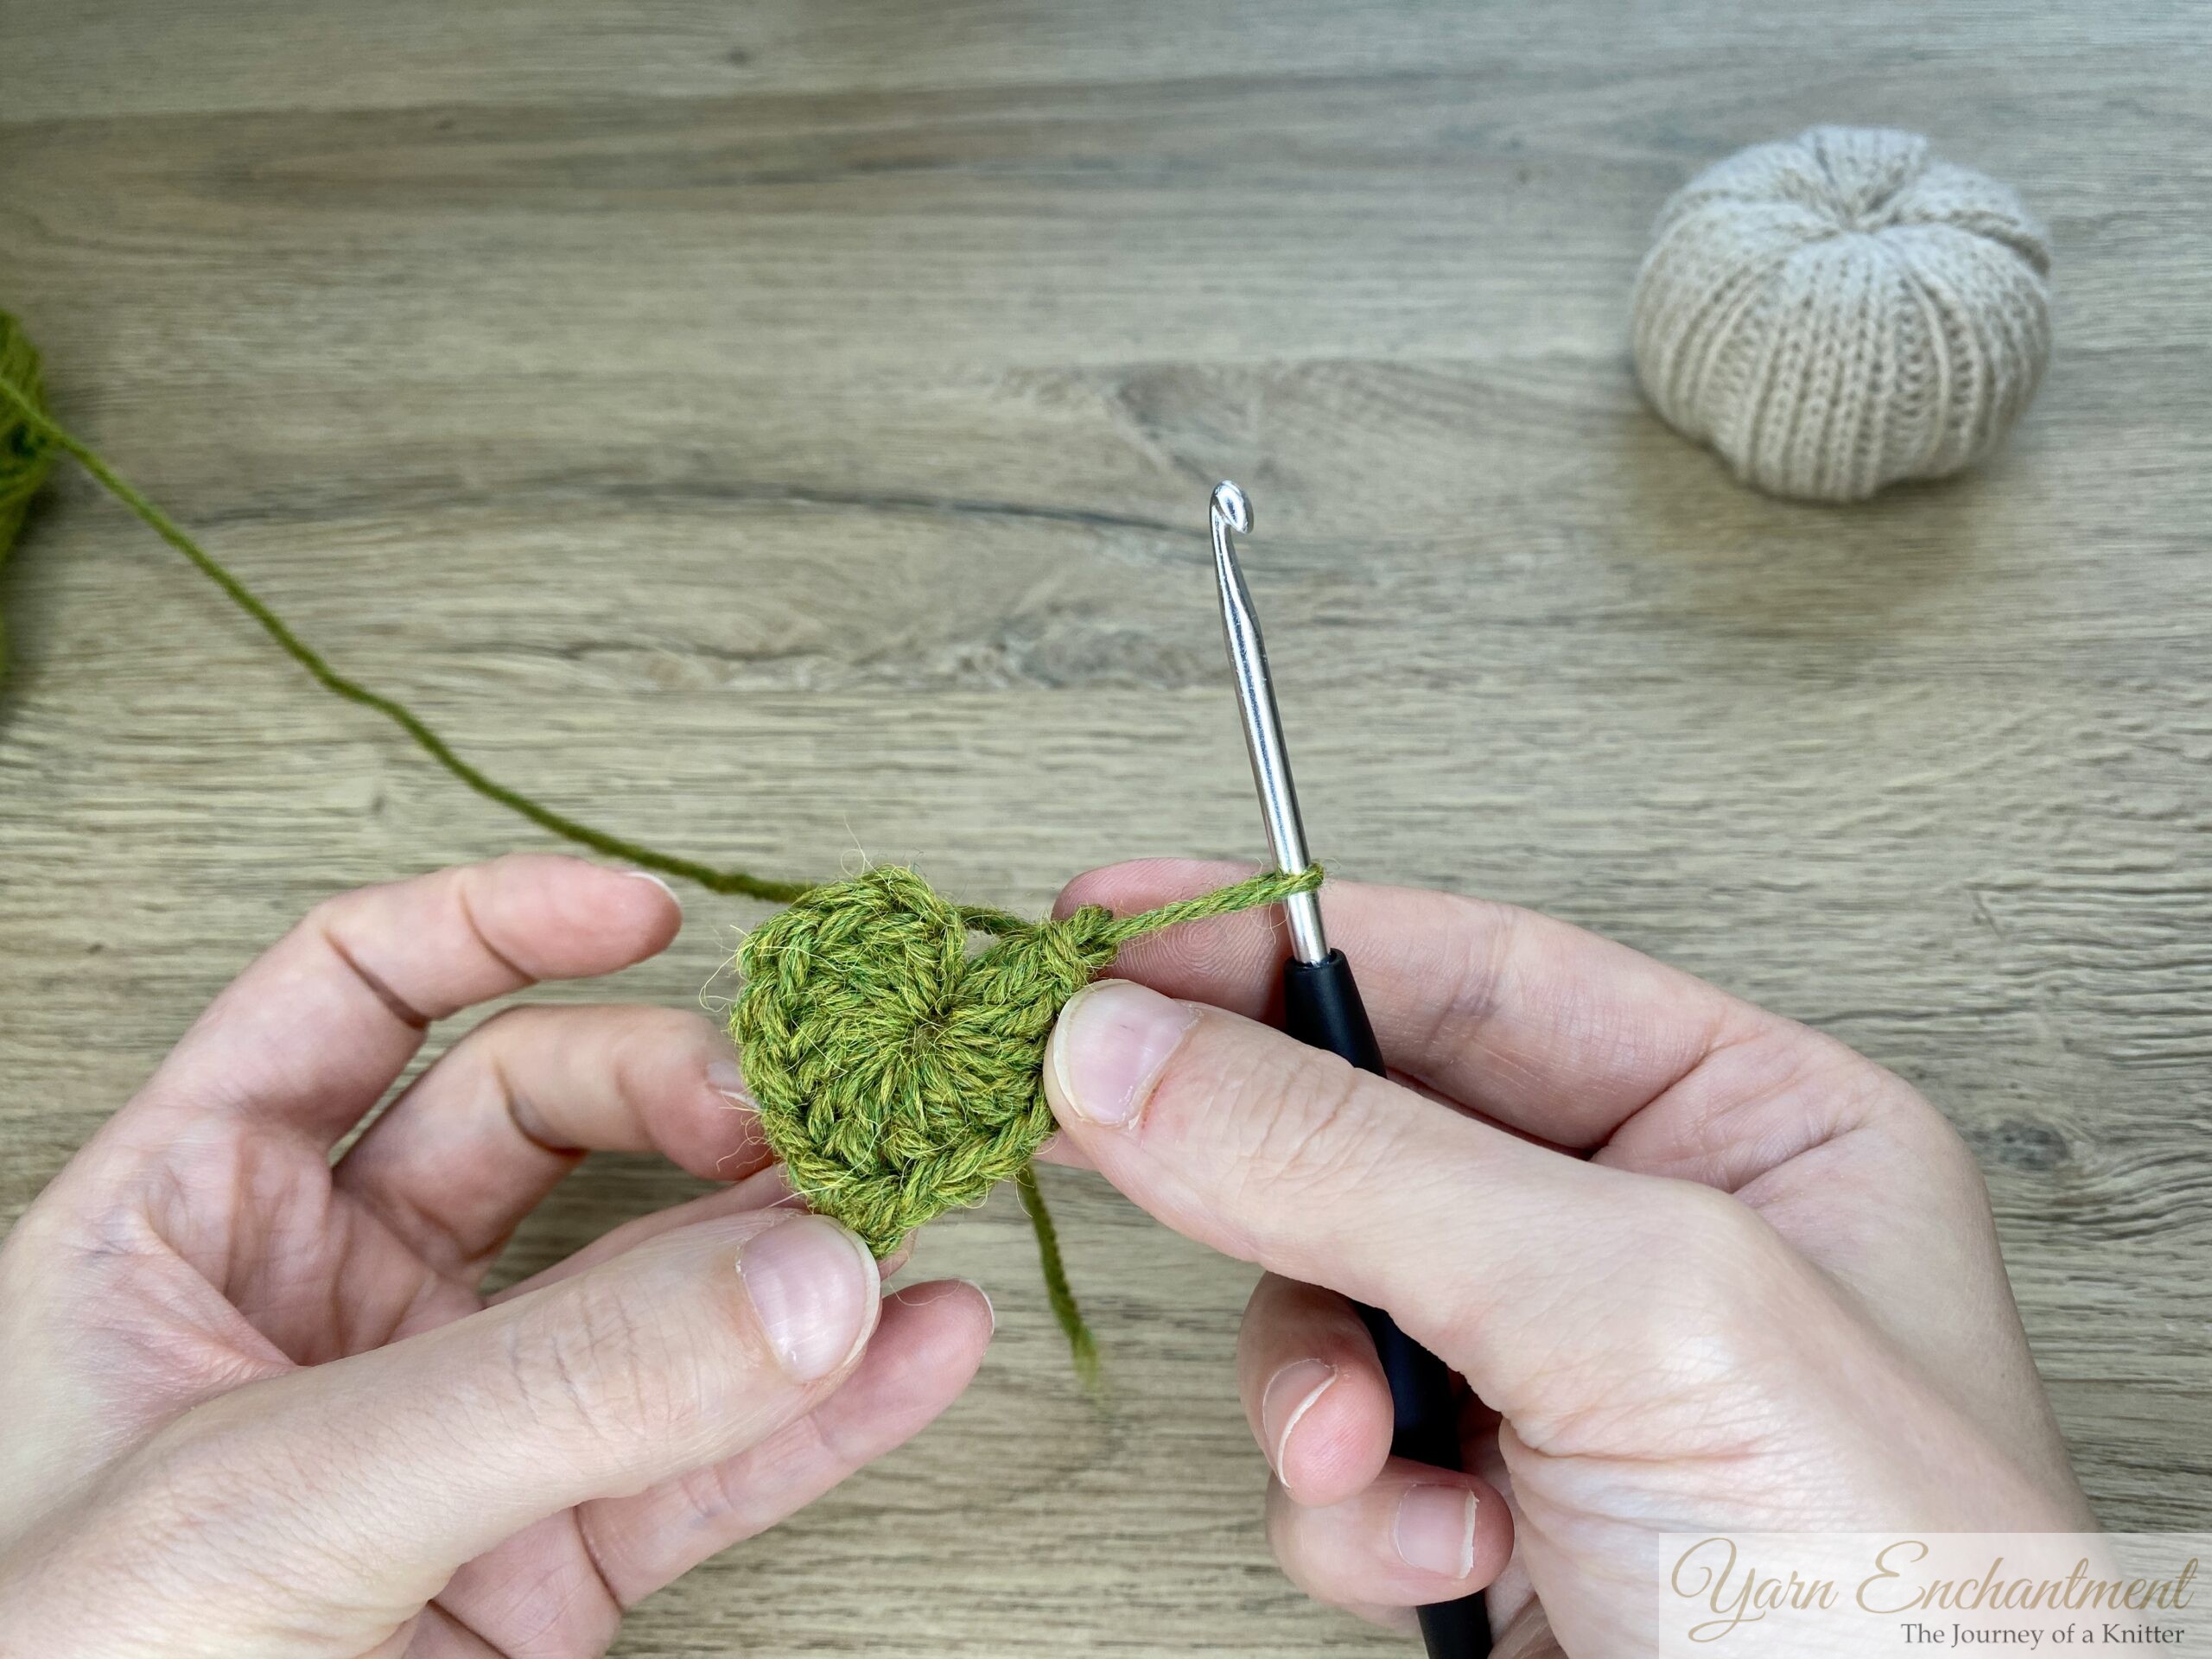 | 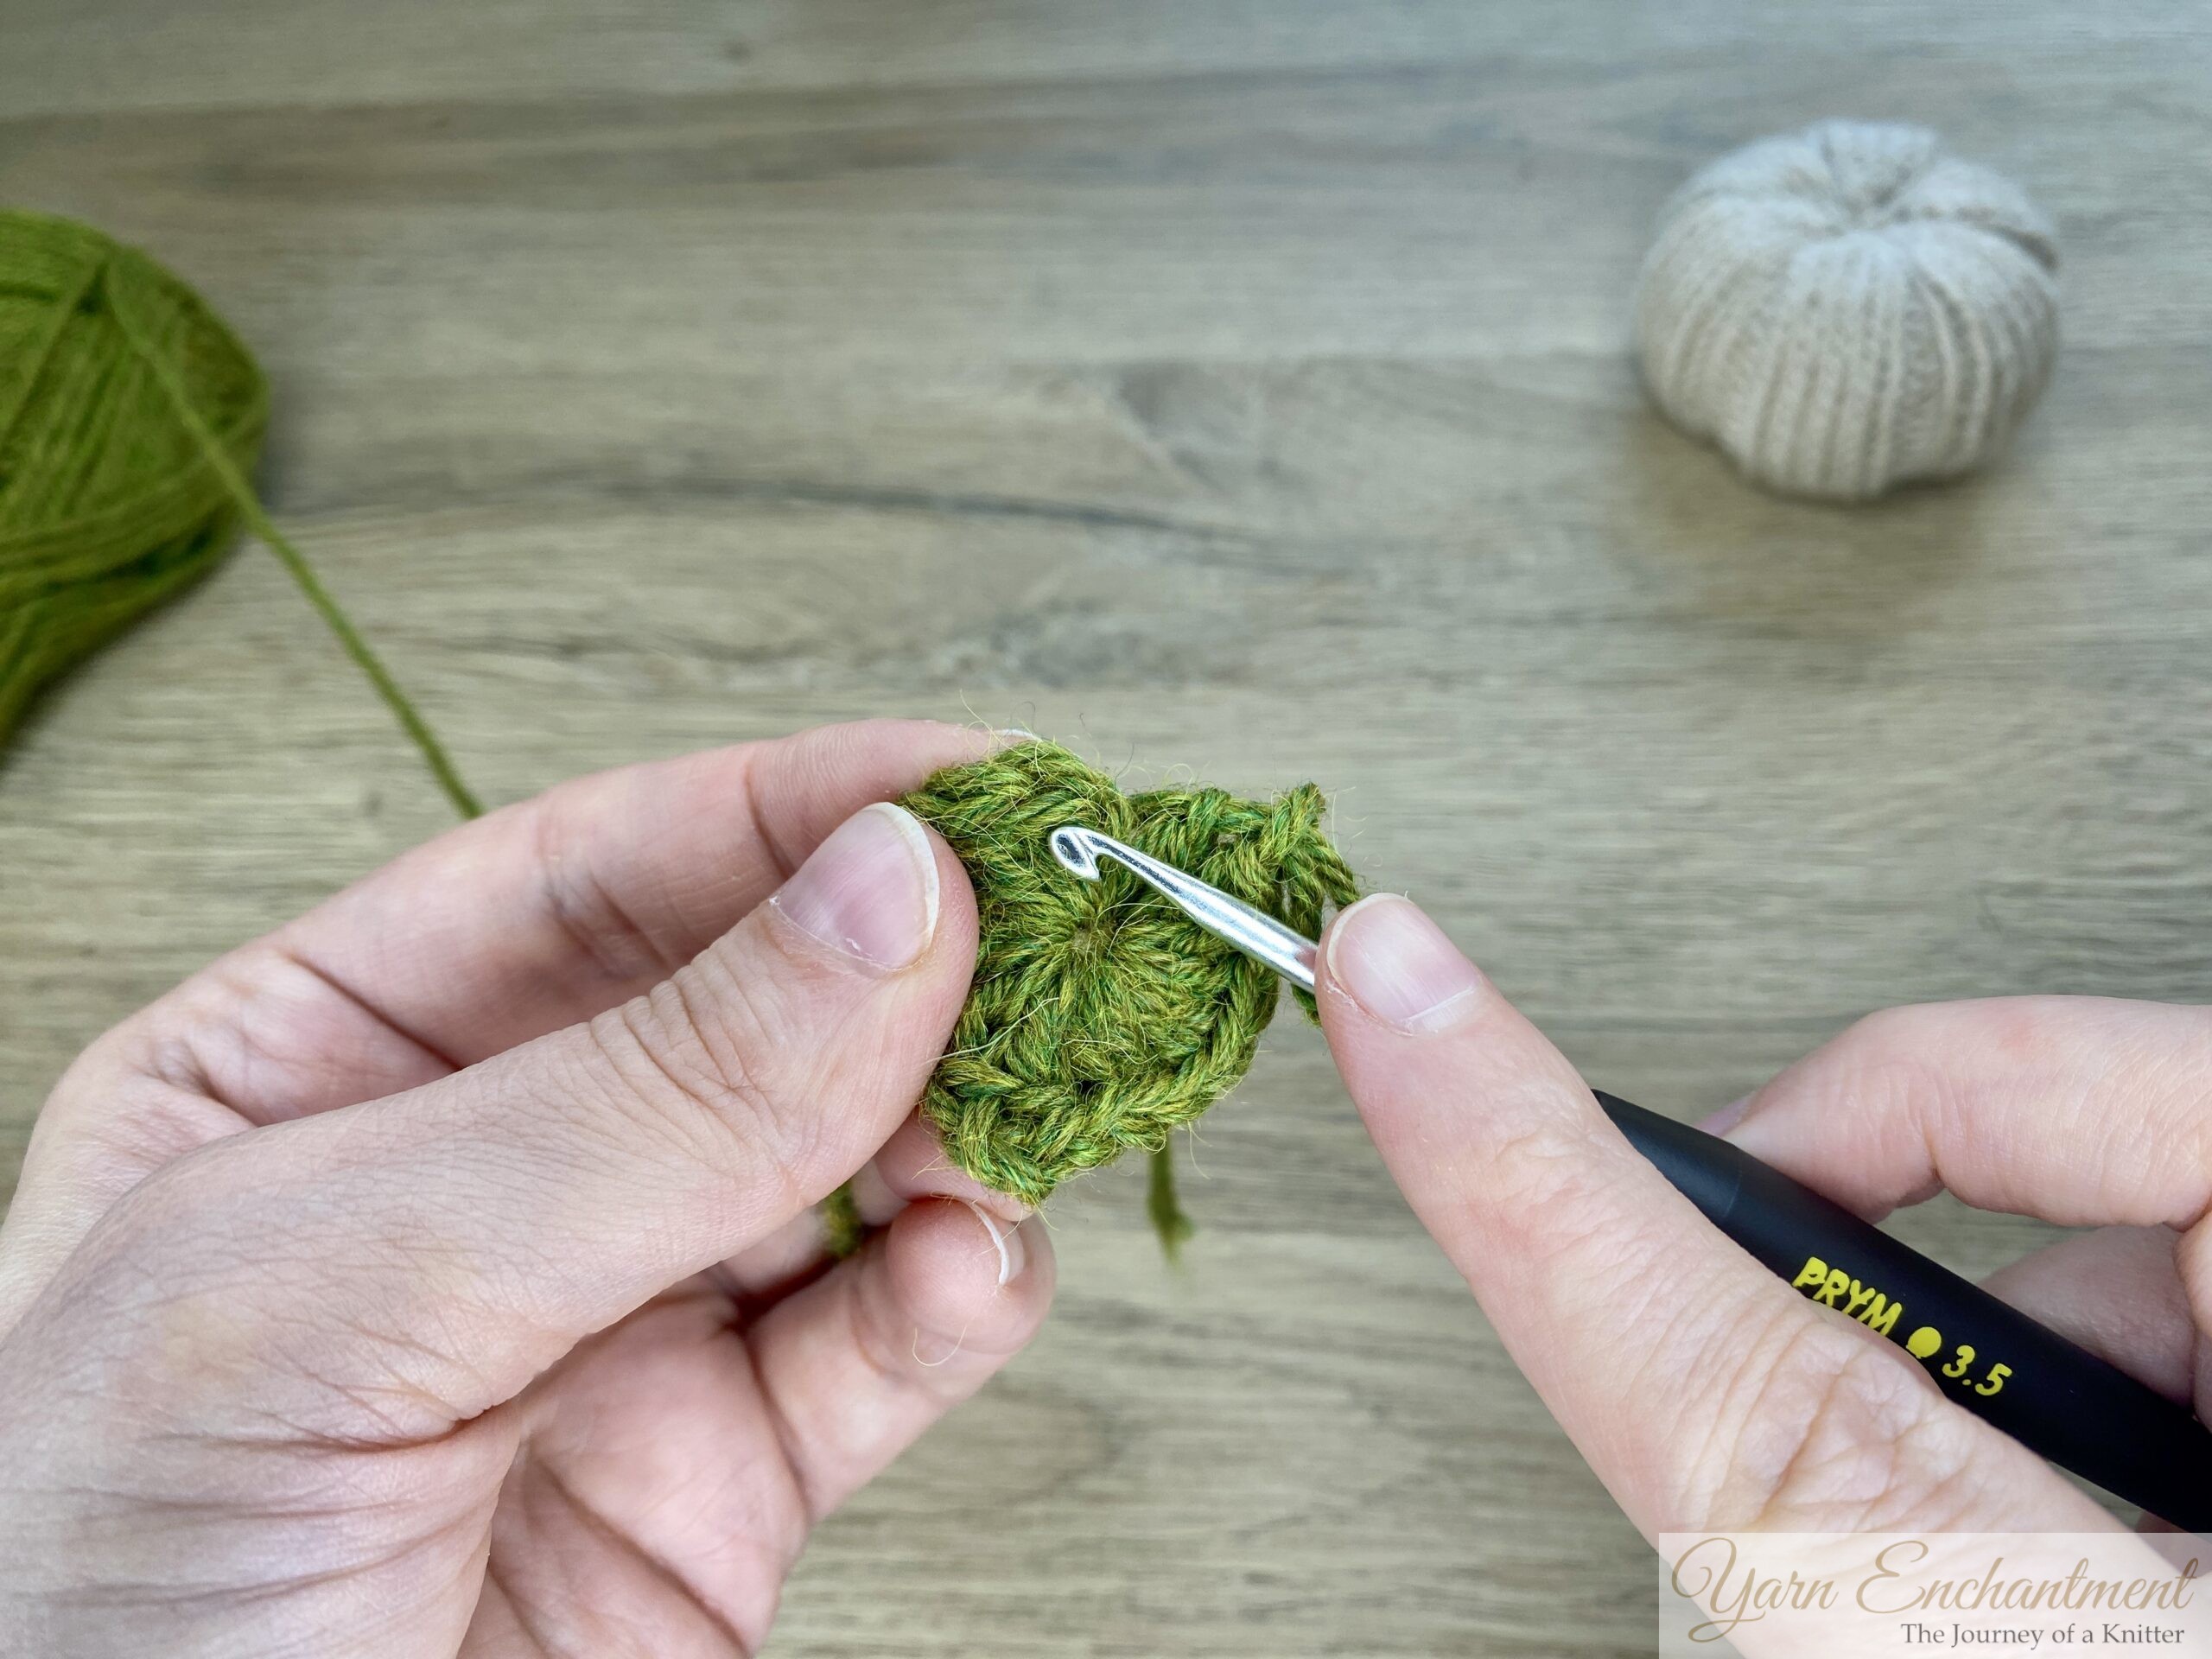 |  | Your small leaf should look like a rounded circle with a tiny point where the picot sits. | To finish, slip stitch into the starting point. | Secure the yarn tail at the back so nothing can come undone. |


Finishing and Assembly Tips
- Now it's time to assemble everything.
- Use a hot glue gun, textile glue, or sew the leaves and stem in place.
- Shape the pumpkin gently with your fingers until you're satisfied with its appearance.
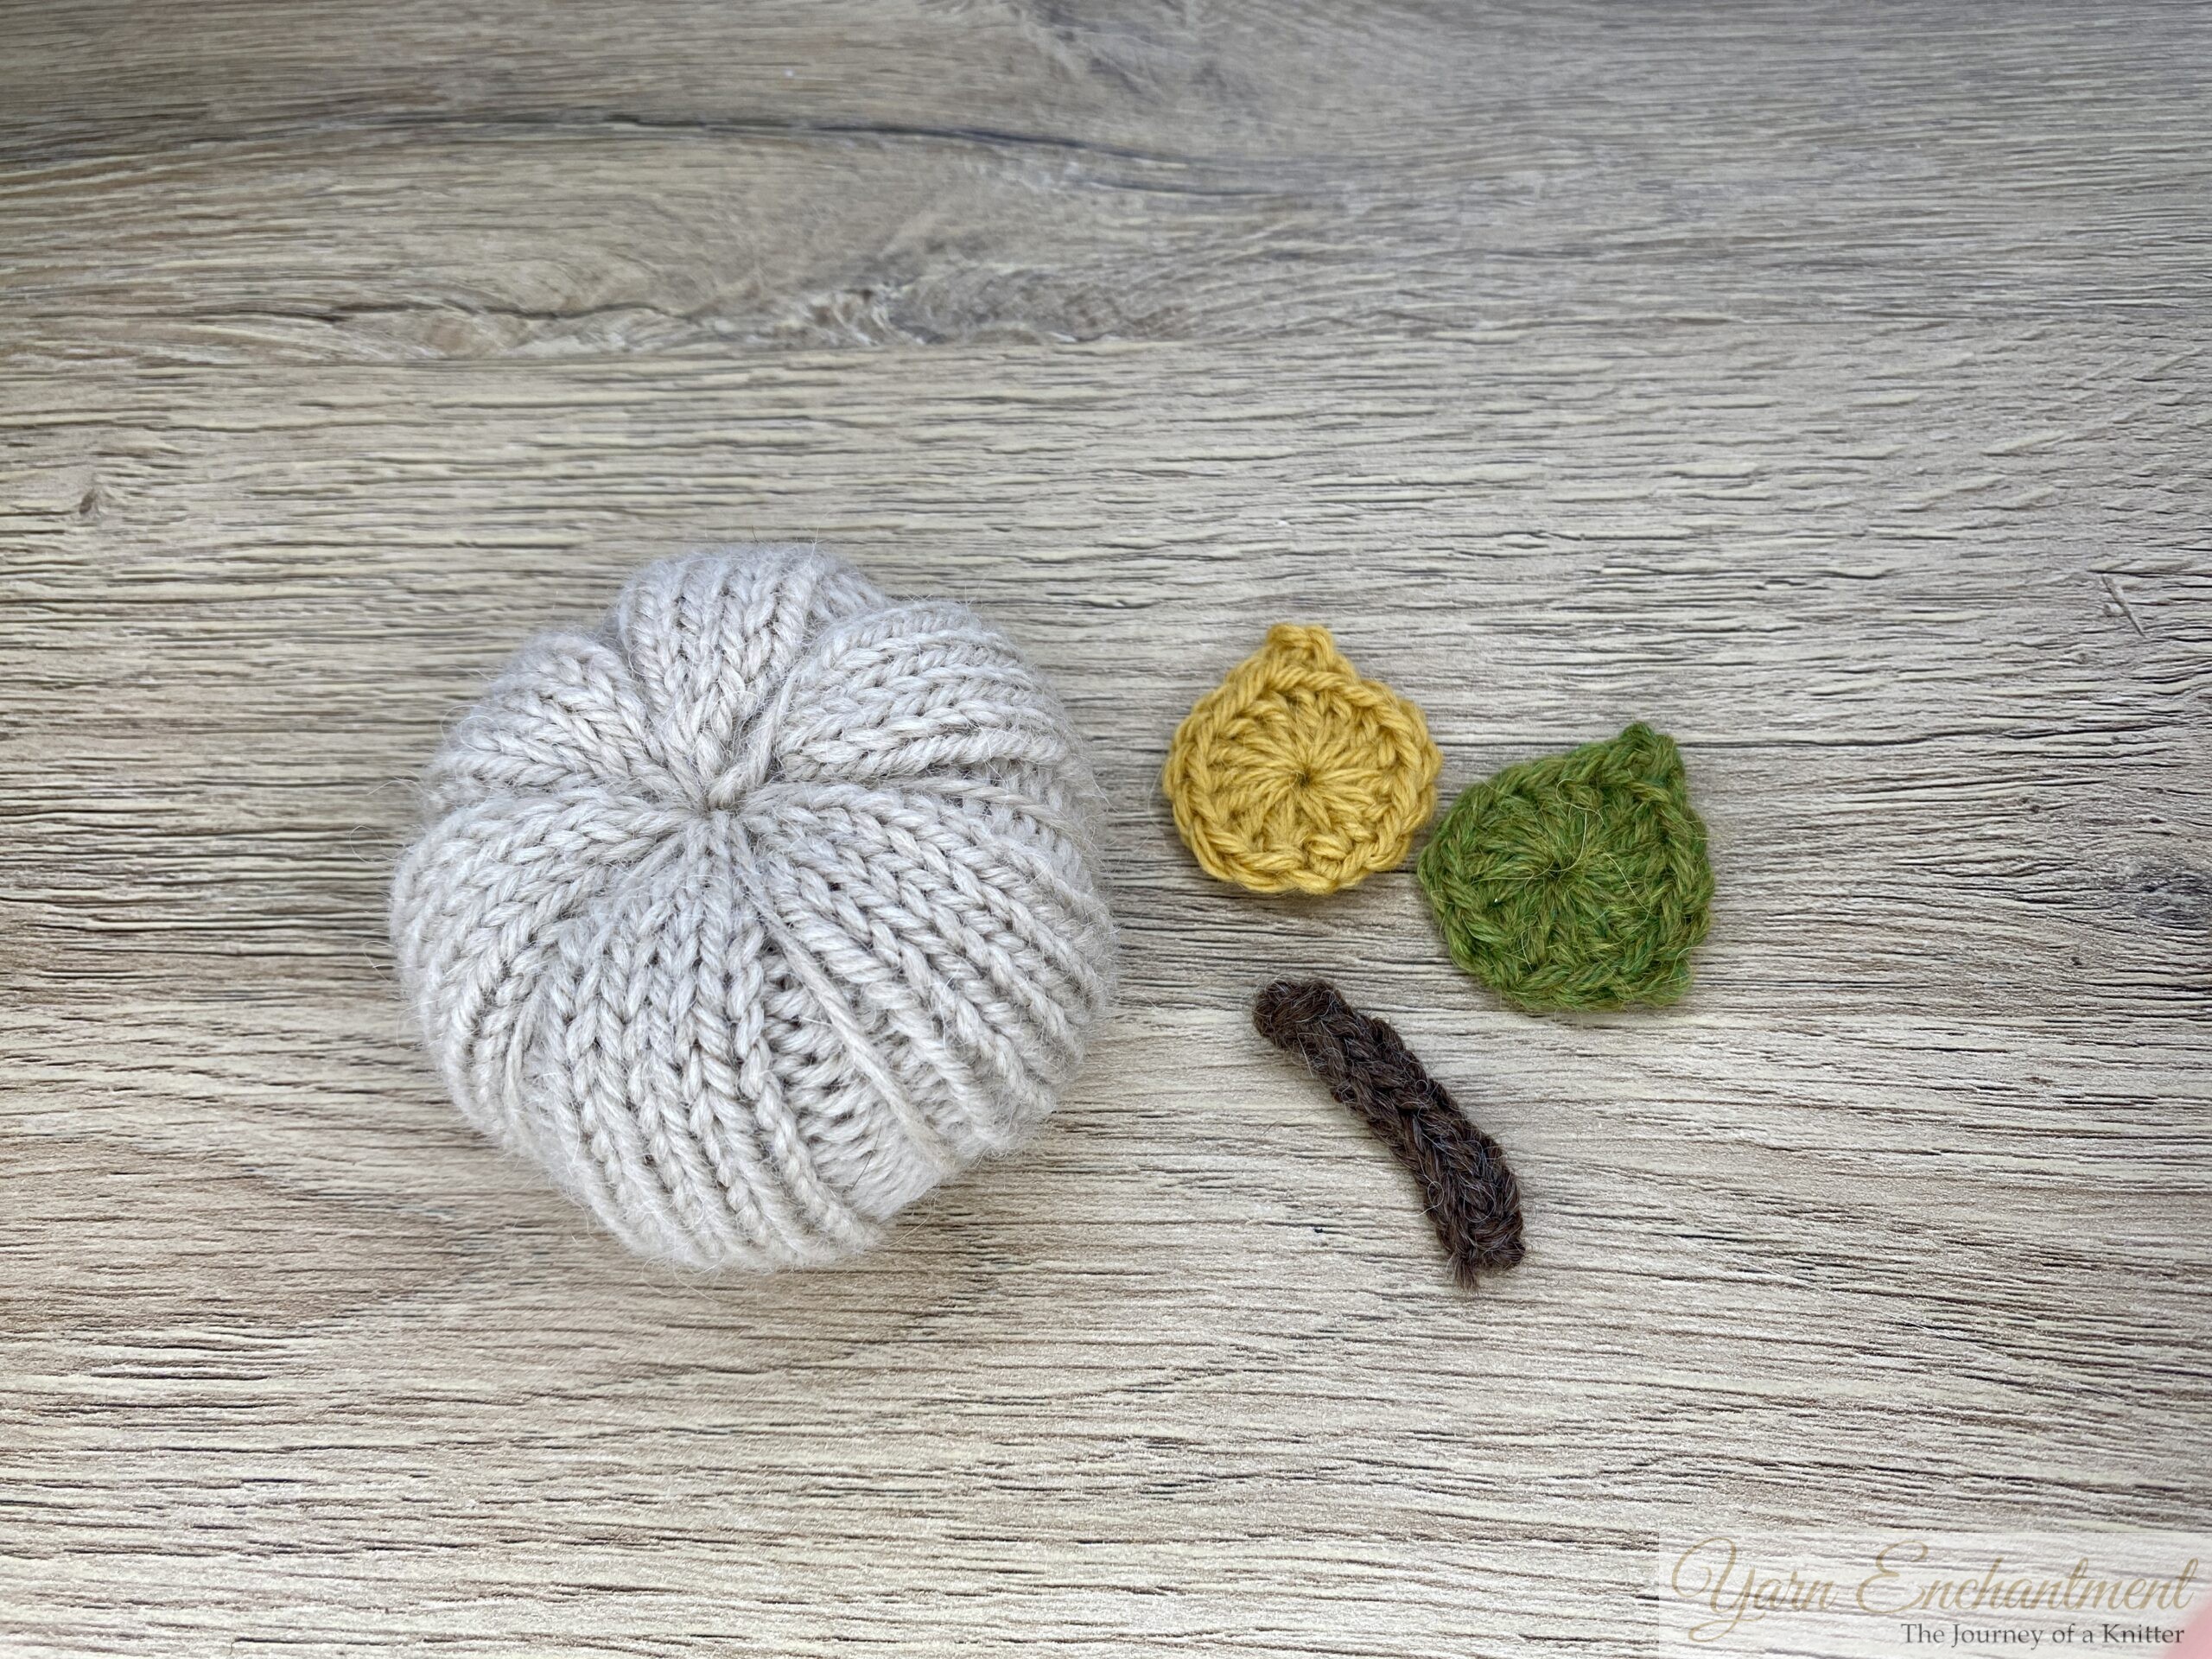 | 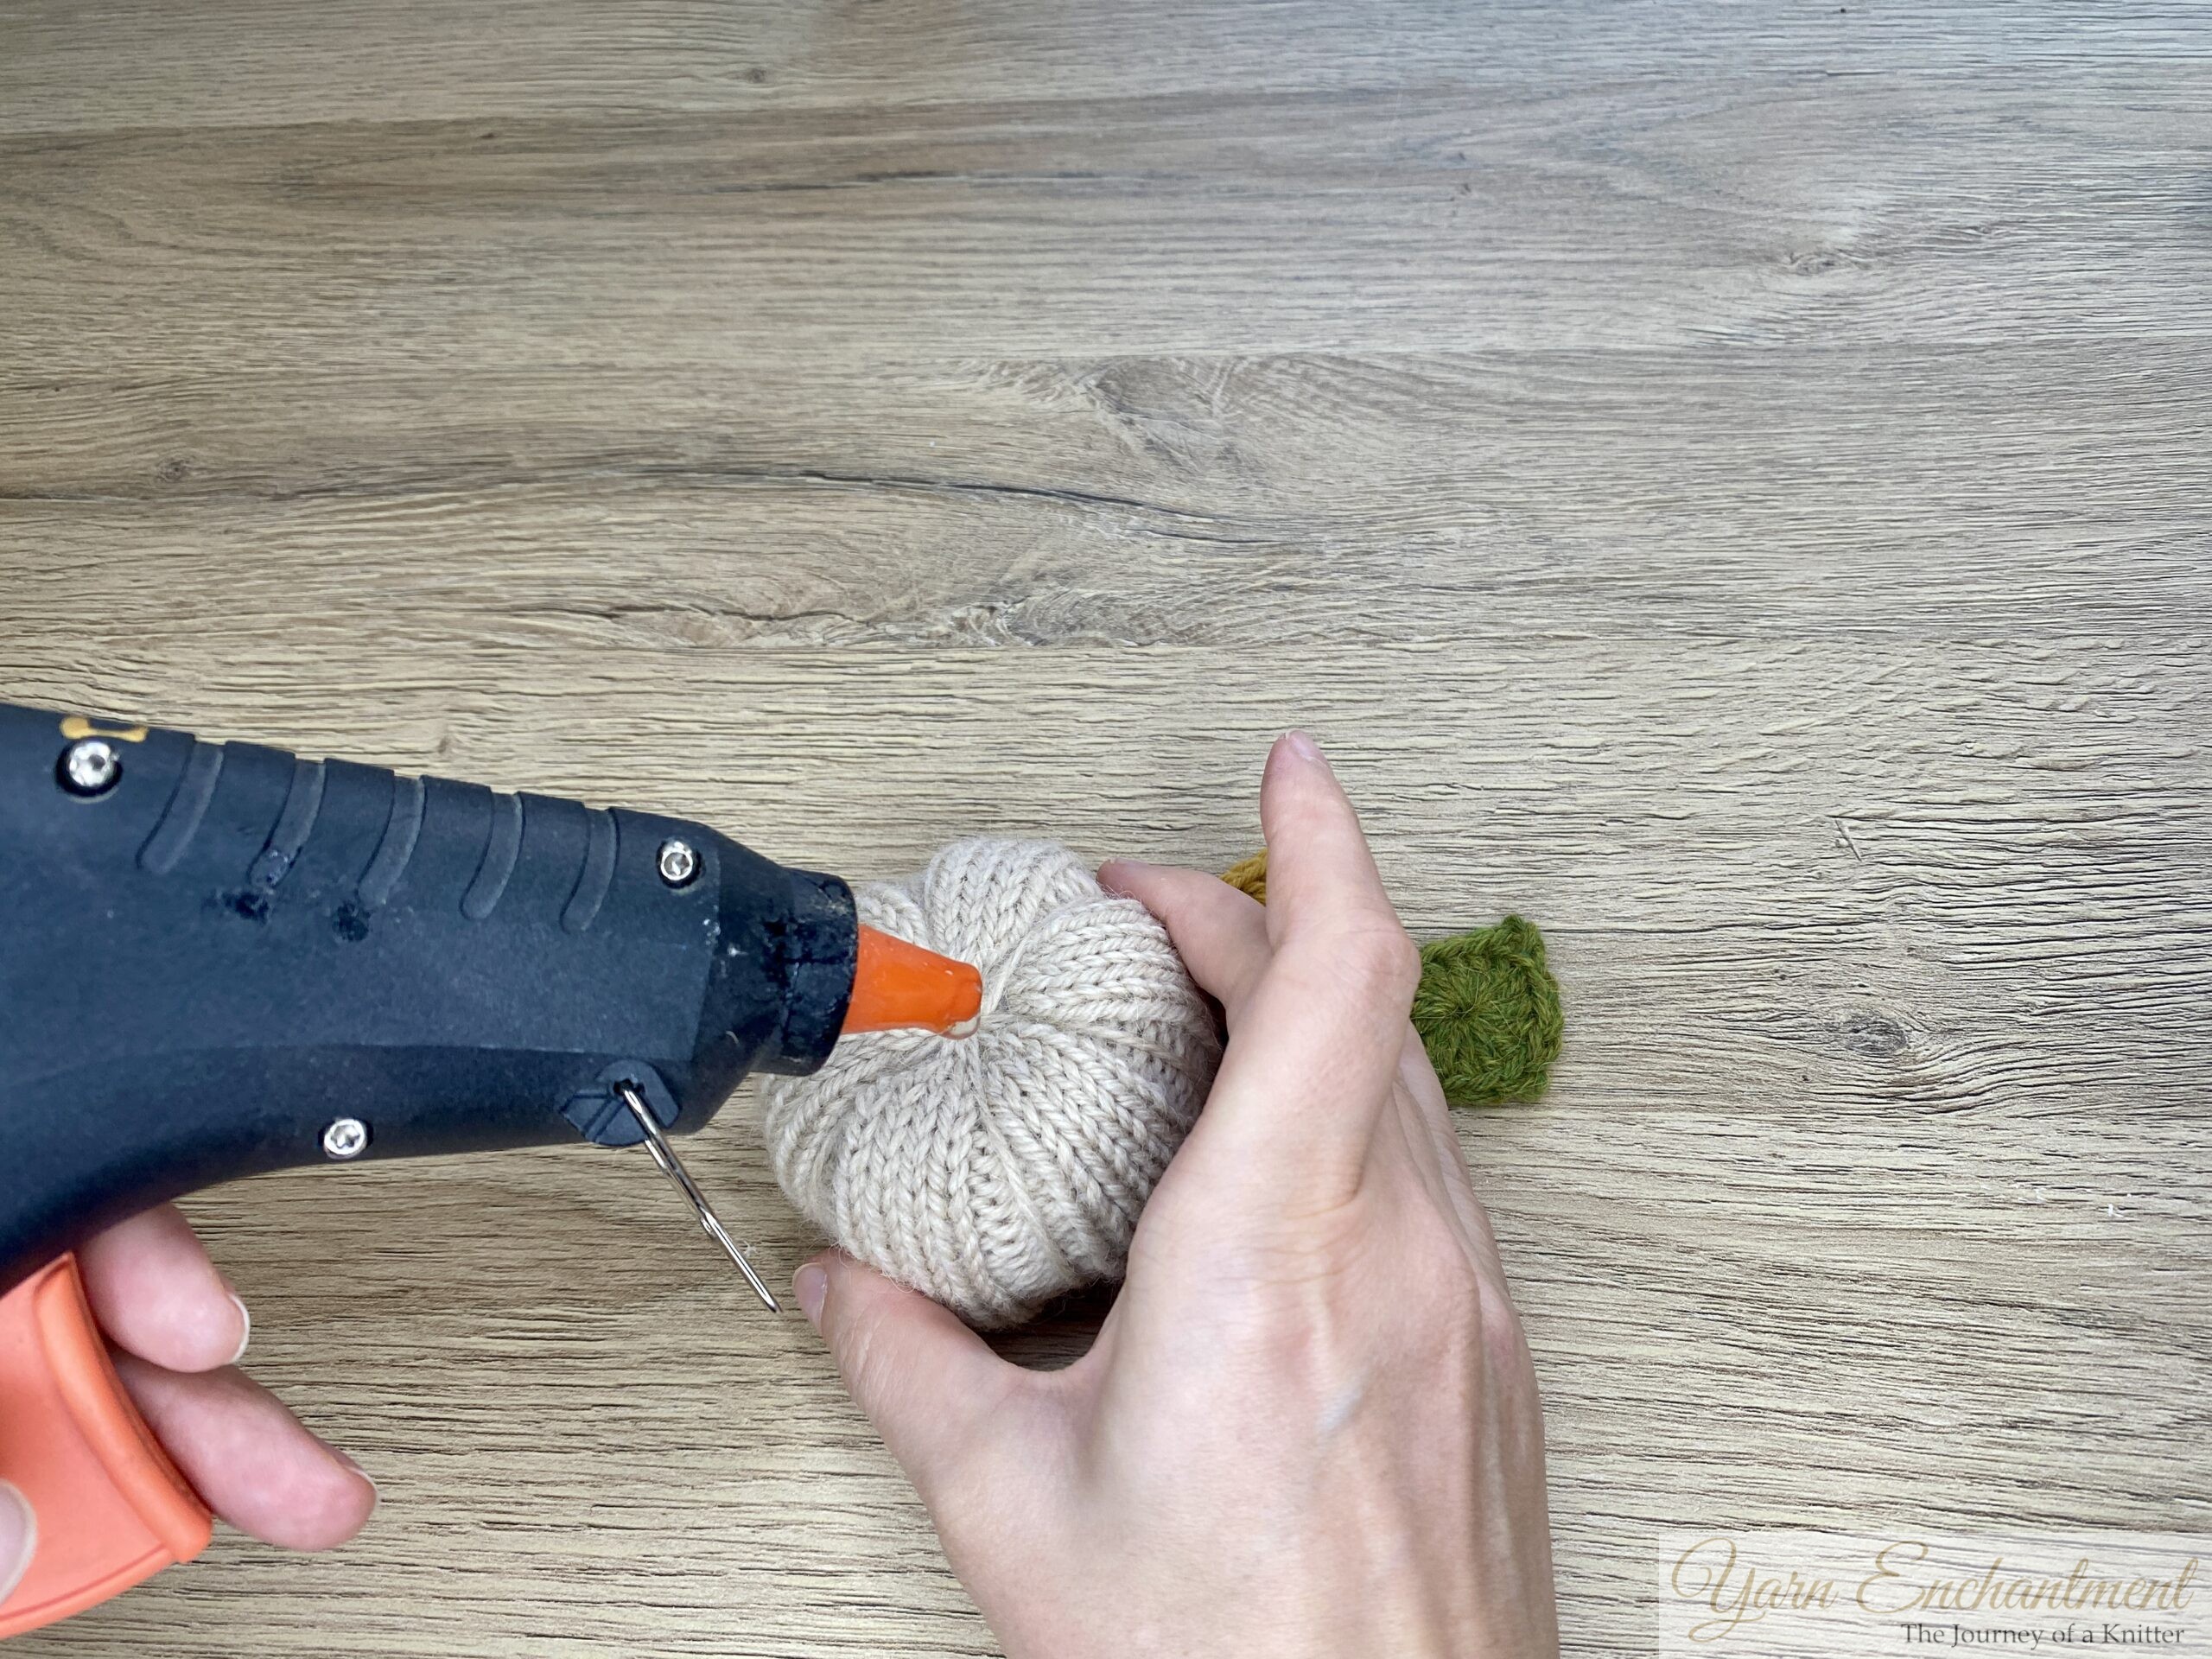 |  | Place your pieces in front of you. | Using glue... | ...attach the stem first in its place. |


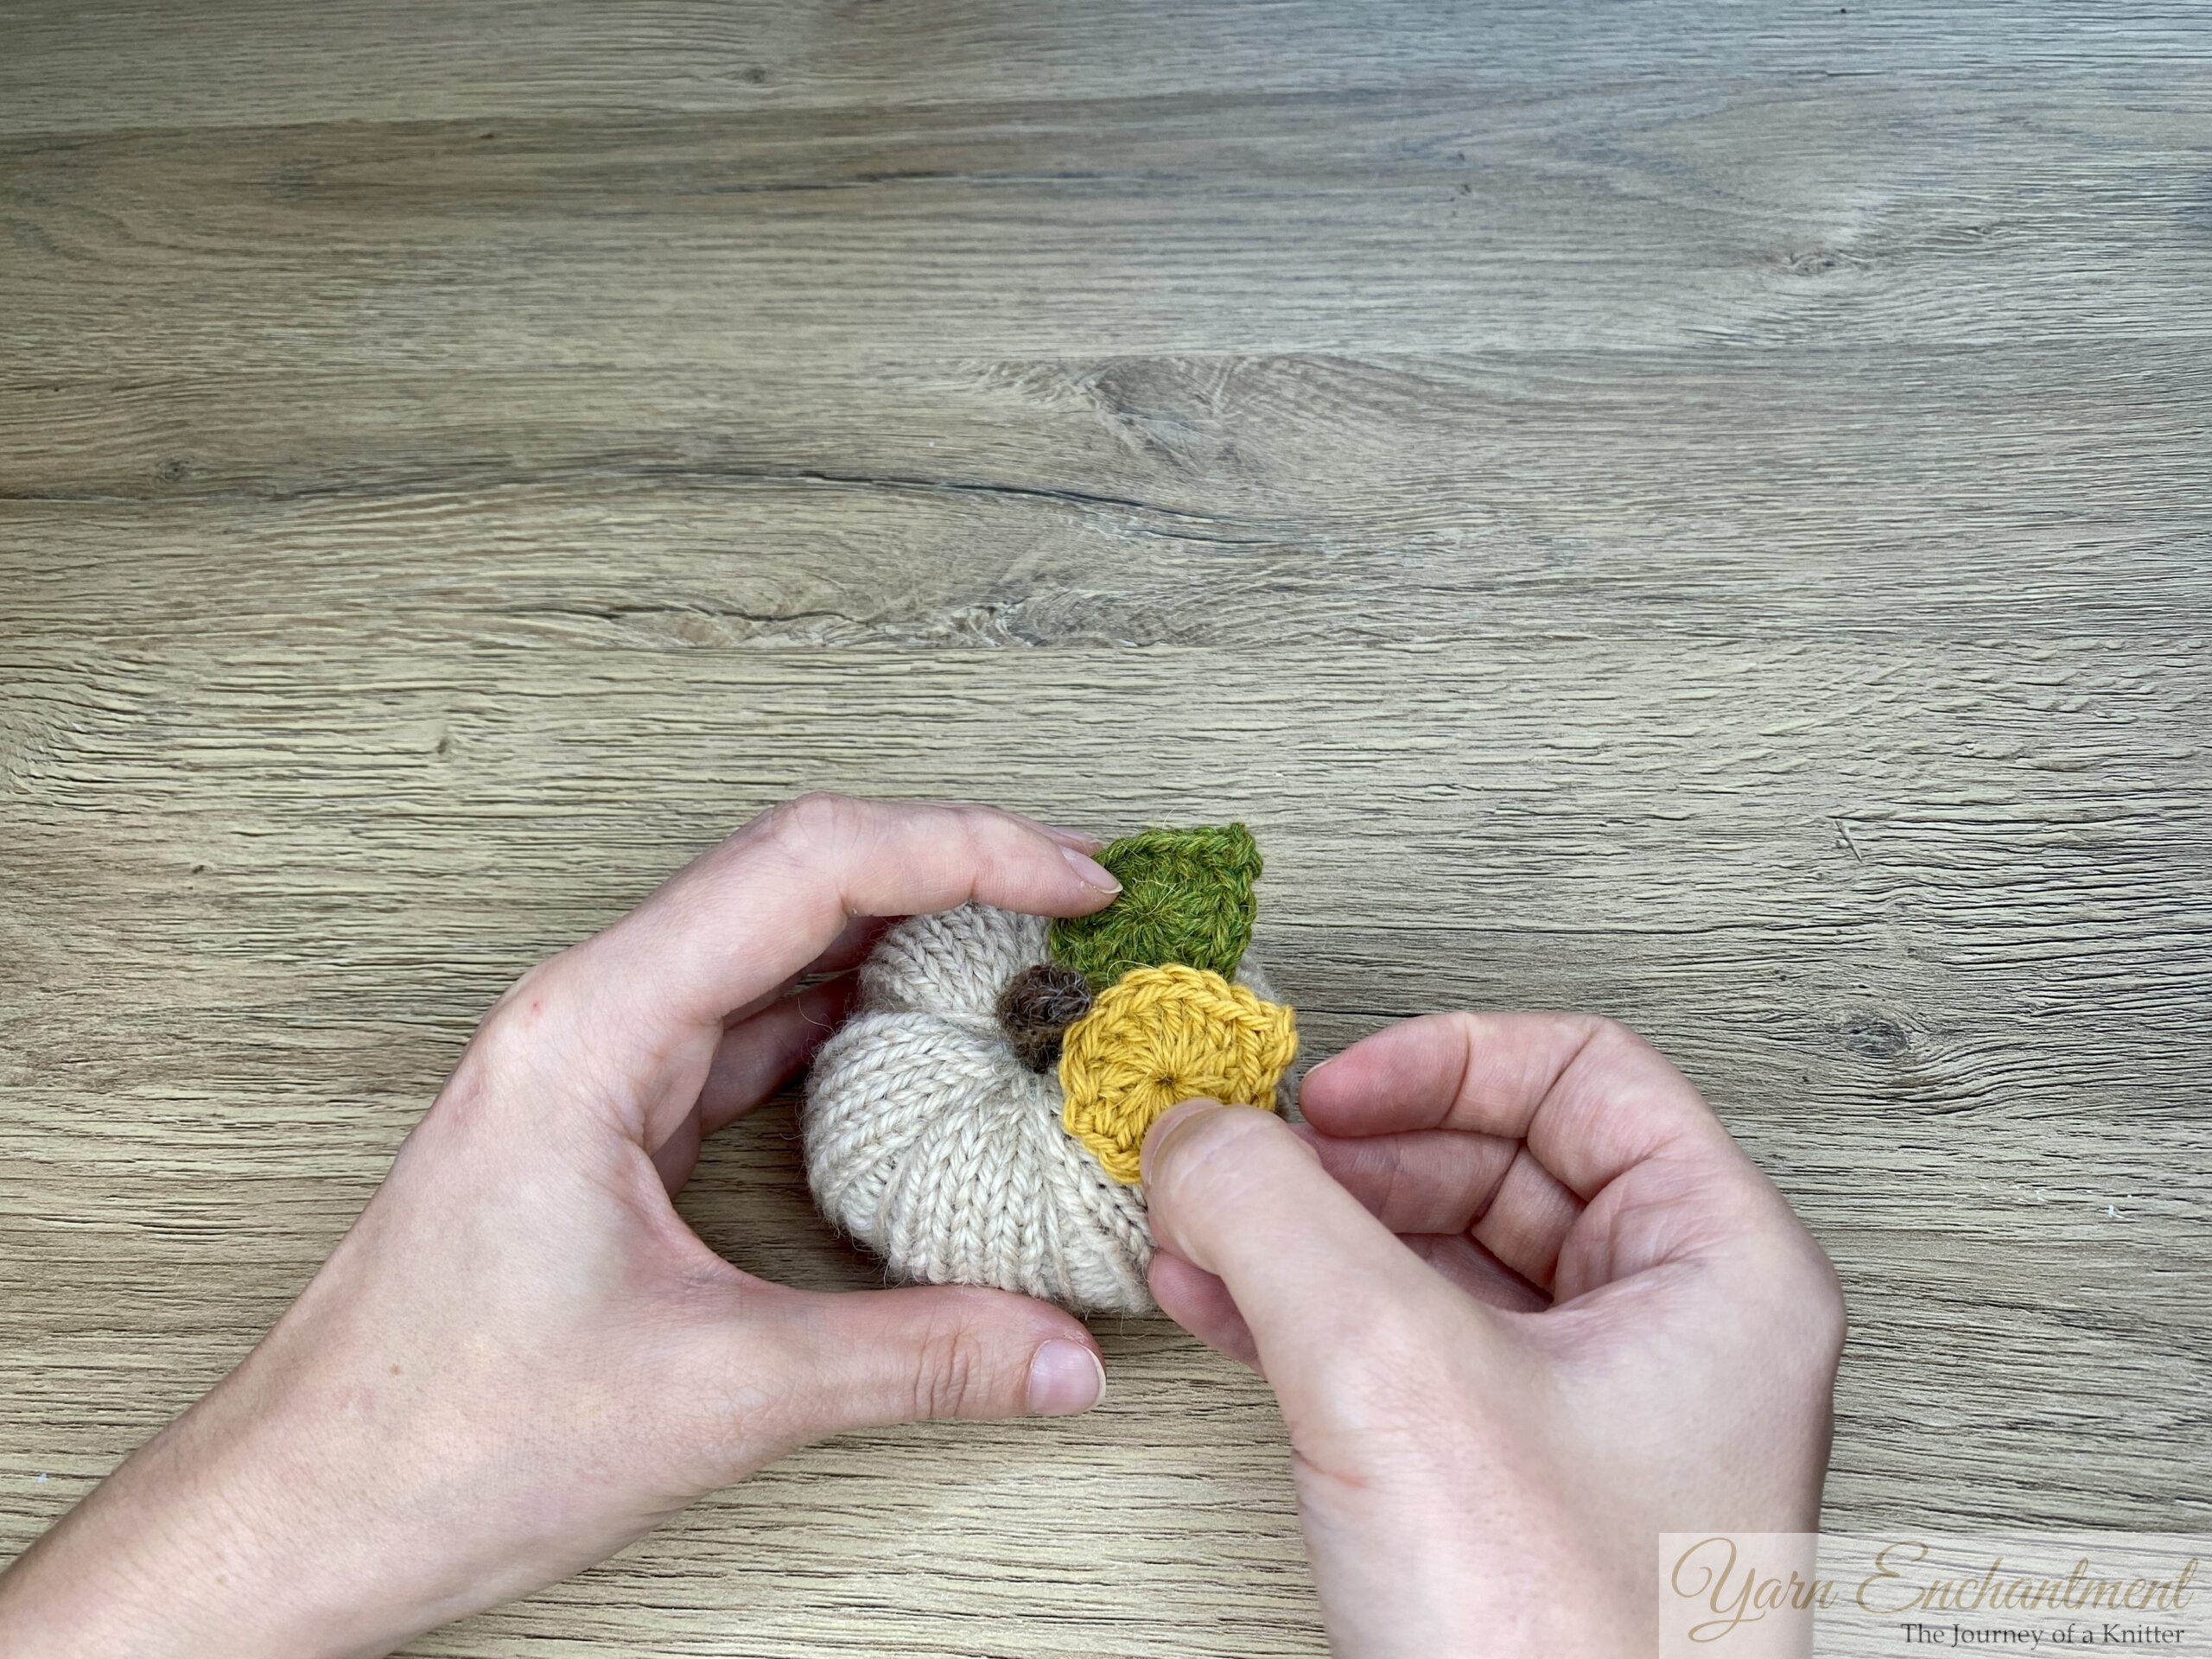 |  | 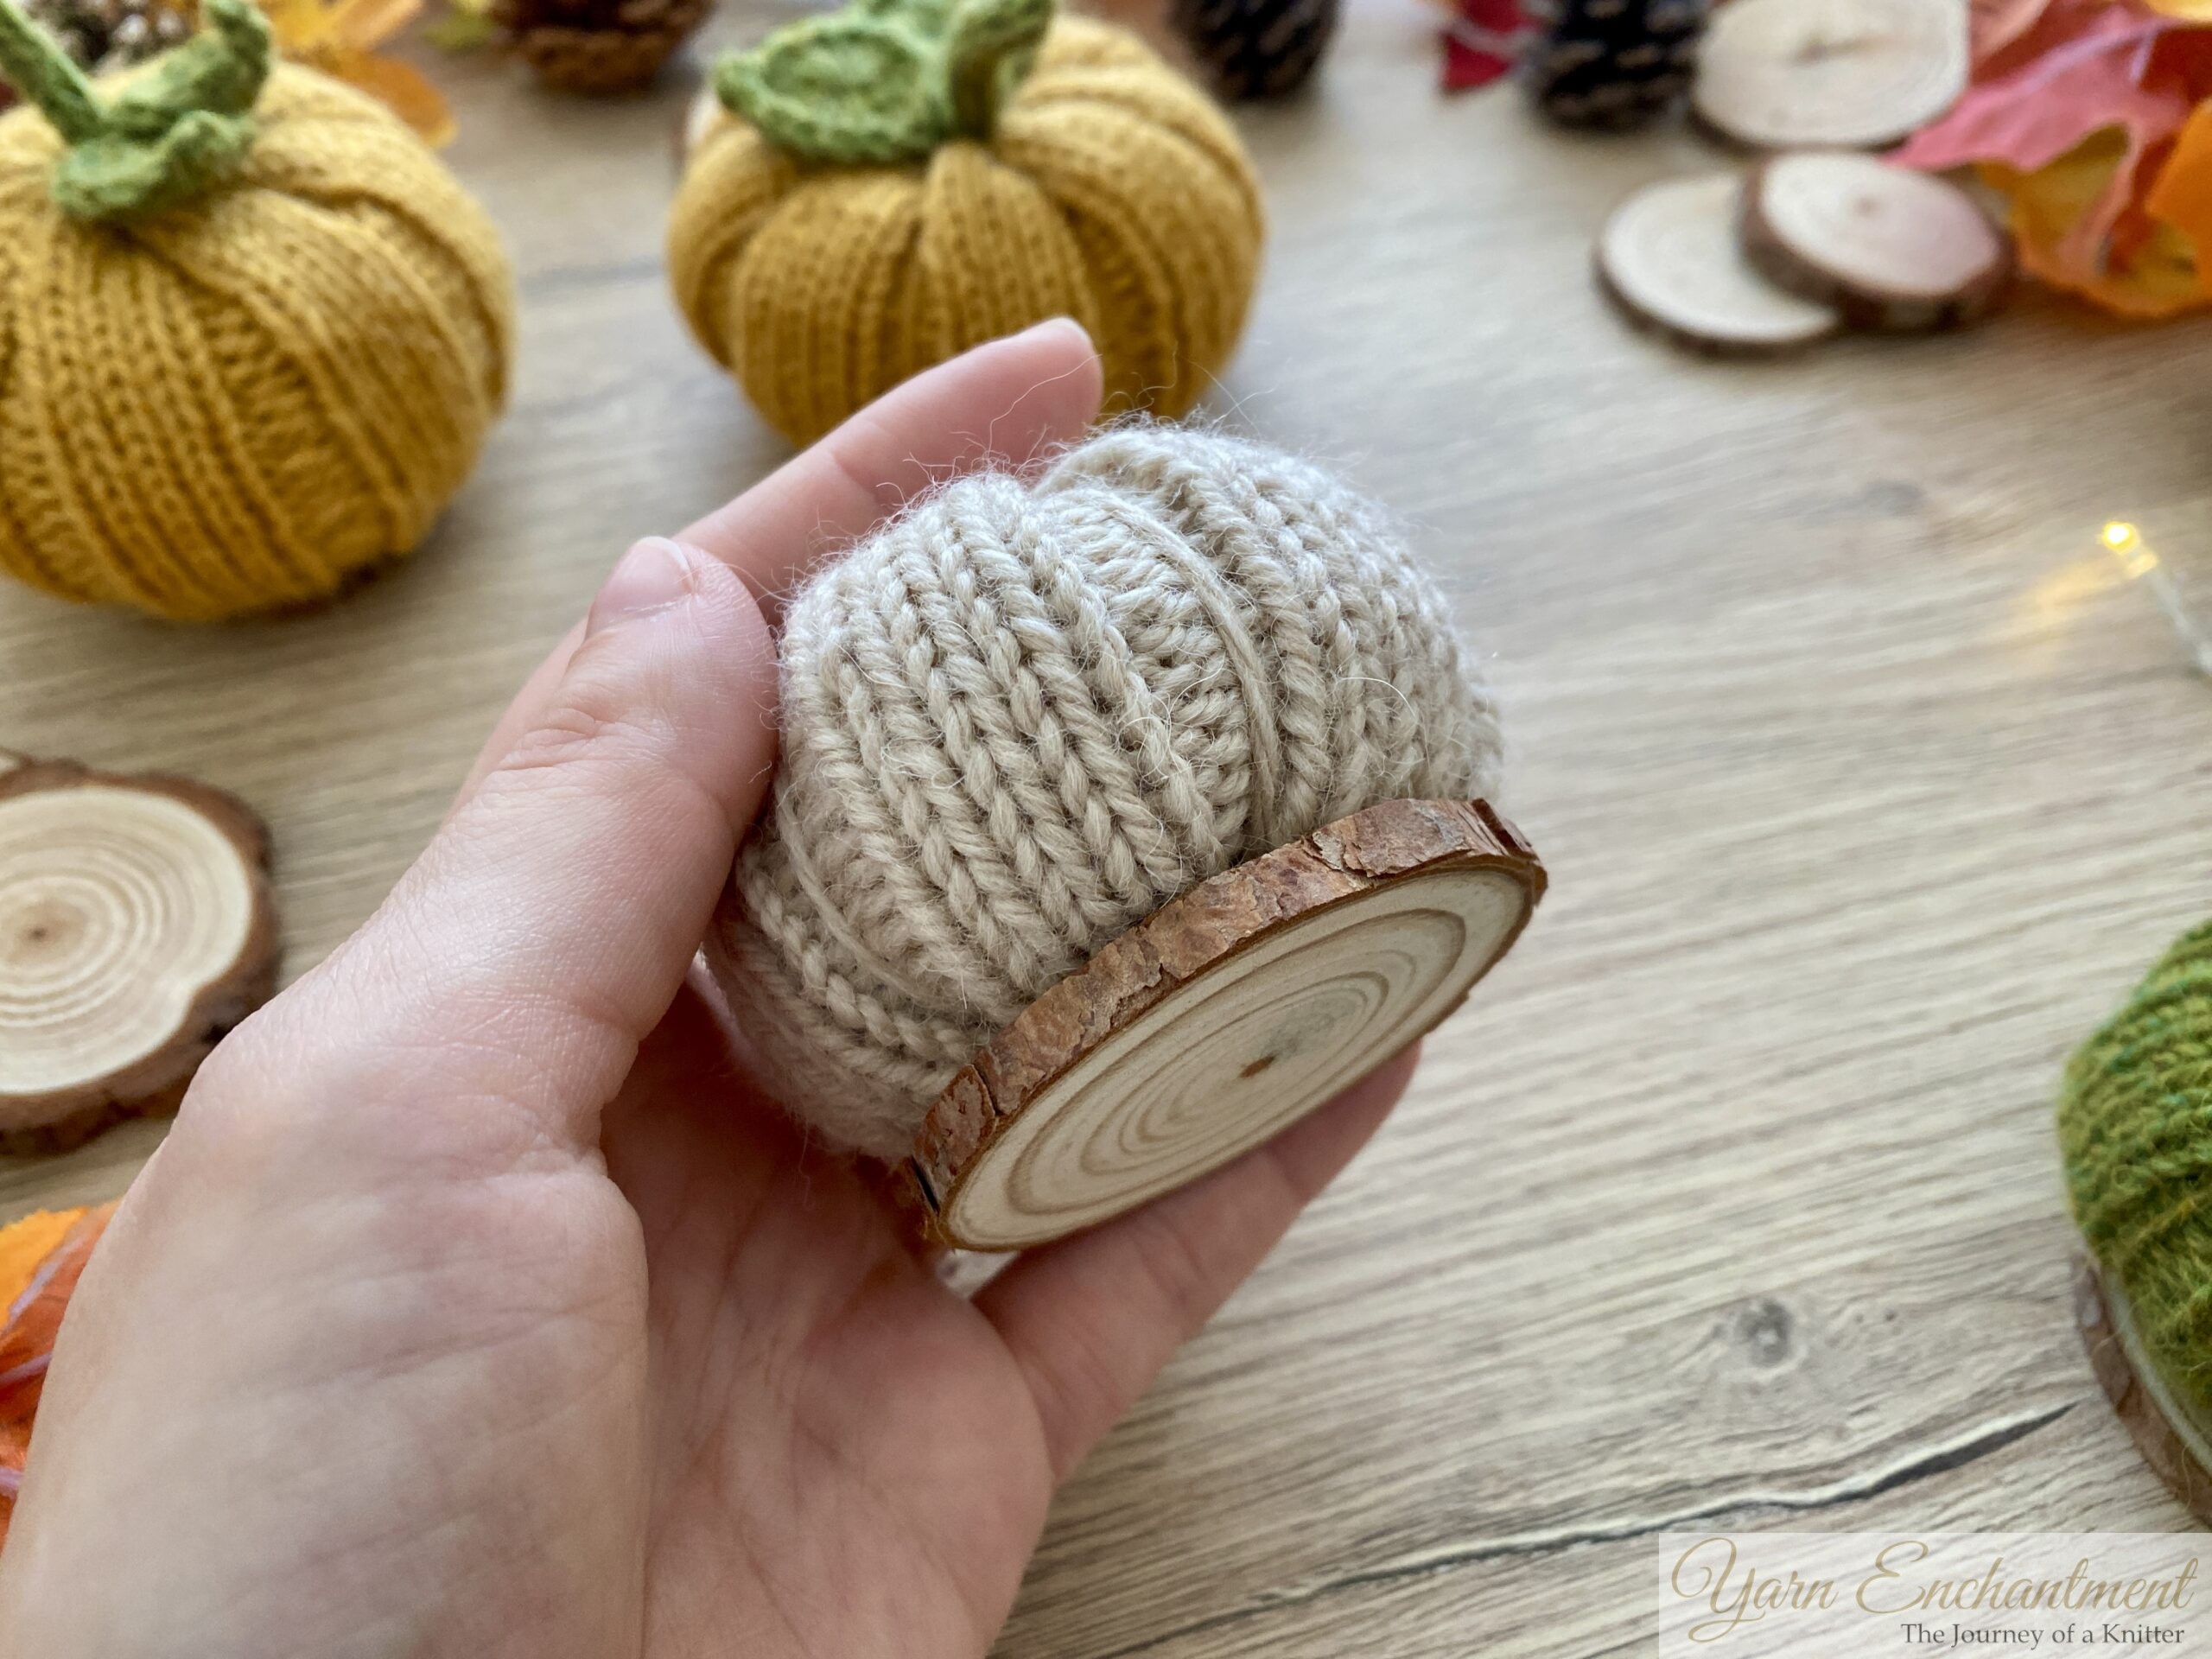 | Now attach the leaves, arrange them in a way that makes you happy, and glue or sew them in place. | You can leave the bottom as it is, or, ... | ...for better stability, I used a wooden disk and also glued it on. |


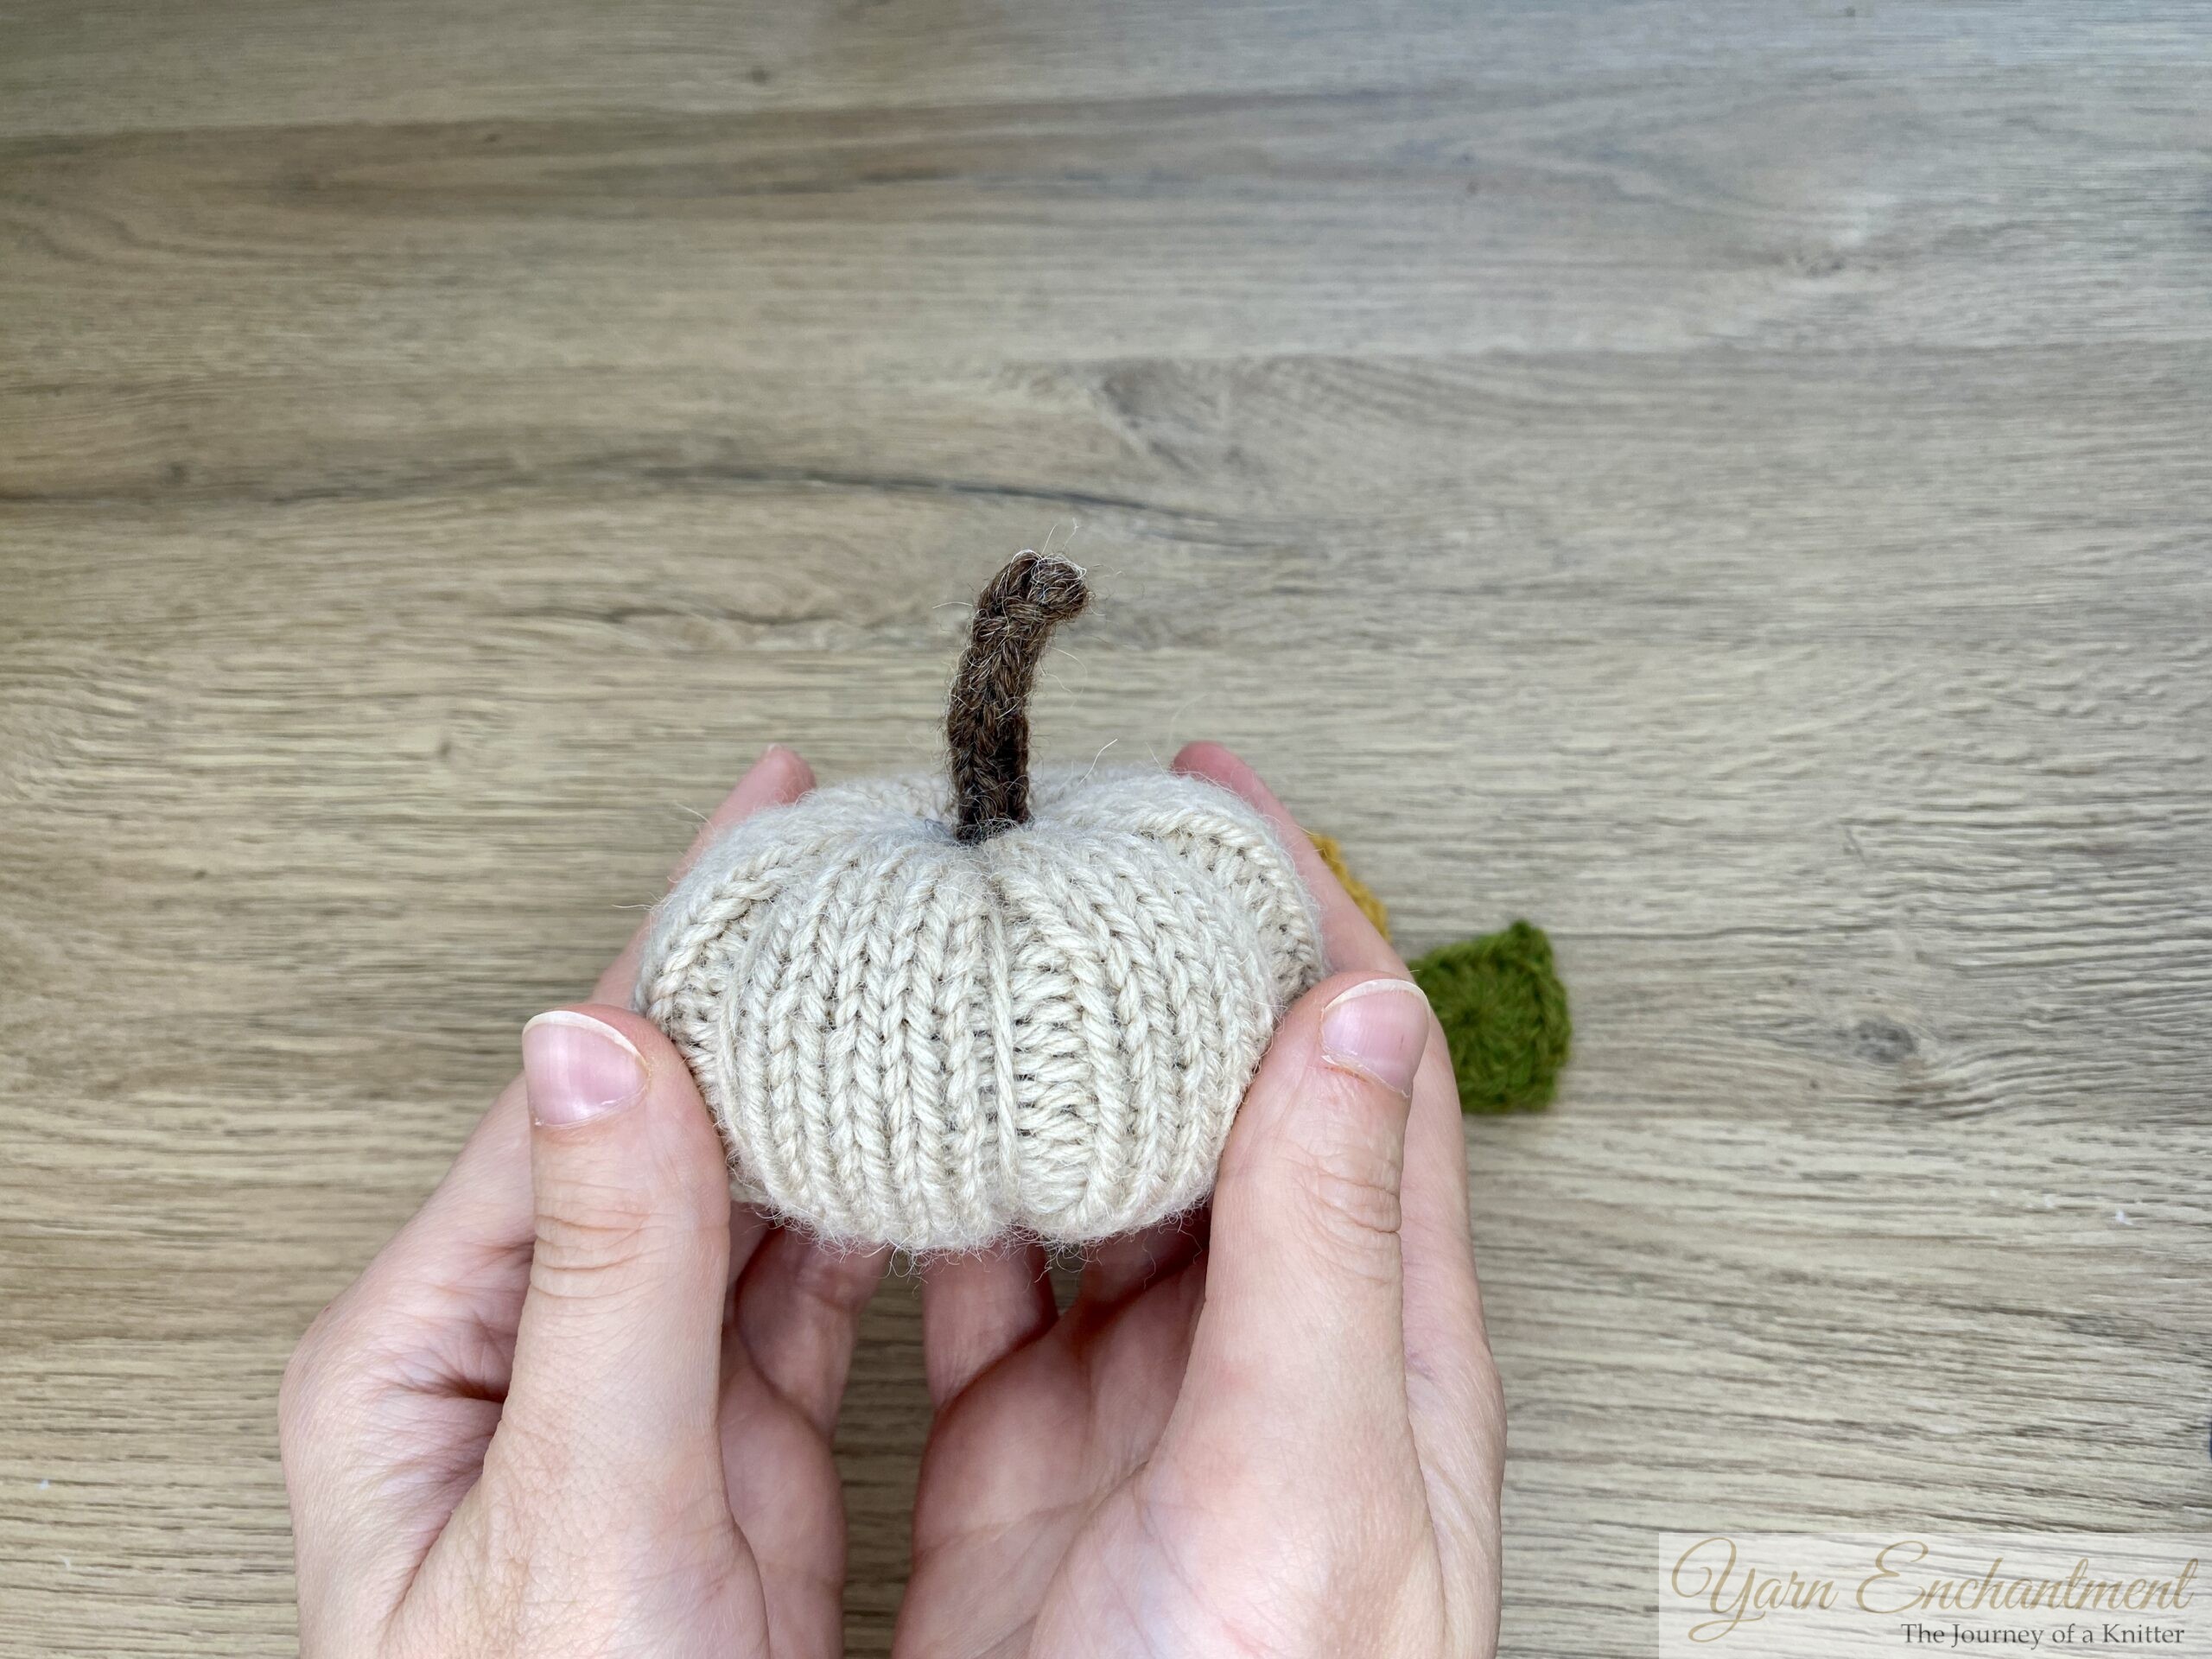
You can also have fun shaping the stem, if you knit the I-cord a little longer, you can playfully twist the stem to give it a whimsical look. This is now your pattern and I want you to get creative with it.
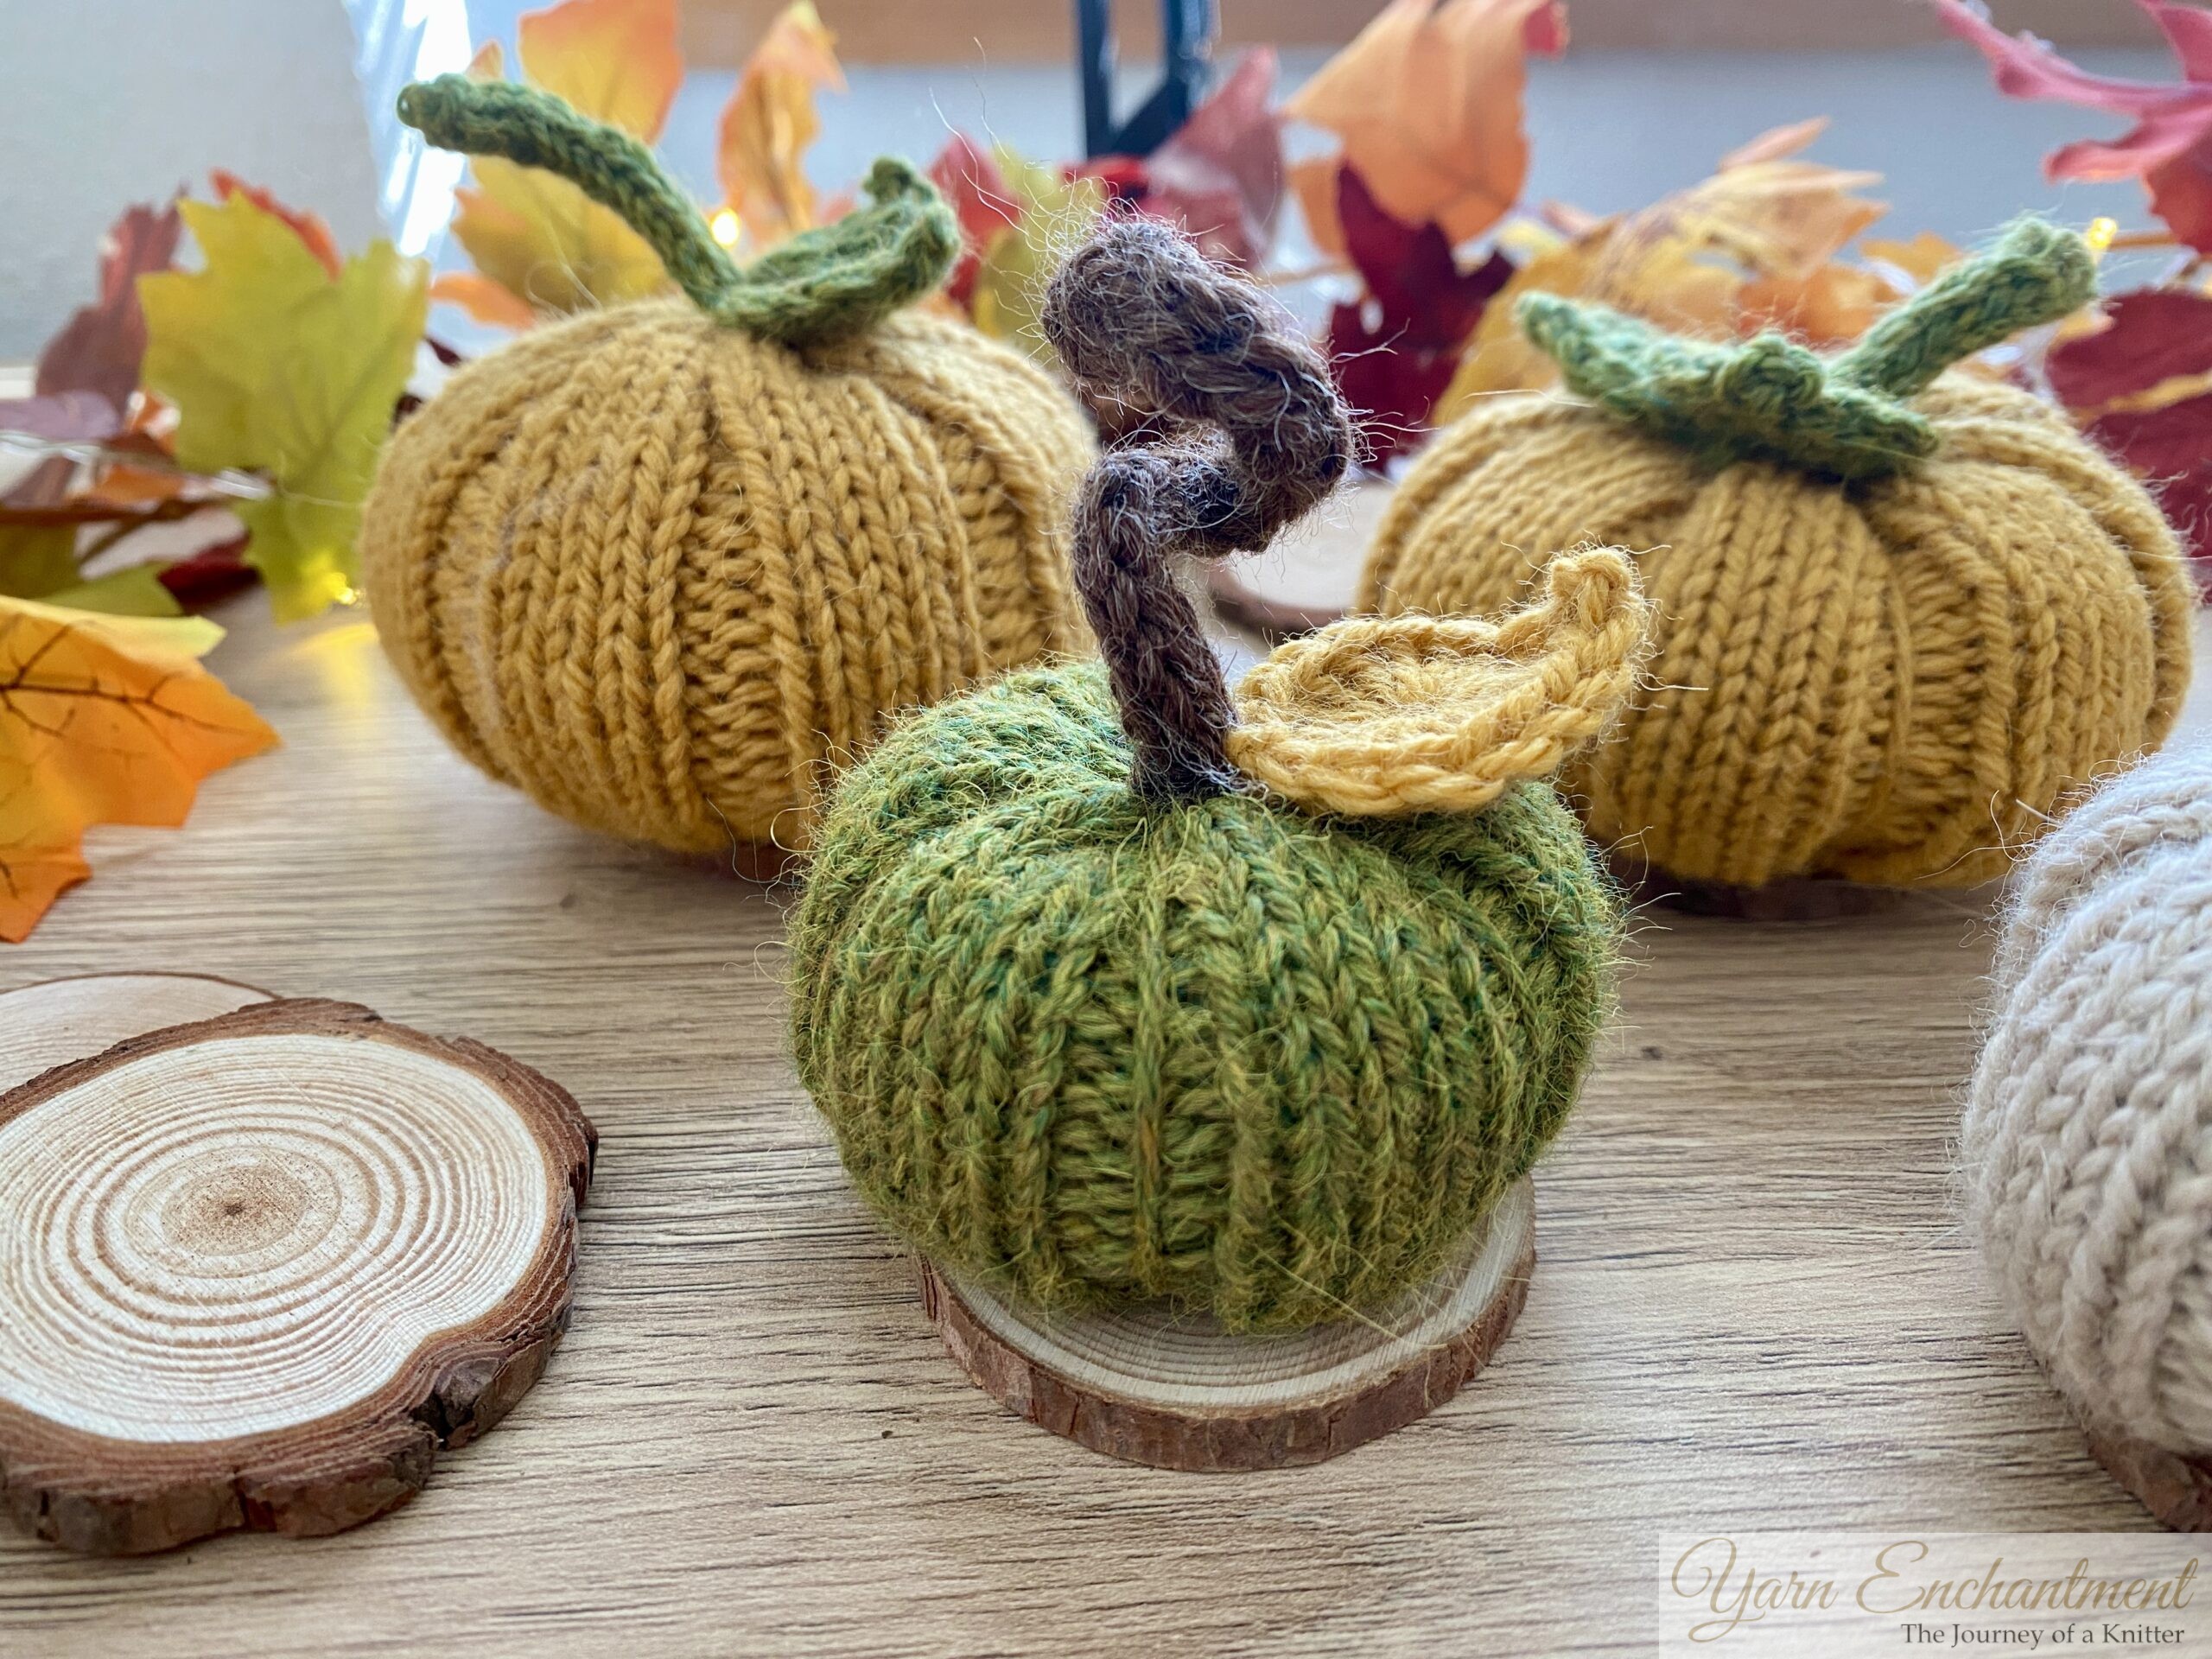 |  | I knitted the I-cord about 5–6 cm long, inserted a wire through the middle, and then curled it slightly for a playful effect. | Or leave the shaping out completely and let it stay a little rounder. |


Conclusion
Take a moment to look at your little pumpkin patch and enjoy what you’ve made. No two will ever be quite the same, and that’s what makes them special. Maybe one ends up on your windowsill, another on the table, or you gift one to a friend who could use a smile. However you use them, I hope these pumpkins bring a bit of that cozy autumn feeling into your home.
Now make yourself a cup of tea, light a candle, and keep those needles moving, there’s always time for one more pumpkin.
Until then, happy knitting!
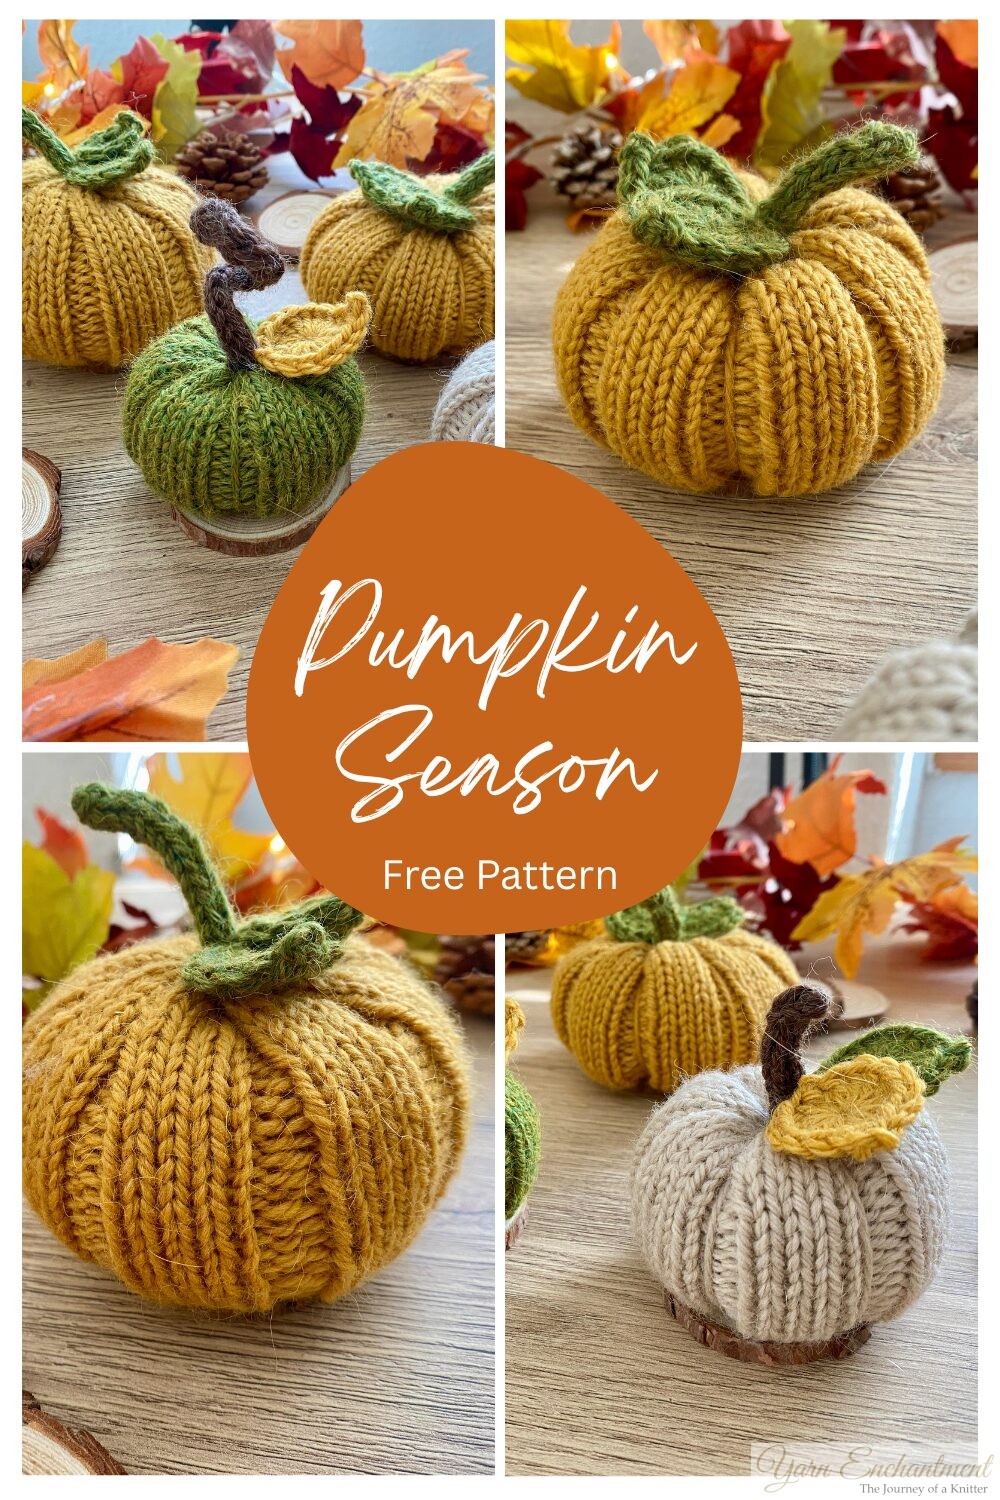 | Beginner-Friendly Pumpkin Knitting Pattern: Free Autumn DIY |

A Little Way to Say Thanks
You Might Also Like


 |
|
Join the Cozy Corner Newsletter!
Hey there, creative soul! Welcome to the Yarn Enchantment Newsletter, where we celebrate all things cozy, crafty, and full of heart. Think of this as your friendly crafting companion - a little dose of inspiration delivered straight to your inbox, just for you. Inside, you’ll find: ✨ Exclusive patterns & tutorials - ideas you won’t find anywhere else (just for us!) 📚 Bookish crafts that bring your favorite stories to life 🧶 Tips and tricks to make your crafting journey smoother (and more fun!) 💌 Heartfelt musings on life, creativity, and the magic of making something with your own two hands Whether you’re knitting by the fire, brainstorming your next DIY project, or just looking for a little creative pick-me-up, this newsletter is here to cheer you on. Because let’s be honest - crafting isn’t just about the finished project; it’s about the joy, peace, and stories we create along the way. So grab a cup of tea, cozy up, and join me. Together, we’ll weave a little magic into everyday life - one stitch, one story, and one email at a time. P.S. I’m so glad you’re here. Let’s make something beautiful together! (Note: If you're using an ad blocker, you may encounter issues subscribing to the newsletter. To subscribe, please consider disabling your ad blocker.)
|
