

Free Knitted Pumpkin Pattern: Easy DIY Fall Decor
October 28, 2025
PetiteKnit Sophie Hood Pattern Review & Knitting Tips
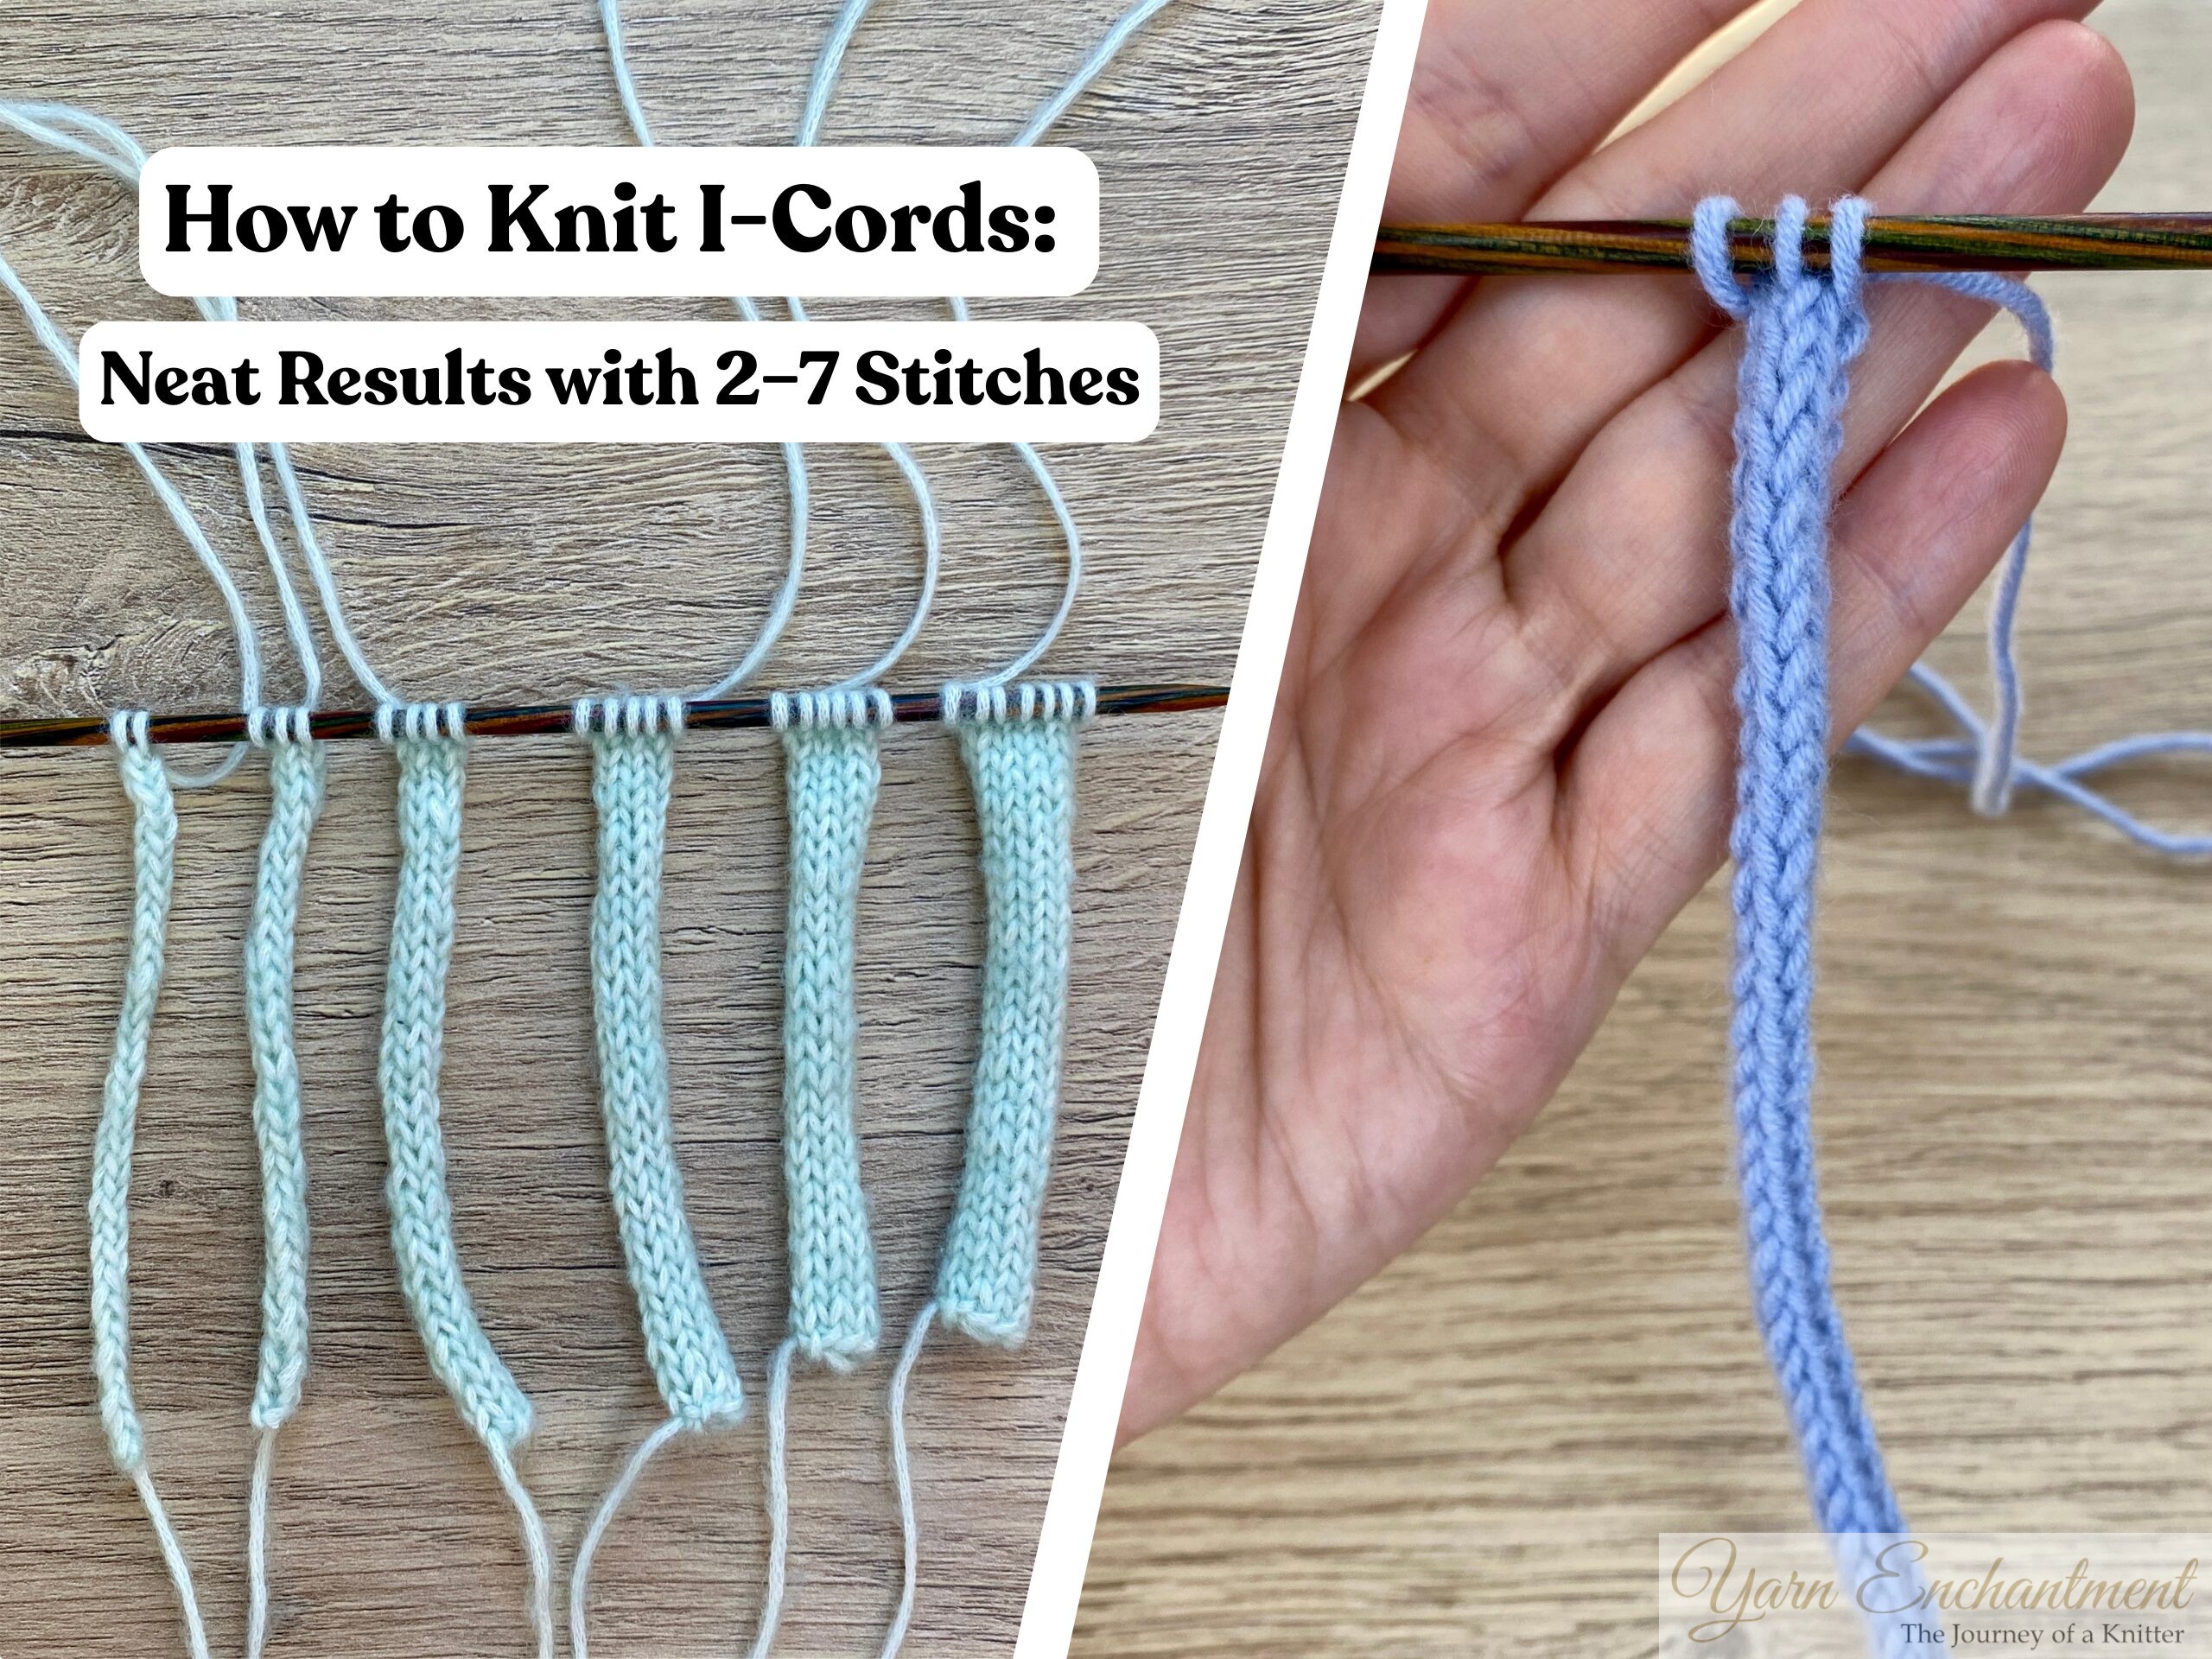
November 11, 2025How to Knit I - Cord: Neat Results with 2-7 Stitches

Originally published on November 4, 2025
In today’s blog post, we’re diving into the basics of the I-cord, an essential knitting technique. An I-cord is a simple tube, think of it as a neat, rope-like strand you can knit using 2 to 7 (or more) stitches. This versatile technique is perfect for crafting drawstrings, bag handles, decorative trims, or giving your projects a beautiful I-cord cast-on. You can also use I-cords for bows, embellishments, or even wrap them around jars for fun handmade cozies. Whether you’re a beginner or have been knitting for years, I-cords open up a world of creative possibilities, and I’ll share my favorite trick for making every I-cord extra neat and tidy.
 | How to Knit I-Cord: Neat Results with 2-7 Stitches |
Table of Contents
- Introduction: What Is an I-Cord?
- Materials Needed
- Step-by-Step I-Cord Tutorial
- Tips for Neat I-Cords
- Knitting I-Cords with Different Needles
- Stitch Count and Variations
- Applied I-Cord and Edges
- Frequently Asked Questions about I-Cord Knitting
- Creative Ideas & Series Preview
What is an I-Cord in Knitting?
An I-cord is a narrow, rounded tube of knitted fabric, most often created with 2 to 4 stitches. Traditionally, I-cords are knitted on double-pointed needles (DPNs), but you can just as easily use circular needles, straight needles, or even the tips of your interchangeable needle set. Each method works well, so in this tutorial you’ll see clear steps for all options, allowing you to choose whichever technique feels most comfortable for you.
Think of an I-cord forming like the watermelon in that viral rubber band experiment: each new row of stitches wraps around and pulls on the previous ones, just as each rubber band adds tension around the watermelon’s surface. The pressure from those floats along the back draws the fabric inward, causing it to curl into a neat, self-contained tube, no seams, no forcing, just natural tension doing its quiet work.
Elizabeth Zimmermann made I-cords famous (and gave them their memorable name) because they’re so simple and useful.
You’ll often see in knitting tutorials that 5 stitches is mentioned as the maximum for a neat I-cord. But after experimenting (and picking up advice from my local craft store owner), I’ve found you can definitely knit I-cords with more than 5 stitches and still get a rounded result. The thing is, I-cords with 6, 7, or more stitches can be a little hollow in the middle and feel less sturdy than ones knit with 3 or 4 stitches, but they still work perfectly well. The secret is adjusting your technique for wider cords, and I’ll show you exactly how to do that, so you never have to feel limited by the 5-stitch rule again.
 | I-cord with 3 stitches |

Materials Needed
- Yarn of your choice
- Two double-pointed needles (DPNs)
Step-by-Step I-Cord Tutorial
How to Knit a 3-stitch I-Cord
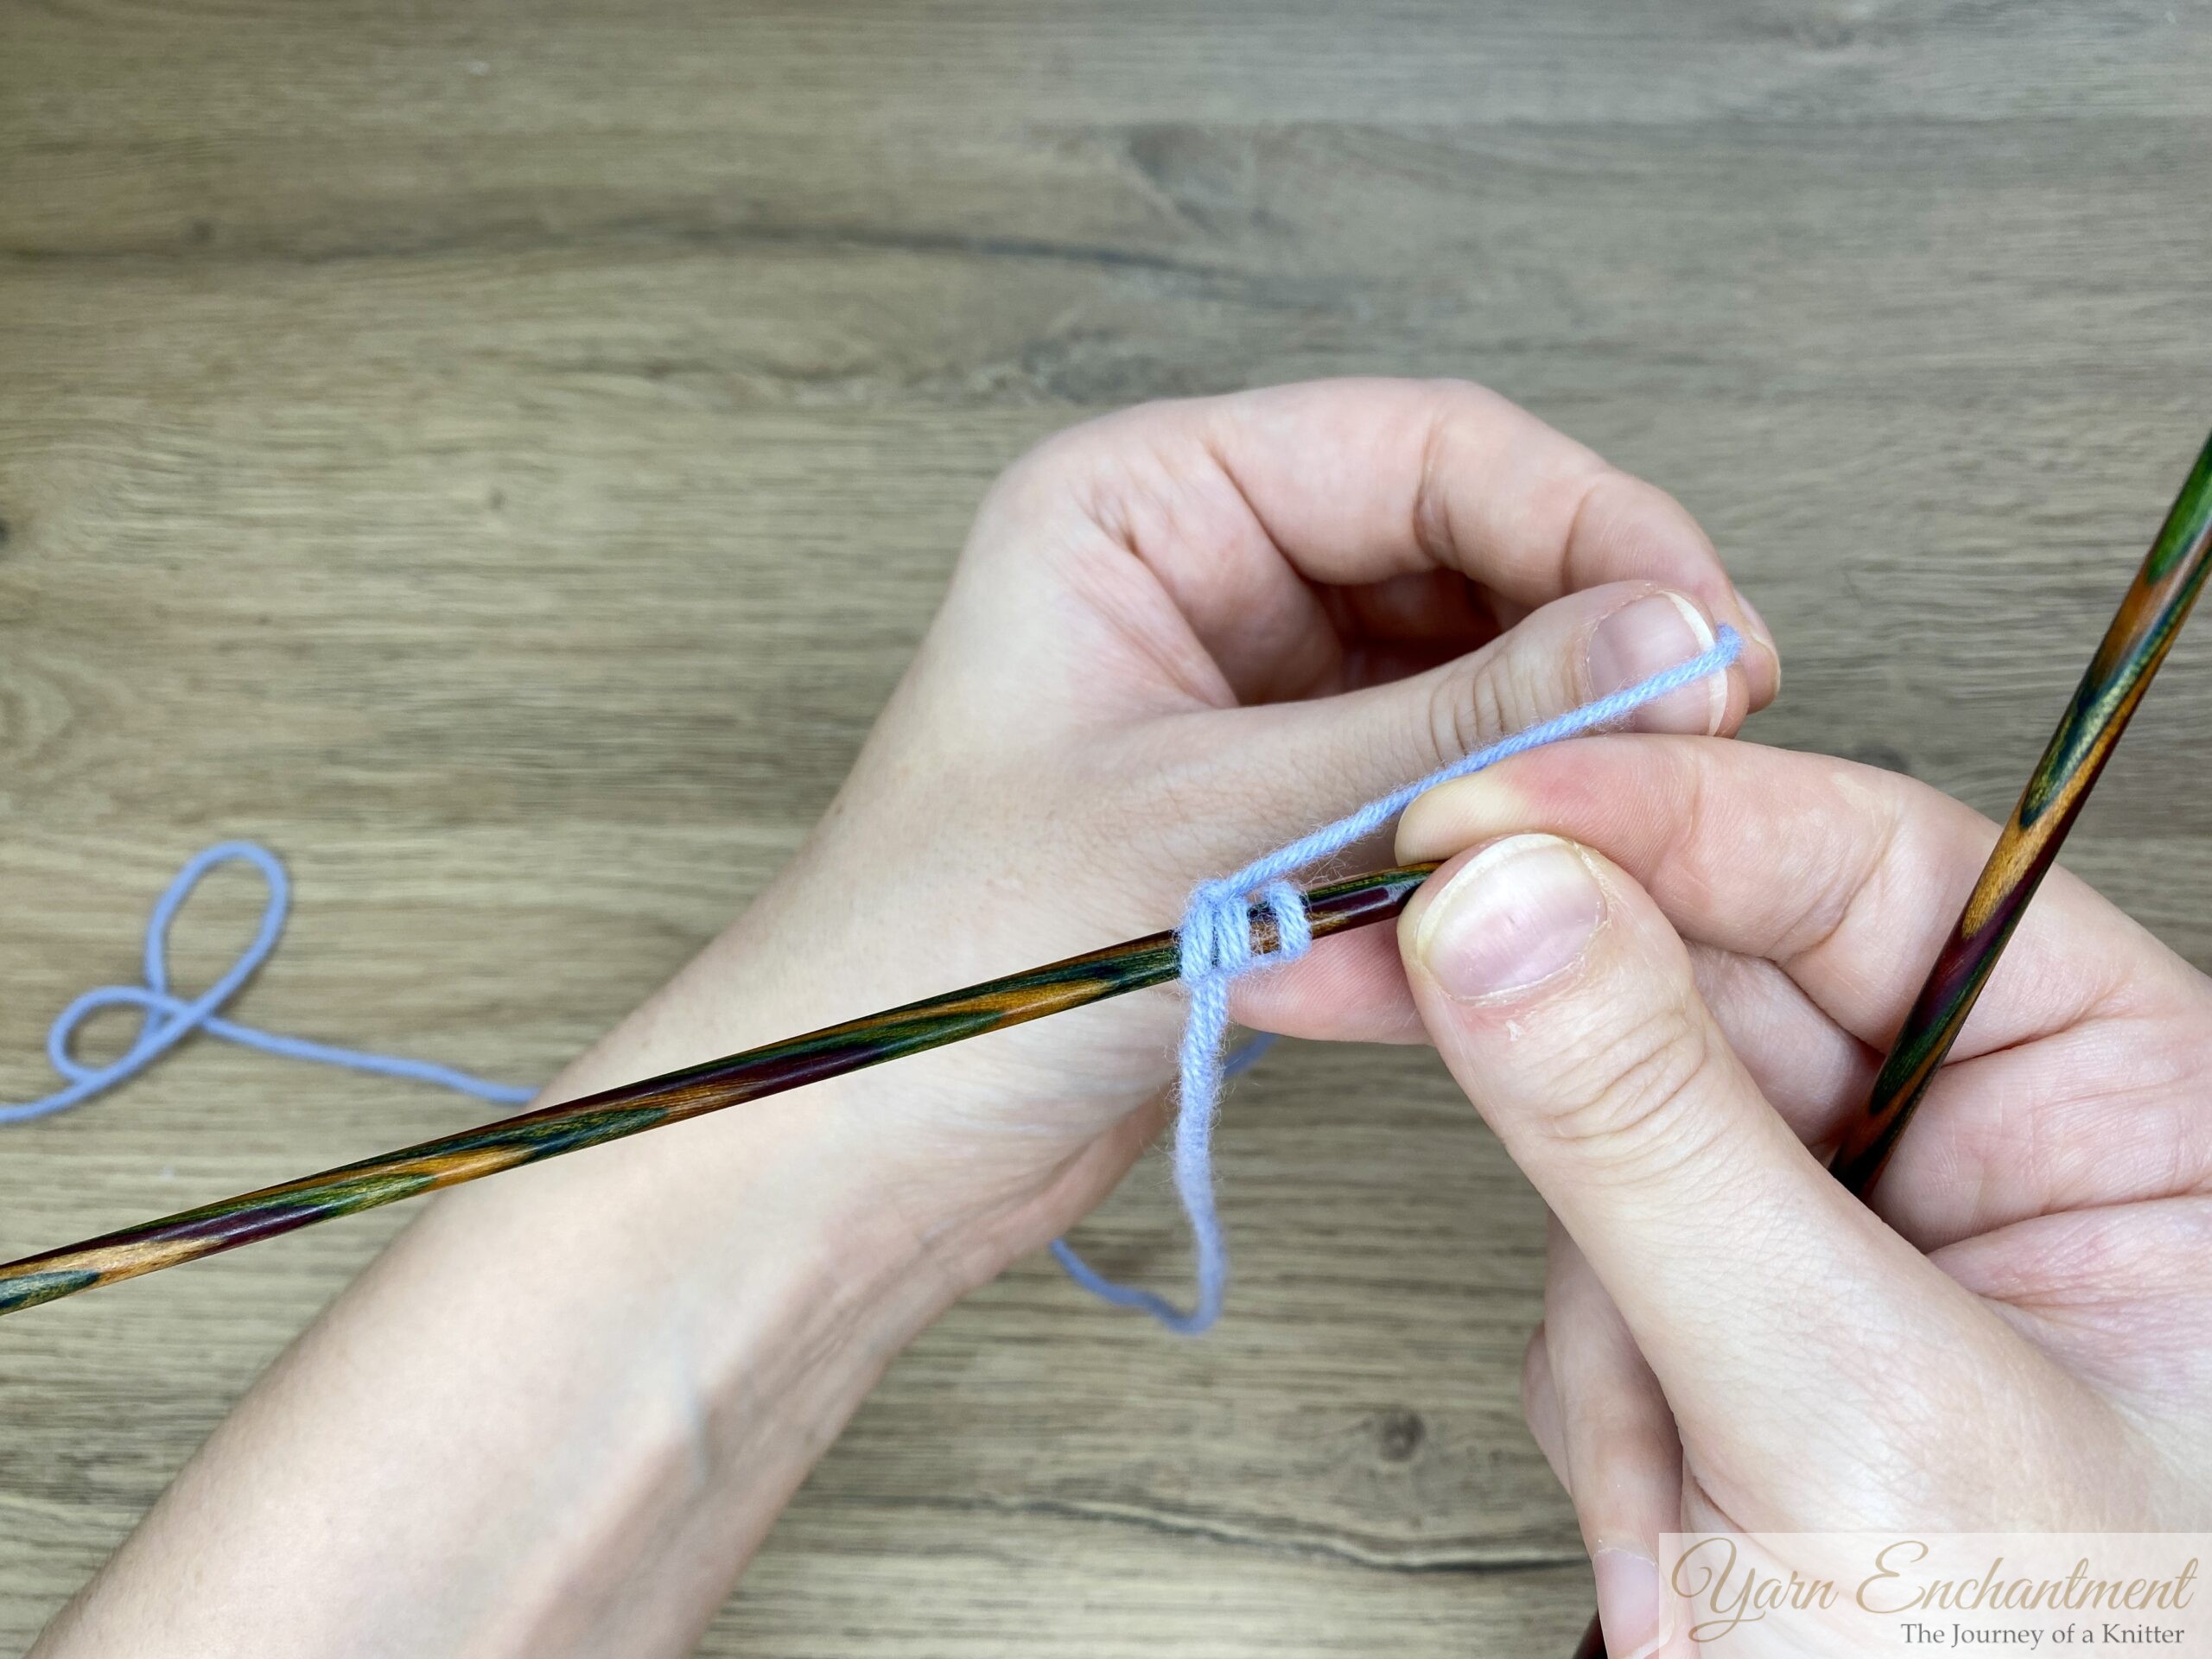
To get started, just cast on 2–7 stitches, depending on how thick you want your cord. For this tutorial, I’m using 3 stitches - it’s a great size to learn with and makes wonderful I-cord accesories or drawstrings. Later I’ll also show you step-by-step how to work a chunkier 7-stitch I-cord!
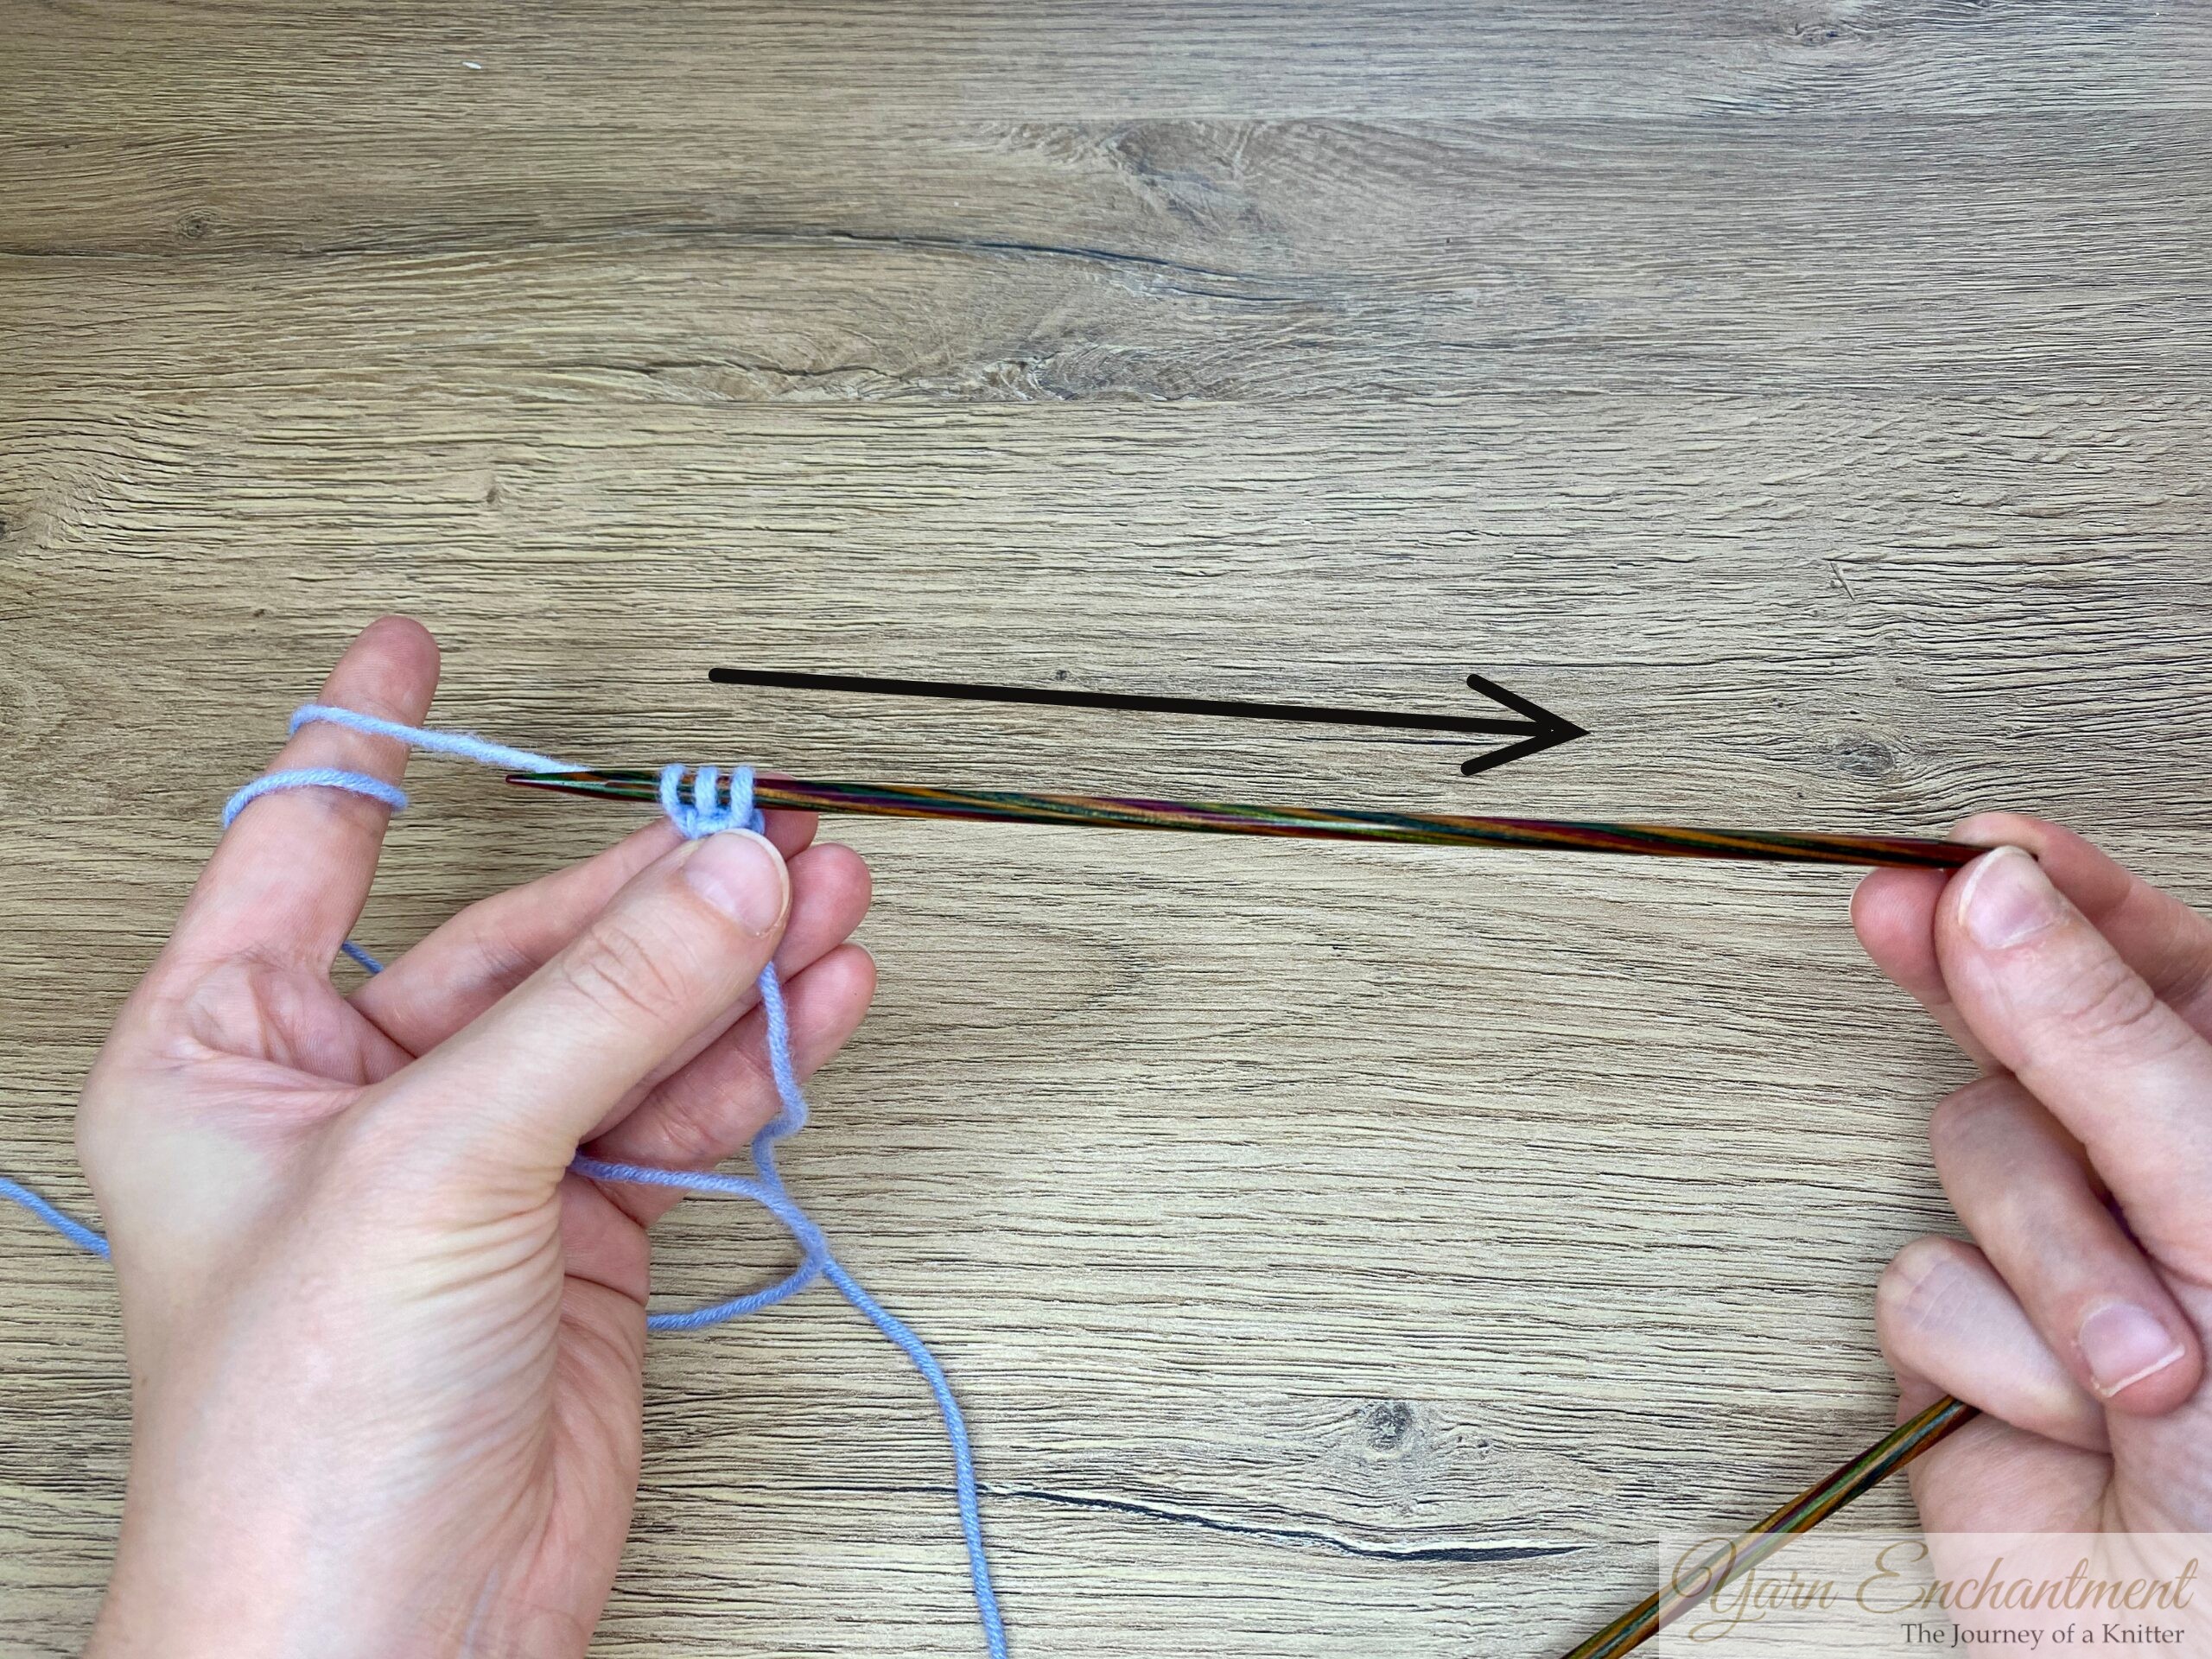
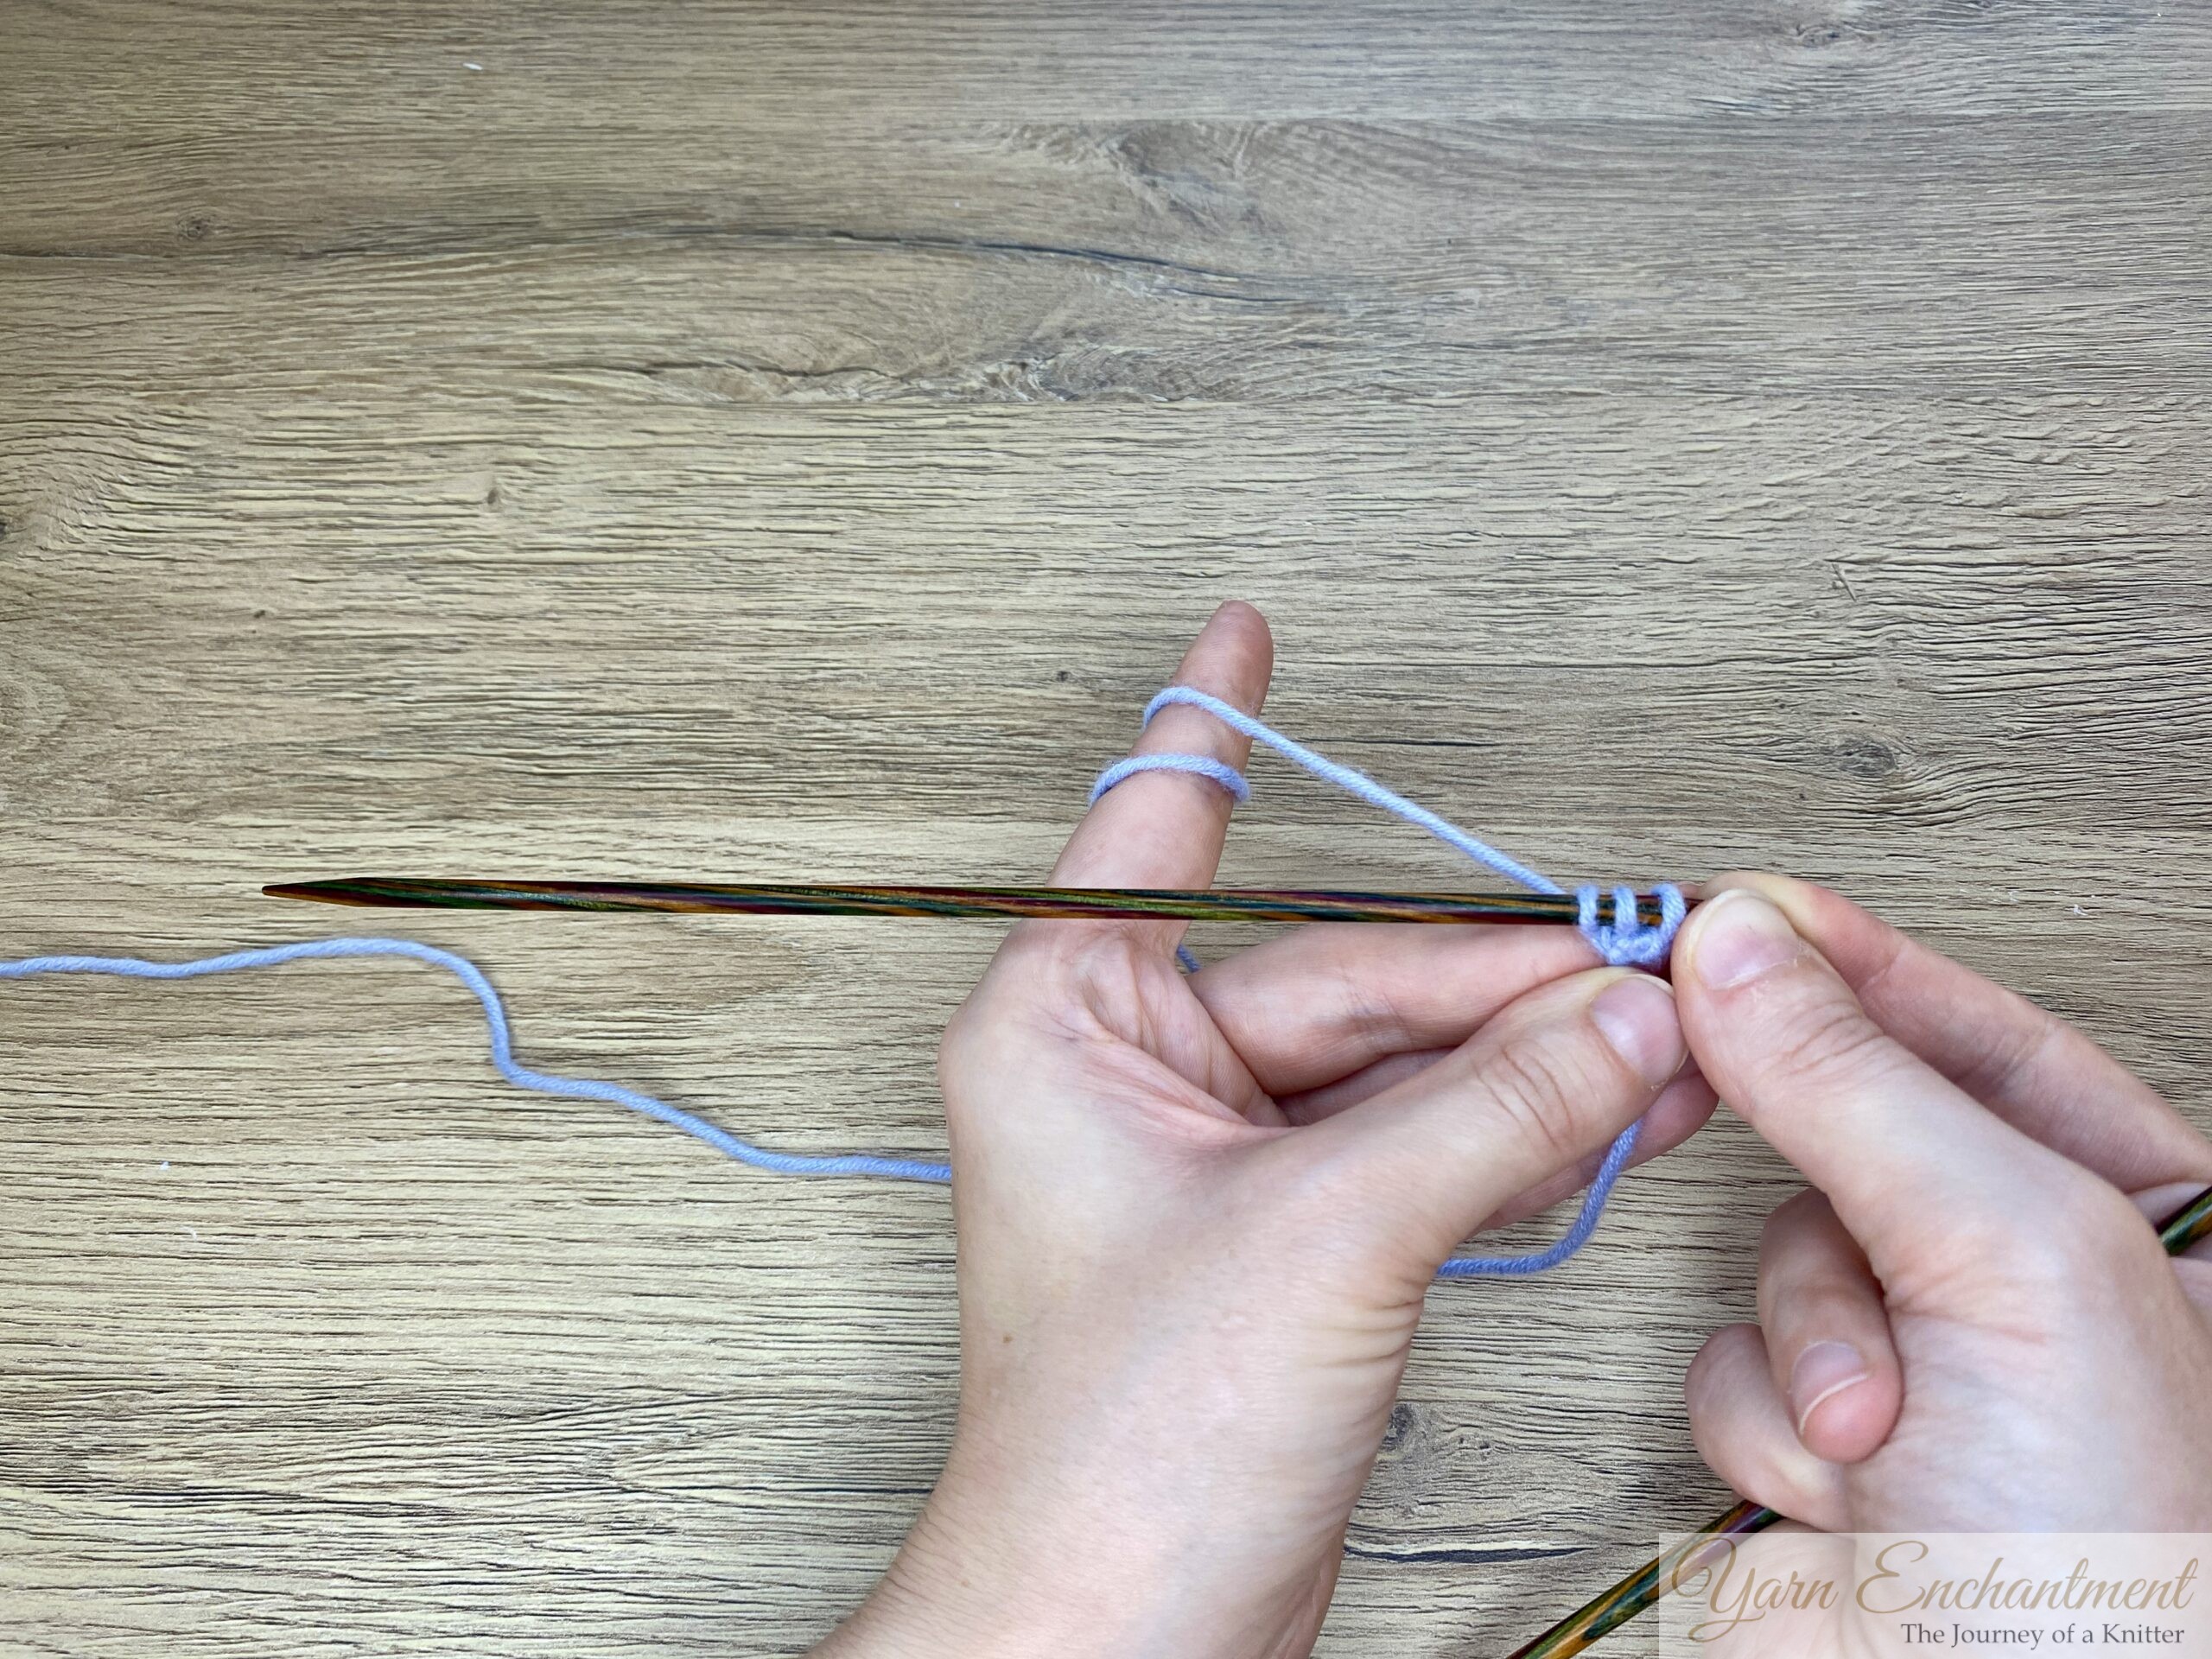
- Without turning, slide your stitches to the other end of the needle.
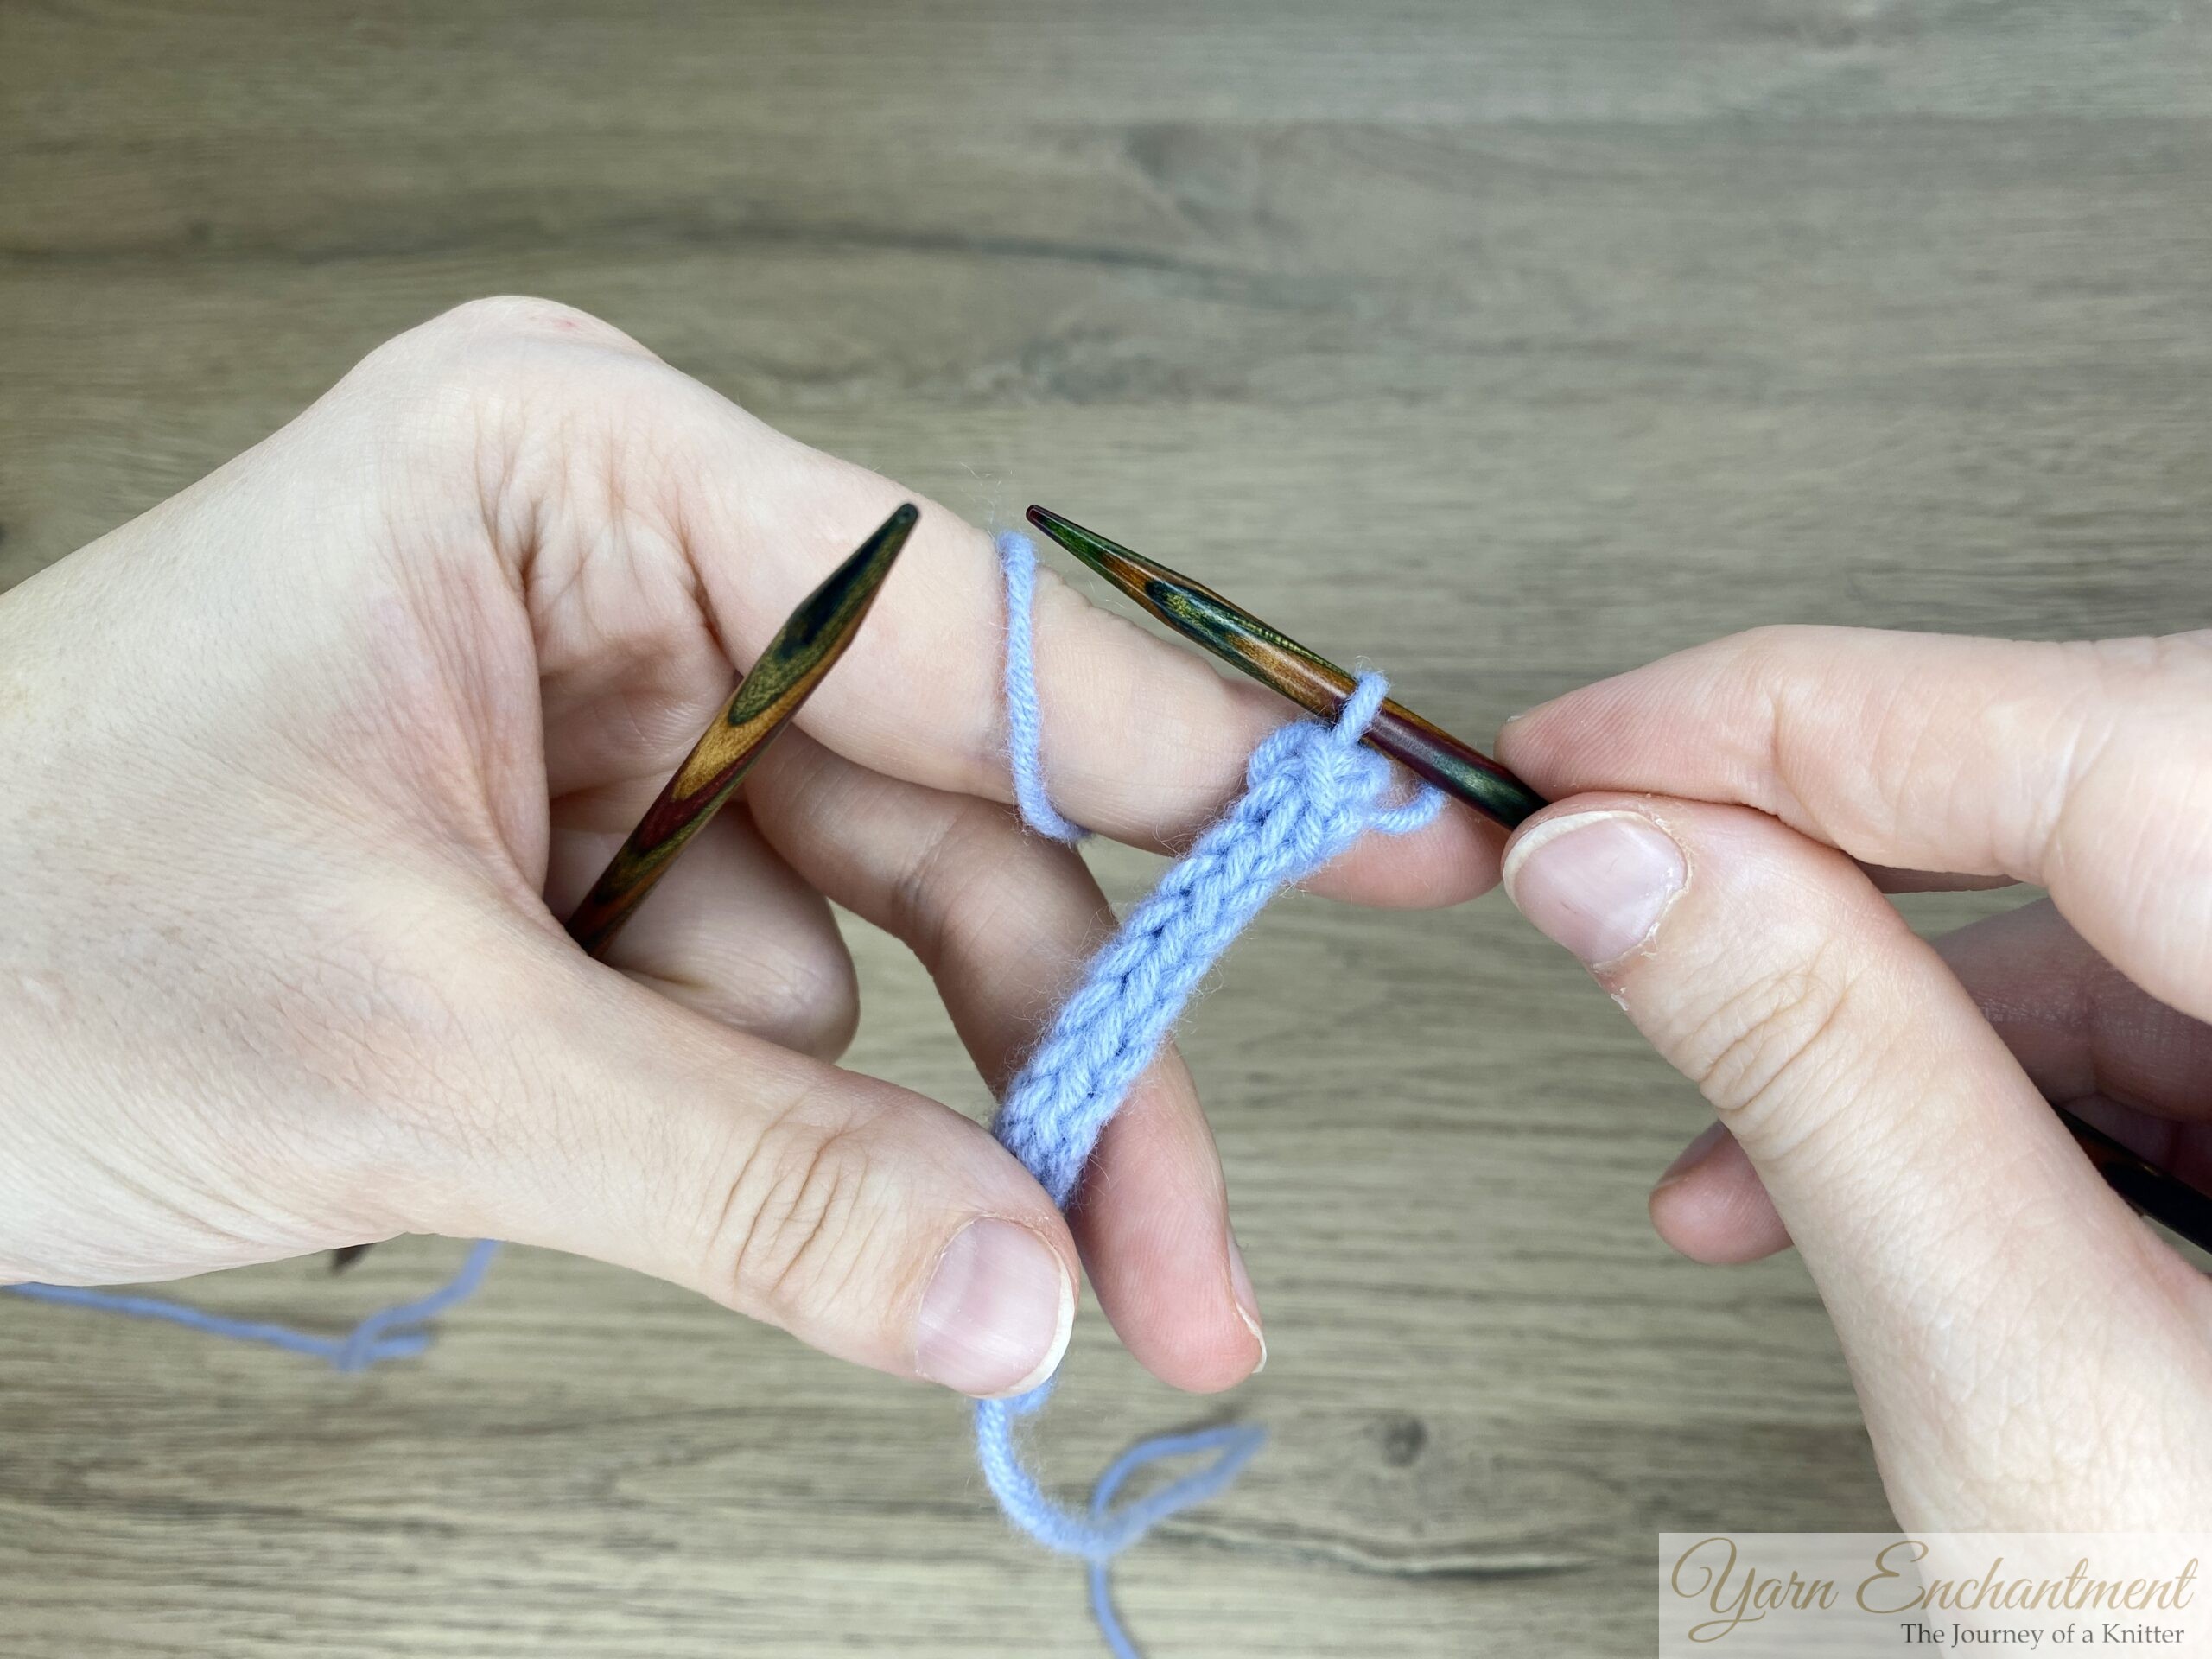
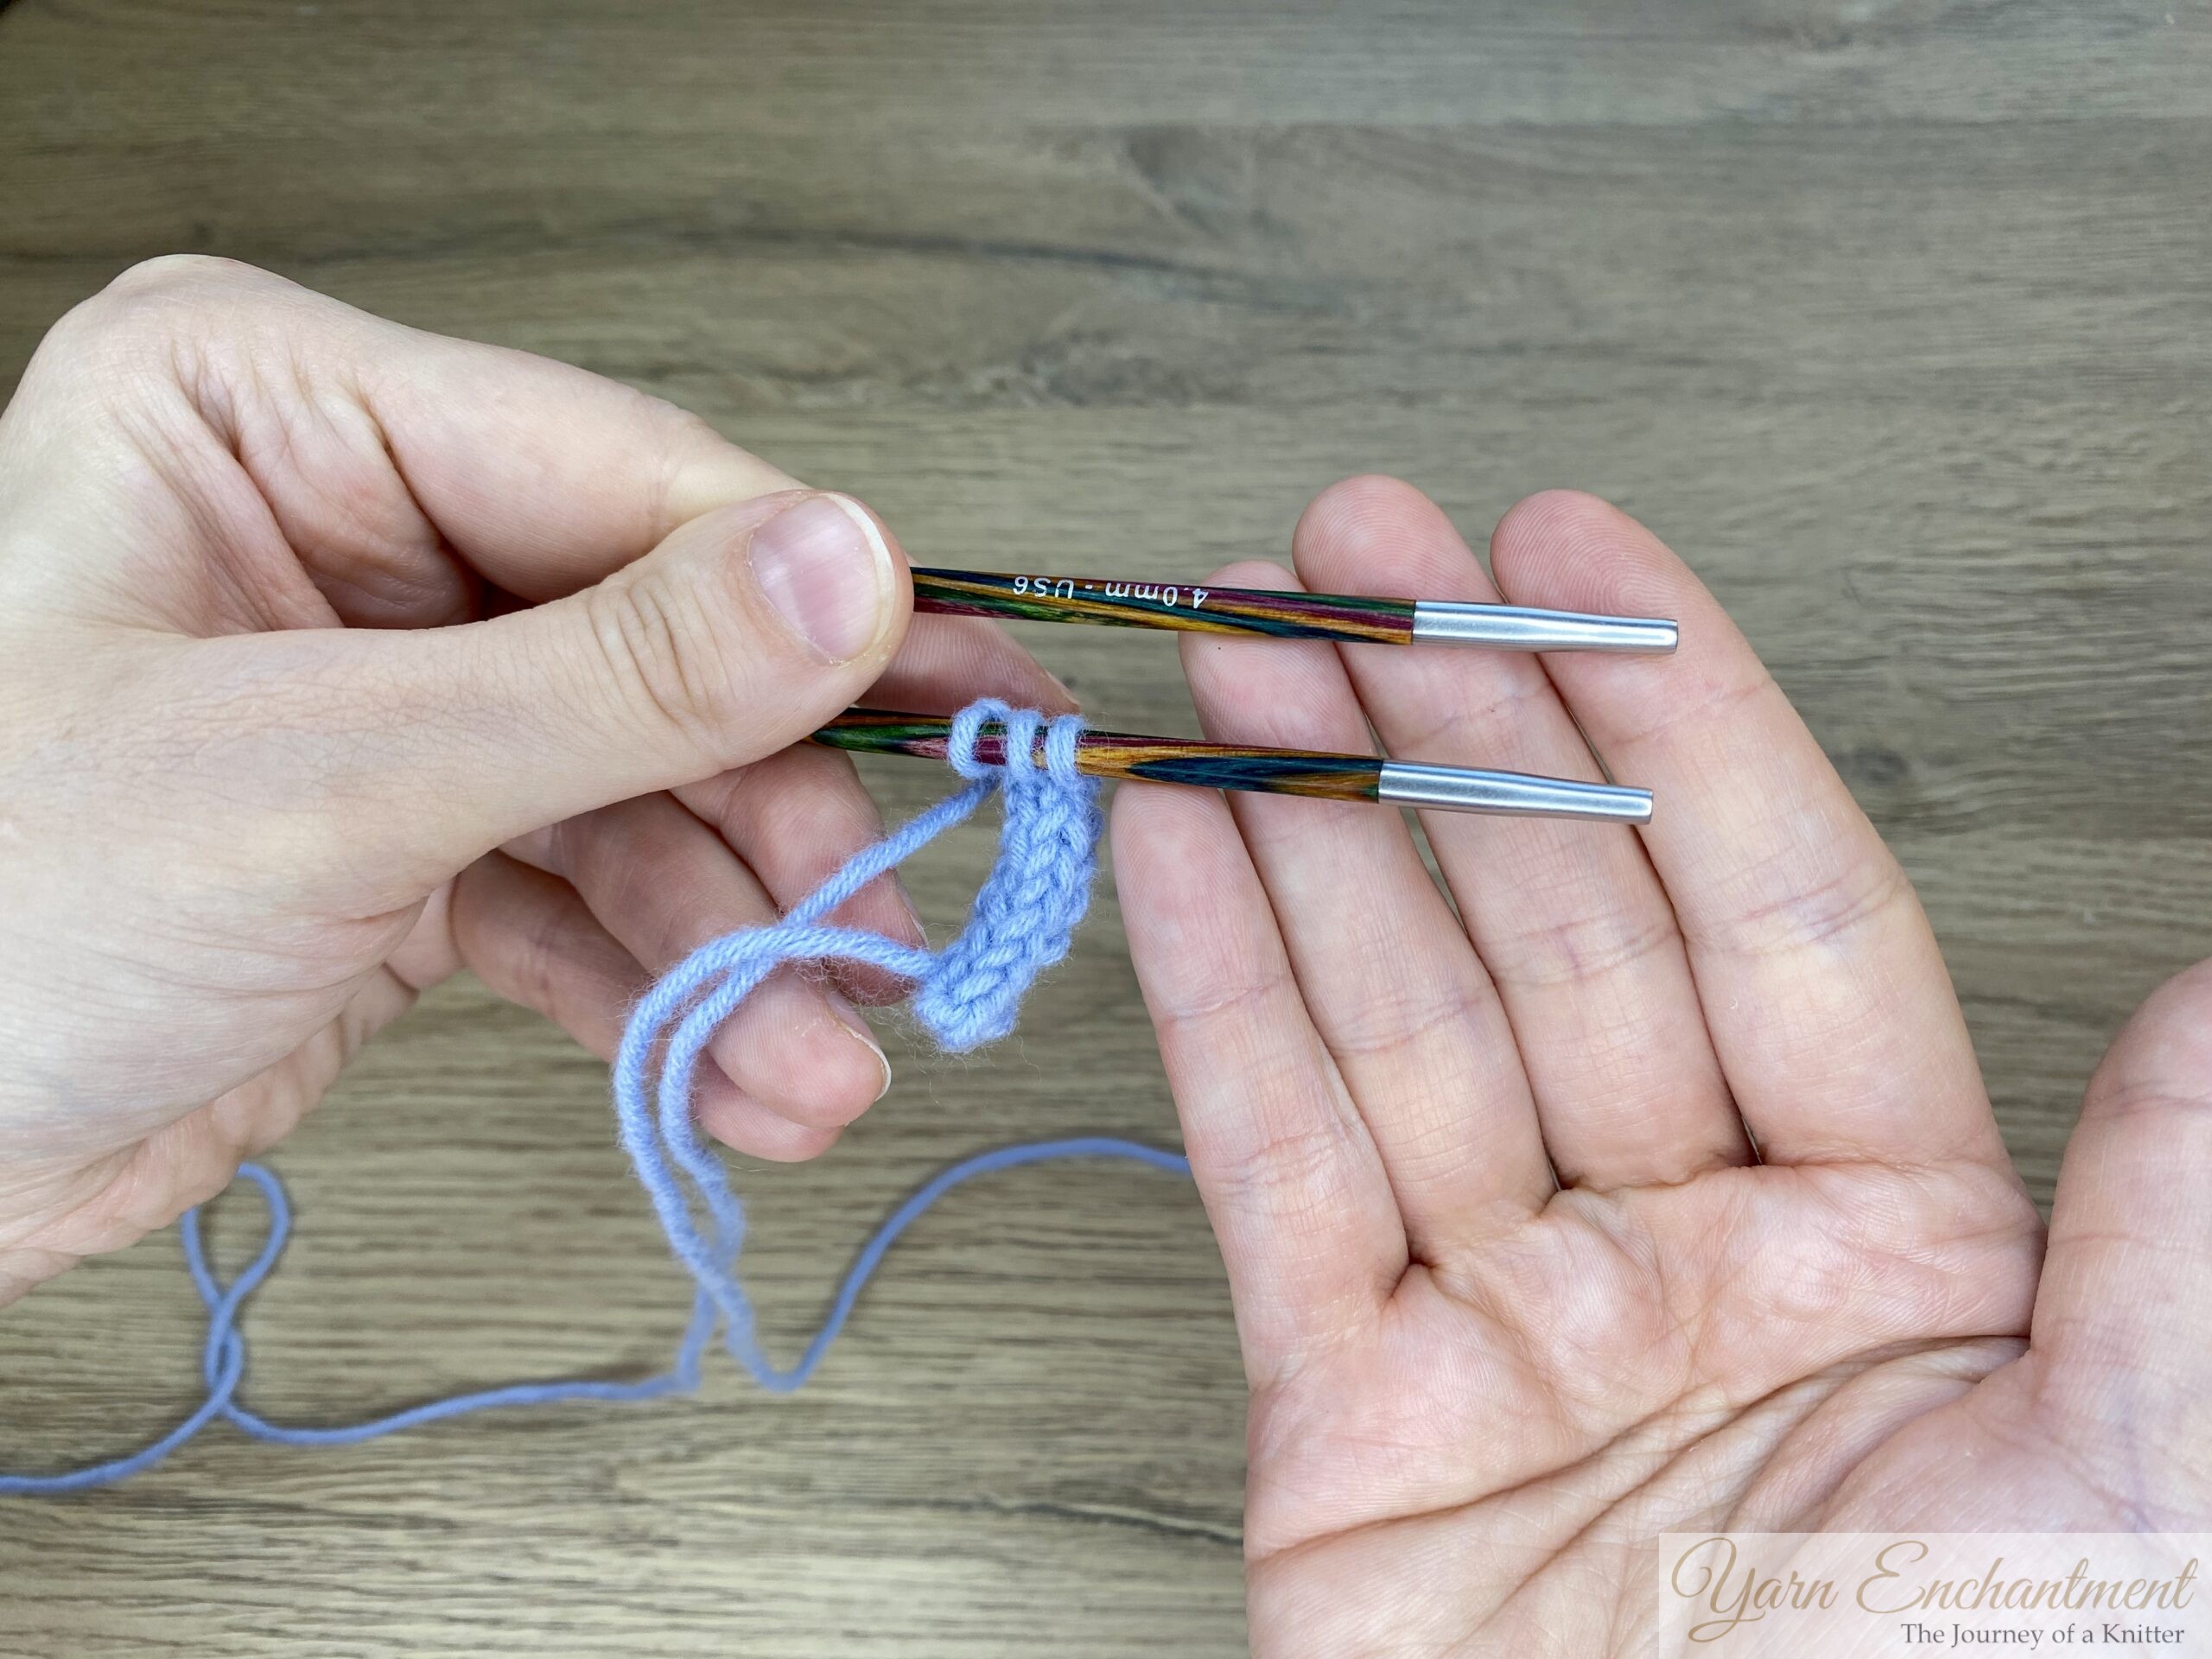
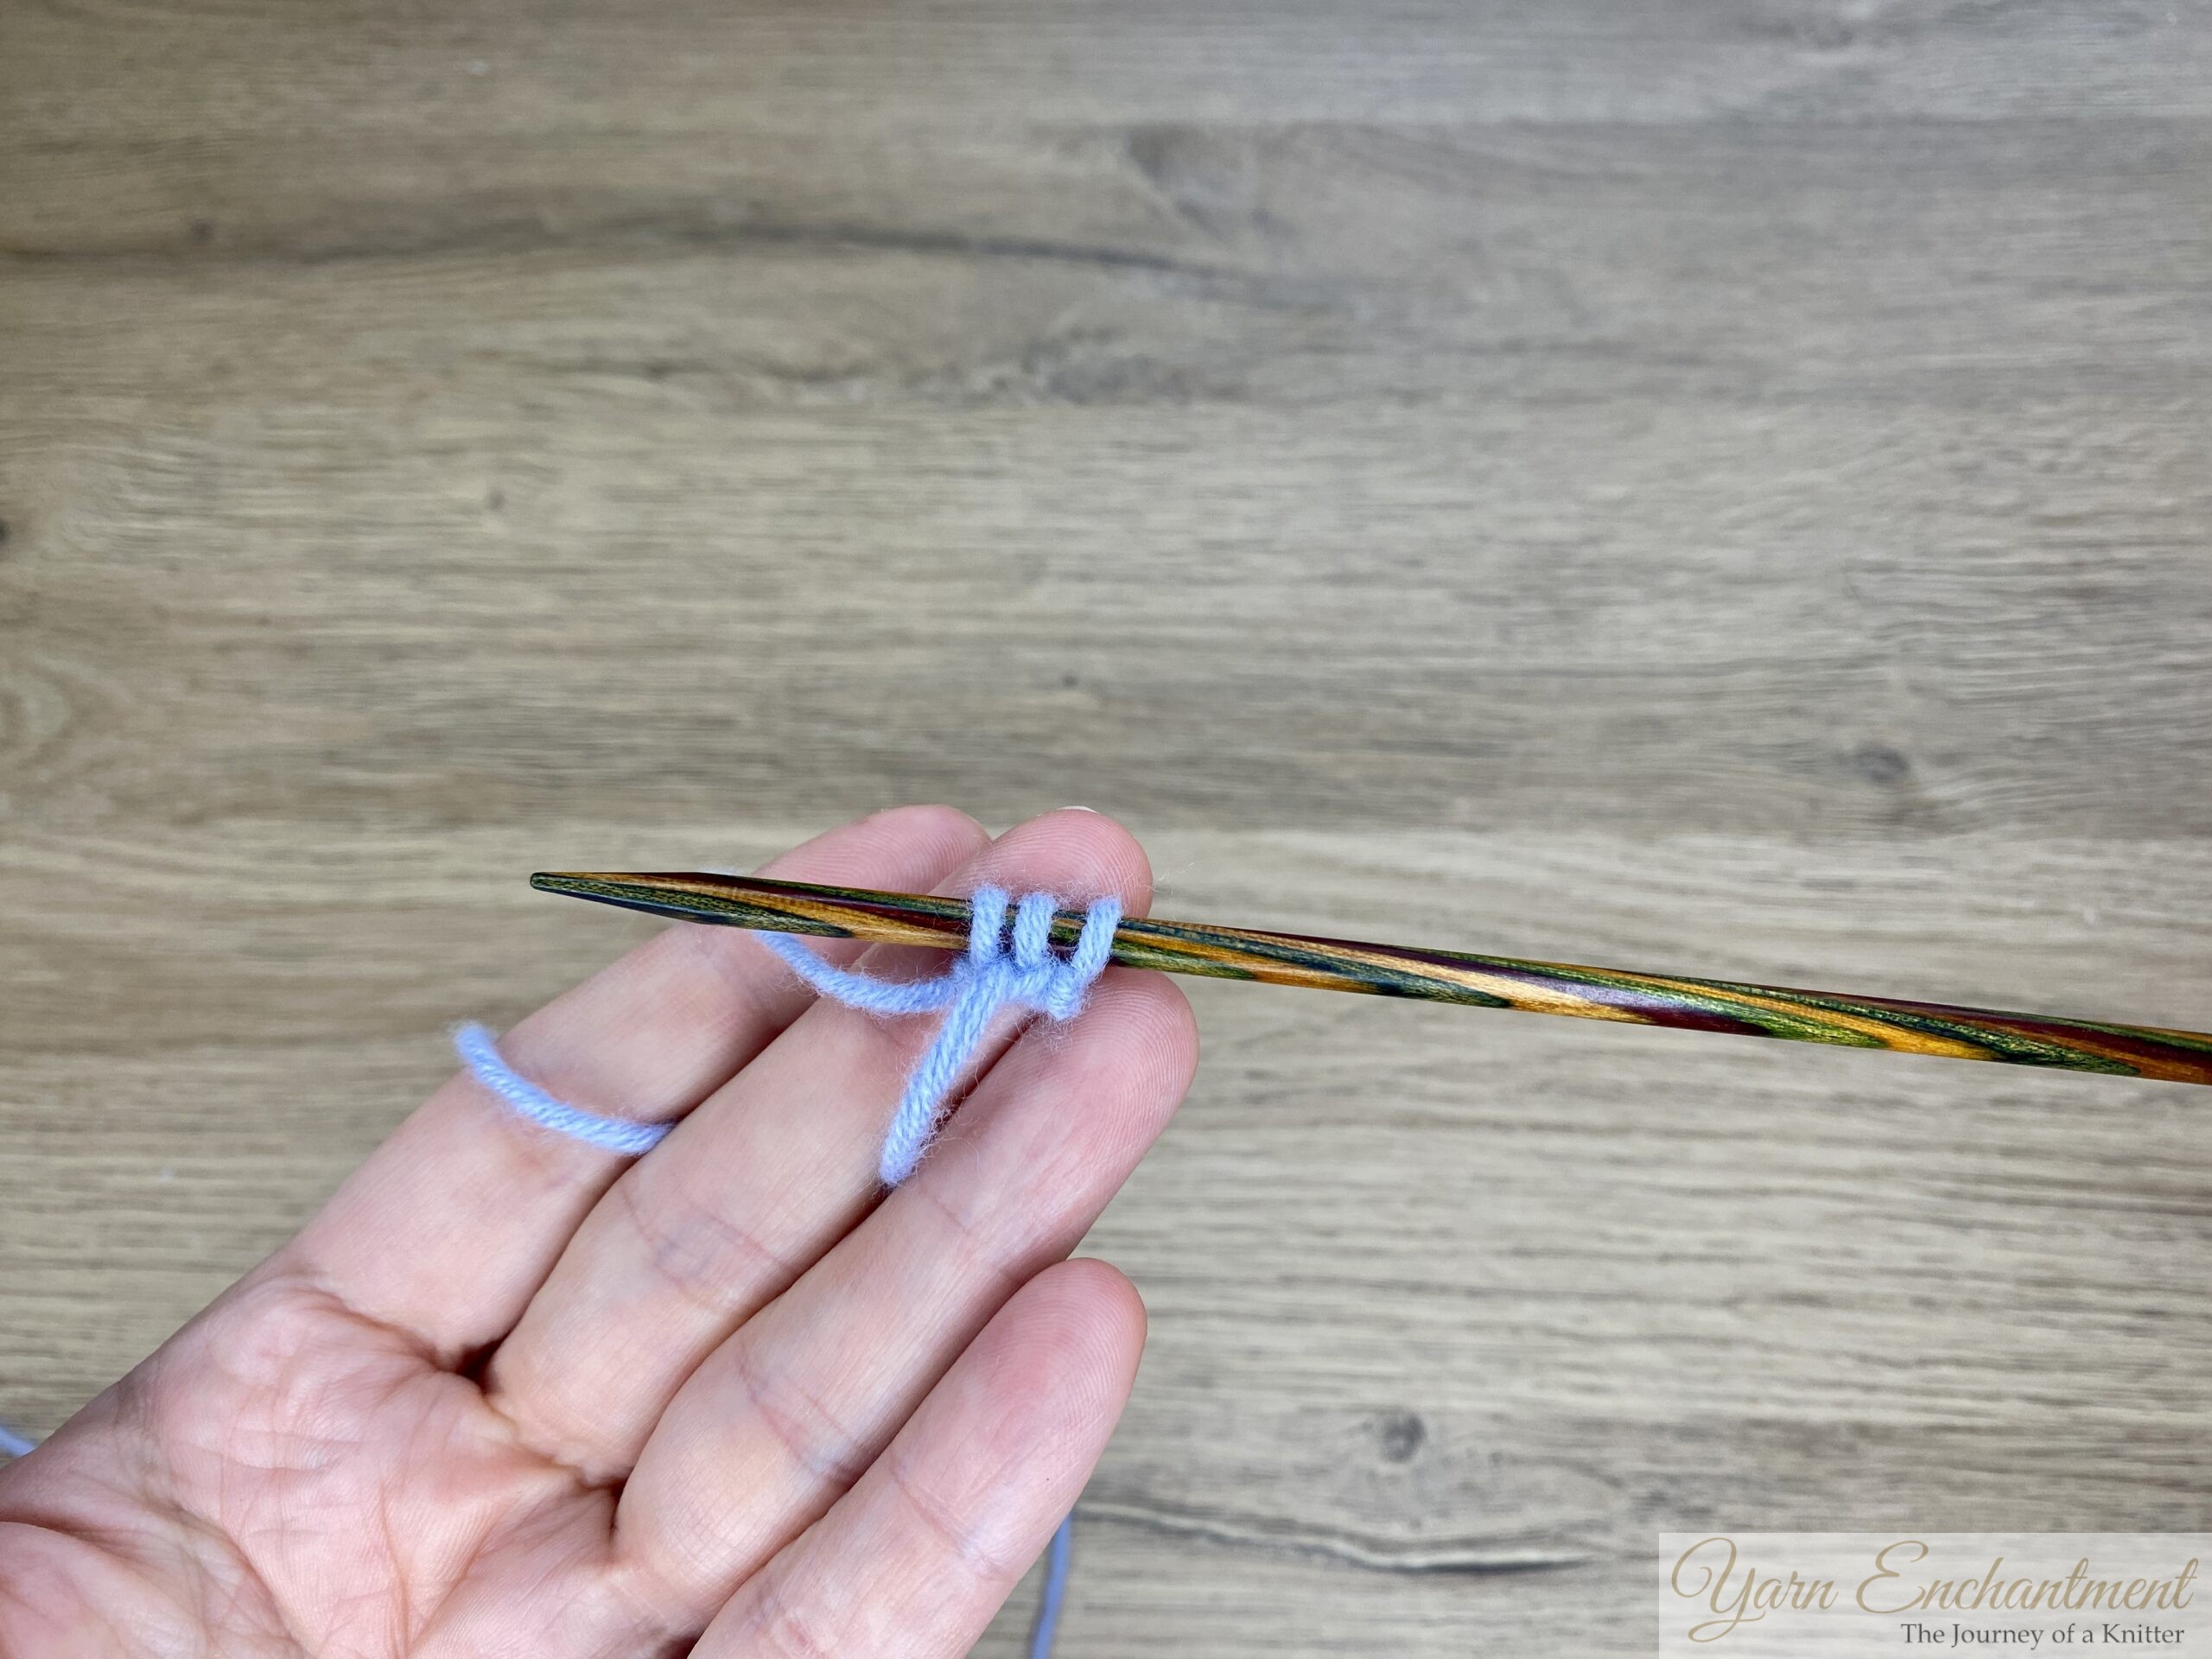 | 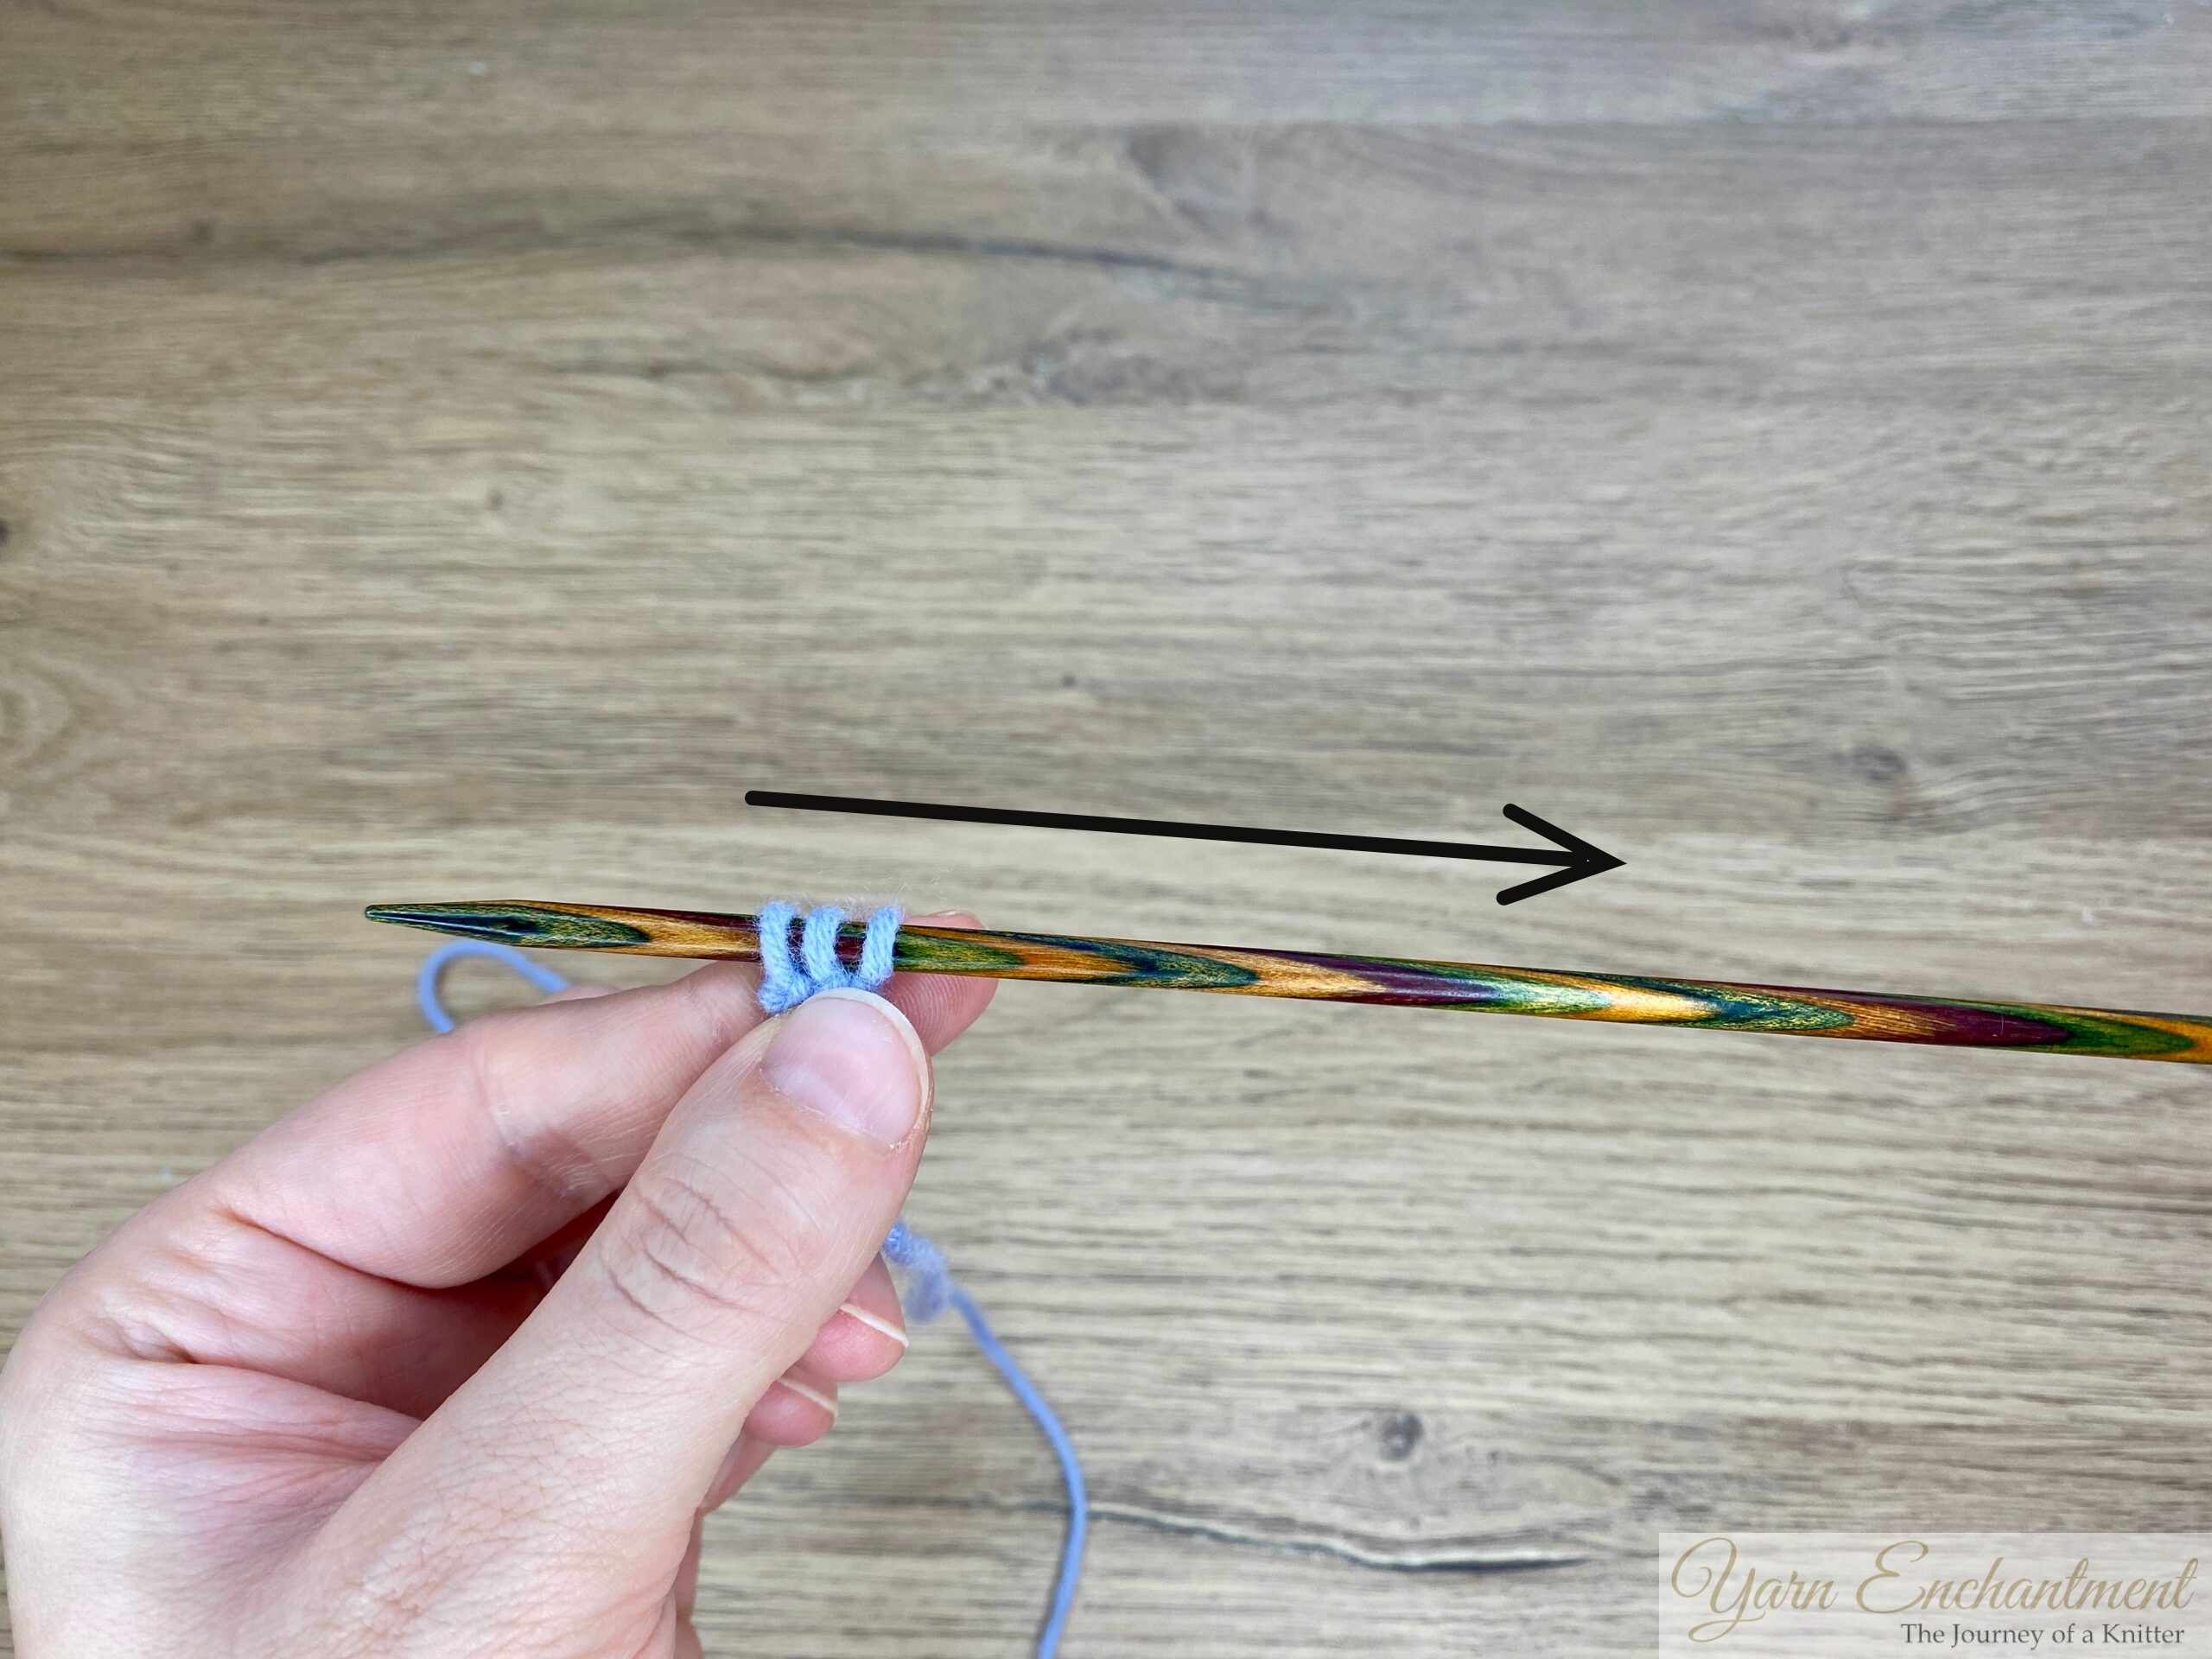 |  | Cast on the number of stitches needed for your I-cord - in this tutorial, use 3 stitches for a classic example. | Without turning your work, slide the stitches from the left side of your needle to the right tip. | At this point, your working yarn and cast-on will both be positioned at the right end of your needle, |


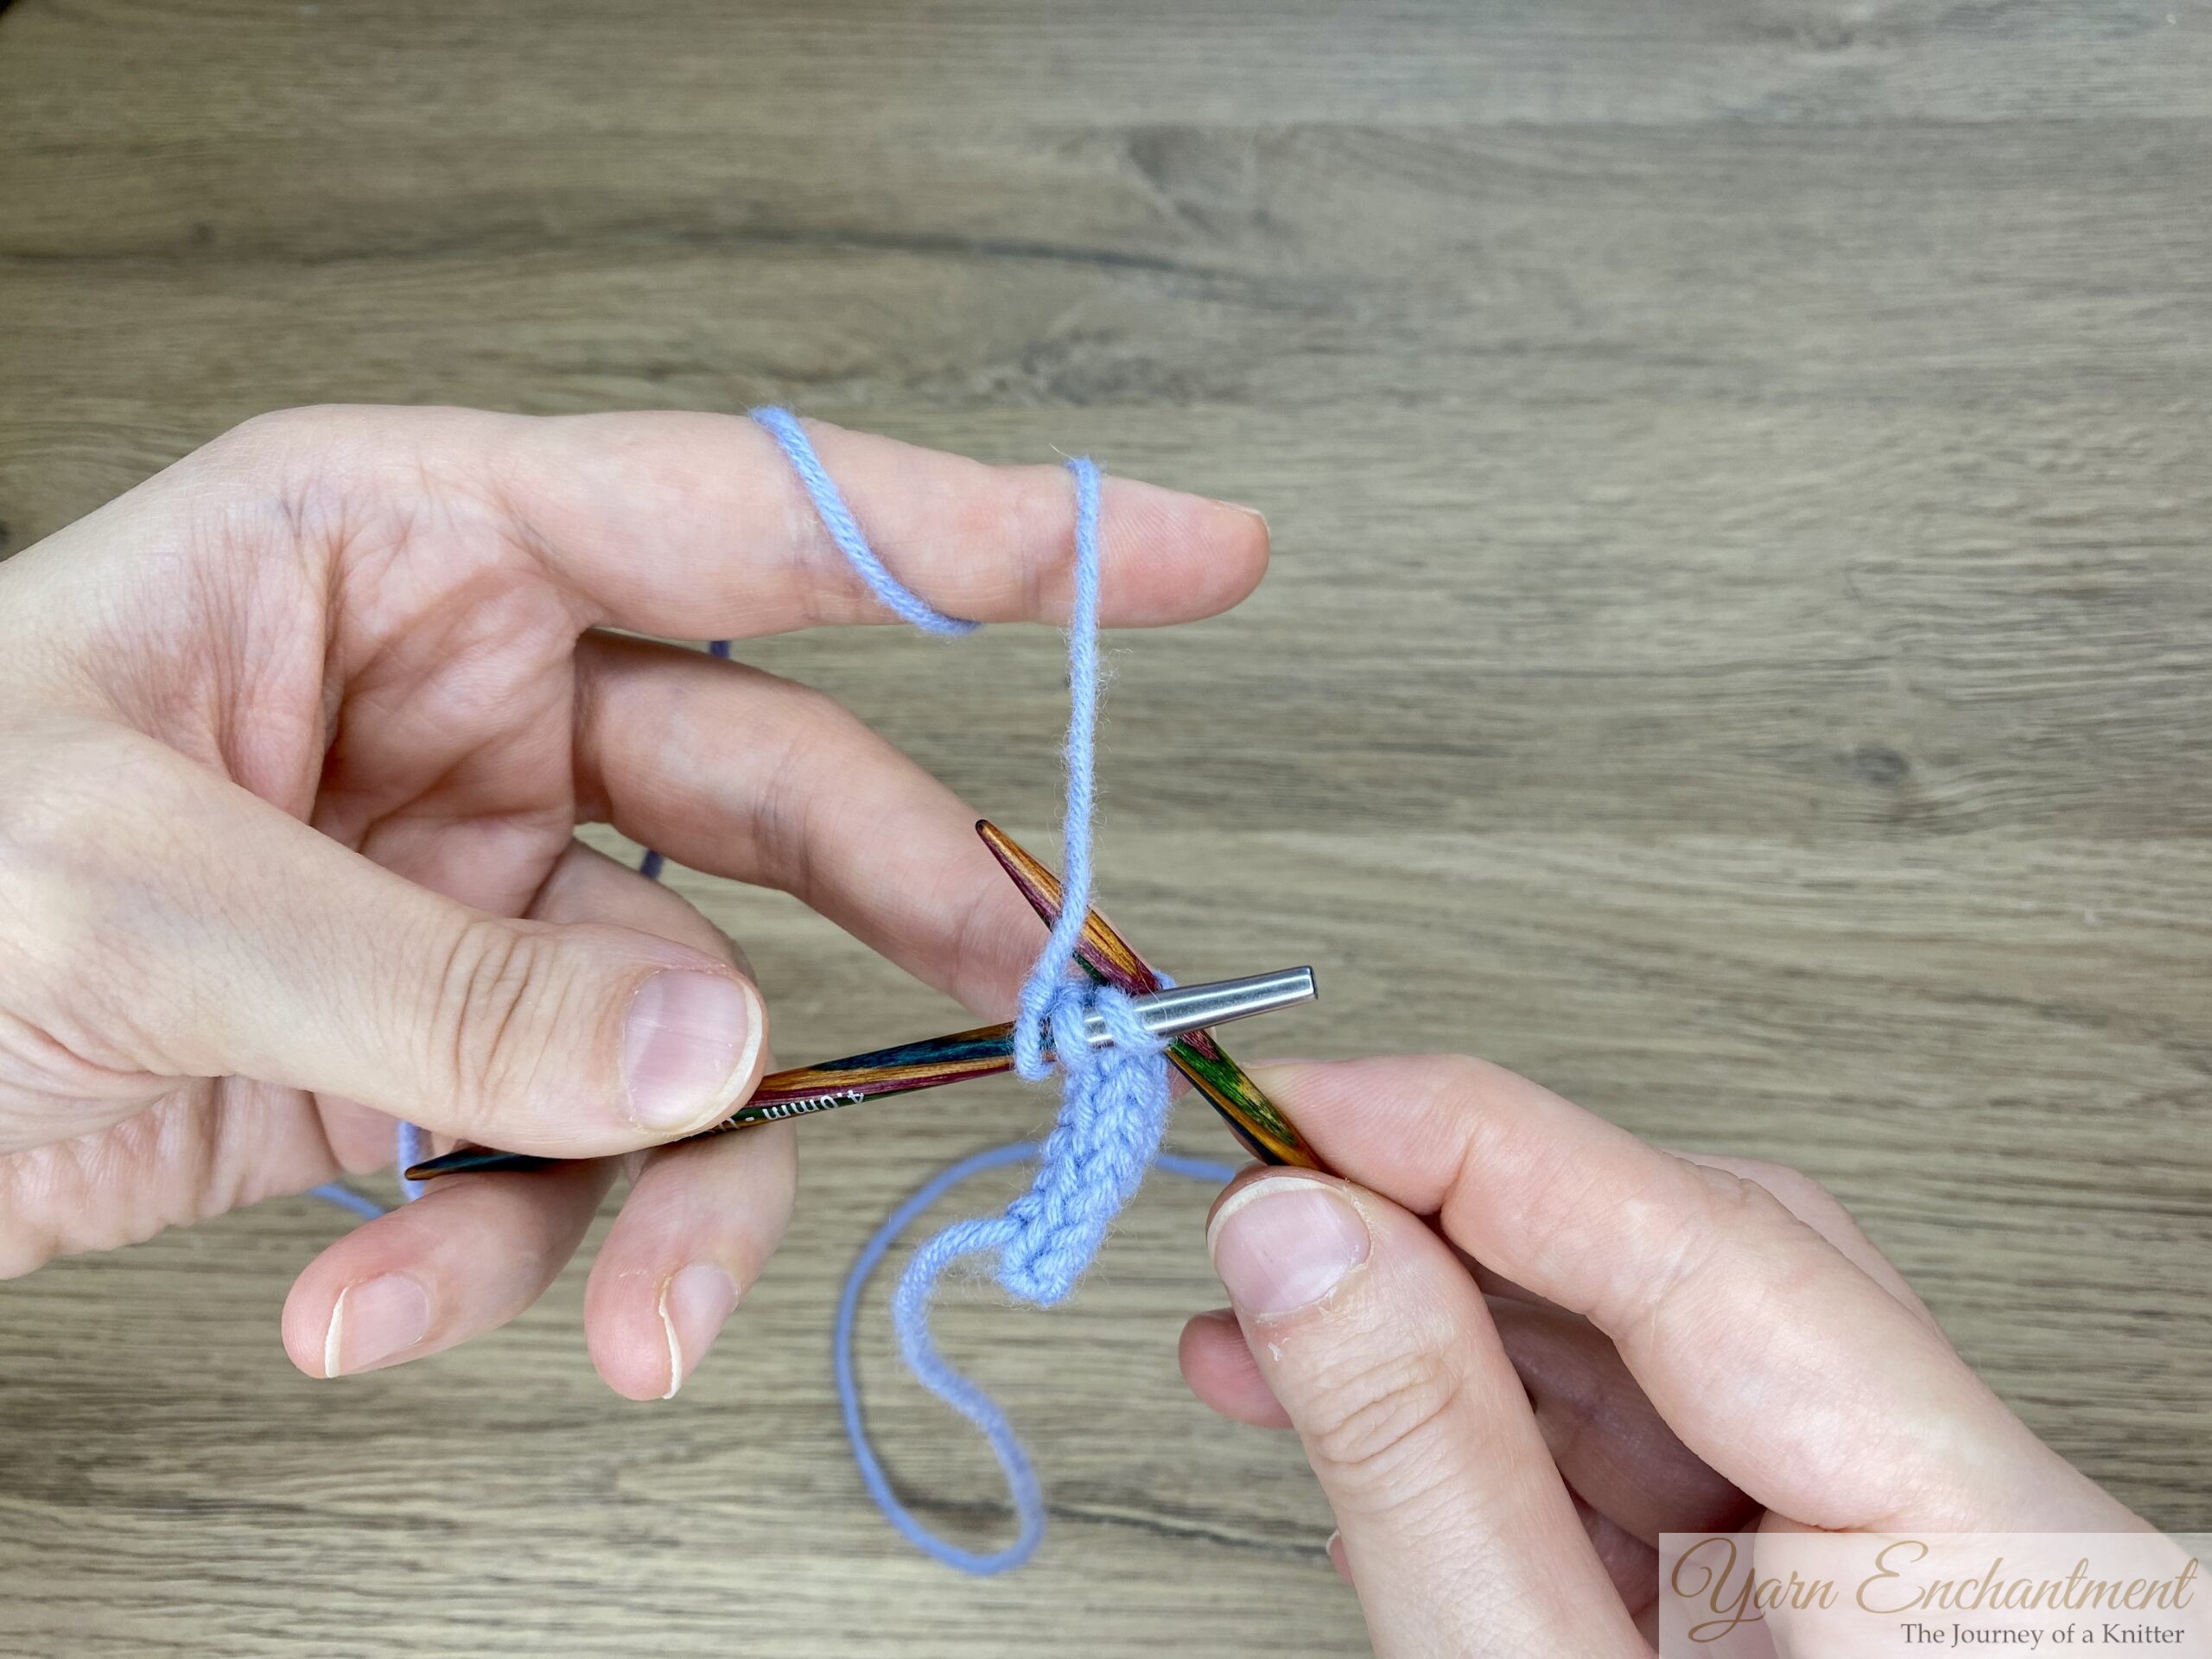
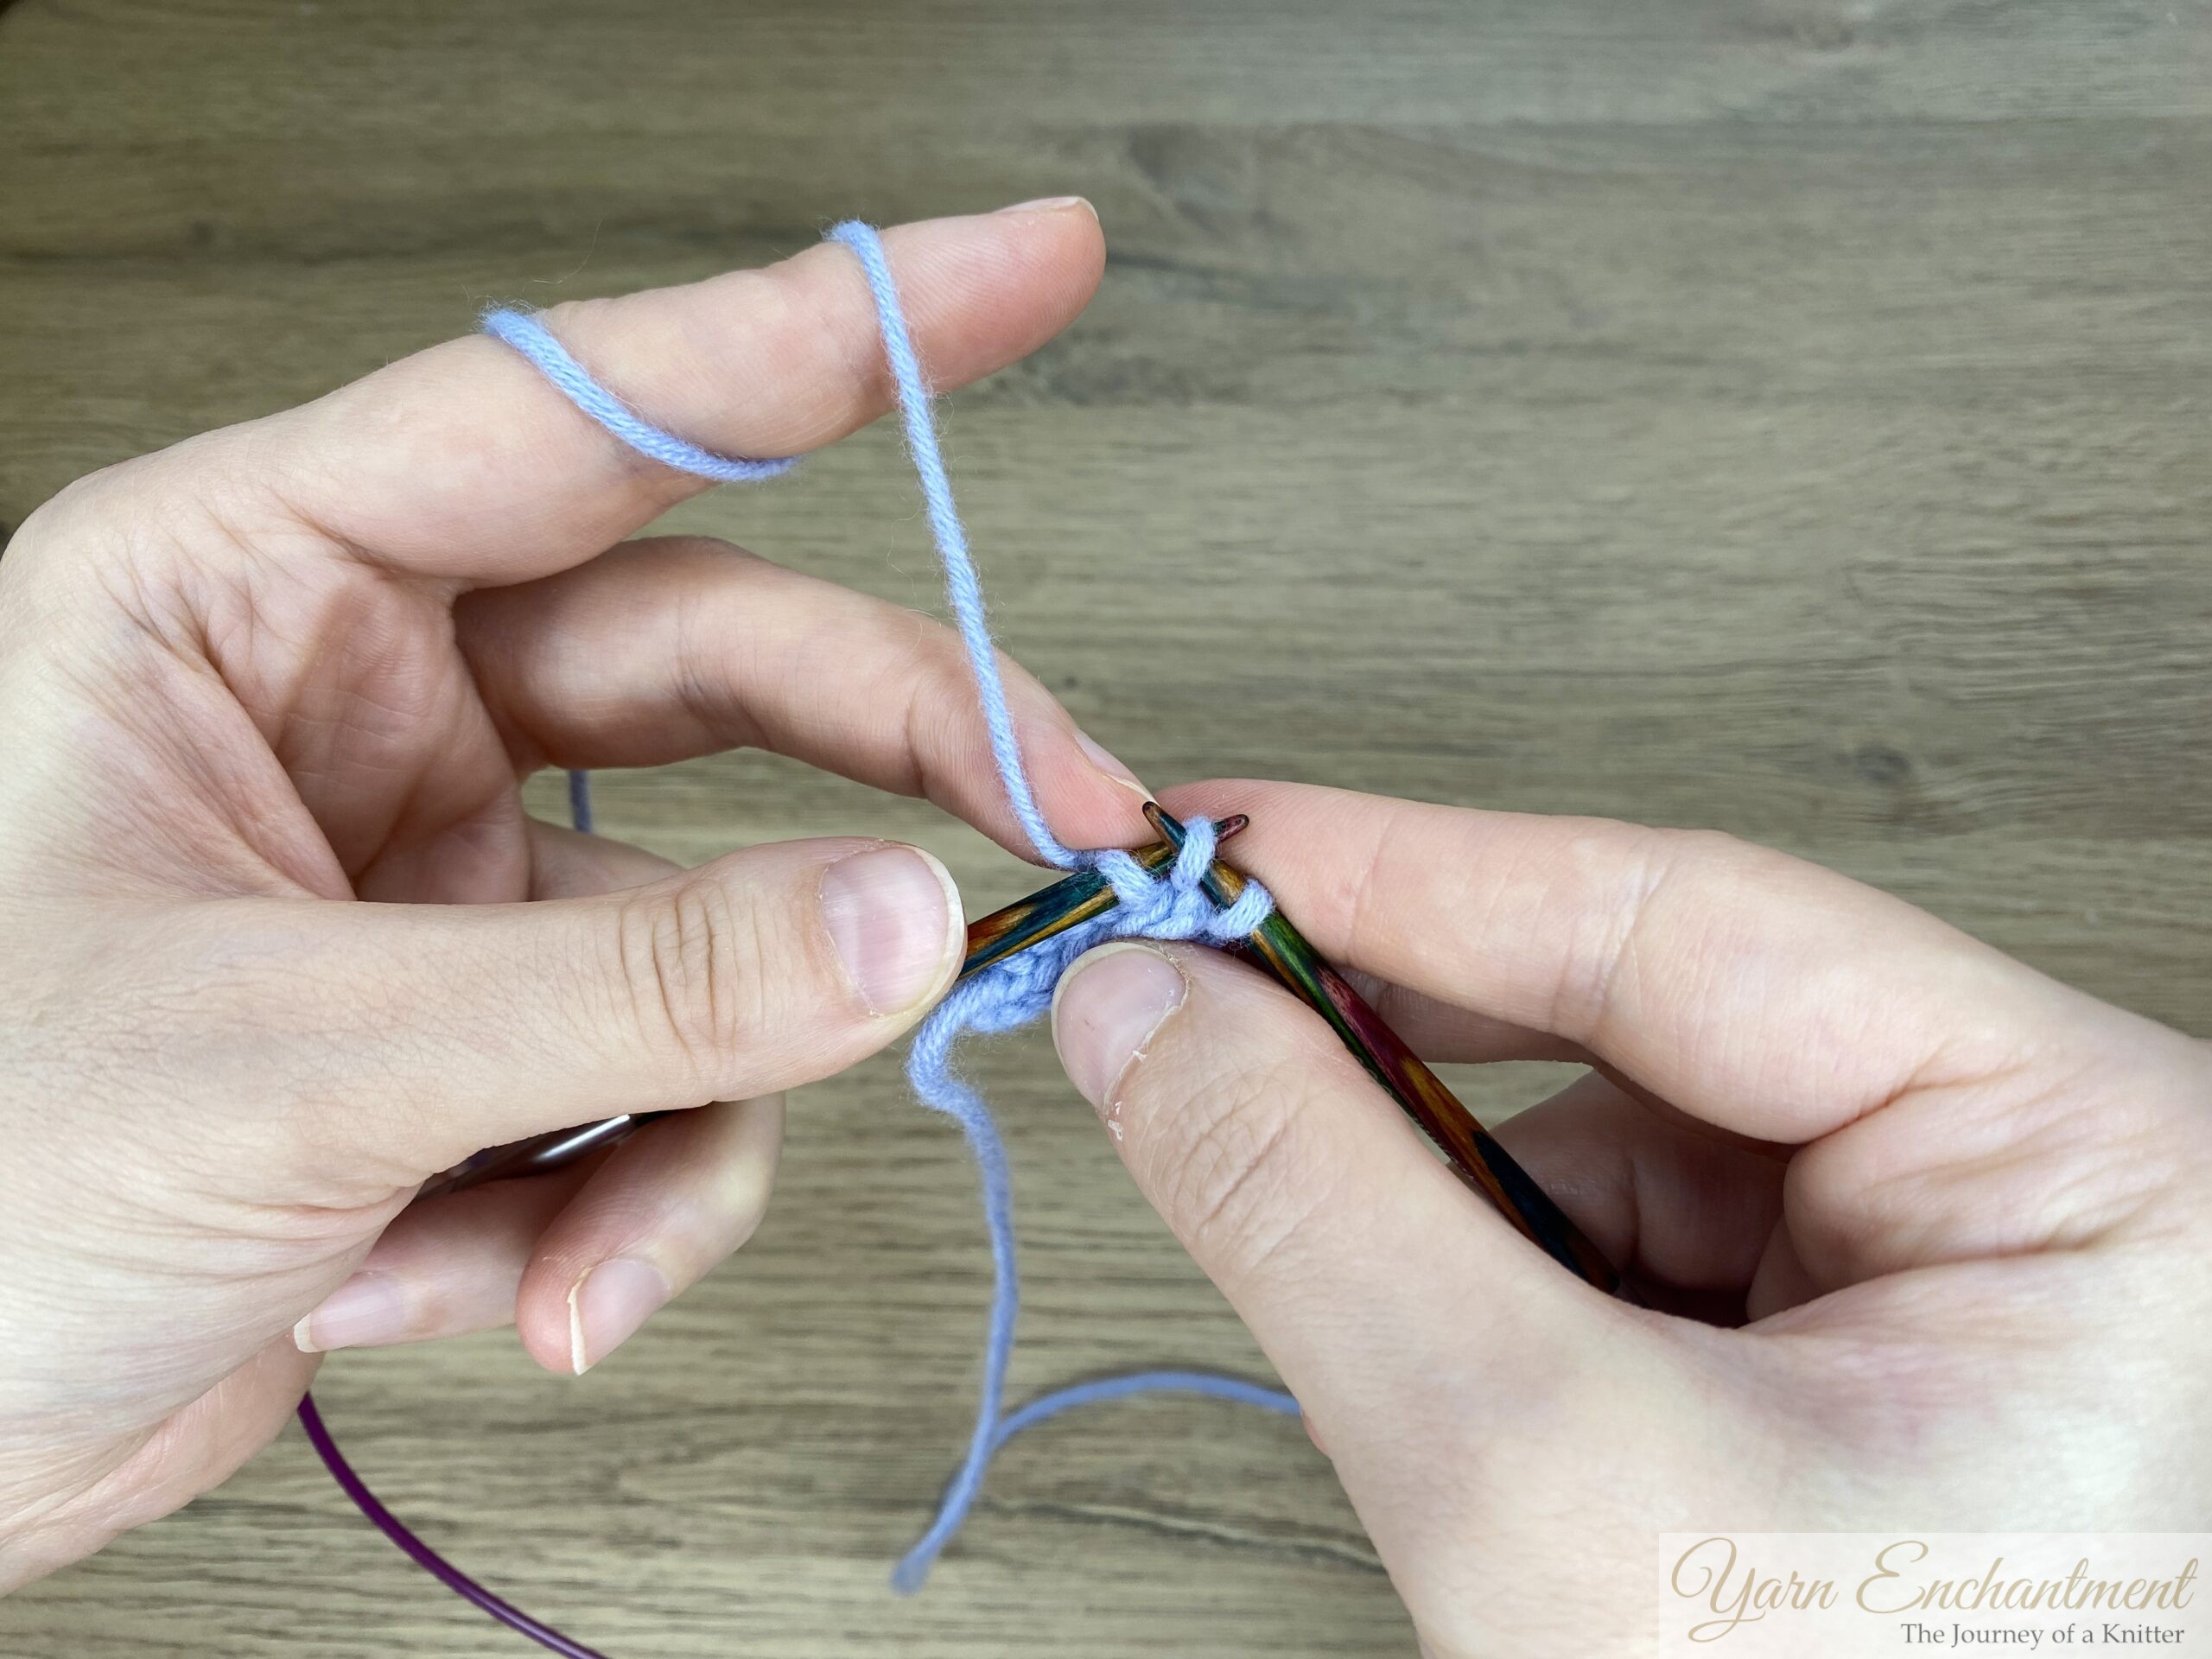
2. Knit the next row, pulling the working yarn snug across the back to form the tube.
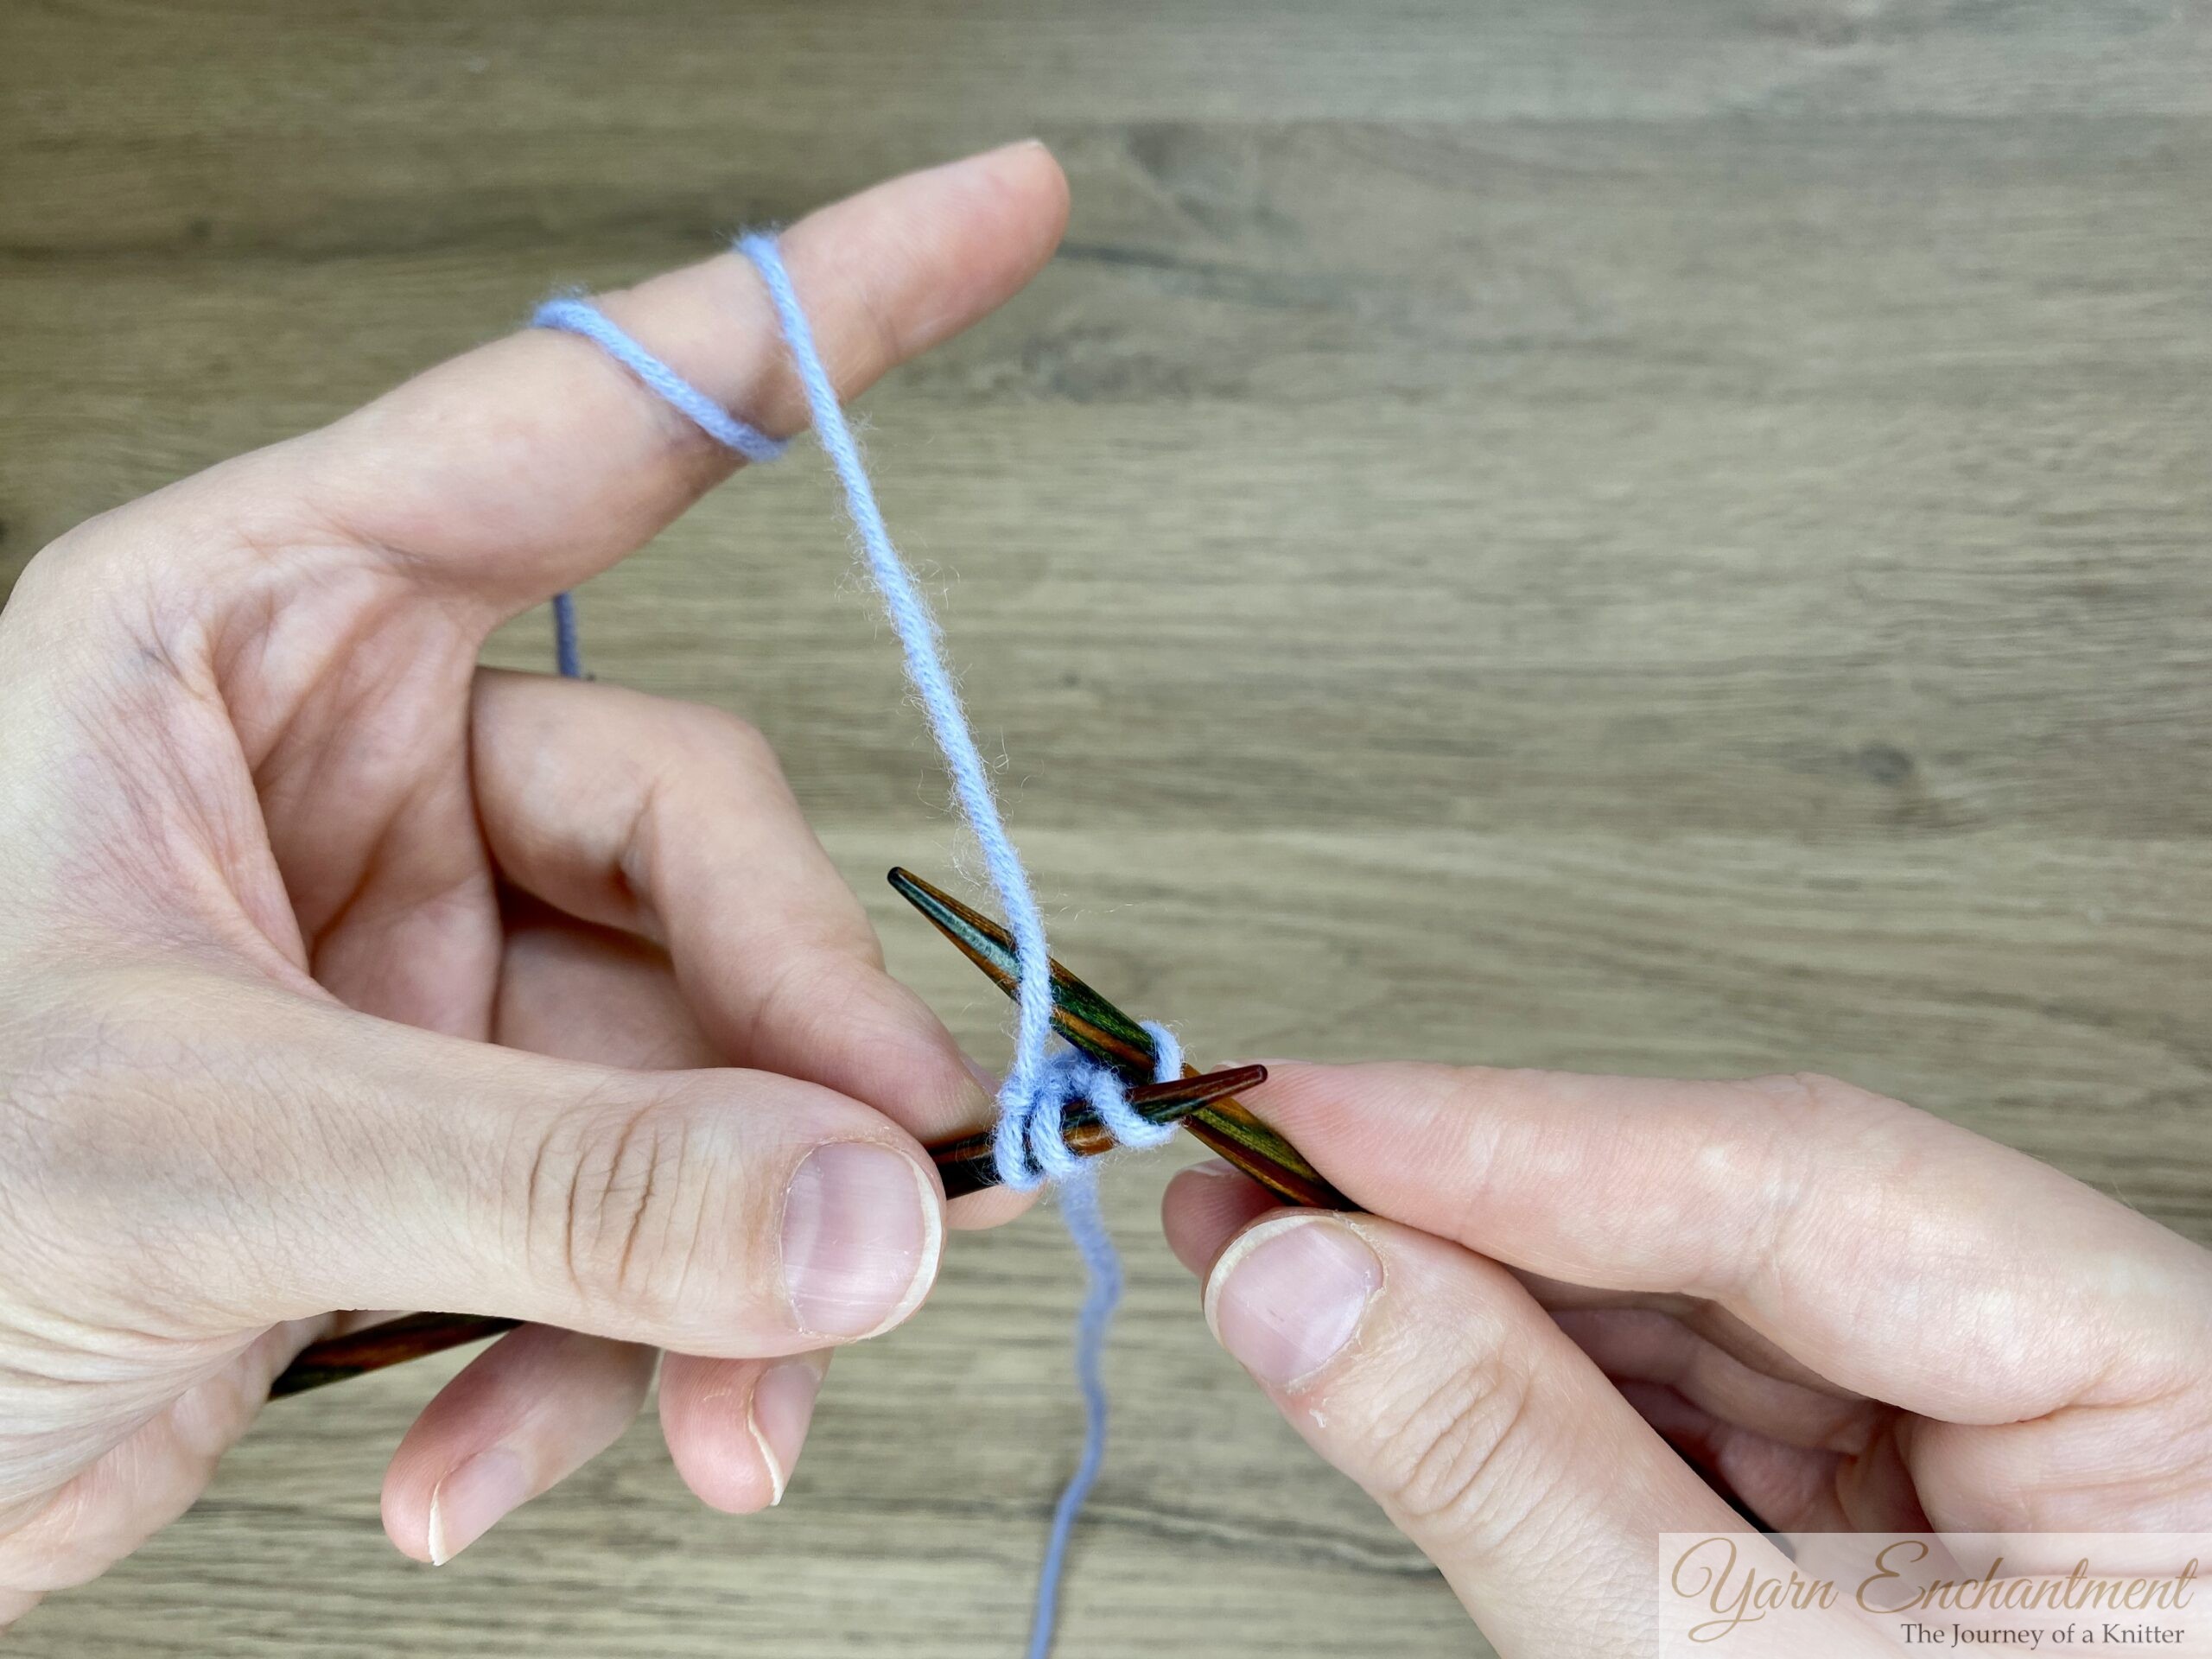
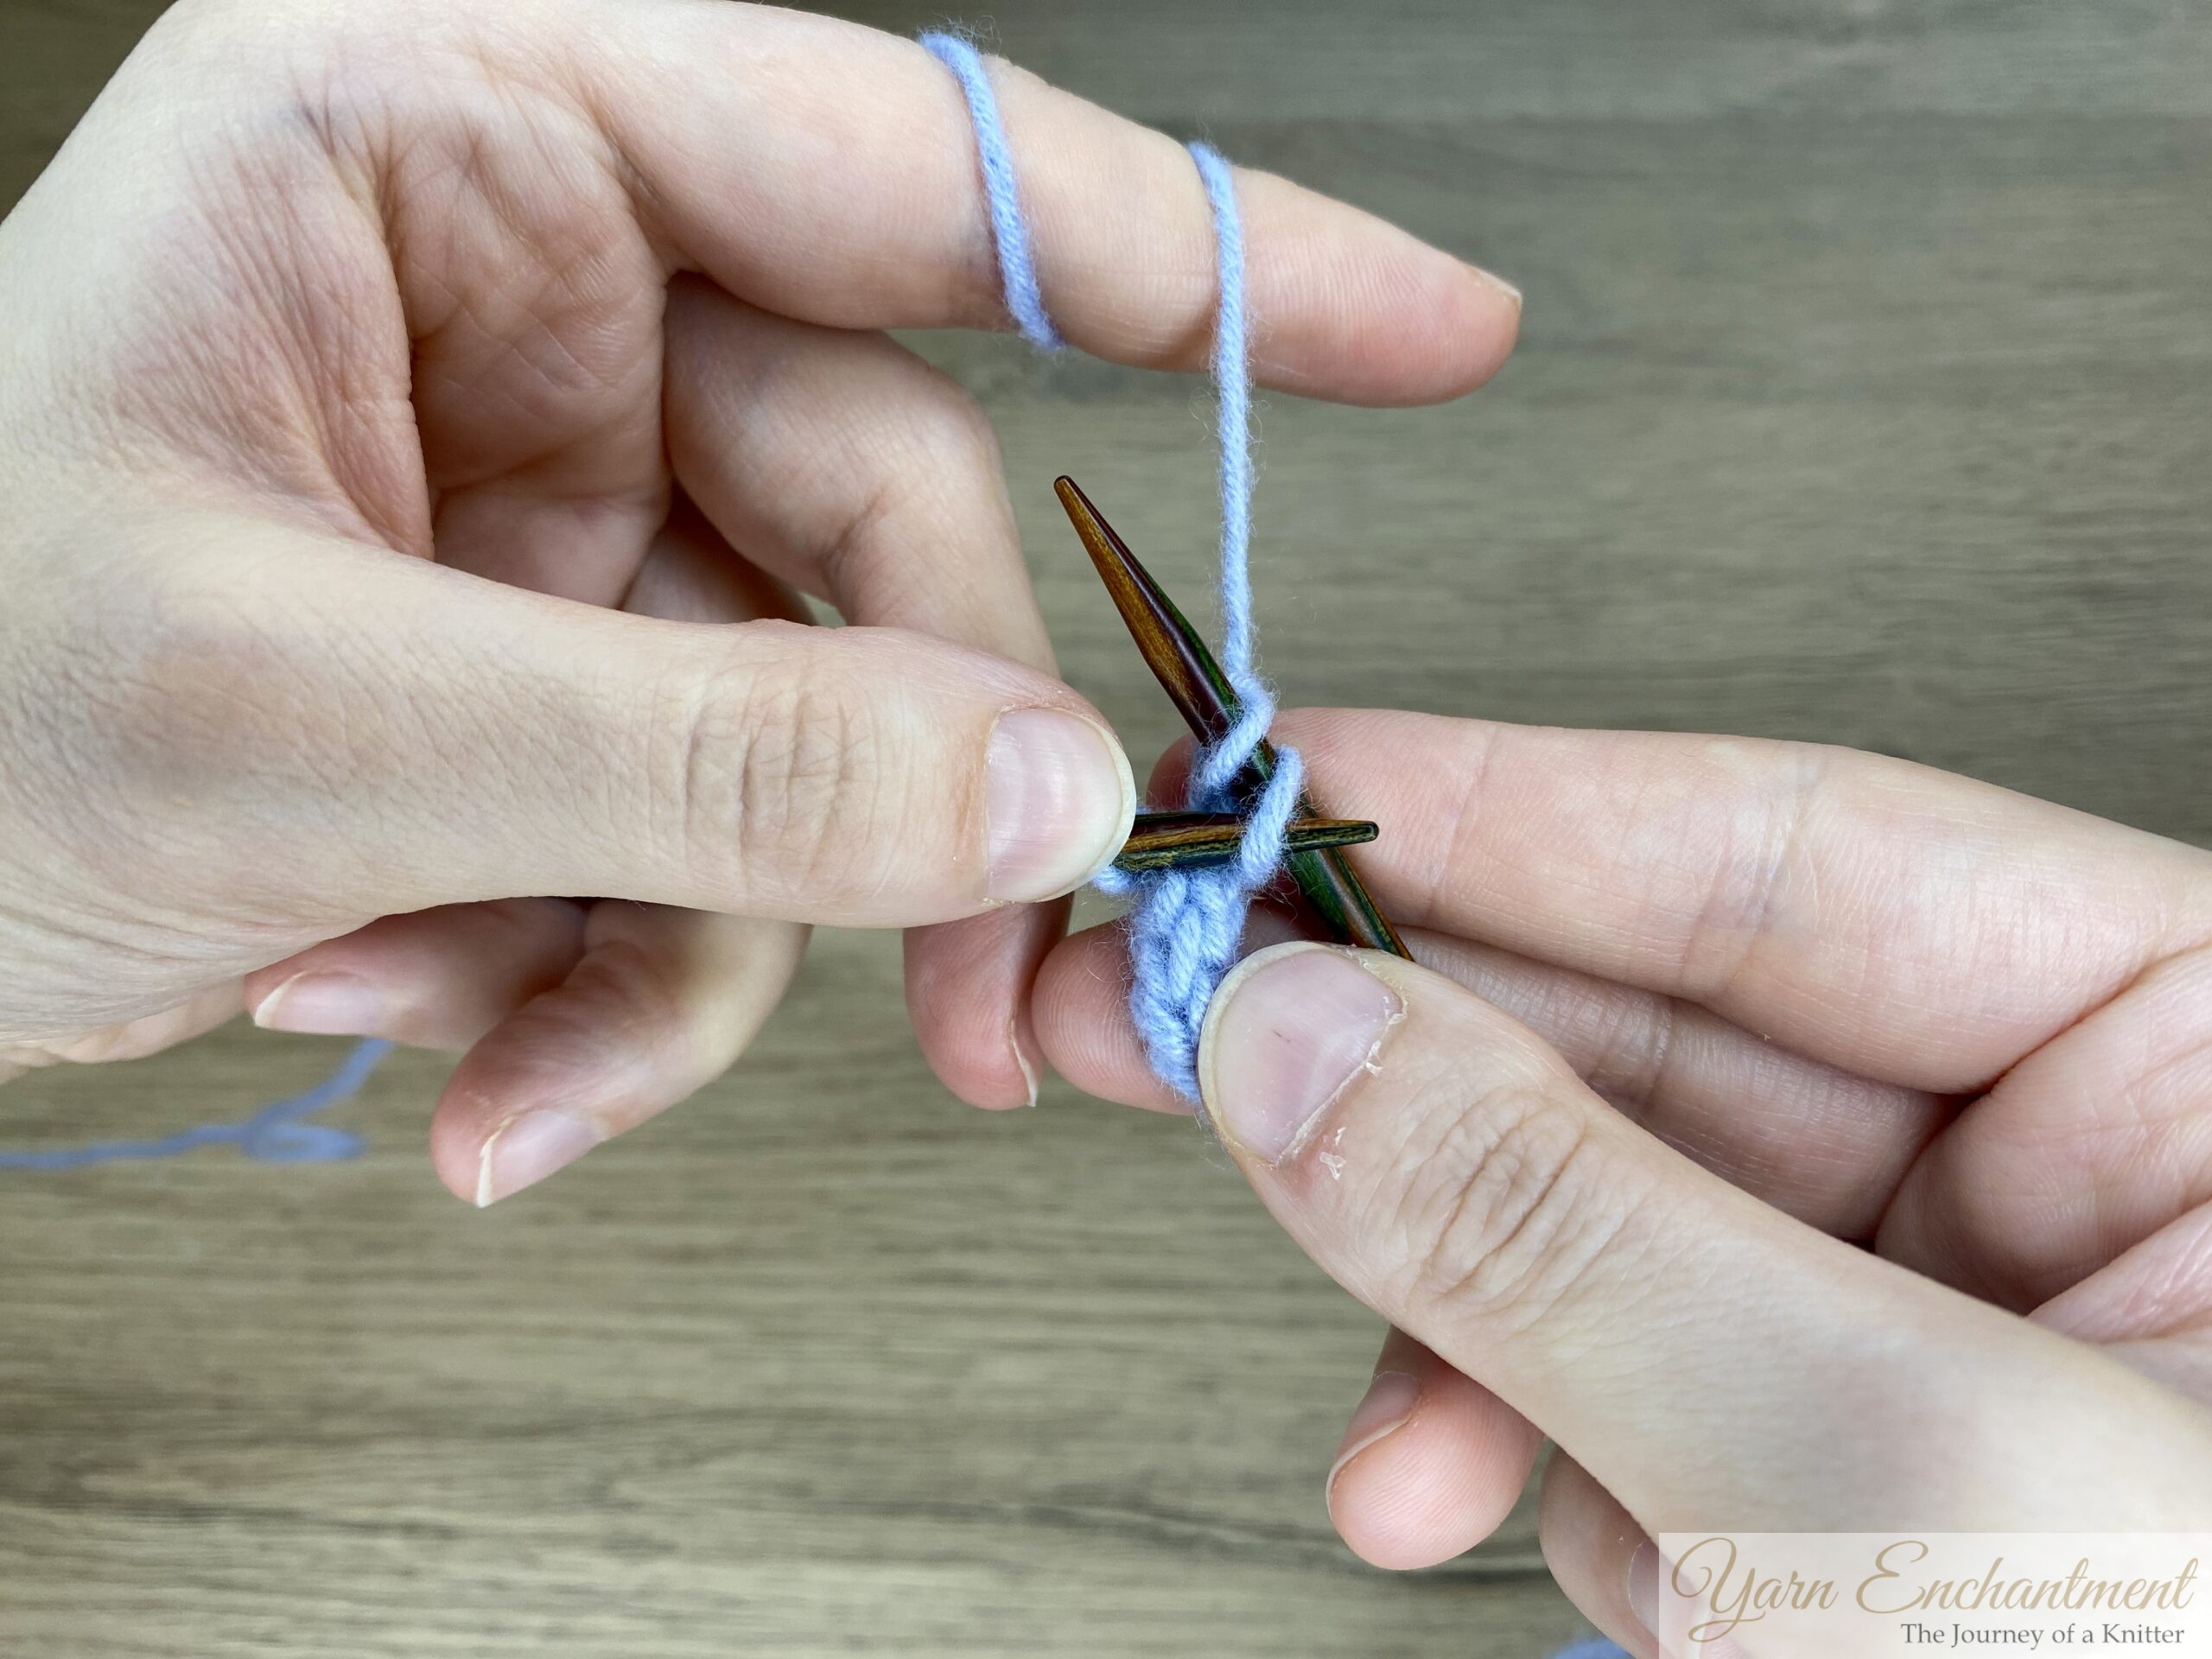
💡Tip: After pulling through your yarn, pause and lay your needle tips in a cross shape against each other. Next, gently pull the working yarn until snug, but not to much - this little measuring trick helps keep the yarn strands at the back even and tidy, giving your cord a neat finish. Knit the next two stitches as normal, without tugging, for a balanced look throughout your I-cord.
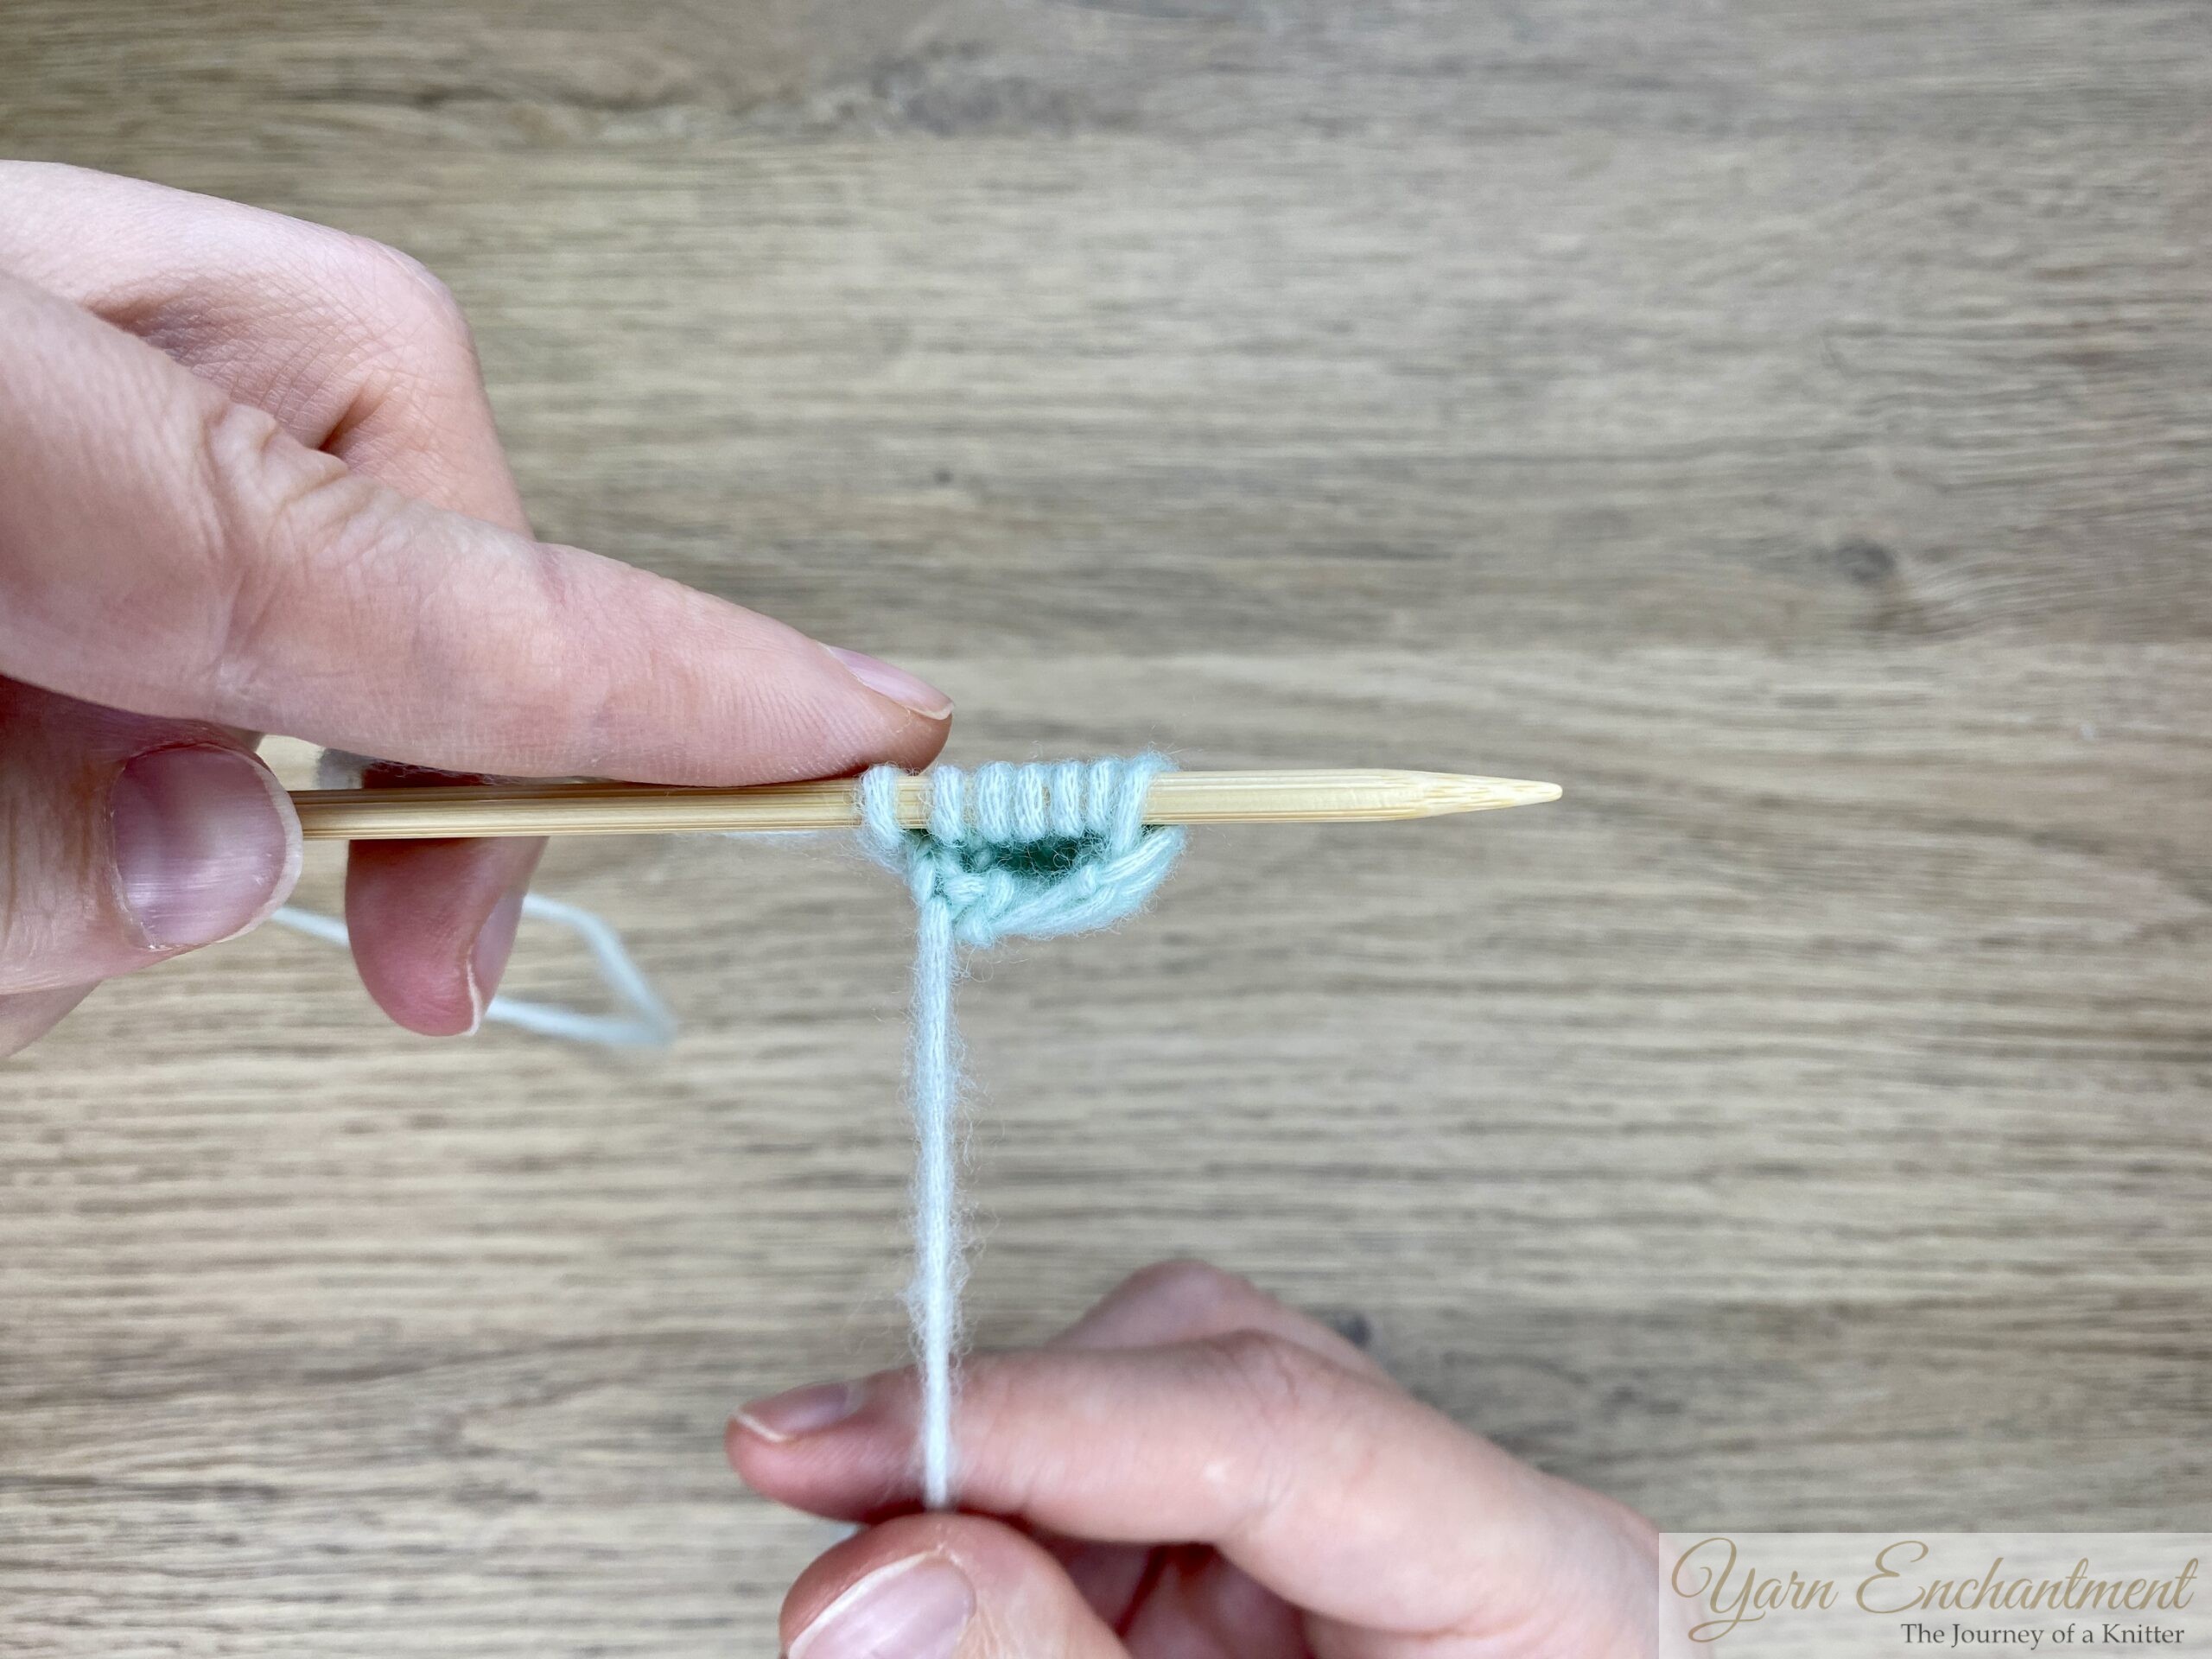
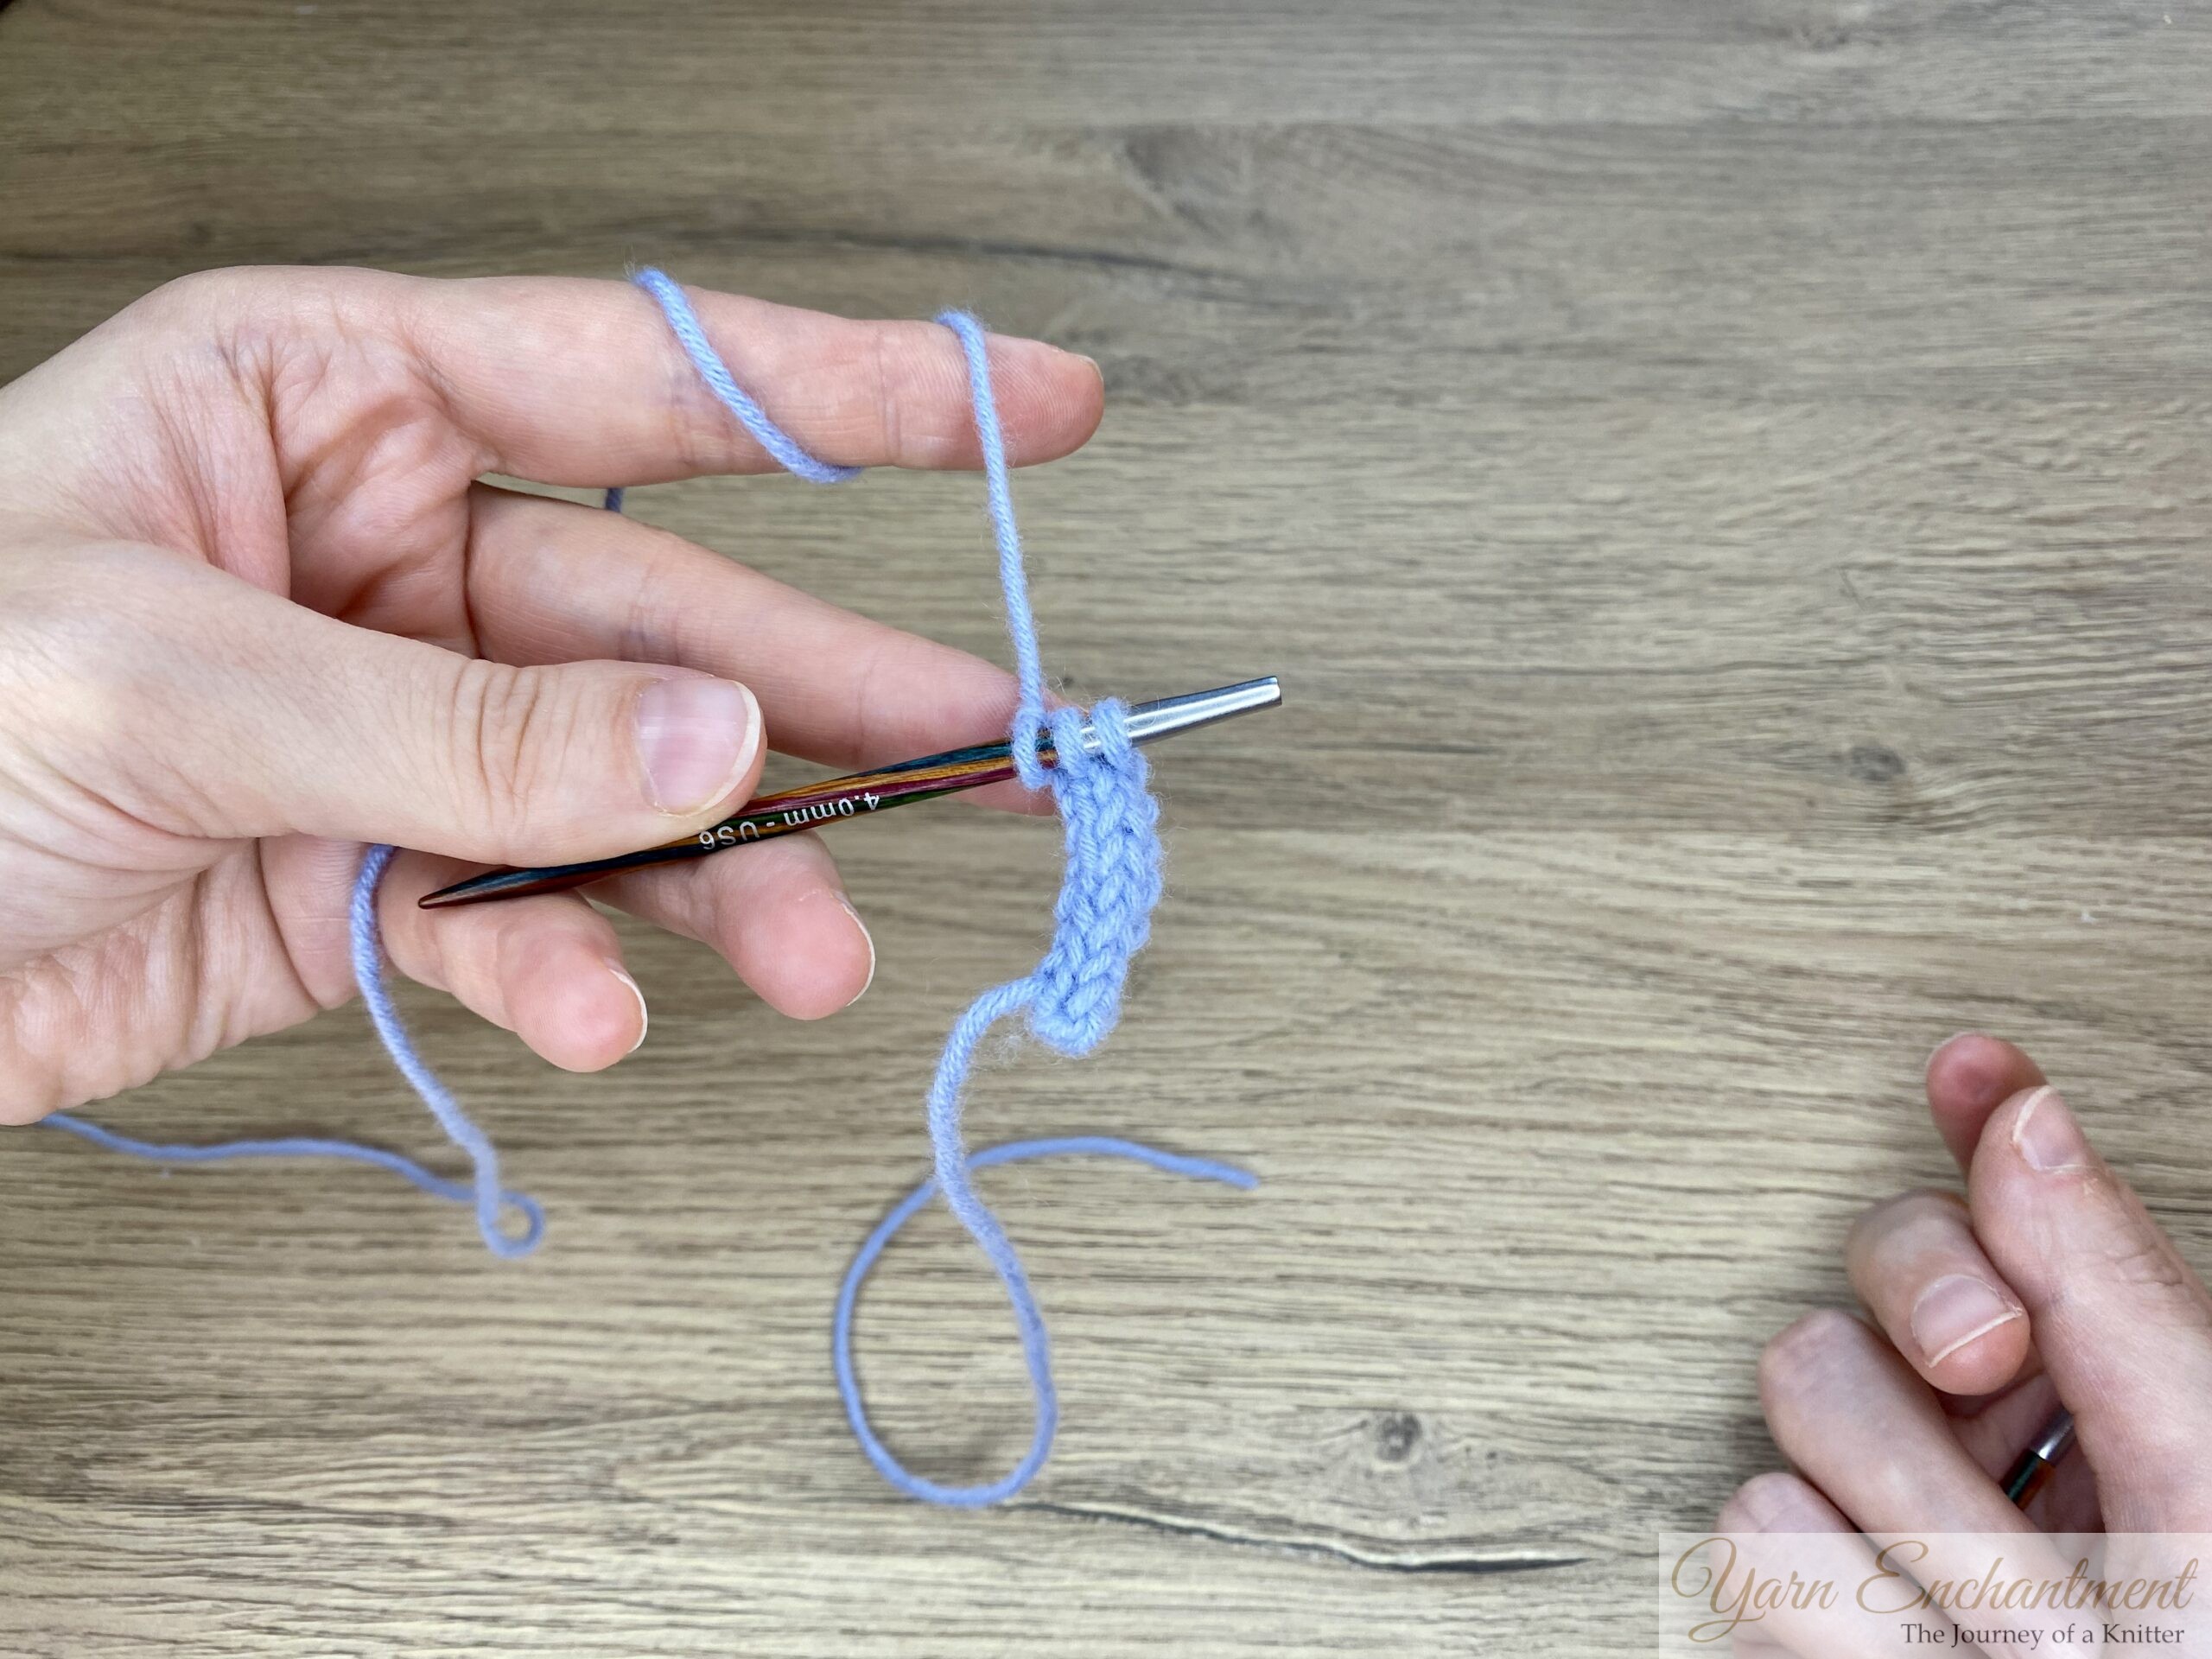
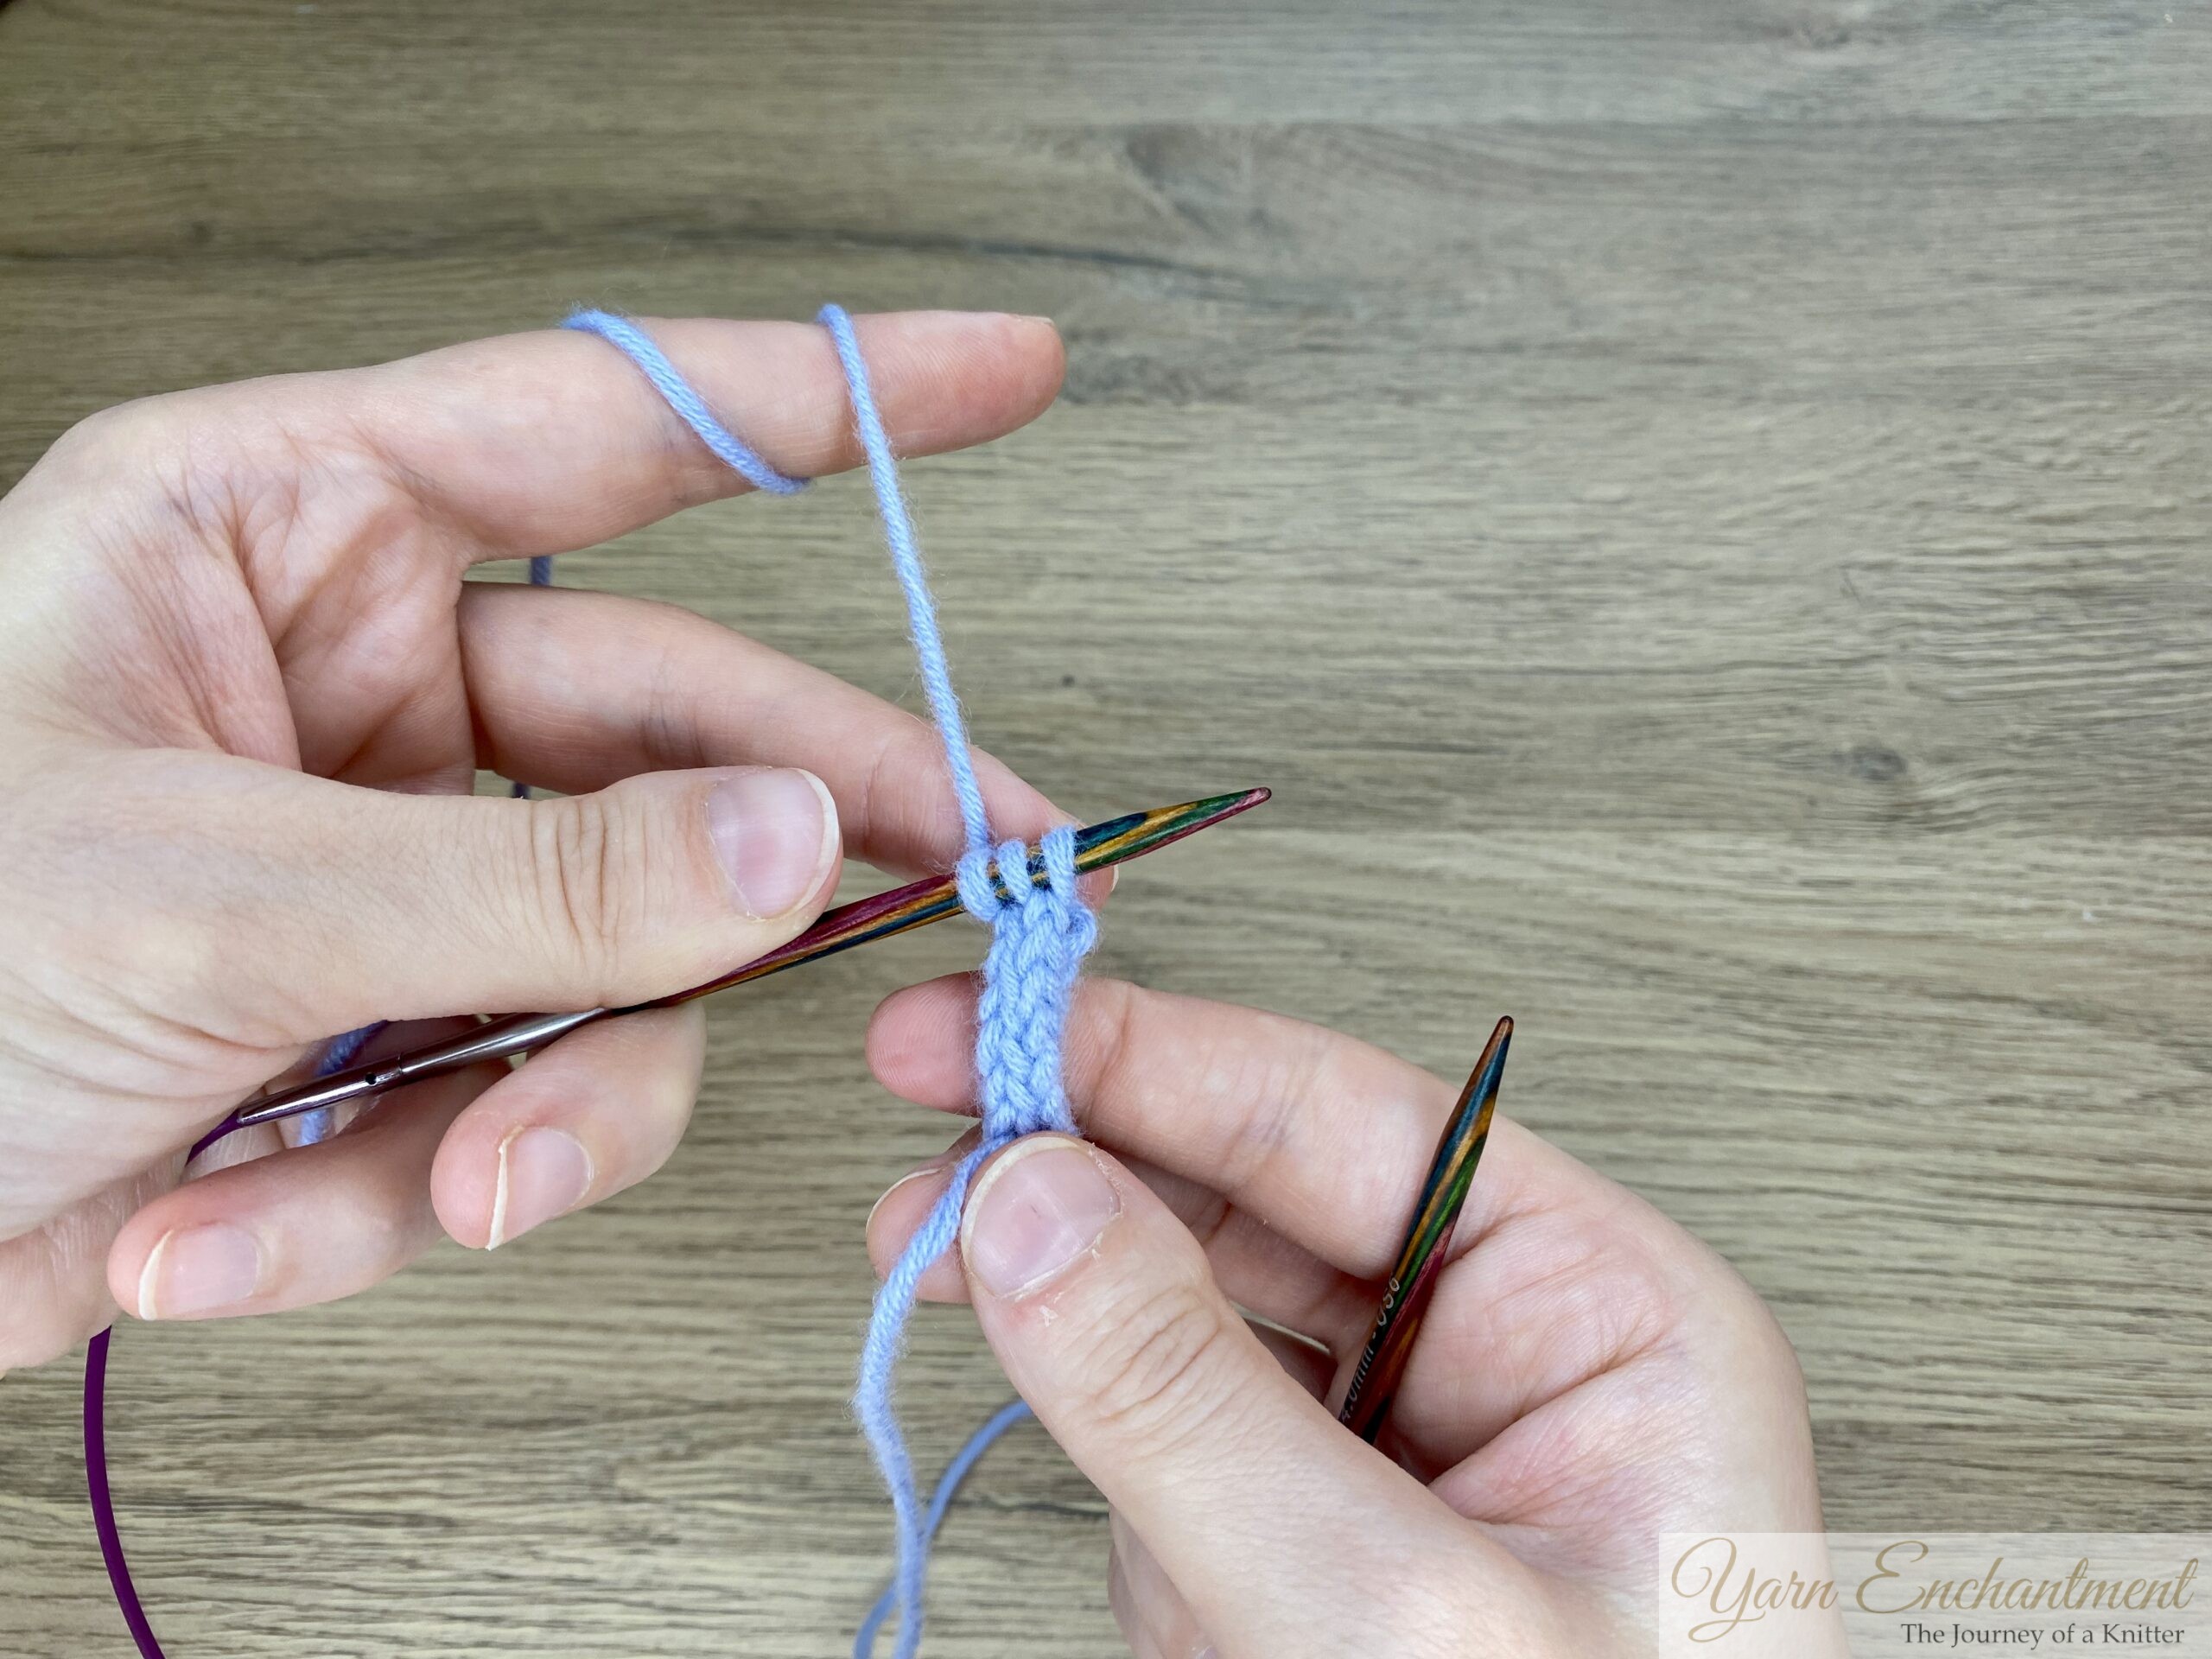
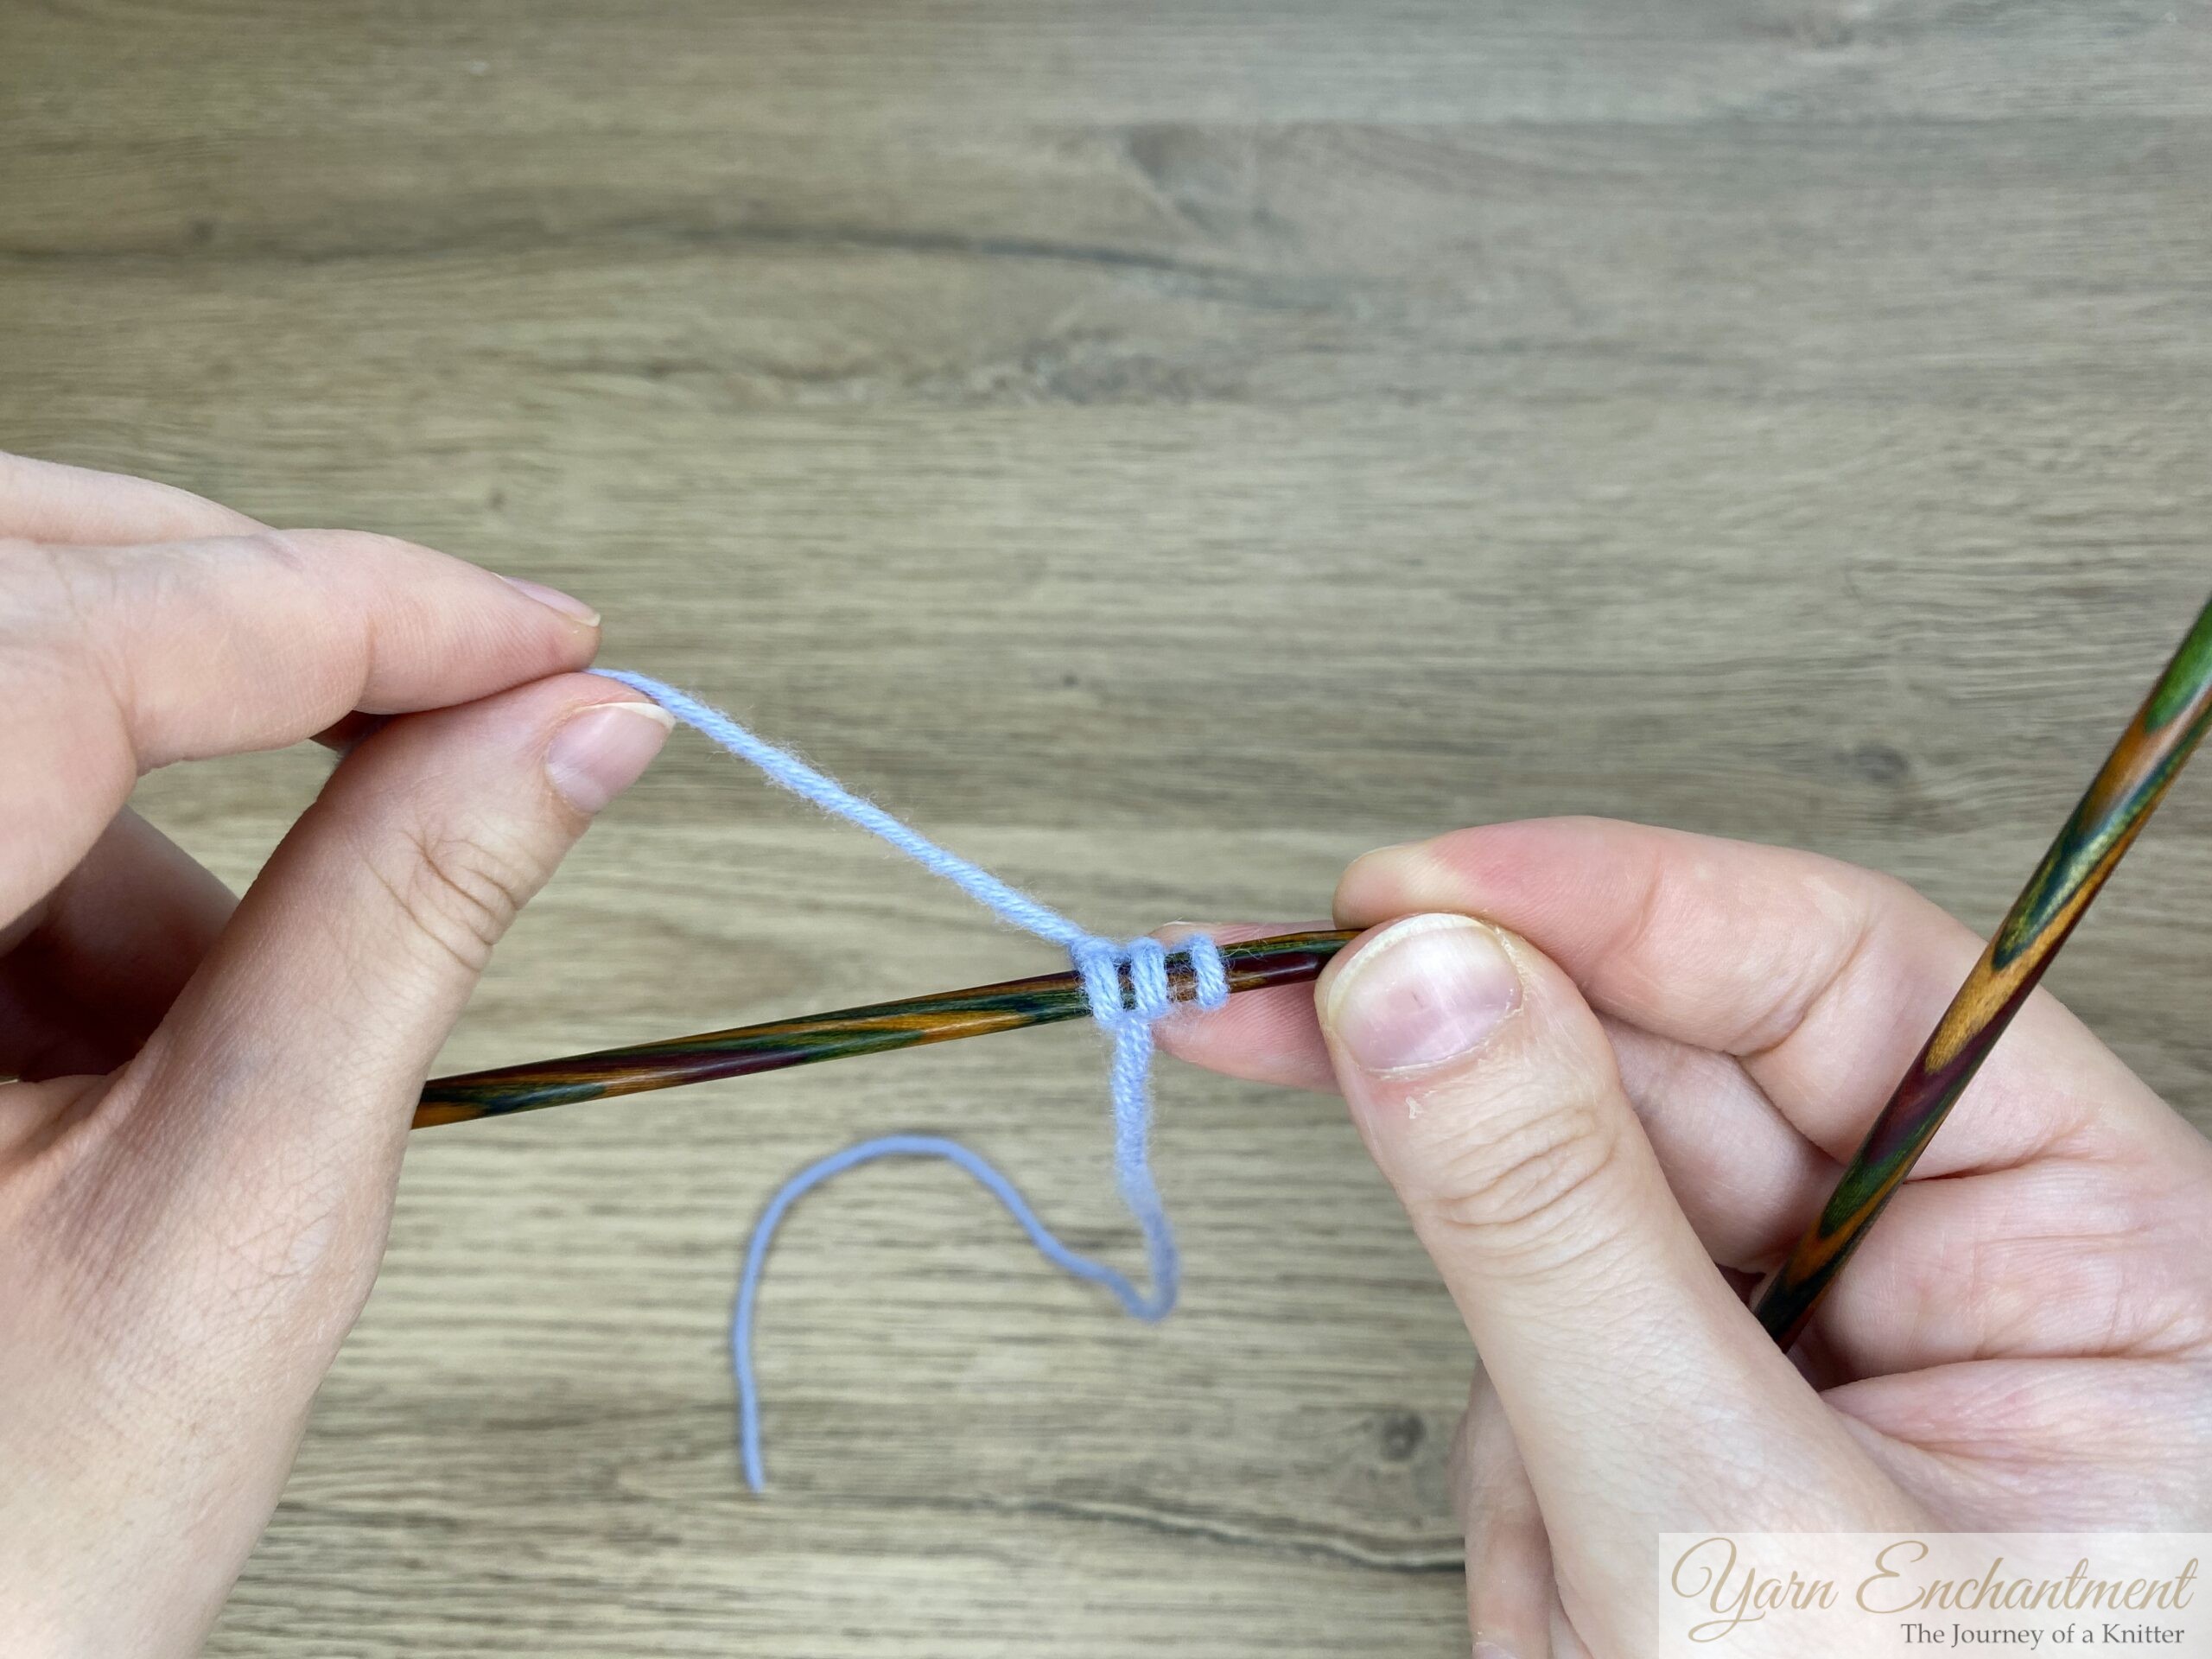 |  | 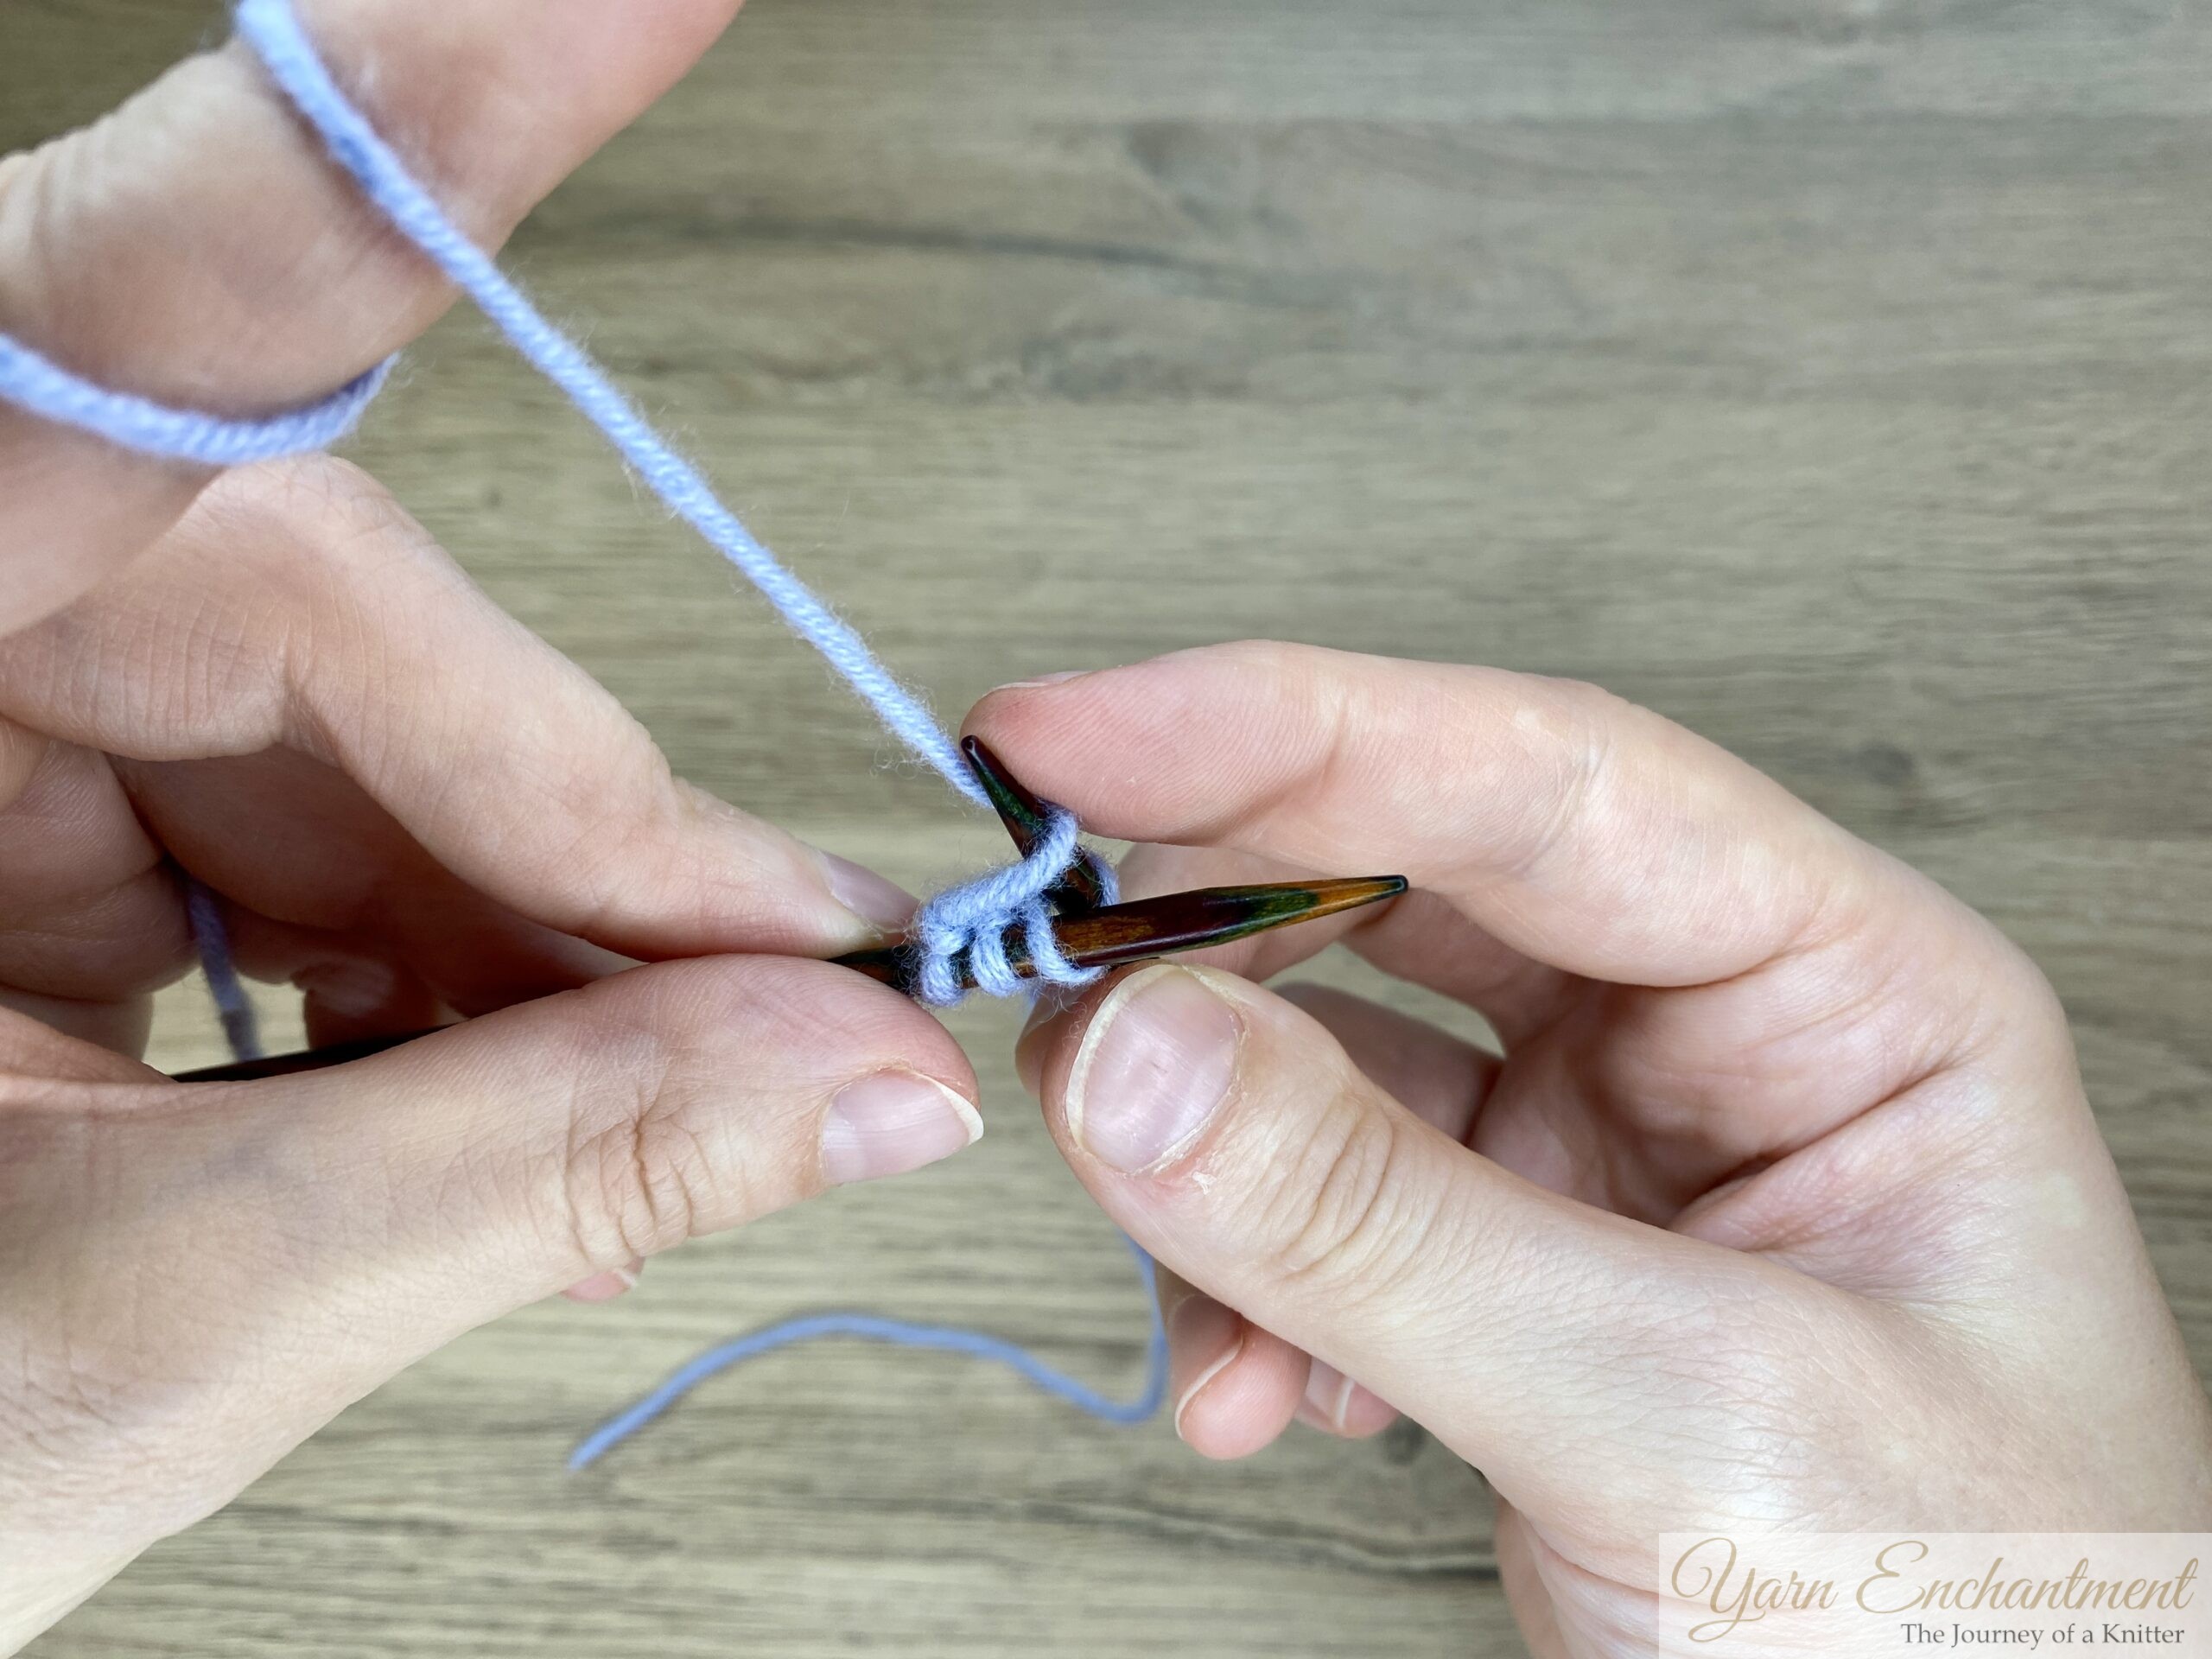 | Your working yarn is now at the left side of your stitches | Move the yarn strand from the left side of your work to the right side | Insert your needle into the first stitch on the right side on your knitting needle |


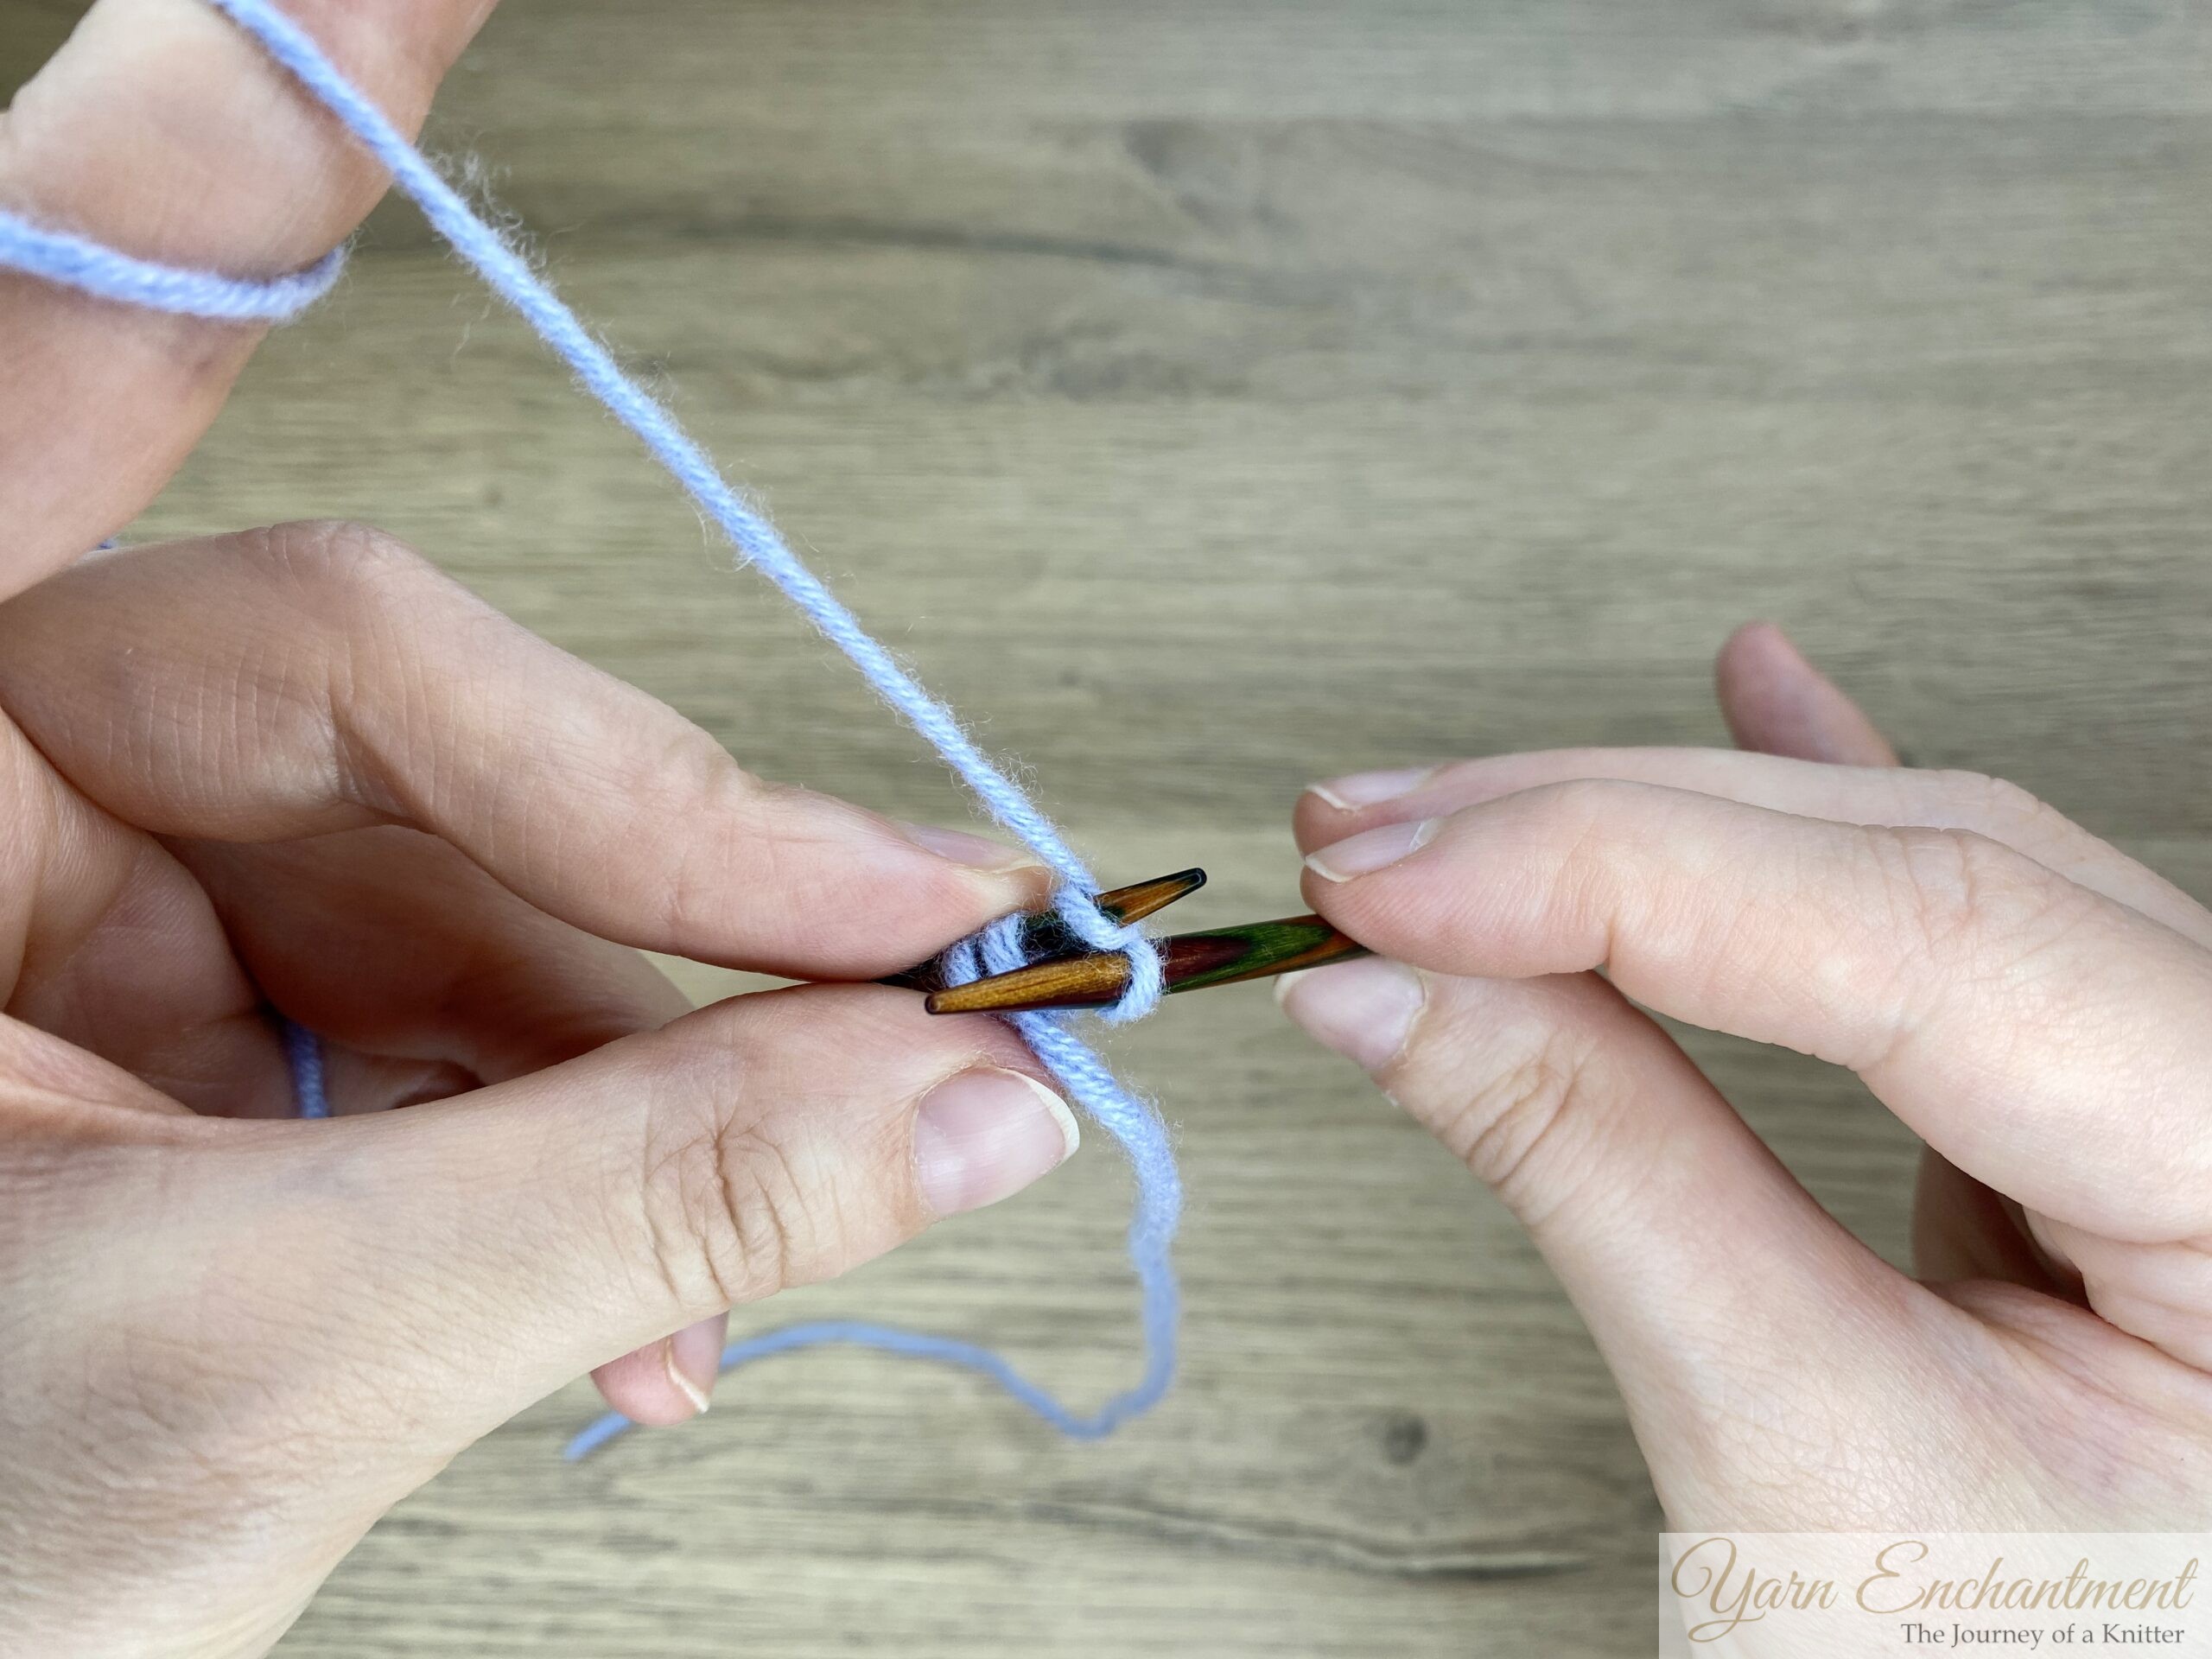 |  | 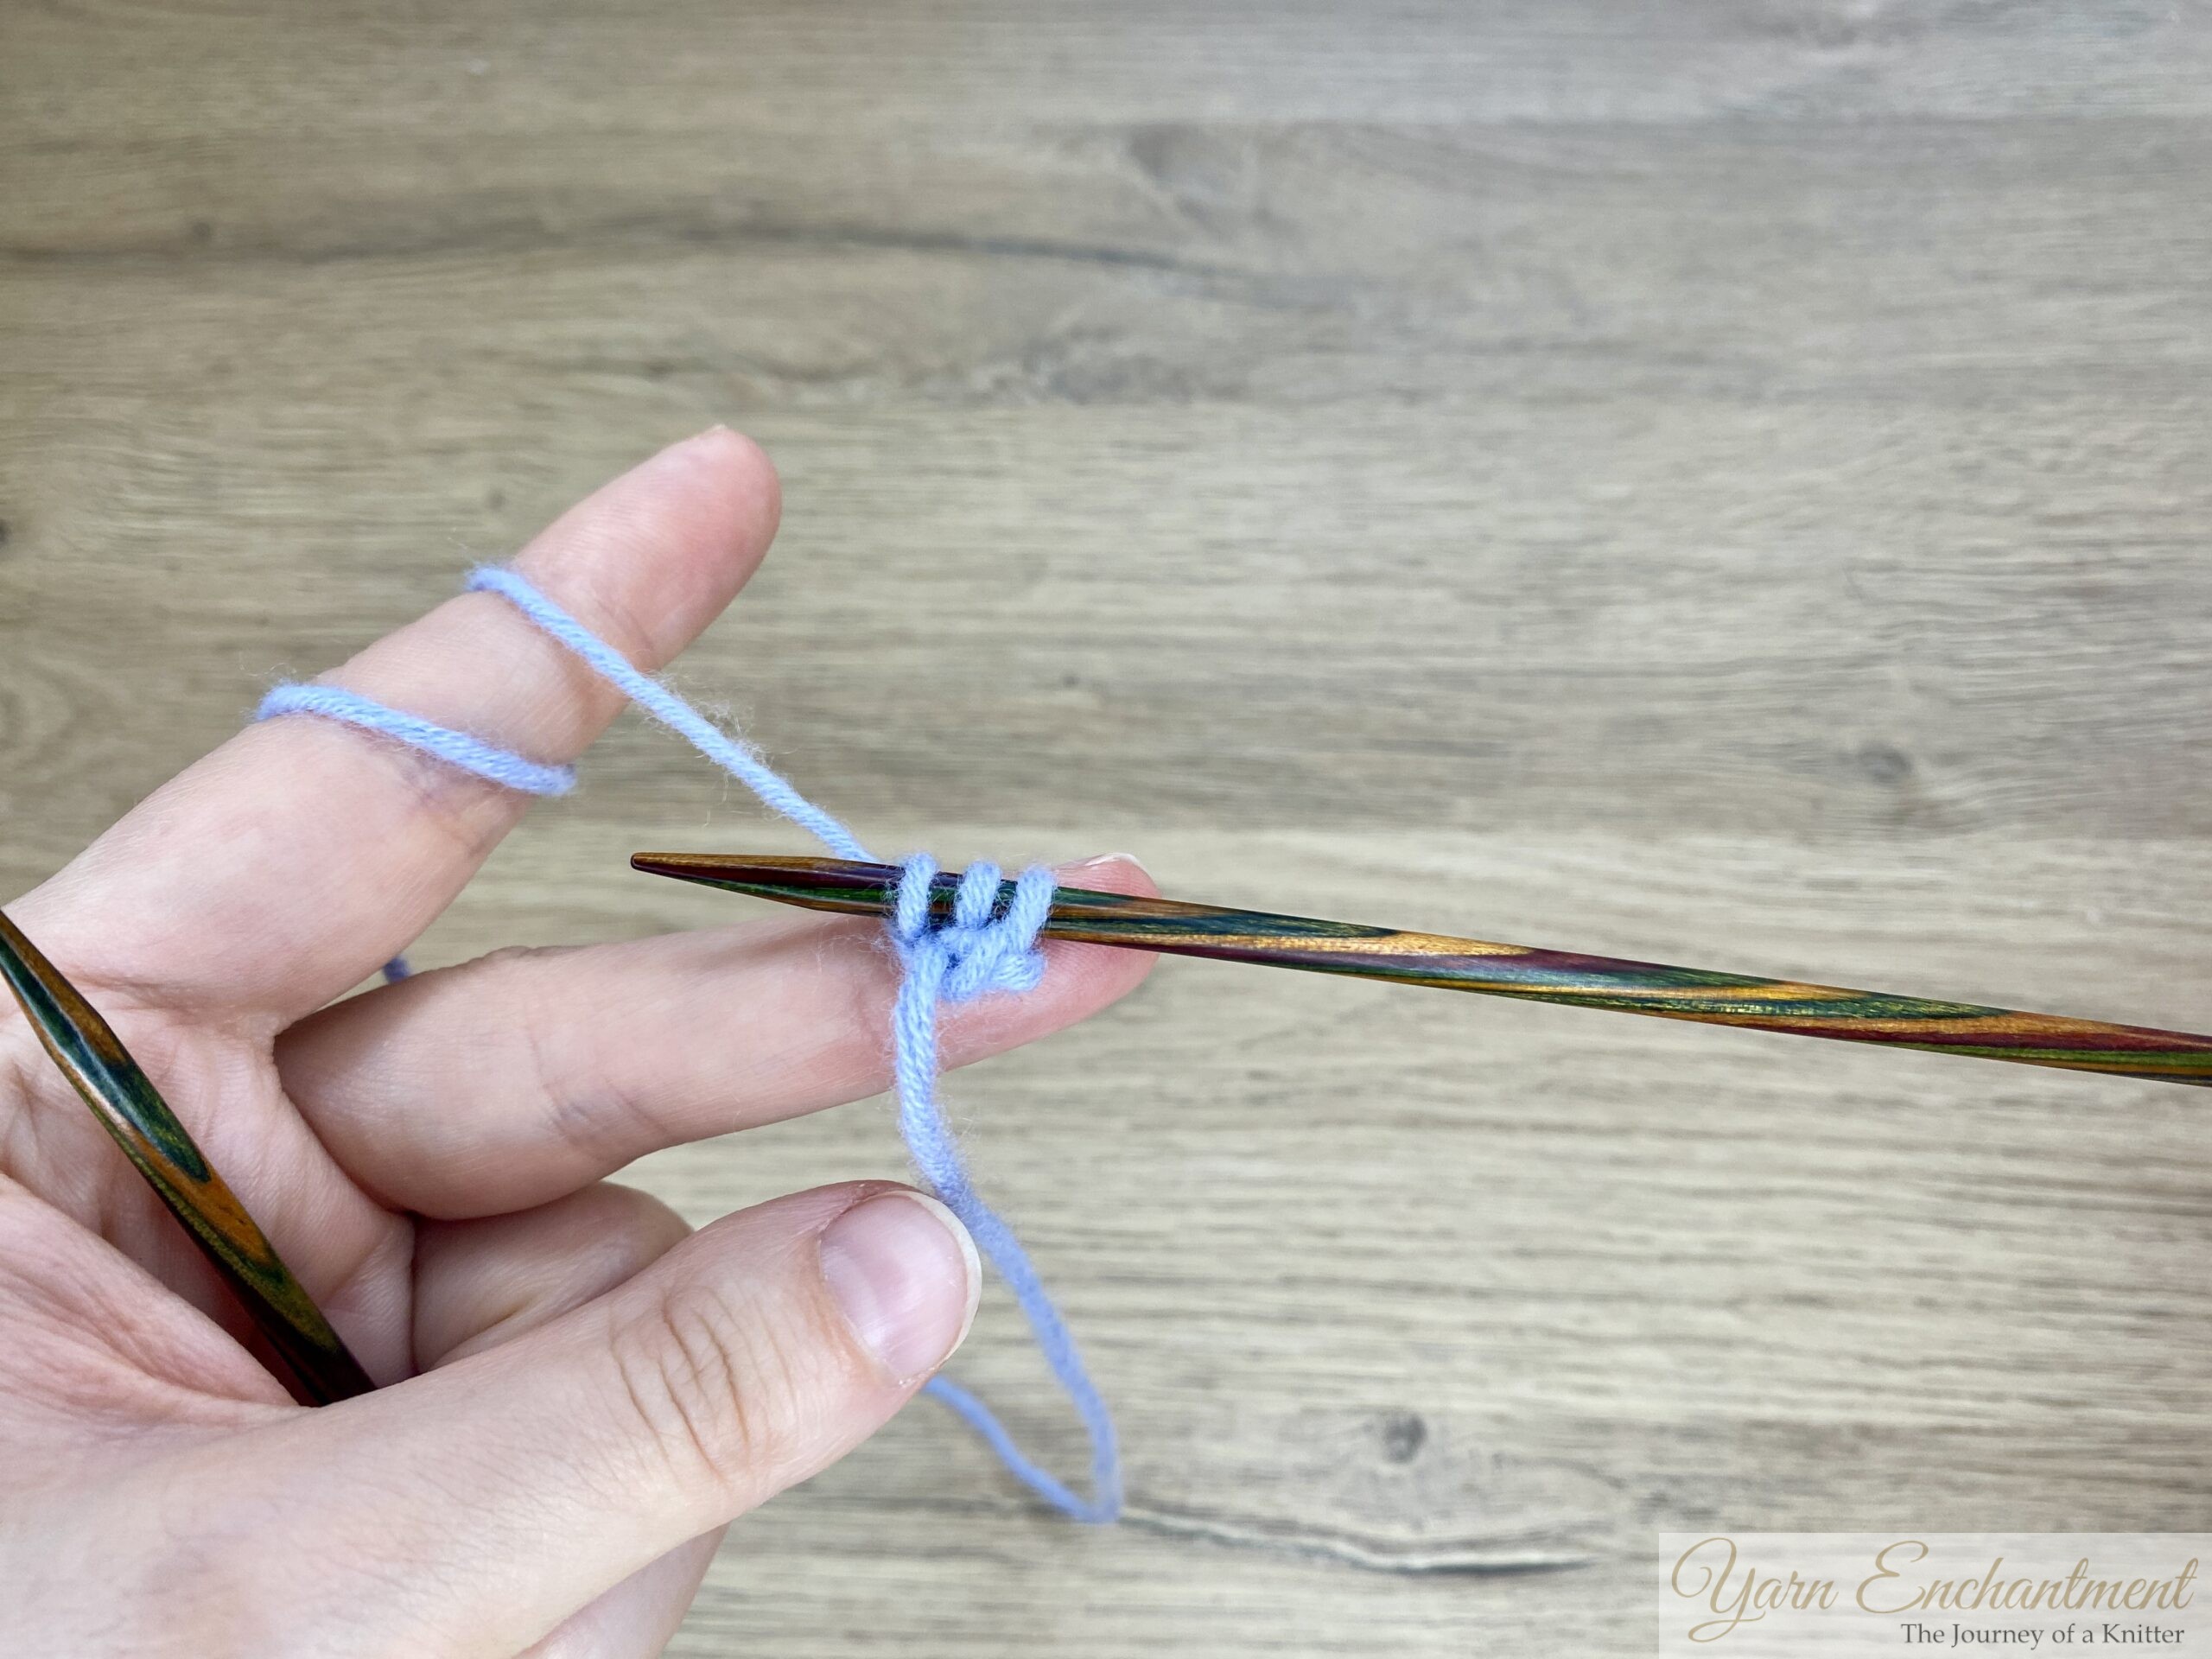 | After pulling through your yarn, pause and lay your needle tips in a cross shape against each other. Next, gently pull the working yarn until snug - this little measuring trick helps keep the yarn strands at the back even and tidy, giving your cord a neat finish | Knit the next 2 stitches | When you finish knitting all 3 stitches, your stitches will be positioned at the left side of your needle again. |


3. Repeat until your I-cord is the length you want.
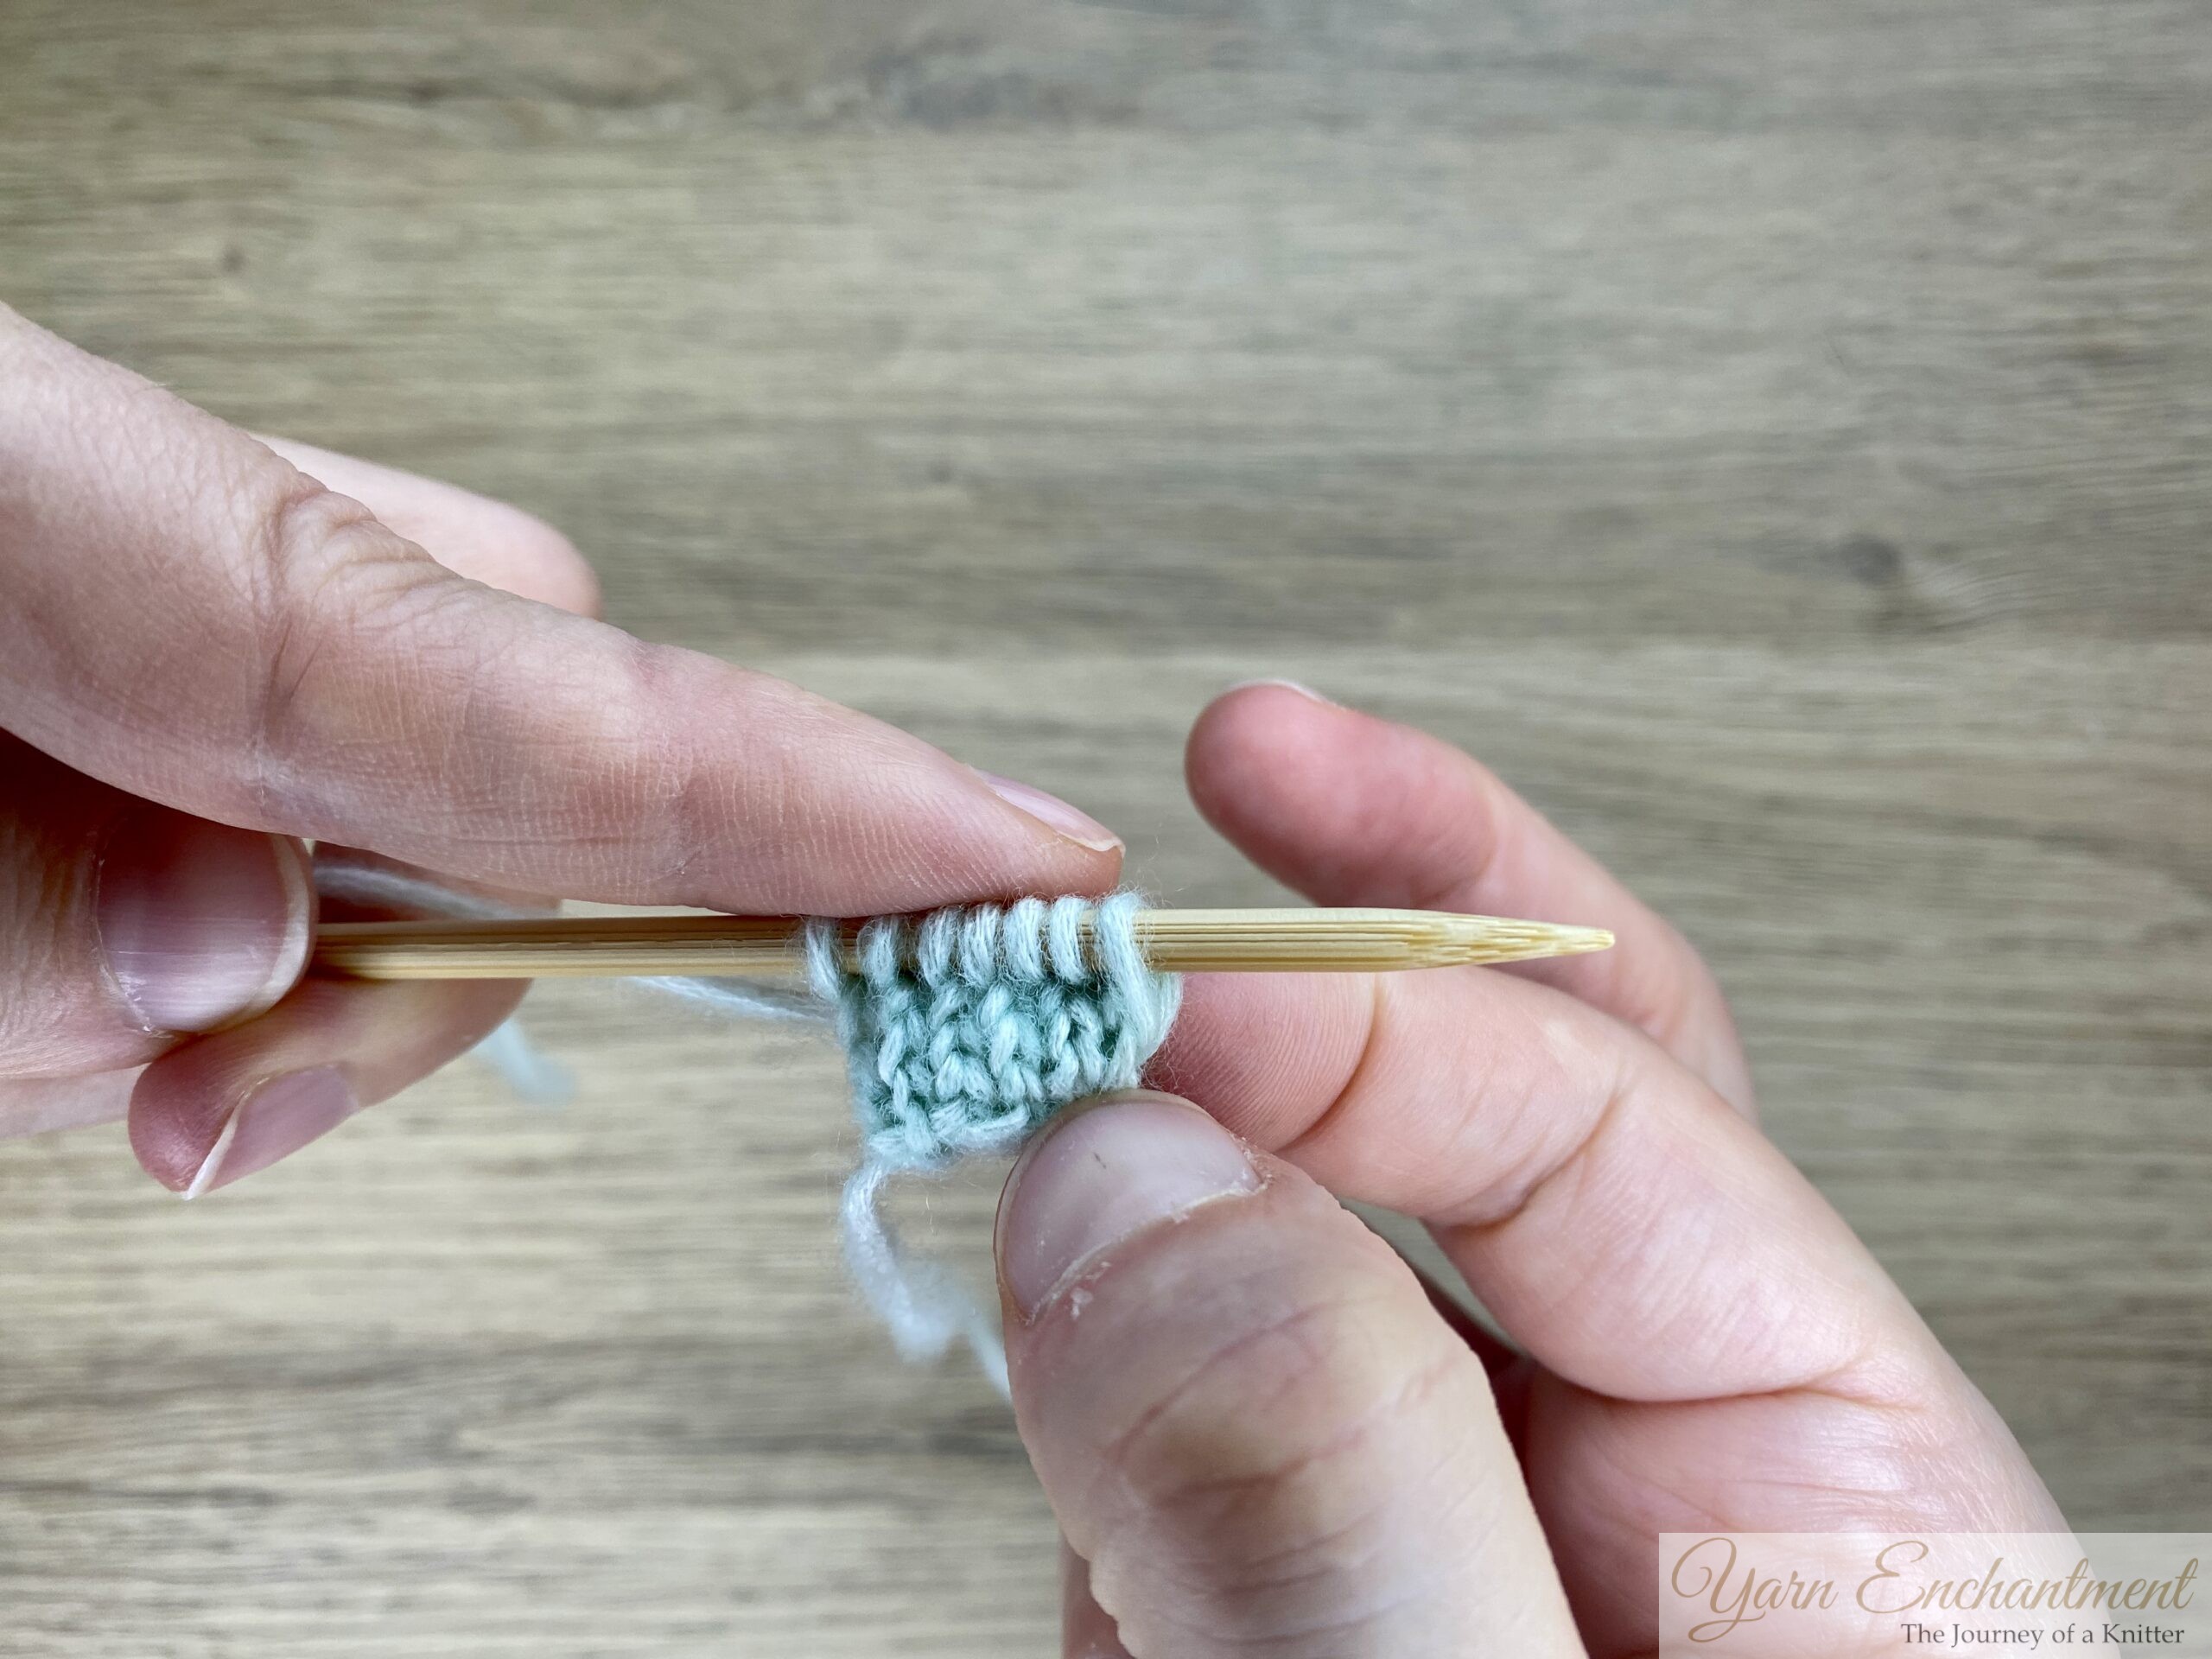
 |  |  | Keep repeating the process: slide your stitches from the right side... | ...to the left side, ... | ...and then knit those |


4. When you have finished your I-cord, bind off all stitches, or integrate the cord directly into your project.
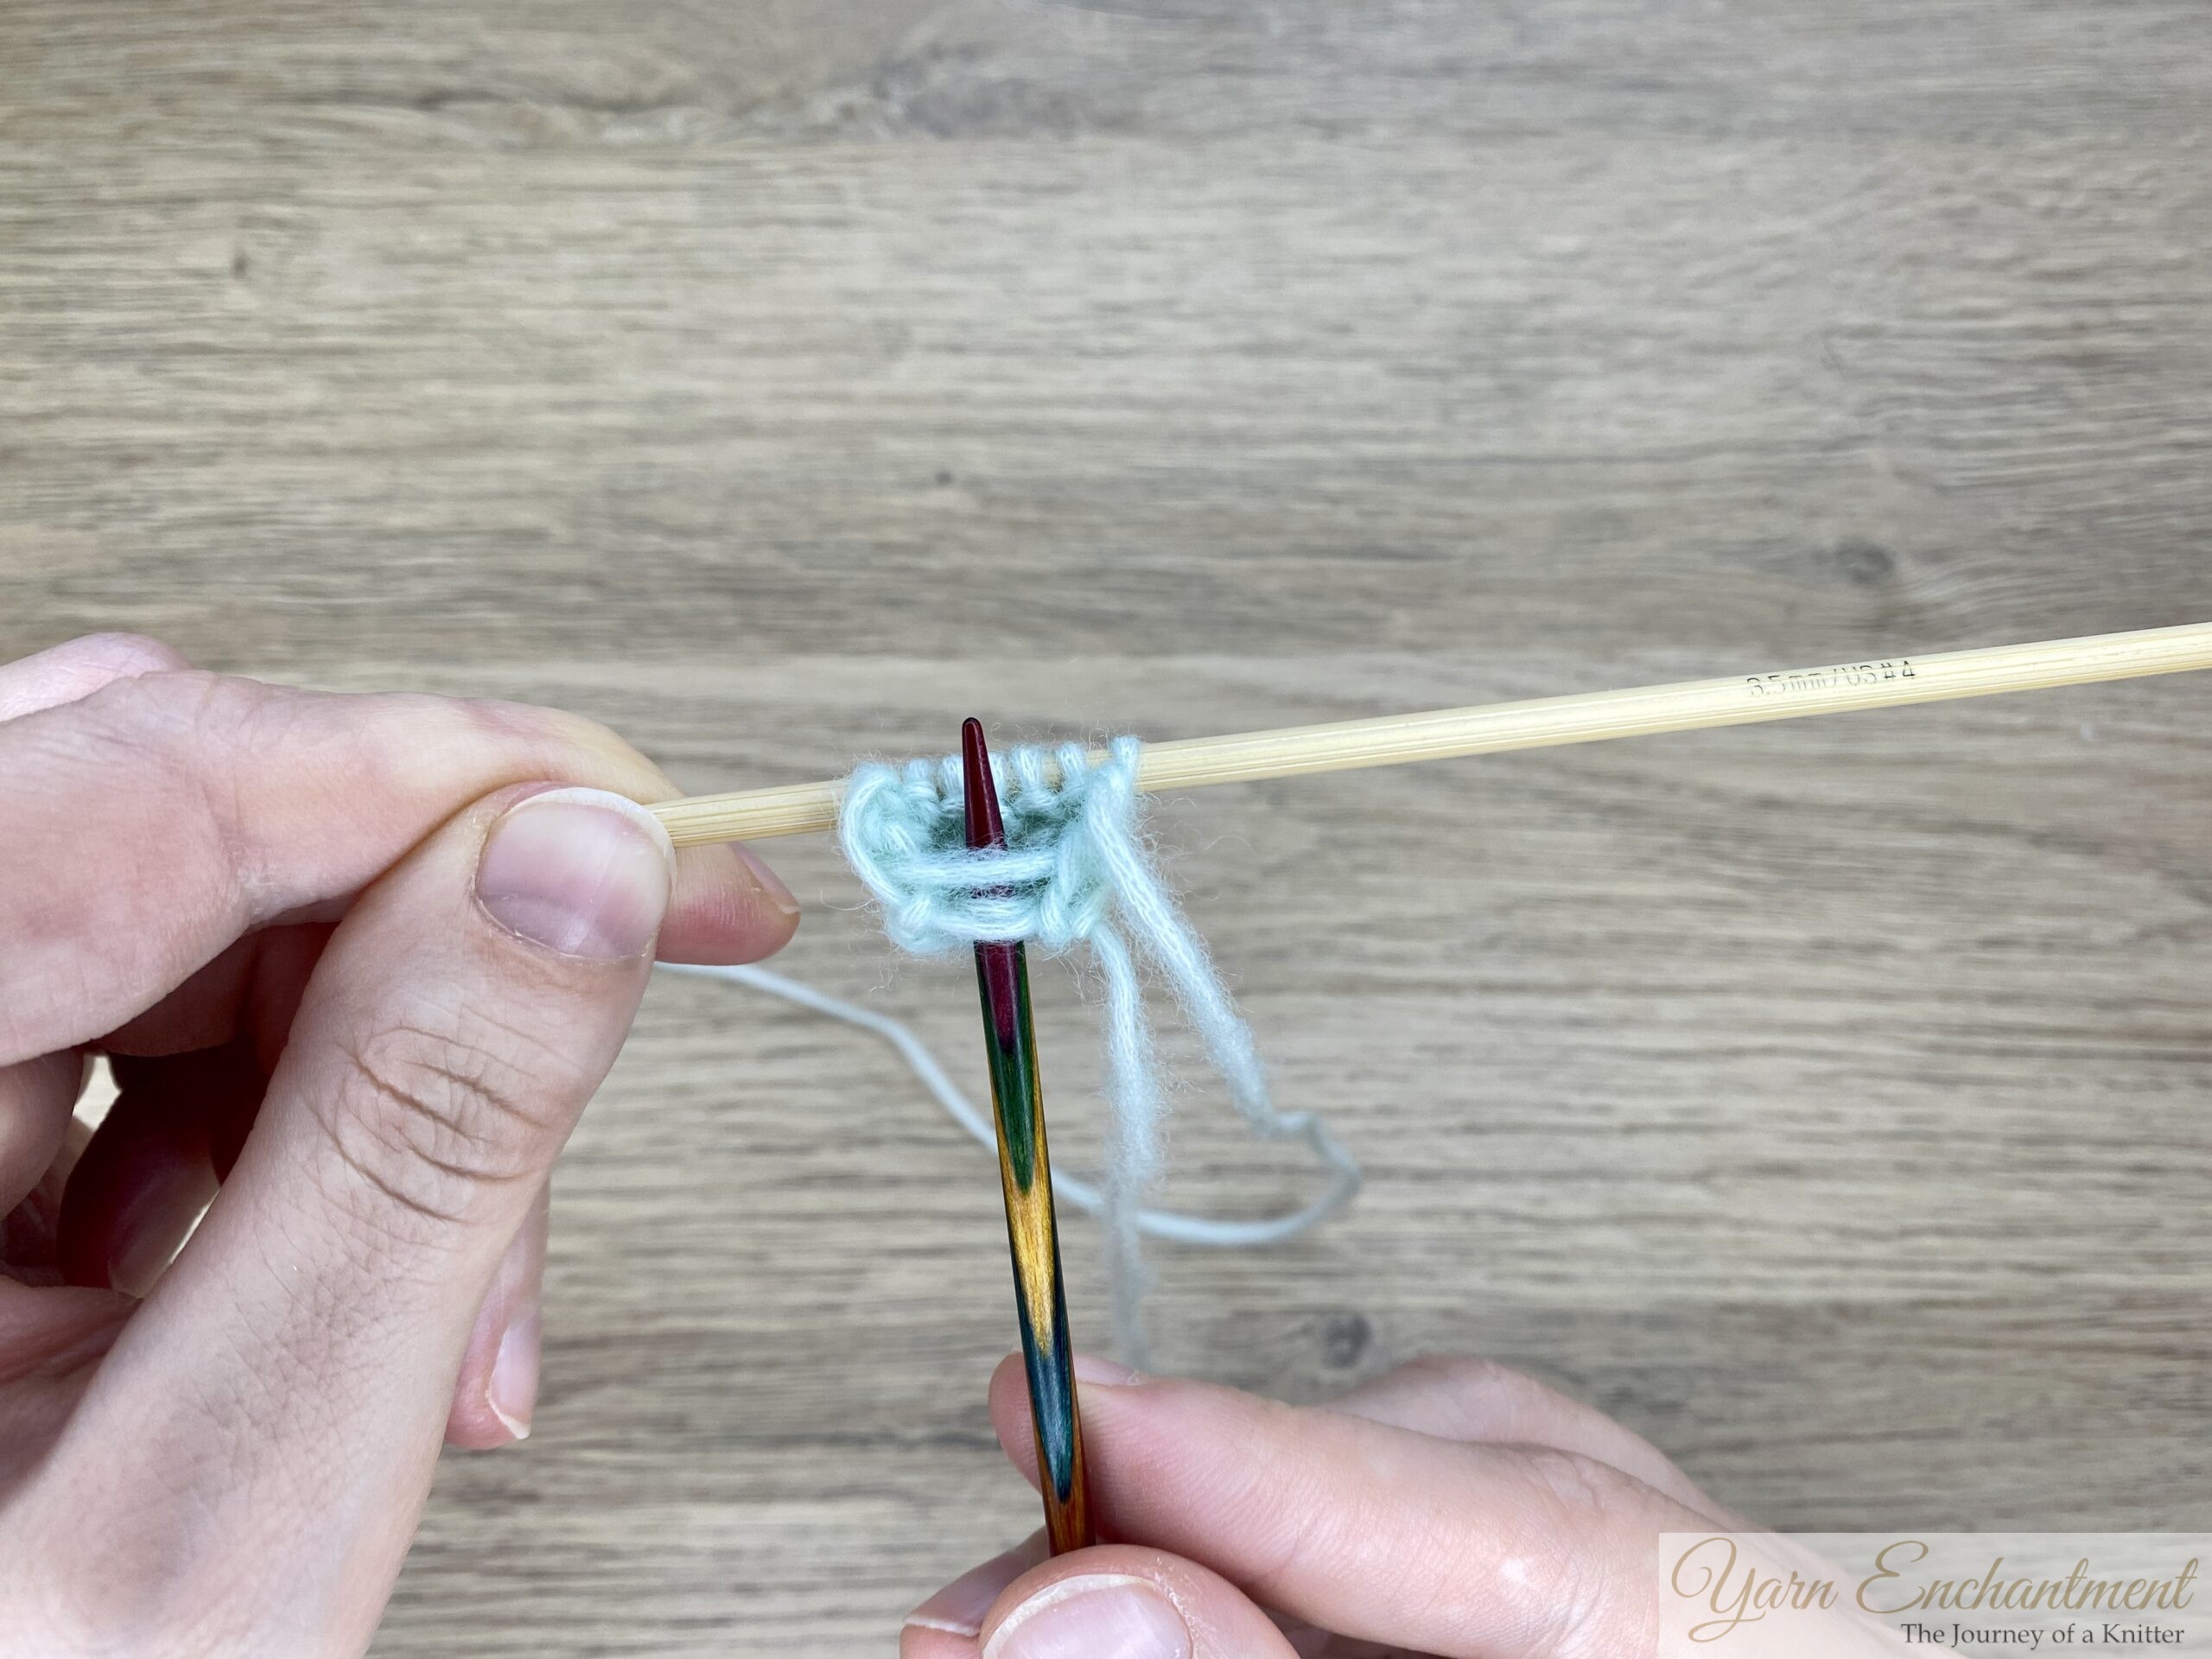
 |  |  | When you are ready to bind off, slide all the stitches to the right side of your needle and knit the first two stitches. | Next, lift the first stitch over the second stitch to bind off one stitch. | Repeat this process, knit the next stitch, then lift the previous stitch over, until only one stitch remains on your needle. |


How to Knit a 7-Stitch I-Cord
Making a 7-stitch I-cord is just as straightforward as a smaller one,
-
- Cast on 7 stitches, and without turning your work, slide the stitches from the left side to the right side of your needle.
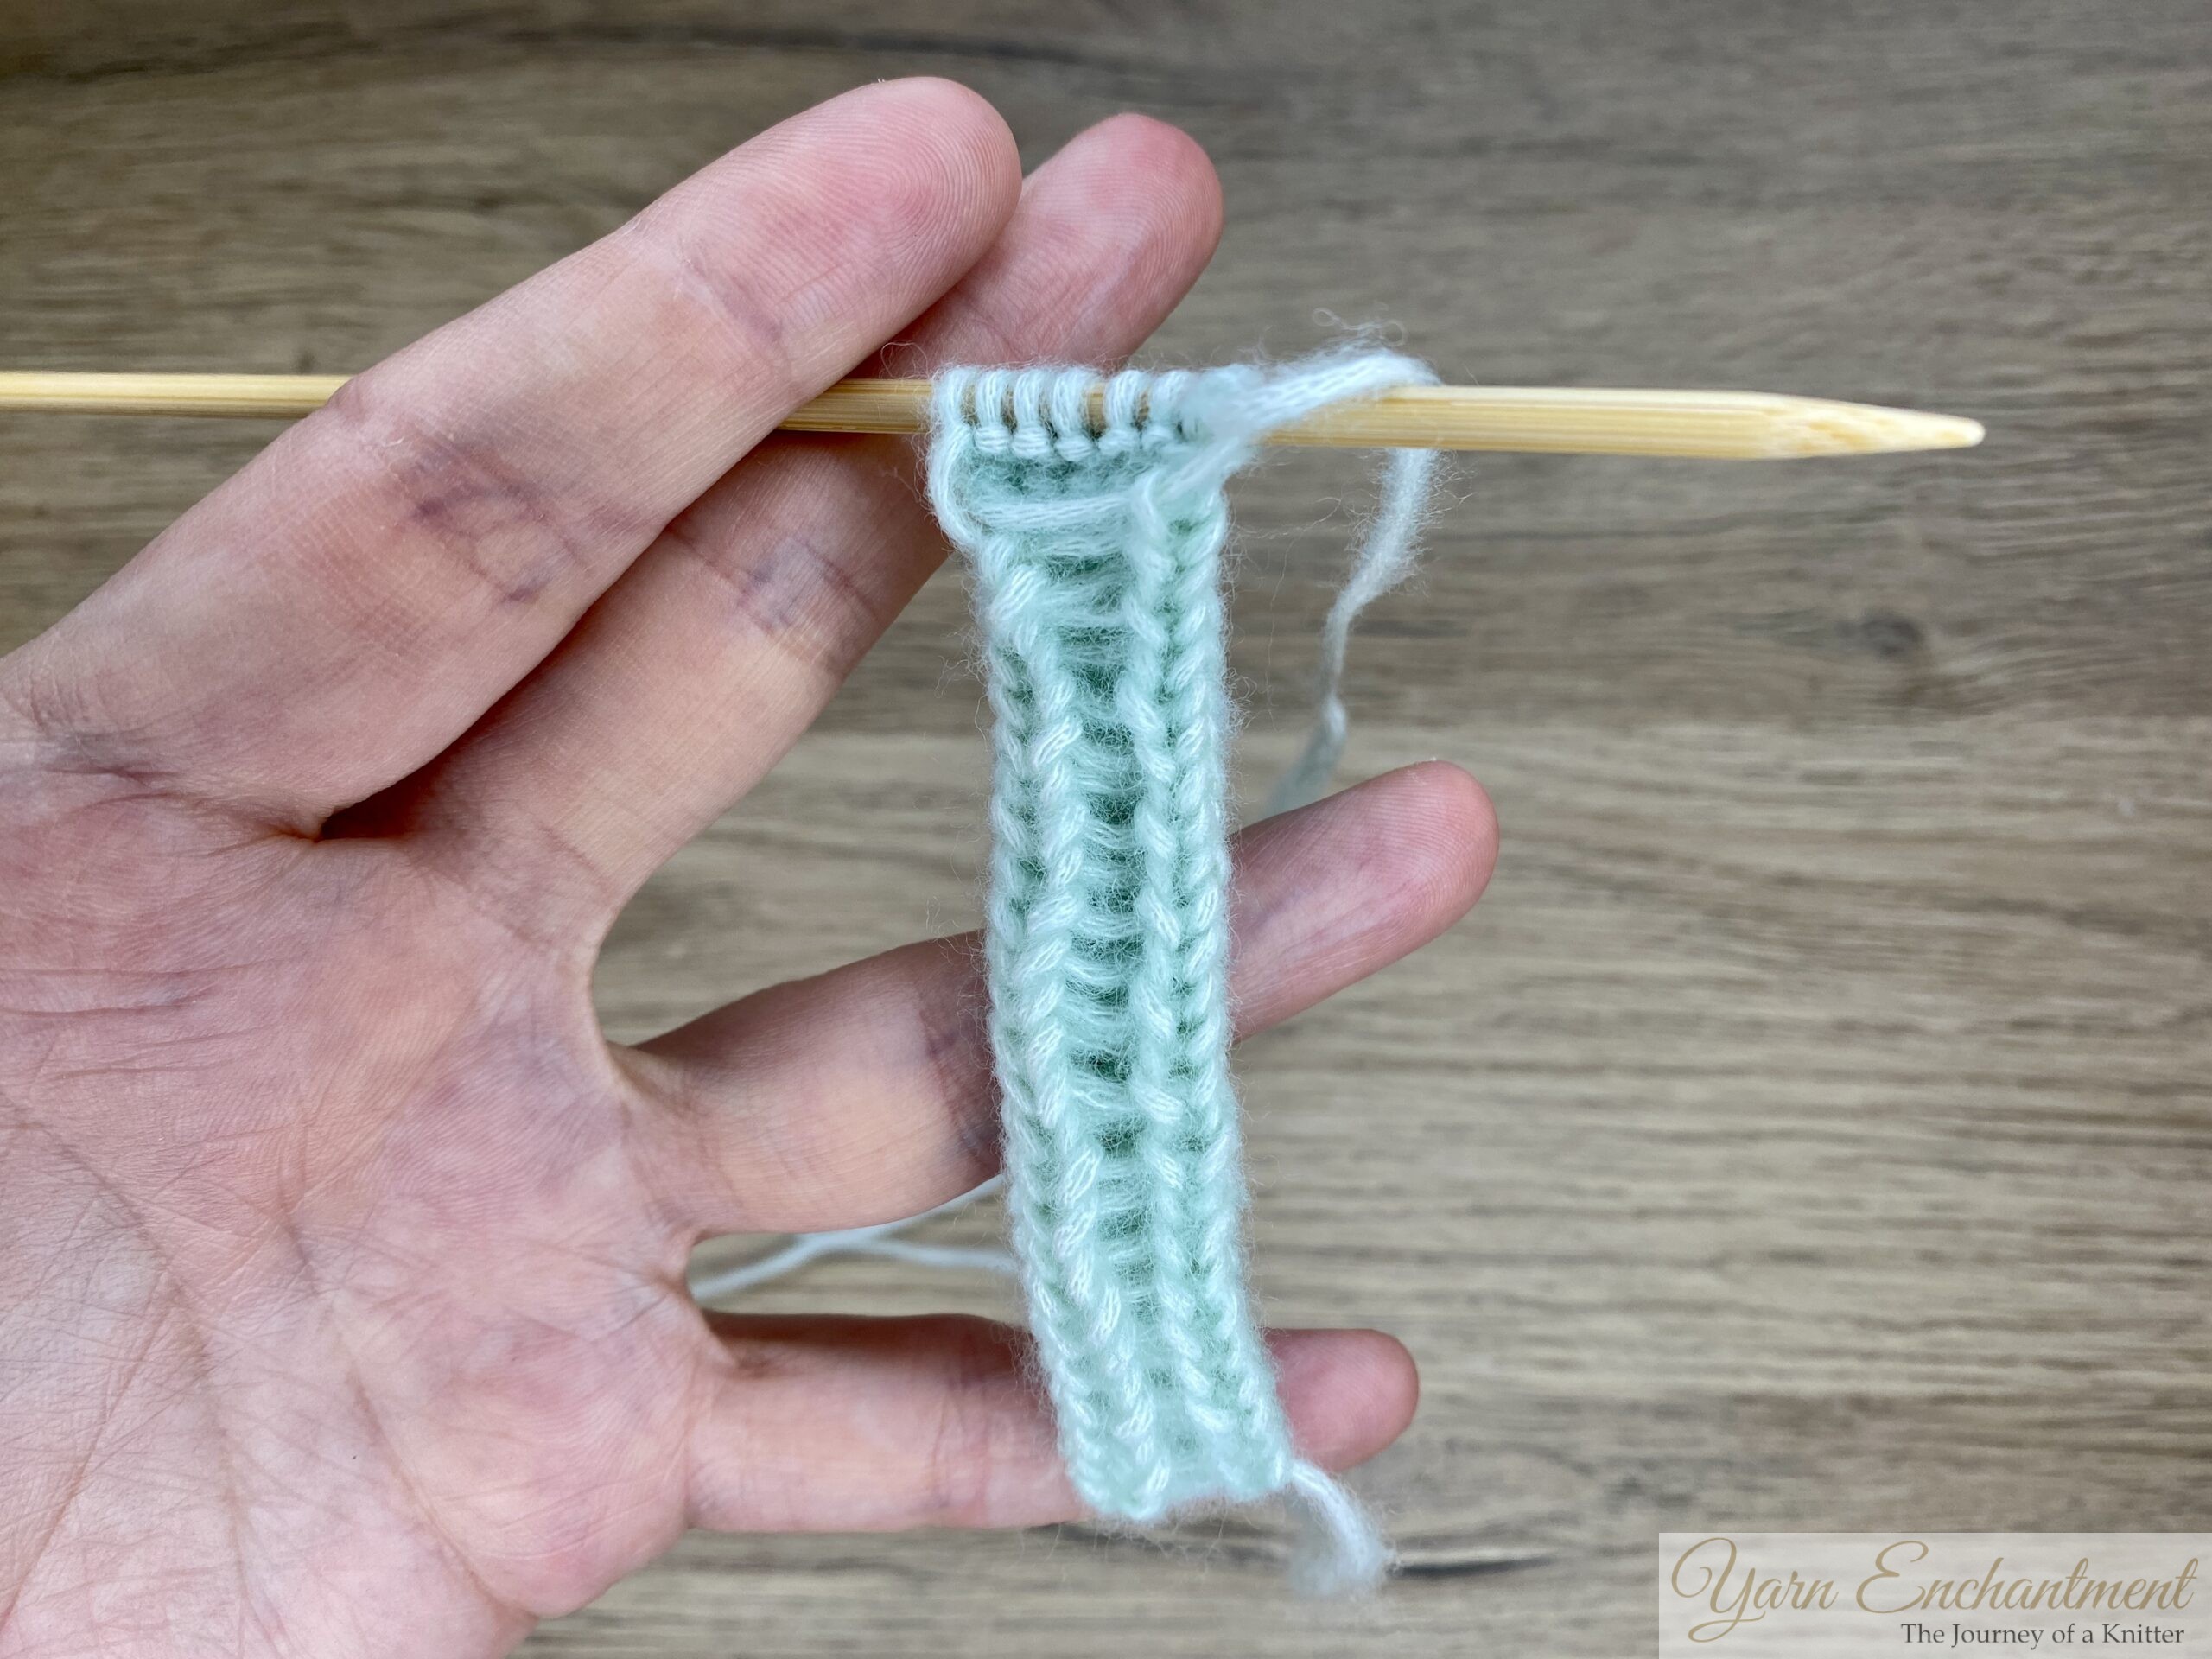
- Knit across all 7 stitches, then slide the stitches back to the right side again, and continue knitting these 7 stitches each row until your I-cord reaches the desired length.
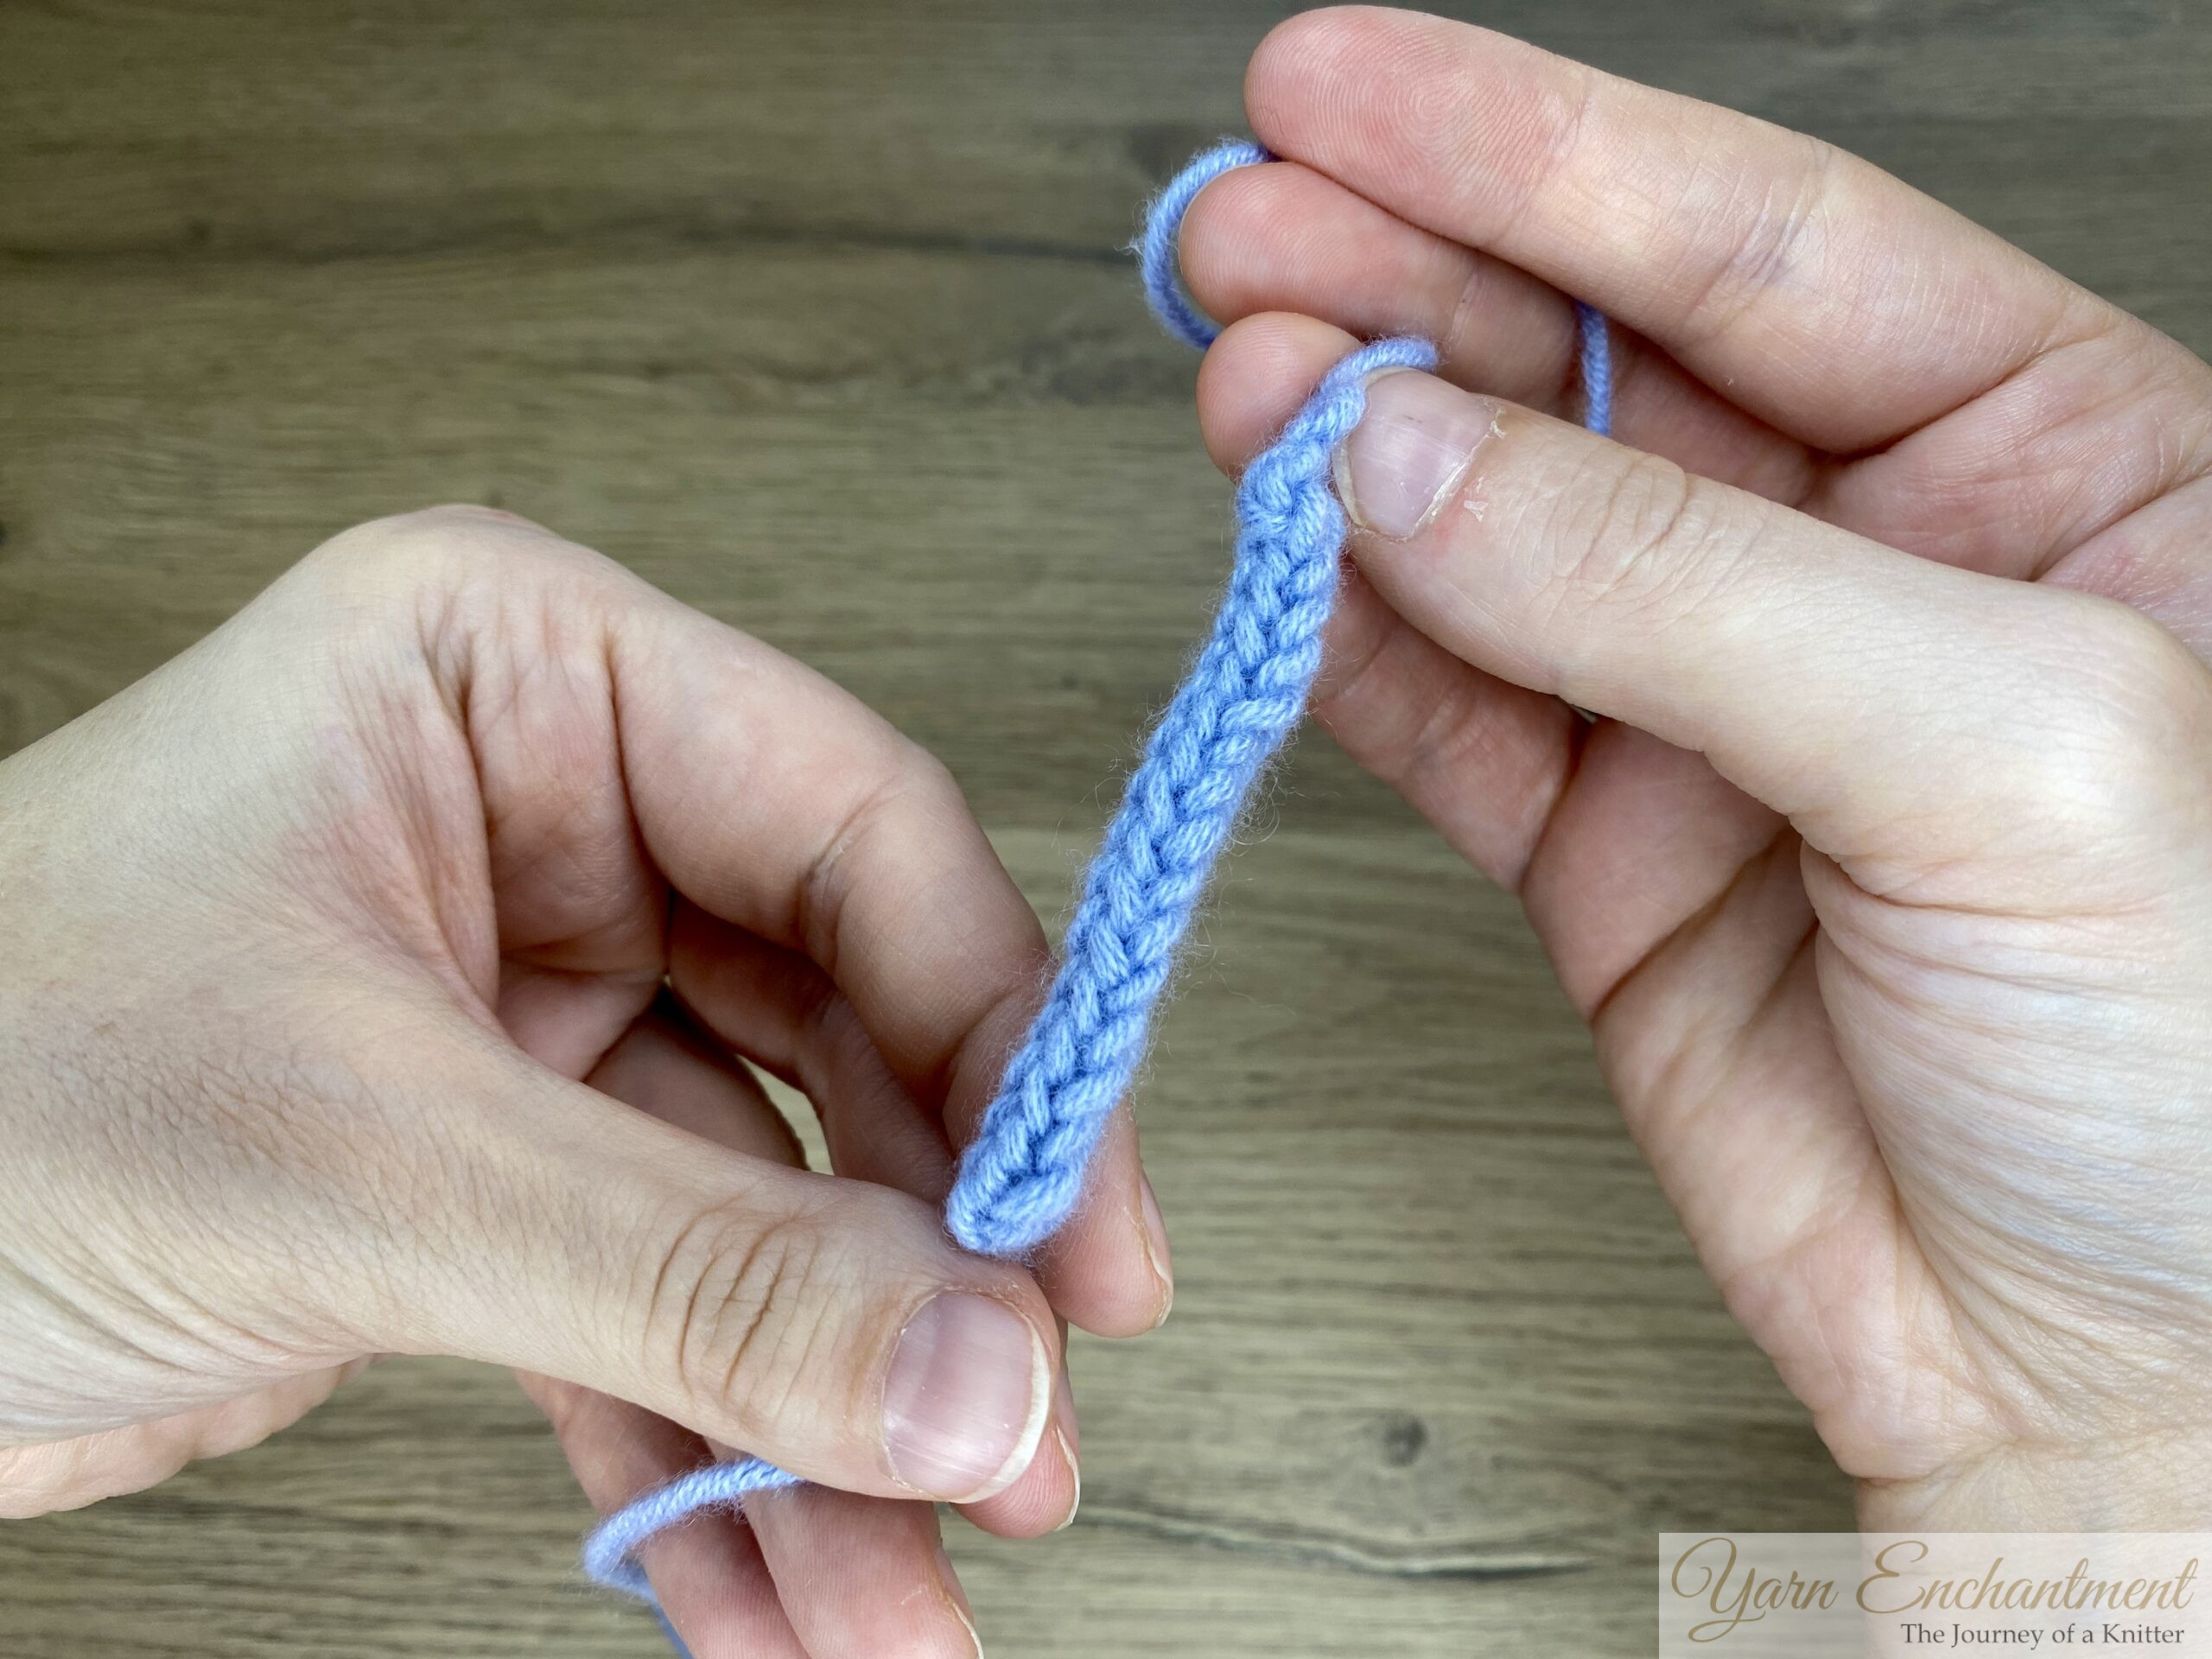
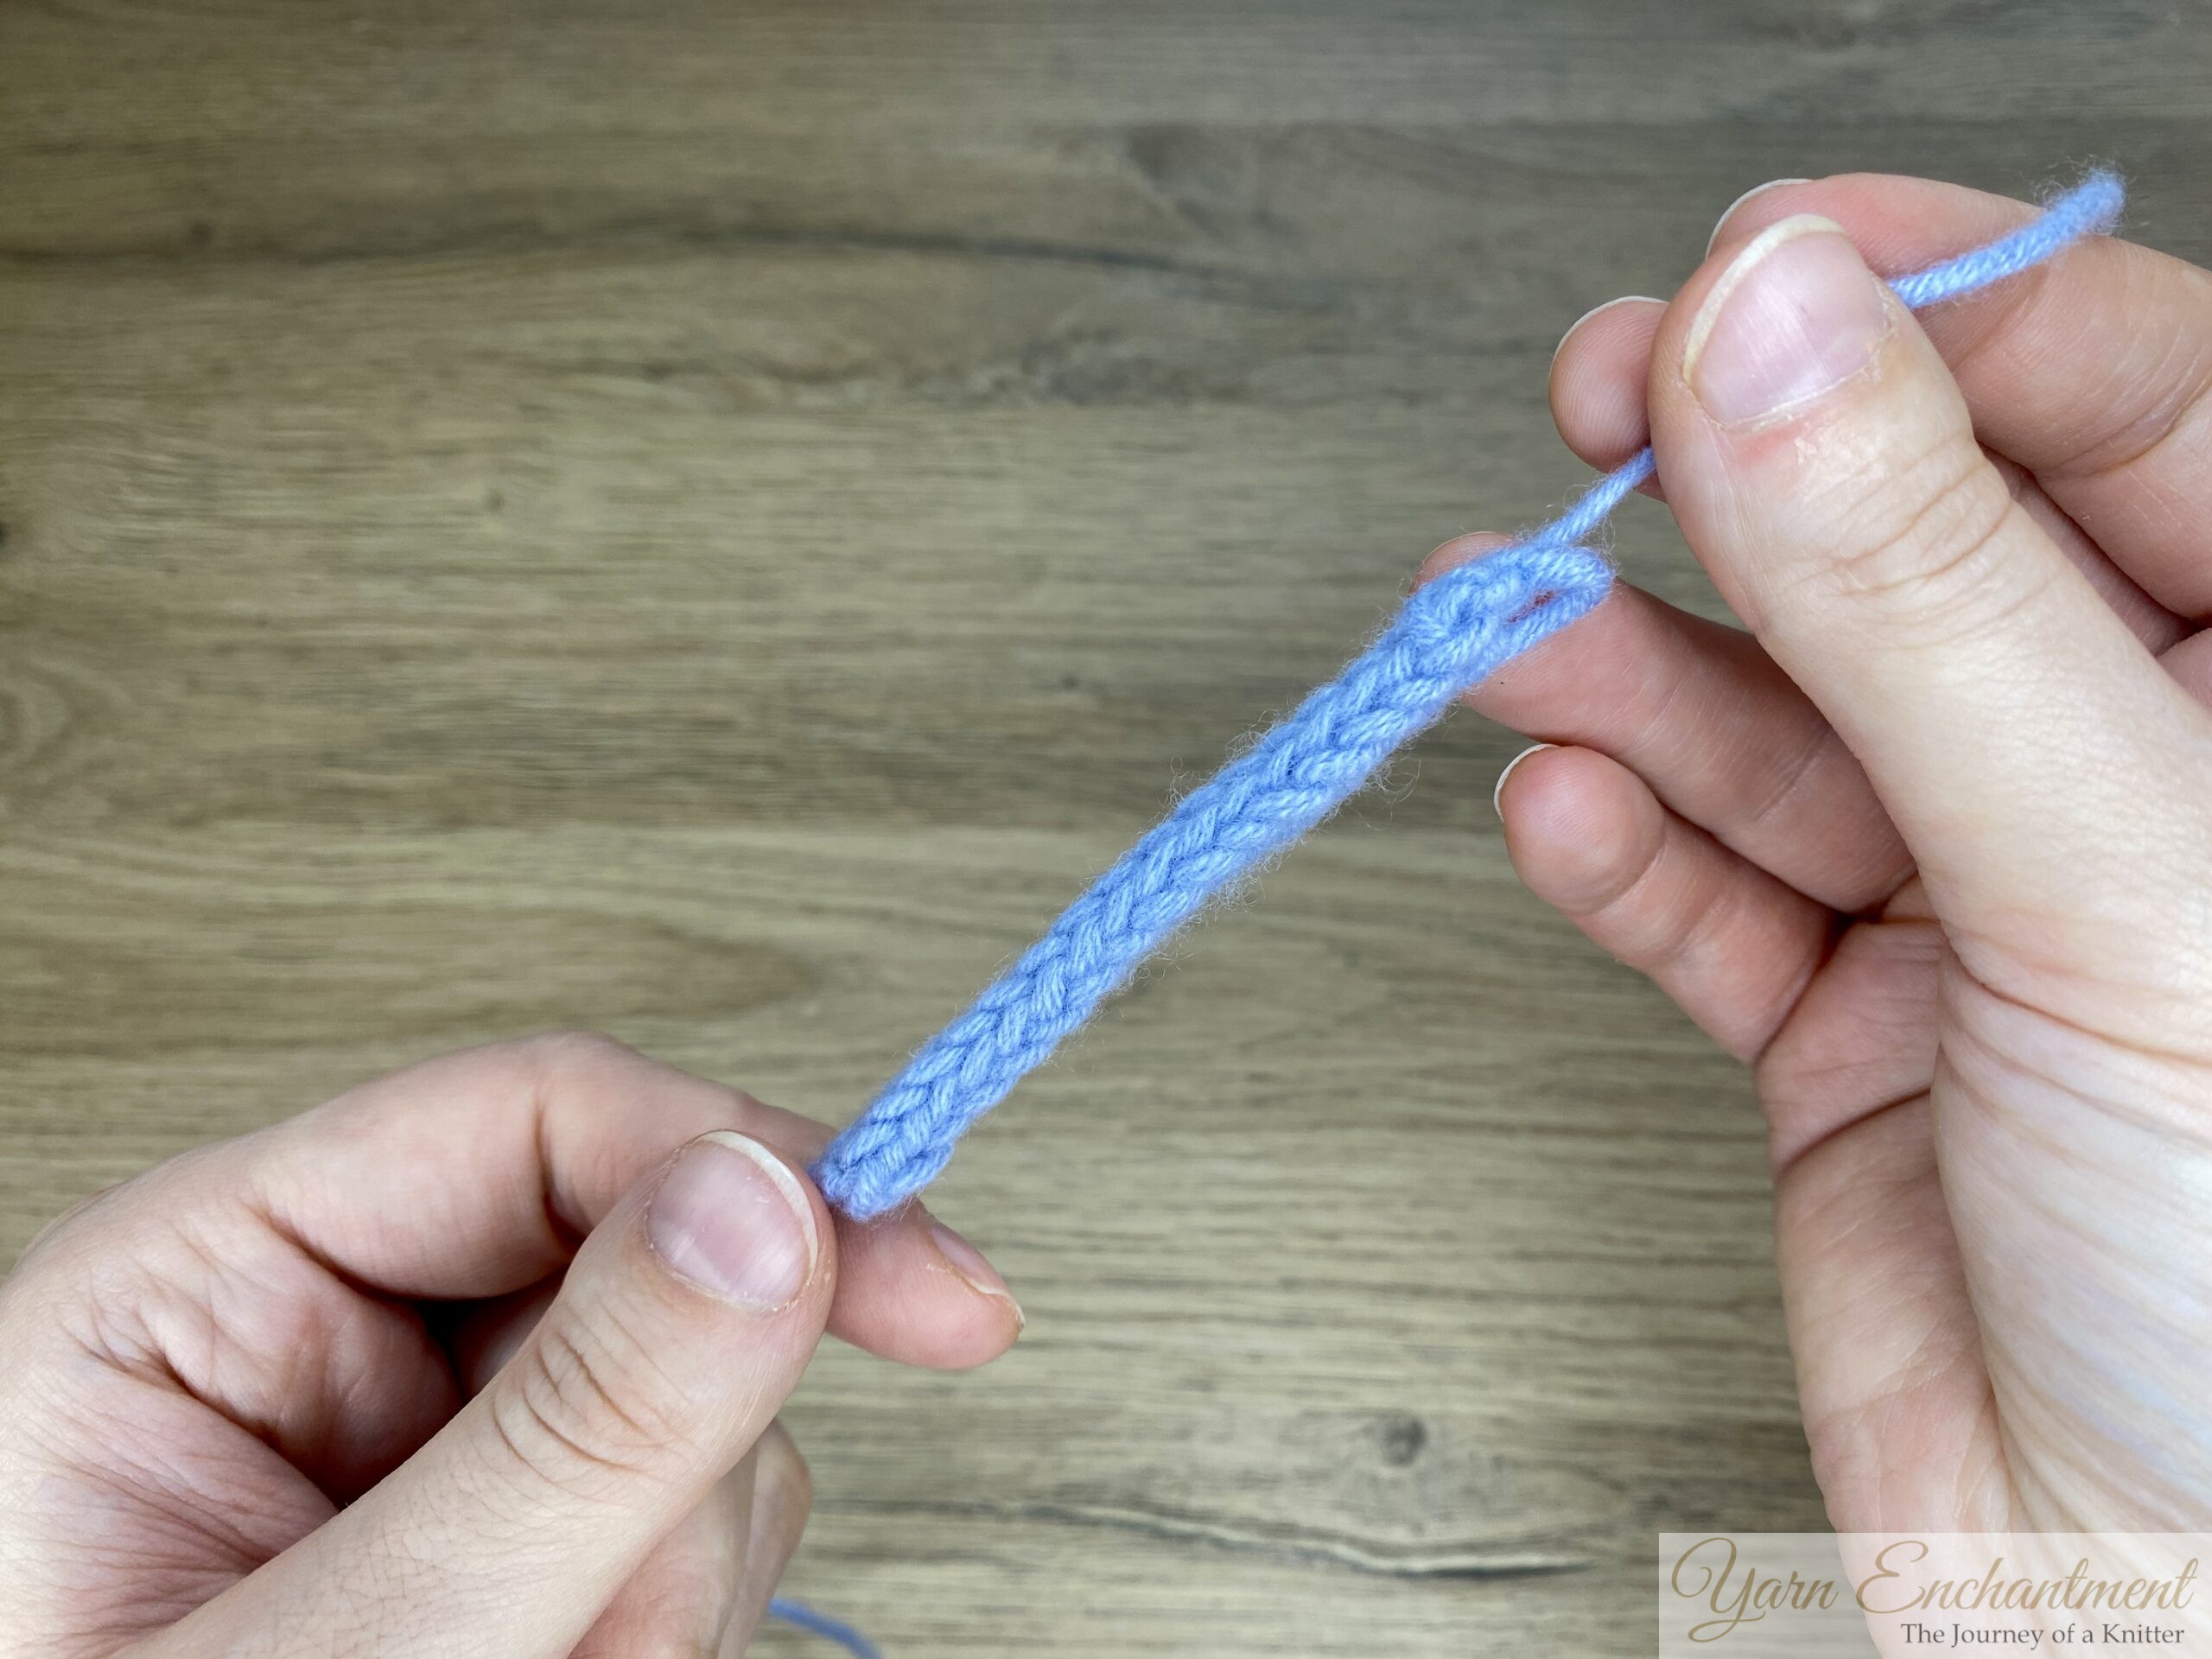
 |  |  | In the first few rows, your I-cord may appear a bit odd, as it can look like the floats are at the front instead of the back. | You can fix this by gently pulling on your work... | ...until the strand or floats move to the back side again. |


The finished tube will look looser, and at first, it might feel like it won’t close up. Don’t worry! Here’s my trick: after you finish a section, place your cord on a stitch holder and roll it between your hands.
 | 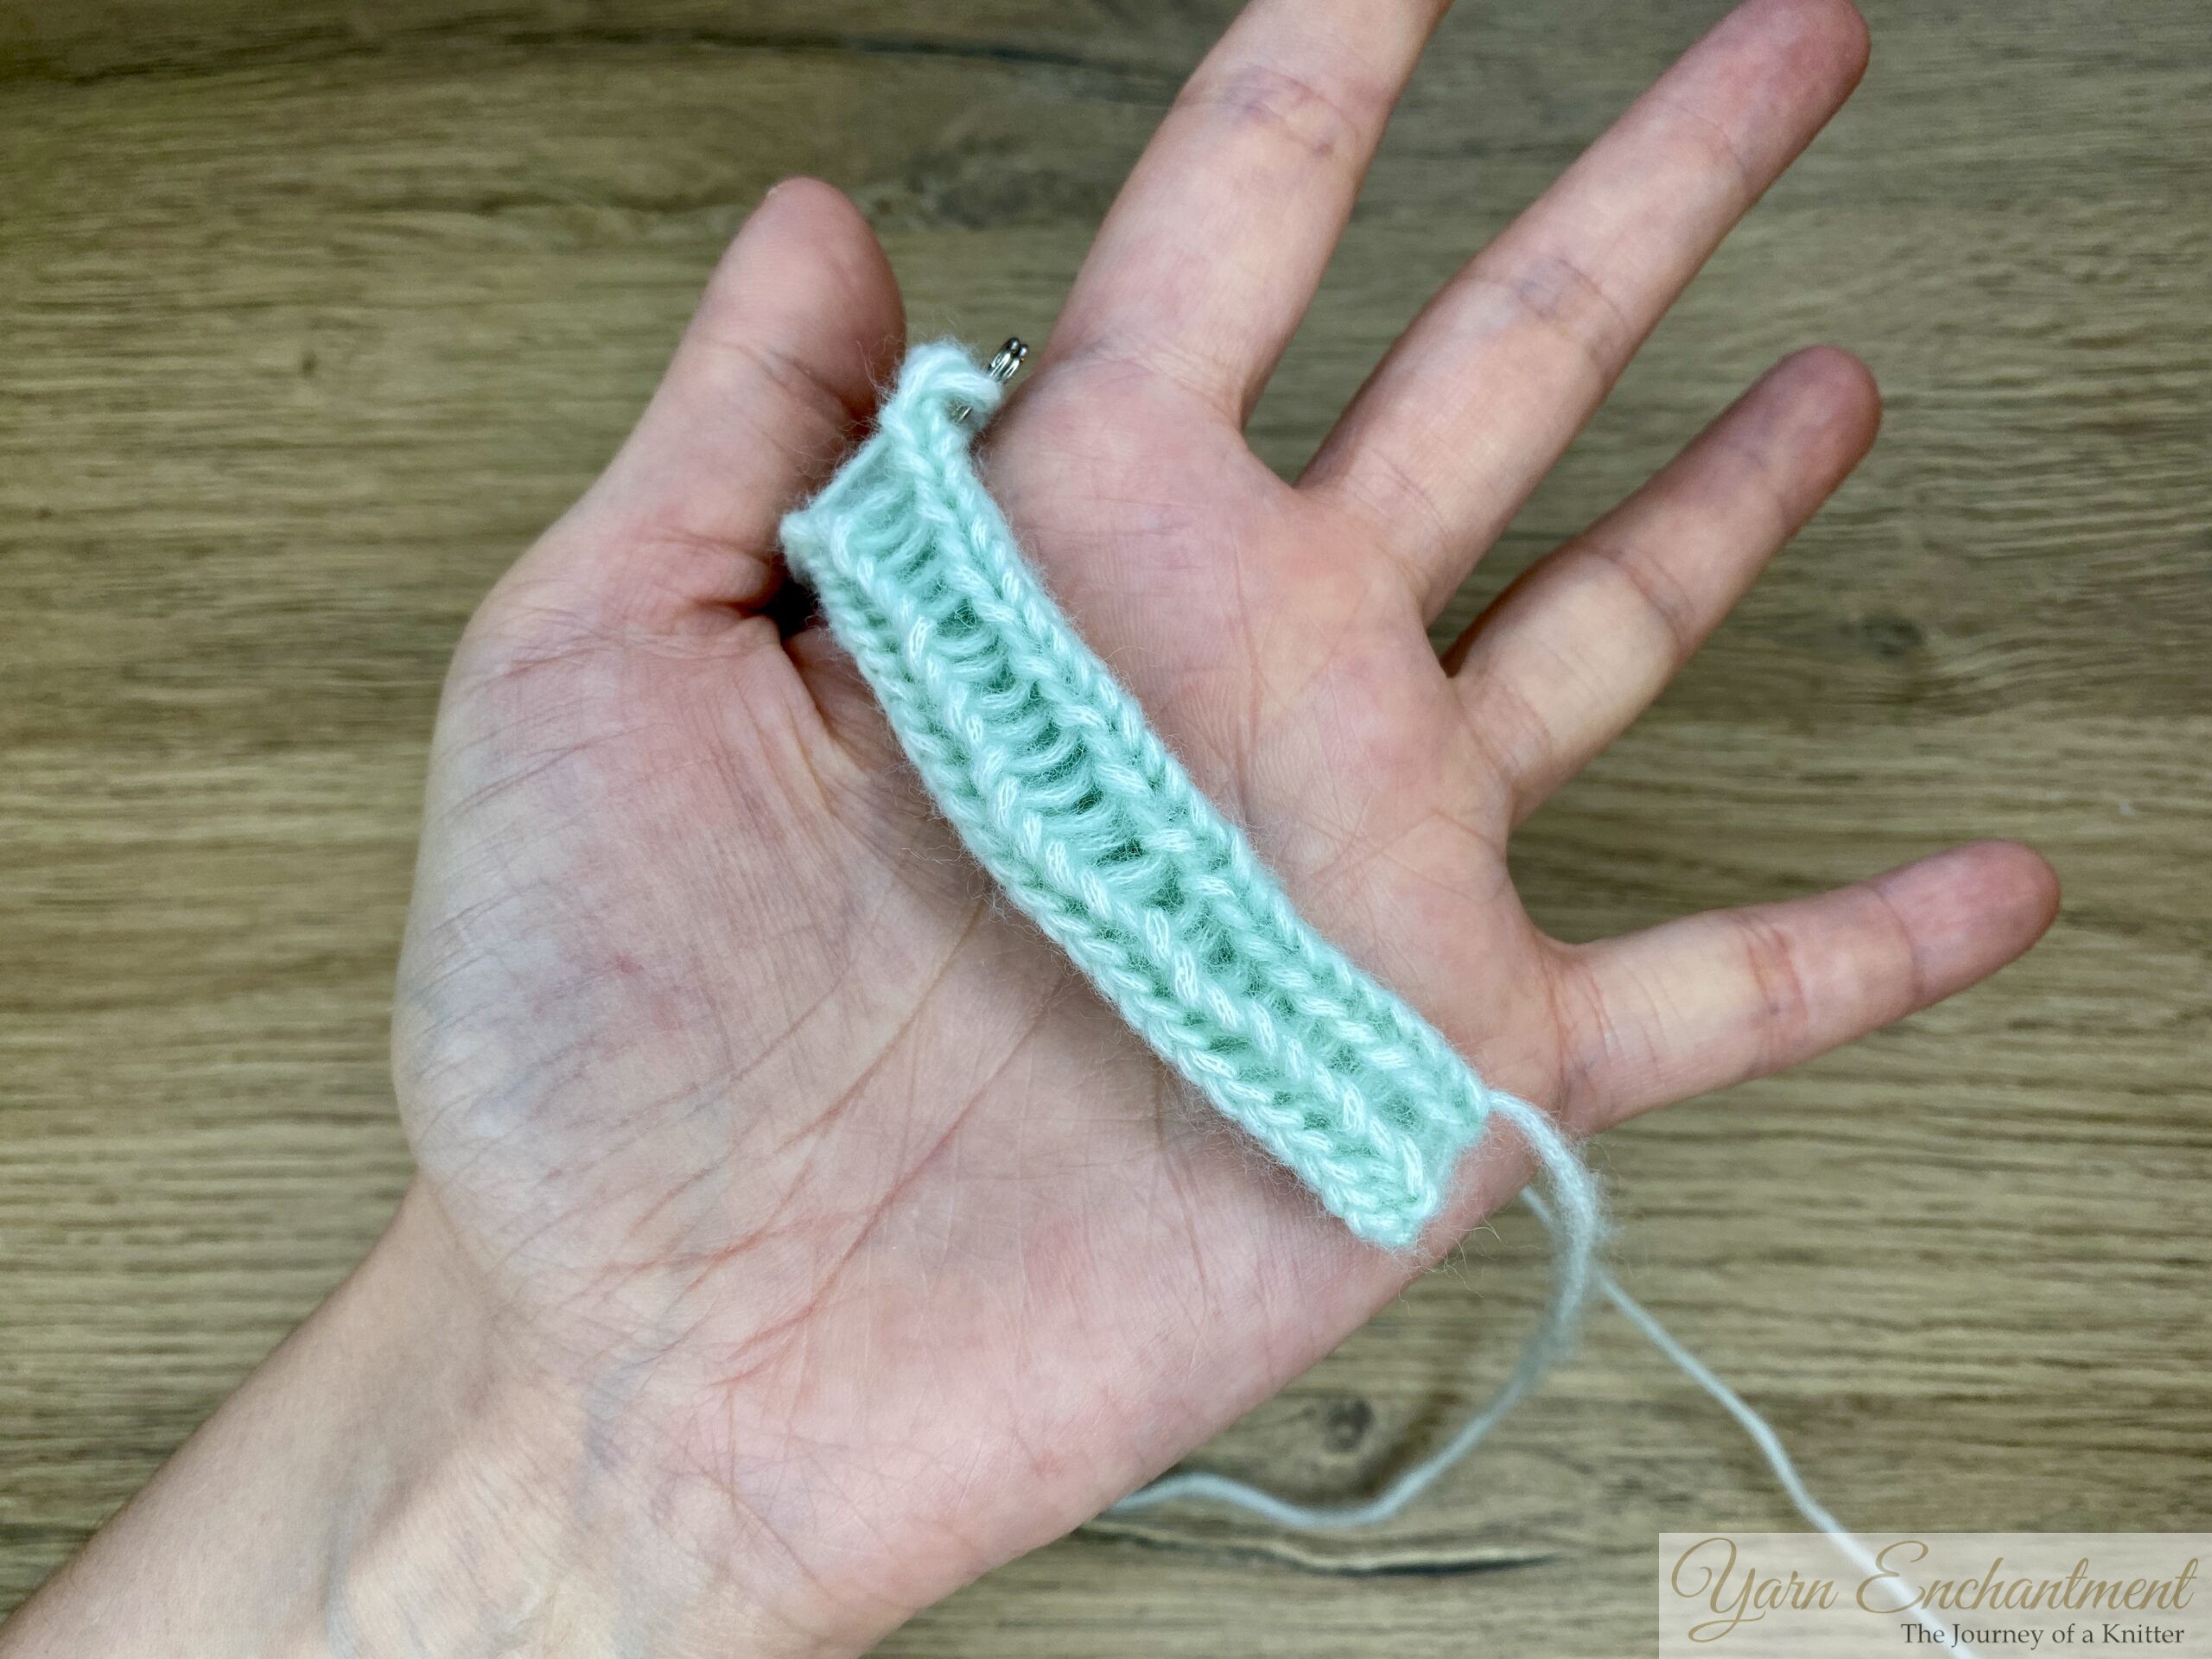 | 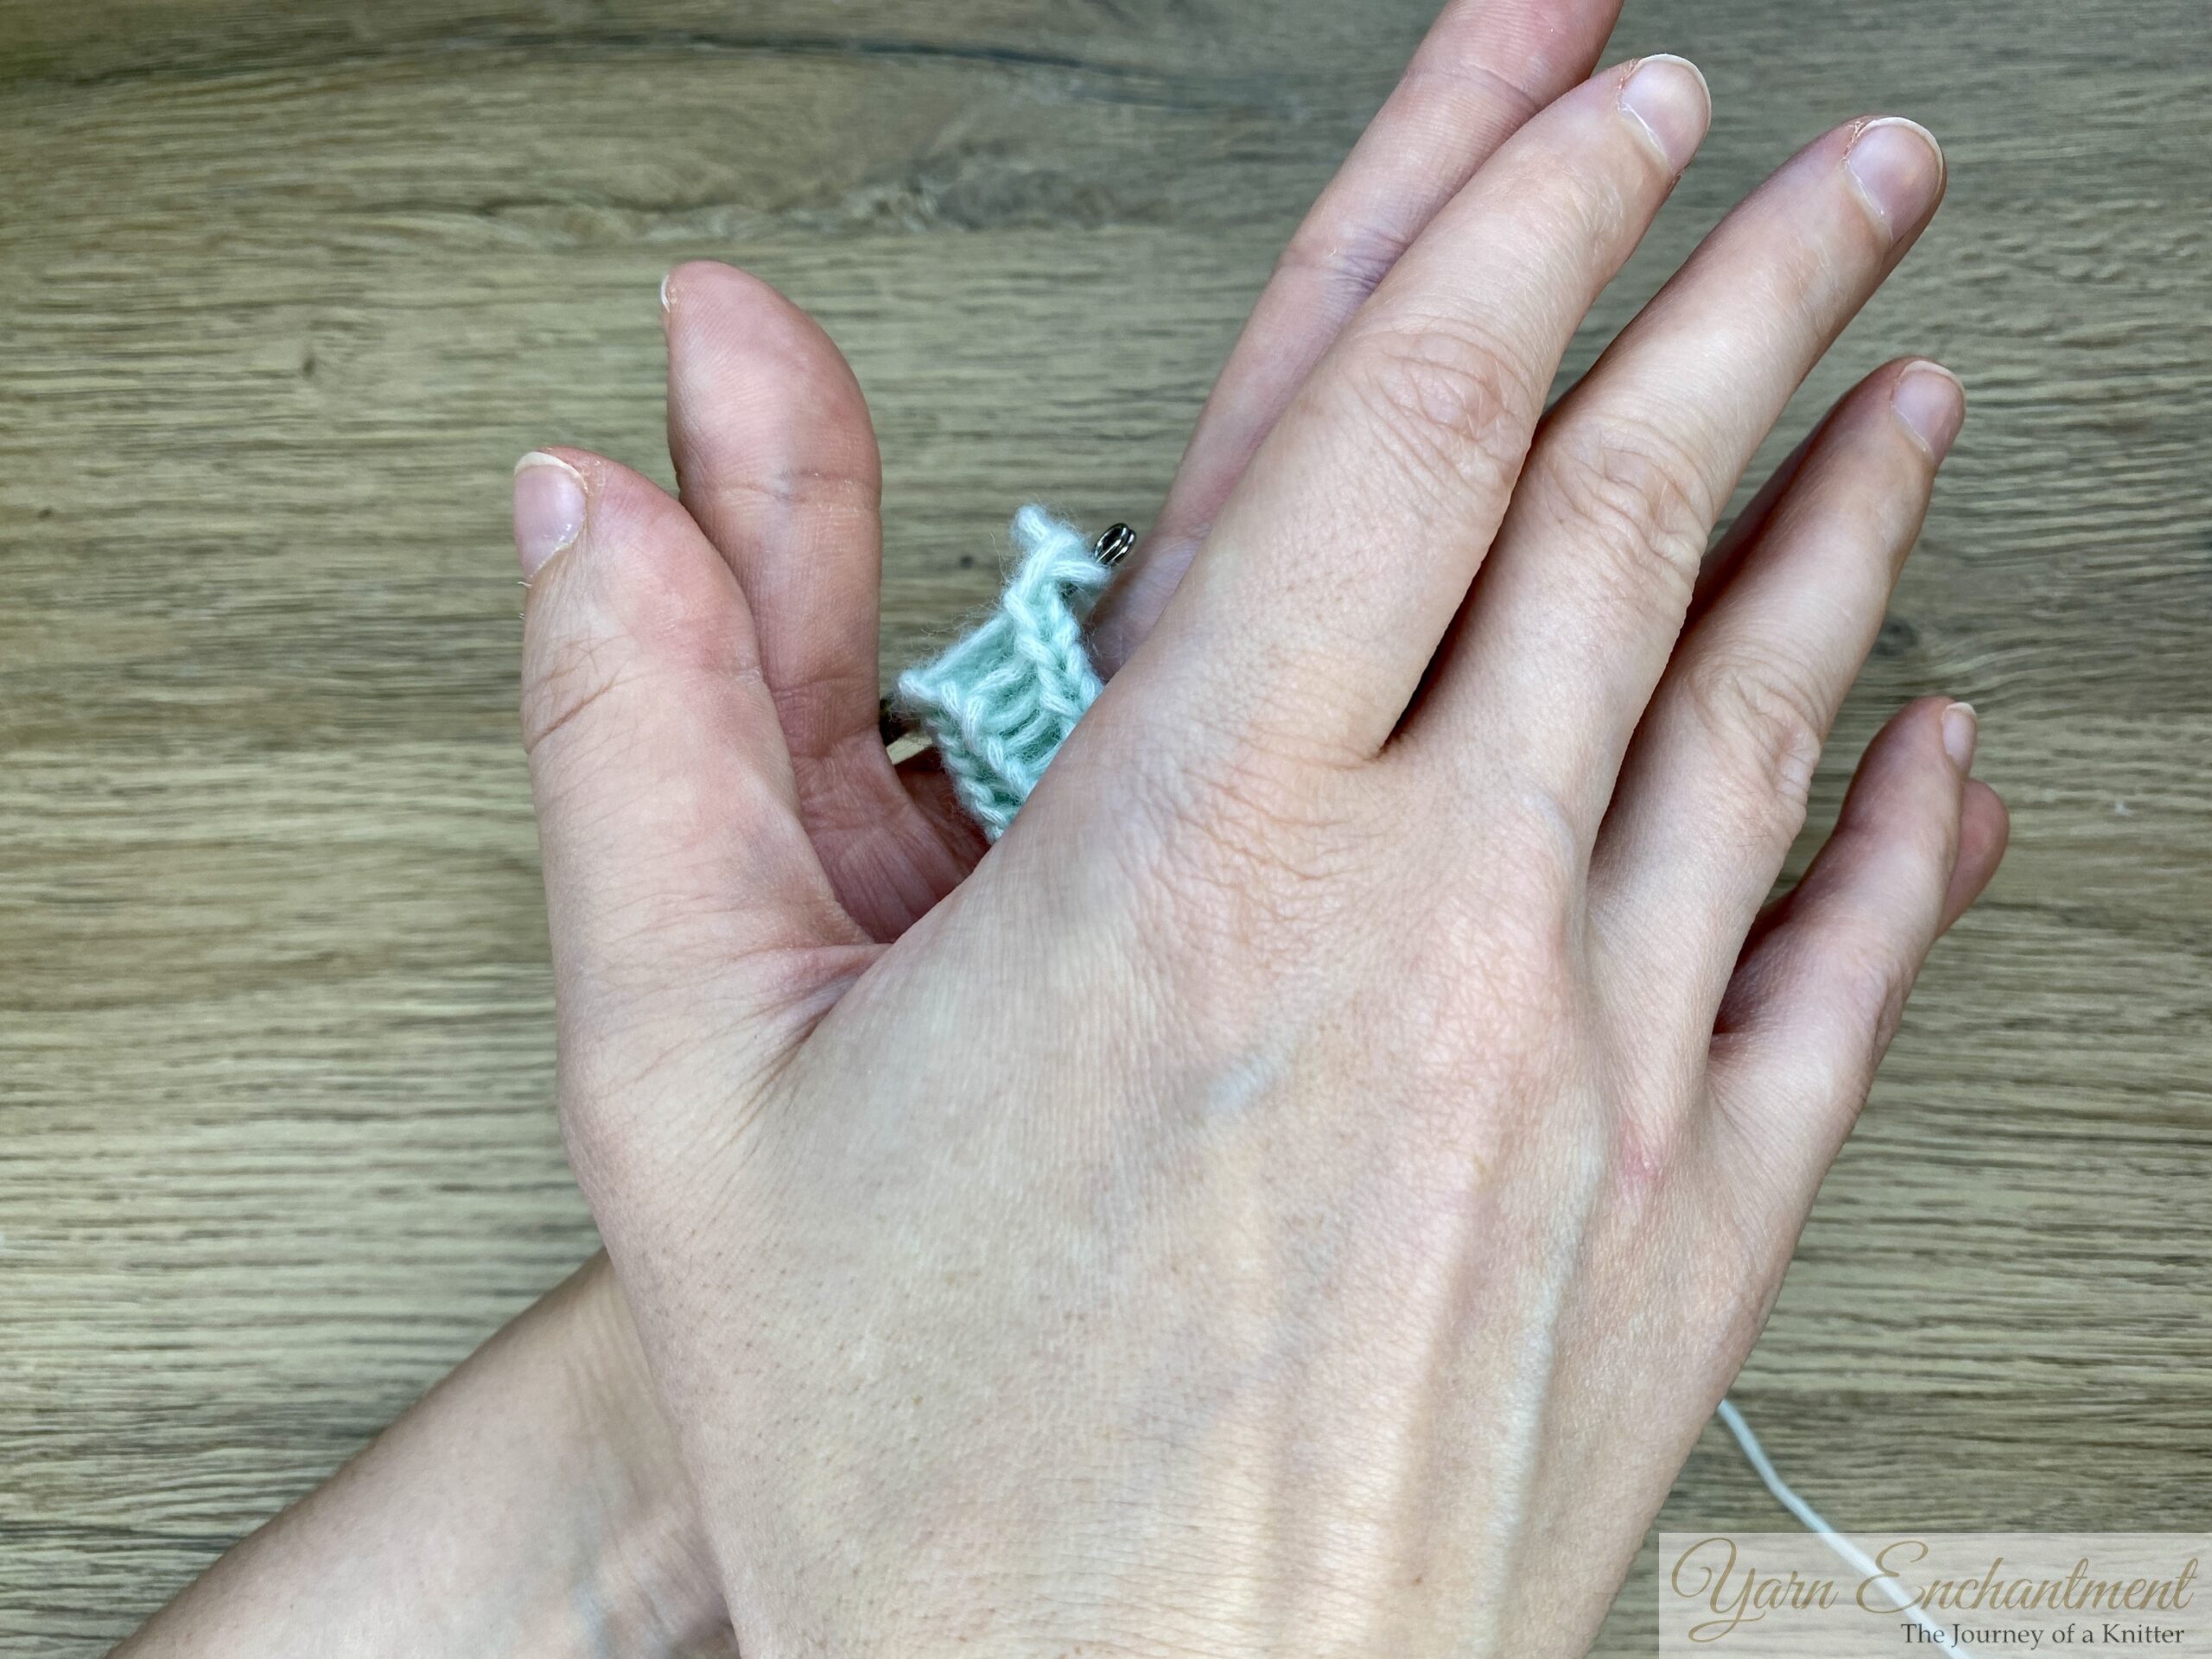 | You can see that the I-cord didn’t close as we wanted it to. | Place your cord on a safety pin and lay it in your hand. | Roll your I-cord between your hands; there’s no need to be gentle - feel free to add some pressure. |


Rolling every few centimeters or inches helps the strands at the back pull together, giving you an even, round I-cord.
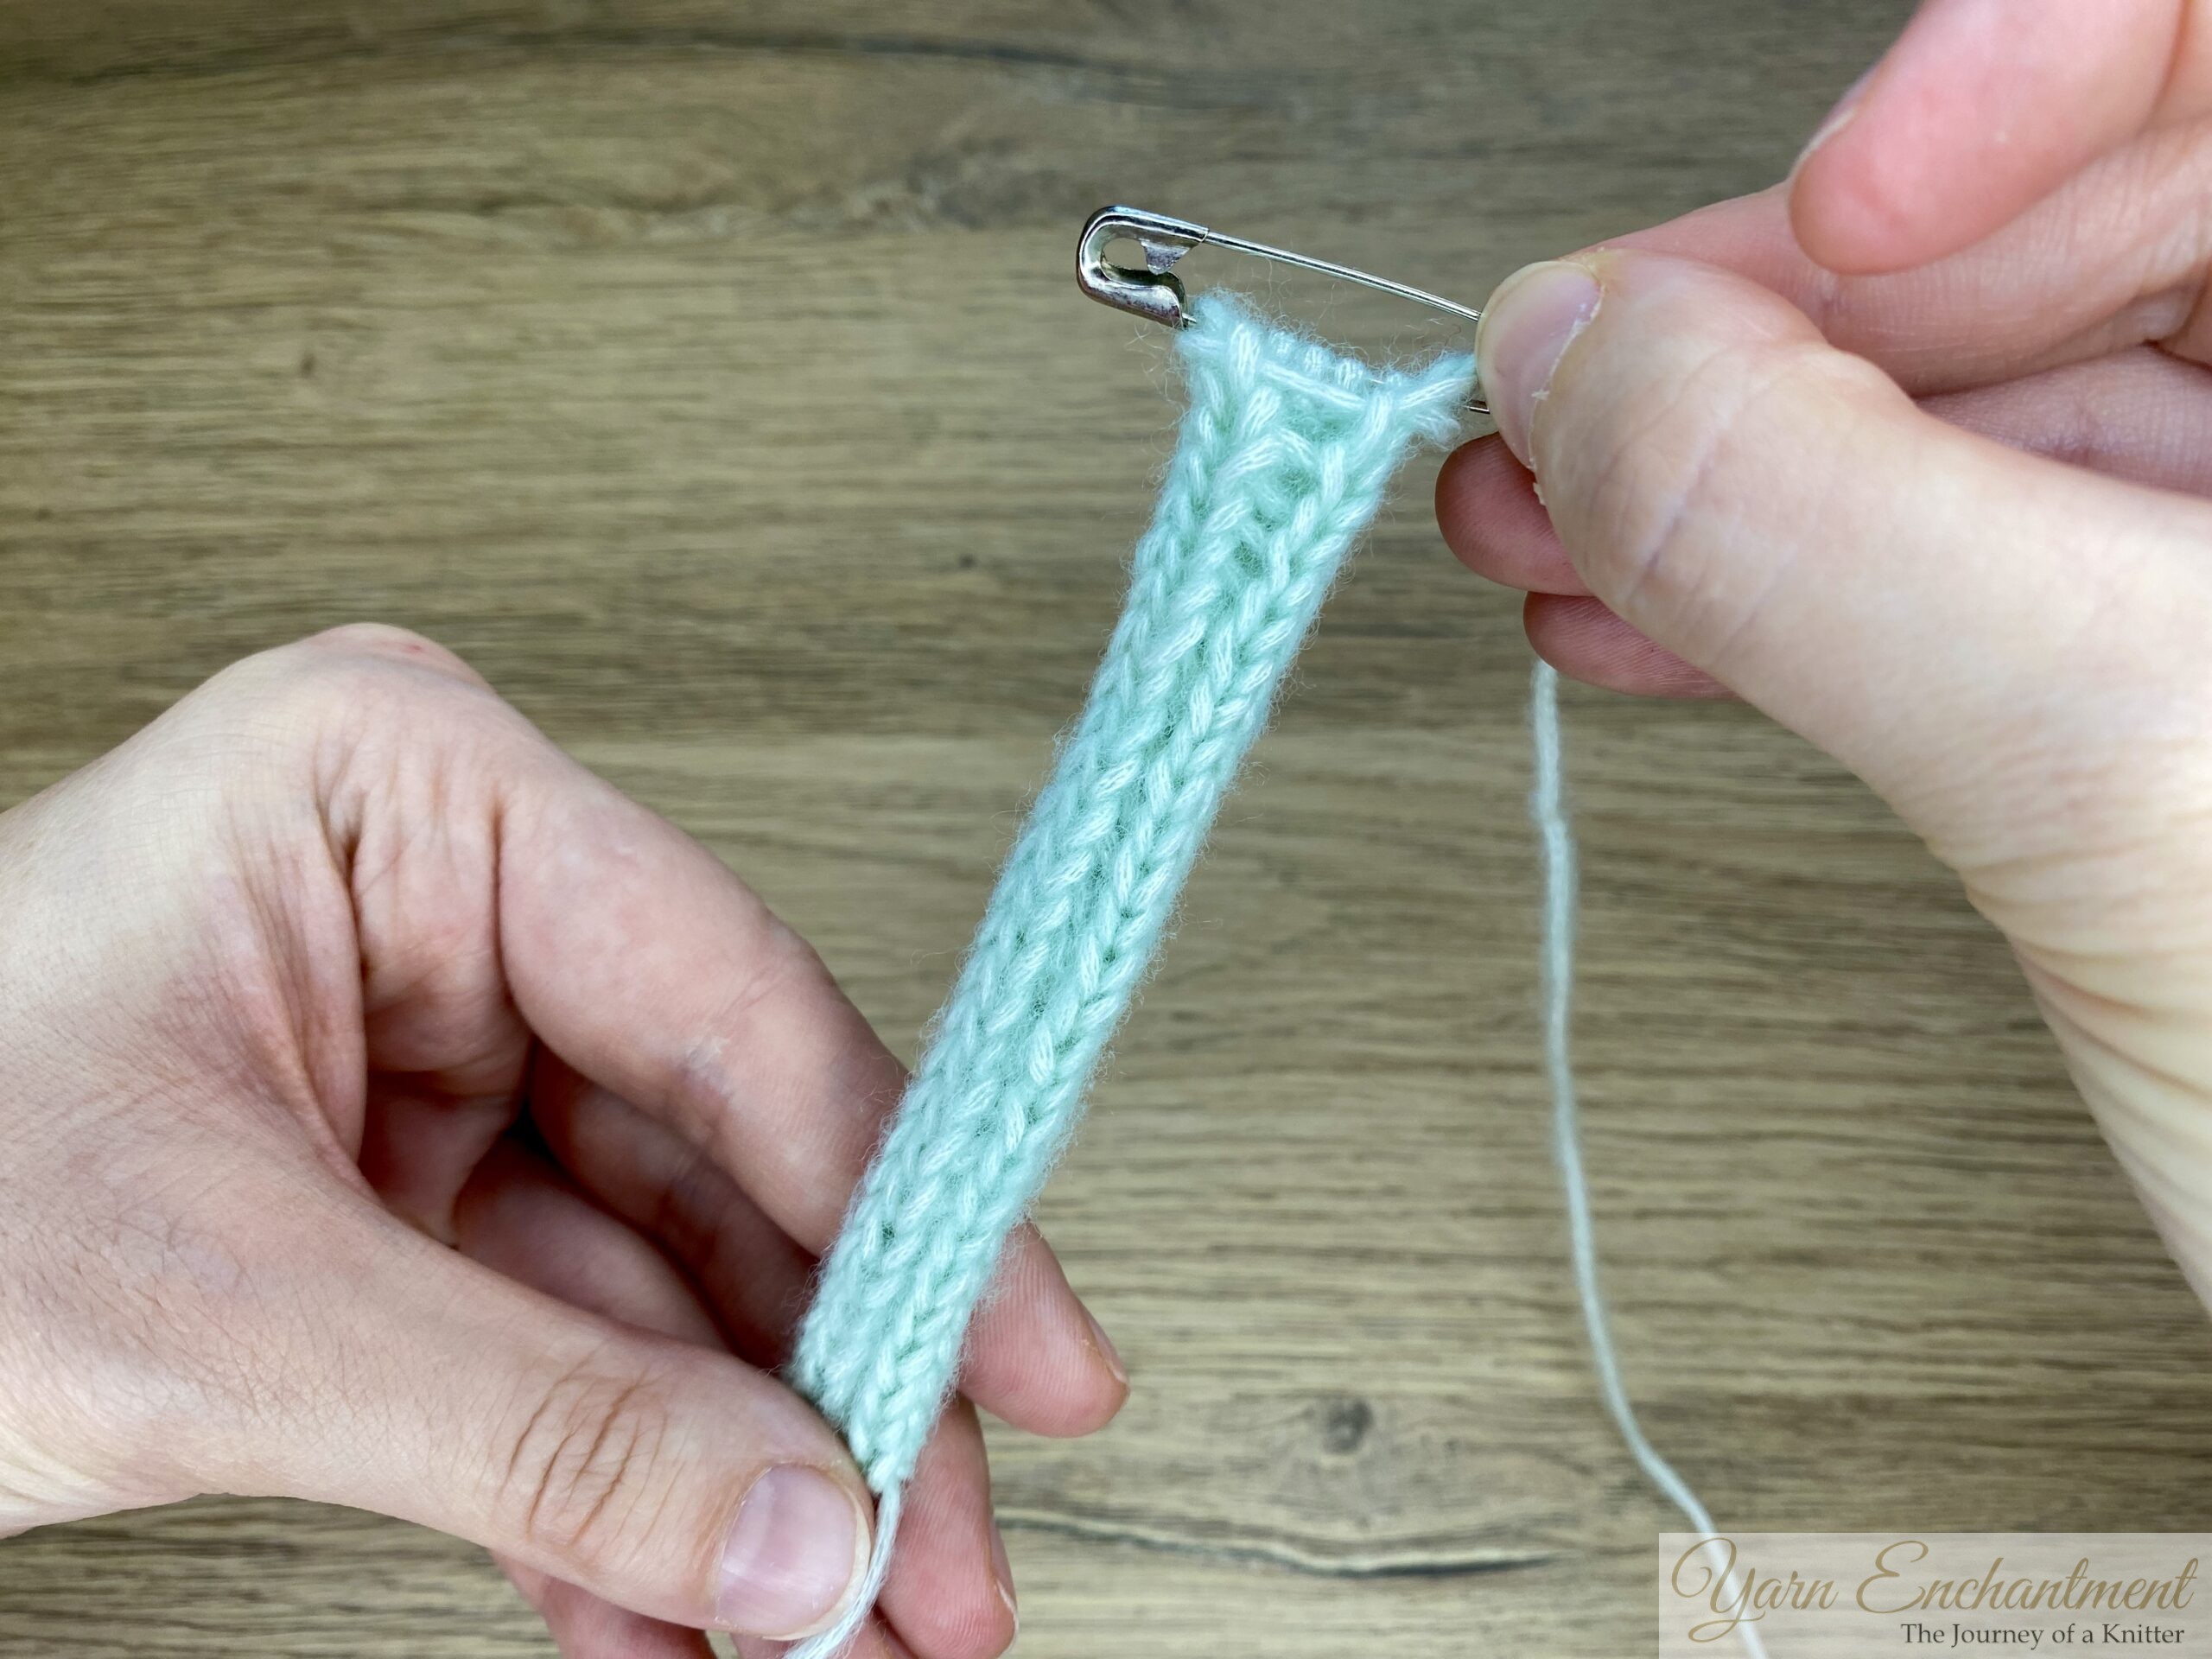 | You can see that everything has closed up nicely. |

Tips for Neat I-Cords
- Rolling your I-cord gently between your hands is my go-to trick for getting those stitches to settle and smoothing out the whole cord. It really makes a difference in how neat and even your I-cord turns out!
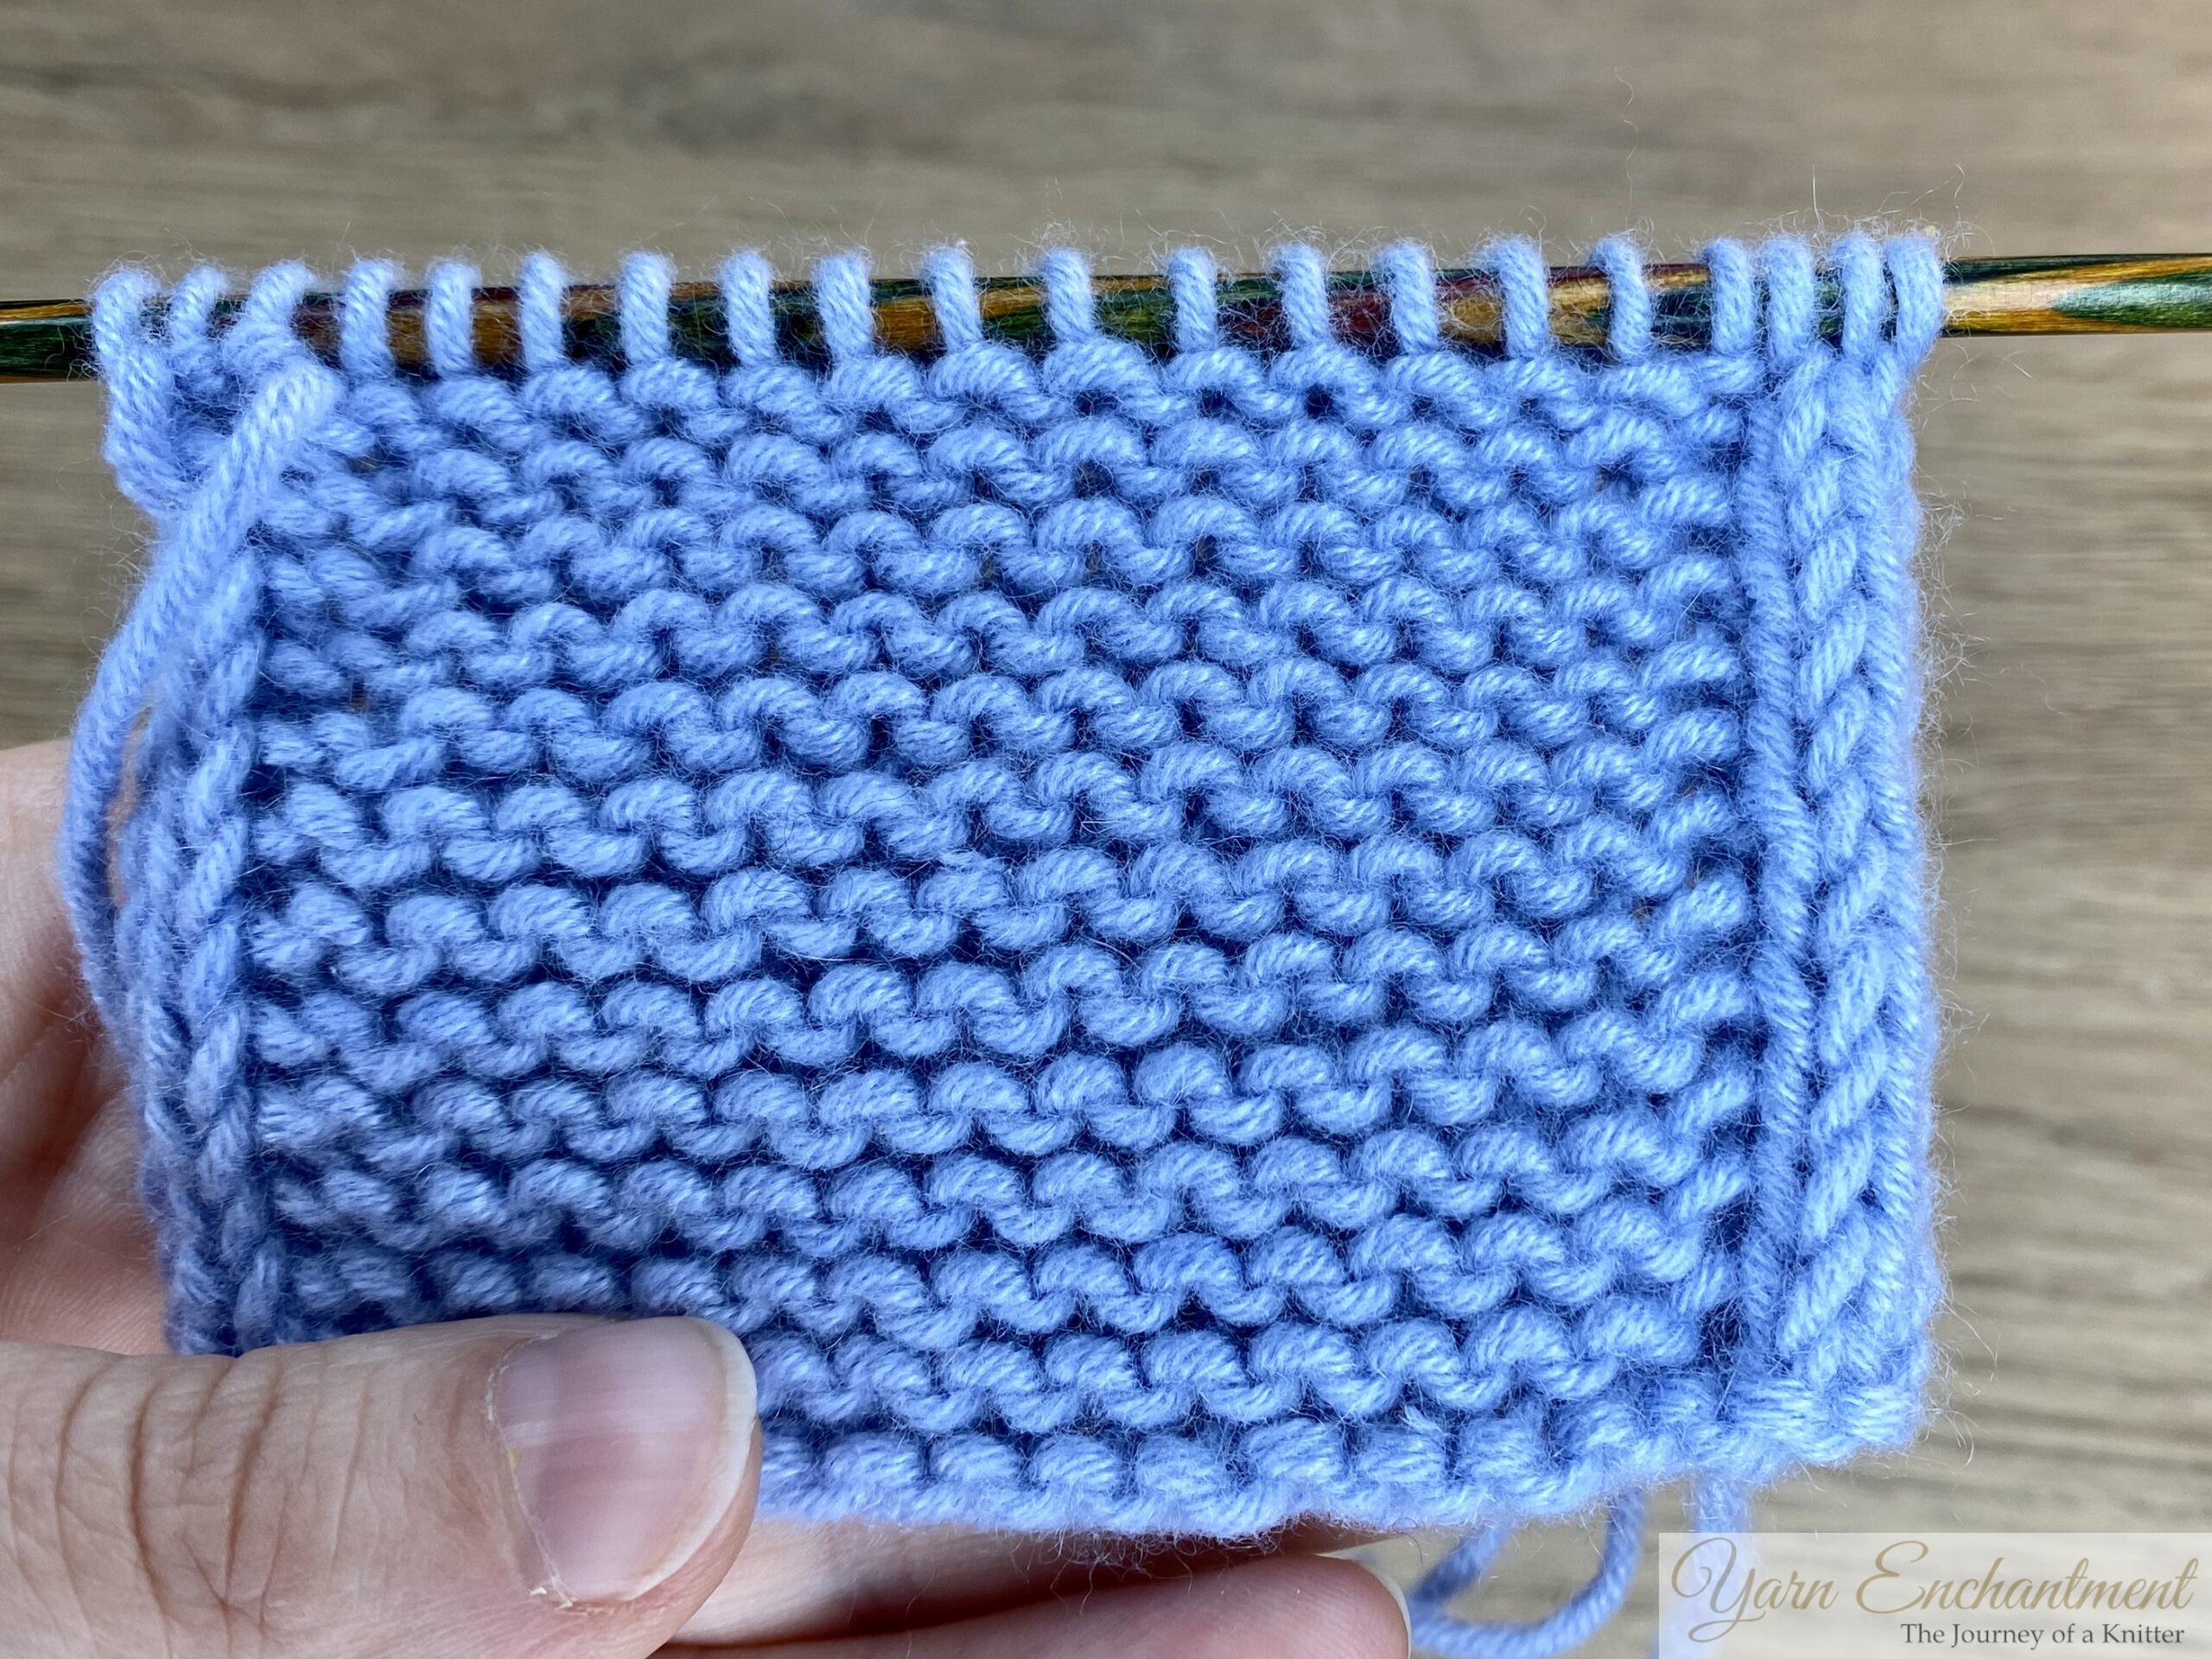
- I also like to use needles that are a bit smaller than the yarn label recommends, just for that extra structure and tidiness. For example, the green I-cord swatches in my photos are made with DK weight yarn and 3.5 mm needles, instead of something bigger.
- And don’t forget: blocking works wonders for any knitting, but especially for I-cords. A quick steam or soak turns a wobbly cord into a picture-perfect tube, ready for any project.
 |  | The I-cord before rolling the stitches at the back appear loose | After rolling, the cord is smooth, even, and tightly closed. |


Knitting I-Cords with Different Needles
You can knit I-cord with several types of needles. Double-pointed needles (DPNs) are the classic choice since you can easily slide your stitches from one end to the other.
As already shown in the tutorial, this method is straightforward - I typically use DPNs sized from 2mm to 4mm, since that’s perfect for sock knitting and I don’t need larger ones.
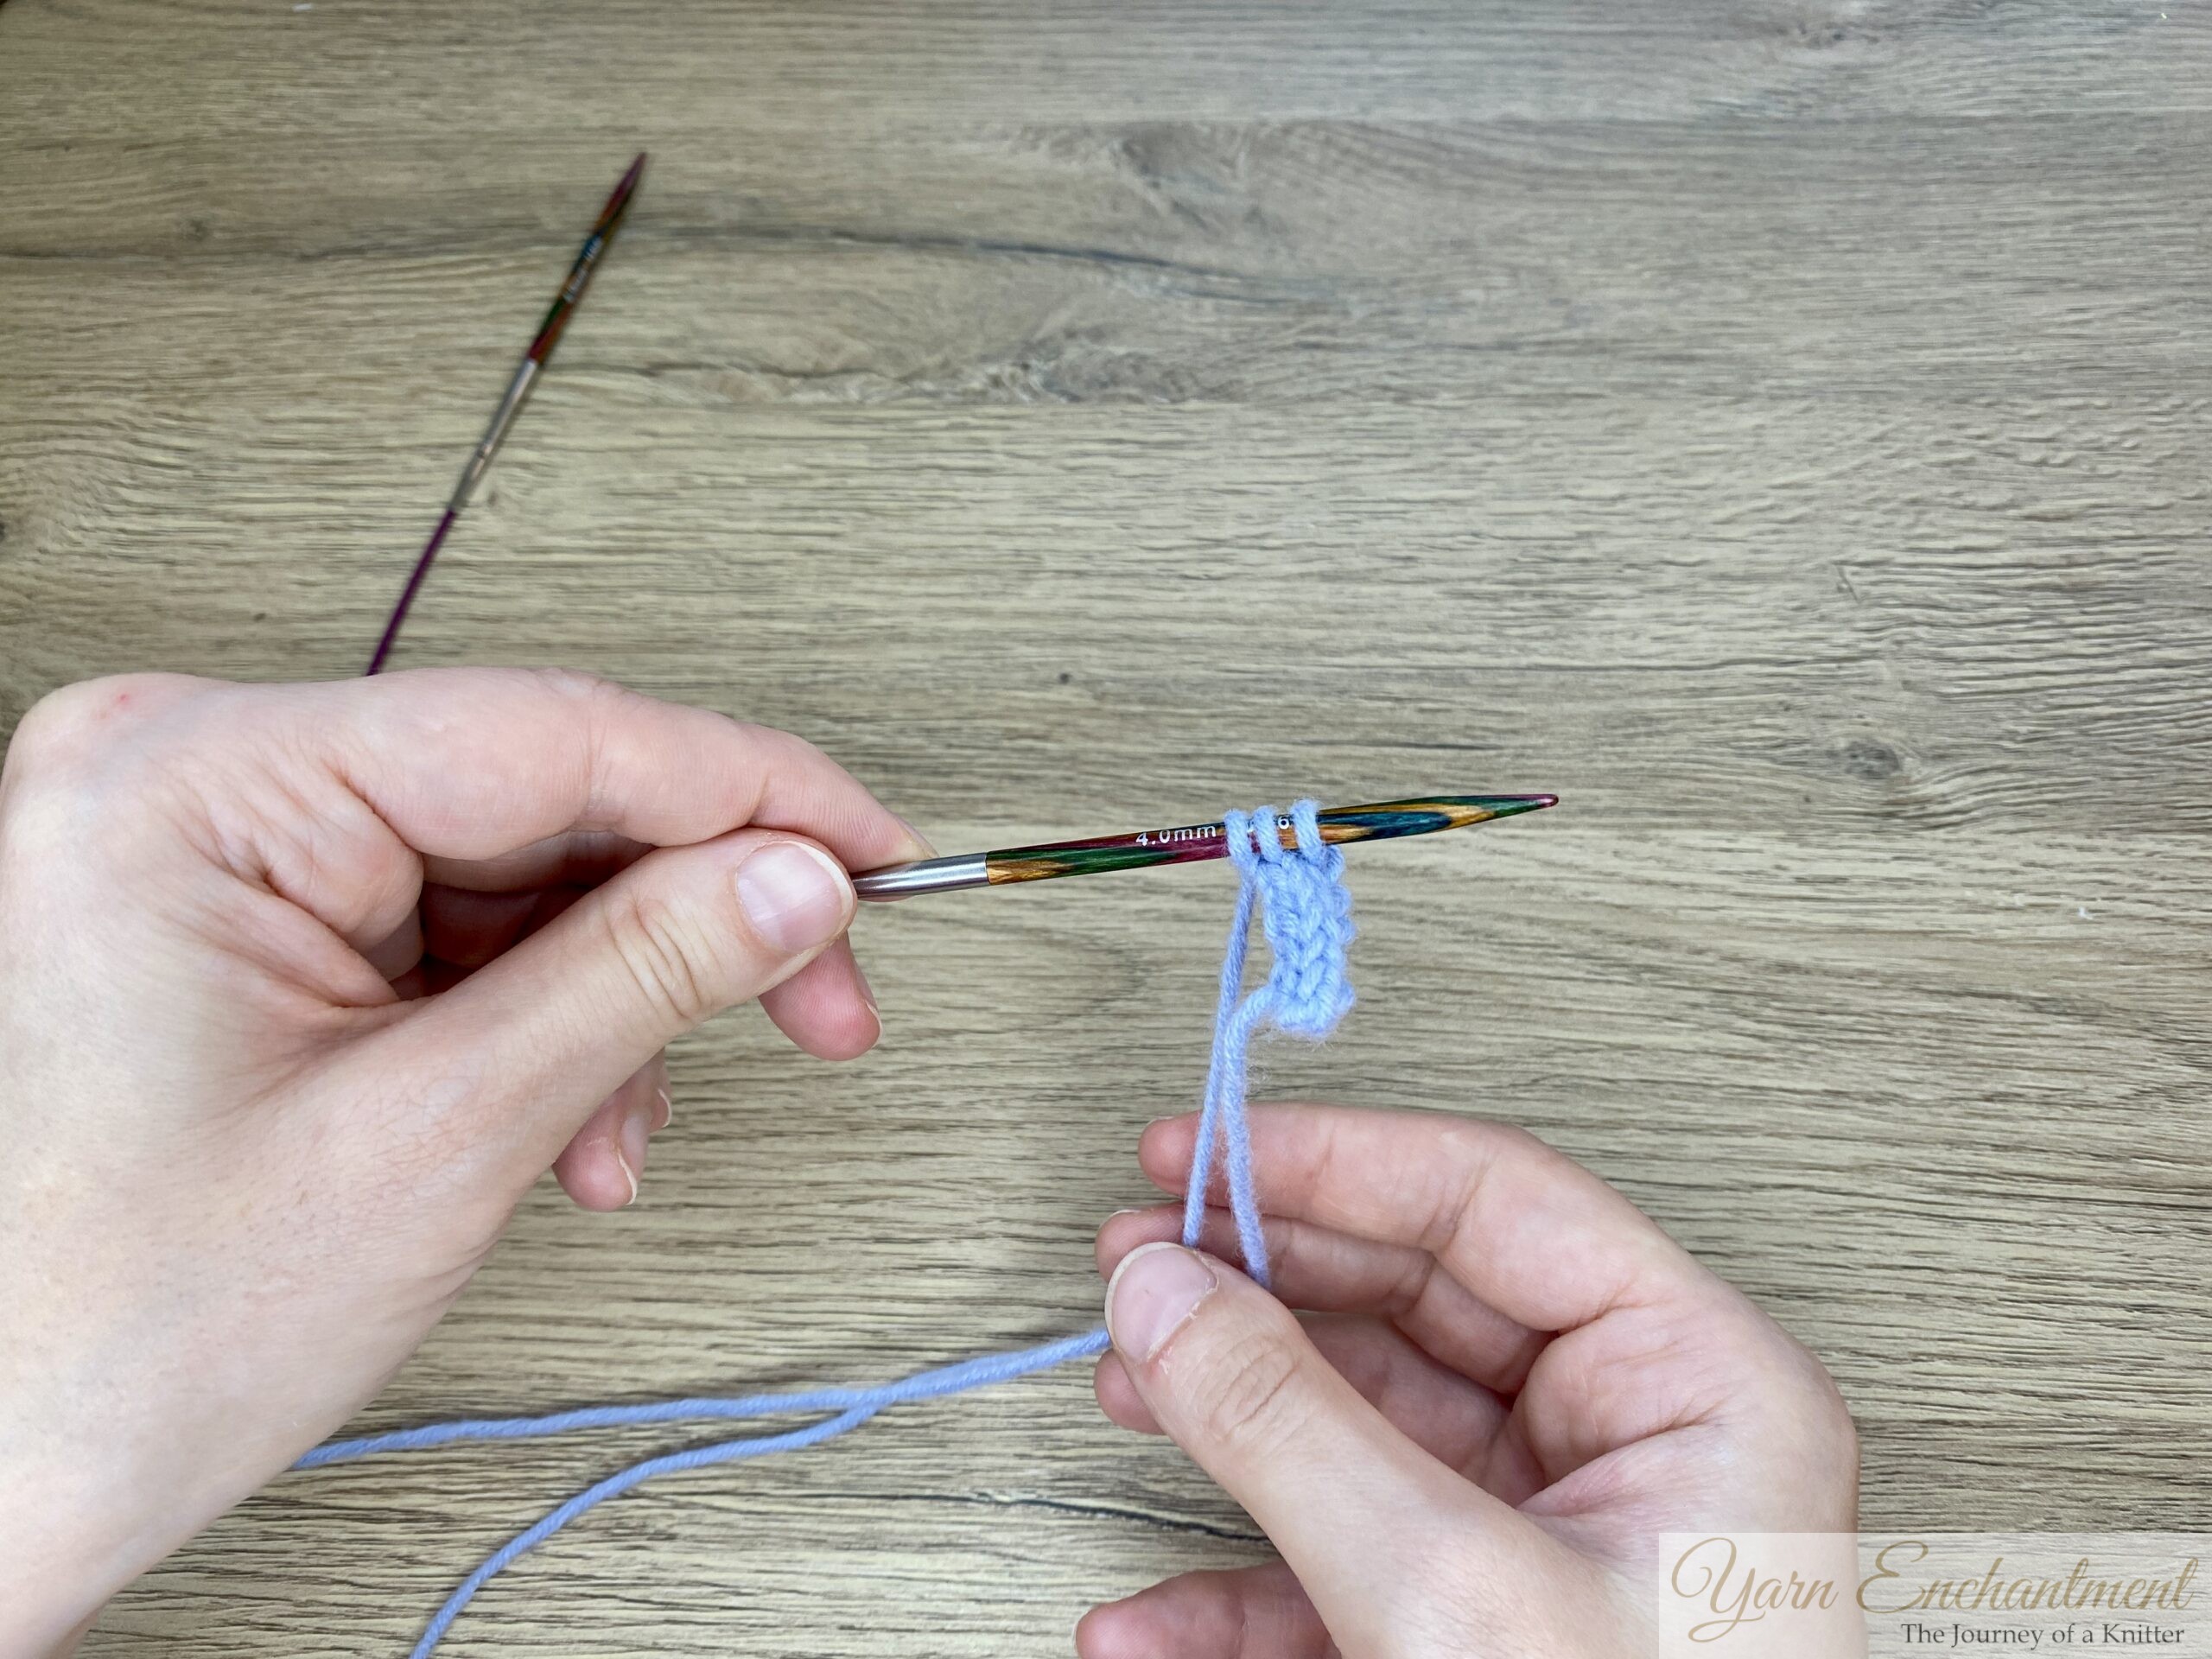
Tips of Your Interchangeable Needle Set
When I need to knit an I-cord with larger needles, I simply use the tips from my interchangeable needle set. This is a great workaround and works just as well for bigger projects. For interchangeable needle sets, you can use just the tips. When working with the tips of your interchangeable needles, the process is just like using double-pointed needles - simply slide the stitches from the left to the right side after each row.
 |  |  | When working with the tips of your interchangeable needles, ... | ...the process is just like using double-pointed needles - simply slide the stitches from the left... | ...to the right side after each row. |


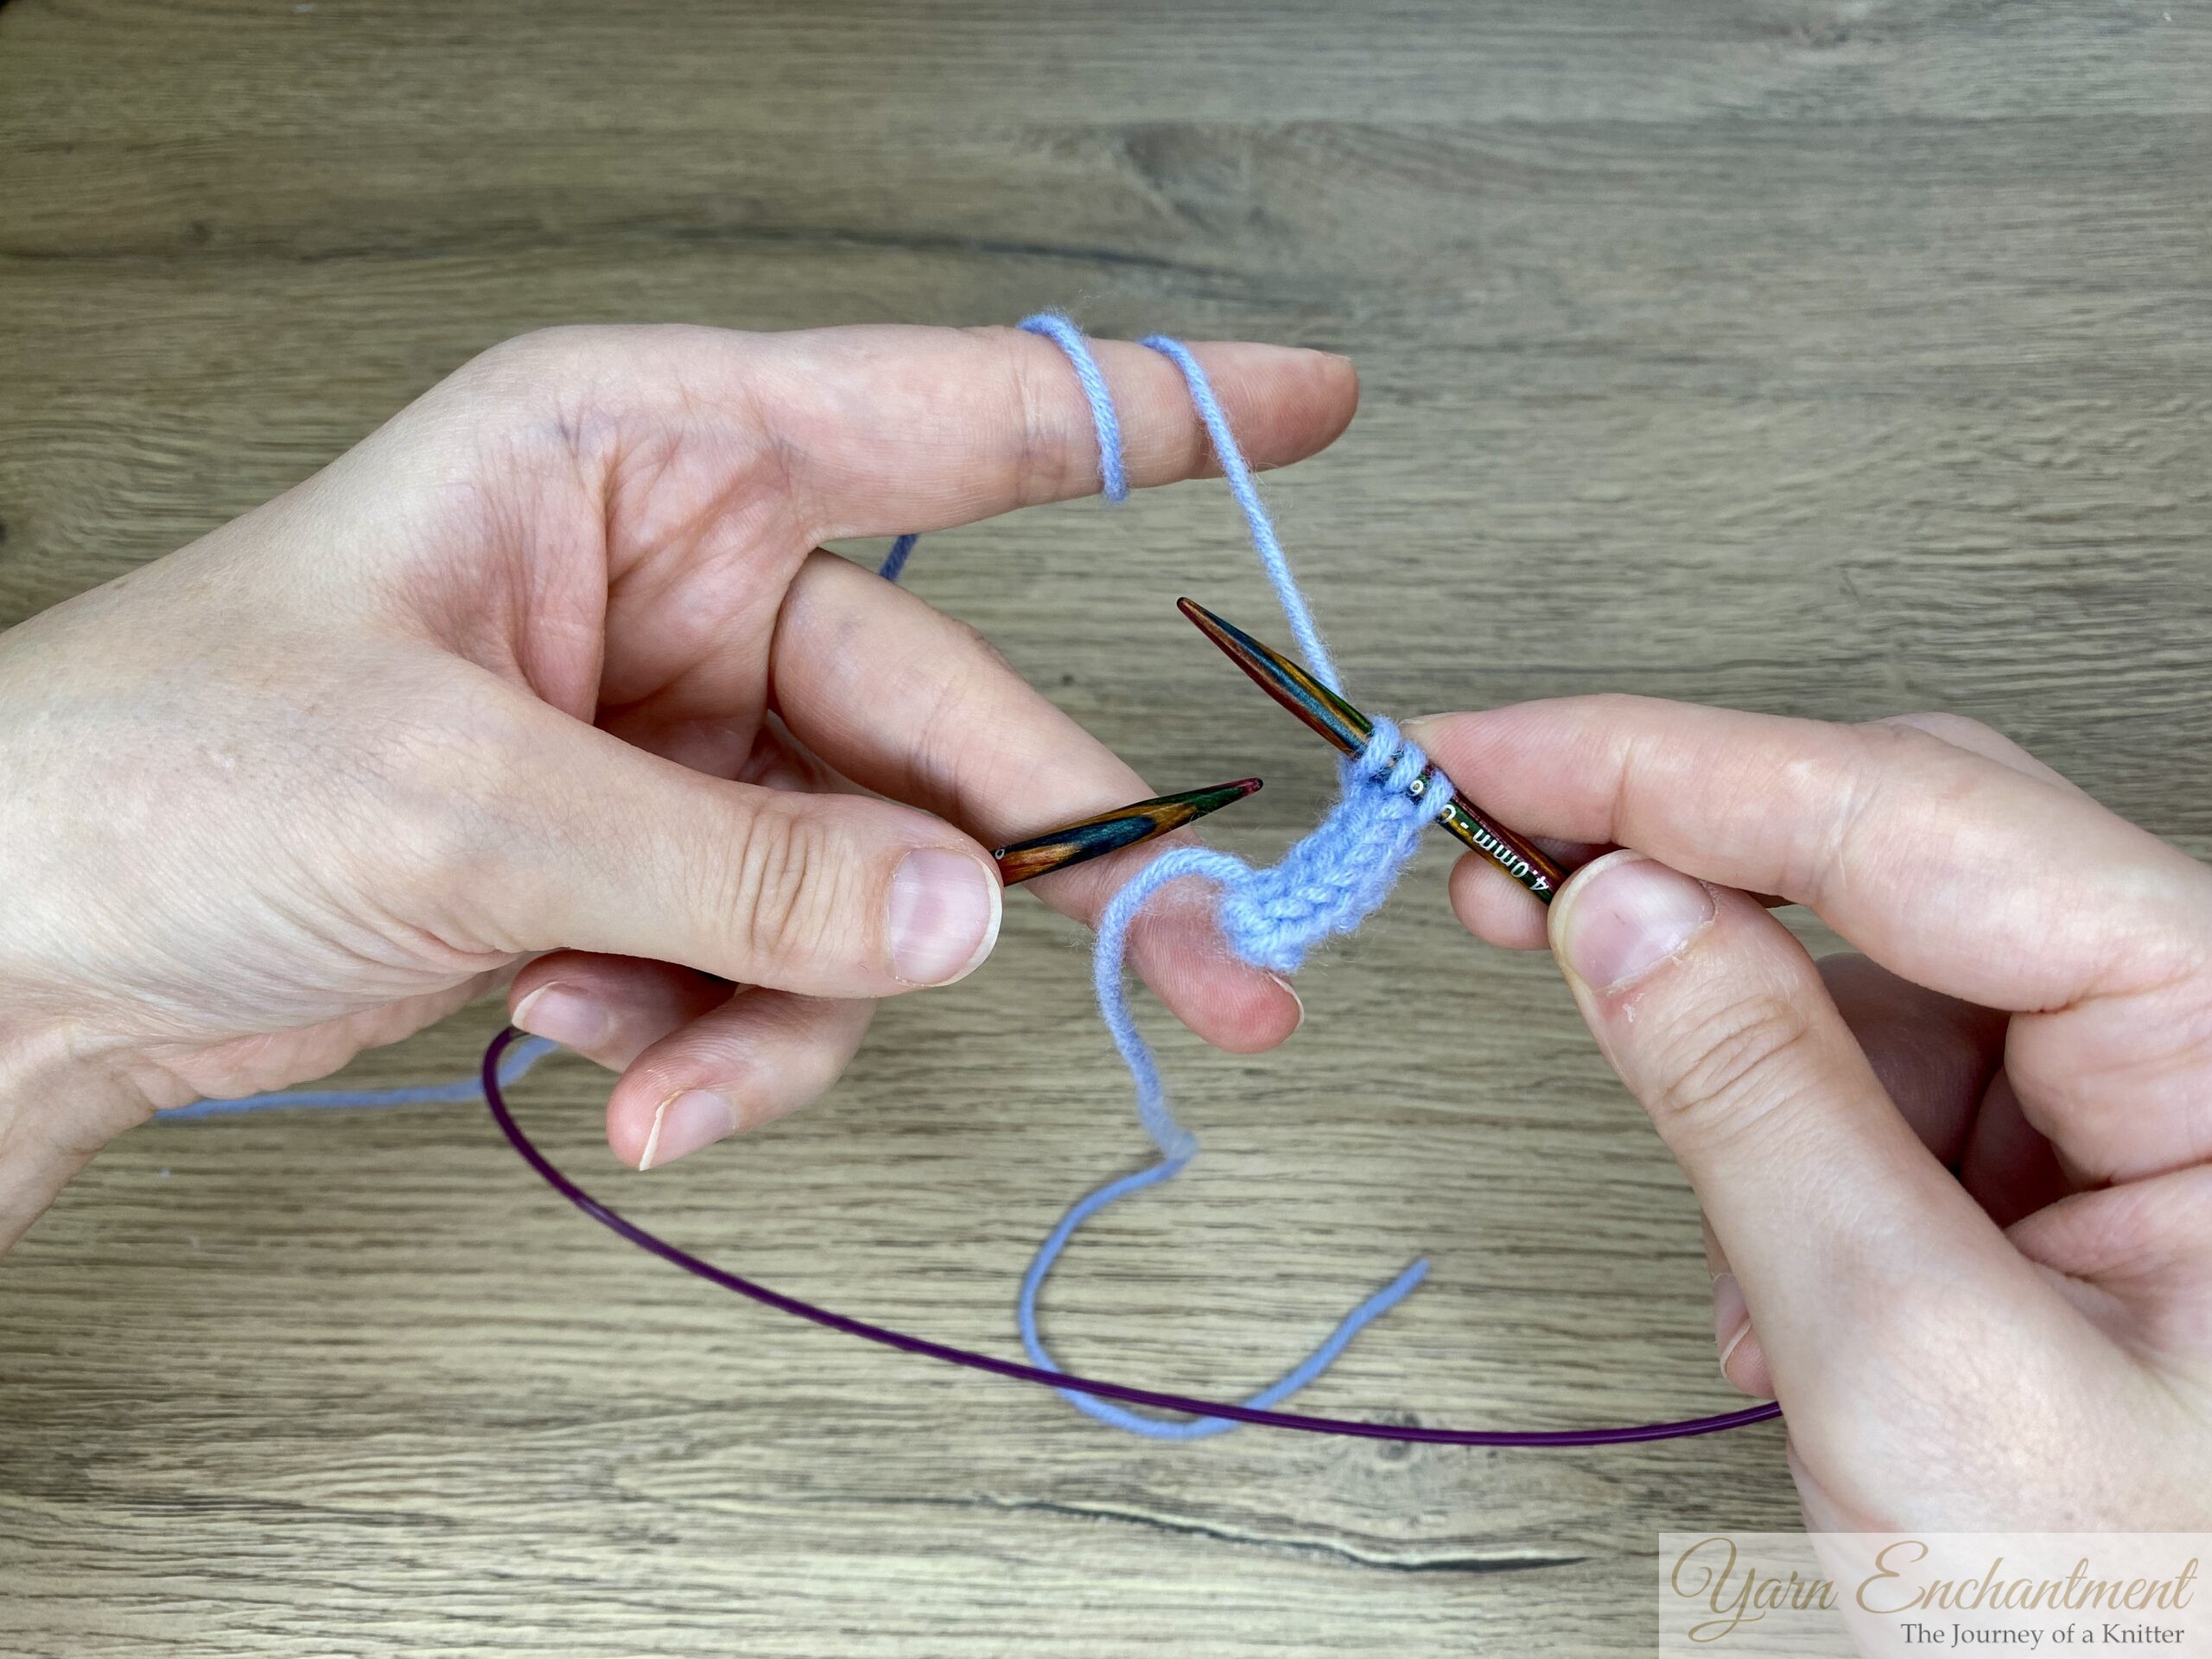
Circular Needles
Circular needles work just as well, simply treat the cable like a long DPN and slide the stitches from one tip to the other for each row.
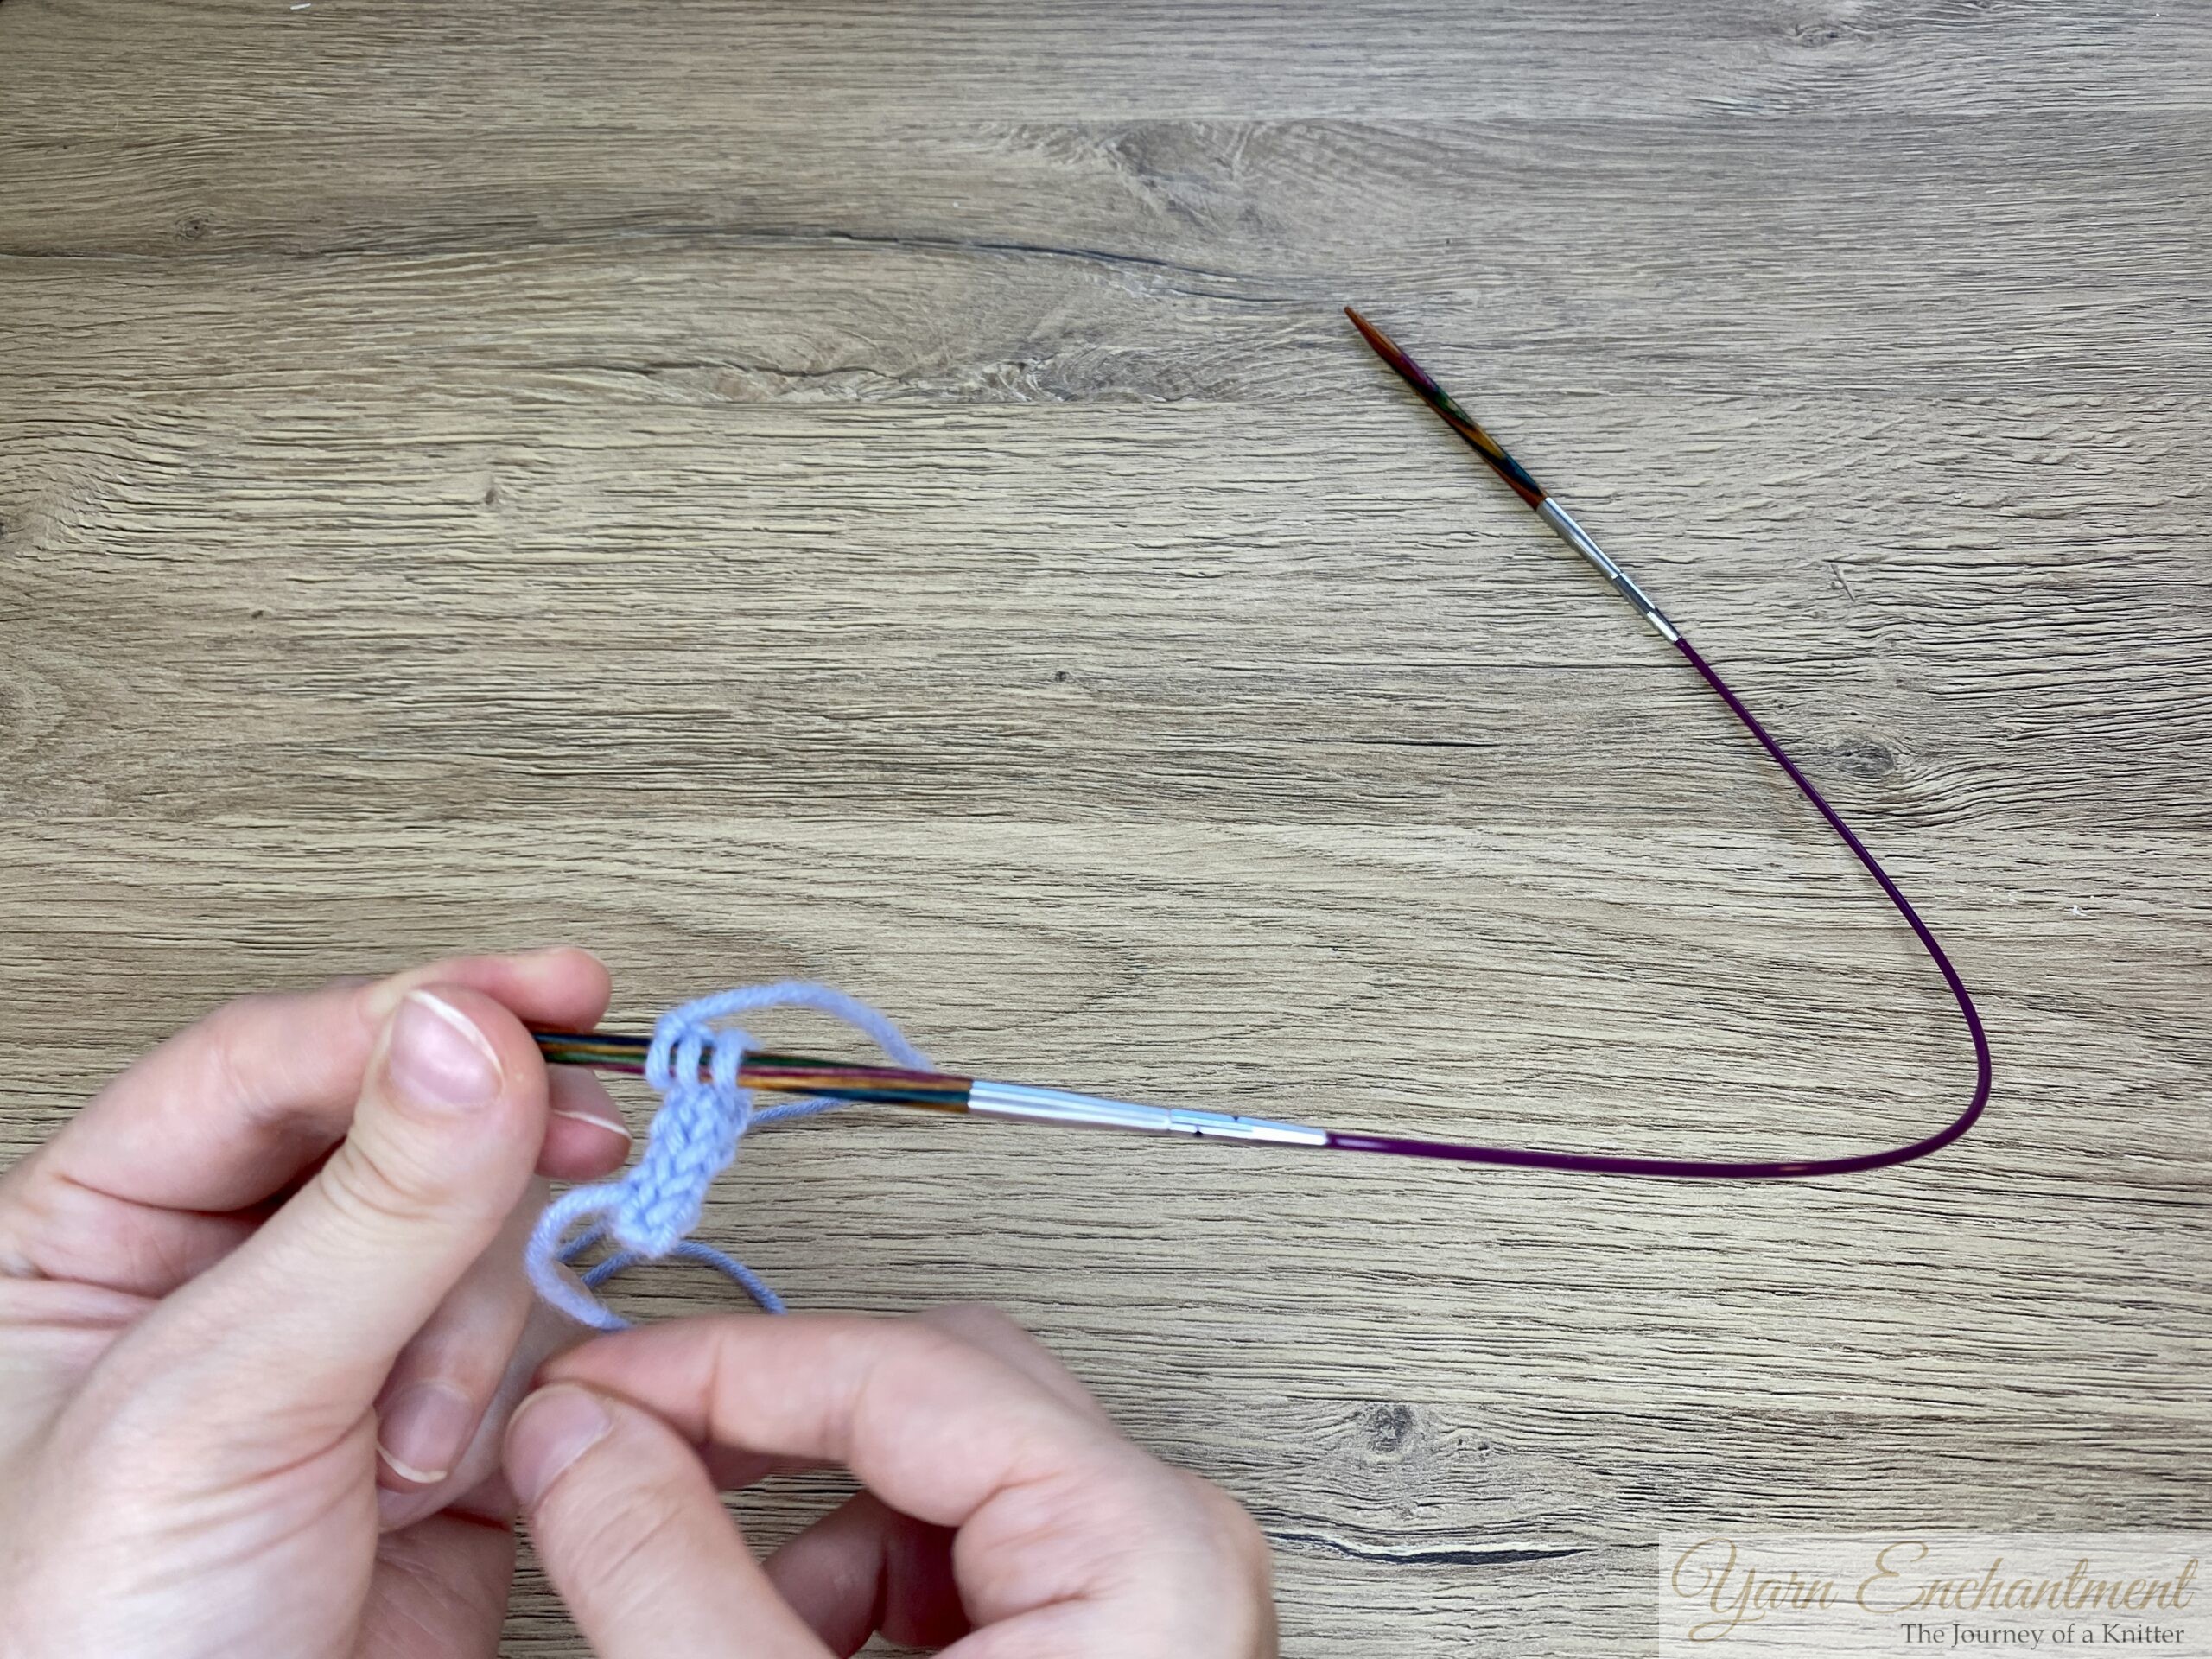 |  |  | Slide your stitches from the left needle... | ...over the cable... | ...to the right needle. |


Circular Needles (Option Two) and Straight Needles
If you don’t have DPNs or circulars, you can even knit an I-cord on straight needles by slipping the stitches from one needle back to the other after each row. You can also do this with circular needles.
 |  |  | With your left needle, ... | ...slip all the stitches from your right needle... | ...back onto your left needle. |


Stitch Count and Variations
Standard I-cords use 3 - 4 stitches, but thick cords with up to 7 (or more!) stitches are possible with proper tension, rolling, and blocking. Experiment with colorwork, stitch patterns, or use machine-knit or loom-knit I-cords for big projects.
Creative Applications
I-cords are ideal for DIY projects like wrapping jars, adding color changes, or sewing on buttons. Fast and easy, these are perfect for practicing I-cord techniques and experimenting with embellishments.
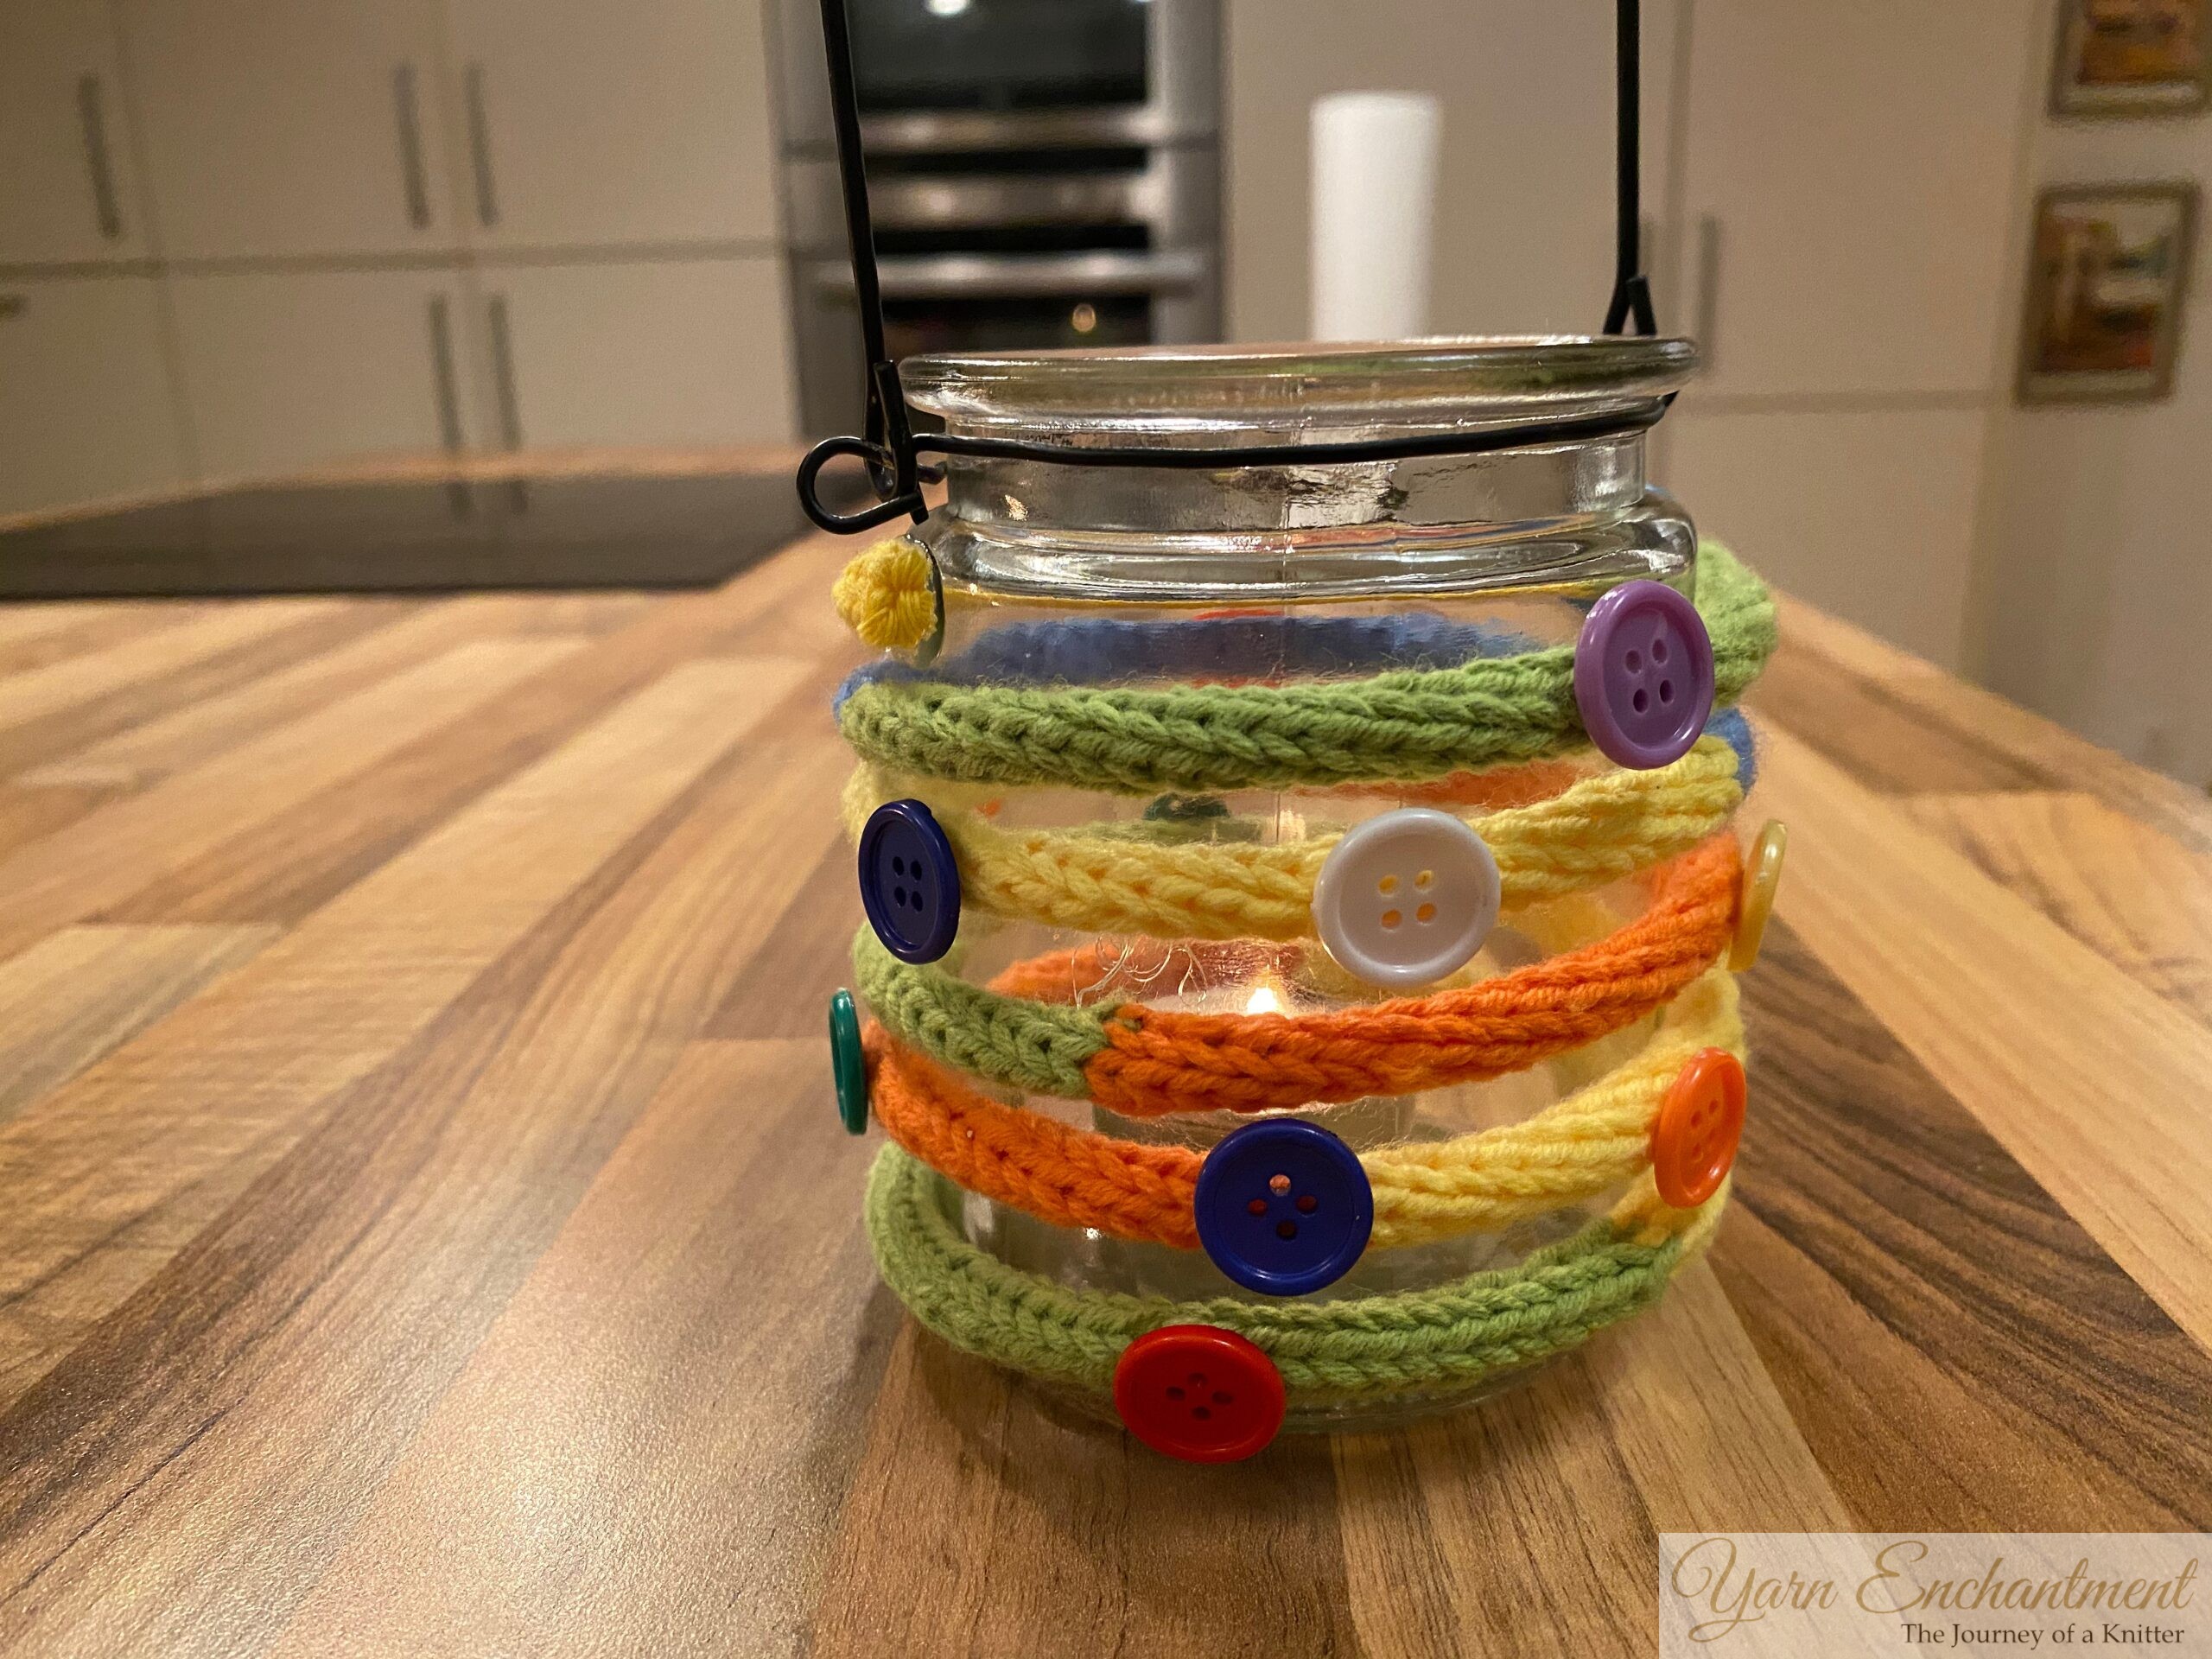 | I made this project back in 2021 together with my children. It’s simply an I-cord with color changes, wrapped around a jar and decorated with some buttons. This is a really fast and easy DIY, and it’s a perfect project for practicing I-cord knitting. |

Applied I-Cord and Edges
Applied I-cord is worked directly onto the edge of your knitting to create a stable, polished finish. I-cord edging adds a neat, professional finish to shawls, blankets, and many other projects. This technique is ideal for giving your knitting projects a clean edge stitch. I’ll feature both applied I-cord, I-cord edges and other I-cord techniques in future posts - stay tuned for more tips on I-cord knitting!
 | 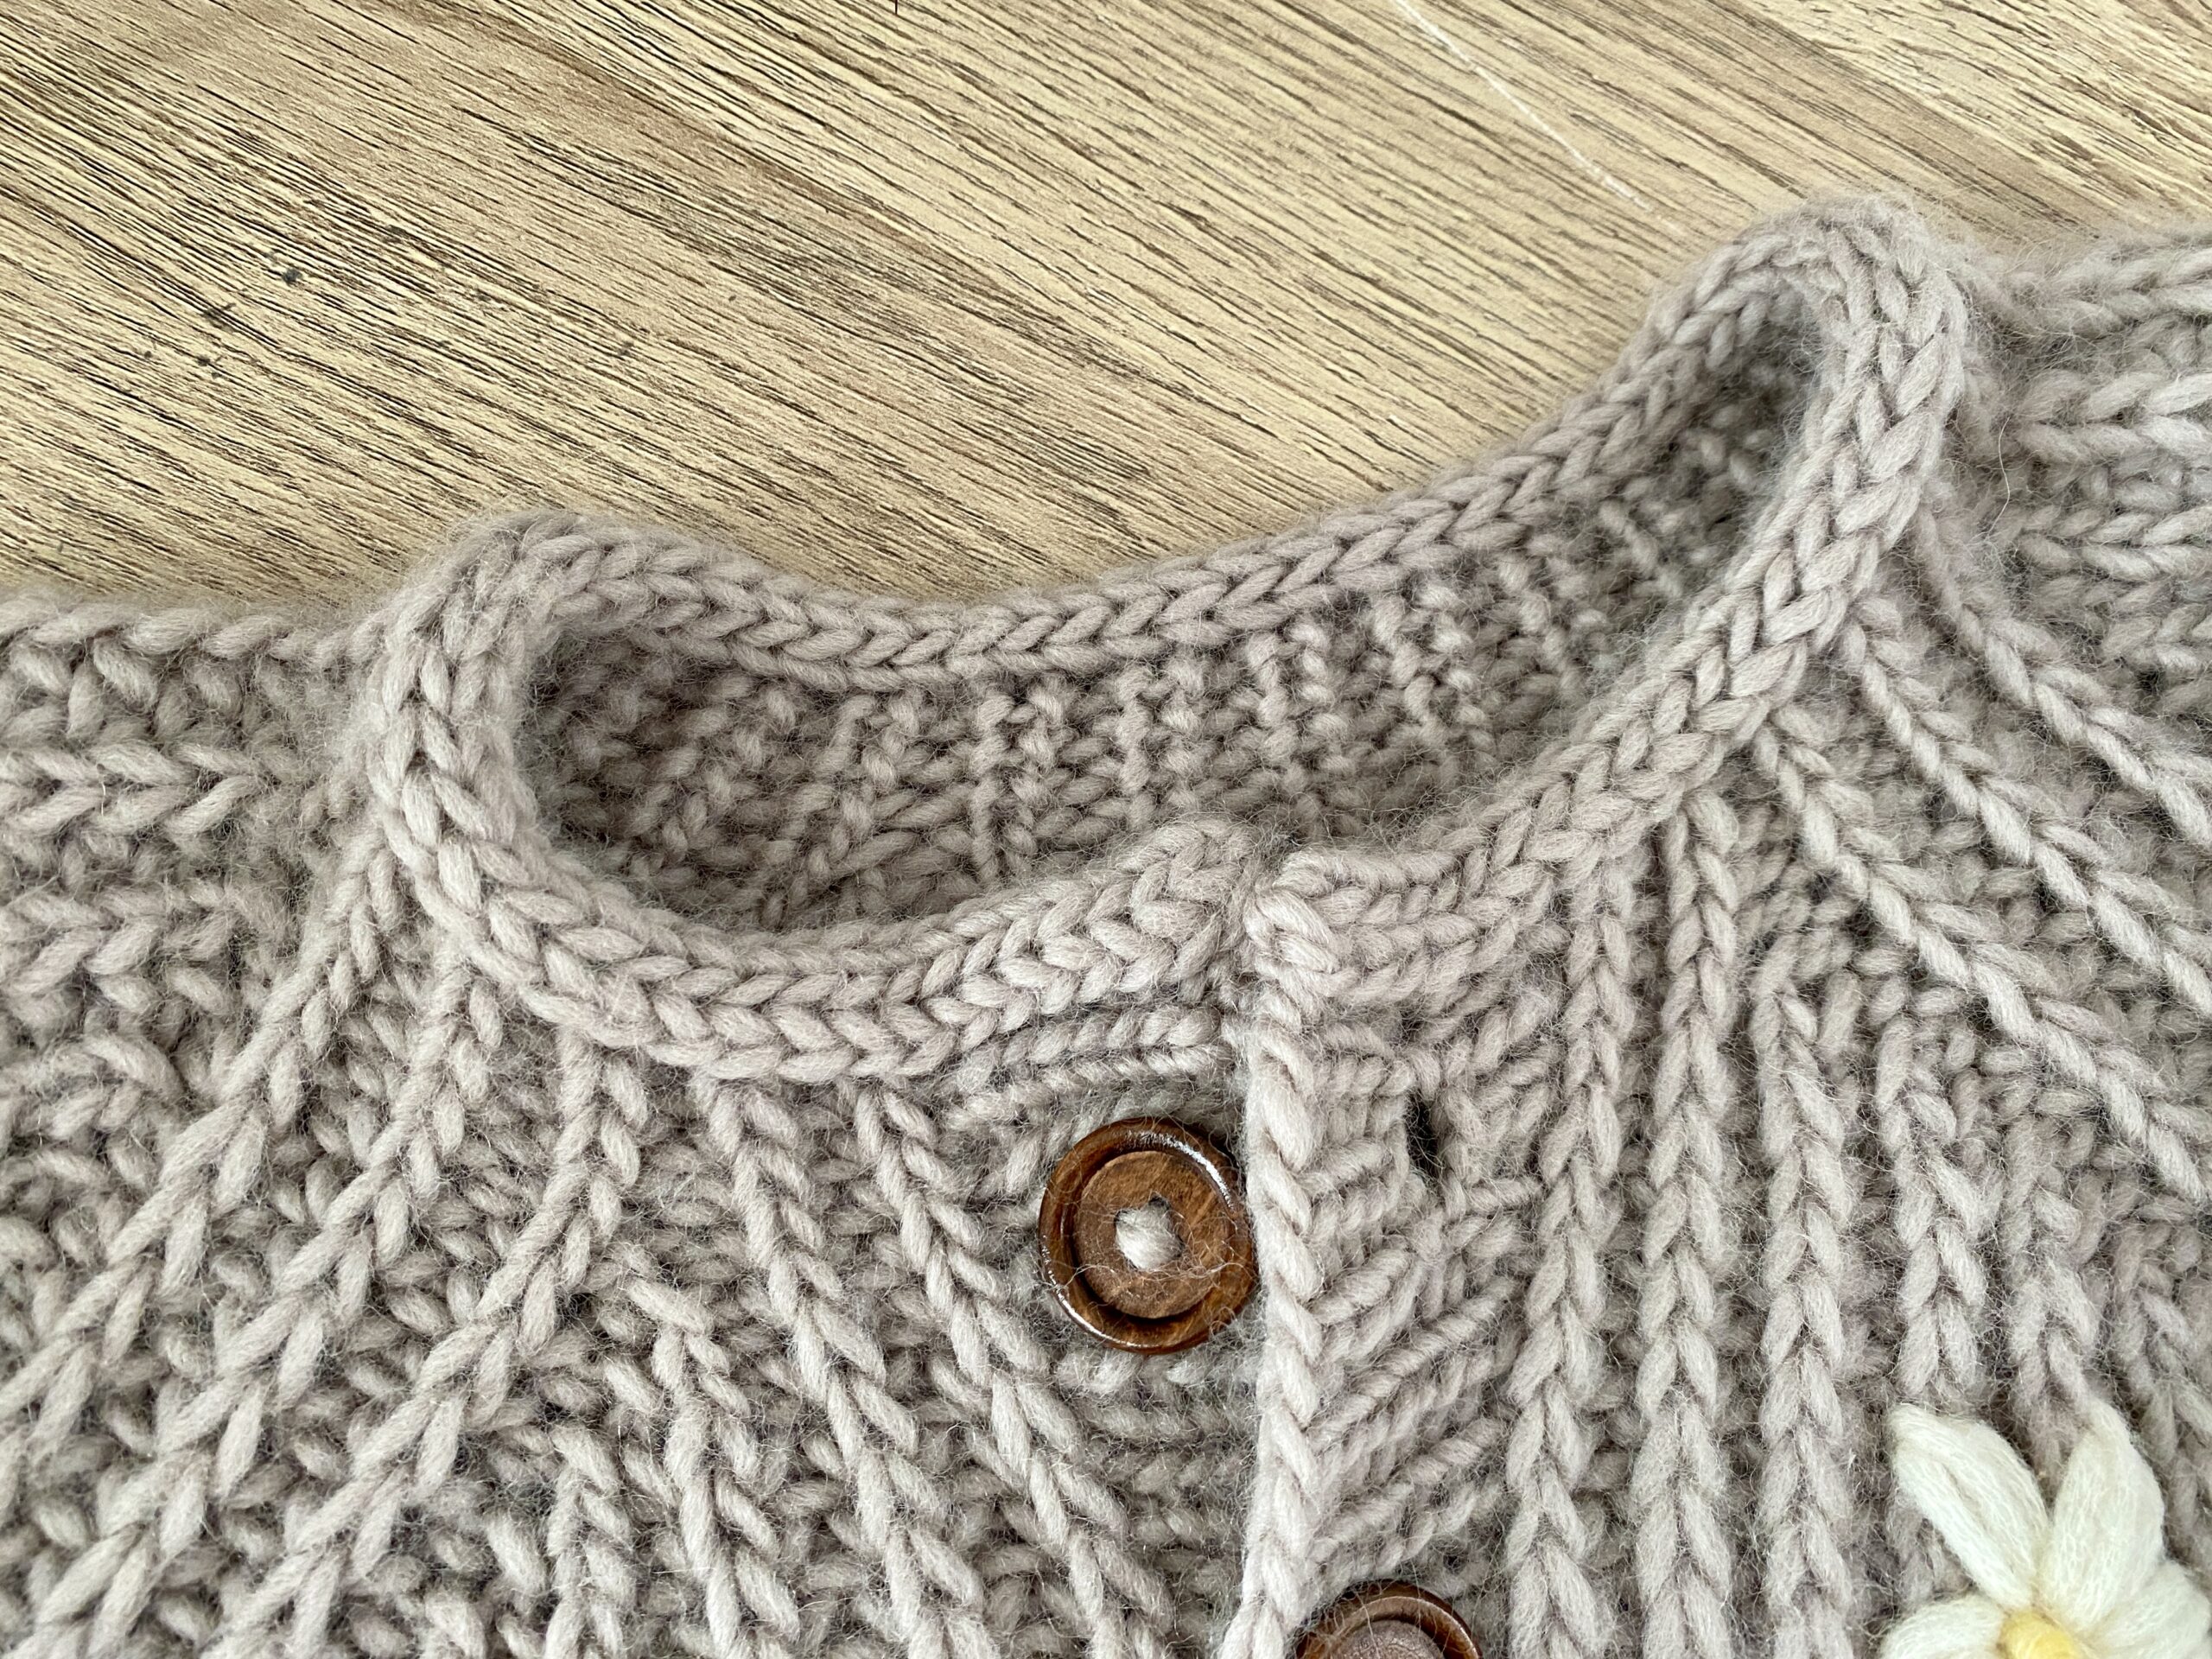 | I worked an I-cord edge with 3 stitches here. | Here I used an applied I-cord with 4 stitches to make the neckline sturdier and help prevent it from stretching out over time. |


Frequently Asked Questions about I-Cord Knitting
What is an I-cord?
An I-cord is a narrow, seamless tube made with just a few stitches, usually 2 - 7, using double-pointed or circular needles. It’s perfect for making drawstrings, handles, and decorative trims.
How do I knit a basic I-cord?
Cast on your chosen number of stitches. Don’t turn your work, then slide the stitches to the other end of your needle (don’t turn your work). Repeat, always pulling the first stitch tightly for a neat tube.
Can I knit I-cord without double-pointed needles?
Yes! You can use circular needles or straight needles and slip your stitches back to the left needle before knitting the next row. Double-pointed needles are fastest, but other options work for shorter cords.
Why does my I-cord look loose or have gaps in the back?
Usually, this means the yarn isn’t pulled tightly enough at the start of each row. Try pulling your first stitch a little tighter and roll the finished cord between your hands to smooth it.
How many stitches can I use for neat I-cord?
Most tutorials recommend up to 5, but with the right tricks (tighter tension and rolling the cord), you can make tidy I-cords with 6, 7, or even more stitches.
Can I use I-cord for bind-offs and edging?
Absolutely! I-cord bind-off and I-cord selvedge add beautiful, finished edges to shawls, blankets, or garments.
What projects use I-cord?
Common uses include drawstrings, bag handles, hat ties, jewelry, embellishments, and edging for knitting patterns.
How do I block an I-cord?
Just like other knitting, a quick steam or wet block helps even your stitches and makes the cord look smoother and more professional.
Can I make purl I-cord or use colorwork?
Yes, you can purl I-cord or experiment with two-color i-cord for creative projects and unique textures.
Why does my I-cord curl into a tube?
It’s all about the tension - imagine those elastic bands on a watermelon! The floats at the back gently pull the stitches inward, forming the classic I-cord shape.
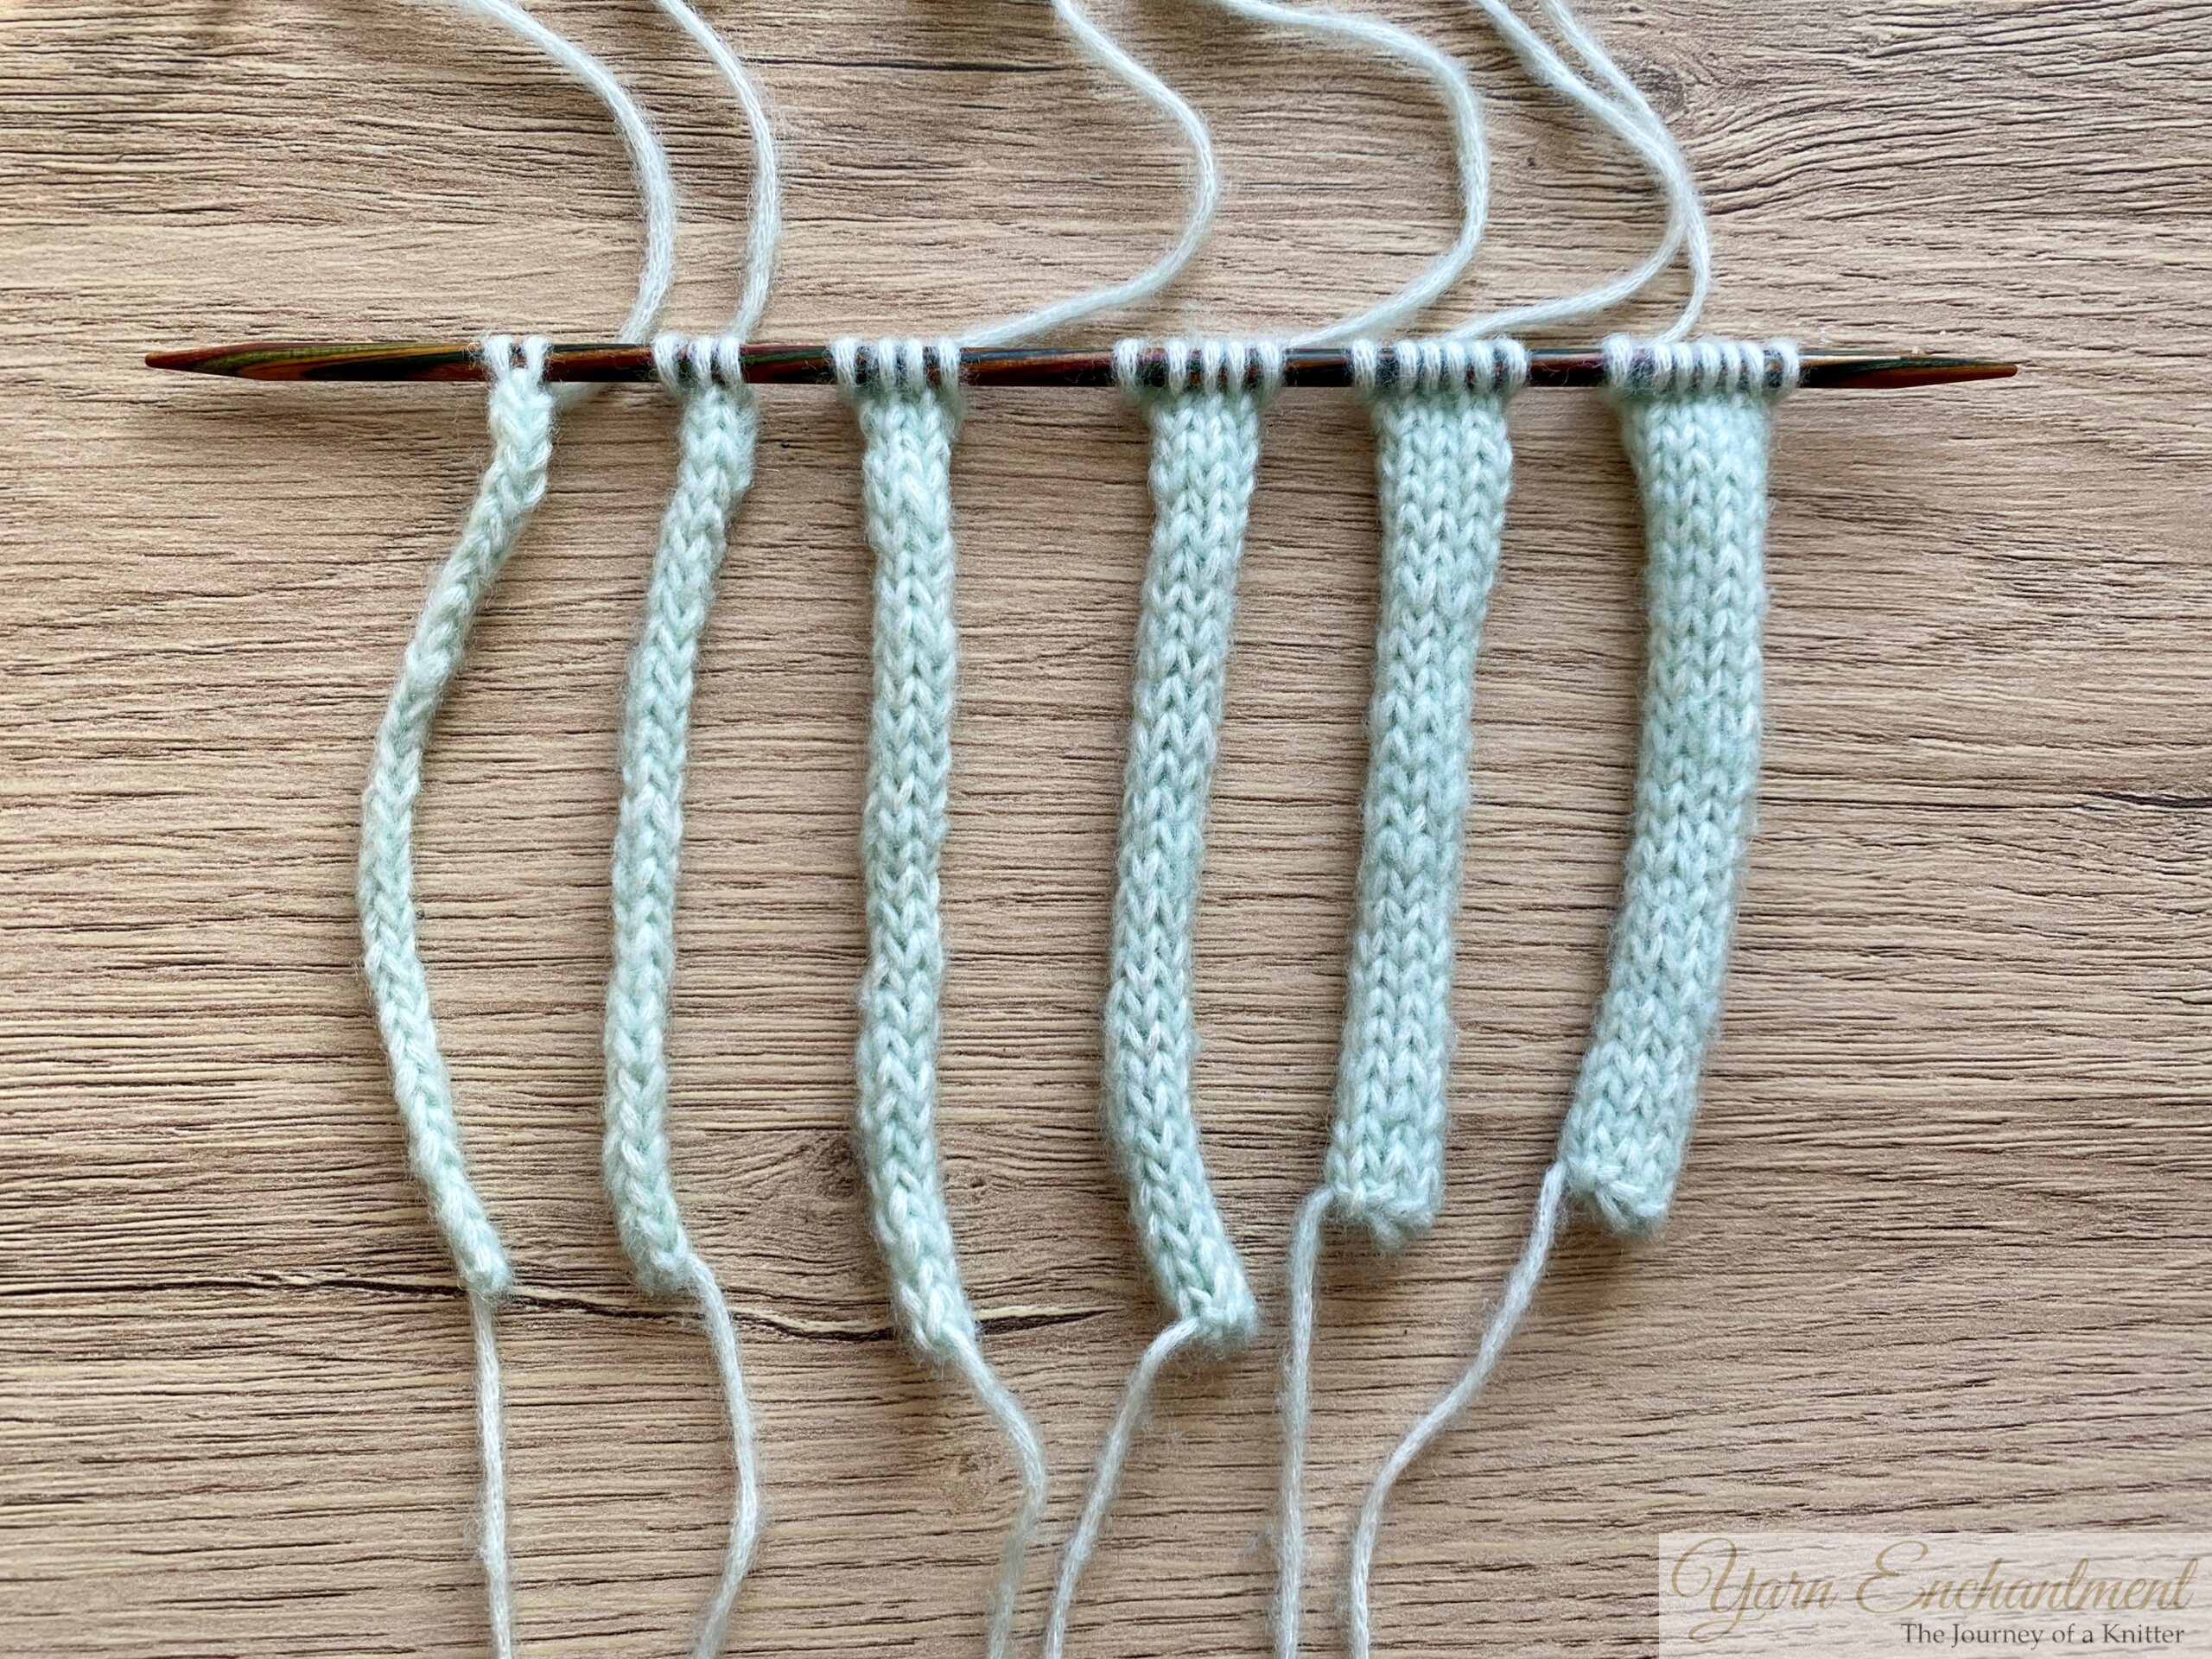 | I-cord swatches with 2-7 stitches |

Creative Ideas & Series Preview
I hope today’s post inspires you to give I-cords a try, there’s so much more you can do than just edges or ties! I-cords are perfect for creative decorations, custom jewelry, and even holiday ornaments. This is just the beginning of an “I-Cord Family” series here on the blog, so keep your eyes peeled, more tips, tricks, and creative I-cord ideas are coming your way soon!
A Little Way to Say Thanks
You Might Also Like


 |
|
Join the Cozy Corner Newsletter!
Hey there, creative soul! Welcome to the Yarn Enchantment Newsletter, where we celebrate all things cozy, crafty, and full of heart. Think of this as your friendly crafting companion - a little dose of inspiration delivered straight to your inbox, just for you. Inside, you’ll find: ✨ Exclusive patterns & tutorials - ideas you won’t find anywhere else (just for us!) 📚 Bookish crafts that bring your favorite stories to life 🧶 Tips and tricks to make your crafting journey smoother (and more fun!) 💌 Heartfelt musings on life, creativity, and the magic of making something with your own two hands Whether you’re knitting by the fire, brainstorming your next DIY project, or just looking for a little creative pick-me-up, this newsletter is here to cheer you on. Because let’s be honest - crafting isn’t just about the finished project; it’s about the joy, peace, and stories we create along the way. So grab a cup of tea, cozy up, and join me. Together, we’ll weave a little magic into everyday life - one stitch, one story, and one email at a time. P.S. I’m so glad you’re here. Let’s make something beautiful together! (Note: If you're using an ad blocker, you may encounter issues subscribing to the newsletter. To subscribe, please consider disabling your ad blocker.)
|
