
My Journey Through Injuries and Crafting
April 29, 2024
Lacy Charms Pattern
May 6, 2024How to Knit M1L and M1R Increases | Step-by-Step Tutorial

Originally published on May 1, 2024
On every knitting journey, we come across a variety of essential techniques that help us shape garments and bring our creative ideas to life. Among these, the M1L (Make One Left) and M1R (Make One Right) increases stand out as foundational skills every knitter should know.
But M1 increases aren’t the only way to add stitches to your knitting! If you’ve ever tried the KFB (Knit Front and Back) increase, you know it’s quick and beginner-friendly, although it leaves a small bar that can double as a decorative detail. Lifted increases are another favorite - they’re smooth, subtle, and nearly invisible. And when working on the wrong side of your fabric, purl-side increases like M1LP (Make One Left Purl) and M1RP (Make One Right Purl) are perfect for reverse stockinette or textured patterns.
If you’d like to explore these other techniques, you’ll find detailed guides and video tutorials across this blog - each one focused on helping you achieve the look, structure, and precision you want for your projects.
Today, though, we’re focusing on M1L and M1R increases. I’ll teach you a simple way to remember their direction and show you how to work them step-by-step so you can add them confidently to your knitting repertoire.
 |
|
M1L and M1R |
Table of Contents
What Are M1L and M1R Increases in Knitting?
M1L and M1R are methods used to increase the number of stitches in a row, creating new stitches where none existed before. These increases are particularly useful for shaping garments, adding decorative elements, or creating complex stitch patterns. In my opinion, M1 increases are the most popular increases, you encounter them in almost every pattern.
When to Use M1L and M1R in Projects
-
Raglan shaping in sweaters and cardigans
-
Shaping thumb gussets in mittens and gloves
-
Creating decorative lace patterns
Step-by-Step Guide to Make One Right (M1R)
M1R creates a new stitch that leans to the right, making it ideal for shaping, such as raglan sleeves and more. To lift the horizontal strand between those stitches, you can also use the right-hand needle. After lifting the strand, you slip it back onto your left-hand needle. I am demonstrating both variations in the video.
-
With your left-hand needle, pick up the strand of yarn that runs between the stitches from back to front. Leave the strand on the left needle.
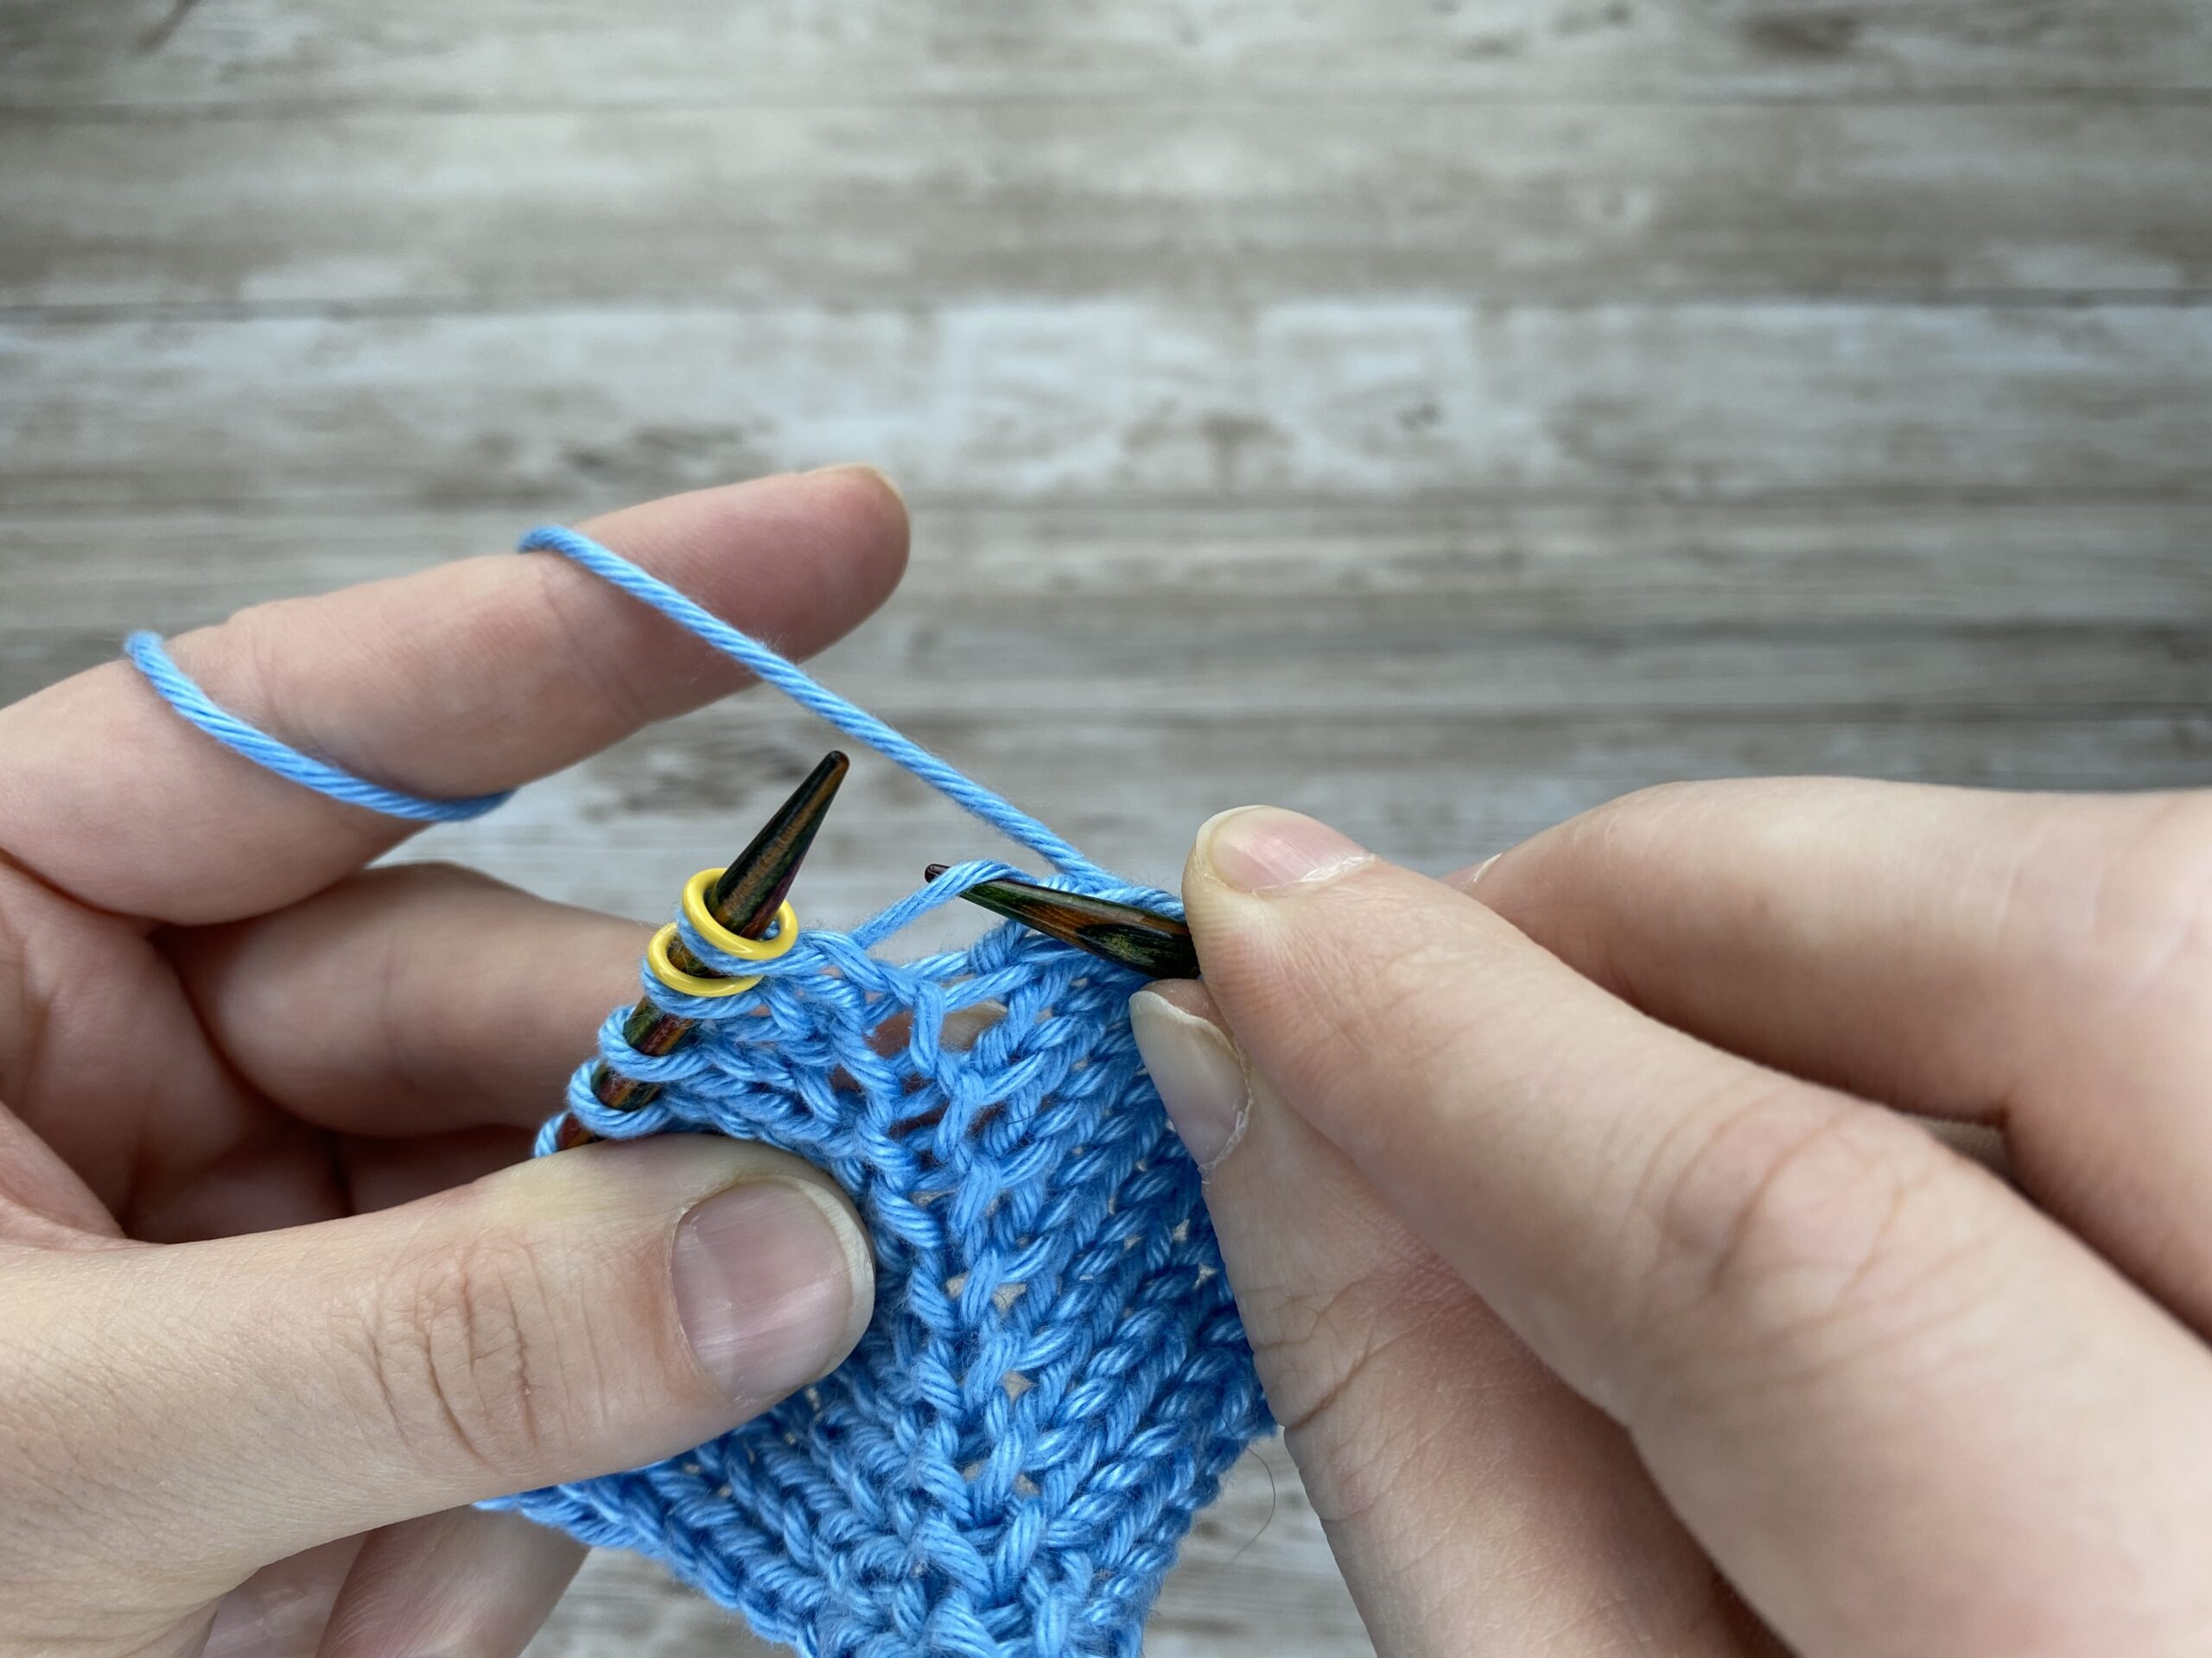
-
Insert the tip of the right needle knitwise into the front leg of the strand between the stitches. This can be a bit tight, so if needed, gently loosen the stitch before knitting into it as usually.
 |
 |
 |
|
Identify the strand in between your stitches |
Pick up the strand of yarn that runs between the stitches from back to front |
Lift it onto your left needle |
 |
 |
 |
|
Gently loosen the stitch |
Insert the tip of the right needle knitwise into the front leg |
Knit it as usually |
Step-by-Step Guide to Make One Left (M1L)
M1L creates a new stitch that leans to the left, making it ideal for shaping, such as raglan sleeves or left-leaning lace motifs. To lift the horizontal strand between those stitches, you can also use the right-hand needle. After lifting the strand, you slip it back onto your left-hand needle. I am demonstrating both variations in the video.
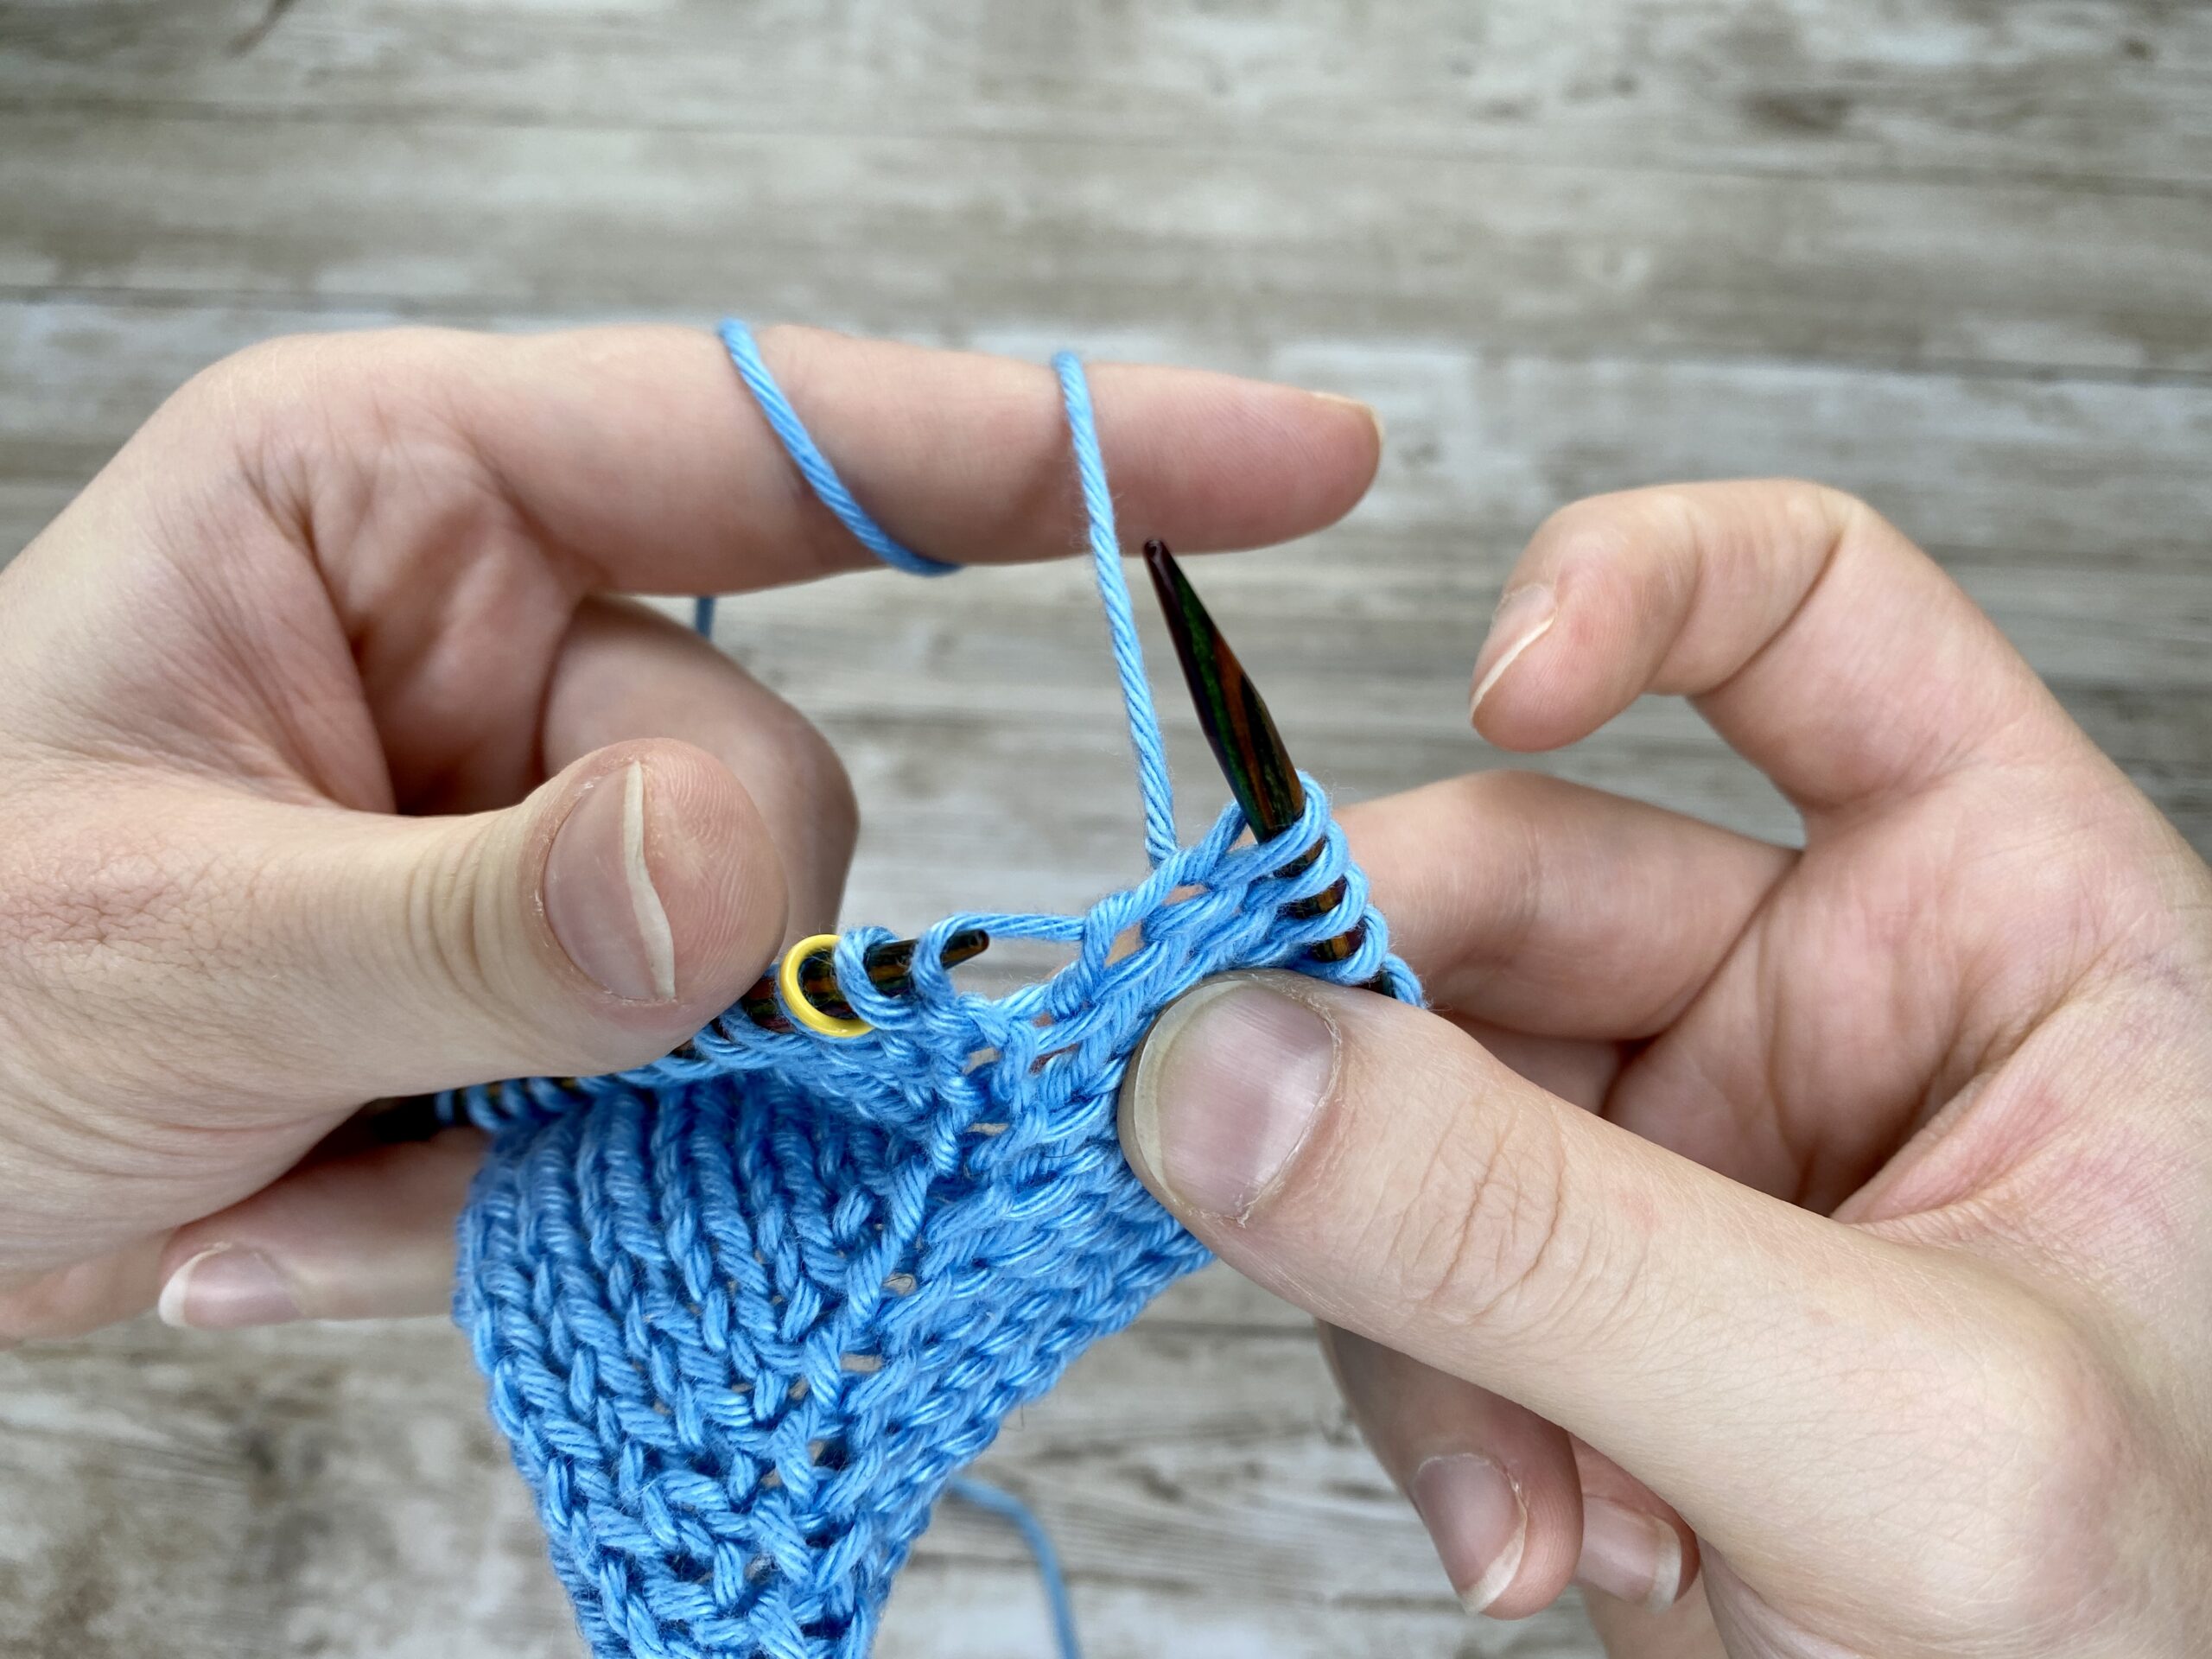
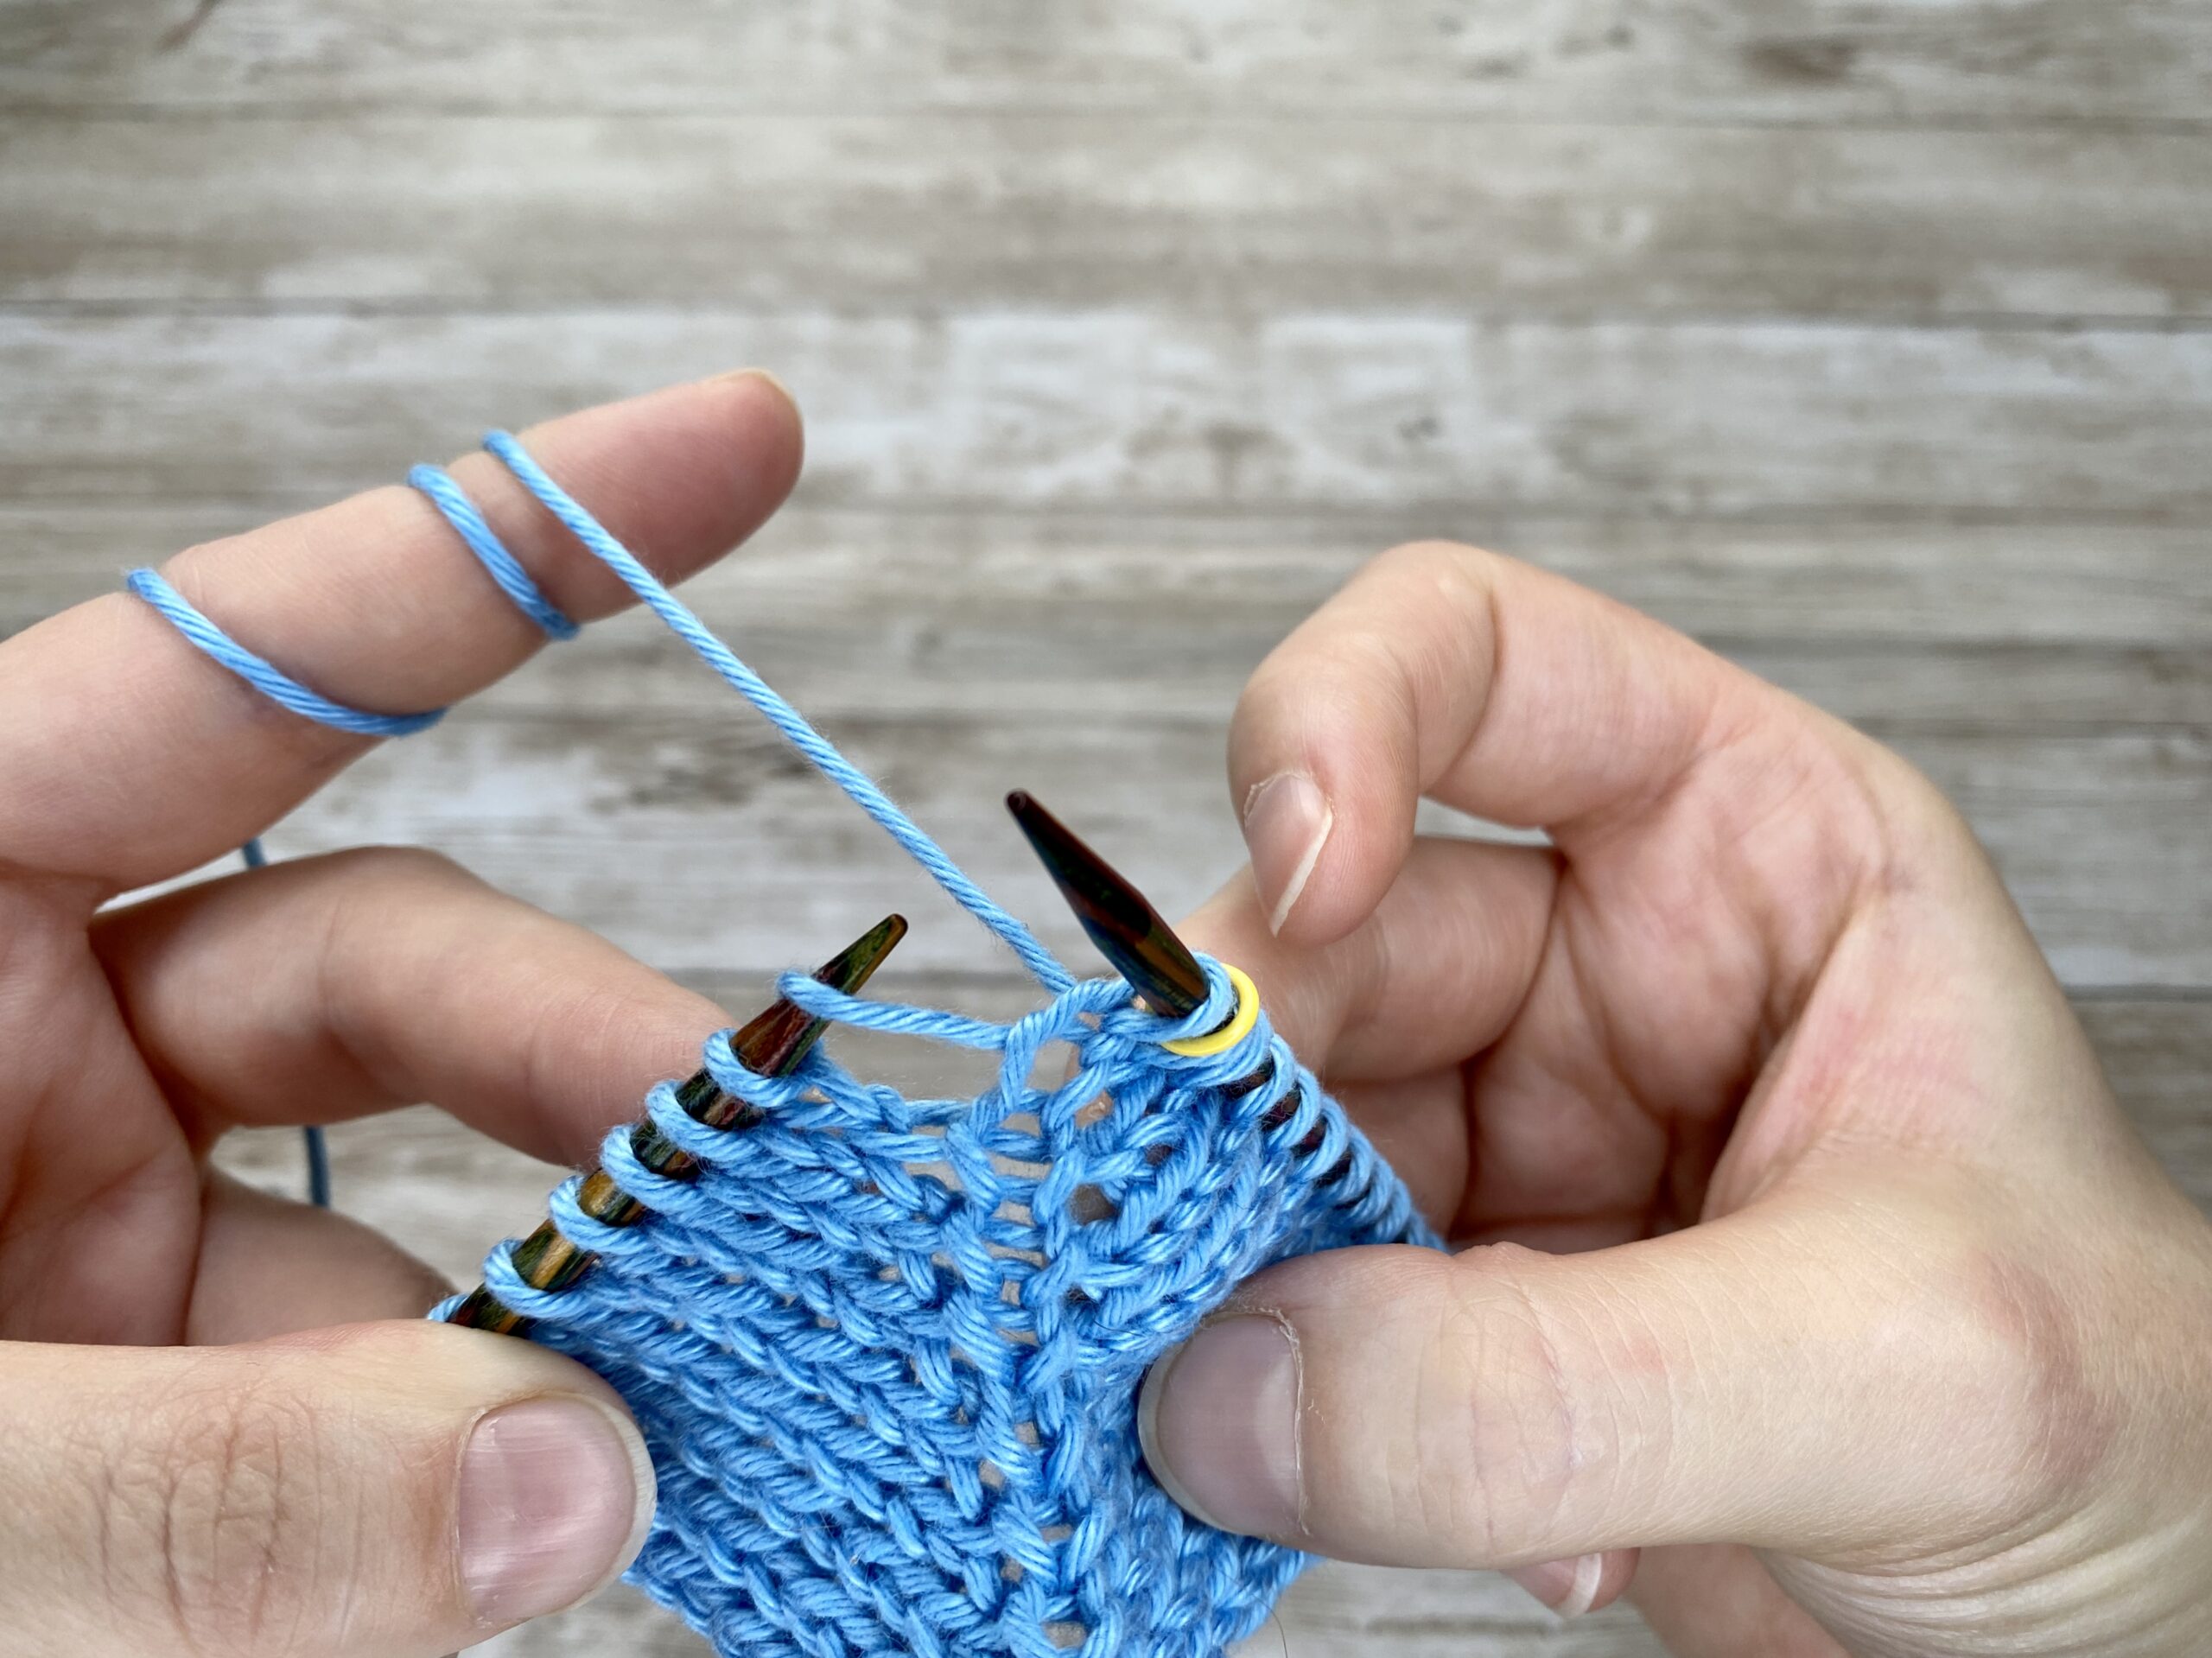
-
Insert the left needle from front to back under the horizontal strand of yarn that runs between the last stitch you knit and the next stitch on your left needle.
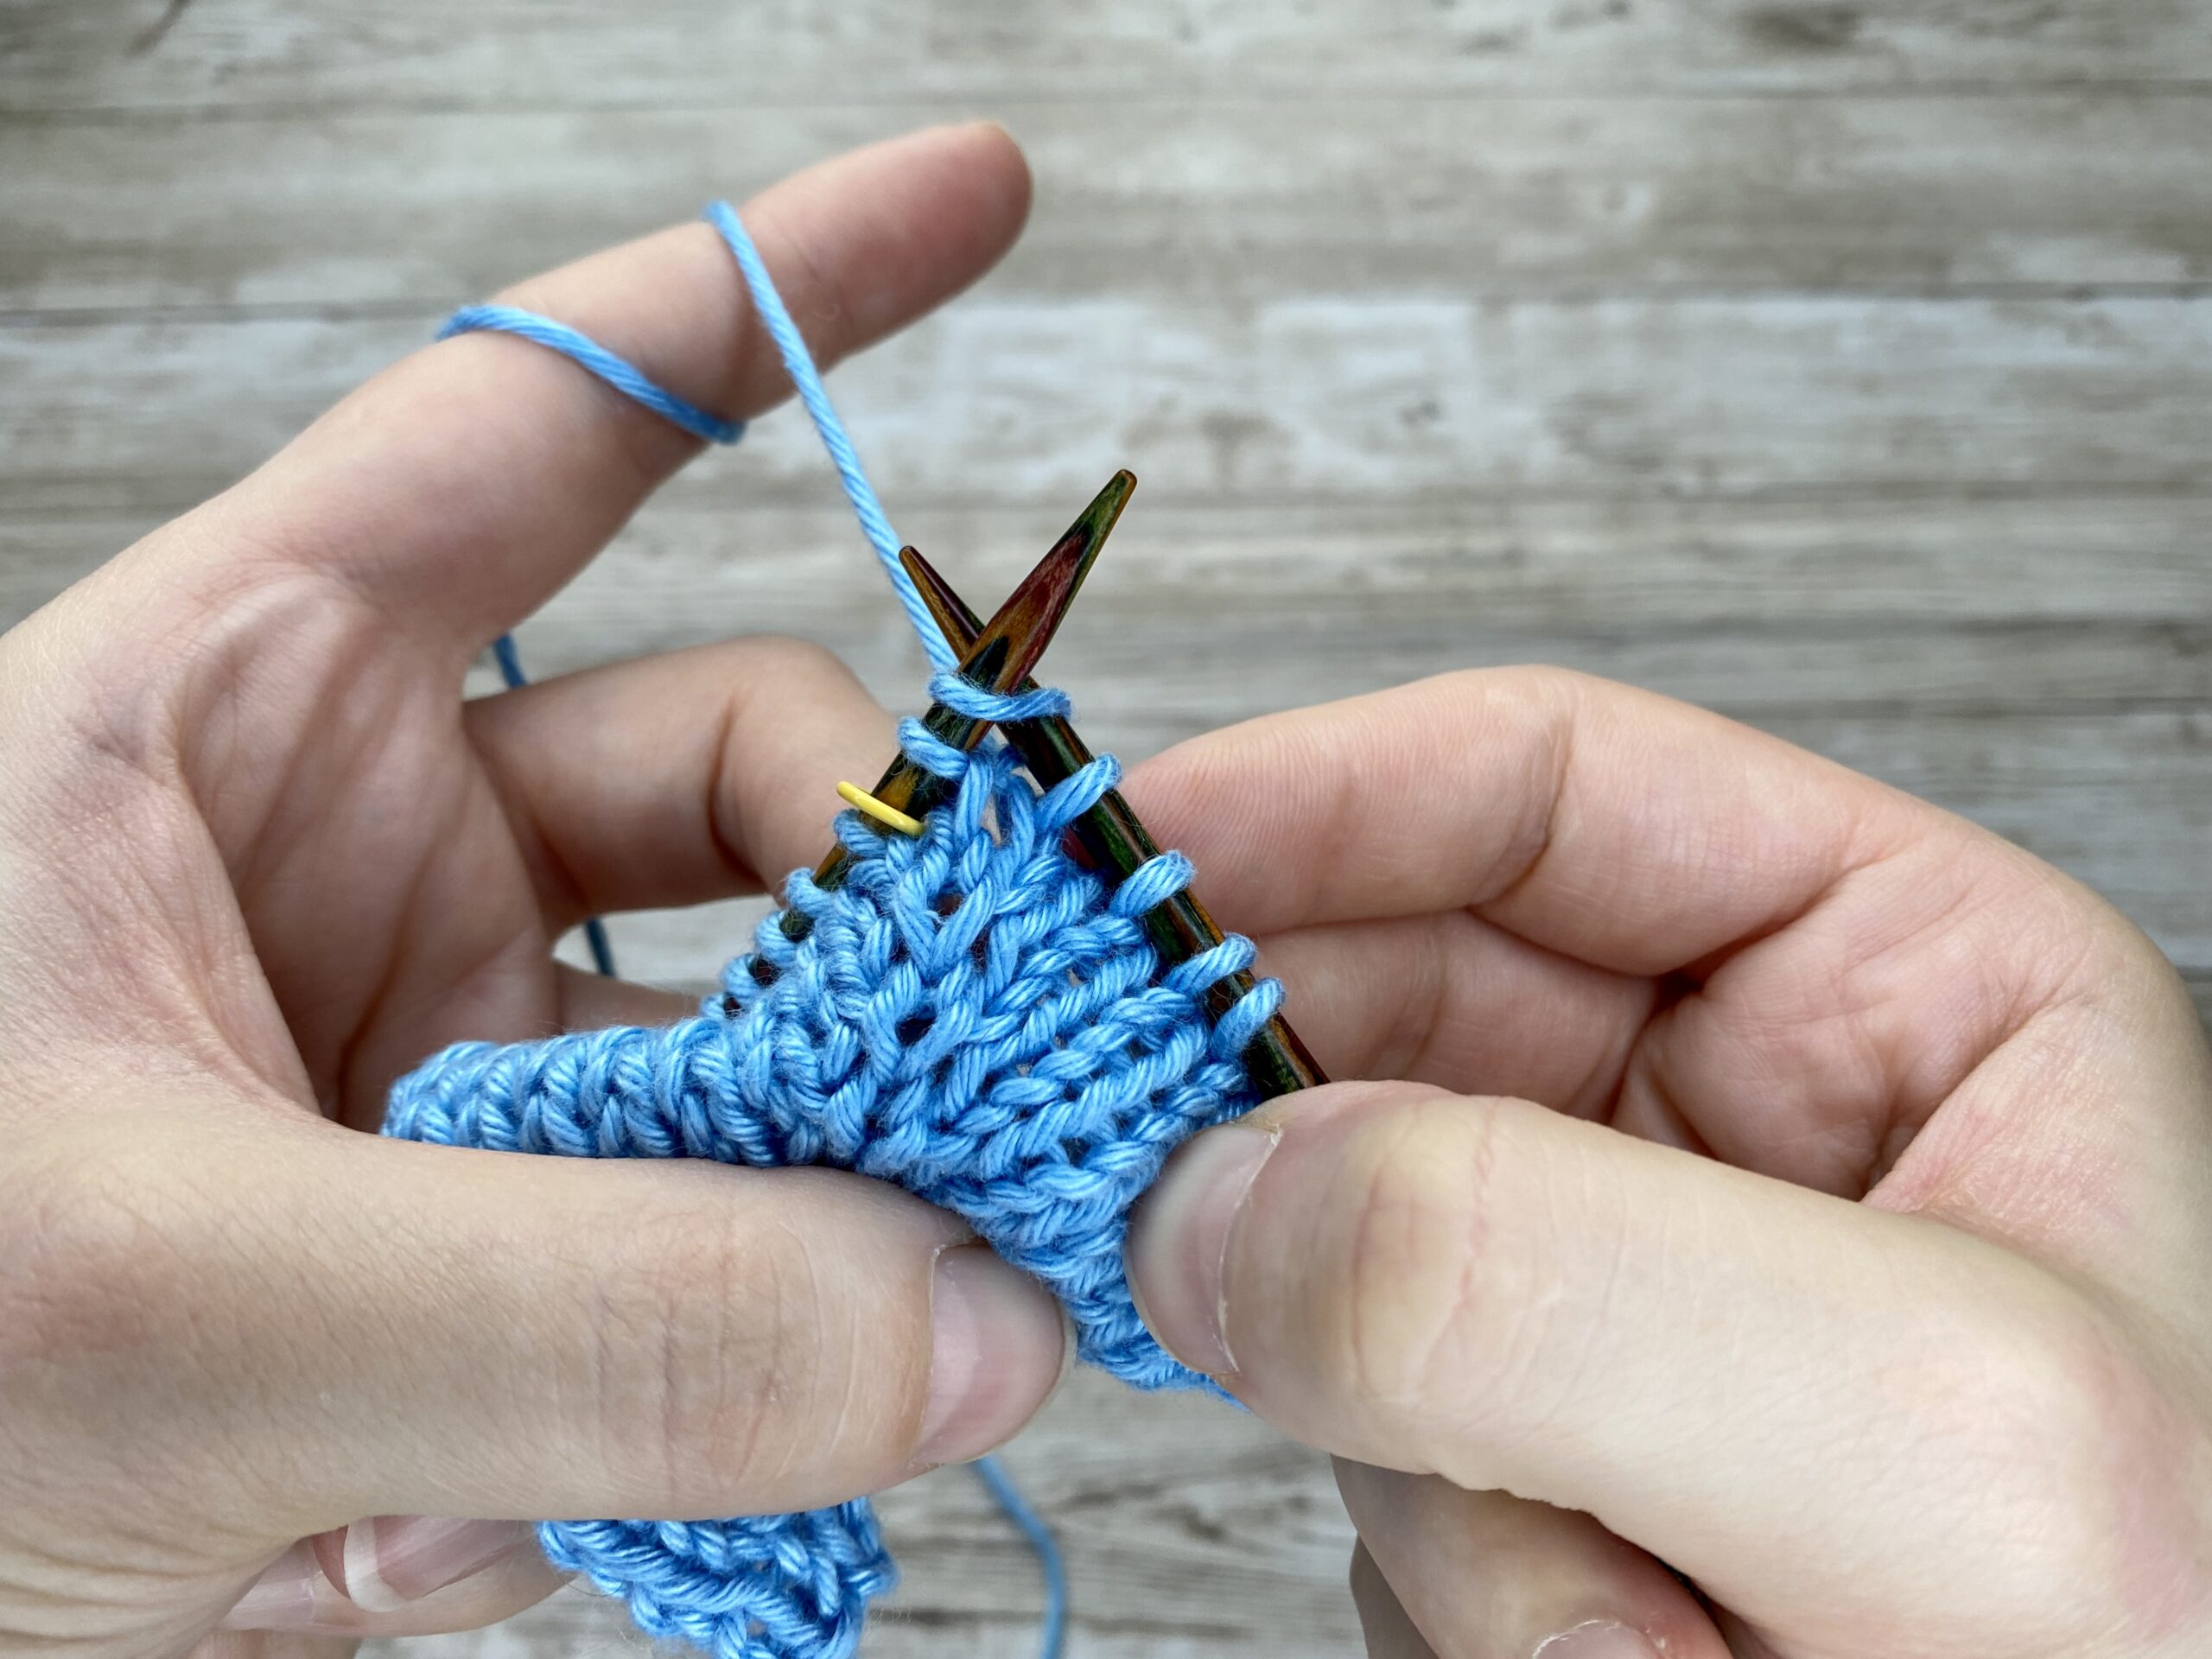
-
Lift this strand onto the left needle, creating a new loop. Insert the right needle into the back leg of the loop and knit it as you would a regular stitch.
 |
 |
 |
|
Identify the strand in between your stitches |
Pick up the strand of yarn that runs between the stitches from front to back |
Lift it onto your left needle |
 |
 |
 |
|
Gently loosen the stitch |
Insert the tip of the right needle knitwise into the front leg |
Knit it as usually |
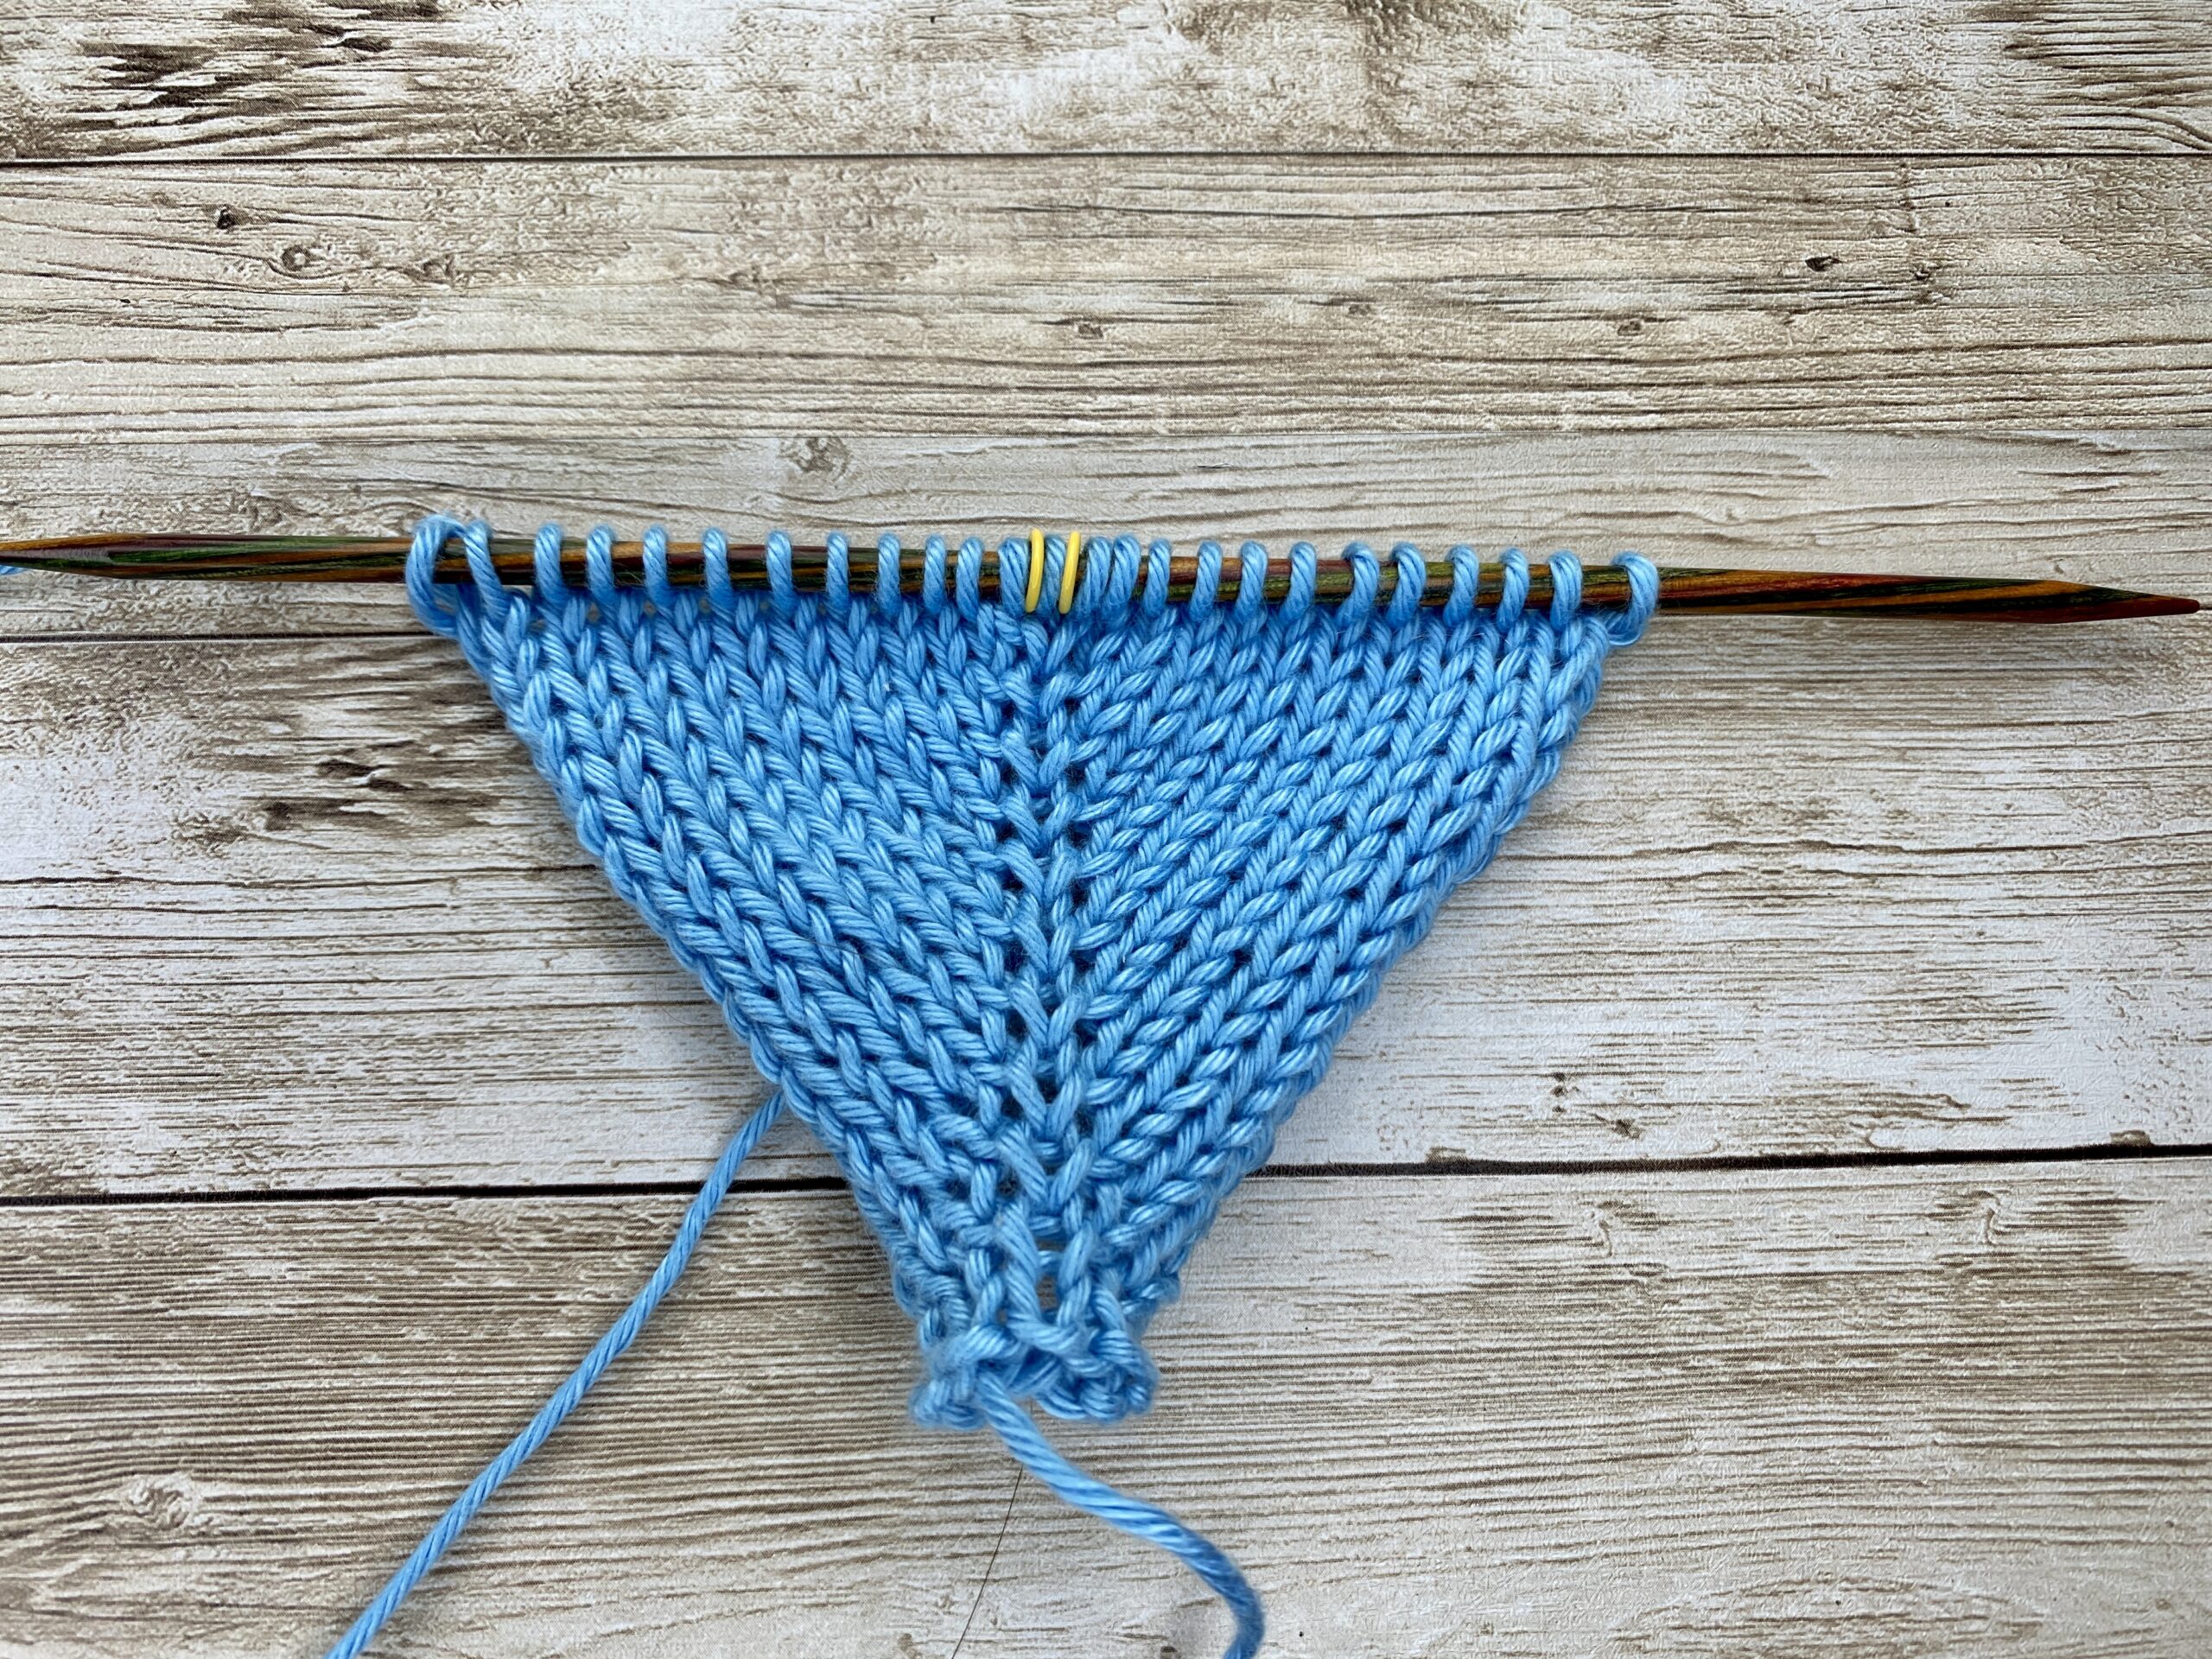
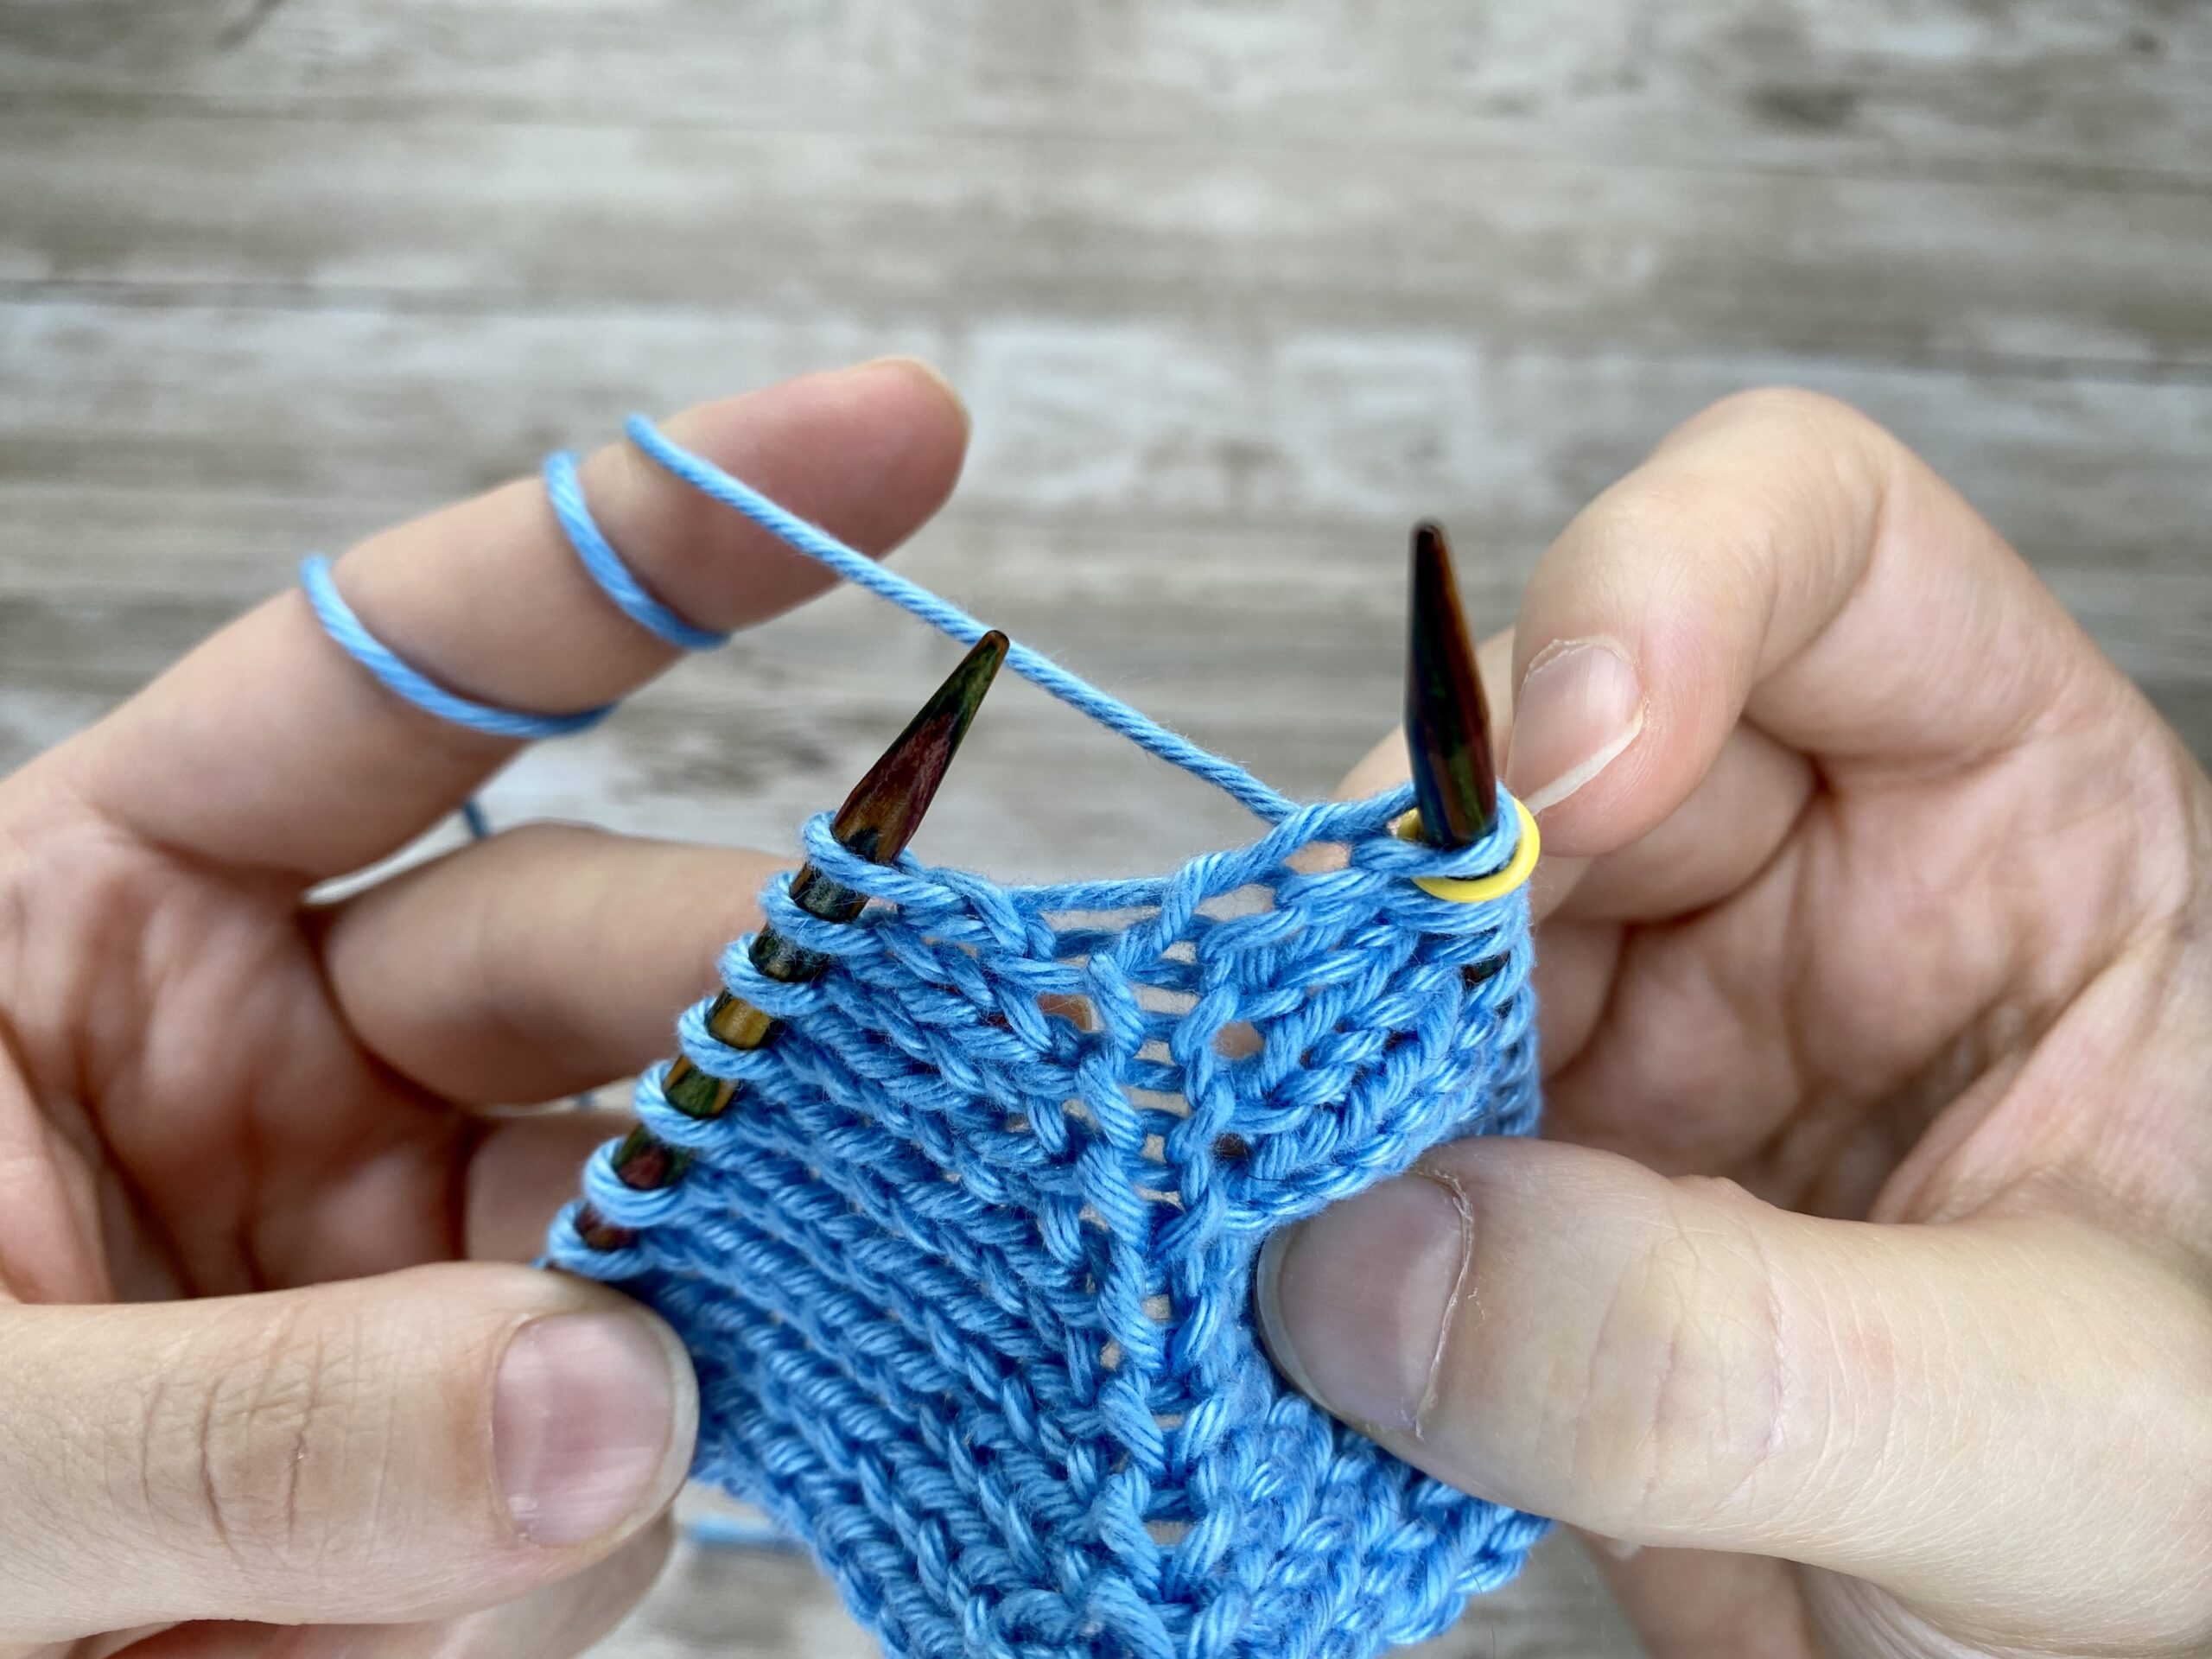
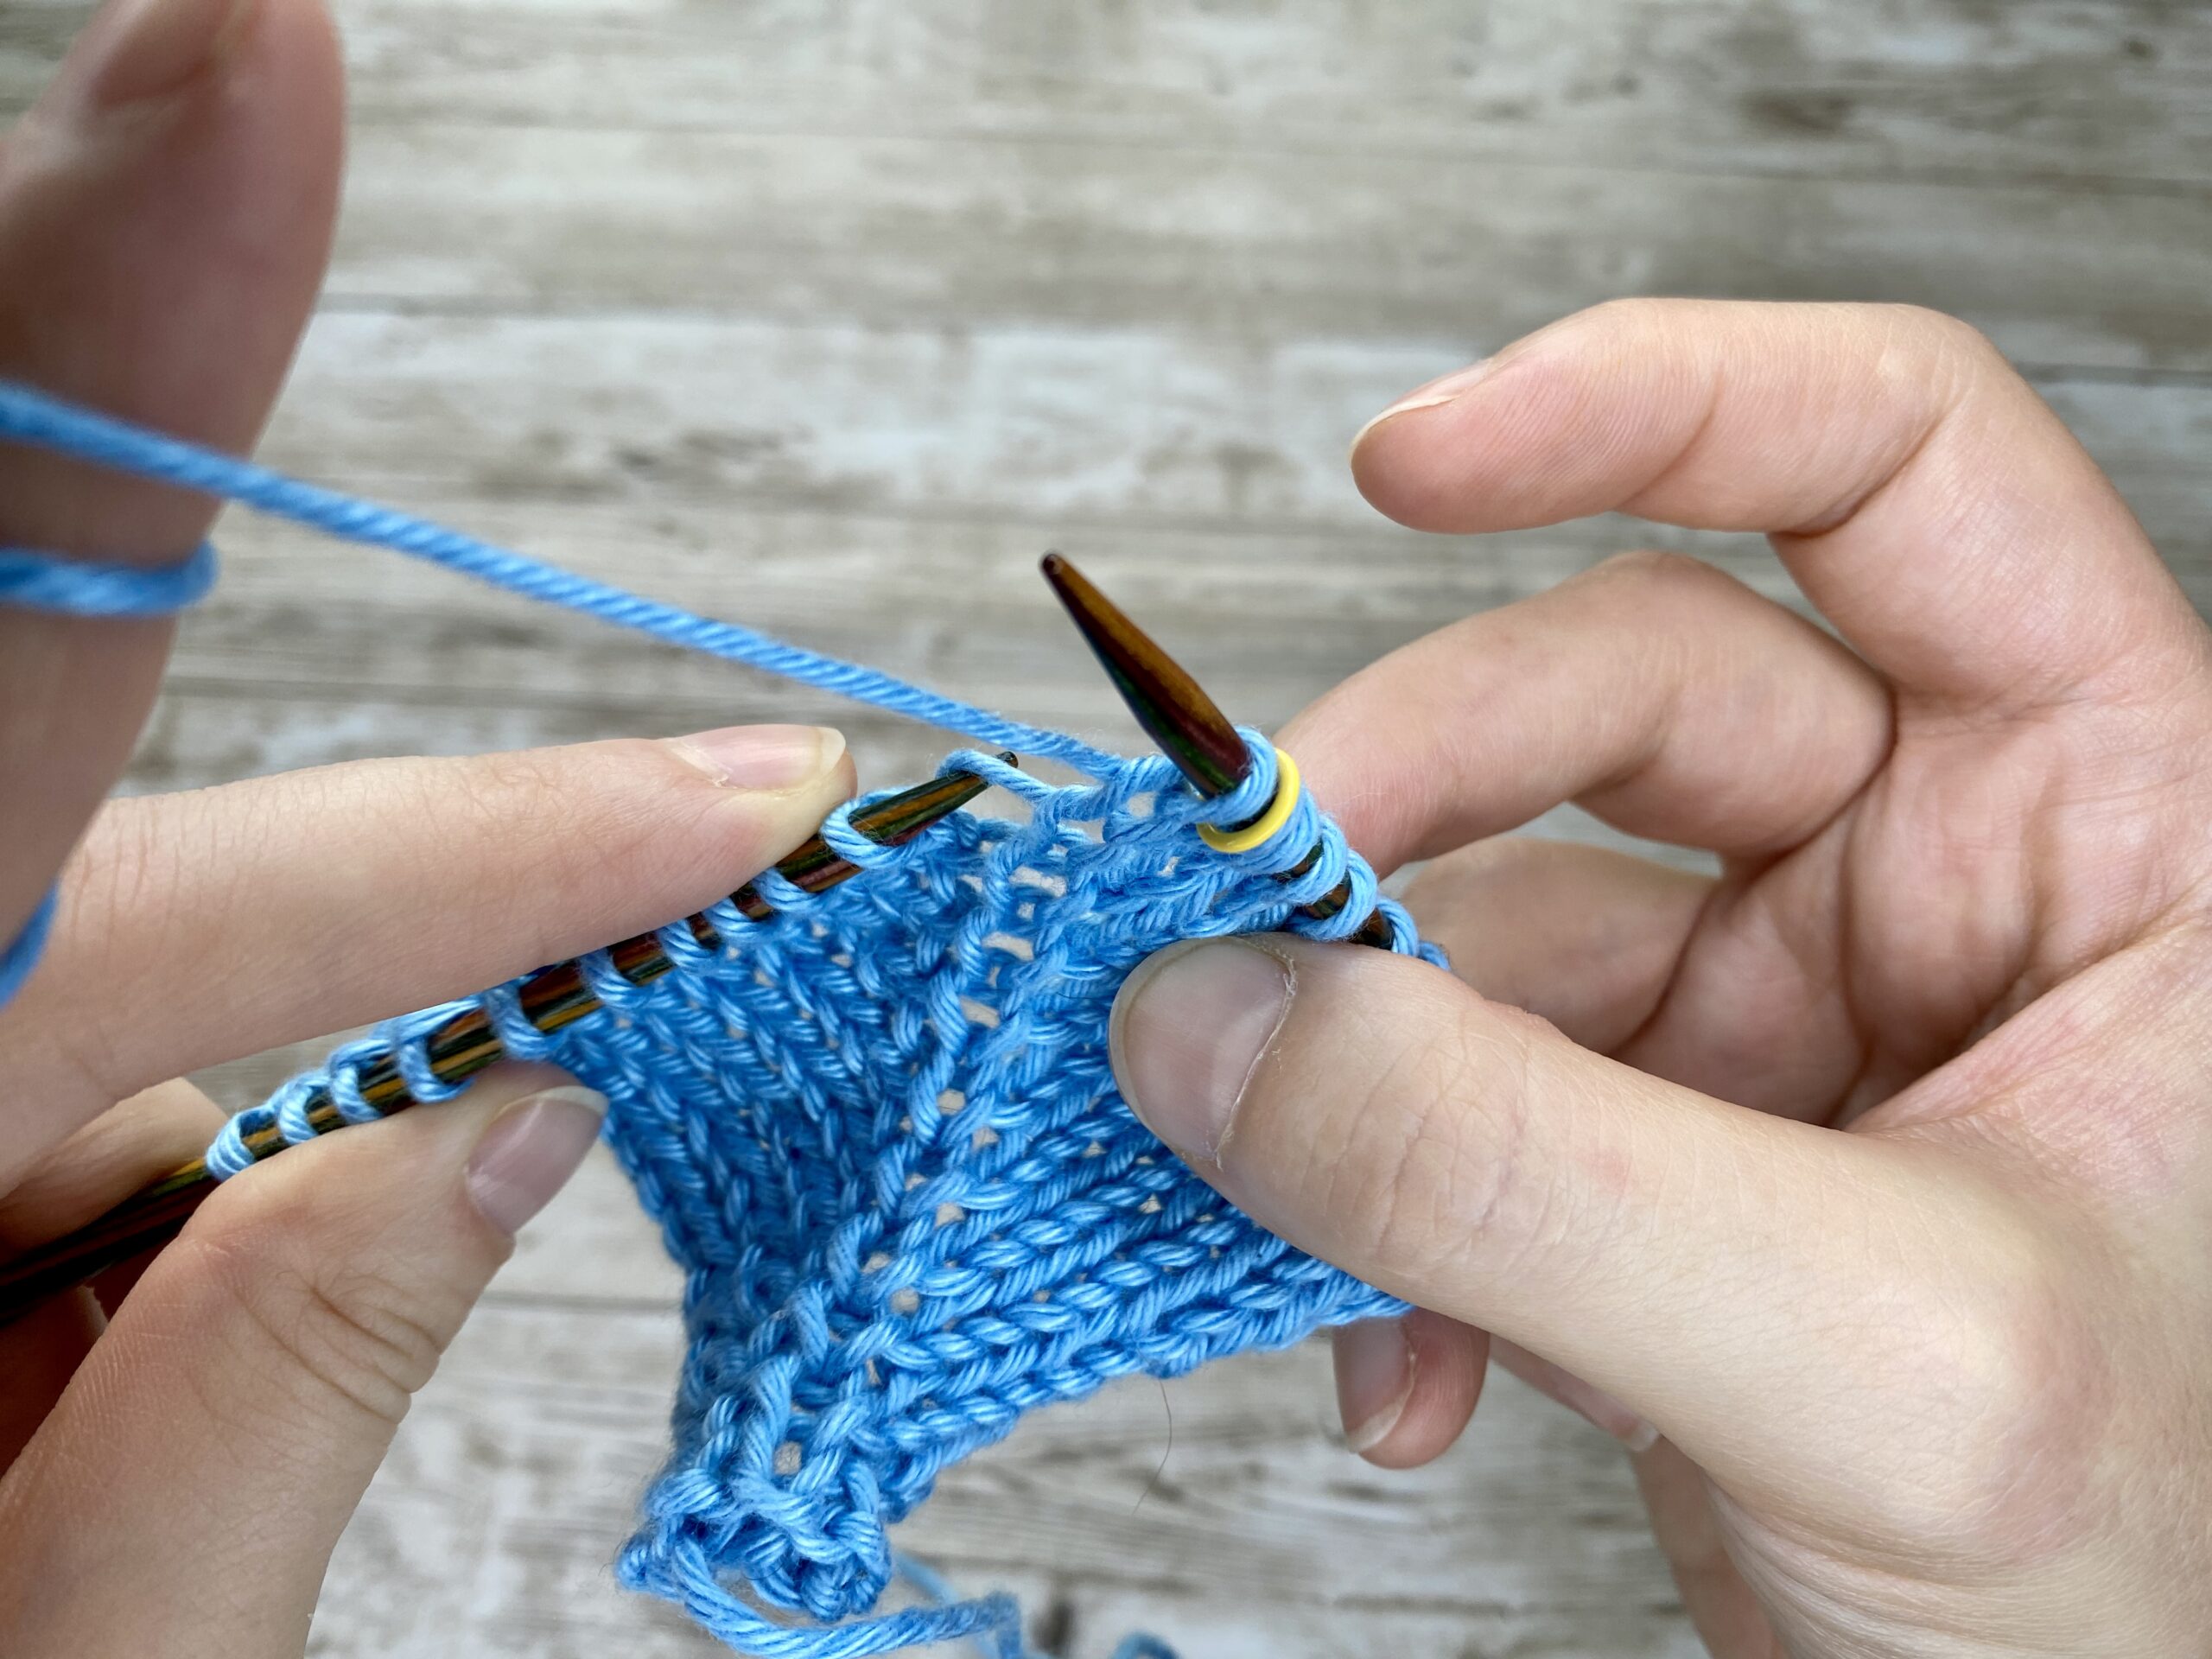
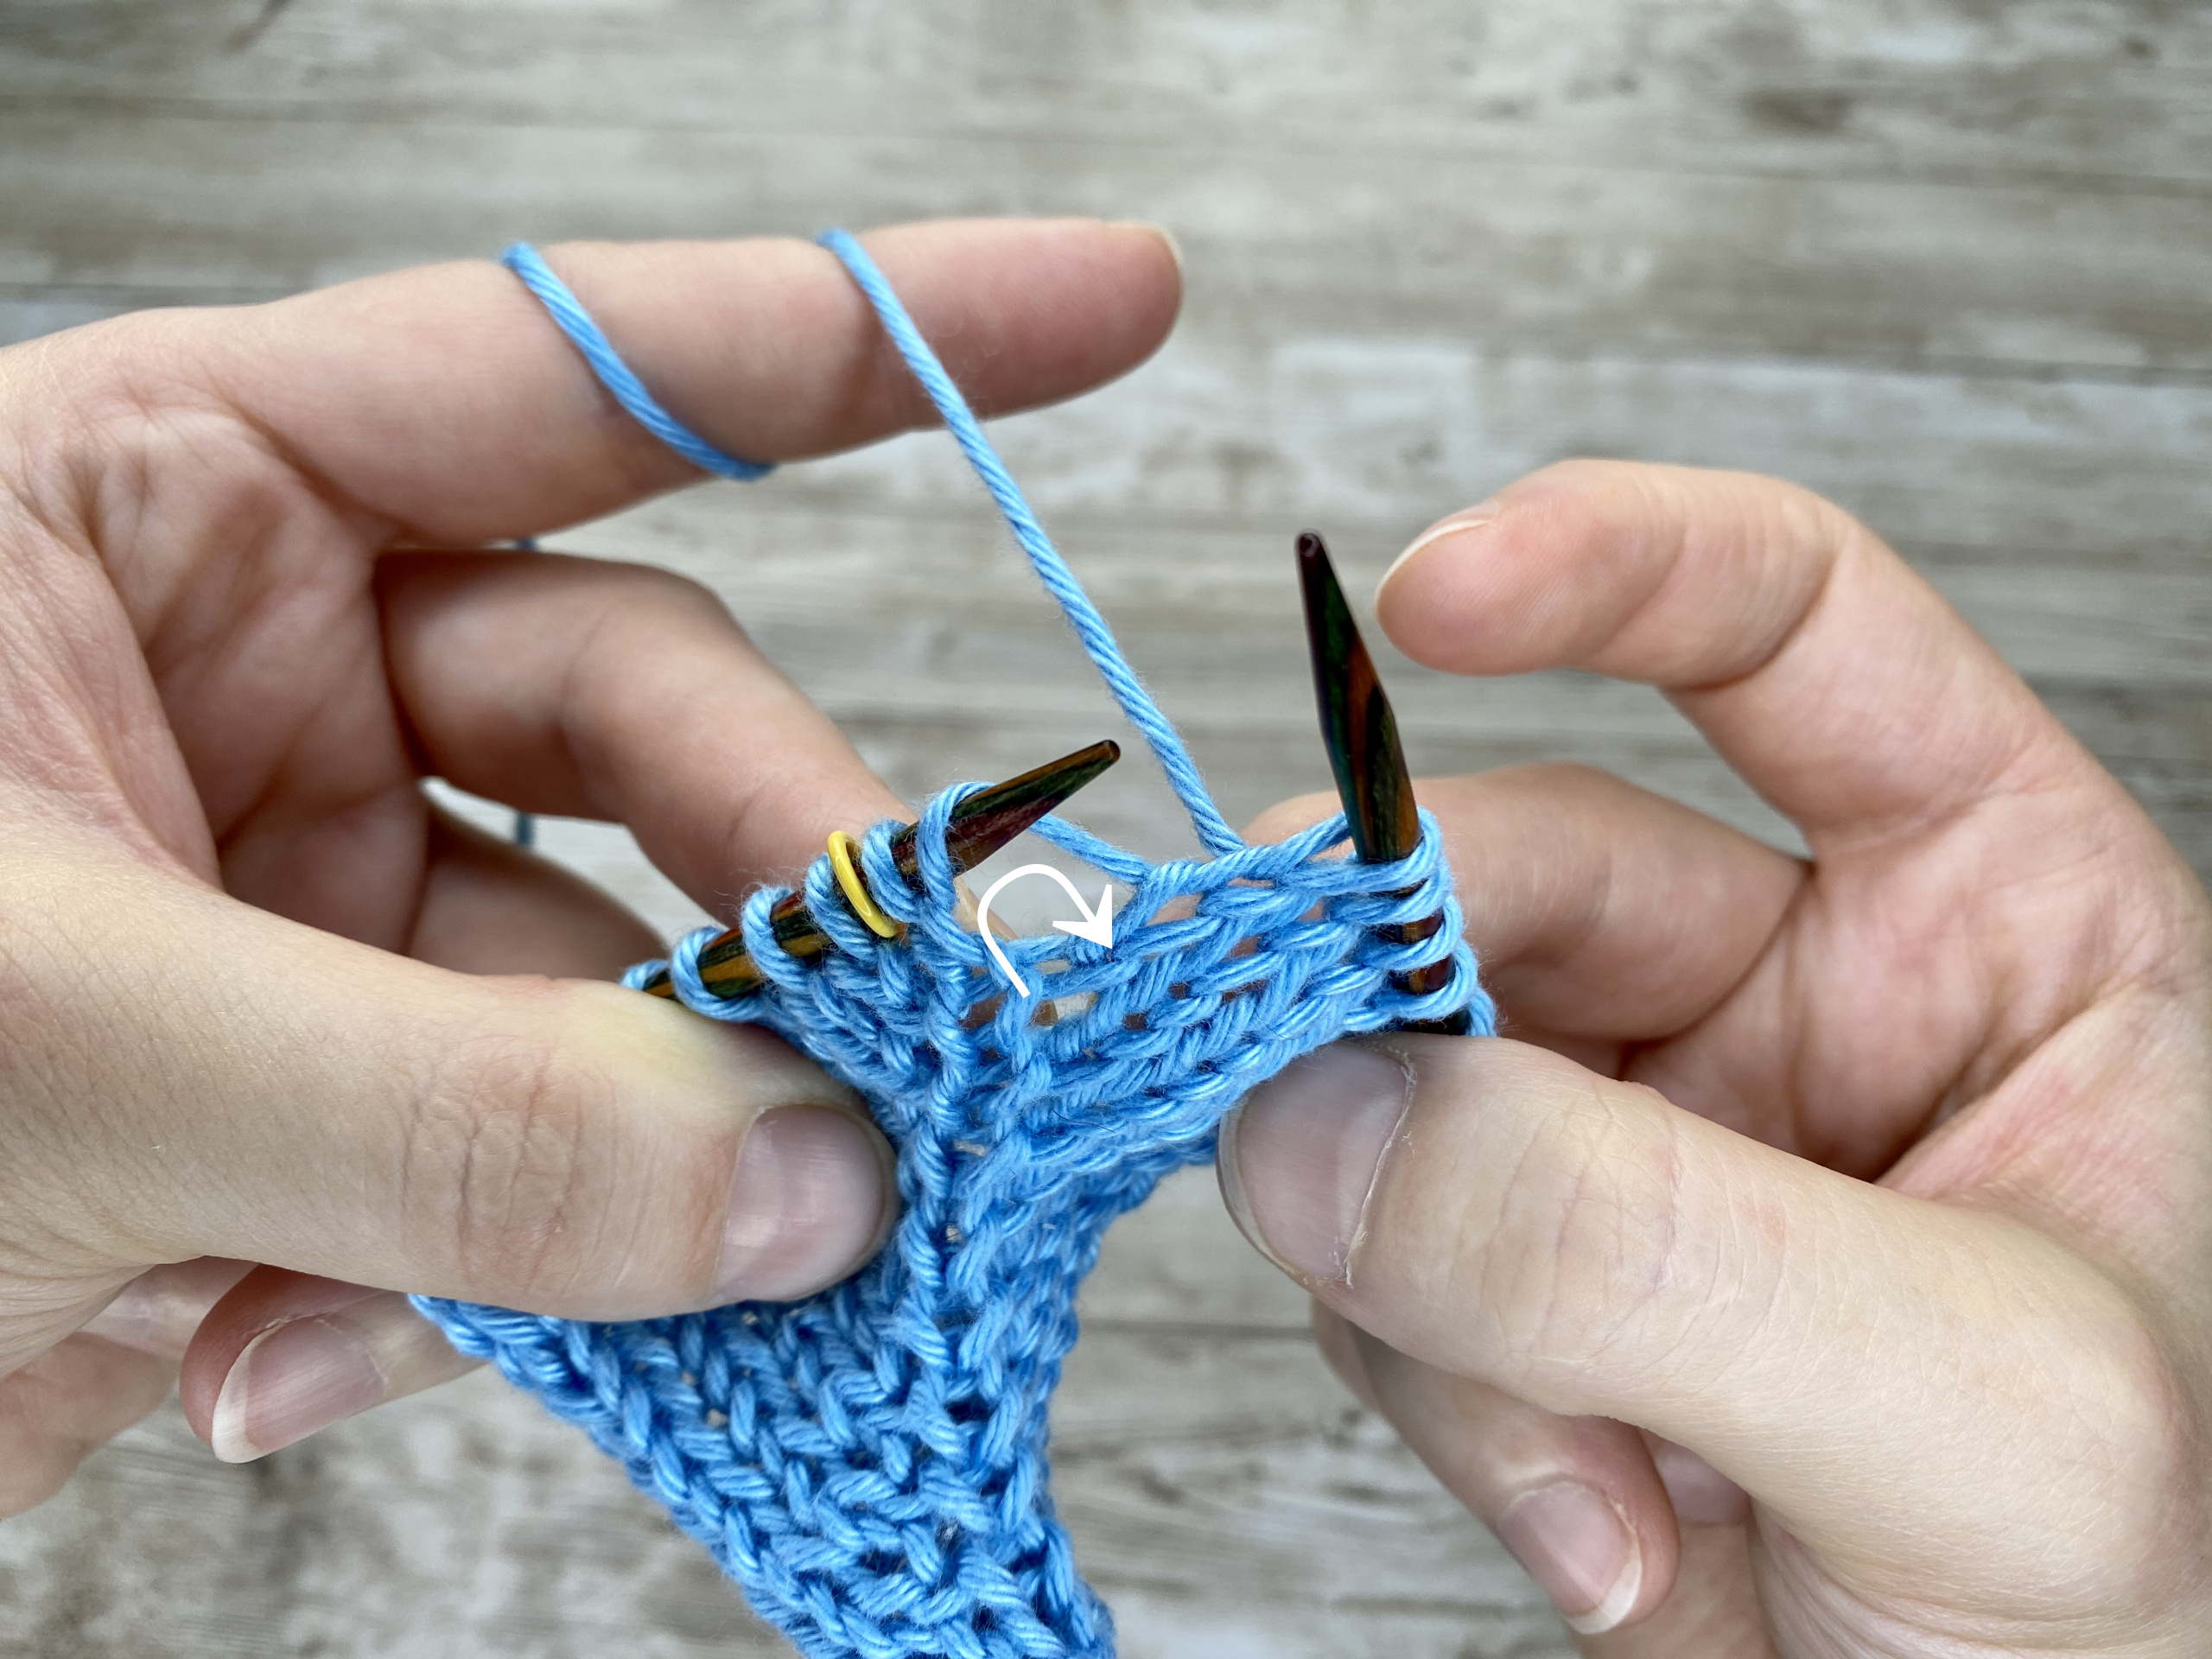
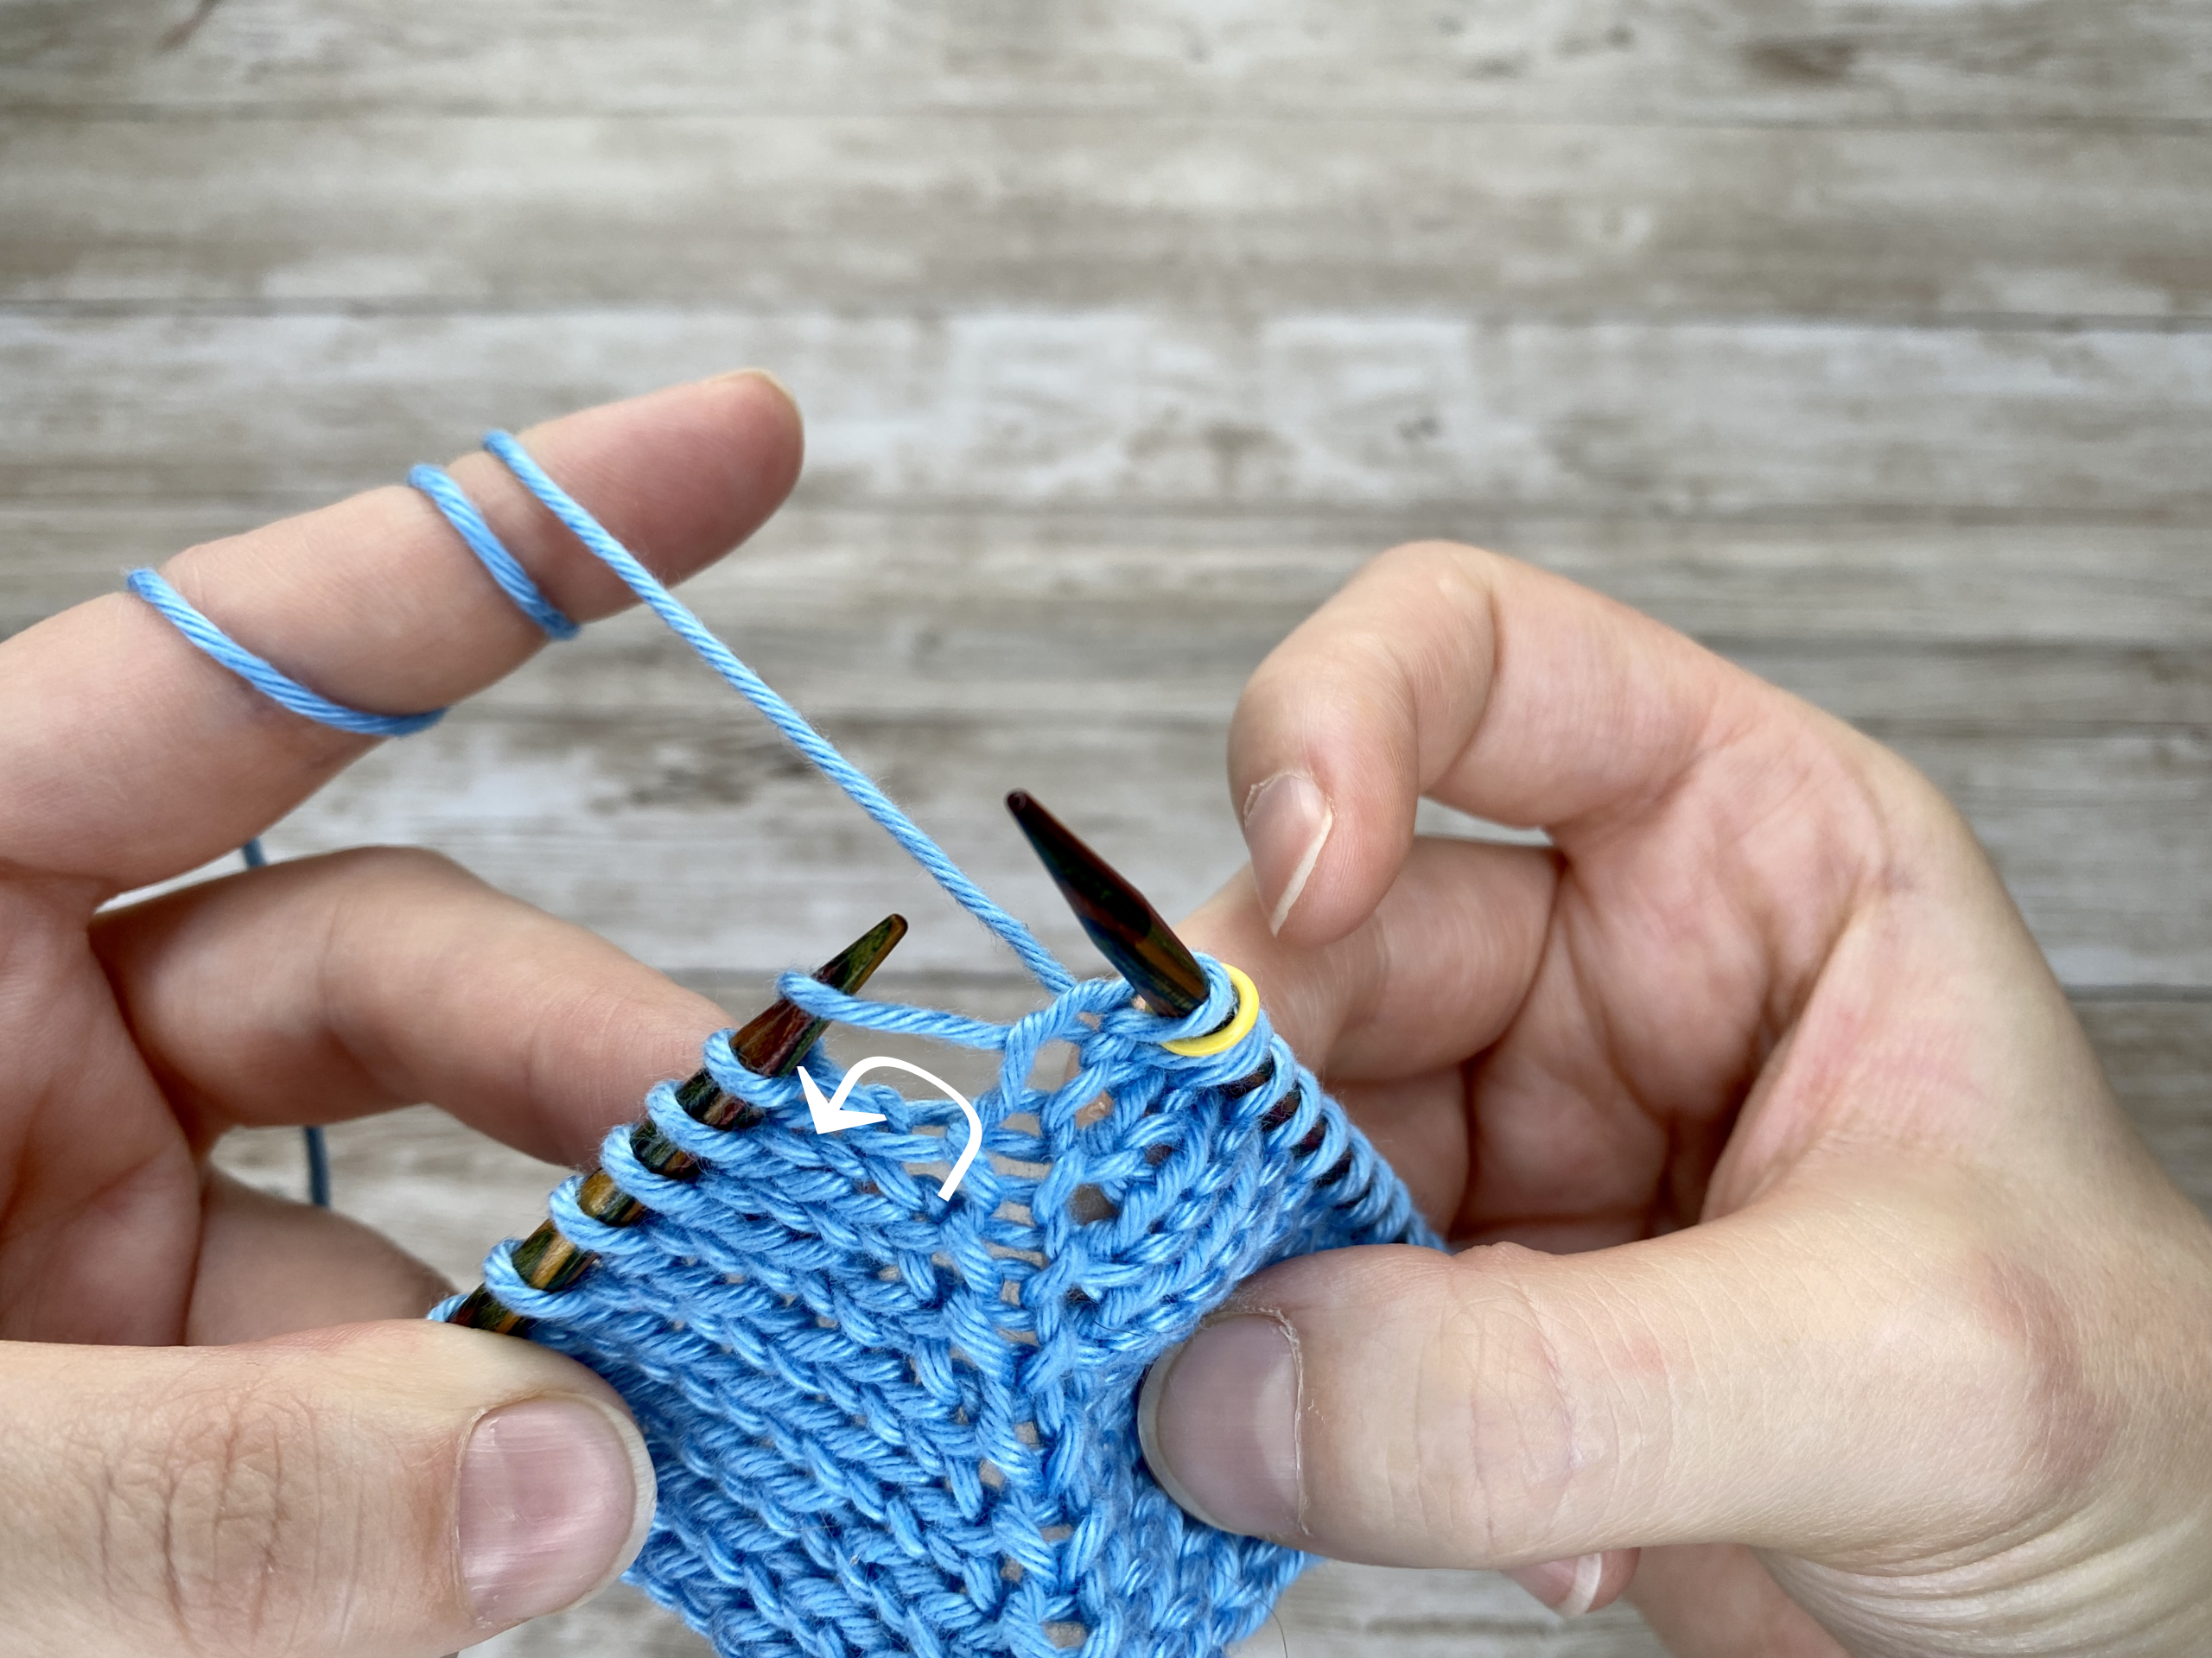
How to Identify the Direction of Your Increase
This is actually really easy to see. You just have to look at the direction your loop is pointing. If it is pointing to the right, it is a M1R increase. If it is pointing to the left, it is a M1L increase.
 |
 |
|
The loop on your needle points towards the right side |
The loop on your needle points towards the left side |
What’s the Difference Between M1L, M1R, and Other Knitting Increases?
The Make One Left (M1L) and Make One Right (M1R) increases are simple techniques for adding a new stitch by lifting the horizontal strand between two stitches and knitting into it. While they’re often described as “almost invisible,” they can sometimes leave a tiny hole - especially when working with cotton yarns, slippery fibers, or looser tensions.
This slight gap happens because the M1 increase uses the strand between stitches rather than one from a previous row. By knitting M1L through the back loop and M1R through the front loop we tighten the strand and reduce the hole.
Some knitters prefer lifted increases instead, as those tend to produce a cleaner, denser fabric without the small gap. Meanwhile, the Knit Front and Back (KFB) method creates a tidy but visible bar, making it more decorative than seamless.
In short:
-
M1L / M1R – Subtle, directional shaping with a risk of a tiny hole.
-
Lifted increases – Smoother and nearly invisible.
-
KFB – Decorative and consistent, but clearly visible.
Common Mistakes and Pro Tips for M1L and M1R Increases
Perfecting your M1L (Make One Left) and M1R (Make One Right) increases is one of the easiest ways to elevate the quality of your knitting. These two small stitches can make a big difference in how polished your shaping looks. But like any new knitting technique, a few common mistakes can sneak in - let’s walk through how to avoid them and get professional-looking results every time.
Avoid These Common M1L and M1R Mistakes
1. Picking up the strand in the wrong direction
This is the number one hiccup knitters face. The rule of thumb is simple:
-
For M1L, lift the strand from front to back.
-
For M1R, lift it from back to front.
Getting that orientation right keeps your increases neat and prevents extra holes from forming in your fabric.
2. Twisted or uneven stitches
If your increases look tight or slightly slanted the wrong way, you’re probably knitting into the incorrect part of the lifted strand. Make sure to:
-
Knit M1L through the back loop
-
Knit M1R through the front loop
This ensures the new stitch aligns beautifully with its neighbors.
Pro Tips for Flawless M1L and M1R Increases
Choose the method that feels natural
If using your left needle to pick up the strand feels awkward, use your right needle instead and then transfer it. What matters is comfort and consistency - not which needle you use.
Use the “lean trick” to double-check direction
Here’s a simple way to remember:
-
If the lifted strand leans right, it’s M1R.
-
If the lifted strand leans left, it’s M1L.
Once you get familiar with this, spotting (and fixing) mistakes mid-row becomes effortless.
Mark your increase rows
Especially in shaping projects like raglan sweaters or lace knitting, it’s easy to lose track of where your increases occur. Drop a stitch marker or use a strand of contrasting yarn to highlight those spots. You’ll stay organized and ensure your layout stays symmetrical.
Frequently Asked Questions About M1L and M1R Increases
What’s the difference between M1L, M1R, and other knitting increases?
The Make One Left (M1L) and Make One Right (M1R) increases add a new stitch by lifting the horizontal strand between two stitches and knitting into it. They can leave a tiny hole, especially with cotton yarns or looser tension, which is why some knitters avoid them. Twisting the stitch (M1L through the back loop, M1R through the front loop) helps close the gap.
Unlike Knit Front and Back (KFB), which creates a visible bar, or lifted increases, which draw from a lower row for a smoother finish, M1 increases sit neatly between stitches. They’re versatile but can vary in appearance depending on your yarn and tension.
Can I use M1L and M1R in any knitting pattern?
Yes! These increases work beautifully in stockinette stitch, garter stitch, and even textured designs. Because of their polished finish, they’re a go-to choice for shaping raglan sleeves, sock gussets, and mitten thumbs - anywhere you want seamless structure and symmetry.
Why do some patterns specify M1L or M1R instead of just “M1”?
Designers often choose one direction over the other to create balanced shaping. Using M1R for a right leaning increase and M1L for a left leaning increase produces mirrored increases that look neat and intentional.
What if I accidentally work M1R instead of M1L?
No worries - your knitting won’t fall apart! The stitch will simply lean in the opposite direction. If you notice it quickly, you can “tink back” (unknit) and correct it. If not, keep knitting; the difference is usually subtle, especially in textured or patterned fabric. I’ll be sharing a short tutorial soon on how to fix those tricky mistakes - like forgetting an M1, dropping one, or working it the wrong way.
Are M1L and M1R good for beginner knitters?
Absolutely. While the movements may feel new at first, they’re simpler than they look. Once you understand which strand to lift and which way to knit through it, M1L and M1R become second nature. These techniques are great for knitters ready to move beyond basic increases like KFB.
Can I substitute M1L and M1R for other increases in patterns?
In most cases, yes - but visualize the effect you want. M1L and M1R add stitches invisibly, while KFB leaves a decorative bar and yarn-over increases create open holes for lacework. Choose the increase that matches your project’s texture and design goals.
Final Thoughts
When I first started knitting, I really struggled with this technique. I wasn’t sure if I was picking up the strand correctly or working the increases in the right direction. Using the left needle to lift the strand felt awkward, so I often avoided these increases altogether - until a pattern finally forced me to face them. That’s when I learned that you can also pick up the strand with your right needle, which instantly made things click.
One day, while chatting with an older woman in a doctor’s waiting room, she told me something that changed everything: “The direction your loop points shows which way your increase leans.” I had never seen that tip mentioned anywhere, not even in my knitting books. It’s one of those little gems of wisdom that come from experience - and a reminder that sometimes, chance encounters teach us the most useful lessons.
I hope this tutorial has cleared up any confusion you’ve had about M1L and M1R and that it helps your knitting look cleaner and feel more natural. Happy knitting, and may your stitches always lean the right way!
Until then, happy knitting!
A Little Way to Say Thanks
You Might Also Like


 |
|
Join the Cozy Corner Newsletter!
Hey there, creative soul! Welcome to the Yarn Enchantment Newsletter, where we celebrate all things cozy, crafty, and full of heart. Think of this as your friendly crafting companion - a little dose of inspiration delivered straight to your inbox, just for you. Inside, you’ll find: ✨ Exclusive patterns & tutorials - ideas you won’t find anywhere else (just for us!) 📚 Bookish crafts that bring your favorite stories to life 🧶 Tips and tricks to make your crafting journey smoother (and more fun!) 💌 Heartfelt musings on life, creativity, and the magic of making something with your own two hands Whether you’re knitting by the fire, brainstorming your next DIY project, or just looking for a little creative pick-me-up, this newsletter is here to cheer you on. Because let’s be honest - crafting isn’t just about the finished project; it’s about the joy, peace, and stories we create along the way. So grab a cup of tea, cozy up, and join me. Together, we’ll weave a little magic into everyday life - one stitch, one story, and one email at a time. P.S. I’m so glad you’re here. Let’s make something beautiful together! (Note: If you're using an ad blocker, you may encounter issues subscribing to the newsletter. To subscribe, please consider disabling your ad blocker.)
|
