
The Complete Guide to the Purl Stitch: Take Your Knitting to the Next Level
August 6, 2025
Drops Yarn Review: Honest Test of Softness & Durability
August 23, 2025How to Knit Garter Stitch: A Beginner’s Guide (With Tips You’ll Love)

Originally published on August 14, 2025
If you’re new to knitting, let me introduce you to your soon-to-be best friend: the garter stitch. It’s simple, versatile, and - dare I say - pretty magical. Whether you want to make cozy scarves, soft blankets, or just practice your skills, the garter stitch is the perfect place to start.
Why it’s so lovable? It lies flat, looks the same on both sides, and has that squishy texture everyone adores. Curious? Let’s get started!
(Psst - if you’re more of a visual learner, you’ll find the video tutorial at the end of this post!)
 | How to Knit Garter Stitch - Learn counting stitches and rows - Tips for gauge |
Table of Contents
- What is Garter Stitch?
- How to Knit Garter Stitch (Step-by-Step)
- How to Count Stitches and Rows in Garter Stitch
- How to make your gauge swatch
- Frequently Asked Questions
- Final Thoughts + Video Tutorial
What is Garter Stitch?
Garter stitch is one of the easiest knitting techniques out there. You simply knit every single stitch when working back and forth on straight needles. Yep - no purling required (at least not until you’re ready for fancier stitches).
The result? A bumpy, textured fabric that doesn’t curl at the edges, making it perfect for scarves, dishcloths, and blanket borders.
Why everyone loves garter stitch:
-
- Hides small mistakes beautifully
- Has a squishy, cozy feel
- Lies perfectly flat
- Looks the same on both sides
Techniques you need to know:
-
- Casting on
- How to knit
- How to purl - only if knitting garter stitch in the round (Optional)
- Binding off
How to Knit Garter Stitch
Knitting on Straight Needles
Use a cast-on (like the long-tail method). For practice, start with about 20 stitches.
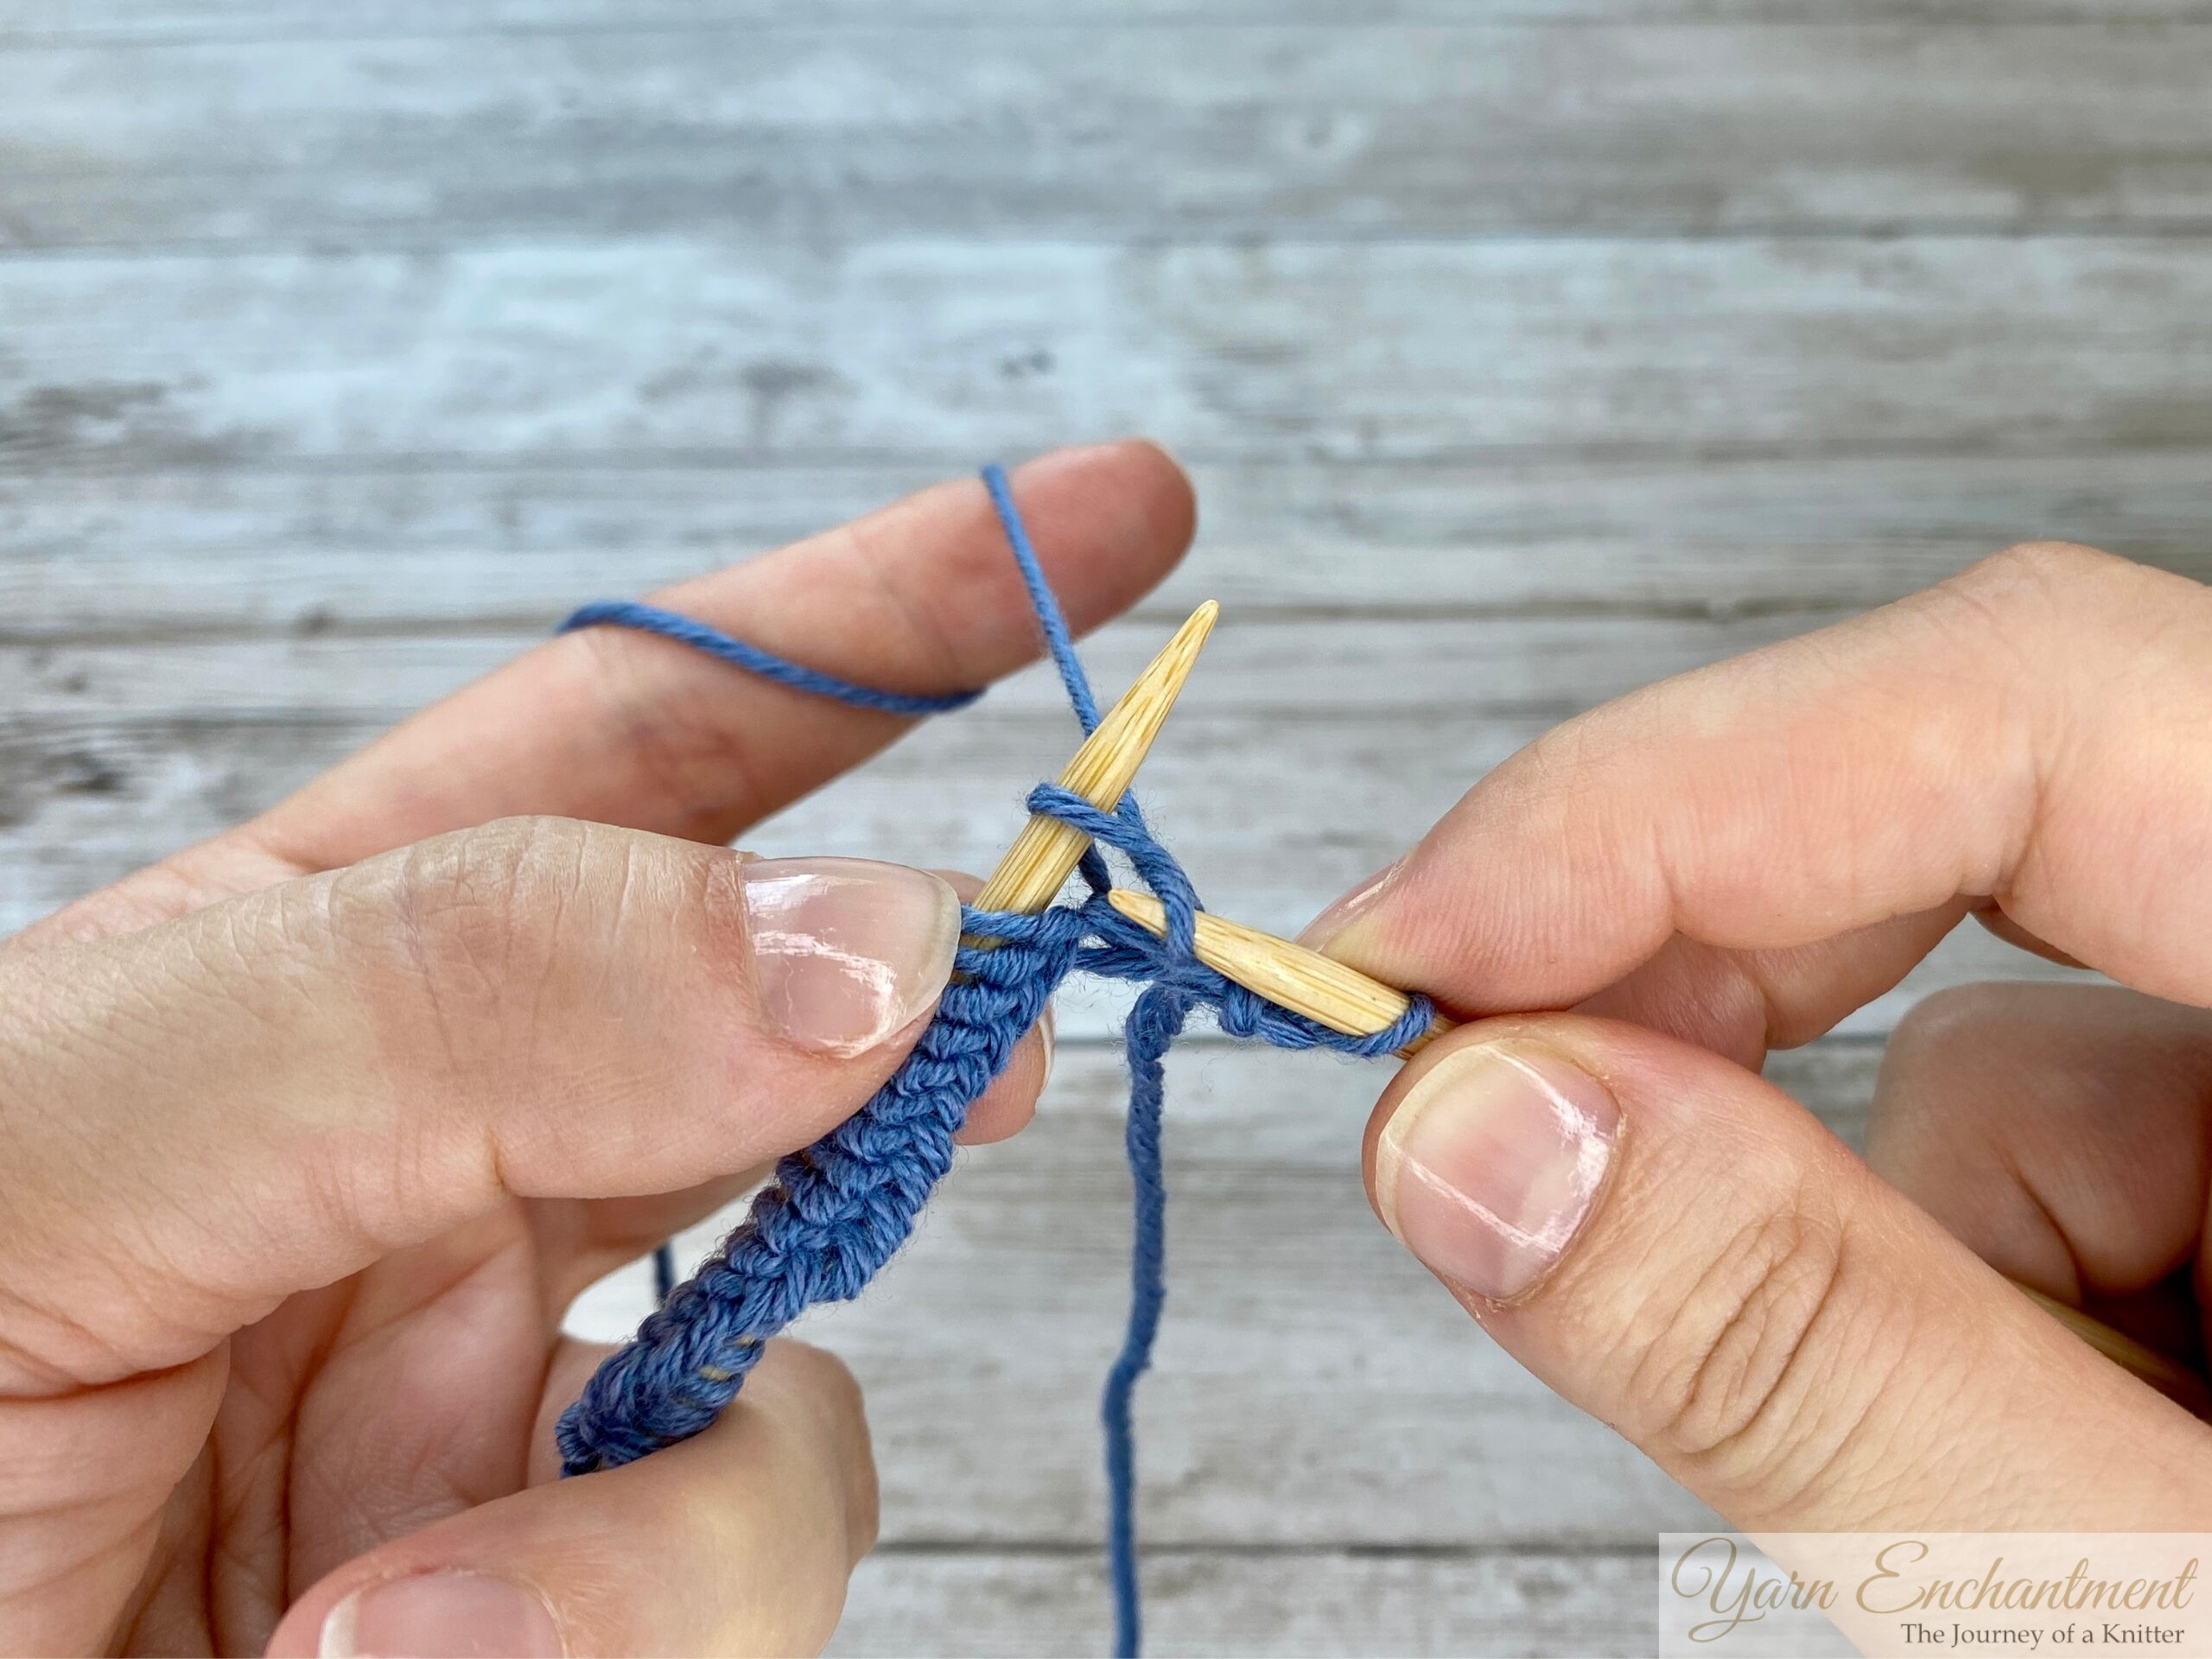
Step 1: Start to Knit your first Stitch
-
- Hold your needle with the cast-on stitches in your left hand.
- Insert the right needle into the first stitch from front to back.
I’ve written The Complete Guide to the Knit Stitch, be sure to check out this tutorial if you’re looking to learn or master the knit stitch!
 |  | Hold your needle with the cast-on stitches in your left hand. | Insert the right needle into the first stitch from front to back. |


Step 2: Knit every Stitch
-
- Wrap the yarn counterclockwise around the right needle.
- Pull the loop through and slide the old stitch off.
 |  | 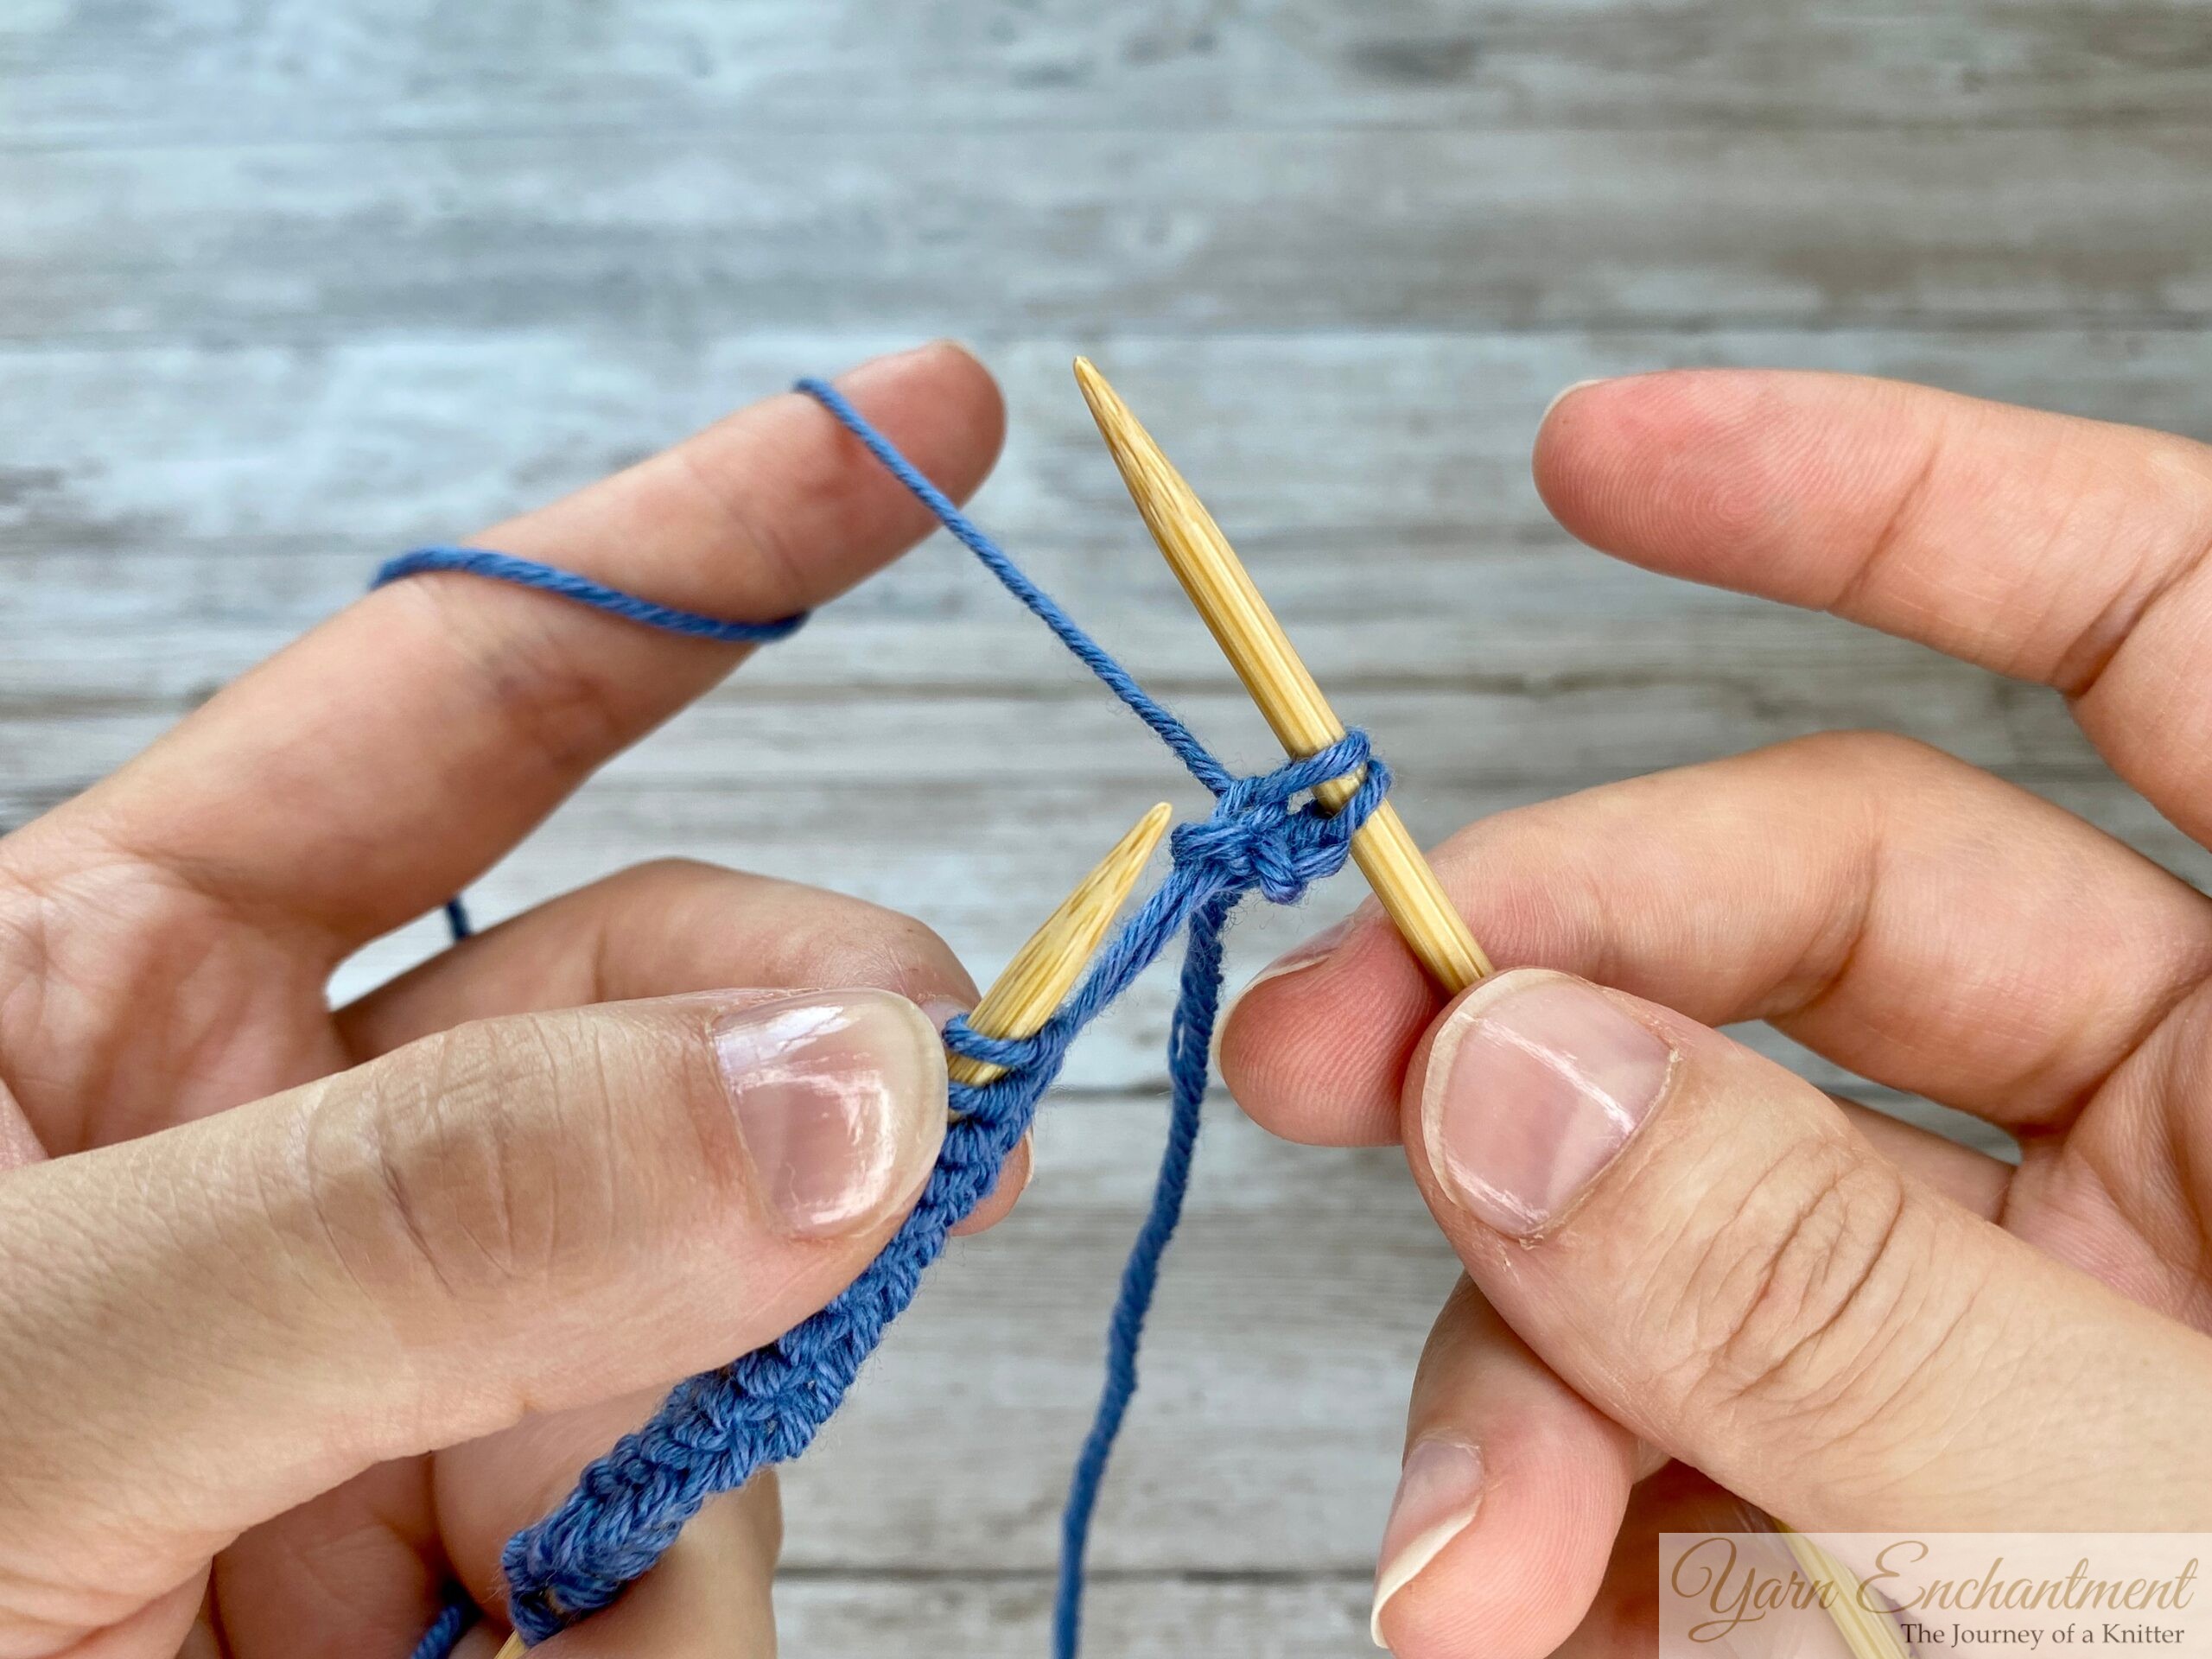 | Wrap the yarn counterclockwise around the right needle. | Pull the loop through and... | slide the old stitch off. |


Step 3: Repeat Knitting Across the Row
-
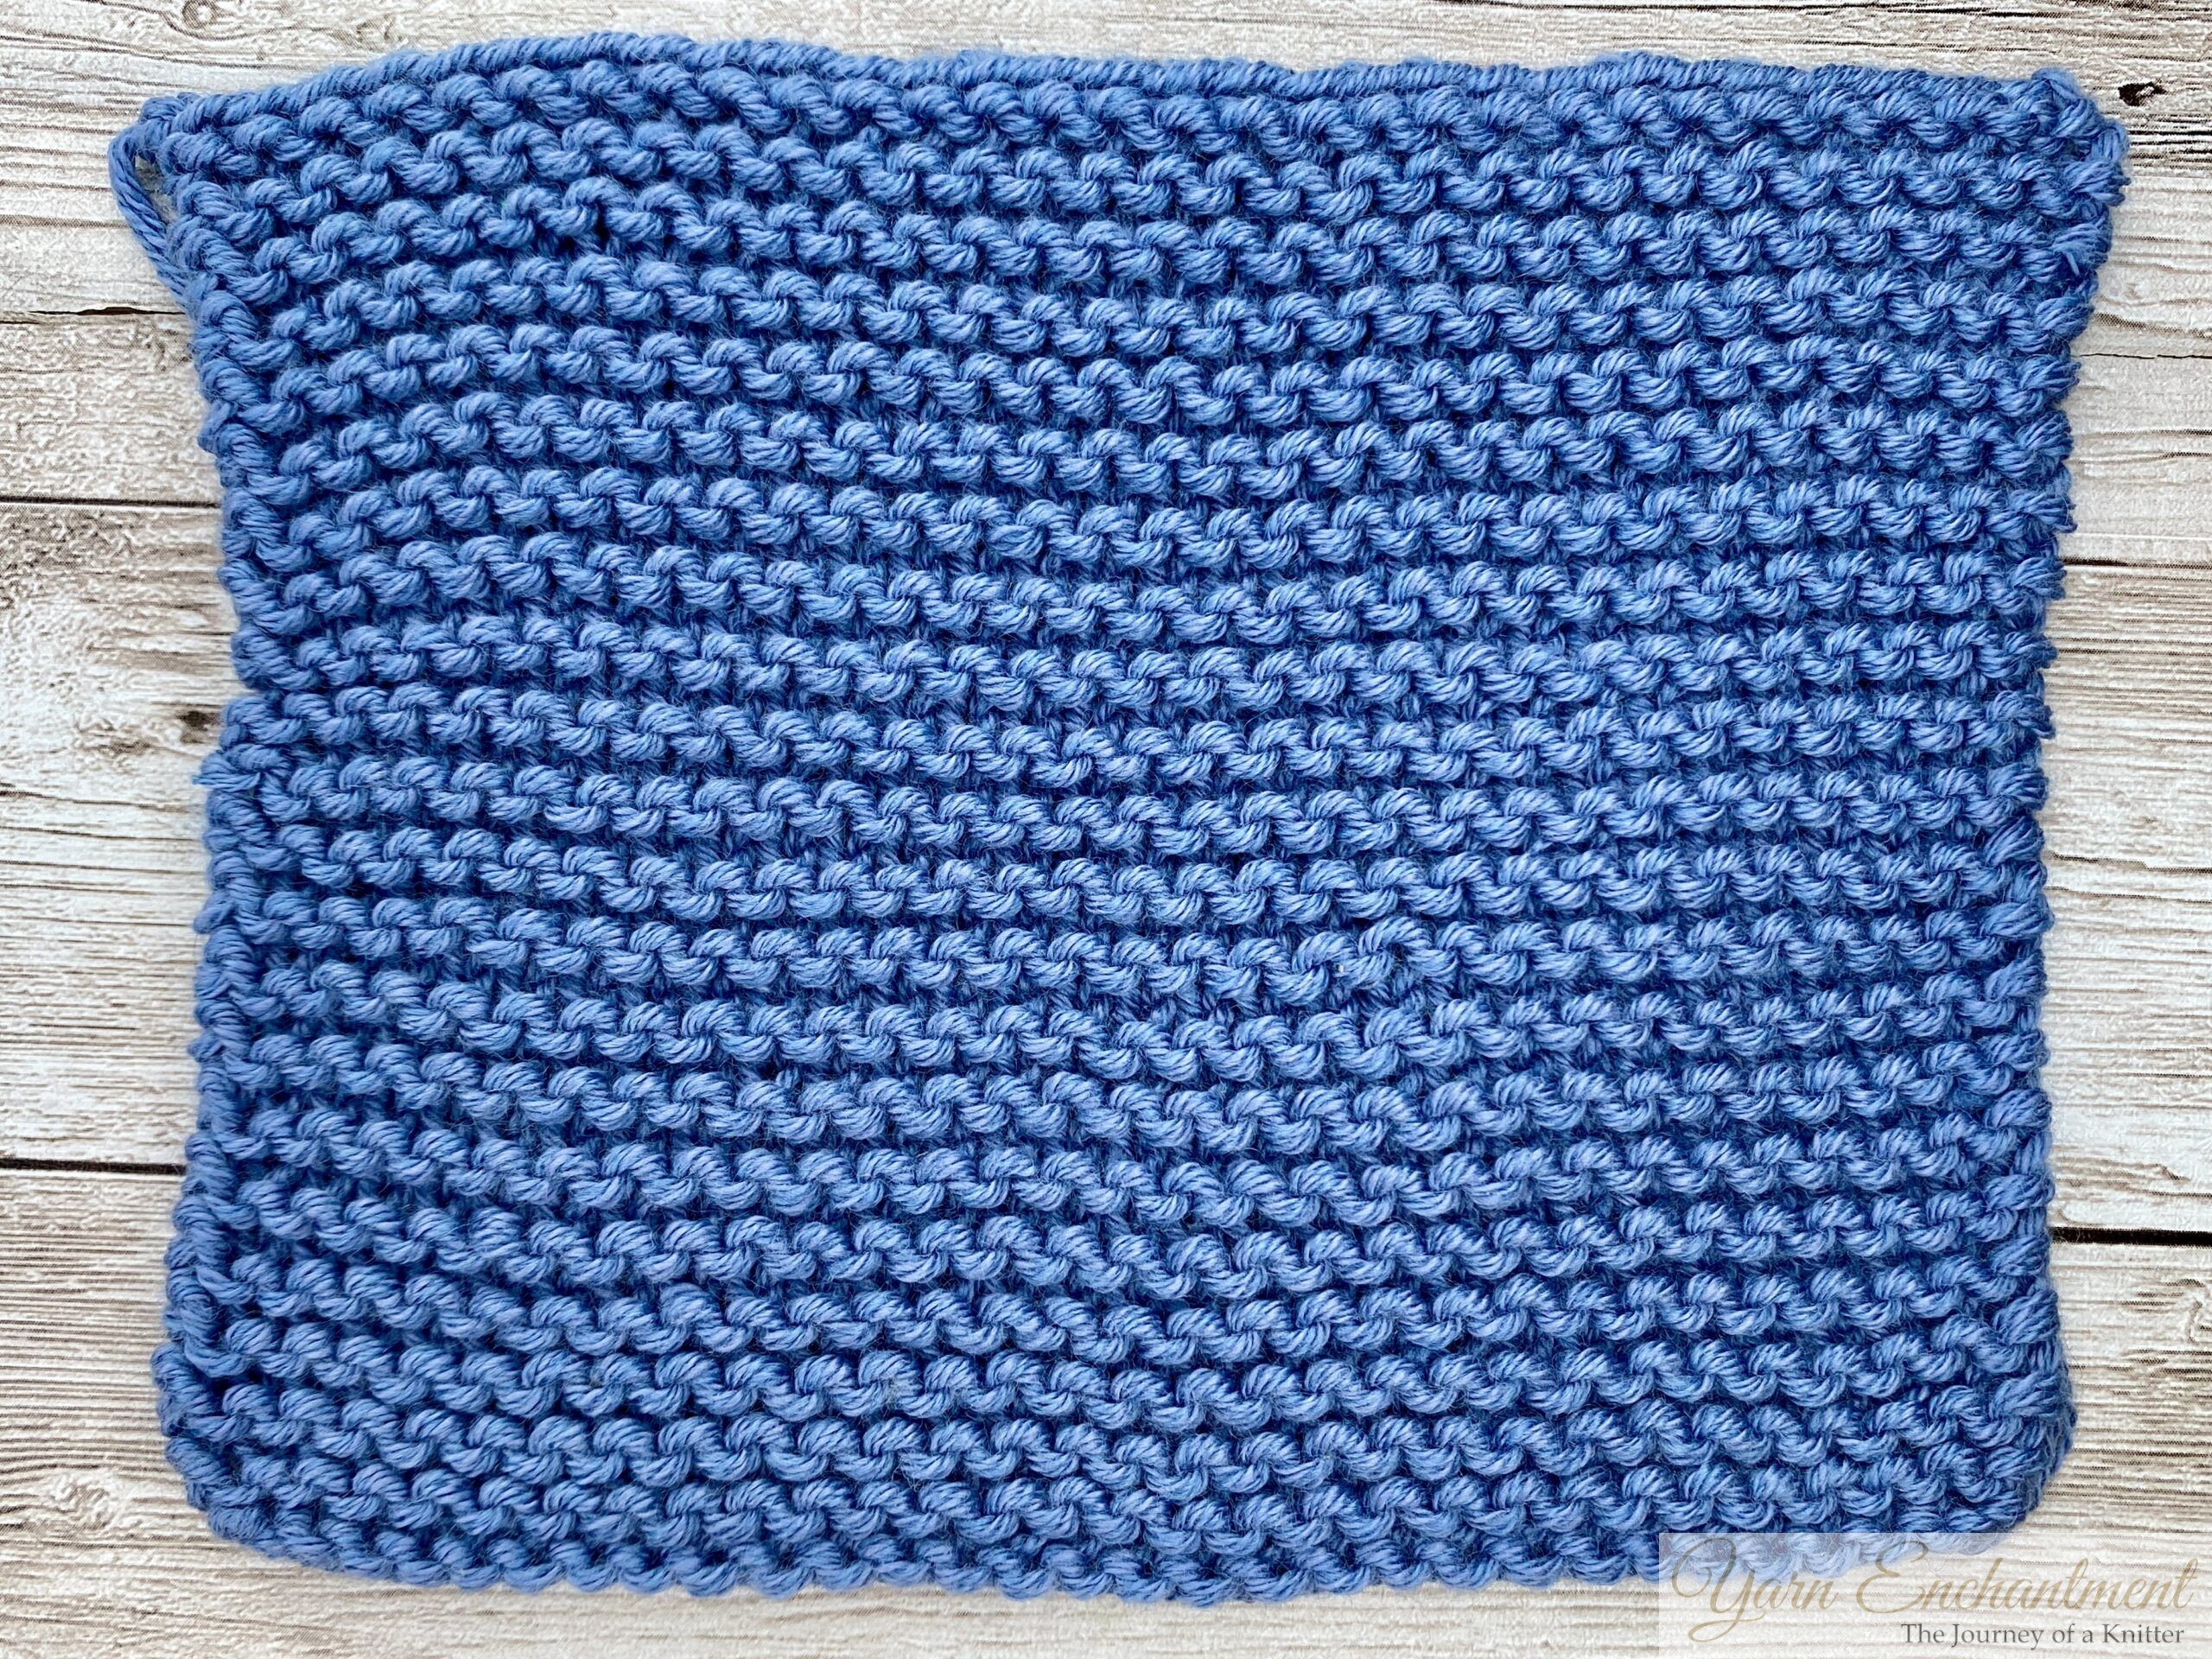
- Knit every stitch across the row, then turn your work and knit across the next row as well. After completing a few rows, you'll begin to see the classic ridged texture that is characteristic of garter stitch fabric.
 | 100% Merino with Mohair Yarn |

Knitting in the Round
When knitting garter stitch in the round, you’ll need to alternate between knitting and purling to create the same texture you get knitting flat:
-
- Round 1: Knit all stitches
- Round 2: Purl all stitches
Then, just repeat those two rounds until your project measures the desired length.
How to Count Stitches and Rows in Garter Stitch
Counting stitches in garter stitch can be tricky - everything looks the same at first glance! Here’s how to count your stitches
-
- Stitches (width): To count stitches in garter stitch, look at top of each stitch. Each 'bump' or 'head' represents one stitch - think of them as little upside-down smiles or tiny frowns sitting side by side!
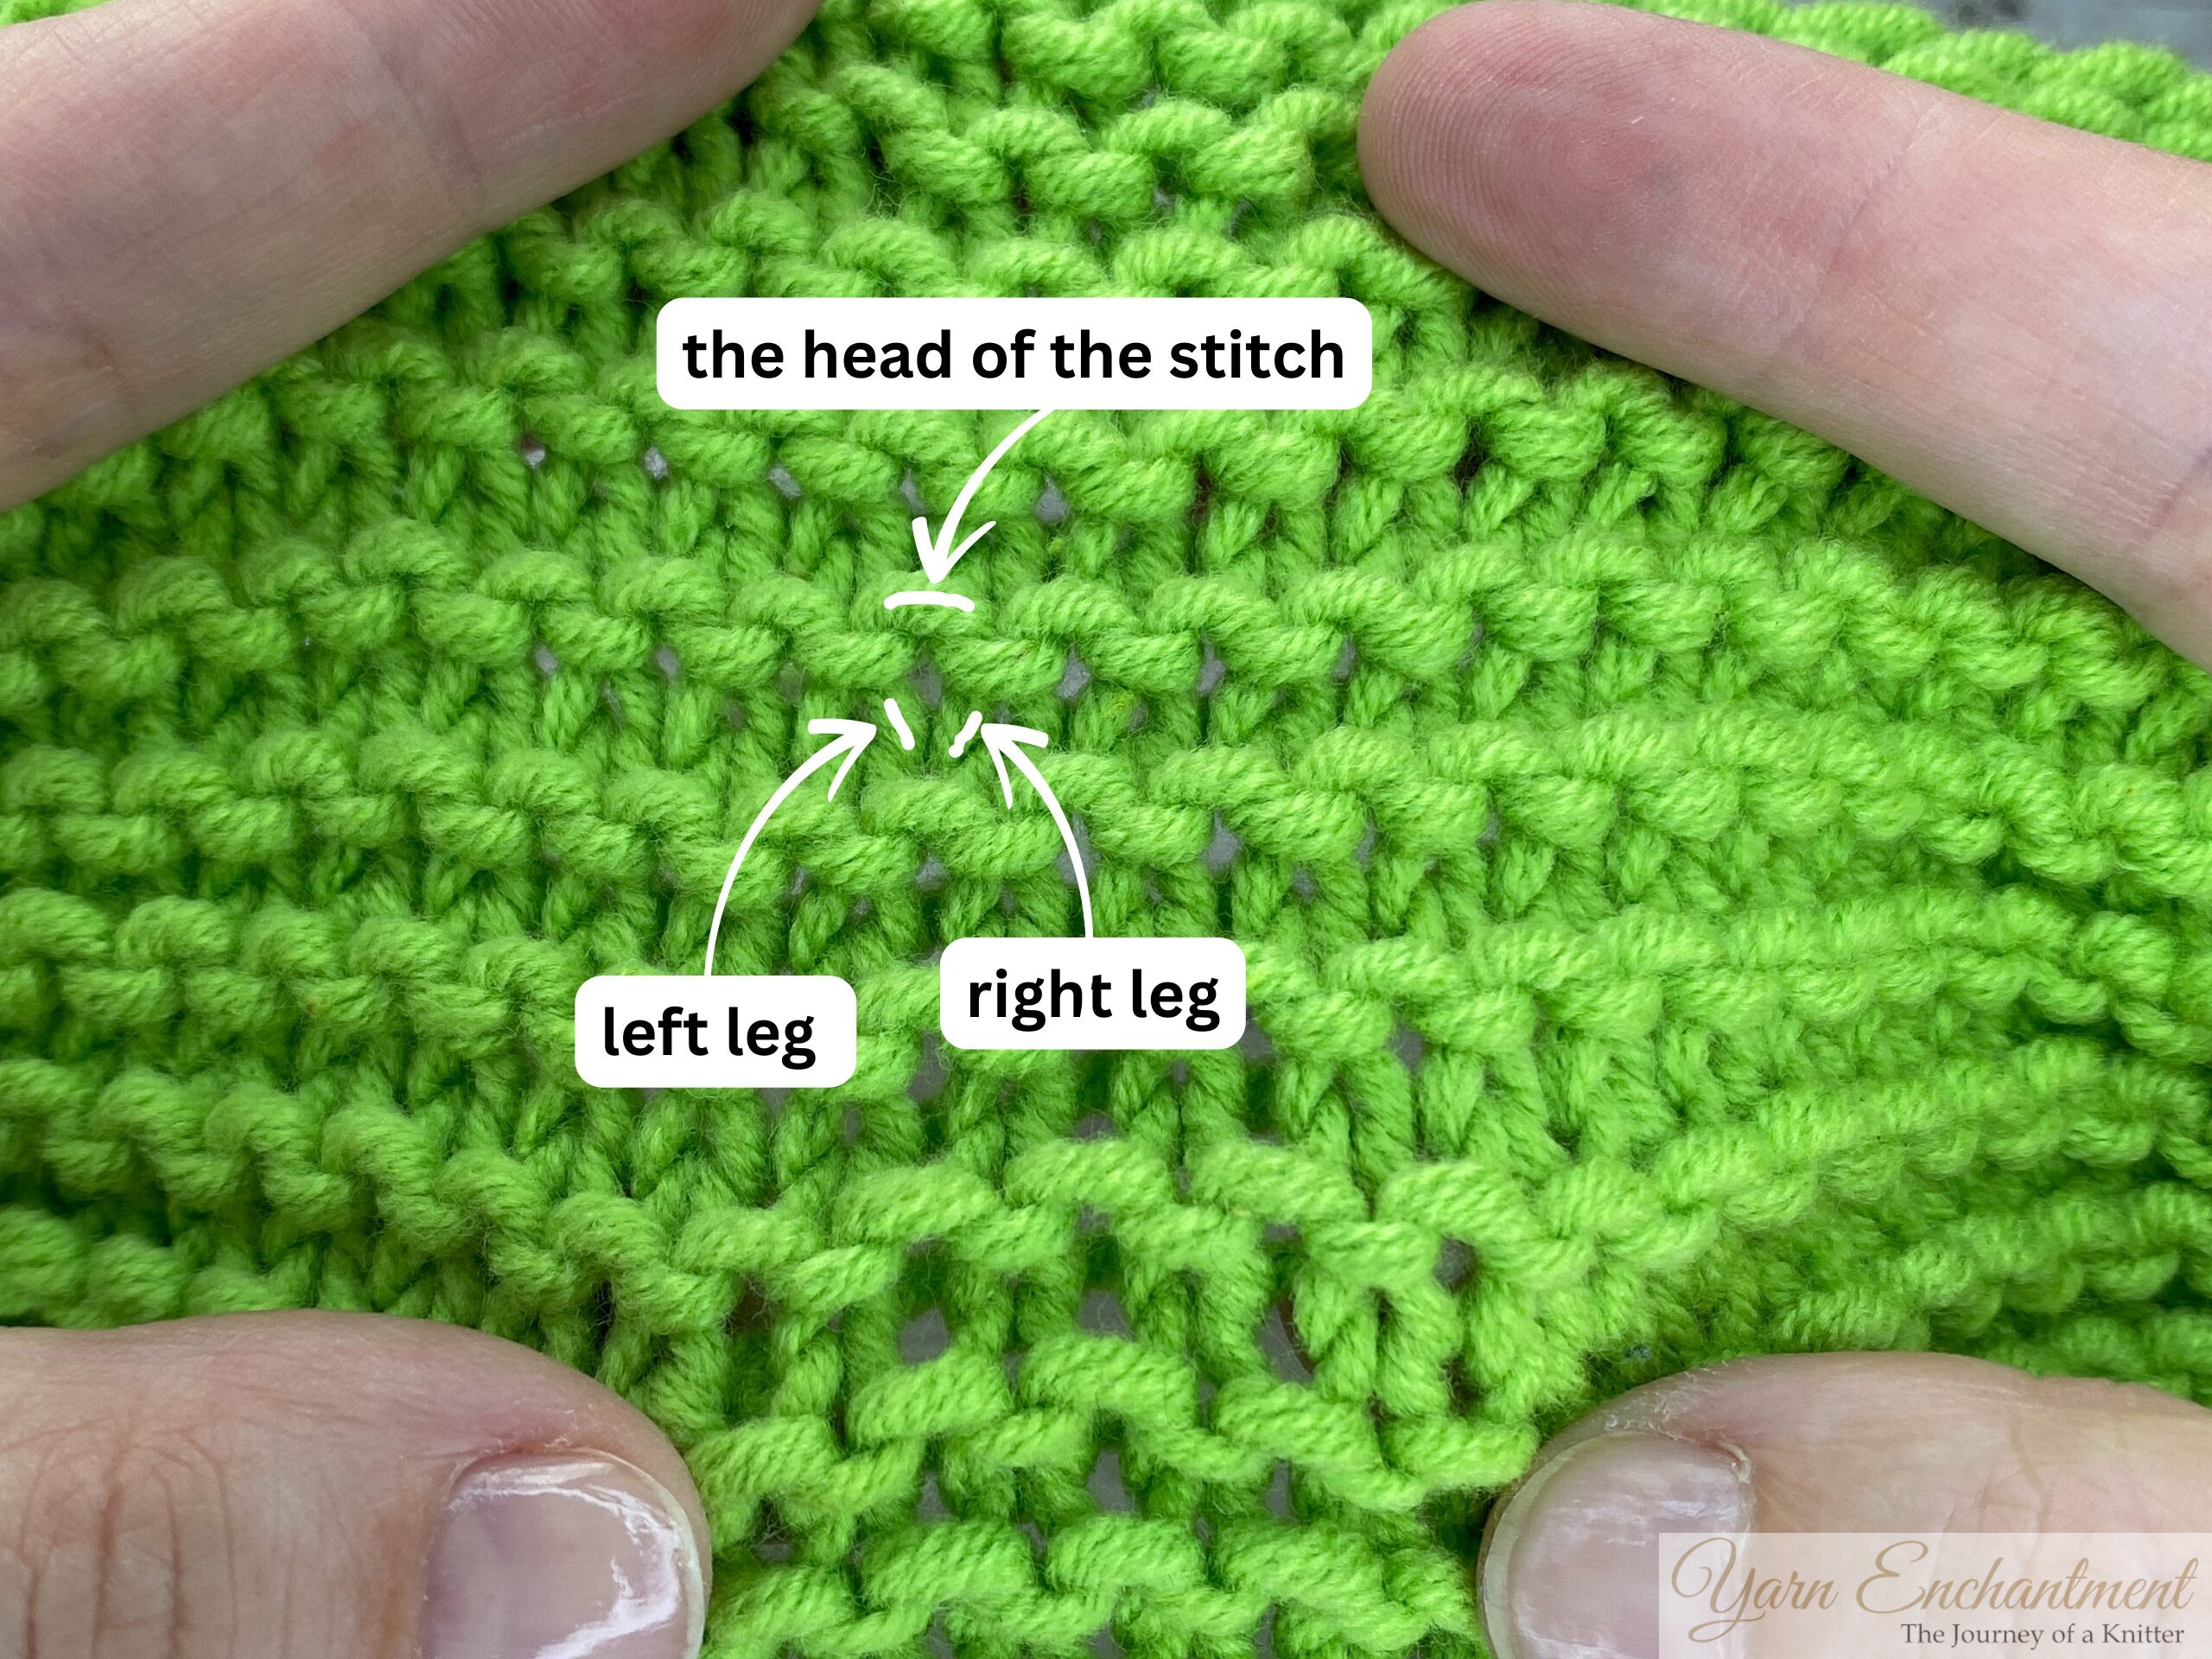 |  | When you gently stretch your fabric, you can see the structure of each knit stitch more clearly. Notice the two legs - the left and right sides—and the 'head' of the stitch sitting at the top. | To count stitches in garter stitch, look at top of each stitch. Each 'bump' or 'head' represents one stitch - think of them as little upside-down smiles or tiny frowns sitting side by side! |


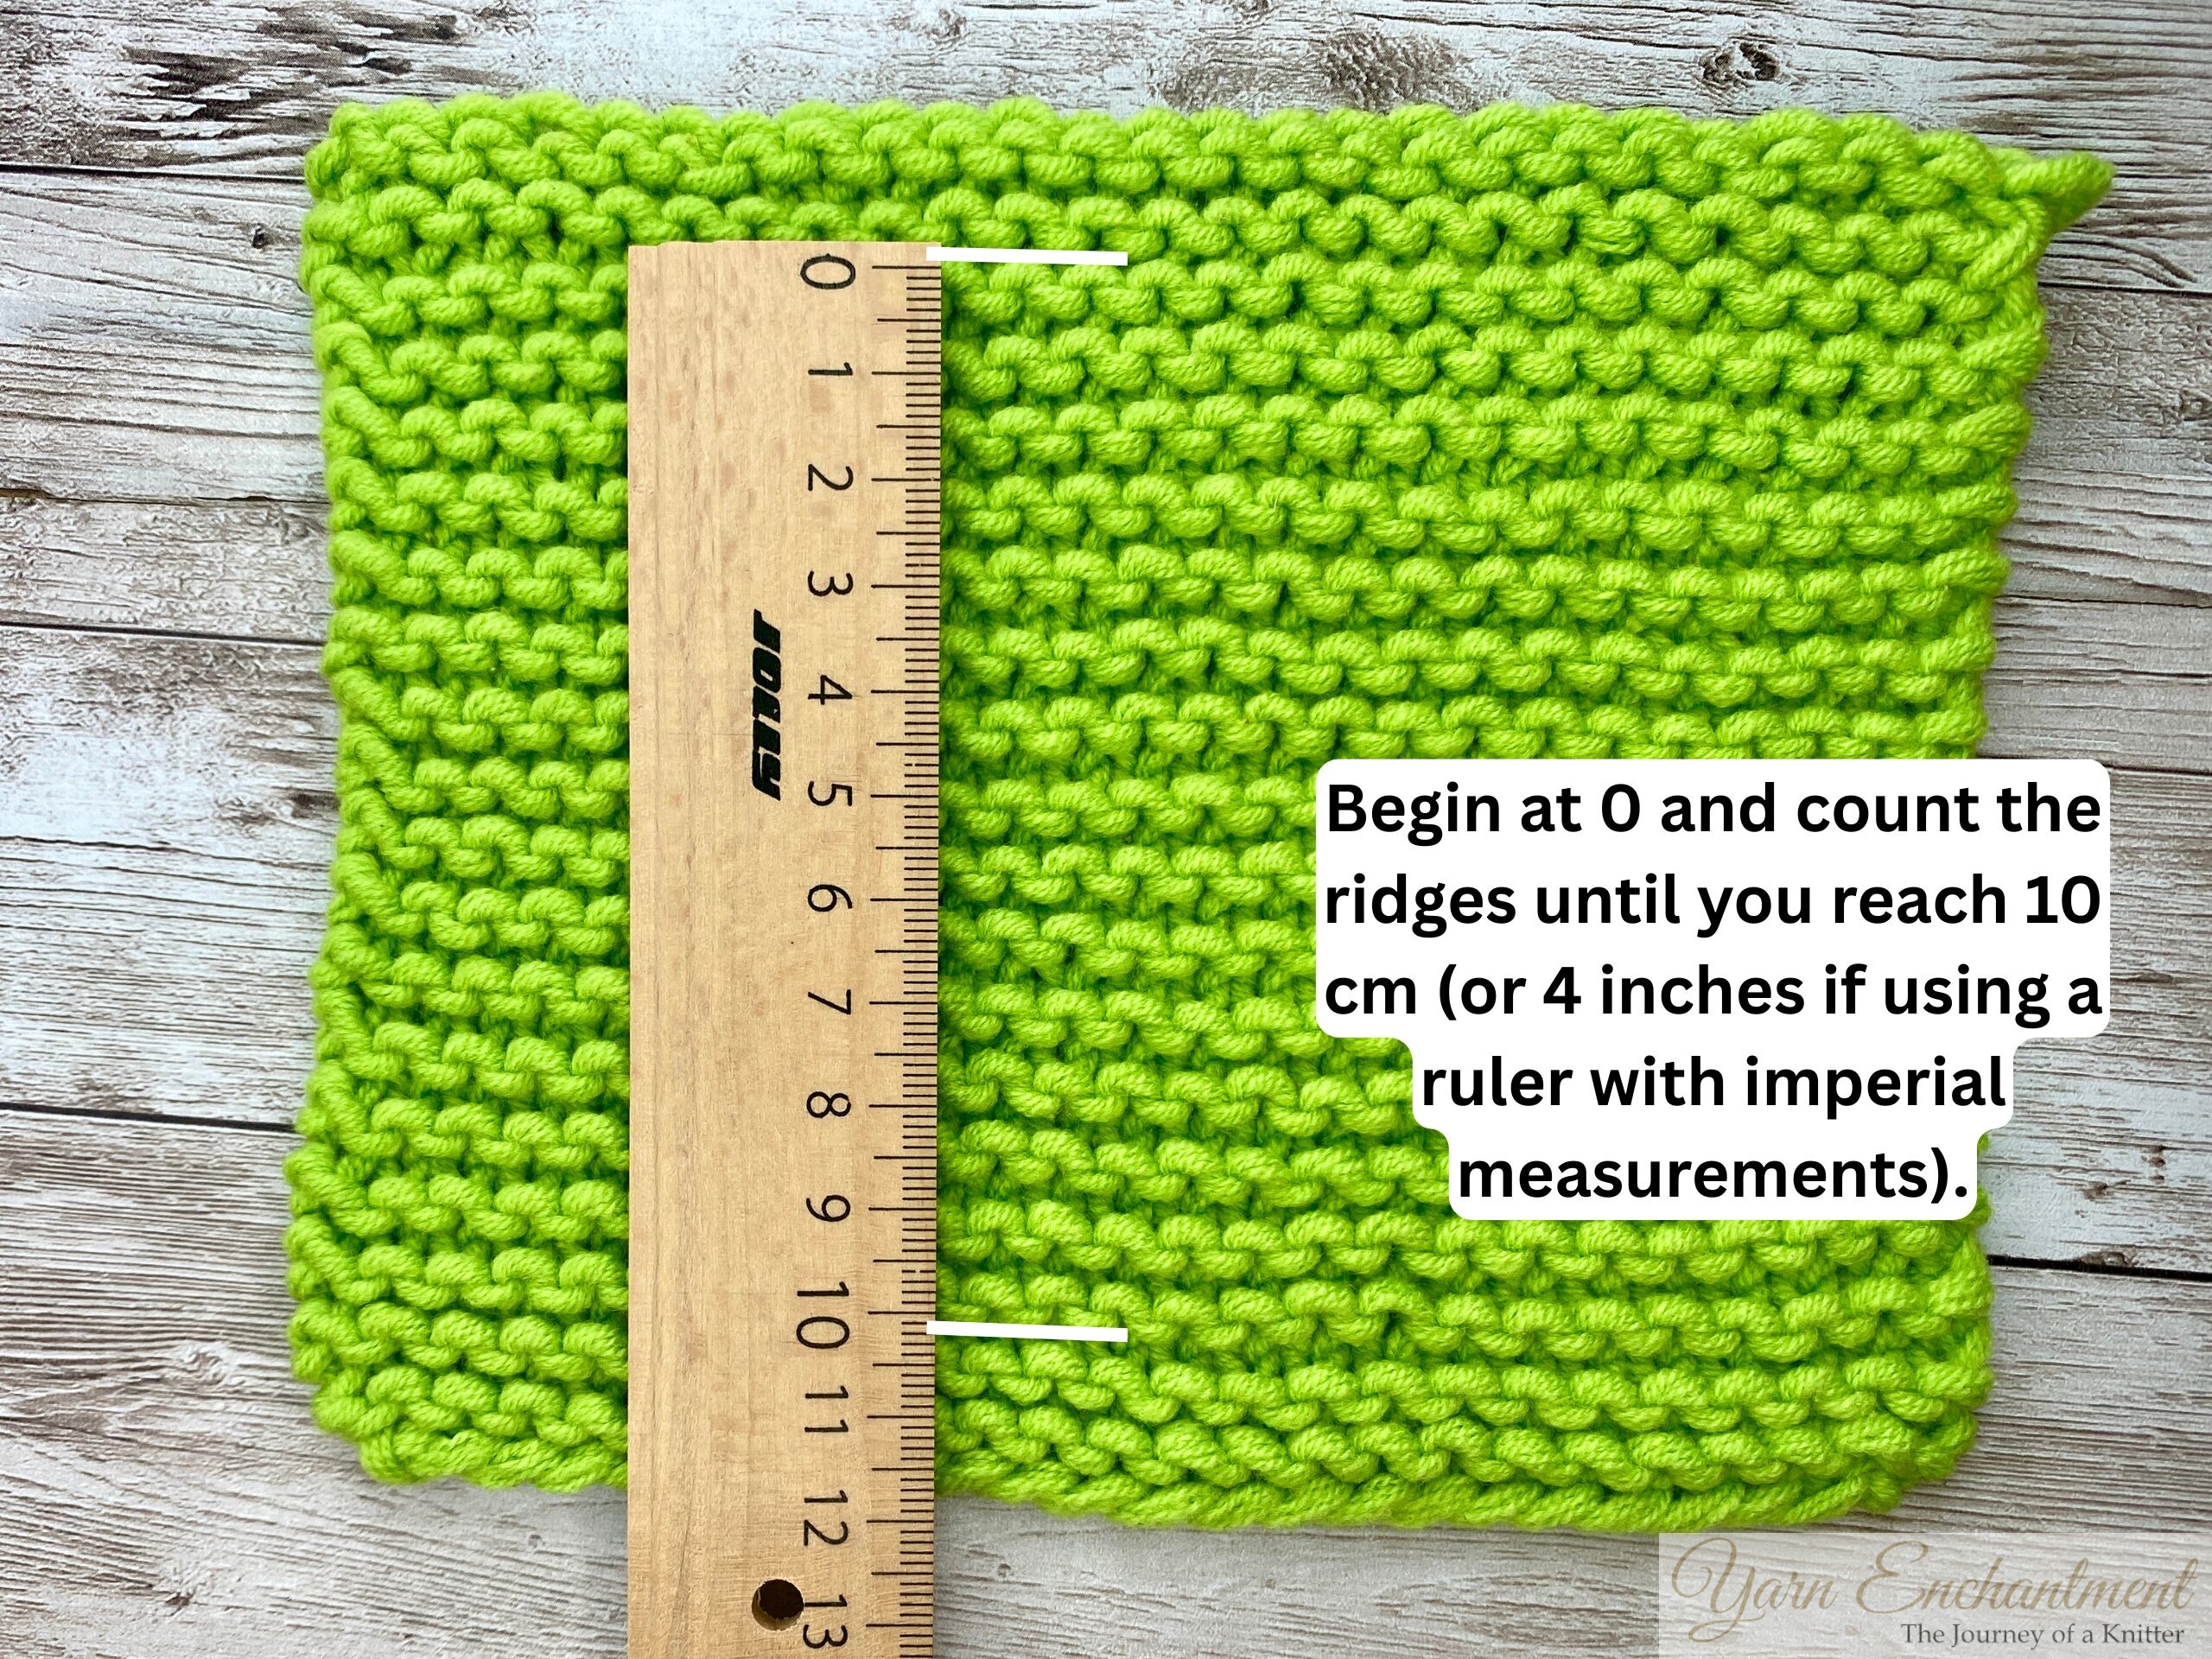
Counting rows in garter stitch can be confusing, especially for beginners. For example, the instruction to 'knit 4 rows in garter stitch' used to confuse me - I thought it meant knitting 4 ridges. But that’s not correct! In garter stitch, 4 rows simply means knitting 4 actual rows (all knit stitches), which will create 2 visible ridges on the fabric.
-
- Rows (height): Each raised ridge = two rows. Count the ridges vertically and multiply by two for total rows.
- Rows (height): Each raised ridge = two rows. Count the ridges vertically and multiply by two for total rows.
 | Each raised ridge represents two rows of knitting. To calculate the total number of rows, count the ridges vertically and multiply by two. For example, three ridges equal six rows. |

How Garter Stitch Works:
Why One Ridge = Two Rows:
Counting Rows in Garter Stitch:
How to make your swatch:
-
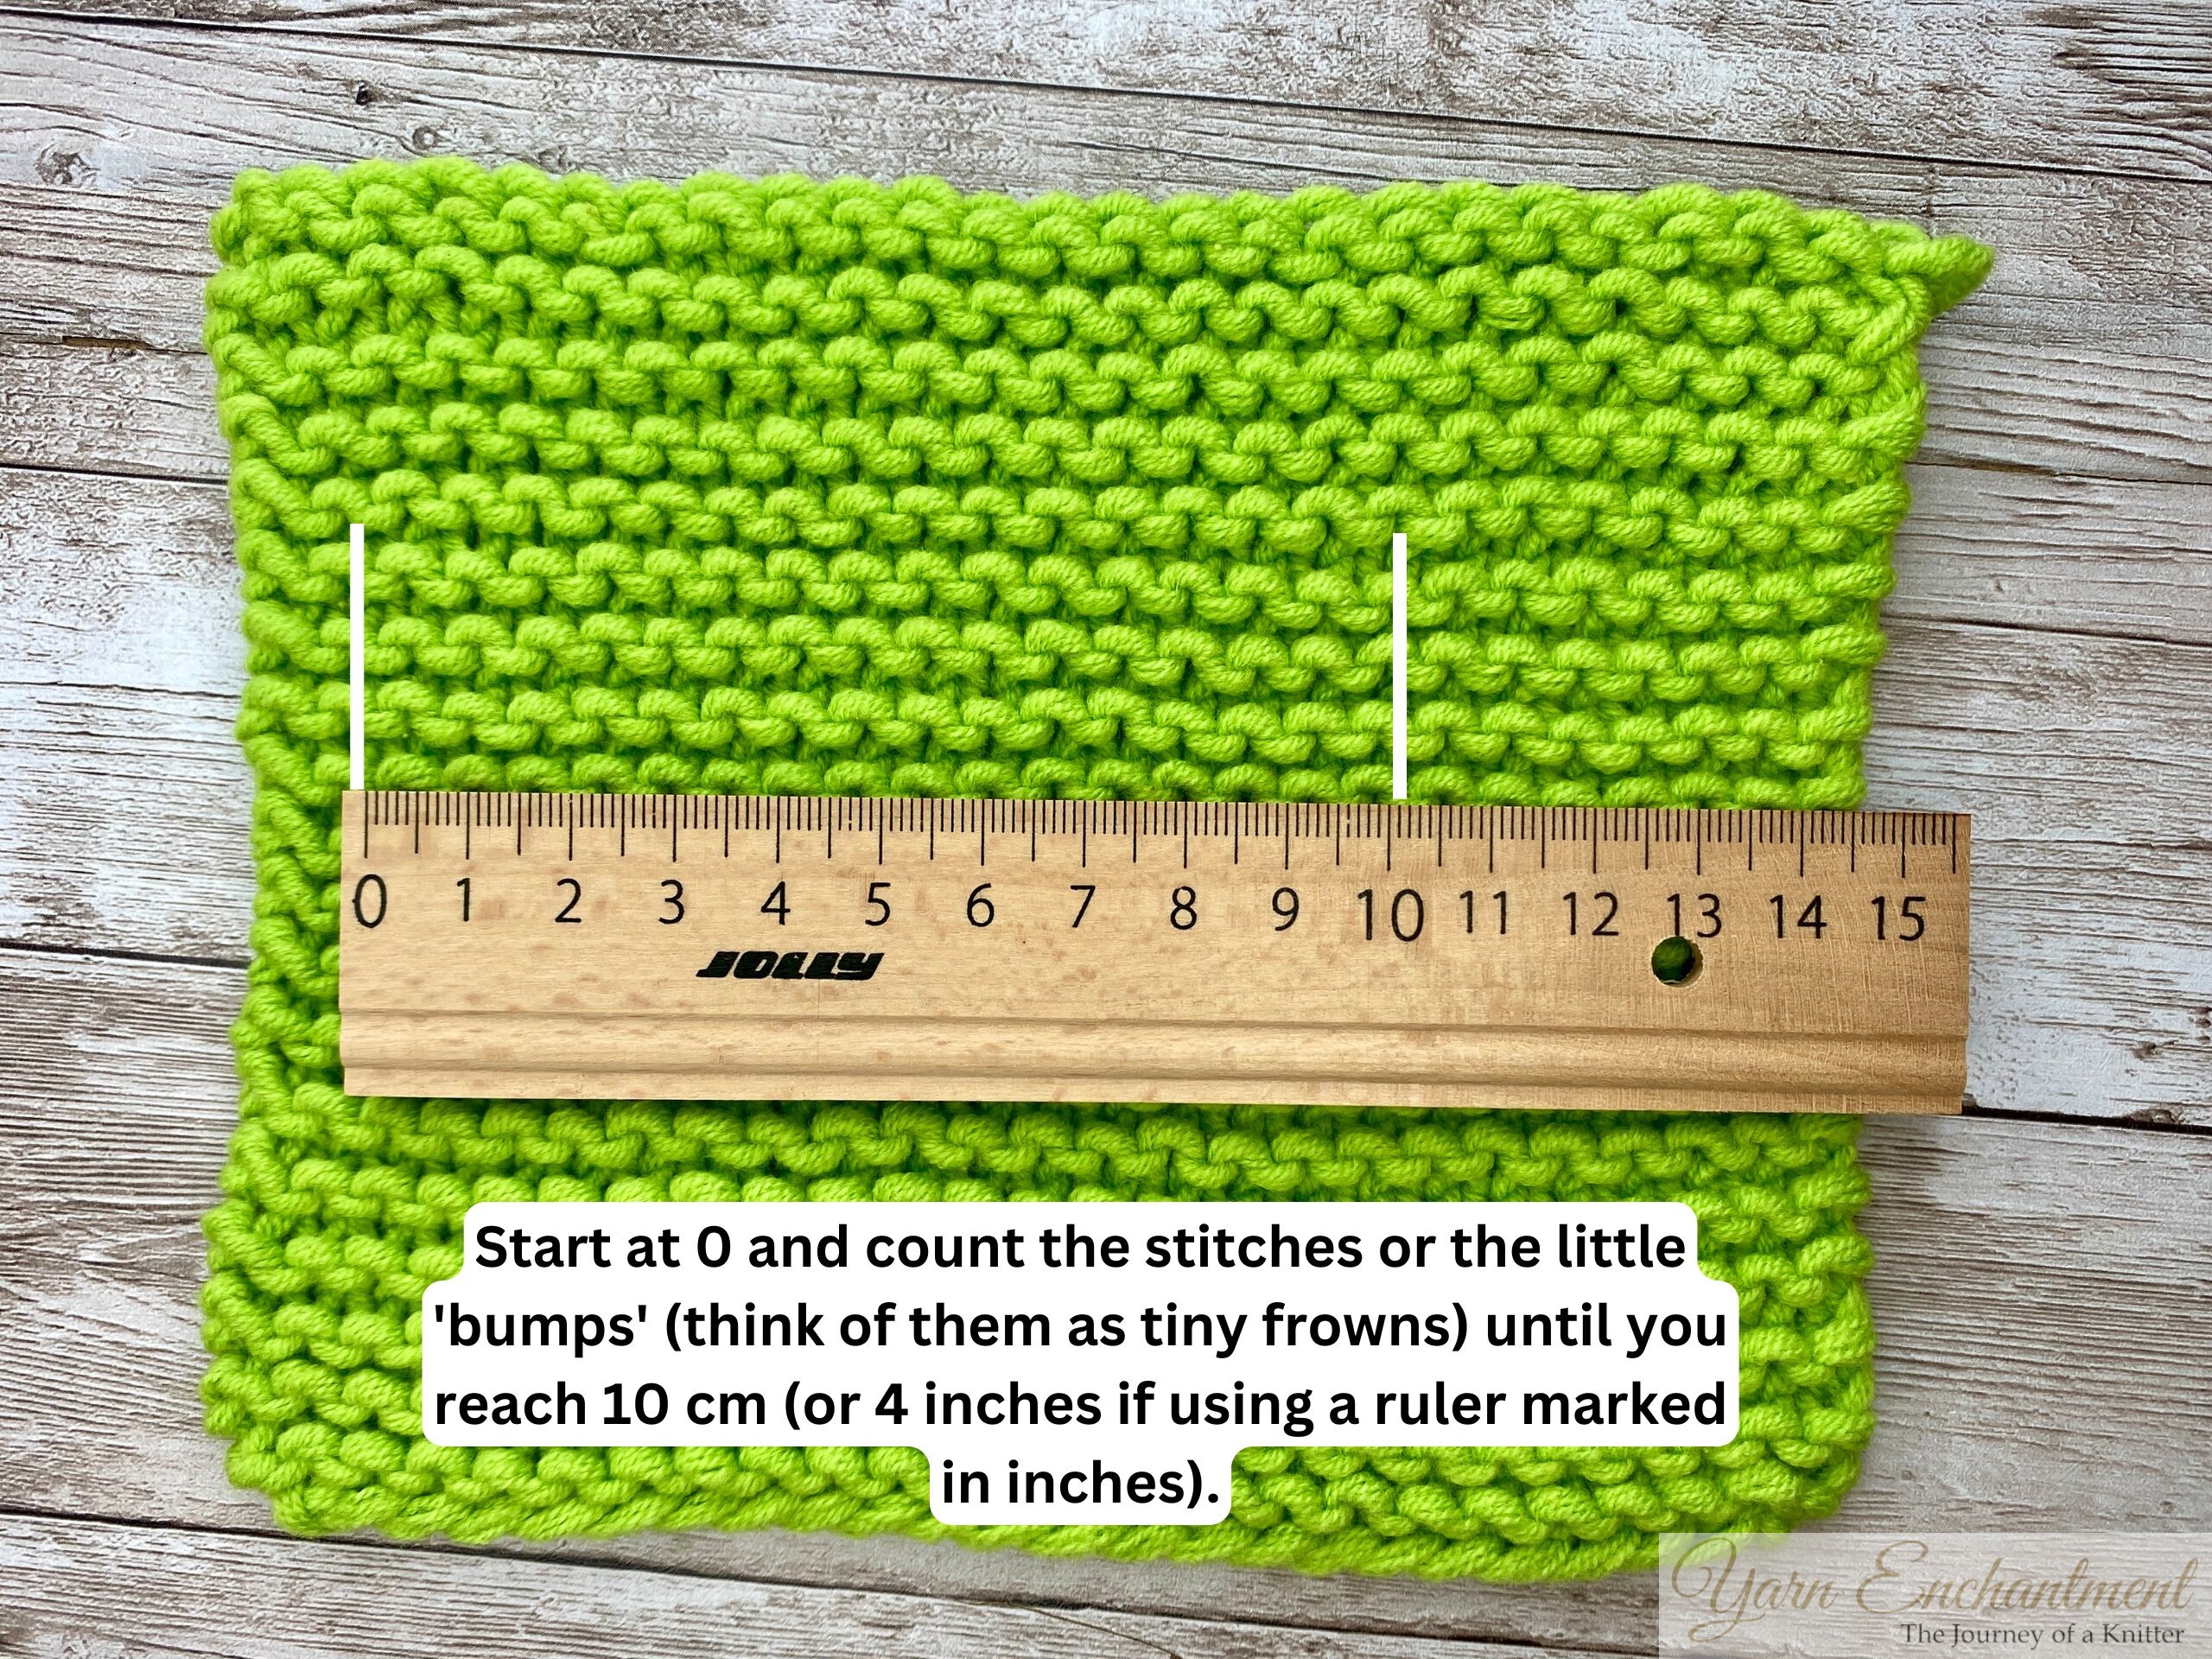
- Cast on enough stitches for at least a 4x4 inch (10x10 cm) square, plus a few extra stitches on each side so your measurement area is in the middle.
- Personally, I aim for about a 12x12 cm swatch - it gives me plenty of space to measure accurately.
- Work in garter stitch until your piece is a square.
- Wash and block your swatch before measuring - garter stitch can relax and change size after blocking, and you want to measure it in its “finished” state.
- Cast on enough stitches for at least a 4x4 inch (10x10 cm) square, plus a few extra stitches on each side so your measurement area is in the middle.
How to measure your gauge:
- Lay your swatch completely flat.
- Place a ruler or gauge tool across the middle - avoid the edges (they can distort measurements).
- Count stitches and rows over exactly 10 cm / 4 inches.
- Include partial stitches if they’re in your 10 cm section - they matter!
 |  | Place a ruler or gauge tool across the middle. | Place a ruler or gauge tool across the middle. |


💡 Adjusting your needle size: Quick tip to remember:
Bigger needles = fewer stitches. Smaller needles = more stitches.
Frequently Asked Questions
Q: Is garter stitch good for beginners?
Yes! It’s the easiest to learn and hides a lot of mistakes.
Q: Does garter stitch curl?
Nope, it lies completely flat, which is why it’s a beginner favorite.
Q: Can I knit garter stitch in the round?
Yes, but you must alternate knit and purl rounds.
Q: Can I use the garter stitch as a border stitch?
Absolutely! The garter stitch is an excellent choice for a border because it lies flat and prevents curling, making it ideal for edges in projects like stockinette stitch fabrics.
Q: What does “knit X rows in garter stitch” mean?
In knitting, when a pattern says to "knit X rows in garter stitch", it means you will knit the stated number of rows using the garter stitch technique - knitting every stitch on every row.
In garter stitch, each visible ridge on your fabric is made up of two rows of knitting. For example, if you knit 4 rows in garter stitch, you will see 2 ridges.
The exact number of rows you knit will depend on your pattern, and counting rows accurately is important so your project turns out the right size.
Final Thoughts
And that’s it - everything you need to know about the garter stitch! From how to knit it, to counting rows and stitches for a perfect garter stitch gauge, you’re all set to create something beautiful. If you’re more of a visual learner, don’t forget to check out the video tutorial, it’s packed with tips to guide you along the way. And if you have any questions at all, I’m just an email or comment away. Don’t hesitate to reach out, I’m always happy to help!
So grab your needles, cast on, and start. I’ll be cheering for you. 💛
Until then, happy knitting!
A Little Way to Say Thanks
You Might Also Like


 |
|
Join the Cozy Corner Newsletter!
Hey there, creative soul! Welcome to the Yarn Enchantment Newsletter, where we celebrate all things cozy, crafty, and full of heart. Think of this as your friendly crafting companion - a little dose of inspiration delivered straight to your inbox, just for you. Inside, you’ll find: ✨ Exclusive patterns & tutorials - ideas you won’t find anywhere else (just for us!) 📚 Bookish crafts that bring your favorite stories to life 🧶 Tips and tricks to make your crafting journey smoother (and more fun!) 💌 Heartfelt musings on life, creativity, and the magic of making something with your own two hands Whether you’re knitting by the fire, brainstorming your next DIY project, or just looking for a little creative pick-me-up, this newsletter is here to cheer you on. Because let’s be honest - crafting isn’t just about the finished project; it’s about the joy, peace, and stories we create along the way. So grab a cup of tea, cozy up, and join me. Together, we’ll weave a little magic into everyday life - one stitch, one story, and one email at a time. P.S. I’m so glad you’re here. Let’s make something beautiful together! (Note: If you're using an ad blocker, you may encounter issues subscribing to the newsletter. To subscribe, please consider disabling your ad blocker.)
|
