

The Magic of Books and a Knitted Bookmark
February 23, 2025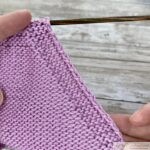
Purl 2 Together (p2tog)
March 3, 2025Enchanted Bookmark

Originally published on February 25, 2025
As I mentioned in my previous blog post, I’m excited to share the pattern for this beautiful bookmark with all of you. The video tutorial gave me a bit of trouble because some of the clips I filmed suddenly disappeared, and I had to re-film those sections. That’s why it took a little longer to complete.
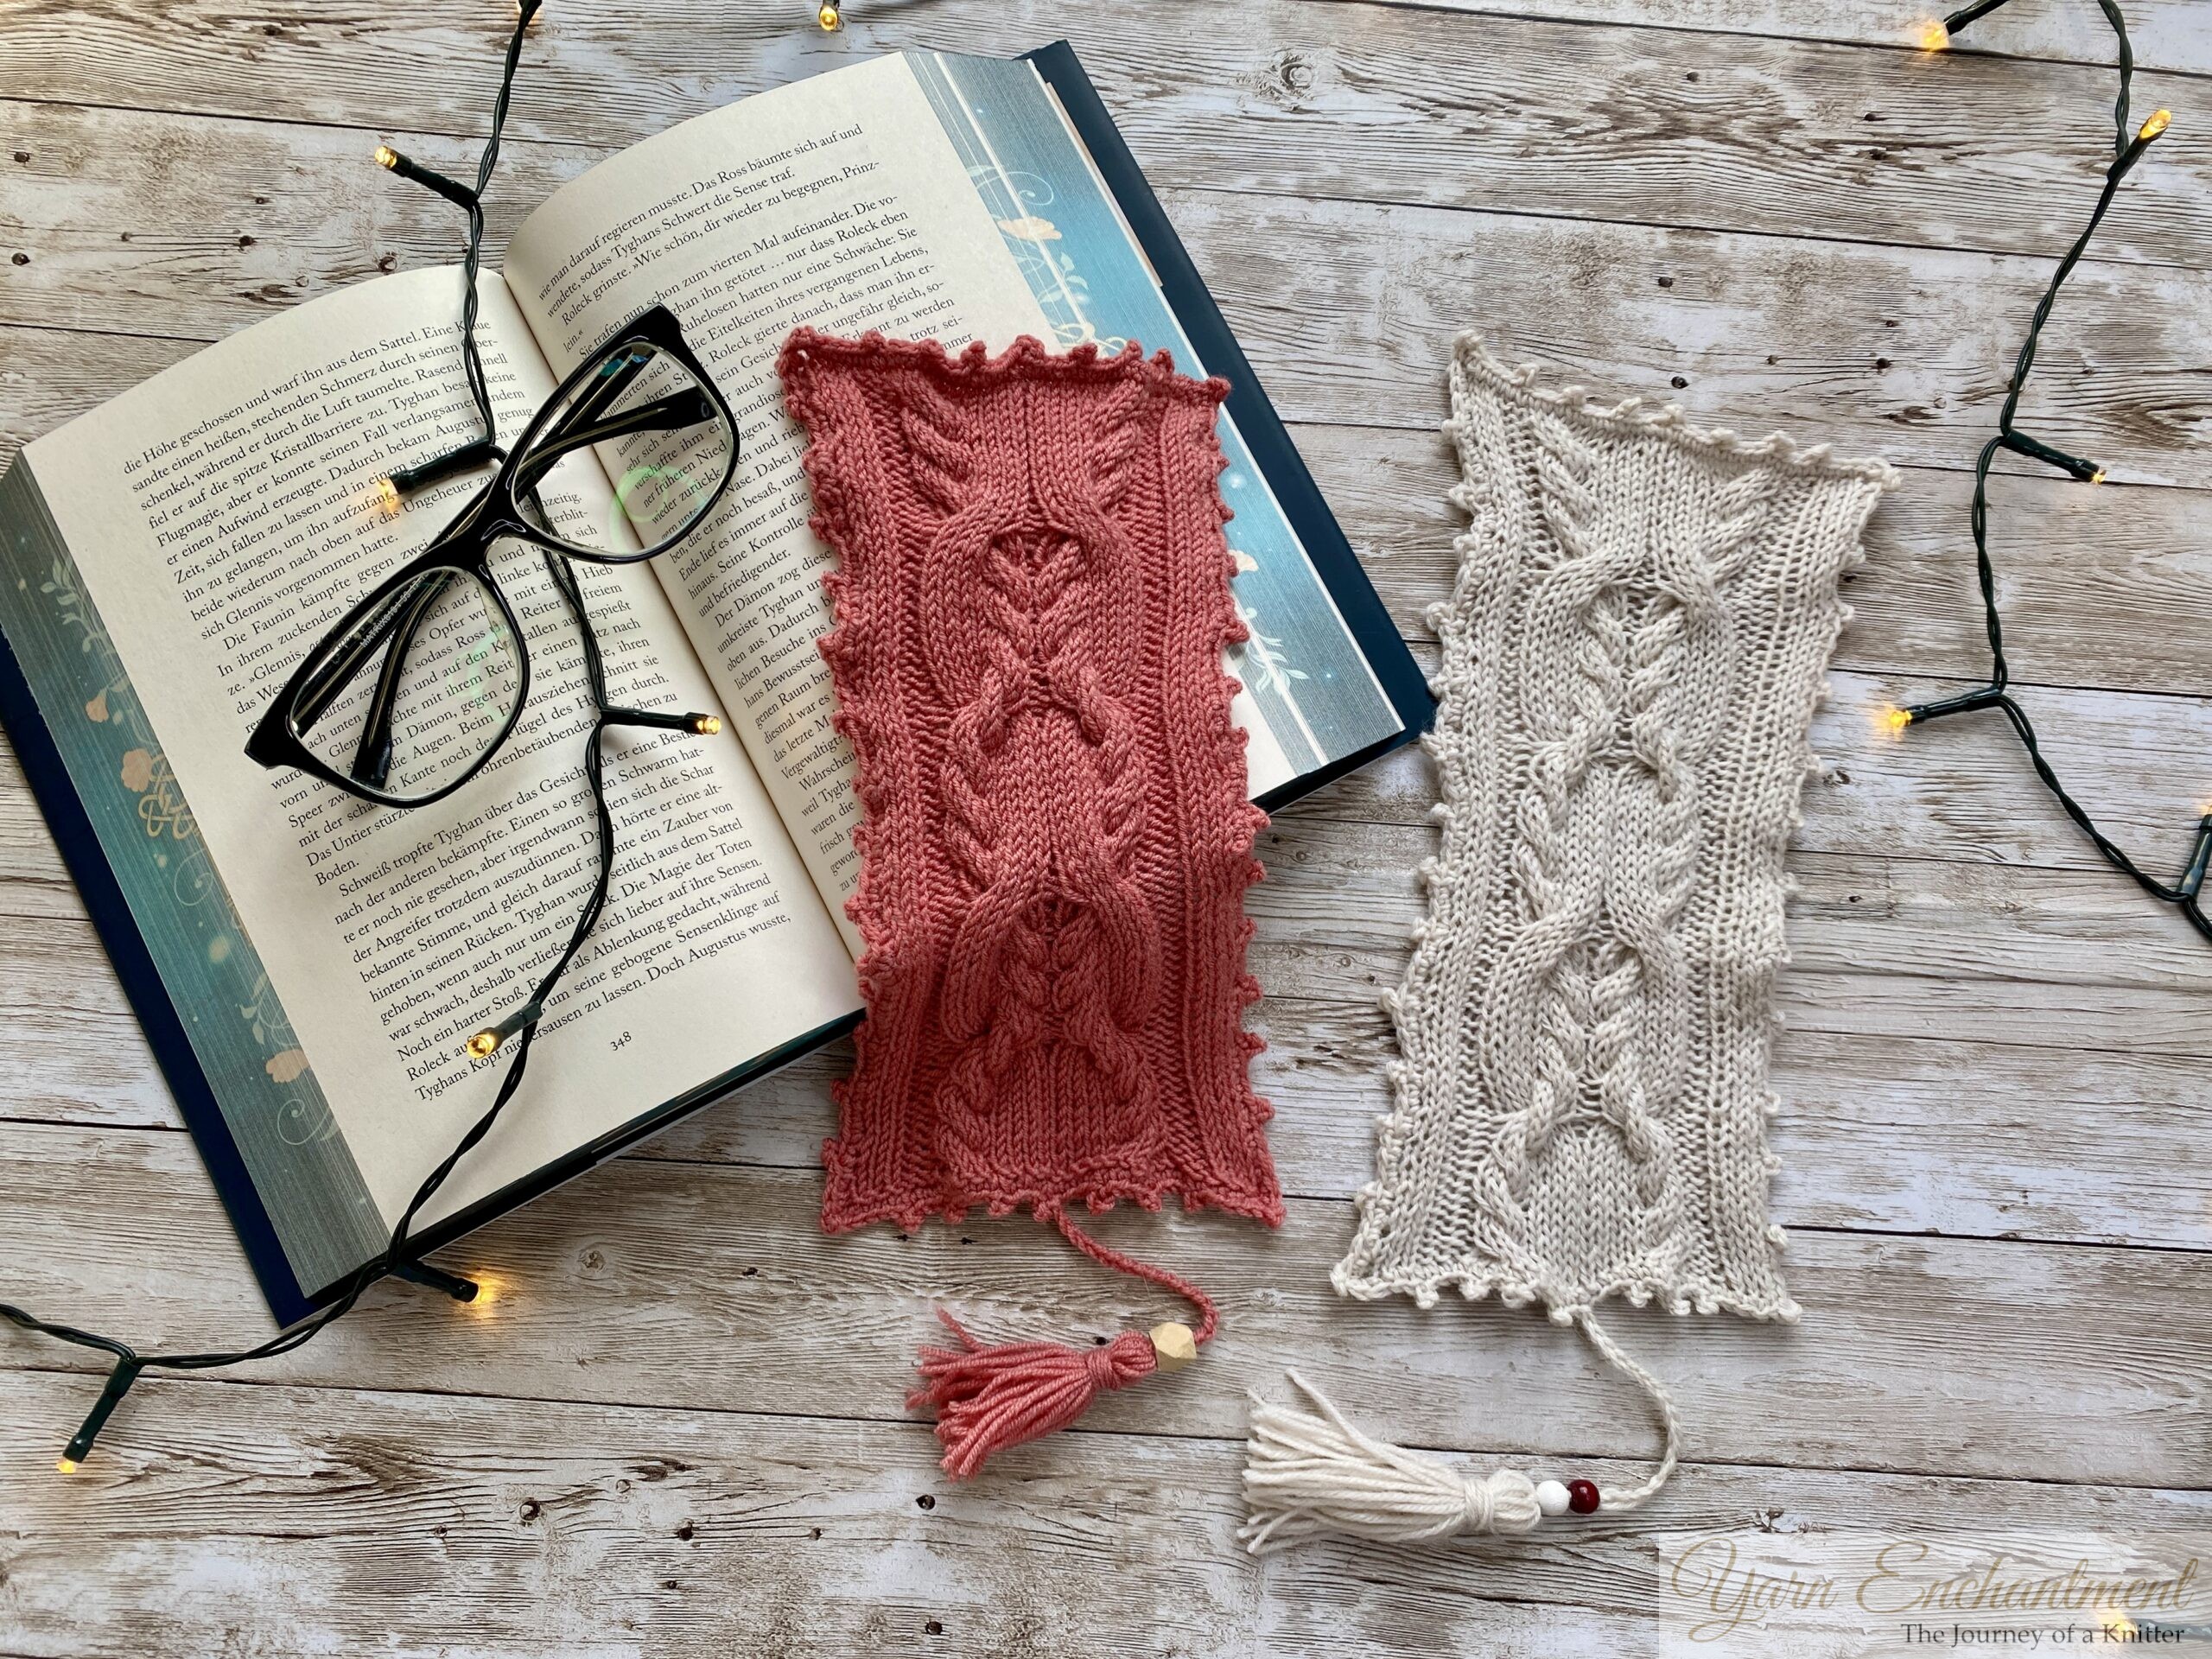
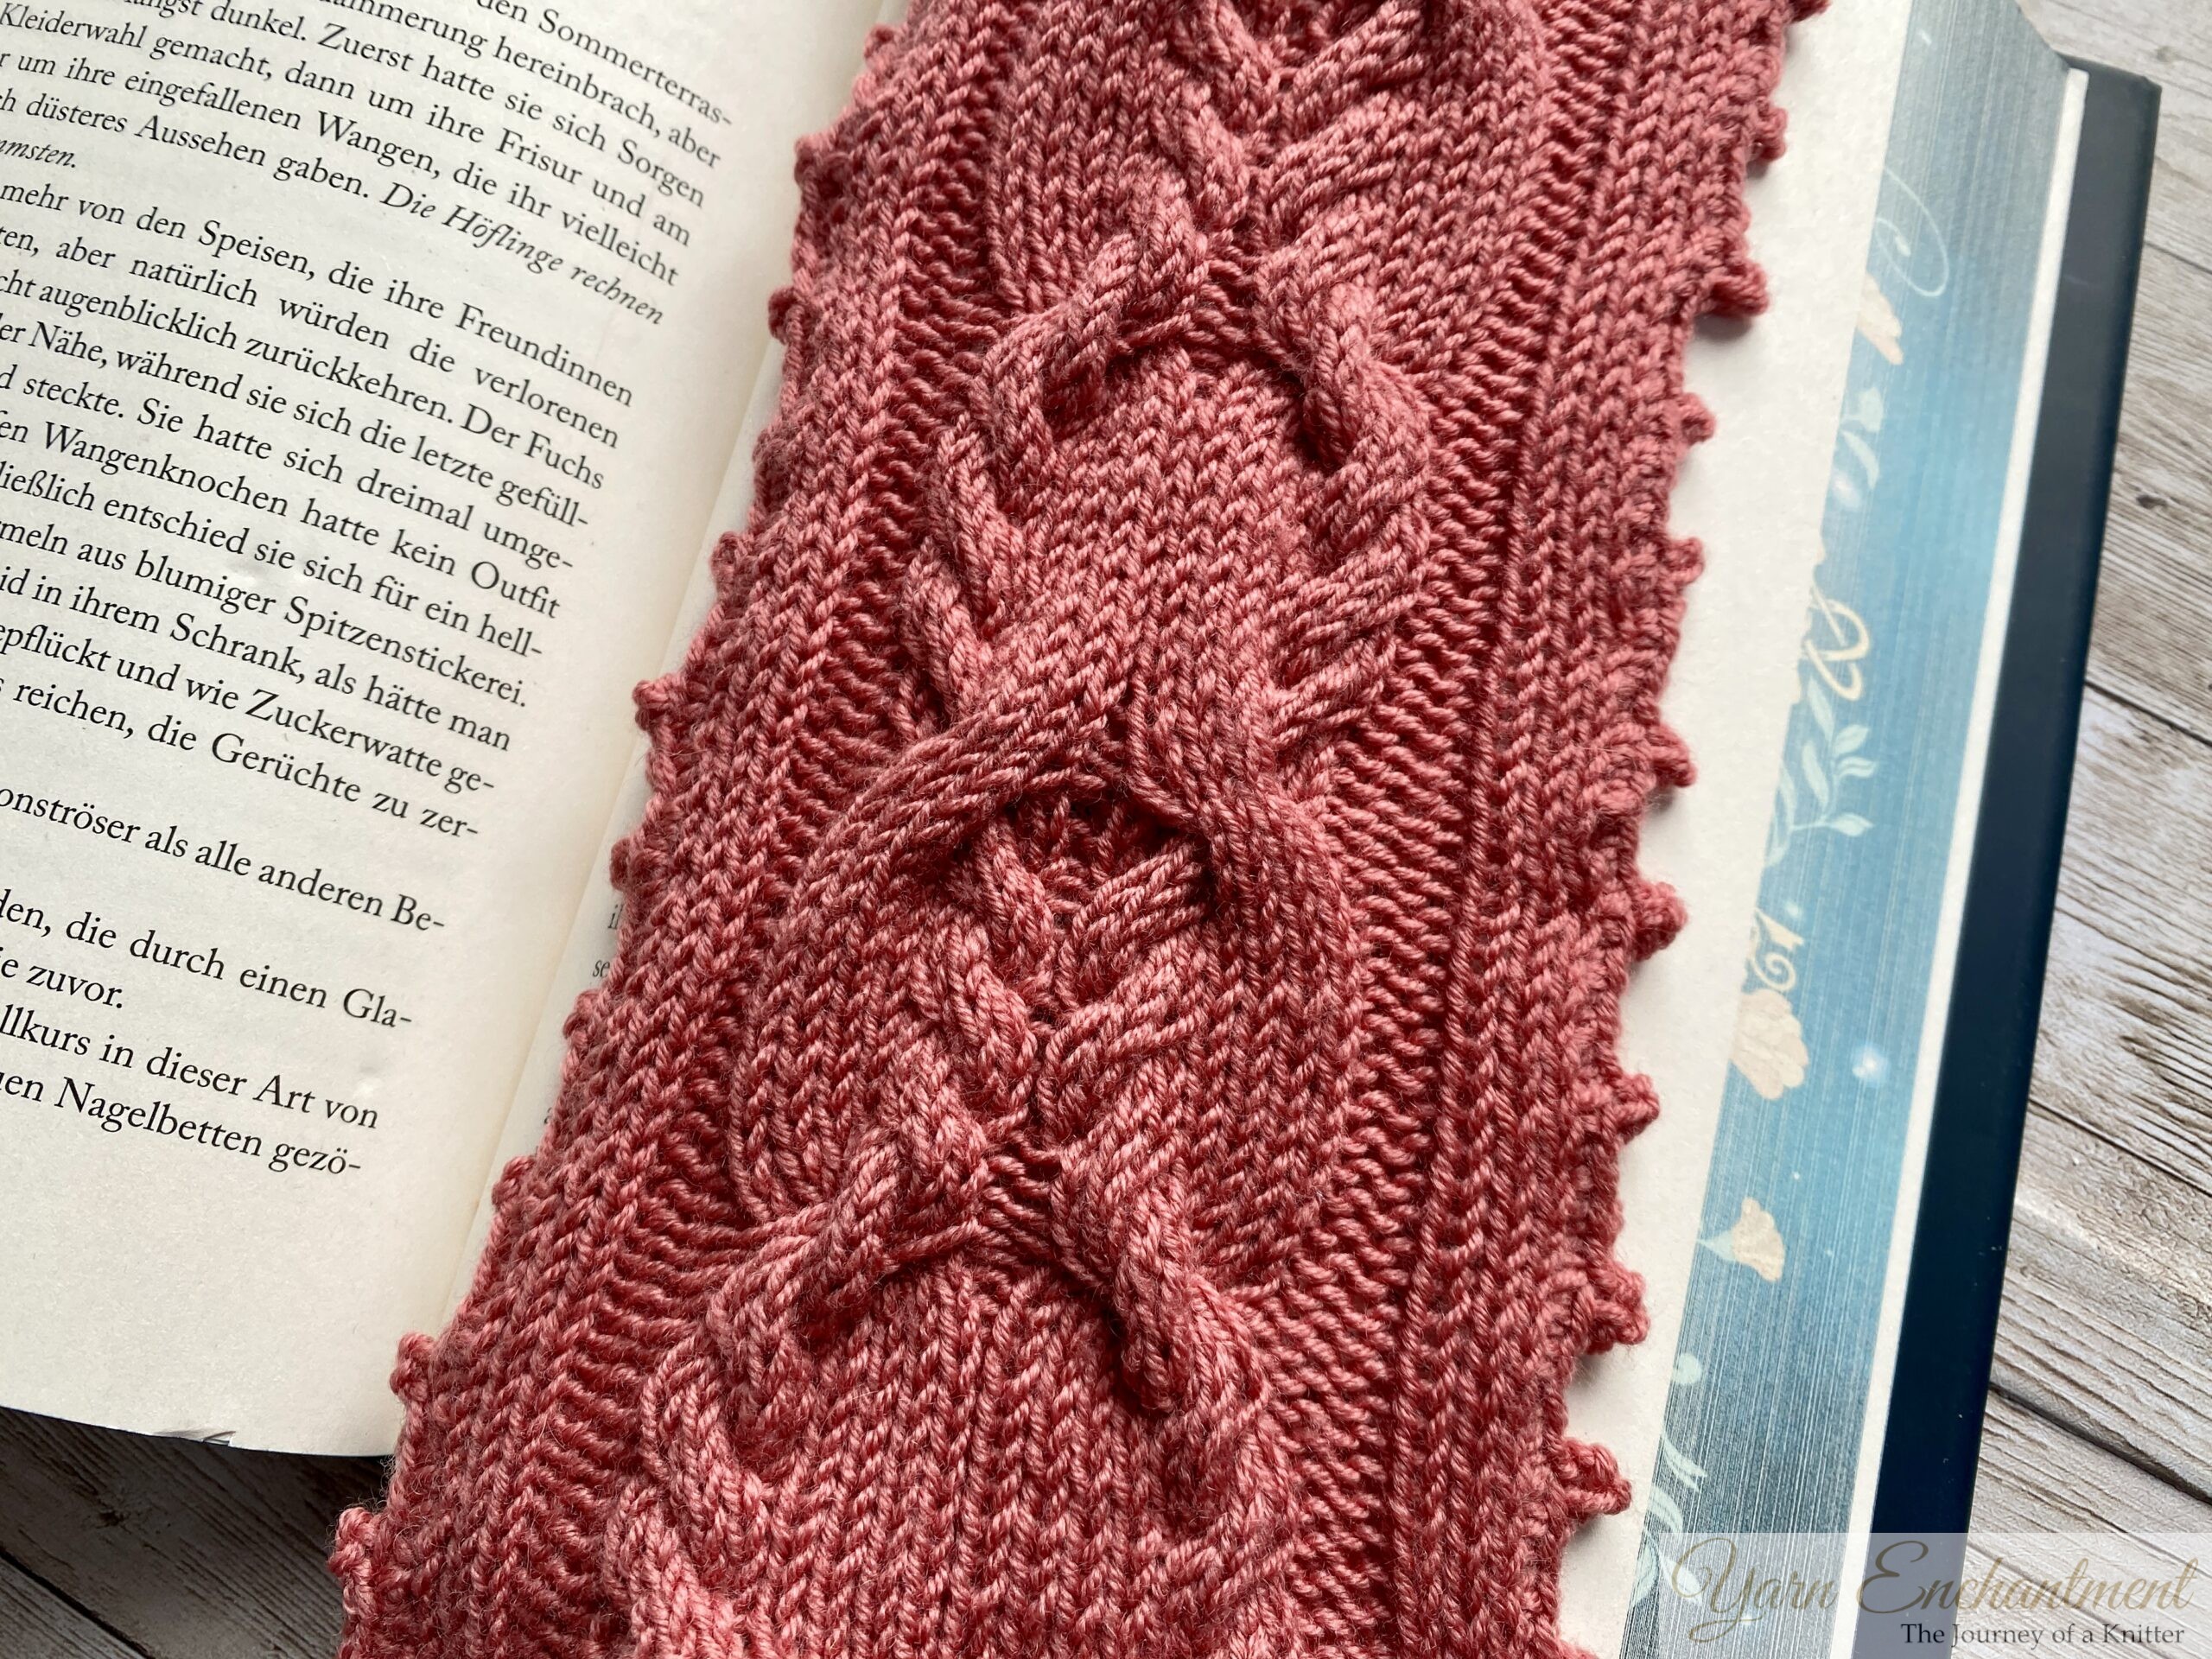
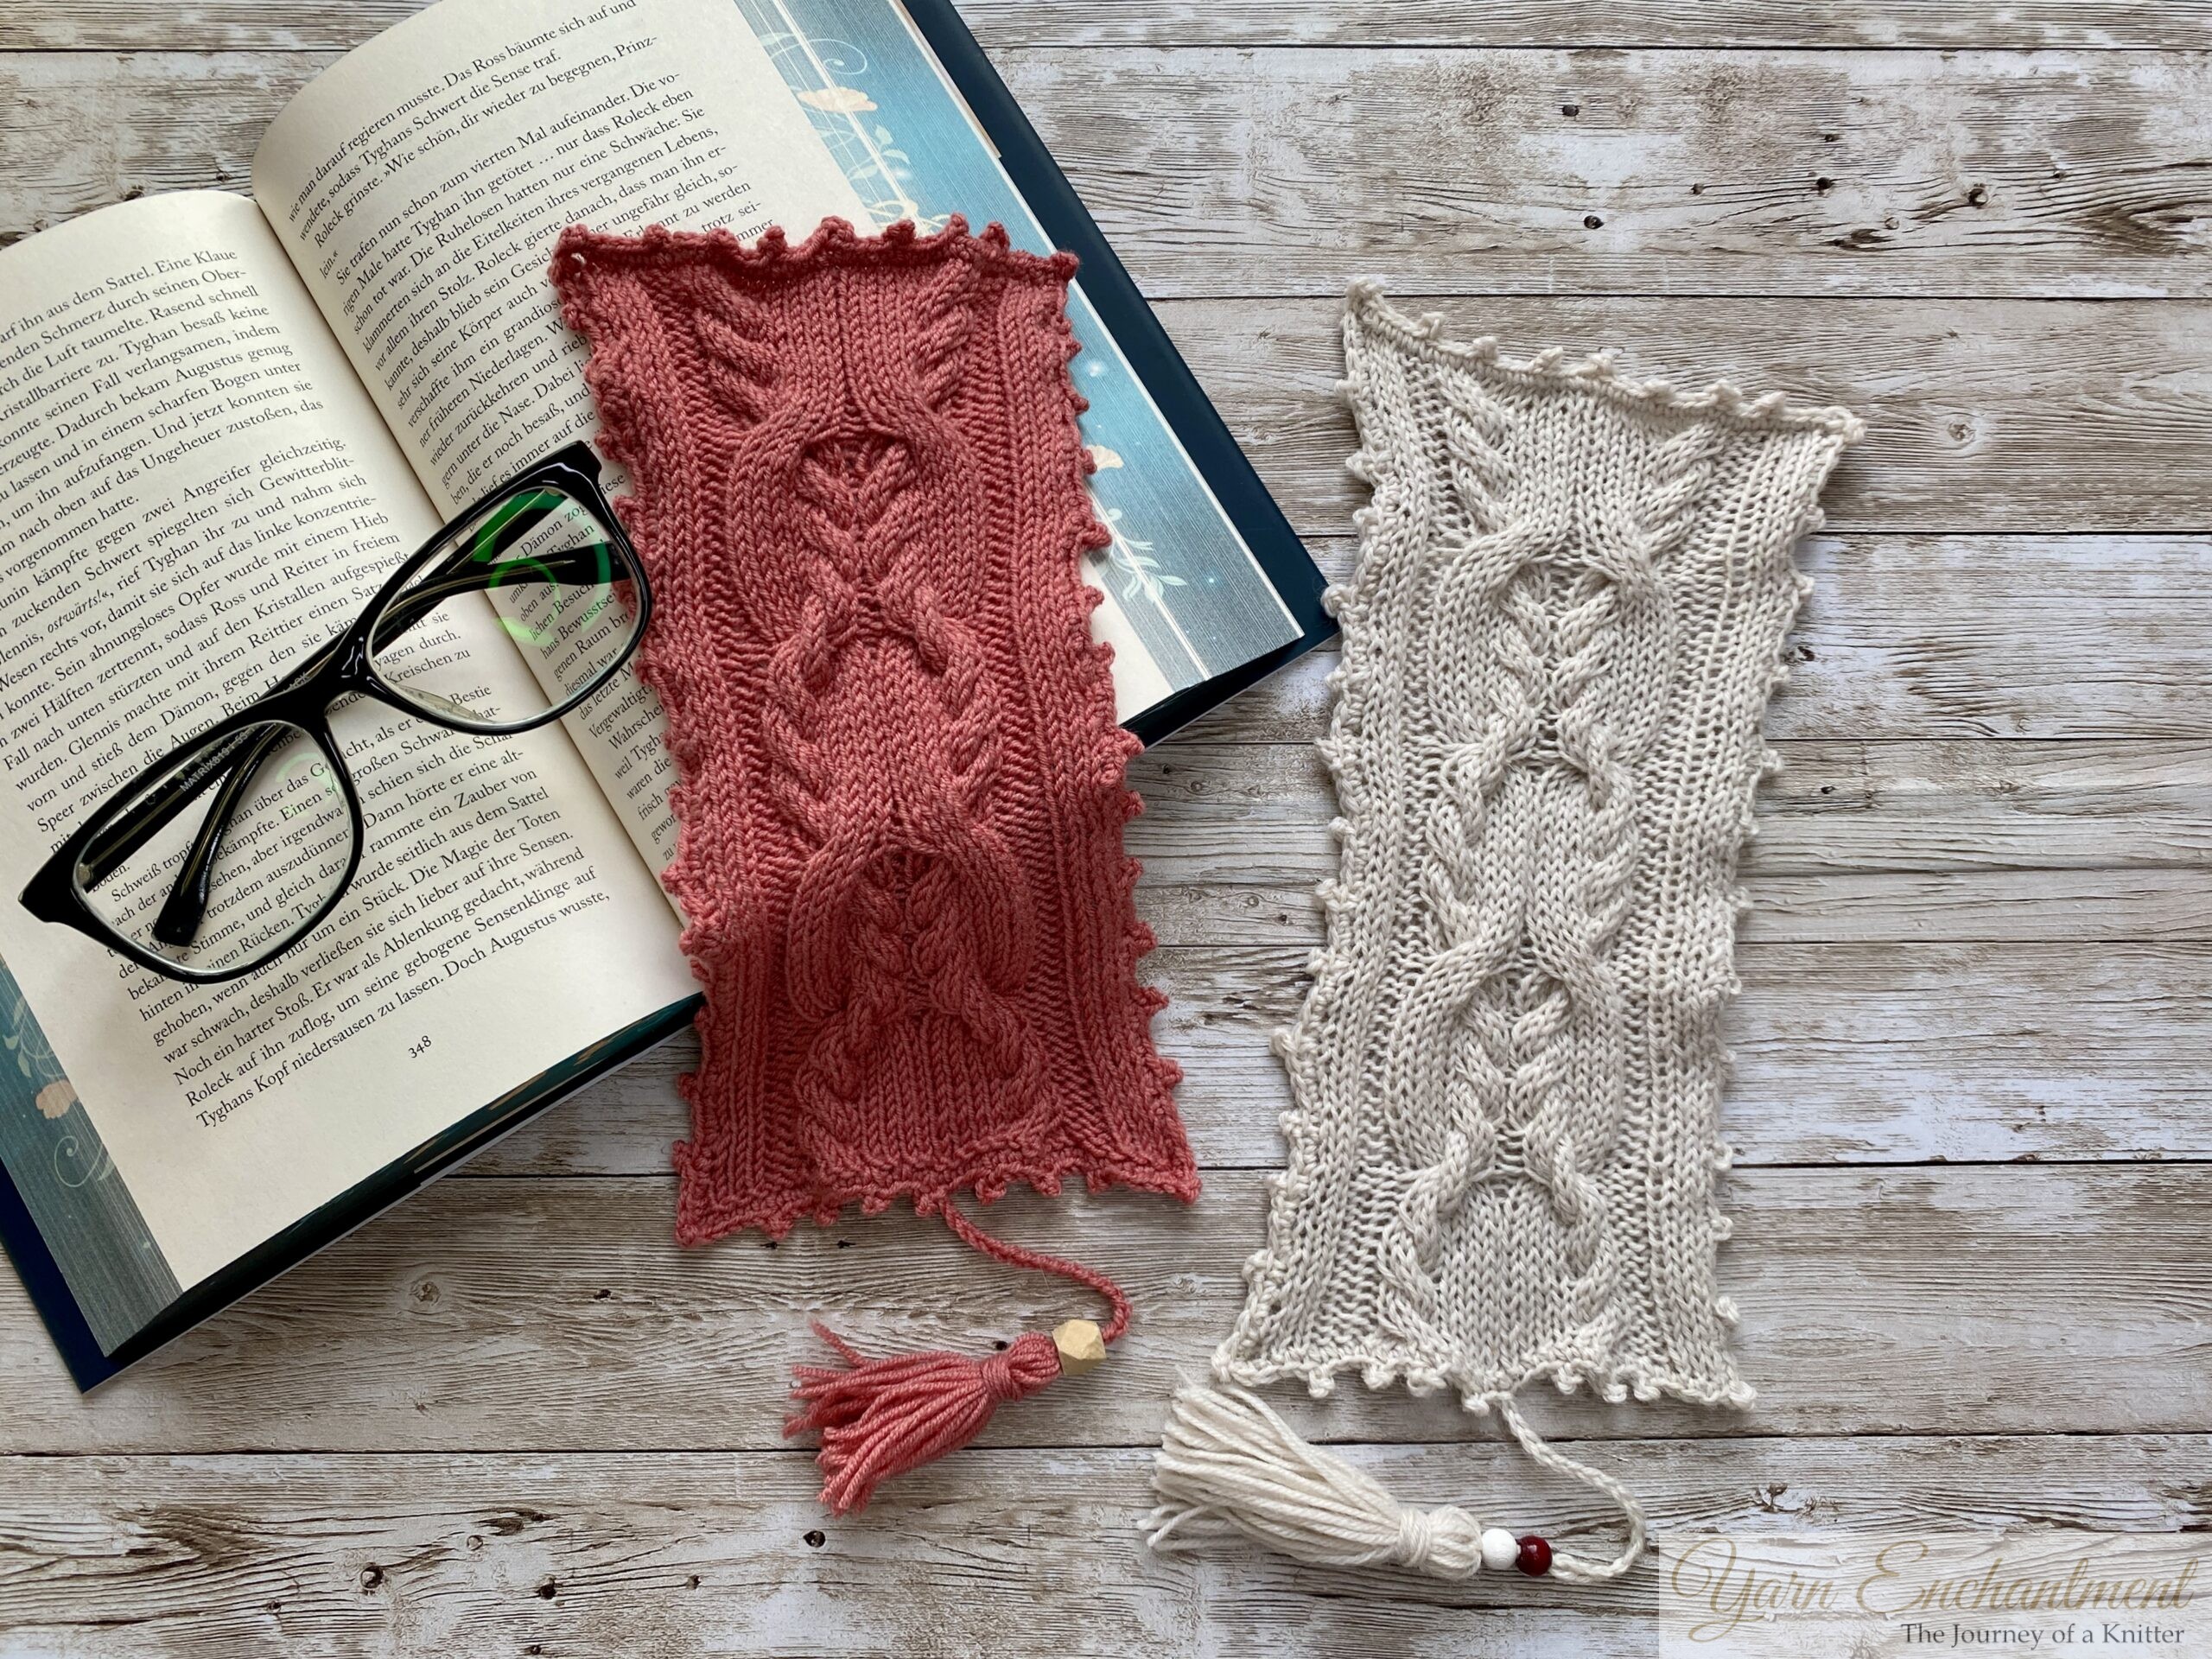
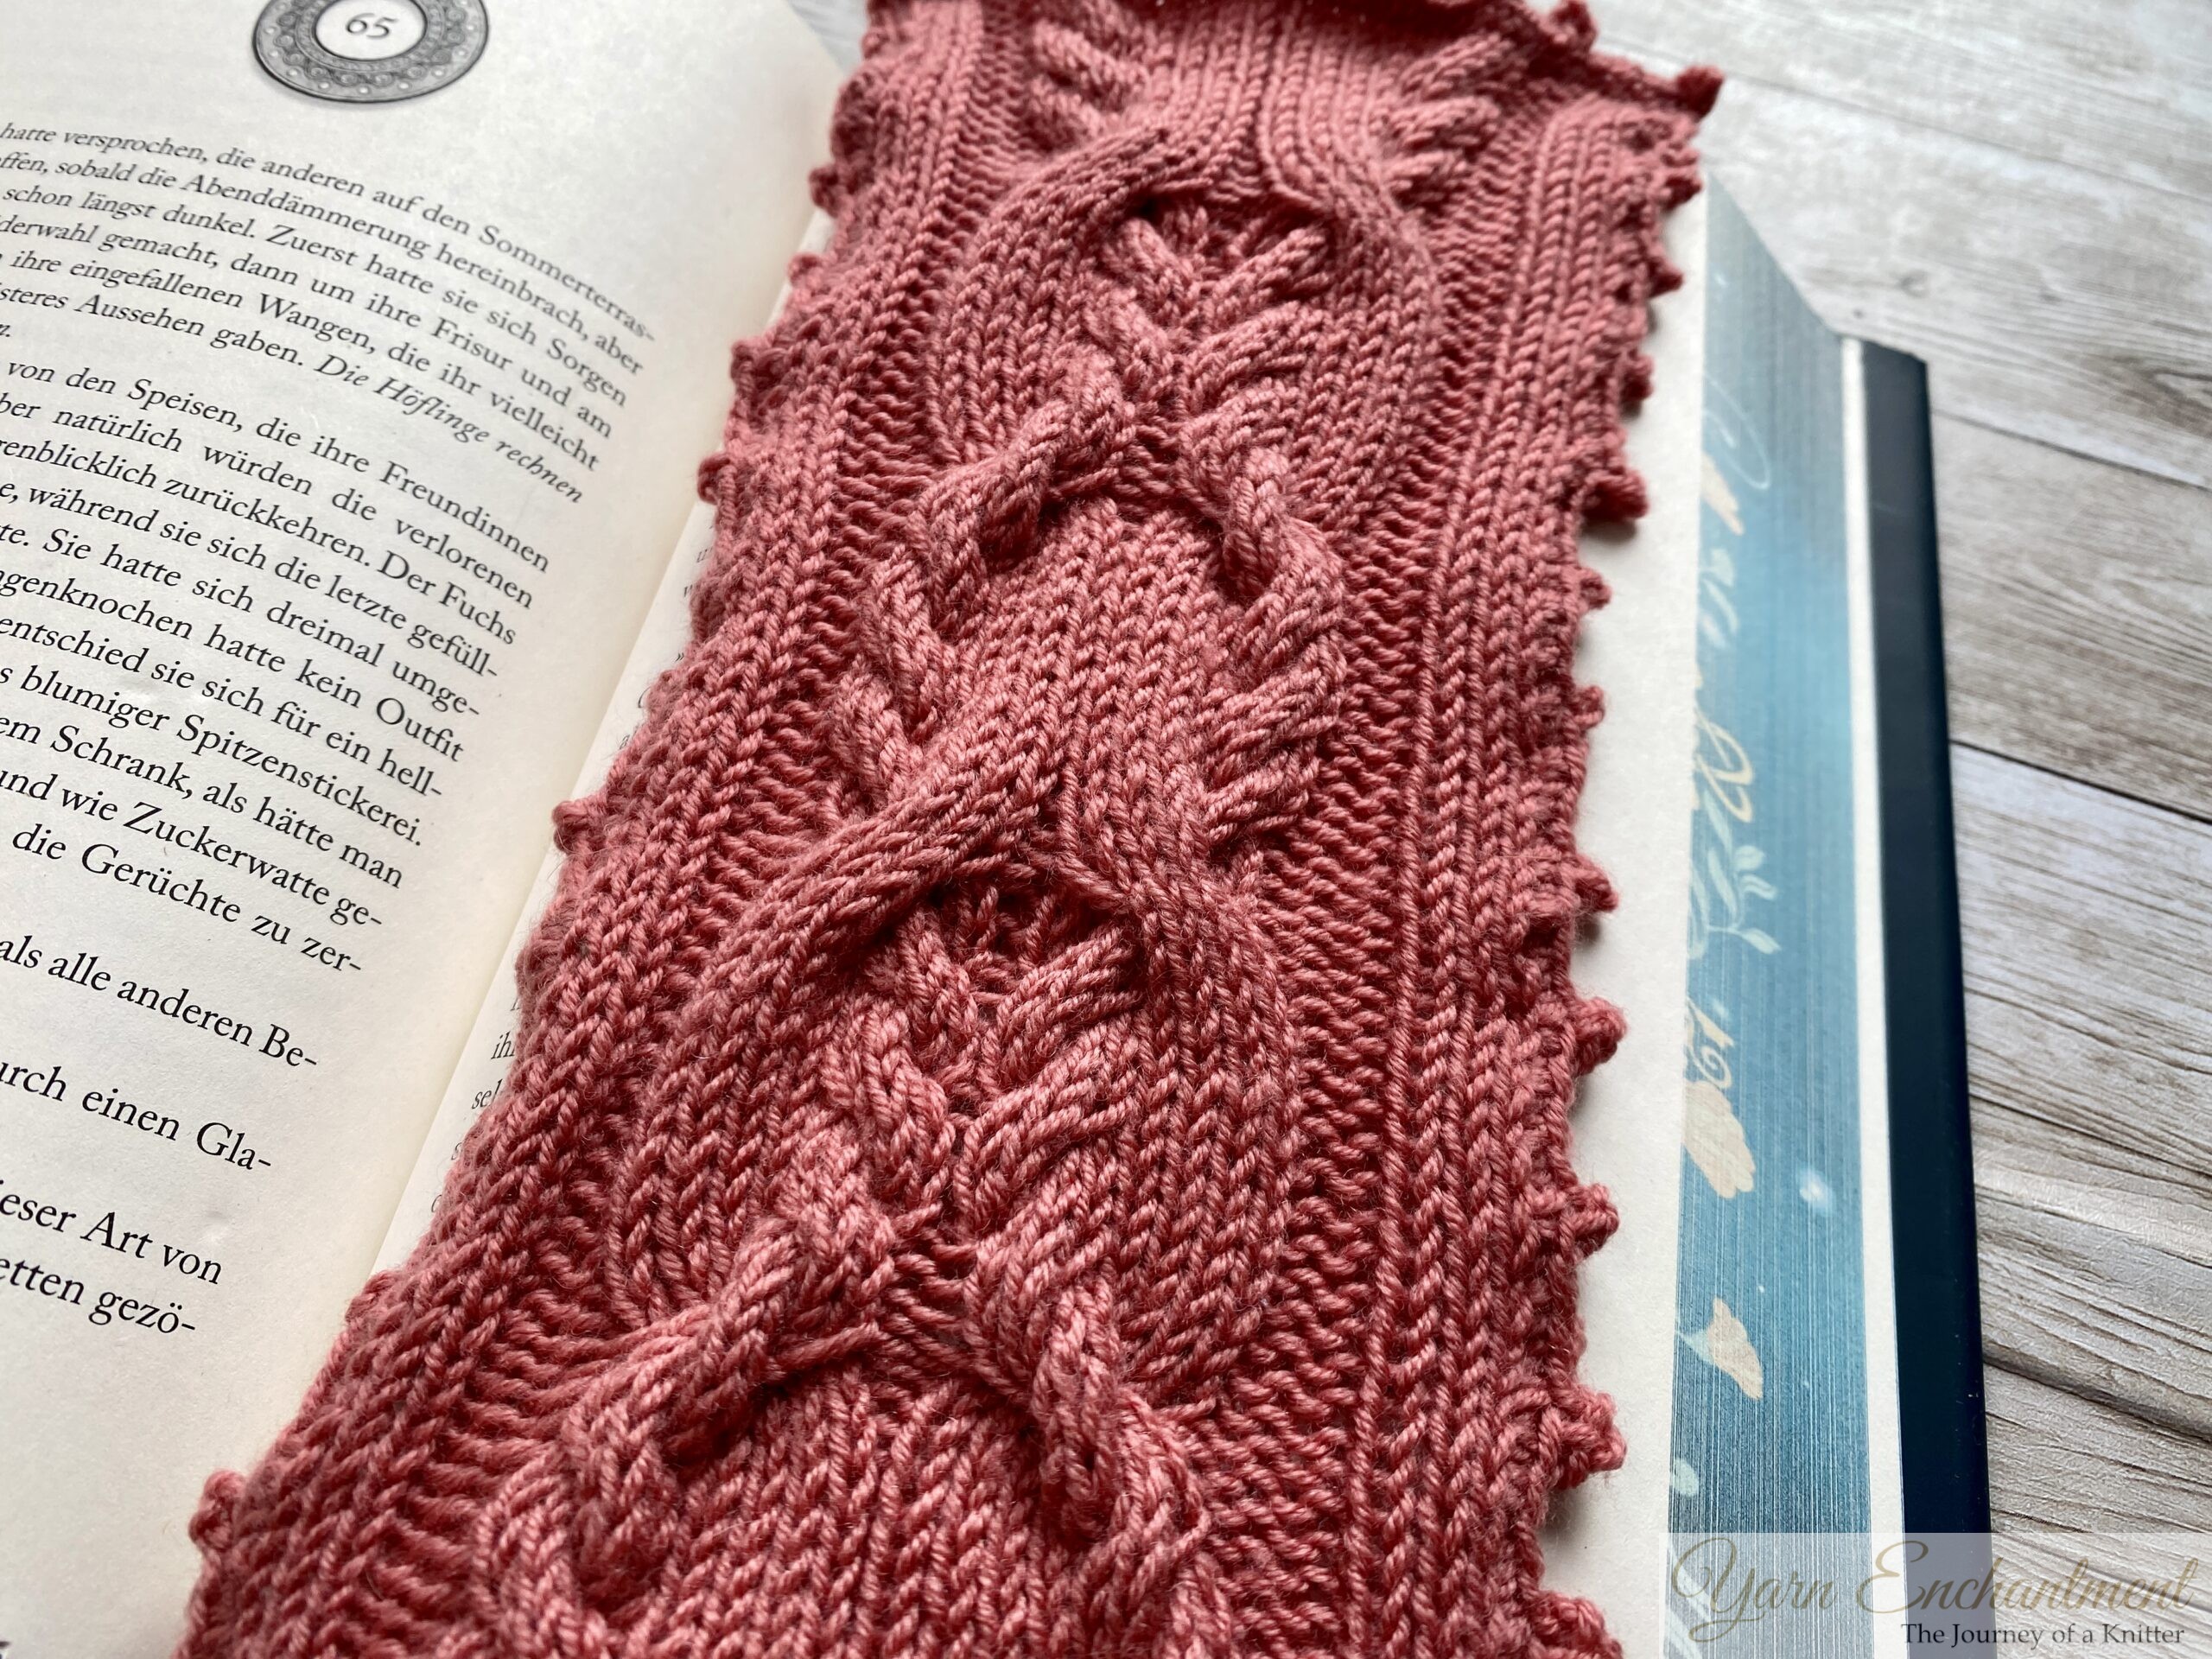
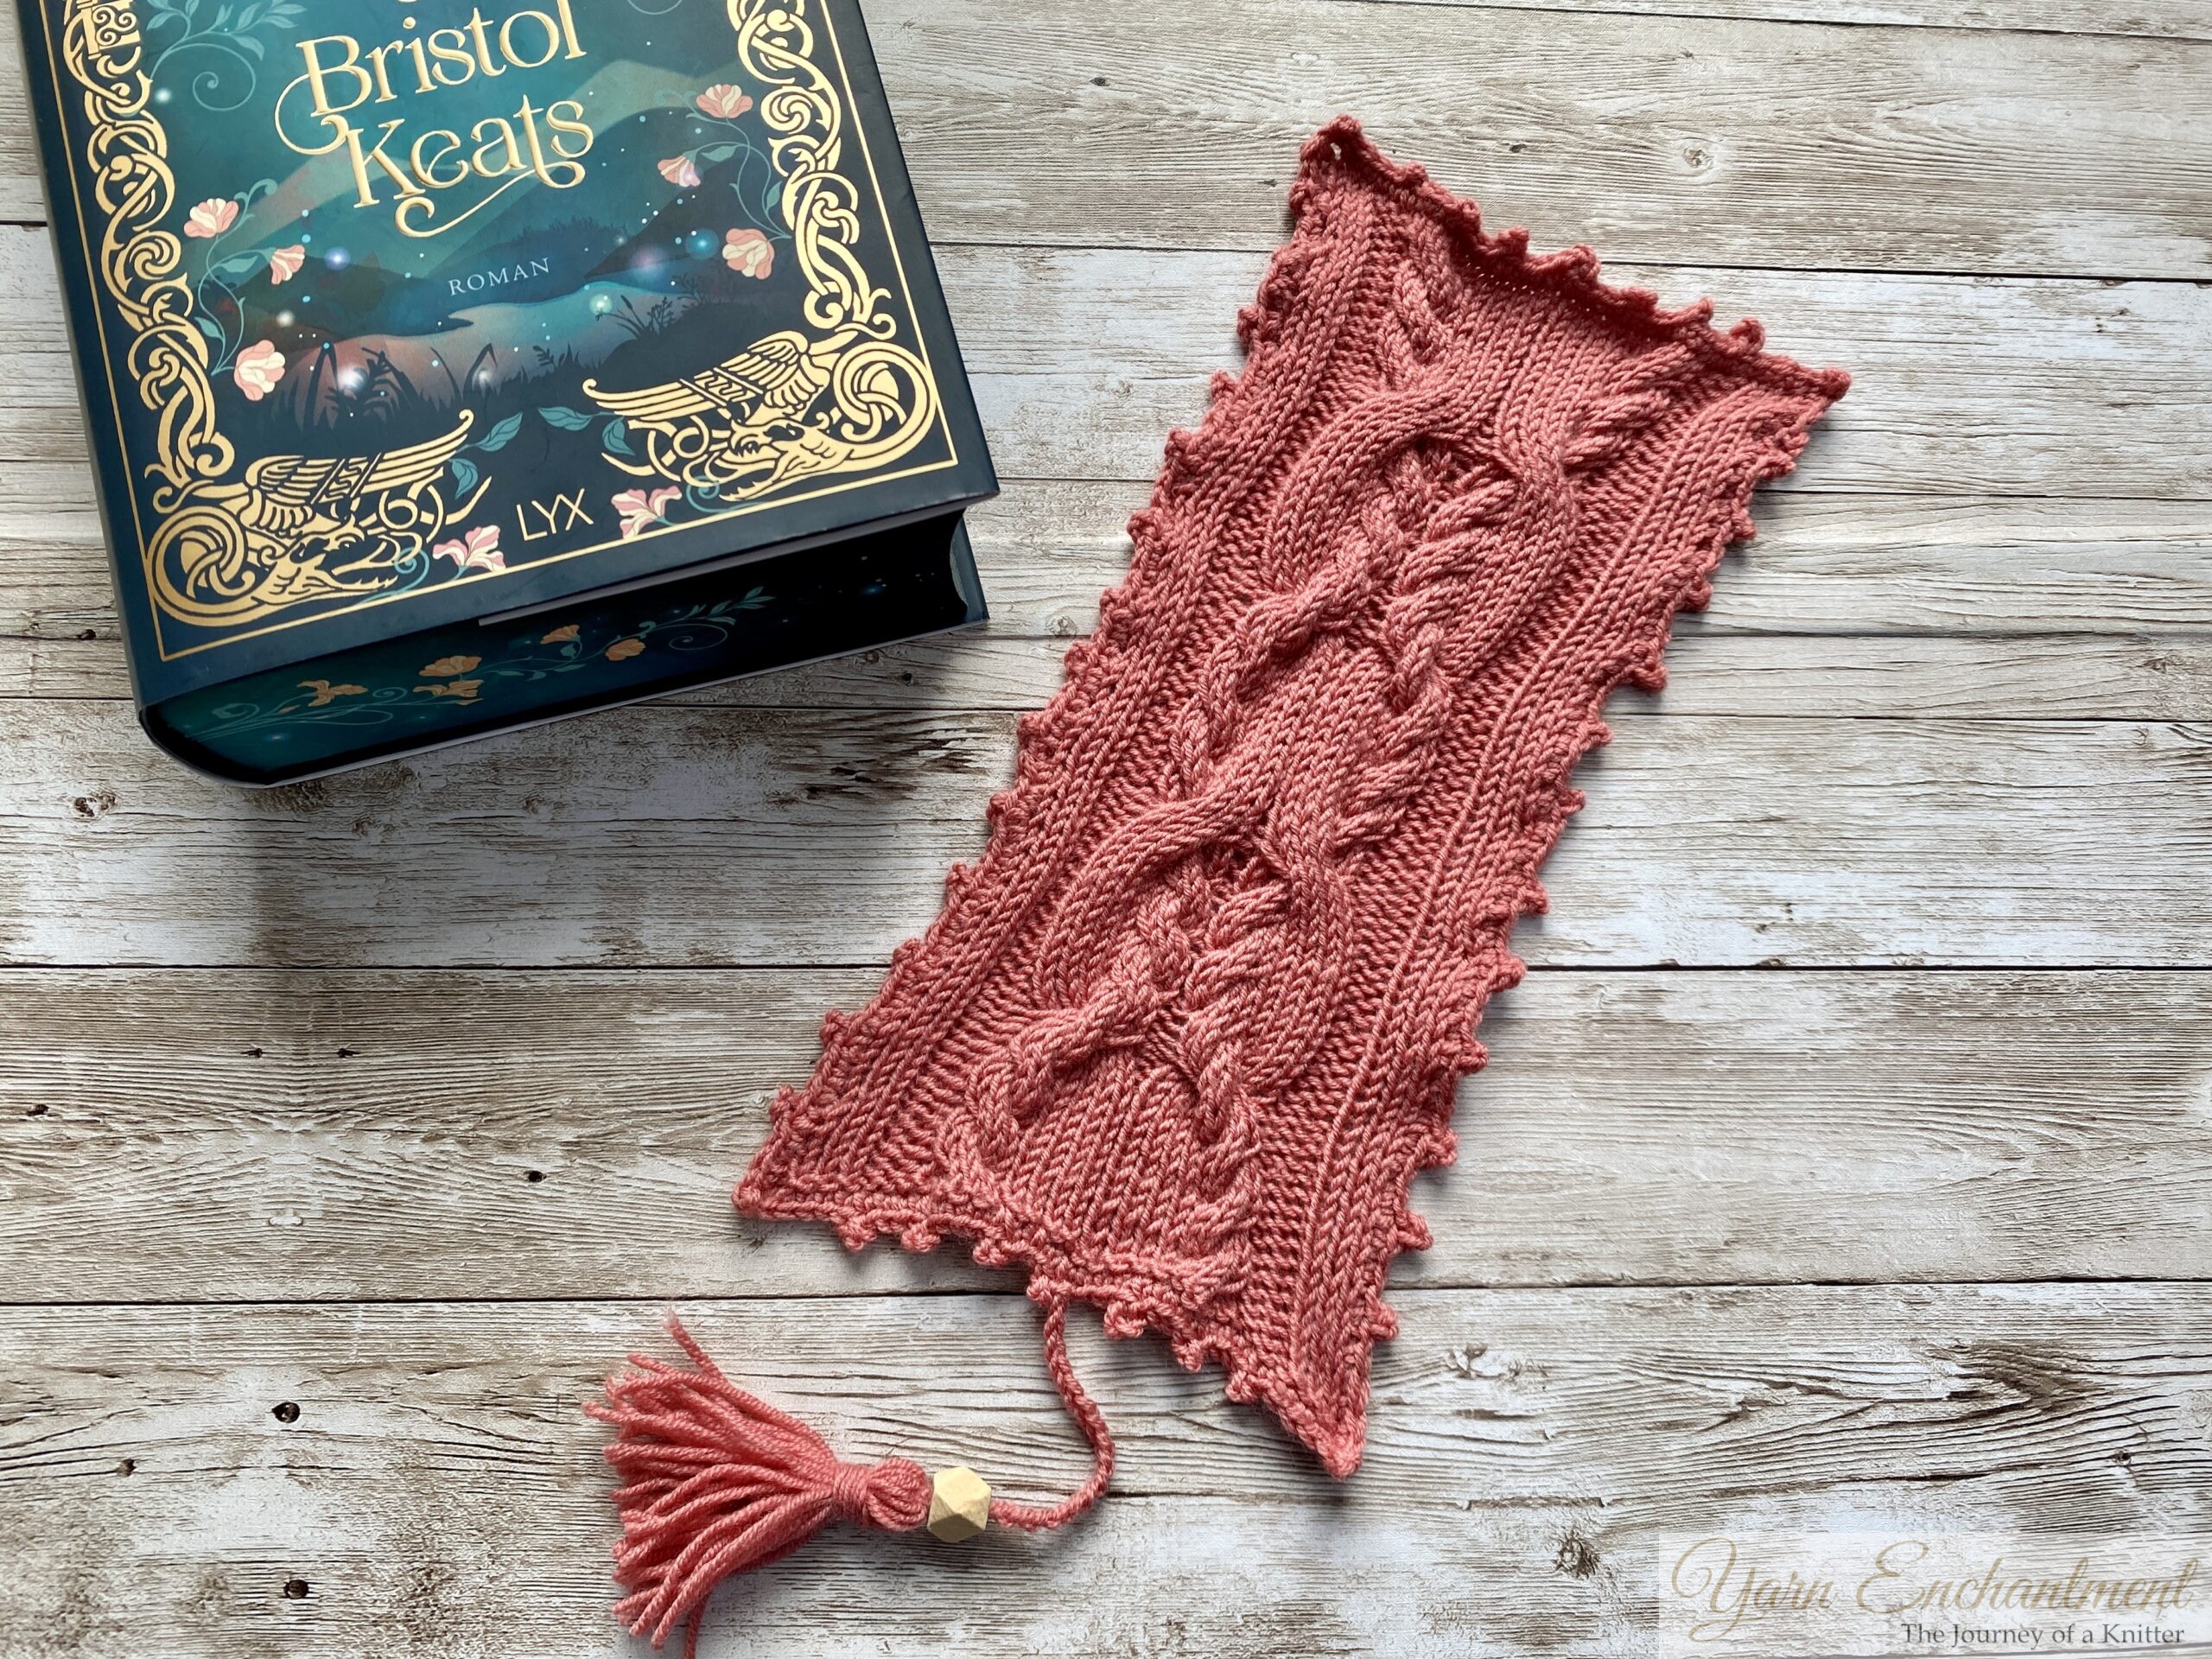
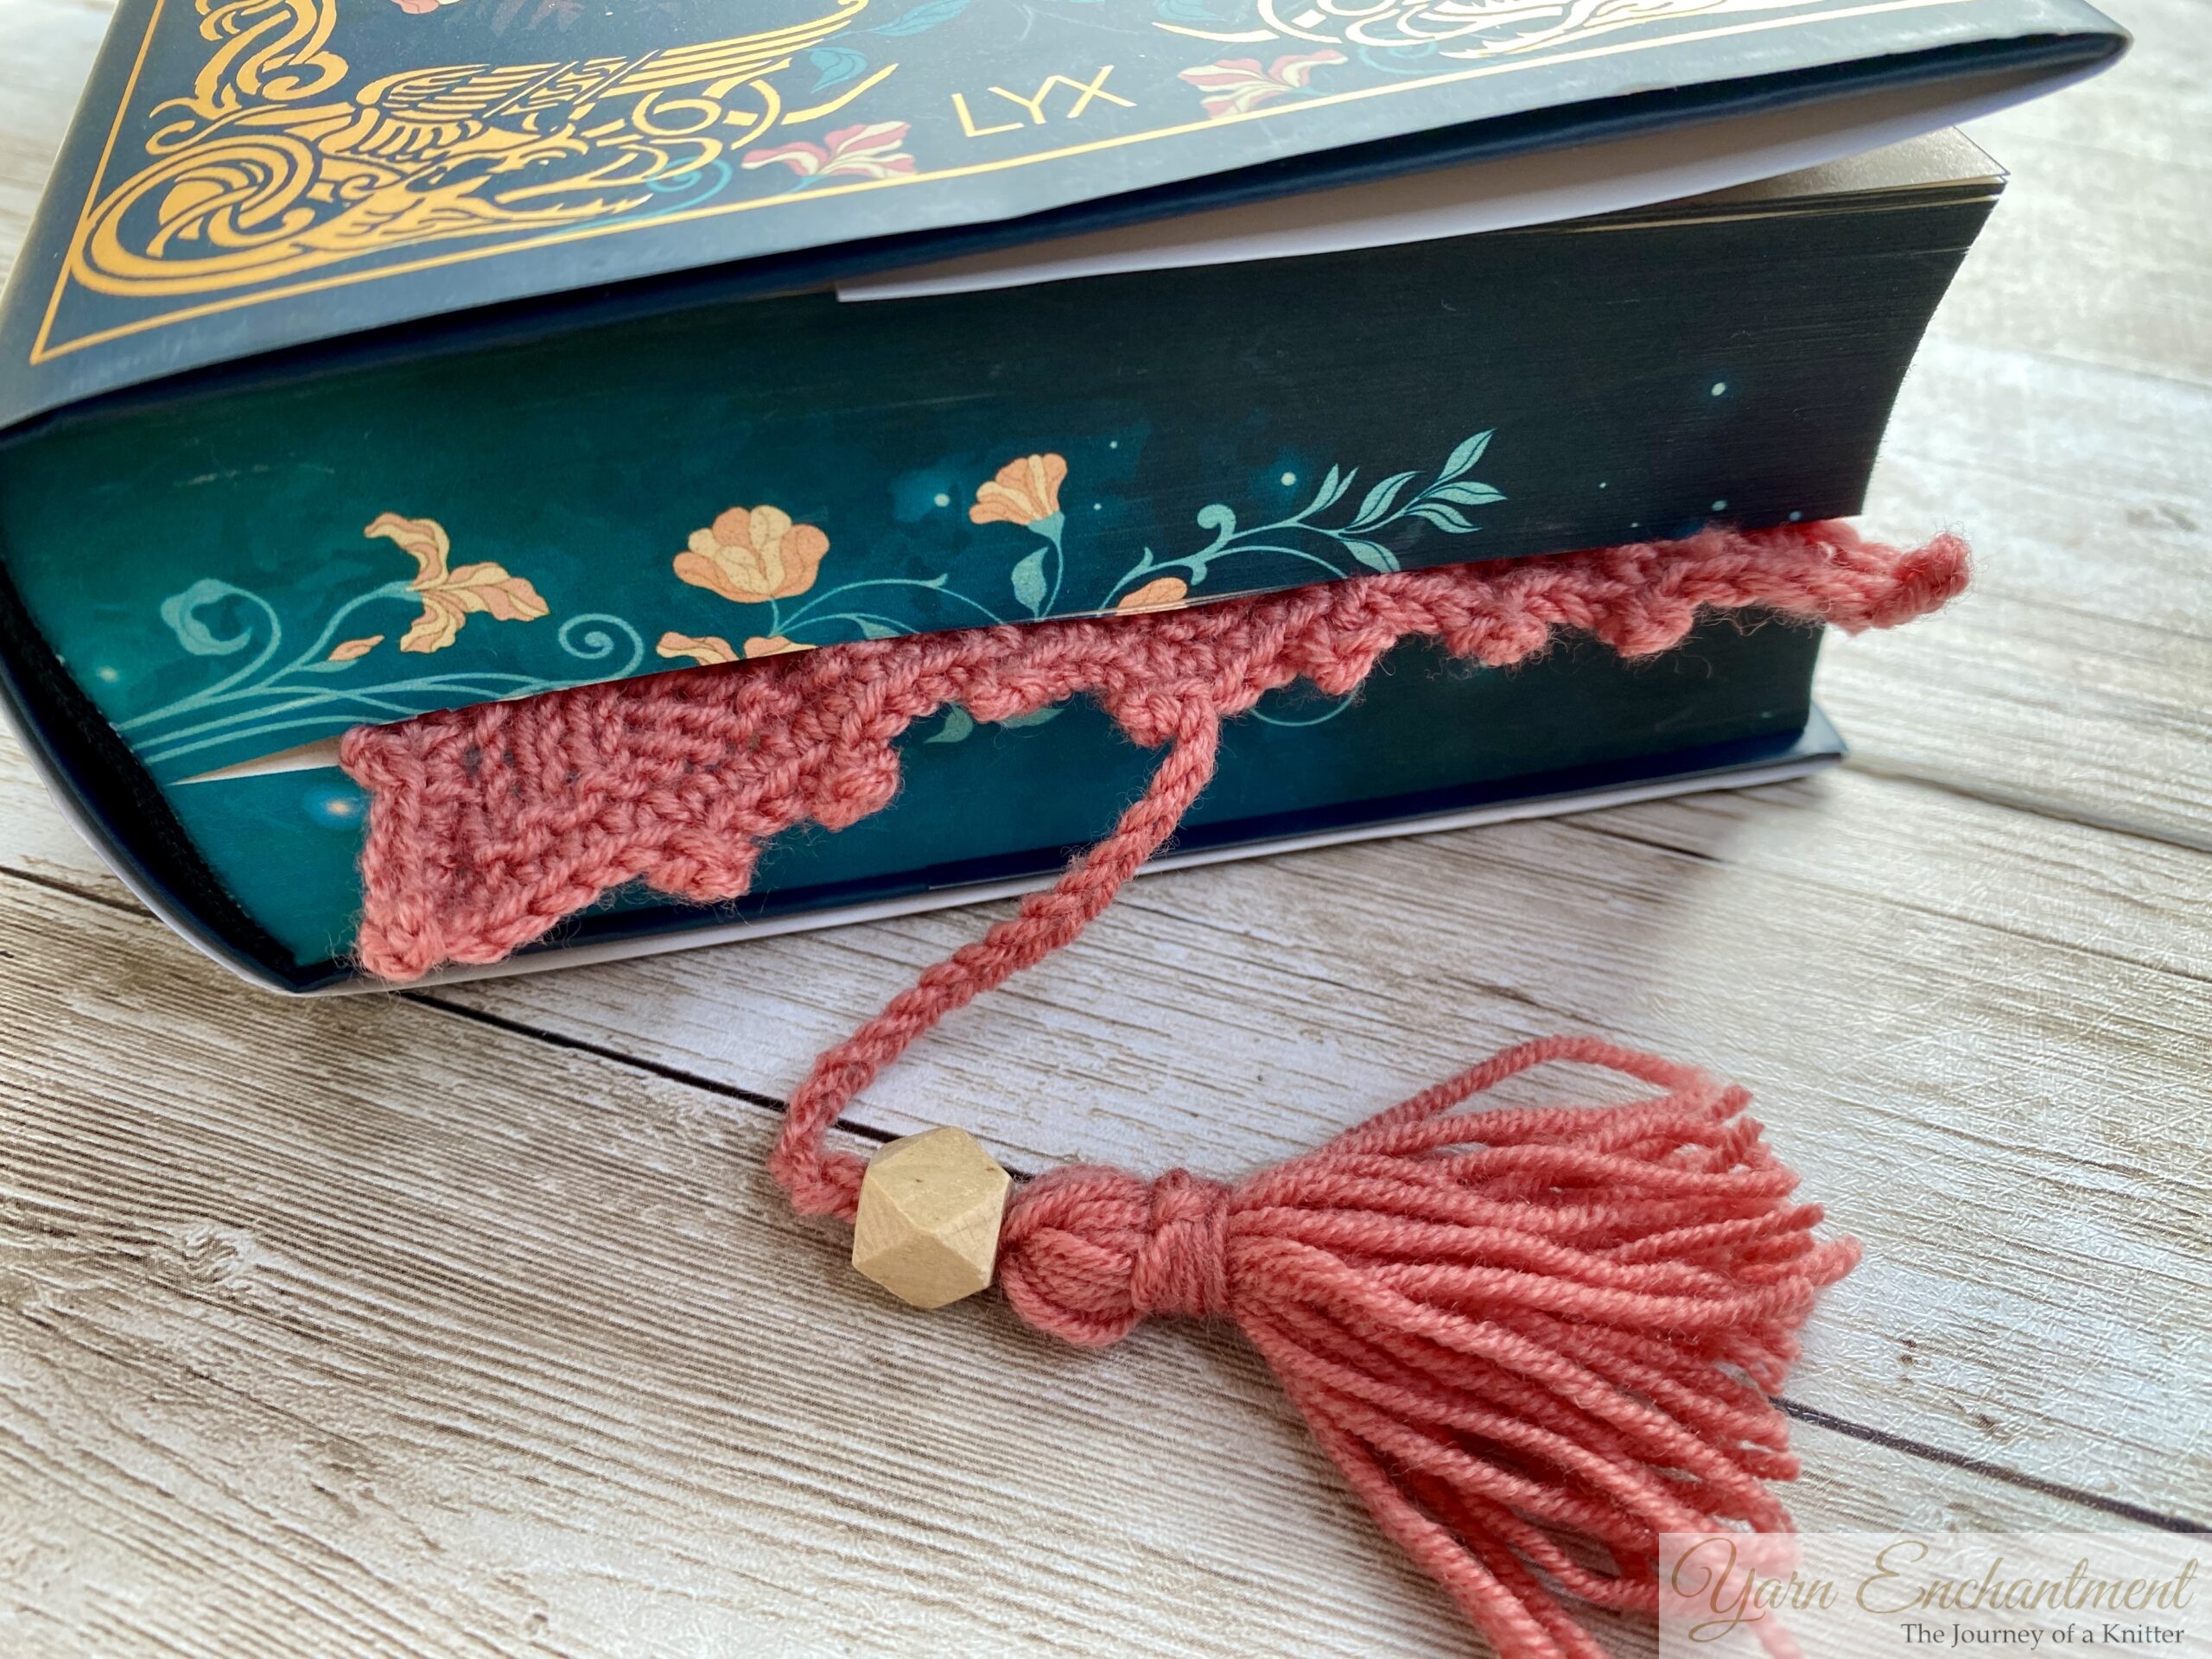
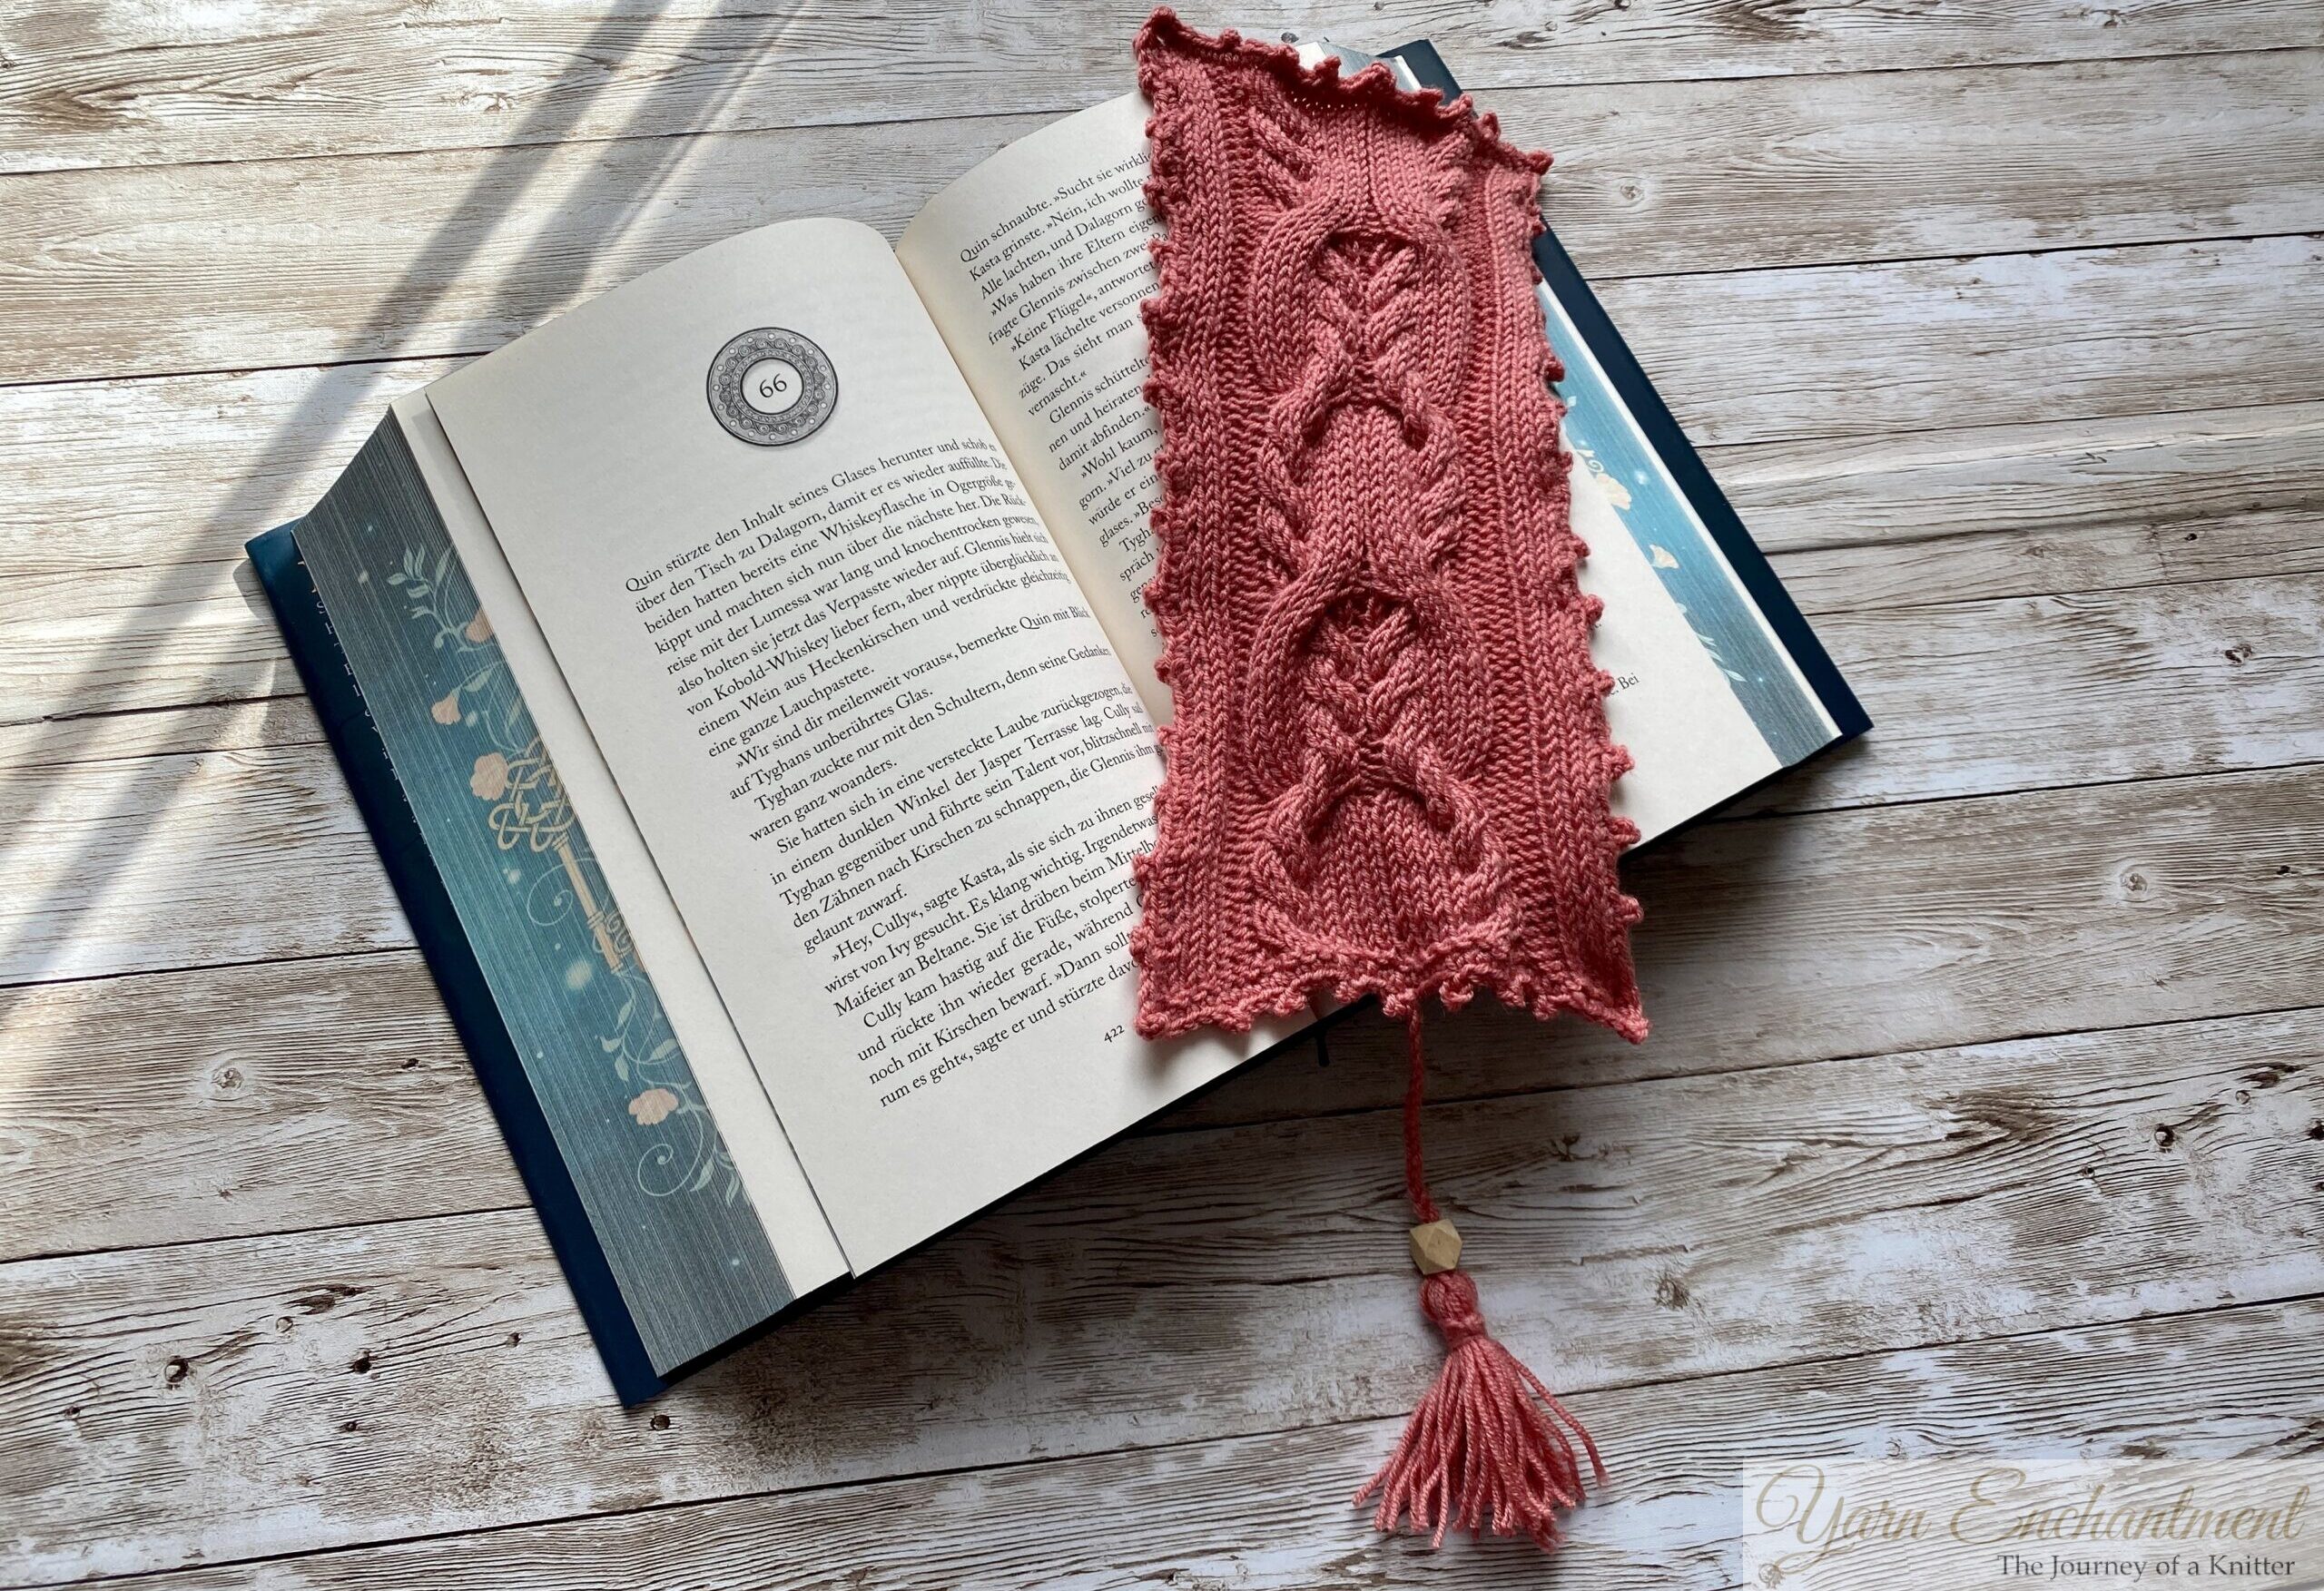
The Enchanted Bookmark is a stunning project that combines an elegant cable design with an optional picot crochet border. It’s perfect for book lovers or as a thoughtful handmade gift. This free knitting pattern includes step-by-step picture instructions, a detailed chart, and written directions to guide you through the process. For extra help, you can also follow along with the full video tutorial.
This stash-busting knitting project is ideal for intermediate knitters who want to practice cable knitting while creating a unique and practical DIY bookmark. I hope you enjoy making it as much as I enjoyed designing it!
Download the free pattern now!
 | Enchanted Bookmark |

Pattern Details
The pattern has a central cable motif, beautifully finished with a picot crochet border for an extra decorative touch. If the picot edge isn’t your style, I suggest knitting the first three and last three stitches with the garter stitch to help prevent curling. At the end of this pattern, you’ll find a chart, but I’ve also included a written version. Row 15 is a bit trickier due to the cabling process, so if you need extra help, you can check out the full tutorial on YouTube! The video includes everything from the first row to sewing on the tassel. I highly recommend watching it if anything is unclear.
Video tutorial
Download Free Pattern here
Materials You’ll Need
To create your own Enchanted Bookmark, you’ll need the following:
- Yarn: Approximately 30g of fingering or sport-weight yarn (cotton or wool). This is a great stash-buster project!
Examples: Baby Merino from Drops Design (pink) or Drops Fabel (white). - Needles: A pair of 3.5mm (US 4) knitting needles or size needed to achieve gauge.
- Cable Needles: 2 cable needles.
- Tapestry Needle: For weaving in the ends.
Finished Size
Approximate dimensions:
- Width: 12 cm (4.7 inches)
- Length: 24 cm (9.4 inches)
Skill Level
- Intermediate
Gauge
One pattern repeat:
- Width: 9.5 cm (3.7 inches) over 35 stitches
- Height: 9 cm (3.5 inches) over 32 rows
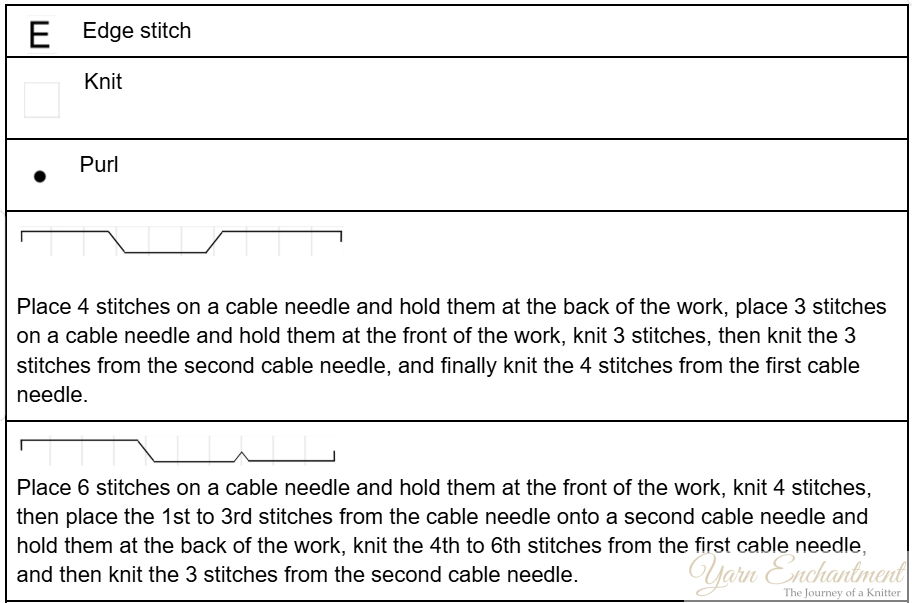
Stitch Key for written pattern
- E: Edge stitch (knit every stitch)
- k: Knit stitch
- p: Purl stitch
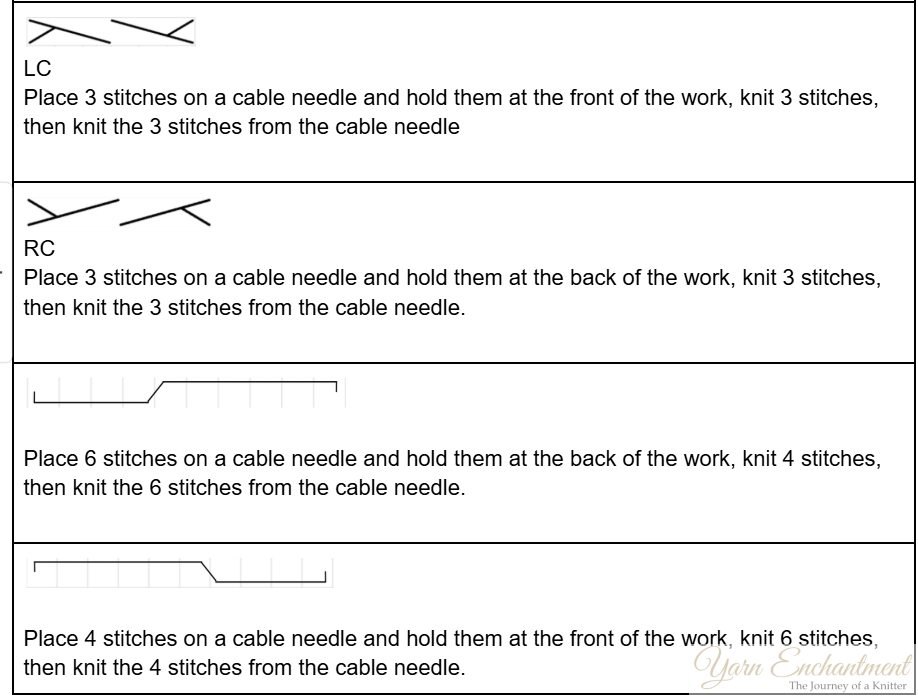
- RC: Place 3 stitches on a cable needle and hold them at the back of the work, knit 3 stitches, then knit the 3 stitches from the cable needle
- LC: Place 3 stitches on a cable needle and hold them at the front of the work, knit 3 stitches, then knit the 3 stitches from the cable needle
- RS: Right Side
- WS: Wrong side
Pattern instruction
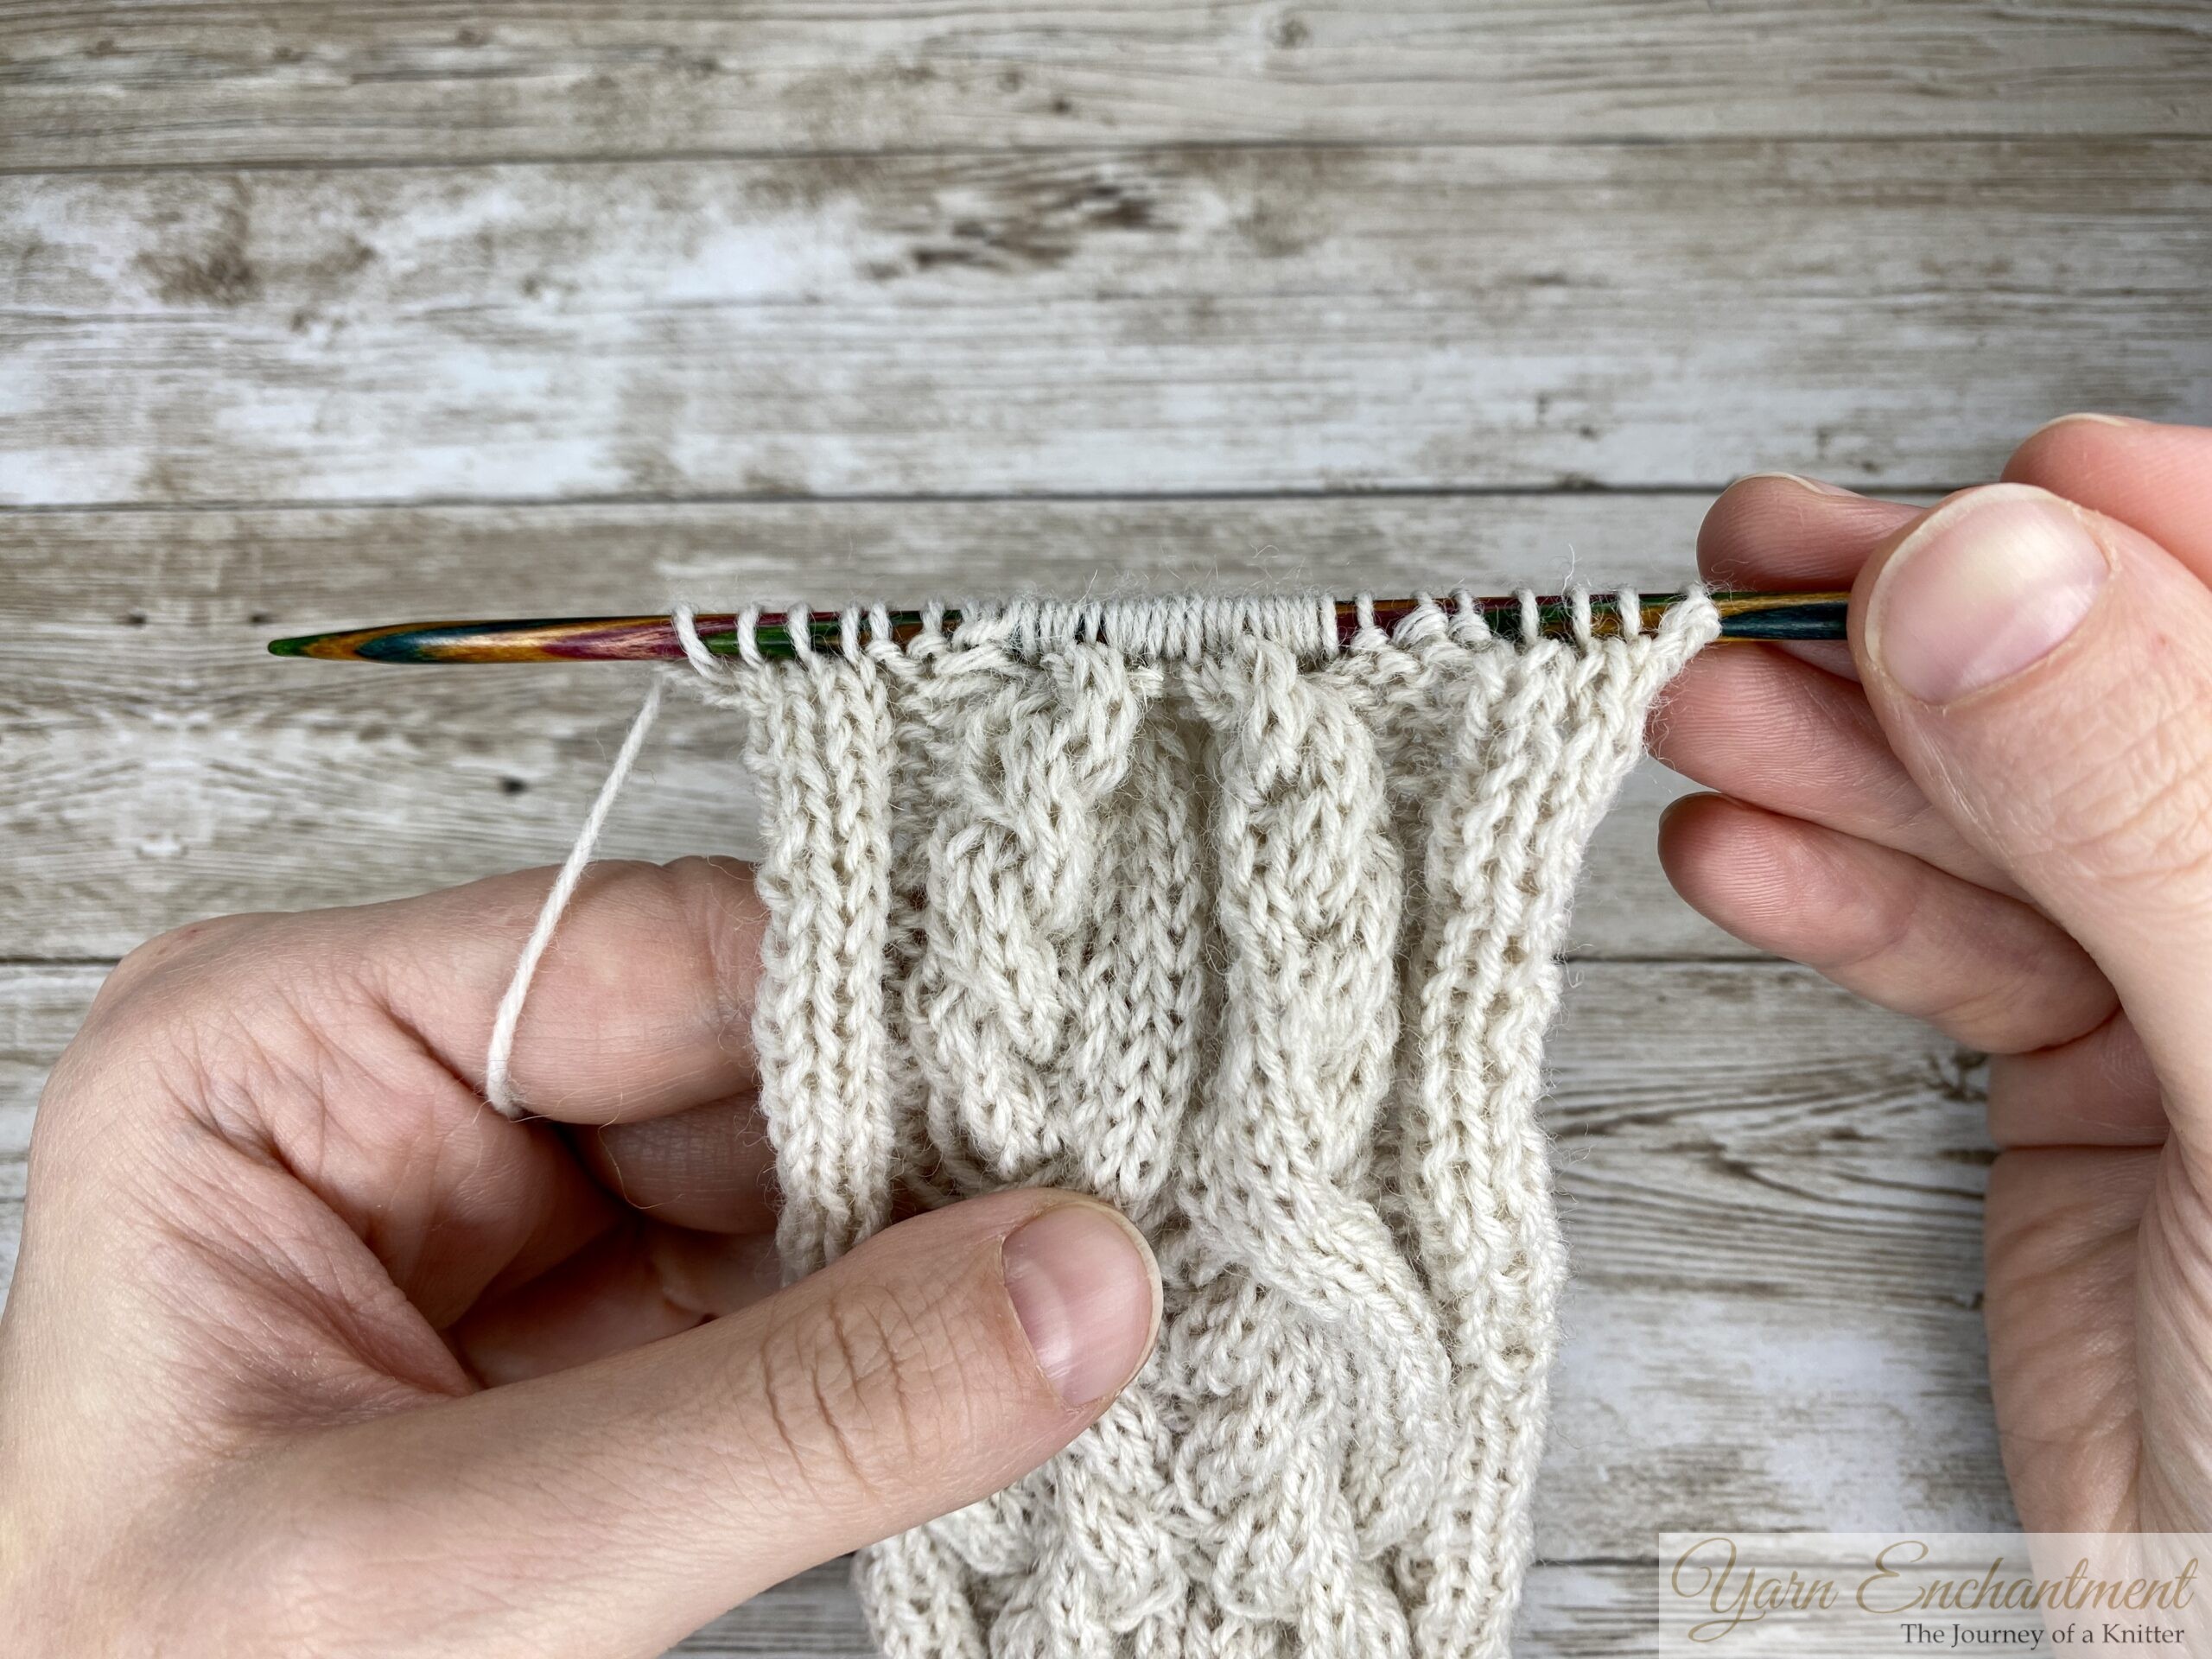
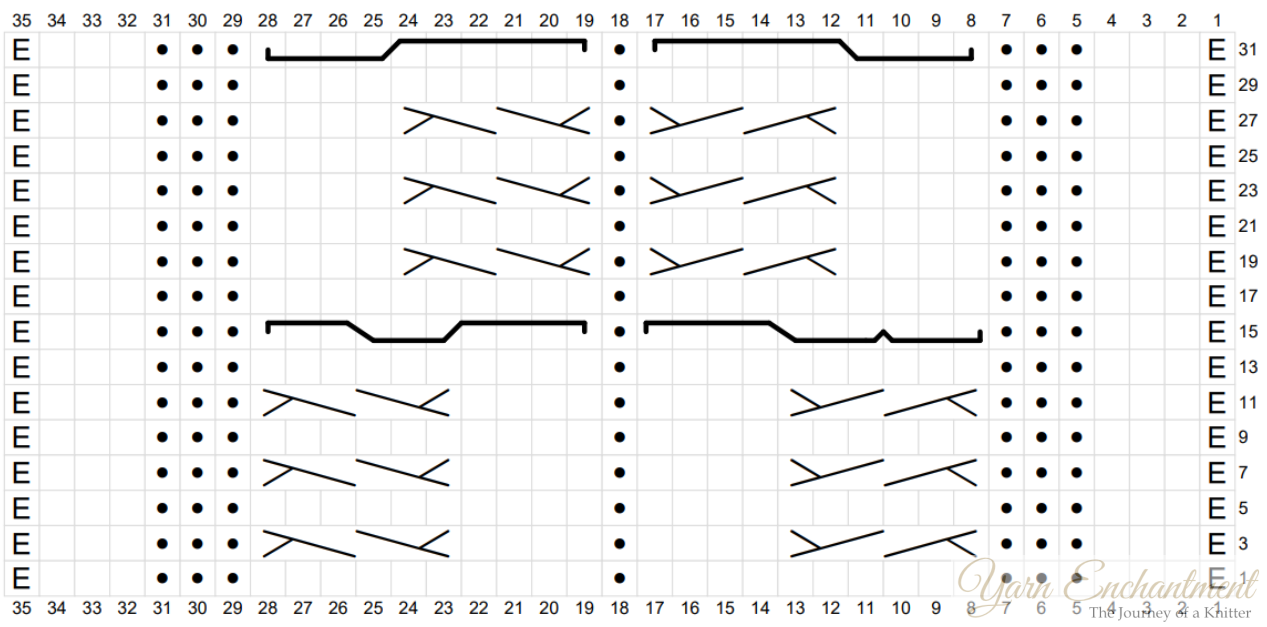
Cast on 35 stitches using the long-tail cast-on method and begin following the chart. Knit rows 1 through 32 twice. After completing the chart for the second time, knit rows 1 through 15 once more. Finish by ending on a wrong-side row.
On every wrong-side row, knit the stitches as they appear (knit the knit stitches and purl the purl stitches).
Row 1: (RS) E, k3, p3, k10, p1, k10, p3, k3, E
Row 2: (WS) E, p3, k3, p10, k1, p10, k3, p3, E
Row 3: E, k3, p3, (3/3 RC), k4, p1, k4, (3/3 LC), p3, k3, E
3/3 RC Step by Step Picture Guide
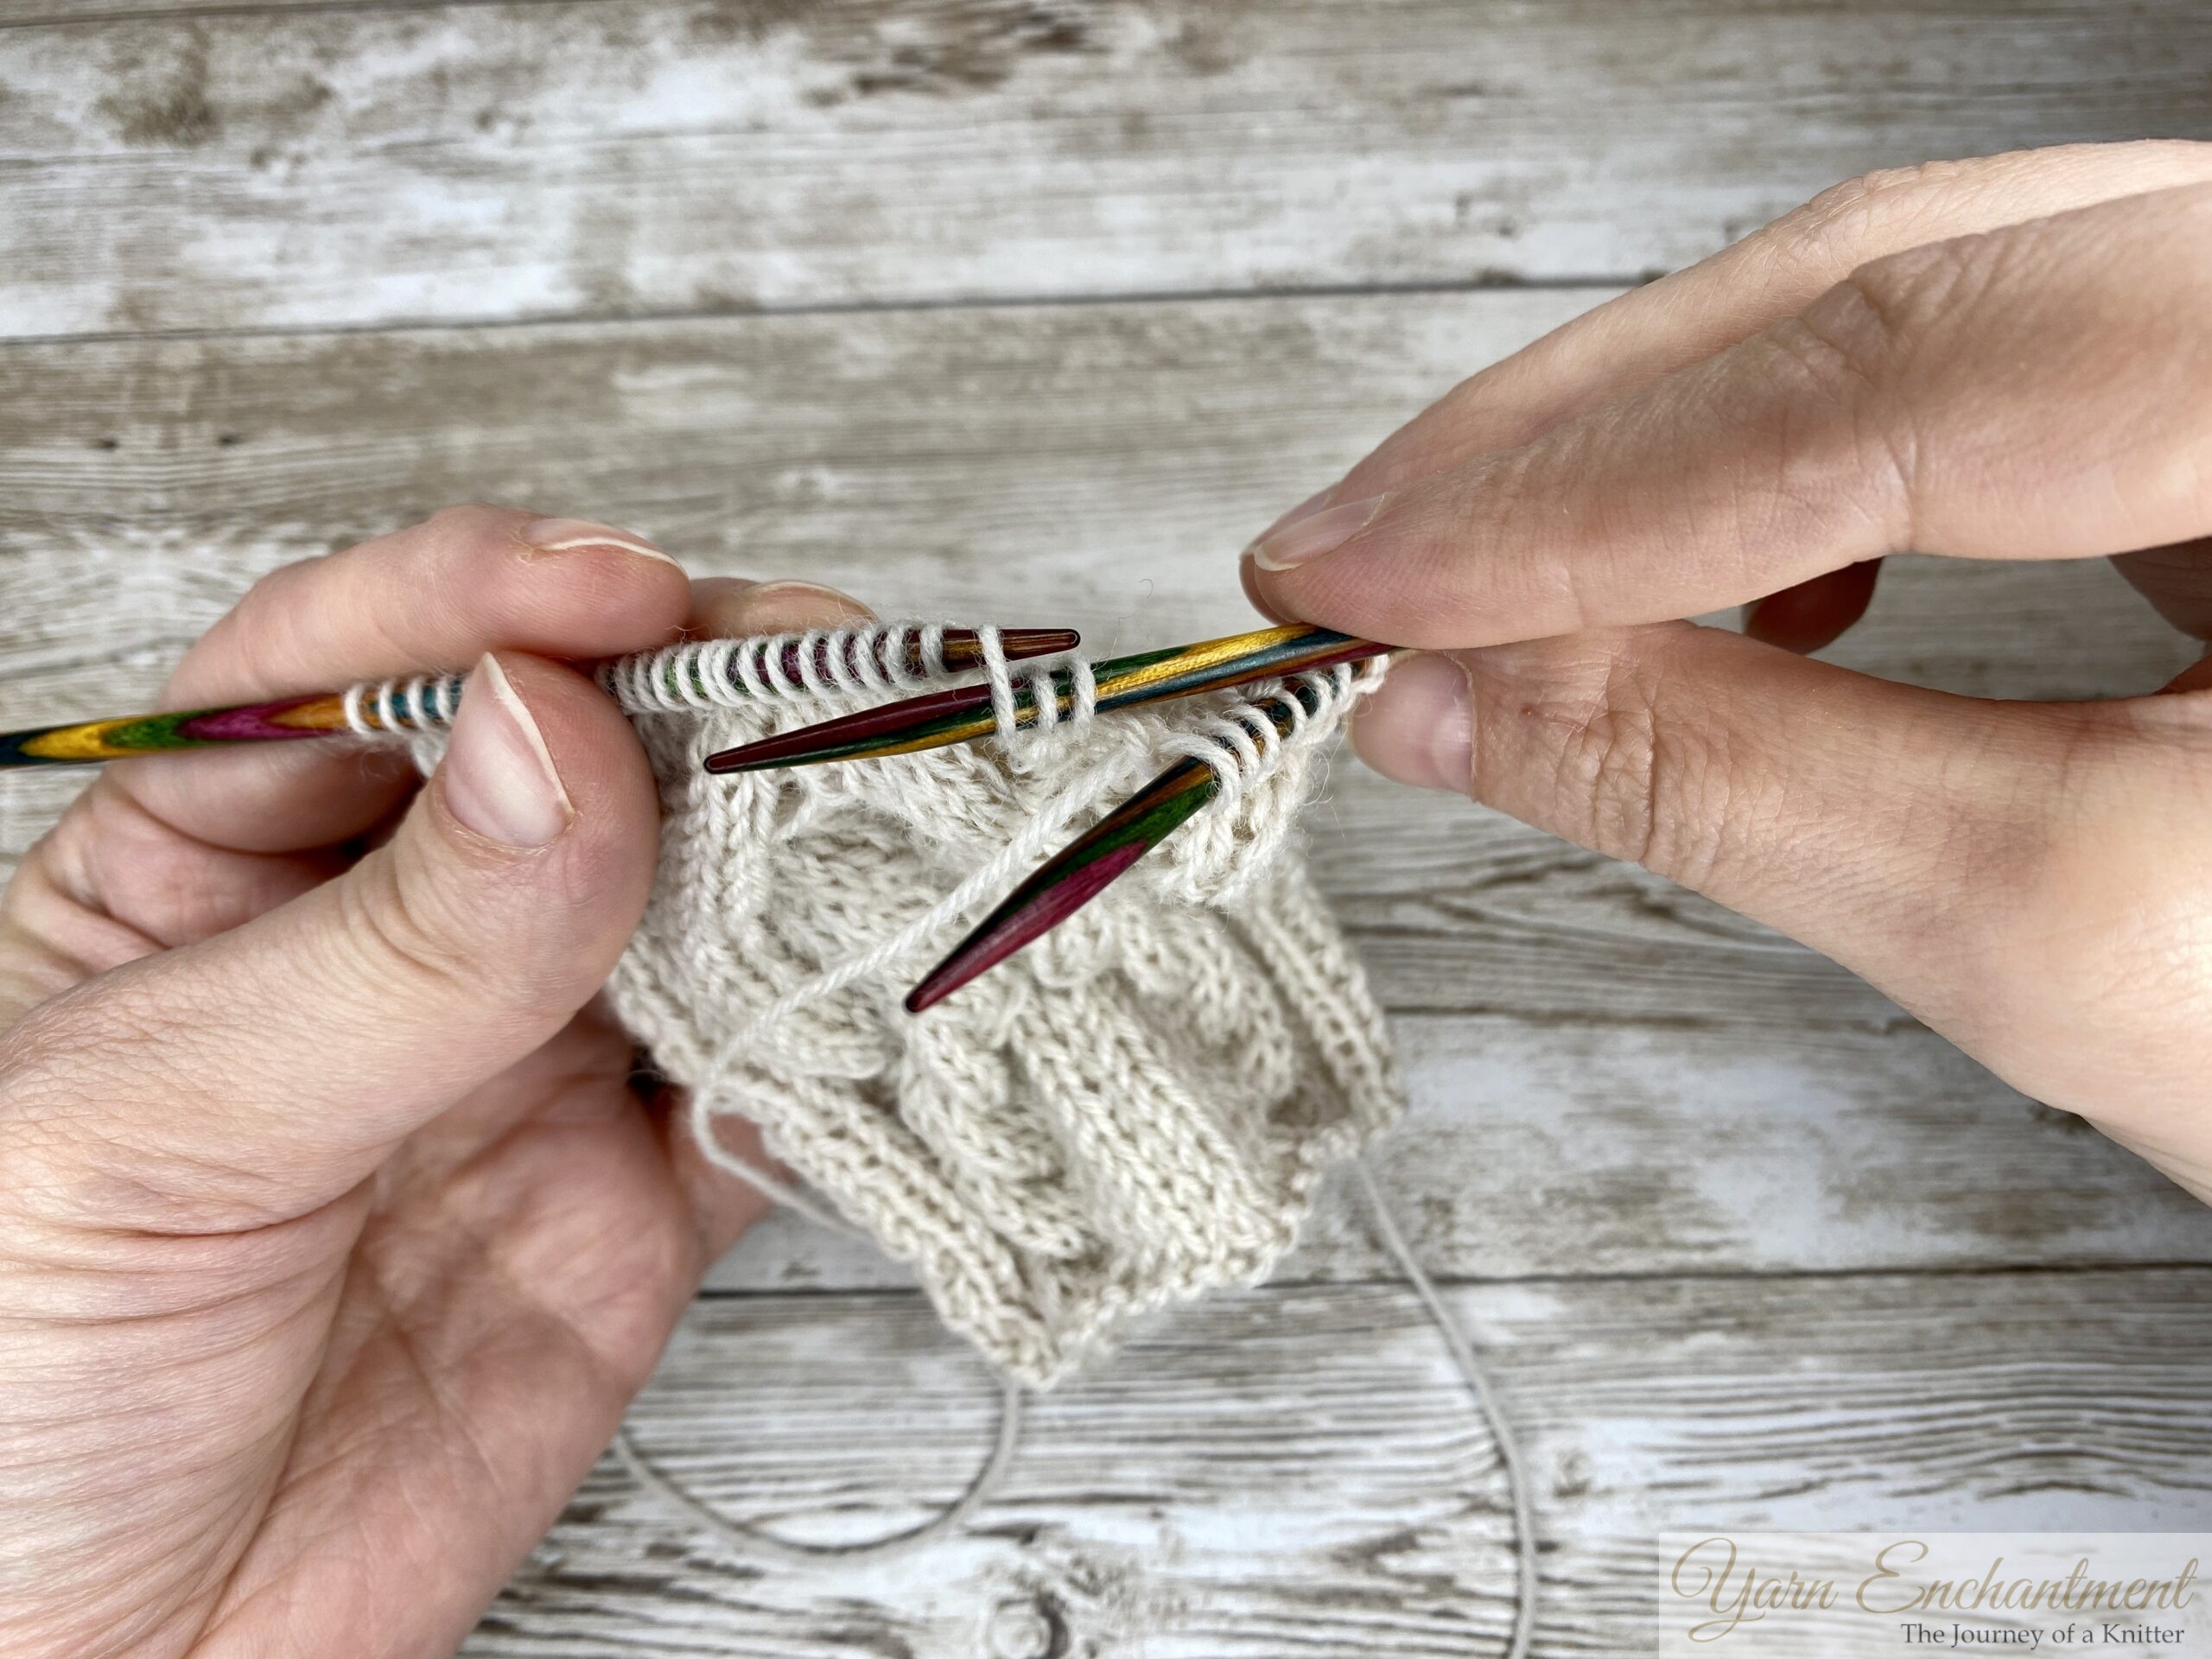 |  | Place 3 stitches on a cable needle | Hold them at the back of the work |


 |  | Knit 3 stitches | Knit the 3 stitches from the cable needle |


3/3 LC Step by Step Picture Guide
 |  |  | Place 3 stitches on a cable needle | Hold them at the back of the work | Knit 3 stitches |


 |  | Knit the 3 stitches from the cable needle (in the pictures I slipped them back to the main needle | Knit the 3 stitches from the left needle |


Row 4: E, p3, k3, p10, k1, p10, k3, p3, E
Row 5: E, k3, p3, k10, p1, k10, p3, k3, E
Row 6: E, p3, k3, p10, k1, p10, k3, p3, E
Row 7: E, k3, p3, (3/3 RC), k4, p1, k4, (3/3 LC), p3, k3, E
Row 8: E, p3, k3, p10, k1, p10, k3, p3, E
Row 9: E, k3, p3, k10, p1, k10, p3, k3, E
Row 10: E, p3, k3, p10, k1, p10, k3, p3, E
Row 11: E, k3, p3, (3/3 RC), k4, p1, k4, (3/3 LC), p3, k3, E
Row 12: E, p3, k3, p10, k1, p10, k3, p3, E
Row 13: E, k3, p3, k10, p1, k10, p3, k3, E
Row 14: E, p3, k3, p10, k1, p10, k3, p3, E
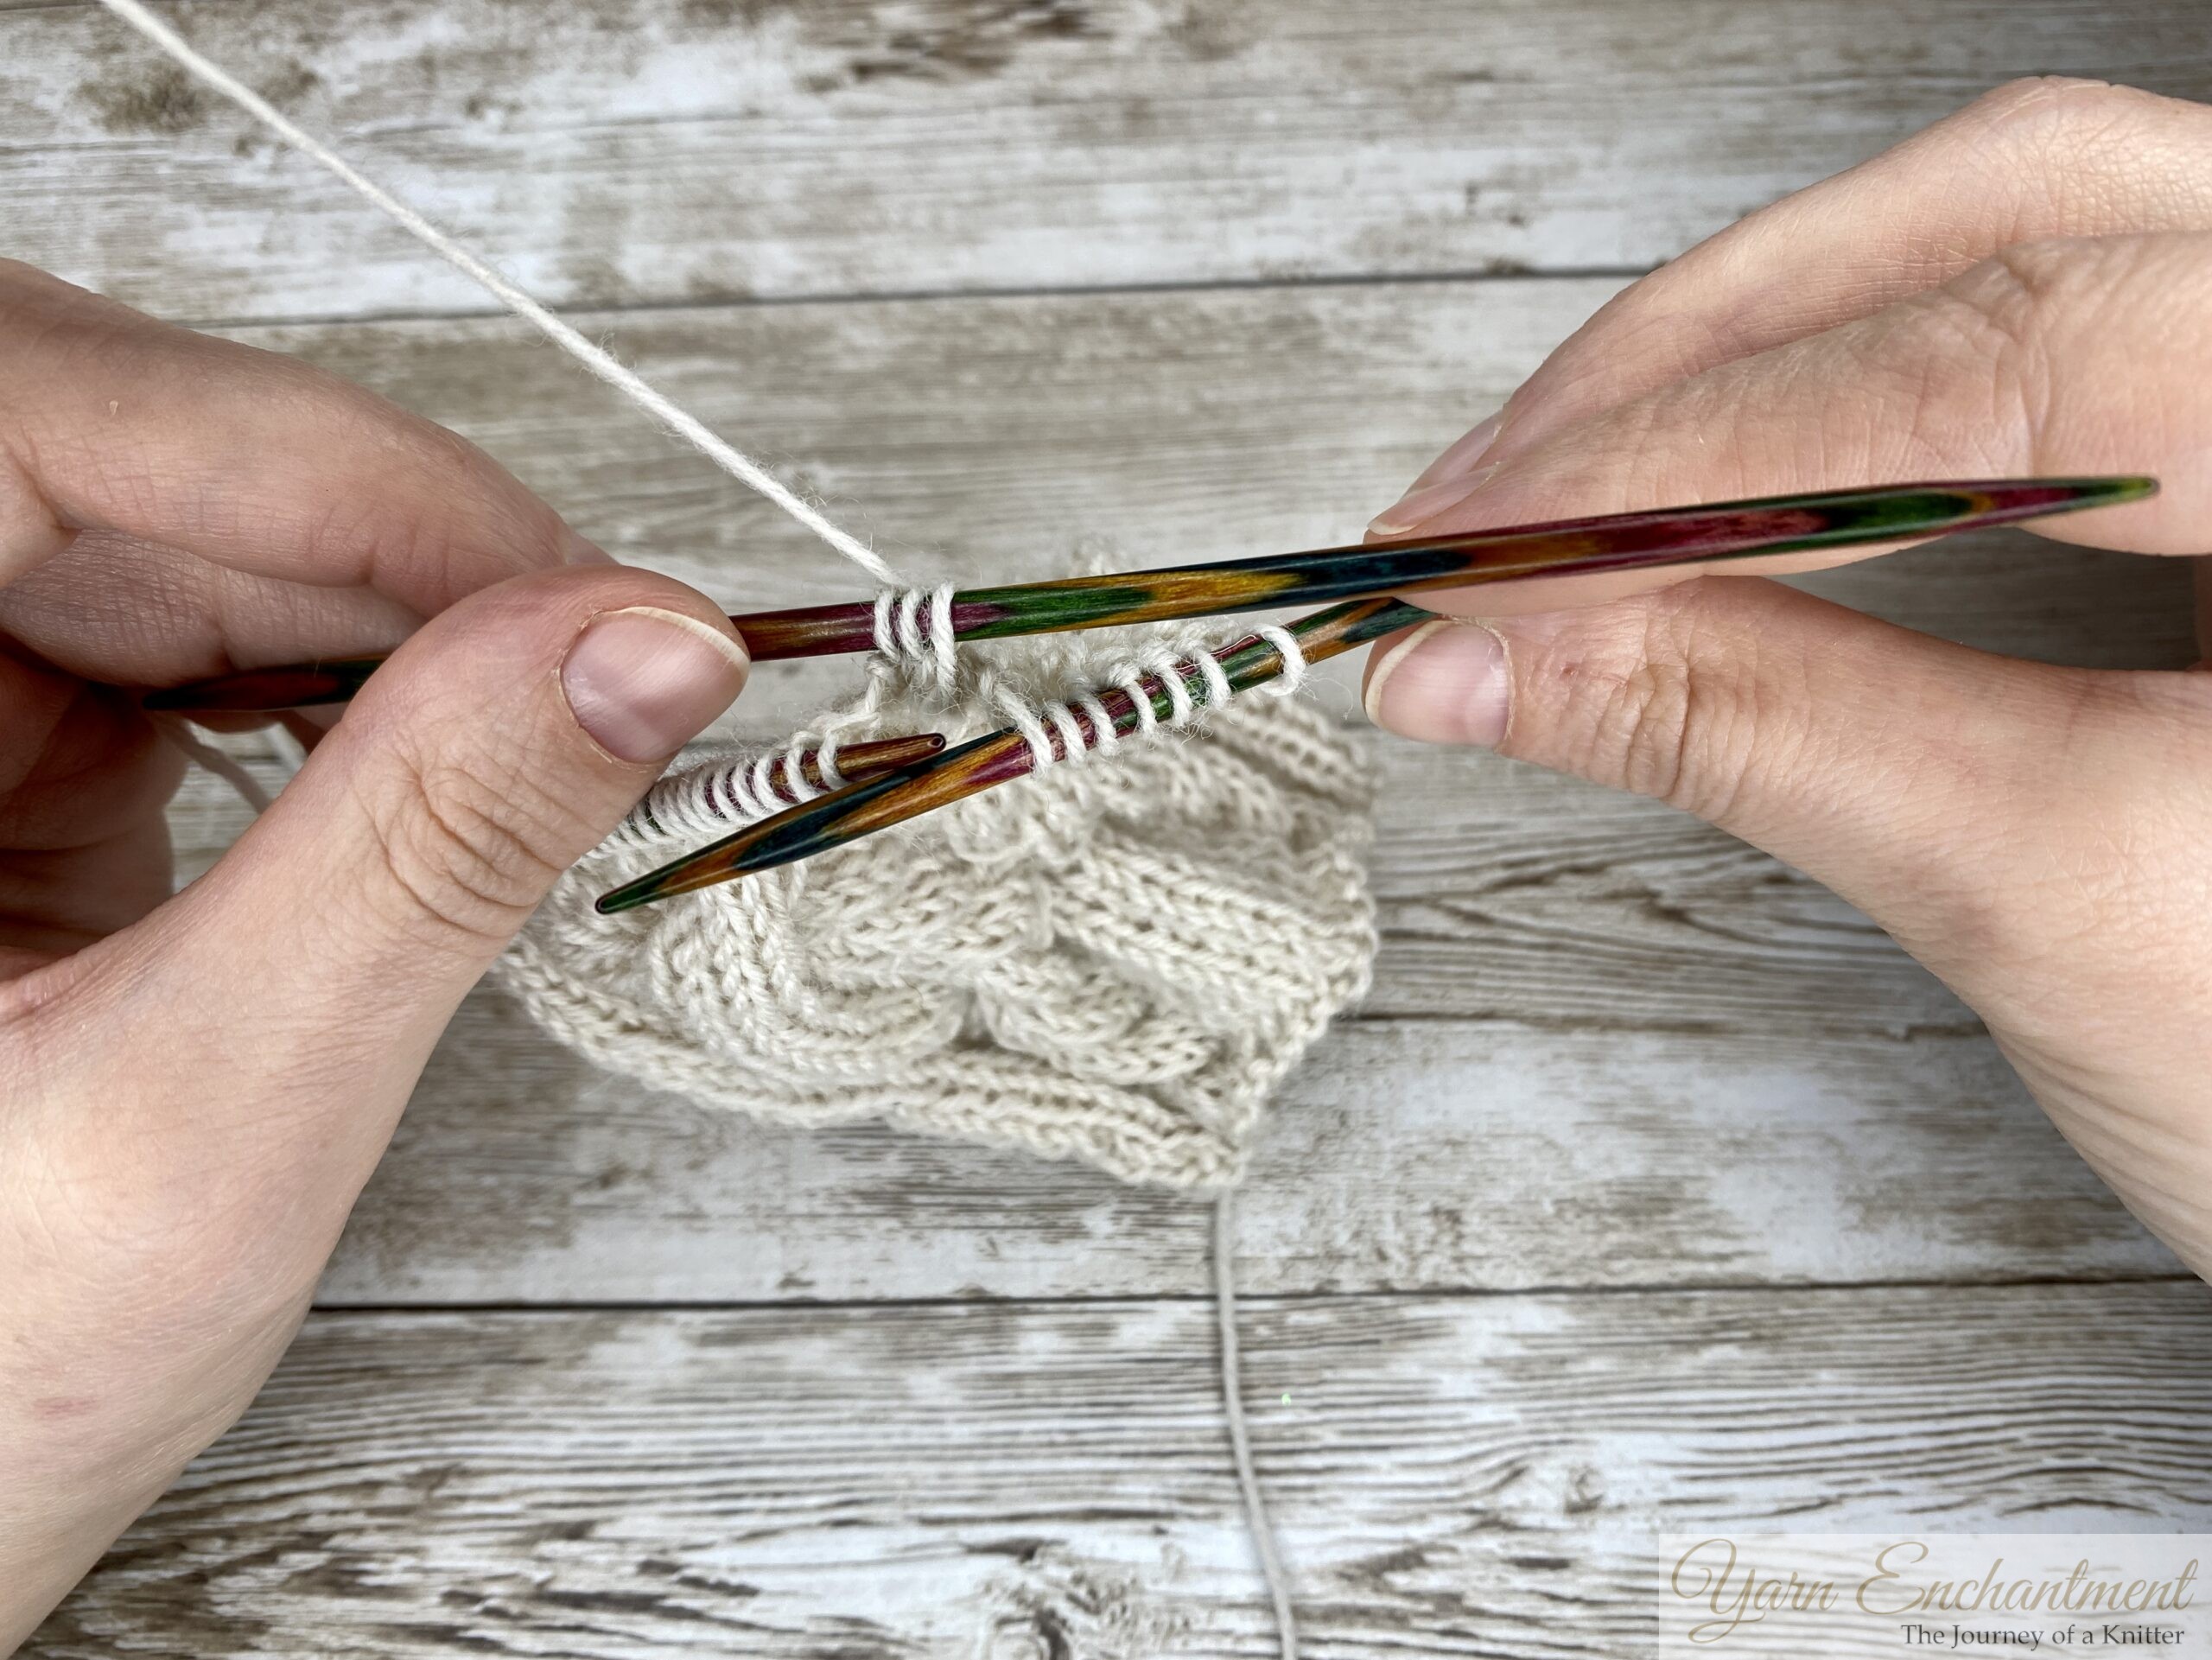
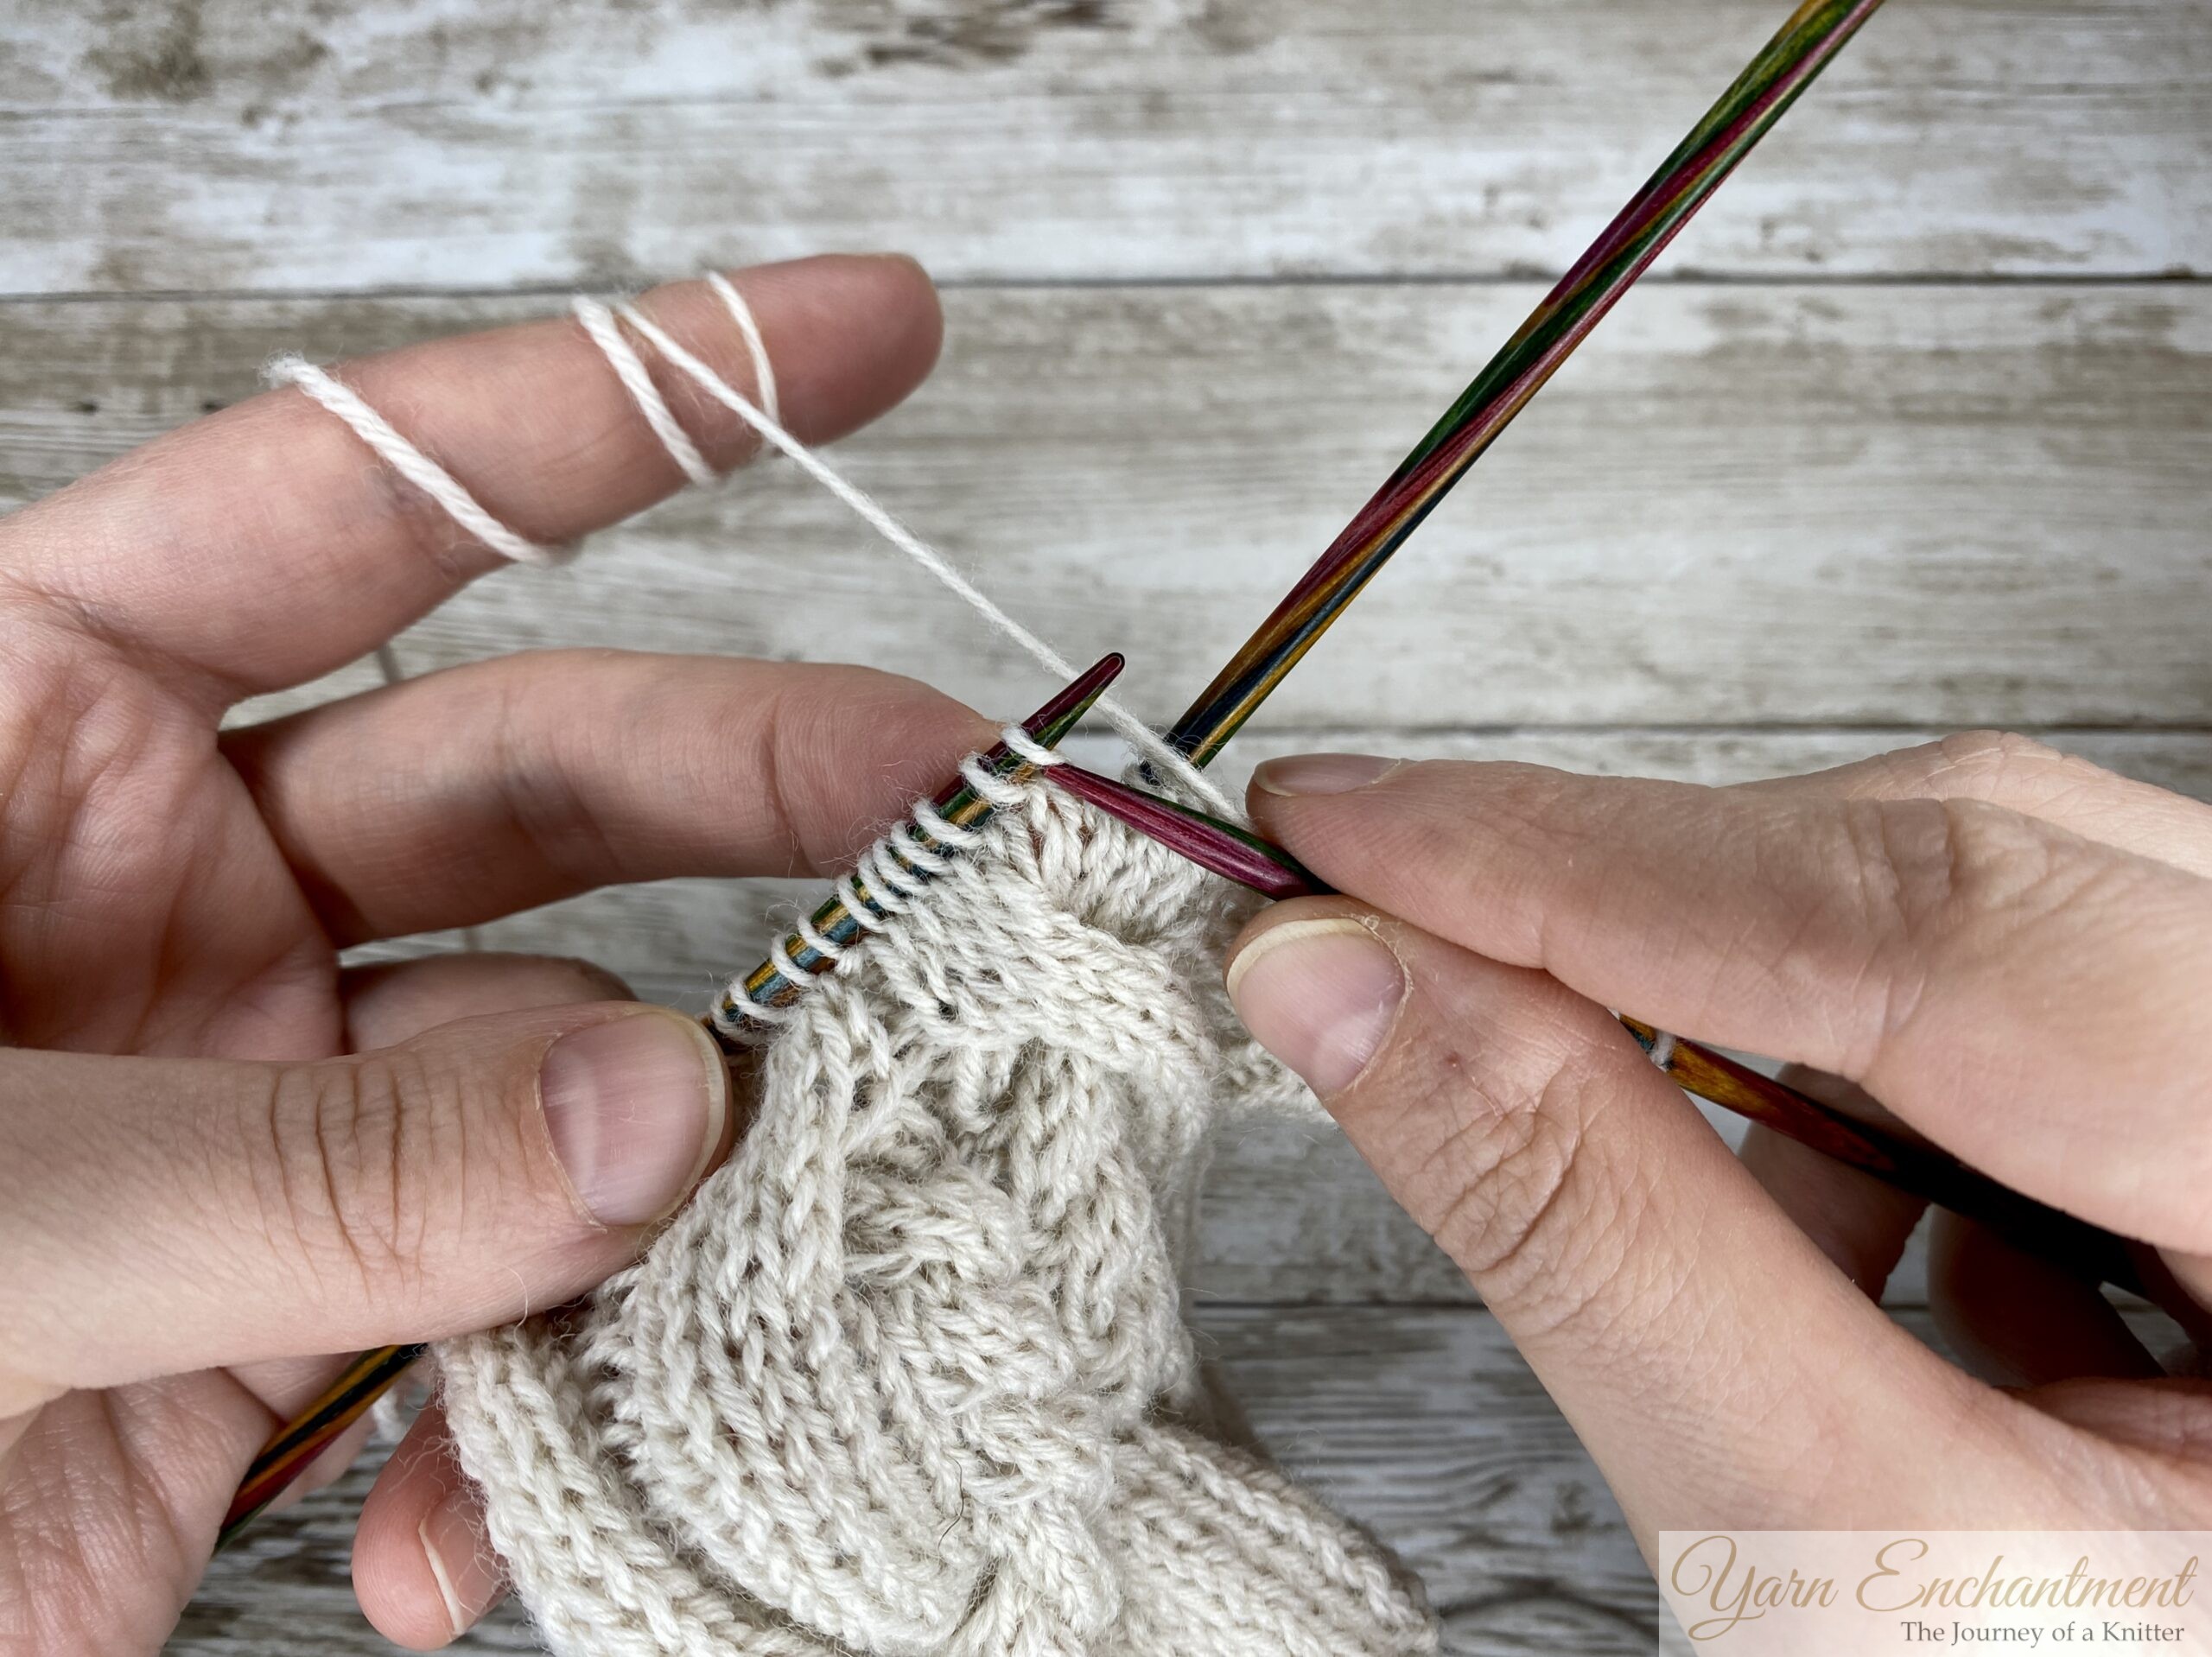
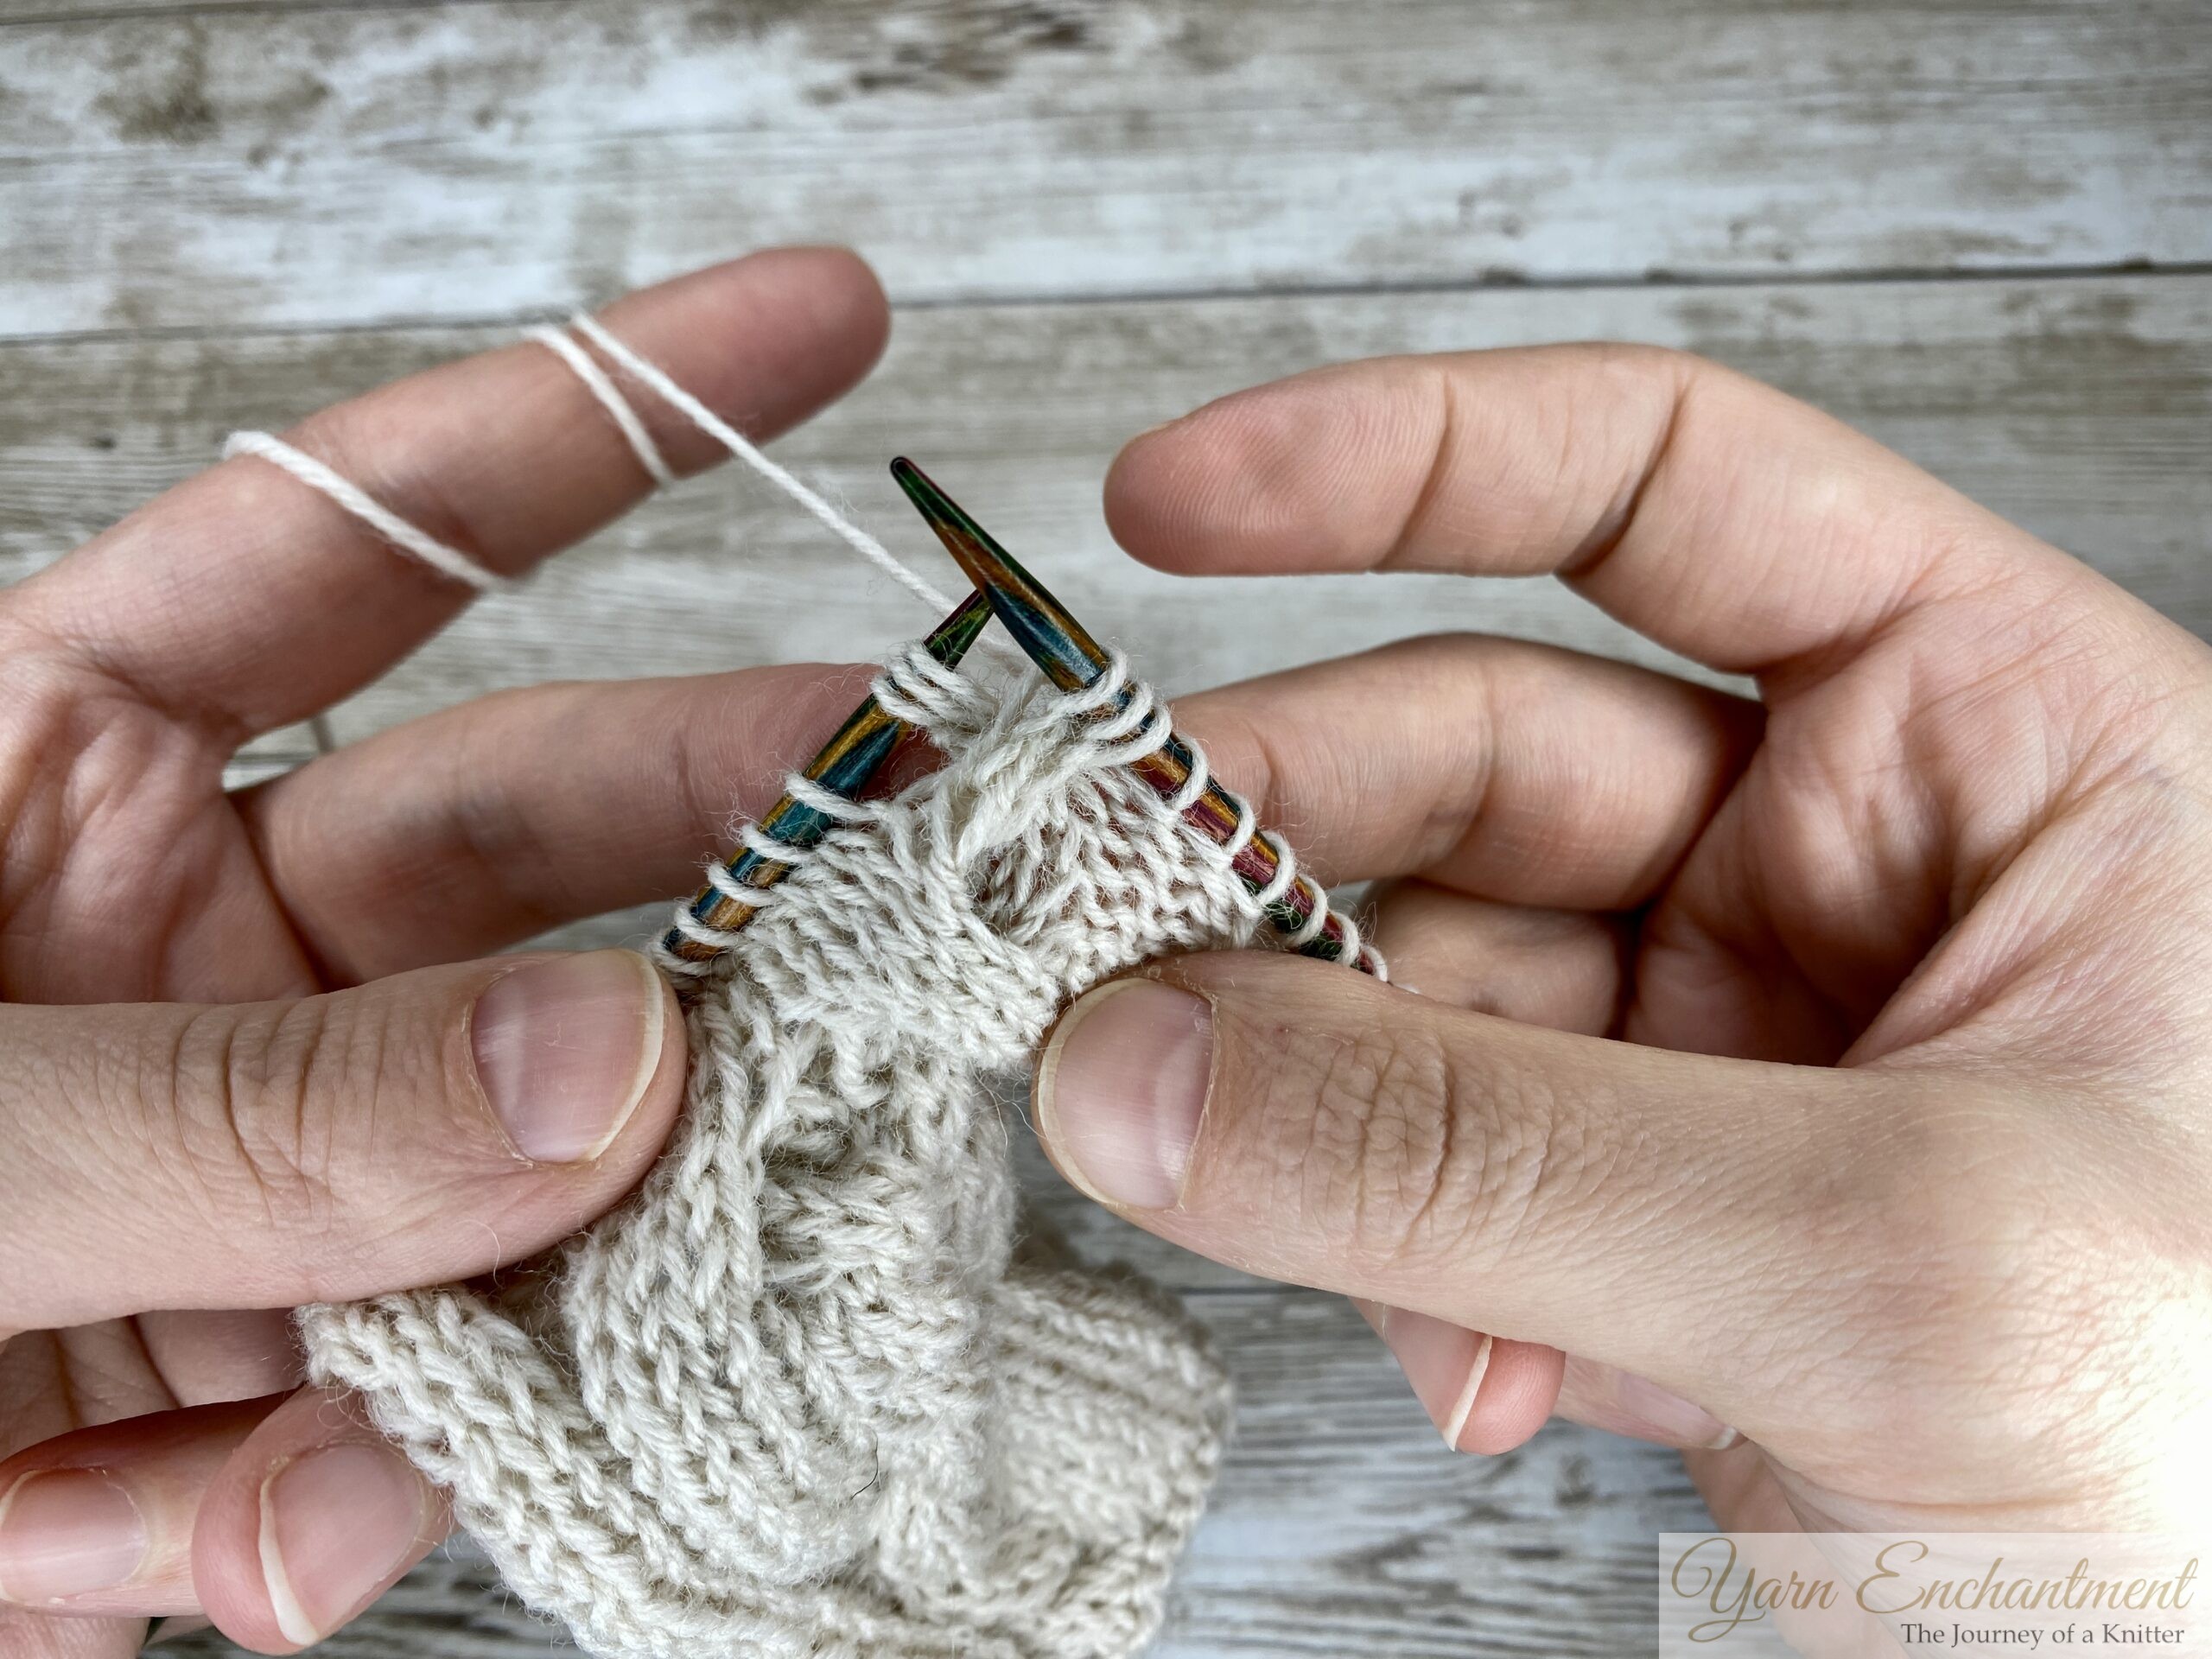
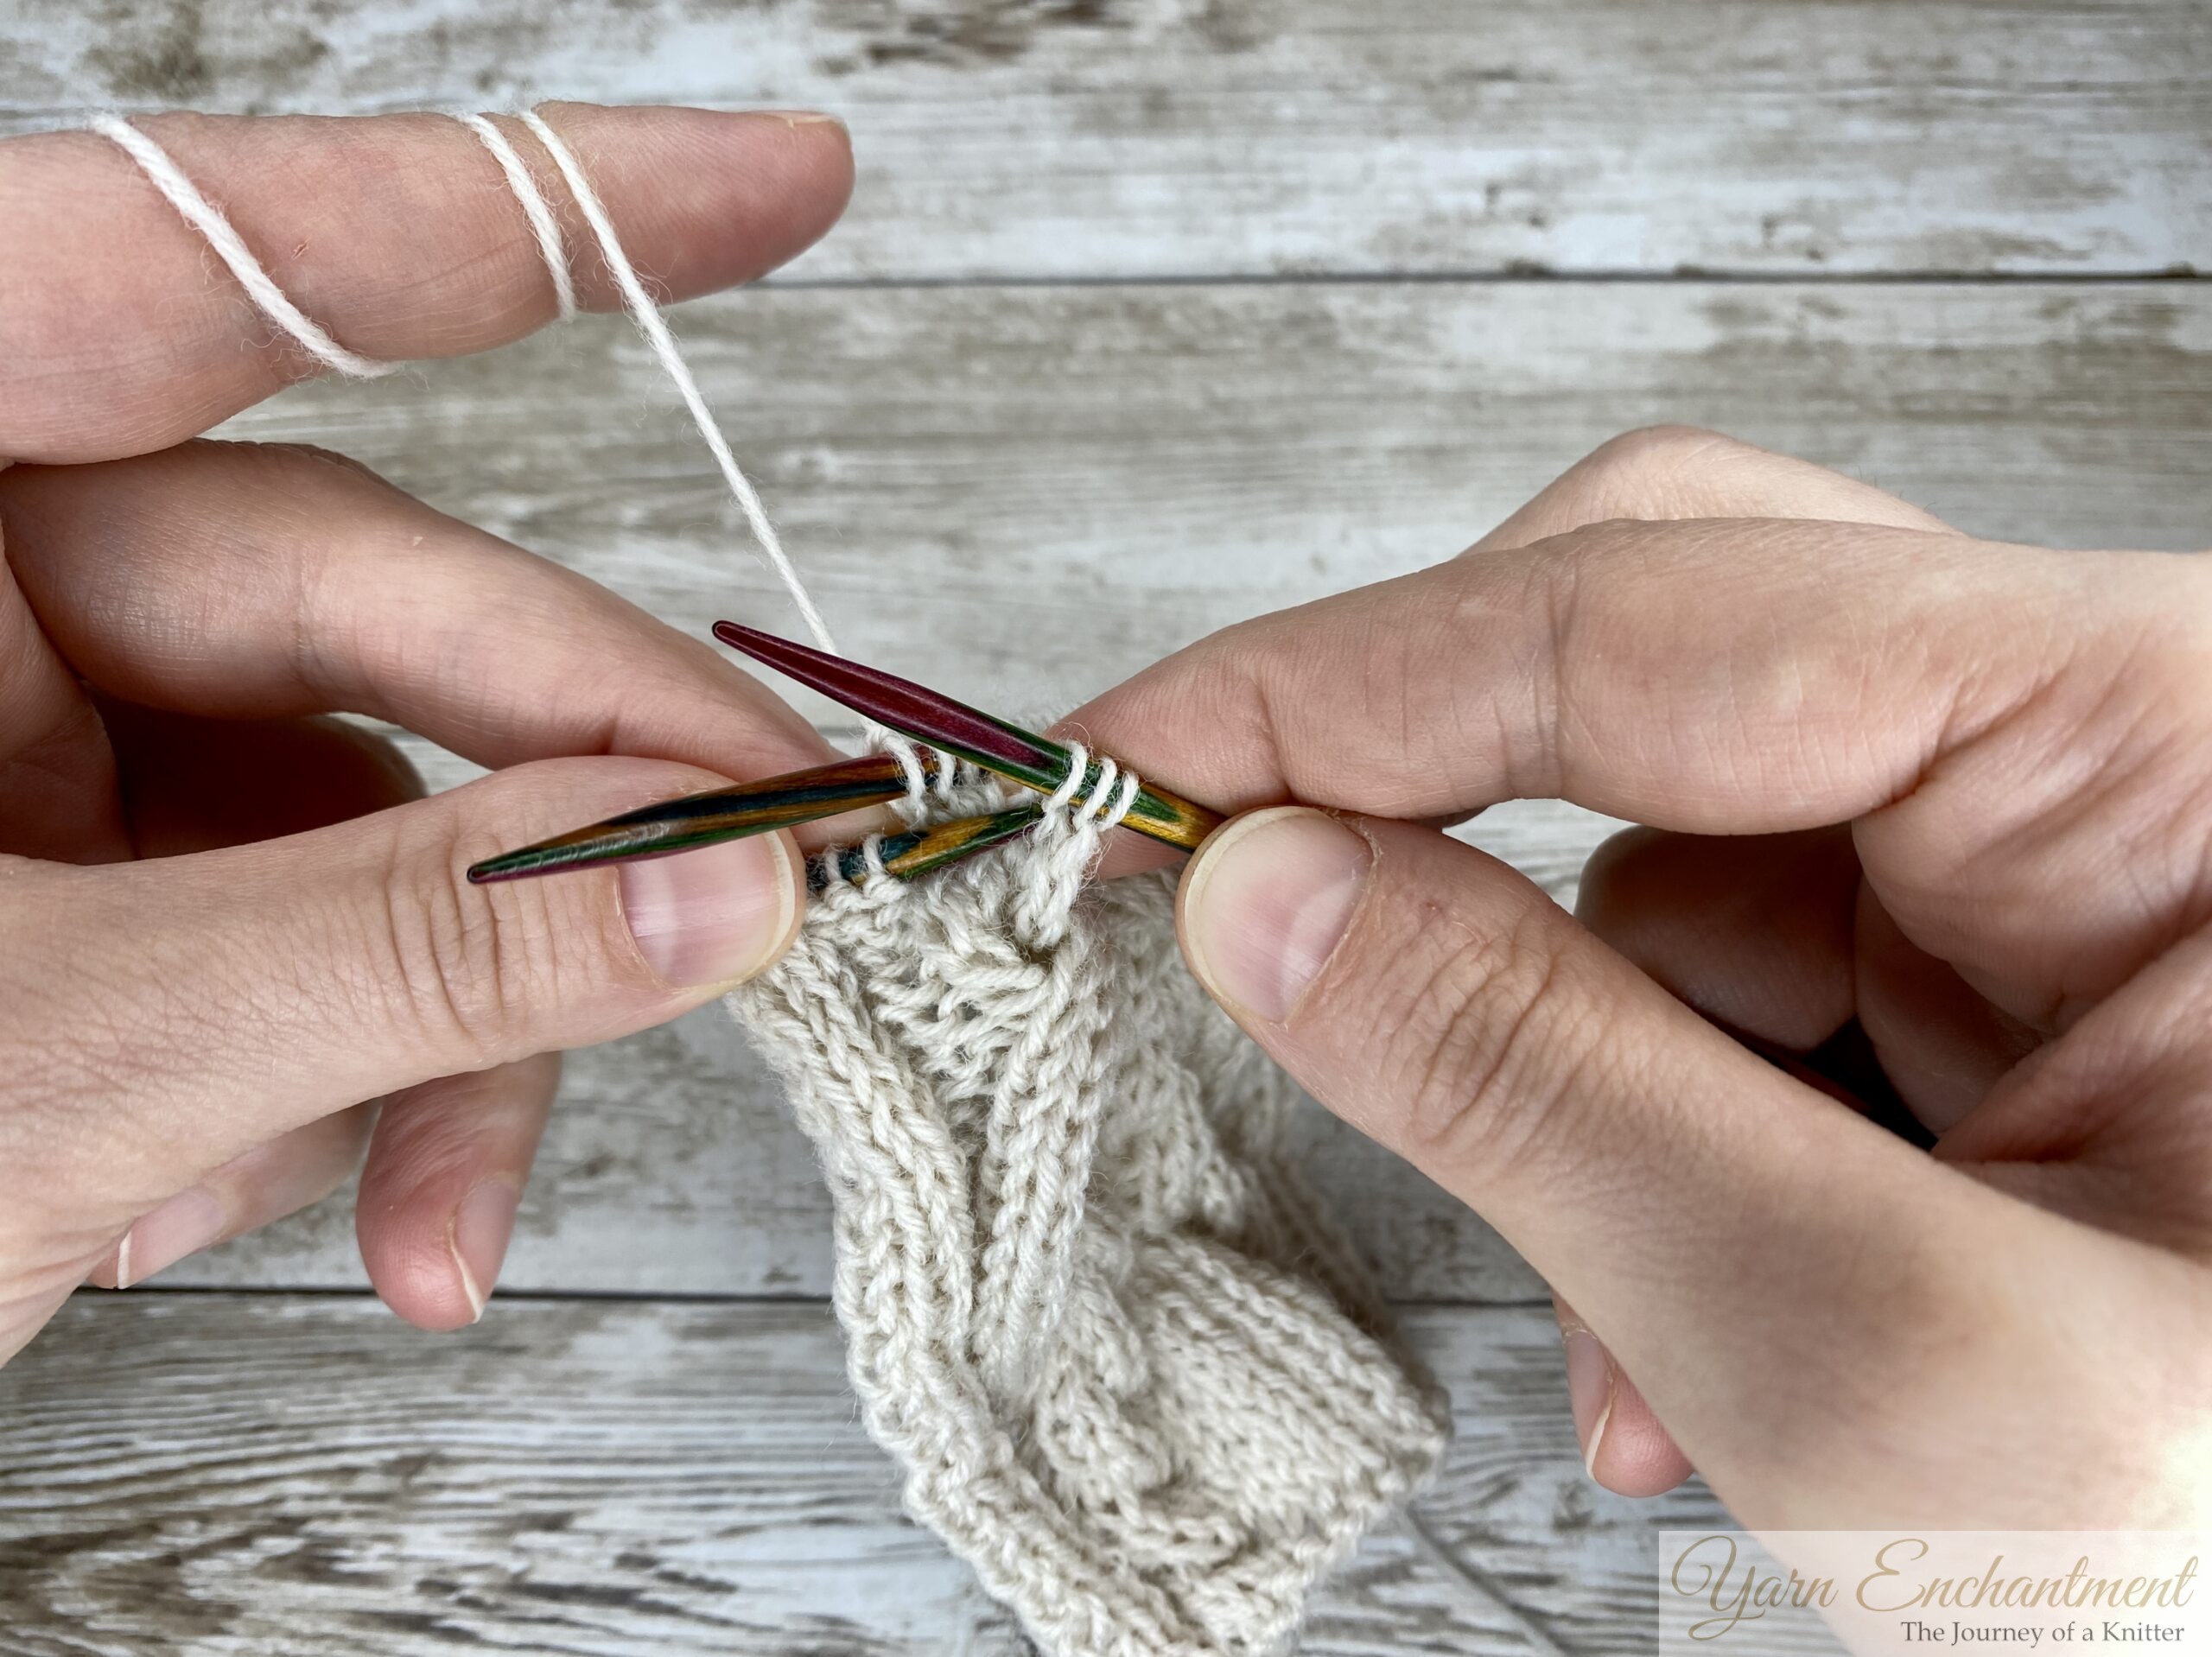
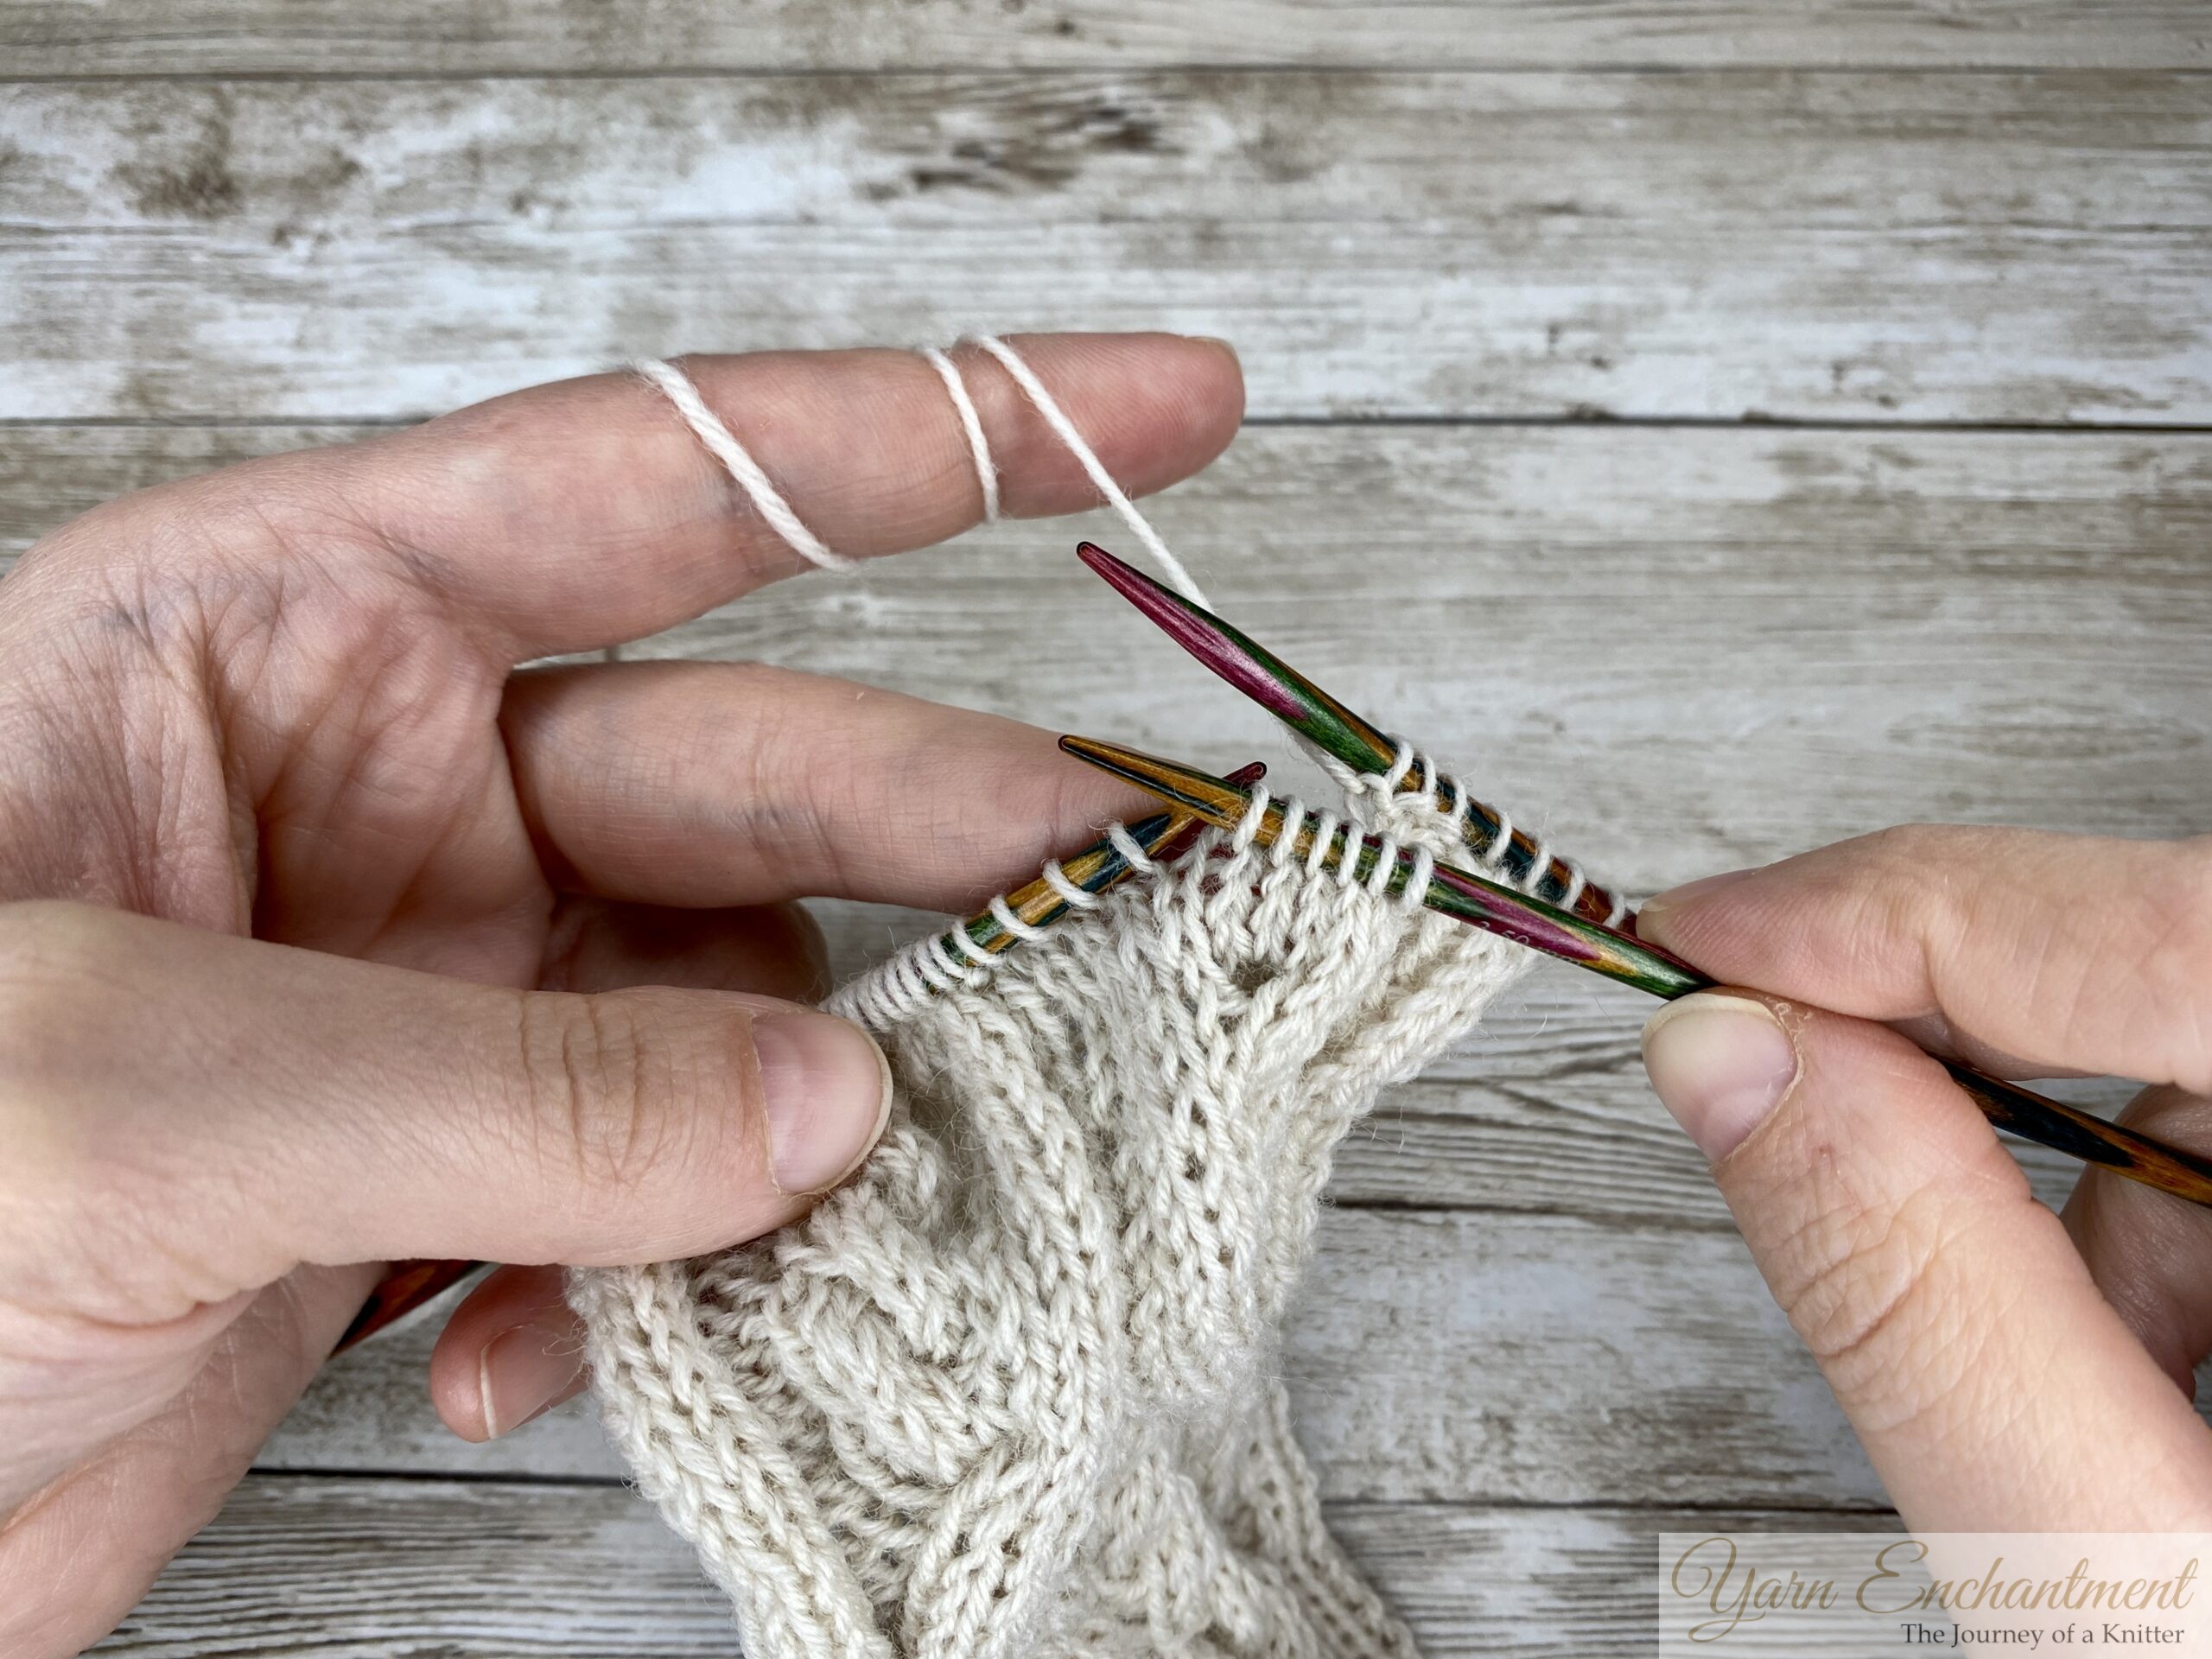
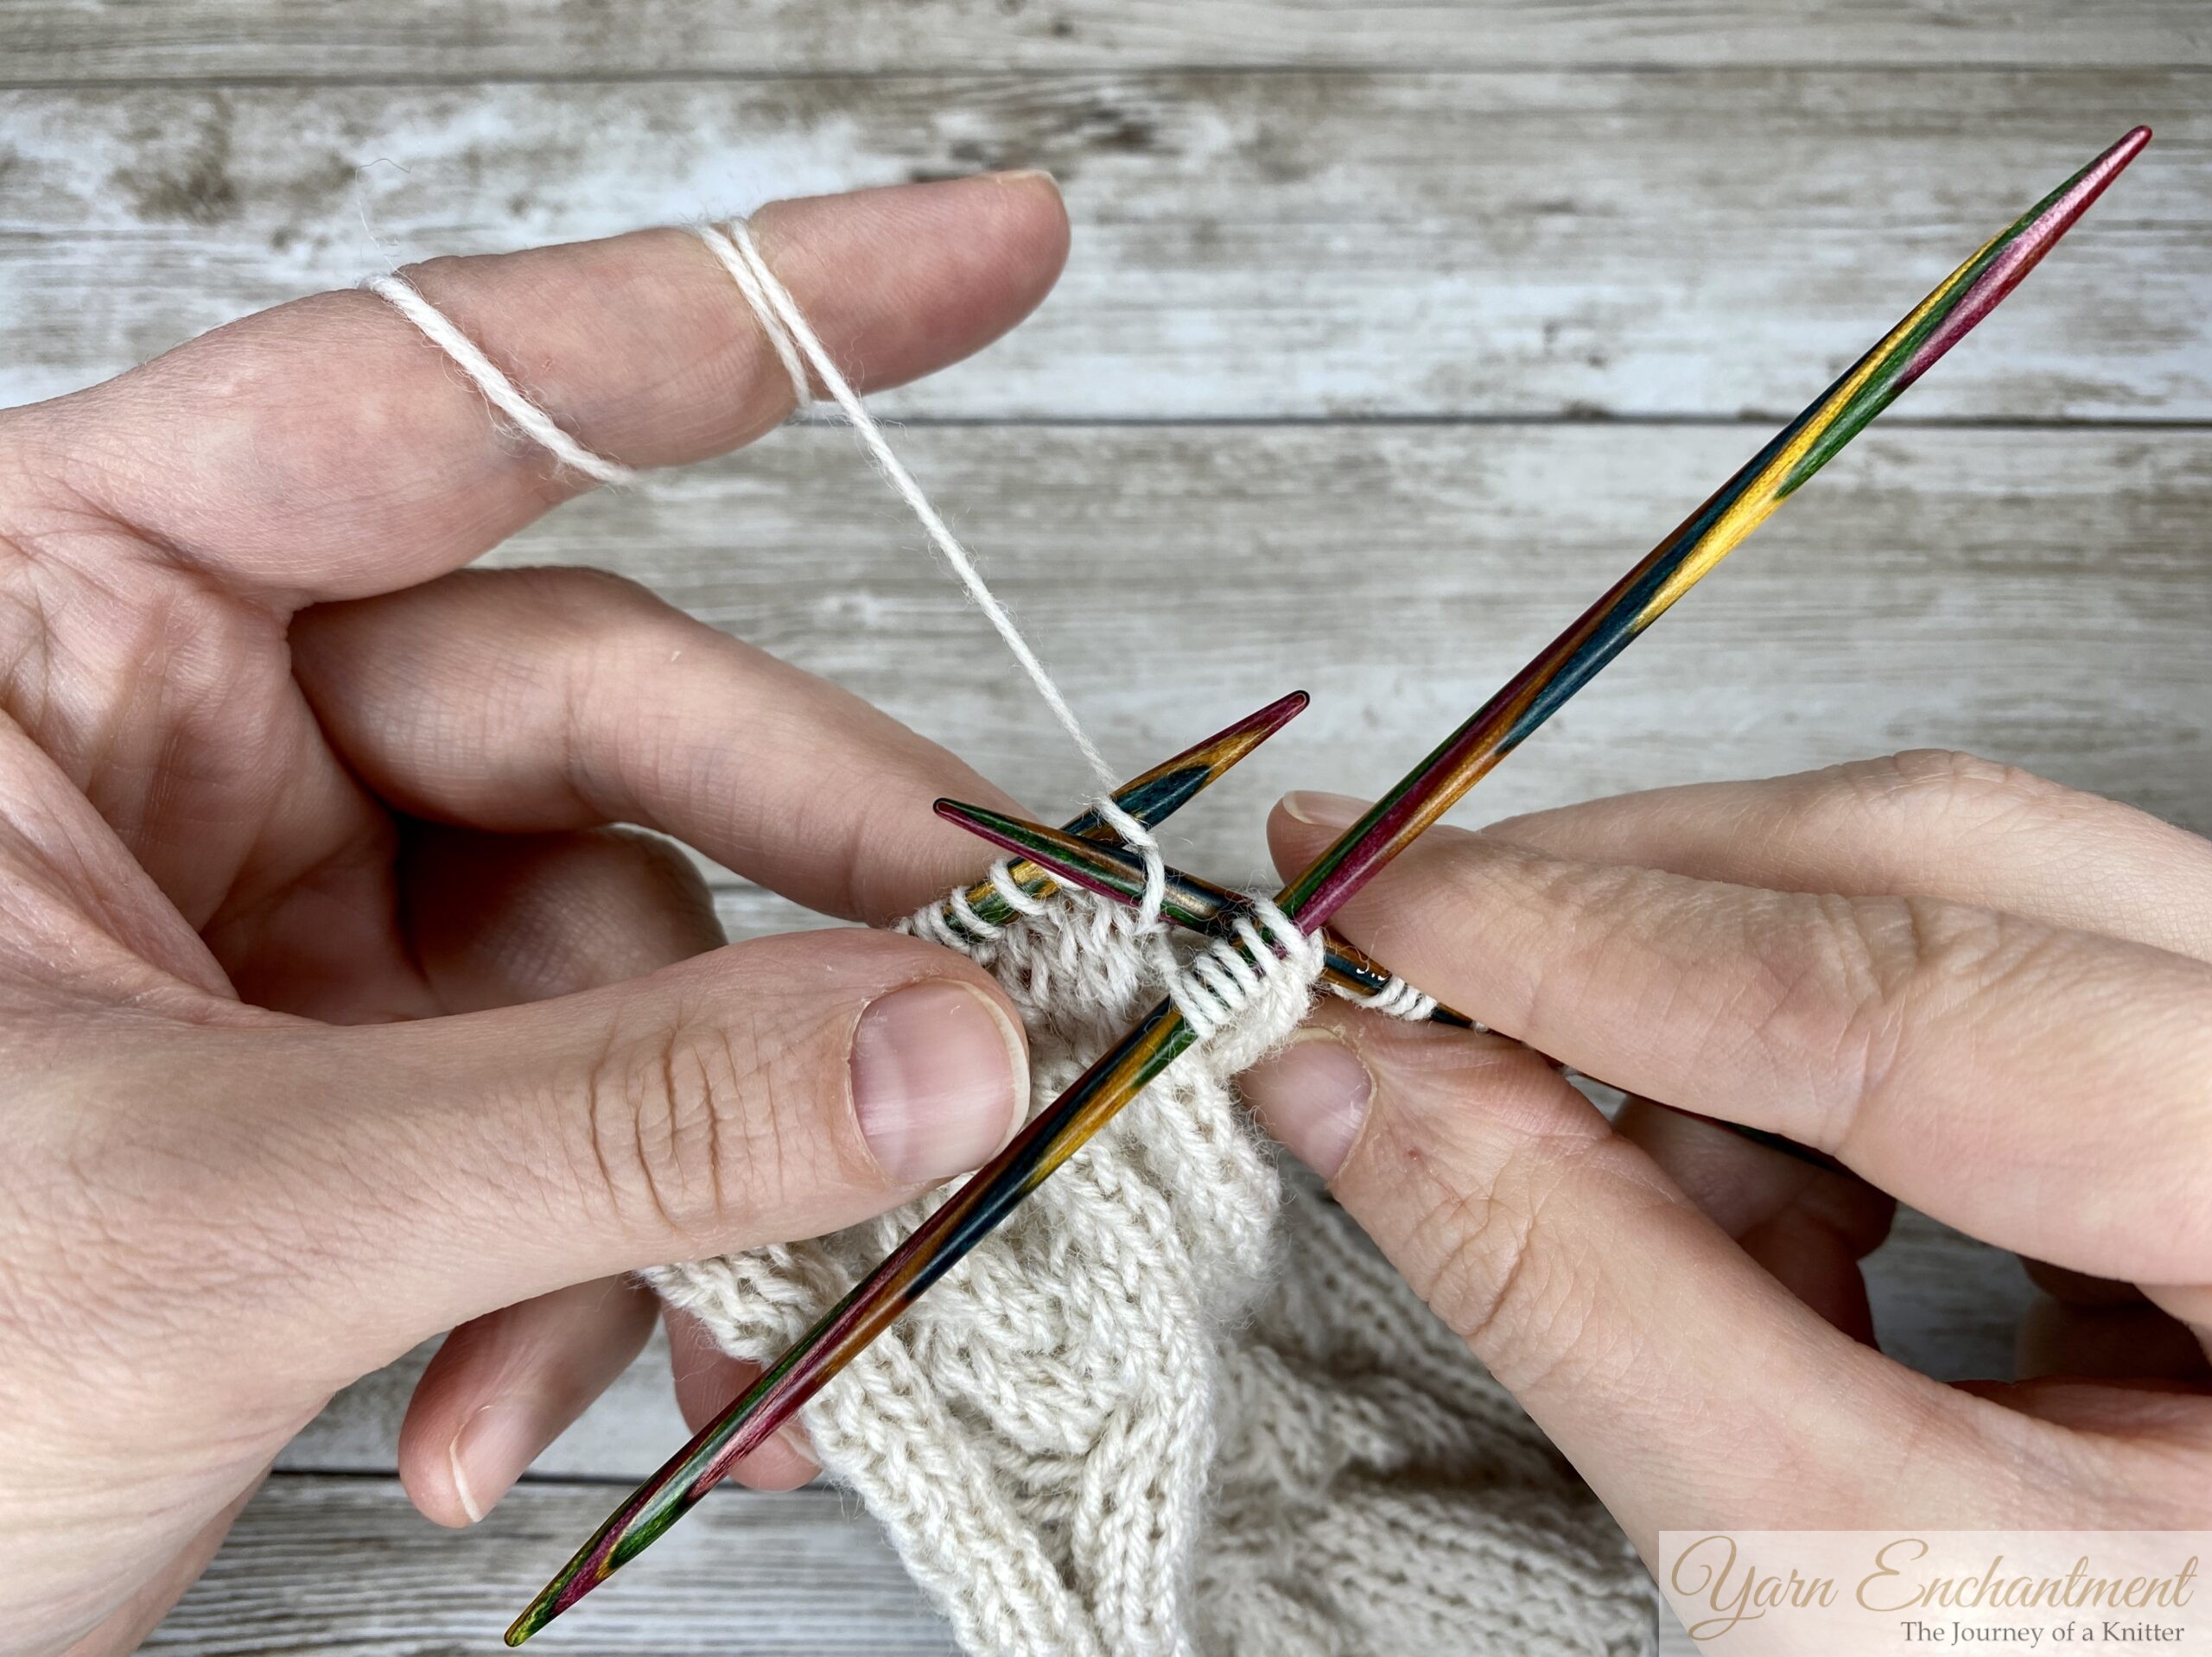
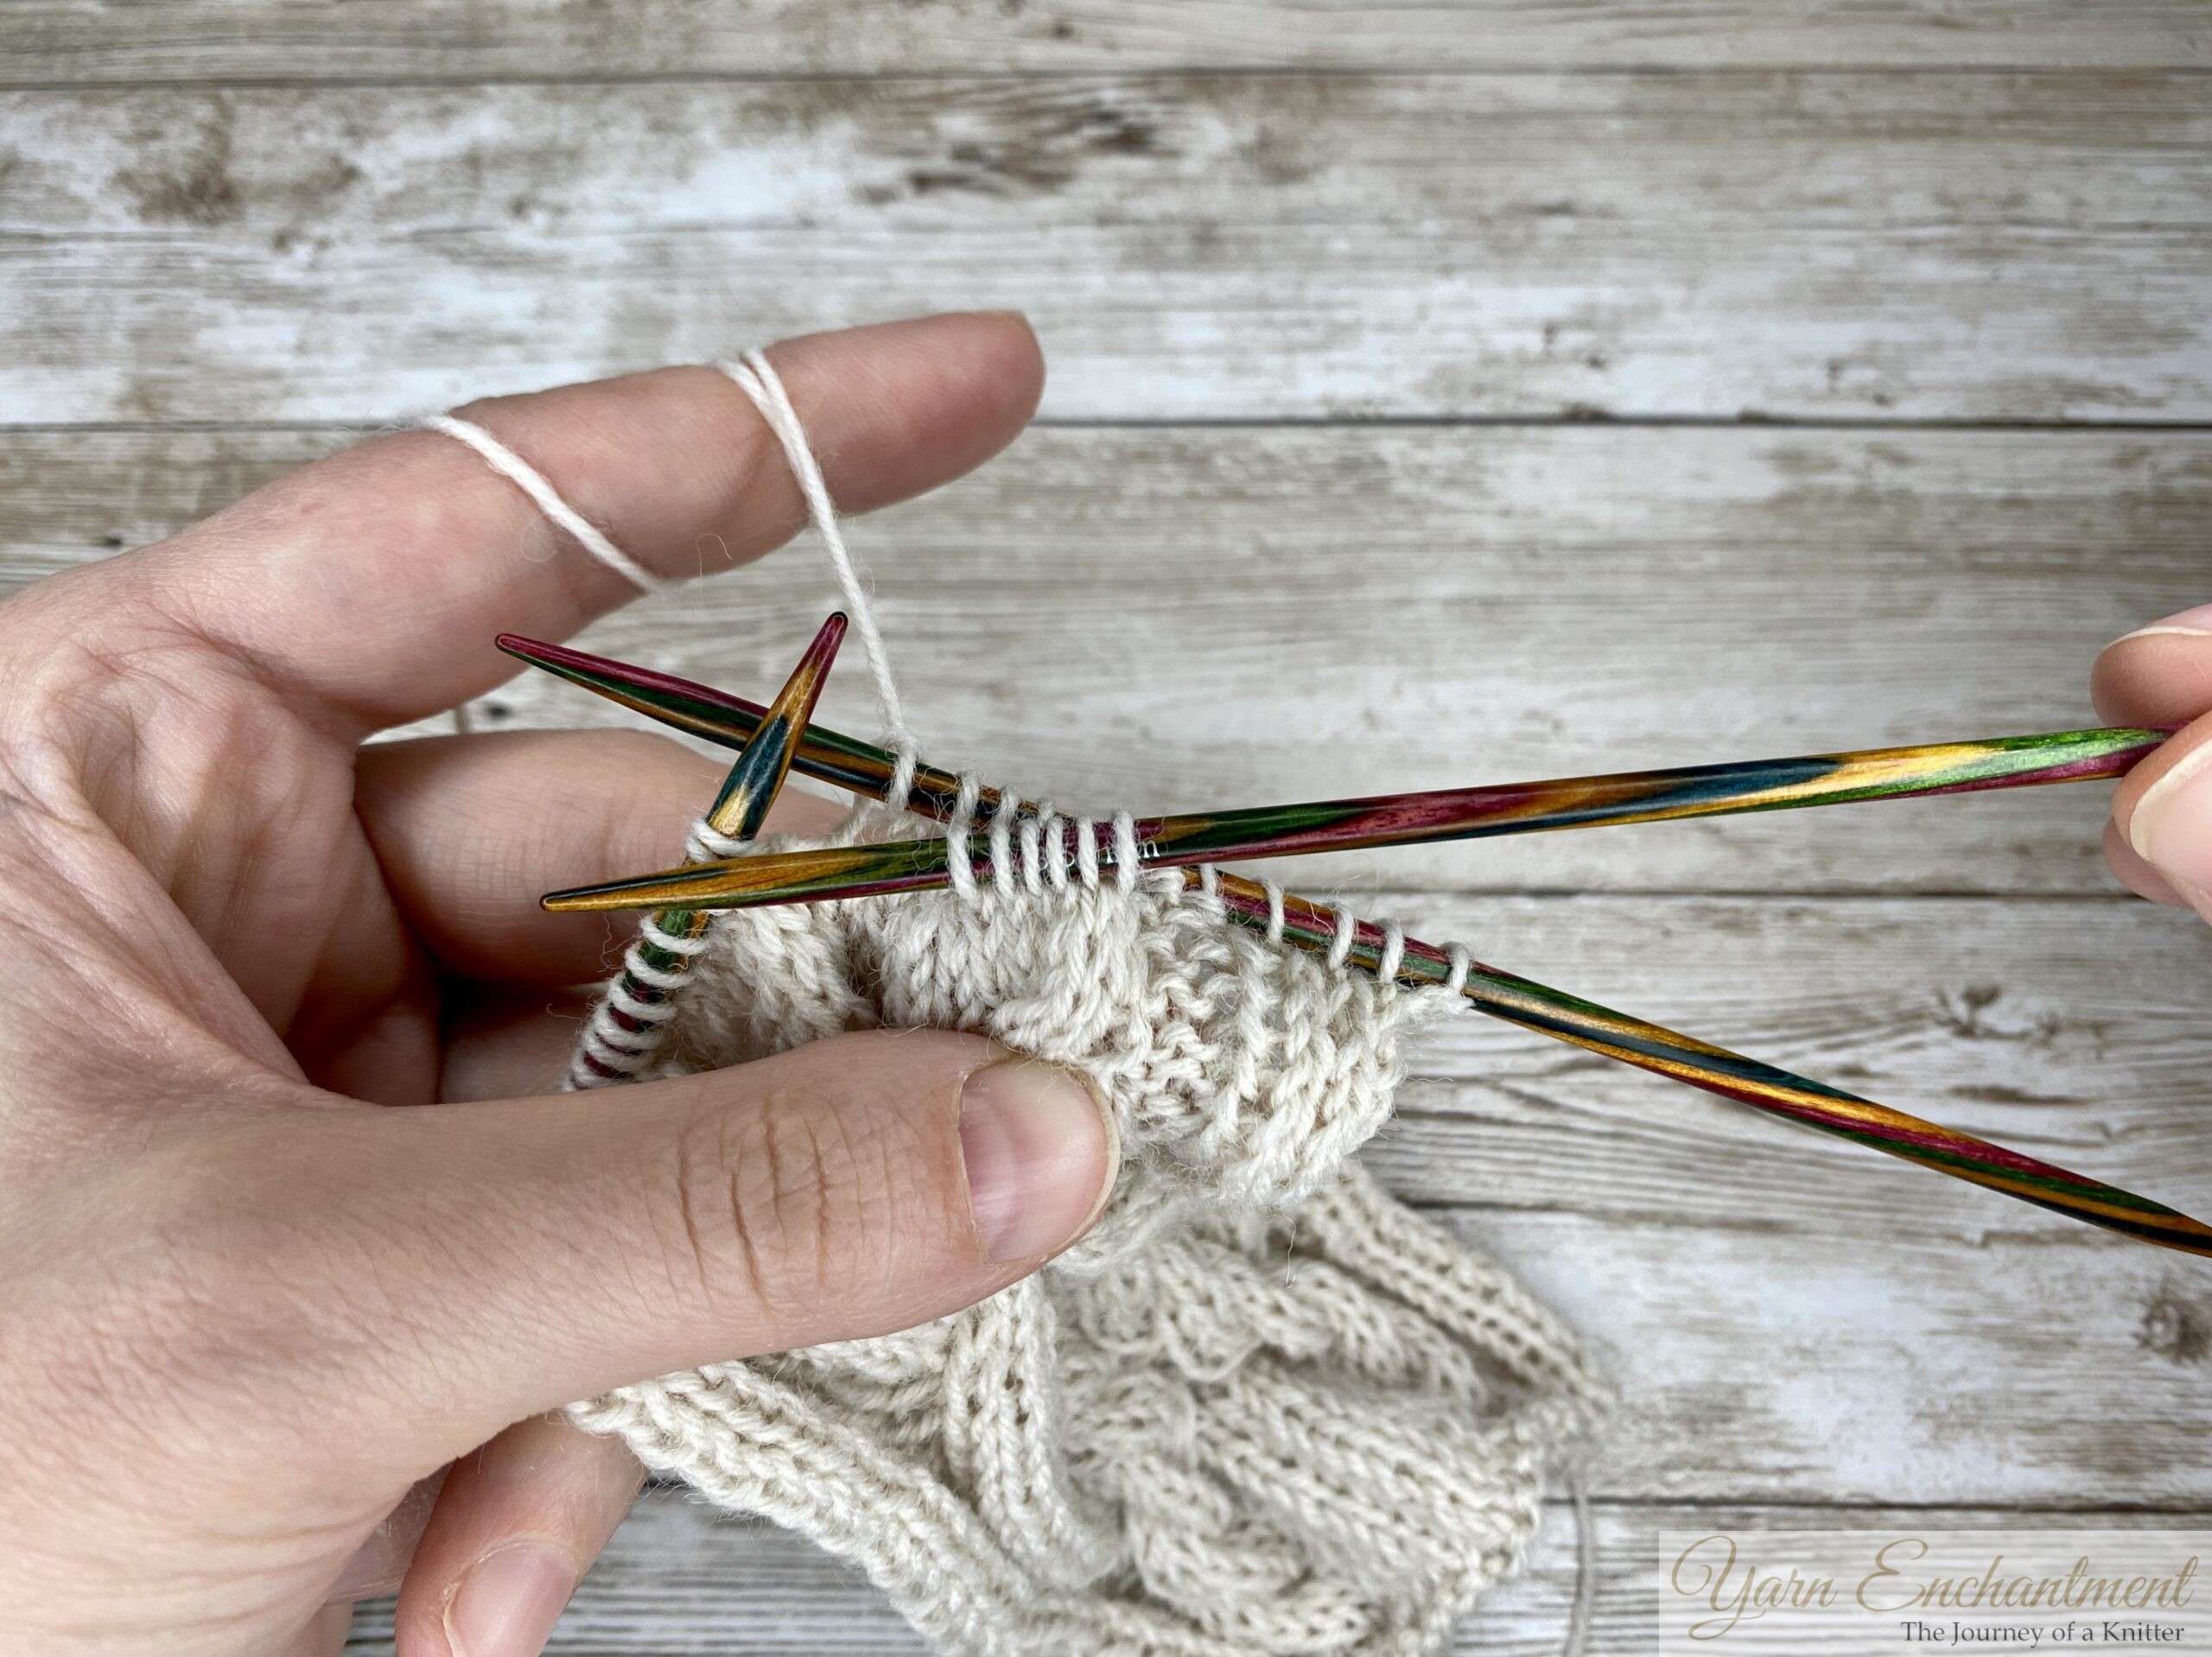
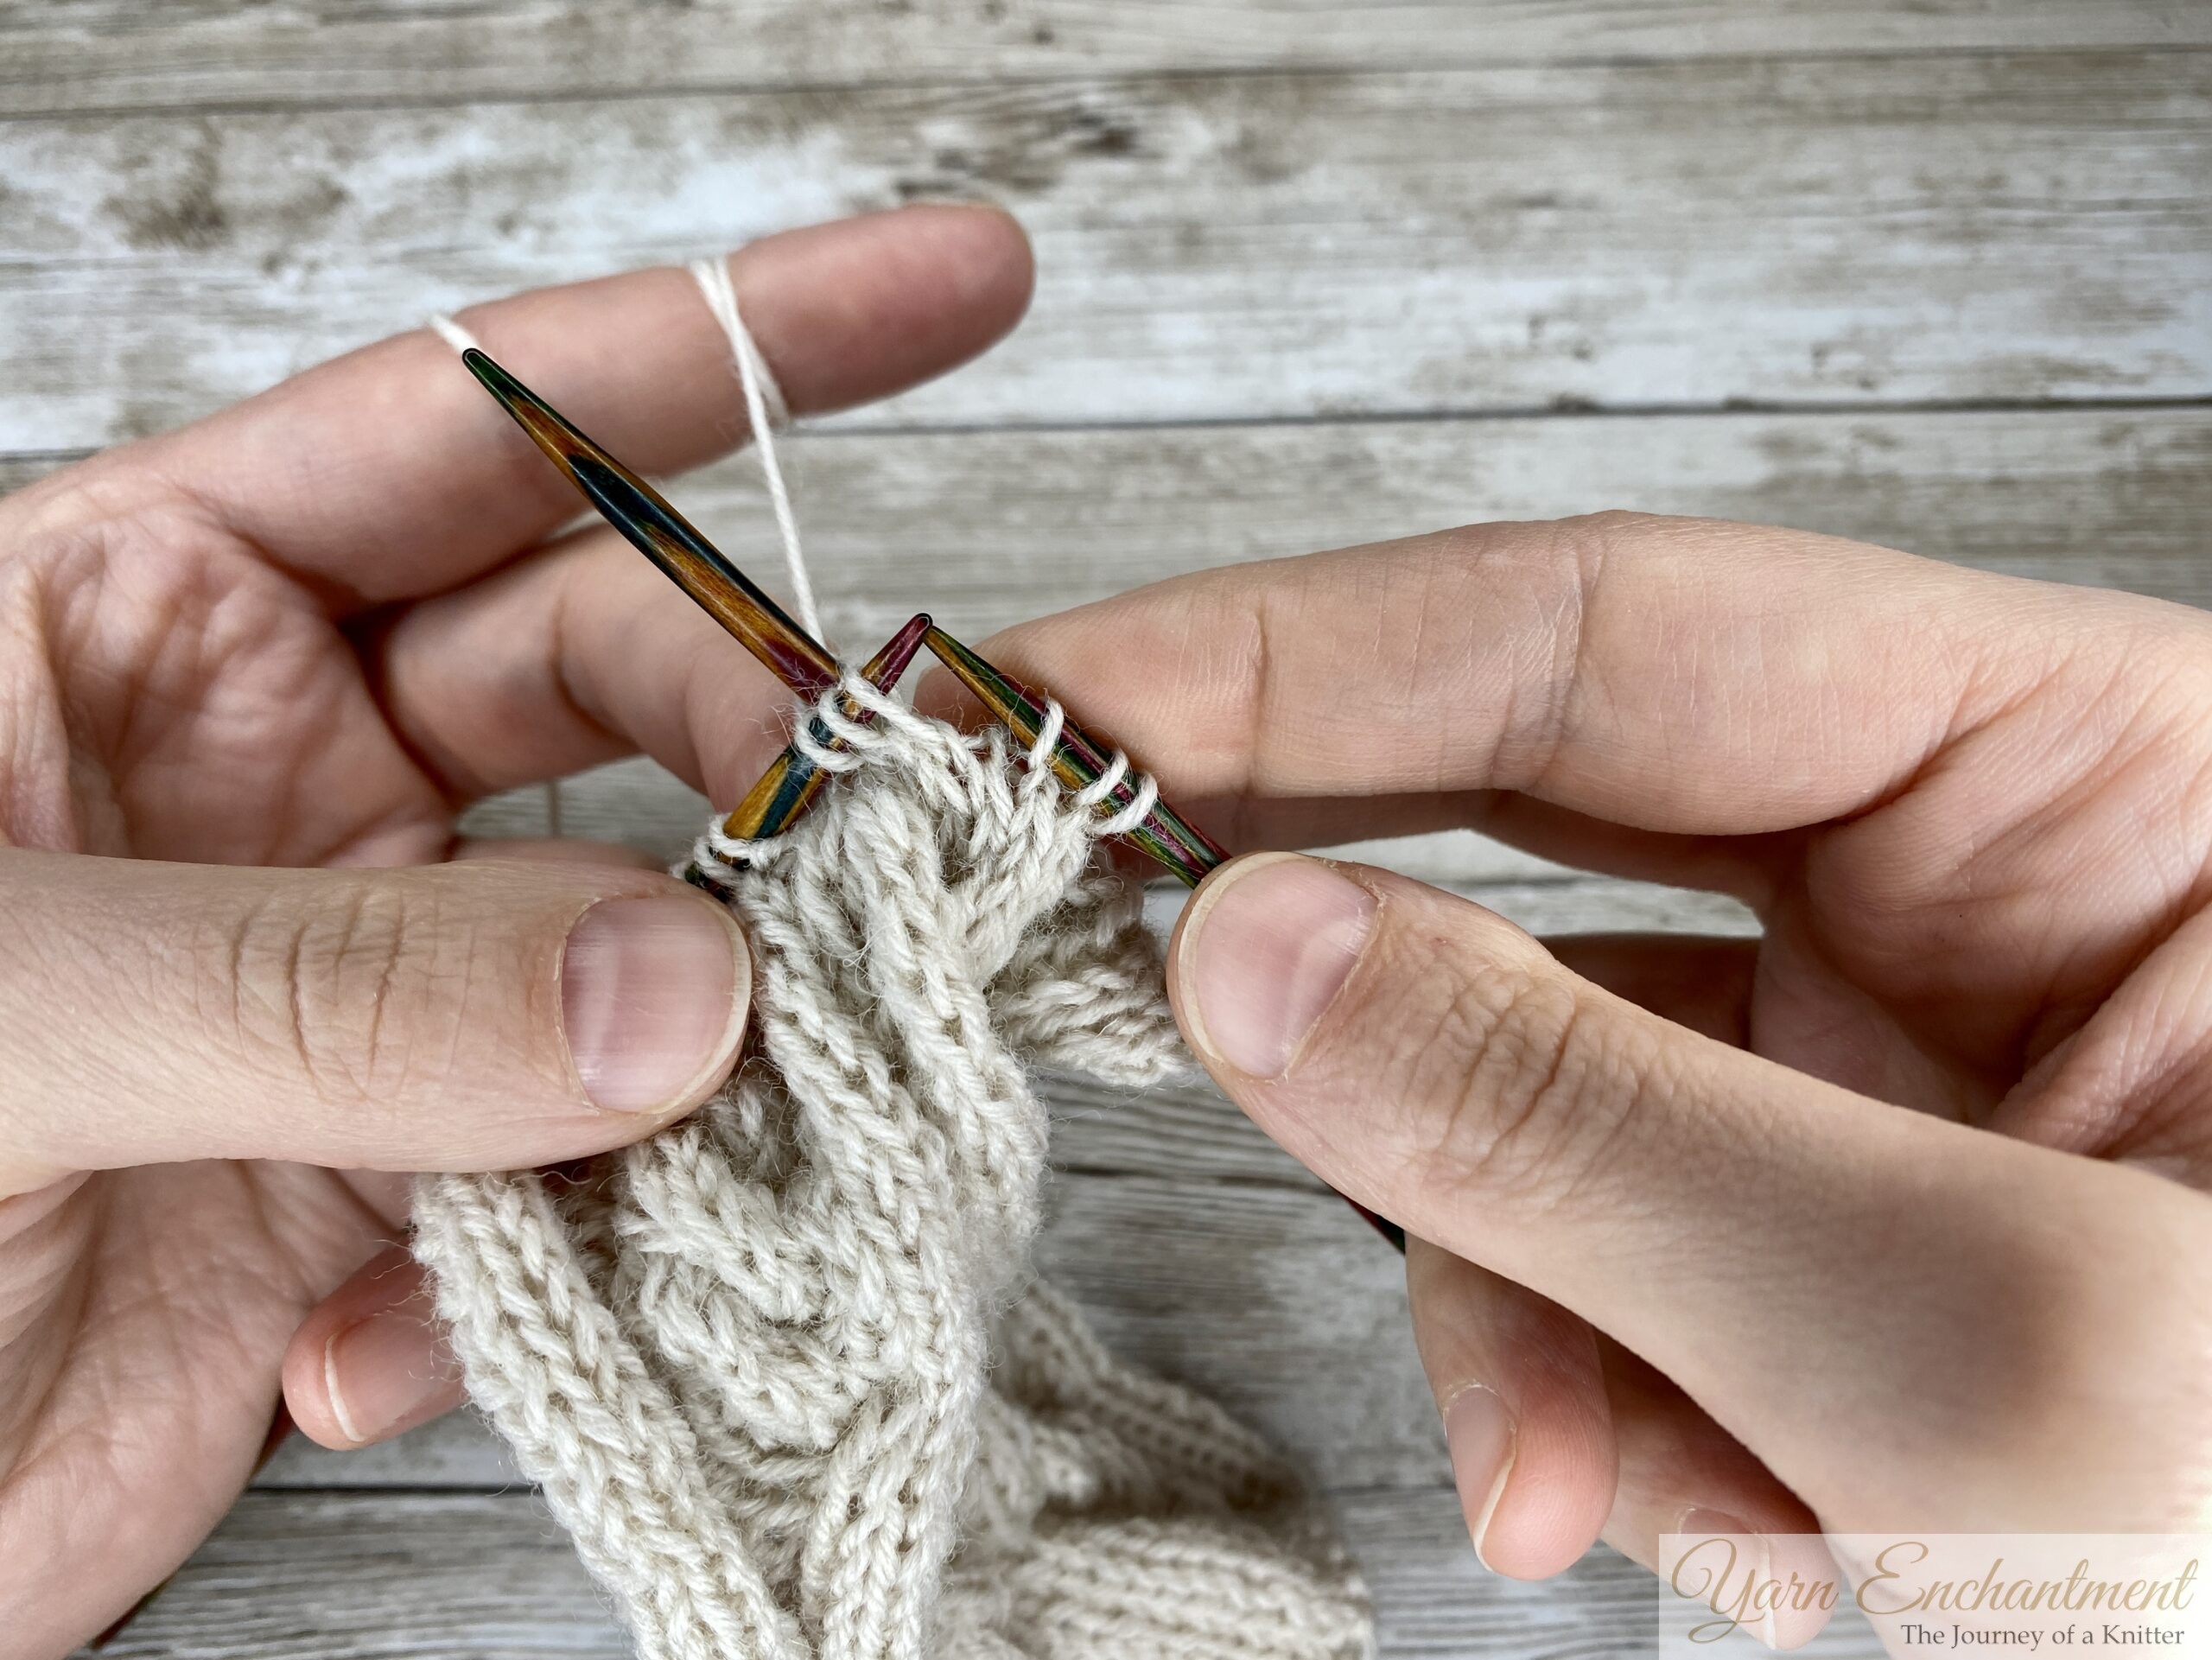
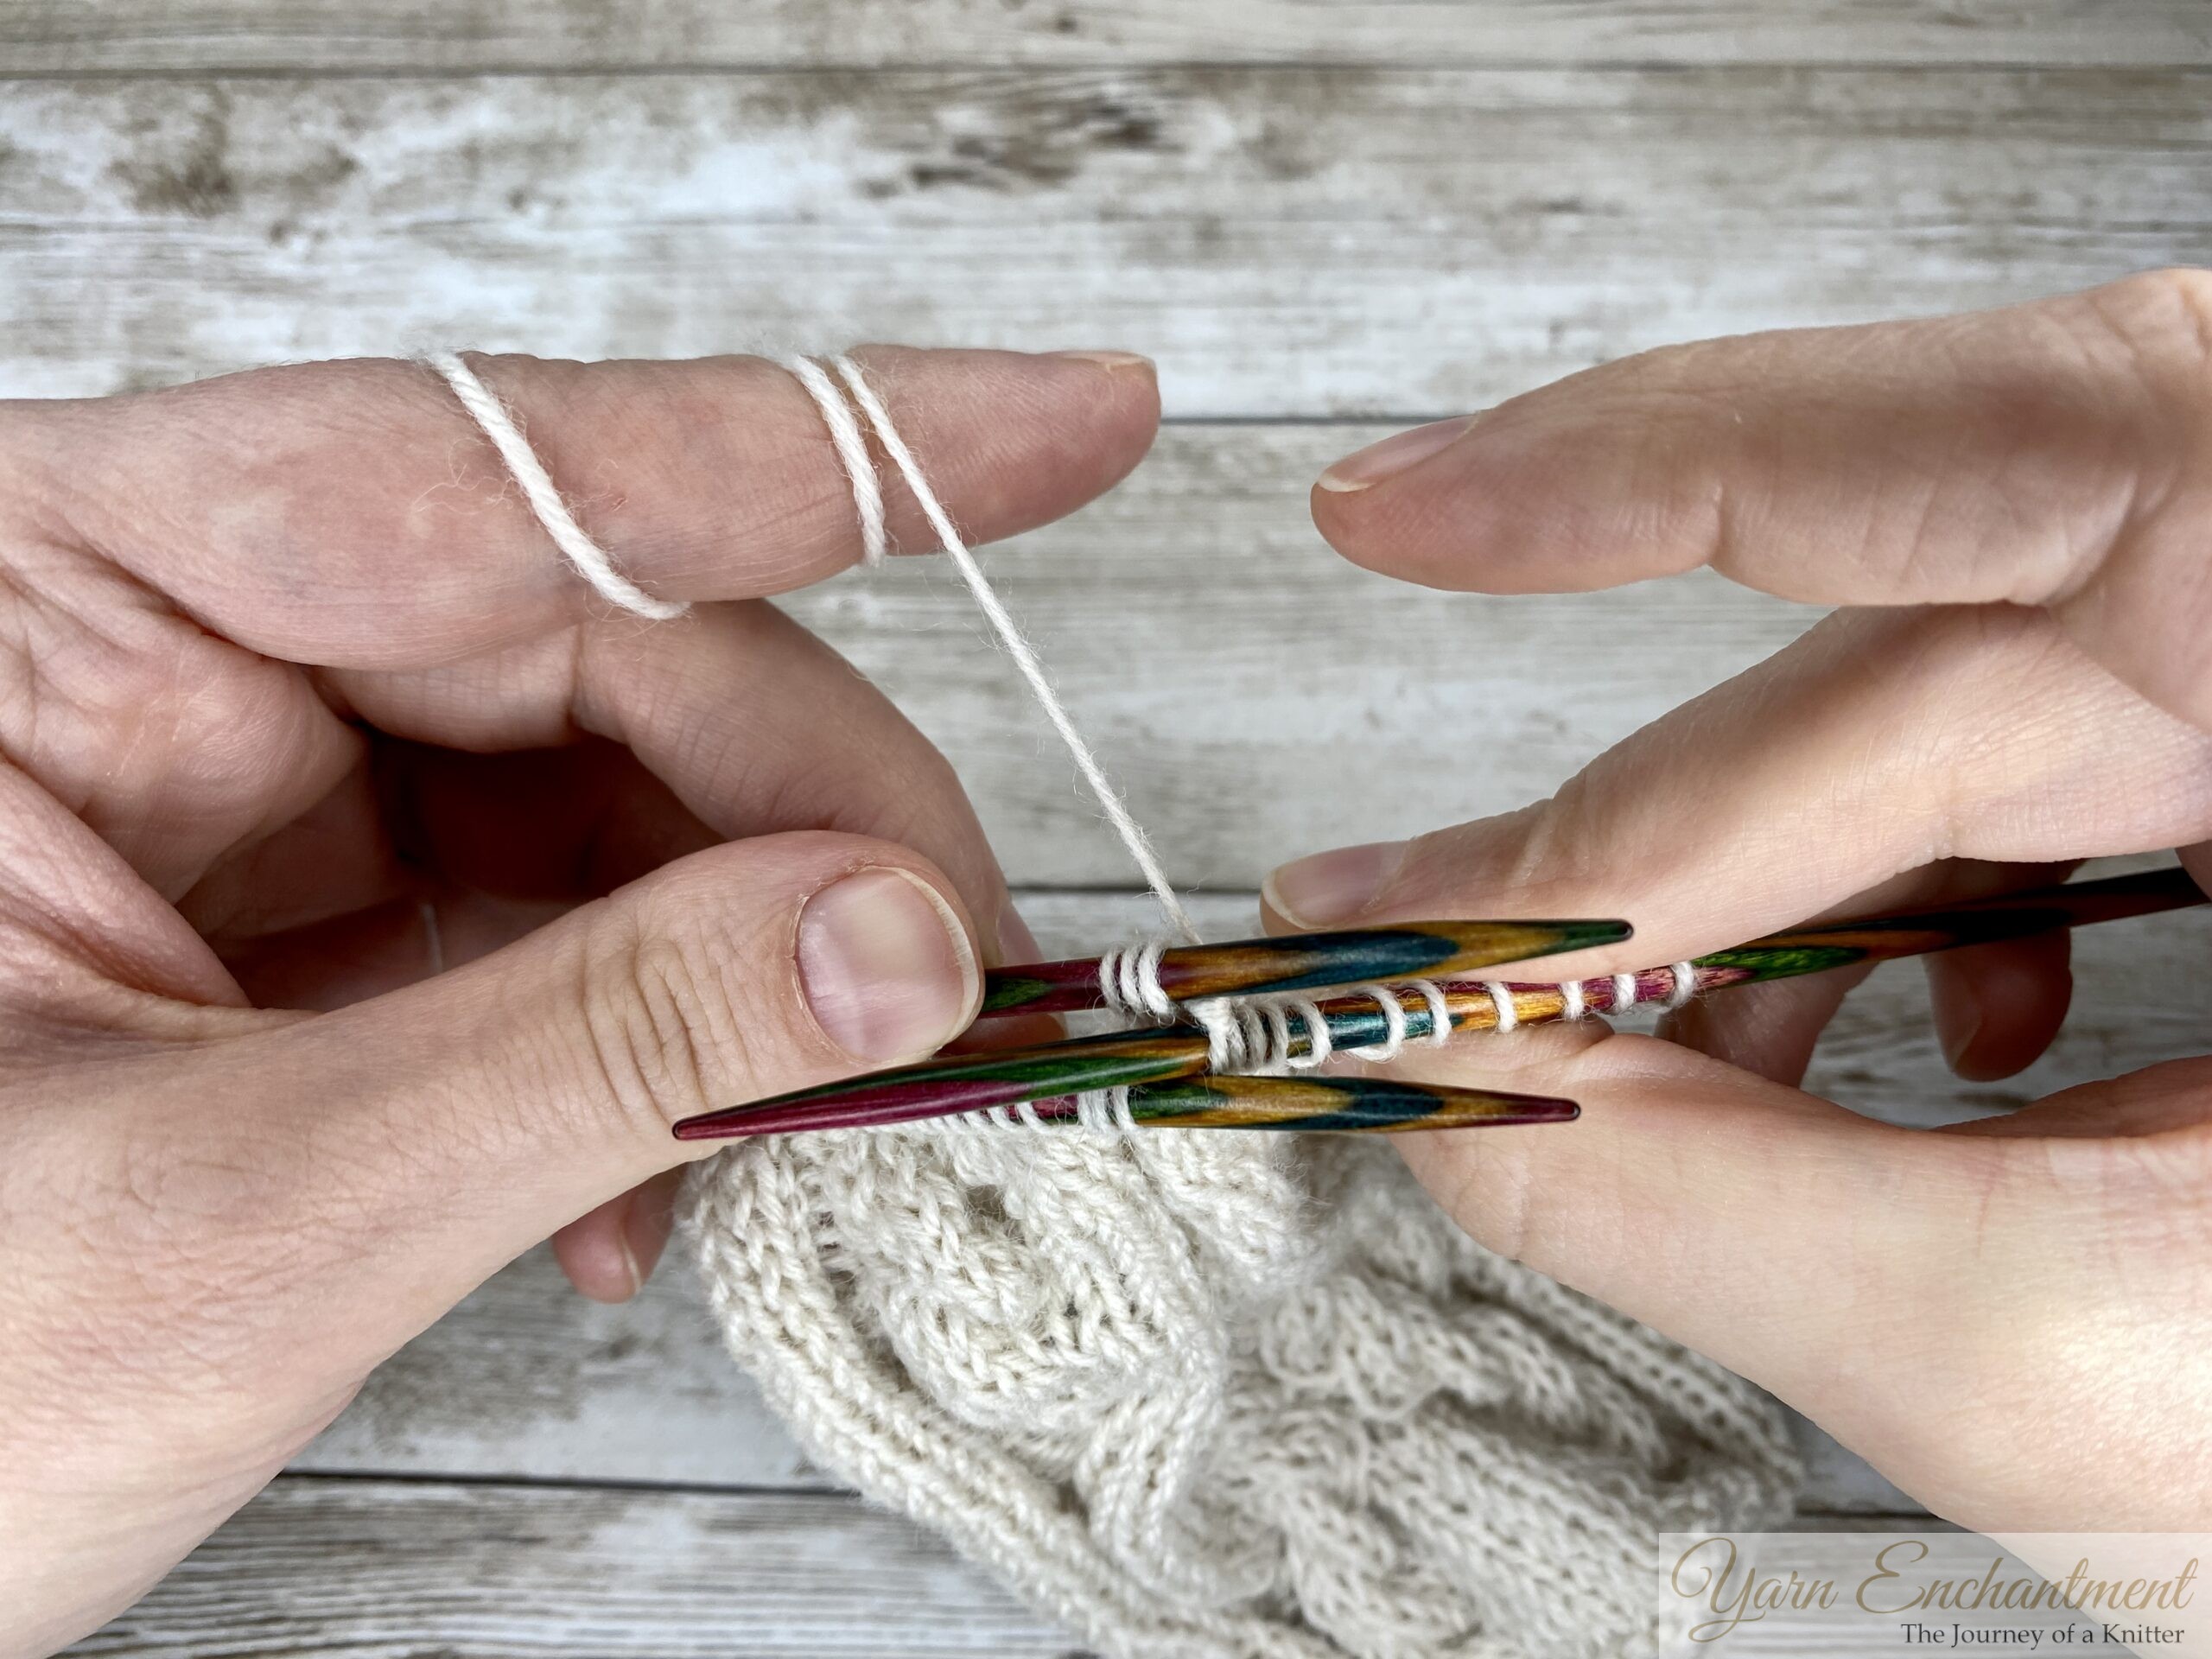
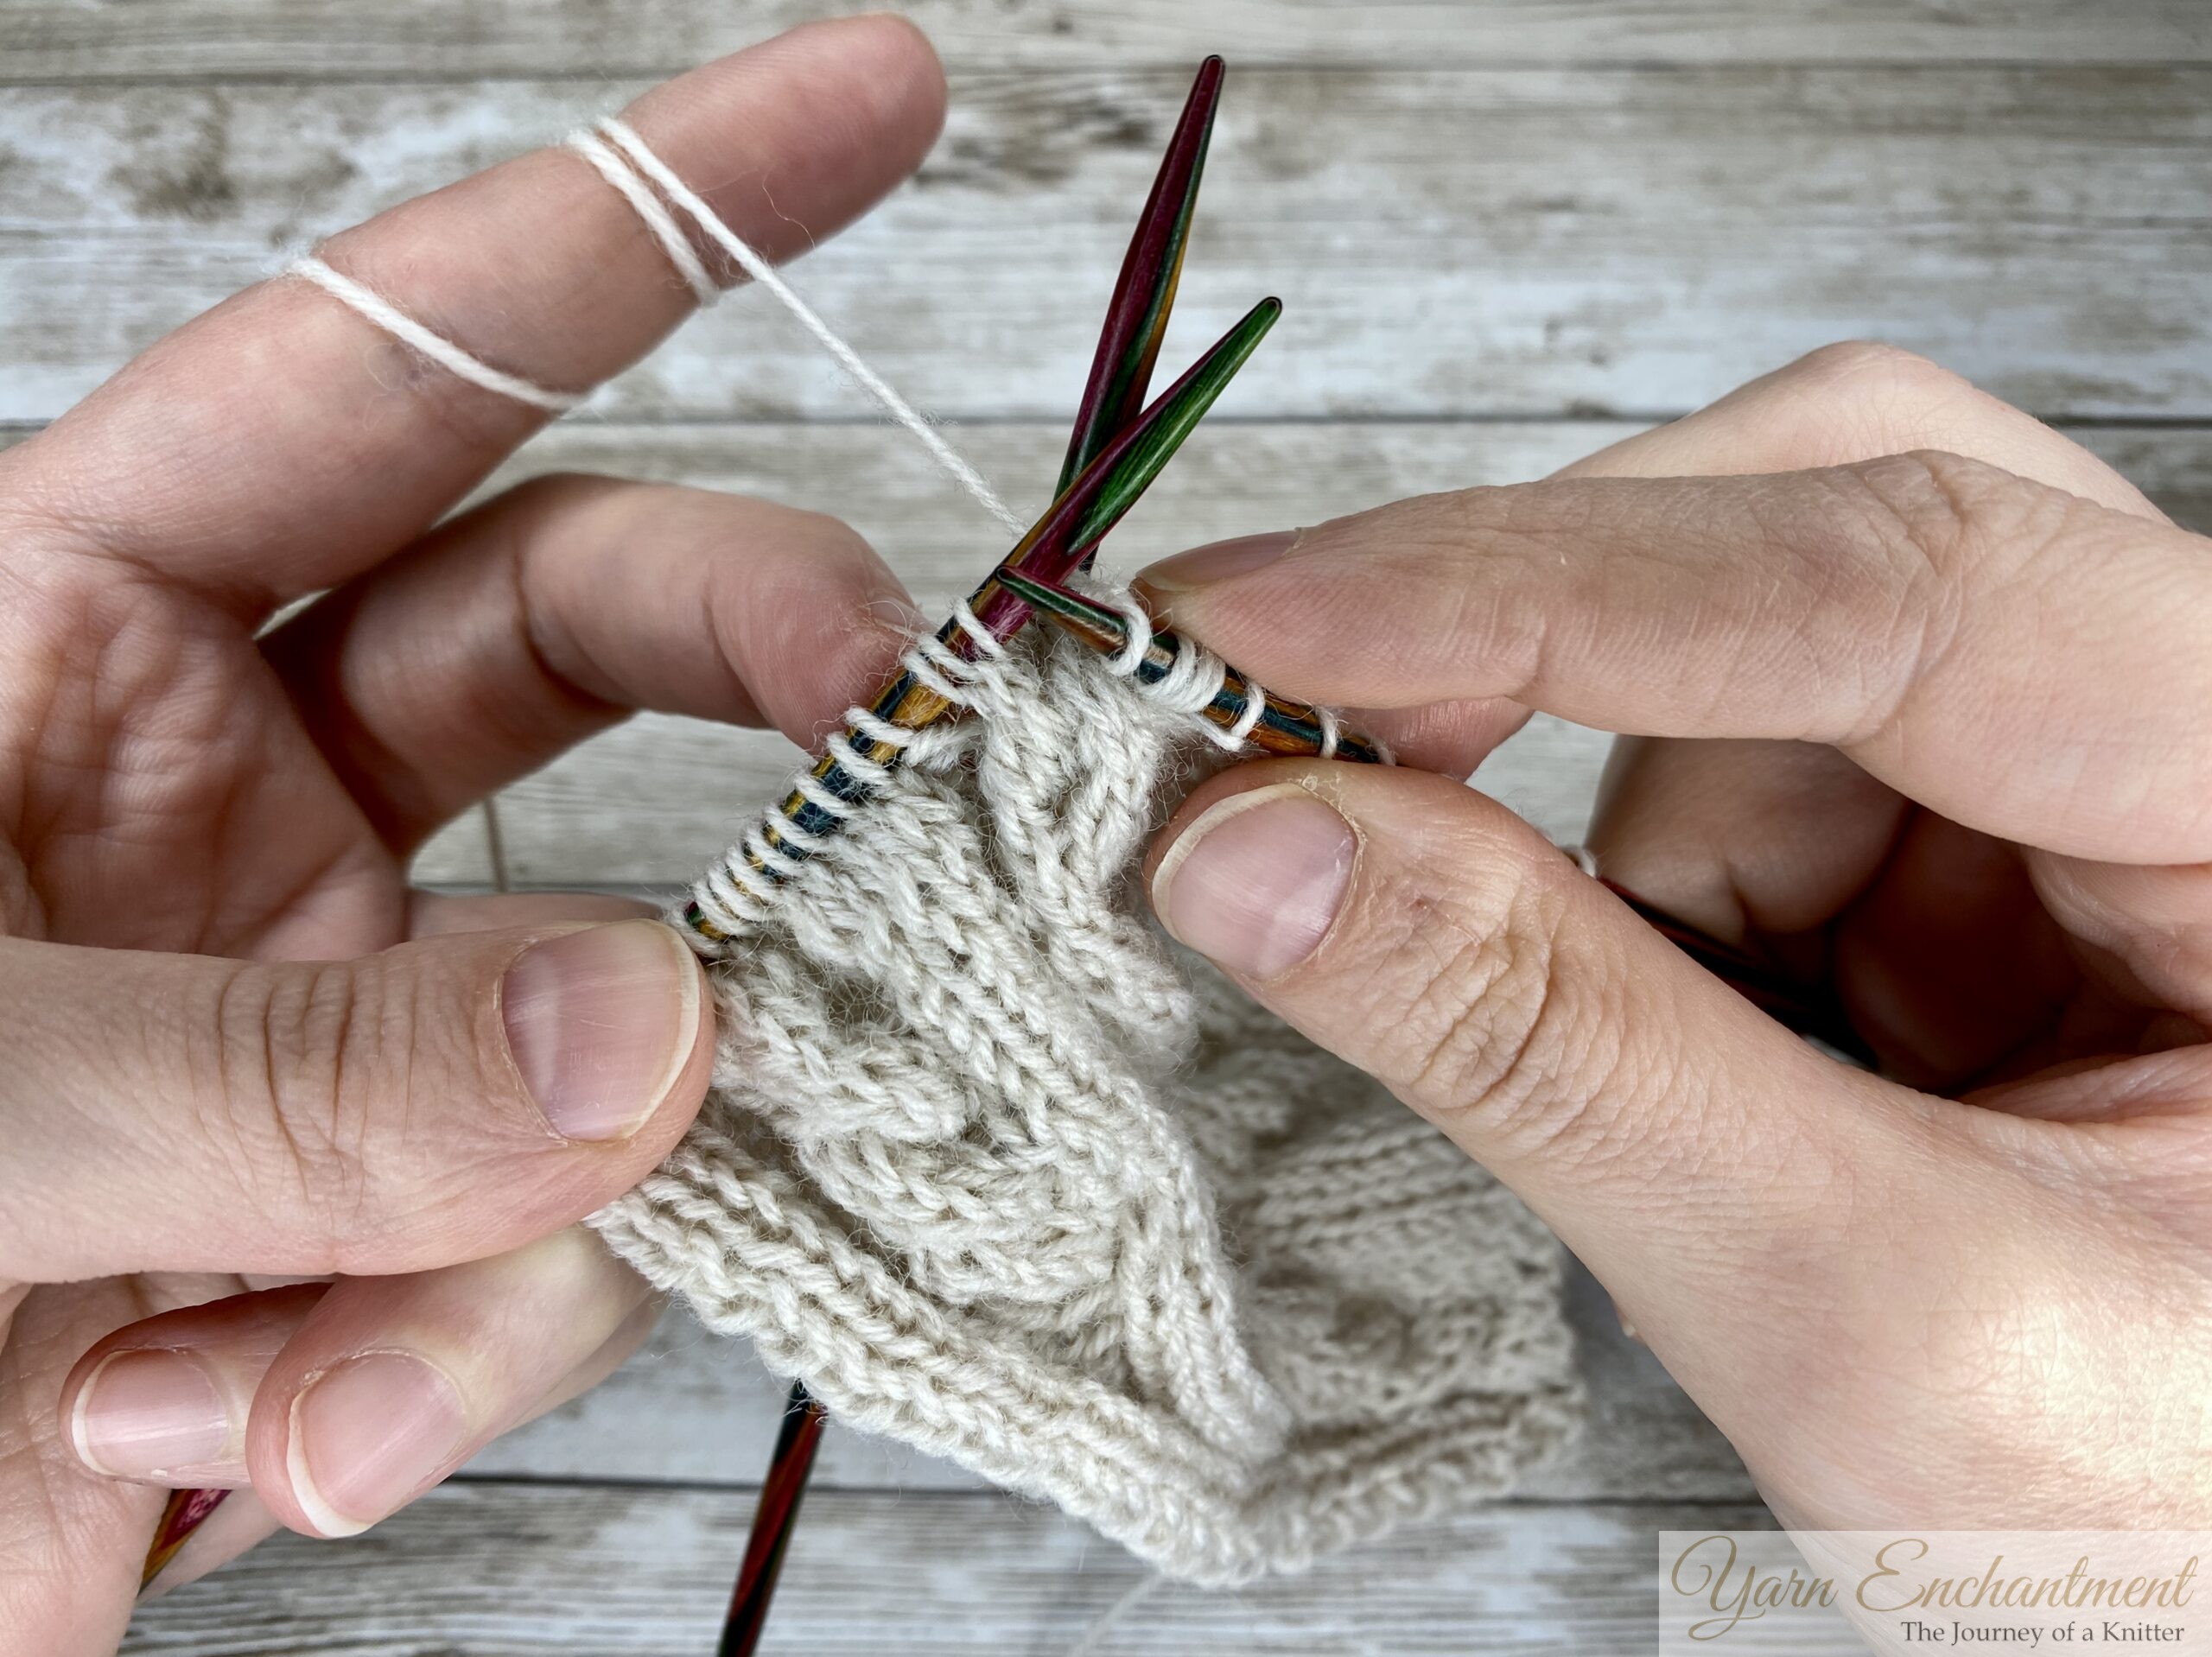
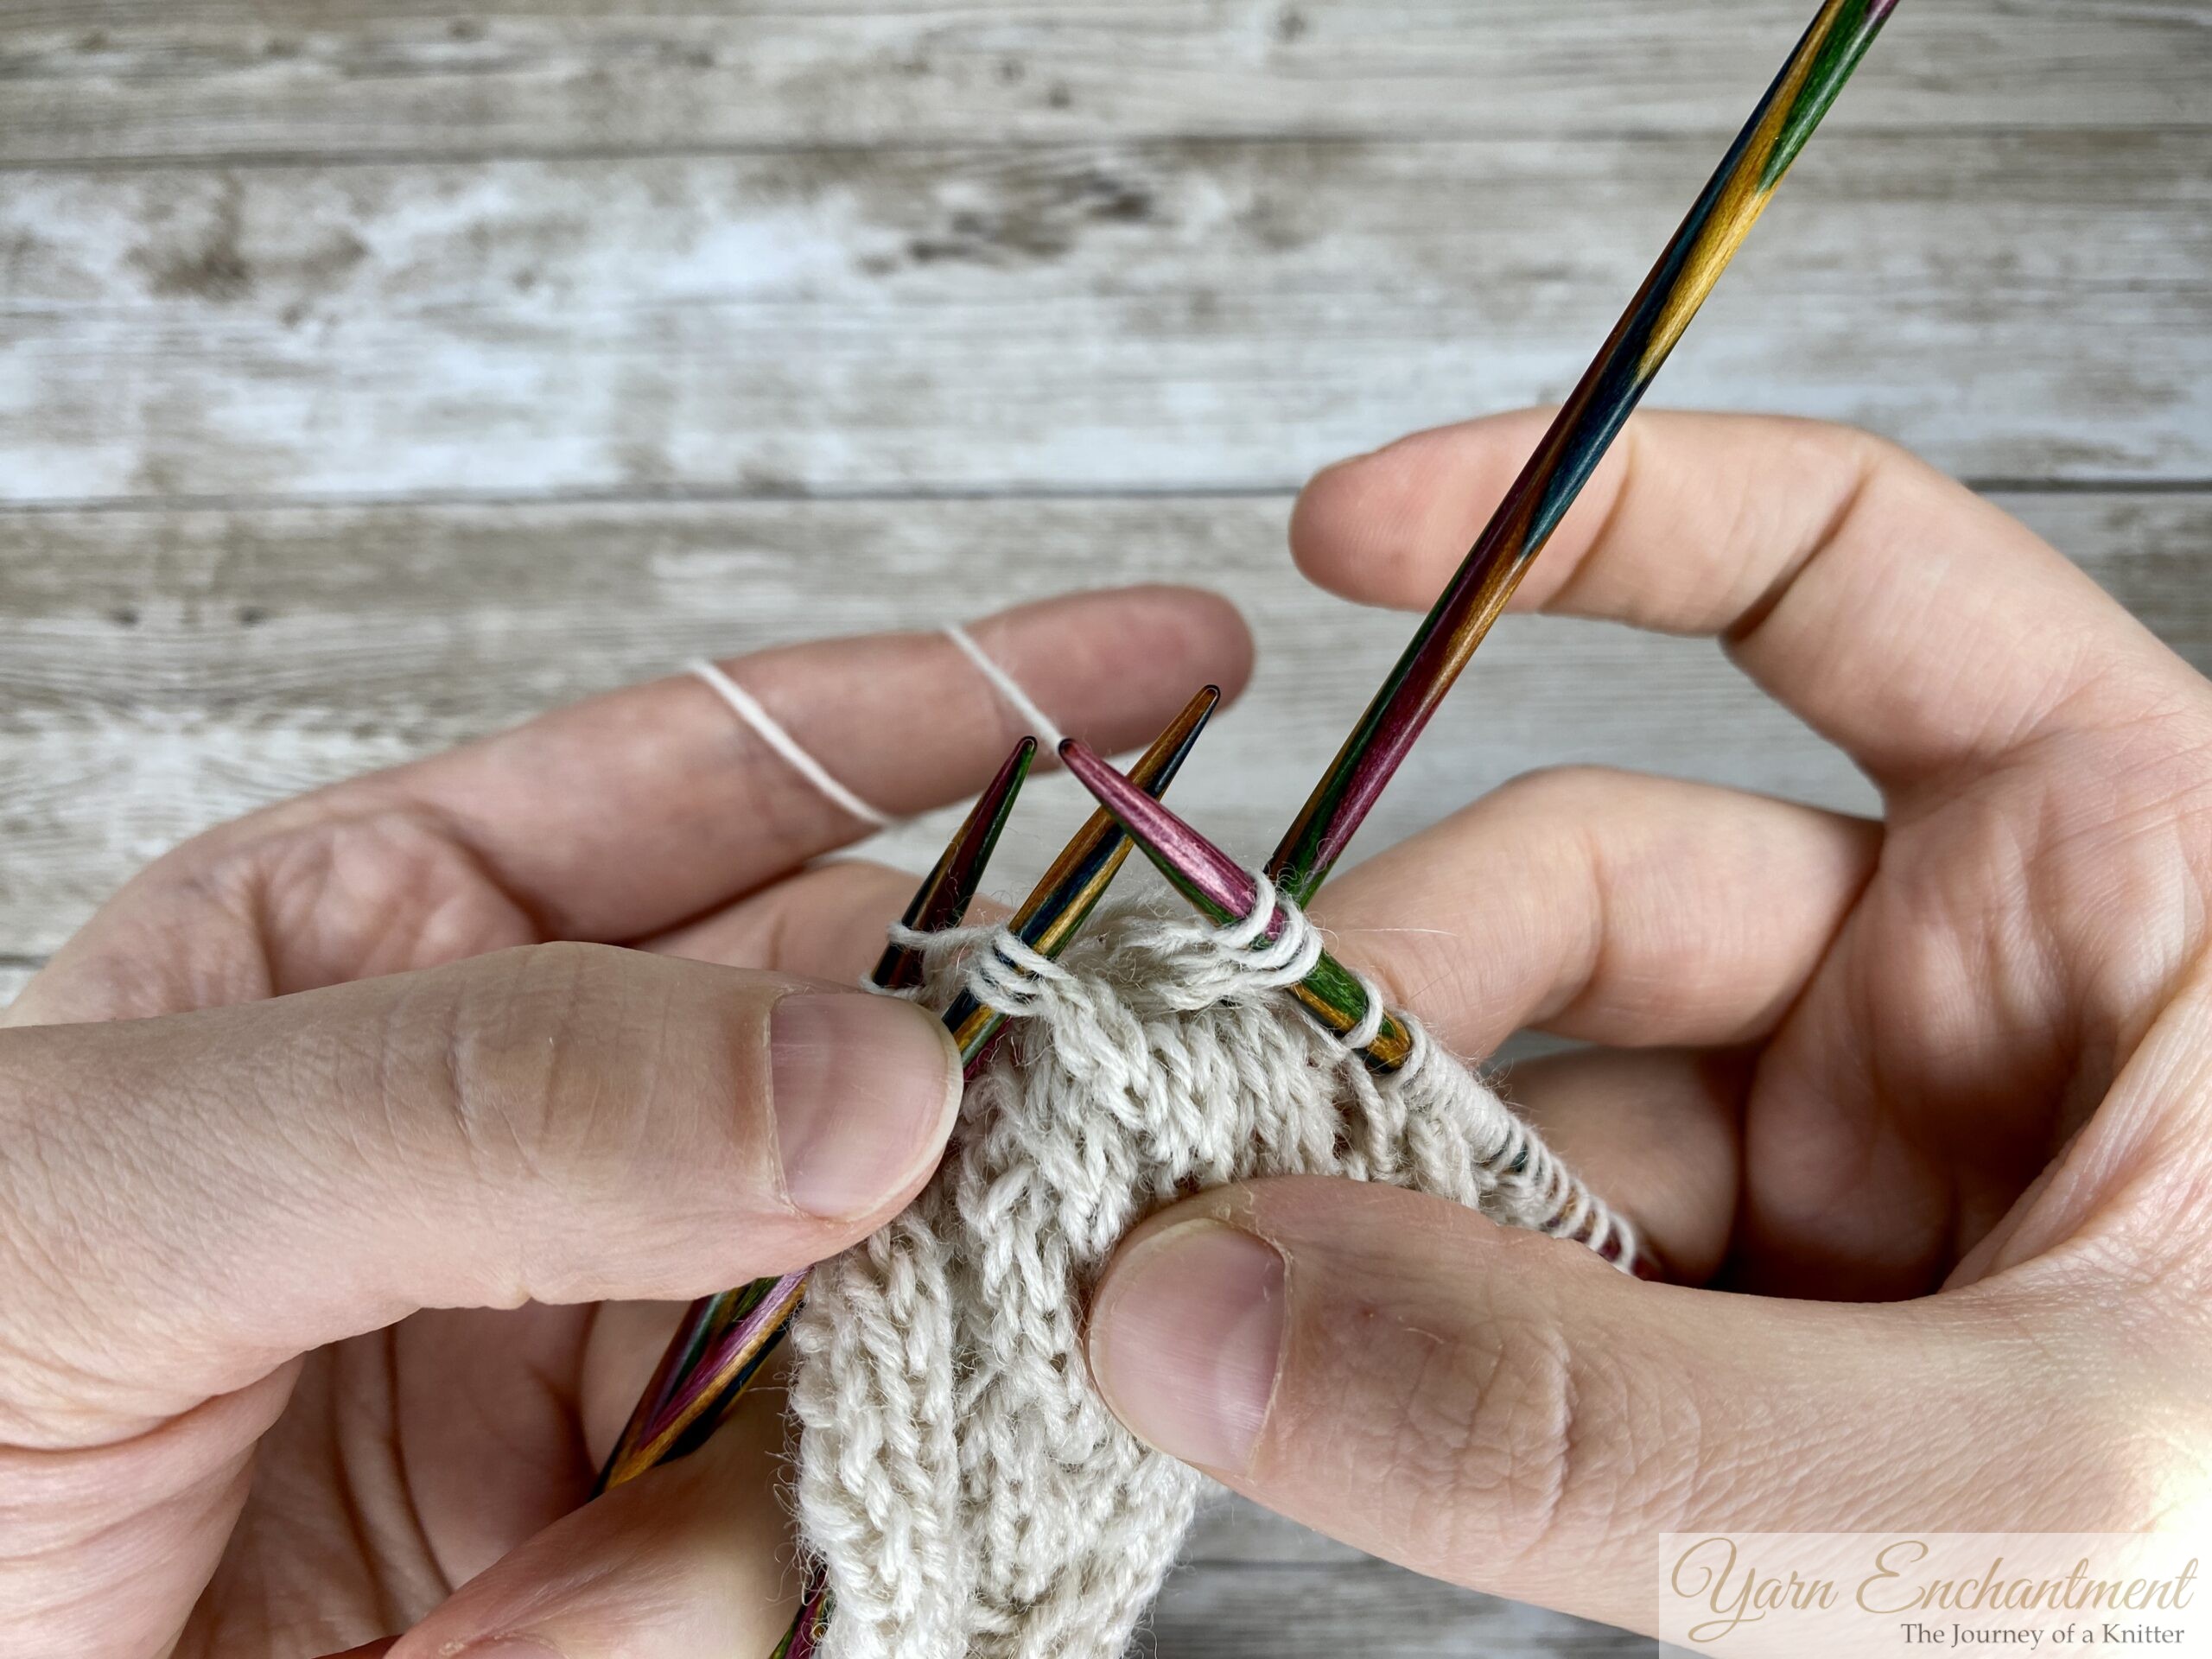
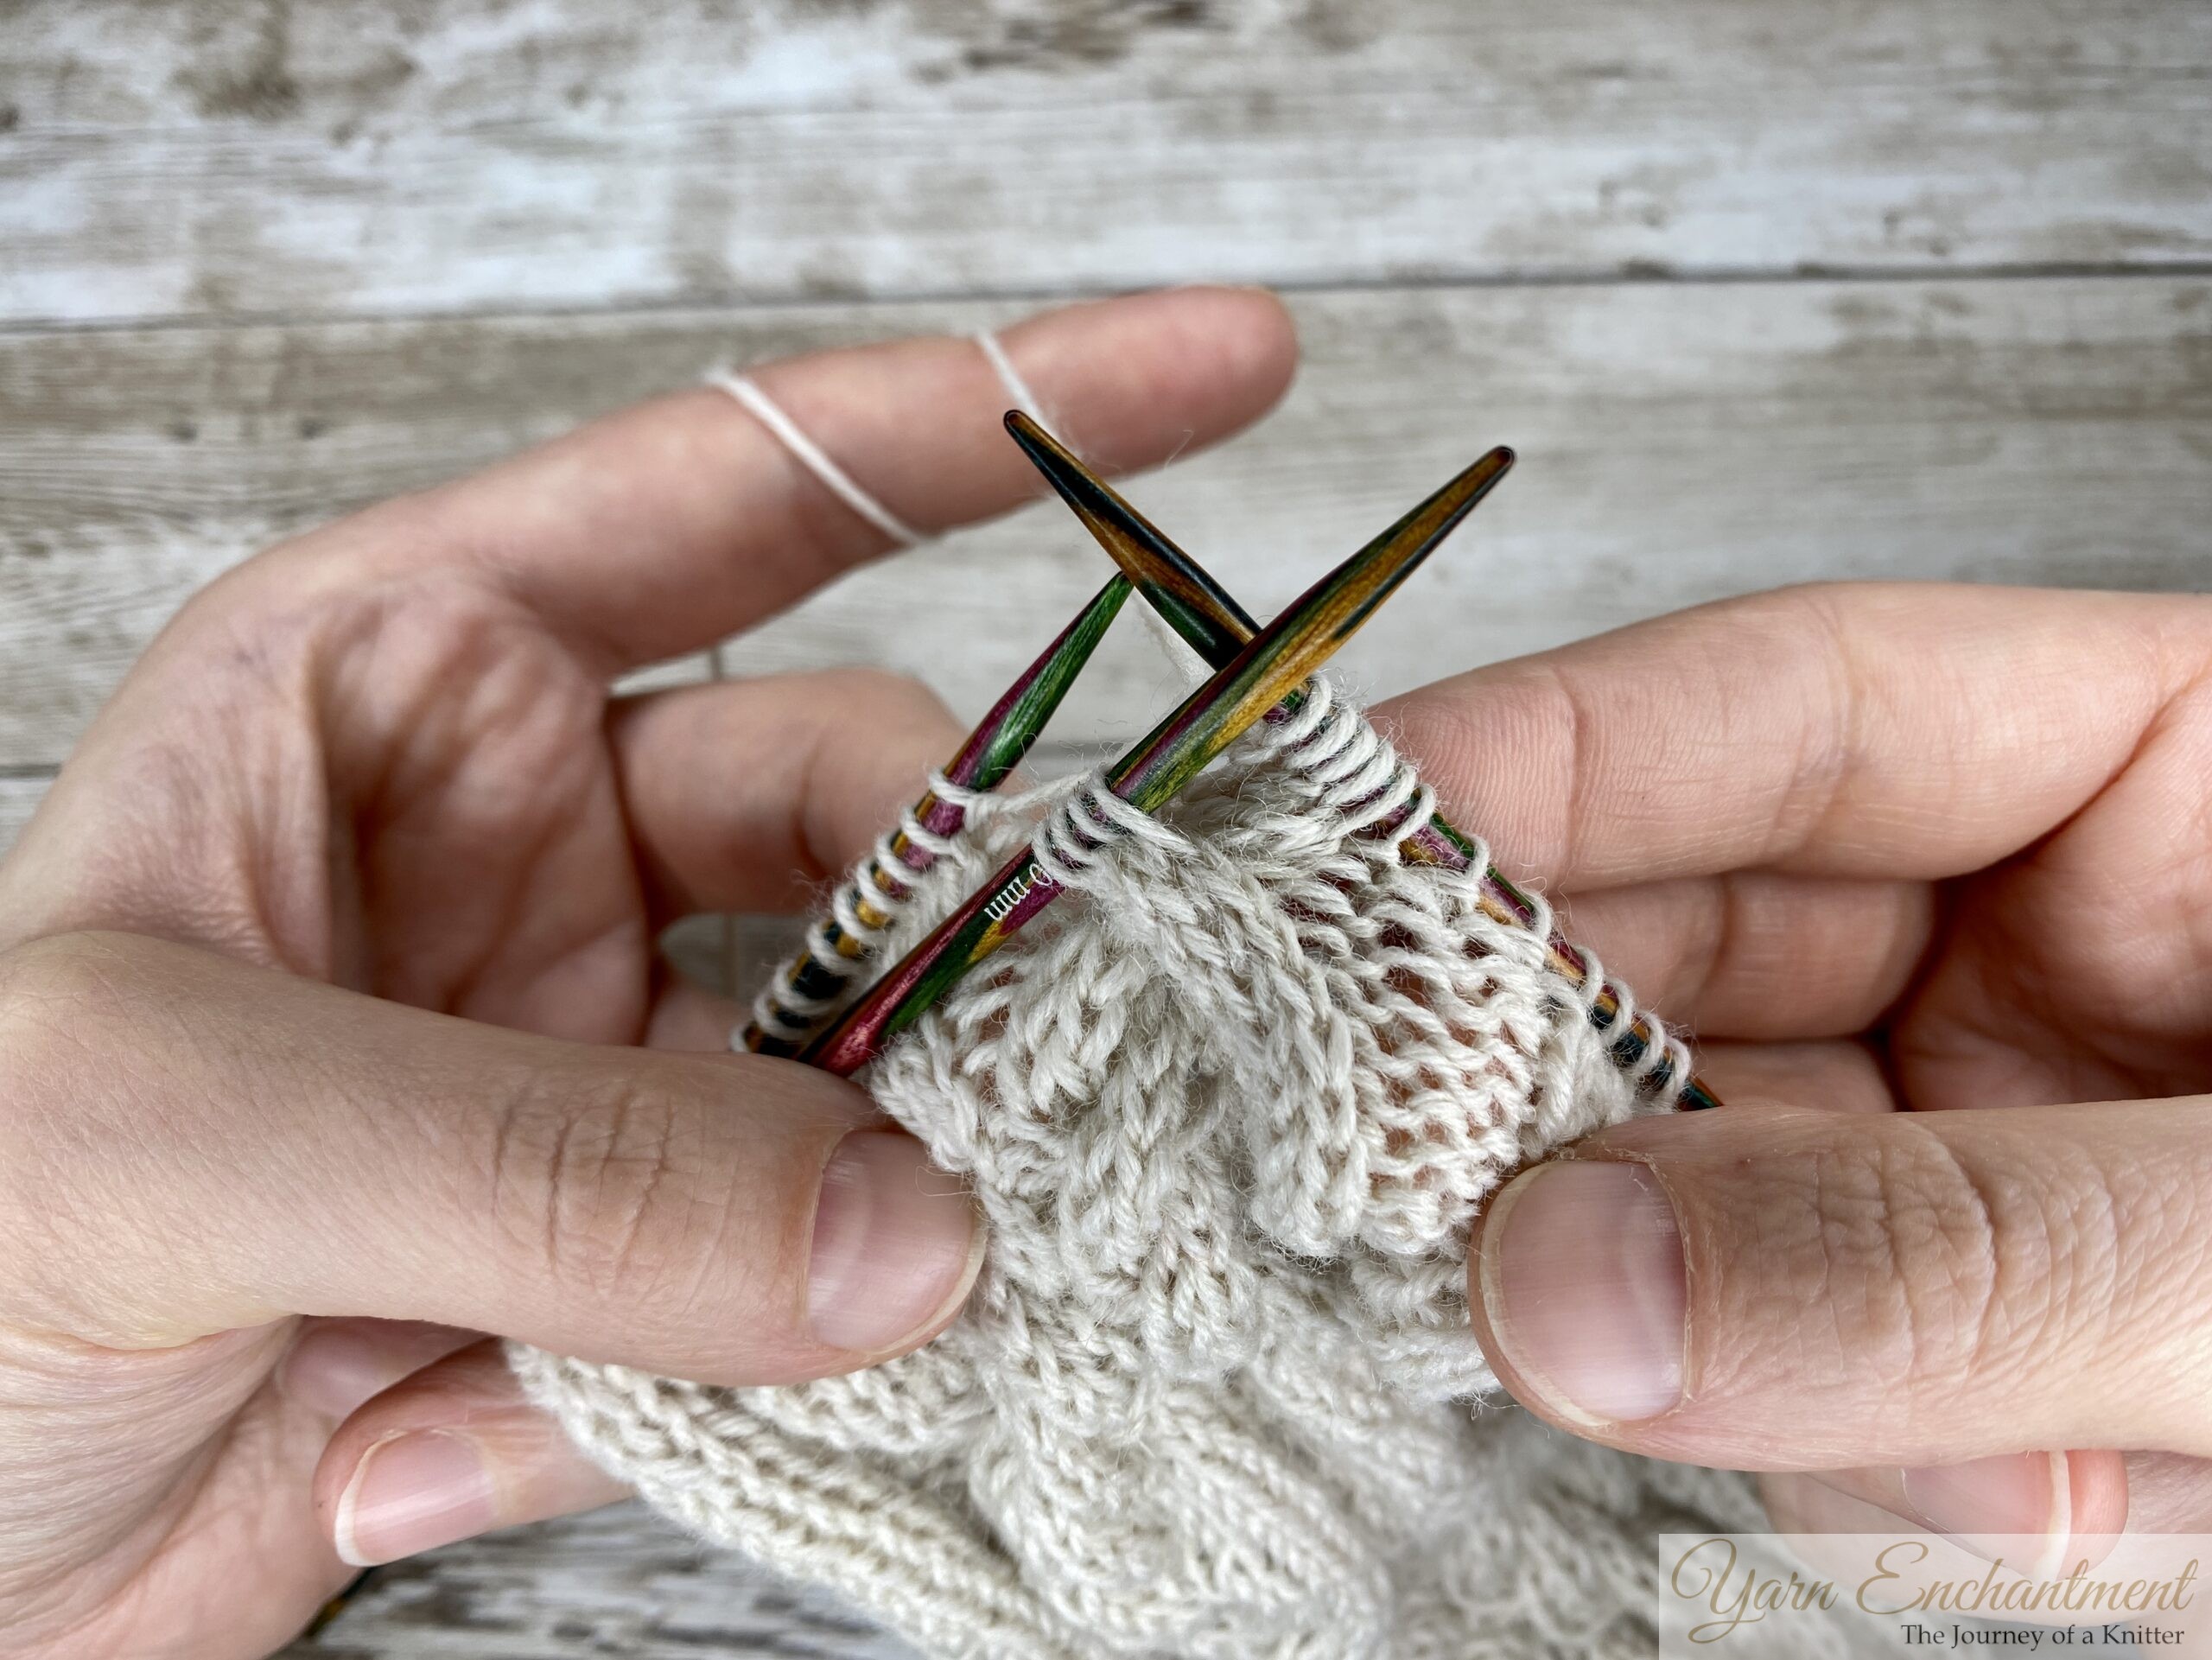
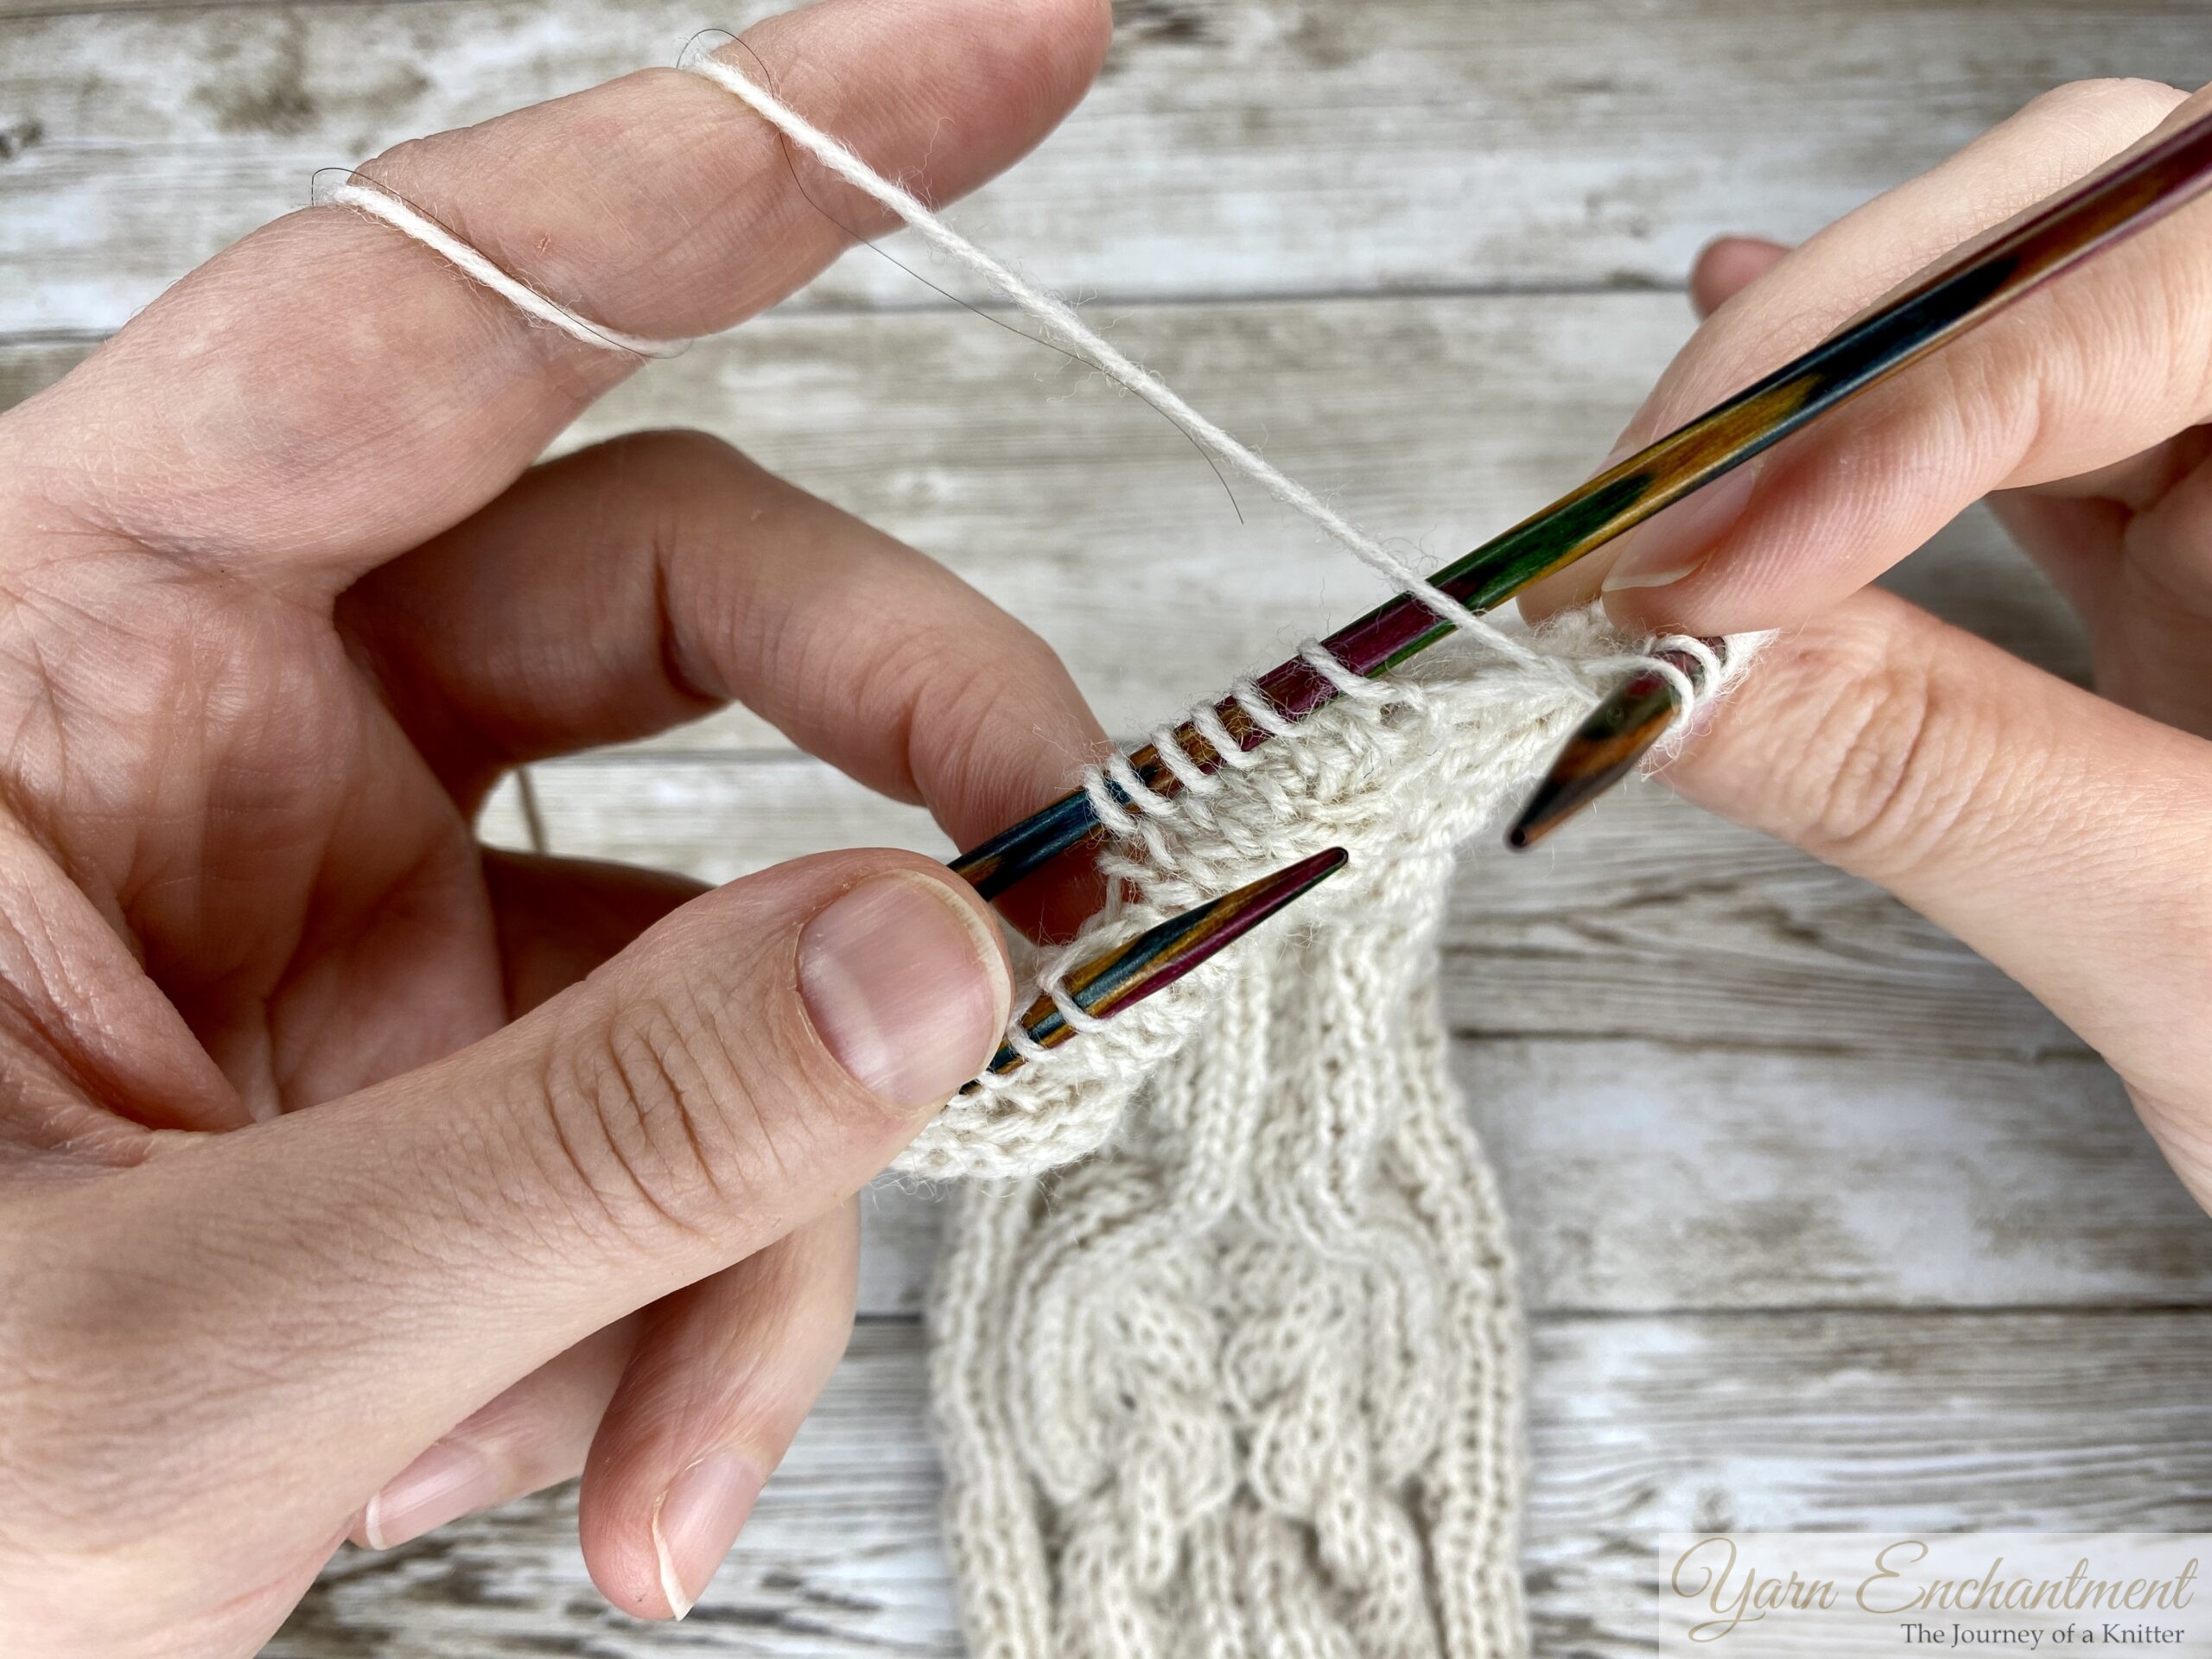
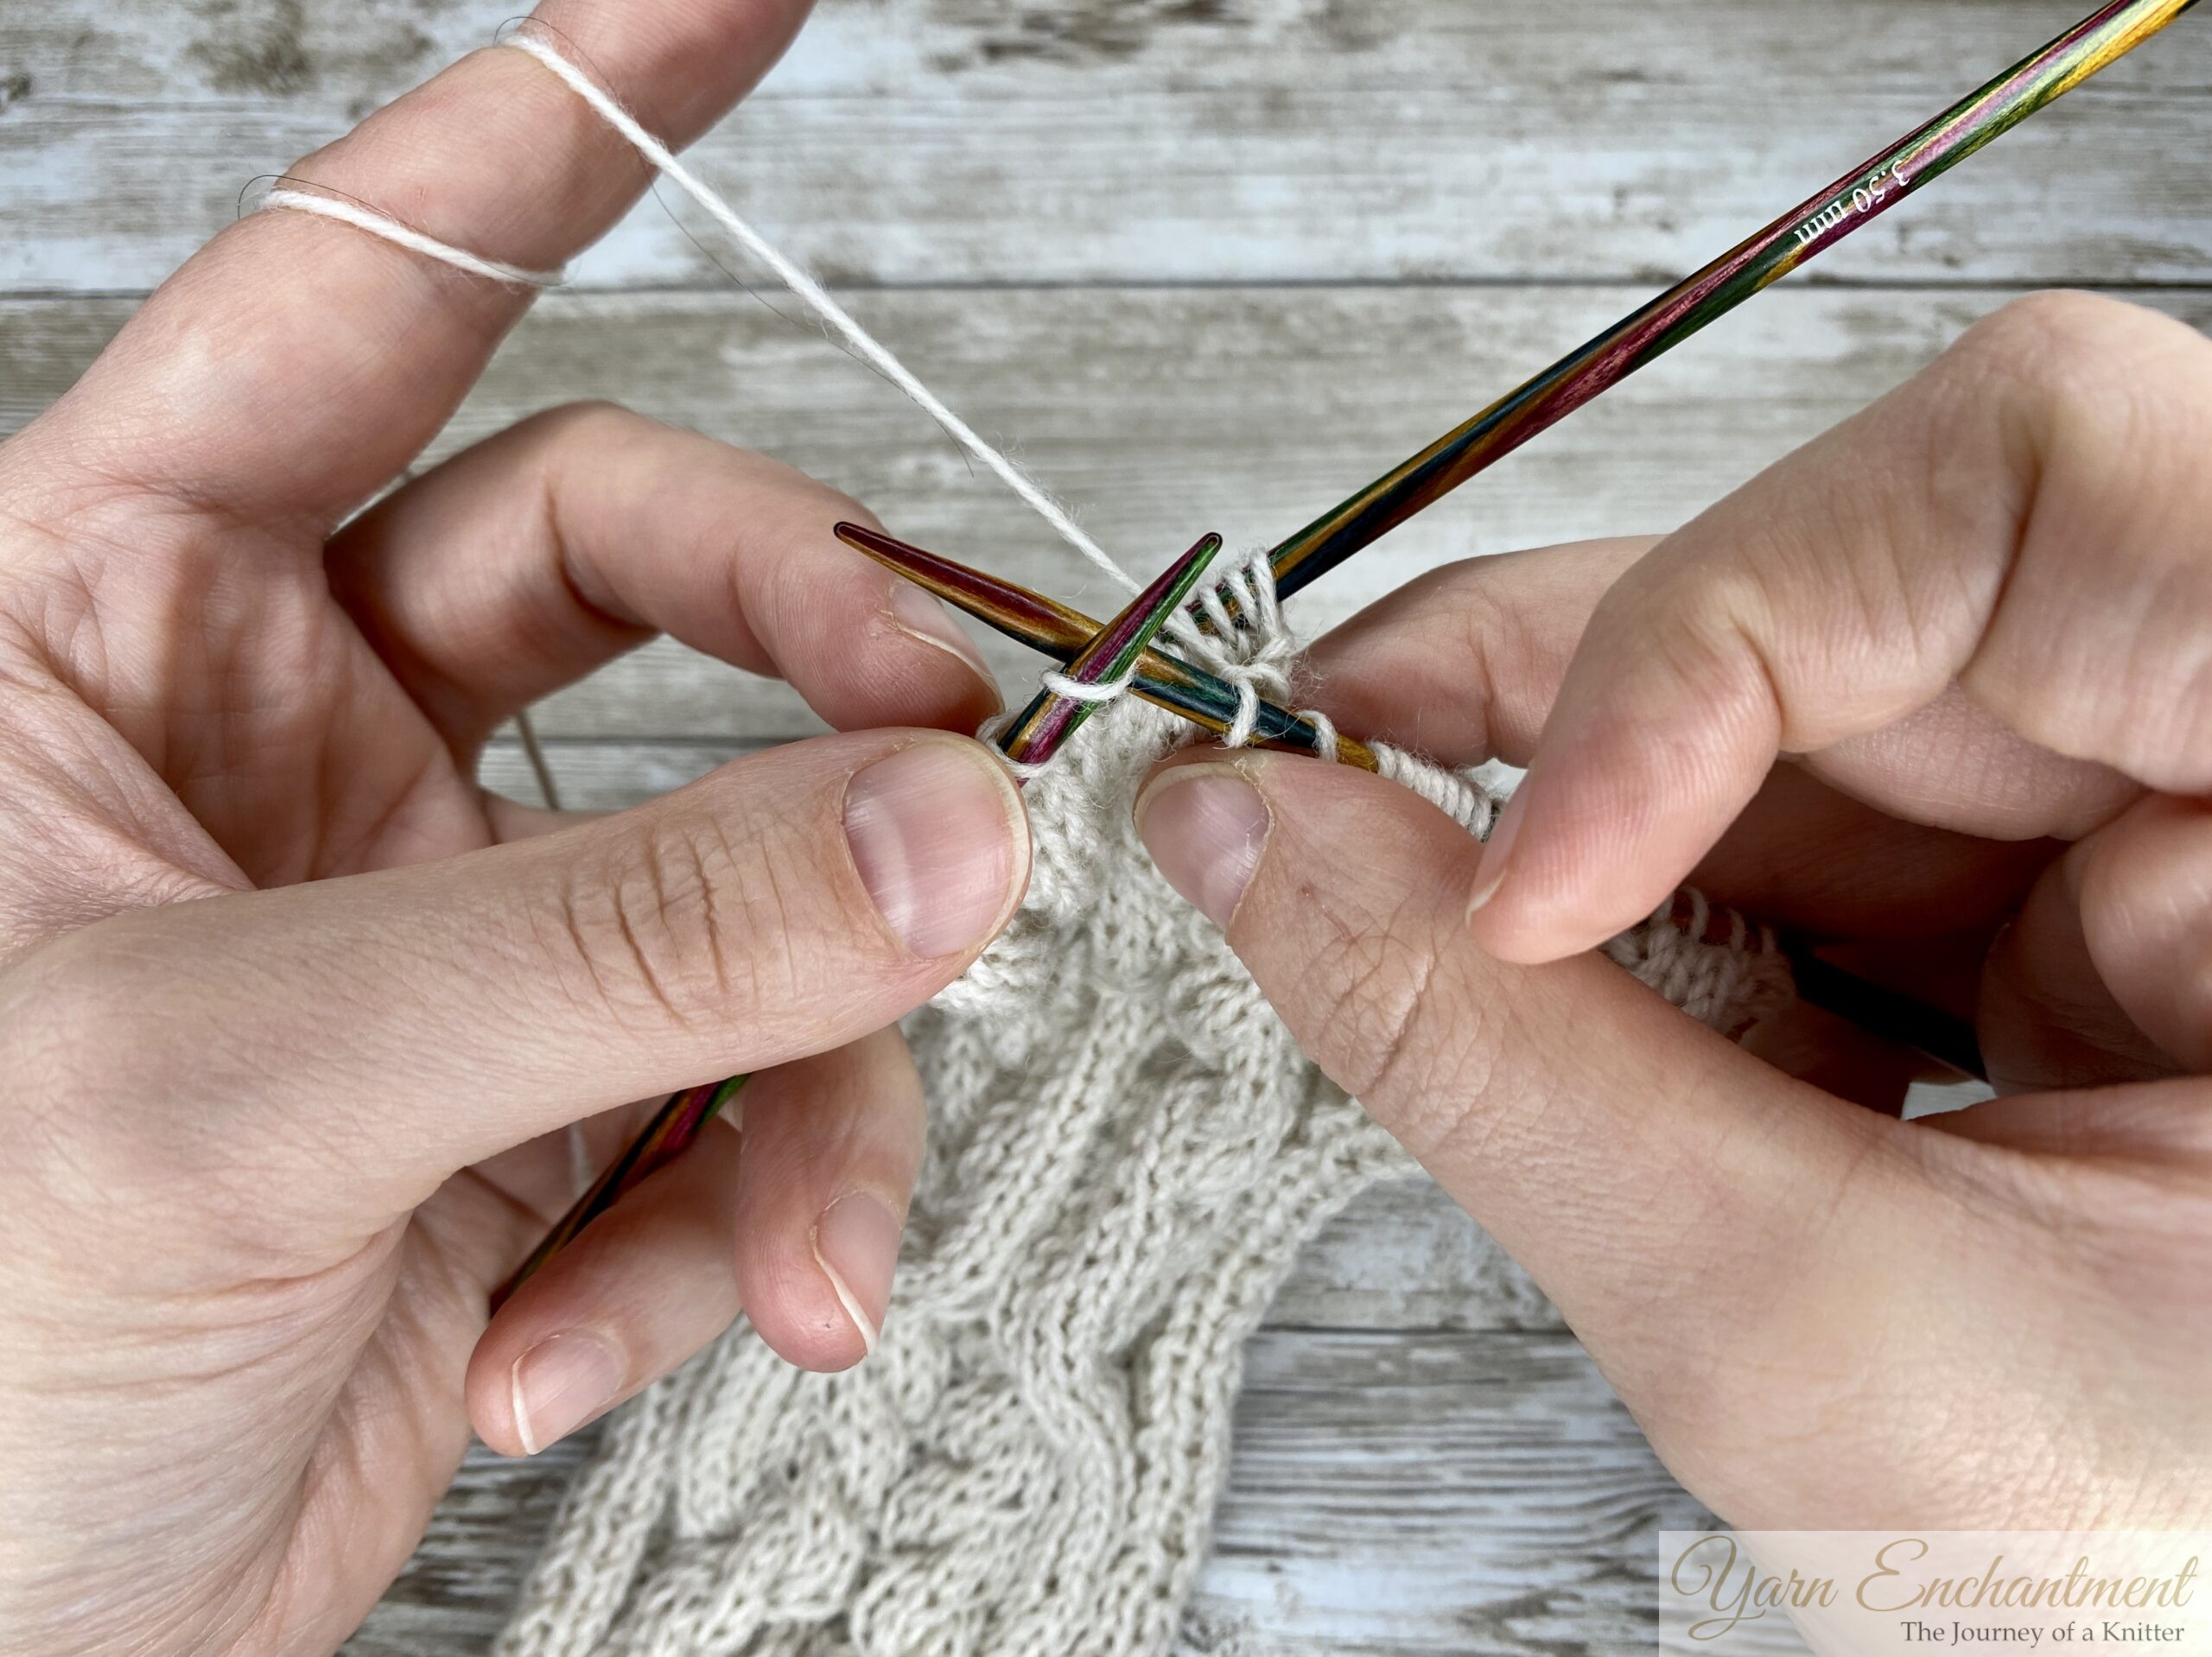
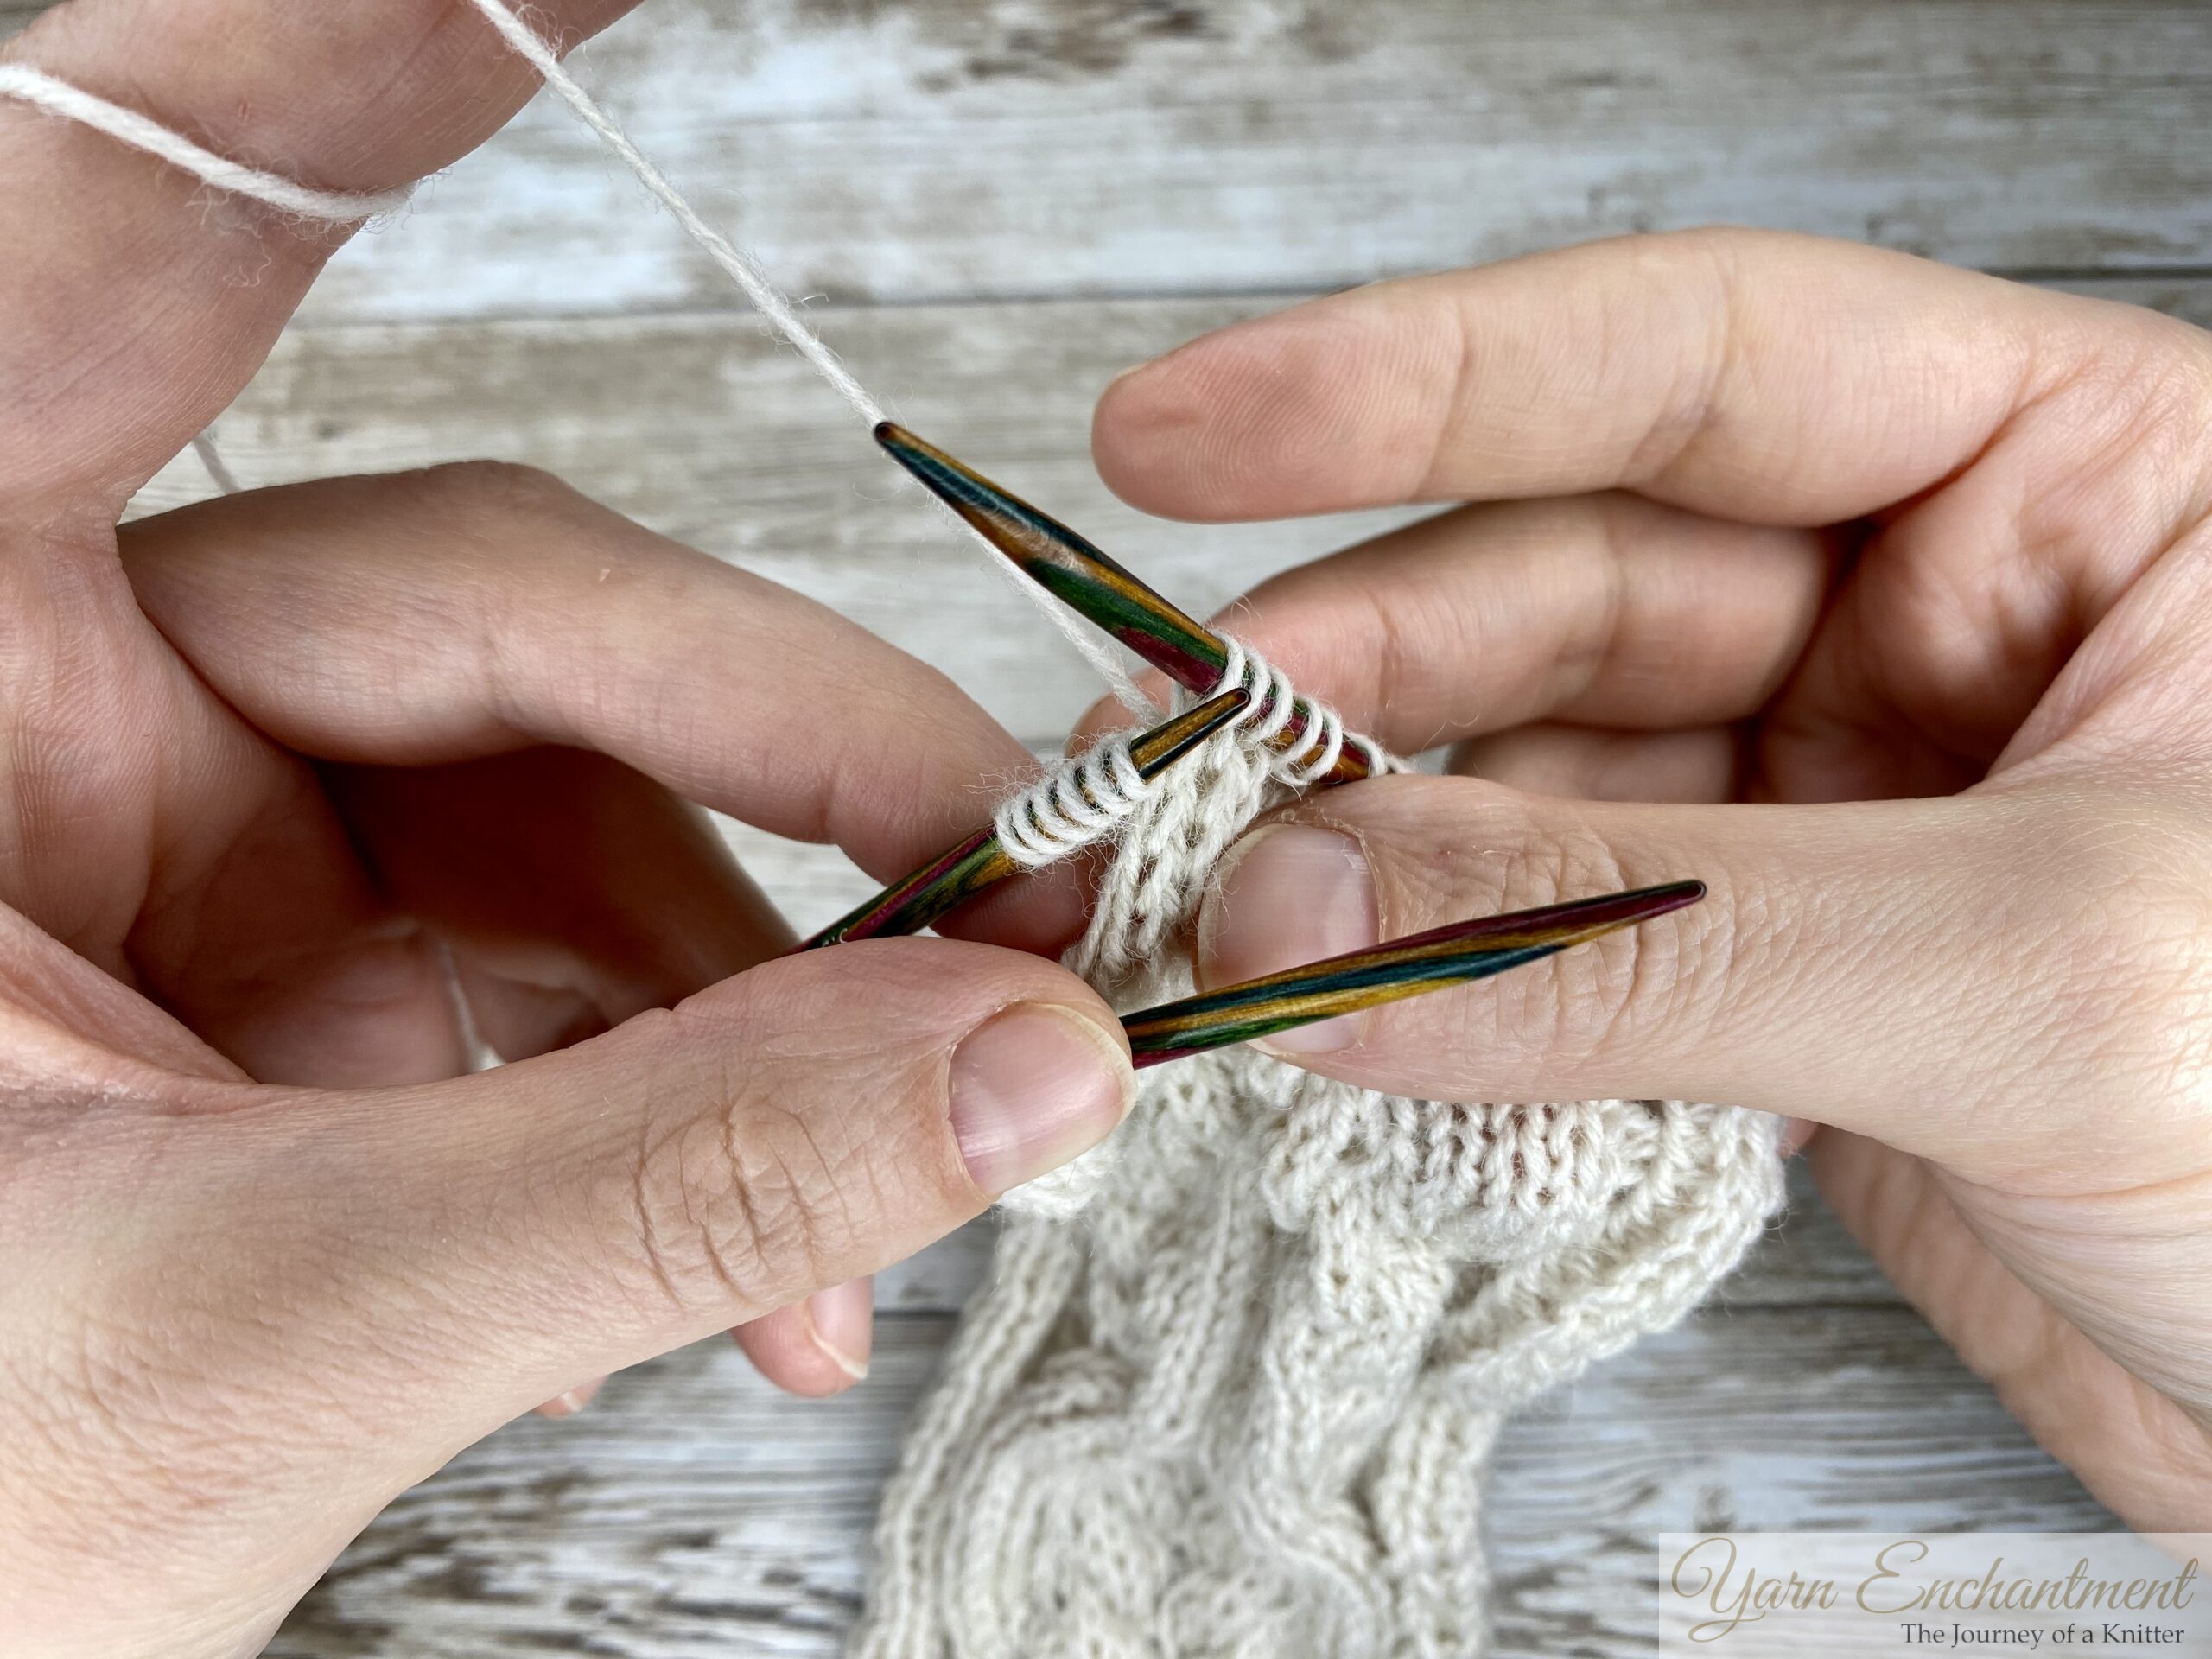
Row 15: E, k3, p3, place 6 stitches on a cable needle and hold them at the front of the work, knit 4 stitches, then place the 4th to 6th stitches from the cable needle back to the main needle and bring your cable needle with the remaining three stitches through the 2 knitting needles and hold them at the back of the work, knit the 4th to 6th stitches from the needle, and then knit the 3 stitches from the cable needle, p1, place 4 stitches on a cable needle and hold them at the back of the work, place 3 stitches on a cable needle and hold them at the front of the work, knit 3 stitches, then knit the 3 stitches from the second cable needle, and finally knit the 4 stitches from the first cable needle, p3, k3, E
Cable 1 from Row 15 Step by Step Picture Guide
 |  |  | Place 6 stitches on a cable needle and hold them at the front of the work | Knit 4 stitches | Place the 4th to 6th stitches from the cable needle back to the main needle (start counting from the right side 1, 2, 3, 4, 5, 6) |


 | 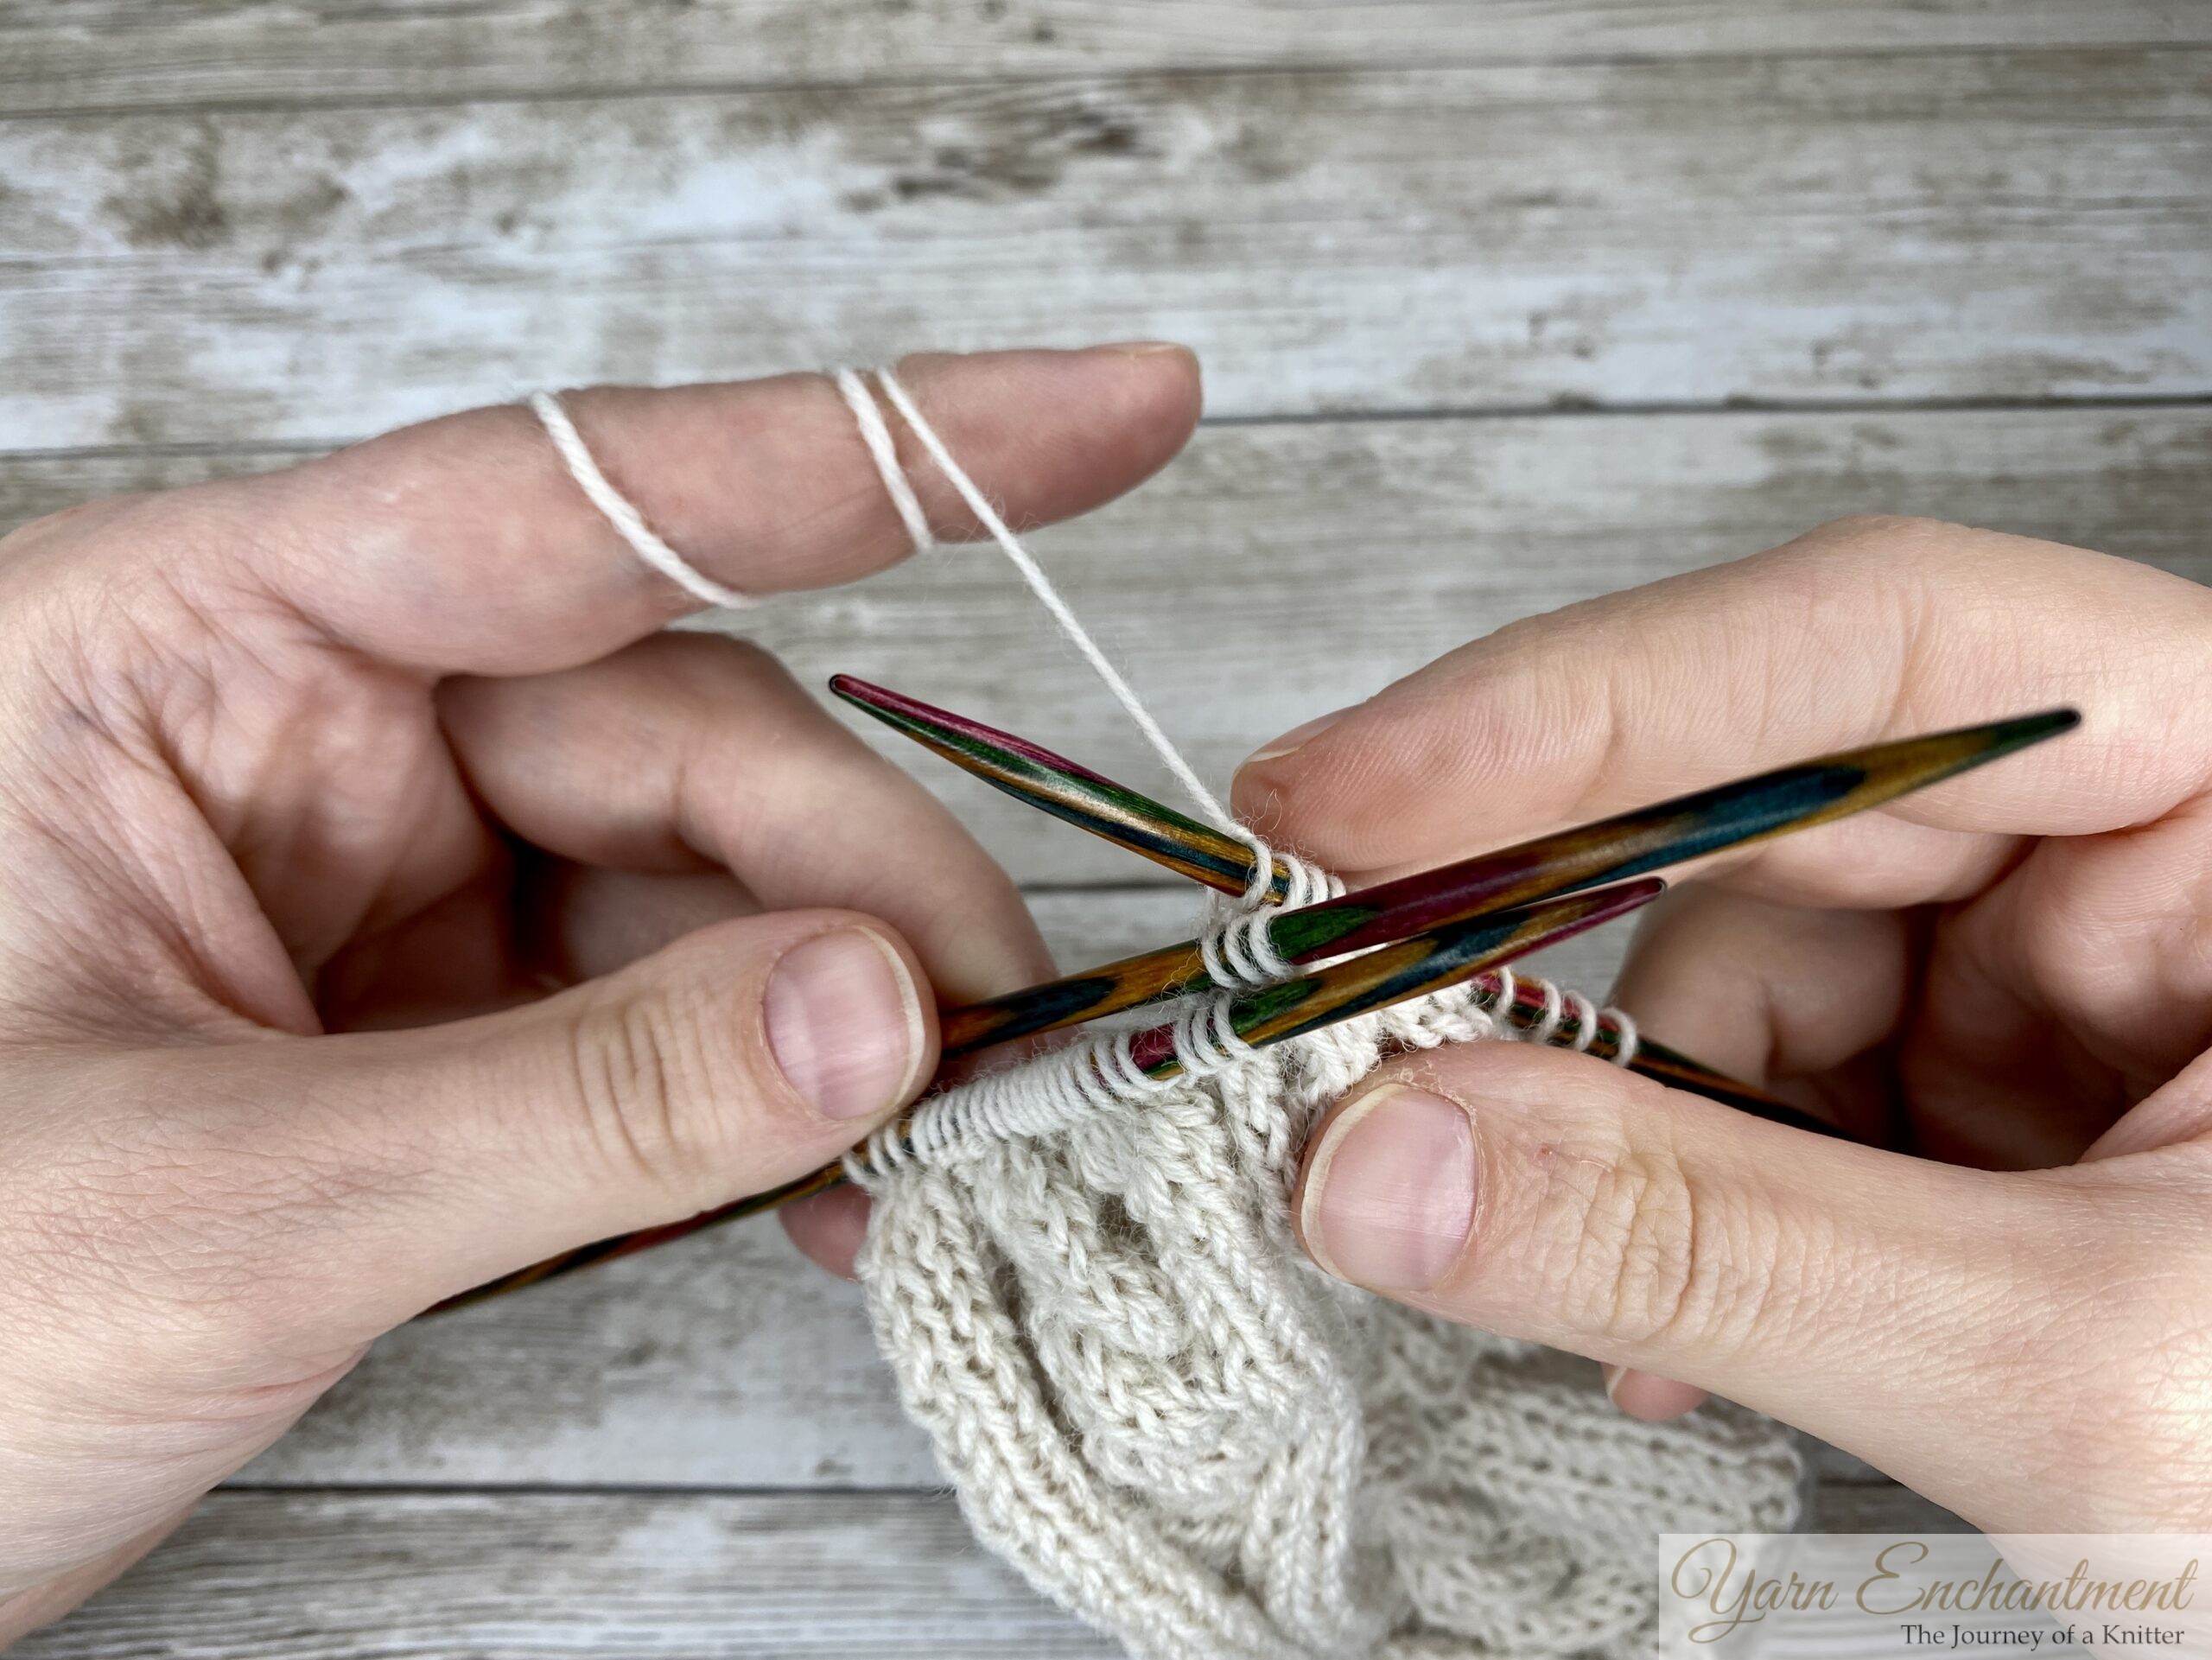 |  | Slip the stitches back to your left hand needle | Bring your cable needle with the remaining three stitches through the 2 knitting needles | Hold them at the back of the work |


 | 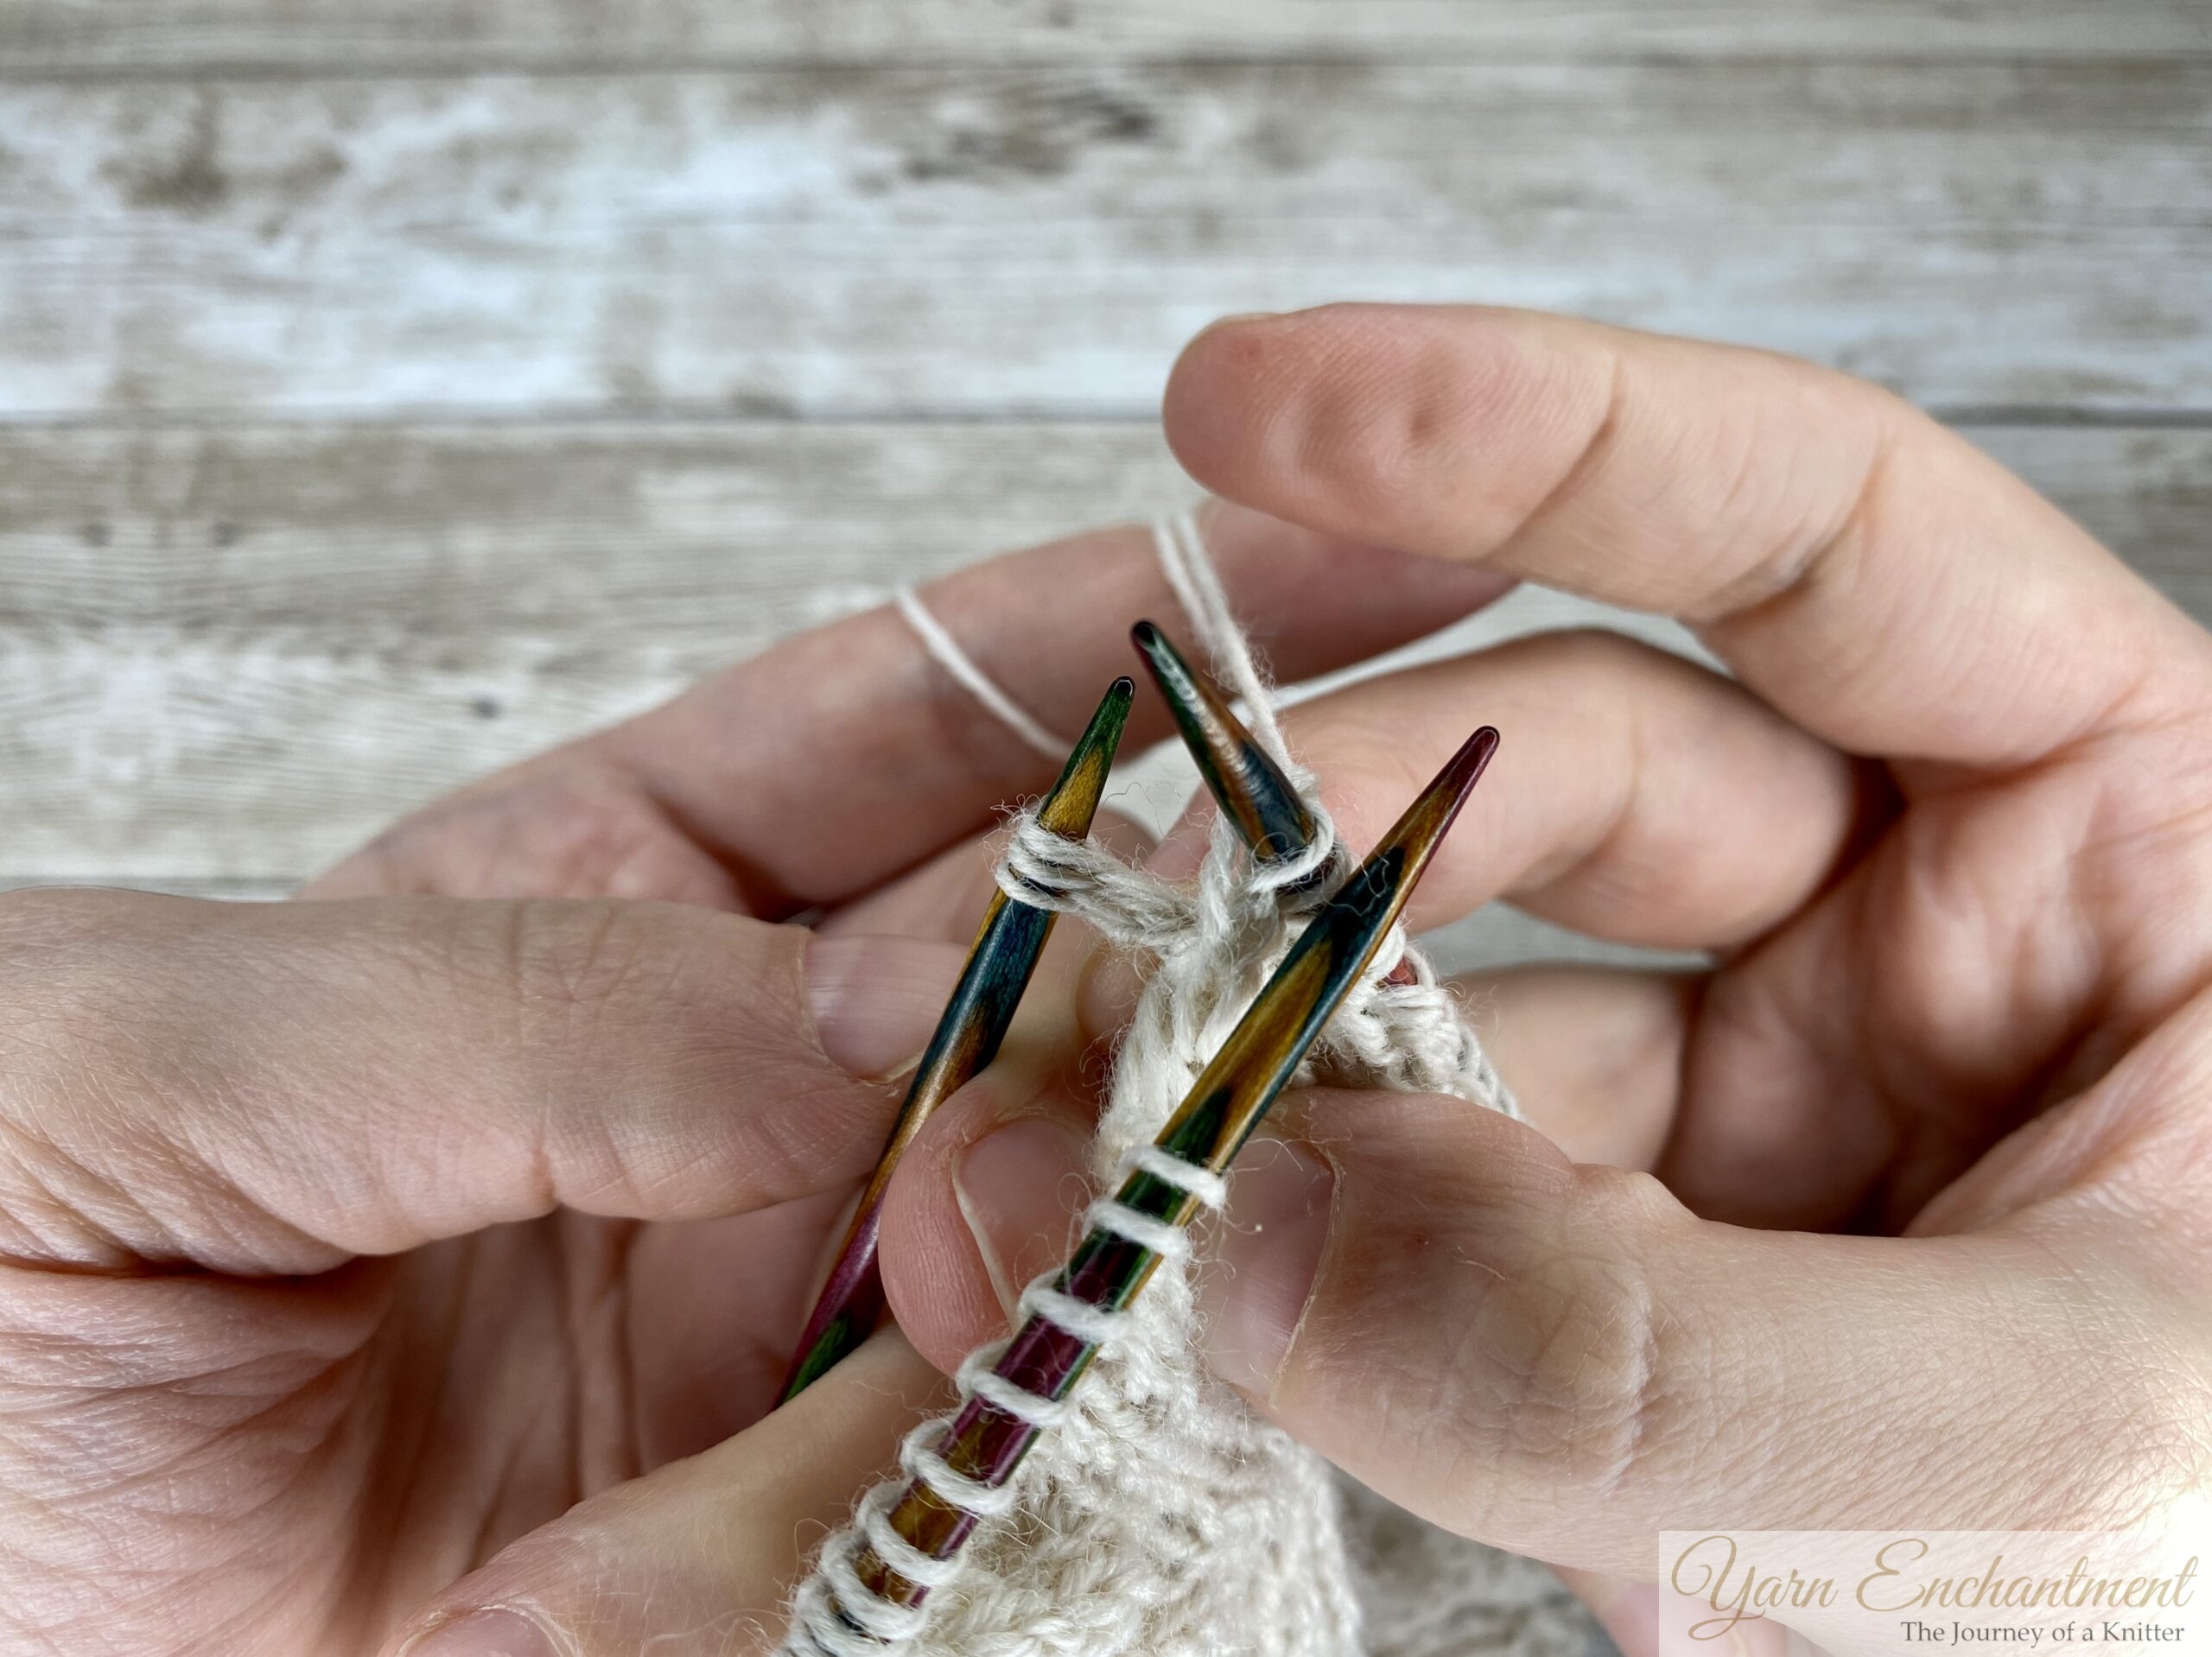 | Knit the 4th to 6th stitches from the lefthand needle | Knit the 3 stitches from the cable needle |


Cable 2 from Row 15 Step by Step Picture Guide
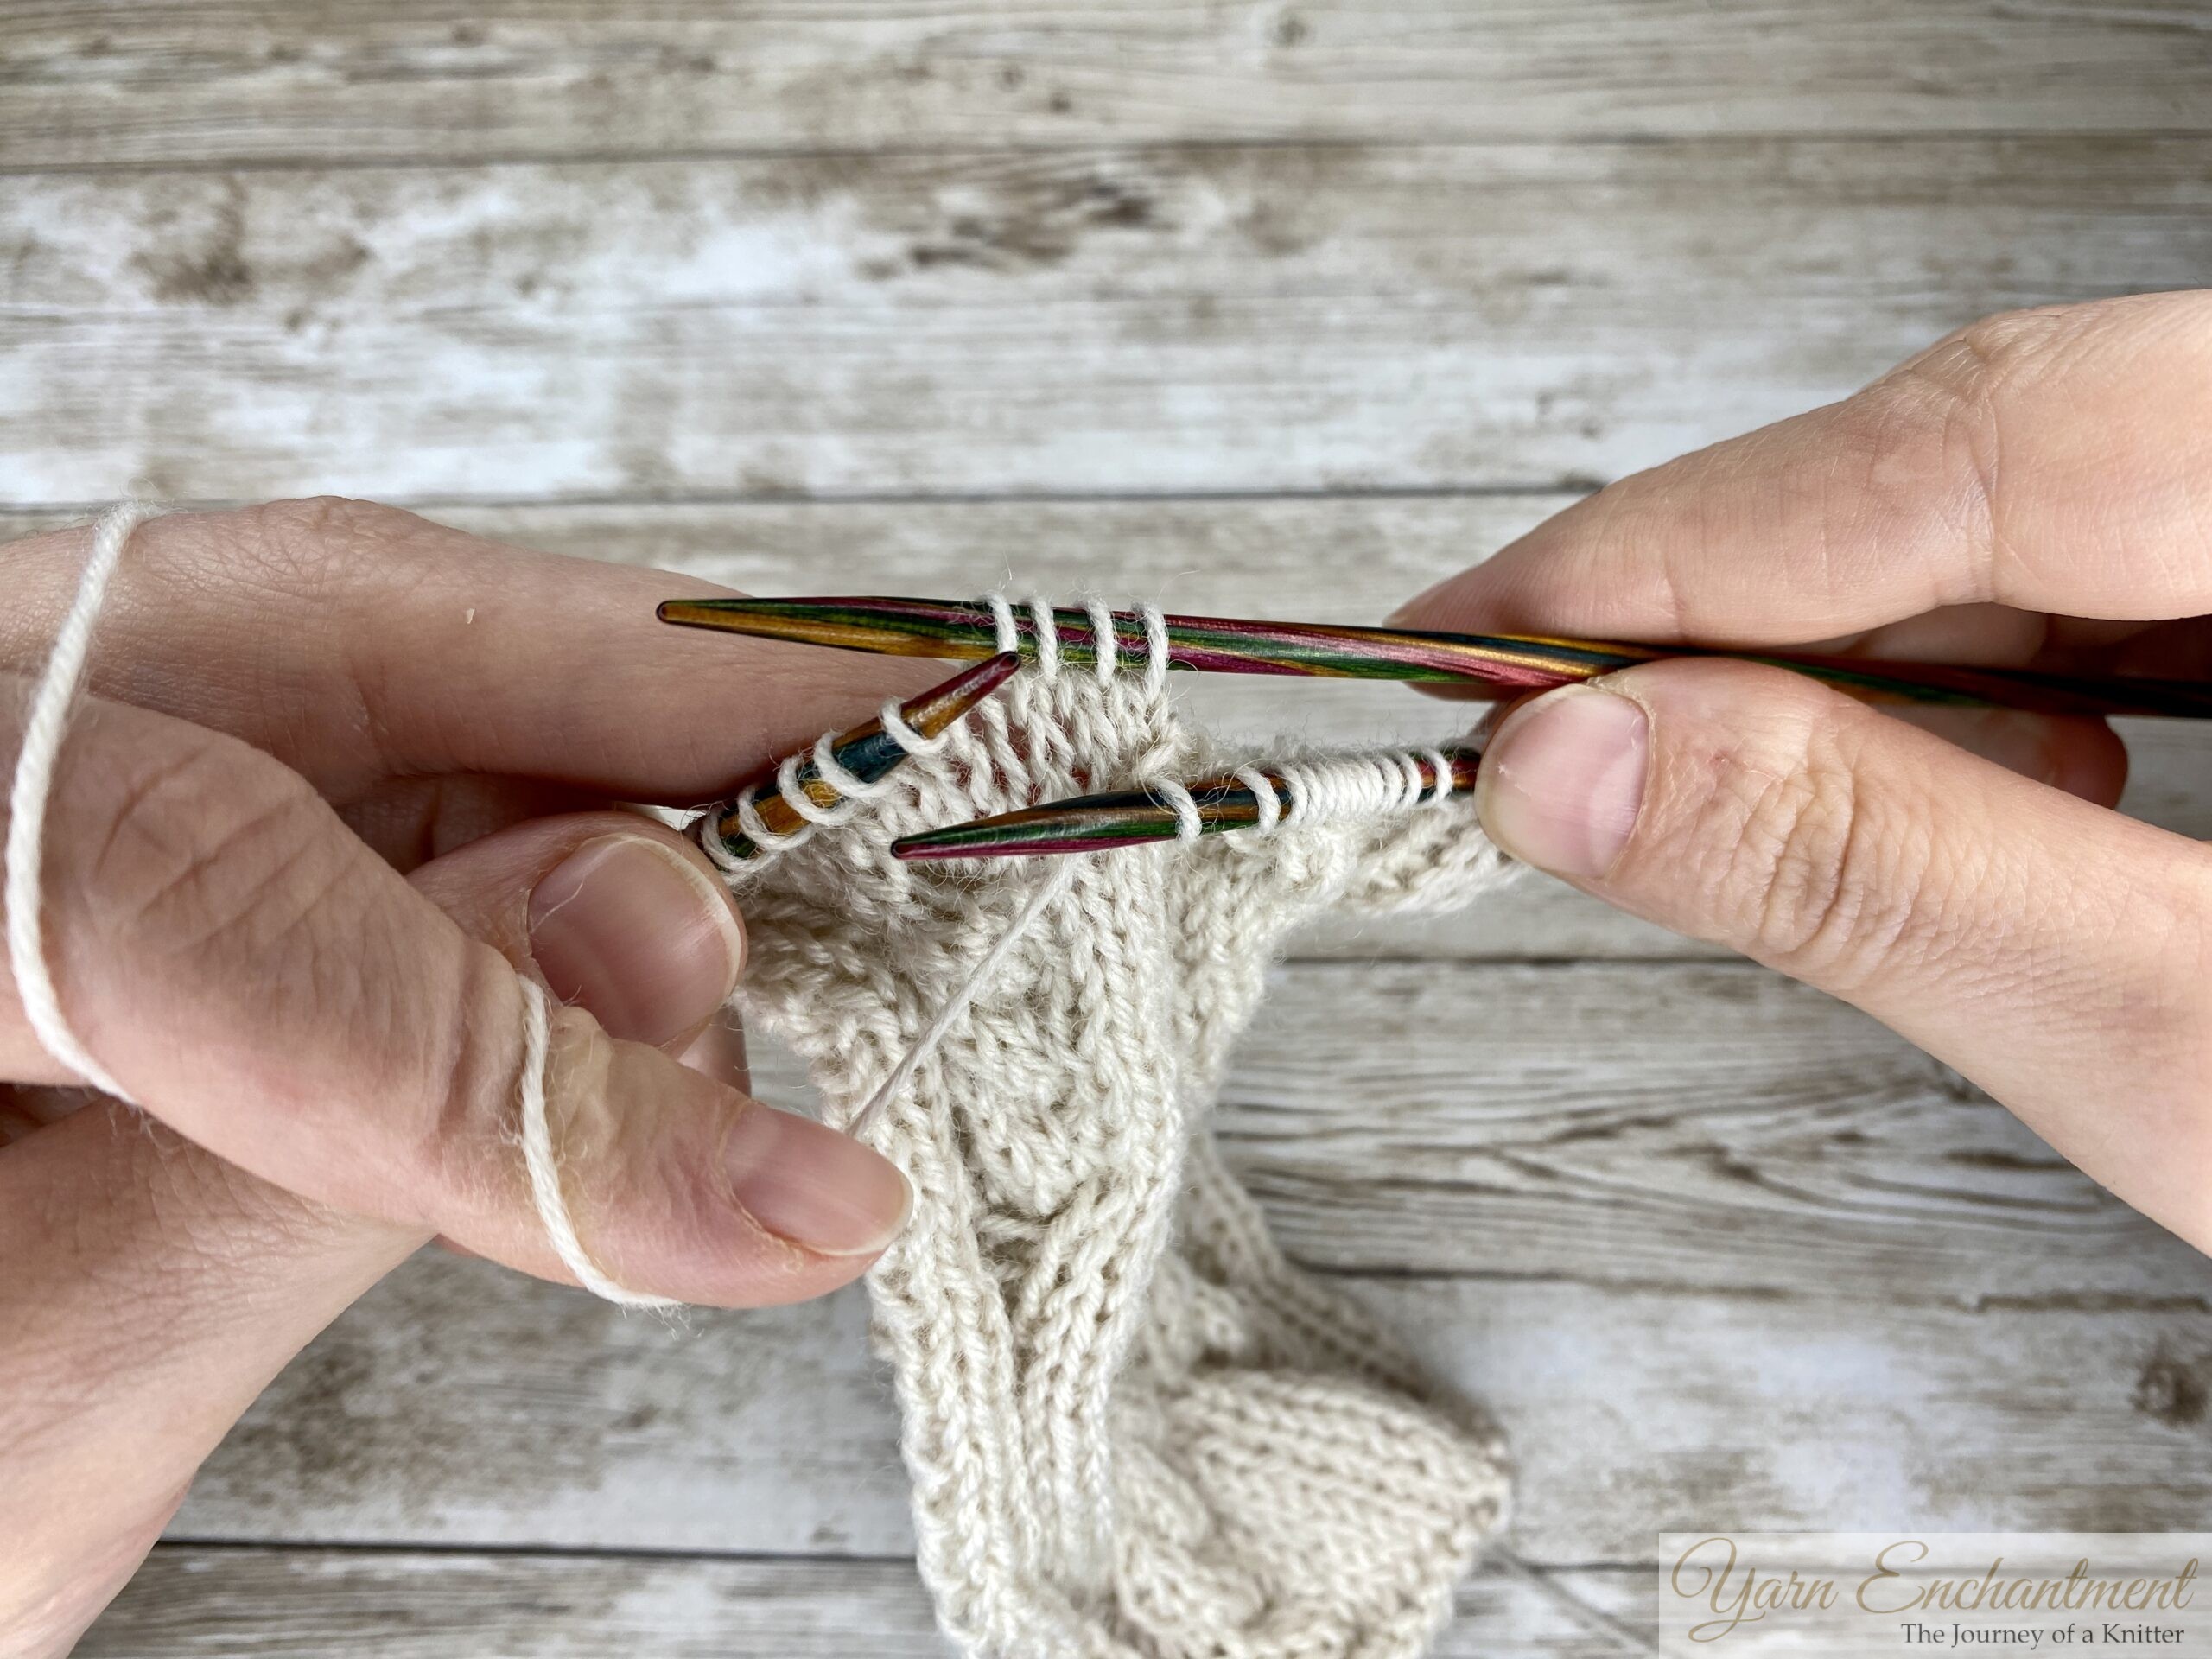 |  |  | Place 4 stitches on a cable needle and hold them at the back of the work | Place 3 stitches on a cable needle and hold them at the front of the work | Knit 3 stitches from your left hand needle |


 |  |  | Knit the 3 stitches from the second cable needle | Knit the 4 stitches from the first cable needle | After row 15, the cables are now in the middle |


Row 16: E, p3, k3, p10, k1, p10, k3, p3, E
Row 17: E, k3, p3, k10, p1, k10, p3, k3, E
Row 18: E, p3, k3, p10, k1, p10, k3, p3, E
Row 19: E, k3, p3, k4, (3/3 RC), p1, (3/3 LC), k4, p3, k3, E
Row 20: E, p3, k3, p10, k1, p10, k3, p3, E
Row 21: E, k3, p3, k10, p1, k10, p3, k3, E
Row 22: E, p3, k3, p10, k1, p10, k3, p3, E
Row 23: E, k3, p3, k4, (3/3 RC), p1, (3/3 LC), k4, p3, k3, E
Row 24: E, p3, k3, p10, k1, p10, k3, p3, E
Row 25: E, k3, p3, k10, p1, k10, p3, k3, E
Row 26: E, p3, k3, p10, k1, p10, k3, p3, E
Row 27: E, k3, p3, k4, (3/3 RC), p1, (3/3 LC), k4, p3, k3, E
Row 28: E, p3, k3, p10, k1, p10, k3, p3, E
Row 29: E, k3, p3, k10, p1, k10, p3, k3, E
Row 30: E, p3, k3, p10, k1, p10, k3, p3, E
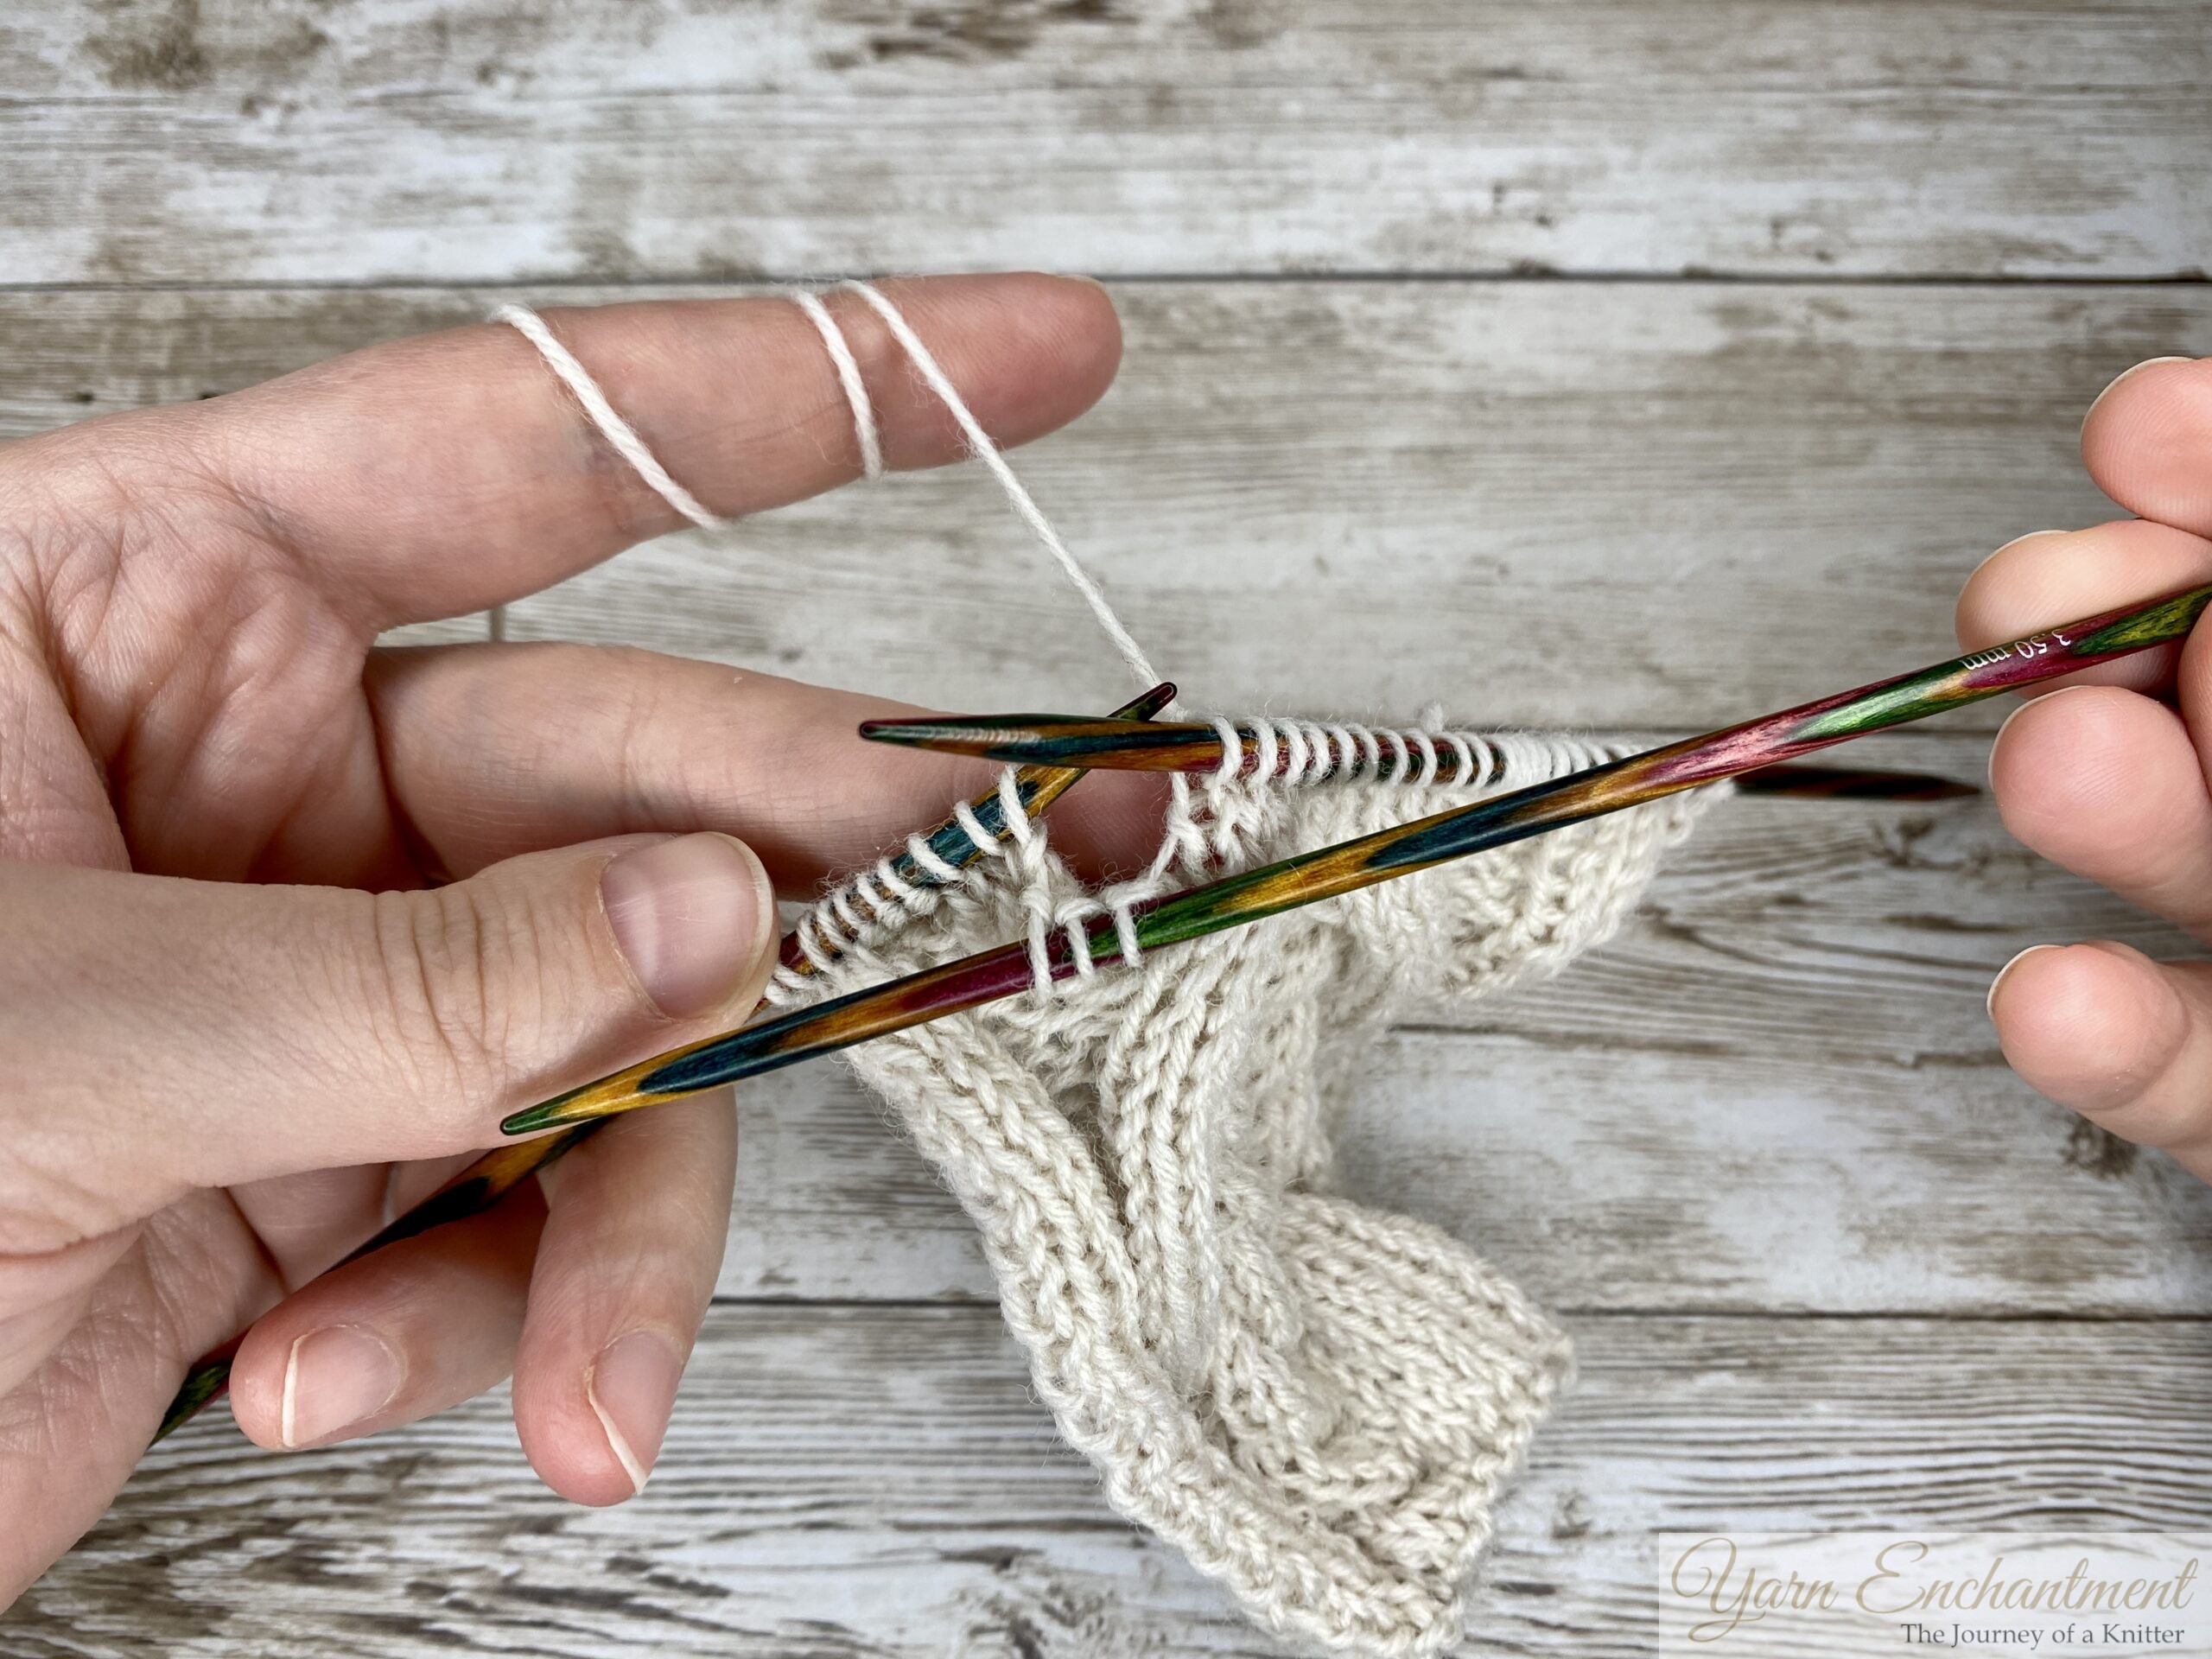
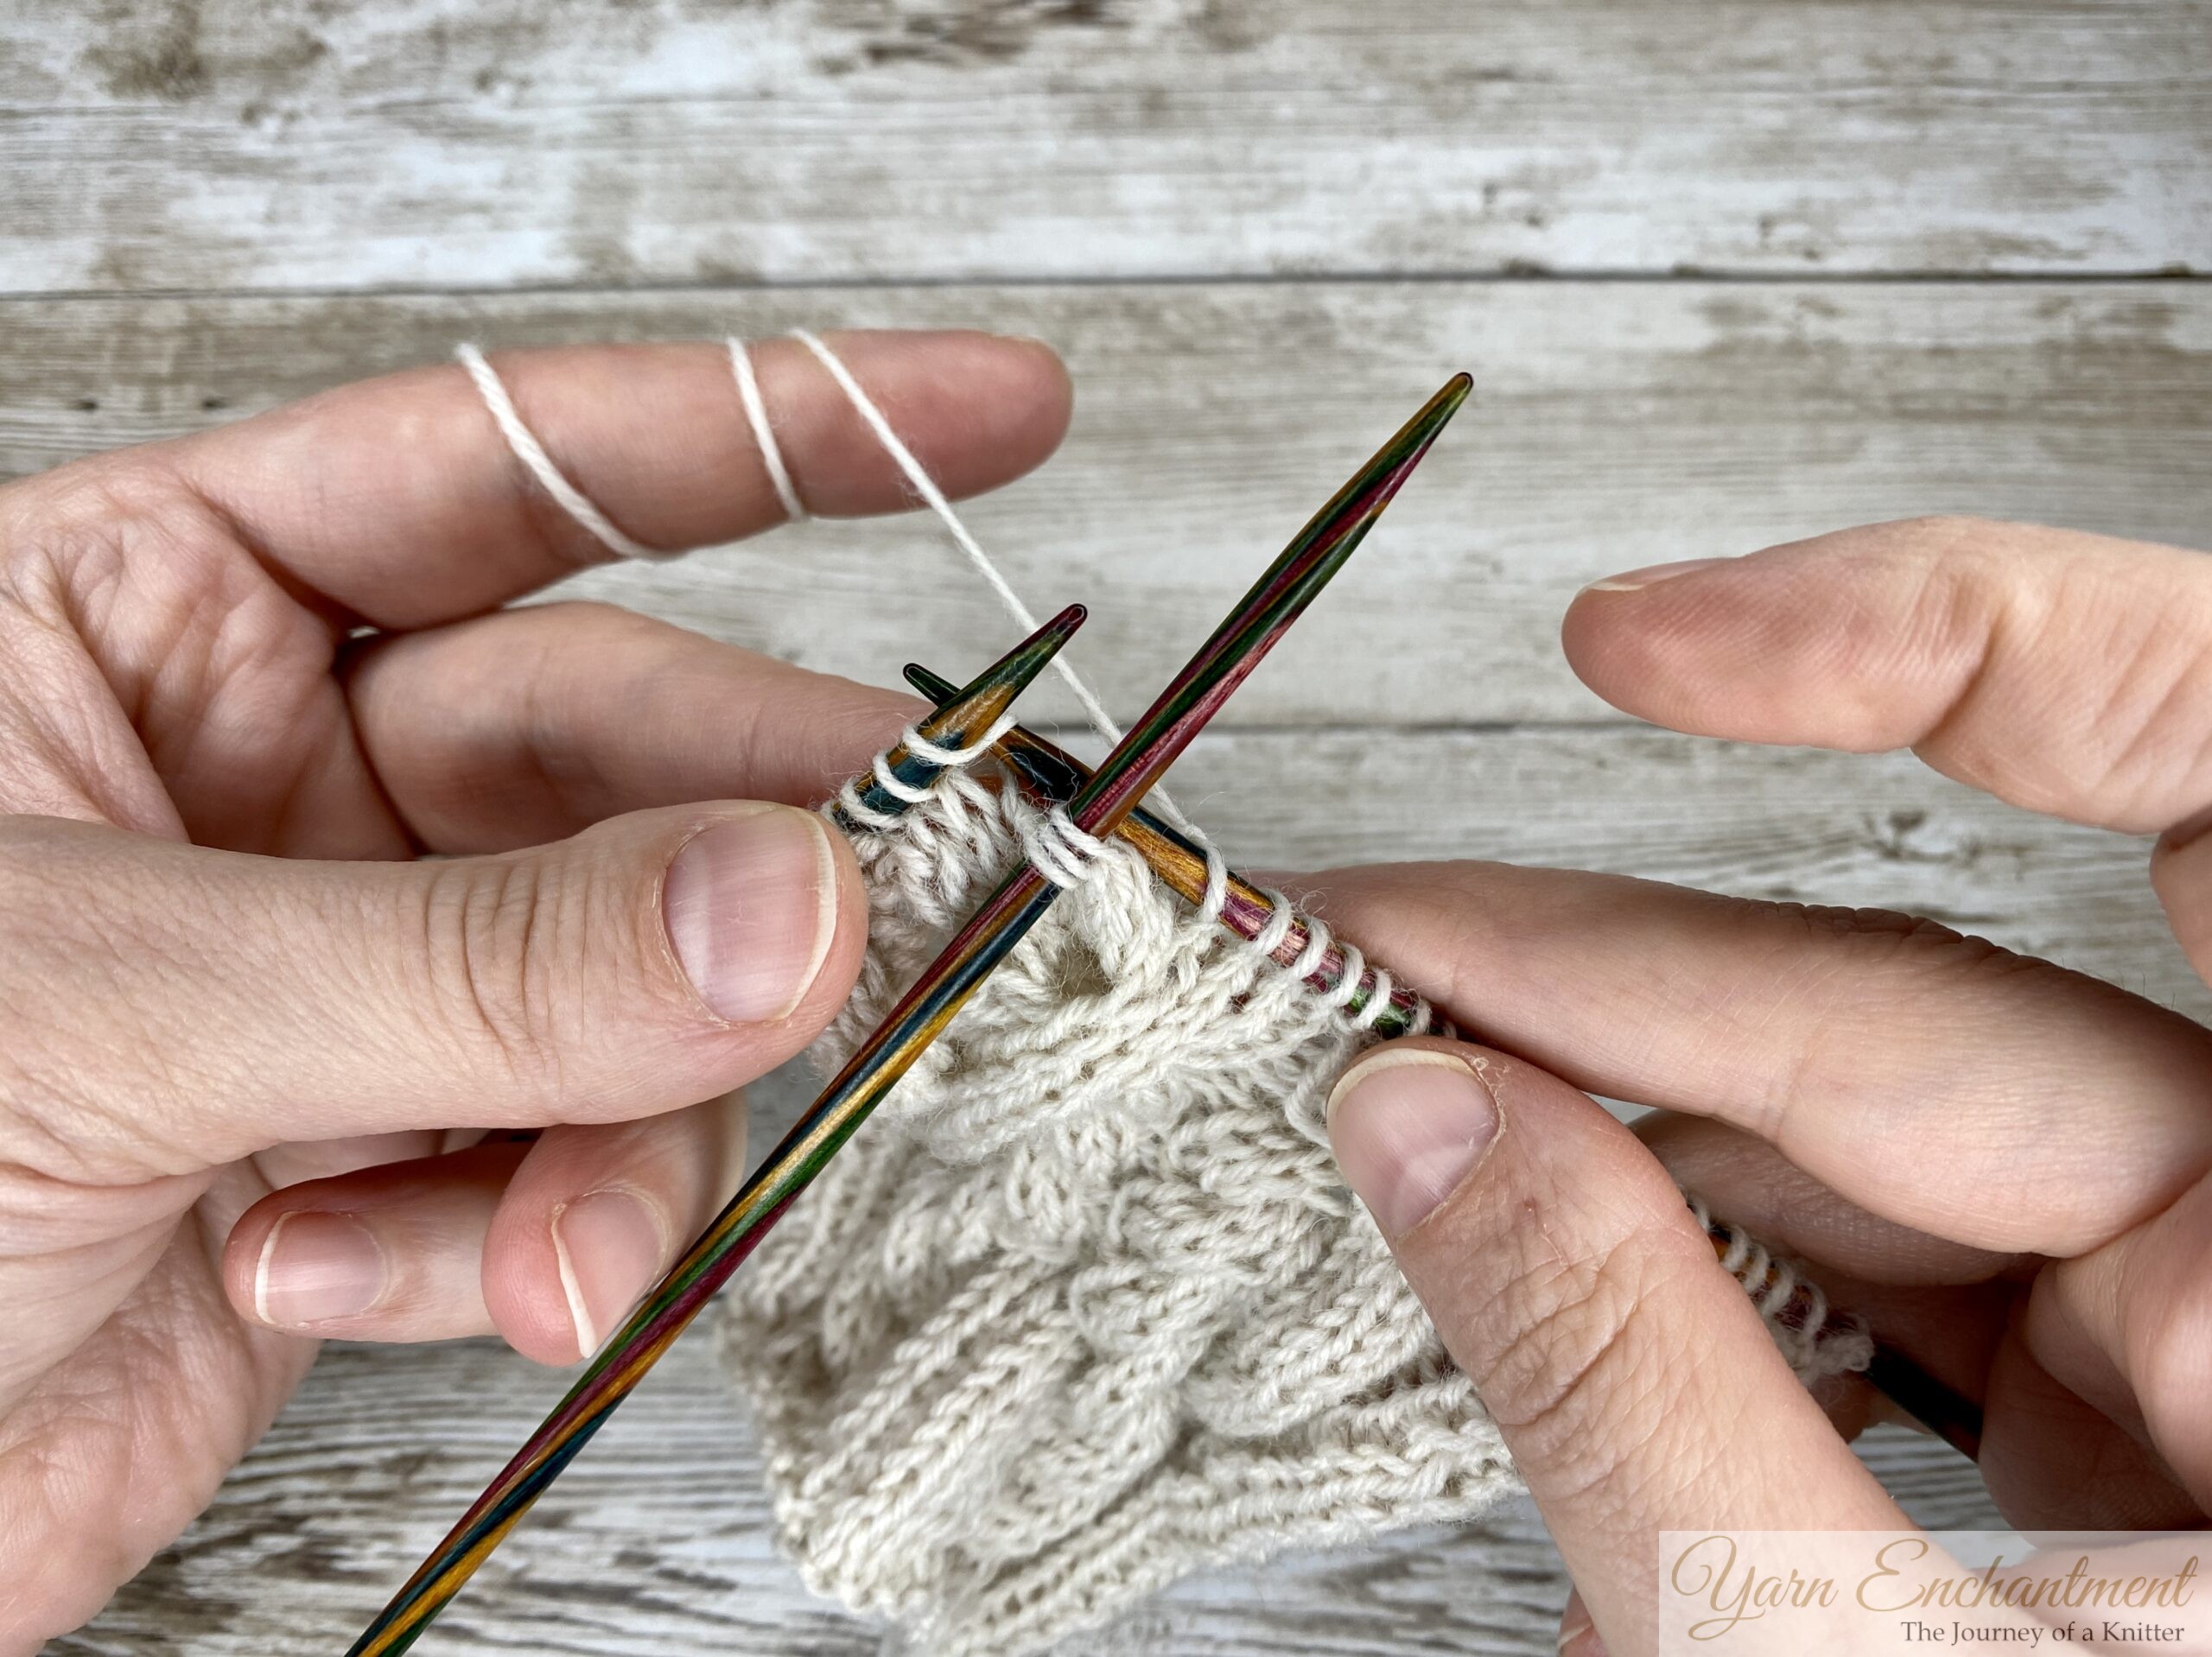
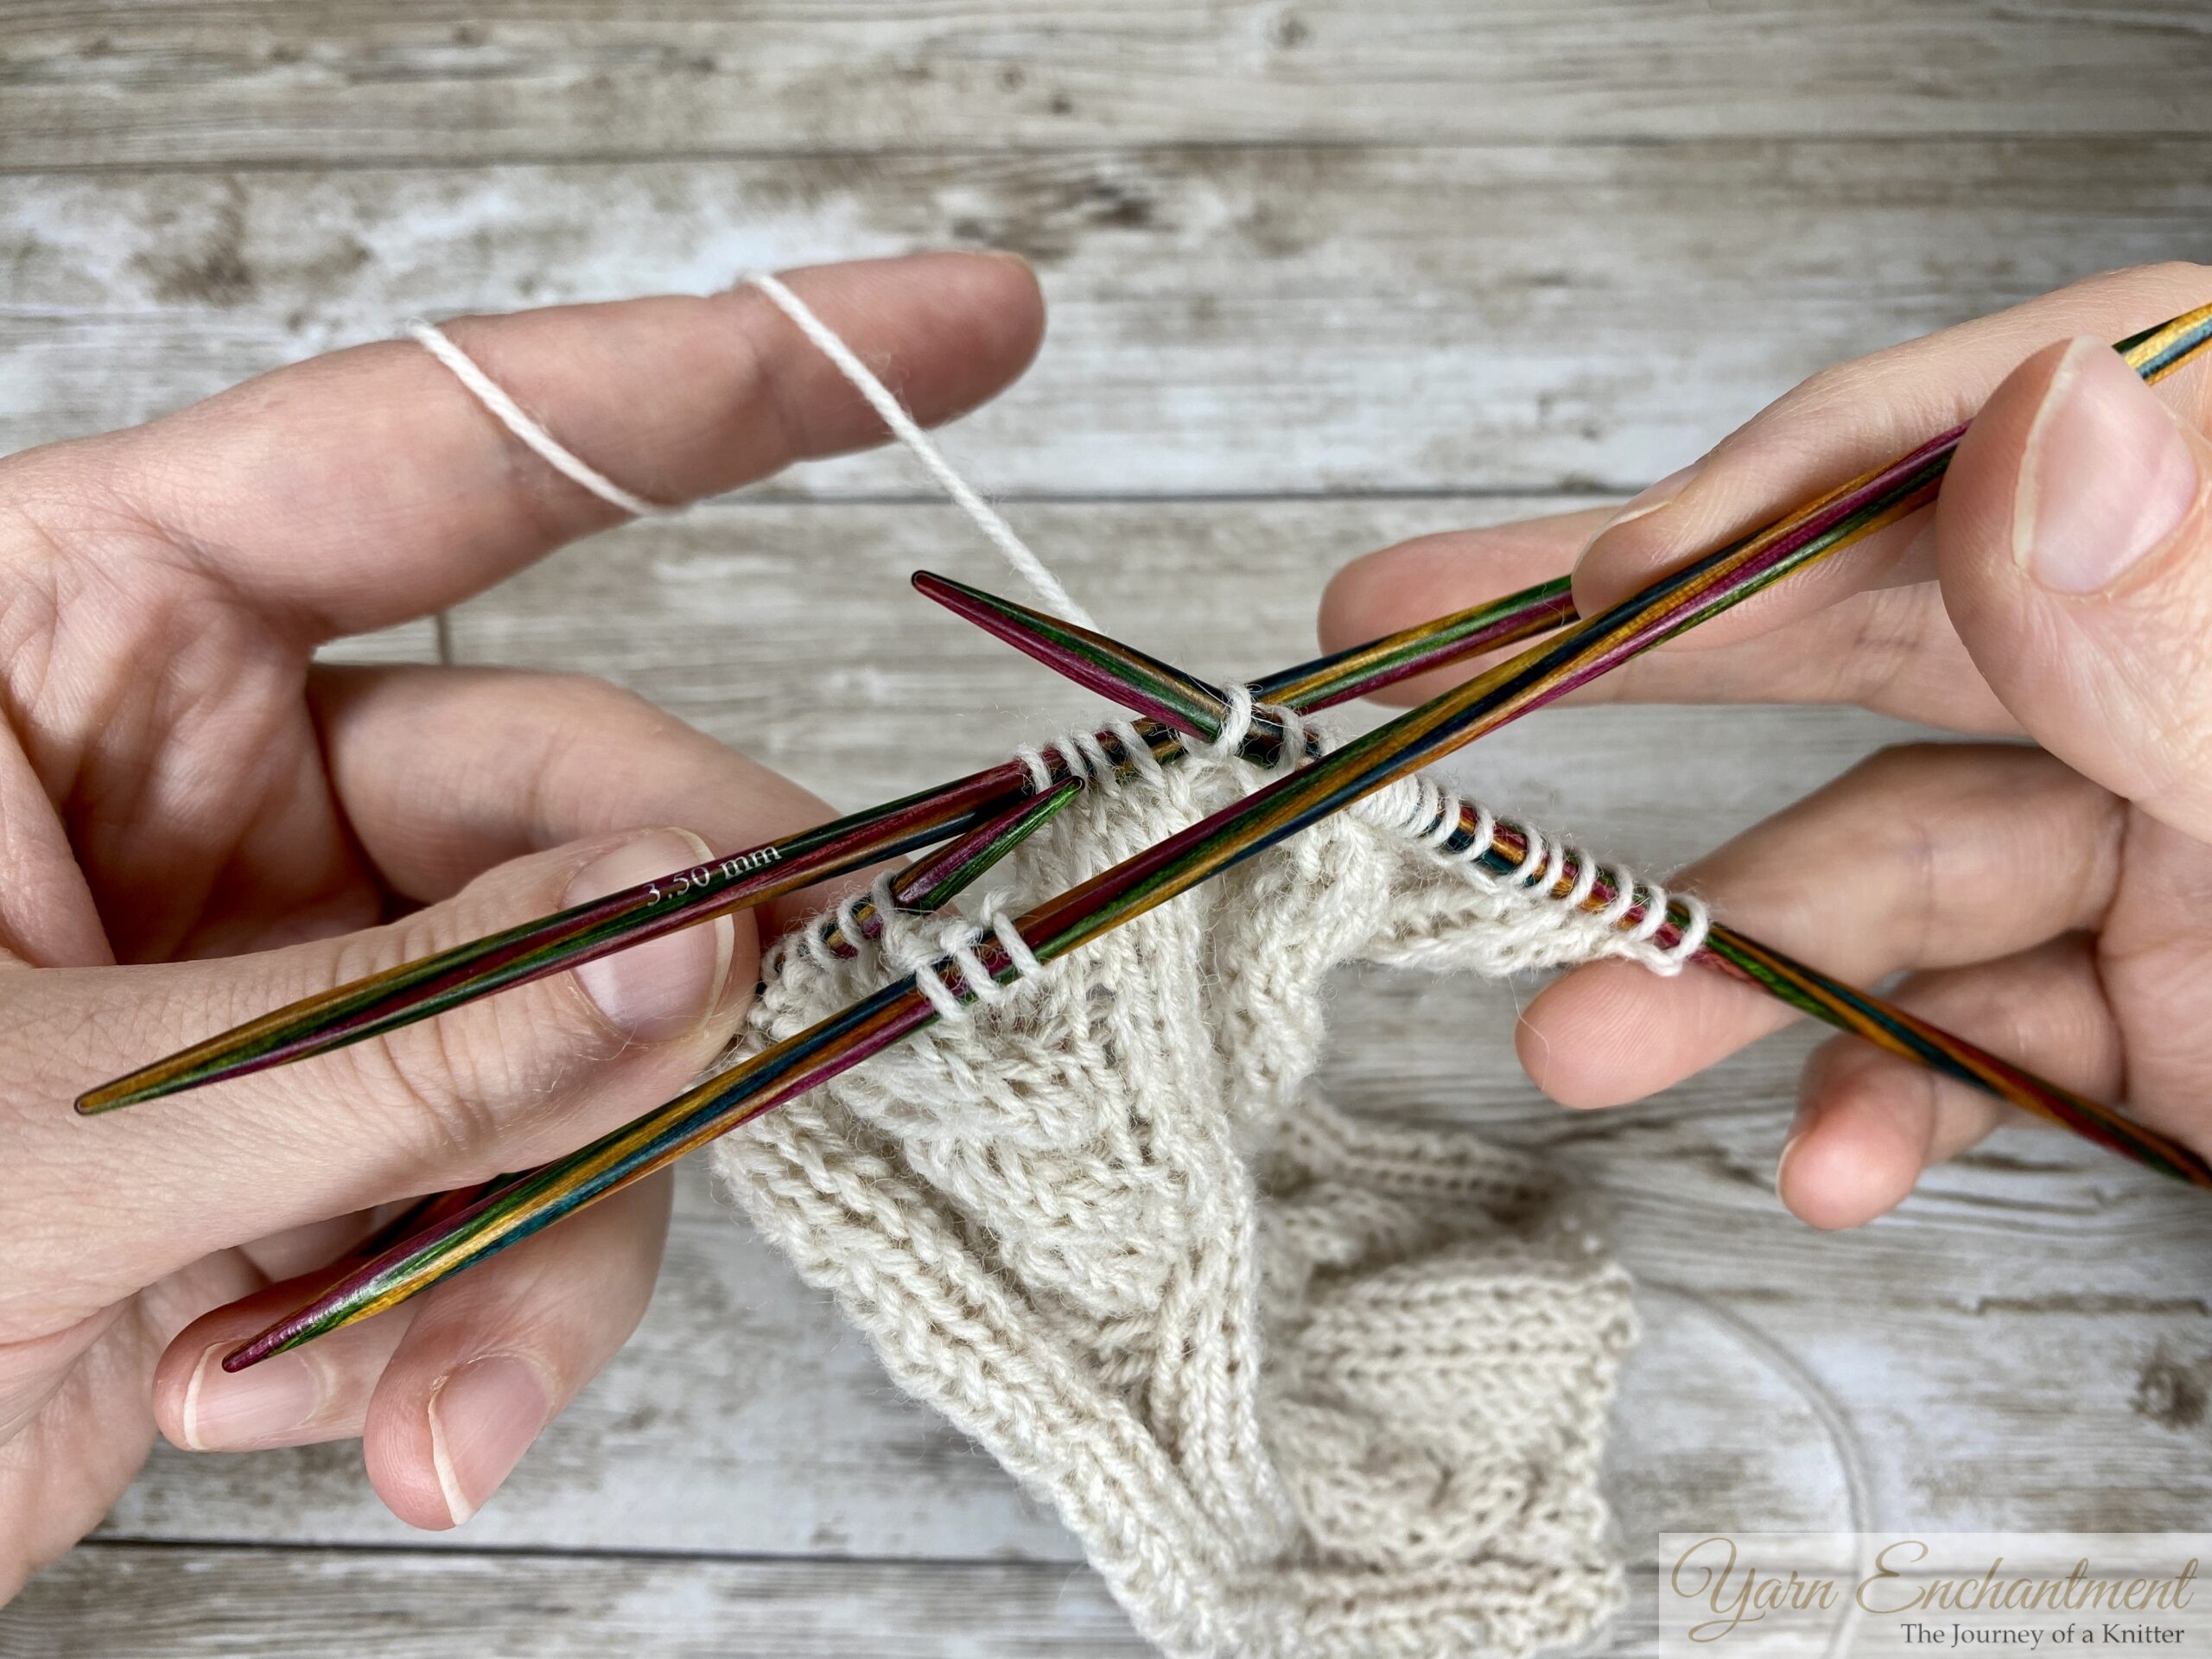
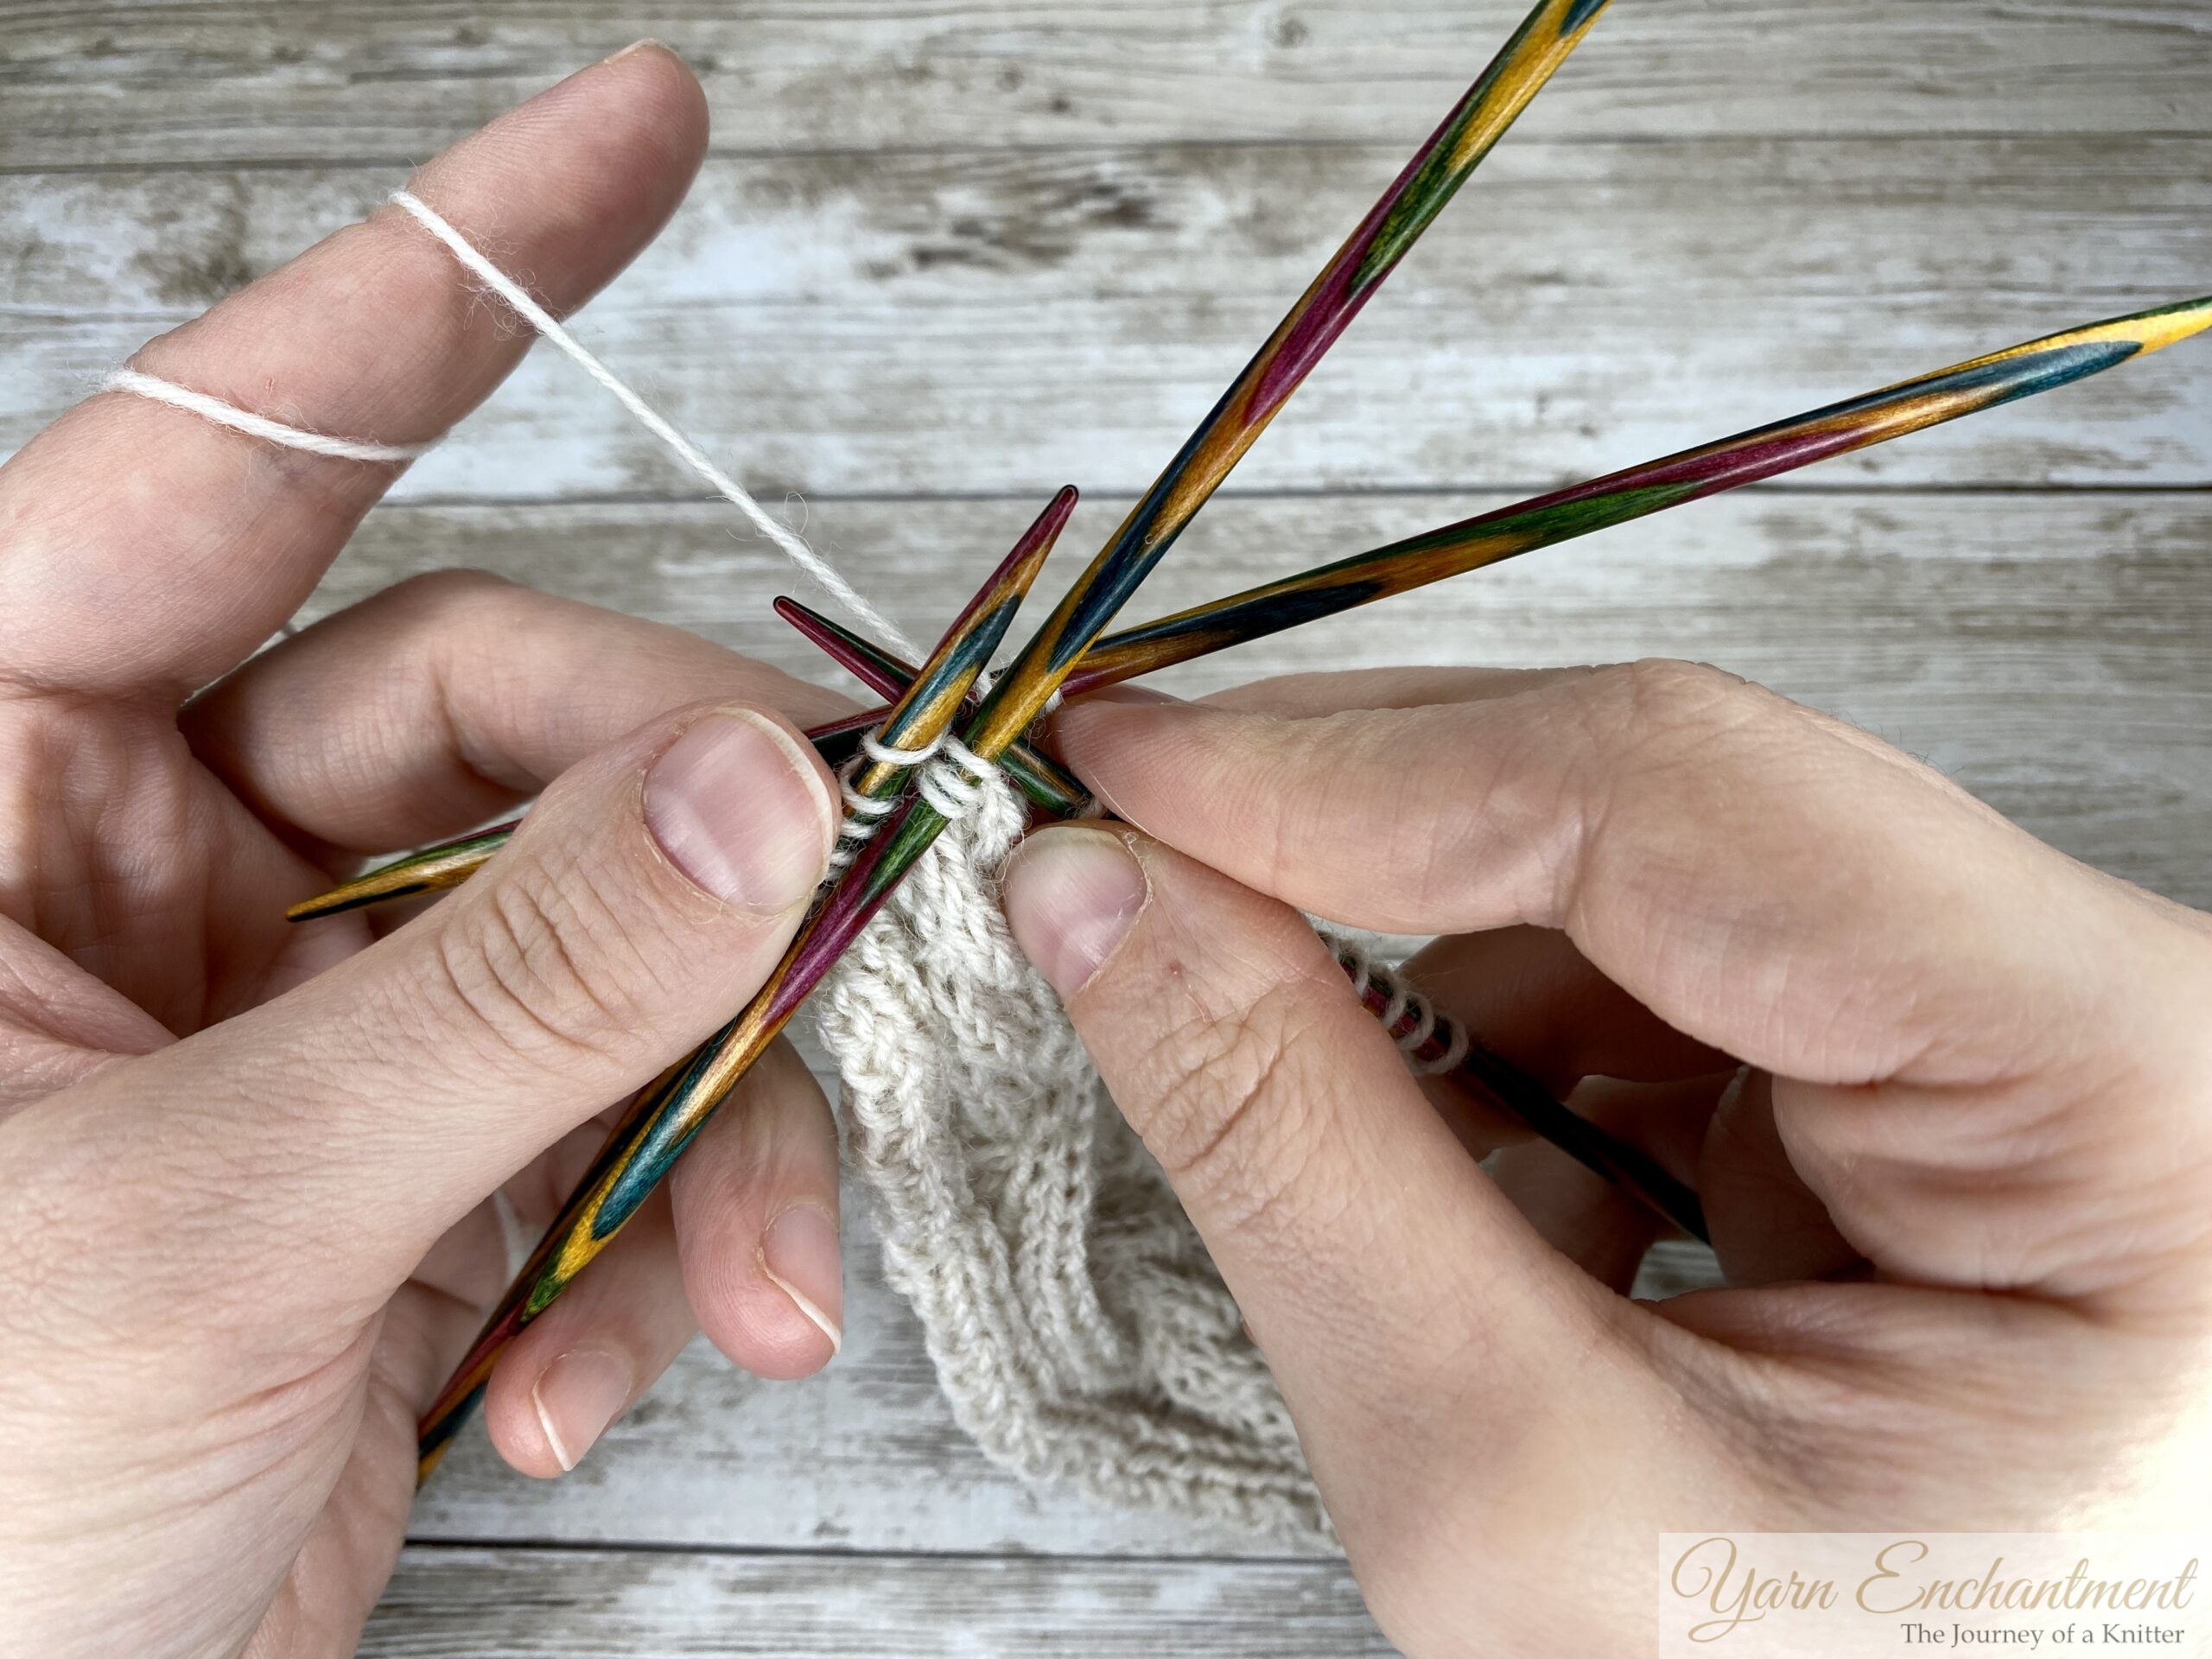
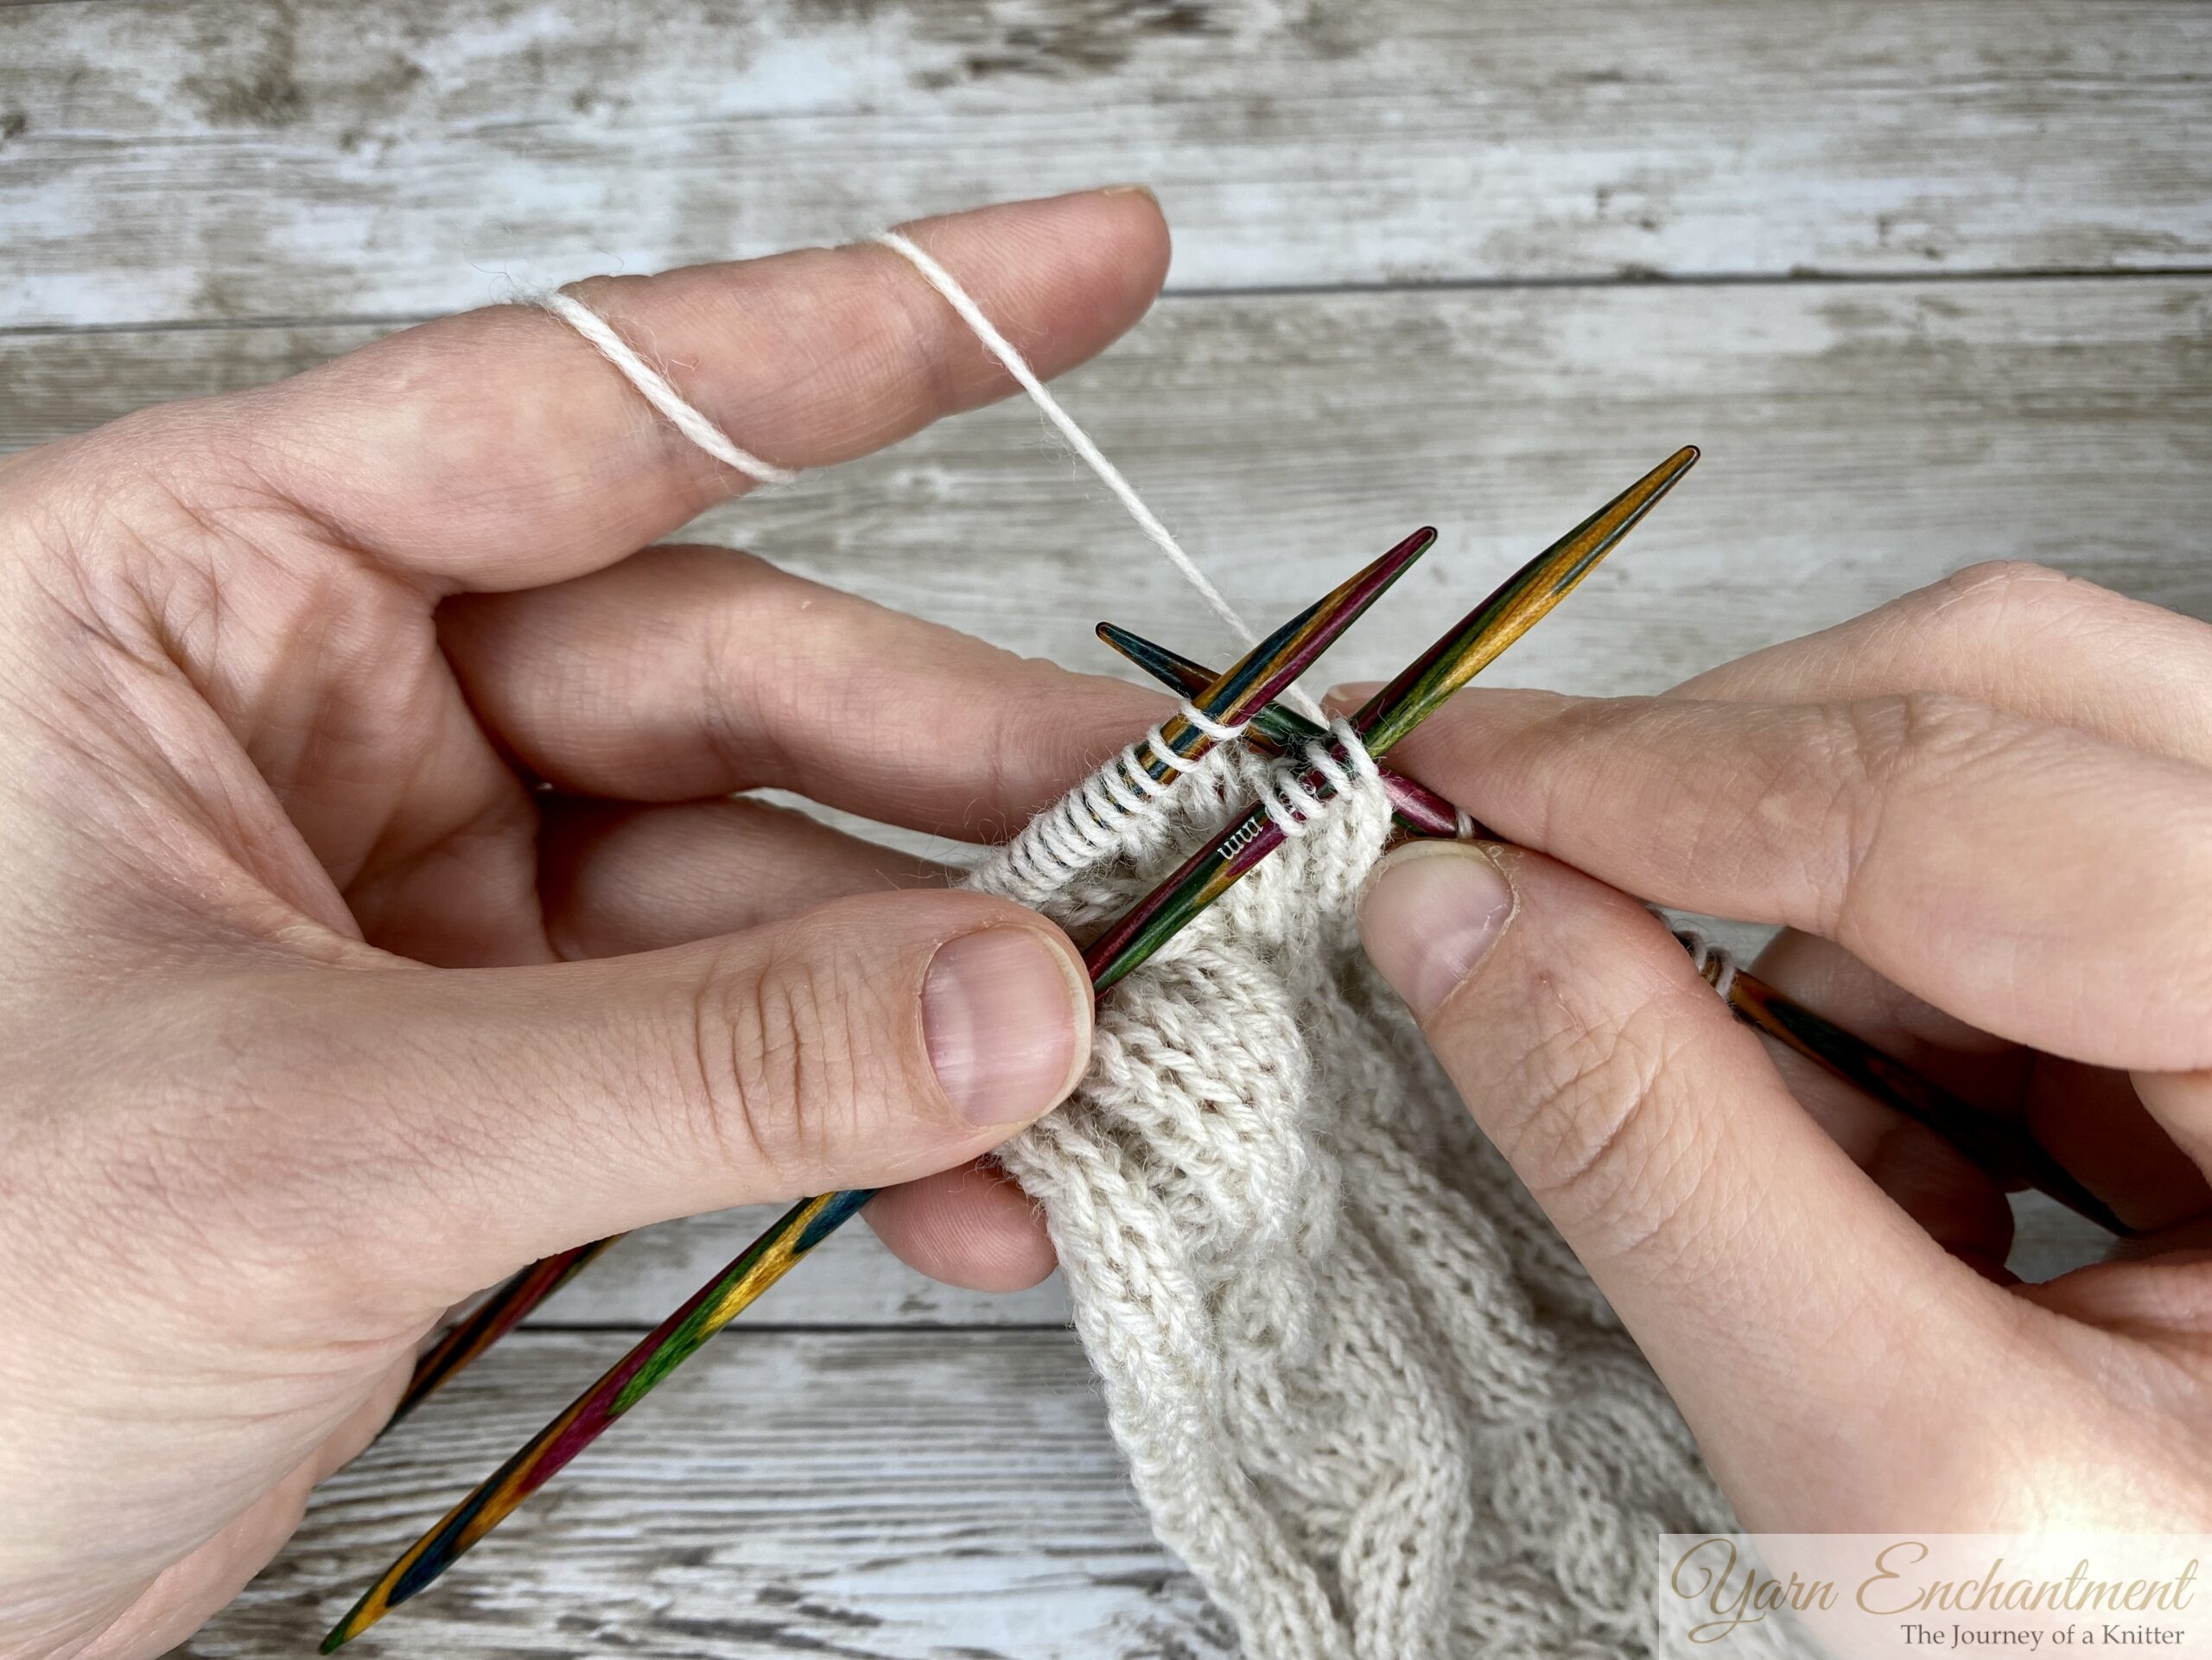
Row 31: E, k3, p3, place 4 stitches on a cable needle and hold them at the front of the work, knit 6 stitches, then knit the 4 stitches from the cable needle, p1, place 6 stitches on a cable needle and hold them at the back of the work, knit 4 stitches, then knit the 6 stitches from the cable needle, p3, k3, E
Row 32: E, p3, k3, p10, k1, p10, k3, p3, E
Cable 1 from Row 31 Step by Step Picture Guide
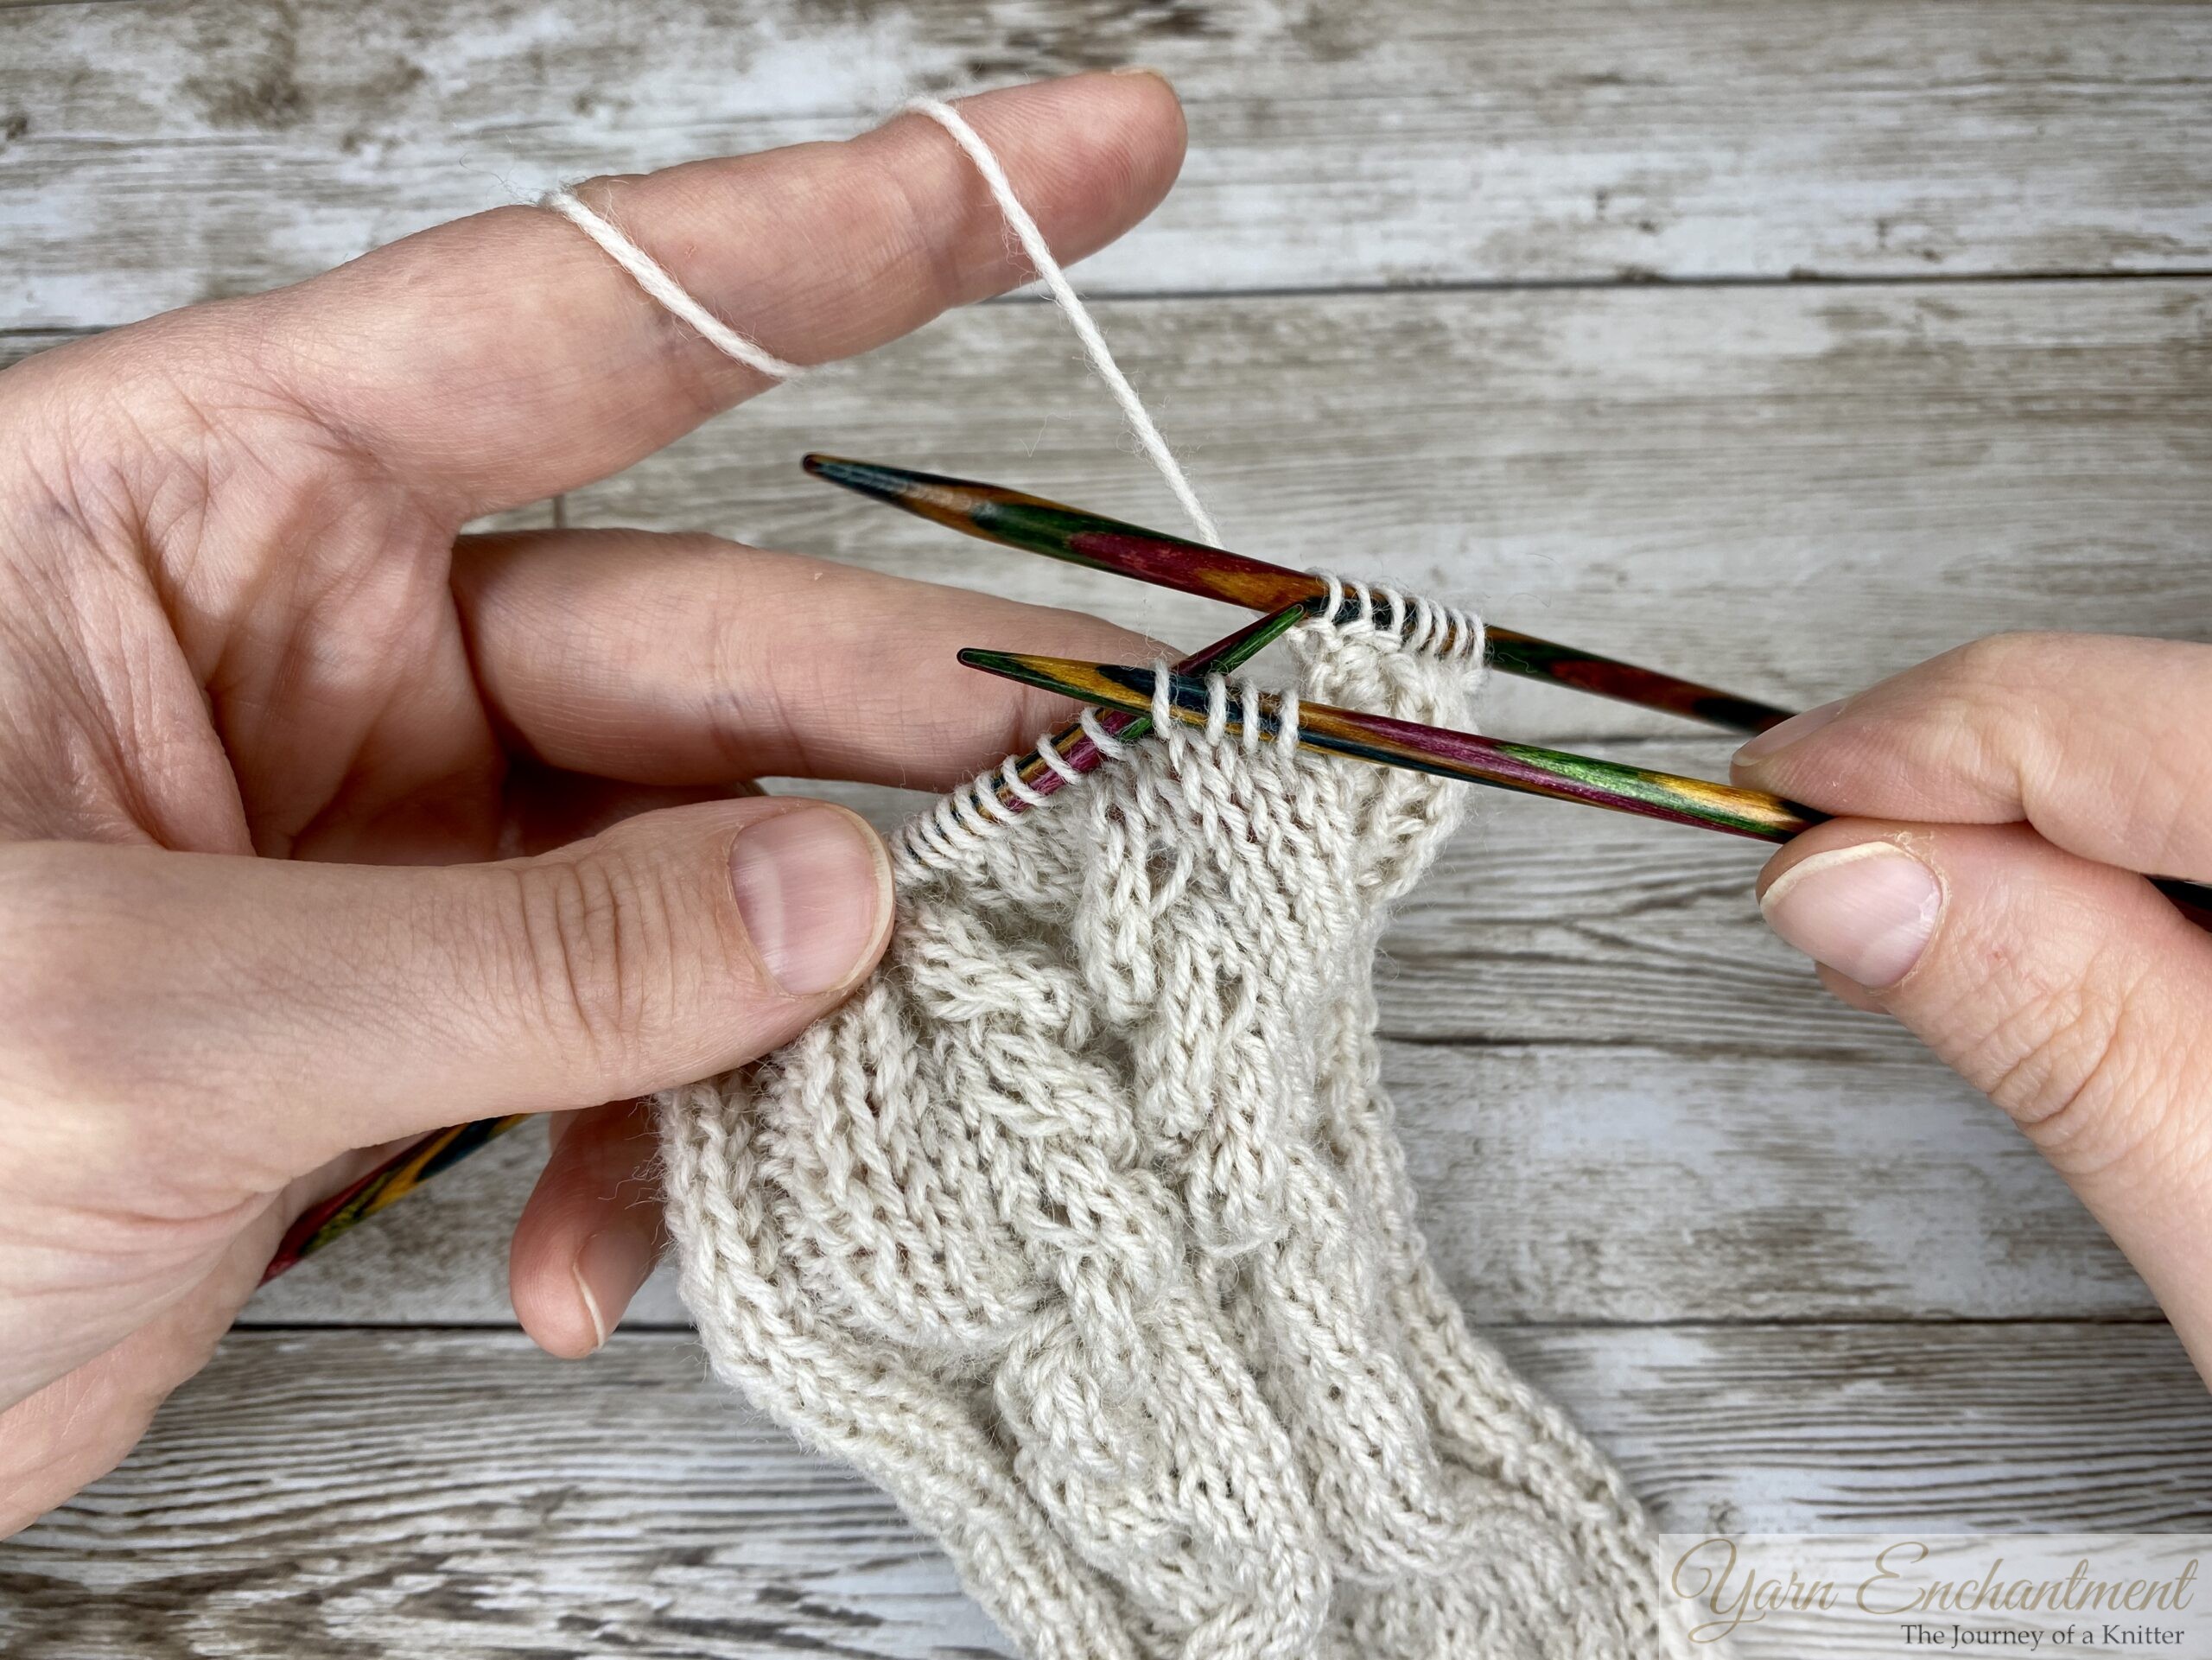 |  |  | Place 4 stitches on a cable needle and hold them at the front of the work | Knit 6 stitches | Knit the 4 stitches from the cable needle |


Cable 2 from Row 31 Step by Step Picture Guide
 |  |  | Place 6 stitches on a cable needle and hold them at the back of the work | Knit 4 stitches | Knit the 6 stitches from the cable needle |


Bind off all stitches and start crocheting the picot border.
 | 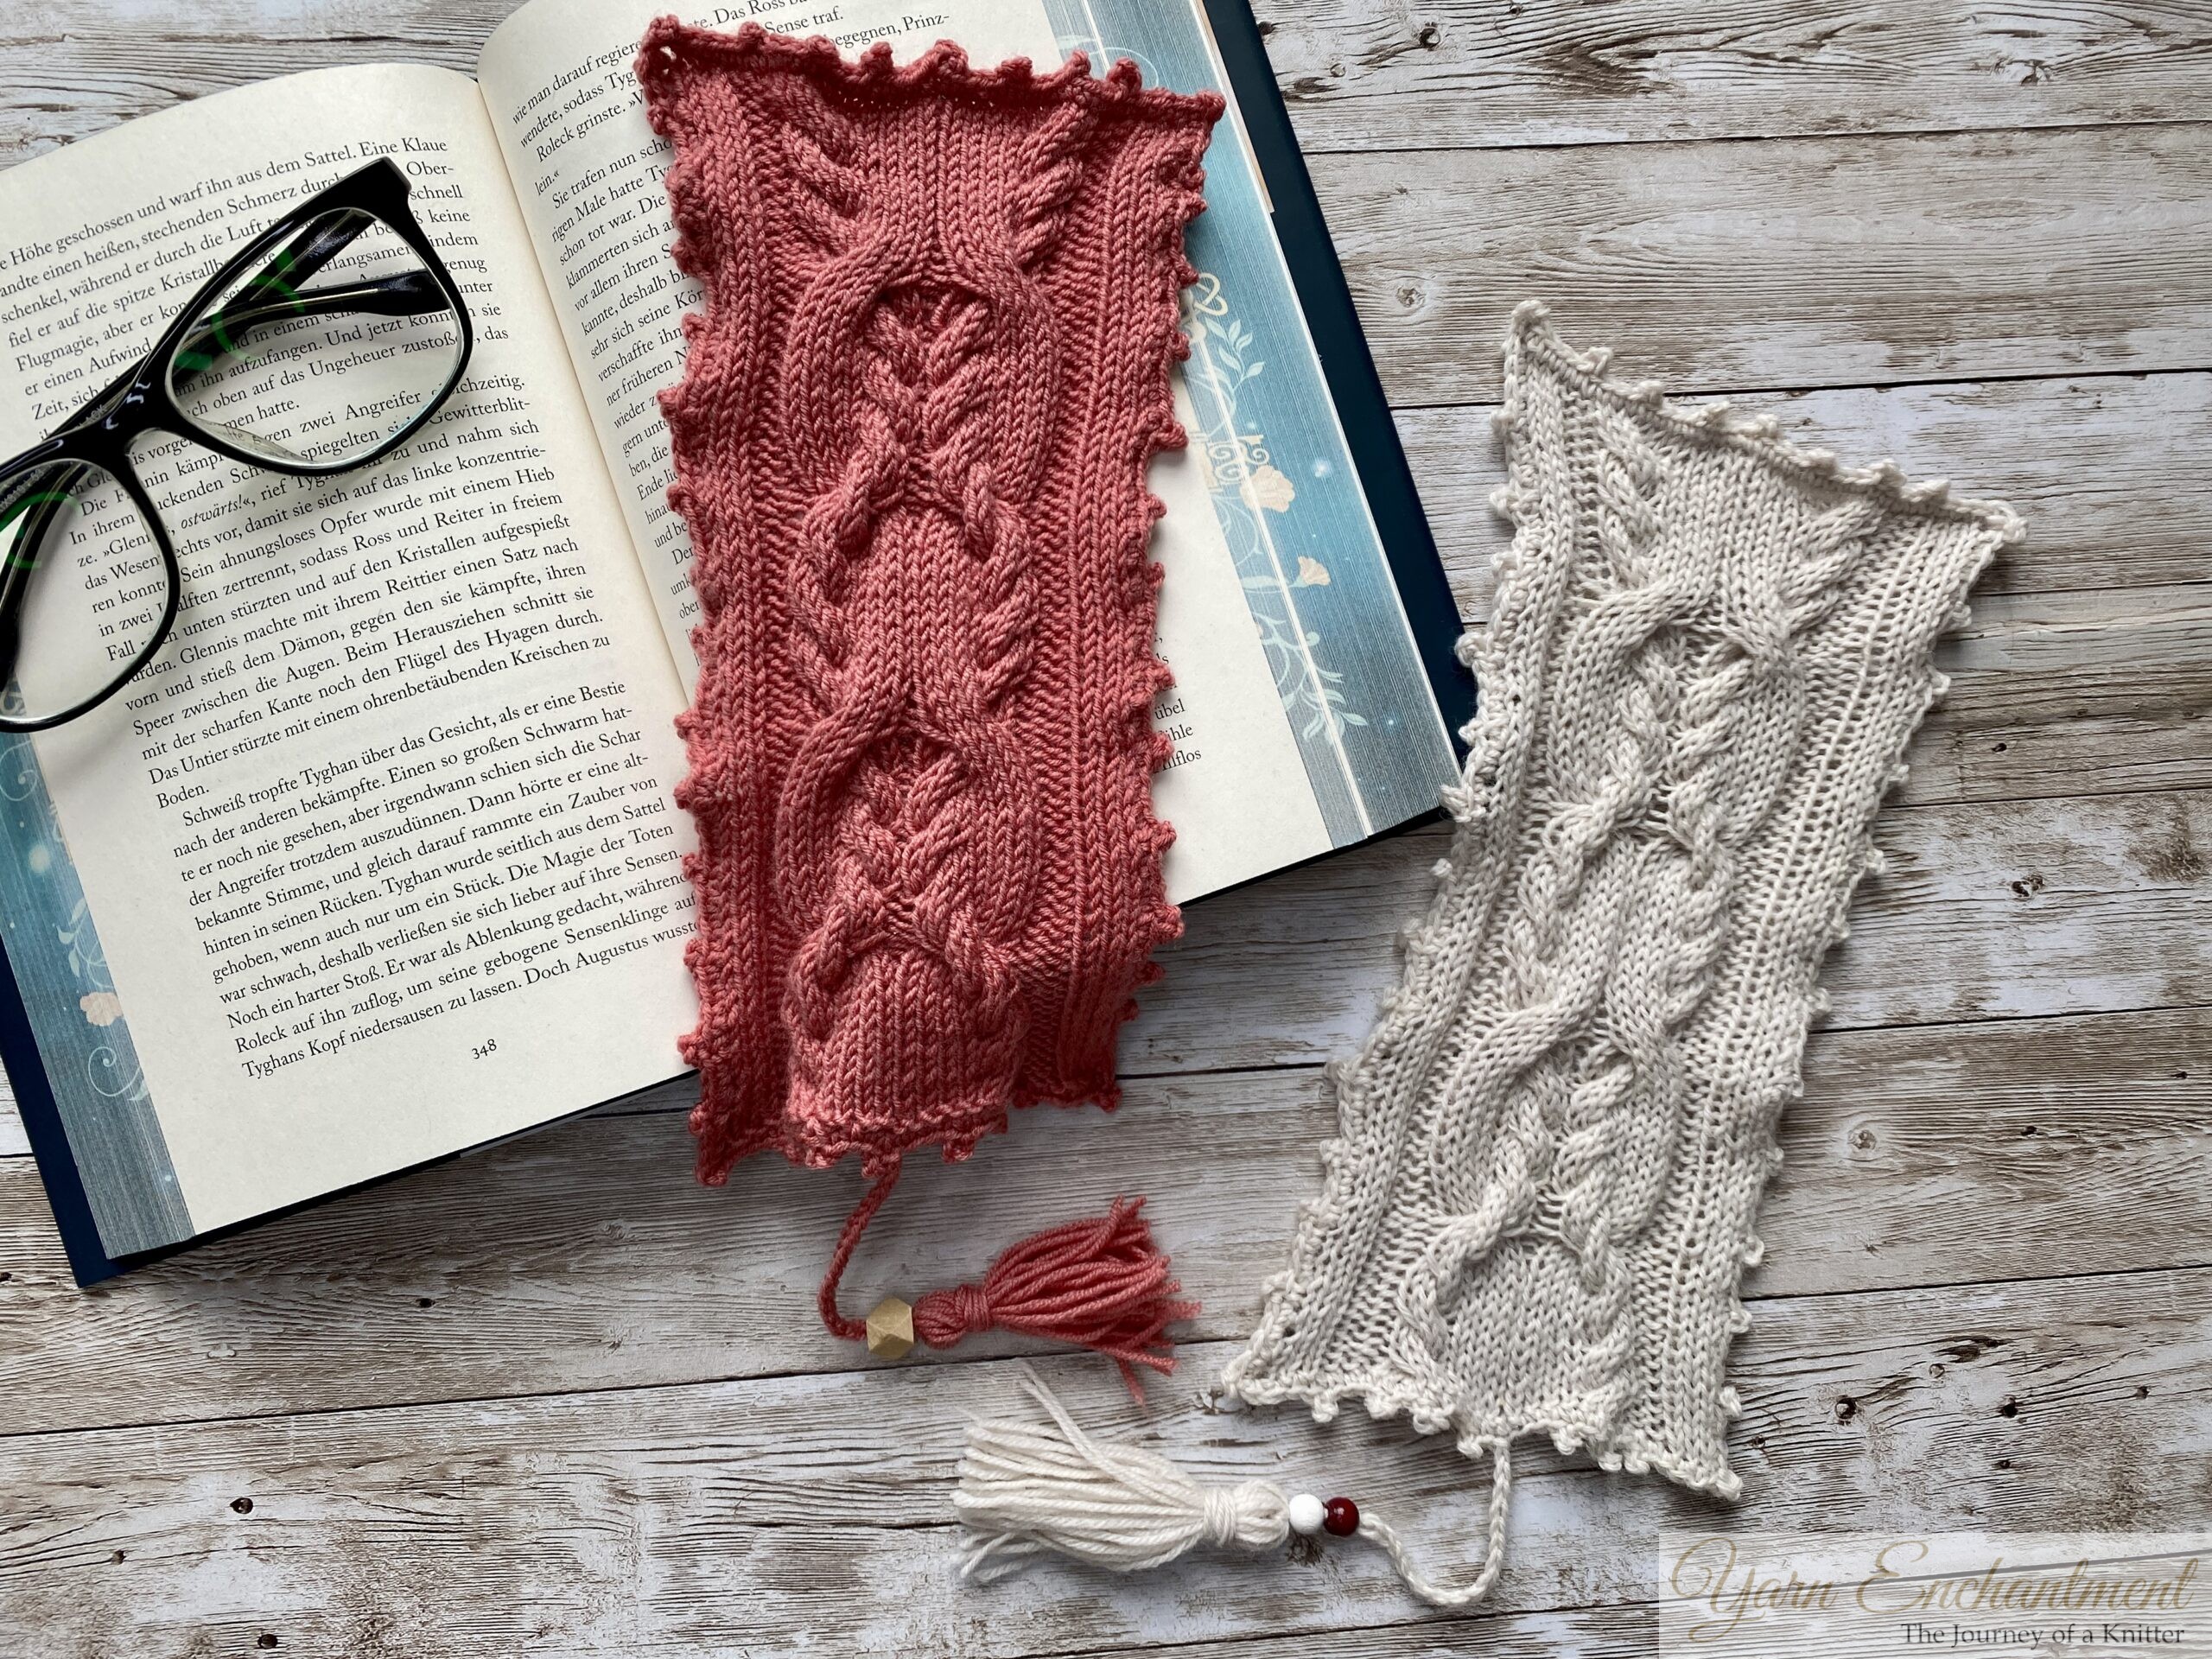 | Enchanted Bookmark | Enchanted Bookmark |


Picot Edge
Stitch Multiple: This pattern can be worked over any number of stitches. To ensure a consistent look, keep the same number of stitches between each picot. In my version, I worked 3 stitches between each picot and placed a picot in every 4th stitch.
Special Stitch:
- Picot (pic): Single crochet (sc) in the stitch, chain 3, then slip stitch (sl st) into the front loop and the left loop of the single crochet at the base of the chain.
Round 1:
- Begin with a standing single crochet (sc) in the middle of the purl stitch (in between the cables).
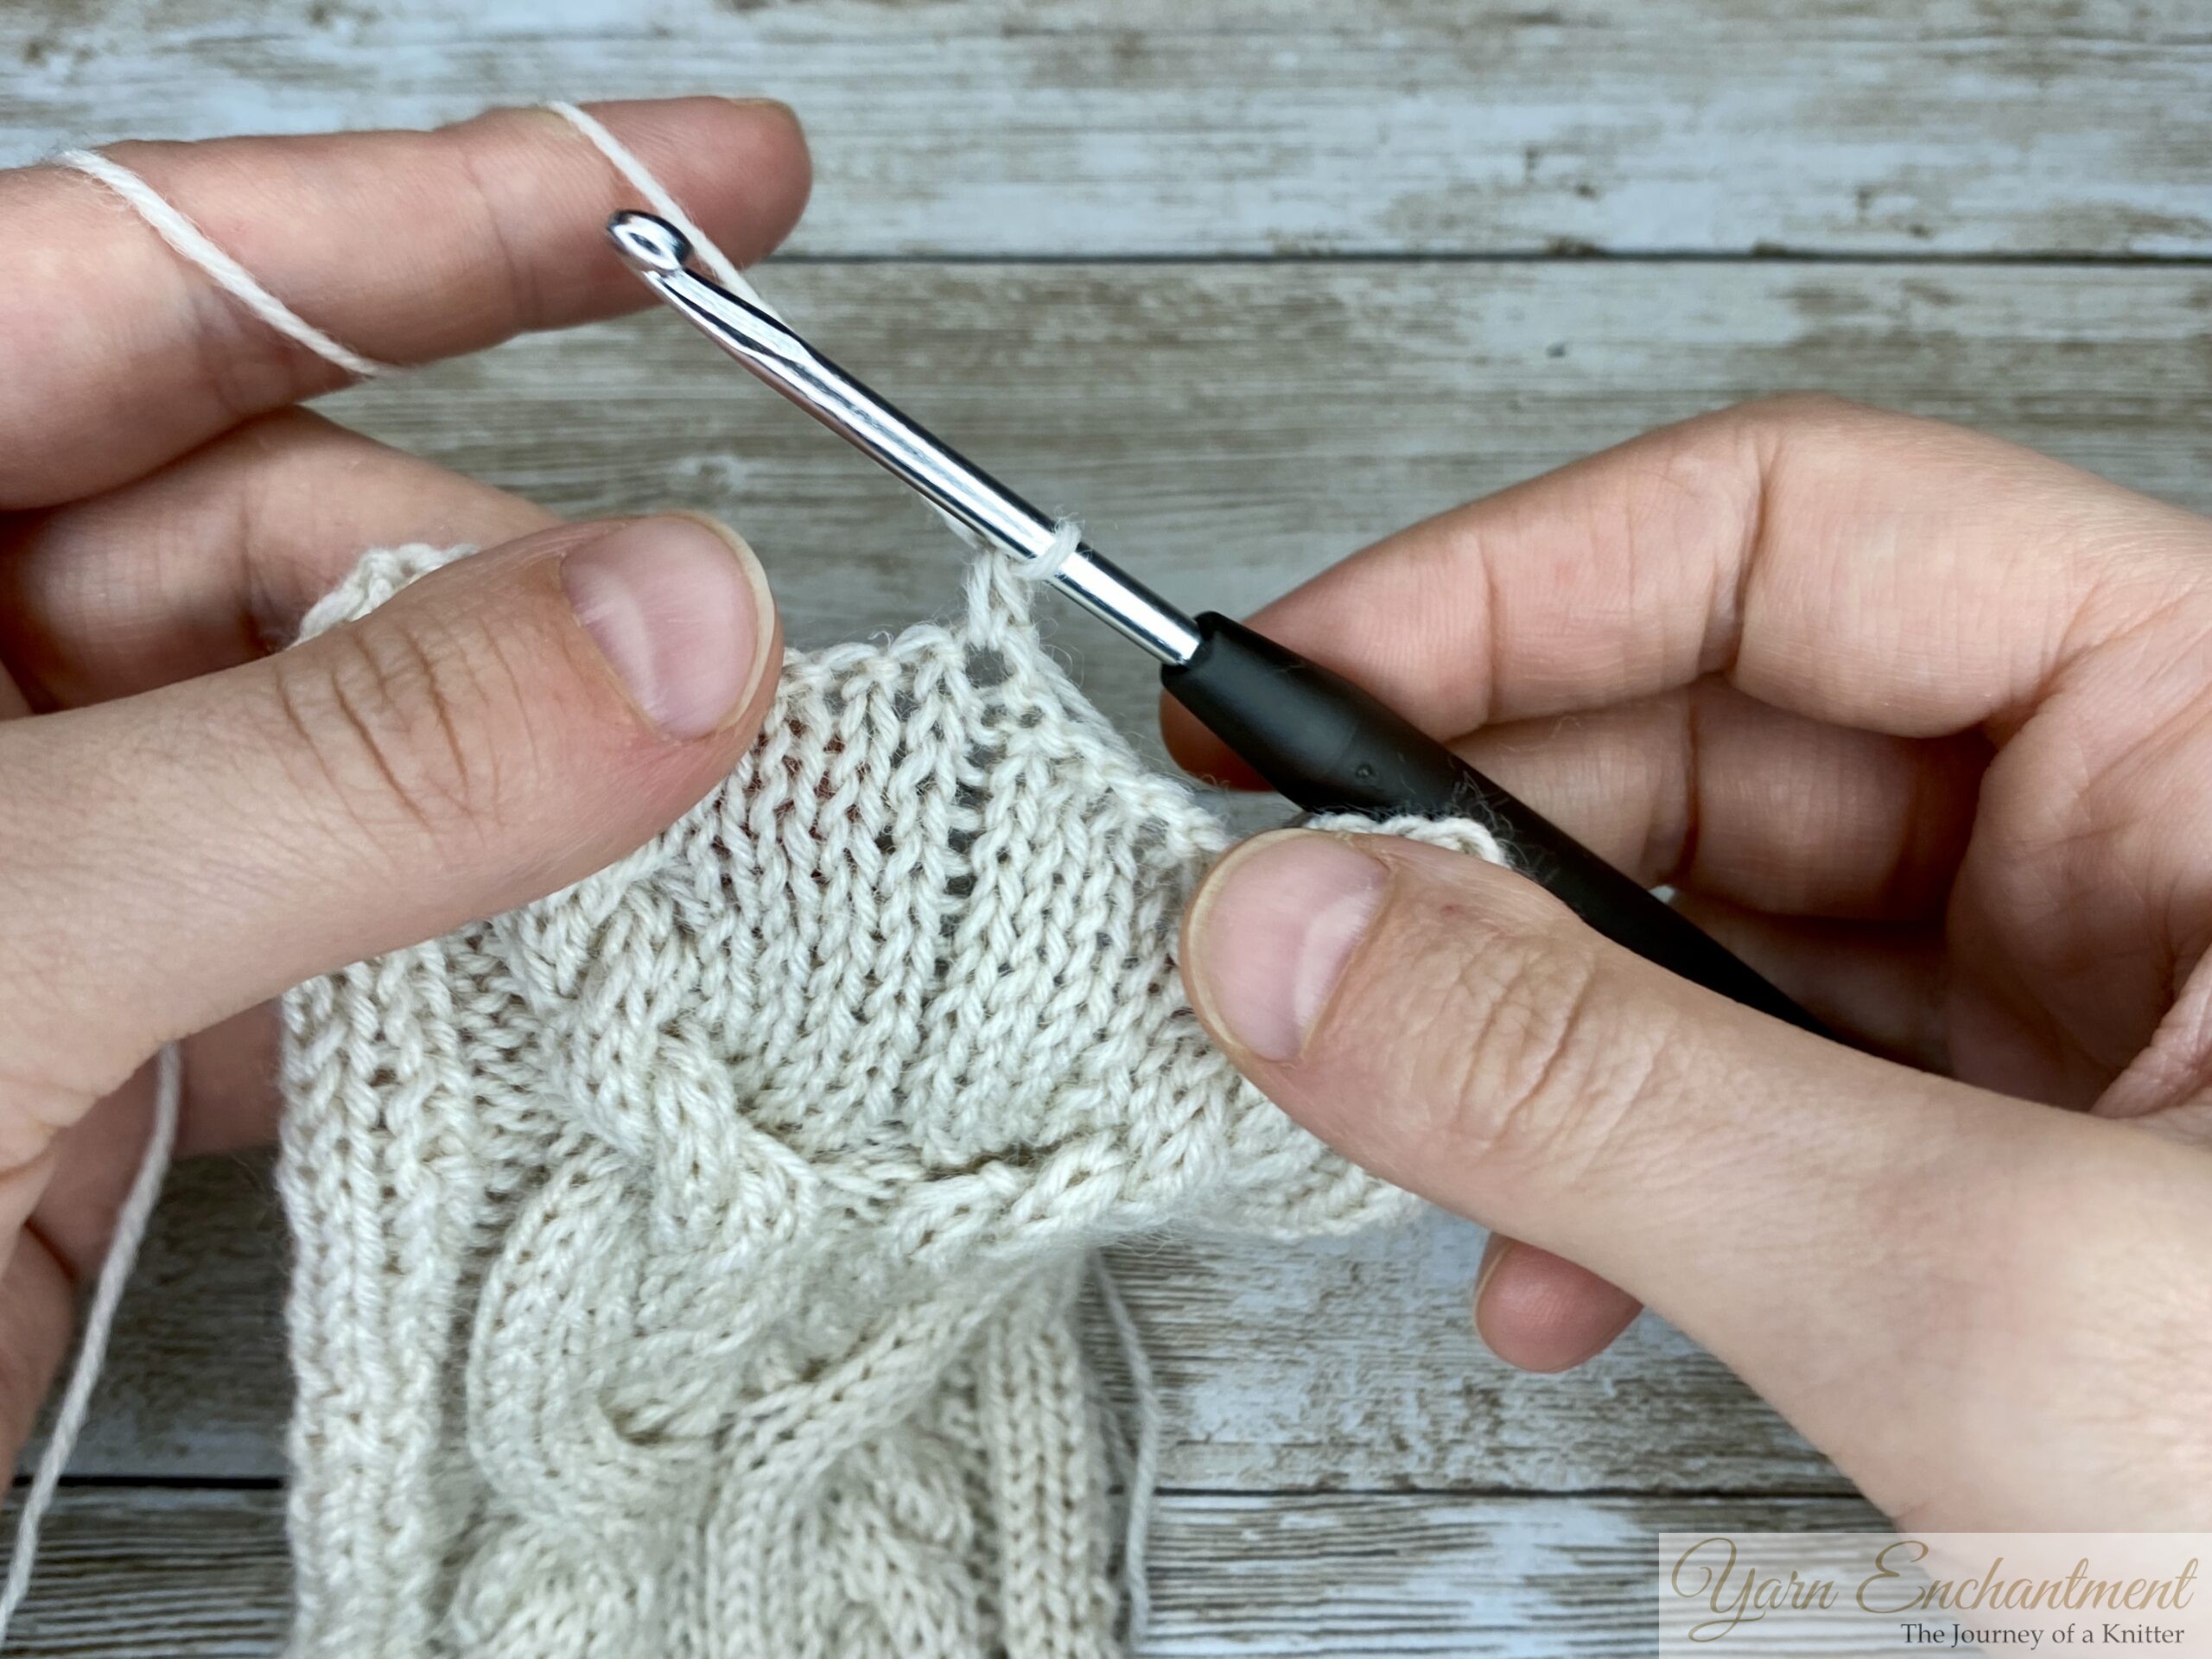 | Start with a standing single crochet in the purl stitch |

- Single crochet (sc) up to the stitch where you want to place your first picot.
- Work (picot, single crochet to the next picot) repeatedly until you reach the corner.
- At each corner, work (sc, 1 picot, sc into the corner stitch).
When you reach the end, work one slip stitch into the first single crochet. Then chain 20 stitches. Cut the yarn and leave a longer tail to sew on the tassel.
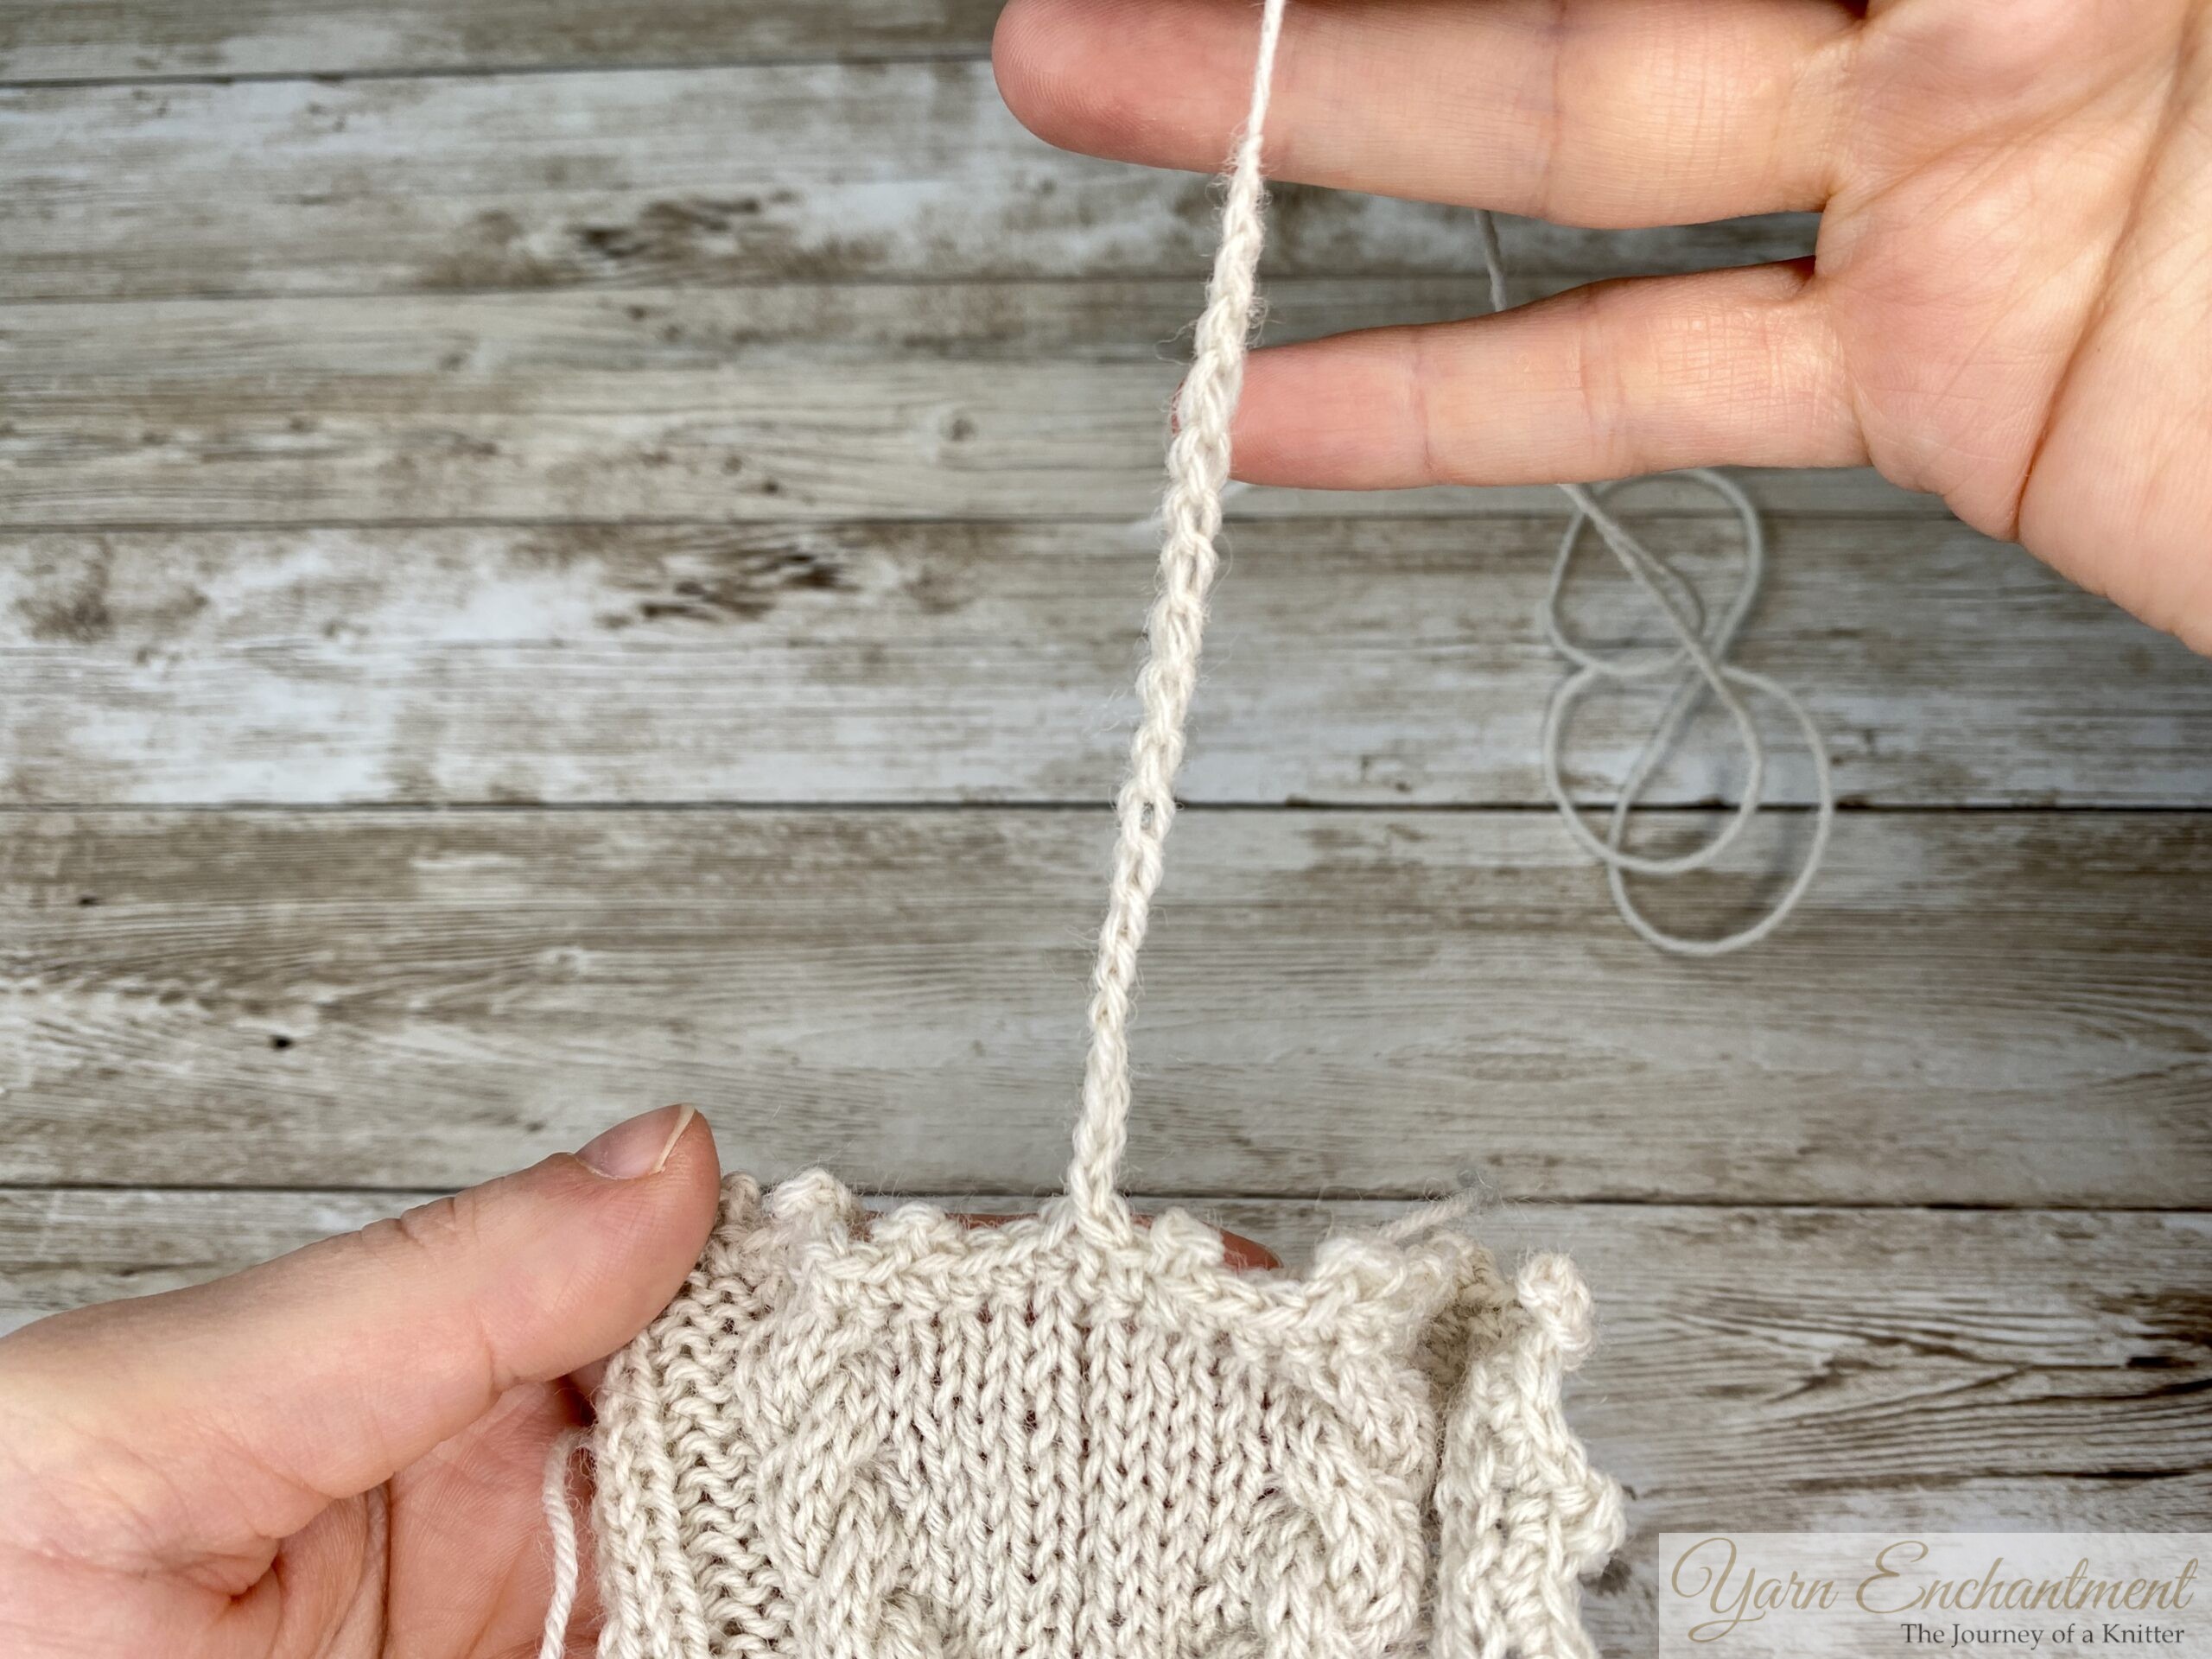 | 20 Crochet Chain |

For the tassel:
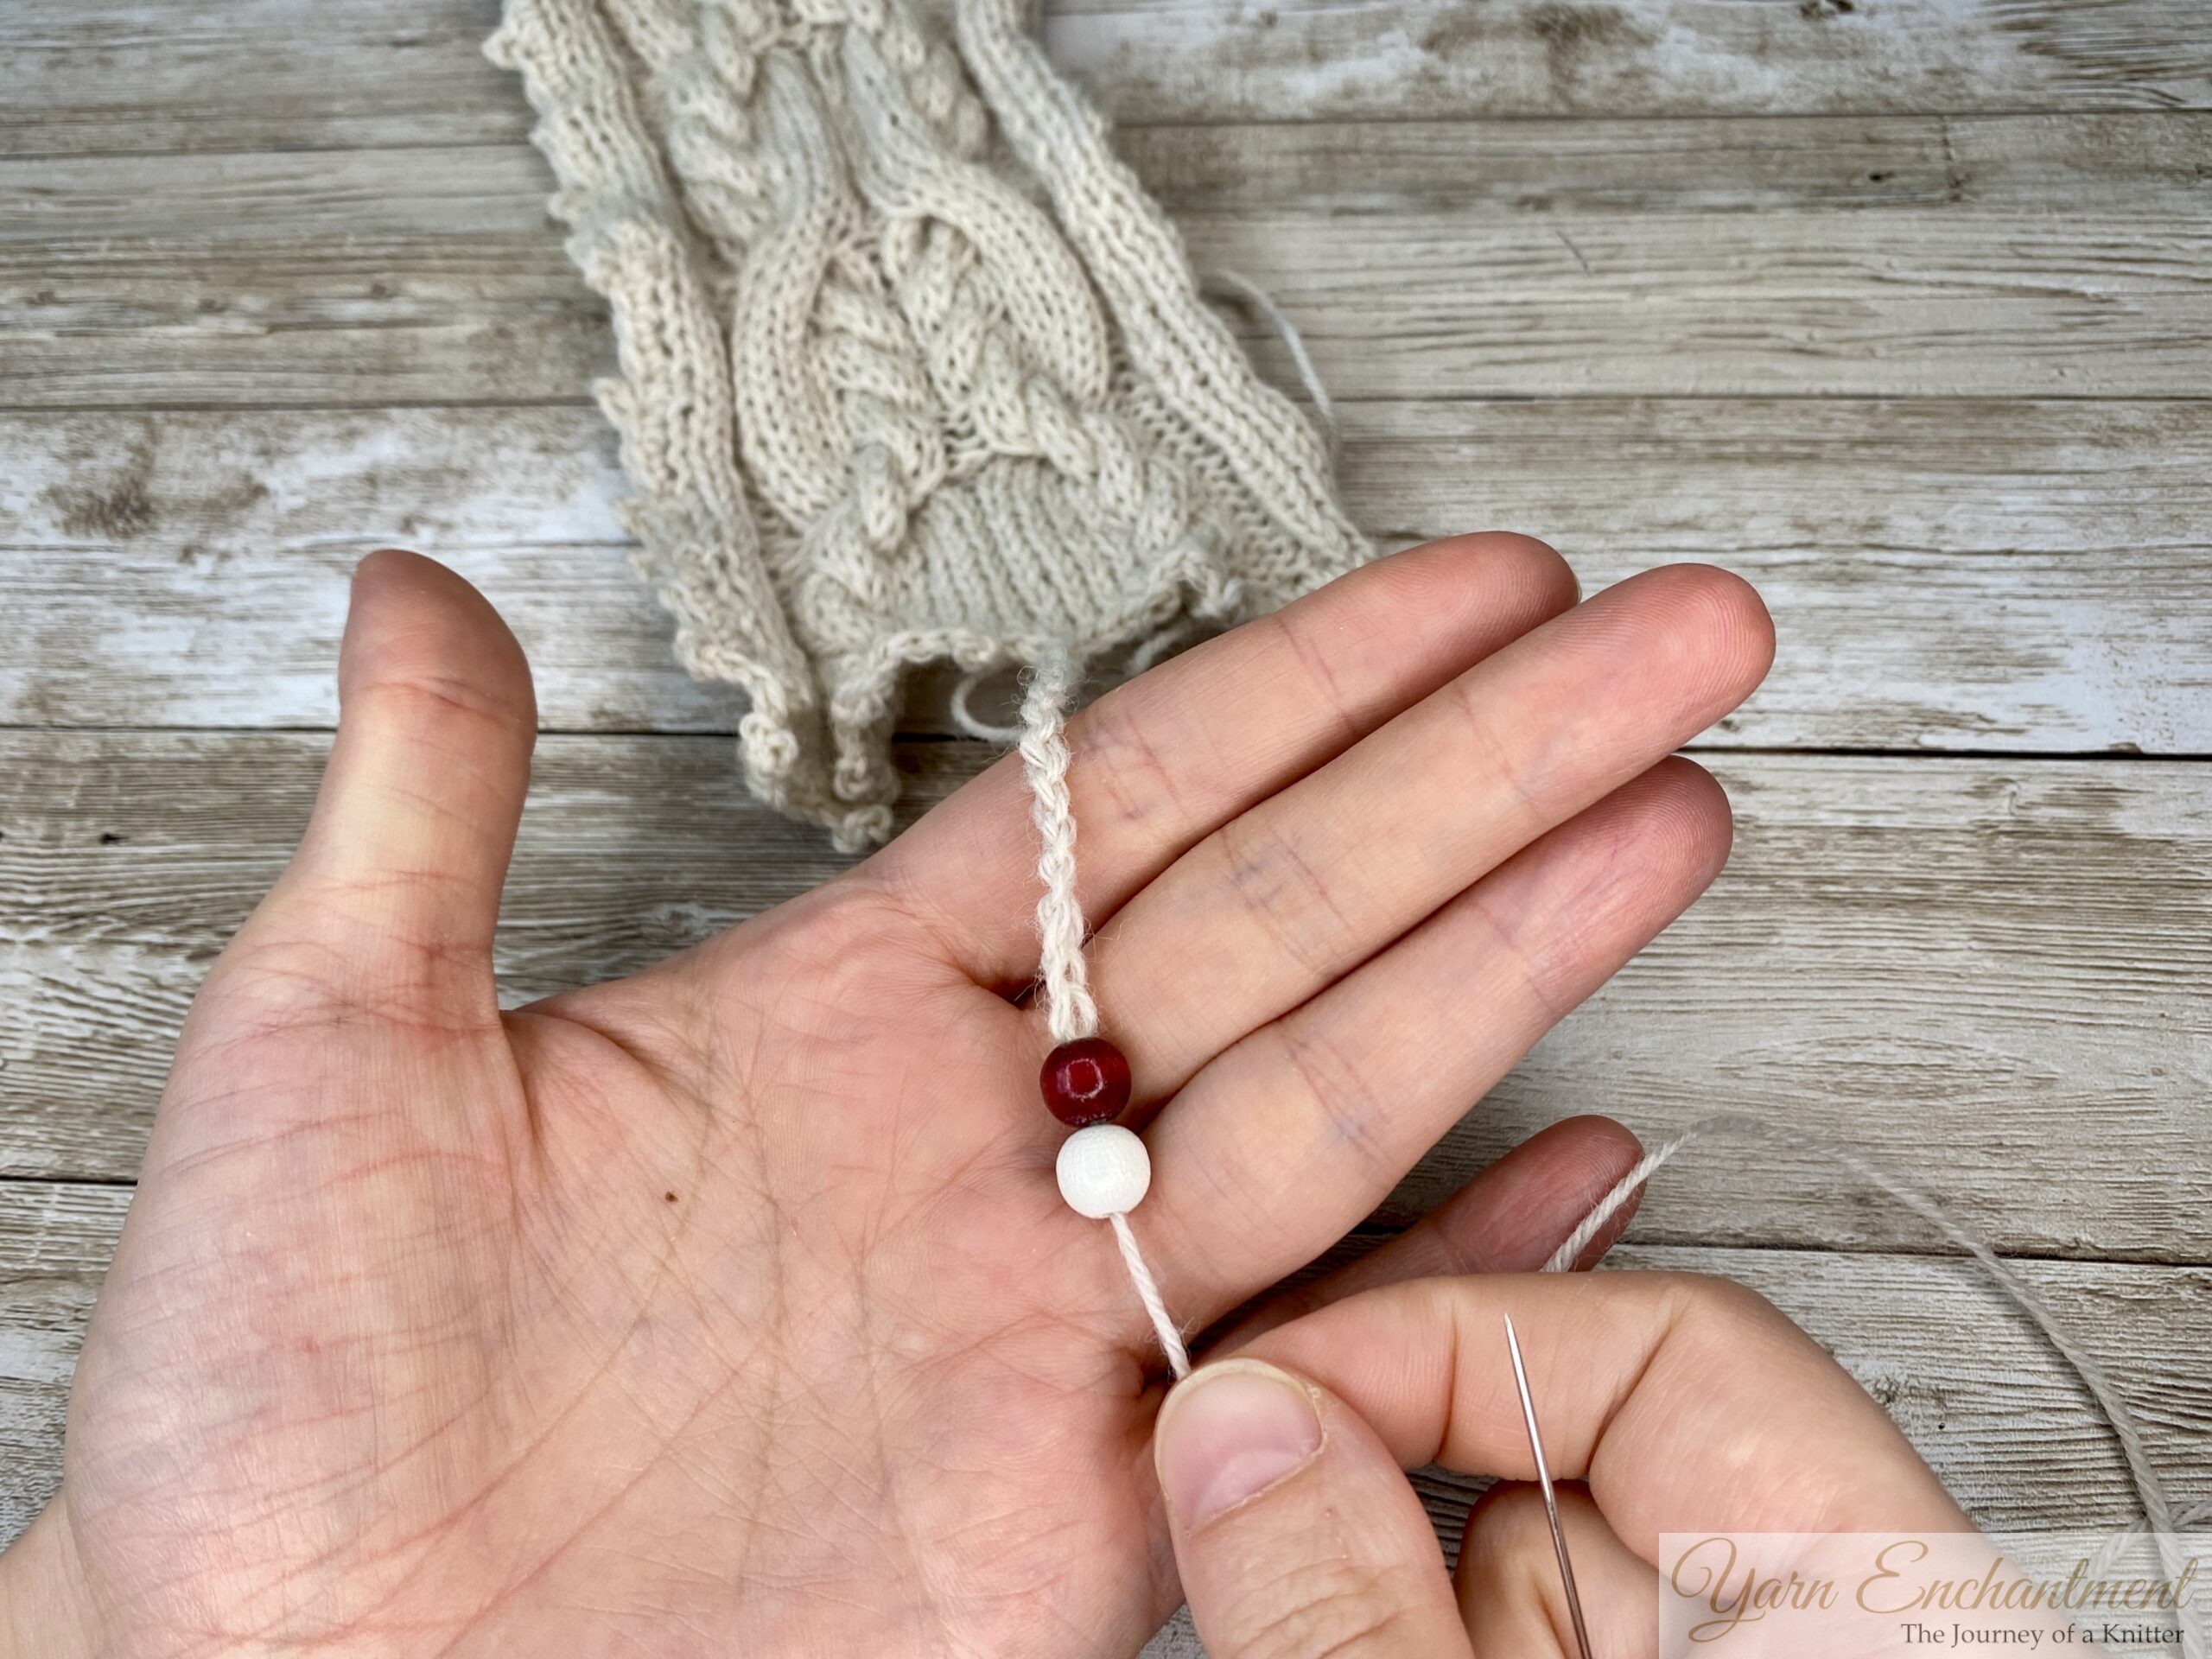
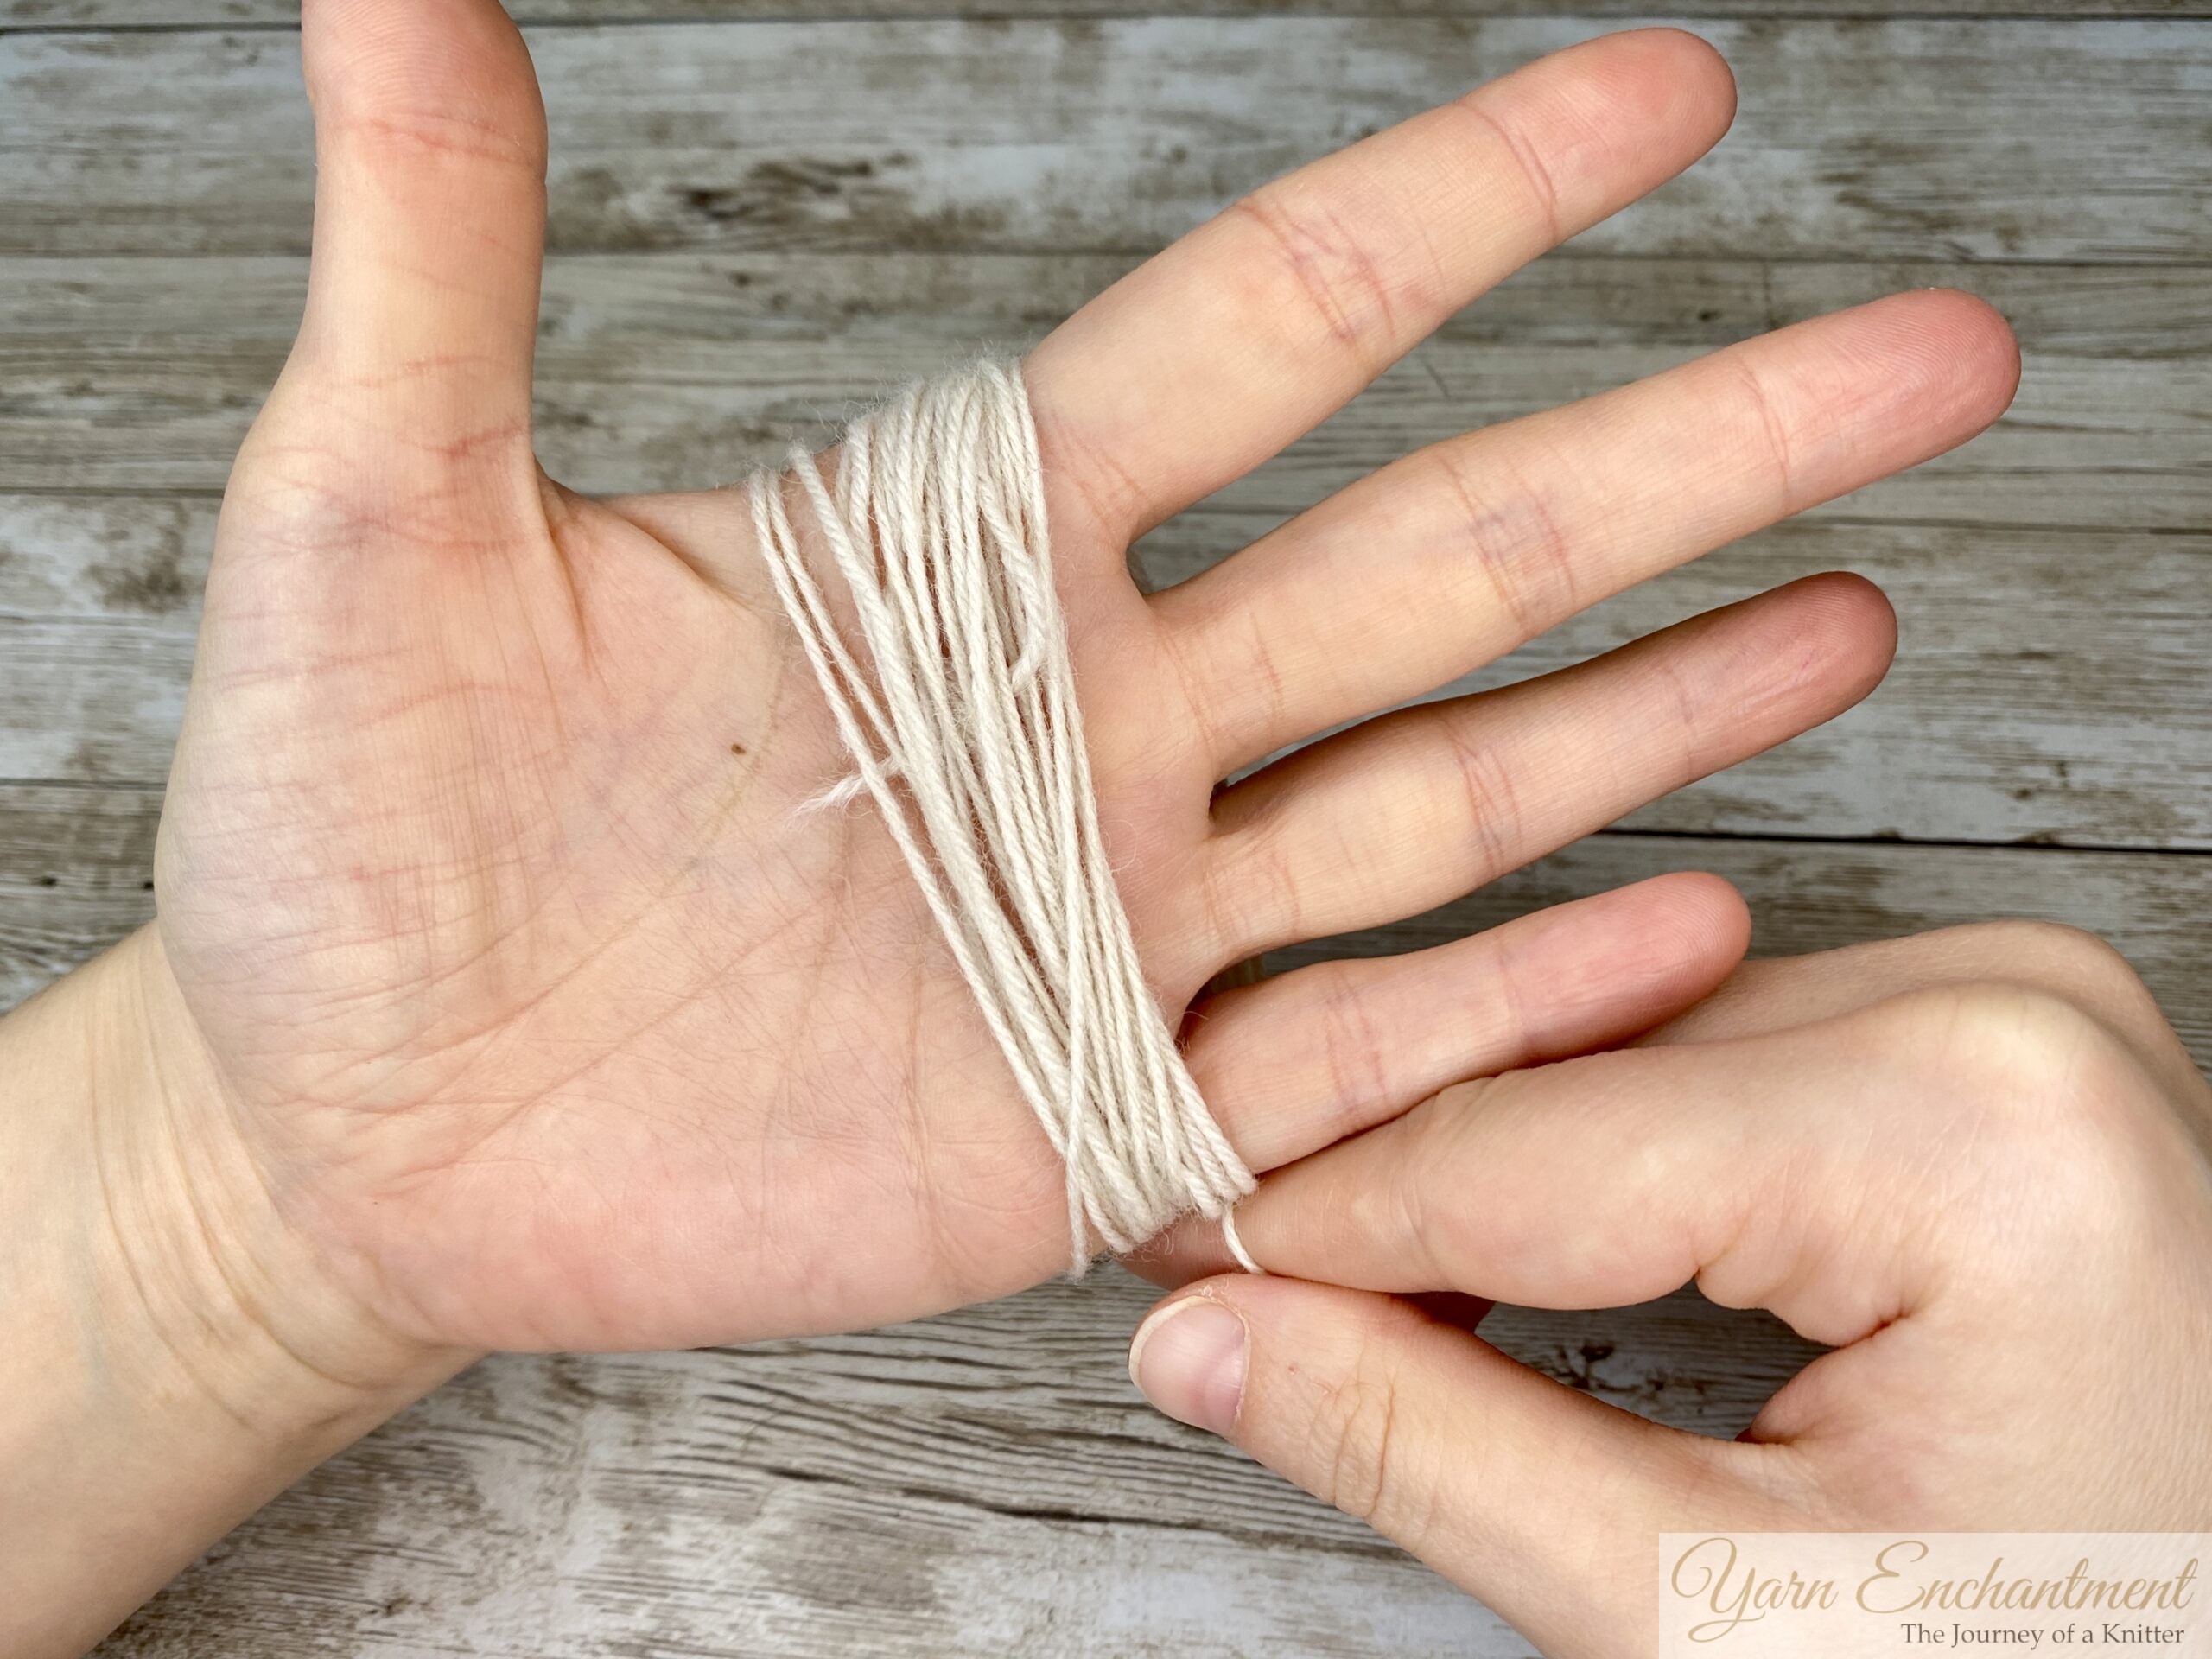
- Wrap your yarn around your hand 20 times and cut it.
- Thread the long tail of your yarn (from your ch20) through a needle.
- Slide a bead onto the chain of 20 stitches you made earlier.
- Pass the long tail of the yarn through the center of the tassel (the looped yarn you wrapped around your hand).
- Then, thread the tail through the hole of the bead.
- Insert the needle through a chain space, bring the yarn back through the bead, and wrap it around the tassel. Repeat this process about 3 times to secure the tassel and bead.
- Wrap the yarn horizontally around the tassel to form the typical tassel shape. Tie a knot to secure it, and pass the yarn through the wrapped section, leaving it hanging.
- Cut open the bottom loops of the tassel and trim it to your desired length.
 |  |  | Slide a bead onto the chain of 20 stitches | Wrap your yarn around your hand 20 times | Pass the long tail of the yarn through the center of the tassel |


Stitch Key for Chart
 |  |


Chart
Cast on 35 stitches using the long-tail cast-on method and begin following the chart. Knit rows 1 through 32 twice (Row 32 is a WS Row). After completing the chart for the second time, knit rows 1 through 15 once more. Finish by ending on a wrong-side row.
The wrong-side rows are not included in the chart. On every wrong-side row, knit the stitches as they appear (knit the knit stitches and purl the purl stitches).
All even-numbered rows (wrong-side rows) are worked as follows: [E, p3, k3, p10, k1, p10, k3, p3, E]
 |

I hope you enjoy creating the Enchanted Bookmark as much as I enjoyed designing it. This project is a wonderful opportunity to practice cable knitting and create something truly special, whether for yourself or as a thoughtful gift. Take your time, enjoy the process, and let your creativity shine. If you need any help, please don’t hesitate to reach out to me at sarah@yarn-enchantment.com
Until then, happy knitting!
A Little Way to Say Thanks
You Might Also Like


 |
|
Join the Cozy Corner Newsletter!
Hey there, creative soul! Welcome to the Yarn Enchantment Newsletter, where we celebrate all things cozy, crafty, and full of heart. Think of this as your friendly crafting companion - a little dose of inspiration delivered straight to your inbox, just for you. Inside, you’ll find: ✨ Exclusive patterns & tutorials - ideas you won’t find anywhere else (just for us!) 📚 Bookish crafts that bring your favorite stories to life 🧶 Tips and tricks to make your crafting journey smoother (and more fun!) 💌 Heartfelt musings on life, creativity, and the magic of making something with your own two hands Whether you’re knitting by the fire, brainstorming your next DIY project, or just looking for a little creative pick-me-up, this newsletter is here to cheer you on. Because let’s be honest - crafting isn’t just about the finished project; it’s about the joy, peace, and stories we create along the way. So grab a cup of tea, cozy up, and join me. Together, we’ll weave a little magic into everyday life - one stitch, one story, and one email at a time. P.S. I’m so glad you’re here. Let’s make something beautiful together! (Note: If you're using an ad blocker, you may encounter issues subscribing to the newsletter. To subscribe, please consider disabling your ad blocker.)
|
