
How to Work SSK in Knitting: Tidy Decreases & Best Alternatives
January 30, 2025
How to Knit k2tog tbl: Easy Left-Leaning Decrease Guide
February 8, 2025Headband Free Crochet Pattern

Originally published on February 4, 2025
Welcome to the final pattern of my spa set, Jade Serenity! These handmade headbands are perfect for a relaxing spa day or a thoughtful gift for someone special. Made with 100% cotton, they’re simple, elegant, and gentle on the skin—perfect for adding a touch of luxury to your self-care routine.
We have already started this self-care and creativity journey together with the elegant, handmade Washcloths, Facial Scrubbies and the Soap Savers. Now, we are going to finish these Set with the beautiful Headband.
 | Headband |

Description
These headbands are created using the star stitch crochet technique, which gives them a unique and beautiful flower texture - a perfect addition to our spa set. The headband is worked around a hairtie, starting with 4 stitches. Then, we work in rows, adding 2 stitches at a time until we reach a total of 11 stitches, creating 5 star stitches for the headband. To finish, we decrease back down to 4 stitches and secure the work with four single crochets around the hair tie.
Want to see how it’s made? Check out the full video tutorial here: https://www.youtube.com/watch?v=O-WGXPkQDdk.
Materials
-
Yarn: Drops Paris (Aran/Worsted weight yarn): about 33g
-
Hook: 5.00 mm
-
Scissors
-
Yarn needle (for weaving in the ends)
-
Hair tie: 5 cm
Gauge
Gauge is not necessary for this pattern. However, keep in mind:
-
Using a larger crochet hook will result in a larger headband.
-
Using a lighter weight yarn and a smaller crochet hook will result in a smaller headband.
-
You can add additional increases or rows to adjust the size to your needs.
Size
The headband will fit an approximate head size of 52–56 cm.
Skill Level
This pattern is perfect for those with an intermediate skill level, but don’t worry if you’re an advanced beginner! With the help of the detailed video tutorial, you’ll be guided through every step, making it a fun and rewarding project for anyone ready to give it a try.
Pattern Notes
-
This pattern is part of the Jade Serenity Spa Set (additional patterns are already available).
-
This pattern uses US crochet terminology.
-
Chain stitches at the beginning of the round count as a stitch.
-
Repeats are listed in brackets [ ].
-
The star stitch is worked with 11 + 3 chains at the beginning.
-
The pattern alternates between rows of star stitches and rows of half double crochet.
Abbreviations
-
ch = chain
-
sc = single crochet
-
hdc = half double crochet
-
st(s) = stitch(es)
-
rep = repeat
-
sc2tog = single crochet two together (to work a decrease)
-
sc increase = increase by 1 stitch
-
dc = double crochet
-
sl st = slip stich
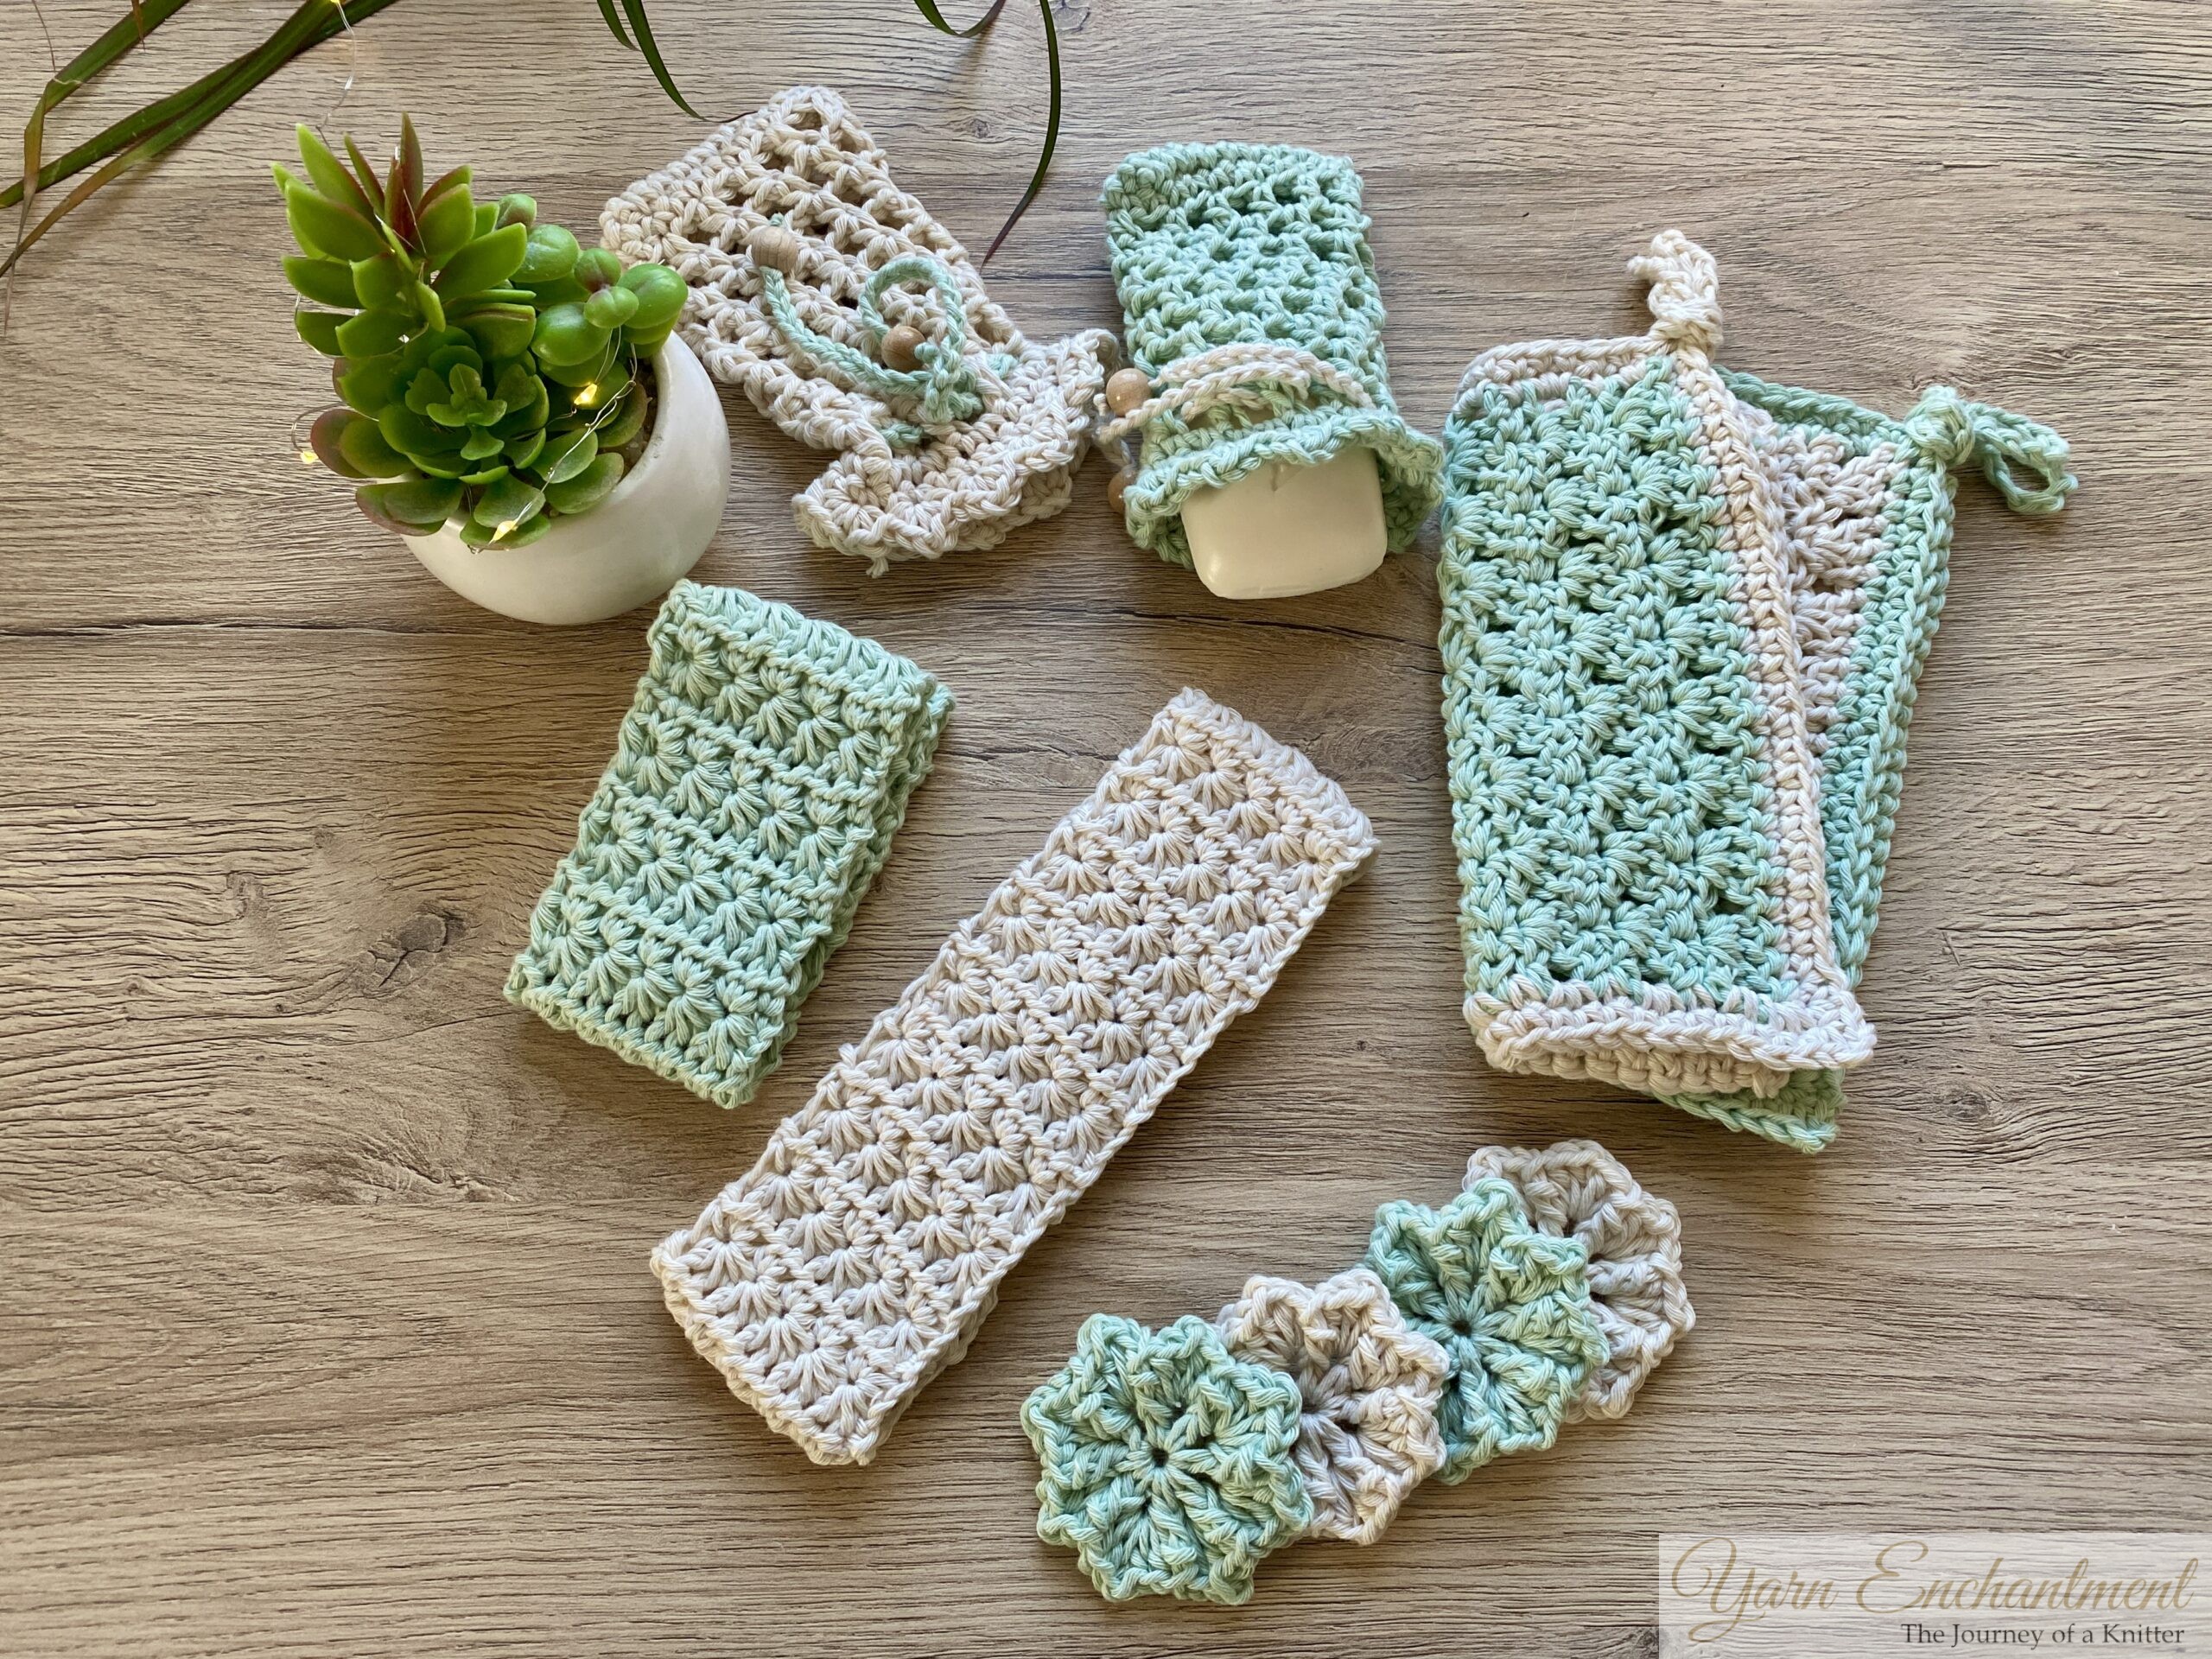 | The complete Spa Set |

Special Stitches
How to Make a Single Crochet Decrease (sc2tog):
-
Insert your hook into the first stitch.
-
Yarn over (YO) and pull up a loop (you now have 2 loops on your hook).
-
Insert your hook into the next stitch.
-
Yarn over (YO) and pull up another loop (you now have 3 loops on your hook).
-
Yarn over (YO) again and pull through all 3 loops on your hook.
 |  |  | For a decrease, work 1 sc into 2 stitches | YO and pull up a loop (2 loops on your hook). | YO again and pull through all 3 loops on your hook. |


How to Make a Single Crochet Increase (sc increase):
- Insert your hook into the stitch where you want to increase.
- Yarn over (YO) and pull up a loop (you now have 2 loops on your hook).
- Yarn over (YO) again and pull through both loops on your hook (this completes 1 single crochet).
- Insert your hook into the same stitch again.
- Yarn over (YO) and pull up a loop (you now have 2 loops on your hook).
- Yarn over (YO) again and pull through both loops on your hook.
You’ve now made 2 single crochets in the same stitch, which is a single crochet increase.
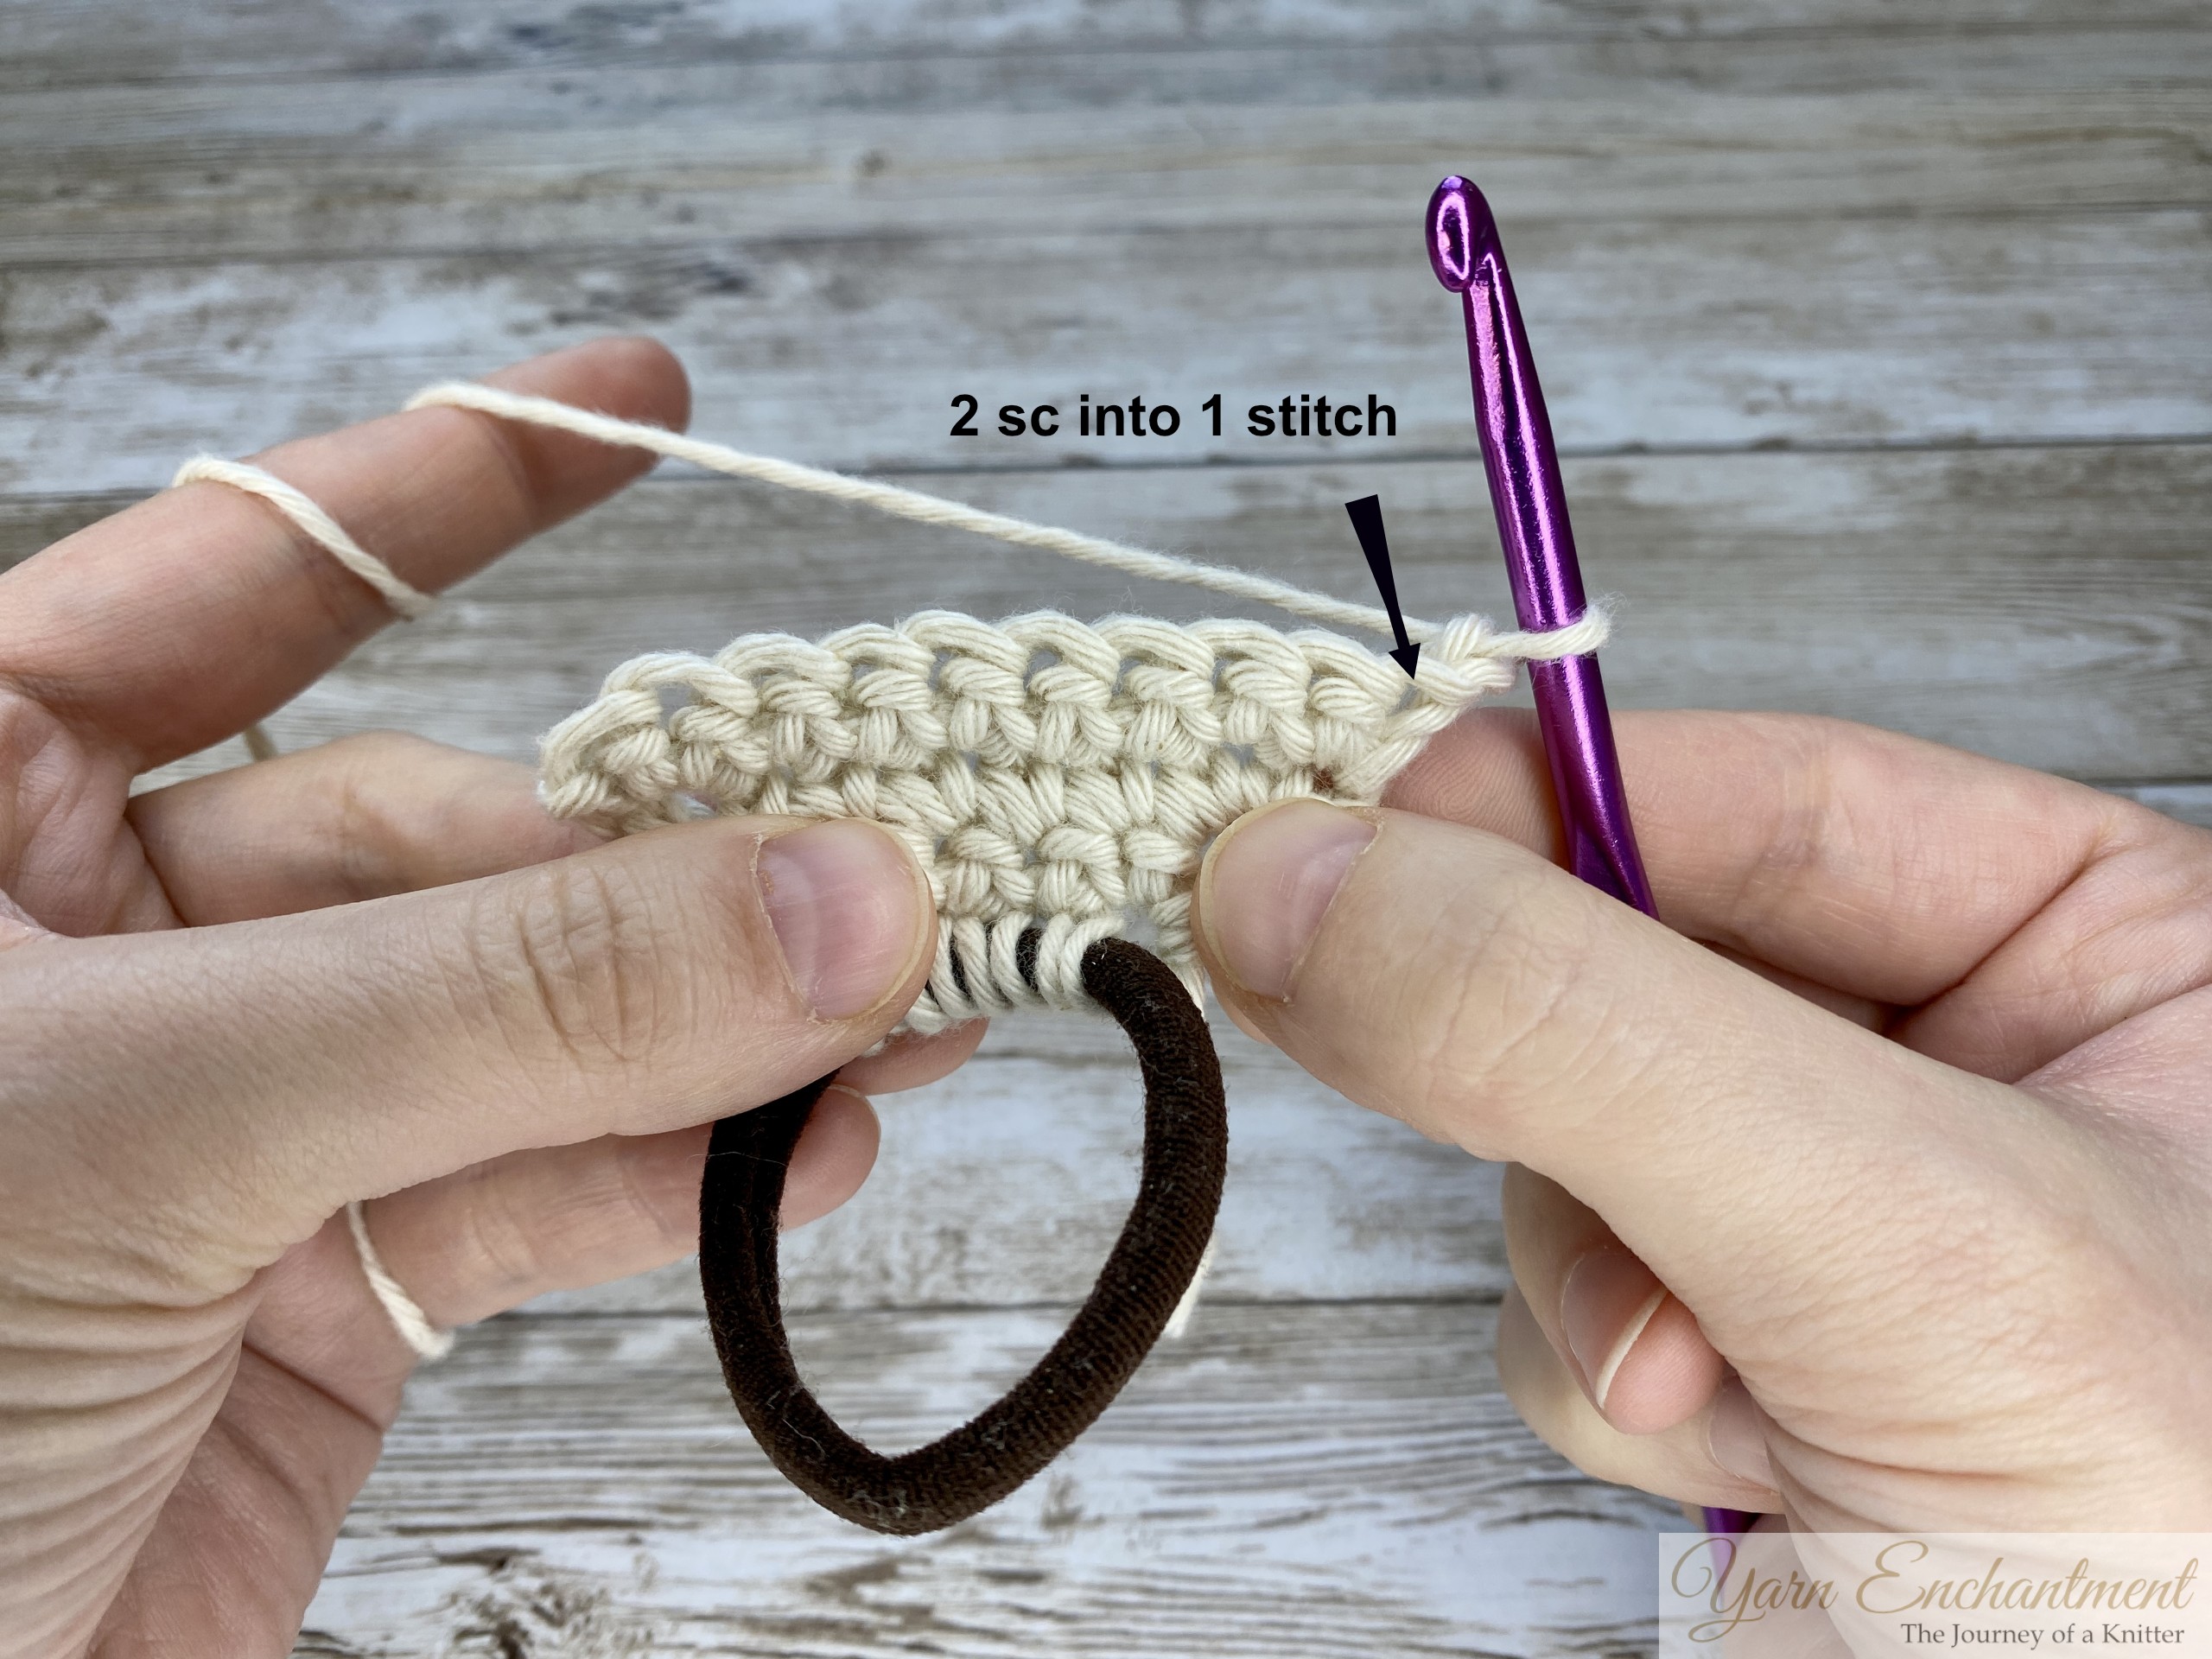 | 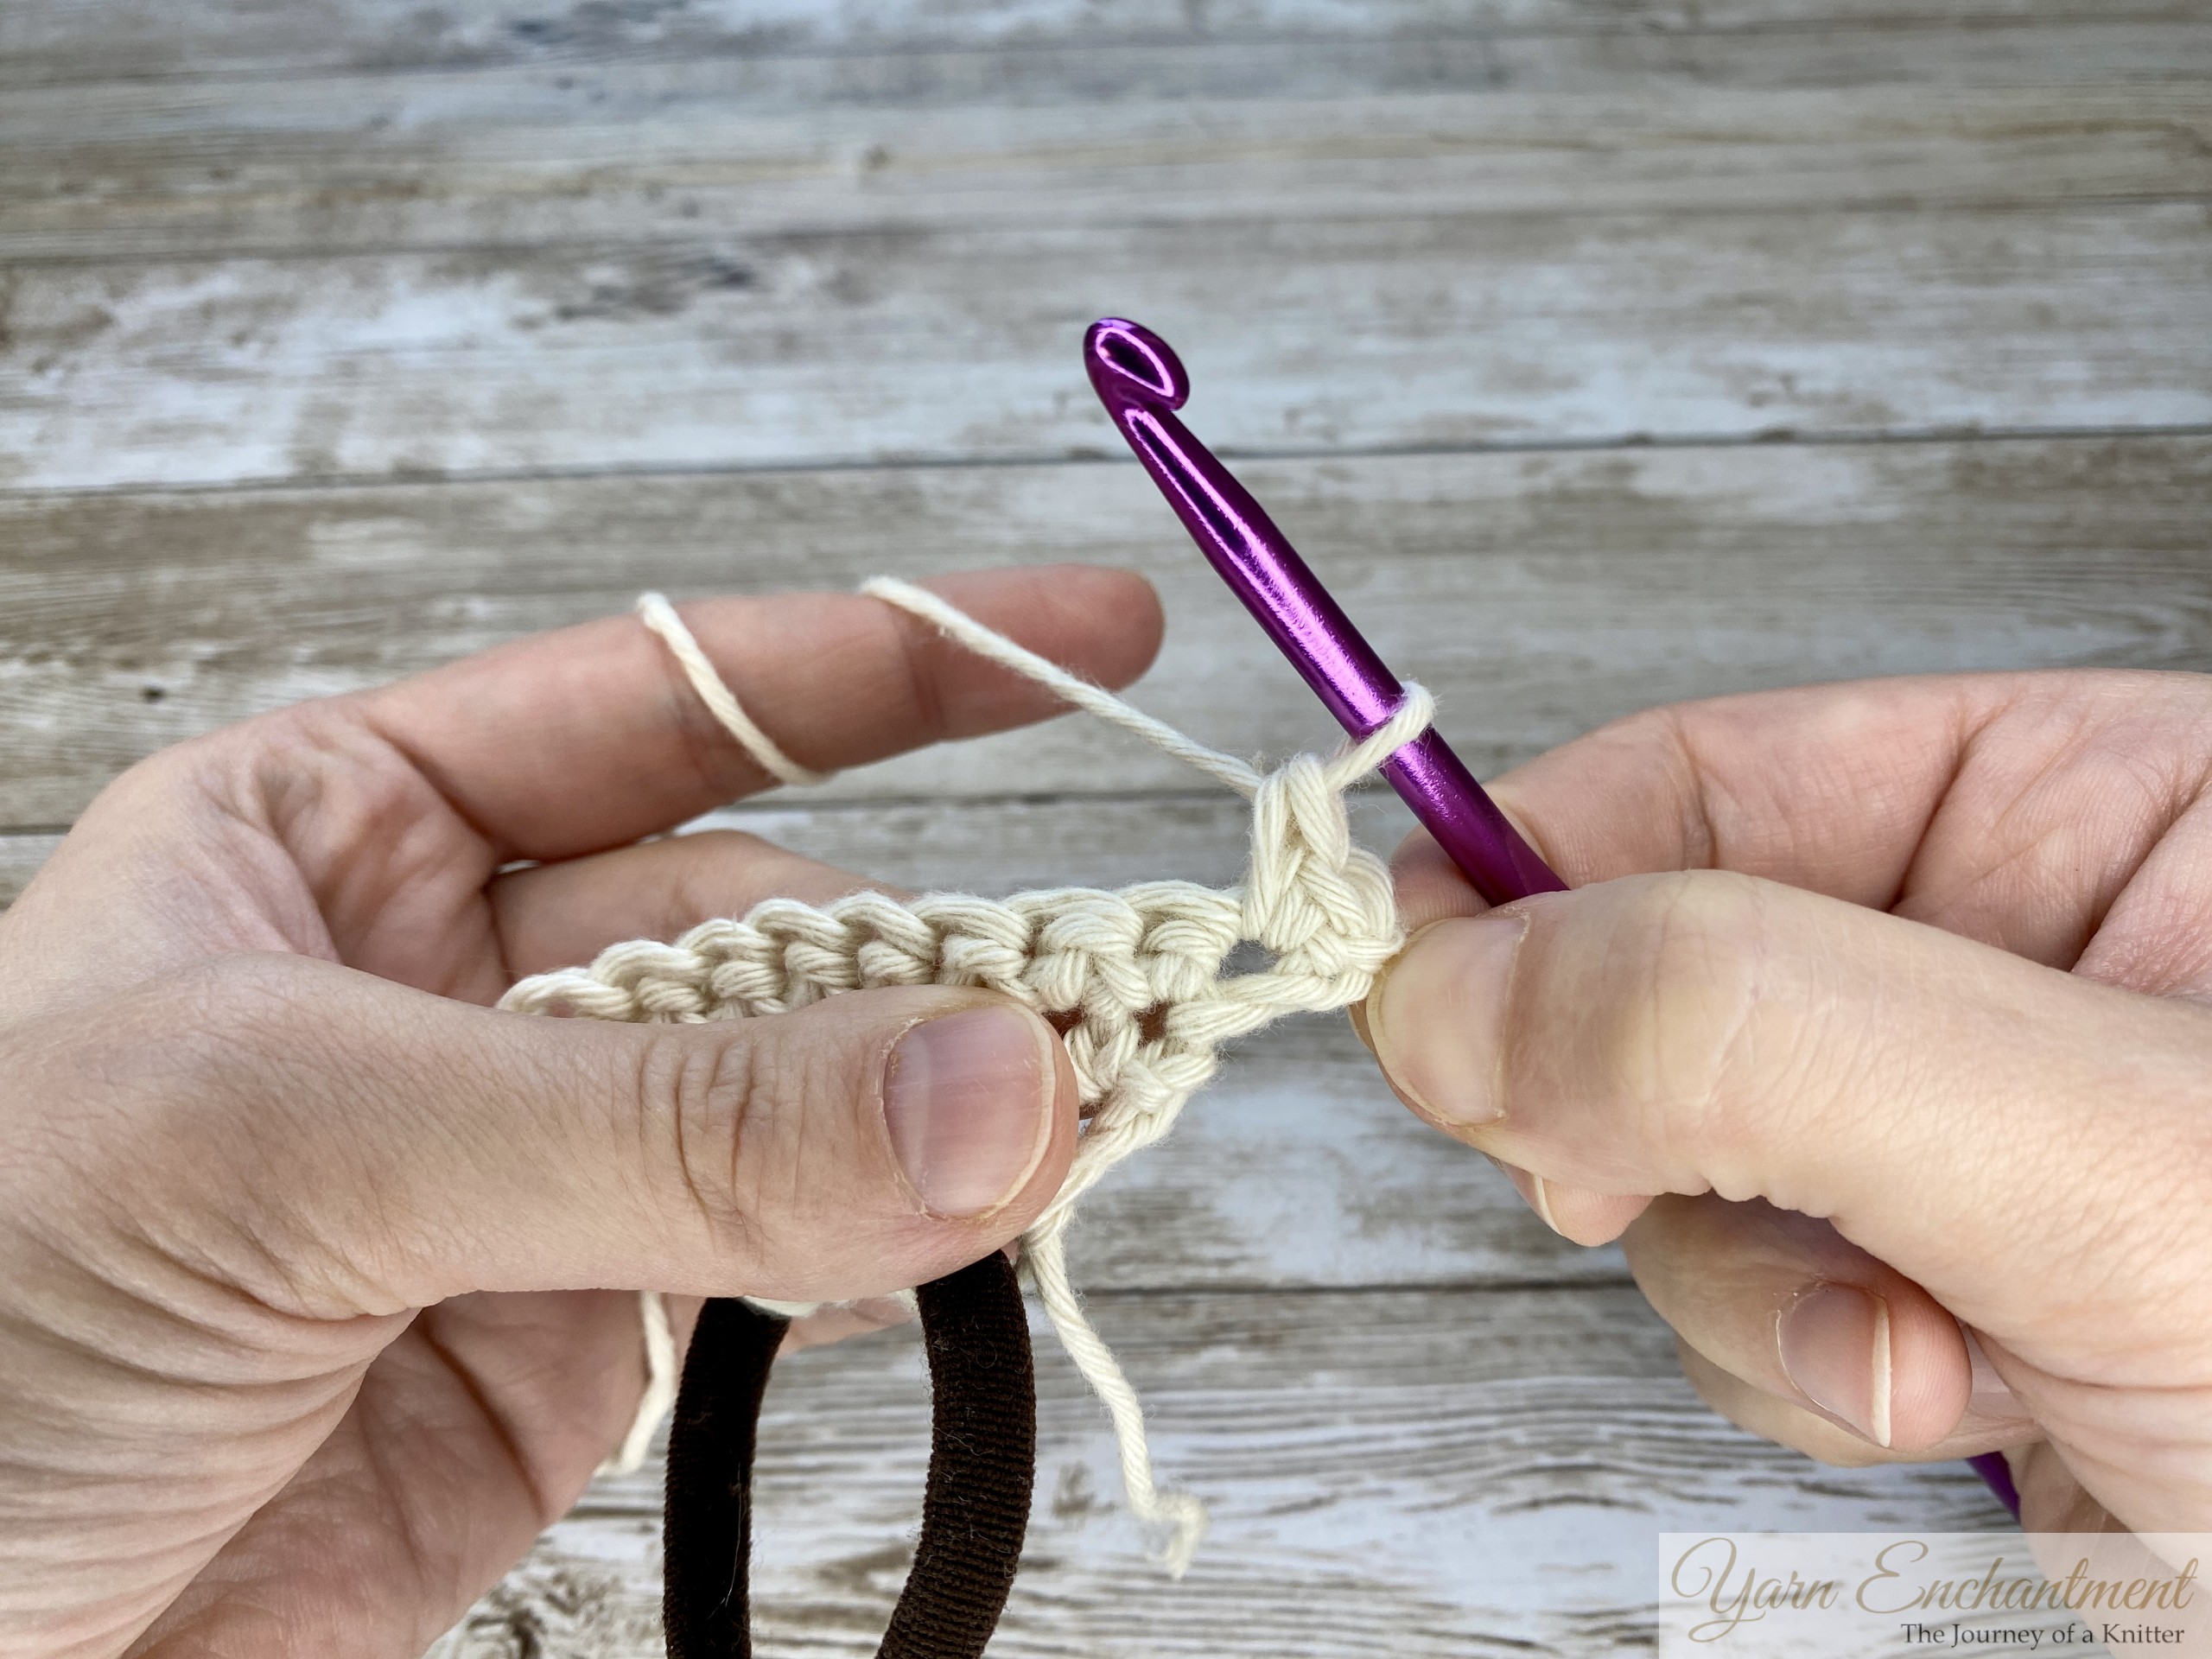 | For a increase, work 2 sc into 1 stitch | 2 sc worked into 1 stitch |


Pattern Instructions
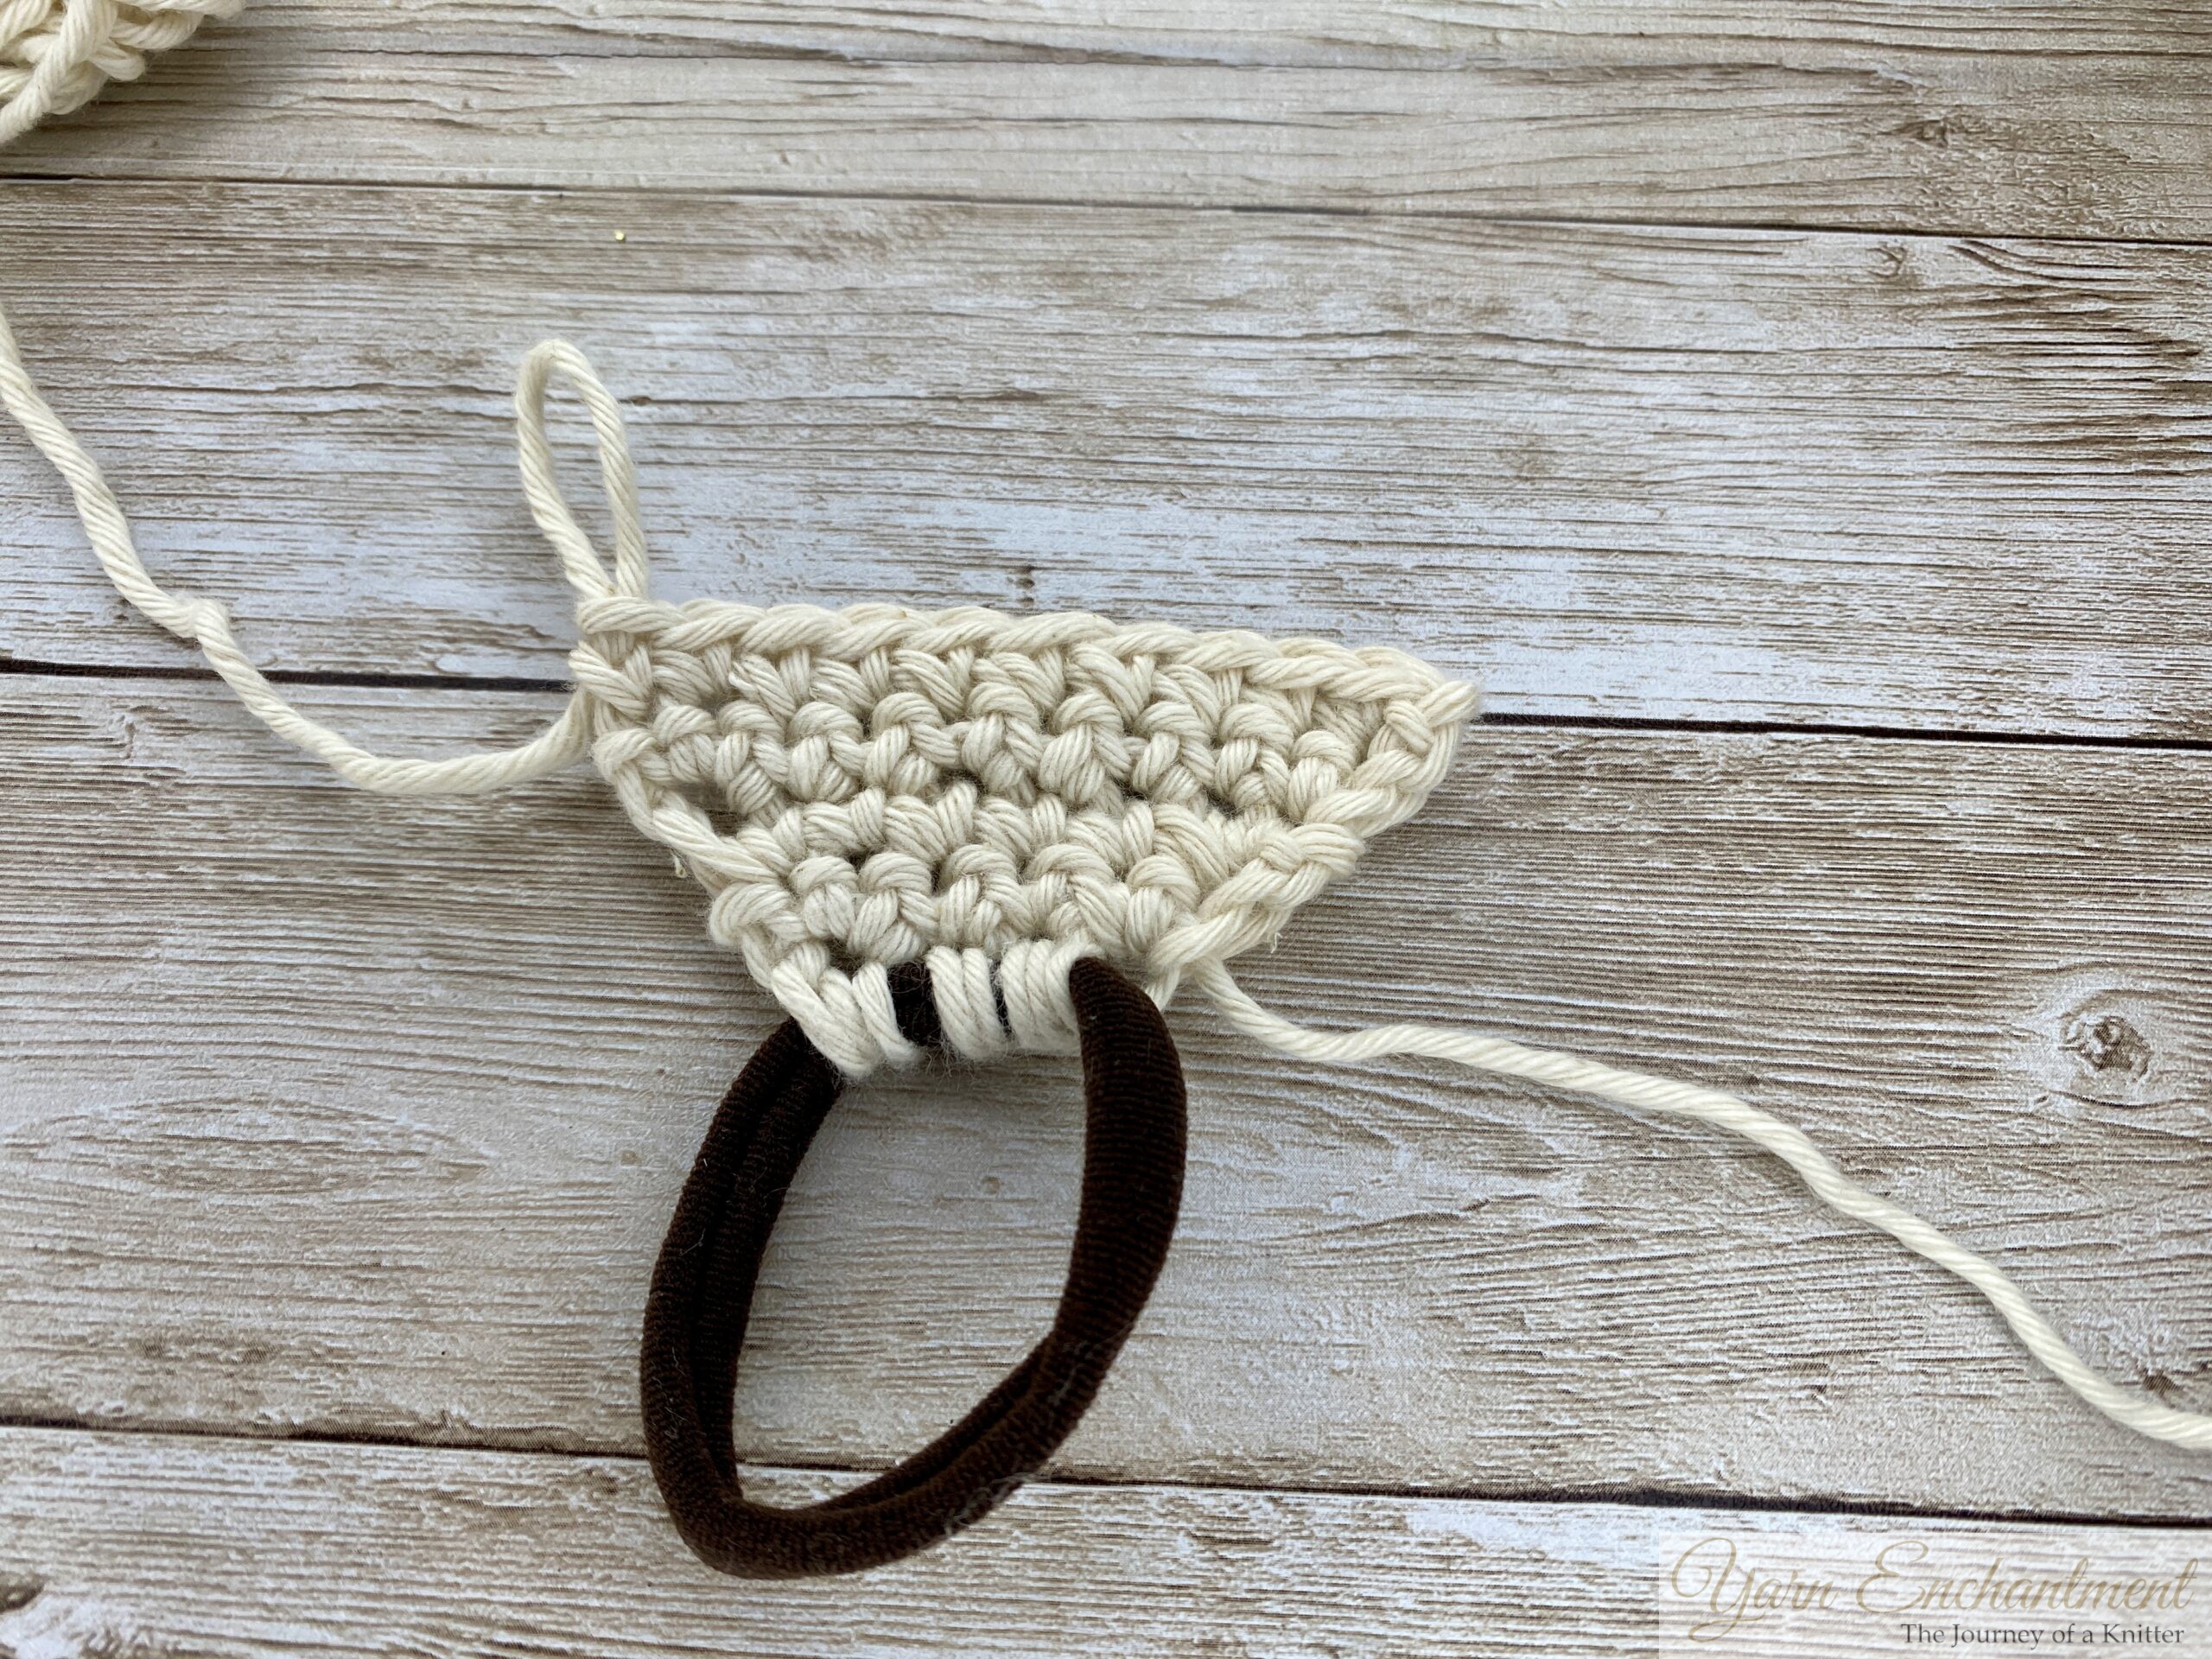
Foundation Row:
- Attach yarn to the hair tie
- Work 4 sc into the elastic hair tie
- Ch 1, turn your work
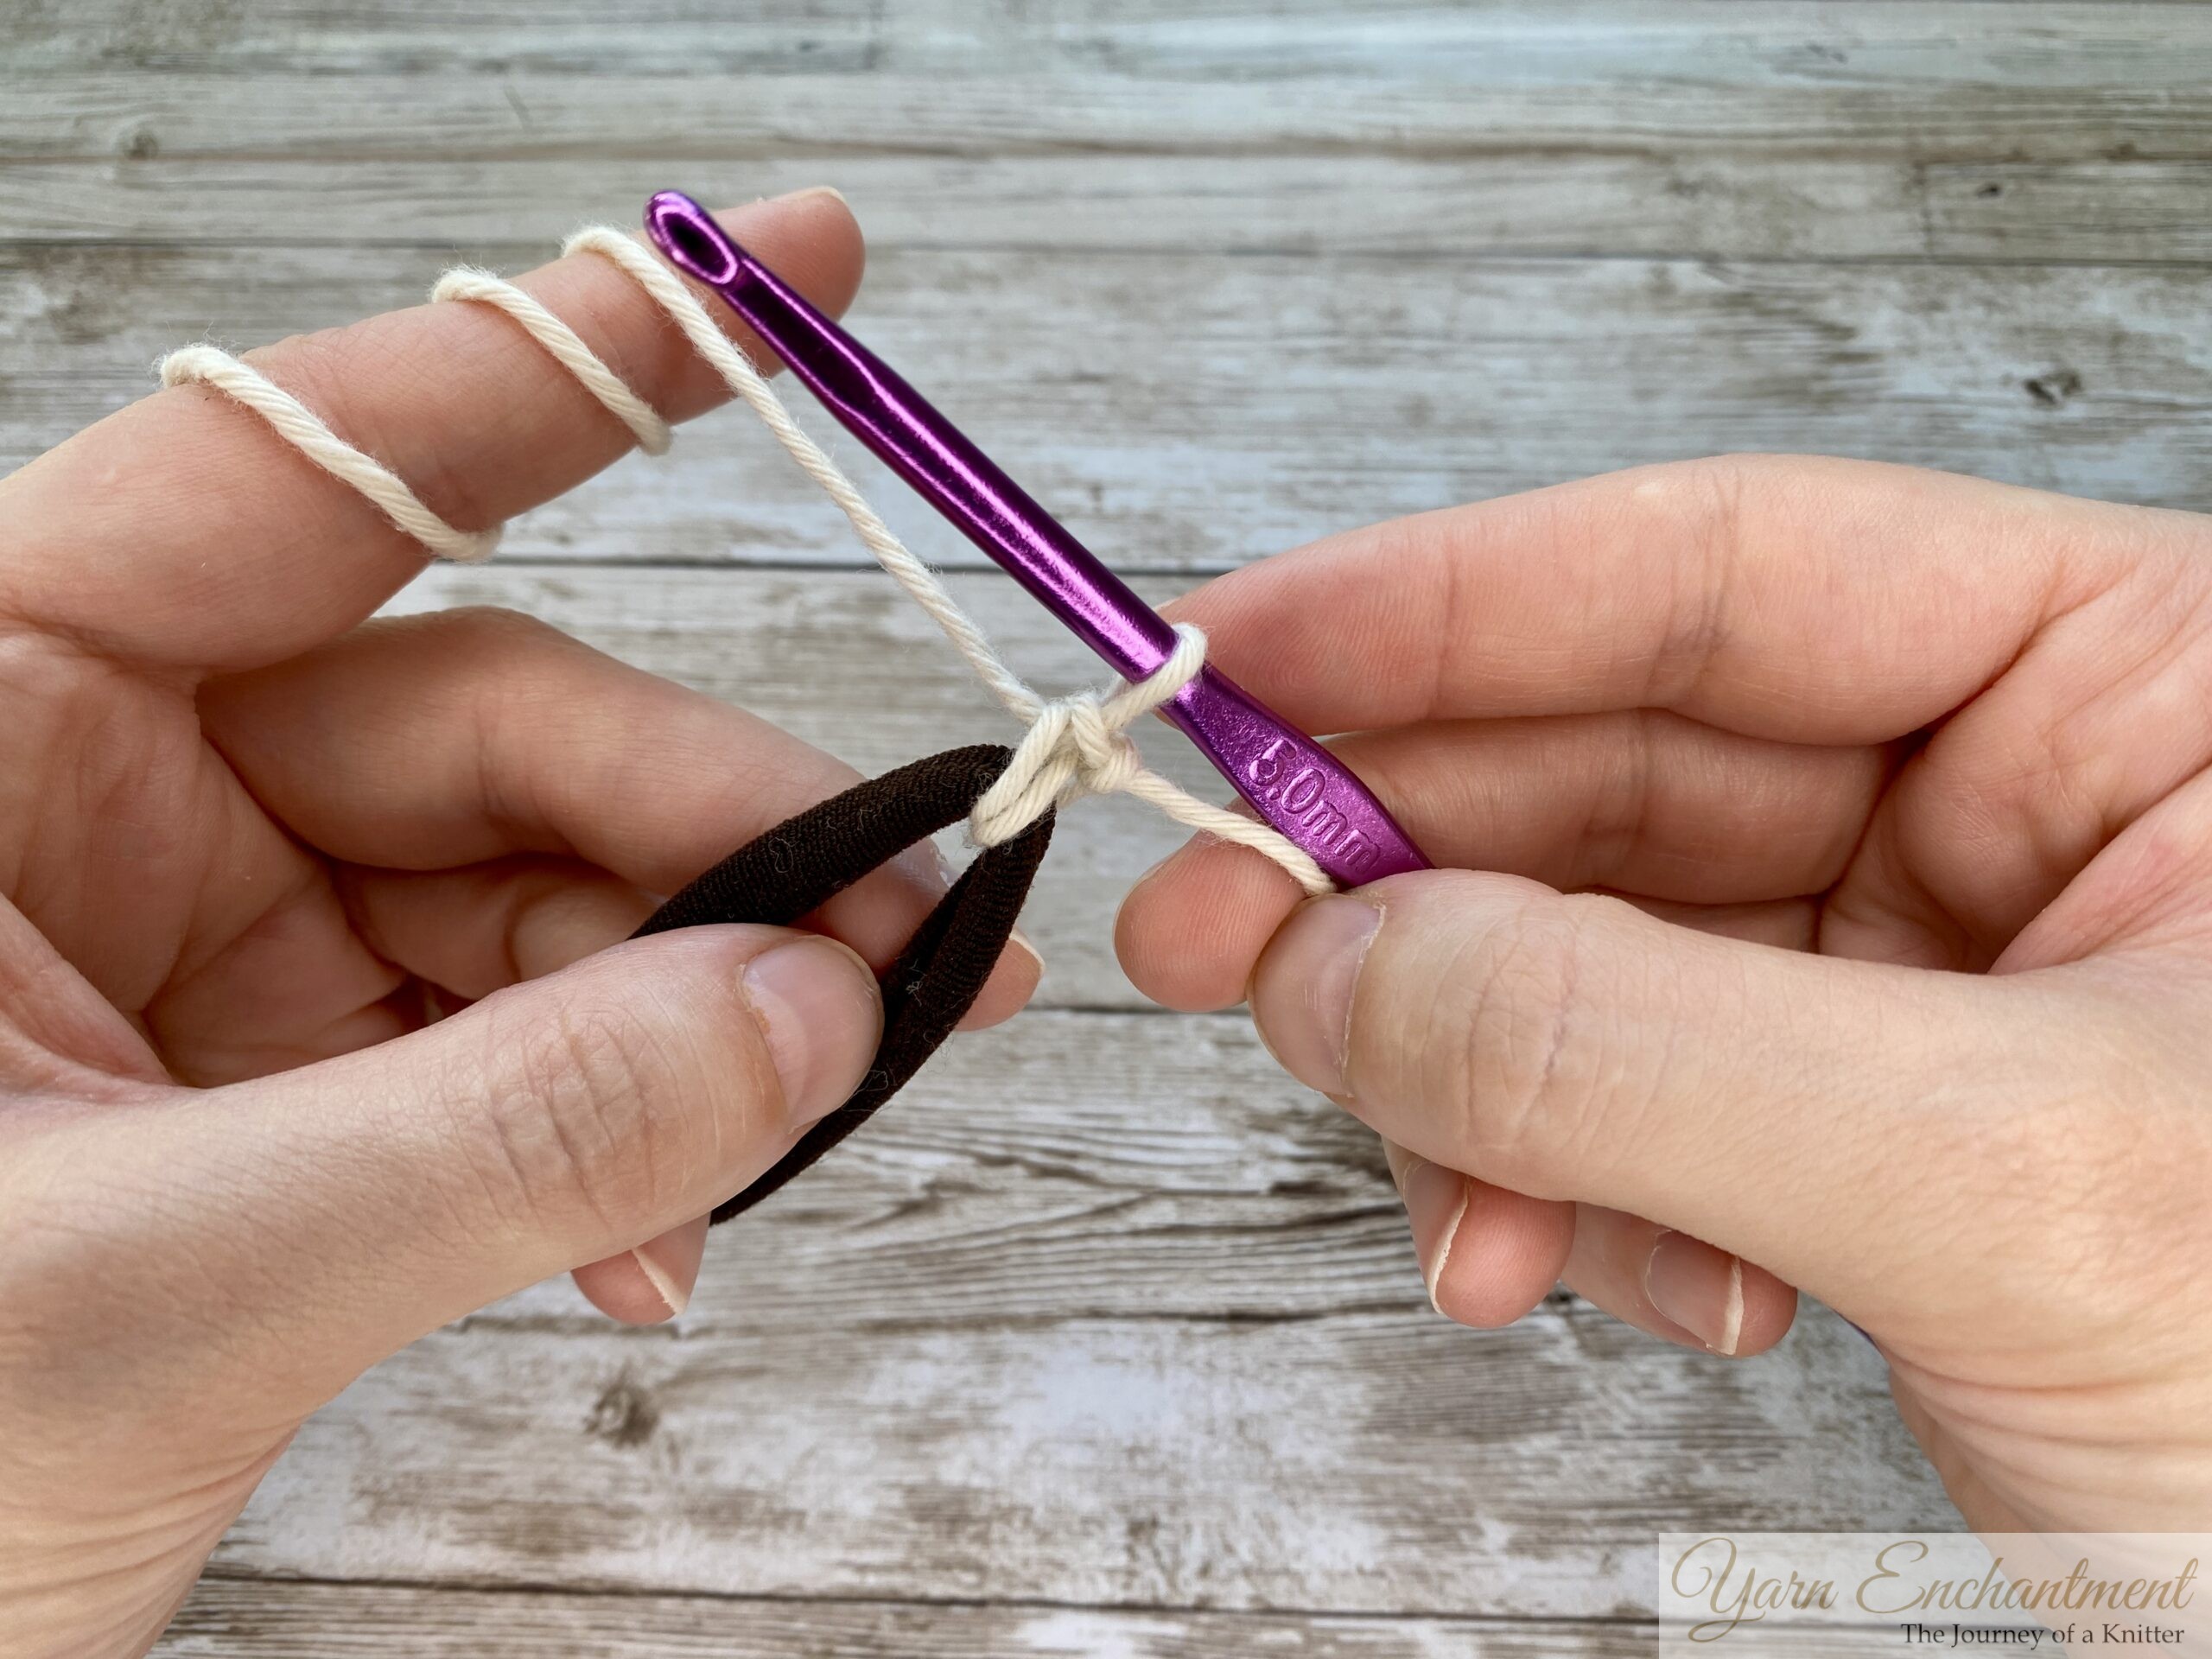 | 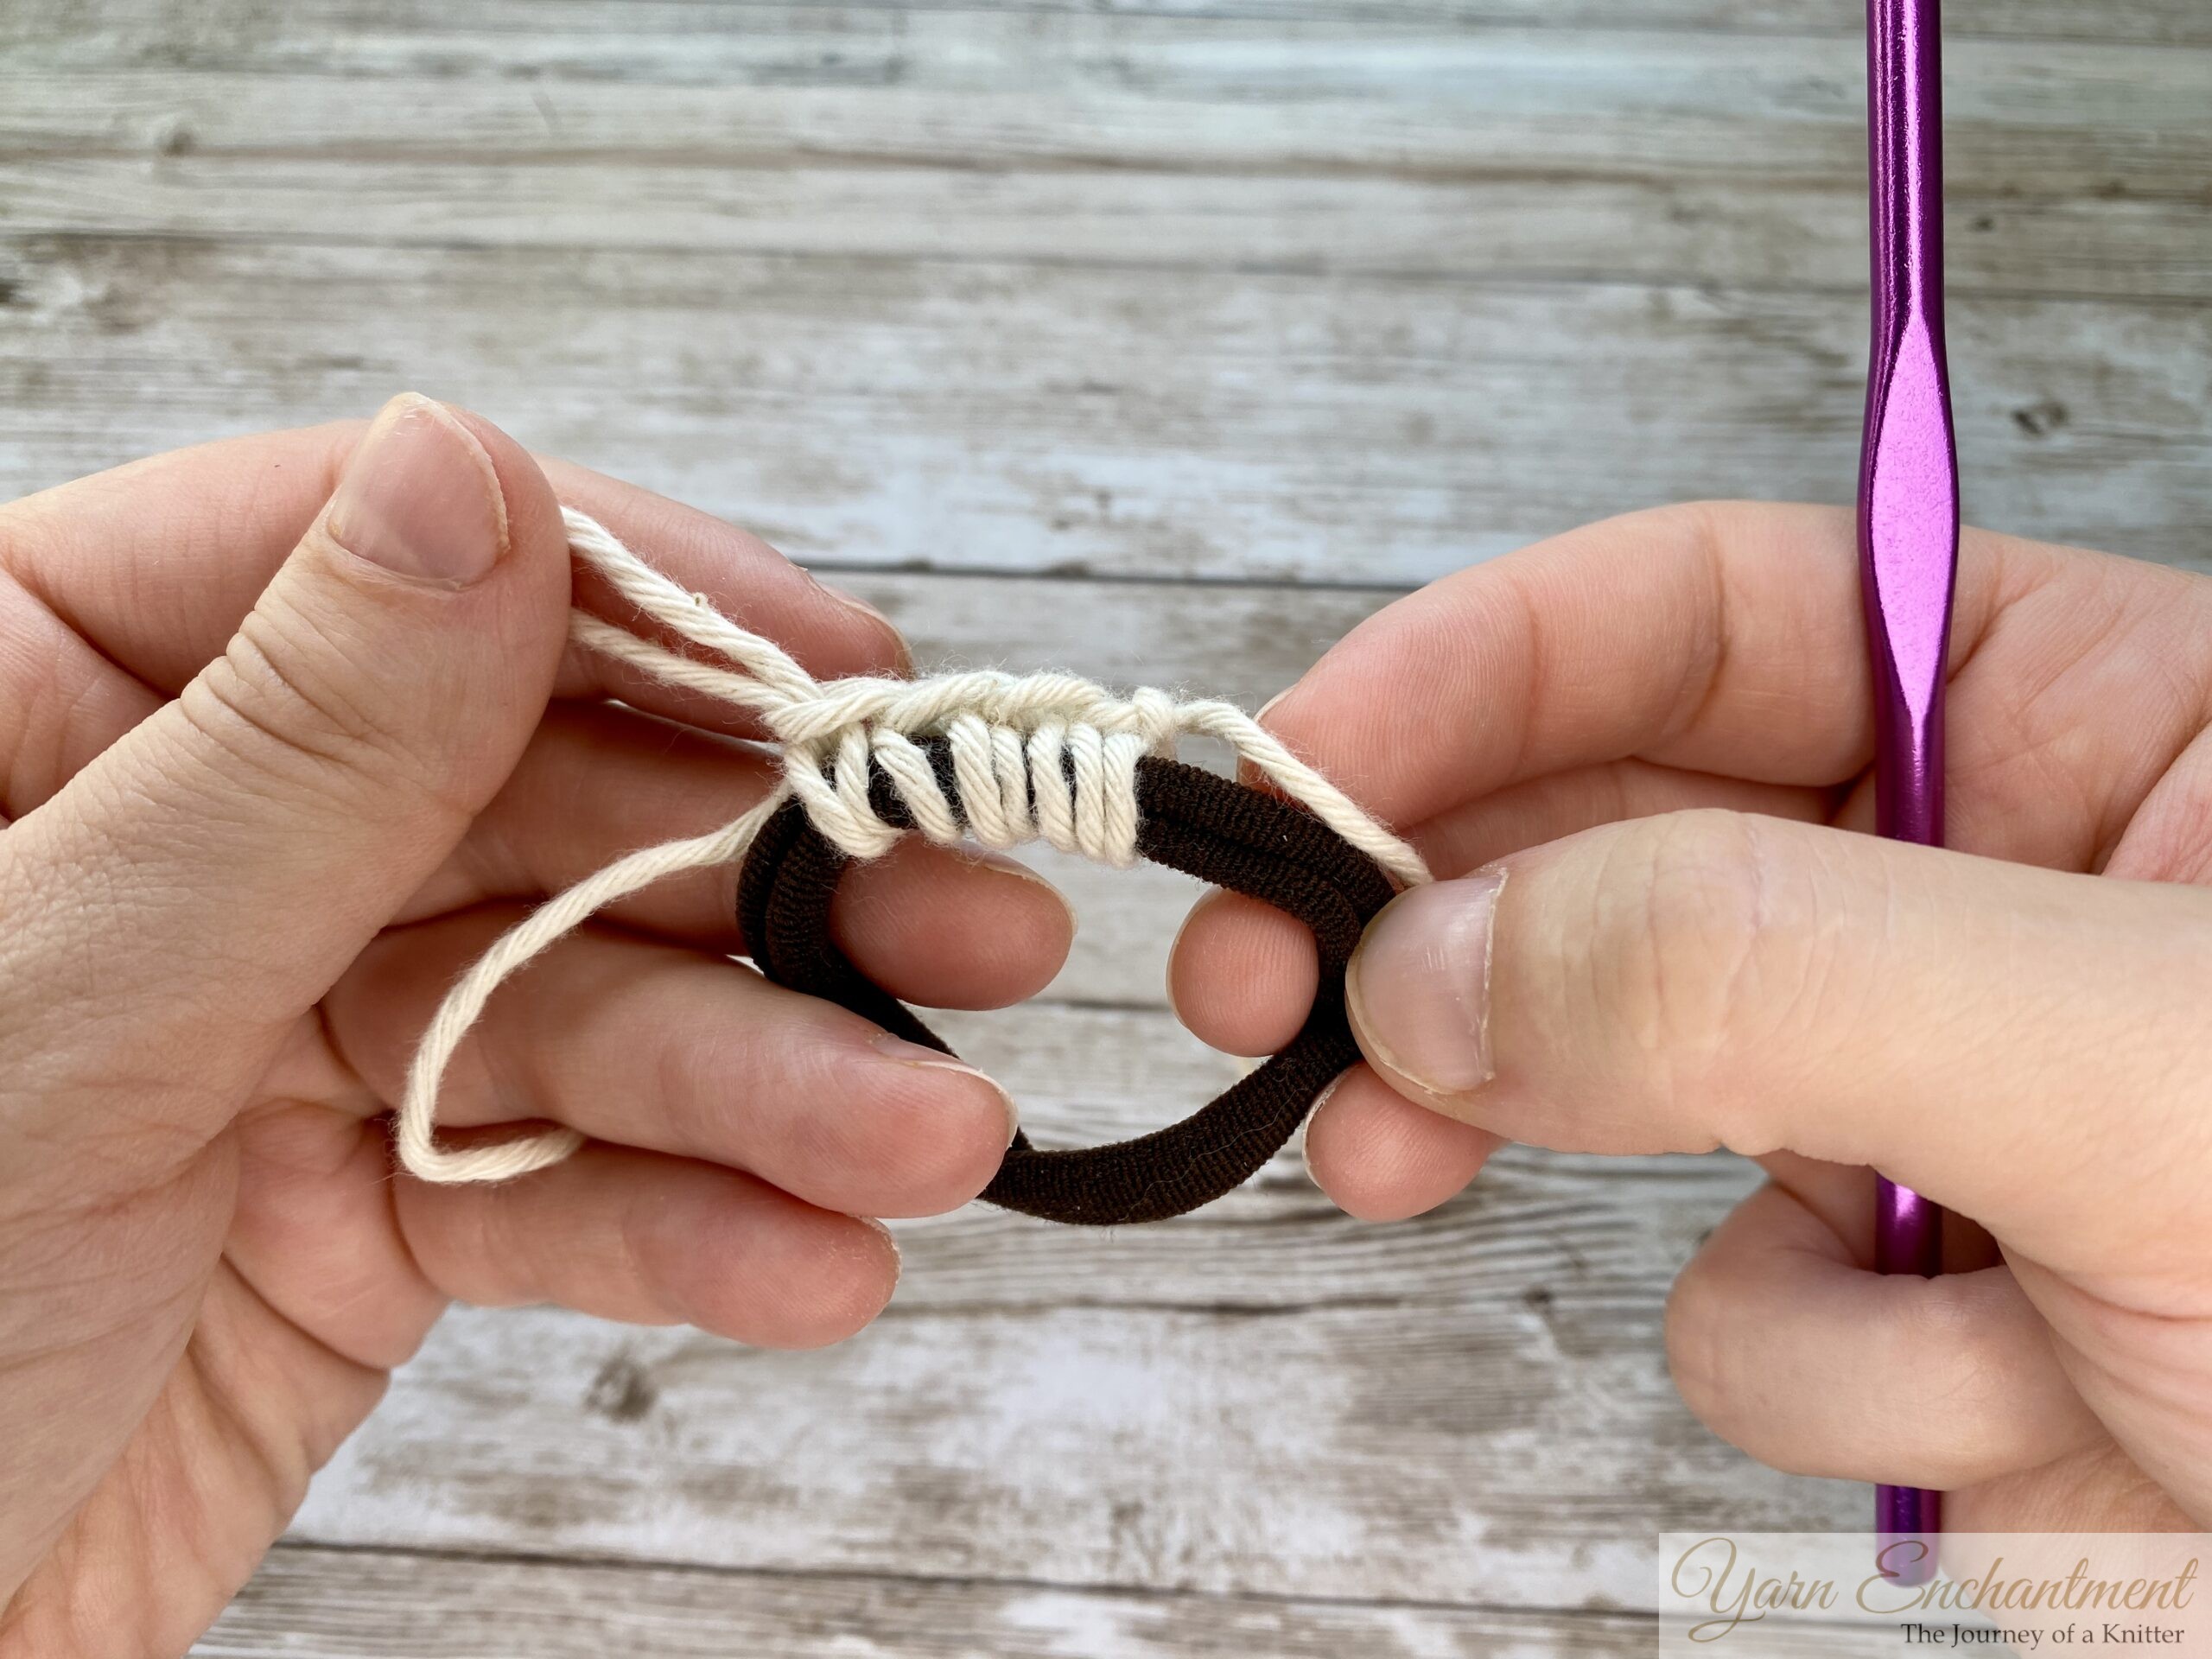 | I worked a standing sc | 4 sc into the hair tie |


Increase Rows:
Row 1:
- 2 sc into the first stitch.
- Work 1 sc into the next two stitches.
- 2 sc into the last stitch.
- You increased by 2 stitches (6 sts).
- Ch 1, turn.
Row 2:
- 2 sc into the first stitch.
- Work 1 sc into the next 4 stitches.
- 2 sc into the last stitch.
- You increased by 2 stitches (8 sts).
- Ch 1, turn.
Row 3:
- 2 sc into the first stitch.
- Work 1 sc into the next 6 stitches.
- 2 sc into the last stitch.
- You increased by 2 stitches (10 sts).
- Ch 1, turn.
Row 4:
- 2 sc into the first stitch.
- Work 1 sc into the next 8 stitches.
- 1 sc into the last stitch.
- You increased by 1 stitch (11 sts).
- Ch 3, turn.
 | 11 stitches |

Star Stitch Pattern:
Row 1: Star Stitch Row
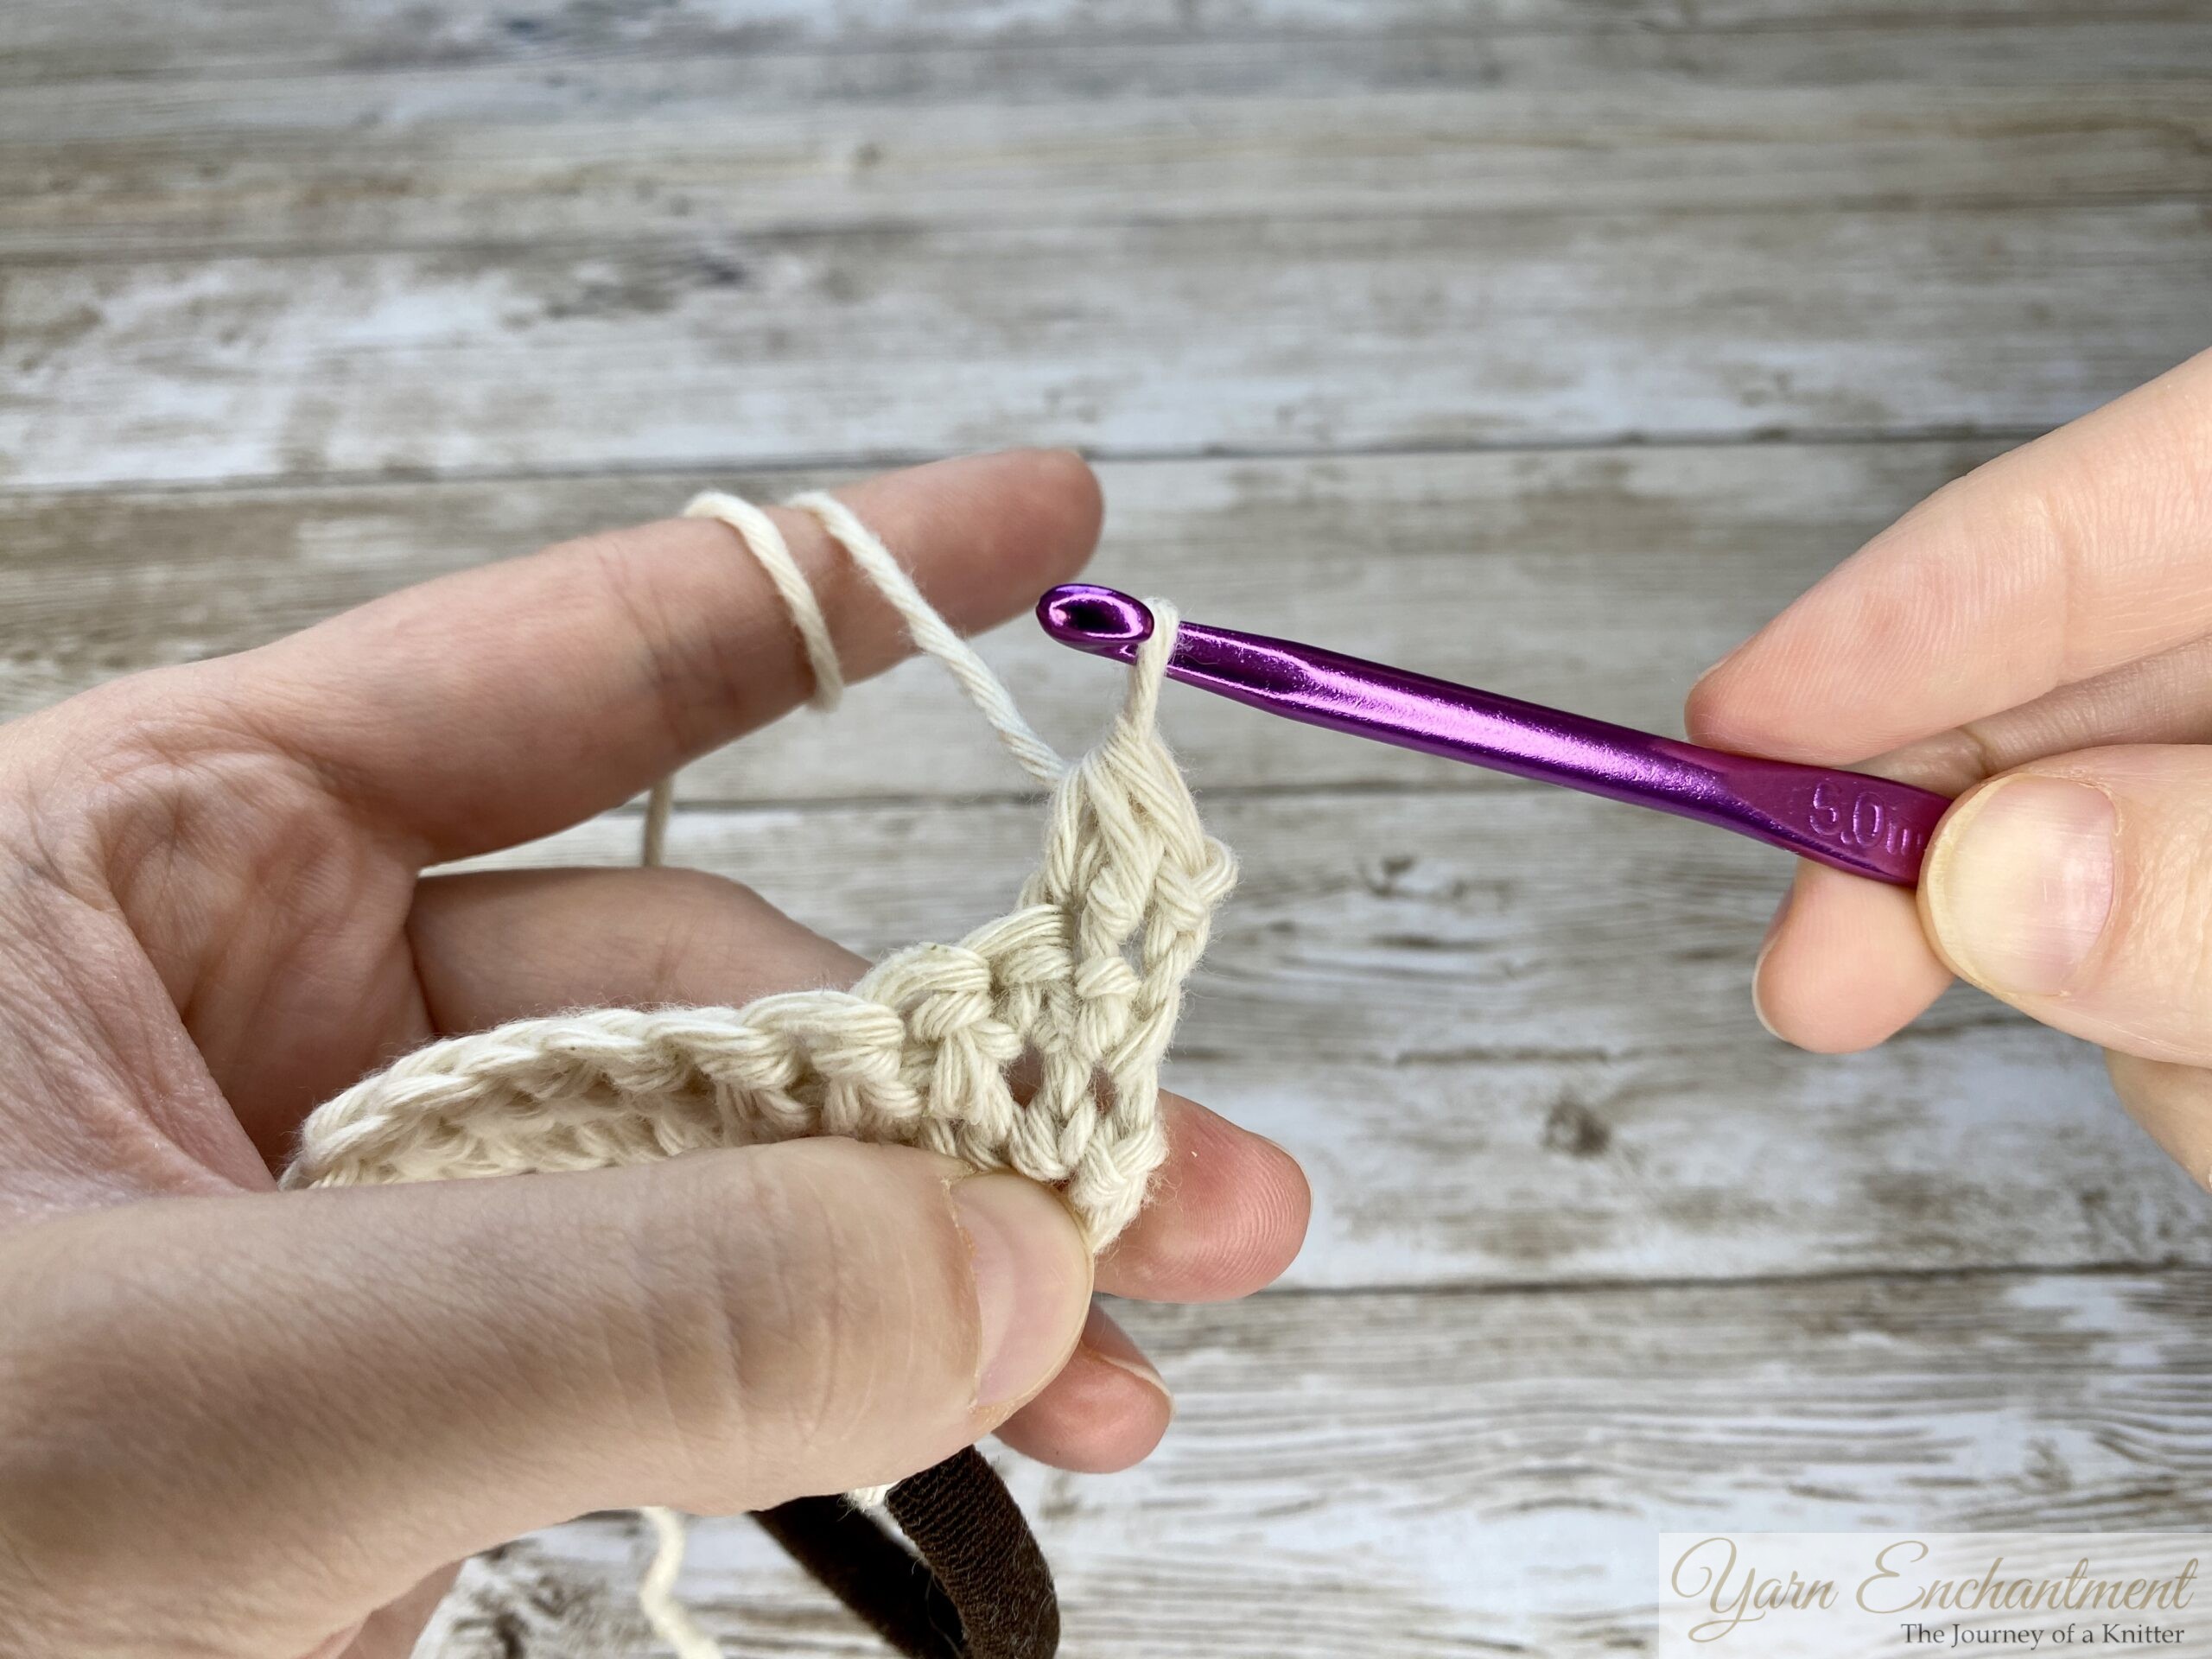
First Star Stitch:
- Chain 3 and turn your work.
- Skip the first chain and insert the hook into the 2nd chain from the hook, yarn over, and pull through.
- Insert the hook into the 3rd chain, yarn over, and pull through.
- Insert the hook into the top of the previous row's stitch, yarn over, and pull through.
- Insert the hook into the next 2 stitches, yarn over, and pull through each time until you have 6 loops on the hook.
- Yarn over and pull through all 6 loops, then chain 1 to close the star
 |  |  | The loop on the hook is your first loop | Skip the first chain and insert the hook into the 2nd chain from the hook, yarn over, and pull through. Insert the hook into the 3rd chain, yarn over, and pull through. | Insert the hook into the next 2 stitches, yarn over, and pull through each time until you have 6 loops on the hook. Insert the hook into the next stitch, yarn over, and pull through. |


 |  |  | Insert the hook into the next stitch, yarn over, and pull through, you have 6 loops on the hook. | Yarn over and pull through all 6 loops | Chain 1 to close the star |


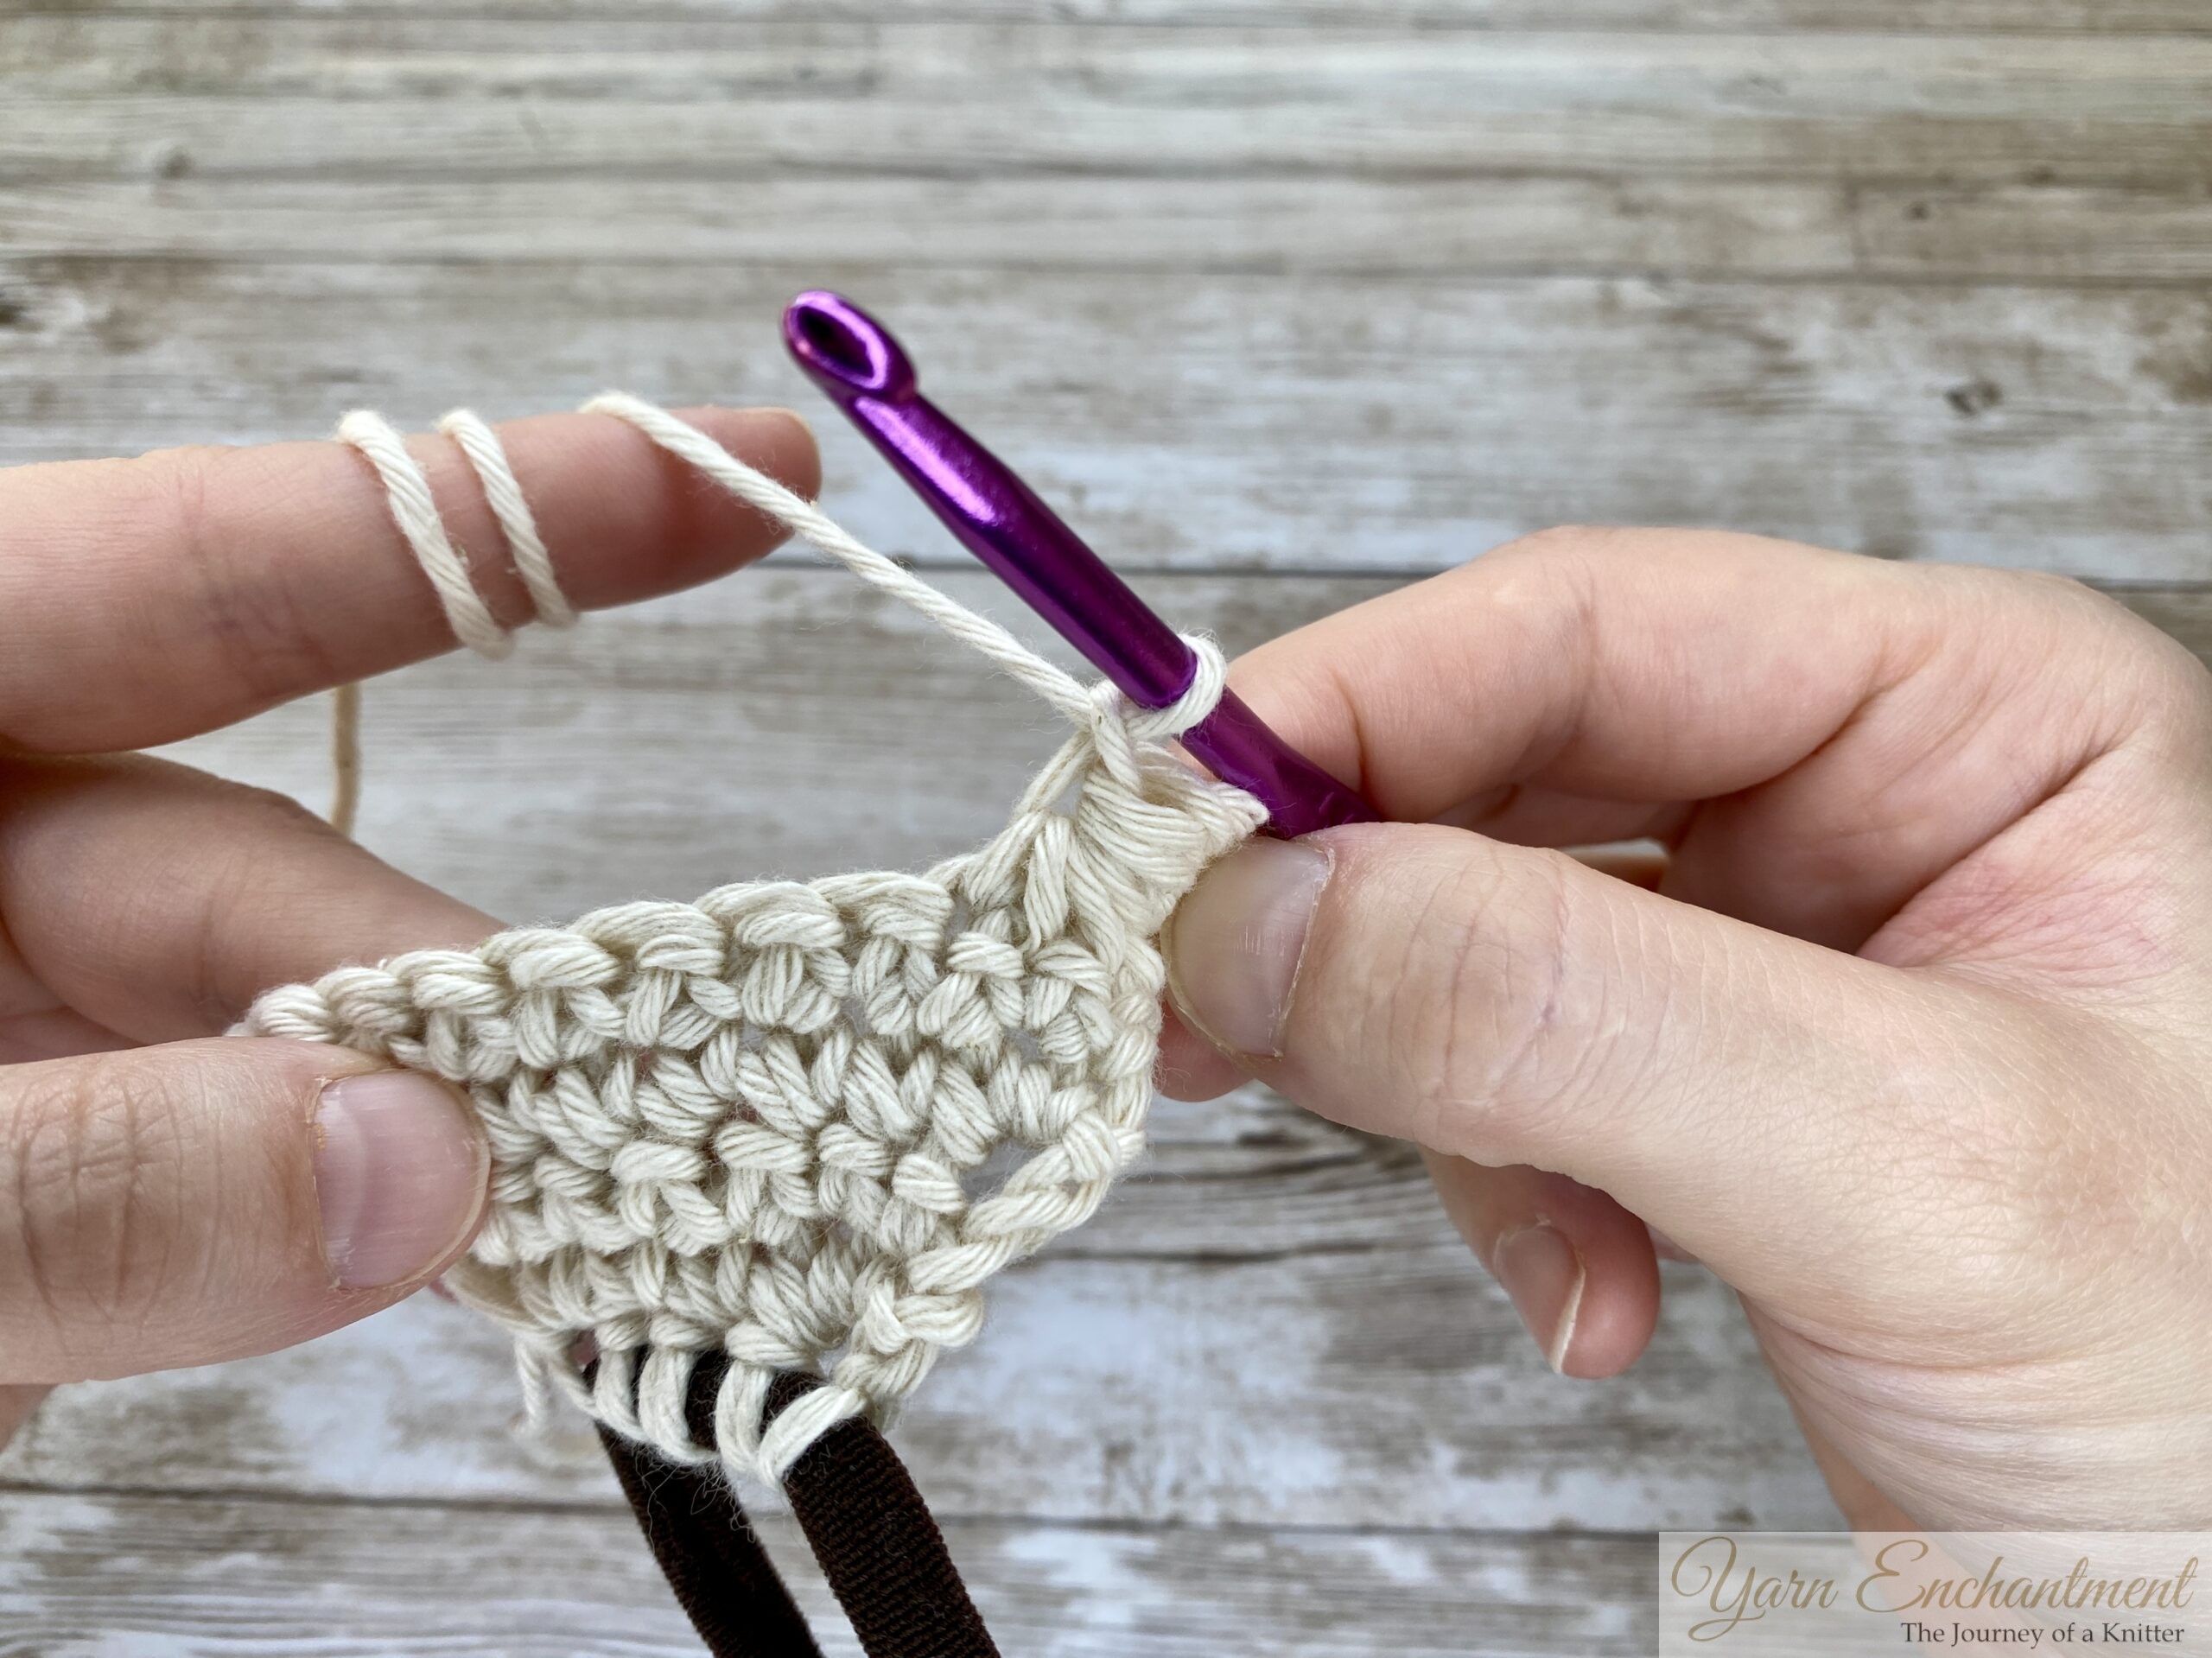
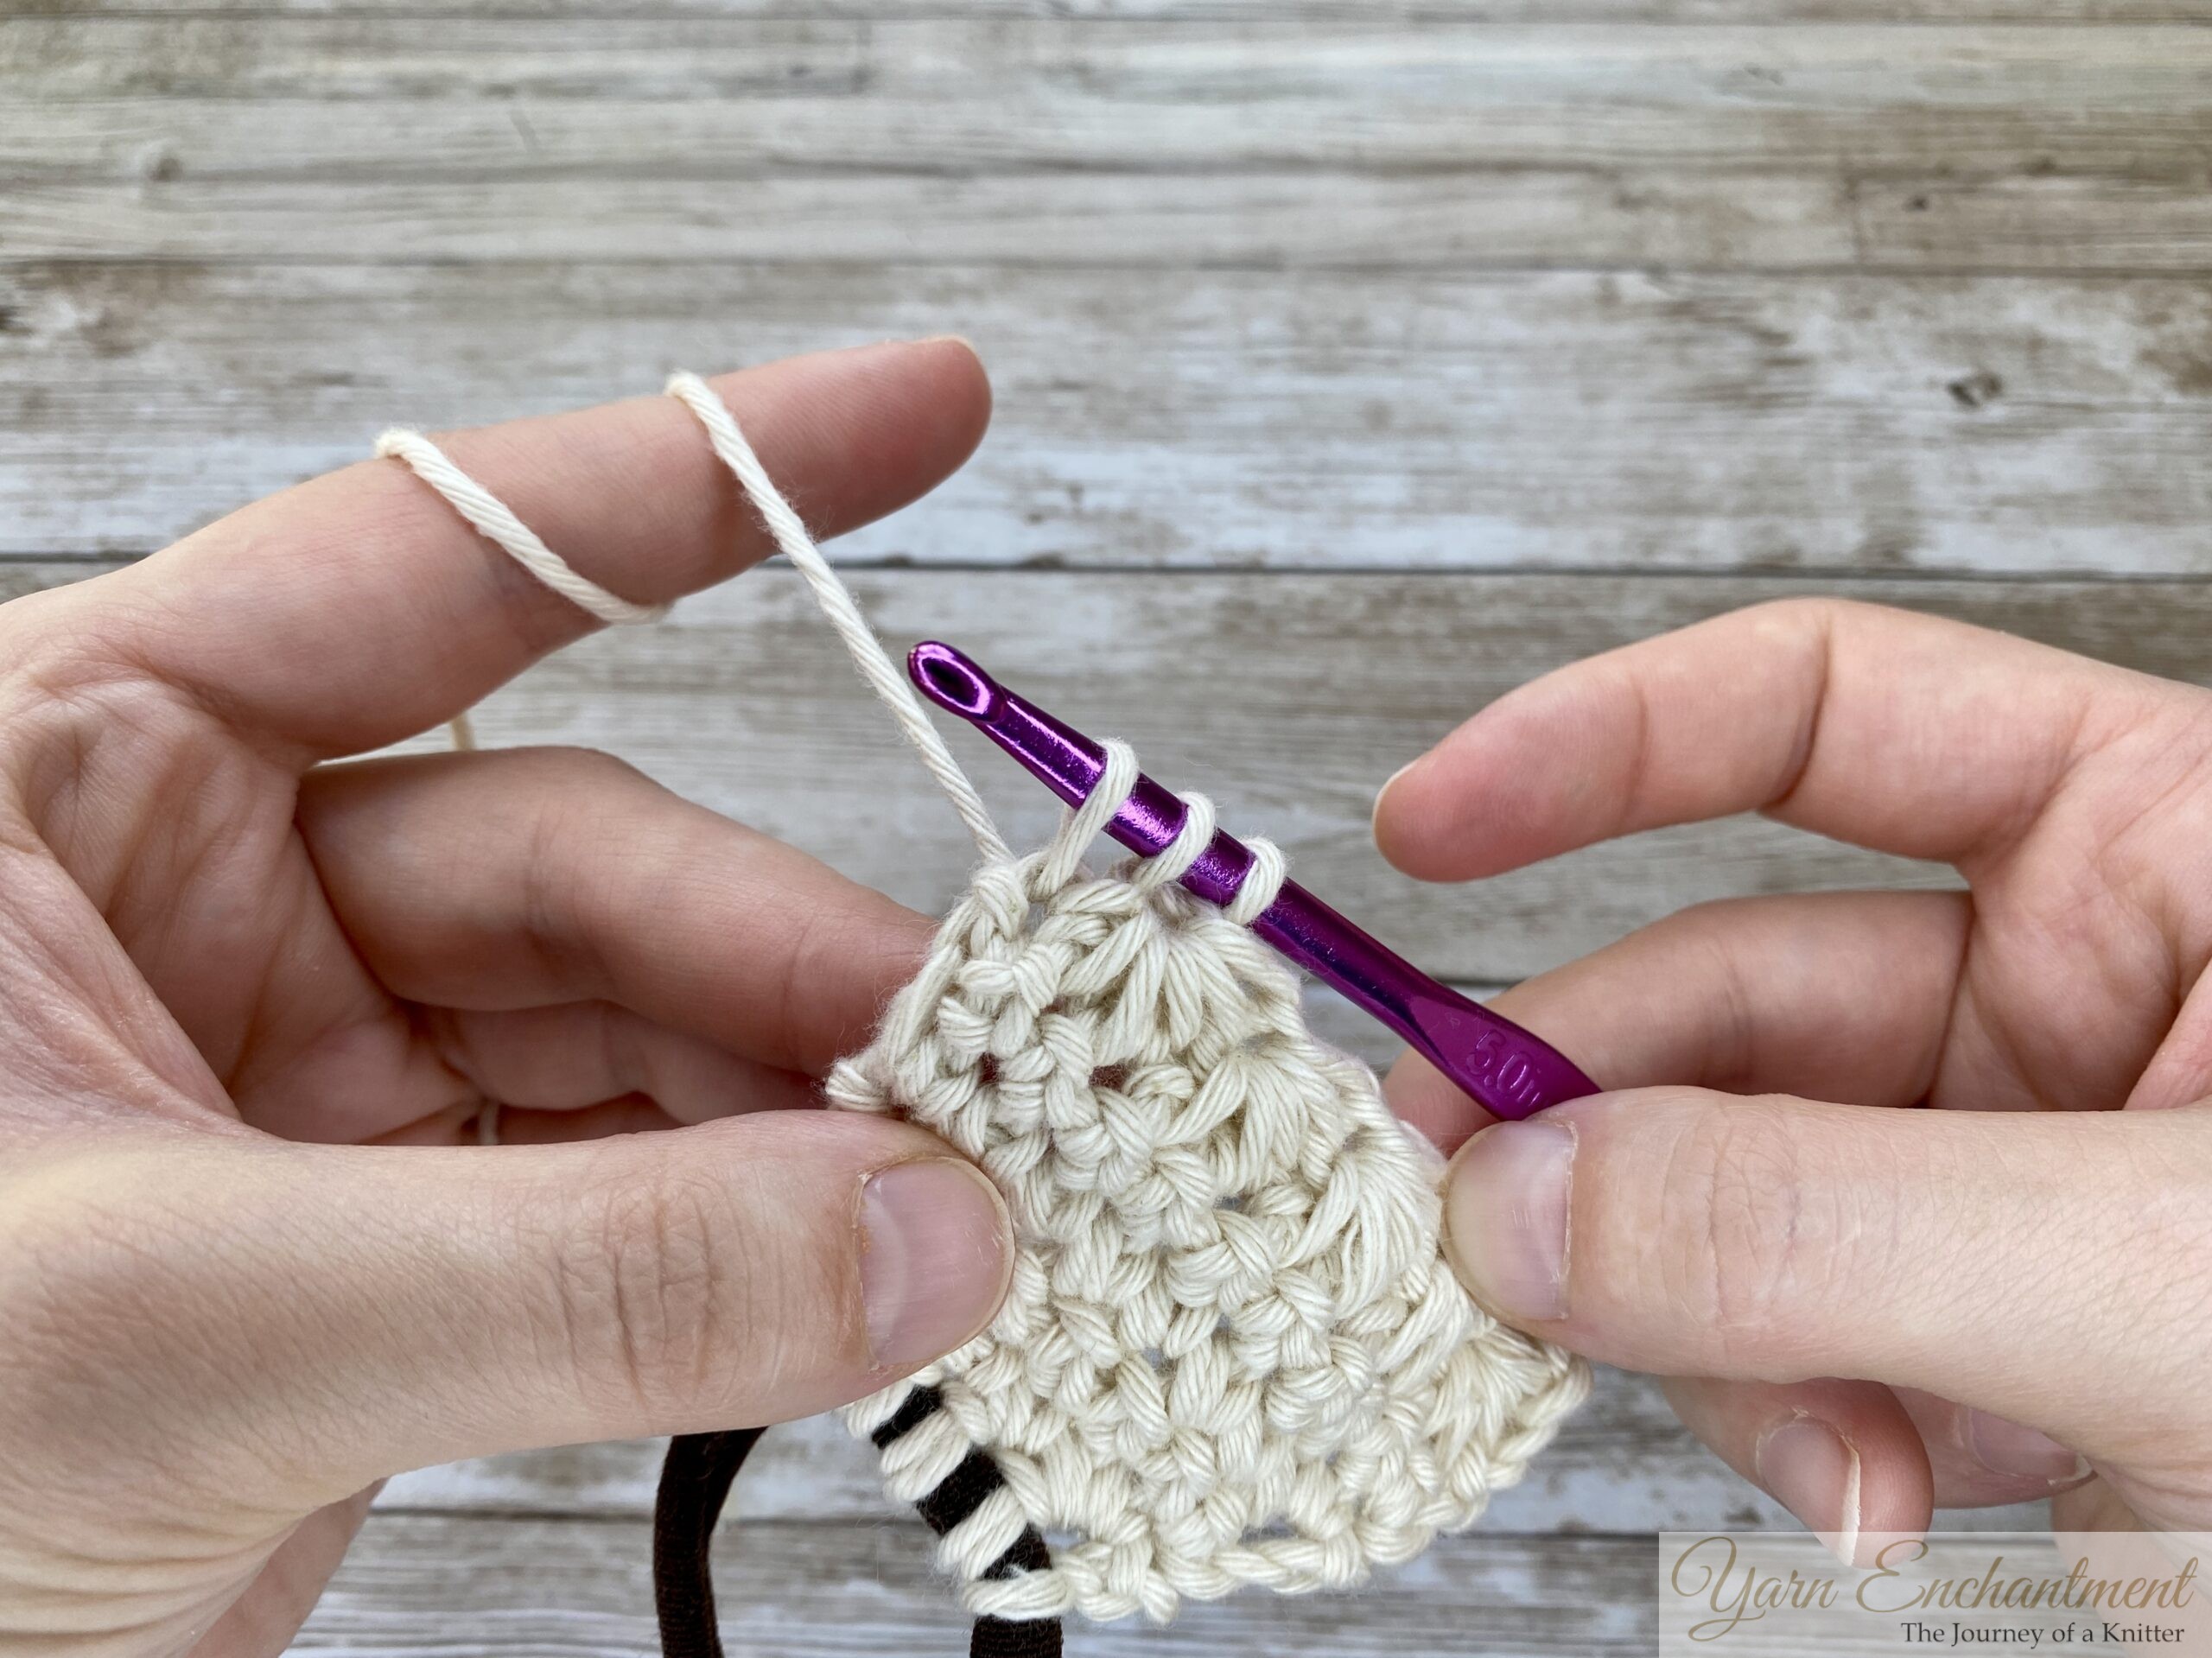
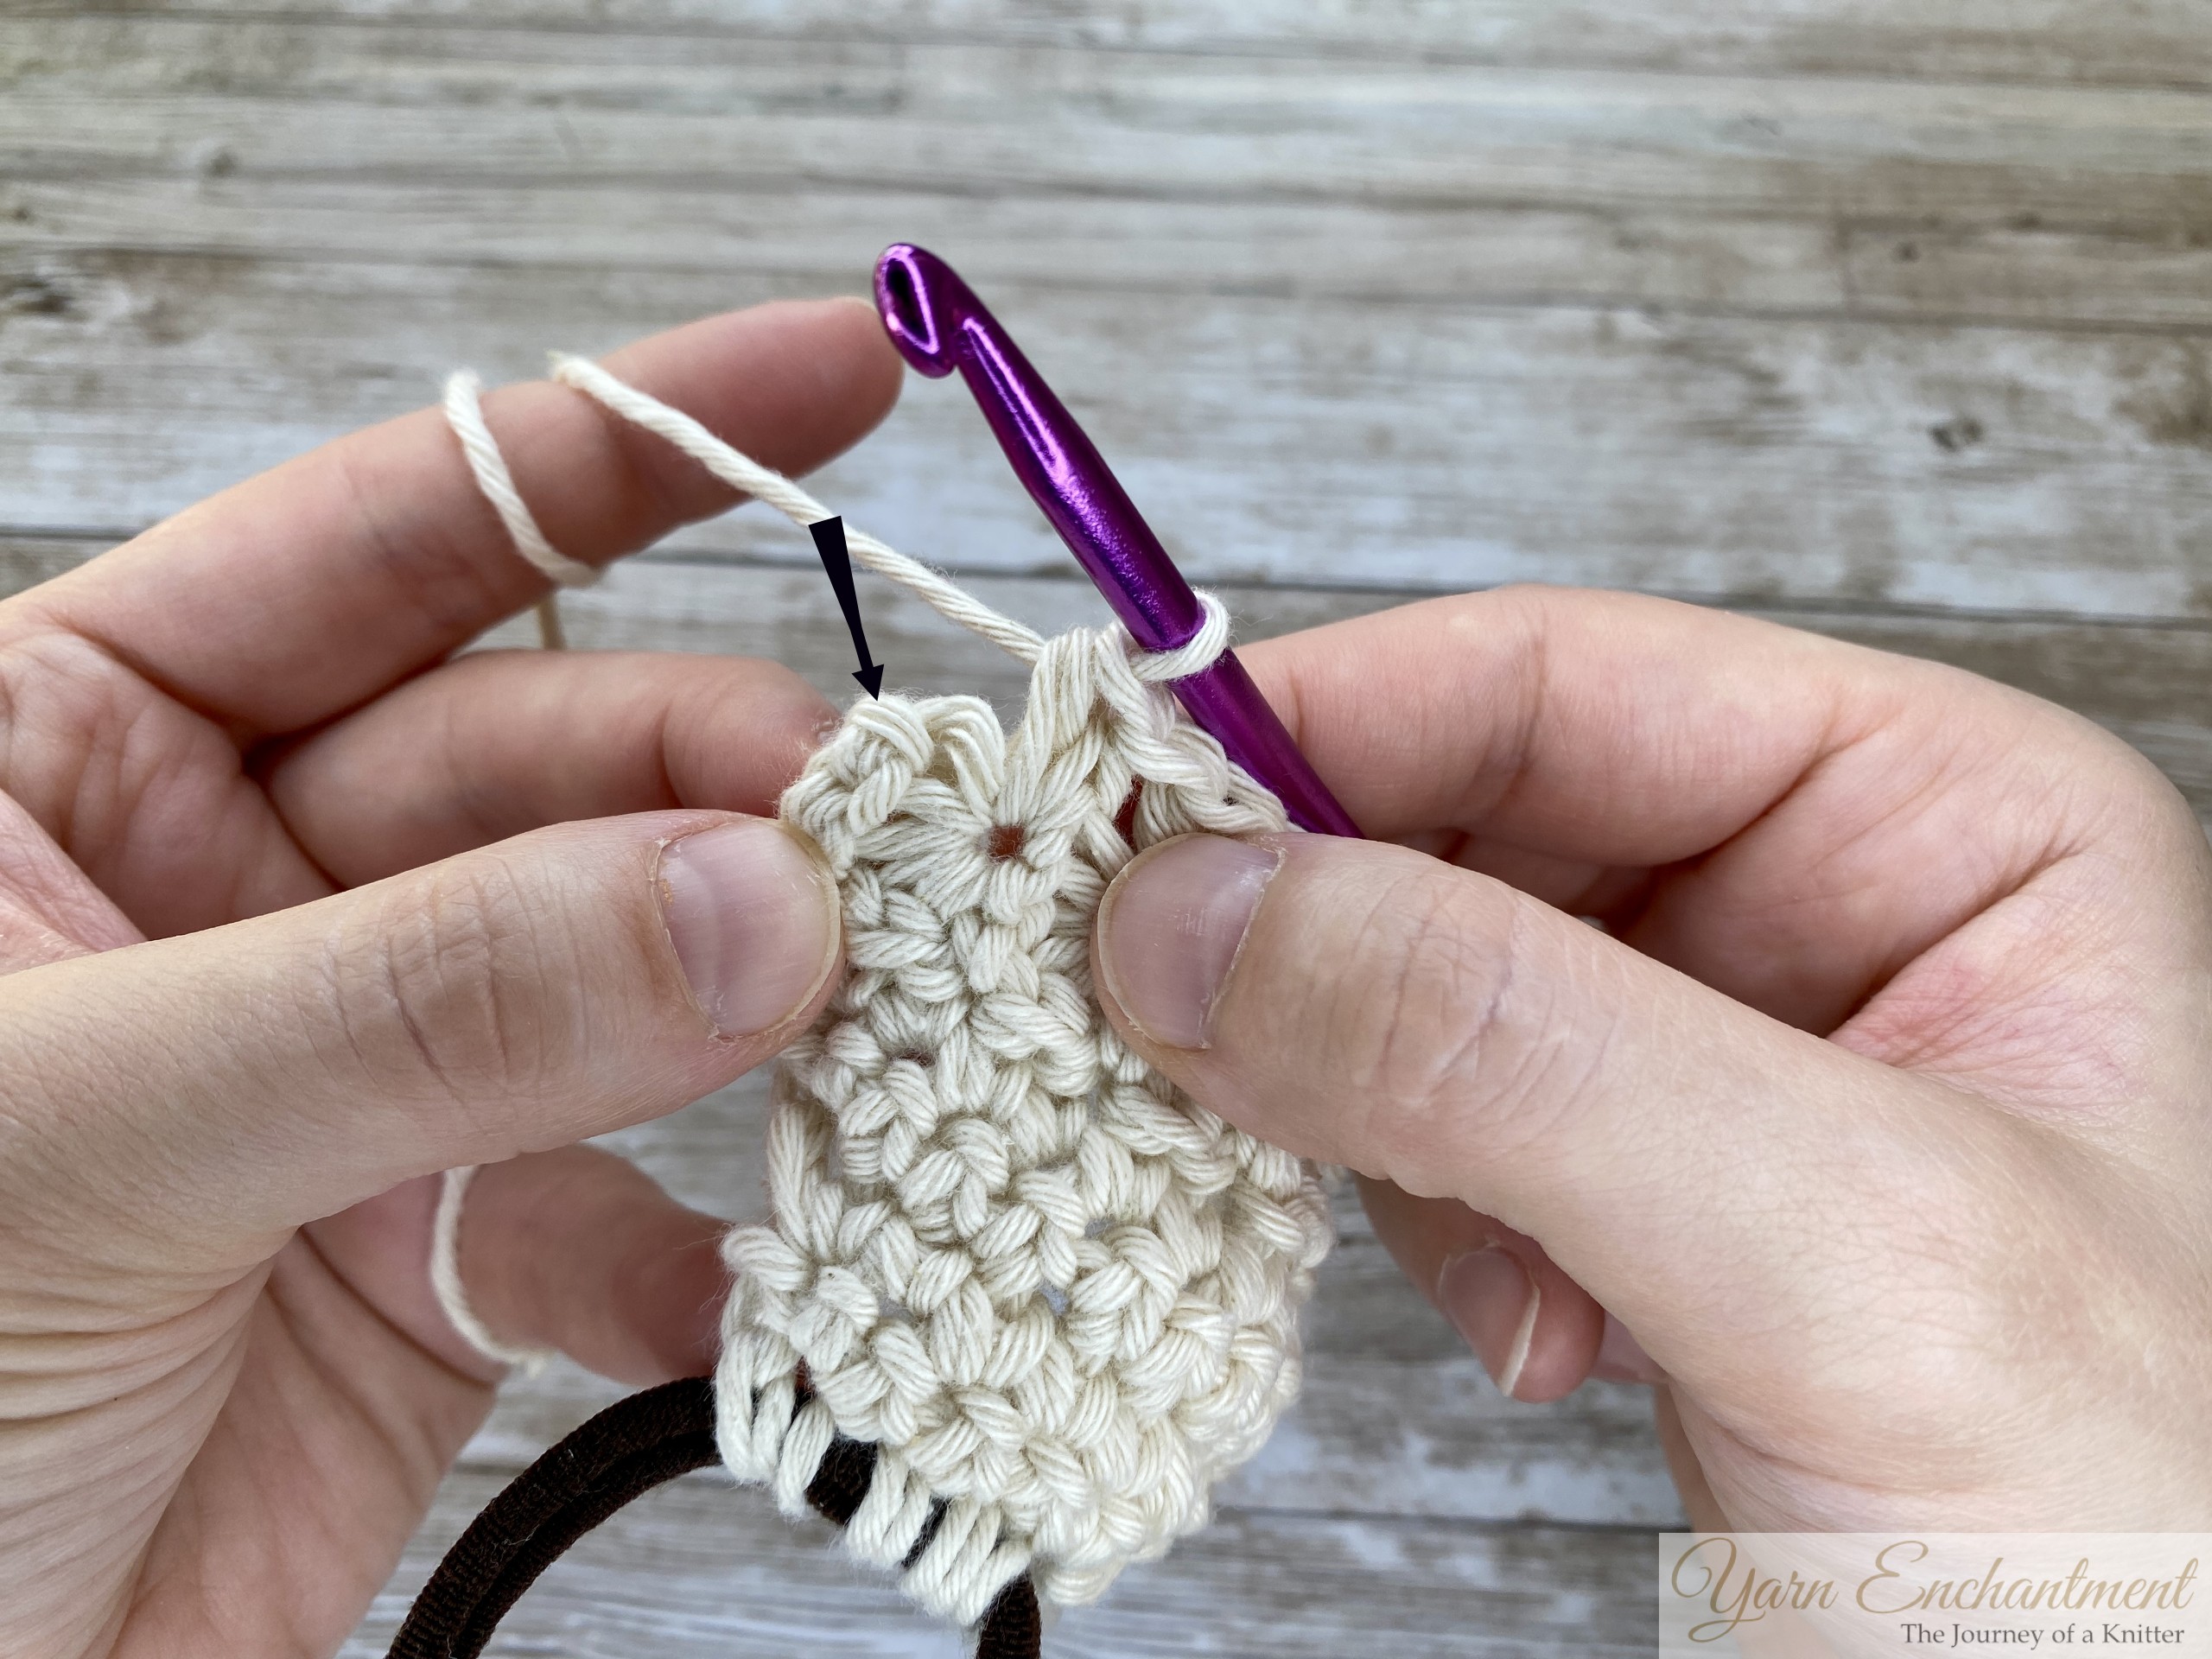
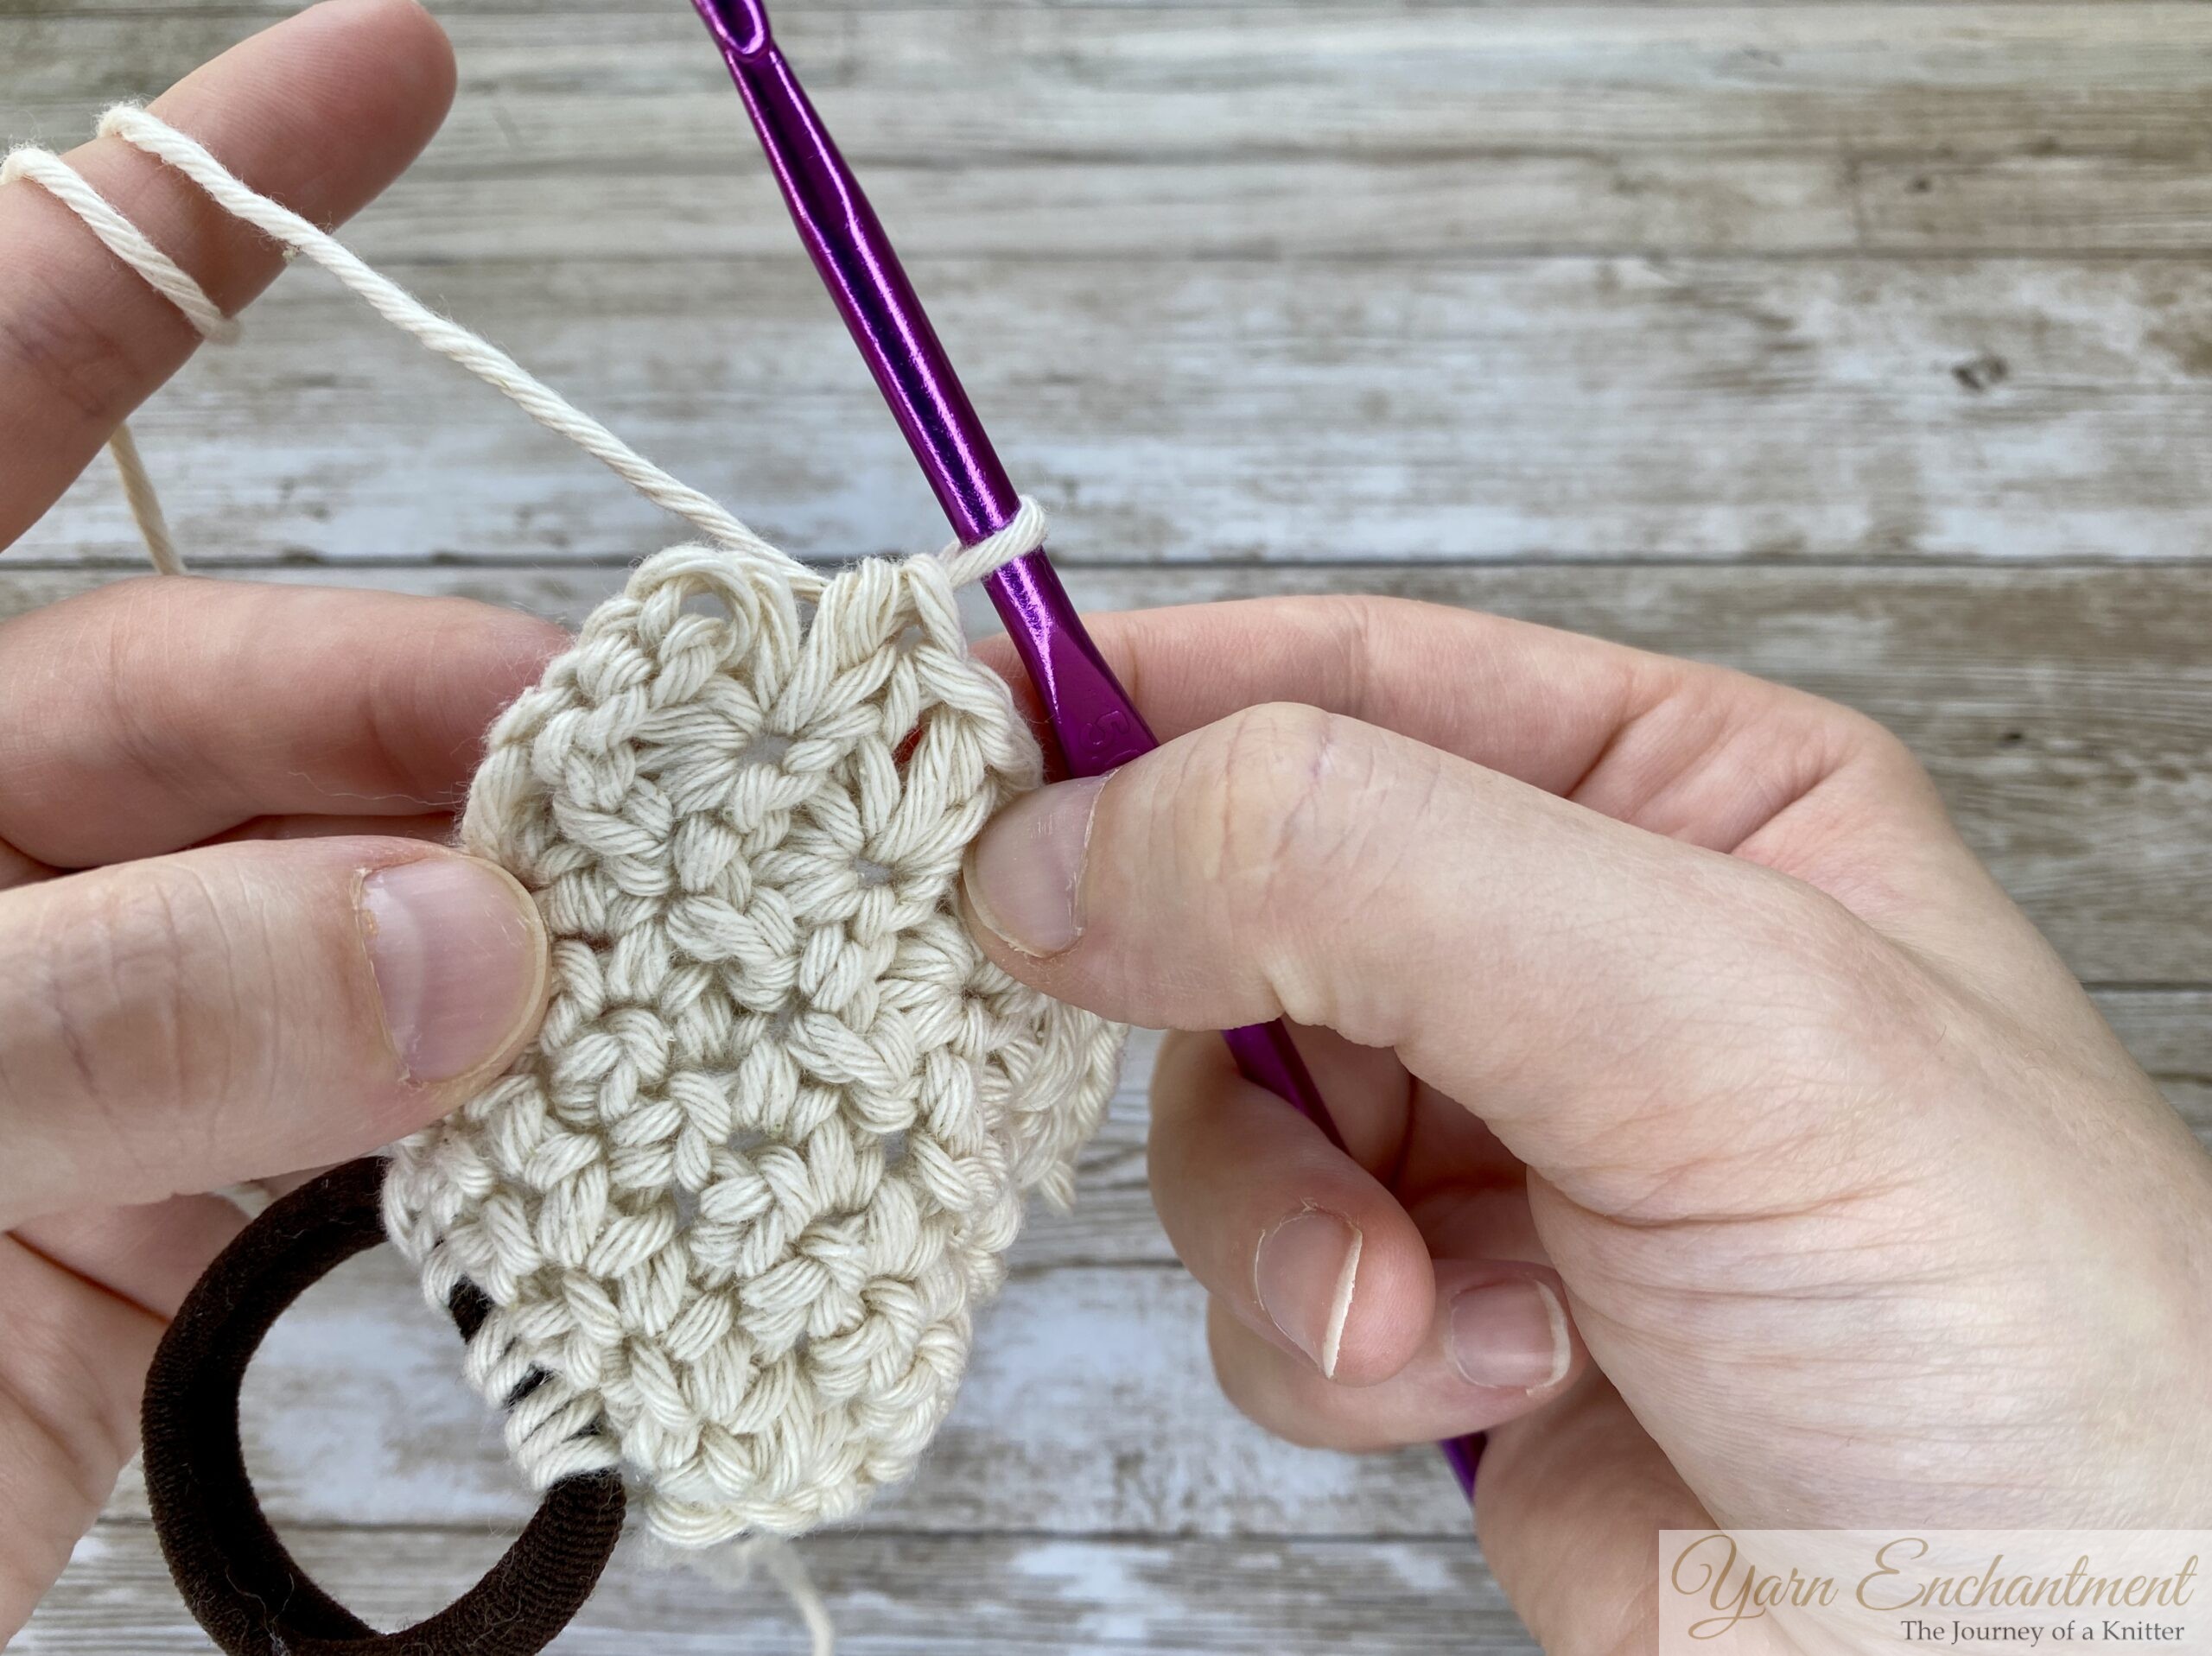
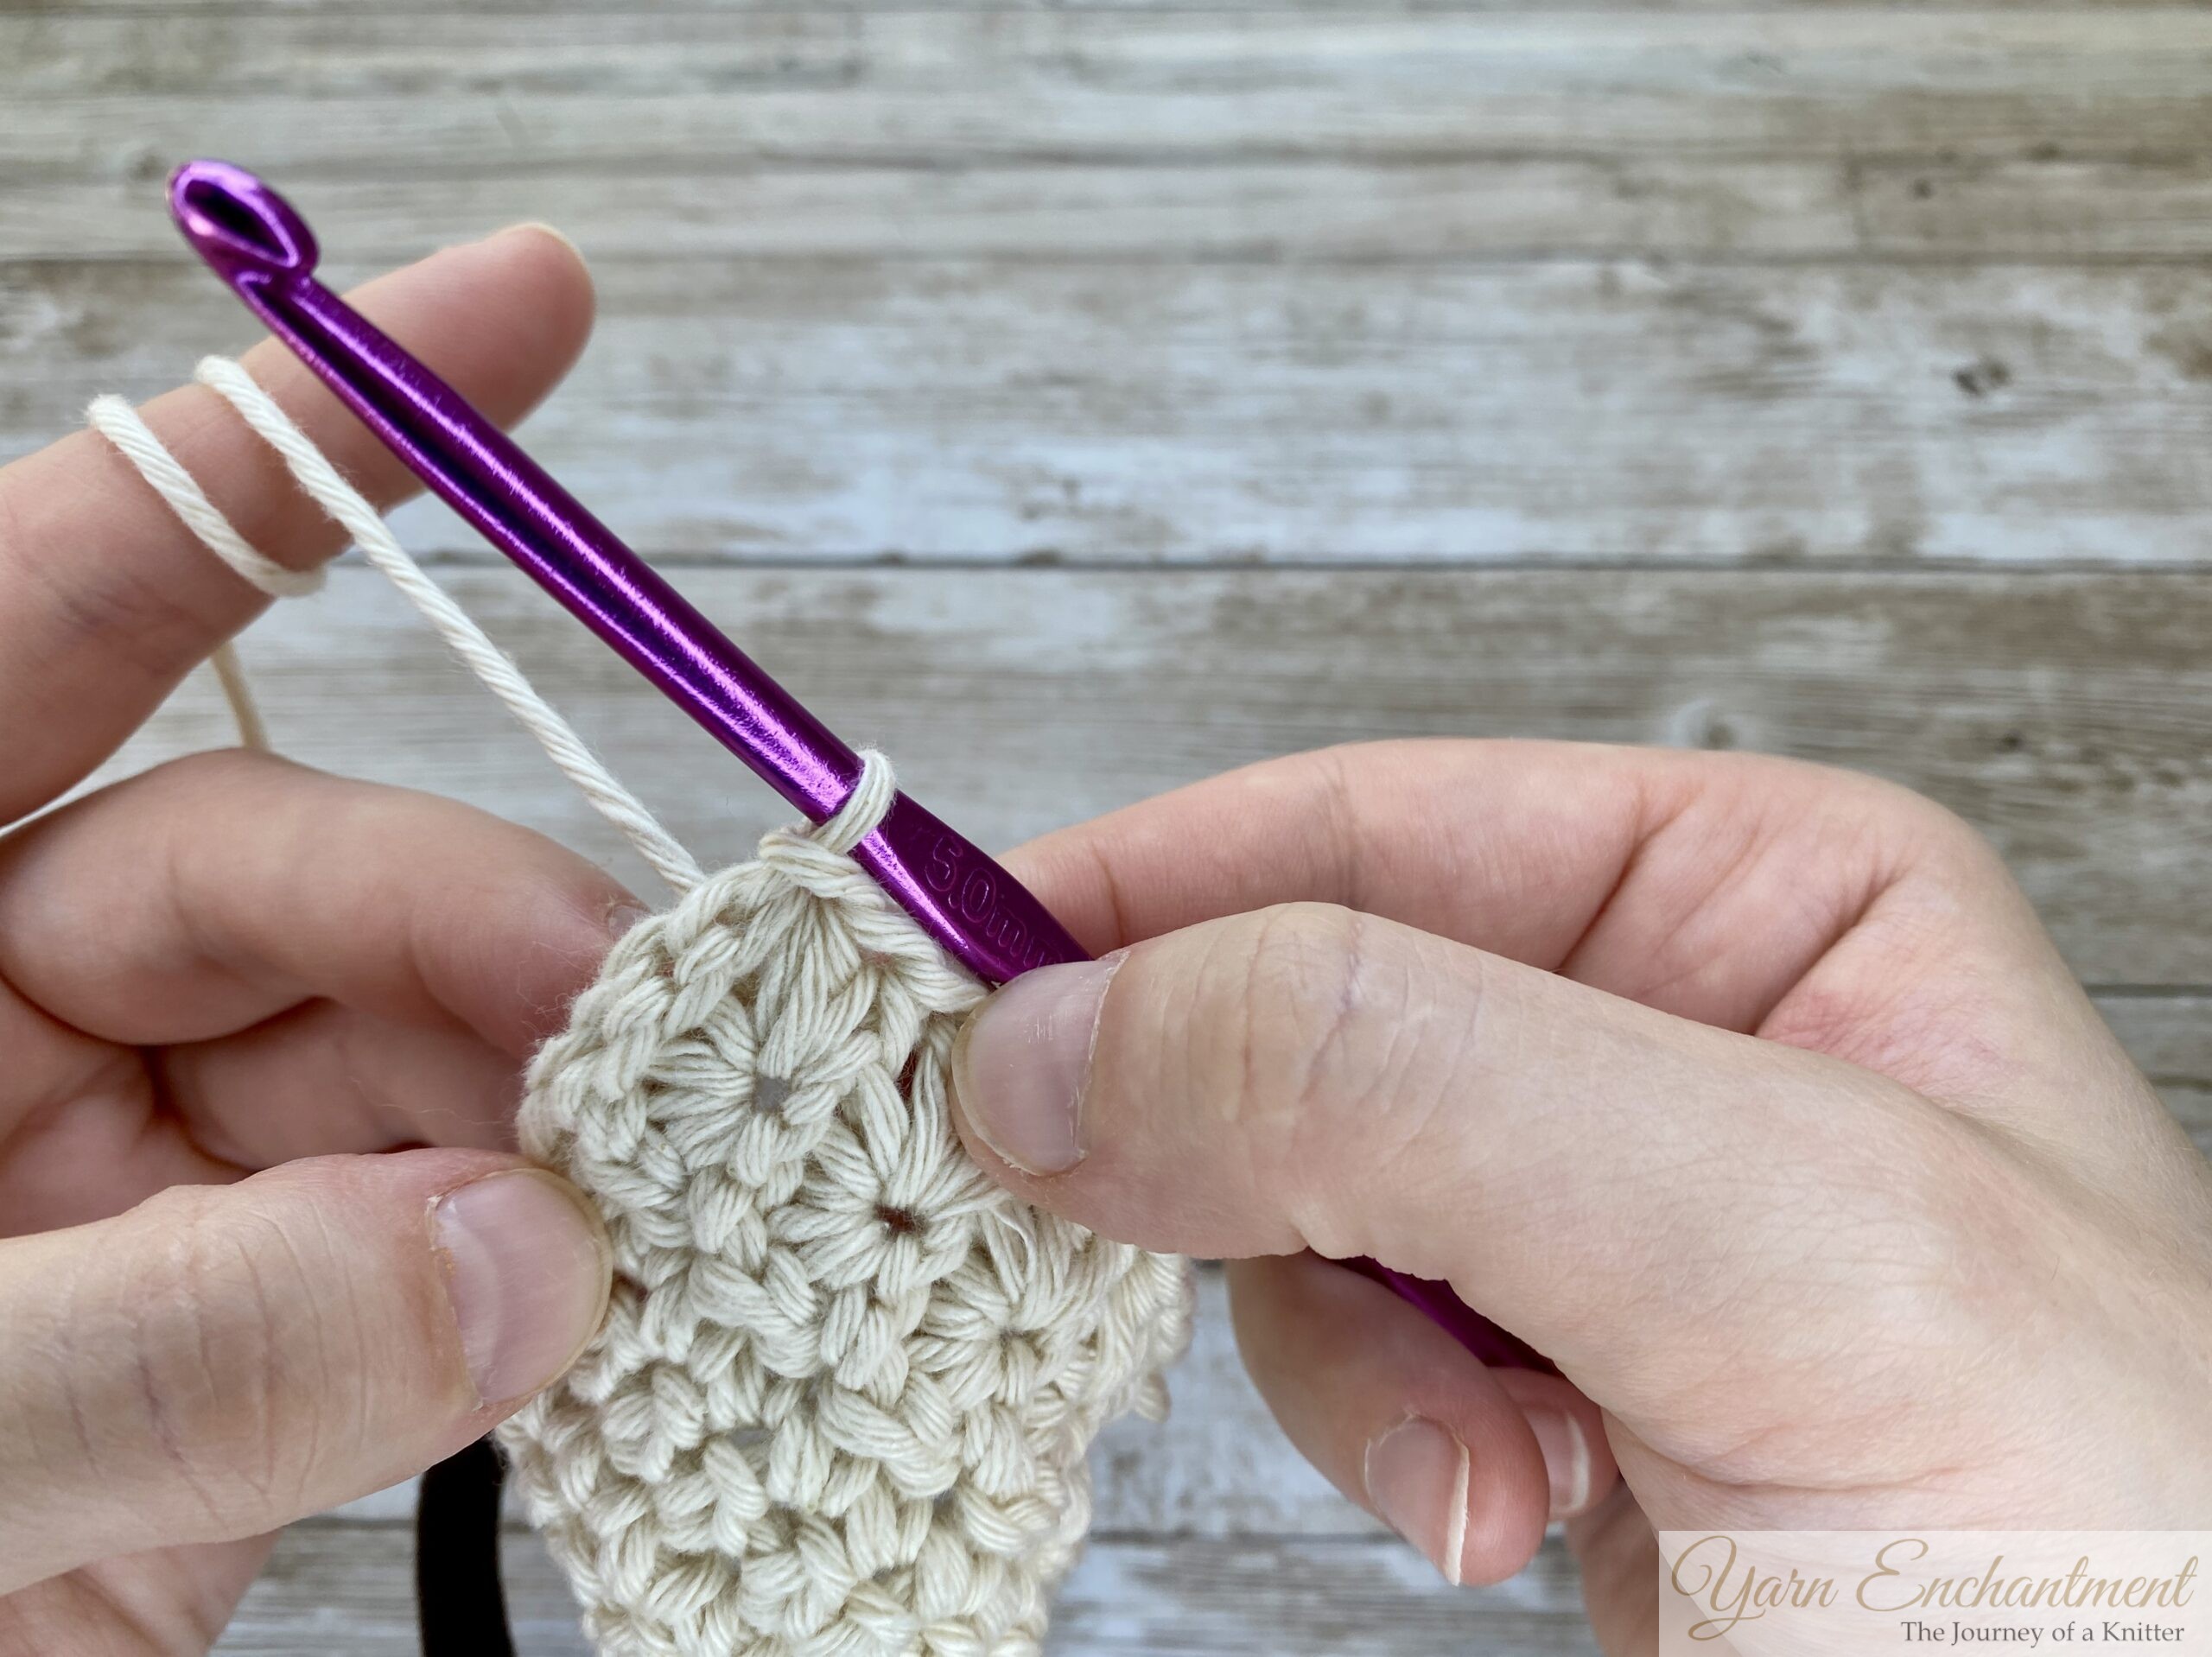
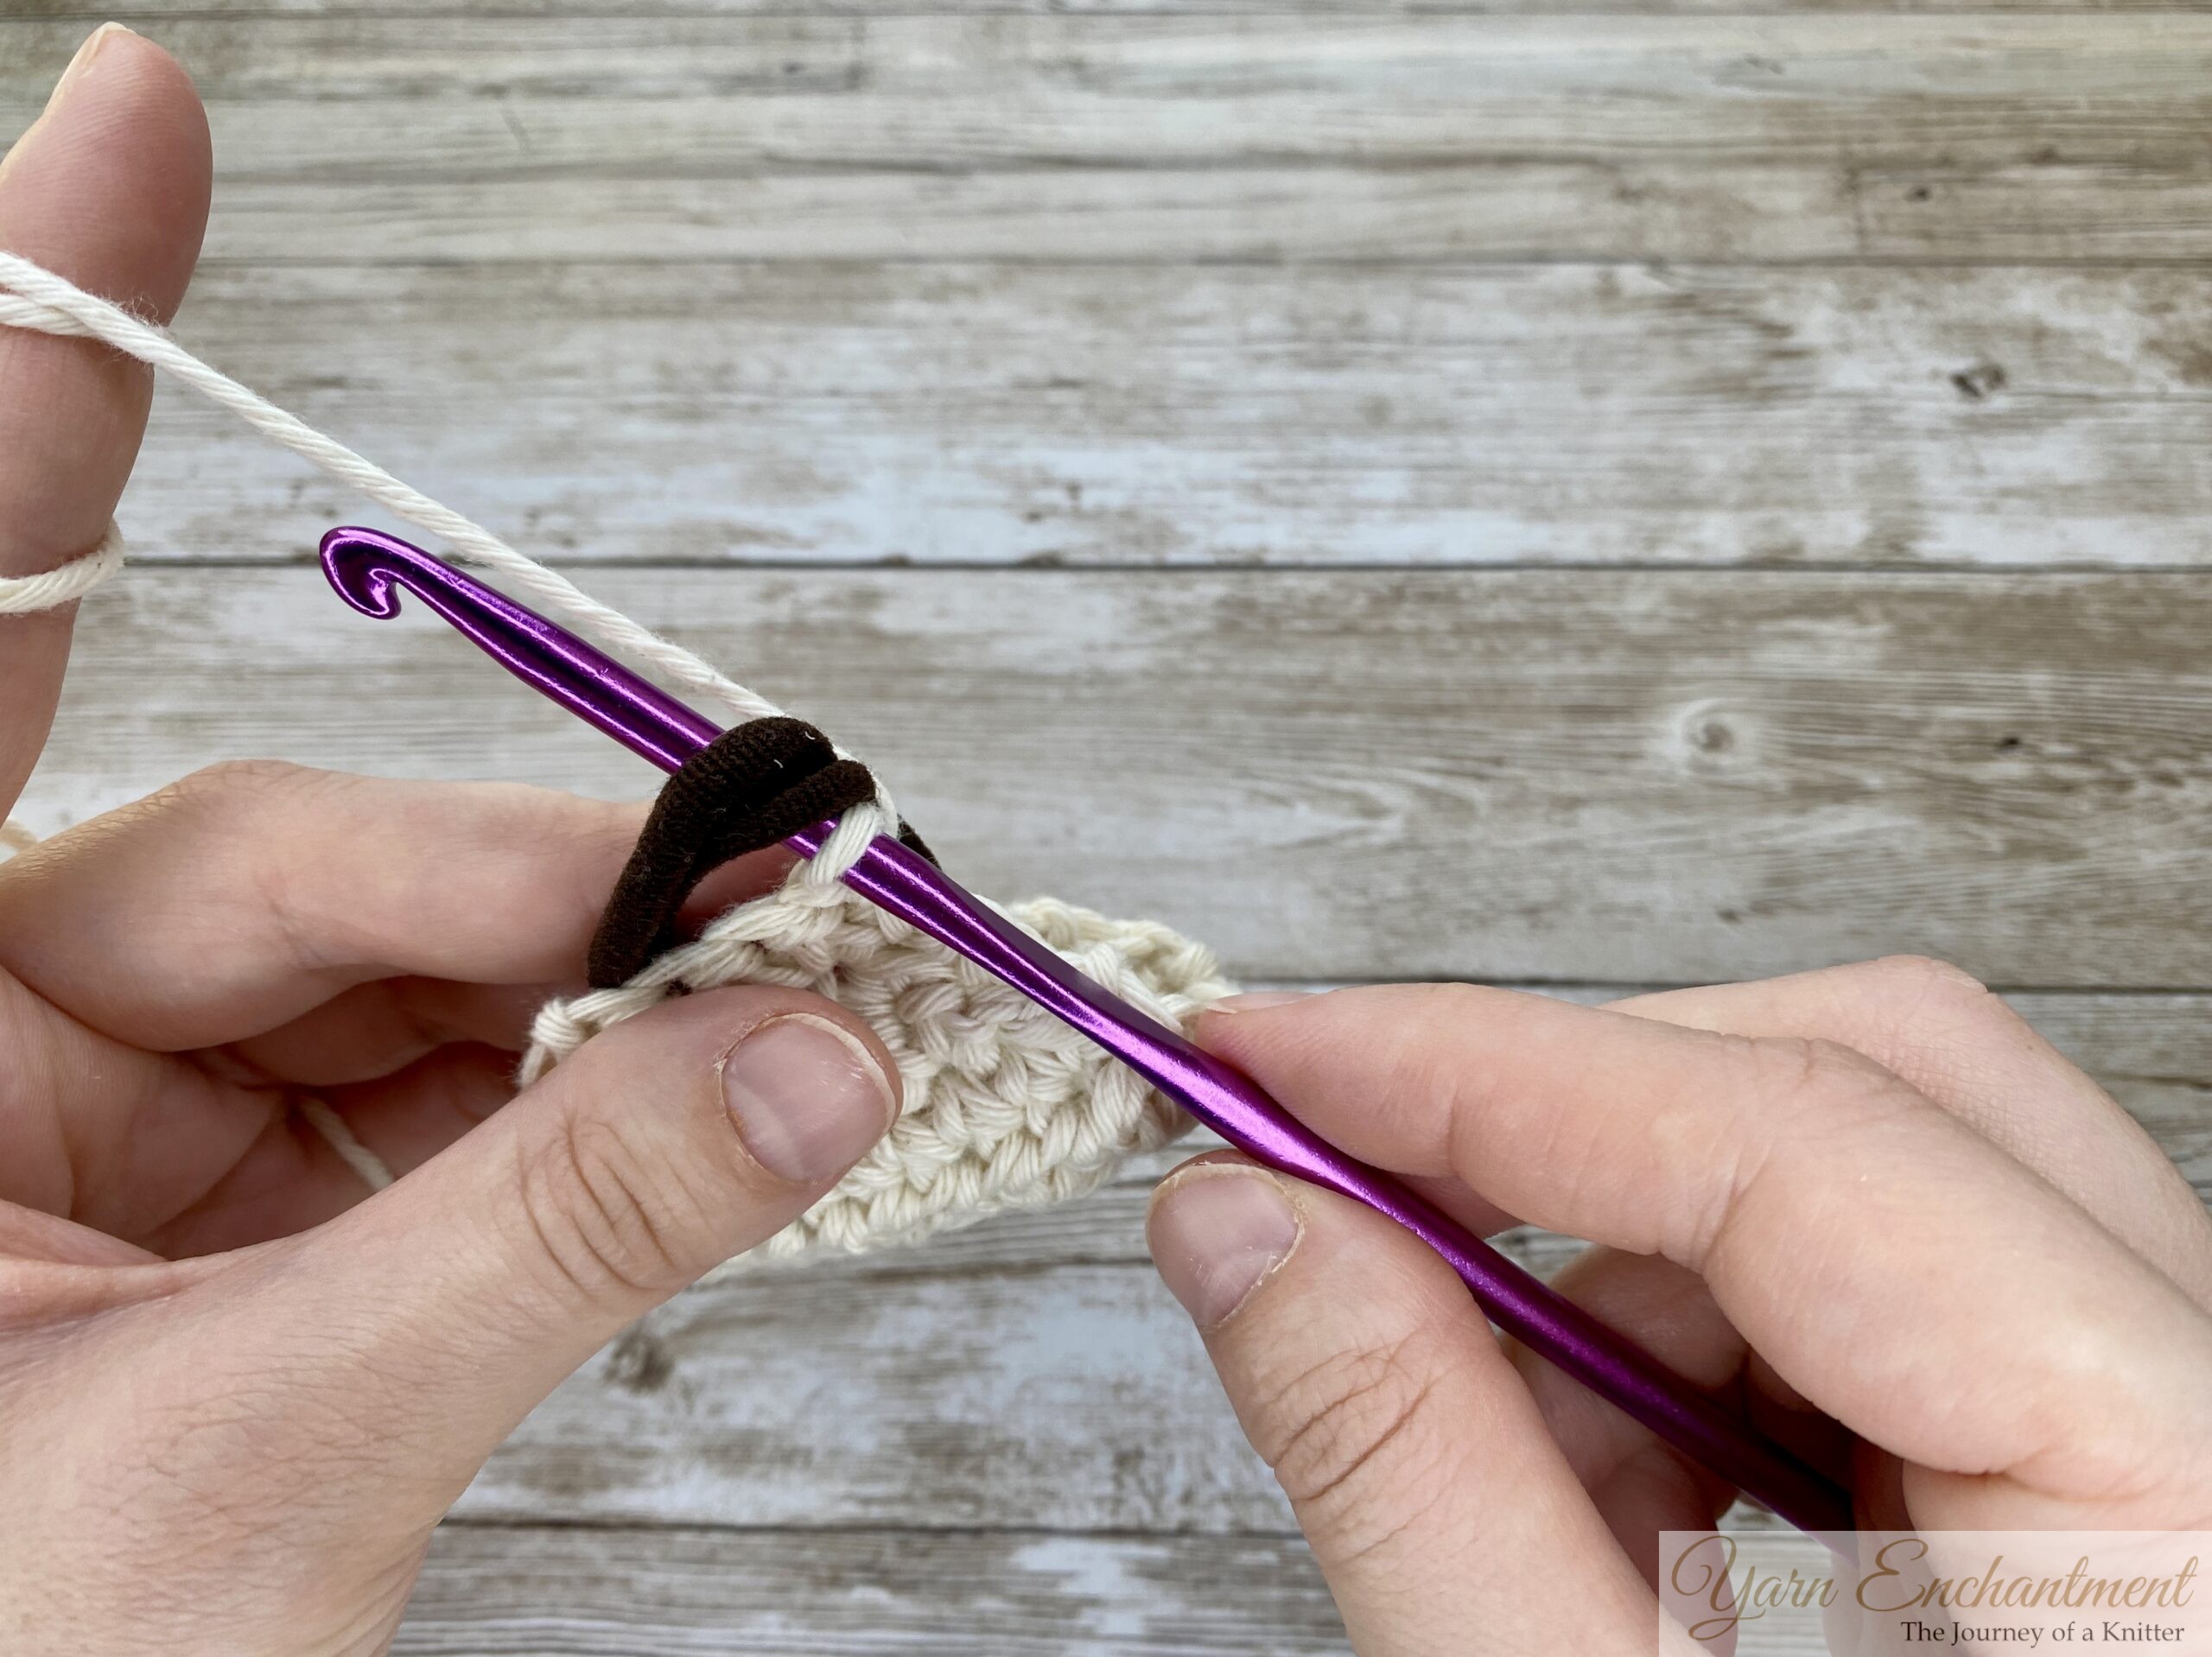
Next stars:
- Insert the hook into the "eye" of the star (the small hole created when closing the star), yarn over, and pull through.
- Insert the hook into the last arm of the star (the last loop created), yarn over, and pull through.
- Insert the hook into the base of the star (where the last arm originates), yarn over, and pull through.
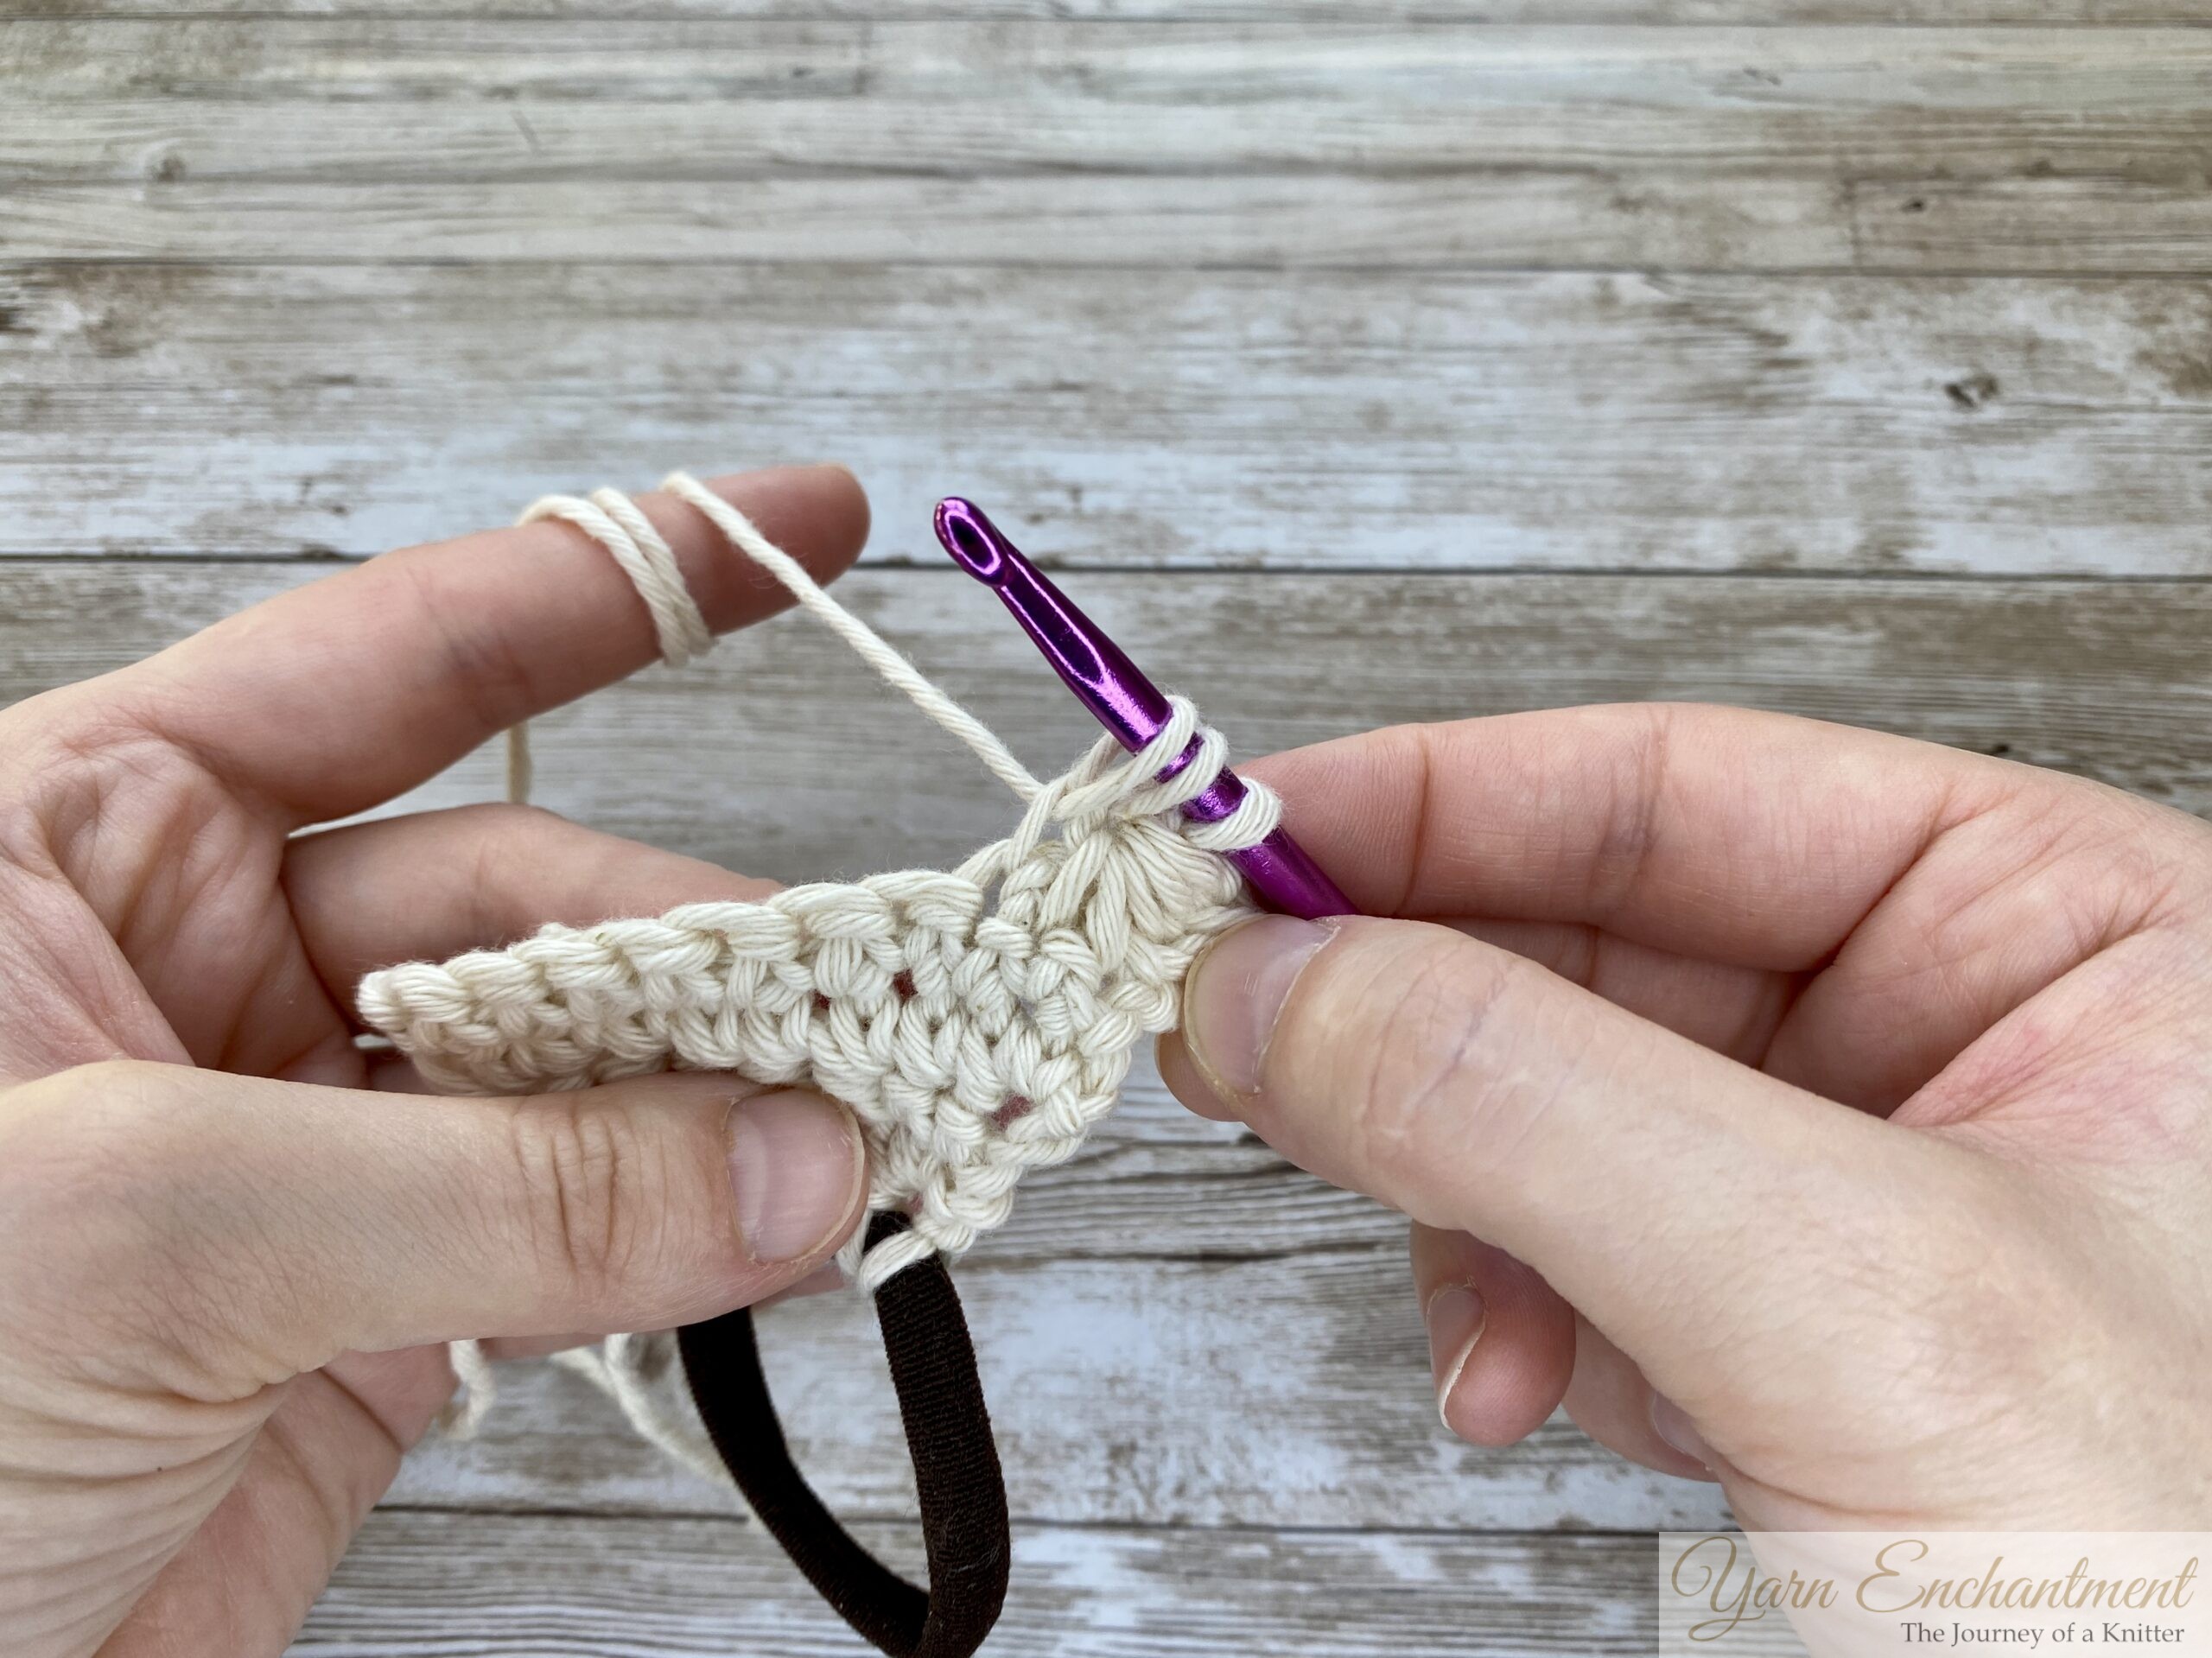
- Insert the hook into the next 2 stitches, yarn over, and pull through each time until you have 6 loops on the hook.
- Yarn over and pull through all 6 loops, then close the star.
Repeat this process until you’ve worked all the way to the end of the row.
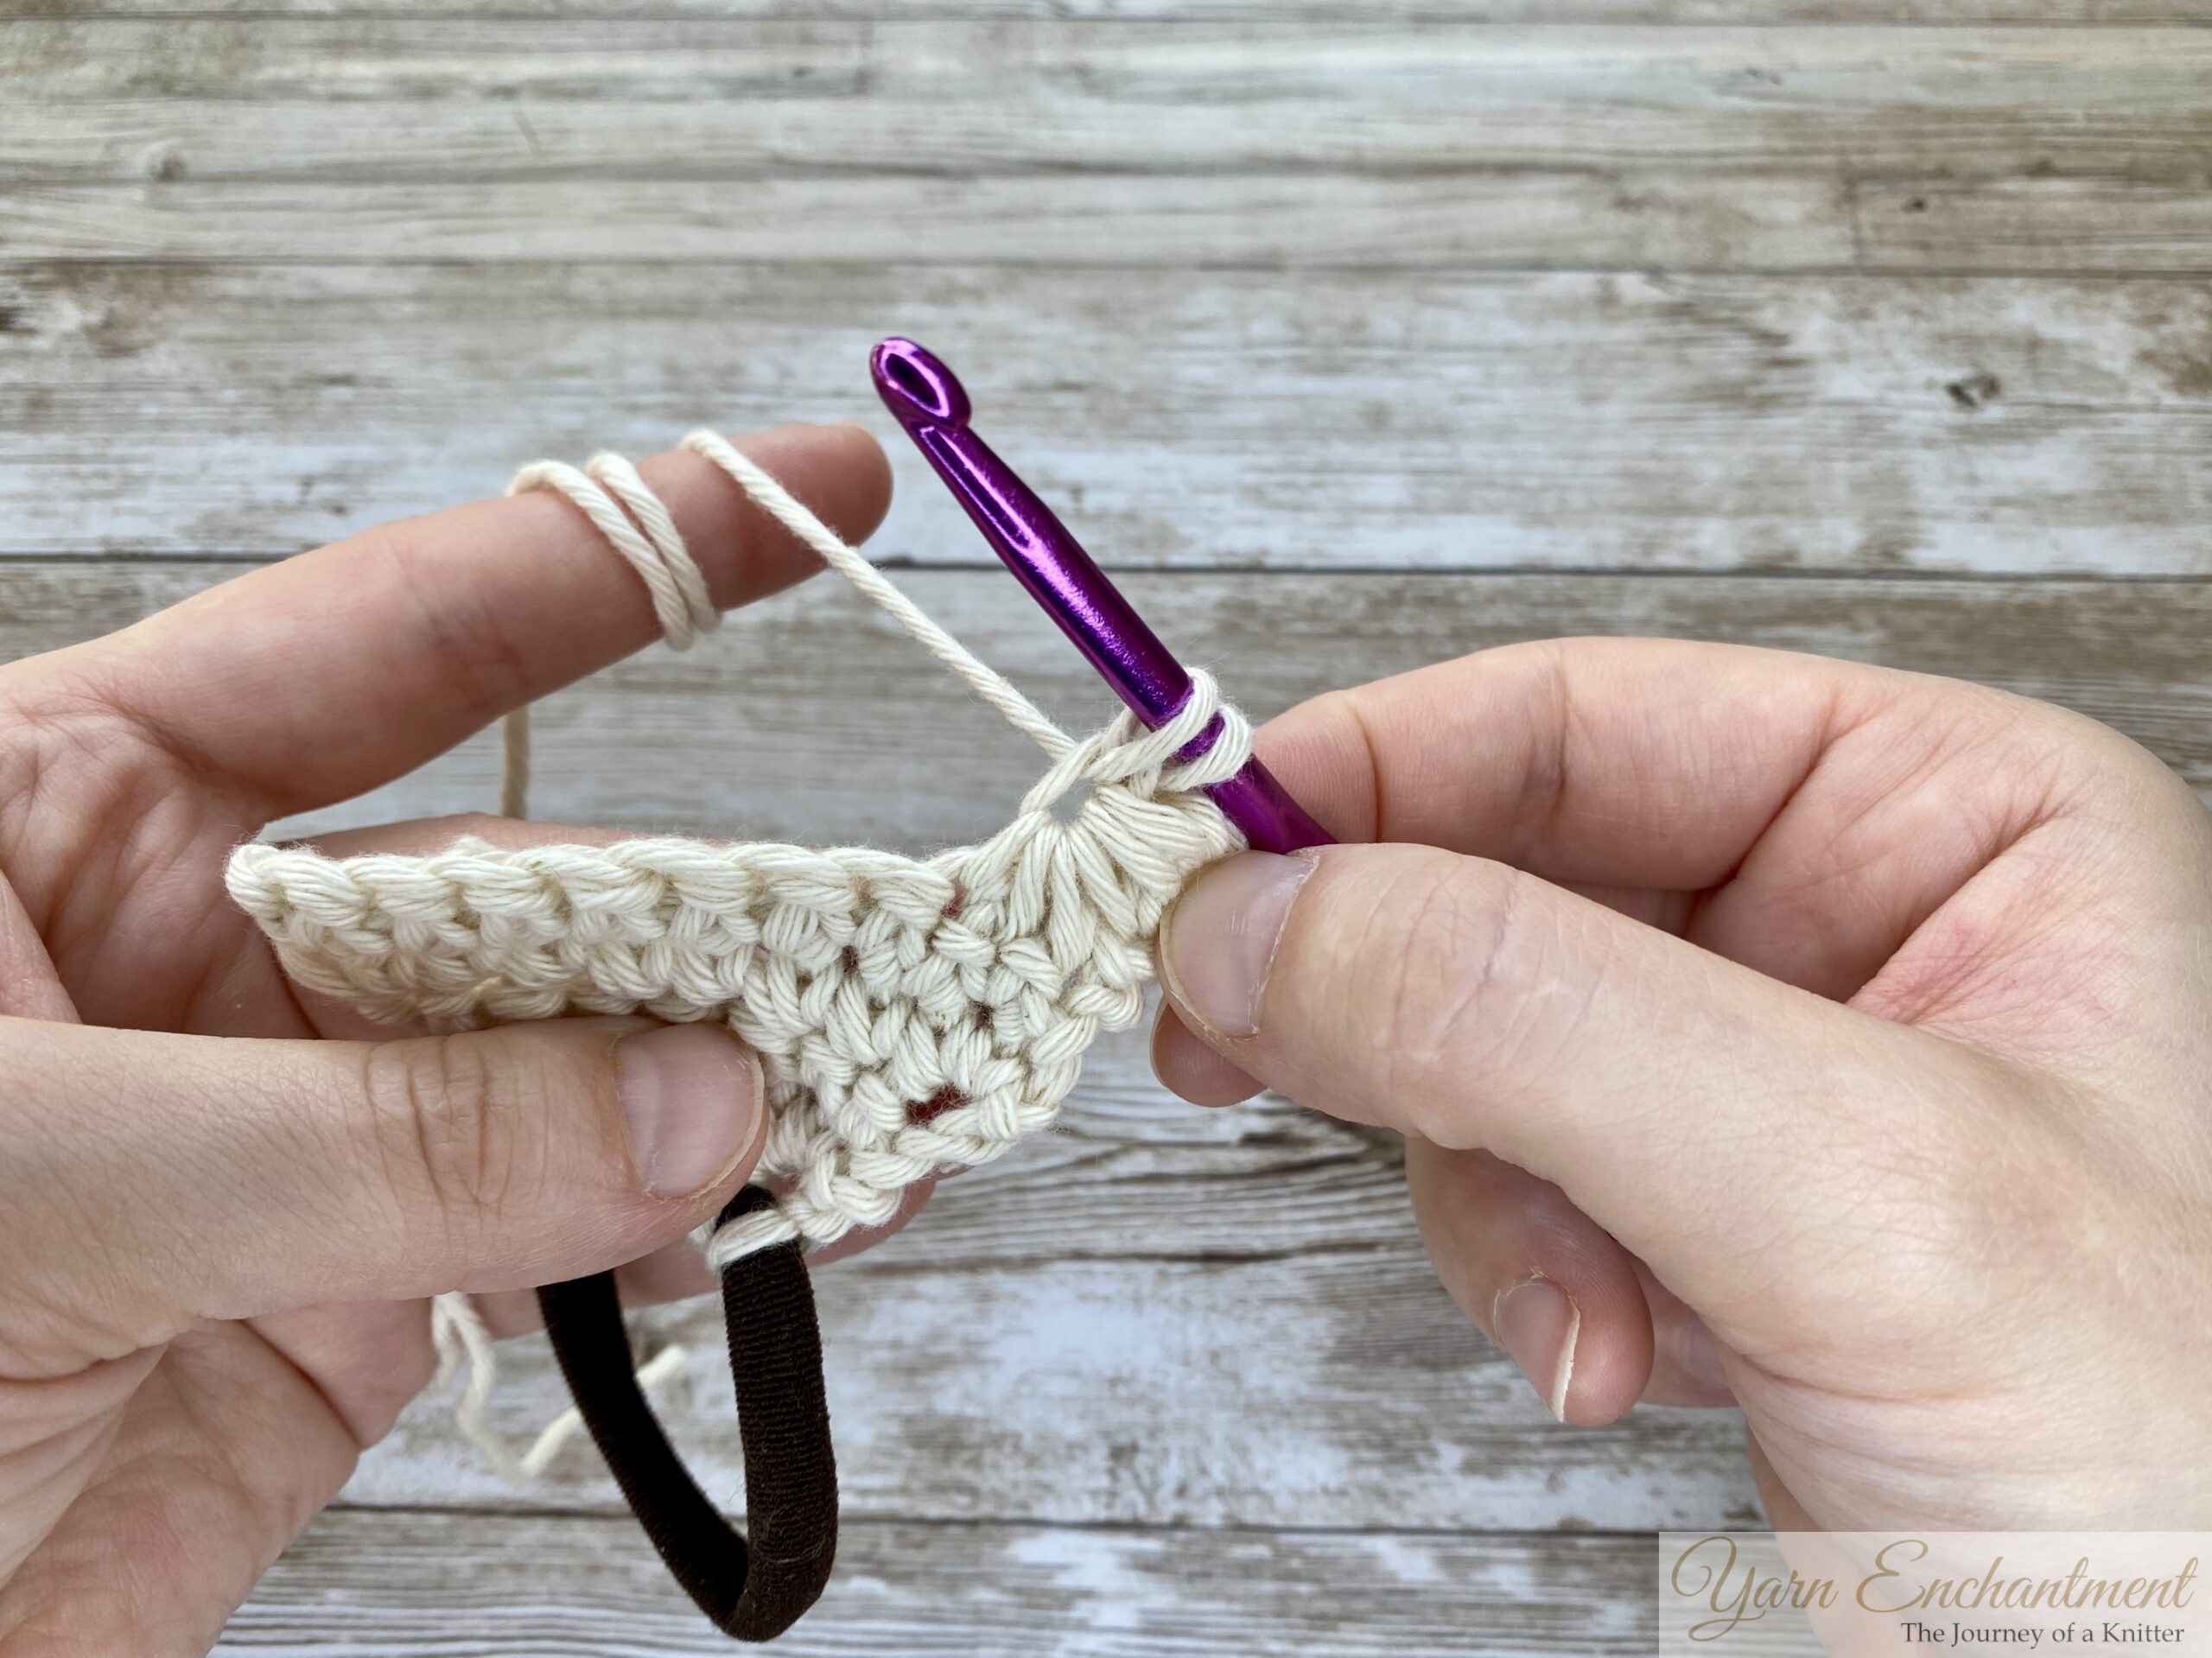 | 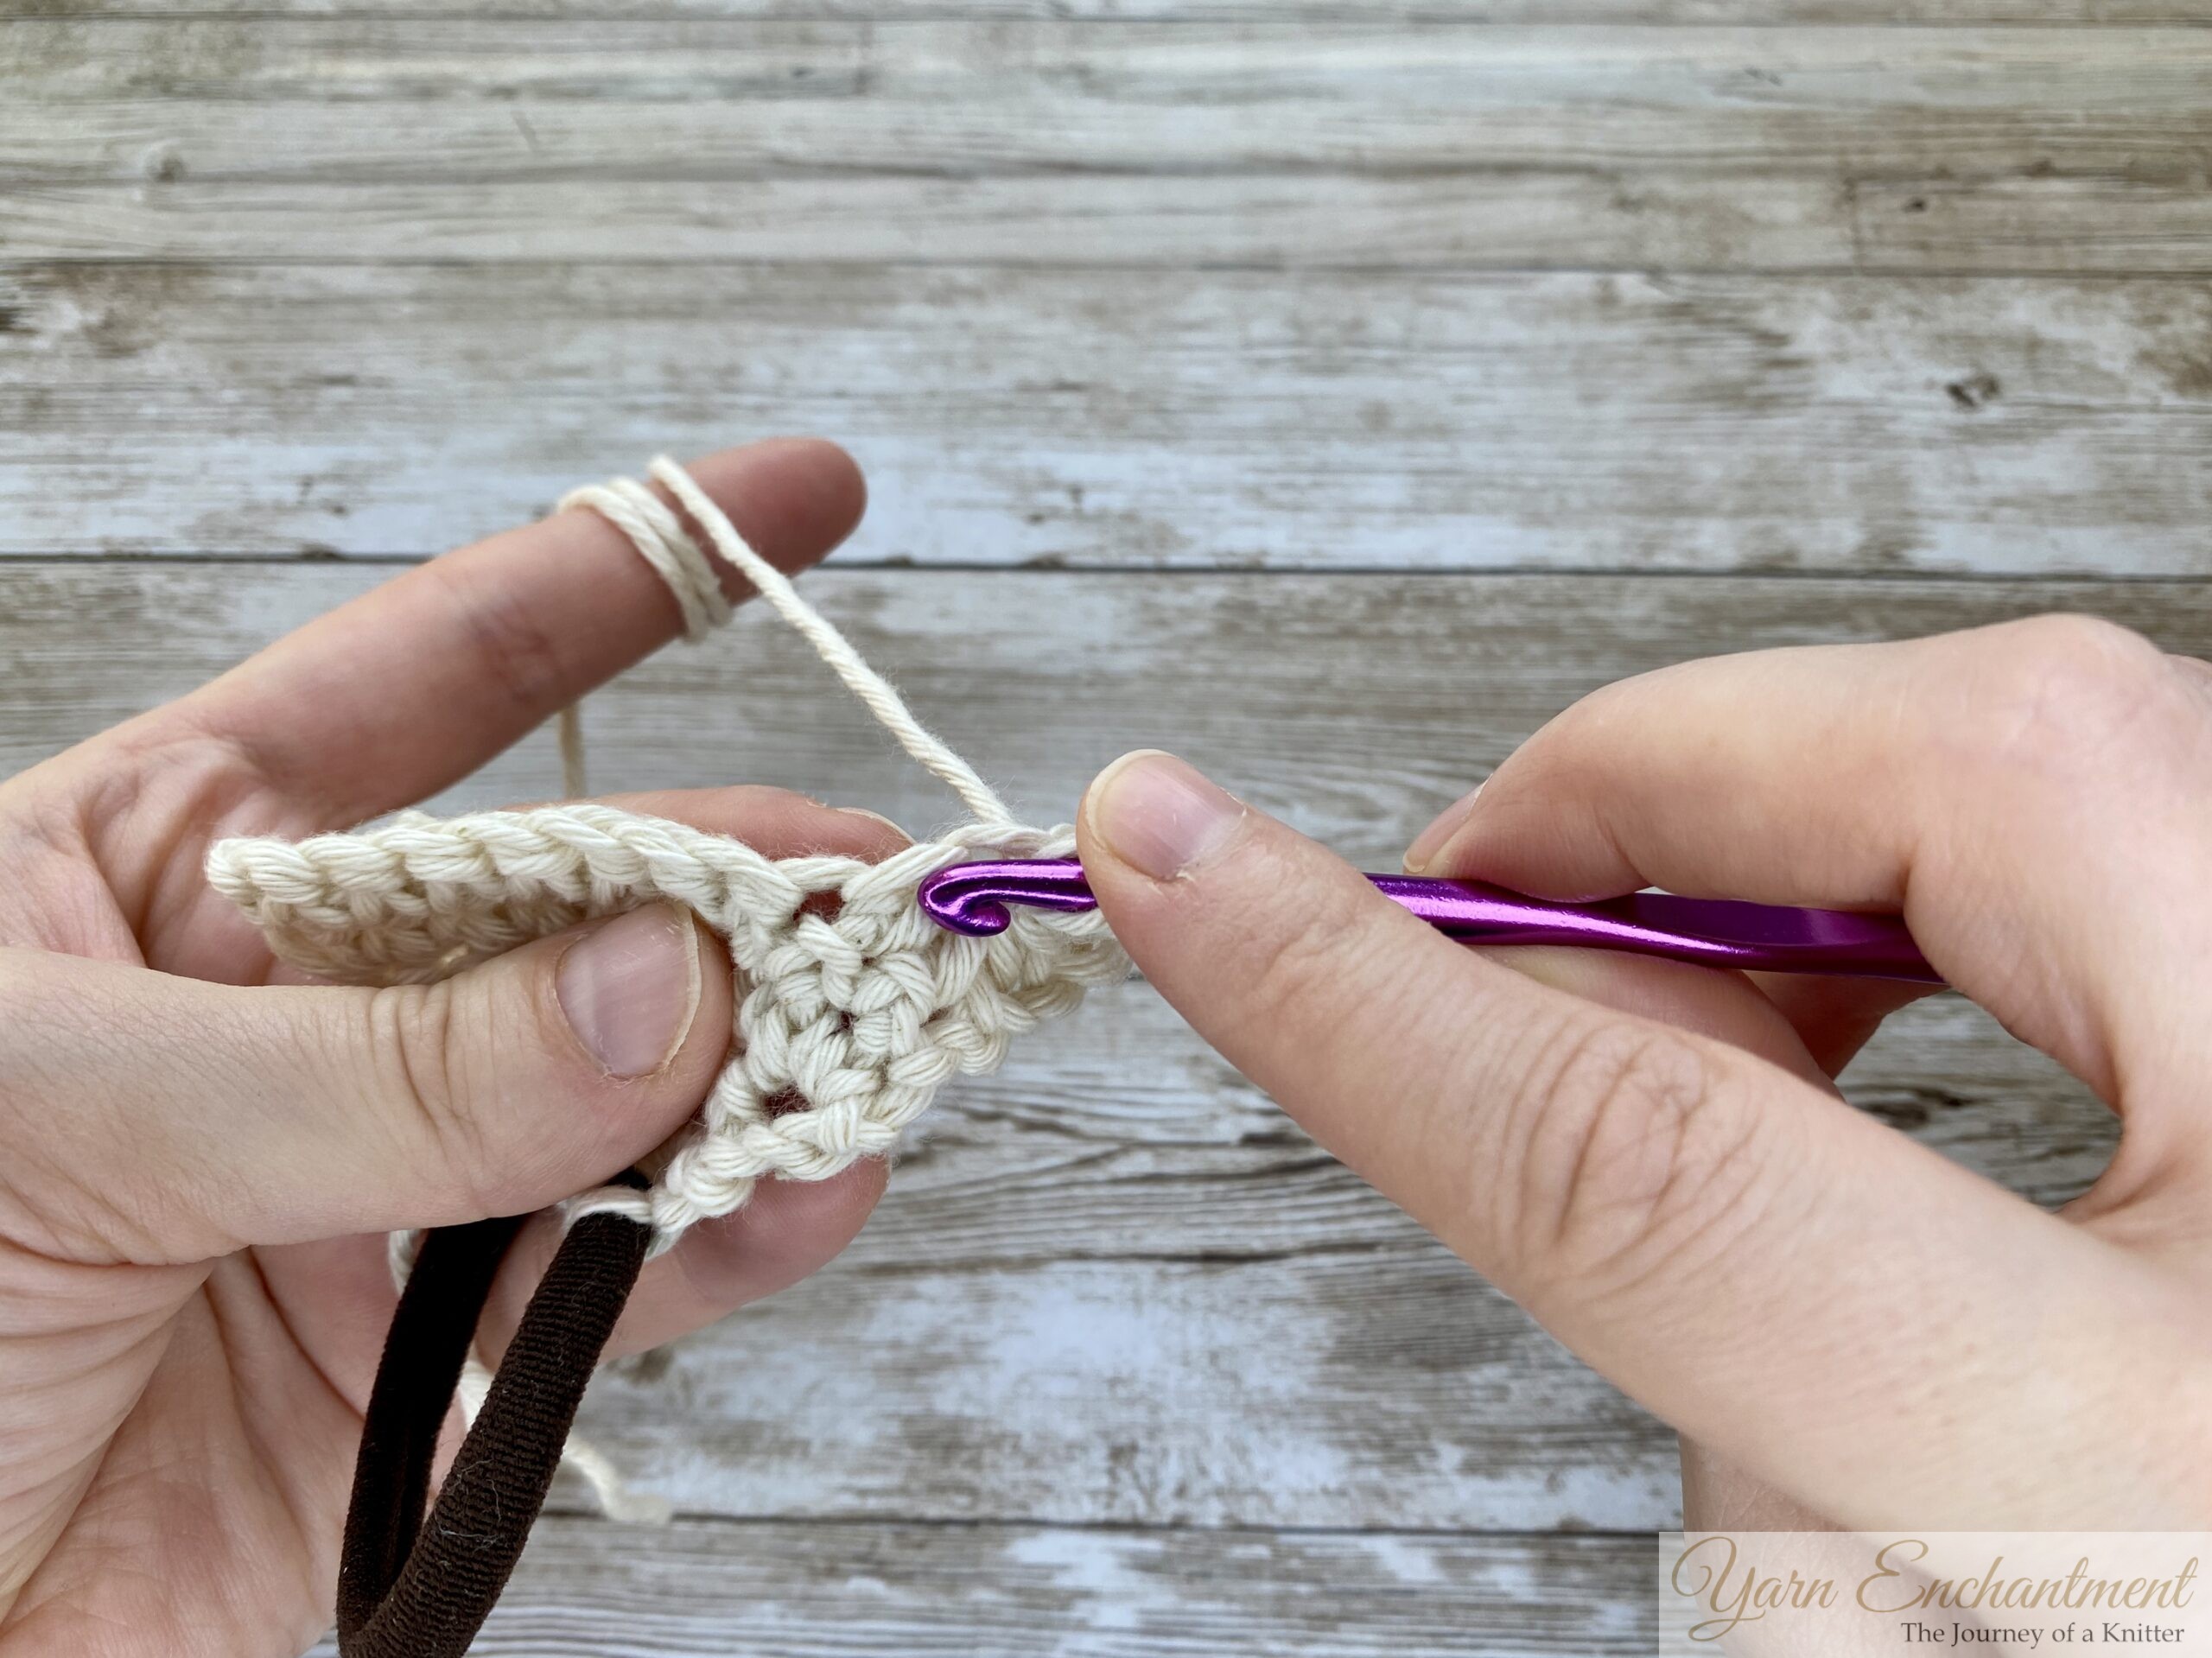 |  | Insert the hook into the "eye" of the star, yarn over, and pull through. | Insert the hook into the last arm of the star | Yarn over, and pull through. |


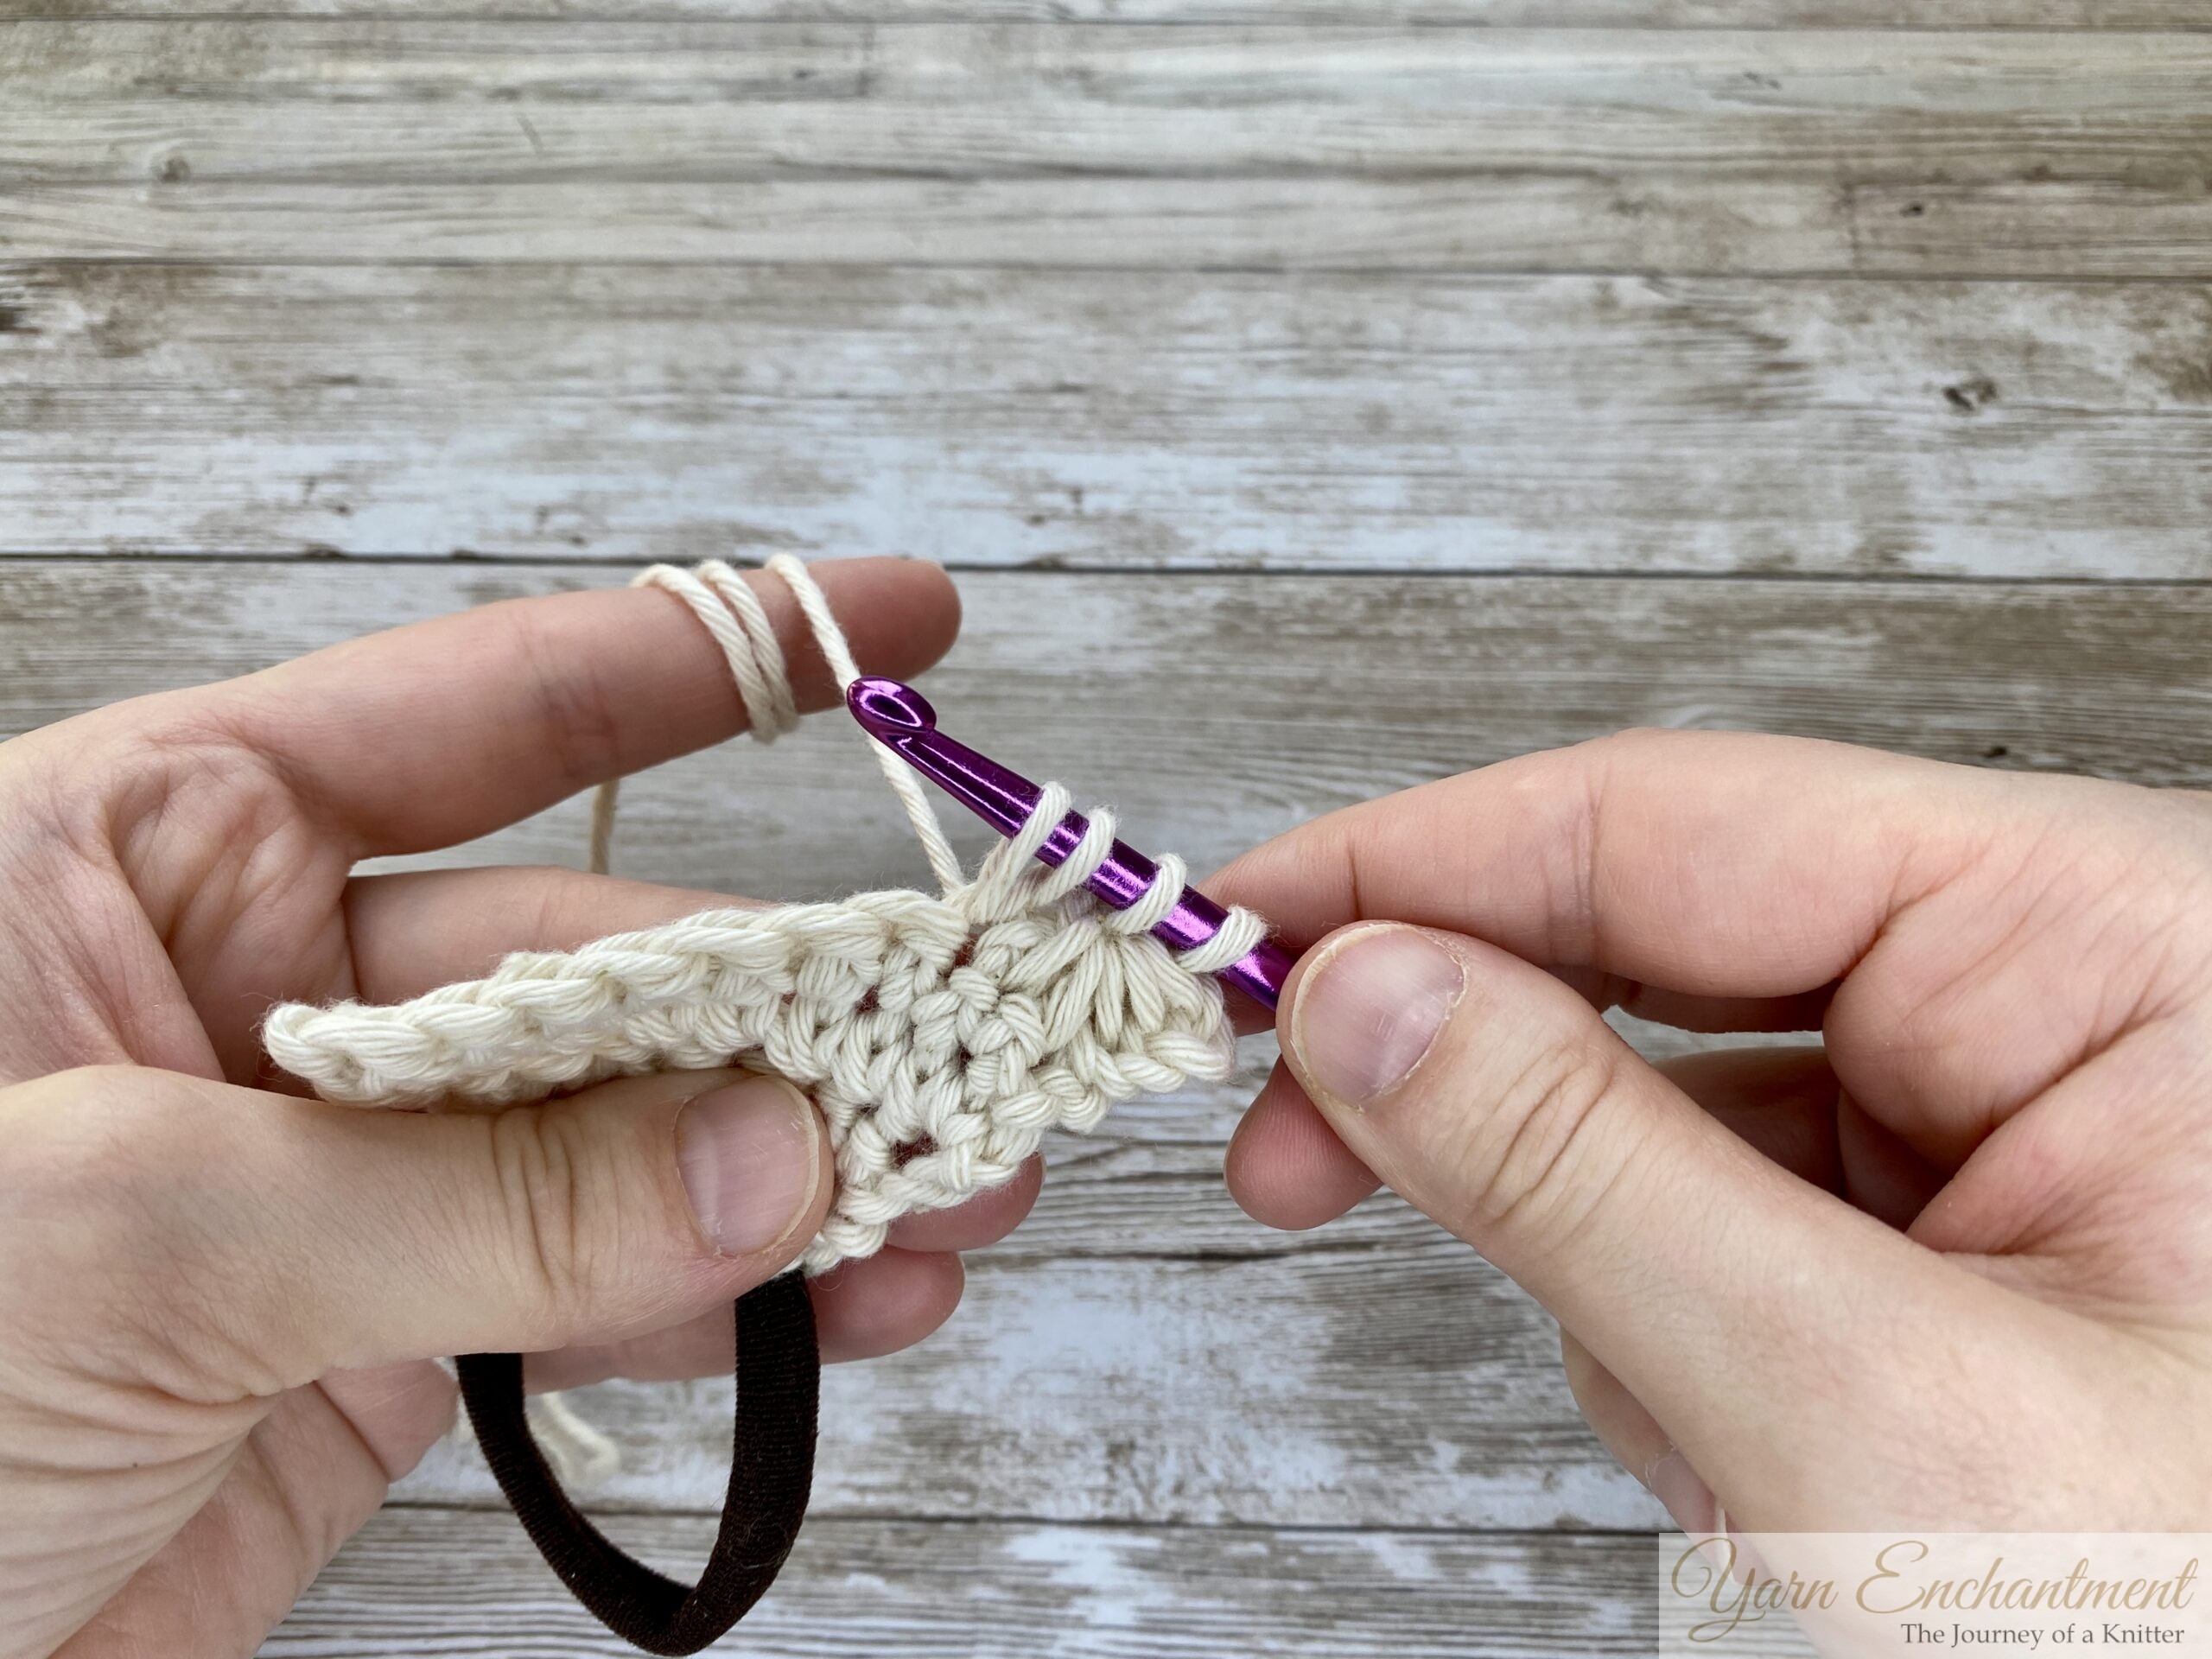 |  |  | Insert the hook into the base of the star, yarn over, and pull through. | Insert the hook into the next 2 stitches, yarn over, and pull through each time until you have 6 loops on the hook. | Yarn over and pull through all 6 loops, then close the star. |


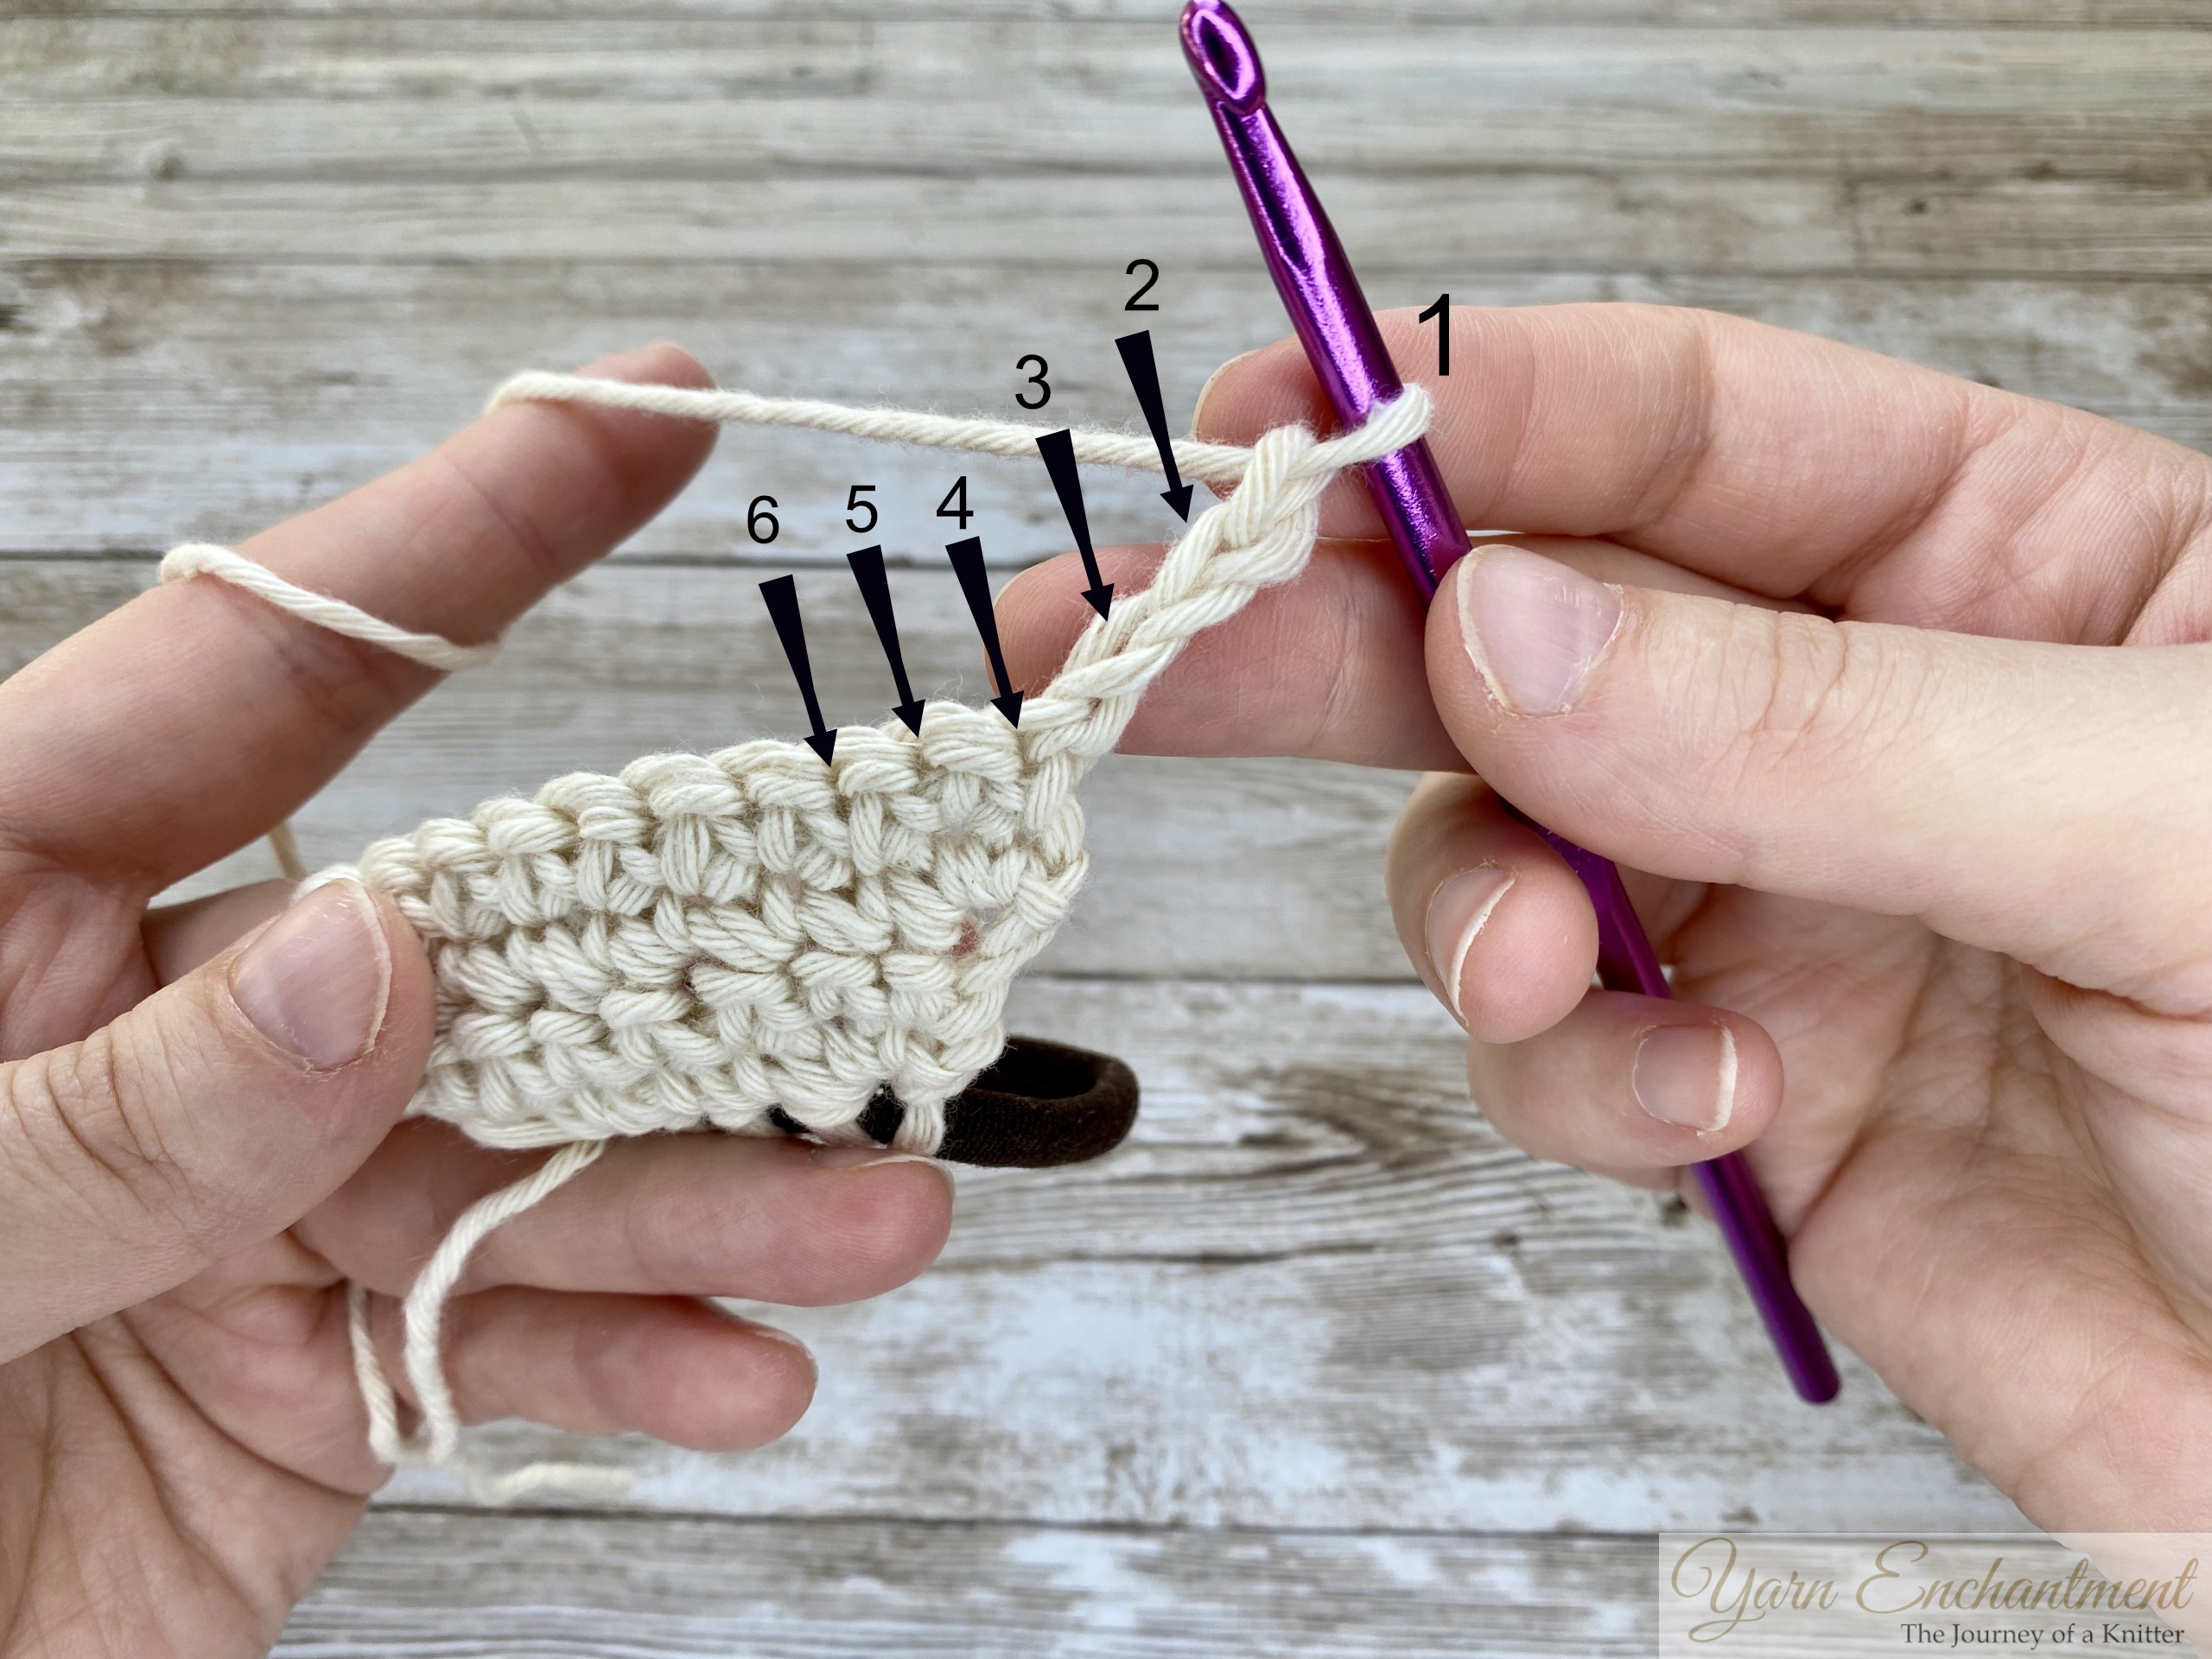
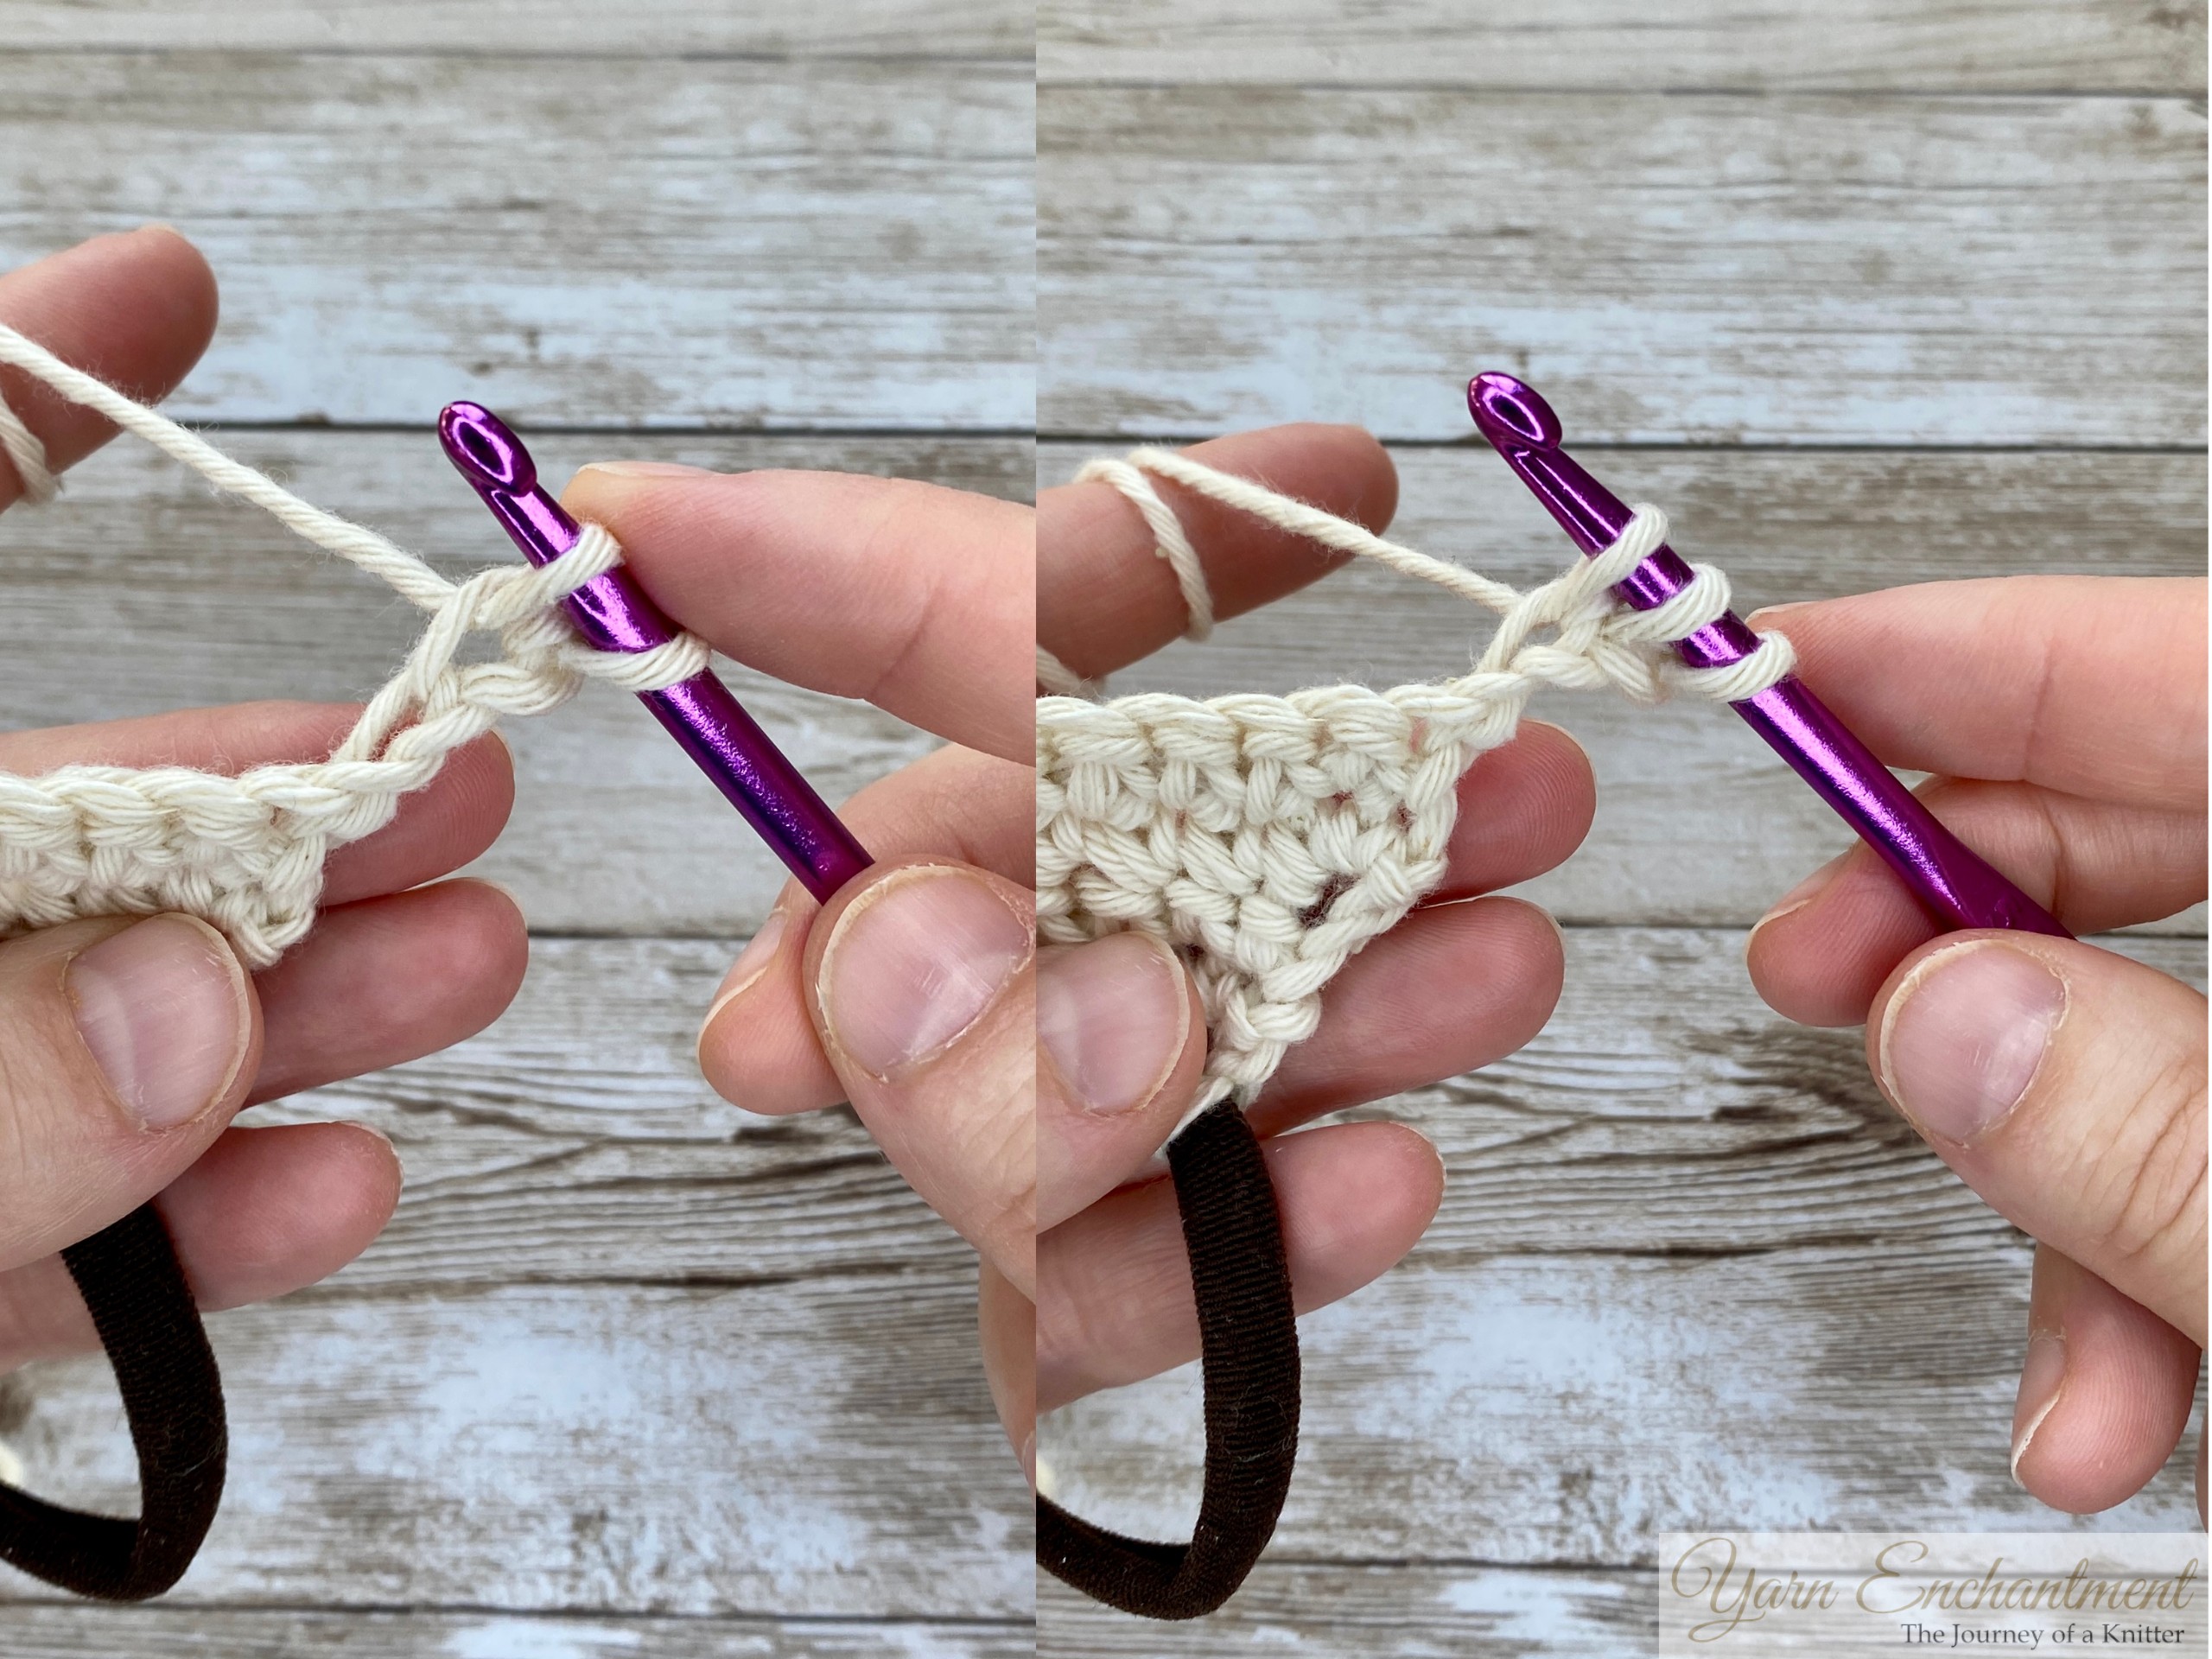
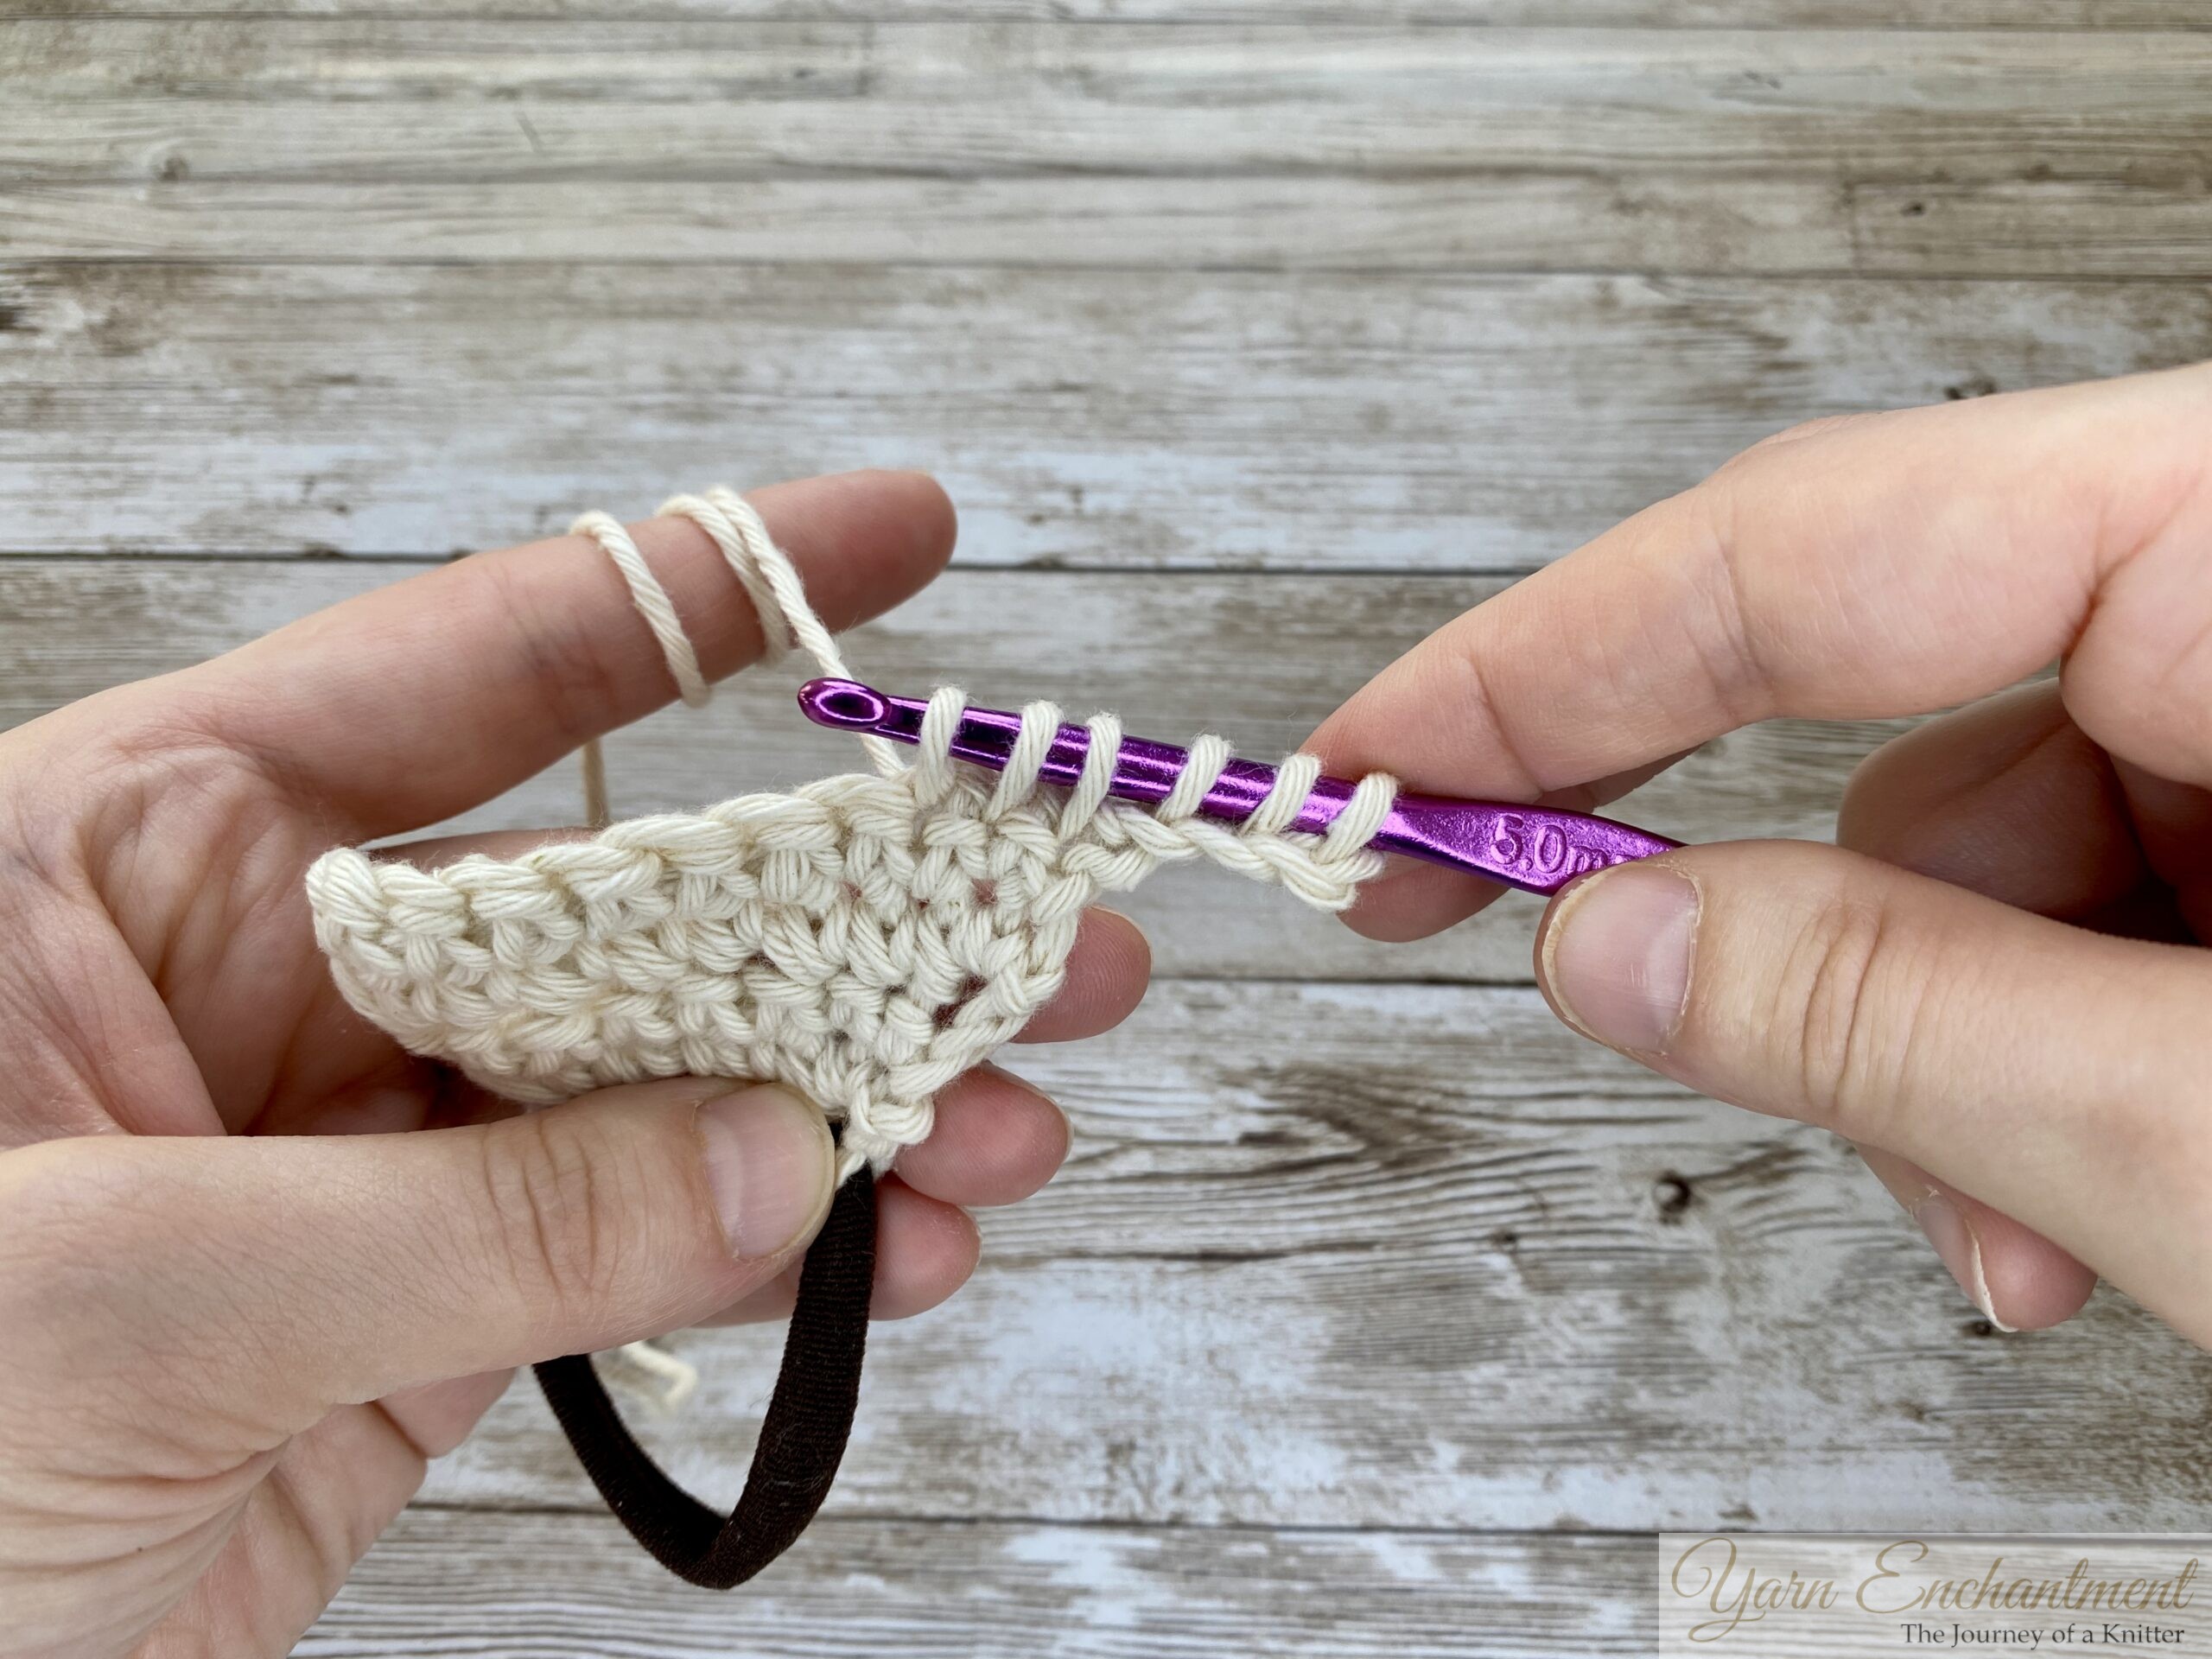
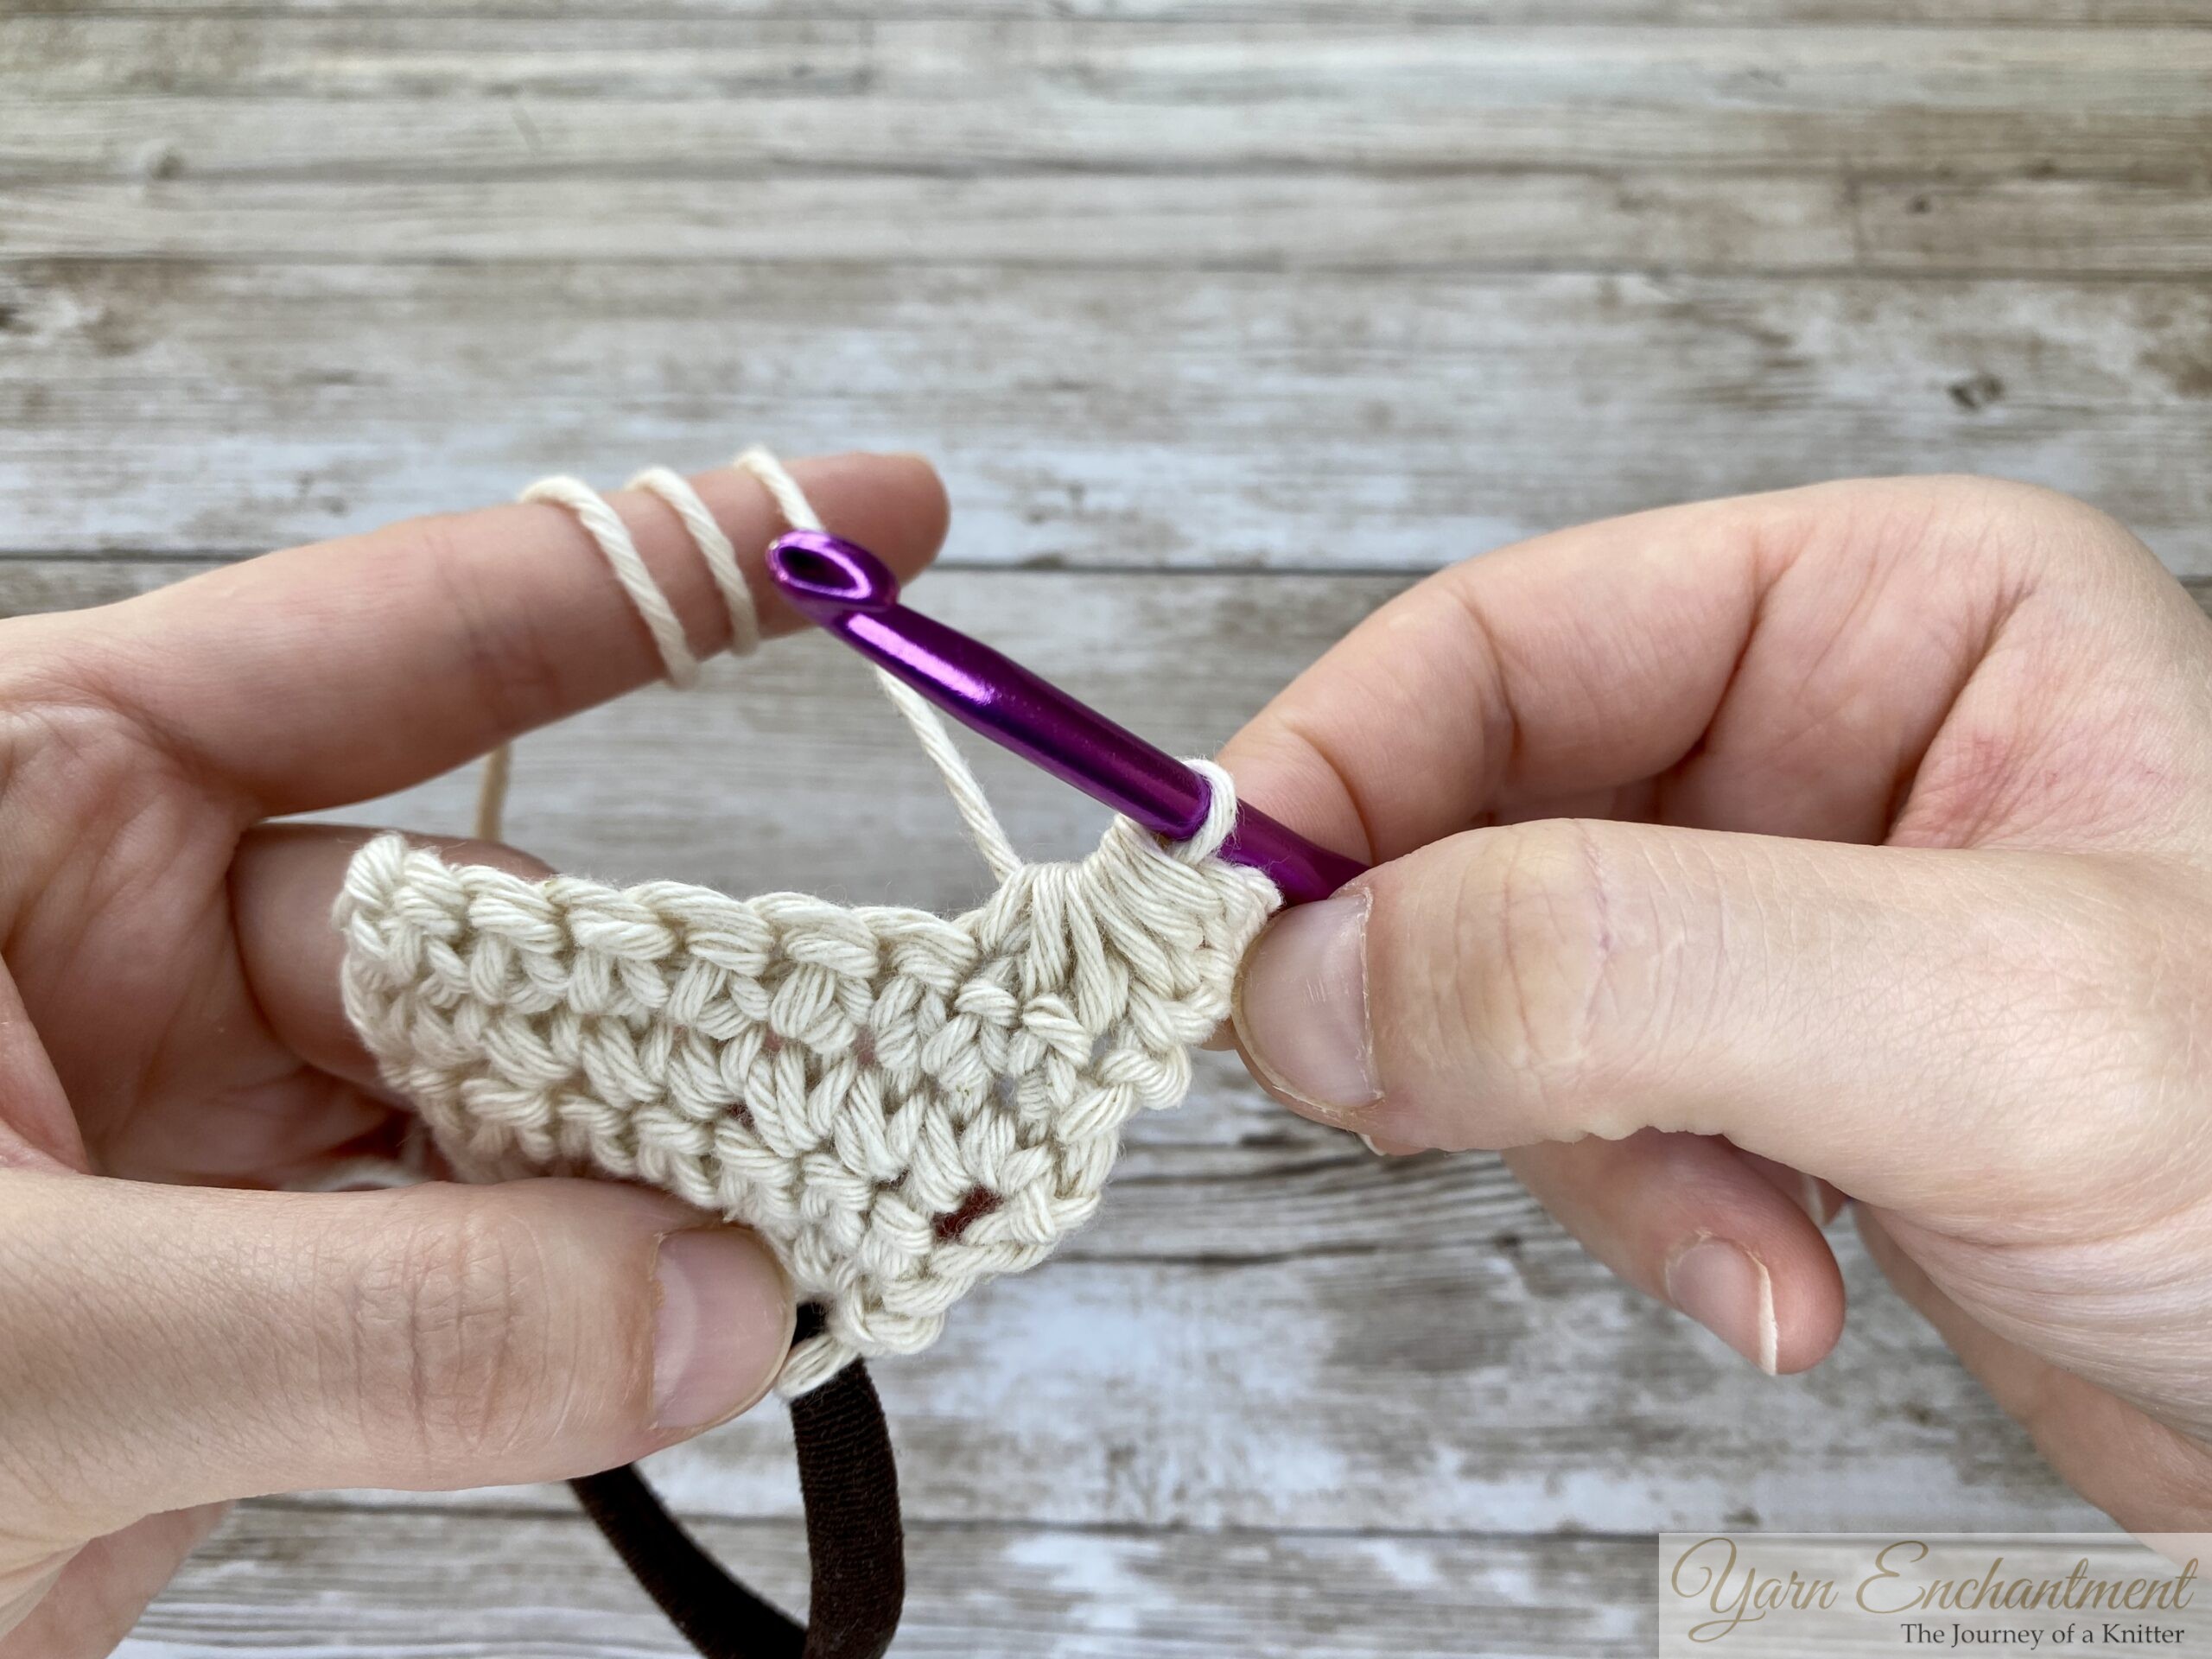
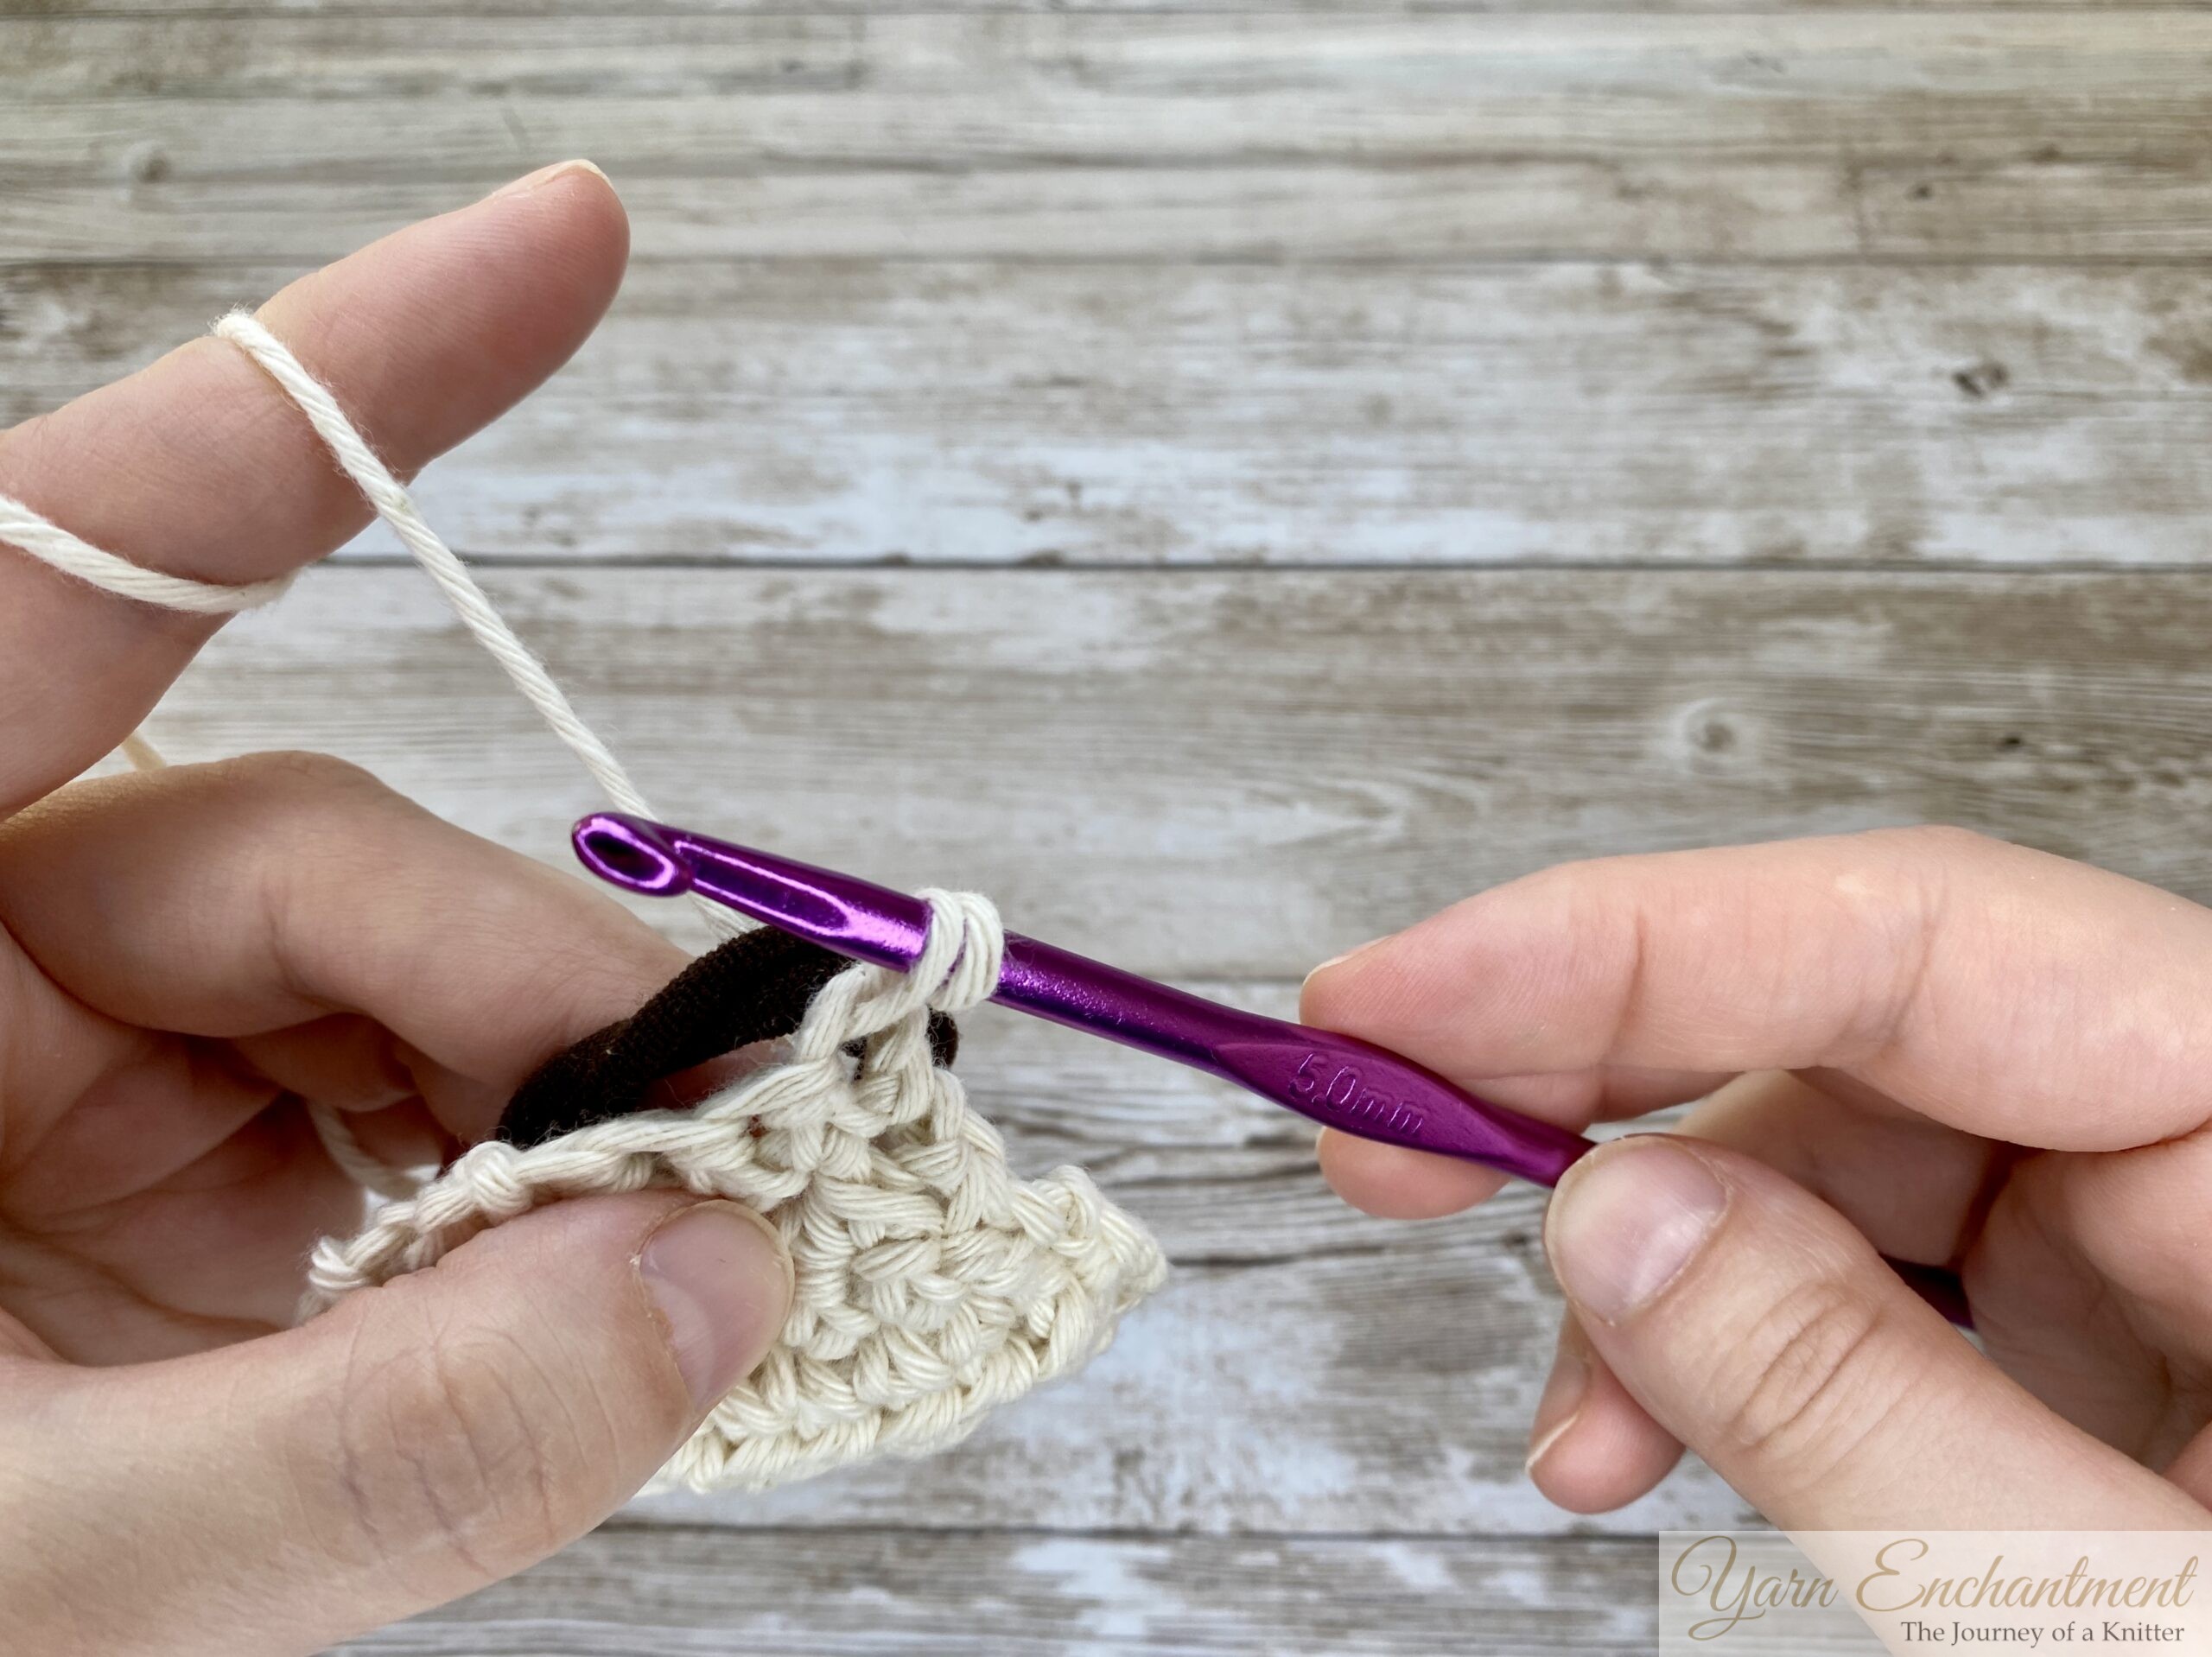
To finish this row, follow these steps:
- Insert your hook into the eye of the last star stitch, YO and pull through a loop
- Skip the arm of the star stitch and insert your hook into the base of the stitch.
- Yarn over (yo) and pull through a loop - you should now have three loops on your hook.
- Yarn over and pull through two loops.
- Yarn over again and pull through the remaining two loops to complete the stitch.
 |  | 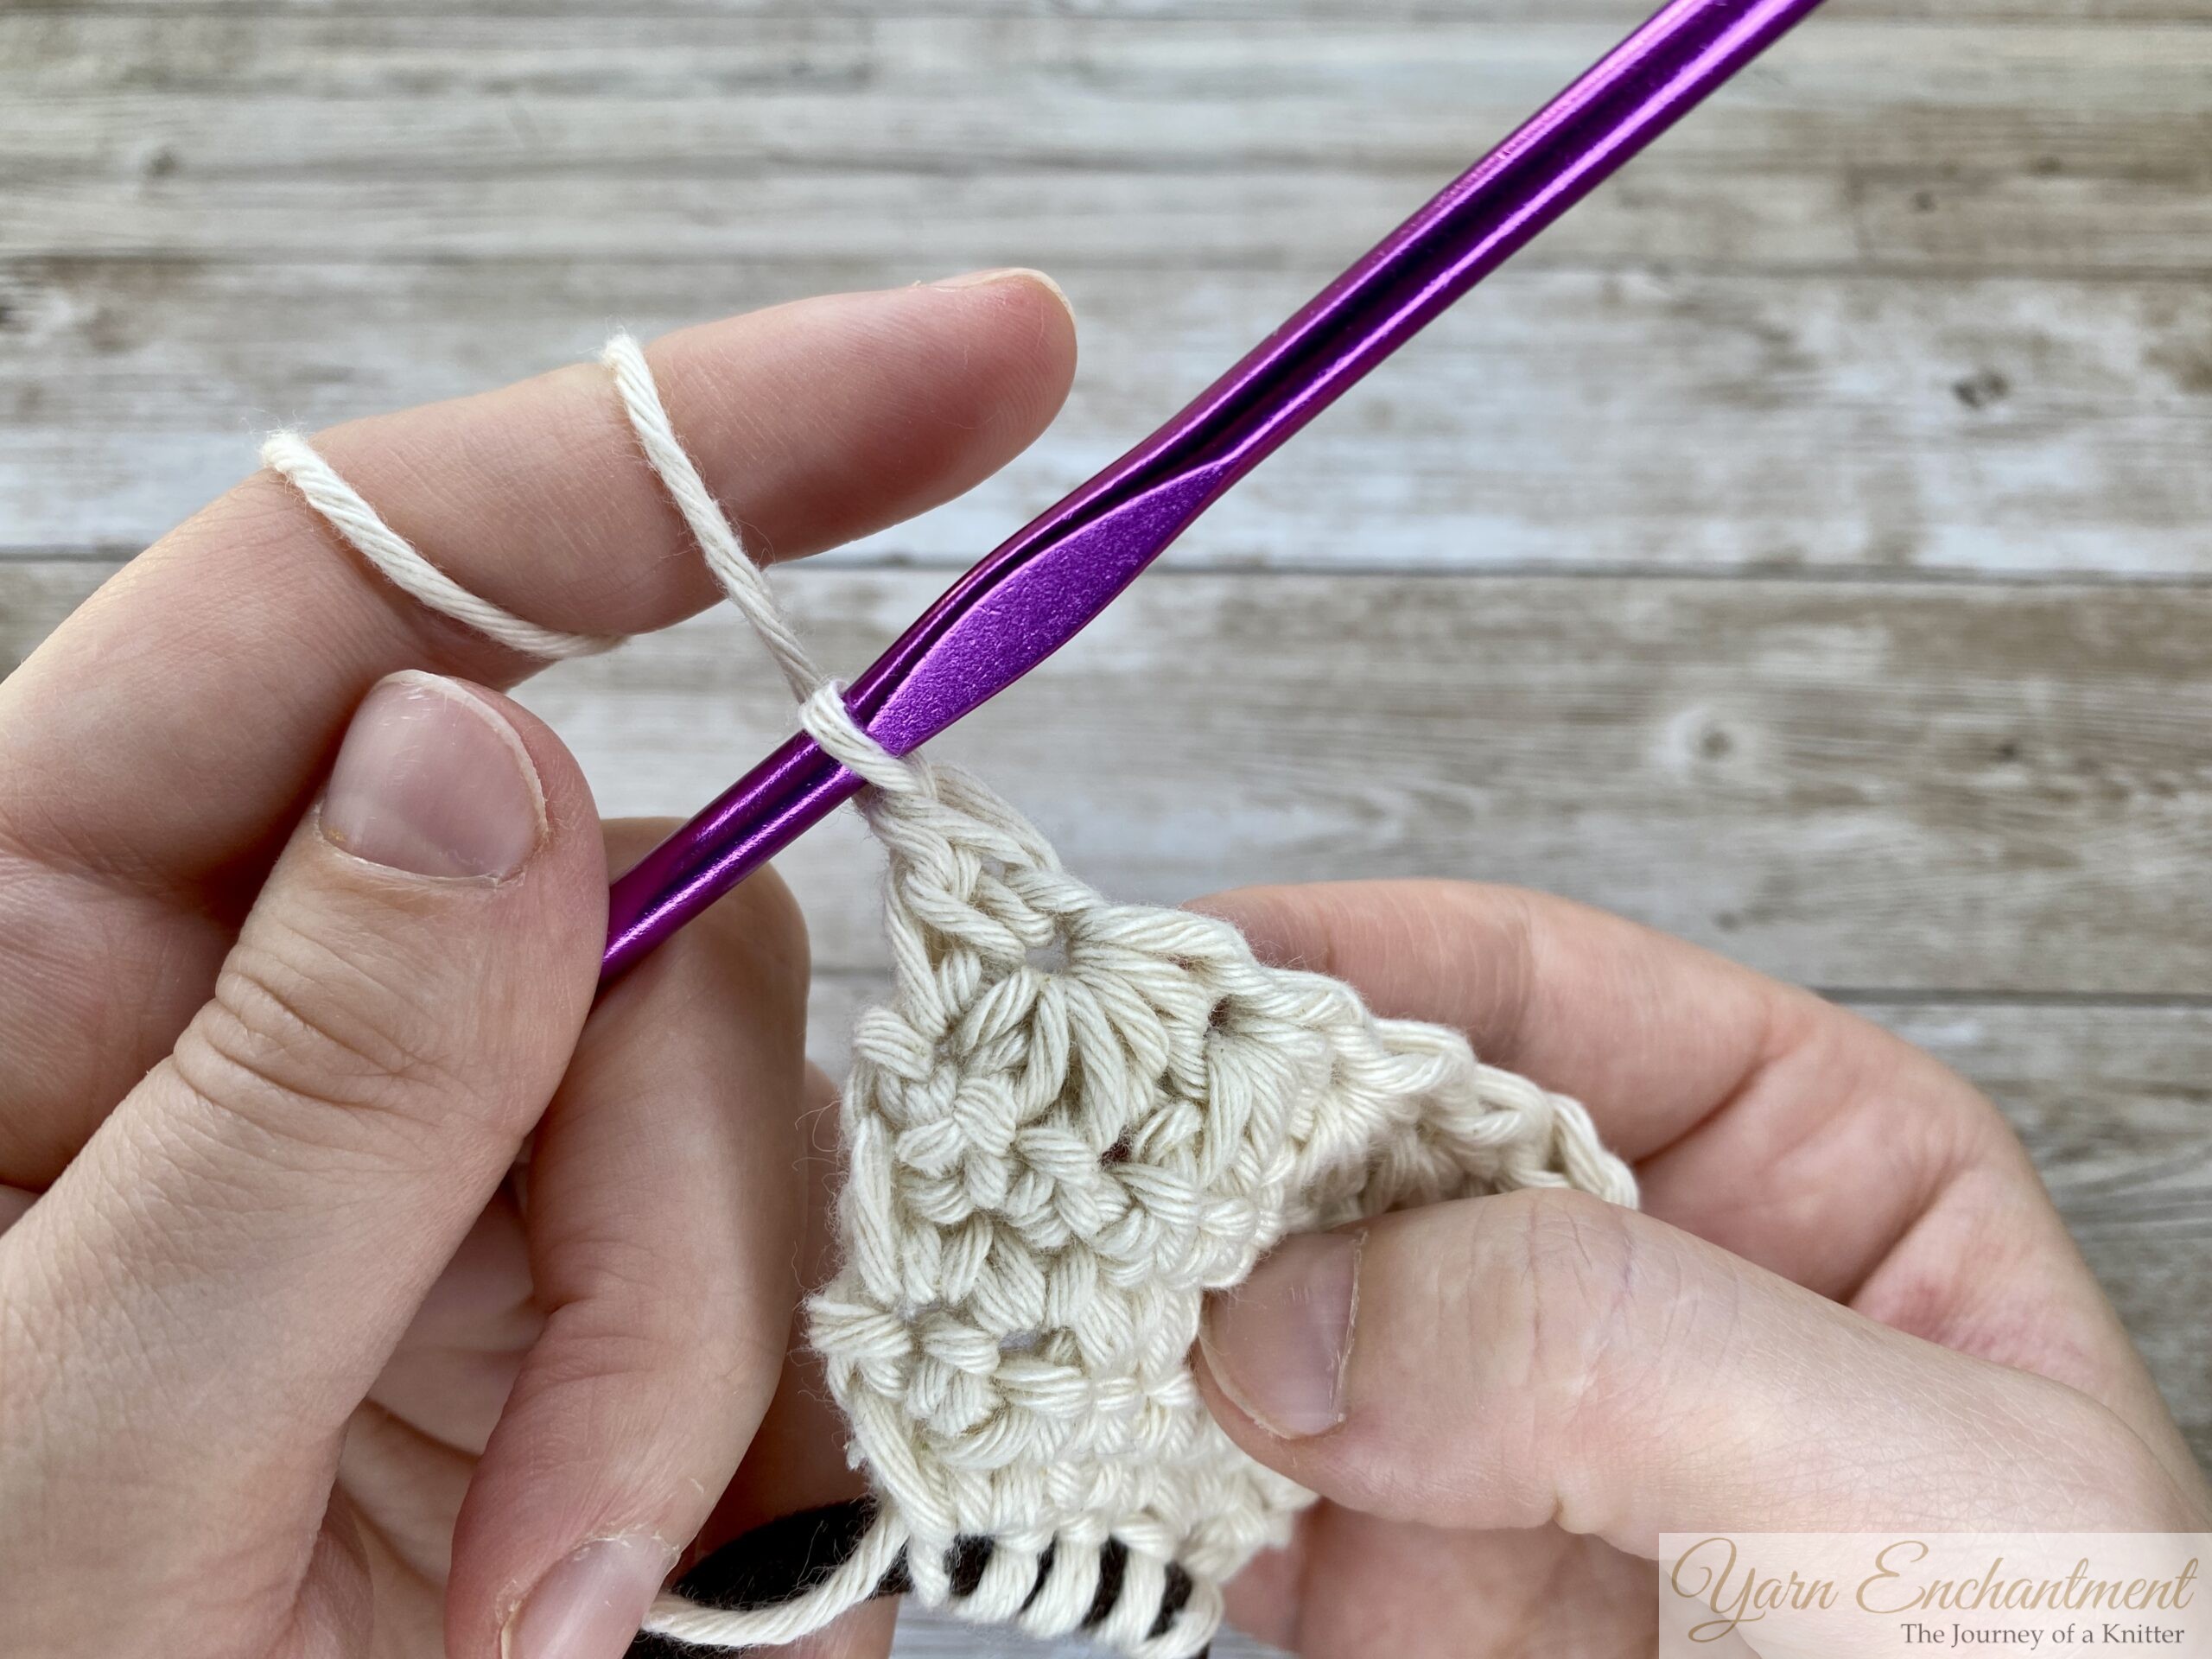 | Insert your hook into the eye of the last star stitch | Skip the arm of the star stitch and insert your hook into the base of the stitch. | Work a dc |


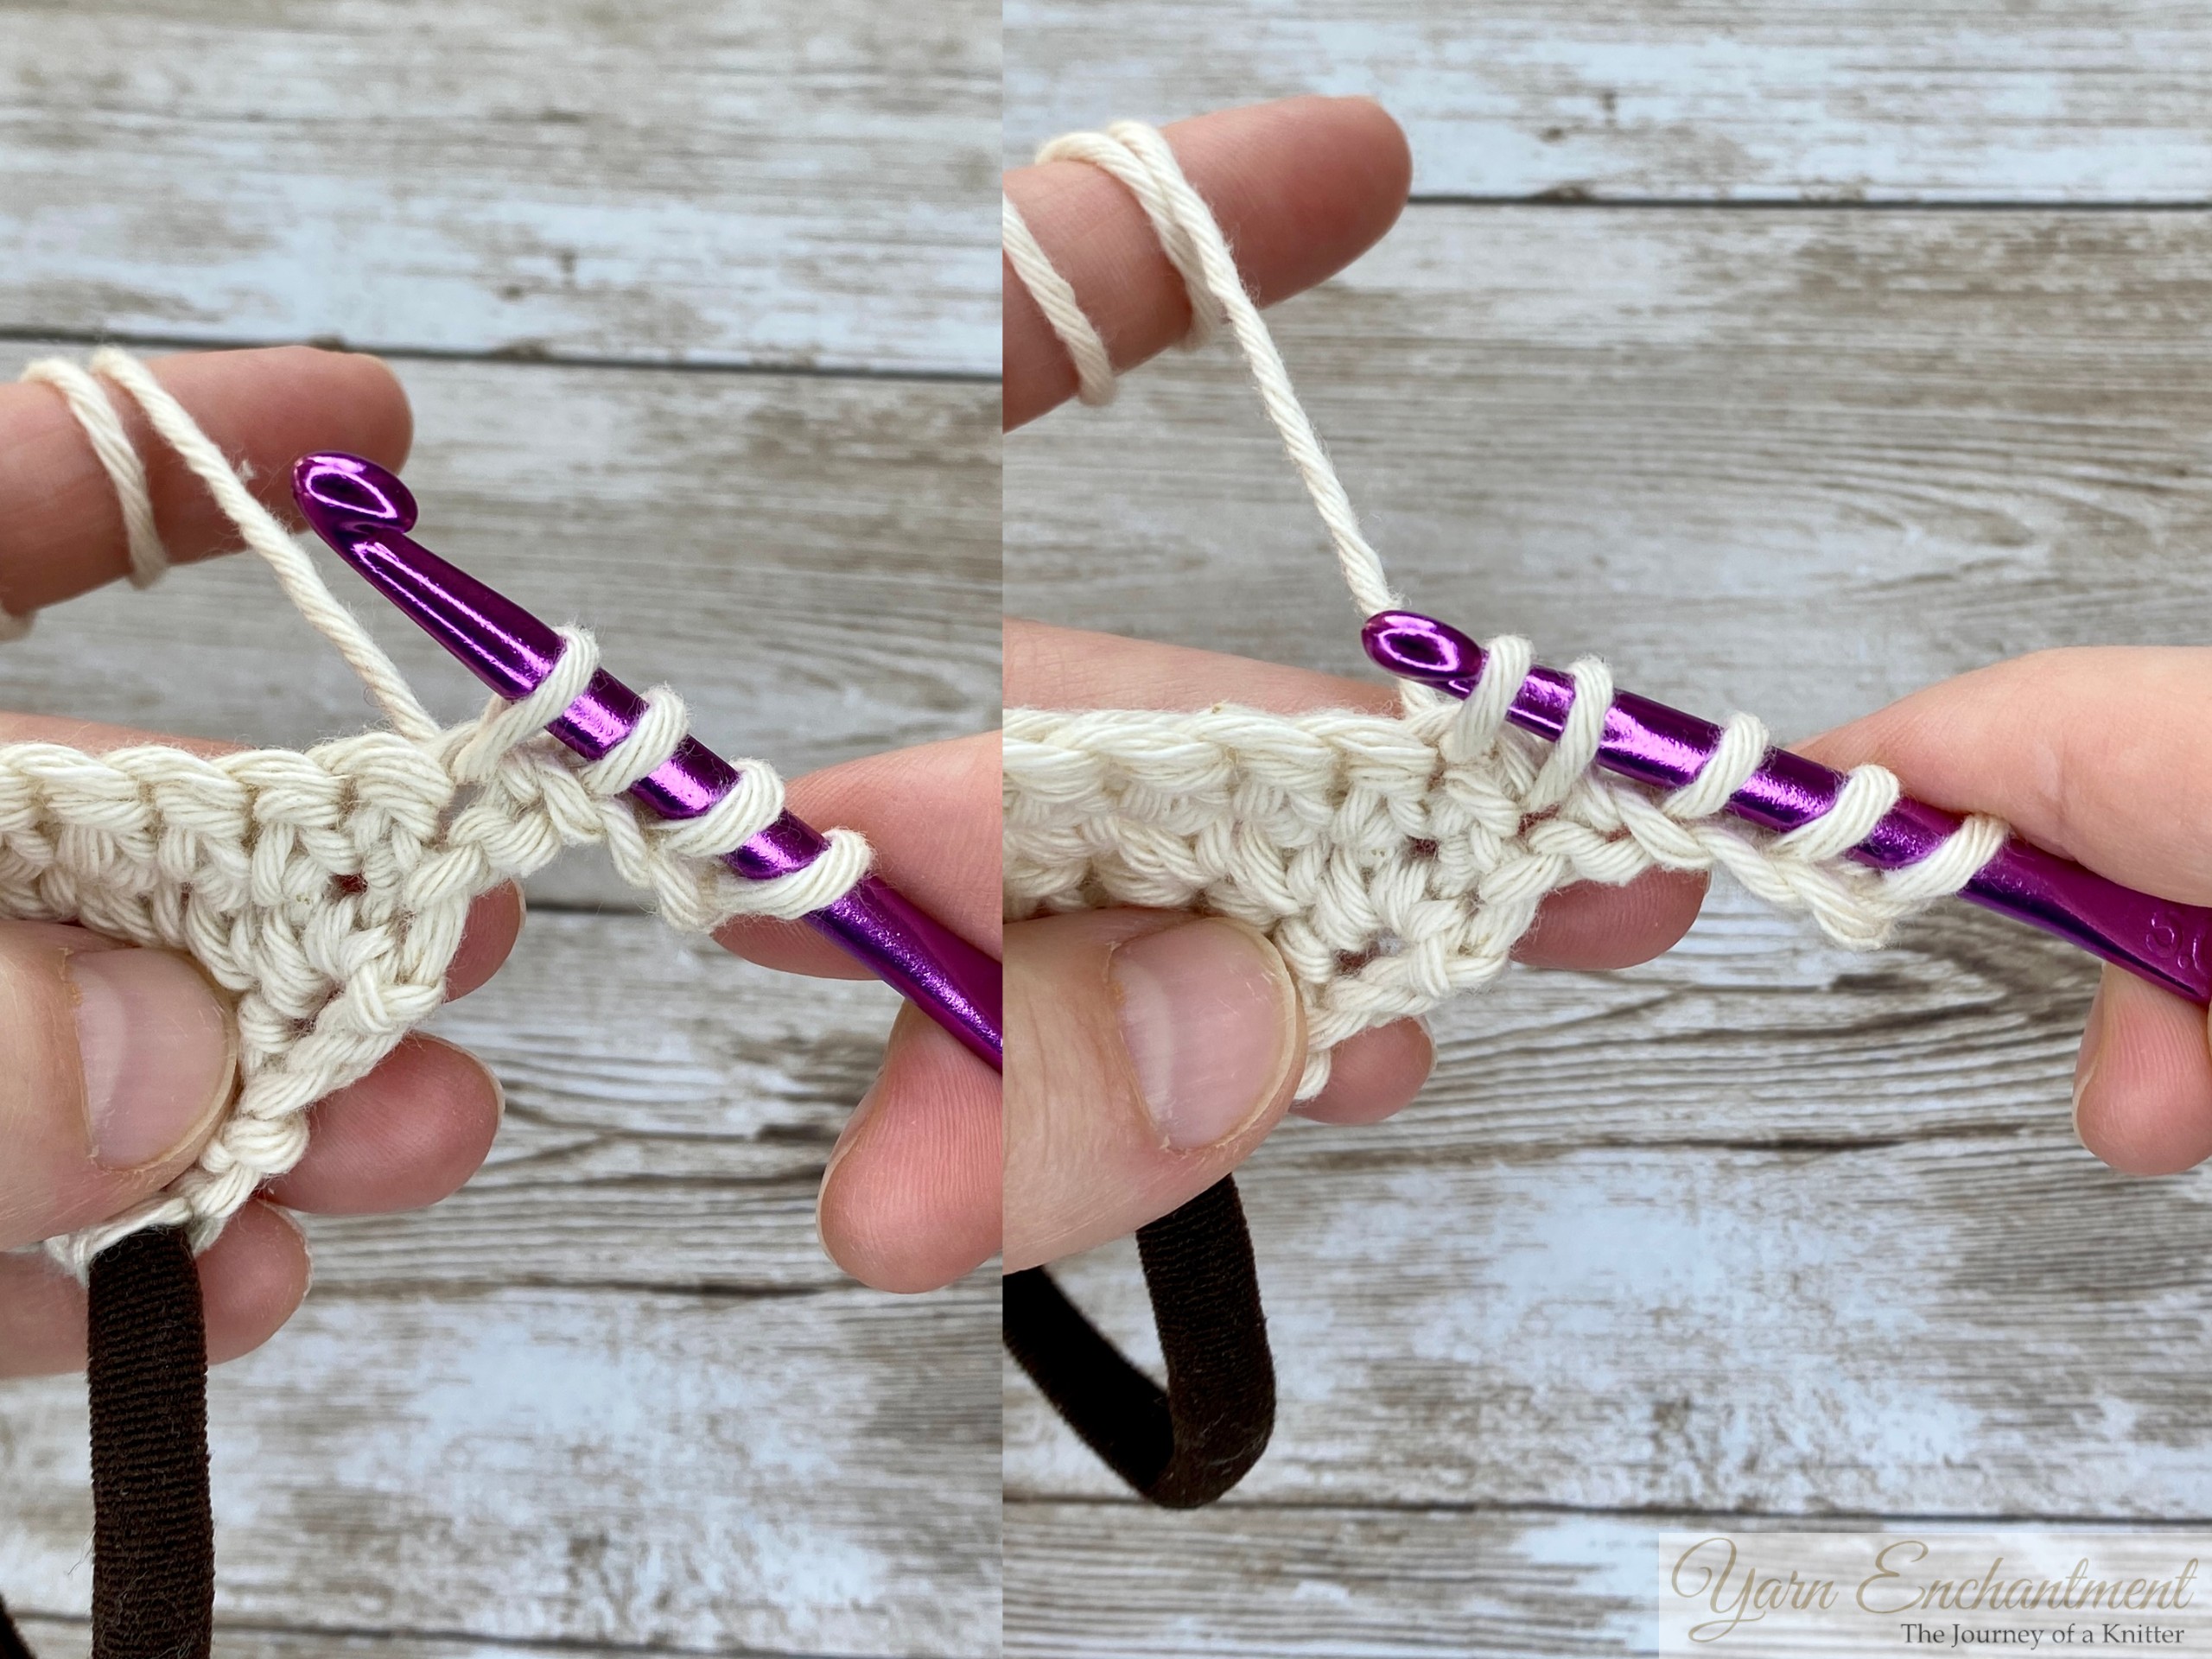
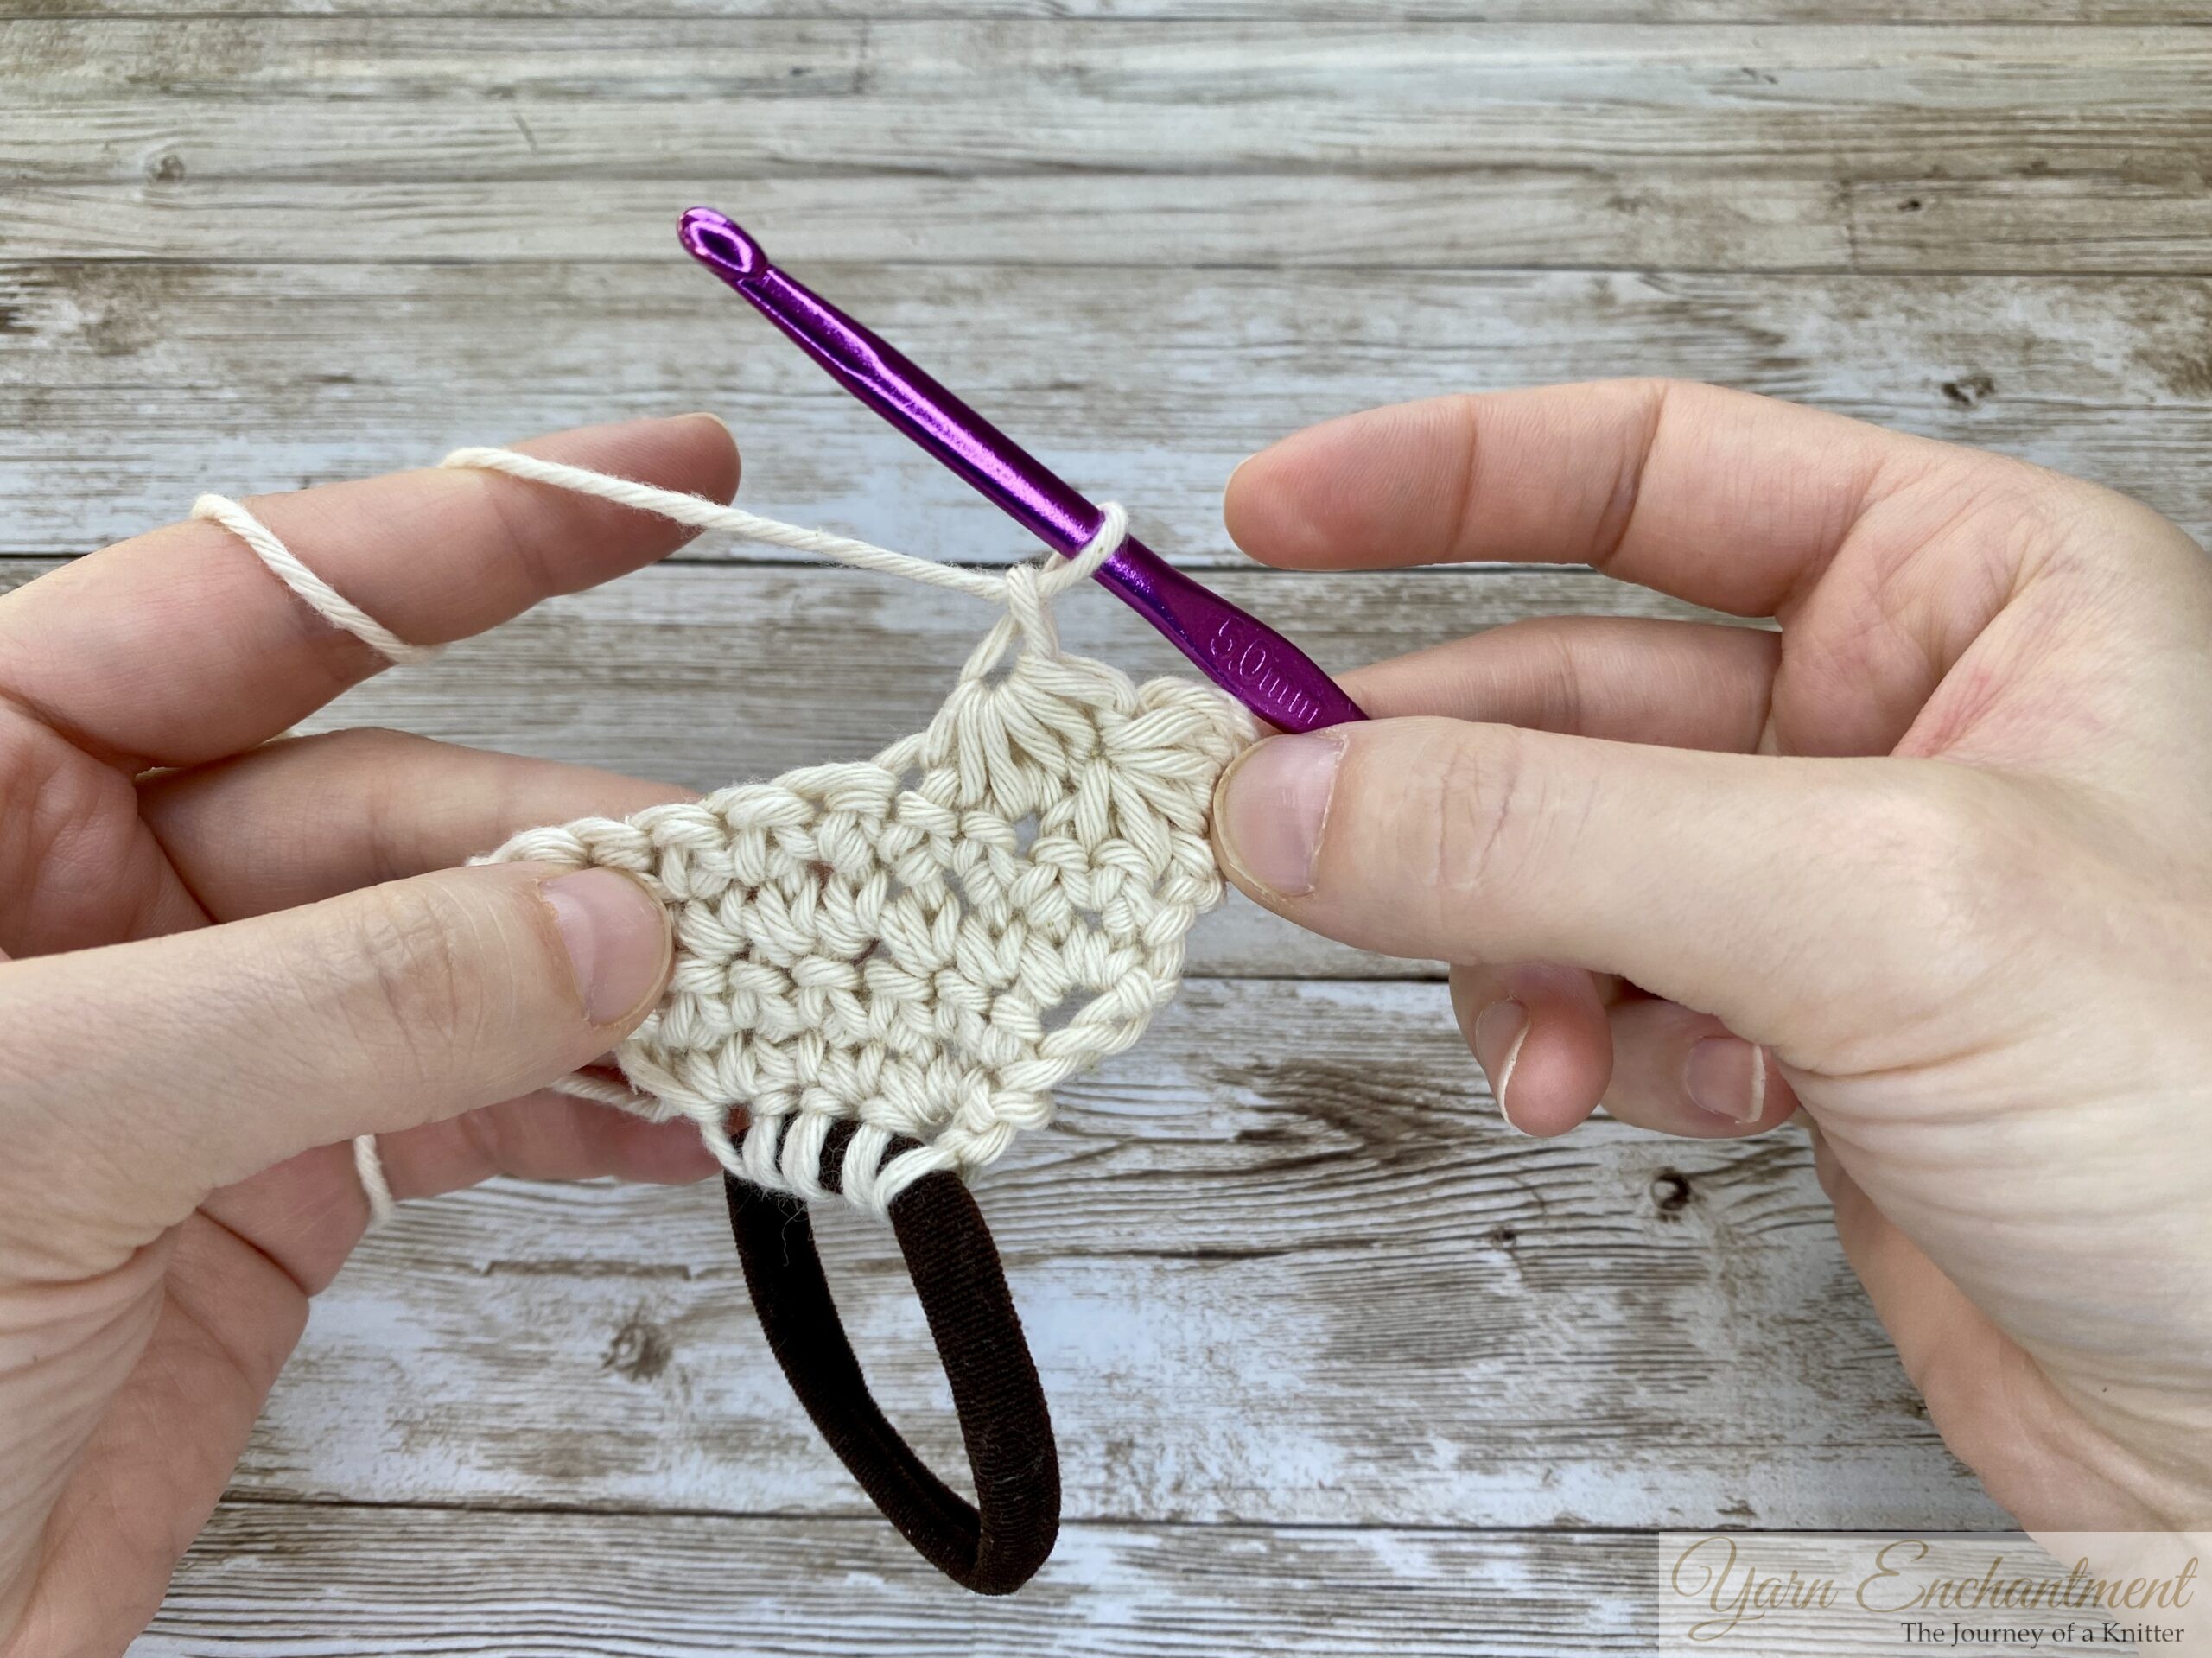
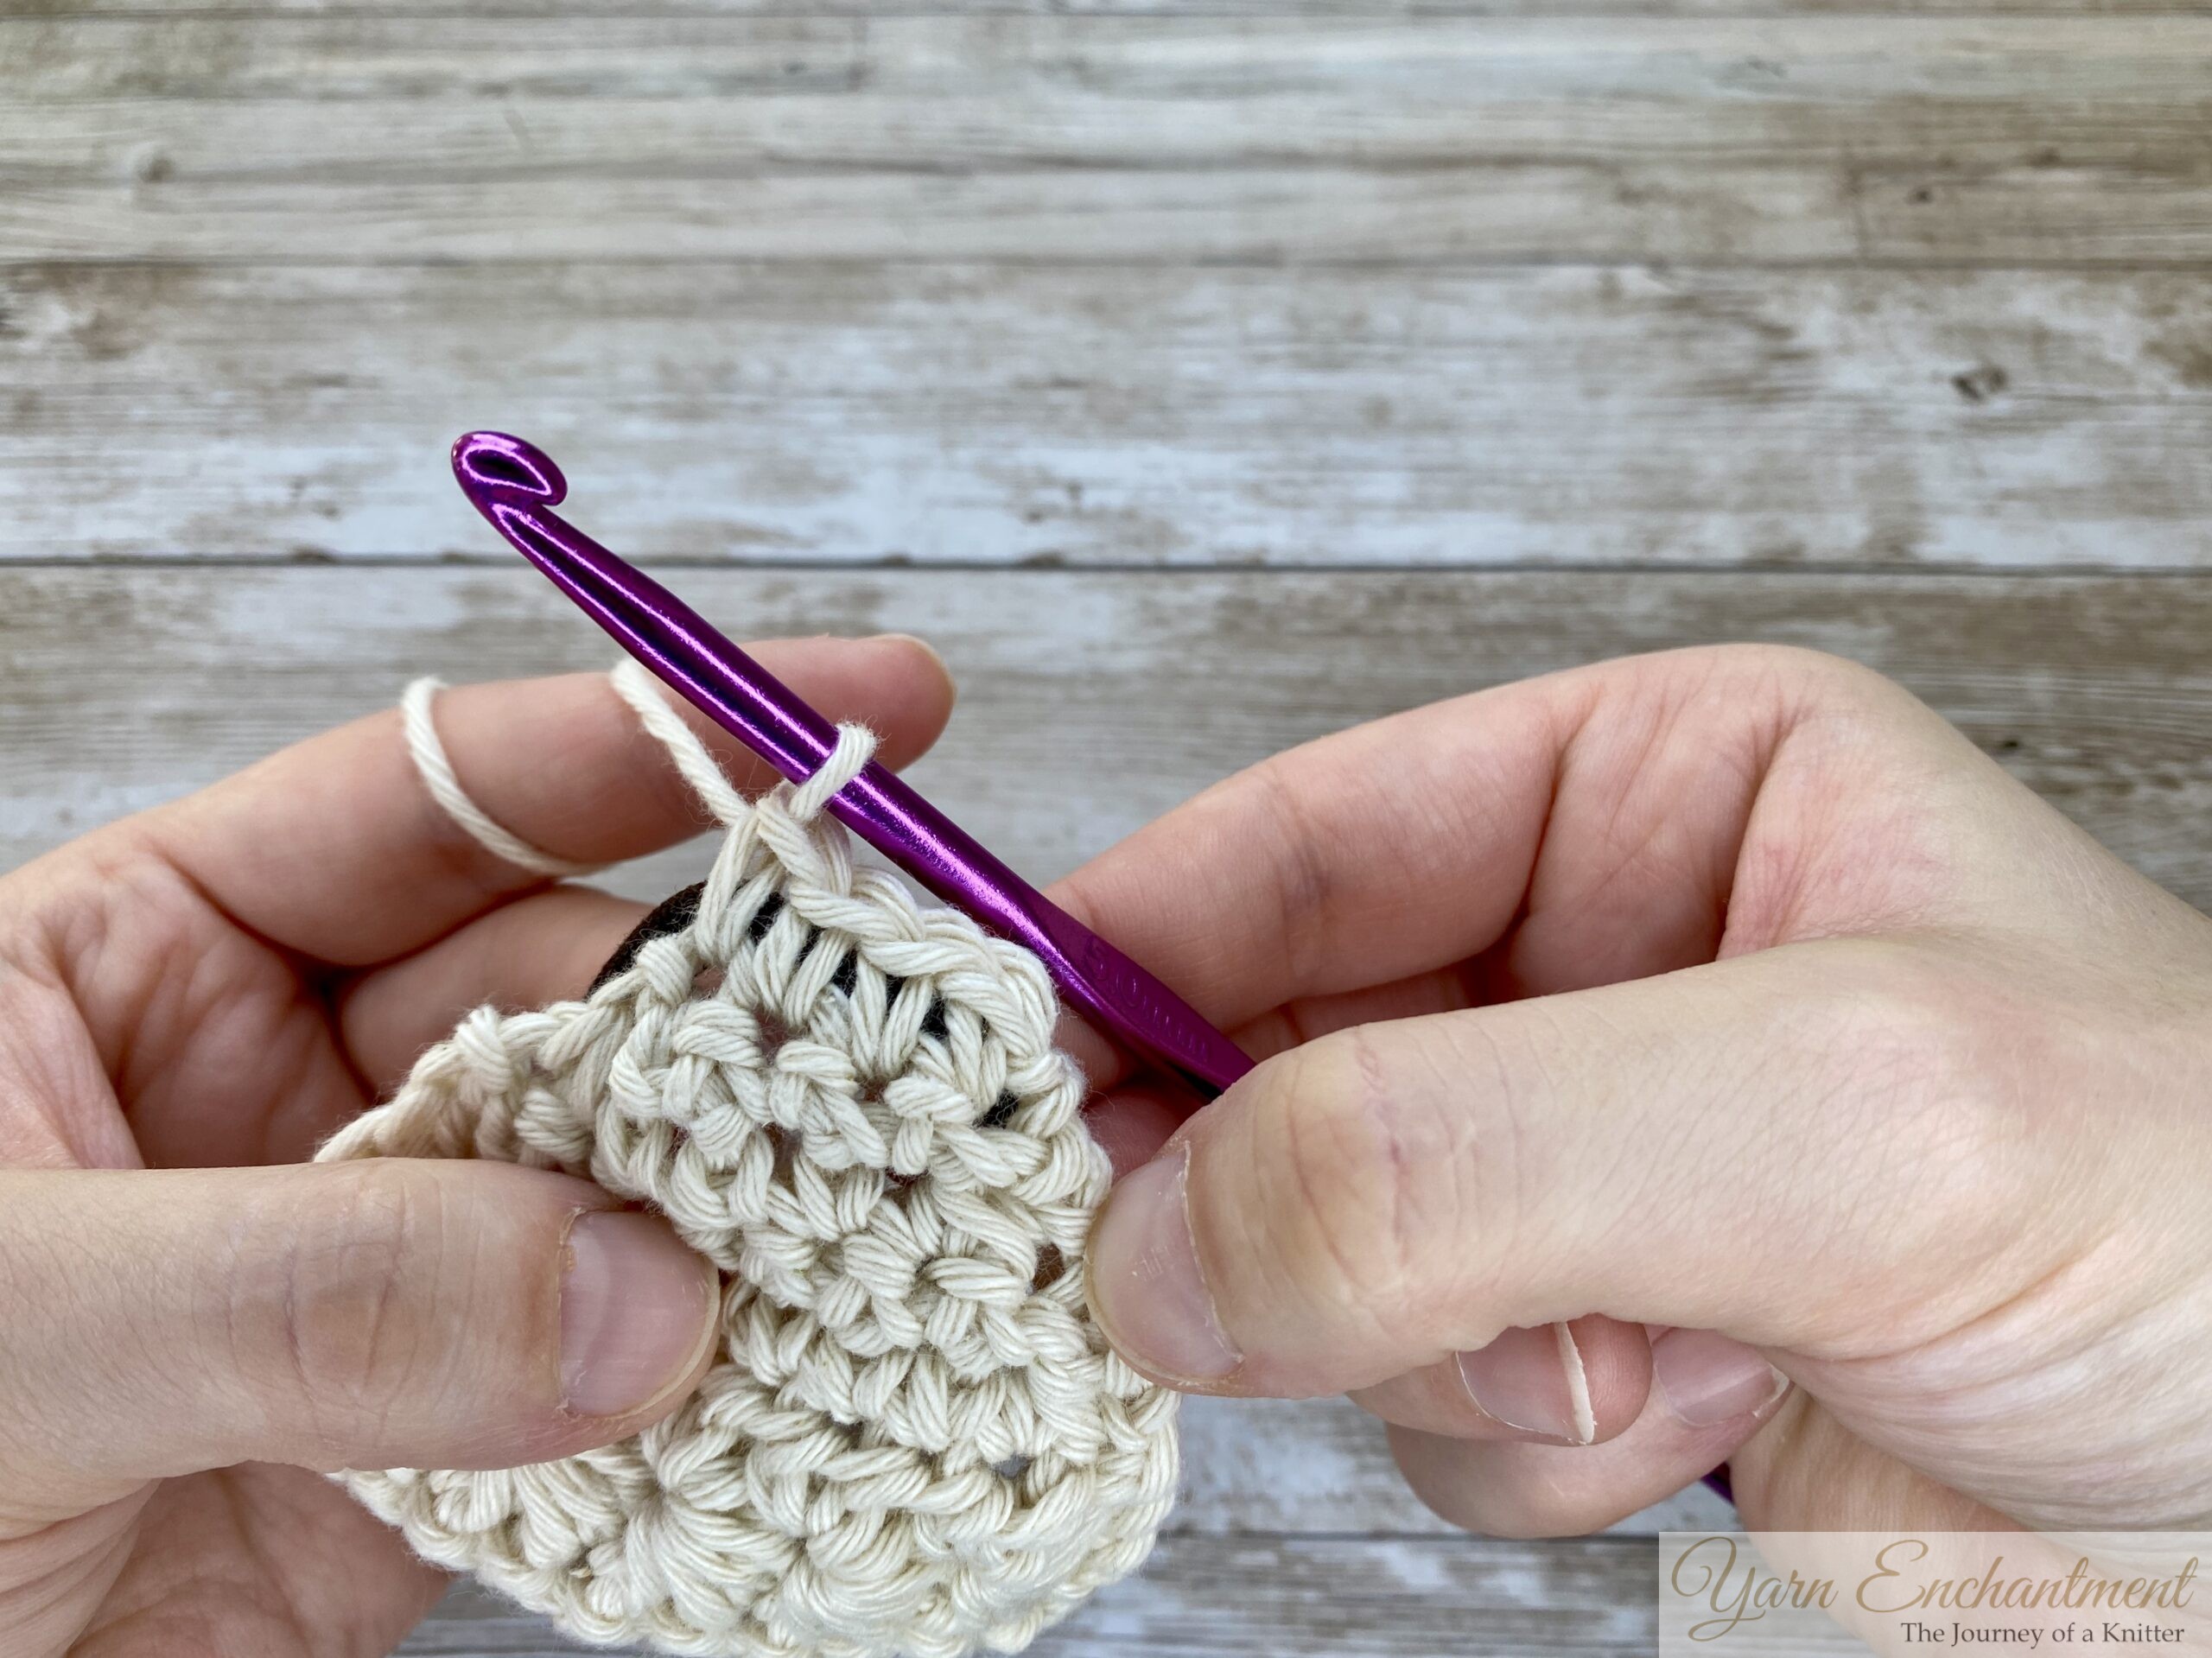
Row 2: Half Double Crochet (HDC) Row
- Turn your work without chaining.
- Work 2 half double crochets (HDC) into the eye of each star across the row.
- At the end of the row, work a slip stitch into the last stitch for a neat edge.
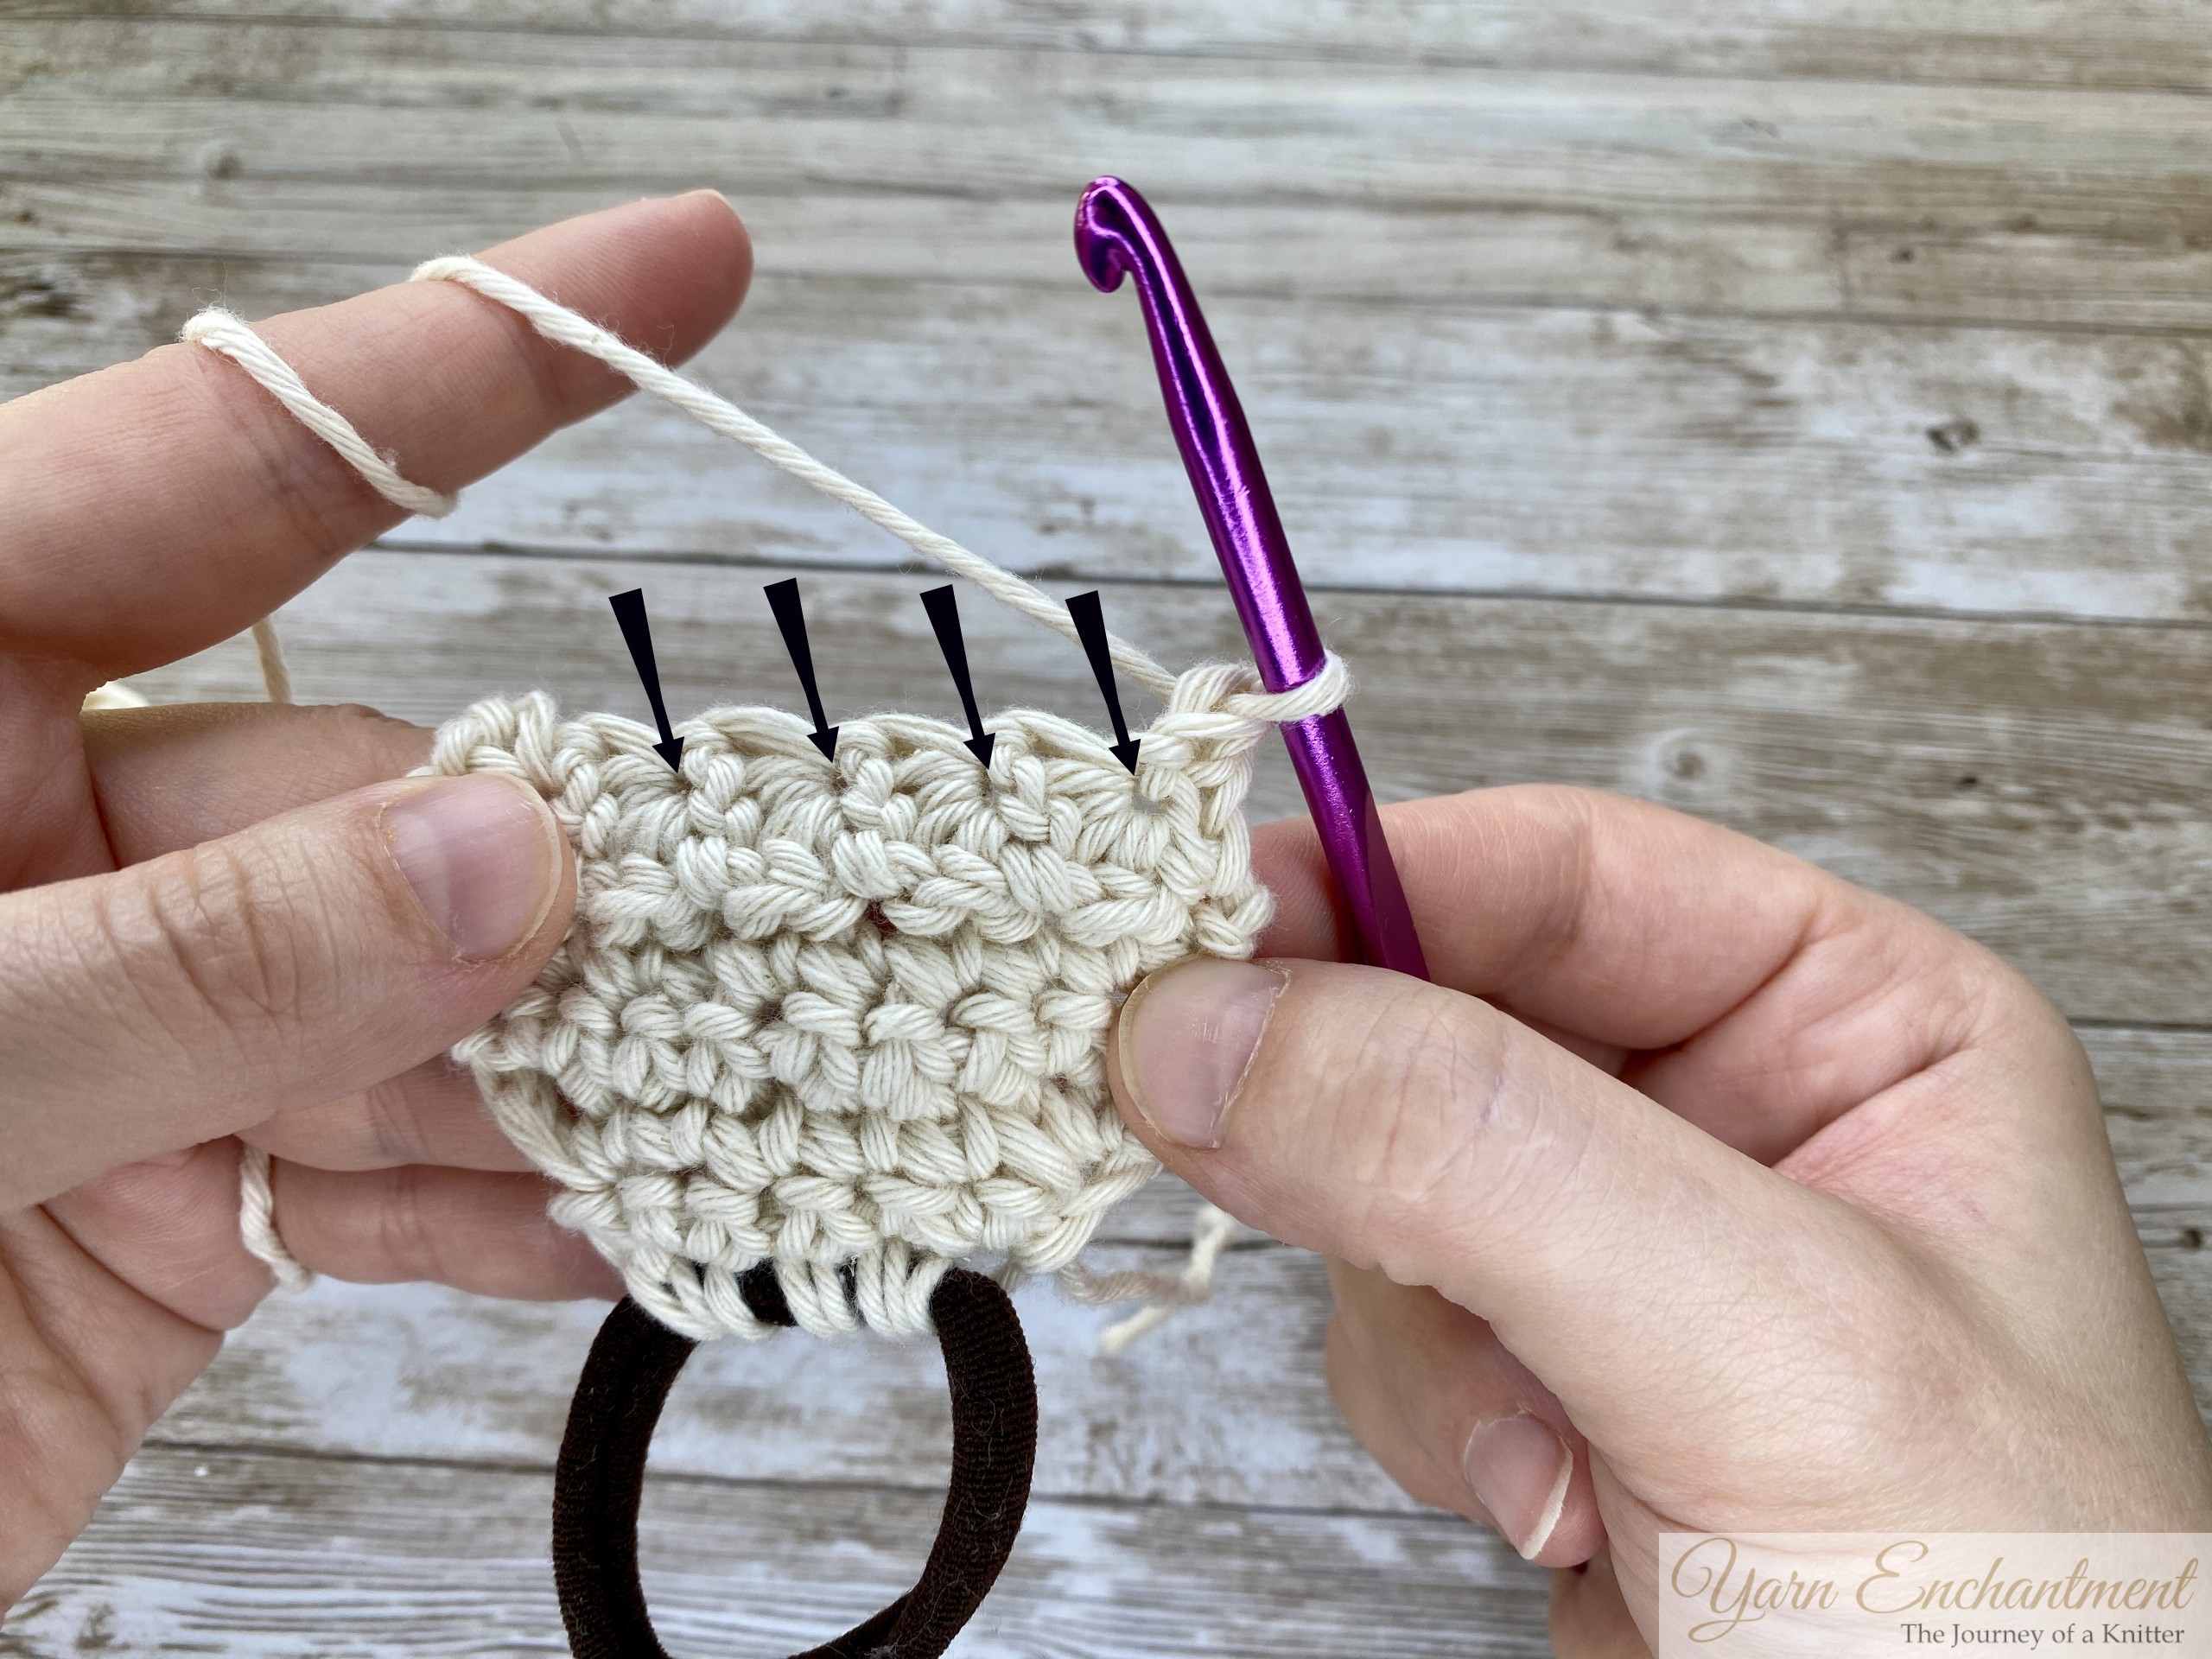 | 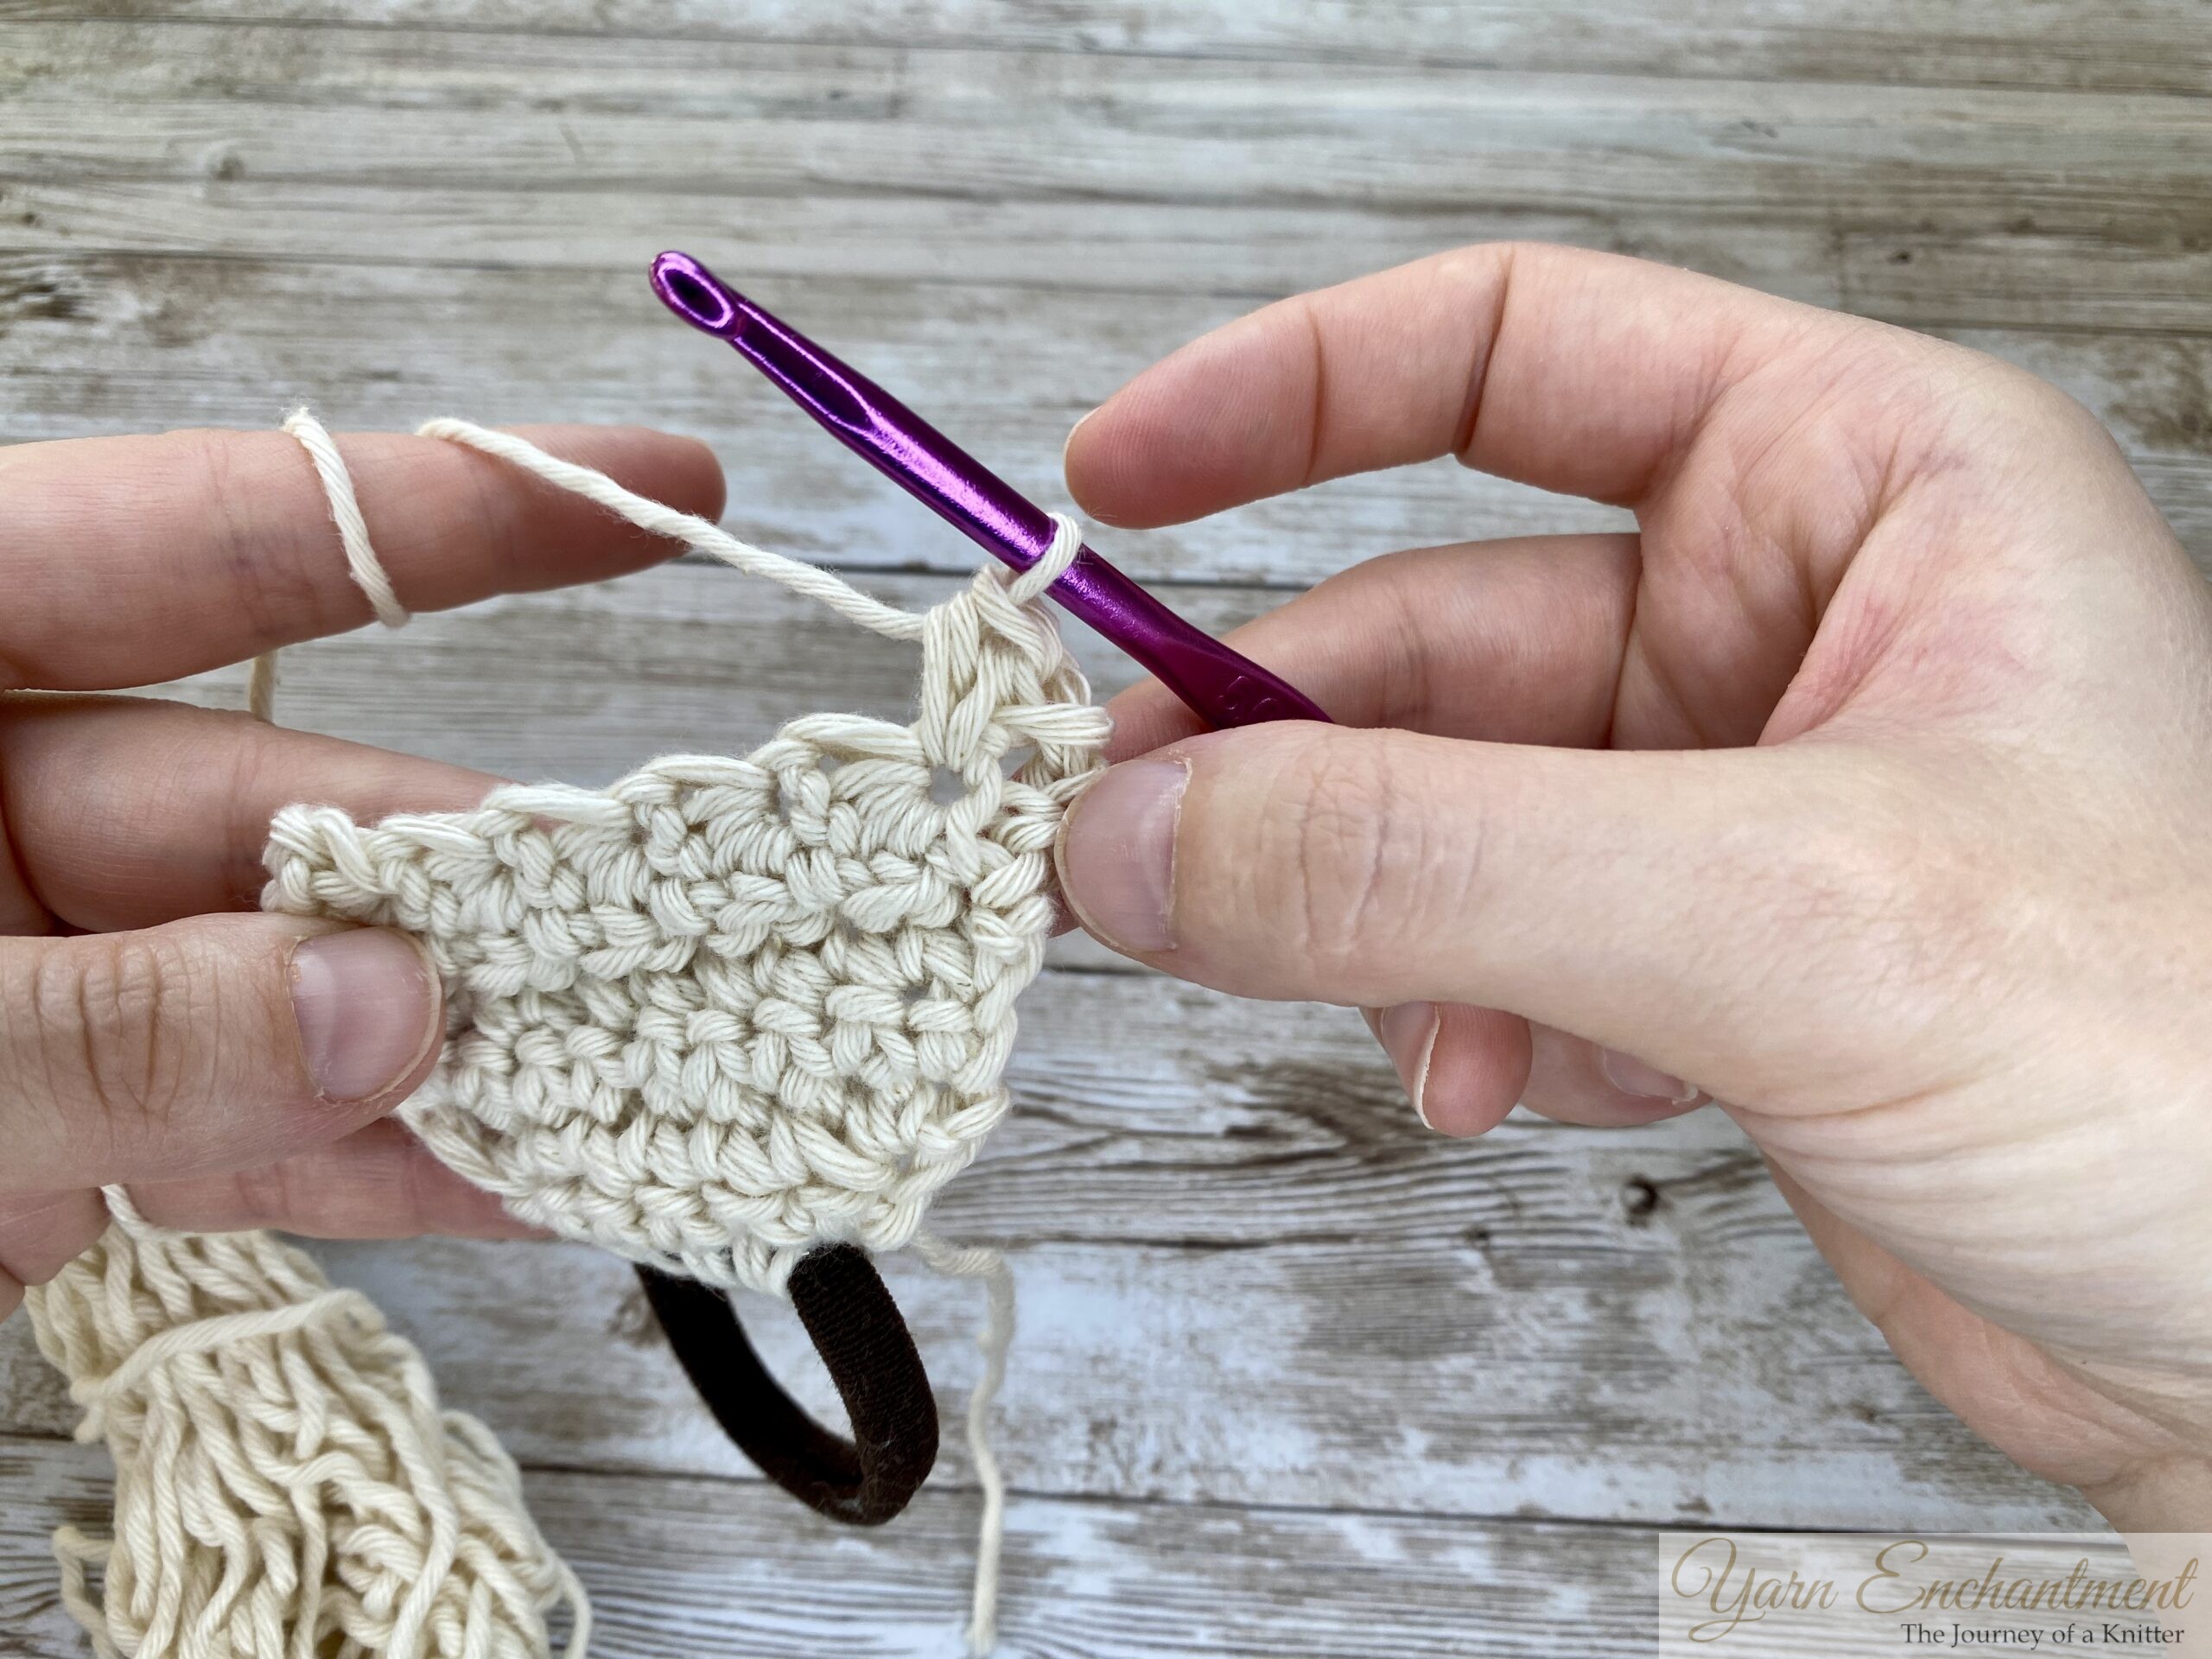 |  | Without chaining turn your work, and then work 2 hdc into the eyes of the star stitches | 2 half double crochets (HDC) | At the end of the row, work a slip stitch into the last stitch for a neat edge. |


 |  | This stitch is a little fiddly to work, but make sure to go under both loops. | Slip stitch into this stitch |


Repeat the Pattern:
- Repeat Row 1 (star stitch row) and Row 2 (single crochet row) until your project reaches the desired length.
- End with a Row 2.
Note:
I worked Row 1 and Row 2 for a total of 15 rows (15 star stitches), which fits a head circumference of 52–56 cm.
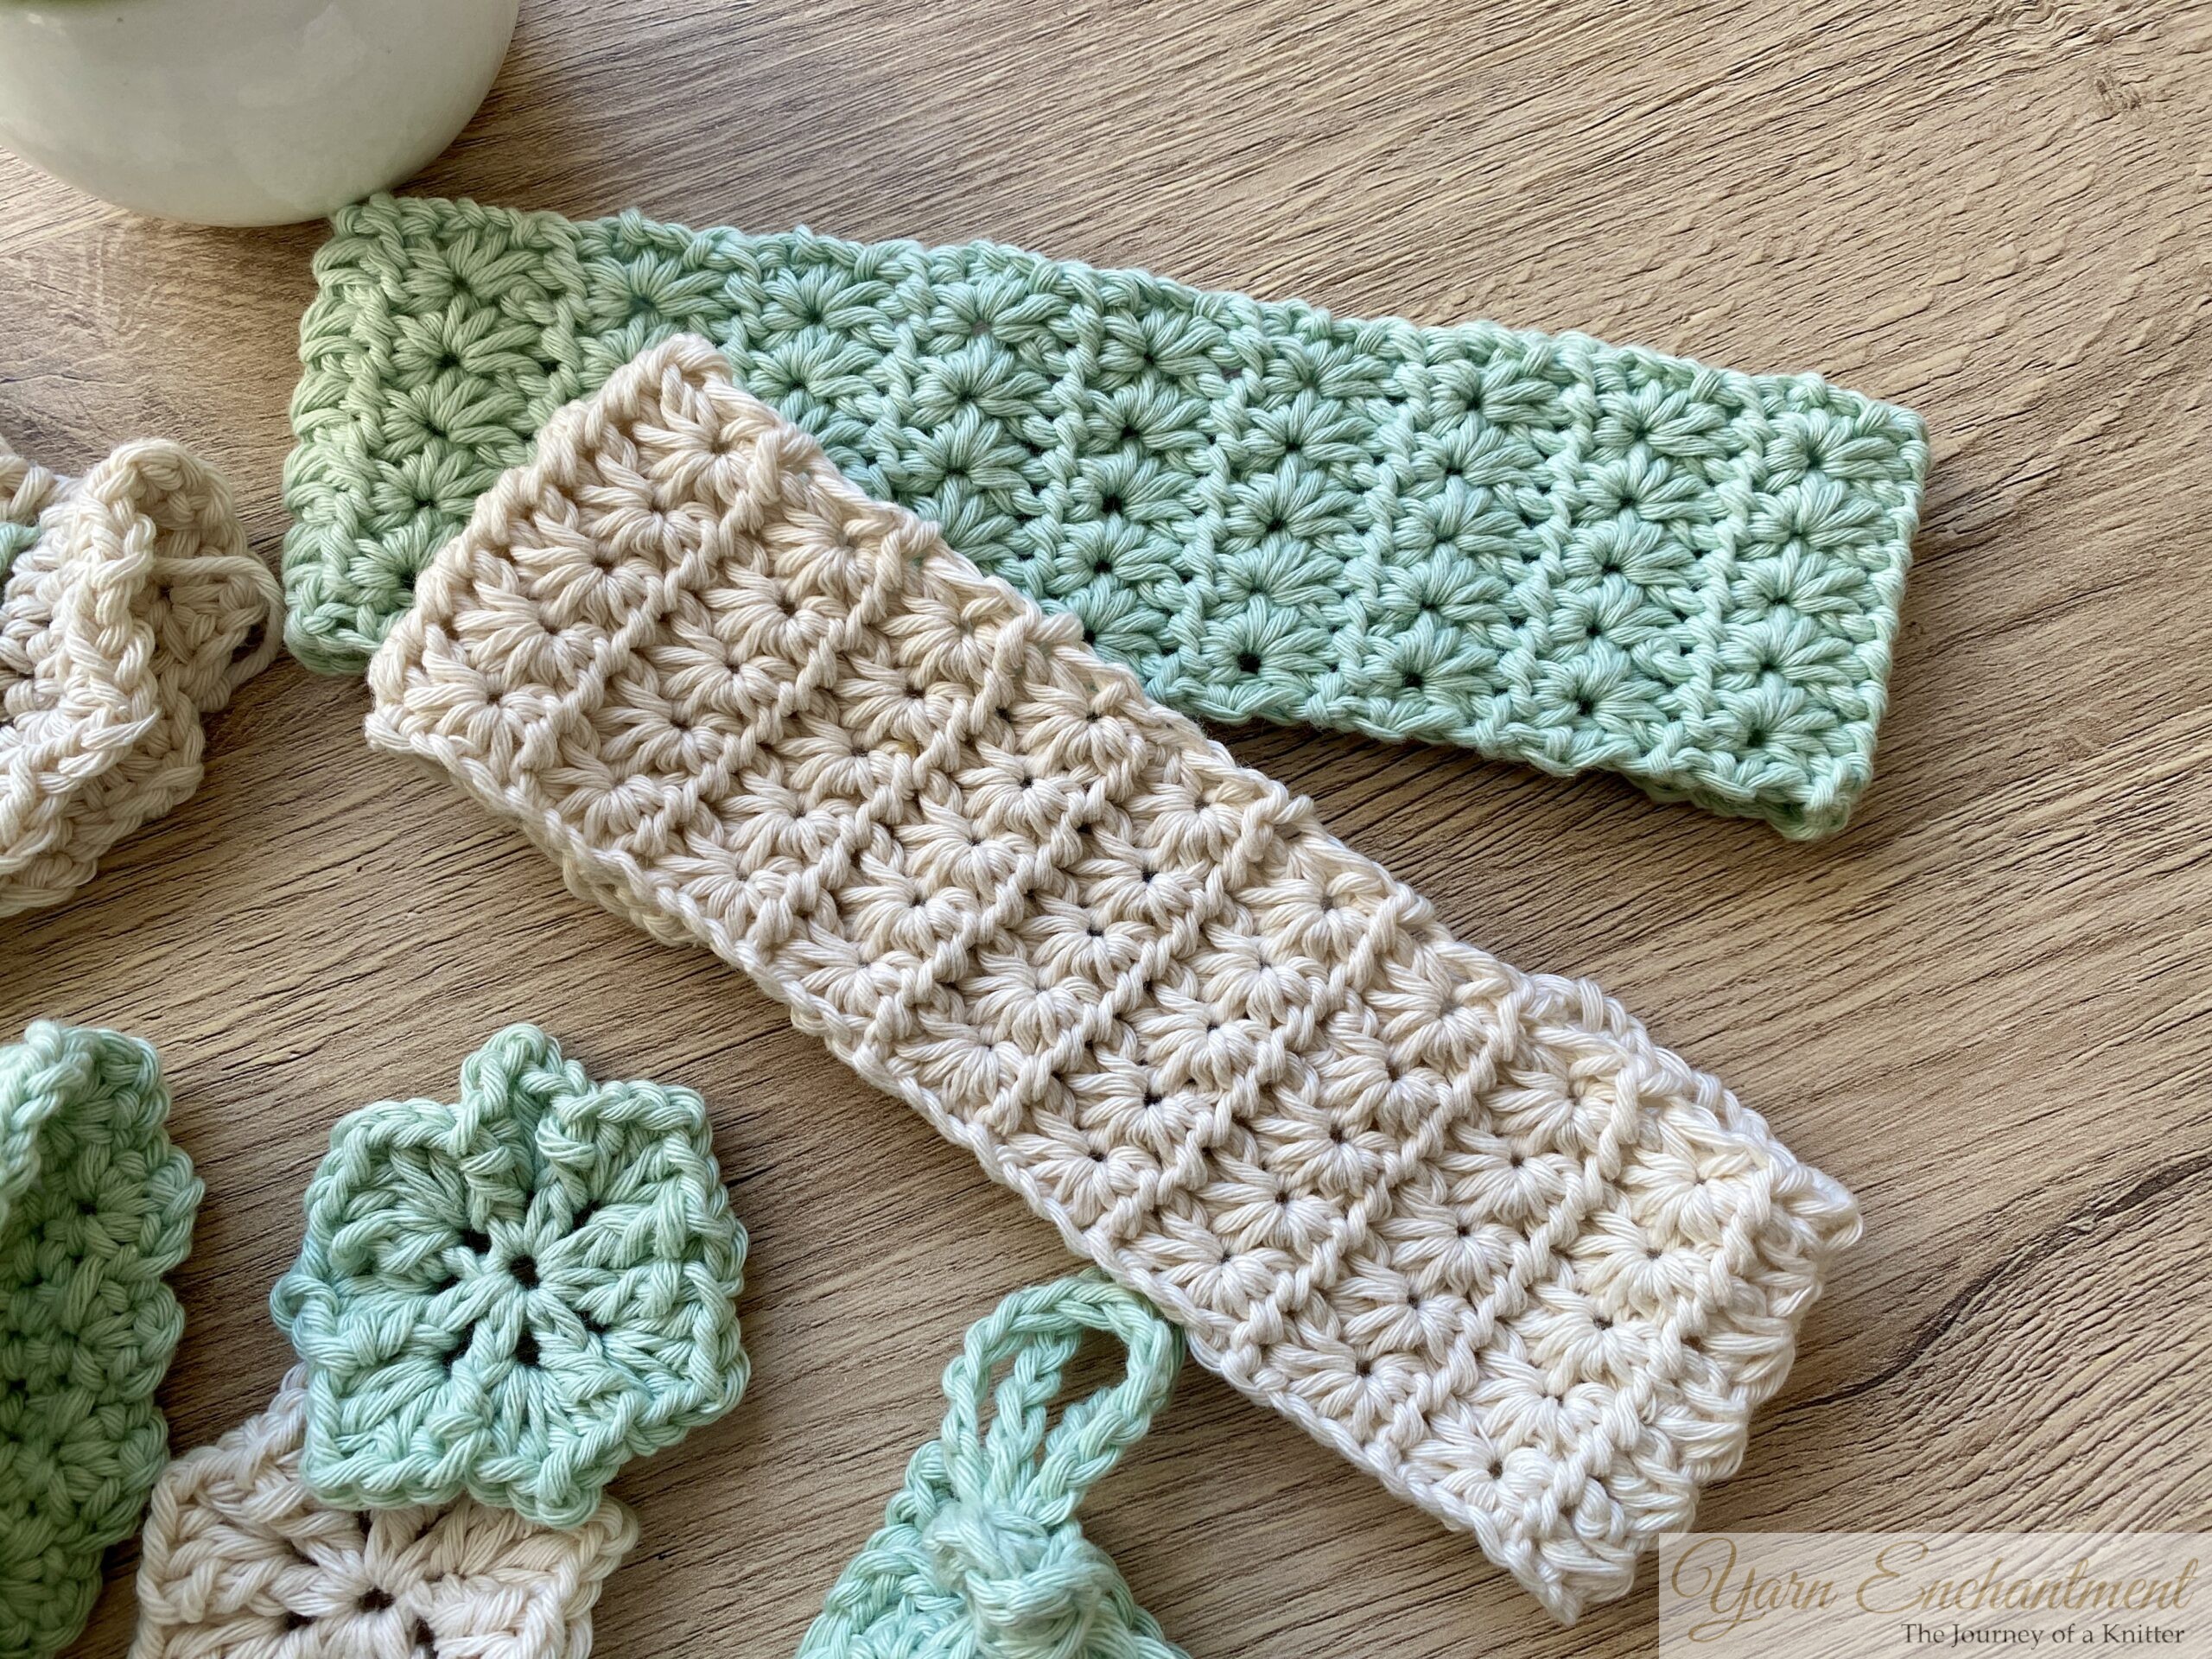 | Headband |
Decrease Rows:
Row 1:
- 2 sc2tog into the first stitch.
- Work 1 sc into the next stitches.
- 2 sc2tog into the last 2 stitches.
- You decreased by 2 stitches (9 stitches)
- Ch 1, turn.
Row 2:
- 2 sc2tog into the first stitch.
- Work 1 sc into the next stitches.
- 2 sc2tog into the last 2 stitches.
- You decreased by 2 stitches (7 stitches)
- Ch 1, turn.
Row 3:
- 2 sc2tog into the first stitch.
- Work 1 sc into the next stitches.
- 2 sc2tog into the last 2 stitches.
- You decreased by 2 stitches (5 stitches)
- Ch 1, turn.
Row 4:
- 2 sc2tog into the first stitch.
- Work 1 sc into the next stitches.
- You decreased by 1 stitch (4 stitches)
- Ch 1, turn.
Finishing
- When you’re back to 4 stitches, work 4 single crochets around the hair tie to secure the end.
- Fasten off and weave in the ends with a yarn needle.
 |  |  | Insert your hook through the stitch and the headband | Pull your loop through the hair tie and work a single crochet | Work these steps until you have 4 sc on your hie tie |


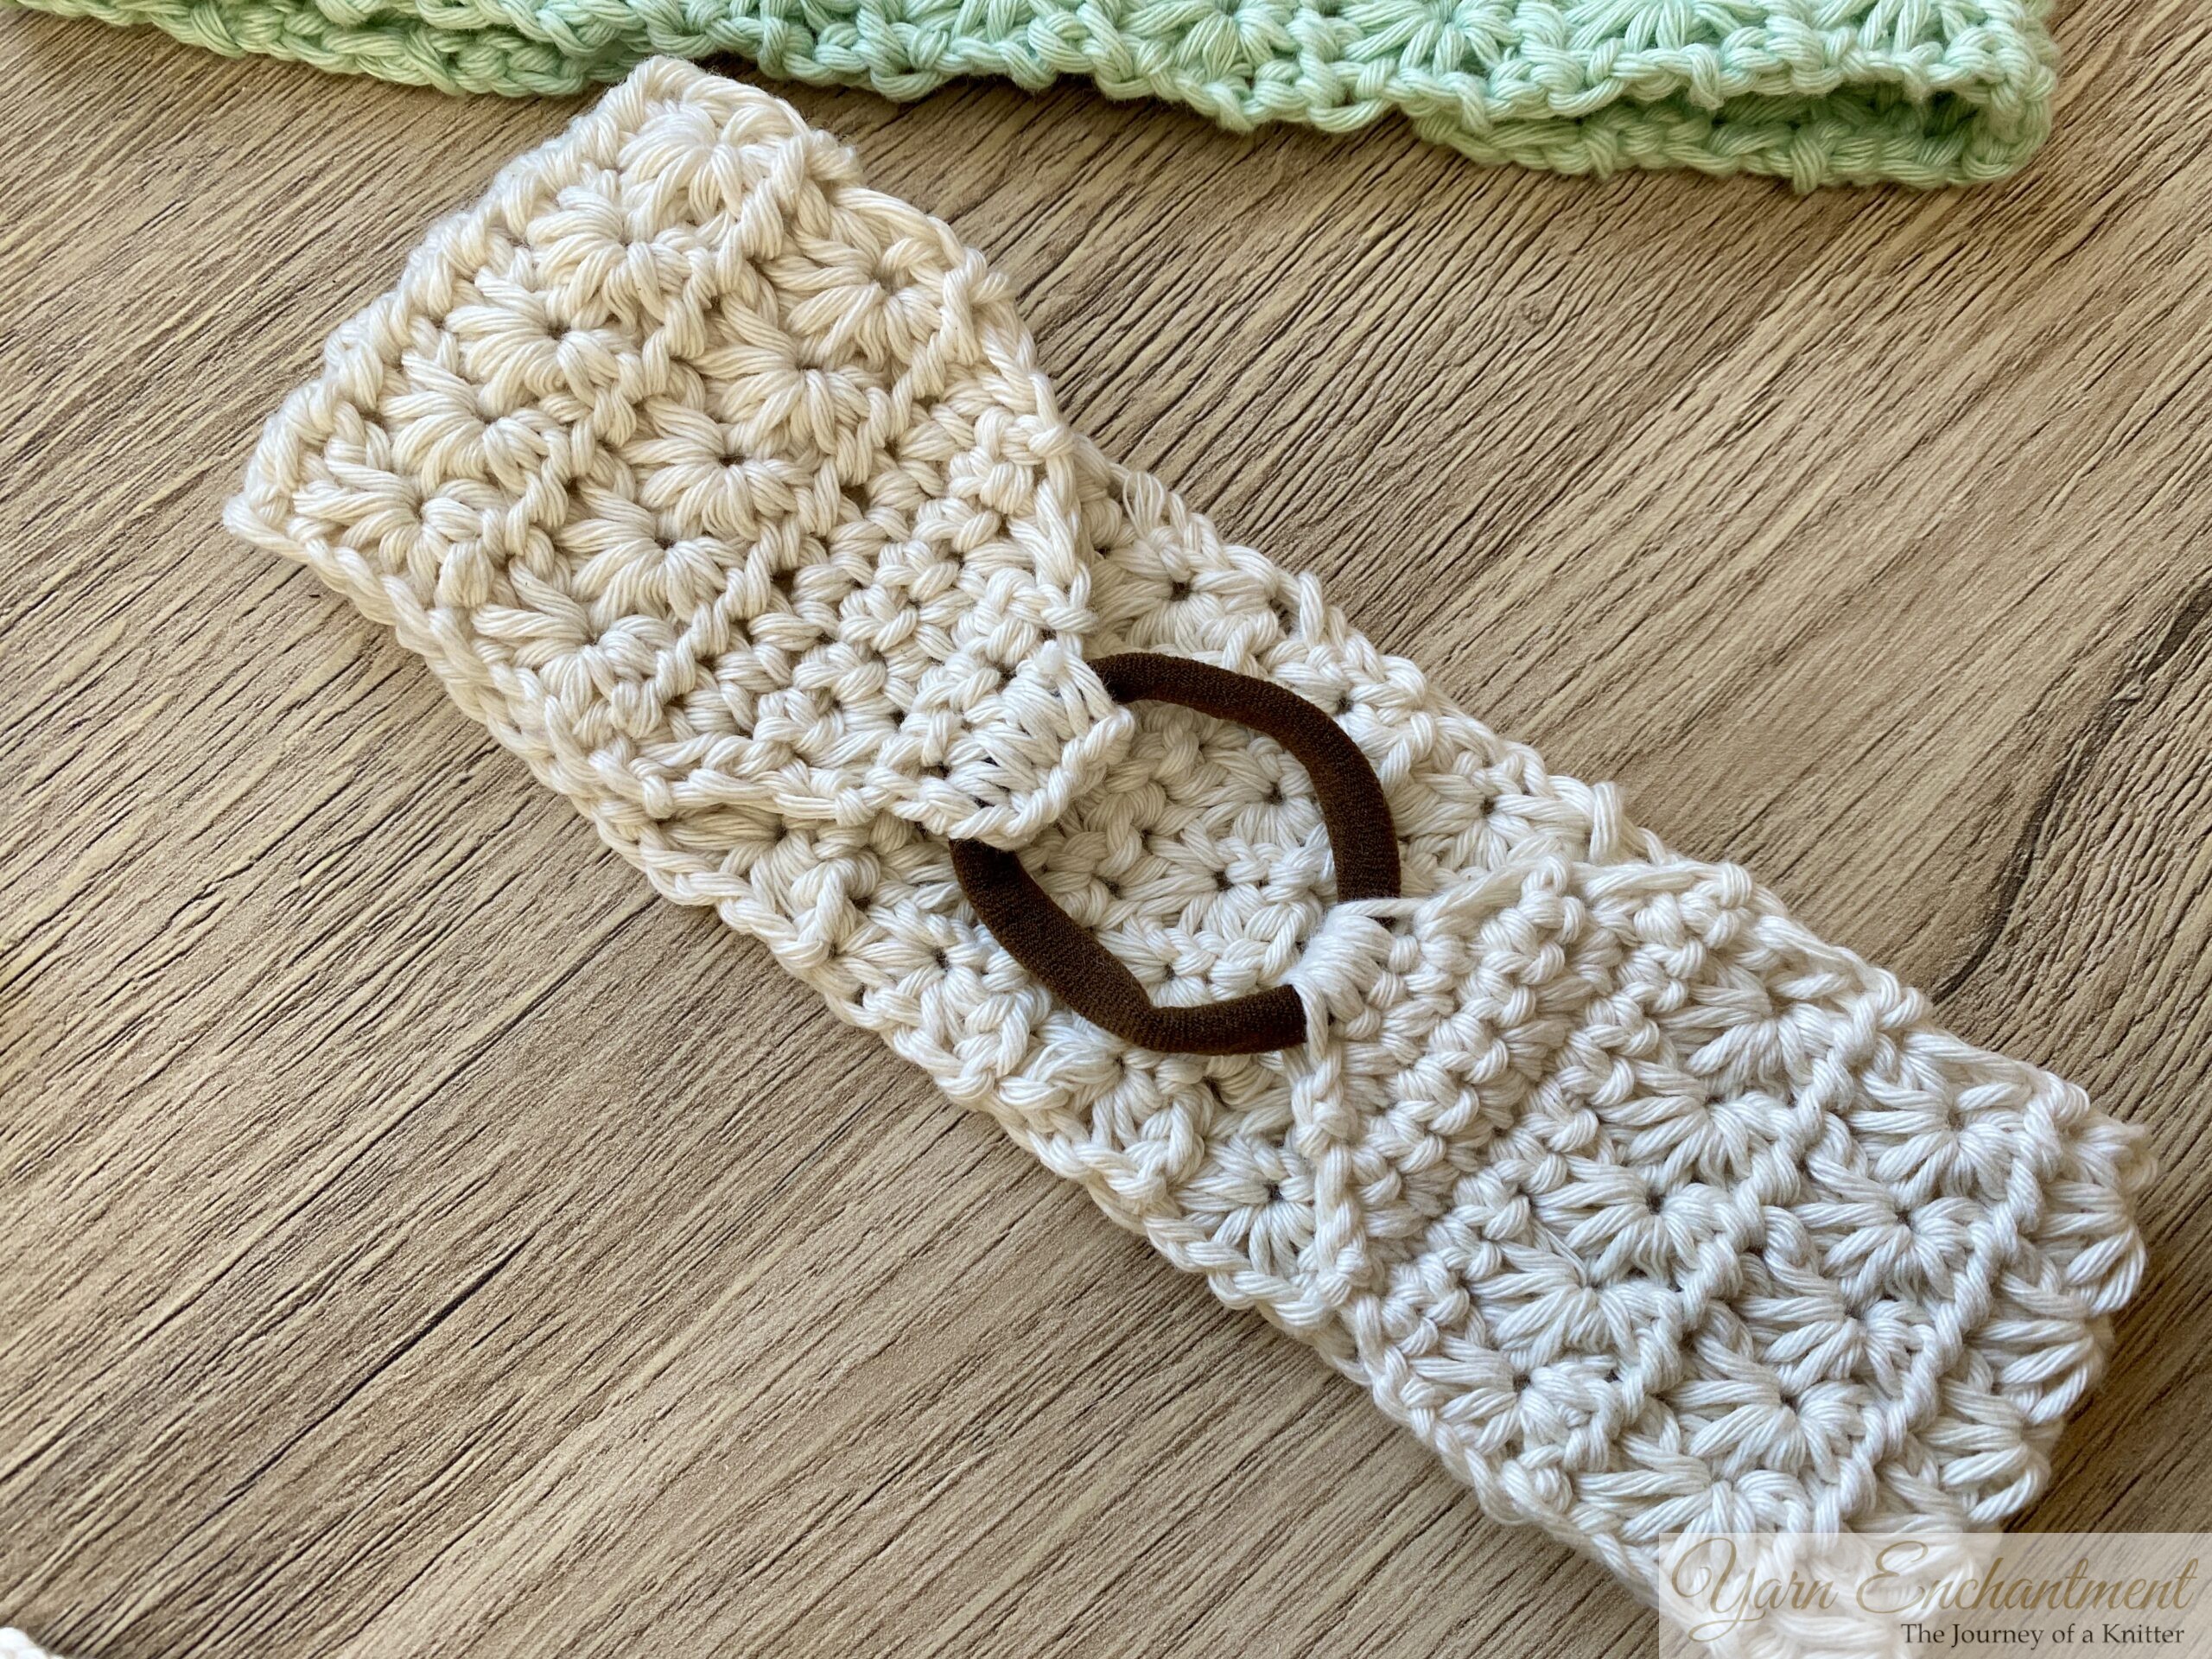 | Headband from behind |

I hope you have a lot of fun creating your own headband for your spa day! What colors would you choose for this pattern? Would you go for soft pastels, bold brights, or something totally unique? I’d love to hear your ideas - share them in the comments below!
Until then, happy crocheting!
Copyright notice
This pattern is free for personal use. You are welcome to make and sell items created using this pattern. The written pattern itself may not be sold or claimed as your own. You are welcome to share the pattern, but I would greatly appreciate it if you could credit my blog and share the link to it when doing so. Thank you for your support!
If you need any assistance with this pattern, please feel free to reach out to me at sarah@yarn-enchantment.com
A Little Way to Say Thanks
You Might Also Like


 |
|
Join the Cozy Corner Newsletter!
Hey there, creative soul! Welcome to the Yarn Enchantment Newsletter, where we celebrate all things cozy, crafty, and full of heart. Think of this as your friendly crafting companion - a little dose of inspiration delivered straight to your inbox, just for you. Inside, you’ll find: ✨ Exclusive patterns & tutorials - ideas you won’t find anywhere else (just for us!) 📚 Bookish crafts that bring your favorite stories to life 🧶 Tips and tricks to make your crafting journey smoother (and more fun!) 💌 Heartfelt musings on life, creativity, and the magic of making something with your own two hands Whether you’re knitting by the fire, brainstorming your next DIY project, or just looking for a little creative pick-me-up, this newsletter is here to cheer you on. Because let’s be honest - crafting isn’t just about the finished project; it’s about the joy, peace, and stories we create along the way. So grab a cup of tea, cozy up, and join me. Together, we’ll weave a little magic into everyday life - one stitch, one story, and one email at a time. P.S. I’m so glad you’re here. Let’s make something beautiful together! (Note: If you're using an ad blocker, you may encounter issues subscribing to the newsletter. To subscribe, please consider disabling your ad blocker.)
|
