

How to Embroider on Knits: Pro Tips & Techniques
October 4, 2025
Why Do We Start Hating Our Knitting Projects? (And How to Cope)
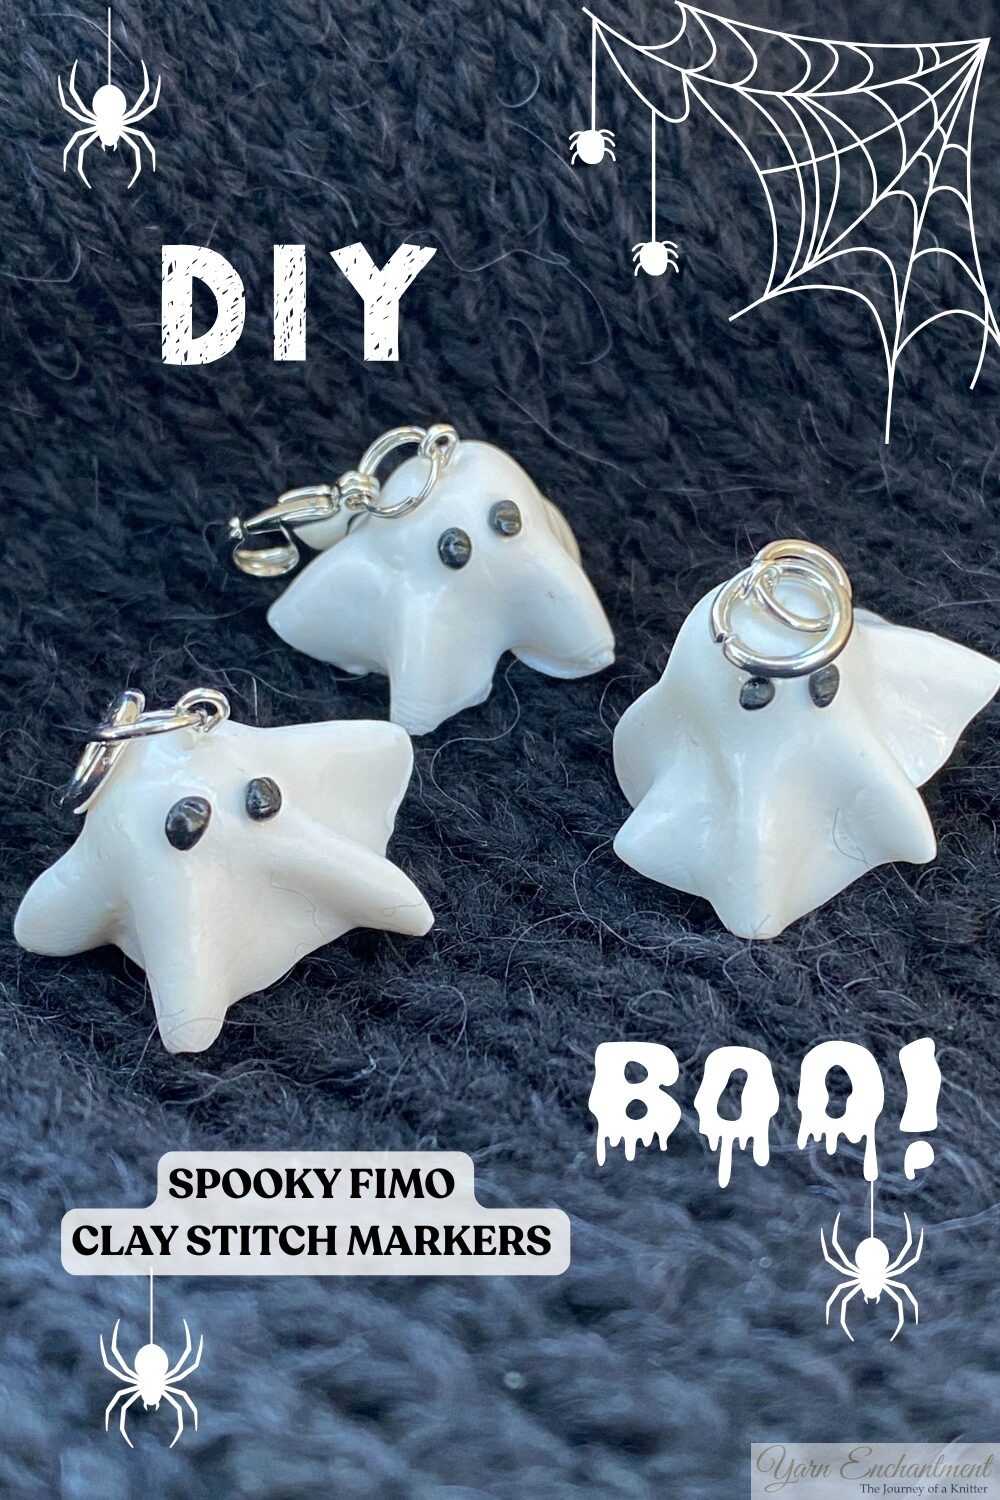
October 17, 2025DIY Spooky Fimo Clay Stitch Markers for Halloween Knitting - Easy Polymer Clay Tutorial

Originally published on October 11, 2025
The spooky season is sneaking up again, and I couldn’t resist crafting a Halloween-themed knitting accessory, spooky stitch markers for my current projects! They might be called spooky, but honestly, I think these little ghost stitch markers are more cute than creepy (and they make me smile every time I use them).
As for the name, “Boo!” was my first idea, though I’m pretty sure Nintendo might have something to say about that! In the end, spooky Halloween stitch markers just seemed to fit.
These handmade ghost stitch markers are shaped from fimo polymer clay, which is hands-down my favorite material for little crafty details. Fimo is super easy to work with, available in tons of colors, and it holds up beautifully. I still have a few Fimo bowls from years ago that still look as good as new!
If you’re on the hunt for a fun Halloween knitting notion, want a cute handmade gift for a knitting friend, or simply love ghostly progress keepers, these Fimo clay stitch markers add just the right touch of festive charm to any autumn project.
 | DIY Spooky Fimo Clay Stitch Markers for Halloween Knitting – Easy Polymer Clay Tutorial |

Why Make Halloween Stitch Markers?
Well, the short answer is, it's really fun. Decorating your WIPs with special Halloween stitch markers is like tossing confetti on your knitting: they lift your mood, help you find your place in the pattern, and make every row feel a little more festive and fun. They’re not just cute, they’re genuinely useful for tracking your increases, pattern changes, or simply reminding you where you left off after a coffee break.
To be honest, I'm really a big fan of Halloween, even though it isn’t widely celebrated in Austria, which is a bit of a shame. But everyone has their own traditions! In our family, we get extra cozy on Halloween day with our three children, indulge in a few sweets, and settle in for some seasonally themed, kid-friendly movies. That’s our Halloween, simple, sweet, and just the right amount of spooky fun for us.
Materials: What You’ll Need
For these Halloween stitch markers, gather the following supplies.
Most are basic and easy to find, and you don’t need to be a polymer clay expert to get started!
- Fimo clay (black and white)
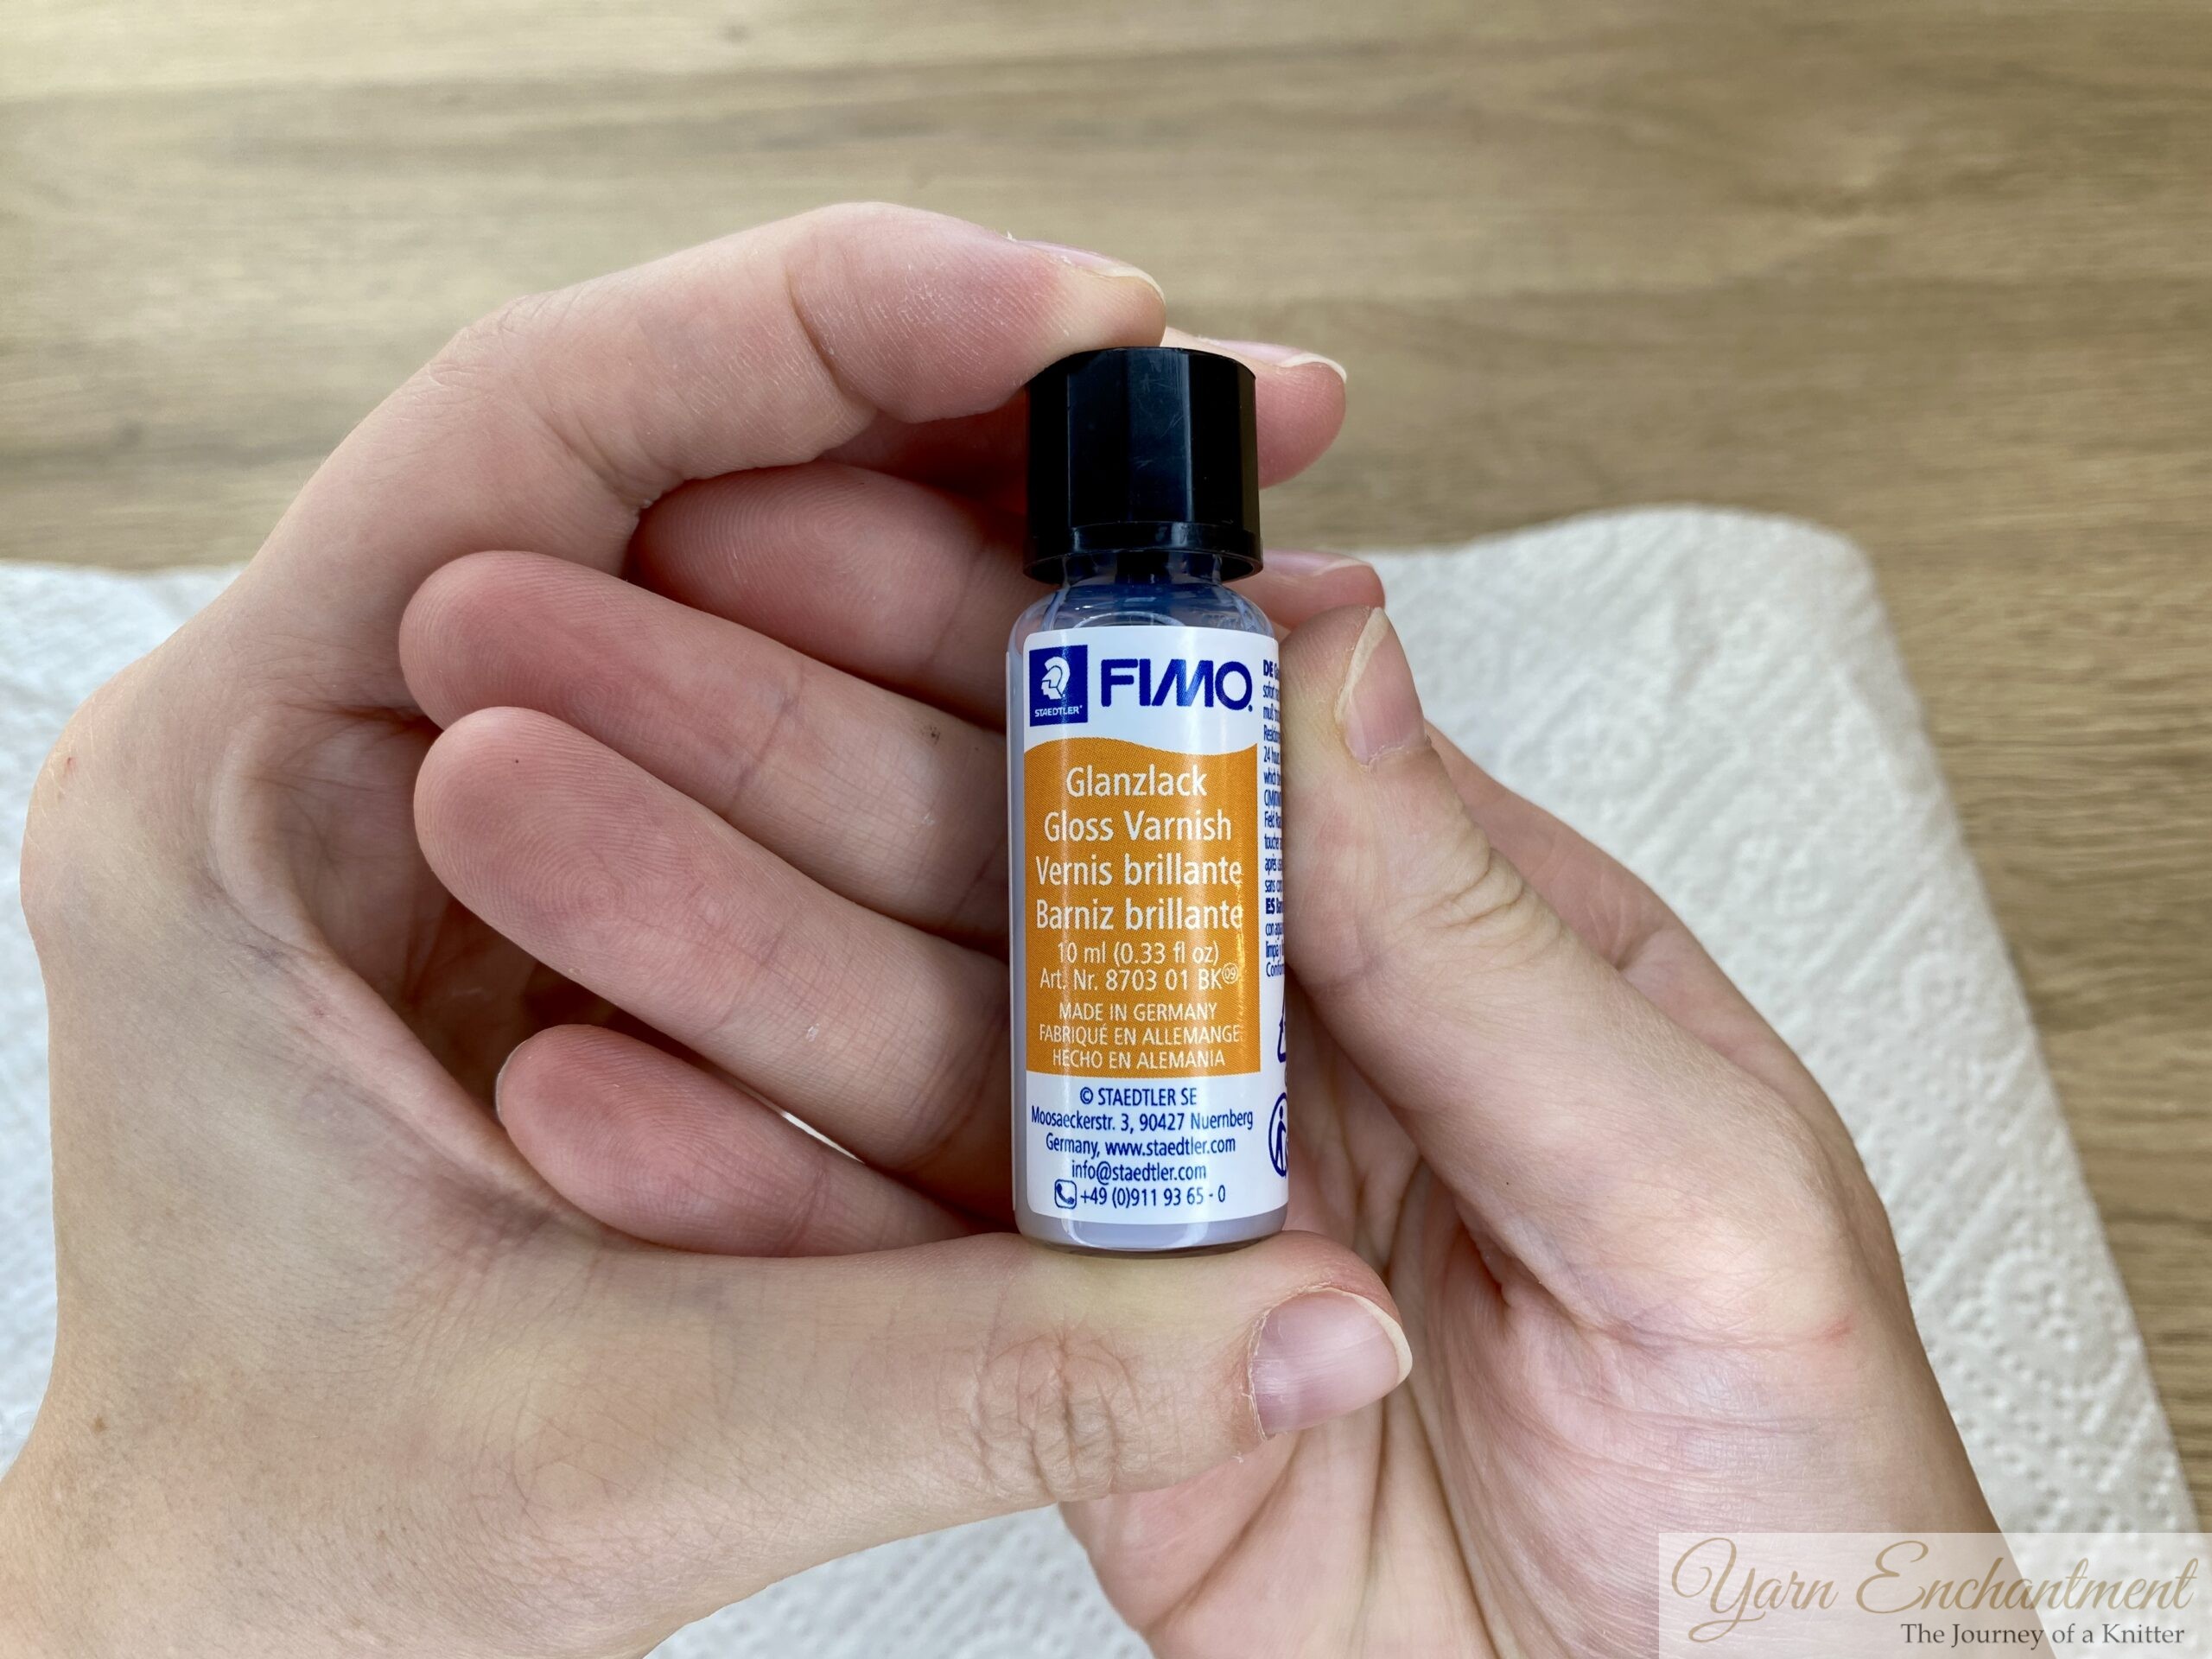
- Fimo gloss finisher (for a shiny and protective marker surface)
- A work surface (parchment or baking paper works well)
- Rolling pin (or any kitchen rolling tool)
- Round cookie cutter or bottle cap about 3cm (for shaping circles)
- Split rings or carabiner keychain holders
- Eyepins (to attach your markers, I got mine from Amazon)
- Superglue (for securing the eyepins)
- Disposable gloves (optional, keeps your hands clean and clay free of fingerprints)
- Toothpick (for placing tiny clay pieces)
- Tweezers (for placing tiny clay pieces)
- Small pliers (for bending eyepins, split rings, and assembling findings)
- Optional: A nasal spray cap (makes a handy stand for placing small clay balls or shaping your ghosts)
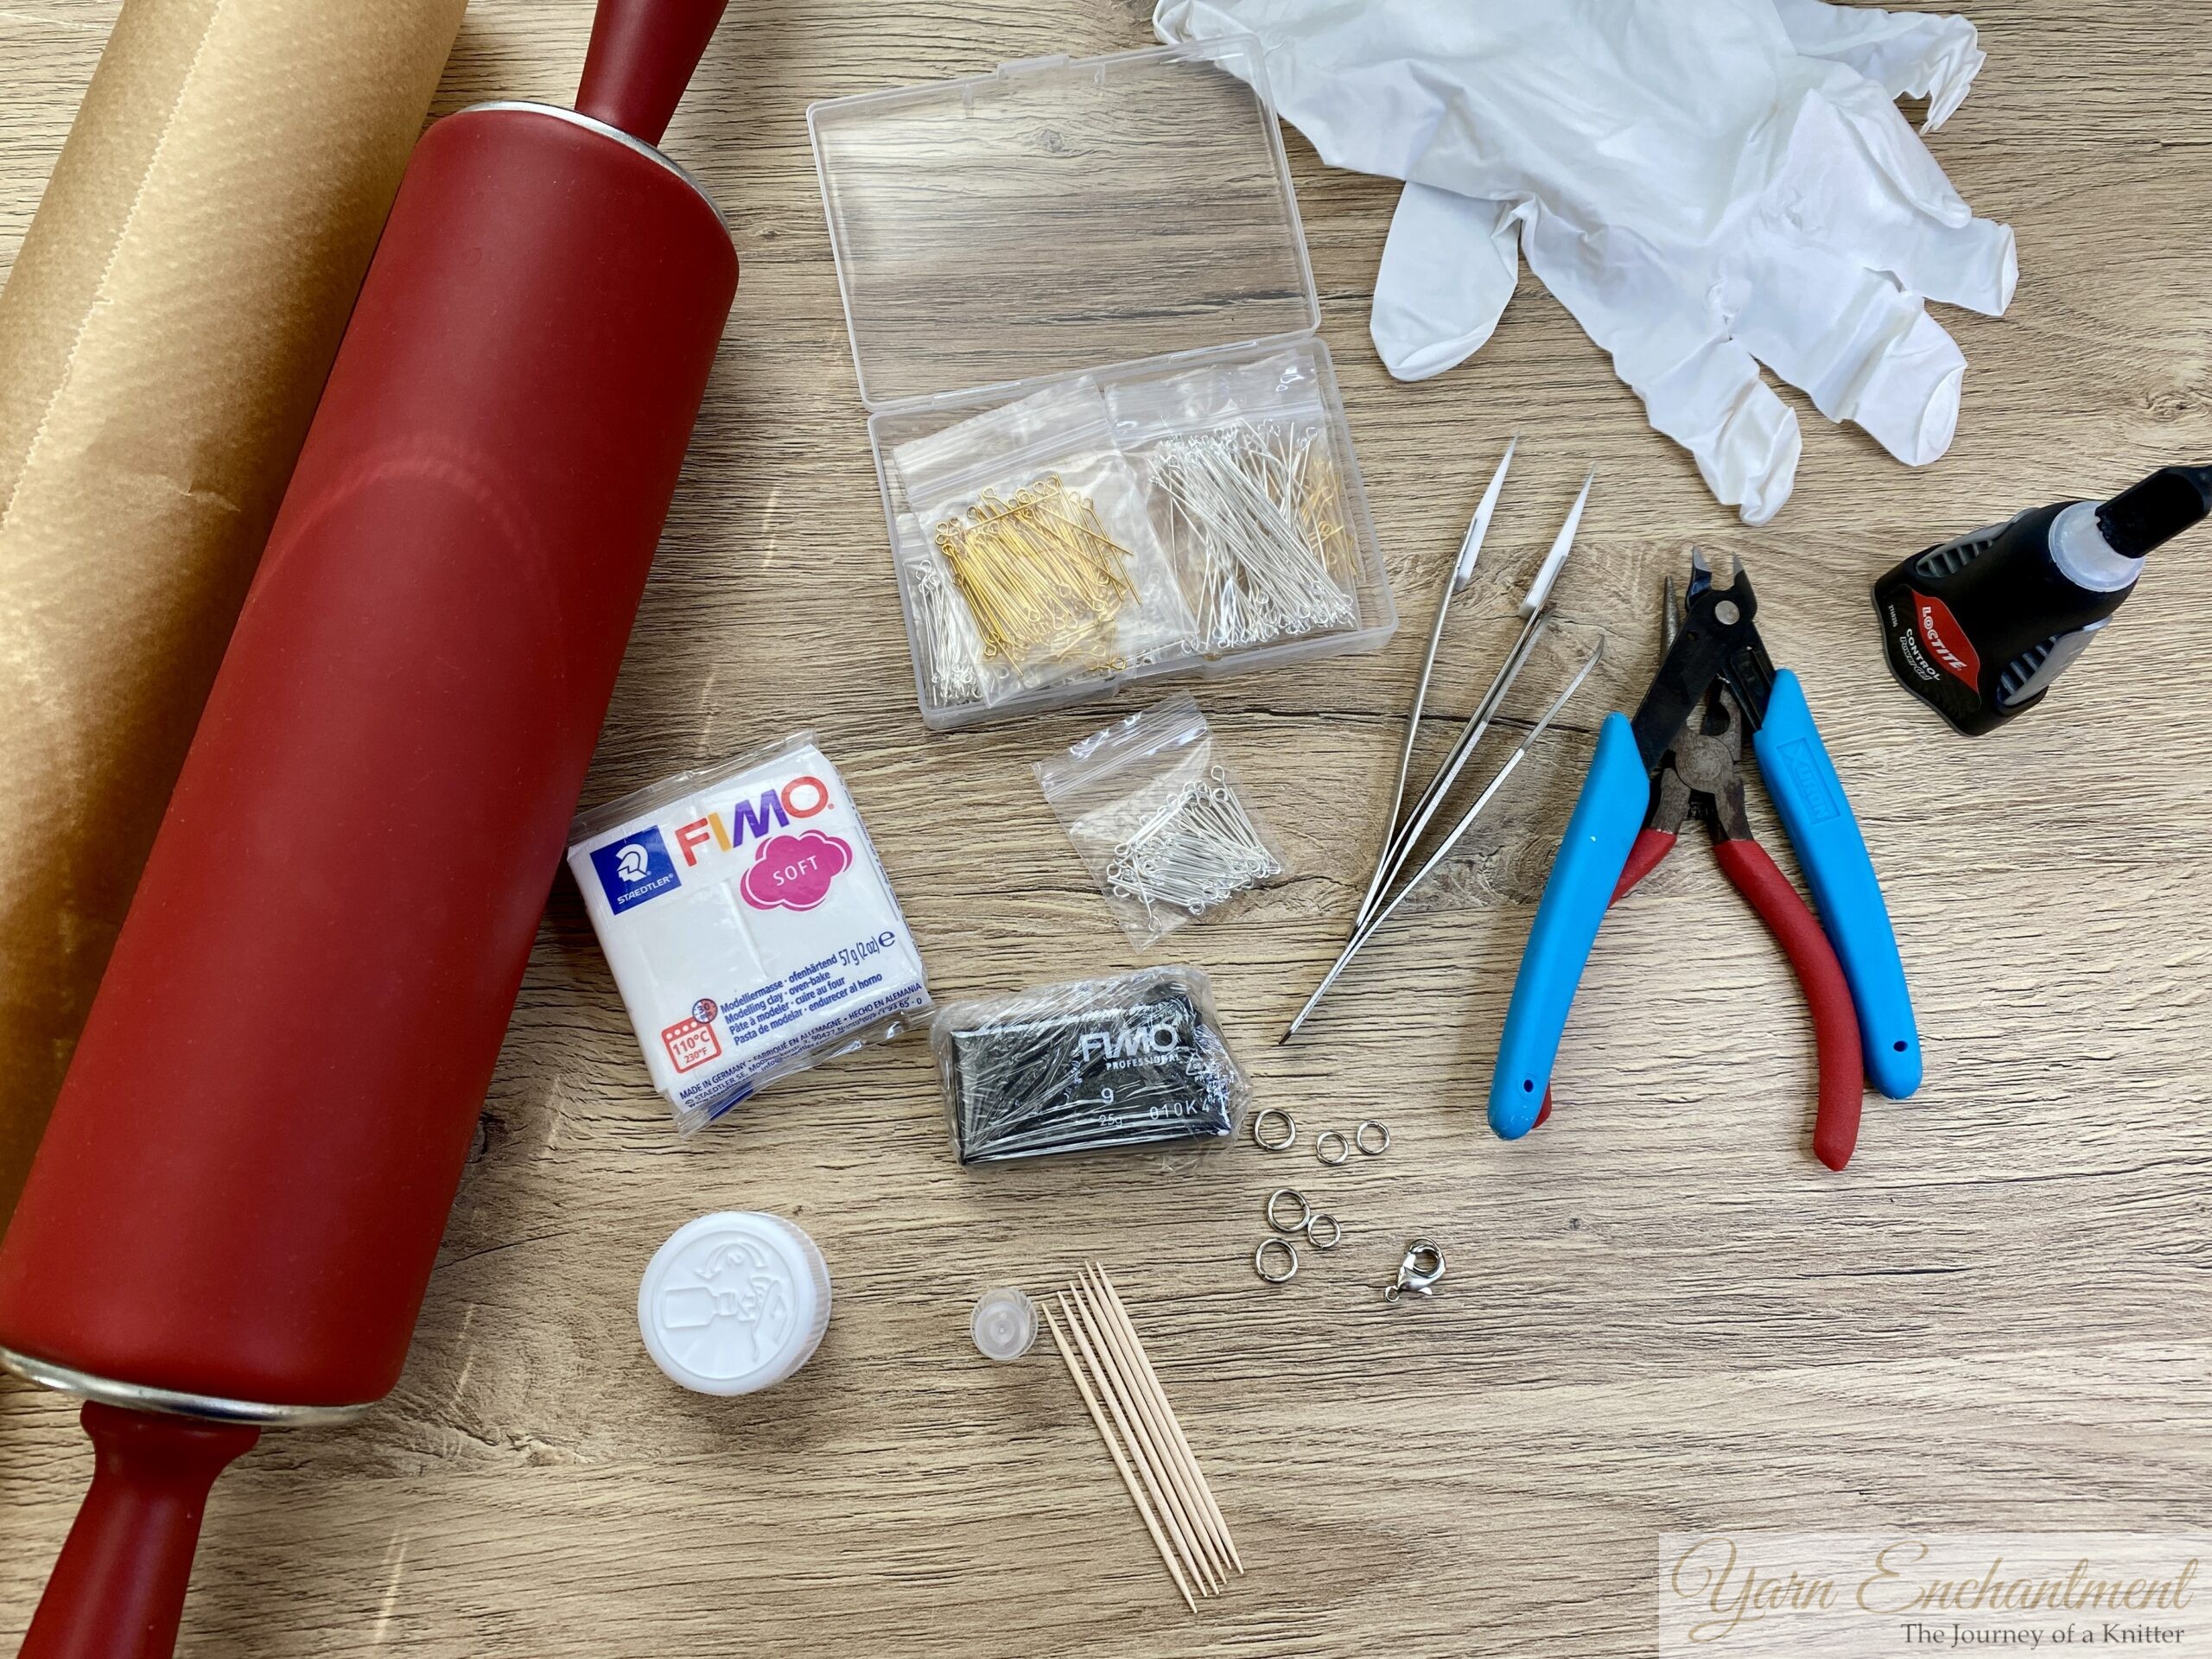 | A few essential supplies for making handmade Fimo clay ghost stitch markers: Black and white Fimo polymer clay, rolling pin, parchment paper, metal eyepins and findings, superglue, disposable gloves, mini pliers, toothpicks, wire cutter and jump rings. |

Step-by-Step Ghost Stitch Marker Tutorial
If you’ve ever wanted to make your own Halloween-themed stitch markers for knitting or crochet, this easy step-by-step guide is for you.
Just a little note before we begin: I’m not an expert in polymer clay, and my Fimo creations are definitely more cute than professionally sculpted. But that’s exactly why this tutorial is so beginner-friendly, everything I show here is simple to make, even if you’ve never used Fimo or tried working with clay before!
Step 1: Prepare Your Fimo Clay
Begin by preparing your Fimo clay for crafting. Knead the clay in your hands for several minutes until it becomes very soft, pliable, and smooth to the touch. Softened clay is much easier to work with and is less likely to crack or break while you shape it for your stitch markers. If the clay feels stiff, roll it into a ball and then a snake shape repeatedly, or warm it with your hands.
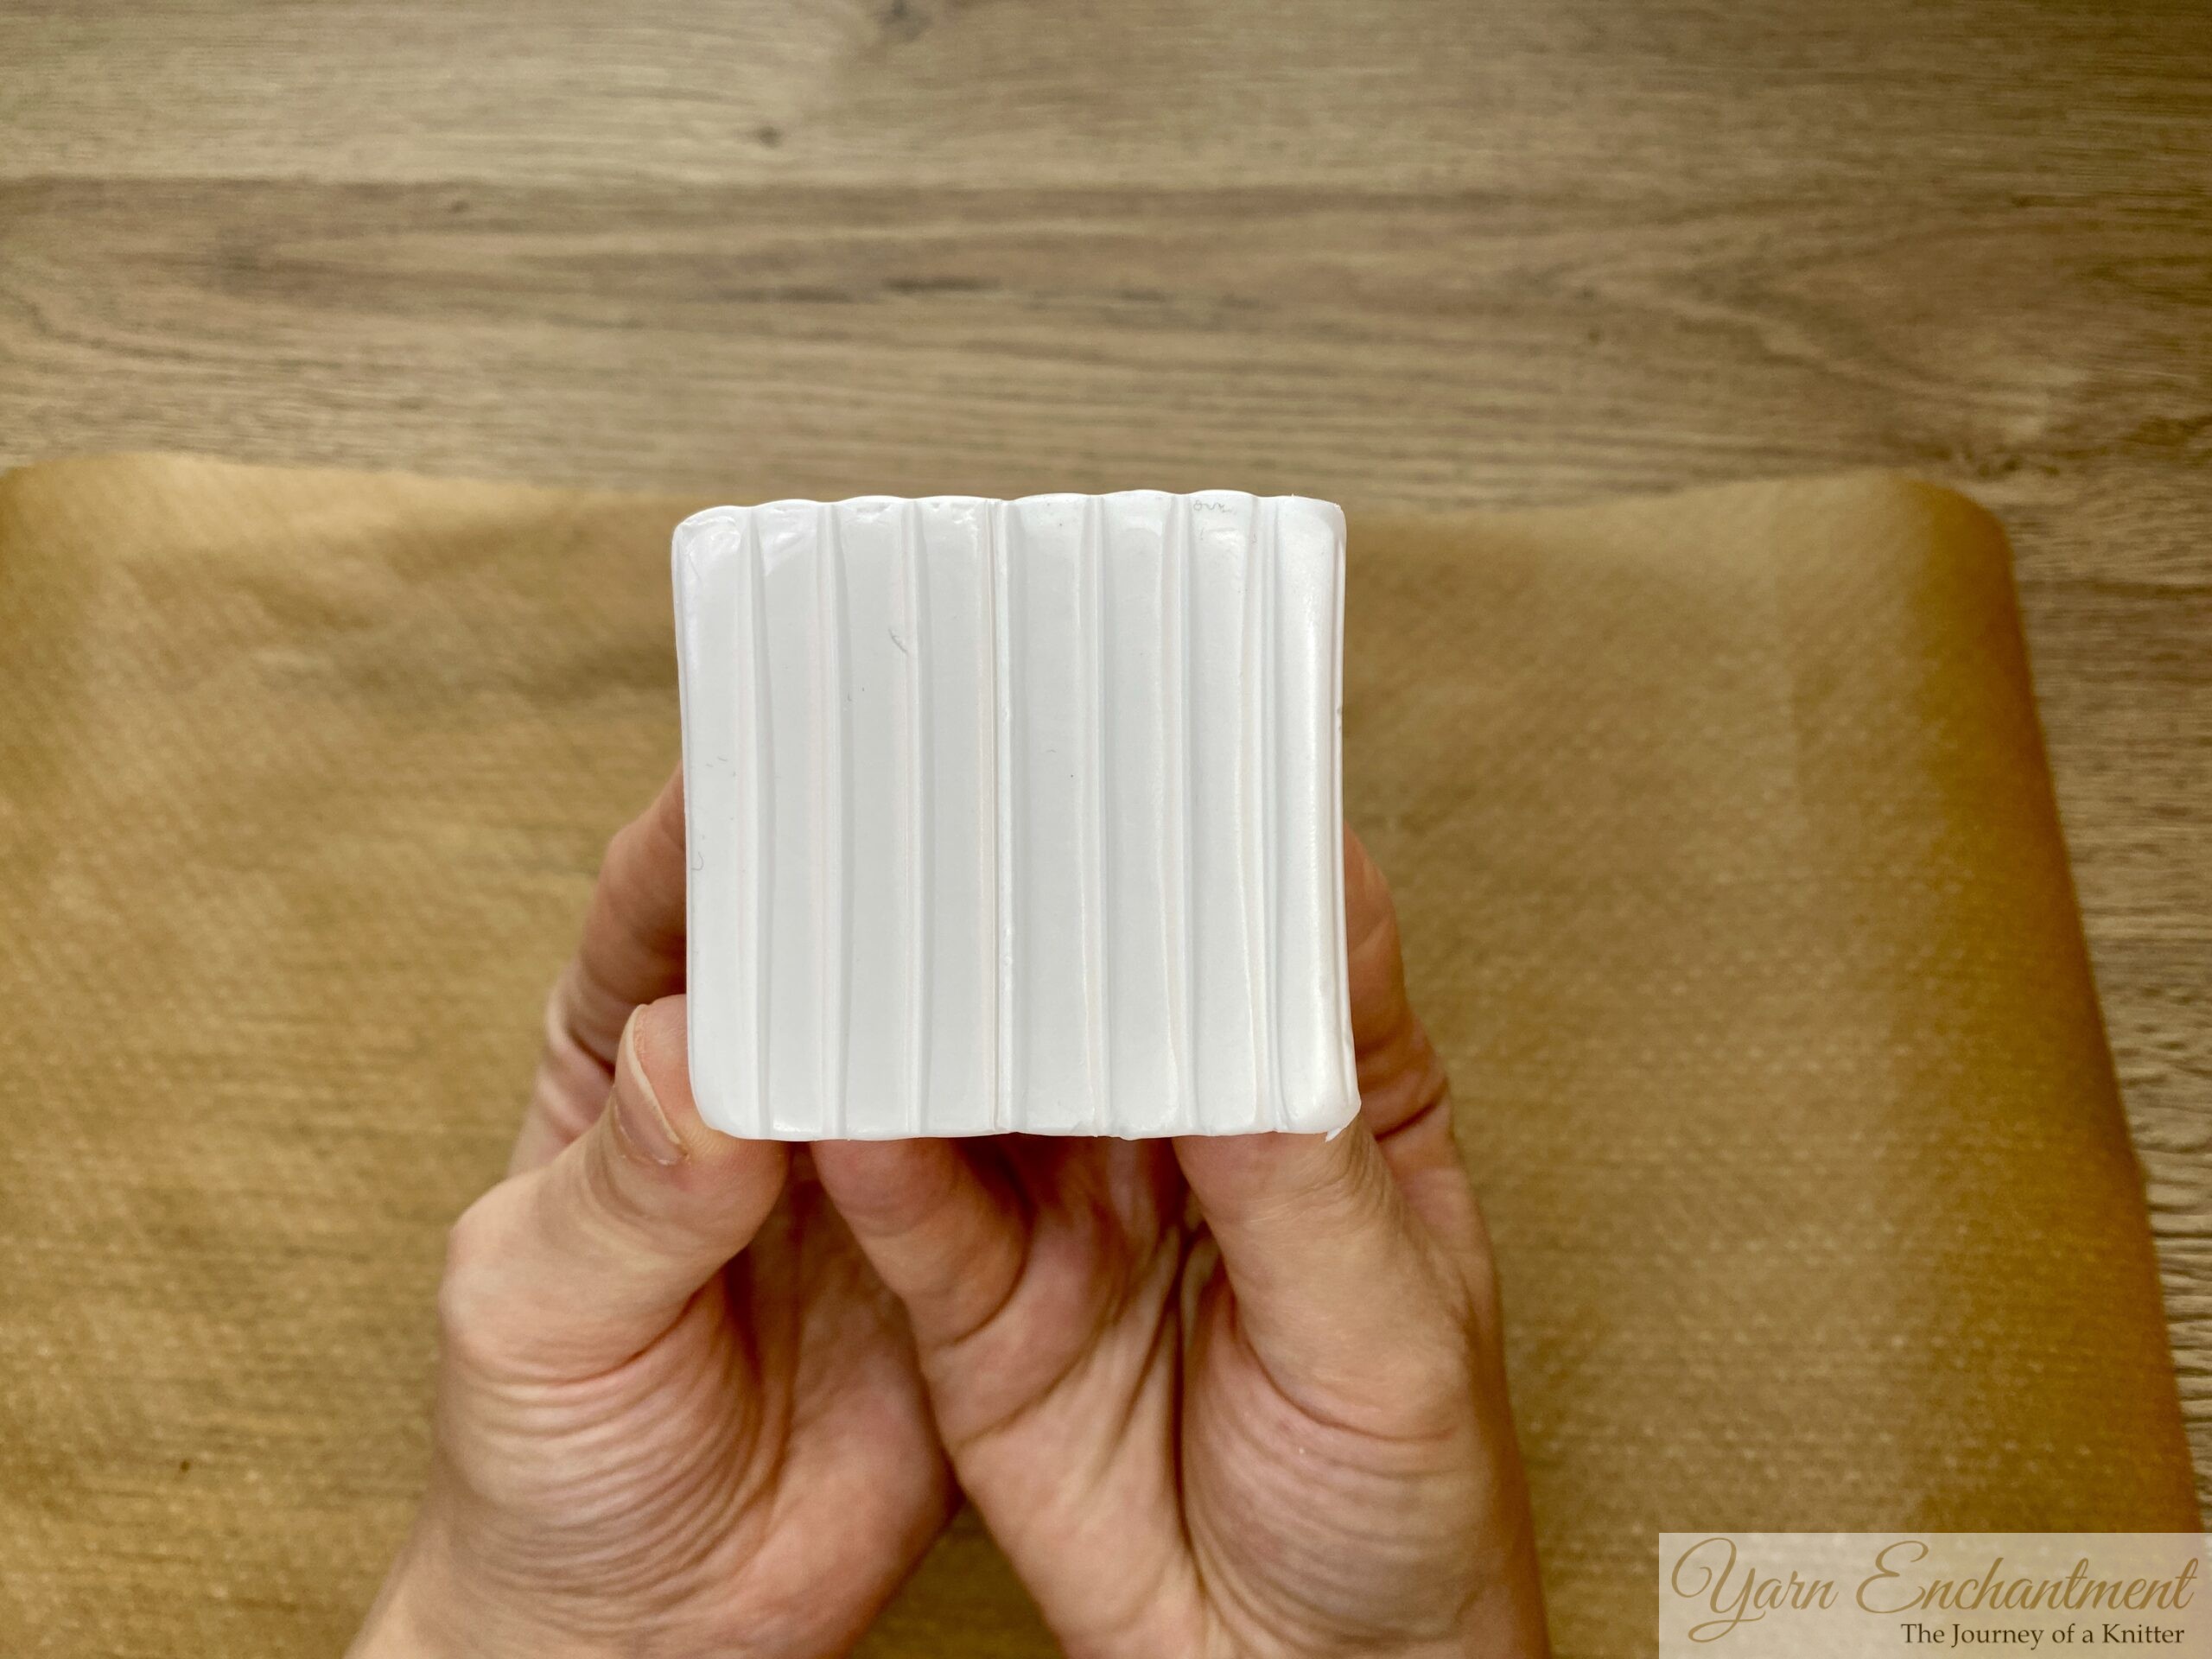 | 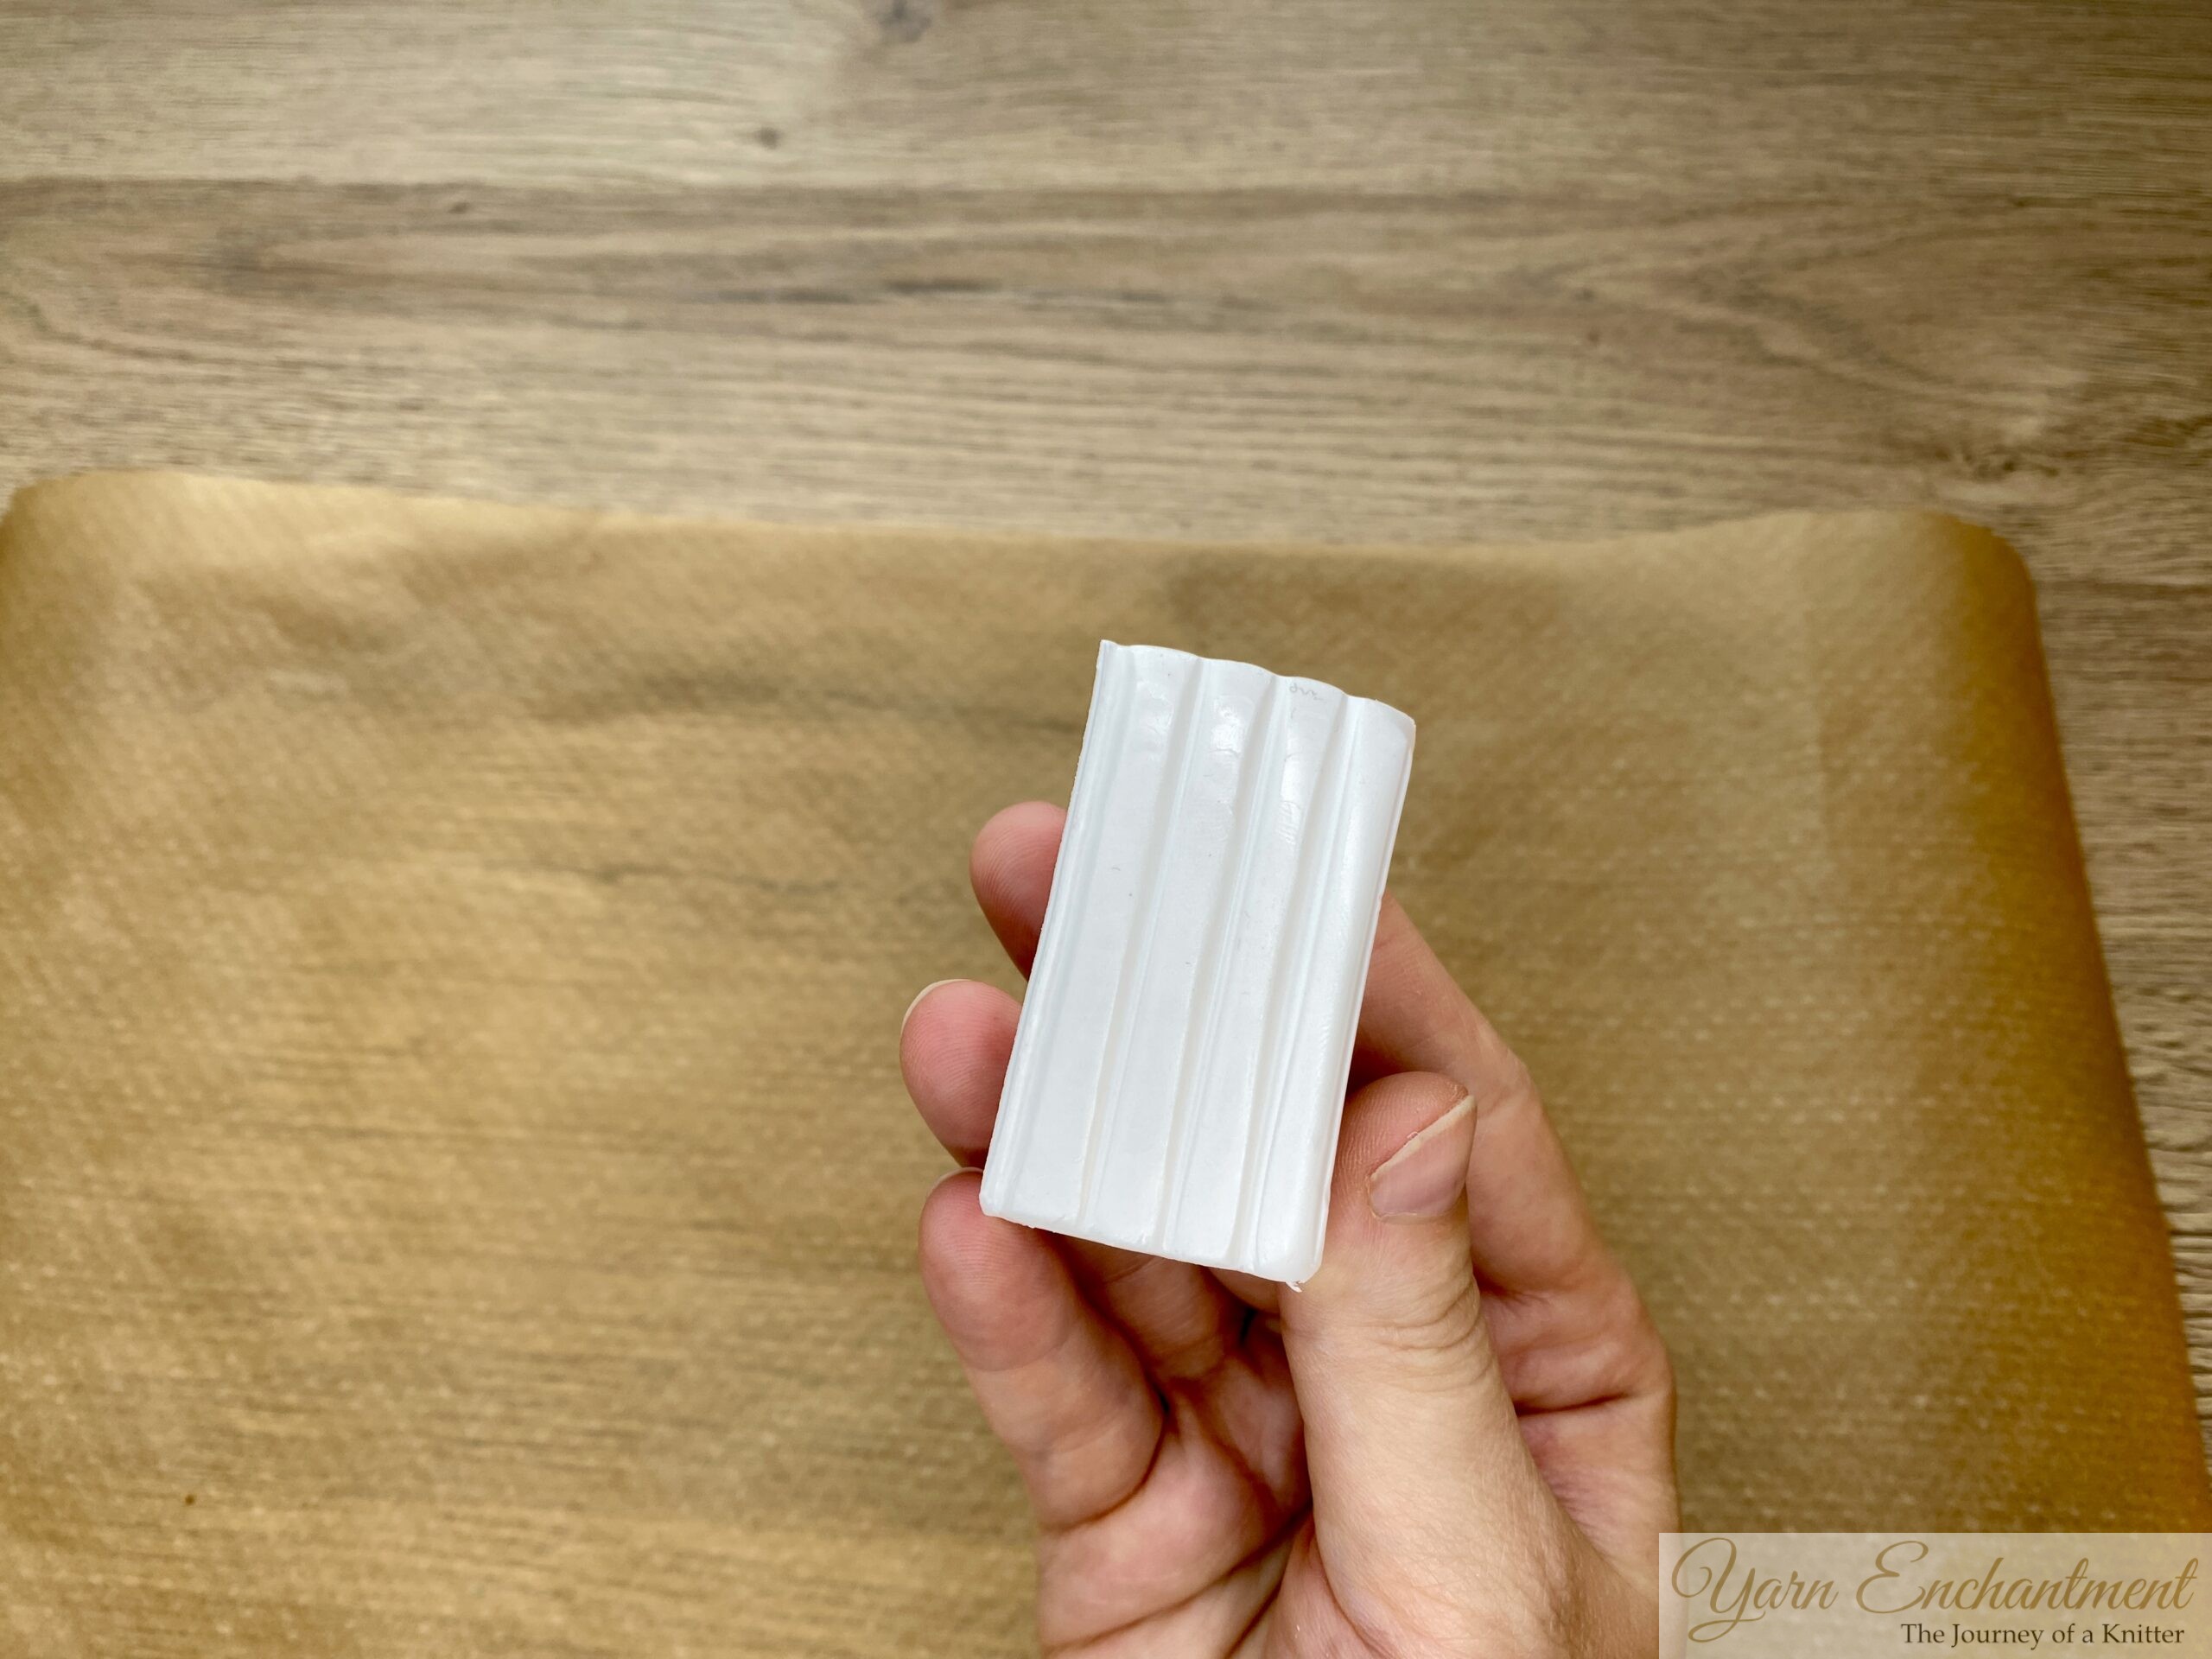 |  | My Fimo block has built-in grooves, so it’s really simple to break off or portion exactly how much clay I need. | I took about half of it, but it was still too much, I could have broken it in half one more time. | I kneaded it until it was soft and easy to work with. |


Step 2: Shape the Ghosts (Head/Body)
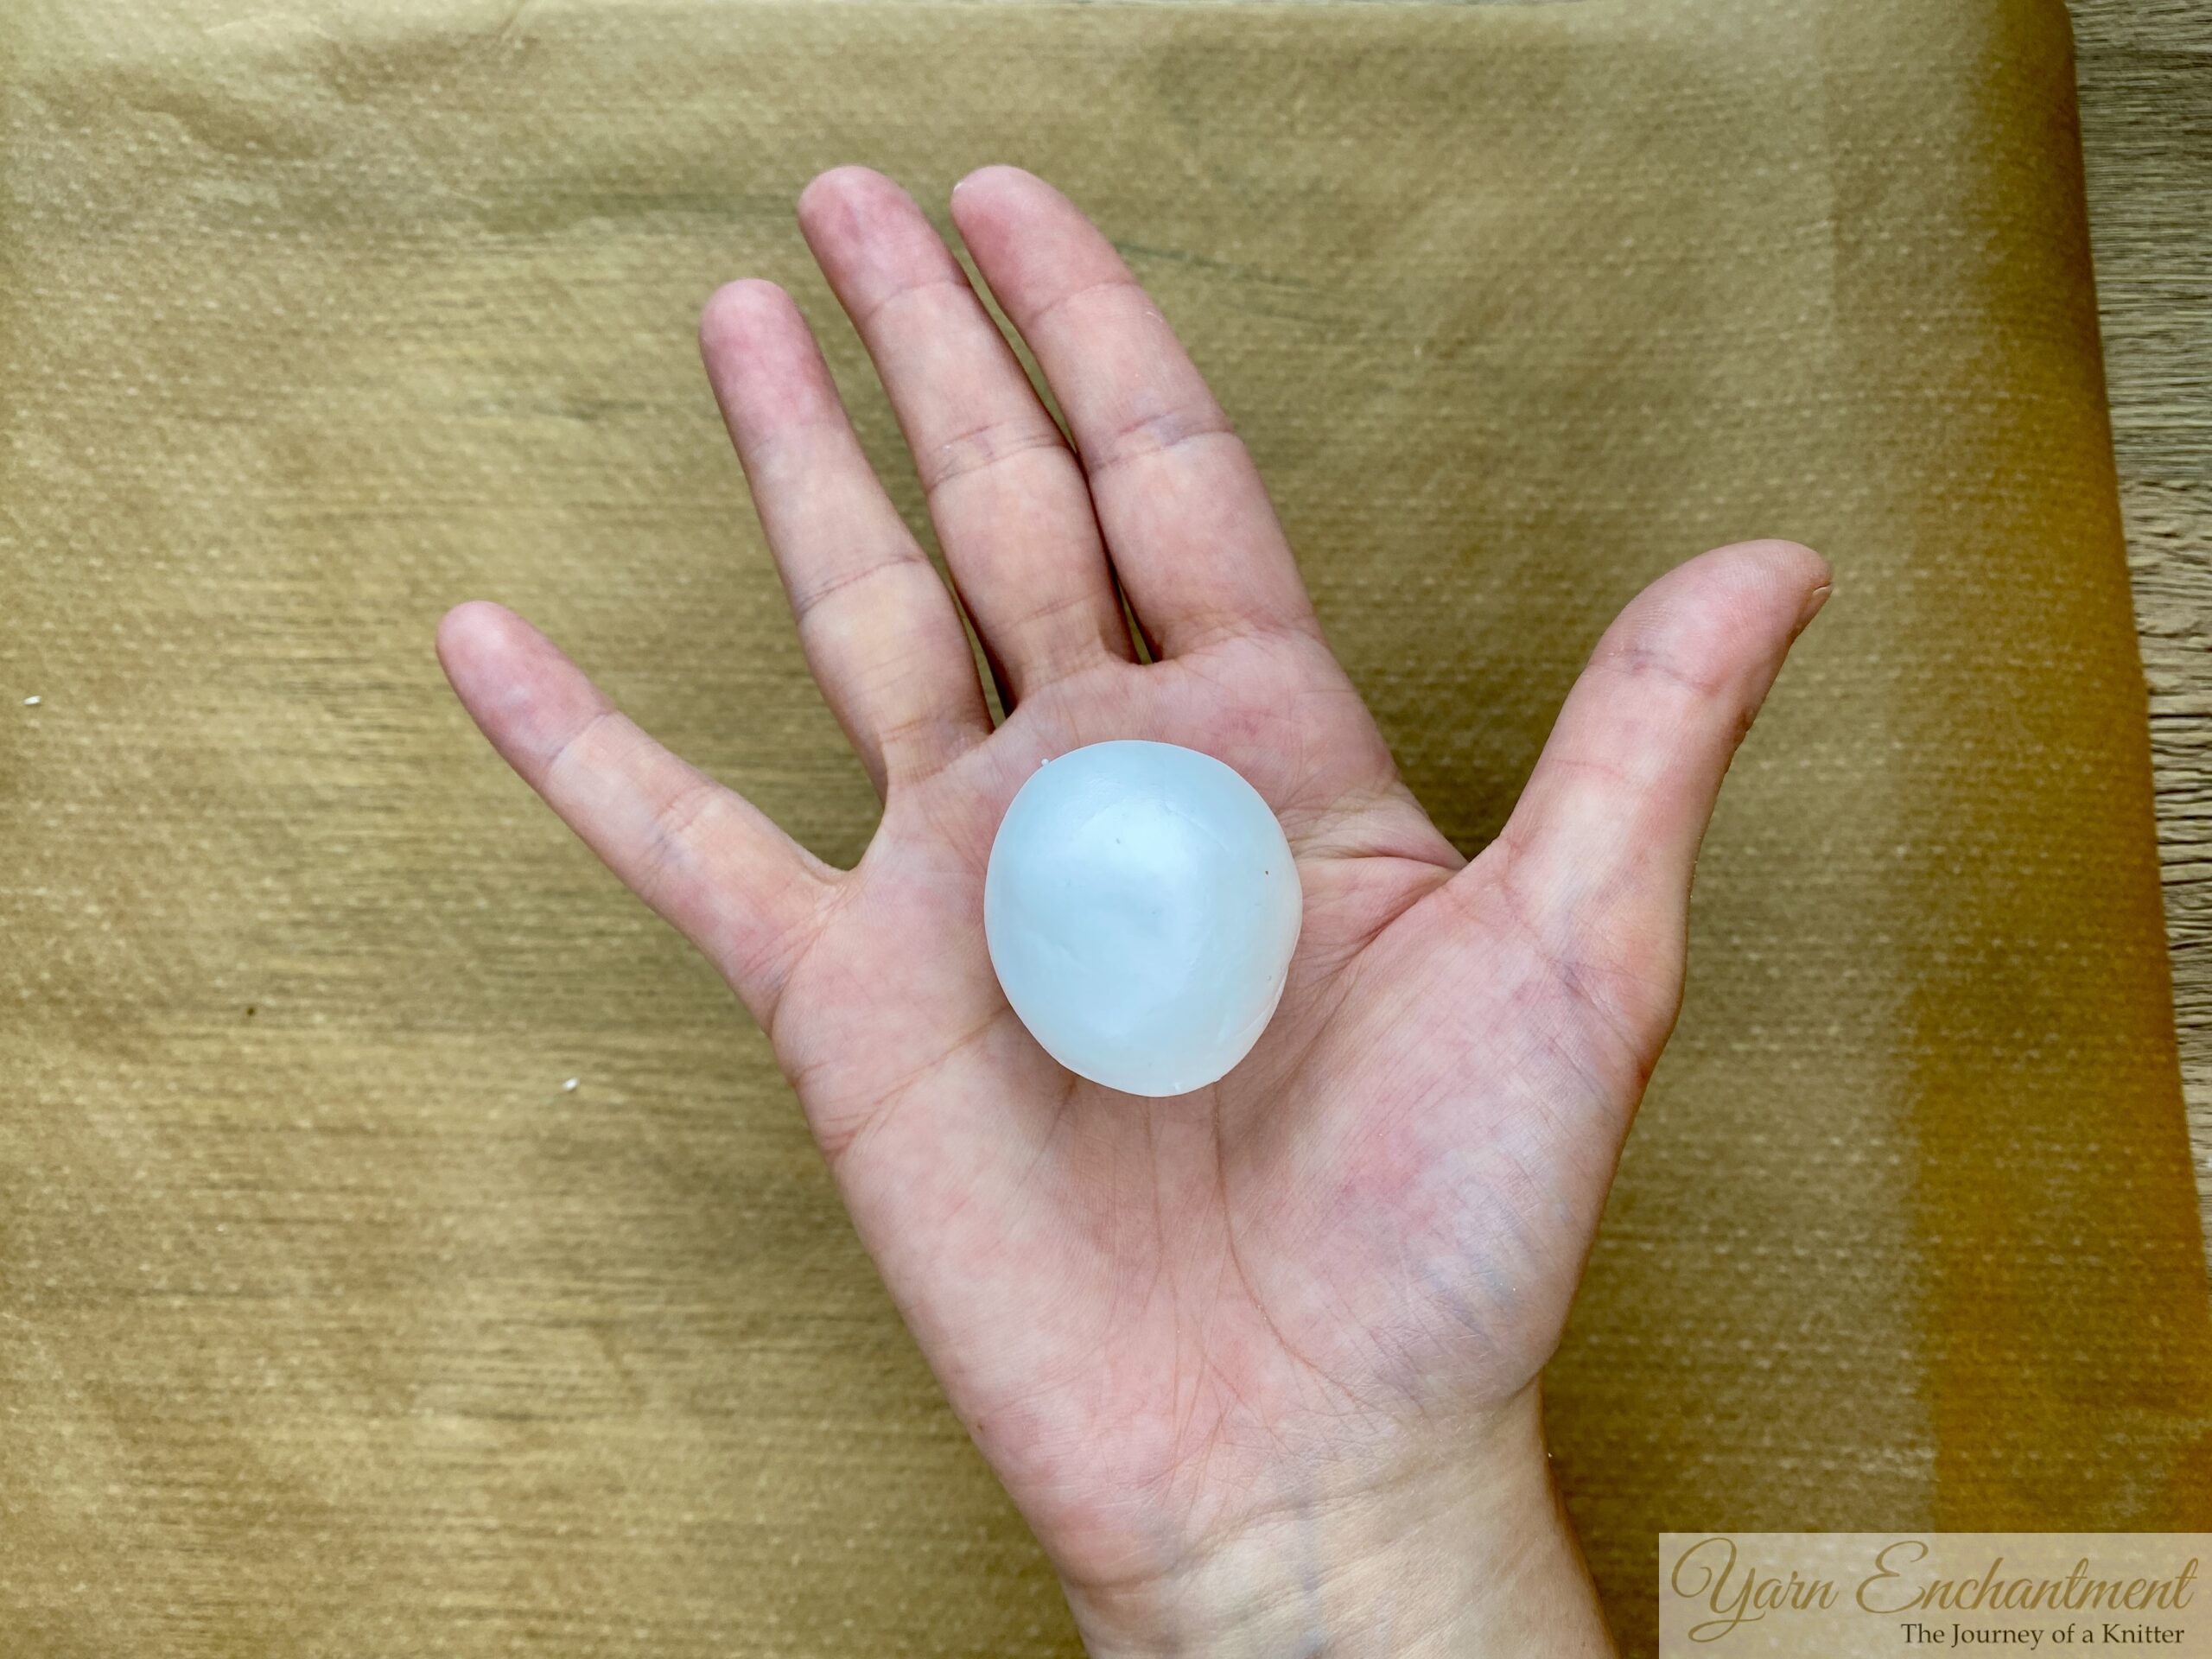
- Break off a small piece of white clay (about 5 mm in diameter).
- Roll it into a ball for the ghost’s head.
- Set it aside.
- Take more white clay and roll it out flat (about 2-3 mm thick). You can use a rolling pin, glass, or kitchen roller.
- Use a round cookie cutter or a bottle cap to cut out a circle from the flat clay. This will be the ghost’s "blanket."
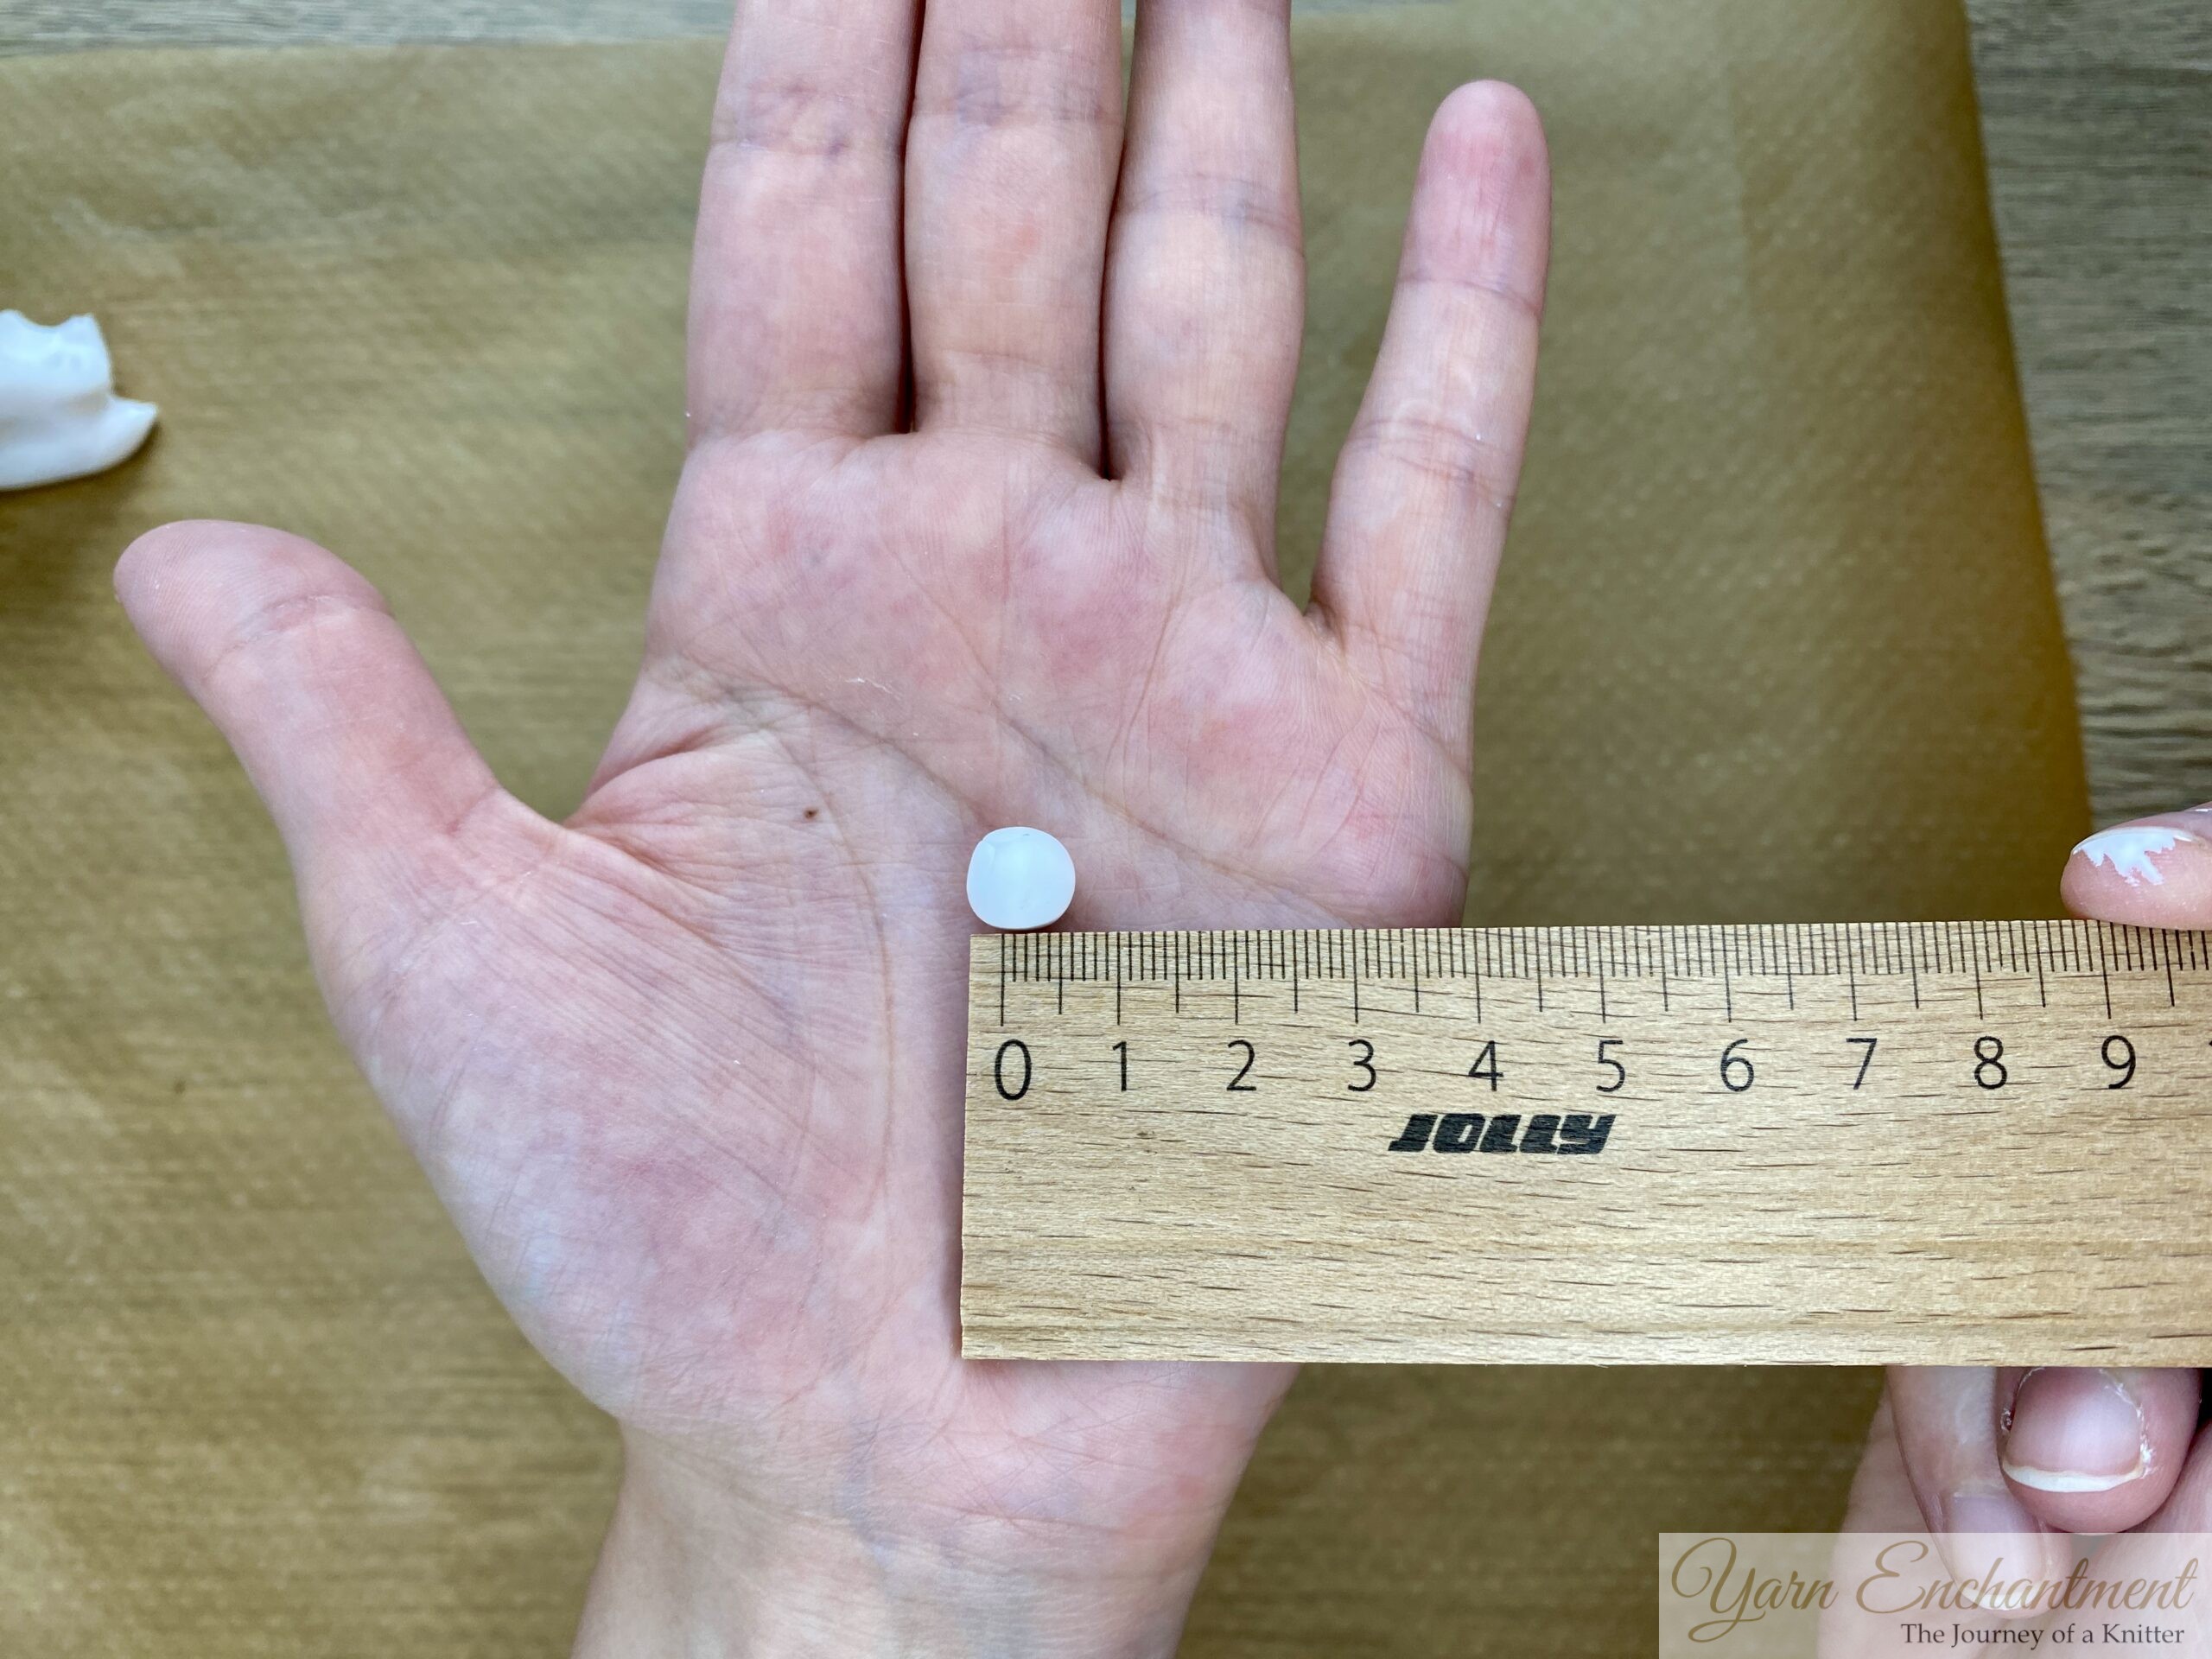 | 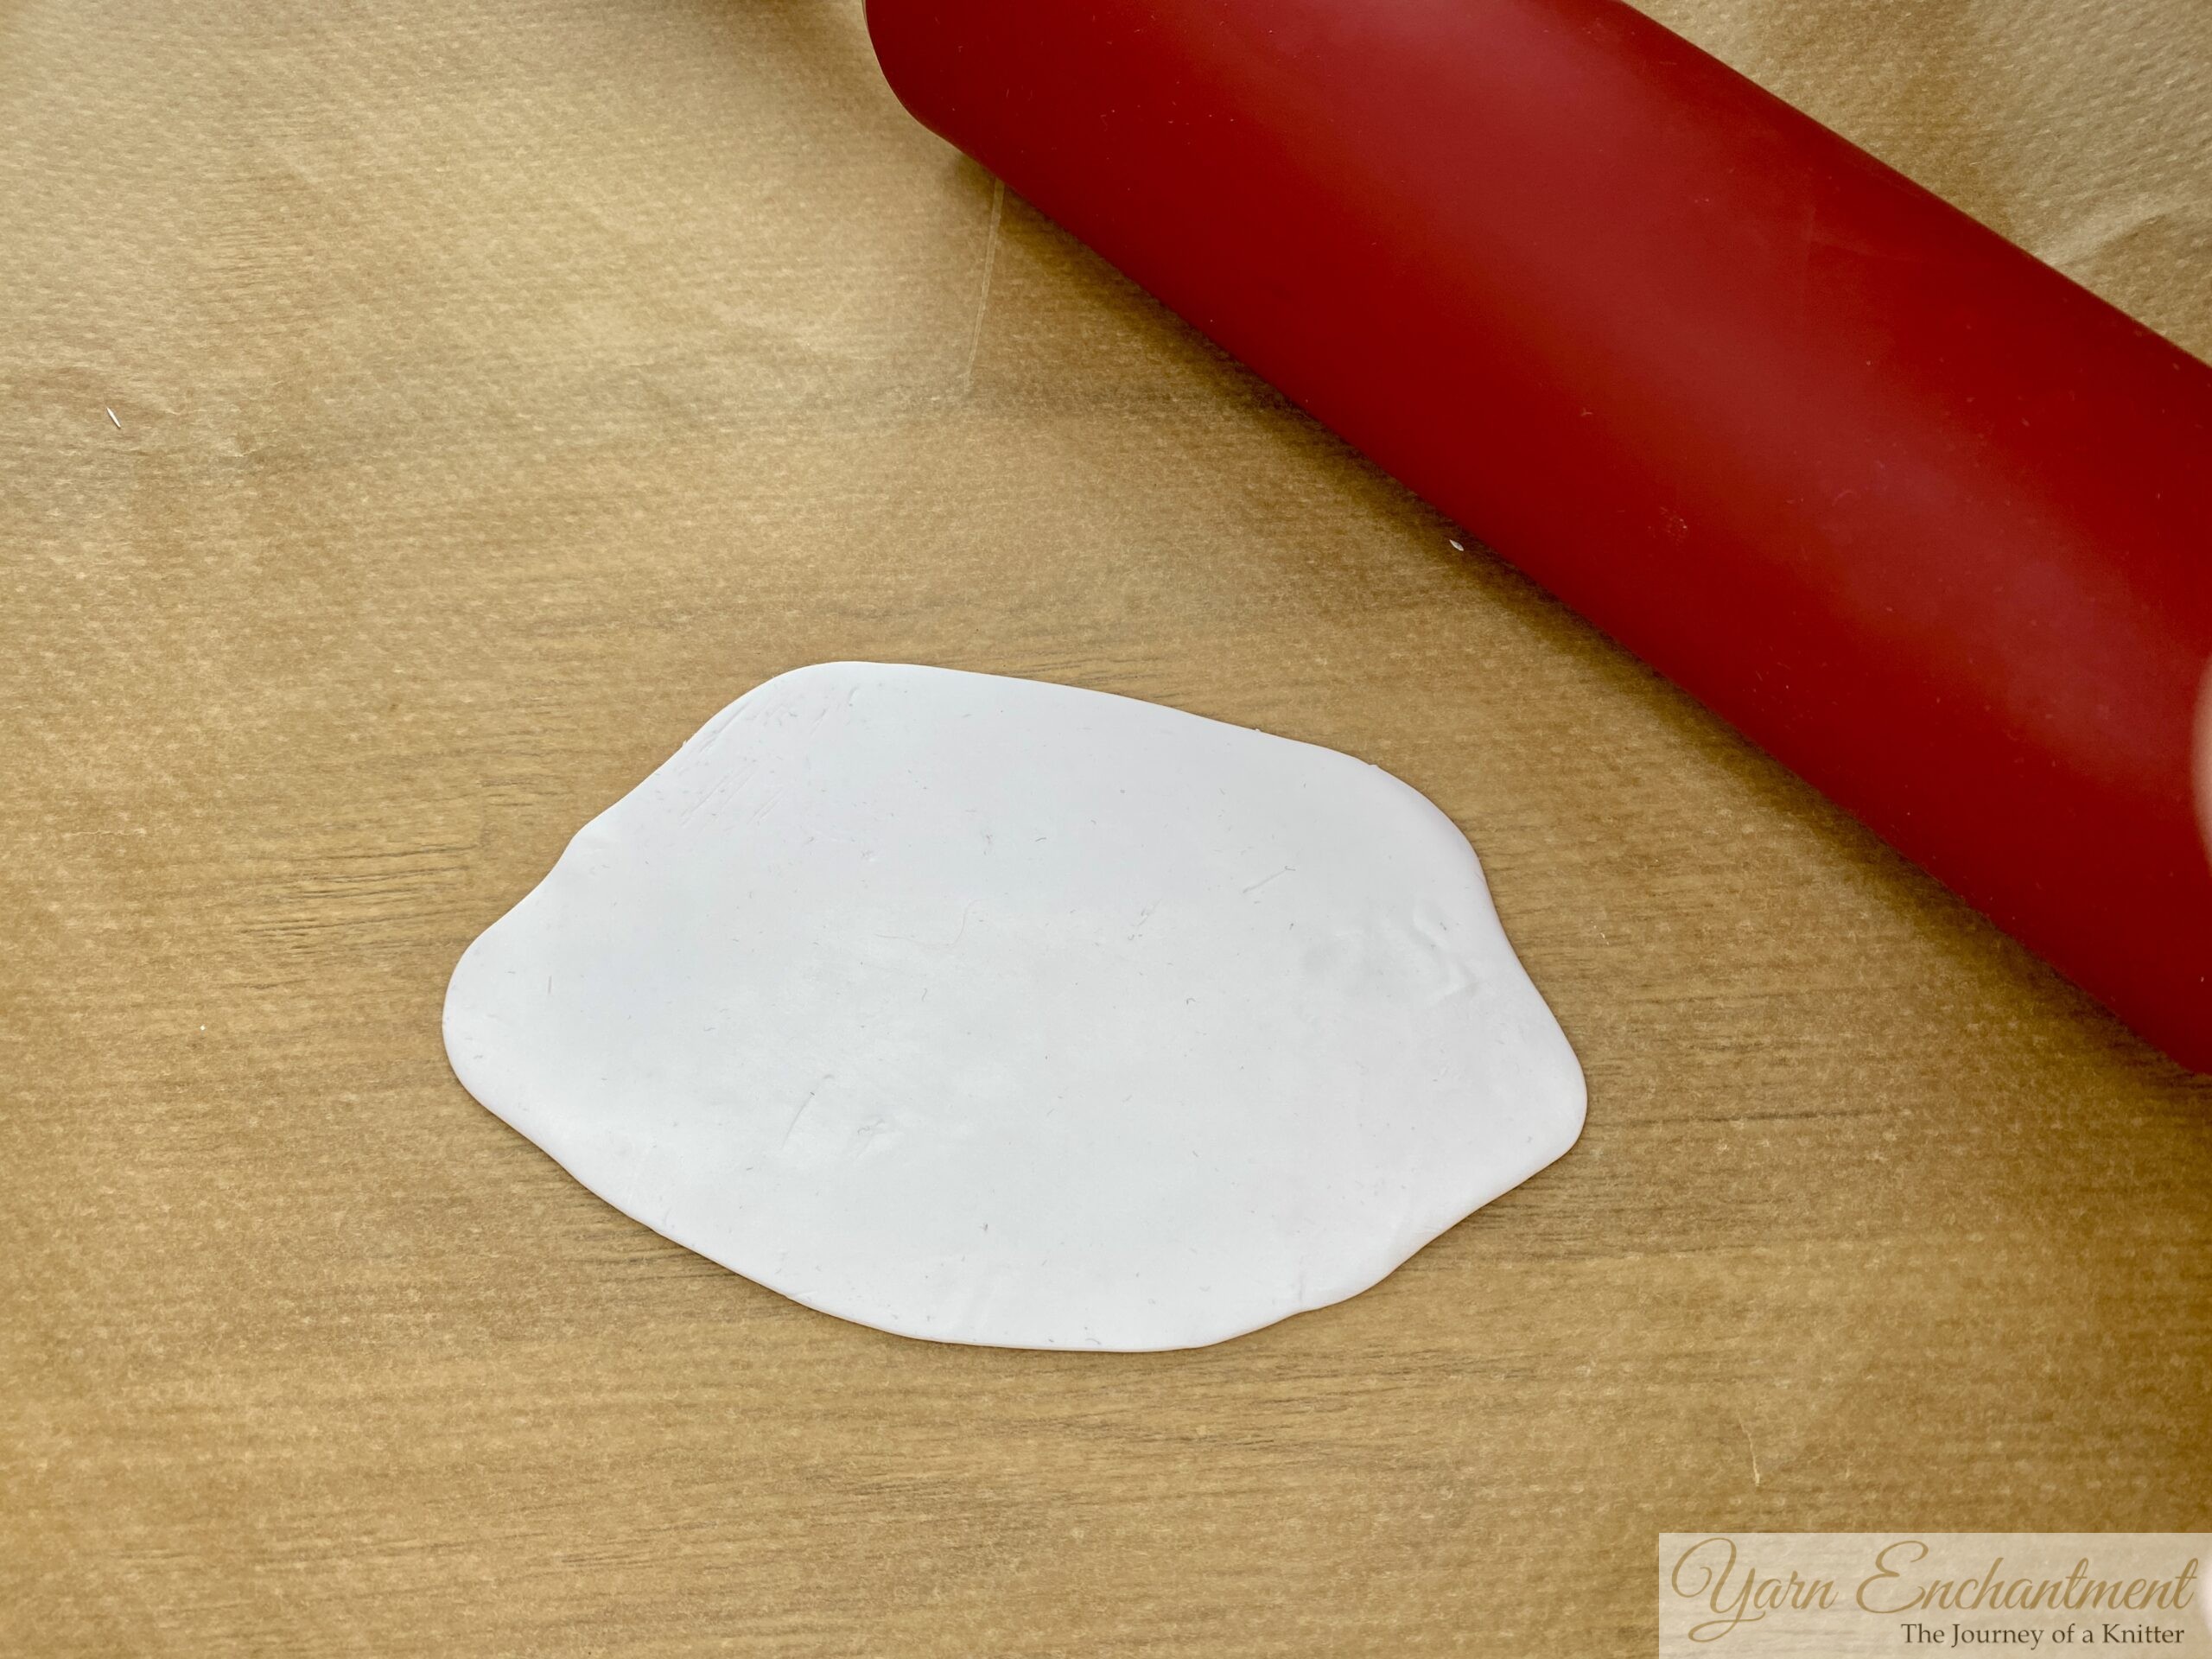 | 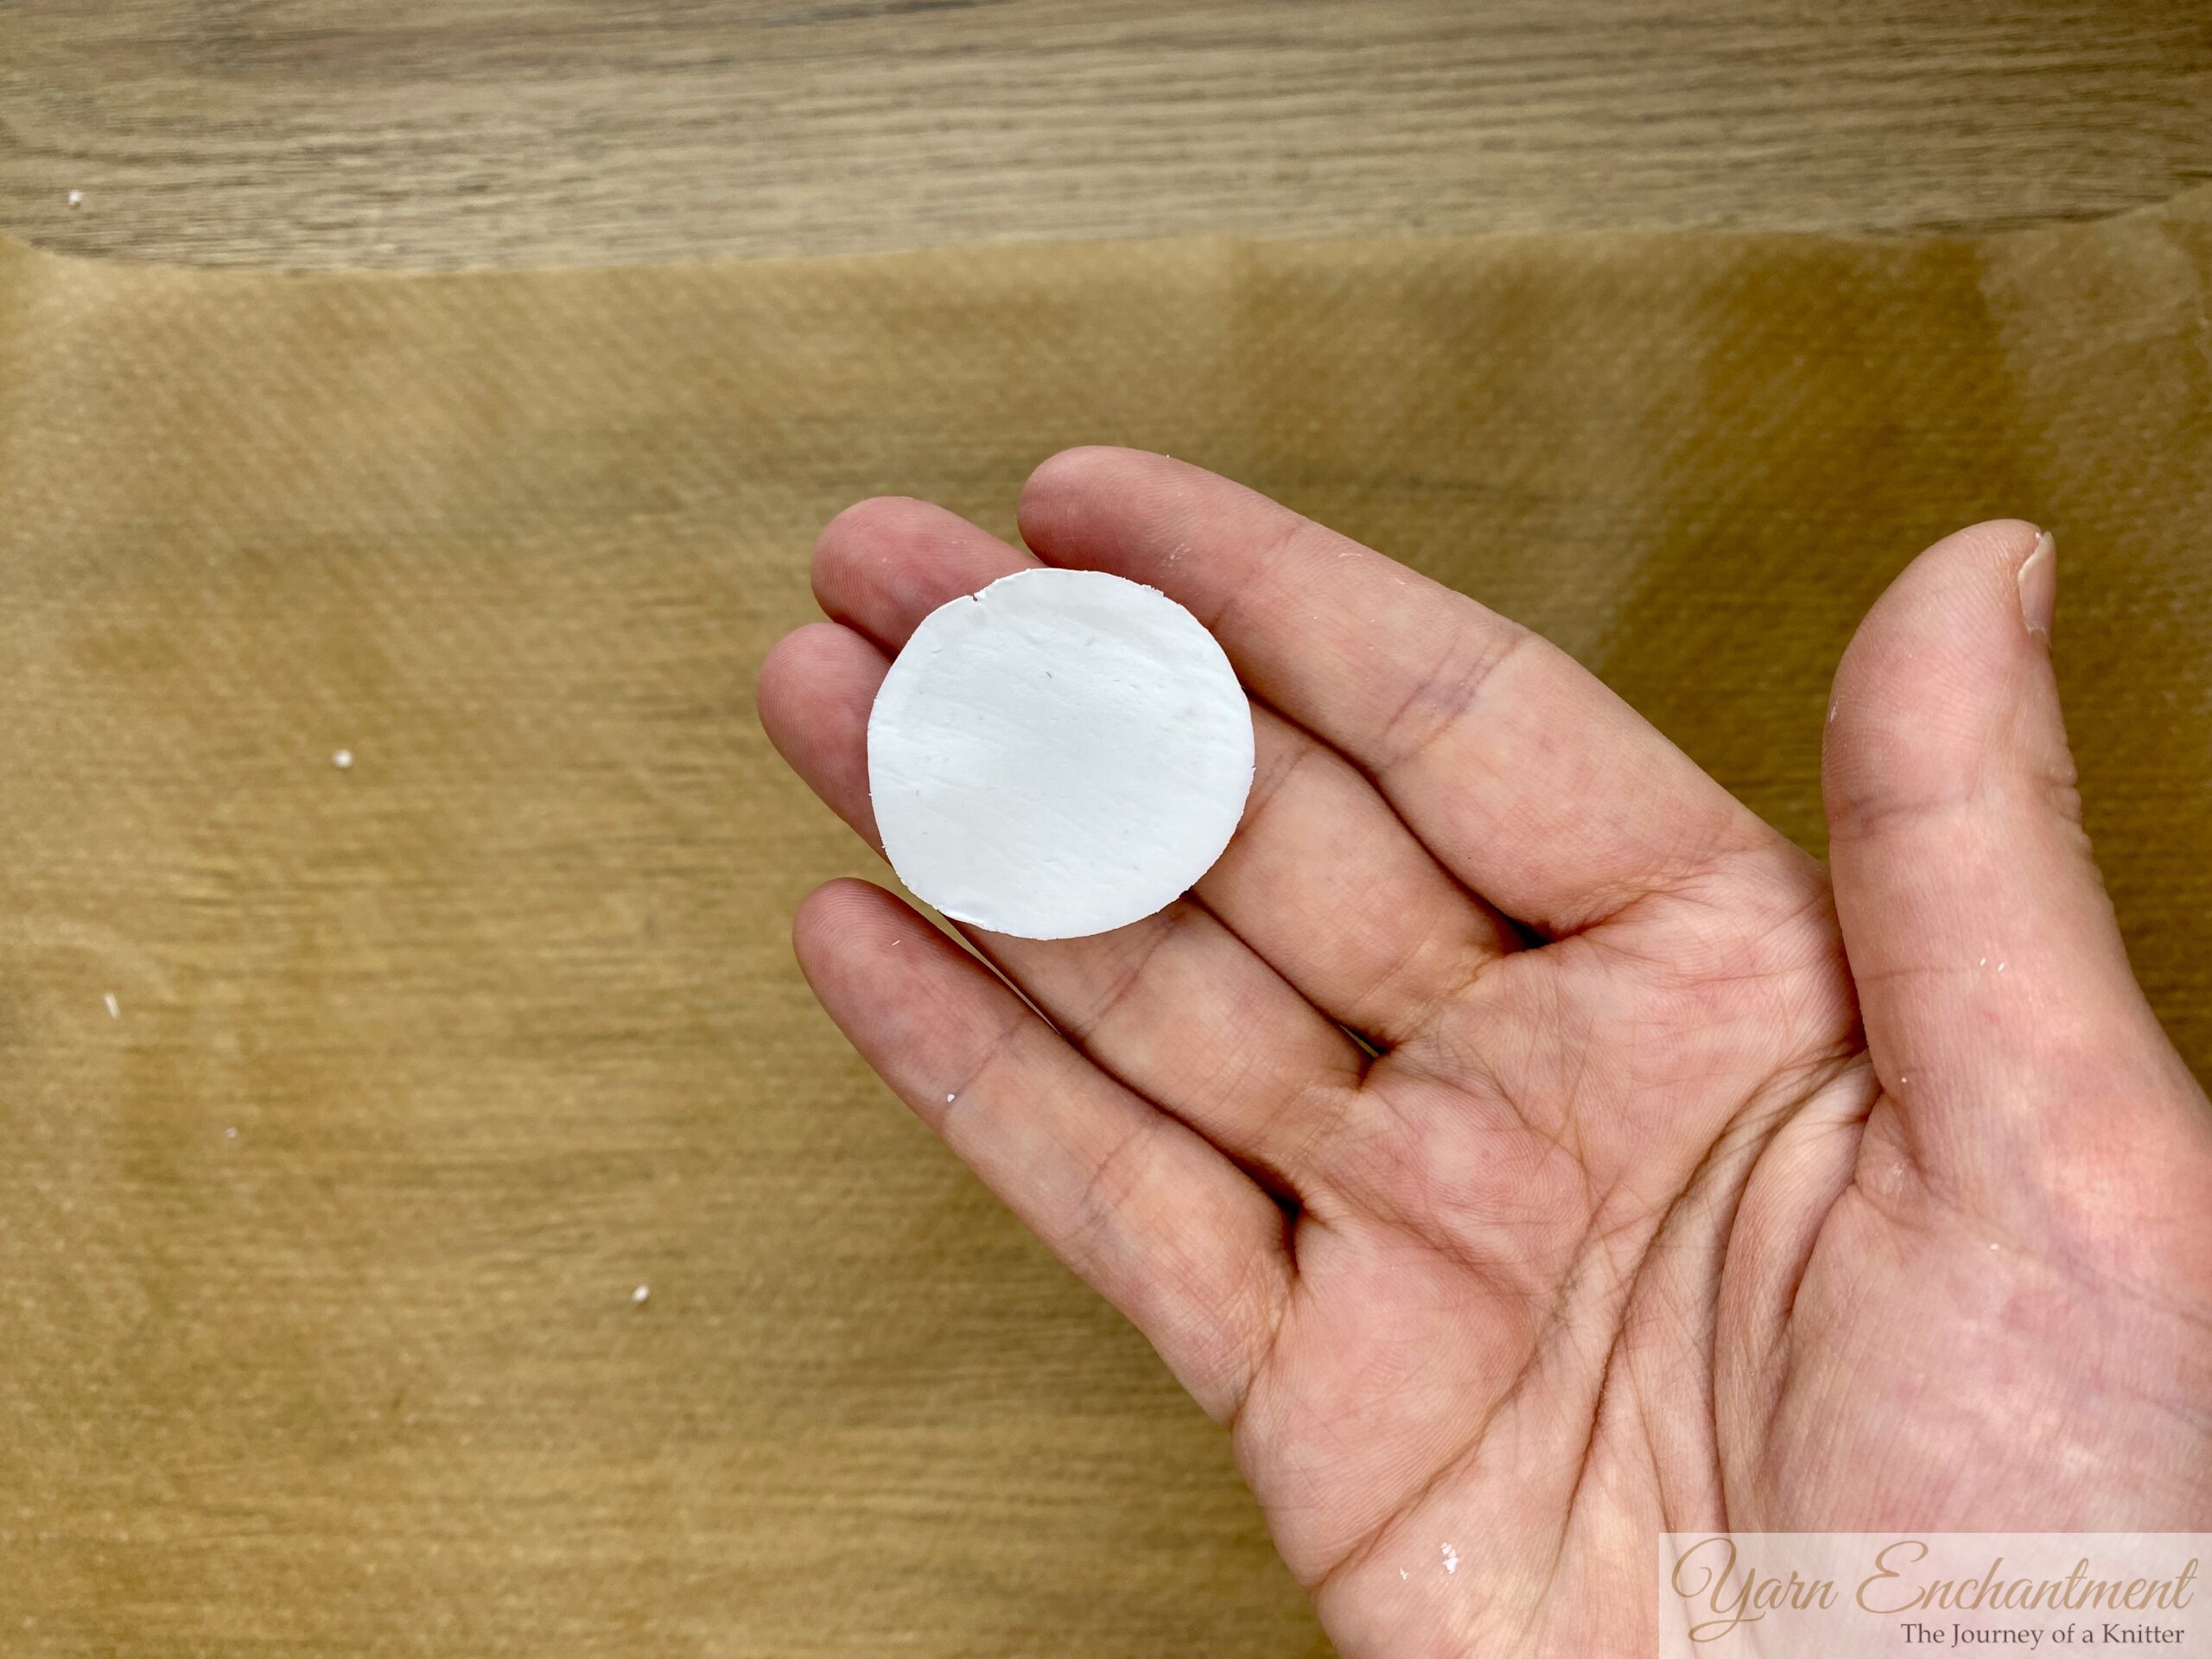 | Break off a small piece from your big ball of clay and roll it into a smaller ball. This will form the body, and we’ll also need it to insert the eyepin later, this little ball will hold everything in place. | Then take your bigger ball, lay it onto your working surface, and roll it out. The best thing is to use an old silicone roller so nothing will stick to it. | Use your cookie cutter or bottle cup to cut out small circles. Mine are about 3 cm (1 inch). Smooth out any edges now, you don't want sharp edges in your knitting project. |


Step 3: Form the Ghost Shape
- Place the small clay ball (the head) on top of a nasal spray cap or similar small bottle cap. (The cap acts as a stand.)
- Drape your clay circle (the blanket) gently over the head, letting the edges fall naturally to make the ghost’s body and “floating” look.
- Use your fingers to arrange the folds for a more ghostly effect.
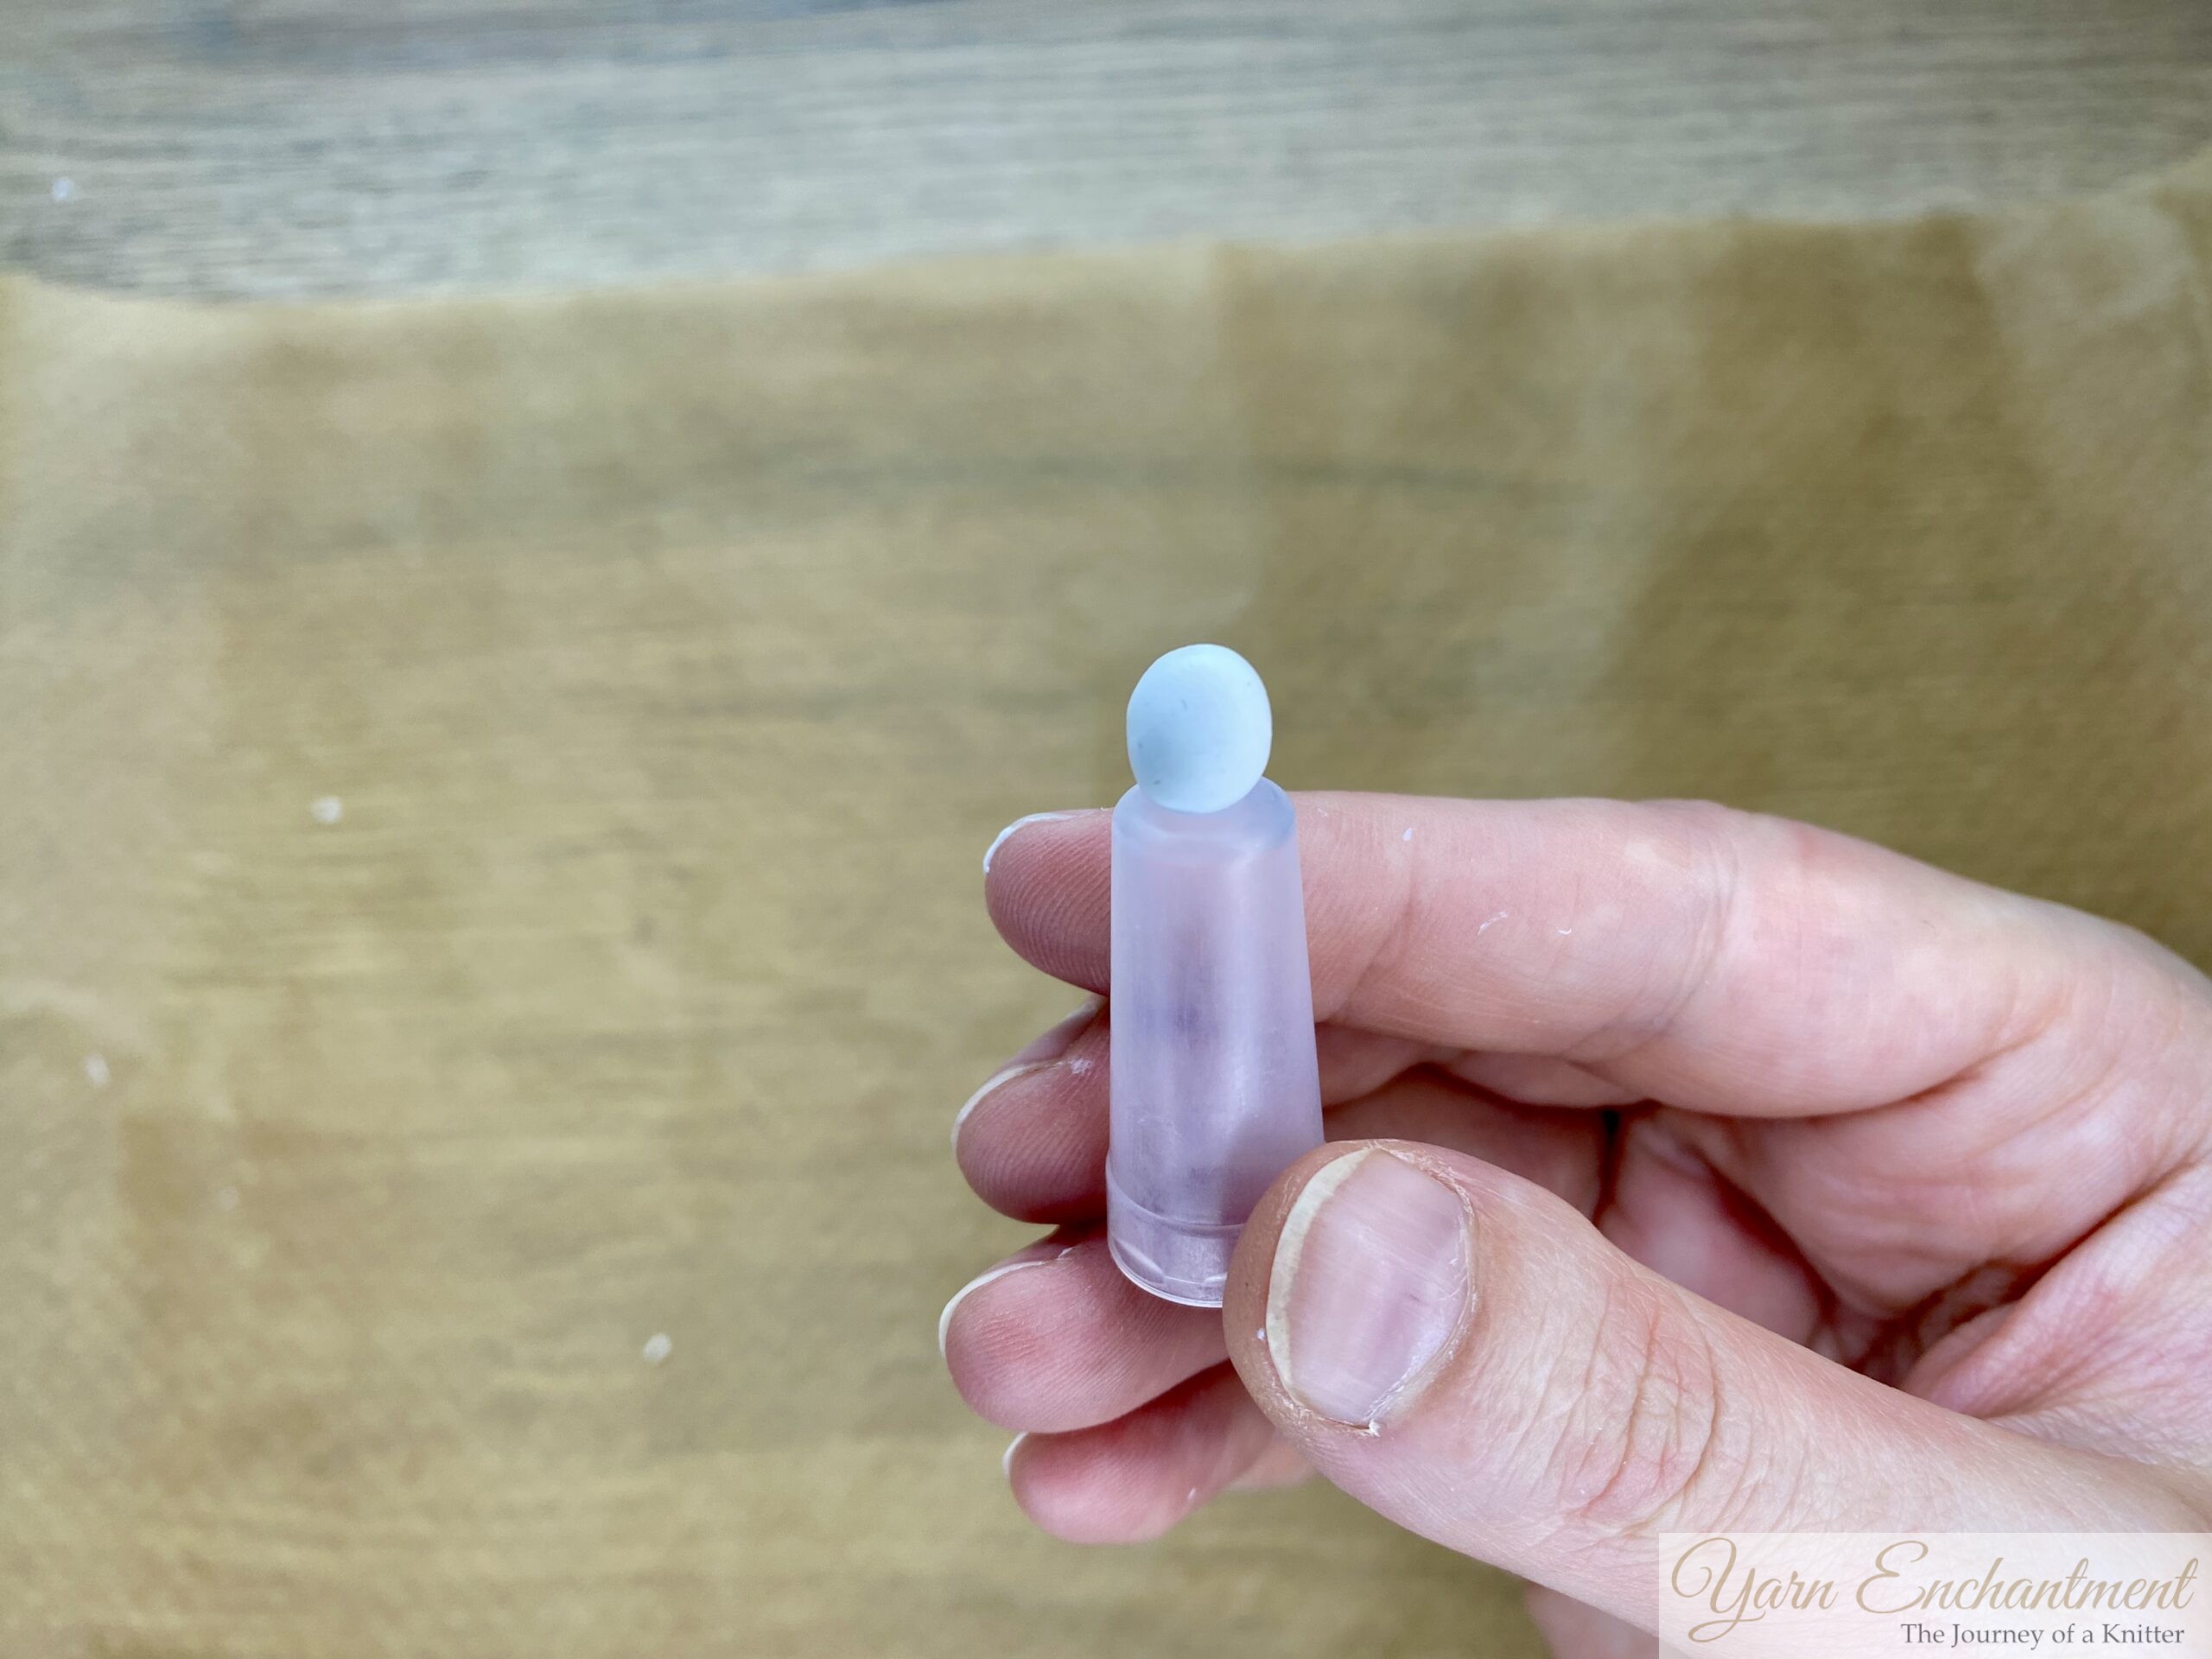 |  |  | I am placing my little ball on a cap from a nasal spray. You might have something similar. | Drape your clay circle (the blanket) gently over the head, letting the edges fall naturally to make the ghost’s body and “floating” look. | Use your fingers to arrange the folds for a more ghostly effect. If you kneaded everything thoroughly, you won't have trouble with the clay breaking. |


Step 4: Add Eye Pins & Features
- Cut an eye pin slightly shorter using wire cutters or sturdy scissors.
- Use a toothpick or your eyepin to poke a small hole where you want to insert your eye pin (usually at the top of the ghost’s head).
- Take out the eye pin, add a tiny bit of superglue to its shaft, and carefully insert it back. This will keep it secure.
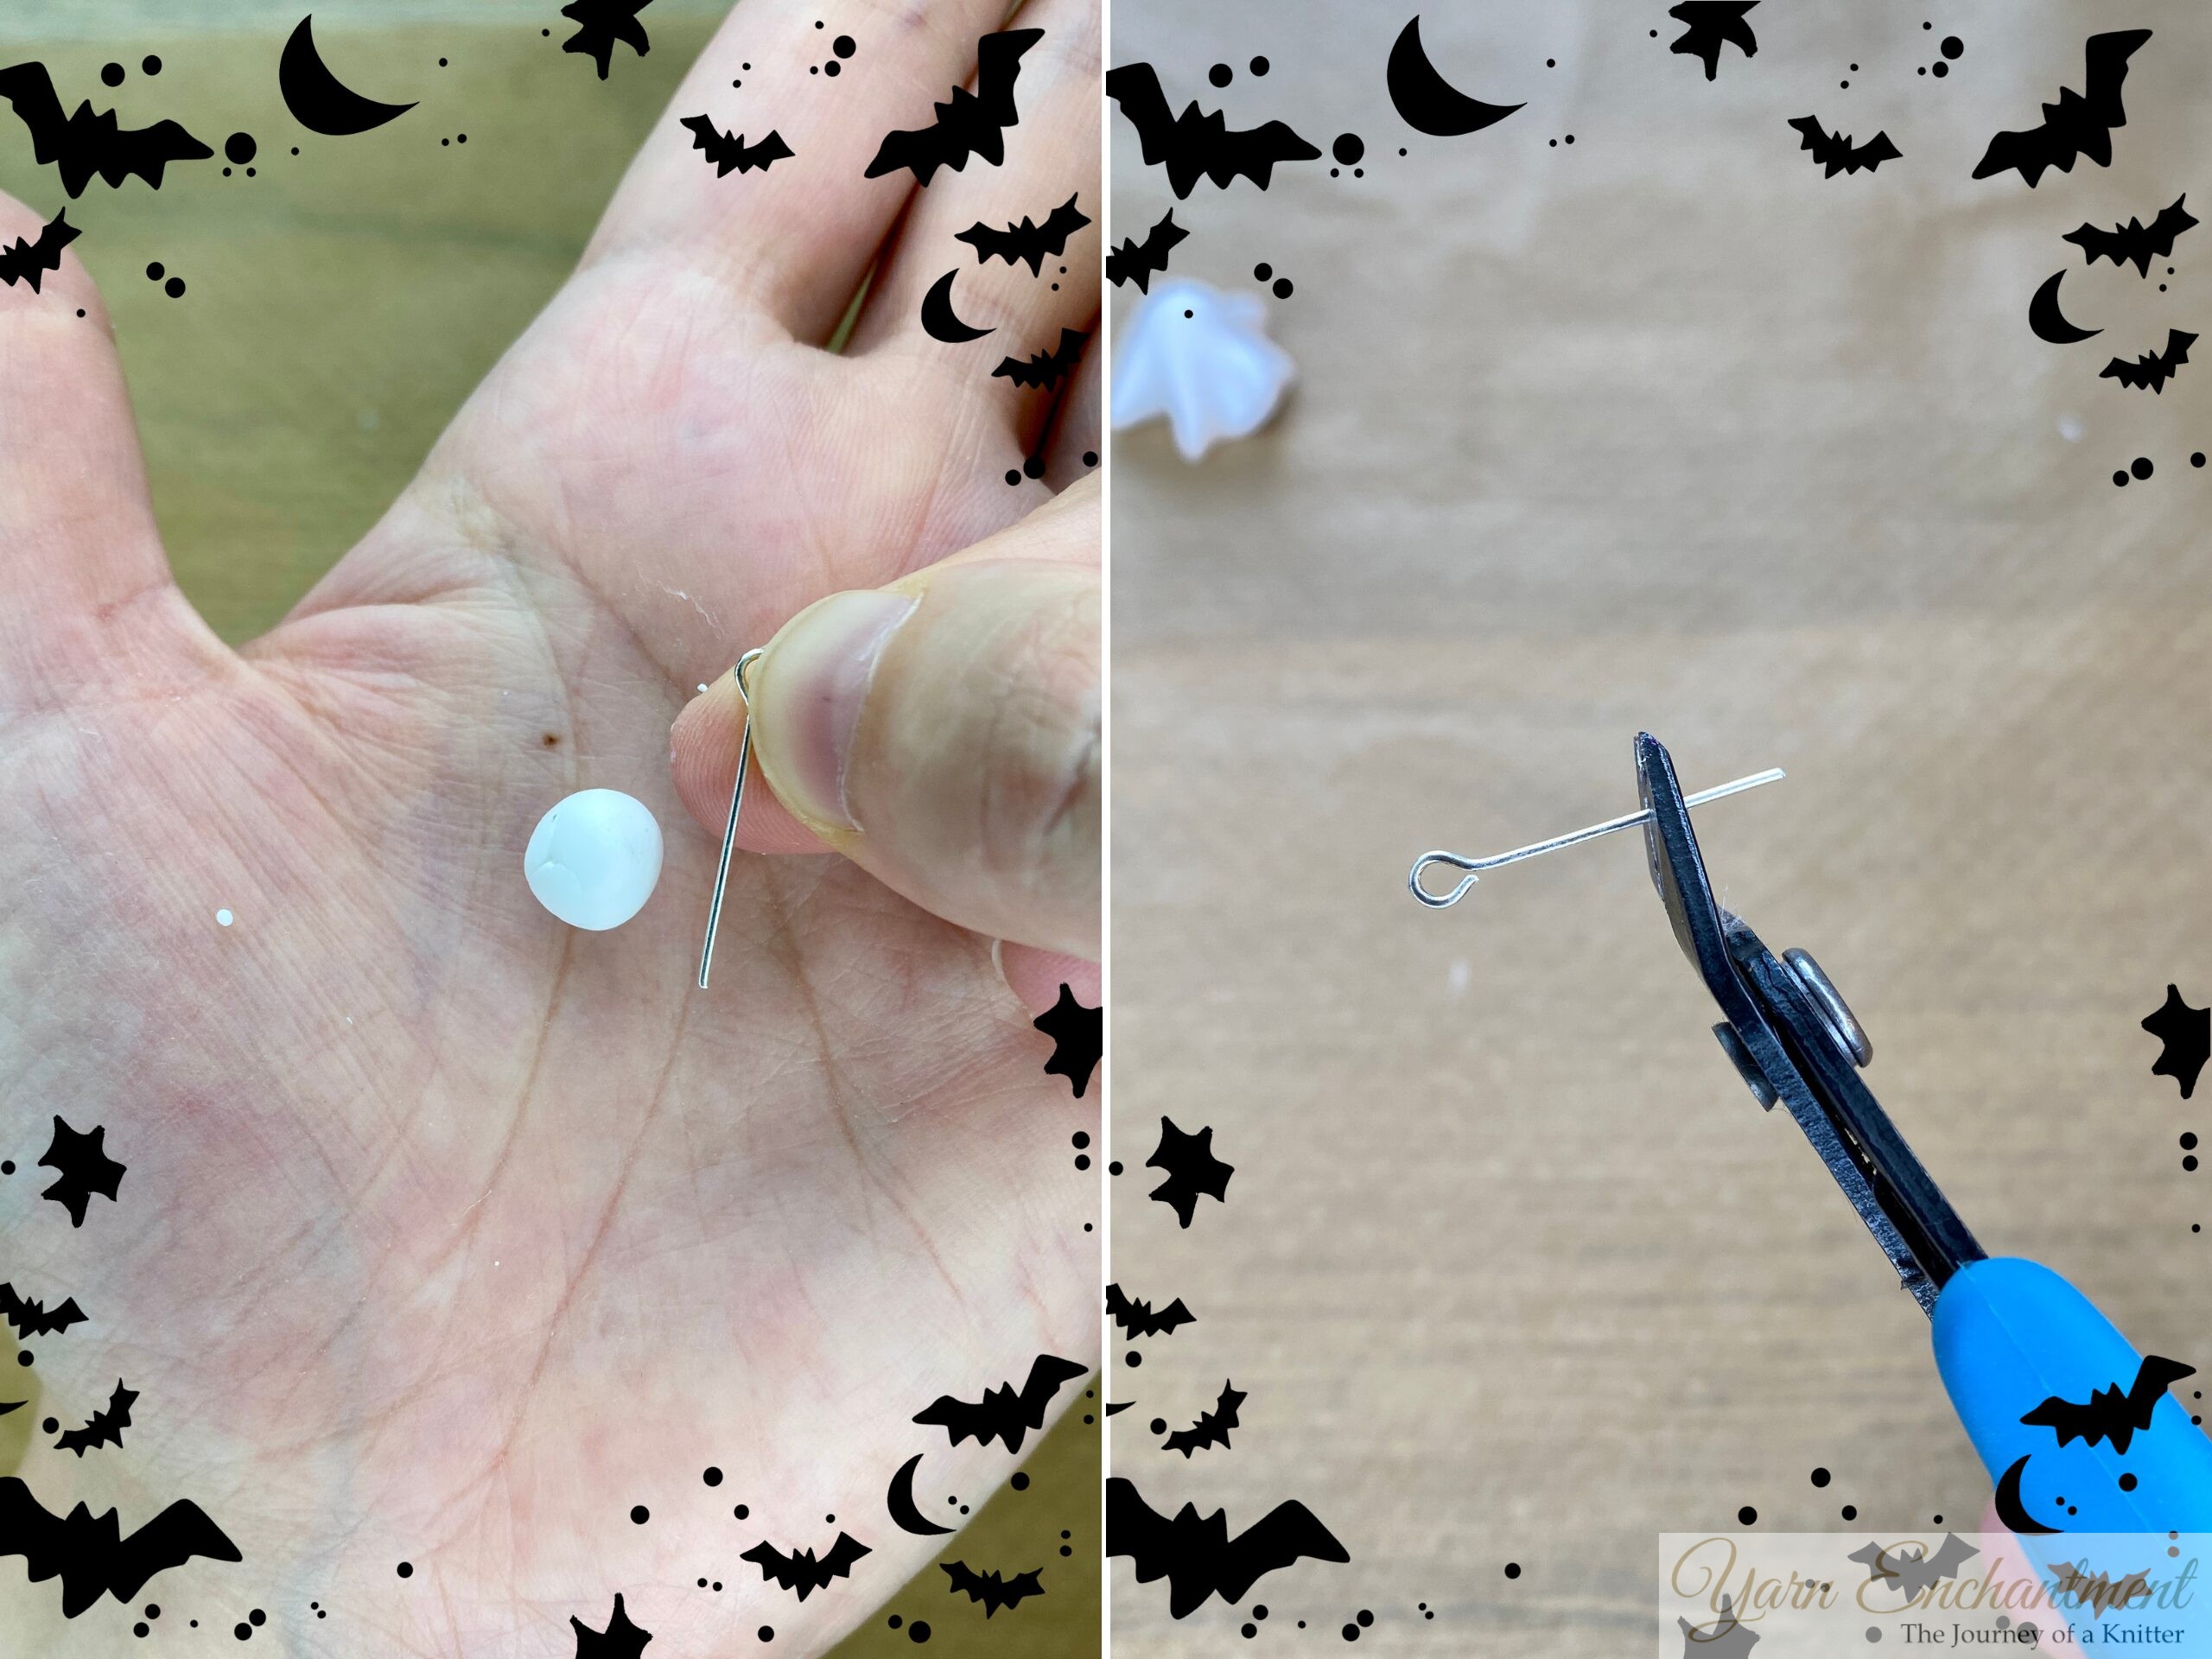 |  | 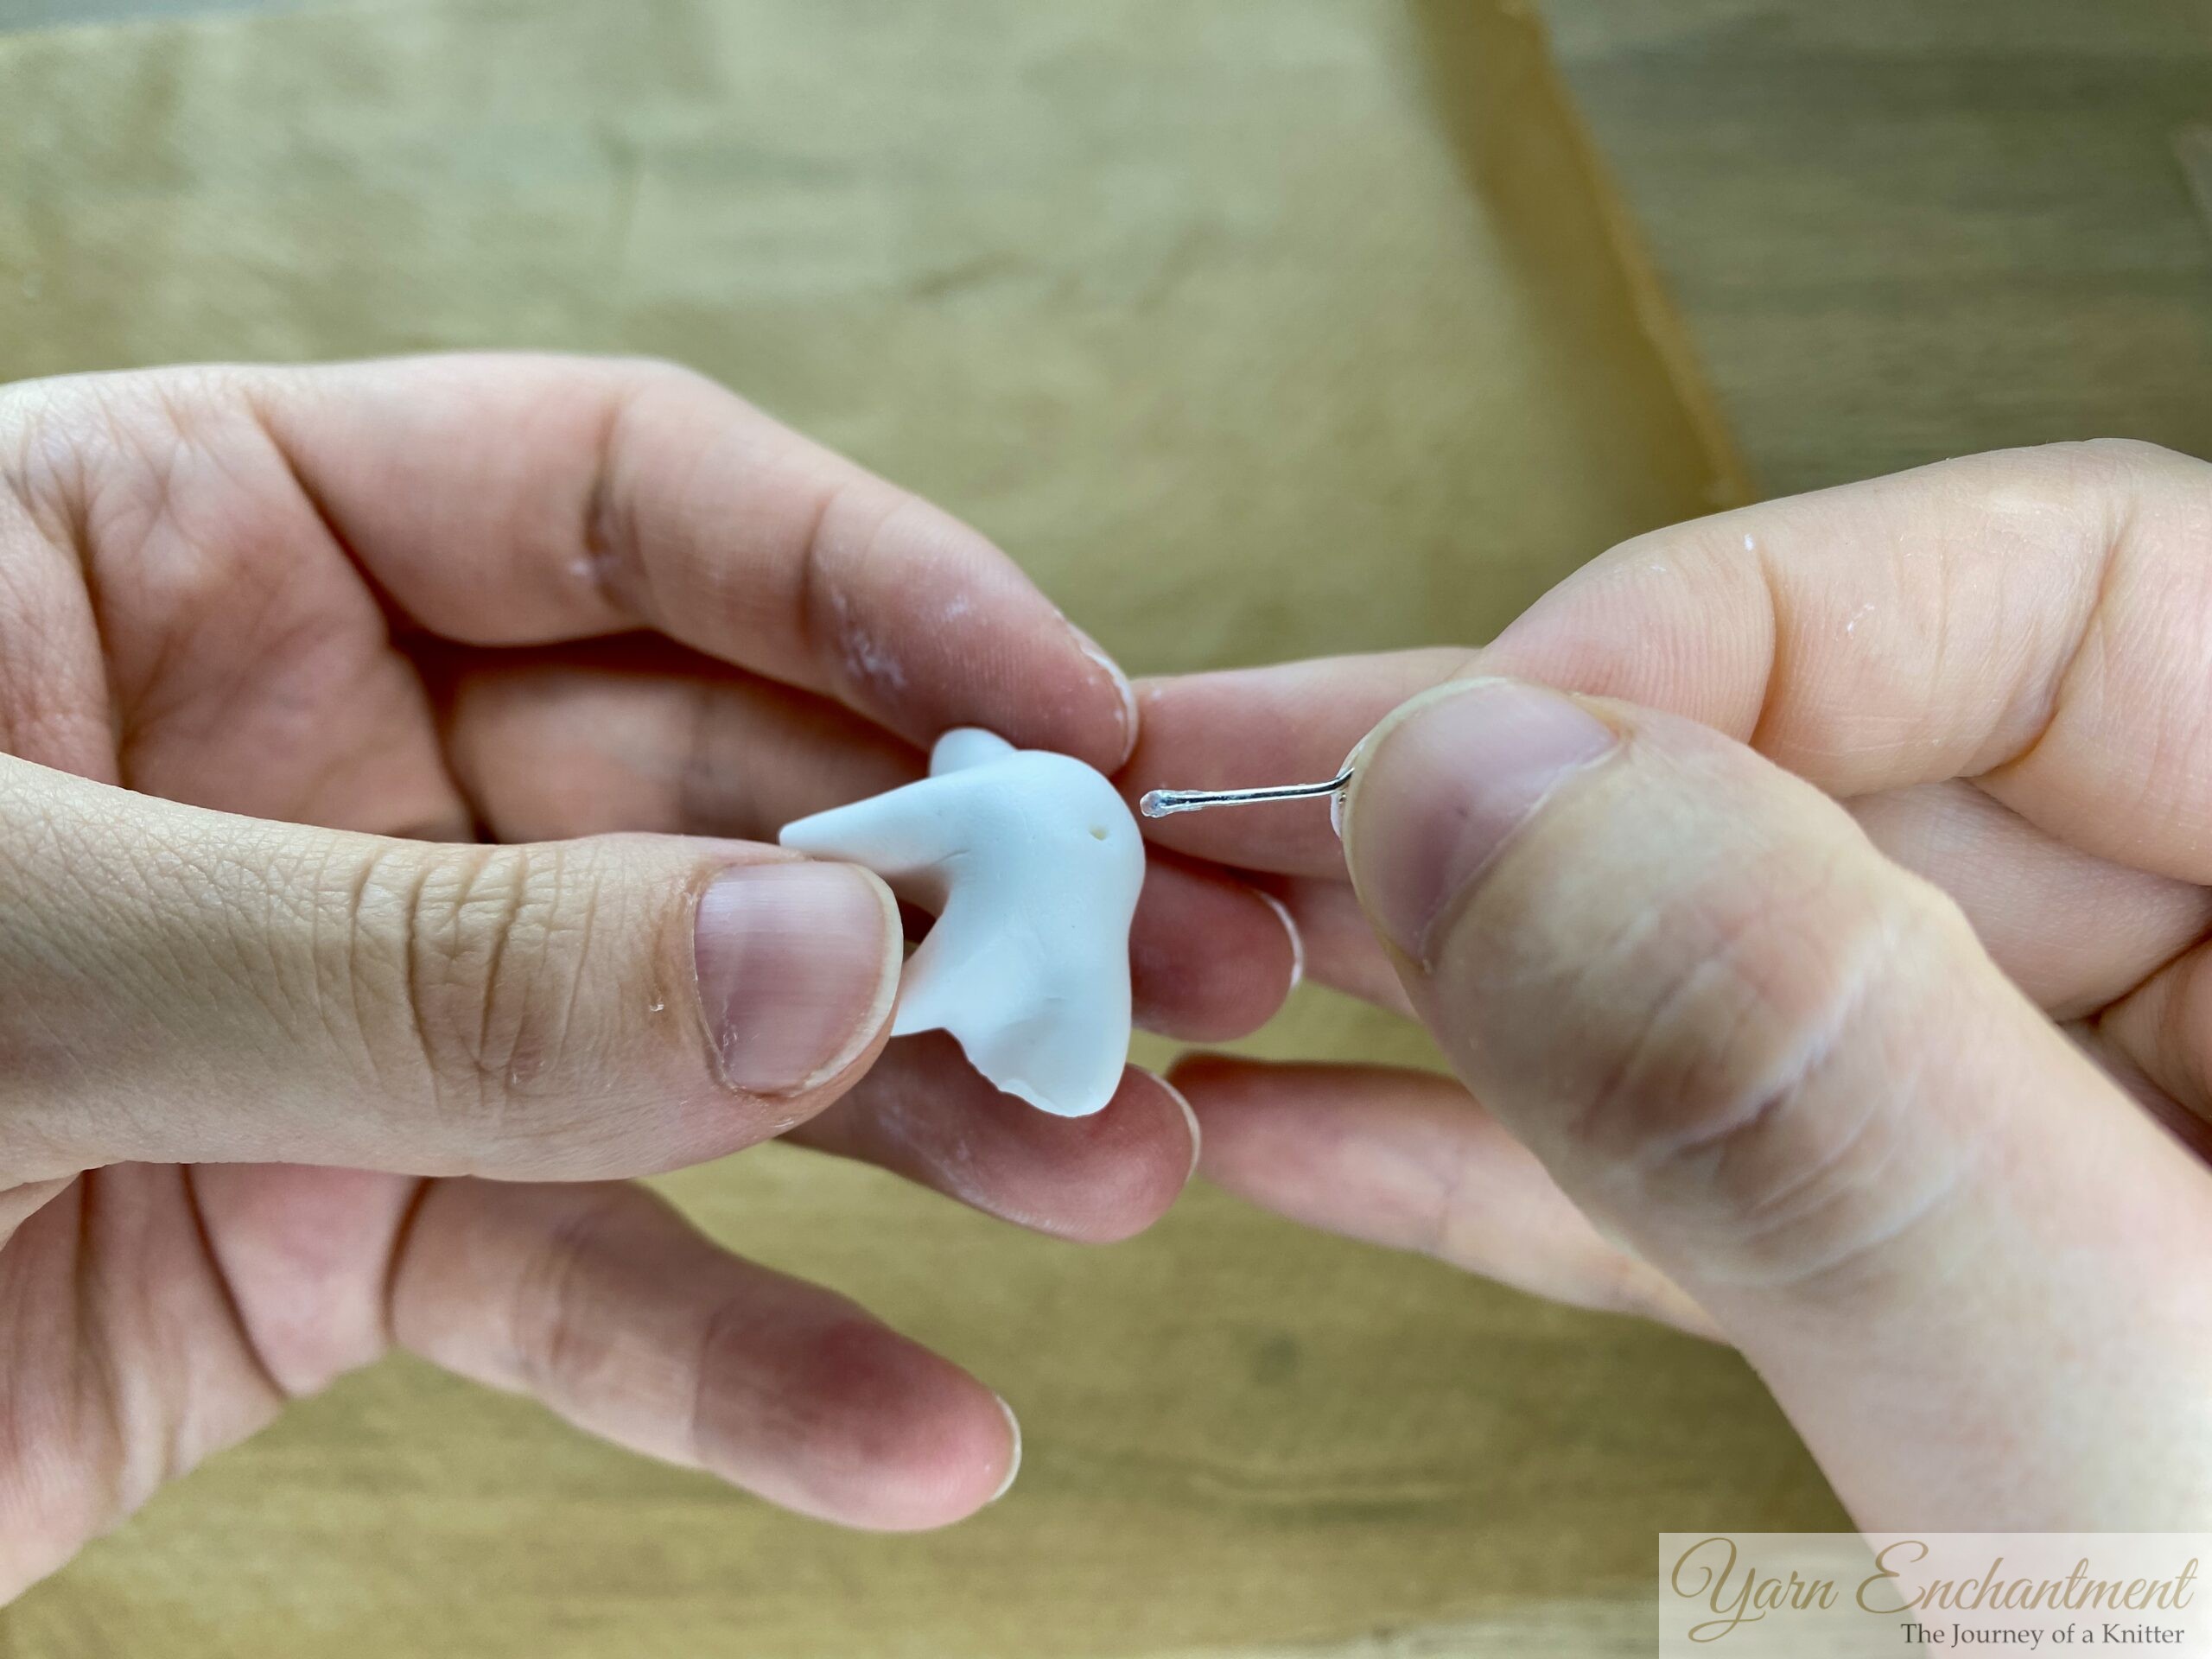 | Trim your eyepin to the length needed so it fits securely inside the body of your clay ghost | First, insert your eyepin to make a small hole. Then remove it, and add a little superglue to the eyepin before reinserting it. | Reinsert the eyepin. Your eyepin will stay securely in place inside the clay charm. |


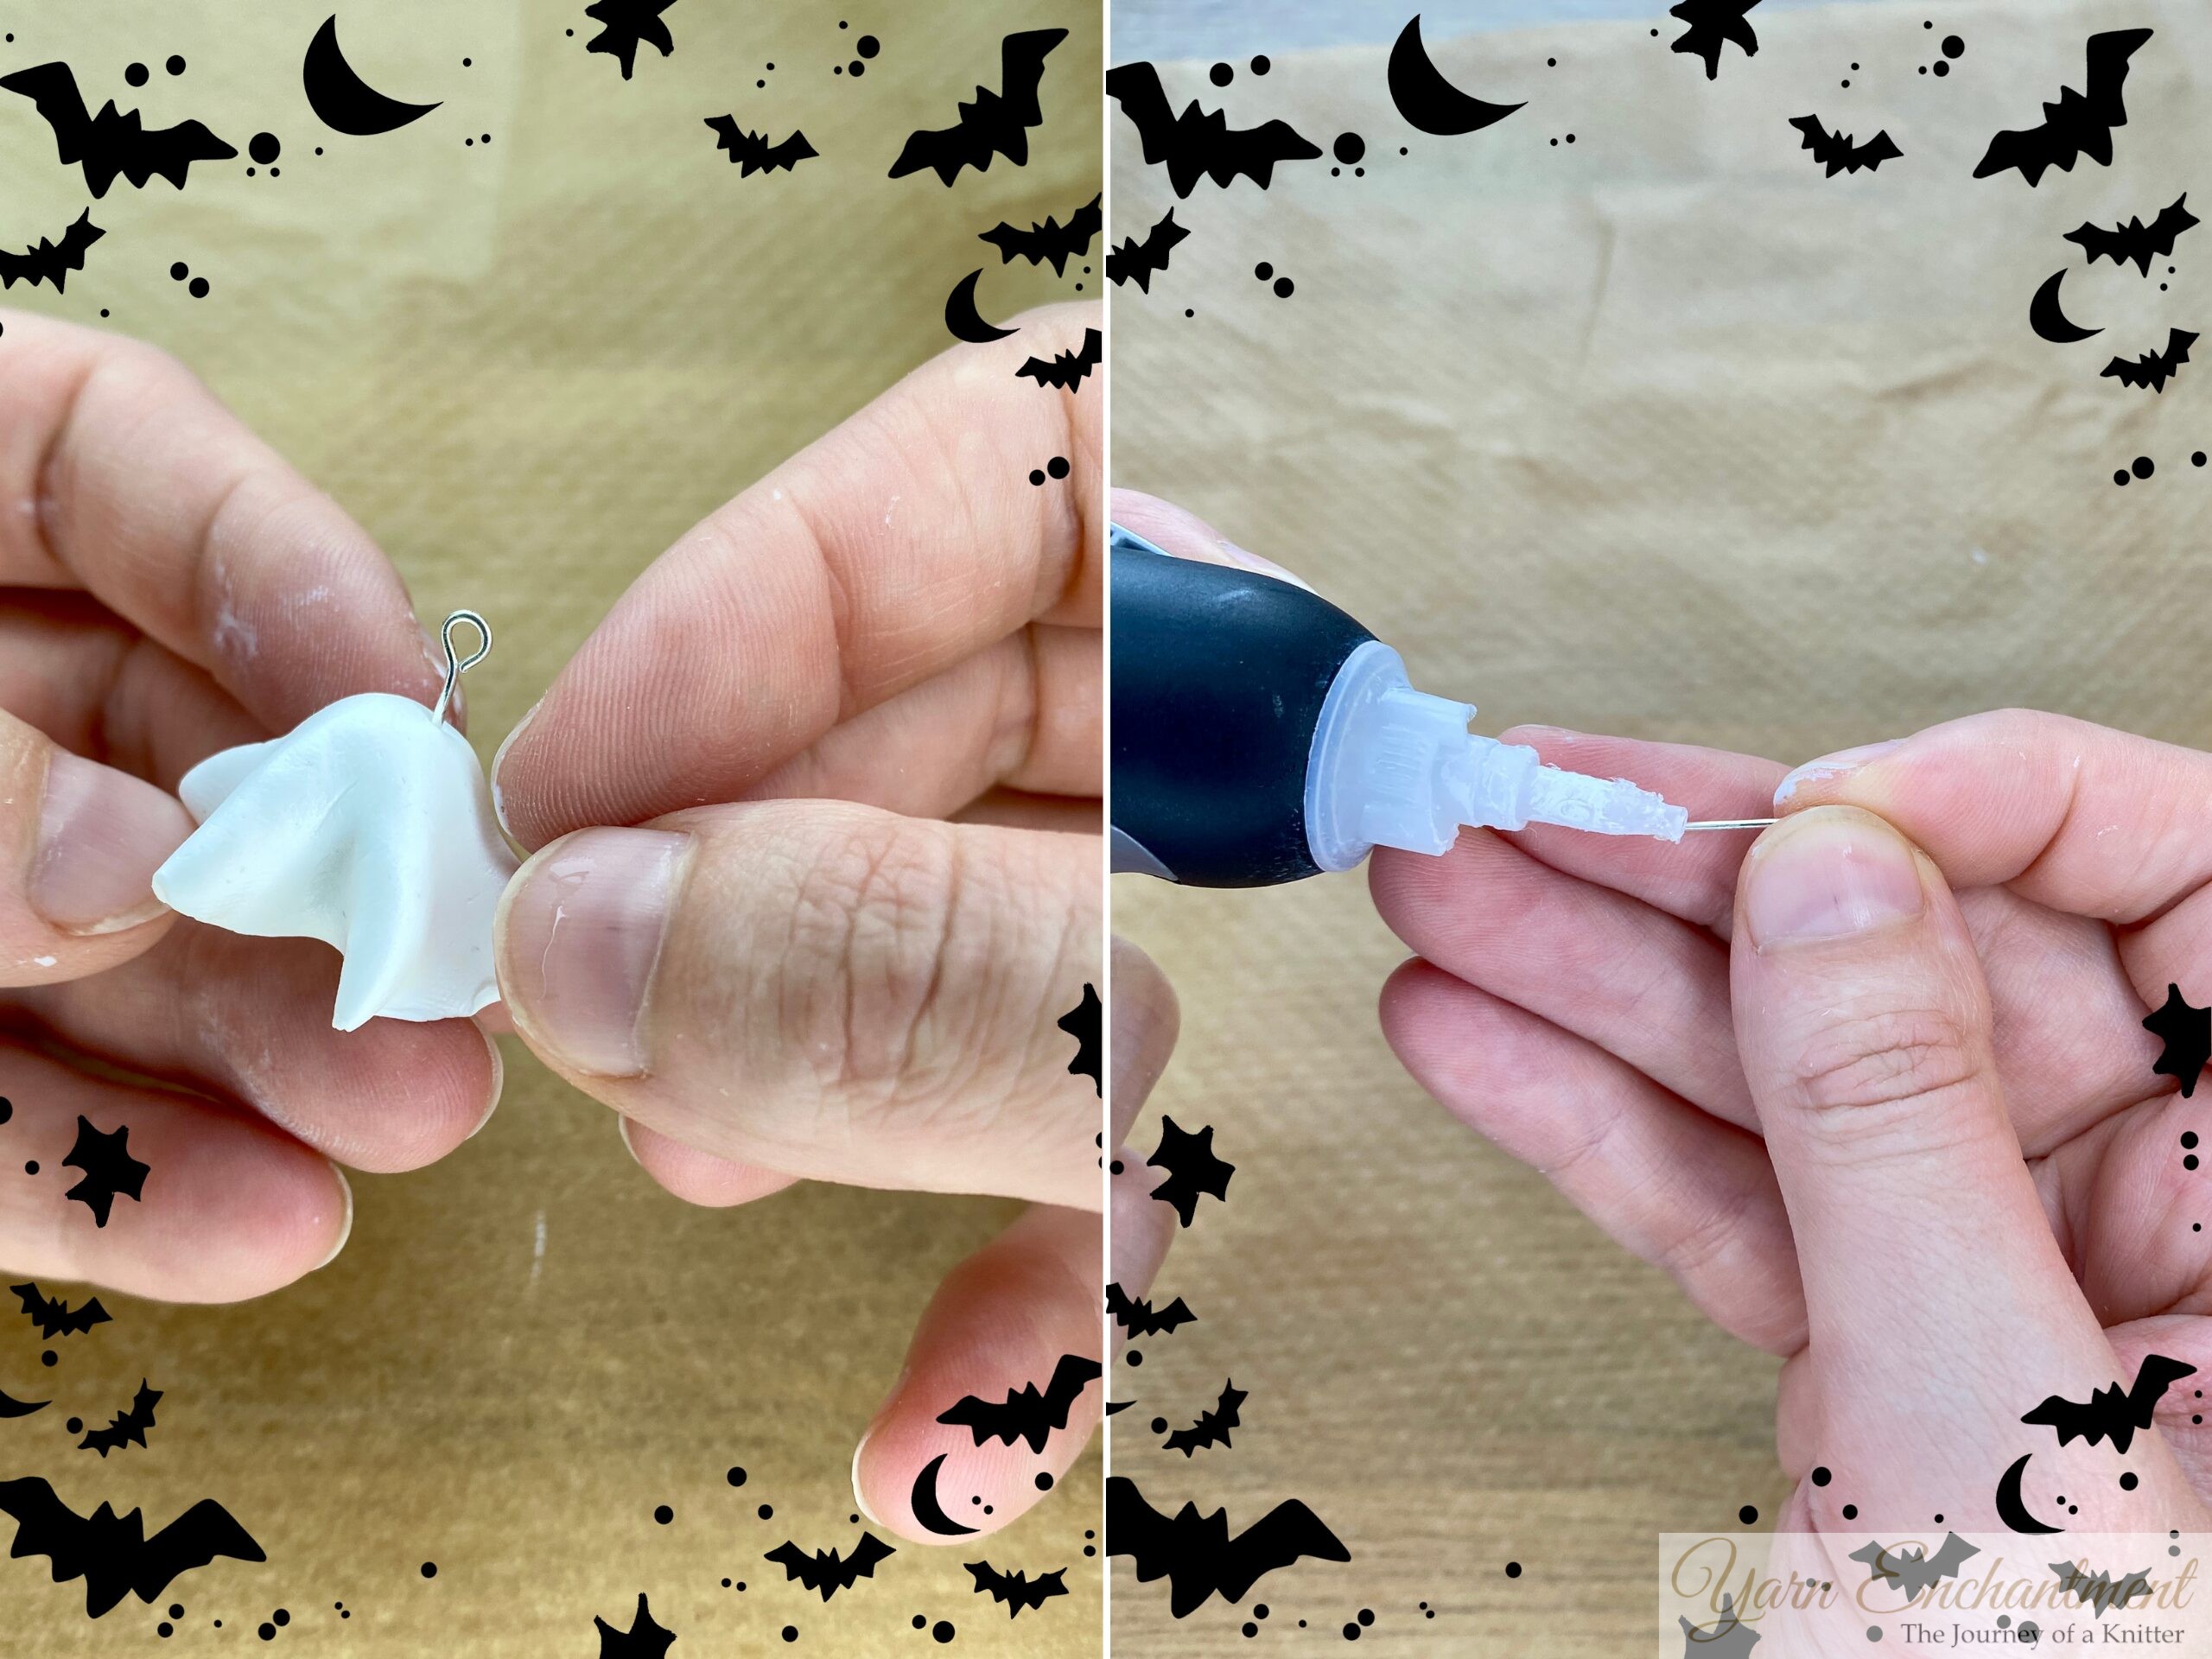
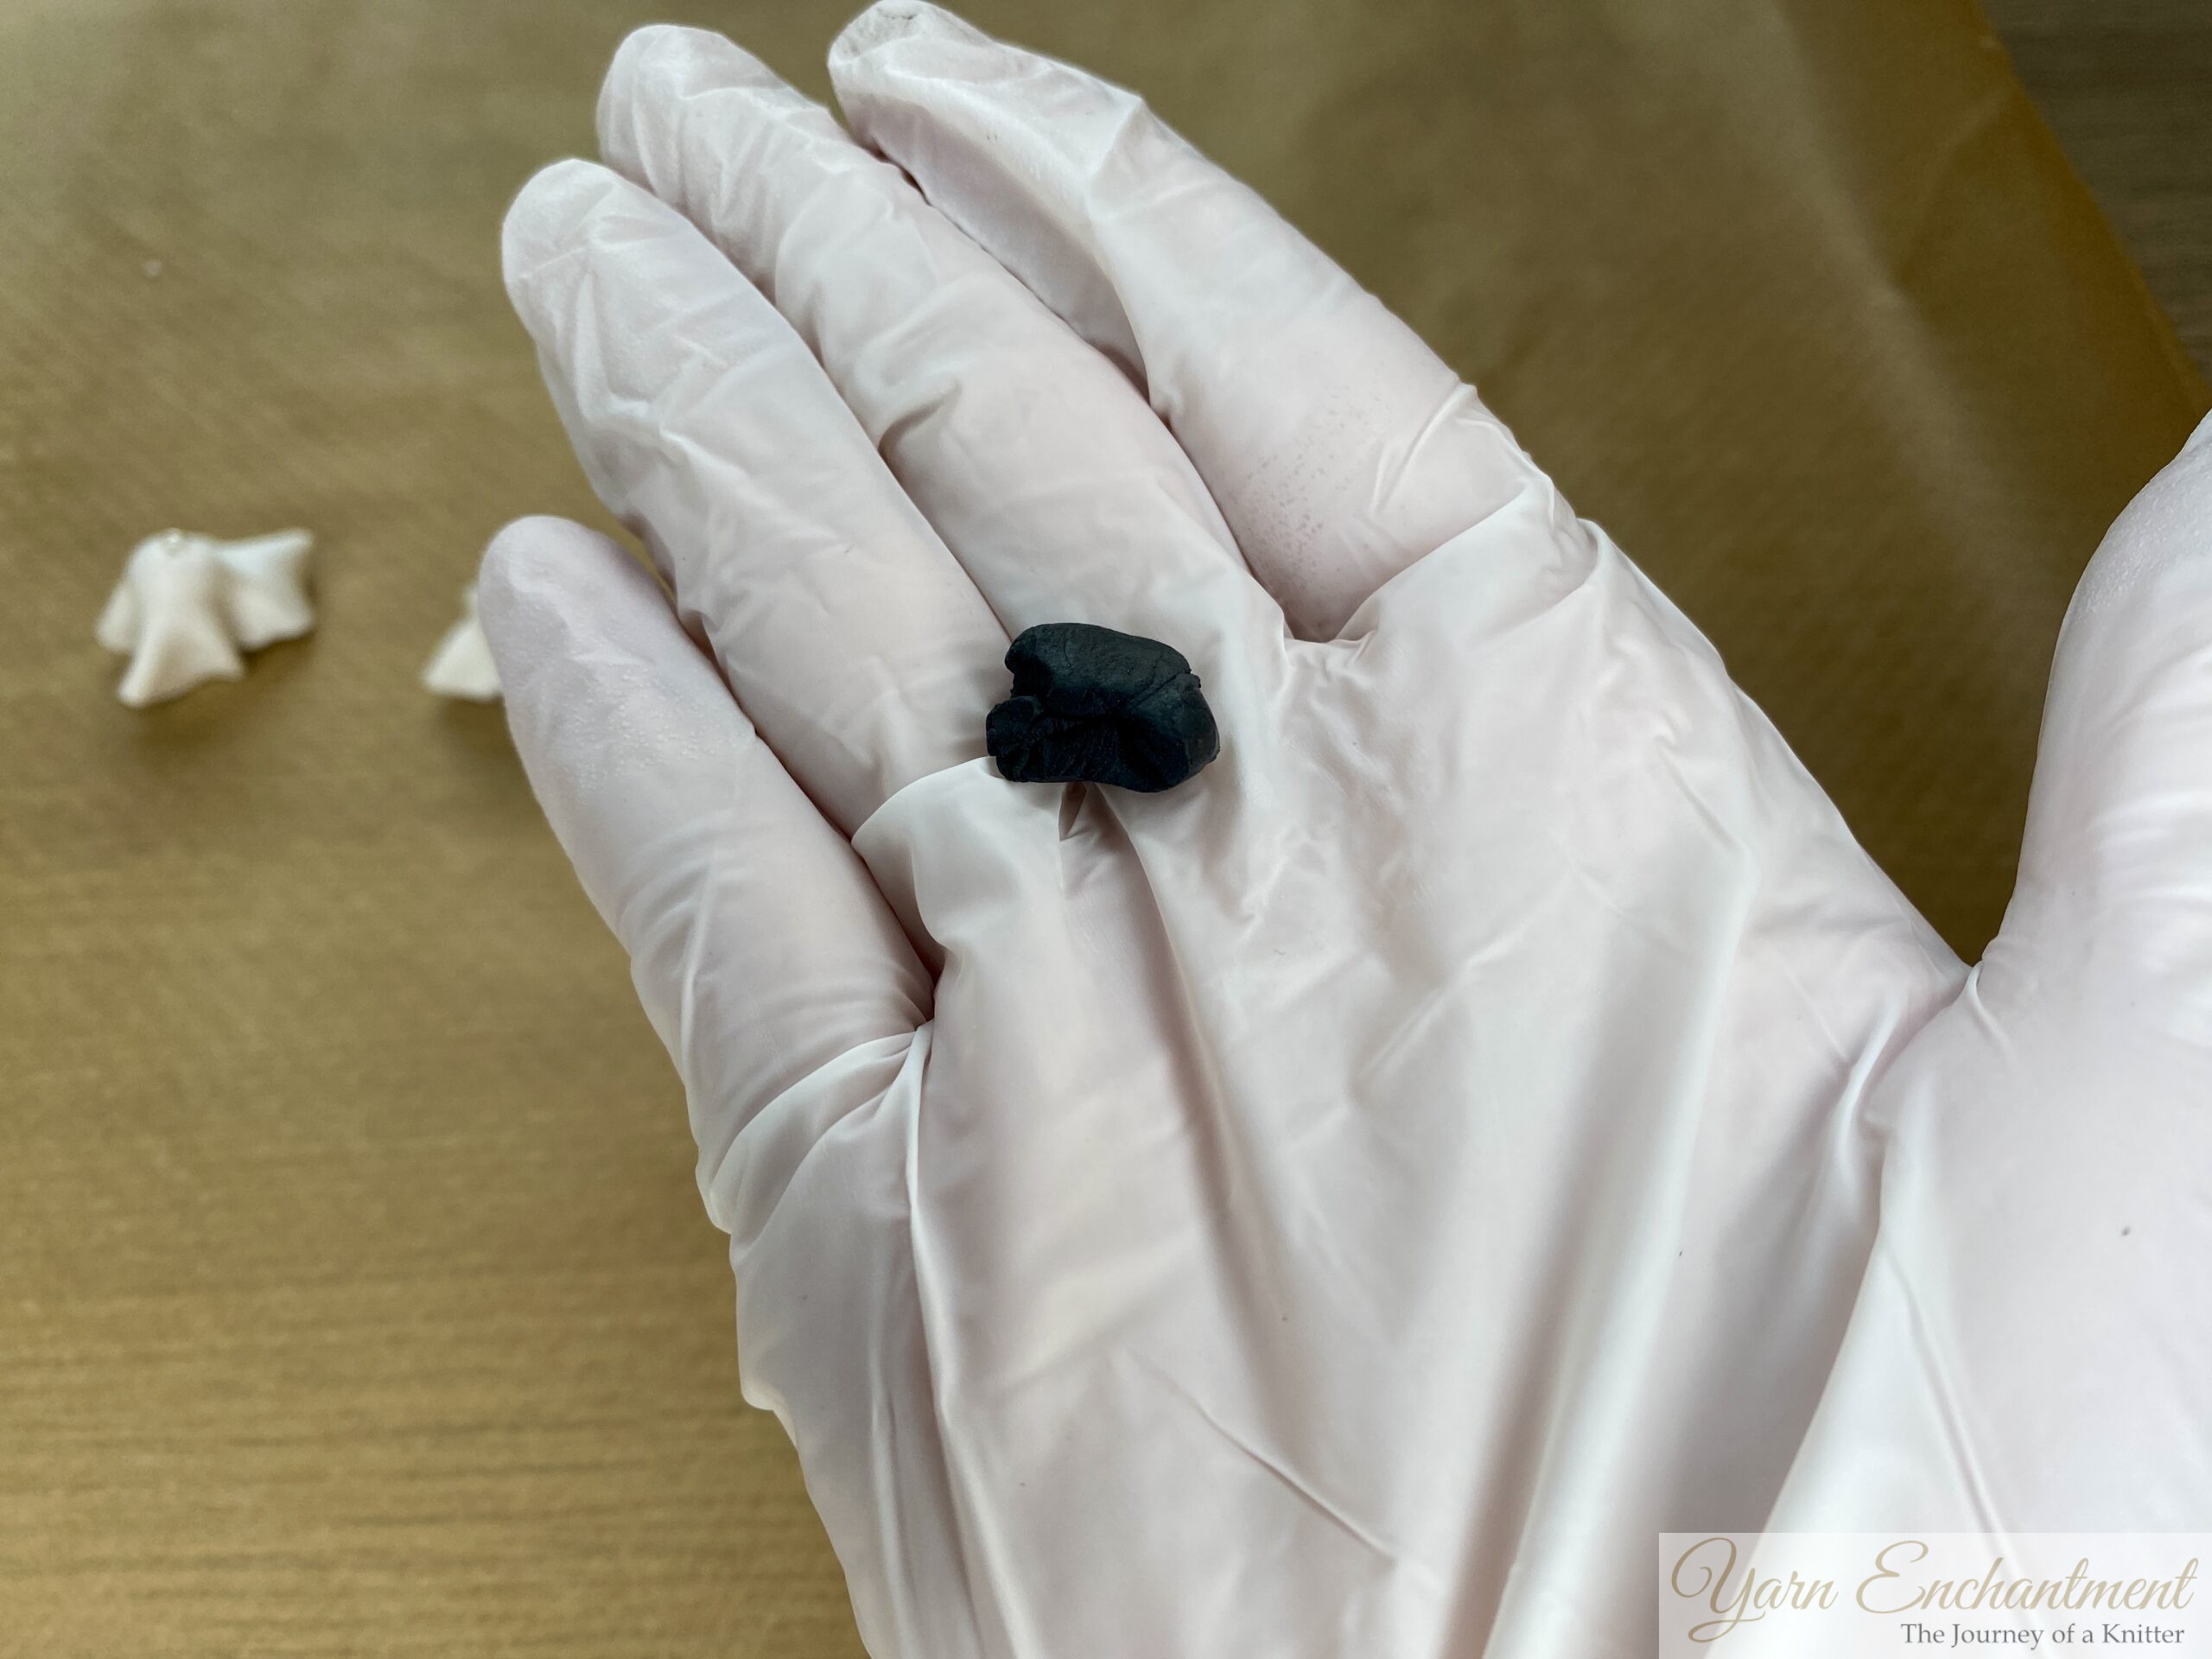
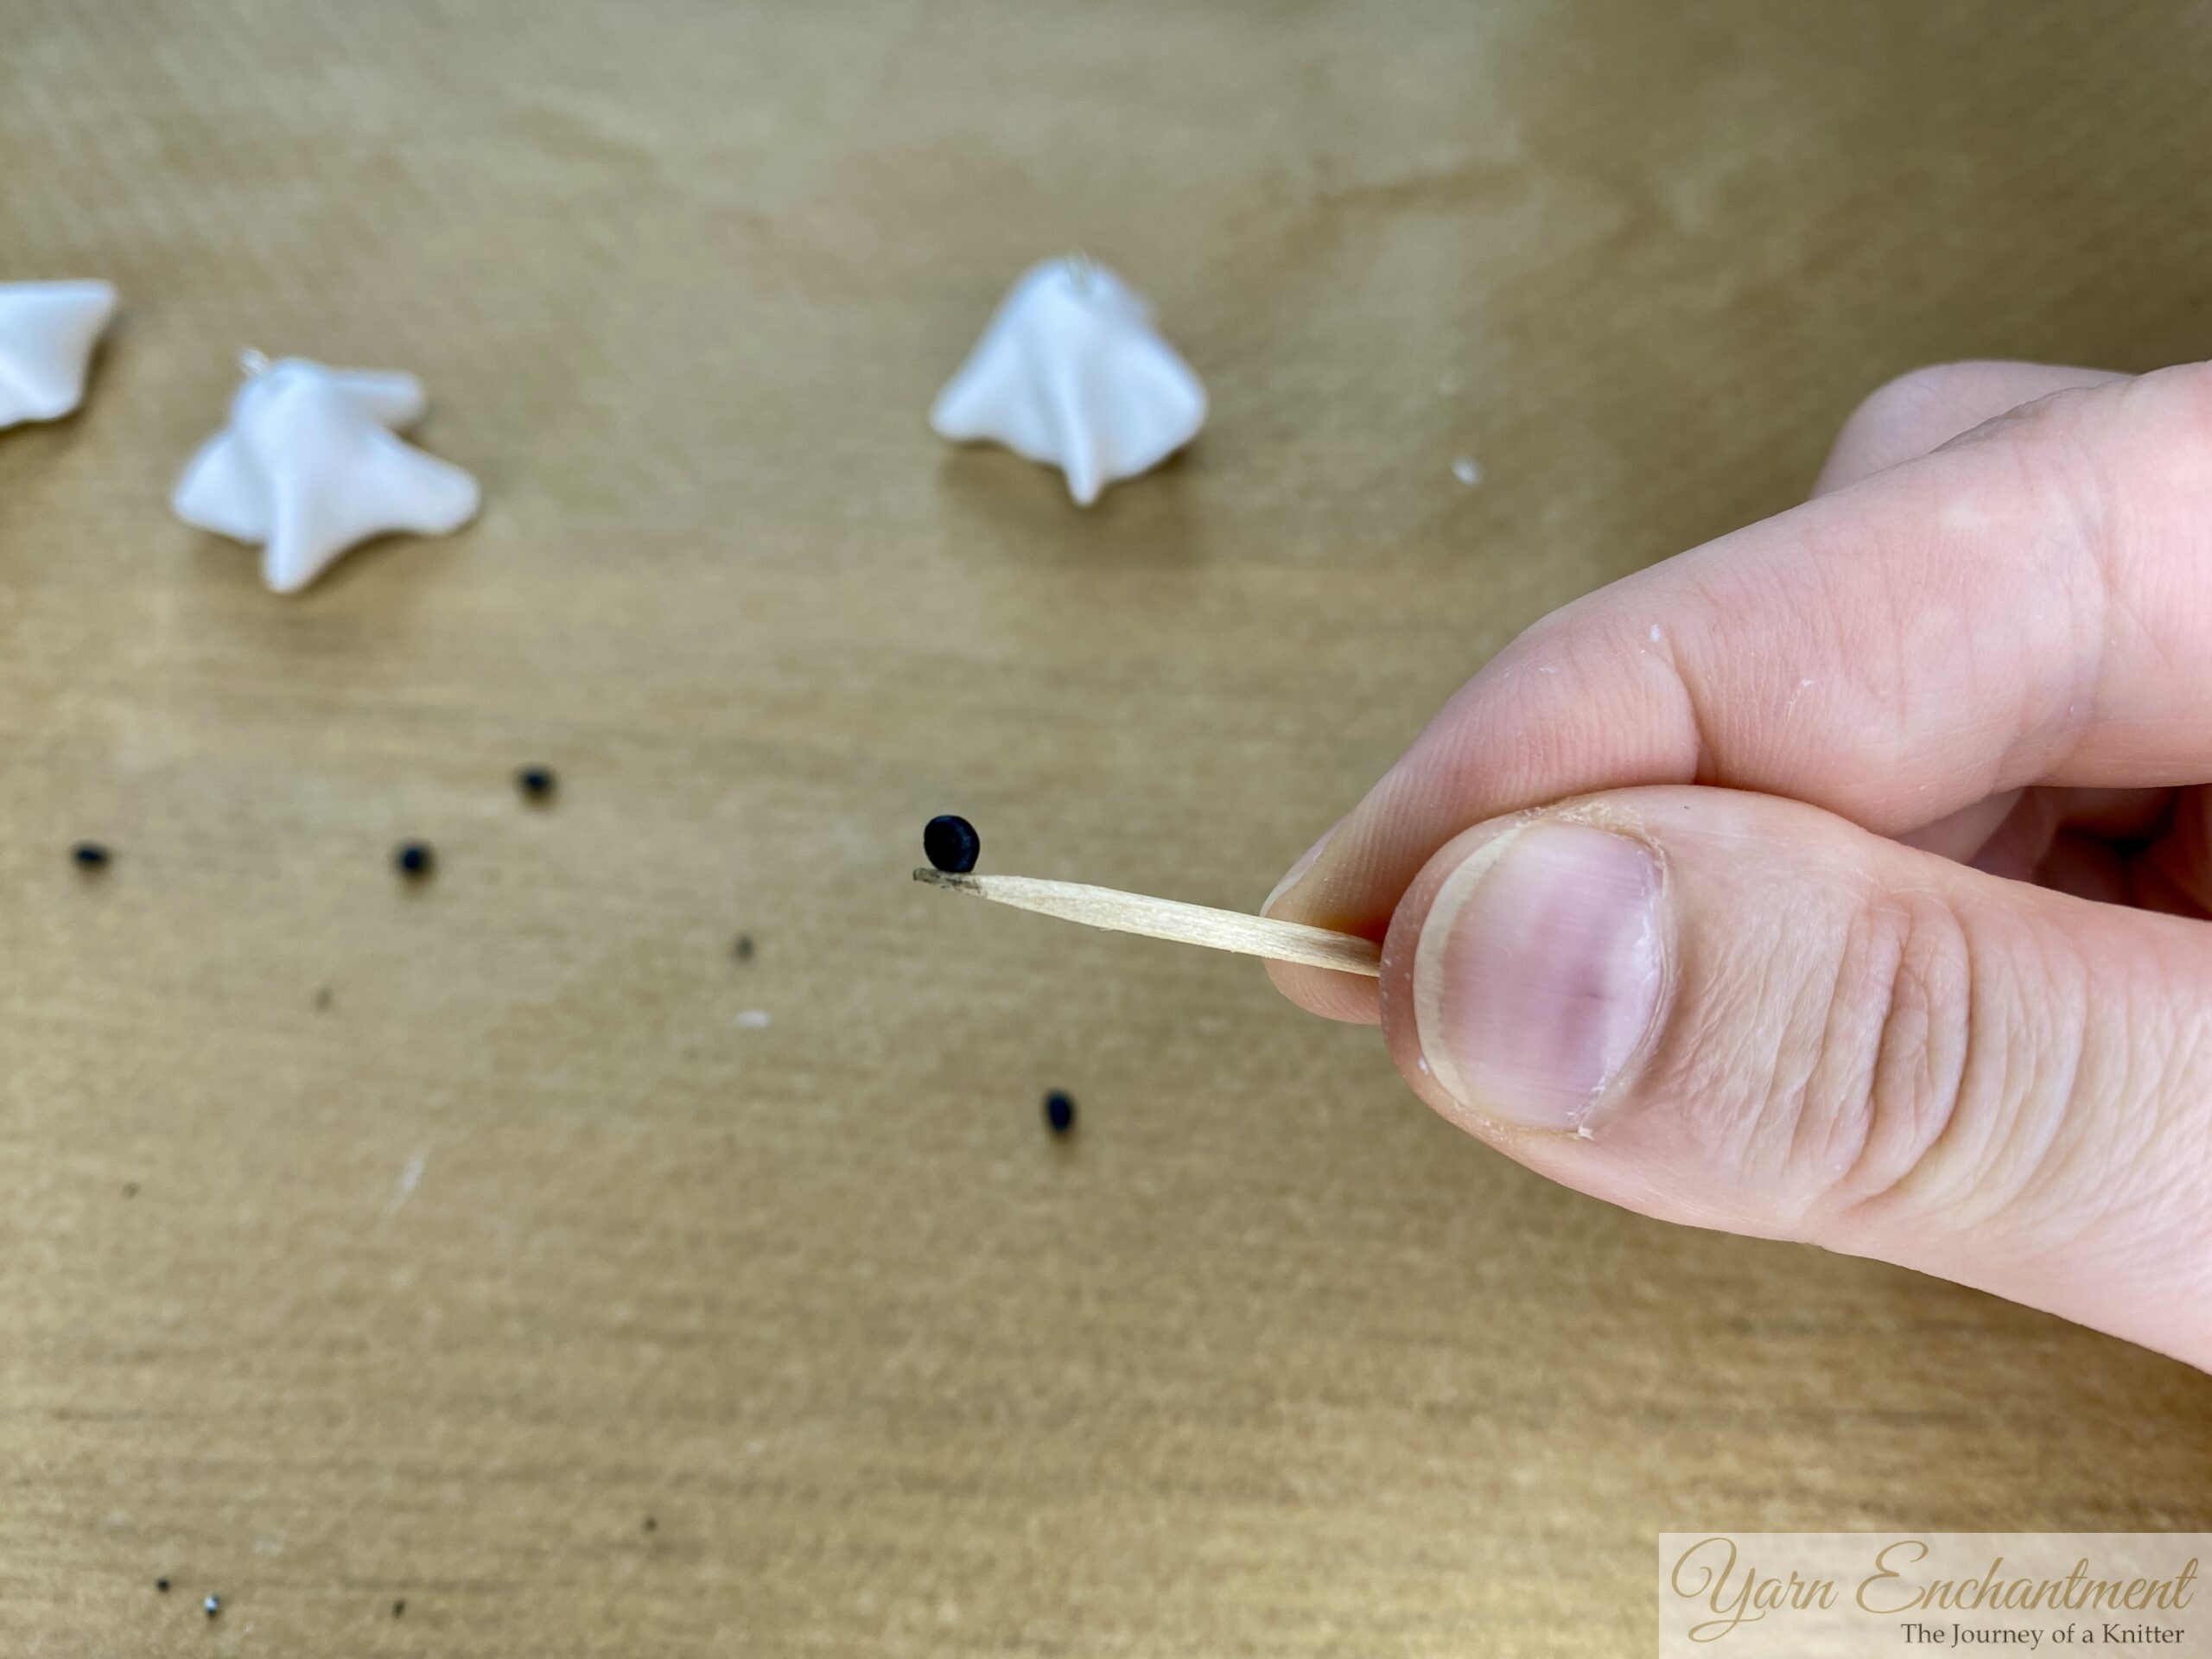
Step 5: Add the Eyes
- Put on gloves so that you don't get some black color on the white body.
- Roll two super tiny balls of black Fimo for the eyes
- Using a toothpick or tweezers, gently place and press the mini black balls onto the ghost’s face. They don't have to be perfect
- You can use the toothpick to shape or flatten them a bit if needed.
 |  | 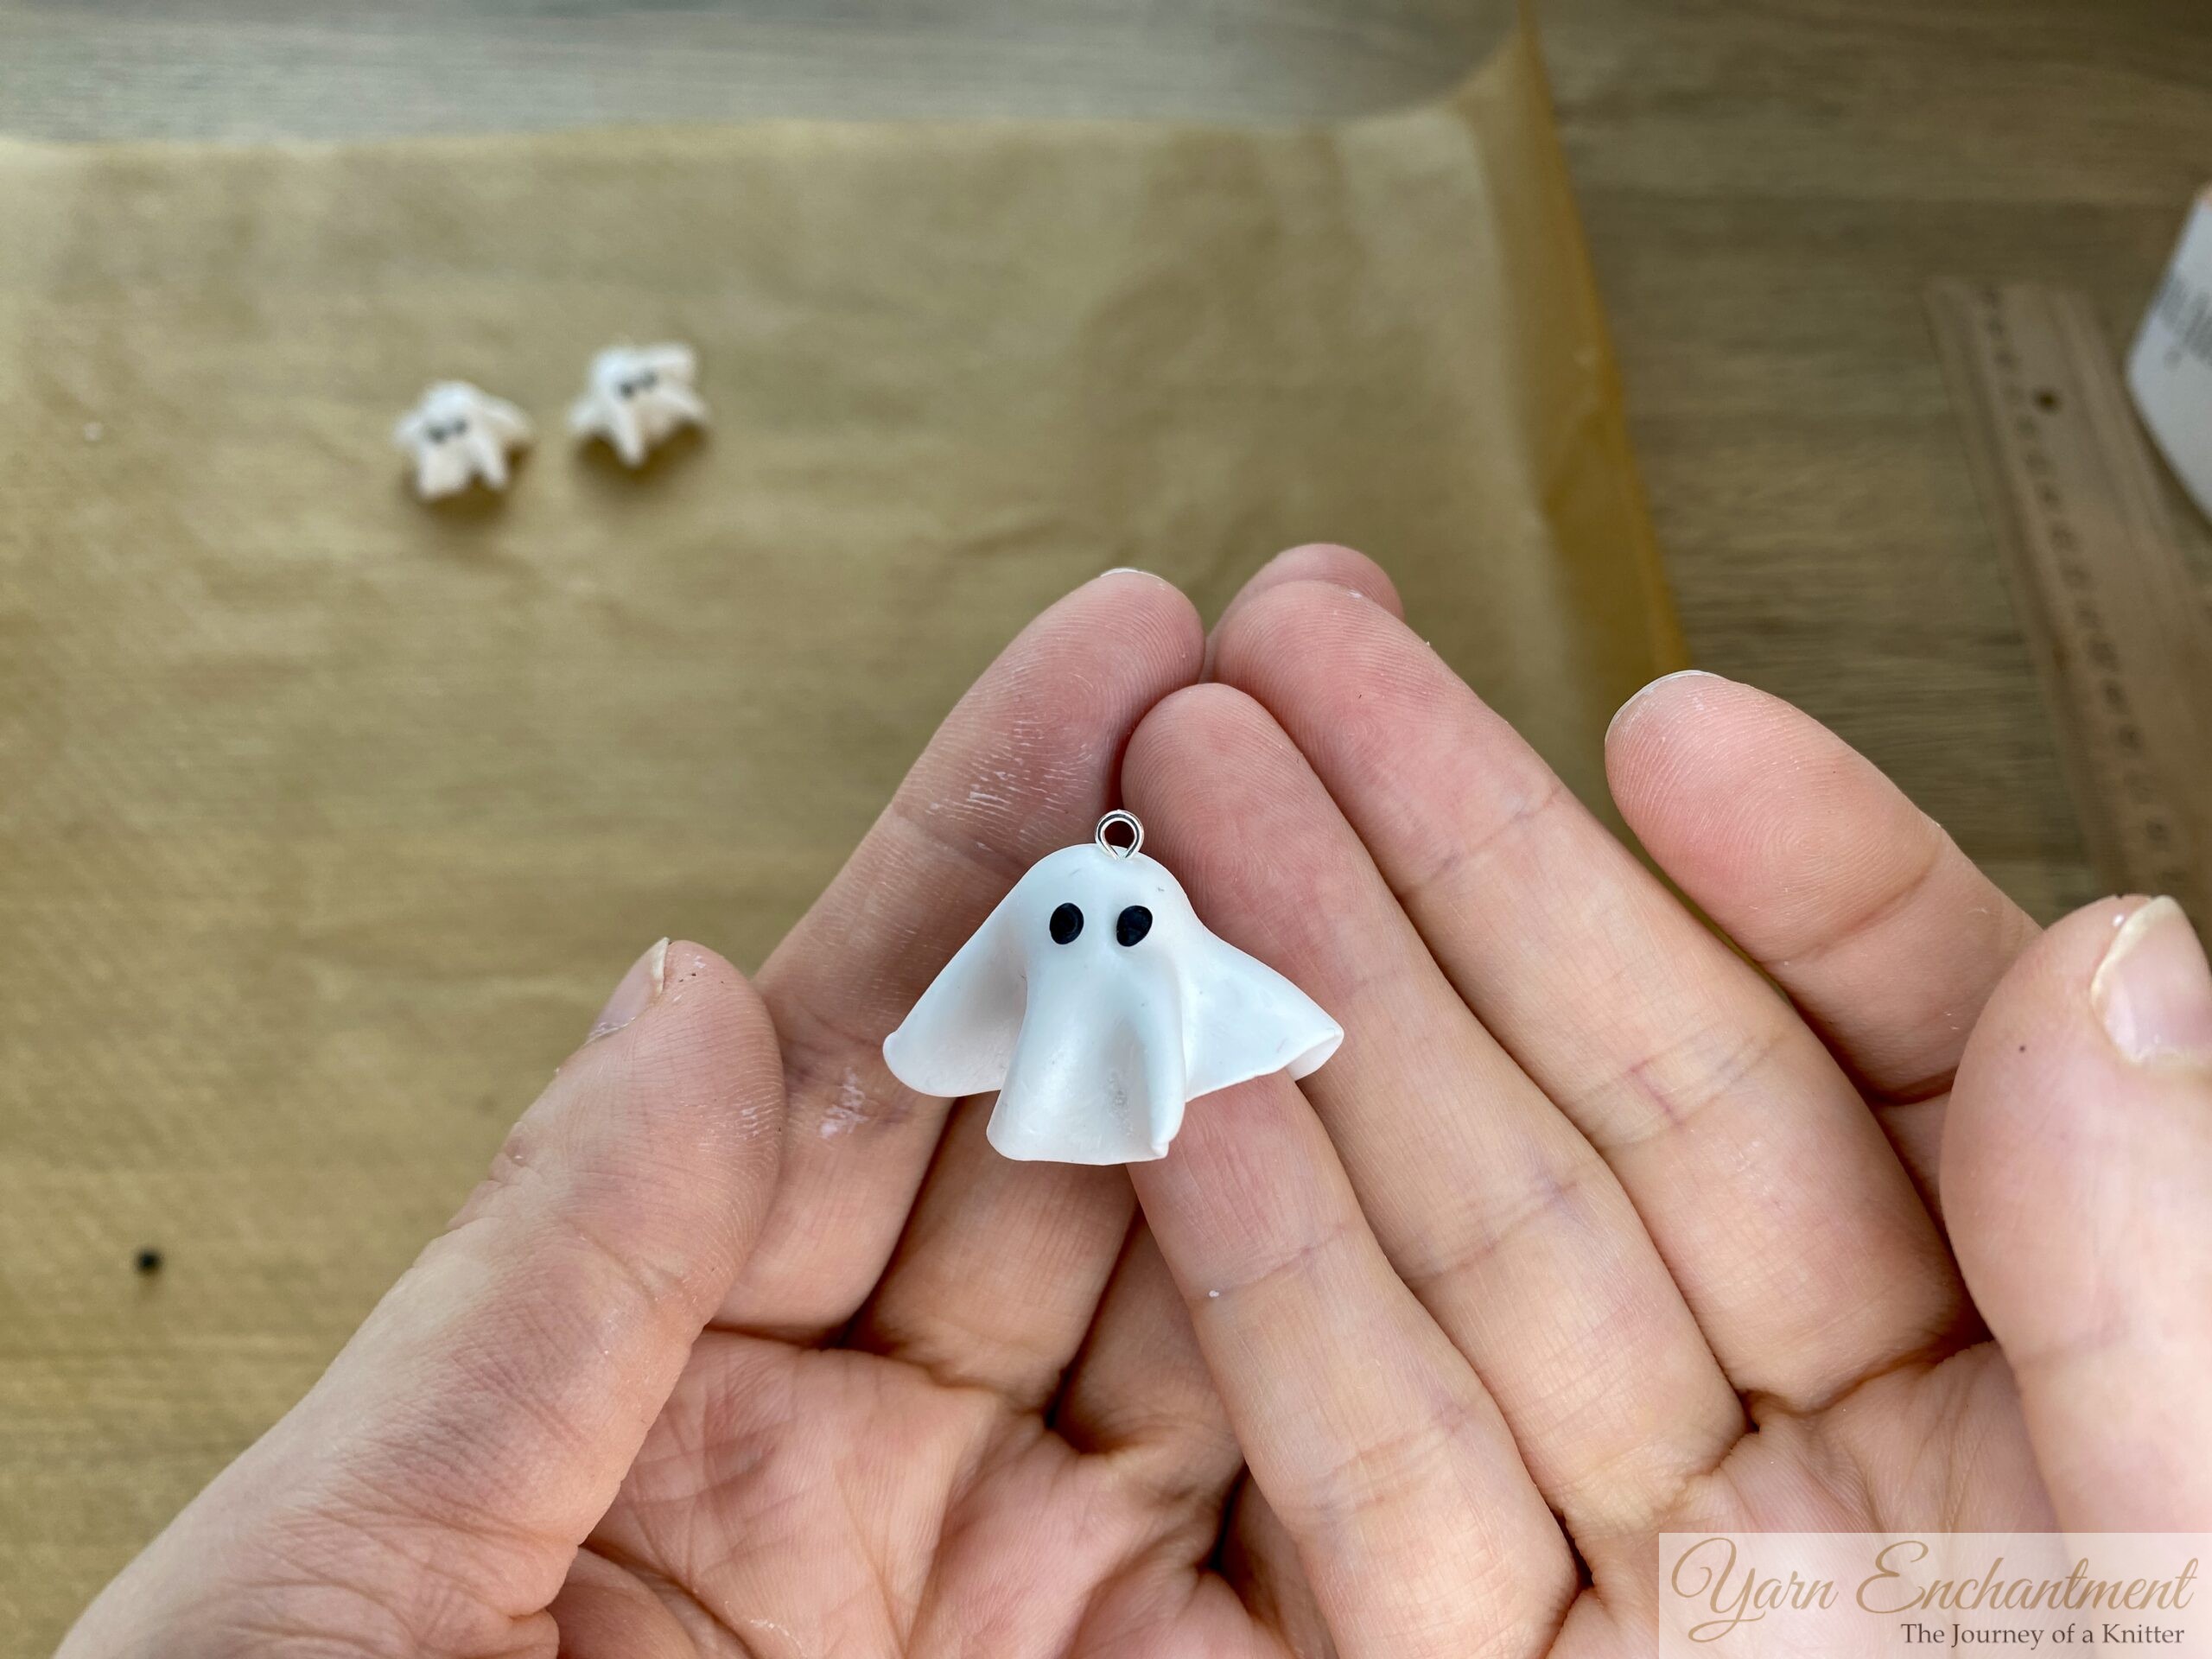 | Take a small amount of black Fimo and knead it until it is soft and smooth, so you can easily shape tiny eyes. | Roll two super tiny balls of black Fimo for the eyes. Using a toothpick or tweezers, gently place and press the mini black balls onto the ghost’s face. | The finished piece now looks like this, it's still soft, so be sure to handle it gently and touch it carefully. |


Step 6: Baking & Assembling Your Markers
- Place the ghost onto a baking sheet lined with parchment.
- Bake according to your Fimo clay package instructions (typically 110°C to 130°C for 20-30 minutes, but check your packaging).
- Allow to cool fully before handling further.
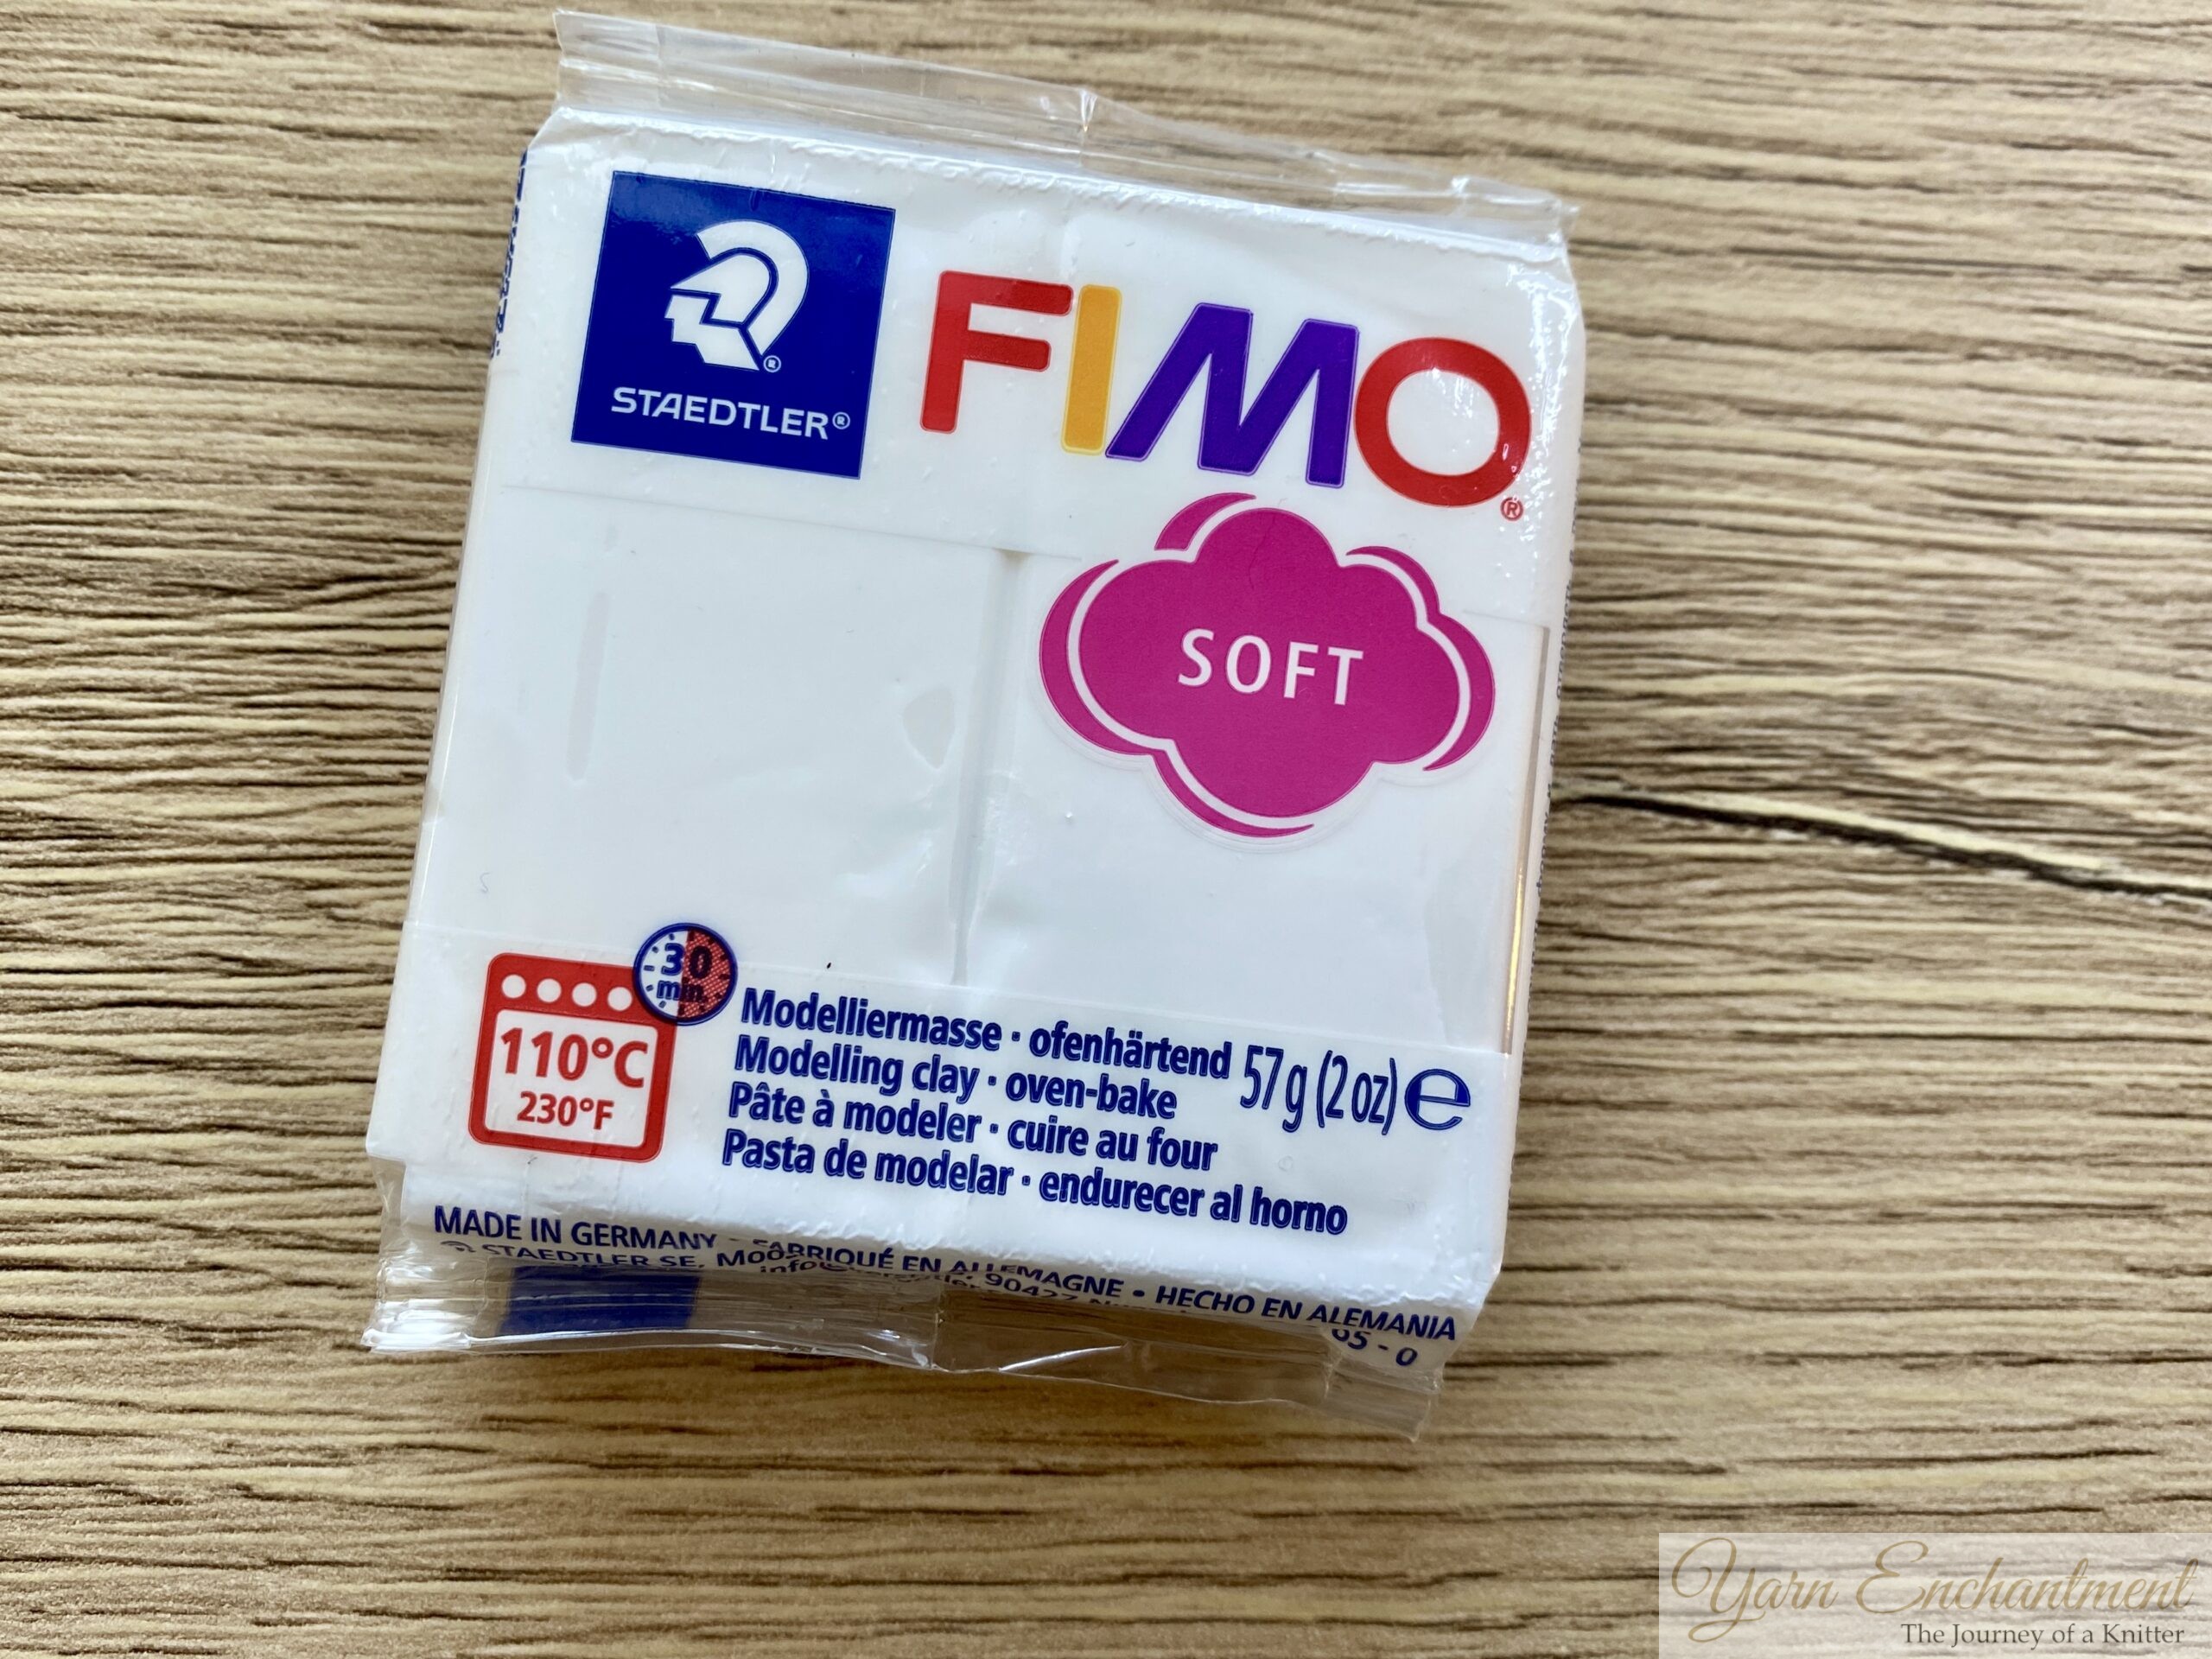 | The baking instructions for Fimo are always printed on the package. In my case, the clay needs to be baked at 110°C (230°F). |

Assemble the Marker
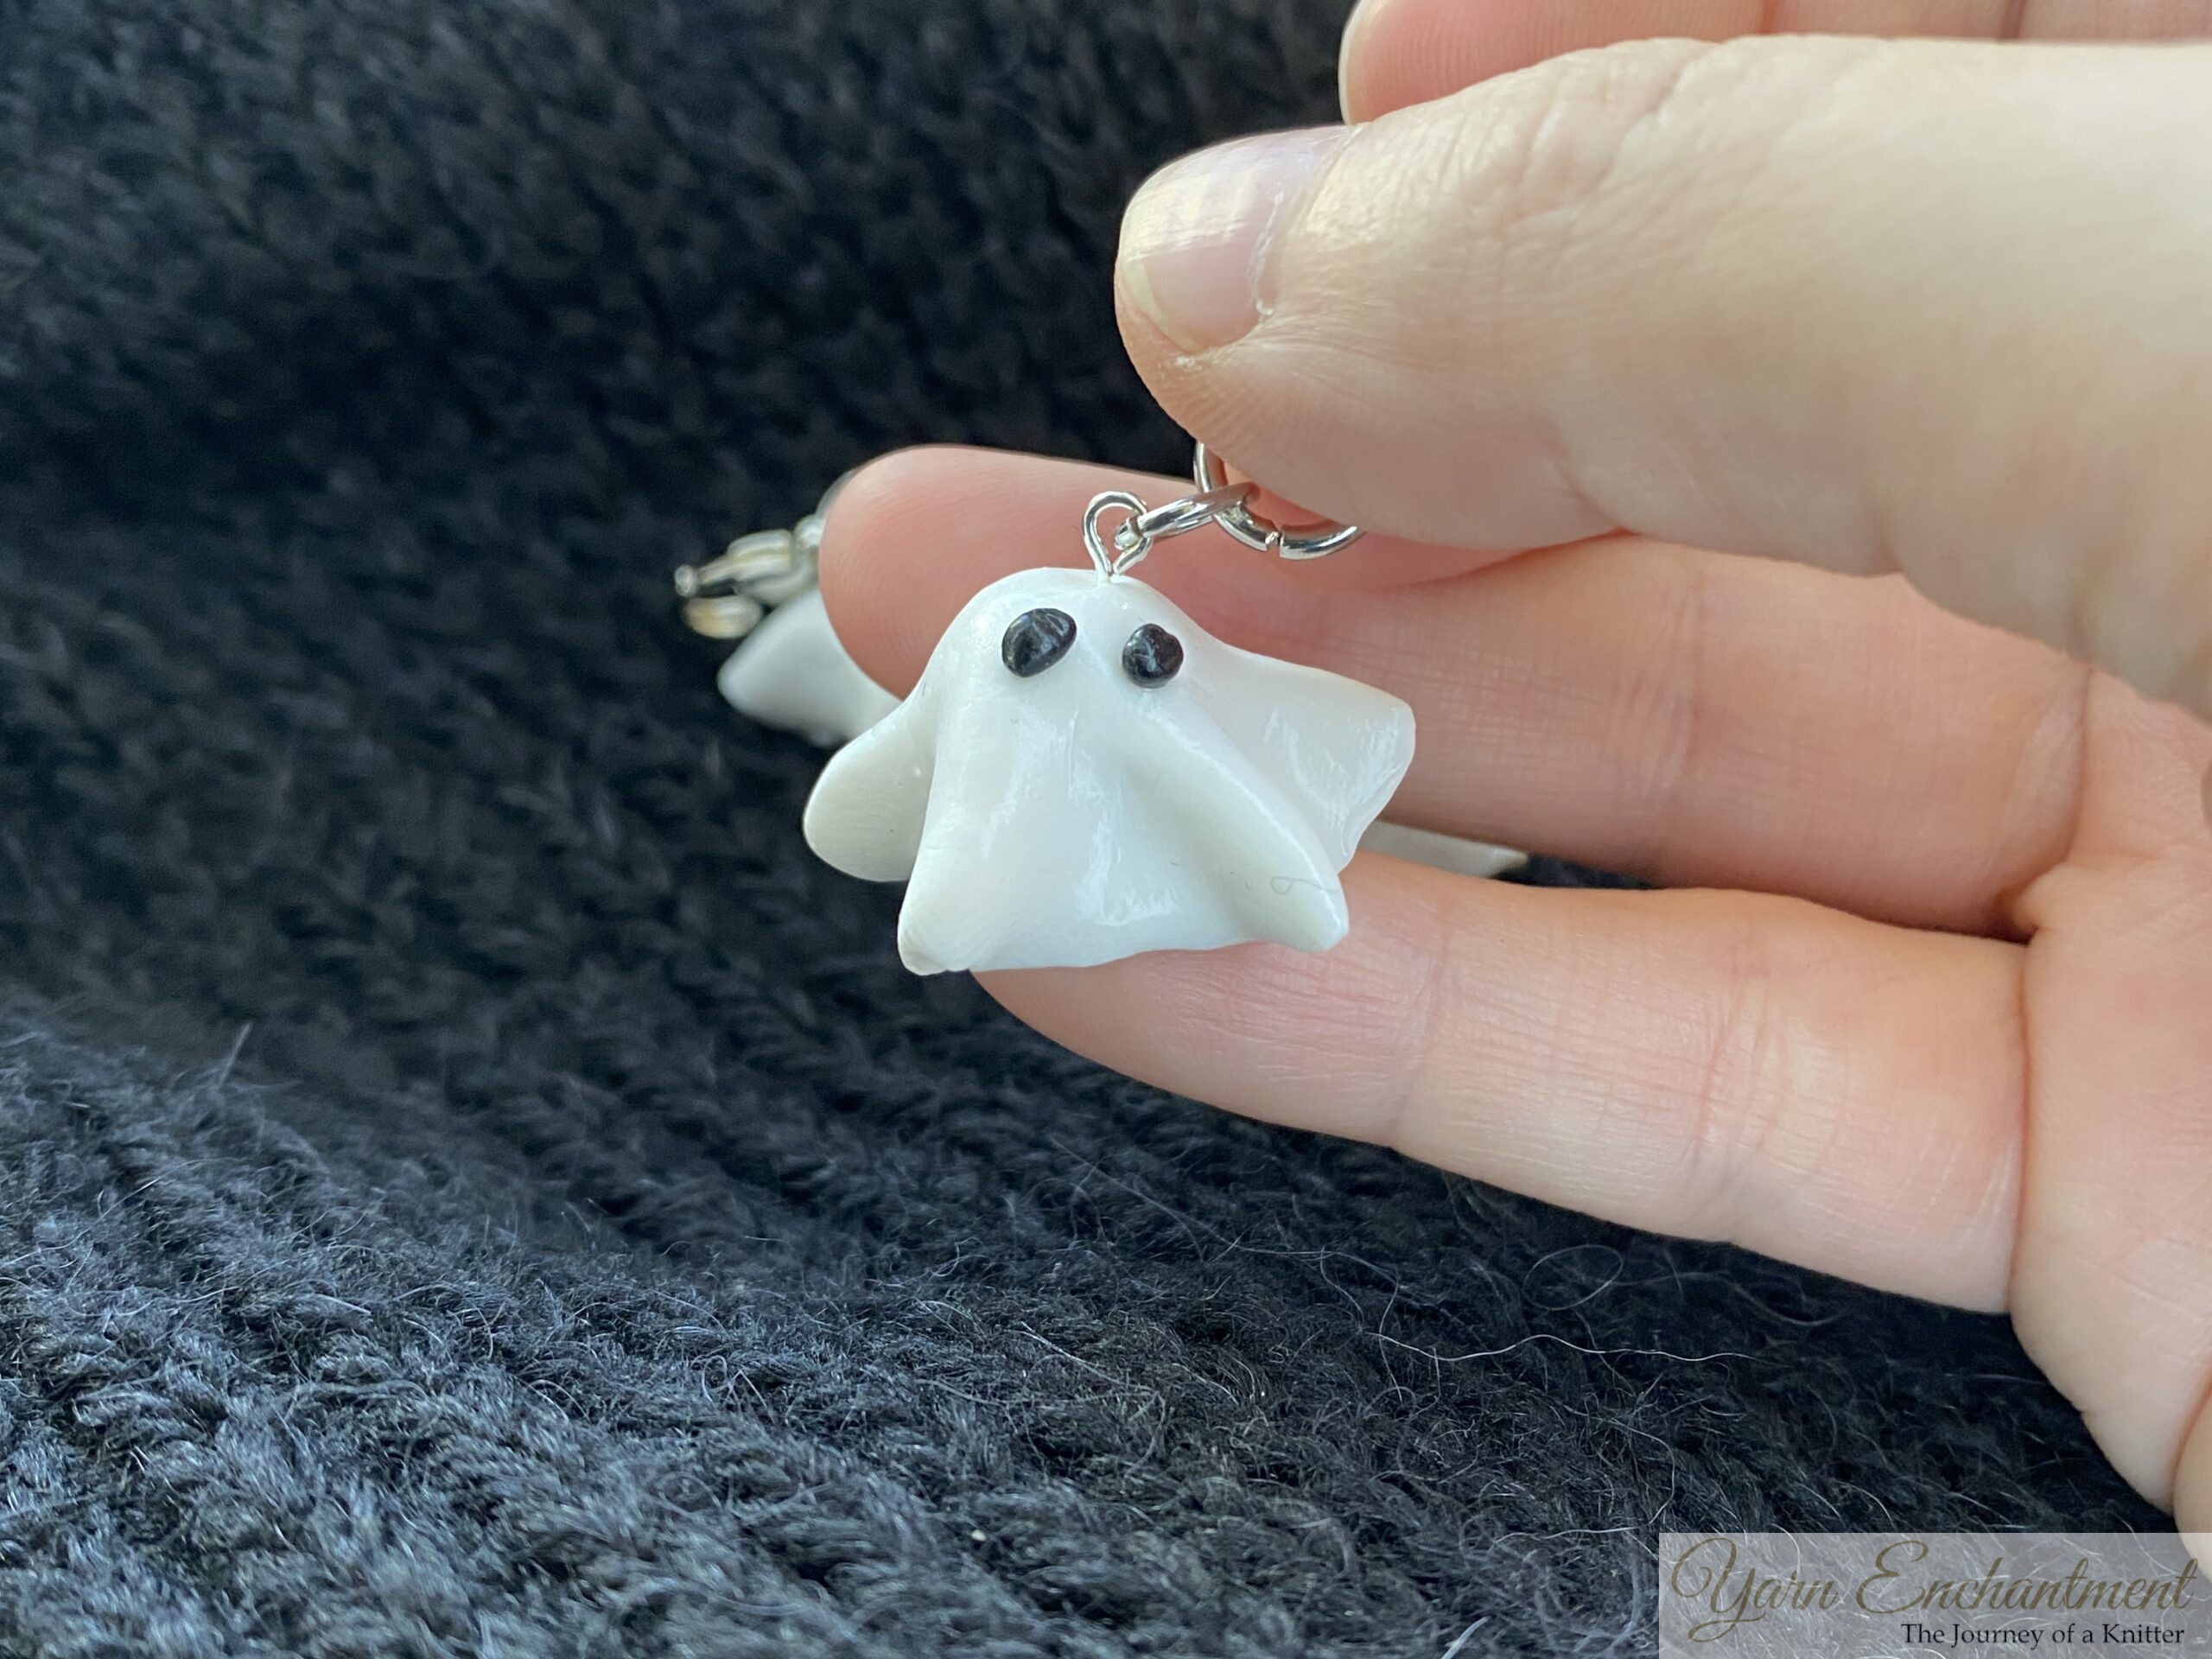
- Attach a split ring or carabiner keychain through the eye pin to create your stitch marker.
- For extra durability and shine, brush on Fimo gloss finish and let dry completely.
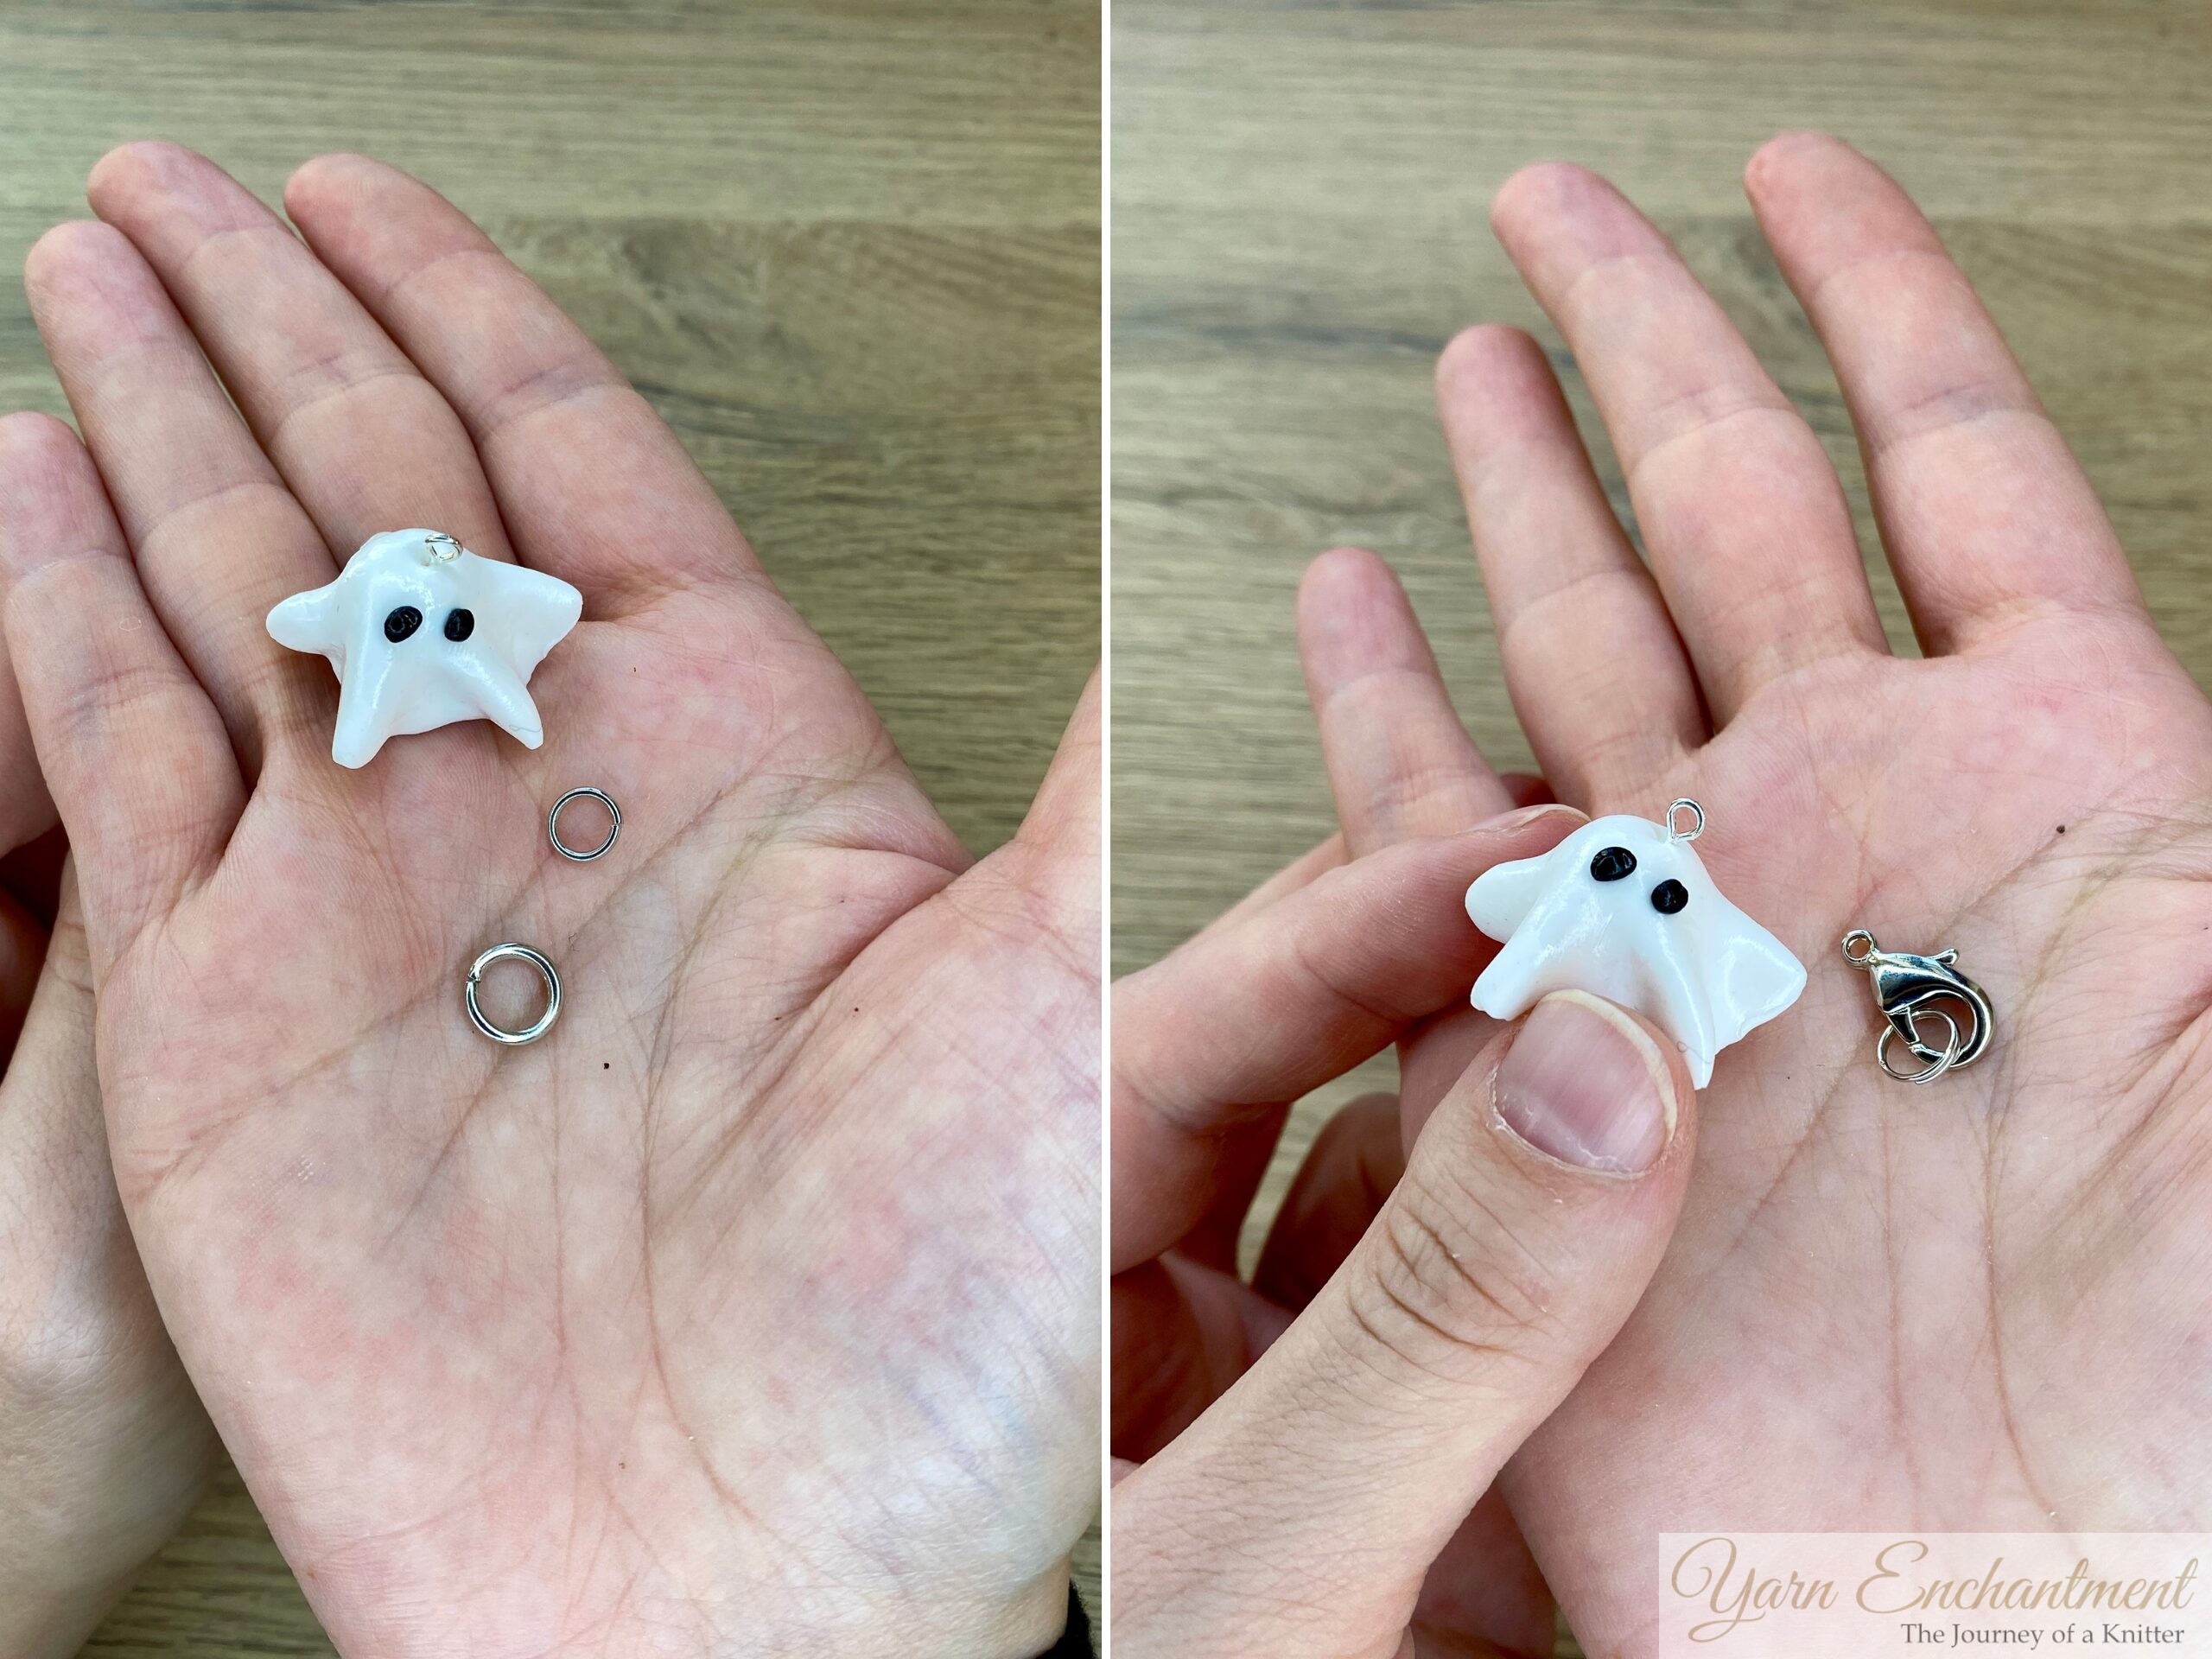 |  | 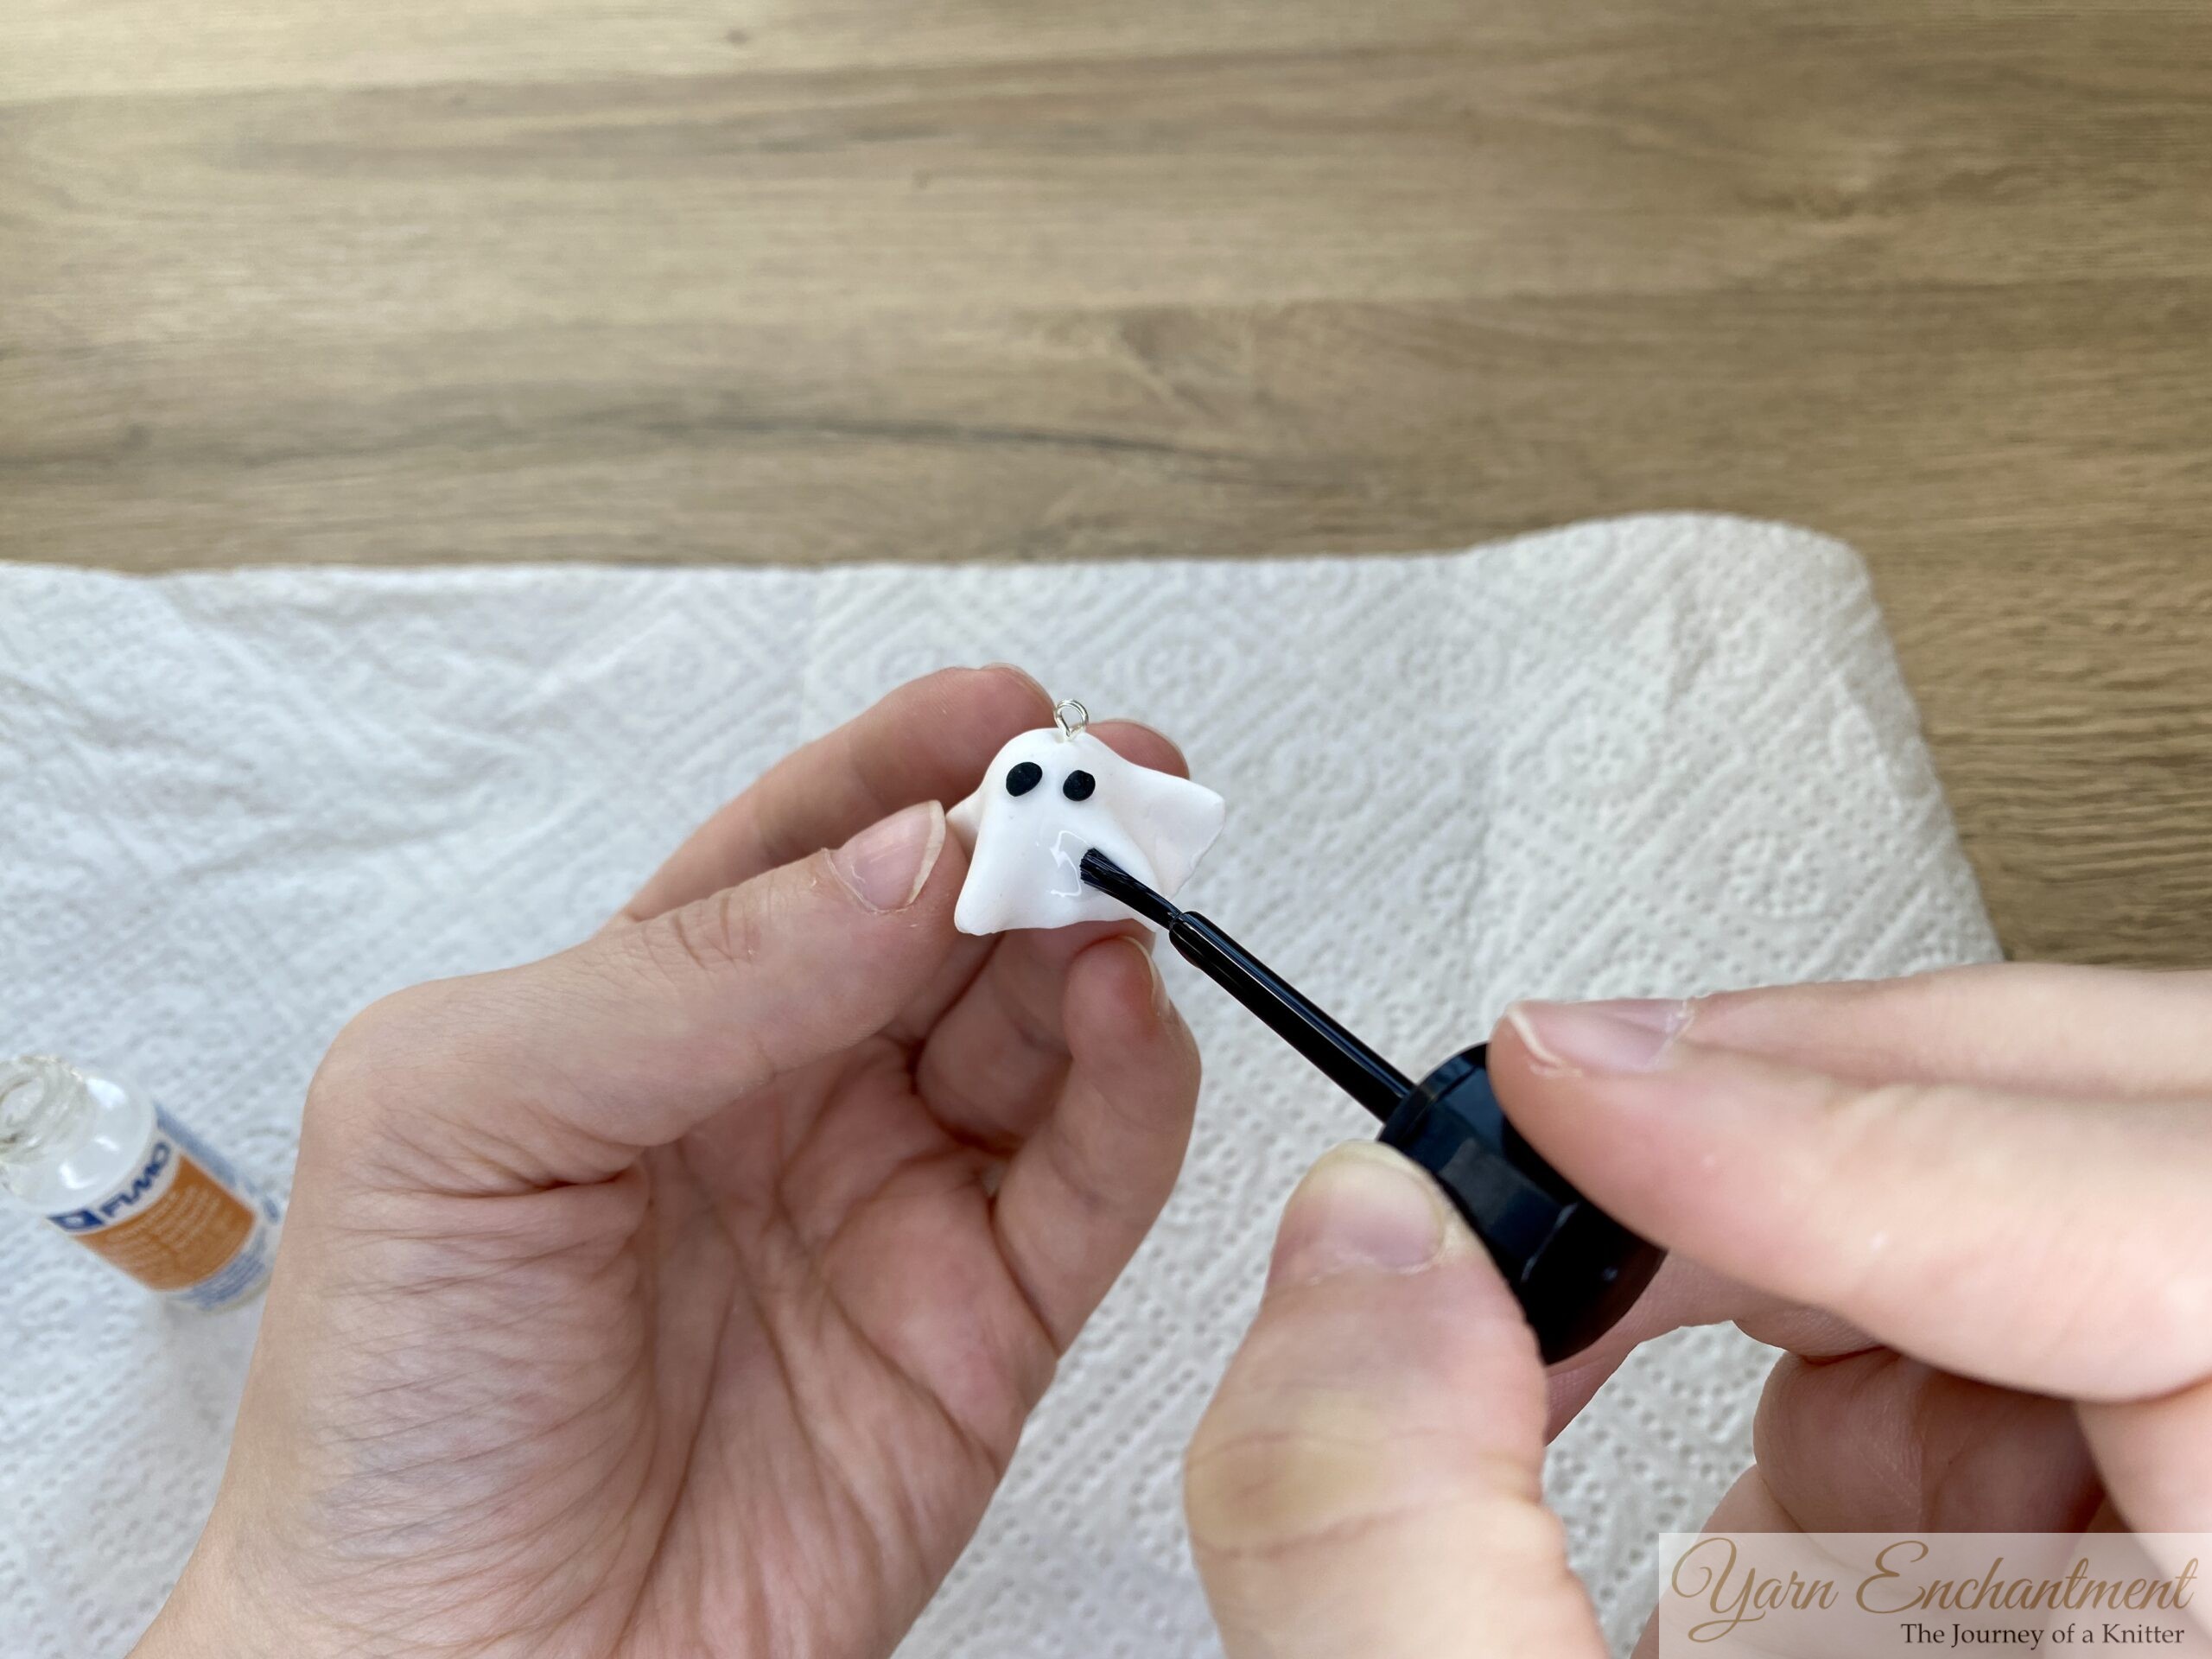 | Attach a split ring or carabiner keychain through the eye pin to create your stitch marker. For the split ring, use two small pliers to open and close it. | For extra durability and shine, brush on Fimo gloss finish and let dry completely. |
Let it dry for an hour before you attach your ring.
|


Mine are about 1.5 cm (0.59 inch) in height, so they’re perfect for a BOR (Beginning of Round) marker. Because of their compact size, they sit nicely on the needle without getting in the way, making it easy to spot the start of each new round while knitting in the round. But they are not so small that you accidentally lose them without noticing so perfect for the spooky Halloween season.
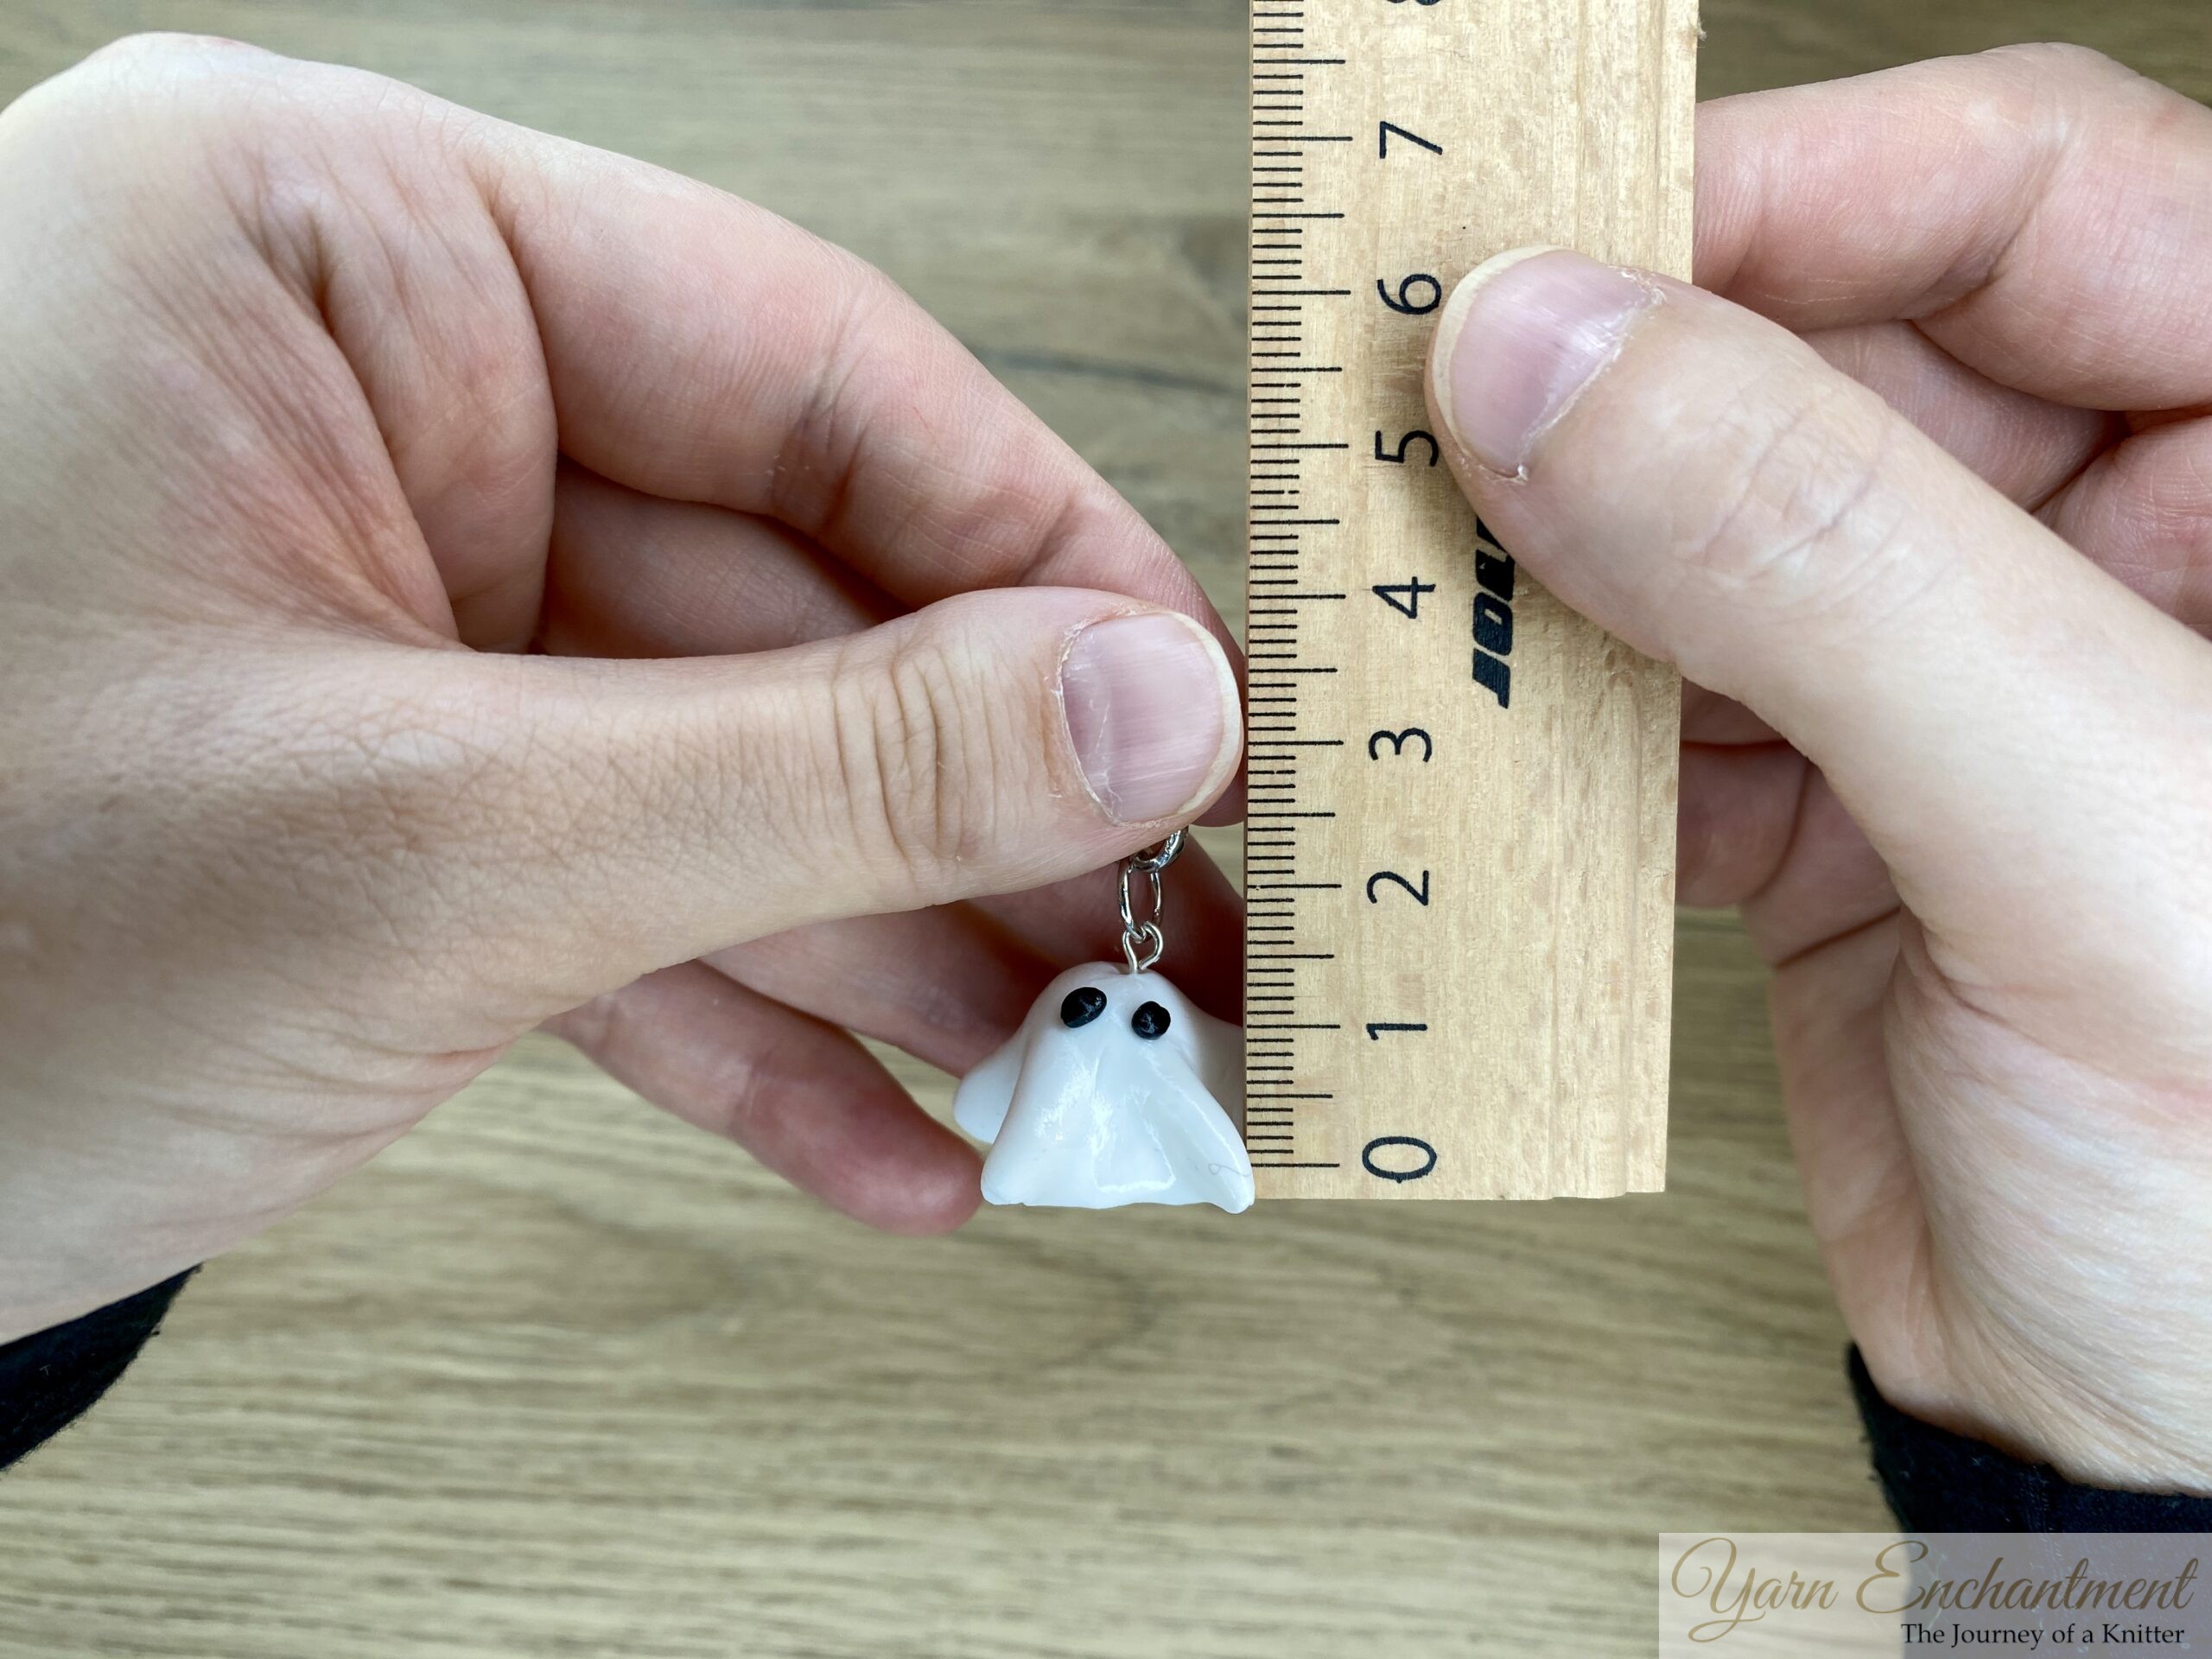 | 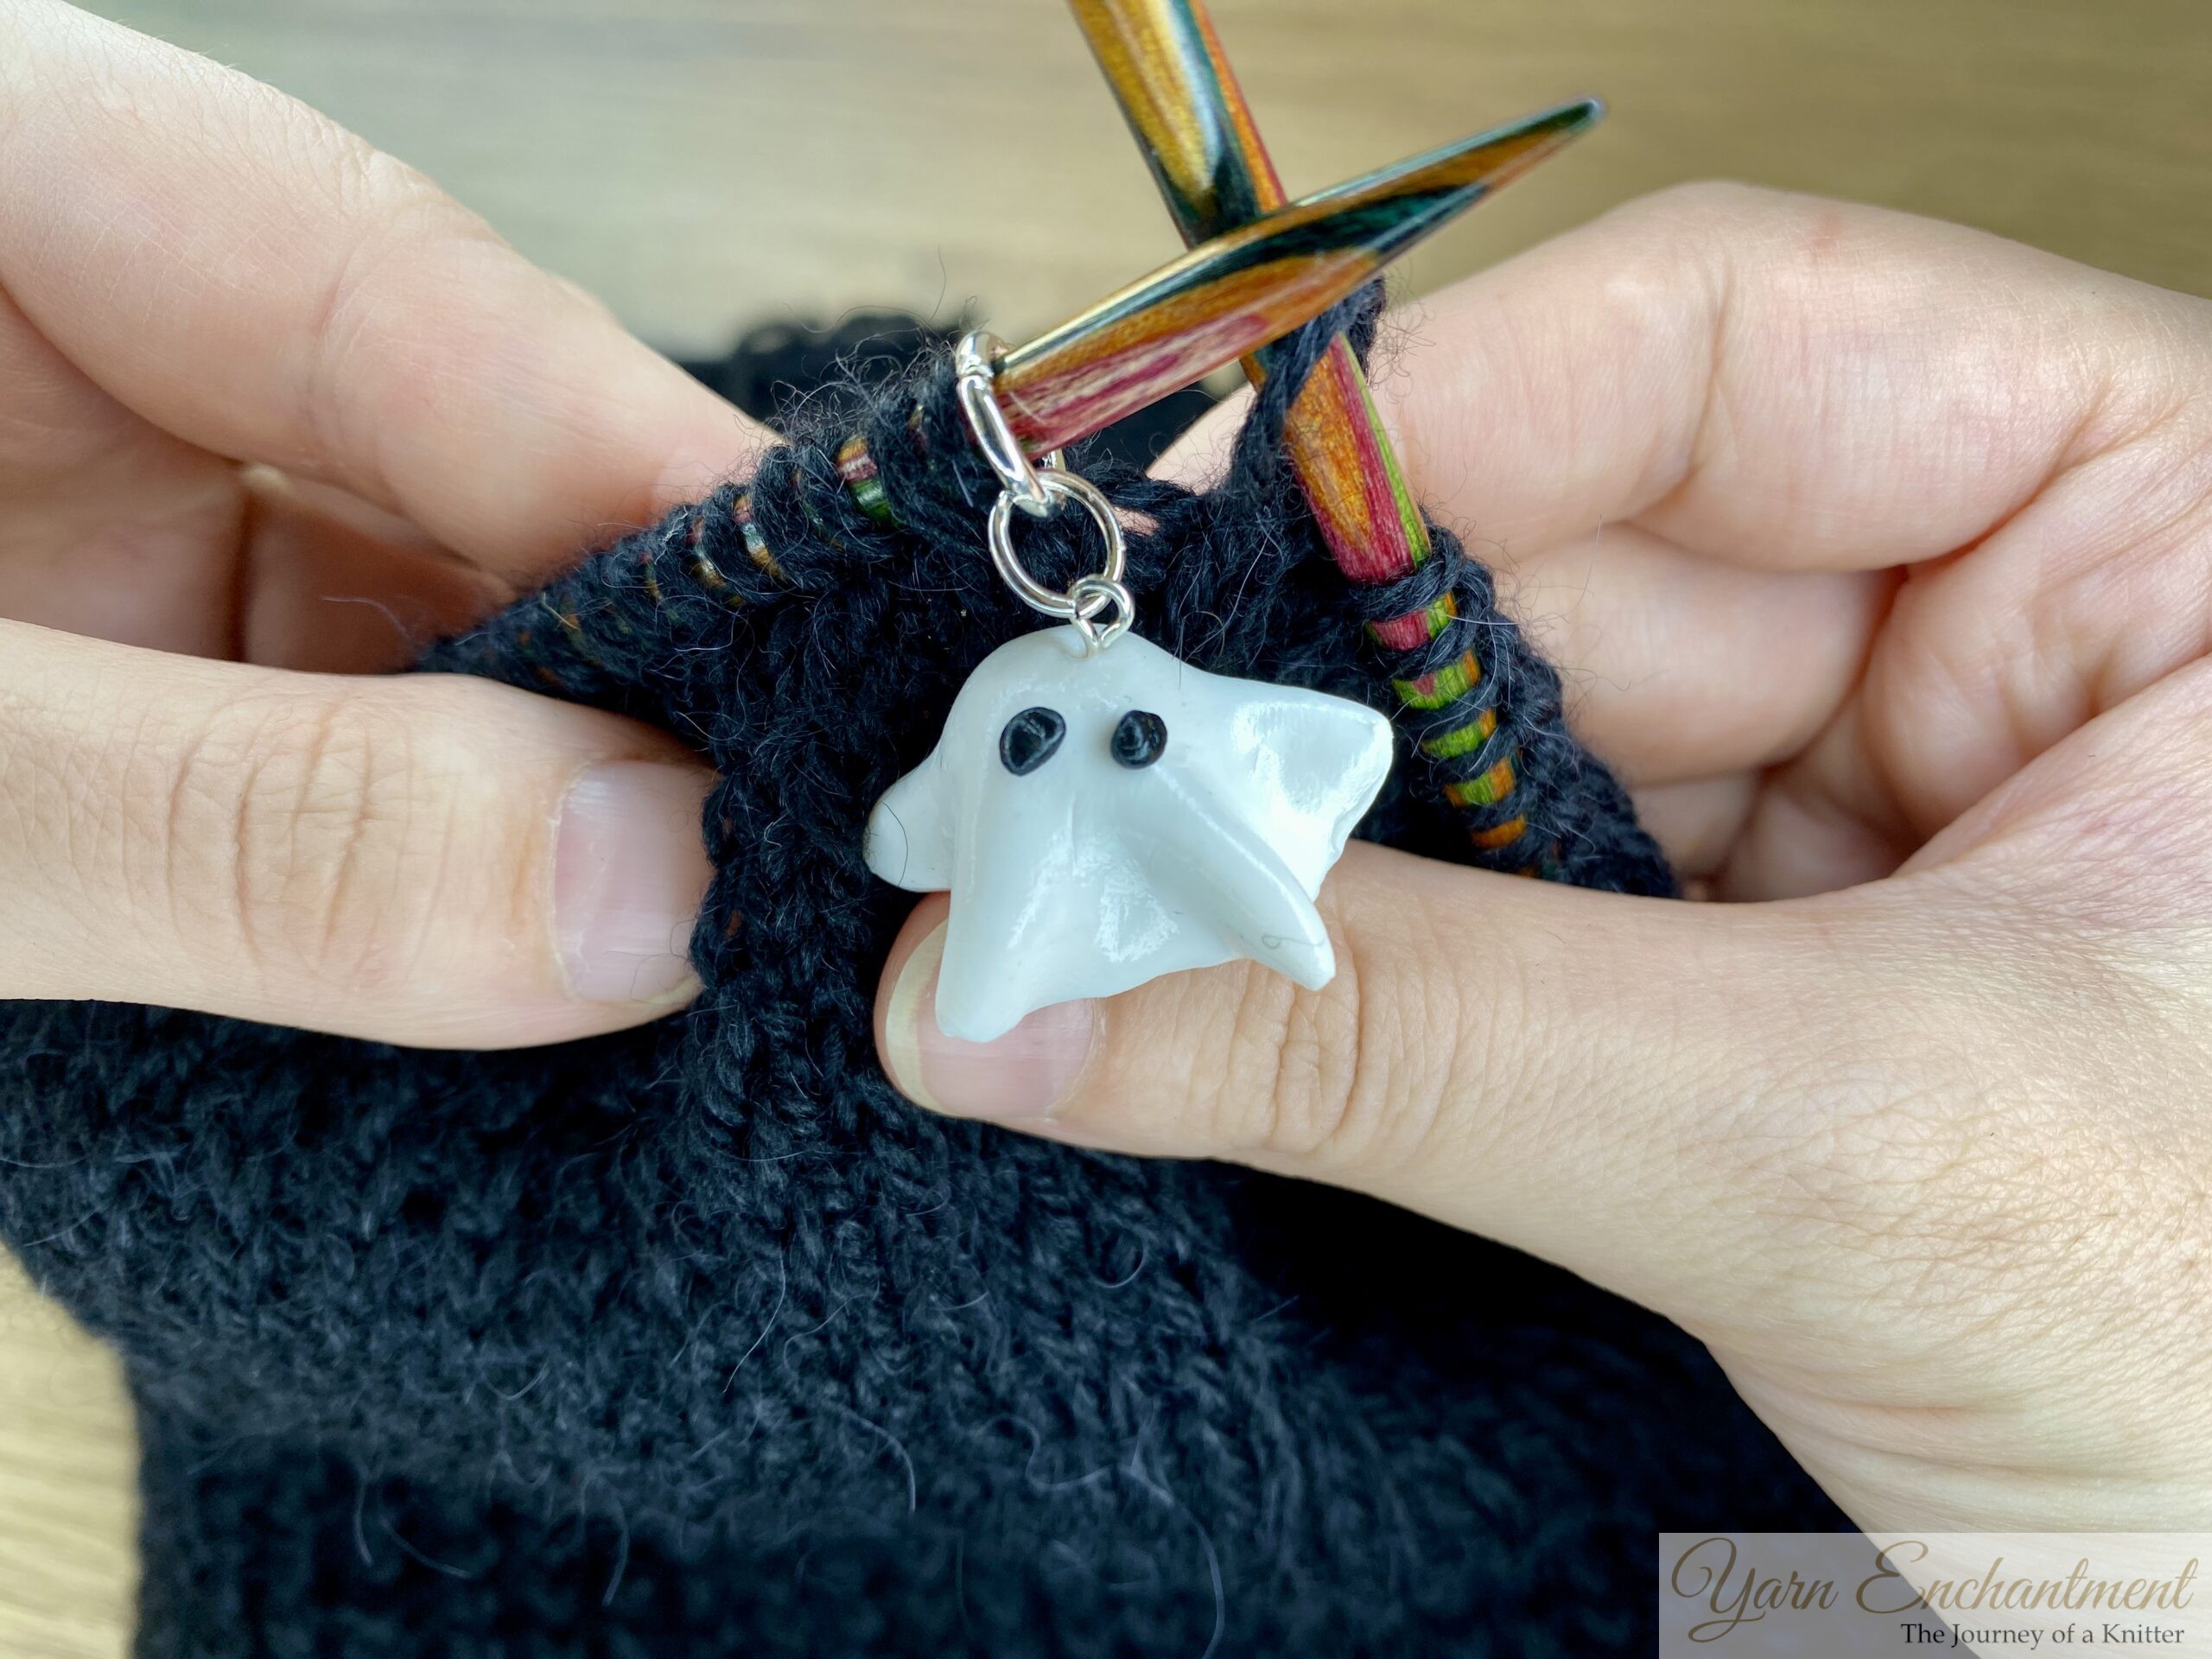 | The finished marker is about 1.5 cm or 0.59 inch in height. | Make sure you choose split rings that fit comfortably on your needles. |


Pro Tips for Beginners & Safety
-
Find yourself a nice, smooth, non-sticky surface to work on - a silicone mat or a sheet of baking paper is perfect. Stay away from anything with texture, or you’ll end up with unwanted patterns stamped all over your clay.
-
Always warm up your clay in your hands before you start. Give it a good knead until it’s soft; this makes everything from shaping to mixing colors so much easier.
-
A quick hand wash goes a long way! Clean hands and tools help keep lint and dust out of your creations, and trust me, nothing is more annoying than trying to pick cat hair out of soft clay. (I still have dusk and little hairs in ghost)
-
Don’t worry about buying fancy tools at first. Toothpicks, old credit cards, even a bit of foil, these work surprisingly well for shaping or adding little details.
-
Mix colors in small batches until you’re happy with them. You can combine Fimo with other polymer clays too, but pay attention to baking times and temperatures, they can differ.
-
If you spot fingerprints or little bits of dust stuck to your piece, gently run a soft brush or a Q-tip with some rubbing alcohol over the surface. It tidies everything up before baking.
-
Take your time baking, follow the instructions for temperature (usually 110°C for about 30 minutes). If possible, use an oven thermometer so you don’t accidentally scorch your creations.
-
Store unused clay in a sealed container or wrap it in plastic. That way, it stays soft and doesn’t get dusty between projects.
-
Most of all, experiment and have fun! Don’t stress about making things perfect. The little quirks in your first pieces are what make them feel handmade and unique.
💡Important Safety Note
Always make sure that any kitchen items or tools you use for polymer clay crafts are completely retired from food use. Once a tool, surface, or utensil (such as a rolling pin or cookie cutter) has been used with polymer clay, it should never touch groceries, food, or anything edible again. Polymer clay is not food-safe, and even after careful washing, small residues can remain in porous materials or crevices.
For your safety, keep a dedicated set of craft tools and surfaces separate from your kitchen equipment. Label them if necessary so that they’re easy to identify and only use them for creative projects, never for food preparation.
 | They really are way too adorable, those little ghost stitch markers are packed with personality! |

FAQs and Troubleshooting
Got questions about Fimo clay? Or maybe something didn’t turn out quite right? Don’t worry, I’ve got you covered with tips and simple fixes for the most common clay problems. Let’s figure it out together!
Why is my clay too hard or crumbly?
Try warming it in your hands or popping it somewhere warm for a bit. If it still won’t soften, a drop of clay softener or baby oil can help.
Why is my baked polymer clay brittle and breaking?
If your Fimo clay piece feels brittle or snaps after baking, it’s usually because it was underbaked, baked at the wrong temperature, or the clay wasn’t conditioned well enough. Always use an oven thermometer, bake for at least 30 minutes at the recommended temperature (typically 110°C), and make sure the clay is well mixed and soft before shaping
How do I remove fingerprints or dust from polymer clay before baking?
If you notice fingerprints or tiny dust particles on your clay piece before baking, use a soft brush or a Q-tip dipped in isopropyl (rubbing) alcohol to gently rub the surface. This helps smooth out unwanted marks and tidies up your piece, making it look much cleaner once baked. For hard-to-reach areas, tweezers or a needle tool can help tease out stubborn dust or hairs. Always do this before baking, as marks are much harder to remove afterward.
What household items can I use instead of special Fimo tools?
If you don’t have fancy polymer clay tools, no problem! Toothpicks, old credit cards, the end of a paintbrush, or even small kitchen items like forks or straws work well for shaping, adding texture, and making details. Foil balls and Q-tips are perfect for smoothing or brushing away dust. Just look around your home, chances are, you have plenty of crafty alternatives.
Why does my Fimo or polymer clay stick to the table? What’s the best surface to work on?
Polymer clay can get sticky, especially when it’s warm or freshly conditioned. If your clay keeps sticking to the table, try switching to a non-stick surface like a silicone mat, or a sheet of baking/parchment paper. These surfaces are easy to clean and make it much easier to lift your clay creations without stretching or tearing.
Conclusion
I’m not super invested in working with polymer clay, but I’ve picked up a few tricks over the years homeschooling my kids, since we do a lot of creative projects. What I’ve learned is that it doesn’t have to be perfect, the best part is having fun while you’re making it. Every time you look at your Halloween knitting marker, I hope it brings back good memories and gives you a warm feeling. It should make you smile and fill you with pride and joy, no matter how it turns out.
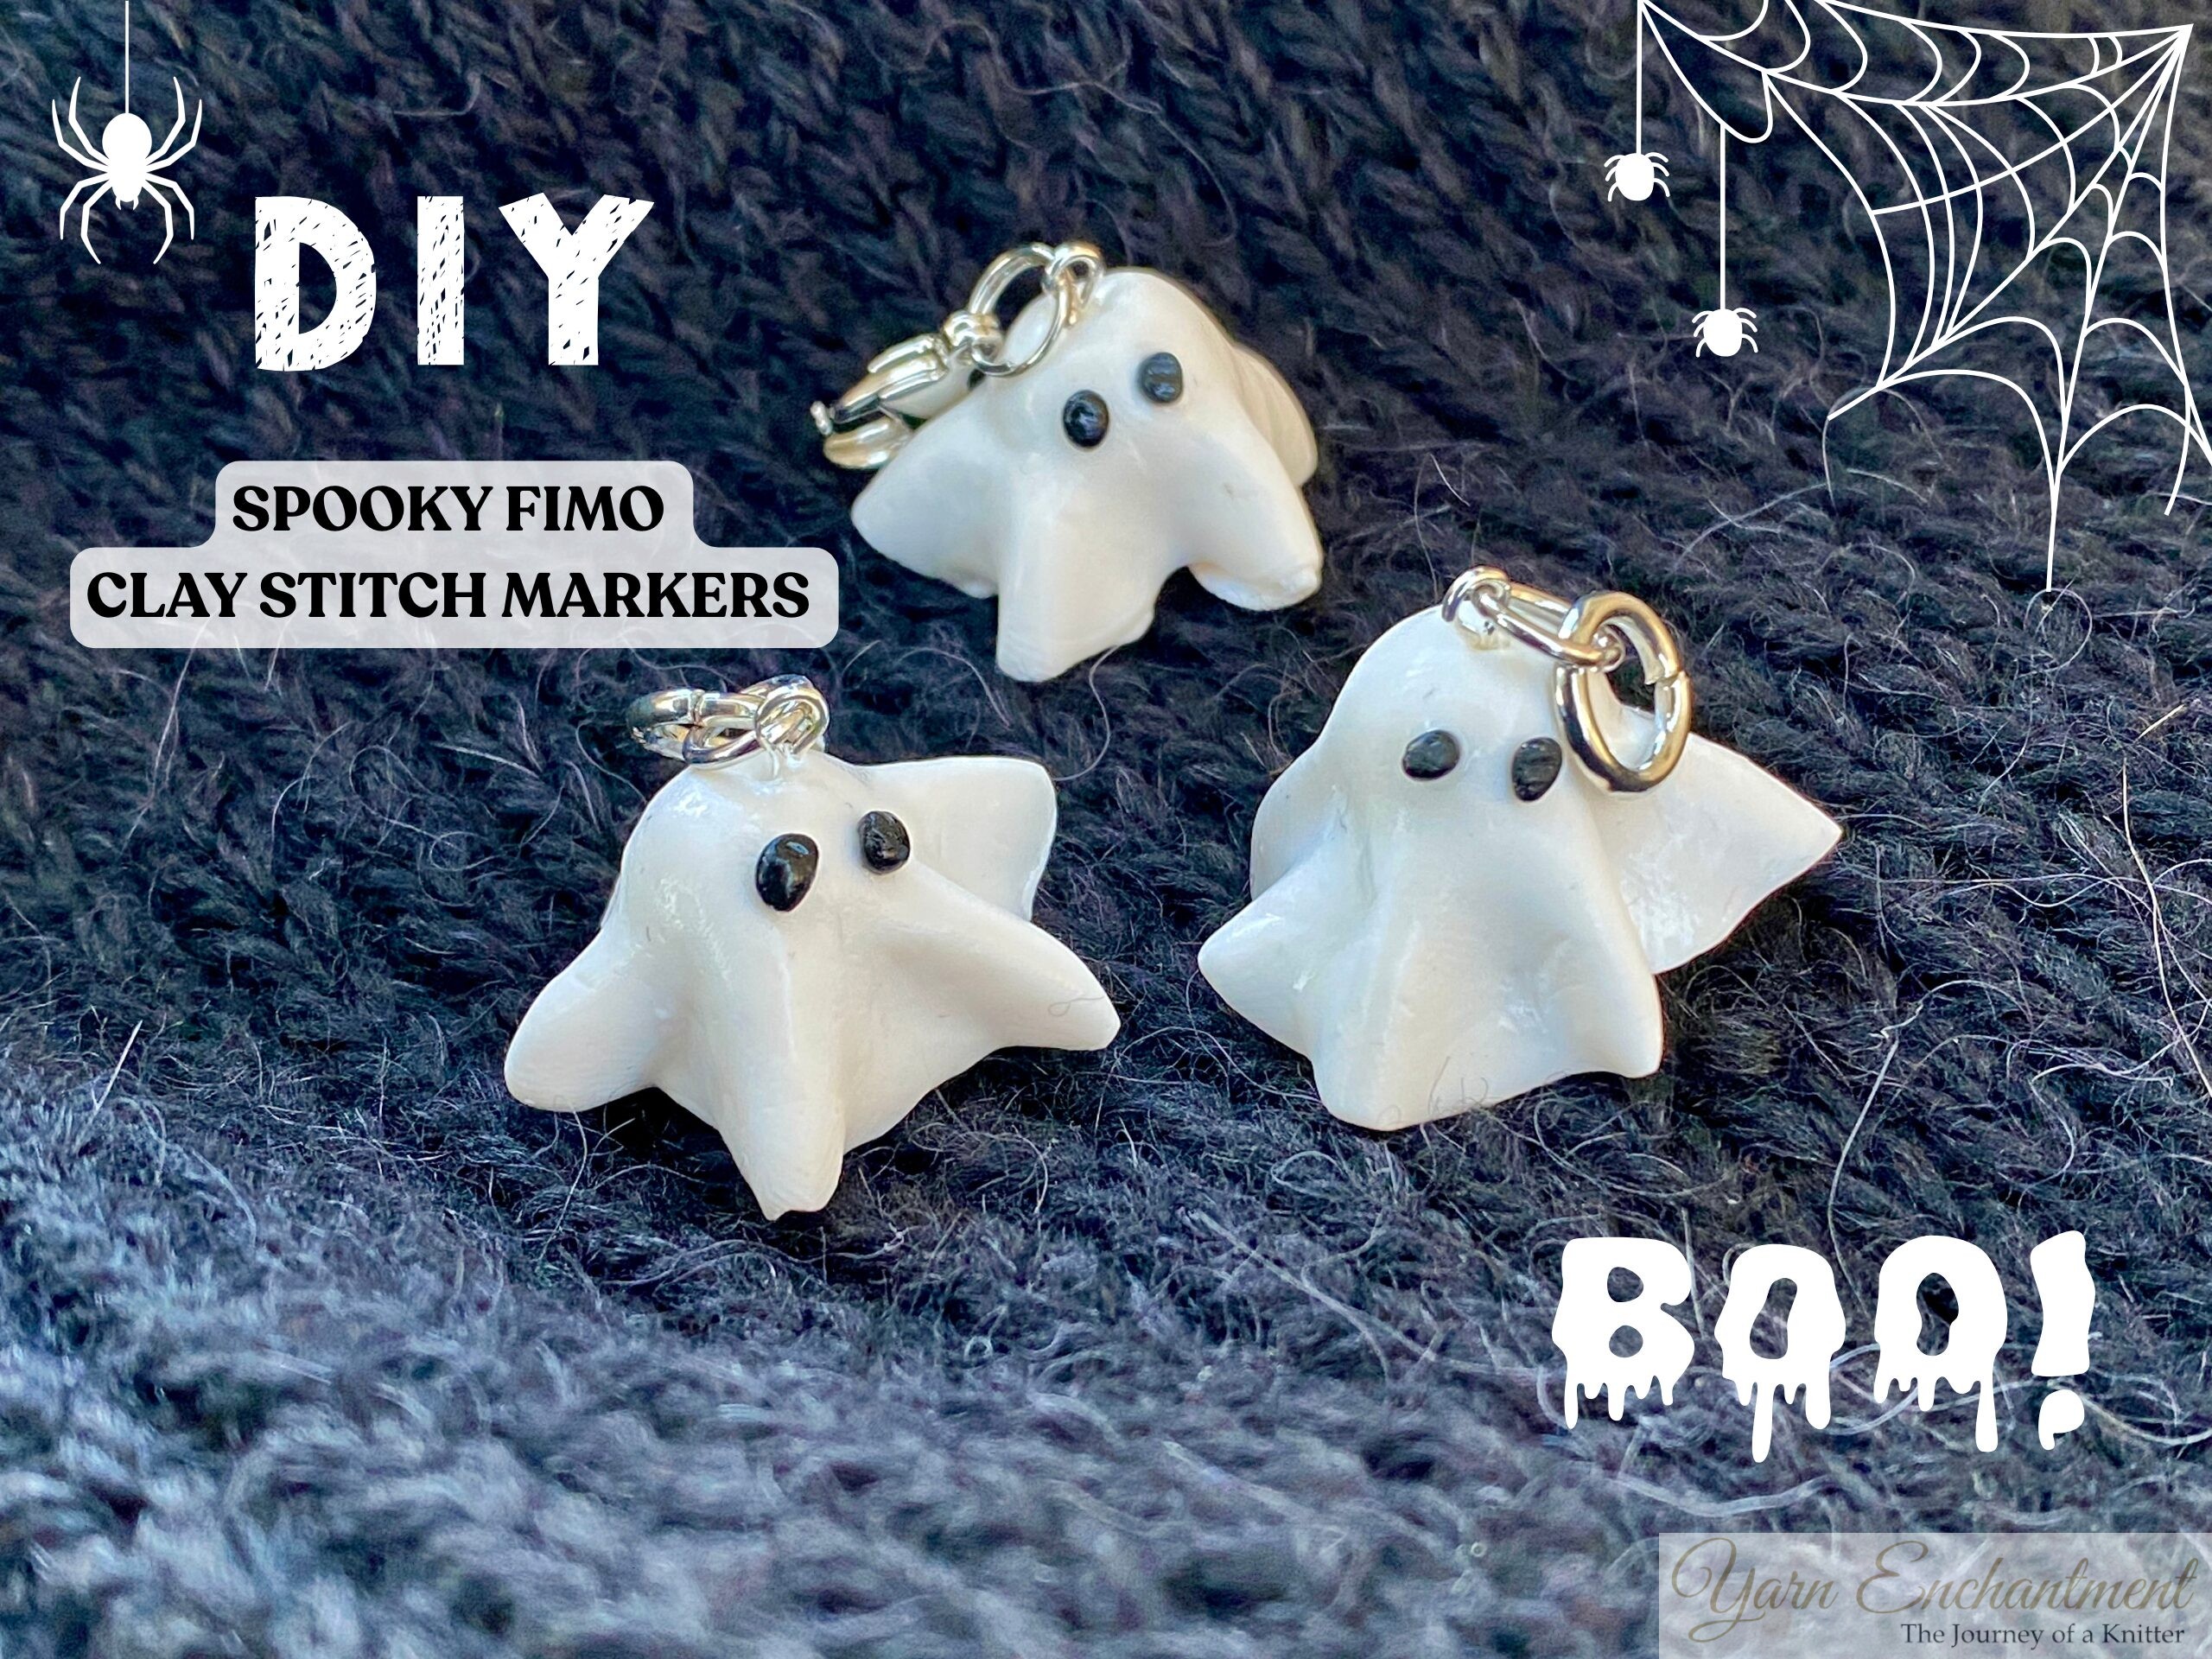 | DIY Spooky Fimo Clay Stitch Markers – DIY polymer clay tutorial |
A Little Way to Say Thanks
You Might Also Like


 |
|
Join the Cozy Corner Newsletter!
Hey there, creative soul! Welcome to the Yarn Enchantment Newsletter, where we celebrate all things cozy, crafty, and full of heart. Think of this as your friendly crafting companion - a little dose of inspiration delivered straight to your inbox, just for you. Inside, you’ll find: ✨ Exclusive patterns & tutorials - ideas you won’t find anywhere else (just for us!) 📚 Bookish crafts that bring your favorite stories to life 🧶 Tips and tricks to make your crafting journey smoother (and more fun!) 💌 Heartfelt musings on life, creativity, and the magic of making something with your own two hands Whether you’re knitting by the fire, brainstorming your next DIY project, or just looking for a little creative pick-me-up, this newsletter is here to cheer you on. Because let’s be honest - crafting isn’t just about the finished project; it’s about the joy, peace, and stories we create along the way. So grab a cup of tea, cozy up, and join me. Together, we’ll weave a little magic into everyday life - one stitch, one story, and one email at a time. P.S. I’m so glad you’re here. Let’s make something beautiful together! (Note: If you're using an ad blocker, you may encounter issues subscribing to the newsletter. To subscribe, please consider disabling your ad blocker.)
|
