PetiteKnit Sophie Scarf: Tips & Tricks
July 26, 2026
Centered Double Decrease (CDD / s2kp): Step-by-Step Knitting Guide
August 7, 2026Yarn Over in Lace Knitting: The Complete Beginner's Guide

Originally published on August 1, 2026
Hello everyone, I hope you are doing well. In one of my previous blog posts about yarn over increases, I told you that I want to talk about yarn overs in lace knitting. And here we are today.
I have a confession to make. When I first got into knitting after years of crocheting, yarn overs were actually quite difficult for me. In crocheting, you wrap the yarn over from back to front. So in knitting, this would be a reverse yarn over. But in knitting, you wrap the yarn from front to back. Relearning this motion took me a little bit of time. And I can say with confidence, this was the most common mistake I made. Wrapping the yarn over the wrong way.
If you are coming from crochet like I did, or even if you are brand new to knitting, I want to save you from that same frustration. So let's break it down together, nice and slow. And if you have any questions, do not hesitate to reach out to me.
  |
Yarn Over in Lace Knitting: The Complete Beginner's Guide |
Table of Contents
What Is a Yarn Over in Lace Knitting?
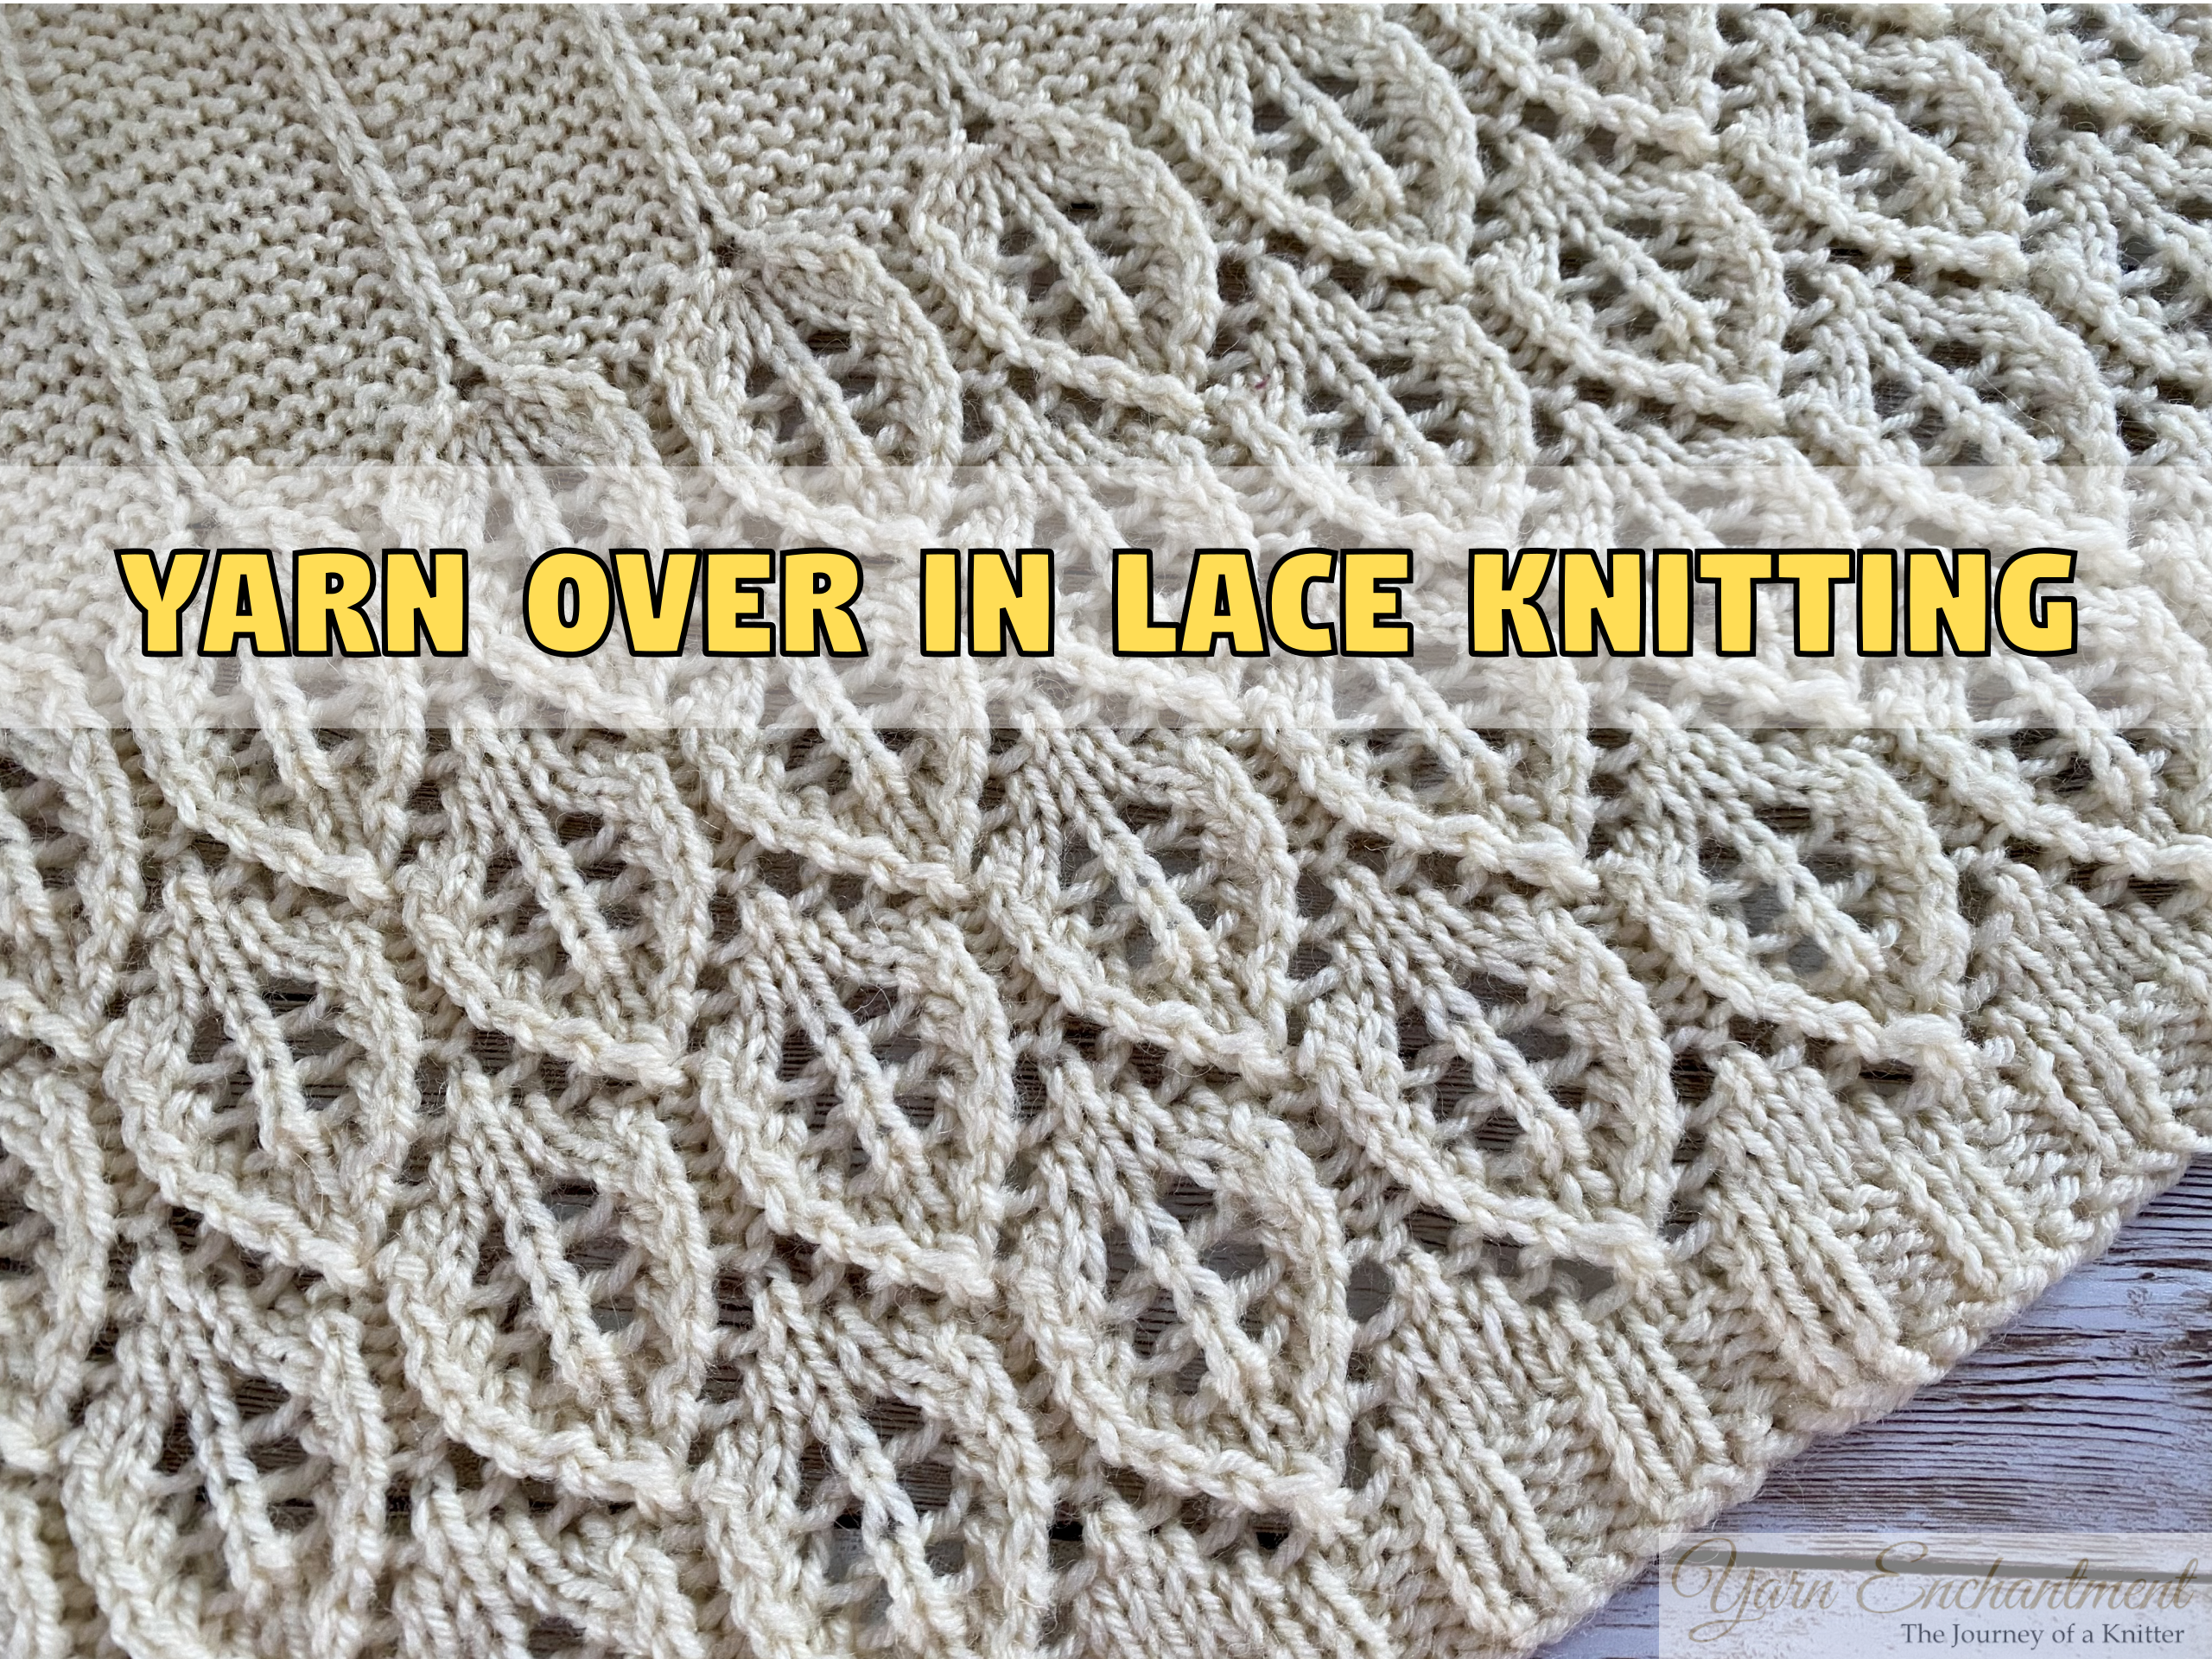
A yarn over is just a loop you wrap around your needle on purpose, without knitting into a stitch. That little loop becomes a brand new stitch on your next row. It sounds almost too simple, right? But that simple loop together with the K2tog and the SSK is the foundation of so many gorgeous lace patterns.
Here is what you need to know. A yarn over adds a stitch to your needle, so it is an increase. And because that new loop has no stitch underneath it, it leaves a tiny hole in your fabric. That hole is the eyelet, and it is what makes lace look like lace.
But here is the tricky part for us crochet converts. In crochet, a yarn over is done by bringing the yarn from the back to the front over the hook. In knitting, you do the opposite. You bring the yarn from the front to the back over the needle. It feels completely backwards at first. My hands wanted to do the crochet motion so badly. I cannot tell you how many rows I had to rip out because I wrapped the wrong way. So if you are struggling with this, please know you are not alone. It took me a week of practice before my muscle memory finally switched over.
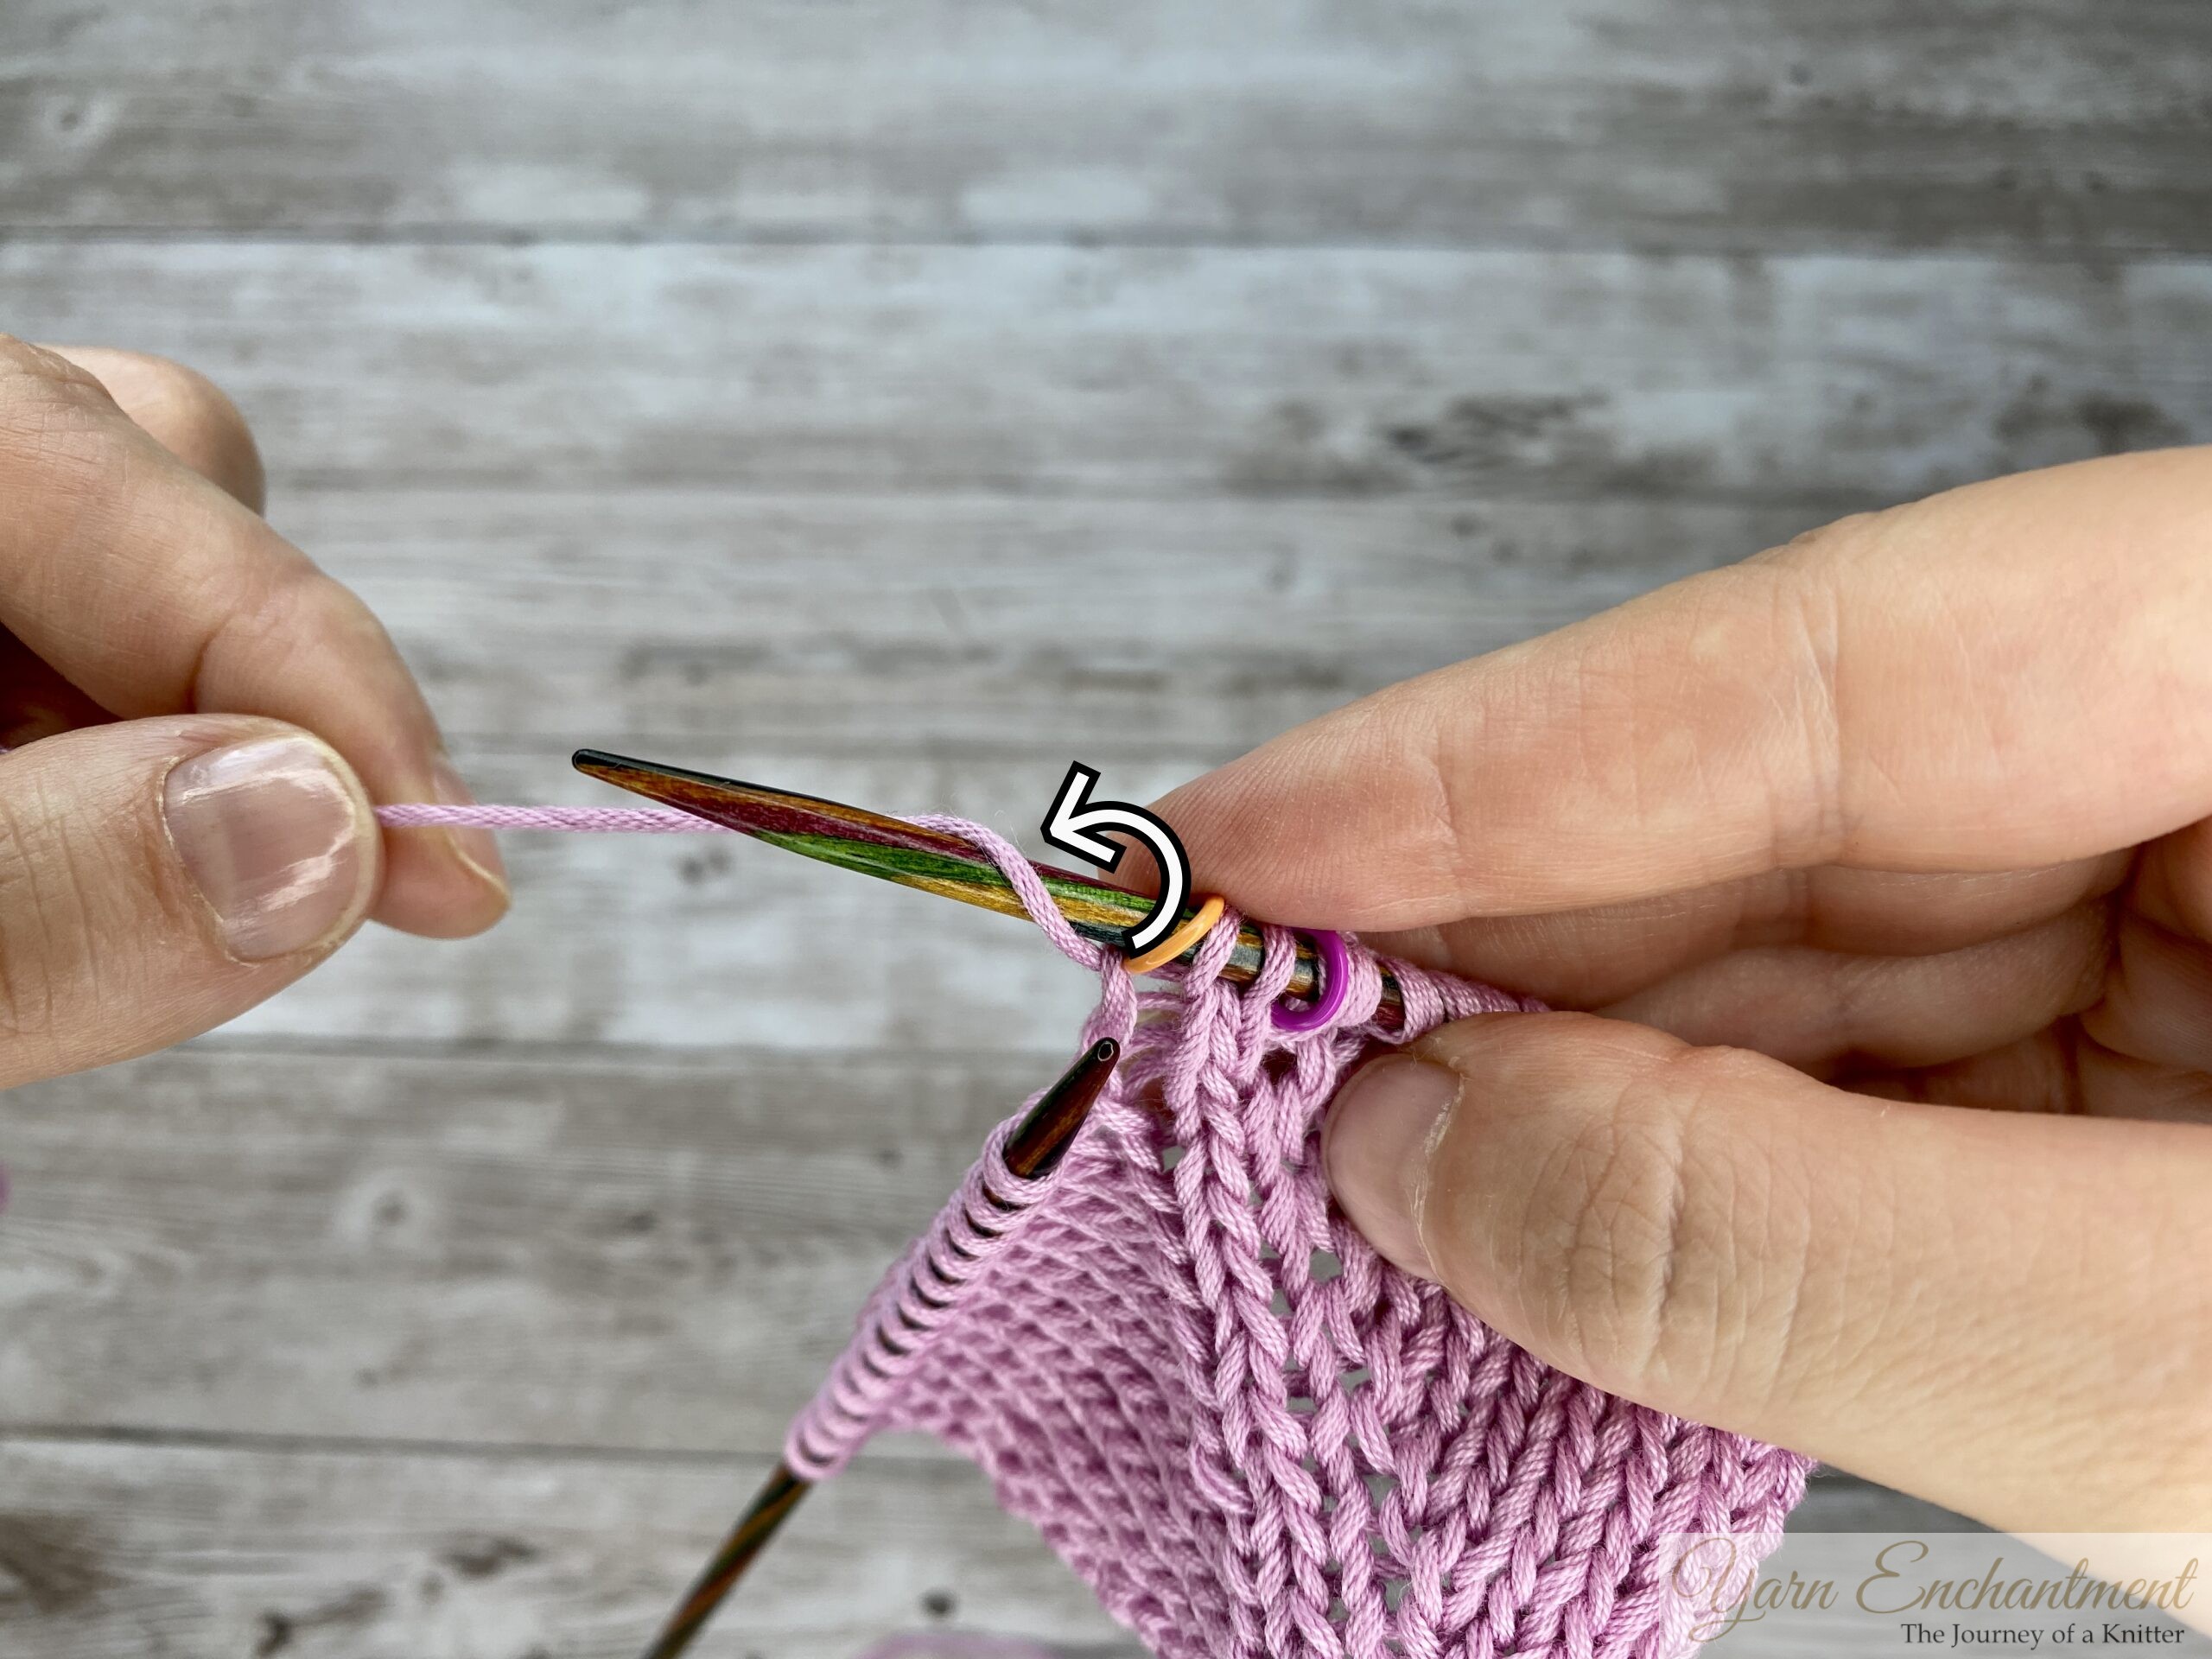  |
When you work a yarn over, you usually bring your yarn from the front over the needle to the back, creating a loop on your needle. |
Yarn Over Abbreviations Explained
Now, before we dive in, let me quickly explain the abbreviations you might see in lace patterns. They all mean the same basic thing, a yarn over, but they are used in slightly different situations. Please note, these abbreviations, especially YFWD and YRN, are older terminology. You will mostly find them in vintage patterns or patterns written by older British designers. Modern patterns almost always use "YO" for everything, regardless of where the yarn over is placed. If you are knitting a modern pattern, you probably will not see these older abbreviations at all. But if you love vintage patterns like I do, it is good to know what they mean.
-
YO (yarn over) – This is the standard abbreviation used in modern patterns and it is typically used between two knit stitches.
-
YFWD or yf (yarn forward) – This is an older term meaning yarn forward. It is used when you have just worked a knit stitch and your next stitch is a purl. You simply bring the yarn to the front between the needles and then over the top to purl.
-
YRN (yarn round needle) – This is an older term meaning yarn round needle. It is used between two purl stitches or after a purl before a knit. Your yarn is already in the front, so you take it over the needle and back to the front again.
-
YO twice (double yarn over) – This means you wrap the yarn around the needle twice, creating two new stitches and a bigger, more dramatic hole. On the return row, you will typically knit into one loop and purl into the other.
Don't let the different names confuse you. They are all just yarn overs in different positions. Once you understand where your yarn needs to be, the name does not really matter anymore. In modern patterns, you will almost always just see "YO" and that is perfectly fine.
The Beautiful Balance Rule in Lace
Lace knitting is all about balance. If you just added yarn overs all over the place, your scarf would start to look like a very lopsided, ever-widening triangle. Not exactly what we want. So lace patterns pair those increases with decreases.
I think it is like dancing with stitches. I am feeling so poetic today. The yarn over steps forward and adds a stitch. Then a k2tog or an ssk steps right up and removes one. When they move together, your stitch count stays perfectly the same, and the fabric keeps its shape. The eyelet gets to live on, but your scarf does not turn into a mess. That is the structural trick behind almost every lace pattern you will ever meet, from a simple eyelet washcloth to the most intricate shawl.
Common Decreases for Lace Knitting
To be a yarn over hero, you just need a couple of dance partners.
- k2tog, or knit two together, leans to the right.
- ssk, or slip, slip, knit, leans to the left.
Designers use the lean of the decrease to make the eyelets mirror each other beautifully. So when you see an ssk right next to a k2tog, just smile and appreciate the symmetry. I wrote a detailed tutorial for those to techniques.
The Four Yarn Over Situations
The yarn over looks a little different depending on where you are in your row. But once you get a feel for it, you will not even think about it. Here is the simple map. I think English style knitters have it even trickier than Continental knitters, so I will try to explain it for both. And if I say anything confusing or you need further help, just scream in the comments.
Between Two Knit Stitches
Your yarn is in the back. Just bring it to the front, then over the top of the right needle, and knit your next stitch. Remember, front to back over the needle. That is the knitting way.
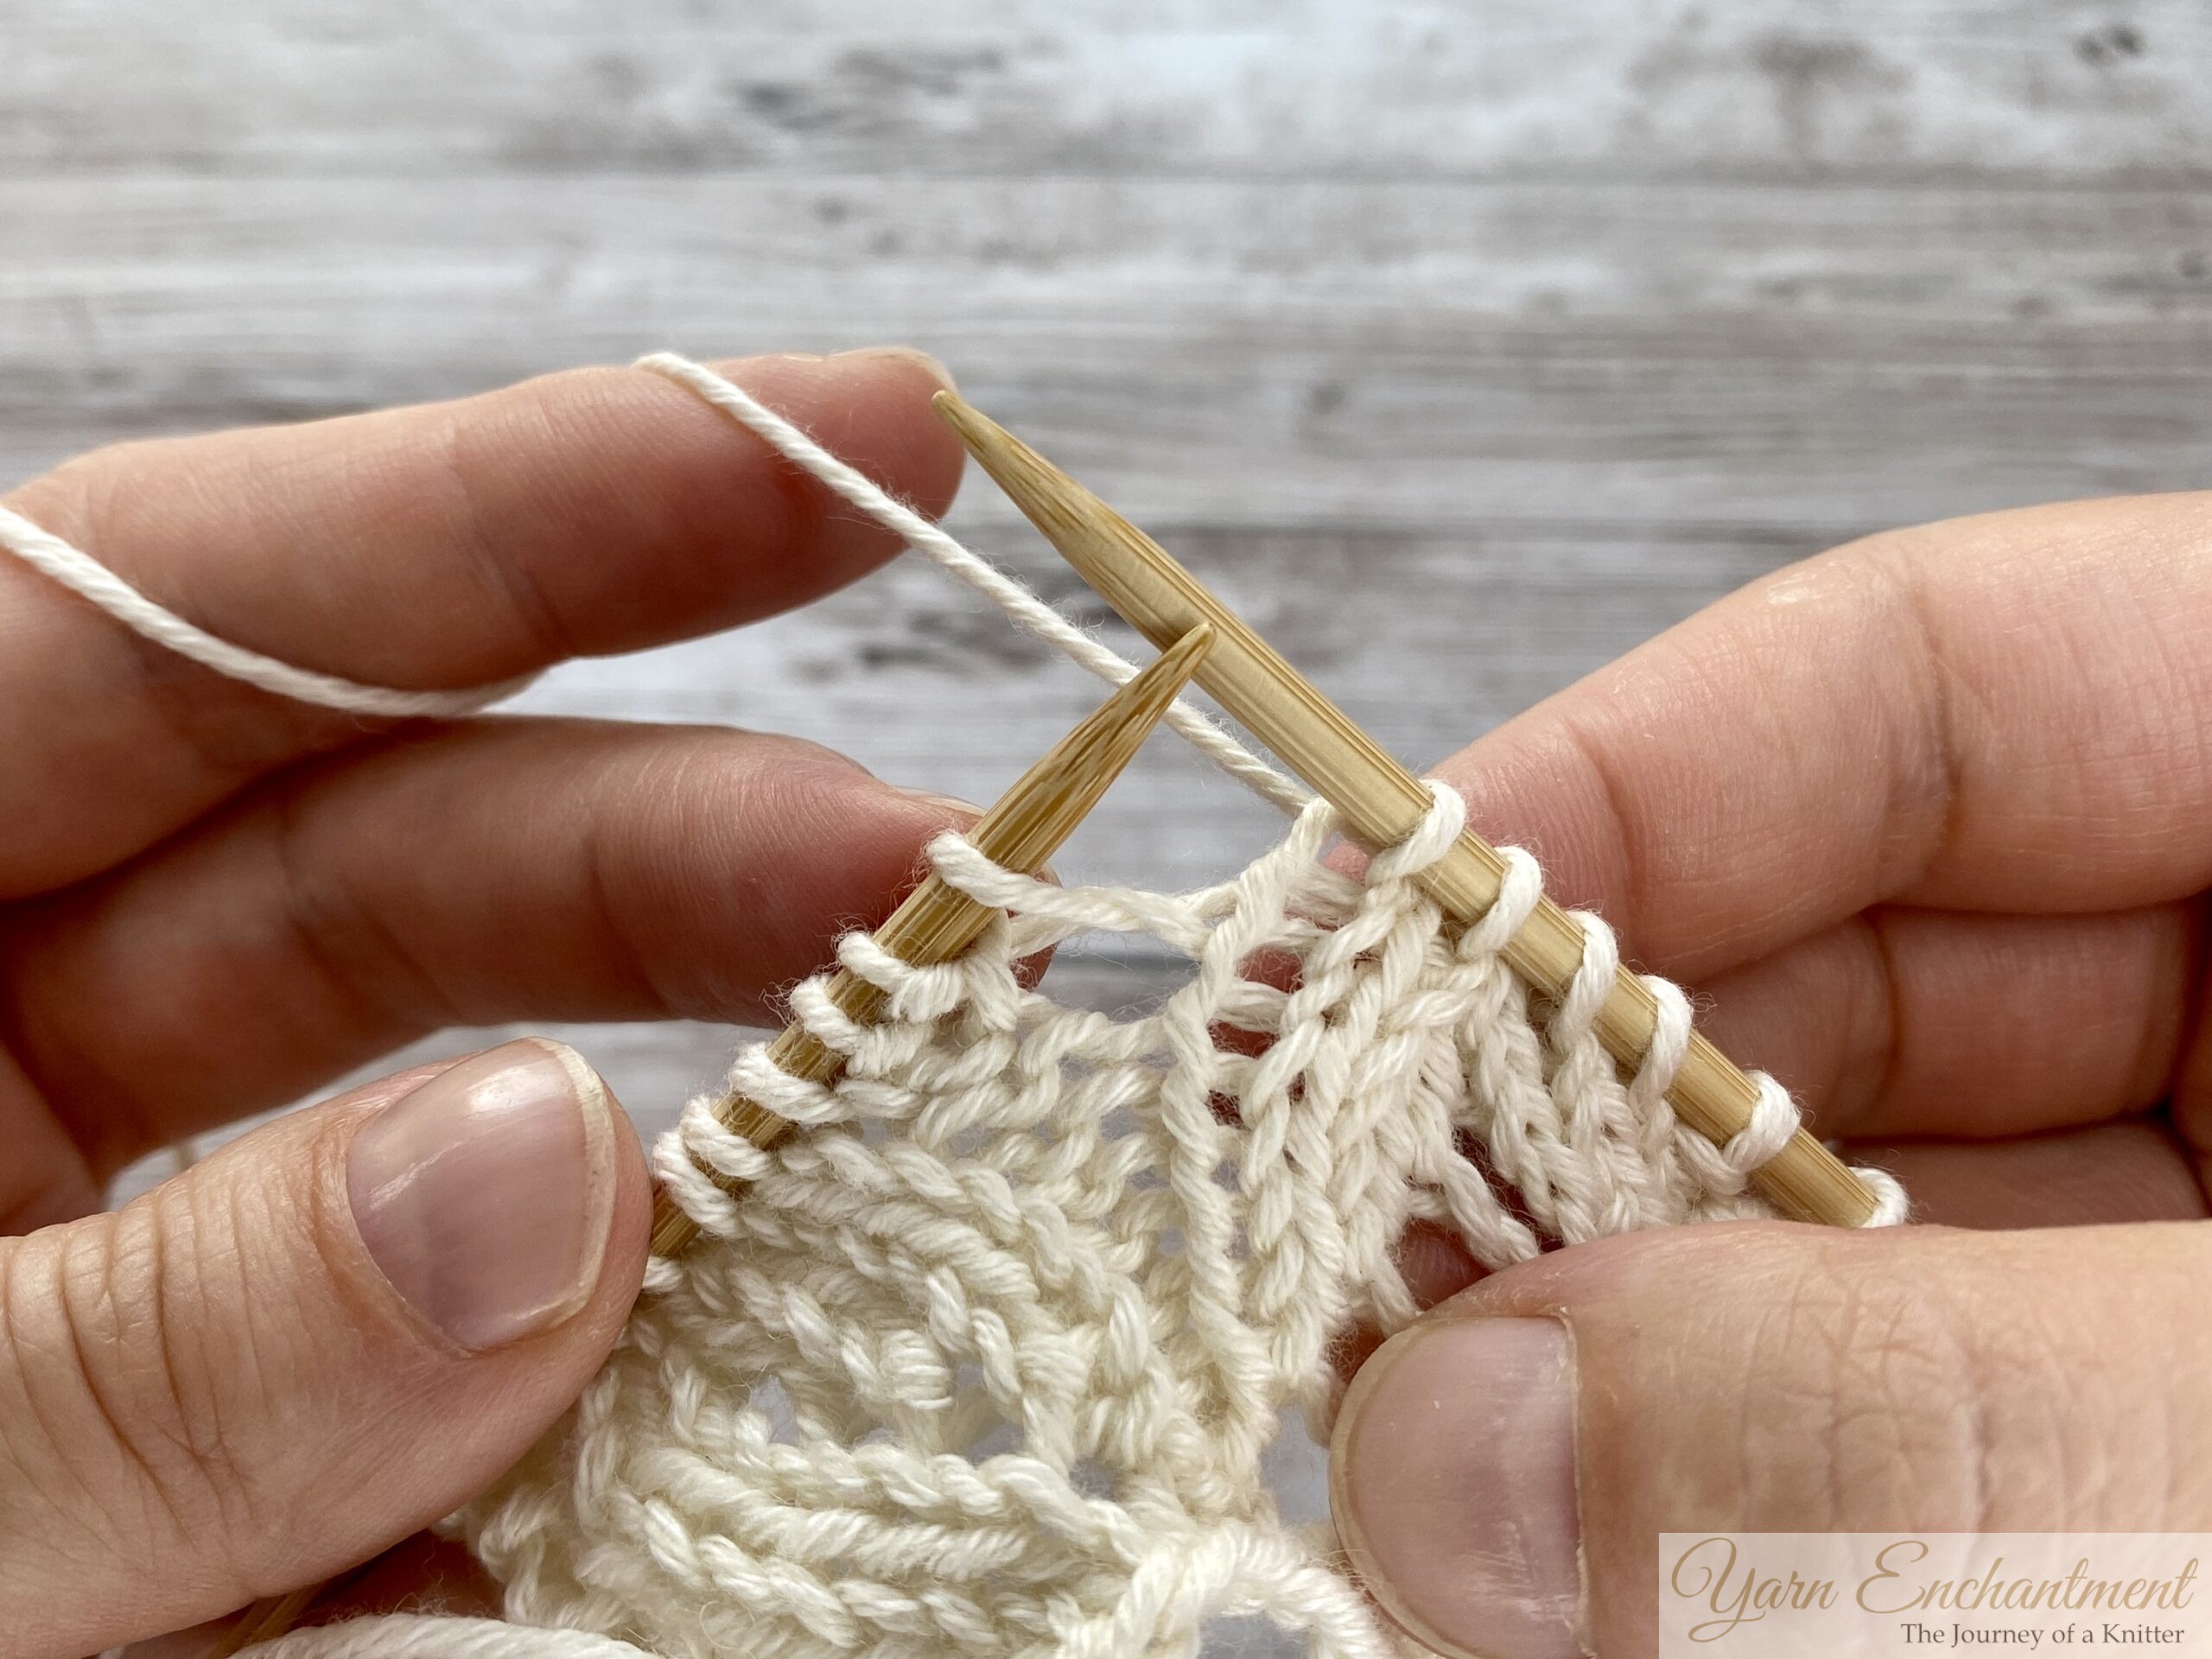  | 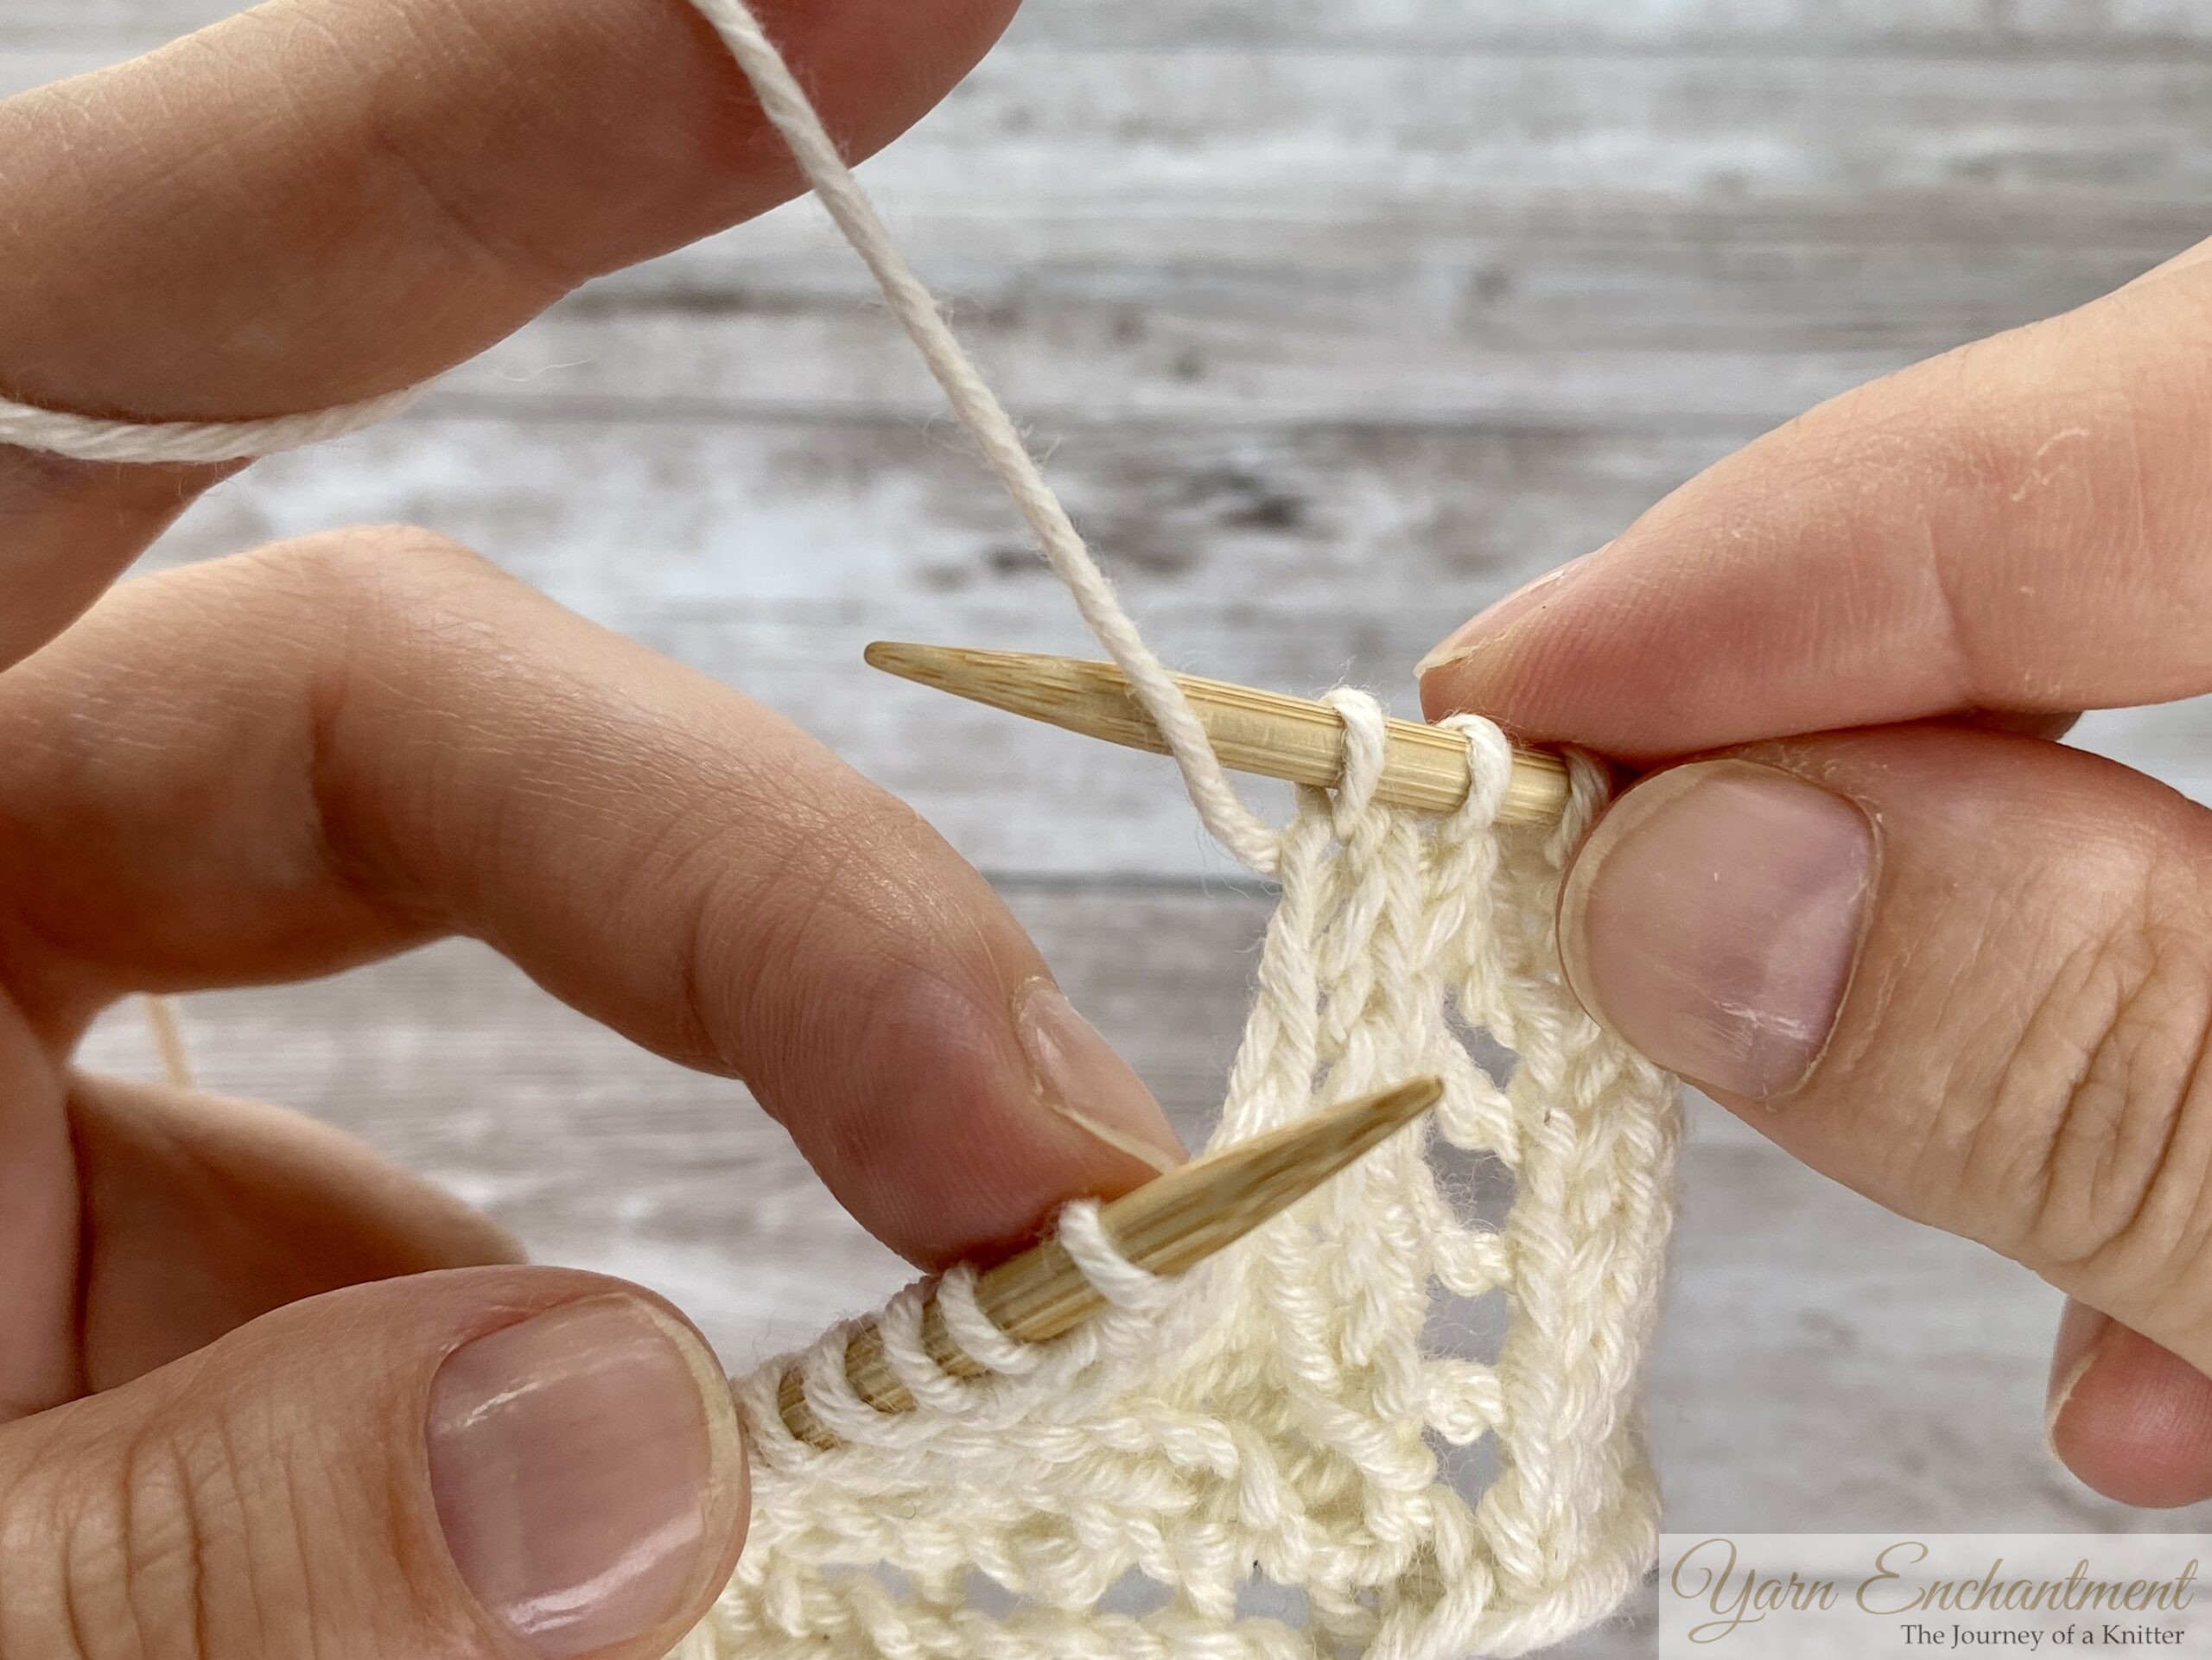  |
You start with the working yarn in the back | Bring it to the front... |
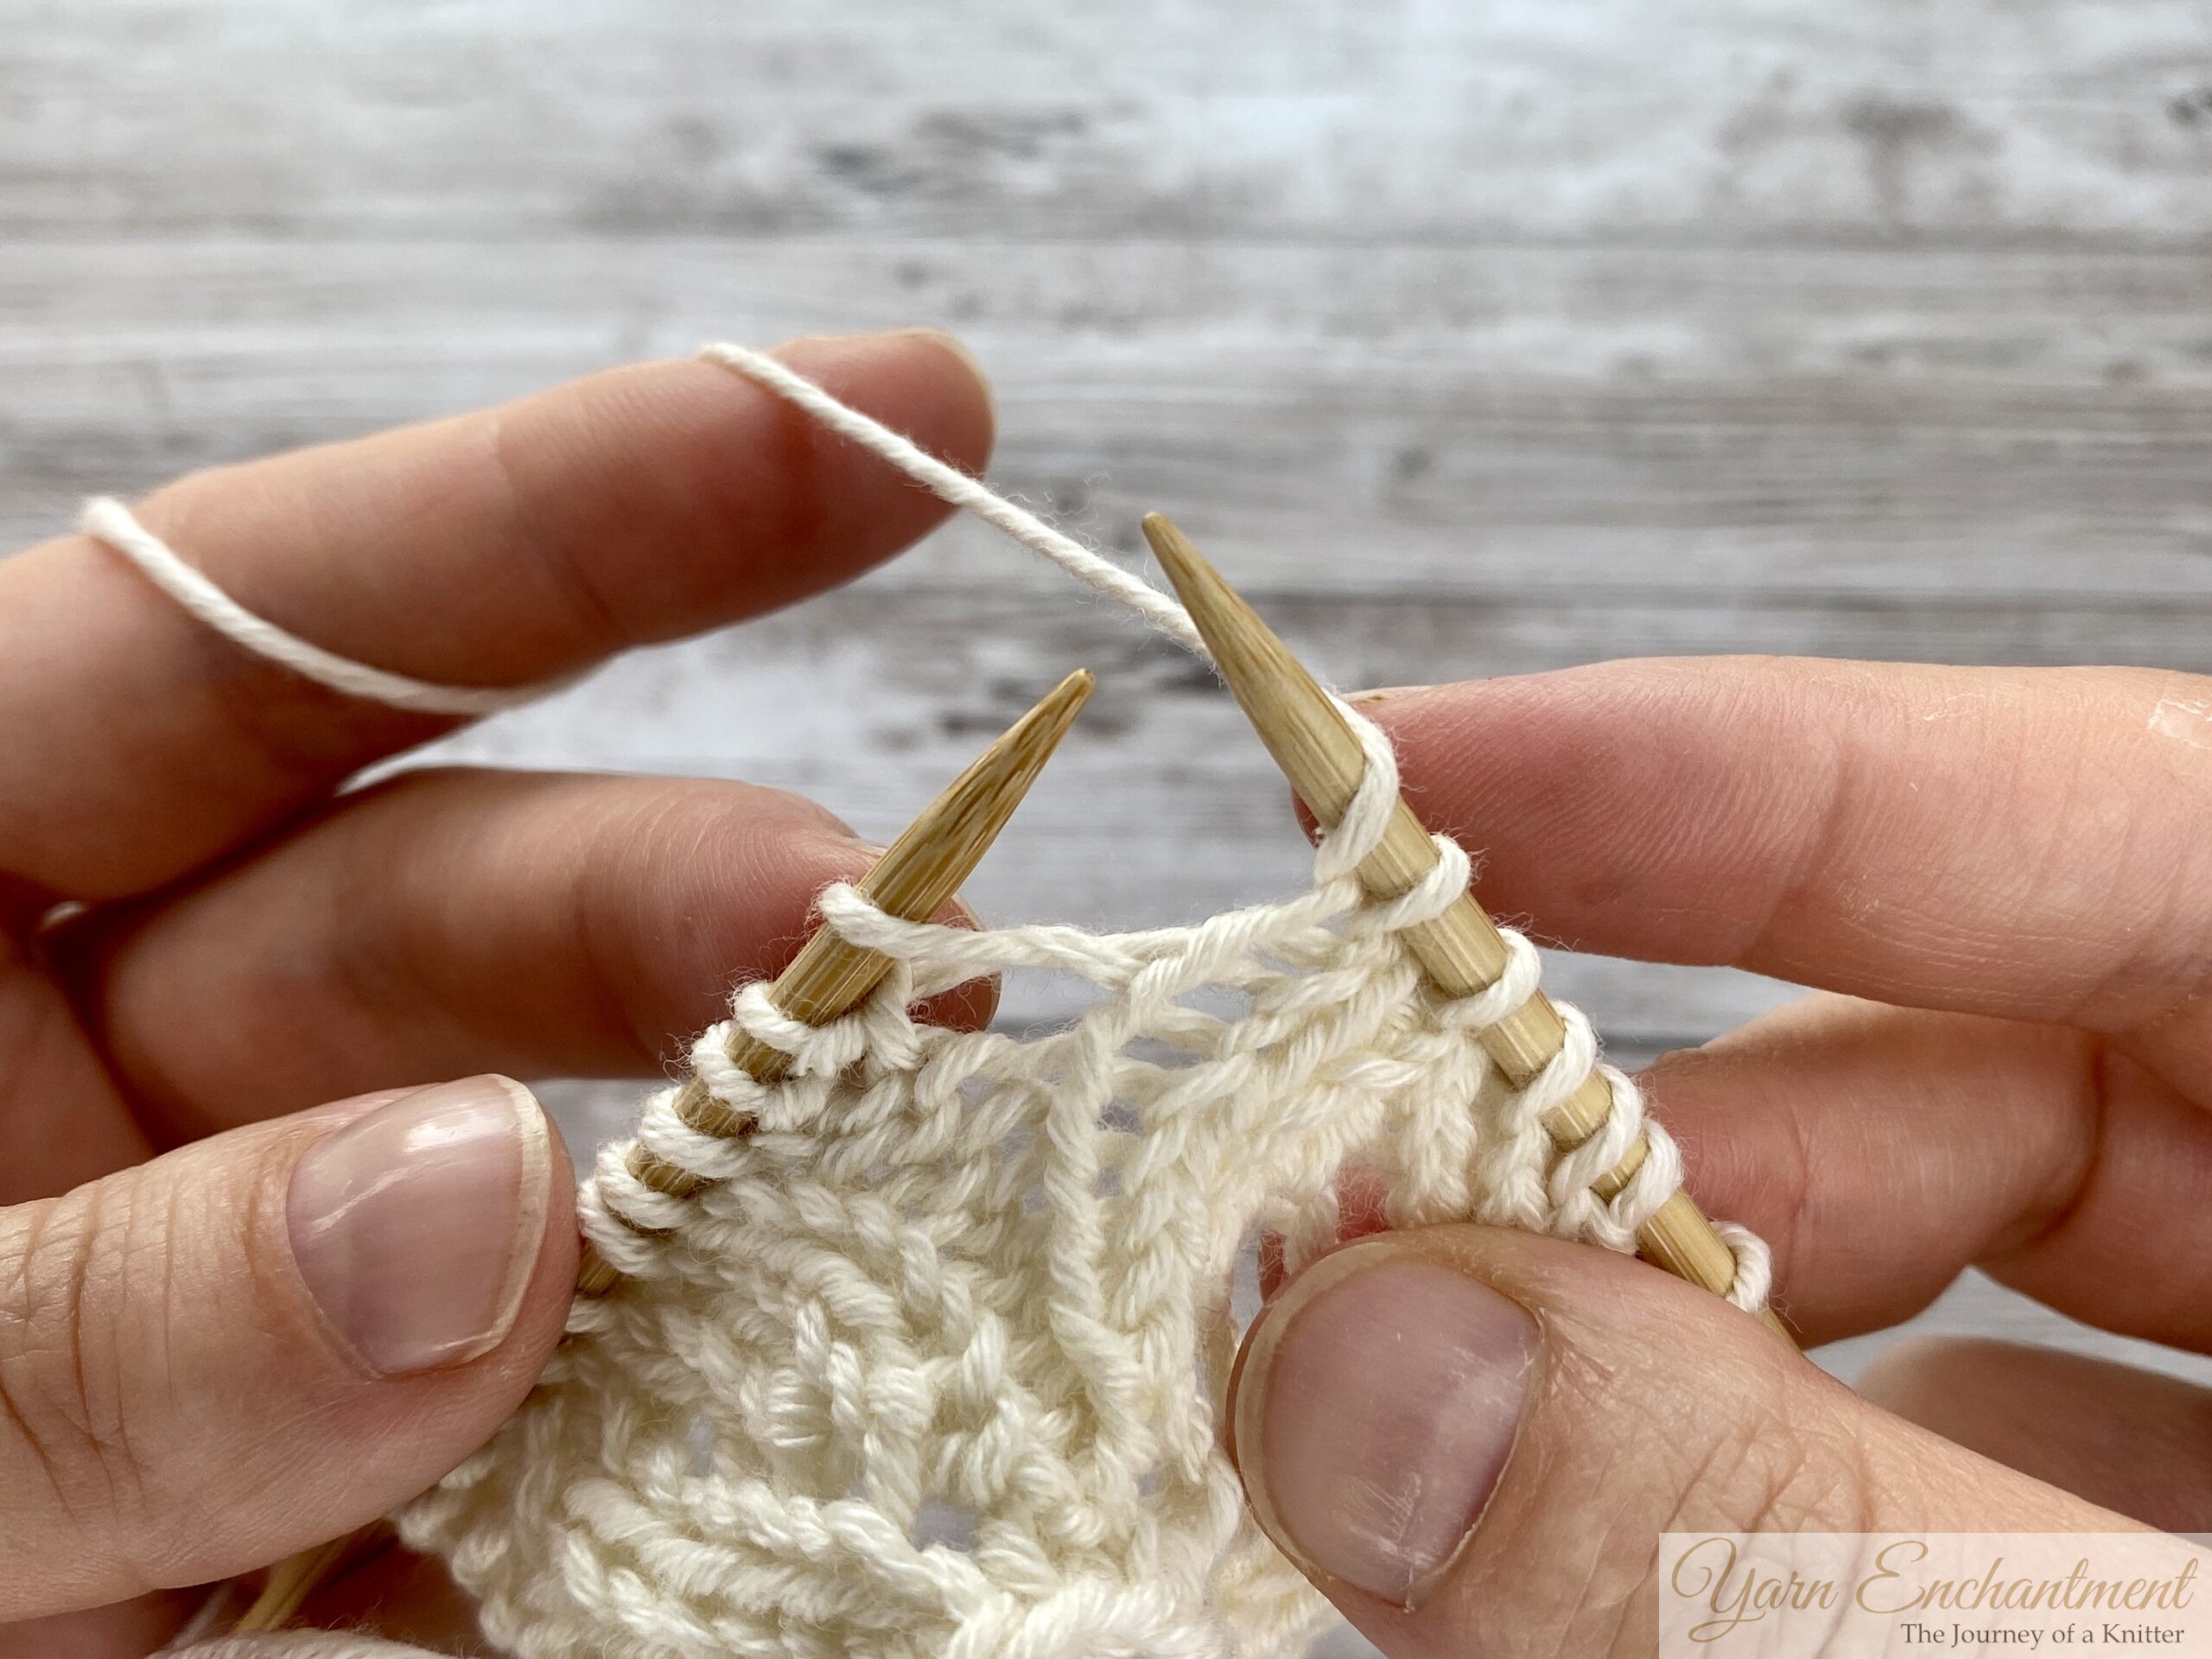  | 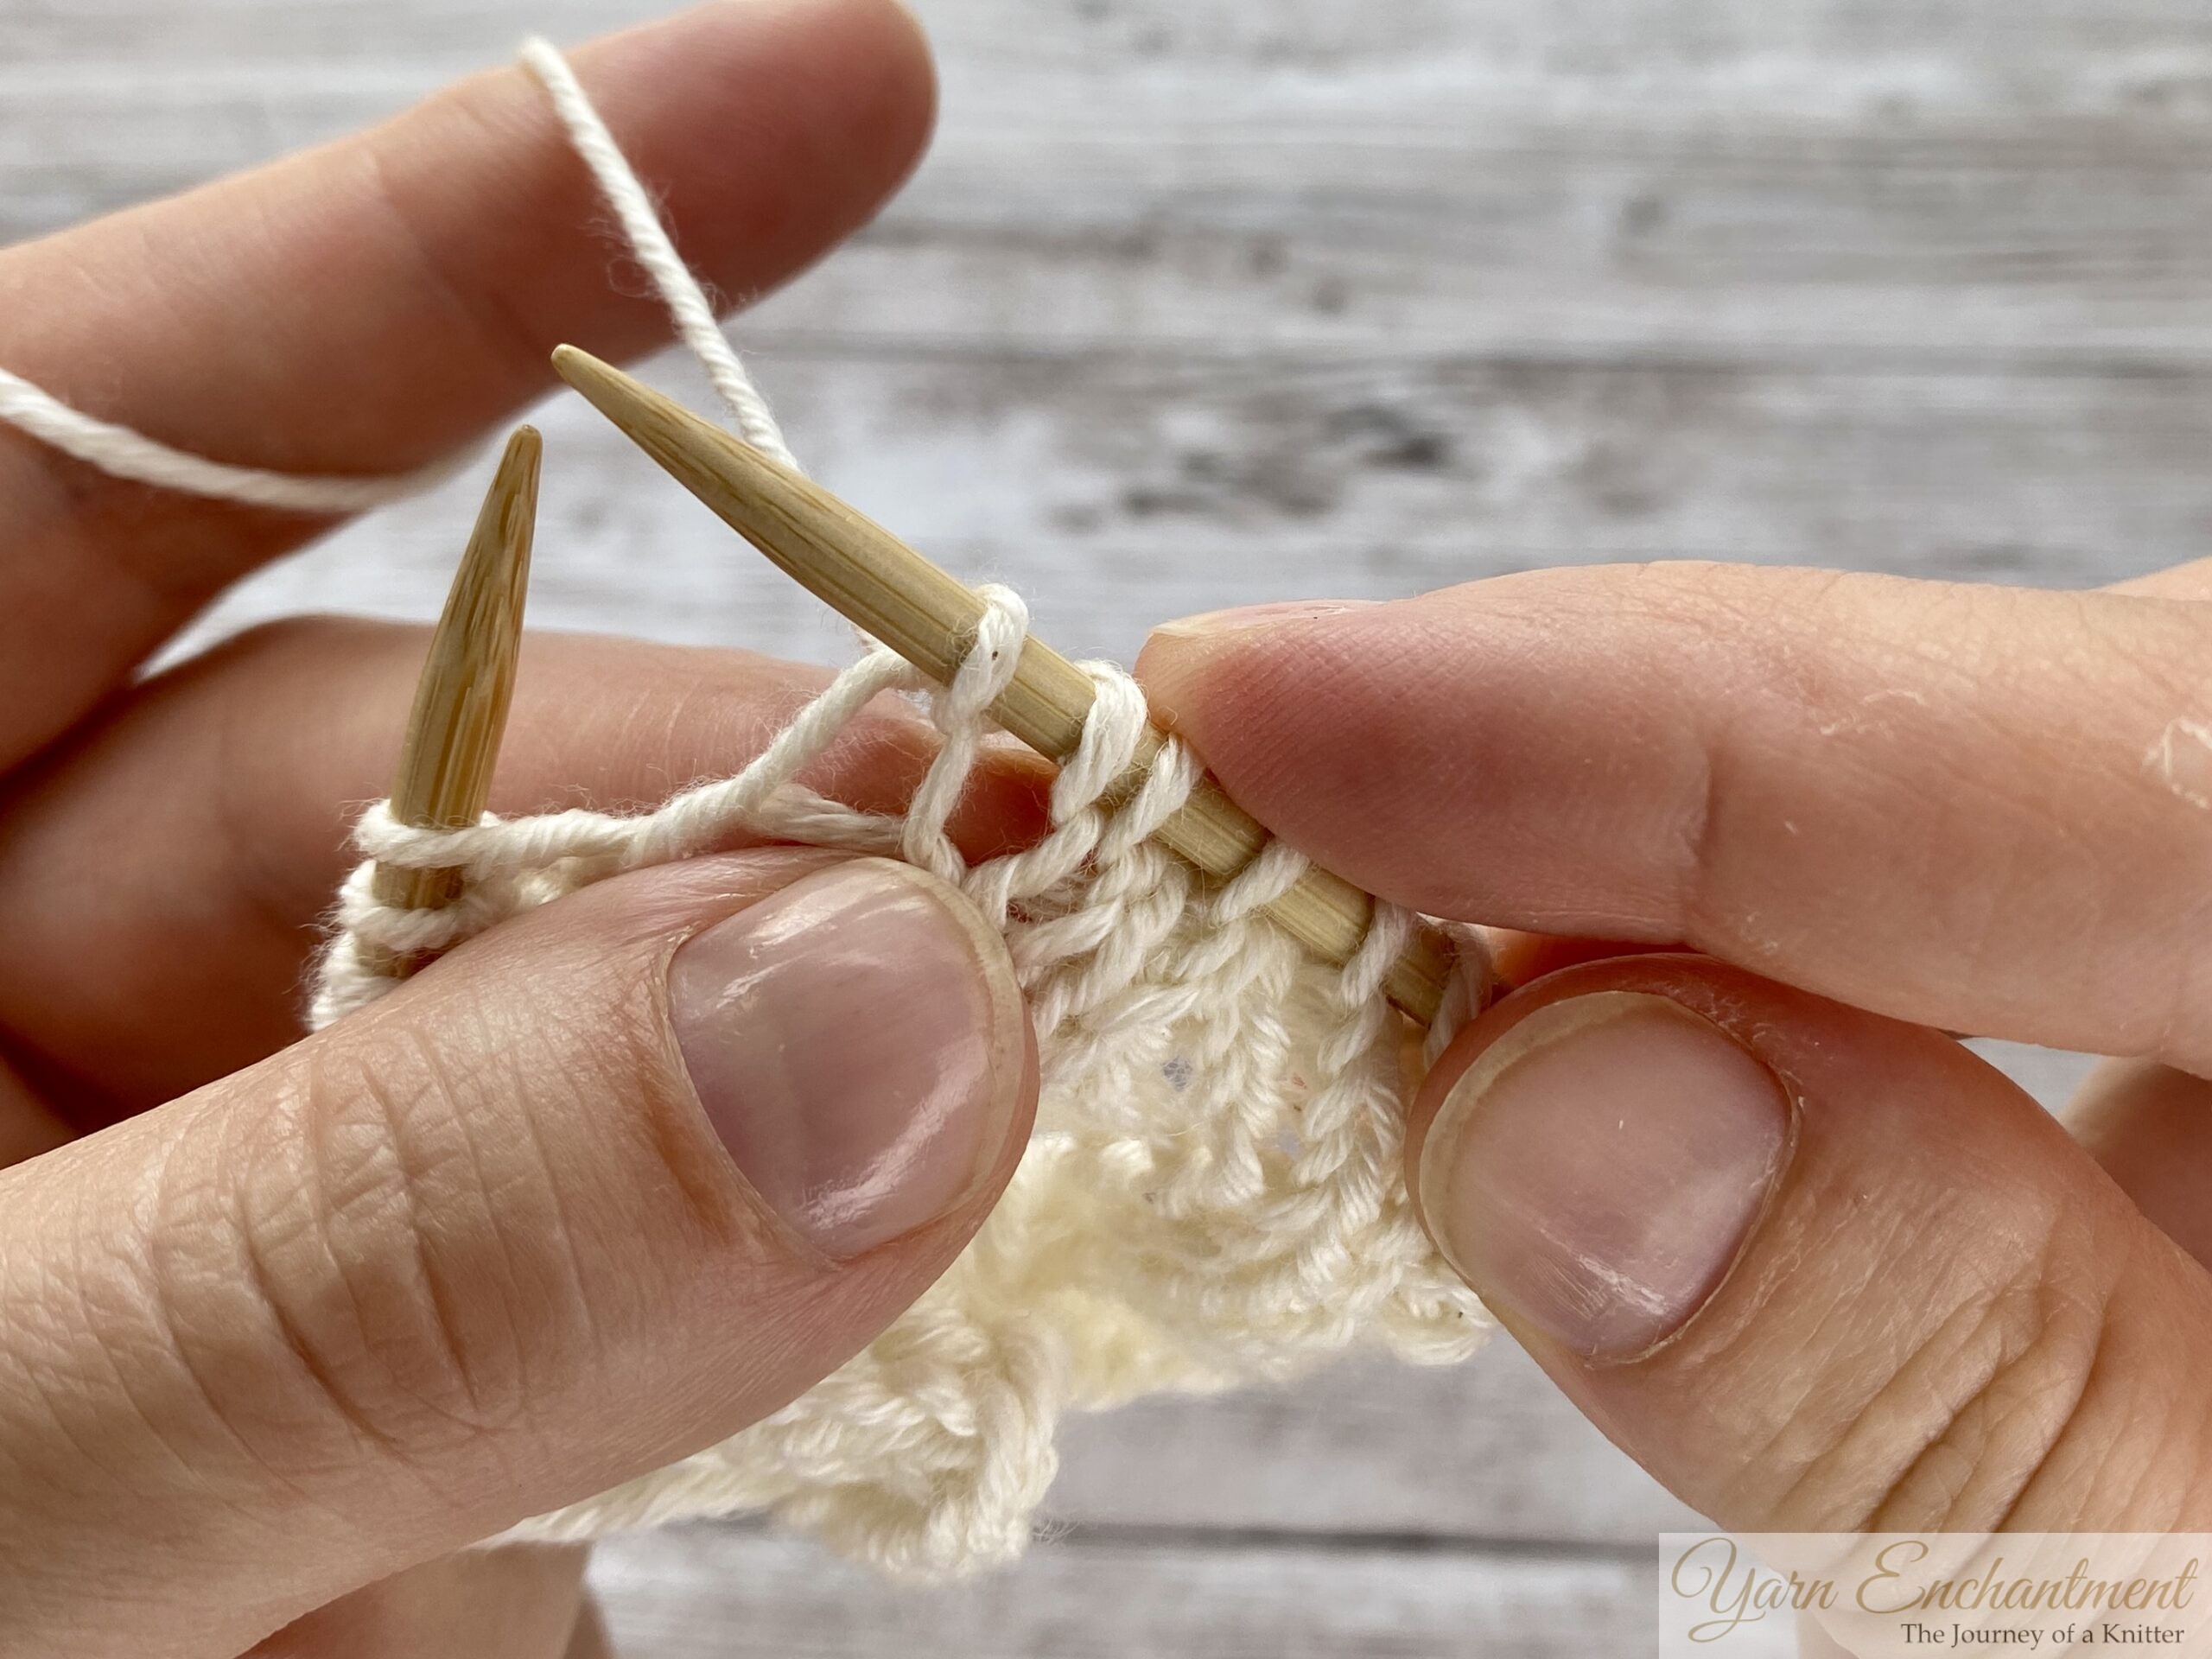  |
...then over the top of the right needle. Place your finger on your yarn over to secure it... | ...and then knit the next stitch. You can see here in the picture the yarn over in between the knit stitches. |
Between a Knit and a Purl
After a knit stitch, your yarn is in the back. To make a yarn over between a knit and a purl, you bring the yarn to the front, then over the needle to the back again. But then you have to bring your yarn again to the front to purl the next stitch.
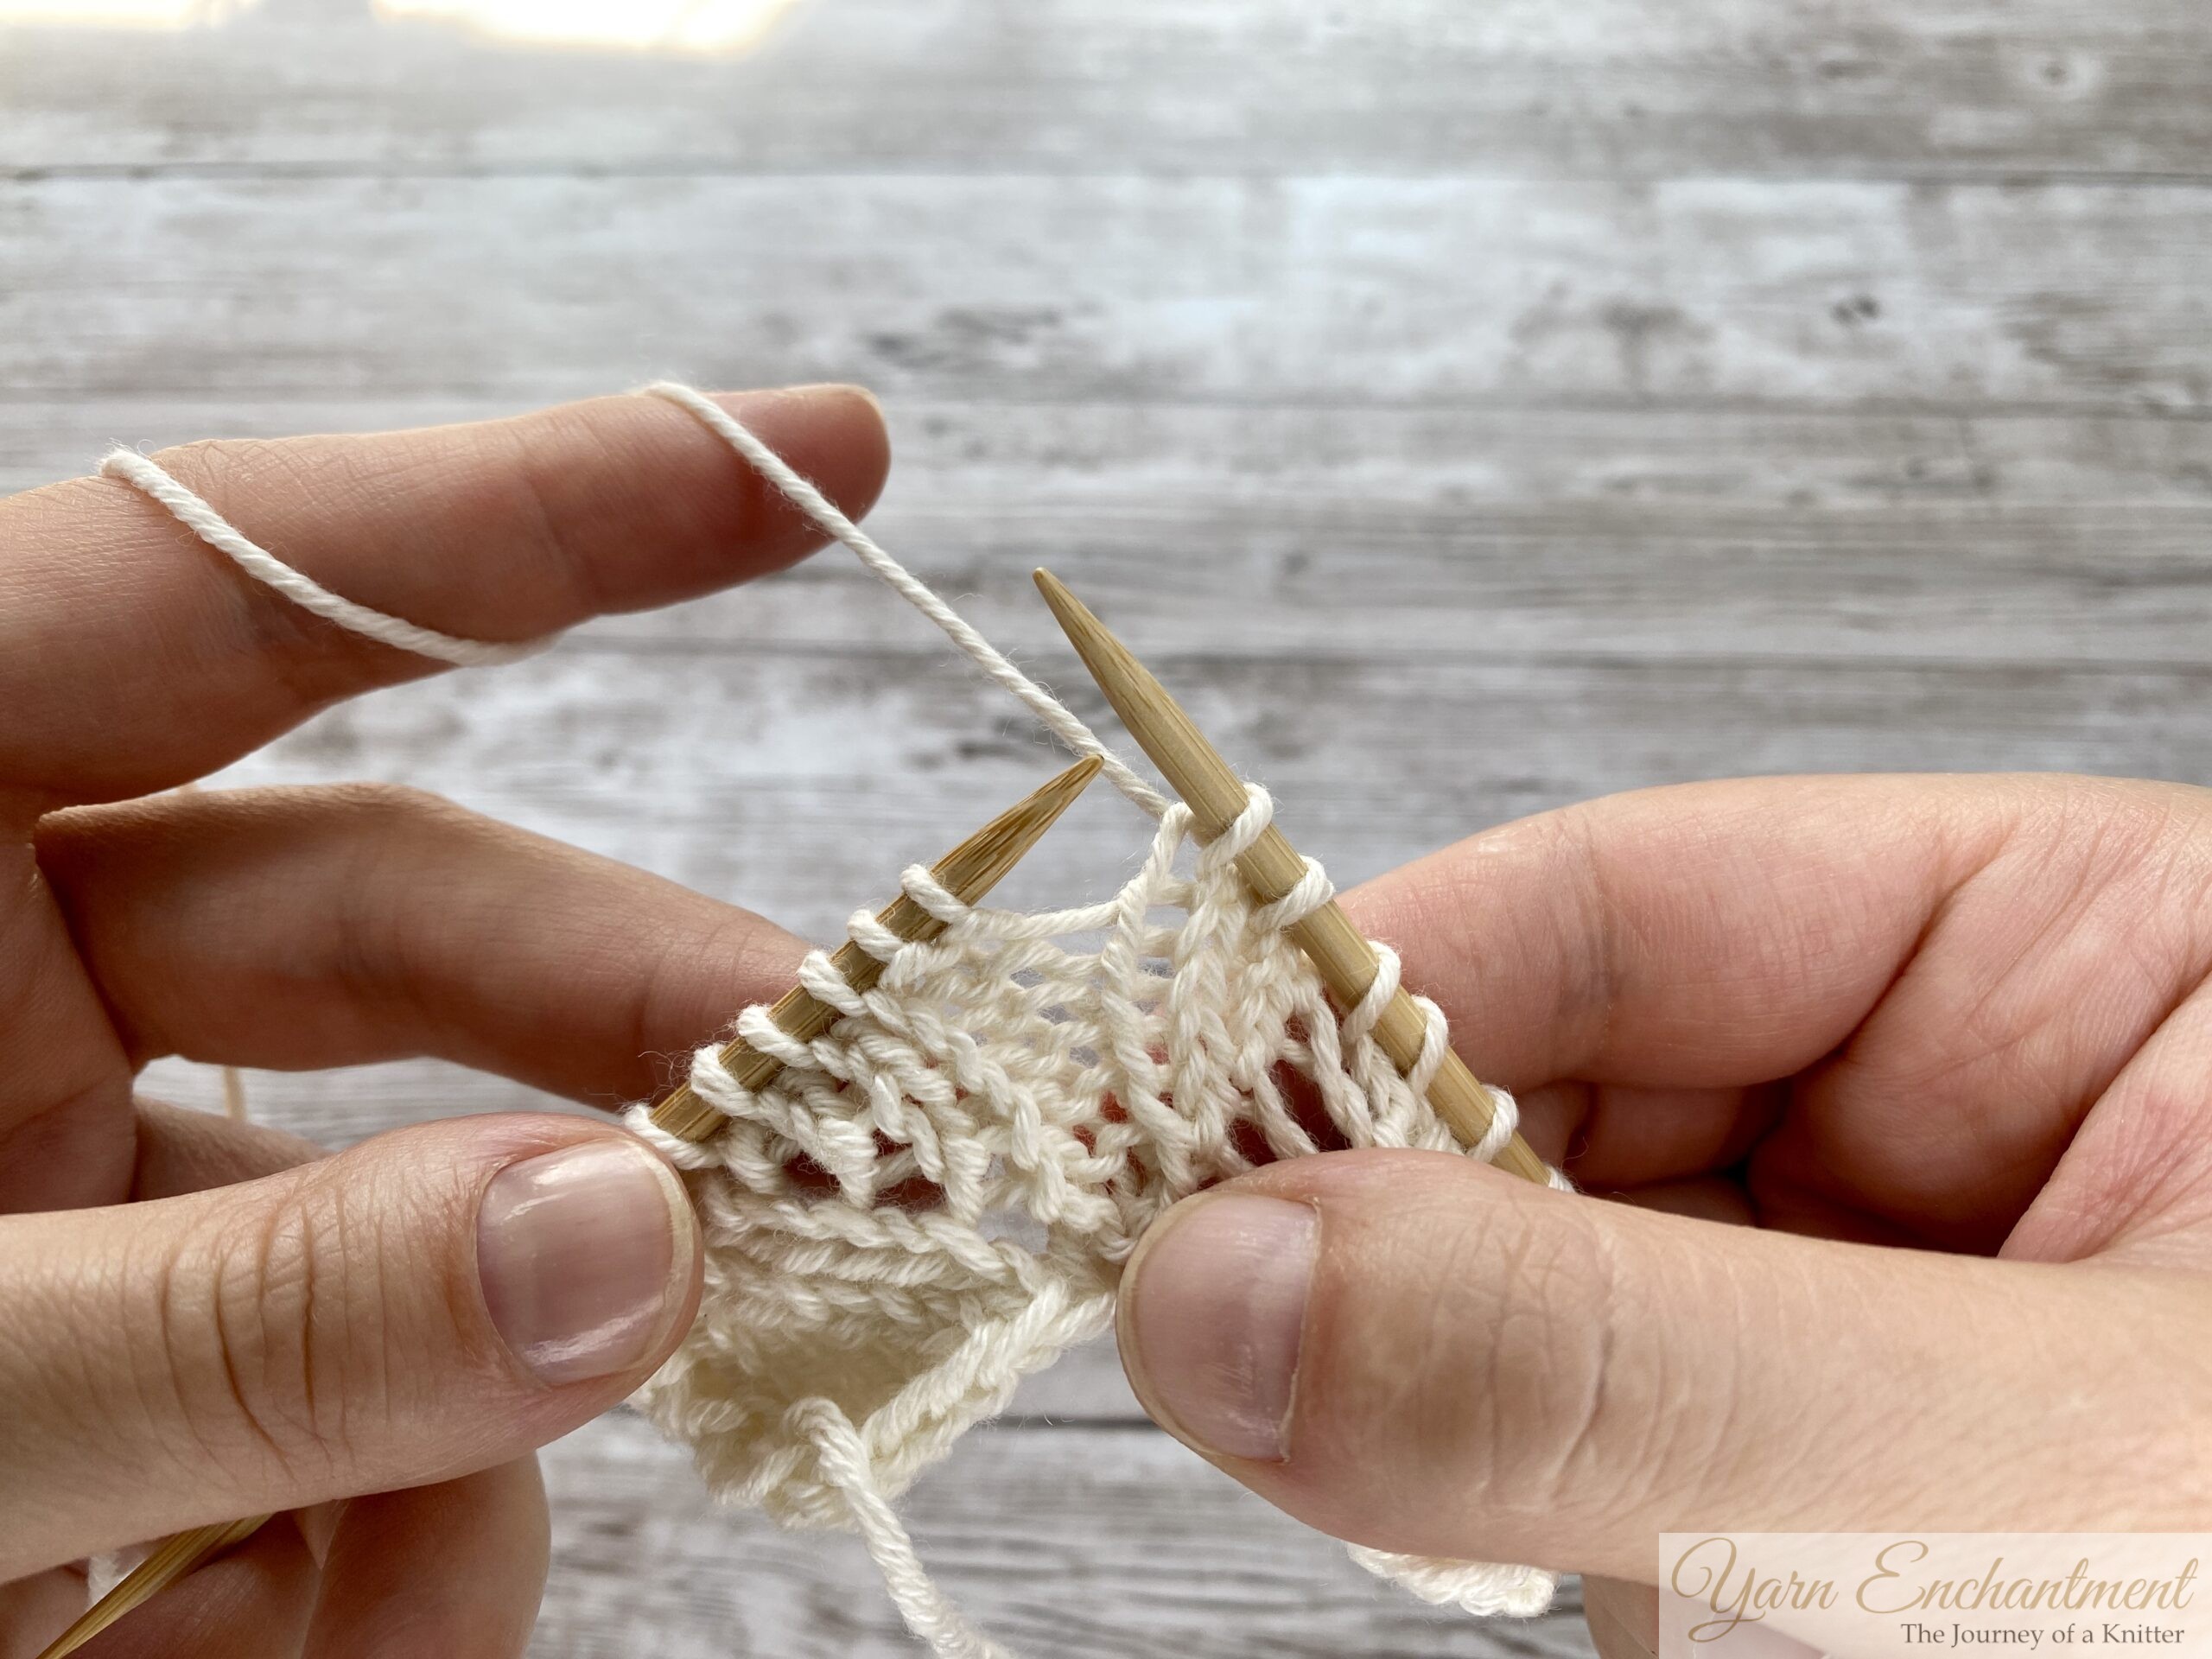  | 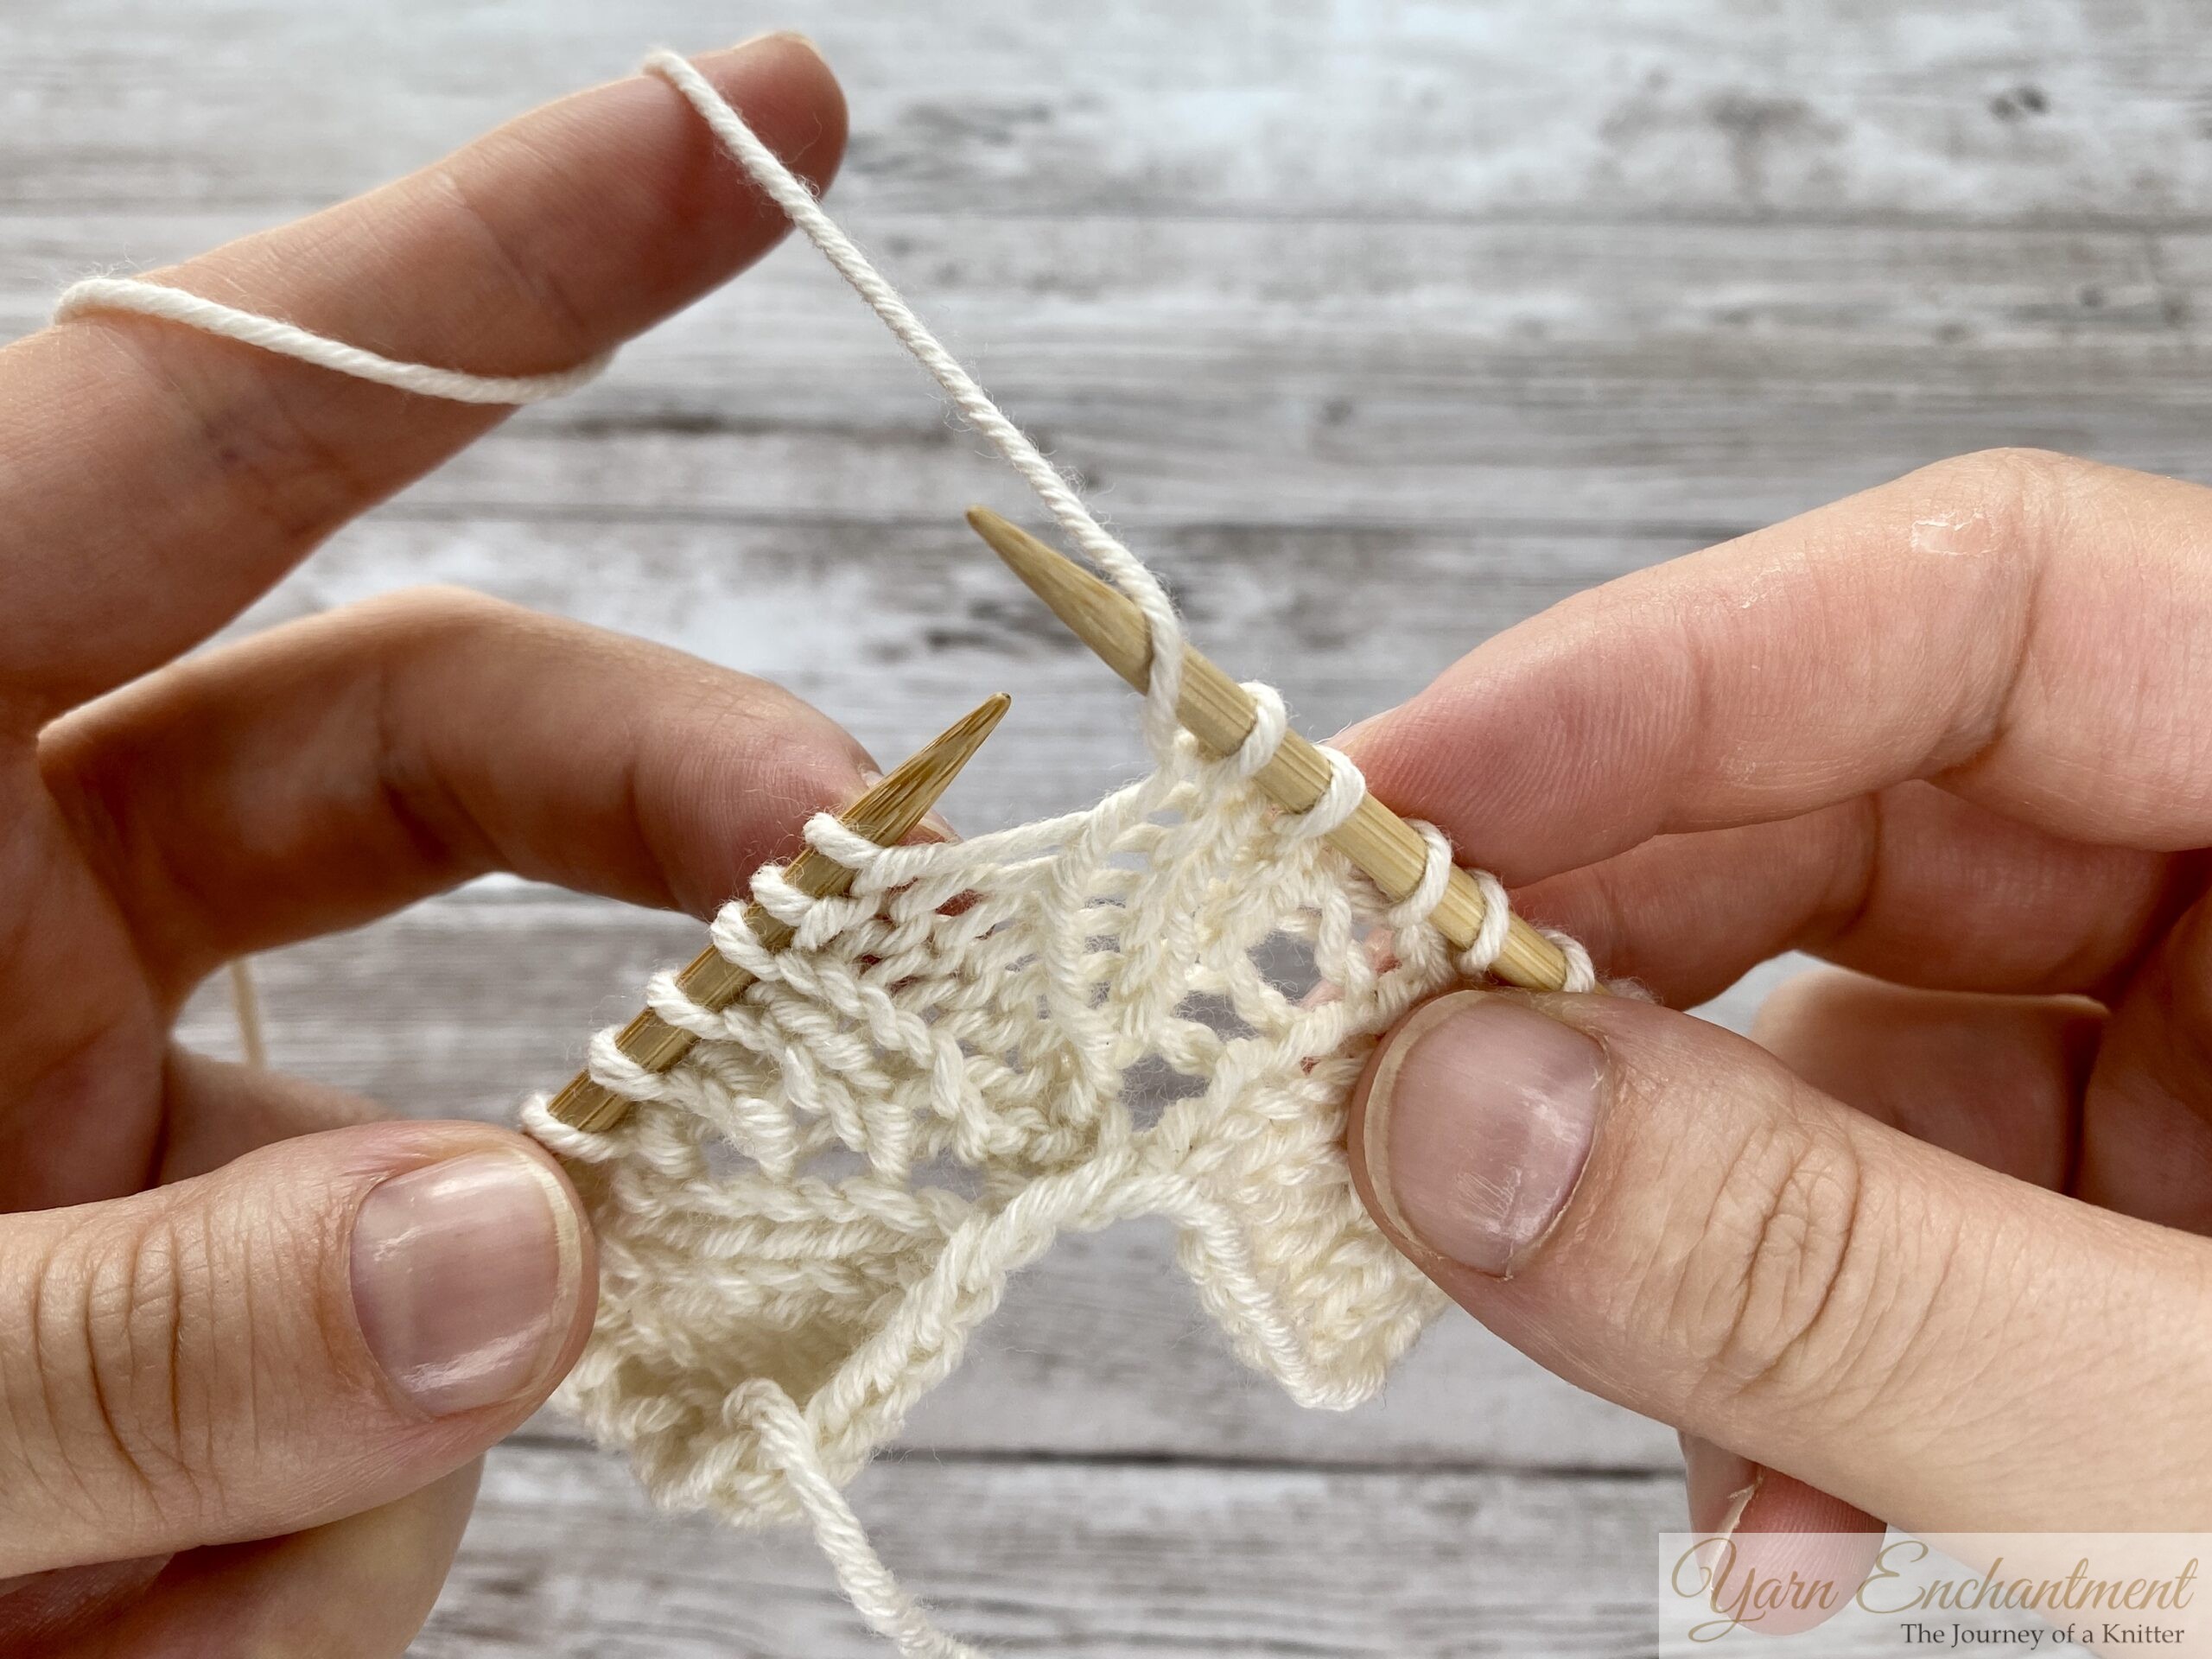  |
After a knit stitch, your yarn is in the back | Bring the yarn to the front, then over the needle to the back again. |
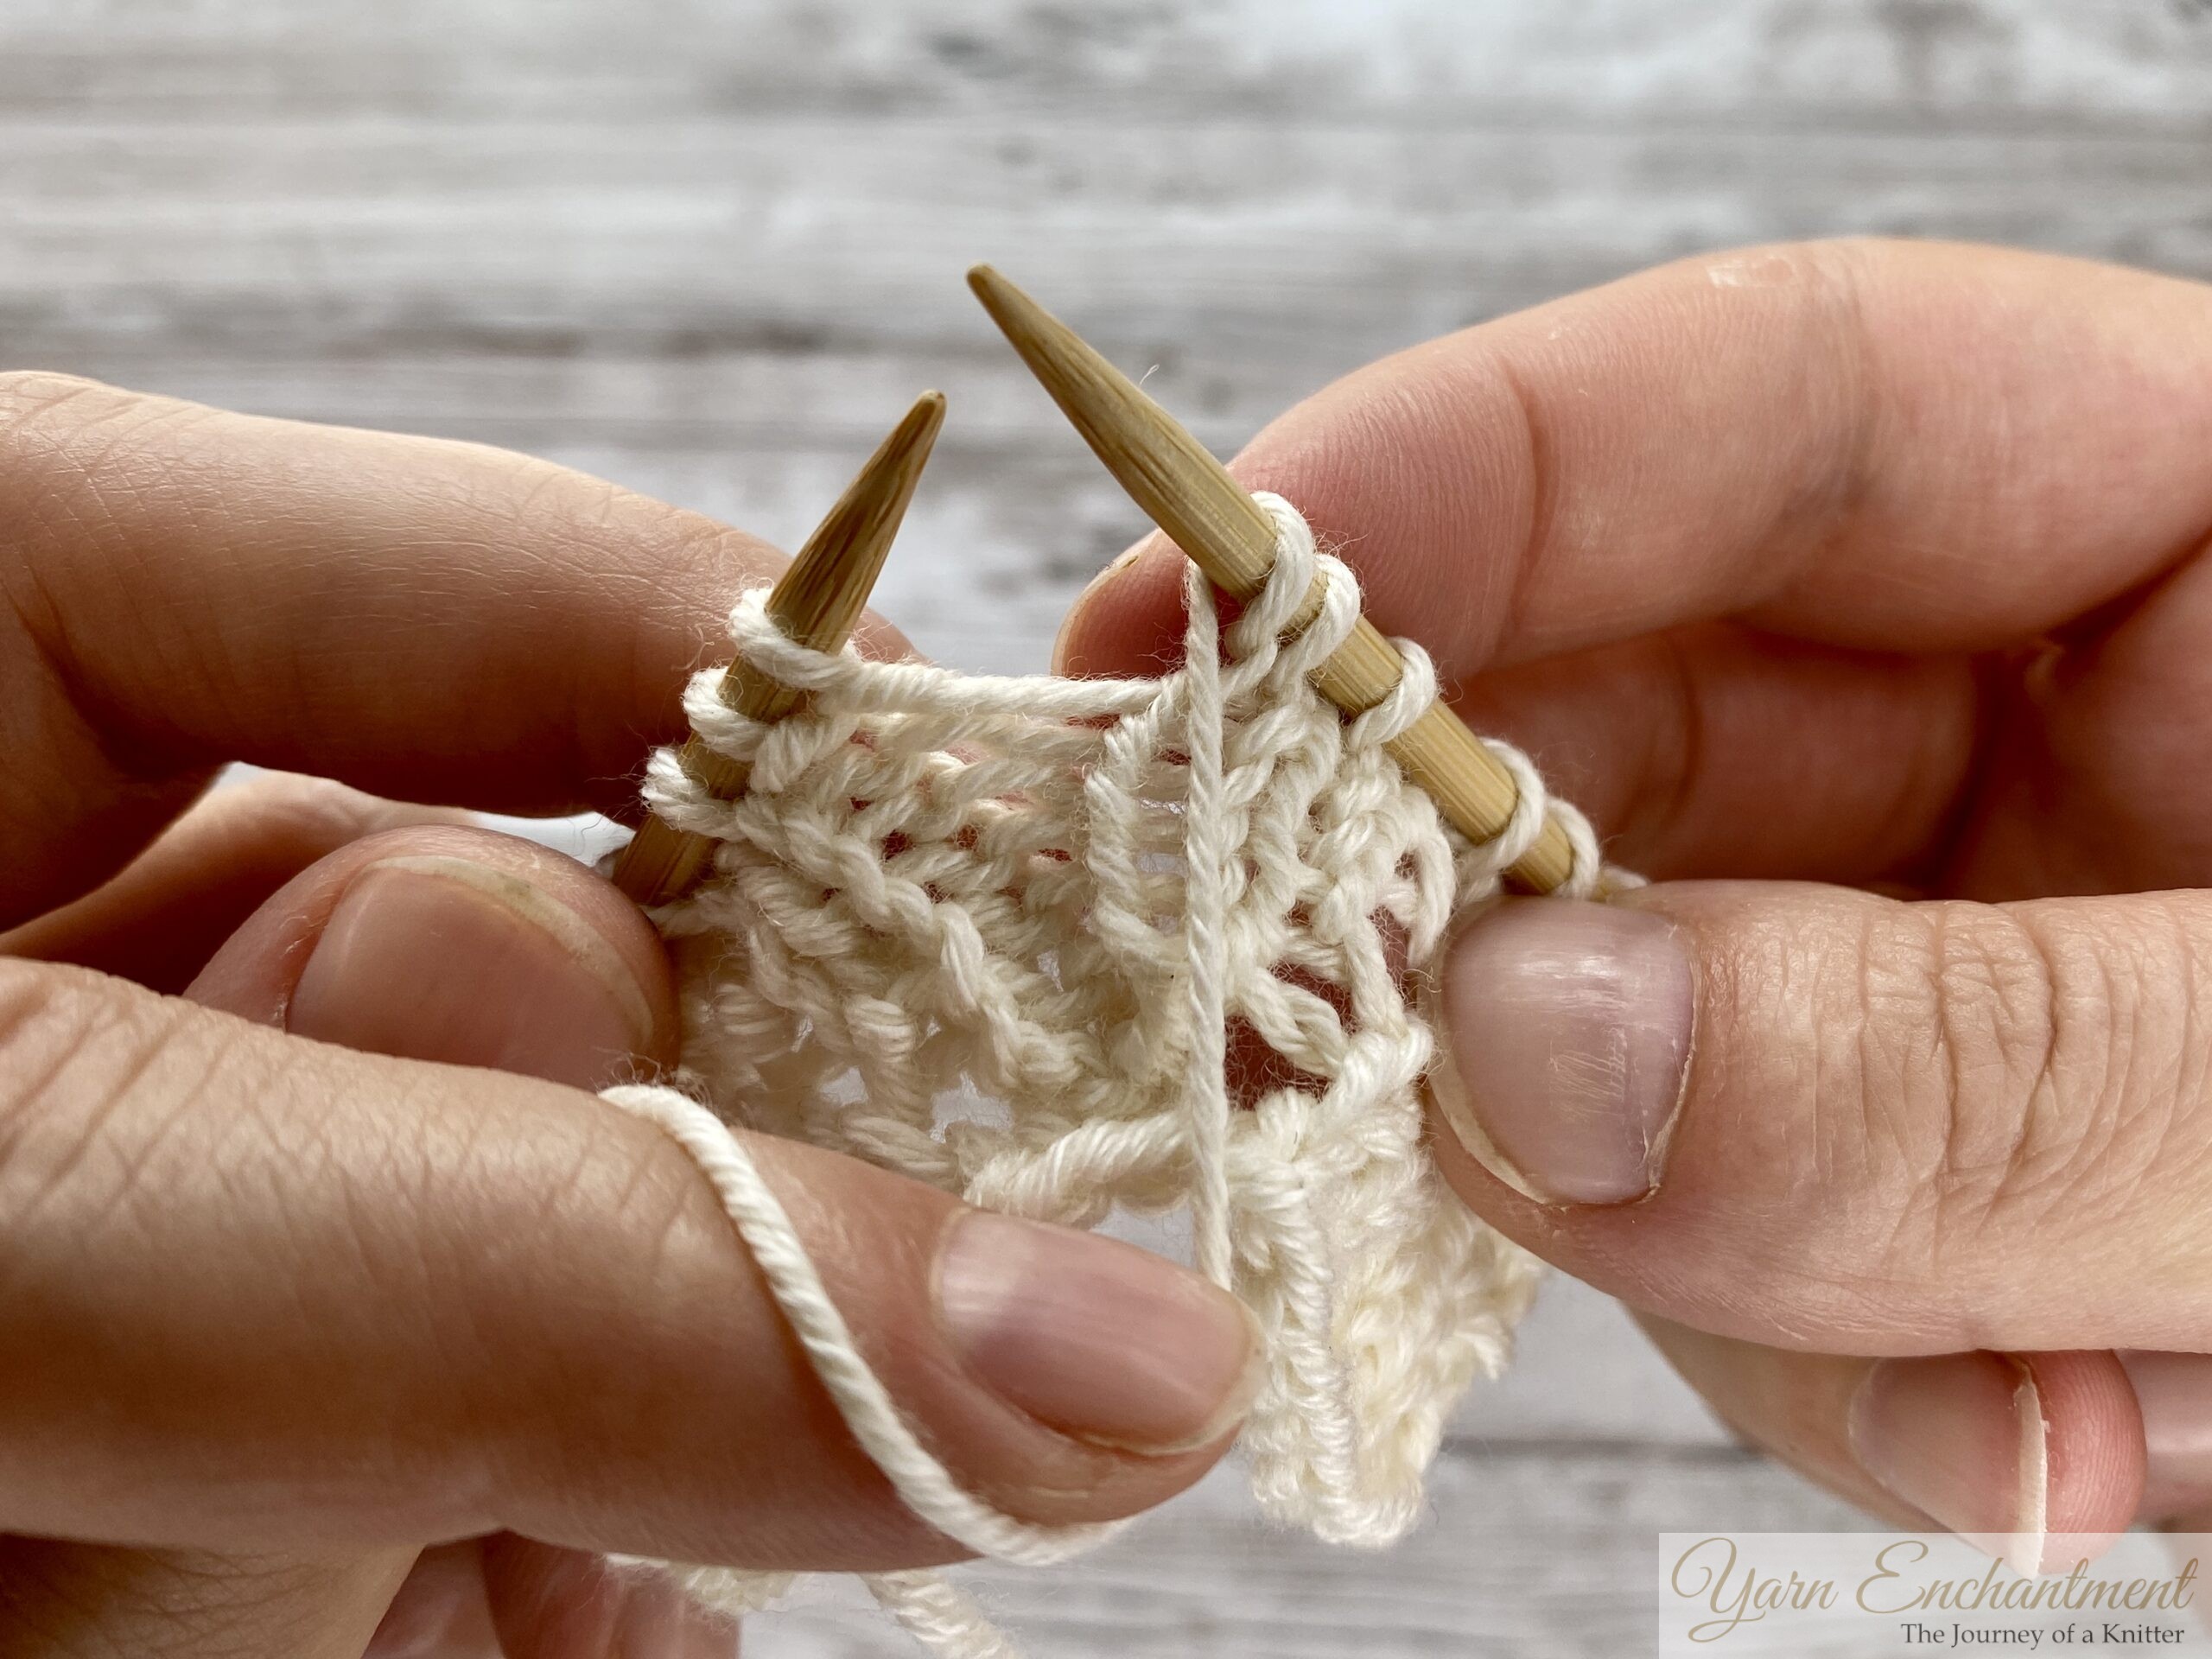  | 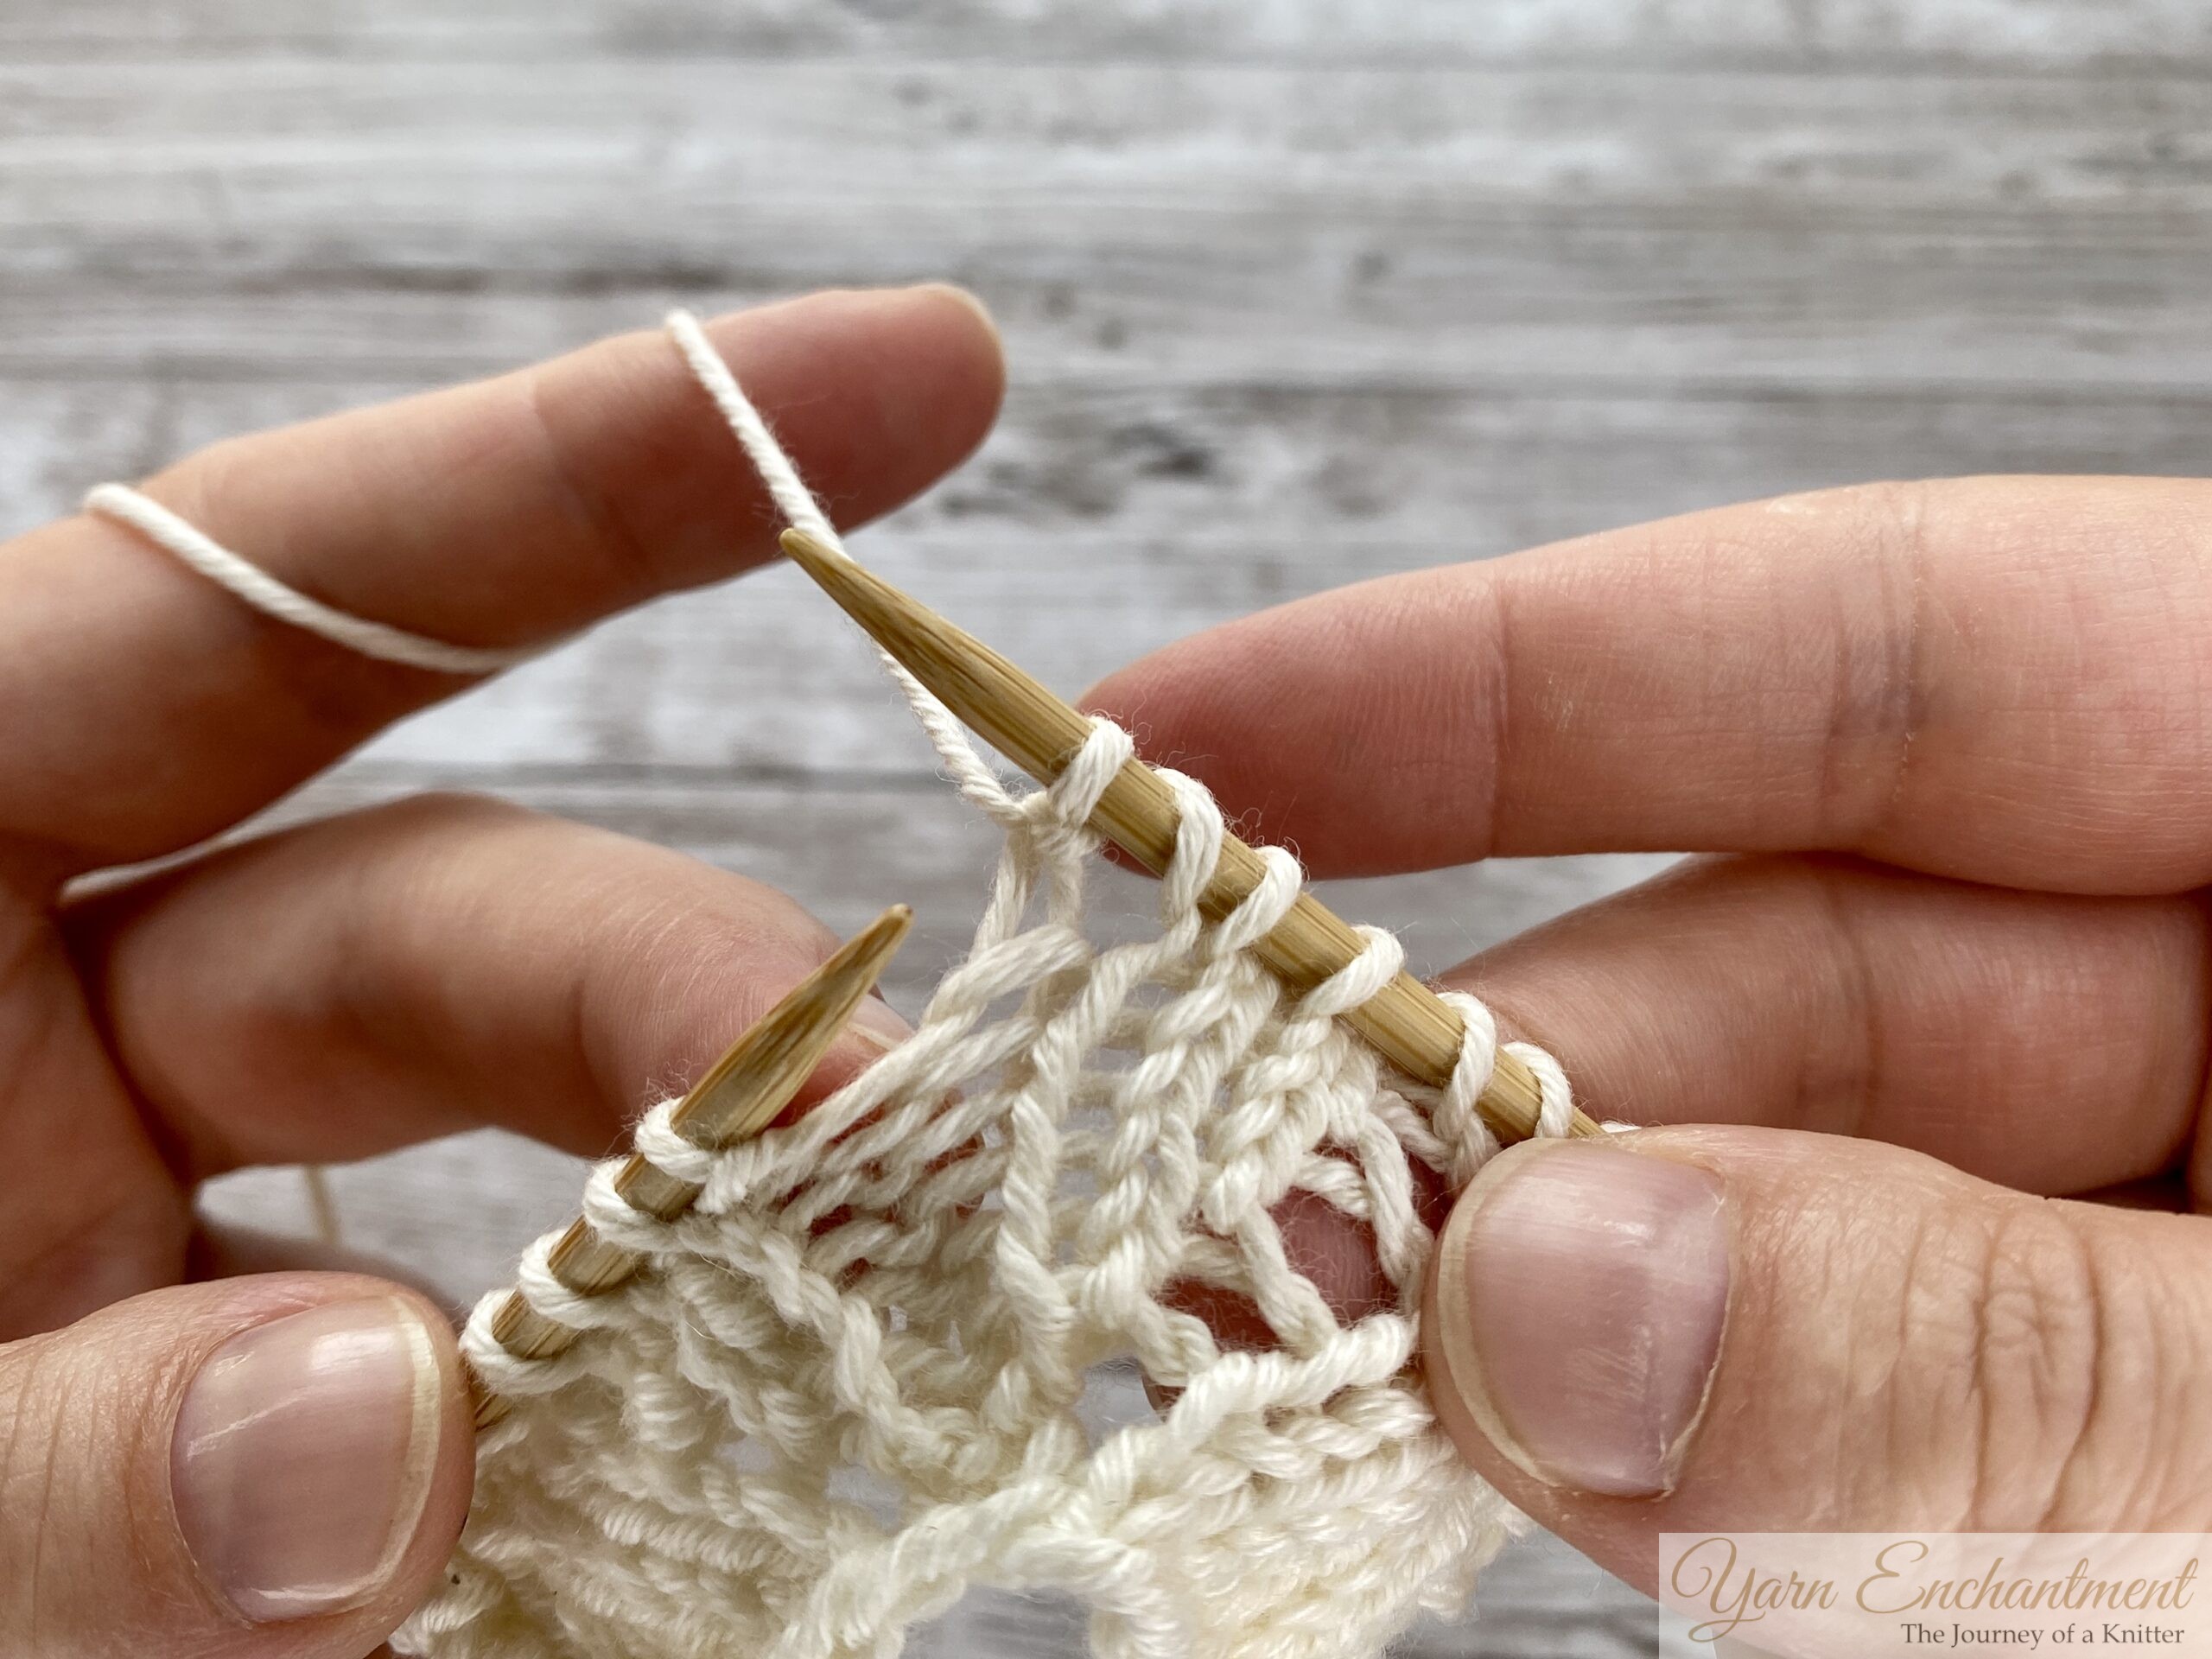  |
Bring your yarn once more to the front to purl the next stitch. You can see here that this yarn over travels more than 360 degrees around the needle. | This yarn over is larger than the others. So try to pull a little on your working yarn to compensate for the size. I wrote more about yarn over sizes in the notes below. |
Between a Purl and a Knit
I believe this is why beginners, especially in English style knitting, end up with so many accidental yarn overs. Your yarn is already in the front after purling. You just knit the next stitch without moving the yarn to the back first, and the yarn naturally hops over the needle to create your loop. That is why you need to remember to bring your yarn to the back before knitting, unless you actually want a yarn over.
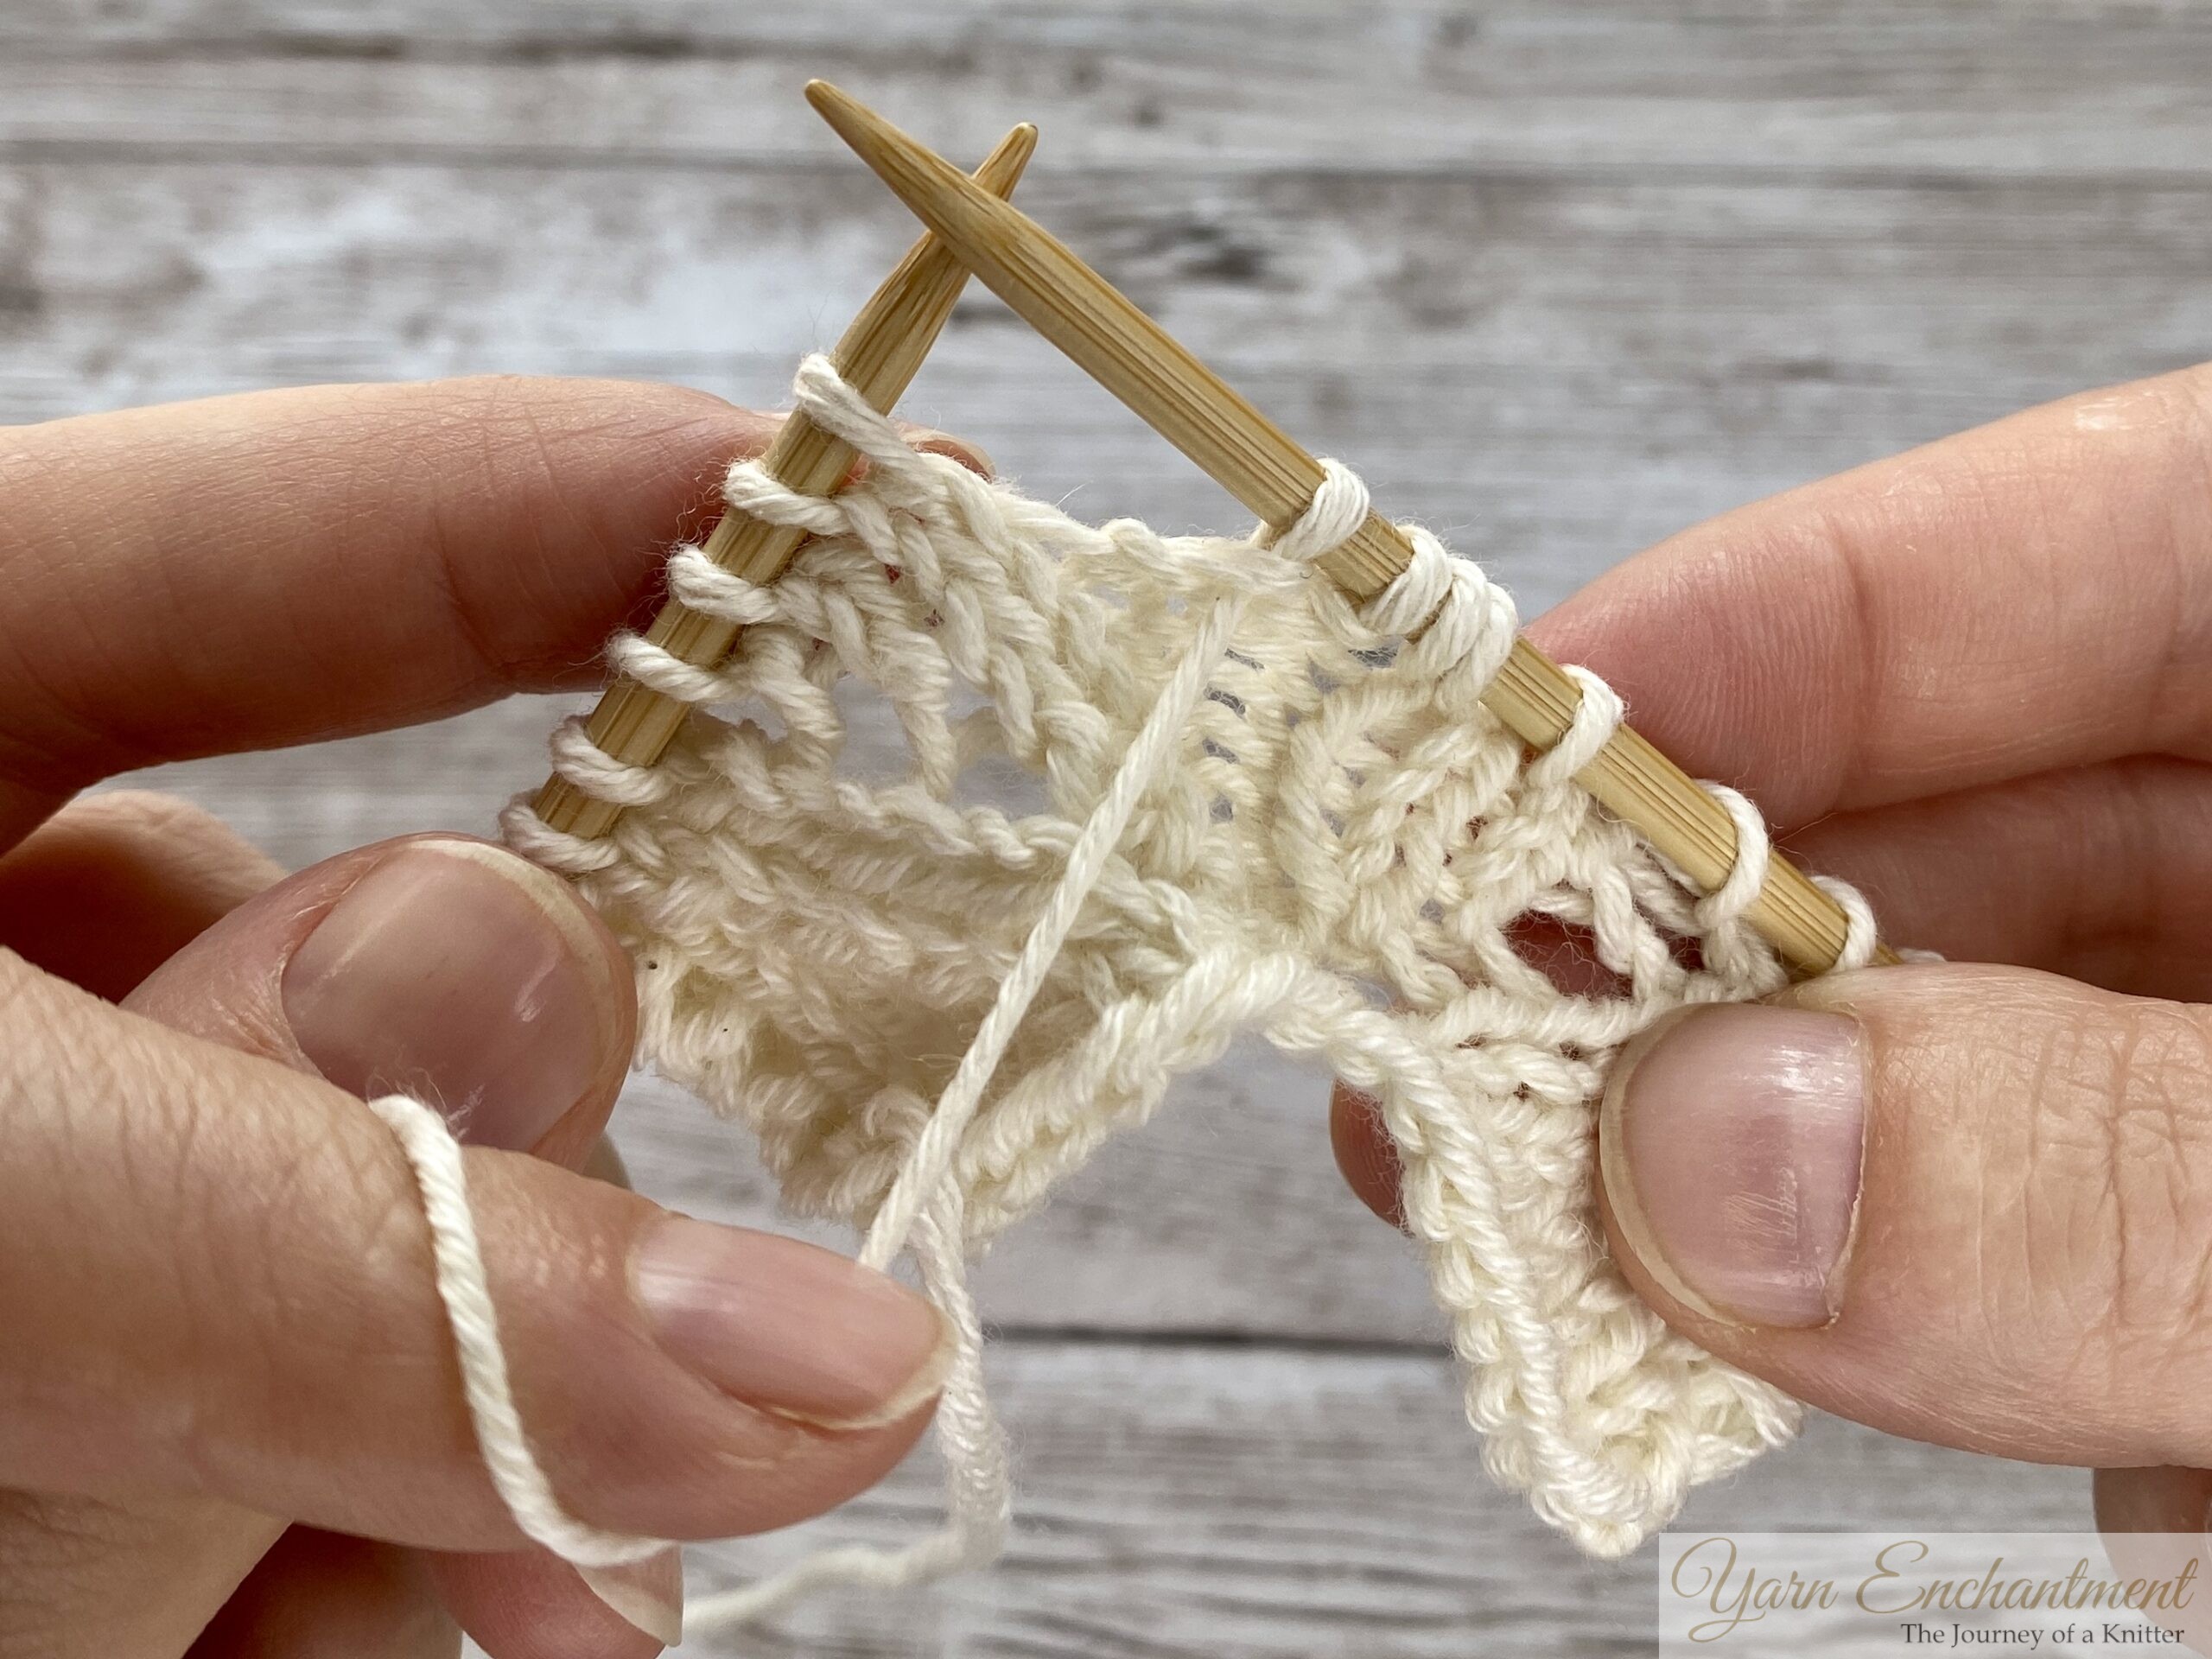  | 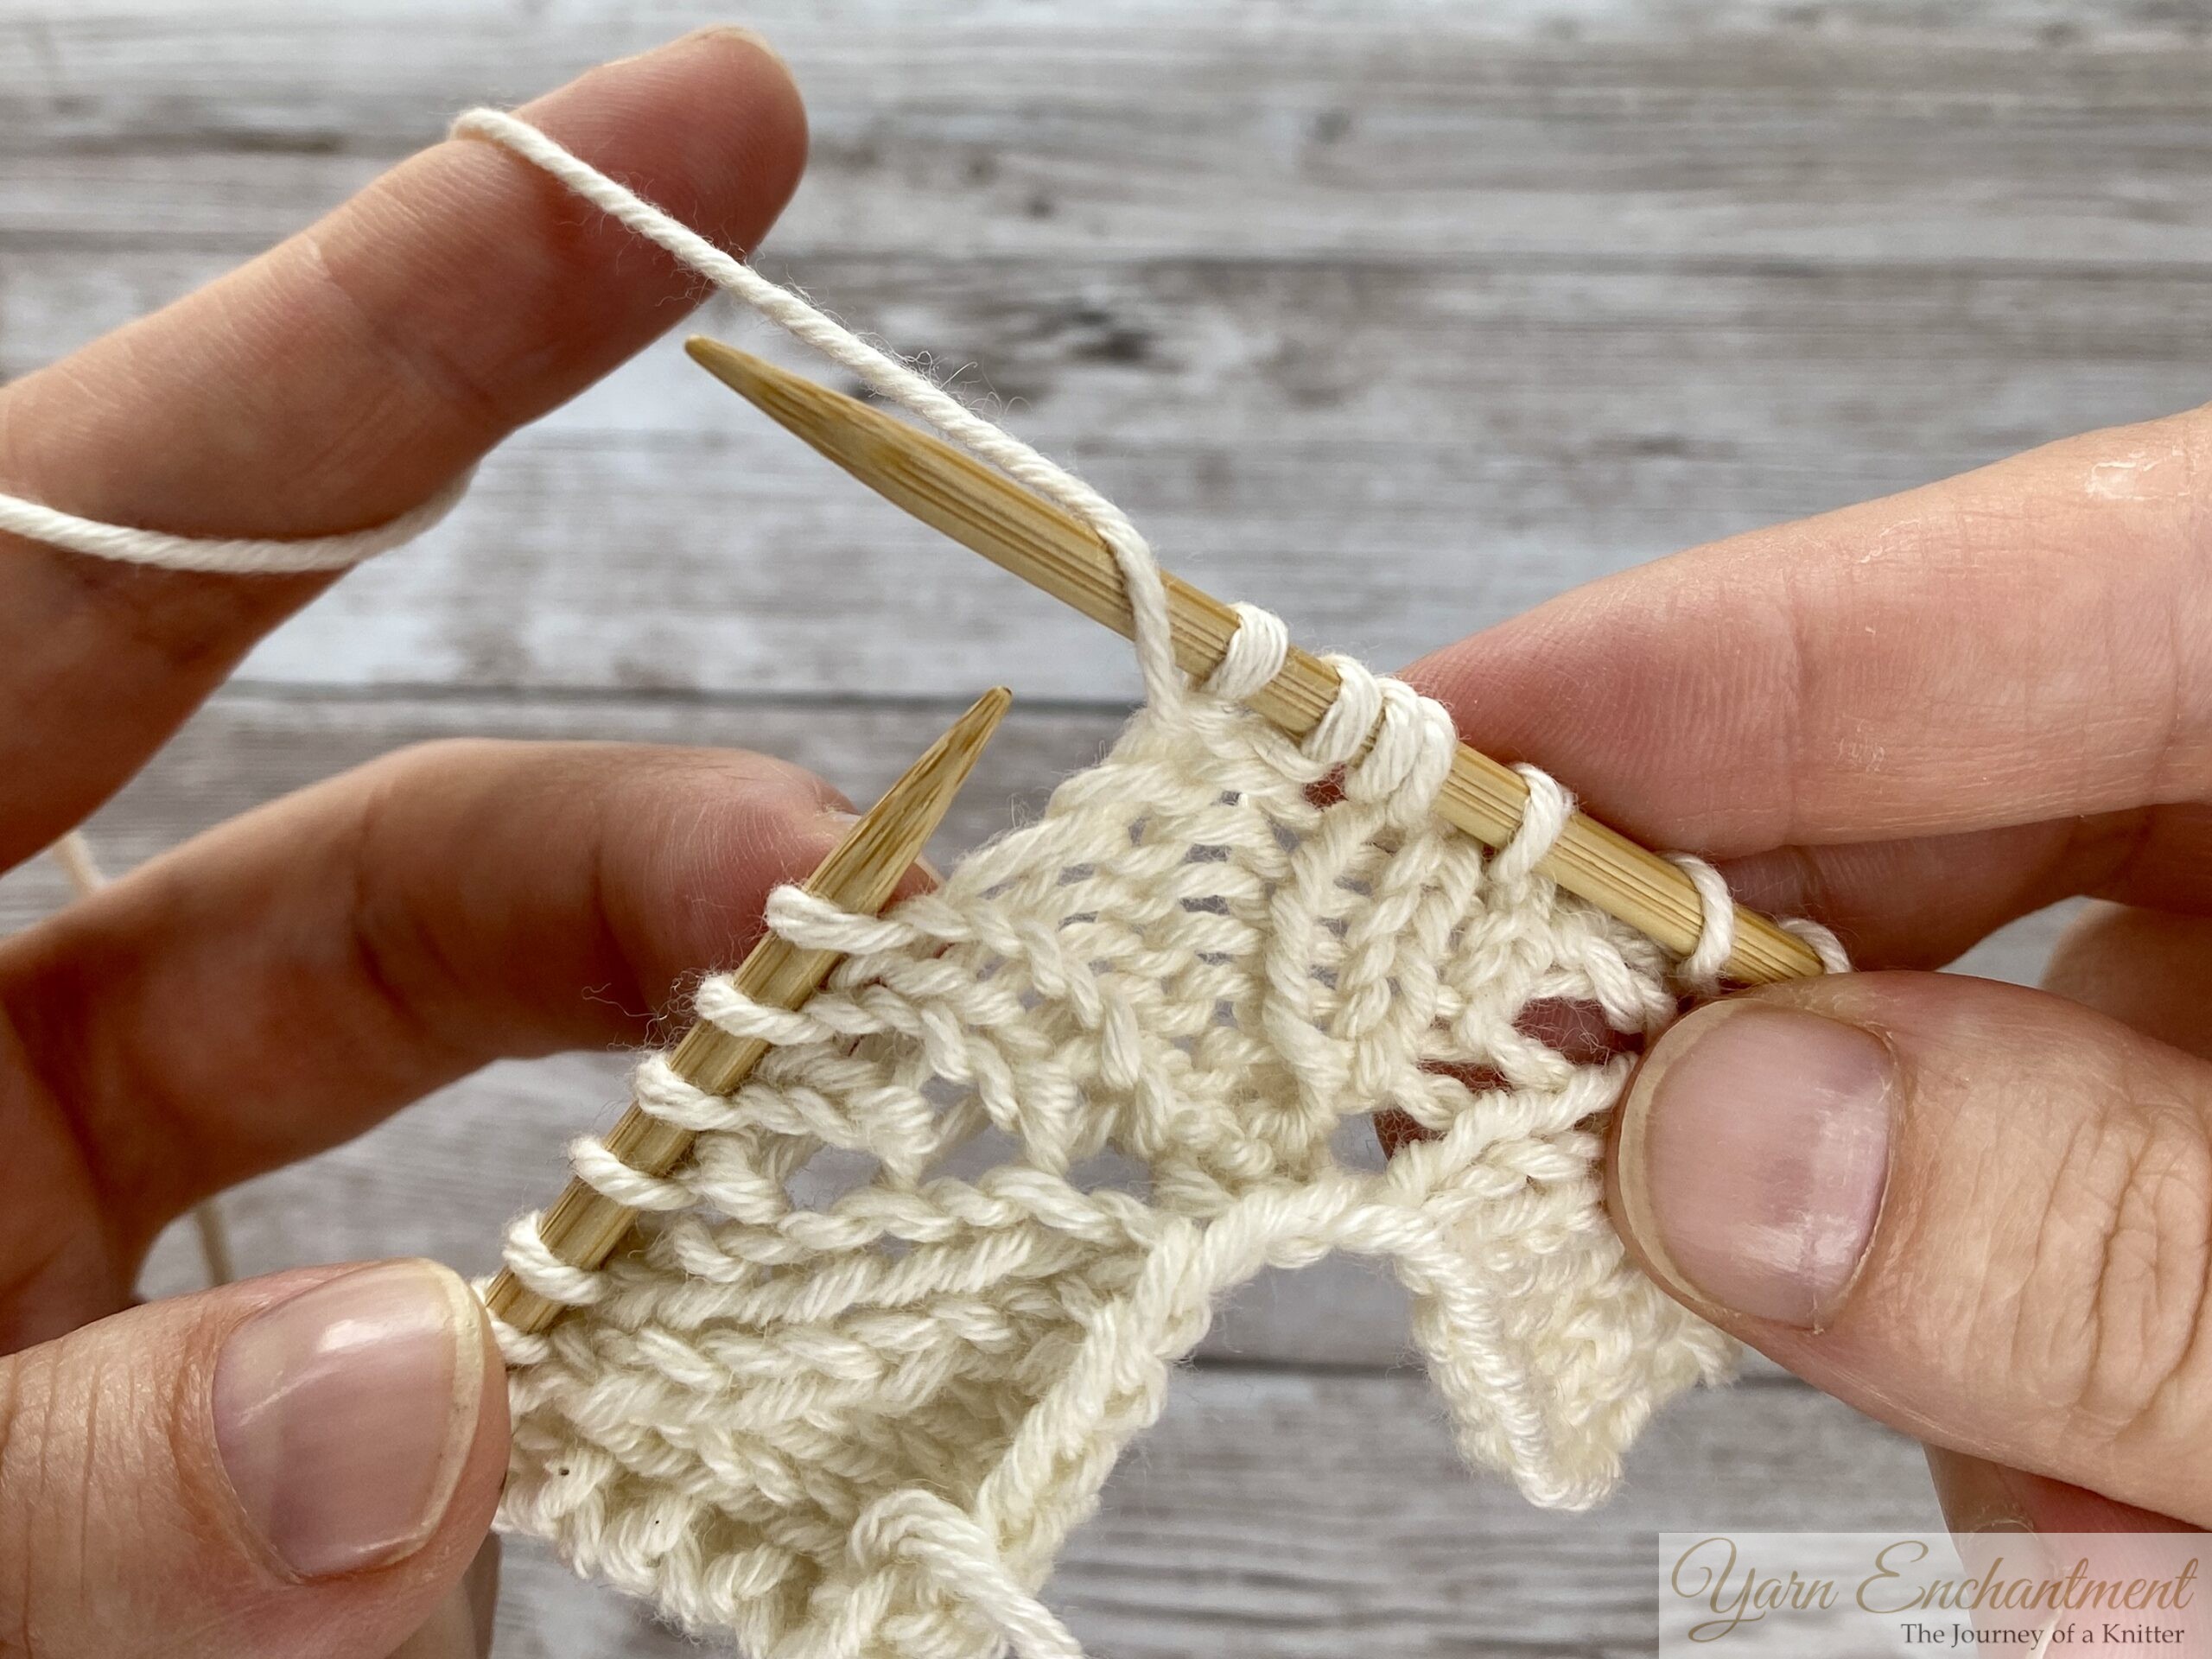  | 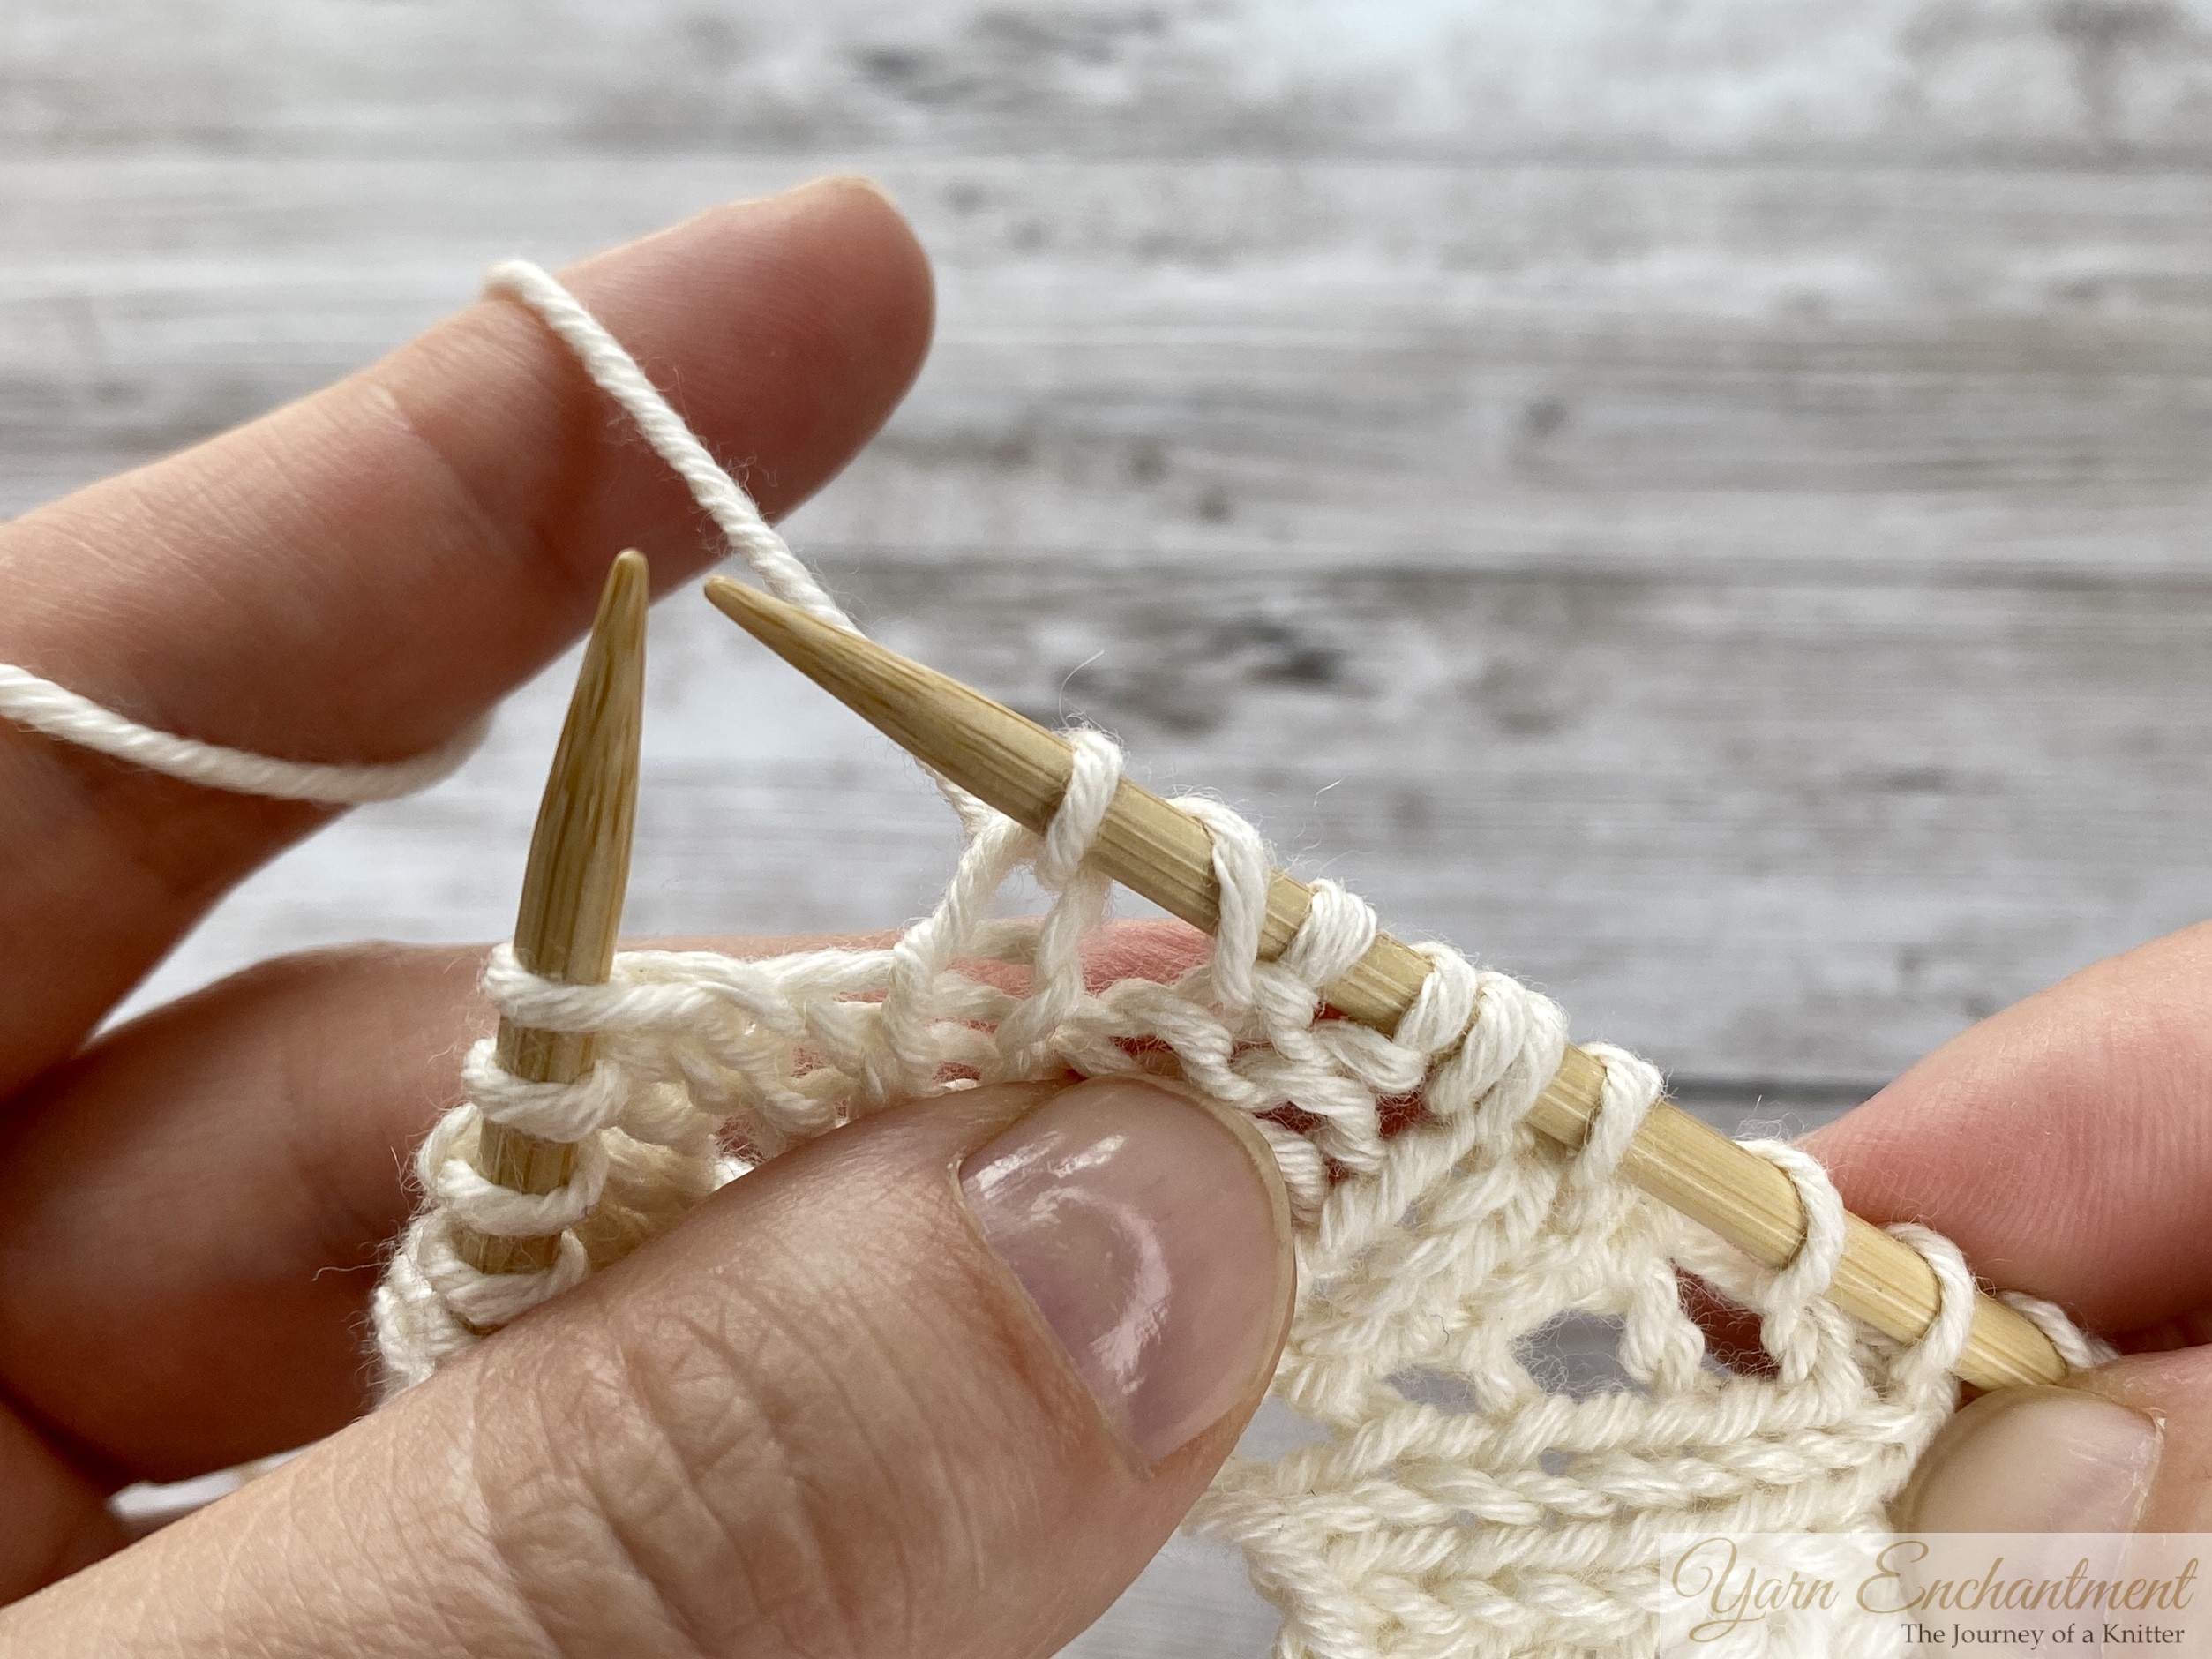  |
Your yarn is already in the front after a purl stitch. | Bring it to the back by wrapping it over your needle, ... | ...and then knit the next stitch. |
Between two purl stitches
Your yarn is already in the front after your purl stitch. Bring it over the top of the right needle and back to the front again, then purl the next stitch as usual.
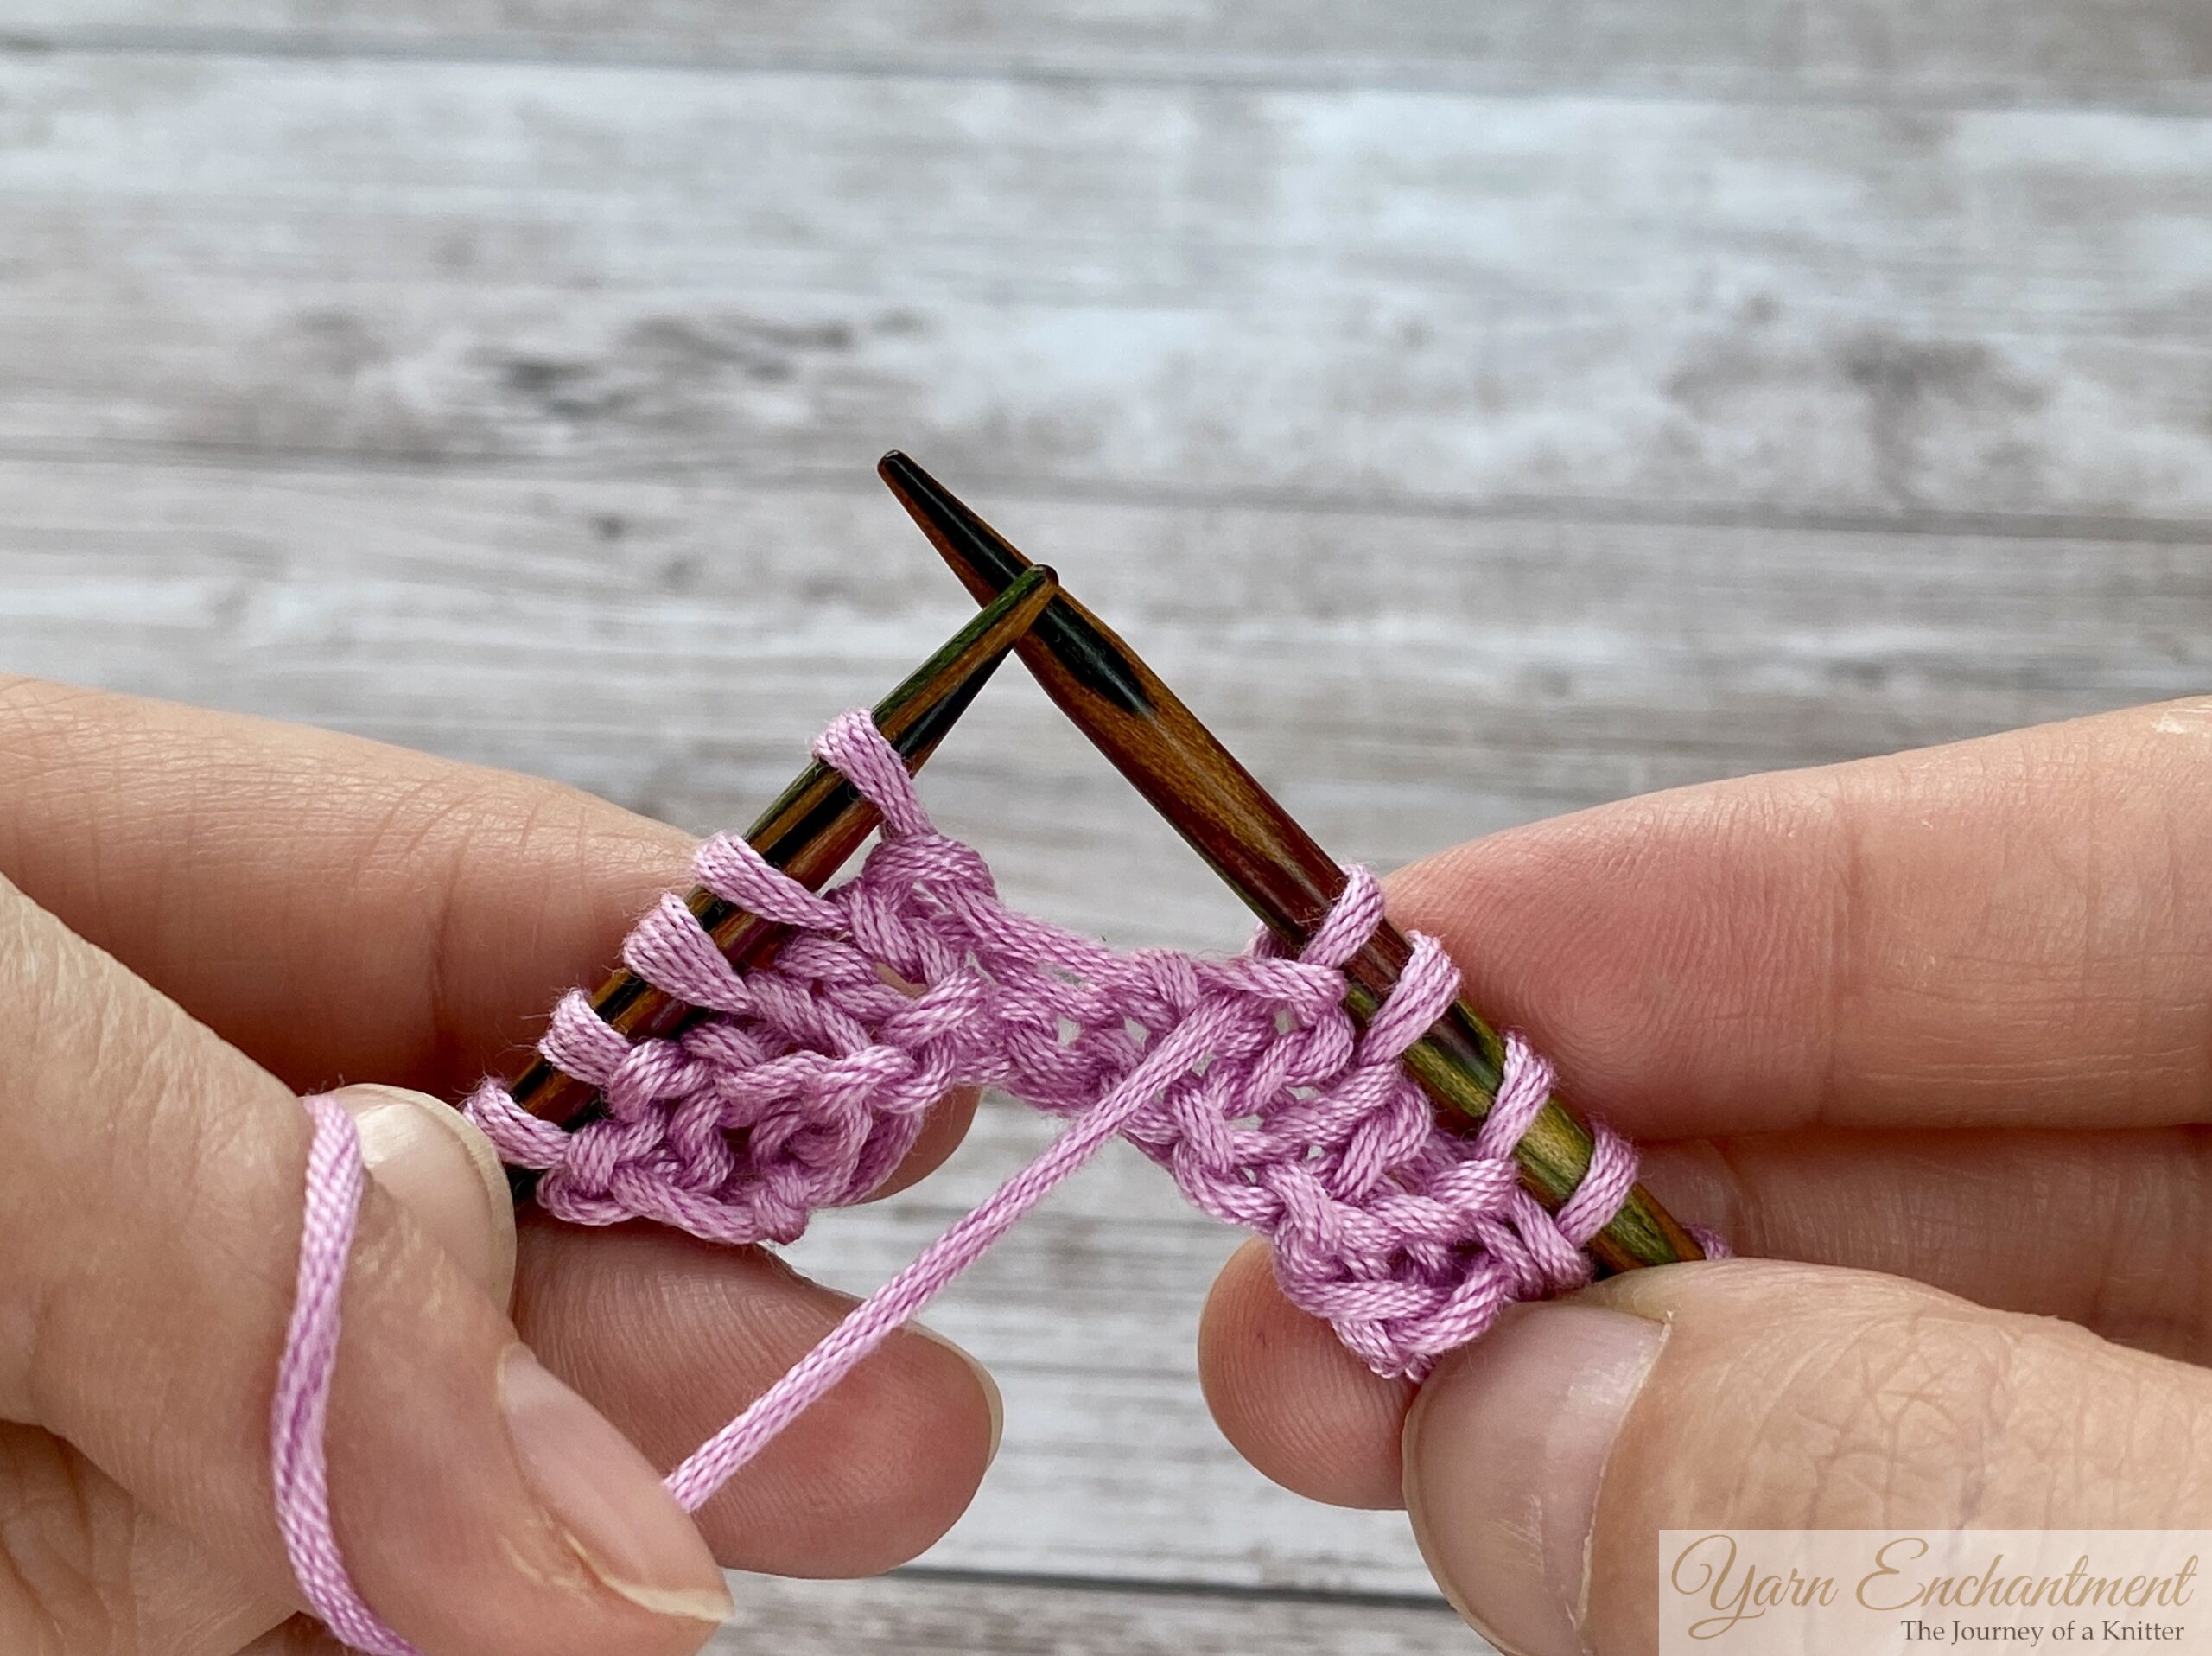  | 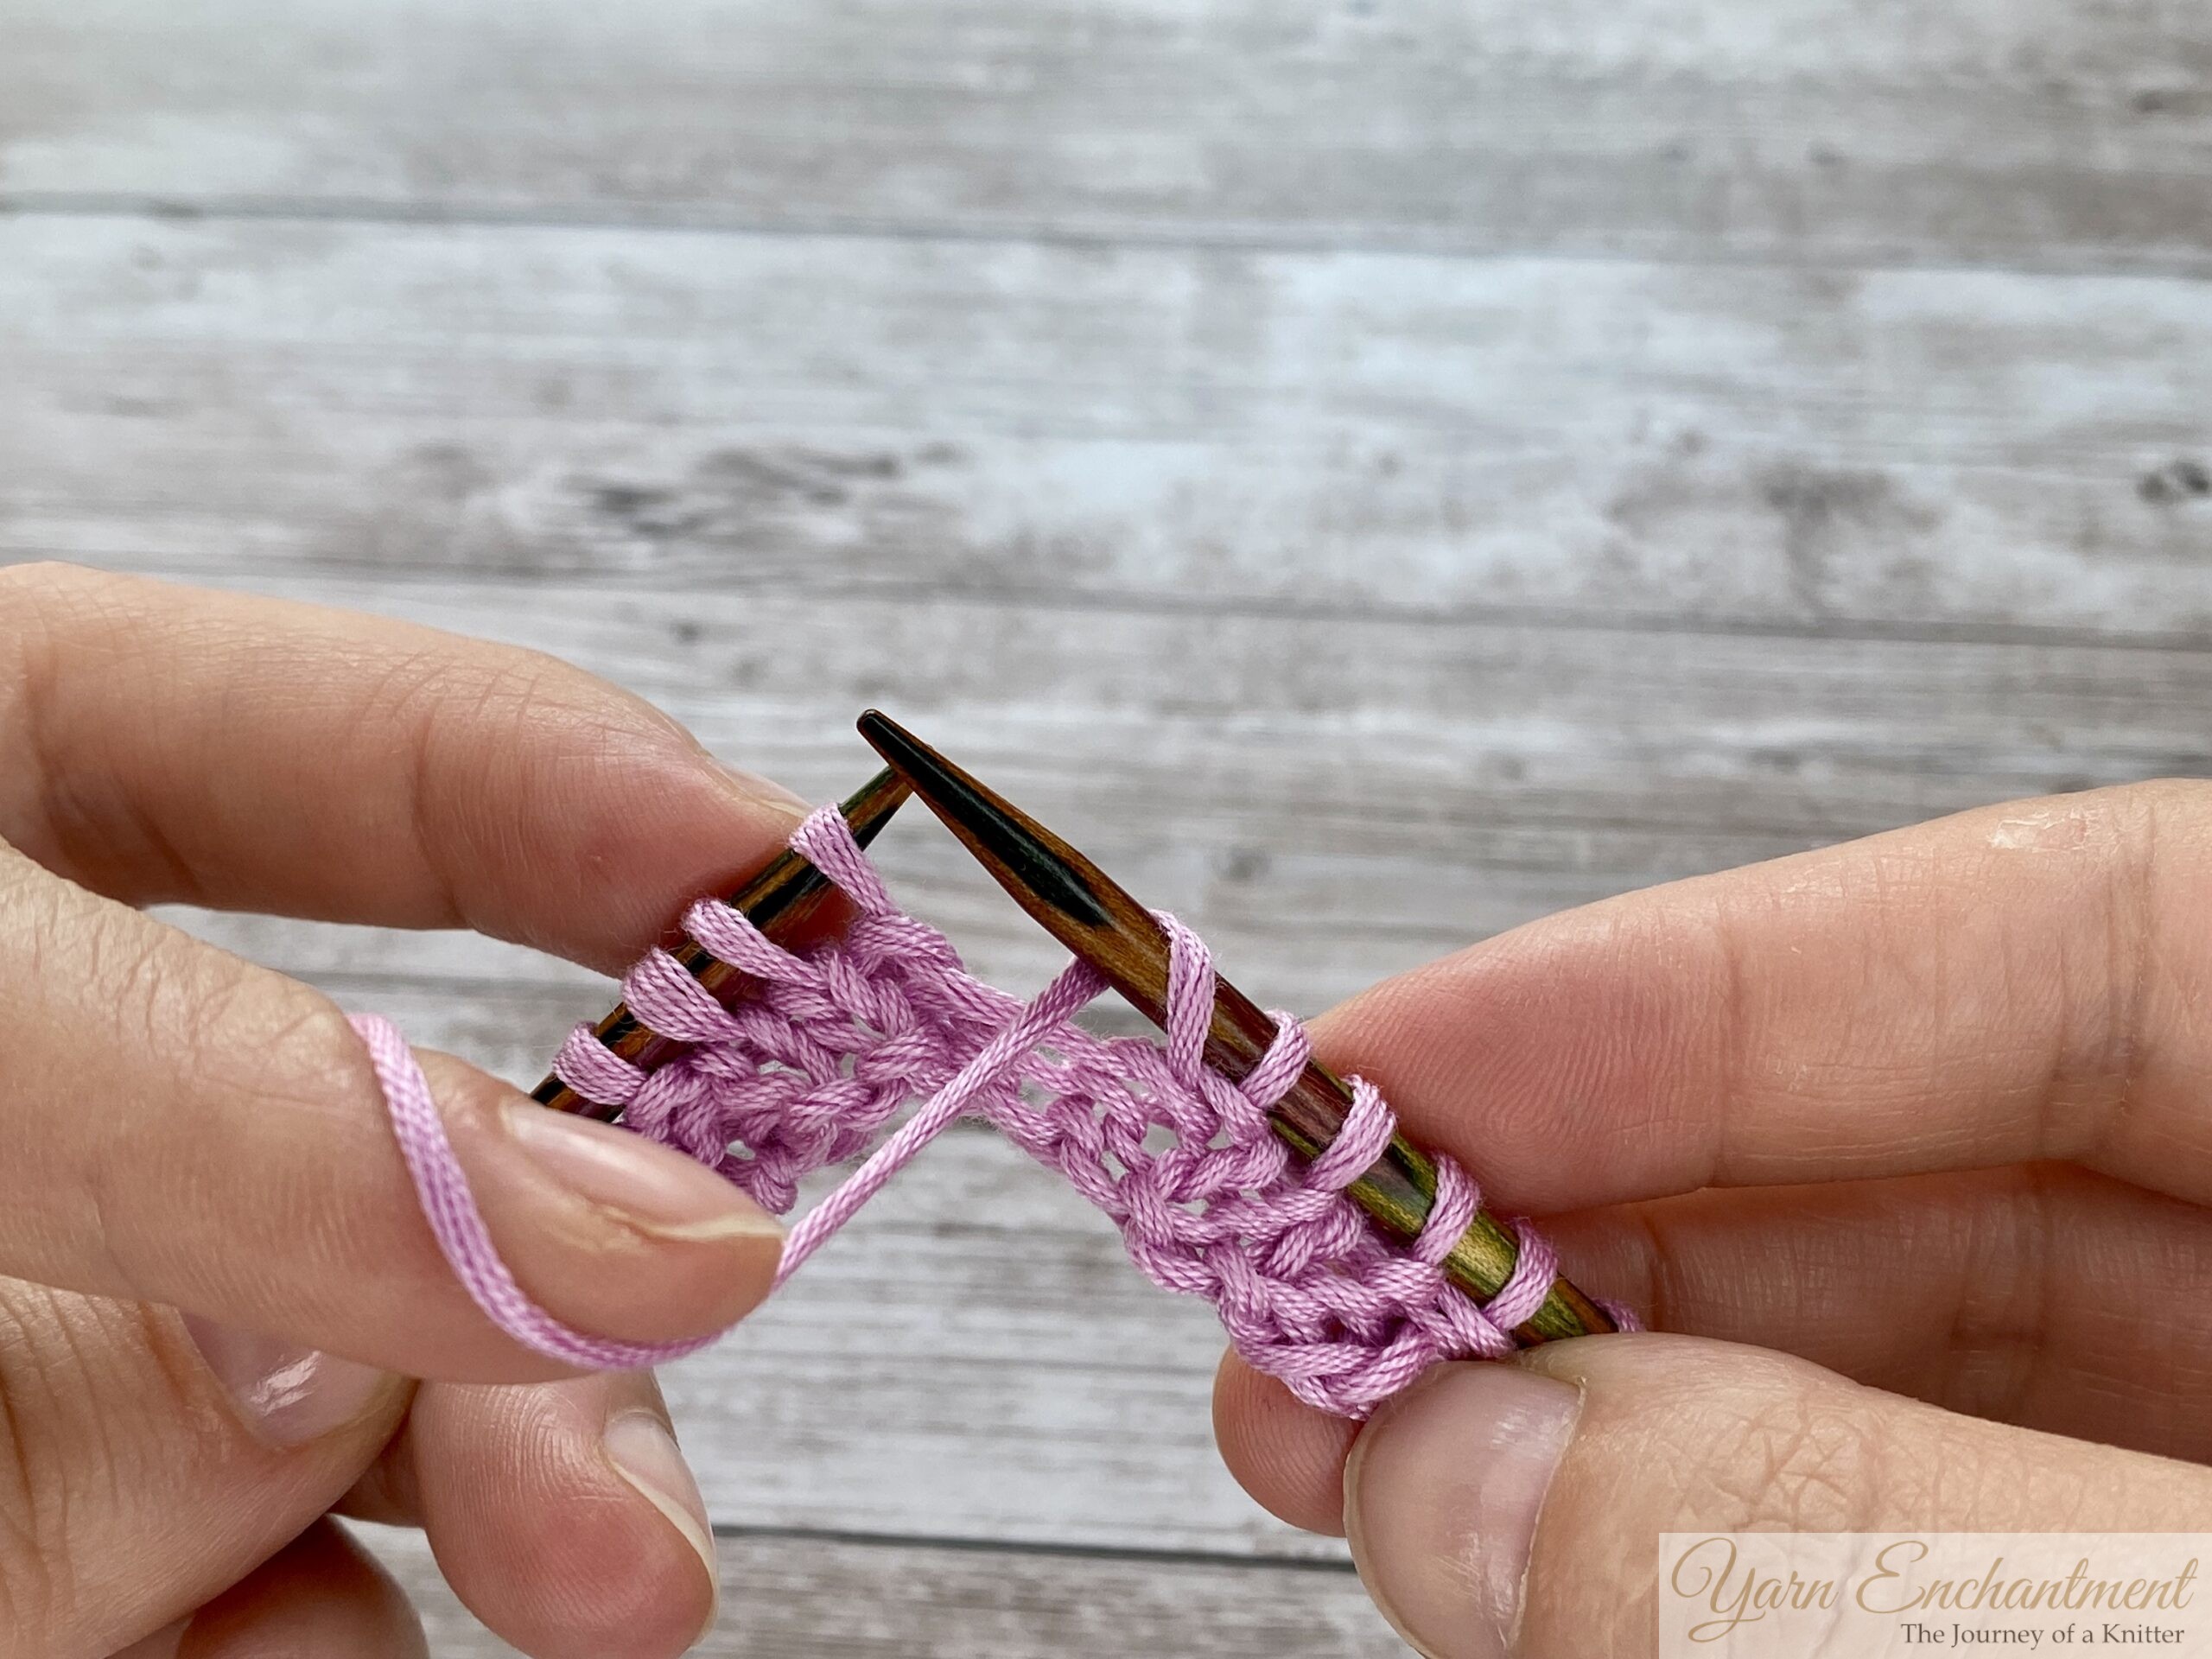  | 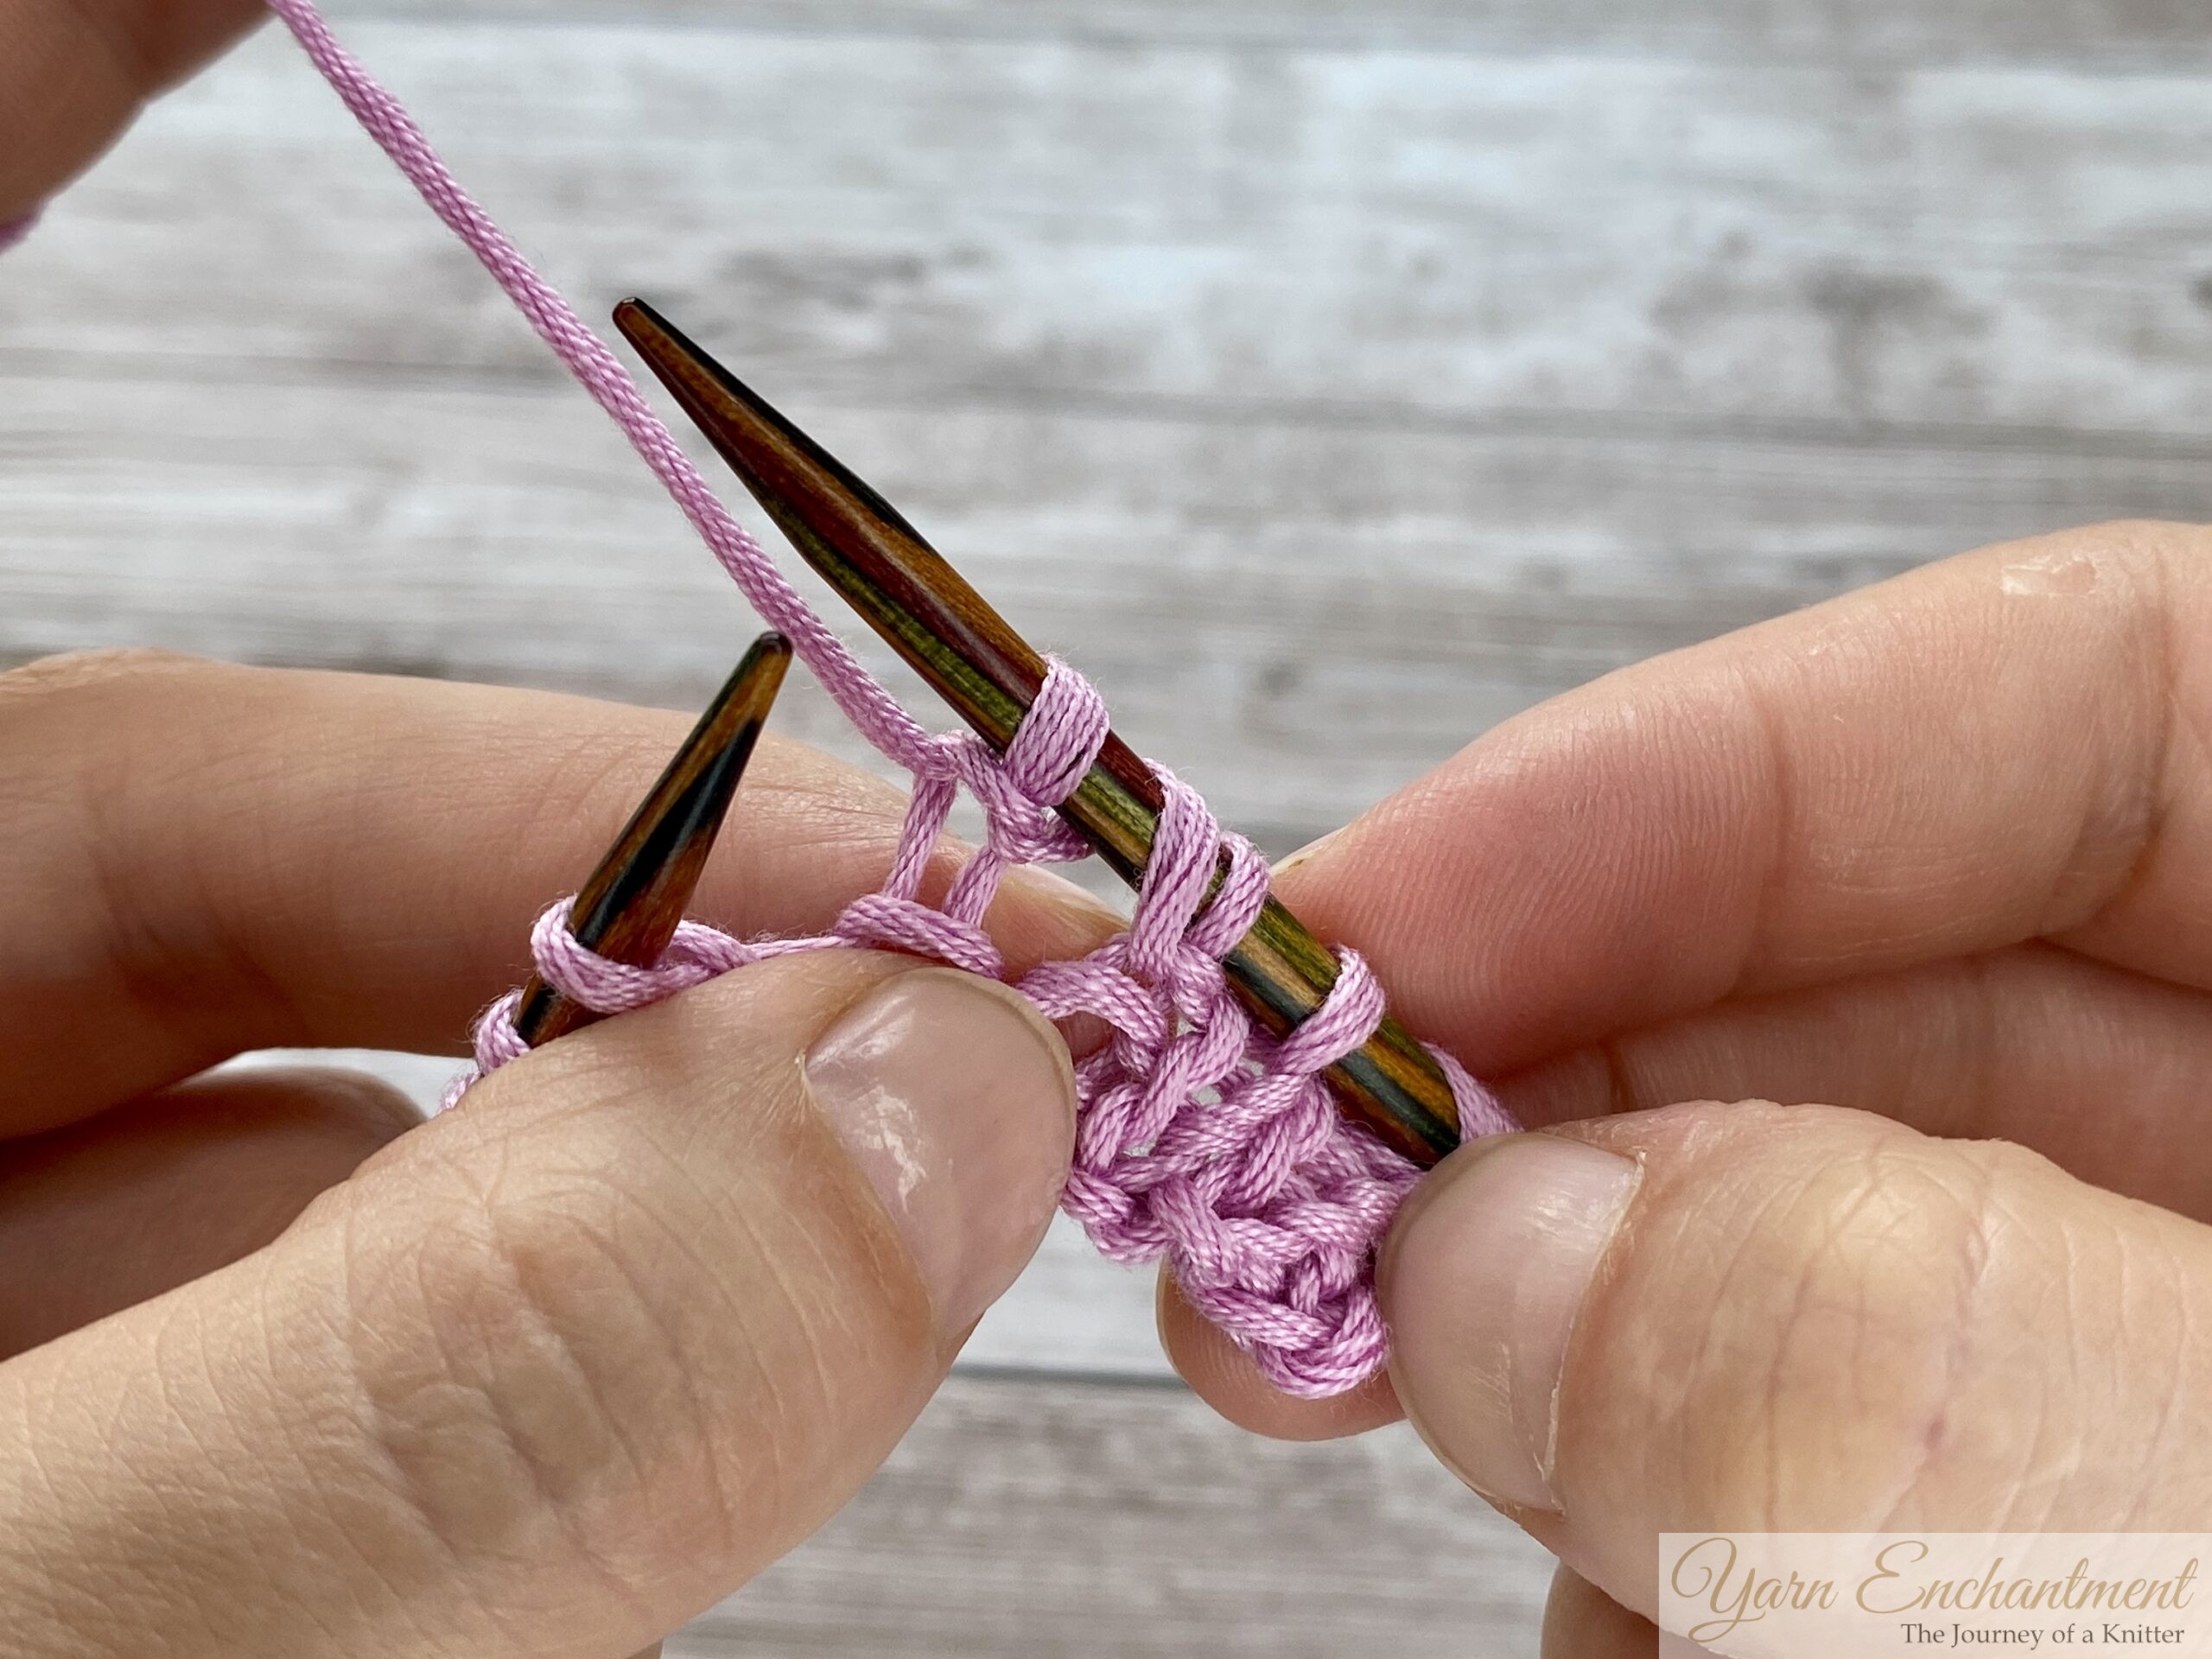  |
Your yarn is in the front. | Bring it over the top of the needle to the front again, ... | ...and purl the next stitch. |
A Note About Yarn Over Sizes
Not all yarn overs are created equal. Depending on where they sit in your knitting, the size of the hole can actually change. This is not your imagination, and it is not a mistake in your knitting. It is just the nature of how the yarn travels.
-
Between two knit stitches. The yarn travels from back to front, over the needle, and back to the back again. This is exactly 360 degrees around the needle, giving you your standard size yarn over. This is the size you want all your yarn overs to be.
-
Between a knit and a purl. The yarn has to travel much farther. It goes from the back, under the right needle, over the top, and then all the way around to the front to get ready for the purl. This means the yarn goes more than 360 degrees around the needle, so it creates a larger hole.
-
Between a purl and a knit. This one is the shortest. Your yarn is already in the front after purling. When you just knit the next stitch without moving the yarn, the yarn naturally hops over the needle. But it does not even go a full 360 degrees. It travels a very short distance, so the hole ends up being smaller.
The yarn over between a knit and a purl uses more yarn, so it creates a bigger hole. And the yarn over between a purl and a knit uses less yarn, so it creates a smaller hole.
You can compensate for this by adjusting your tension. When you work the larger yarn over, pull it a little tighter. When you work the smaller yarn over, give it a little extra slack. This way, all your yarn overs will end up looking about the same size.
The important thing is to be aware of this. If you suddenly have a column of large eyelets next to a column of tiny ones, it is not because you made a mistake. It is just because of where those yarn overs are sitting. Now you know why, and you can adjust your tension to fix it.
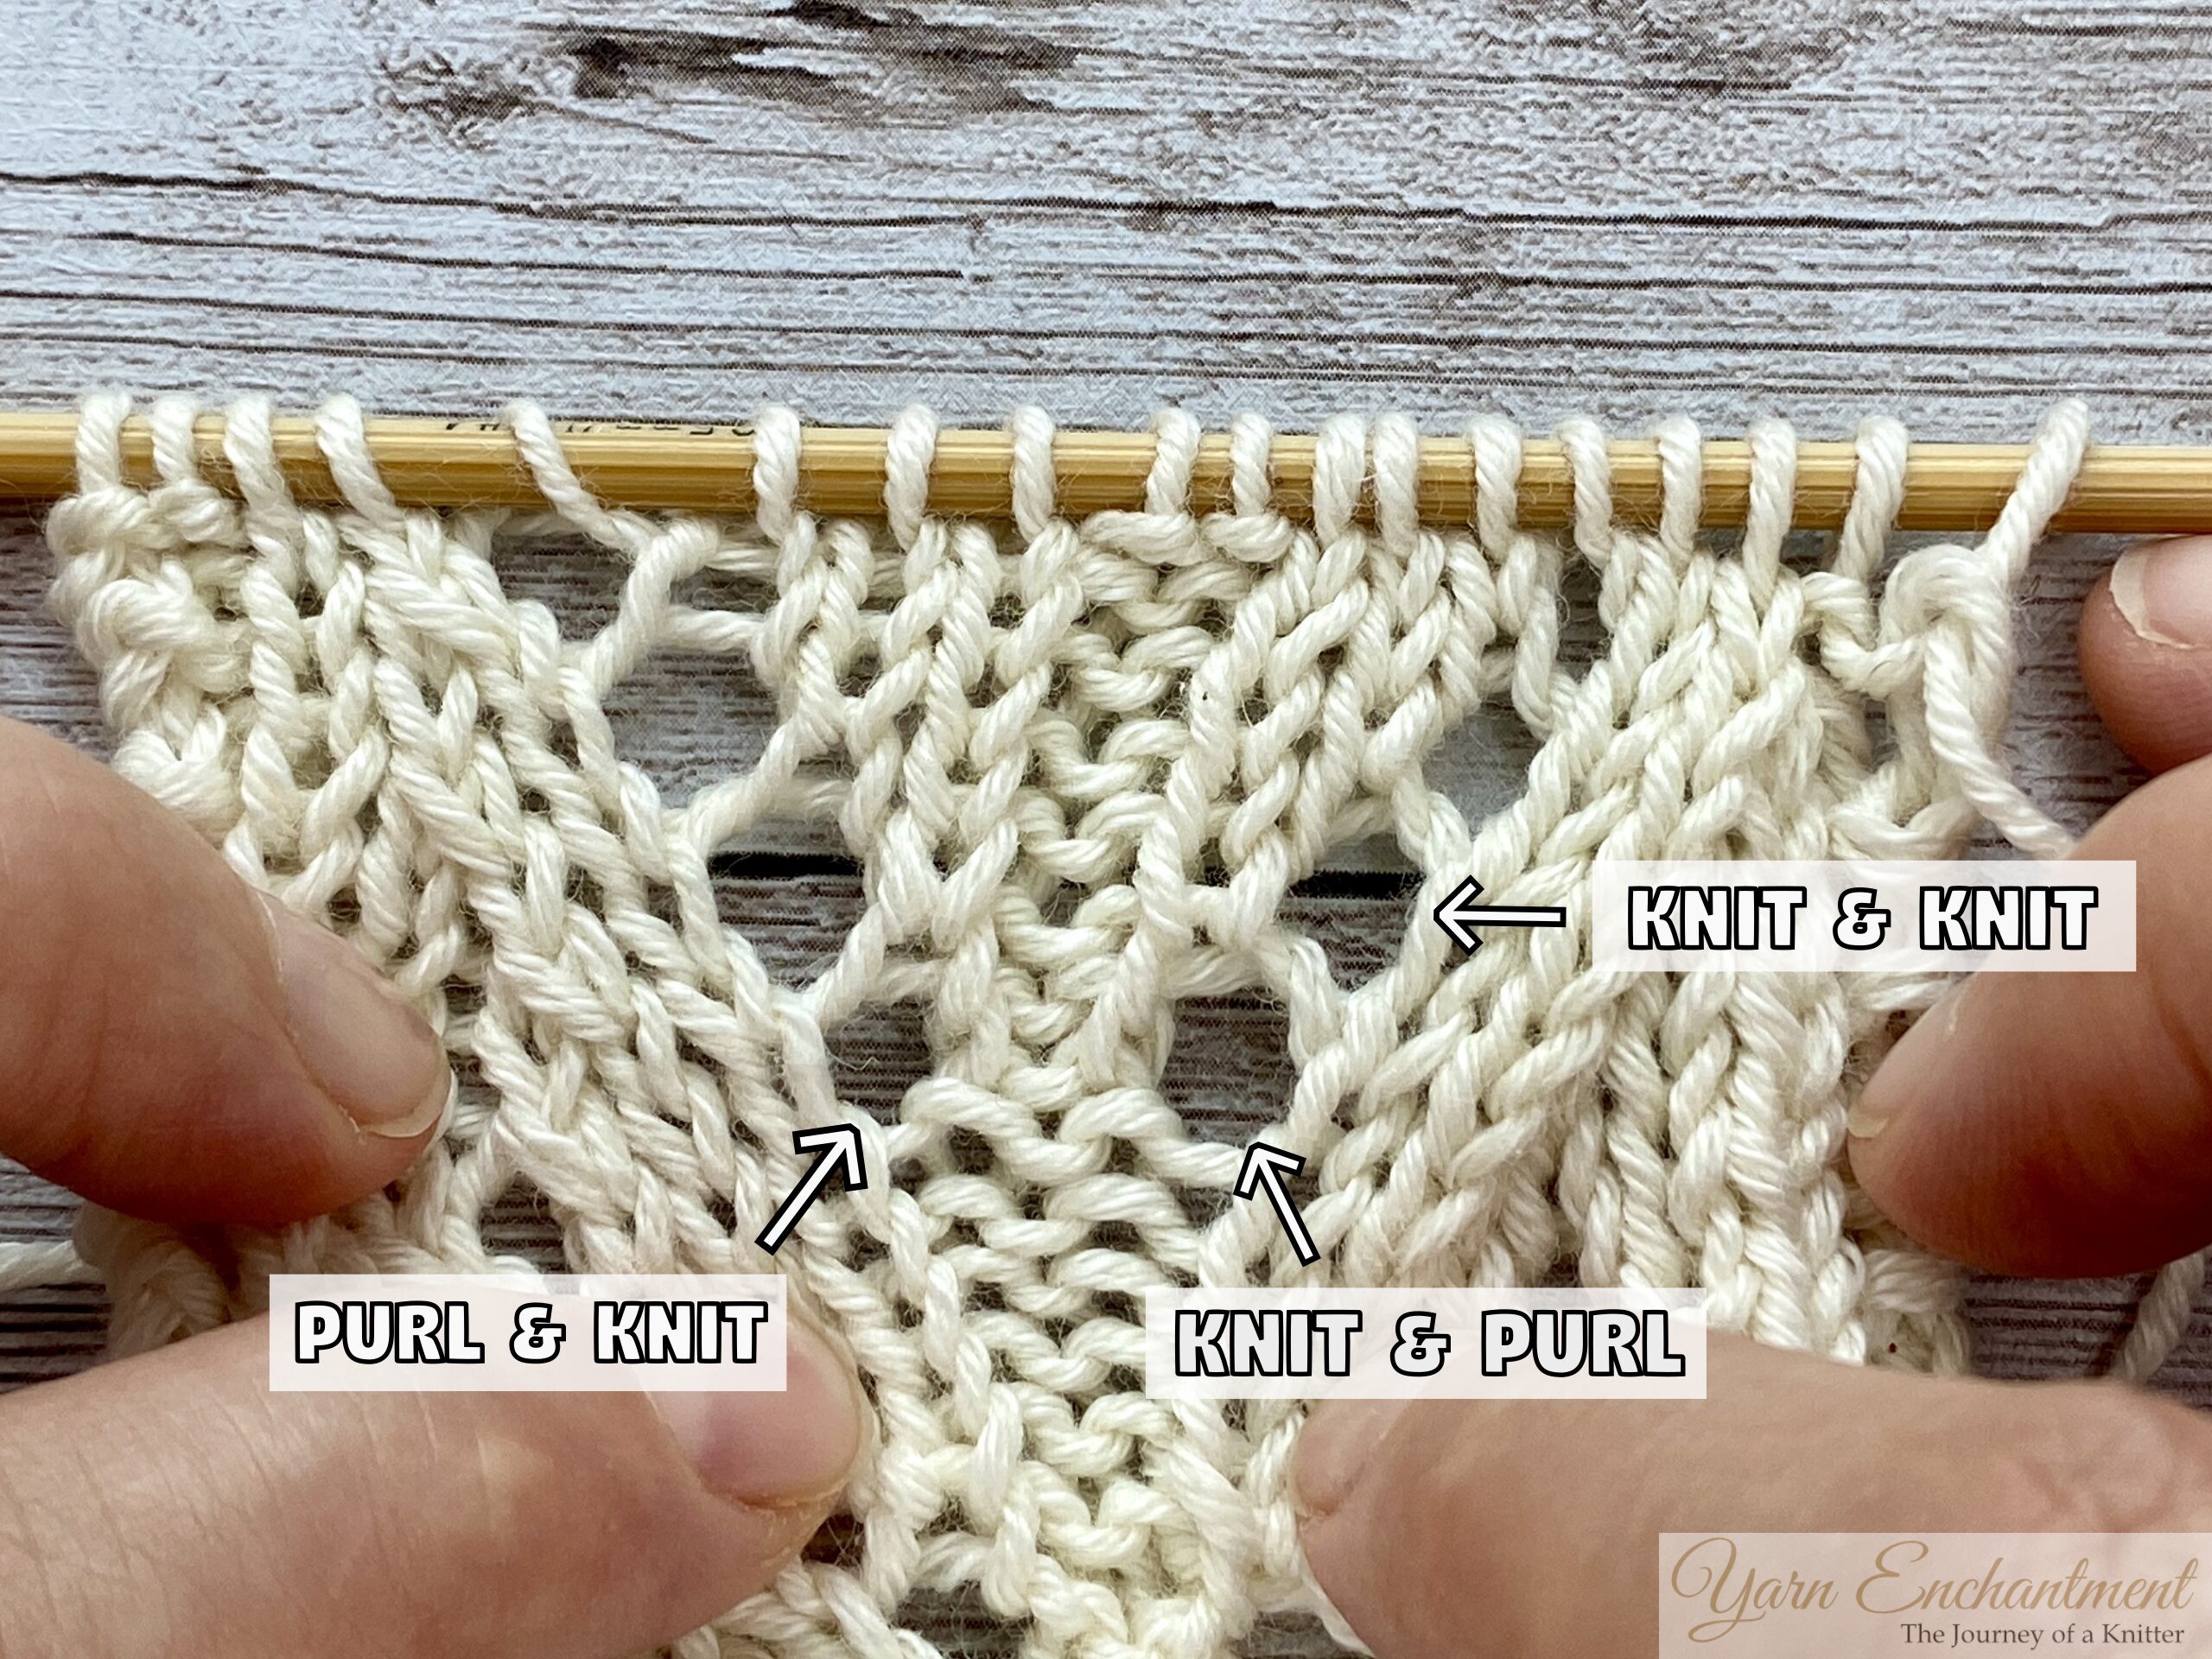  |
Between the knit and the purl stitch, I pulled a little on my working yarn to compensate for the longer yarn travel. Right above that, there is a knit to knit yarn over, and you can see that these are now similar in size. I did not compensate between the purl and the knit stitch. Normally I would give the yarn over a little bit more slack so that it could be bigger, but I wanted you to see the difference in size between them. |
Yarn Tips for New Lace Knitters
My first lace piece looked like a crumpled mess until I blocked it. Do not panic when you finish a row and the stitches look uneven. That is totally normal. Blocking is where the true magic happens. Soak it a little bit and then gently pin it, and suddenly all those tiny holes open up into a beautiful, balanced pattern. It's like watching a flower bloom.
If you find your yarn overs are coming out uneven, try keeping the stitches on either side snug on your needle. And if you are working a big project, do yourself a favor and thread a lifeline through your stitches every few rows. That is a thin piece of scrap yarn. If you make a mistake, you can rip back to that lifeline and start over without weeping. Trust me on this one. It has saved my sanity many times.
Another little tip. Put a stitch marker between each pattern repeat. When I do this, I can instantly see which section went wrong if my stitch count is off at the end of the row. And if you miss a yarn over, do not try to fake it and just add a stitch later. It will throw off the whole look. You can add a yarn over when you are already in row two by just lifting up the bar in between the needles. This bar is your yarn over only tied there, so if possible try to stretch it a little bit. But I want to make a separate post about fixing mistakes in lace knitting.
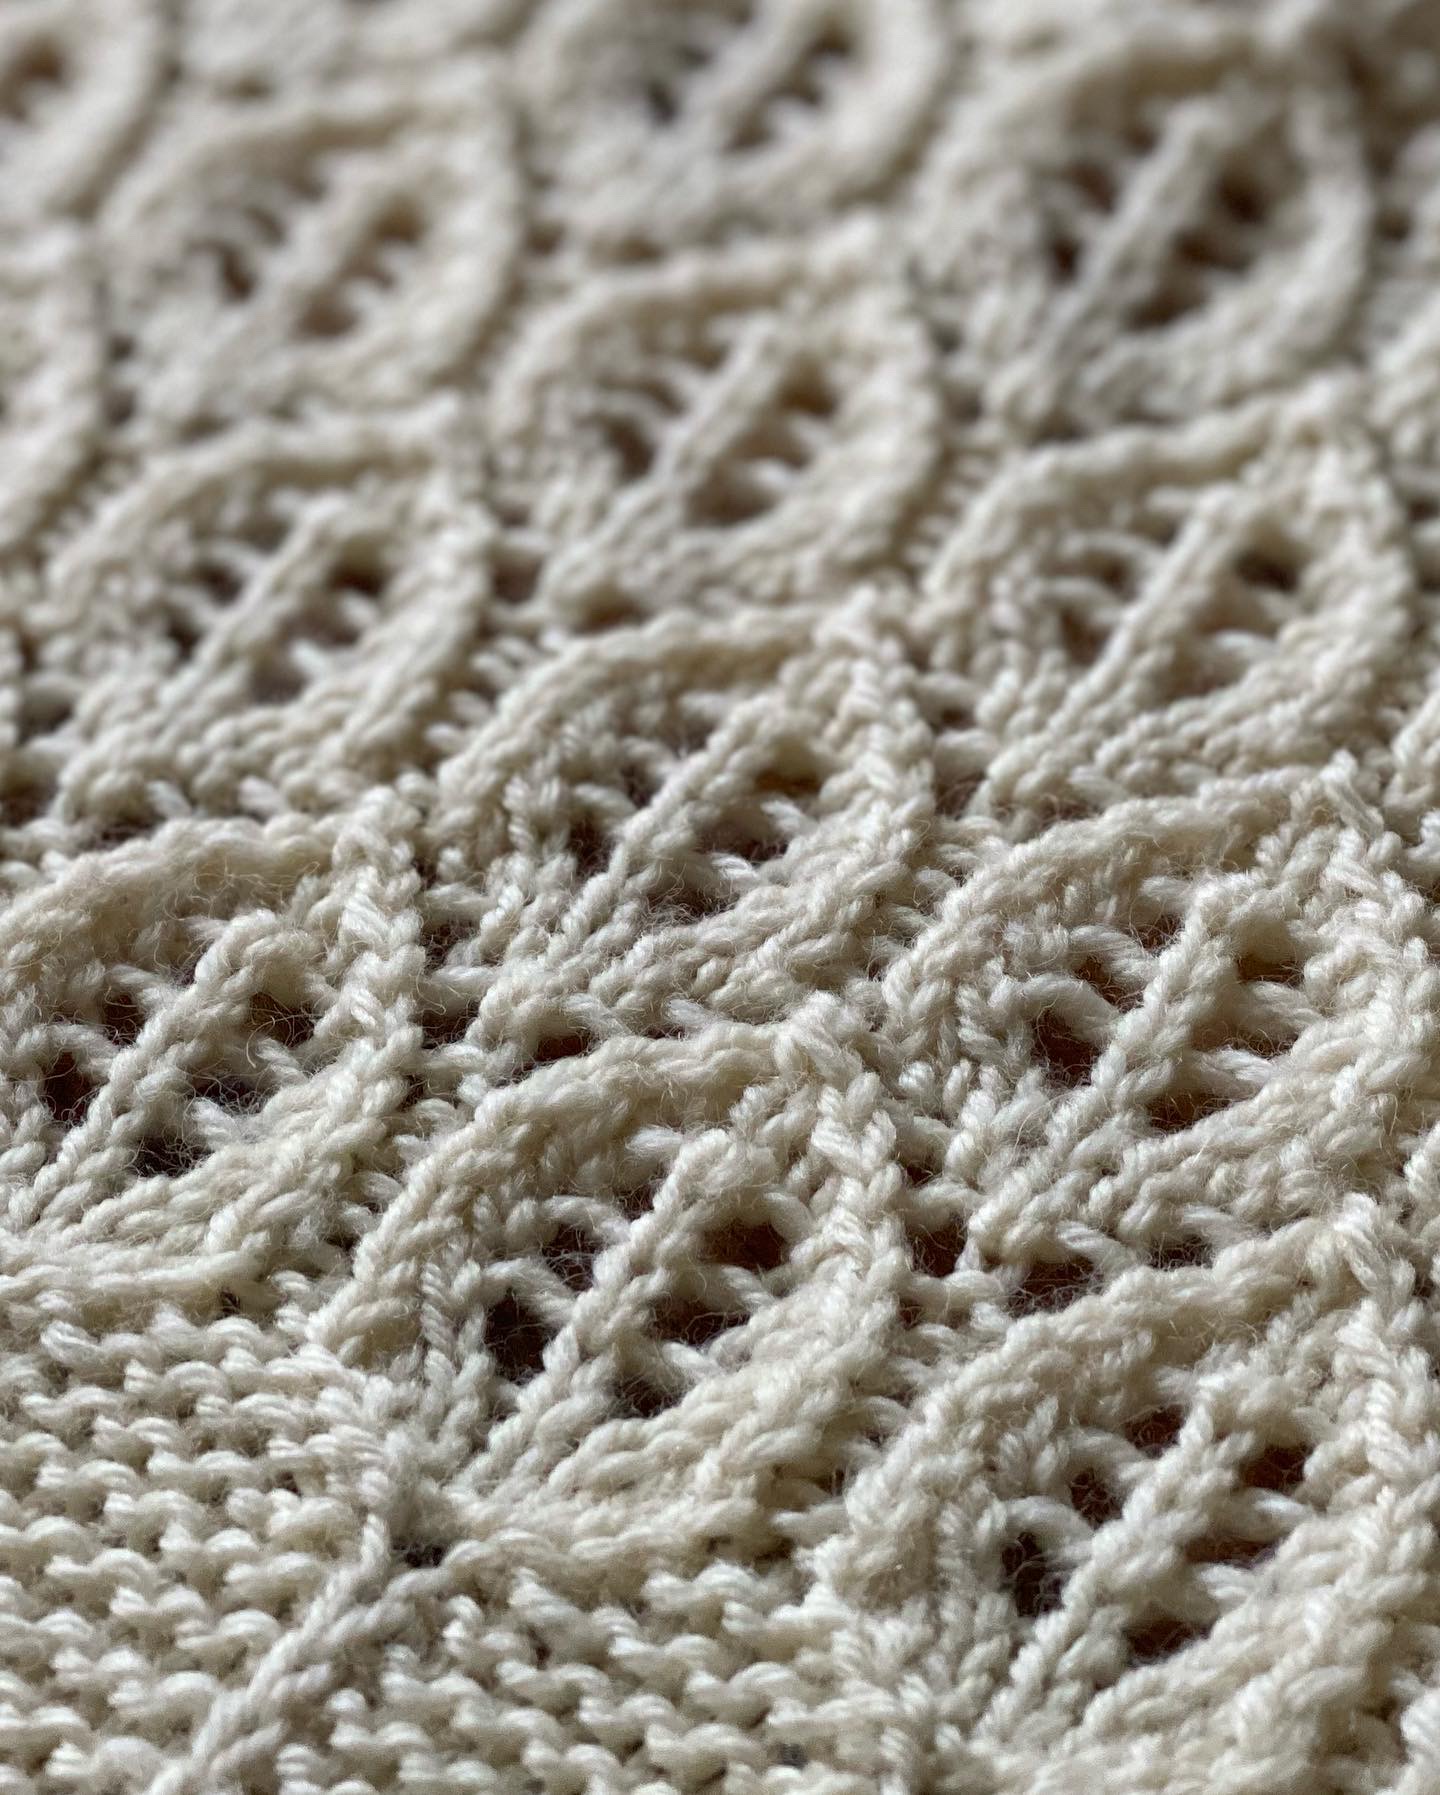  |
The Agram Shawl was my first lace pattern, and I had to unravel everything more times than I can count now. The pattern was really well written though, and I would say go for it even if you have never knitted lace before. If I could do it, you absolutely can too. |
Frequently Asked Questions
What is the most common mistake in lace knitting?
Missing a yarn over is by far the most common issue. It happens so easily that even experienced knitters do it from time to time. You will know it has happened if you get to the end of a row and do not have enough stitches to finish your pattern. That is why I always recommend counting your stitches at the end of each row and using stitch markers between repeats. It helps you catch mistakes early before they become a bigger problem.
Why are there accidental holes in my knitting?
This is almost always an accidental yarn over. It happens when you inadvertently wrap the yarn over the needle when you are not supposed to. For example, you might bring the yarn to the front before a knit stitch, or you might pull the yarn up over the needle at the start of a new row. This creates an extra stitch and a little hole that you did not intend. If you are coming from crochet like I did, this can be even more common because your muscle memory is used to moving the yarn differently. Just slow down and pay attention to where your yarn is and where it needs to go.
What is the difference between a yarn over and a yarn forward?
A "yarn over" (YO) is the general term that creates an increase and a hole. "Yarn forward" (YFWD) is an older term that means to bring the yarn to the front of the work. Most of the time, this is part of a yarn over, but occasionally a pattern might just ask you to move the yarn forward for a slip stitch pattern, and then move it back without creating a new stitch. So it is always best to read the pattern's instructions carefully. In modern patterns, you will almost always just see "YO" and that is perfectly fine.
Your Turn to Weave a Little Magic
So here is my challenge for you. Grab a skein of something lovely, even that single skein you have been saving because the color is too pretty. Cast on a small swatch, maybe twenty stitches, and just play. Work a row of knit one, yarn over, knit two together. Watch what happens. You are creating holes on purpose, and that is intentional and beautiful. And remember, front to back over that needle. If you wrap it the crochet way, your eyelets will be twisted and tight instead of open and airy.
Do not worry about perfection. Lace knitting is forgiving, and blocking fixes a multitude of small sins. You have got this, truly. And when you sit back and see the little eyelets catching the light, you will understand why I call it a bit of enchantment.
I would love to hear how it goes for you. Have you tried lace knitting before, or is this your first attempt? Did you also come from crochet and struggle with the yarn over direction? Share your thoughts in the comments below, and if you know a friend who could use a cozy afternoon with some yarn, pass this post along.
I am planning to turn the swatch I knit for this tutorial into a full pattern. But first, I want to write a post about reading lace charts. I hope you have a lovely day.
Until next time, happy knitting
  |
Yarn Over in Lace Knitting |
Ready to keep practicing and build your confidence? This guide is part of a cozy lace series. If you would like to explore eyelets and shaping even further, take a peek at these companion guides:
[How to Knit Yarn Over Increases]: A step-by-step tutorial on creating clean, open eyelets with ease.
[Yarn Overs in Lace Knitting]: Discover how simple yarn overs work together to create airy, delicate textures in your favorite projects.
[How to Read Lace Charts]: Your beginner-friendly guide to learn and understand how to read lace carts.
A Little Way to Say Thanks
Yarn Enchantment is my cozy hobby corner on the internet. If something here made your knitting day easier or you simply enjoy reading my posts and would like to say thank you, you can leave a small Ko-fi tip - but only if you truly want to.
My patterns and tutorials stay free for everyone, always. Every little tip just goes toward new yarn and a cup of tea for my cozy knitting evenings.
☕ Support me on Ko-fi
You Might Also Like


 |
|
Join the Cozy Corner Newsletter
Hello, creative soul. Welcome to the Yarn Enchantment Newsletter, a little space where we celebrate all things cozy, crafty, and full of heart. Think of this as your friendly crafting companion, a soft dose of inspiration delivered straight to your inbox, just for you. Each newsletter brings you: ✨ Notifications about new patterns and tutorials – easy knitting patterns and beginner crochet projects you won’t find anywhere else 🧶 Practical yarn tips for new crafters, plus advice on the best yarn for fall, blankets, and handmade gifts 💌 Small stories and adventures from my own workbench, because crafting is as much about the journey as the finished piece Whether you’re knitting by the fire, looking for your next creative spark, or simply wanting a quiet moment with your hooks and needles, this newsletter is here to cheer you on. Crafting isn’t just about the final project. It’s about the joy, the peace, and the stories we weave along the way. So grab a cup of tea or coffee, settle in, and join me. Together we’ll make a little magic, one stitch and one story at a time. I’m so glad you’re here. Let’s create something beautiful together. Sign up below to receive your first email, and feel free to leave a comment on the blog if there’s a topic you’d love to see covered. Your ideas might just become our next newsletter feature. |