

My Favorite Neat I‑Cord Edge Increases for PetiteKnit’s Sophie Scarf, Hood & Shawl
December 15, 2025
Cozy Yuletide Cottage – Free Christmas Cottage Dishcloth Knitting Pattern
December 25, 2025Elastic Bind Off in Ribbing: A Stretchy, Comfortable Edge
)
Originally published on December 18, 2025
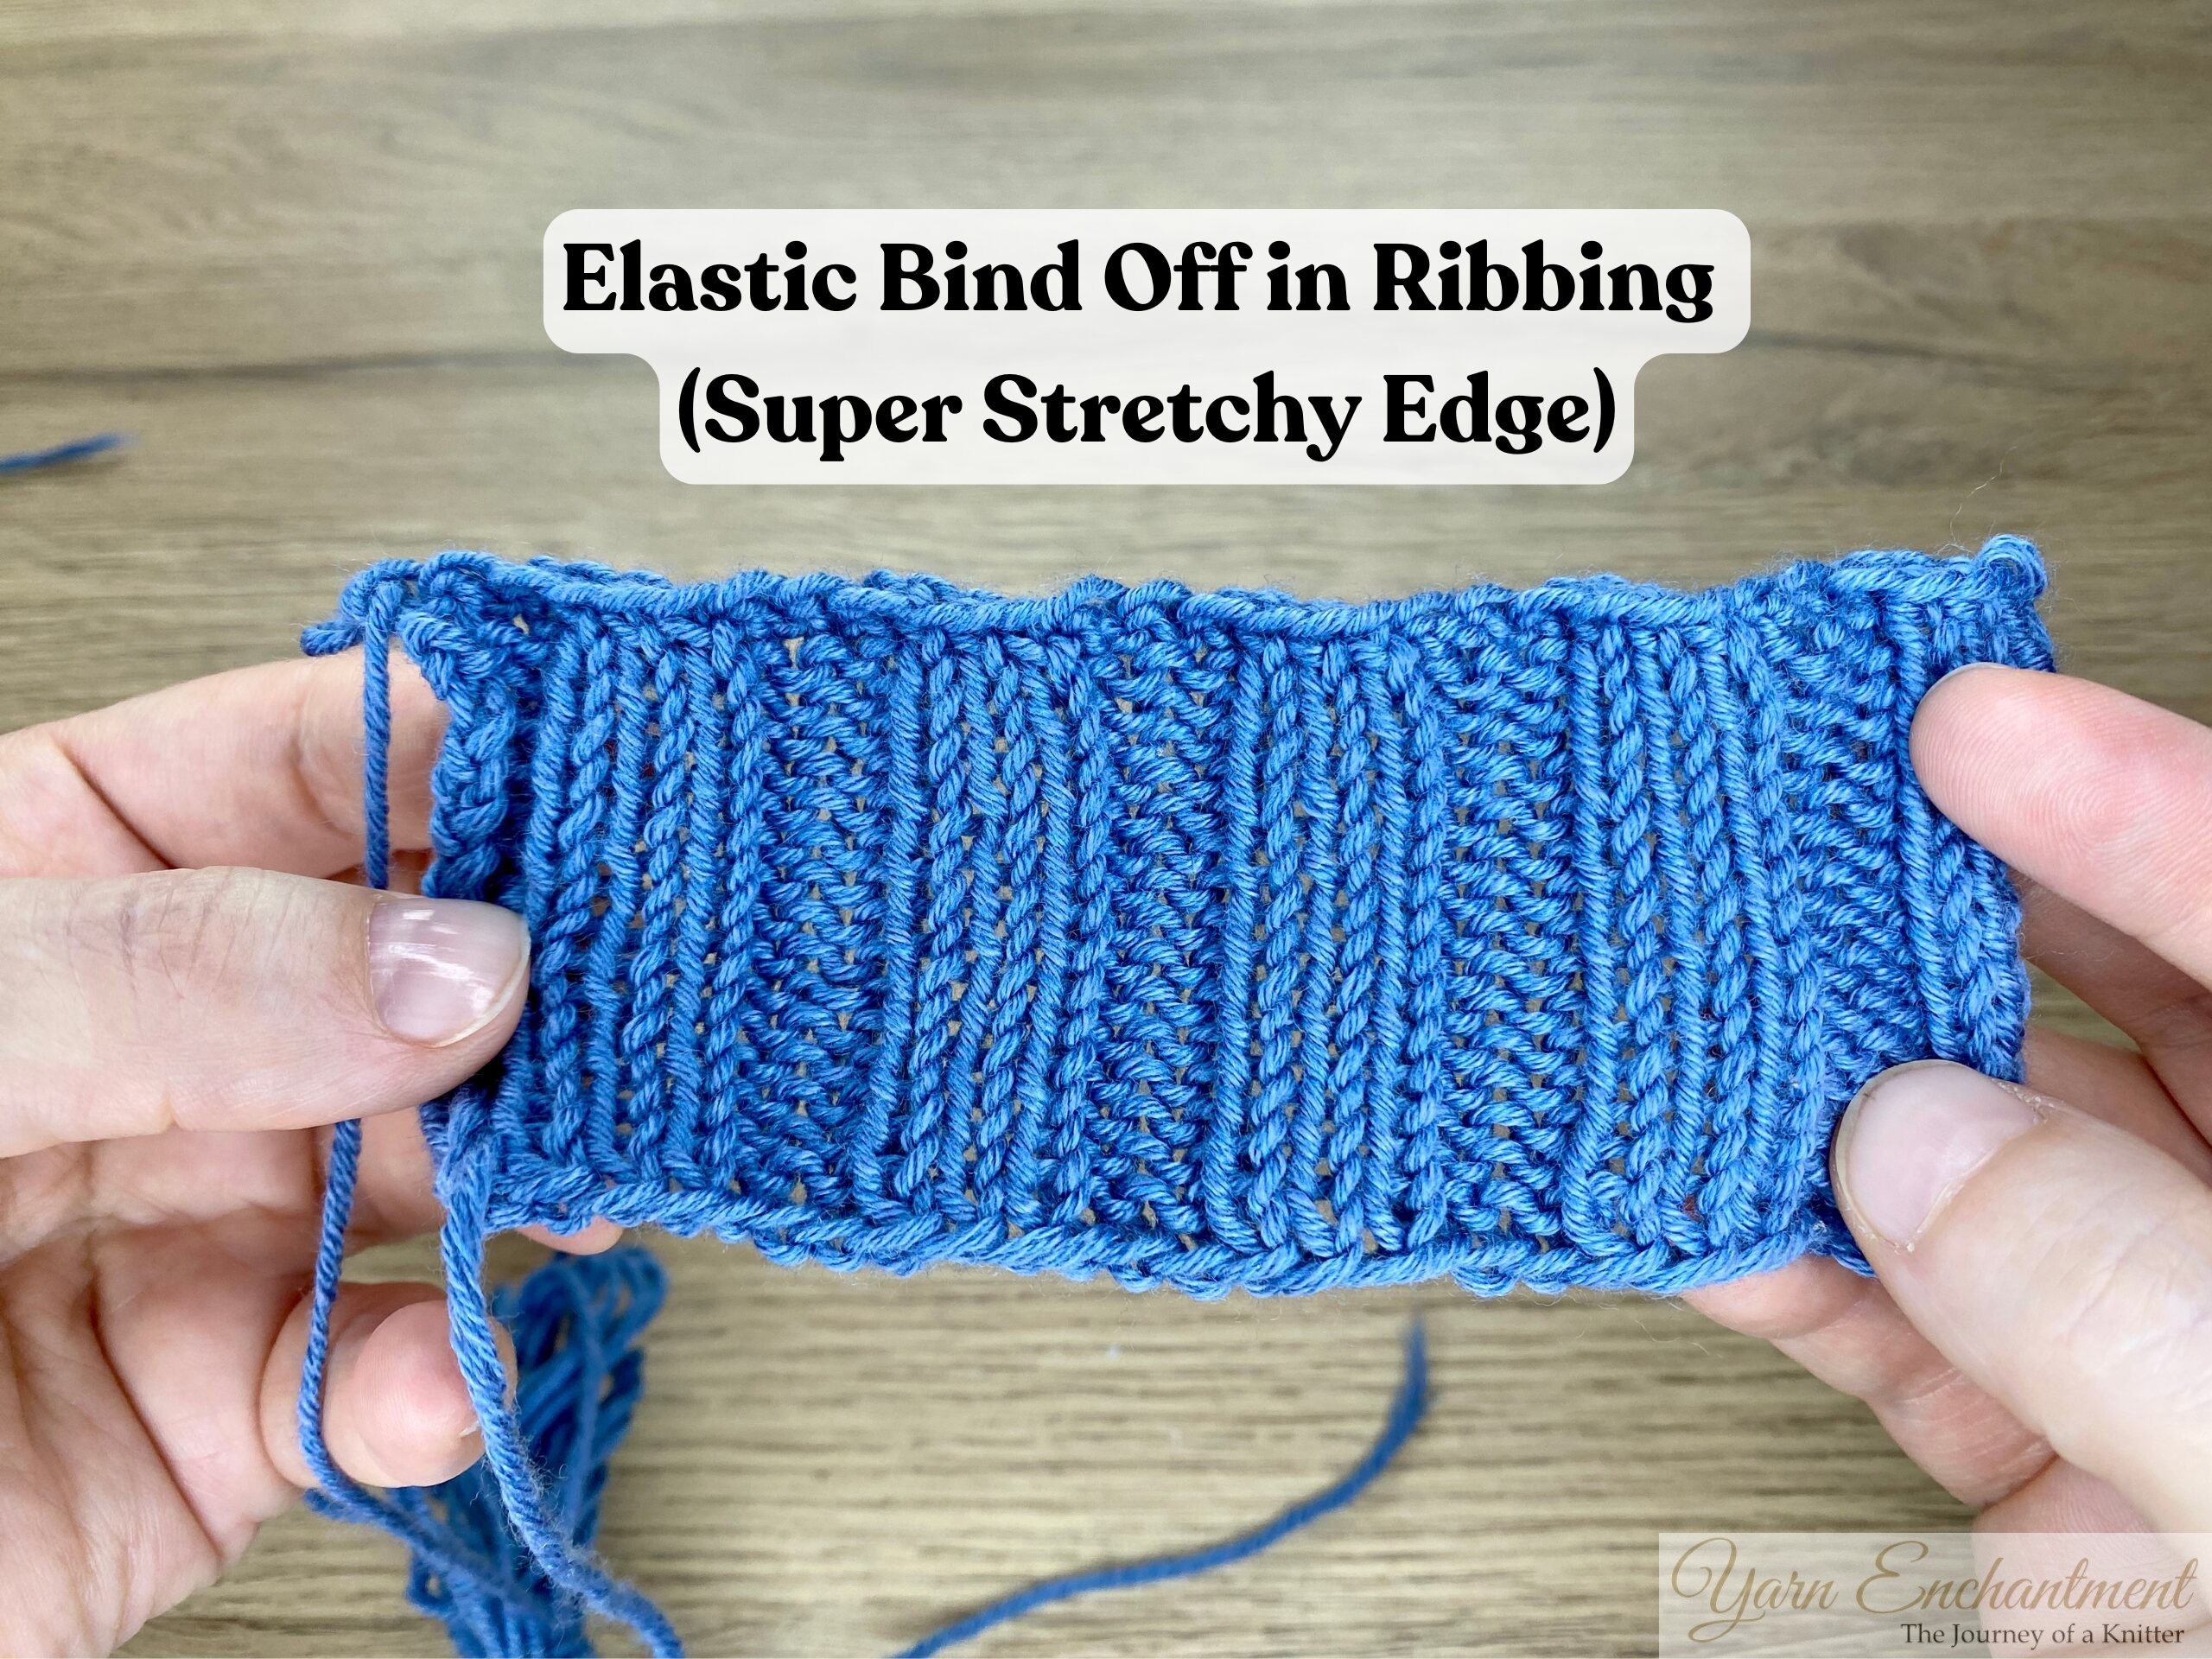
Elastic bind offs can really change how a finished garment feels on the body. When the edge has enough stretch, cuffs, necklines and sock legs suddenly feel soft and easy to wear instead of tight or a bit “cutting in”. In this tutorial, you’ll learn a simple elastic bind off that works beautifully in ribbing and gives you plenty of stretch. This version does flare out a little, so if you prefer a bind off that stays more straight and doesn’t flare, you can use the variation with only knit stitches instead. I also made a full tutorial for that version if you want to try it out.
Here, the method is shown on a small swatch in 2x2 ribbing (and in the video tutorial you’ll also see it in 3x3 ribbing), but you can use it with any ribbing pattern. It’s especially useful for necklines, hat brims, and the leg of toe‑up socks, or anywhere you need enough stretch to get your knitting comfortably over heels or over the head.
 | Elastic Bind Off in Ribbing |
Table of Contents
What this bind off does
This elastic bind off keeps your edge stretchy enough even if your knitting tension is on the tighter side. You don’t need to size up your needle for this bind off, which makes it easy to use on most projects. You can also adapt it slightly depending on whether you prefer maximum stretch (worked in ribbing) or a straighter, less flared edge (all‑knit bind off on ribbing).
Before you start
Work until you are ready to bind off a row of ribbing. The example here uses 2x2 ribbing, but the technique is the same for any combination of knit and purl stitches. Always look at your last worked stitch: that tells you whether your next bind off pair will be a “knit two together through the back loop” or a “purl two together”.
Step‑by‑step: elastic bind off in ribbing
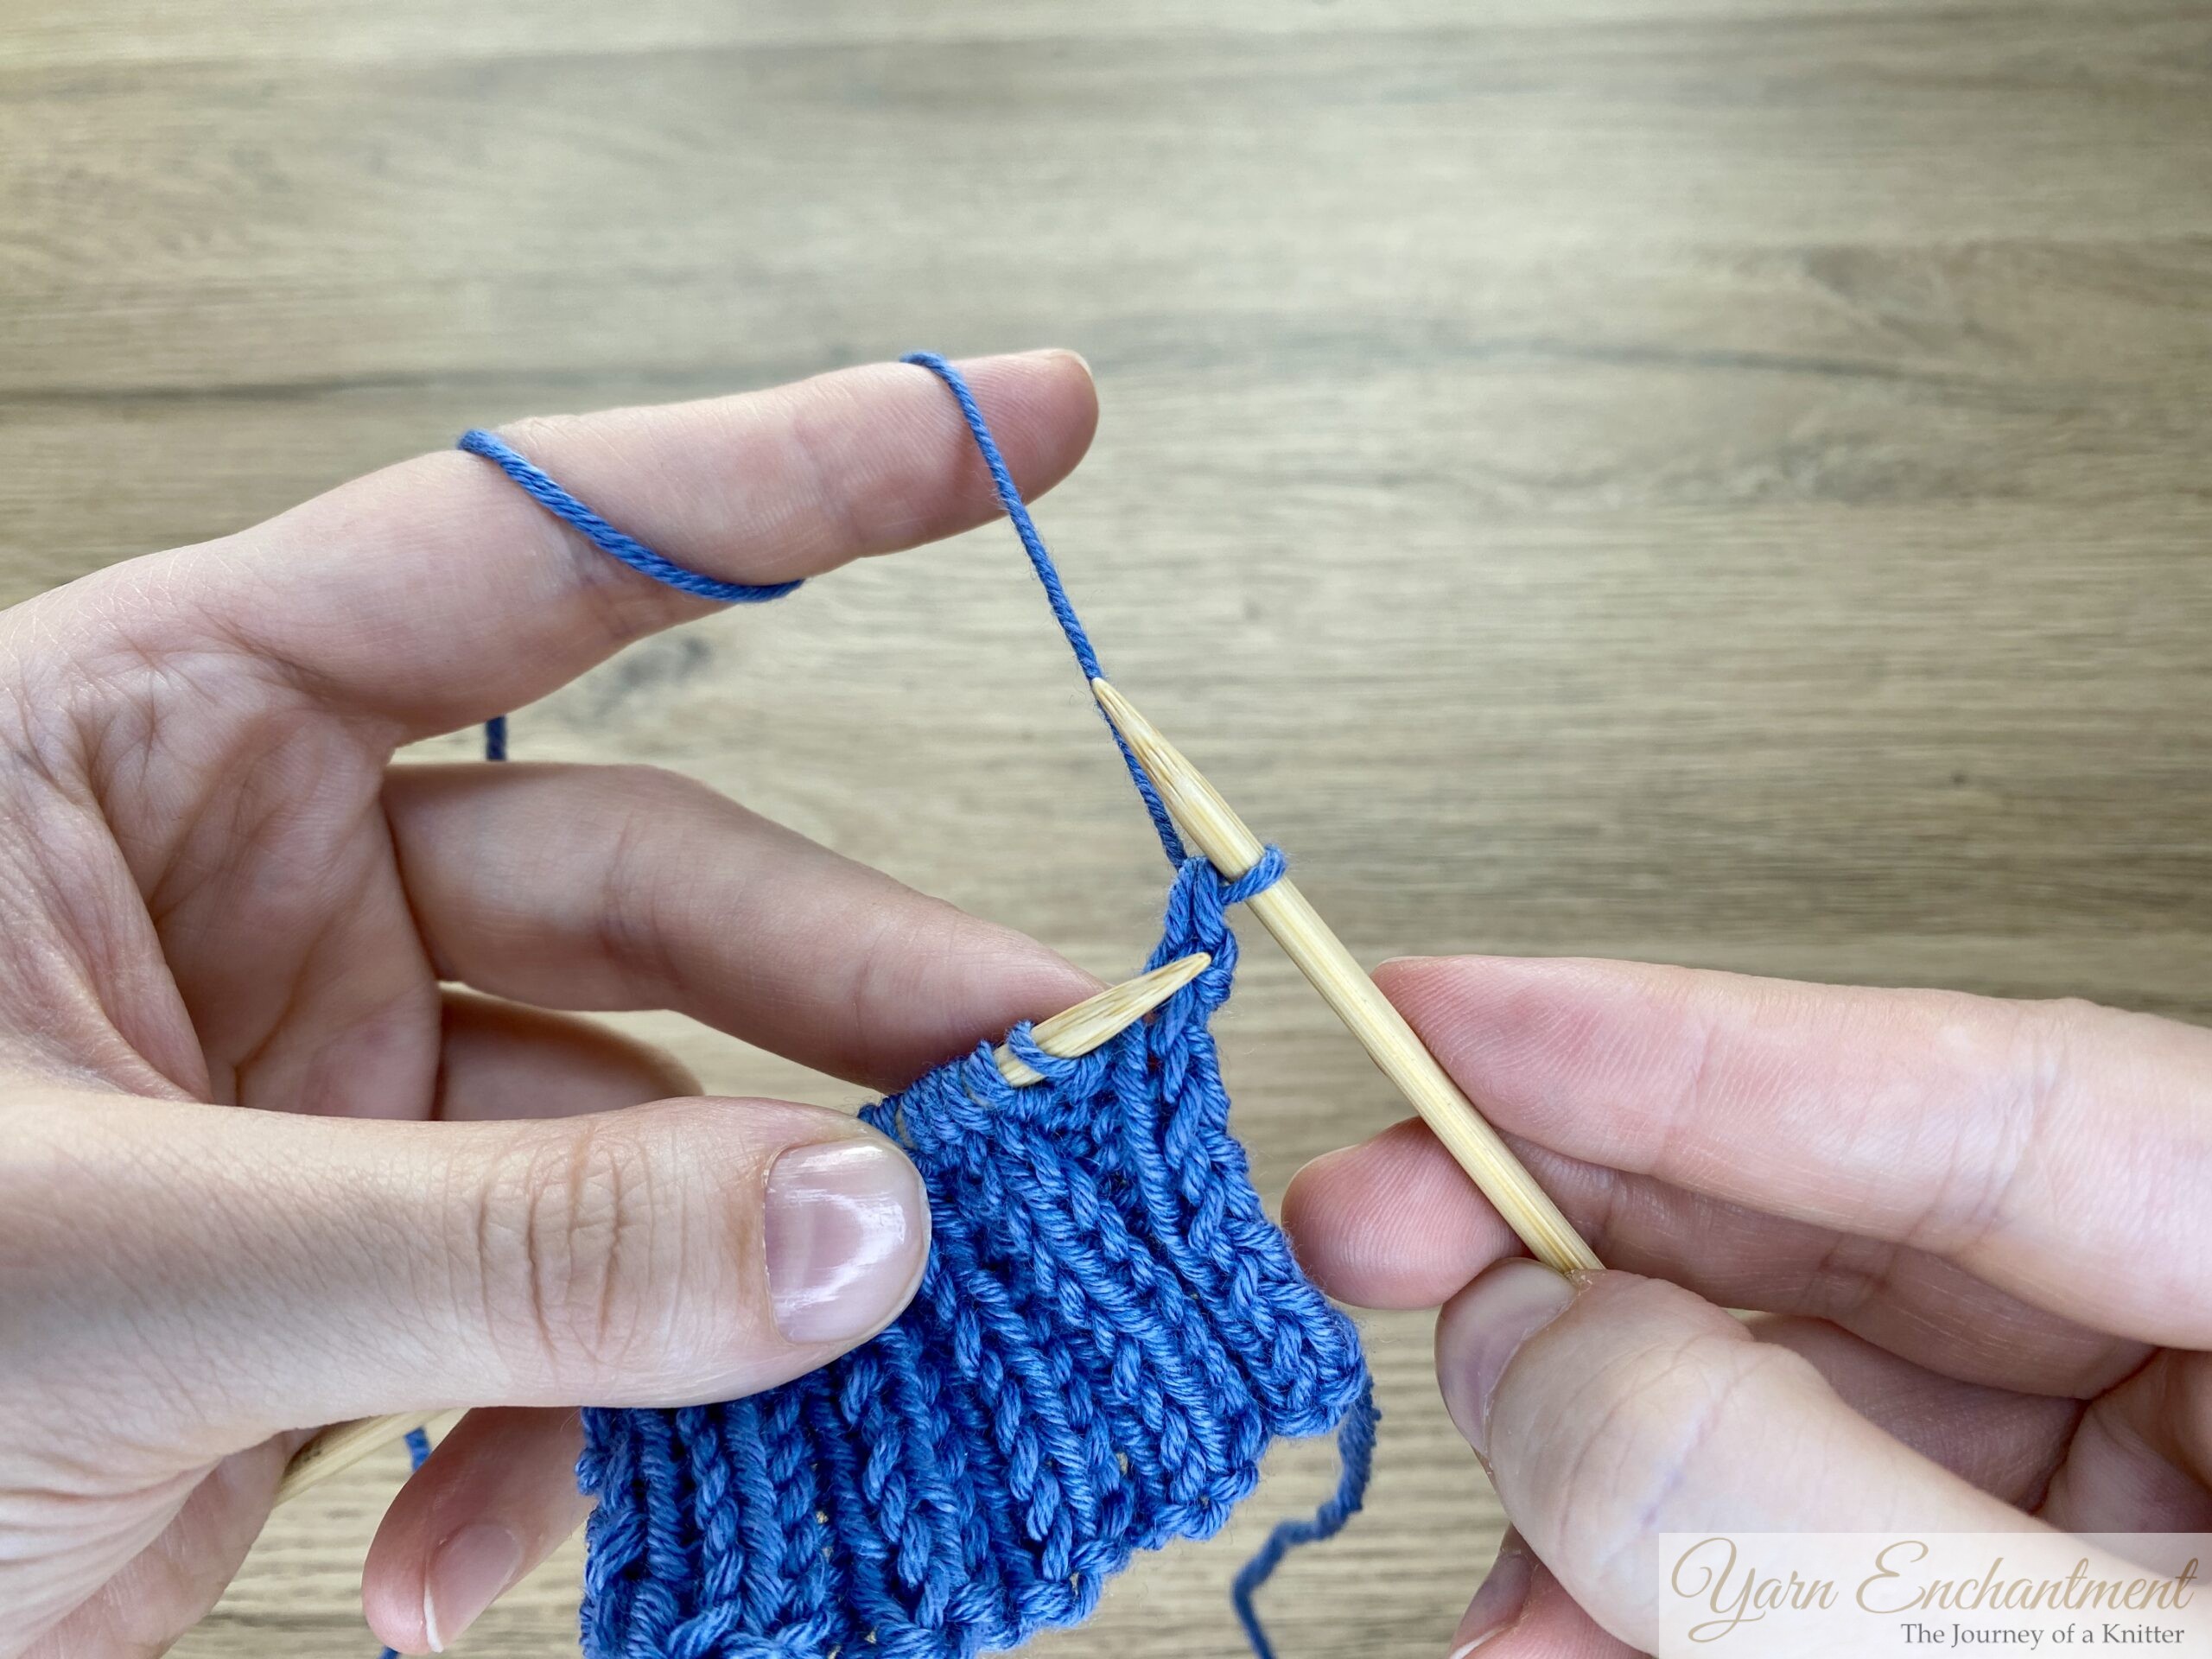
1. Work the first knit bind off
- Knit the first two stitches of the row as normal.
- Insert the left needle through both stitches on the right needle from left to right, and slip them back onto the left needle together.
- With the working yarn at the back, insert the right needle into the back loops of both stitches and knit them together through the back loop.
- You’ve now worked your first elastic bind off stitch.
 |  | Knit the first two stitches, if your pattern starts with purl stitches you want to purl this. | Insert the left needle through both stitches on the right needle, and slip them back onto the left needle together. |
)
)
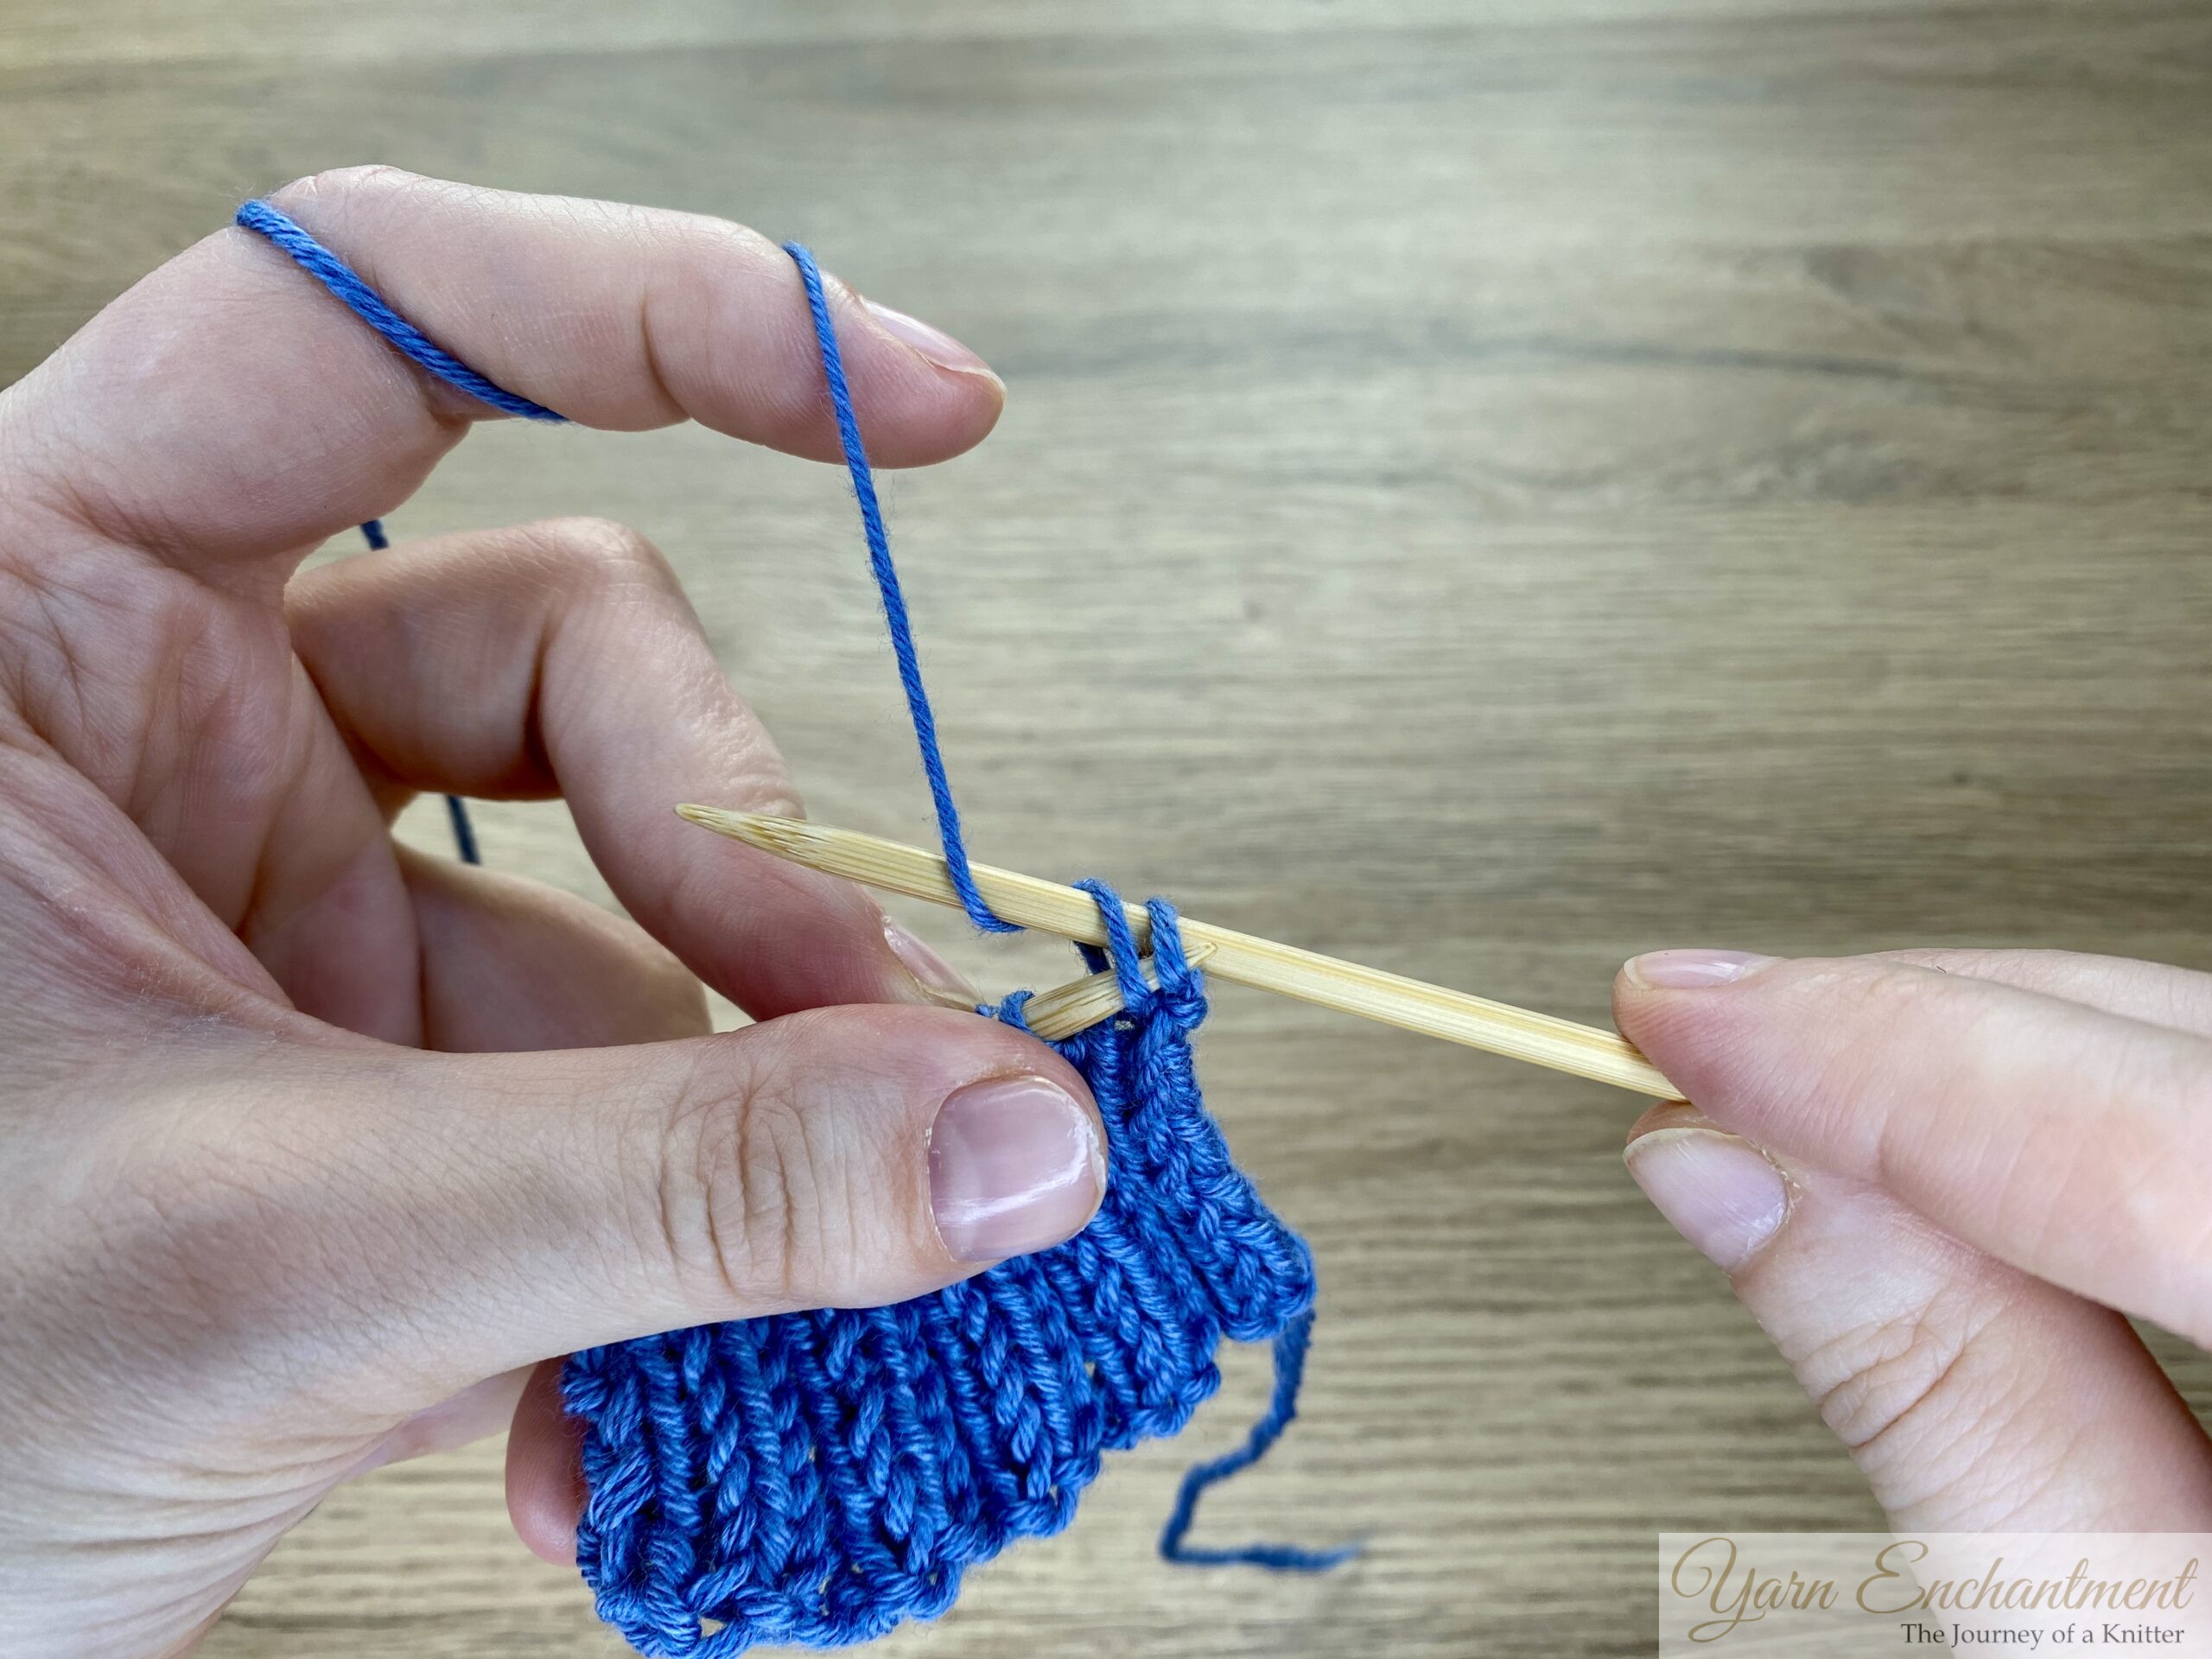 |  | With the working yarn at the back, insert the right needle into the back loops of both stitches and knit them together through the back loop. | You’ve now worked your first stitch bind off stitch |
)
)
2. Switch to purl bind off when you reach purls
- When you come to a purl stitch in your ribbing, purl the next stitch as usual.
- Look at the last stitch on your right needle: if it is a purl stitch, your next bind off pair will be a purl‑two‑together.
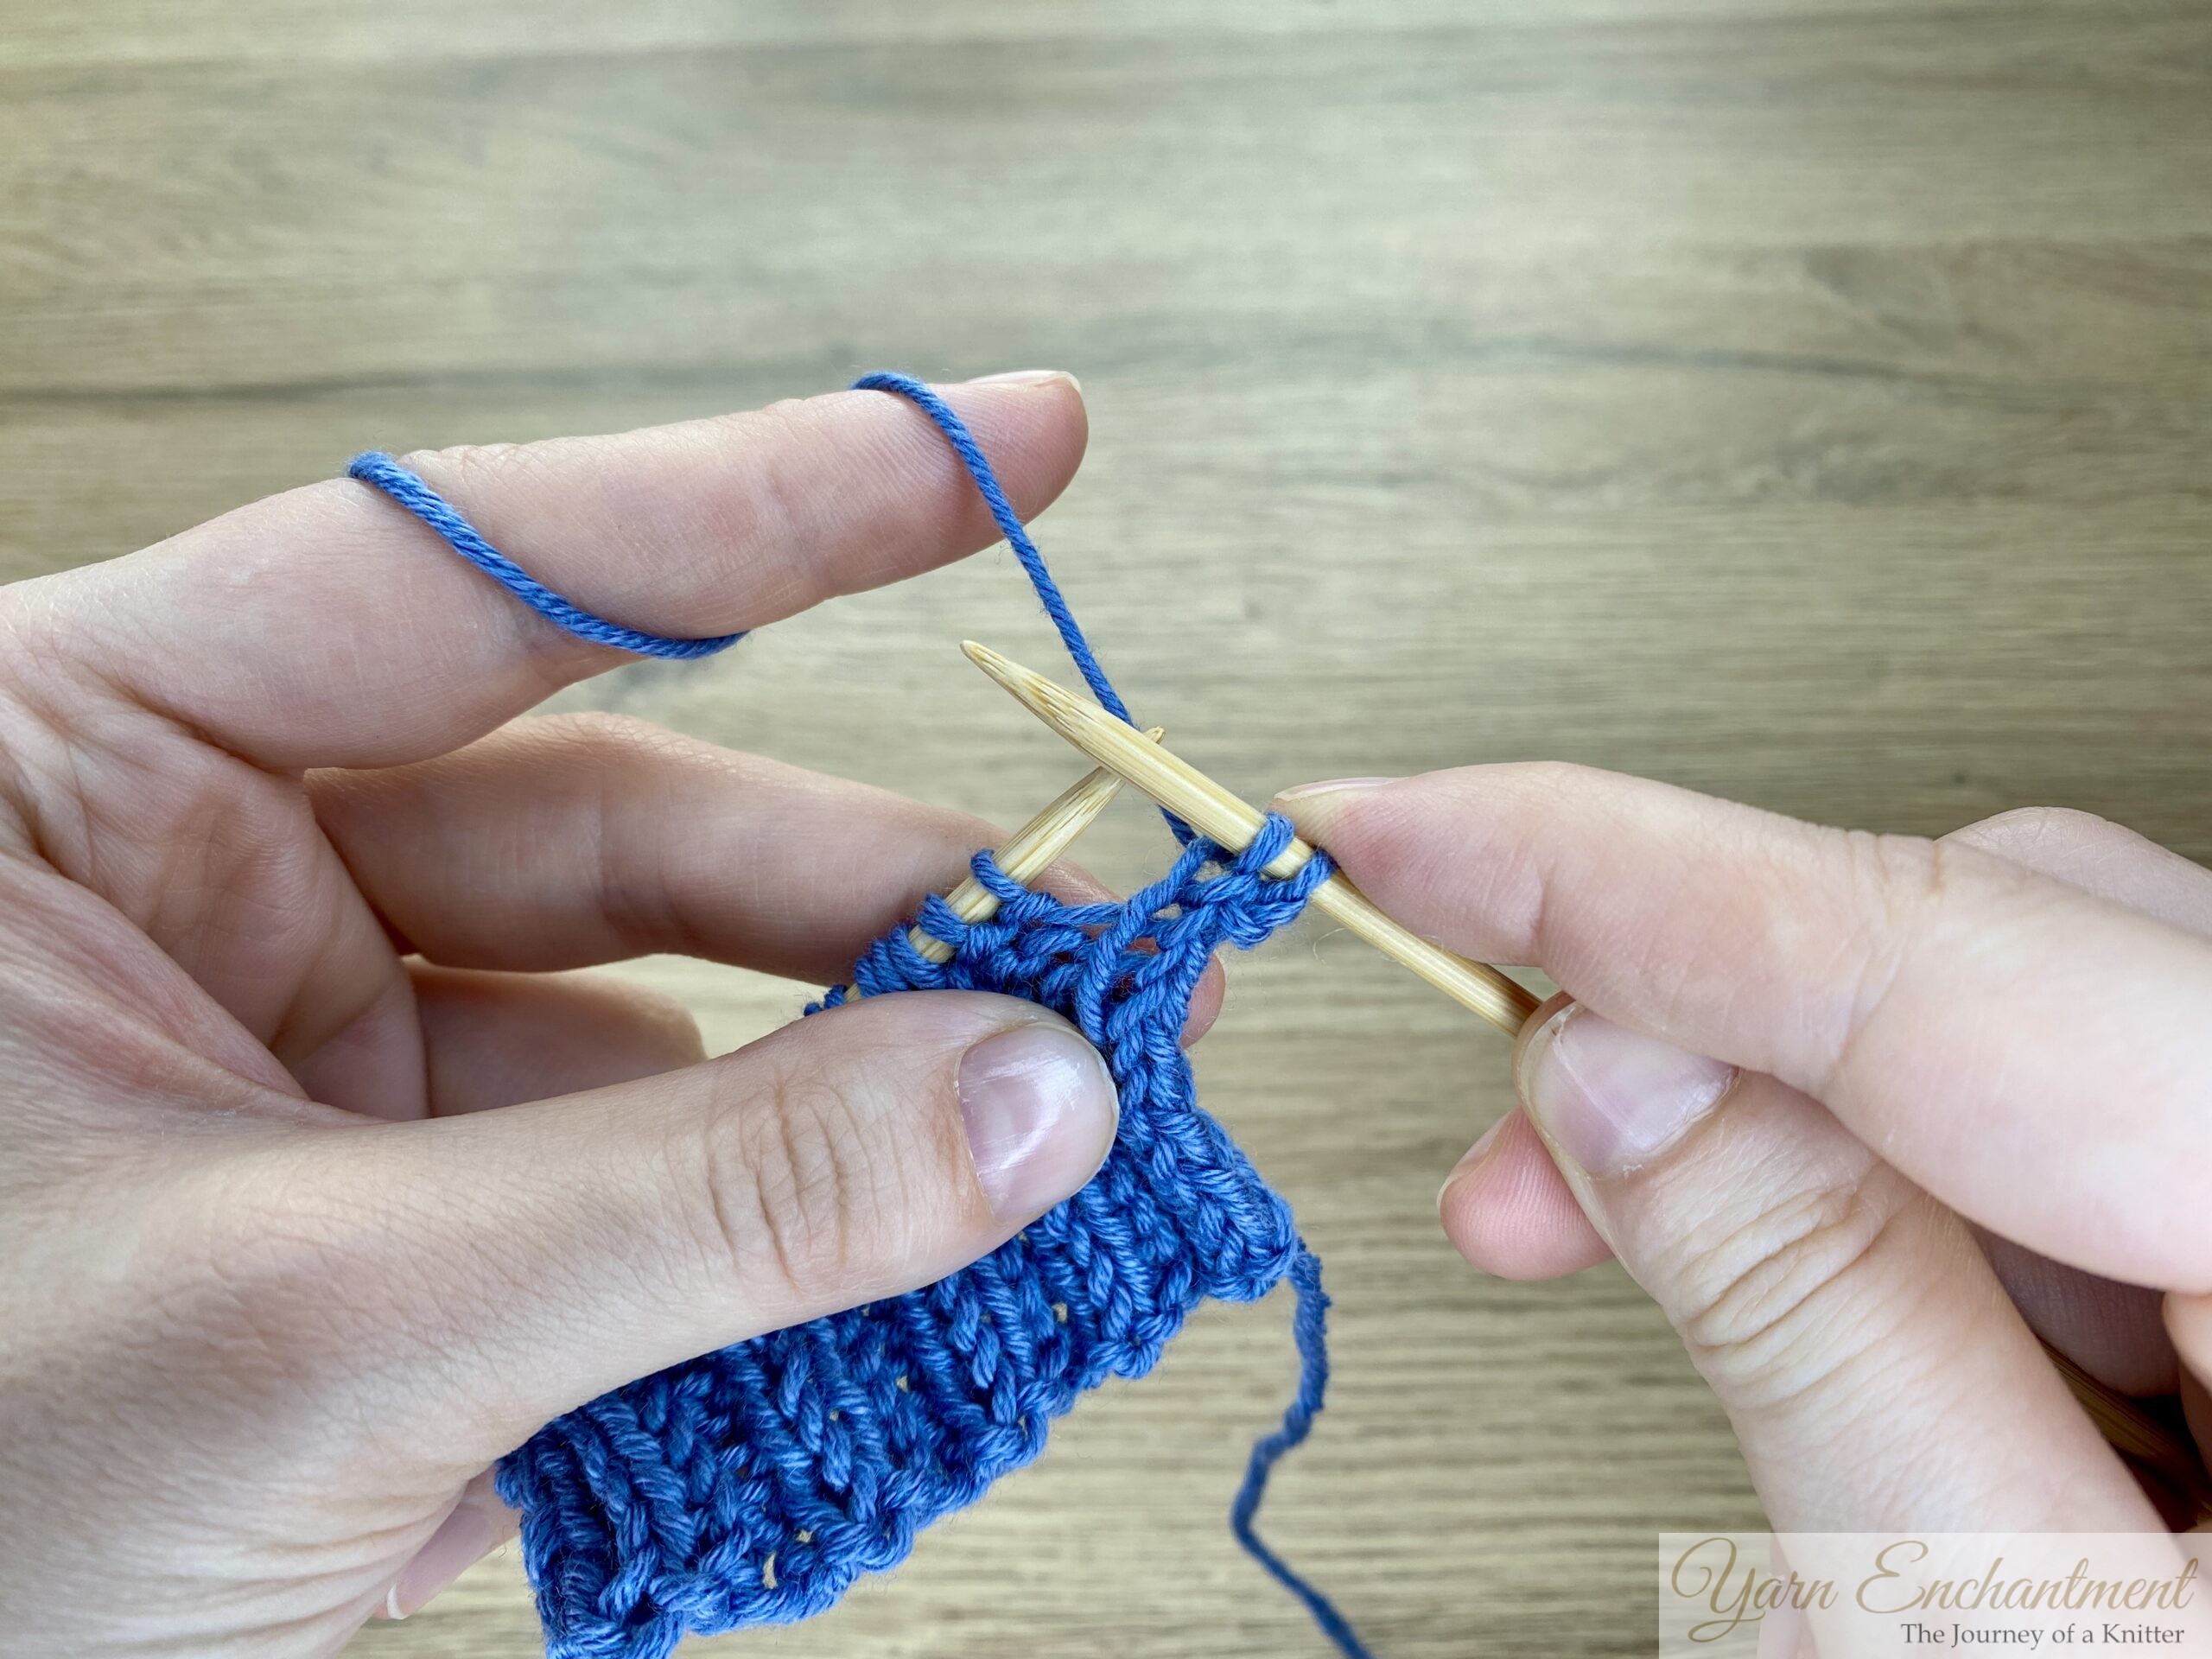
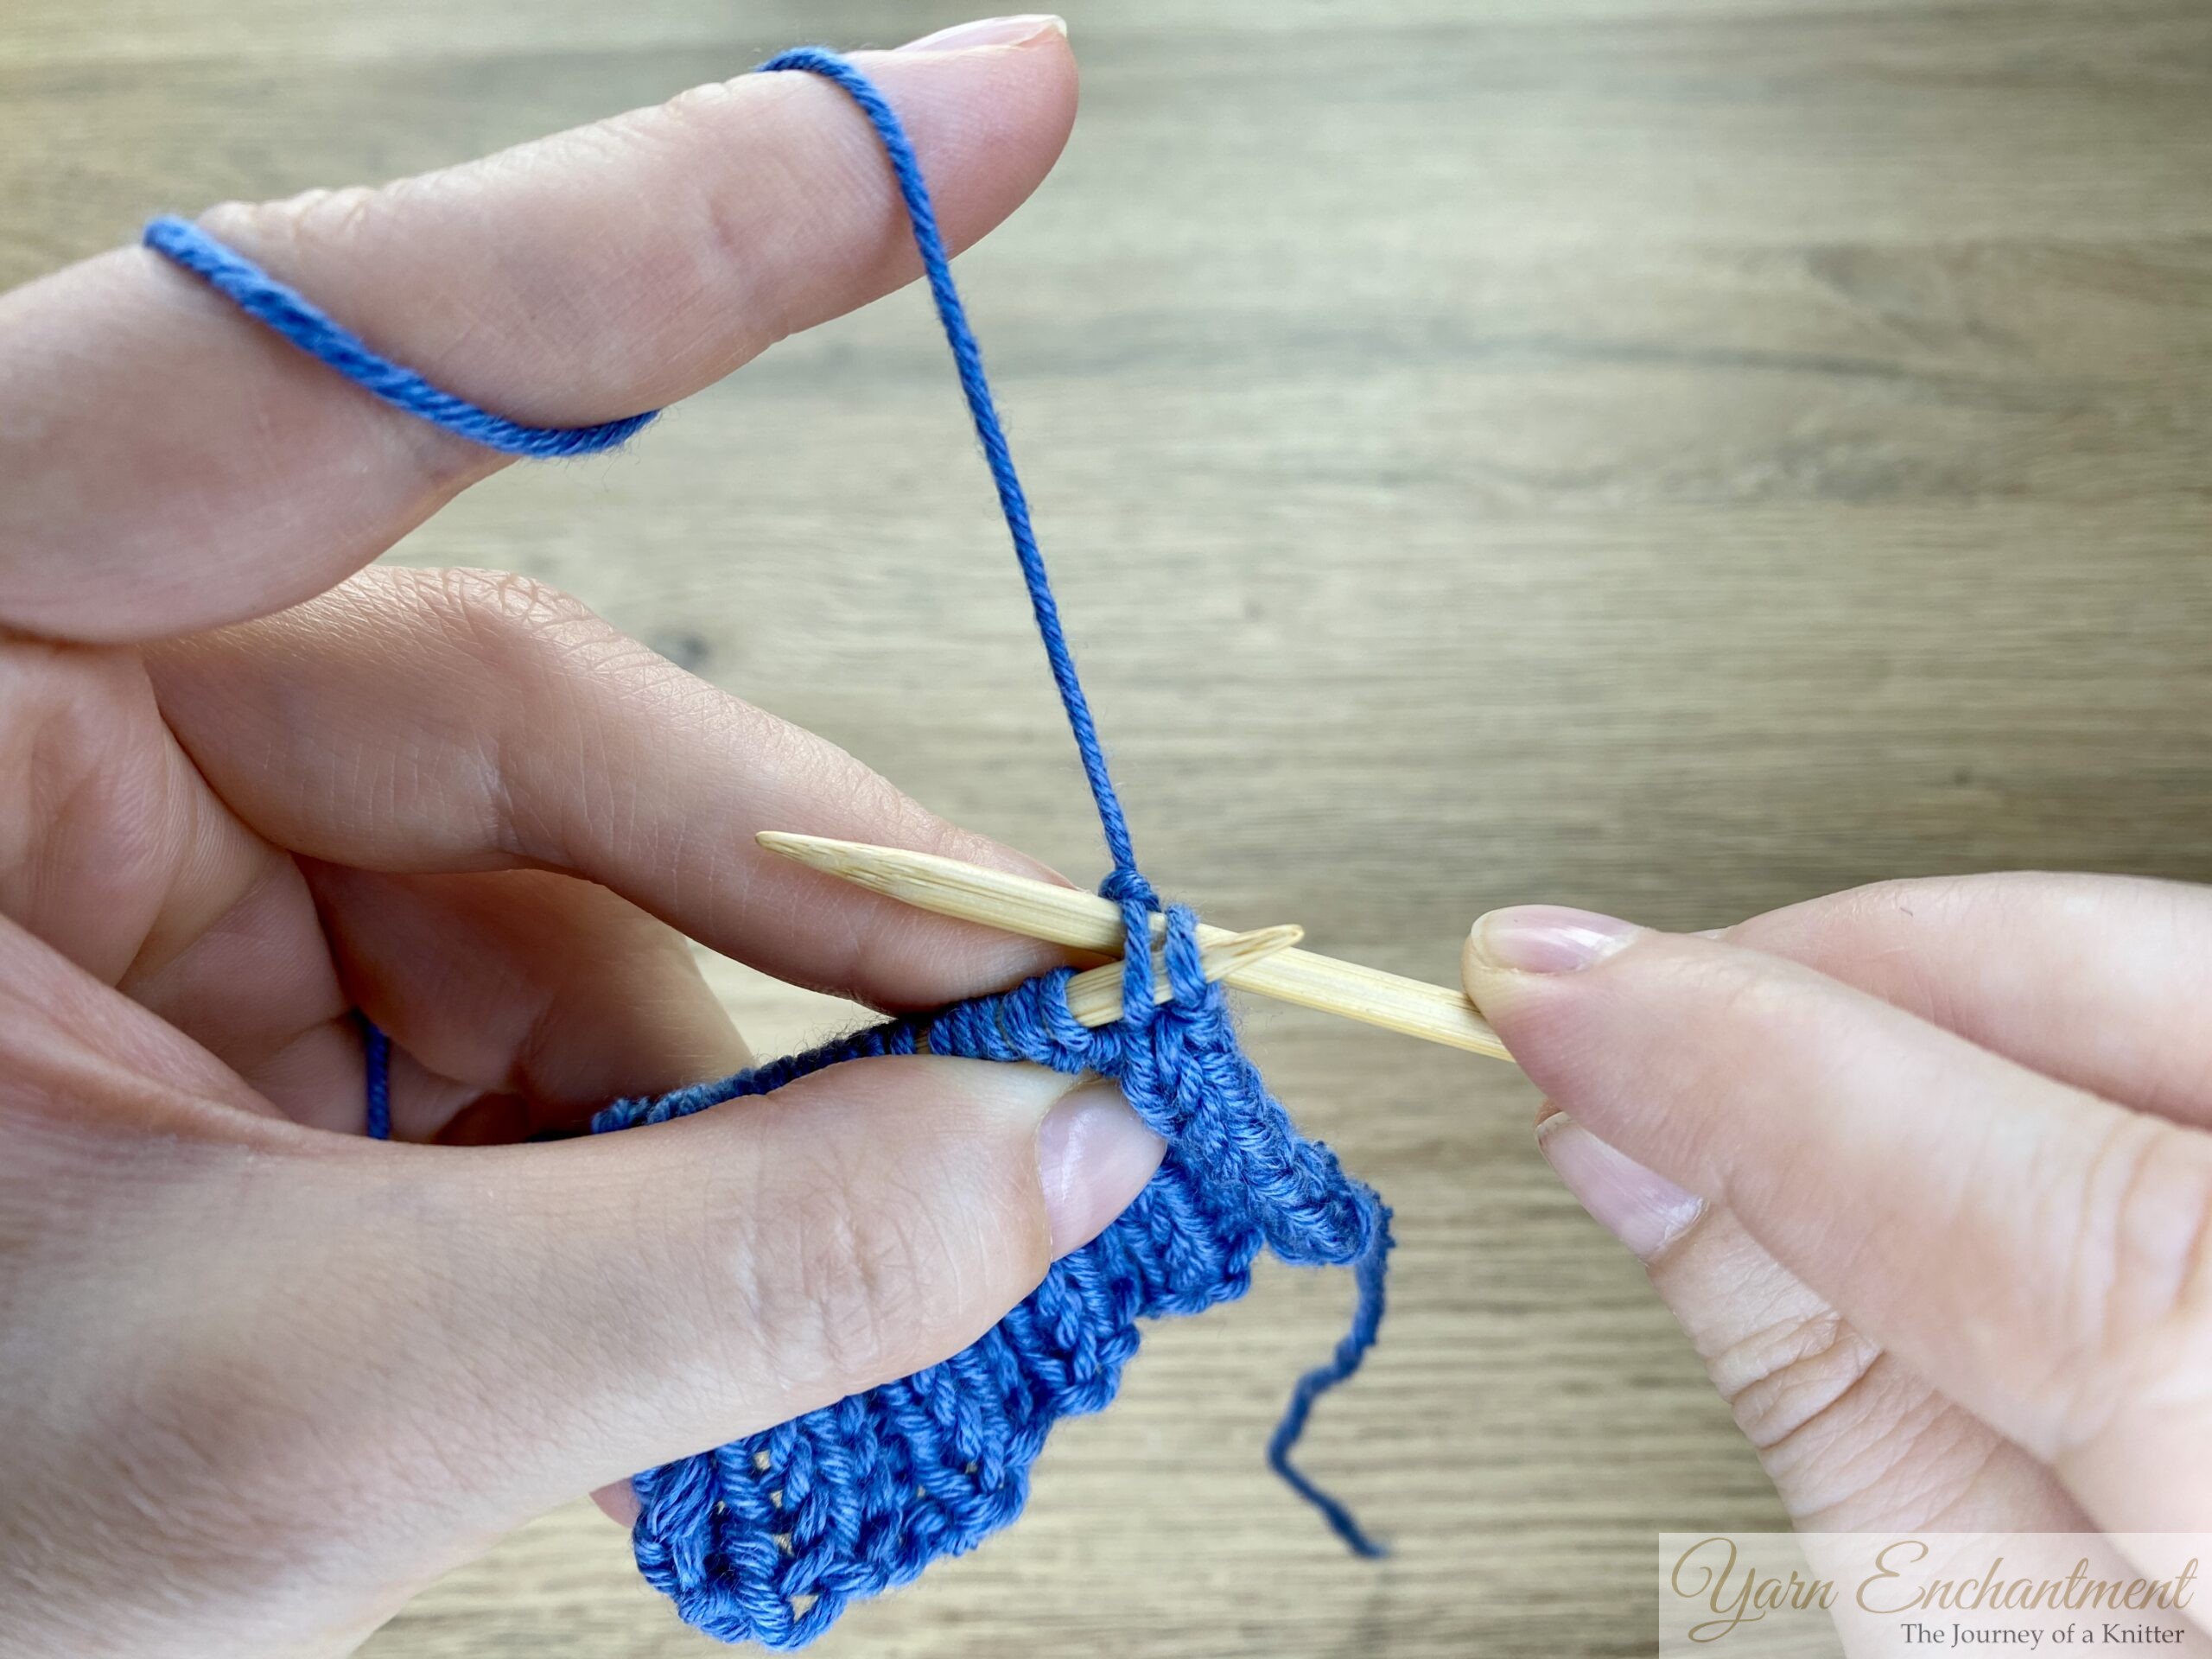
- Bring the working yarn to the front. Slip both stitches back onto the left needle – you can slip them together or one at a time, whichever feels easier.
- Insert your needle through both stitches on the left needle. Make sure your right needle is in front of your left needle. Wrap the yarn as for a purl stitch and purl the two stitches together.
- If the yarn wants to slip away, gently hold it in place with your thumb while you form the stitch.
 | 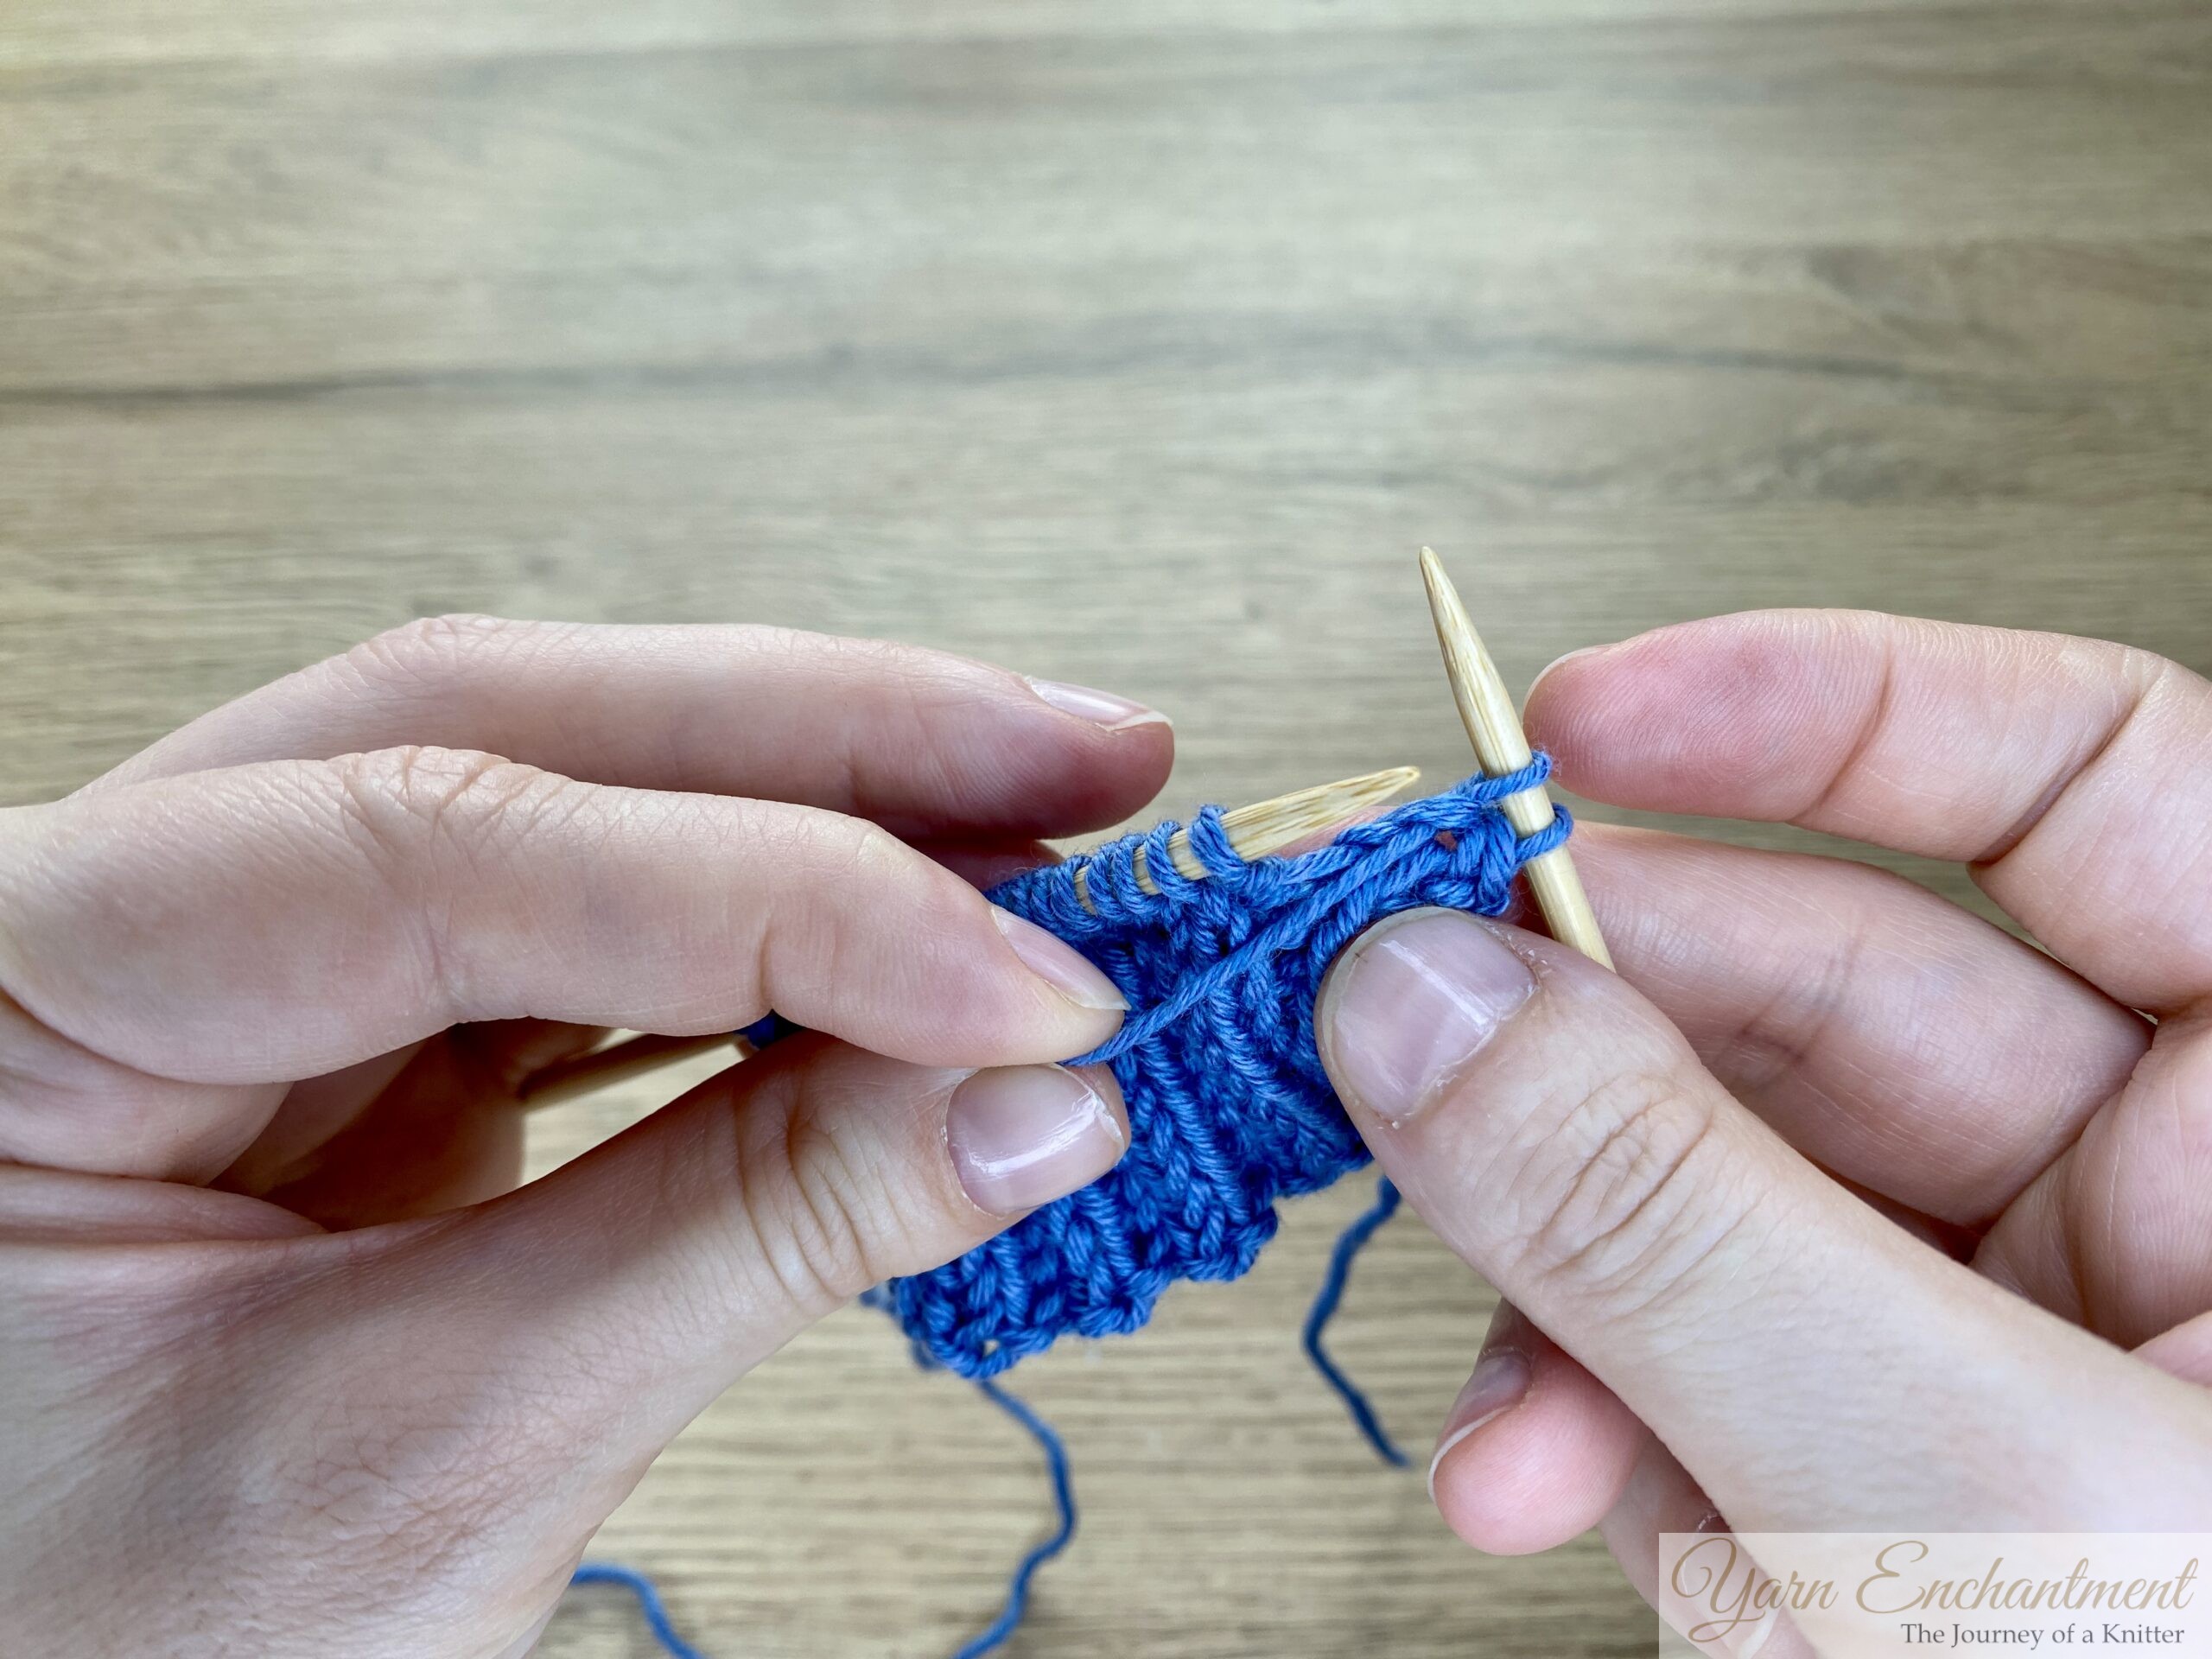 |  | Purl the next stitch as usual. | Make sure the working yarn is at the front | Slip both stitches back onto the left needle. |
)
)
)
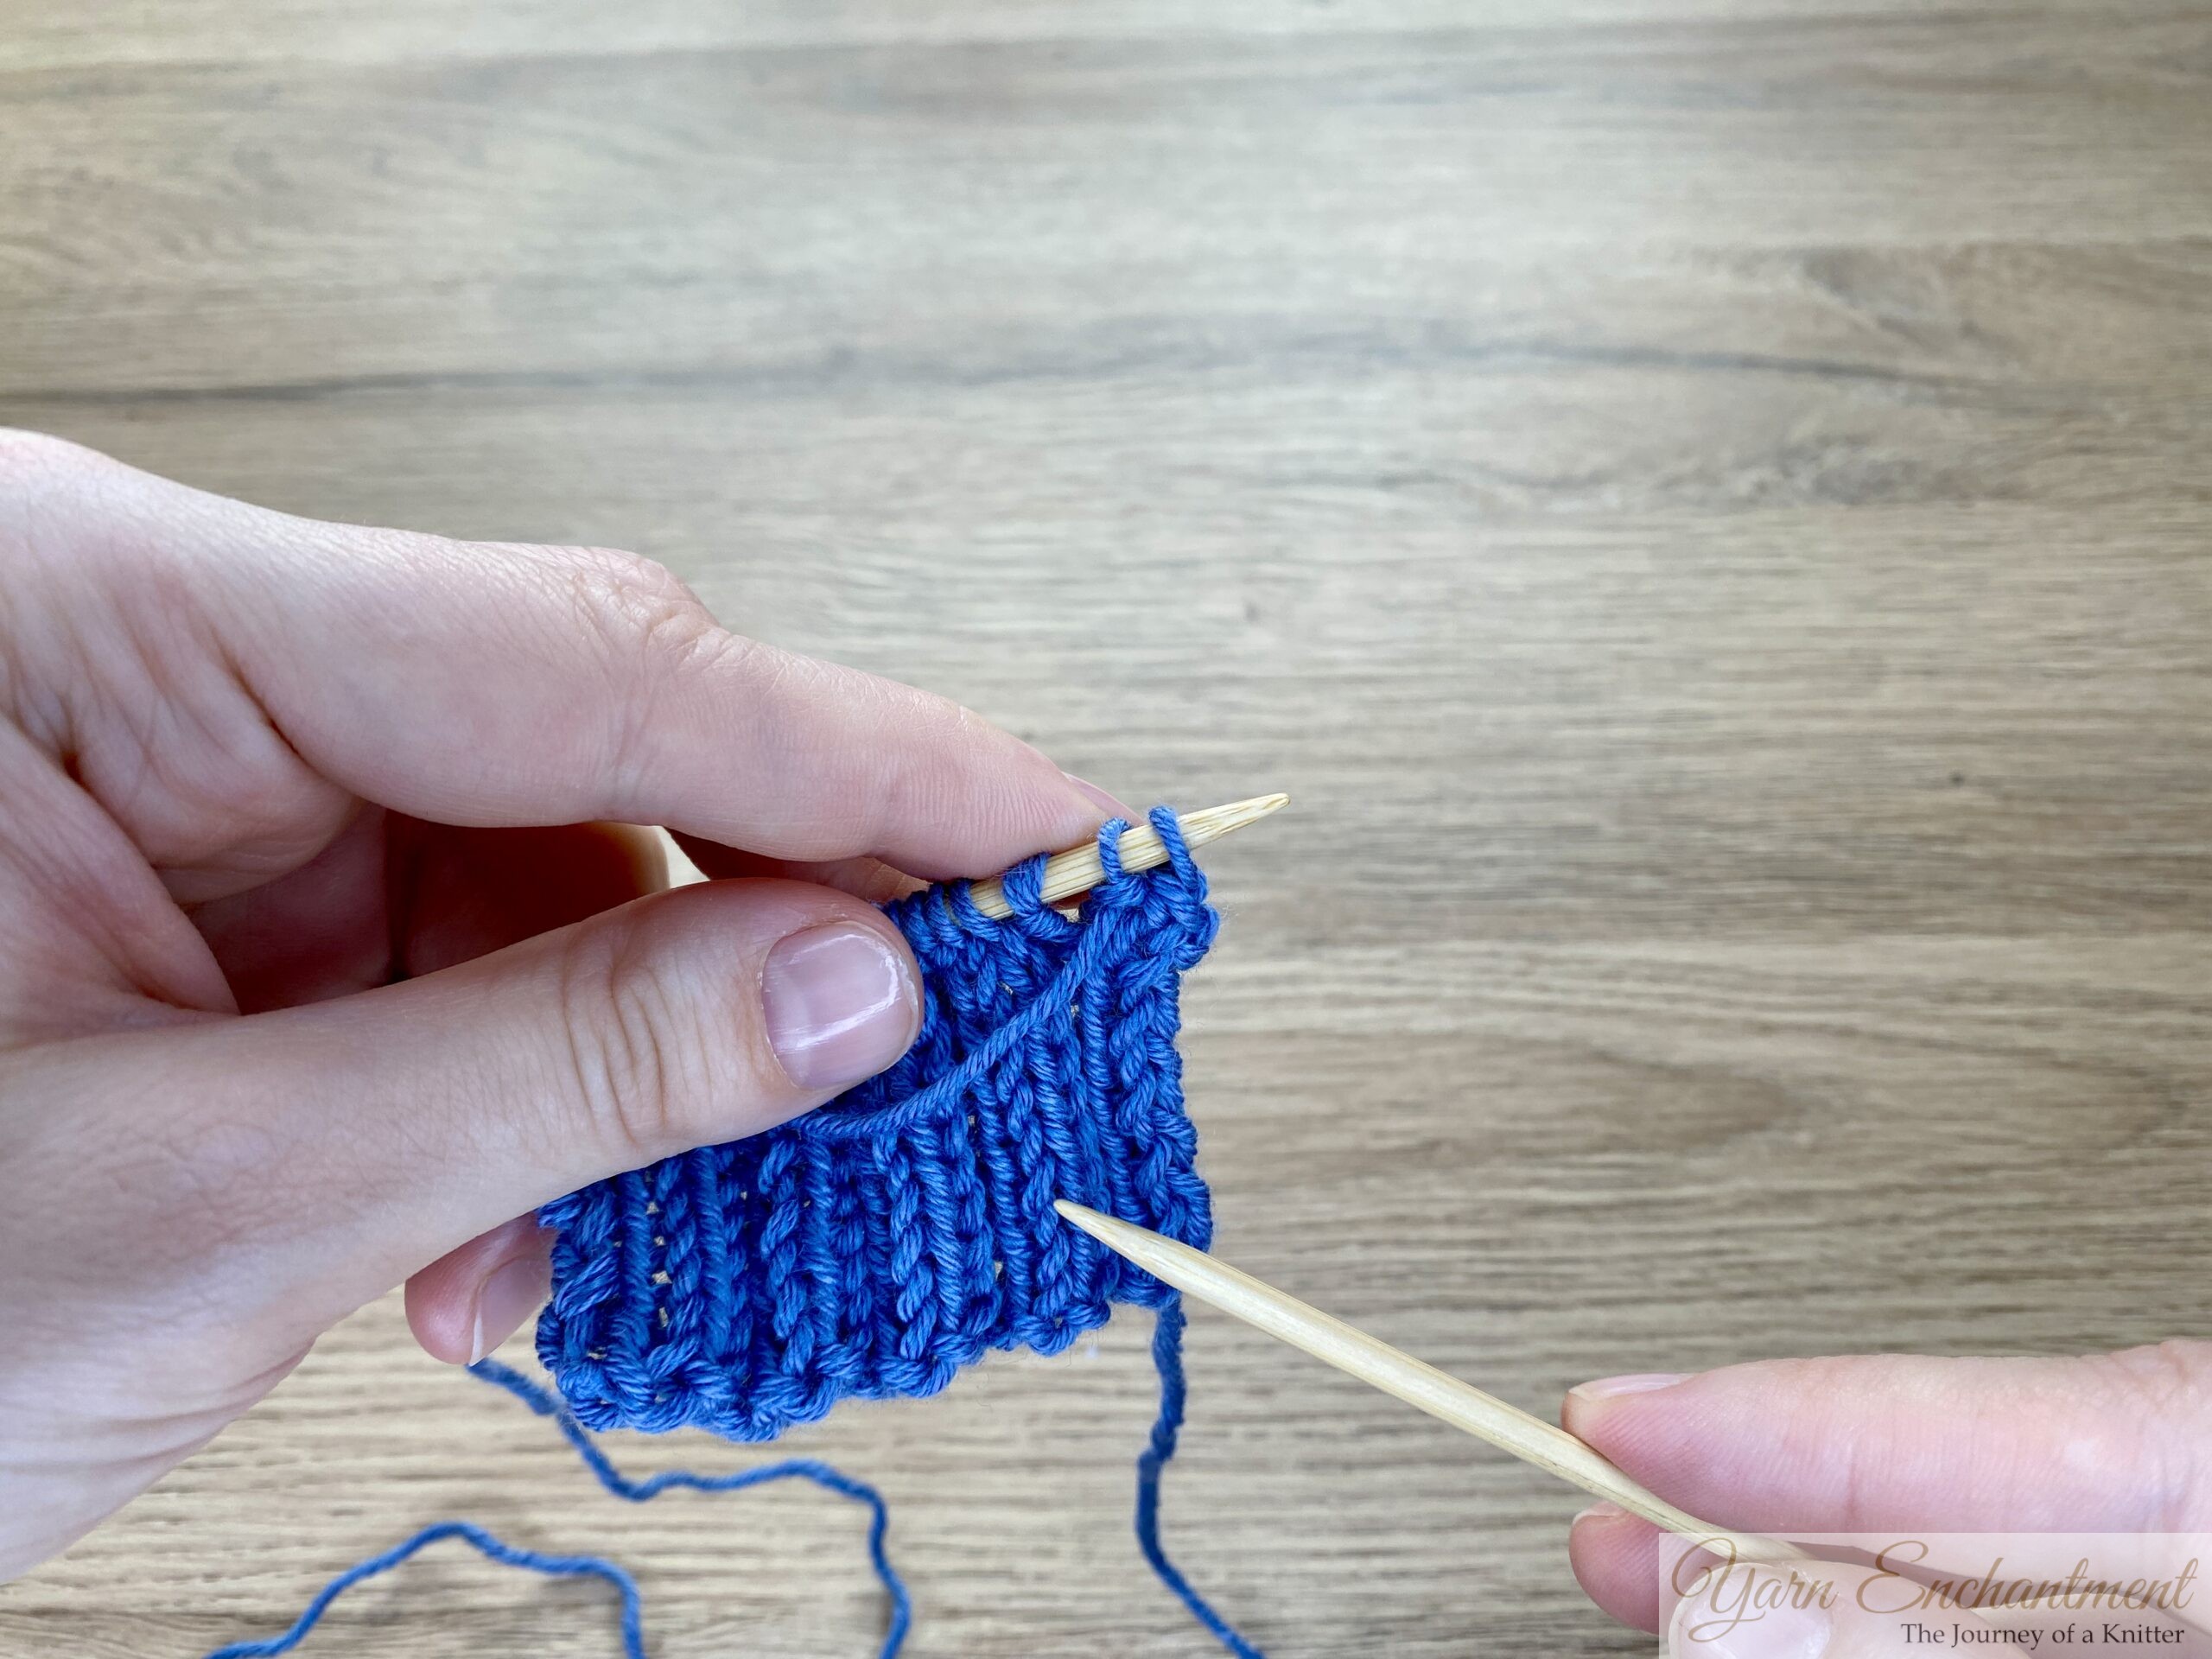
 |  |  | Insert your needle through both stitches on the left needle. Make sure your right needle is in front of your left needle. | Wrap the yarn as for a purl stitch... | ...and purl the two stitches together. |
)
)
)
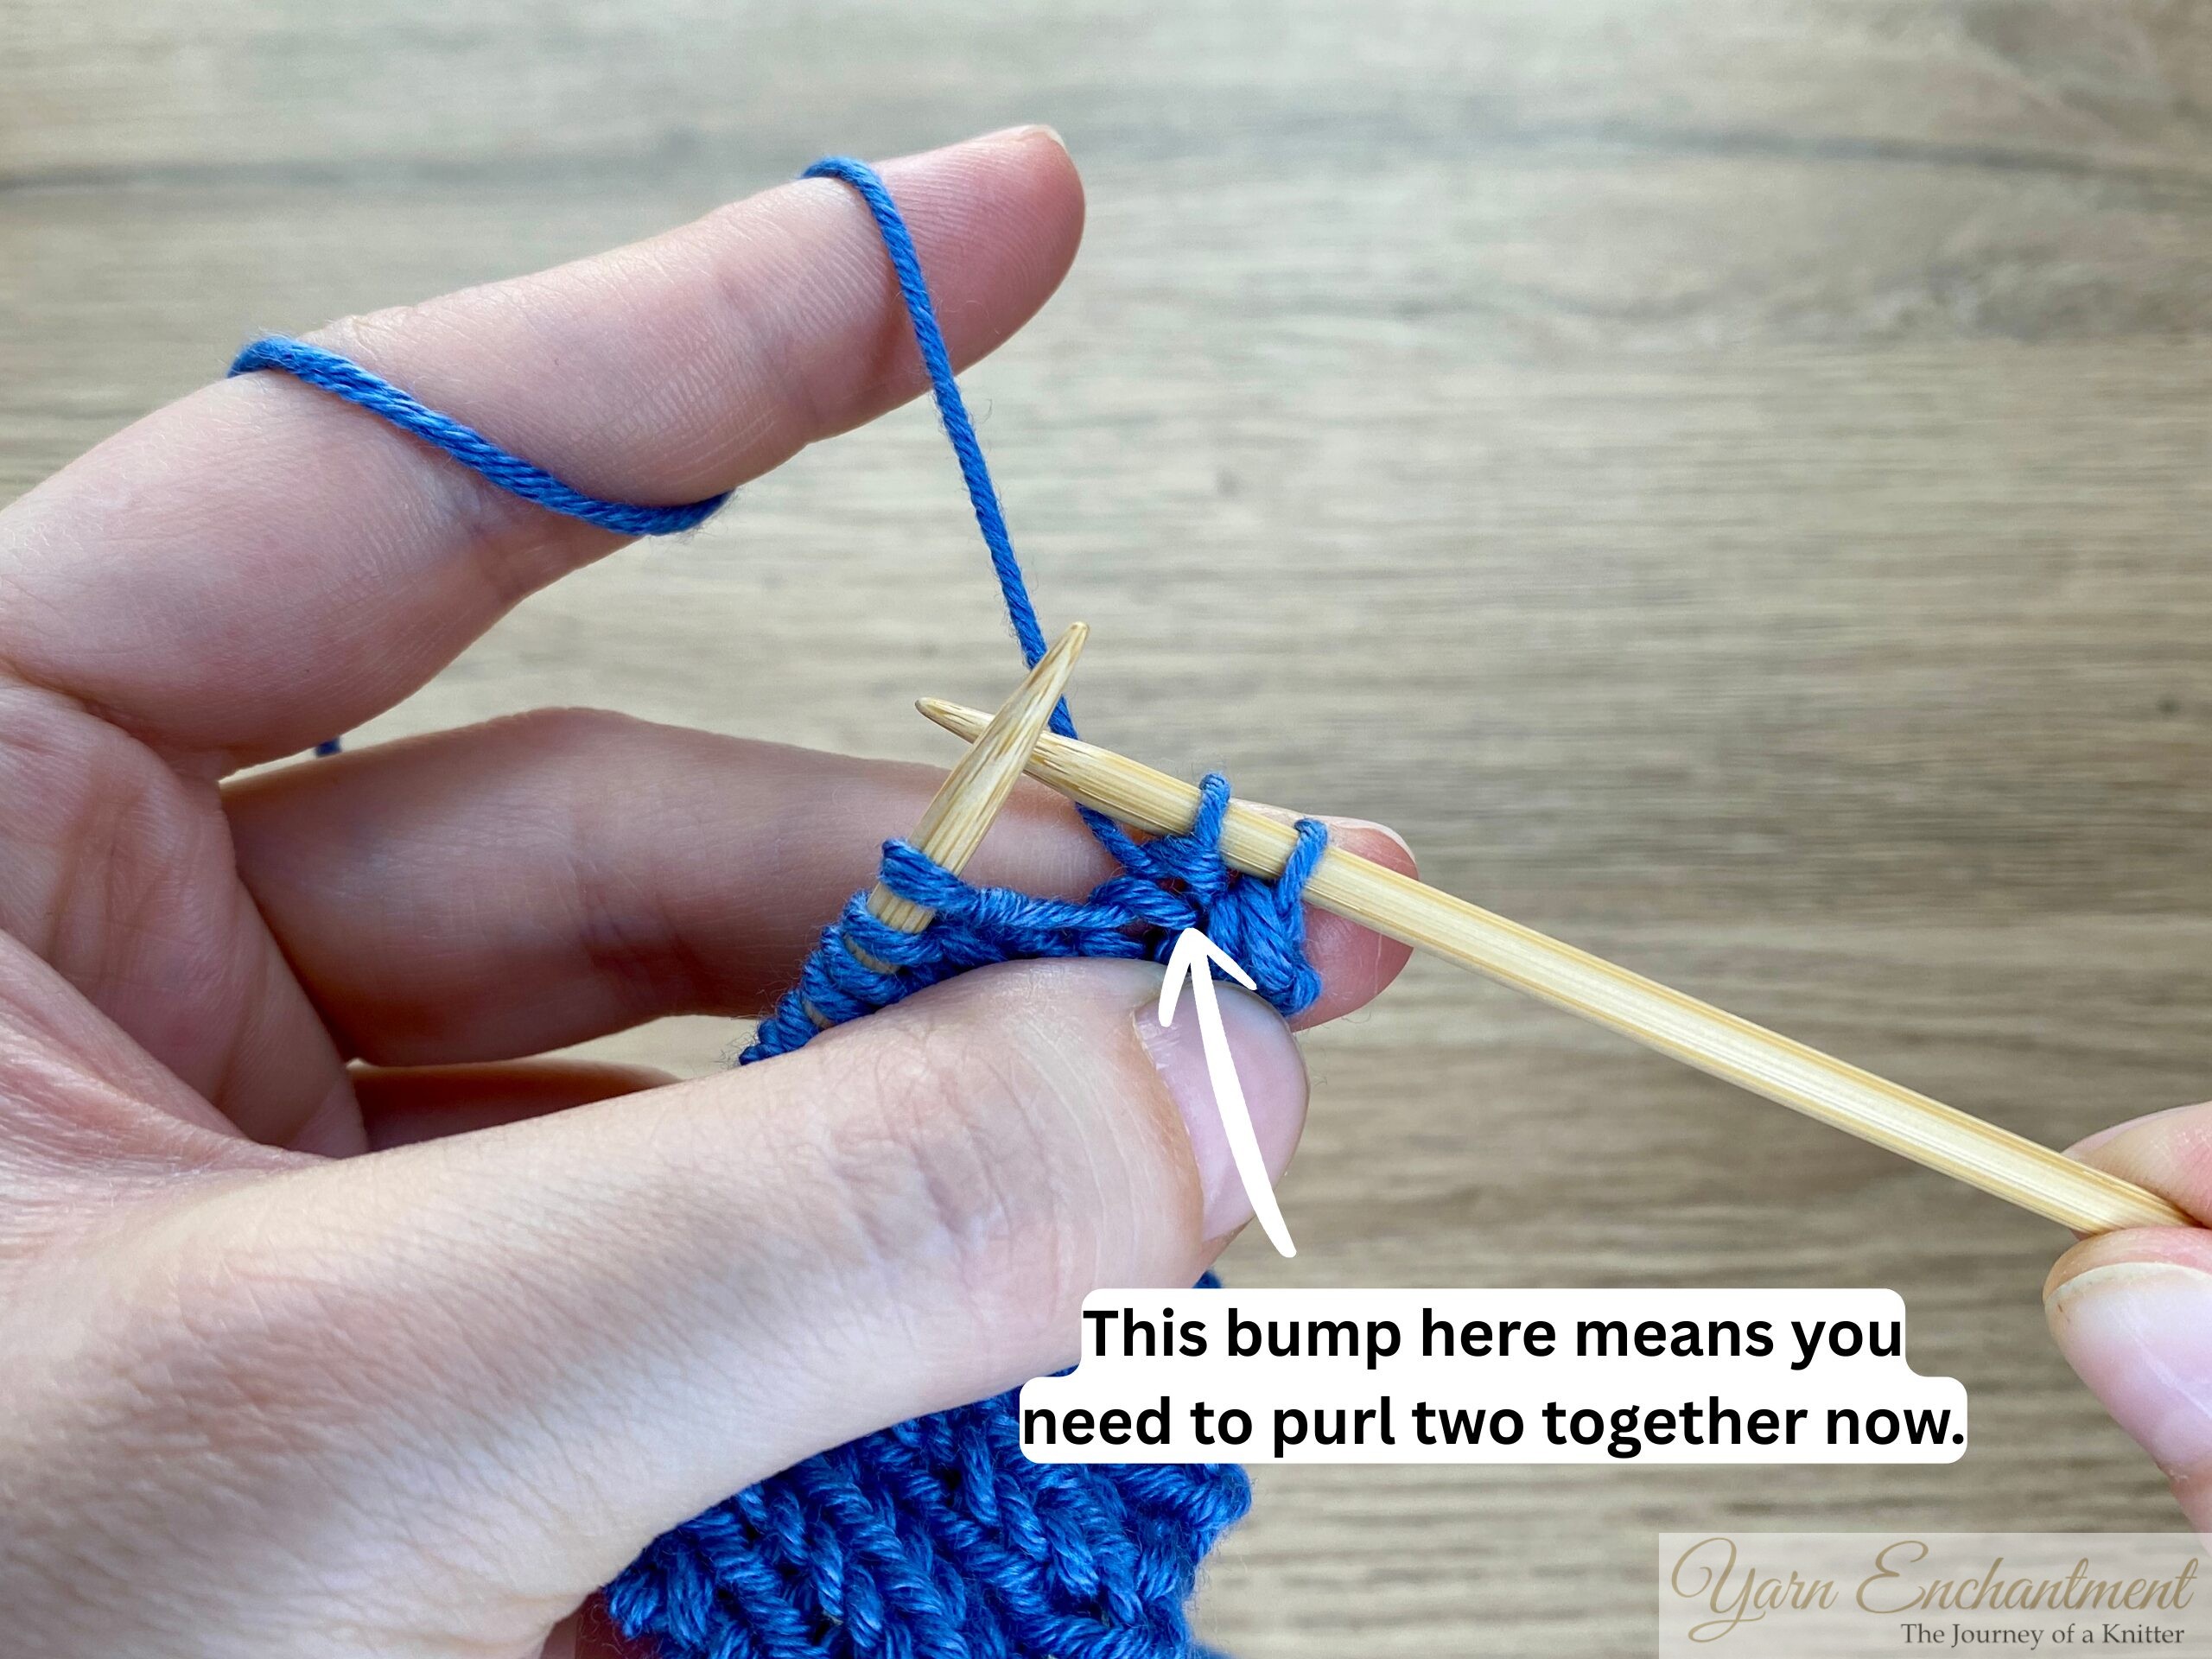
Tip: Let your stitches tell you what to do next. When the stitch on your needle looks open and smooth, without a little bump in front, that’s a knit stitch - work a knit two together through the back loop. When you see a bump sitting in front of the stitch, that’s a purl stitch, and it’s time to purl two together. When the stitch on your needle looks open, without a little bump in front, that tells you it’s a knit stitch - here you work a knit two together through the back loop When you see a bump sitting in front of the stitch, that’s a purl stitch, and it’s time to purl two together.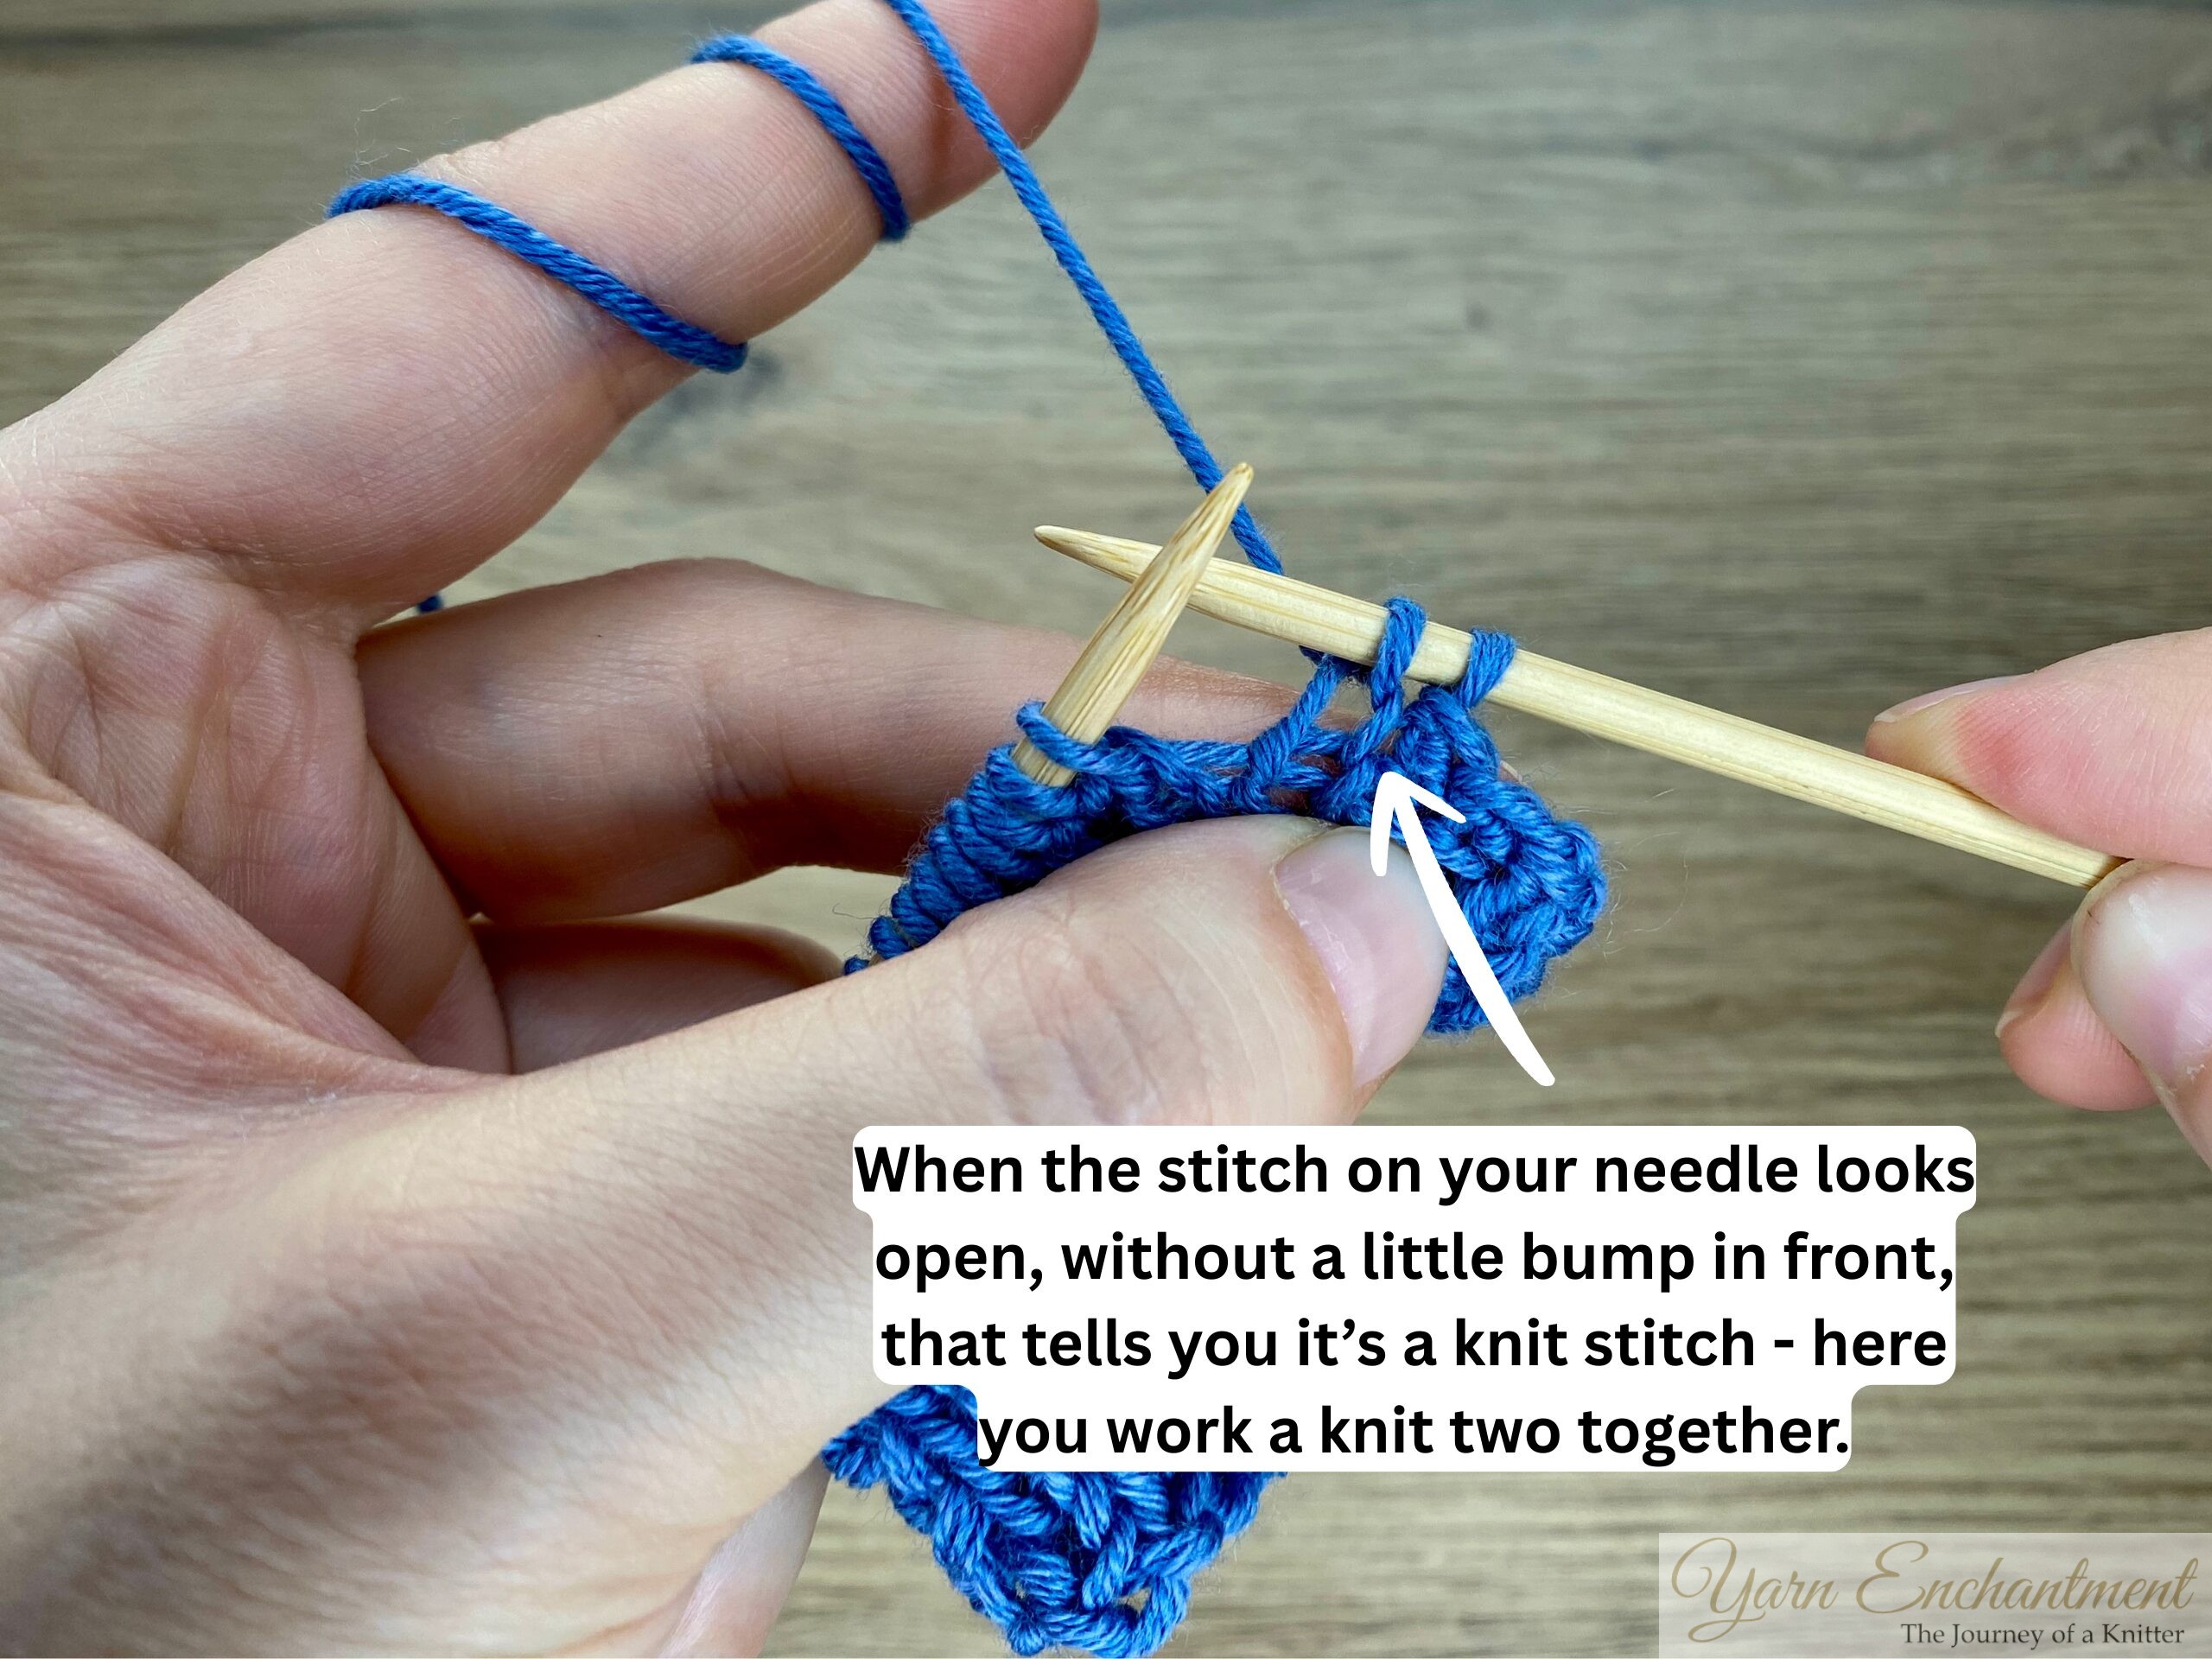
)
)
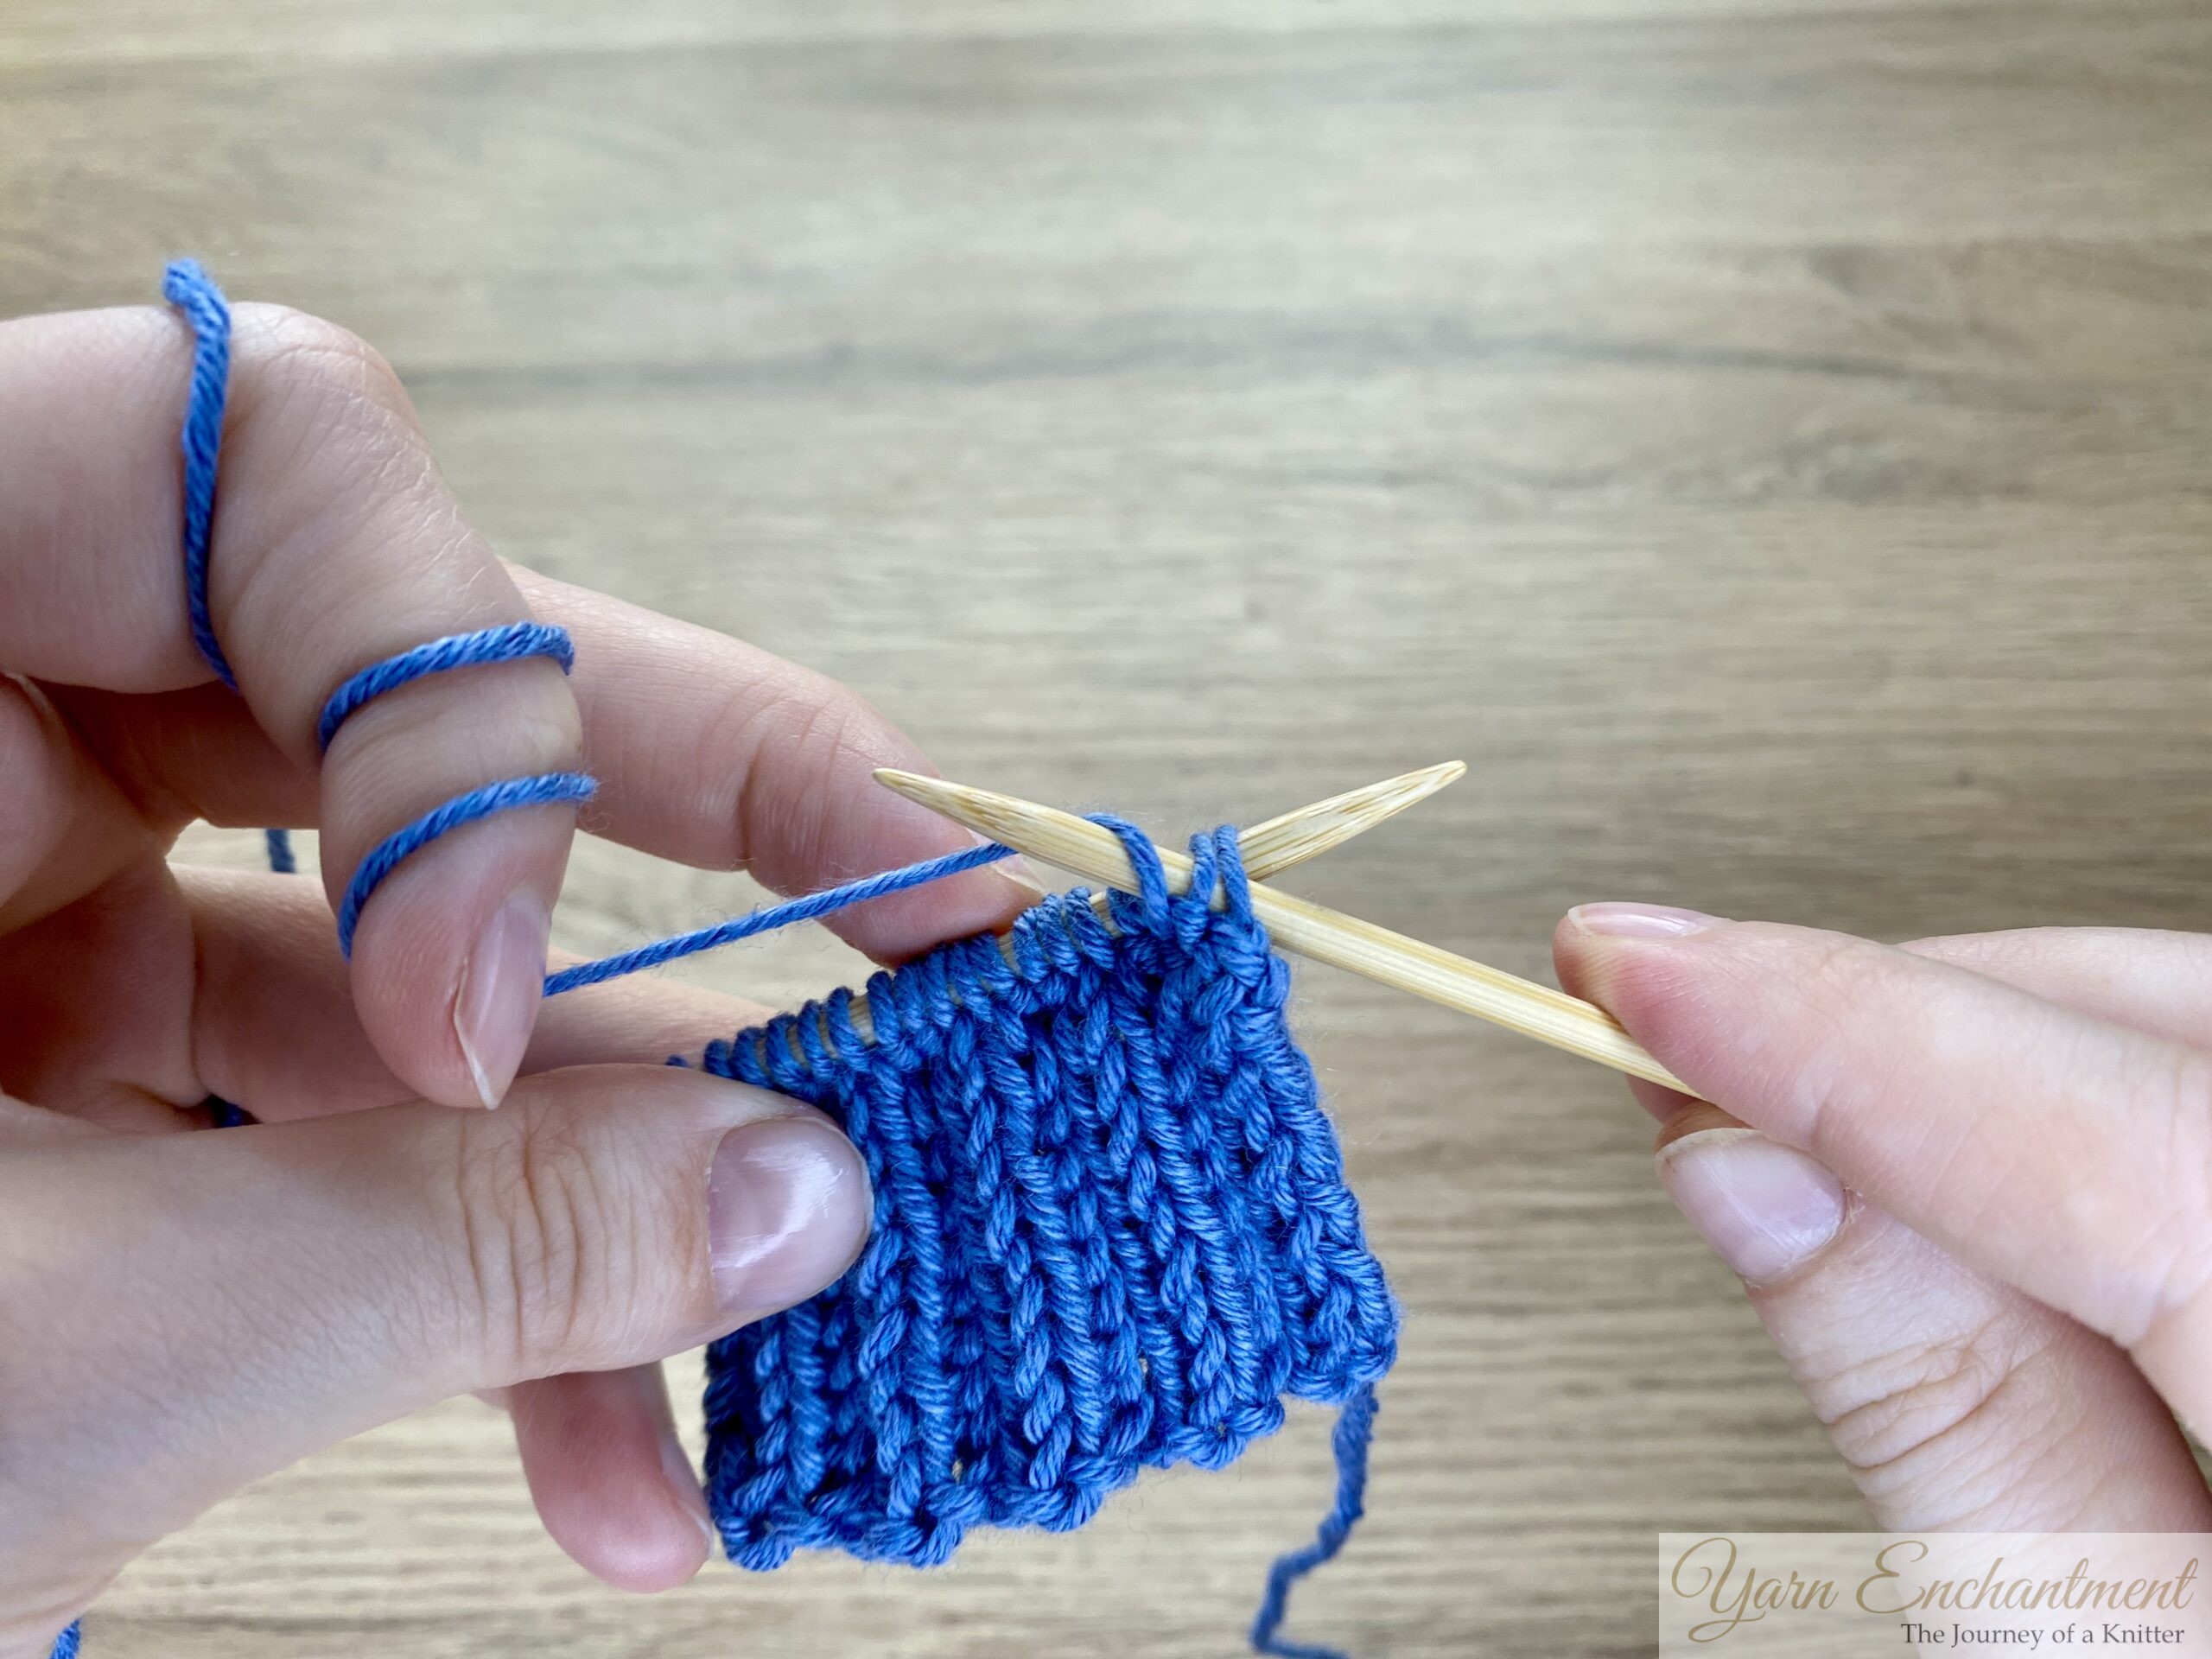
3. Continue the rhythm across the row
After you have purled two together, purl the next stitch in the ribbing.
If the last stitch on your right needle is a purl stitch, repeat the purl‑two‑together bind off: slip both stitches back to the left needle with the yarn in front, keep the right needle in front, and purl them together.
If the last stitch on your right needle is a knit stitch, slip both stitches back to the left needle with the yarn at the back and knit them together through the back loops.
4. Work to the end of the row
Repeat this rhythm all the way to the final stitch.
If your last stitch is a knit stitch, finish by knitting two together through the back loop; if it is a purl stitch, finish by purling two together.
Cut the yarn, leaving a tail, and pull it through the final stitch to secure the edge.
Two variations and when to use them
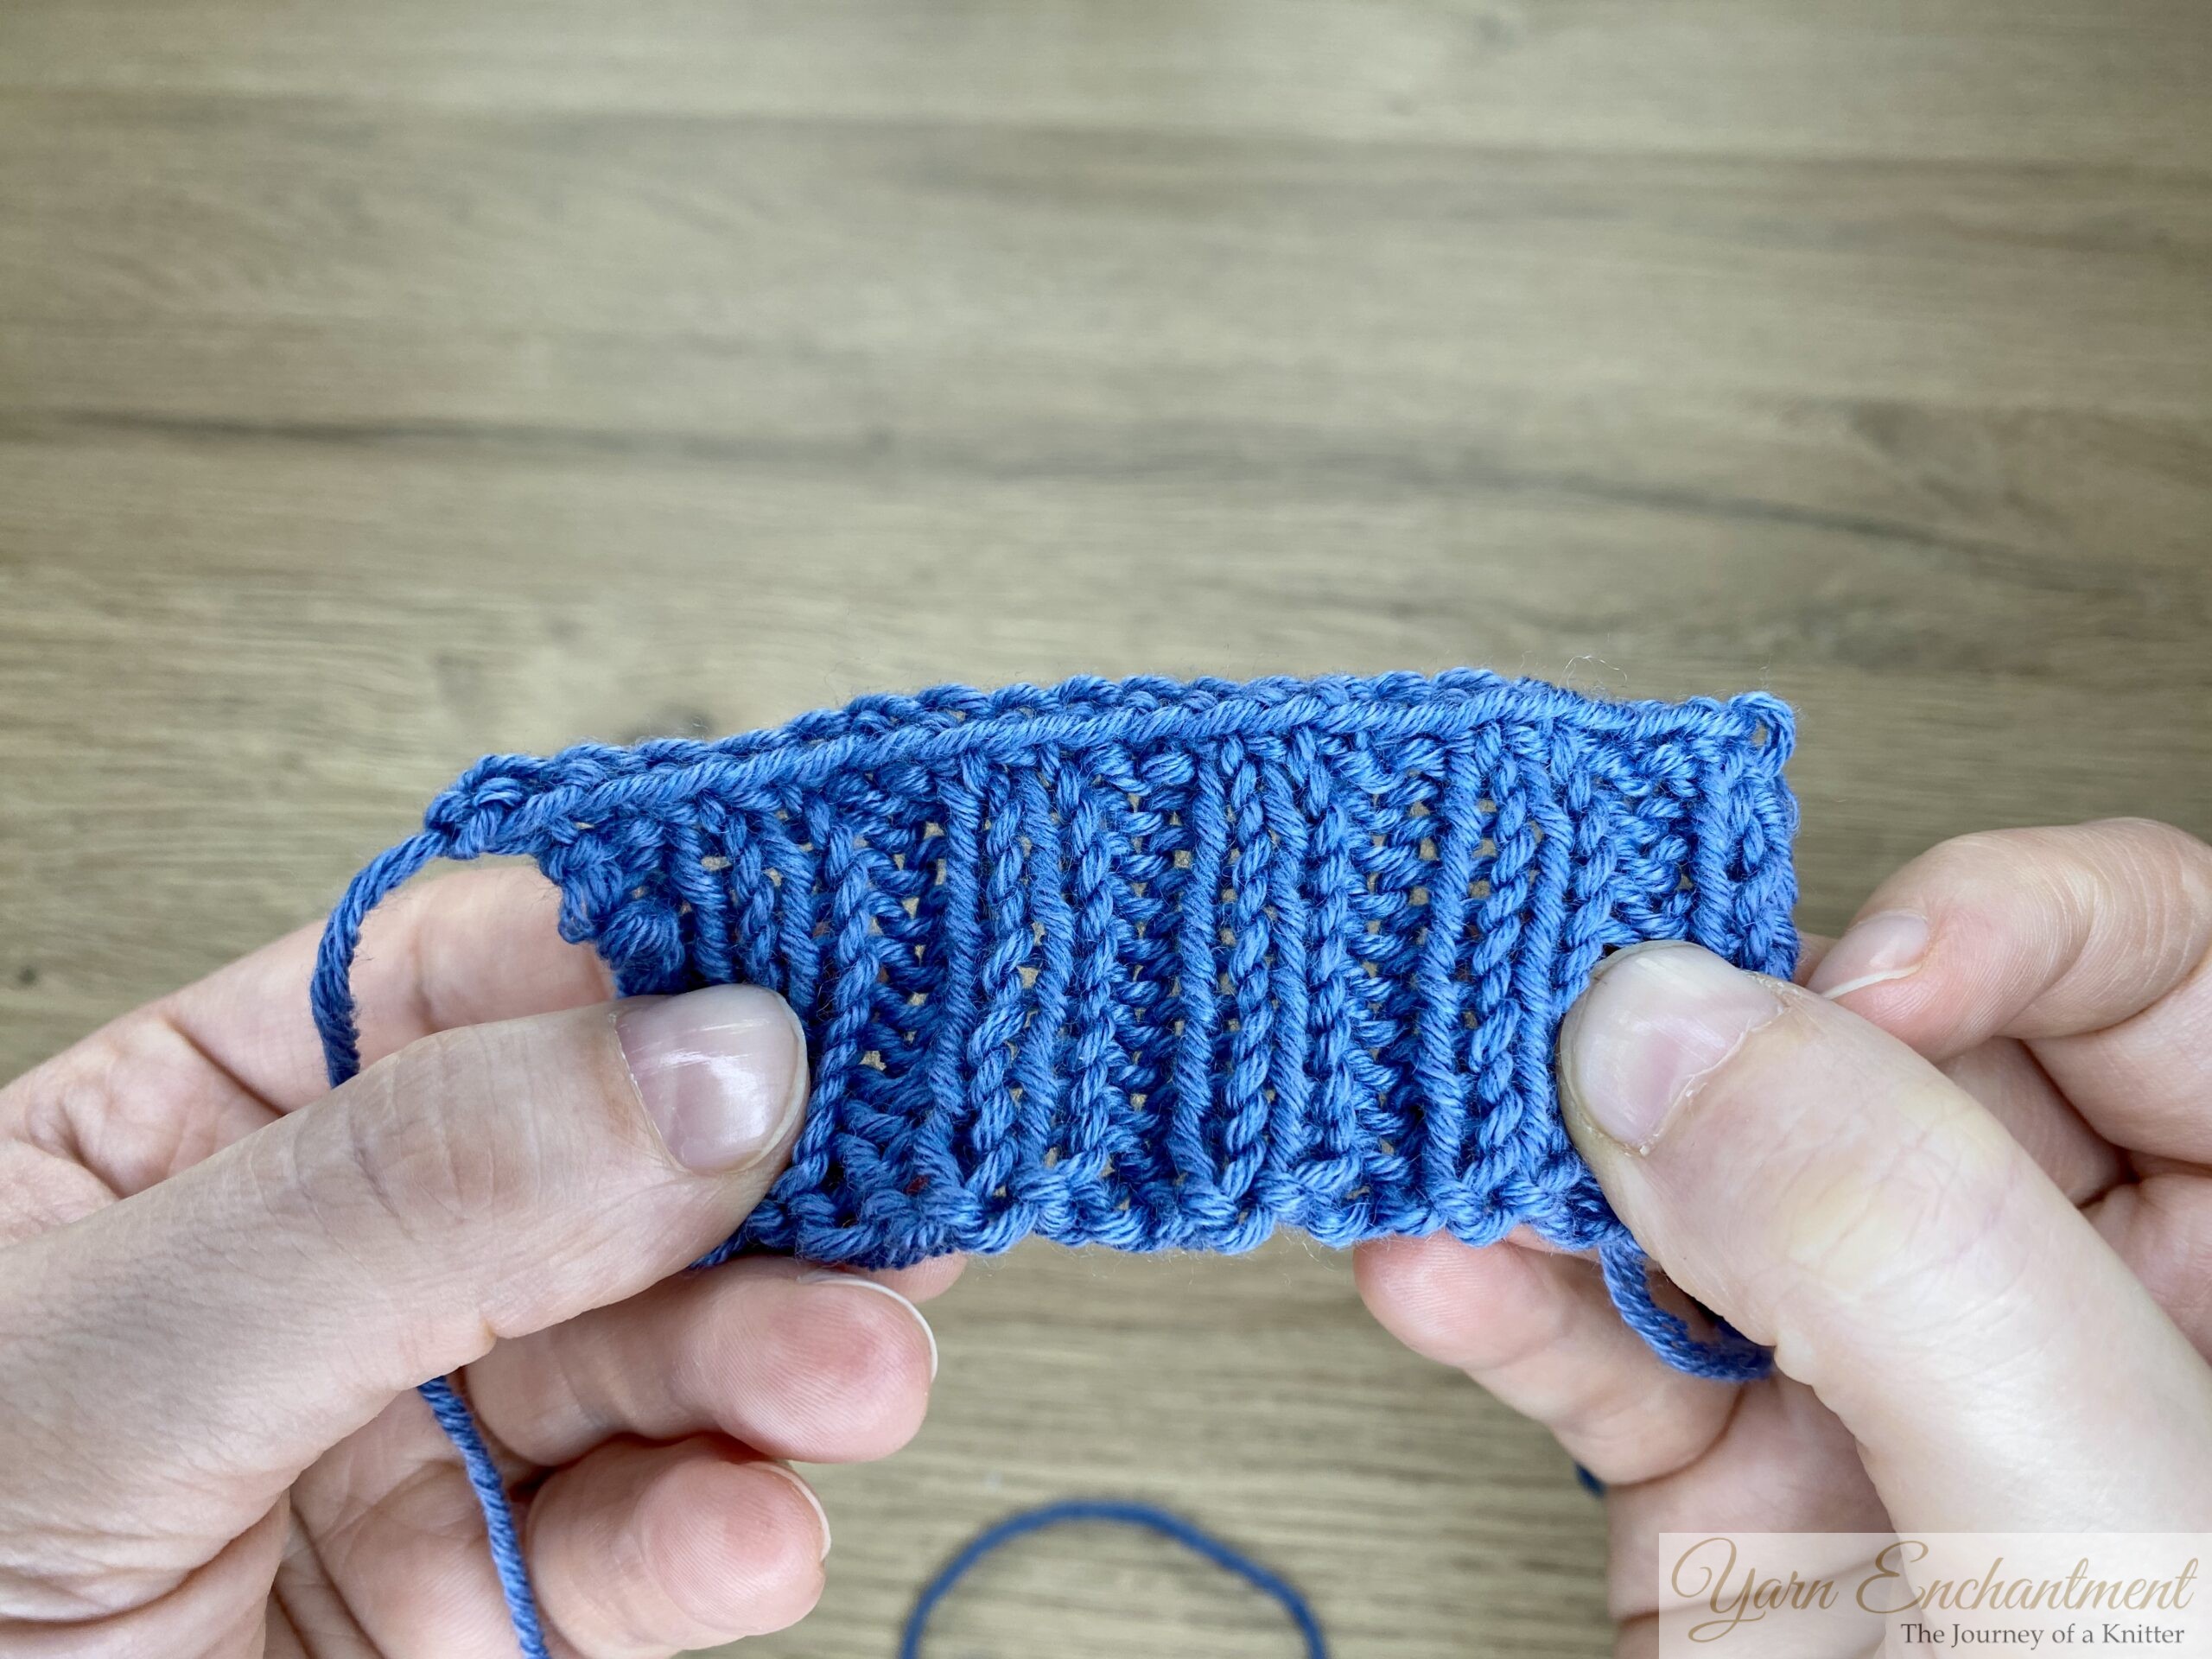
Elastic bind off worked in pattern (ribbing)
Knit and purl the stitches as they appear in your ribbing and bind off with knit‑two‑together or purl‑two‑together, depending on the last stitch.
This version is very stretchy and excellent for toe‑up socks or snug necklines because it easily stretches over heels or the head.
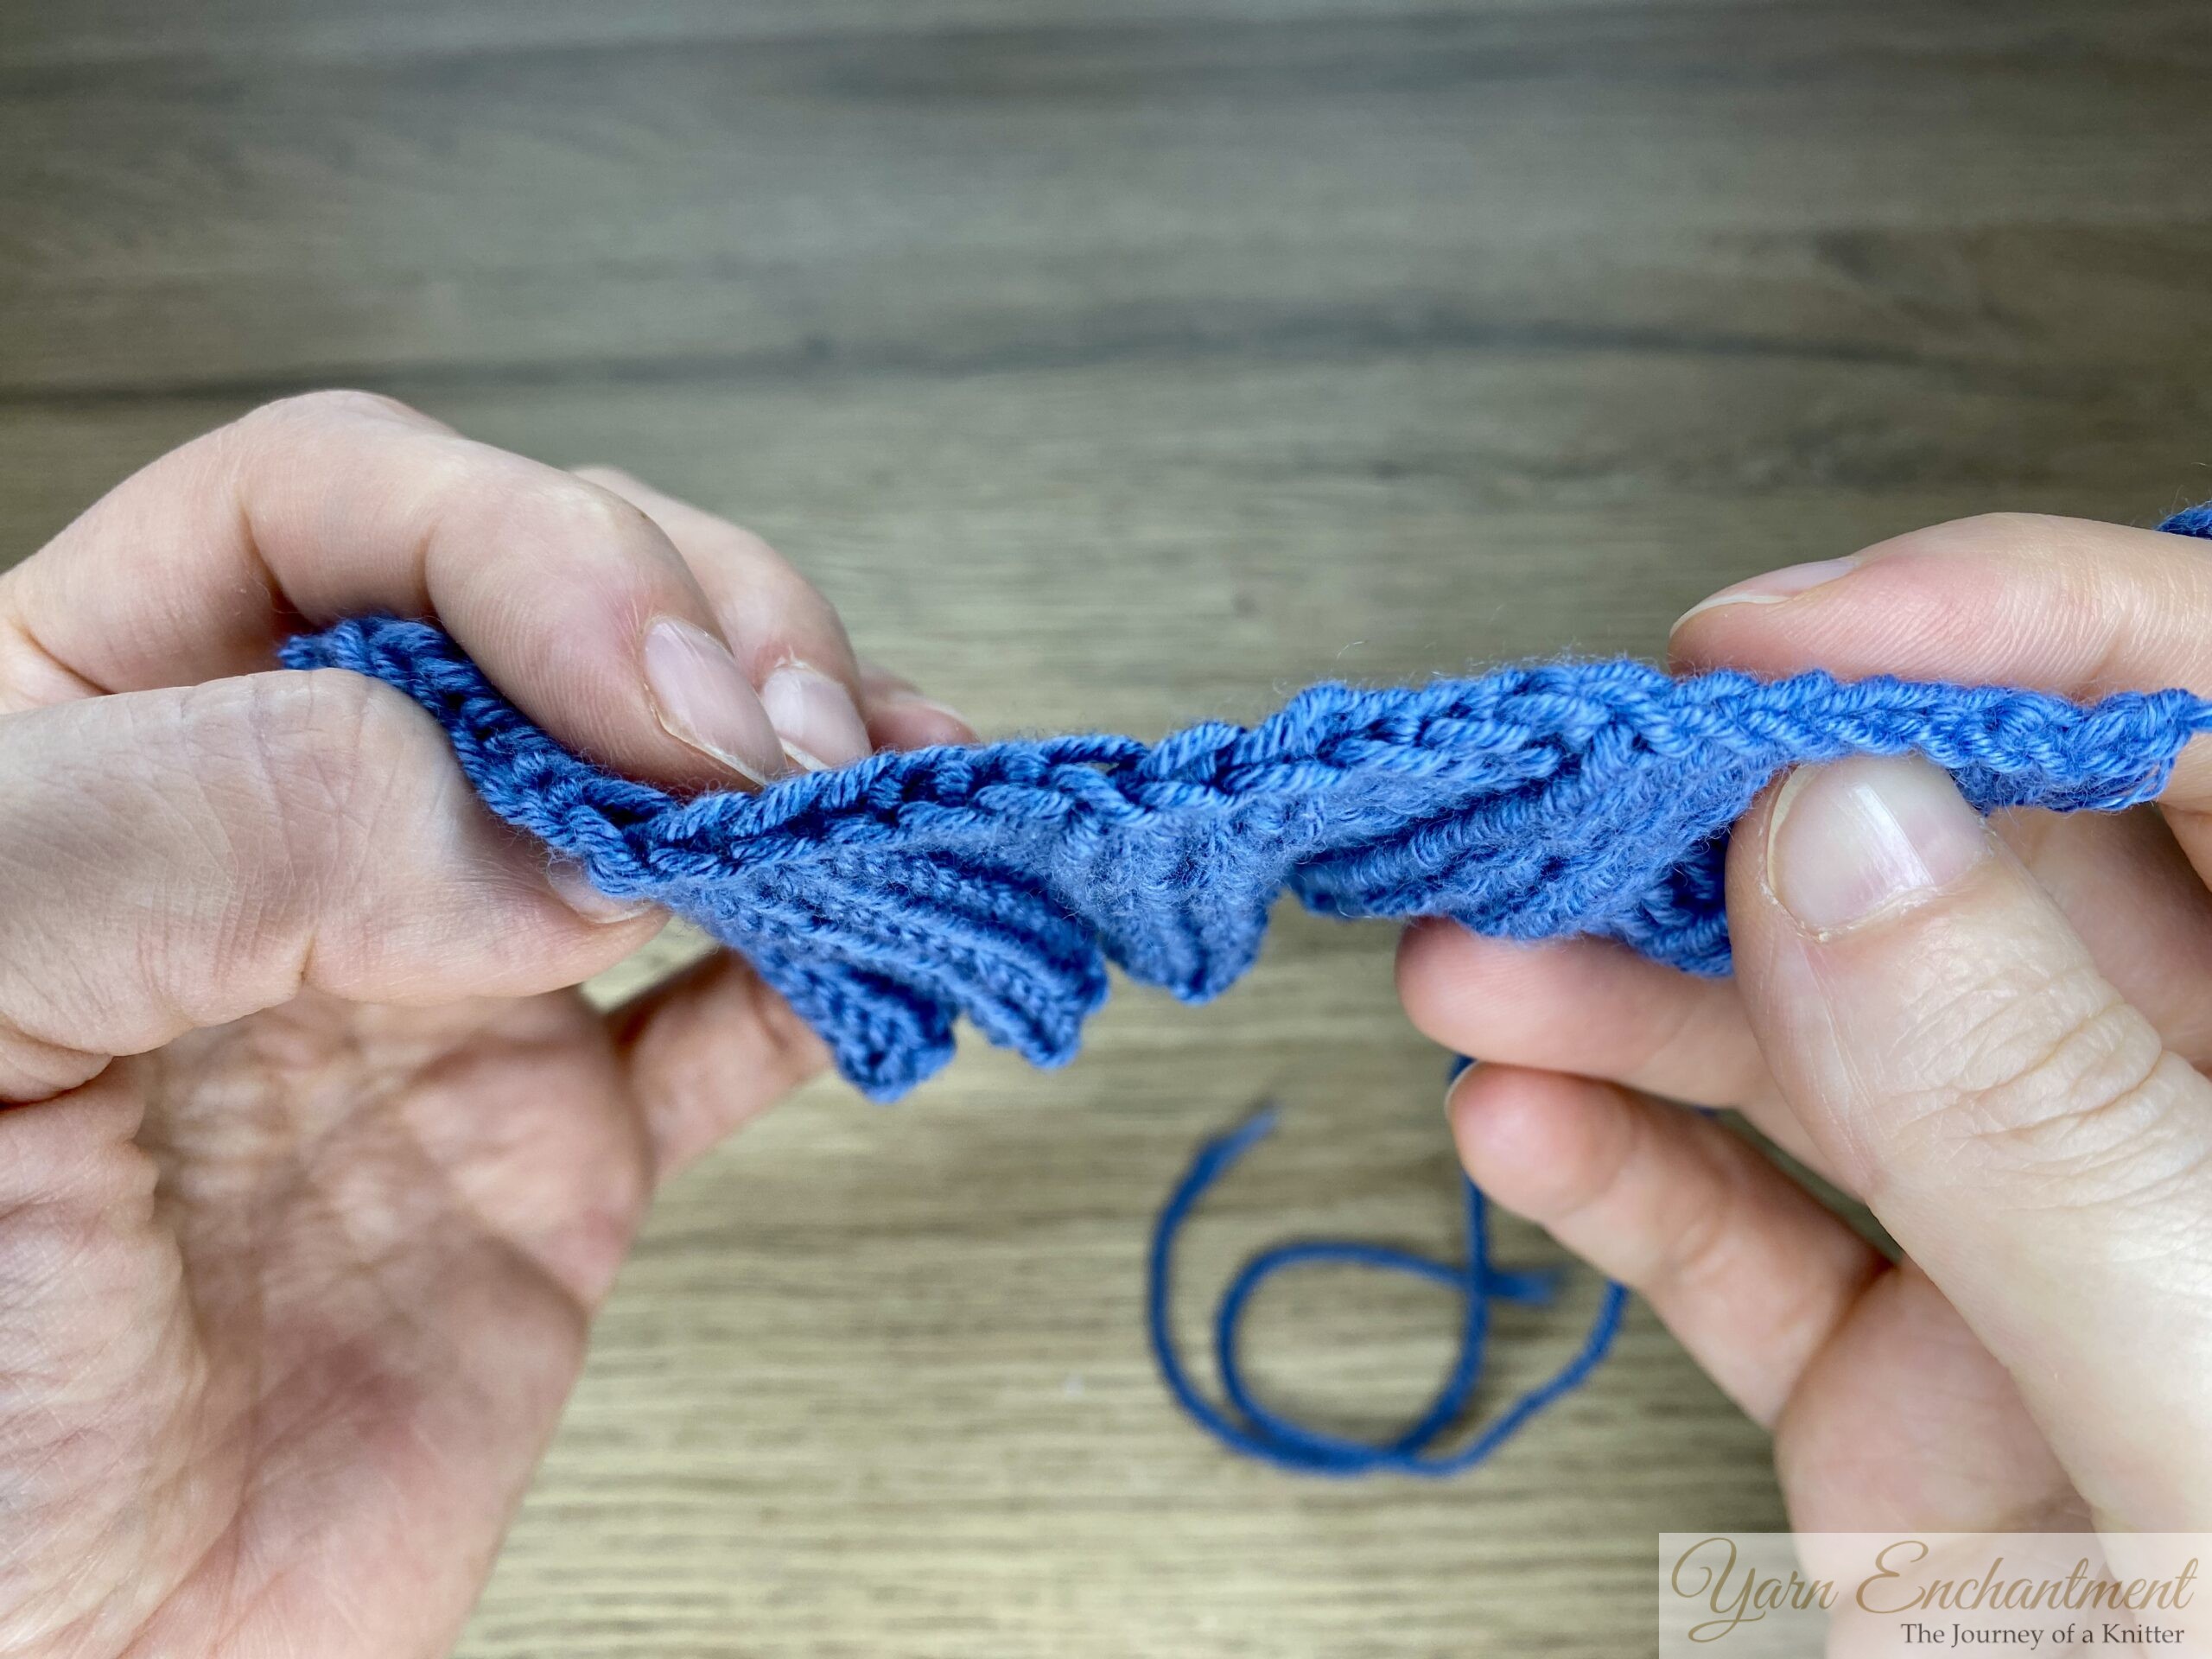
It may flare out at the edge, which is usually a good trade‑off when maximum stretch is needed, but be mindful of your tension so you don’t get too much flare.
 | Elastic bind-off in ribbing |
)
Elastic bind-off worked all in knit
Work the same elastic bind off, but knit all stitches instead of following the ribbing pattern.
This still gives you a nice amount of stretch but with less flare, resulting in a straighter, neater edge.
This version is ideal for sweater bodies, sleeve cuffs and other garment edges where you want comfort and flexibility without a ruffled look.
 | I also worked the bind off using all knit stitches so you can see a direct comparison. |
)
Comparison with a standard bind off
A traditional bind off (knit one, knit one, pass the previous stitch over) can look neat but often has very little stretch, especially if your knitting tension is naturally tight.
Even if you go up a needle size, the edge can stay firm and may feel restrictive at cuffs or necklines.
The elastic bind off gives noticeably more stretch while still looking clean and polished, making it a good “everywhere” bind off for garments.
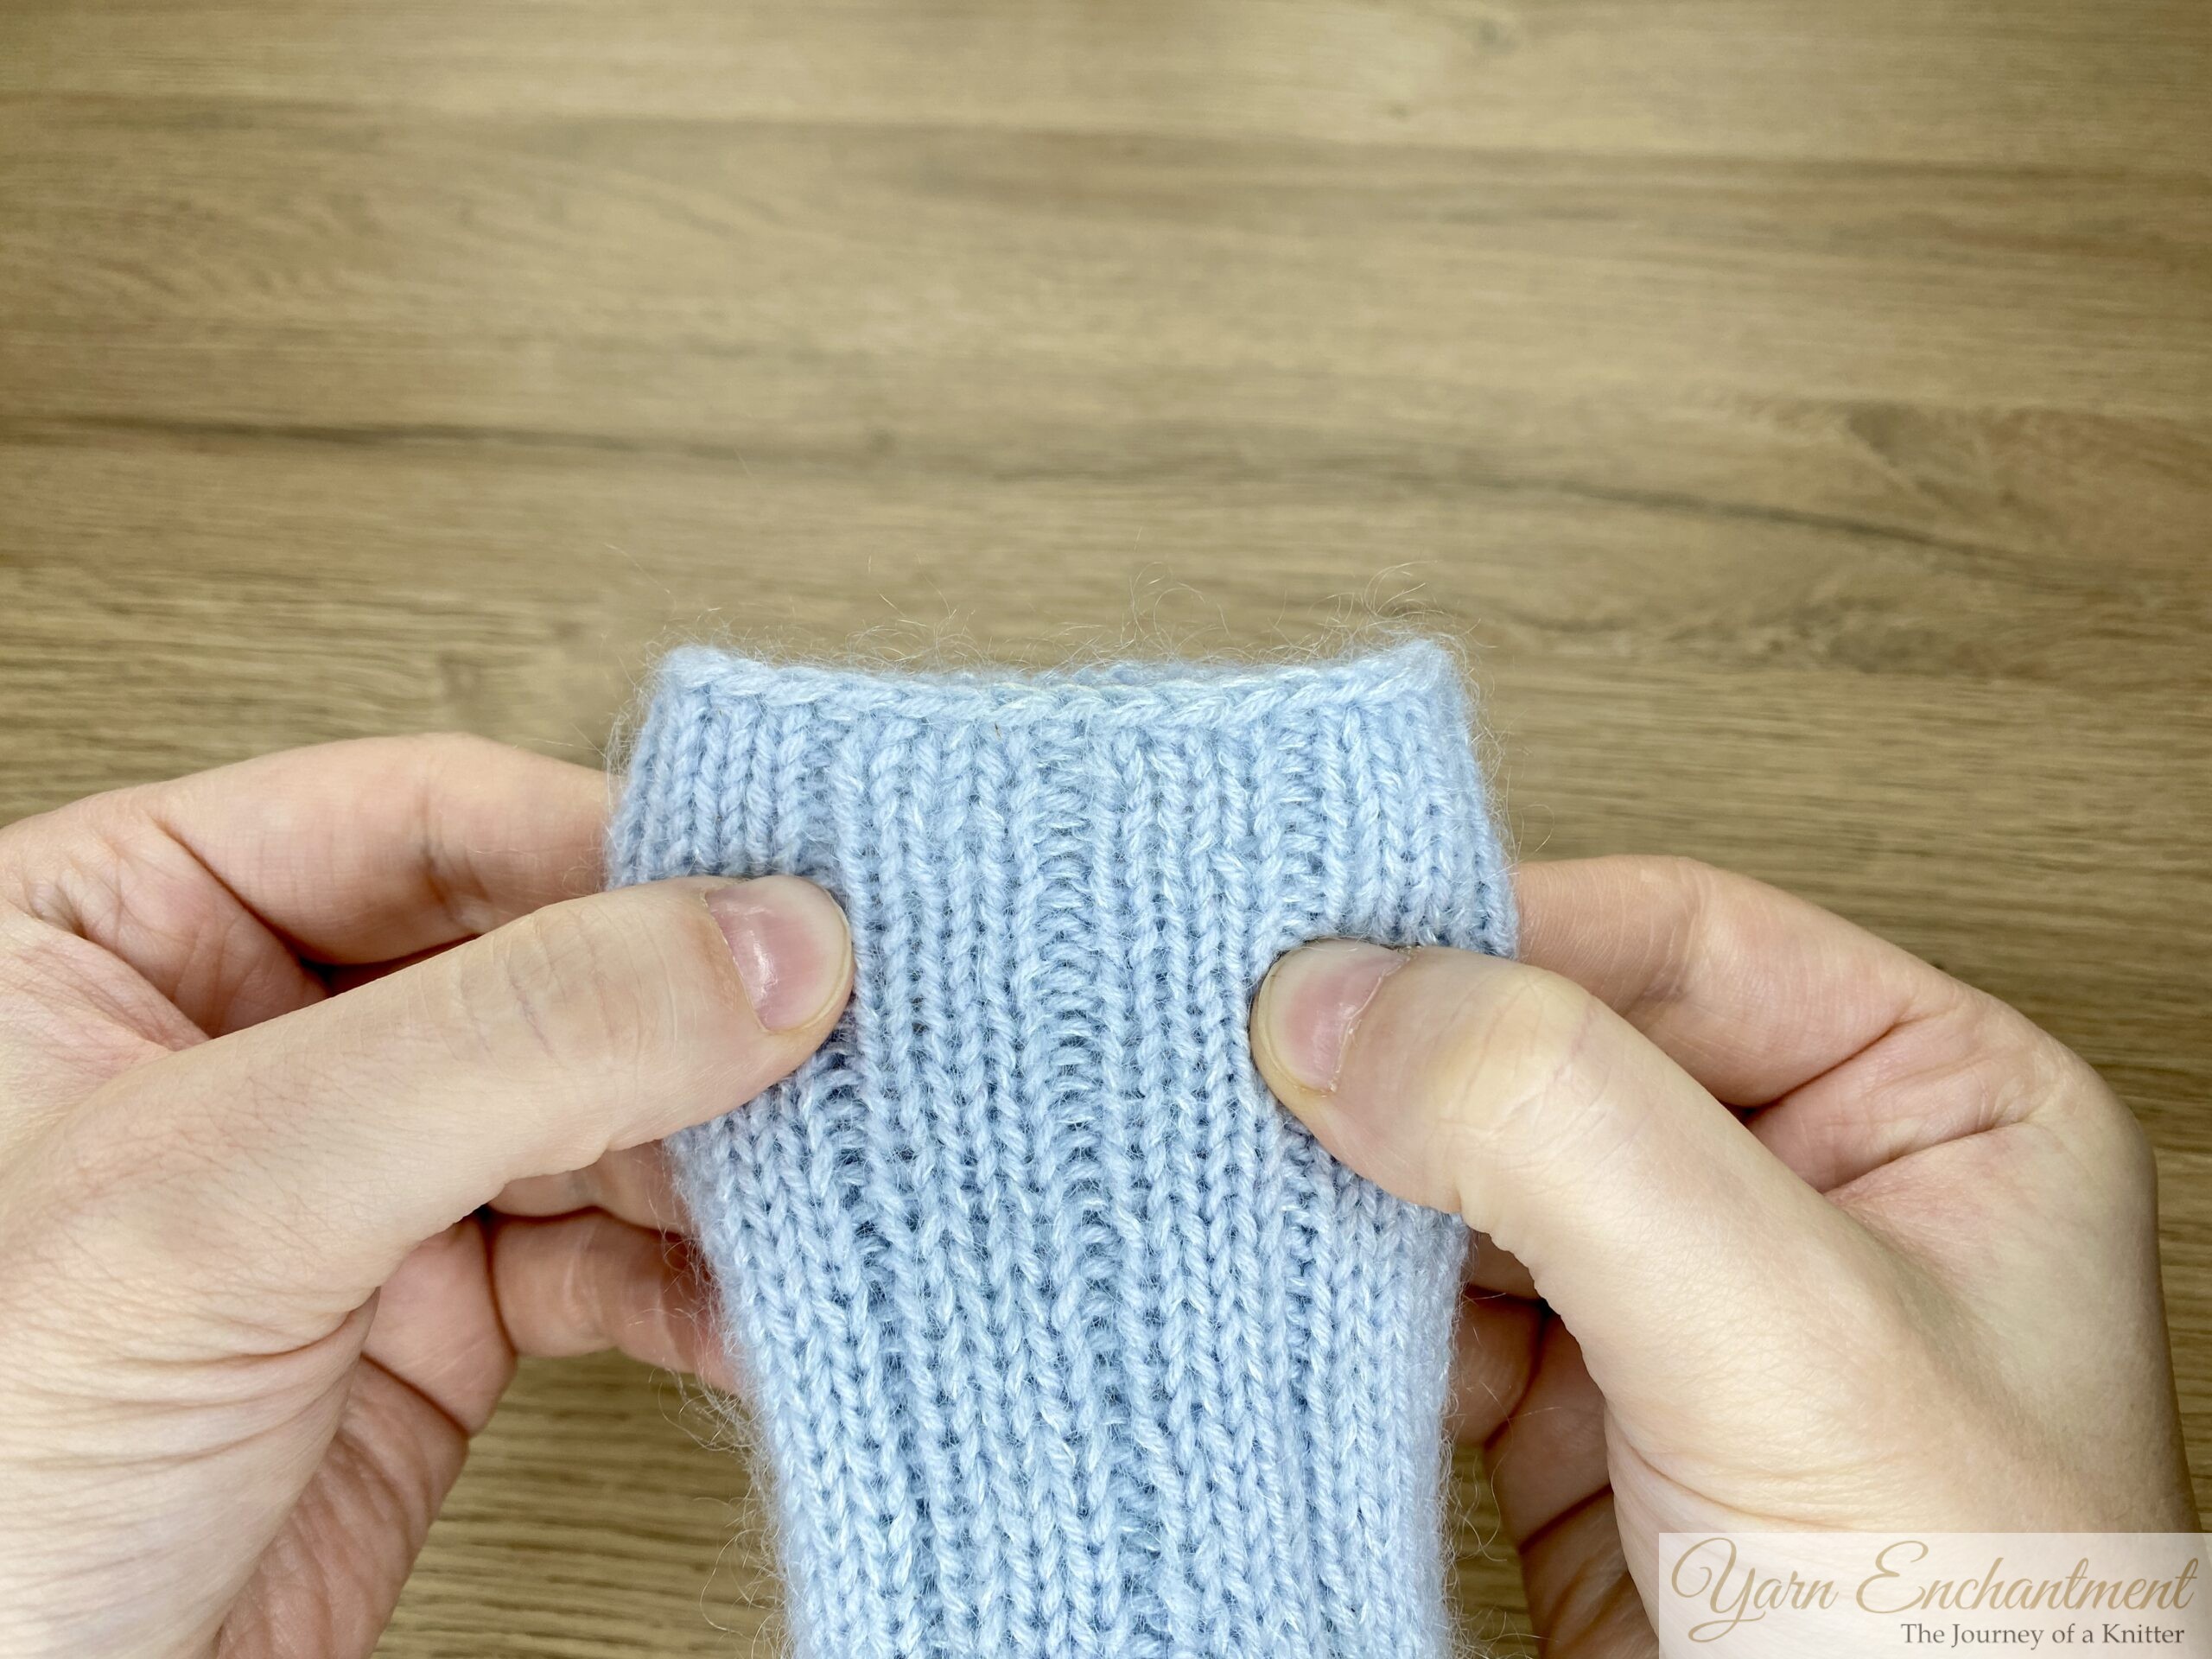
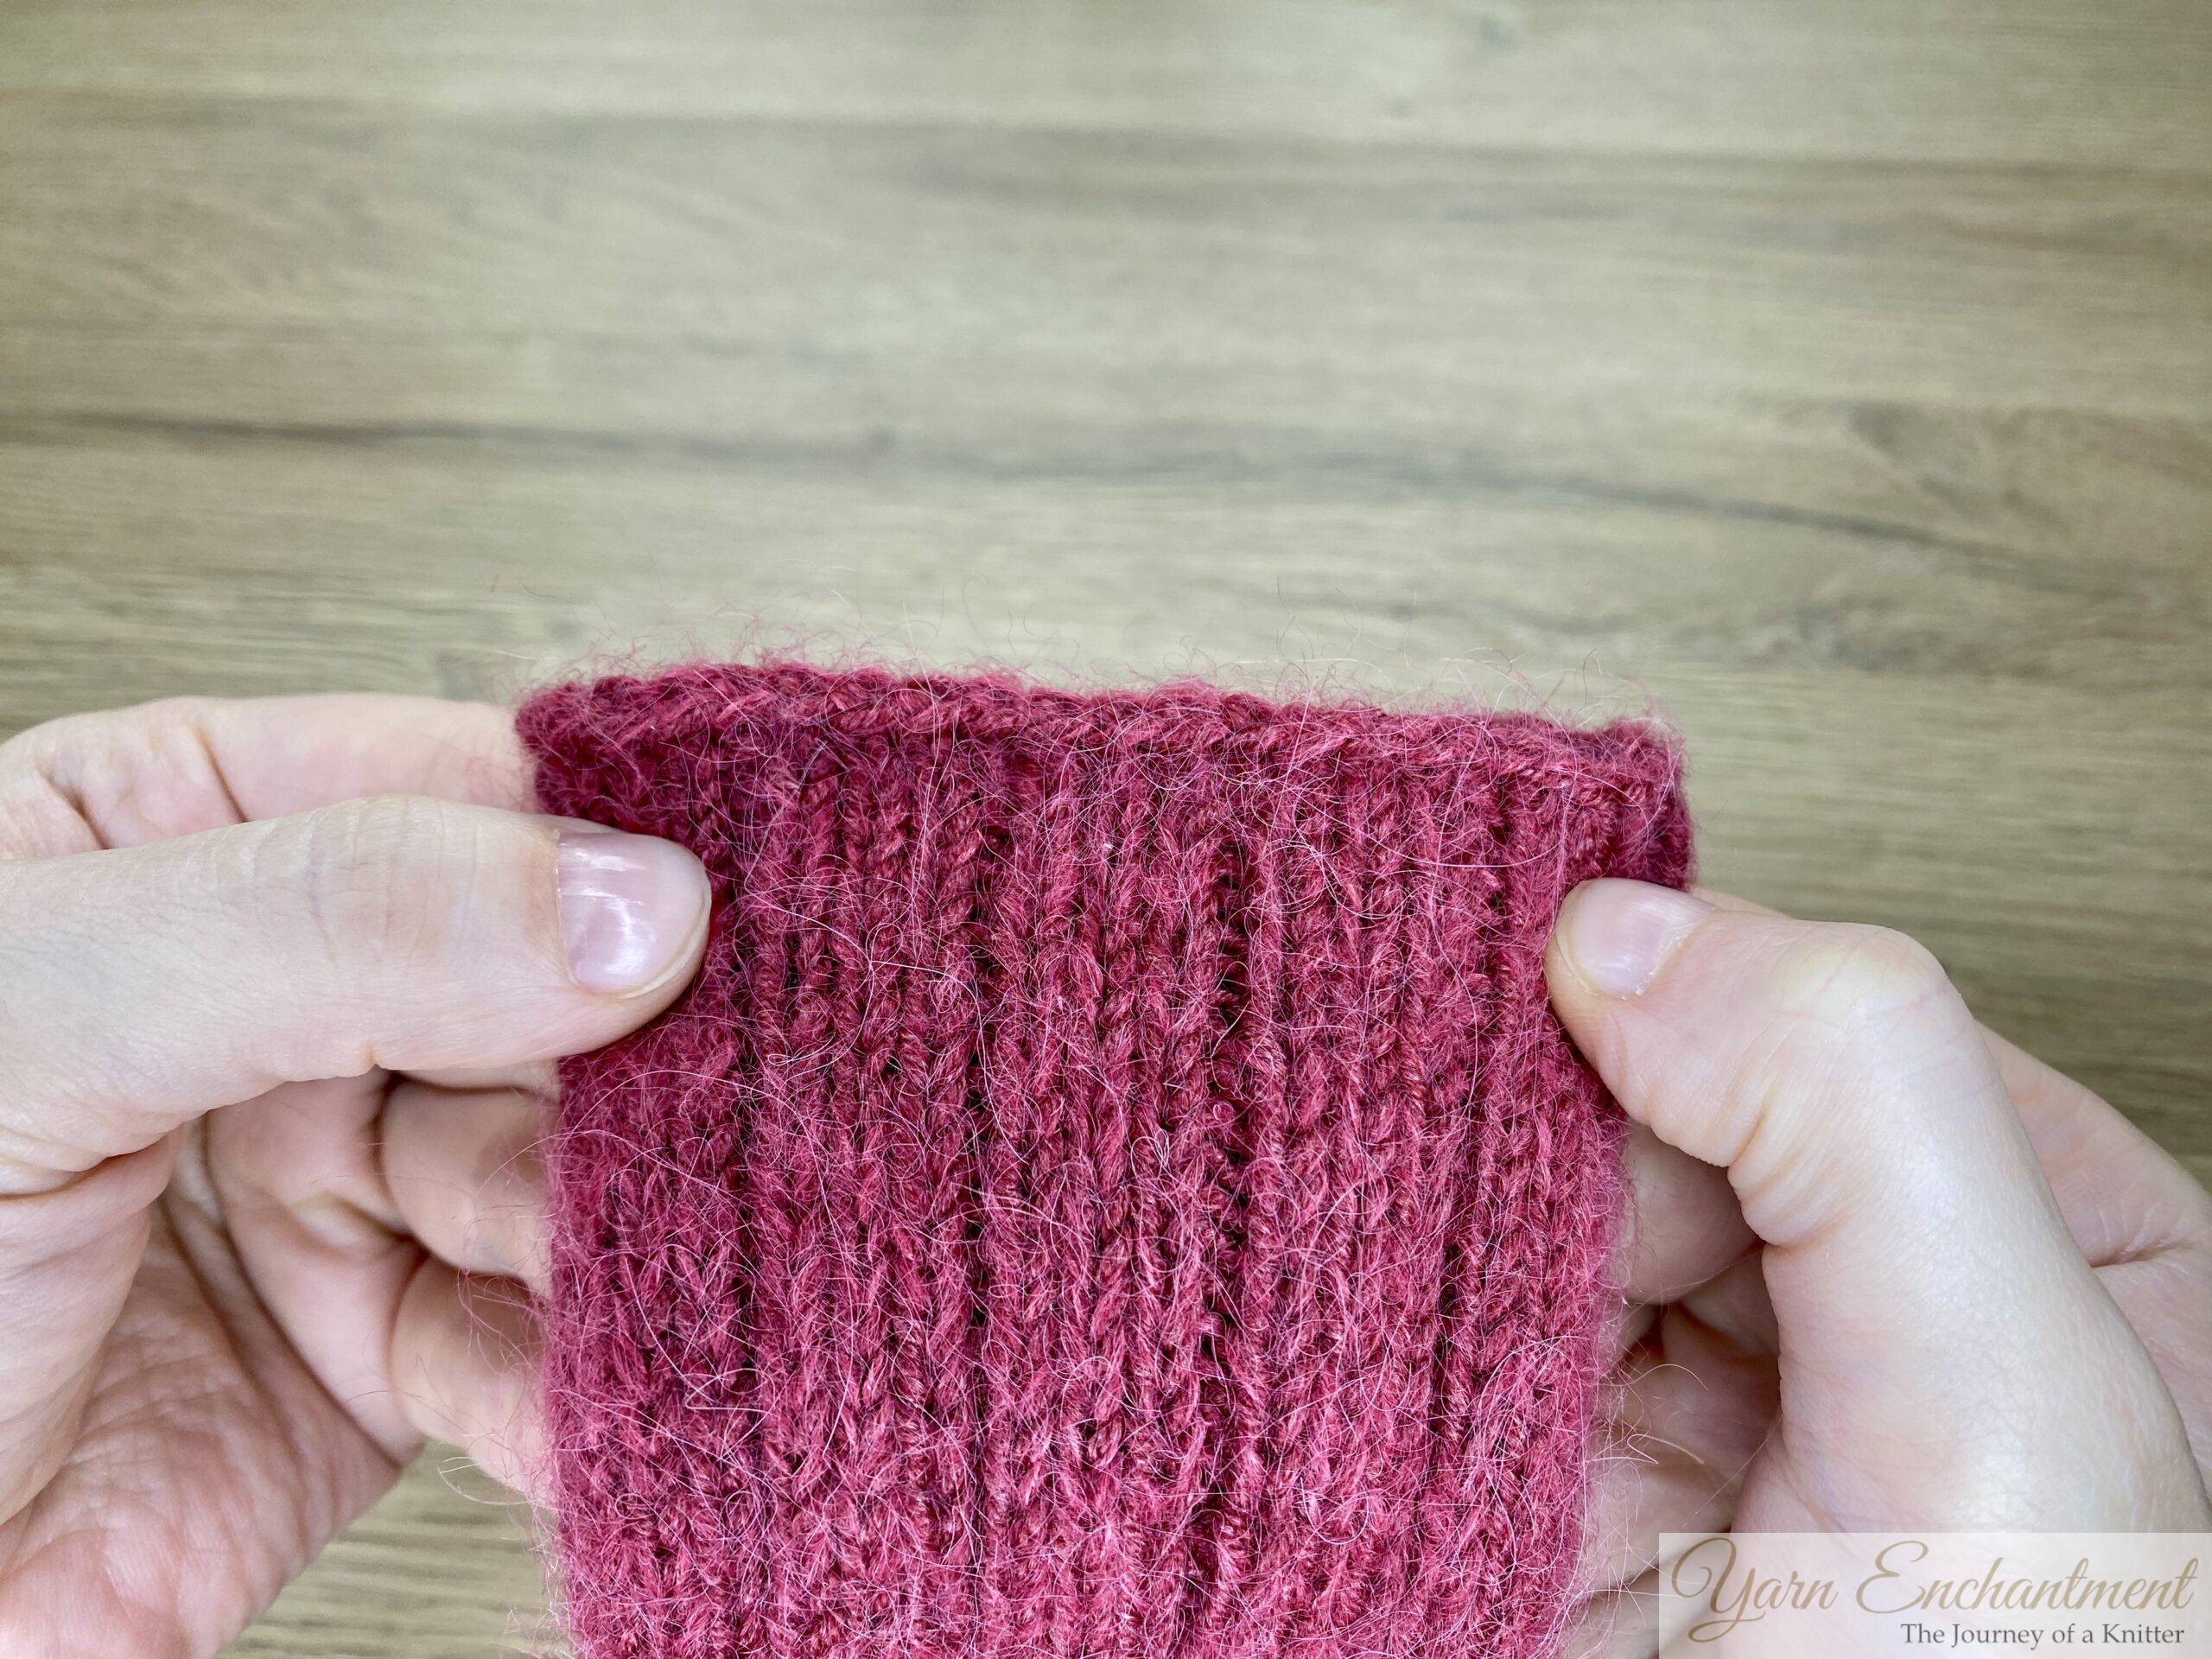 | 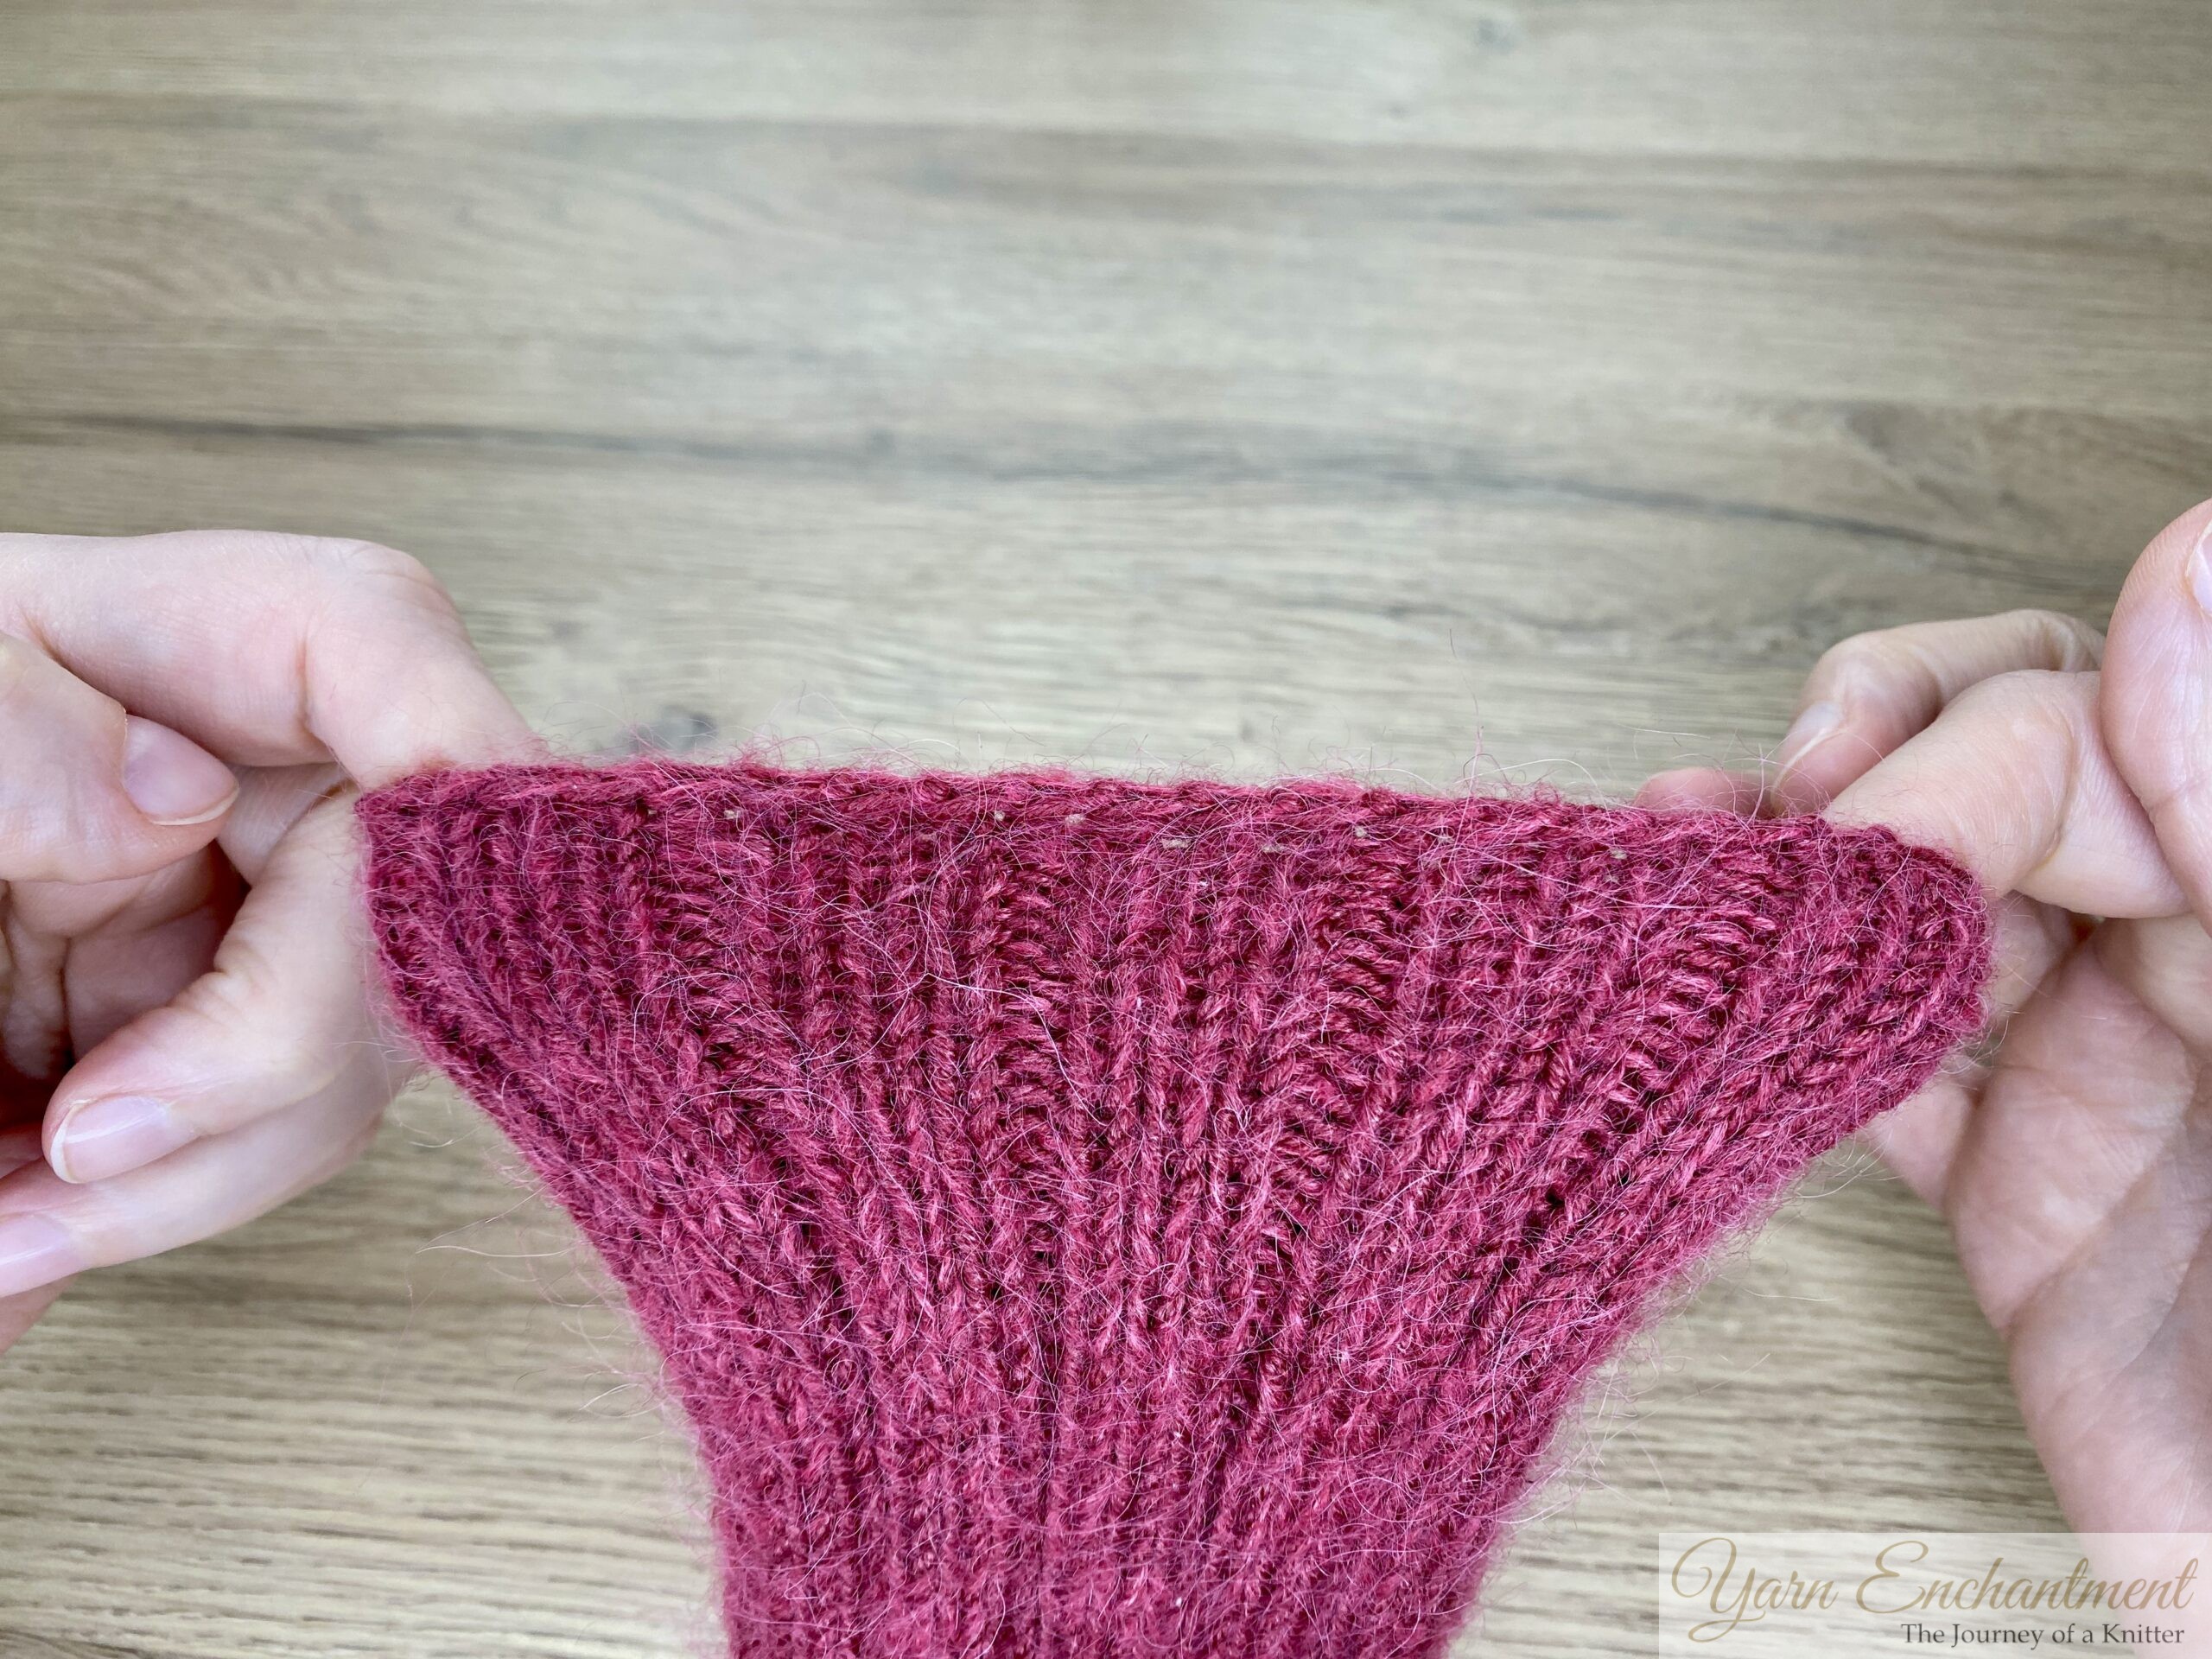 | For this sleeve, I used the elastic bind off worked only with knit stitches. | As you can see, it gives a really tidy edge with no flare and a comfortable amount of stretch, which feels very nice to wear. |
)
)
 |  | This blue sleeve here was worked using a standard bind off, which gives a really tidy, neat edge,... | ...but almost no stretch at all. That can become quite uncomfortable, especially around the wrist if you are wearing a watch. |
)
)
Personal notes and usage ideas
This elastic bind off is a great choice for knitters with tight tension who struggle to get enough stretch from standard bind offs.
It works well for sleeves, the body of a sweater, hat brims and most ribbed edges where comfort and movement matter.
For toe‑up socks, the in‑pattern version (with knit and purl bind offs) provides enough stretch to slide easily over the heel without cutting into the leg.
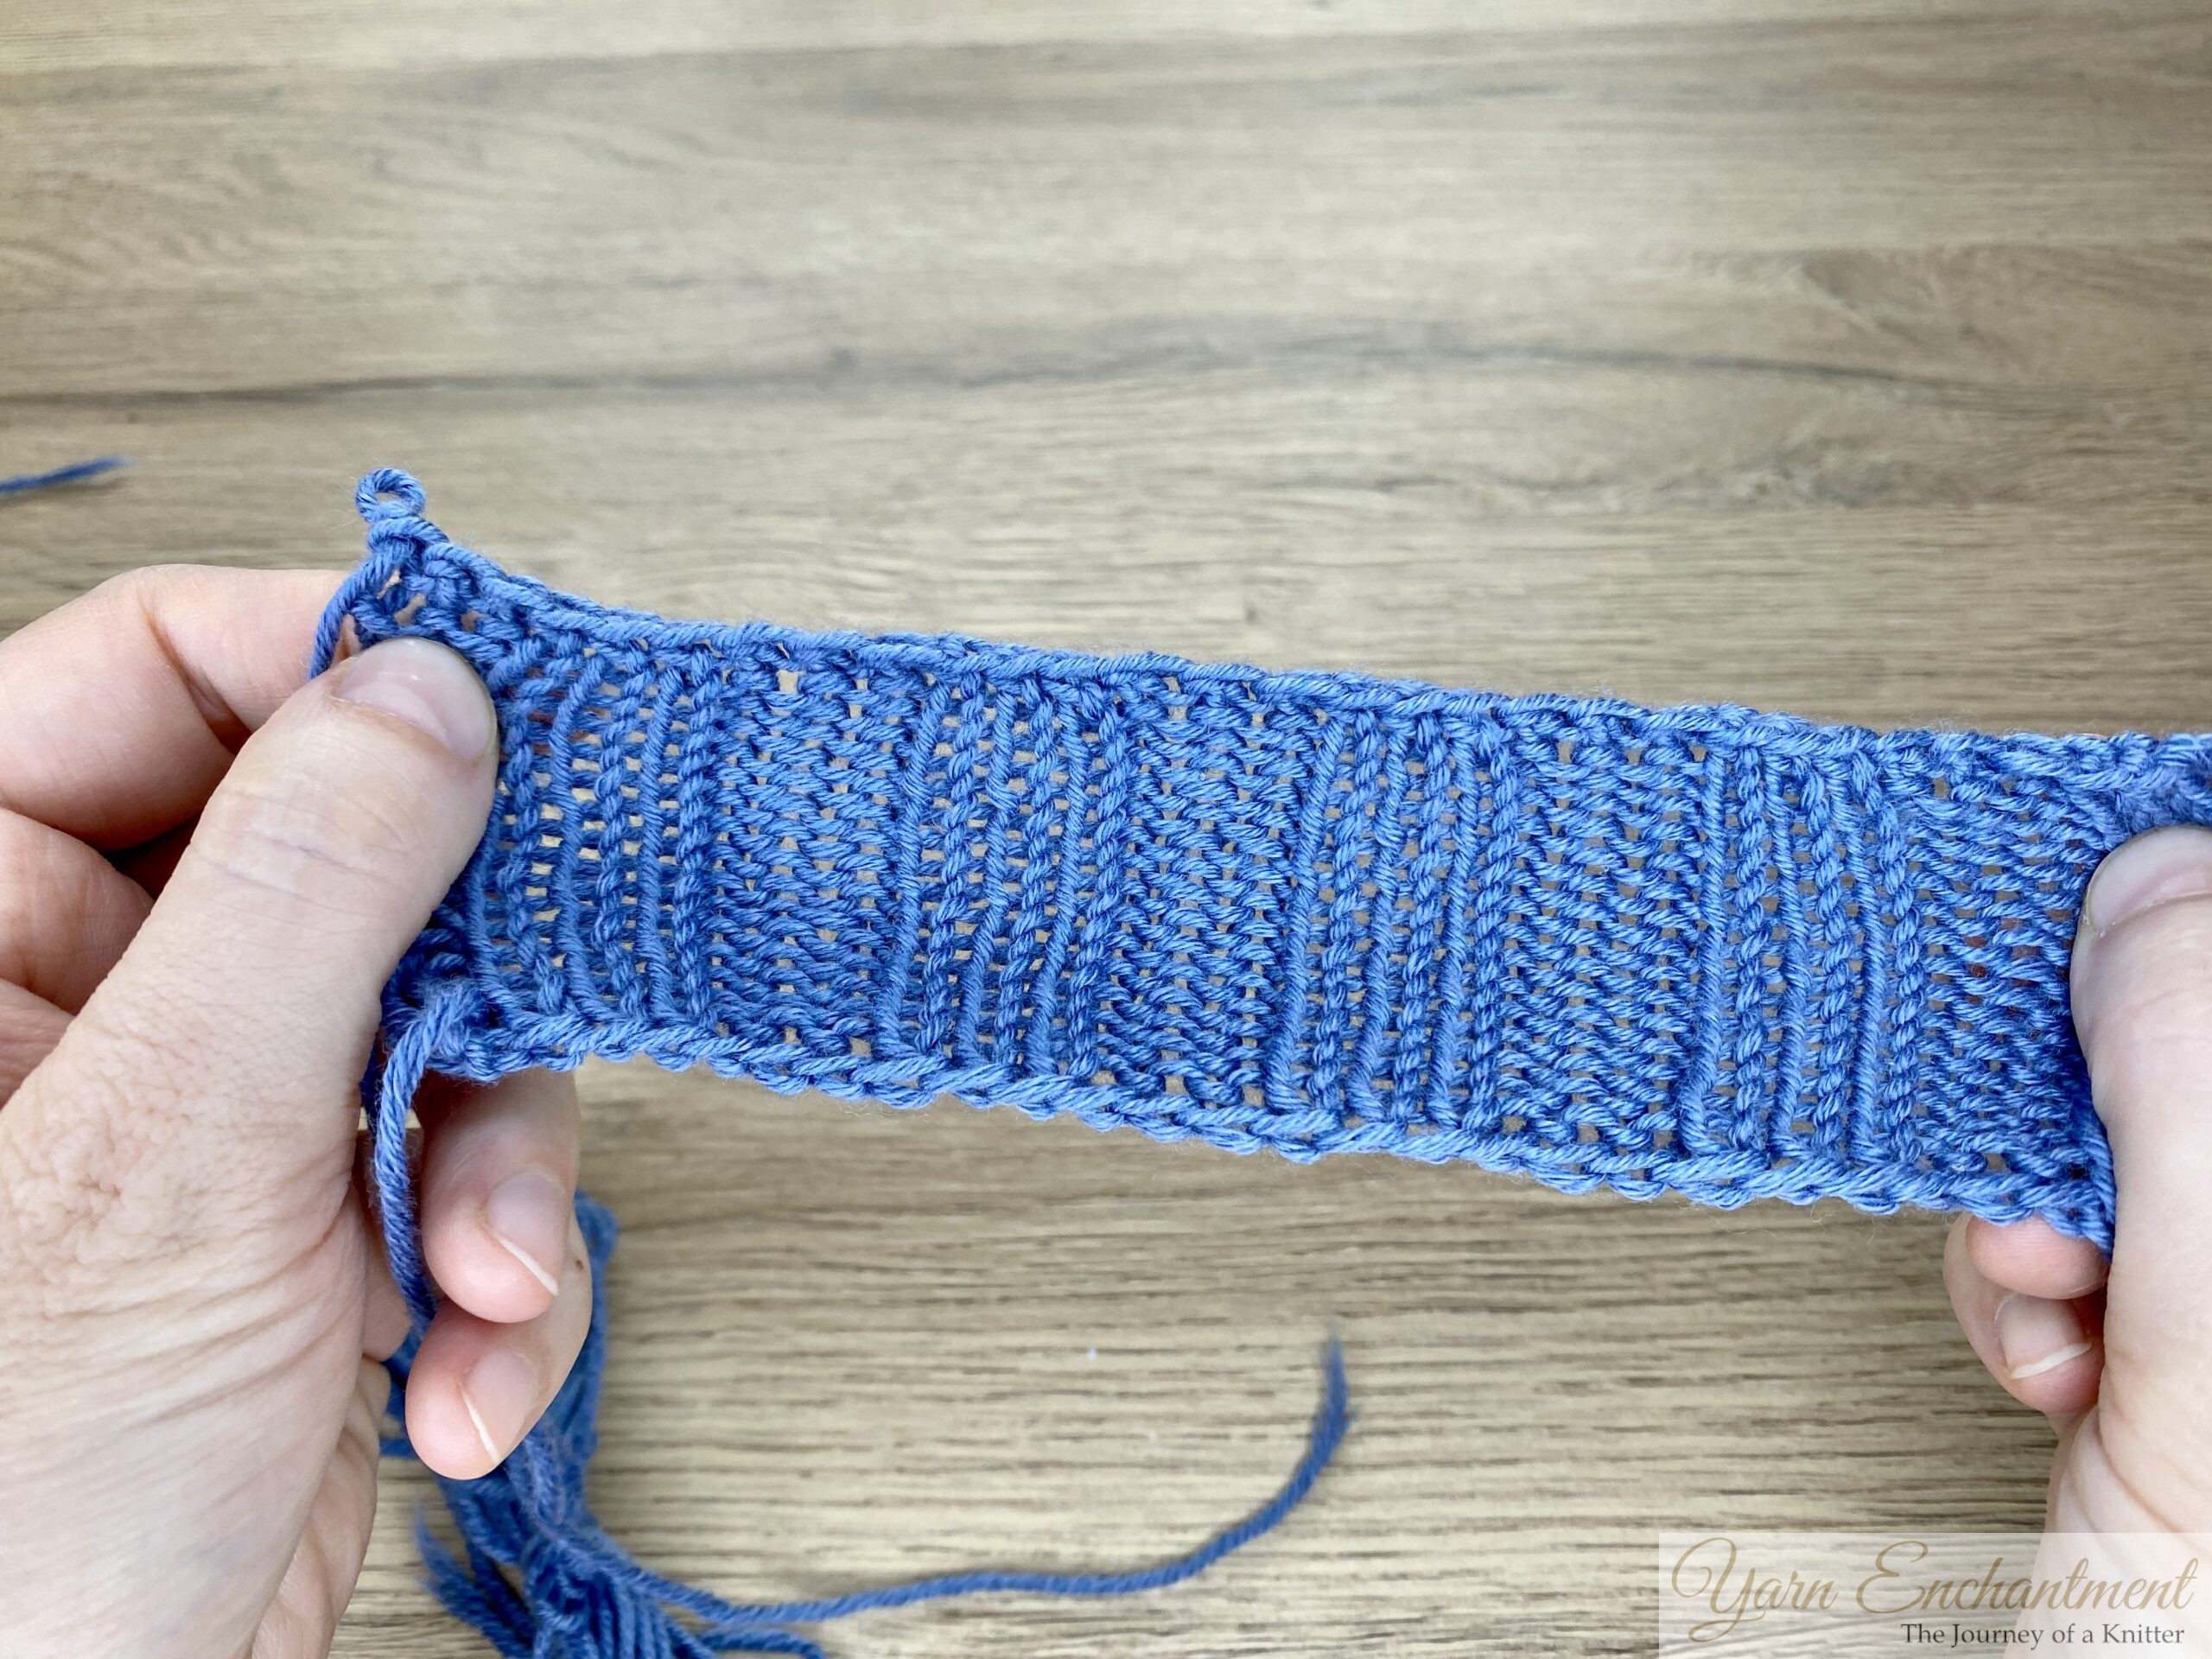 | Elastic bind off stretched |
)
Elastic bind off in ribbing – FAQ
Which knitting projects is this elastic bind off for ribbing best for?
This stretchy bind off is ideal for any ribbed edge that needs to expand and spring back, such as cuffs, sweater hems, necklines, hat brims and toe‑up sock legs. It keeps the ribbing comfortable without cutting into the skin when worn.
Why does my elastic bind off edge in ribbing flare out?
When you work the bind off in full ribbing, the extra stretch can relax the stitches and cause a slight flare at the edge. If you prefer a straighter finish, try the variation where you knit all stitches while binding off instead of following the rib pattern.
Can I use this stretchy bind off on 1x1 or 2x2 ribbing?
Yes, this elastic bind off works on both 1x1 and 2x2 ribbing without any modifications. Always watch the last stitch on your right needle: if it is a knit stitch, work a knit‑two‑together through the back loop; if it is a purl stitch, work a purl‑two‑together.
Do I need to change needle size for an elastic bind off in ribbing?
In most cases you can keep the same needle size you used for the ribbing section. The technique itself adds plenty of elasticity, so even knitters with tighter tension usually get a flexible edge without needing to size up.
 | Top view: Elastic bind-off |
)
Conclusion
Whether you’re finishing a cozy cuff, a sweater hem, or the leg of your favorite socks, this elastic bind off adds that final touch of comfort and polish that makes your knitting truly wearable. It’s one of those small techniques that makes a big difference in how a finished piece feels - flexible, soft, and ready to move with you. Try both versions to see which you prefer; sometimes it’s the little tailoring details that make a project feel custom‑made.
If you’d like to see the process in real time, don’t forget to check out the full video tutorial, and thank you so much for spending some time with this post today.
Until next time, happy knitting!
A Little Way to Say Thanks
You Might Also Like


 |
|
Join the Cozy Corner Newsletter!
Hey there, creative soul! Welcome to the Yarn Enchantment Newsletter, where we celebrate all things cozy, crafty, and full of heart. Think of this as your friendly crafting companion - a little dose of inspiration delivered straight to your inbox, just for you. Inside, you’ll find: ✨ Exclusive patterns & tutorials - ideas you won’t find anywhere else (just for us!) 📚 Bookish crafts that bring your favorite stories to life 🧶 Tips and tricks to make your crafting journey smoother (and more fun!) 💌 Heartfelt musings on life, creativity, and the magic of making something with your own two hands Whether you’re knitting by the fire, brainstorming your next DIY project, or just looking for a little creative pick-me-up, this newsletter is here to cheer you on. Because let’s be honest - crafting isn’t just about the finished project; it’s about the joy, peace, and stories we create along the way. So grab a cup of tea, cozy up, and join me. Together, we’ll weave a little magic into everyday life - one stitch, one story, and one email at a time. P.S. I’m so glad you’re here. Let’s make something beautiful together! (Note: If you're using an ad blocker, you may encounter issues subscribing to the newsletter. To subscribe, please consider disabling your ad blocker.)
|
