
Winter Whirl Colorwork Hat
December 10, 2025
Elastic Bind Off for Ribbing (Super Stretchy Edge)
December 18, 2025My Favorite Neat I‑Cord Edge Increases for PetiteKnit’s Sophie Scarf, Hood & Shawl

Originally published on December 15, 2025
Creativity and confidence in knitting
One of the things I love most about Elizabeth Zimmermann is how she encouraged us to think for ourselves and become truly confident knitters, instead of following any pattern blindly. When I buy a new pattern, I don’t see it as a set of strict rules, but as an empty canvas I can fill with my own colours, and little experiments. That mix of creativity in knitting and gentle rule‑breaking is what keeps this hobby so magical for me.
Recently, I had exactly that feeling while knitting the Sophie Hood and Sophie Scarf by PetiteKnit. I adore her designs. They are modern, clear and have brought so many younger knitters into our world of wool and needles. Her patterns are beautifully written, but part of growing as a knitter is noticing when a tiny tweak might make a project feel even better in your own hands, and gives you the confidence to gently customise your knitting patterns.
  |
For the best side‑by‑side comparison, I chose to knit both swatches with the same yarn and needle size. |
Why Modify Knitting Patterns?
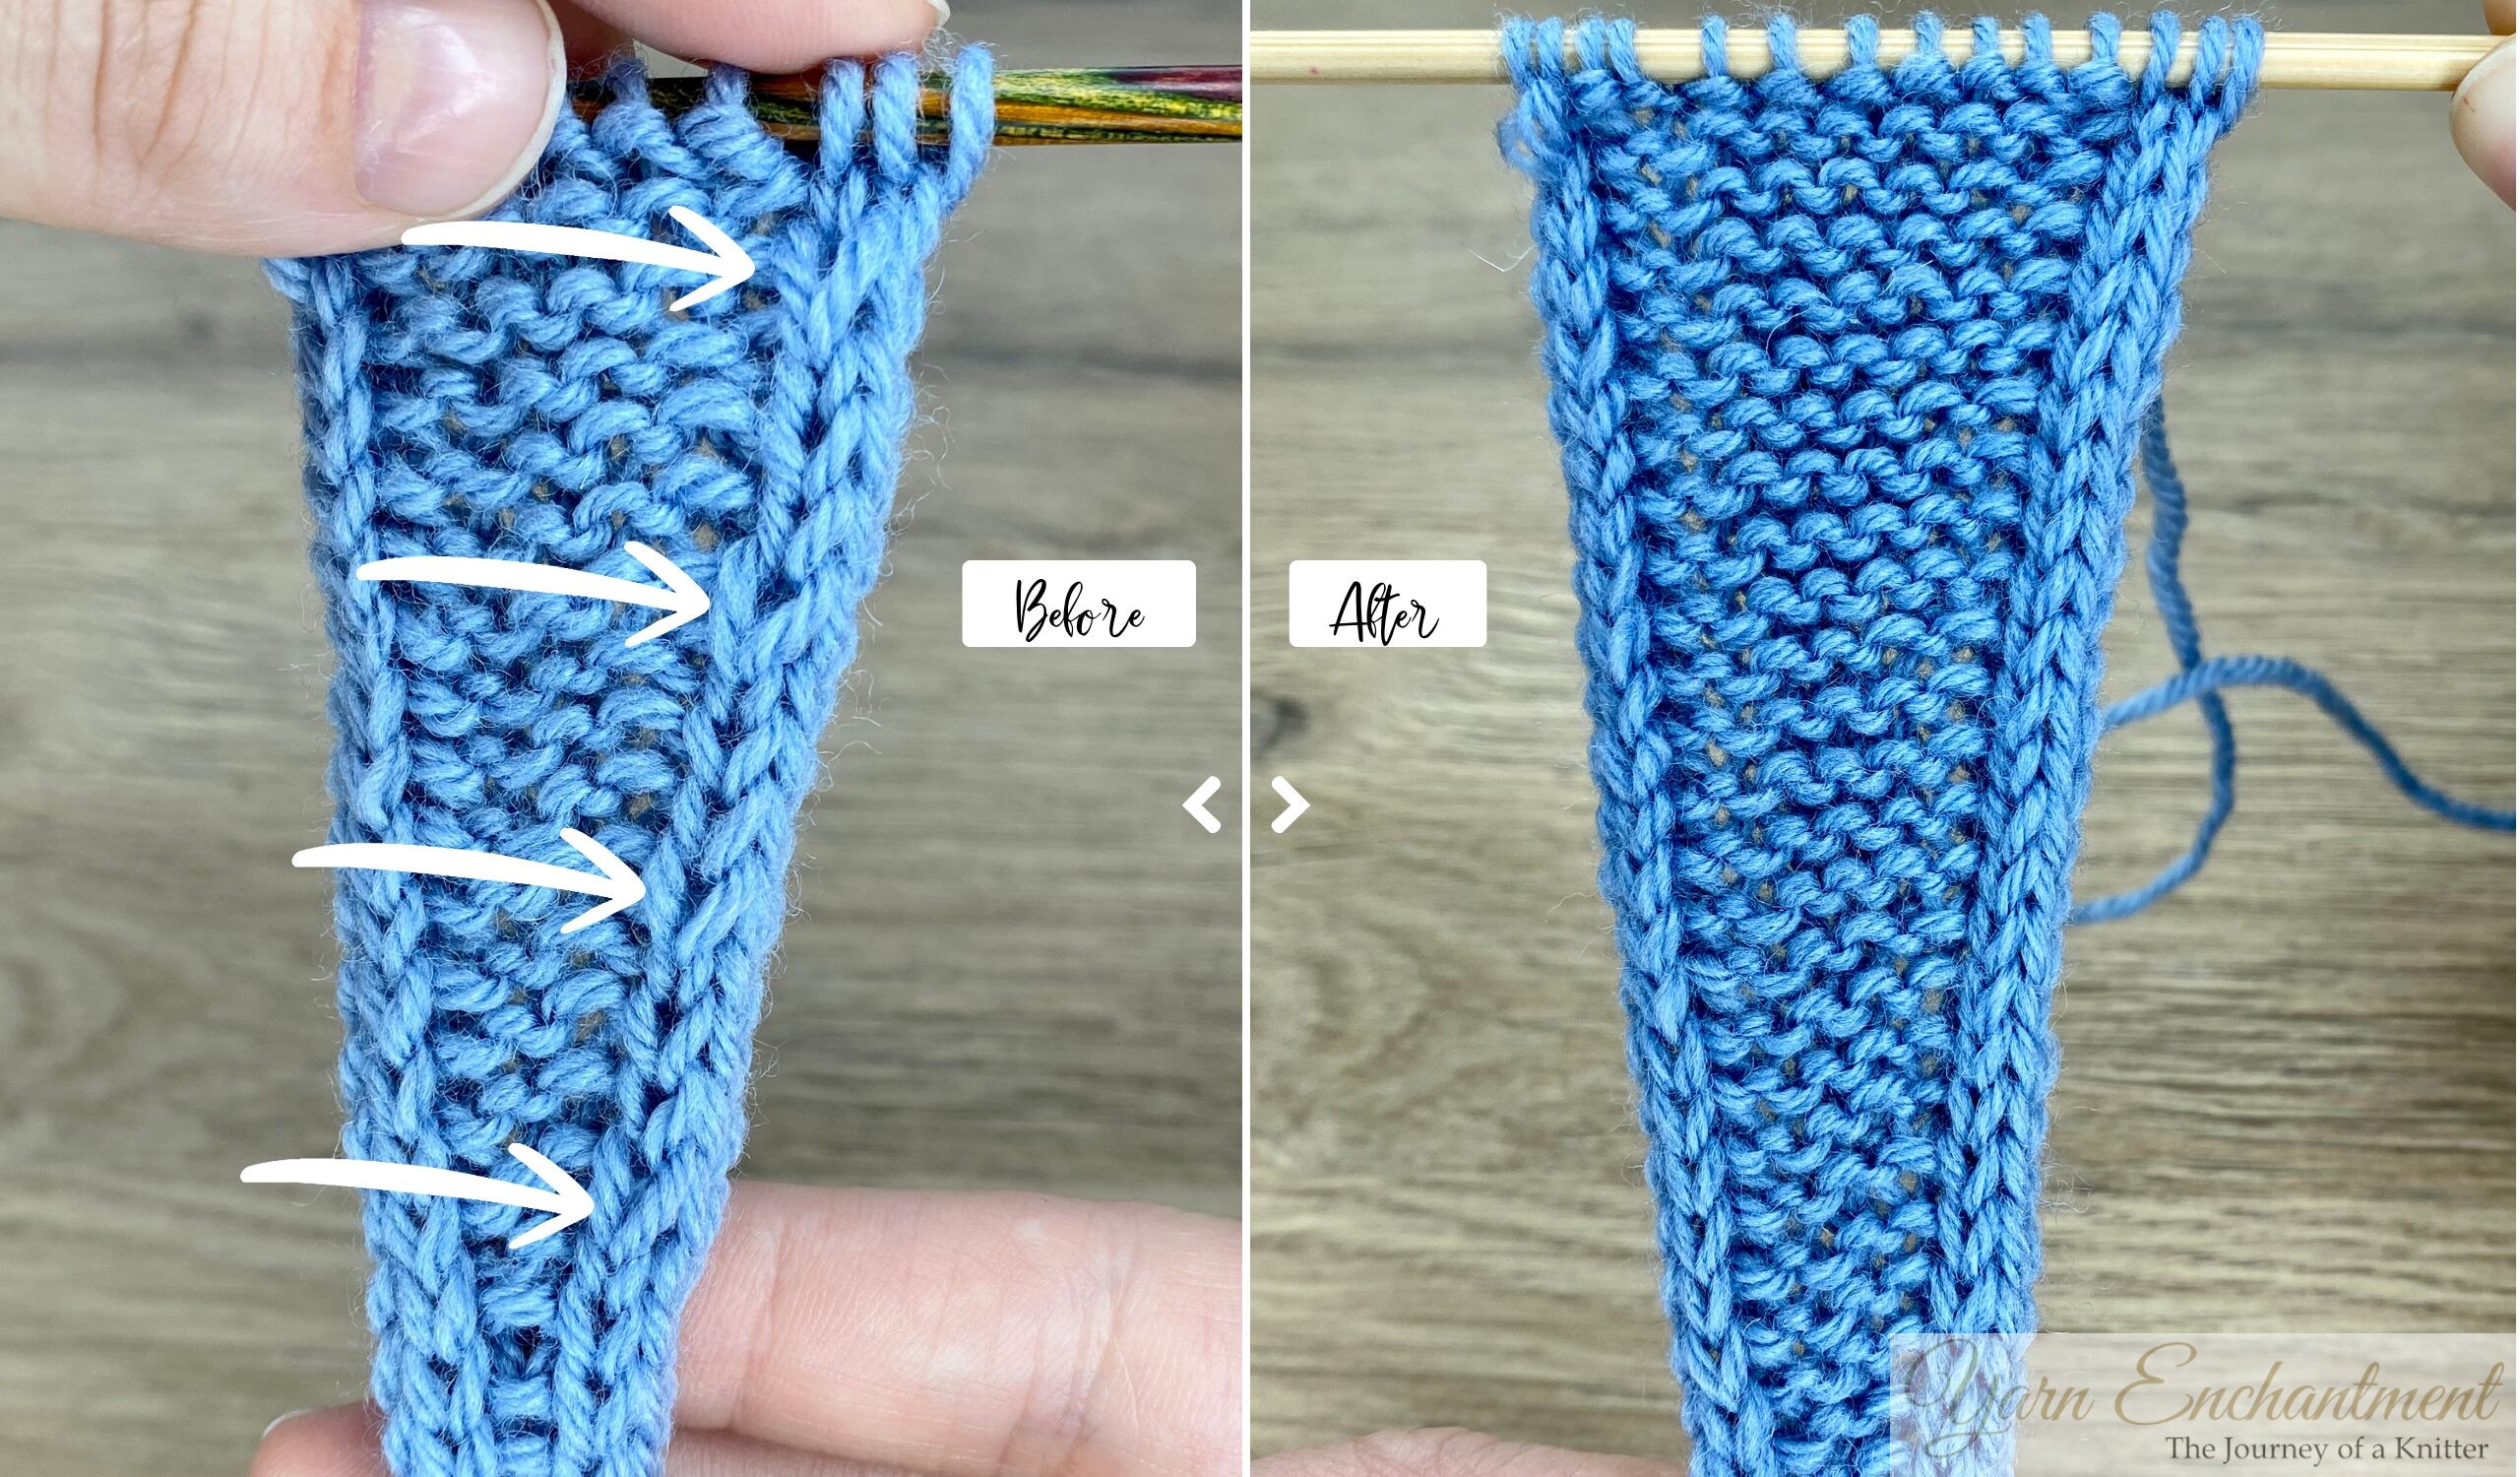
On the Sophie Scarf, Hood and Shawl, the increases and decreases along the I‑cord edge are beautiful design details, but on my needles the edge sometimes turned out a little uneven. The I‑cord stitches look slightly enlarged, especially right where the increases happened. My theory is that slipping the edge stitches on one row and then working a kfb increase on the next stretches that stitch more than the stitches around it. This extra tension is what can make the I‑cord stitches look larger or uneven, sometimes with little steps in the edge or, depending on the yarn you are using, even tiny holes.
Note: The kfb increase itself does not create any holes. If you do see little gaps along the edge, they usually come from the combination of slipping the edge stitch and then stretching that strand on the following row, not from the kfb technique.
So I started to experiment a bit. I don’t want my knits to look like they were made by a machine, but when we spend so much time and money on yarn, it feels wonderful when our handmade pieces have tidy edges and an intentional, polished look. These little adjustments are simply my way of customizing knitting patterns so they fit the way I like to knit and the kind of finish that makes me smile when I bind off.
  |
This swatch was knitted with a cotton–merino blend. |
Neat increases for the Sophie Scarf, Hood and Shawl
For the first increase between the I‑cord edges, I like to use the backward loop cast‑on. It adds a new stitch with a small bump that mimics the look of garter stitch and sits between the two I‑cord edges.
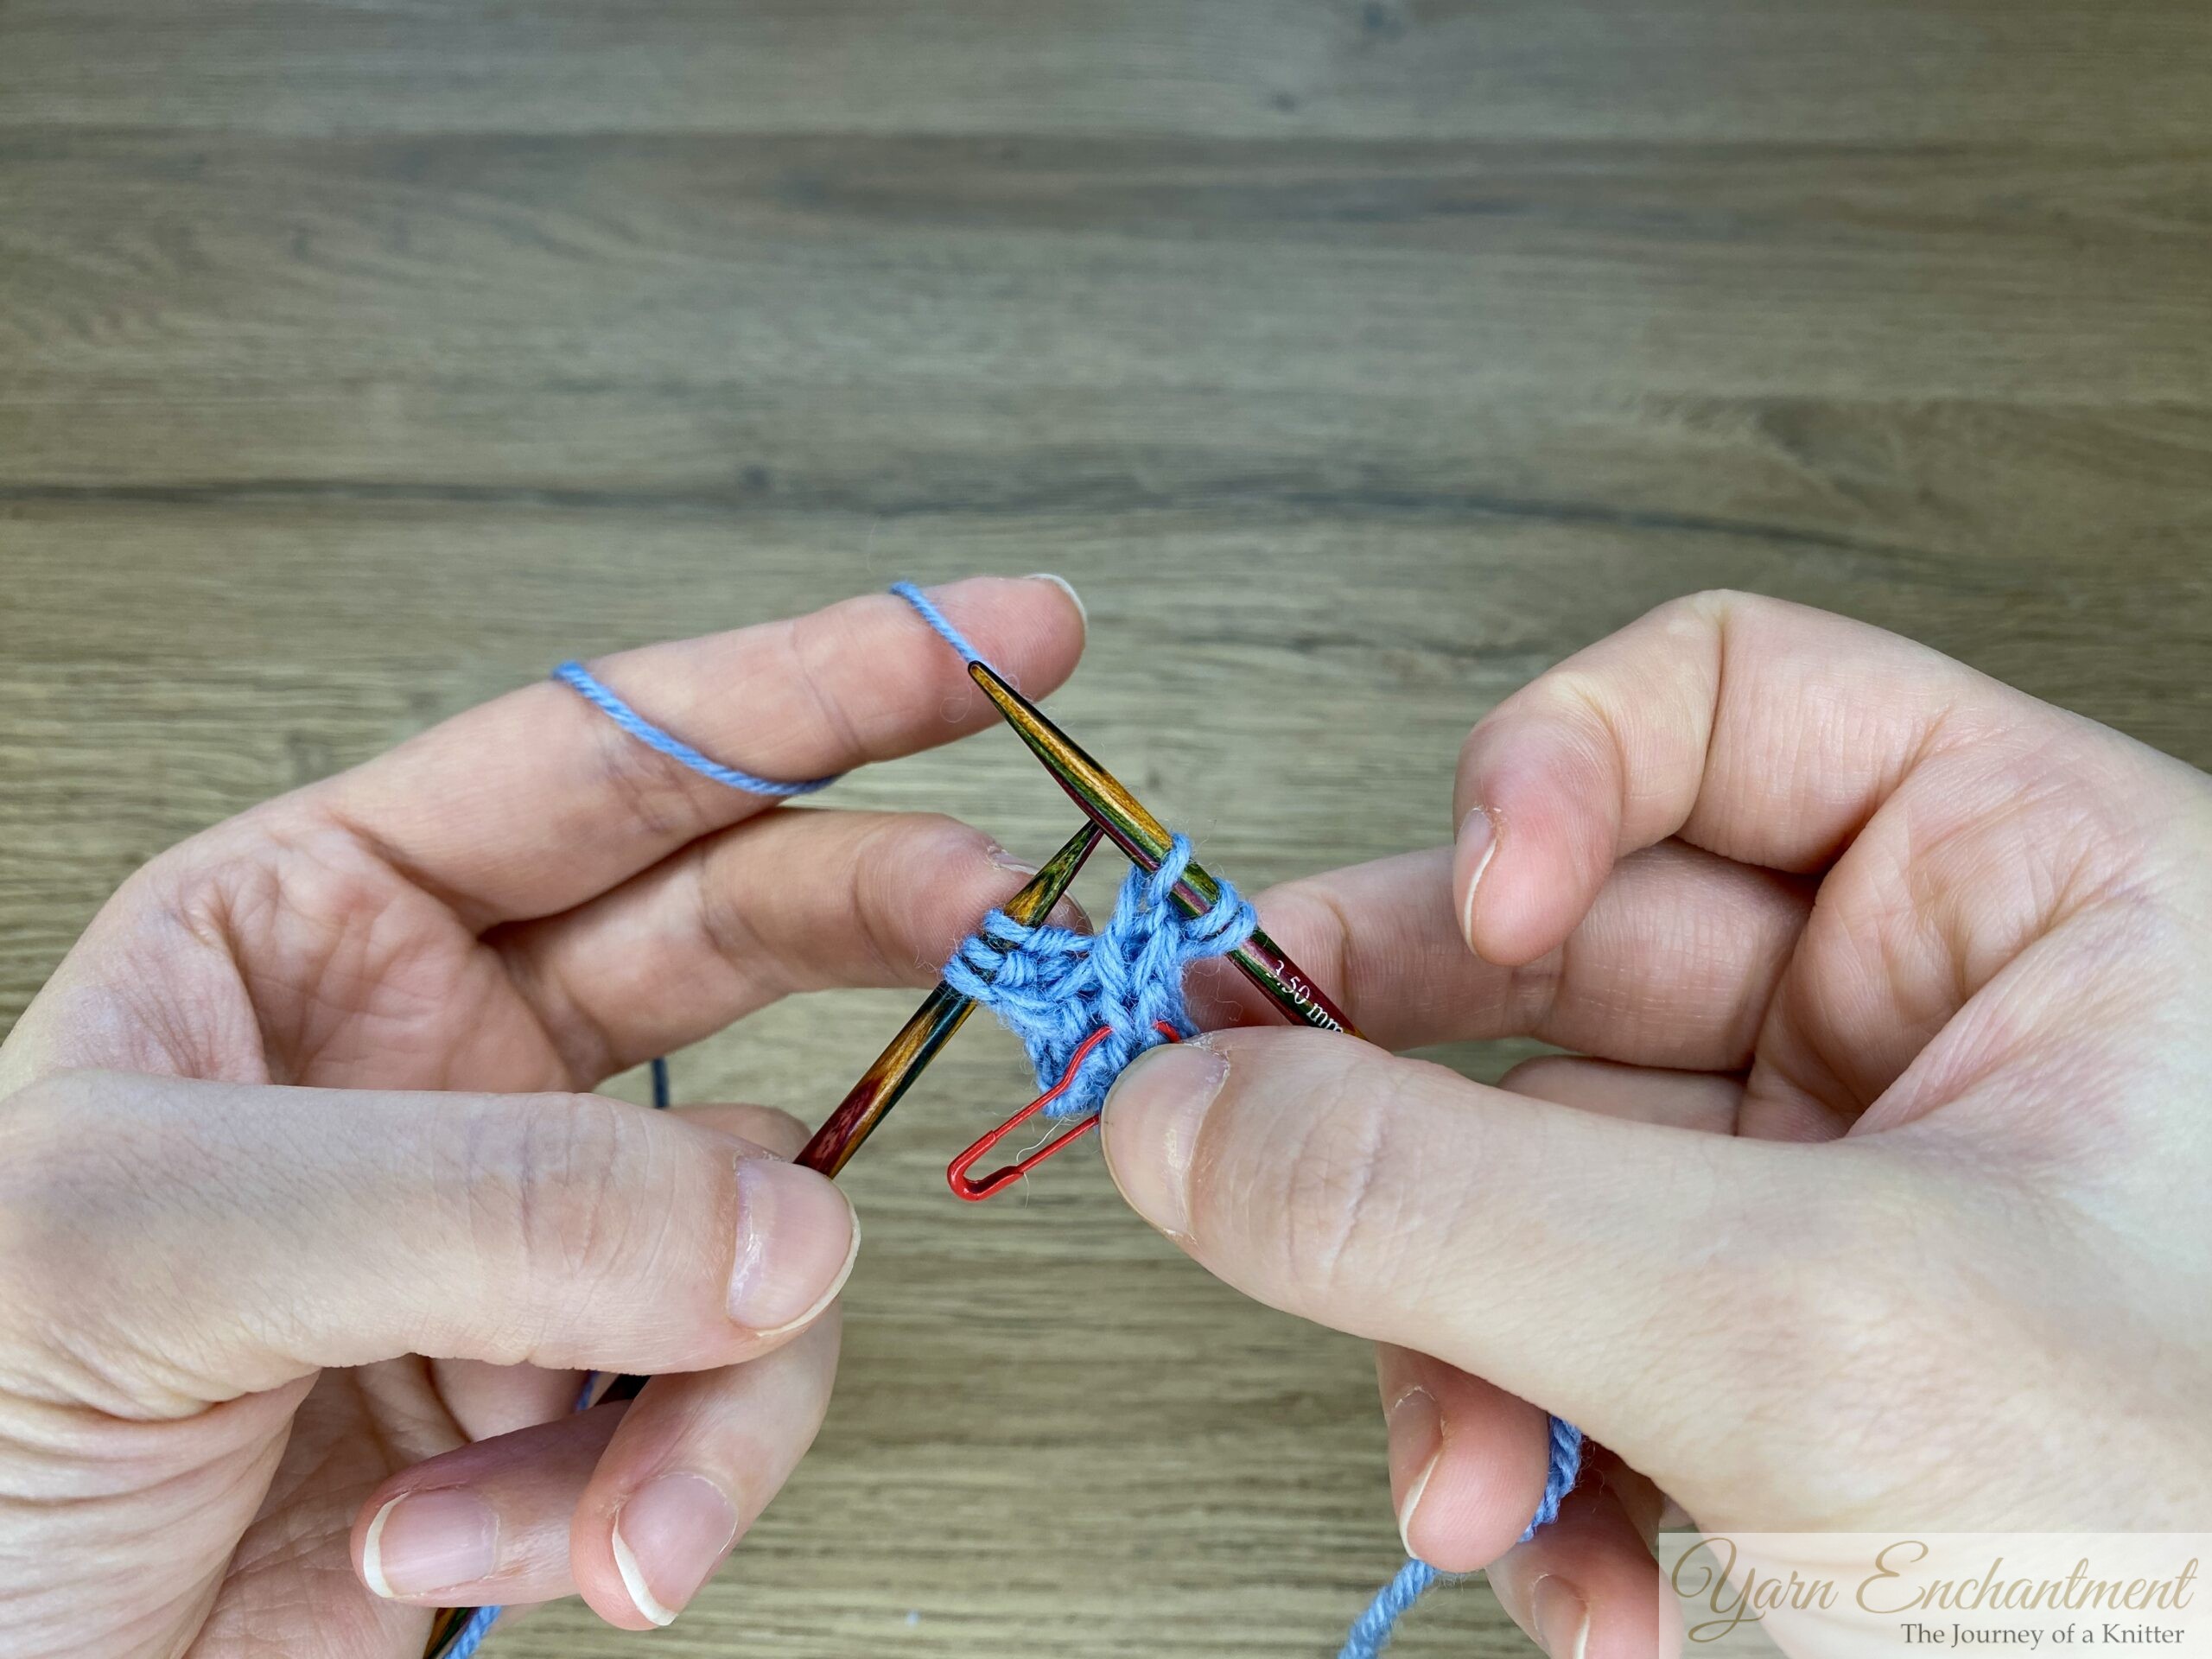  | 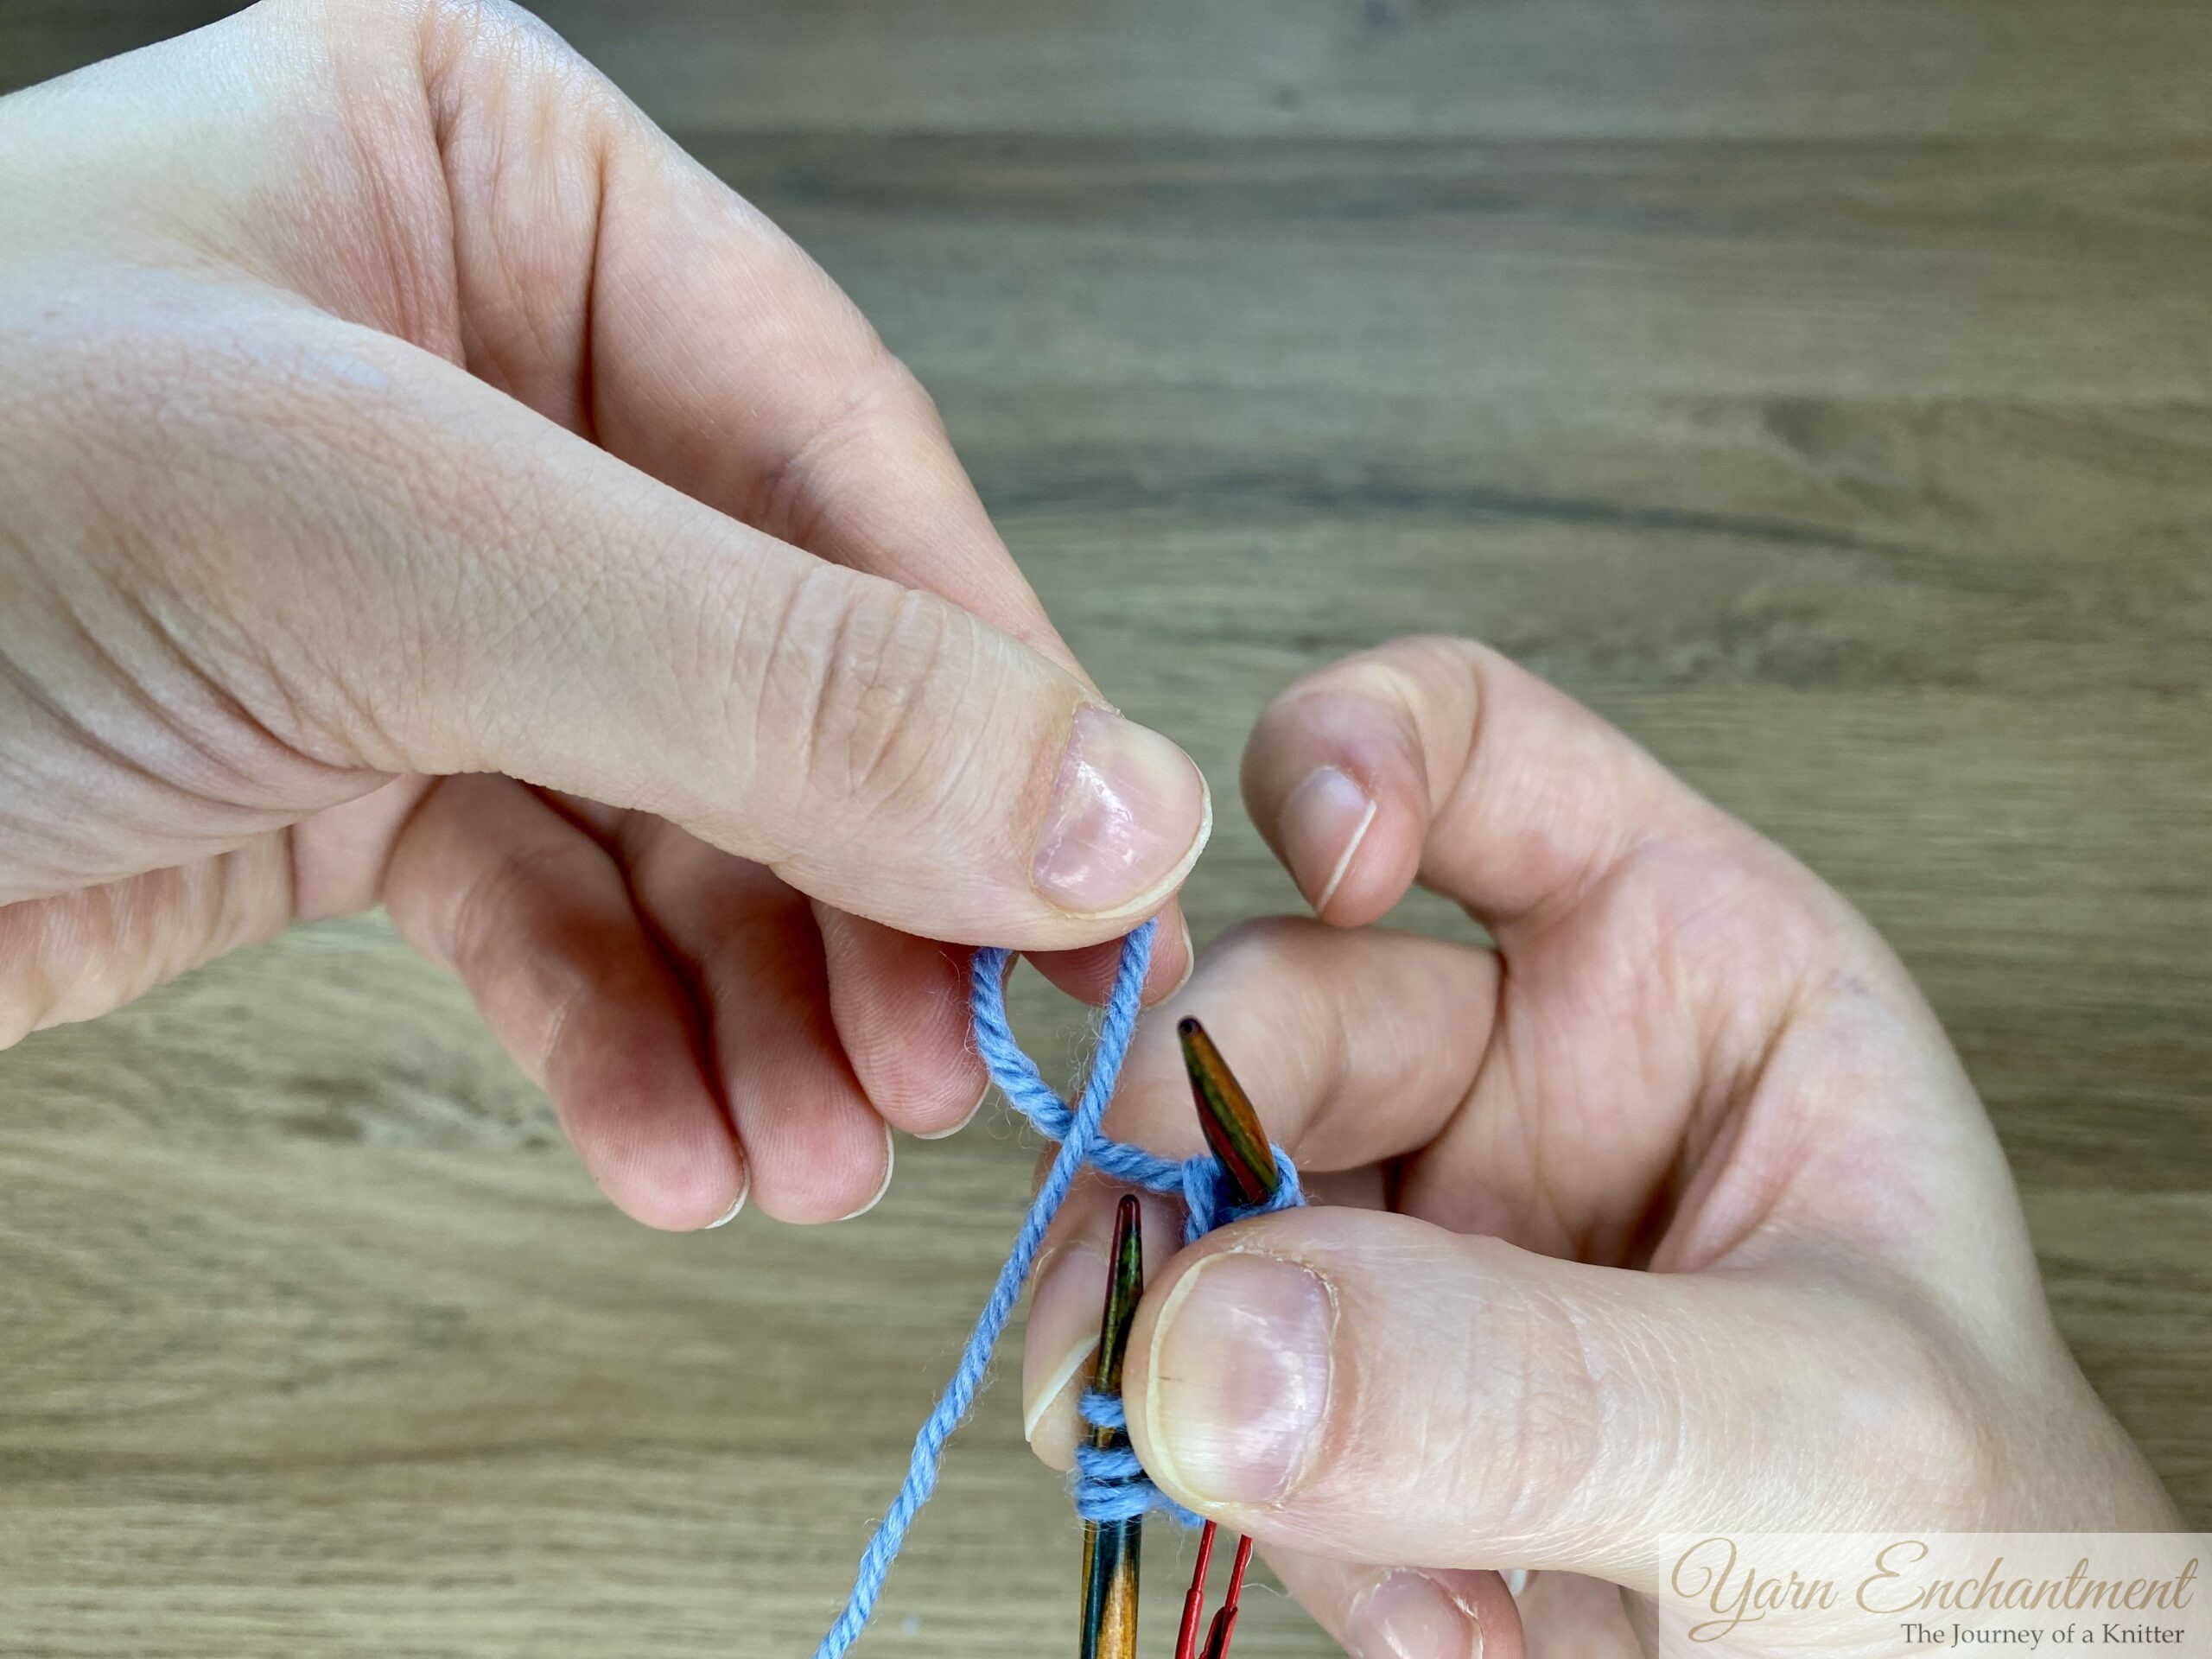  | 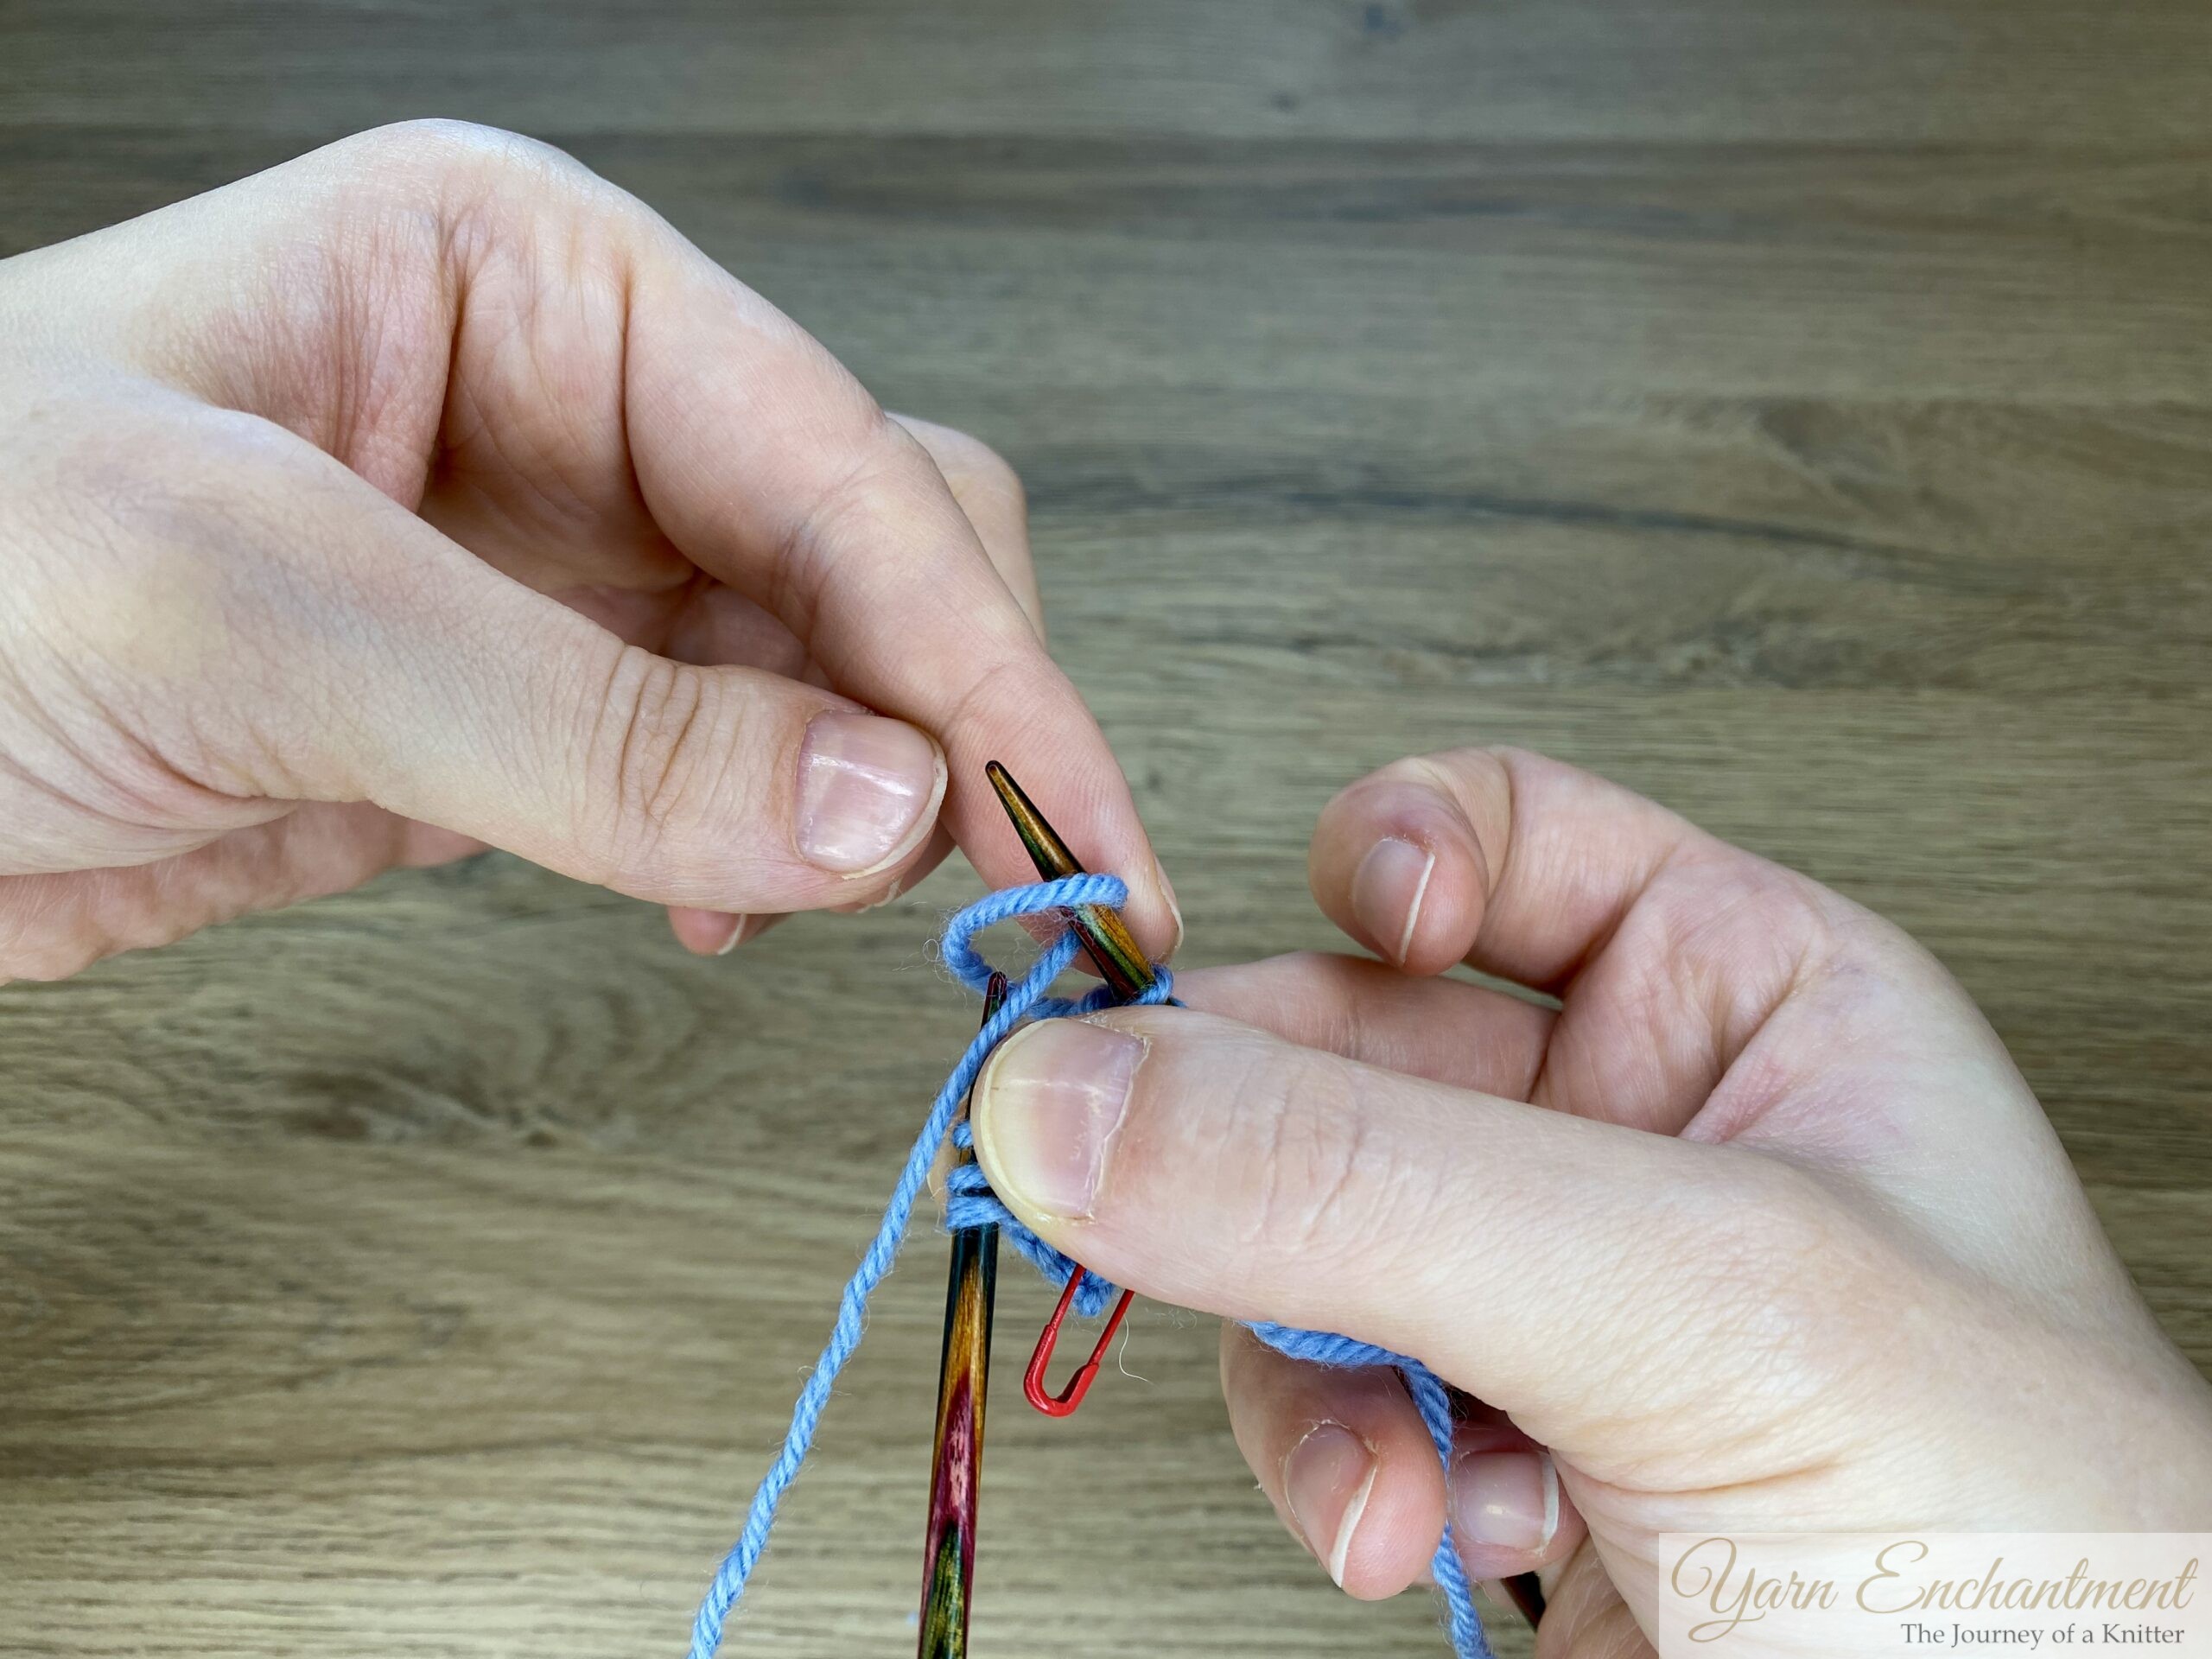  |
When you reach the point where you need to work your first increase between the I‑cord edges,... | ...instead of working a kfb into the third I‑cord stitch, I like to make a backward loop cast on. Simply form a little loop with the yarn... | ...and place it onto your needle. |
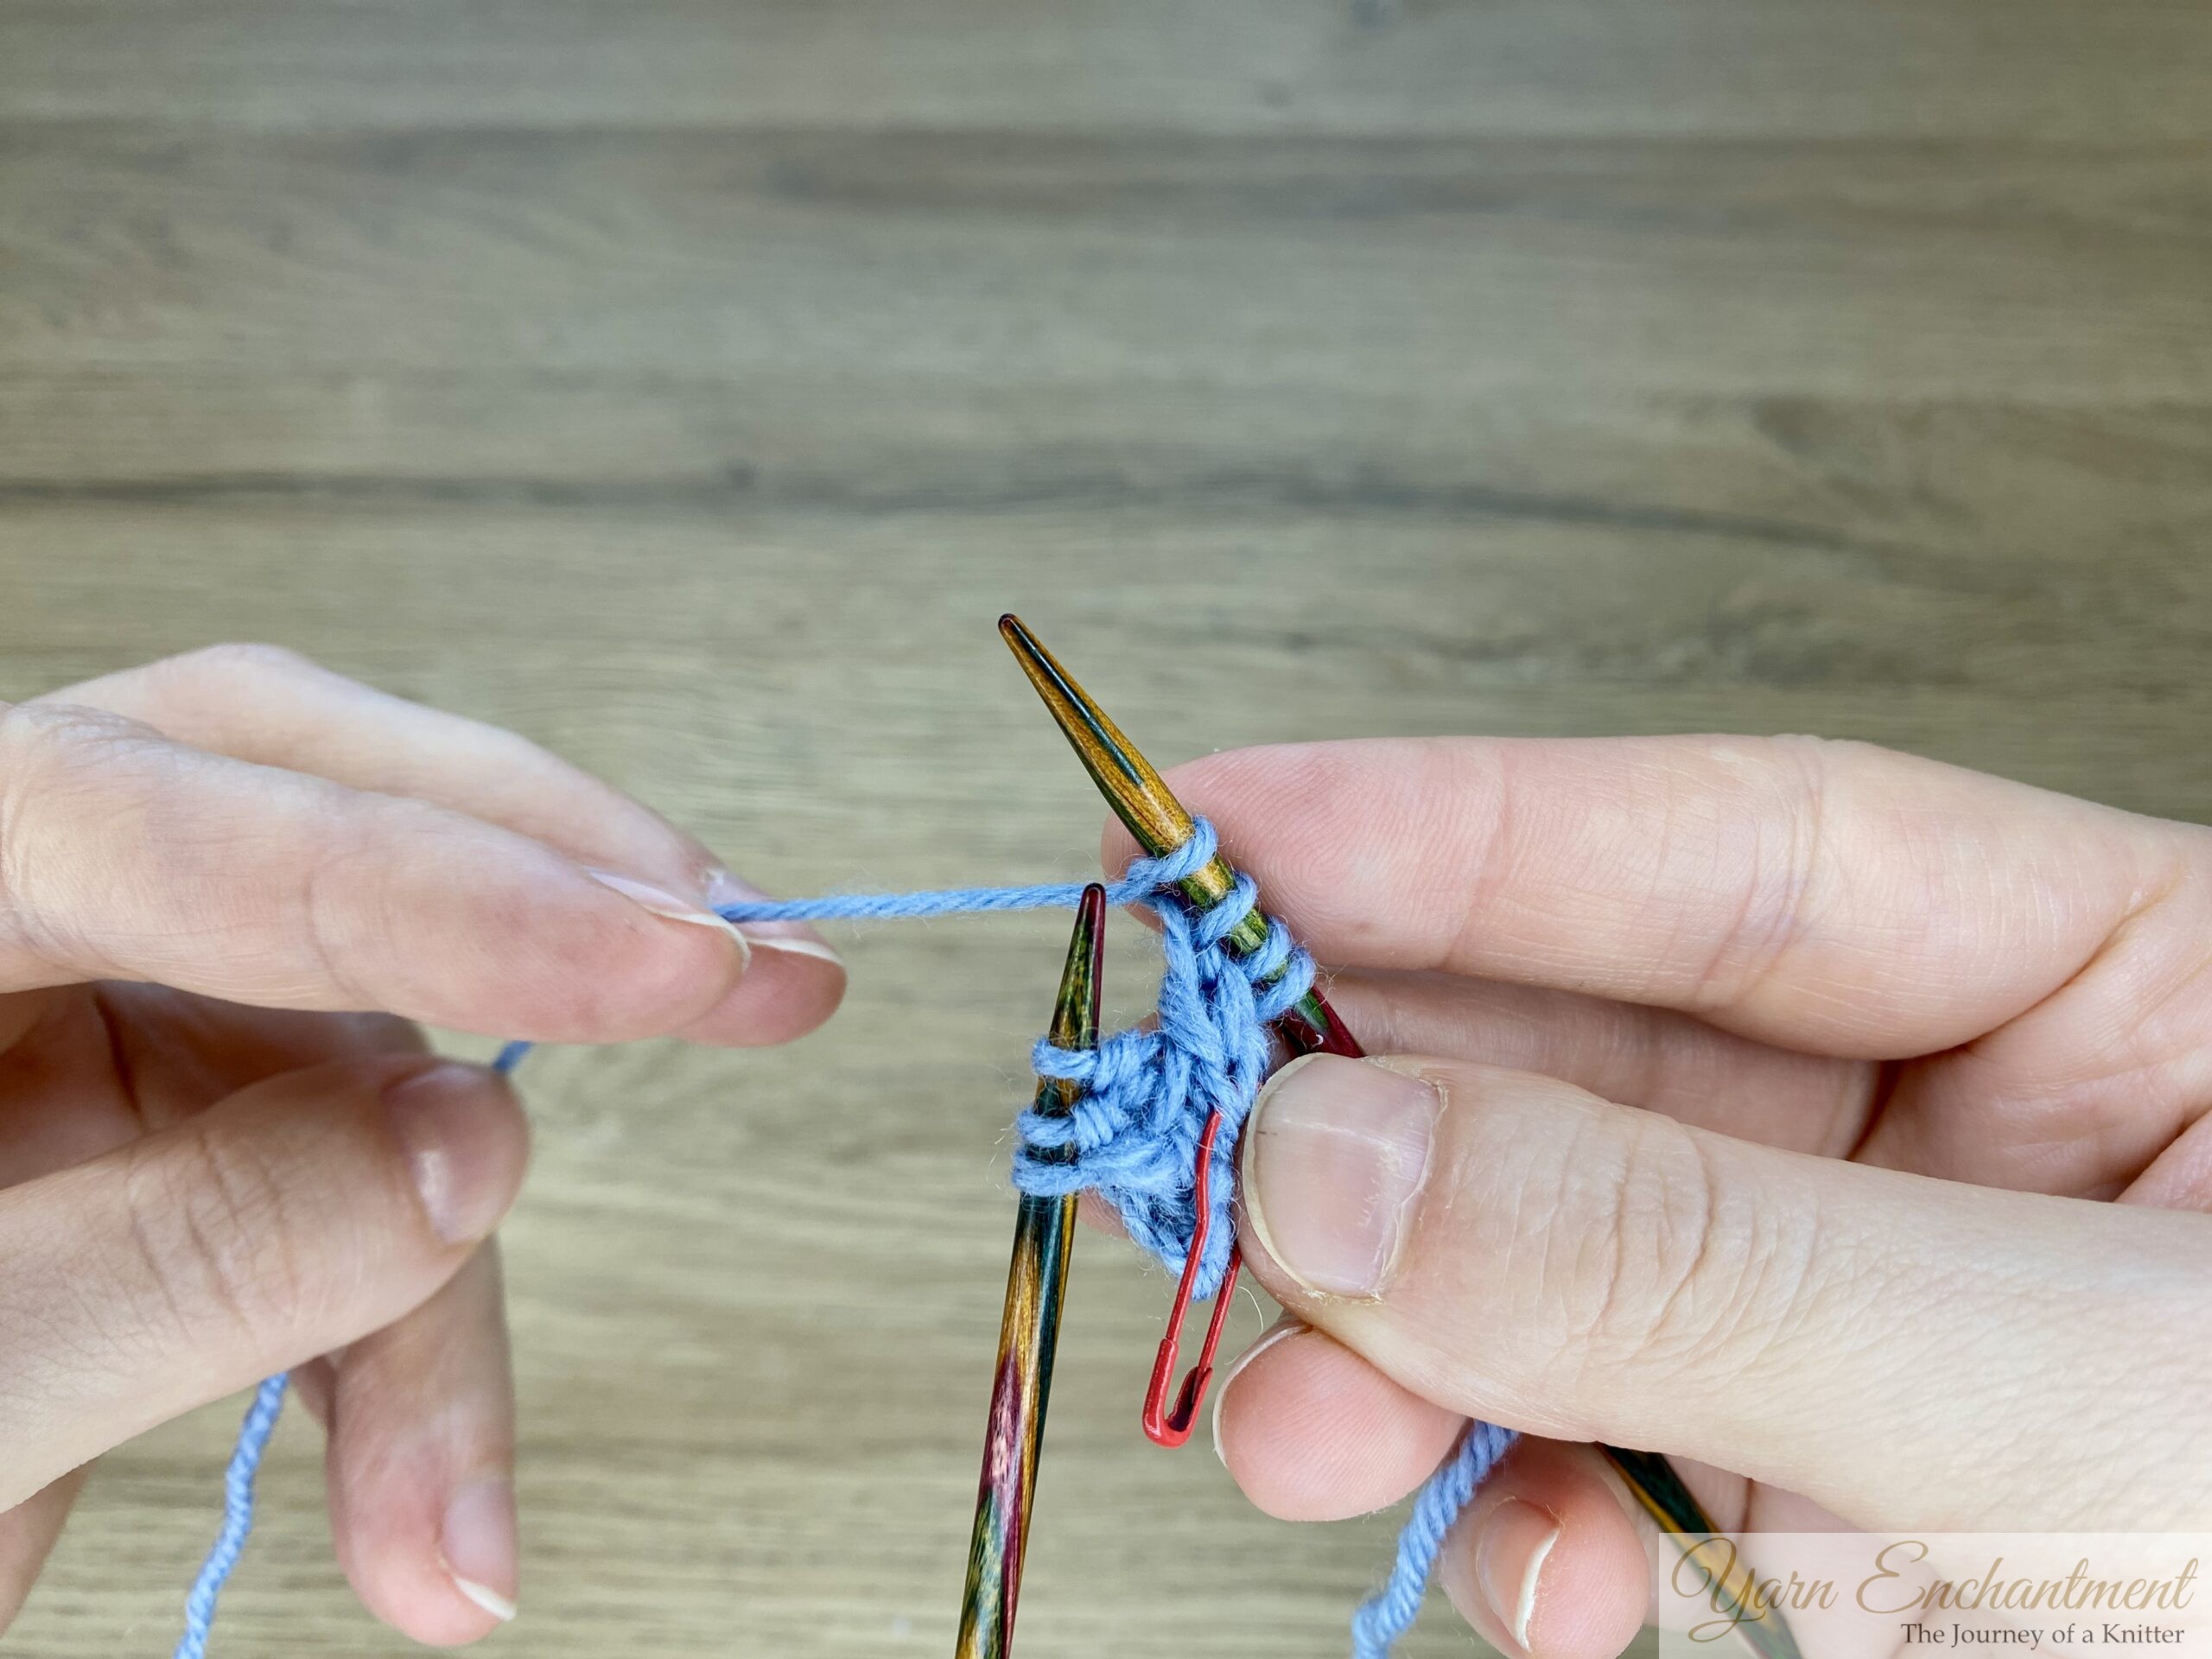  | 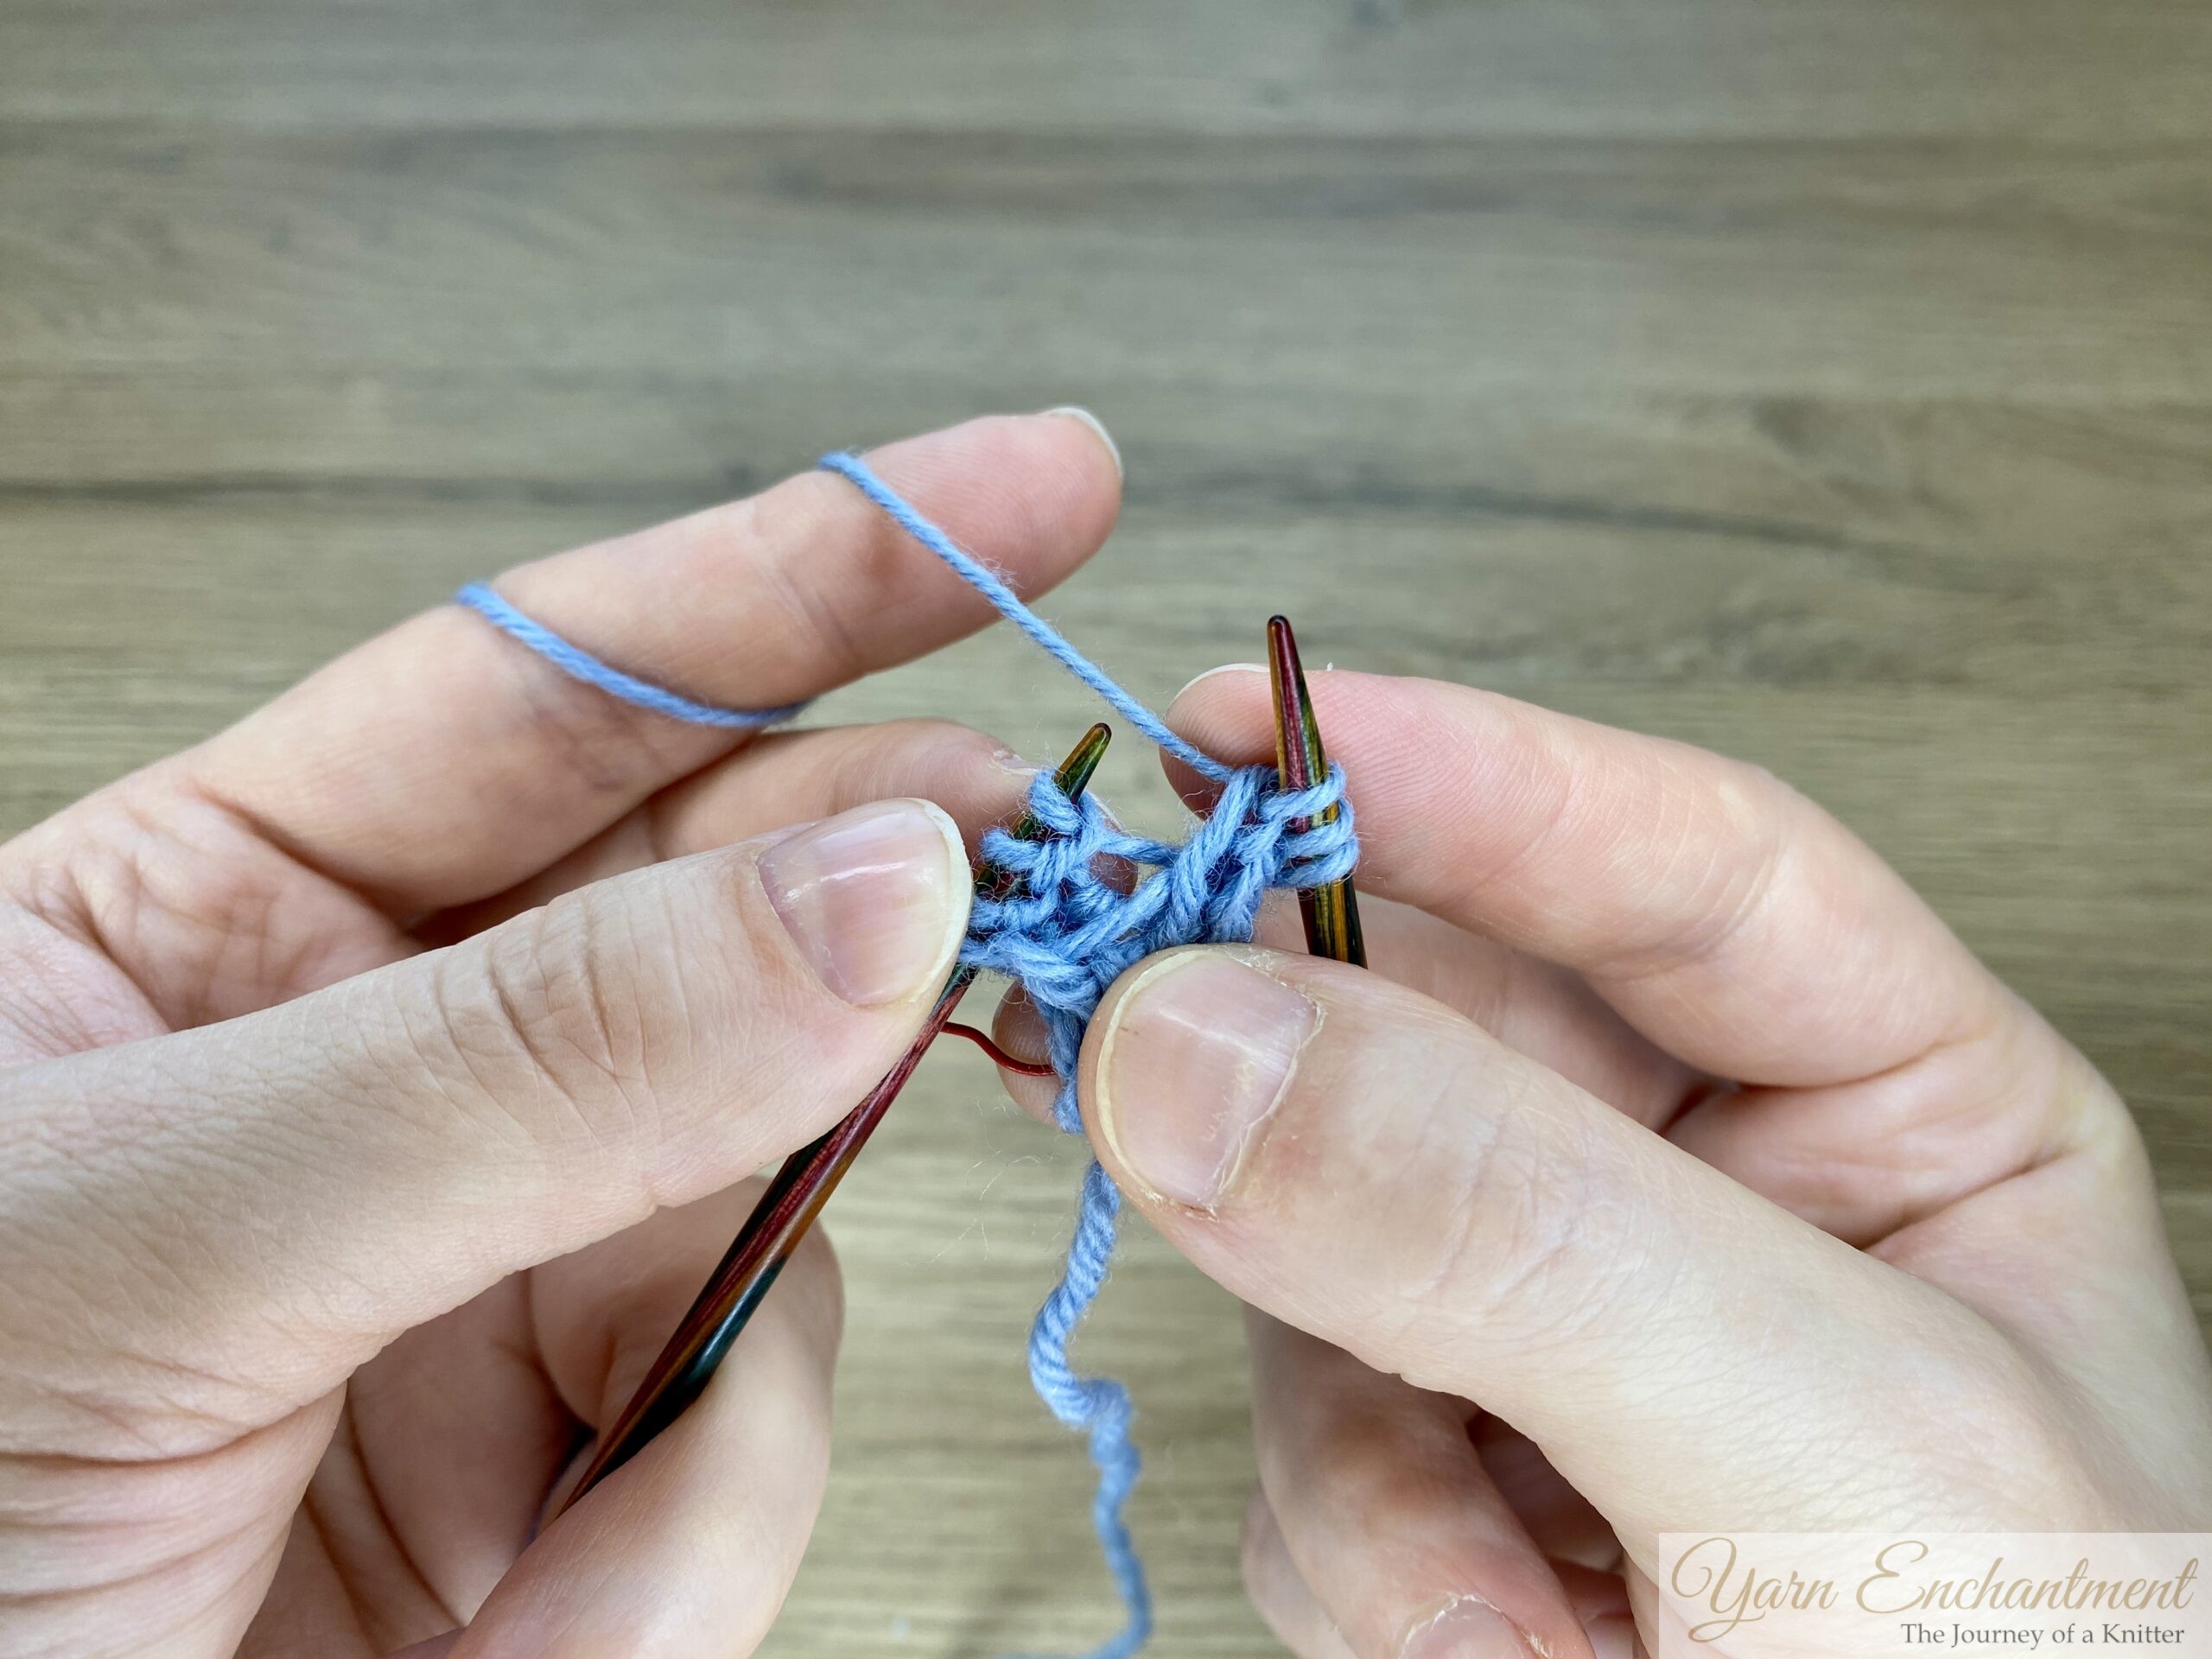  | 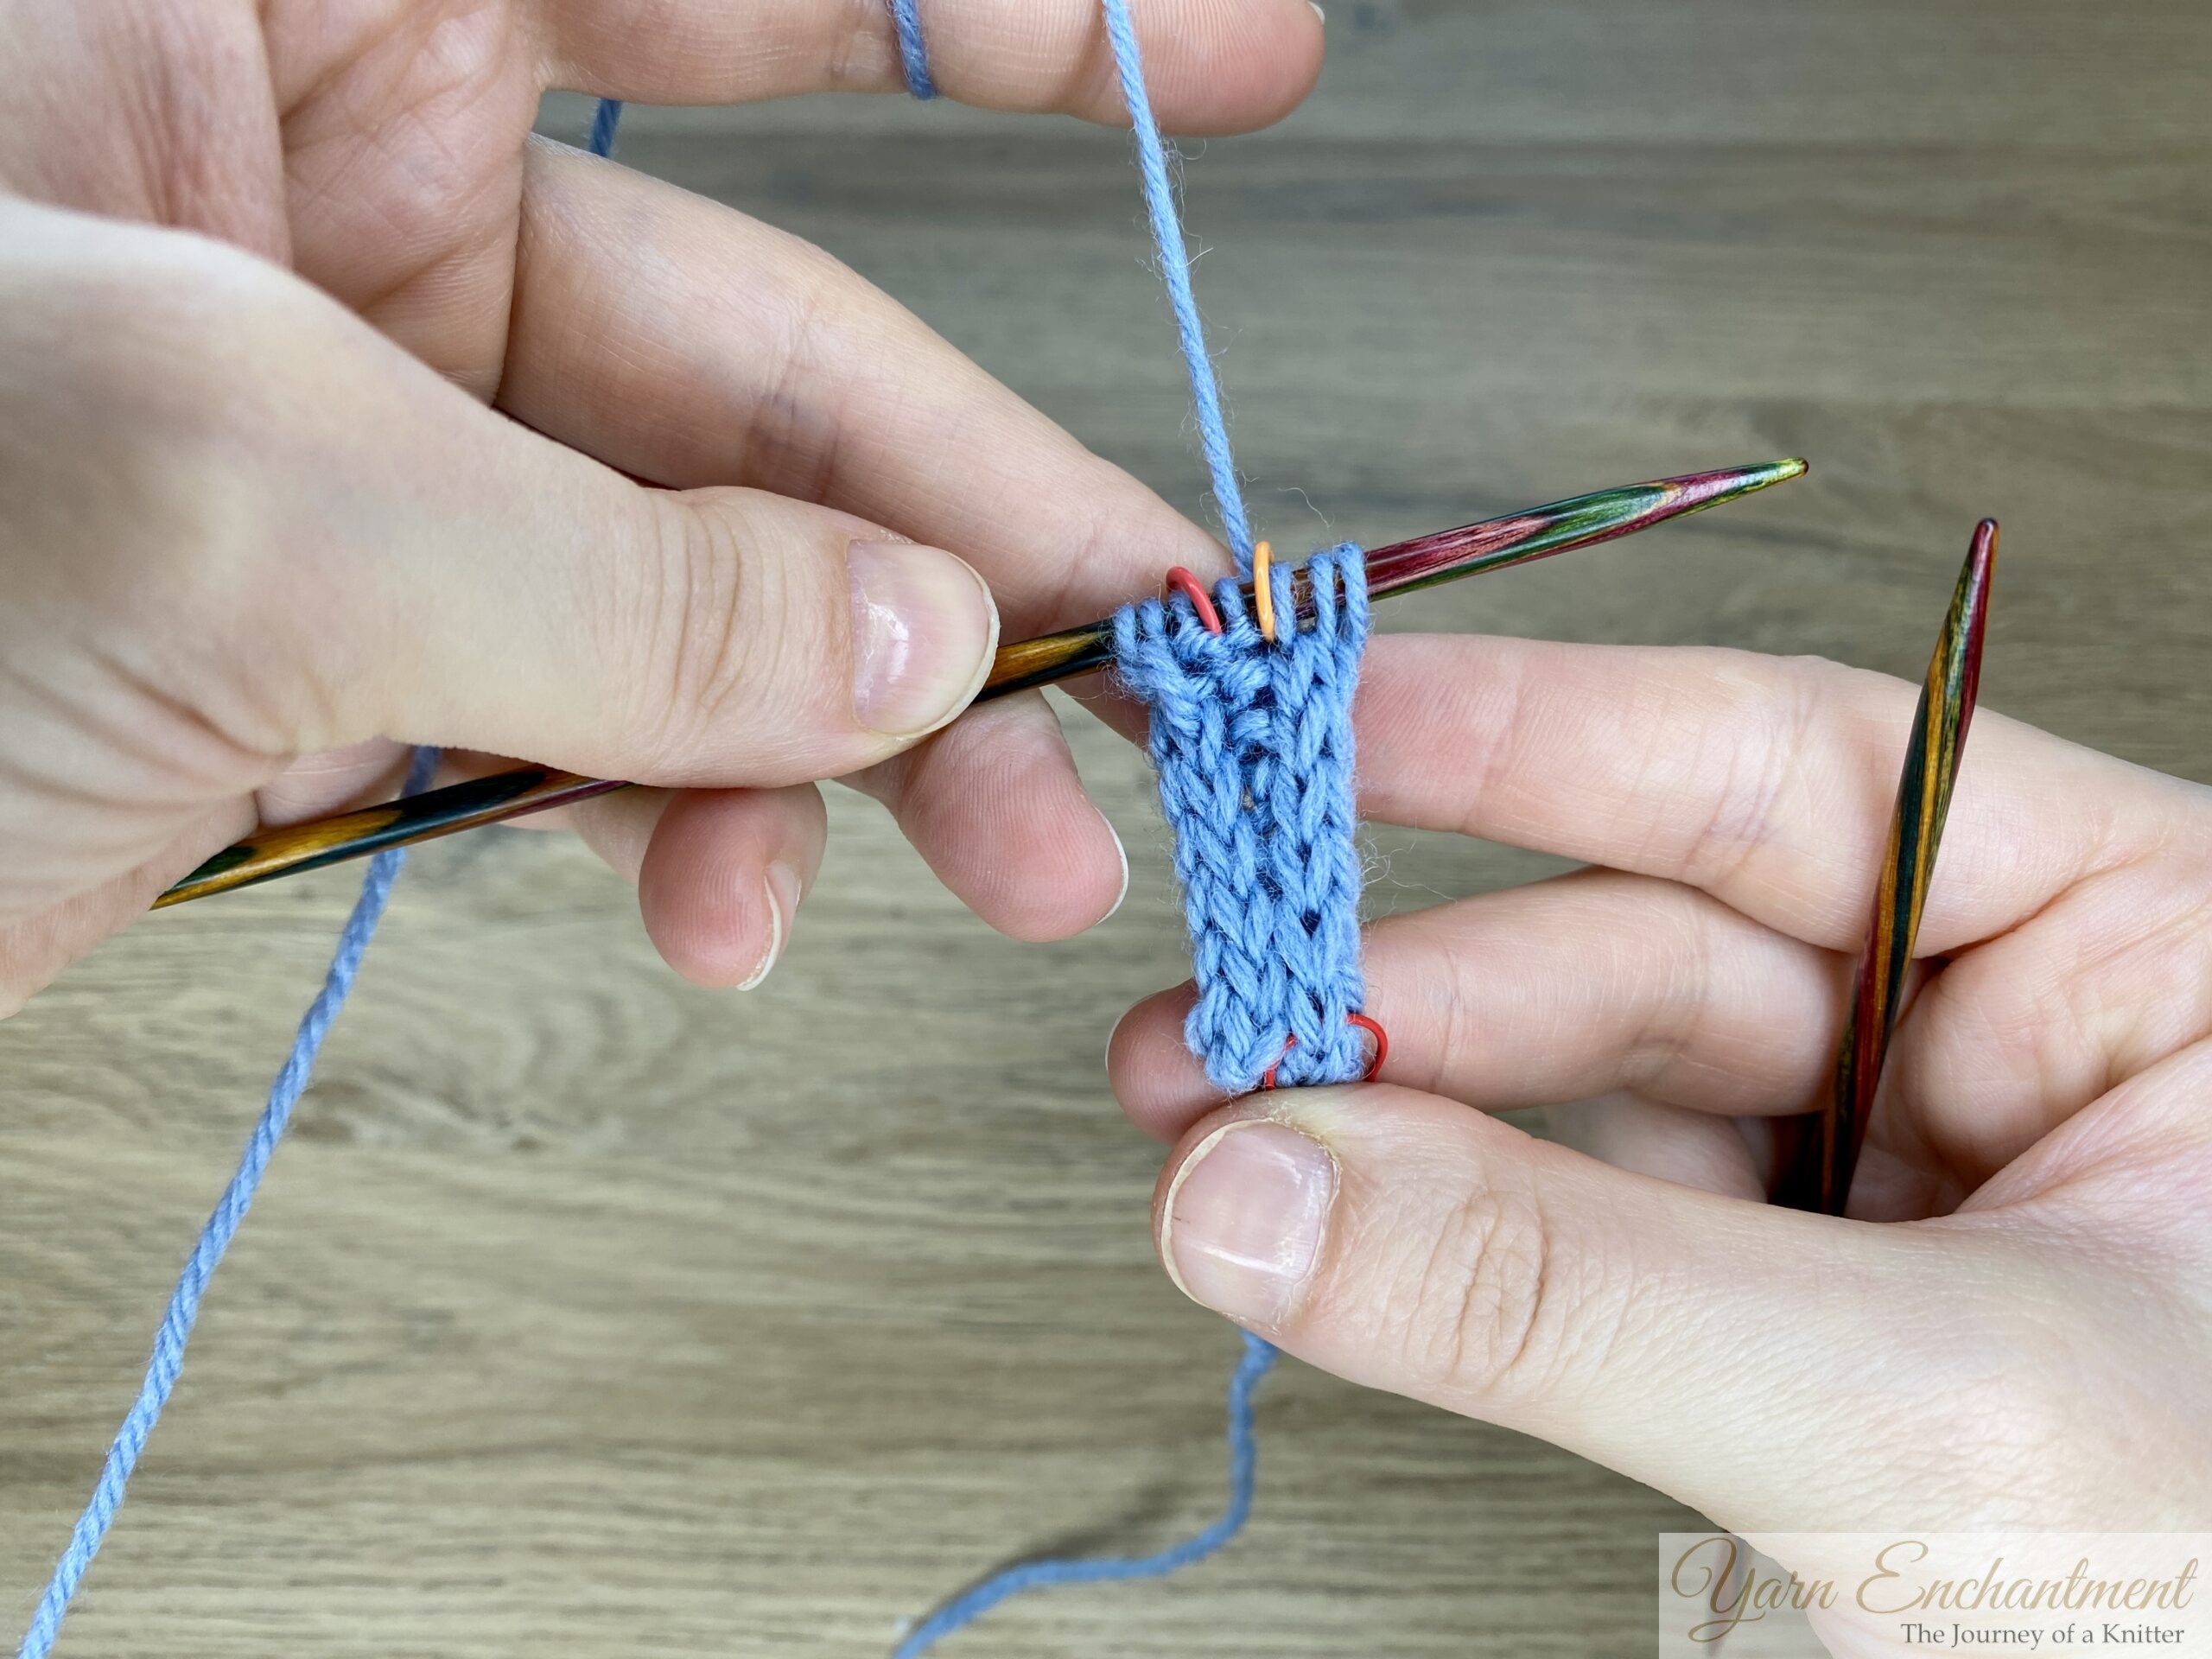  |
You’ve now created a new stitch directly between the two I‑cord edges | On the wrong side, just knit this loop as a normal stitch (it can feel a little tight on the first row, and that’s okay) | As you can see, this gives very neat increases without disturbing the I‑cord edge at all. |
After that, I work all further increases as a knit front and back (kfb) in the first stitch right after the I‑cord edge. Keeping the kfb one stitch after the edge means the I‑cord itself remains undisturbed, while the Sophie Scarf, Hood or Shawl grows wider row by row. On my swatches, this simple change gave a much smoother, tidier I‑cord edge. I also like to place stitch markers before and after the I‑cord stitches. This little trick reminds me to slip the last three stitches and helps prevent me from accidentally knitting them instead.
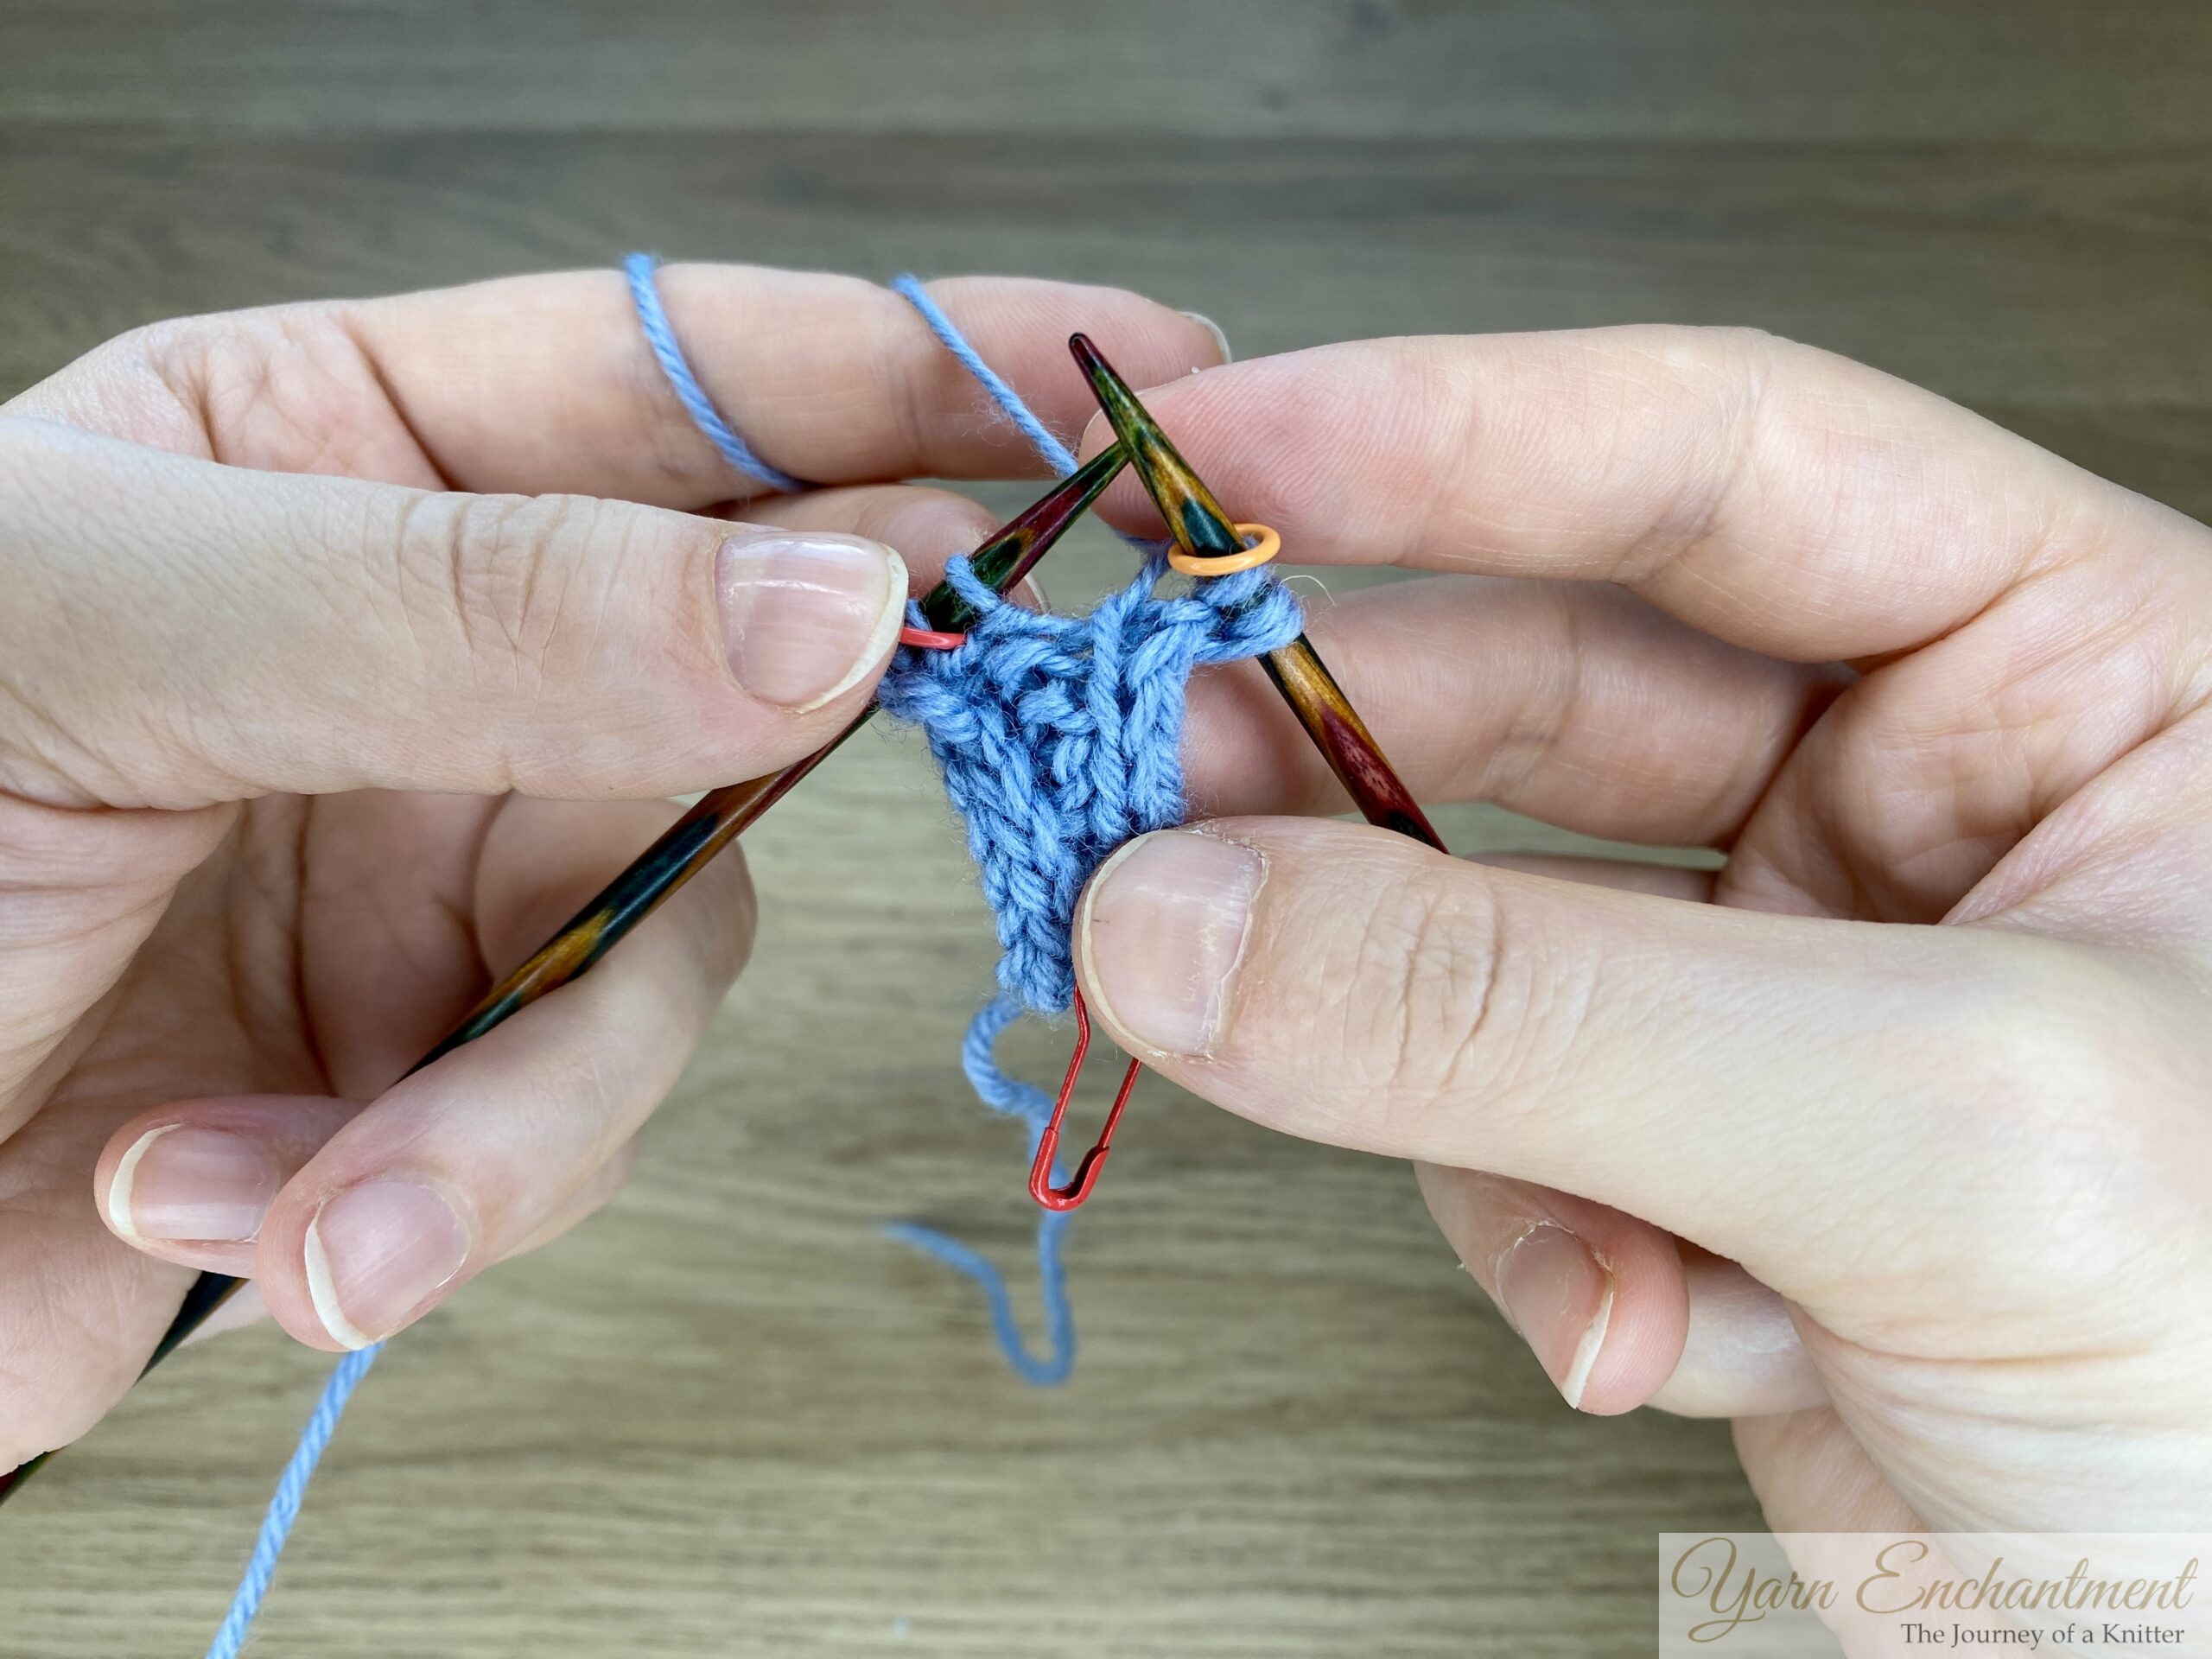  | 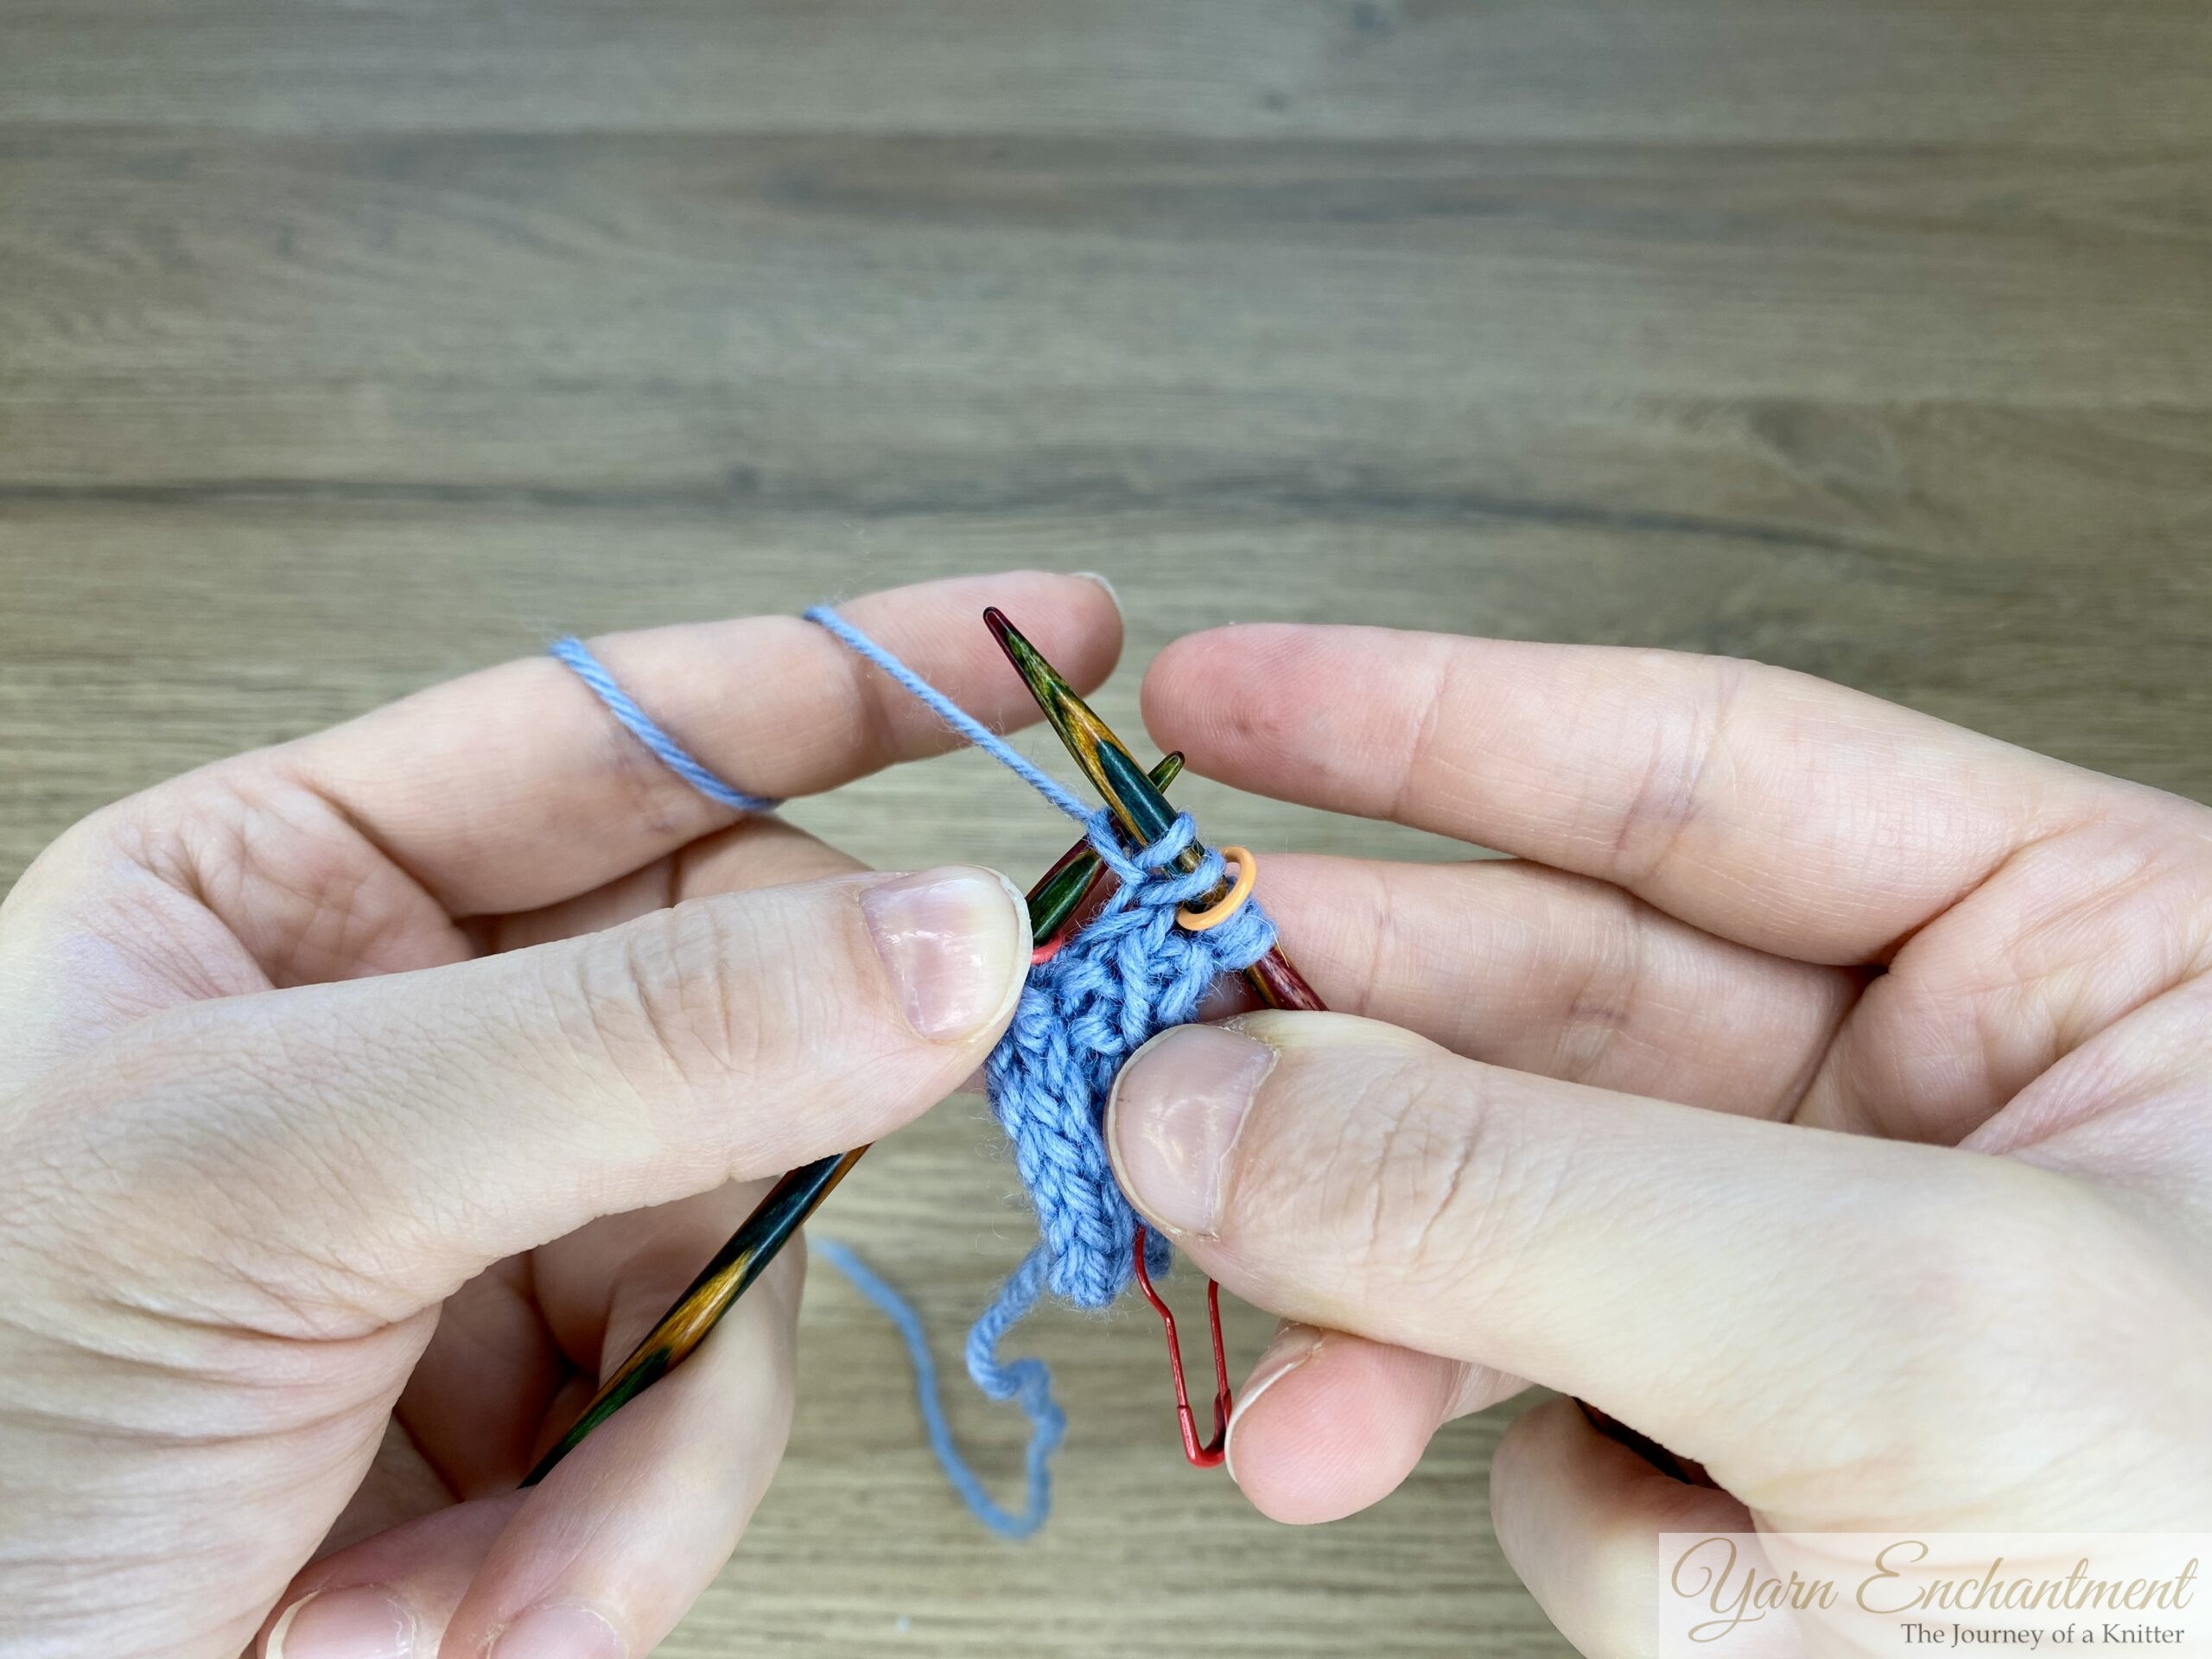  | 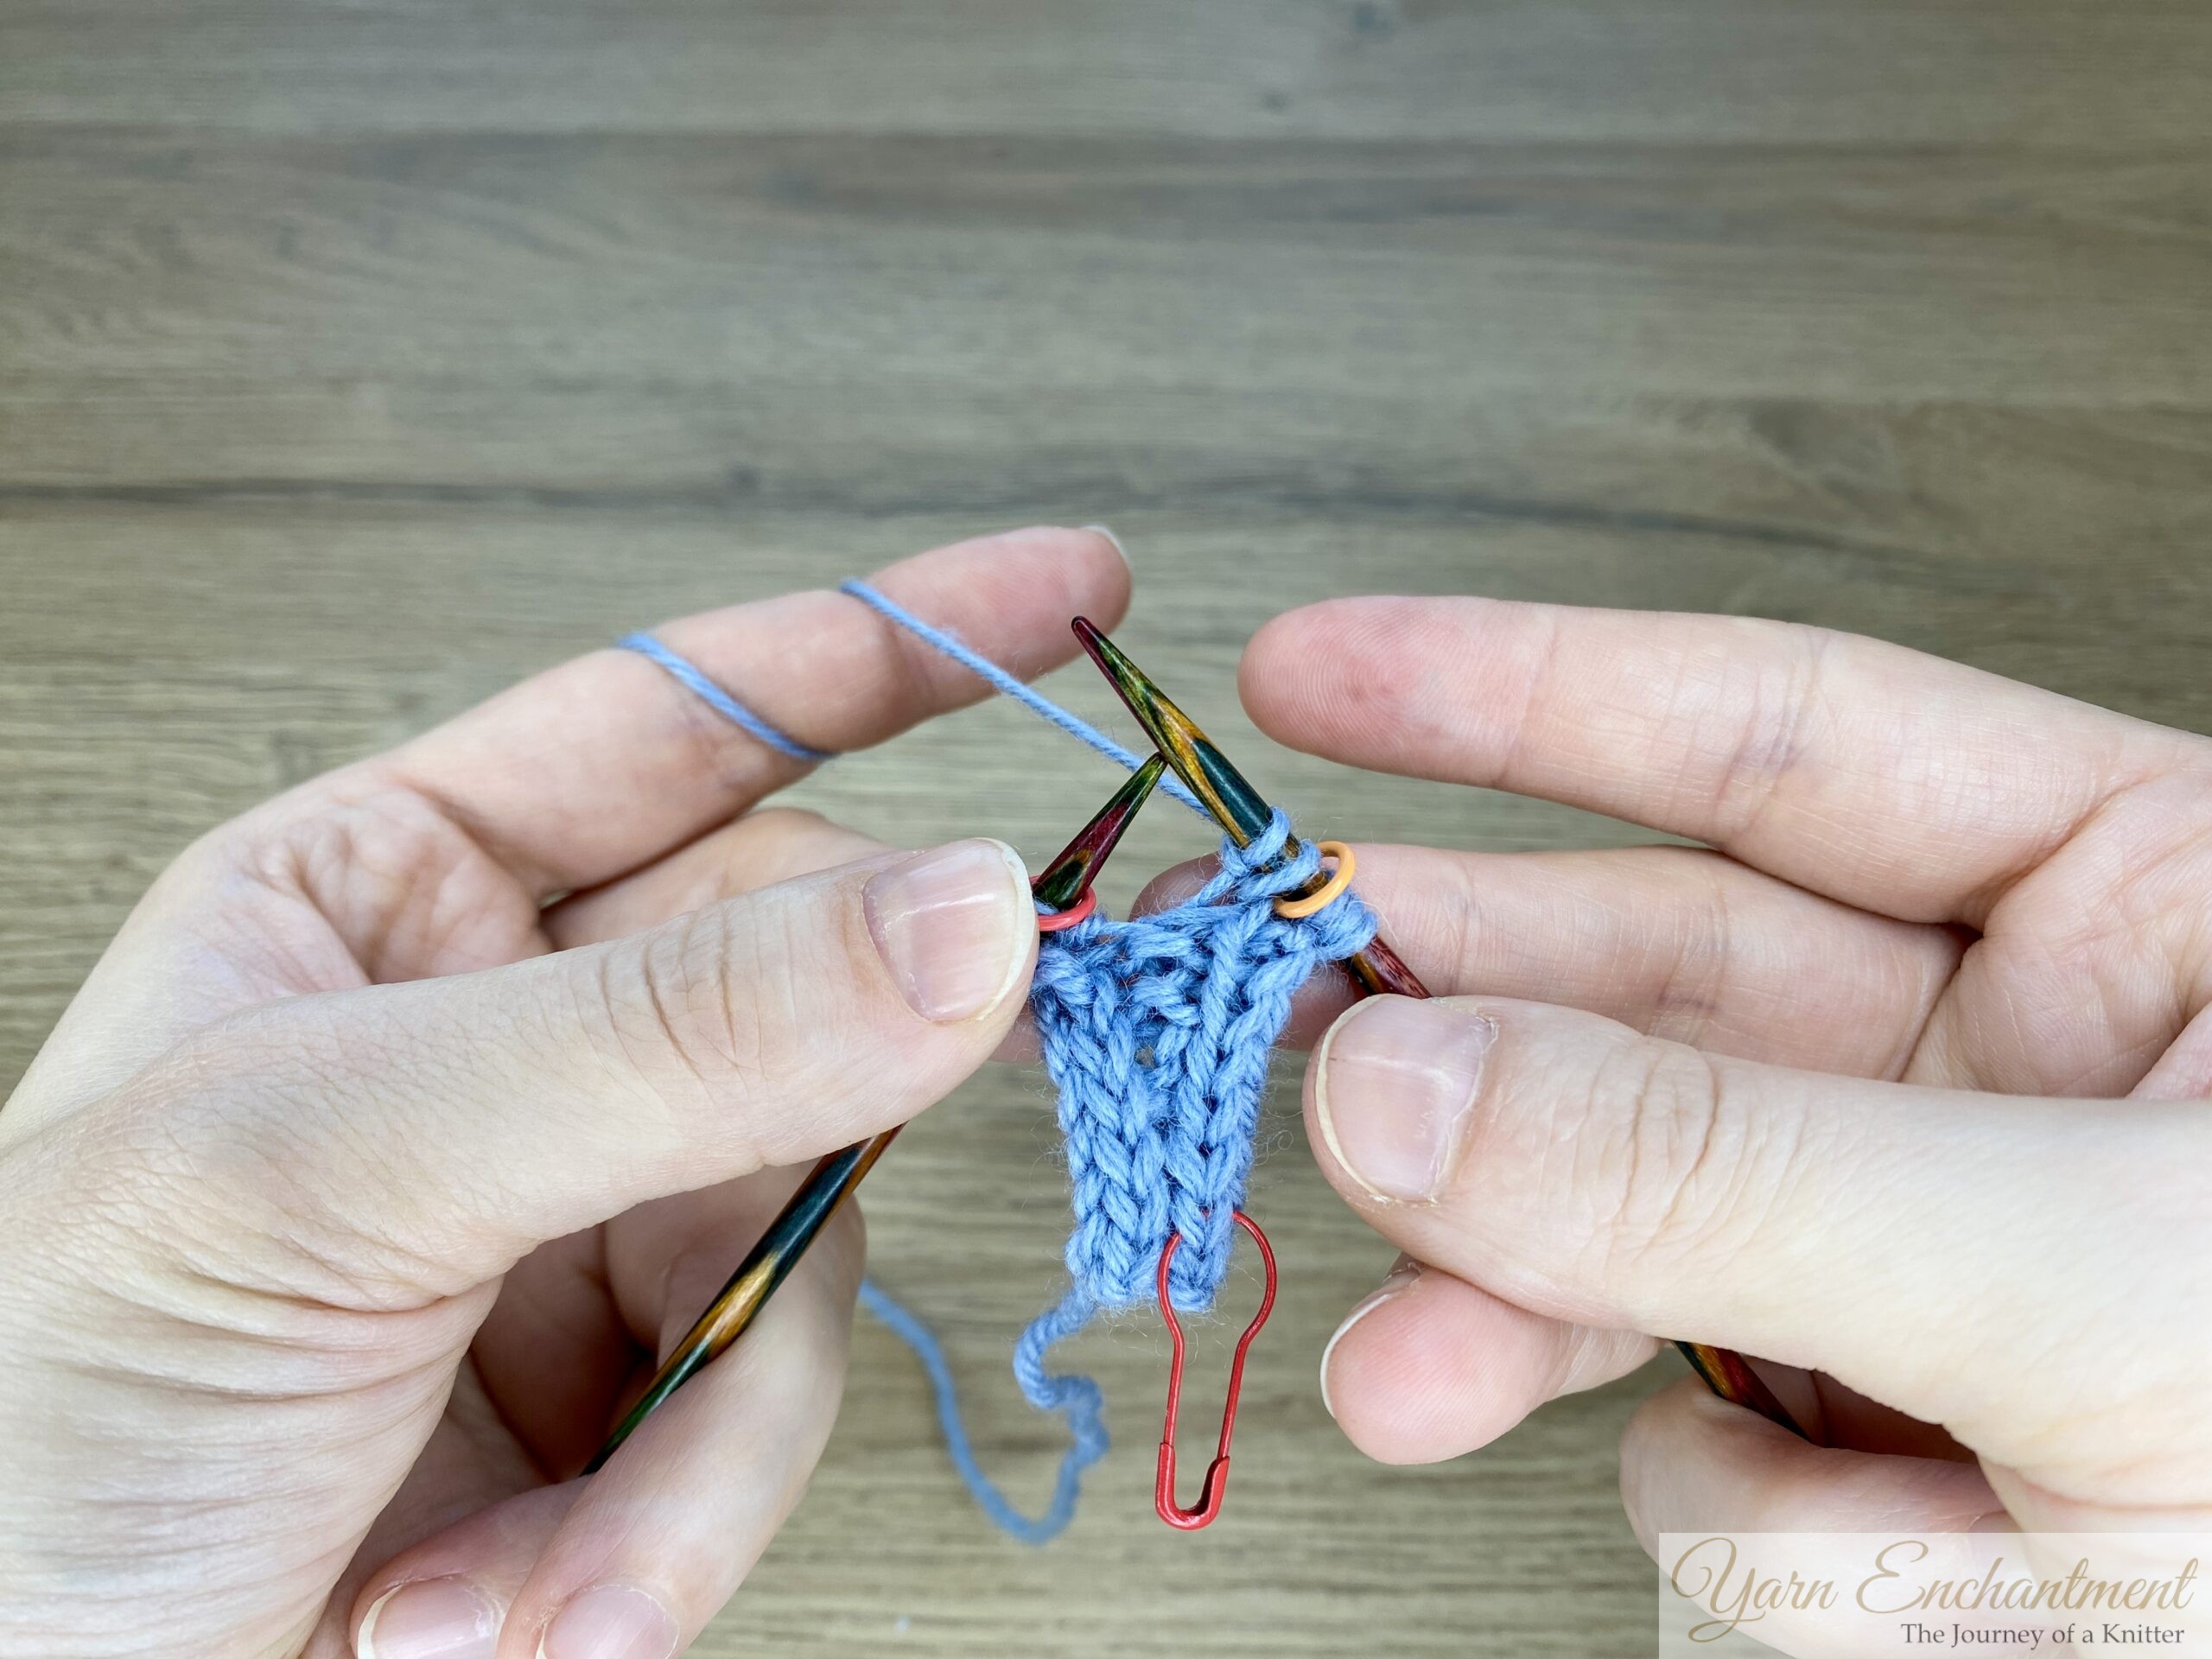  |
Right after the I‑cord edge,... | ...work a kfb increase into the first stitch | This way, you add another stitch without disturbing the I‑cord edge. |
Softer decreases for a smooth edge
When it is time to decrease, I actually prefer to use a k2tog. For my taste, this decrease looks smoother and less fussy than “knit one, slip one, pass the slipped stitch over,” especially in garter stitch next to an I‑cord. The shaping line feels softer and the edge flows more nicely into the rest of the fabric.
Again, there is nothing wrong with the original decreases at all - they are just a different style choice. This is simply the version that makes me happiest when I look at my finished Sophie pieces.
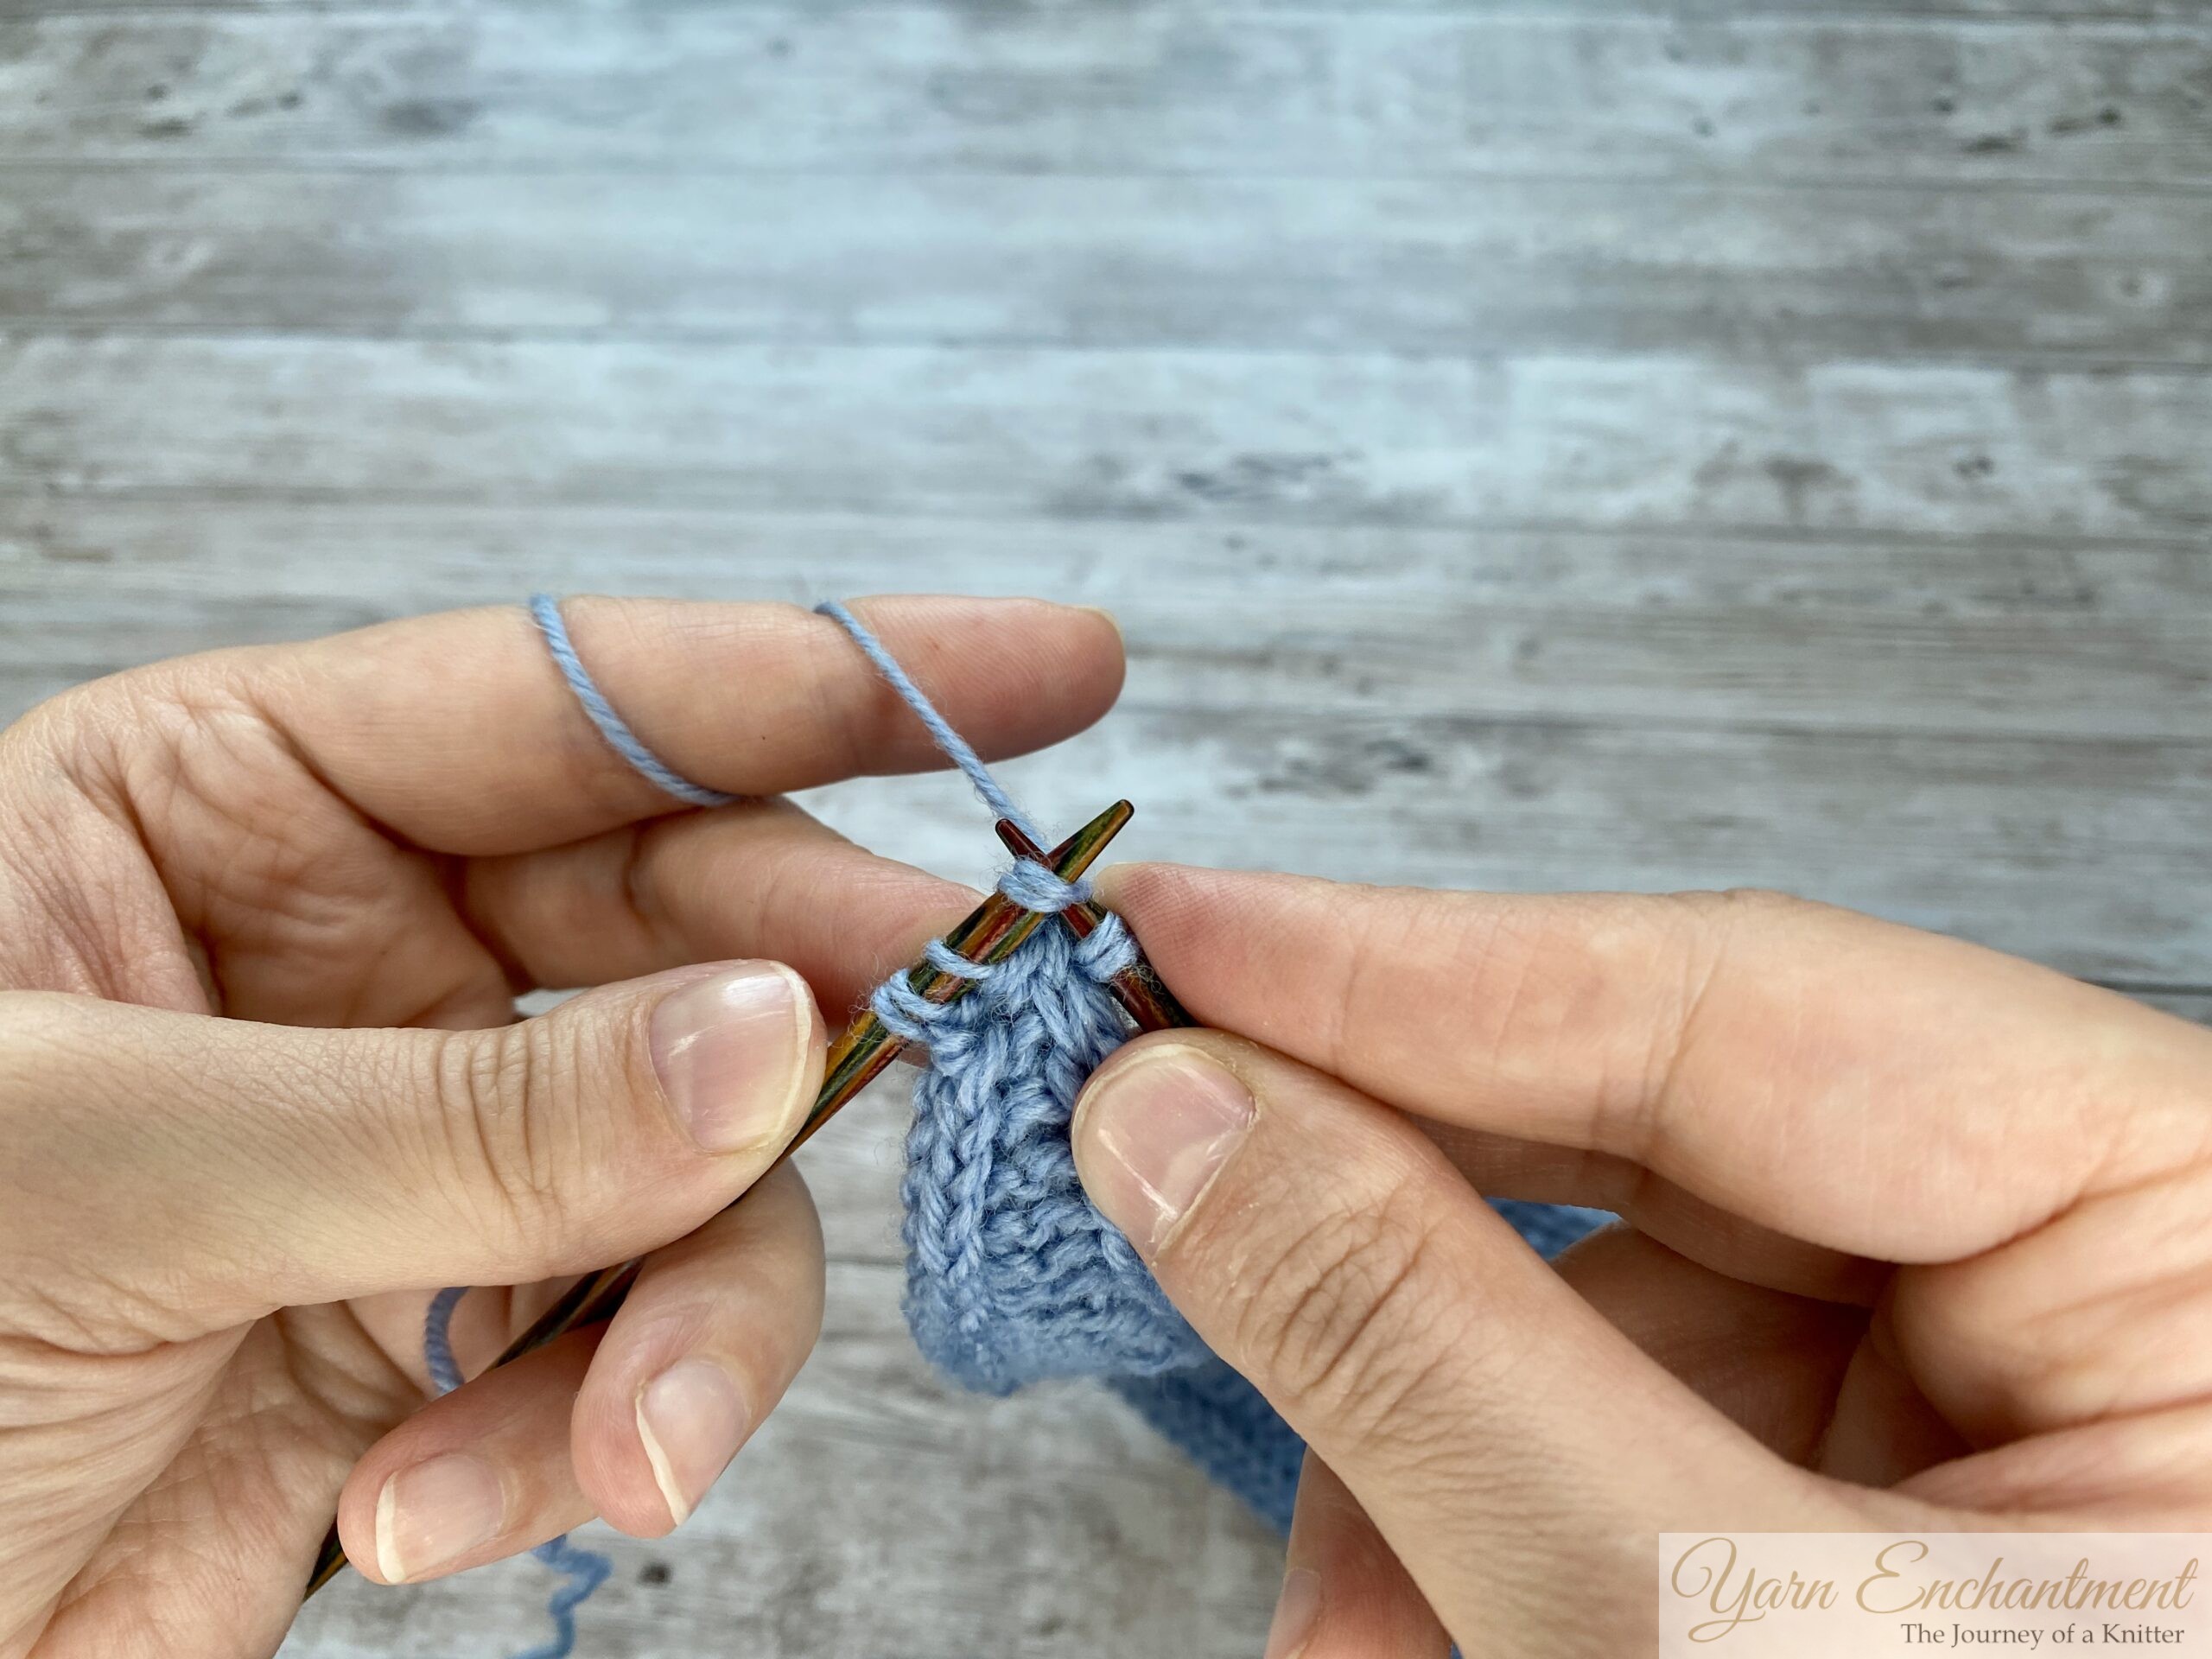
Knit the first three i-cord stitches,
then work a knit2tog over the fourth and fifth stitches.
I worked this decrease all the way to the end of the pattern.
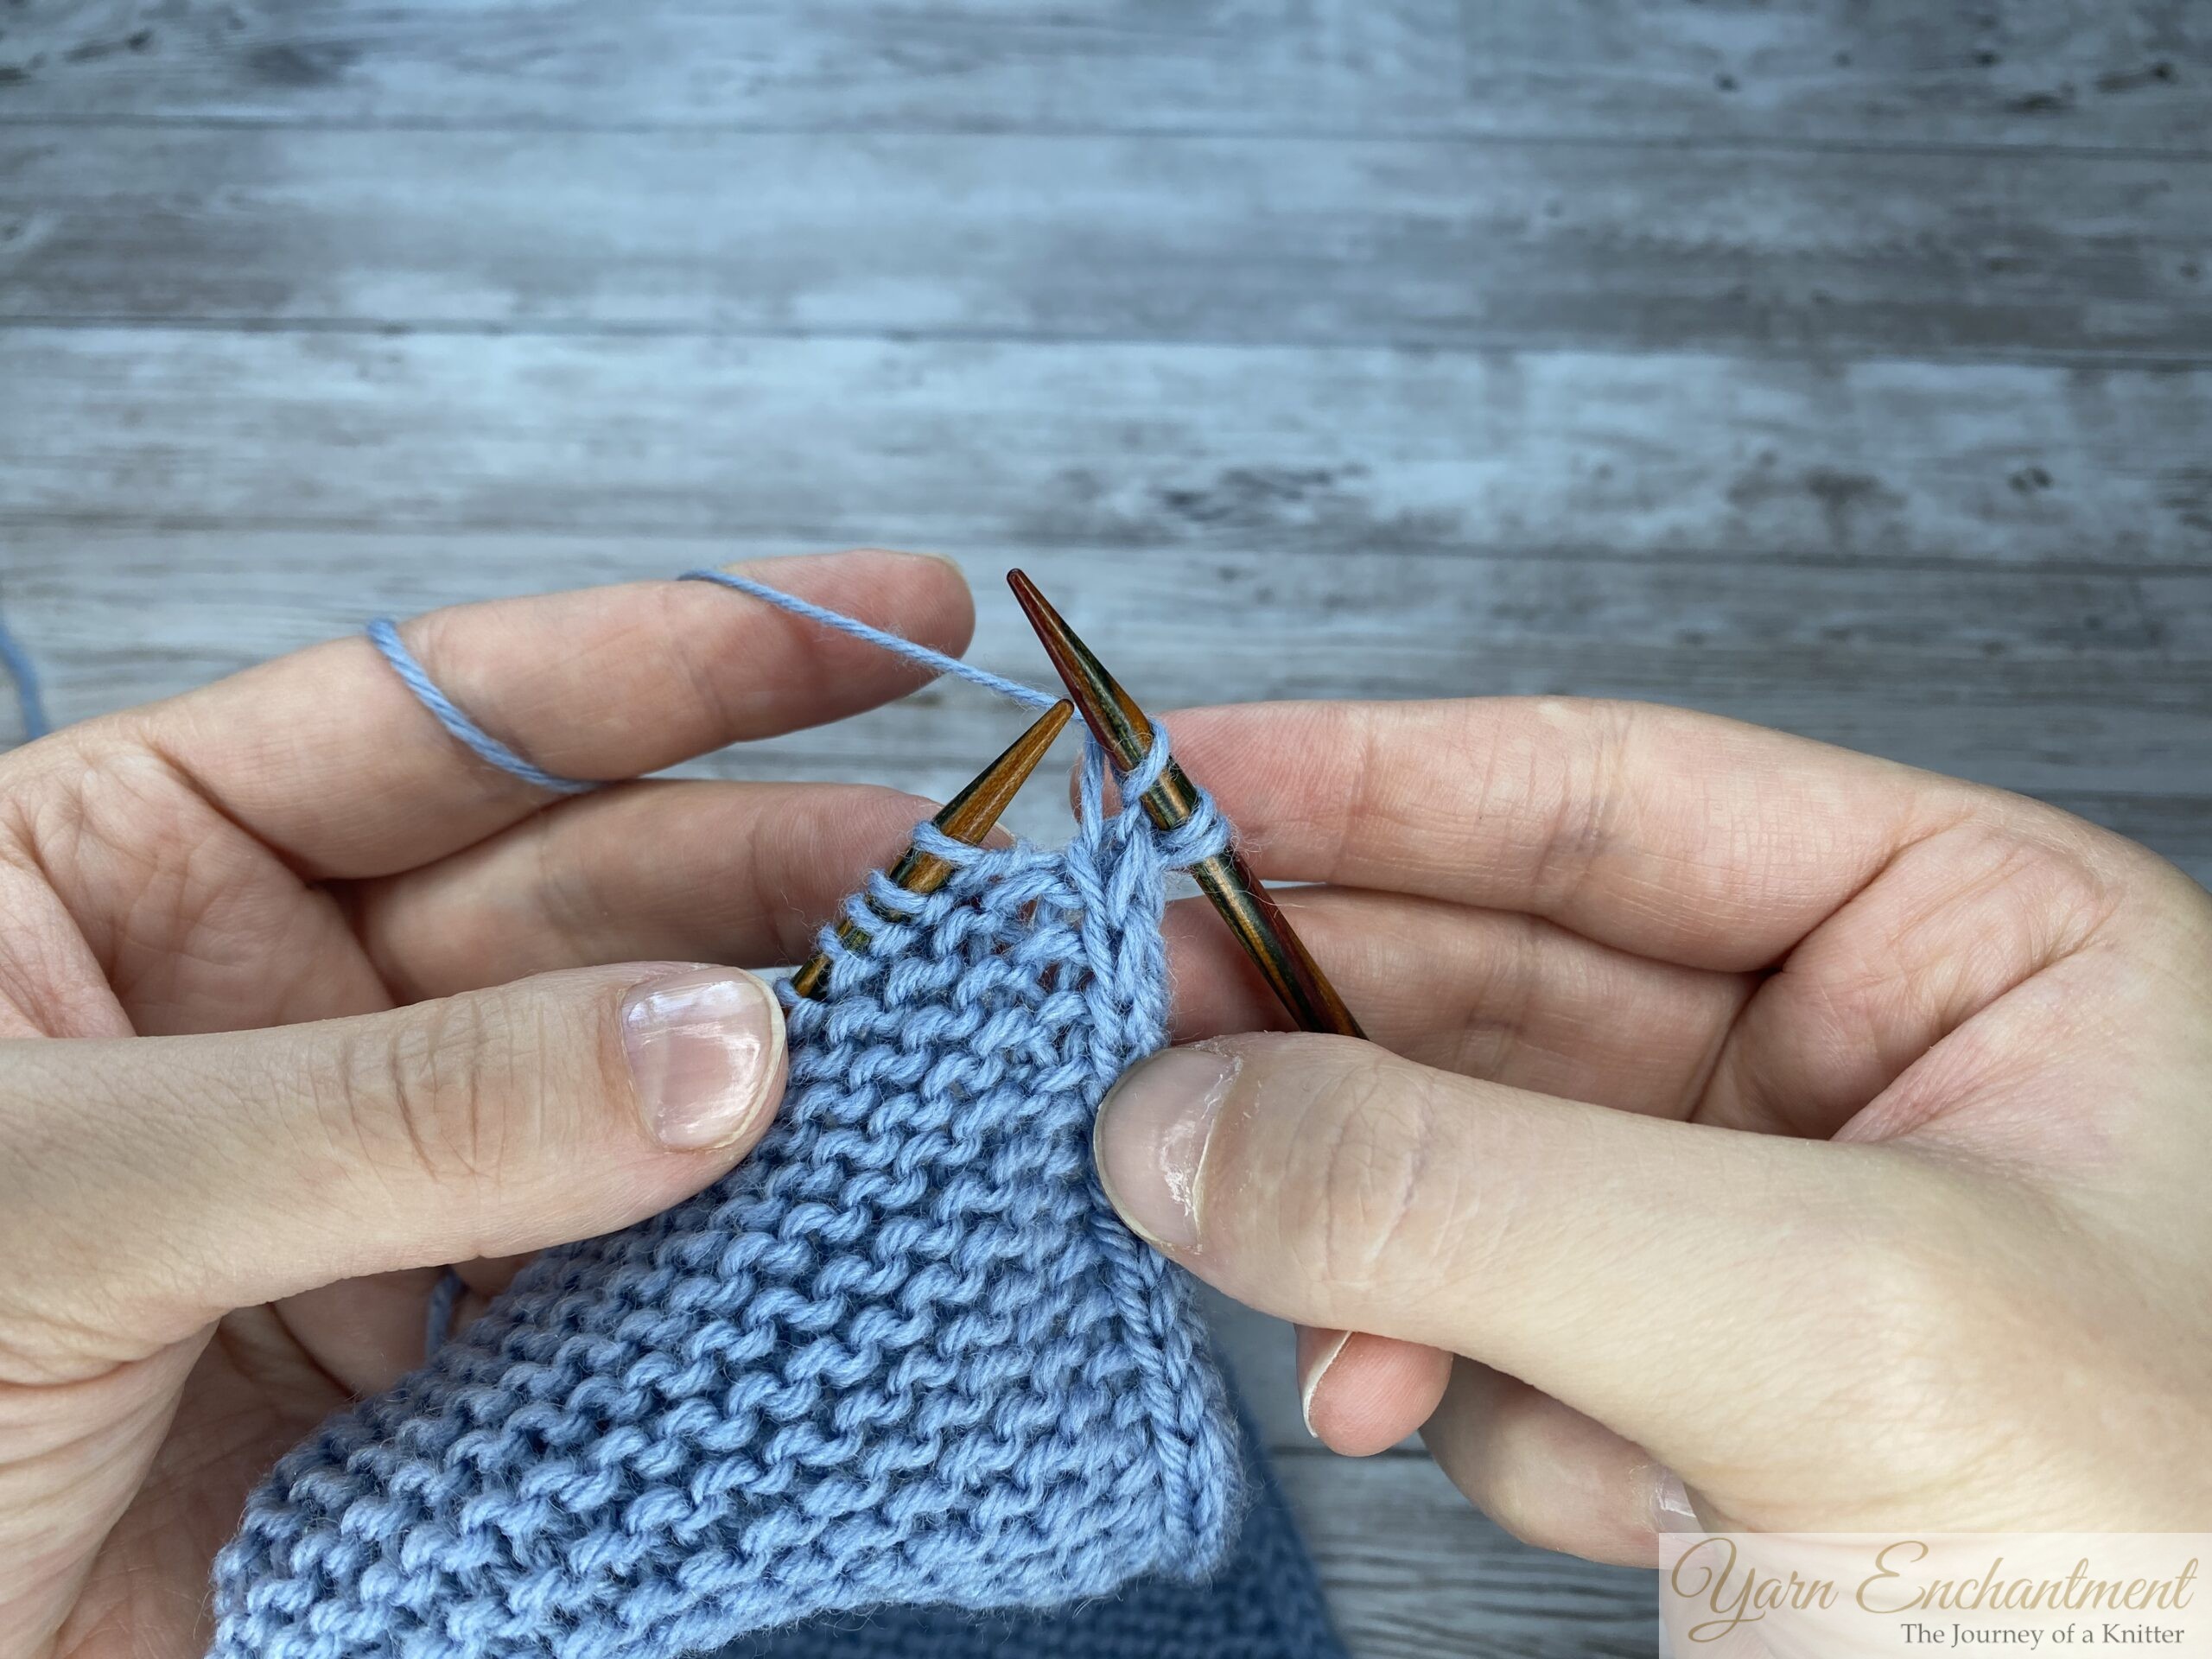

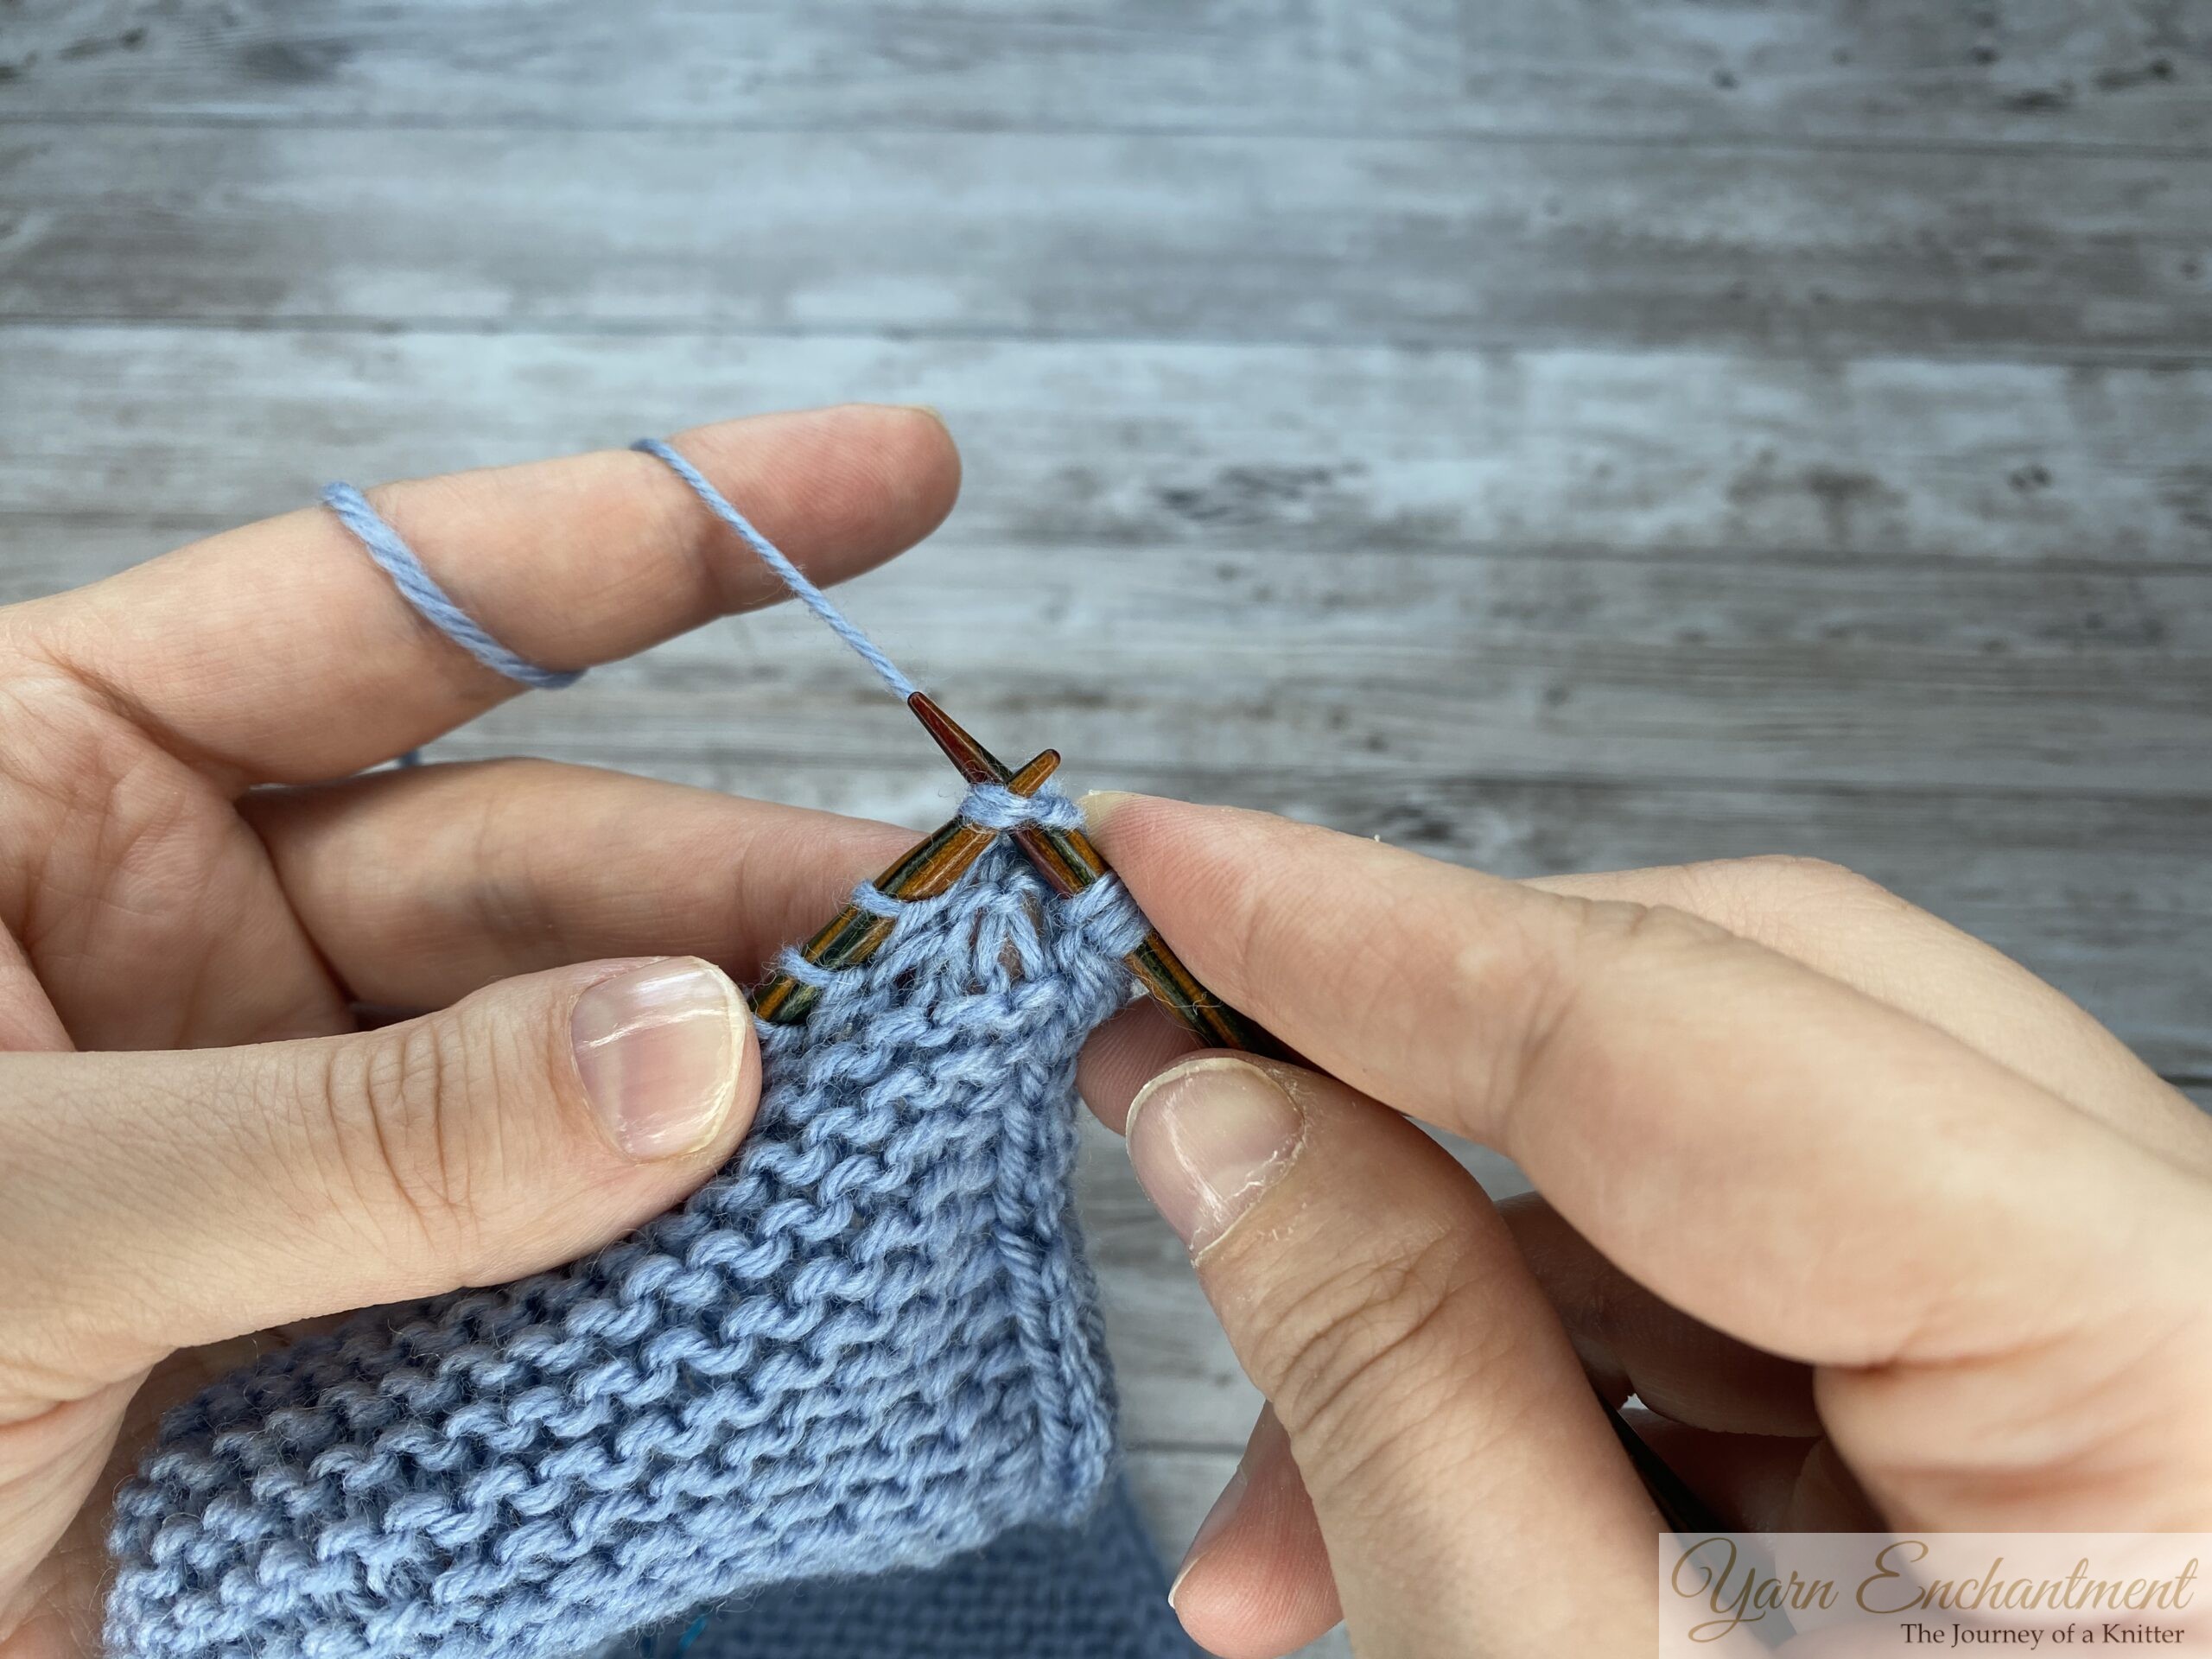

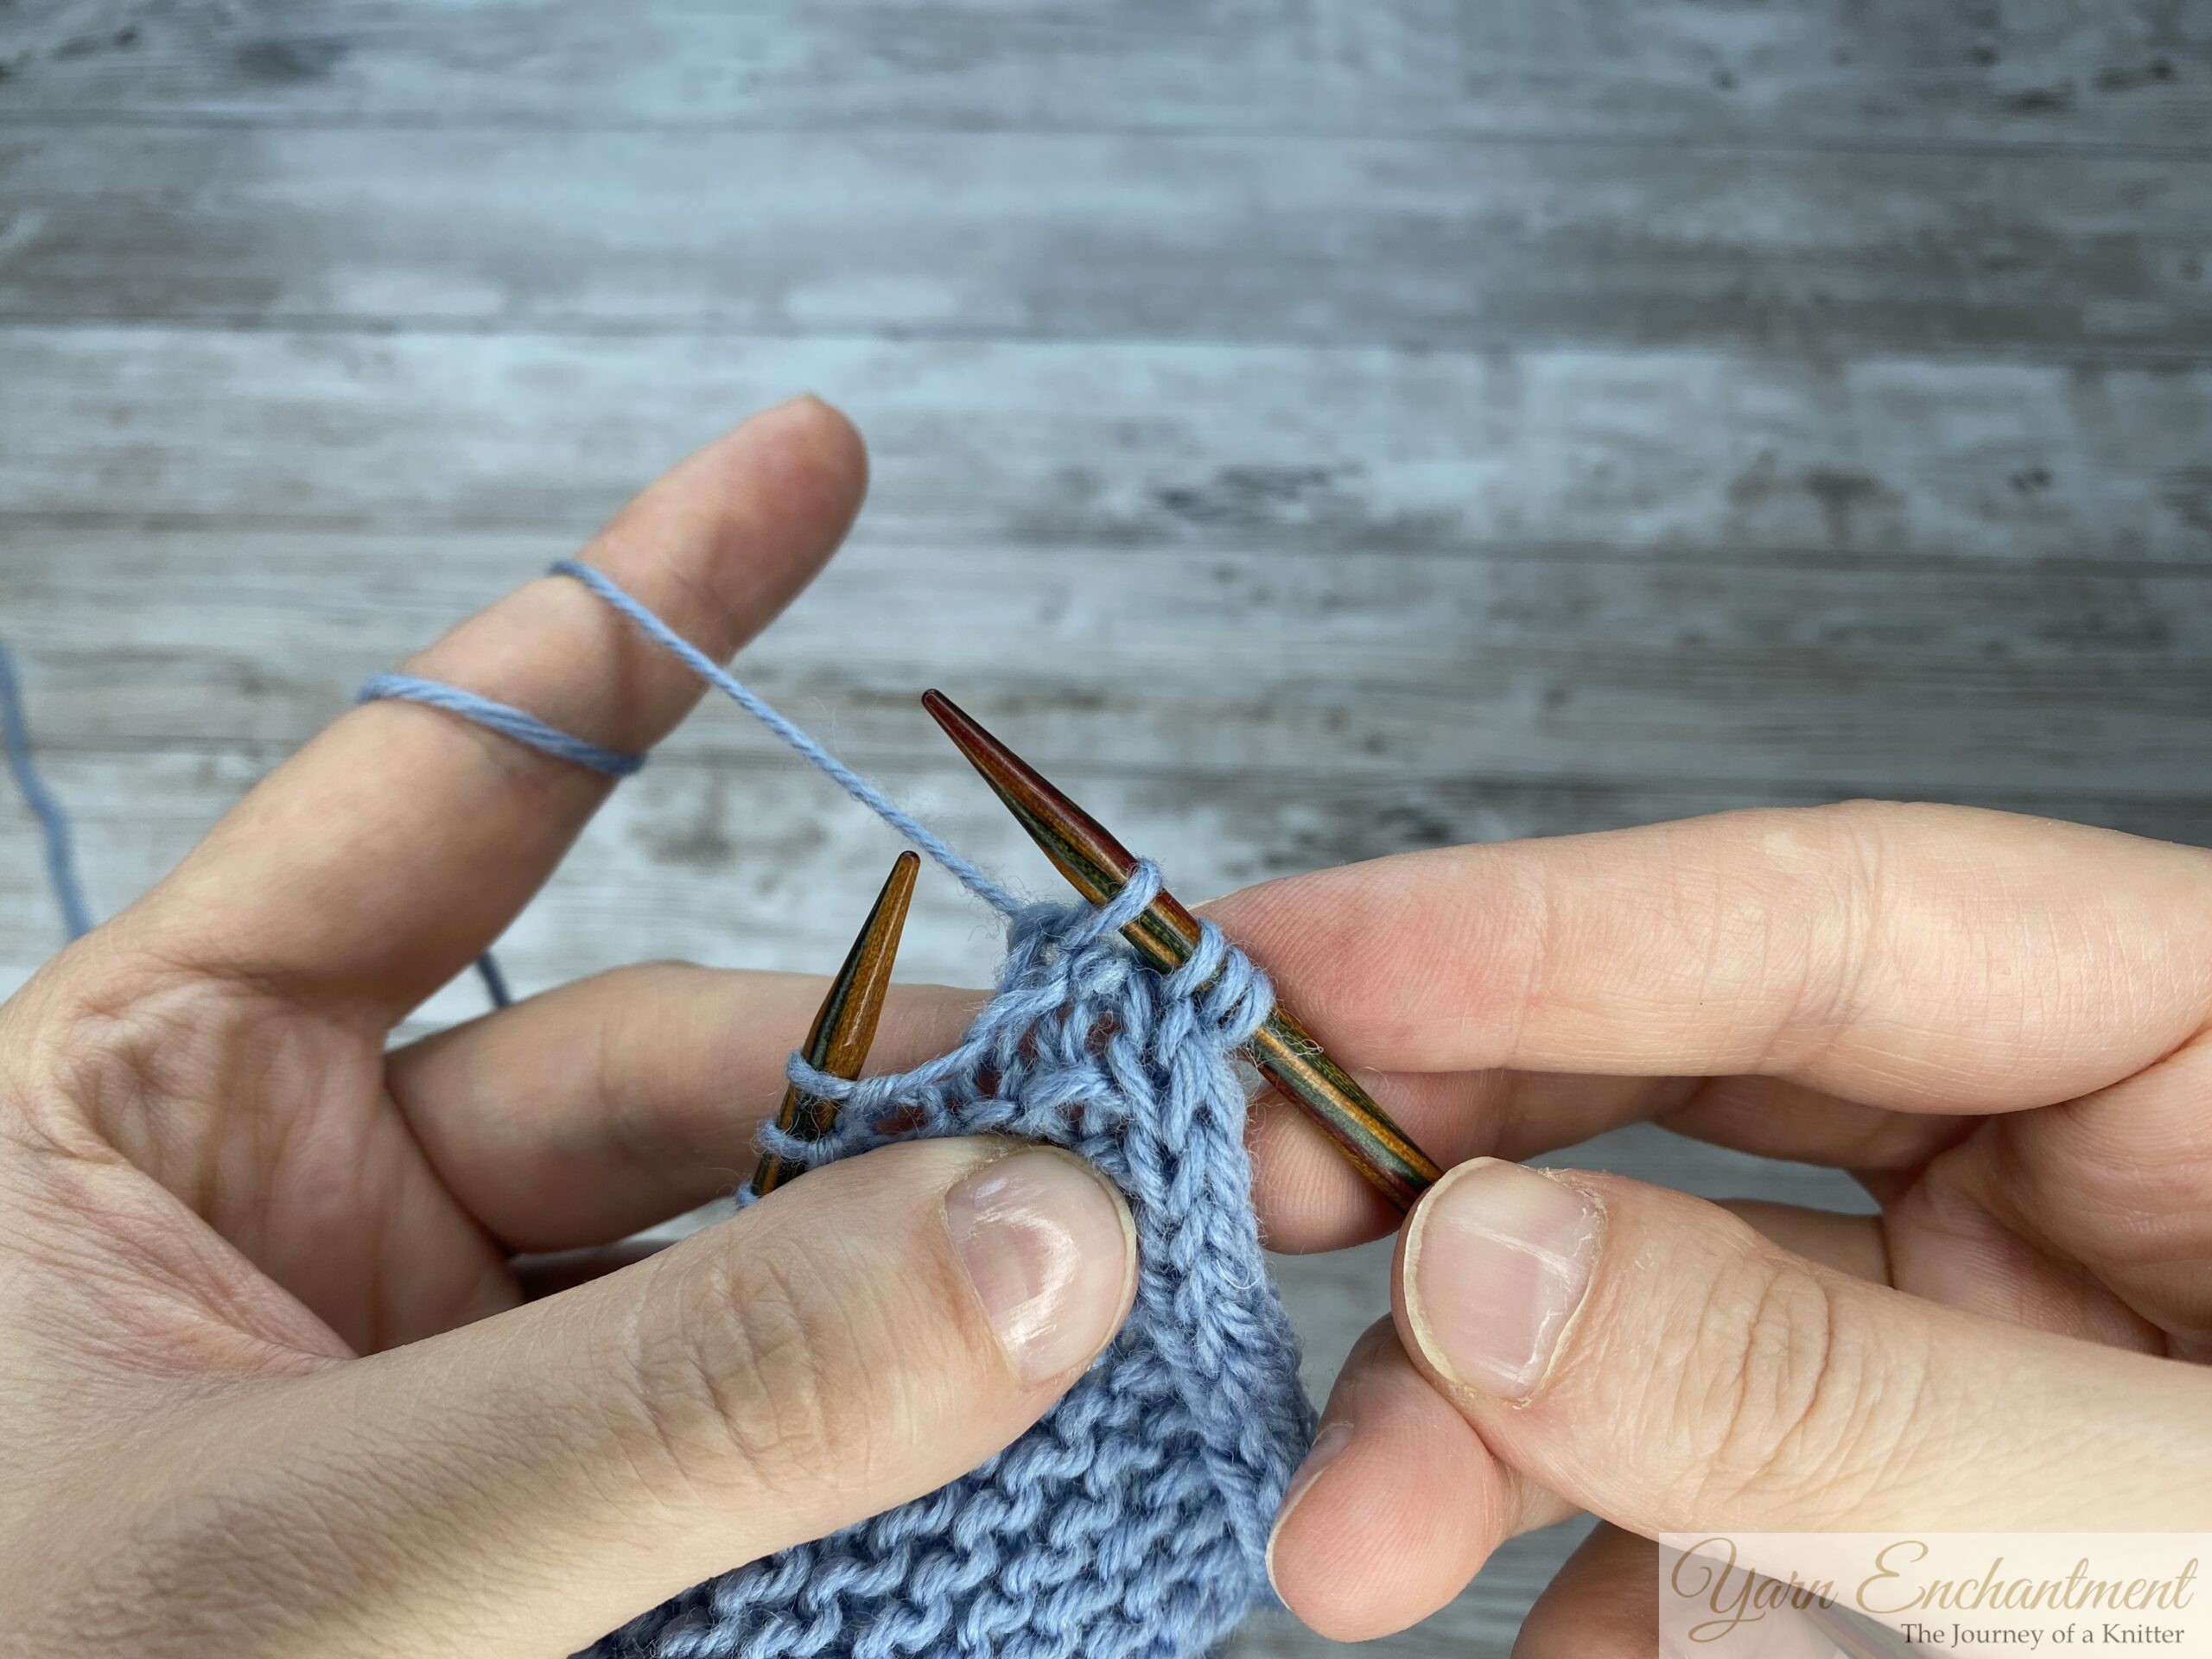

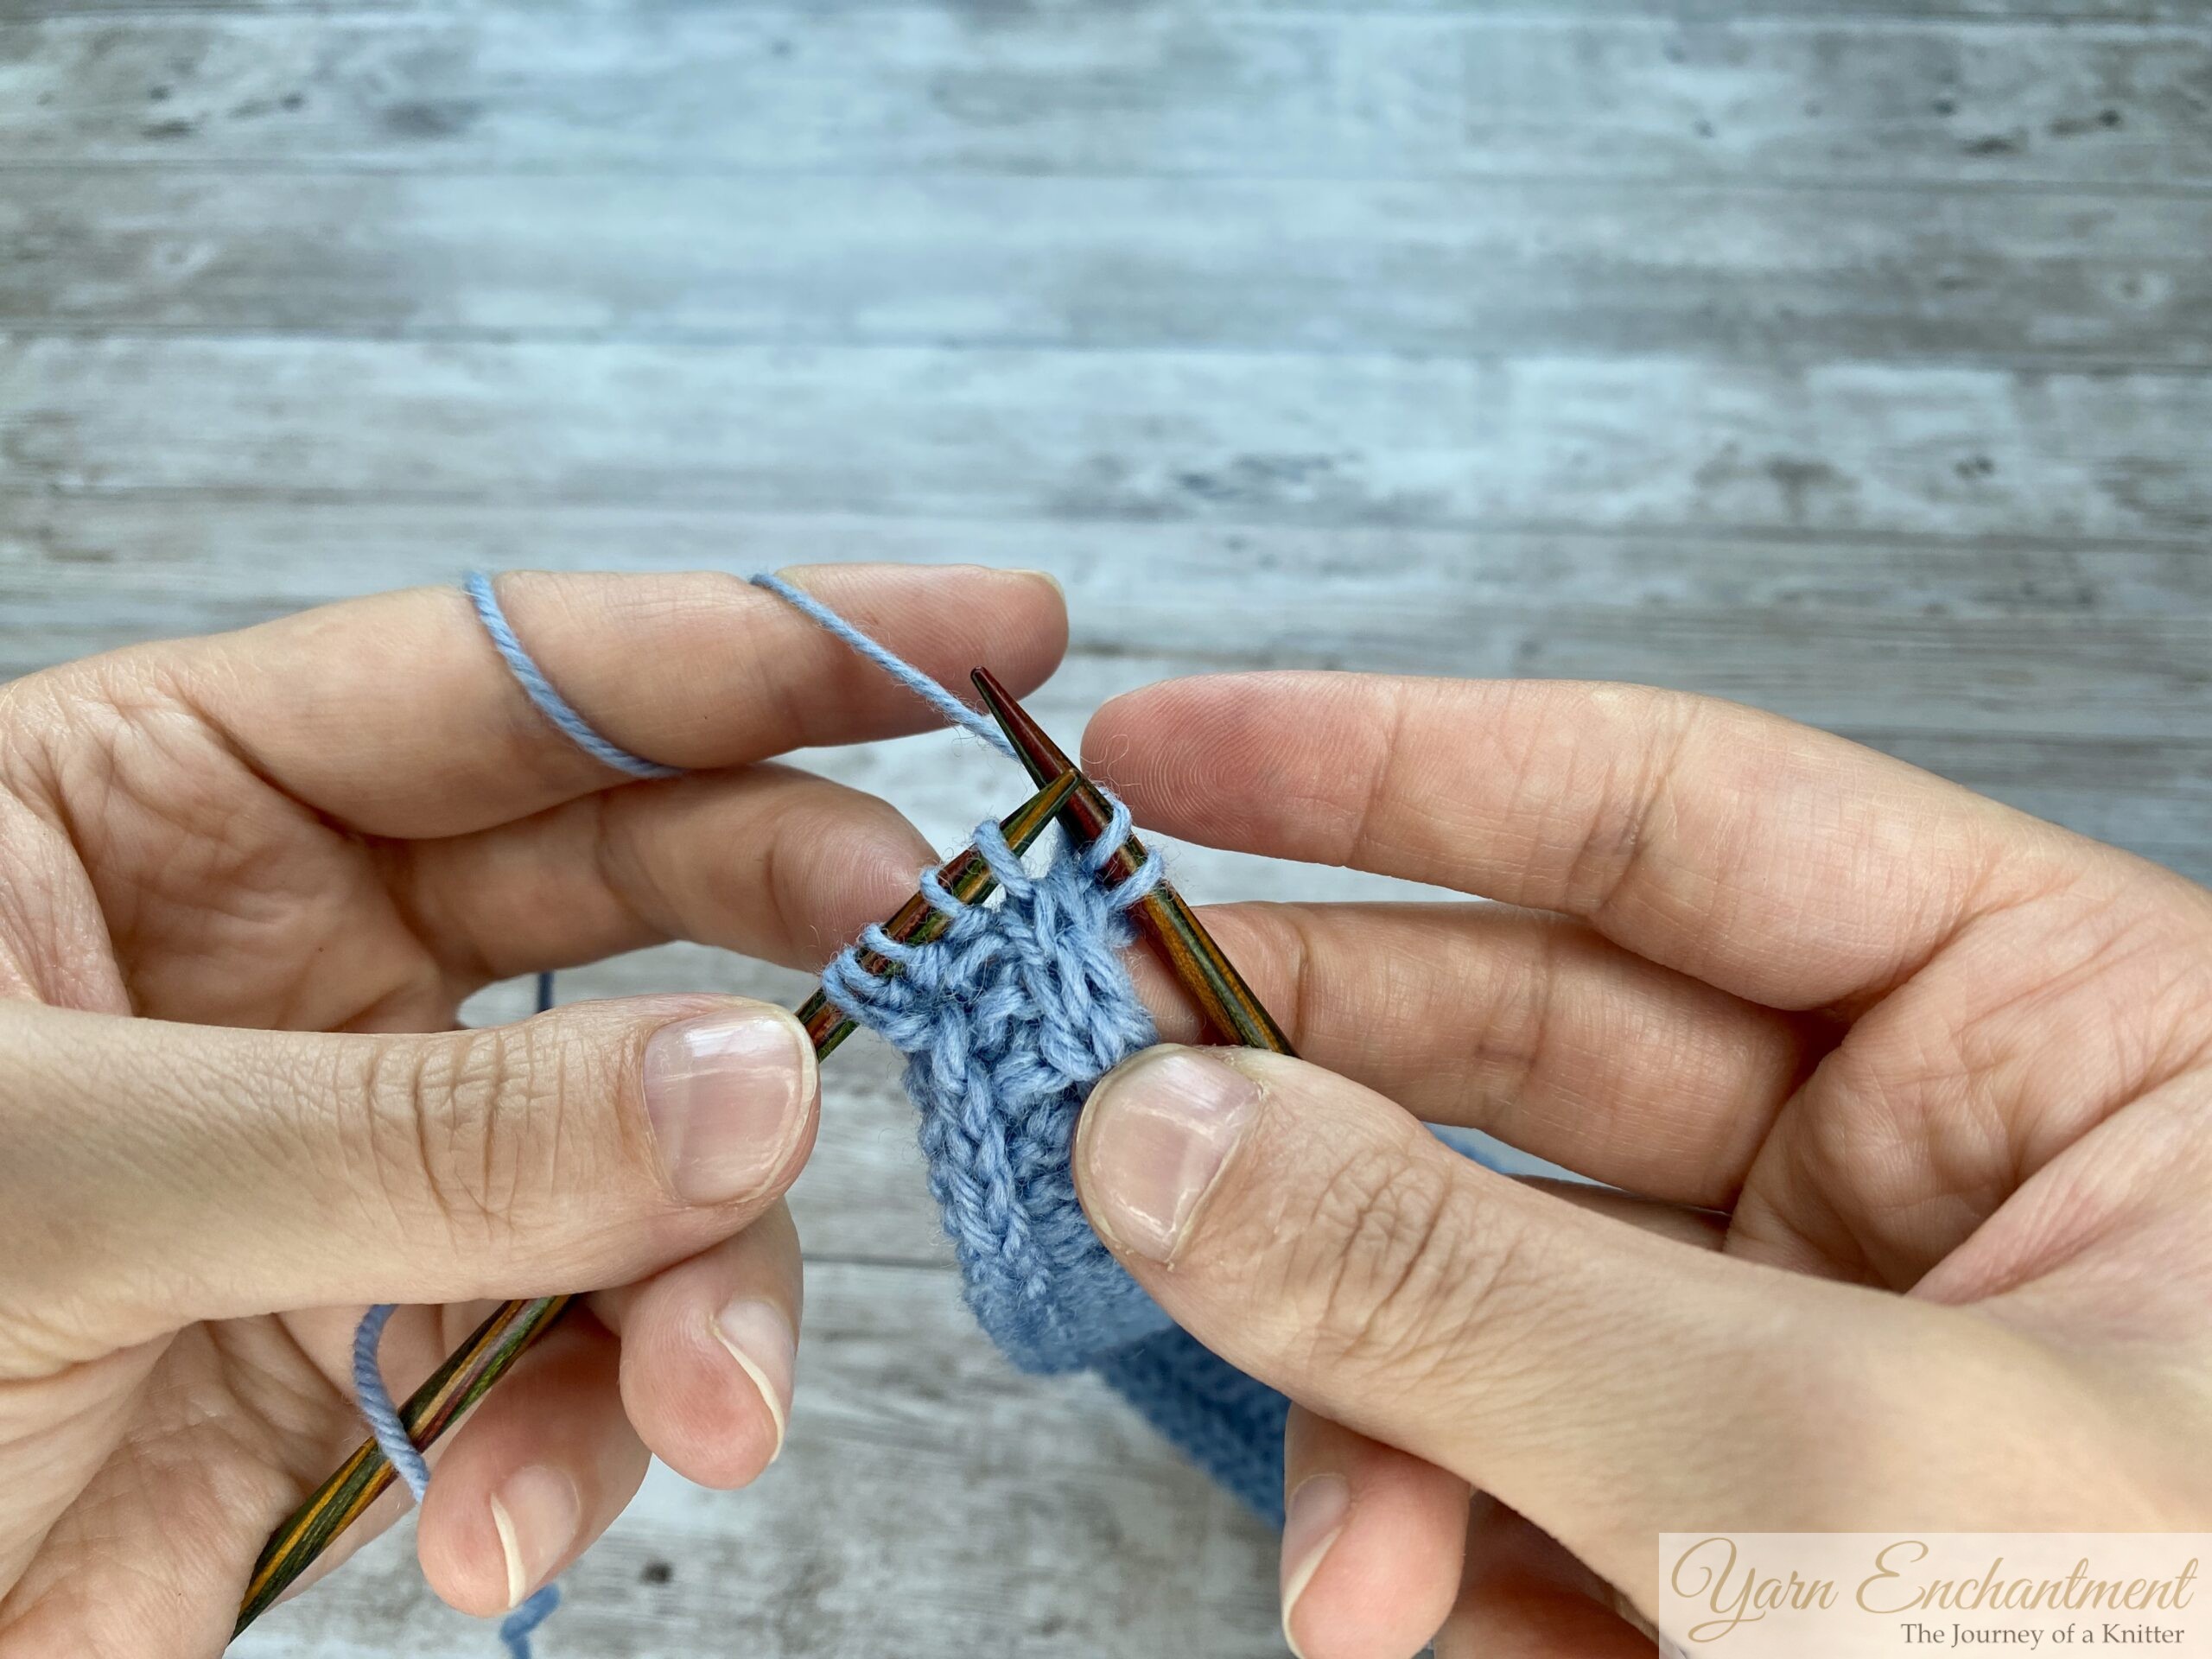
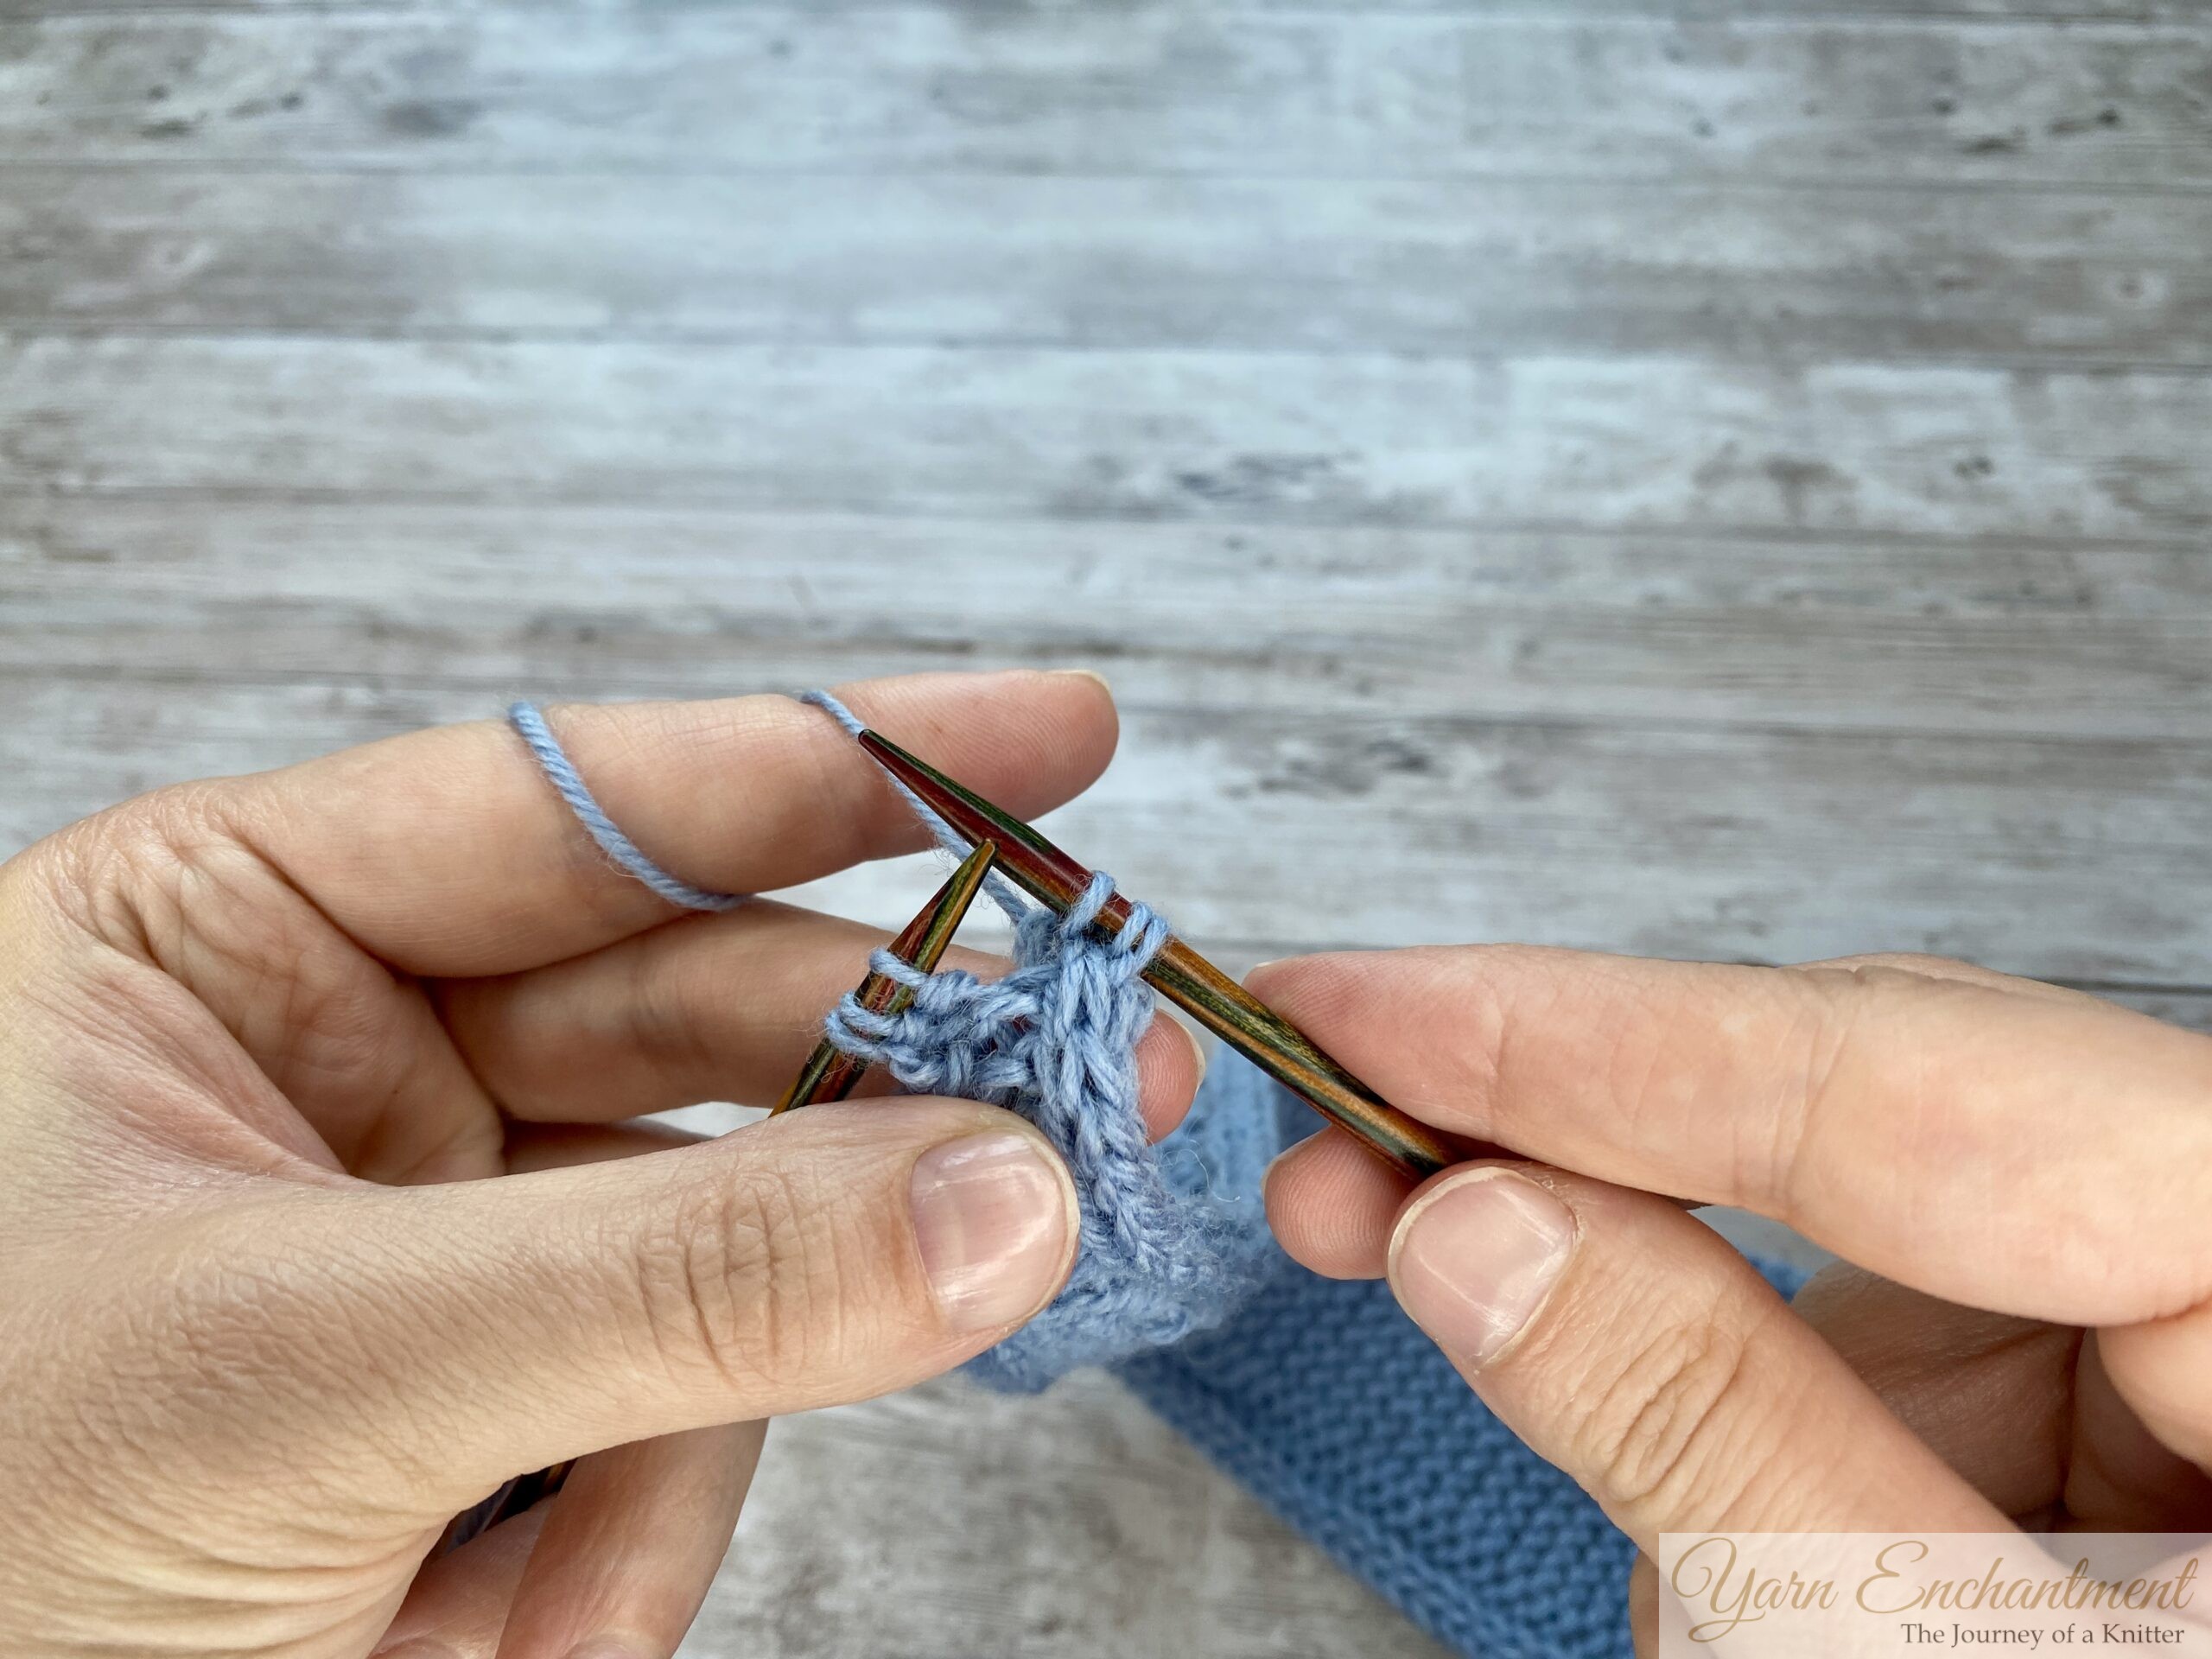
For the last decrease, I am using the same steps as the pattern. I only switch the SKP to a knit2tog. I knit the first two i-cord stitches and then work a knit2tog over the third and fourth stitch.
Knit the first two i-cord stitches
then work a decrease over the third and fourth stitch.
Now you are at 6 stitches again and can work the last rows in the pattern.



Why Yarn Choice Matters for Your Increases
The yarn you choose can completely change how your increases look. Merino wool, for example, has a beautiful natural elasticity that lets the stitches sit nice and even. When you block it, those increases smooth out and become barely noticeable. It is one of the reasons I love merino for patterns like this. But if you use a yarn with no stretch, like cotton, those increases will stay exactly where you knit them, and that means they will not soften or blend in after blocking. This is why it is so important to cast on a little swatch and block it before you decide which increase you want to use. You need to see how your yarn behaves. A kfb increase might look messy in cotton but nearly invisible in merino. So take the time to test it. It saves so much heartache later.
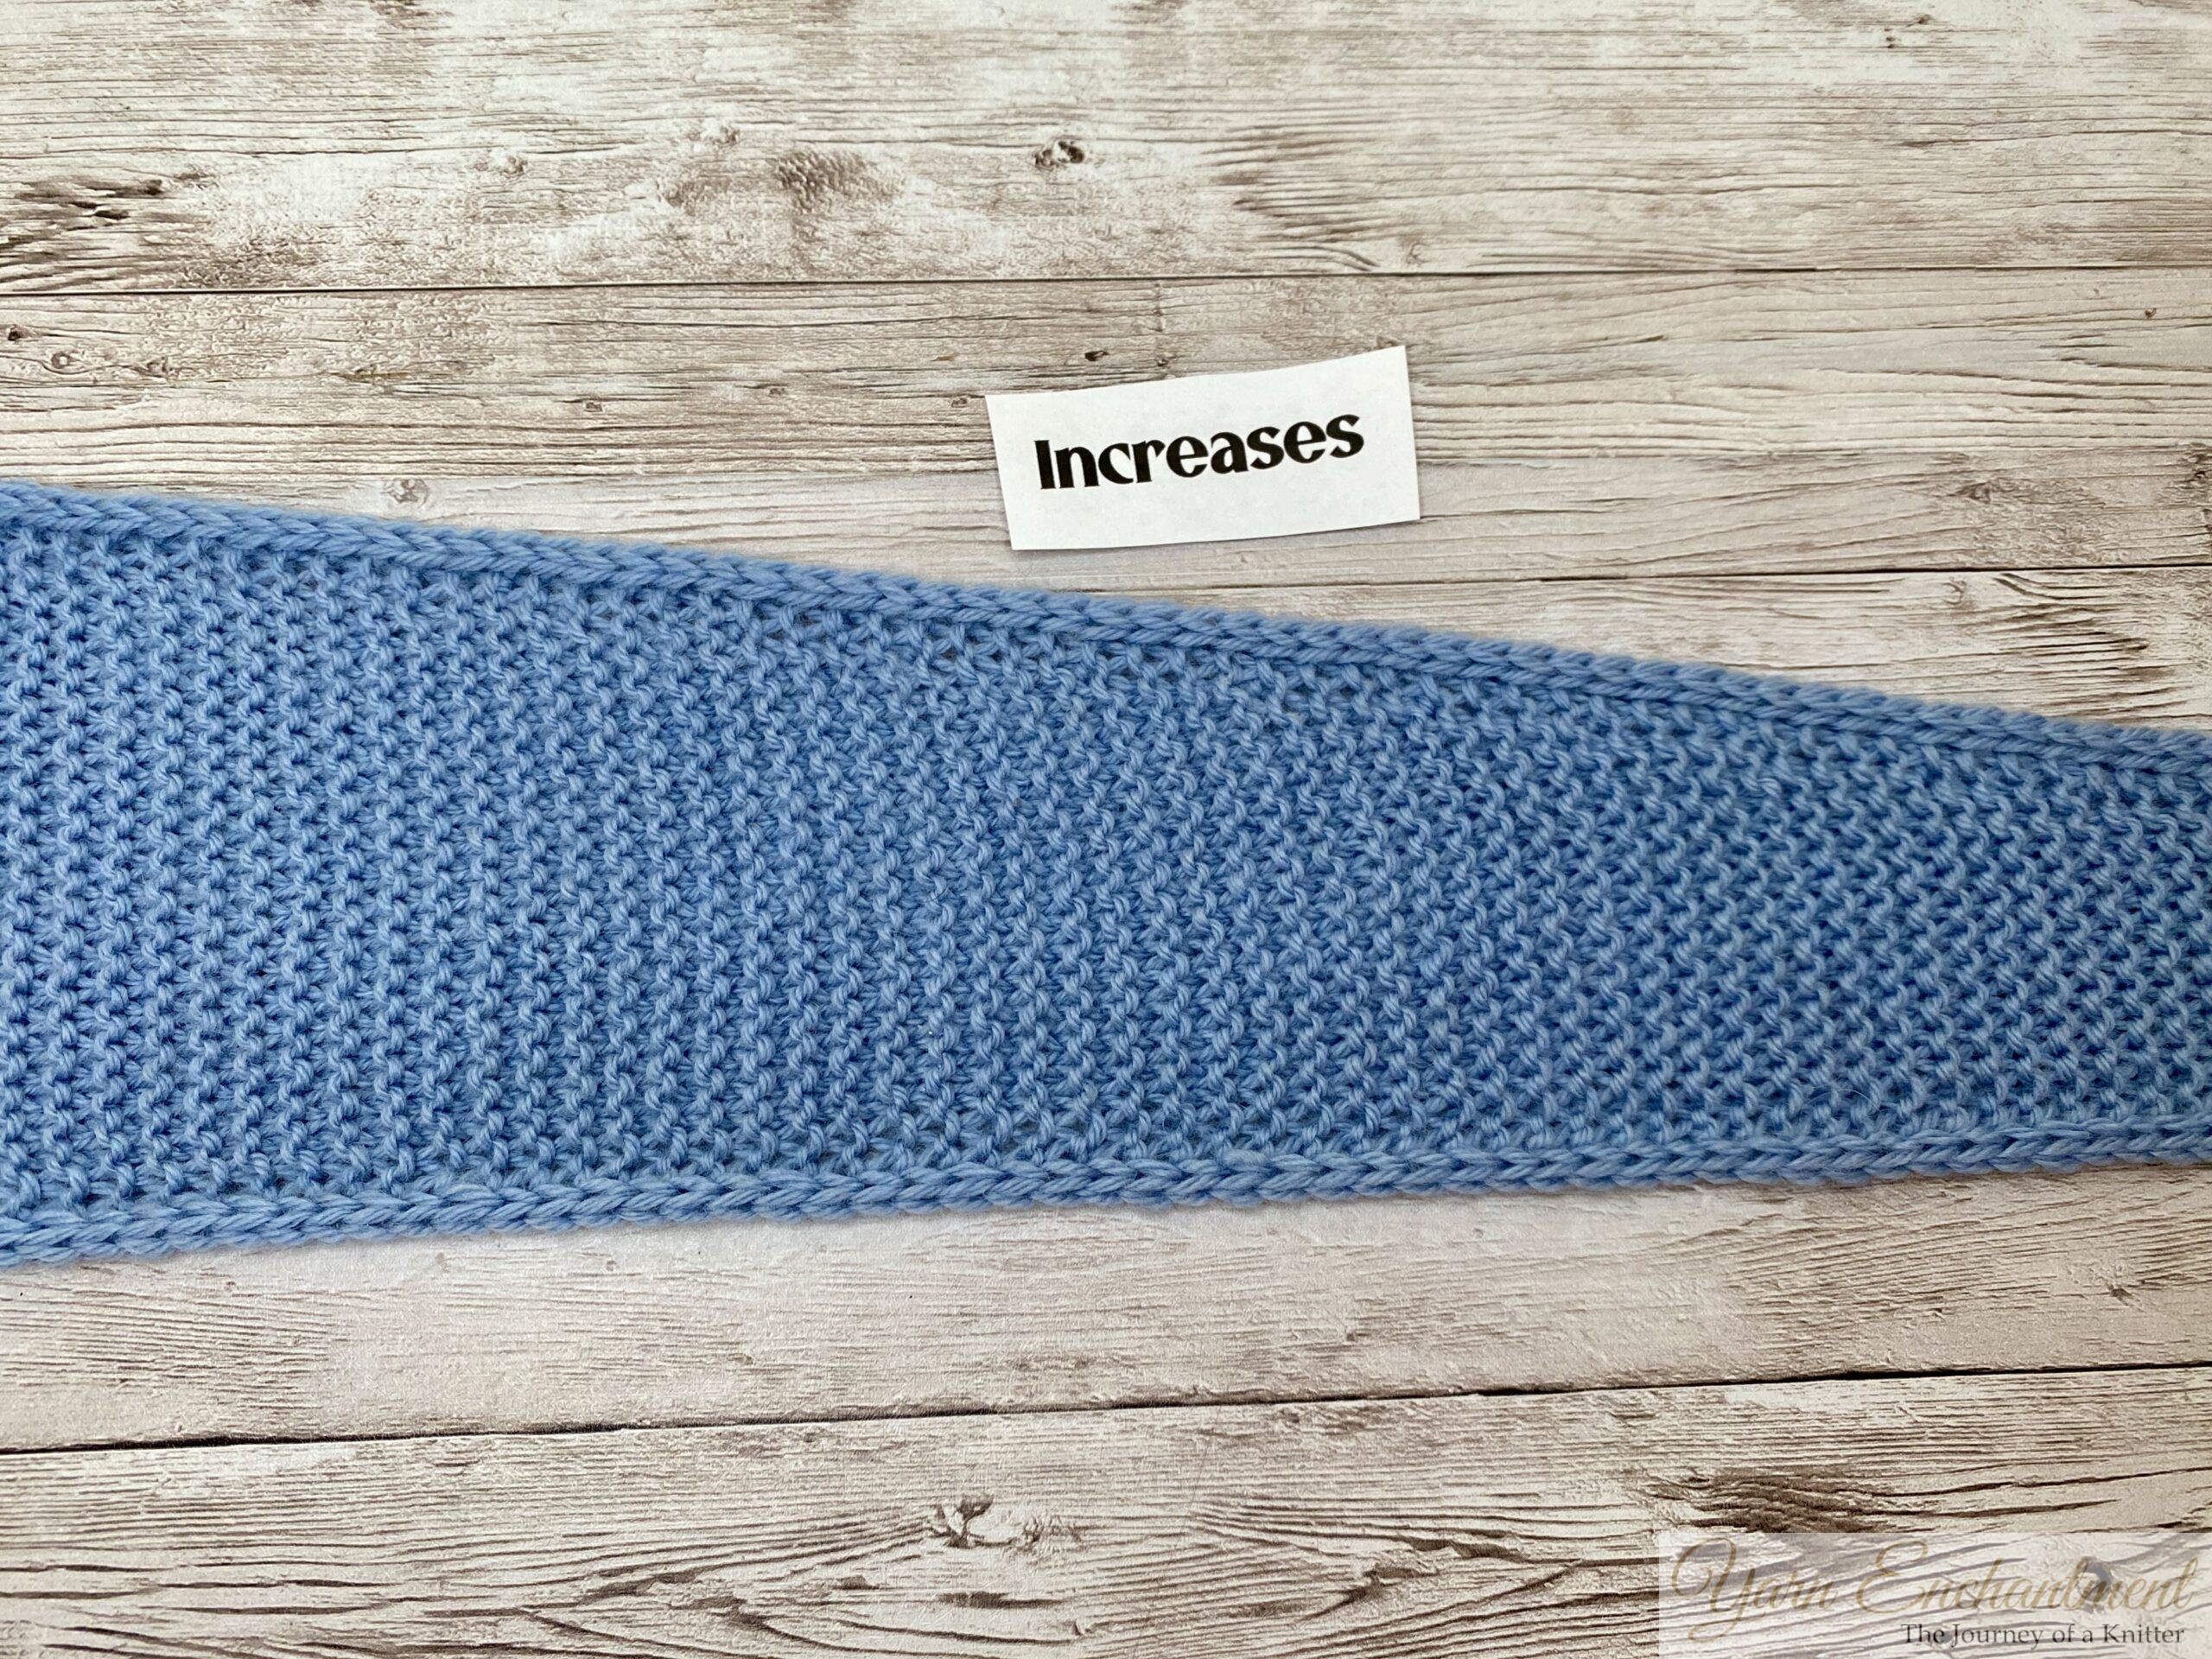
In this picture, you can see the where I did all the increases.The blue garter stitch texture looks really nice.
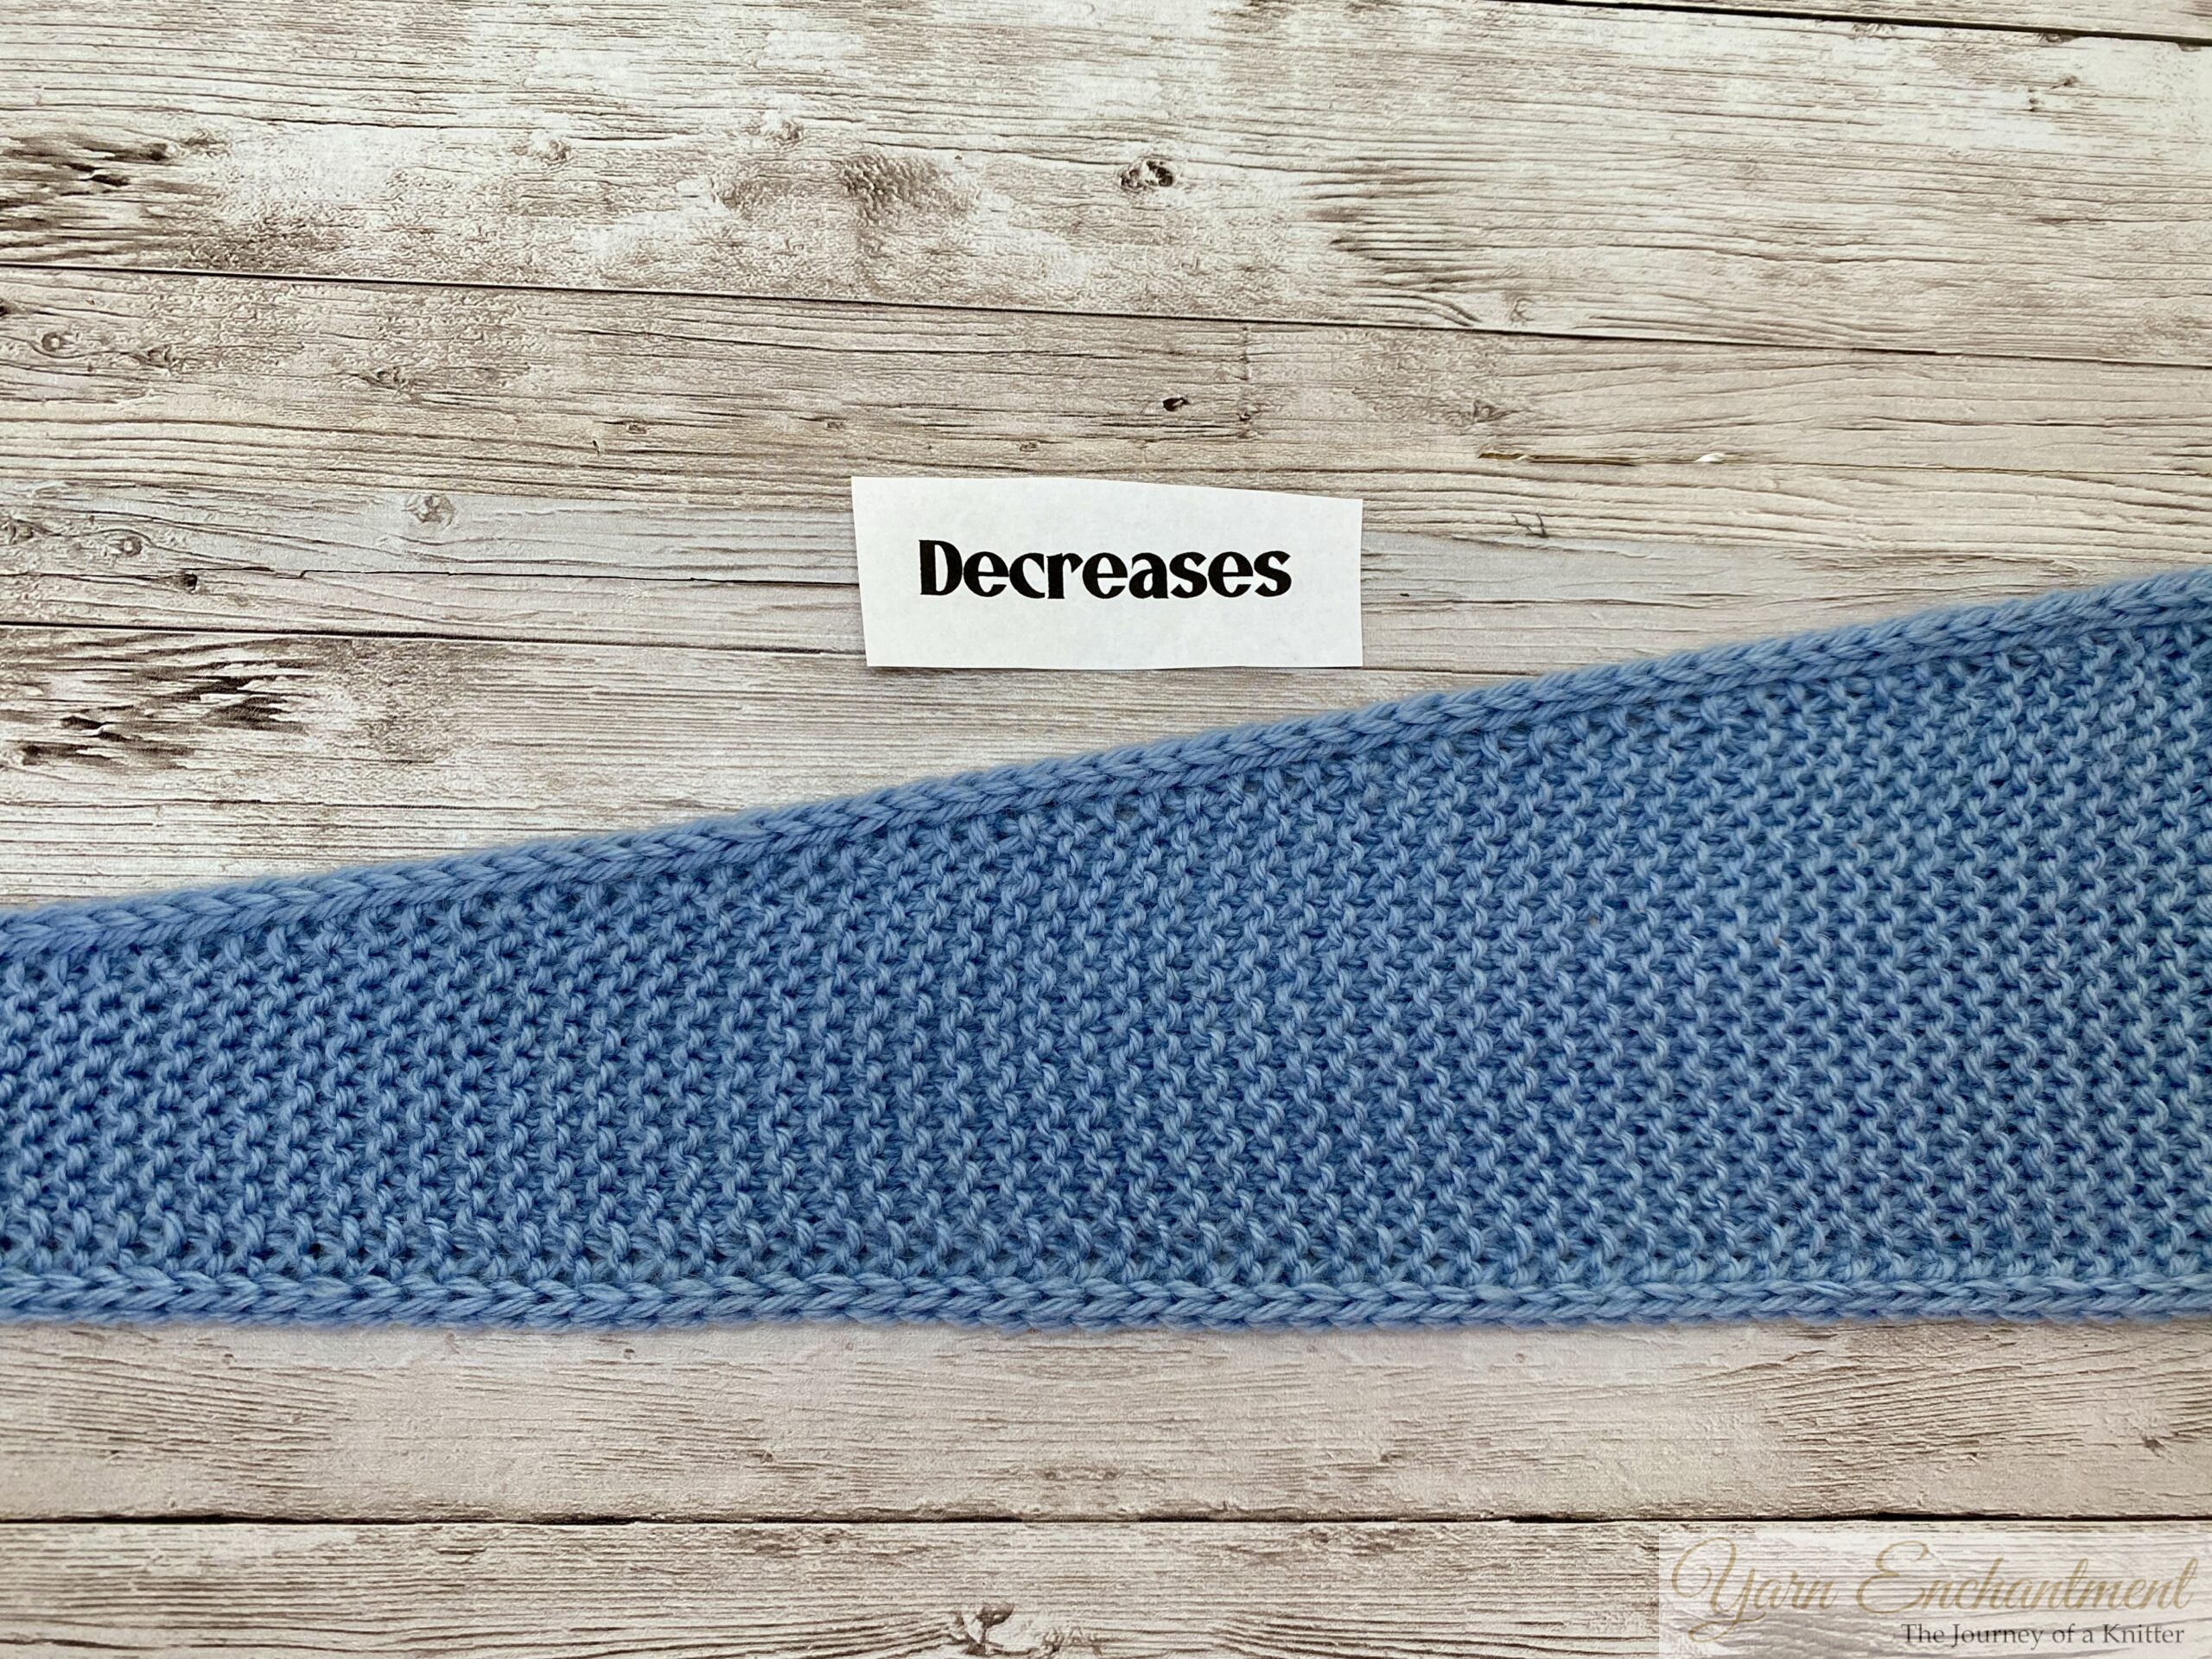
in the picture, you can see where I’ve been doing the decreases. I popped a little paper label above it just to make it super clear.


Personal Taste, Honest Reviews and Enjoyable Knitting
All of this is just my opinion and my way of knitting. You never have to change a thing if you love your Sophie Scarf, Hood or Shawl exactly as PetiteKnit designed it. When I started this blog, I made myself two quiet promises: no sponsorships or ads, and always being honest. For me, that means sharing my real thoughts about the yarns, patterns and needles I use, and passing on the tiny tips and tweaks that have helped me - just in case they make your own knitting time a little more enjoyable too.
Sharing these small details - like alternative increases, or simple ways to tidy an I‑cord edge - is my way of supporting other knitters who might be looking for the same refinements. If even one of these ideas helps you feel more confident modifying knitting patterns such as the Sophie Scarf by PetiteKnit, then the spirit of creativity and confidence in knitting is being passed on, one project at a time.
Until then, happy knitting!
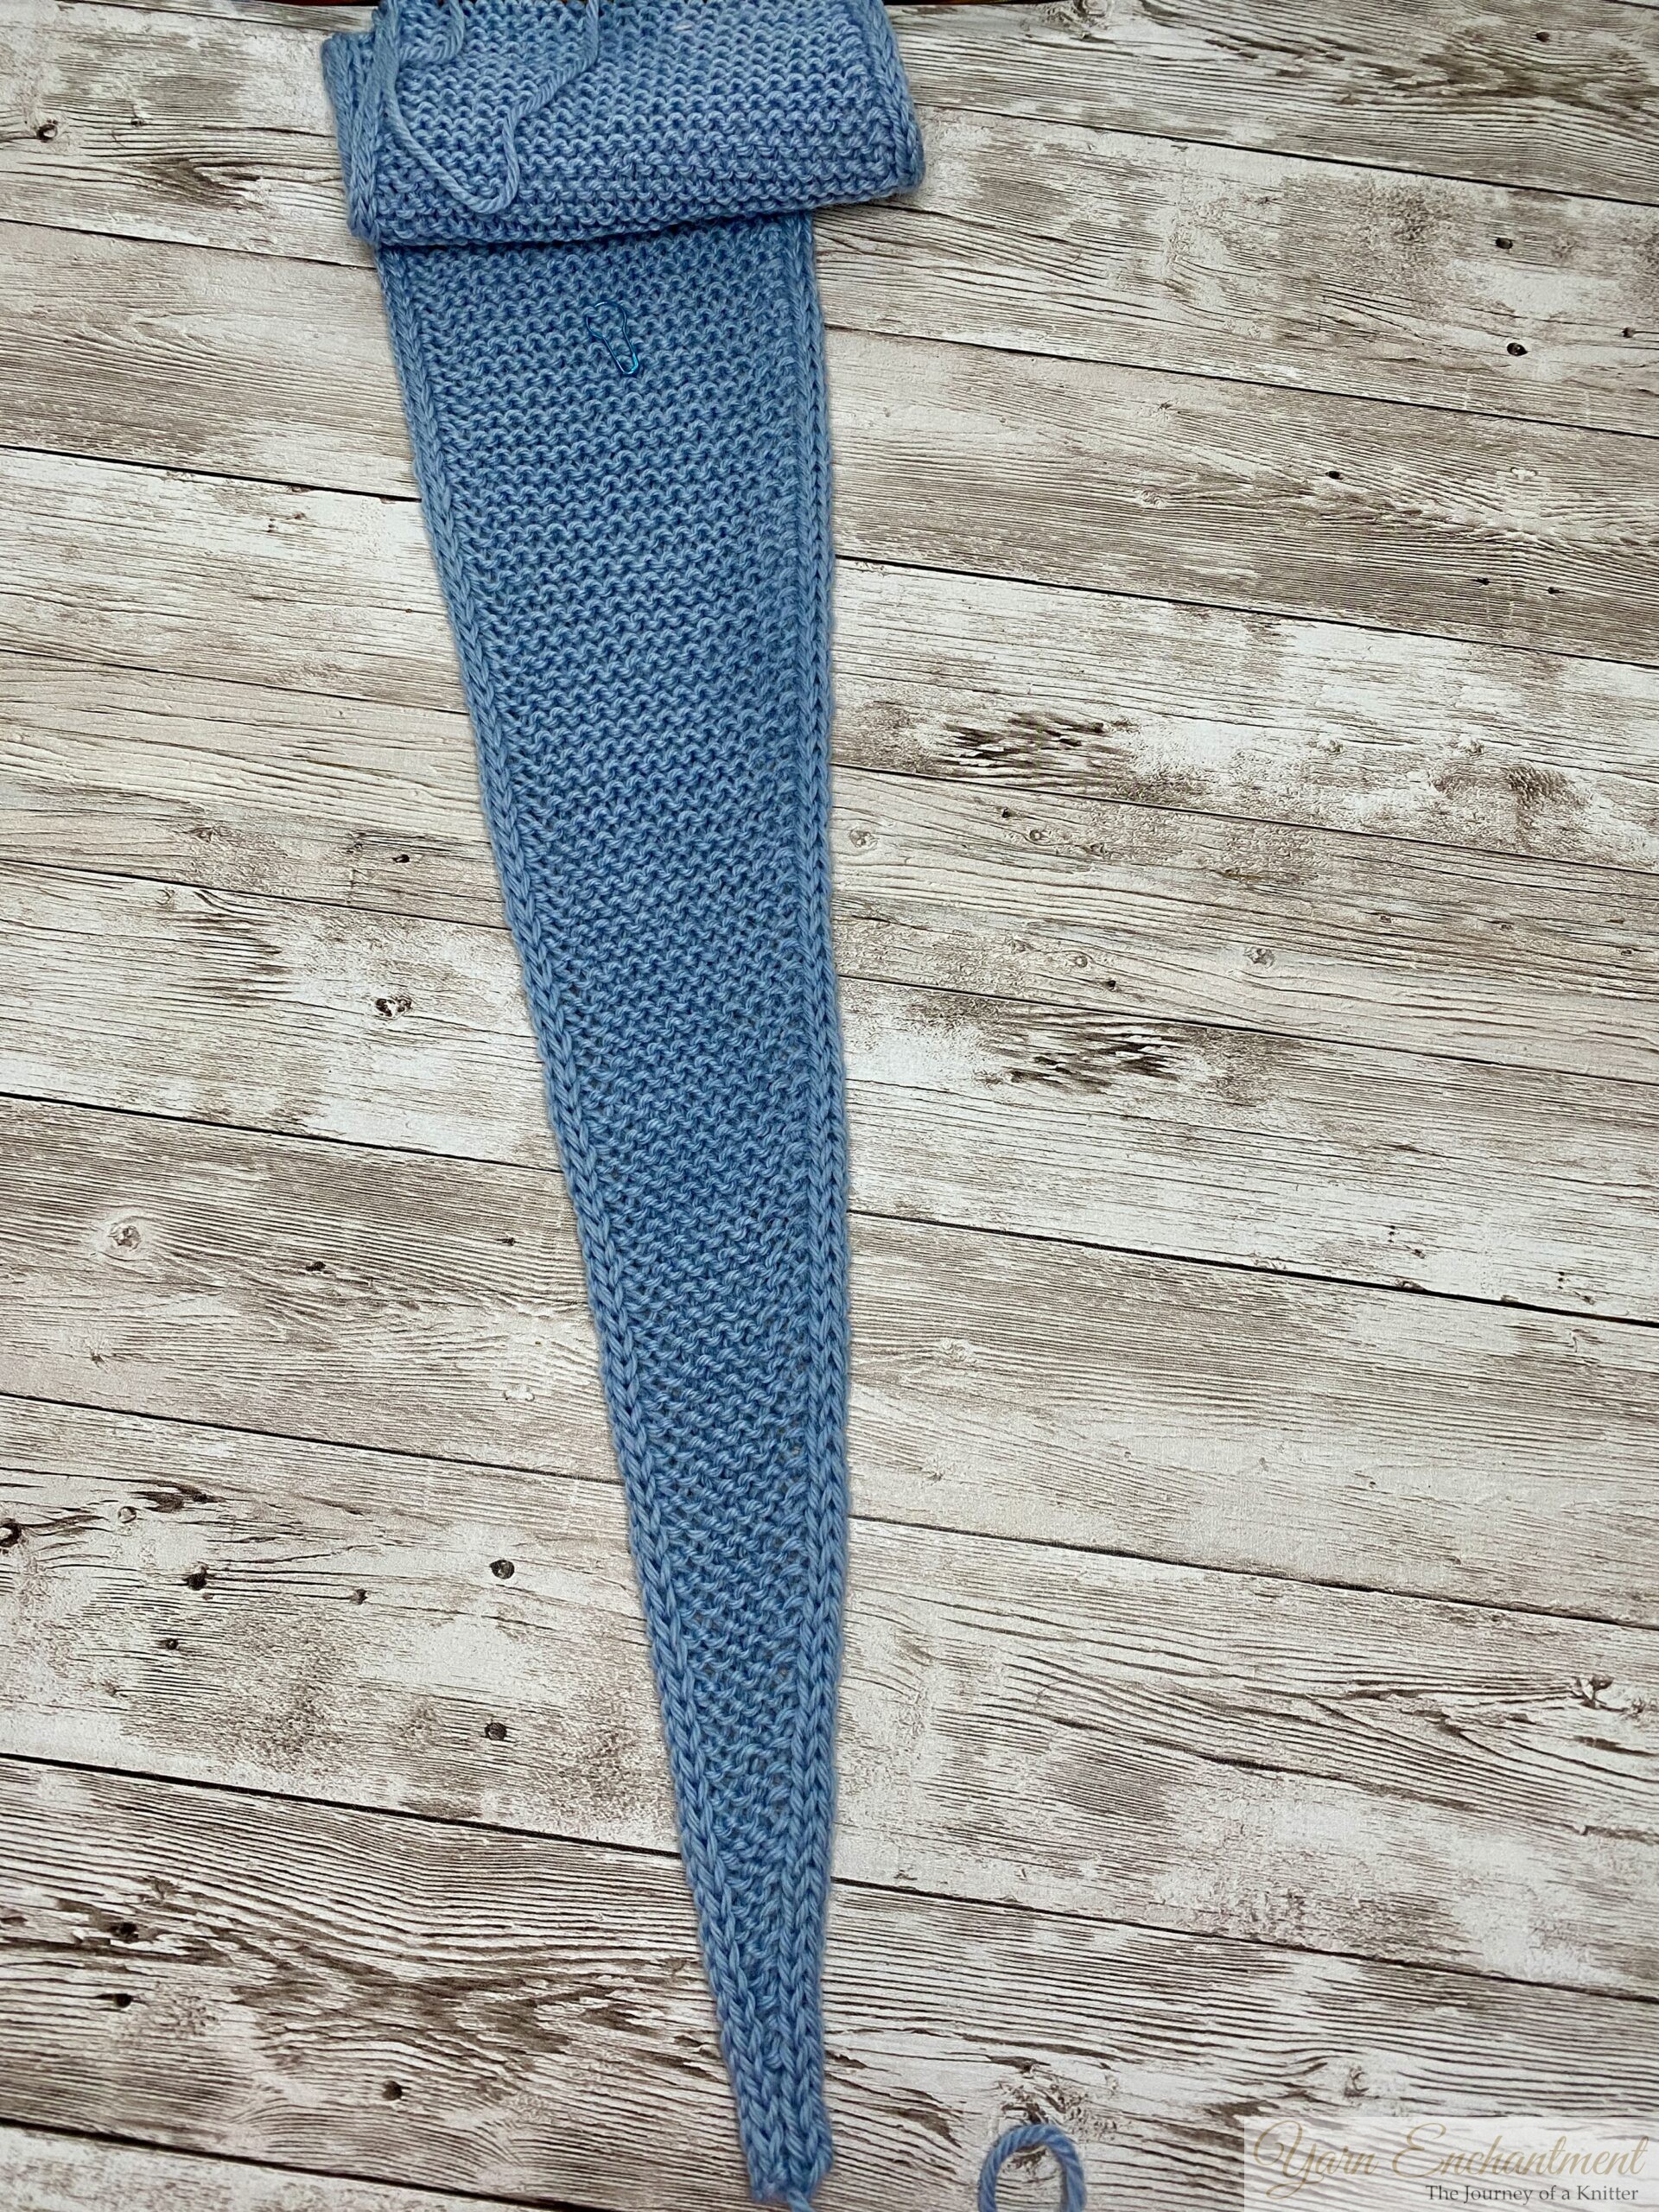  |
I worked the increases on the right side all the way up. You can click on the image and zoom in for a closer look, if you'd like. Another option would be to work invisible increases after the three I-cord stitches, which might give an even better result. However, in my opinion, the KFB looks really neat, and the I-cord stitches remain even throughout the Sophie scarf. |
A Little Way to Say Thanks
Yarn Enchantment is my cozy hobby corner on the internet. If something here made your knitting day easier or you simply enjoy reading my posts and would like to say thank you, you can leave a small Ko-fi tip - but only if you truly want to.
My patterns and tutorials stay free for everyone, always. Every little tip just goes toward new yarn and a cup of tea for my cozy knitting evenings.
☕ Support me on Ko-fi
You Might Also Like


 |
|
Join the Cozy Corner Newsletter
Hello, creative soul. Welcome to the Yarn Enchantment Newsletter, a little space where we celebrate all things cozy, crafty, and full of heart. Think of this as your friendly crafting companion, a soft dose of inspiration delivered straight to your inbox, just for you. Each newsletter brings you: ✨ Notifications about new patterns and tutorials – easy knitting patterns and beginner crochet projects you won’t find anywhere else 🧶 Practical yarn tips for new crafters, plus advice on the best yarn for fall, blankets, and handmade gifts 💌 Small stories and adventures from my own workbench, because crafting is as much about the journey as the finished piece Whether you’re knitting by the fire, looking for your next creative spark, or simply wanting a quiet moment with your hooks and needles, this newsletter is here to cheer you on. Crafting isn’t just about the final project. It’s about the joy, the peace, and the stories we weave along the way. So grab a cup of tea or coffee, settle in, and join me. Together we’ll make a little magic, one stitch and one story at a time. I’m so glad you’re here. Let’s create something beautiful together. Sign up below to receive your first email, and feel free to leave a comment on the blog if there’s a topic you’d love to see covered. Your ideas might just become our next newsletter feature. |


15 Comments
Thank you for addressing these issues. I am about to finish my first of these scarves. I accidentally did the kfb increases in stitch #4 like you suggest: I didn’t read the pattern properly, and it seemed logical.
I don’t suppose you have a photo comparison of the decreases? It looks like all the photos show increases.
Hello Eva,
It actually happened to me too. When I was knitting the Sophie Hood, I made the increases in the wrong stitch at first. I was thinking that I made a mistake, but before I unraveled it, I worked a swatch trying out different approaches. I didn’t like the suggested increases, so I stuck with the increases after the i-cord edging.
I am so full with work at the moment that I didn’t have time to finish the scarf. I am planning on posting a picture of it soon. But I can tell you that the knit two together looks really great. I worked it with the Sophie Hood, and the motion of k2tog is more natural than ssk. In my opinion, it looks so much smoother. I would have posted the Sophie Hood, but I used blown yarn and it looks really fuzzy.
Thank you for the followup! <3 I went ahead and did a comparison myself:
https://www.ravelry.com/projects/evahovelsrod/sophie-scarf-2
In my case there was surprisingly little difference between the two decrease styles, but k2tog certainly comes more naturally, so I will keep using it.
Thanks for these suggestions. I am also experimenting and was wondering if you do the k2tog in the i-cord or in the two stitches after the i-cord? Thanks!
Hello Juliette,
I am very sorry for the late response regarding the decreases. I worked the three i-cord stitches and right after that, the k2tog.
Warmly Sarah
Hello,
This looks really useful, but I’m confused about one part of your instructions. For the caption on the first picture, you wrote: “When you reach the point where you need to work your first decrease between the I‑cord edges,…” Is this just a typo? Did you mean increase instead of decrease? You are talking about row 8 where you increase to seven stitches? What you’re saying is to do a cast on after the third stitch and before the fourth instead of kfb in the third stitch?
Thank you!
Hello Kelly,
I am very sorry for the late response. You are right, I made a typo there, and I am so sorry for the confusion. It should say “increase” not “decrease” for the first increases. I am working a back loop increase in all my Sophie Hoods; this was the cleanest way to increase. It sits in the middle of the two i-cord edges, you are not disturbing your edges, and you have no holes.
Thank you so much for pointing that out. I wish you a nice summer.
Warmly,
Sarah
Hello,
I love your tips with this pattern. I want to knit this scarf in stockinette instead of garter. Have you tried it in stockinette? If so, did you need to make any changes in the increases/decreases?
Thank you,
Linda
Hi Linda,
Thank you so much for your comment. Knitting the Sophie Scarf in stockinette stitch sounds like such a lovely idea. I absolutely adore the thought of it.
I have not tried knitting it in stockinette myself. But if I were to give it a go, I would still place the increases after the i-cord edge. But, I would swap the KFB increase for a lifted increase
instead. The KFB blends beautifully into garter stitch. But in stockinette, it tends to leave a noticeable little bump. A lifted increase, on the other hand, blends in much more seamlessly. So I think that would be the perfect choice here.
For the decreases, I would still use K2tog after the i-cord edging. That part works just as well and keeps the edge nice and tidy.
Happy knitting, Linda. And thank you again for your wonderful suggestion. I really appreciate you sharing it with me. 💛
Oh my god, thank you SO much for this post! I honestly thought I was going crazy with my Sophie Scarf. I kept restarting because the edges looked terrible, super wonky and uneven, and no matter how many times I tried, it never looked pretty.
I tried your backward loop cast-on for the first increase and it made such a huge difference. My edge is finally neat and tidy and I’m actually excited to keep knitting instead of wanting to throw my needles across the room!
Seriously, I just wanted to say a massive thank you for taking the time to share your experiments and tips with us. I can’t wait to finish my scarf now!
Love, Samantha
Hey Samantha, thanks so much for your kind words. They made my day. So glad the tip helped. Have a lovely summer and happy knitting!
Sarah 🧶
just signed up for your newsletter. When will I receive it.
I expect this will be very helpful. Thank you.
Thank you so much for signing up for my newsletter! That truly means a lot. I usually send one email a week, and my goal is to make each one genuinely helpful for your knitting. If there’s something you’d love me to cover, just let me know. Warmly Sarah
Hello, and thank you for these ideas. I’m about to knit my first Sophie Scarf. I do have a question on another topic. Until recently, I had always knitted with wool, but I joined a prayer shawl group, and they prefer acrylic yarn to make the care of the shawls easier for the recipients. I am wondering about the best way of joining new yarn. Other ladies in the group simply tie a tight square knot and cut the ends short, but this seems risky to me. What would you suggest?
Thank you so much for your comment, and I’m with you that a tight square knot would make me nervous. I’m not a fan of knots in knitting at all: I knitted an acrylic blanket once and used knots, and everything started unraveling. Acrylic yarn is a bit more slippery than wool, so I personally wouldn’t trust a Russian join or a knot with that type of yarn. My safest approach is to leave long tails, overlap the old and new yarn and knit a few stitches with both strands held together if needed, then later thread each tail onto a tapestry needle and weave it through the wrong side in several directions, not just straight along one row. That’s the safest way I know to attach a new yarn in acrylic without relying on a knot. Warmly Sarah