
Ultimate List of Knitting Abbreviations: Increases, Decreases, Cables & More
November 18, 2025
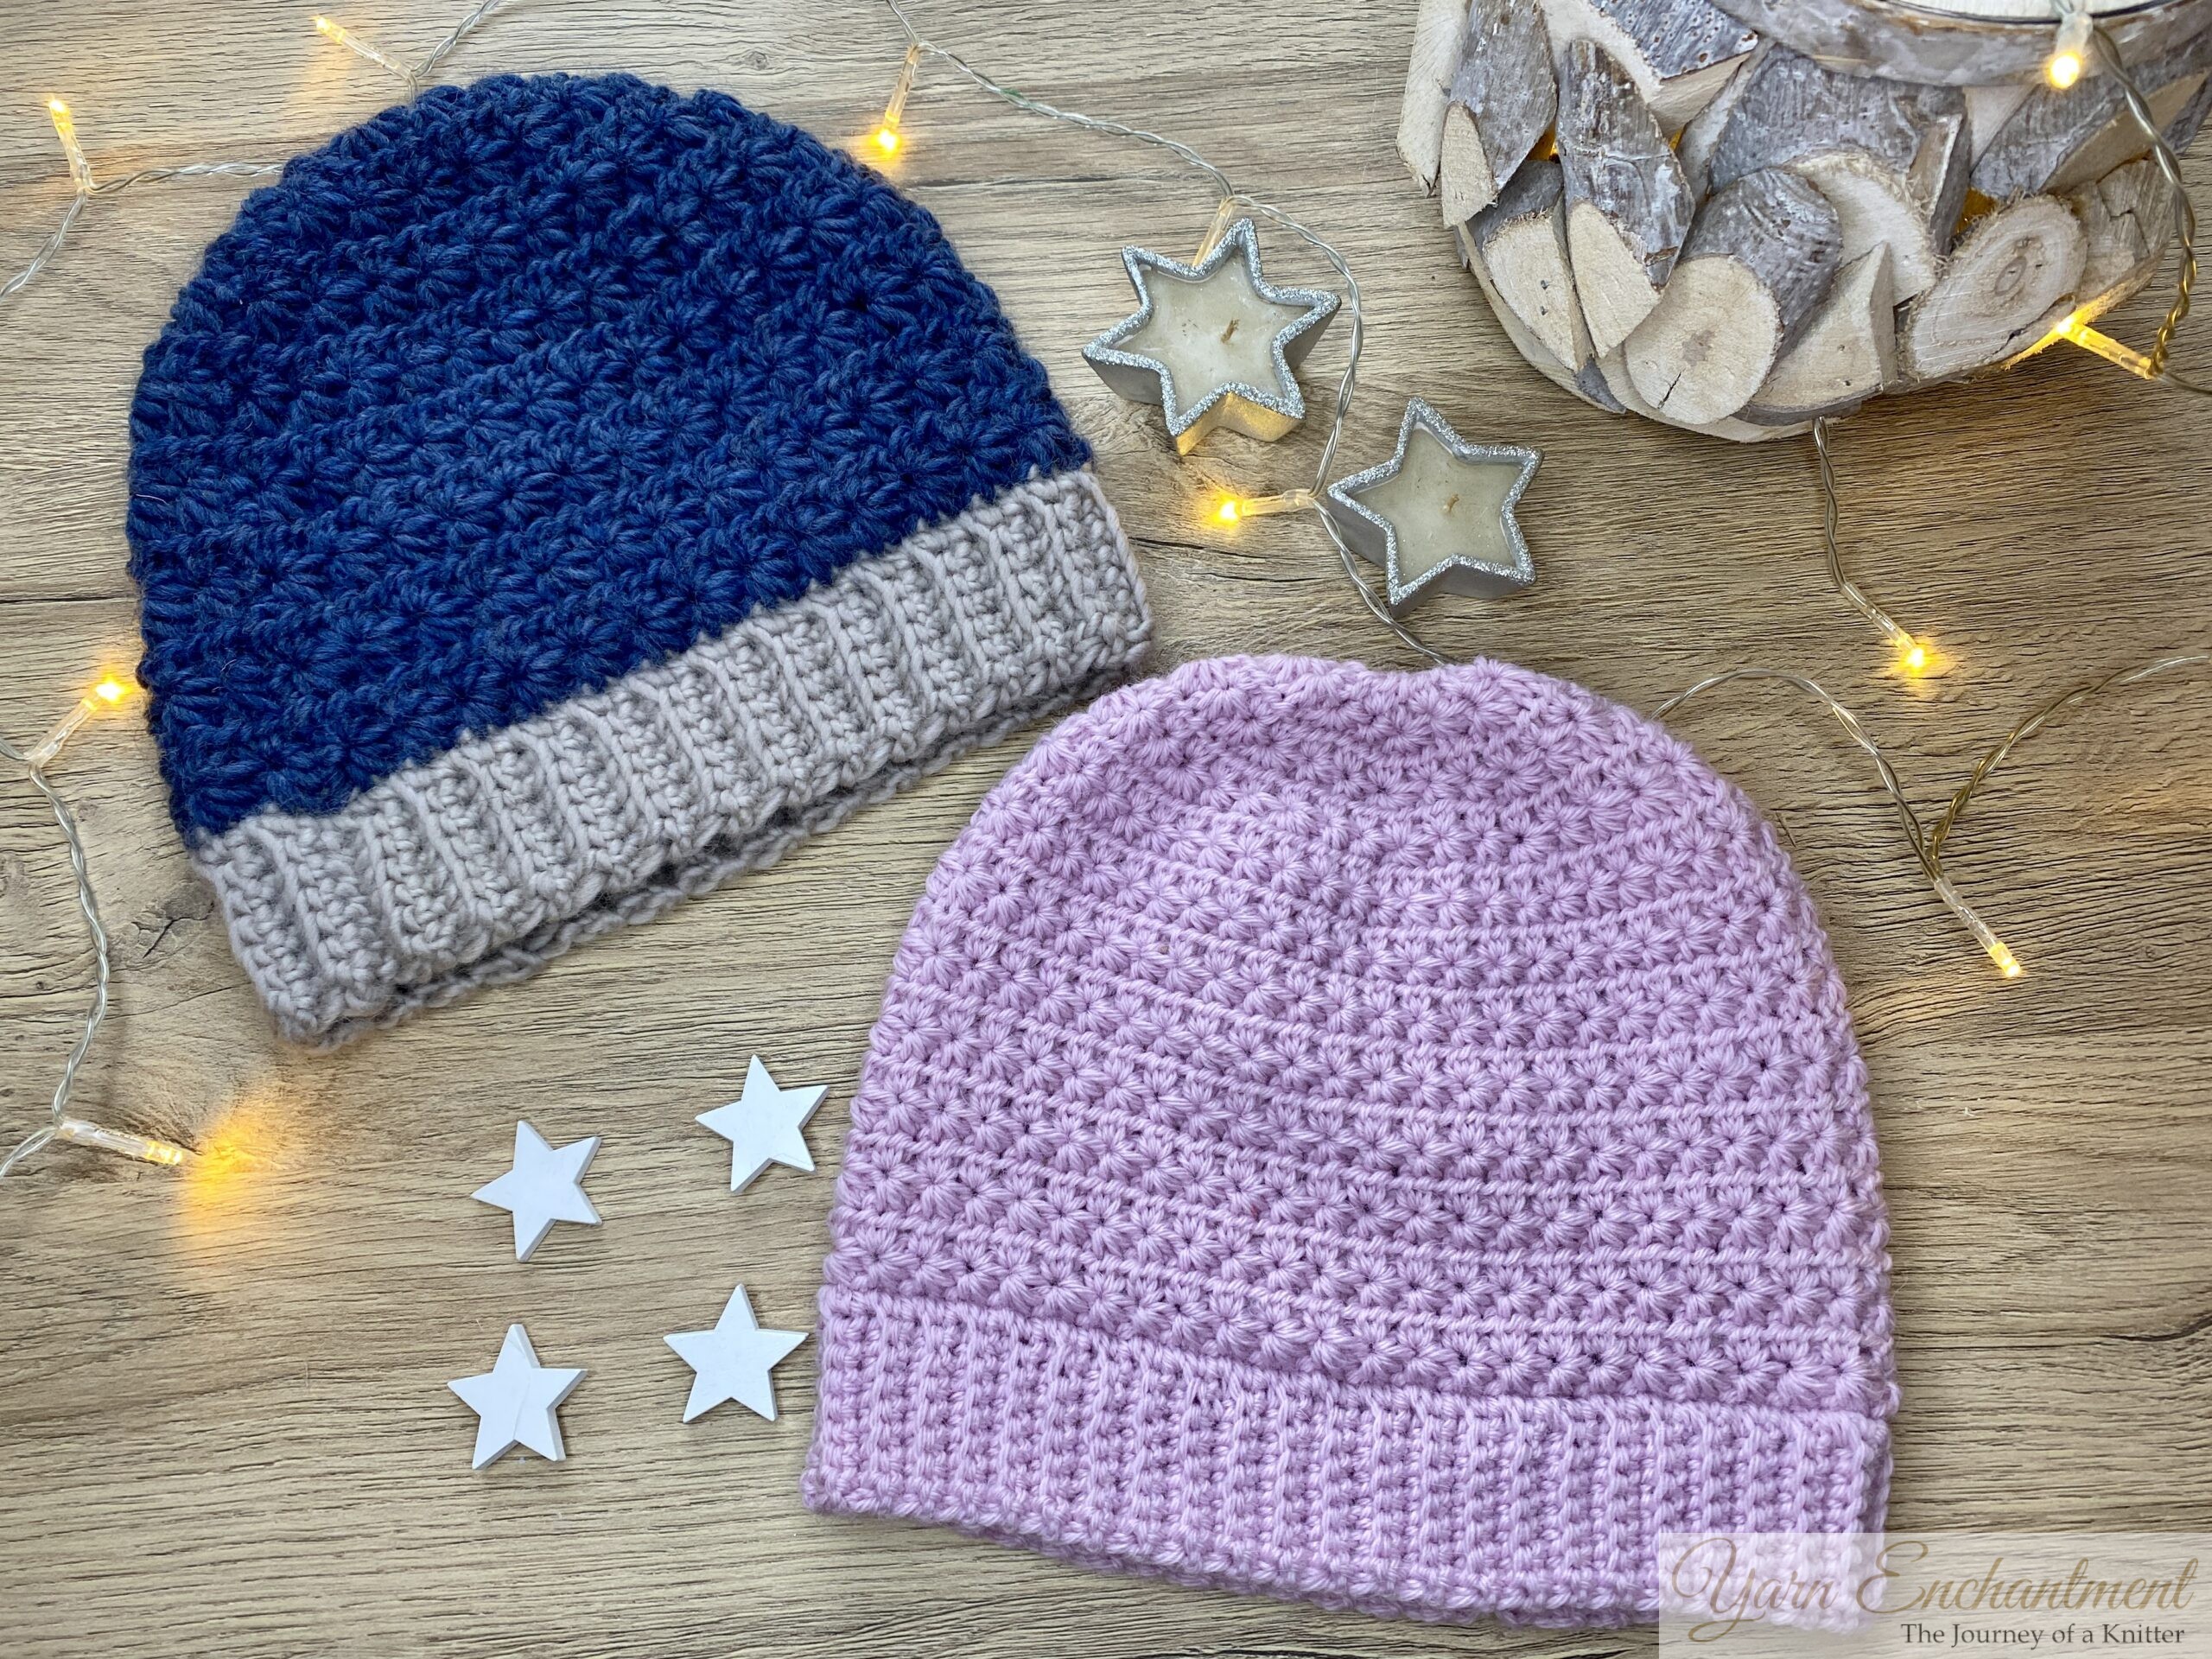
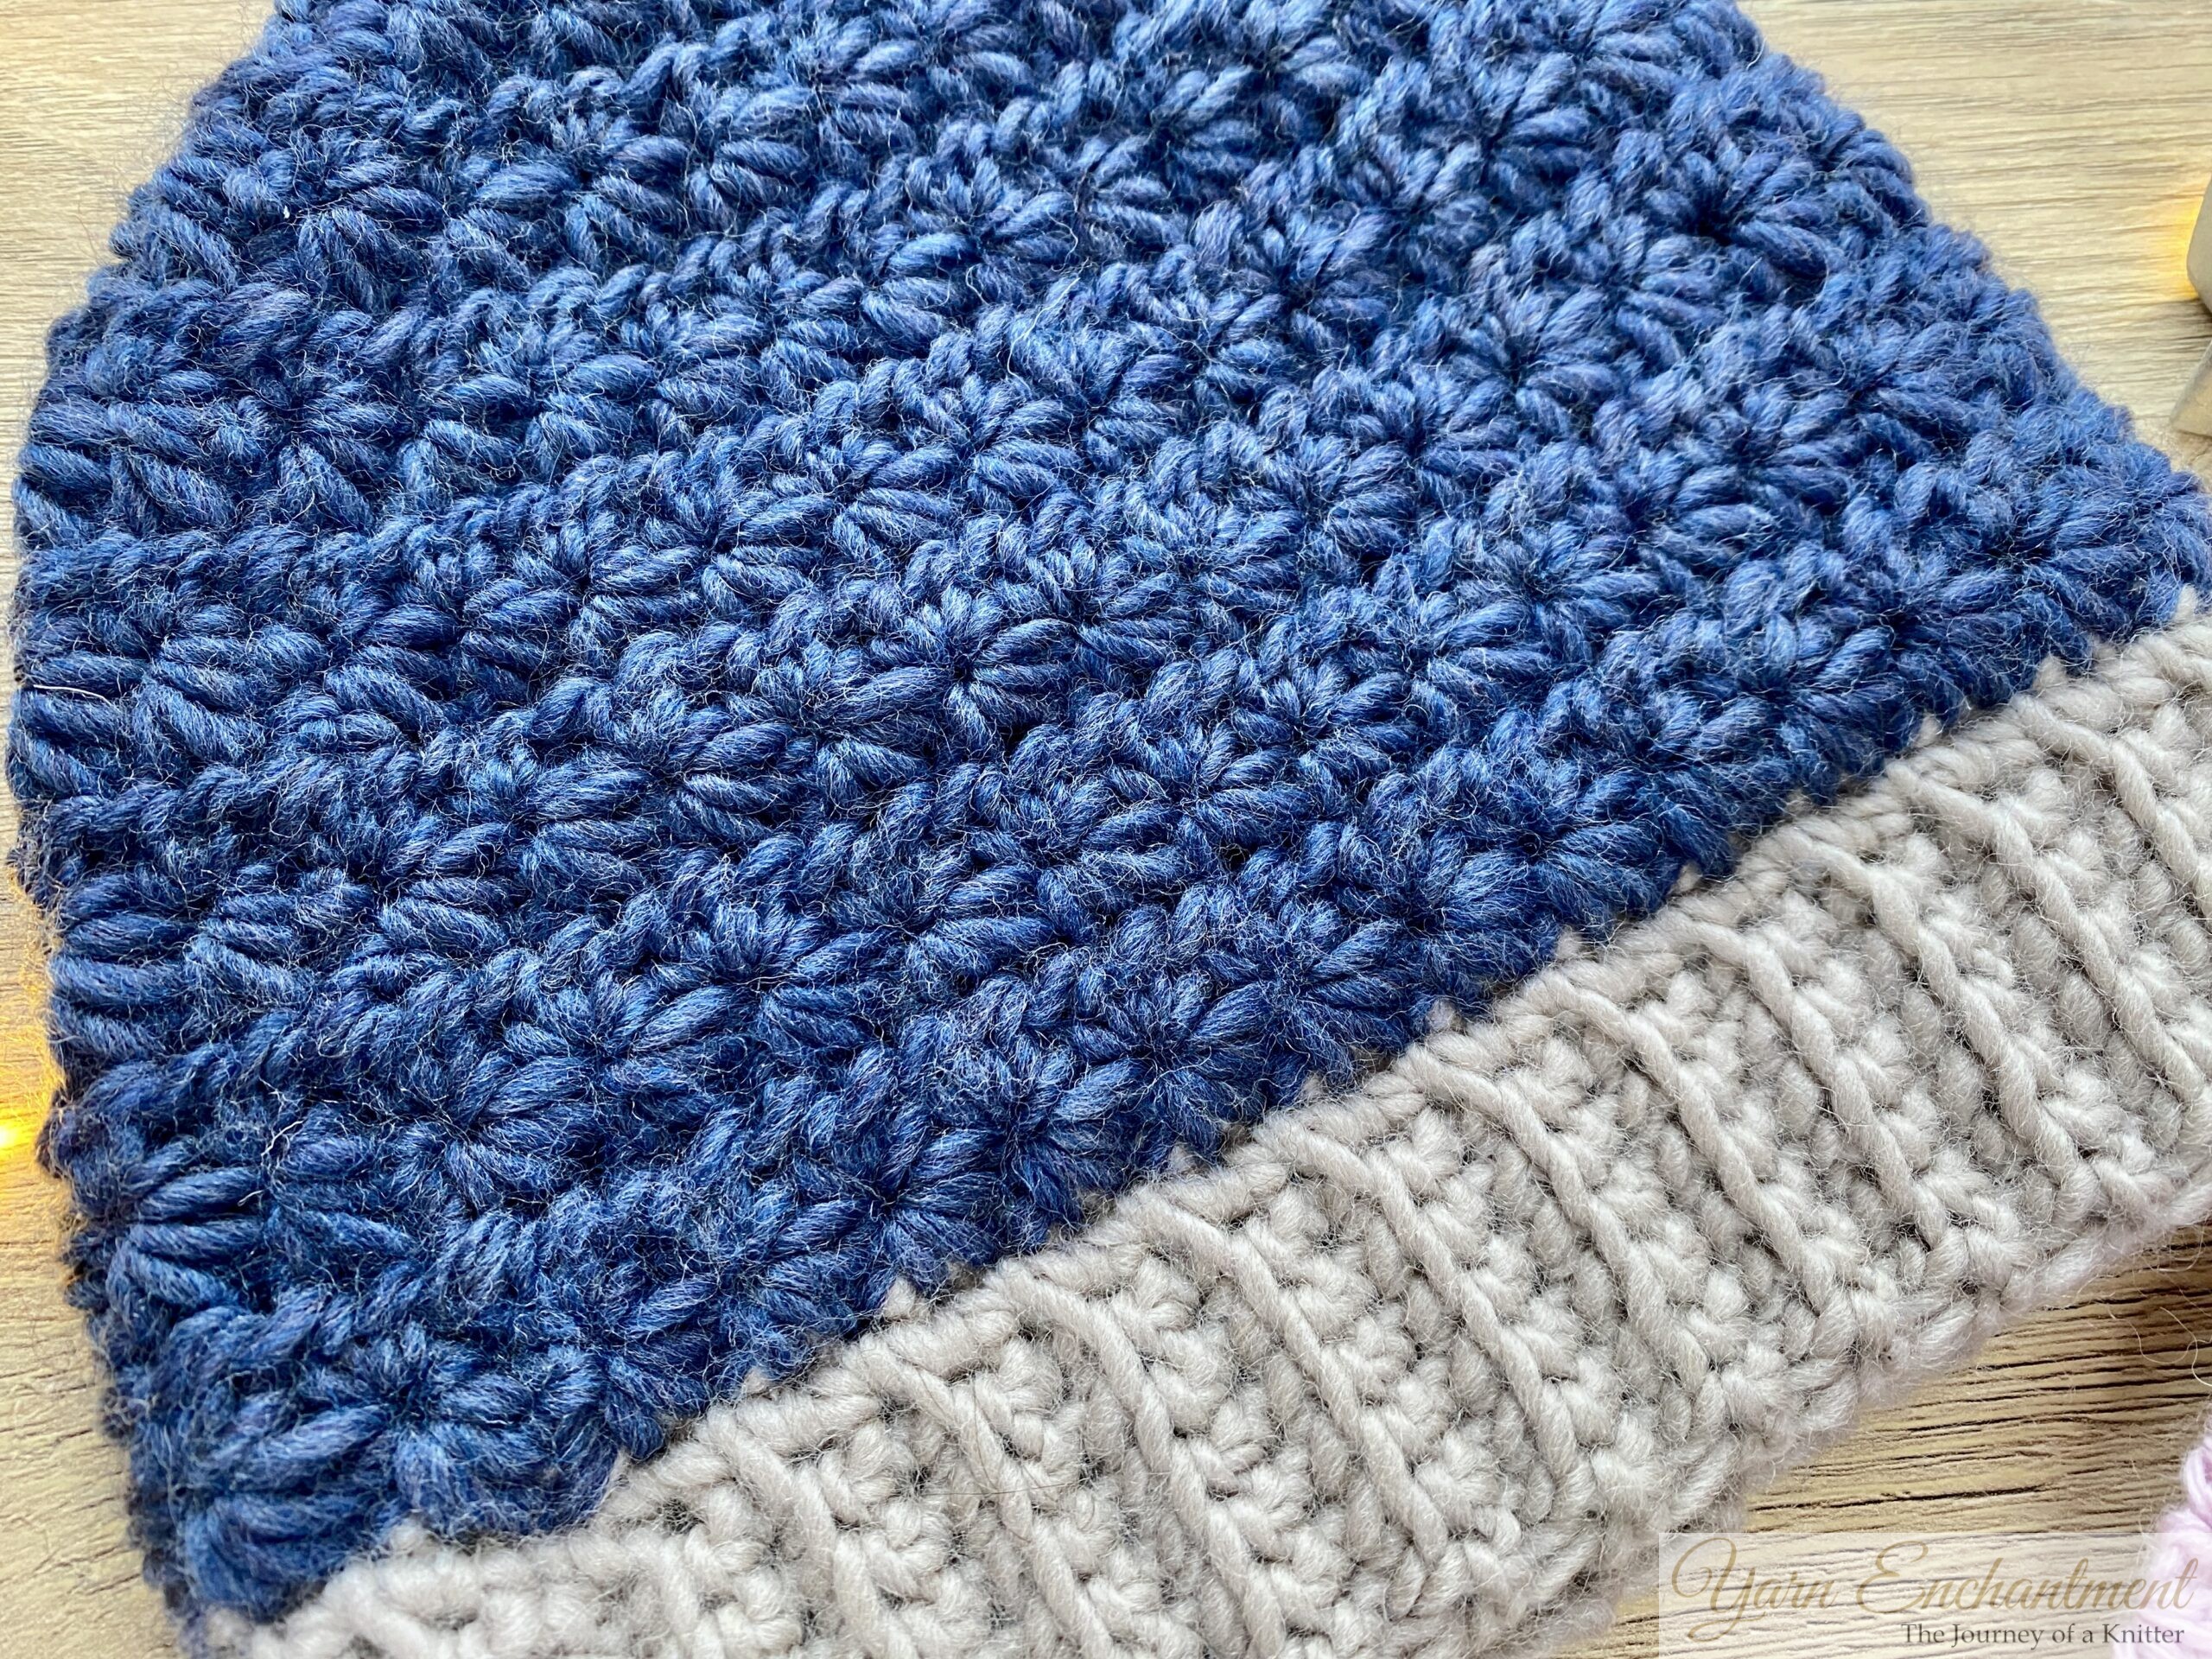
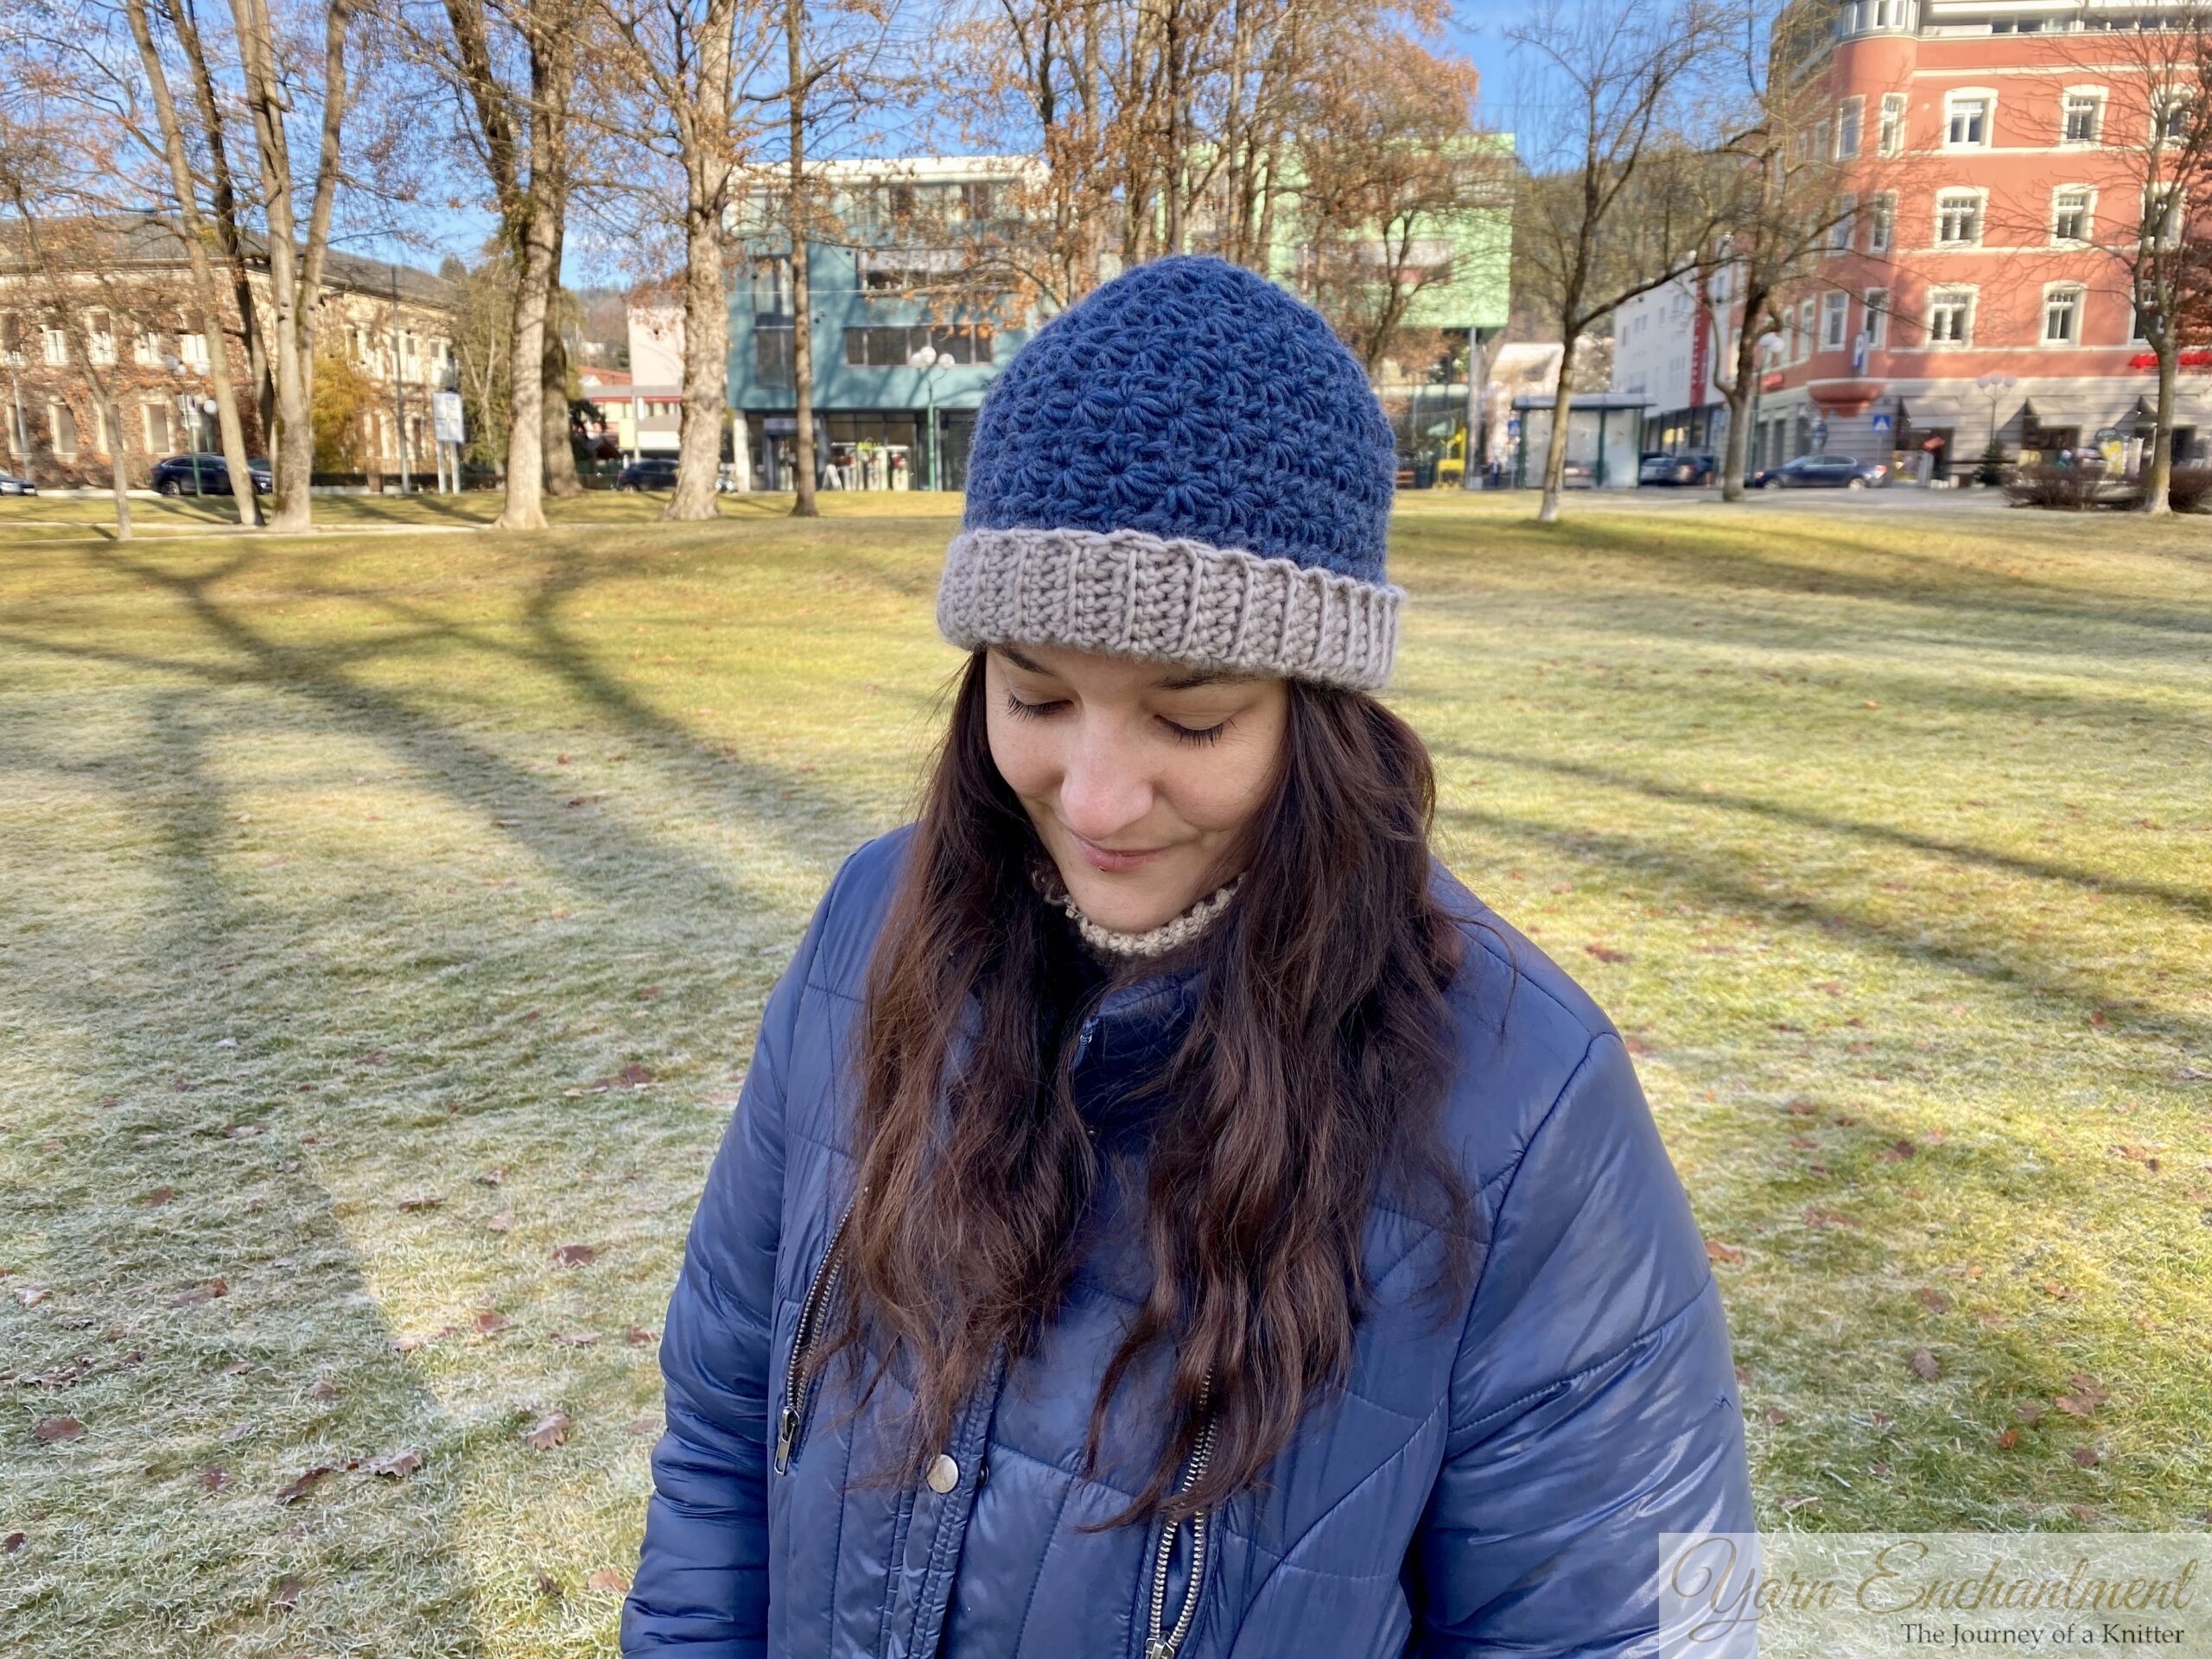
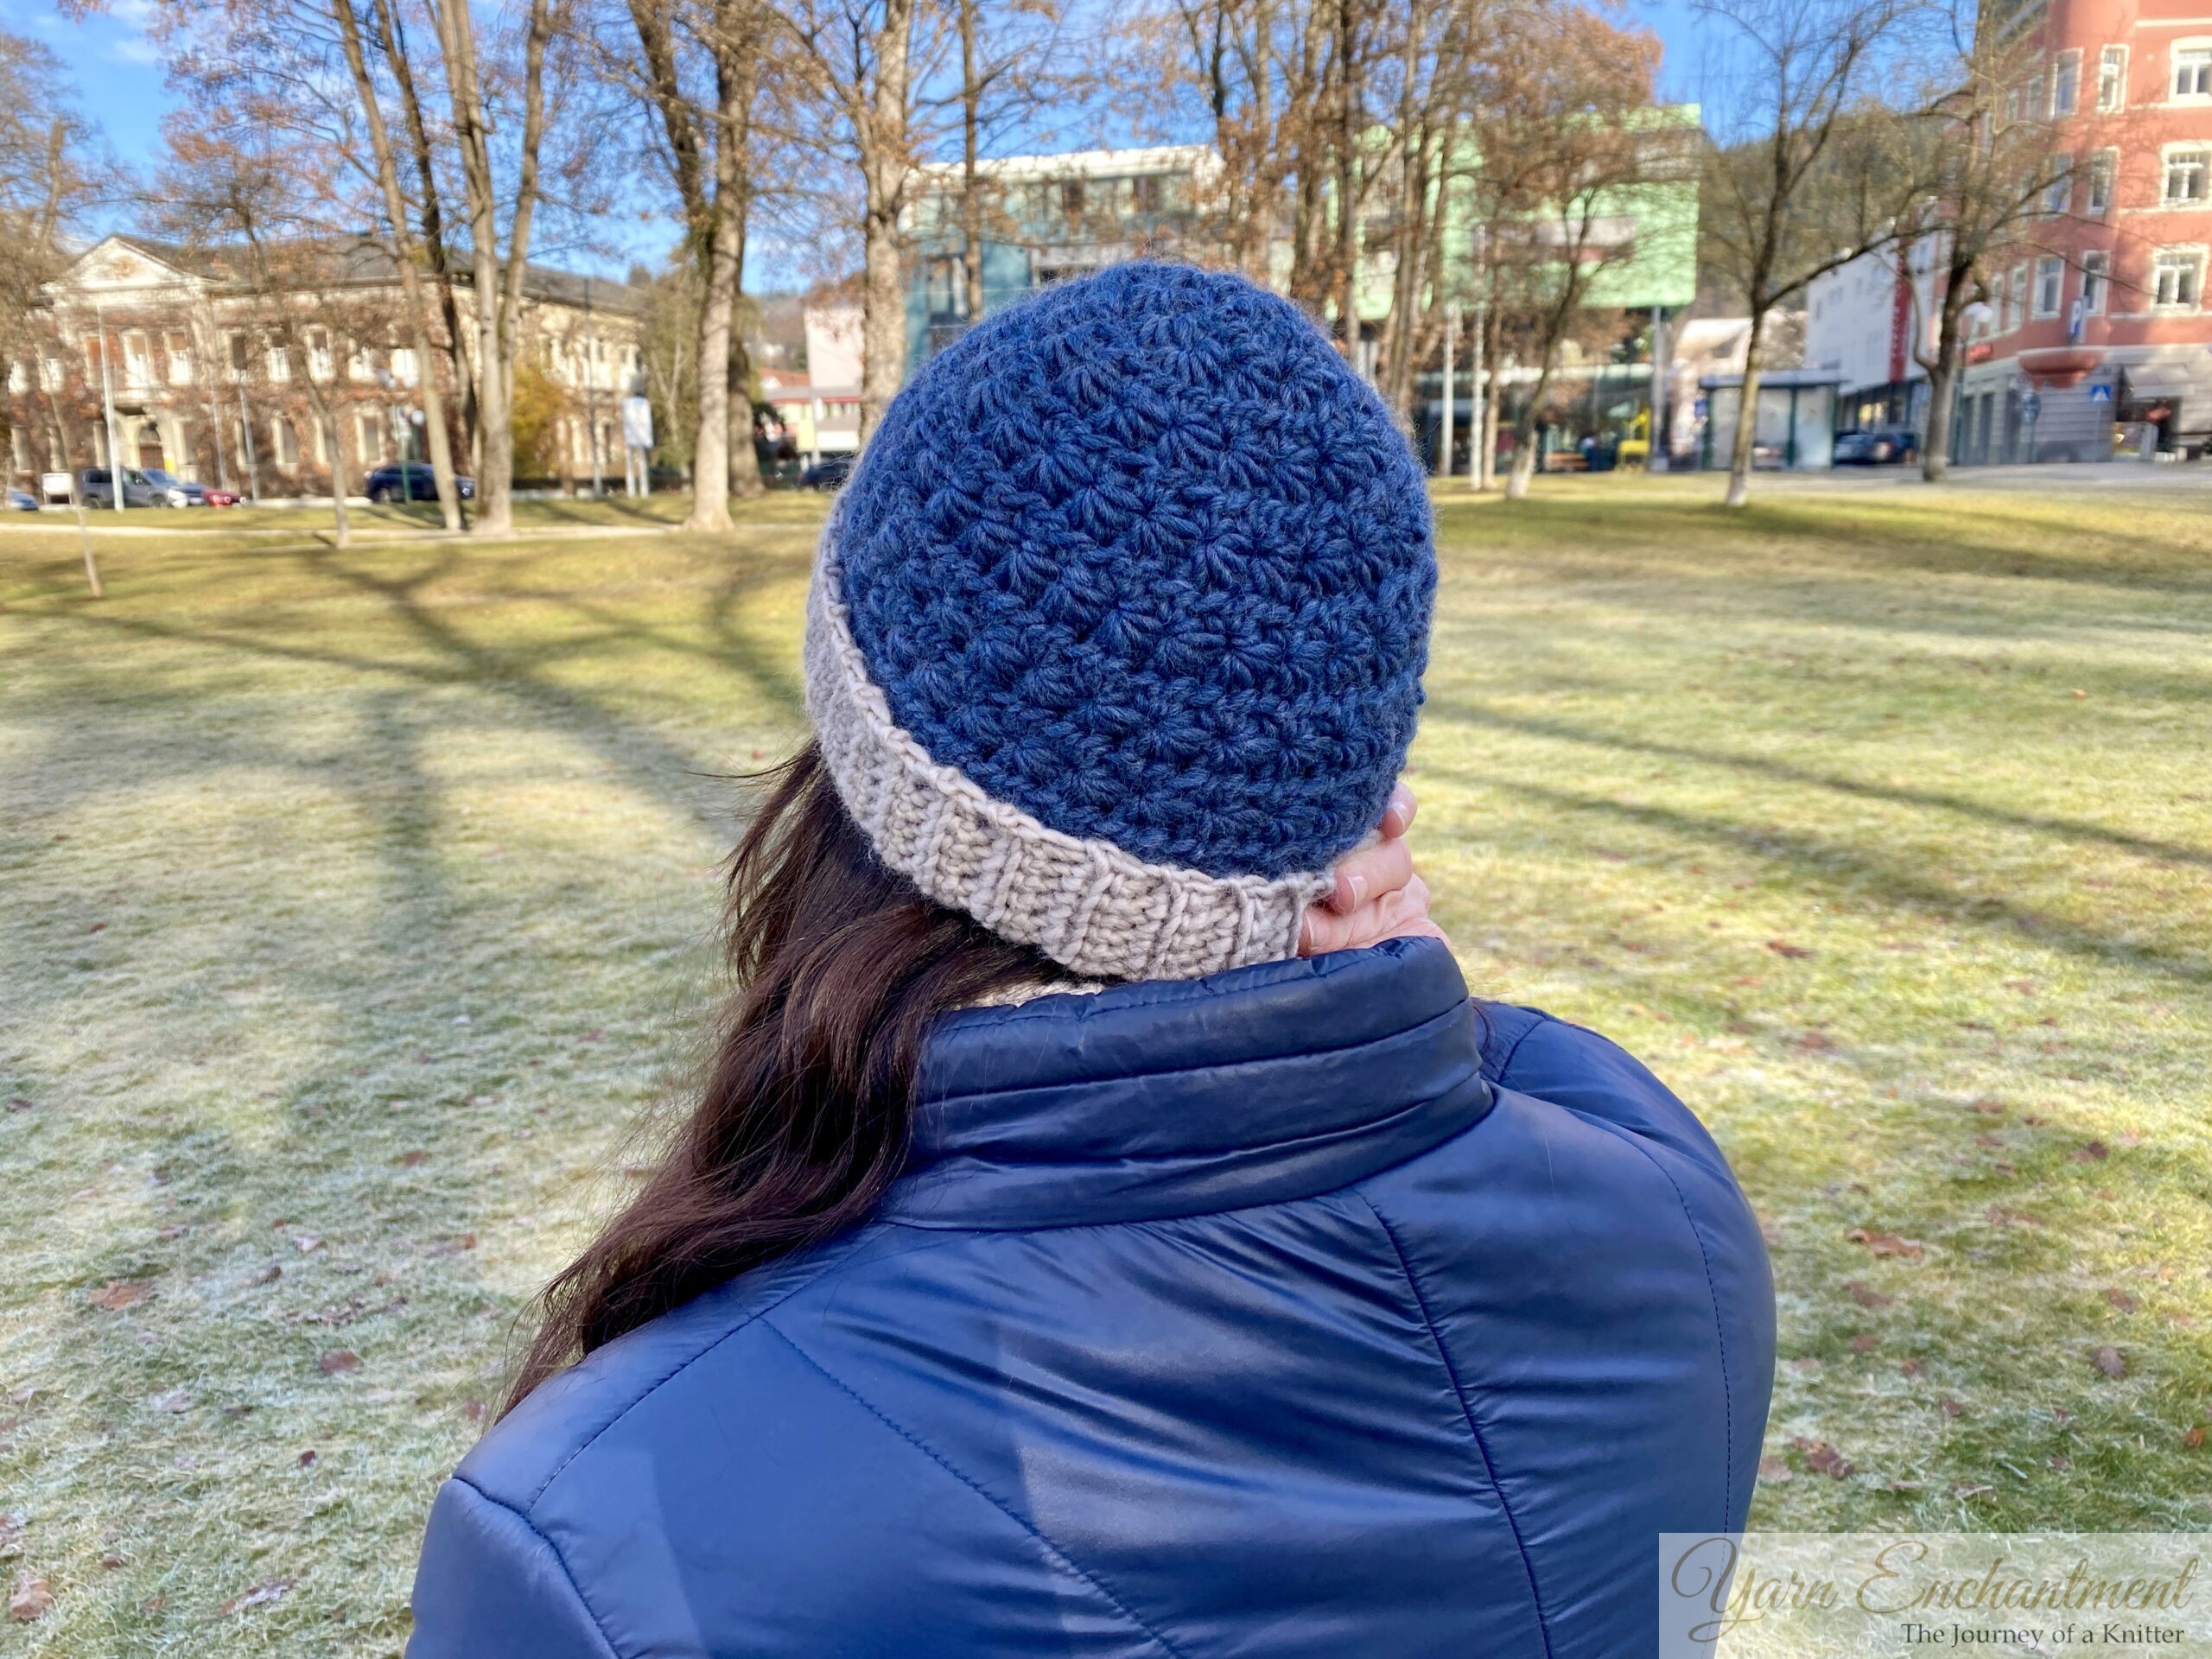
Winter Whirl Colorwork Hat
December 10, 2025Any‑Size Crochet Star Stitch Hat in the Round

Originally published on November 28, 2025
A few days ago, a really lovely person reached out to me and asked if I could make a men’s hat using the star stitch in the round. When I read this YouTube comment, I felt so much joy, because sharing my knowledge and helping other people is one of my favorite things to do.
I immediately started crocheting a few hats, because in my vision, this design should work for any size - from newborn to adult XL - and with any yarn or crochet hook you choose. My goal with this pattern is to help you create a custom-fit crochet star stitch hat using simple measurements, so you can make it for absolutely anyone.
I truly hope you have a lot of fun recreating this hat. And if there is anything in particular you would like to see next, or if you need help adjusting this pattern, please let me know, I’ll gladly help you.
 | Any Size Star Stitch Hat |

Table of Contents
- Size and Fit: How to Measure
- Materials for Your Star Stitch Hat
- Abbreviations (US Terms)
- Brim: Ribbed Band Construction
- Join the Brim and Start the Round
- Star Stitch Pattern in the Round
- Repeat Rounds for Hat Height
- Shape the Crown with Decreases
- Close the Top and Finish
- Tips for Customizing Yarn, Size, and Style
- Conclusion + Video Tutorial
Size and Fit: How to Measure for Your Hat
This star stitch hat is meant to fit every head, and the goal is for it to be truly size-inclusive, but the real magic lies in the measuring. When you take a moment to measure head circumference and hat height, you give yourself everything you need to crochet a soft, comfortable hat that hugs the head gently and feels just right on whoever wears it.
1. Head circumference (around your ears)
Take a soft measuring tape (or a piece of string you can measure later). Place it on the middle of your forehead, then wrap it around your head so it goes over your ears, around the back of your head, and back to the forehead where you started. Make sure the tape is snug but not tight – it should touch the skin or hair without squeezing. Write down this number. This is your head circumference and the base for your hat size.
Use this measurement to decide how long to make your brim band. The band should usually be about 2–5 cm (¾–2 inches) shorter than your head circumference so it stretches for a comfy fit.
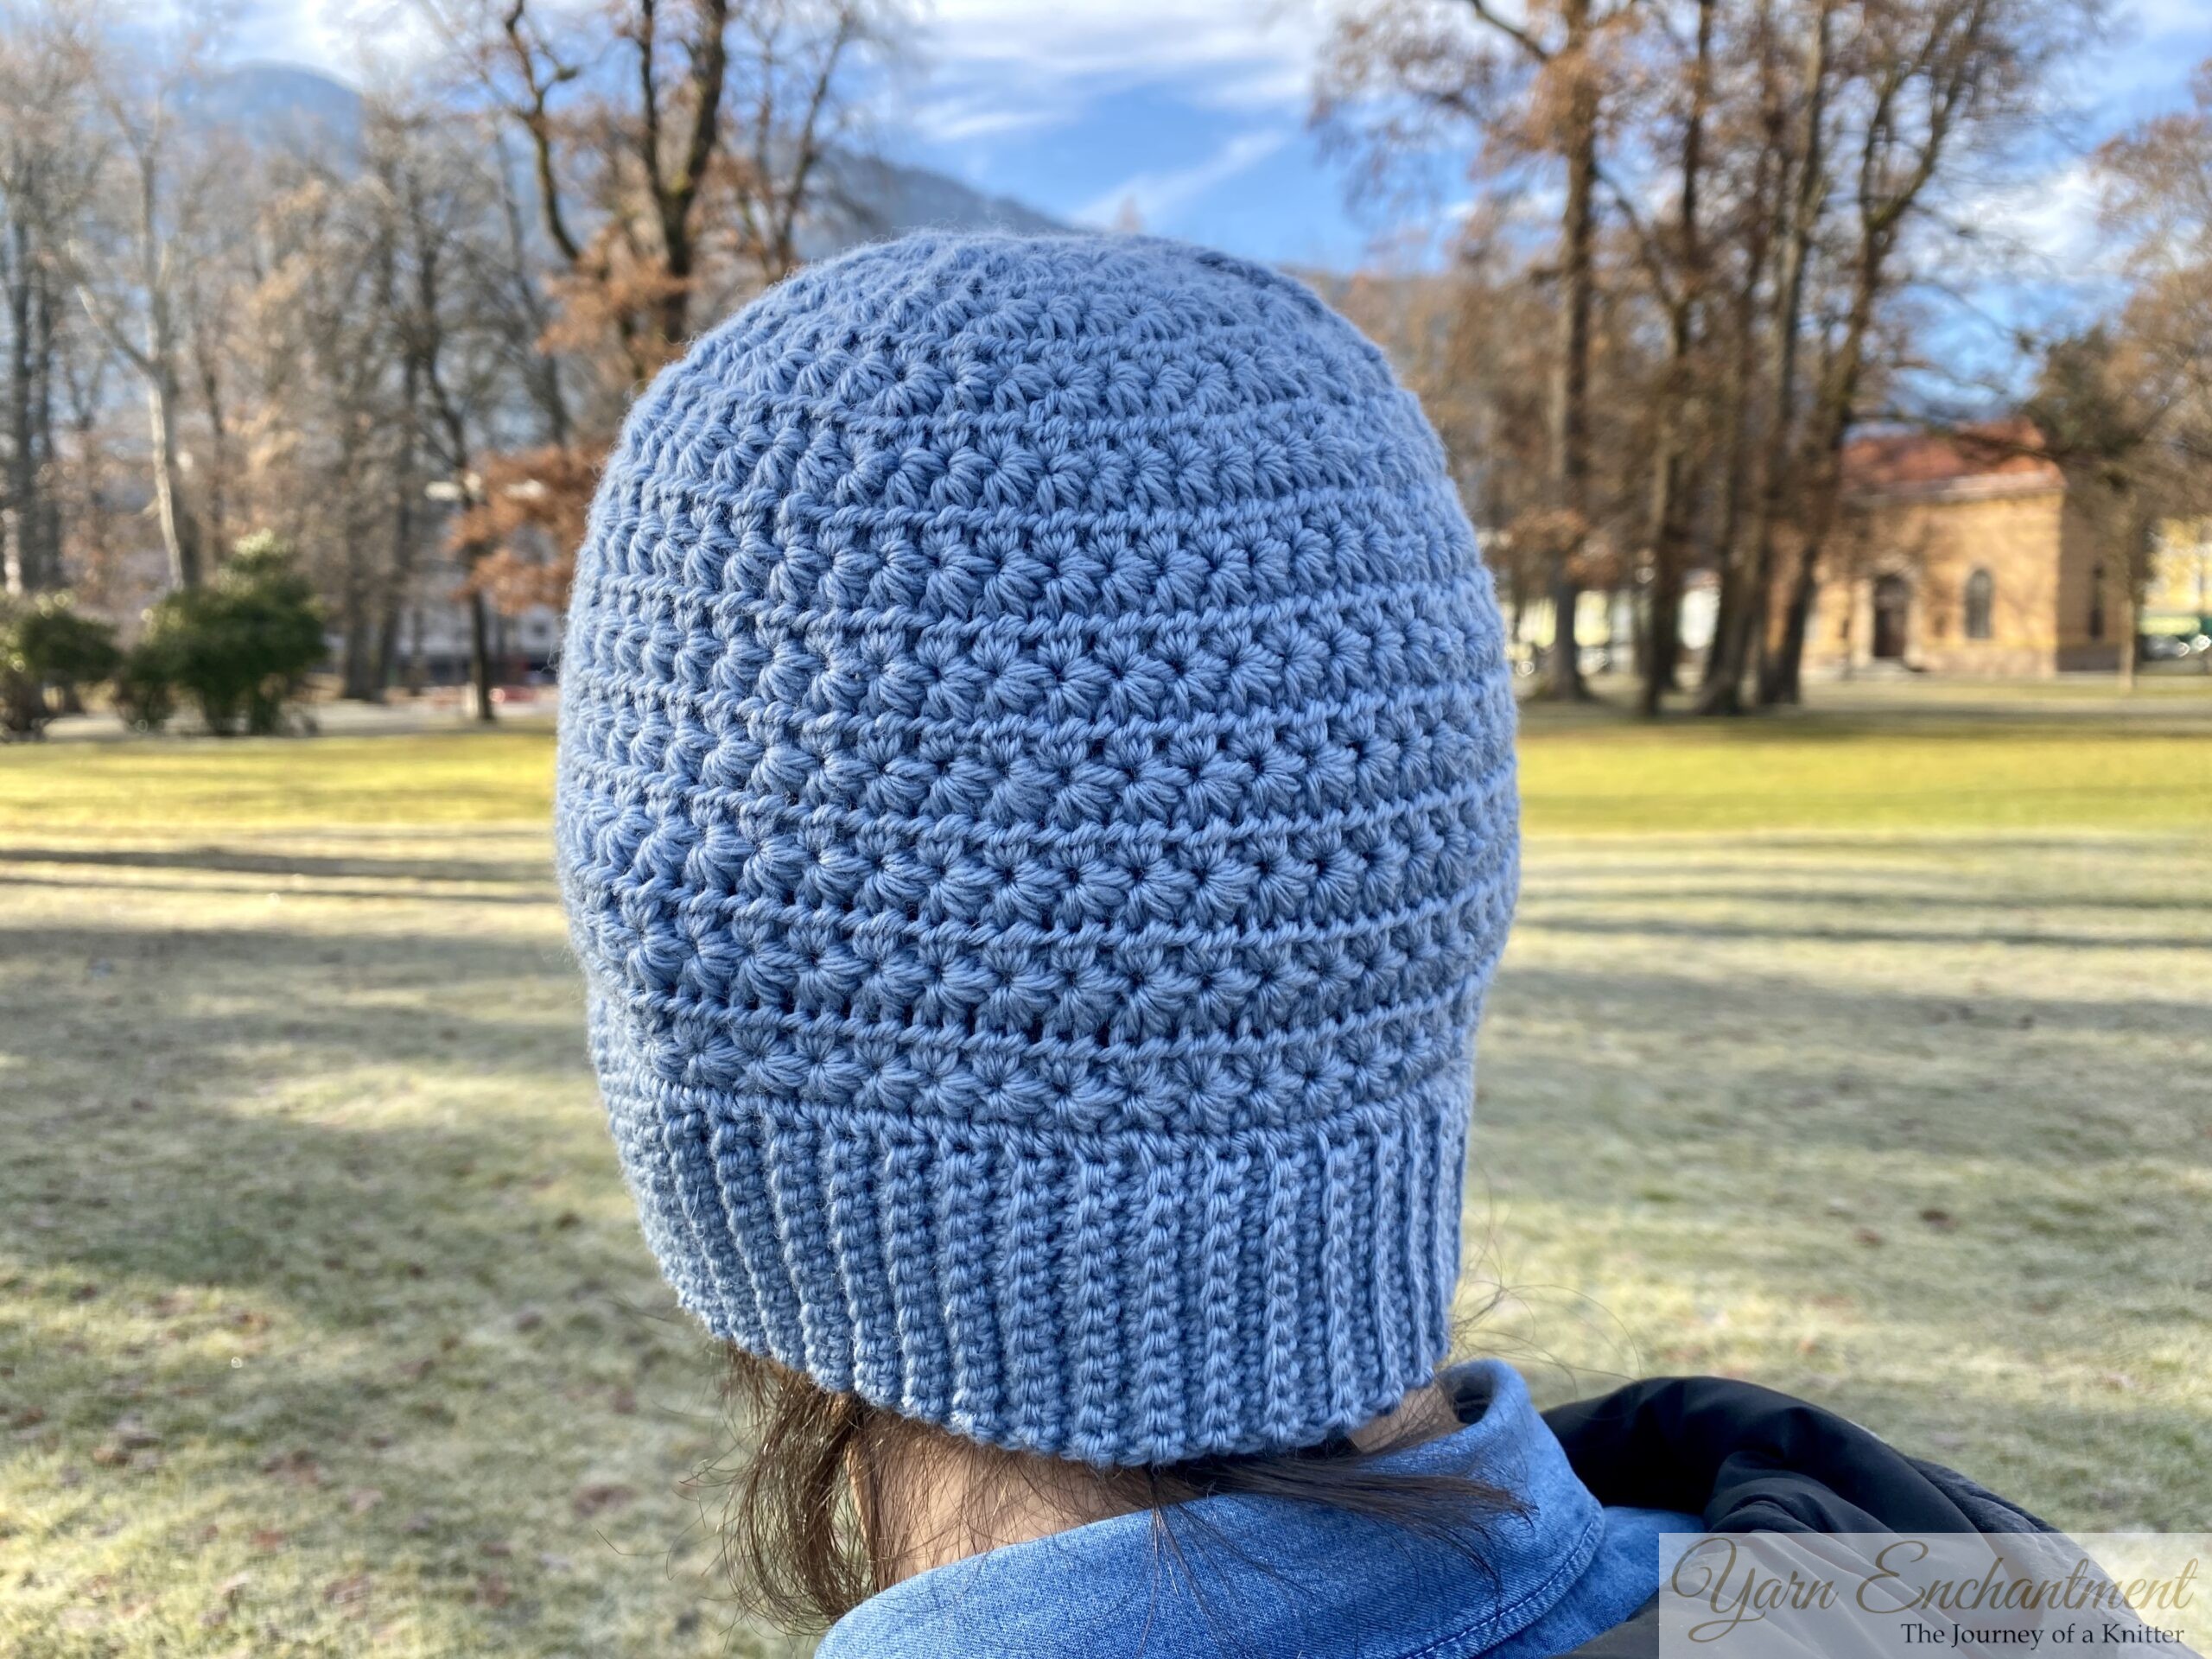
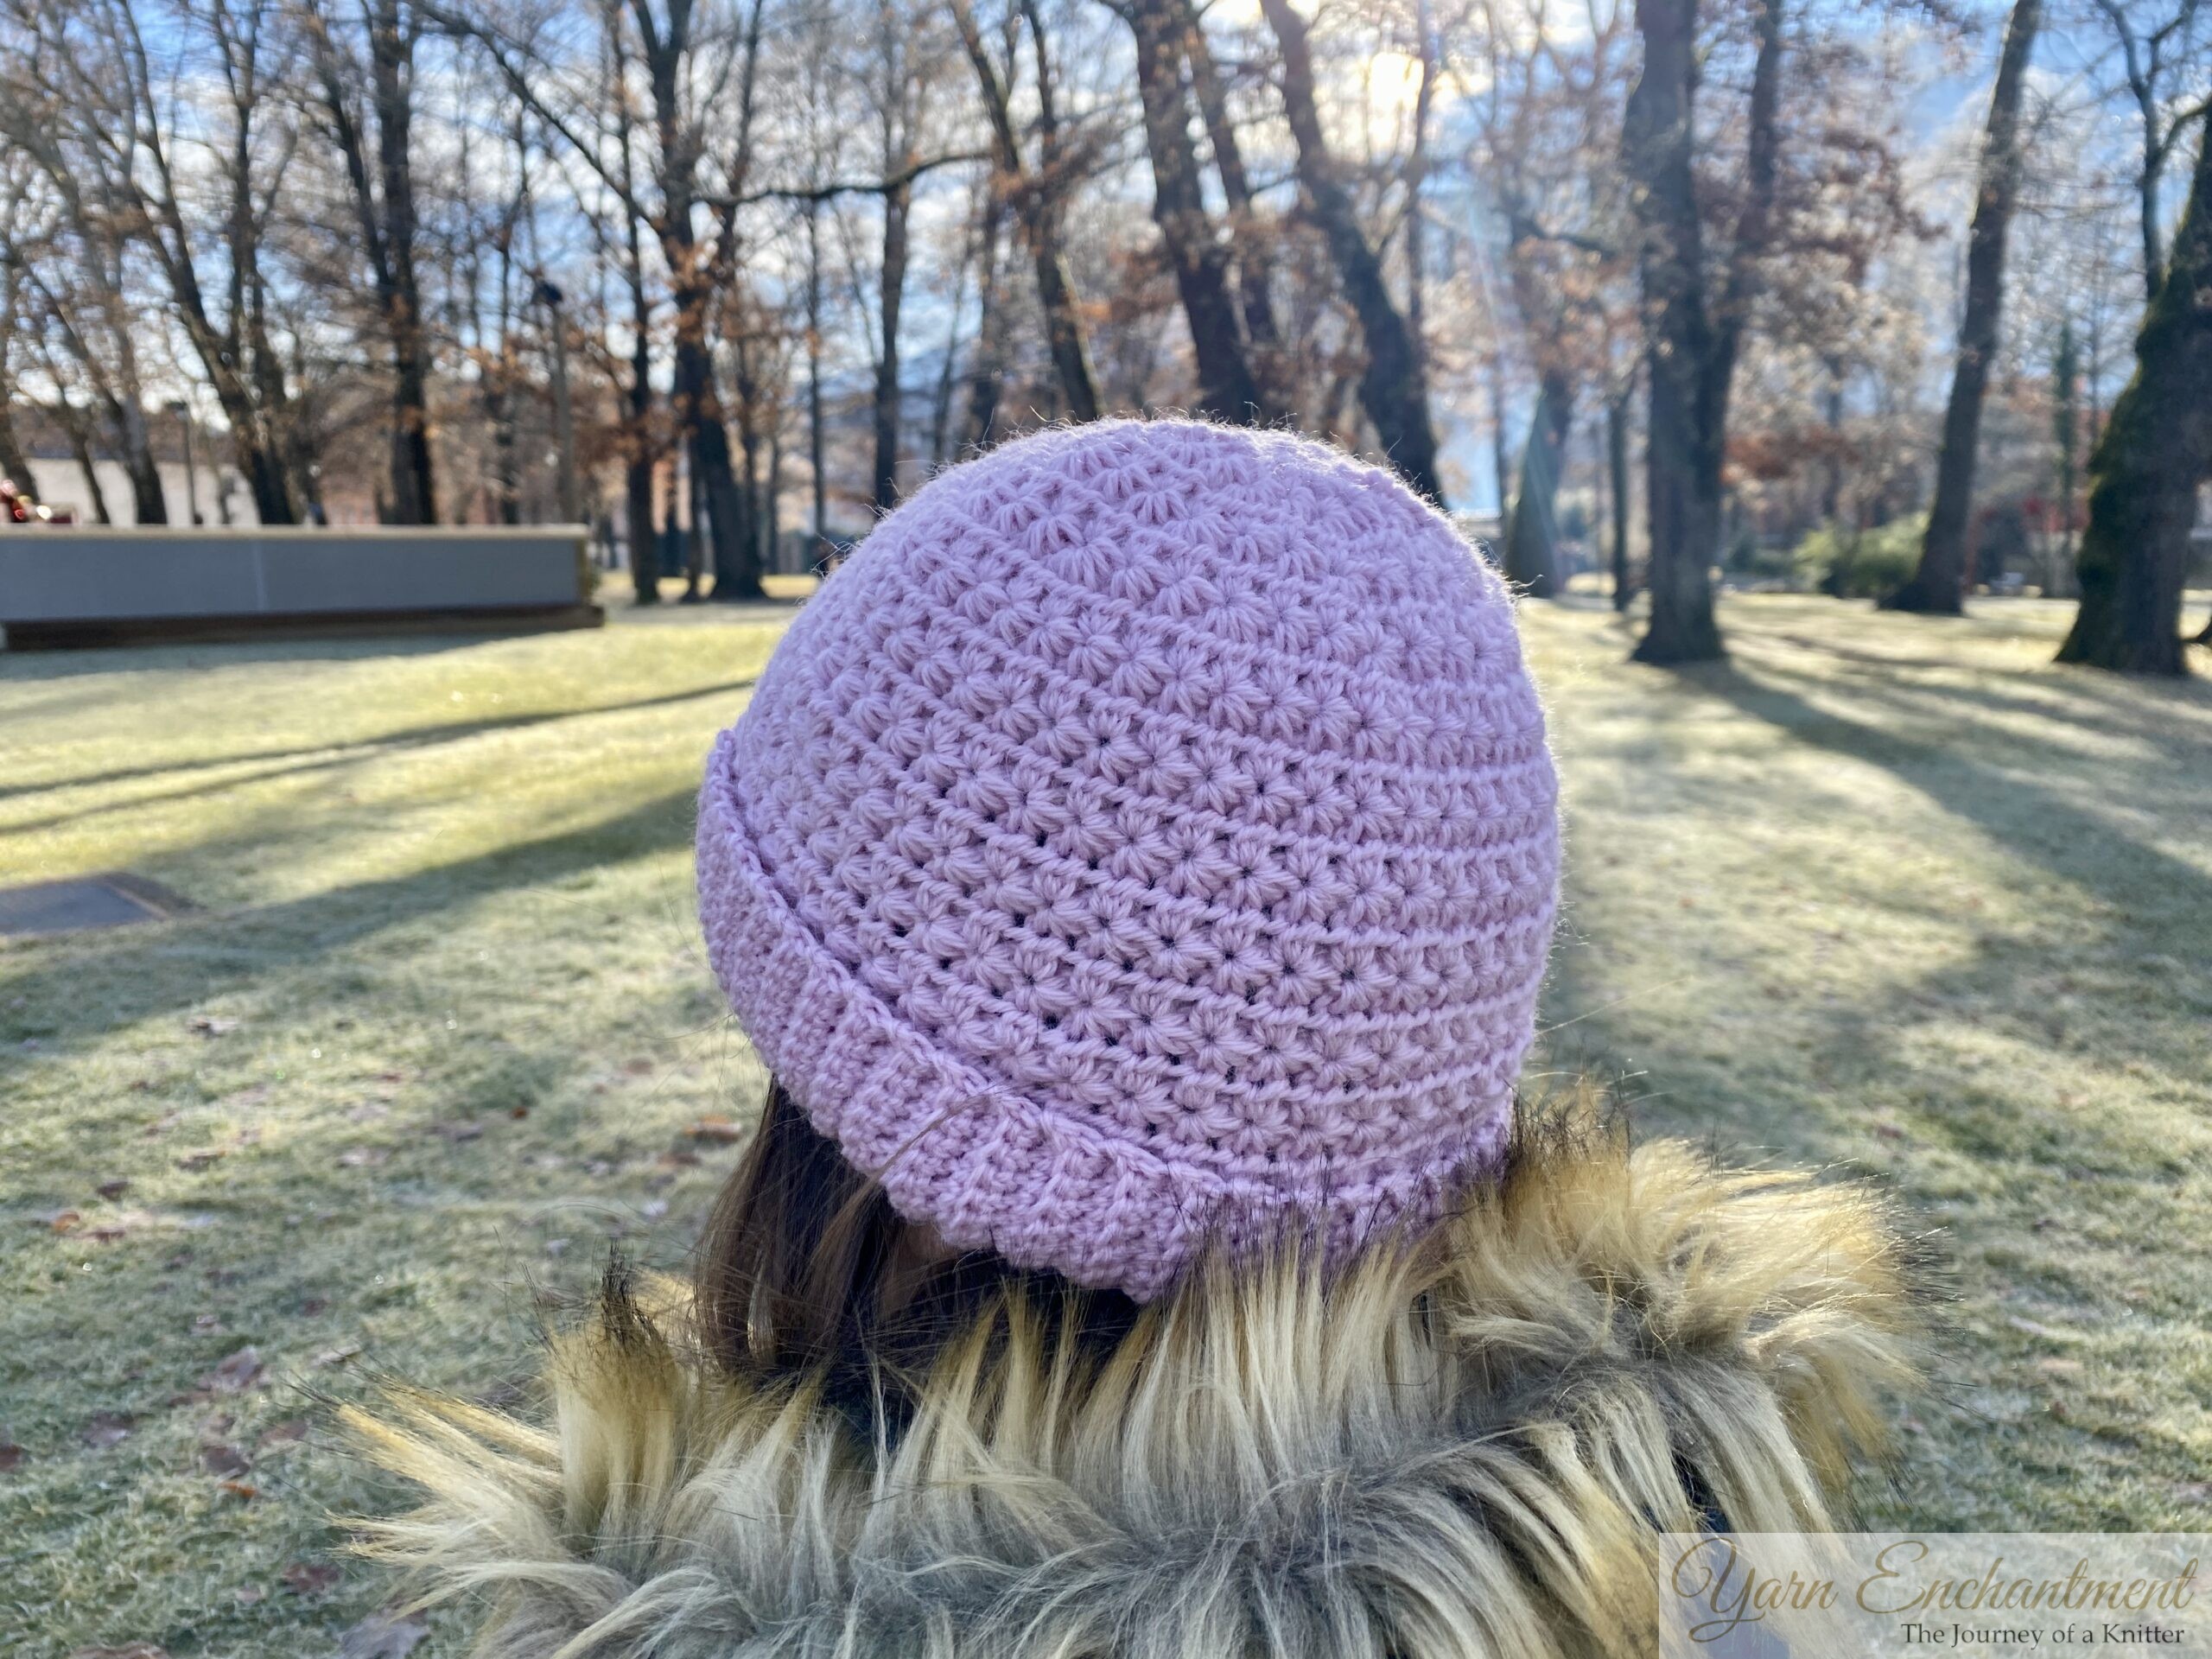
Note on negative ease: When you work with a very stretchy yarn, it is important to build in more negative ease so your hat keeps its shape over time instead of growing too big. For my blue hat in WAK The Petite Wool, which is very stretchy and relaxes a lot with washing and wearing, I chose about 10–12 cm (4–4.75 inches) of negative ease. For the pink hat in Drops Lima, which has more structure and does not stretch as much, 5–6 cm (2–2.25 inches) of negative ease is enough for a comfortable fit.
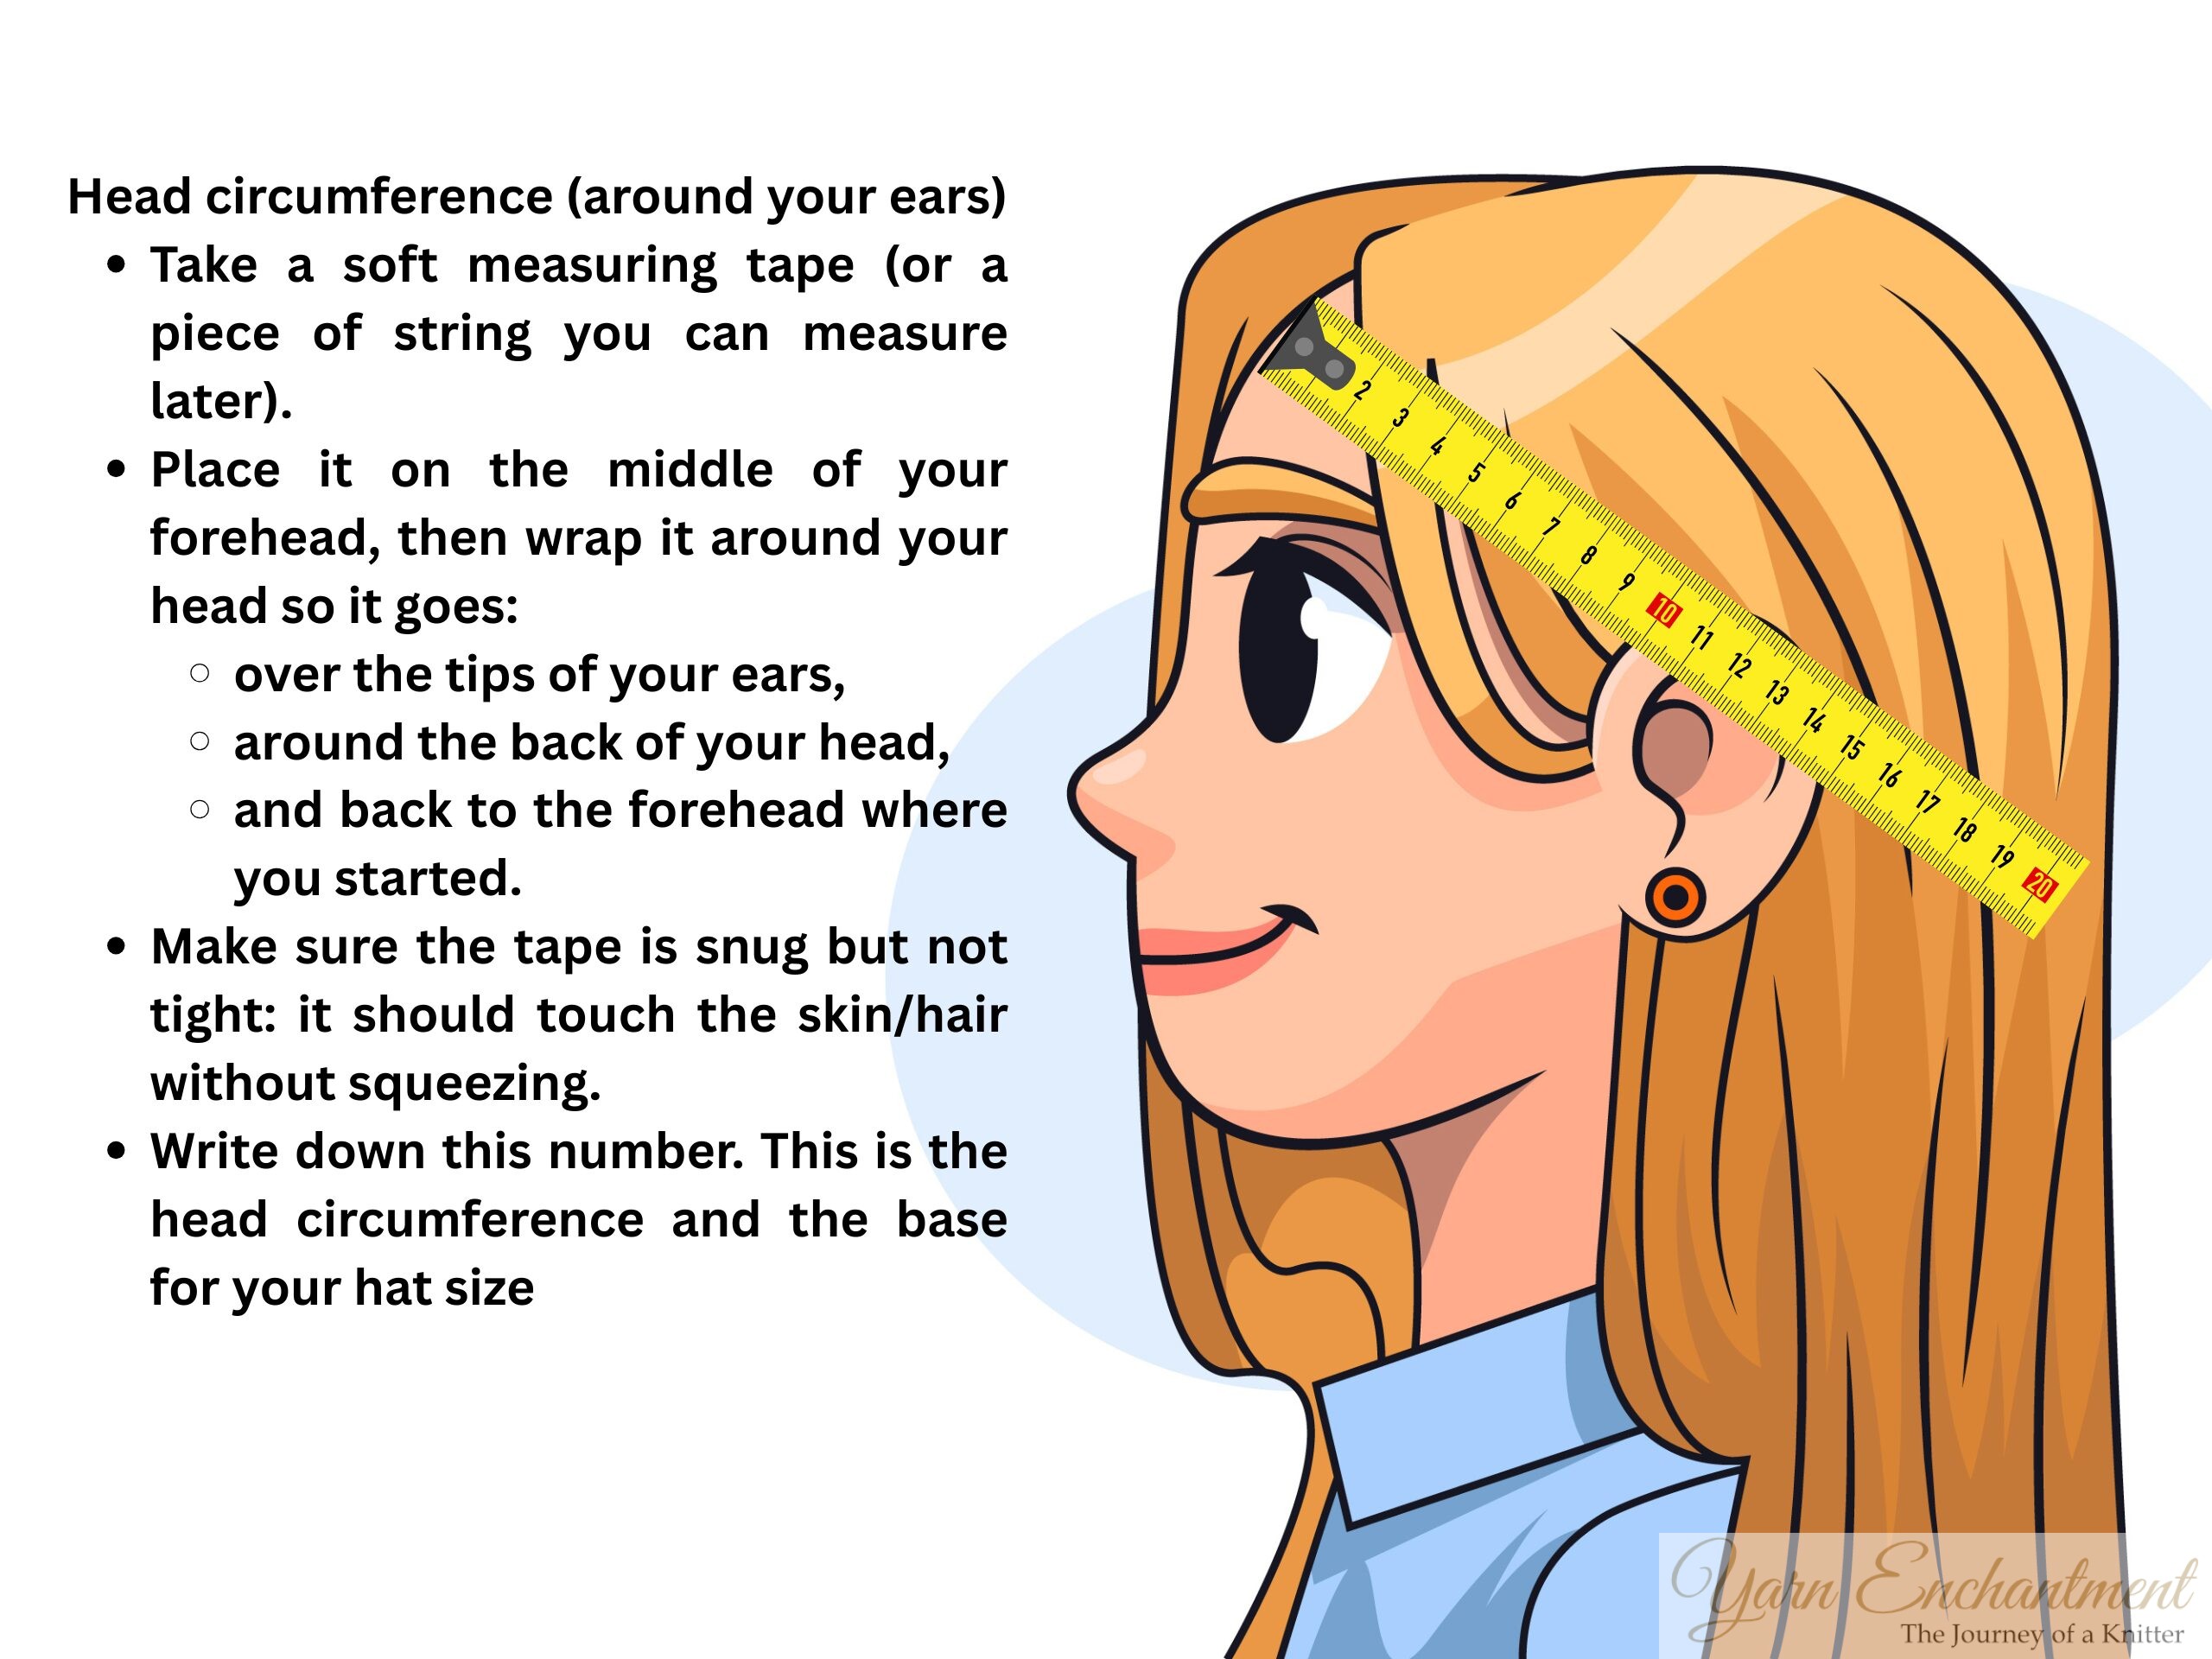 | Take a soft measuring tape (or a piece of string you can measure later). Place it on the middle of your forehead, then wrap it around your head so it goes over your ears, around the back of your head, and back to the forehead where you started. Make sure the tape is snug but not tight – it should touch the skin/hair without squeezing. |

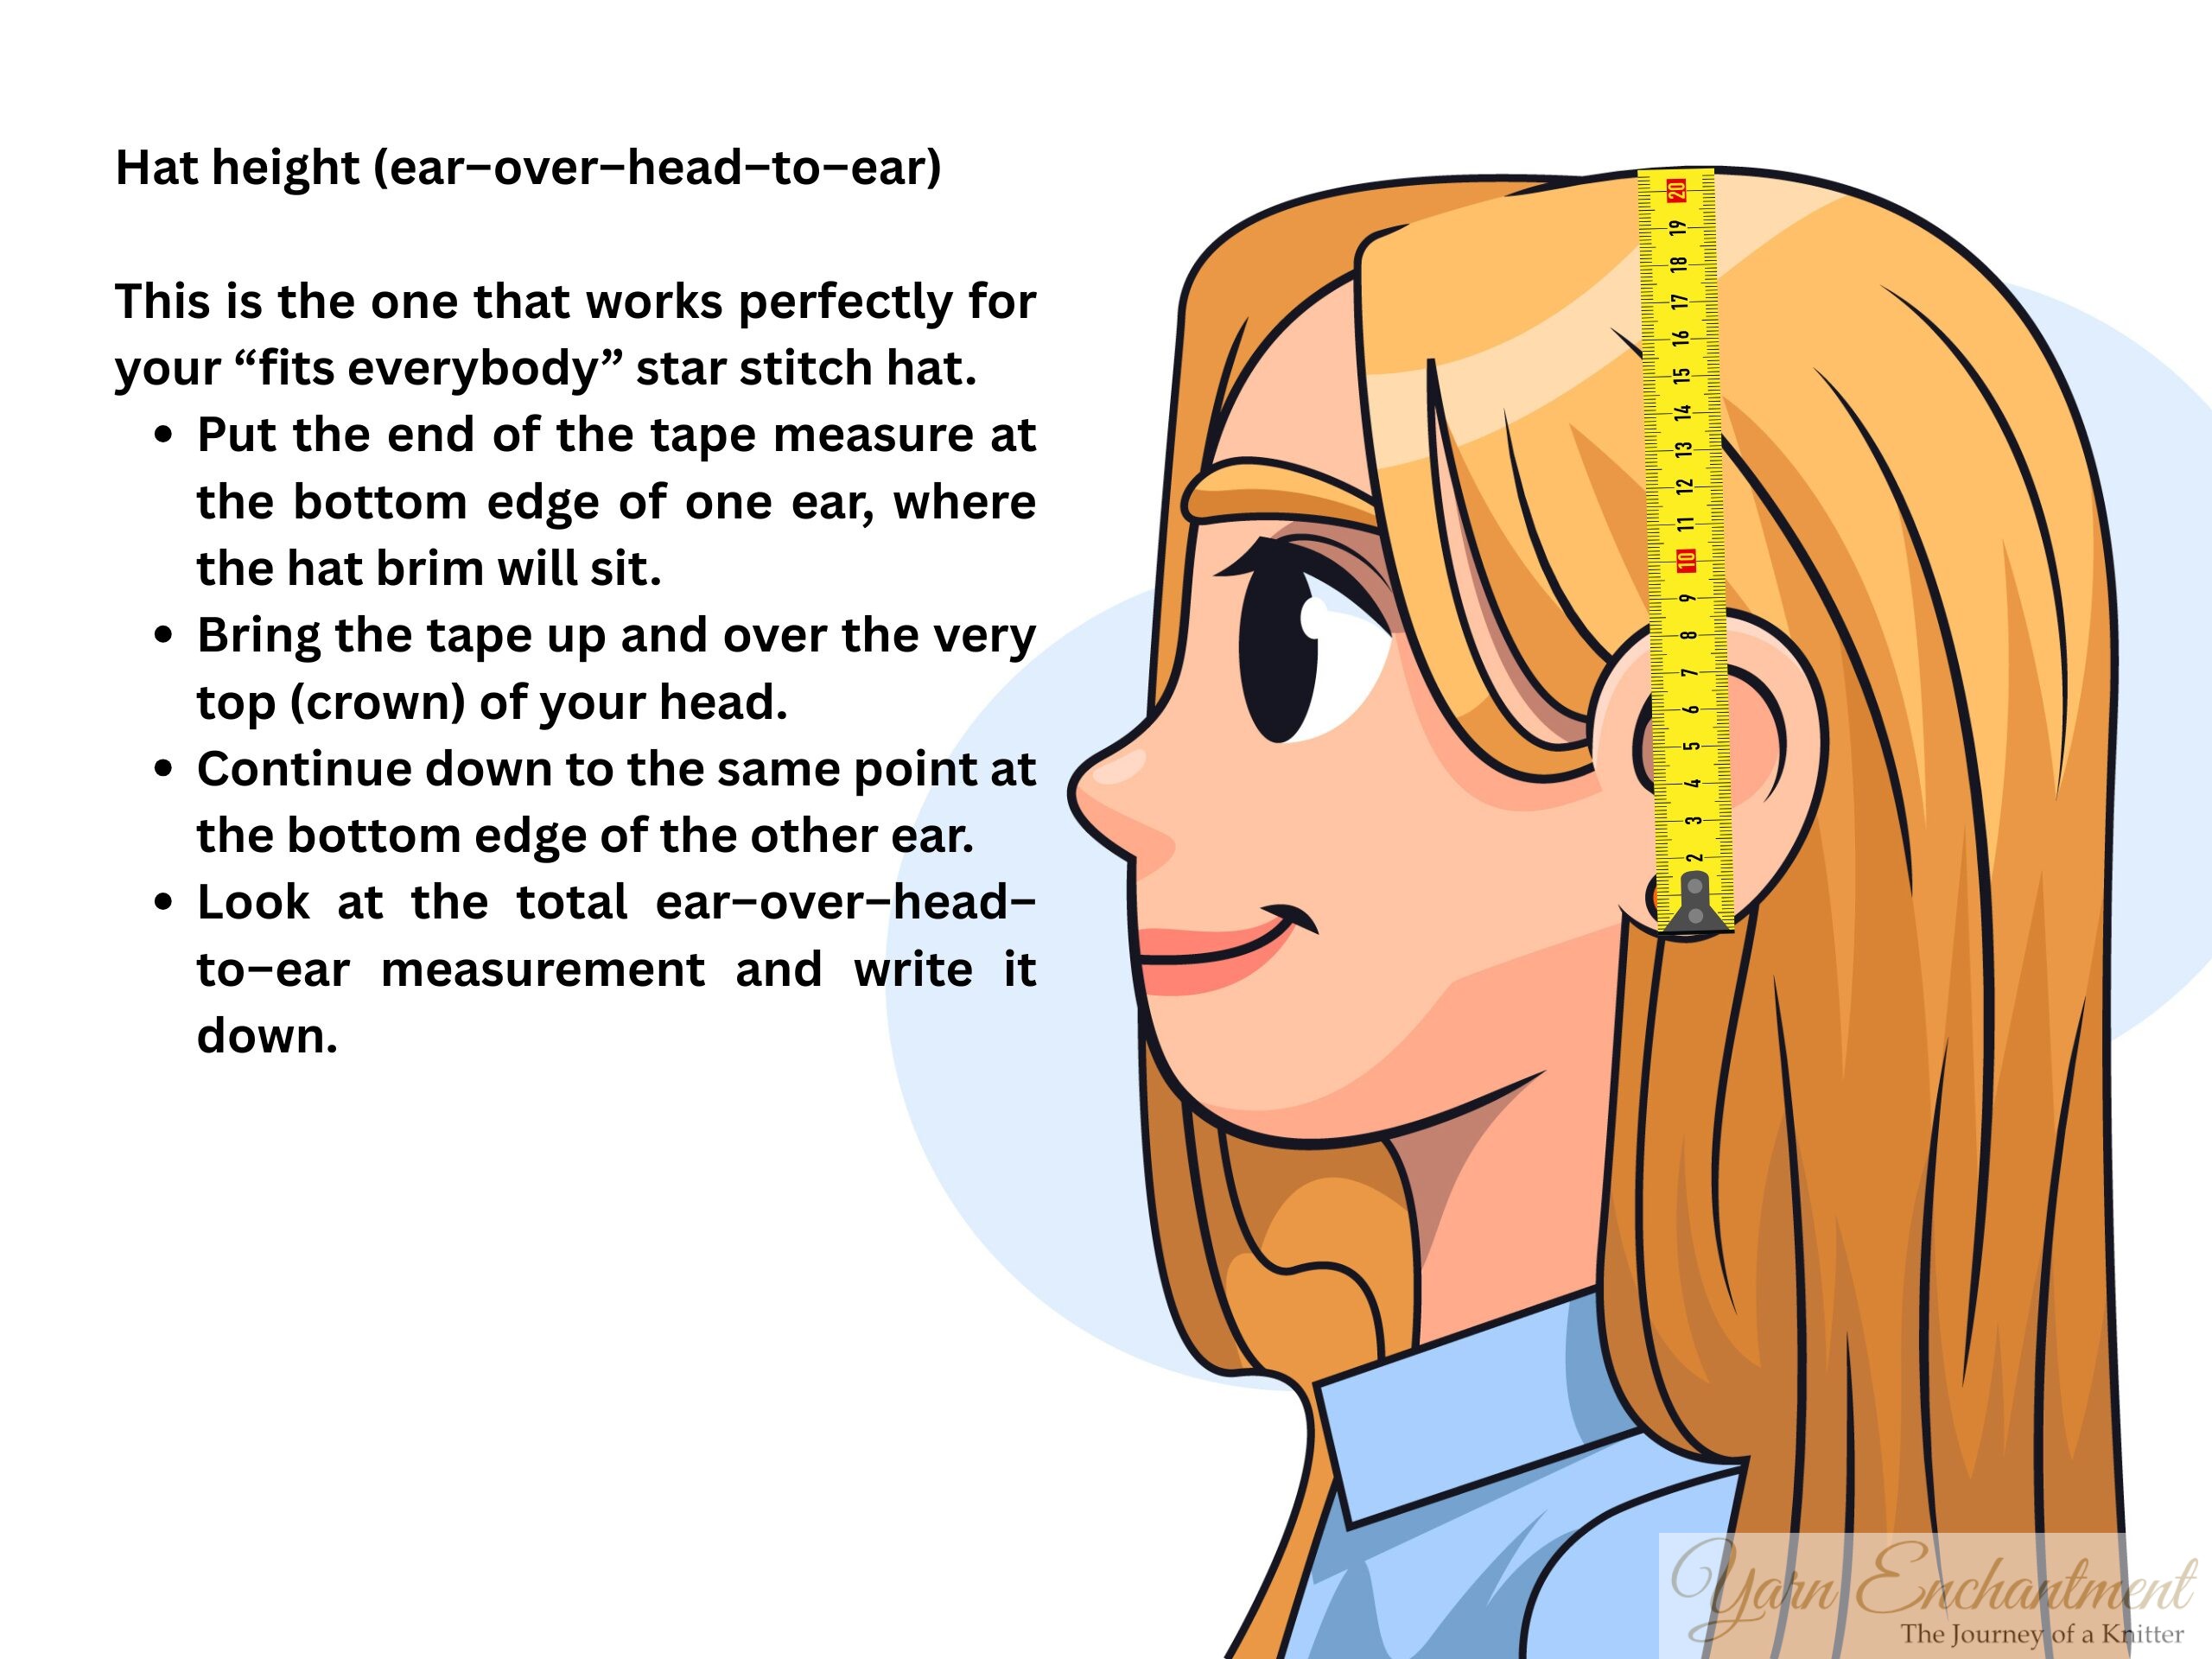
2. Hat height (ear–over–head–to–ear)
This is the measurement that makes your “fits everybody” star stitch hat really work.
-
Put the end of the tape measure at the bottom edge of one ear, where the hat brim will sit.
-
Bring the tape up and over the very top (crown) of your head.
-
Continue down to the same point at the bottom edge of the other ear.
-
Look at the total ear–over–head–to–ear measurement and write it down.
To turn this into the hat height for your pattern, use this:
-
Hat height for a close-fitting beanie ≈ half of the ear–to–ear measurement.
-
If you want a snug beanie: use that half measurement.
-
If you want a slightly slouchy hat: add 2–3 cm (about 1 inch).
-
If you want a folded brim: add the brim depth on top (for example, add 5–7 cm / 2–3 inches if the brim will fold up that much).
In short: measure from one ear, over the top of the head, to the other ear. Divide this number by 2 for your basic hat height, then add extra centimeters if you want slouch or a deep folded brim.
 | Measure from one ear, over the top of the head, to the other ear. Divide this number by 2 for your basic hat height, then add extra centimeters if you want slouch or a deep folded brim. |

Materials for Your Star Stitch Hat
-
Yarn: Any weight yarn you like. The pattern is measurement-based, so you can use anything from light DK to bulky yarn, depending on the look you want.
-
Hook: A crochet hook that works well with your chosen yarn (check the yarn label for a suggestion).
-
Notions: Stitch marker, tapestry needle for weaving in ends, scissors, measuring tape.
Note: This is a measurement-based pattern, so there is no strict gauge. Use your favourite yarn and hook, and follow your head measurements to get a custom fit. If you are working with a yarn for the first time, you can crochet a small swatch to see how it feels and how much it might stretch after washing.
Abbreviations (US Terms)
-
ch = chain
-
sc = single crochet
-
hdc = half double crochet
-
sl st = slip stitch
-
yo = yarn over
-
blo = back loop only
Brim: Ribbed Band Construction Step by Step
Begin with a foundation chain for the brim
Chain 10–14 stitches, or until the chain measures your desired brim height (usually 4–6 cm / 1.5–2.5 inches). For most adult hats, 10–14 chains give a good height. Don’t forget to add one extra chain for turning.
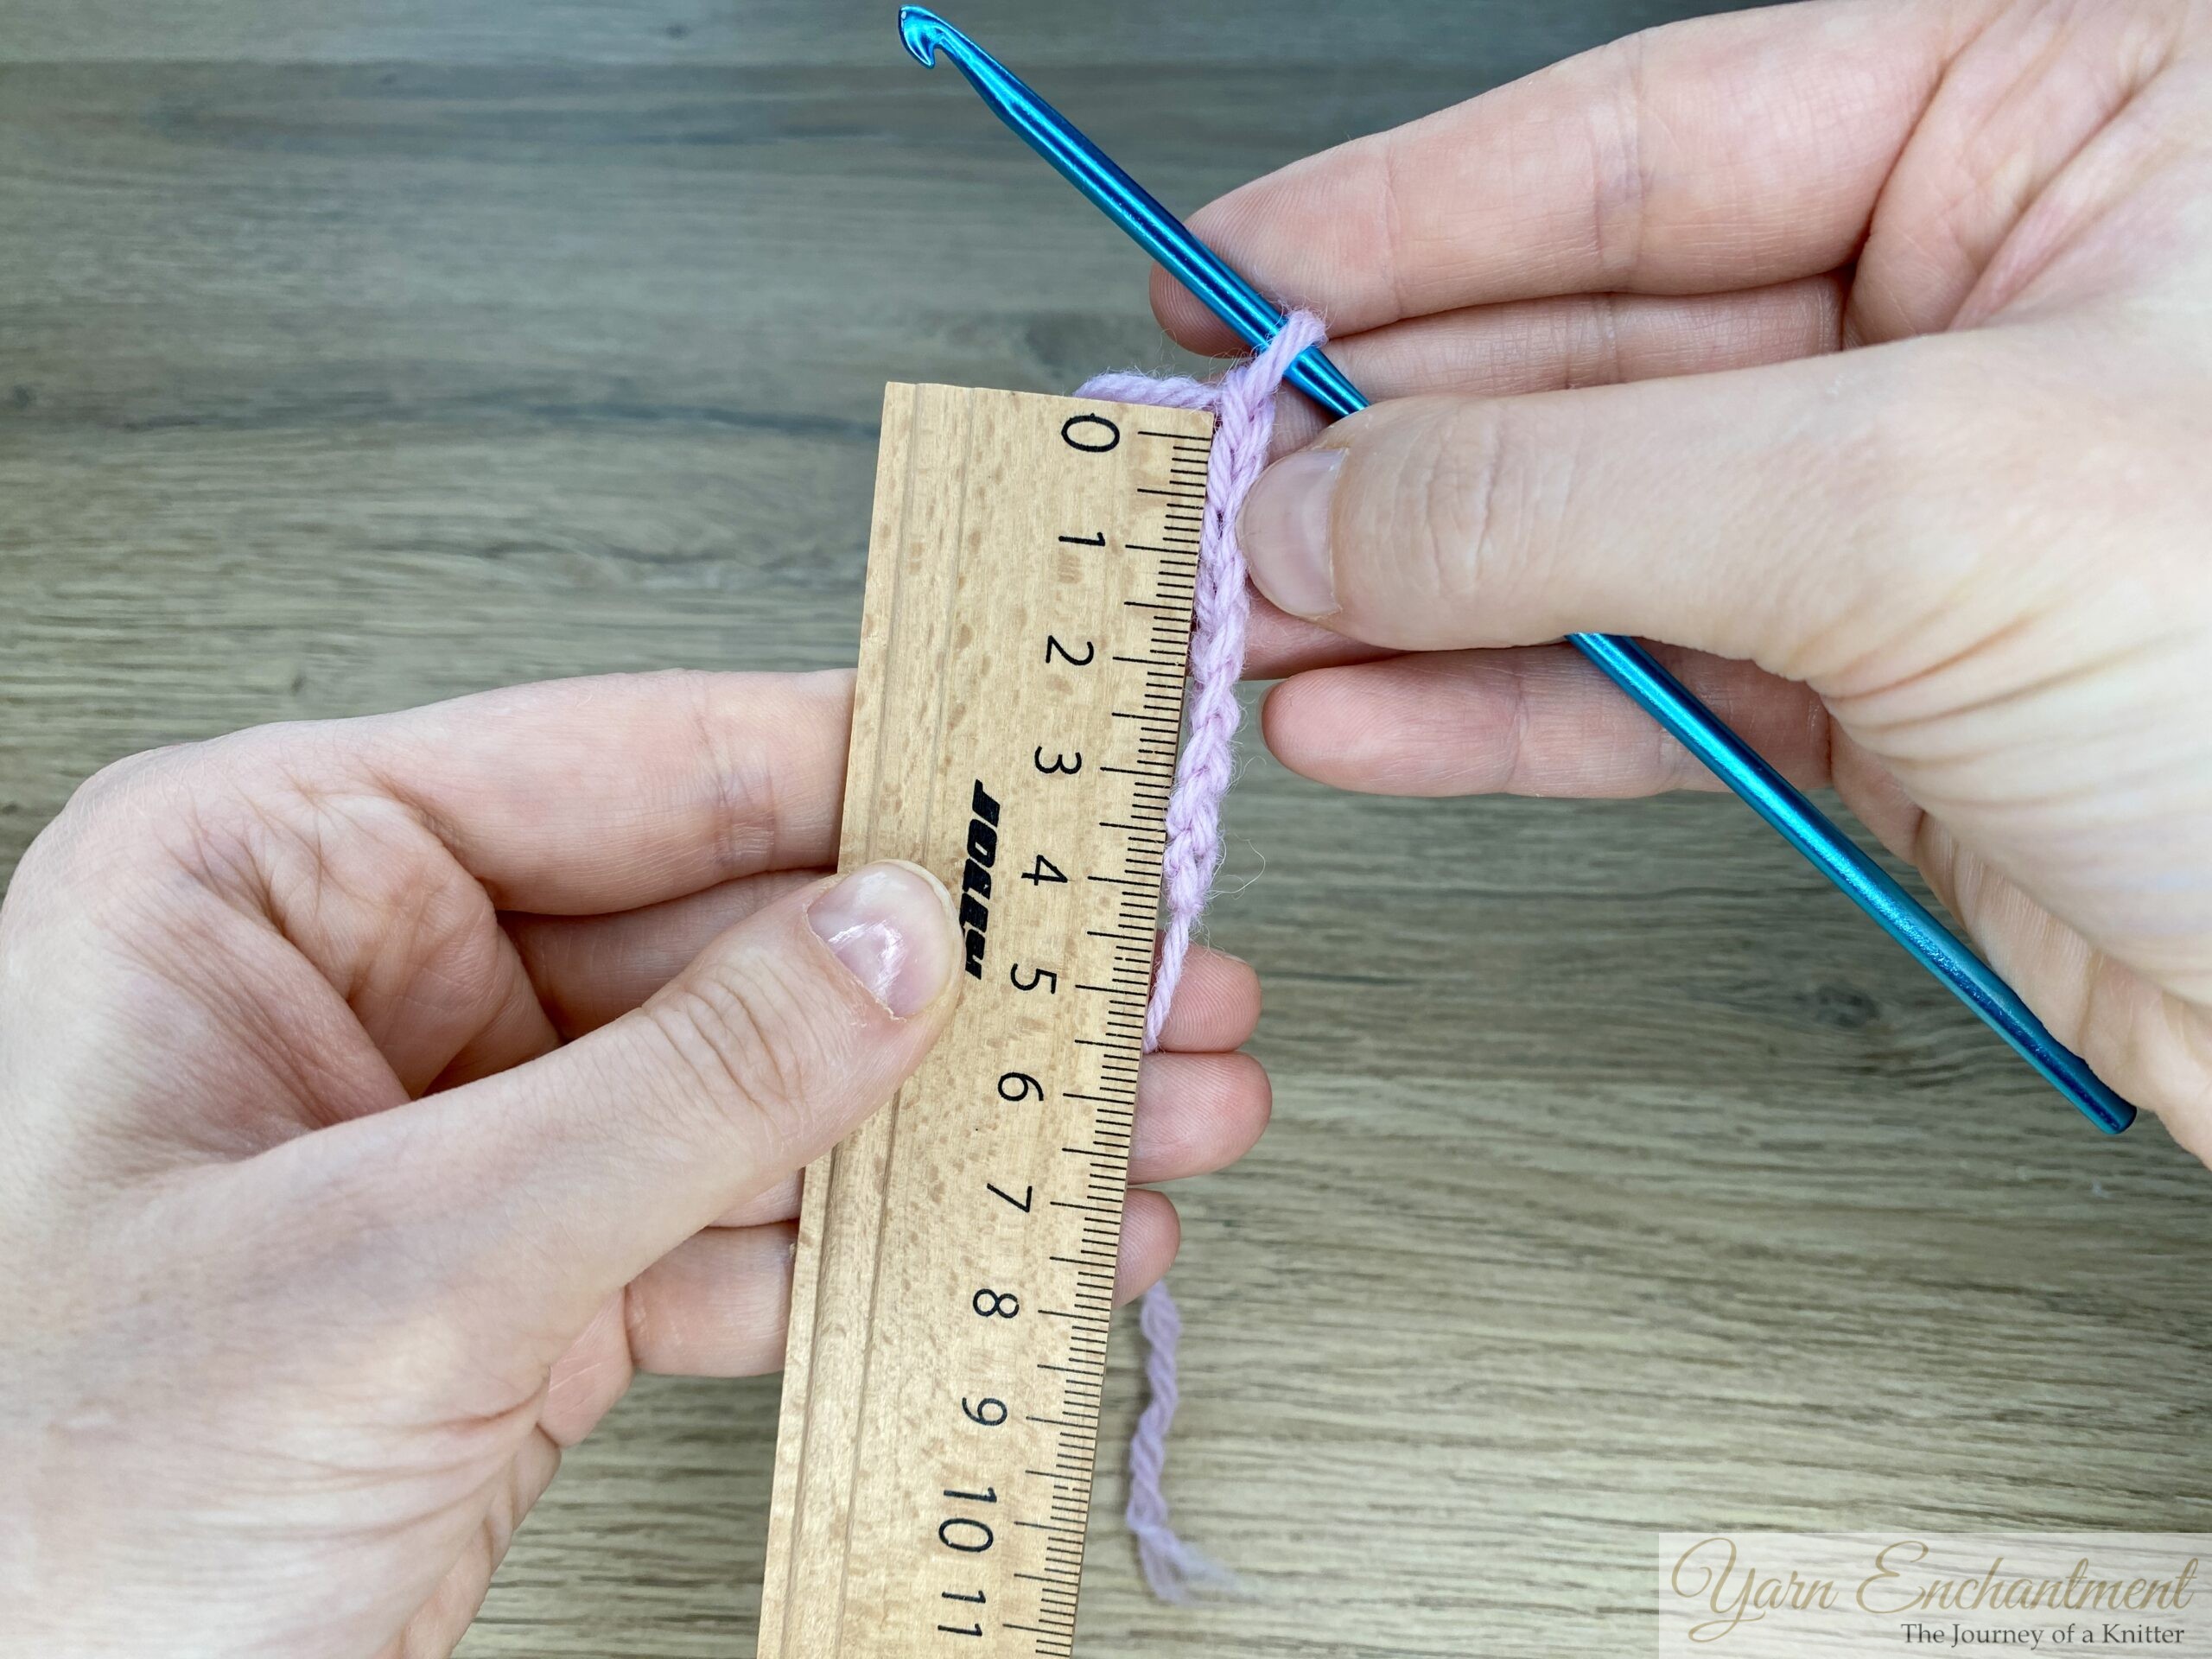 | I worked a brim with 8 chains plus 1 turning chain, which gives a height of about 4 cm (around 1.5 inches) in DK weight yarn. For a child’s size this height works perfectly, but for an adult size I would recommend making the brim about 6–7 cm (around 2.25–2.75 inches) tall. |

Work the band
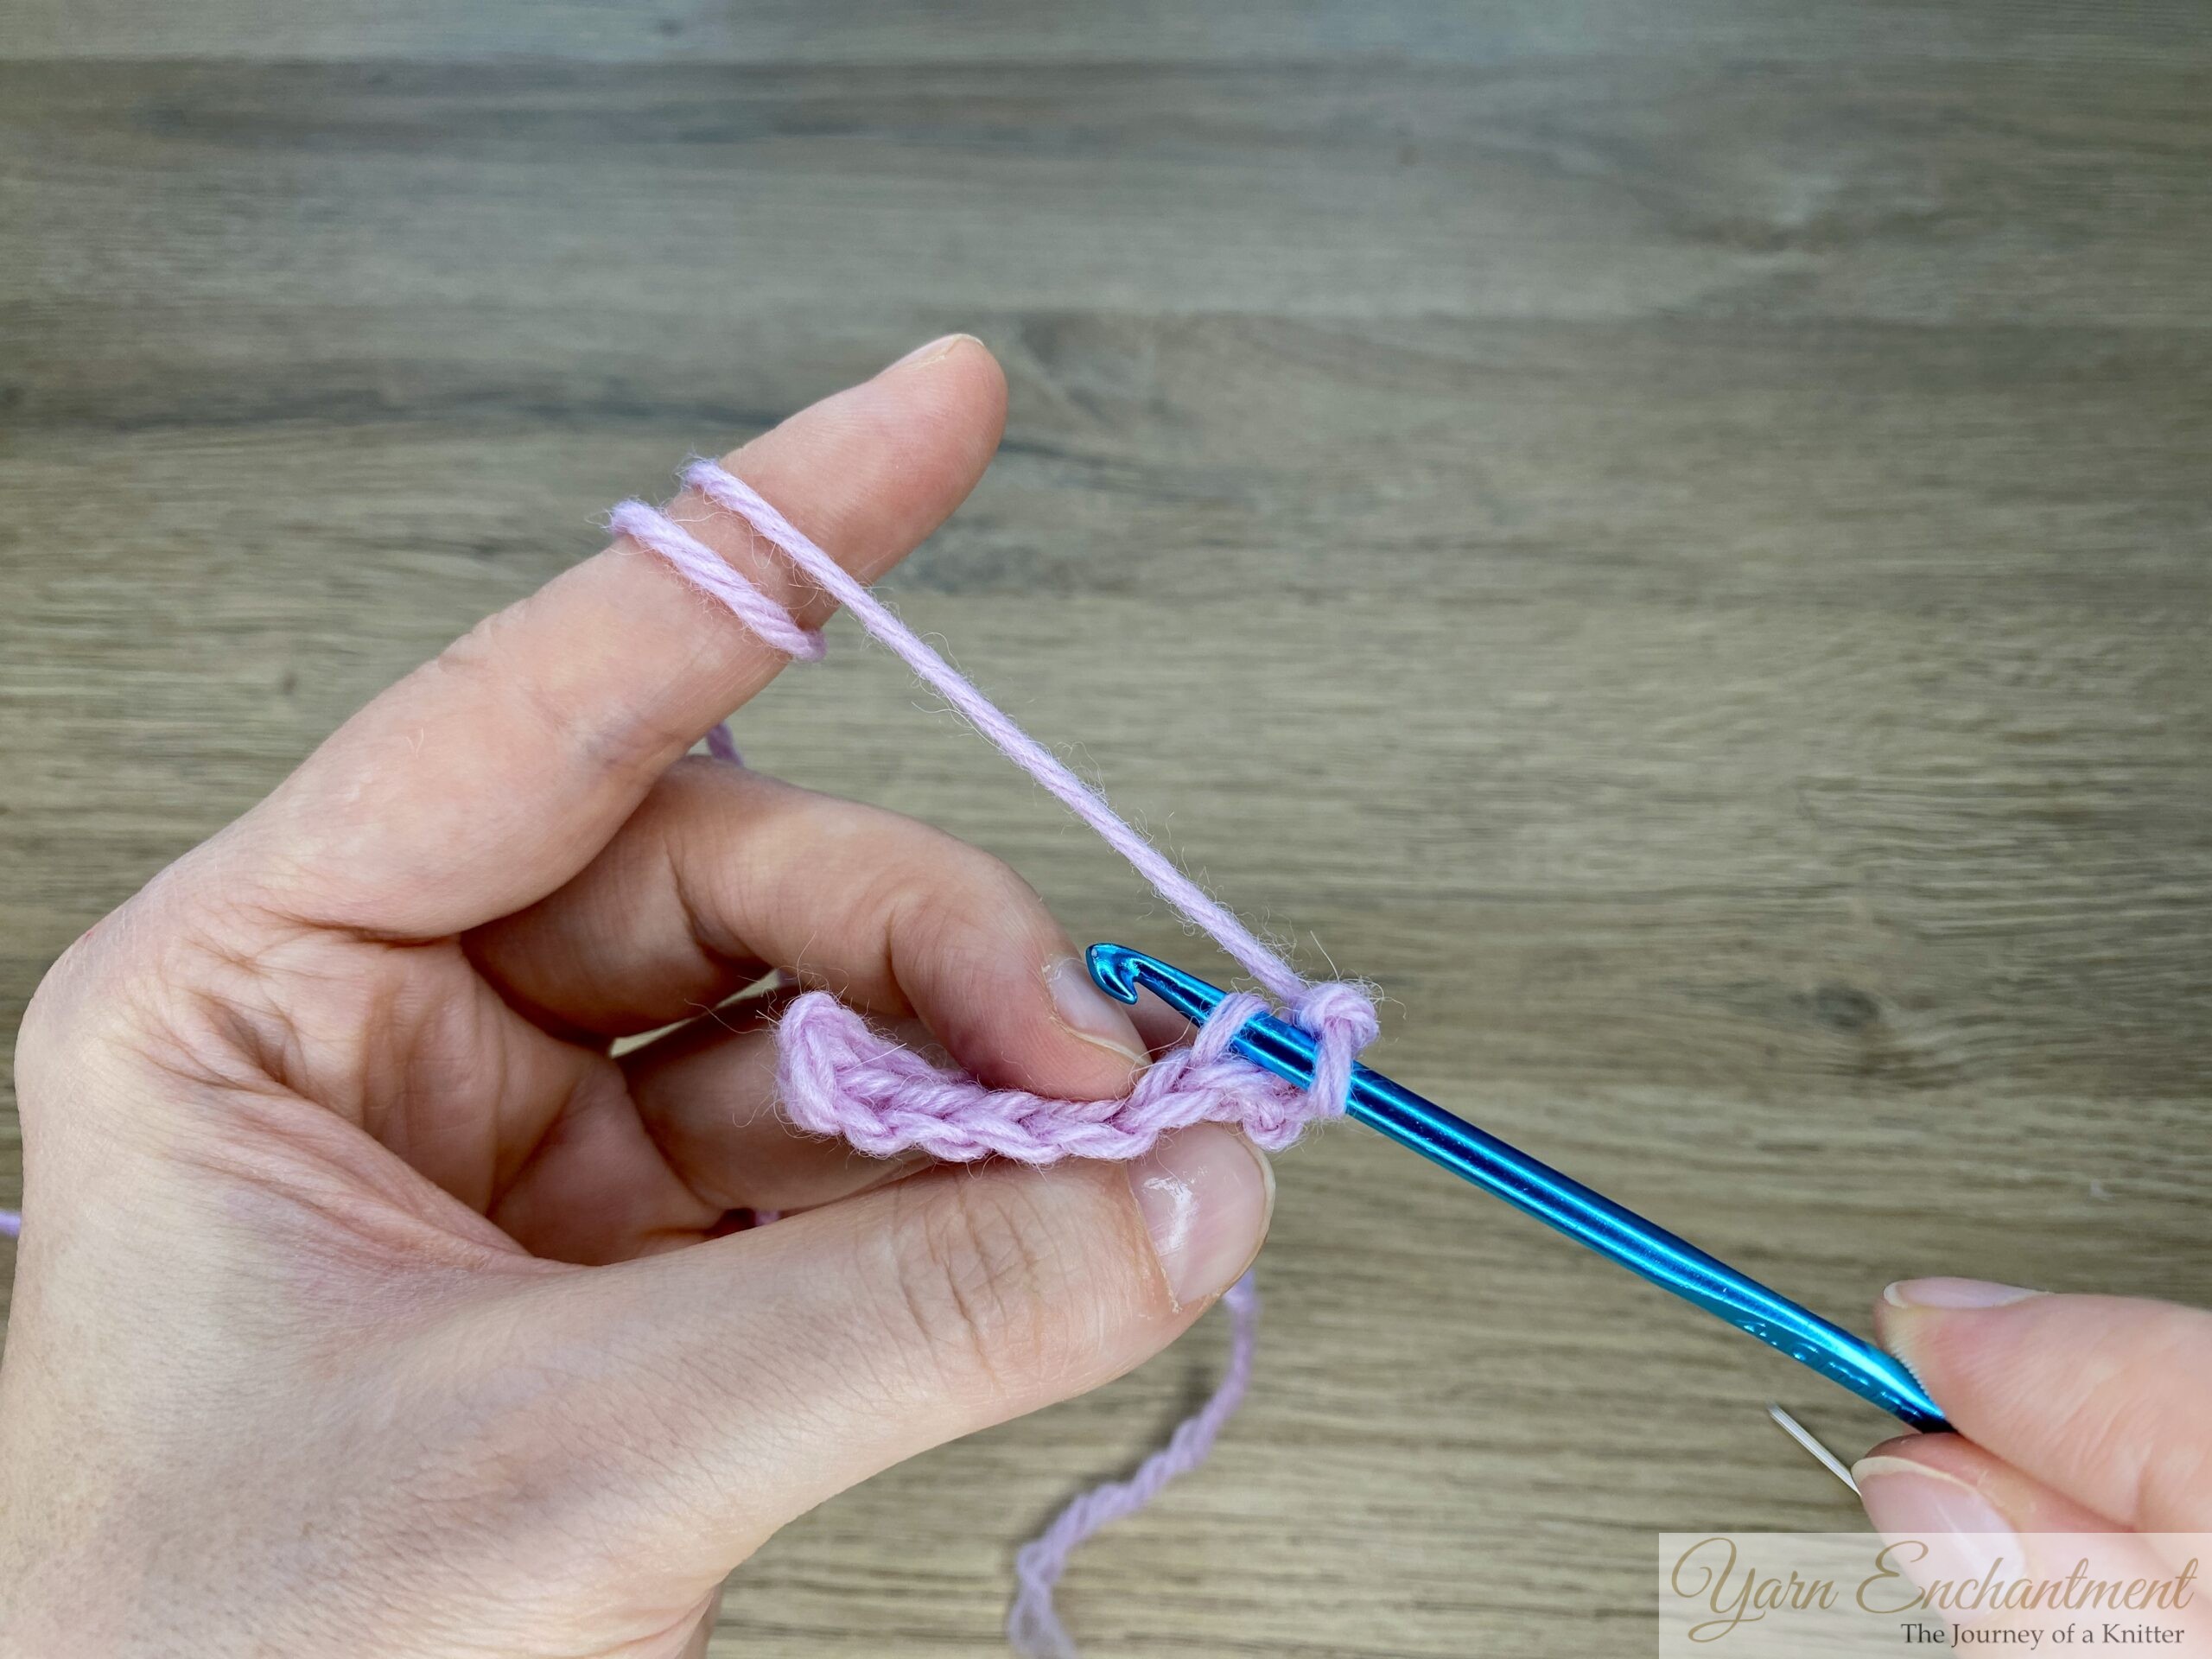
Row 1: Single crochet in each chain, ch 1, turn.
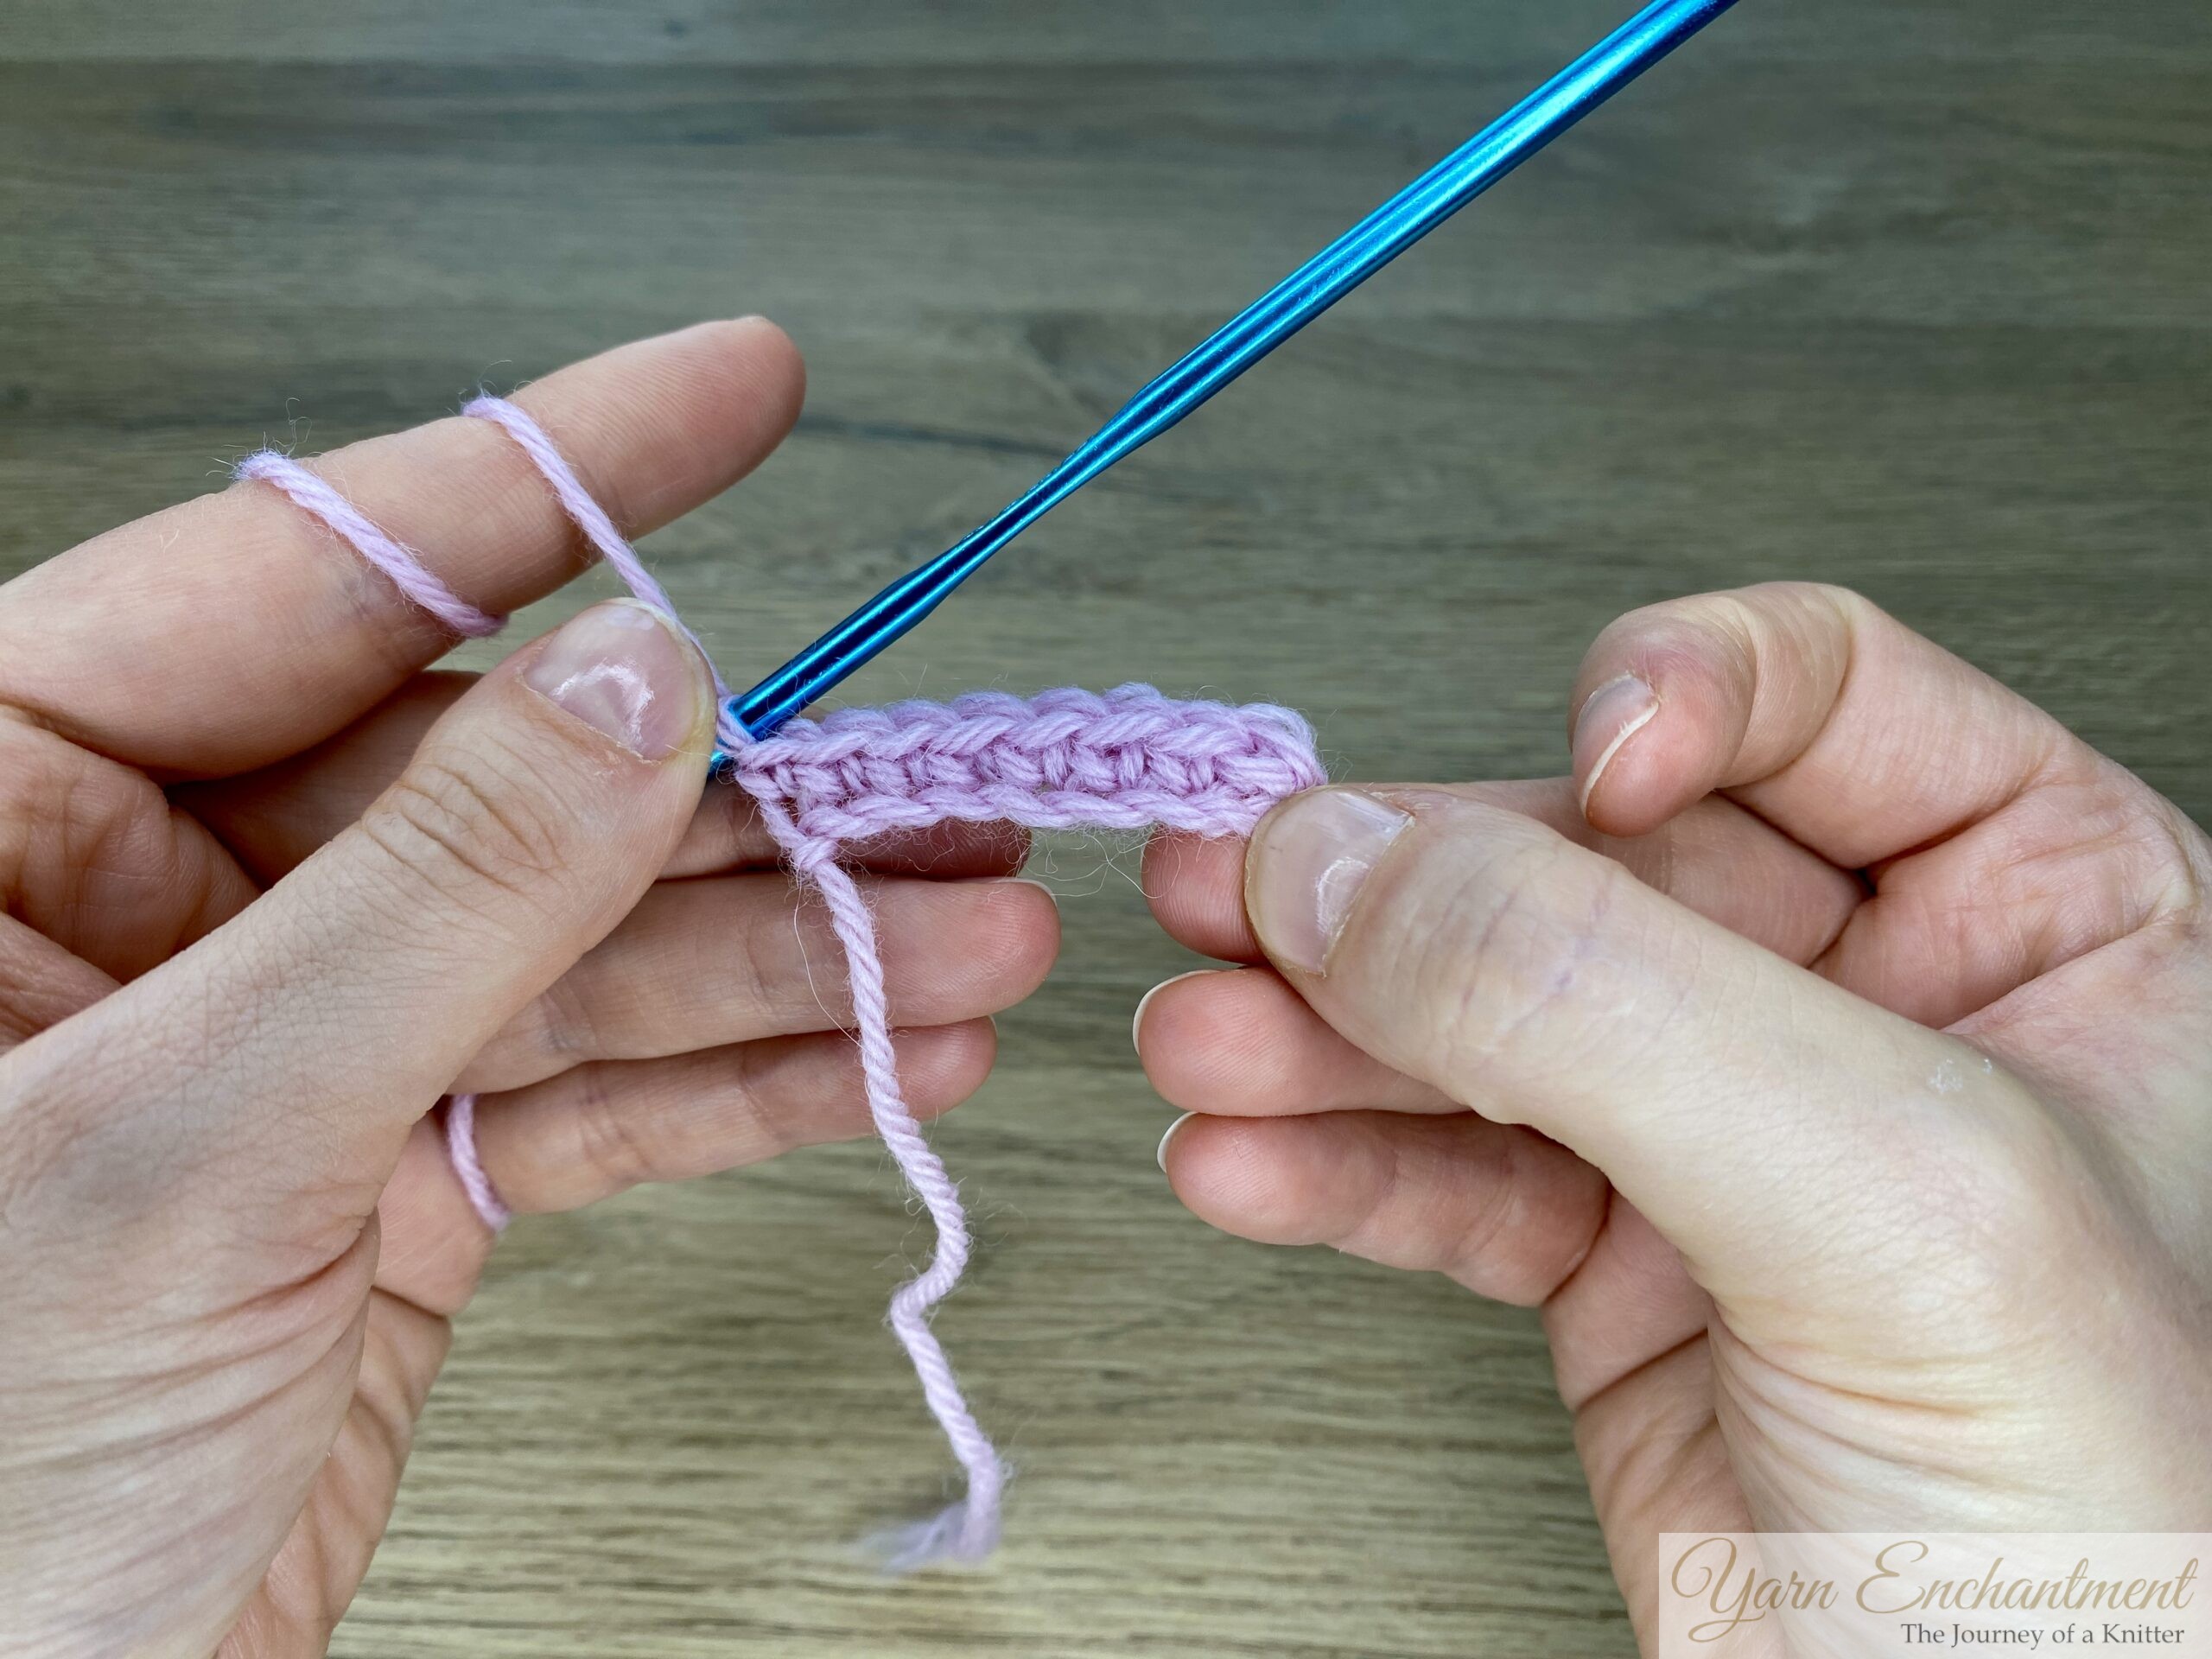 | Single crochet in each chain, ch 1, turn |

Row 2 and every row after: Work 1 single crochet in the back loop of each stitch, ch 1, turn.
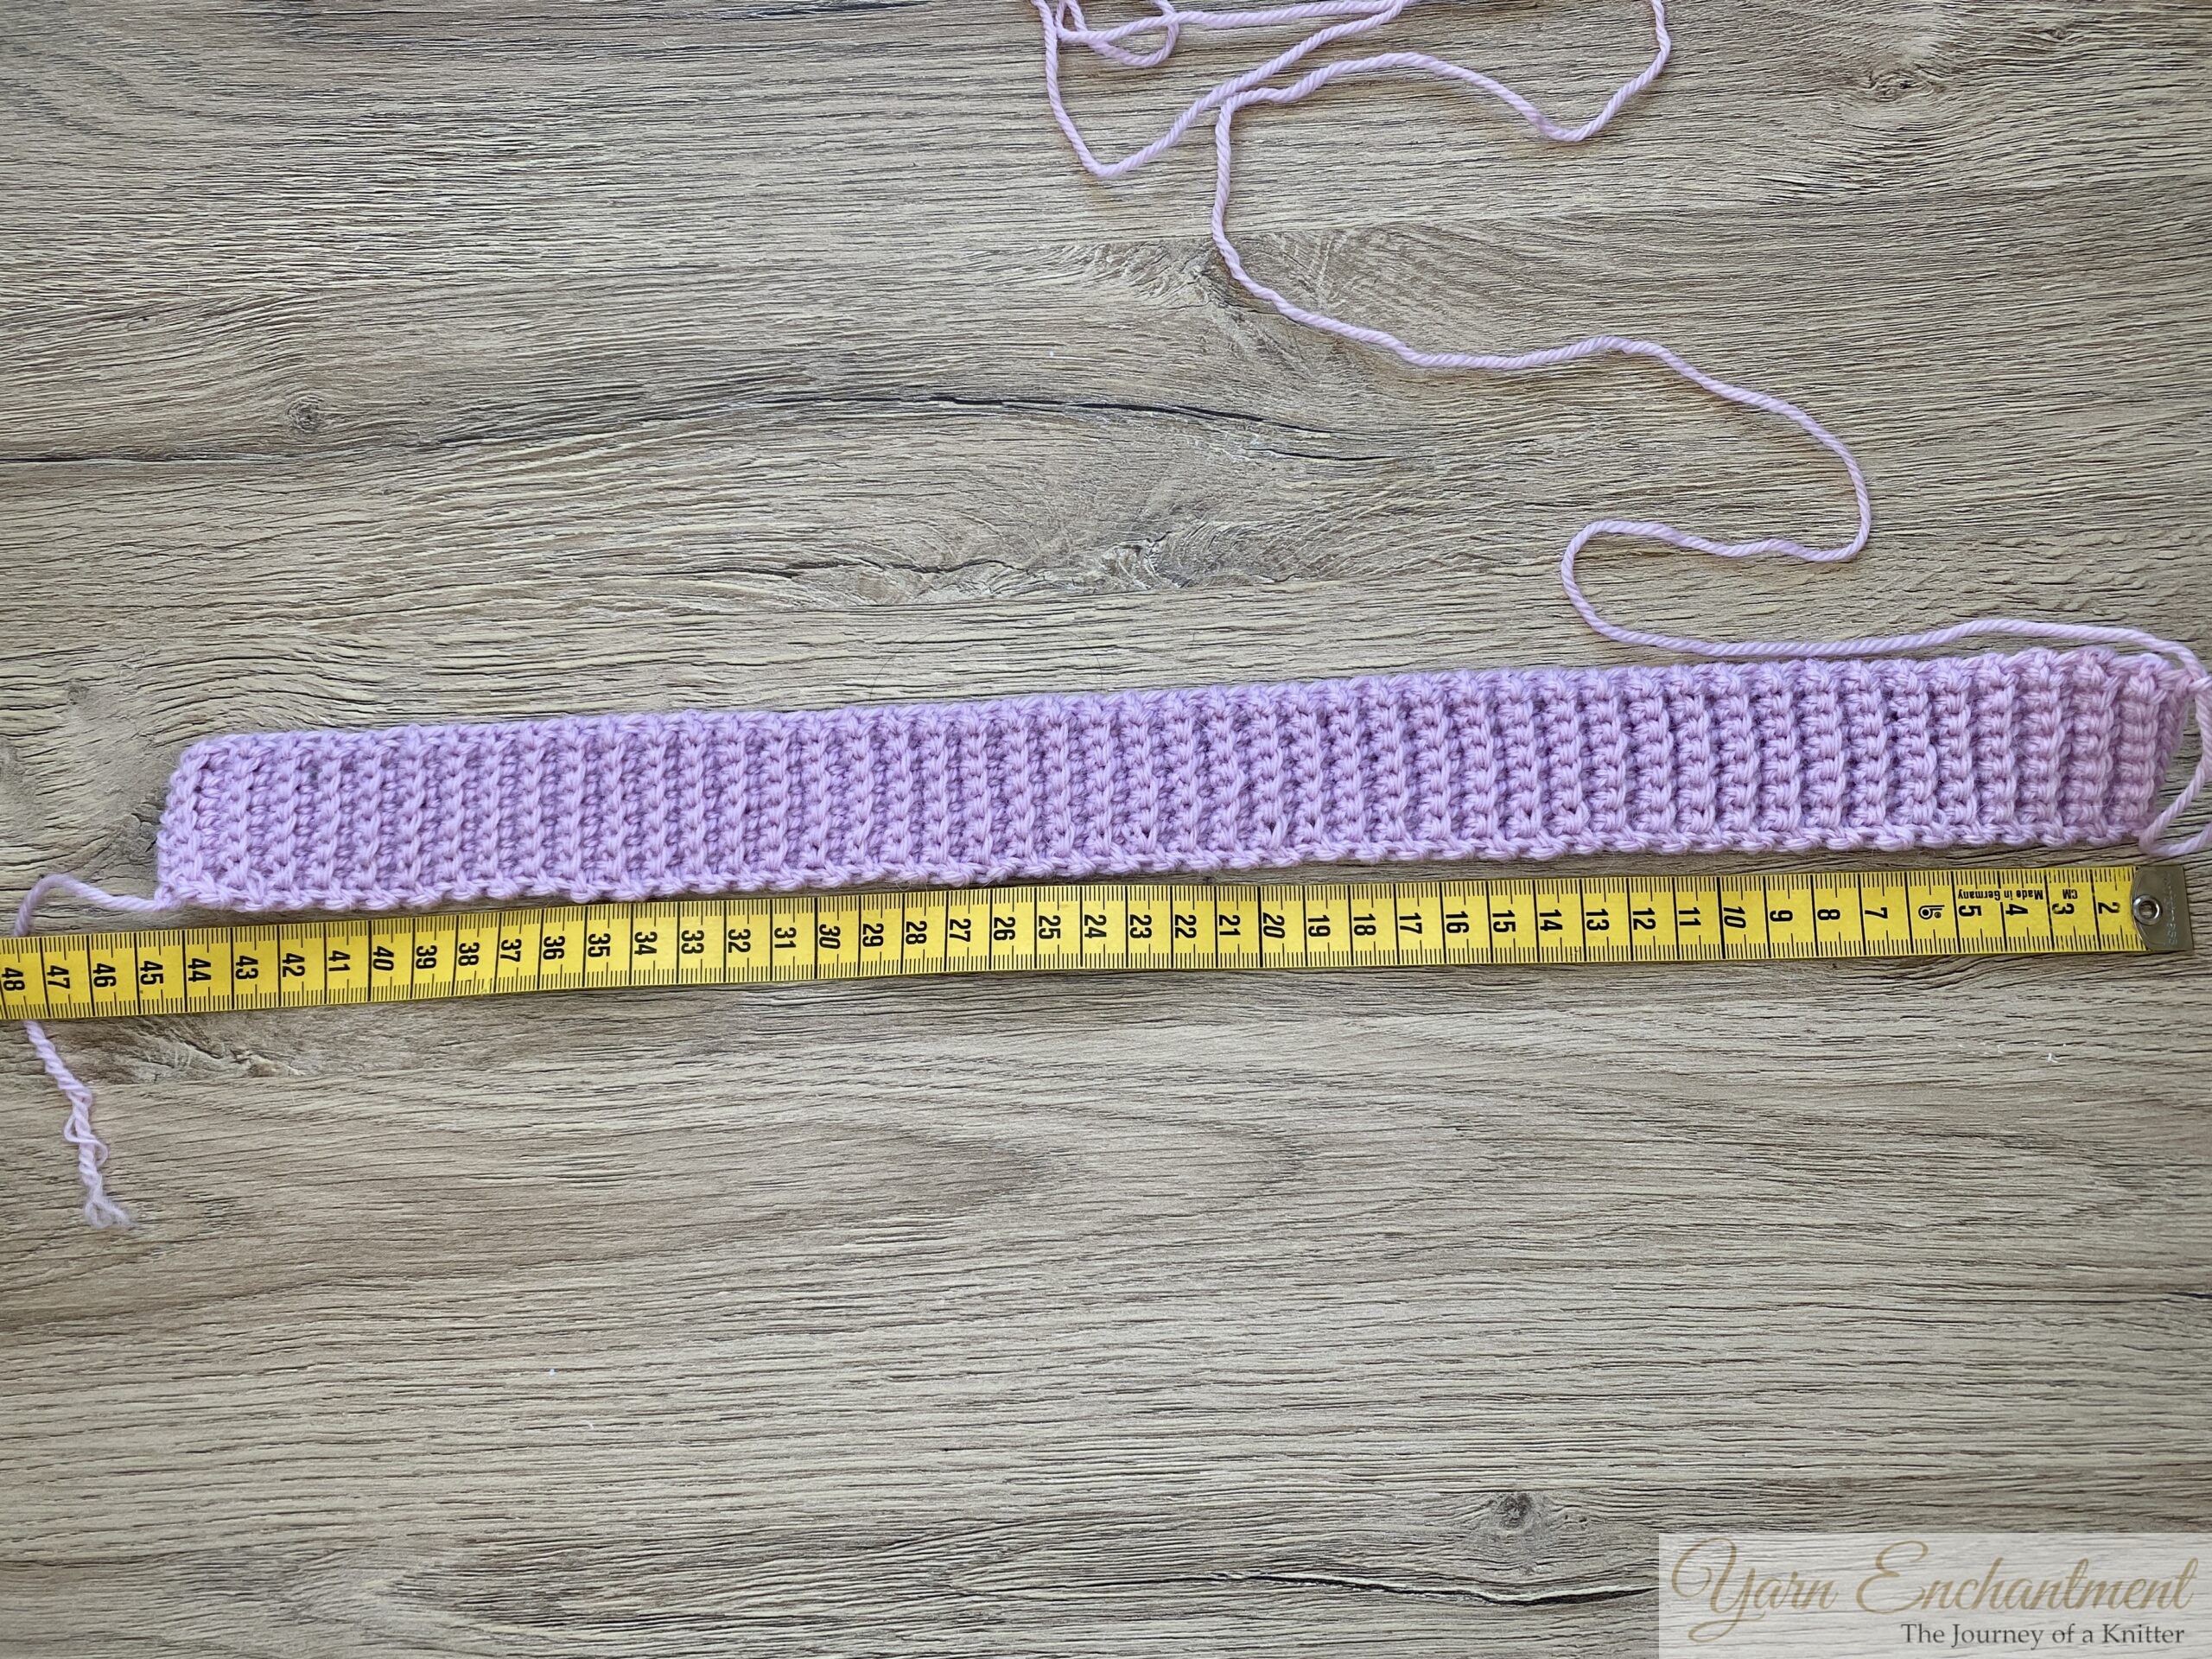
Repeat Row 2 until the band length measures about 5 cm (2 inches) less than your actual head circumference. This negative ease helps the brim stretch to fit securely.
 |  | 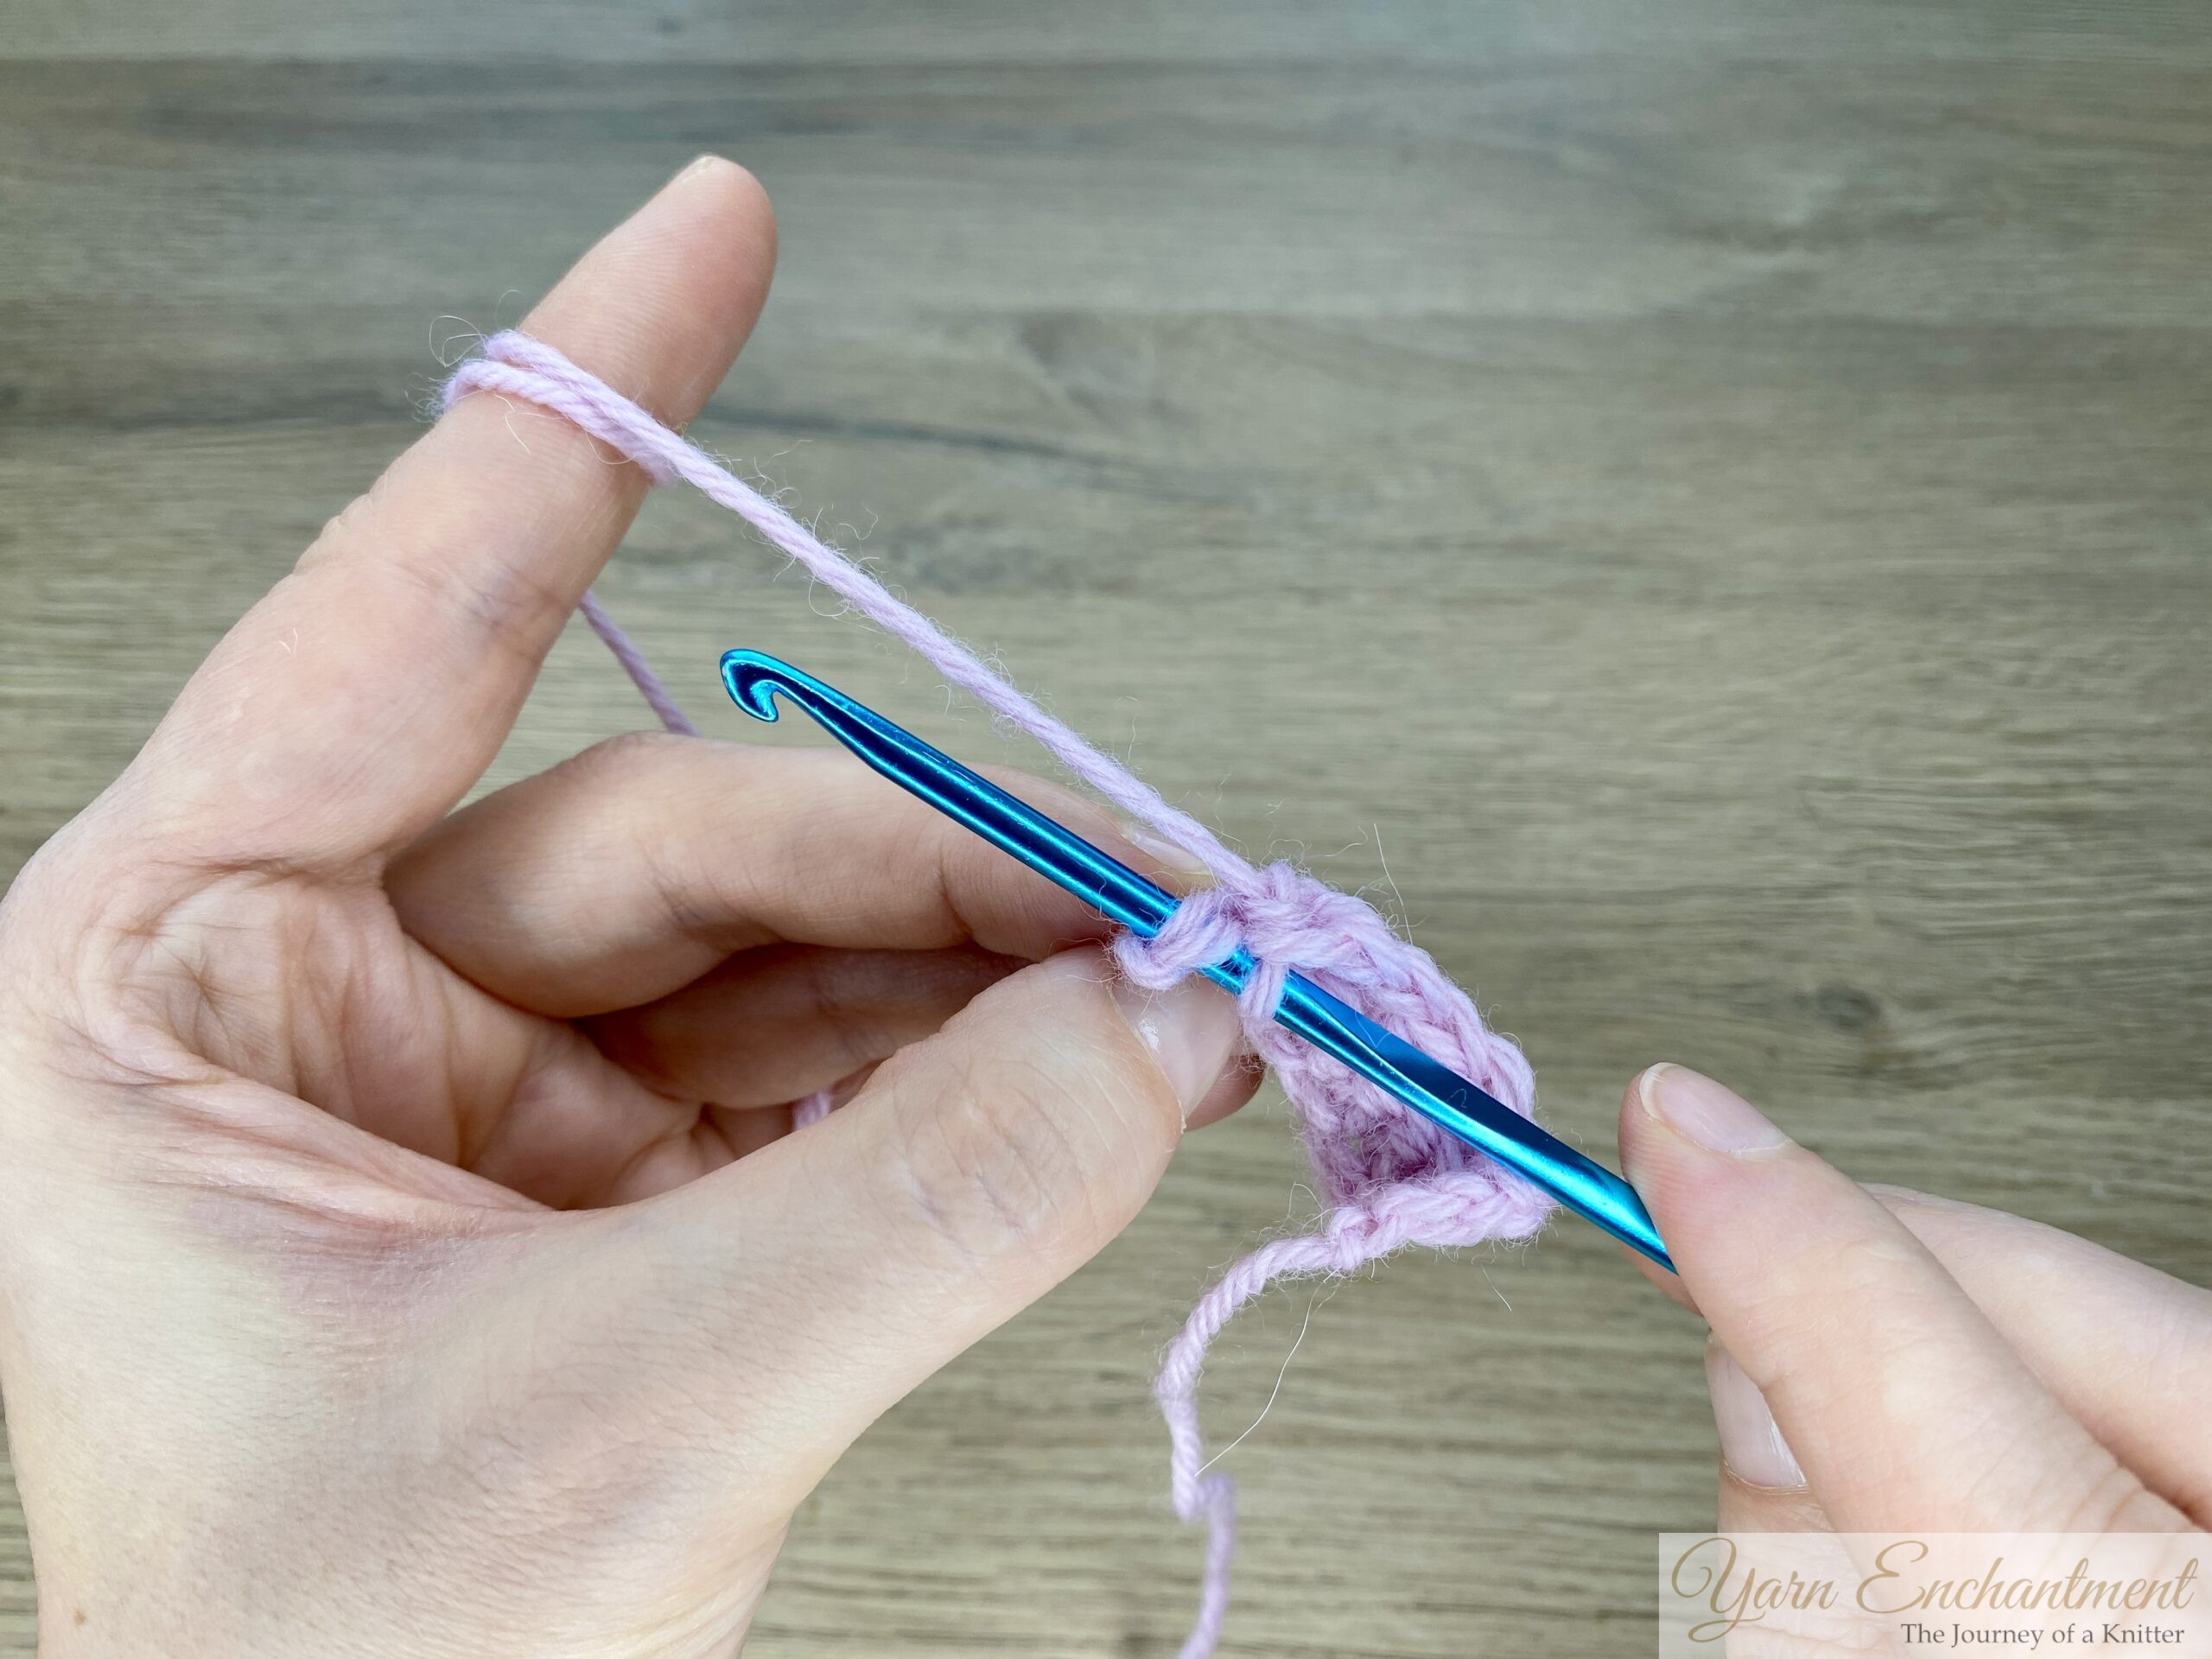 | You only need to work into the back loop of each single crochet. The back loop is the loop that is farthest away from you. | Work 1 single crochet in each back loop only until 1 stitch remains. | I like to work into both loops on the last stitch because this gives a much neater edge. |


Check the fit
Wrap the band around your head to make sure it feels snug but not too tight or too loose. Add or remove rows if you need to adjust the fit before joining.
 | 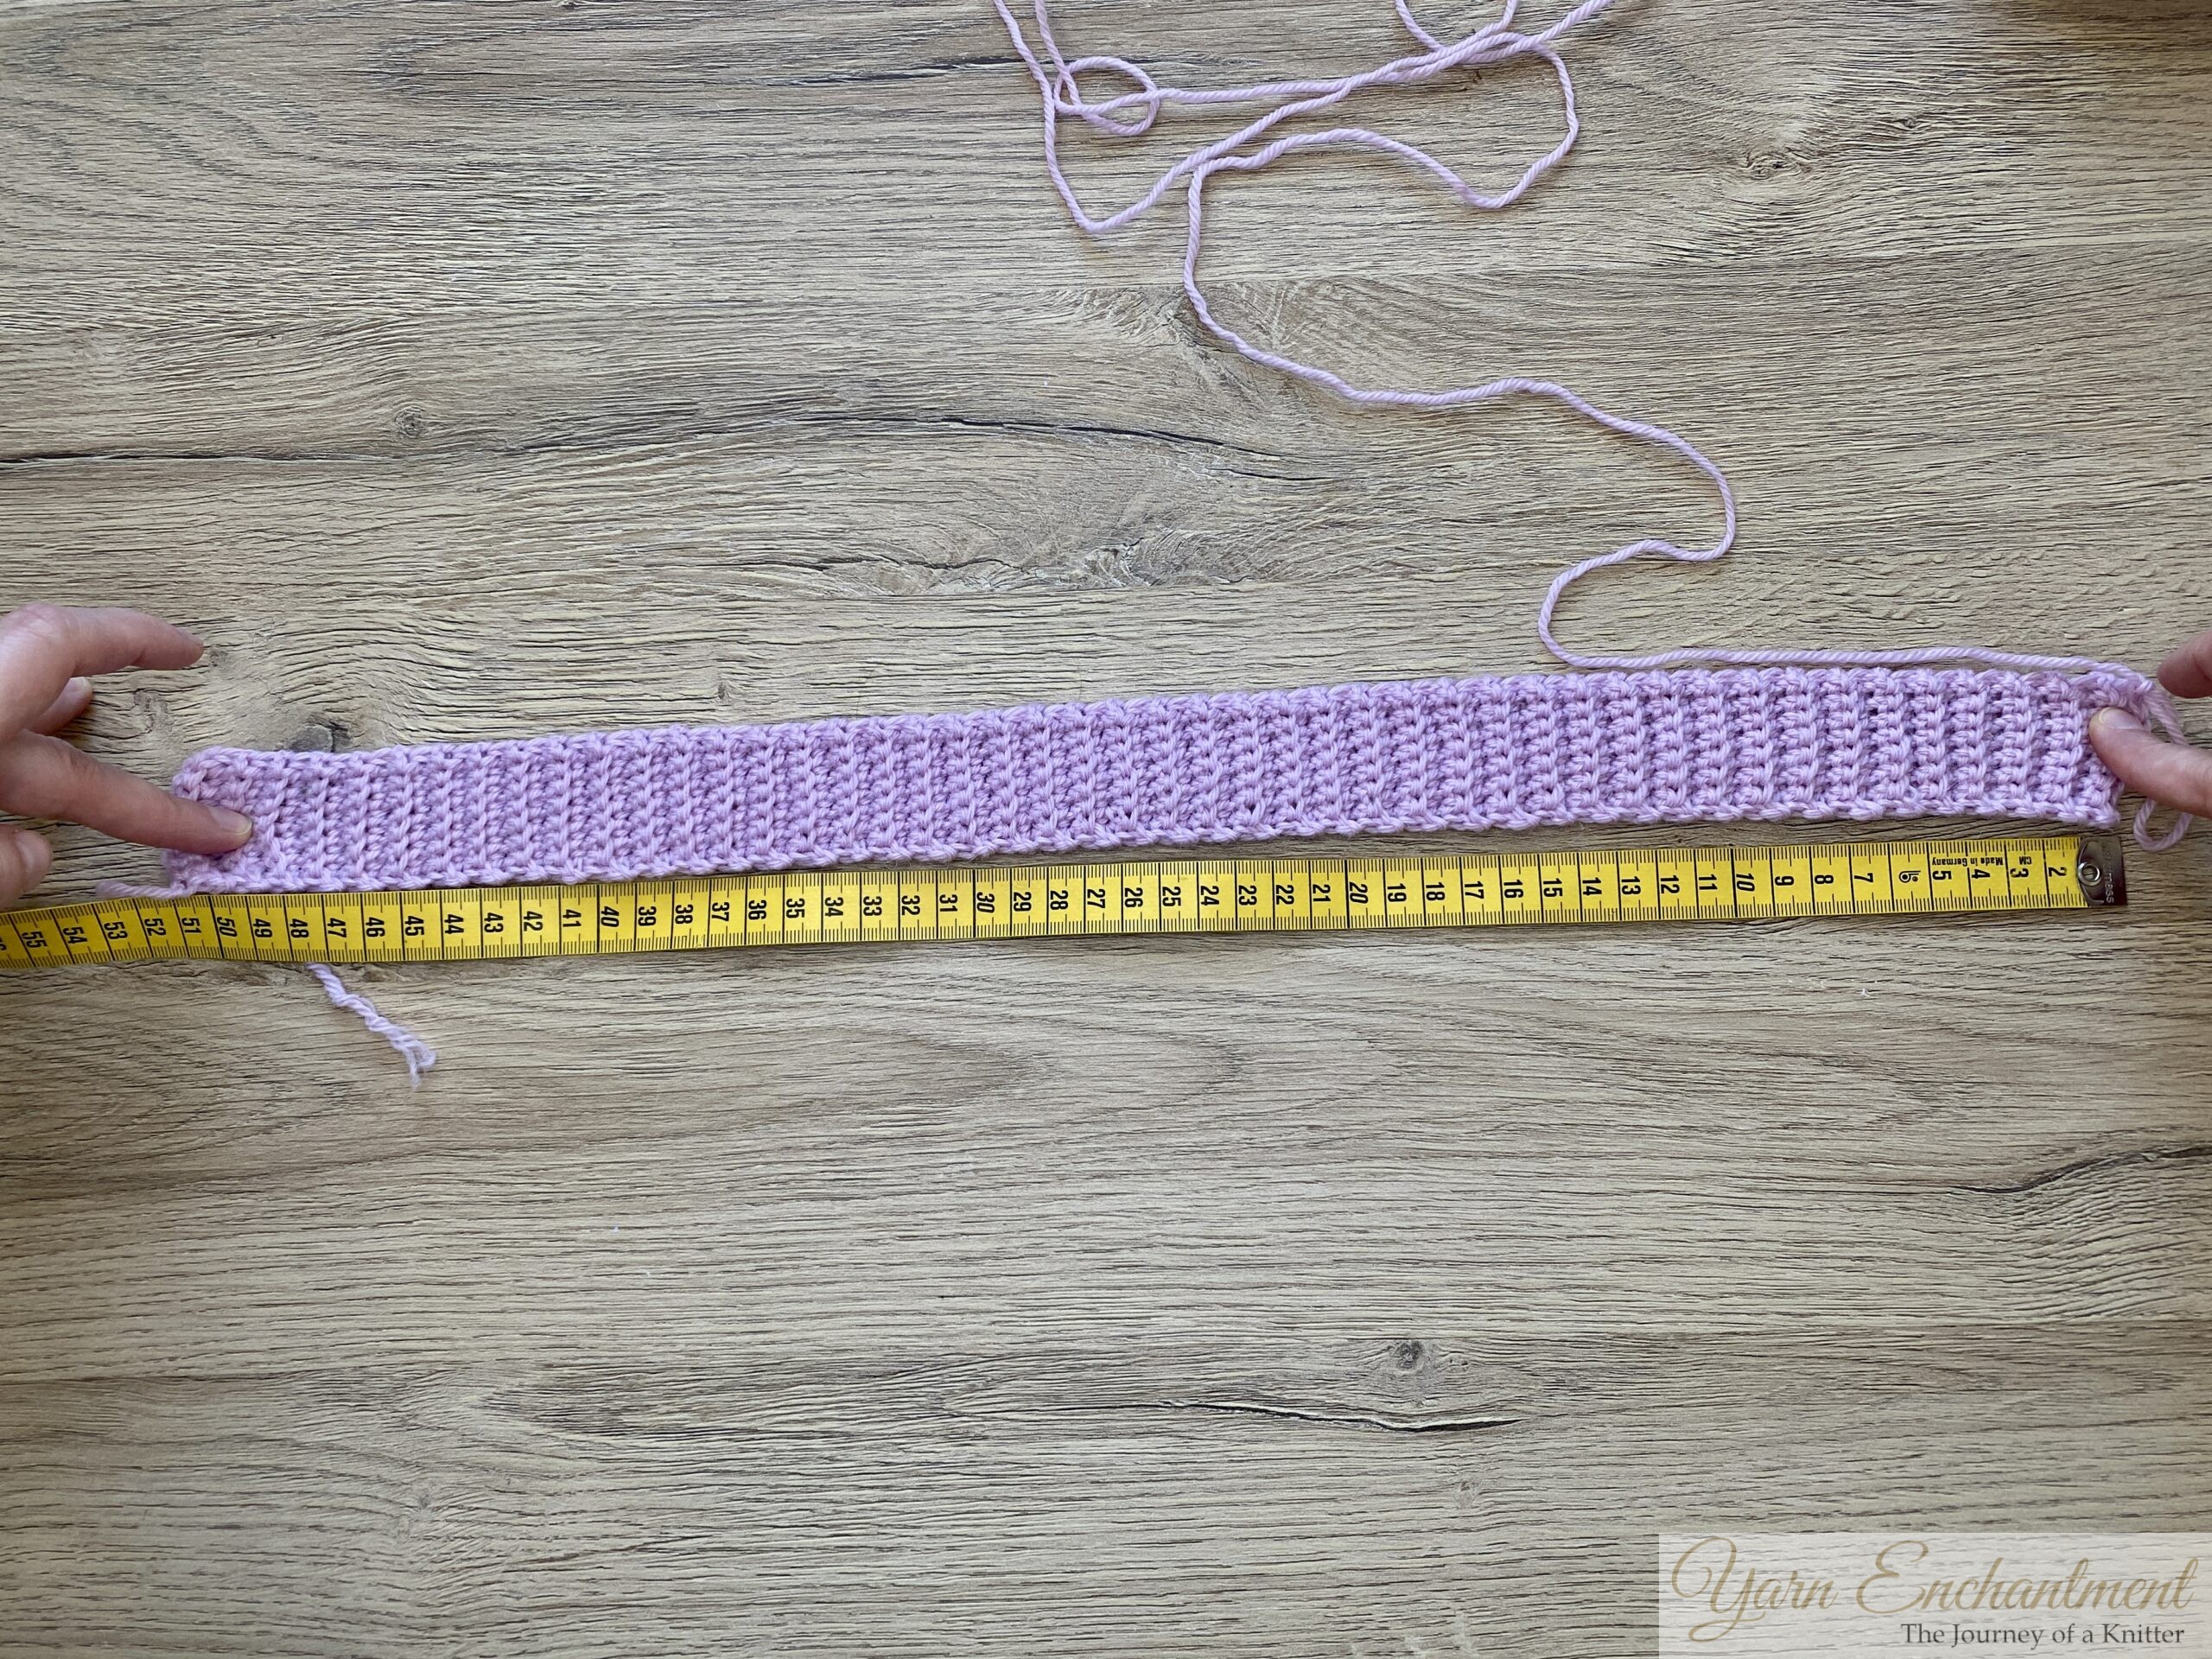 | I made this hat for my daughter. Her head circumference is 50 cm, and I made it with 6 cm (about 2.5 inches) of negative ease. | The brim (or band) can be easily stretched to more than 50 cm, and it still feels comfortable for her to wear |


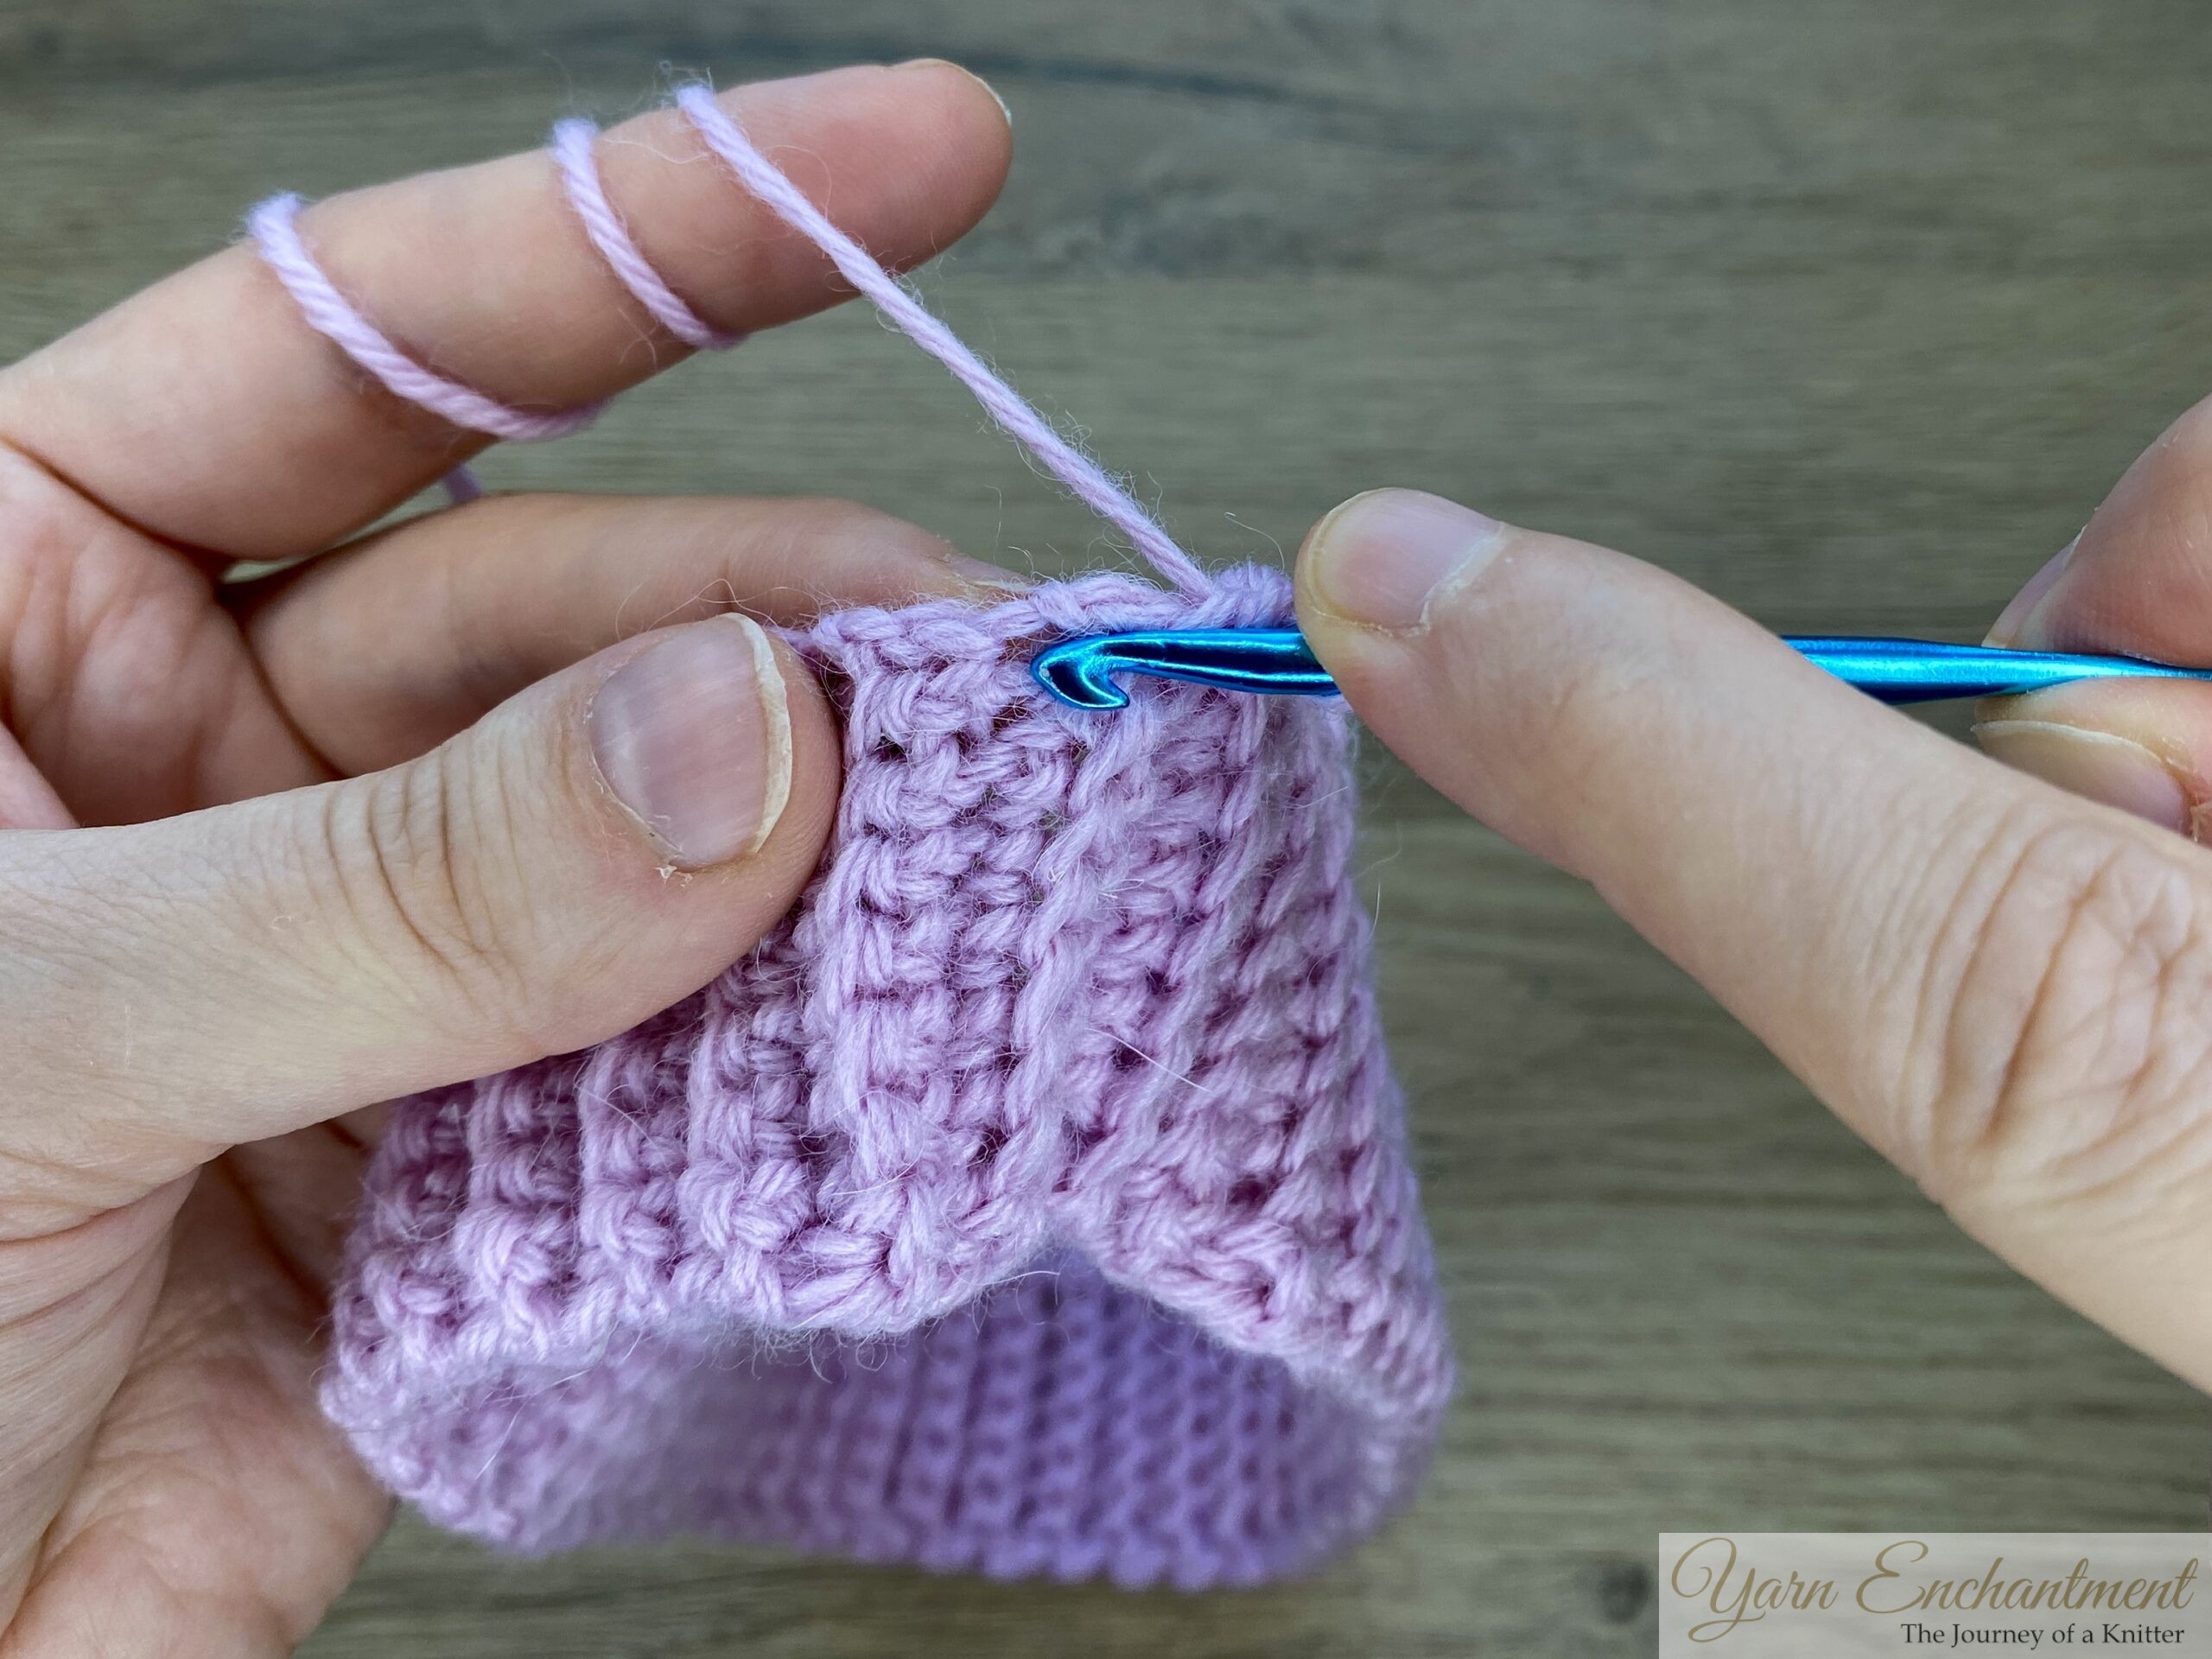
Join the Brim and Start Working in the Round
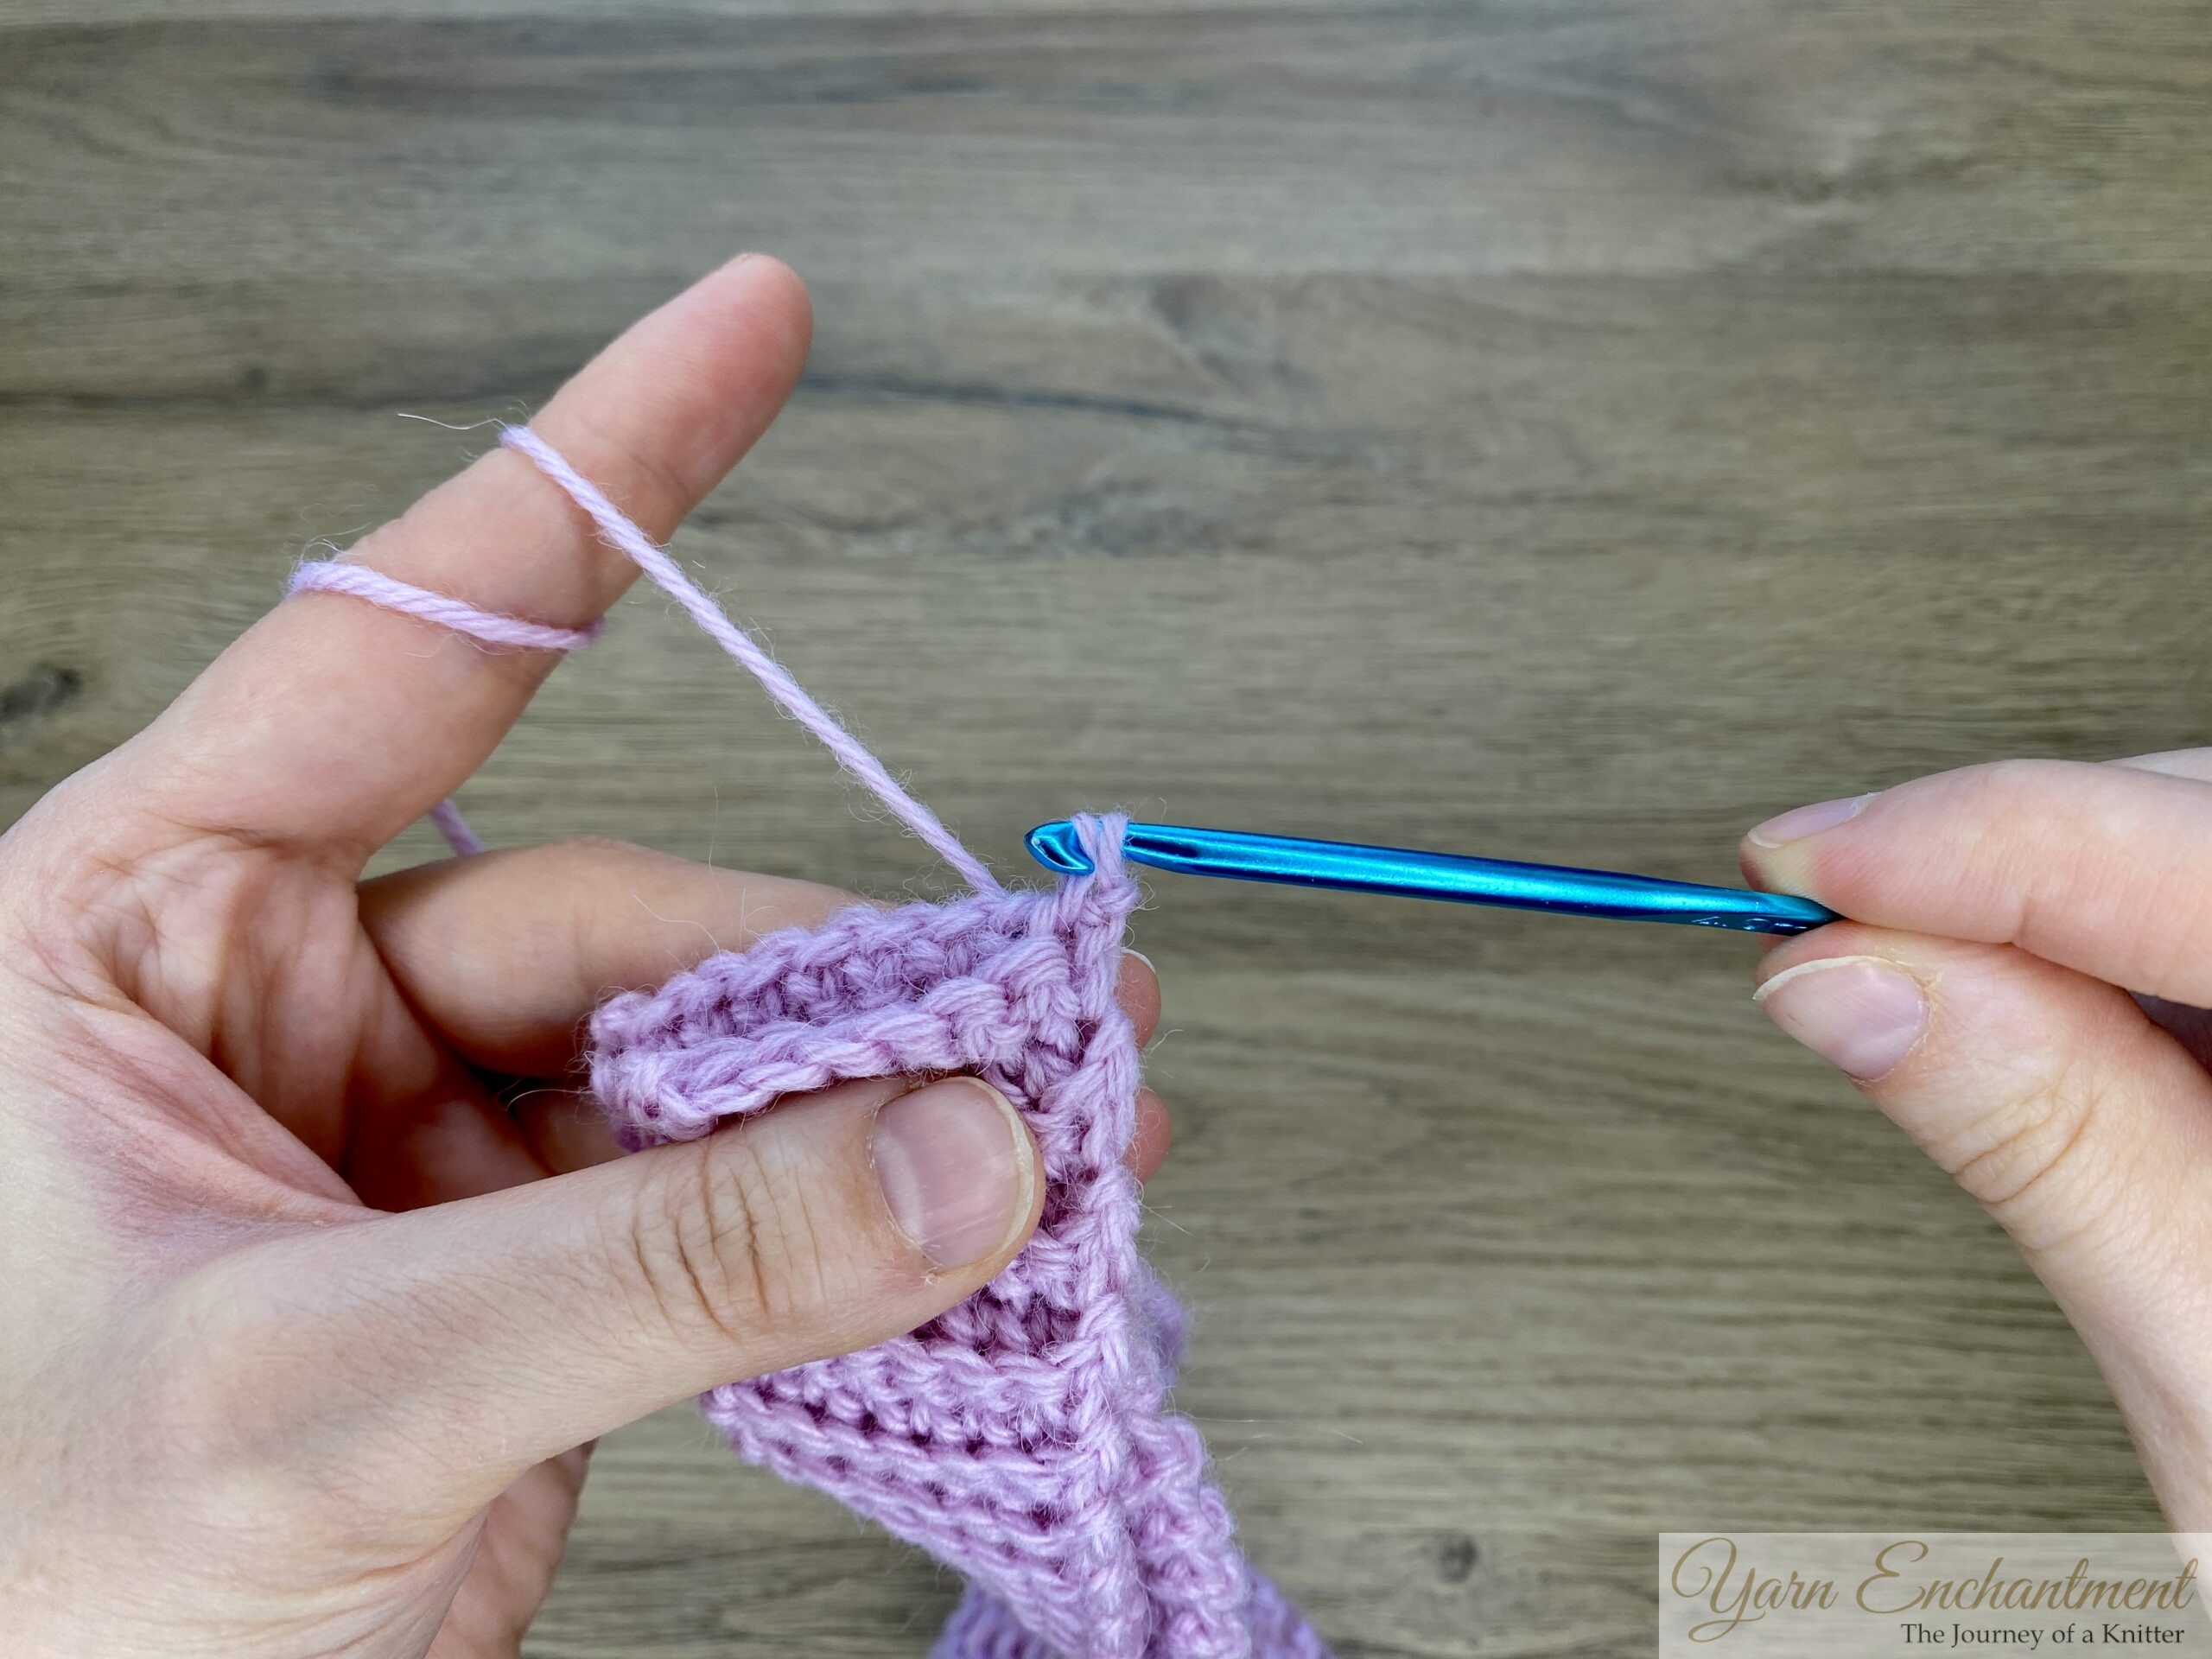
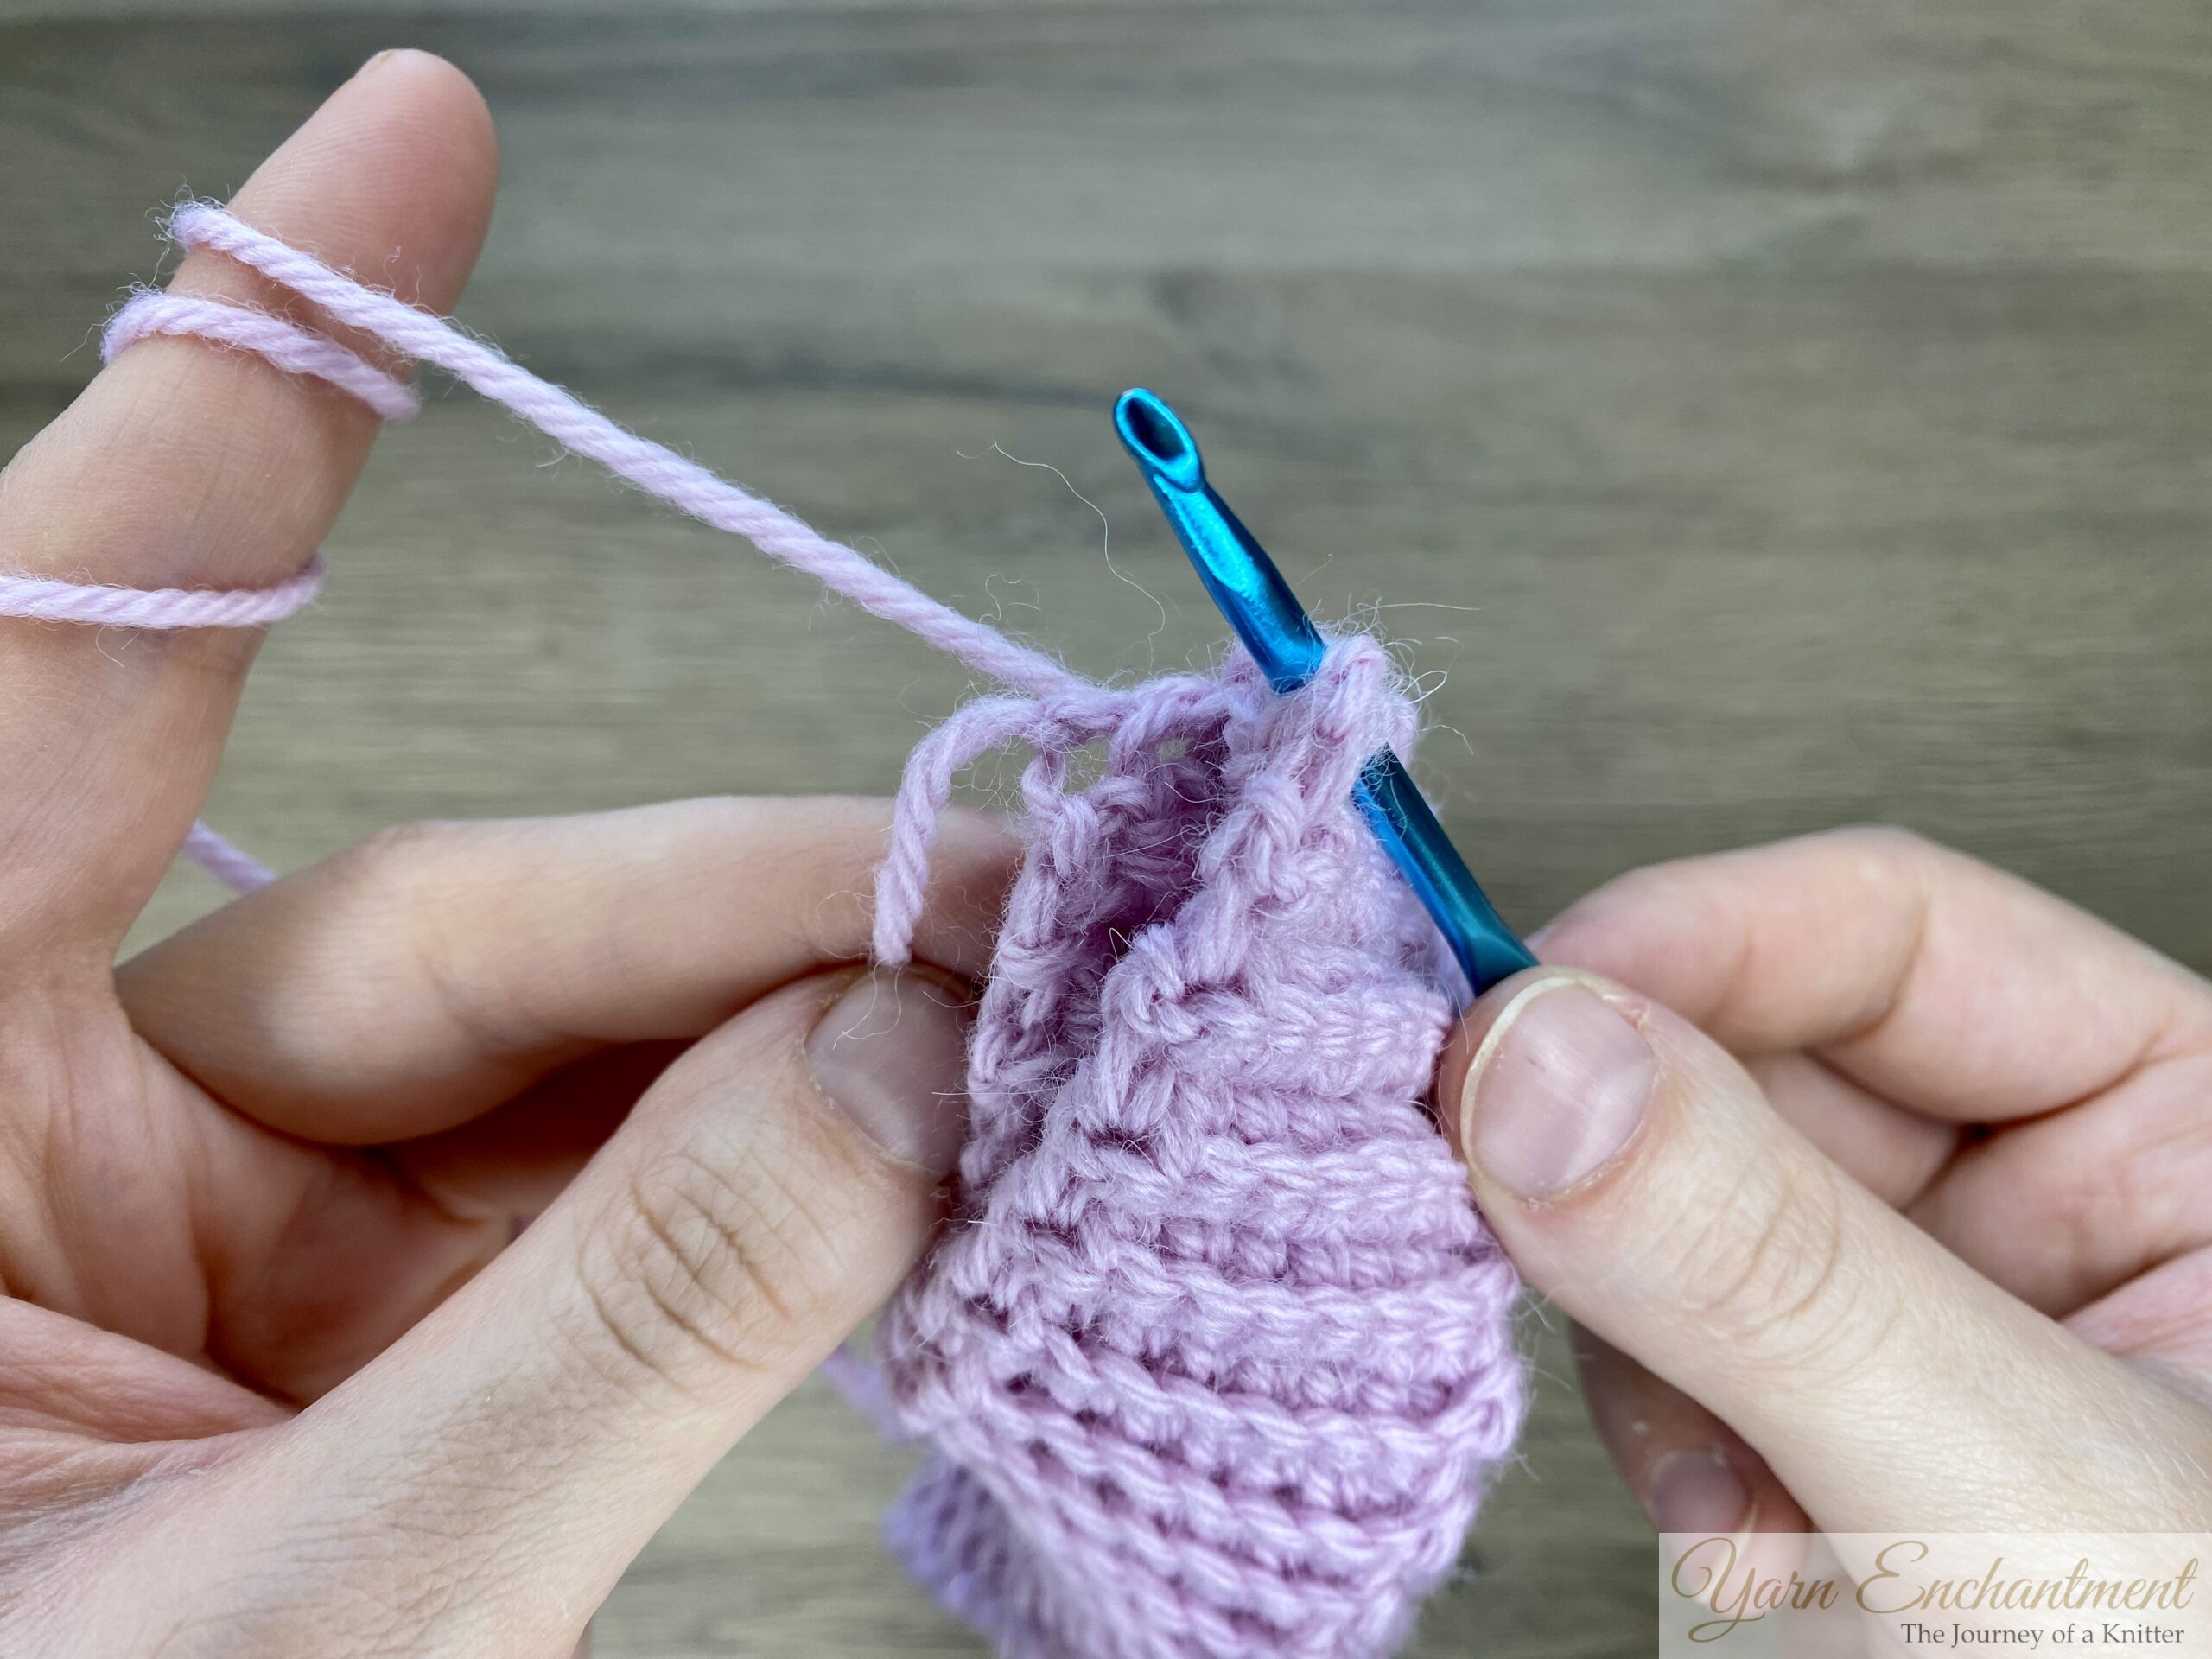
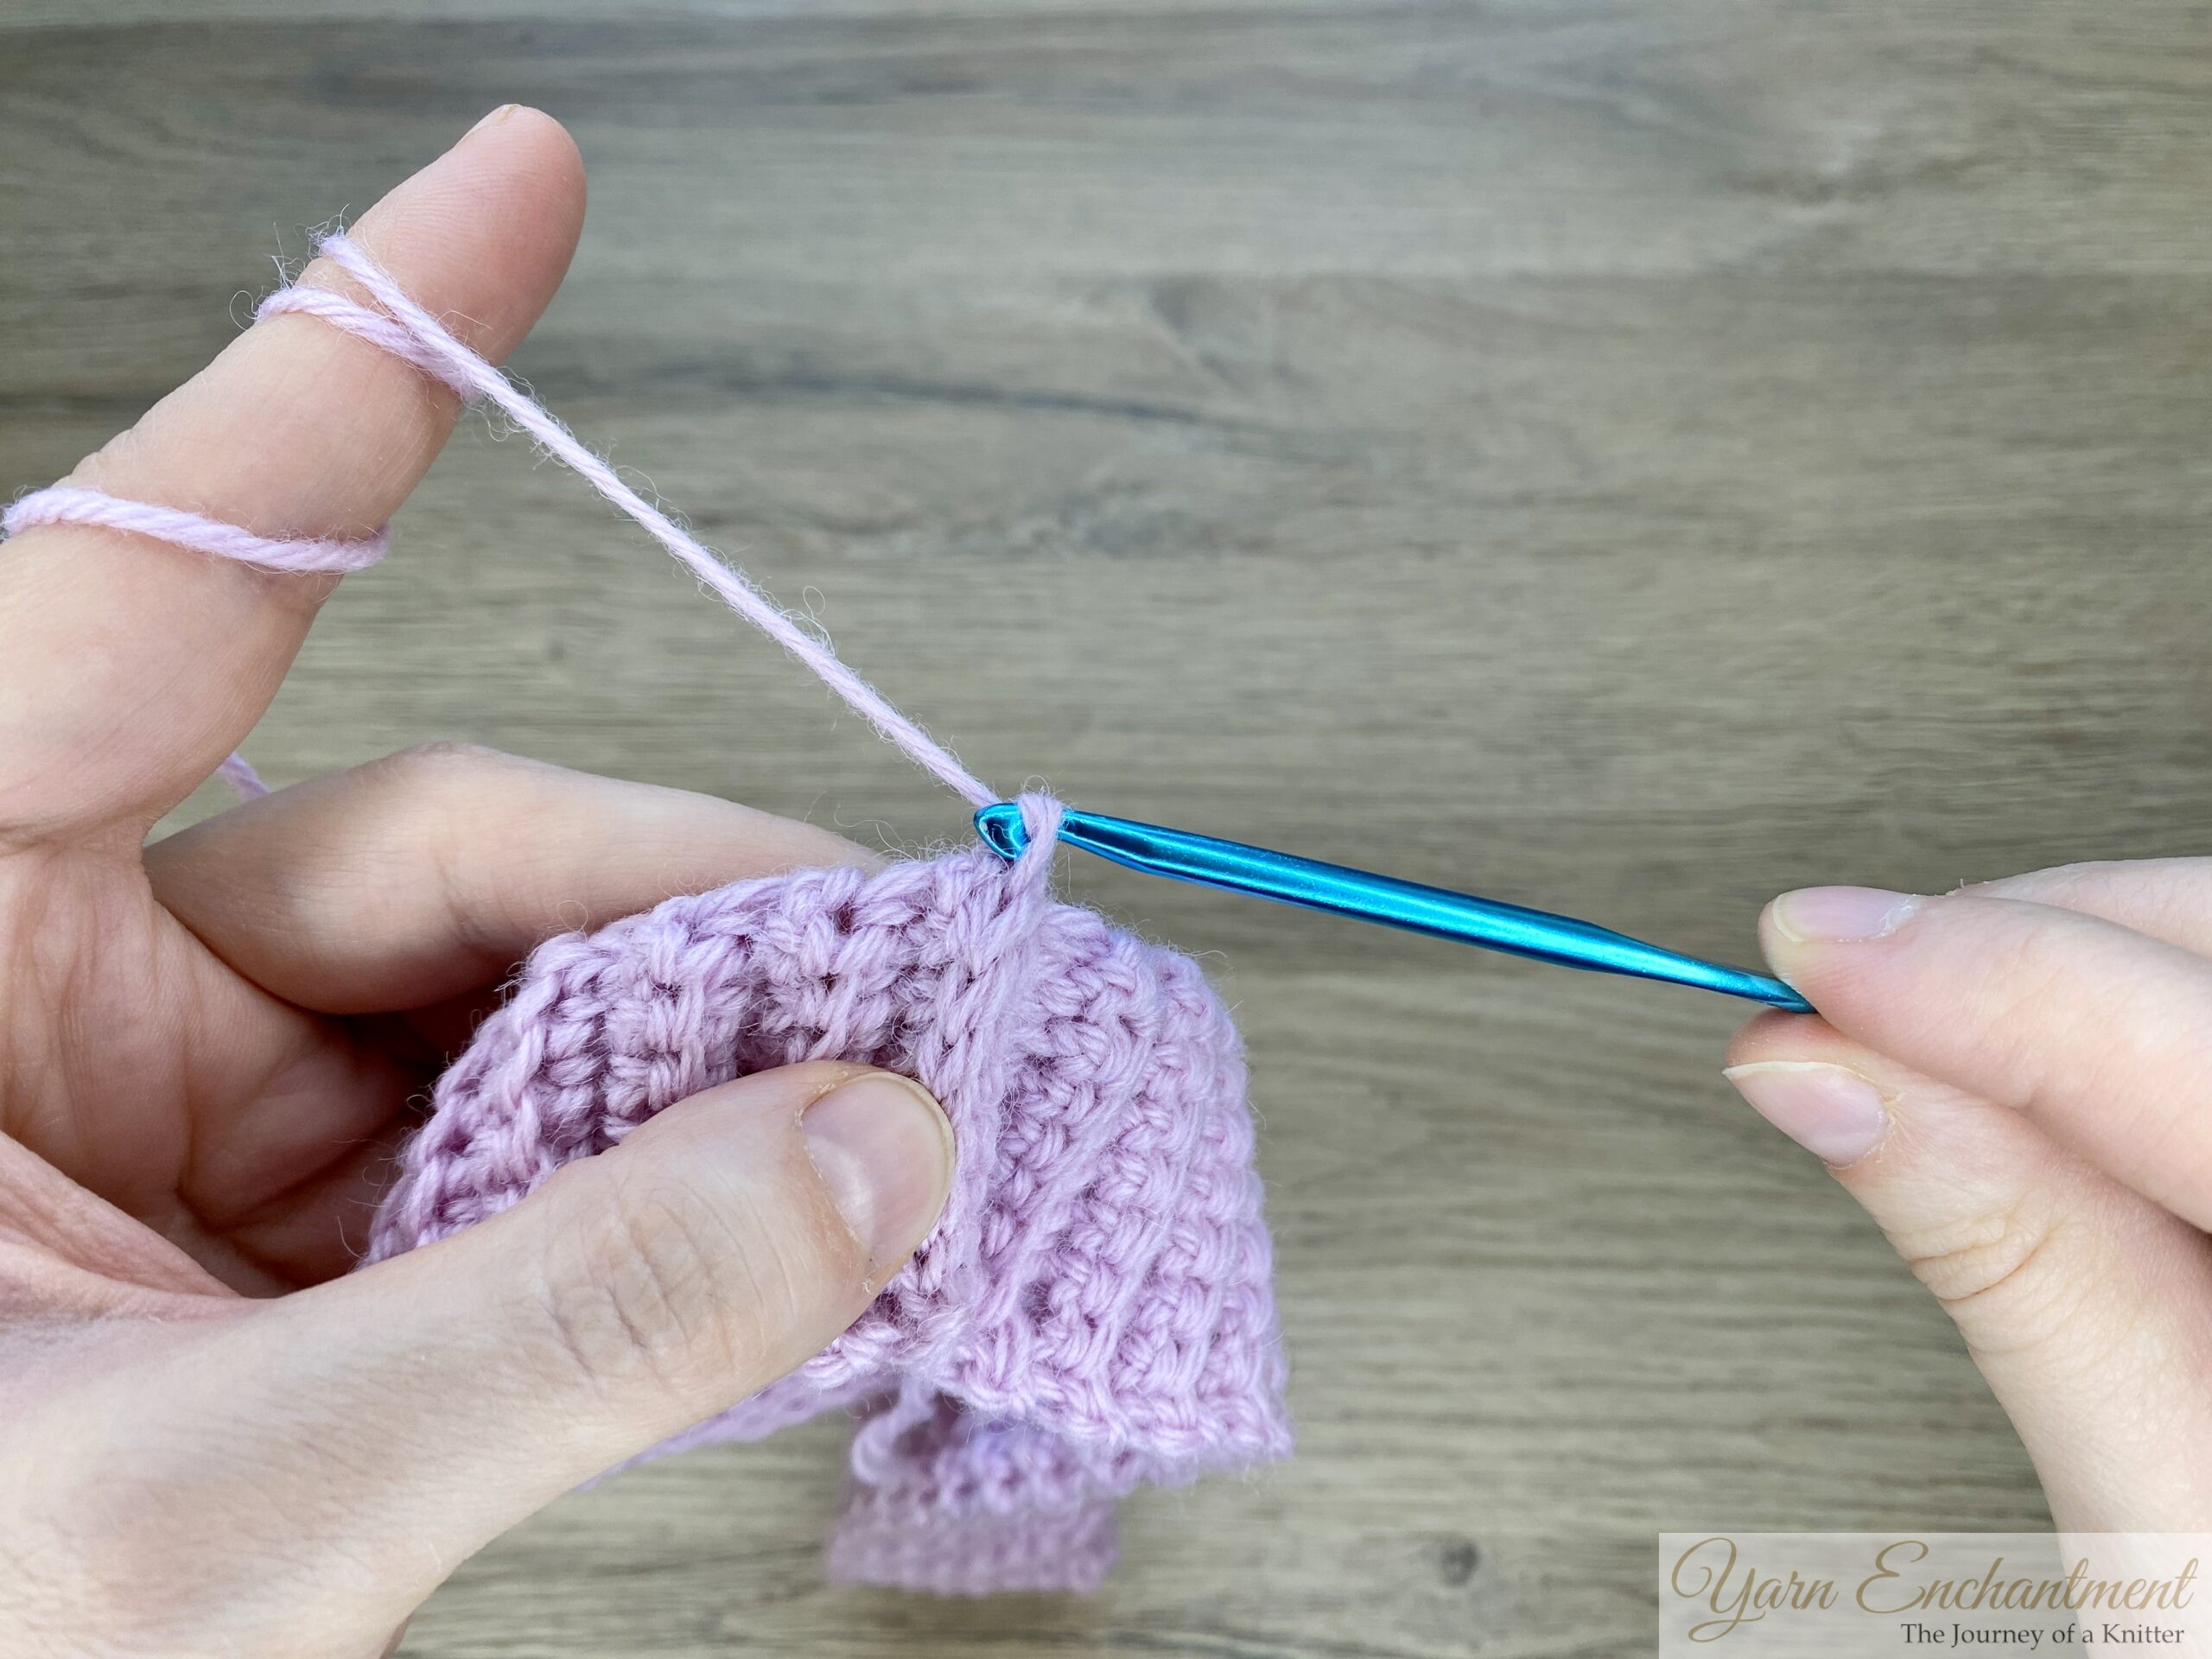
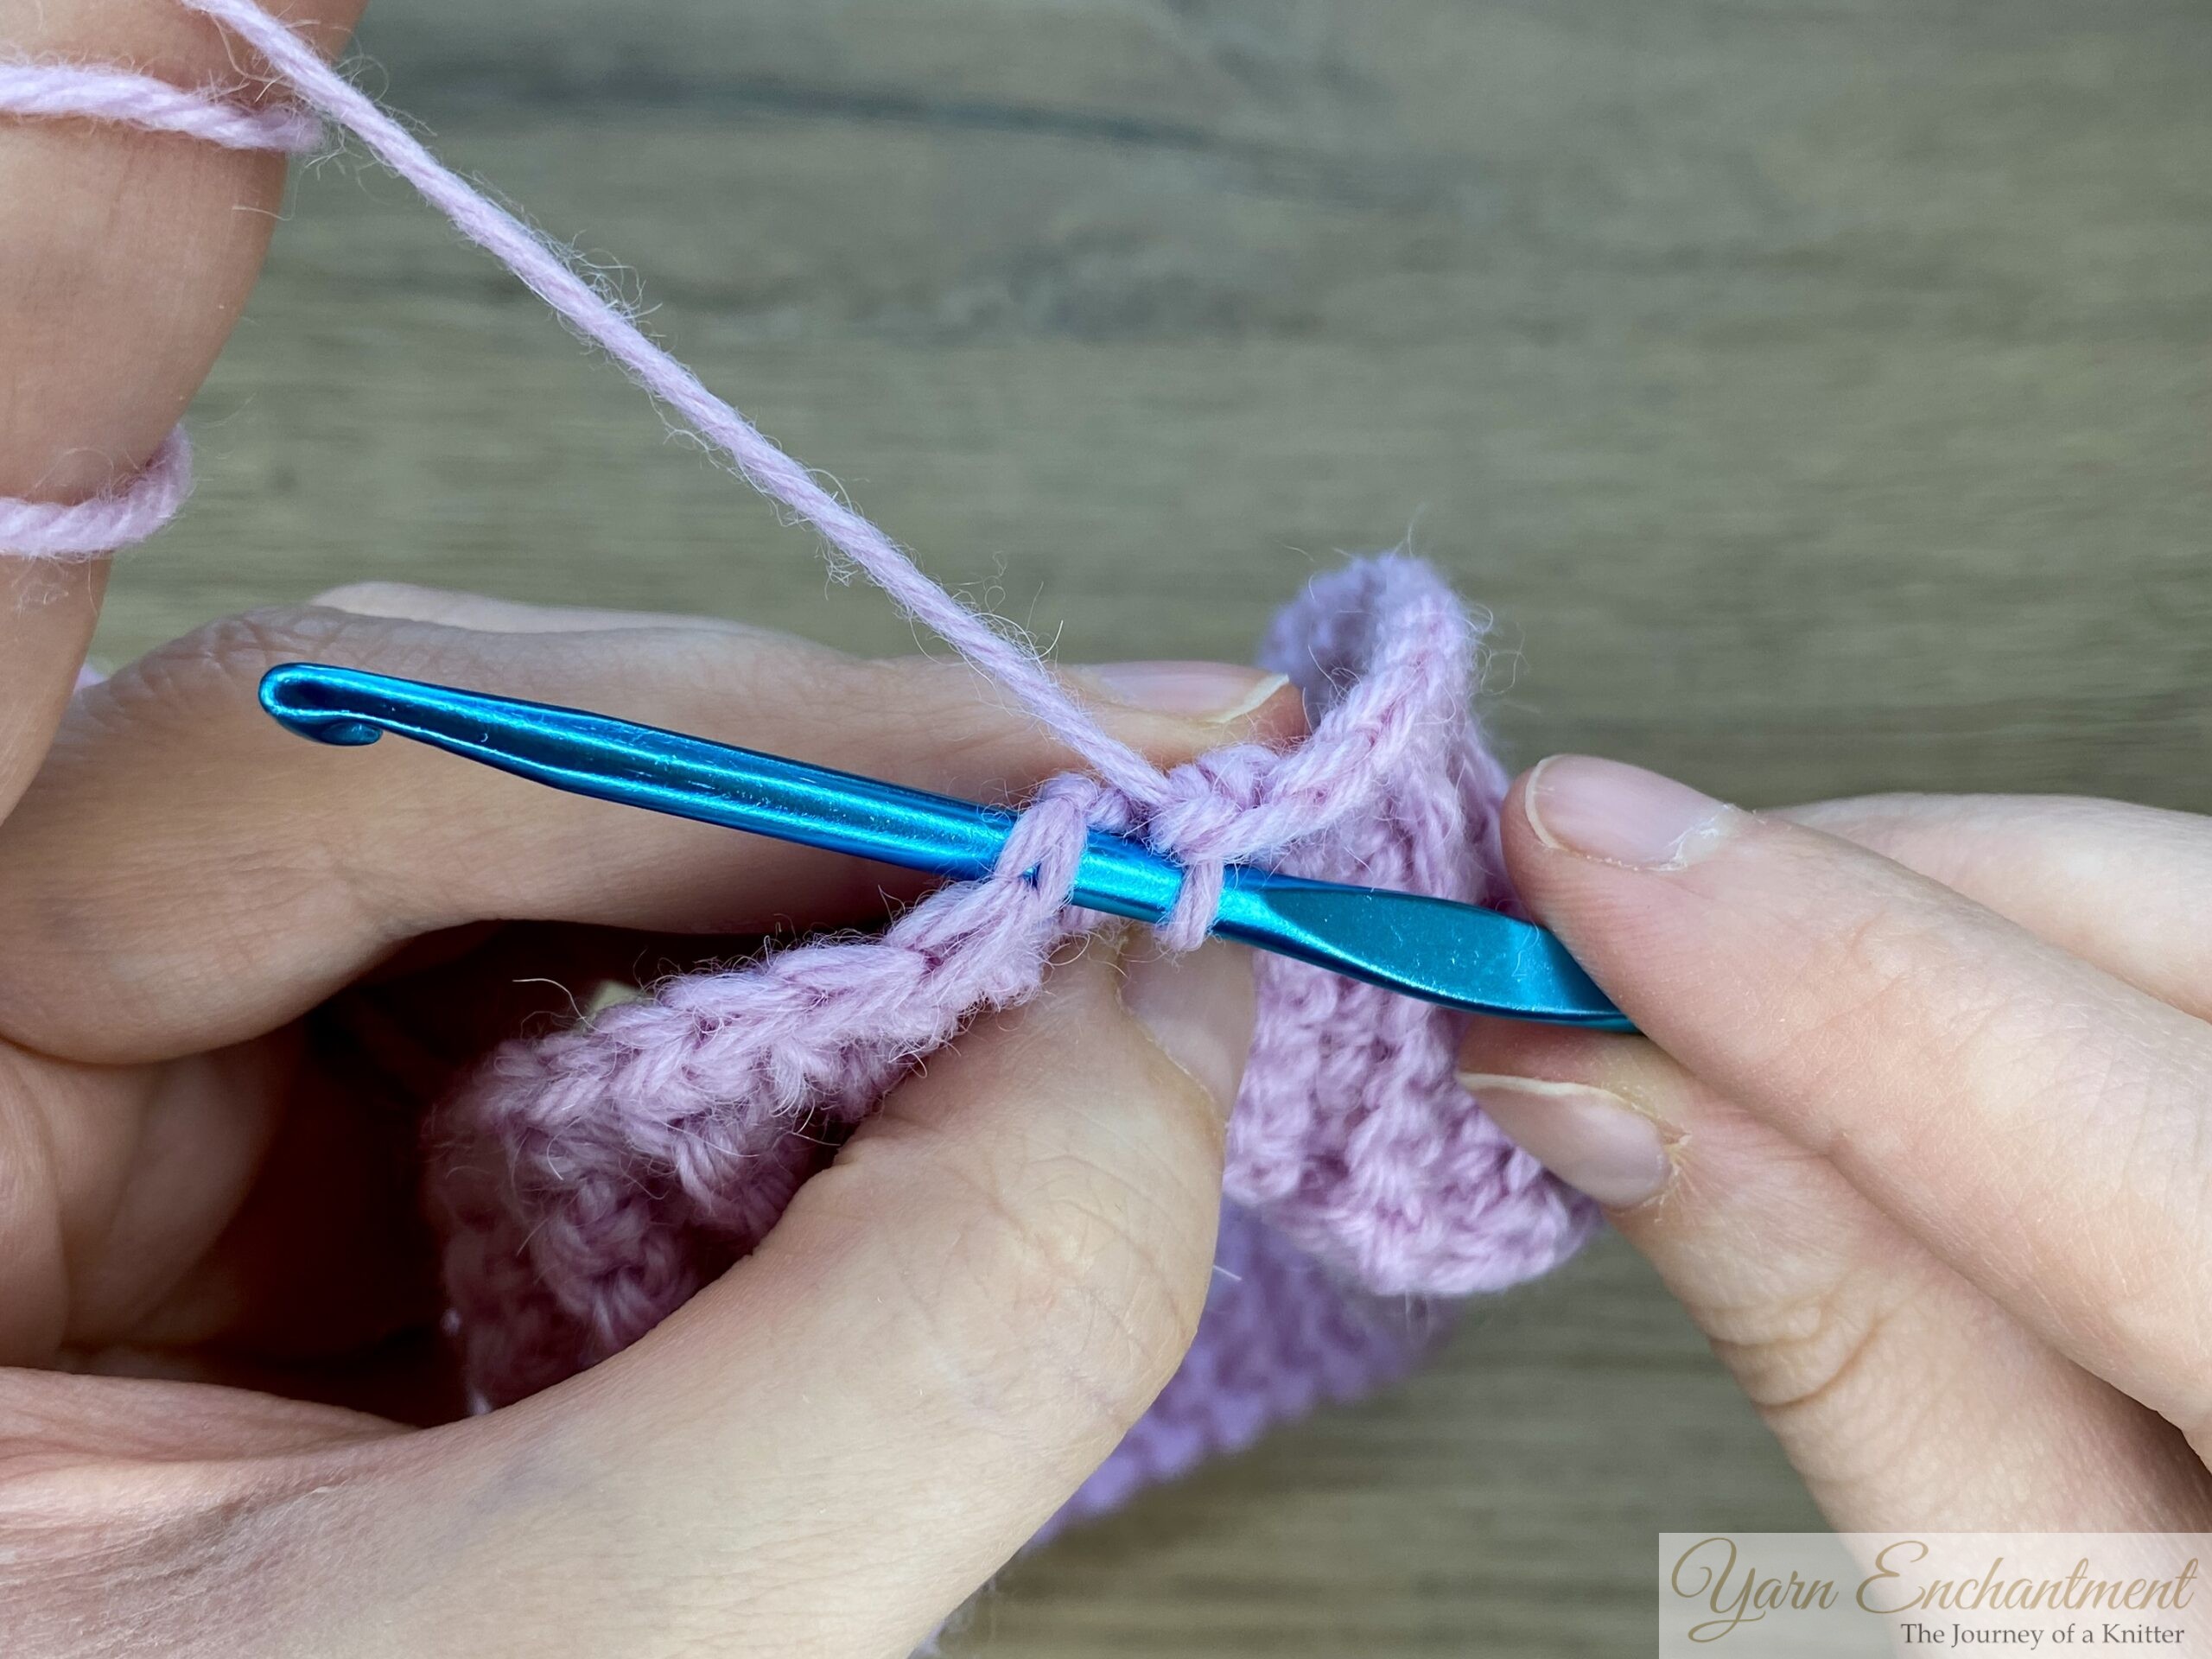
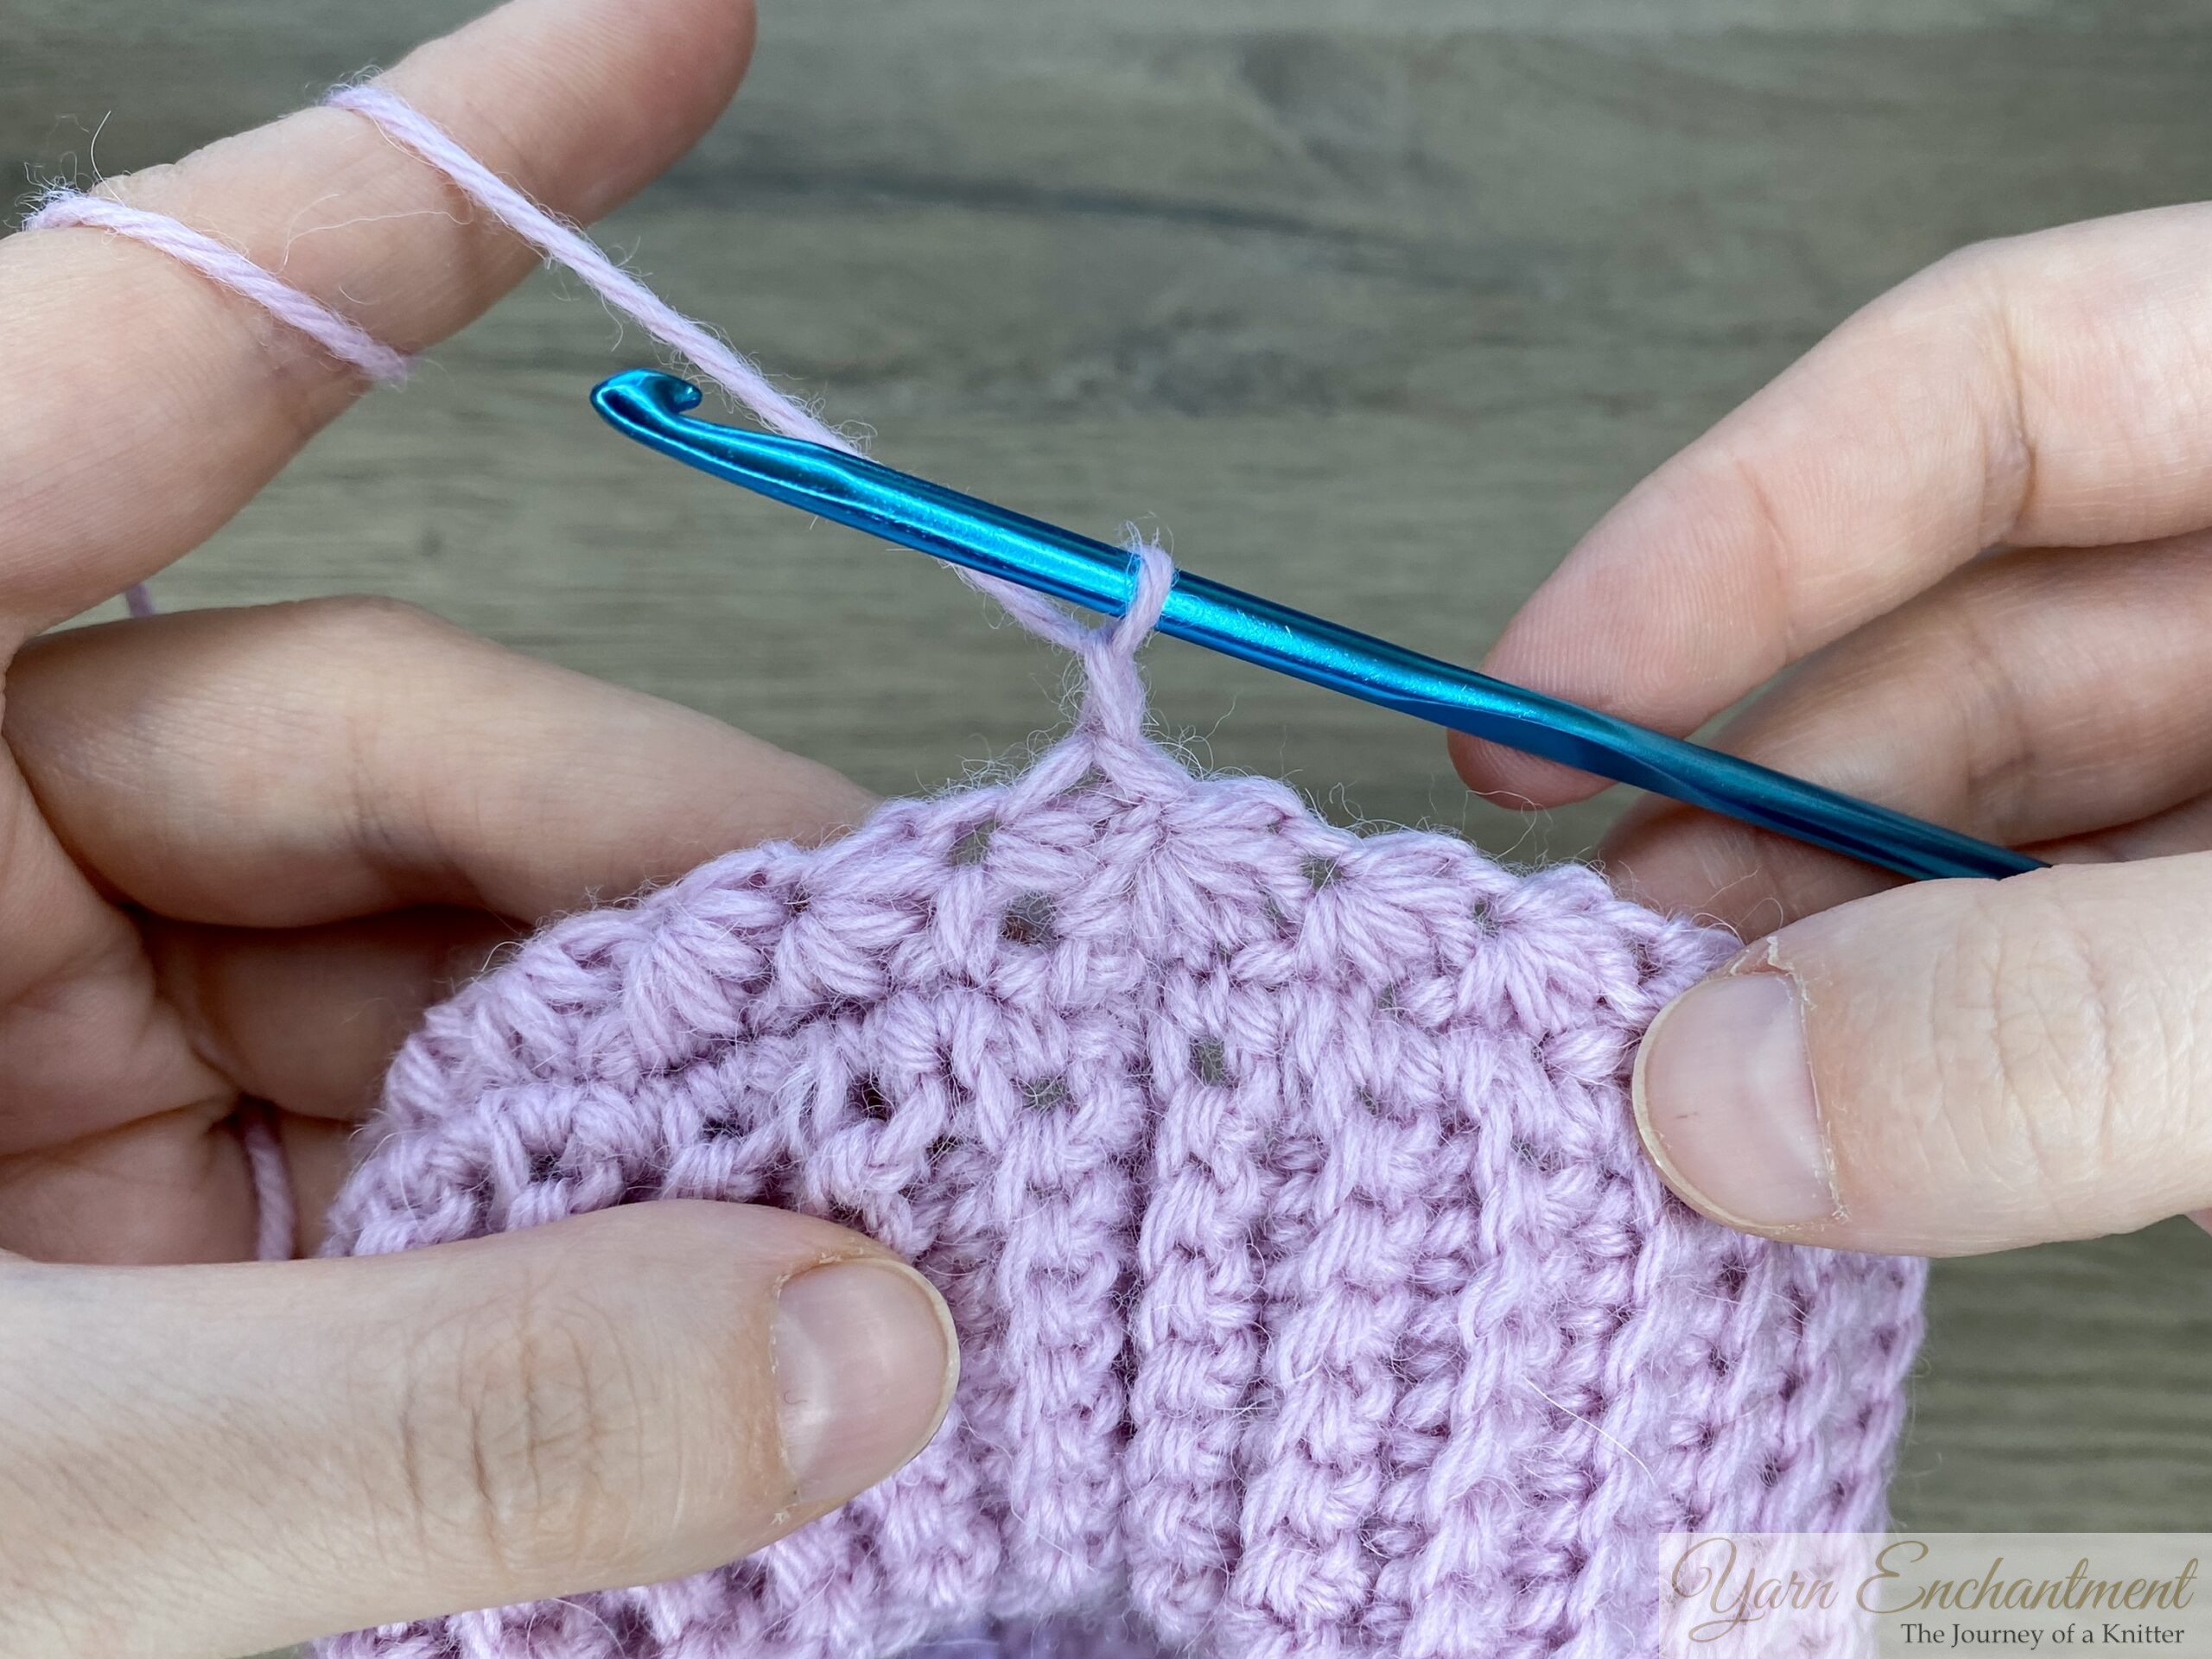
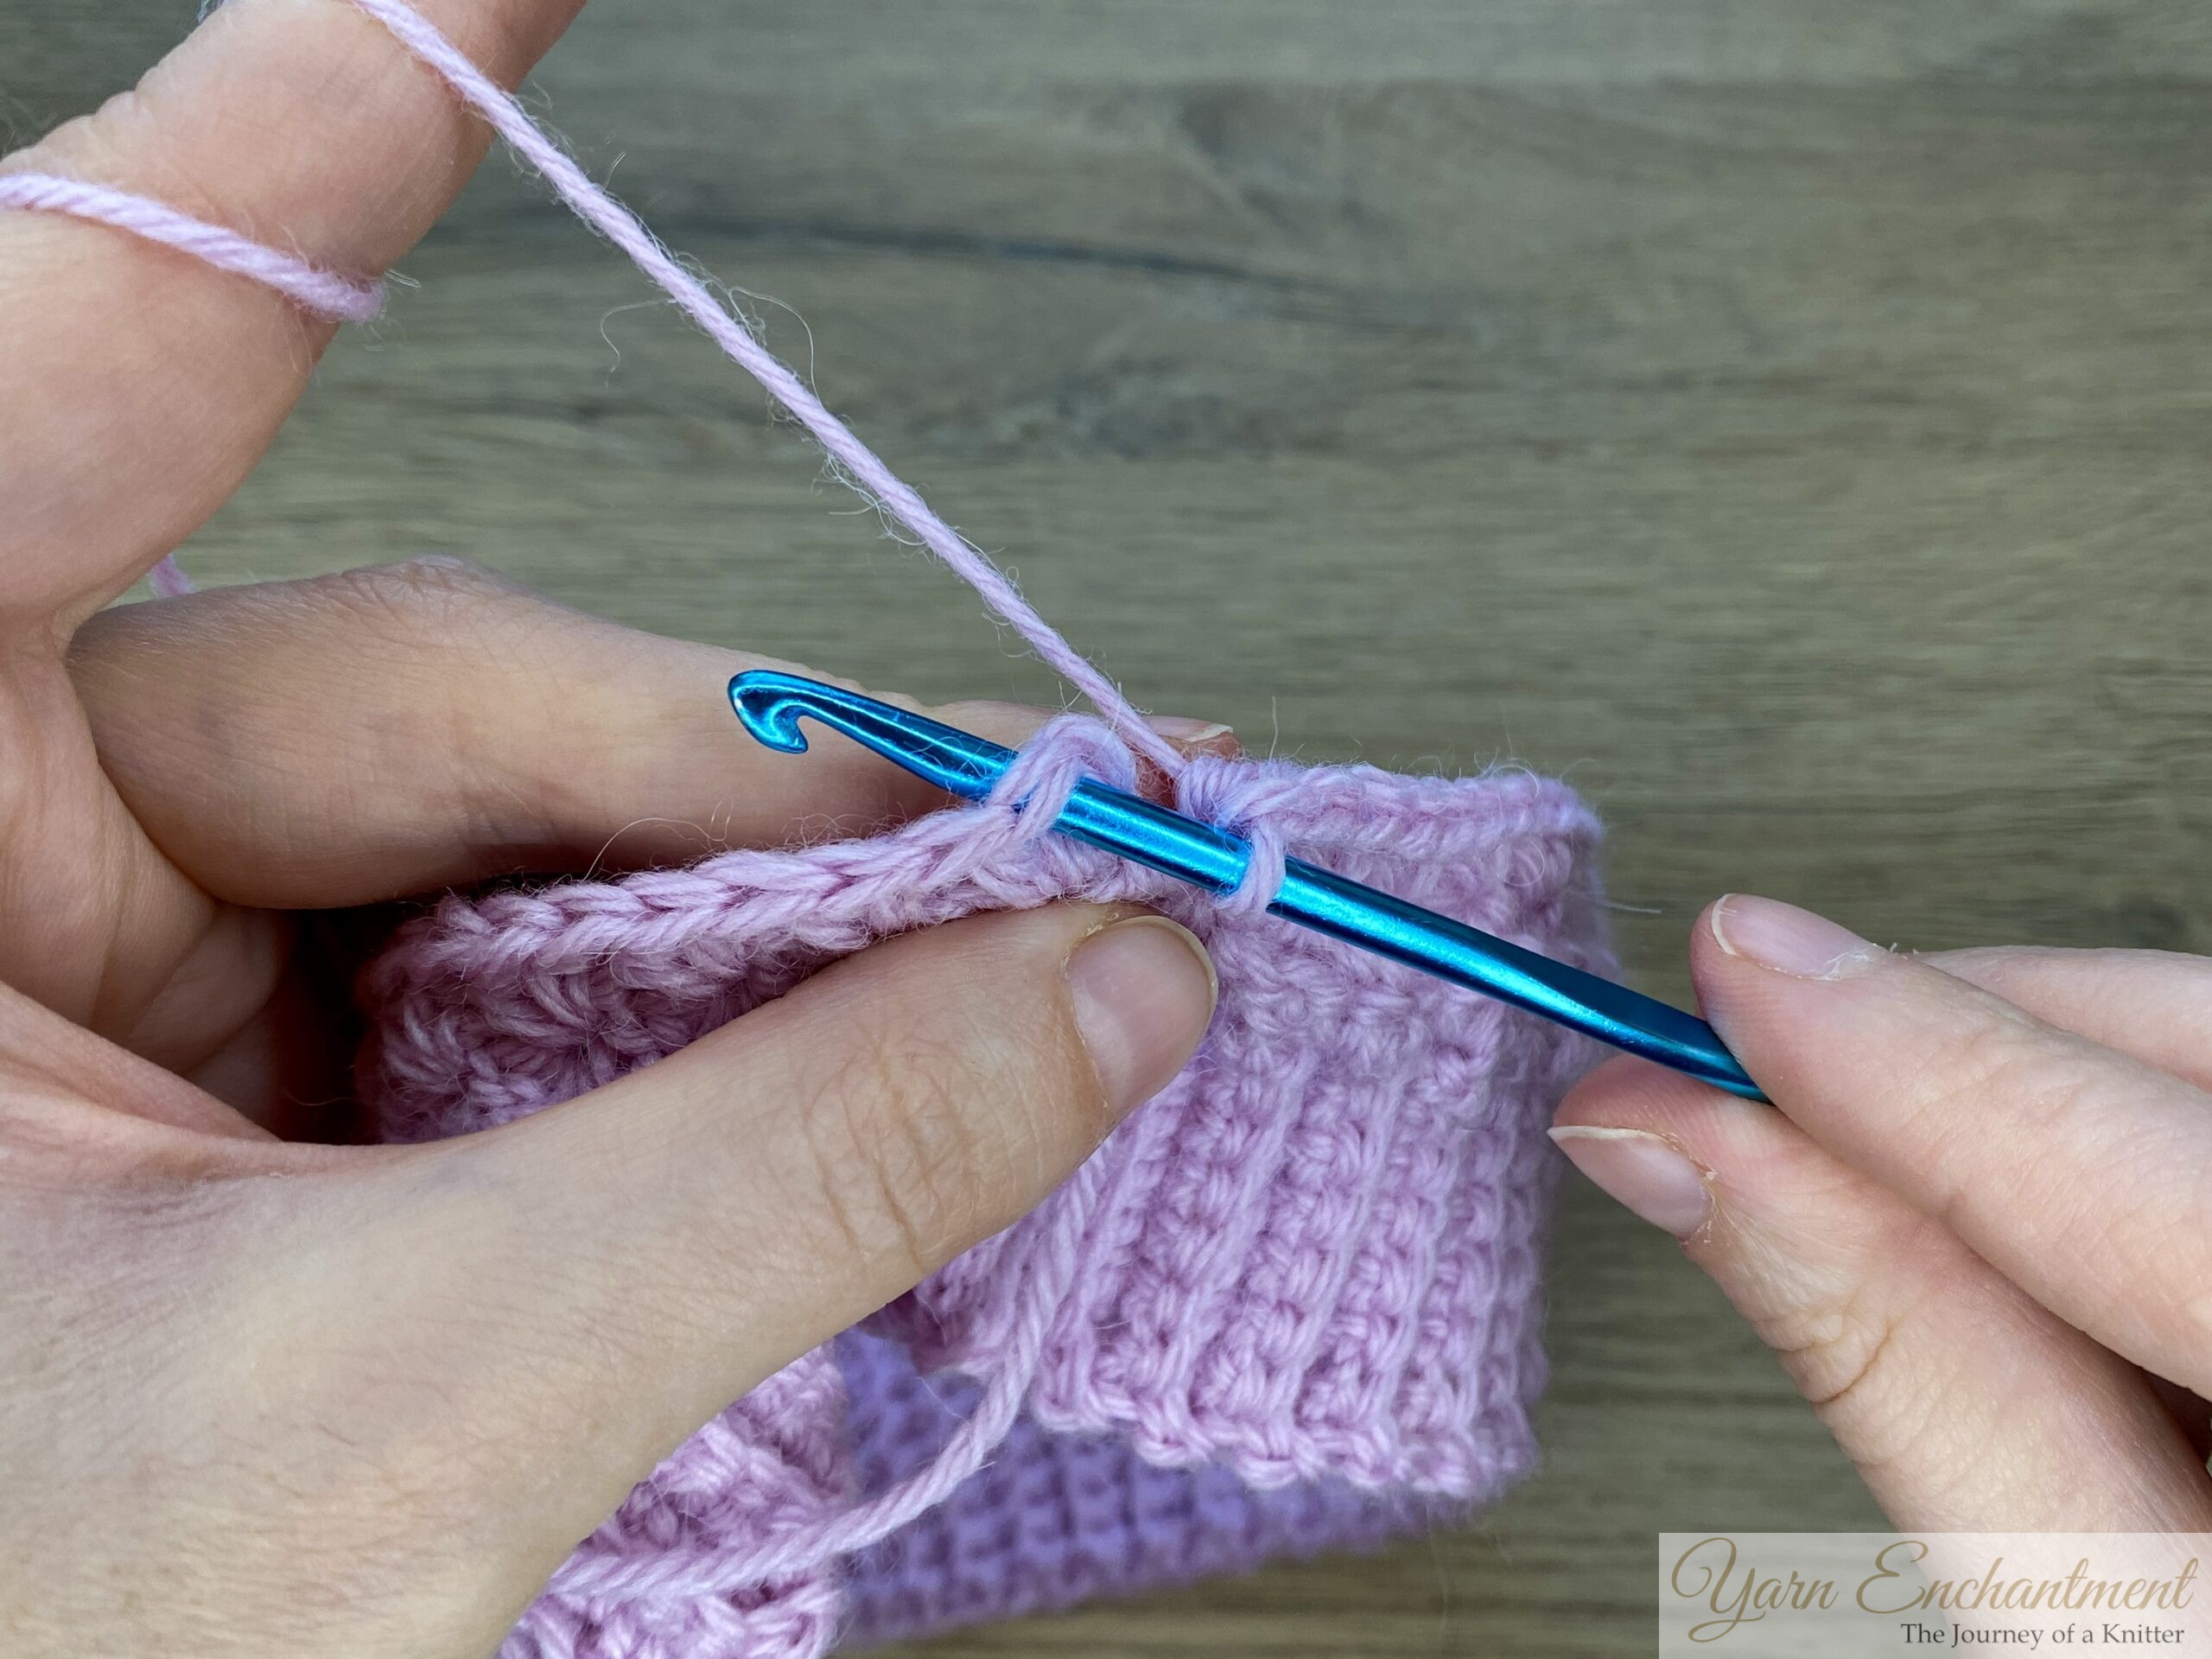
Fold the band so the short ends meet. Use slip stitches to join the two ends together, forming a circle.
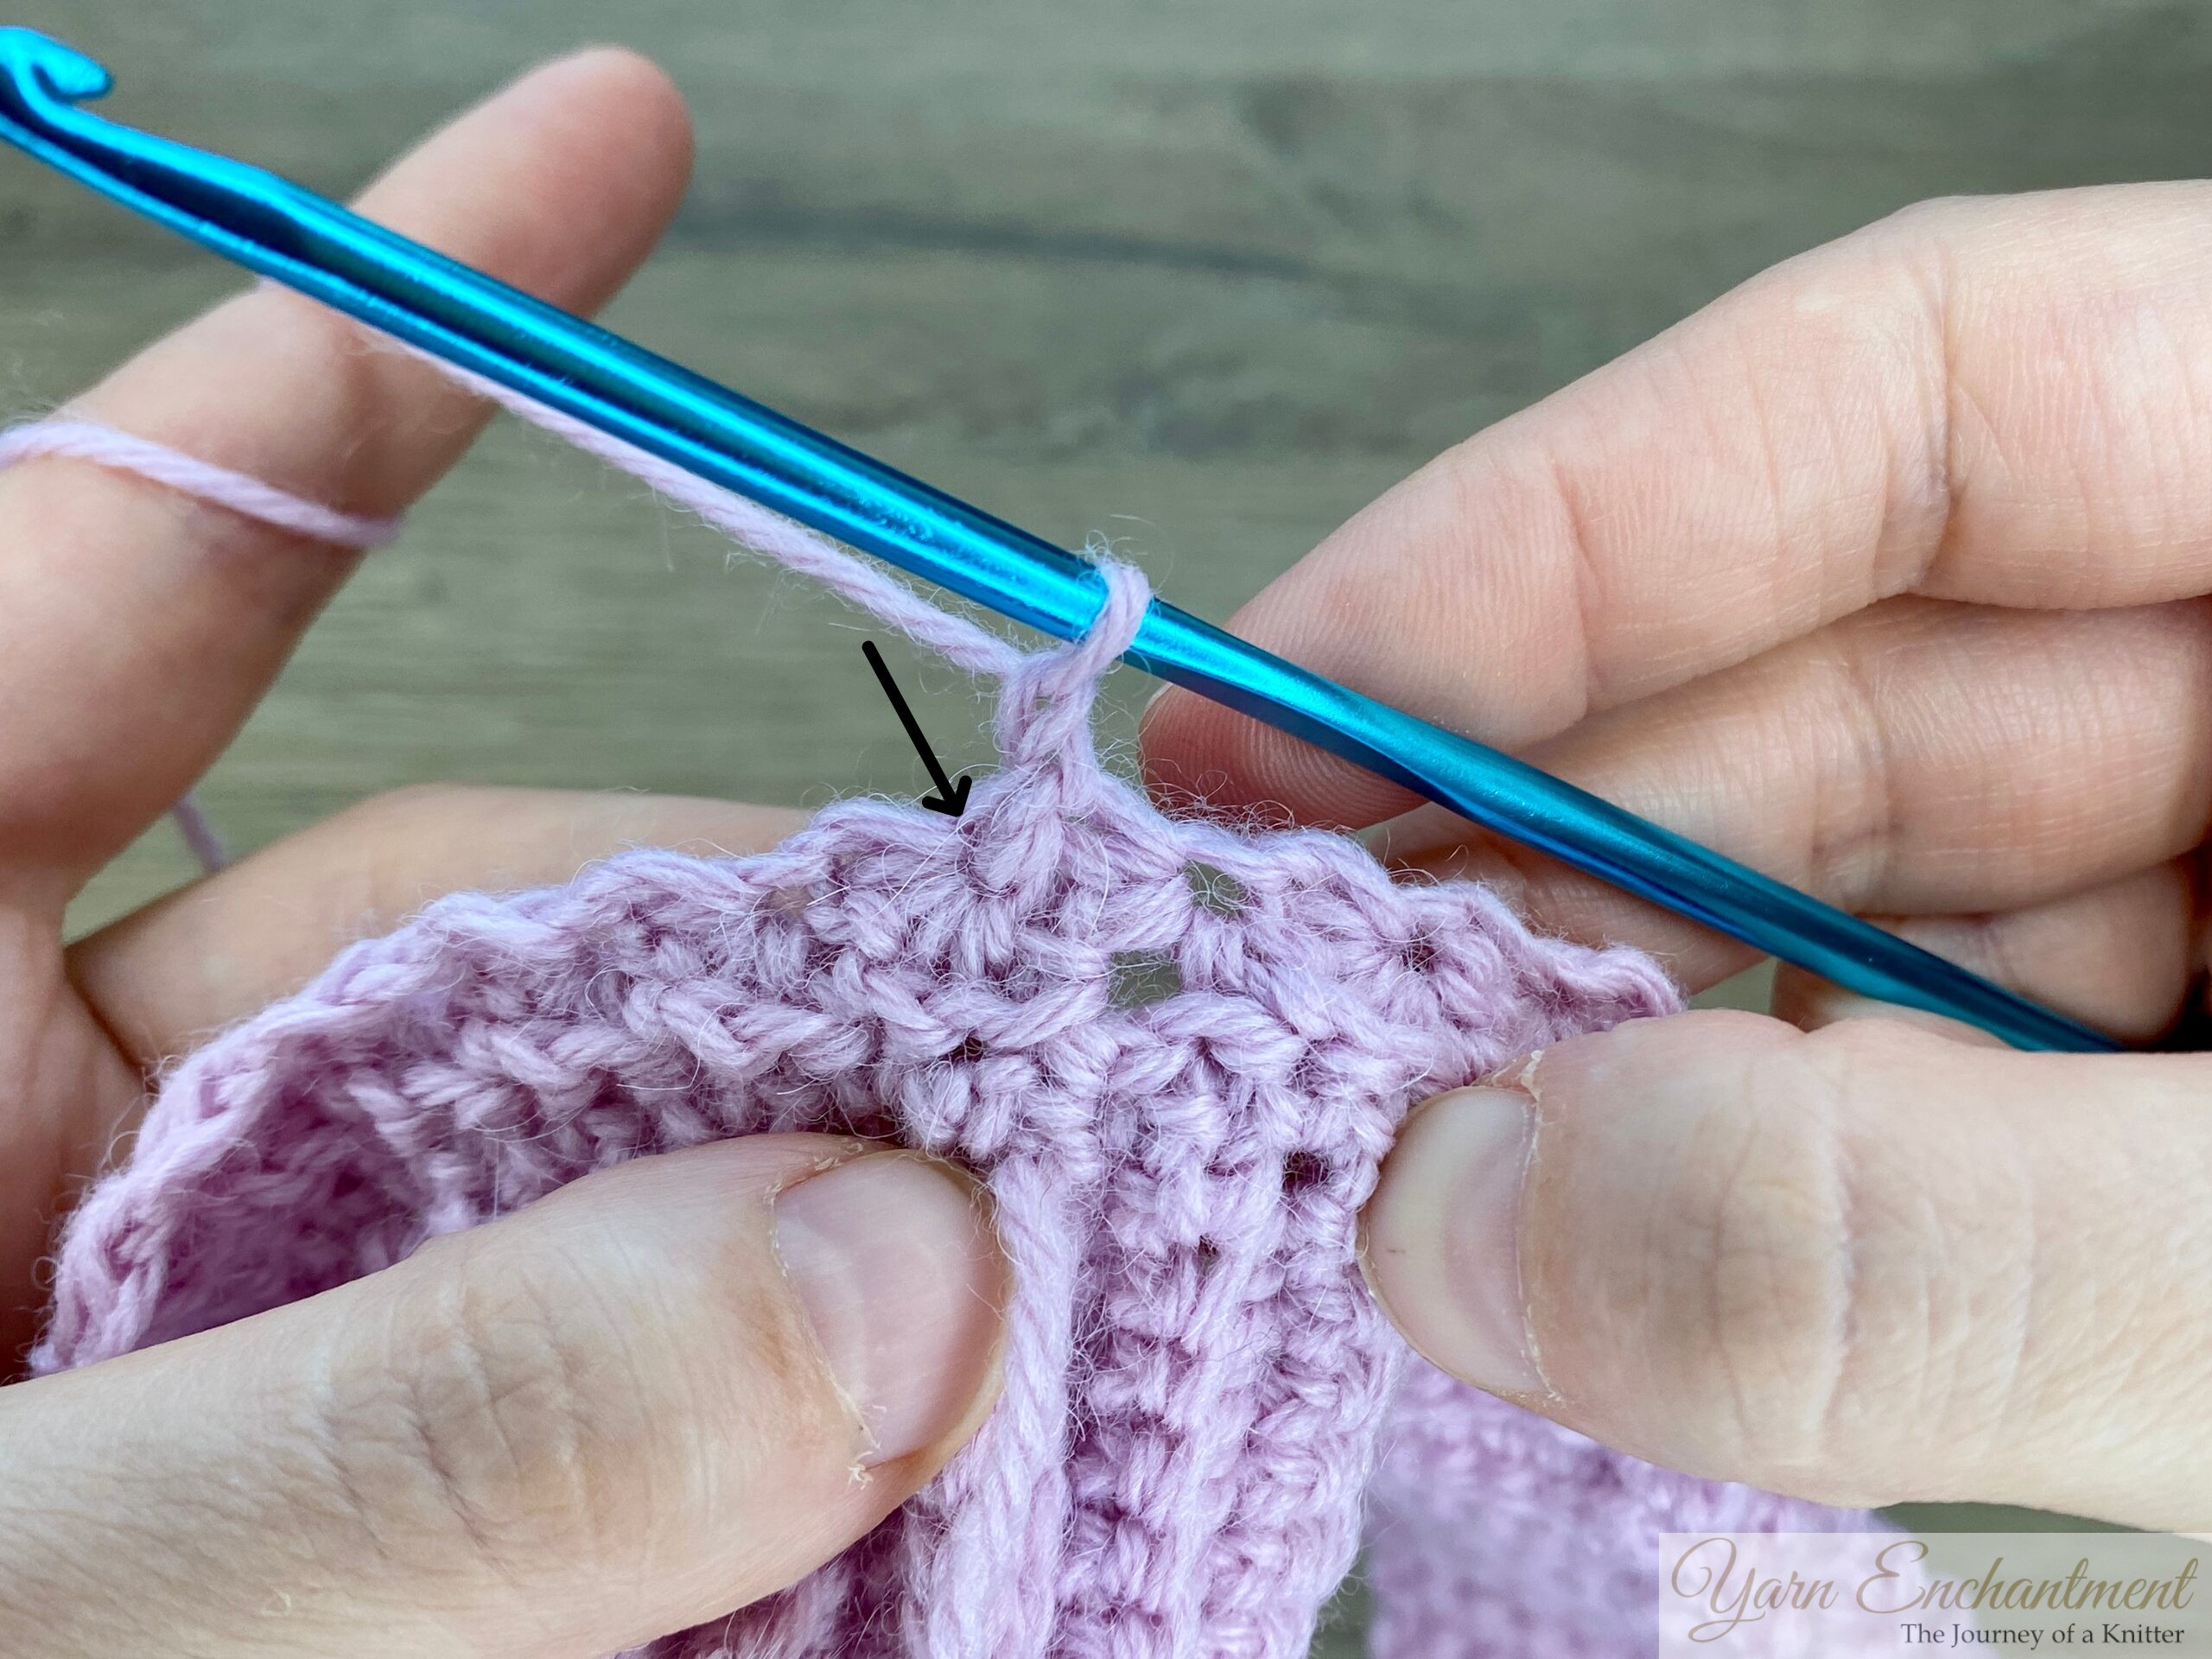
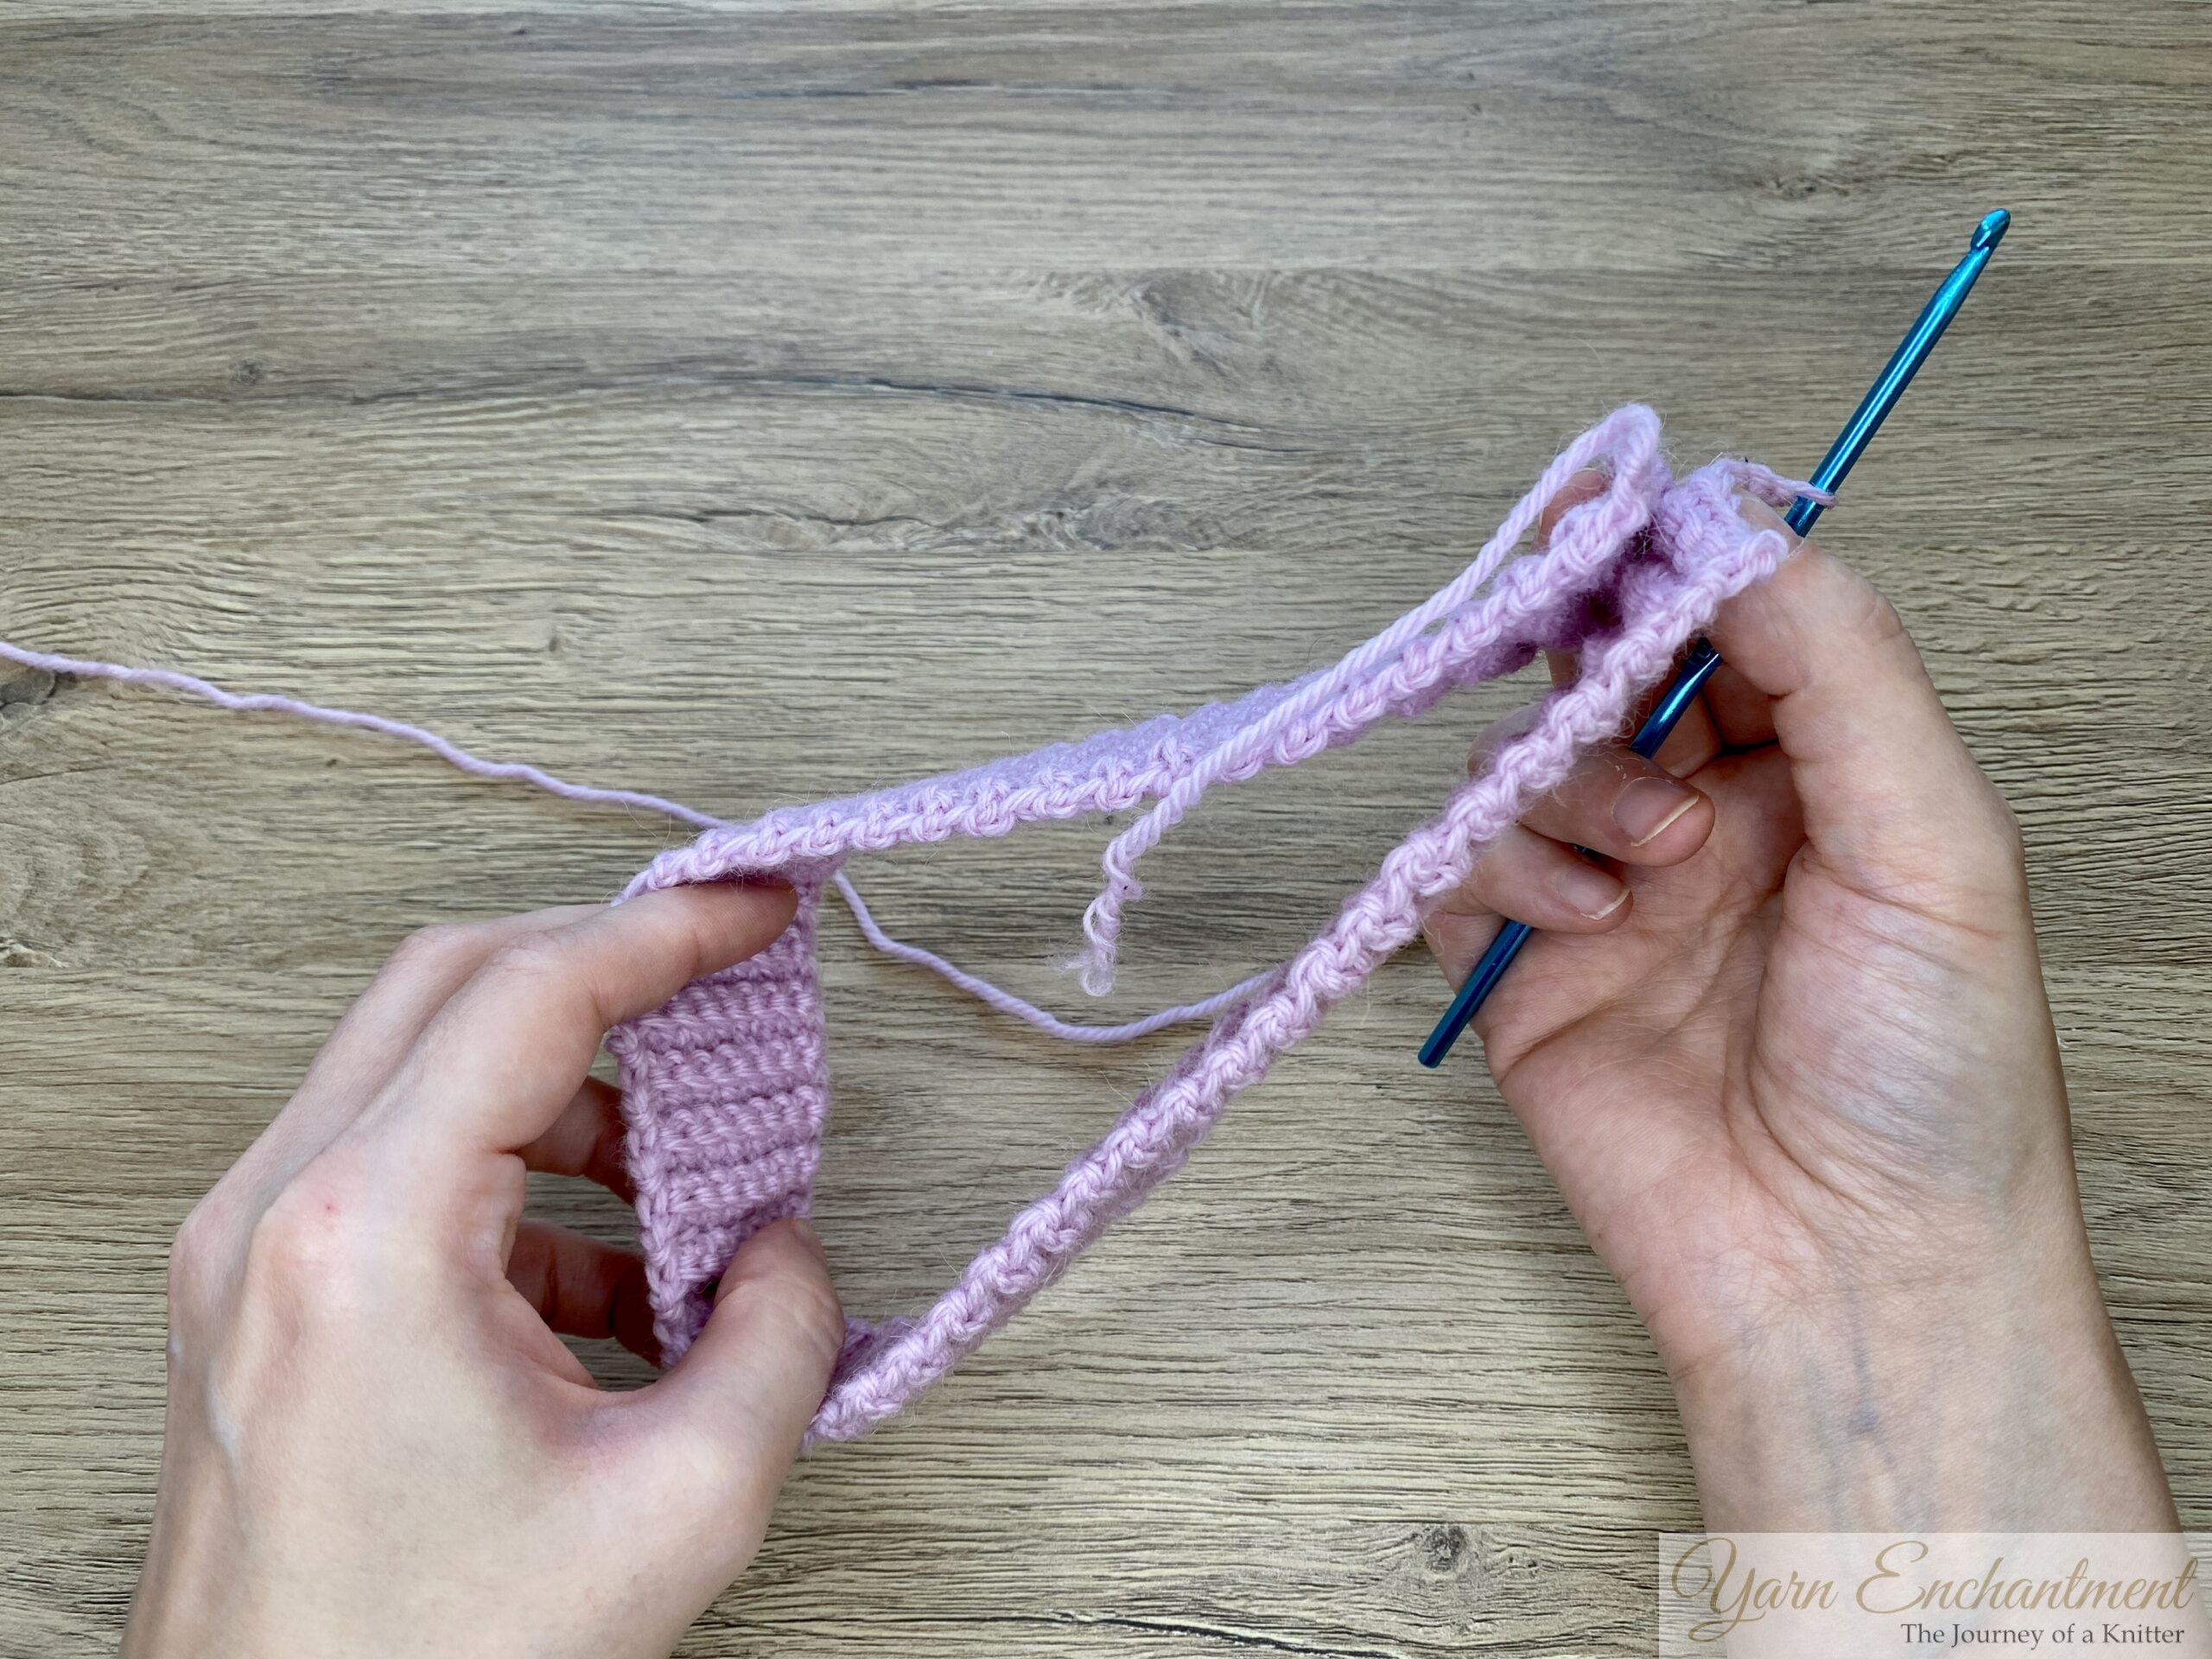 | 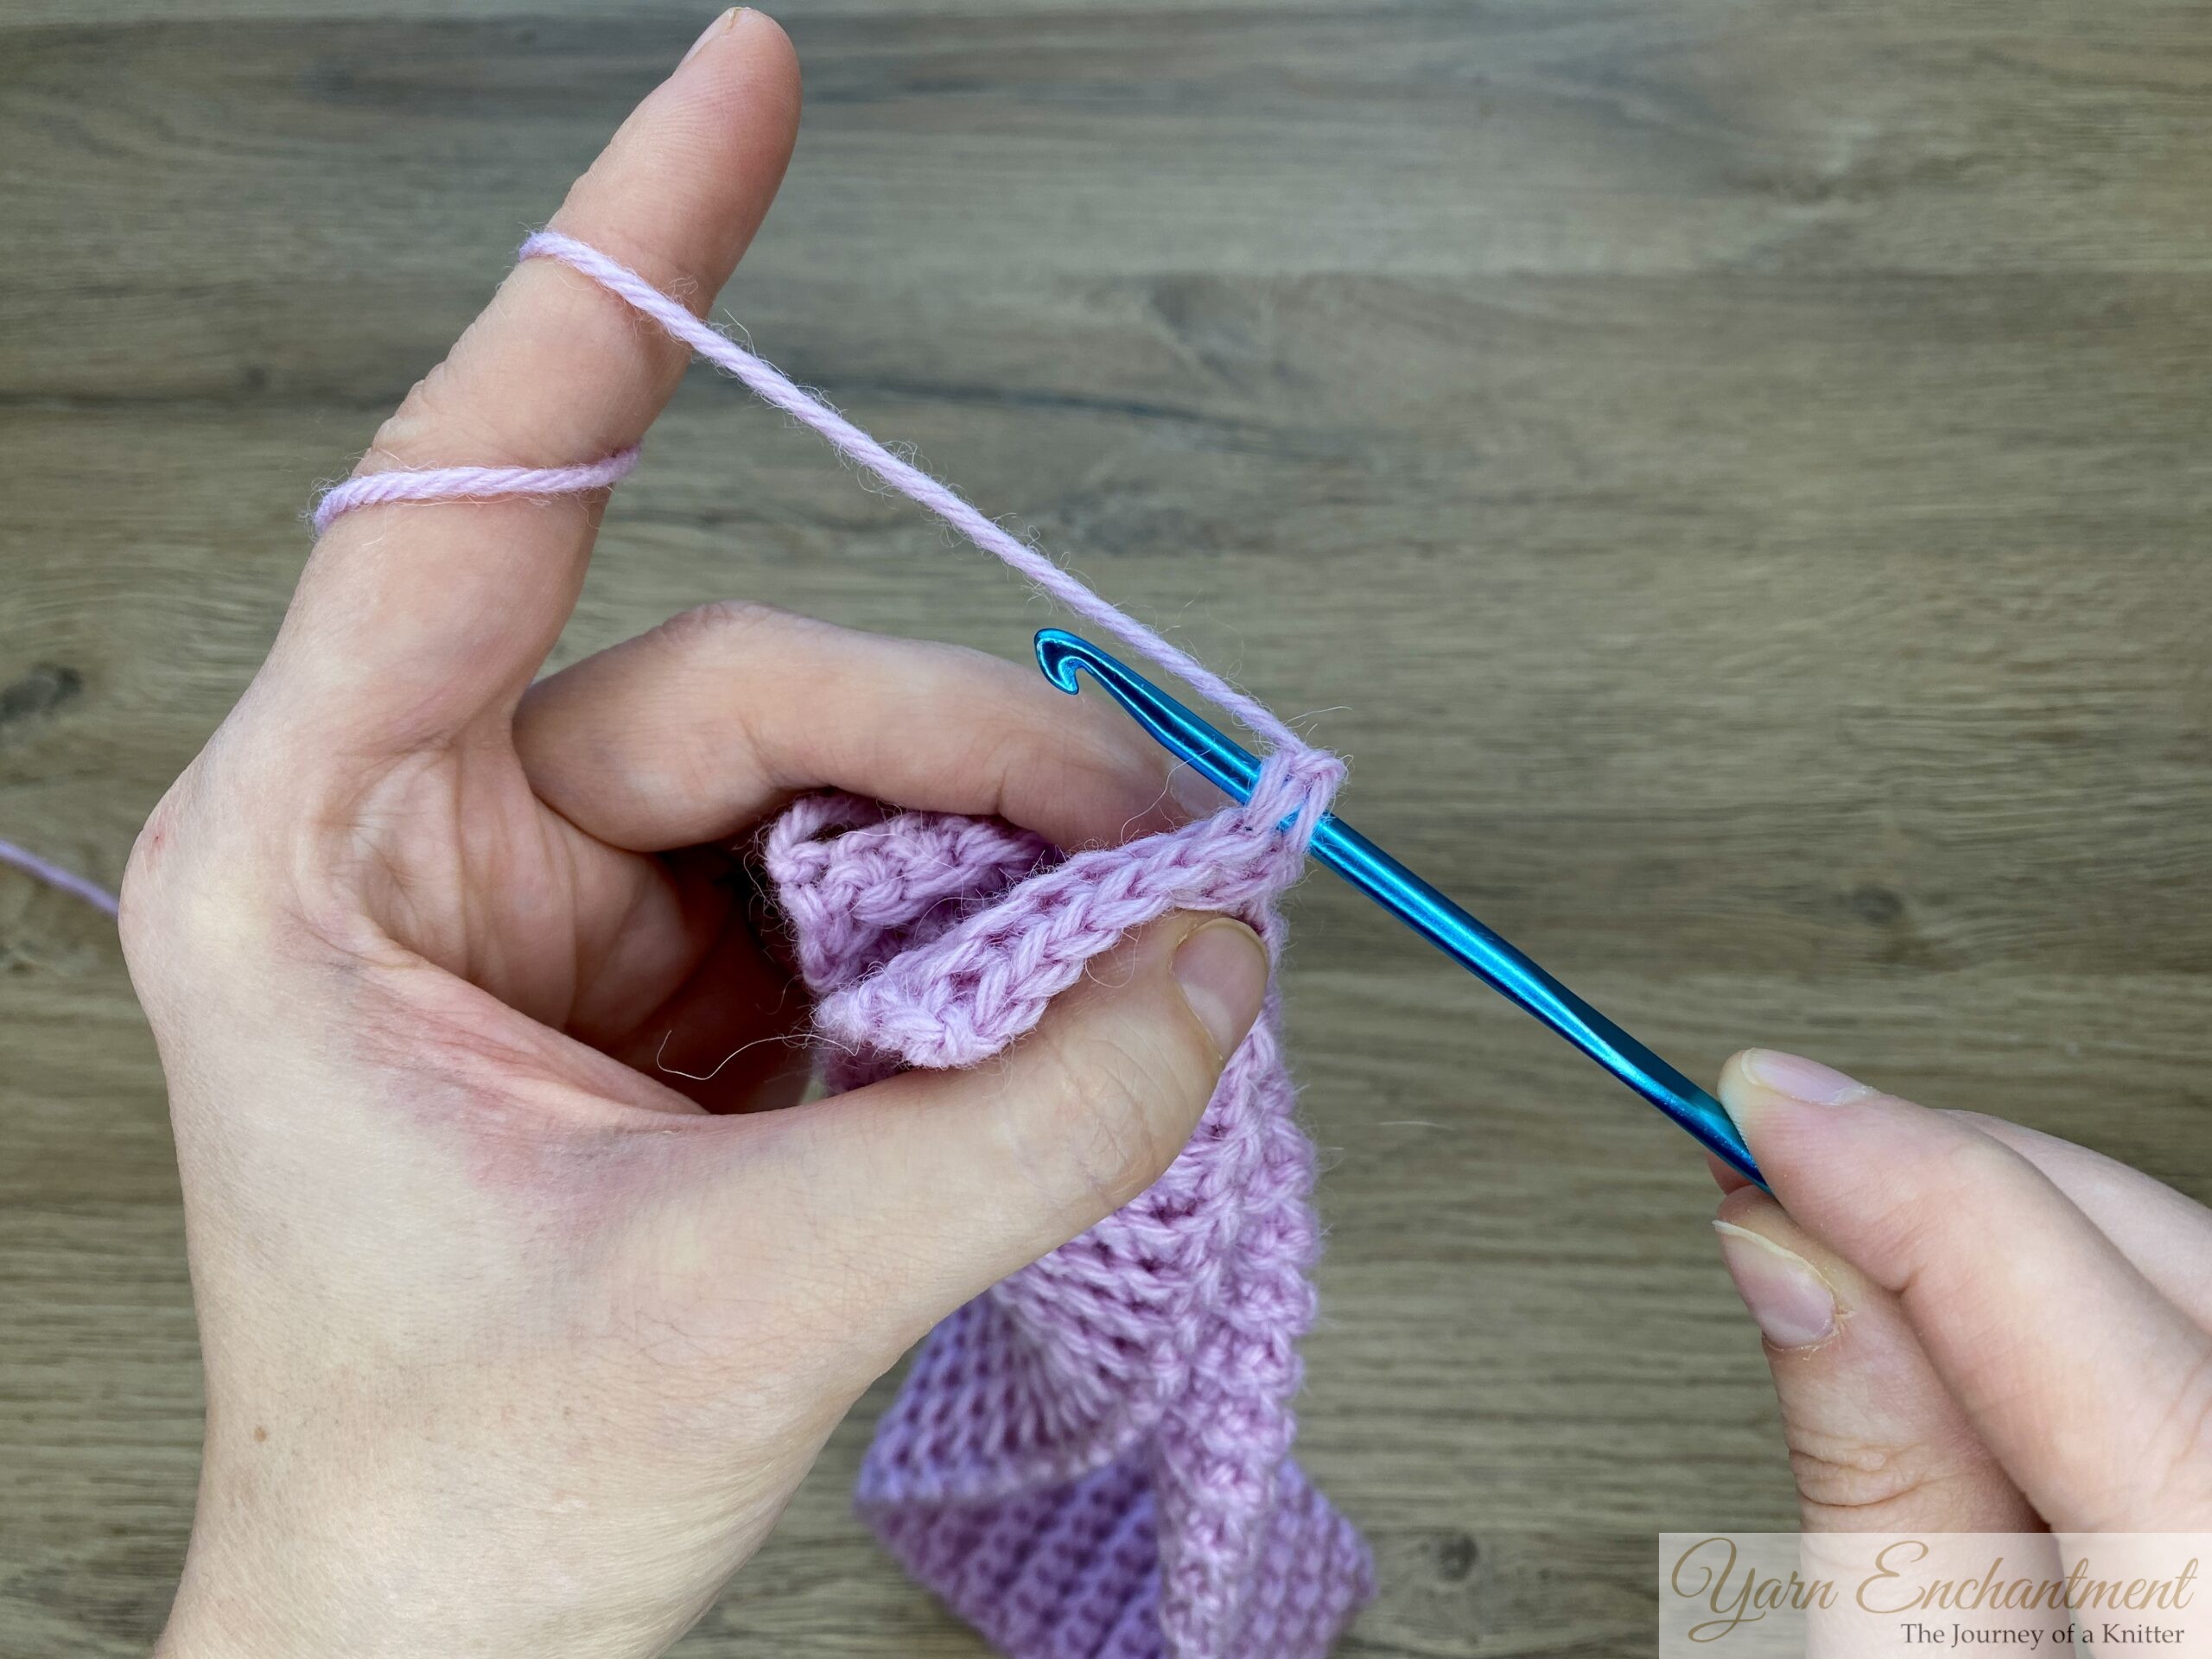 |  | Bring your band together and make sure it is not twisted | Insert your hook through the first stitch, this time through both loops, | and the corresponding single crochet on the other side. |


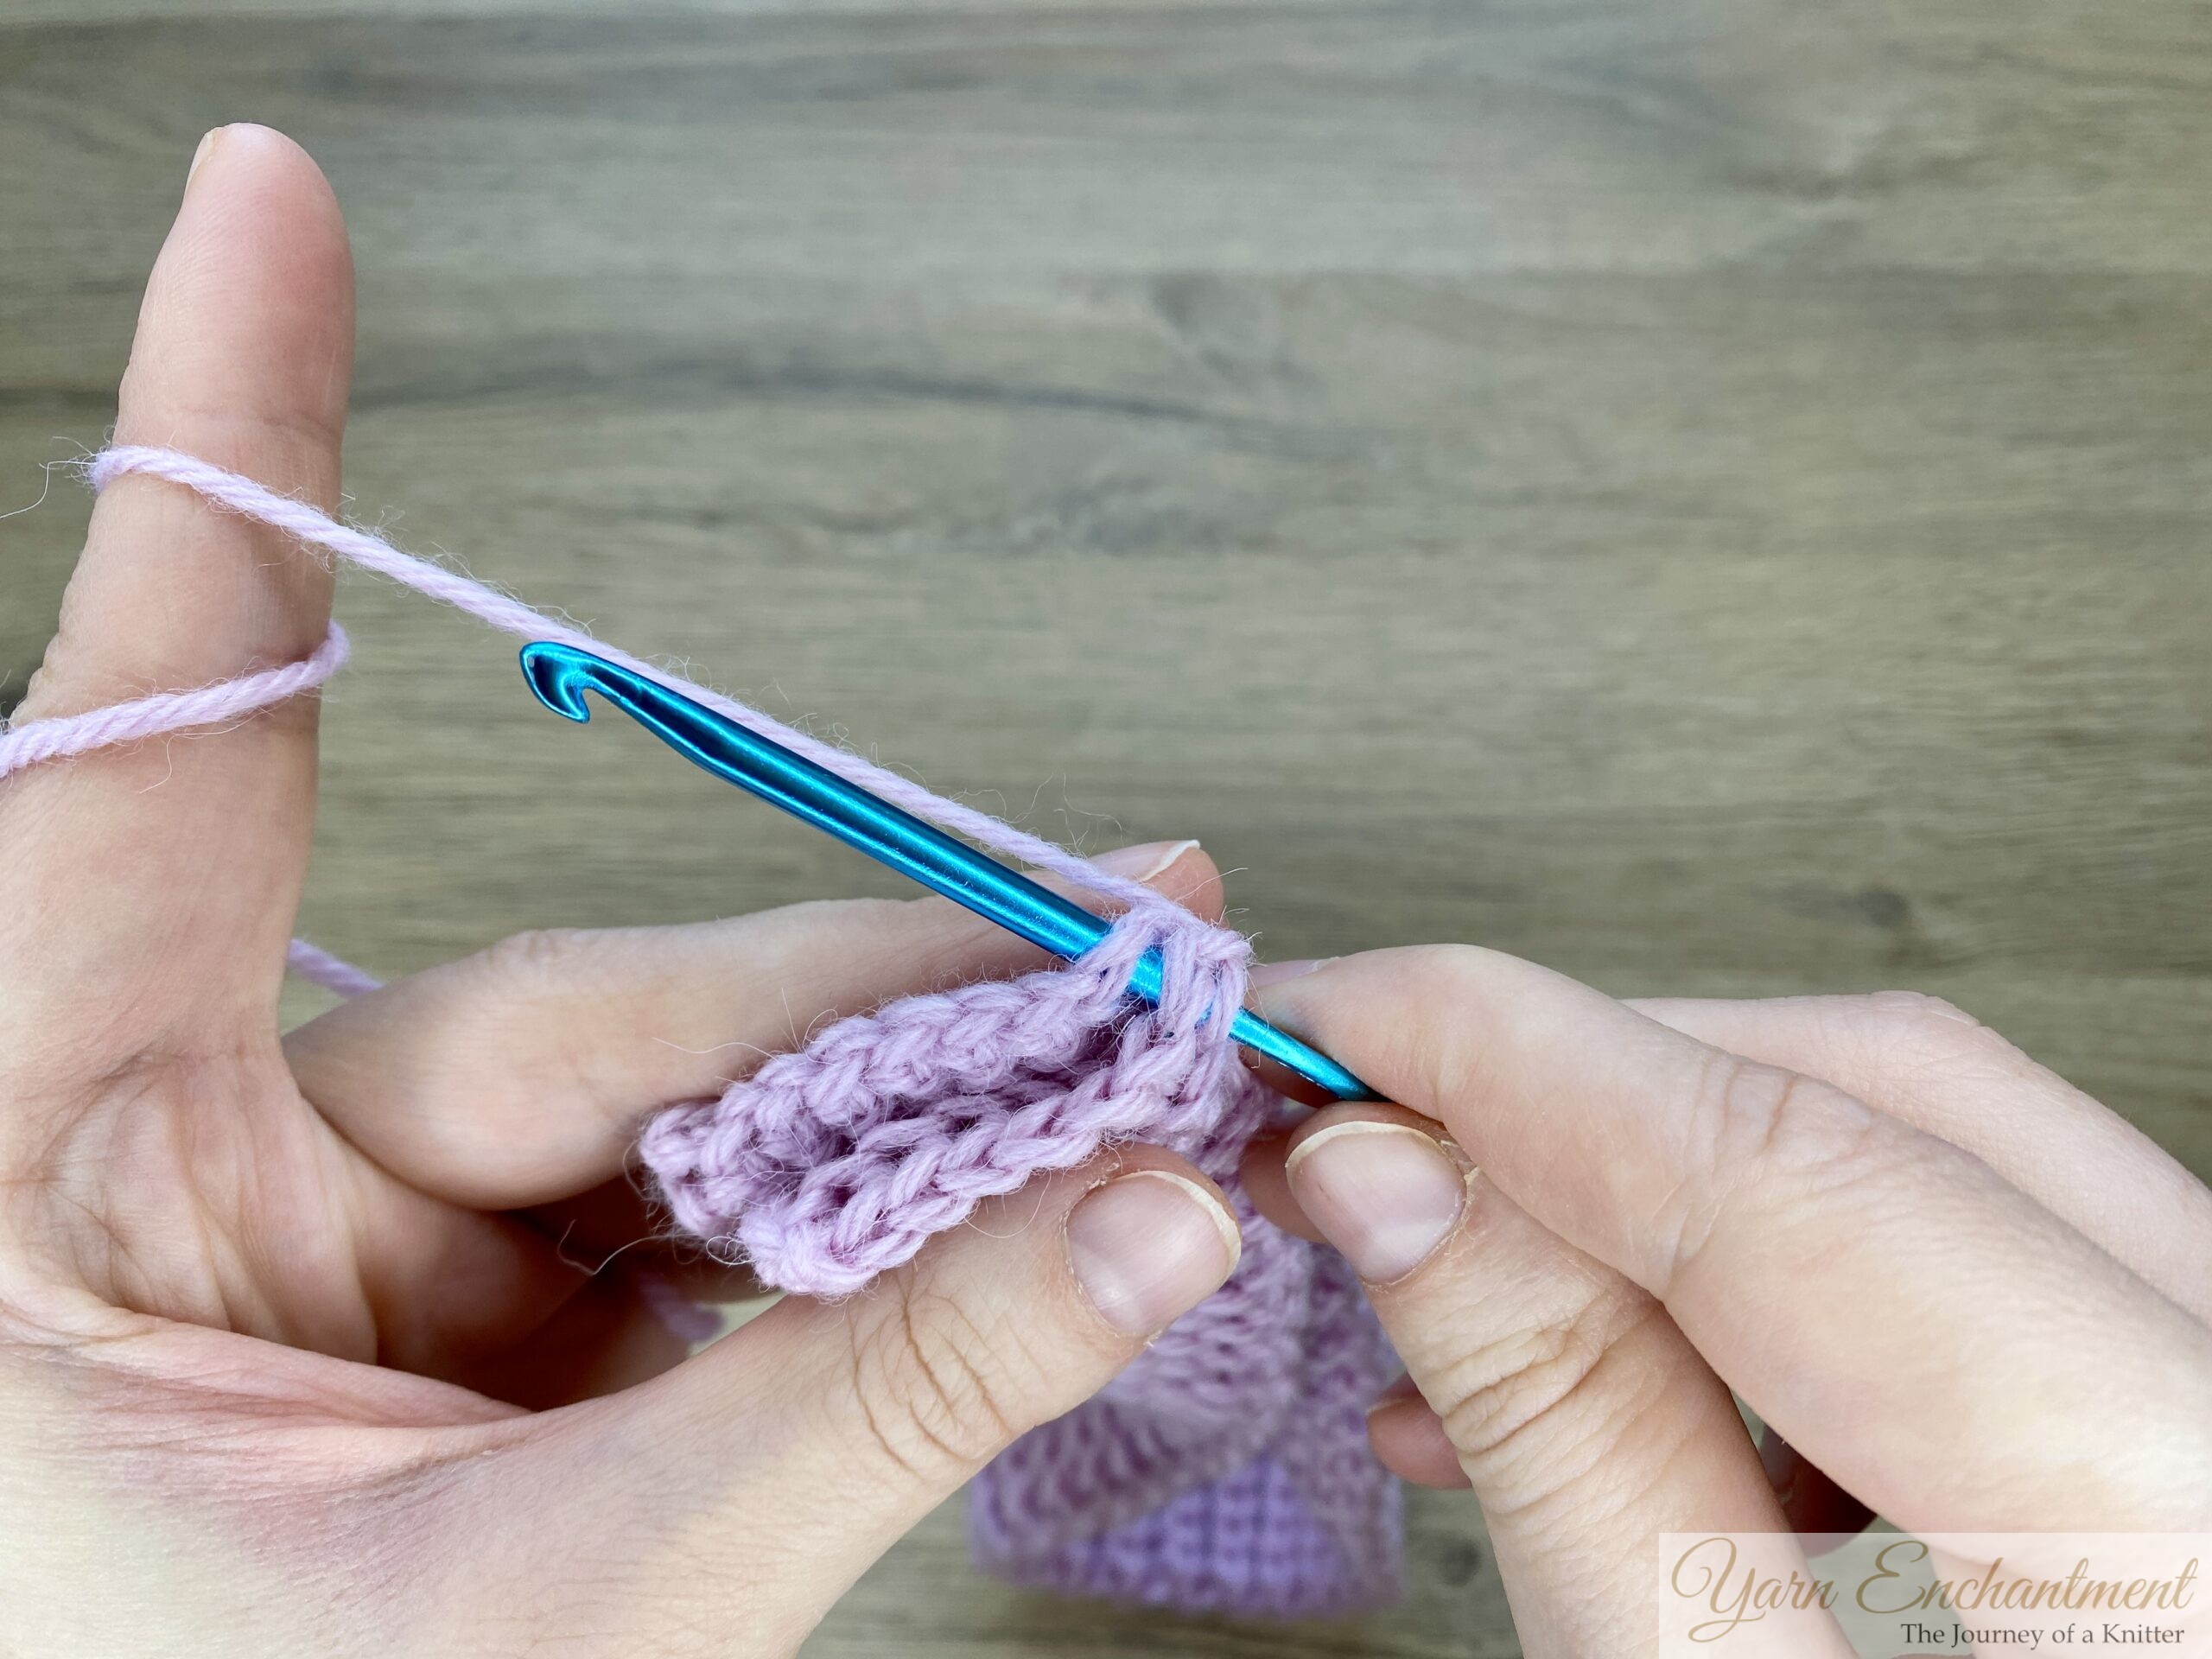
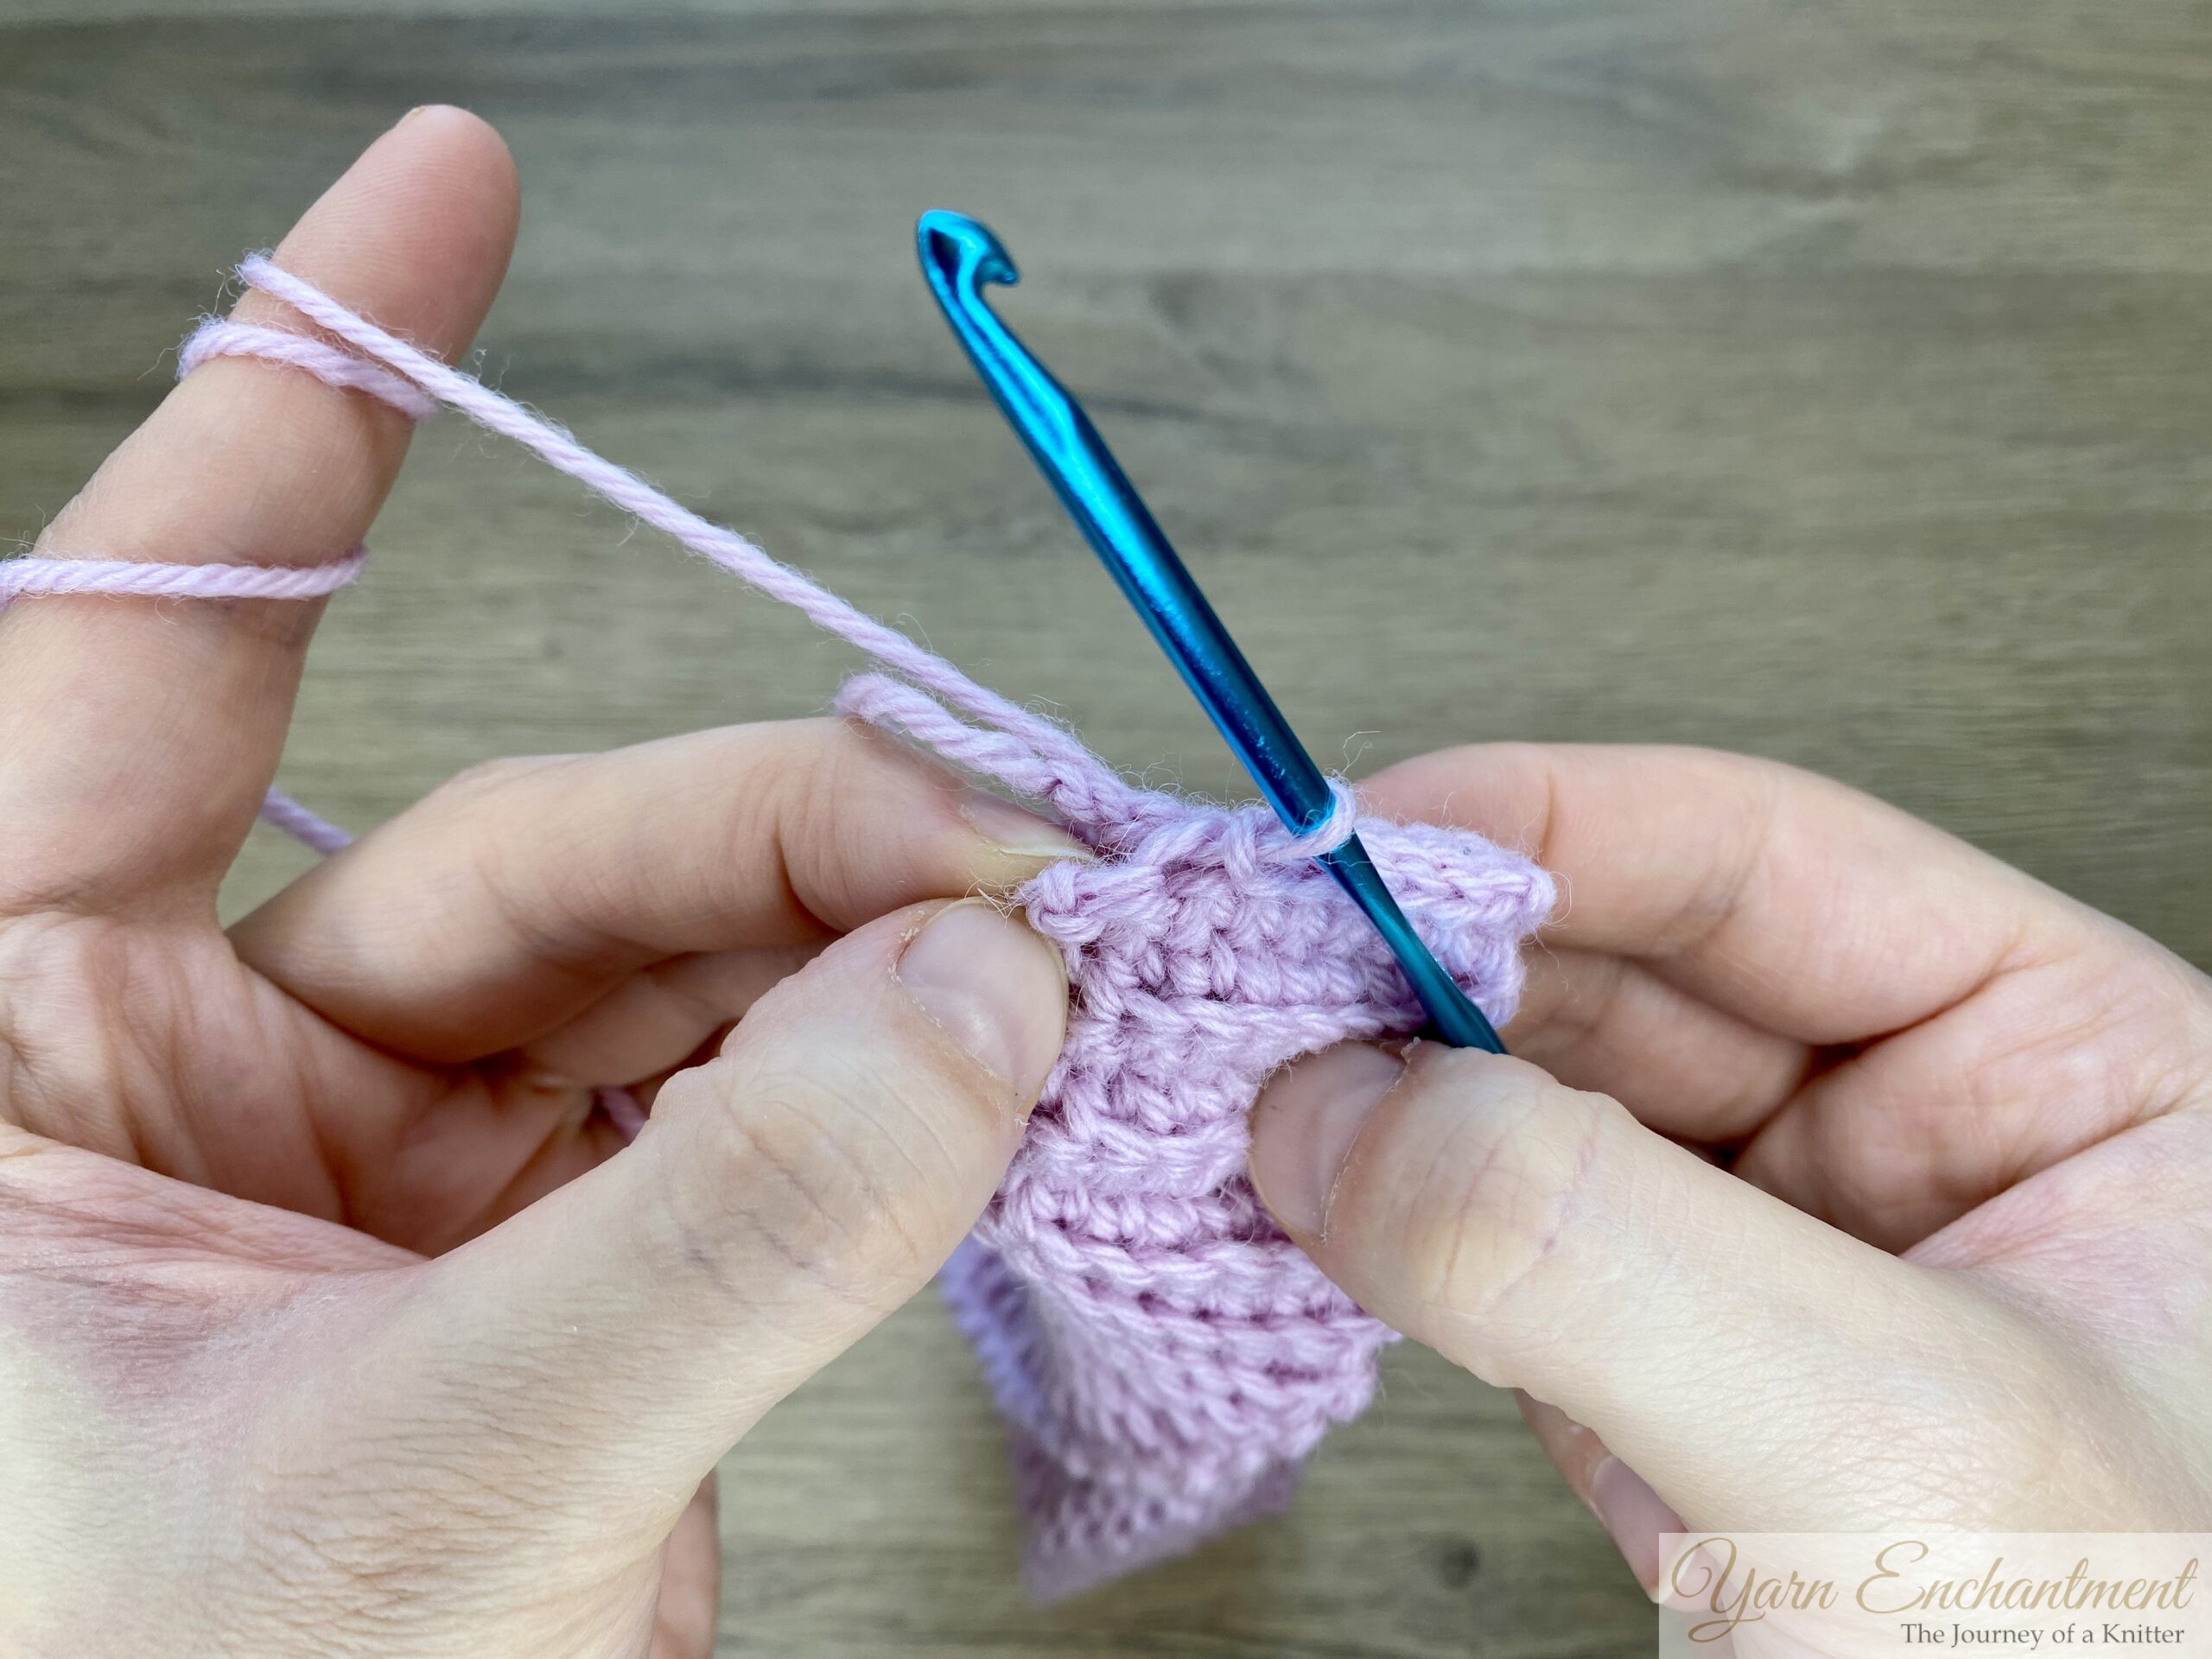
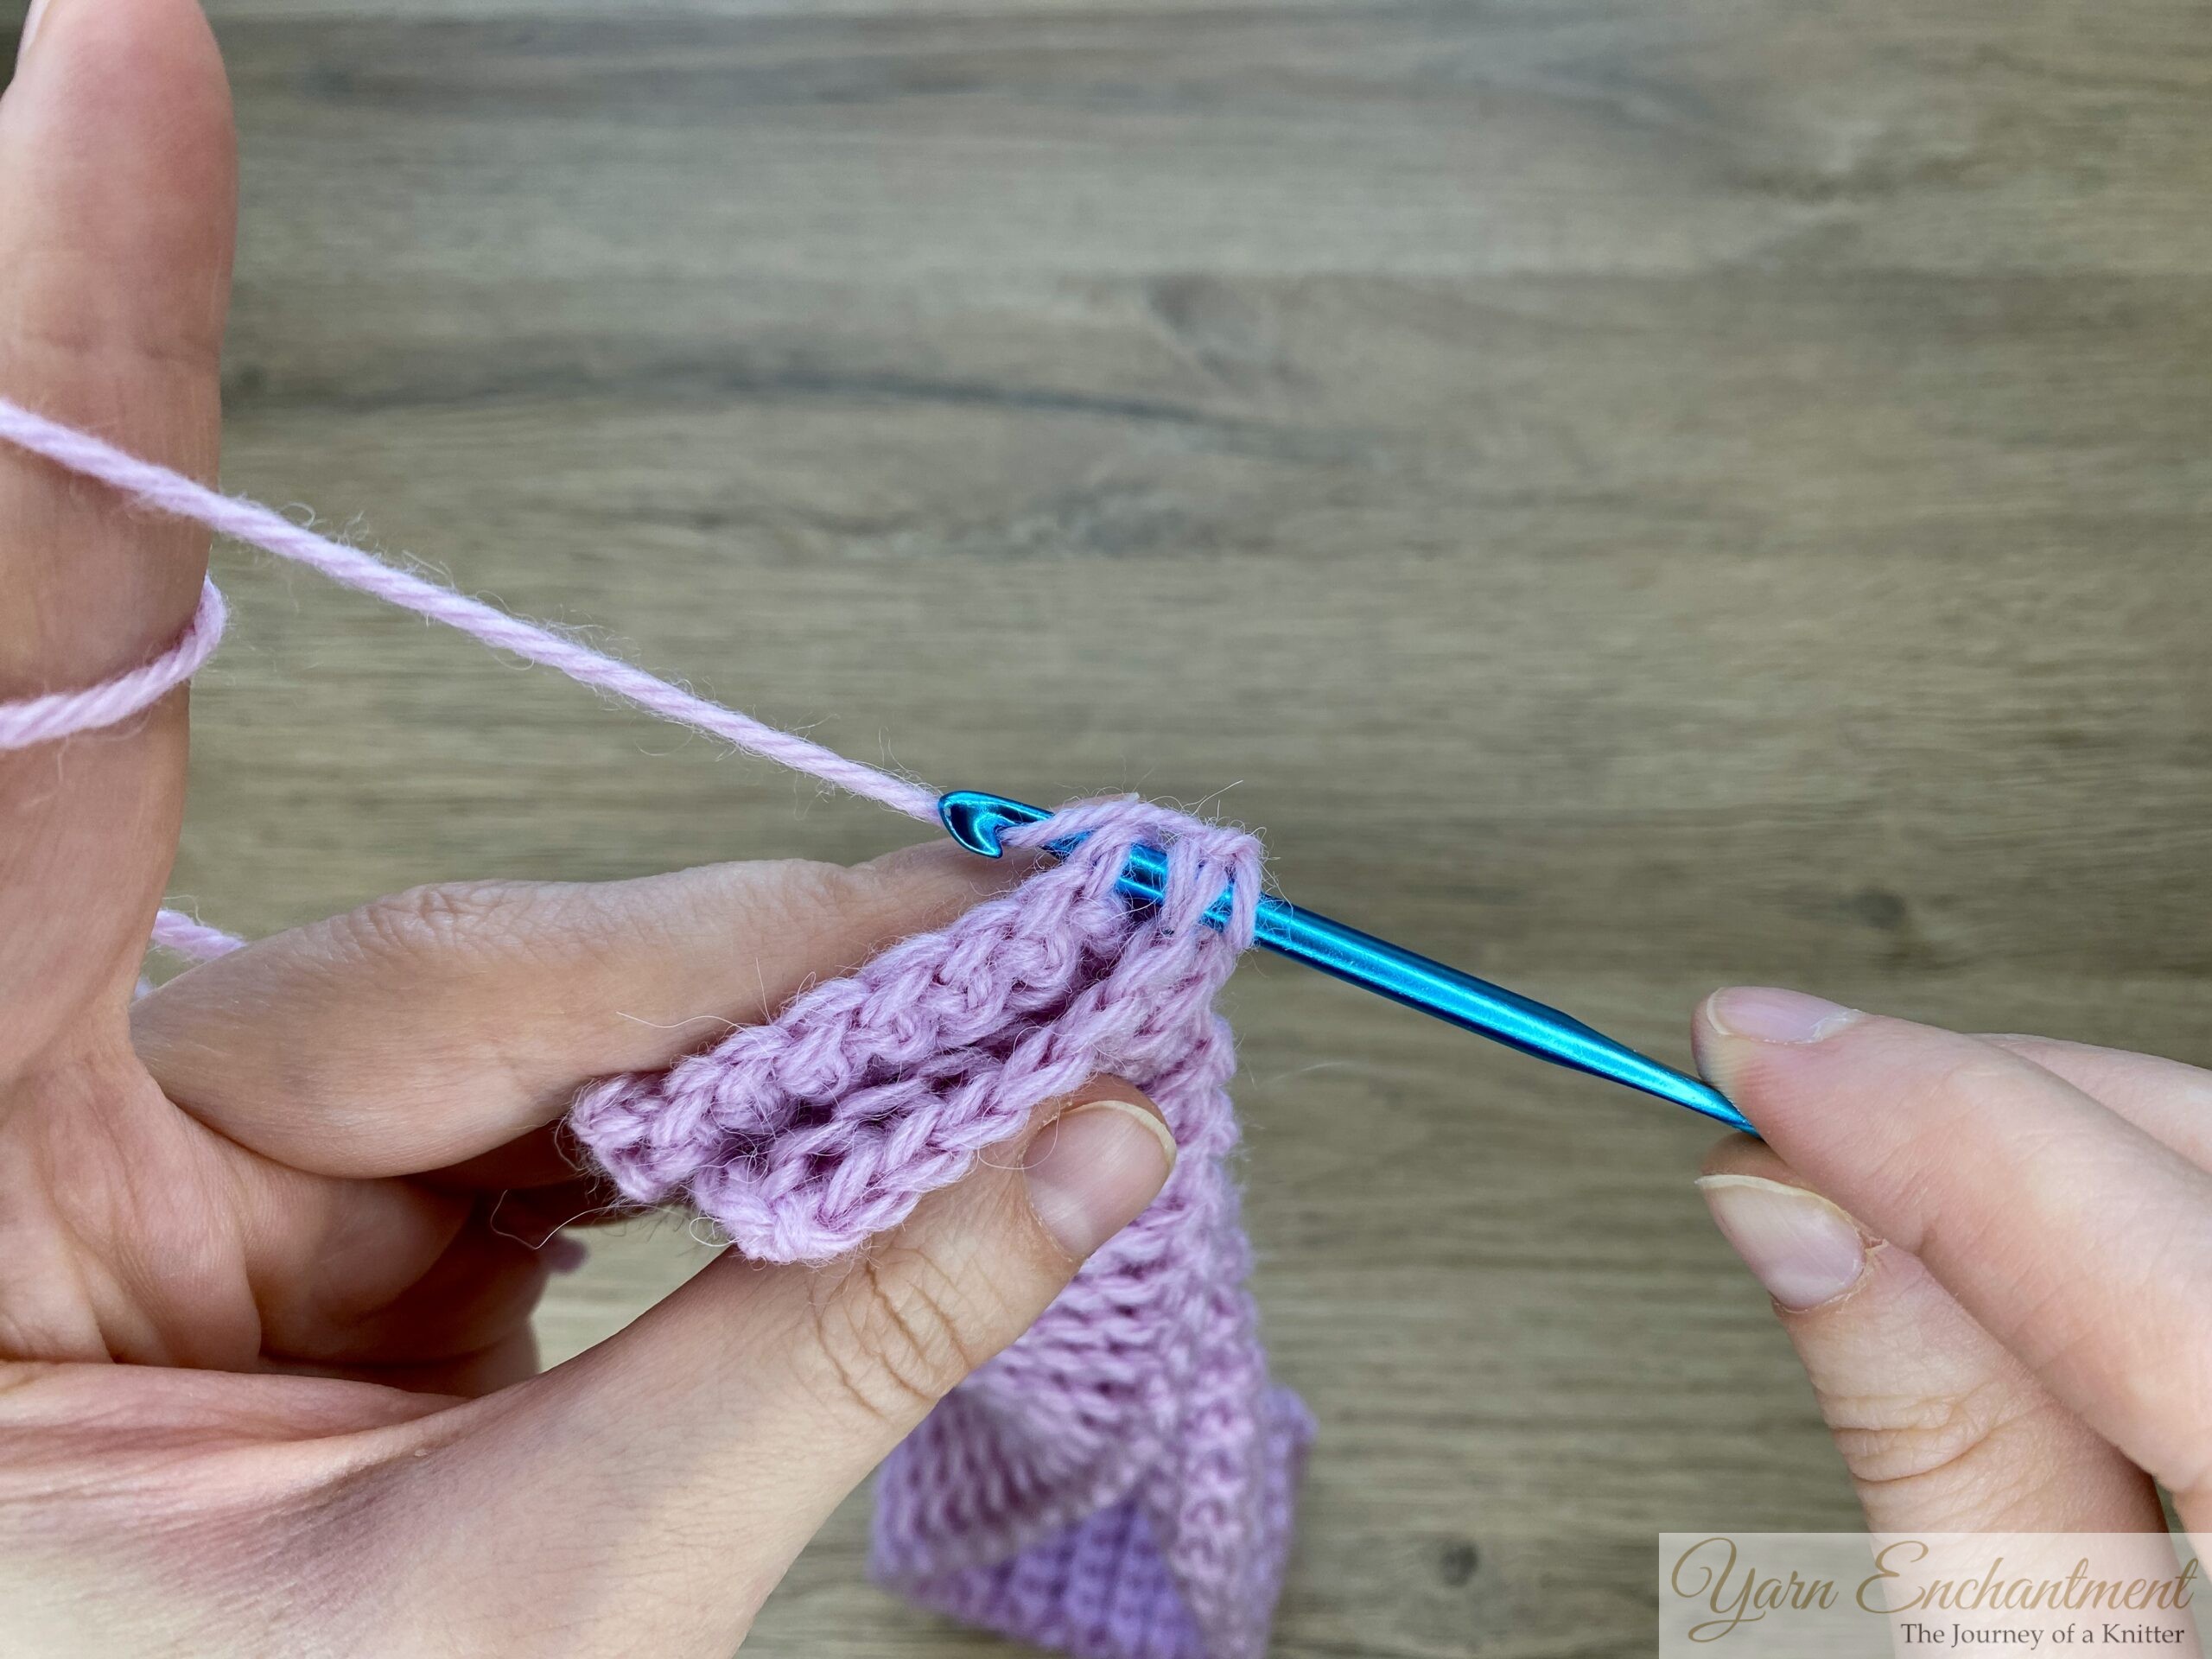 |  | 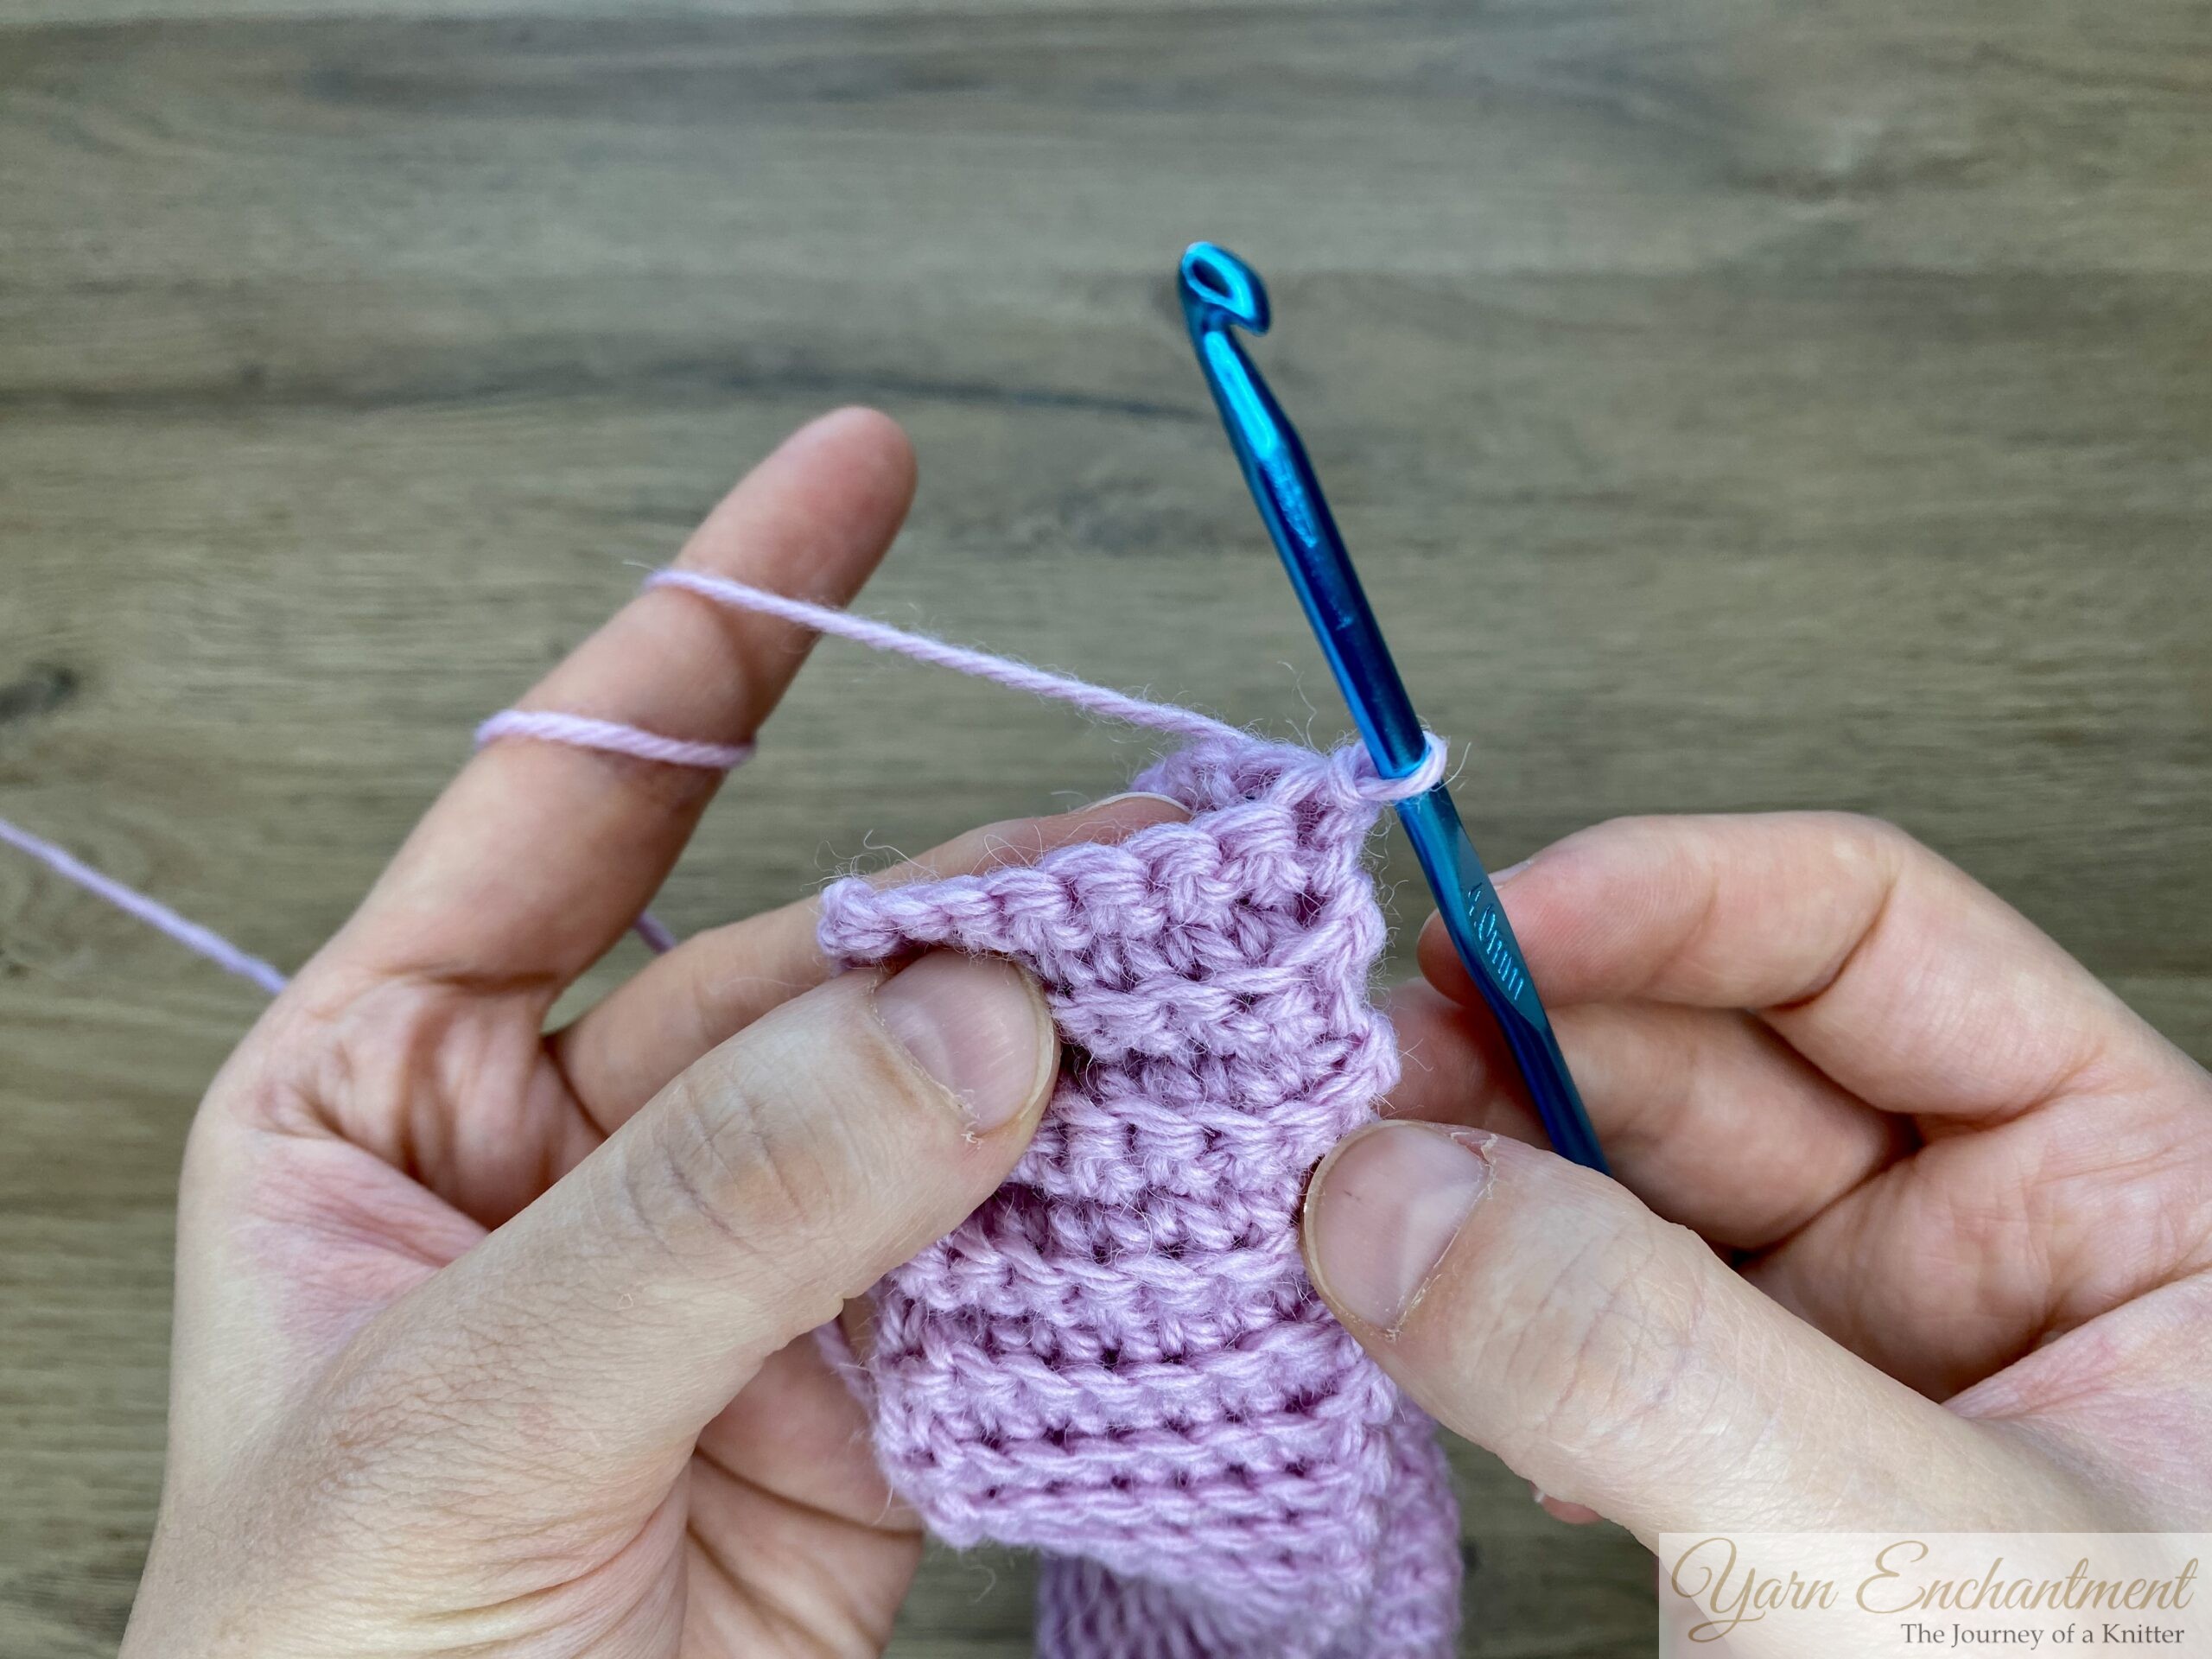 | Yarn over and | pull through both stitches and the loop on your hook, | to join the band together. |


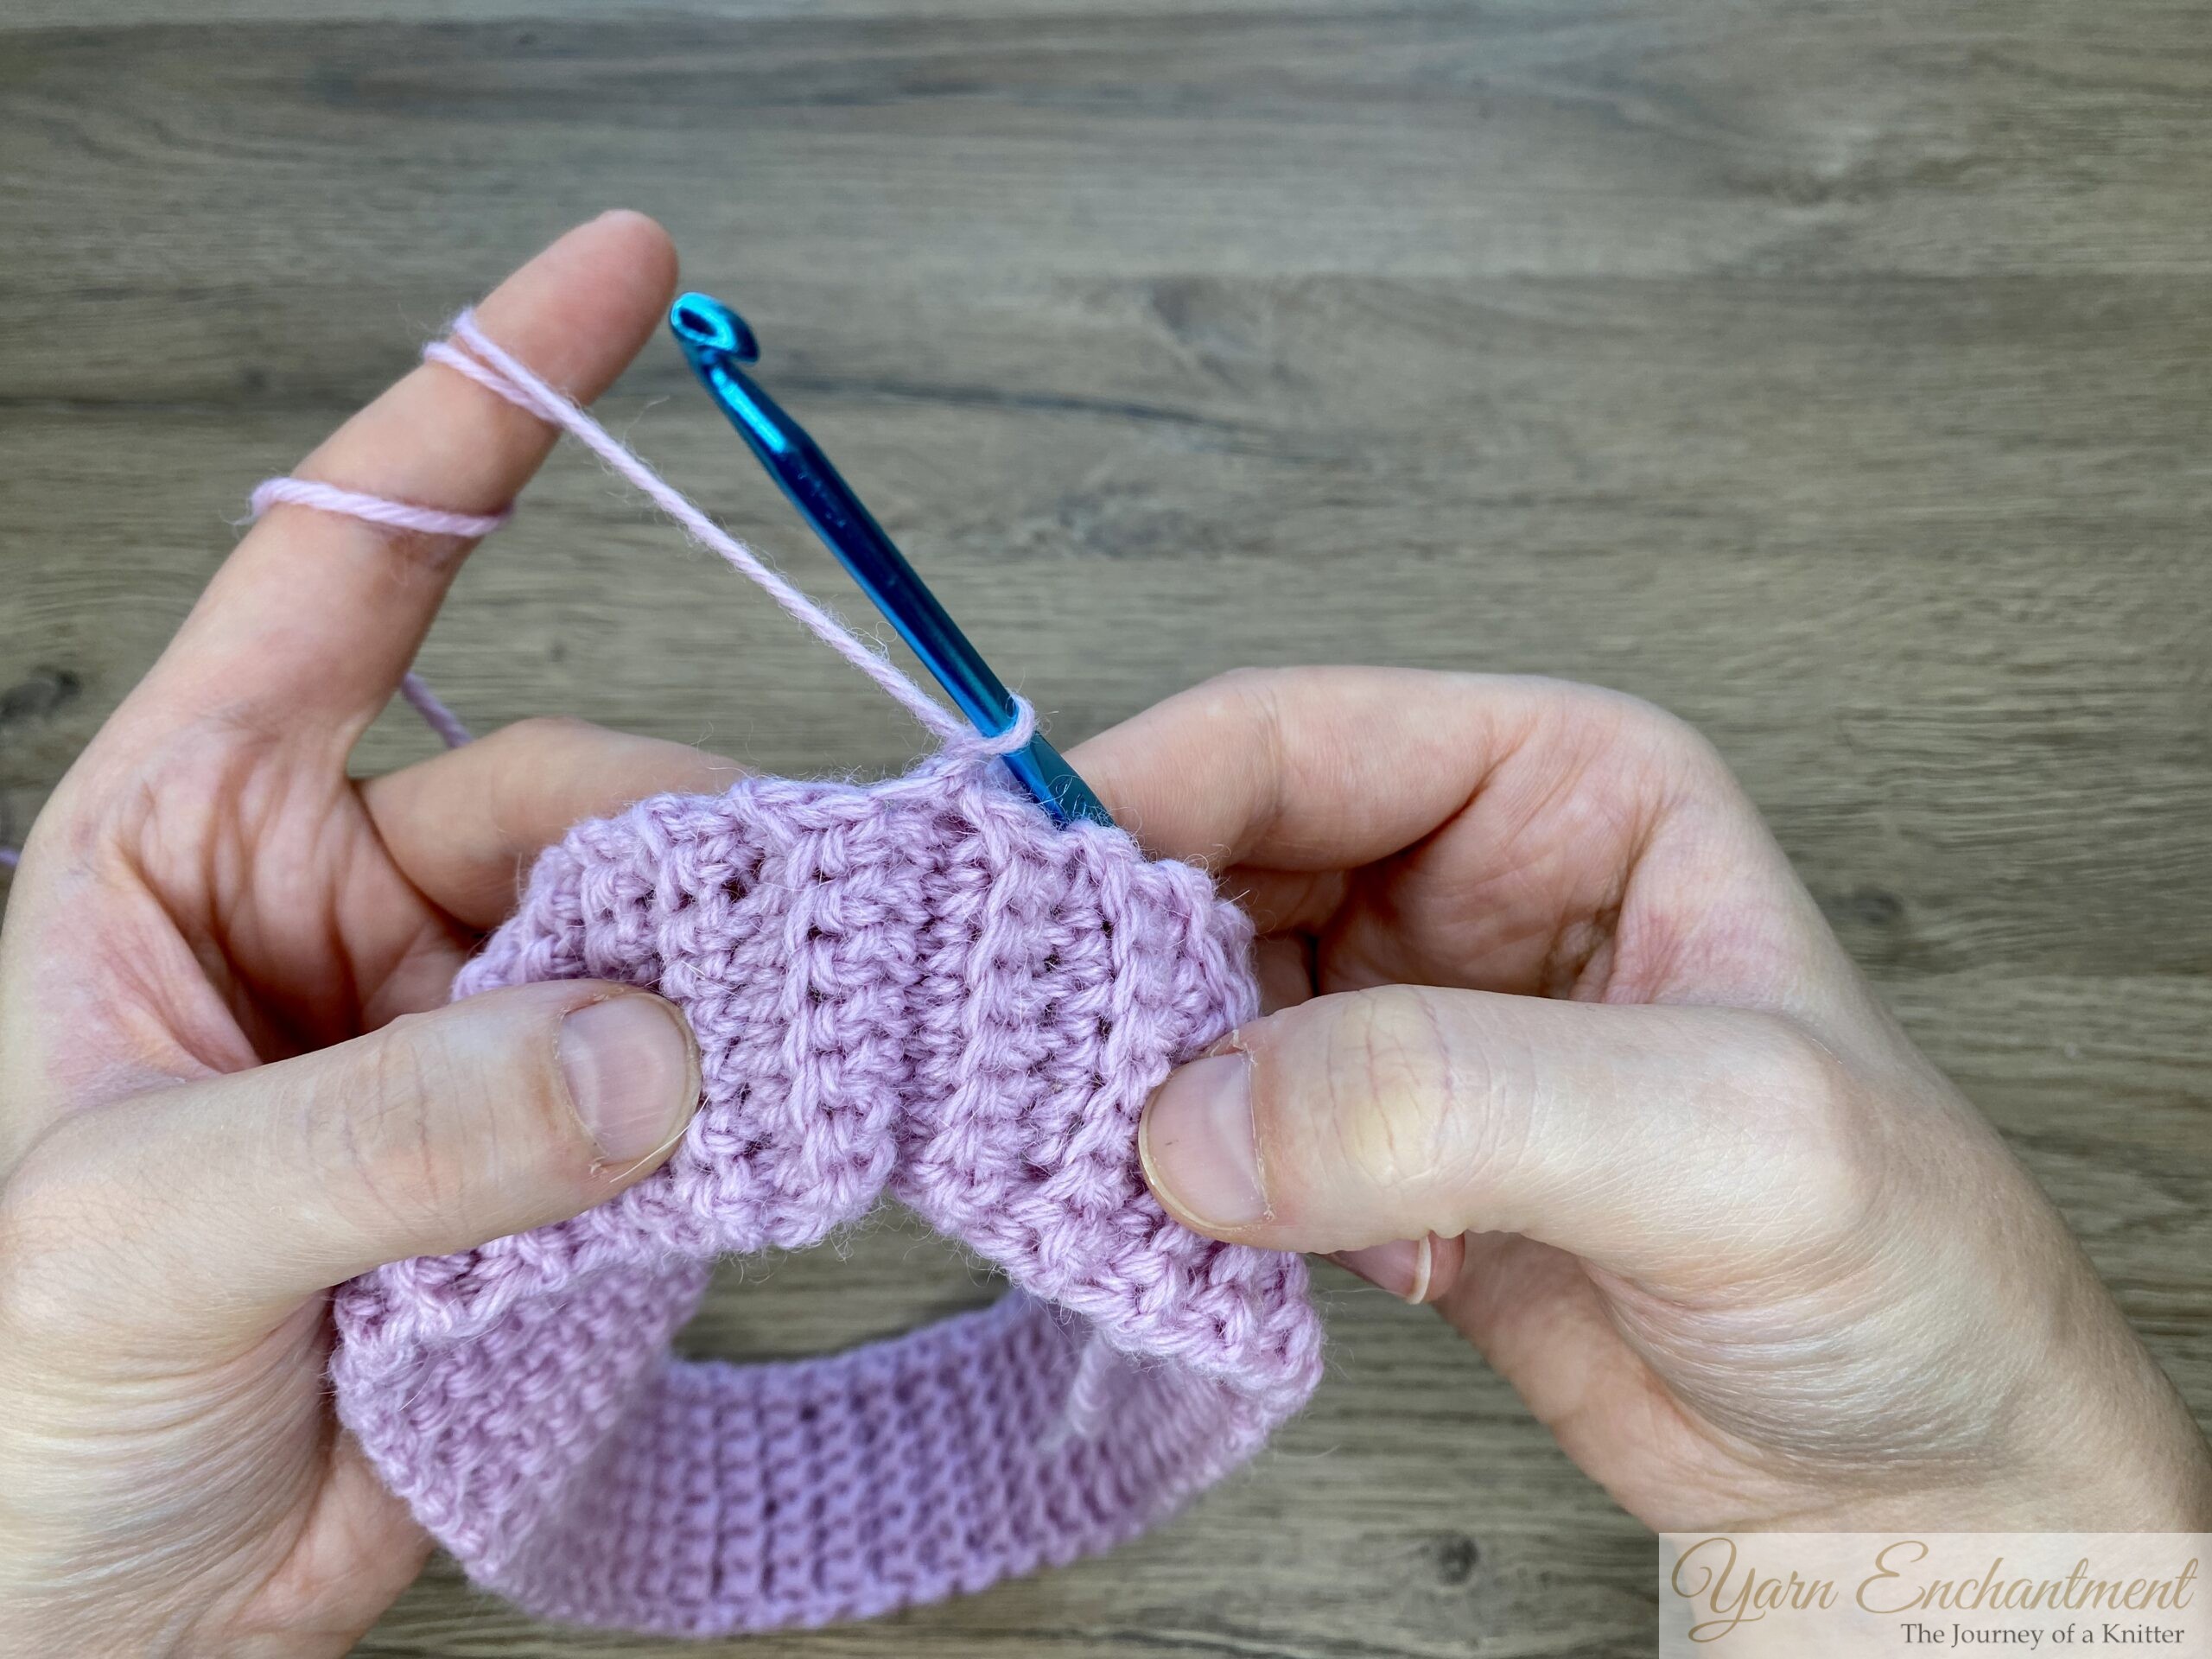
Repeat this step with all the stitches until you have joined your brim together, and don’t forget the last two stitches, as they can sometimes look a little funny.
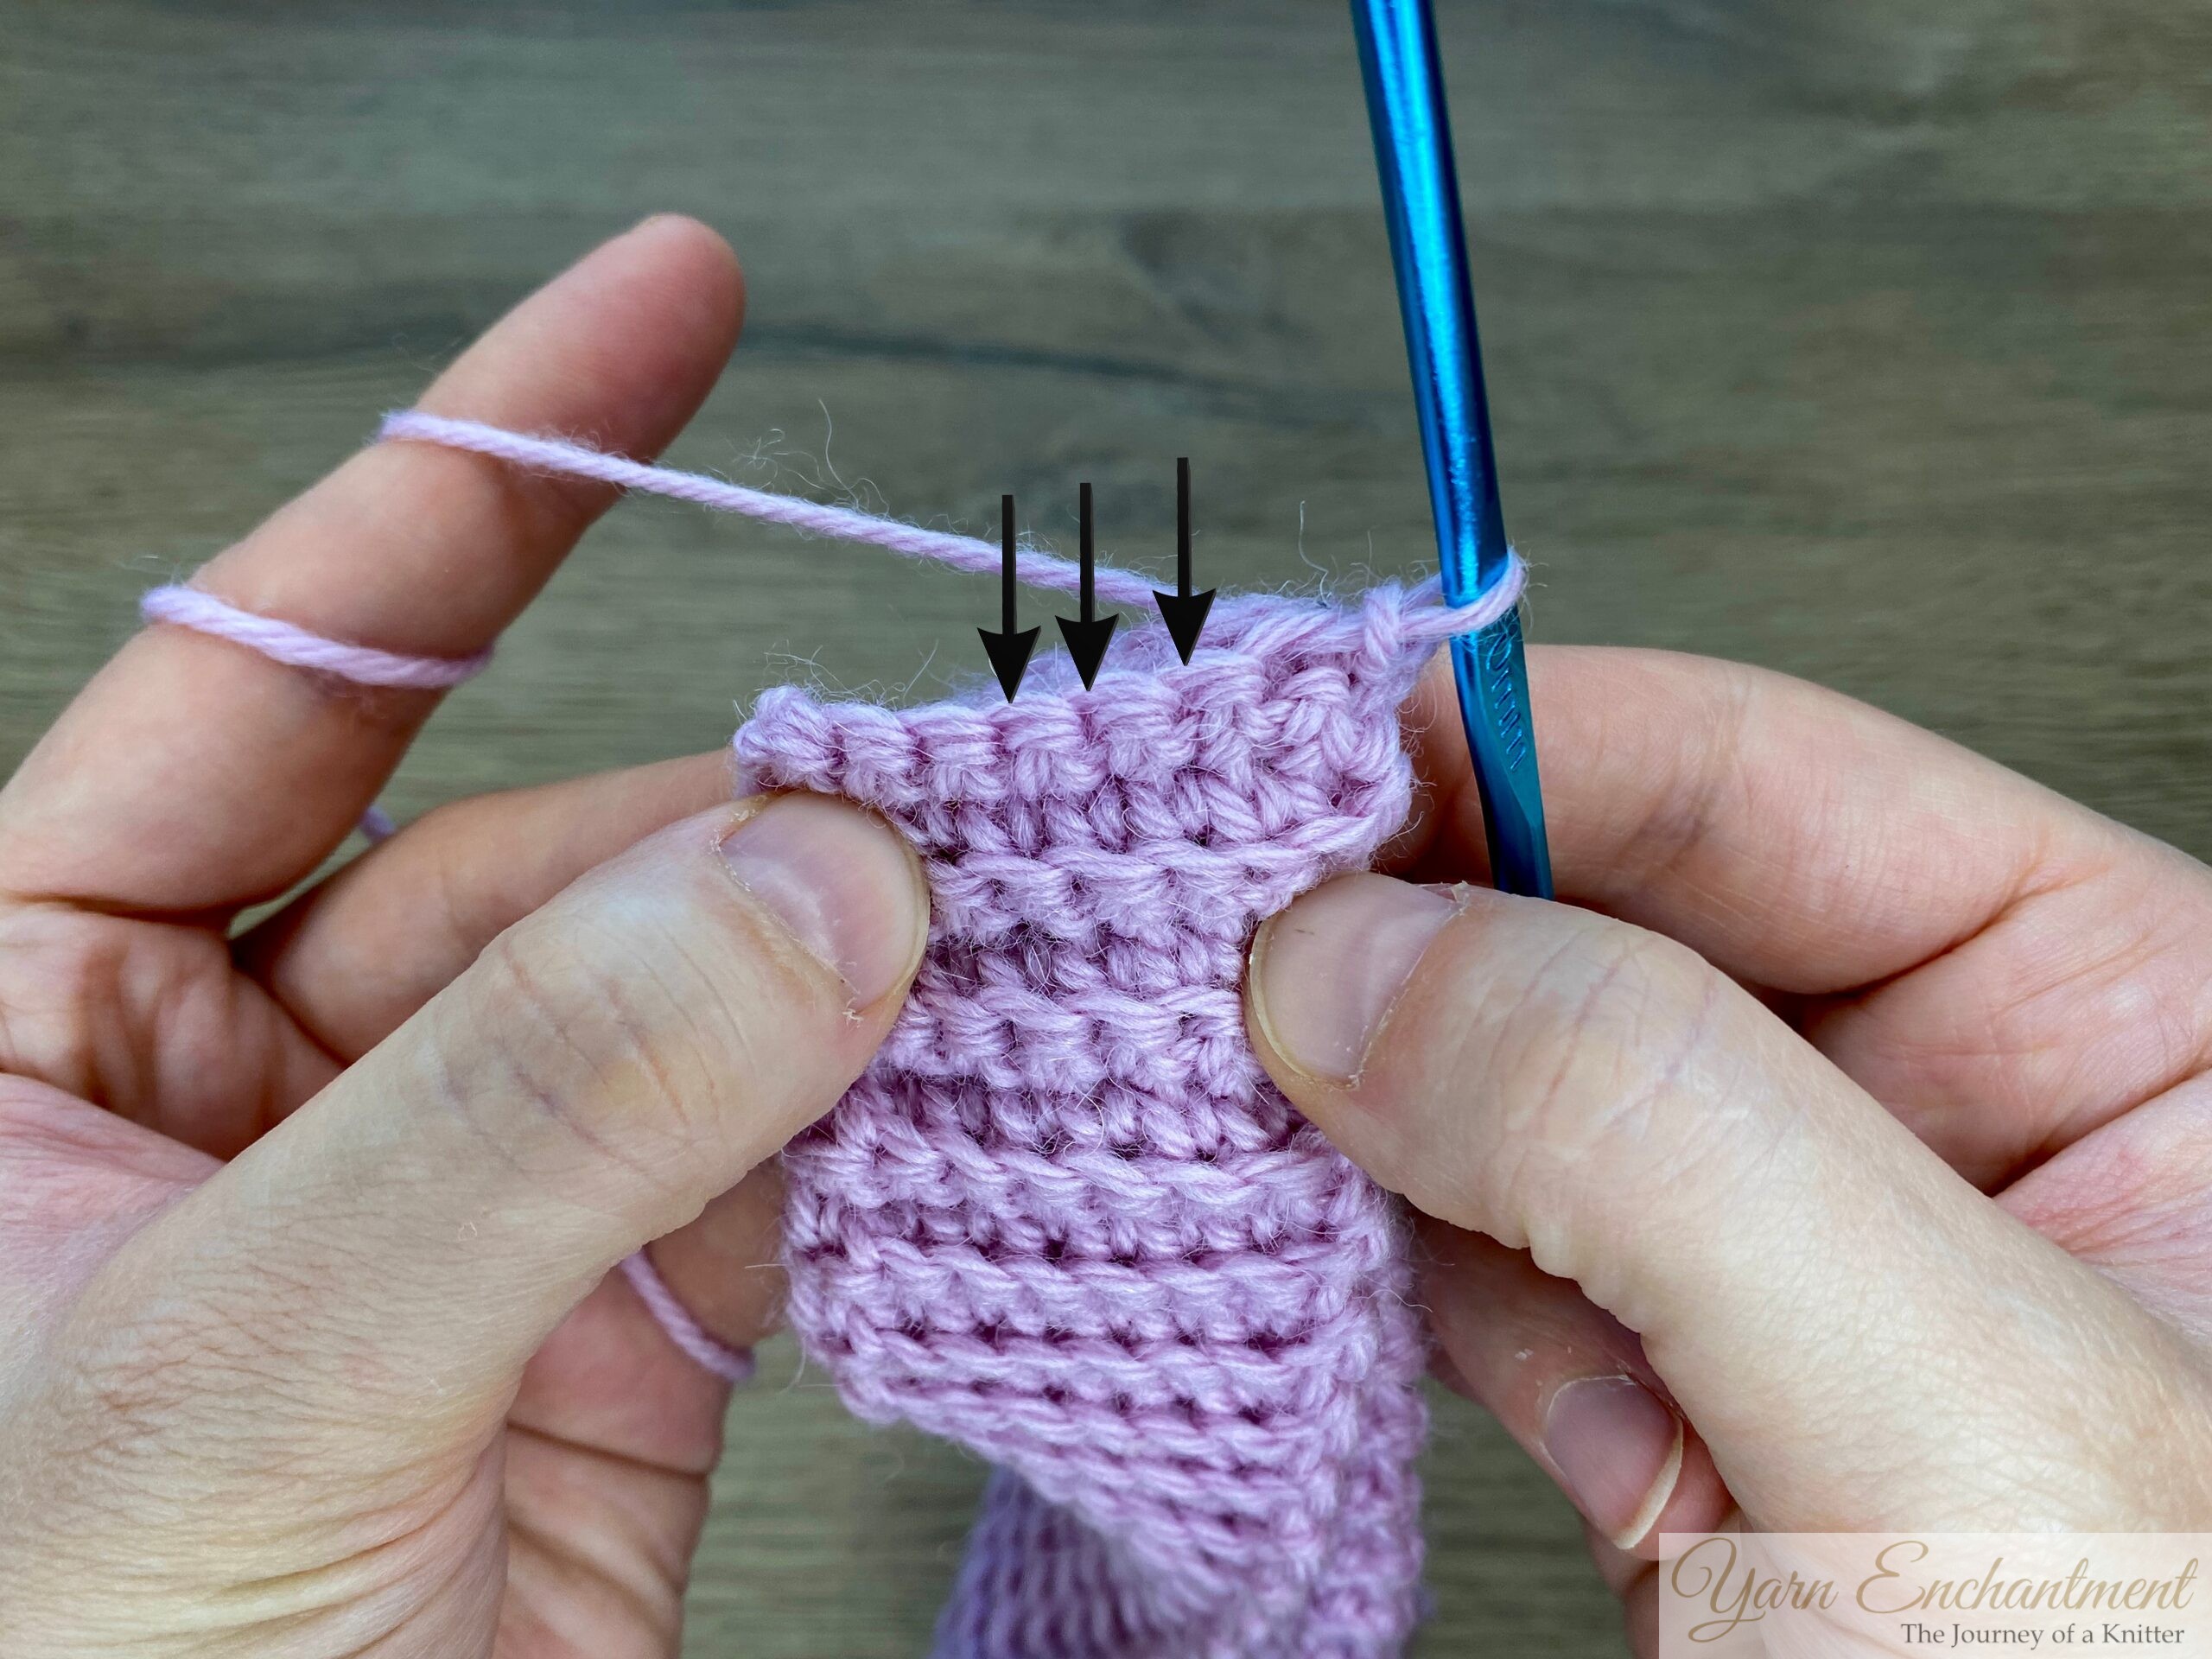 |  |  |
| The last stitch on the front side | and the last stitch on the back side can sometimes look a little different, so make sure you don’t miss them. |


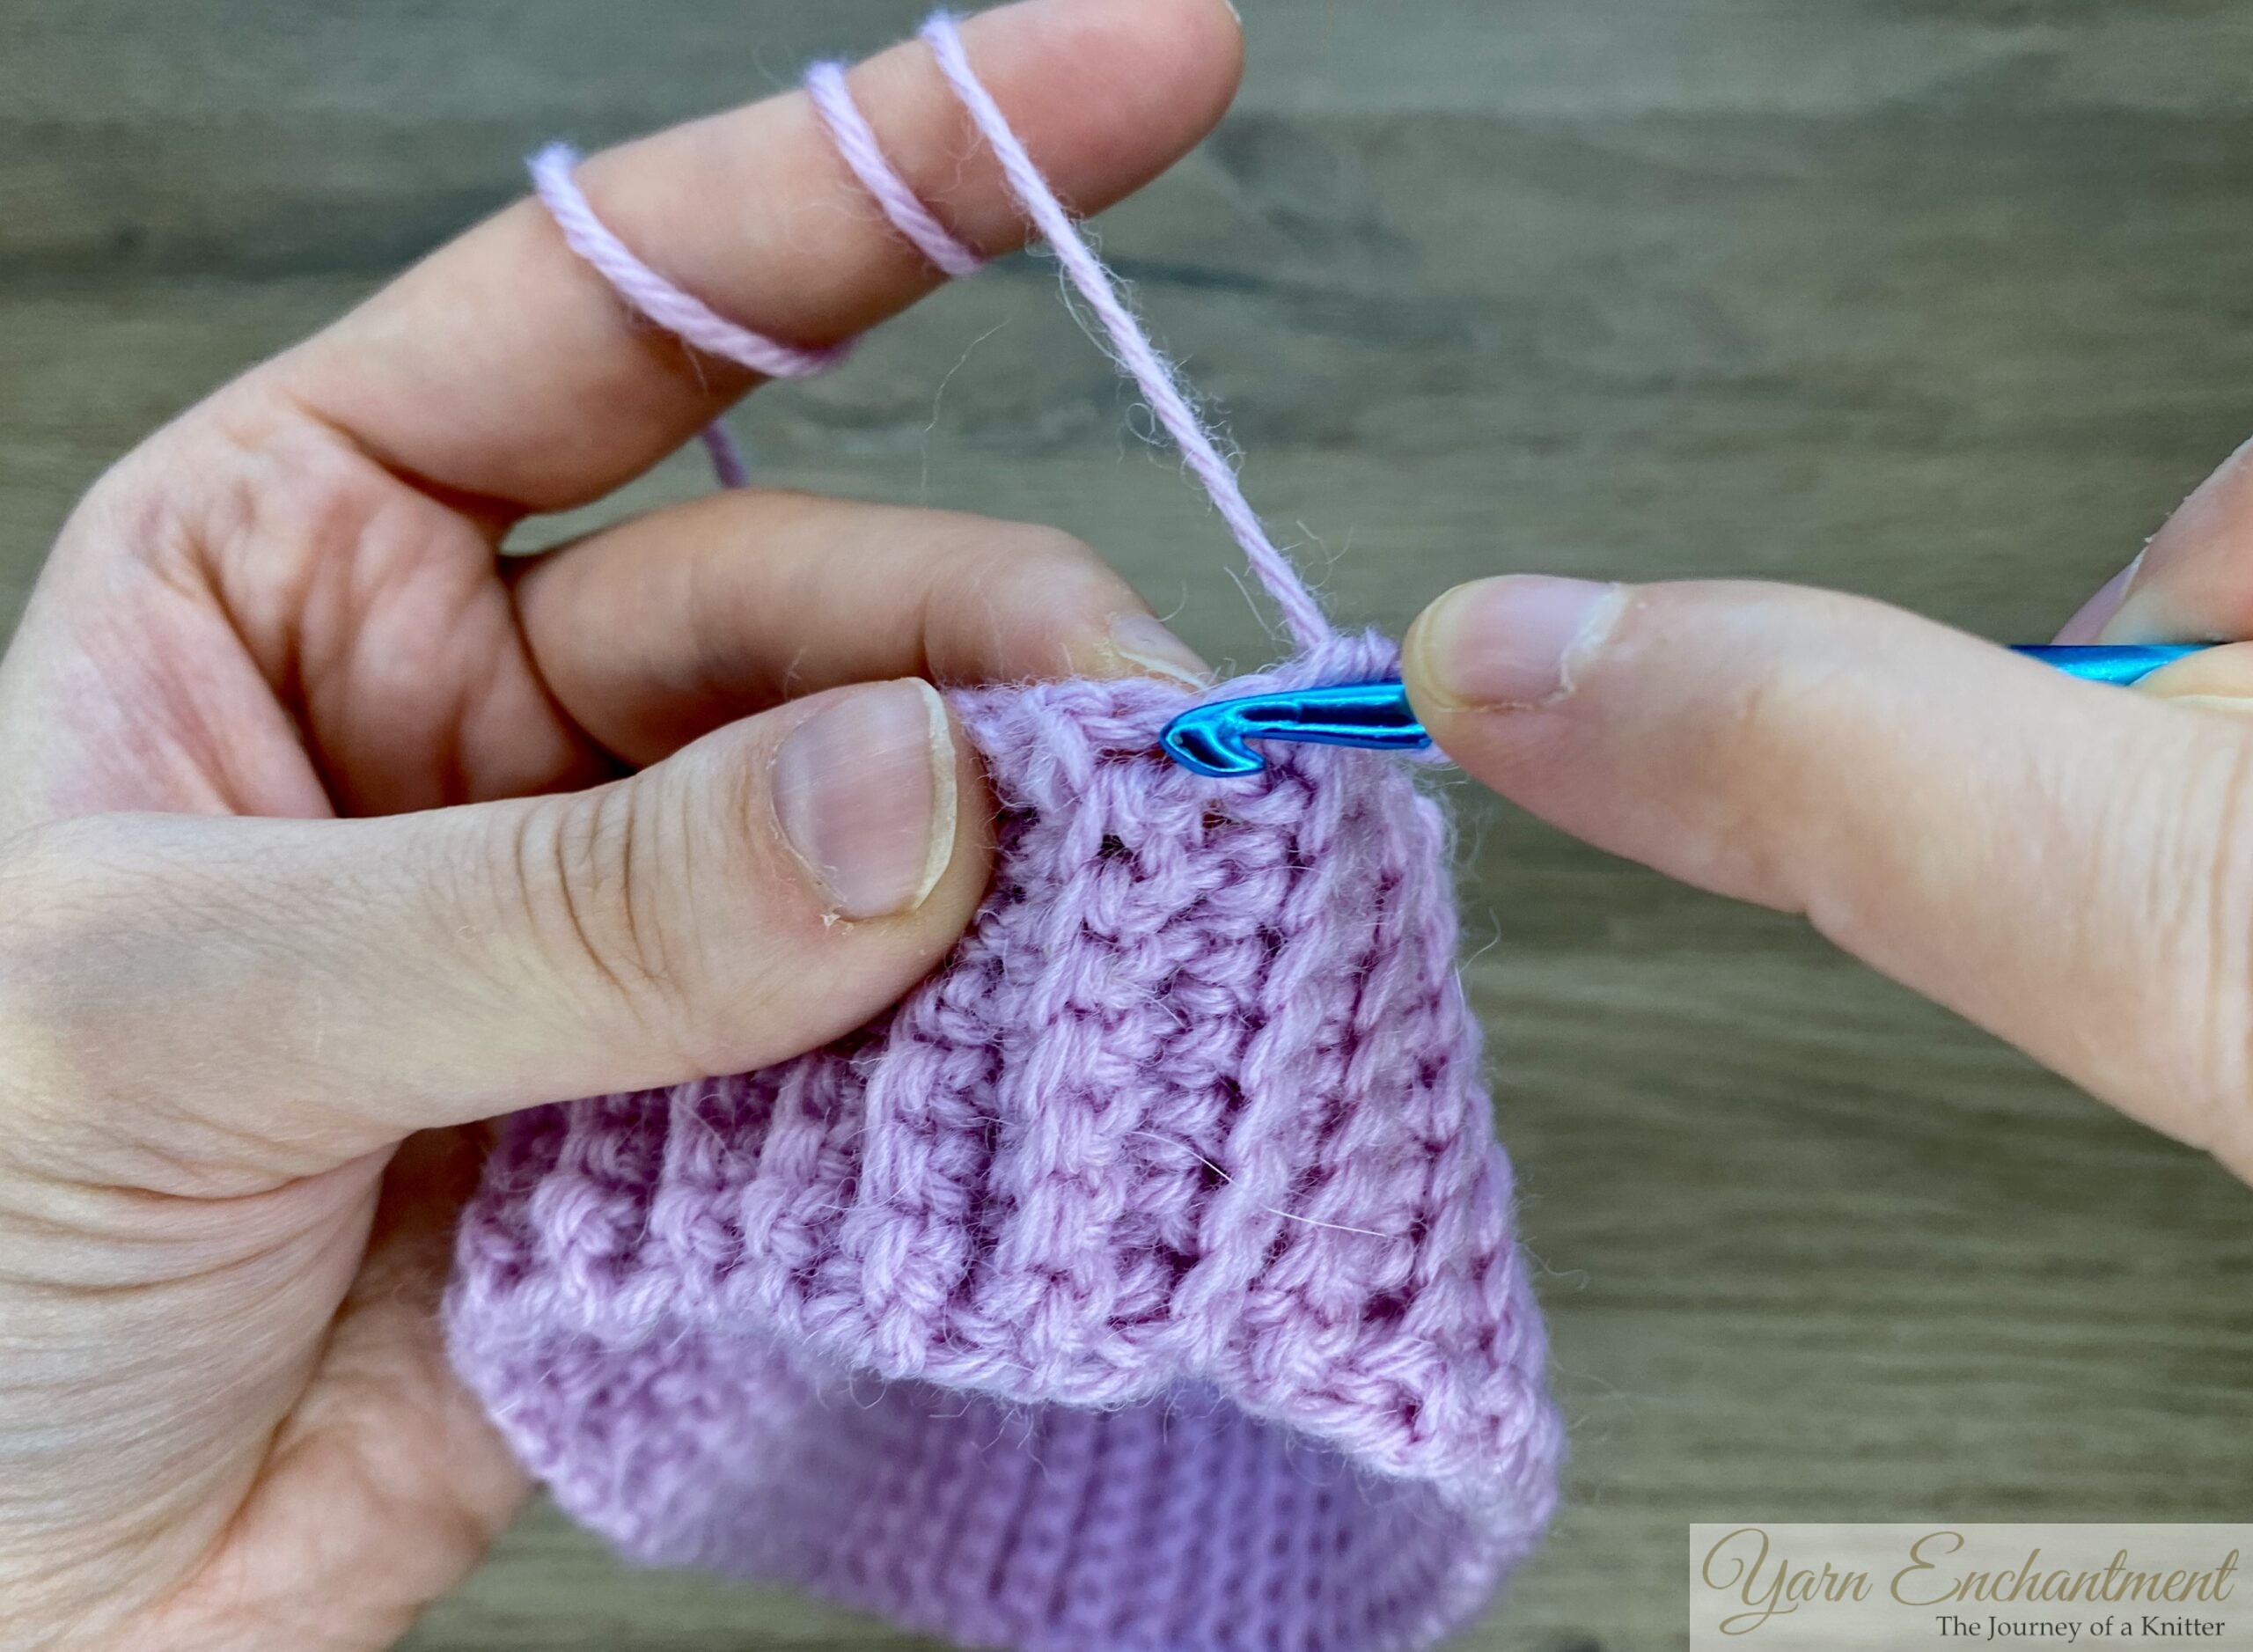
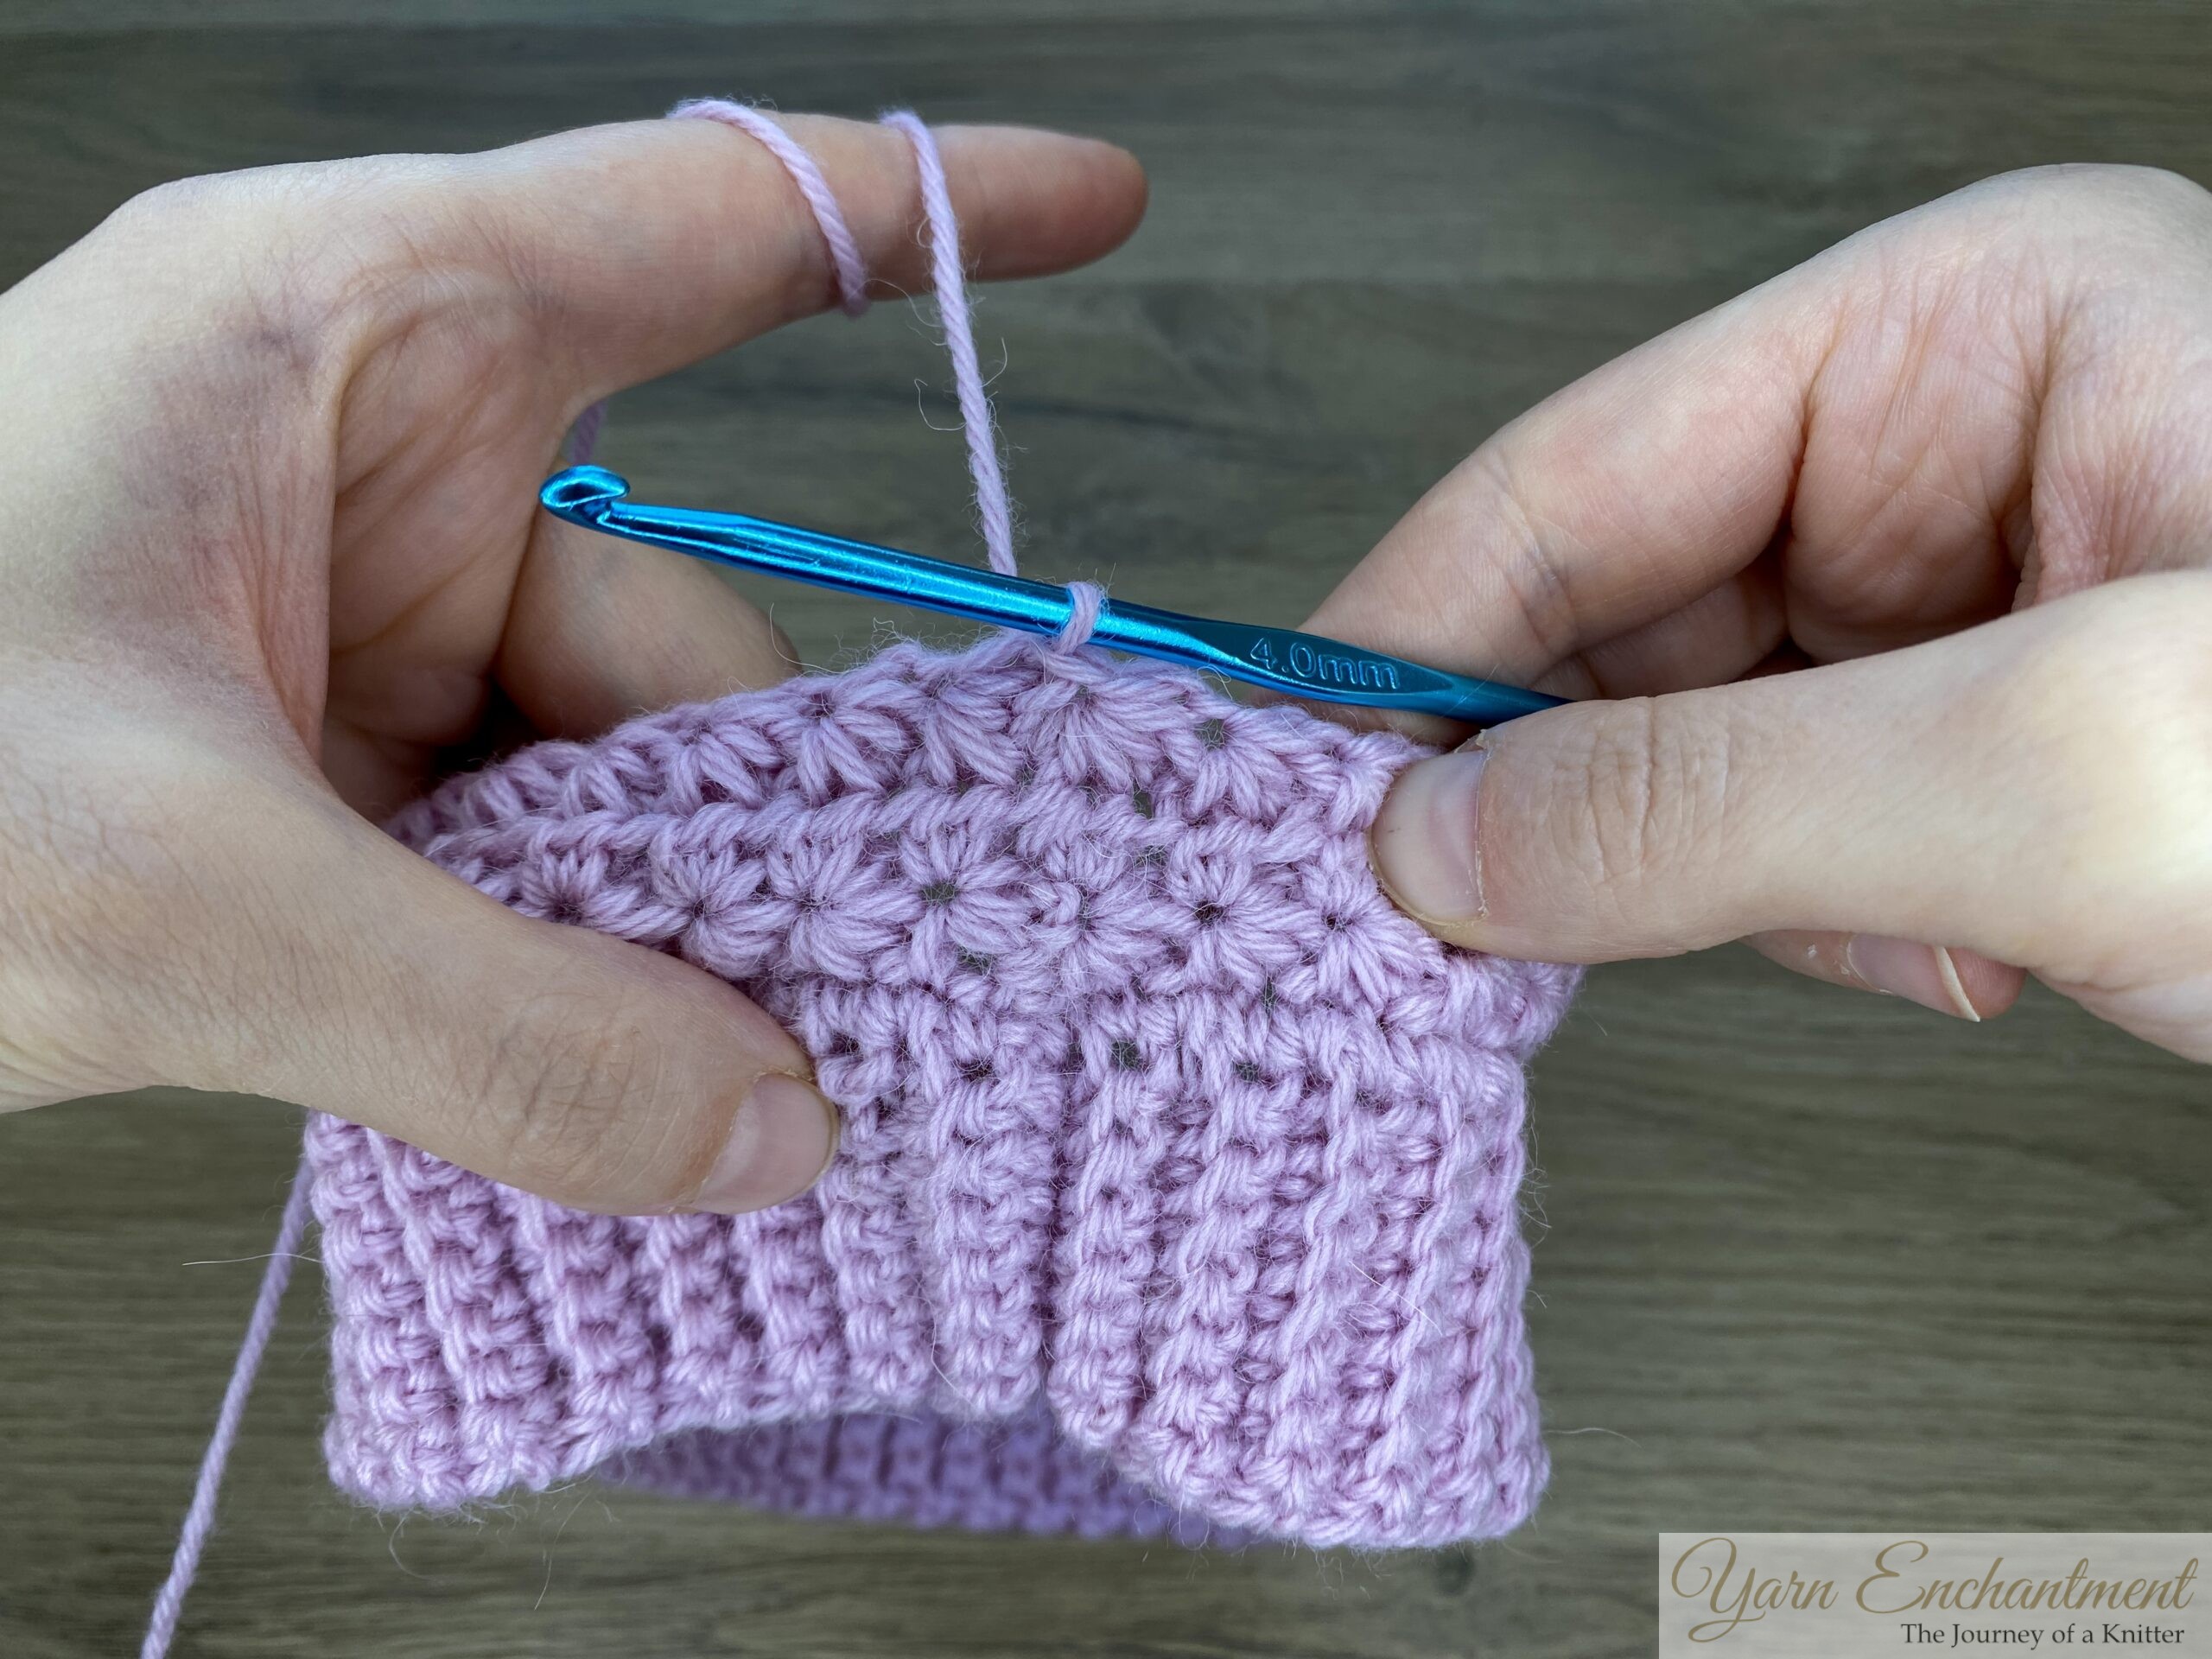
Chain 1 and turn your hat to the right side, so the slip stitch seam is on the inside
 |  | Chain 1 | and turn your hat to the right side, so the slip stitch seam is on the inside |


Transition to hat body
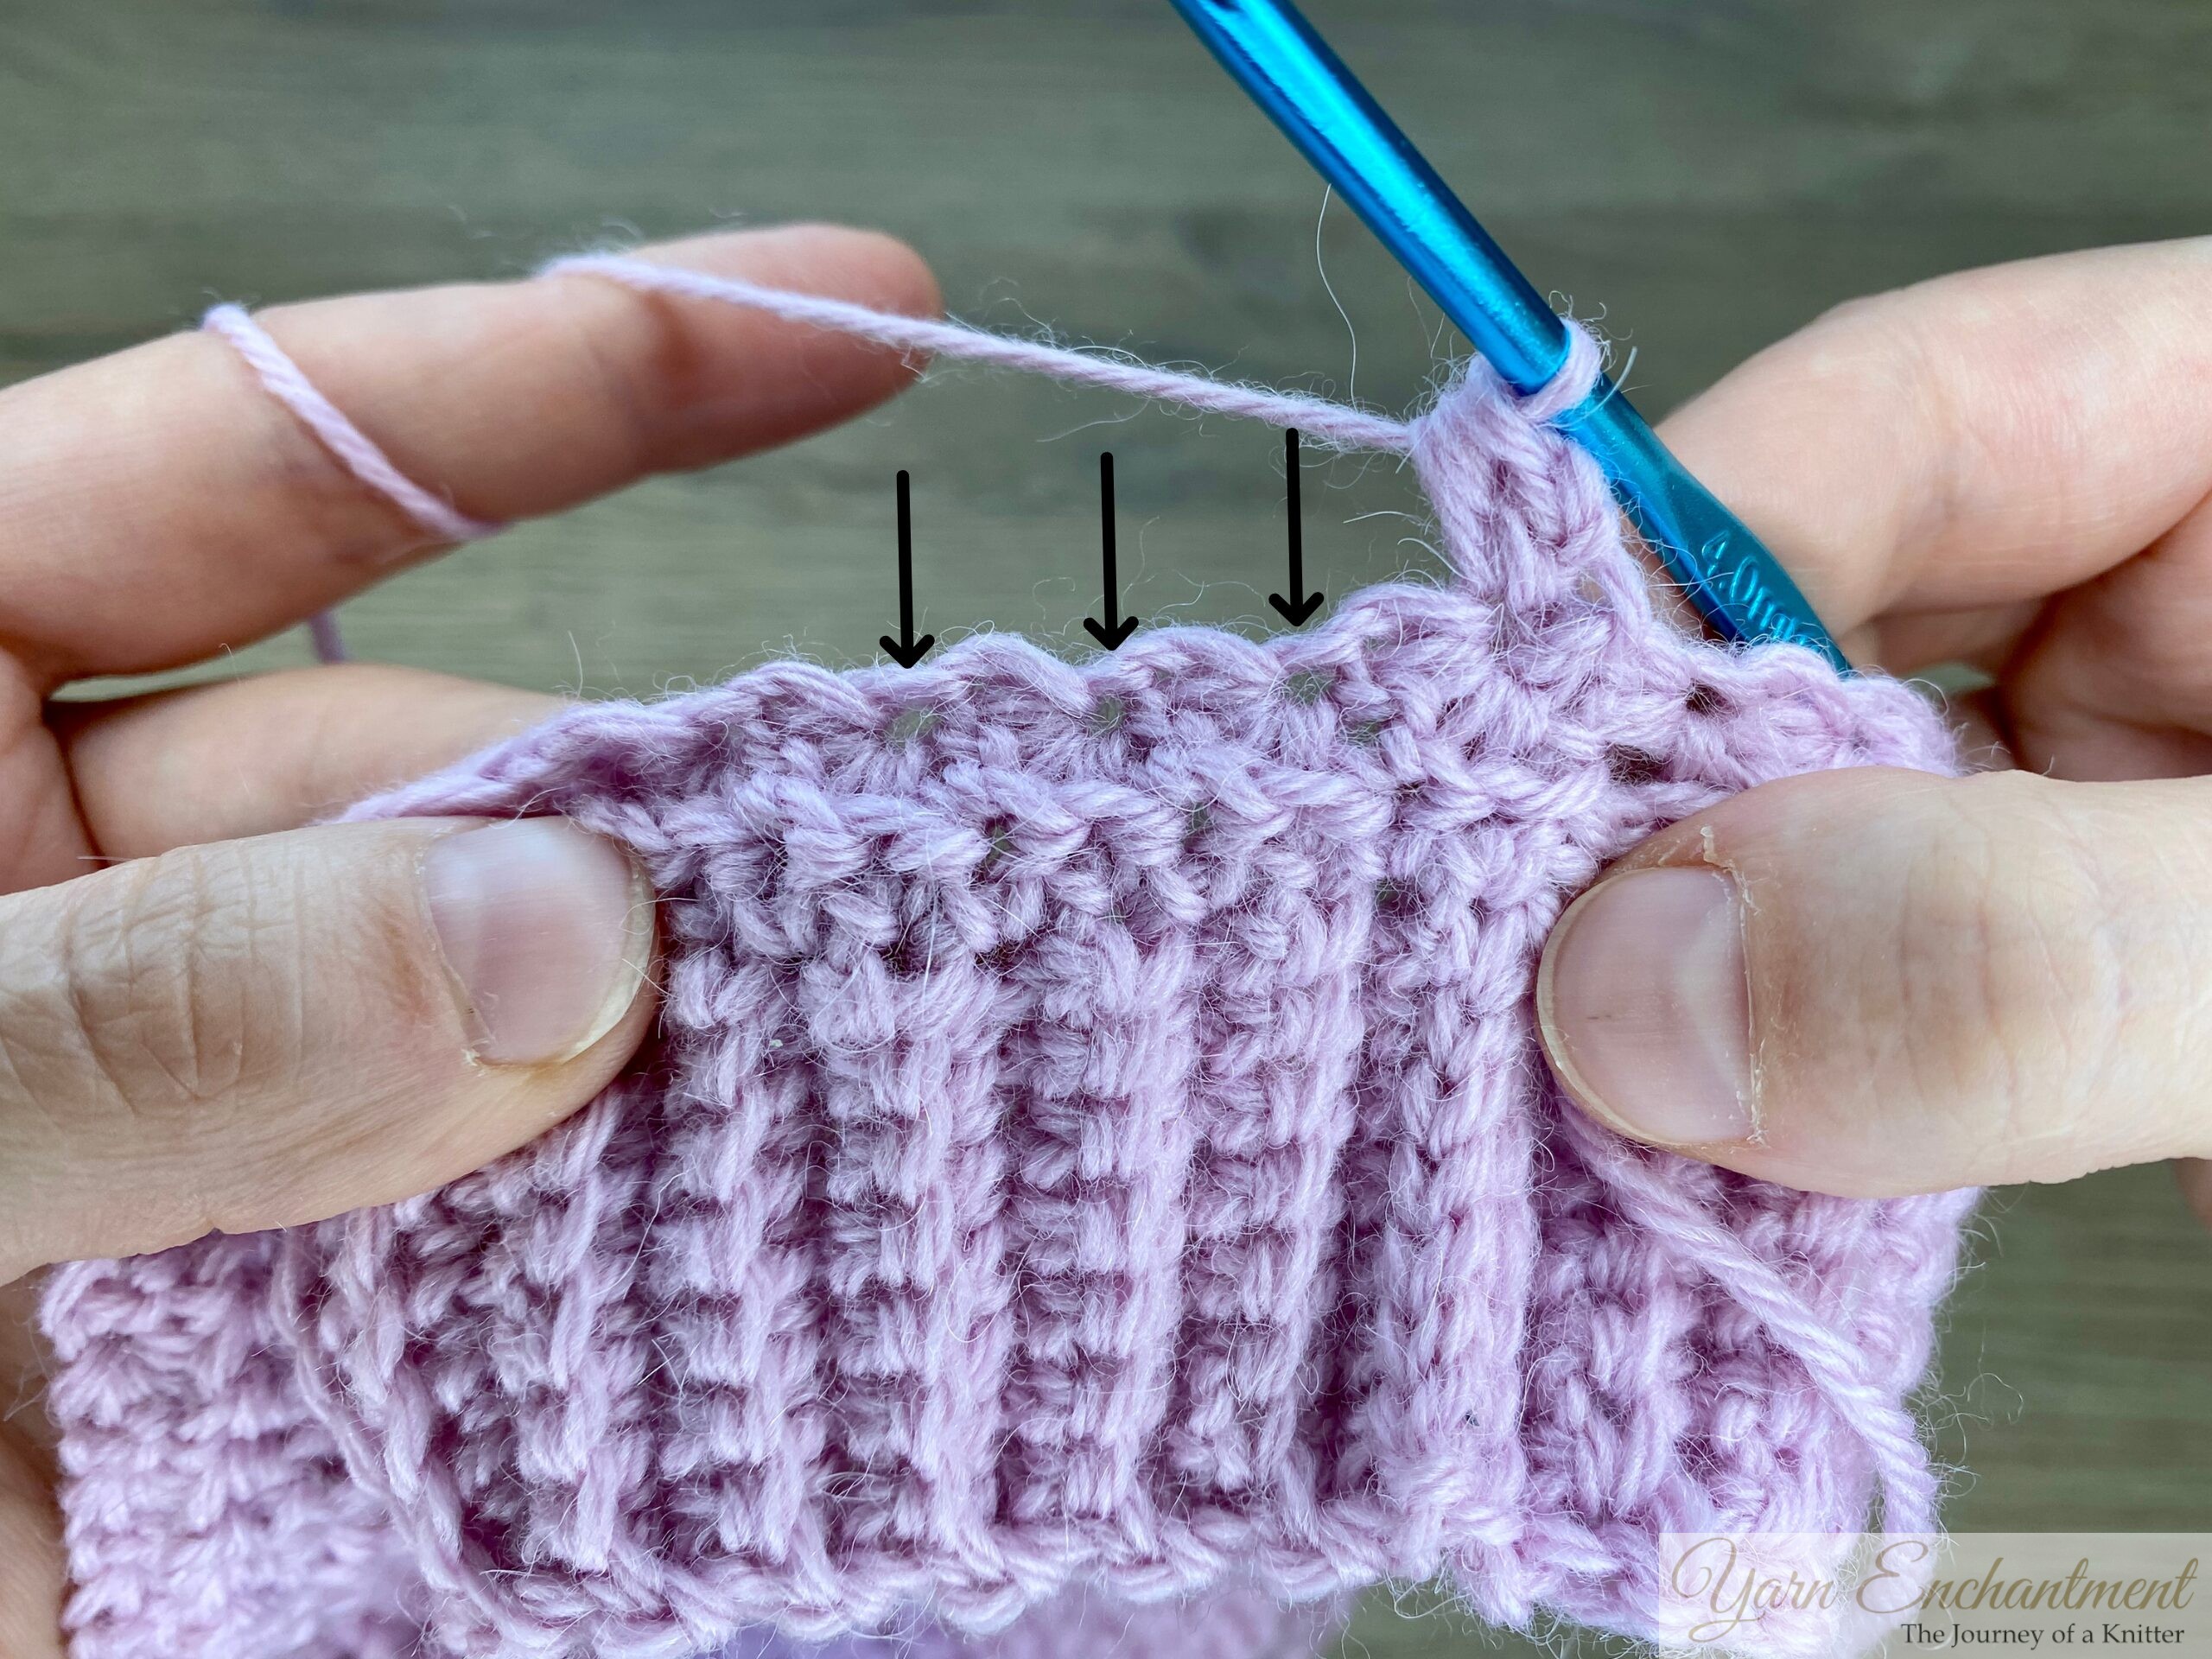
Pick up stitches along the brim edge
Single crochet evenly along one long edge of the band. Make sure your stitch count is an even number so the star stitch pattern will work correctly. If needed, you can add or skip one stitch to end with an even count. When you reach your first single crochet, join the round with a slip stitch.
Color Change Tip:
If you want to make your hat in two colors, switch to the new color right after finishing the single crochet round. This gives your hat a smooth and tidy color transition for the next section.
 |  | 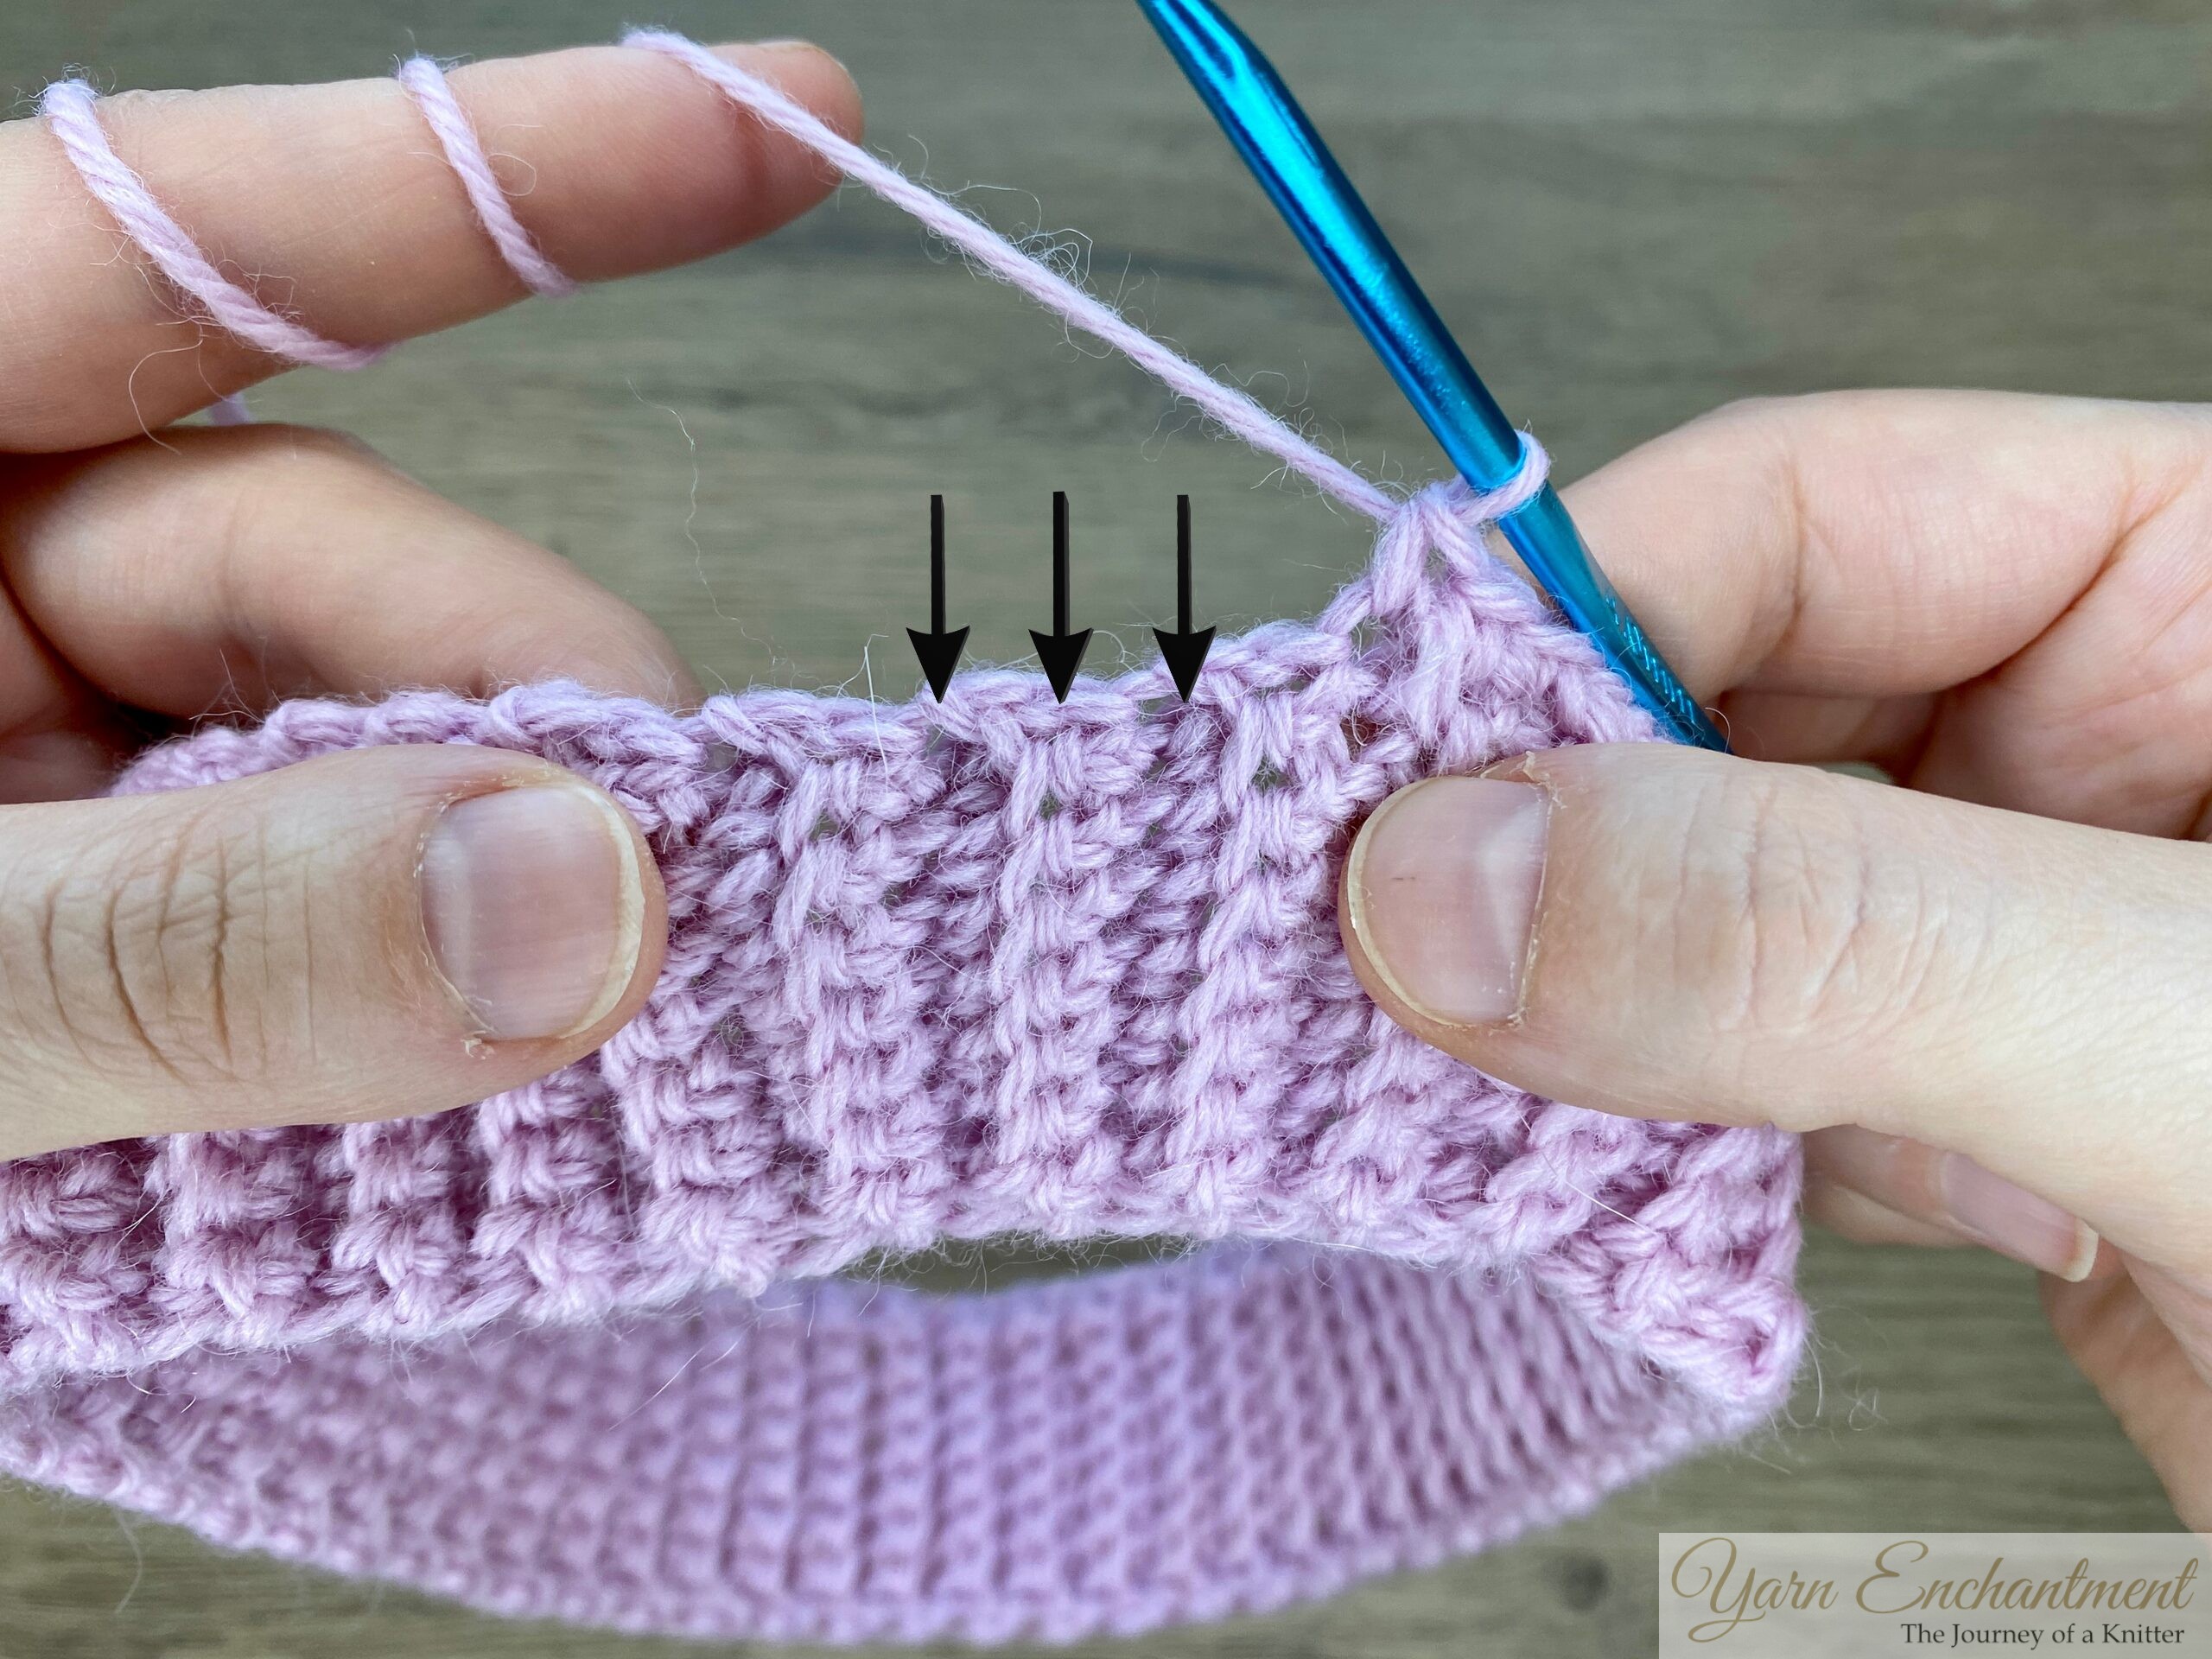 | Work one single crochet into every peak | and valley, | all the way around. |


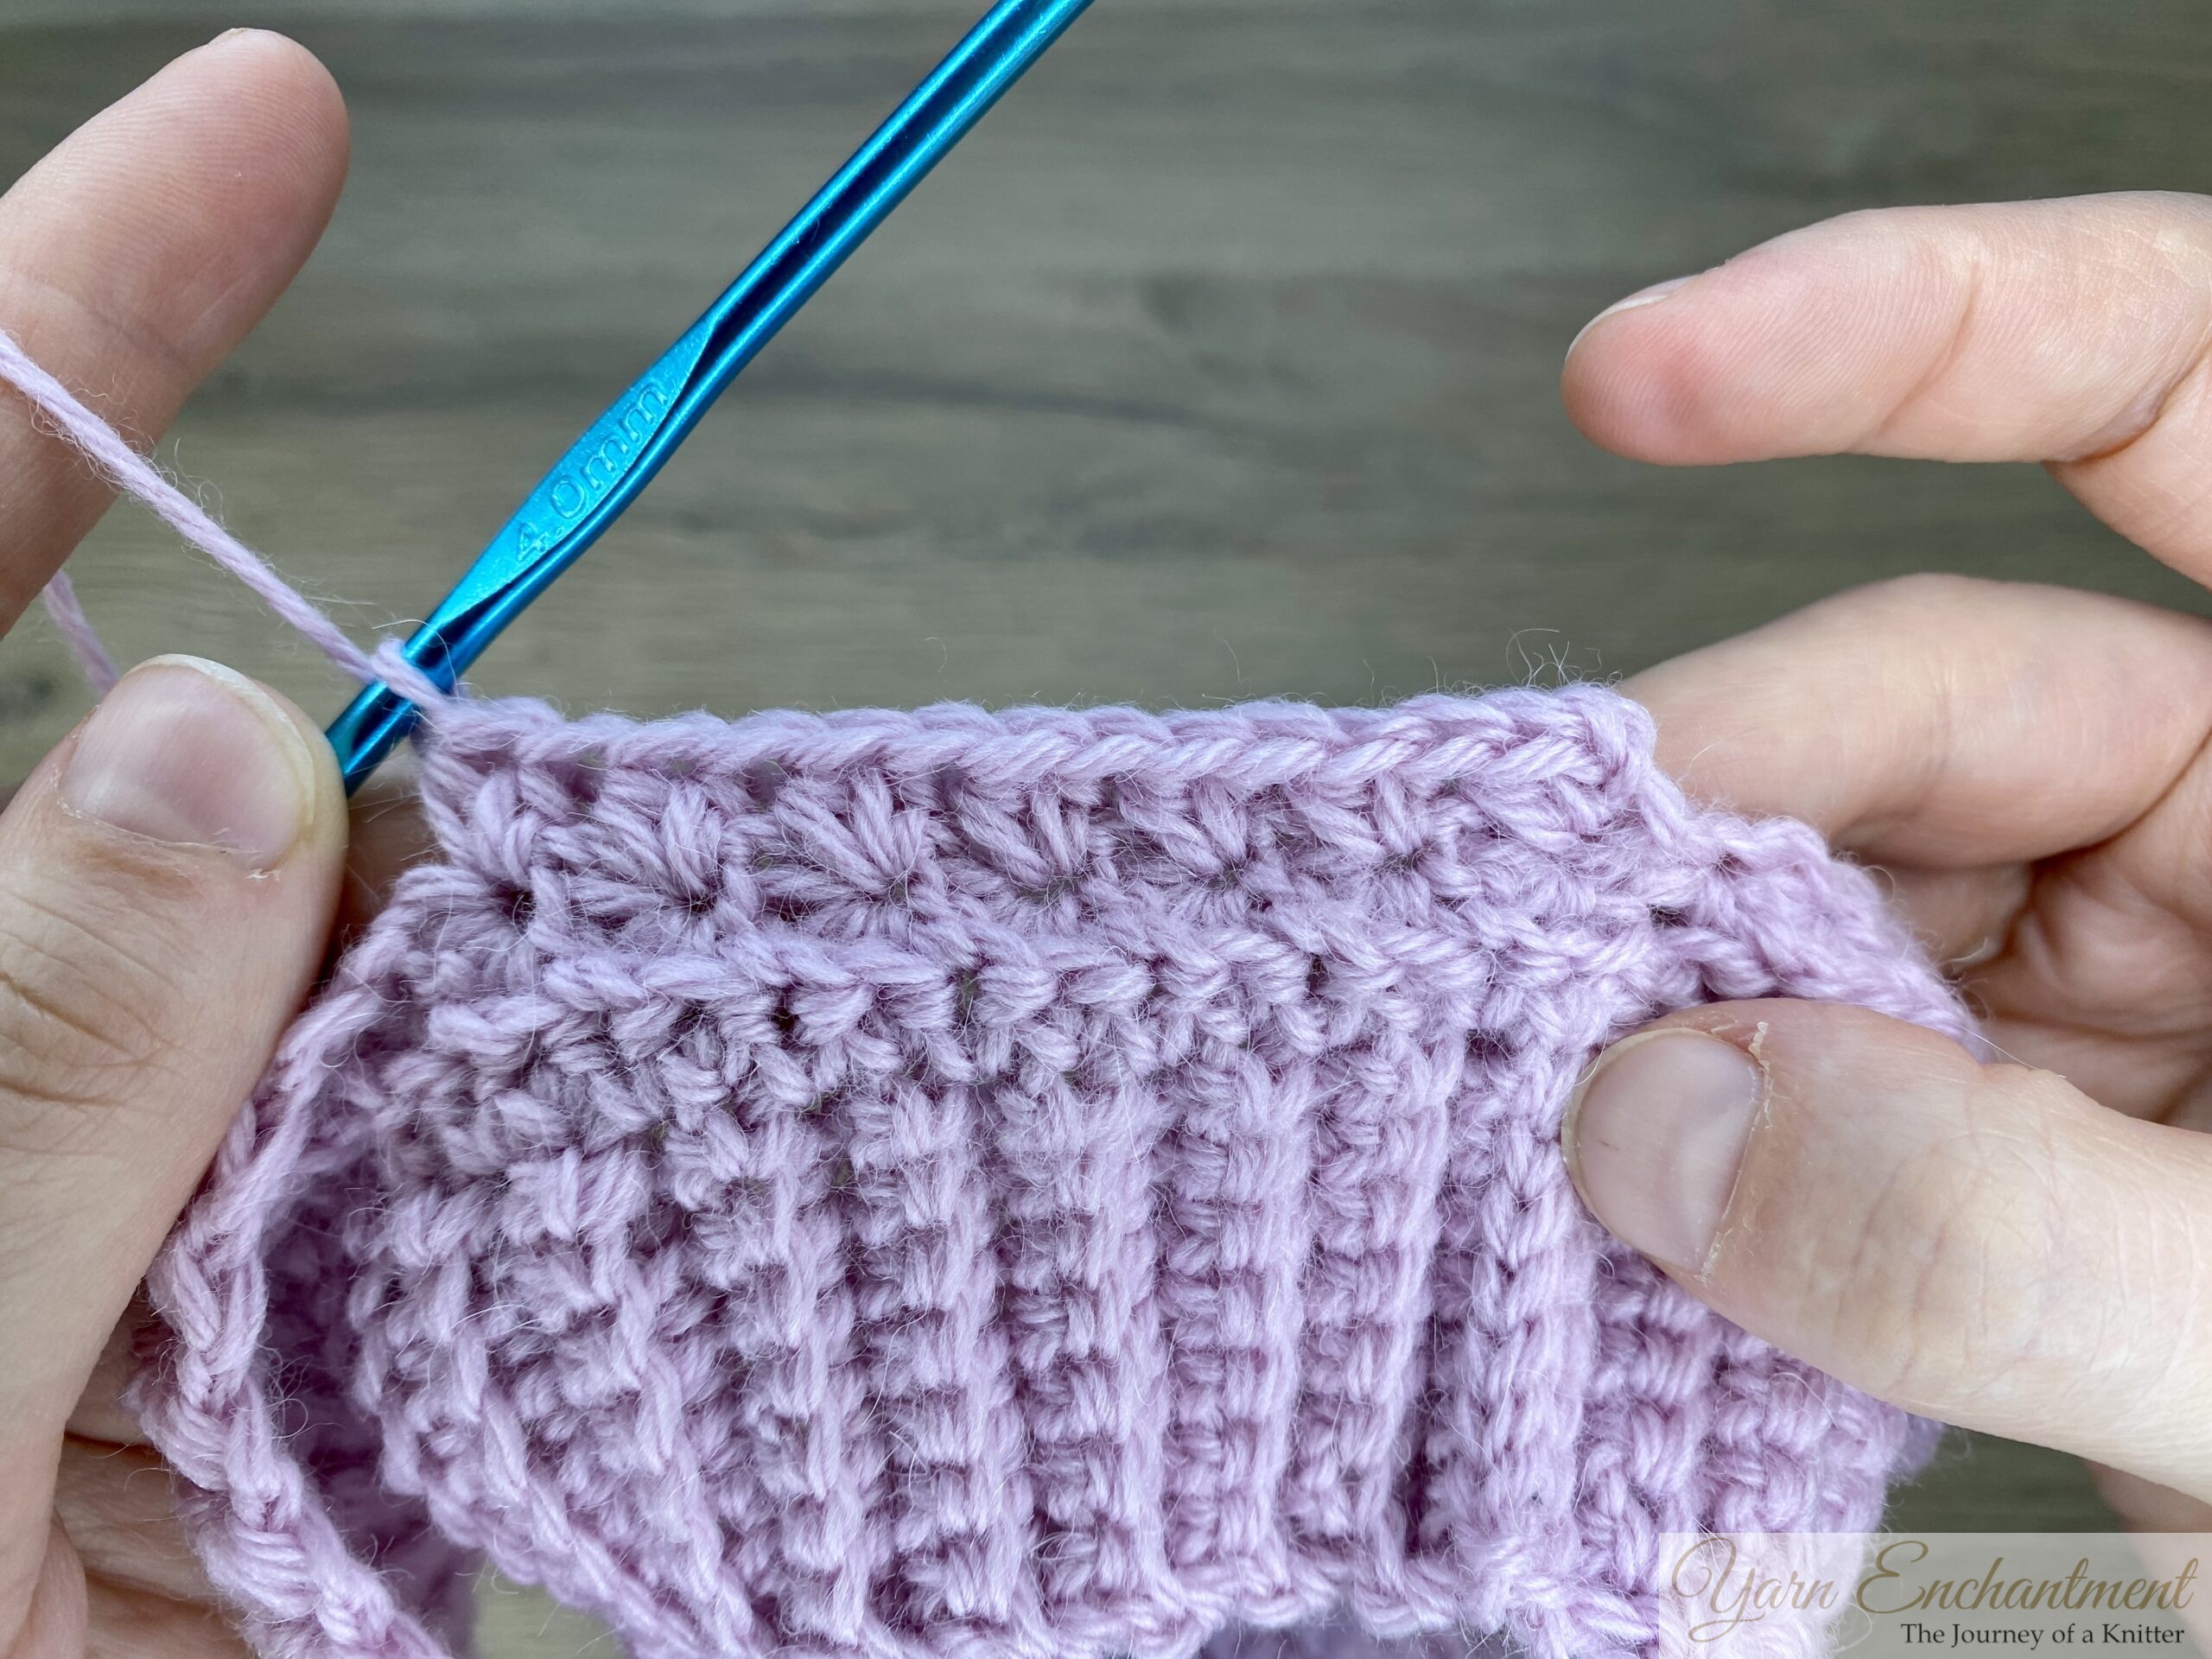
Join to work in the round
Slip stitch to the first single crochet to close the round. You can mark this stitch with a stitch marker
 | 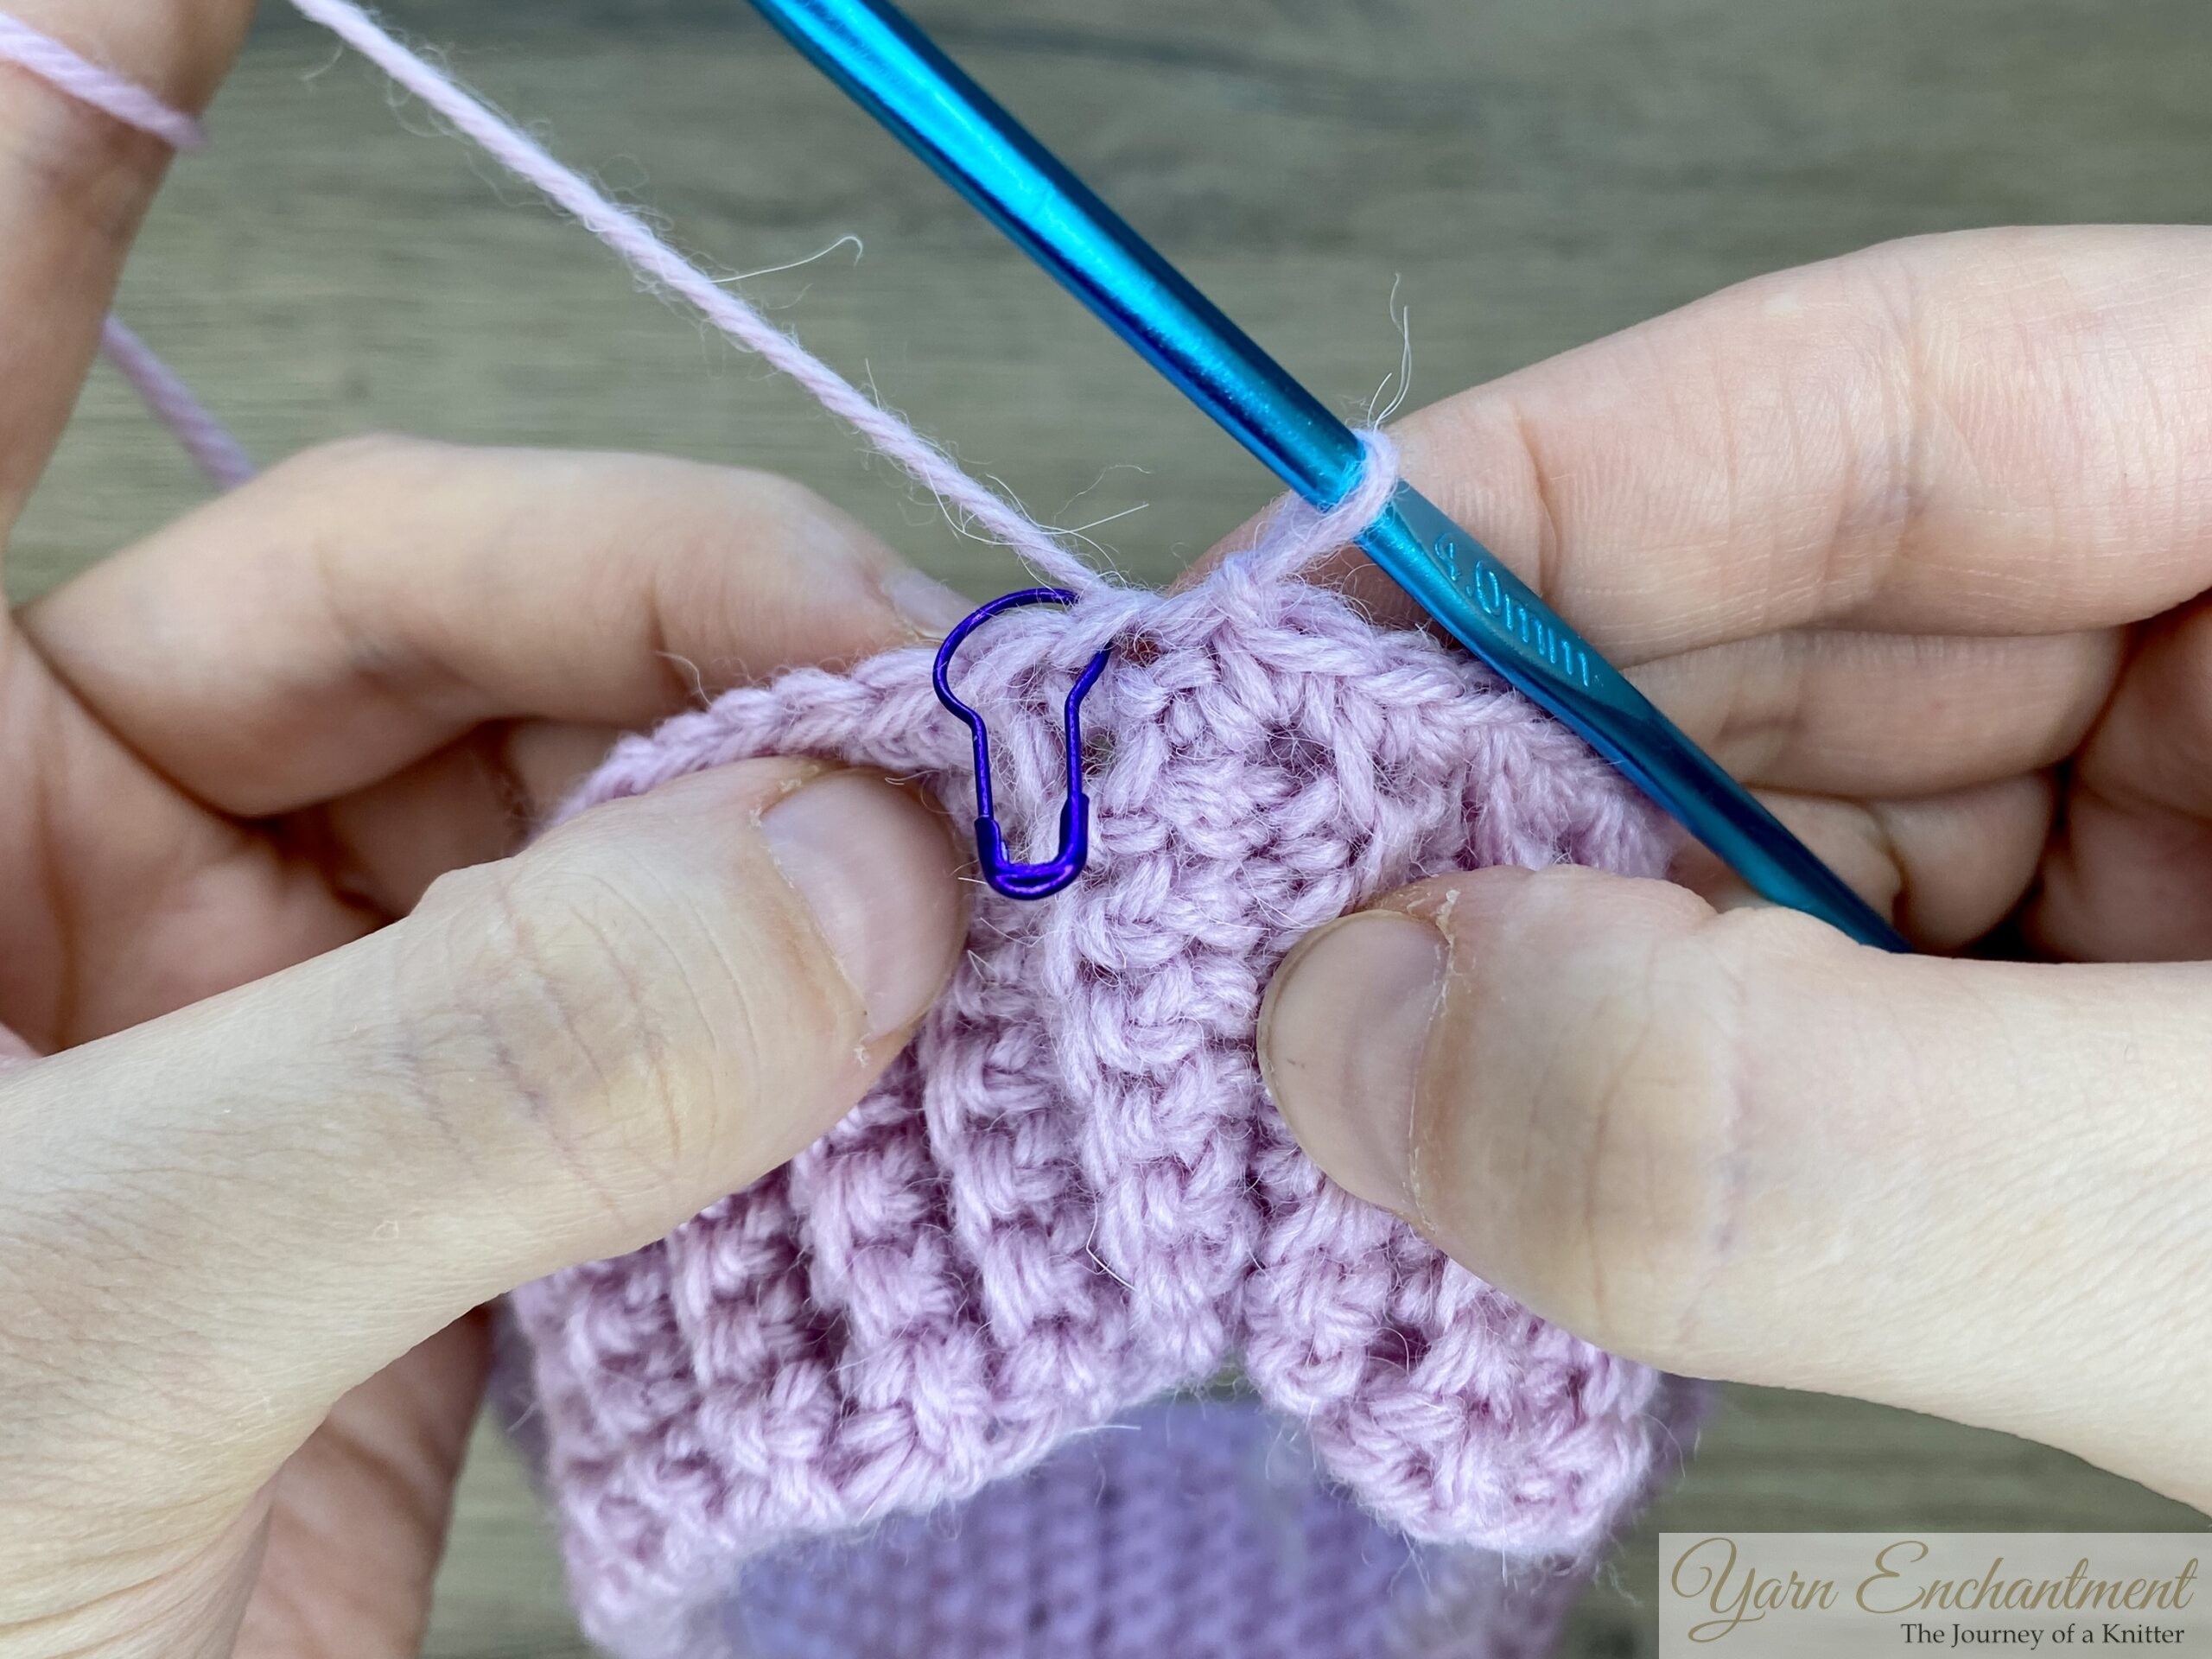 | Slip stitch to the first single crochet to close the round | Mark this stitch with a stitch marker |


Star Stitch Pattern in the Round
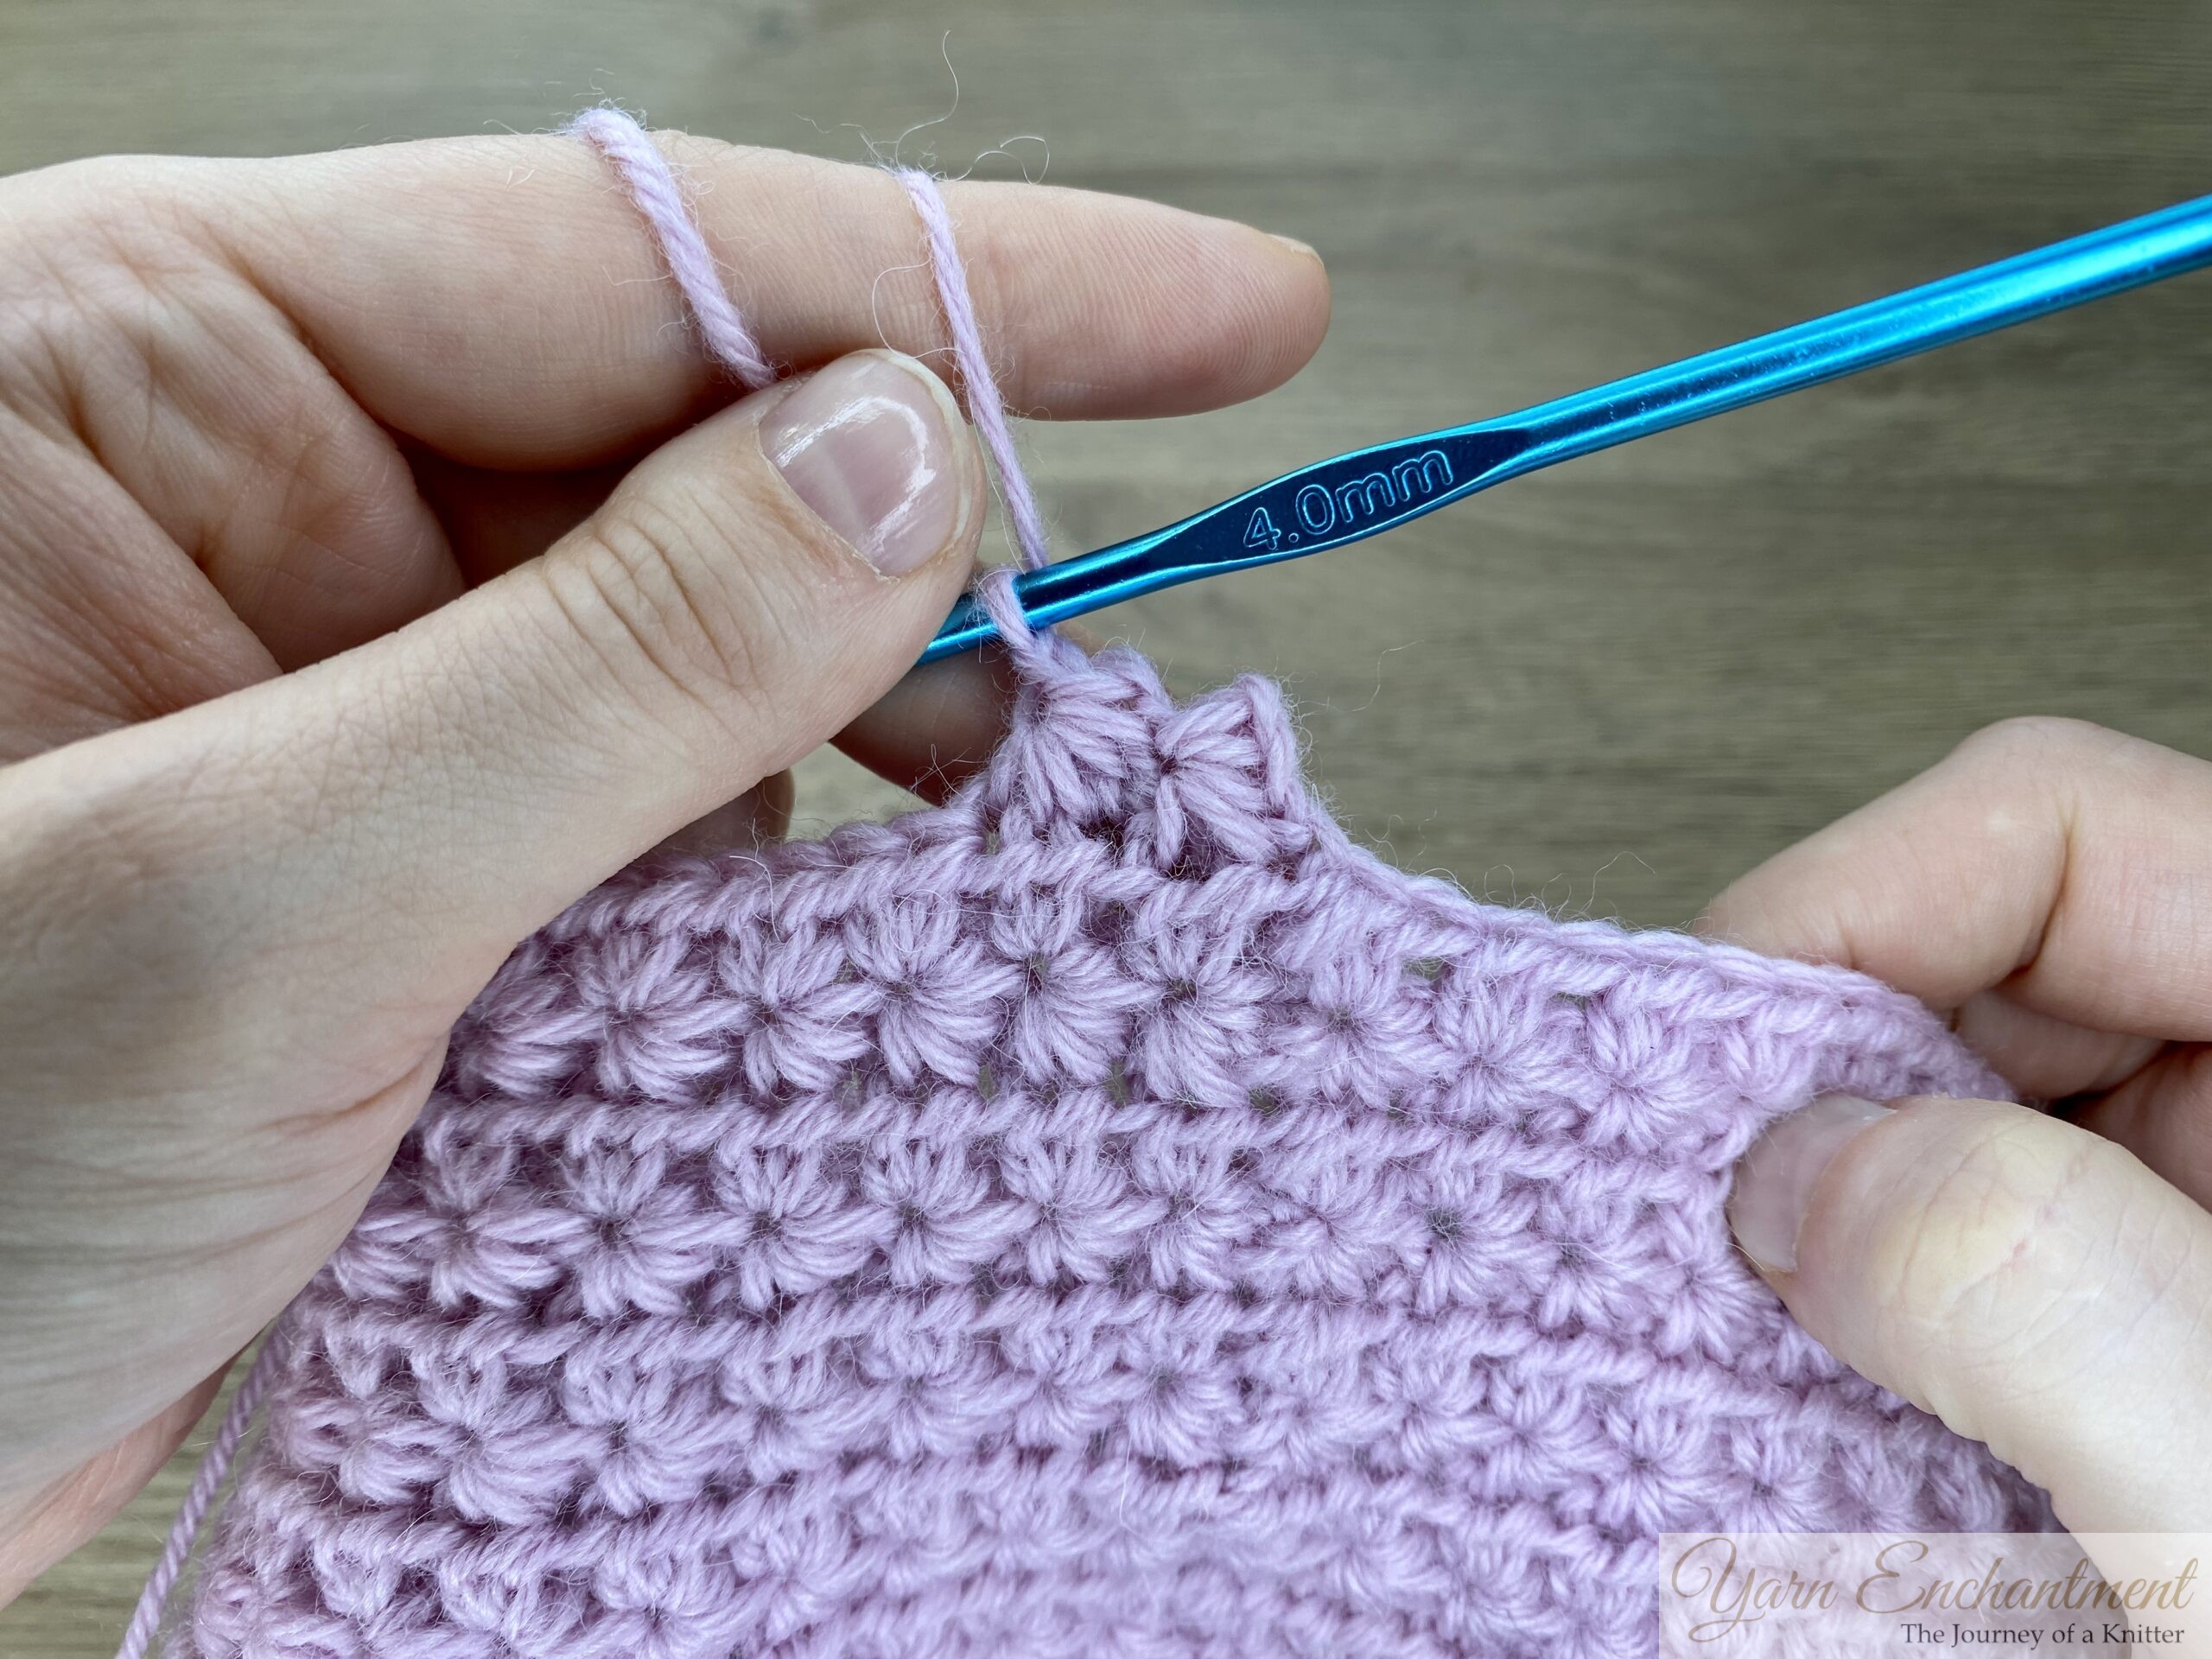
First Star Stitch Round (Set‑Up)
- Chain 3
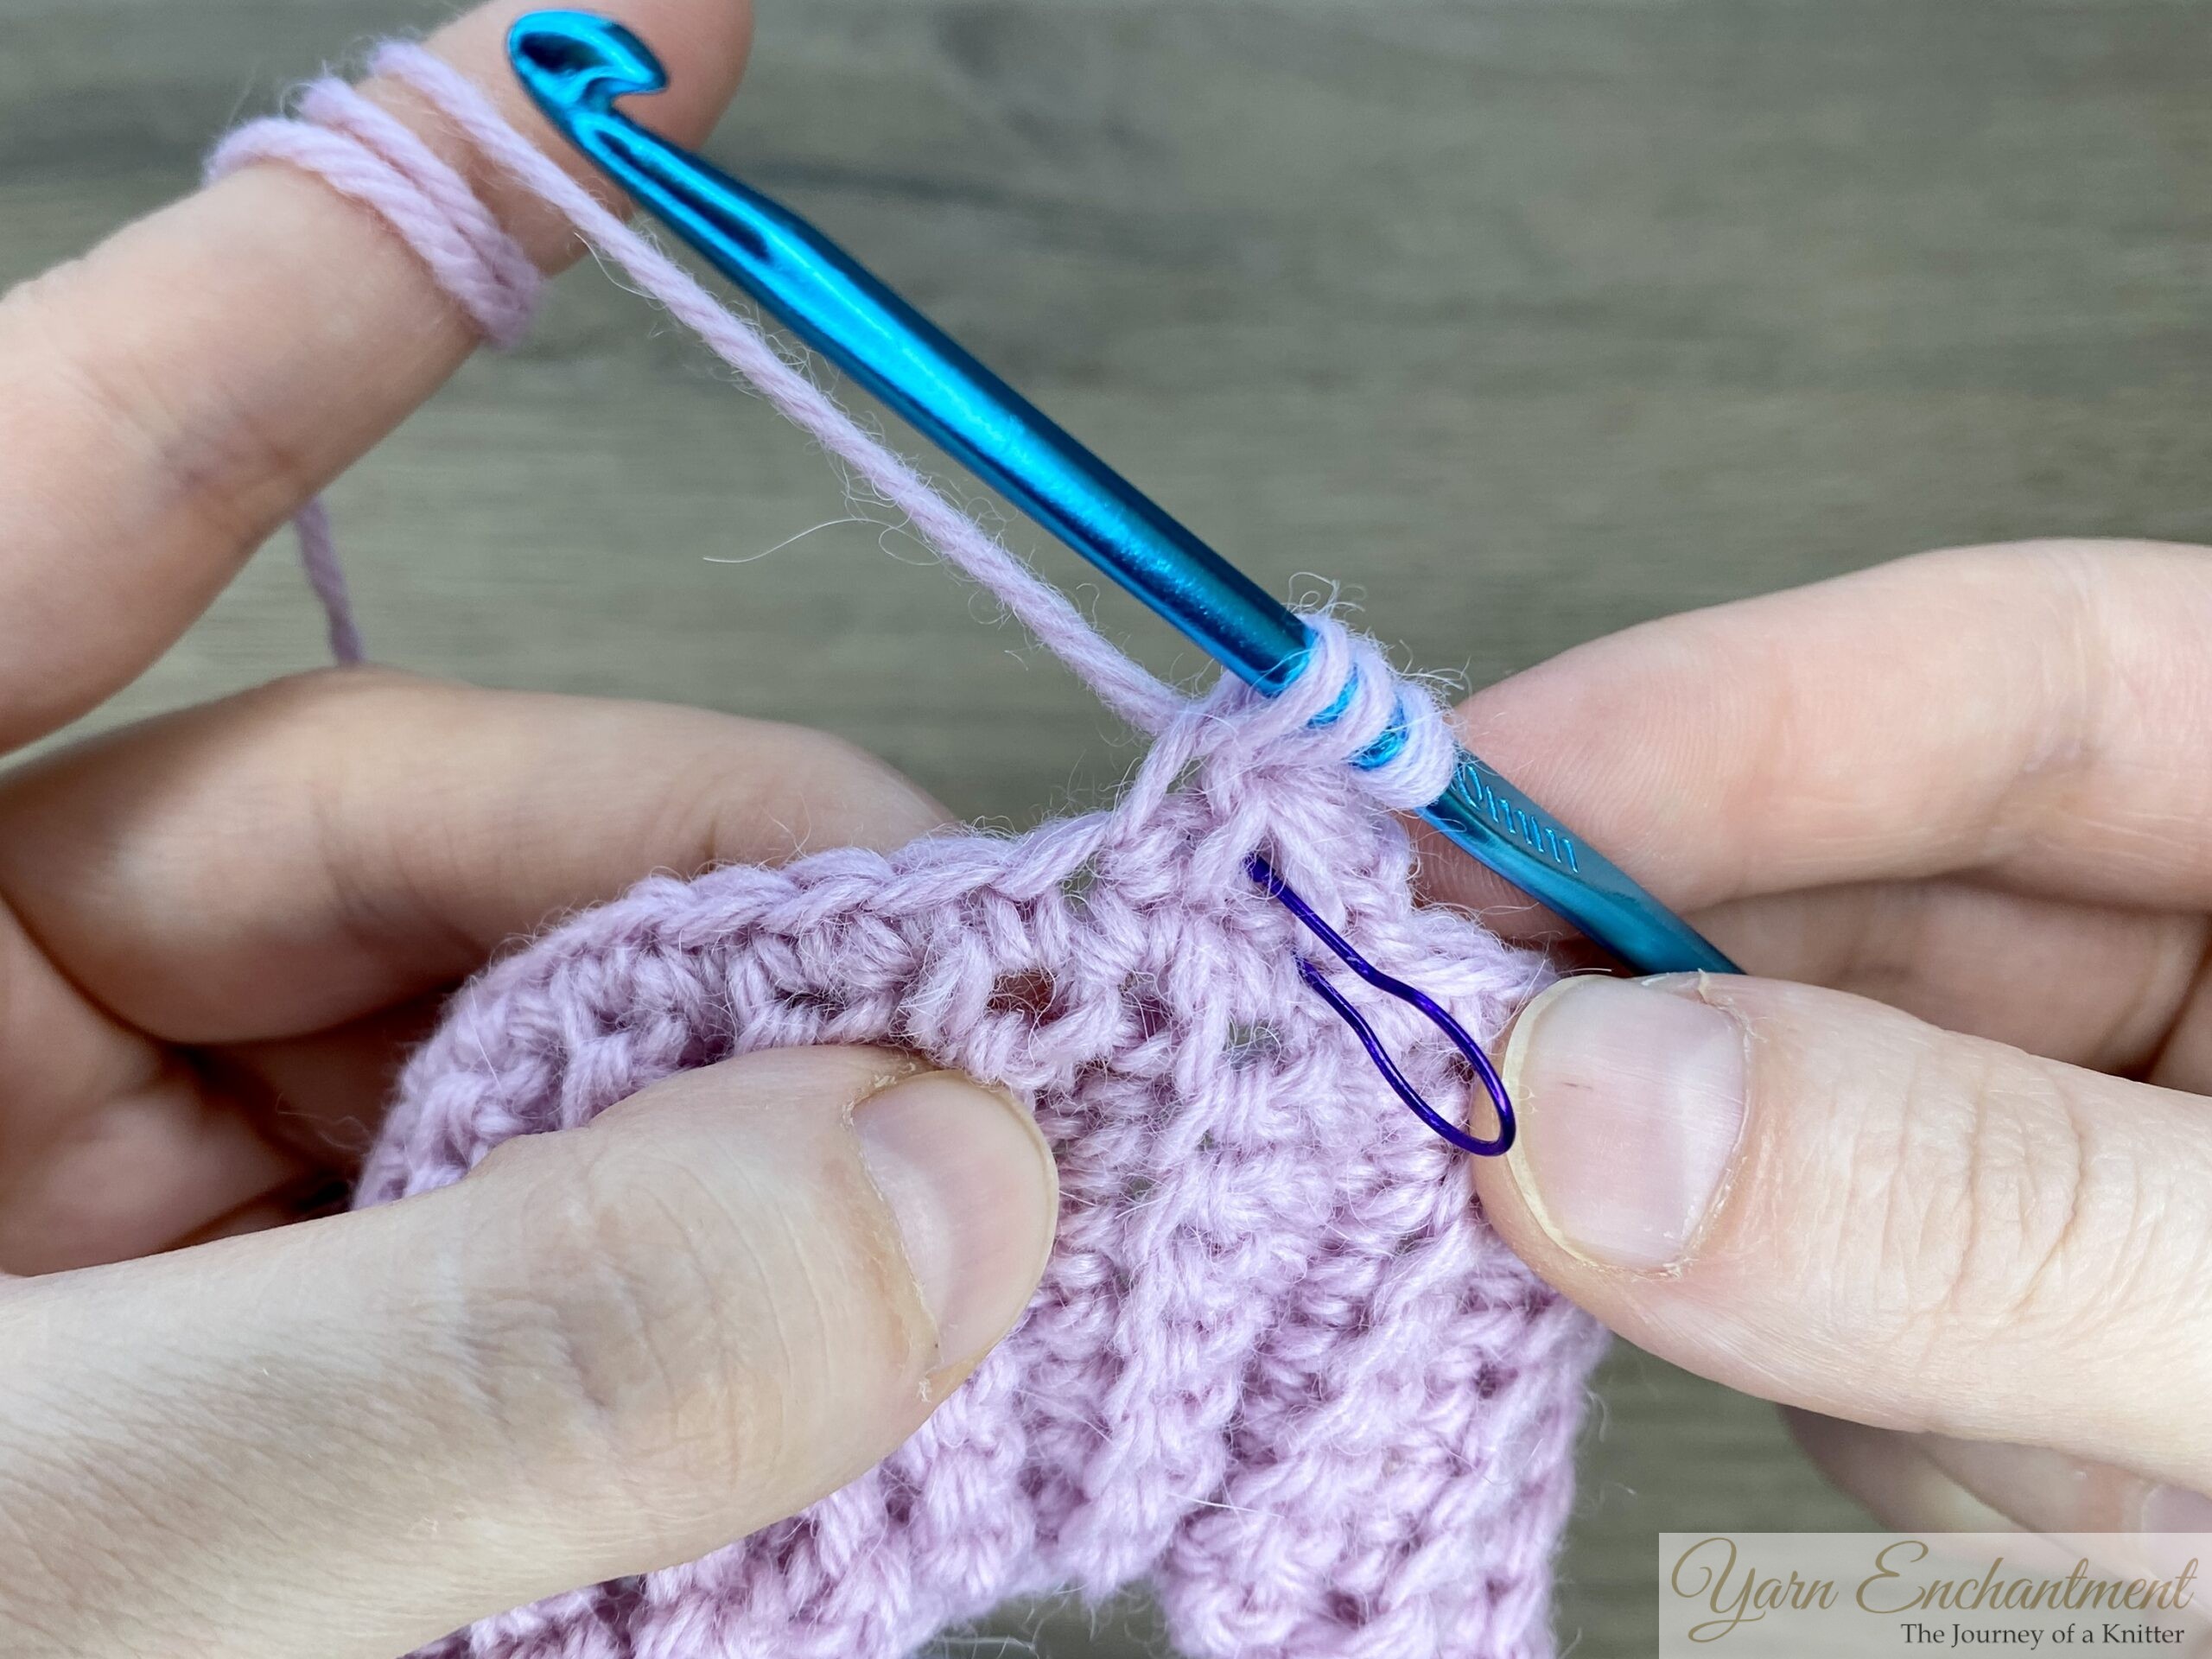
- Skip the first chain and insert the hook into the 2nd chain from the hook, yarn over, and pull through.
- Insert the hook into the 3rd chain, yarn over, and pull through.
- Insert your hook into the base of the ch-3 there were your stitch marker is,yarn over, and pull through.
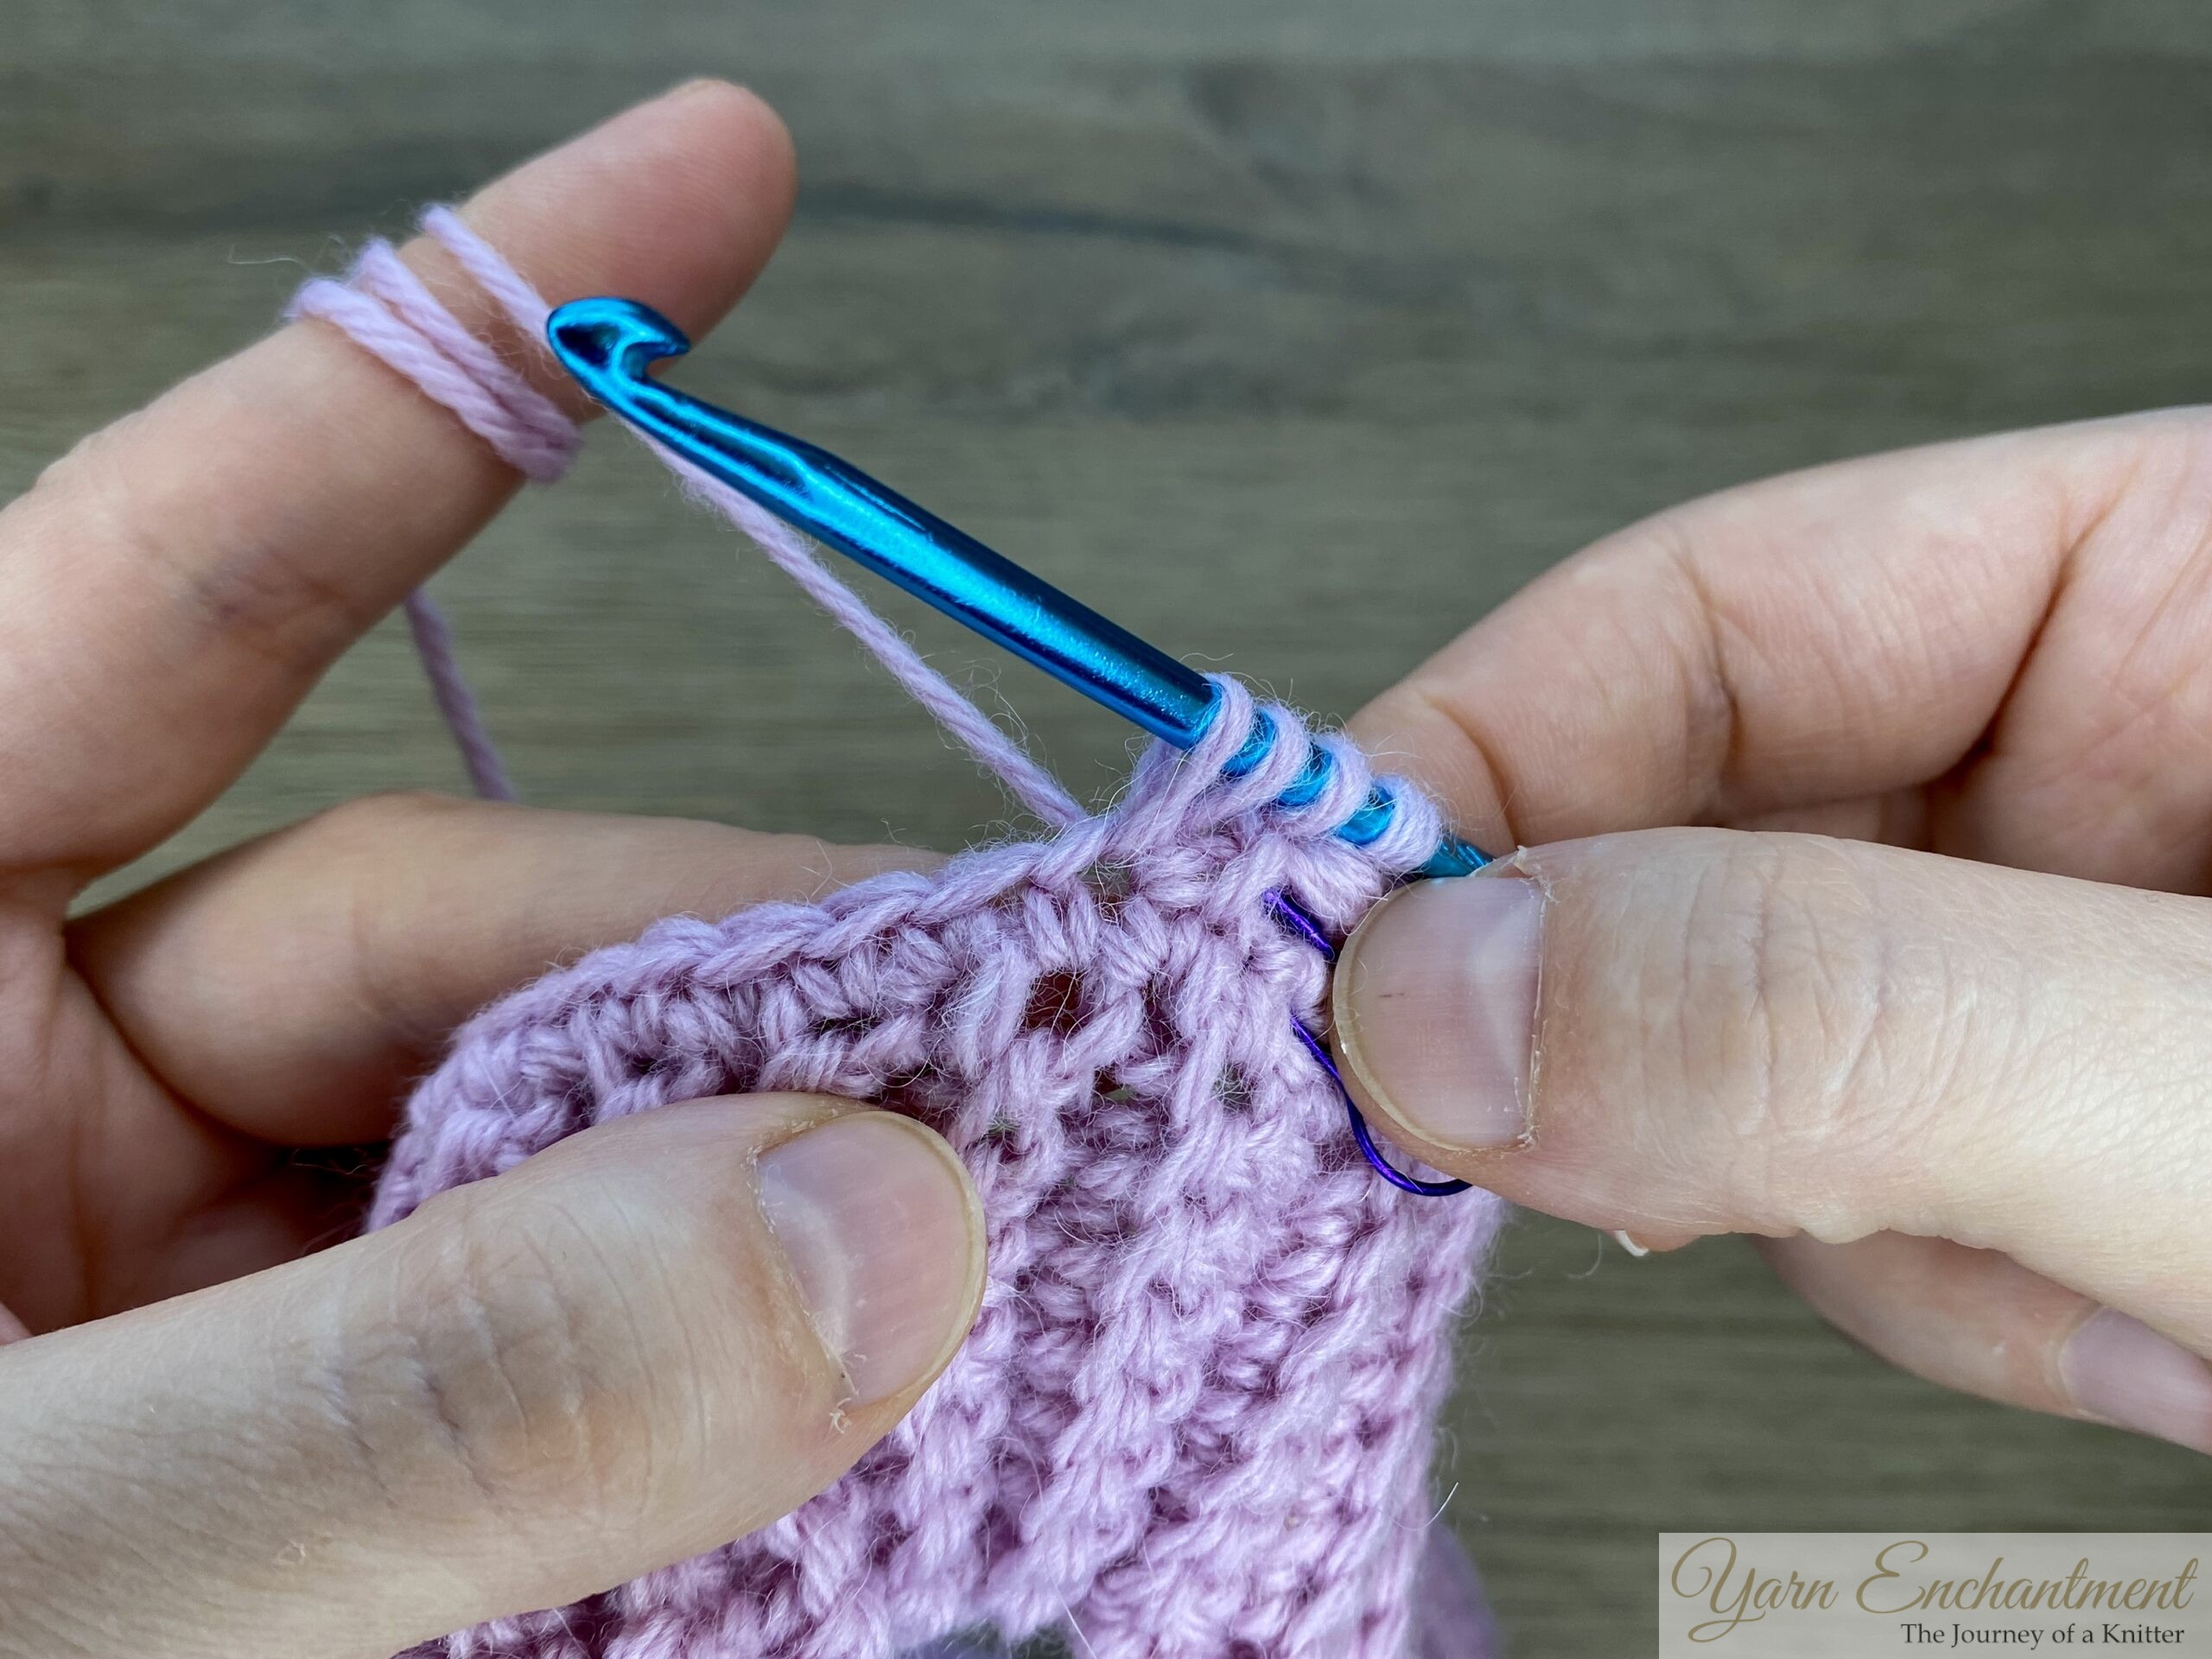
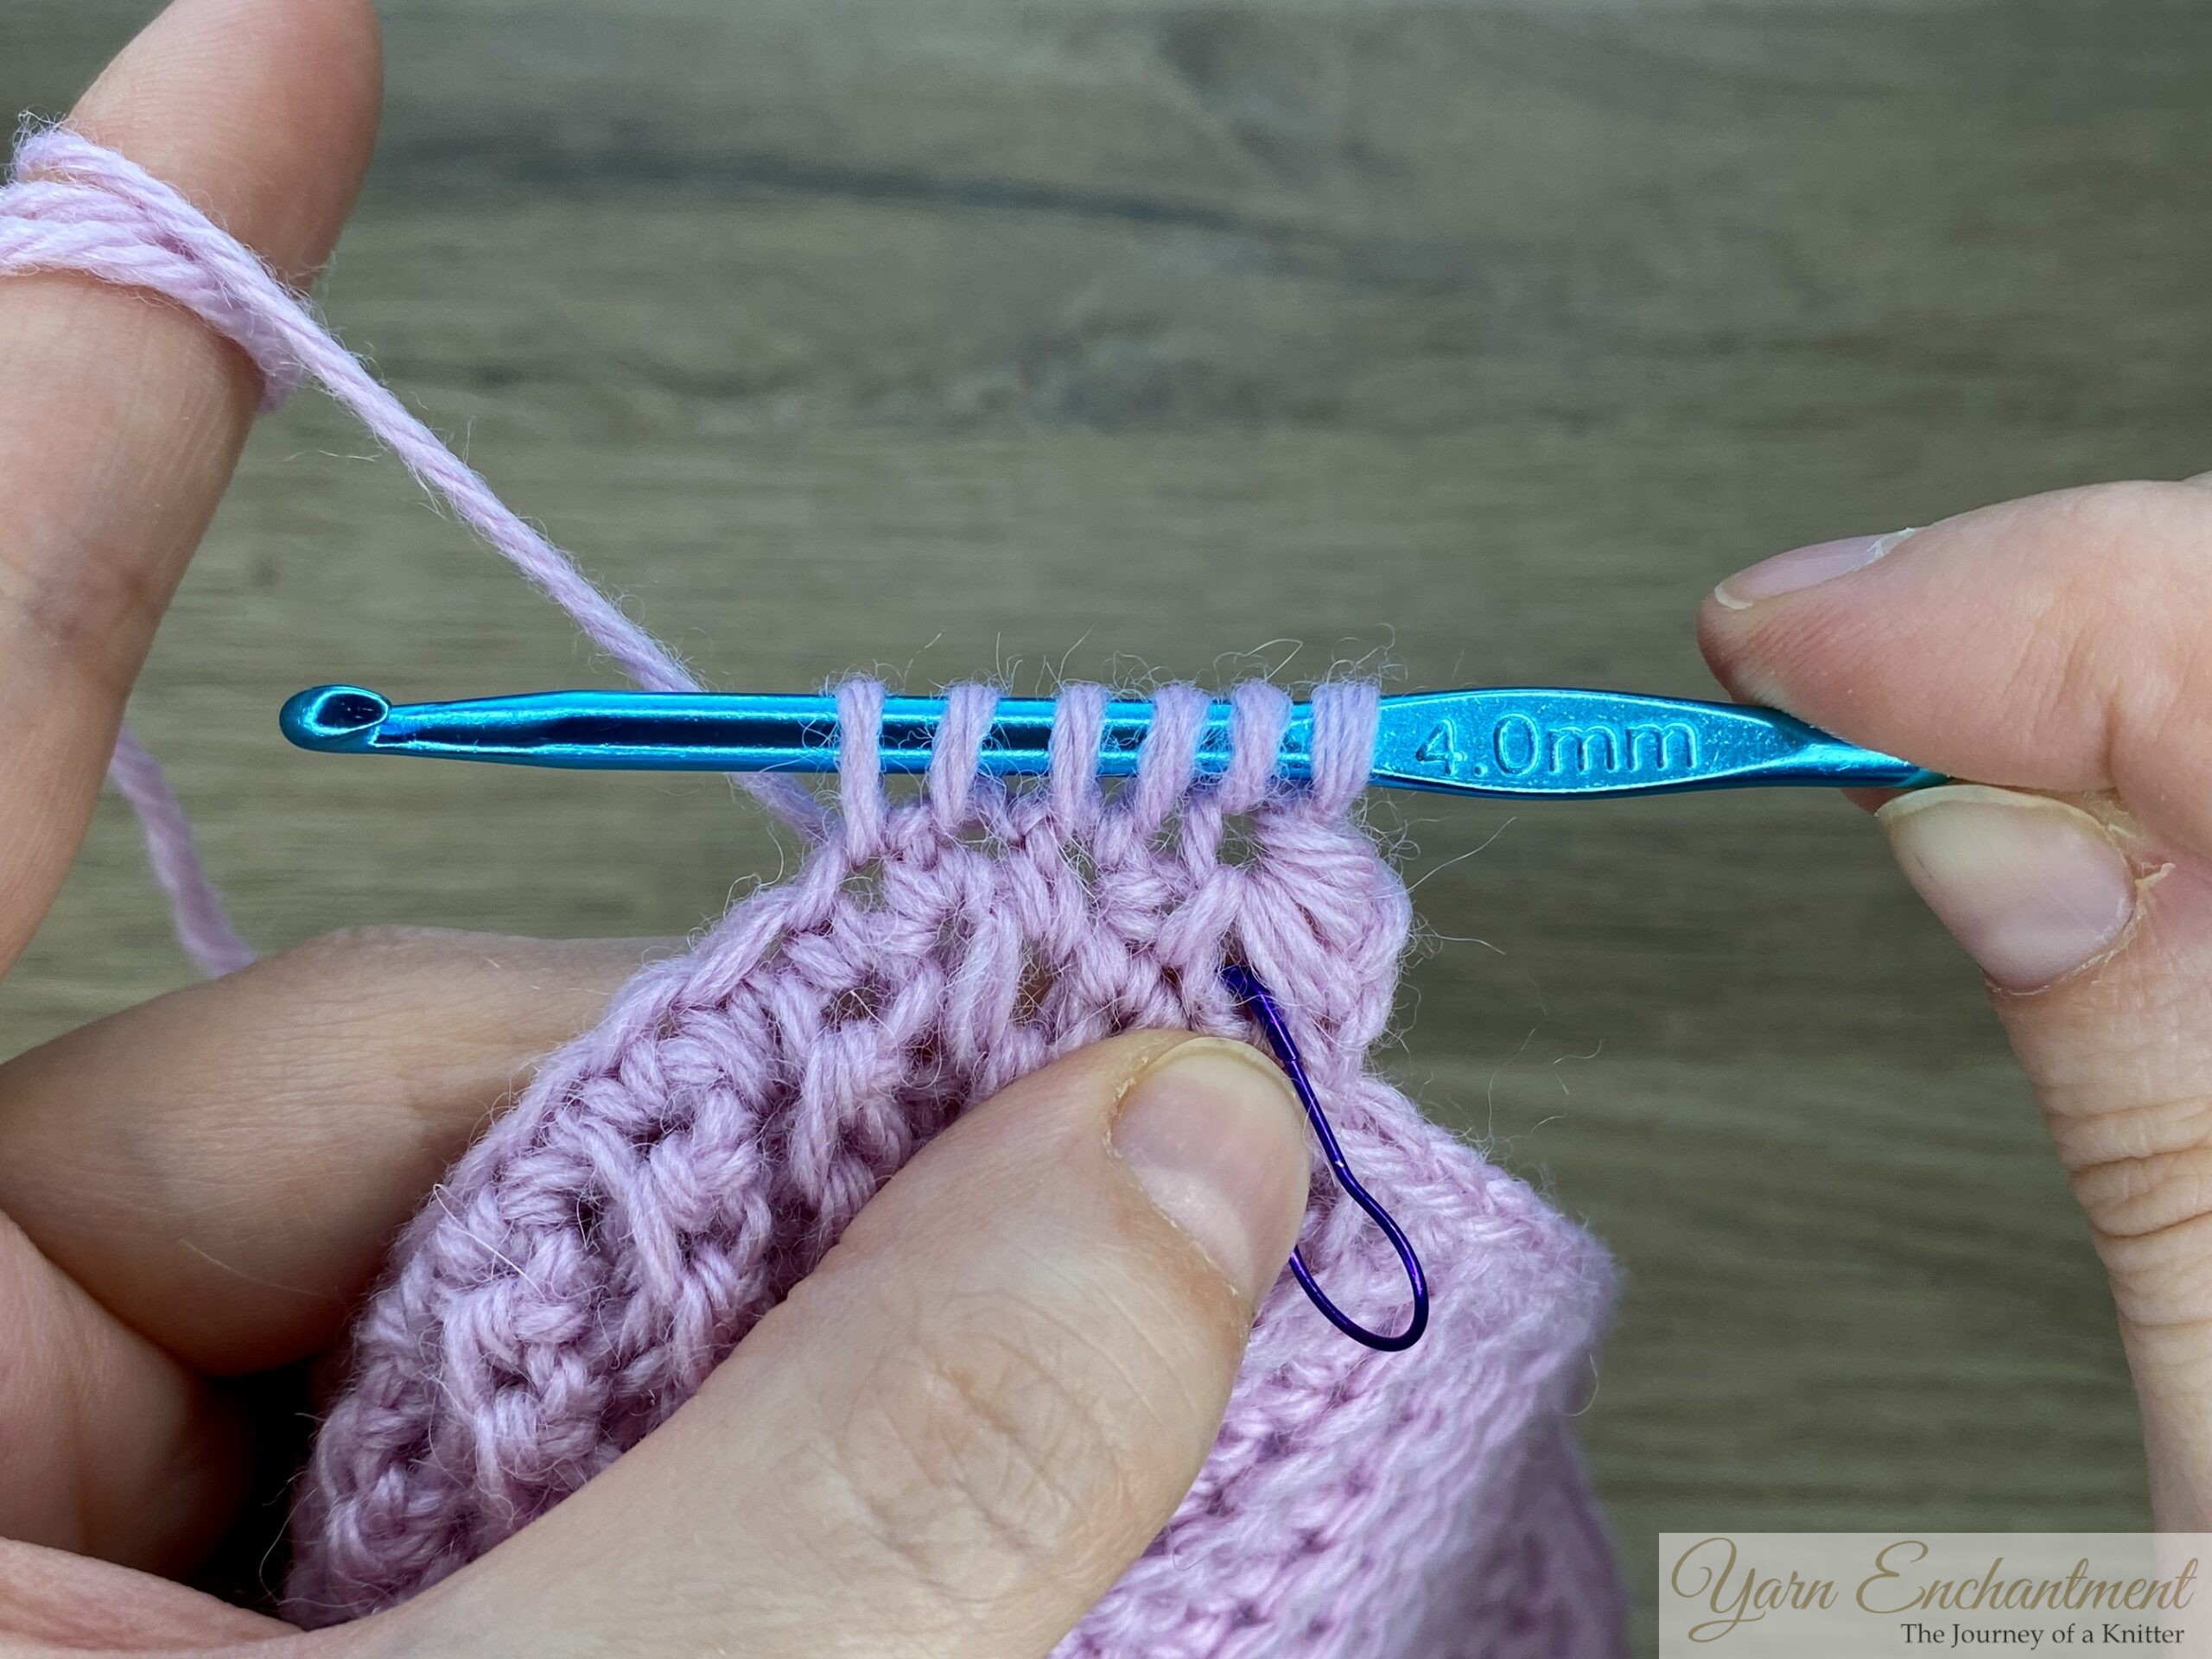
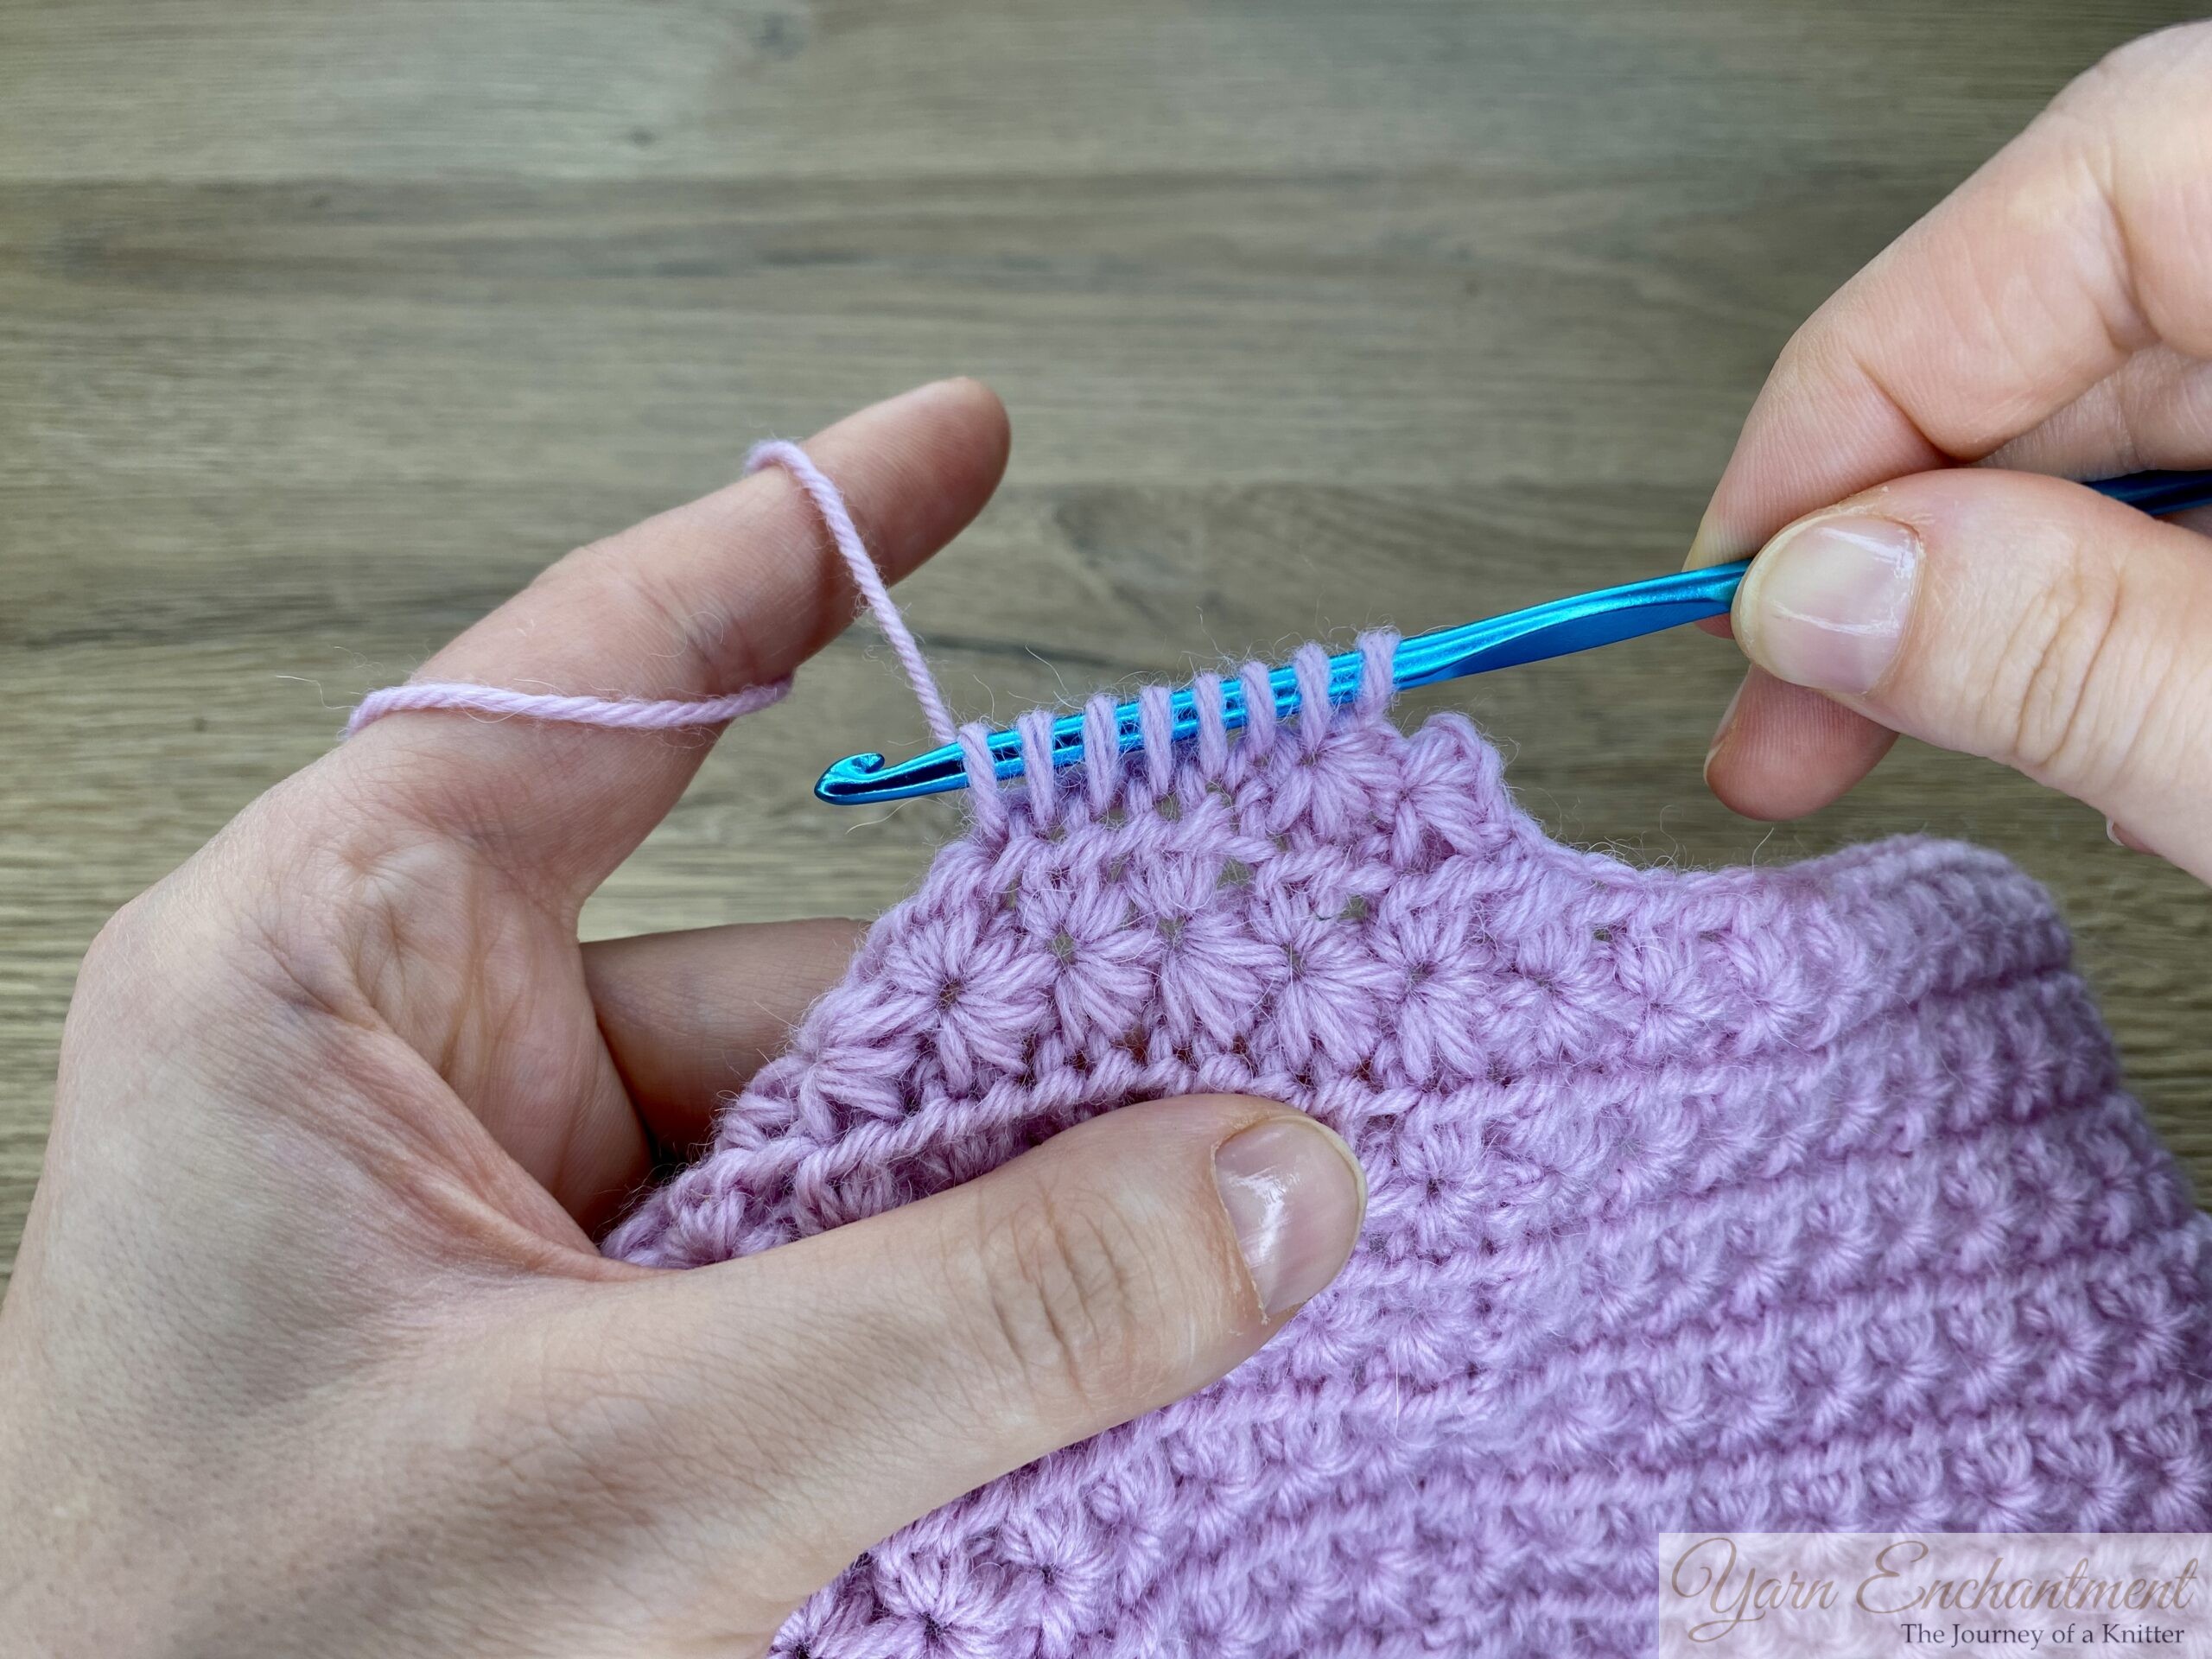
- Insert the hook into the next 2 stitches, yarn over, and pull through each time until you have 6 loops on the hook.
- Yarn over and pull through all 6 loops, then chain 1 to close the star
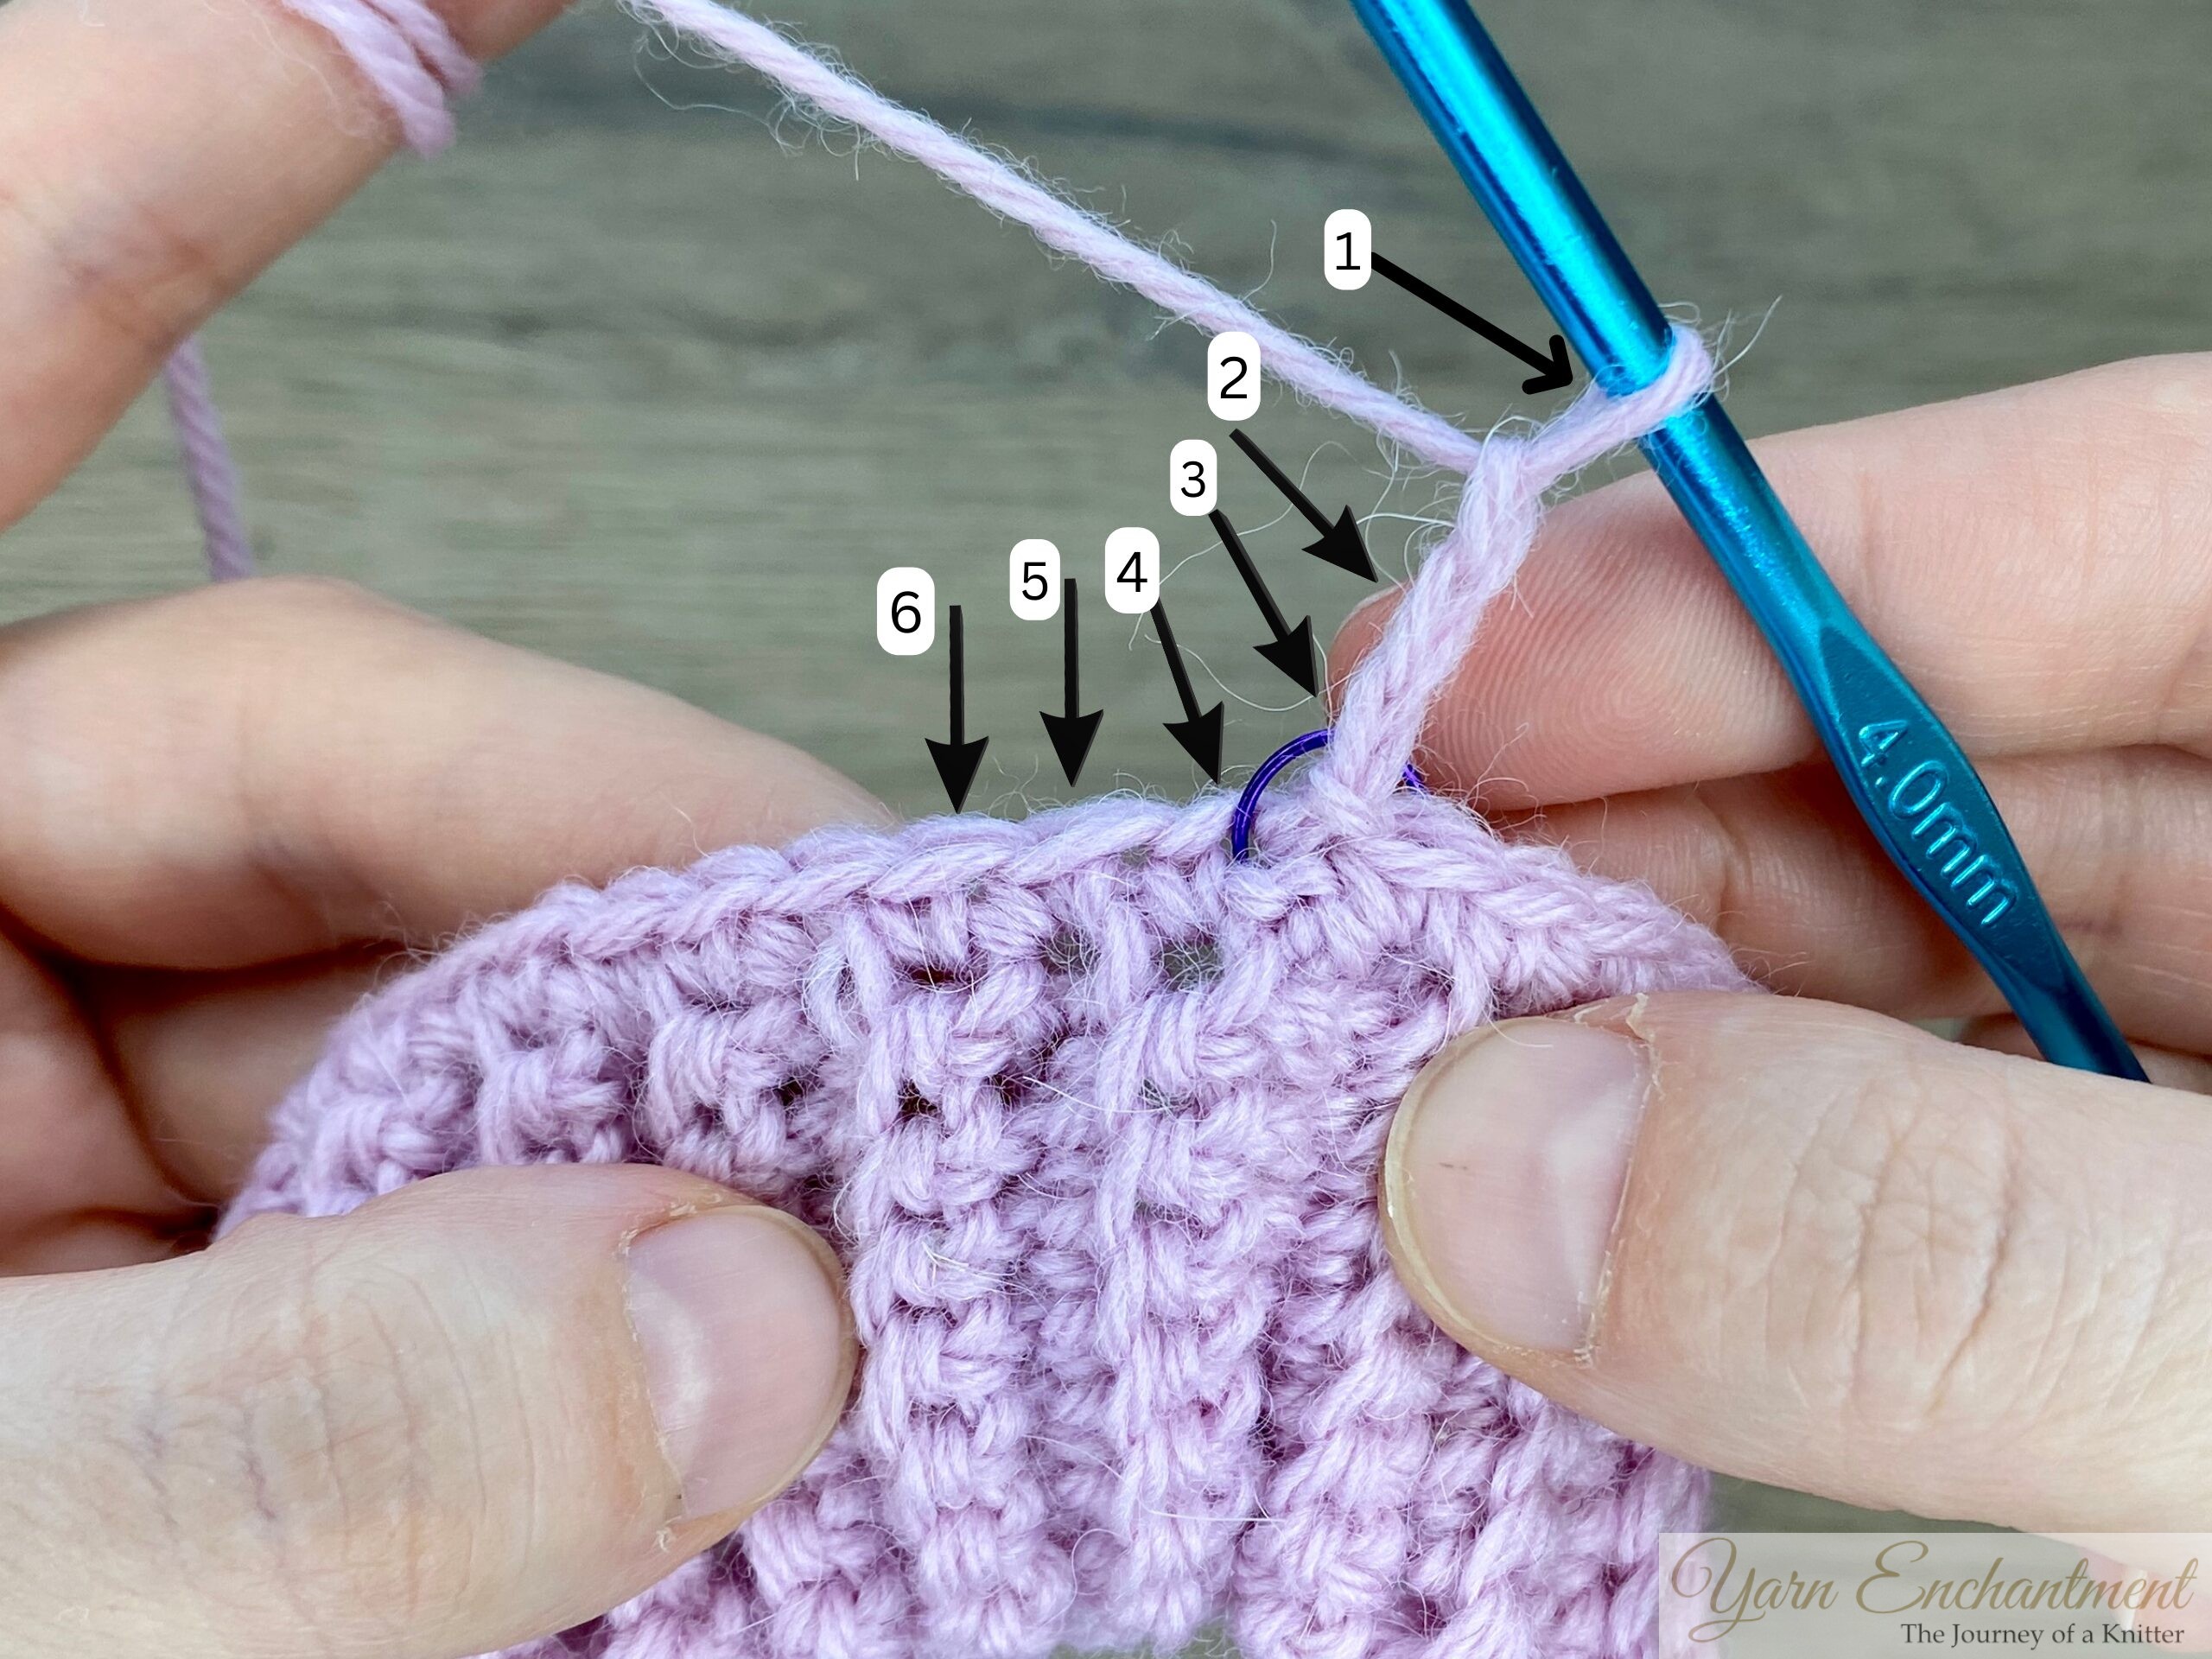 |  |  | I marked all the stitches where you need to insert your crochet hook and pull up a loop with an arrow. I will also make a full video tutorial explaining each and every step. | Insert your hook into the 2nd chain from the hook, yarn over and pull up a loop. And in the the 3rd chain from the hook, pull up a loop | Insert your hook into the base of the ch-3 there were your stitch marker is and pull up a loop. |


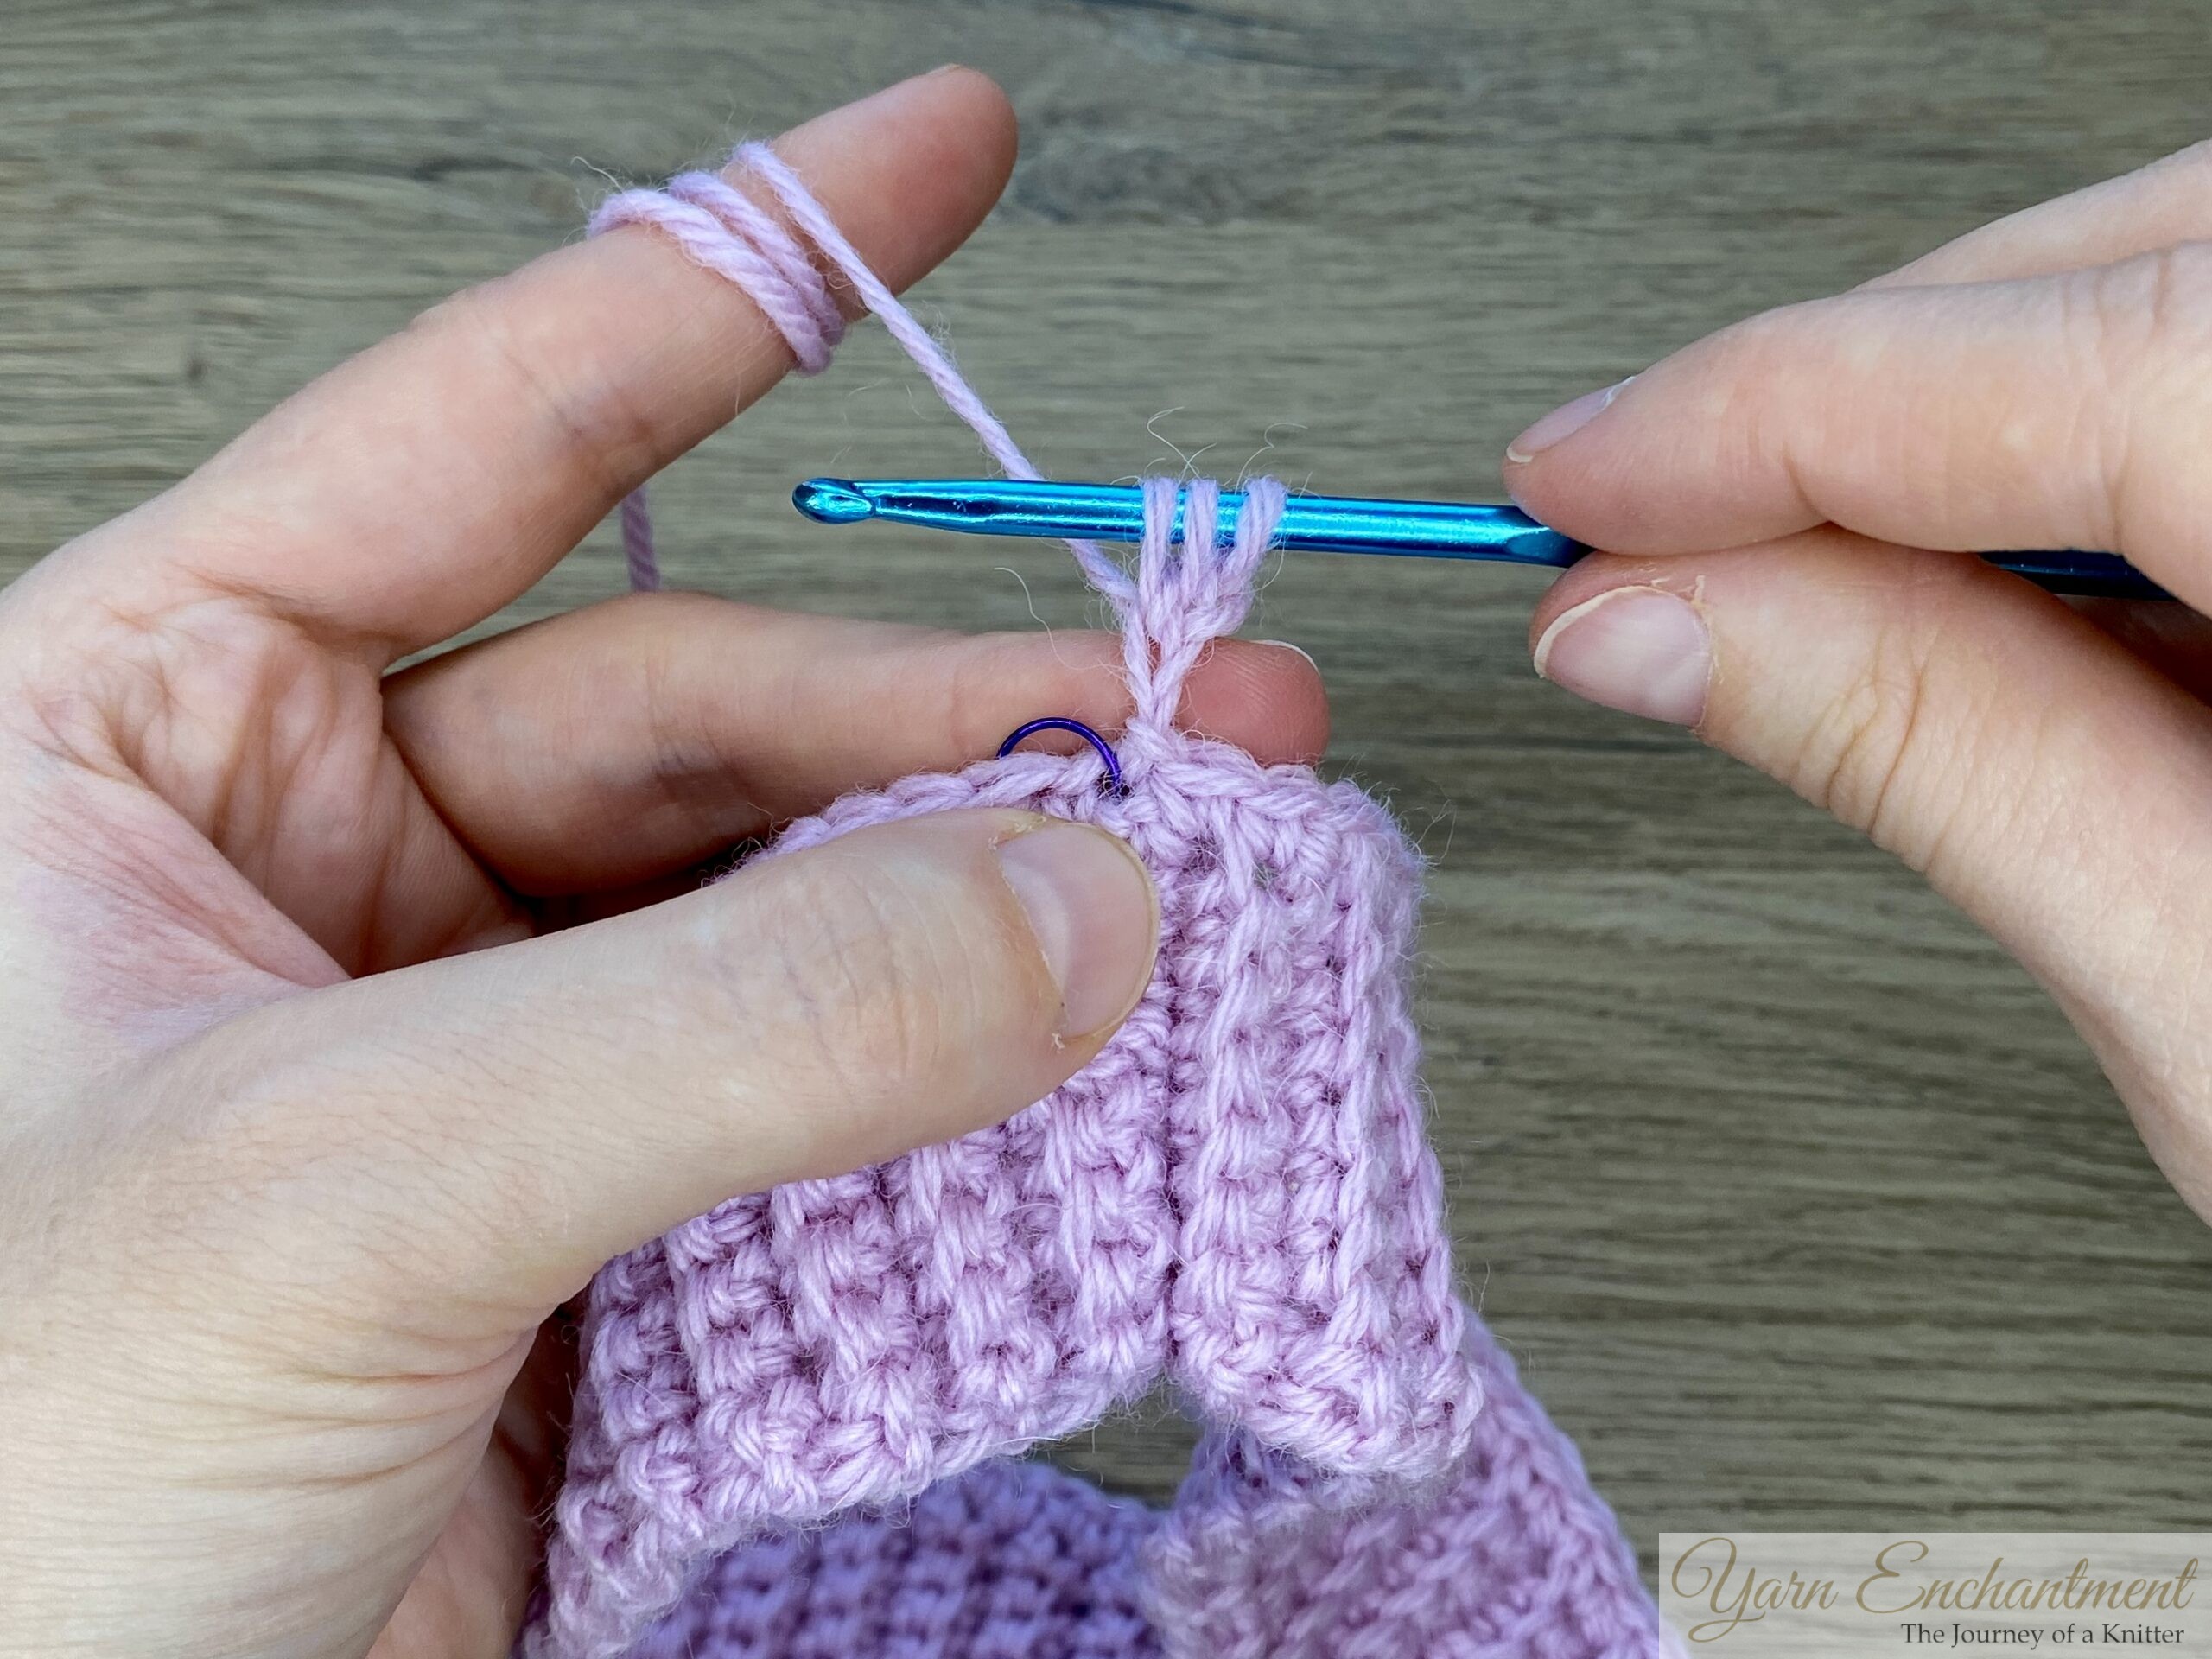
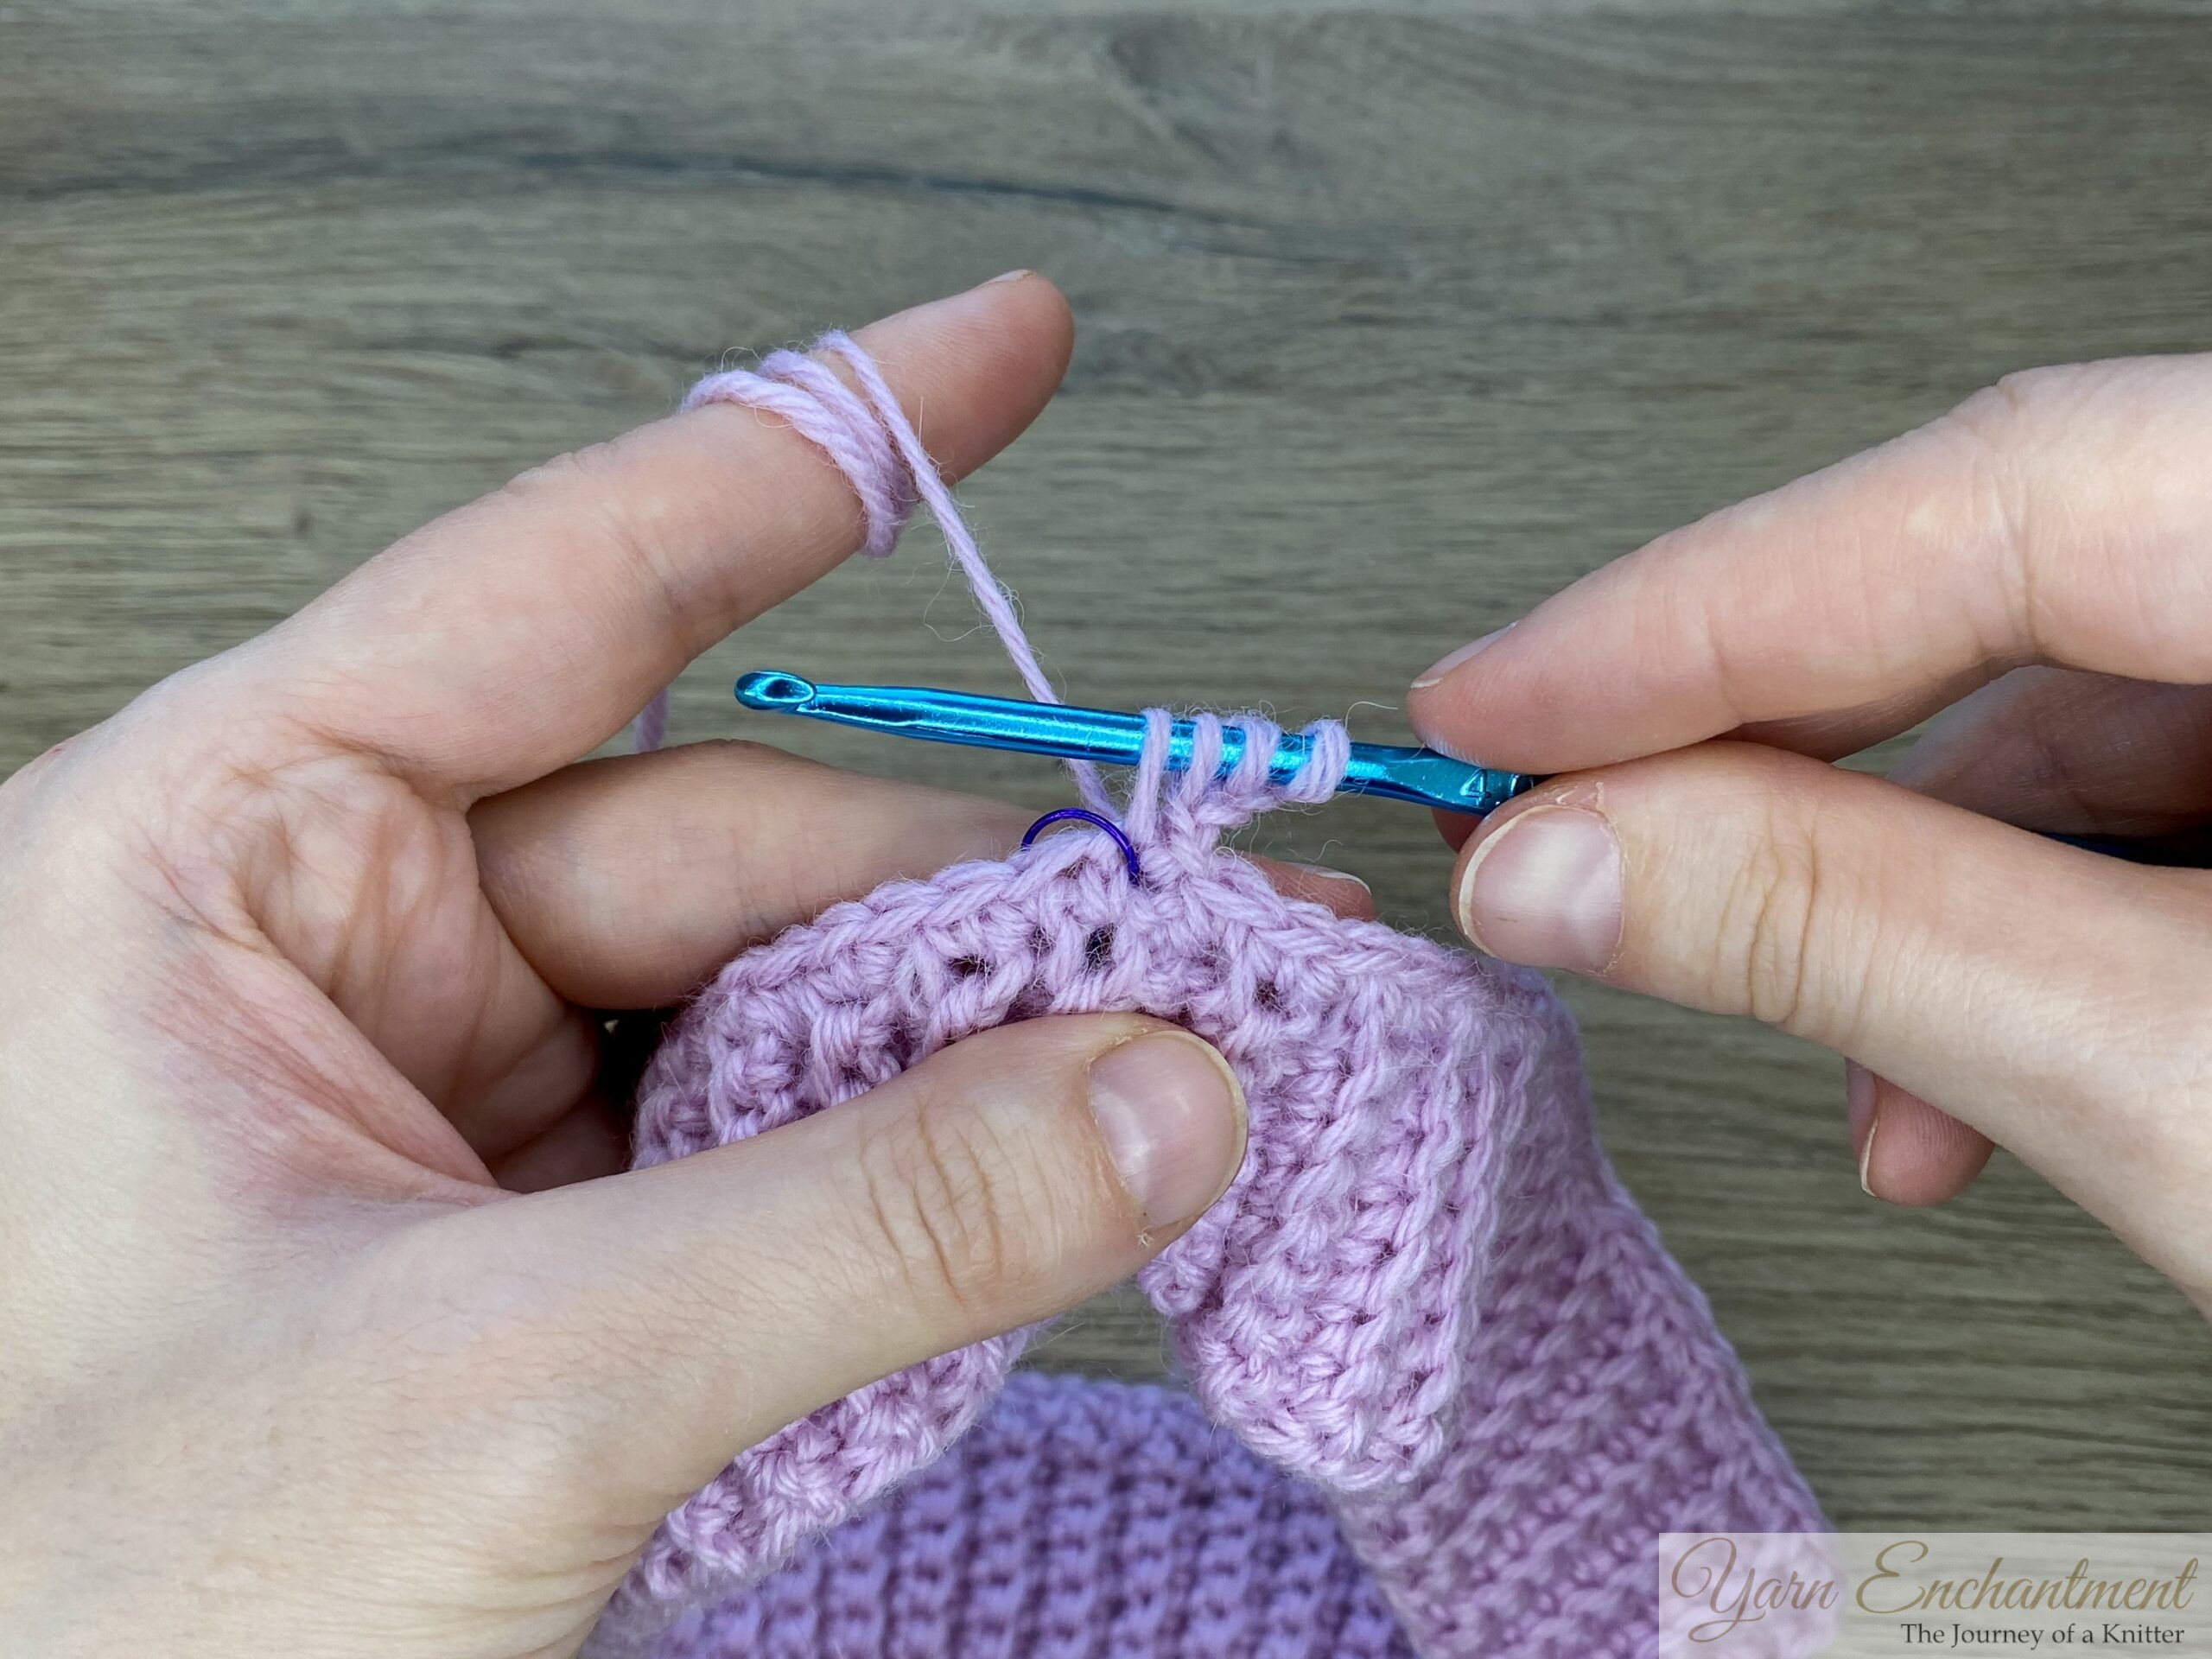
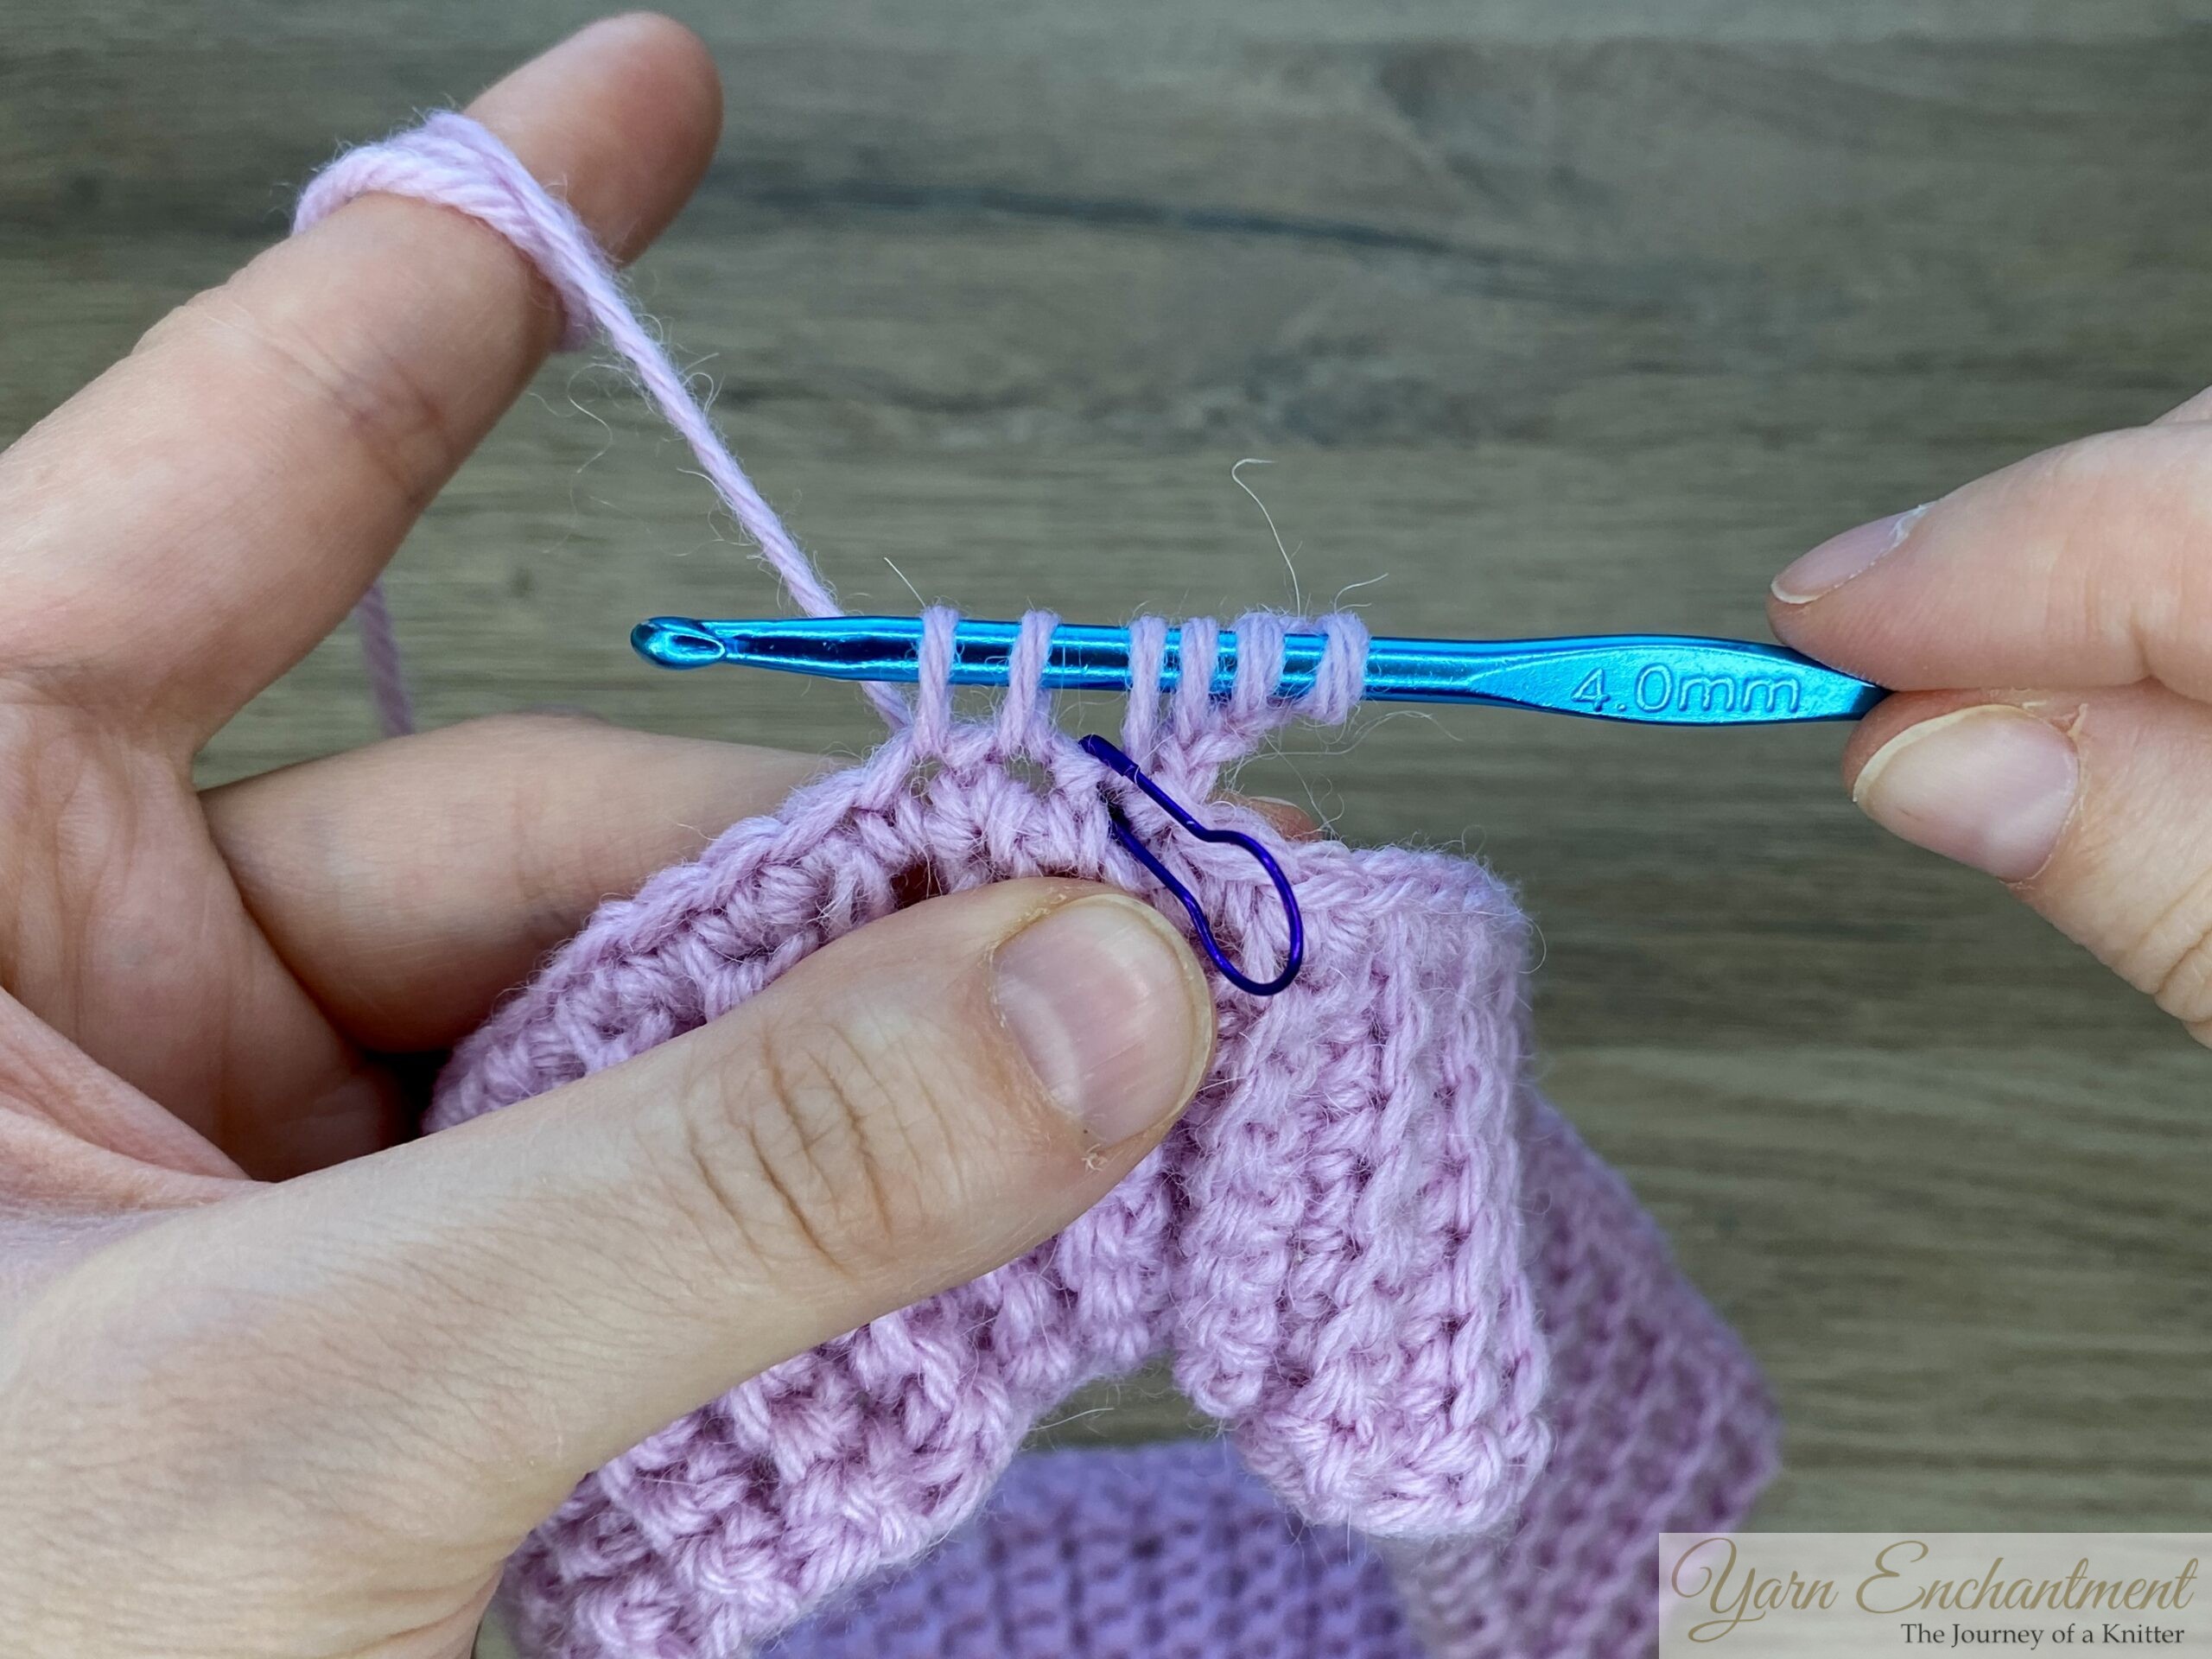 |  |  | Insert the hook into the next 2 stitches, yarn over, and pull through each time until you have 6 loops on the hook. | Yarn over and pull through all 6 loops. | then chain 1 to close the star and make the “eye”. |


Next stars:
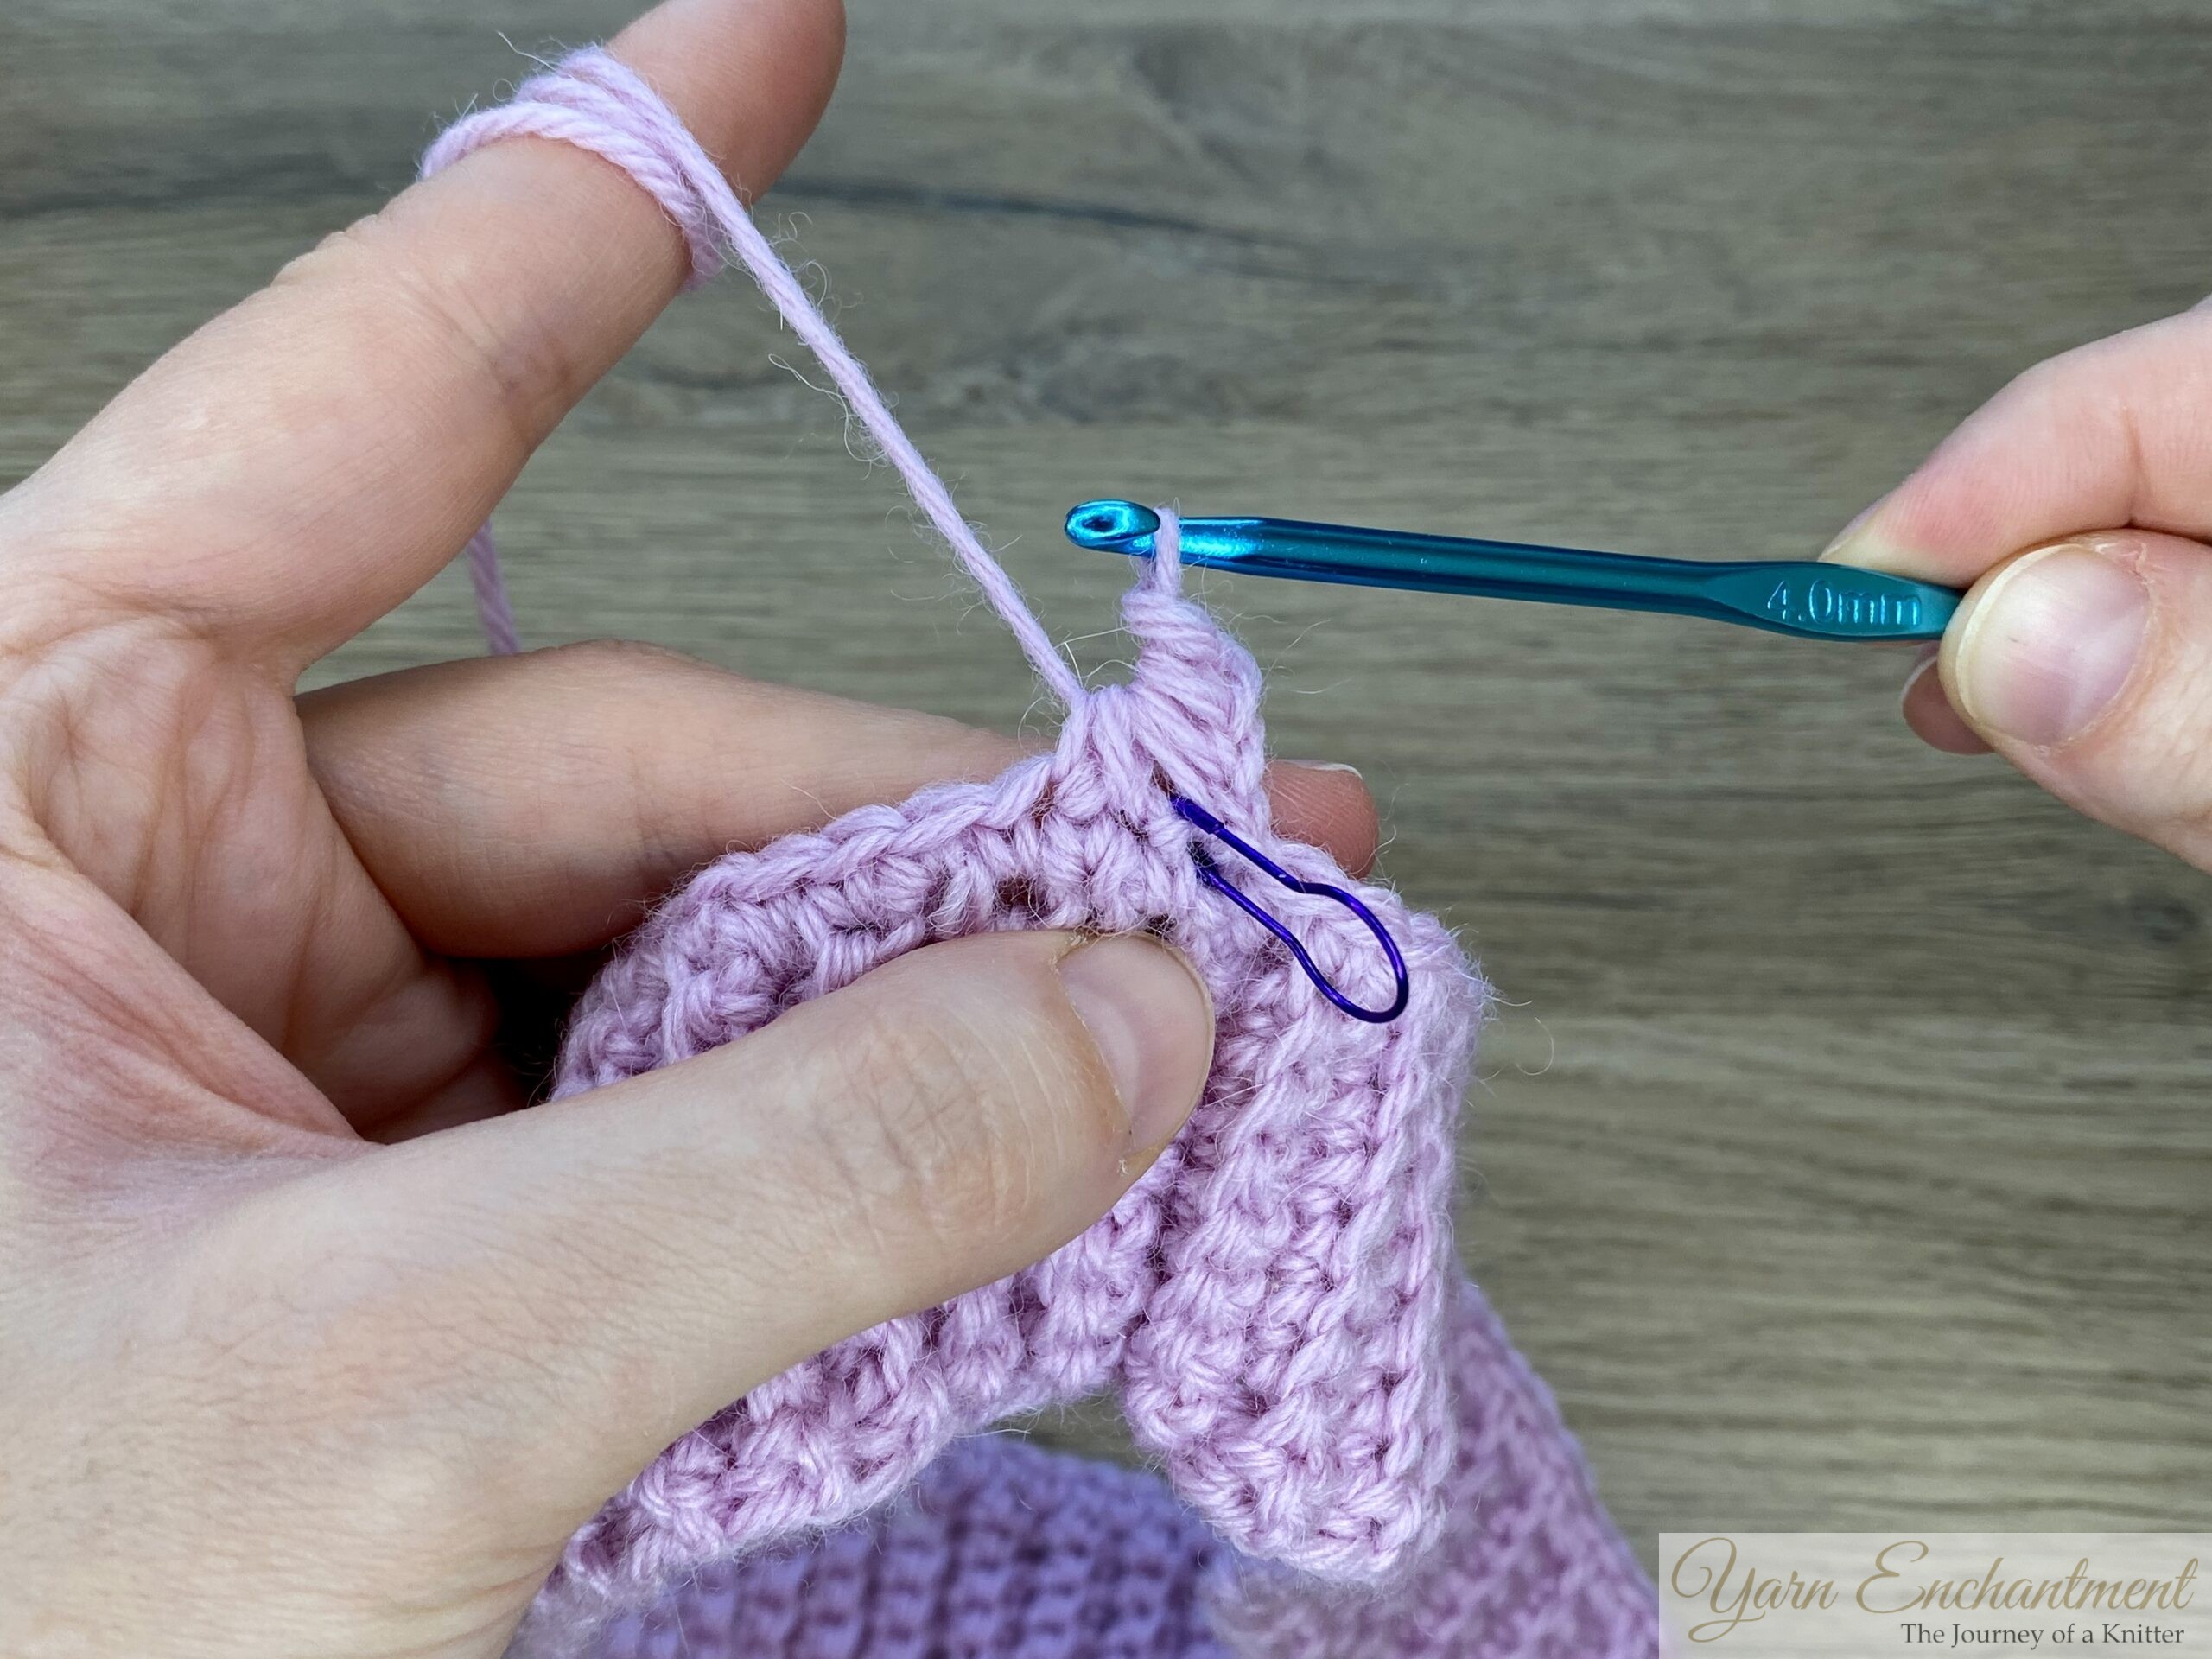
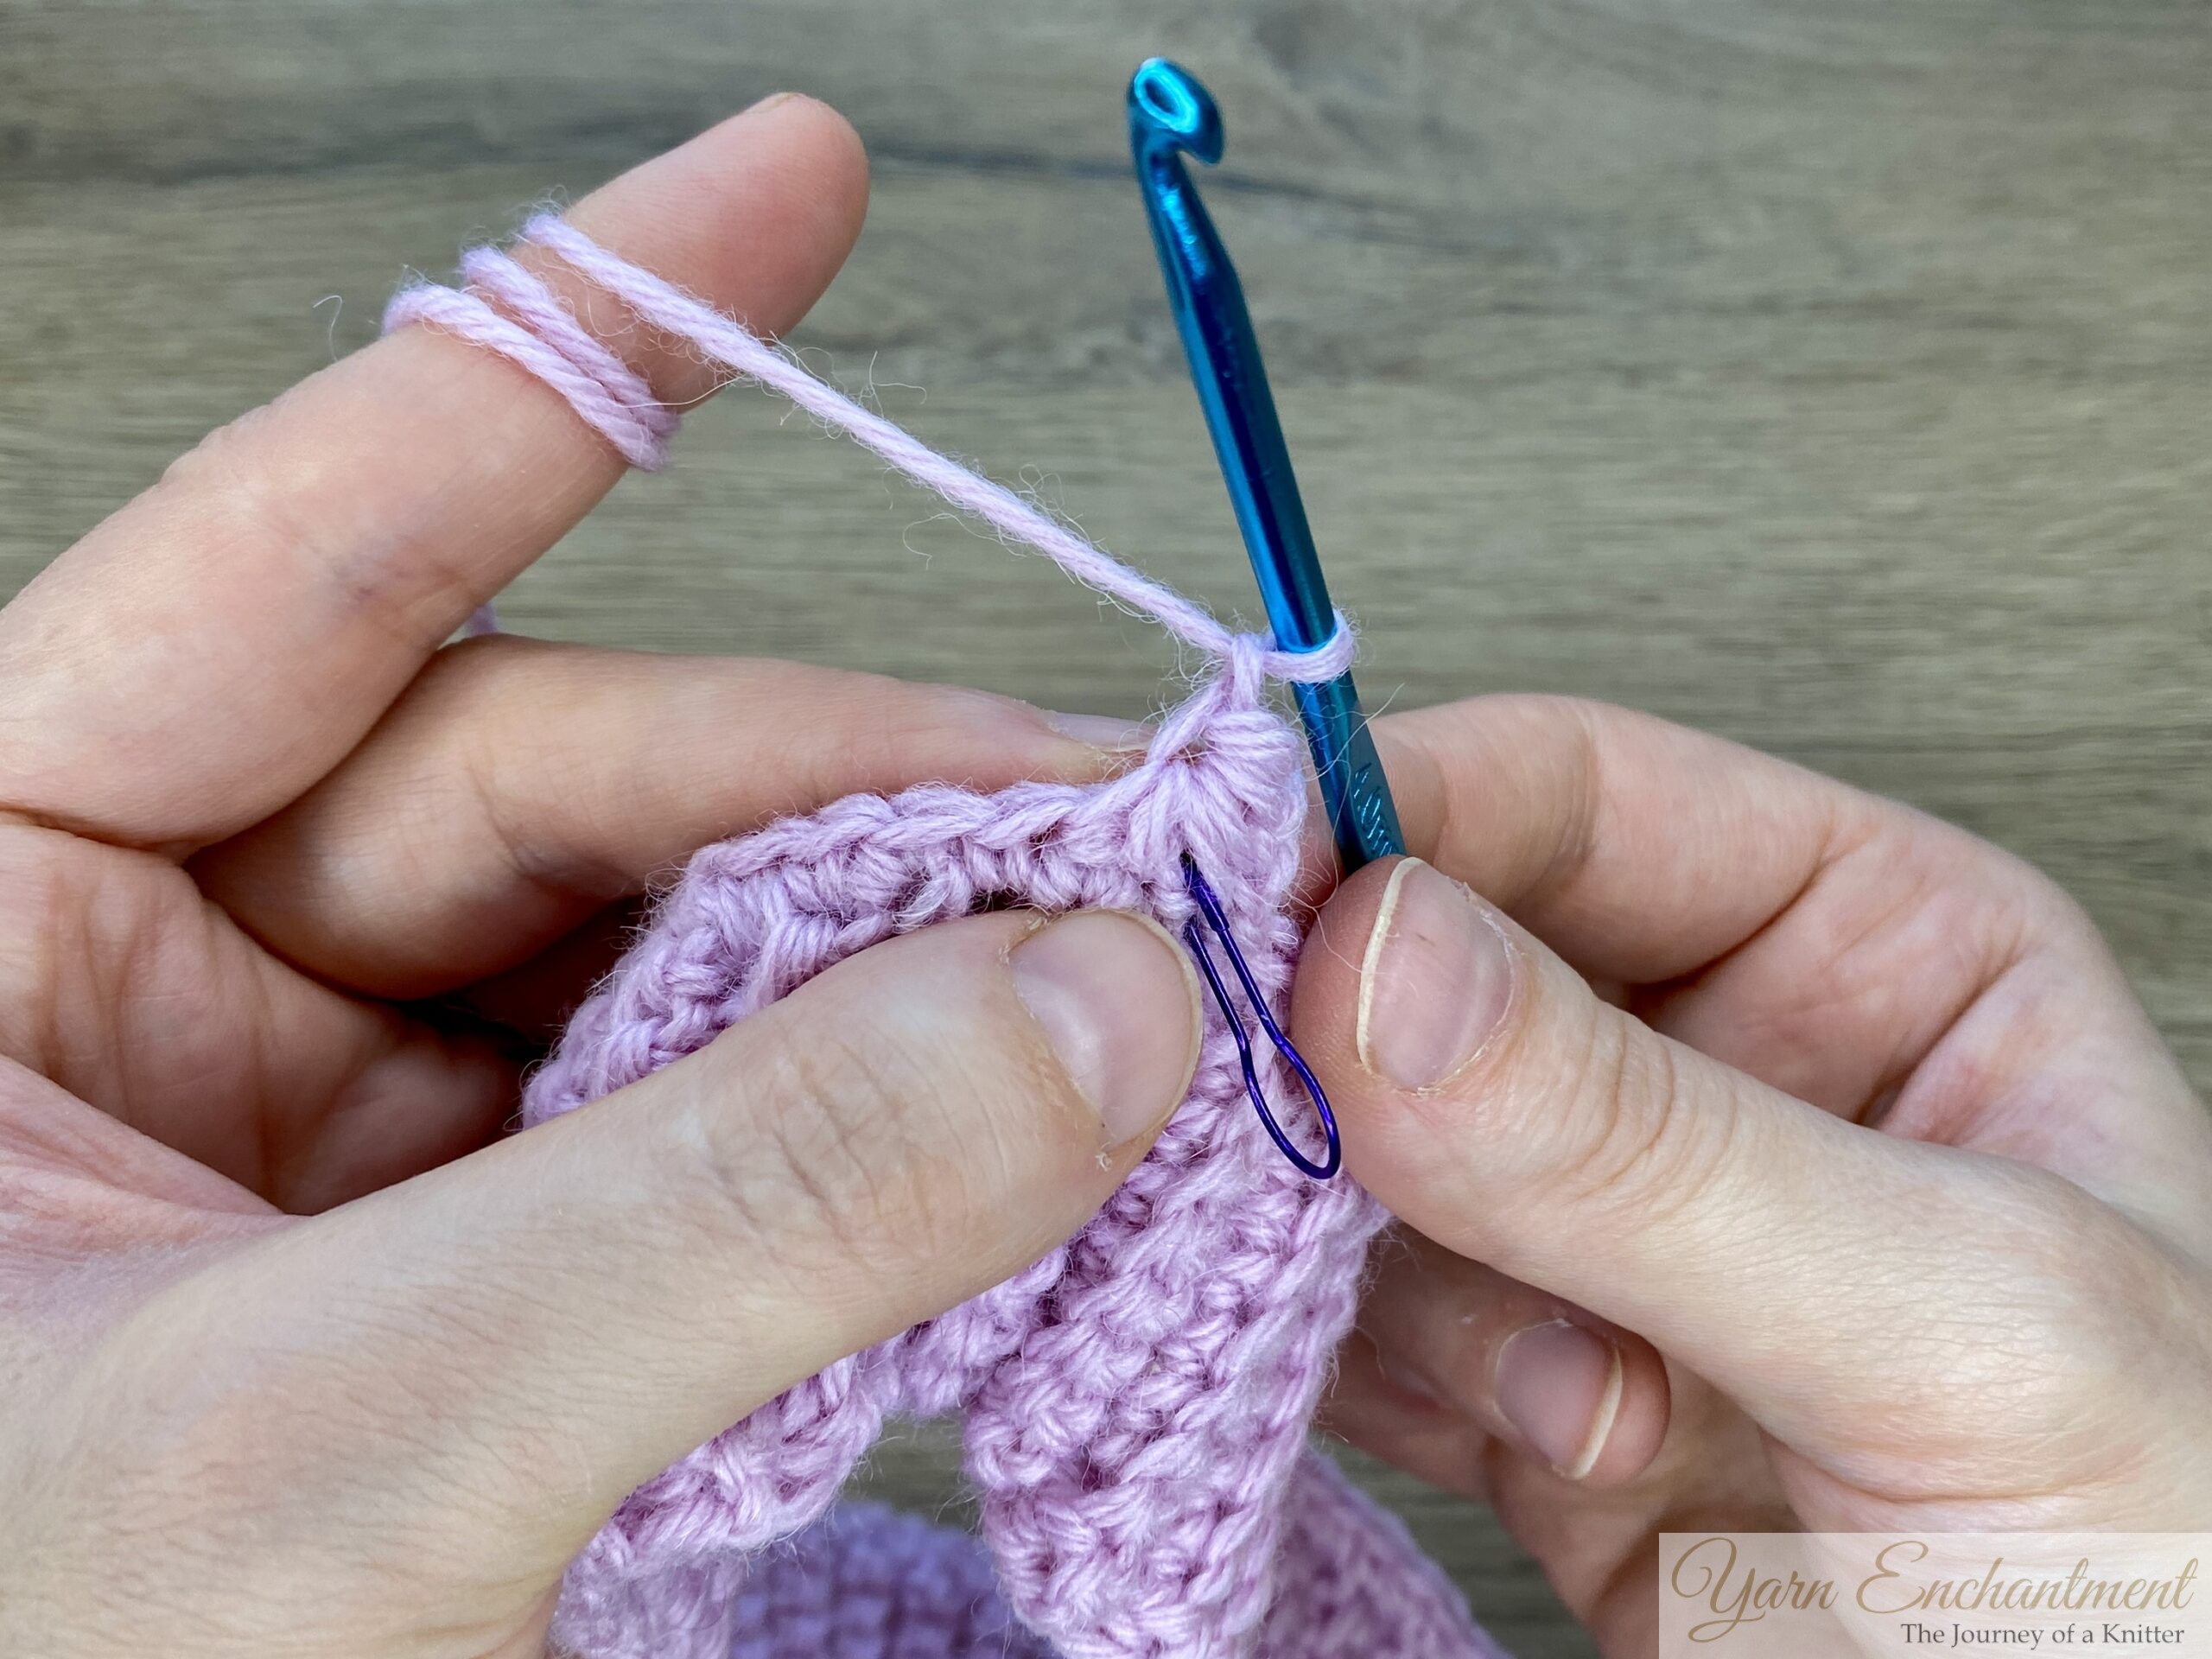
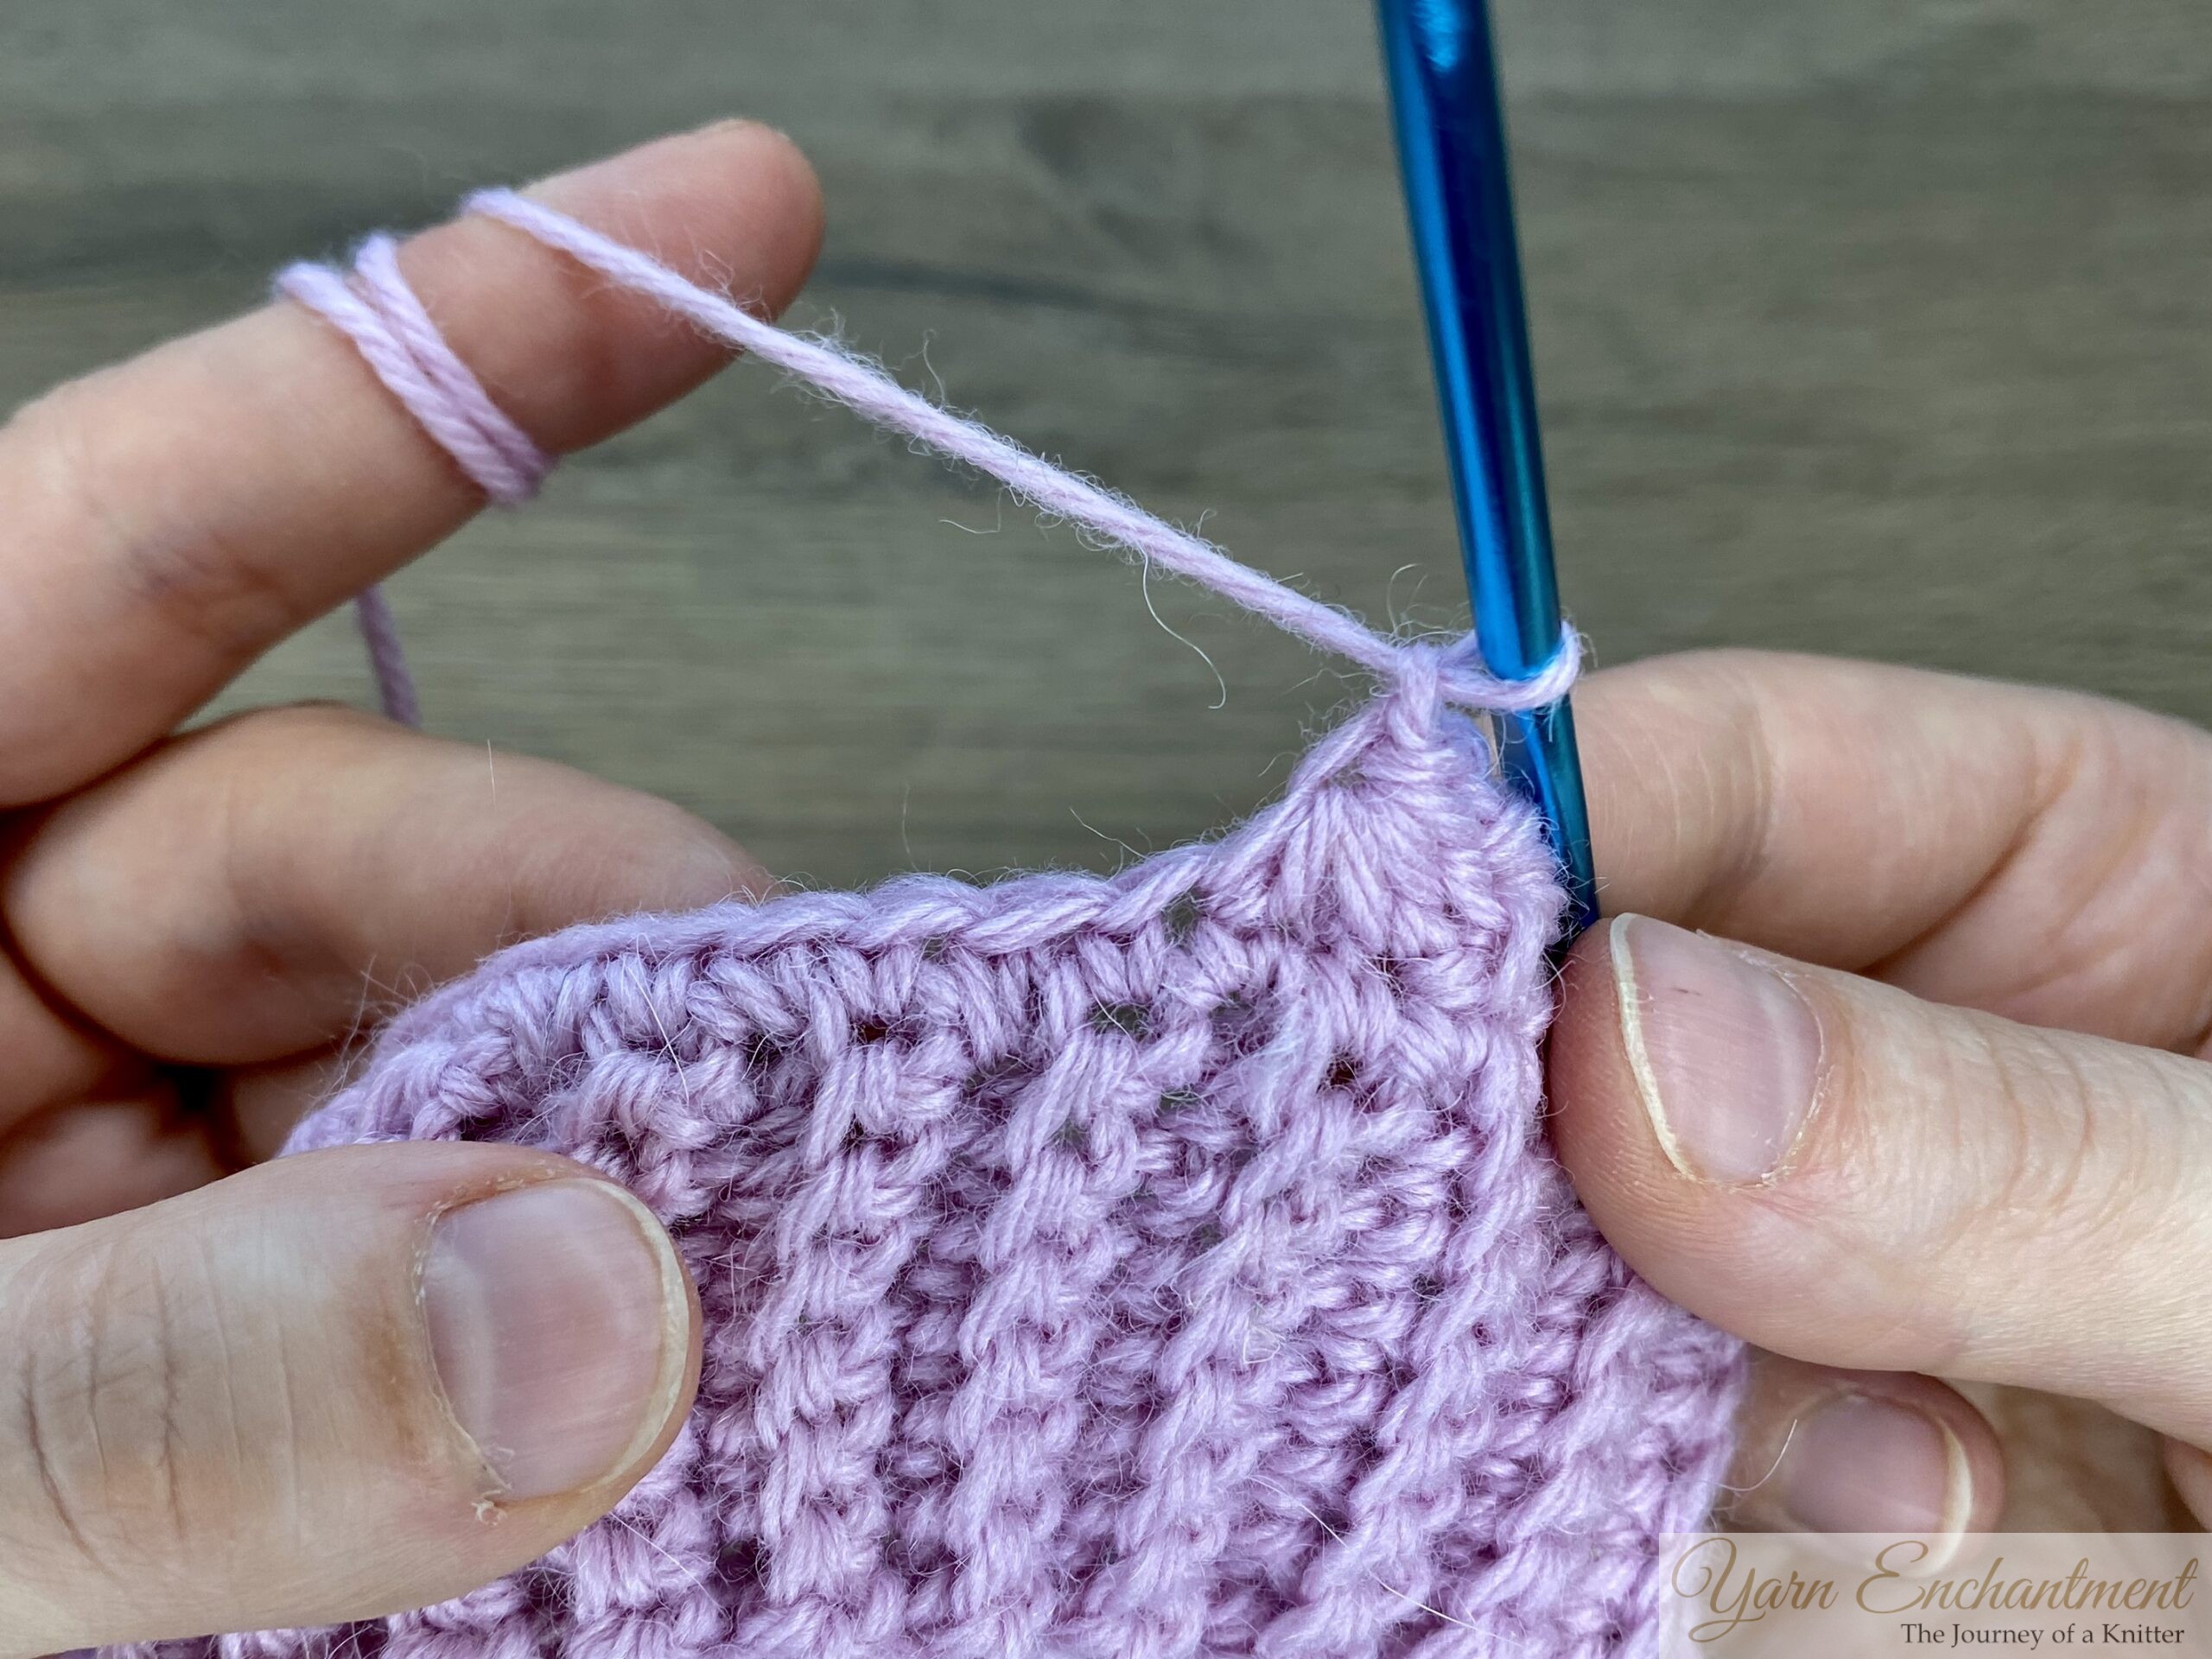
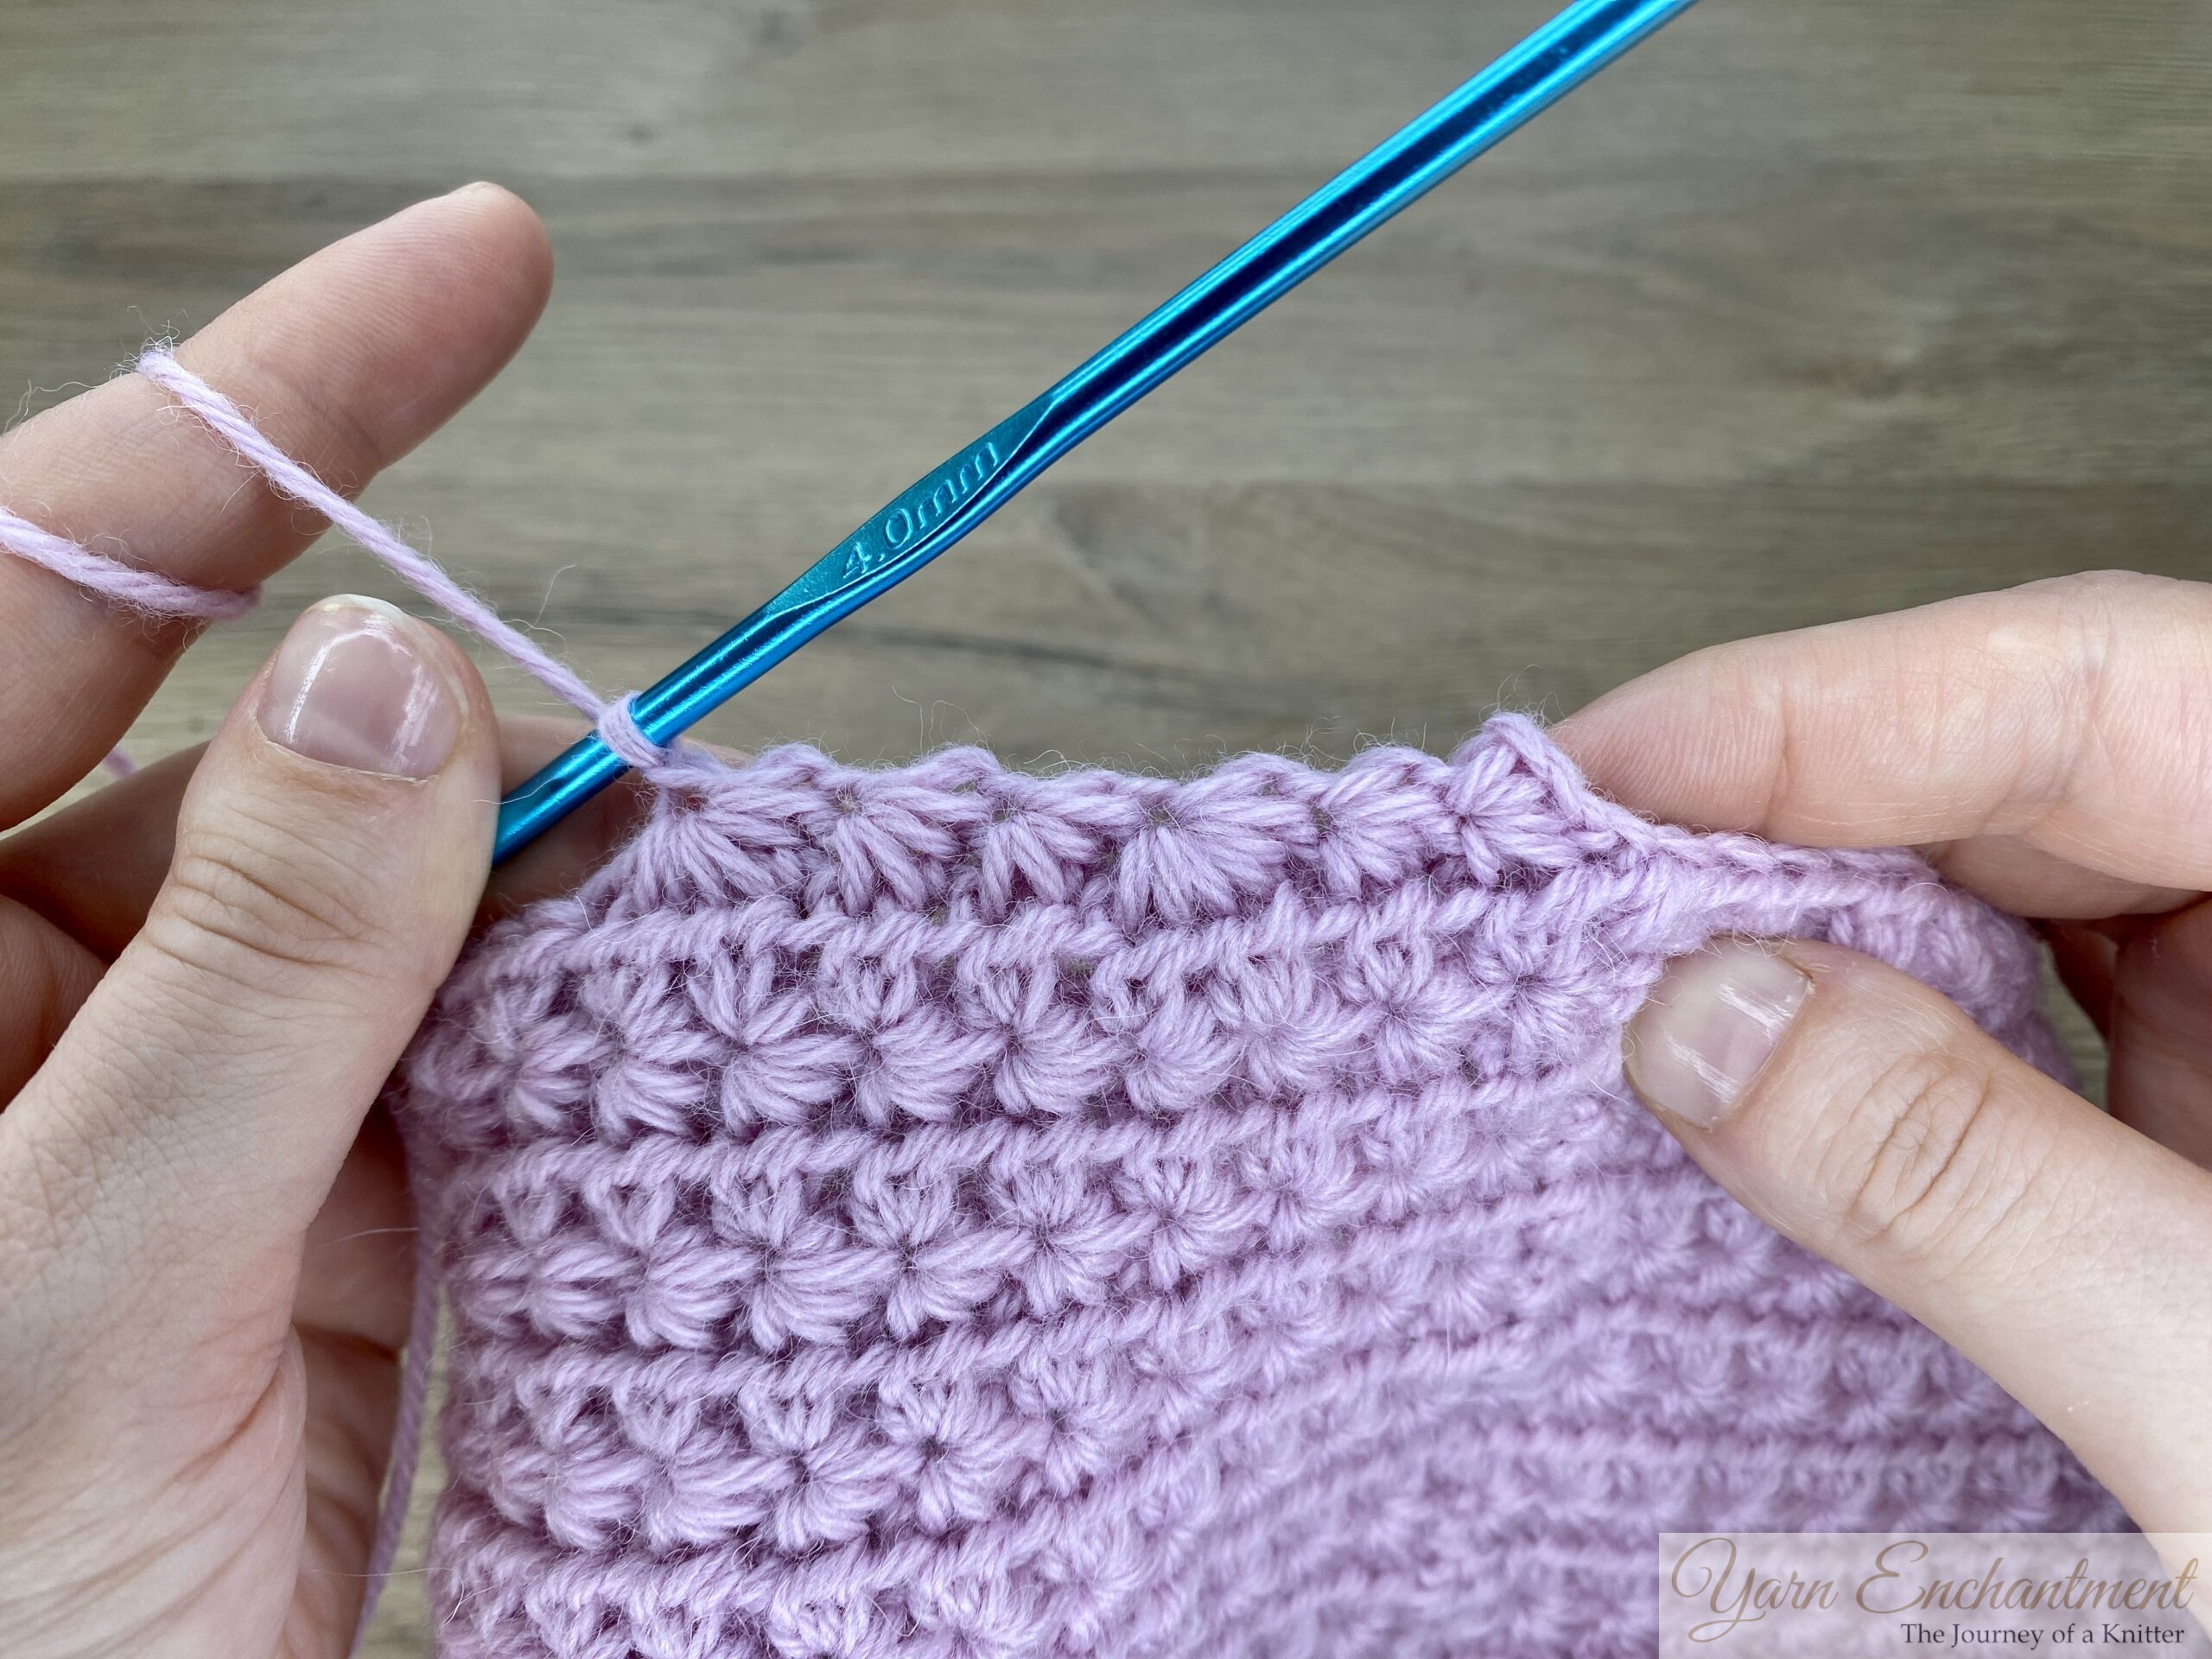
- Insert the hook into the "eye" of the star (the small hole created when closing the star), yarn over, and pull through.
- Insert the hook into the last arm of the star (the last loop created), yarn over, and pull through.
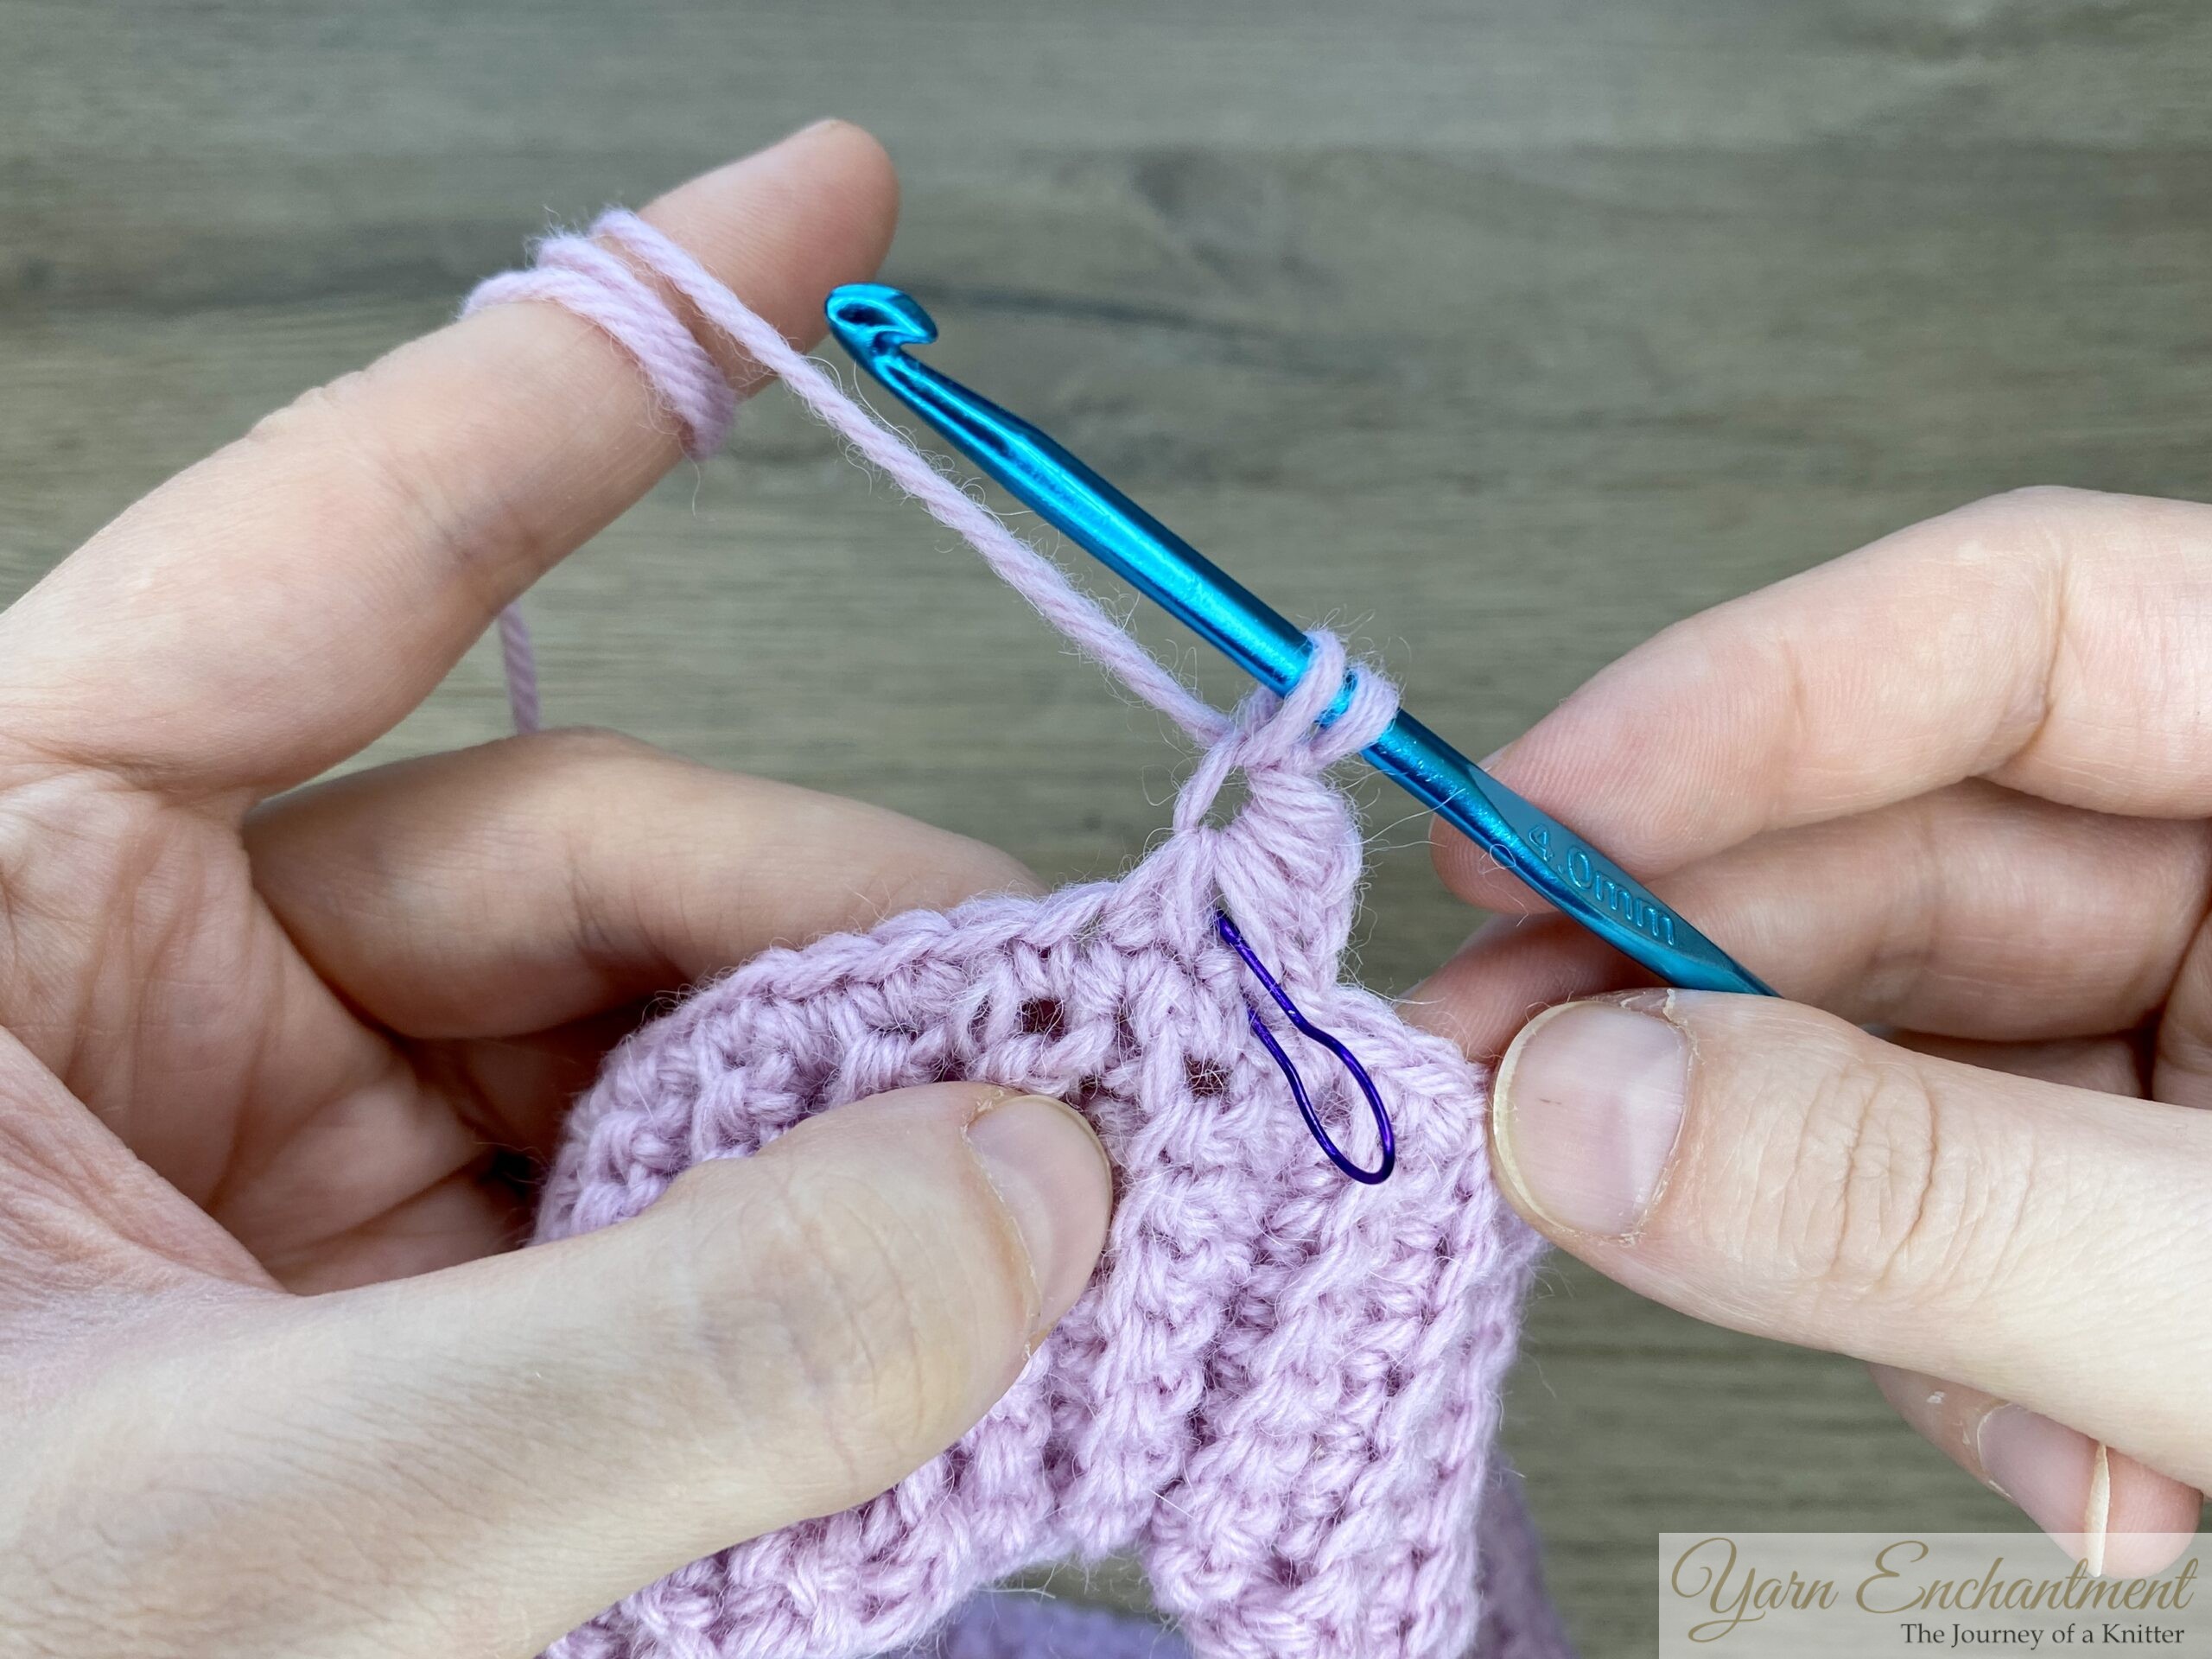
- Insert the hook into the base of the star (where the last arm originates), yarn over, and pull through.
- Insert the hook into the next 2 stitches, yarn over, and pull through each time until you have 6 loops on the hook.
- Yarn over and pull through all 6 loops, then close the star.
Repeat this process until you’ve gone all the way to the last star stitch. We will do something special to close the round and prevent any gaps.
 |  |  | Insert the hook into the "eye" of the star (the small hole created when closing the star), yarn over, and pull through. | Insert the hook into the last arm of the star (the last loop created), | yarn over, and pull through. |


 |  |  | Insert the hook into the base of the star (where the last arm originates), yarn over, and pull through. | Insert the hook into the next 2 stitches, yarn over, and pull through each time until you have 6 loops on the hook. | Yarn over and pull through all 6 loops, then close the star with a chain 1. |


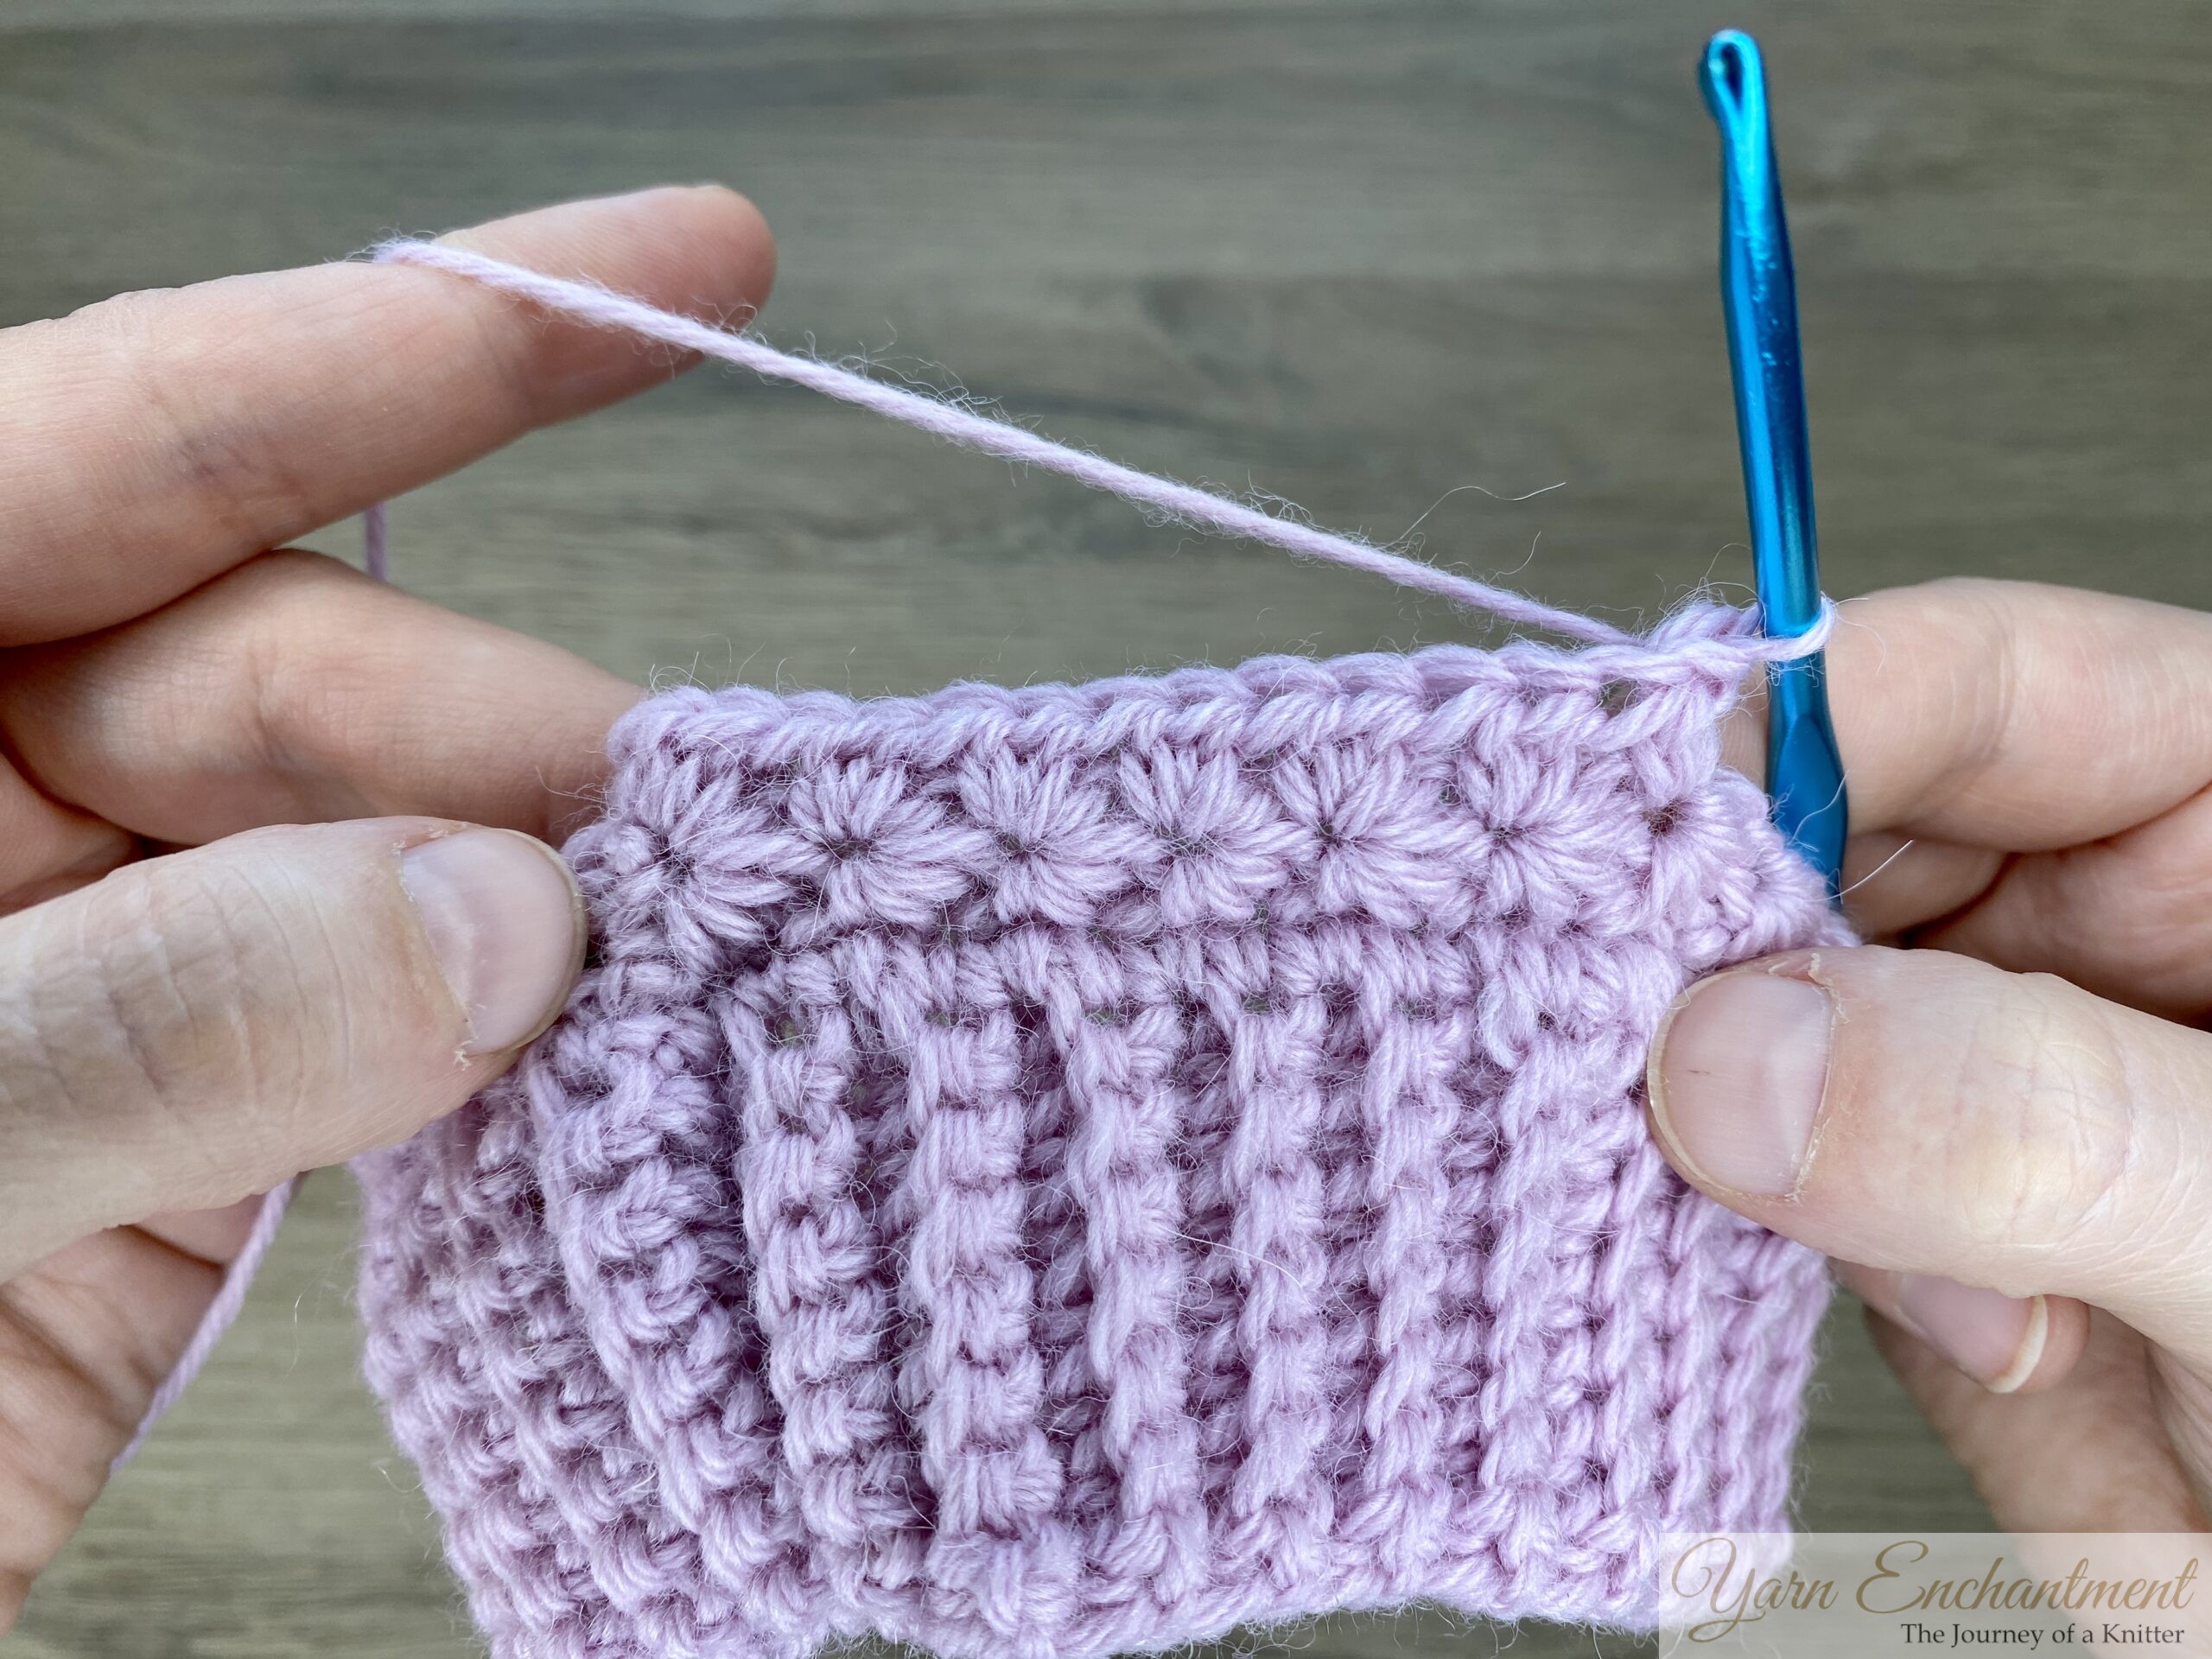
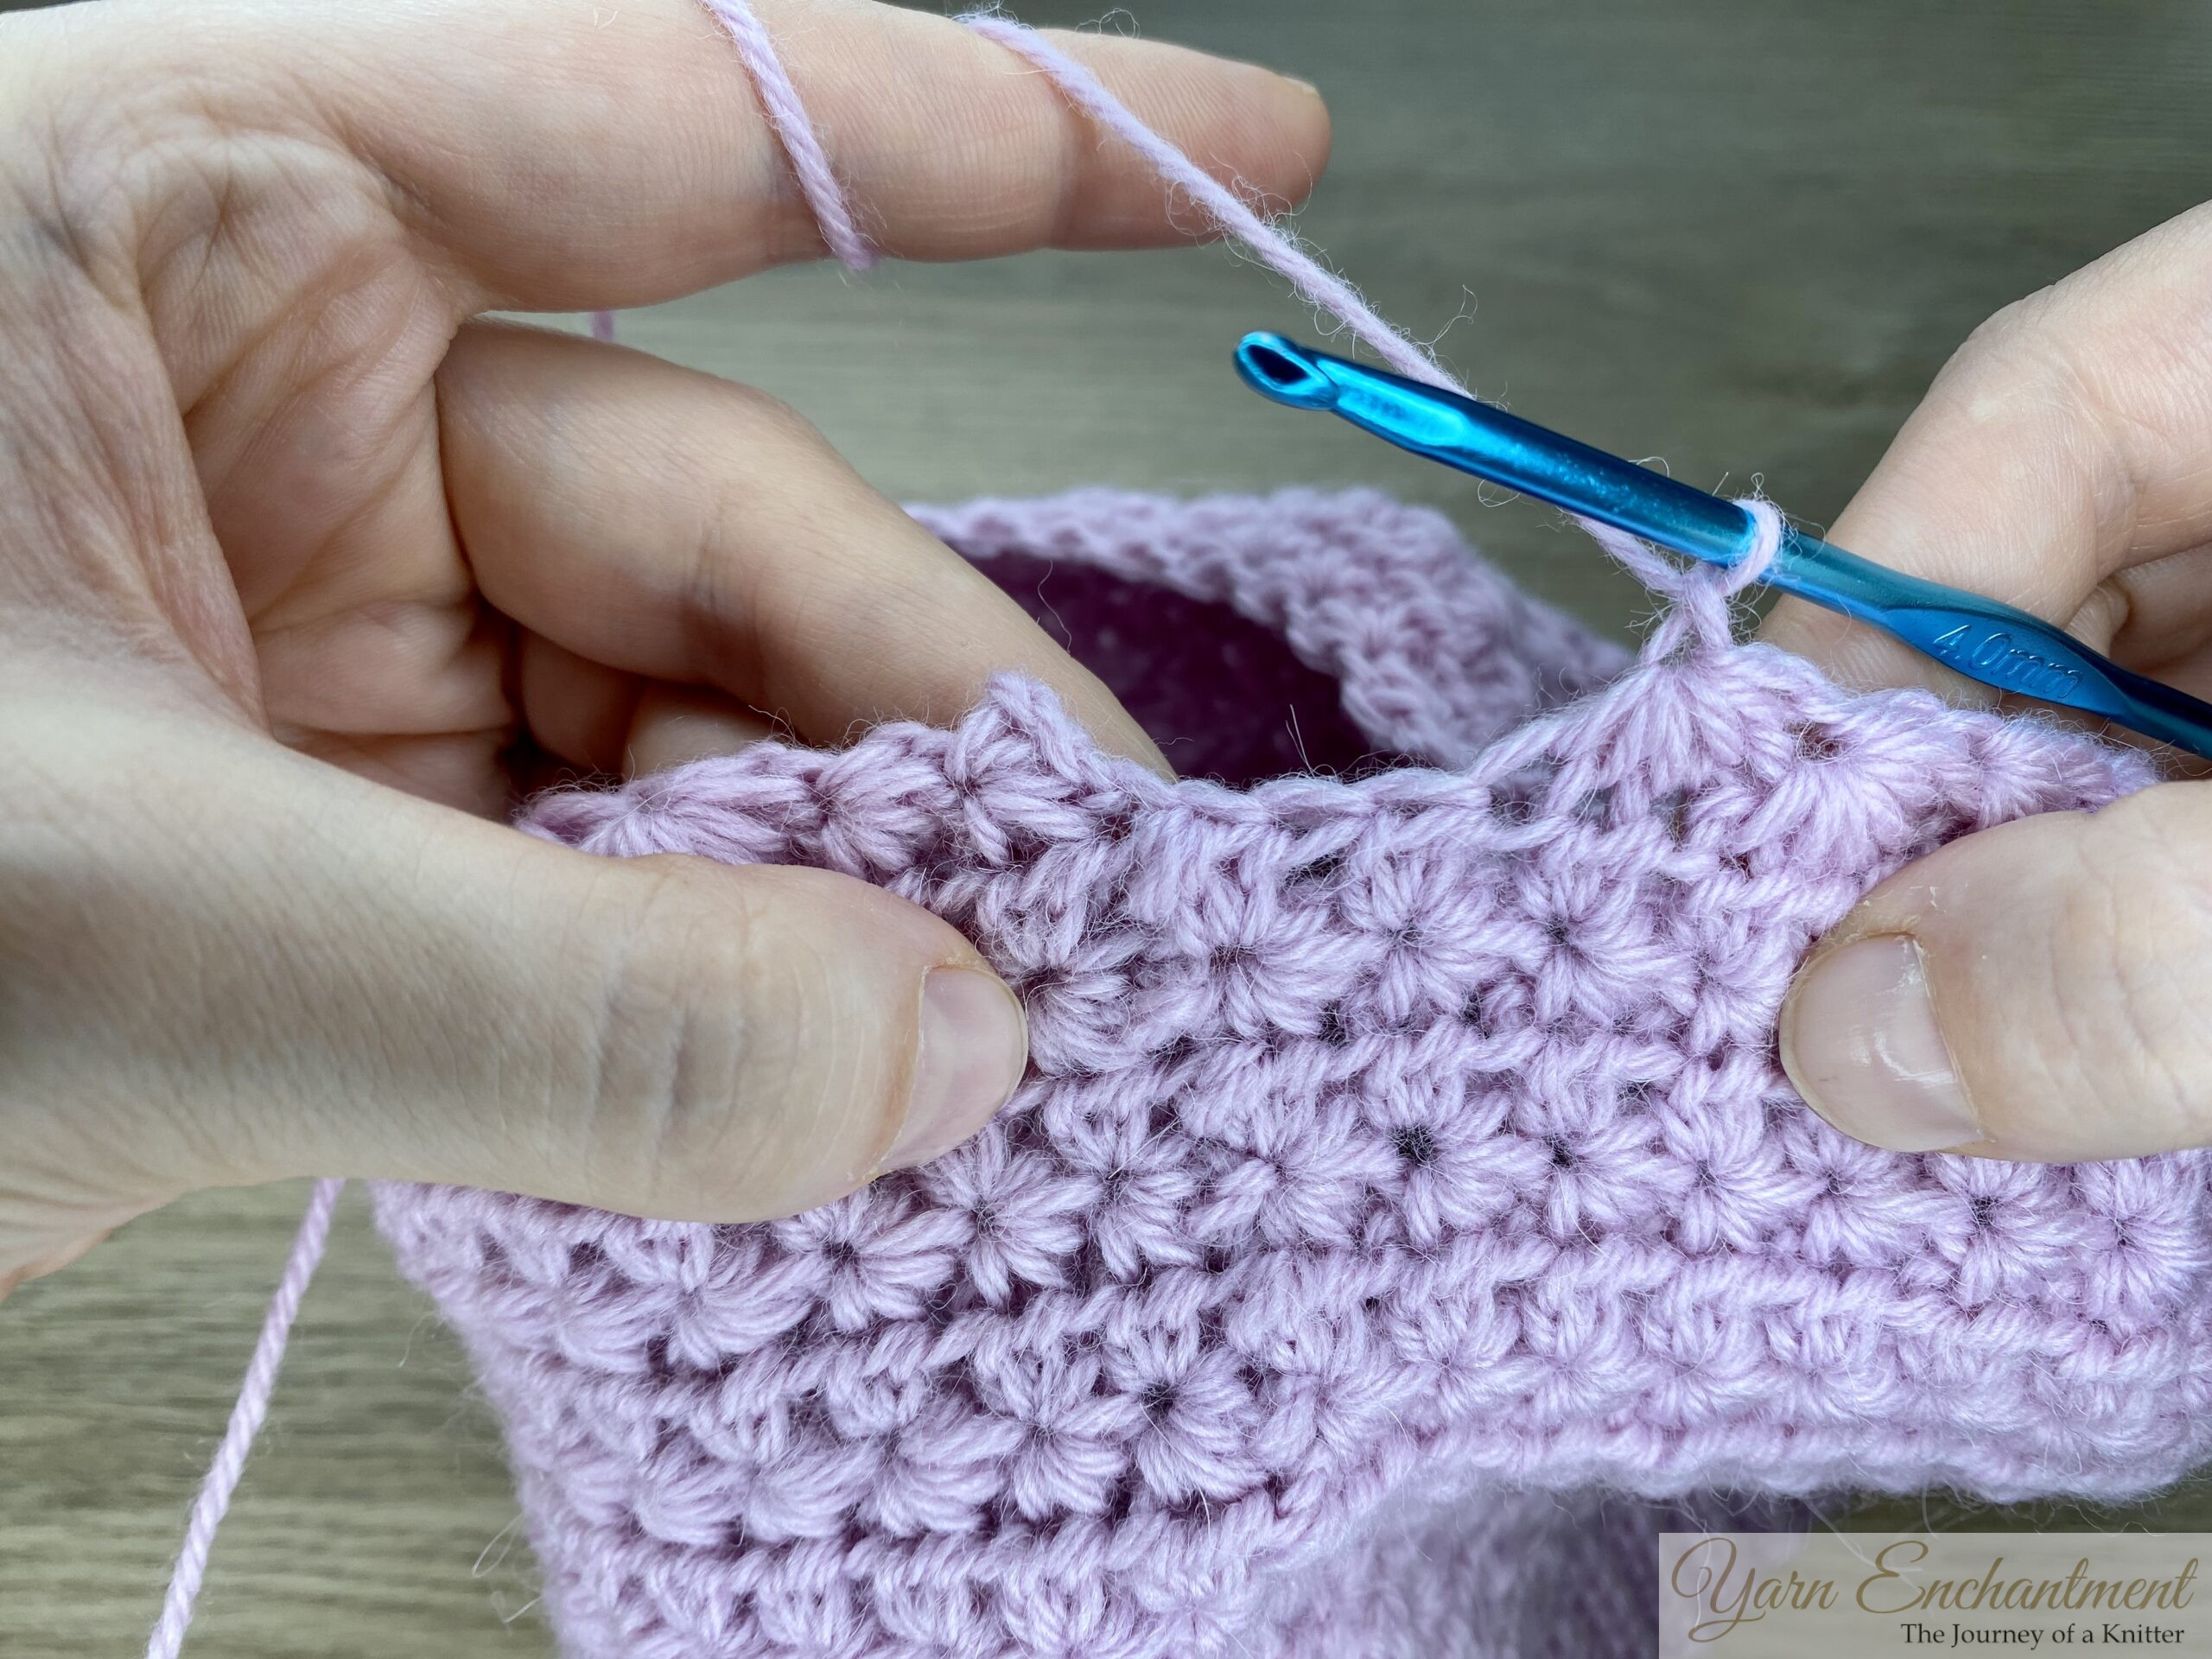
To finish this round, here’s what to do:
When you reach the end, you’ll notice there’s only one single crochet left for your last star stitch, don’t worry, that’s exactly right! The second leg of this star stitch will be worked into the base of your first star. You’ve still got your stitch marker in place, making it easy to spot. After pulling through all your loops, skip the chain one and instead work a slip stitch into the first star stitch (not into the eye). This brings everything together and closes up any gaps for a neat finish.
You should now have half as many star stitches as single crochets from the previous row. So if you started with 100 single crochet stitches, you’ll end up with 50 star stitches in this round.
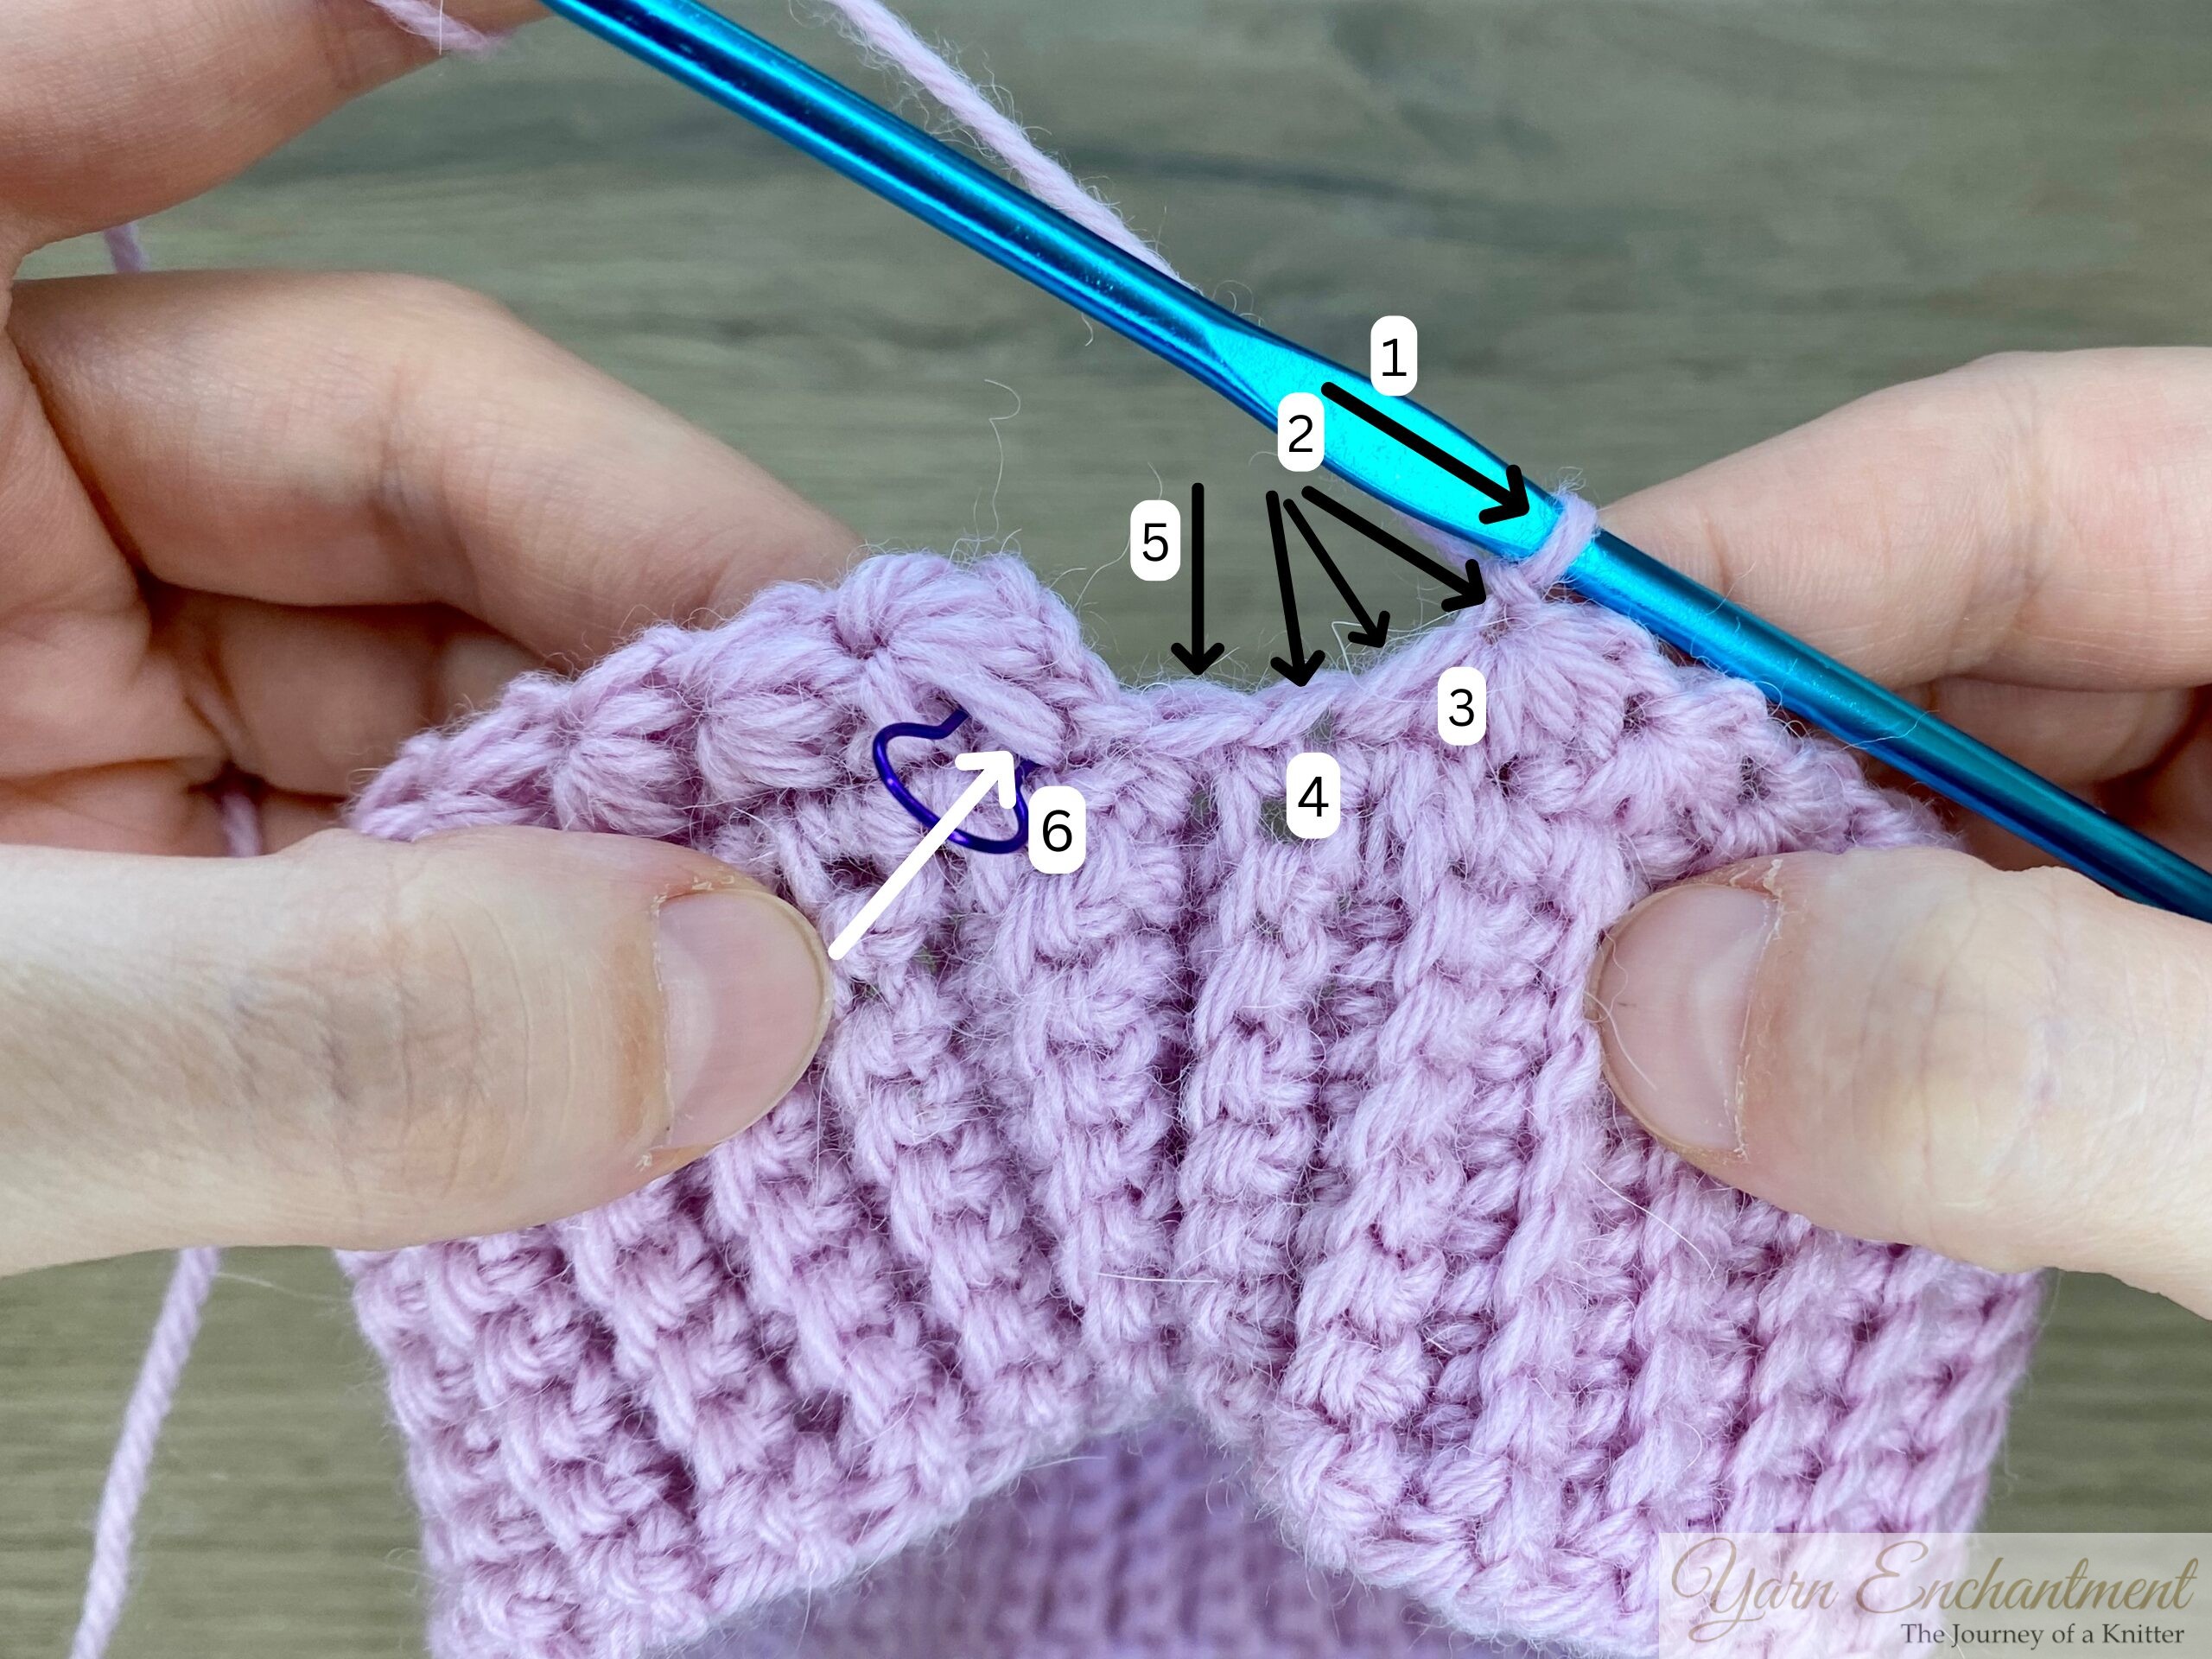 | 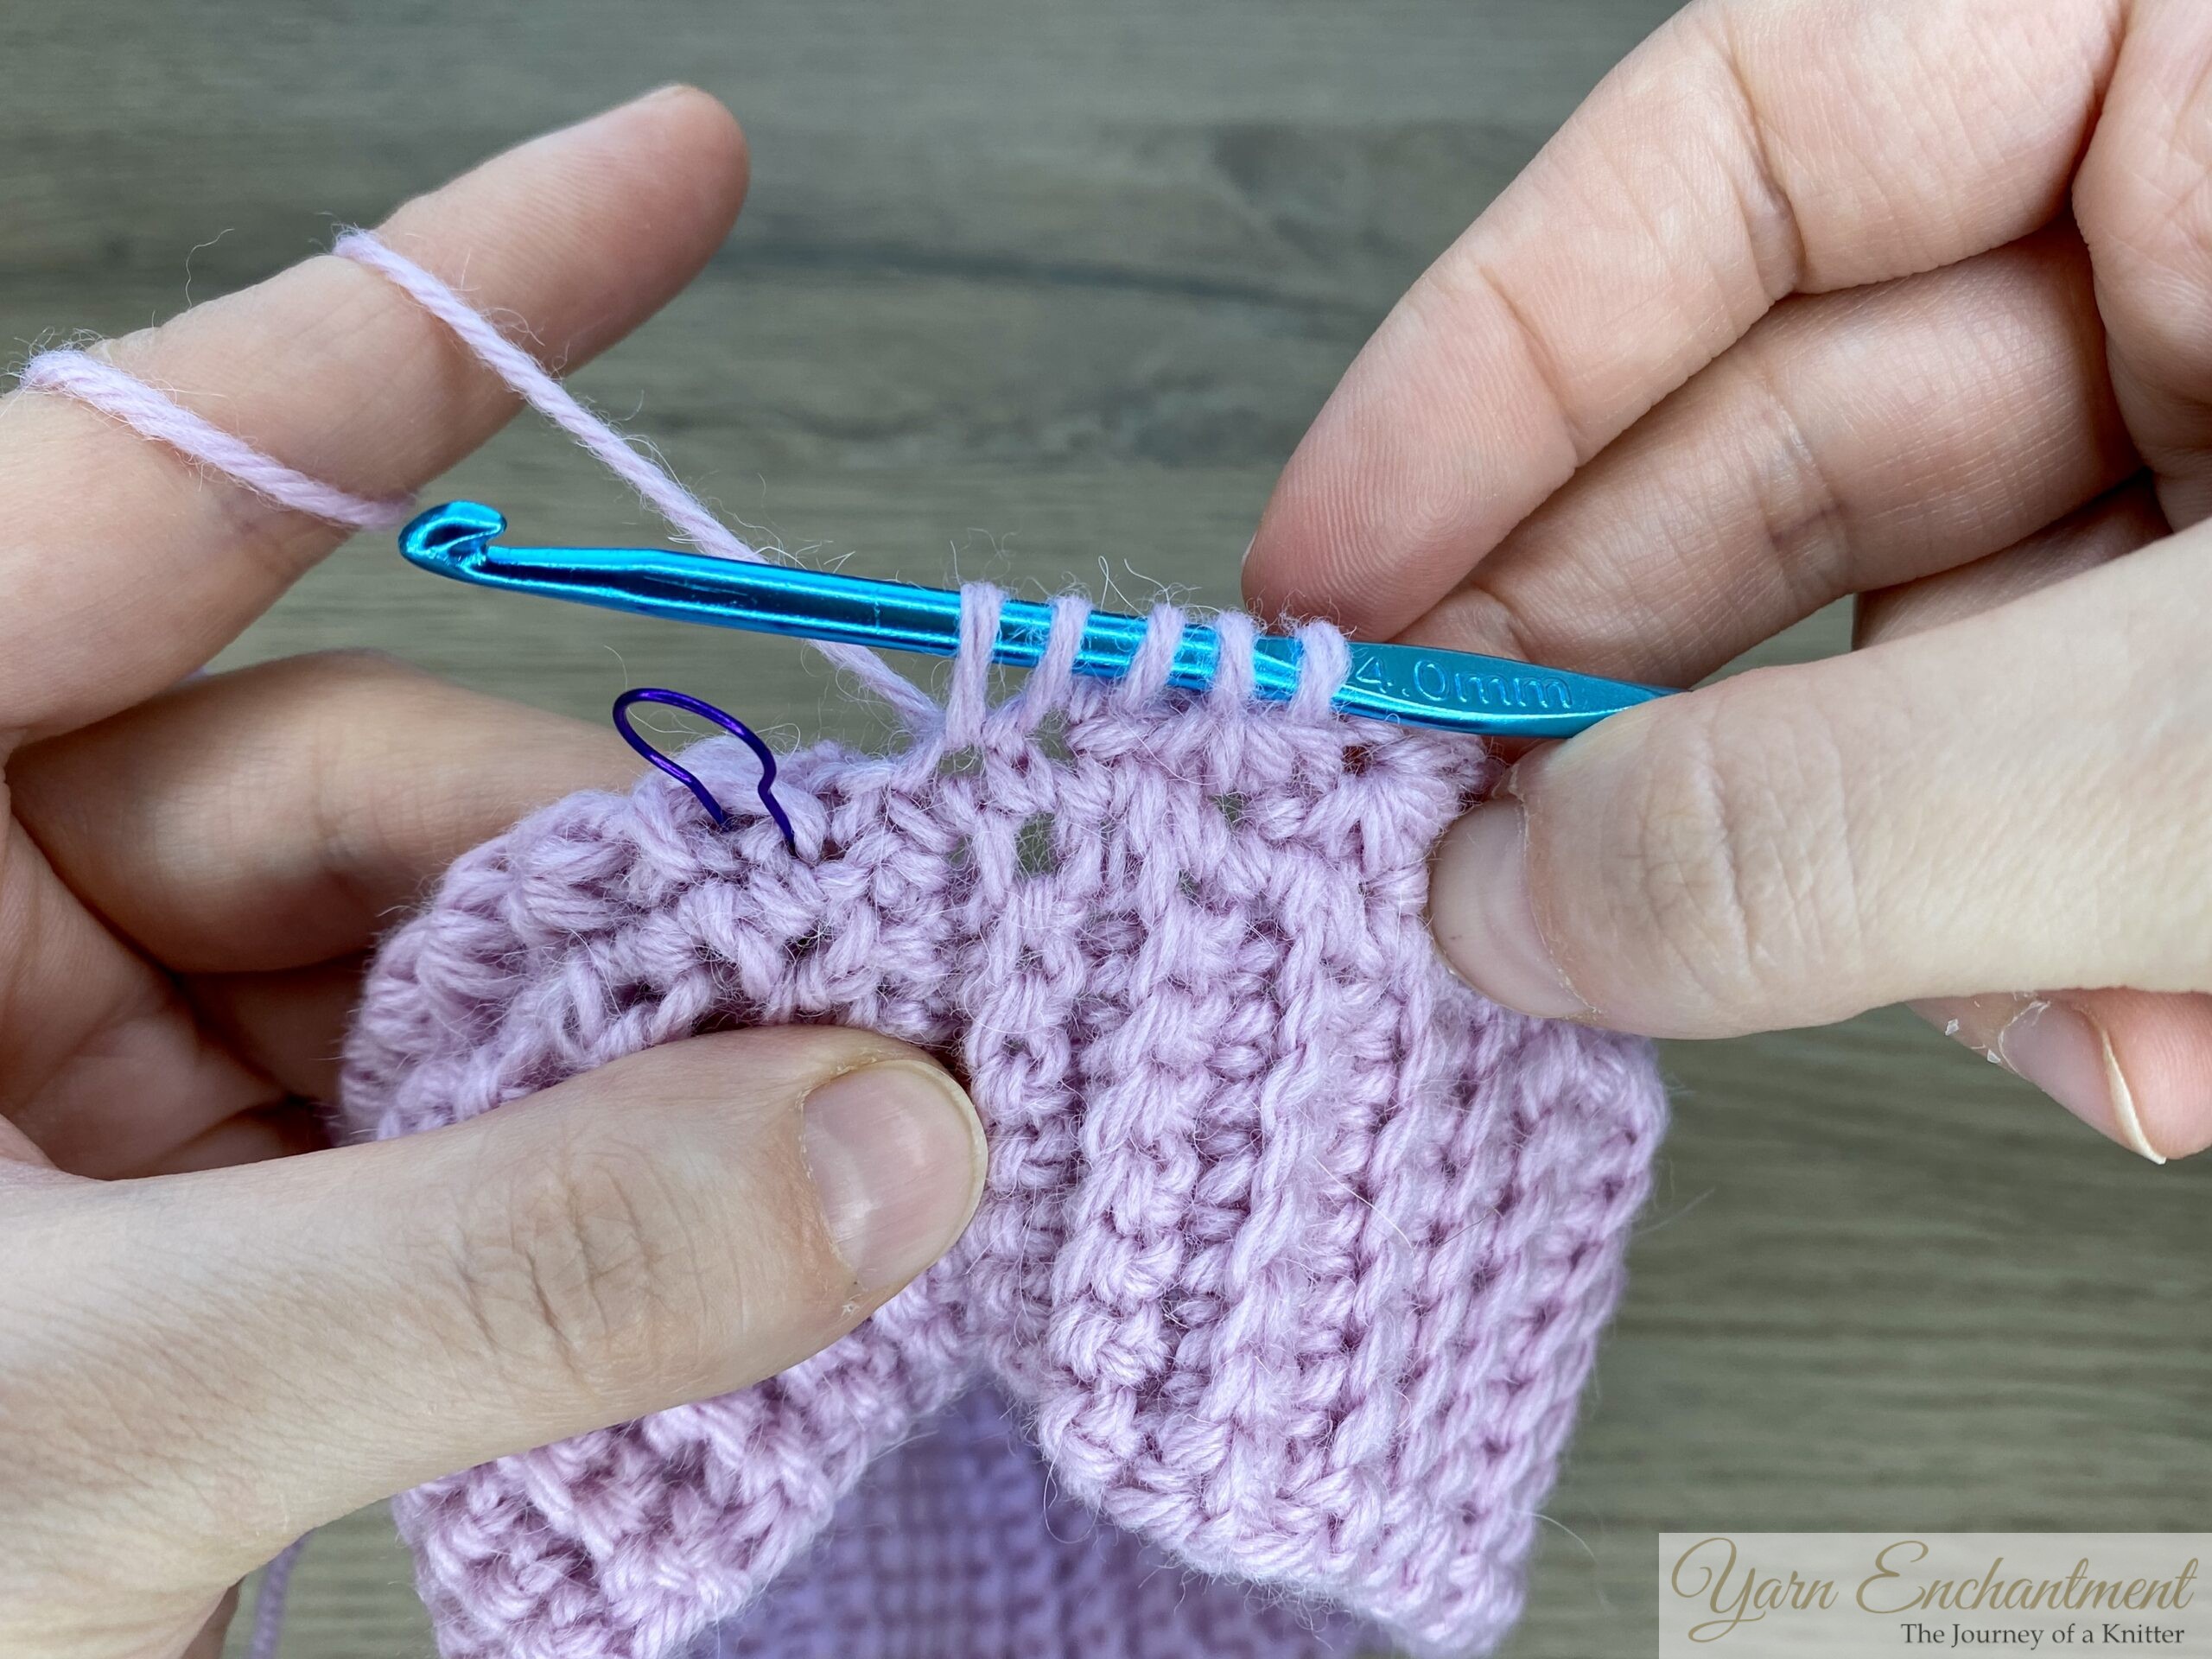 |  | At the end of the round you will have something that look like this | Pull up a loop from each stitch just like before: from the eye, the arm of the stitch, the base, and the next single crochet, until you have 5 loops on your hook. | For the 6th loop, insert your hook through the base of your first star stitch, you should still have your stitch marker there if you marked it. |


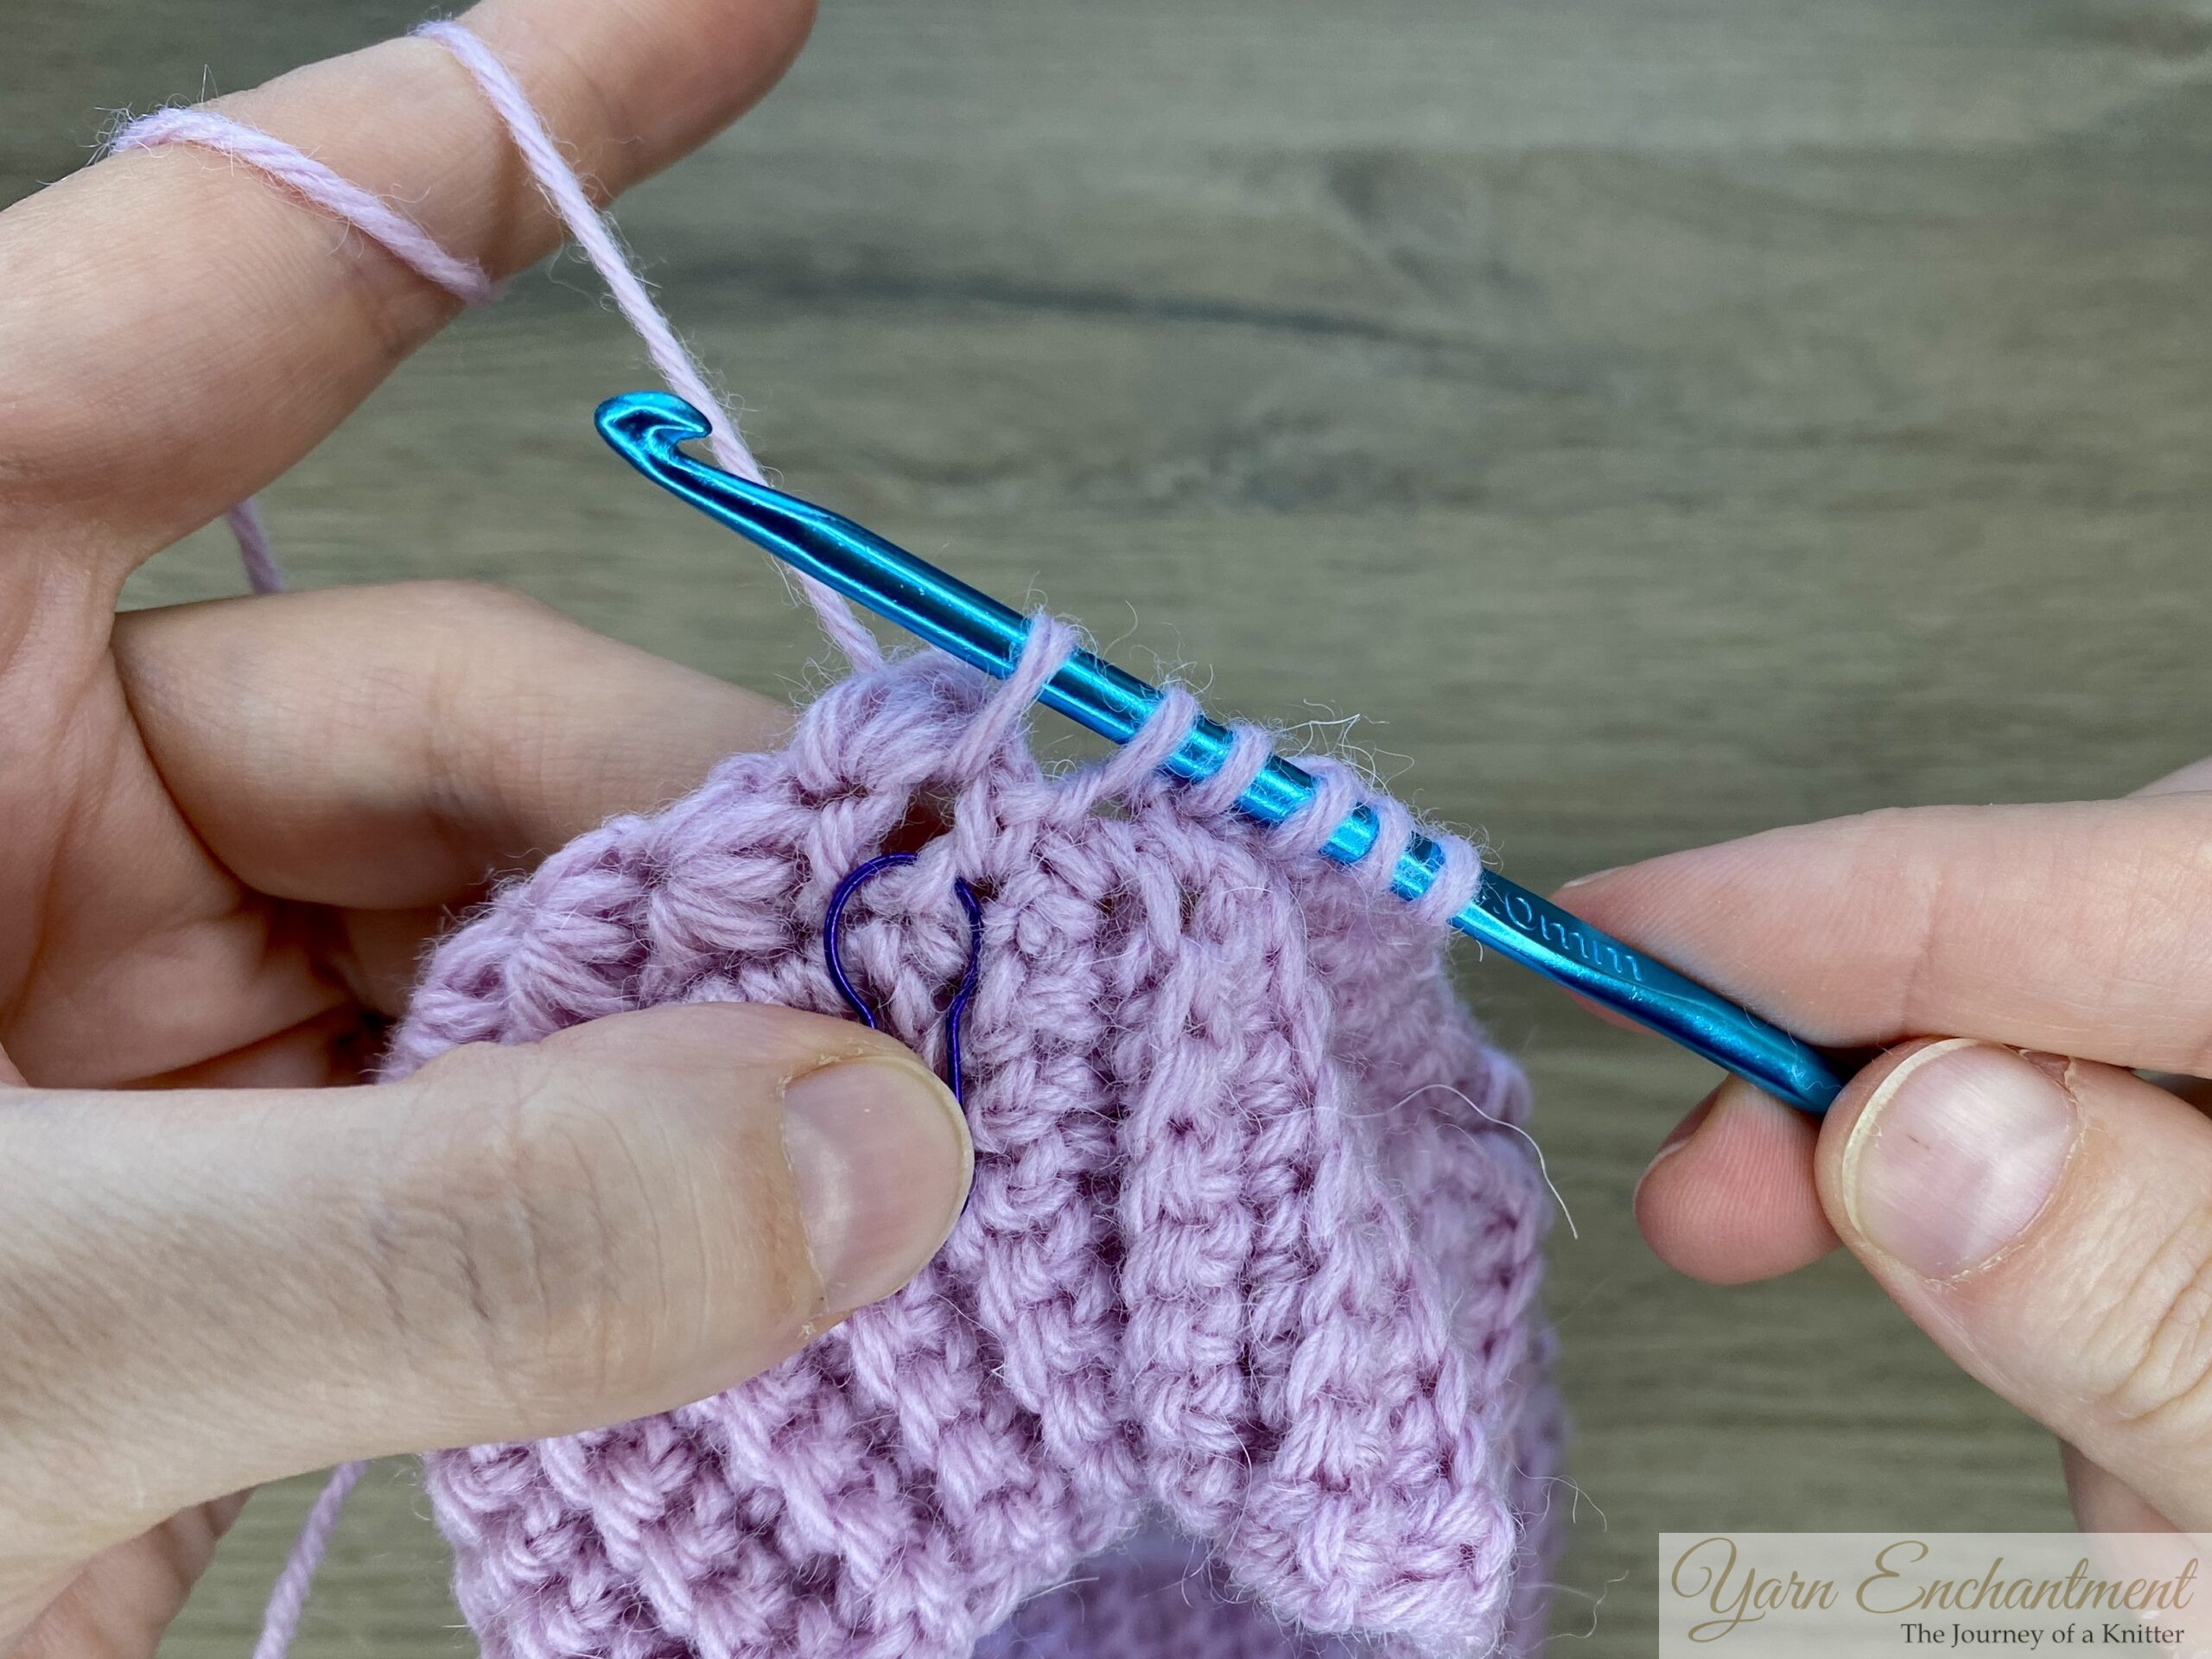
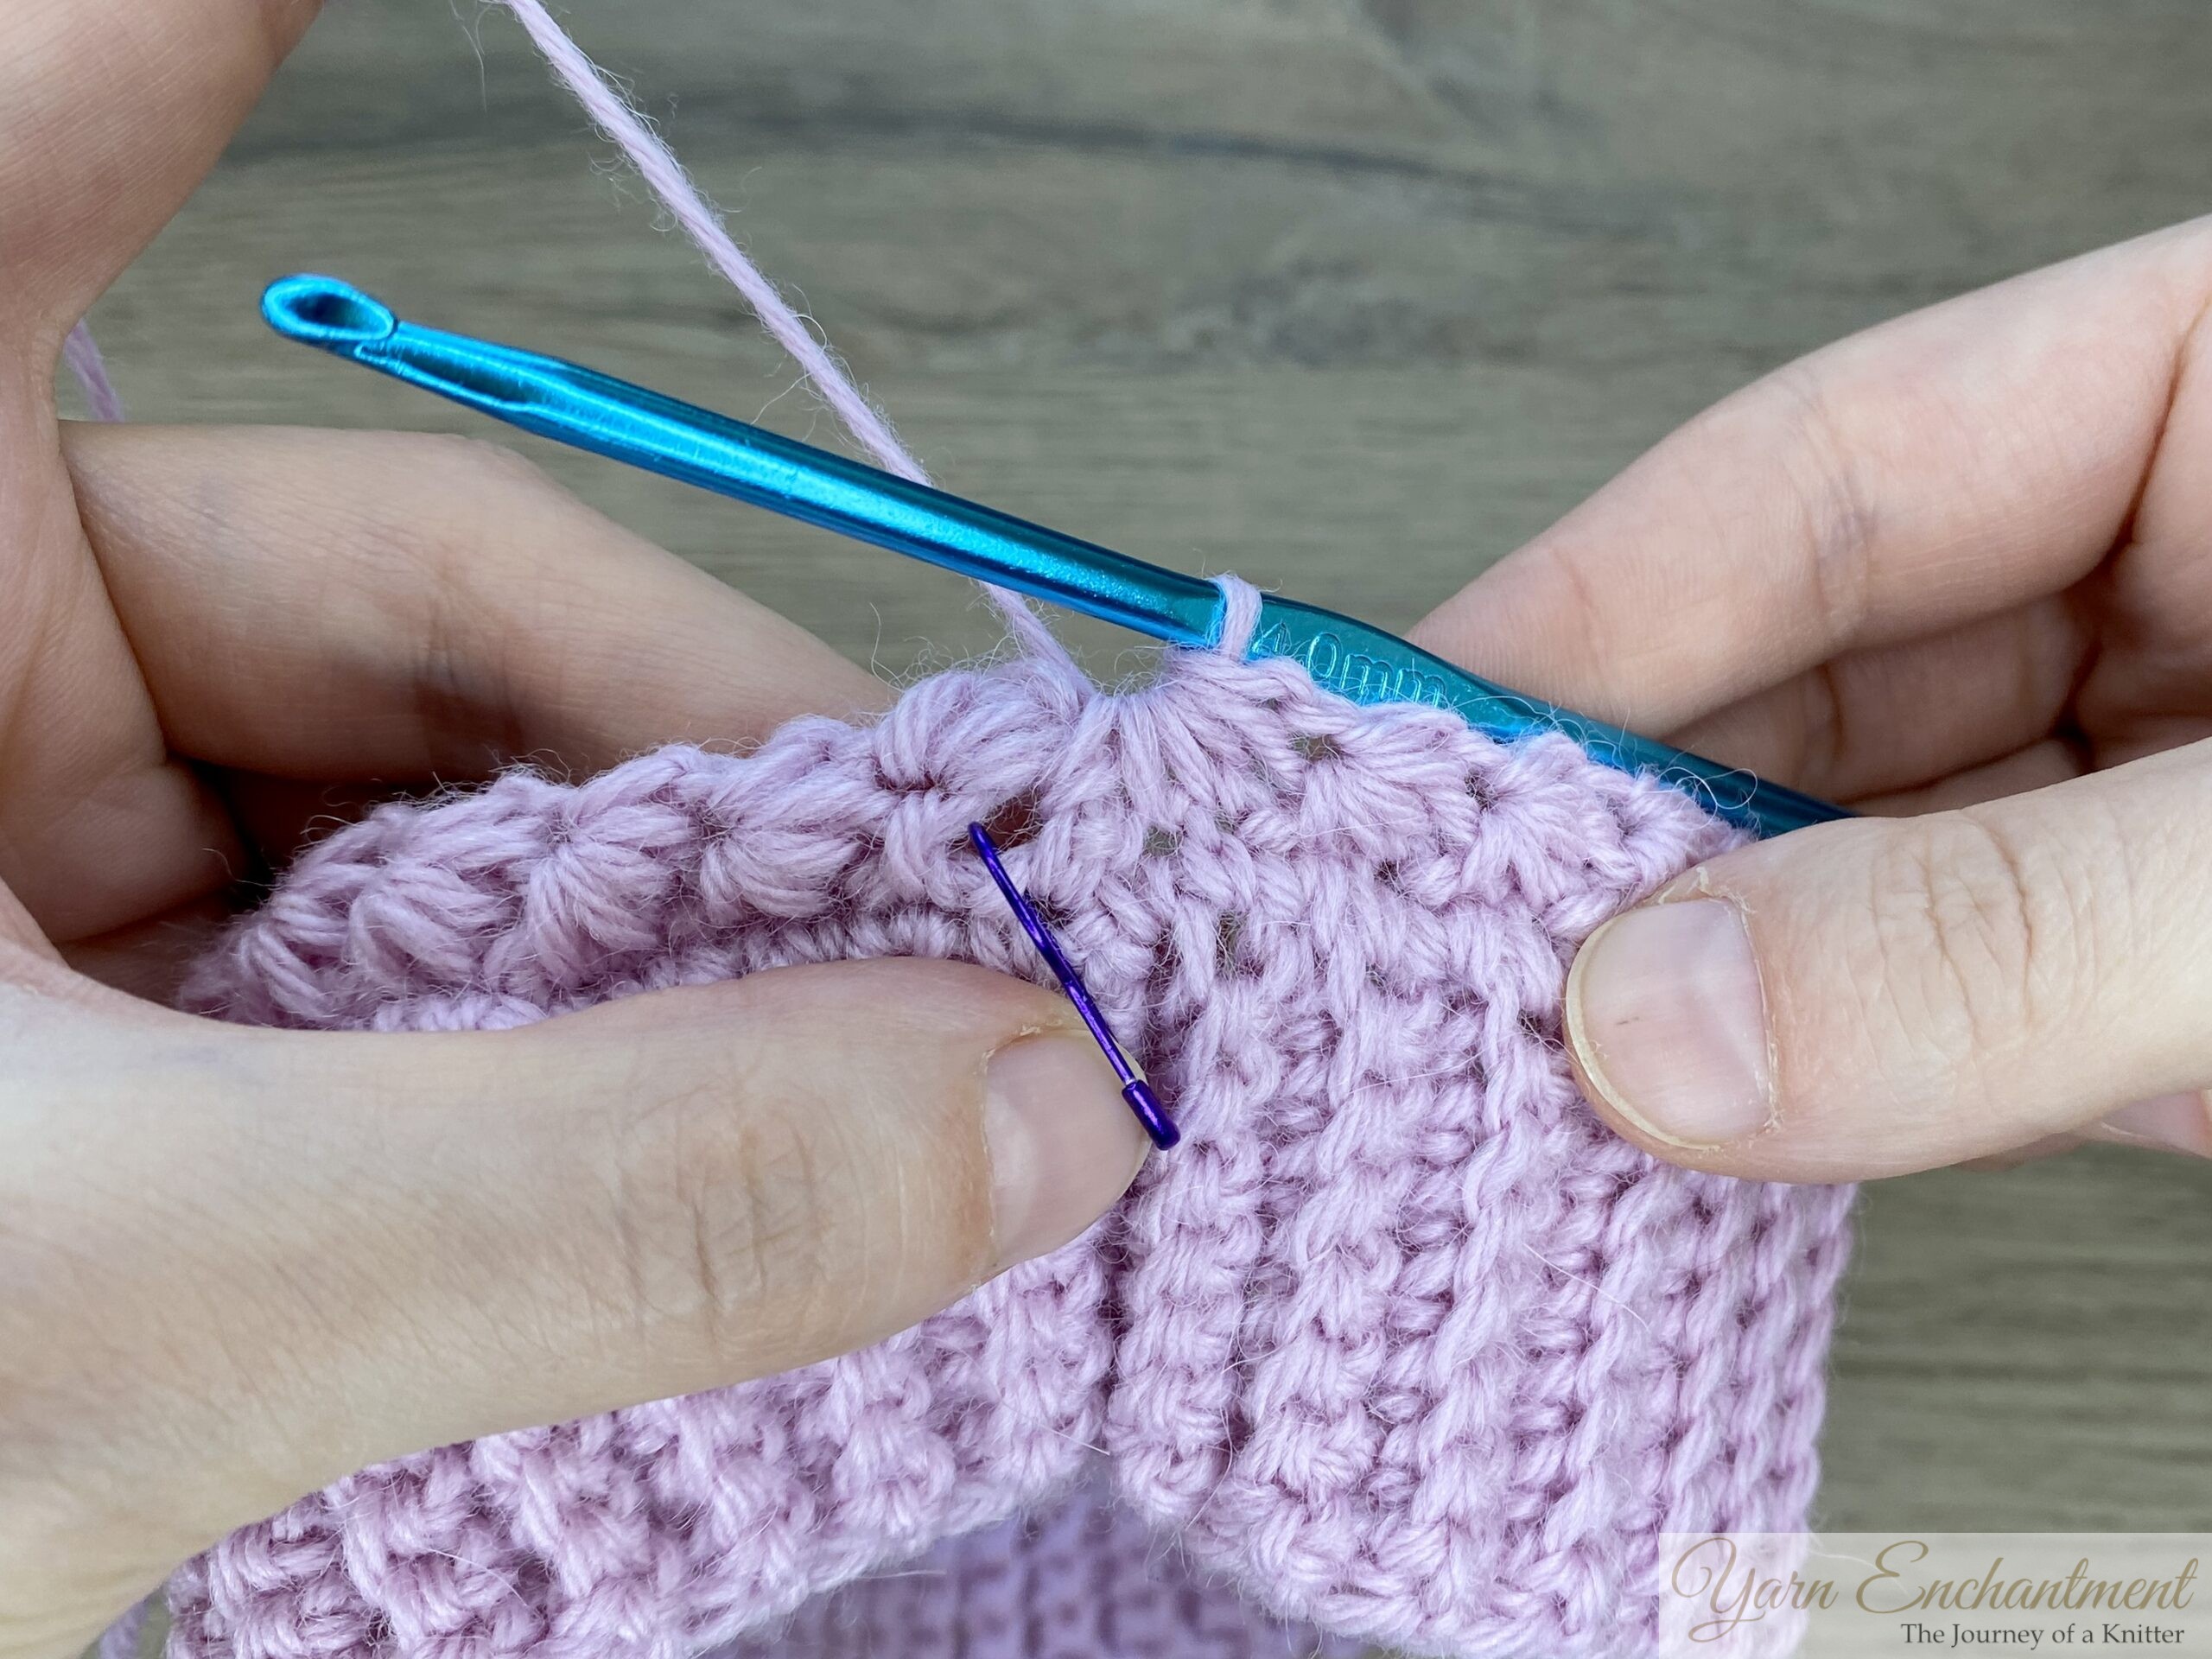 |  |  | pull through all your loops put do not ch 1 | work a slip stitch into the first star stitch (not into the eye) pull a little on your working yarn to thigten up your star stitch | Ch 1 and turn your work |


Second Round: Half Double Crochet on the Wrong Side
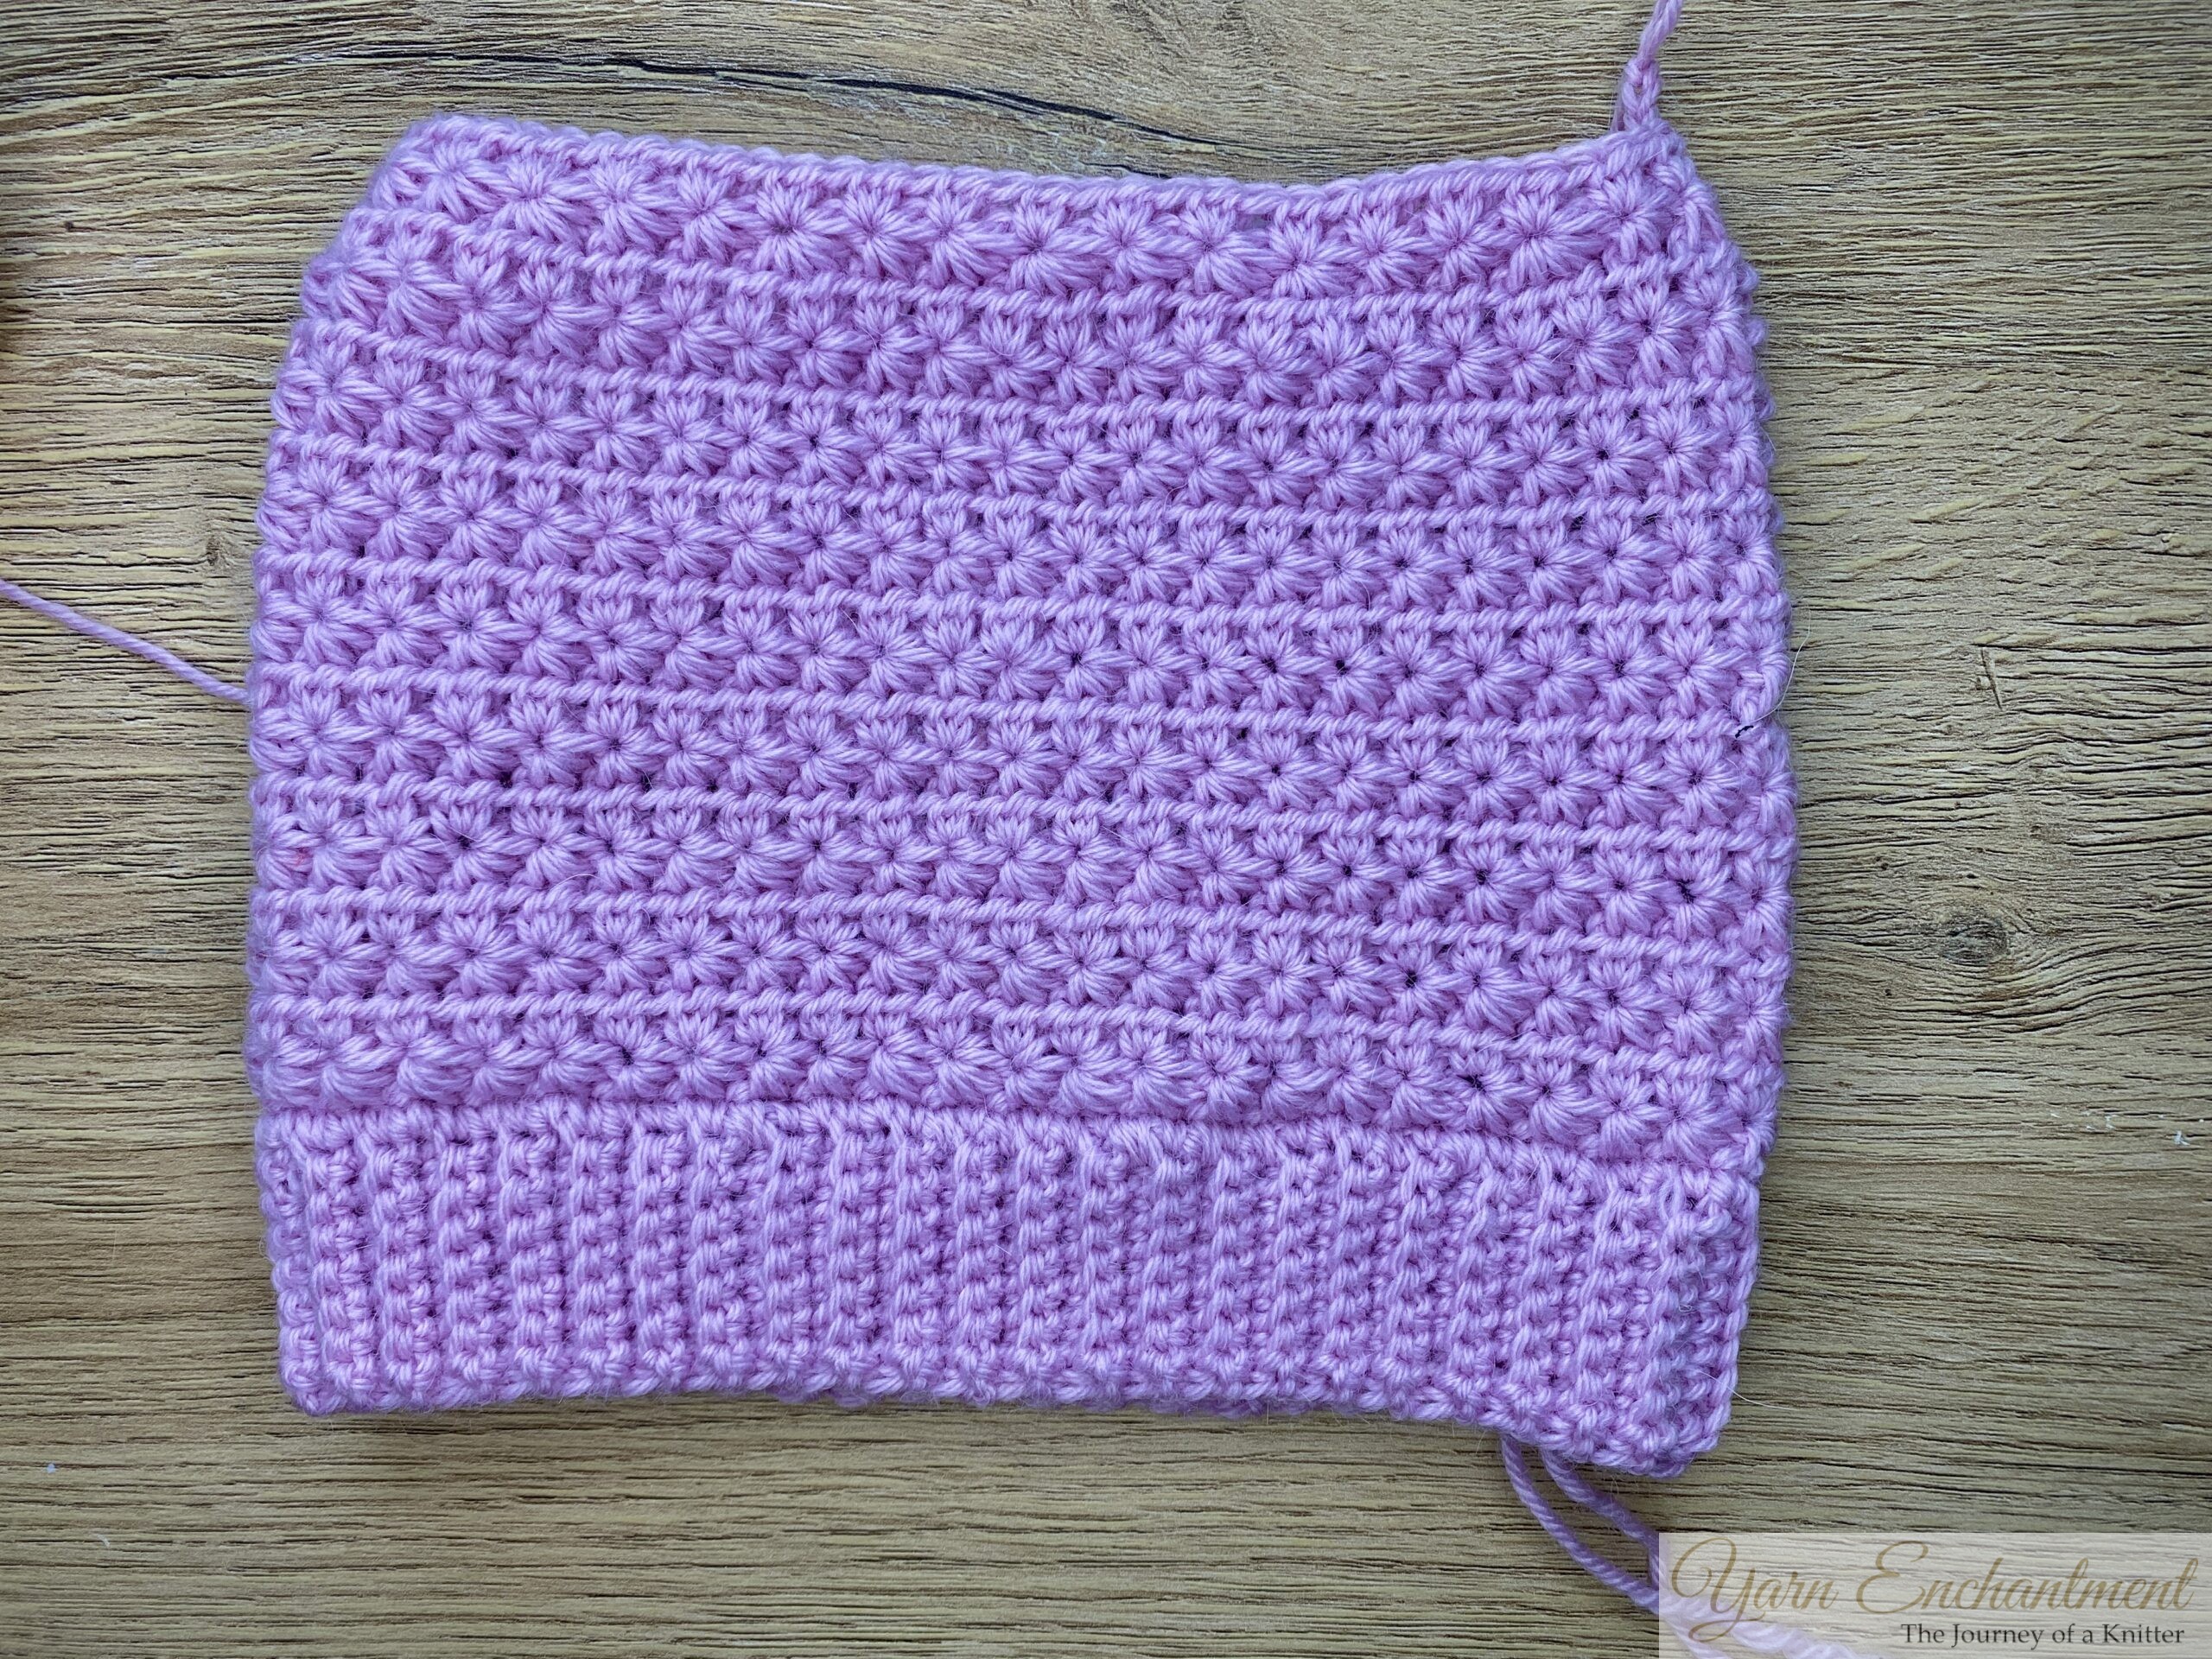
On the wrong side, work two half double crochets into the eye of each star stitch all the way around. The star stitch is worked over two rows: the first row creates the bottom of the star, and the following hdc row completes the top.
 |  |  | On the wrong side, | work two hdc into the first eye of the first star stitch. | work two half double crochets into the eye of each star stitch all the way around. |


 |  | After working a few hdc stitches, you can see how the star stitch is formed (wrong side of the hat) | On this picture, you can see the right side of the star stitch, where the star shapes are clearly visible. |


When you have finished working all the way around, close the round with a slip stitch into the first hdc, then ch 3 and turn your work.
Your stitch count should now be back to your original starting number of stitches. For example, if you began with 100 sc stitches, you should now have 100 hdc.
 | close the round with a slip stitch into the first hdc |

Repeat Rounds for Hat Height
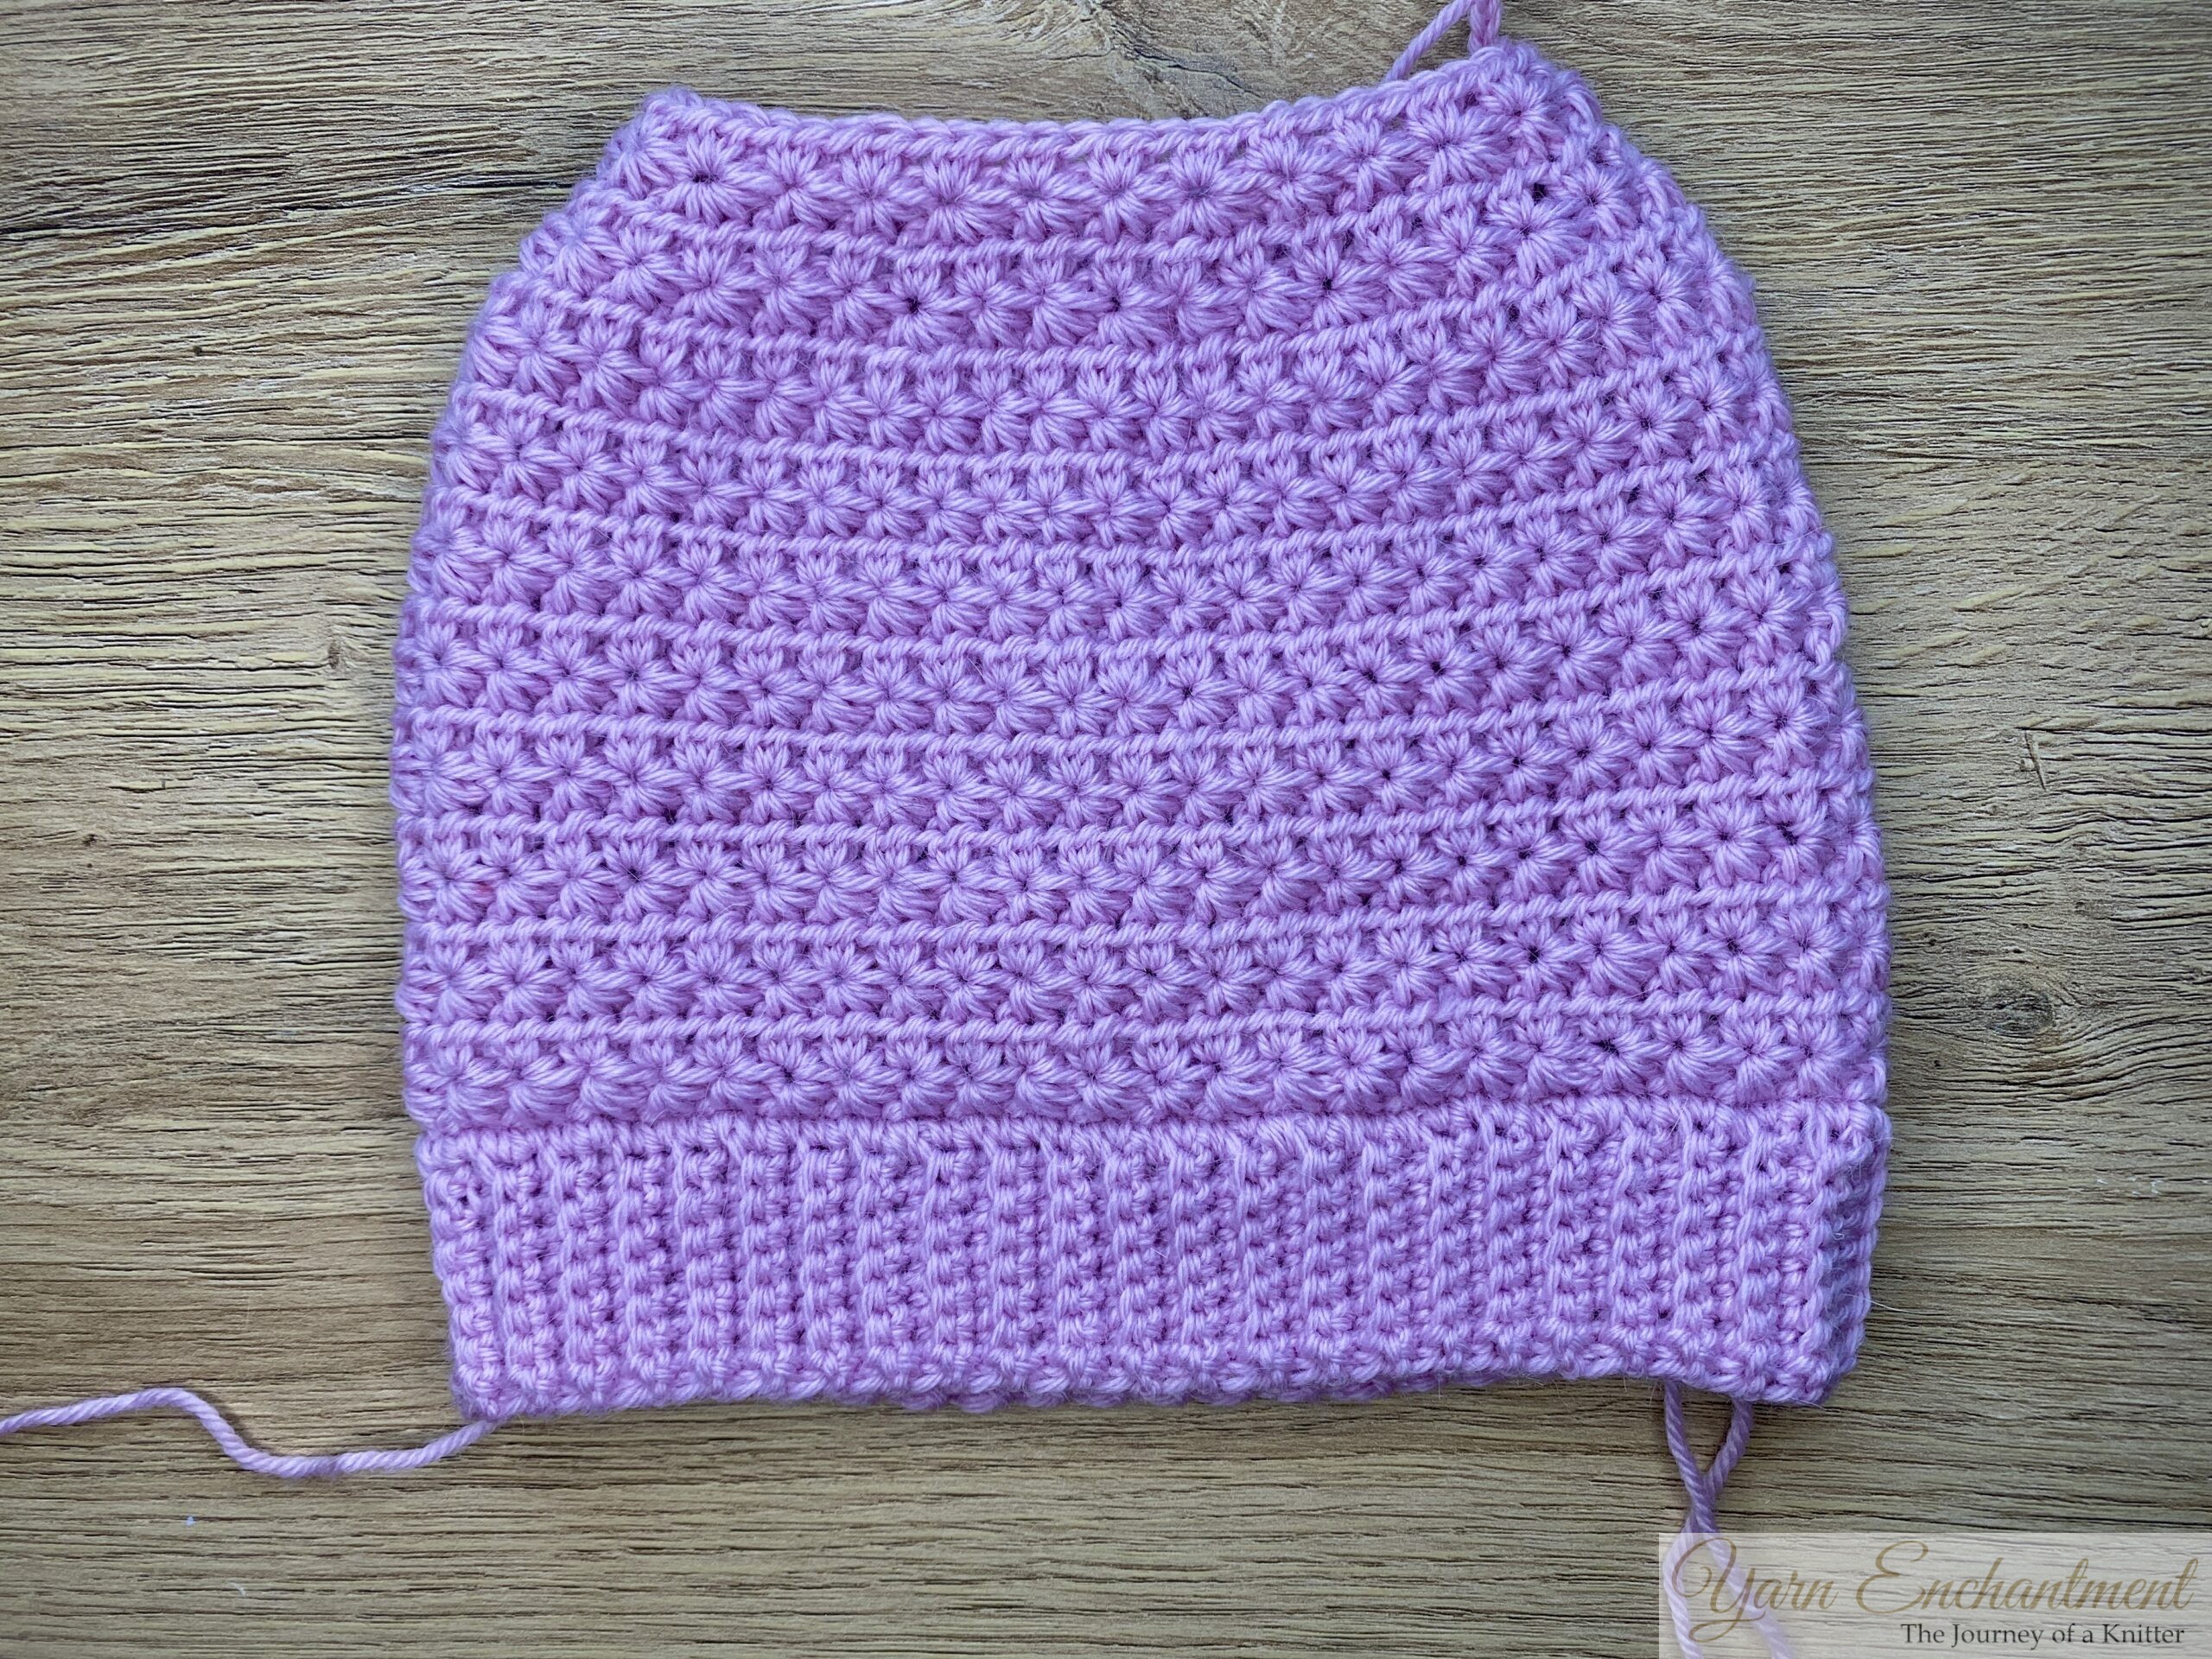
Repeat these two rounds – one round of star stitches and one round of half double crochets – until your hat reaches the height you measured earlier.
 | You can see here that the transitions between the rounds are very clean and there are no gaps. |

Shape the Crown with Star Stitch Decreases
This hat is shaped over 3 full star stitch repeats (6 rounds in total). To keep the stars from stretching out of shape, the crown decreases are worked gradually across these rounds. Before you start decreasing, measure the height of 6 rounds (3 star stitch repeats) on your hat so you know how many centimeters or inches shorter to crochet before beginning the crown shaping.
 | 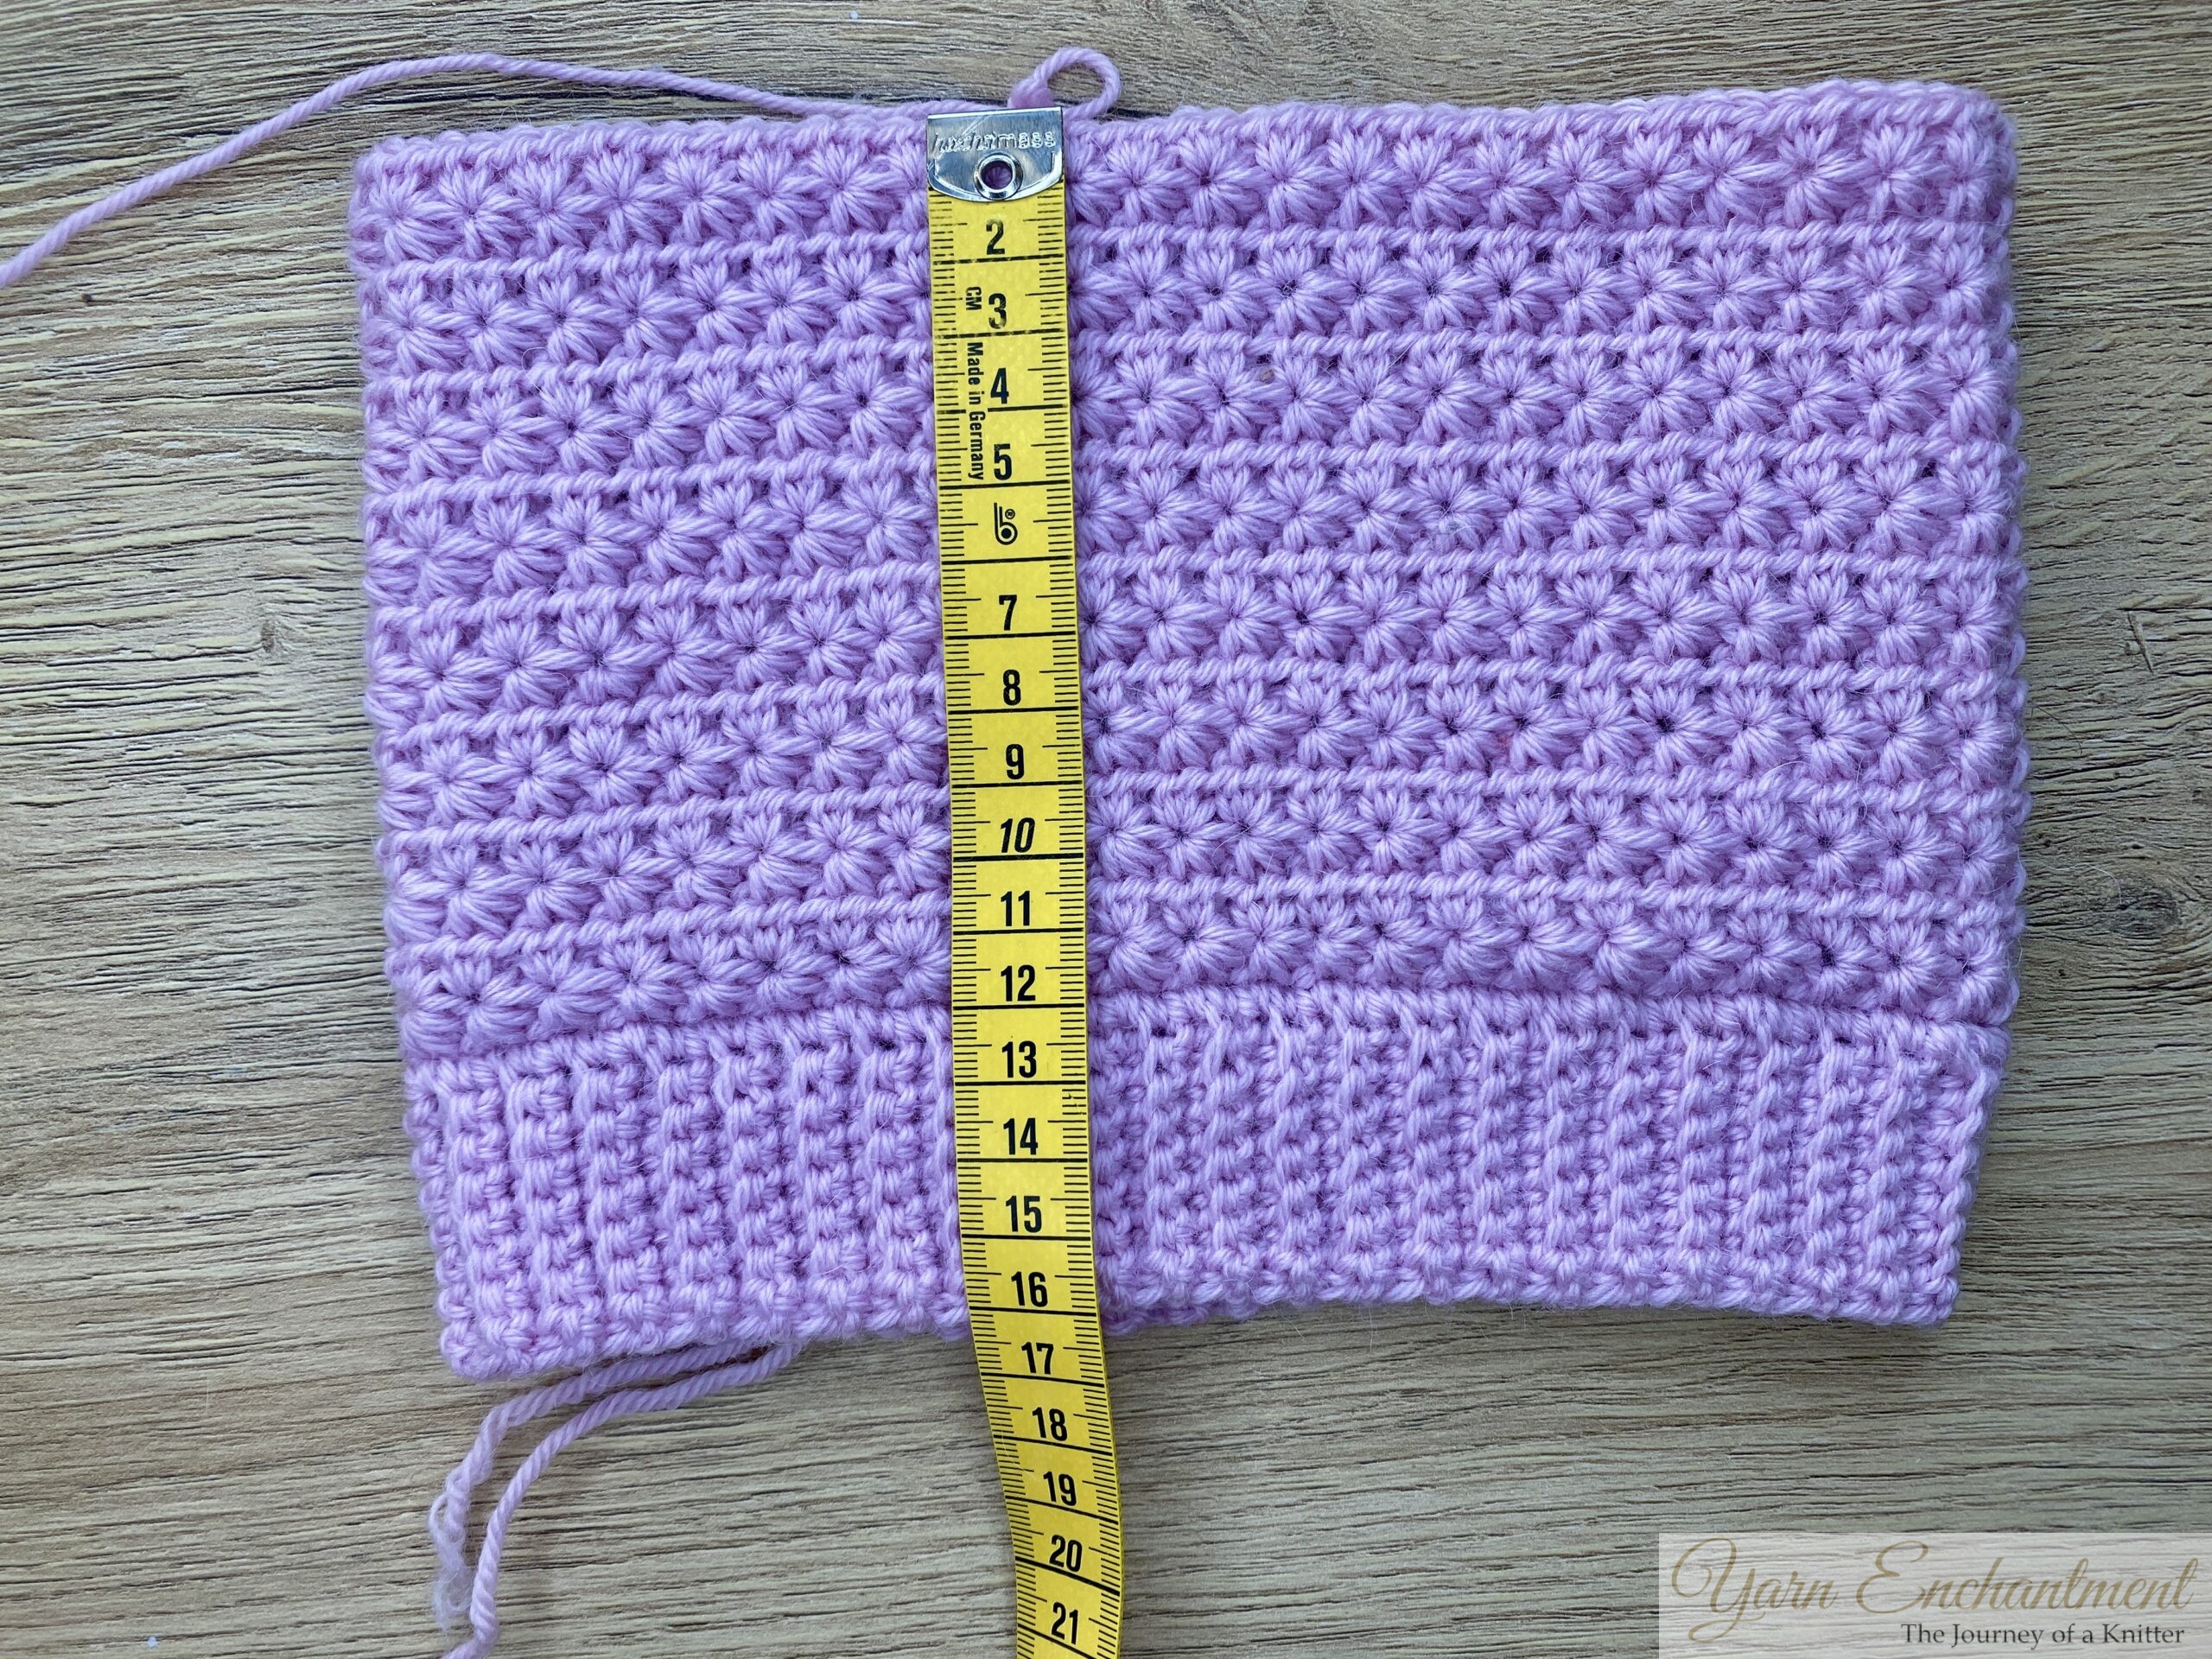 | I am working with DK weight yarn and a 4 mm hook. Three full star stitch repeats measure about 4 cm (about 1.5 inches). | So for this hat, I crochet the hat to a height of 16 cm (6.3 inches). Before starting the crown decreases. |


Once your hat is almost as tall as the required height, begin shaping the crown.
First decrease round.
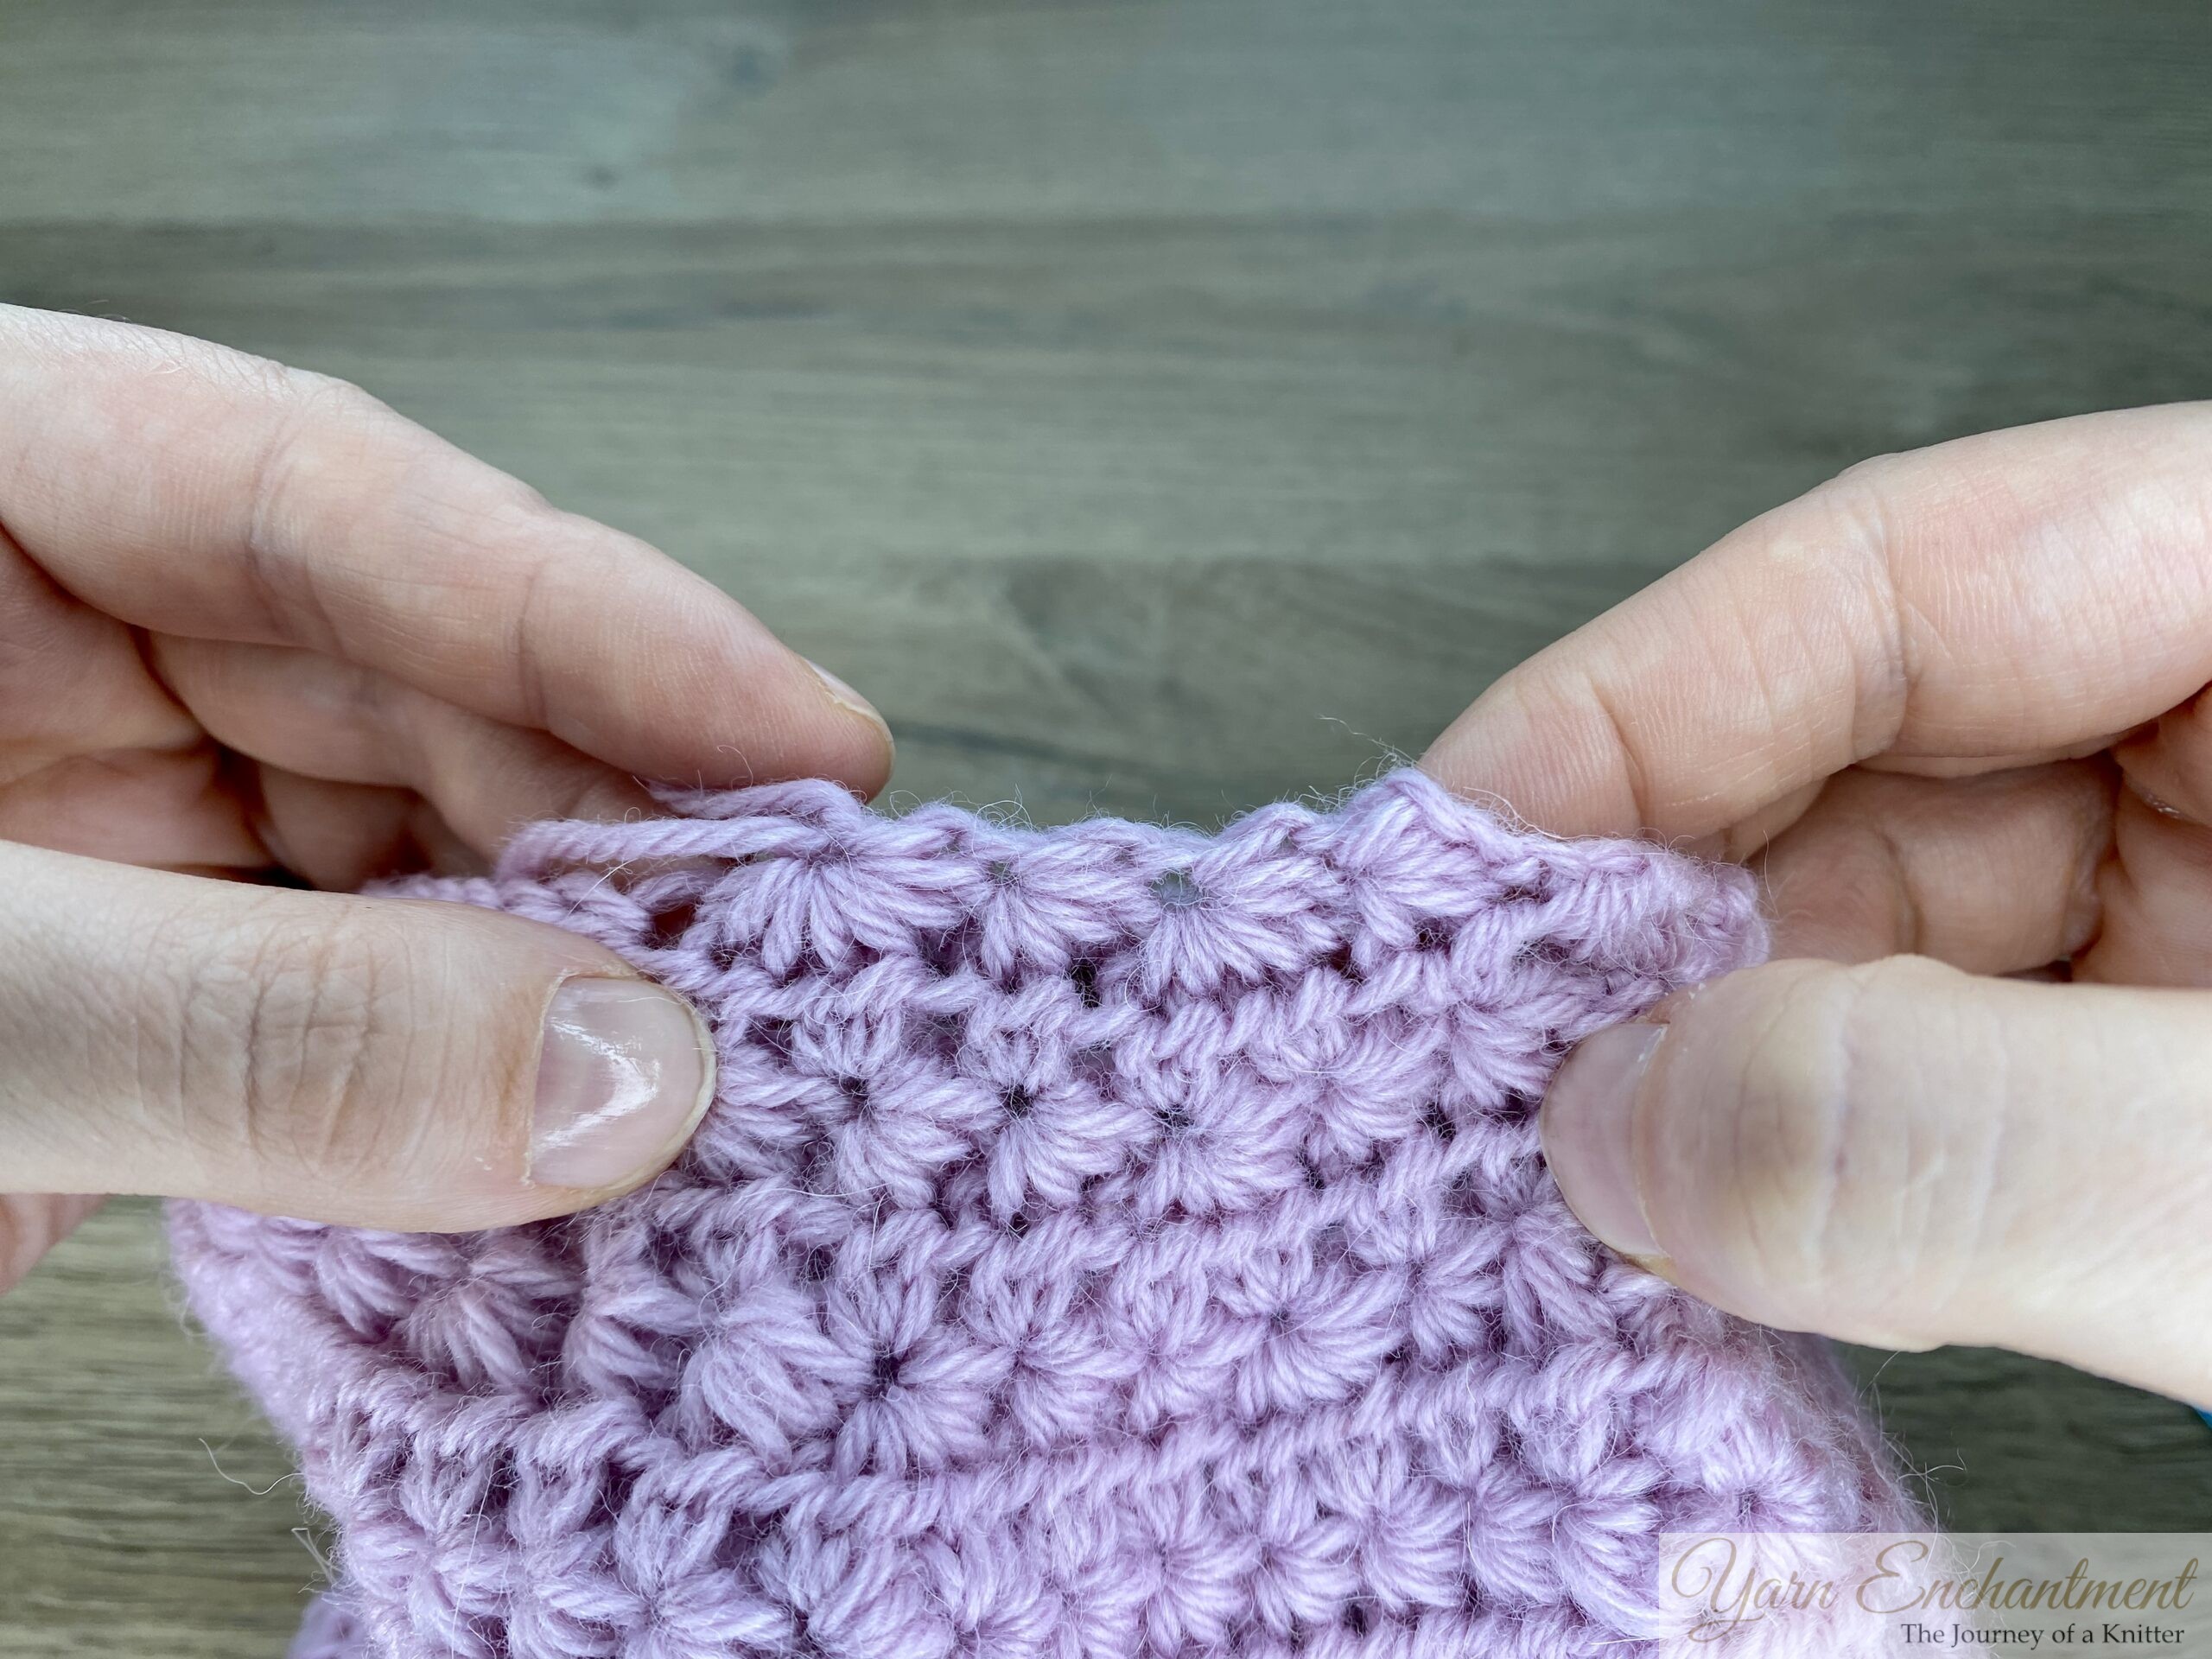
Begin decreasing by working two regular 6‑loop star stitches, then one 8‑loop star stitch, and repeat this sequence around the round (alternating 6‑loop and 8‑loop stars).
 |  |  | Work 2 regular 6‑loop star stitches. | The next star stitch will be a decrease: instead of making a 6‑loop star, draw up 8 loops on your hook to form an 8‑loop star stitch. | Repeat this sequence all the way around: work 2 regular 6‑loop star stitches, then 1 8‑loop star stitch as your decrease. |


At the end of the round, the sequence might not work out perfectly. In my sample, I have only one 6‑loop star before the final 8‑loop decrease star instead of two. When you work your decreases, just make sure you always finish the round with an even number of stitches.
 | I have one 8‑loop star stitch, one 6‑loop star stitch, and my last stitch is an 8‑loop star stitch decrease. |

Row two (wrong side row)
Work 2 hdc into each eye of the star stitch from the previous decrease round. (There are no decreases on this wrong side row.)
 | This is what your hat looks like after your first decrease round. |

Second decrease round
Your second decrease round is worked the same way as the first: work two regular 6‑loop star stitches, then one 8‑loop star stitch, and repeat this sequence around the round.
Row two (wrong side row)
Work 2 hdc into each eye of the star stitch from the previous decrease round. (There are no decreases on this wrong side row.)
 | This is what your hat looks like after your second decrease round. |

Third Decrease Round and Final HDC Decrease Round
For the third decrease round, we will shape the crown a bit faster. Work one regular 6‑loop star stitch, then one 8‑loop star stitch as a decrease, and repeat this 6‑loop/8‑loop sequence all the way around.
 | 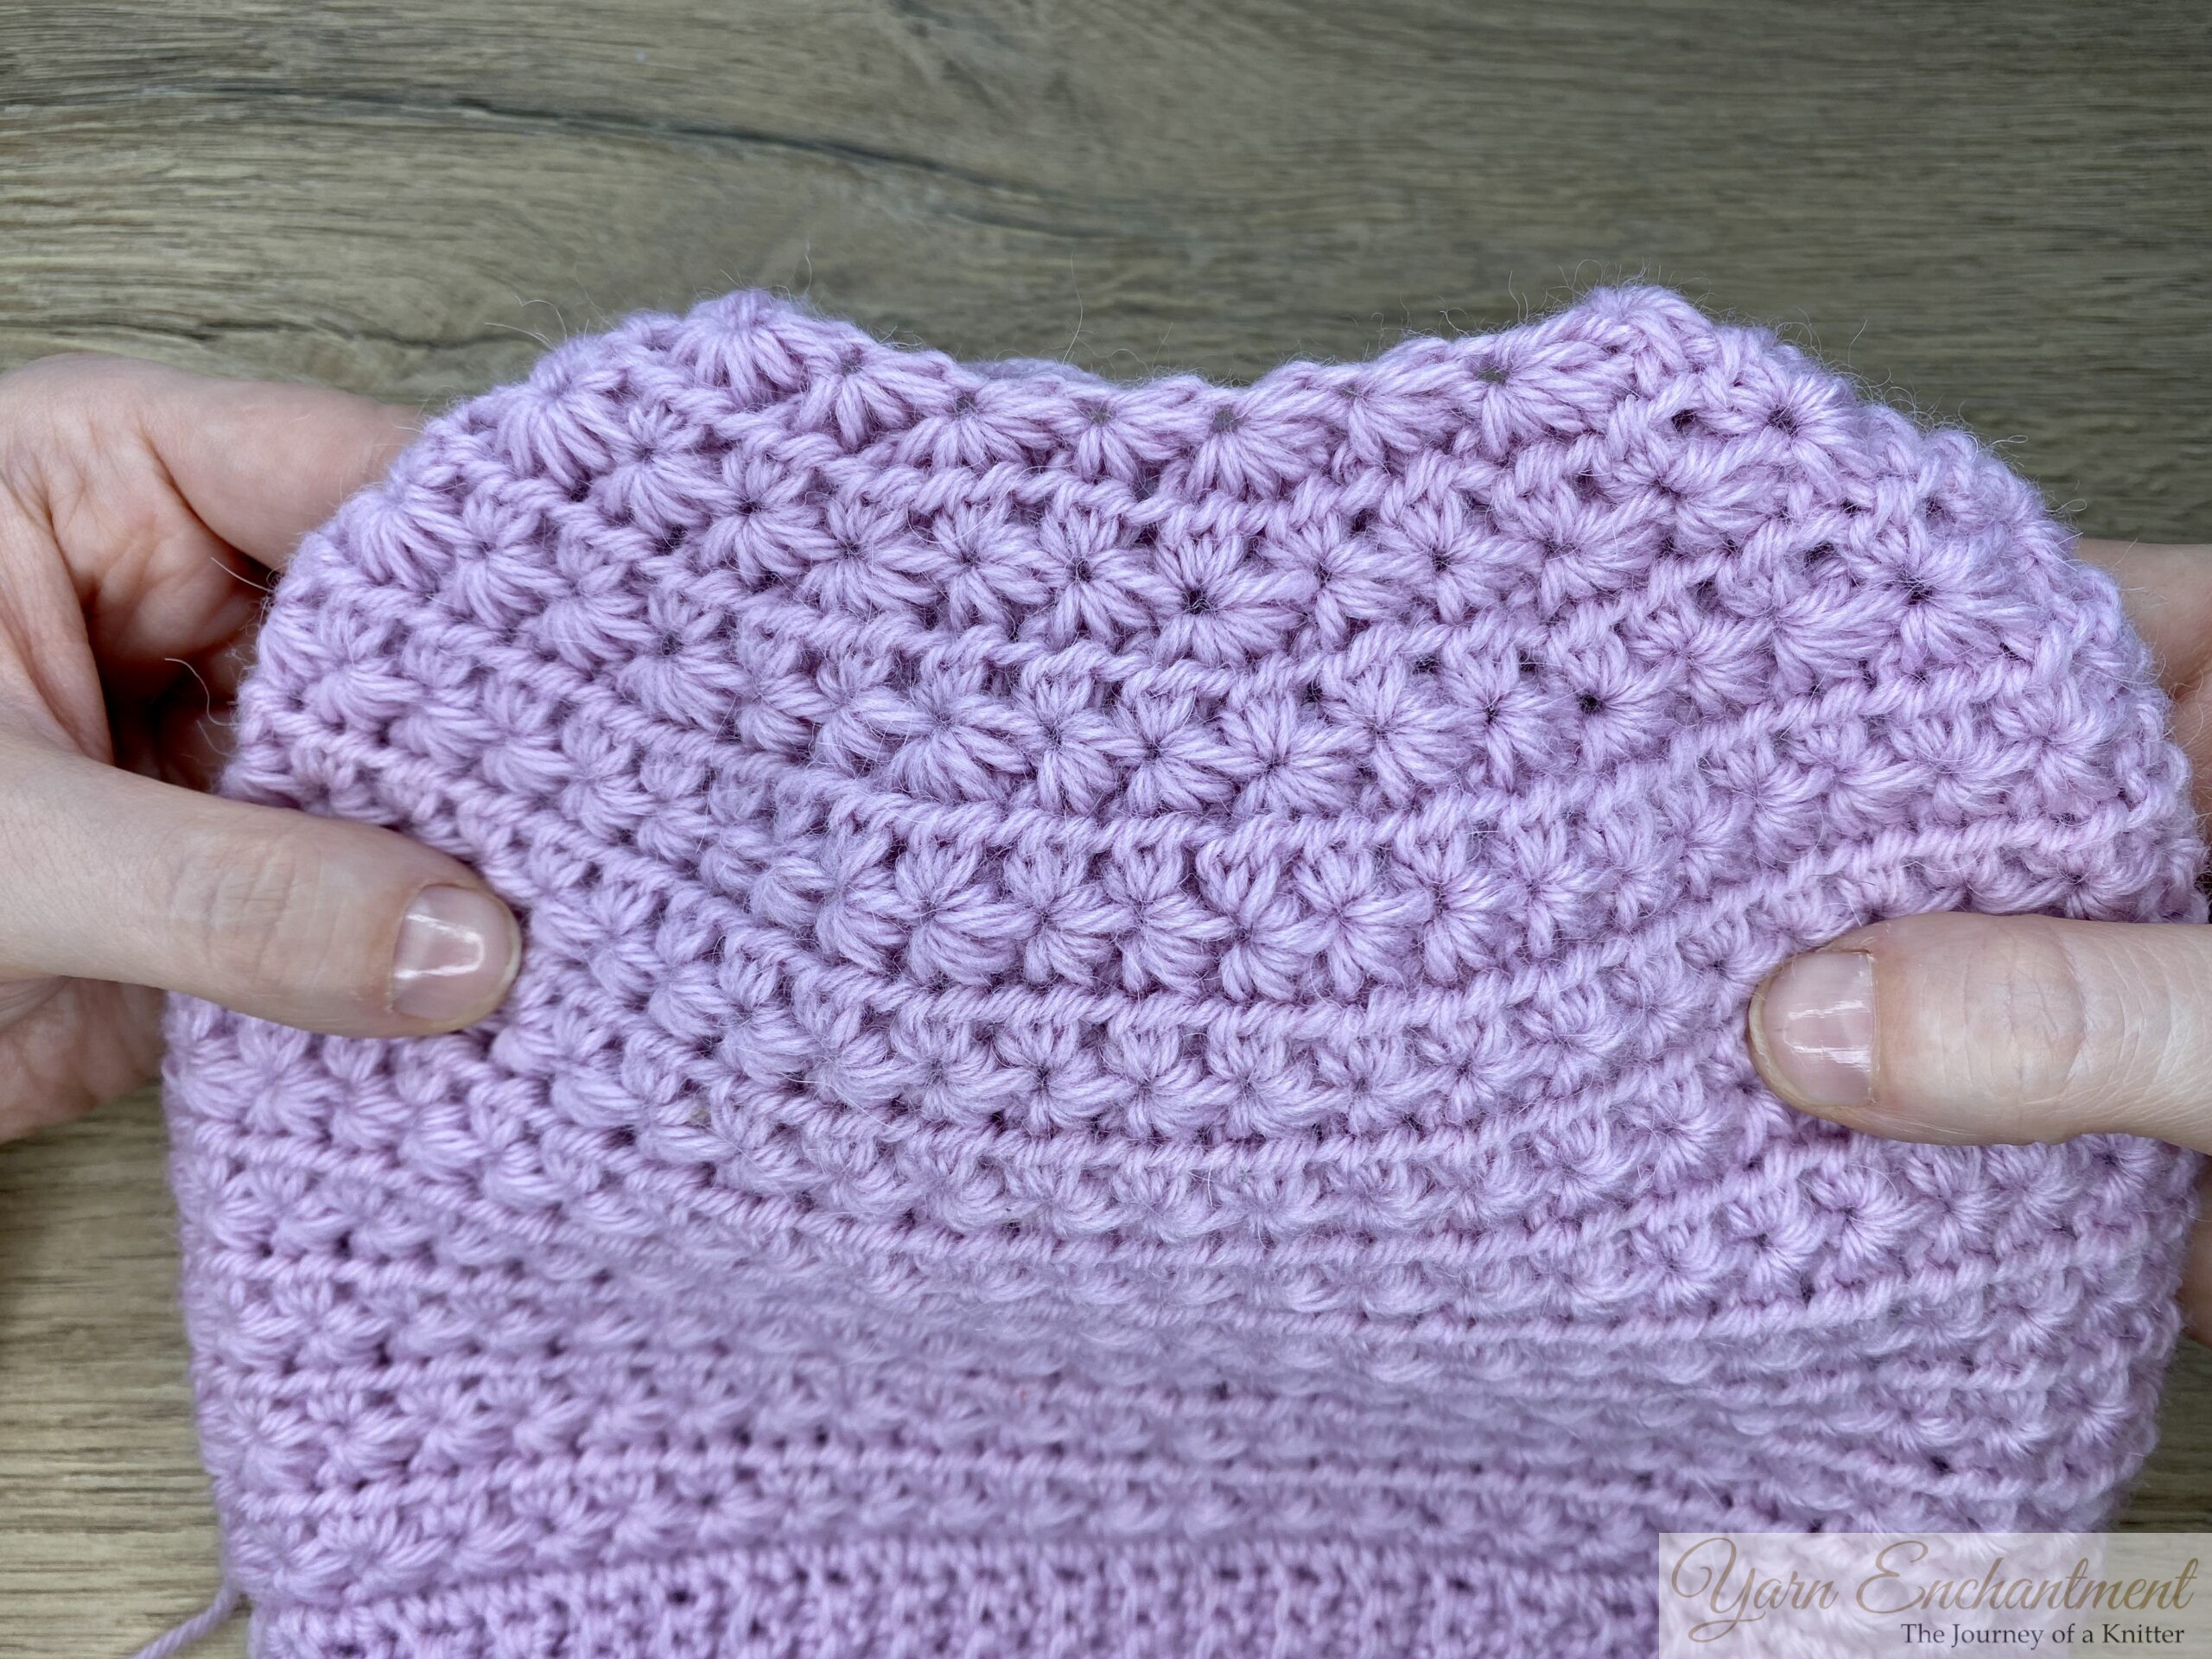 | Work one regular 6‑loop star stitch, then one 8‑loop star stitch as a decrease, and repeat this 6‑loop/8‑loop sequence all the way around. | After your star stitch decrease round, you can see, this helps the star stitches sit very neatly and keeps the crown looking tidy. |


Row 2 (wrong side)
The last half double crochet round is also a decrease round. Ch 1 and turn your work. Work 2 hdc into the first eye of the star stitch, then 1 hdc into the second eye. Repeat this all the way around, join with a slip stitch to the first hdc, then cut the yarn and leave a tail long enough to close the top of the hat.
 |  | Work 2 hdc into the first eye of the star stitch, then 1 hdc into the second eye. Repeat this all the way around | join with a slip stitch to the first hdc, then cut the yarn and leave a tail long enough to close the top of the hat. |


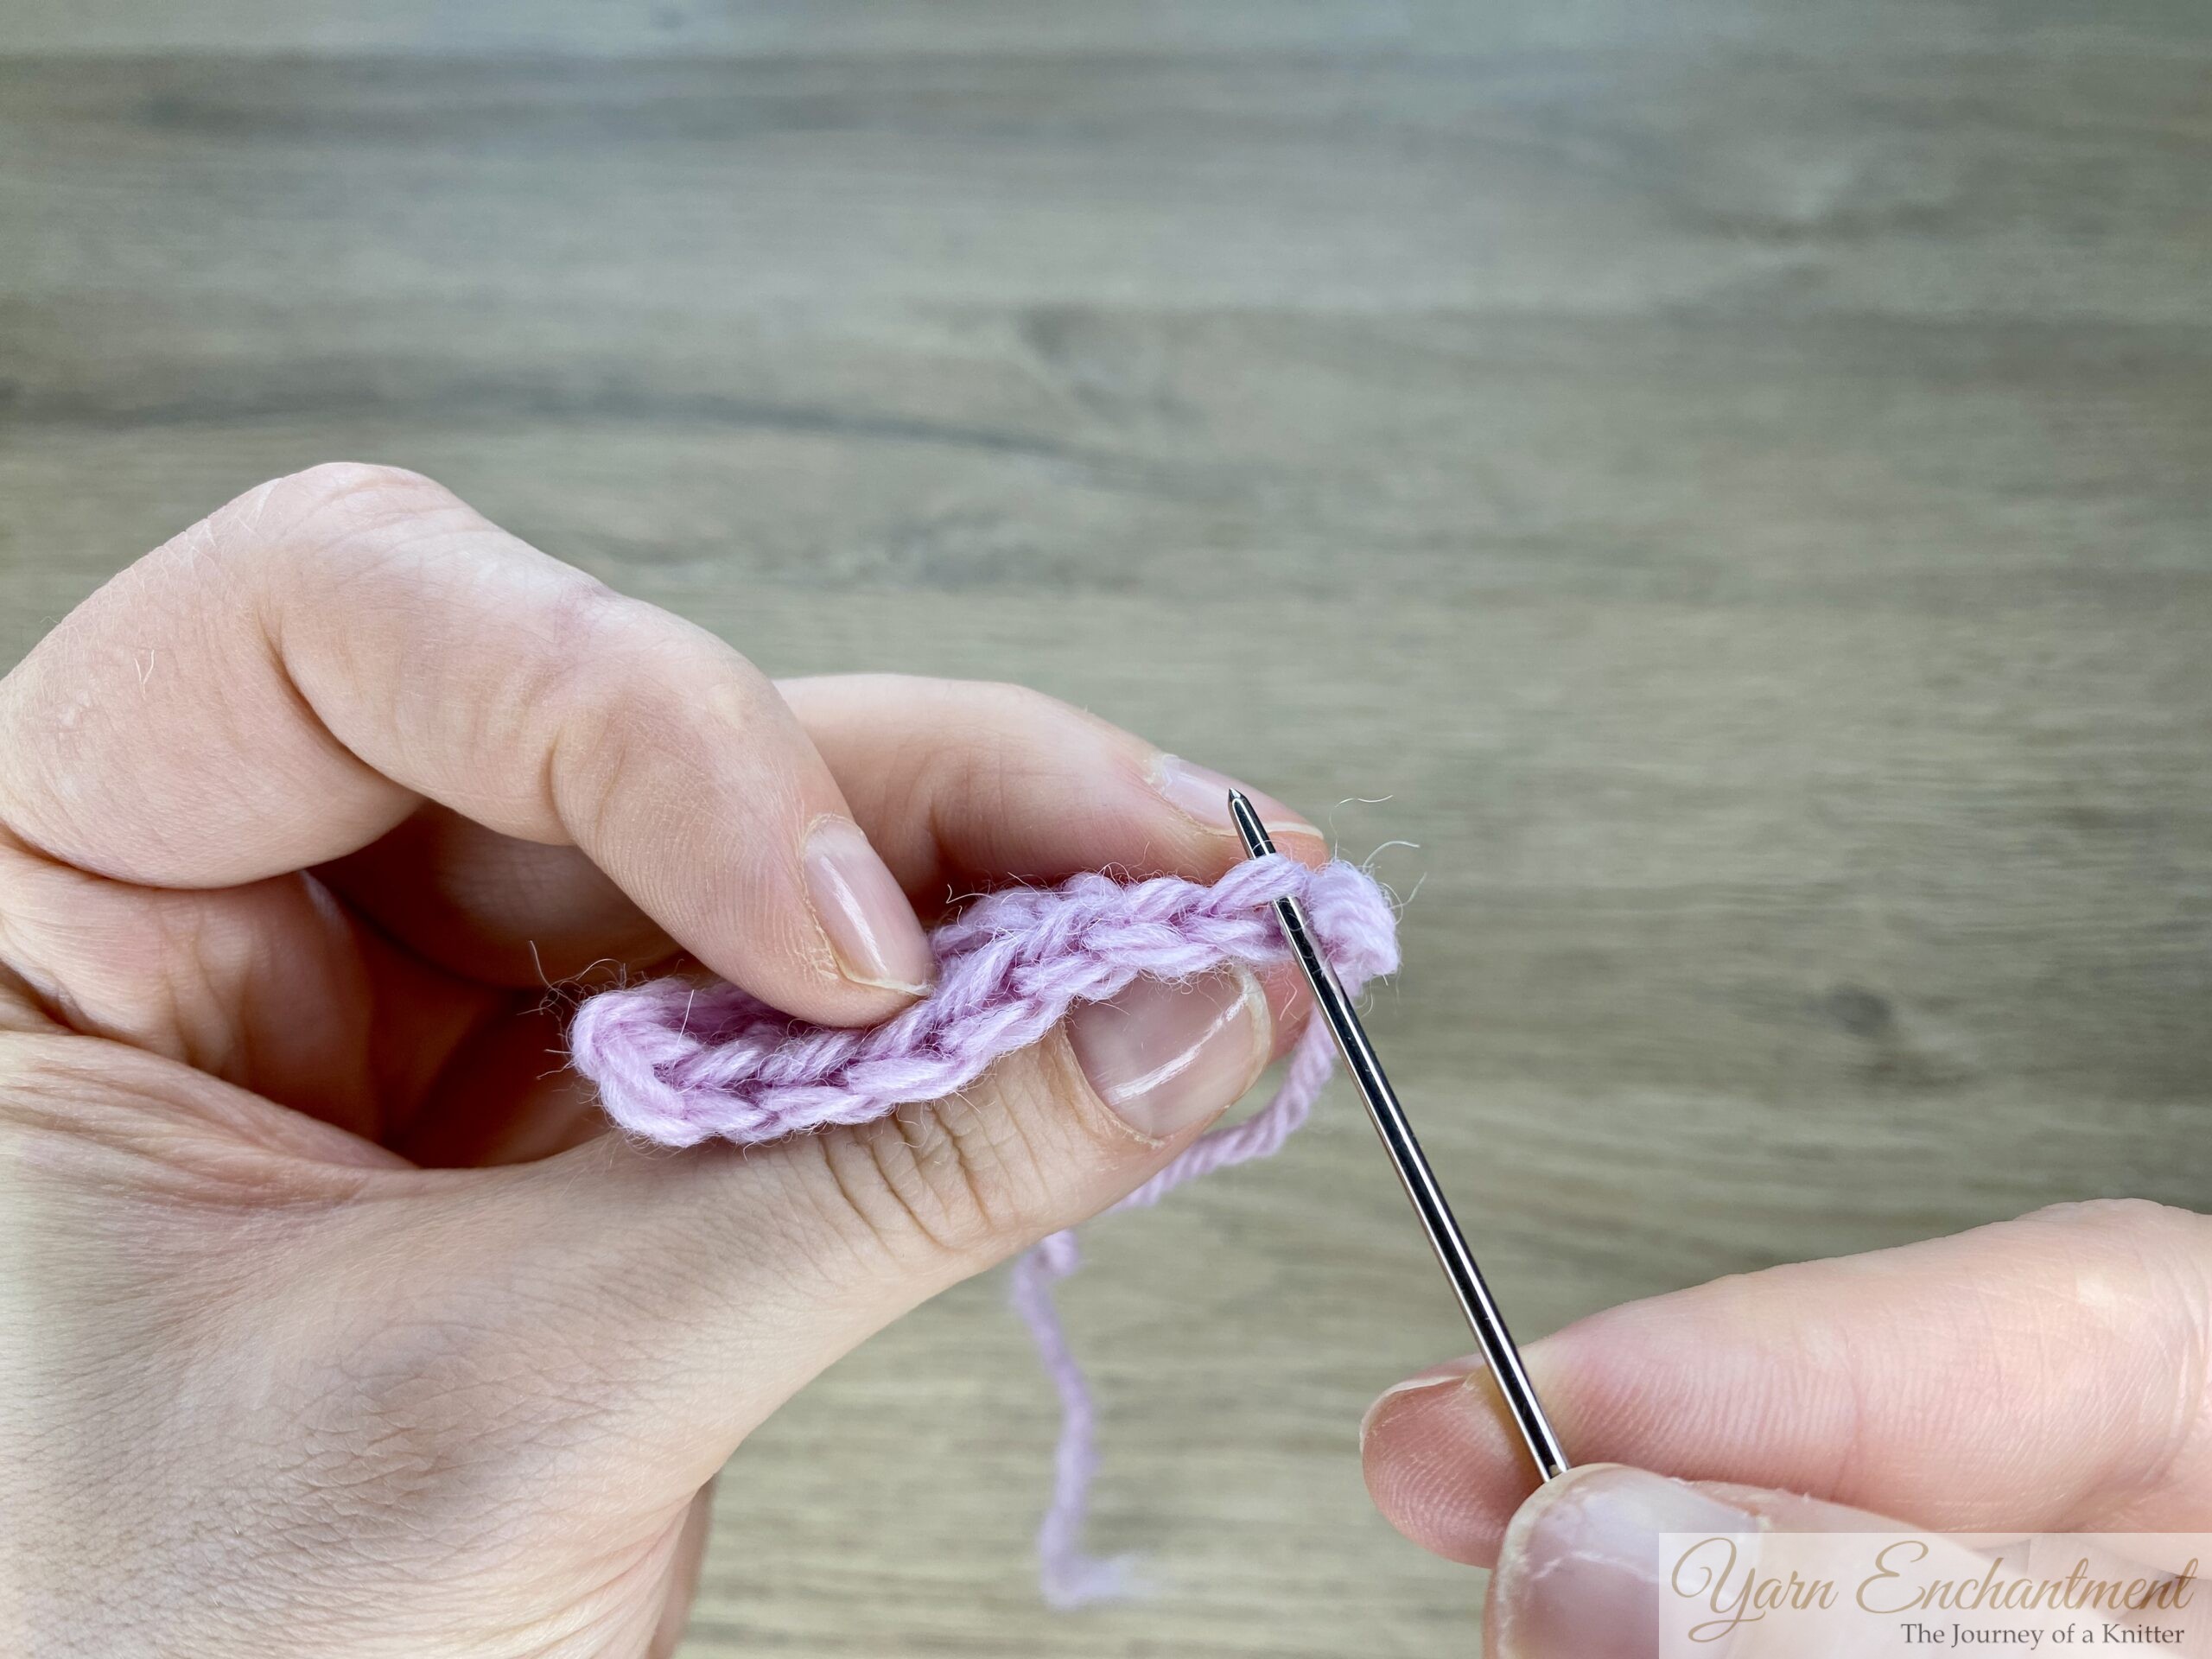
Close the Top and Finish Your Hat
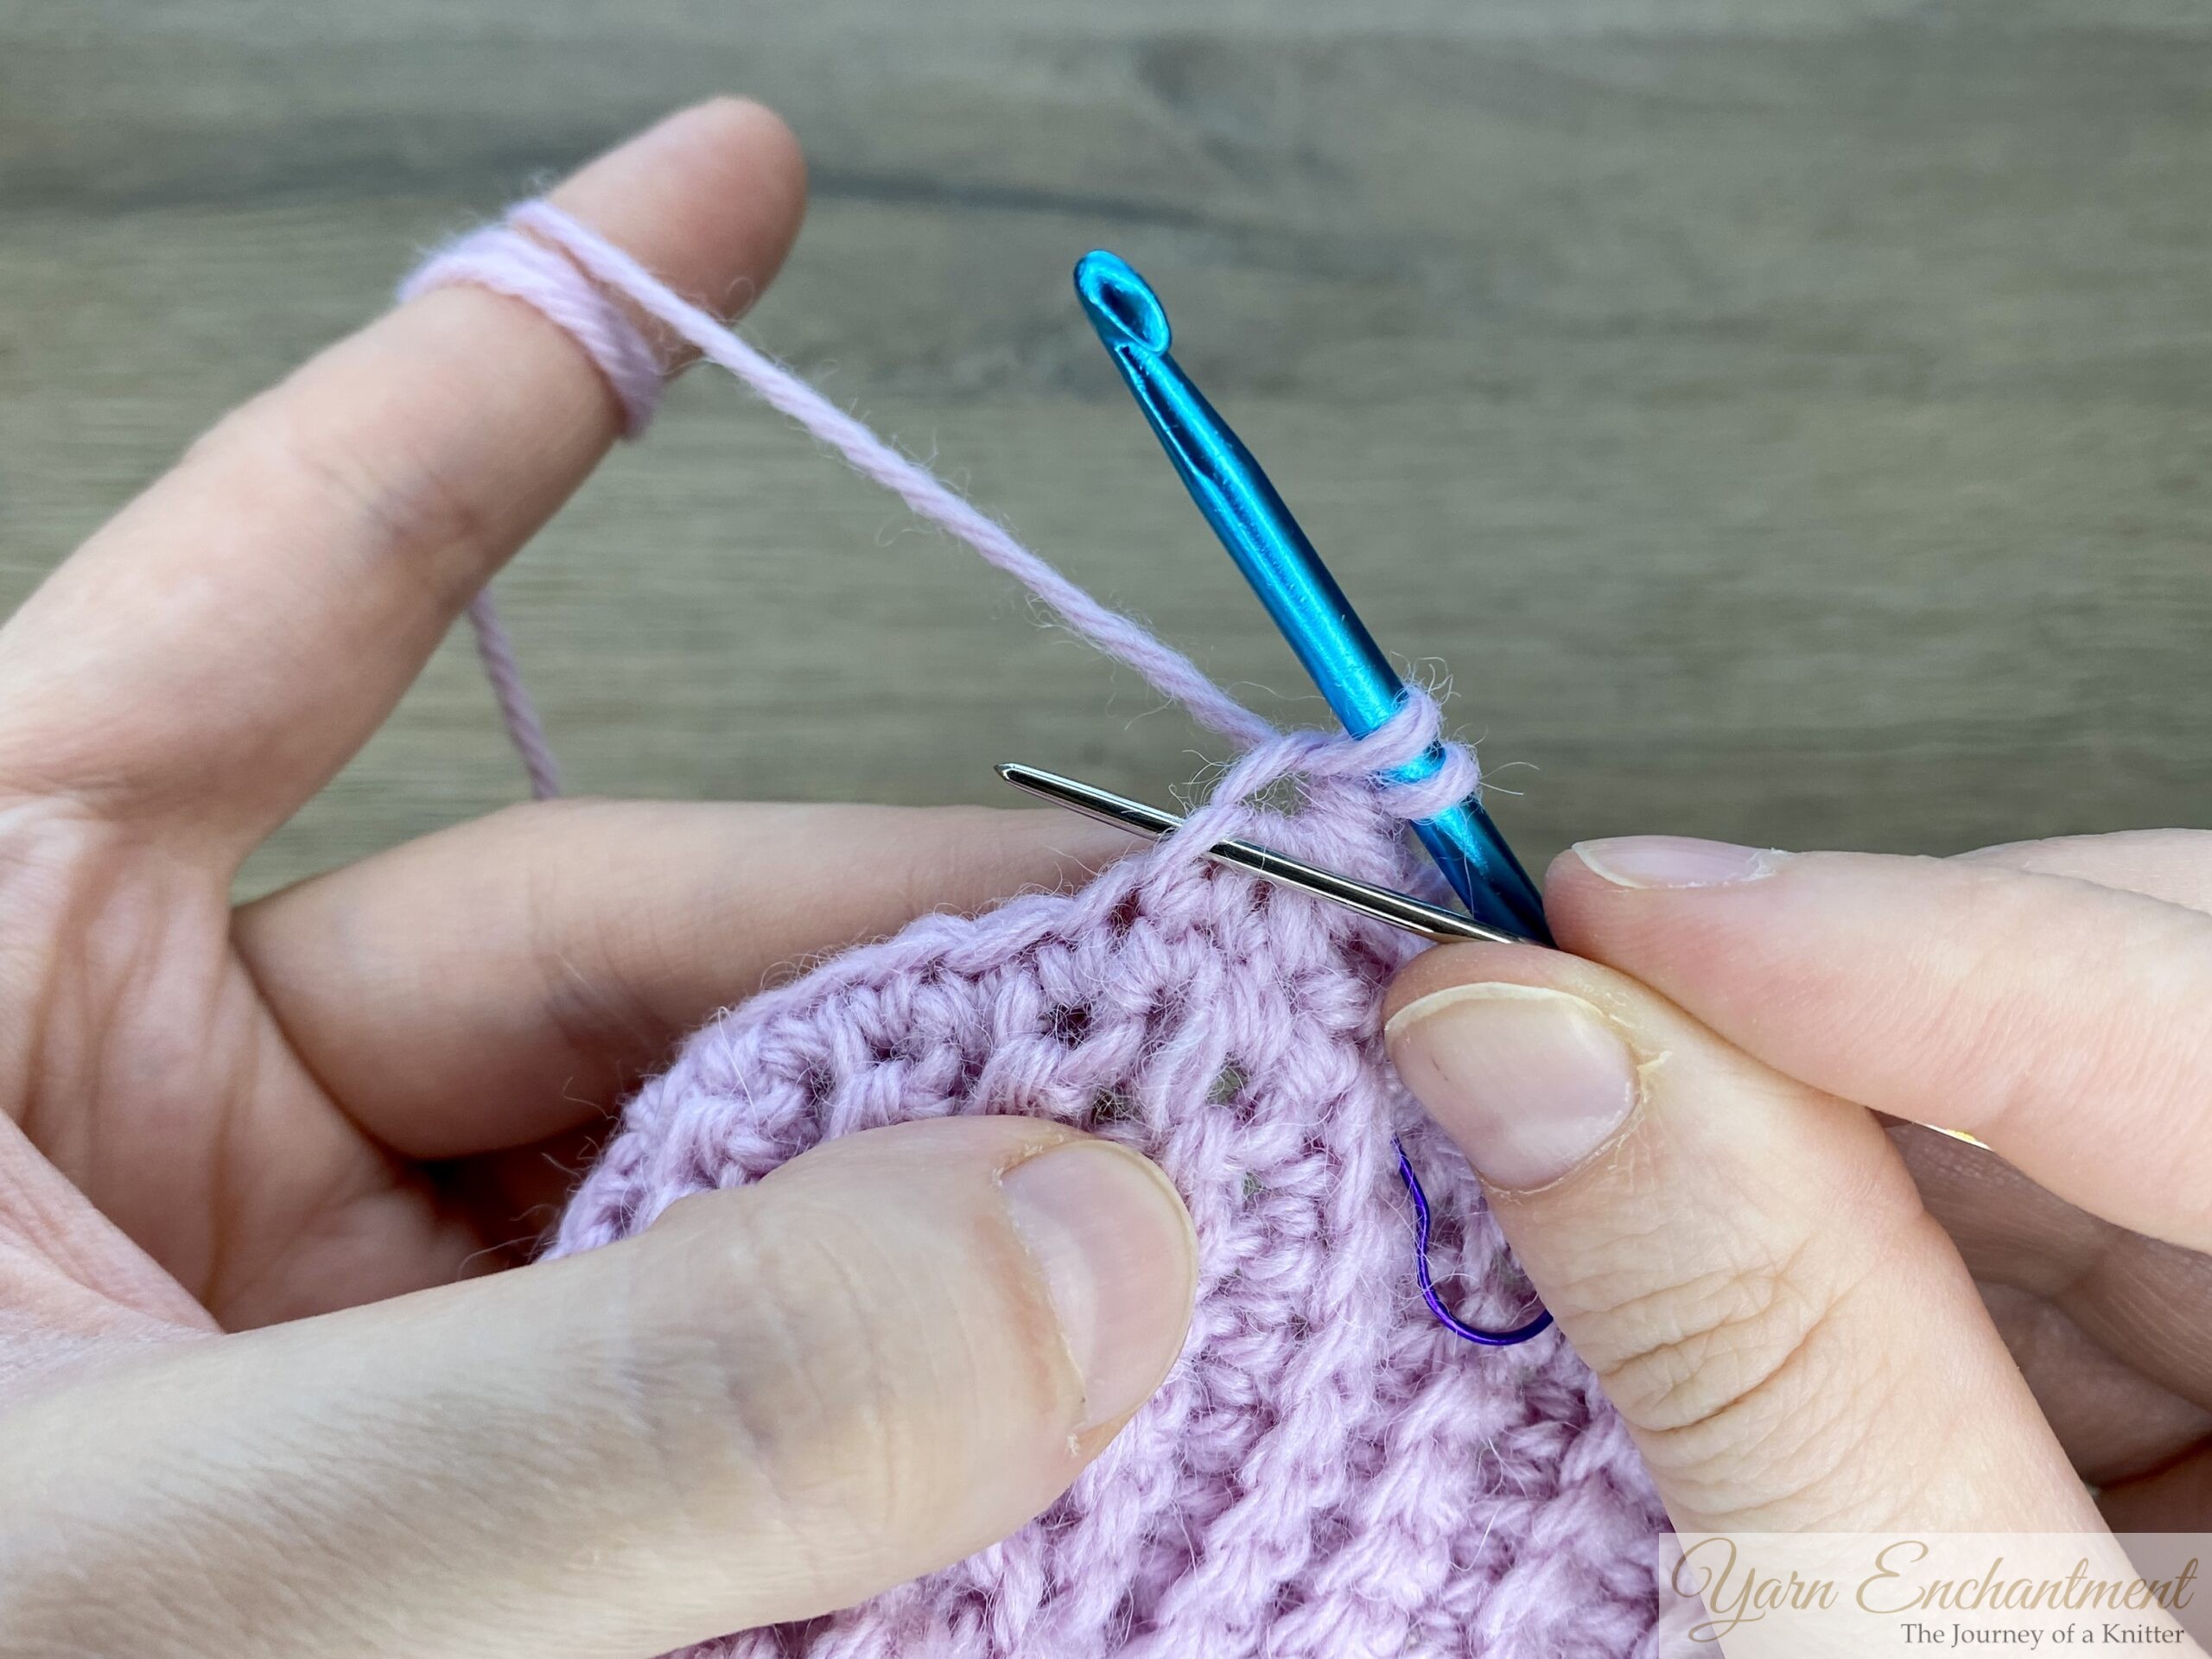
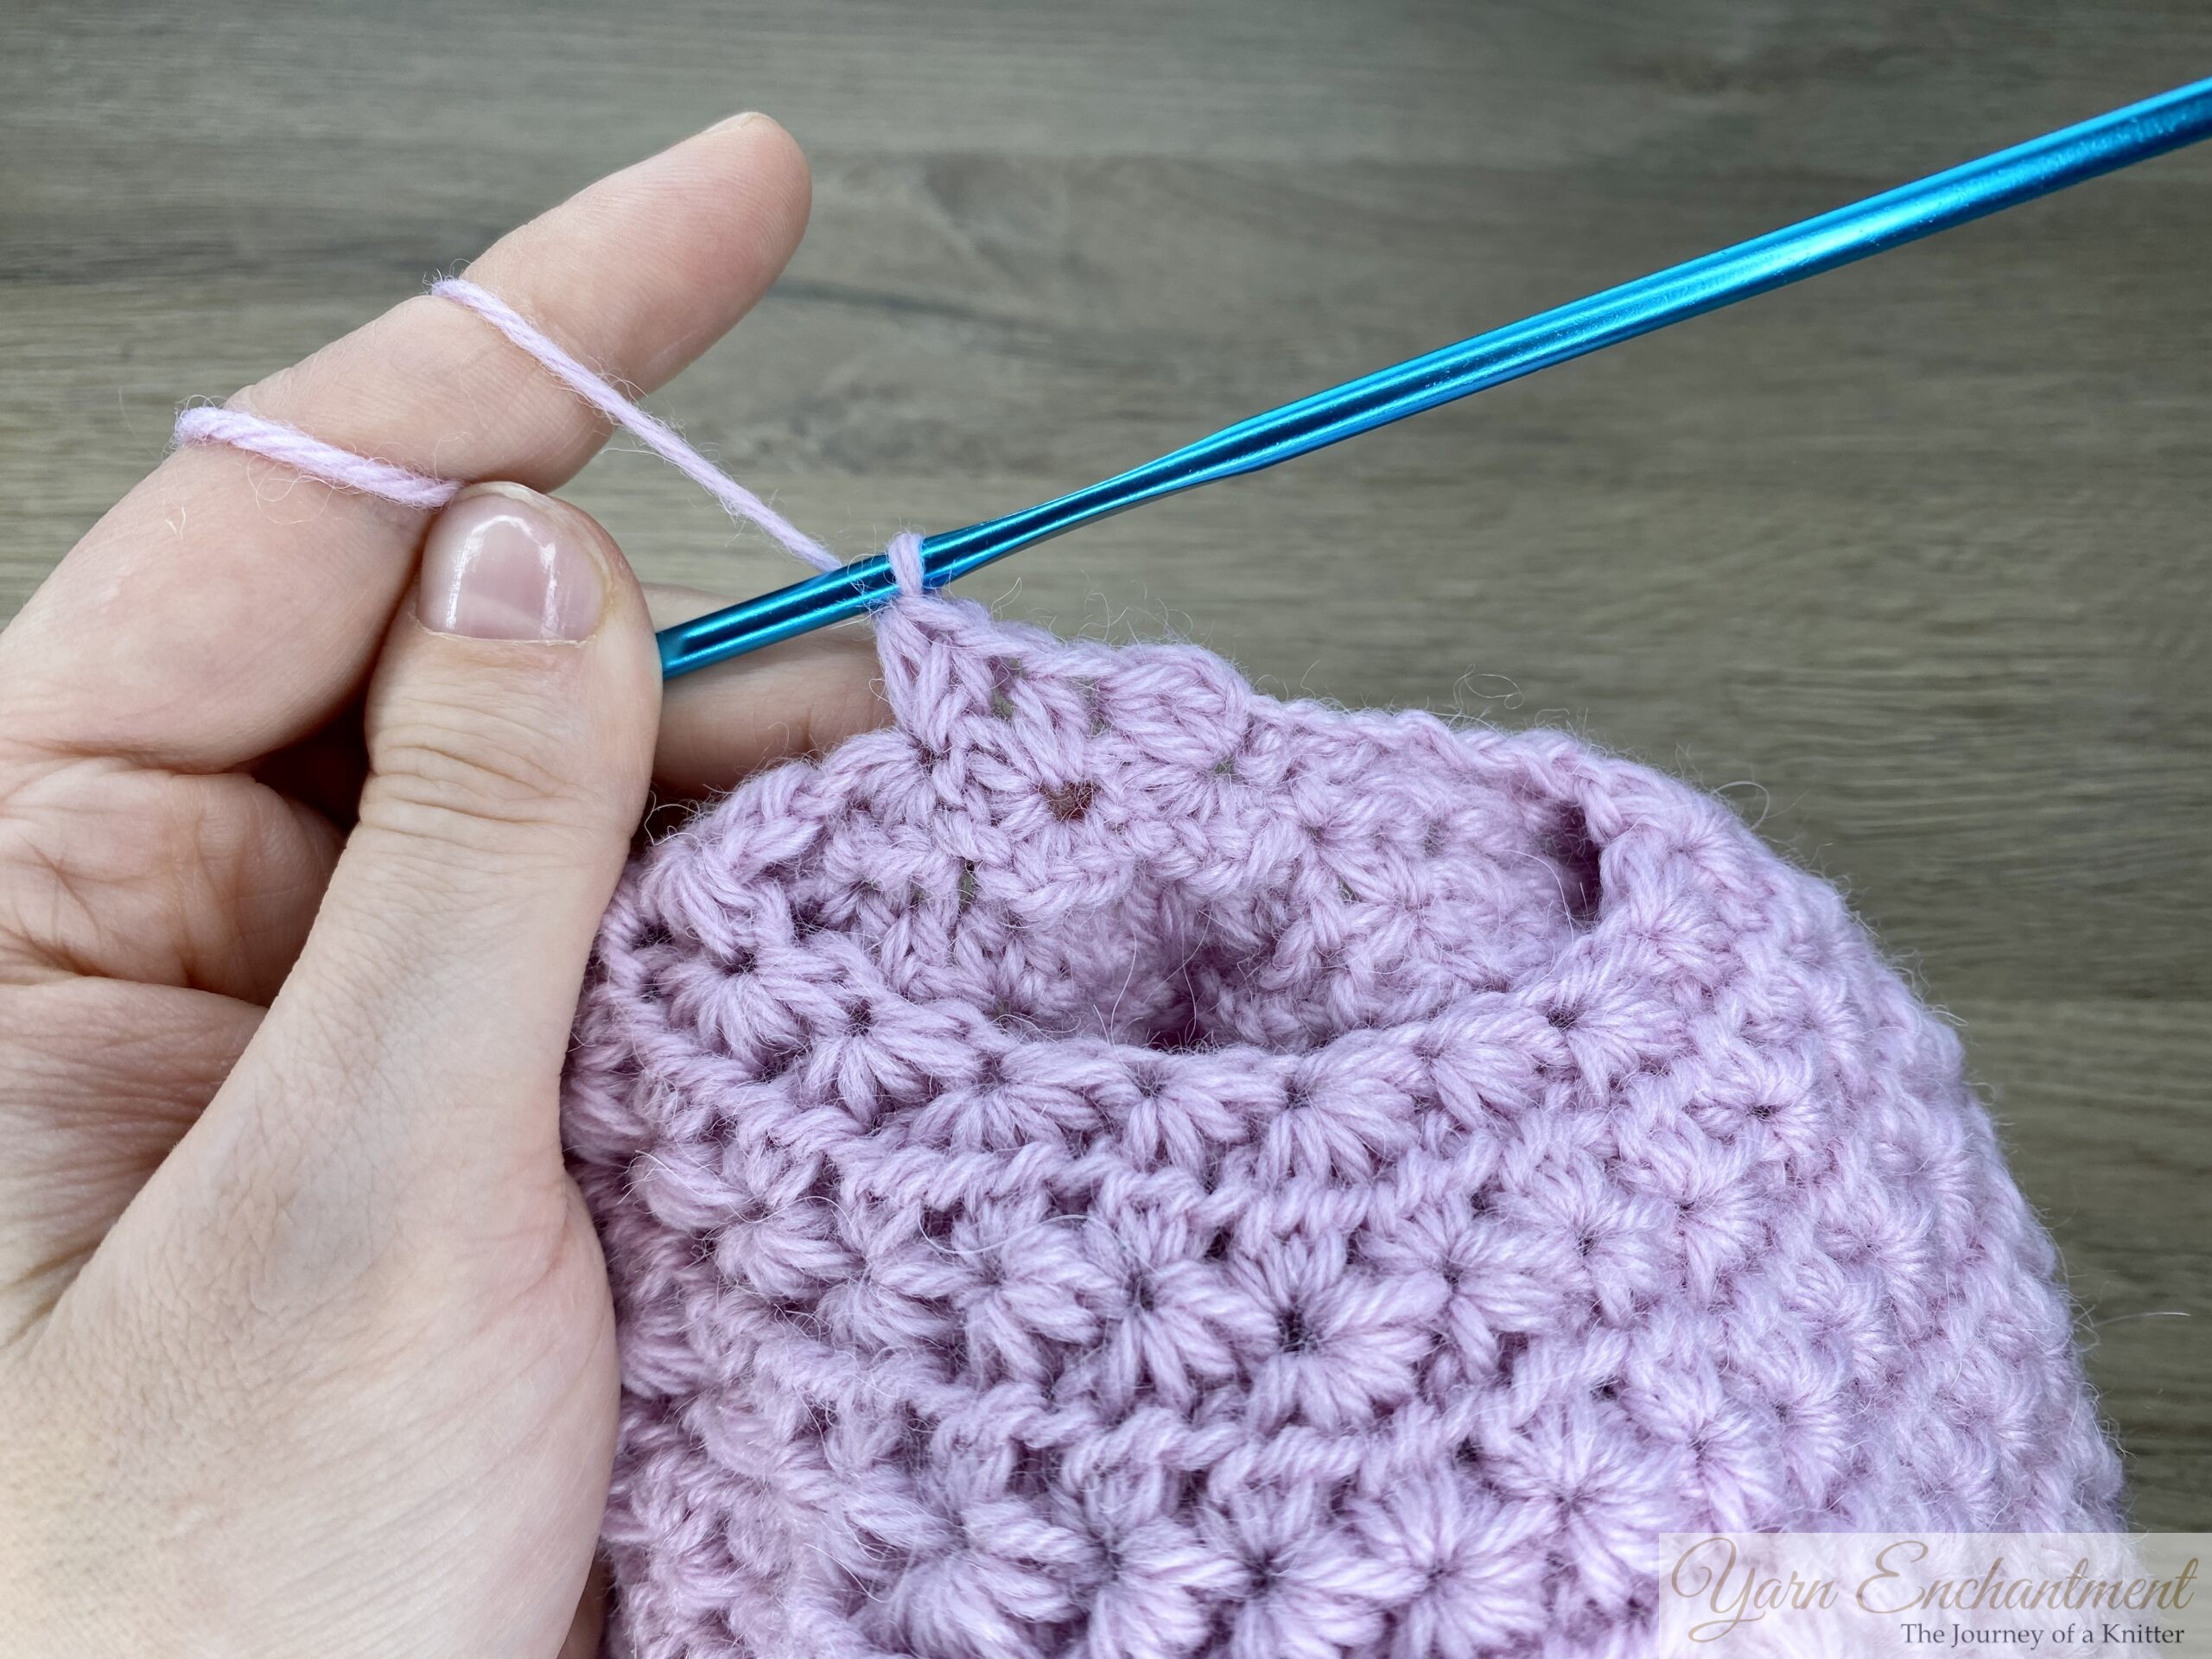
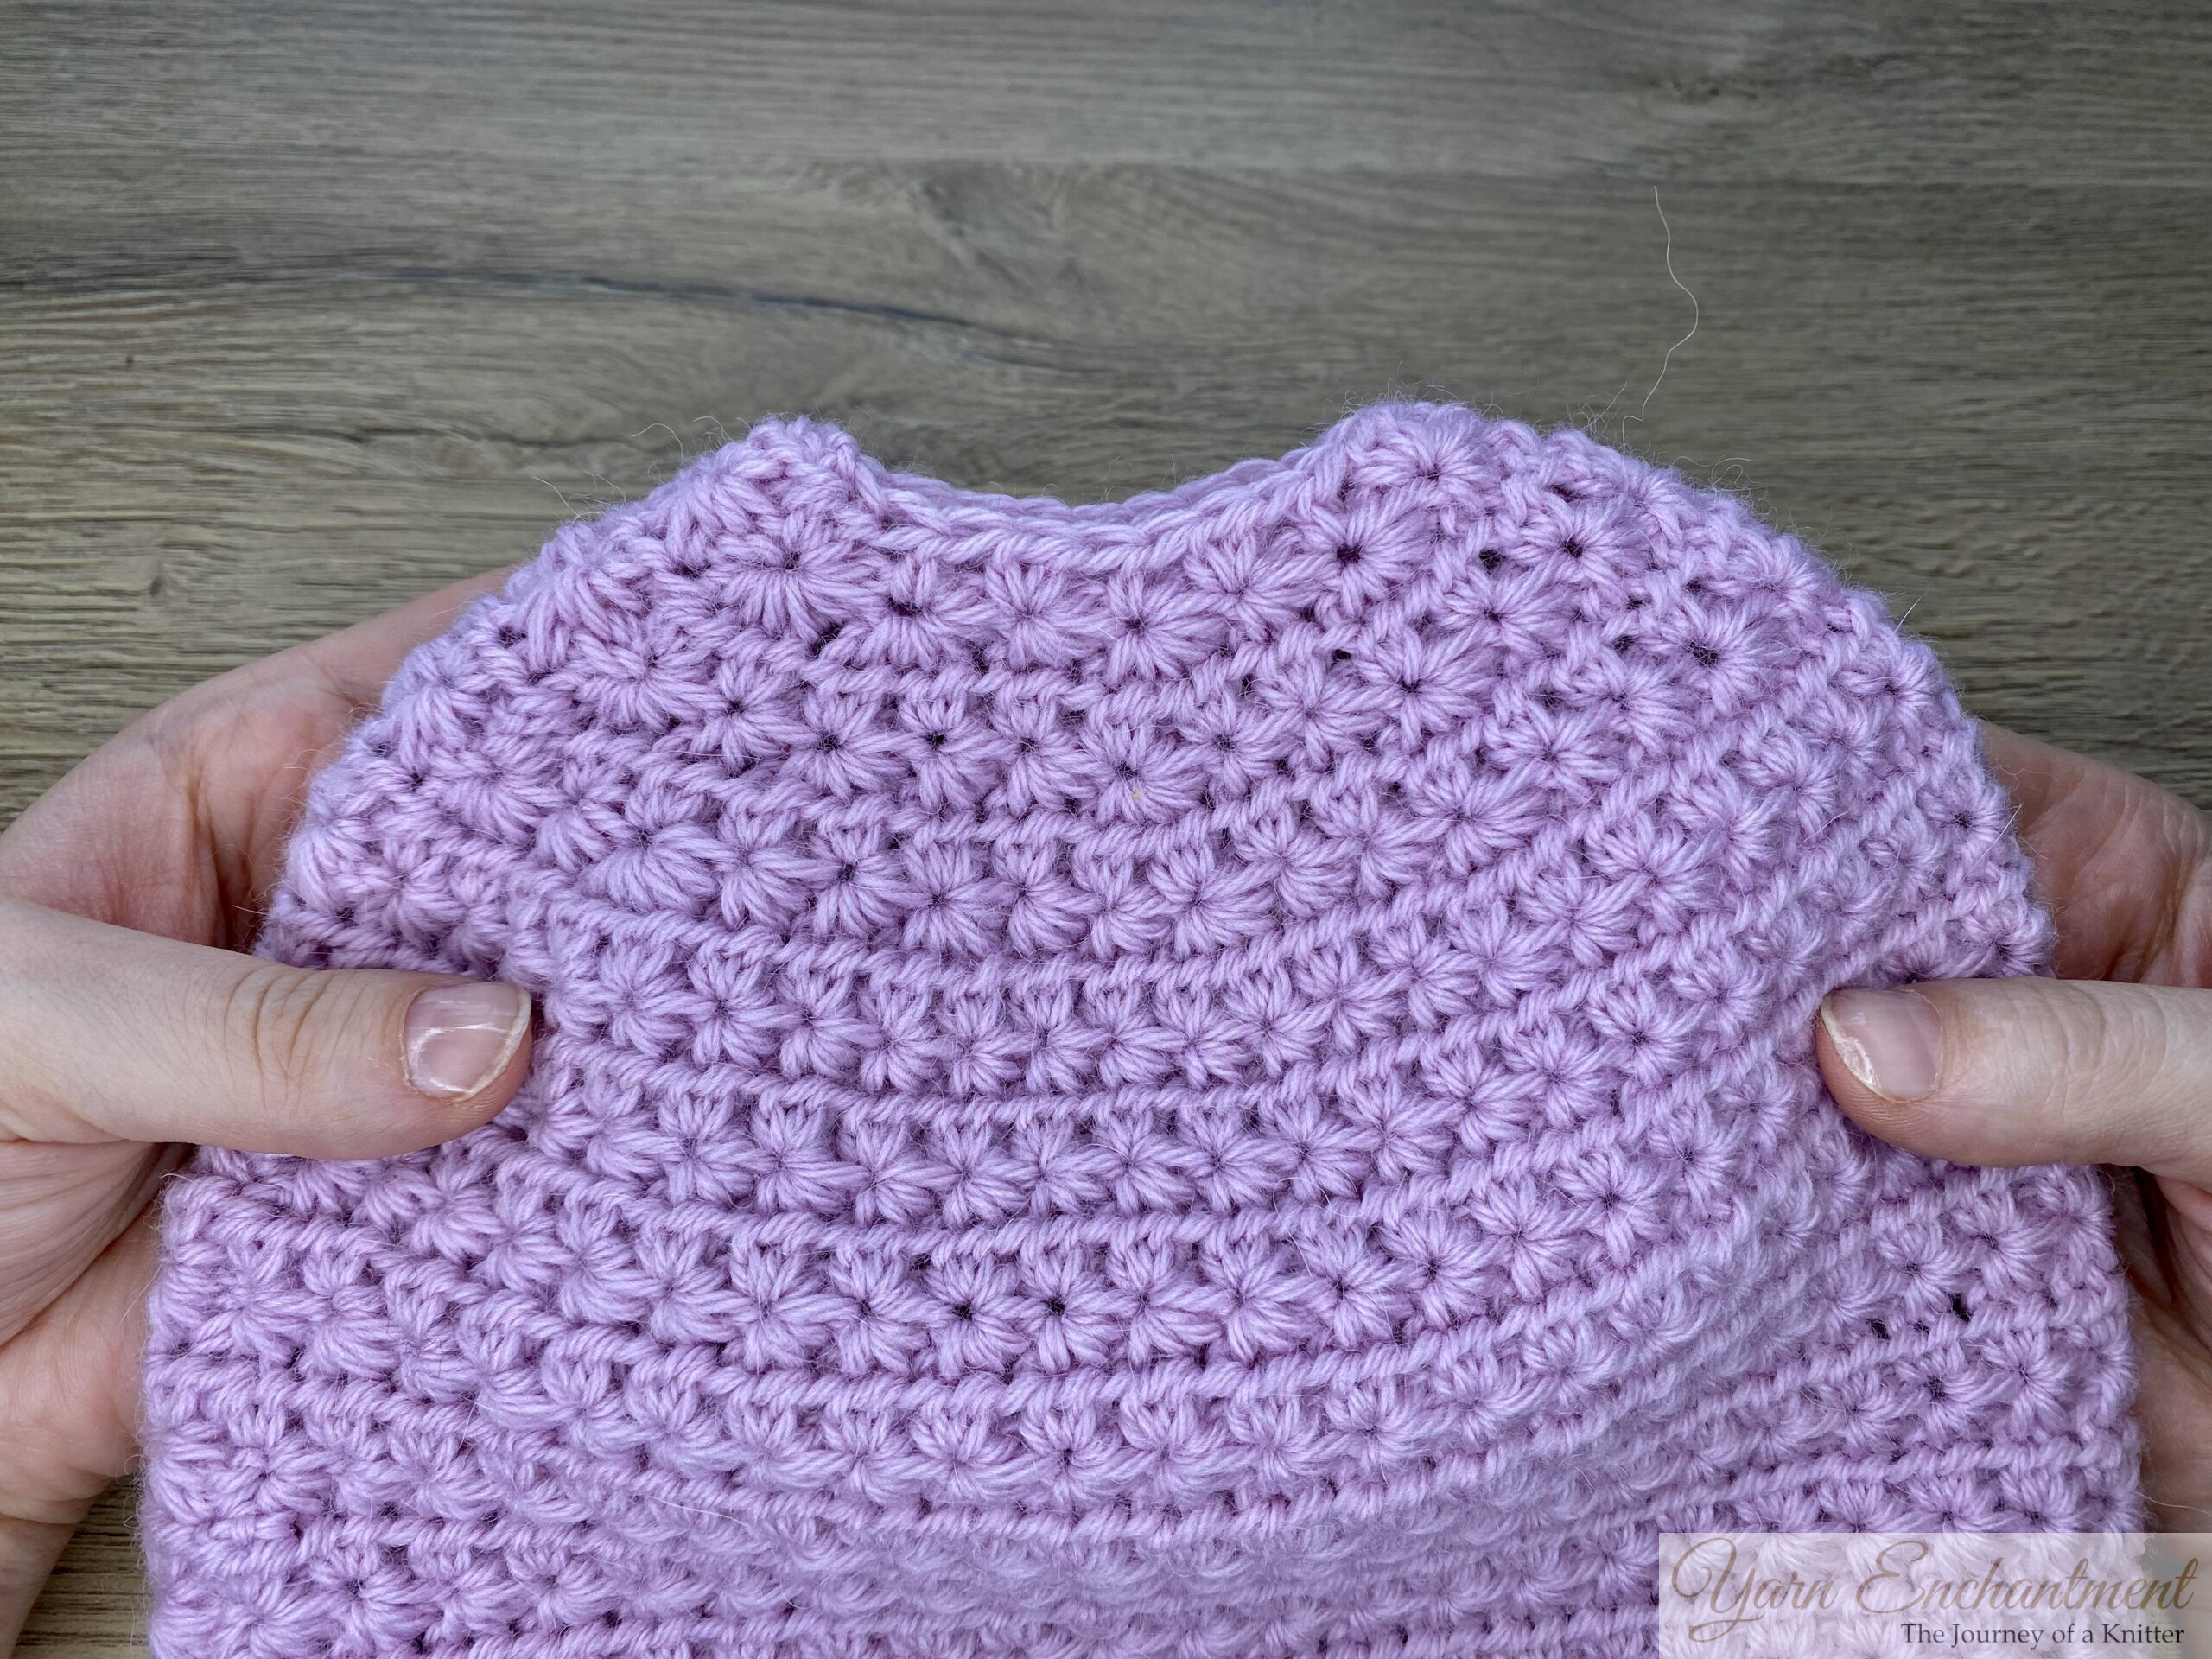
To close the top of the hat, thread the long yarn tail onto a tapestry needle. With the right side of the hat facing you, weave the needle in and out through the tops of all the stitches from the last round, going under both loops of each stitch. When you have gone all the way around, pull the yarn tail gently but firmly to cinch the opening closed. Take a few small securing stitches across the gathered top, then weave in the end on the inside of the hat.
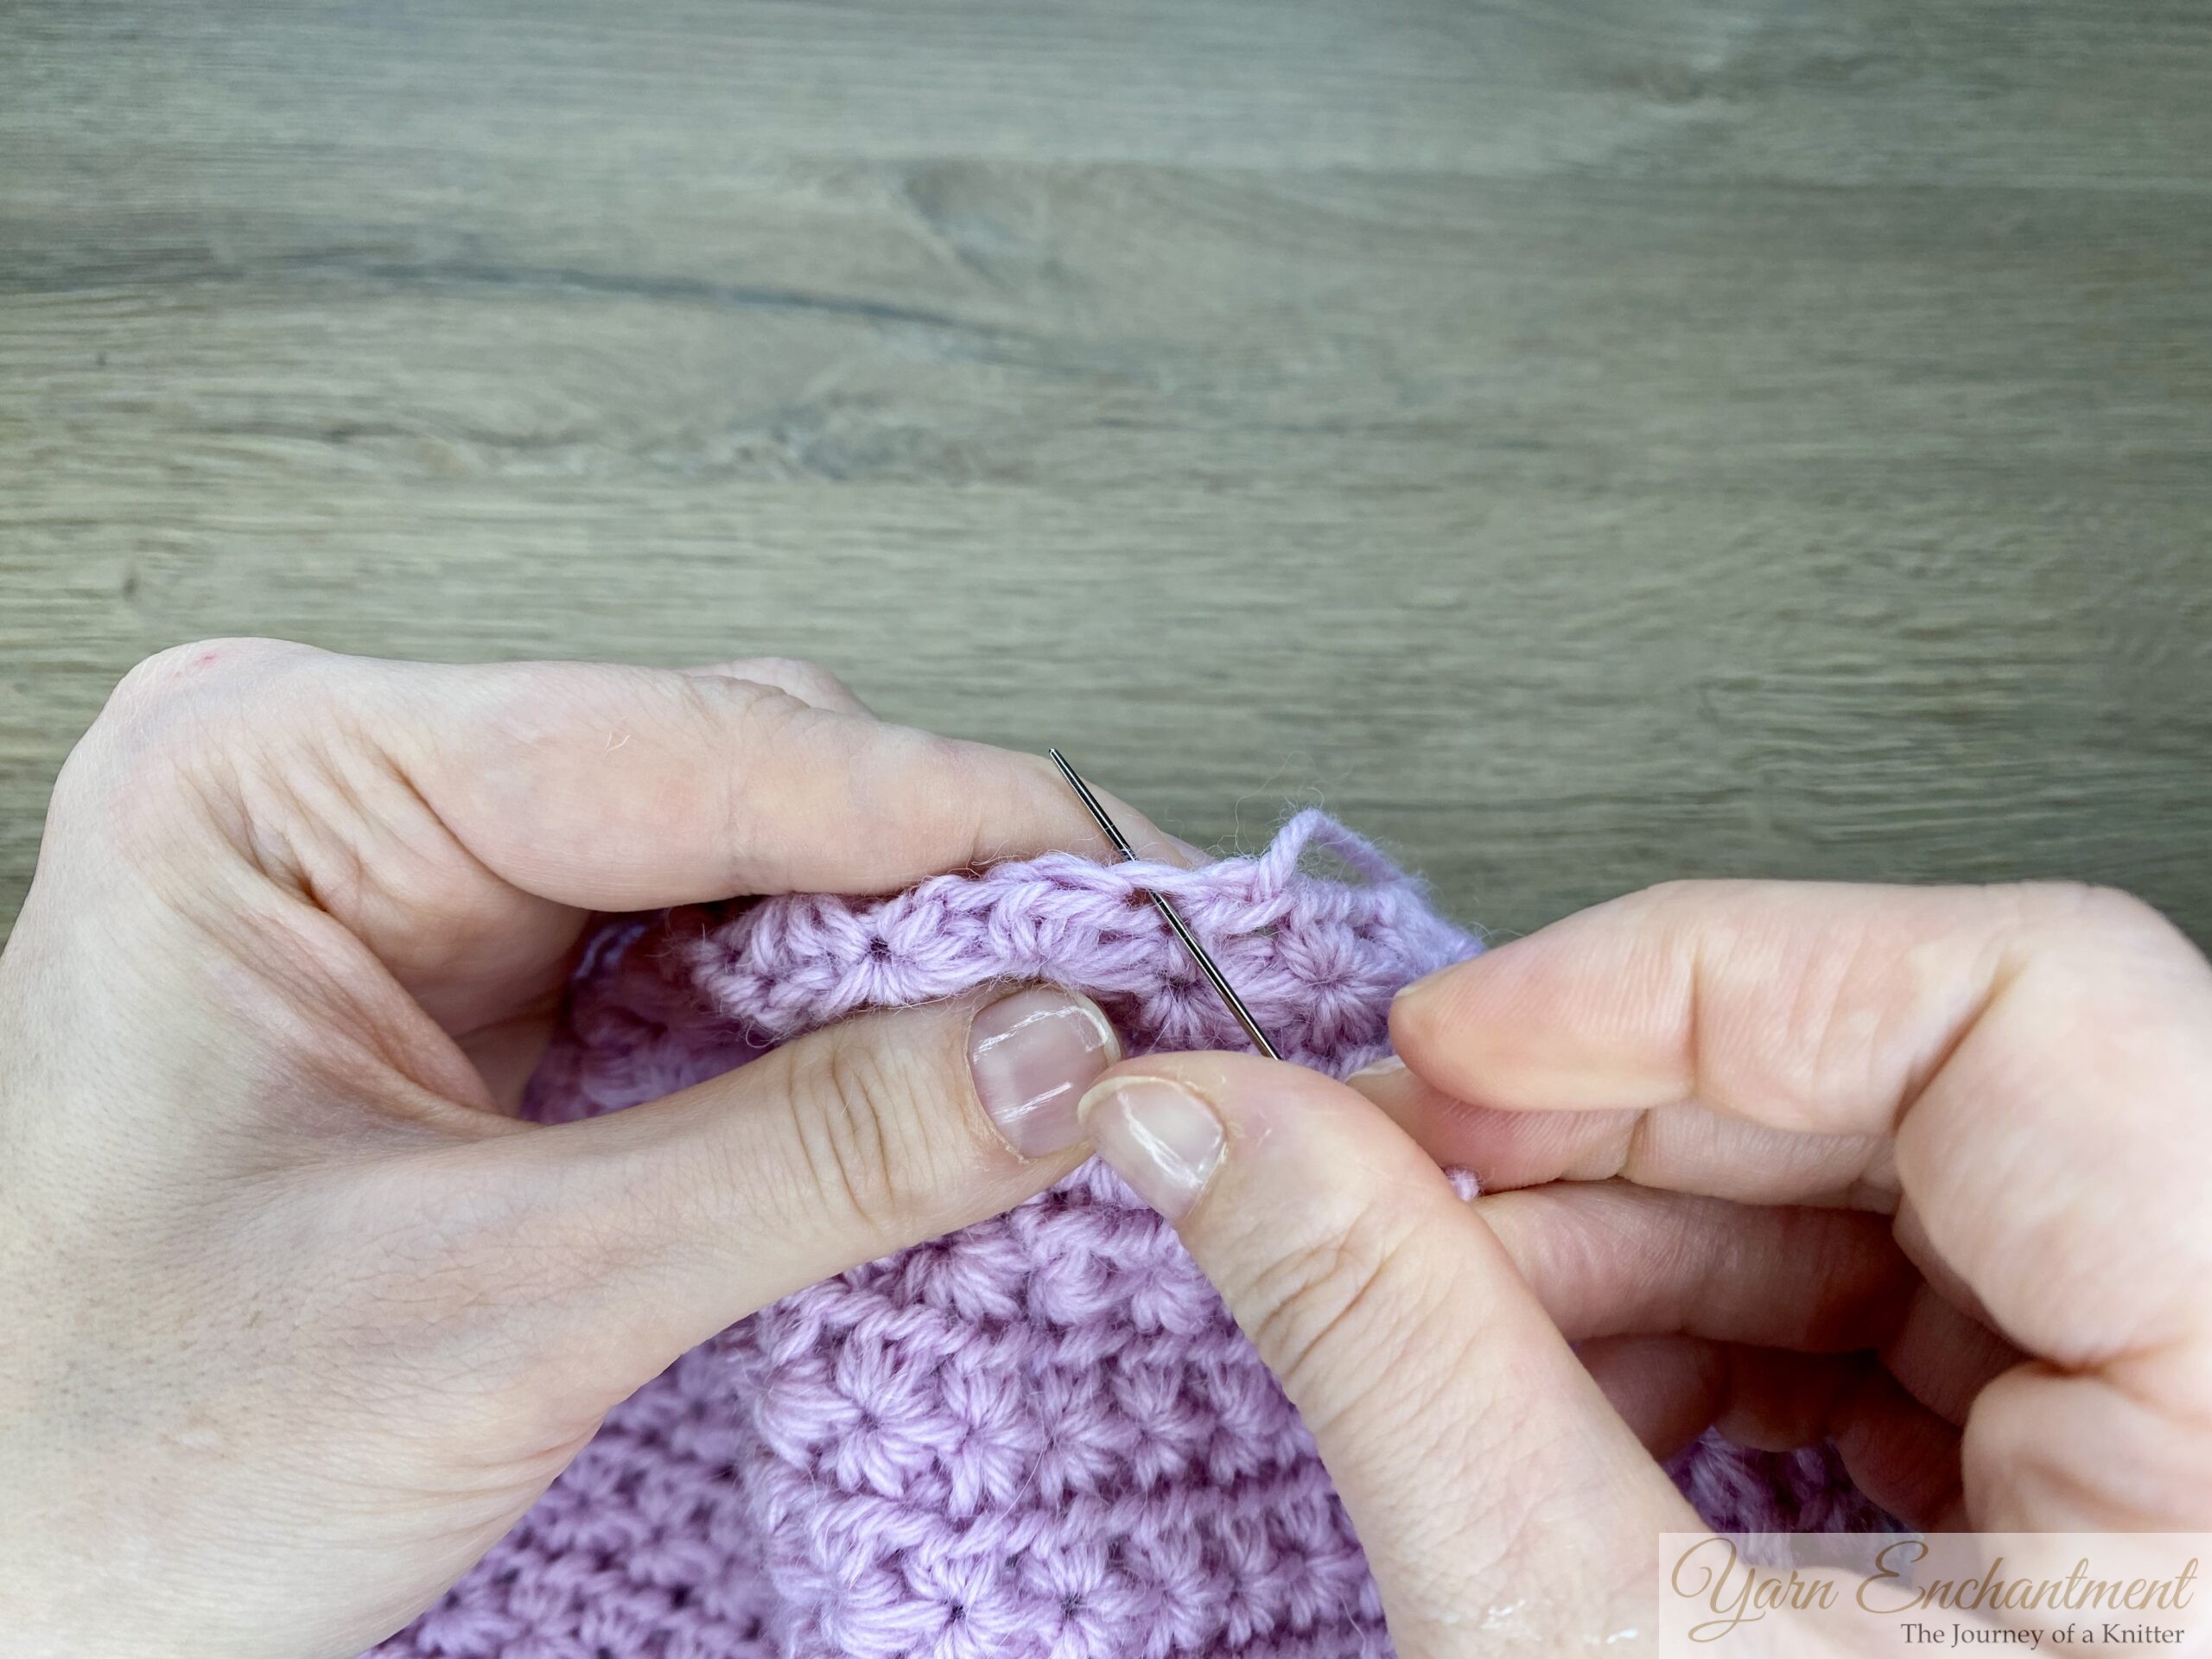 | 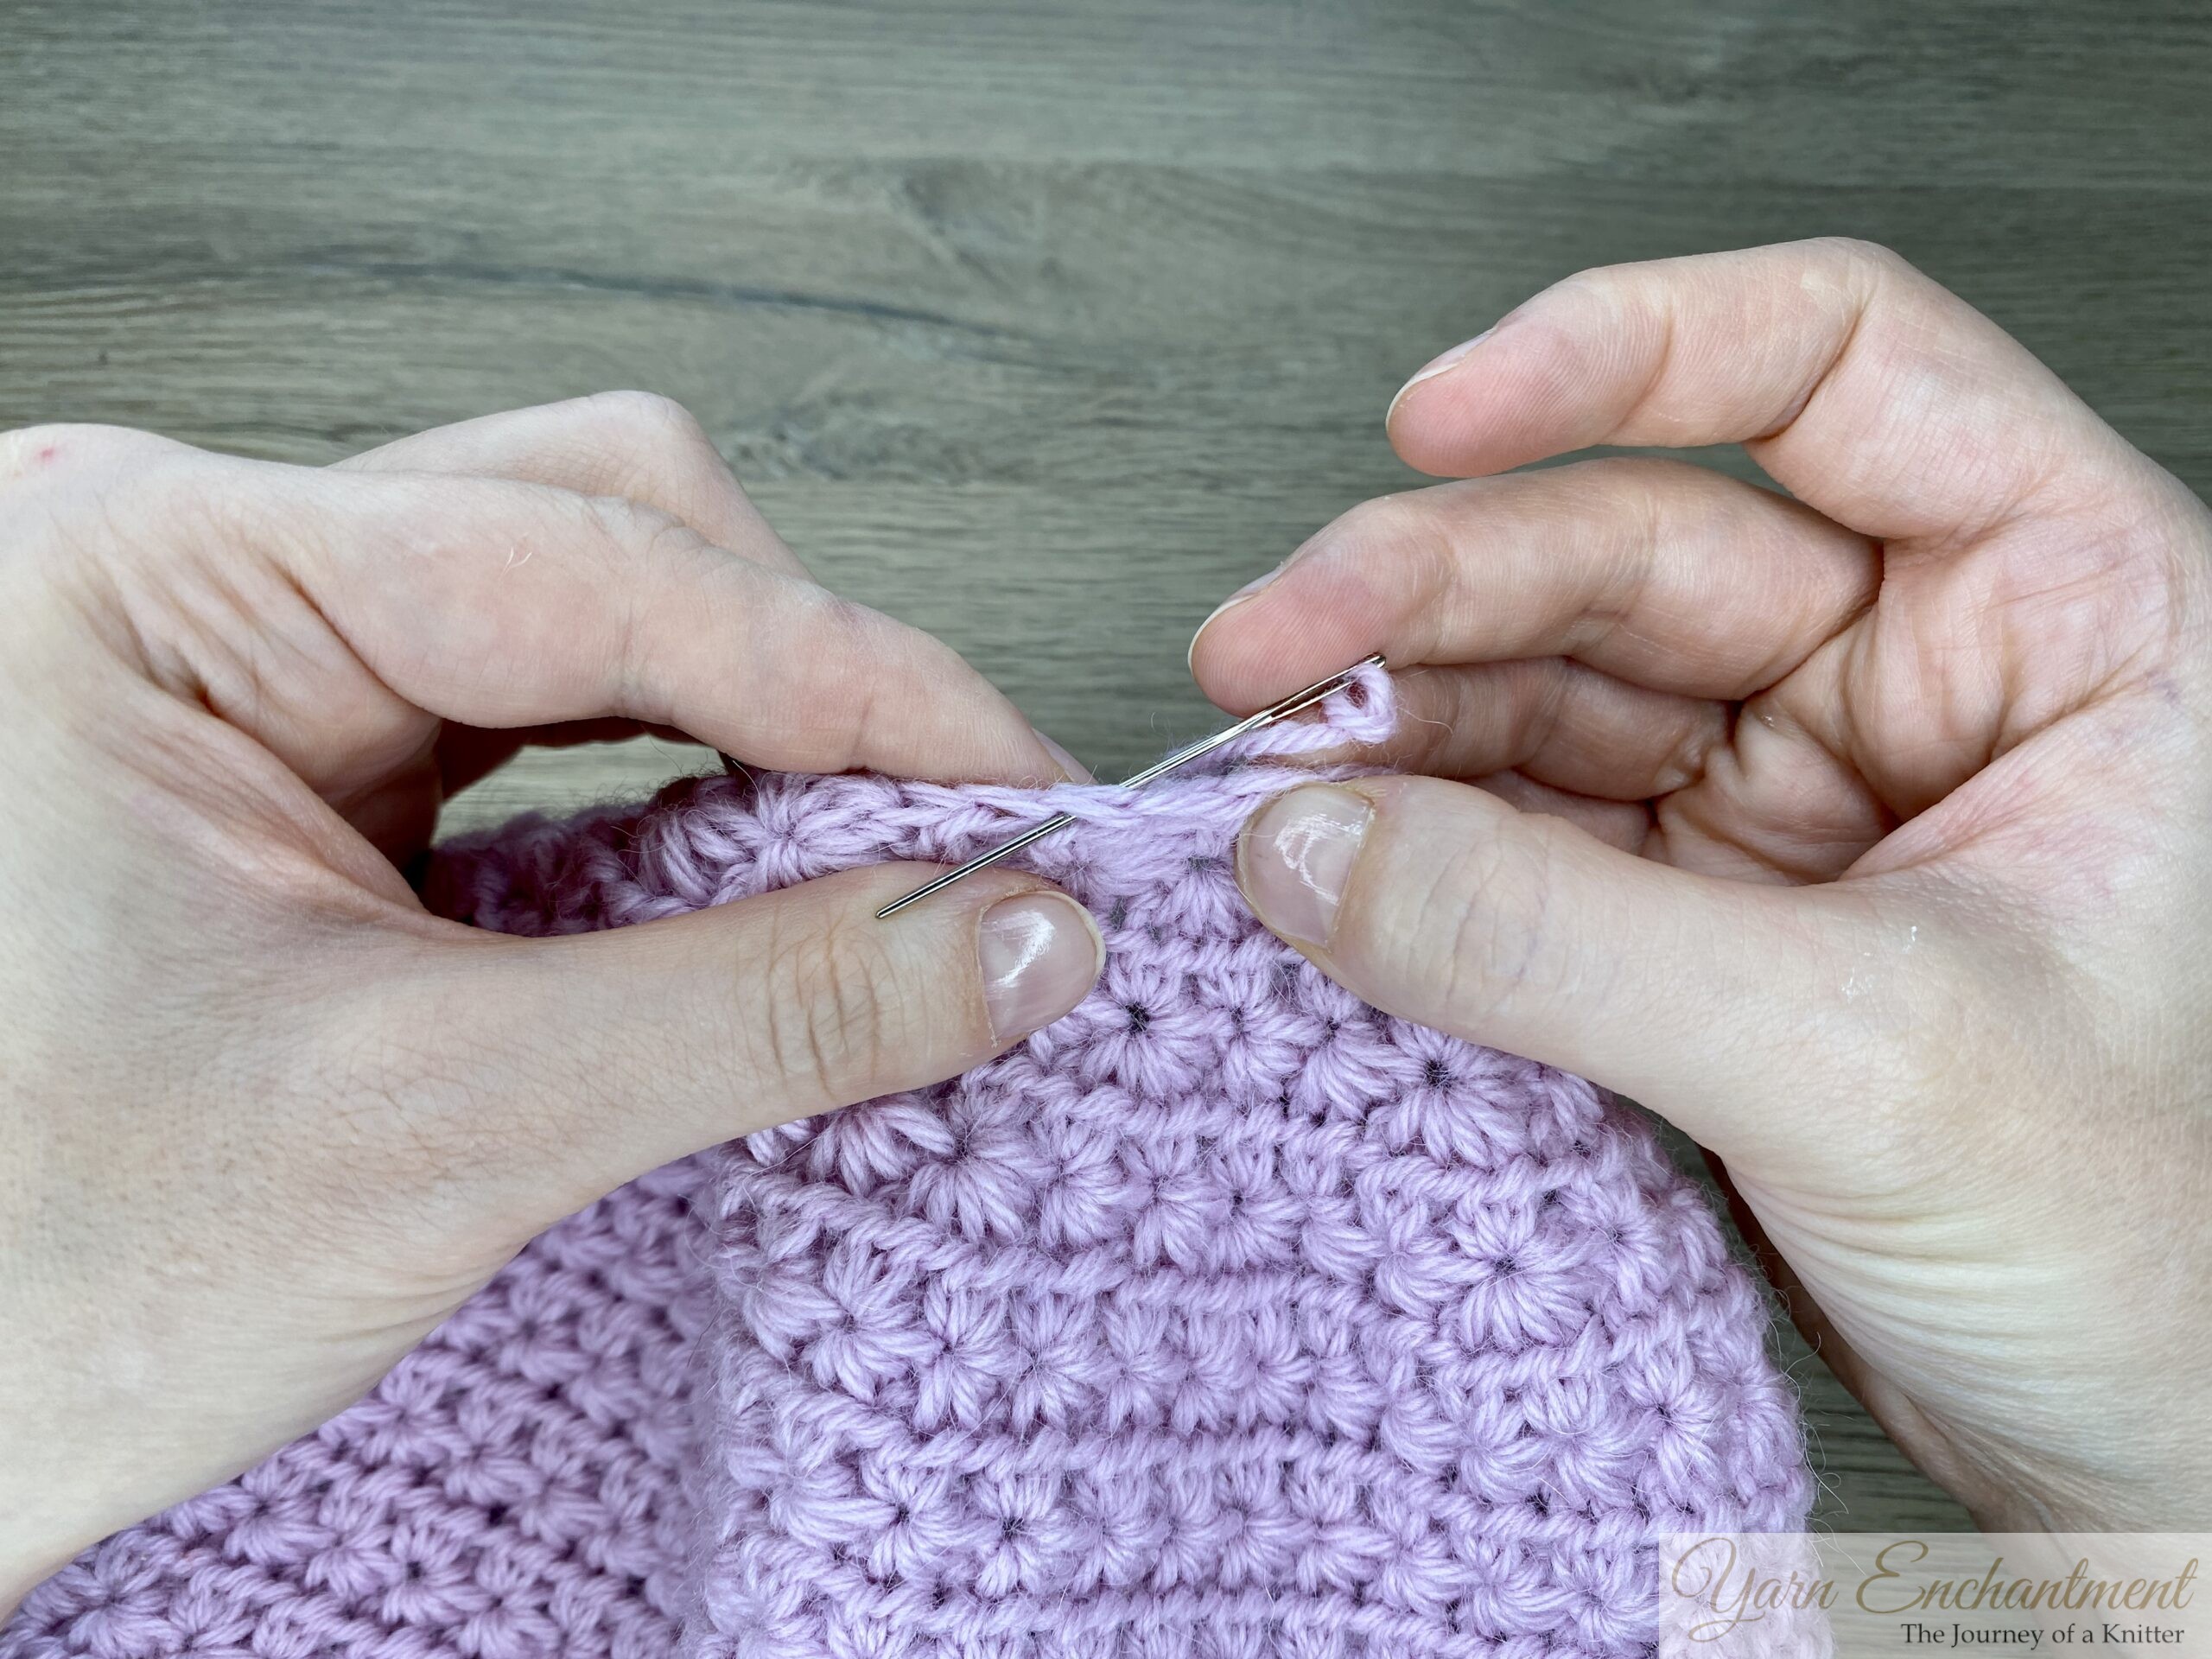 | ith the right side of the hat facing you, weave the needle in and out through the tops of all the stitches | from the last round, going under both loops of each stitch. When you have gone all the way around, pull the yarn tail gently but firmly to cinch the opening closed. |


Tips for Customizing Yarn, Size, and Style
One of the best things about this star stitch hat is how flexible it is, use anything from light DK to bulky yarn, and just follow your head measurements and brim length instead of a fixed stitch count so your fit is always perfect.
For men’s hats or when you want a more structured beanie, reach for a smooth, springy wool or wool blend and aim for about 2–5 cm (¾–2 inches) of negative ease, this will help your brim stay snug and comfortable without being too tight.
If you’re after a slouchy style, simply add 2–3 cm (about 1 inch) to your hat height (or more for lots of extra slouch!), and choose softer yarns like merino or alpaca blends for beautiful drape and coziness.

Conclusion
This little star stitch hat is one of those projects that can truly follow you anywhere. It doesn’t mind which yarn you pick, which hook you love most, or what size head you are making it for - it simply adapts to your measurements and keeps its beautiful texture. The slow, gentle decreases keep the stars from stretching, so the crown looks just as tidy as the brim, and you end up with a soft, squishy hat that feels as good as it looks. It is the kind of make you can return to again and again, knowing it will always fit, always flatter, and always feel a bit special.
Until next time, happy crafting!
A Little Way to Say Thanks
Gallery
You Might Also Like


 |
|
Join the Cozy Corner Newsletter!
Hey there, creative soul! Welcome to the Yarn Enchantment Newsletter, where we celebrate all things cozy, crafty, and full of heart. Think of this as your friendly crafting companion - a little dose of inspiration delivered straight to your inbox, just for you. Inside, you’ll find: ✨ Exclusive patterns & tutorials - ideas you won’t find anywhere else (just for us!) 📚 Bookish crafts that bring your favorite stories to life 🧶 Tips and tricks to make your crafting journey smoother (and more fun!) 💌 Heartfelt musings on life, creativity, and the magic of making something with your own two hands Whether you’re knitting by the fire, brainstorming your next DIY project, or just looking for a little creative pick-me-up, this newsletter is here to cheer you on. Because let’s be honest - crafting isn’t just about the finished project; it’s about the joy, peace, and stories we create along the way. So grab a cup of tea, cozy up, and join me. Together, we’ll weave a little magic into everyday life - one stitch, one story, and one email at a time. P.S. I’m so glad you’re here. Let’s make something beautiful together! (Note: If you're using an ad blocker, you may encounter issues subscribing to the newsletter. To subscribe, please consider disabling your ad blocker.)
|
