

Complete Foot and Wedge Toe Sock Guide: Measuring, Sizing & Decreasing
September 25, 2025
DIY Spooky Fimo Clay Stitch Markers for Halloween
October 11, 2025How to Embroider on Knits: Pro Tips & Techniques

Originally published on October 4, 2025
Why Embroider on Knits?
Embroidery on knits can seem a bit tricky at first. Because knit fabric stretches and moves differently than woven fabric, it takes a slightly gentler touch. But honestly, with a little patience and the right approach, it’s not just possible, it’s deeply satisfying.
There’s something truly special about stitching on a knitted piece. A few embroidered flowers or playful shapes can completely transform it, giving it personality and charm. Over time, I’ve picked up a handful of tips that make the process smoother and the results more beautiful, and I’d love to share them with you.
How to Embroider on Knits: Pro Tips & Techniques 
Table of Contents
- Essential Supplies: Best Stabilizers, Needles & Threads for Knits
- Step-by-Step: How to Stabilize Knit Fabric for Embroidery
- Hooping Tips for Stretch Fabrics
- Embroidery Design Selection for Knits (What Works Best)
- Transferring Embroidery Patterns to Knit Fabric
- Troubleshooting: Preventing Puckering, Snagging & Stretching
- Finishing & Care Tips for Embroidered Knits
- FAQ: Embroidering on Knitted Garments
- Final Thoughts & Happy Stitching
Essential Supplies: Best Stabilizers, Needles & Threads for Knits
Choosing the right embroidery tools is important for success on stretchy fabrics:
-
Tear-Away Stabilizers: Tear-away stabilizers are great for lightweight, non-stretchy knits. They’re simple to use and come off cleanly, making them perfect for decorative stitching or small embroidery projects on stable knit fabrics. I like using them behind buttonholes or small motifs to keep the stitches neat and the fabric nice and flat.
💡Tip: Tear-away stabilizers come in different weights. Use a lightweight version for delicate fabrics and a heavier one for sturdier materials like denim. And if you only have the lightweight kind on hand, just double it up for extra support.
-
Cut-Away Stabilizers: Cut-away stabilizers are essential for embroidery on stretchy or fine knits. Unlike tear-away stabilizers, cut-away versions remain in the fabric after stitching is complete, giving ongoing support, this is crucial for projects where the fabric moves or stretches, as it keeps embroidery from becoming wavy or distorted in the long run. These stabilizers are especially important for items that will be worn or washed often, since they maintain the appearance and quality of your embroidered designs.
For the smoothest process, iron-on cut-away stabilizers work particularly well. They bond to the fabric, making it easier to hoop and helping your design stay secure throughout stitching. Simply iron the stabilizer to the reverse side before embroidering, then trim away the excess close to your finished design, leaving the supportive layer in place. If the design will be in direct contact with skin, consider a soft or mesh-type cut-away for extra comfort. -
Sticky Stabilizers: Sticky stabilizers, available in both tear-away and cut-away types, are ideal for fabrics that can't be hooped, like velvet, silk, or delicate knits. The adhesive surface keeps the fabric securely in place, which prevents stretching, hoop marks (at least not as much), and puckering during embroidery. To use, hoop only the stabilizer and peel away the protective backing to reveal the sticky side. Then gently press the fabric onto the adhesive, making sure it's smooth and free of wrinkles. This method is especially useful for embroidery on garments, textured surfaces, or any material where traditional hooping might cause damage or distortion. For even greater stability, you can use temporary spray adhesive in conjunction with sticky stabilizer for trouble spots or very slippery fabrics.
-
Water-Soluble Stabilizers: Water-soluble stabilizers are perfect when embroidery needs a clean finish with no stabilizer left behind. These are especially useful for intricate designs, lace, or when working with dark fabrics where leftover backing might show through. Simply place the water-soluble stabilizer under (or on top of, for topping) the fabric, complete the embroidery as usual, and rinse or dab the area with water, the stabilizer will dissolve completely, leaving only the stitching. This method is excellent for fine projects, freestanding lace, or textured fabrics where a visible backing would interfere with the look or feel. For best results, handle the embroidery gently when washing out the stabilizer to avoid distorting fine details. I used this stabilizer on my recent project bag, and all I had to do was place it in lukewarm water, everything dissolved, and my embroidery wasn’t damaged at all. Just be sure to buy a good quality stabilizer so you get the best results.
Needle and Thread Choices
Choosing the right needle and thread makes all the difference:
- Ballpoint Needles: Ballpoint needles glide between the fibers rather than piercing them - so you won’t have to worry about runs or snags
- Embroidery Threads: I like to use threads that match the stretchiness of the fabric. For example, when I embroidered my Vine Pullover, I used the same yarn I knitted with!
Top Fiber Choices
-
Wool embroidery thread is a fantastic pick for knitwear, especially if the garment is made from wool. It stretches naturally with the fabric and blends in beautifully, giving your work a seamless, cohesive finish.
-
Cotton embroidery floss is a classic favorite for adding crisp details. It’s super versatile and delivers sharp stitch definition, though it doesn’t stretch much, so it works best on stable knits or for smaller accents and decorative touches.
-
Silk threads brings a luxurious shine and glide effortlessly through knit fabrics. These are perfect for fine or high-end pieces, though they’re a bit less common simply because they tend to be pricier.
Additional Fiber Options
-
Rayon embroidery threads are a lovely way to add shine to your work. They offer gorgeous color and gloss, but keep in mind they’re not as stretchy or tough as wool or cotton, especially on knits that need to move with the fabric.
-
Acrylic yarn or thread is another option, it’s budget-friendly and easy to find. Just know that it doesn’t blend in as naturally with woolen knits and can be prone to pilling with wear.
Tips for Best Results
-
Make sure your thread is the right weight for the fabric - thicker threads work well with heavier knits, while finer threads are the best fit for lighter fabrics.
-
Try stitching on a small swatch of your fabric before jumping into your project. This way, you can check if the look and feel are right, and be certain everything will hold up as you hope.
A few little embroidered flowers on a knit hat can bring so much cheer and brightness to even the coldest winter days. For this embroidery, I chose 100% cotton thread for the flowers. The hat itself is knitted with a soft blend of 65% wool and 35% alpaca, which makes it extra cozy. 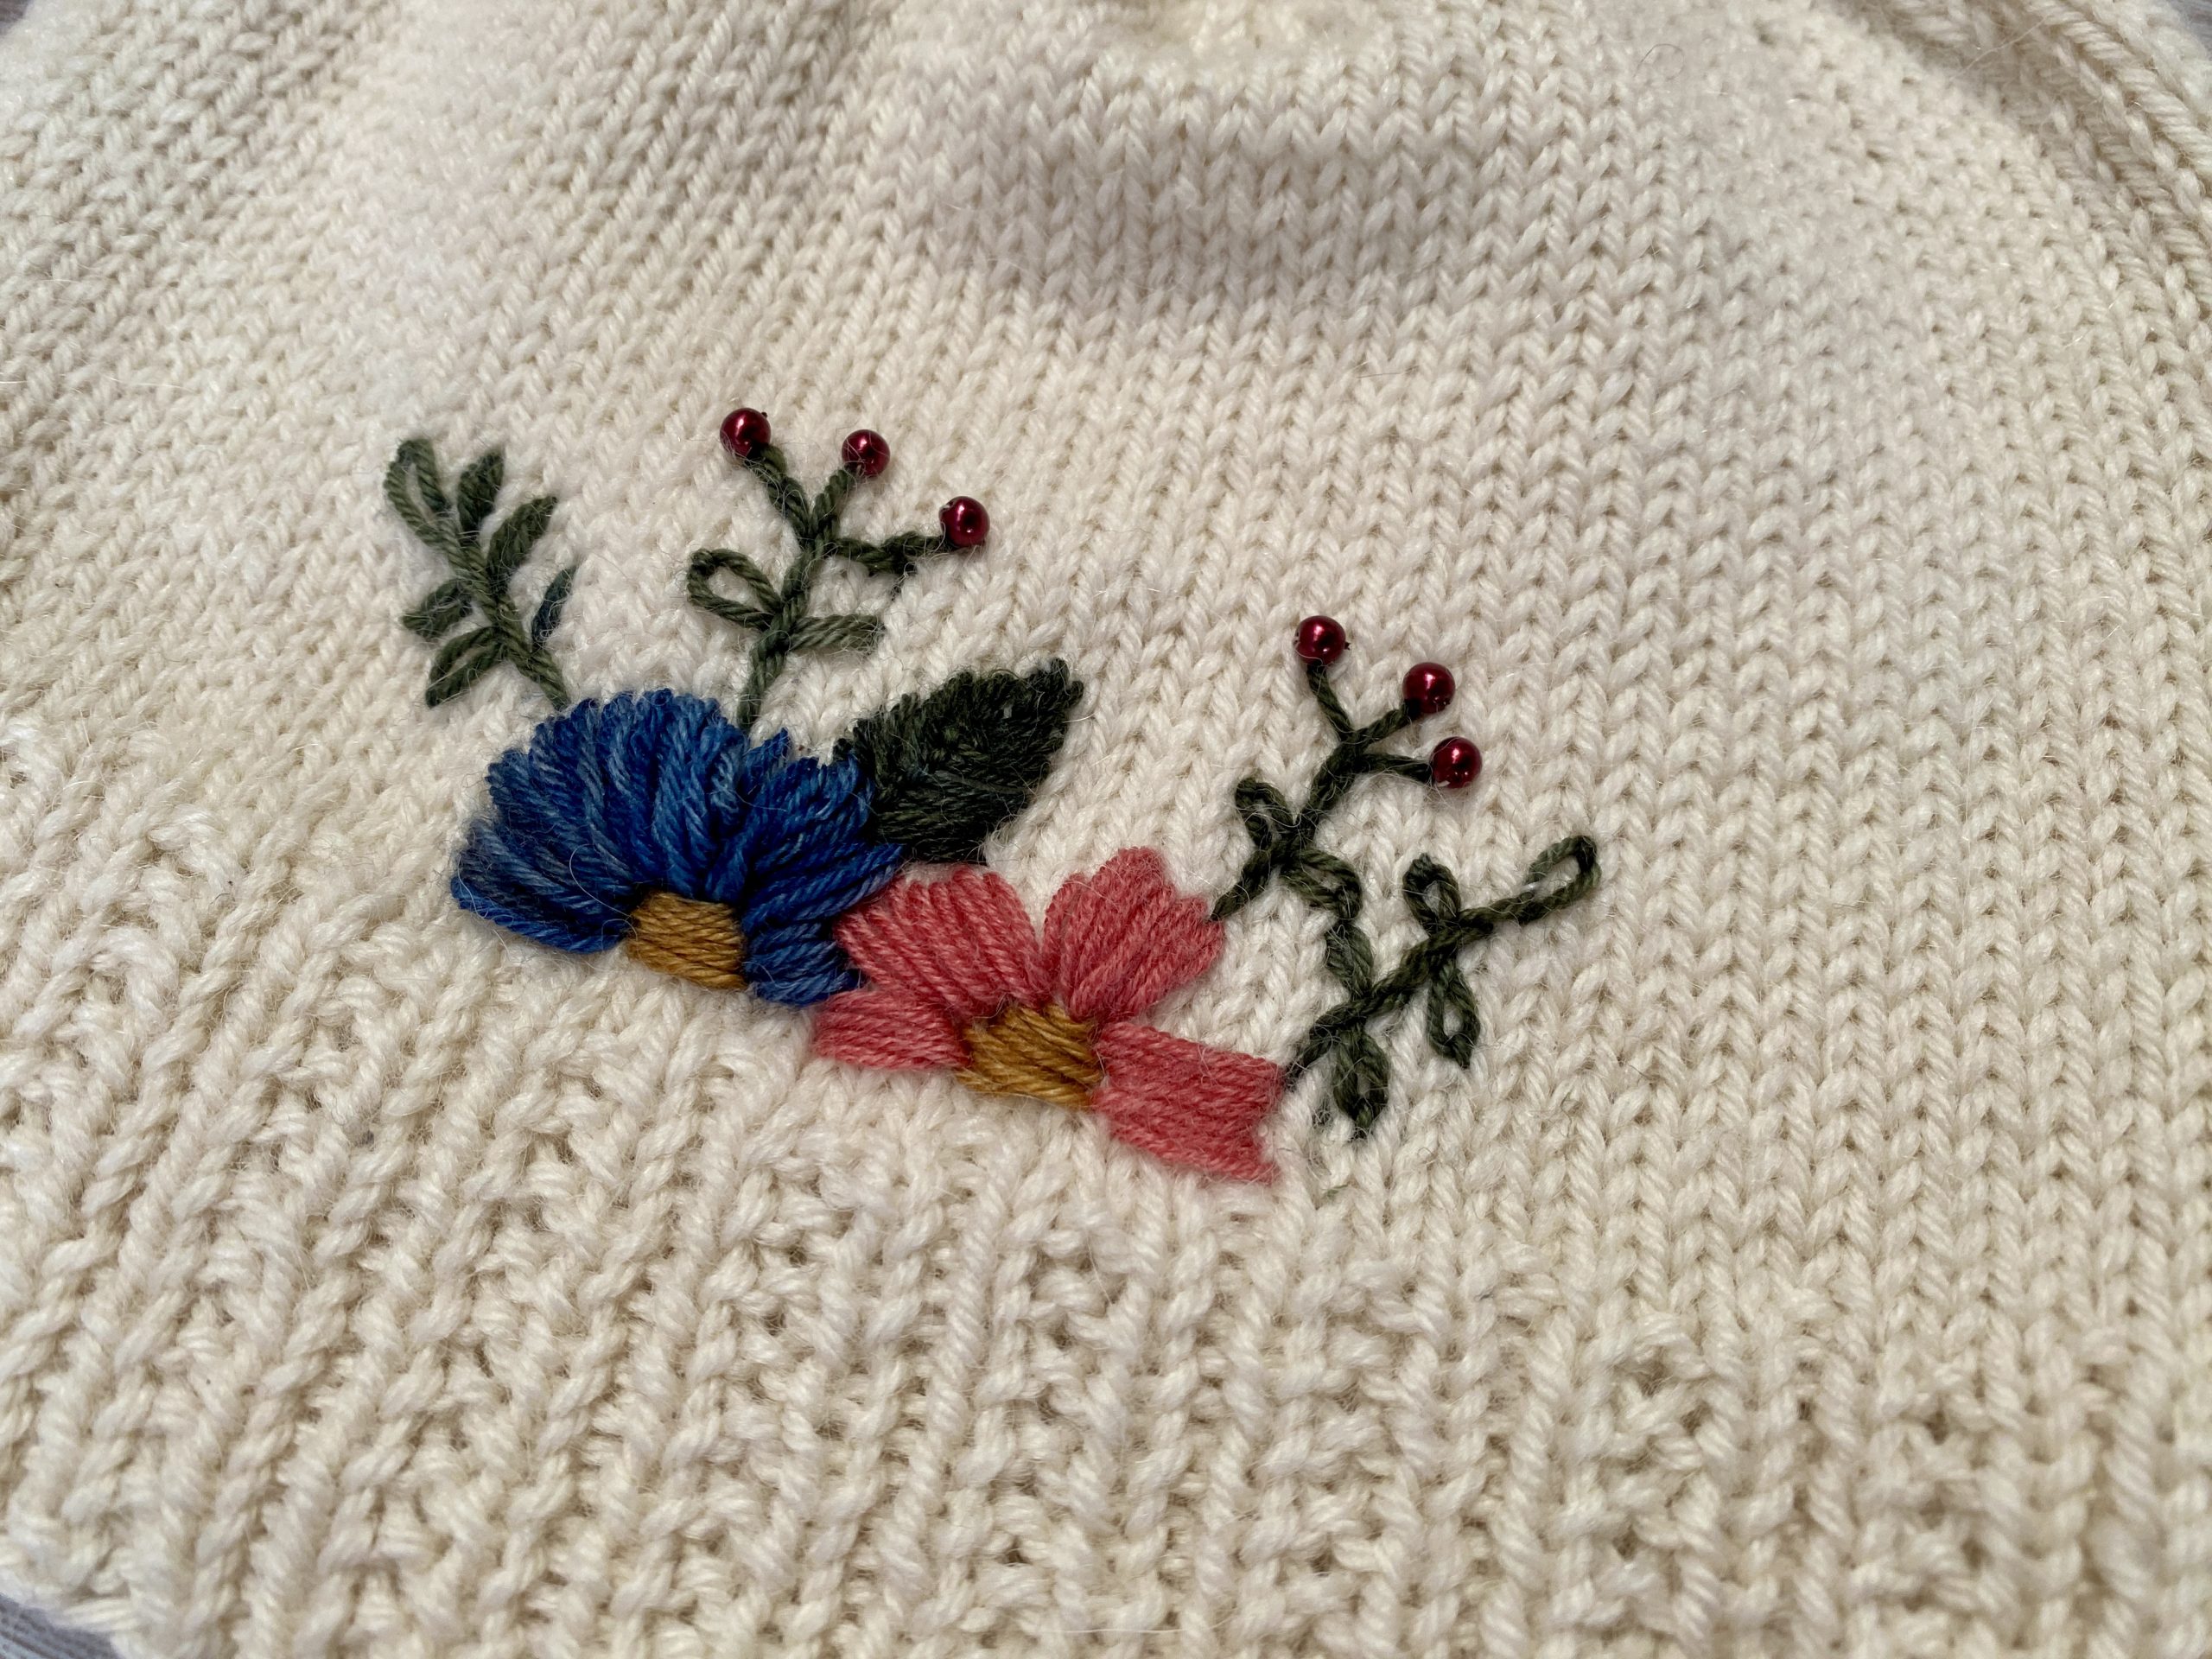

Step-by-Step: How to Stabilize Knit Fabric for Embroidery
Getting the right stabilization is key for embroidery on knits, it keeps your stitches neat and prevents puckering, stretching, or wonky shapes. Here’s how to choose what works best and put it to use:
Using Tear-away vs. Cut-away vs. Water-Soluble Stabilizers
-
Tear-away stabilizer is great for lightweight knits or decorative stitching. Just attach it to the back, stitch your design, then gently pull it away afterwards.
-
Cut-away stabilizer is ideal for anything stretchy. Bond it securely to the wrong side of your knit, and leave it in place when you’re done - this gives lasting support so your embroidery won’t distort.
-
Water-soluble stabilizer is perfect when you want a clean finish. Place it above or below your fabric, stitch through both, and simply rinse away in warm water once you’re done.
💡Tip: If your fabric feels thin and needs more support, you can use two layers of stabilizer. Sticky stabilizers are a lifesaver for tricky fabrics like velvet or knits that can’t be hooped, a little extra hold with no risk of stretching.
Hooping Tips for Stretch Fabrics
Whenever possible, avoid hooping the knit directly, hoops easily distort shape. Instead, hoop the stabilizer and secure the knit on top using pins, tape, or the stabilizer’s own adhesive. This simple adjustment can save delicate stitches and keep your work even.
I made myself a project bag with flower embroidery using 100% linen fabric. For this bag, I used a sticky stabilizer and placed the fabric in an embroidery hoop. Even after washing and gently steaming the finished piece, you can still see the hoop marks left behind. Just imagine how much more visible these marks could be on a knit fabric, which is even more sensitive to stretching and pressure.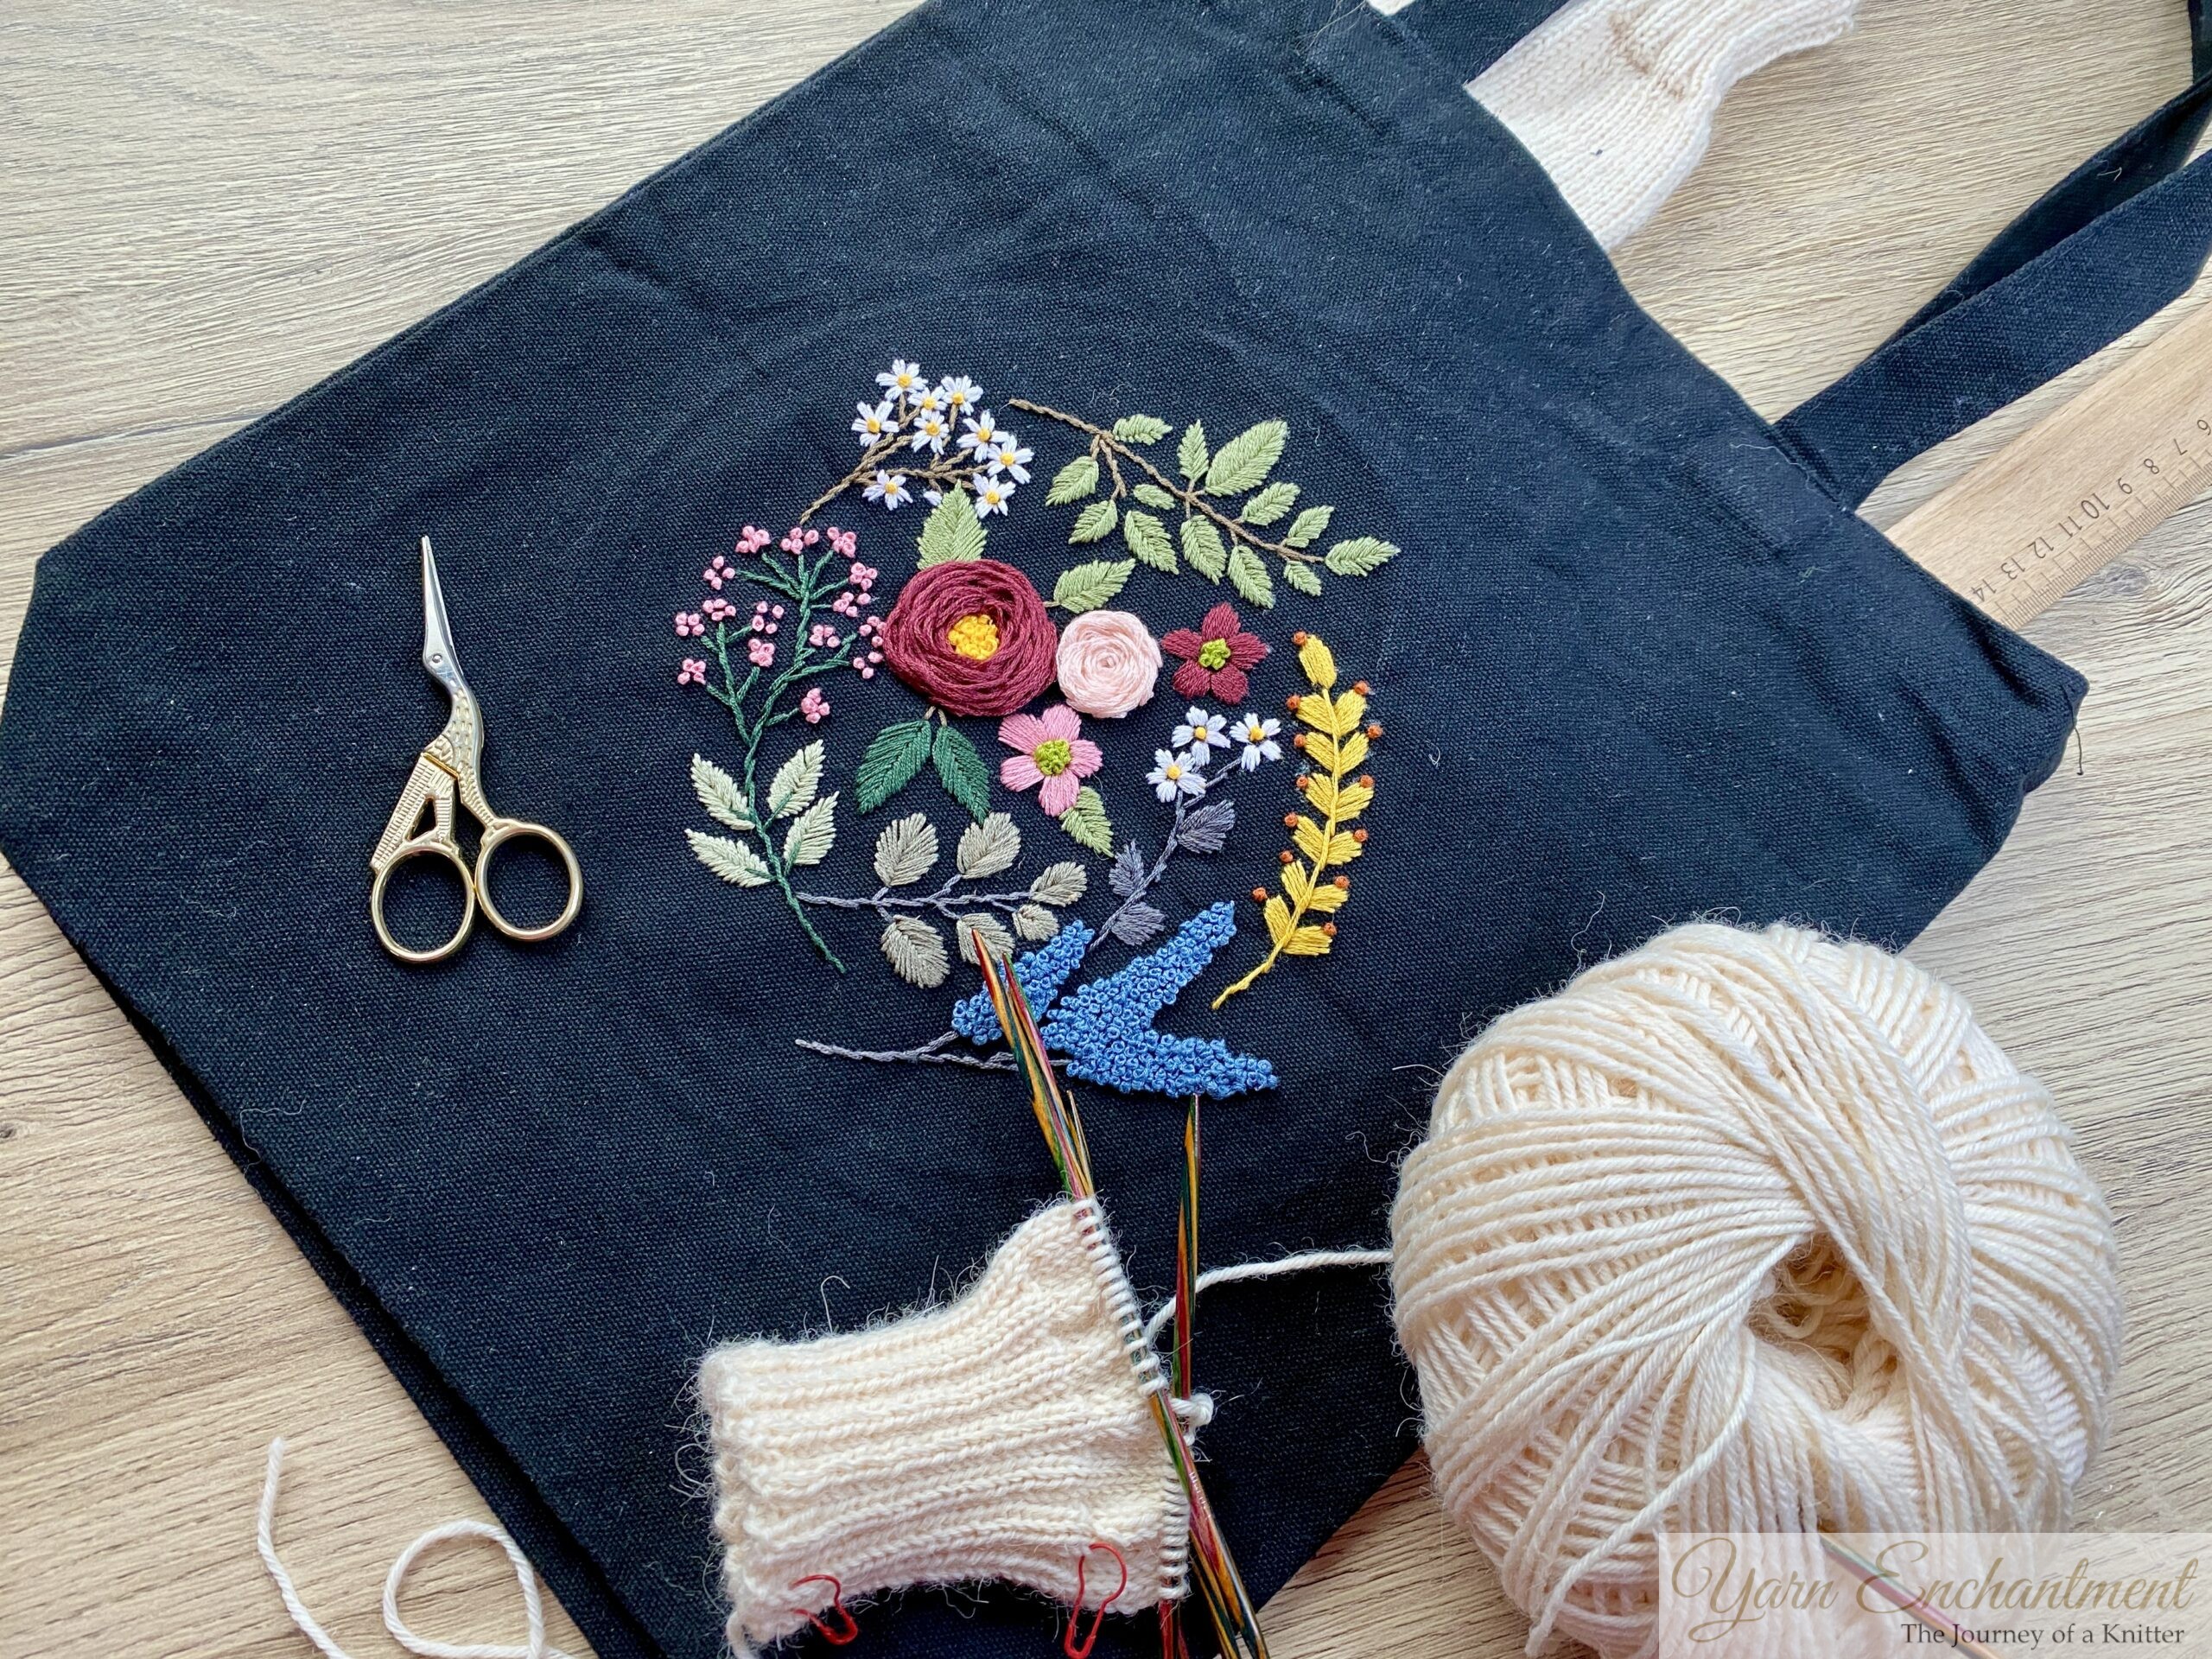

Embroidery Design Selection for Knits (What Works Best)
Not all embroidery designs work well on knit fabrics. Dense stitching or large filled areas can lead to puckering and distortion, so it’s best to choose open, airy designs that allow the fabric to breathe. Personally, I don’t always use a stabilizer, if I’m working with a simple woven wheel stitch or a lacy daisy stitch, I often skip both patterns and stabilizer. However, if you take this approach, be extra careful not to accidentally pull your stitches too tight, as this can easily distort your work.
This is a large embroidery design for a knit sweater, so it’s best to choose an open and airy pattern. To avoid pulling the fabric together, I cut the yarn after finishing each flower instead of carrying the thread across the back. Traveling long distances with your thread can cause the knit to bunch if you pull too tightly, and long thread spans can also snag easily on fingers or hair clips, especially for children.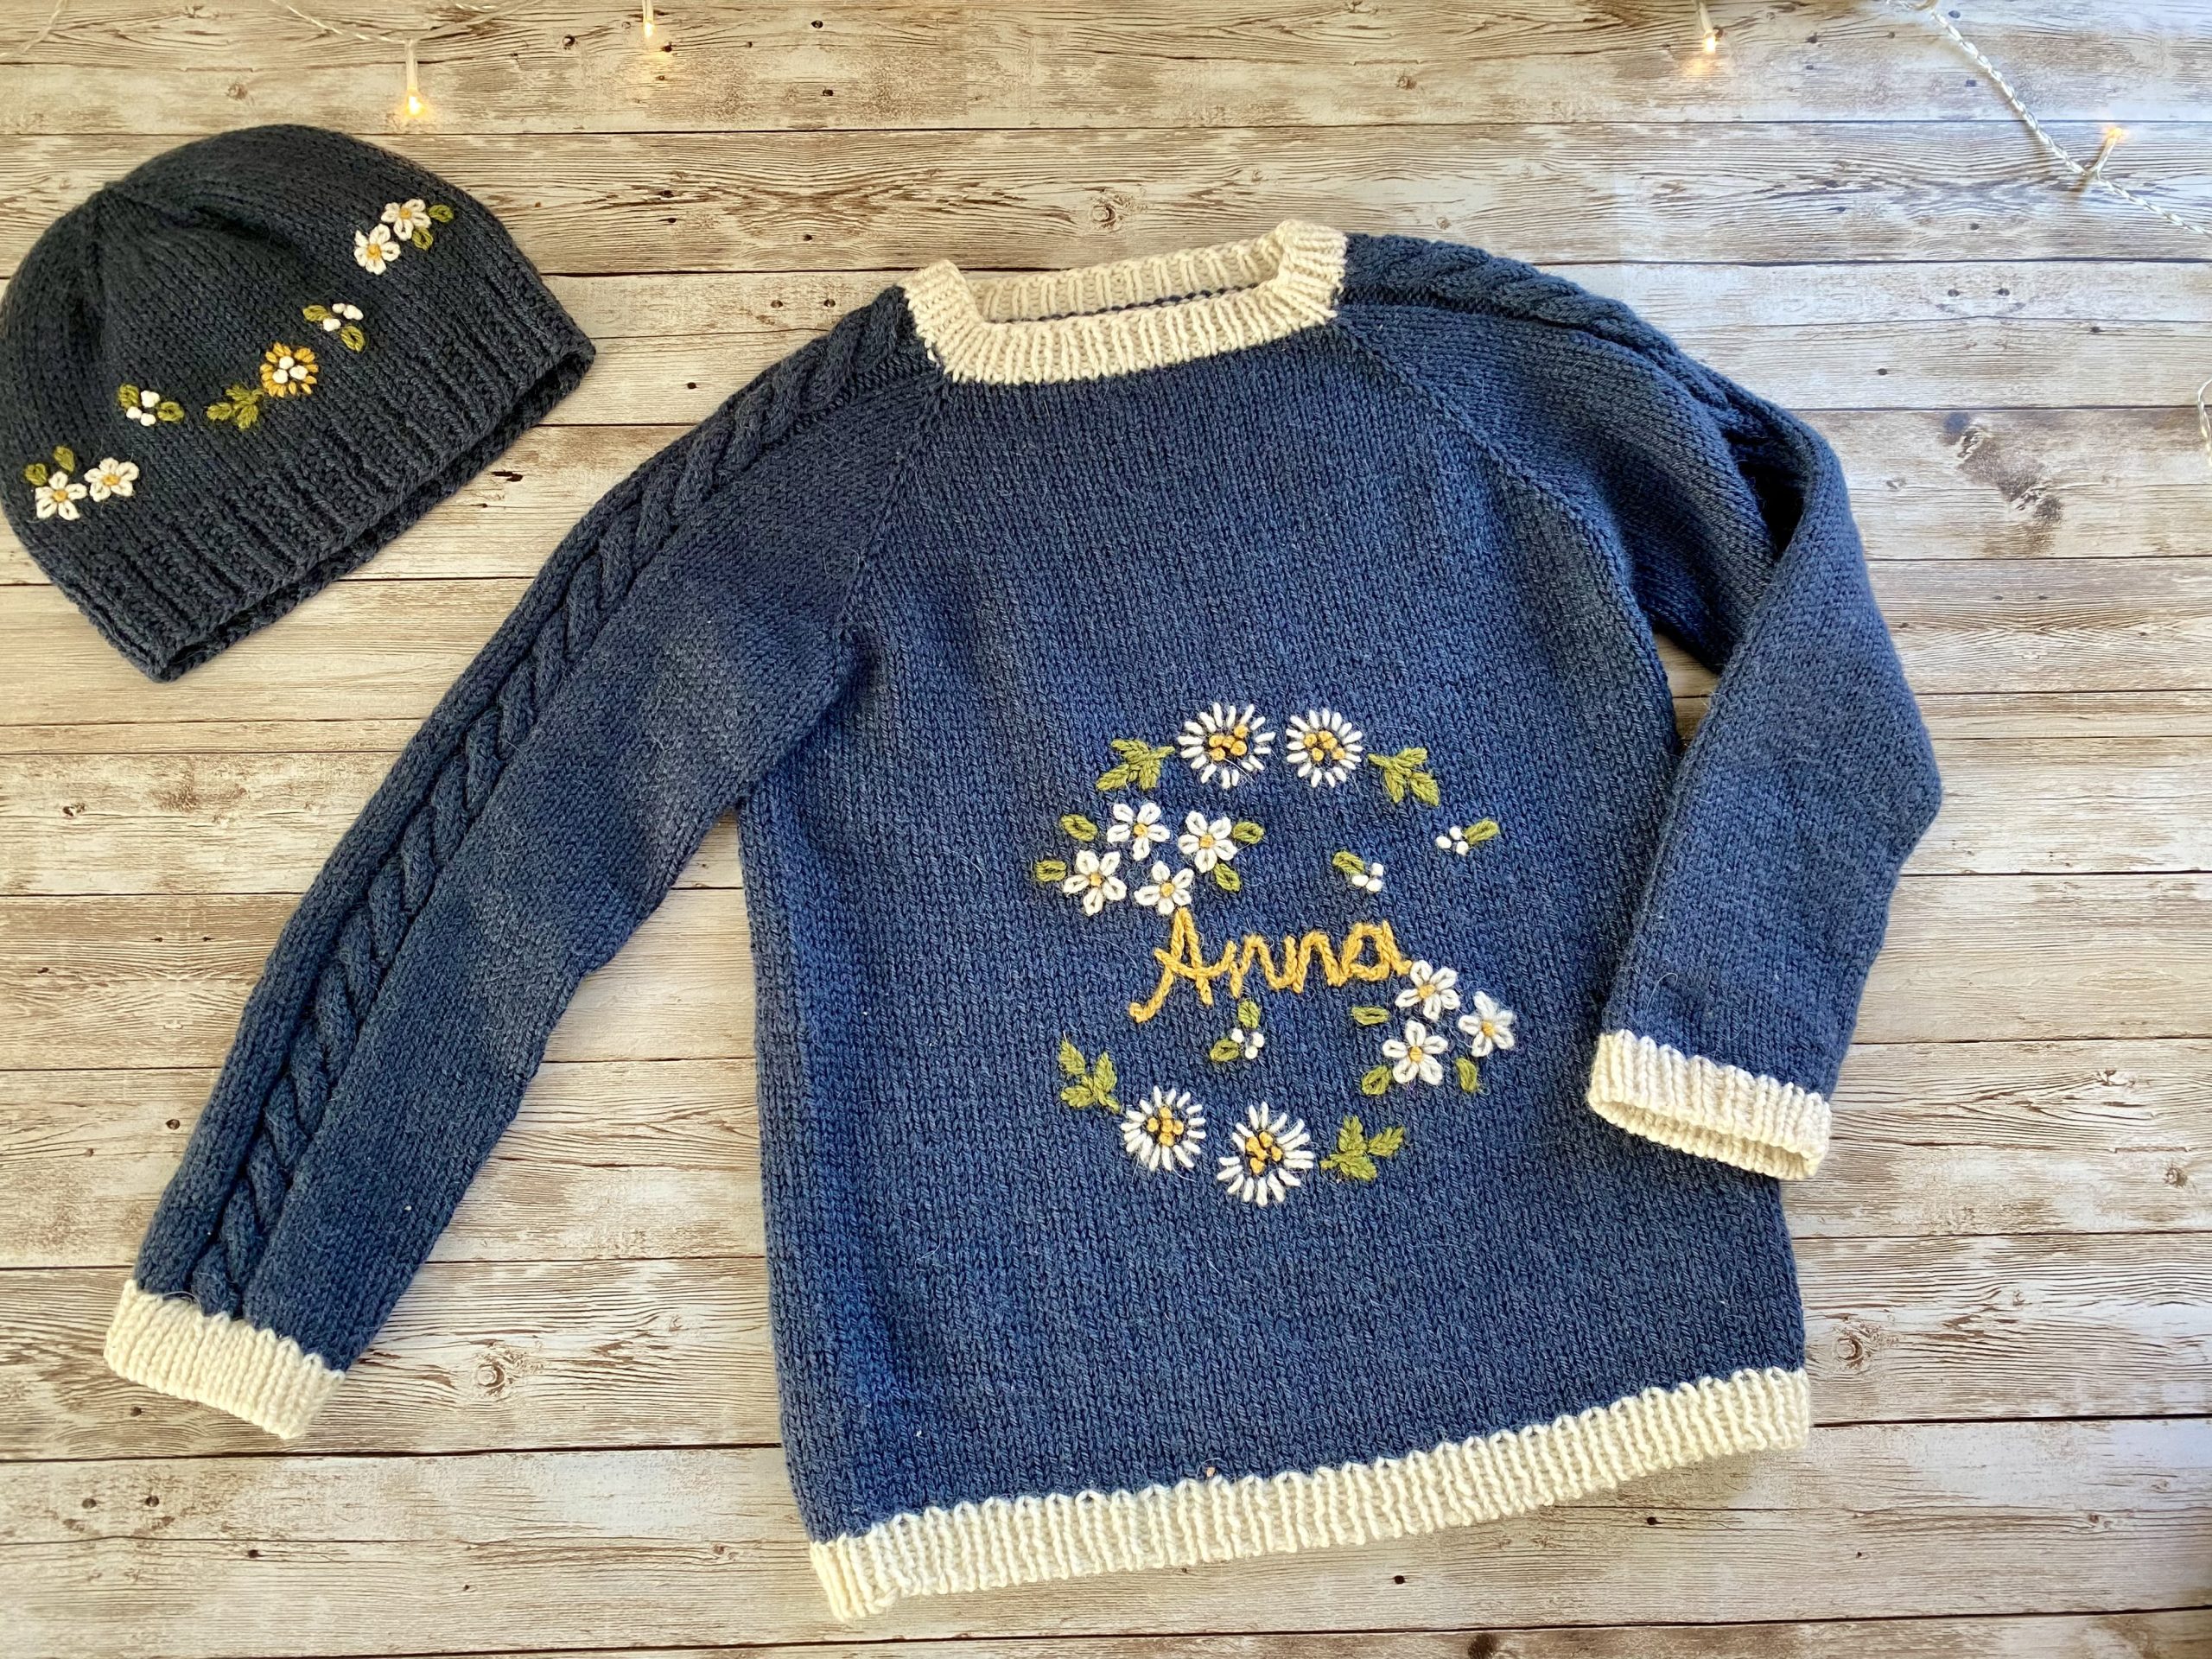

Transferring Embroidery Patterns to Knit Fabric: Two Foolproof Methods
Getting a design onto knit fabric can seem tricky, but these two methods always work for me: water-soluble stabilizer and tracing paper. Both are easy, reliable, and give you a crisp outline to stitch on, no guesswork needed.
Water-Soluble Stabilizer
If you’re working with dark fabrics or intricate patterns, water-soluble stabilizer is your best friend:
- Print your design directly onto the stabilizer and place it on your fabric.
- Stitch through both the fabric and stabilizer, then soak the piece in warm water to dissolve the stabilizer.
Just make sure your fabric can handle being washed and that your thread is colorfast before soaking.
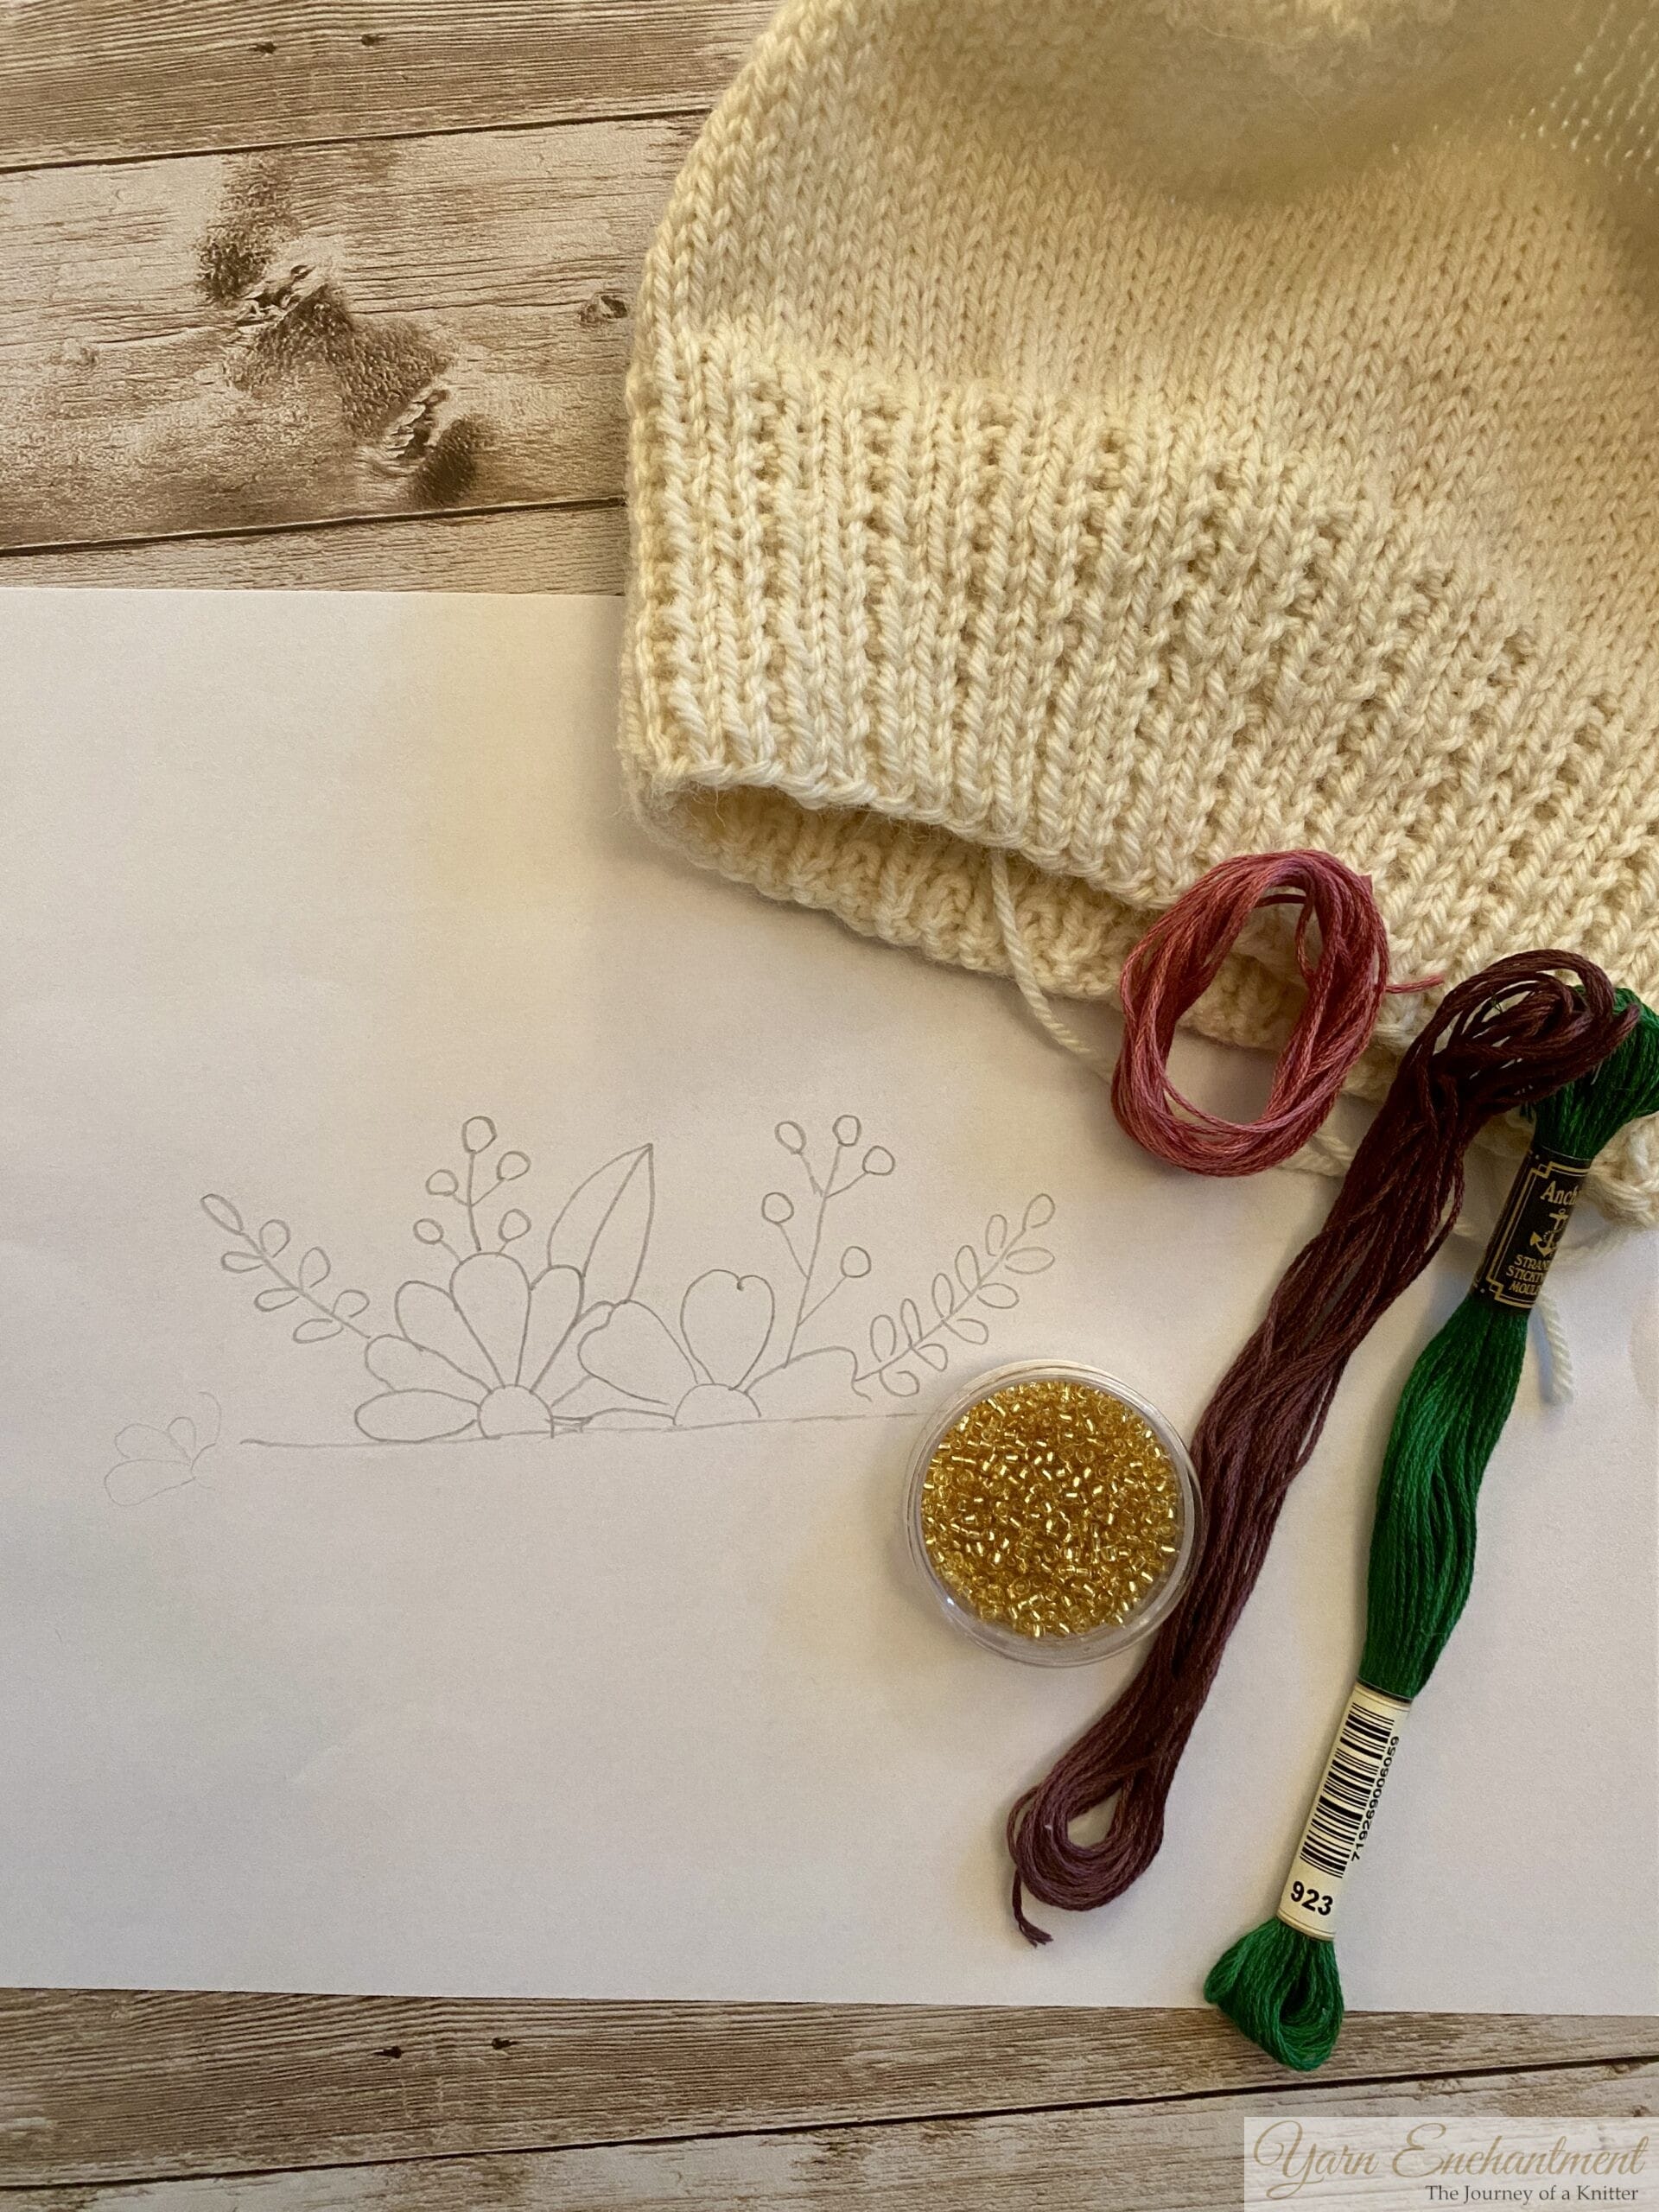 | 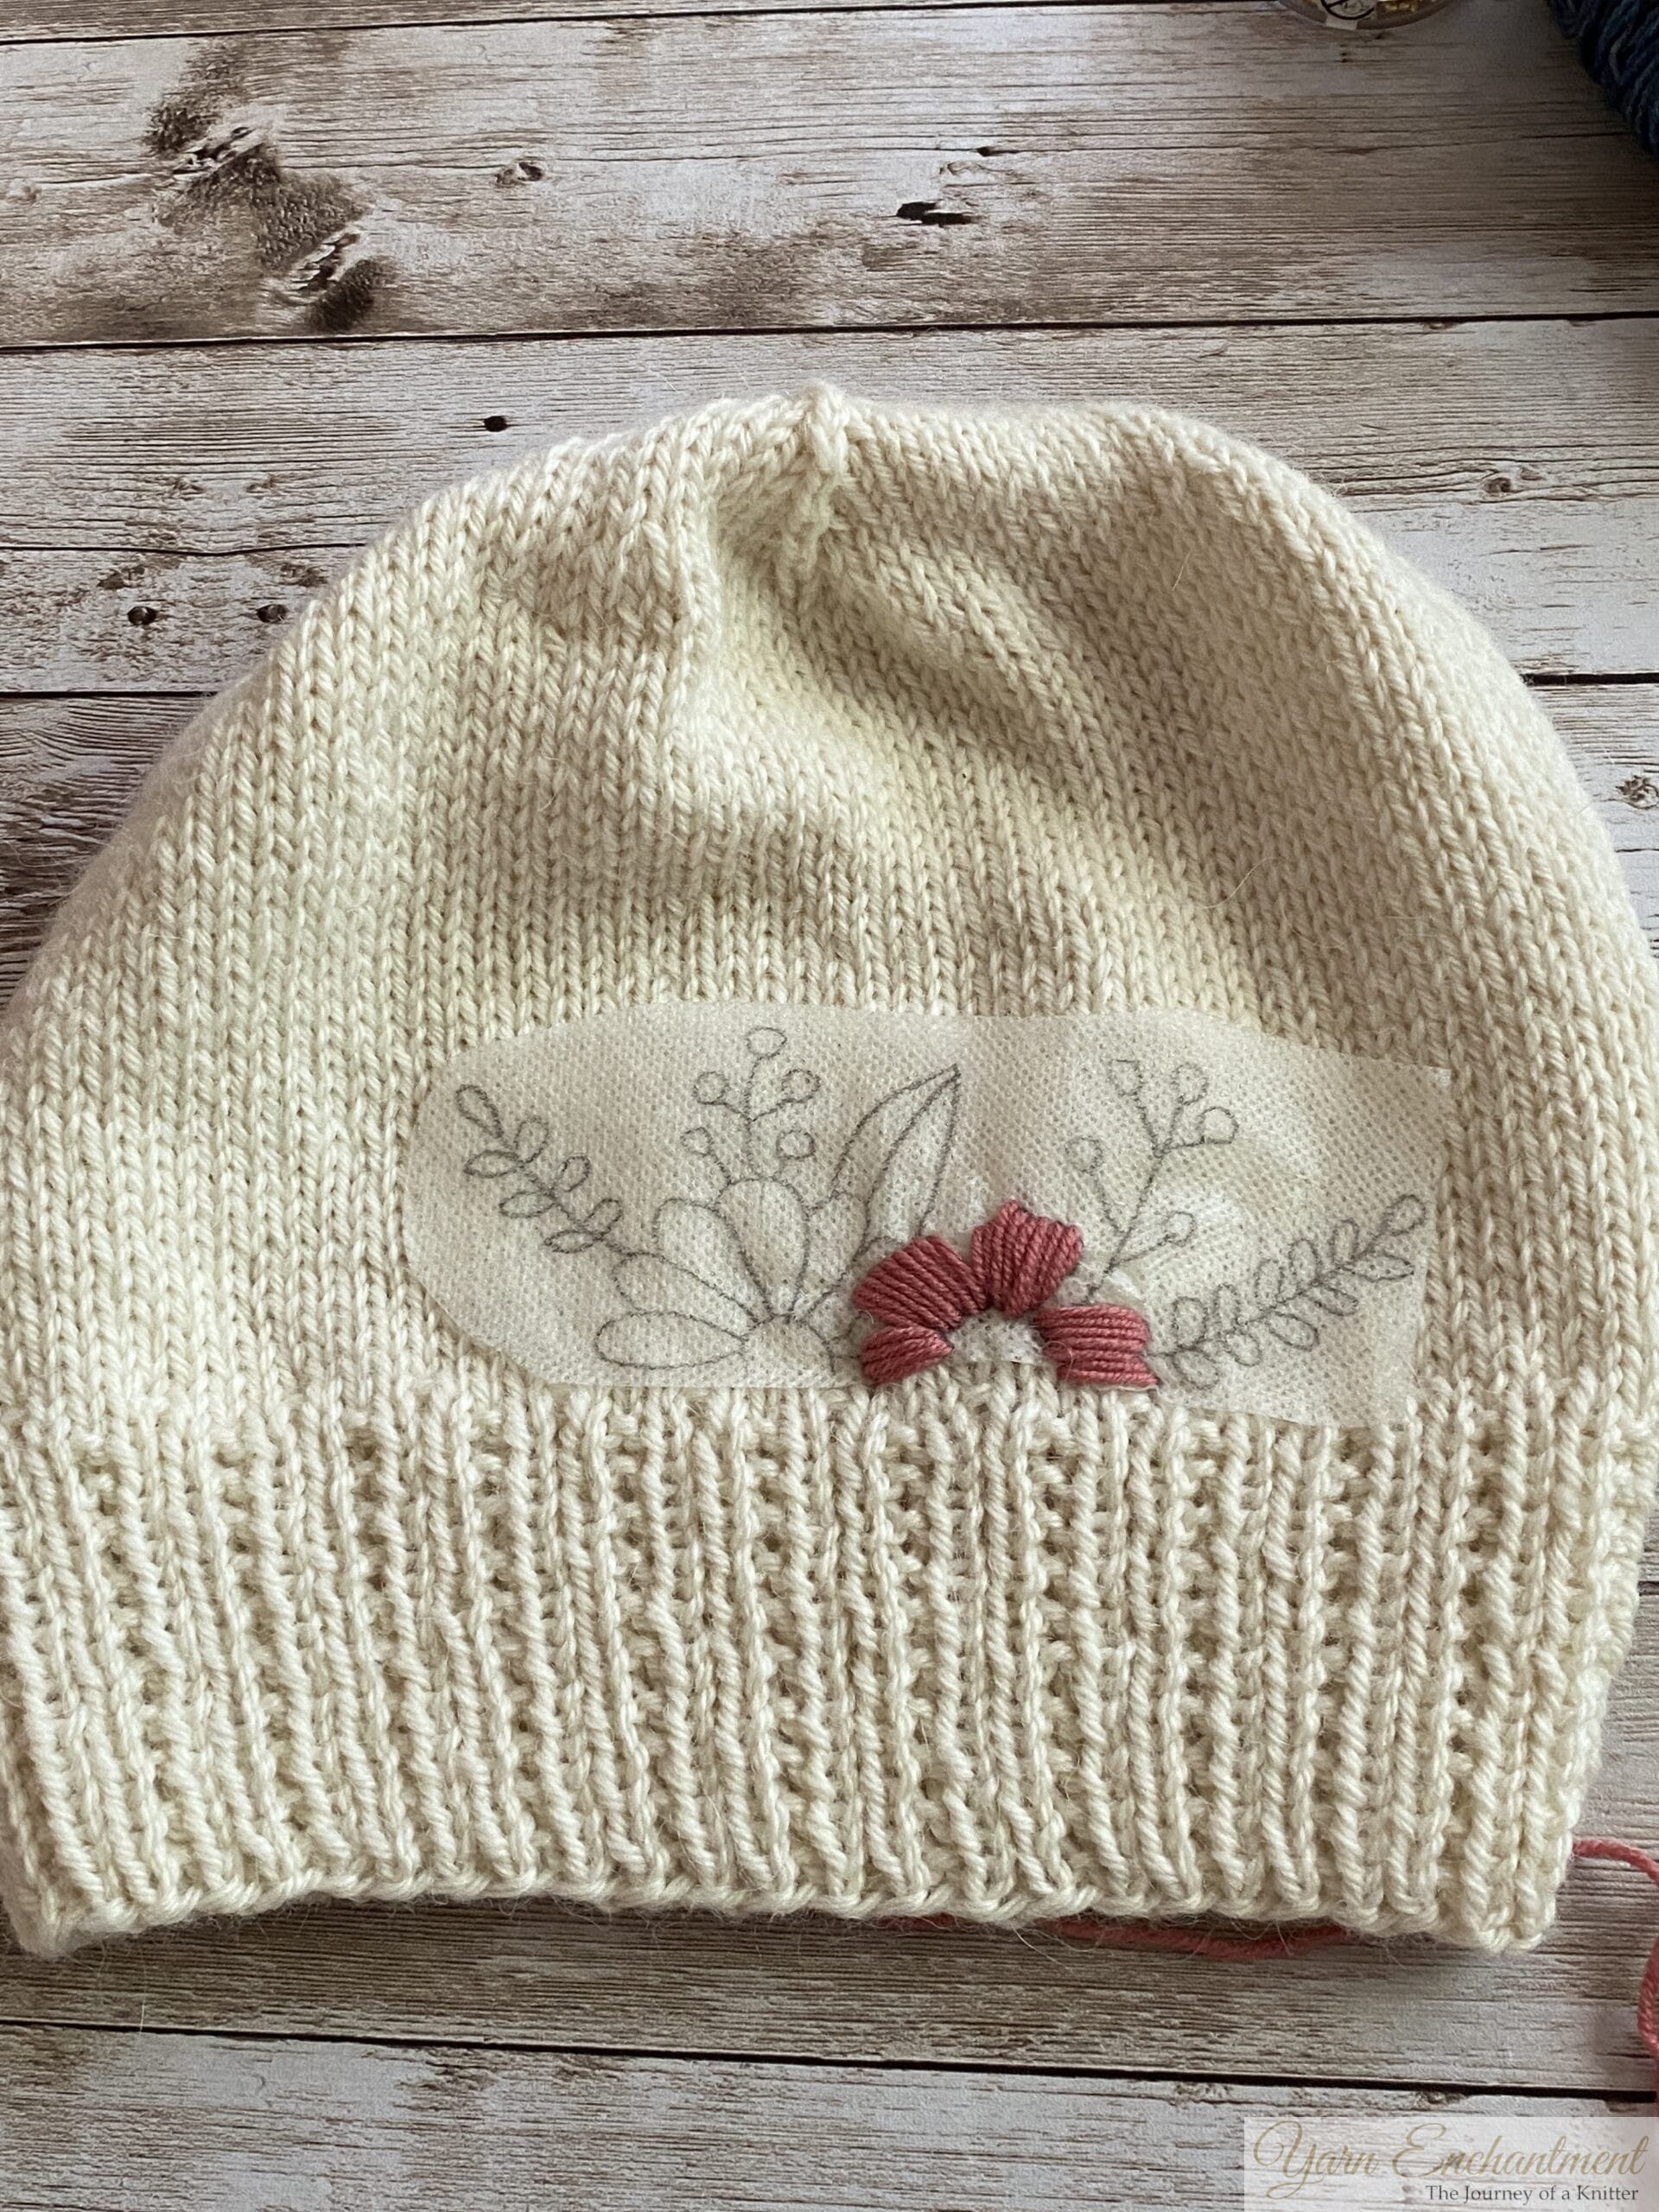 | I made my own design and before I traced the design onto the sticky paper, I made a sketch on a blank sheet of paper. | When I was happy with the design, I traced it onto the water-soluble stabilizer and brought it onto the design. The paper adhered on its own to the Williams hat. |


Tracing Paper Method
If you’re stitching on a fabric you don’t want to mark directly, tracing paper makes things easy. Start by laying tracing paper over your chosen design and tracing the lines with a pencil. Cut it out, leaving a bit of extra room around the edges.
To keep your pattern in place, use basting thread and big running stitches to secure the tracing paper to your fabric. Now you’re ready to embroider, just stitch right through both the paper and the fabric, following your pattern.
When you finish, carefully take out the basting threads and gently tear away the tracing paper. If you find any small bits stuck under the stitches, tweezers will help you get them out. This process is straightforward, and it keeps your design crisp without ever marking the fabric itself.
Troubleshooting: Preventing Puckering, Snagging & Stretching
Knit fabrics are fine, so handle them gently during embroidery:
- Try not to pull or stretch the fabric as you work, keeping your hands light helps prevent distortions. Make sure your stitches are even and not too tight, since pulling hard can cause the fabric to bunch up.
- Keep an eye on your thread tension and adjust it if things start to feel tight or look puckered. When moving between design elements, try to keep thread tails short, this minimizes tangles and prevents unwanted pulling on the knit.
- If you notice puckering, make sure your stabilizer is still firmly in place and adjust your stitching hand to be a little looser. And if your thread starts to break, swapping to a slightly larger needle or loosening your stitches can make things run much smoother.
You can also give your socks a three-dimensional look with embroidery. For these socks, I used the woven wheel stitch, which creates beautiful, raised flowers on the surface. This method keeps the inside of the socks neat, with hardly any threads or floats, so the socks maintain their stretch and you avoid the risk of your toes catching or tangling in loose yarn strands.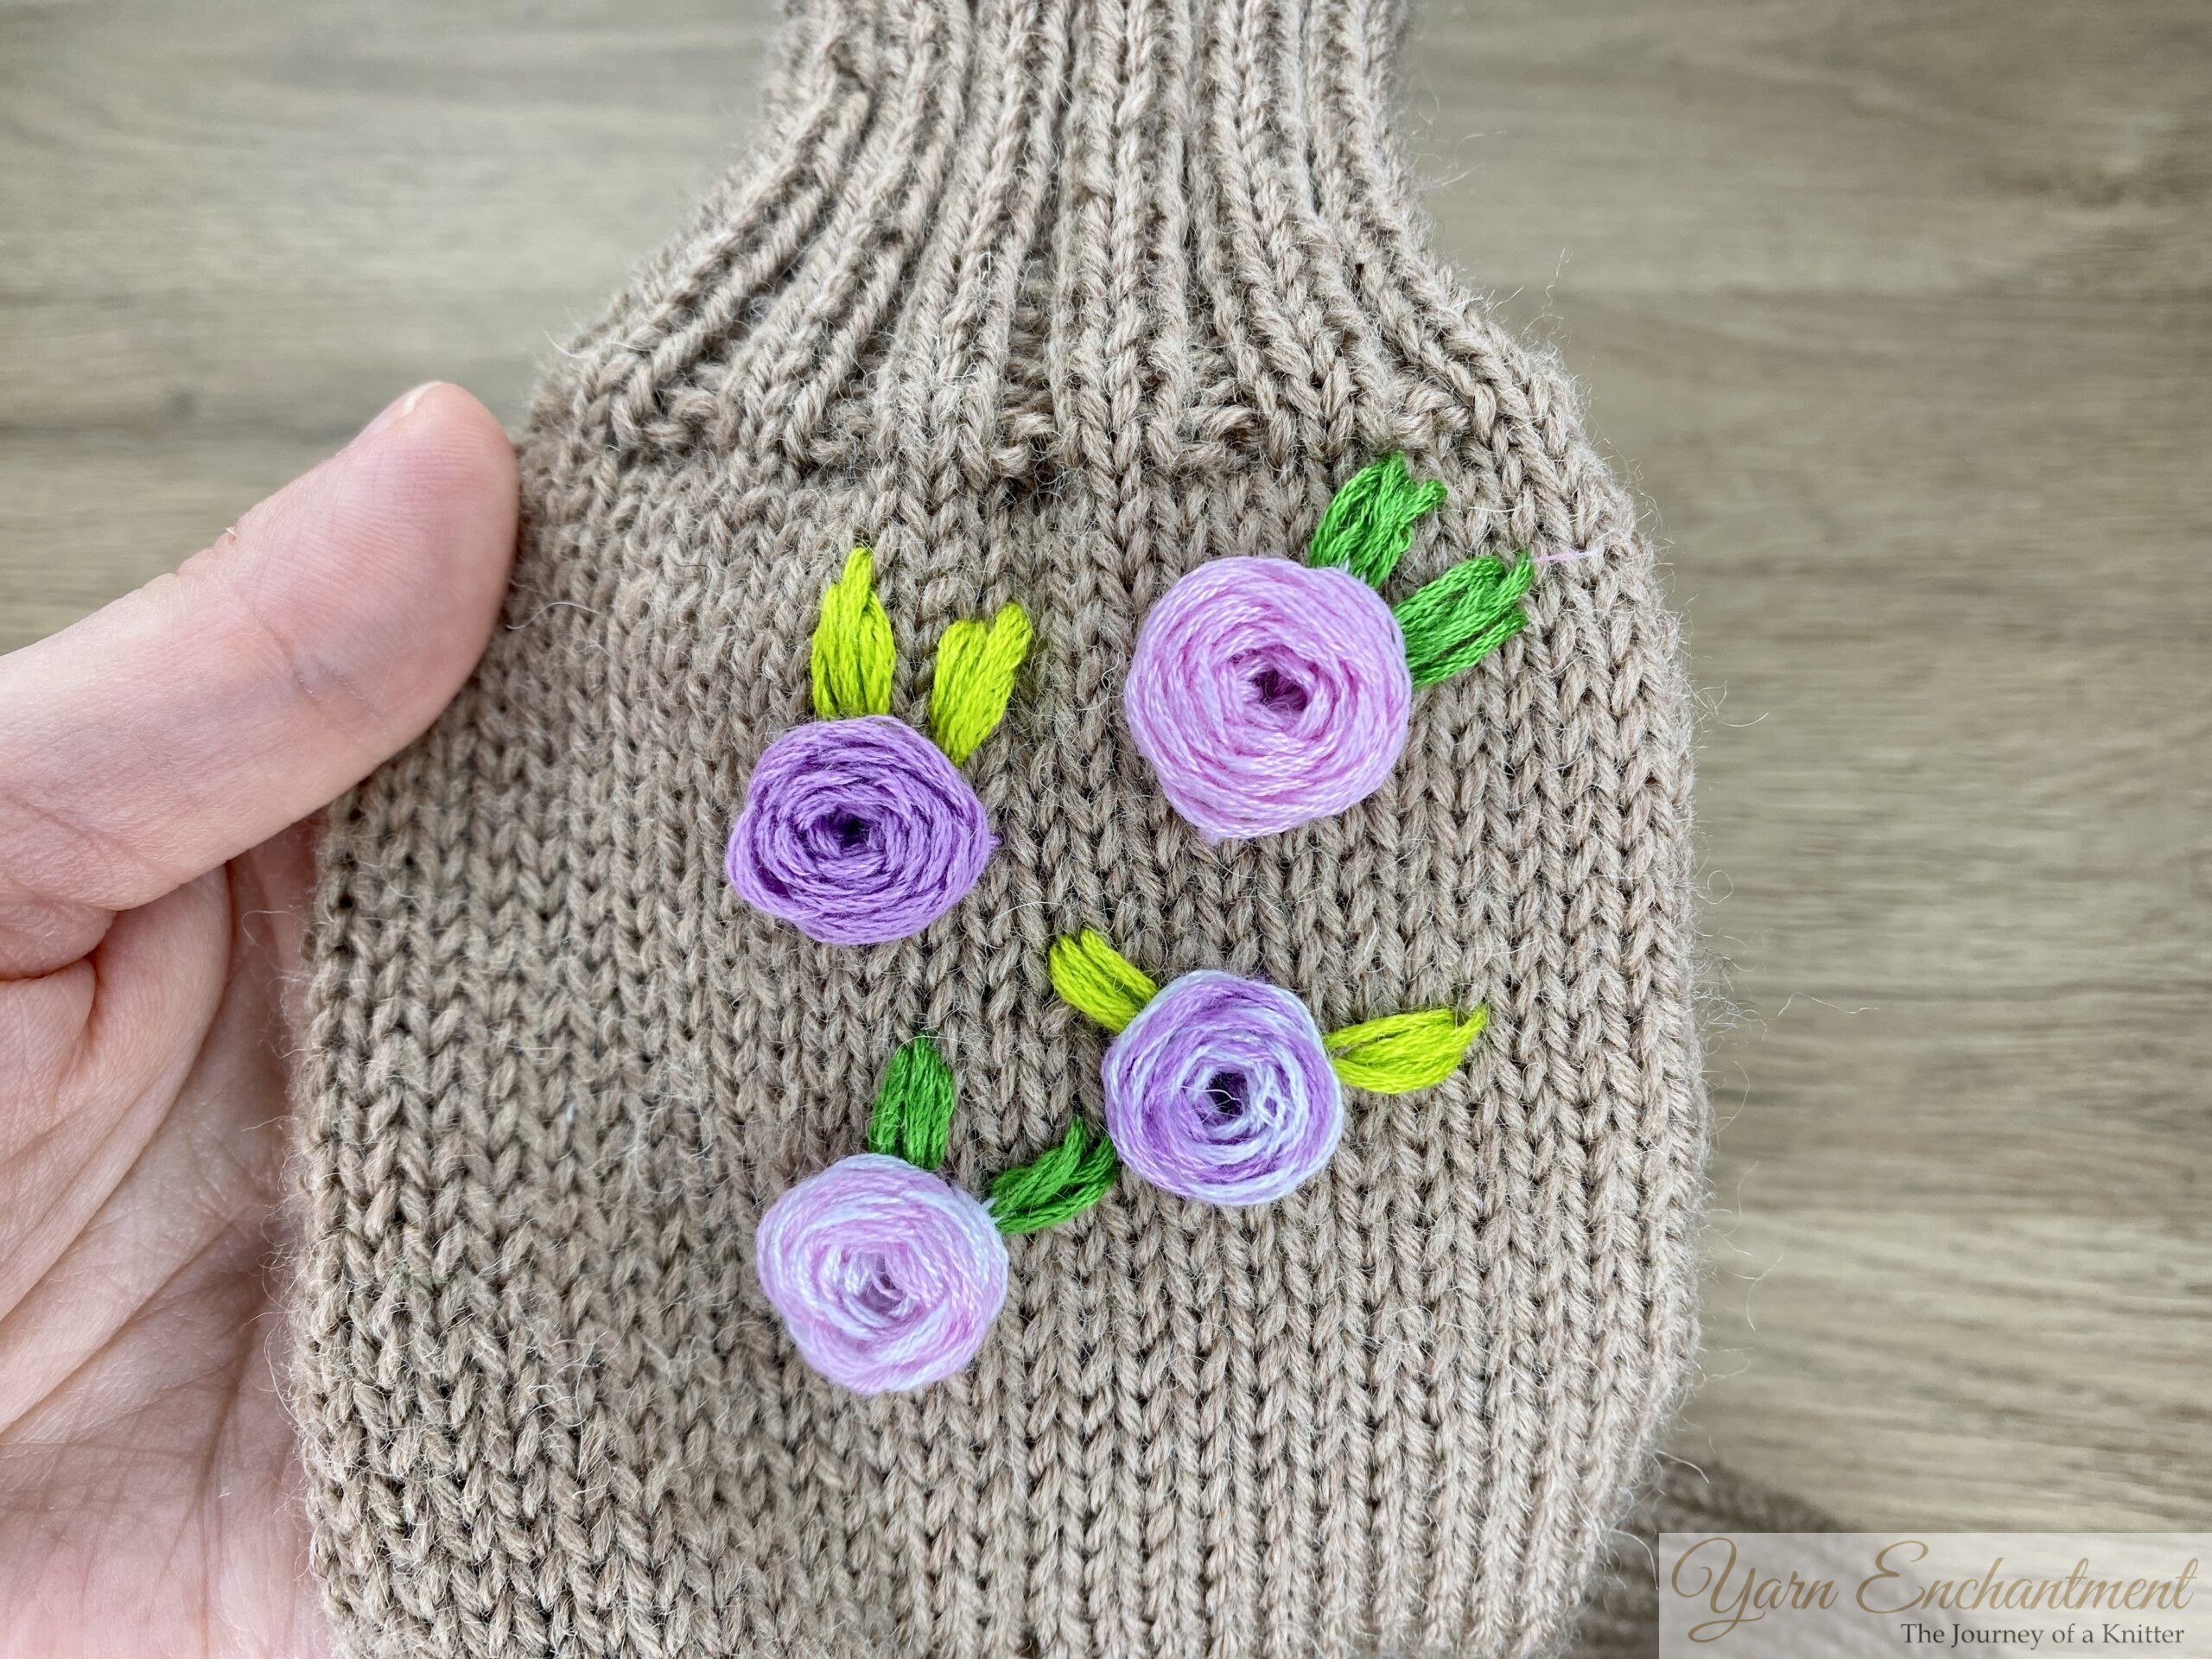

Finishing & Care Tips for Embroidered Knits
To make your embroidered knit look its best, give it a gentle finish. Lay a pressing cloth over your work and use a bit of steam to smooth out any hoop marks or wrinkles. When trimming away excess stabilizer, take your time - double-checking as you go to be sure you don’t accidentally snip a stitch. This extra care keeps your stitches tidy and your project looking polished.
Even a small touch of flower embroidery can instantly add charm and personality to your knit projects, making them feel fresh and full of life. 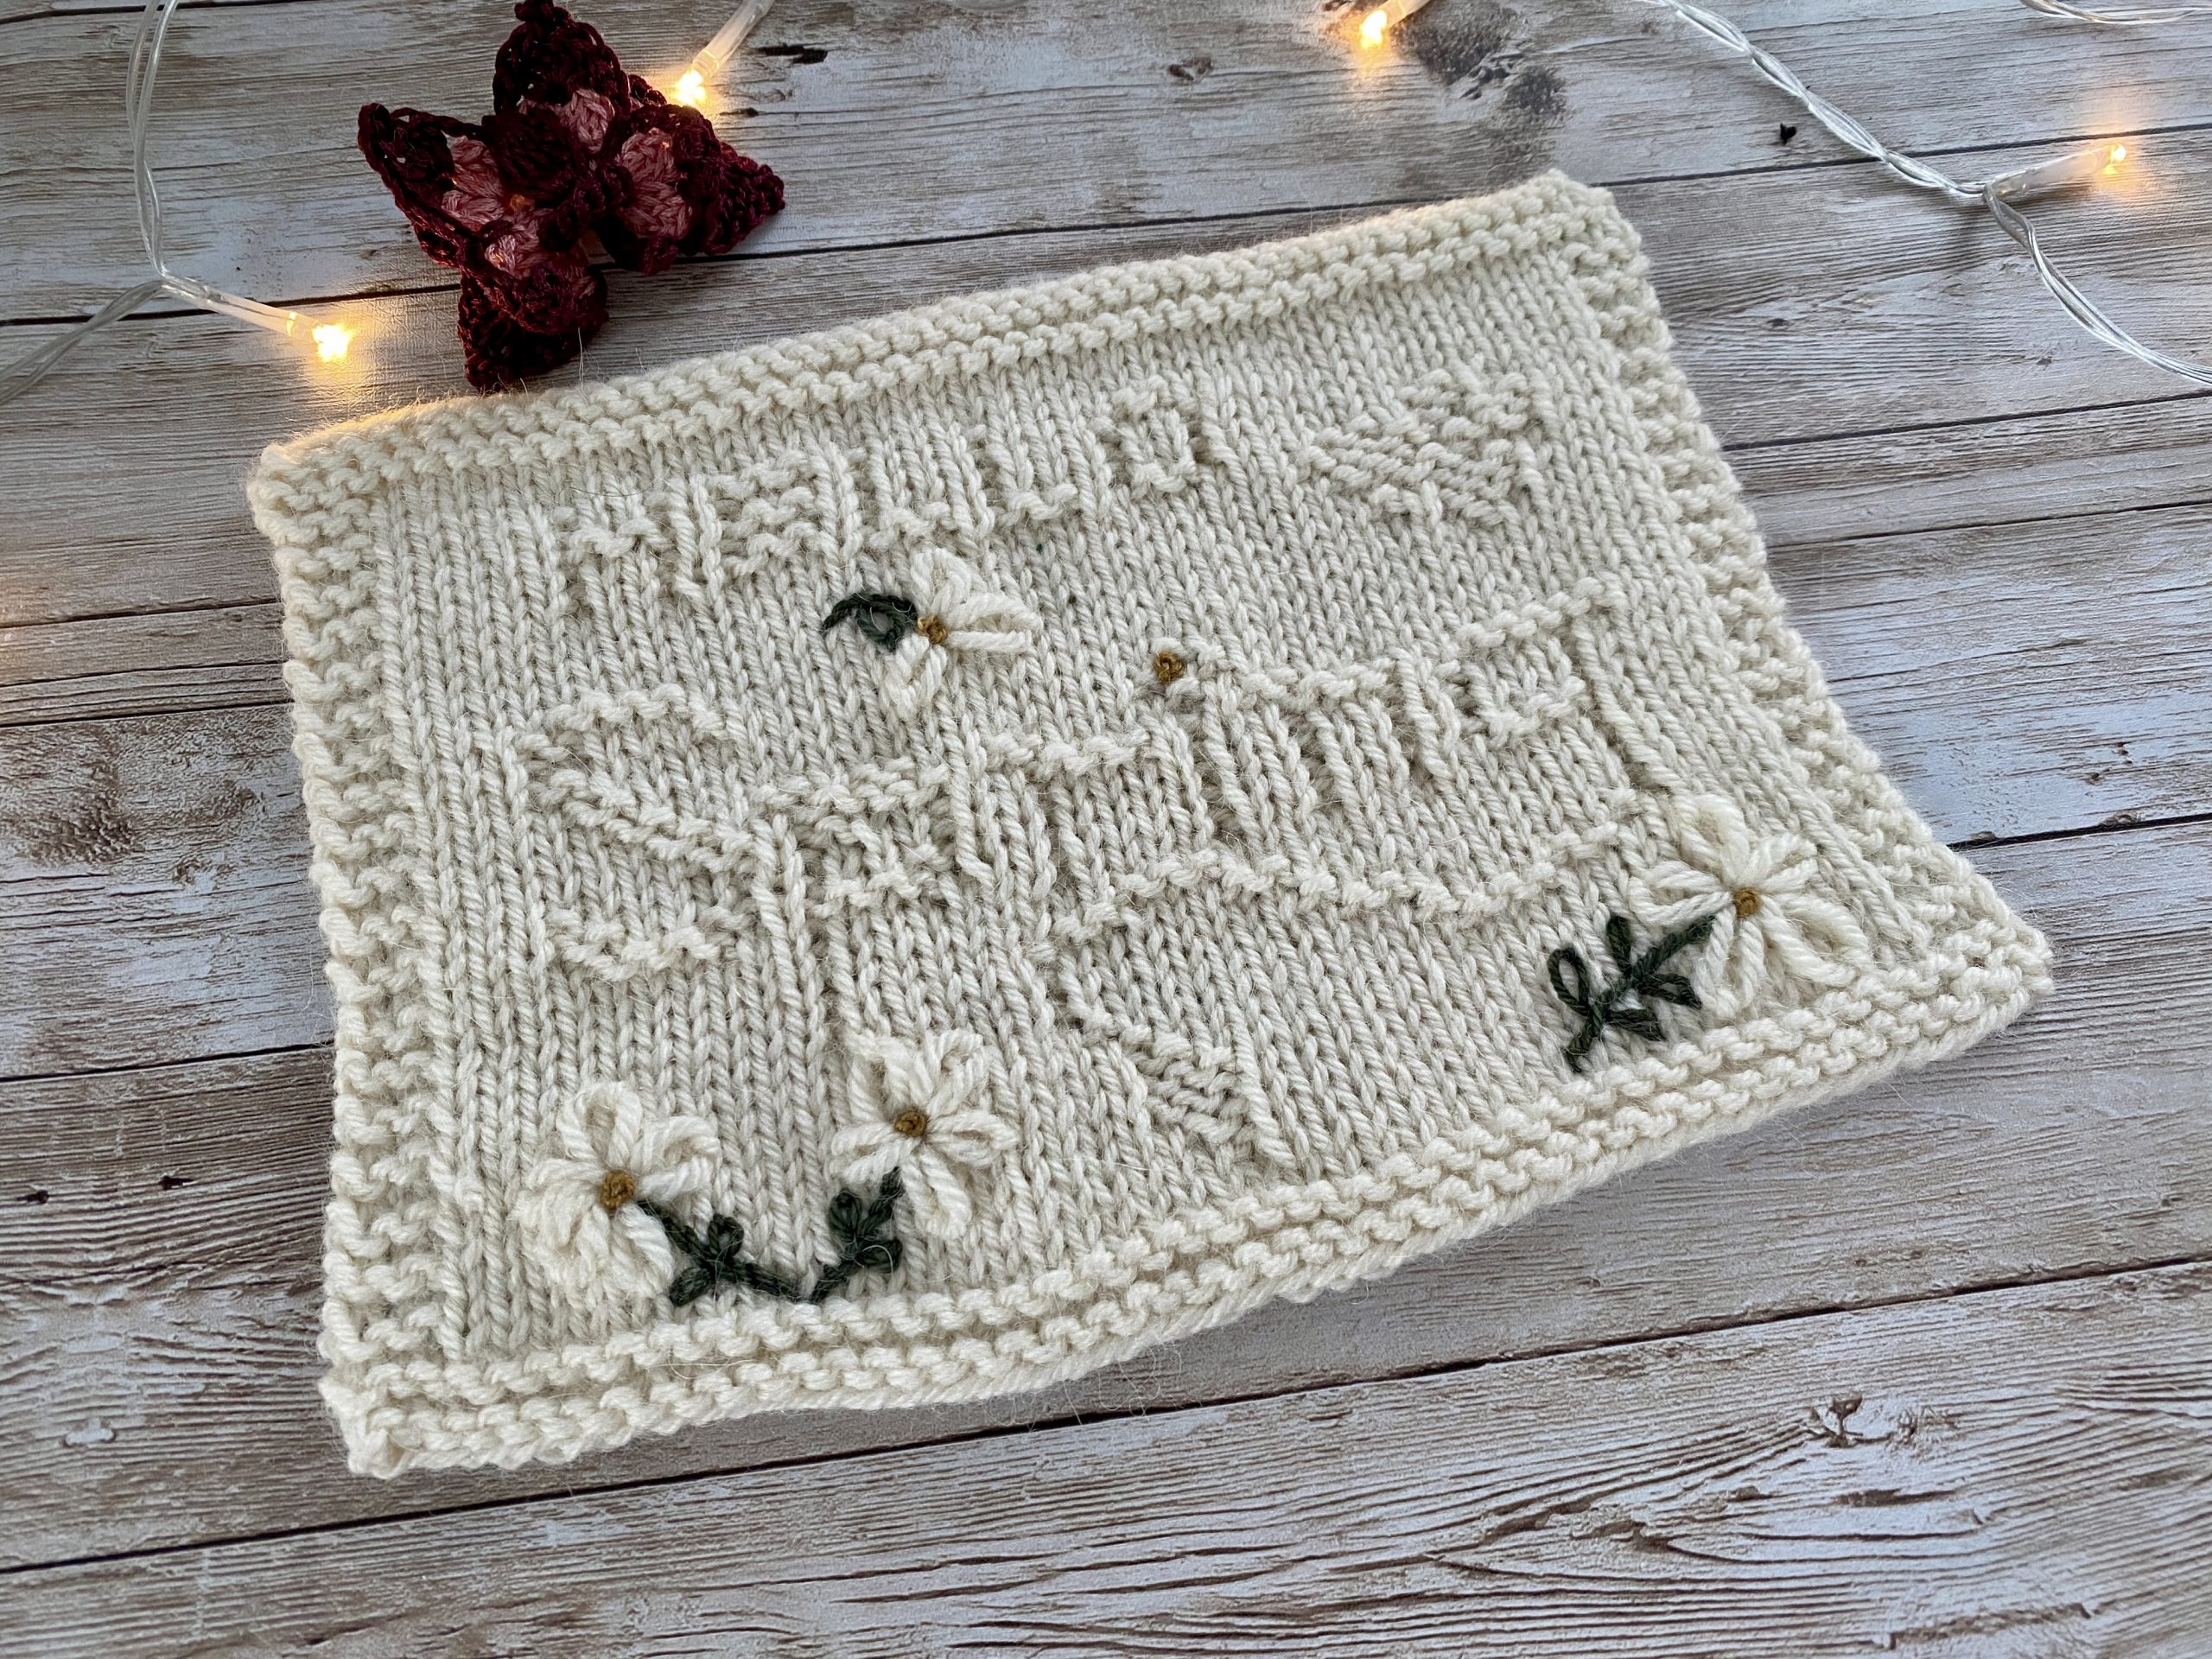

FAQ: Embroidering on Knitted Garments
Can you do embroidery on hand-knitted sweaters?
Yes, absolutely! Using the right stabilizer and gentle technique allows stunning embroidery on hand-knit or store-bought sweaters.
How do you transfer embroidery patterns onto dark knit fabric?
Water-soluble stabilizers or tracing paper are ideal, both make your design visible without leaving a mark.
What’s the best way to prevent puckering on stretch fabric?
Strong stabilizer, light stitch density, and careful tension all help maintain a smooth finish.
Can I embroider without a stabilizer on knit fabric?
Yes, it is possible to embroider on knit fabric without a stabilizer, but doing so can make your embroidery prone to stretching, puckering, and distortion. For best results, especially with stretchy or delicate knits - using a stabilizer is strongly recommended to keep your stitches even and the fabric in shape. If you choose to skip the stabilizer, stick to open, lightweight designs, handle the fabric gently, avoid pulling your stitches tight, and test your technique on a small swatch first.
Final Thoughts, and Happy Stitching!
Embroidering on knits can definitely seem a bit intimidating at first, but with these tips, you’re well on your way to creating something special. The secret is simply to take your time and enjoy every step along the way.
Whether you reach for tear-away stabilizer for lightweight knits or stick to cut-away for something stretchier, having the right tools and techniques really does make all the difference. I hope these ideas inspire you to try out embroidery on your next knit project, big or small, there’s so much you can do.
If you’d like a tutorial on the basic stitches I love to use for knits, just let me know down in the comments.
Until then, happy knitting!
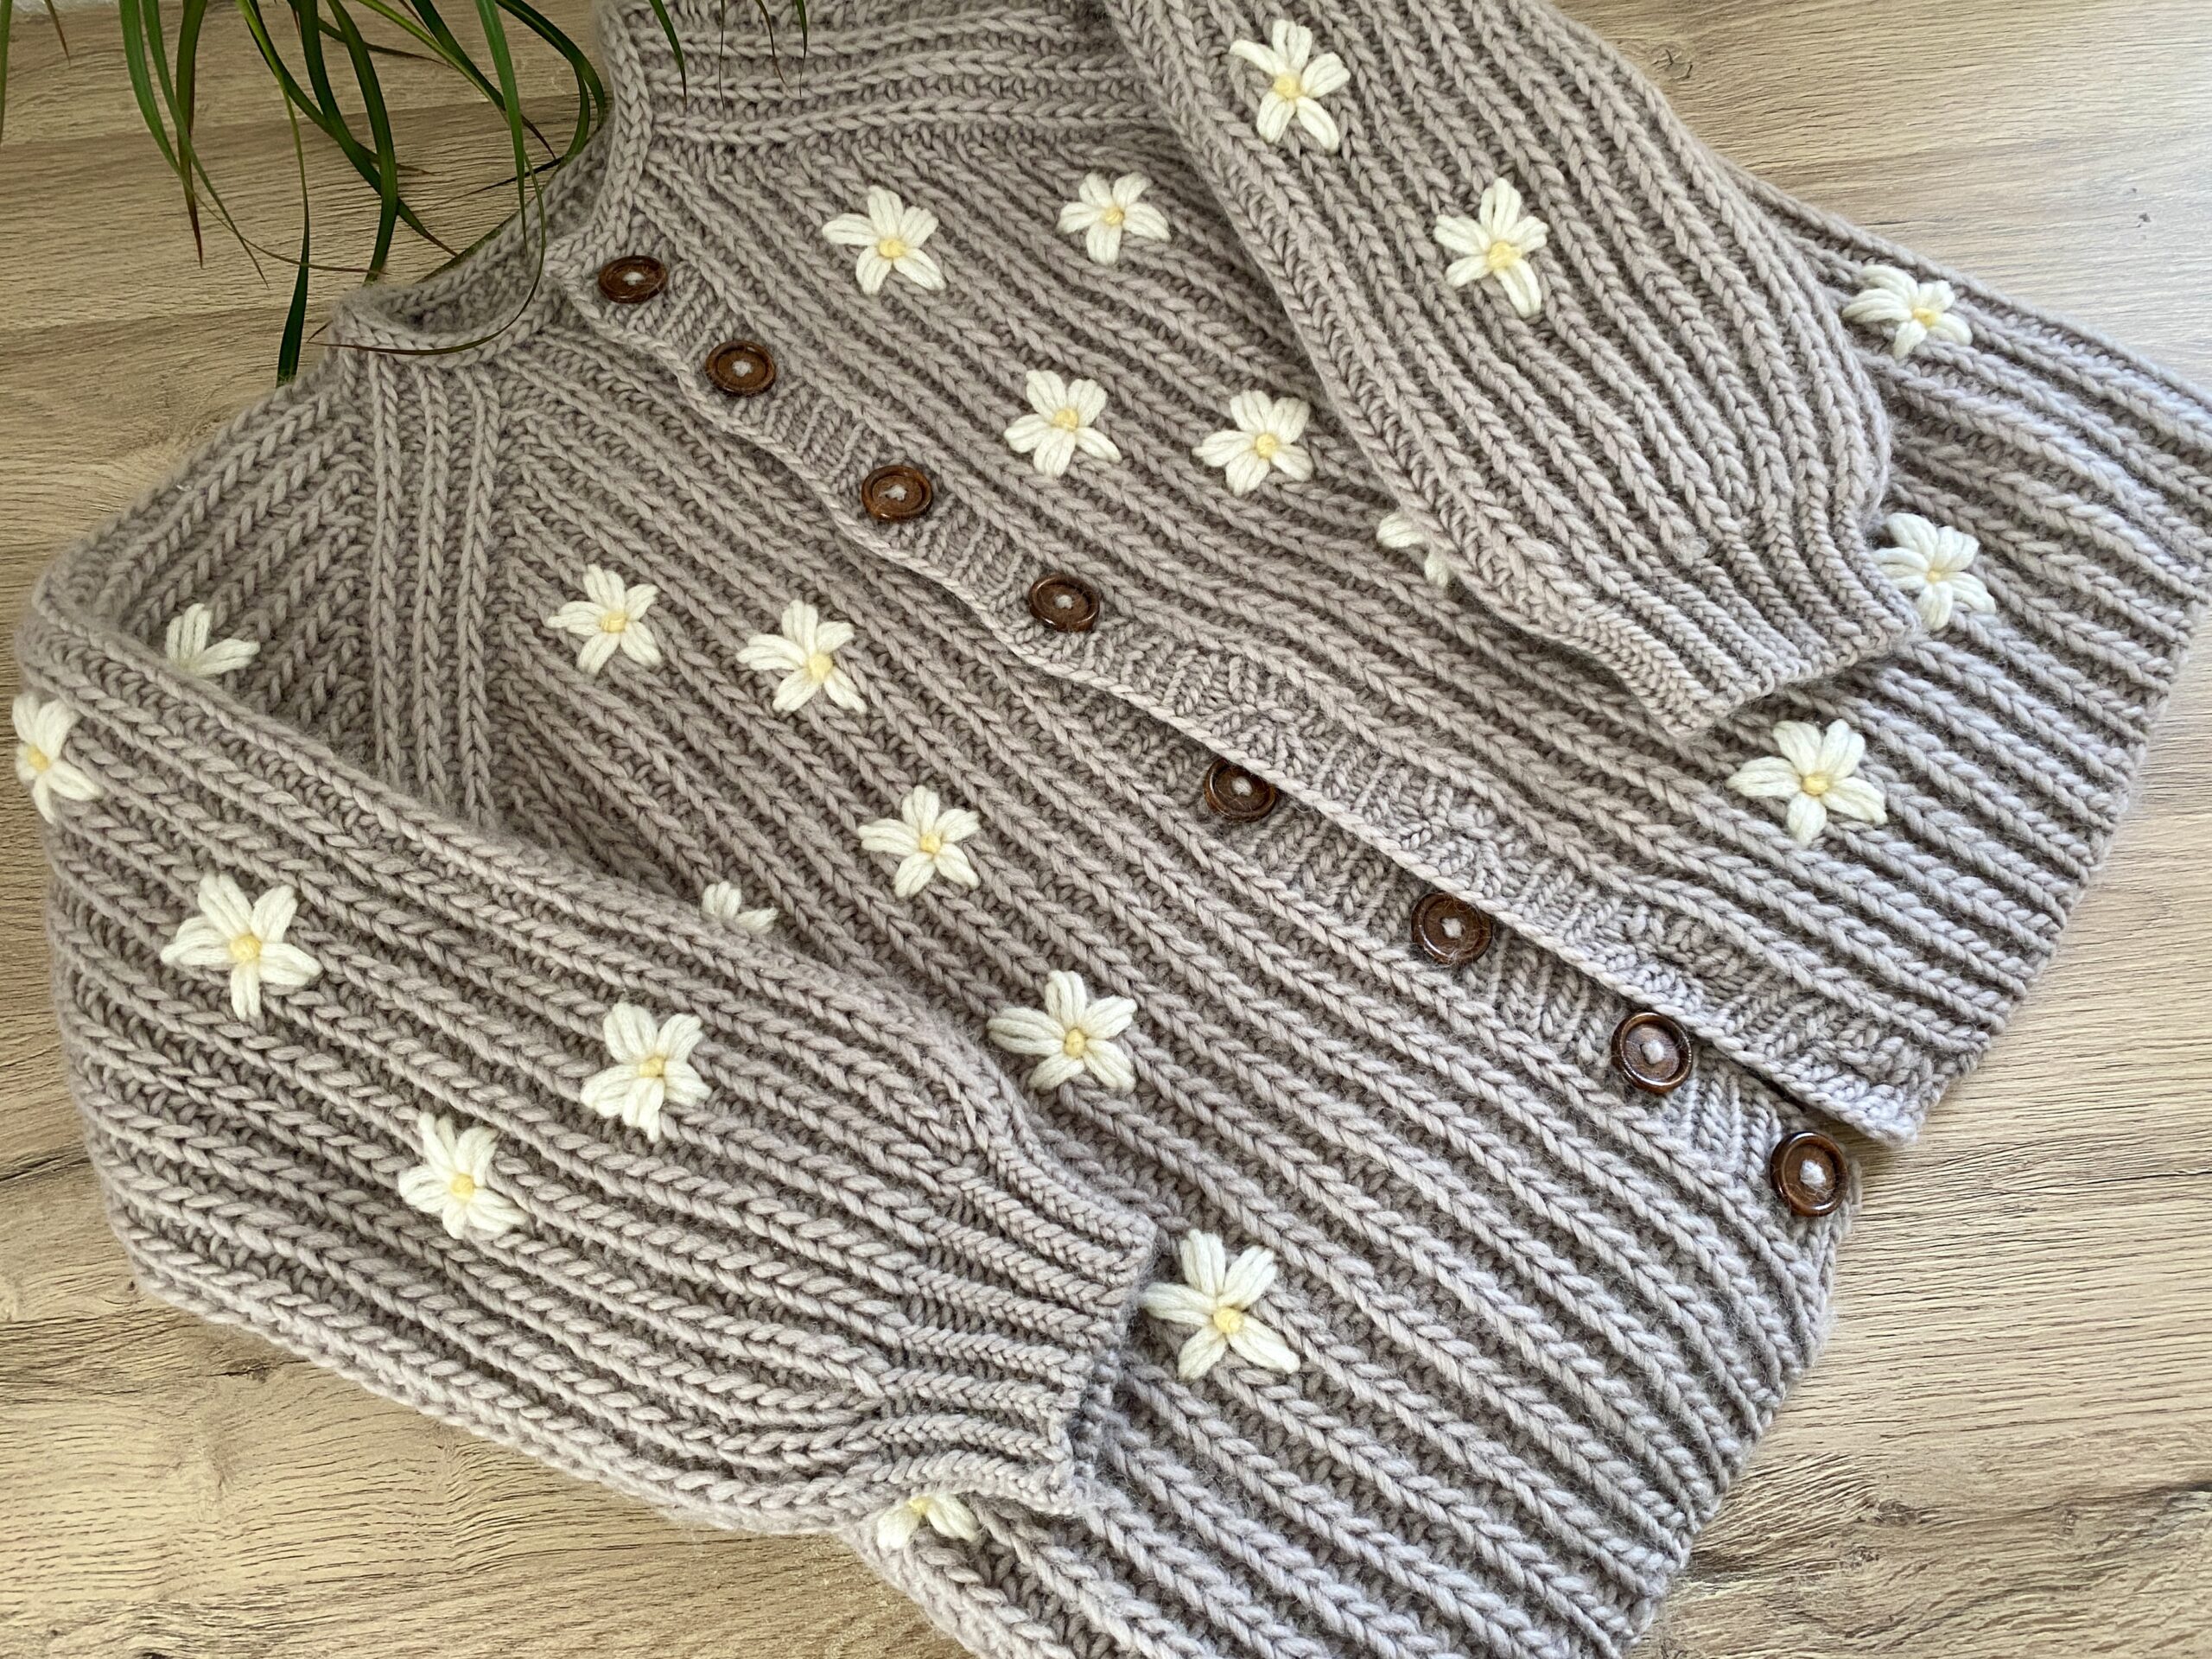 | The cardigan was knitted really quickly - I finished it in about a week. However, all the little embroidered flowers took much longer. It took me a full two weeks to complete all the flower embroidery, working on them every single day. |

A Little Way to Say Thanks
You Might Also Like


 |
|
Join the Cozy Corner Newsletter!
Hey there, creative soul! Welcome to the Yarn Enchantment Newsletter, where we celebrate all things cozy, crafty, and full of heart. Think of this as your friendly crafting companion - a little dose of inspiration delivered straight to your inbox, just for you. Inside, you’ll find: ✨ Exclusive patterns & tutorials - ideas you won’t find anywhere else (just for us!) 📚 Bookish crafts that bring your favorite stories to life 🧶 Tips and tricks to make your crafting journey smoother (and more fun!) 💌 Heartfelt musings on life, creativity, and the magic of making something with your own two hands Whether you’re knitting by the fire, brainstorming your next DIY project, or just looking for a little creative pick-me-up, this newsletter is here to cheer you on. Because let’s be honest - crafting isn’t just about the finished project; it’s about the joy, peace, and stories we create along the way. So grab a cup of tea, cozy up, and join me. Together, we’ll weave a little magic into everyday life - one stitch, one story, and one email at a time. P.S. I’m so glad you’re here. Let’s make something beautiful together! (Note: If you're using an ad blocker, you may encounter issues subscribing to the newsletter. To subscribe, please consider disabling your ad blocker.)
|
