
How to Care for Knitwear: Wash, Dry & Store Sweaters
August 30, 2026How to Use a Lifeline in Knitting: The Ultimate Safety Net

Originally published on September 10, 2026
I'm currently putting together a lace knitting class all about the little things I wish someone had told me when I first started.
While I was preparing the lesson on how to fix mistakes in lace knitting, I realized something: I don't have a post here on the blog yet about lifelines.
So let's fix that today and talk about how to use a lifeline in knitting.
It's such an important skill to have, and not just for lace. A lifeline can save you so much frustration when you're working complicated colorwork, cables, and any pattern where ripping back feels a little scary.
When I started out, making a mistake meant frogging everything. I'm not joking here. I just didn't know how to fix it, and sliding my needles out and getting every live stitch back on again felt impossible. There was always one stitch that slipped away, and I had no idea how to pick it up again. So I ripped it all out.
When the owner of our local yarn shop told me about lifelines, it was such an aha moment. For a while I used a fresh strand of yarn every other row, just to feel safe.
And today, I want to share that little bit of magic with all of you.
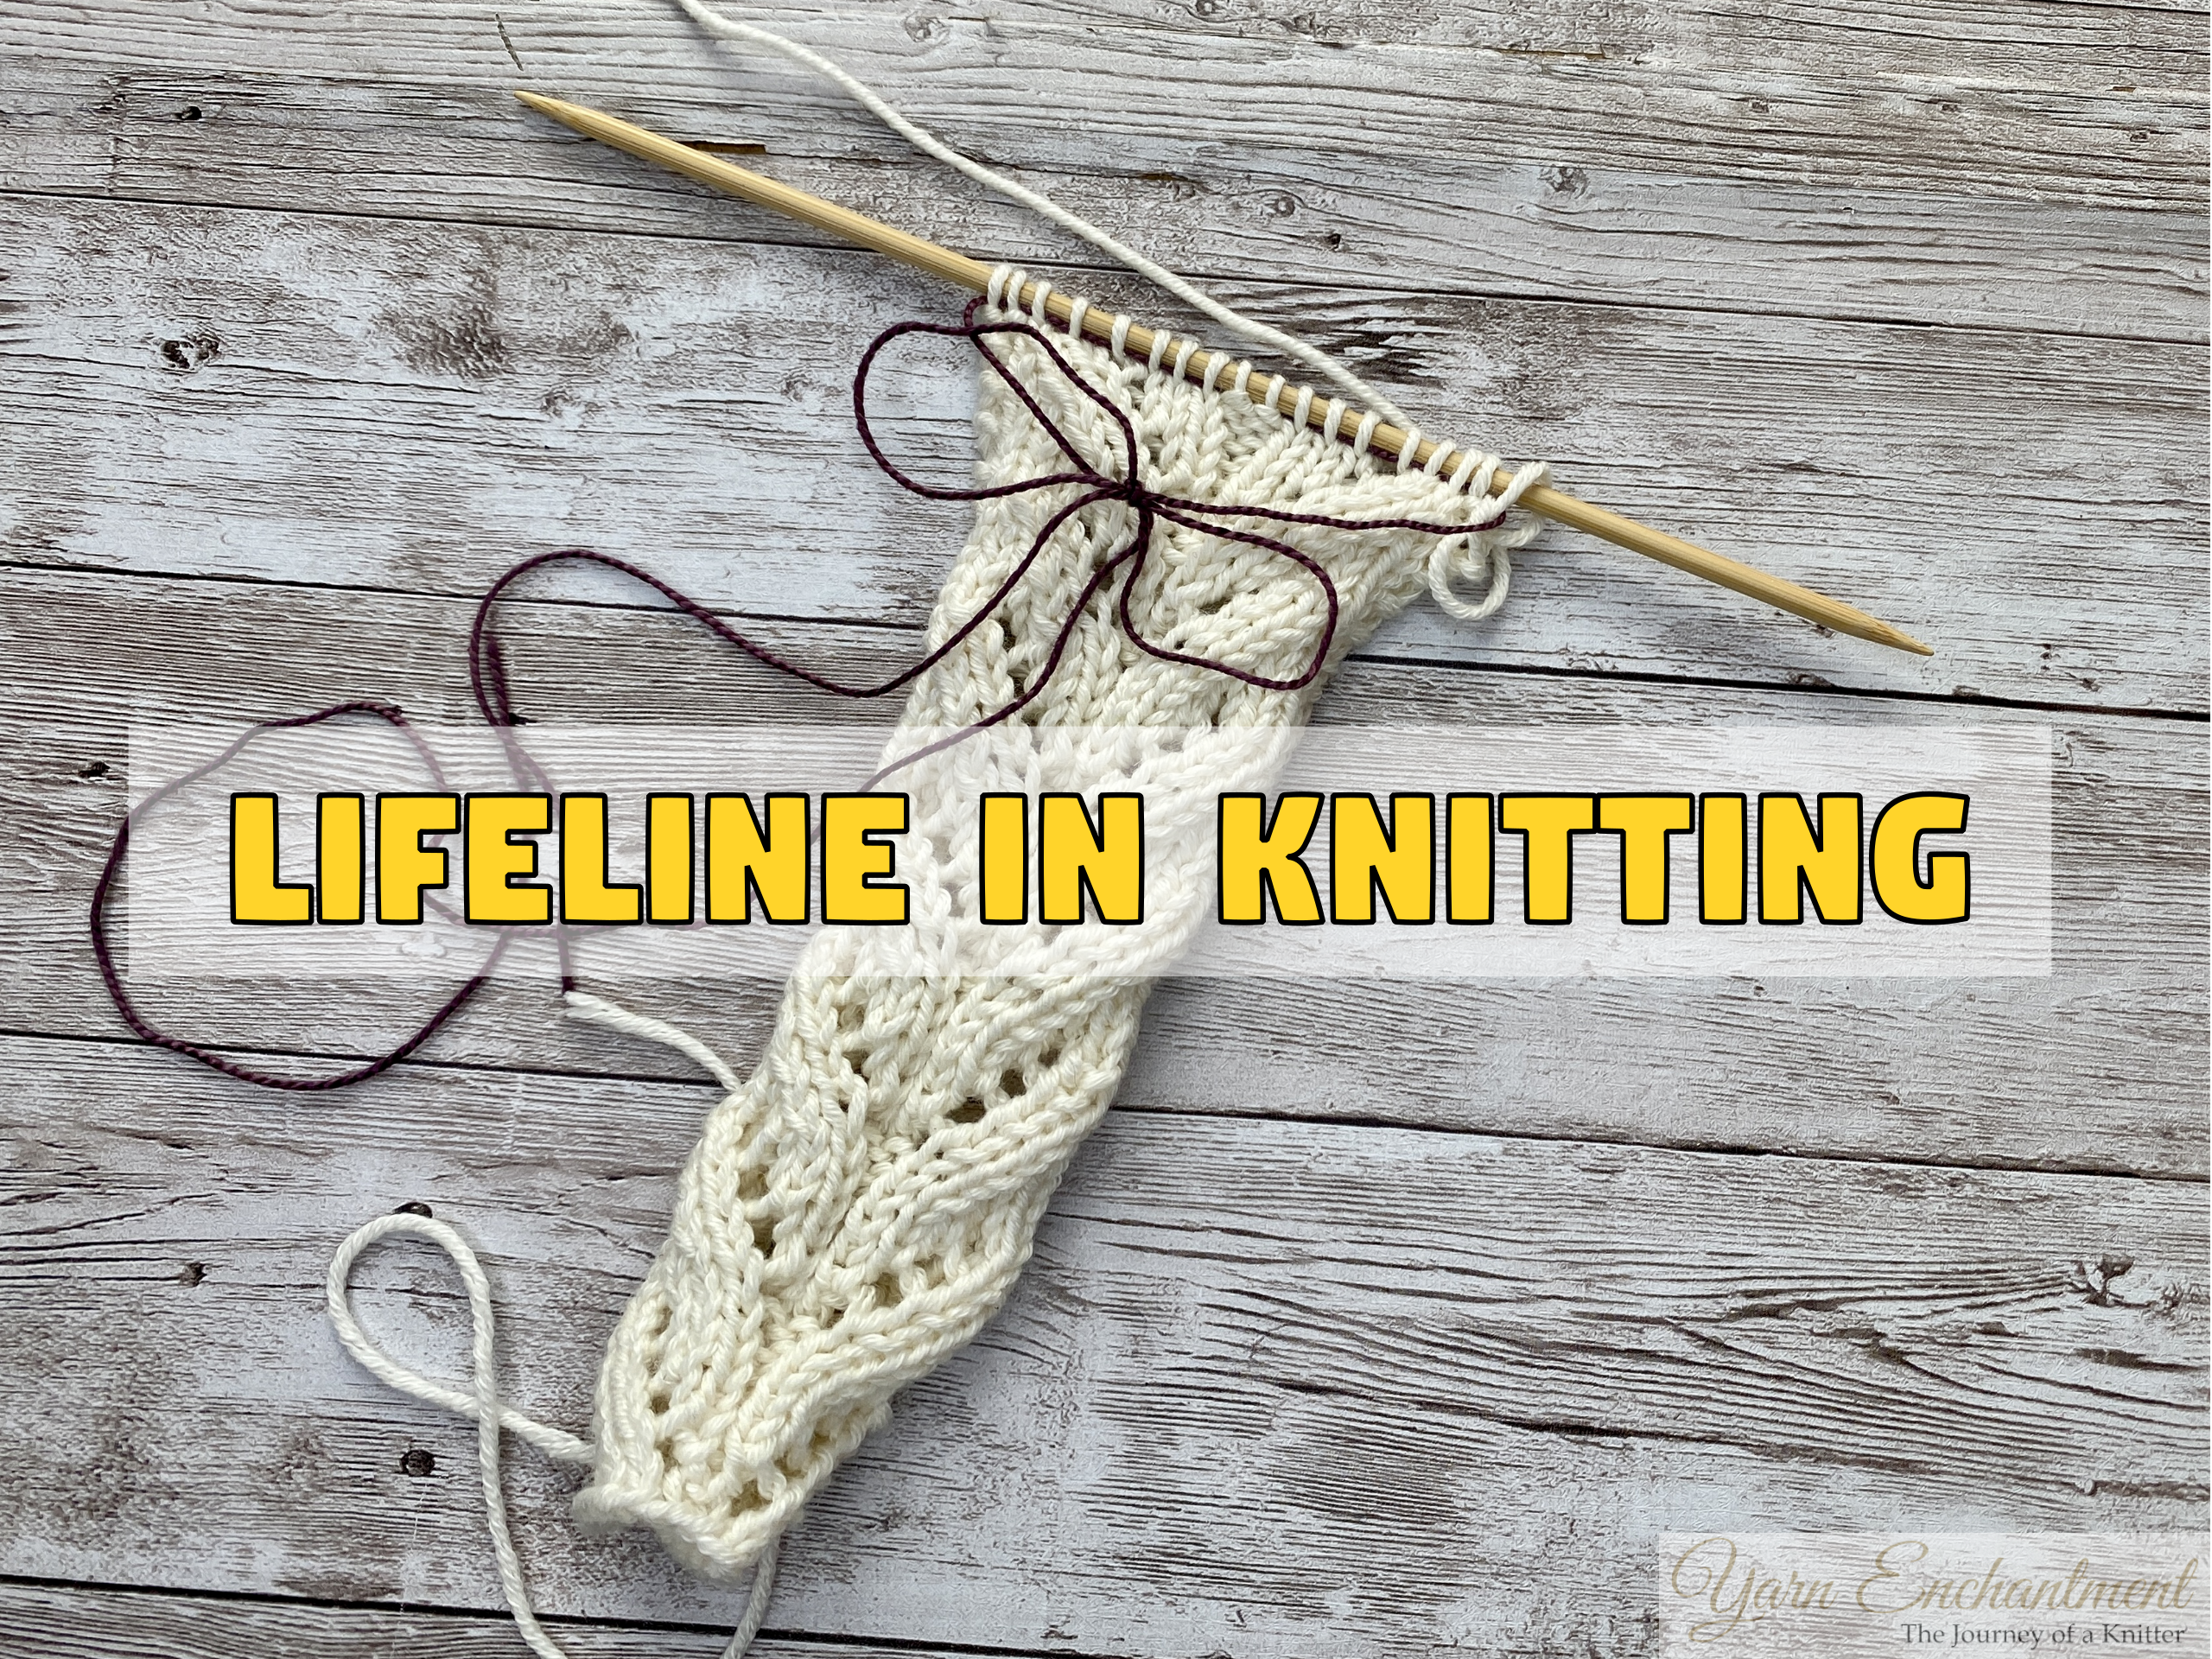
How to use a lifeline in knitting.
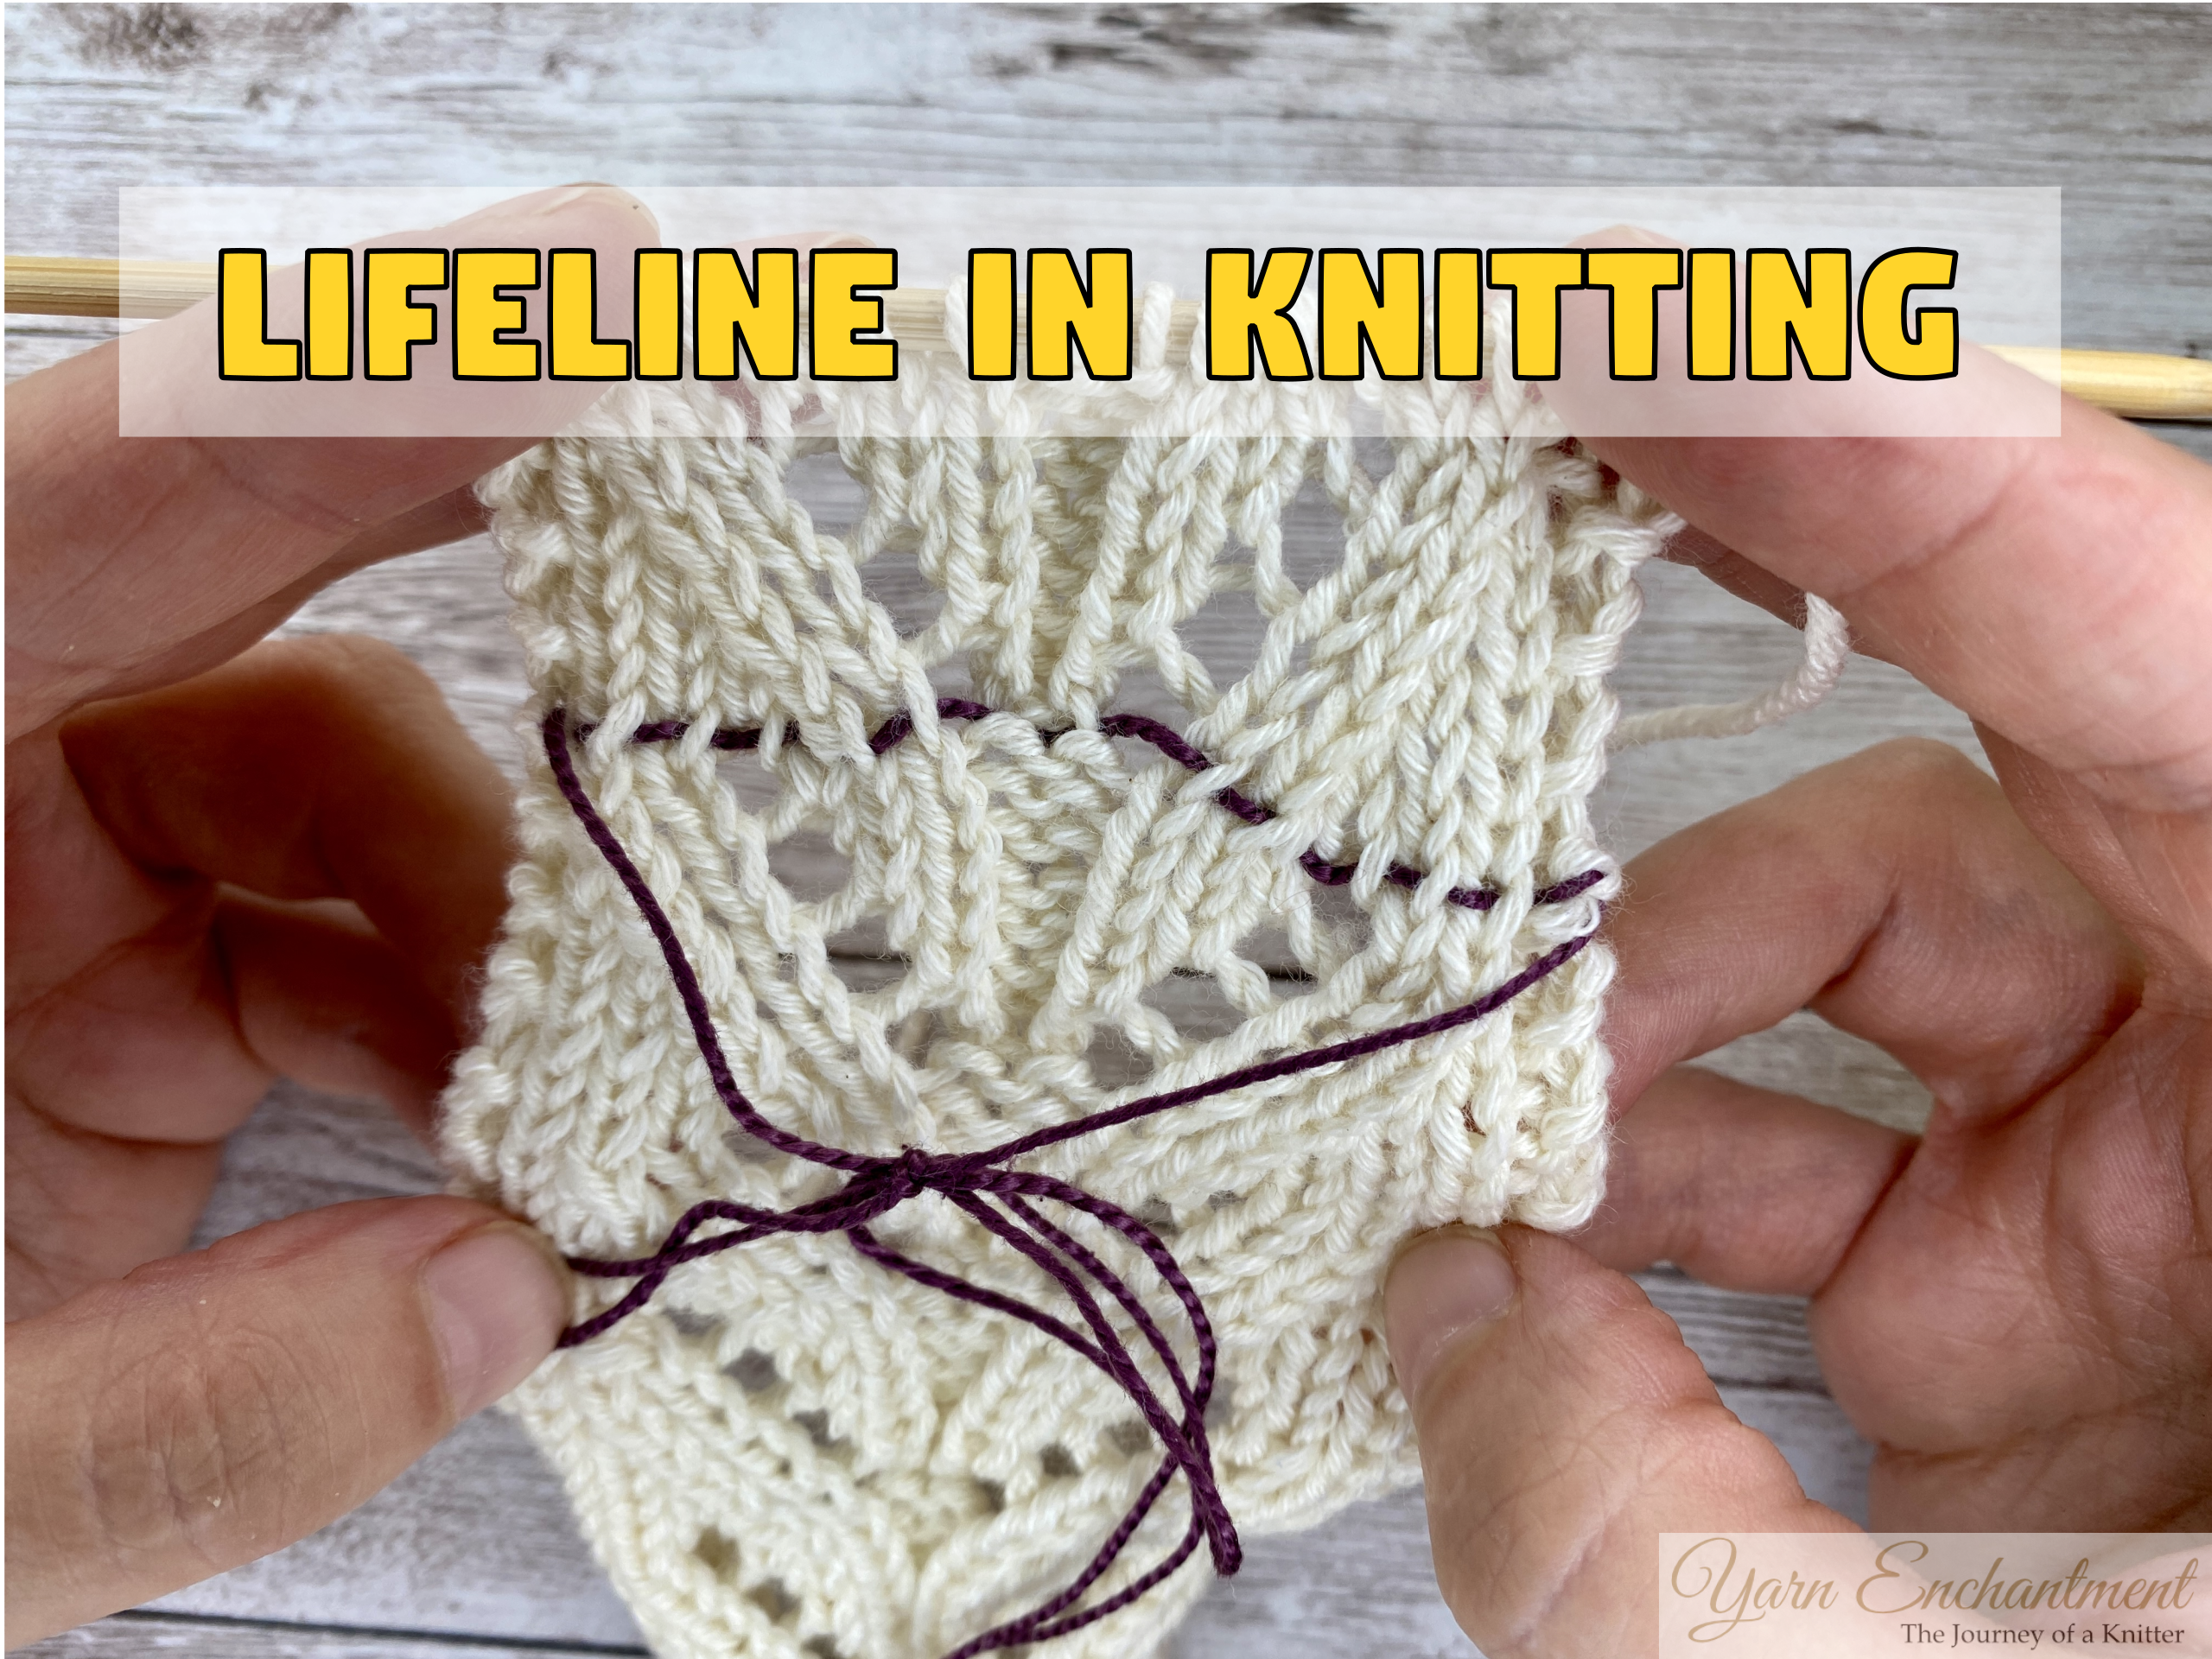

Table of Contents
What Is a Lifeline in Knitting?
A lifeline is a piece of smooth scrap yarn, crochet thread, or dental floss threaded through every live stitch on one row. It just rests there quietly while you keep knitting.
I like to think of it as a video game save point. If something goes sideways 20 rows later, you don’t have to start over from level one. You just unravel back to your save point, where all your stitches are waiting safe and sound.
Other knitters call it a safety net, and that’s exactly what it feels like.
Why Every Knitter Needs This Safety Net
Knitting unravels fast. Pull your needle out at the wrong moment or drop a stitch in pattern, and those loops can run straight down toward your cast-on edge.
It’s extra tricky in lace, brioche, and cables, where it’s hard to figure out where each yarn-over or twist belongs again. A lifeline stops that free-fall.
The big benefits:
- Frog without fear: You can rip back quickly and the unraveling stops right at the lifeline.
- Save hours of work: You lose a few rows, not the whole shawl or sweater.
- Low effort, big payoff: It takes under two minutes to put one in.
When to Put a Lifeline In Your Knitting
You don’t need one for every garter-stitch swatch. Save them for the moments that matter:
- After a perfect section: Counted your stitches and everything lines up? That’s the perfect time.
- Before something tricky: Add one right before a lace repeat, cable chart, short rows, or colorwork.
- With tricky yarn: Dark colorways, fuzzy mohair, and textured novelty yarns make it so hard to see and pick up dropped stitches.
- Every 10 to 20 rows on big projects: For sweaters and shawls, regular save points give you so much peace of mind.
My rule of thumb: When the pattern is very complicated and my little angel, my daughter, has lots to tell me, I put a lifeline in every few rows, because I know I can't fully concentrate. 🙂
Best String to Use for a Lifeline
You don’t need anything fancy, but the right material makes all the difference. You want something smooth, strong, and easy to see.
Good options:
- Unwaxed, unflavored dental floss: Super smooth, strong, thin, and slides right out. Tip from experience: skip the mint unless you want peppermint-scented wool!
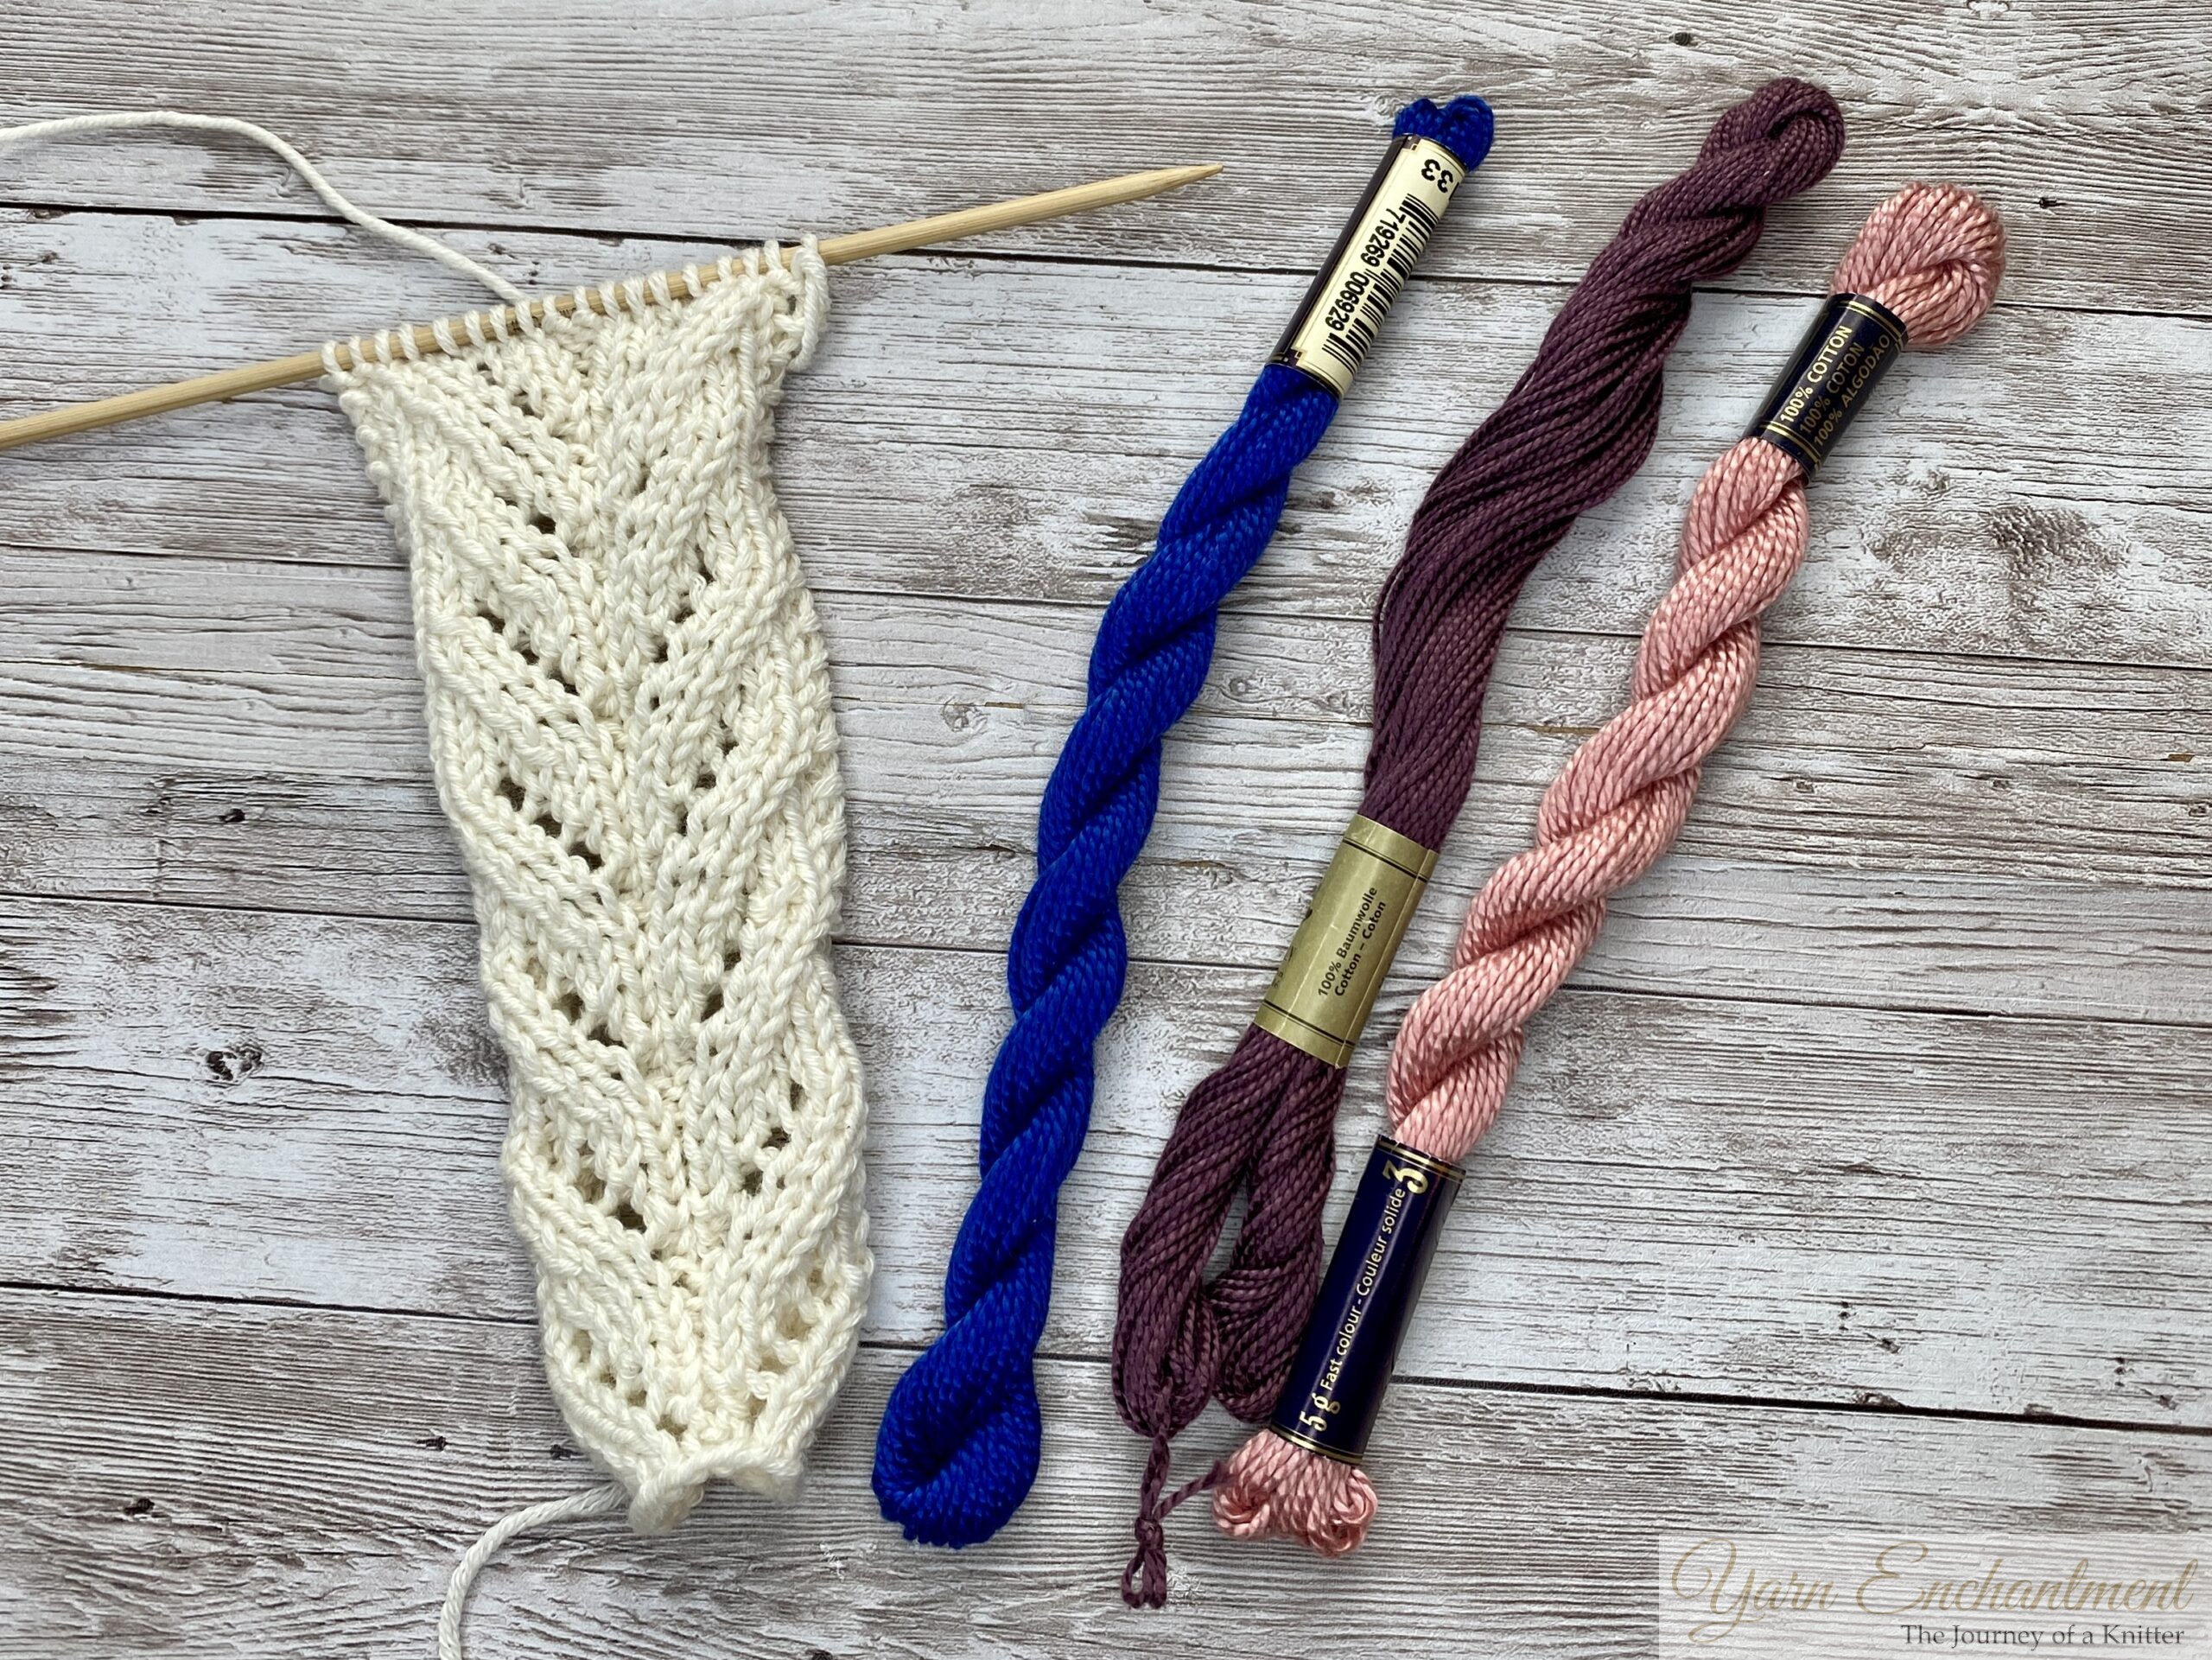
- Smooth crochet thread or pearl cotton (size 10 or 8): Inexpensive, strong, and won’t split or felt.
- Thin, slick scrap yarn in cotton or silk: Use a contrasting color so it pops against your project.
My favorite lifeline thread is pearl cotton. It comes in a whole rainbow of colors, so I can always pick one that shows up clearly against my yarn, and since it's cotton, it will never felt into my knitting, and the color doesn't bleed, either.

What to avoid:
- Fuzzy or grippy yarn: Mohair, bouclé, and single-ply wool will stick to your stitches and refuse to budge.
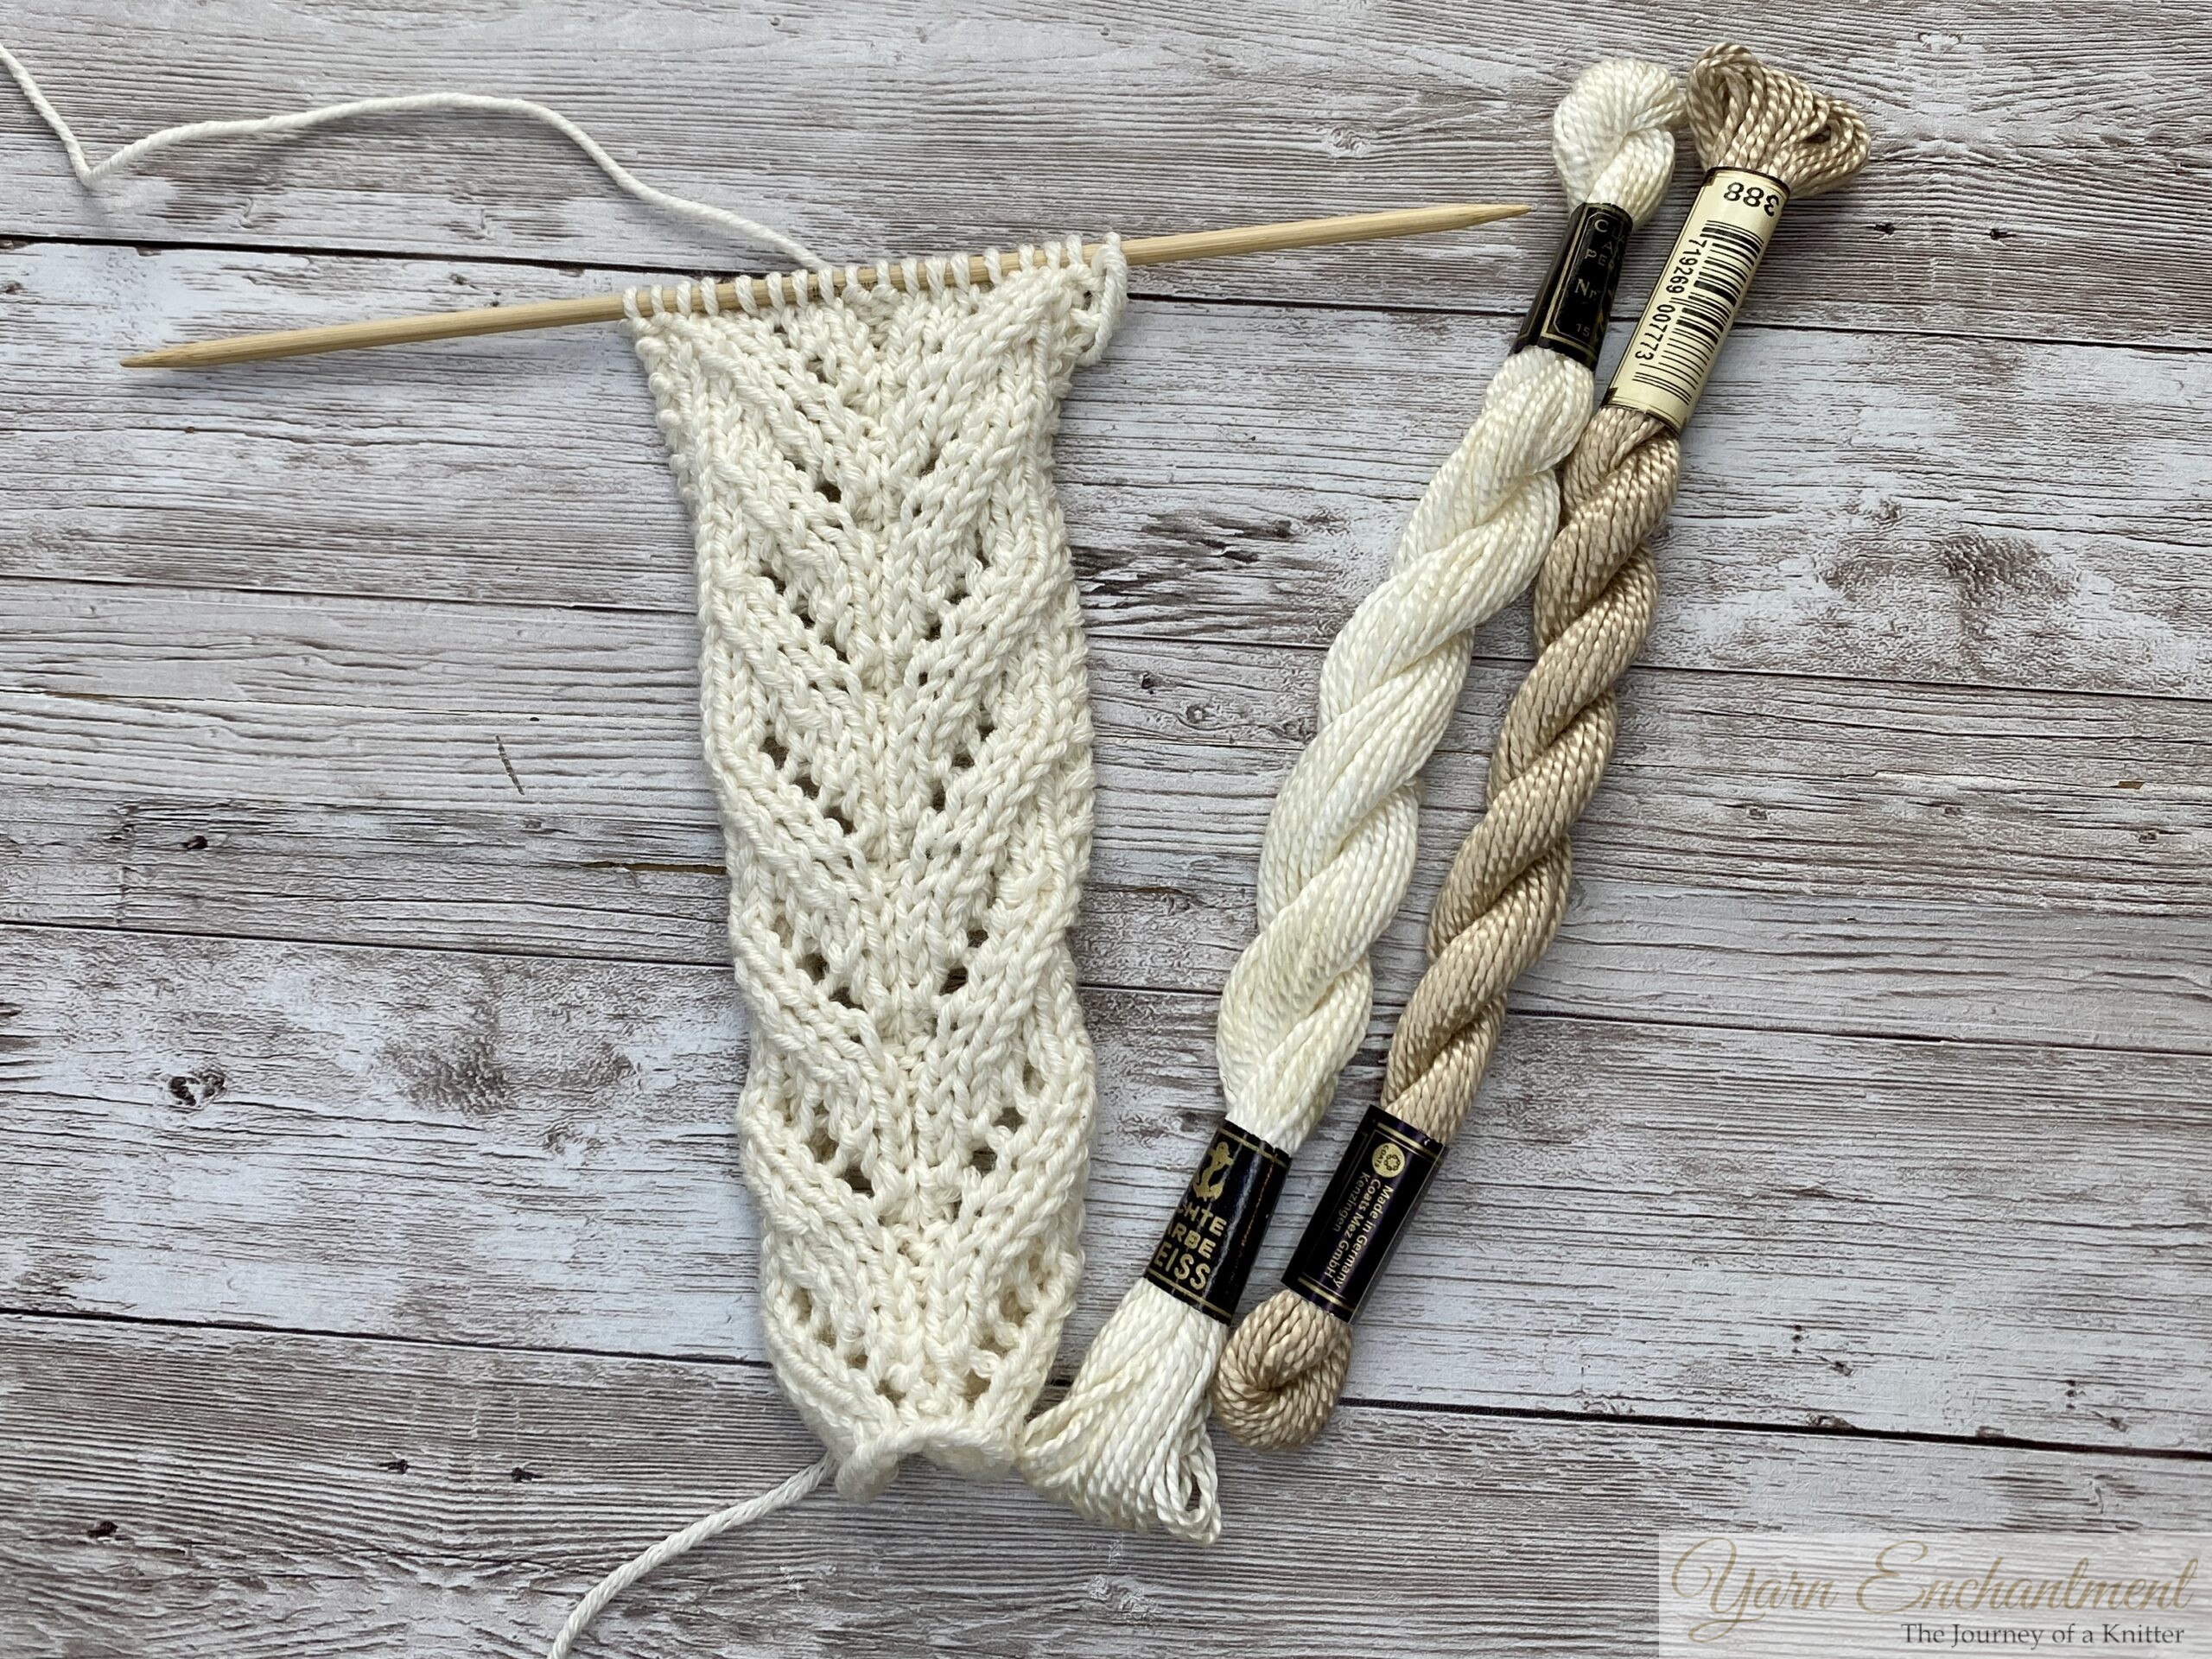
- Matching colors: If your lifeline blends in with your working yarn, you won’t be able to find it, or you might accidentally knit into it.
See how these light pearl cottons almost disappear against the cream yarn? One row of stockinette and you'd never find your lifeline again.

How to Insert a Lifeline: Step-by-Step
This is a proactive lifeline, meaning you’re adding it while your stitches are still safe on the needles.
What you’ll need:
- Your current WIP
- A strand of lifeline thread, cut about 6-8 inches wider than your knitting
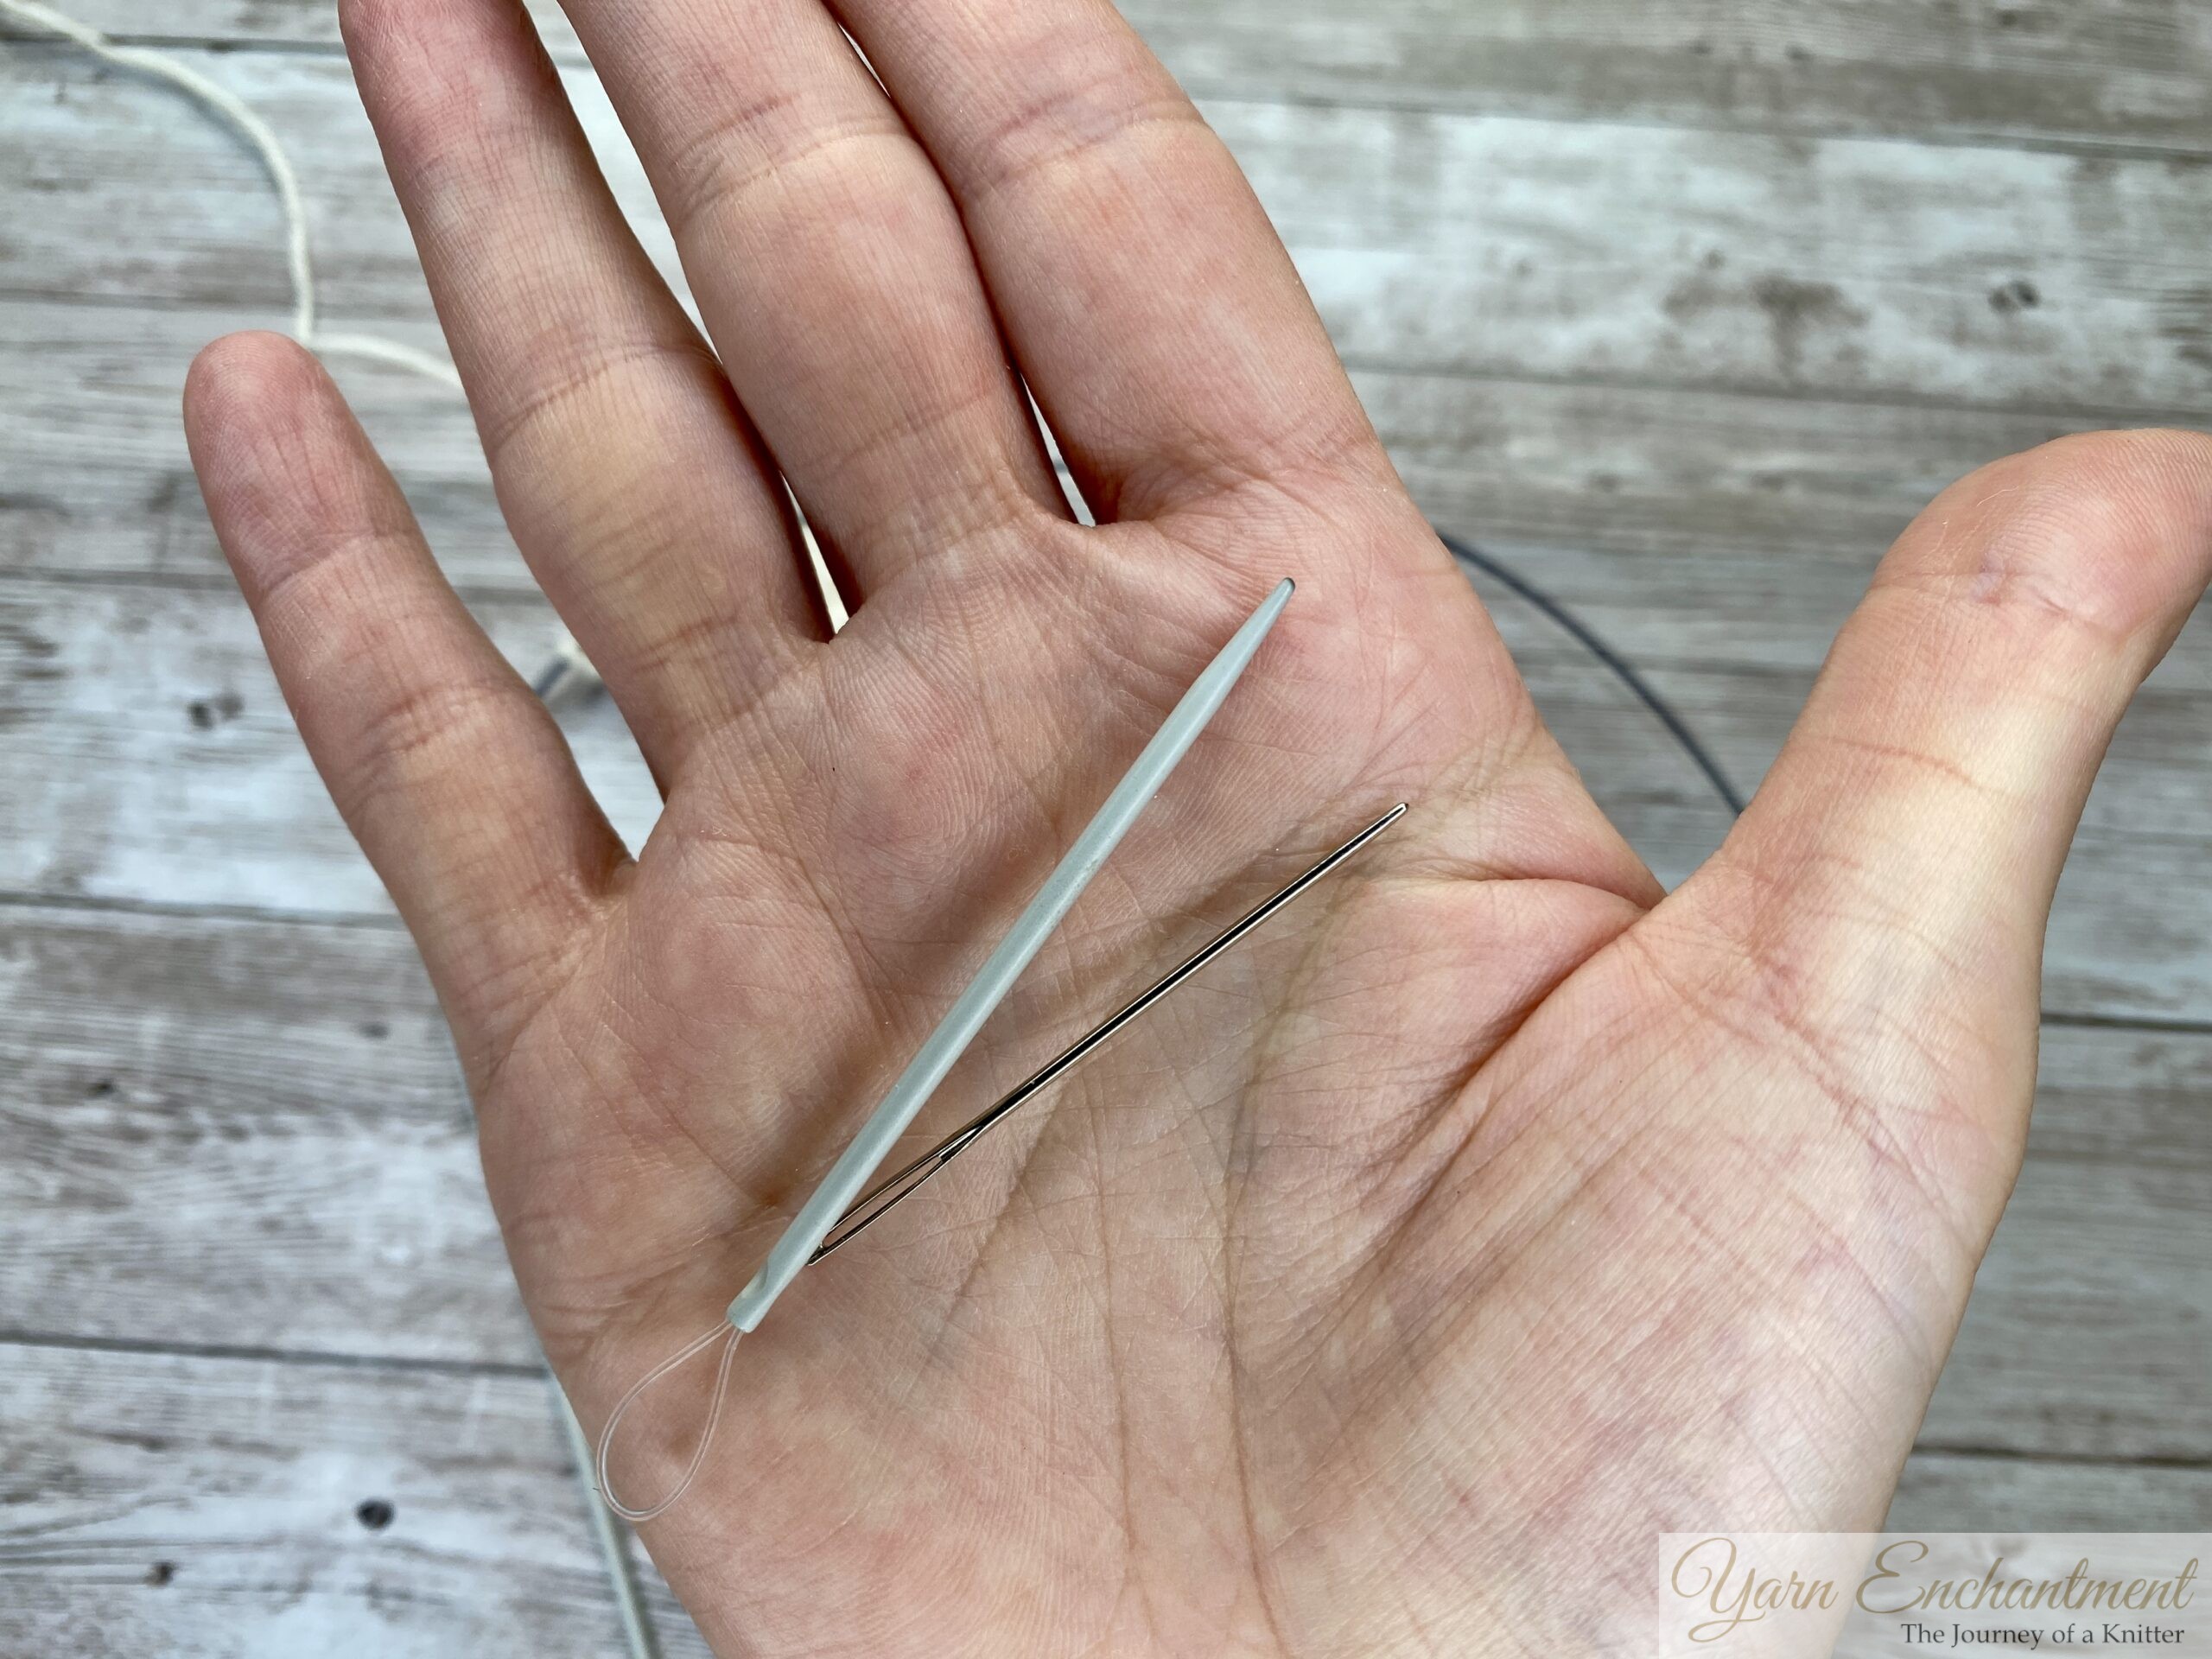
- A blunt tapestry needle
Your lifeline should run the full width of your stitches plus a comfortable tail on each side.
You will also need a blunt tapestry needle.


Step 1: Check your row first
Finish the row, slow down, and double-check. Count your stitches and look for mistakes. You only want to save a row you love.
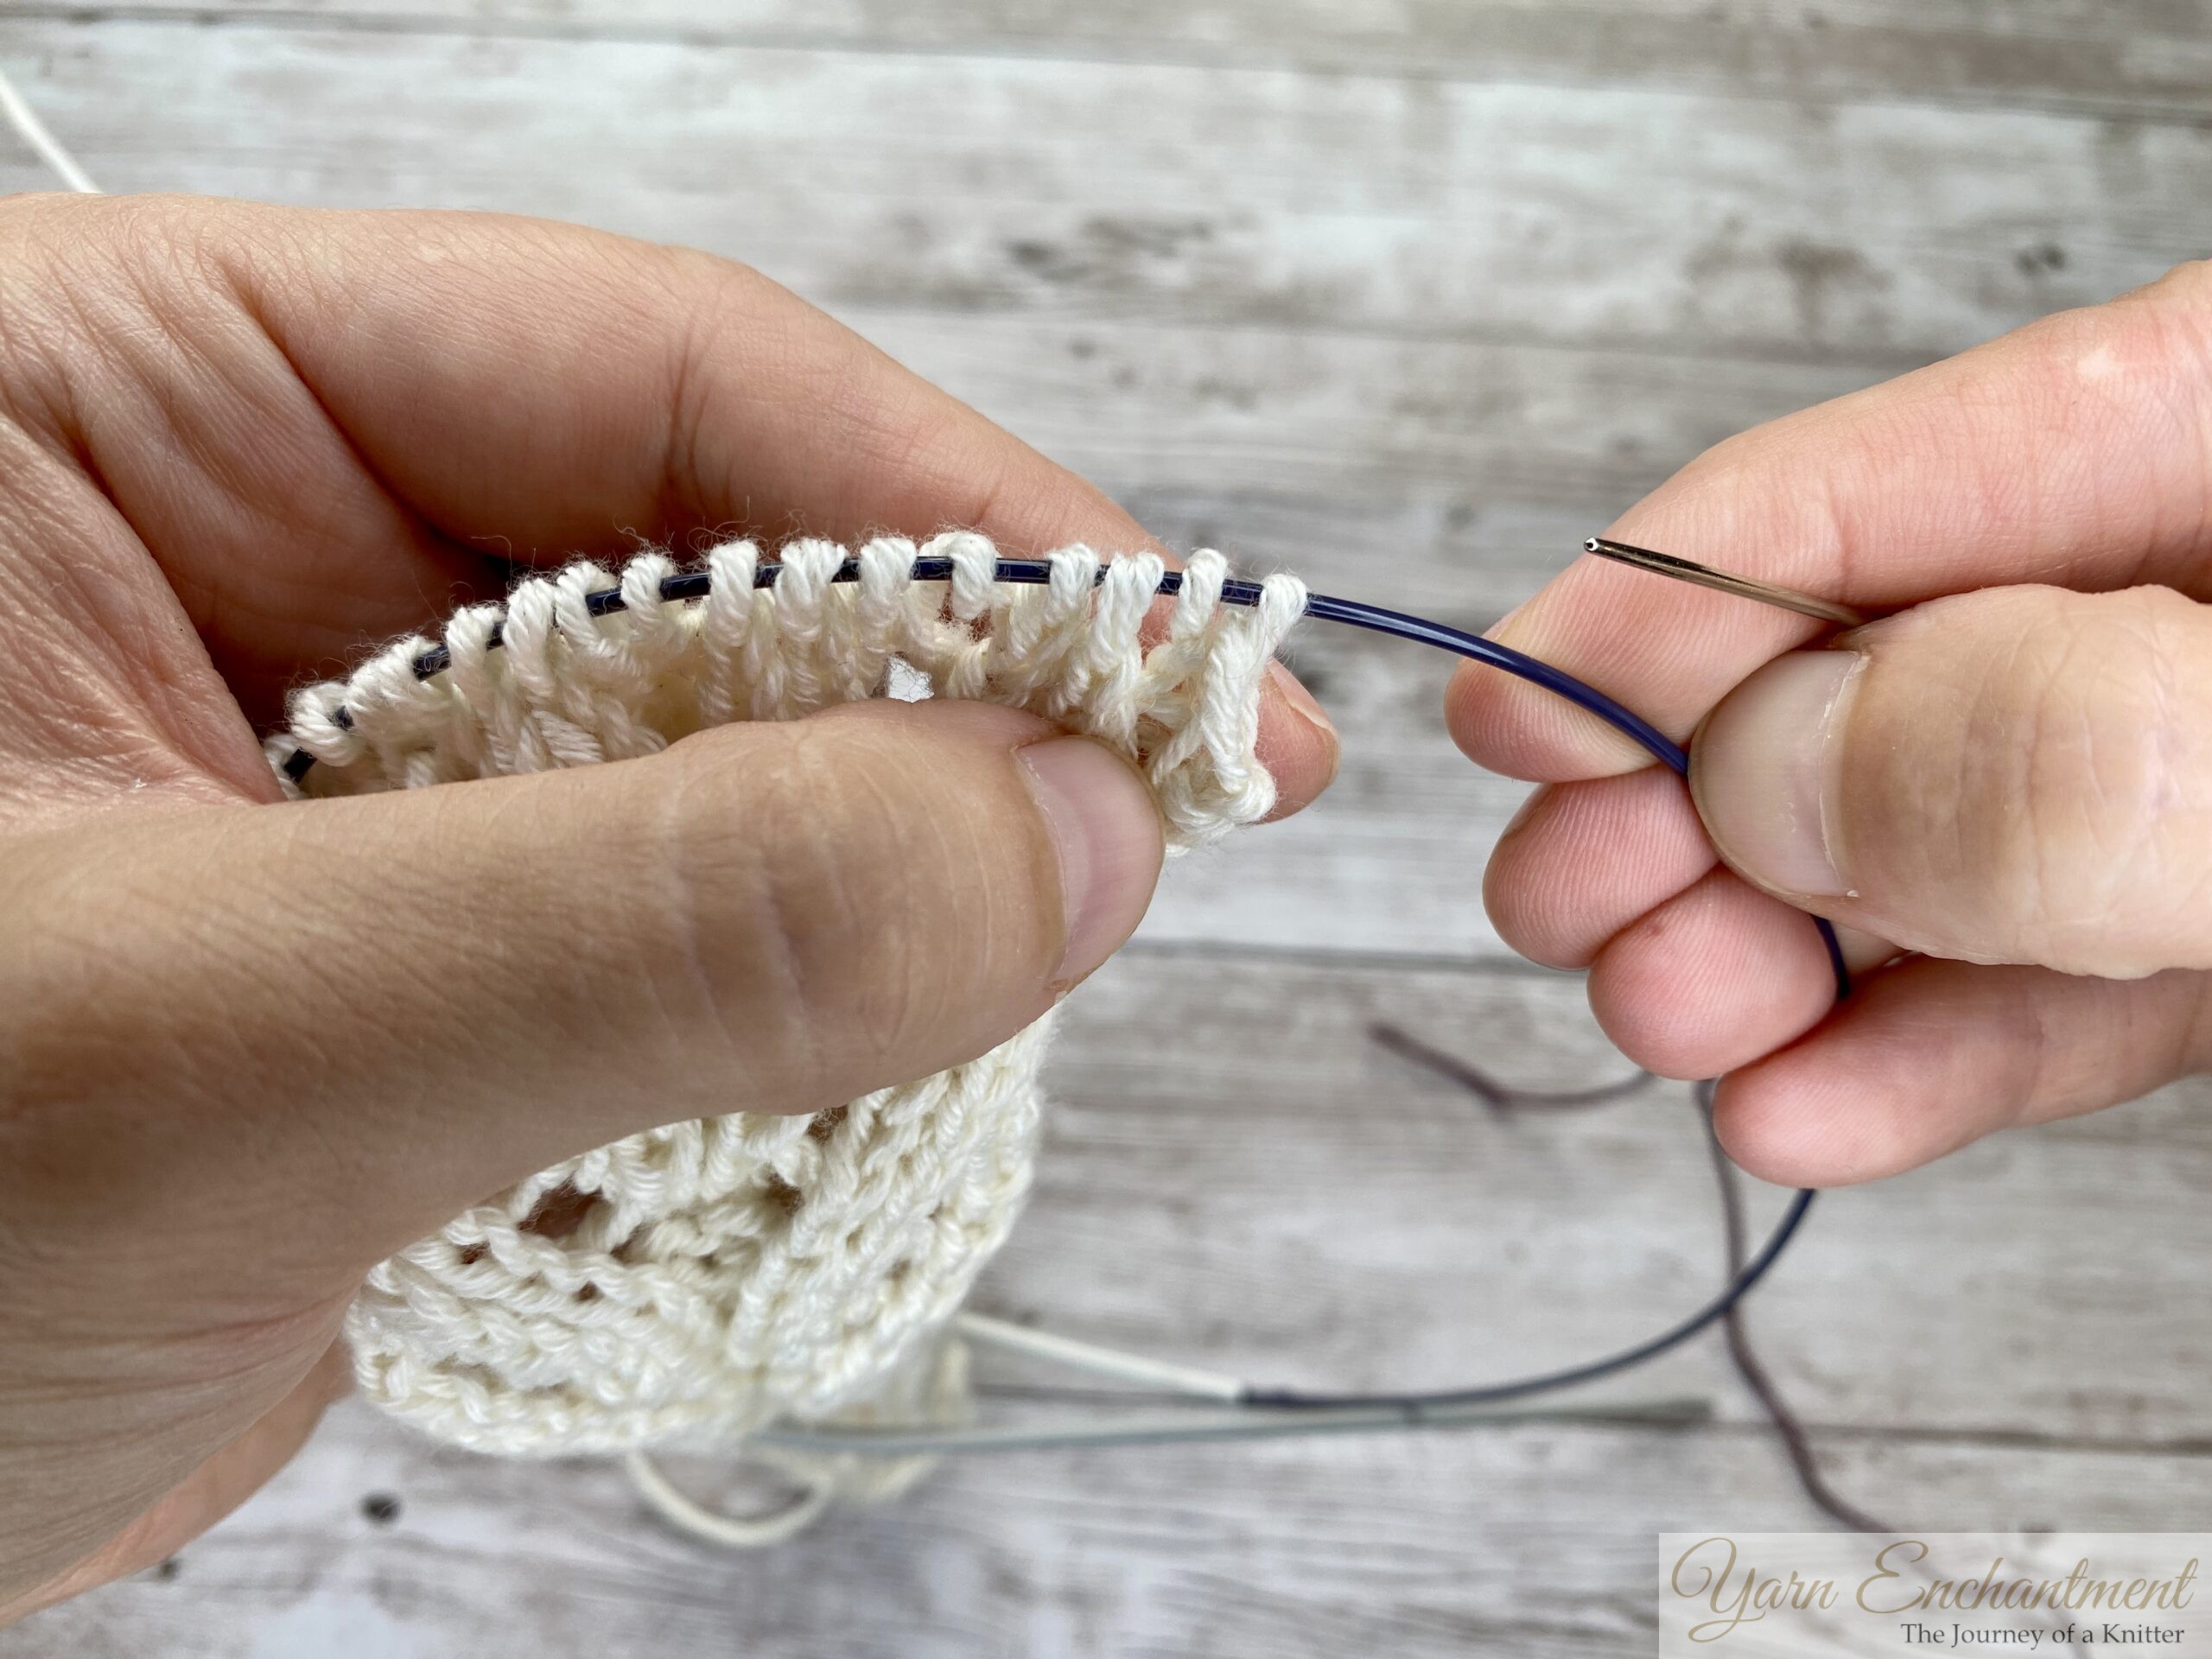
Little trick: slide all your stitches onto the cable of your circular needle and pull the tip out. The cable holds them open and lined up like a rail, so threading your lifeline through becomes wonderfully easy.

Step 2: Thread your needle
Thread your smooth floss or thread onto the tapestry needle.
Thread your smooth floss or pearl cotton onto the tapestry needle.


Step 3: Weave through every live stitch
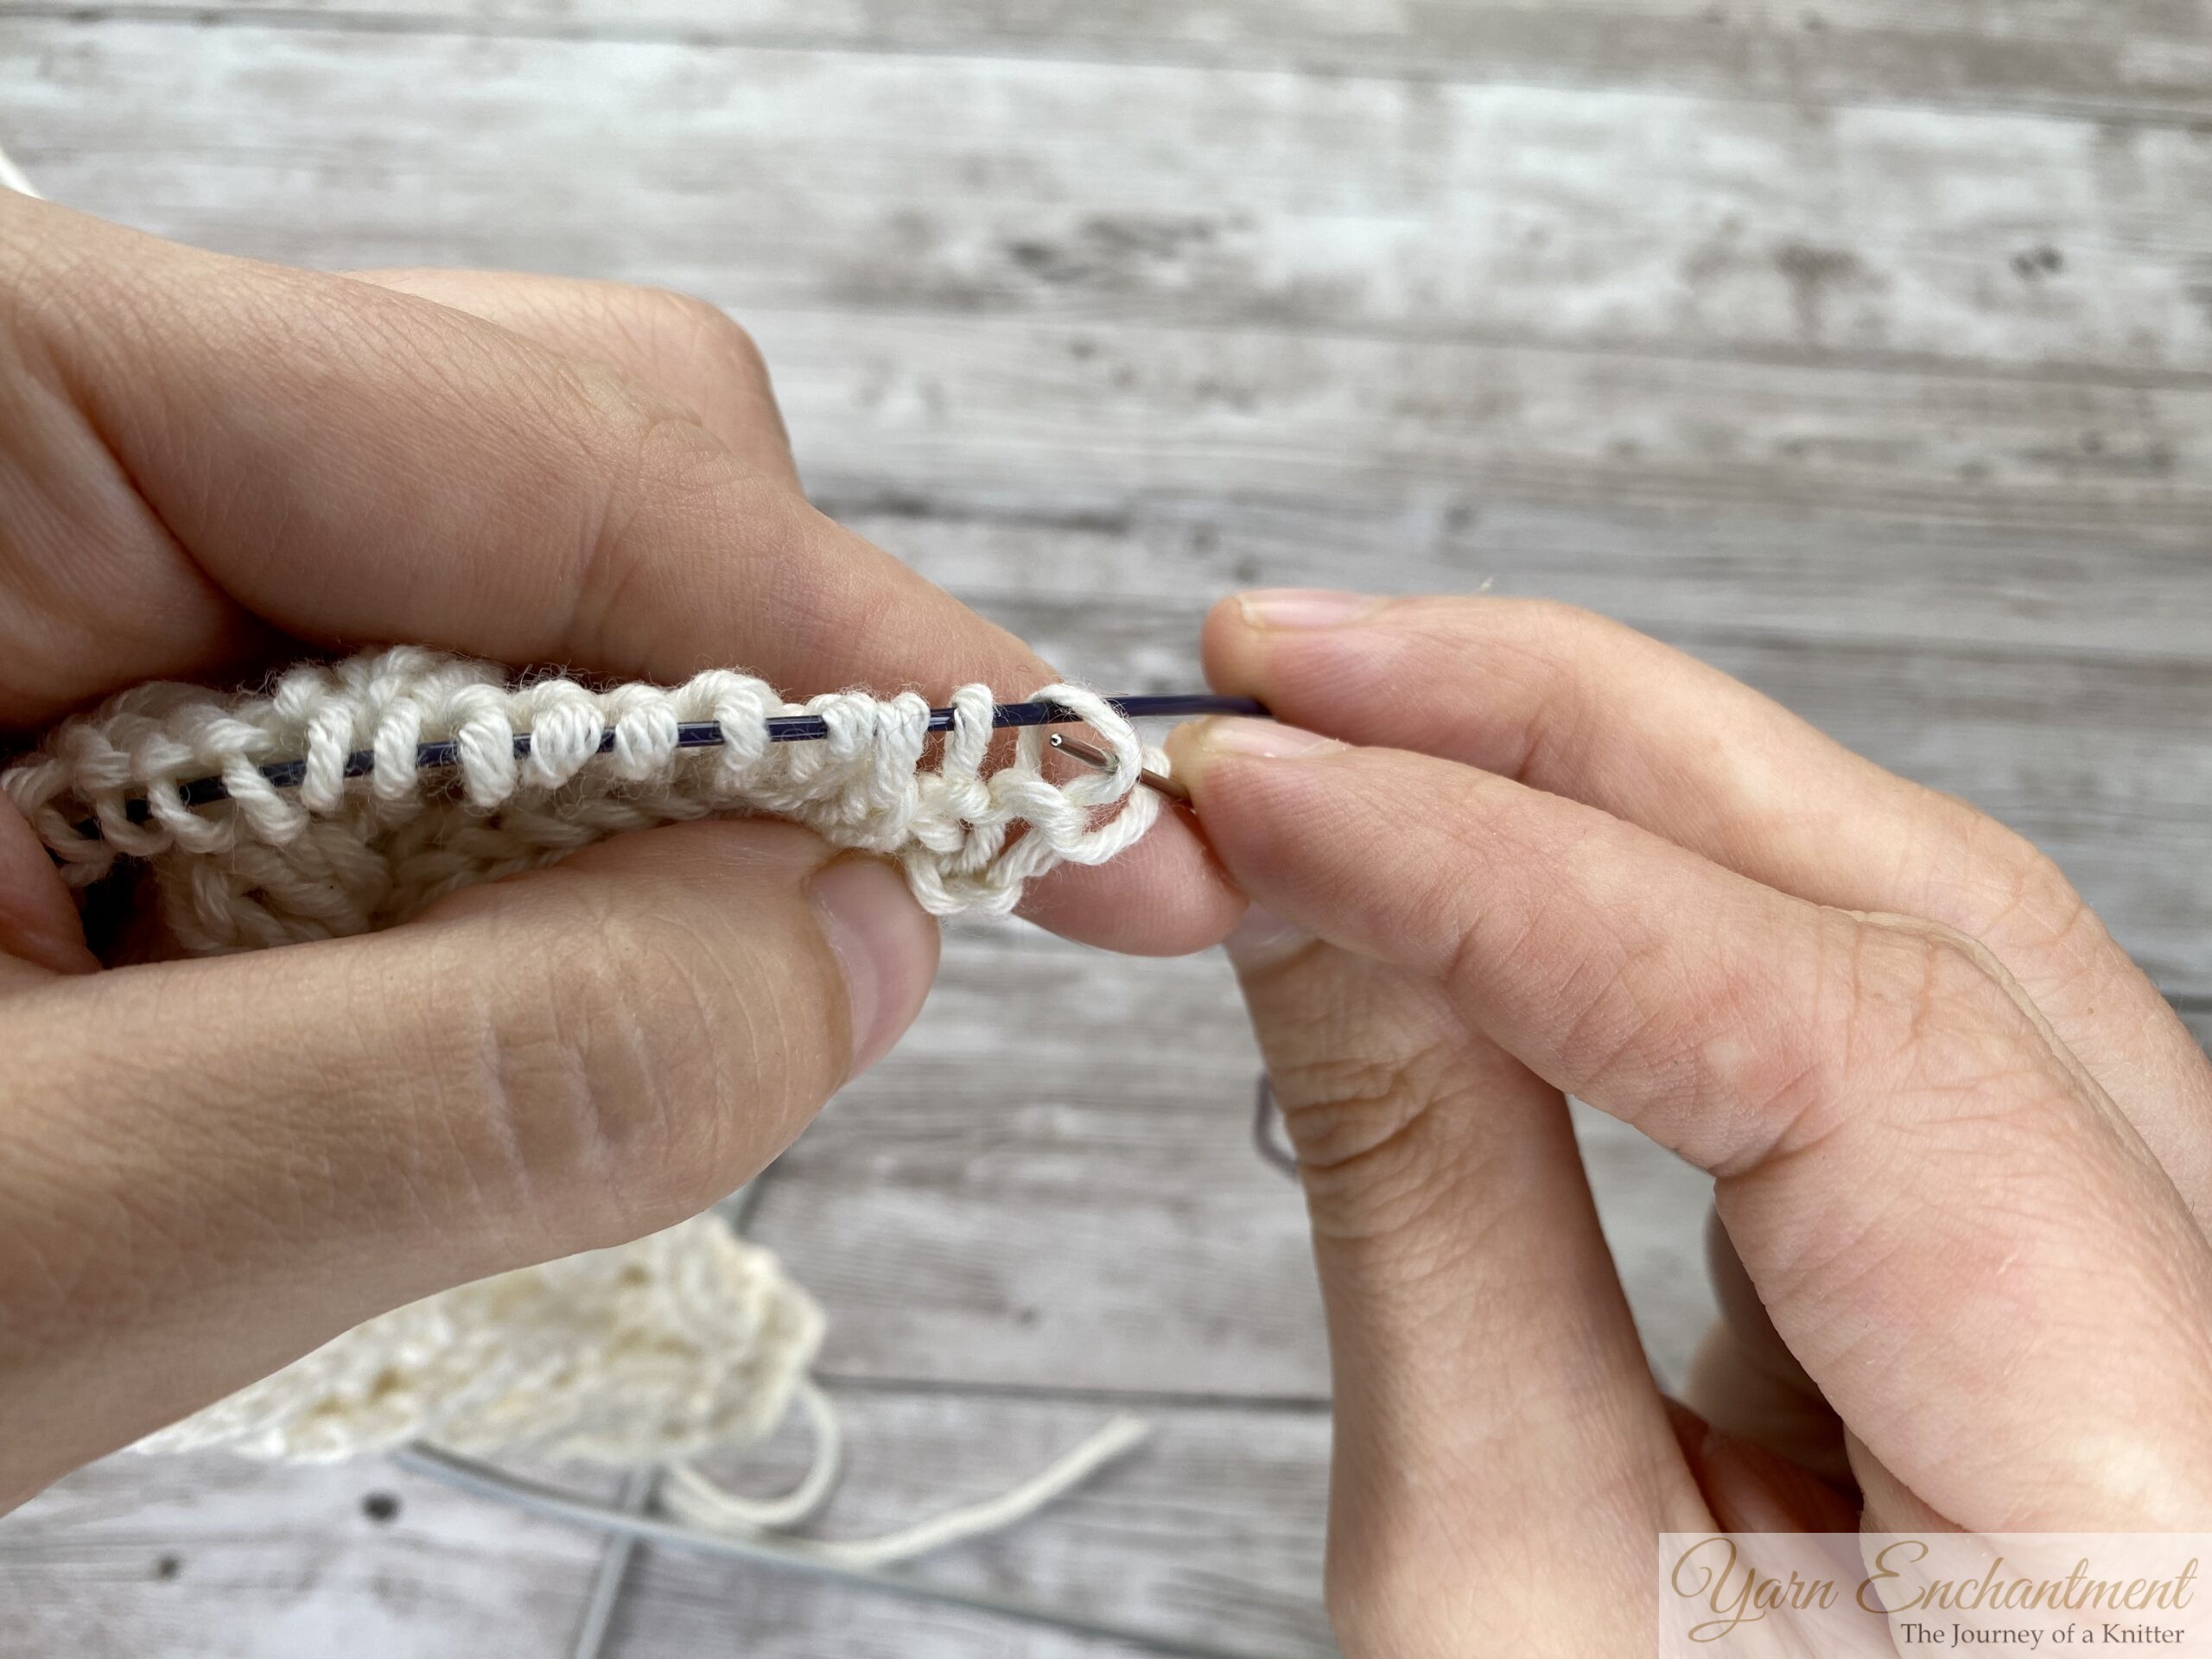
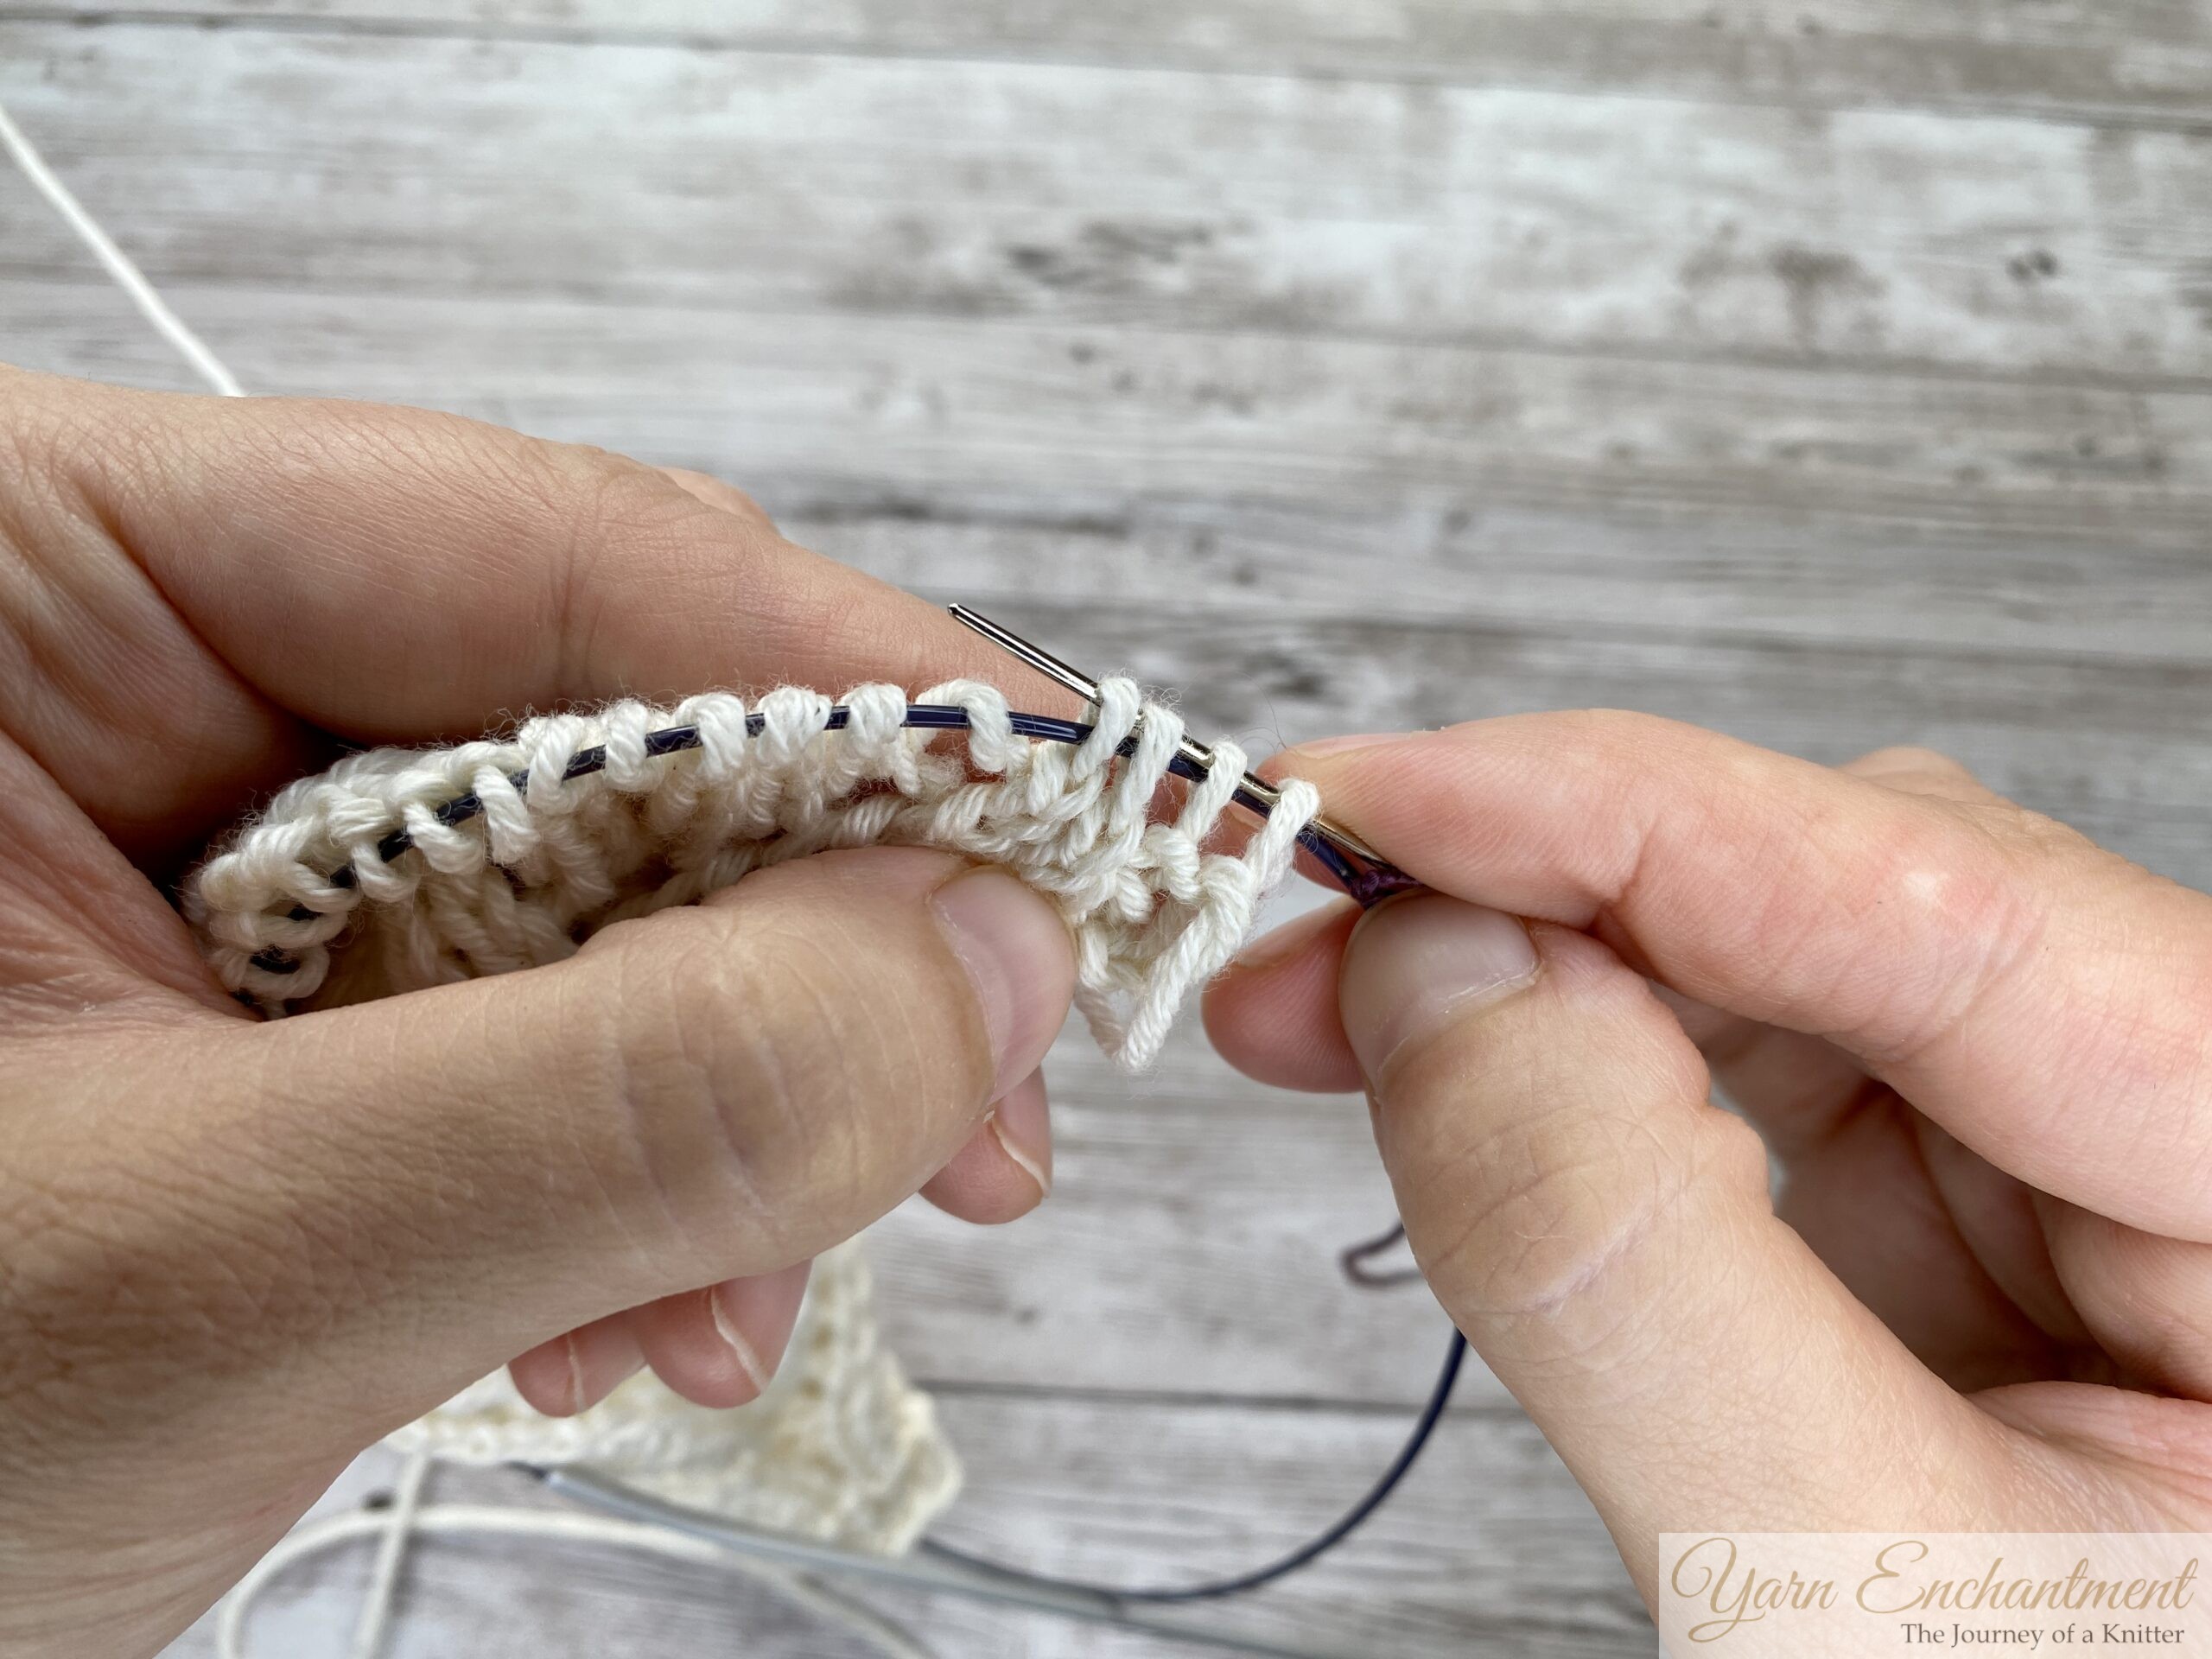
With your knitting needle still holding the stitches, slide the tapestry needle through the center of each loop on the needle.
Take your time here. Go stitch by stitch, avoid splitting the yarn, and go around your stitch markers, don’t thread through them, or they’ll get stuck.
Start with the first stitch: slip the tapestry needle purlwise through the center of the loop.
Then go stitch by stitch, always in the same direction, and if a stitch marker sits on your needle, go around it, never through.
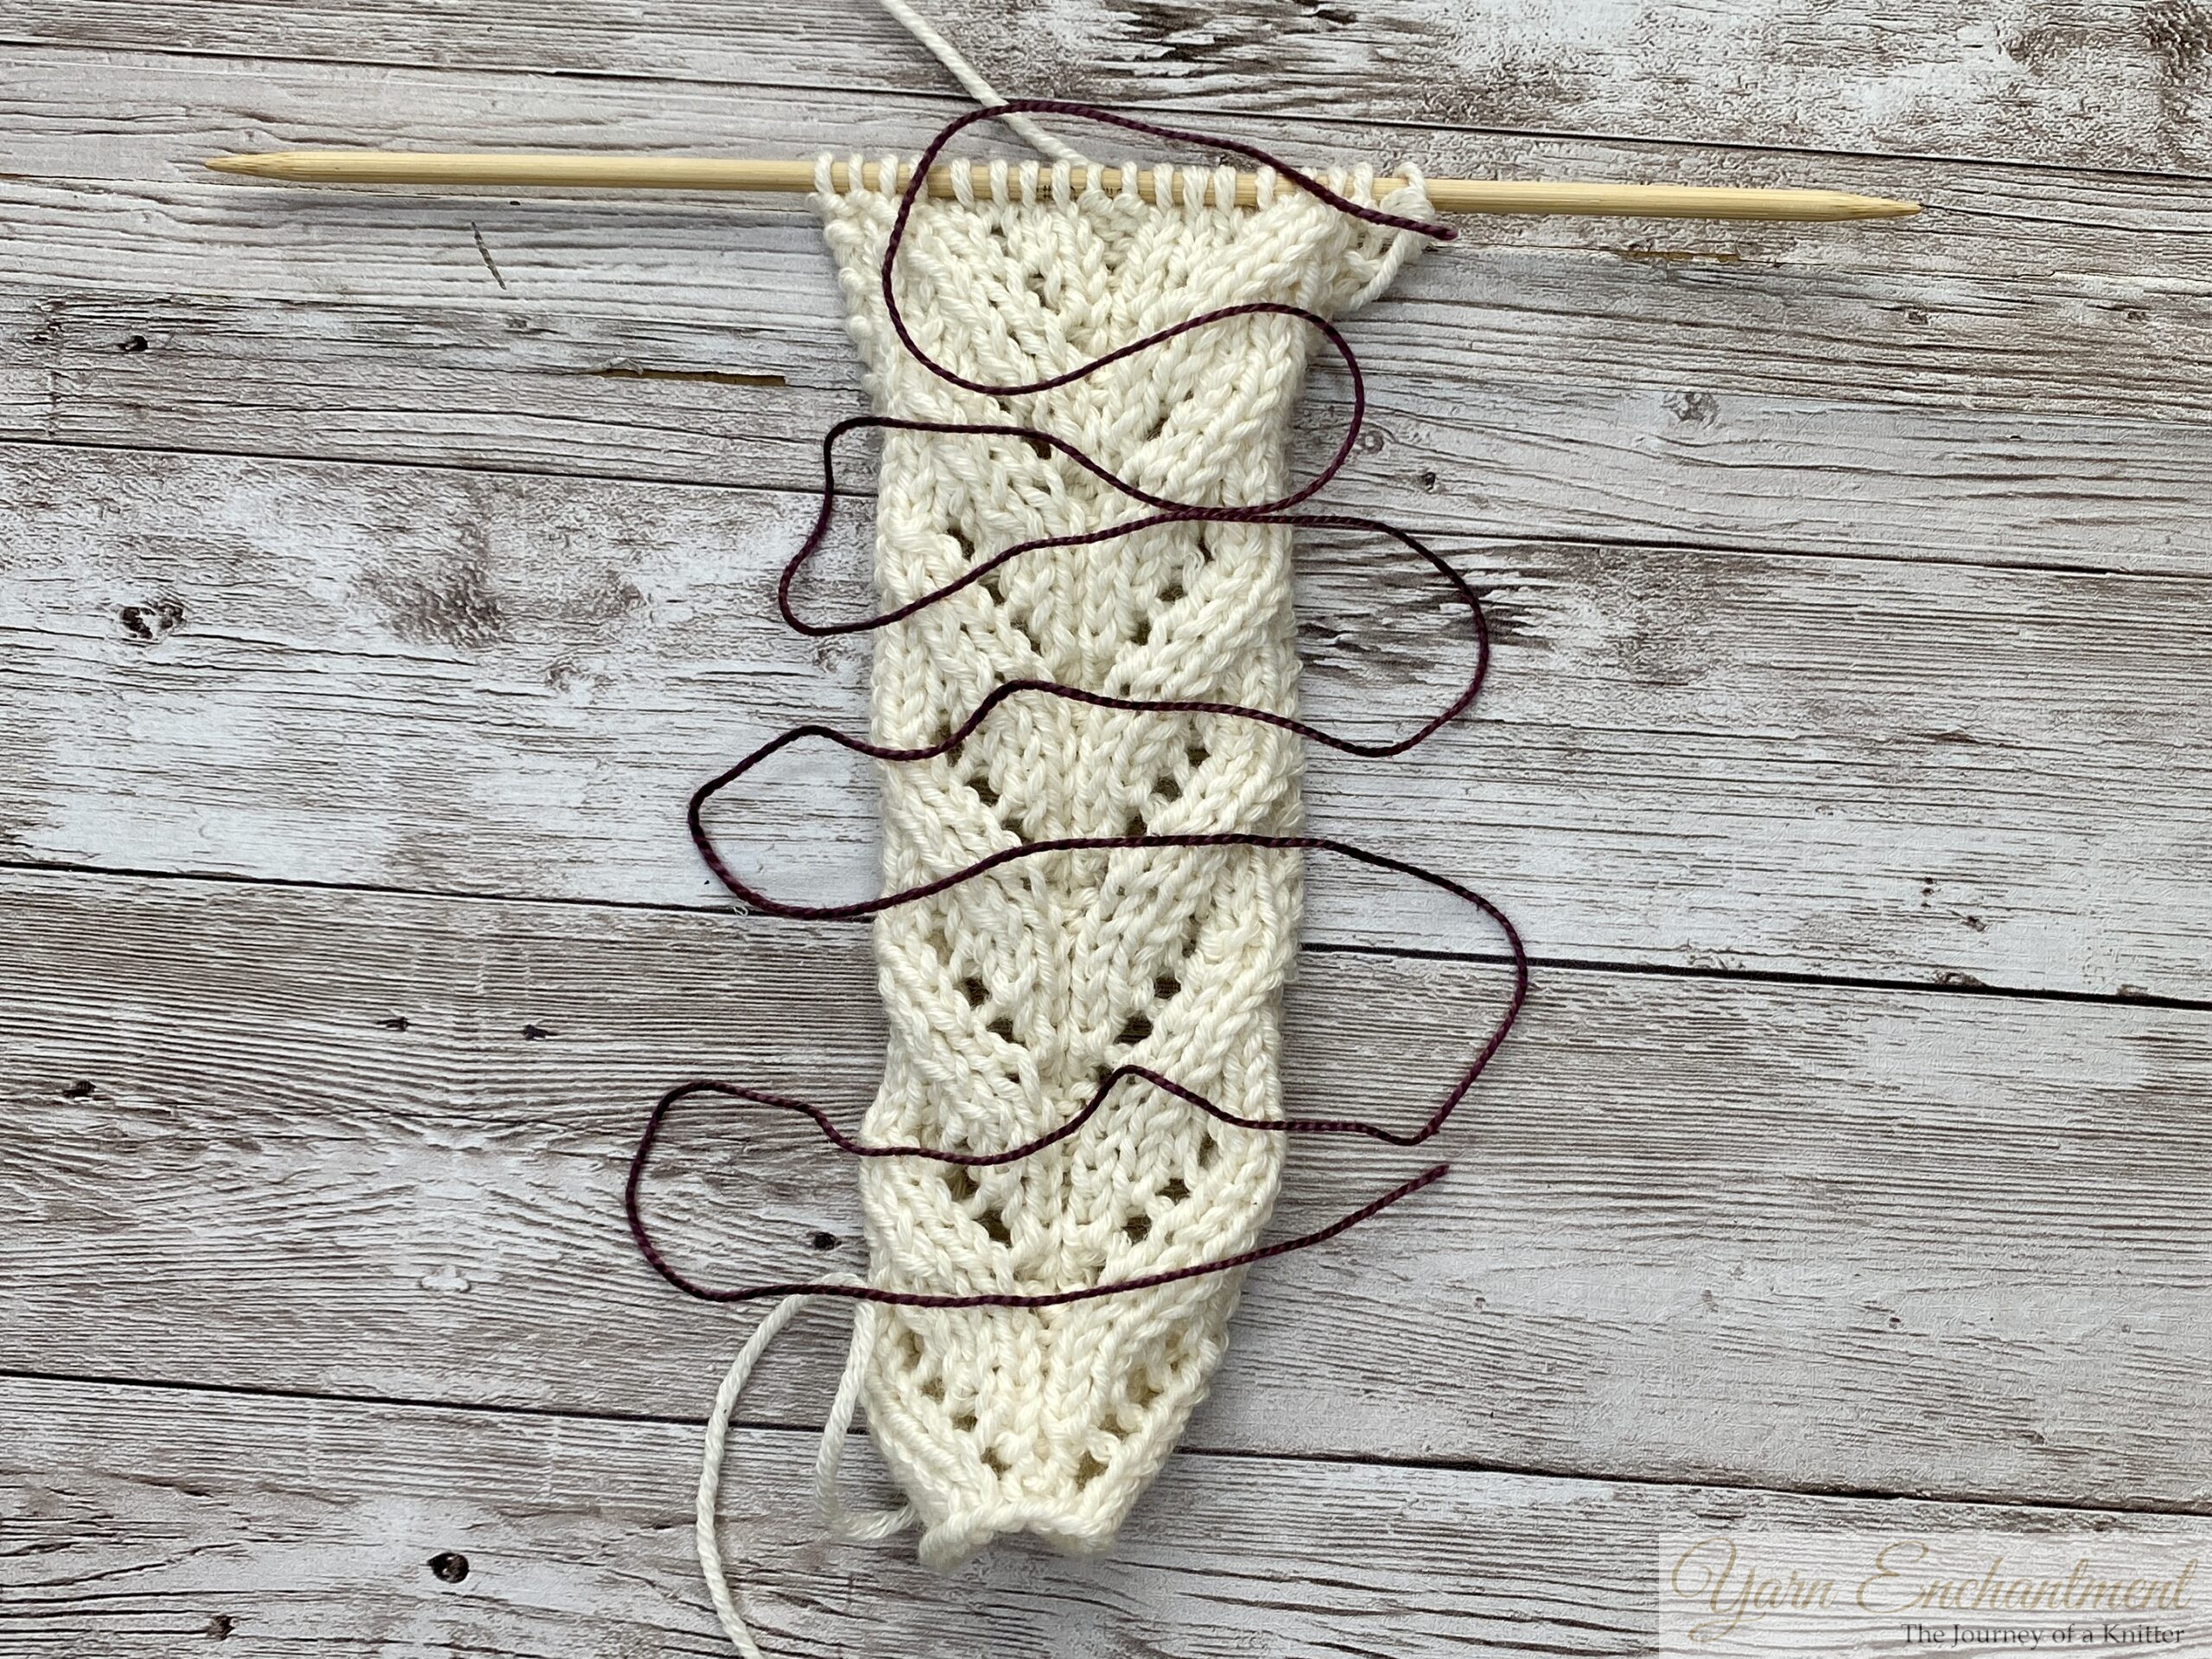
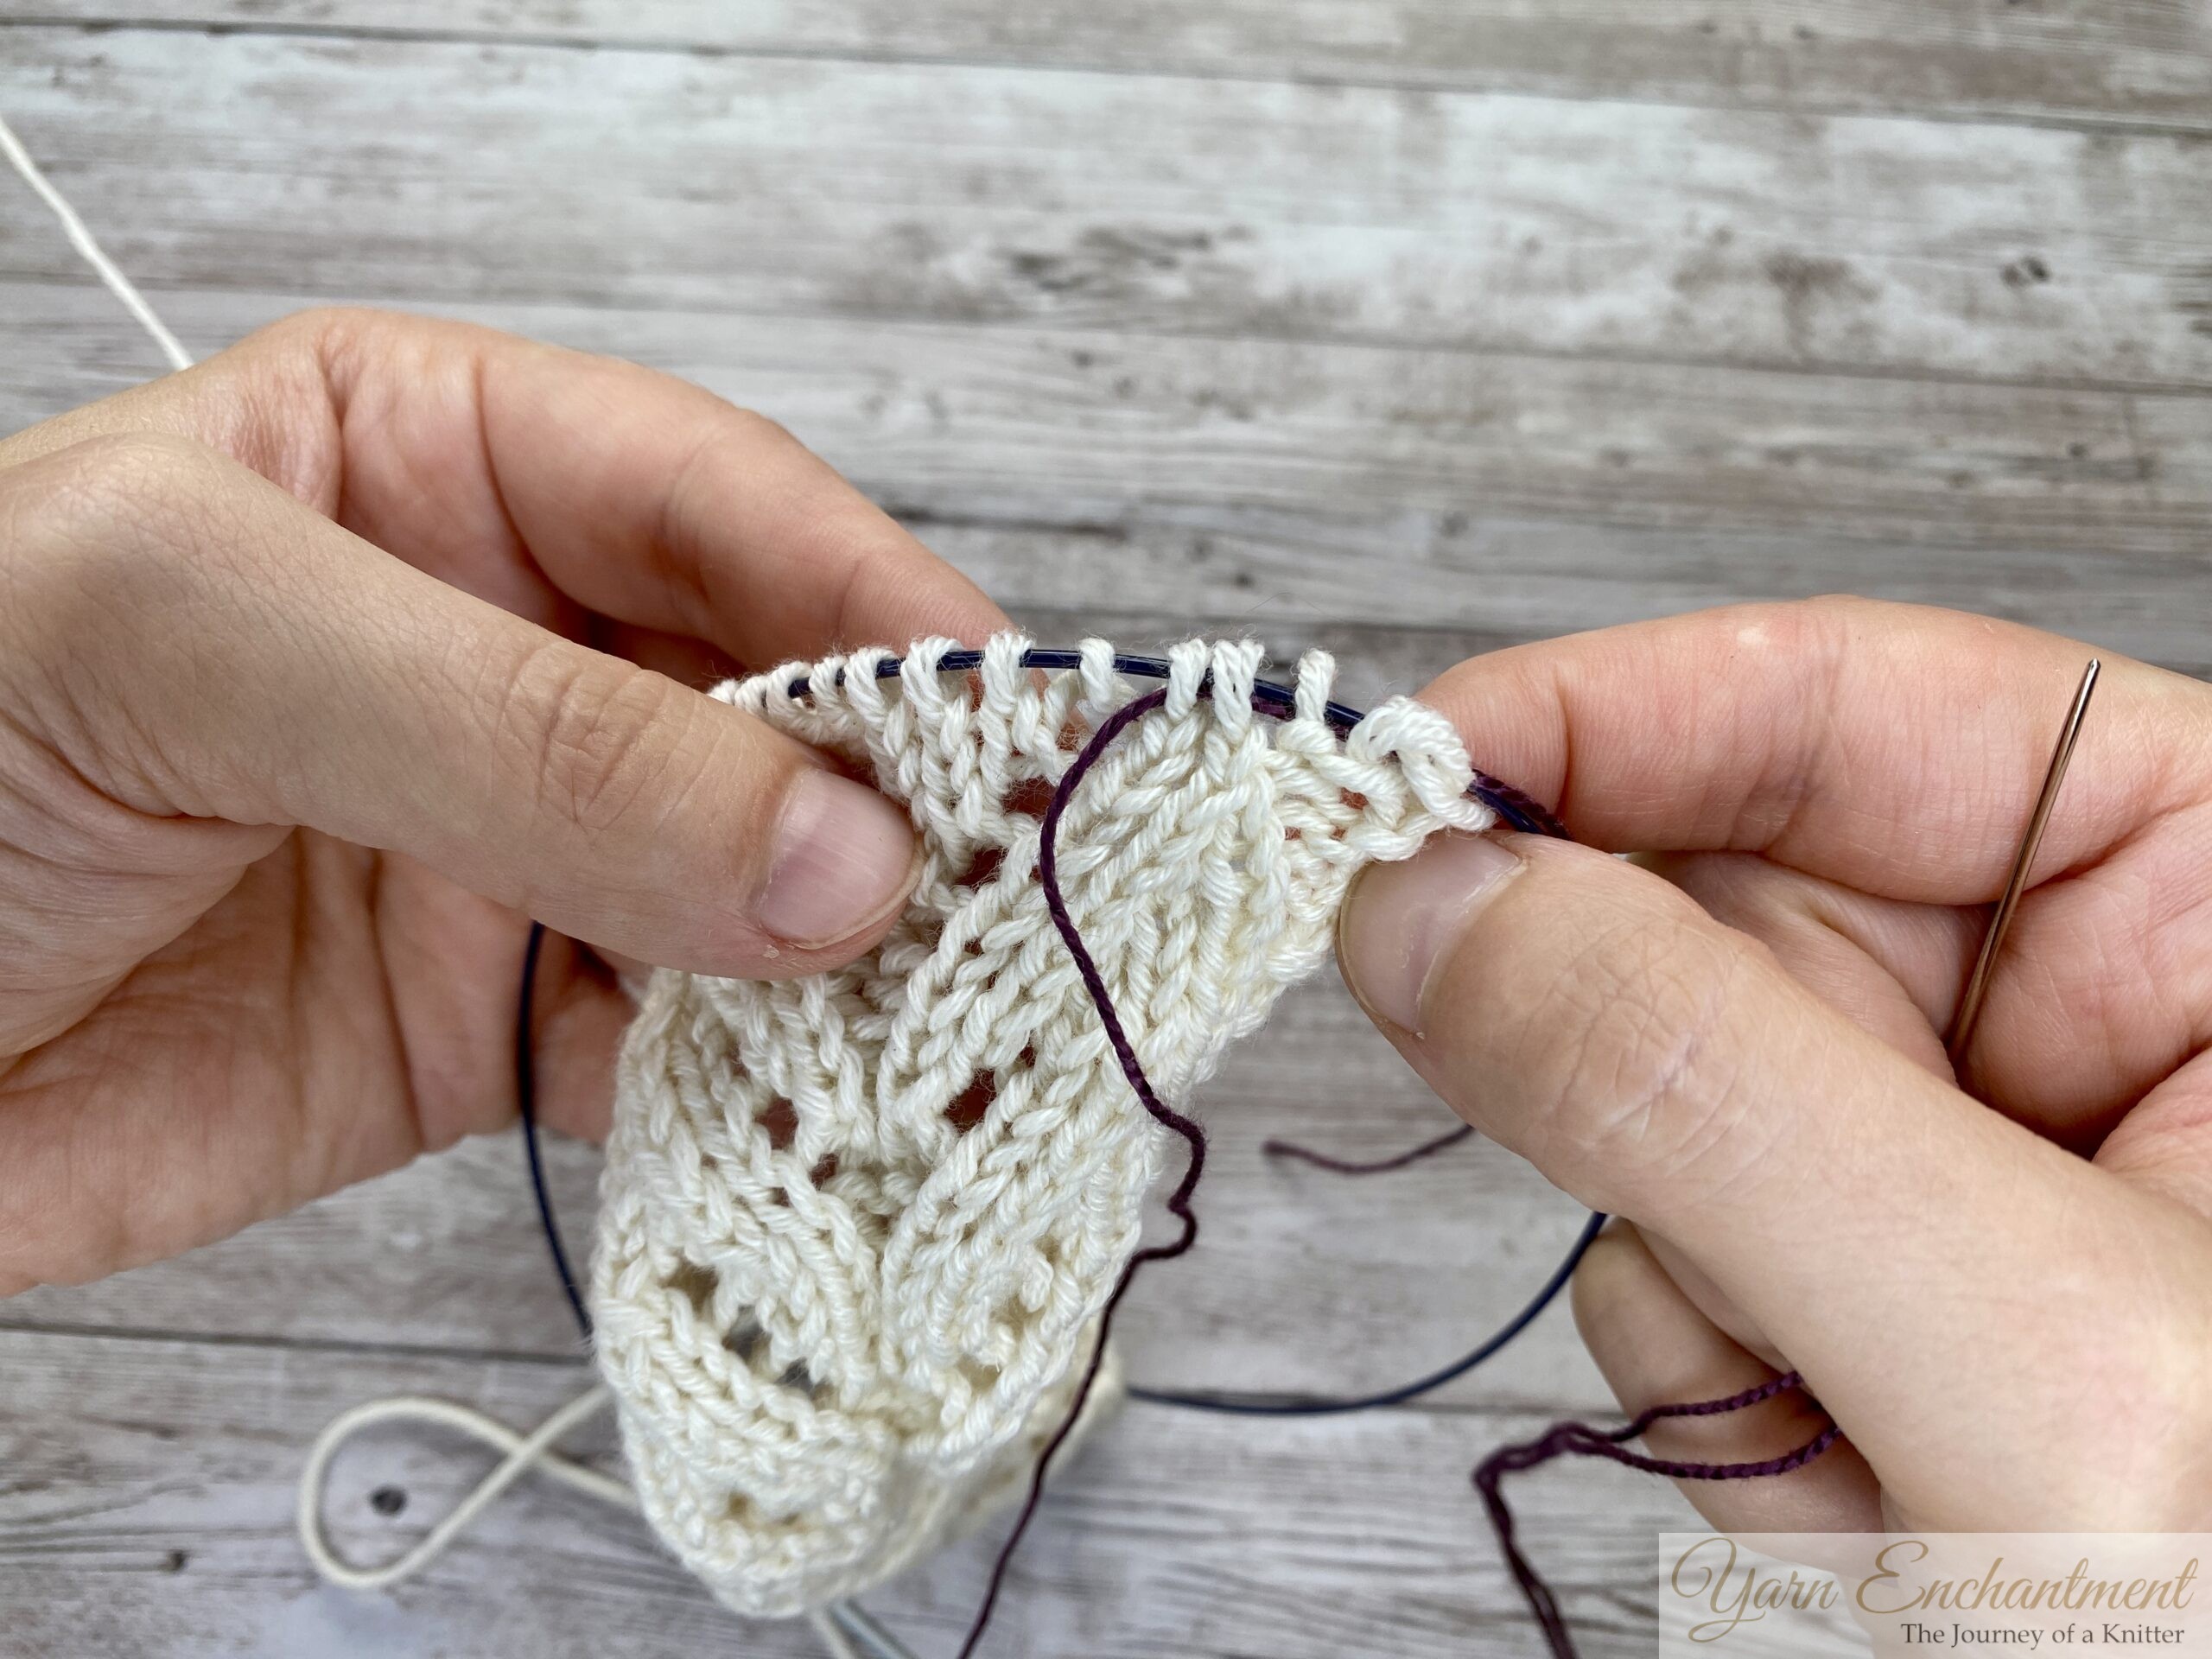
You can see the plum thread now running through every stitch, this is exactly how it should look as you go.



Step 4: Leave tails and keep knitting
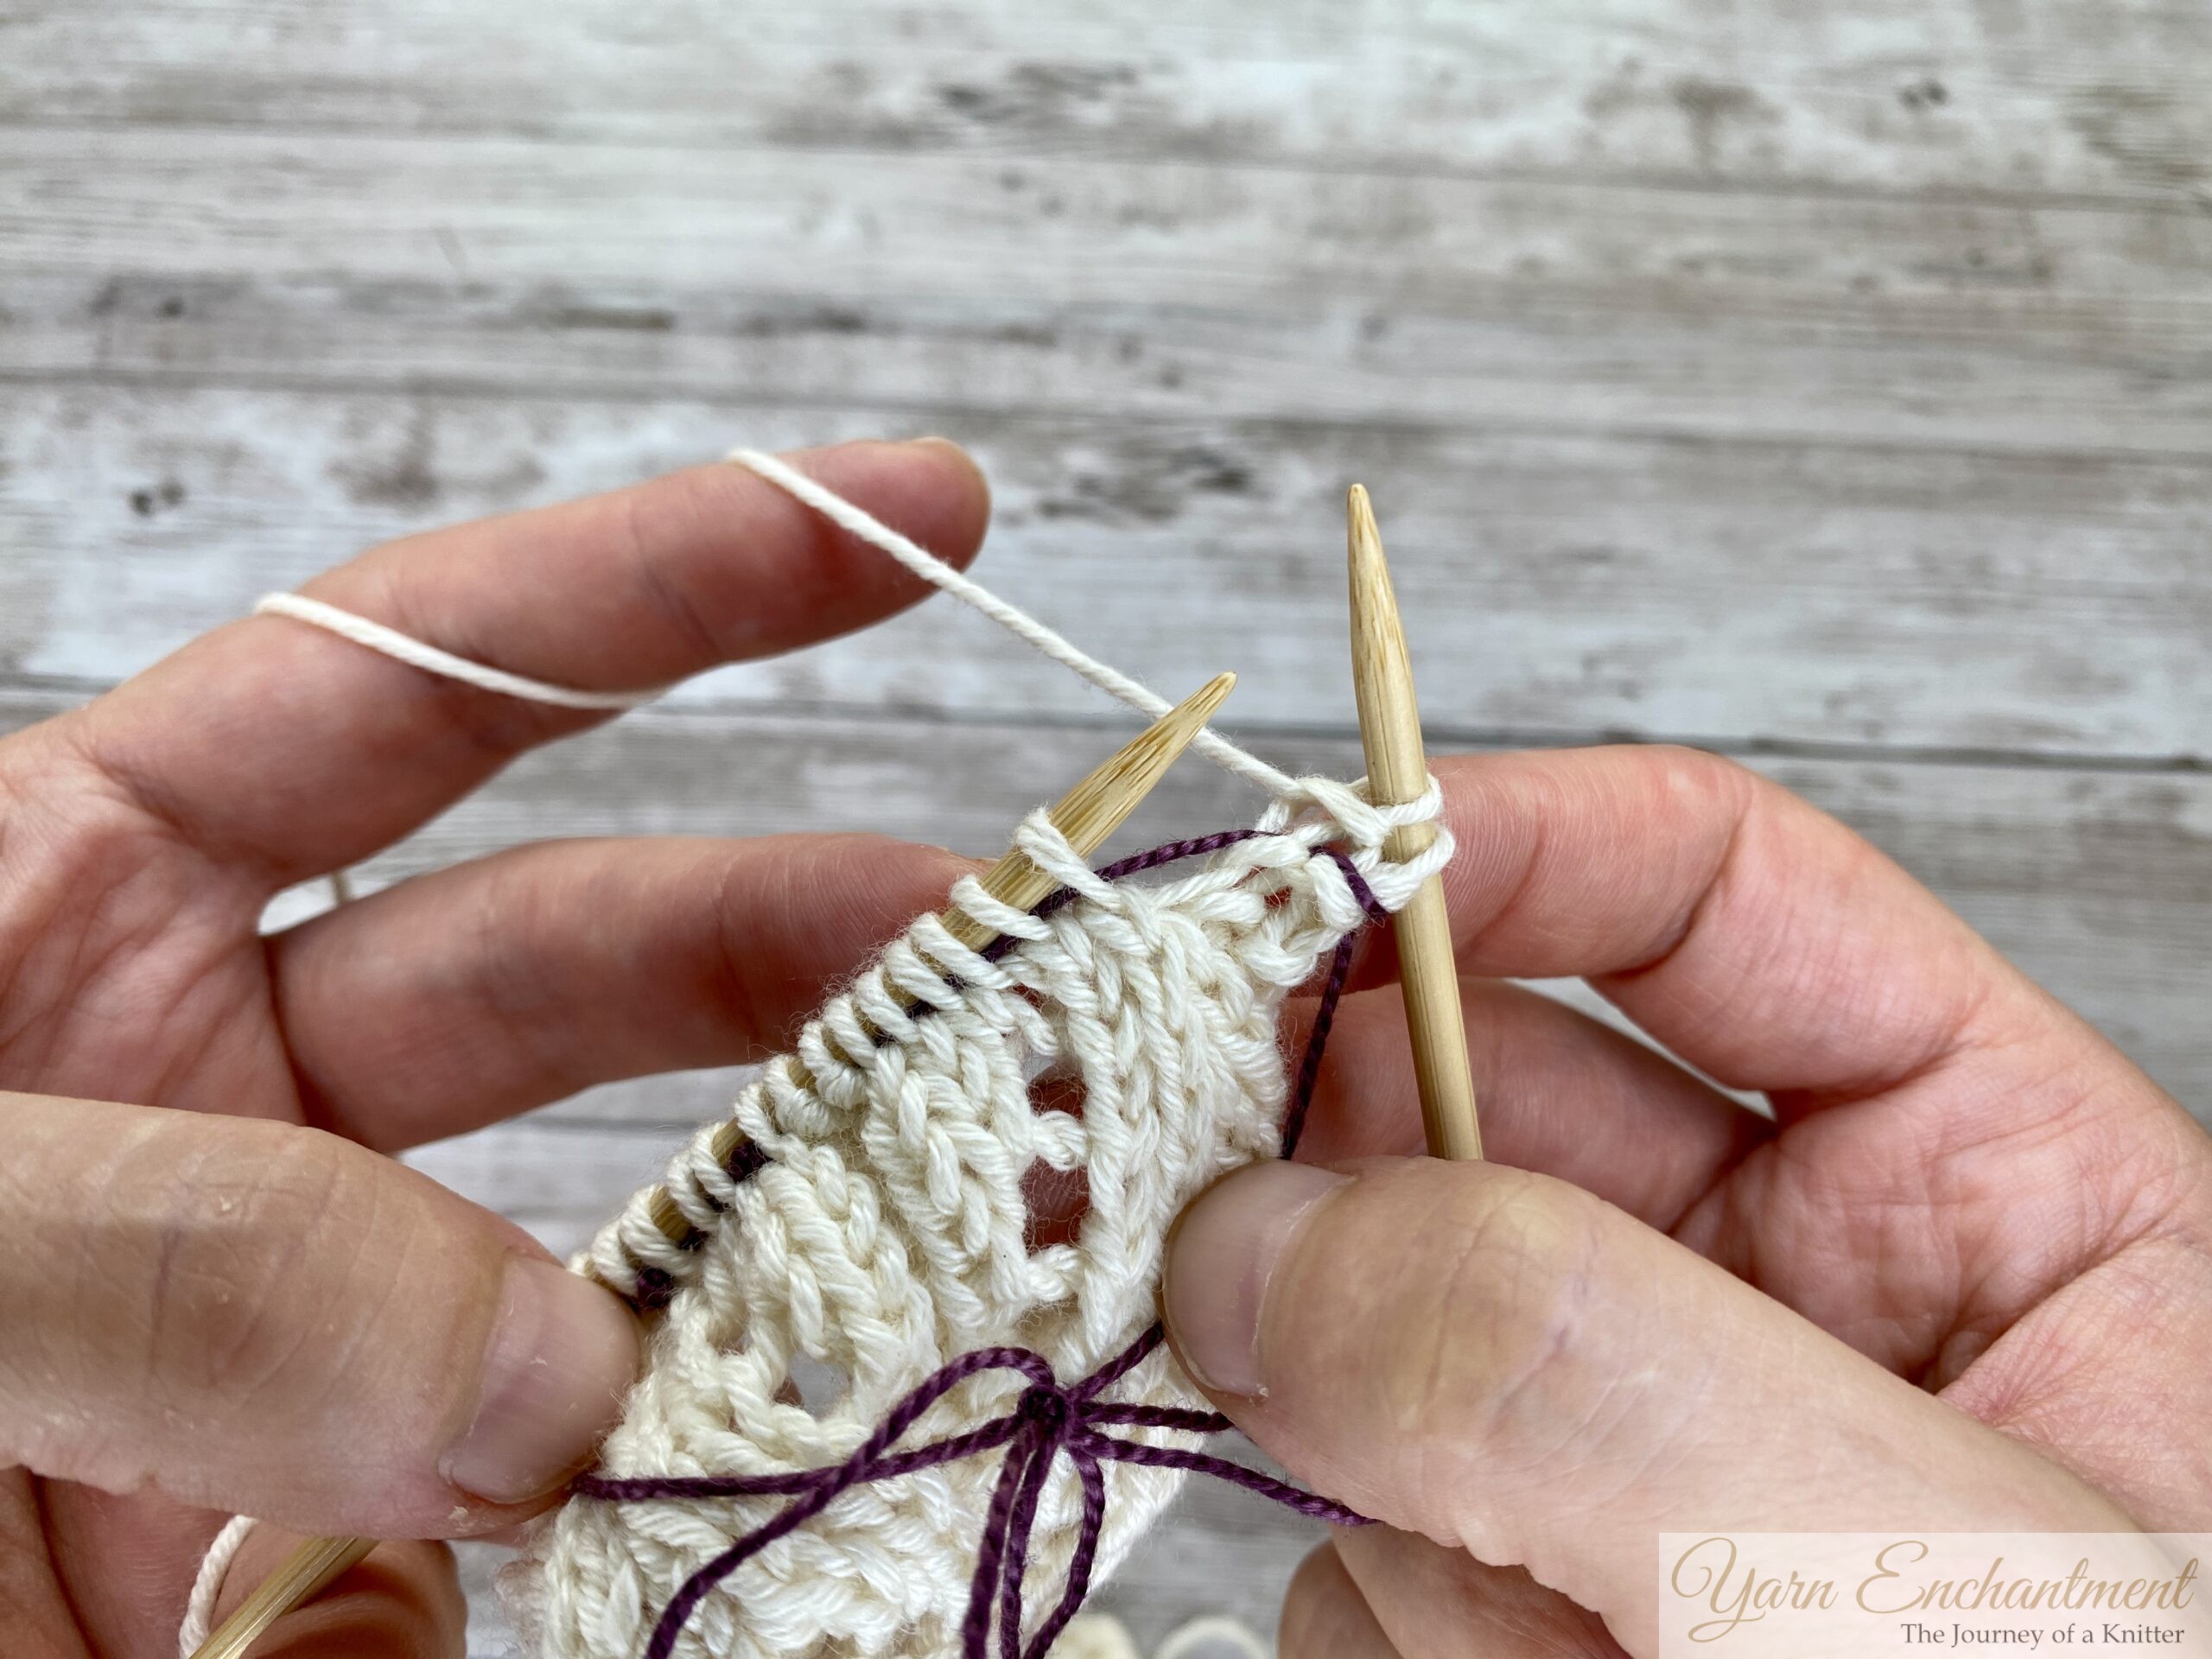
Pull the thread all the way through, leaving a few inches hanging on each side. I like to tie the tails in a loose bow so they don’t wiggle out.
Knit the next row as usual, just be careful not to knit into the lifeline itself.
Cozy tip for interchangeable needles: Many interchangeable circulars have a tiny tightening hole where the needle joins the cable. Thread your lifeline through that hole, knit across the row, and it will pull the lifeline through your stitches automatically. Pure magic.
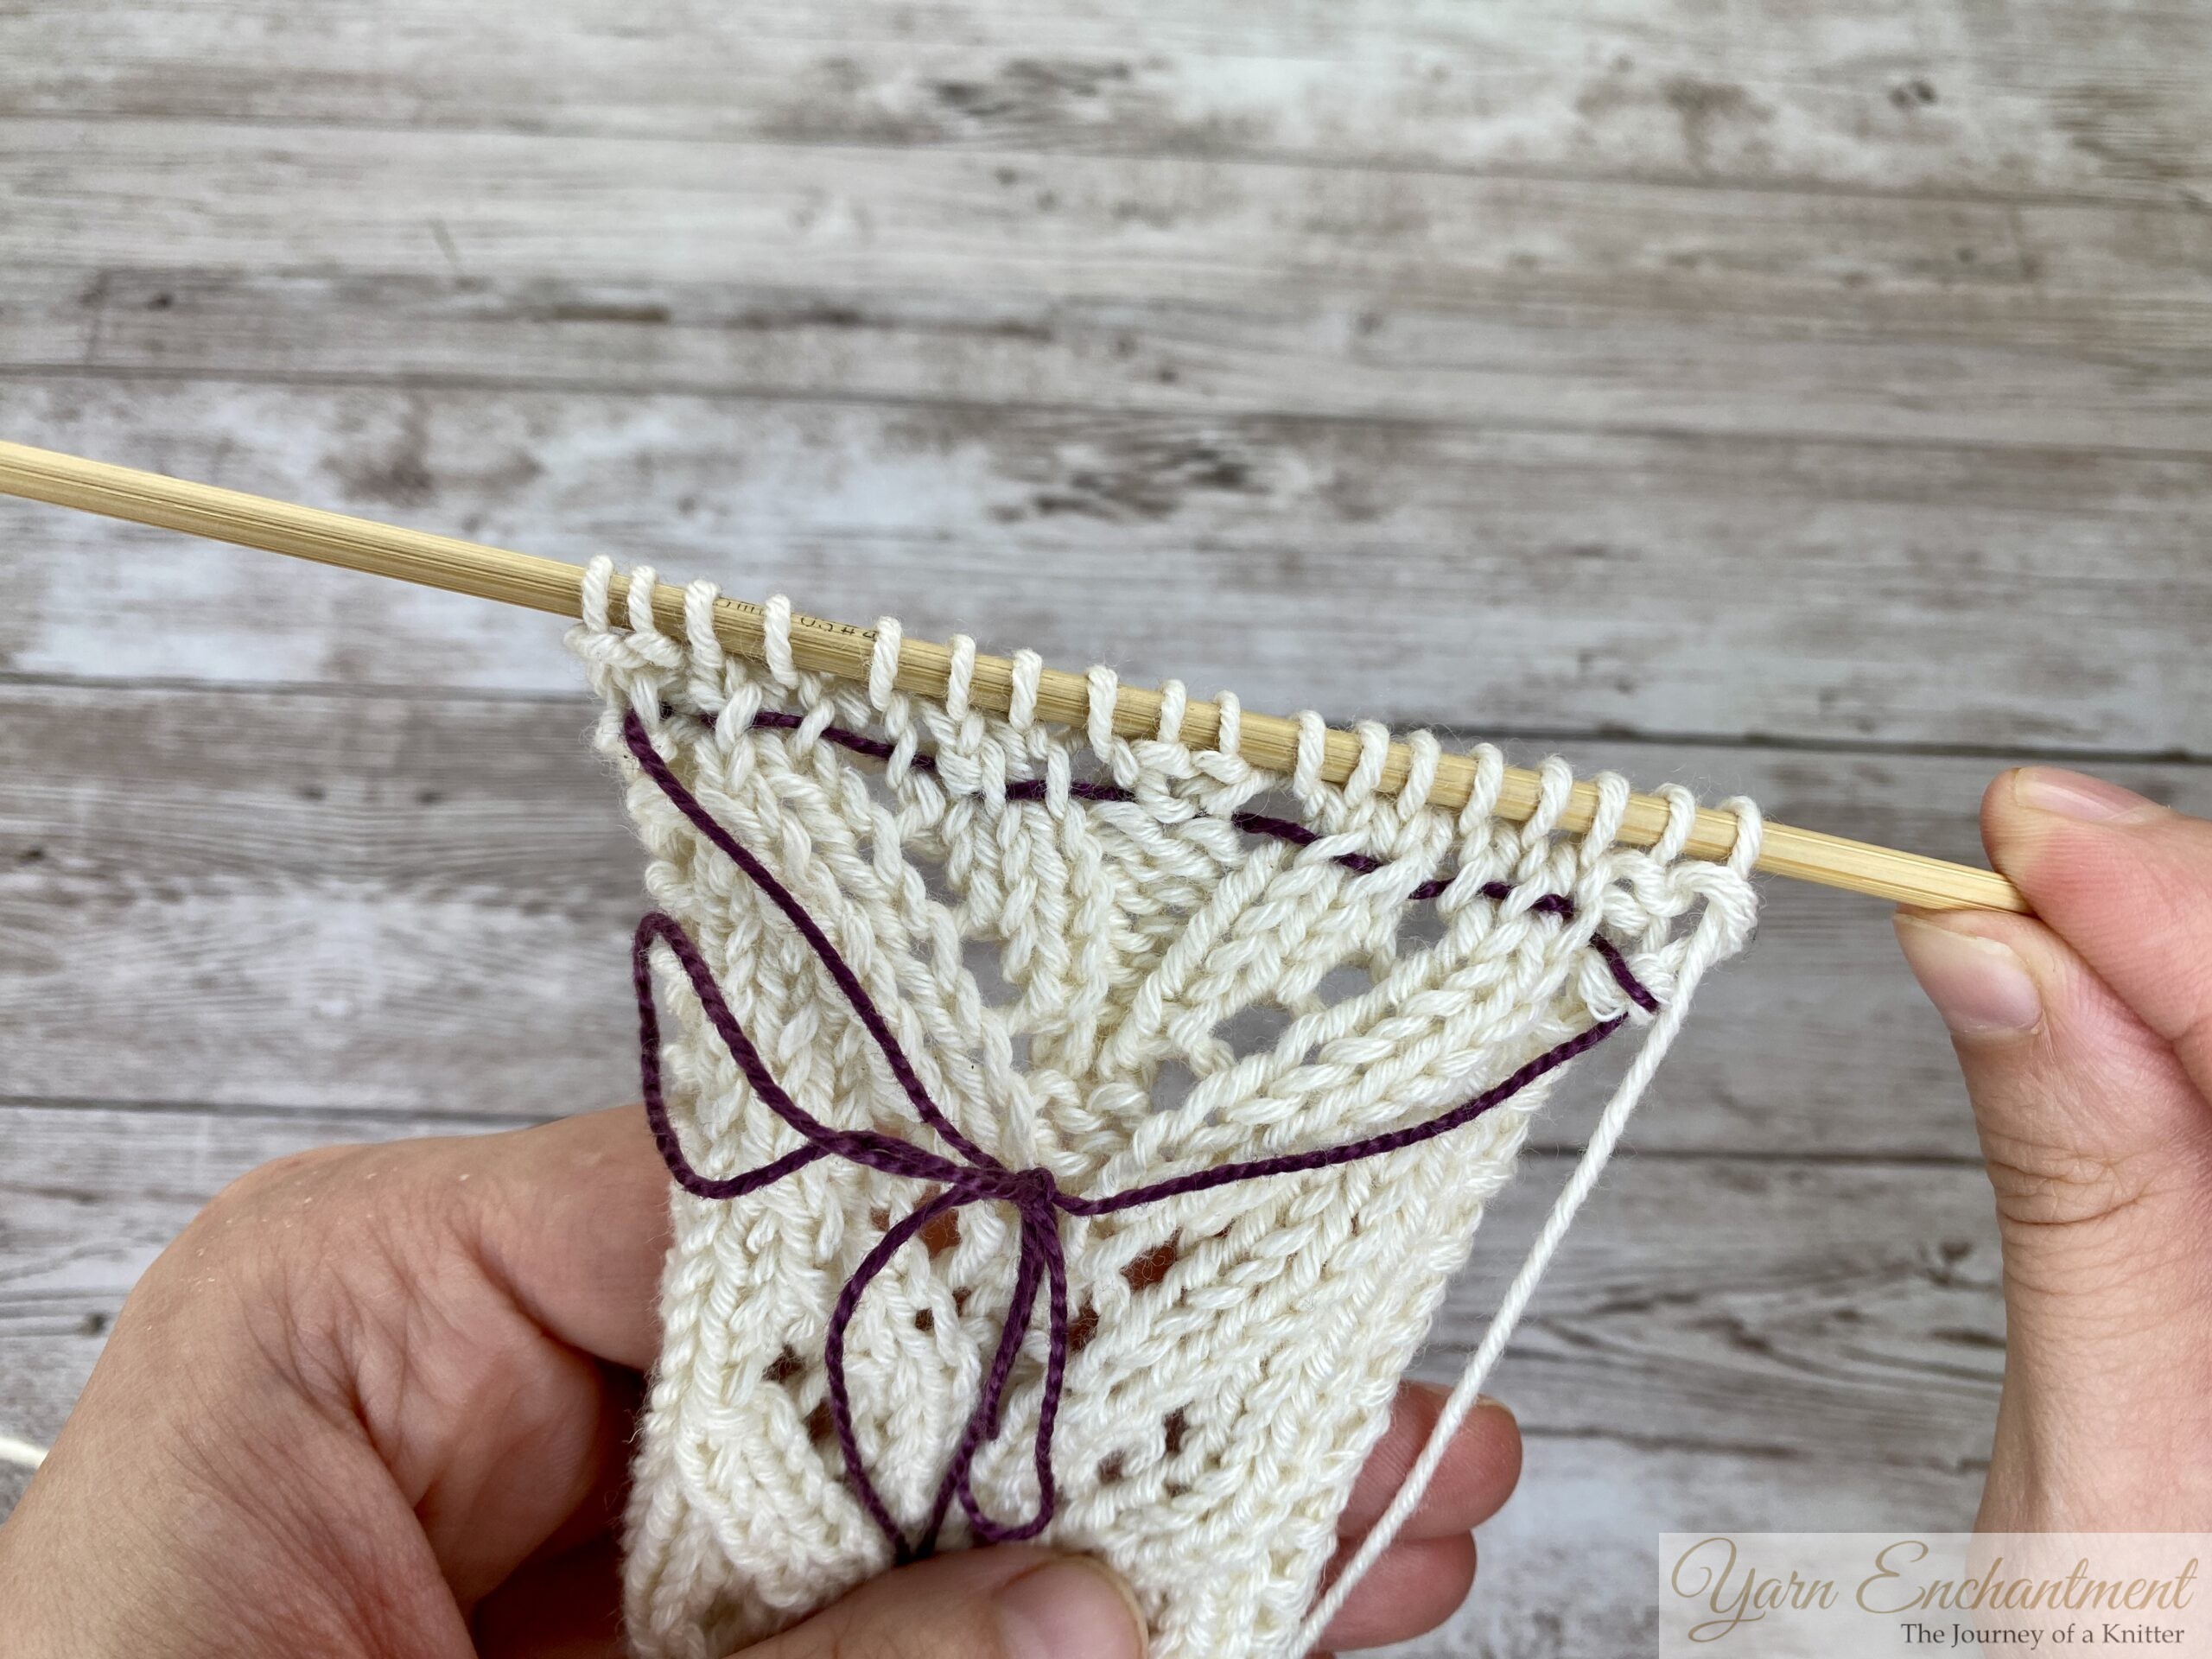
Pull the thread all the way through, a few inches of tail hanging on each side, then tie the two ends in a loose bow. Now it can't wiggle out while you knit on
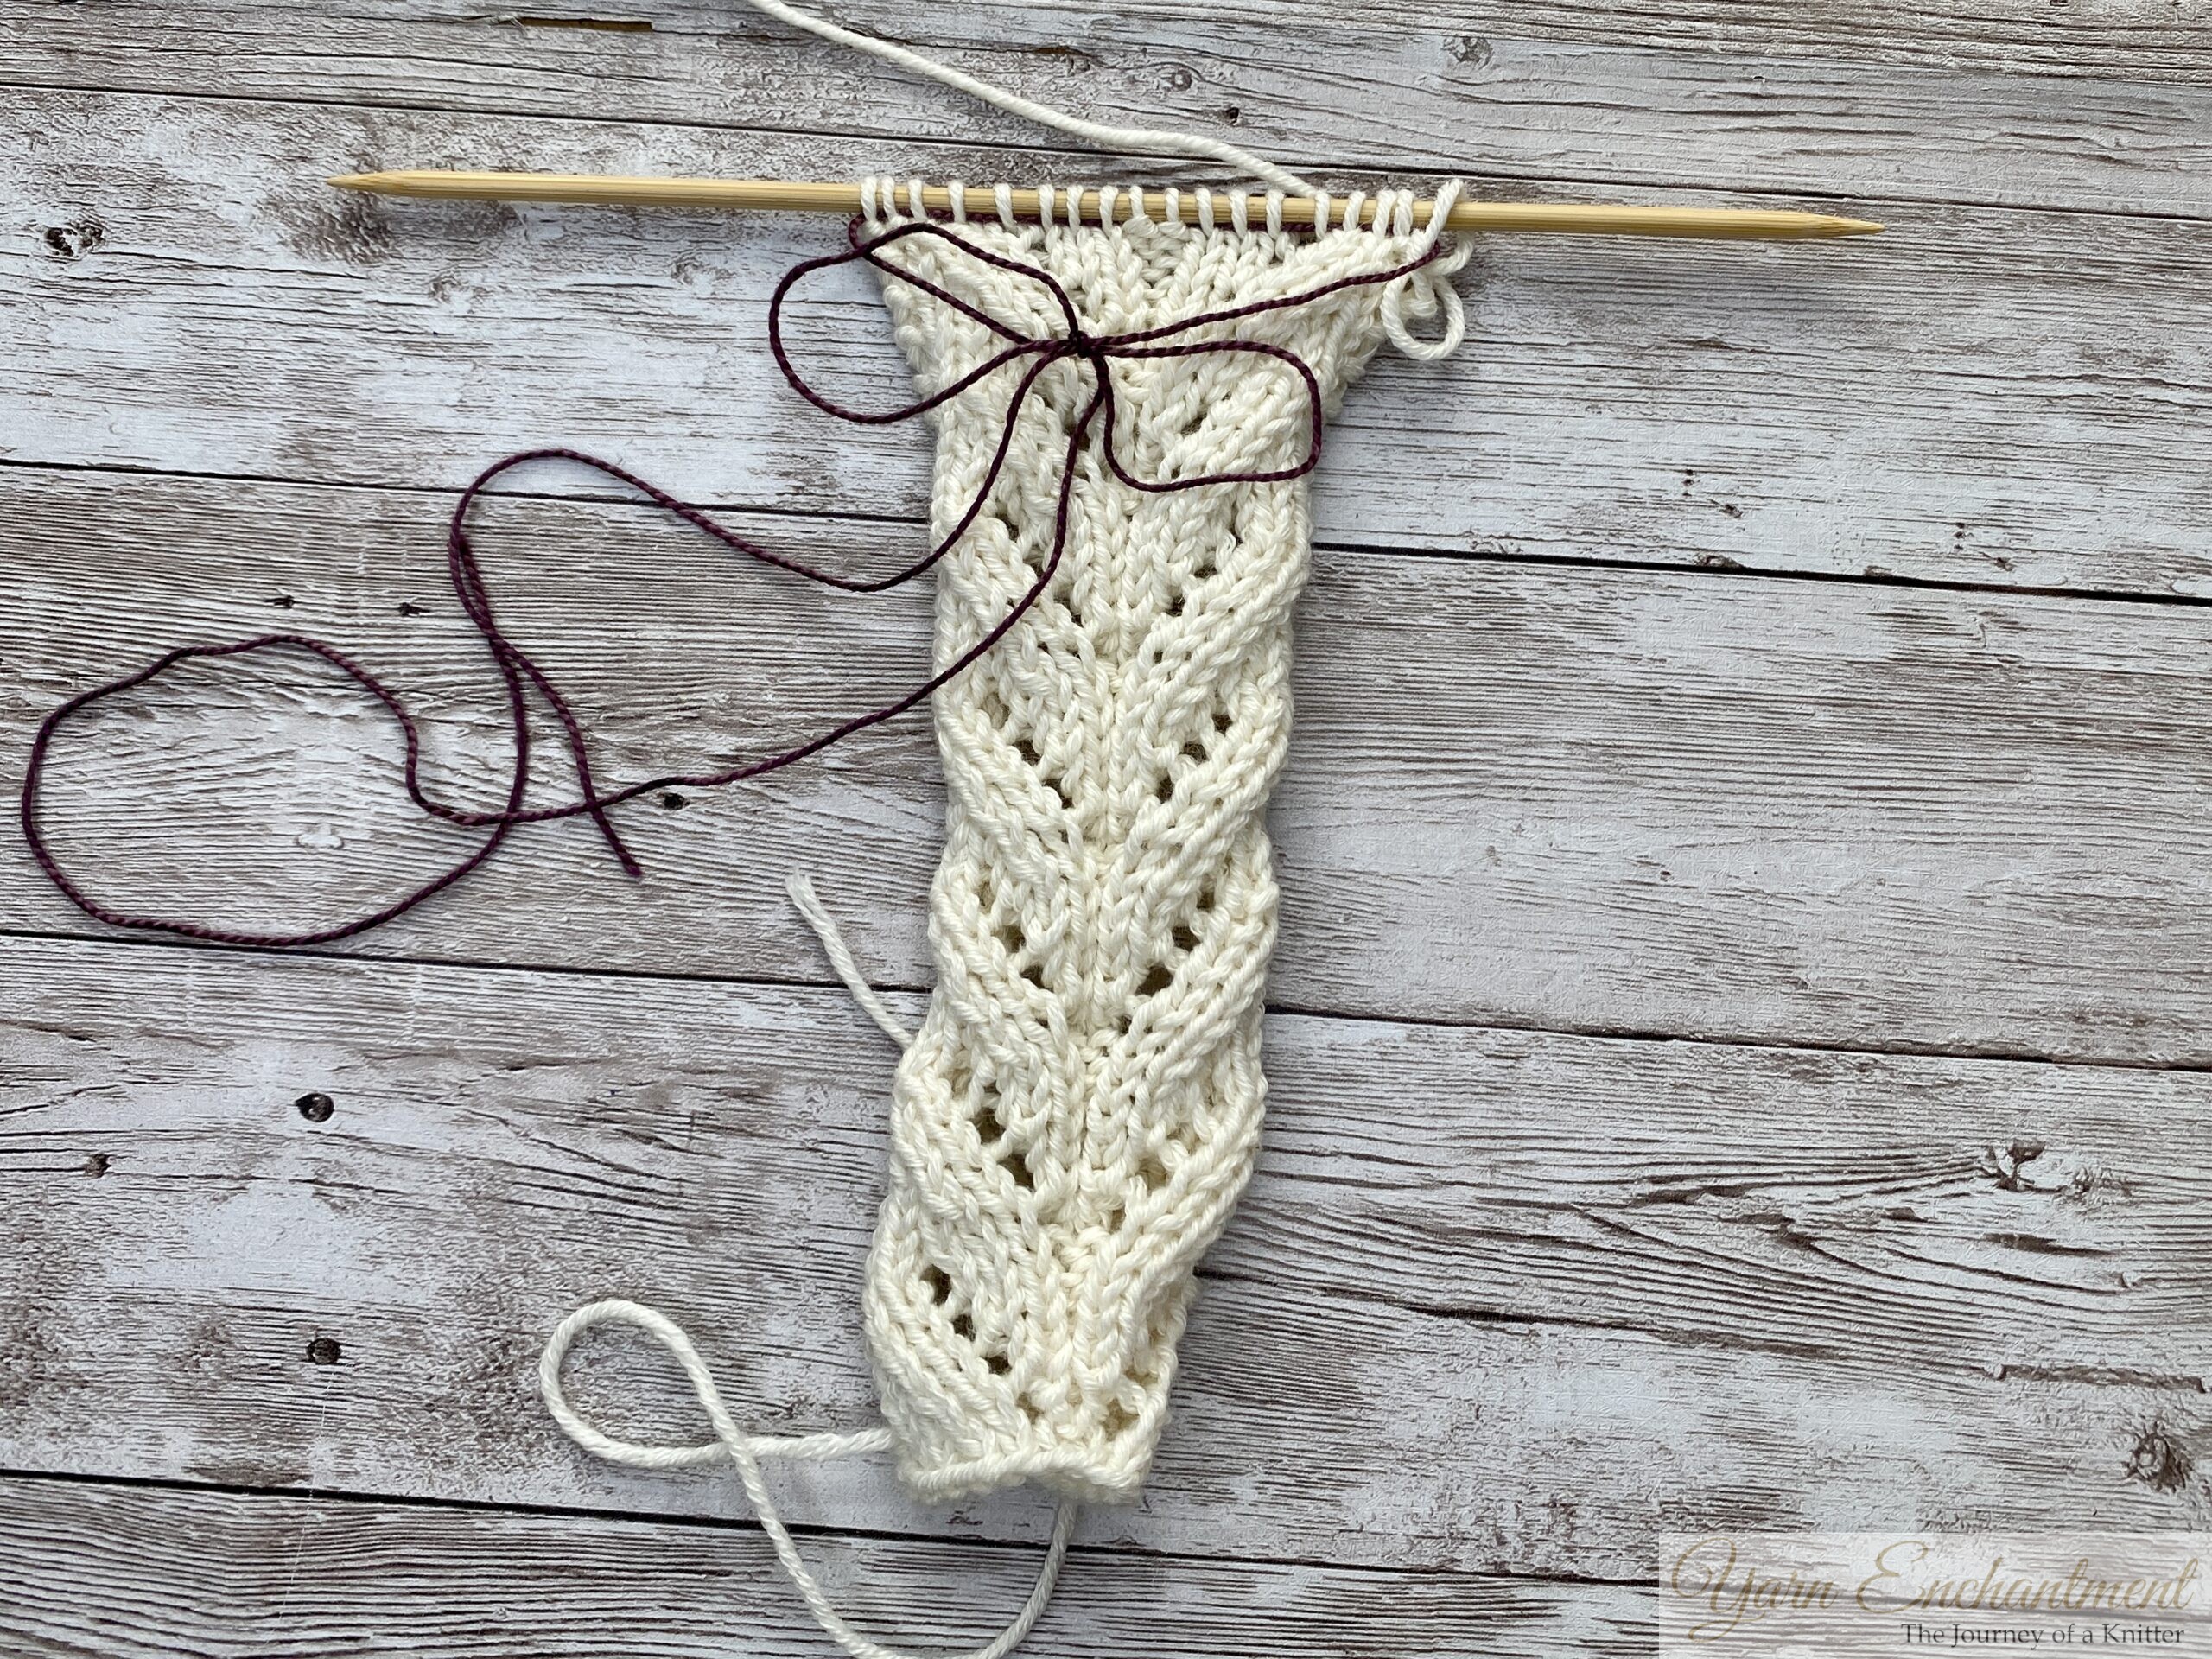
Knit on as usual, the lifeline simply rides along. The only thing to watch: don't knit into it.
And there it is: your lifeline, quietly waiting in its row. From now on, any unraveling stops right here.



How to Frog Back to a Lifeline
Spotted a mistake a few rows up? Here’s how to use that save point:
The flow looks like this: Spot Mistake -> Slip Off Needles -> Frog -> Lifeline Catches Stitches -> Pick Up and Knit
- Slip your work off the needles. Take a deep breath; your stitches are safe.
- Frog it. Gently pull your working yarn to unravel. Knitters call this frogging because you “rip it, rip it.”
- Let the lifeline catch you. Your stitches will stop unraveling right at the lifeline thread.
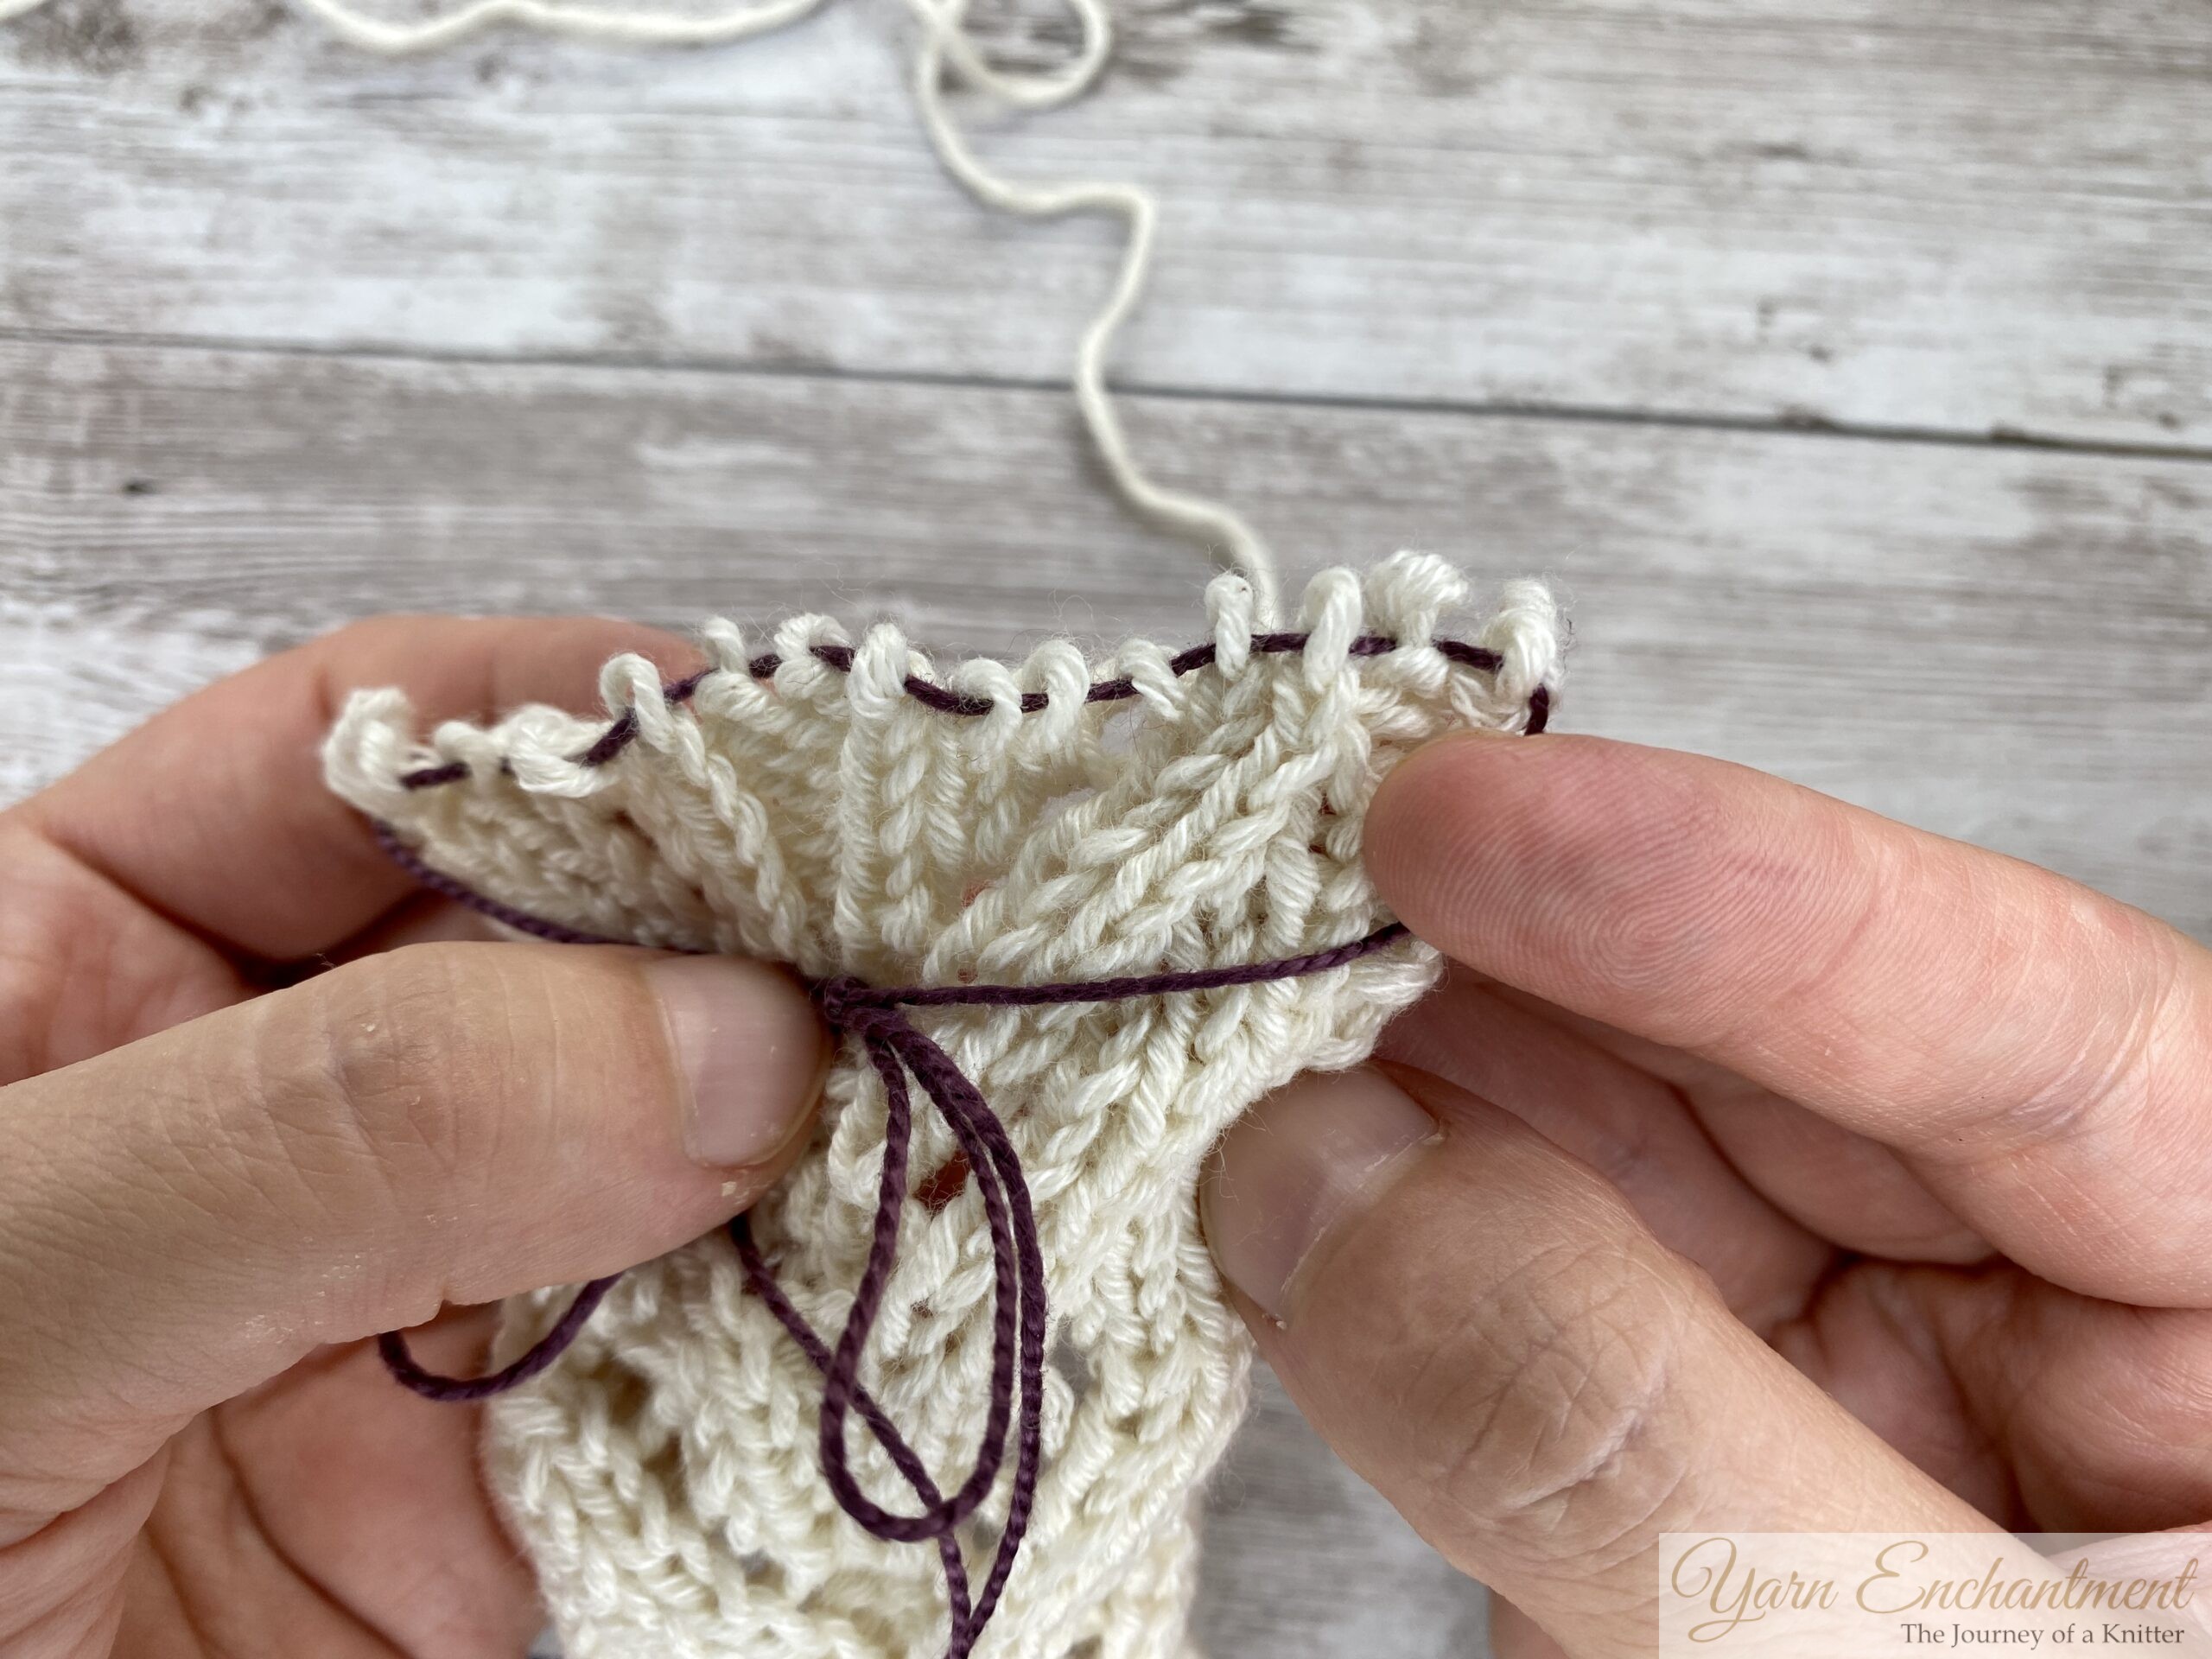
- Slide stitches back on. Slip your needle back into each loop resting on the lifeline. Check that the right leg of each stitch sits in front of the needle so they aren’t twisted.
- Keep the lifeline and keep going. Once every loop is secure, let the lifeline sit exactly where it is, pick up your pattern where you left off.
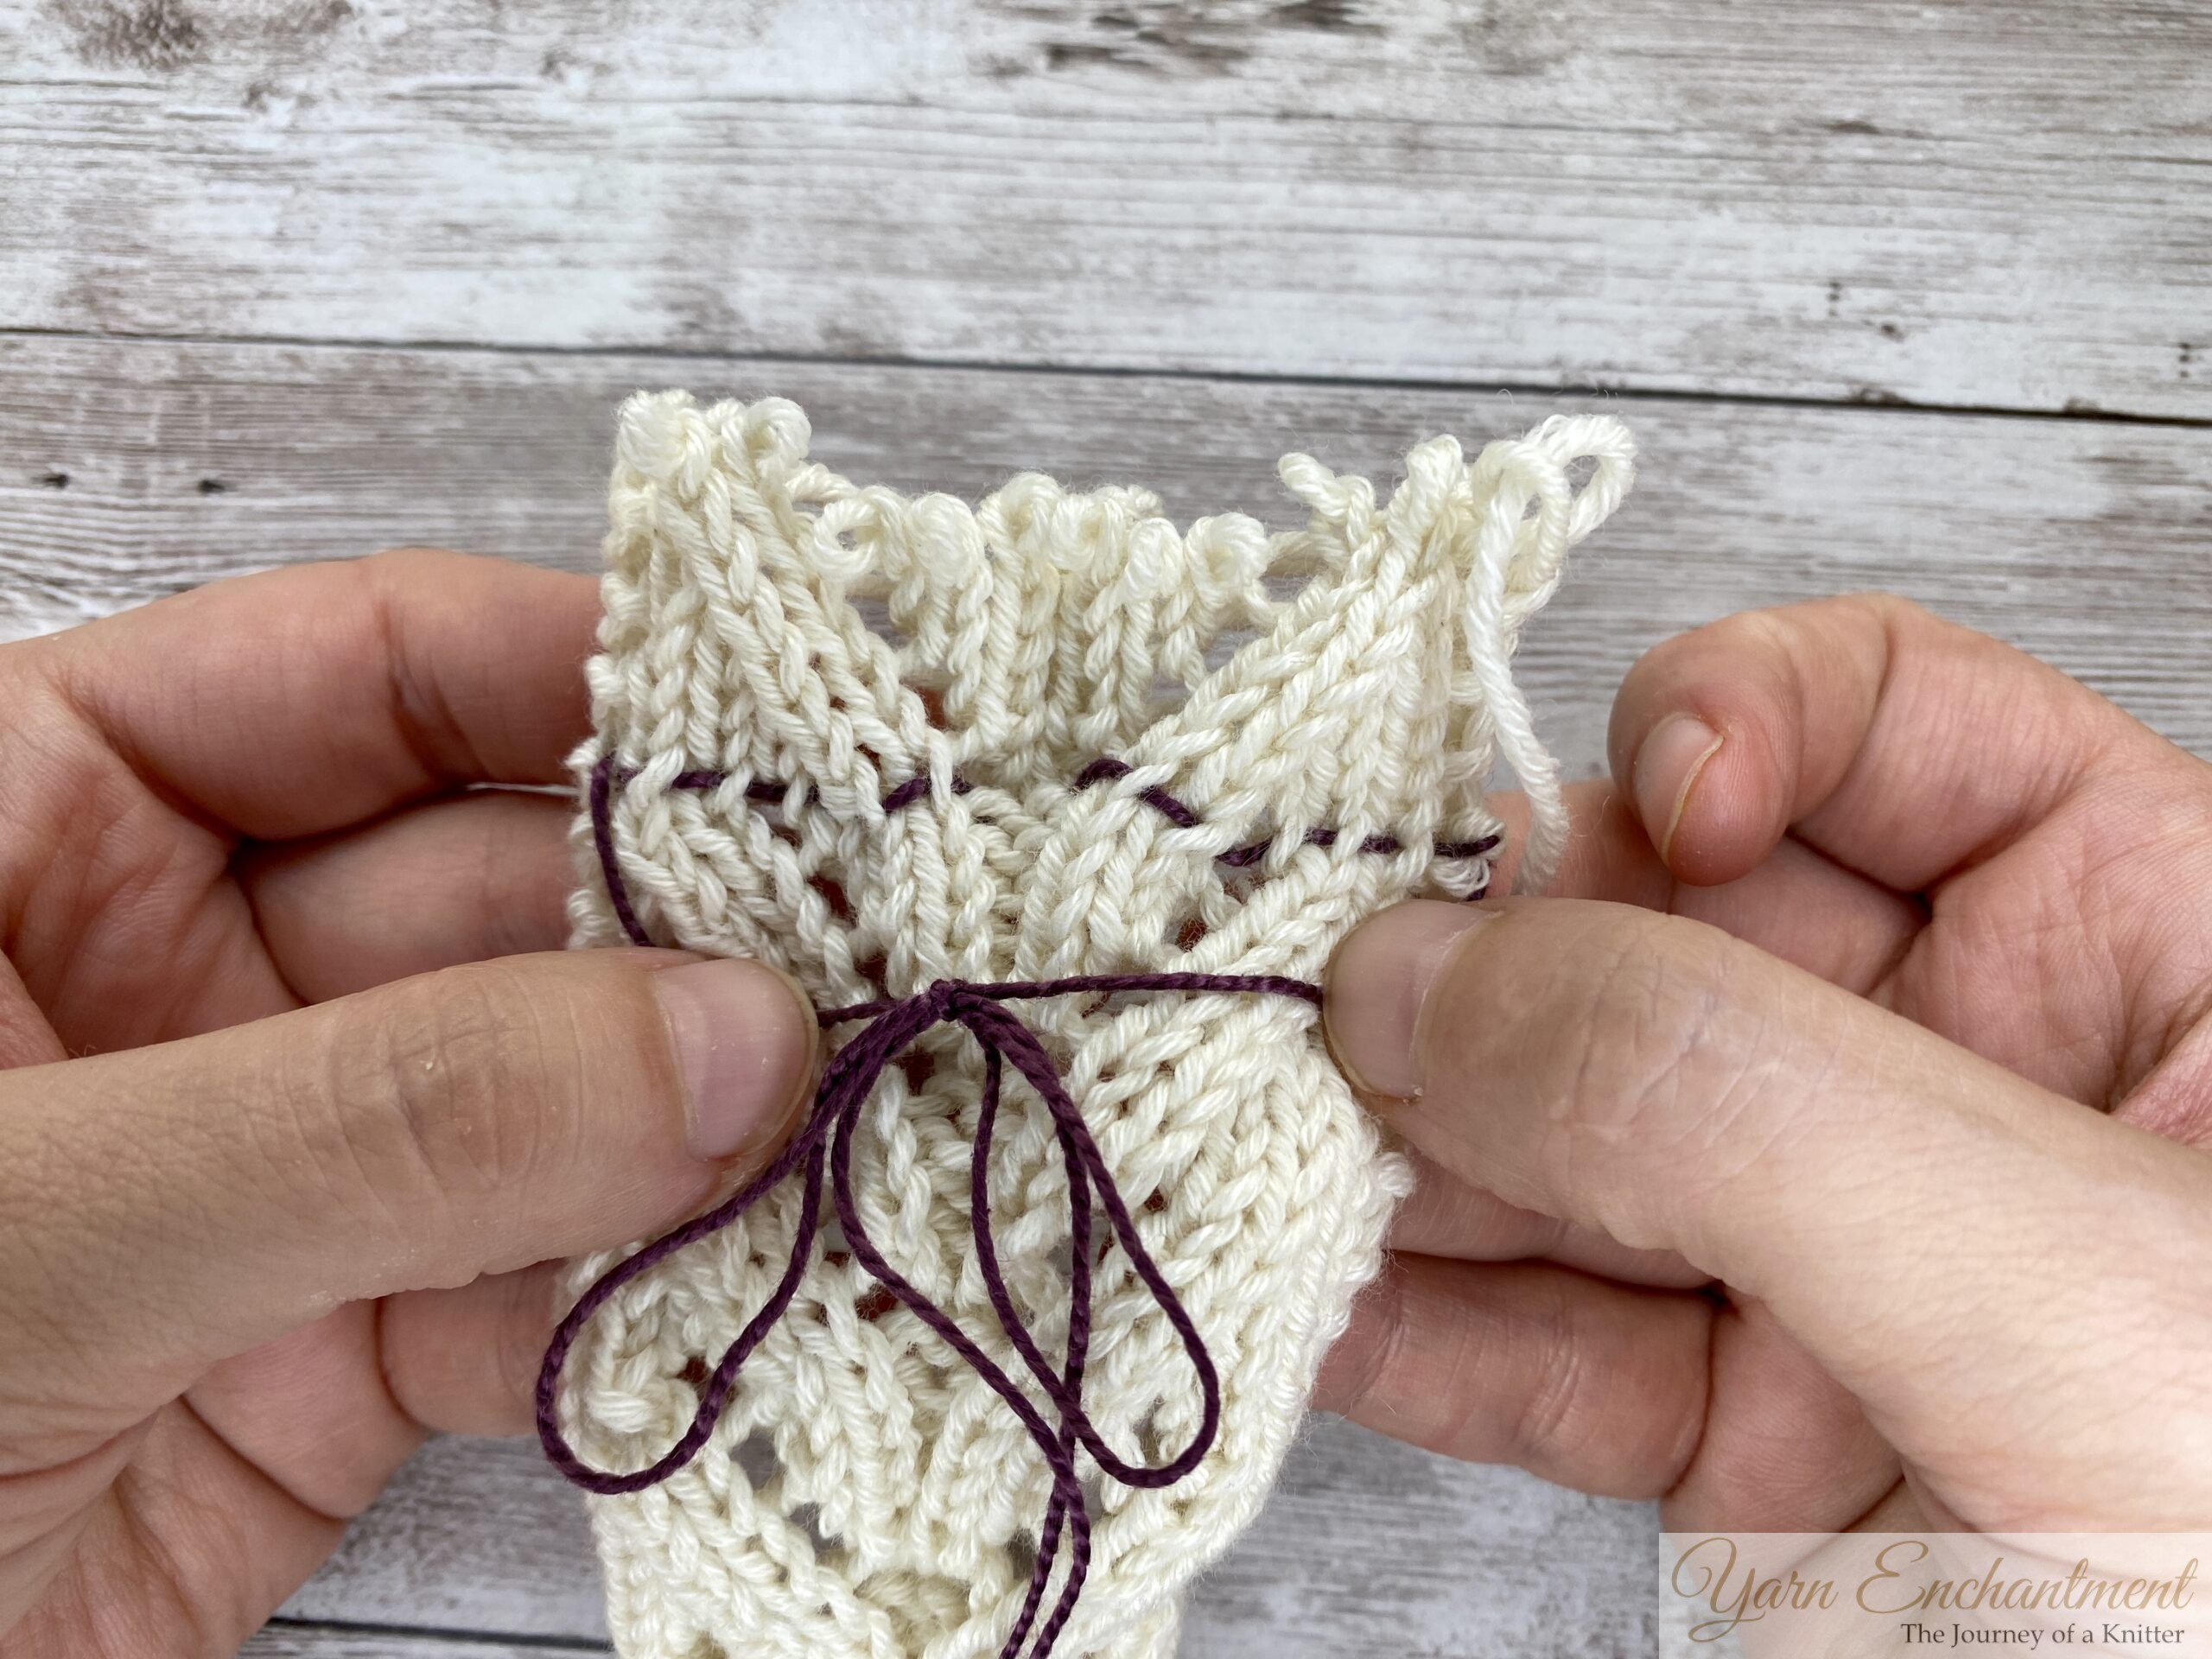
If you spot a mistake, take your needle out. Pull gently on your working yarn, stitch by stitch, right up until the lifeline says "no further."
And there's the magic moment: the unraveling stops exactly at the lifeline. Your knitting is safe.


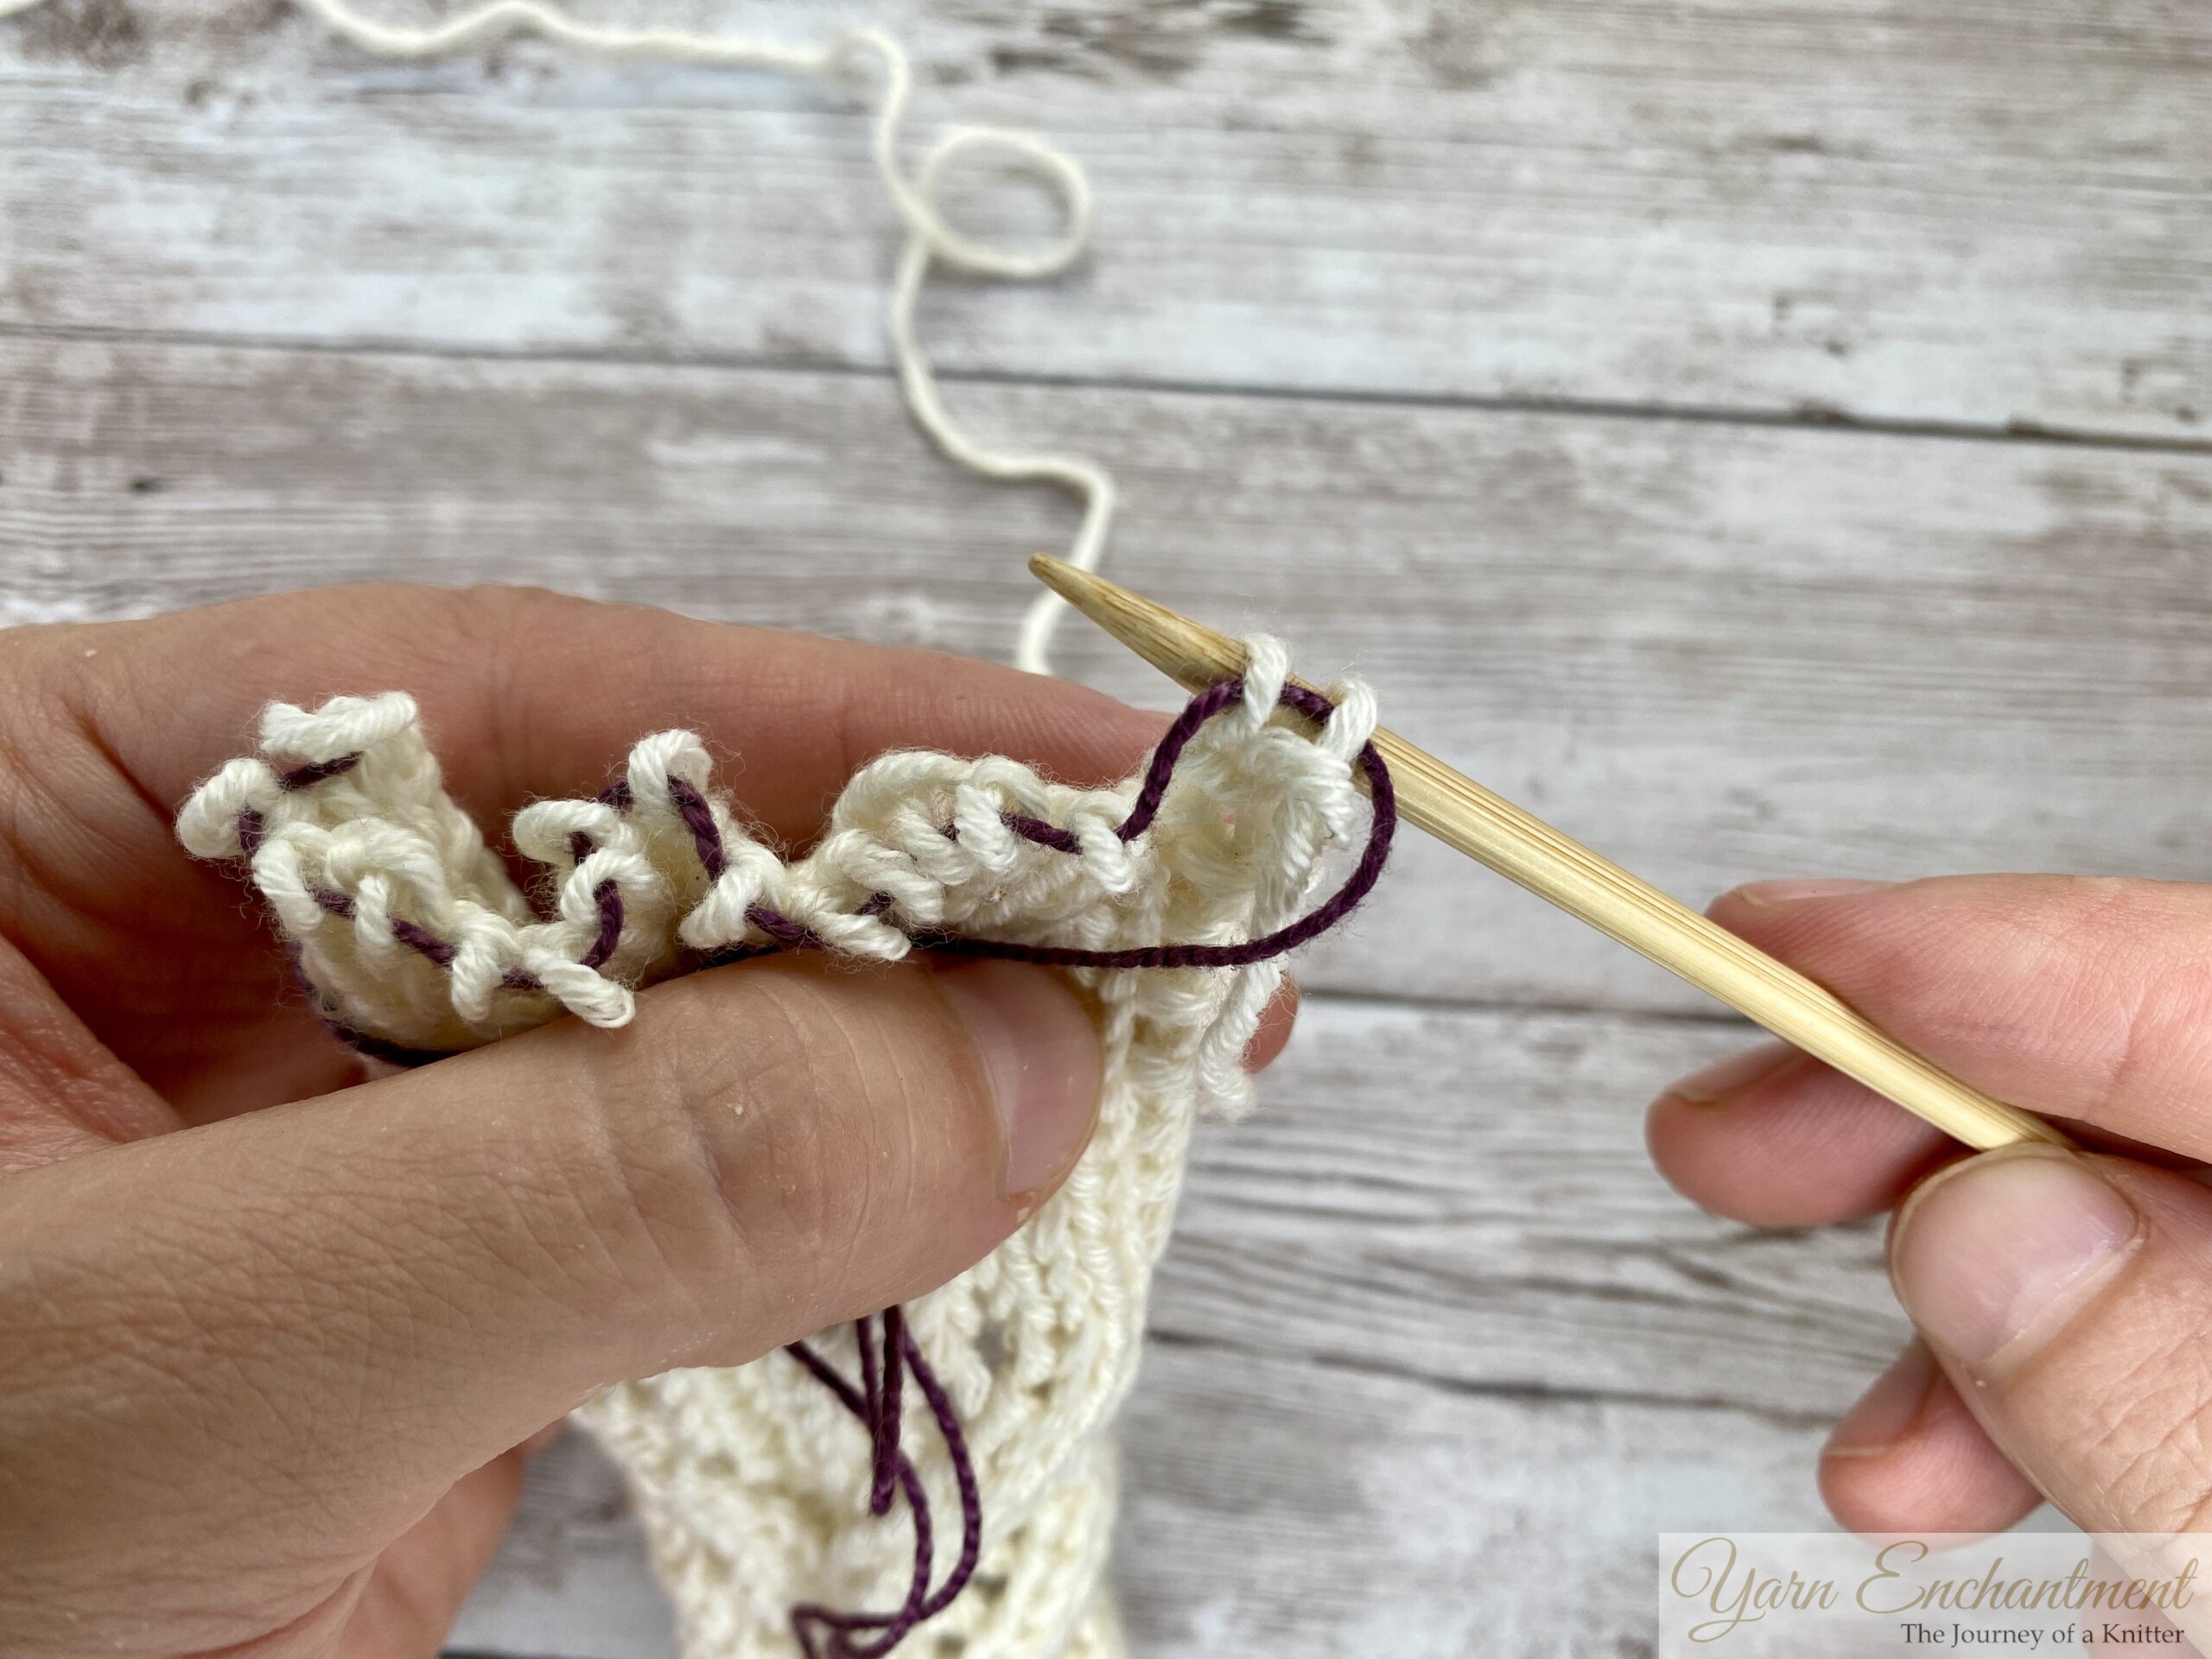  | 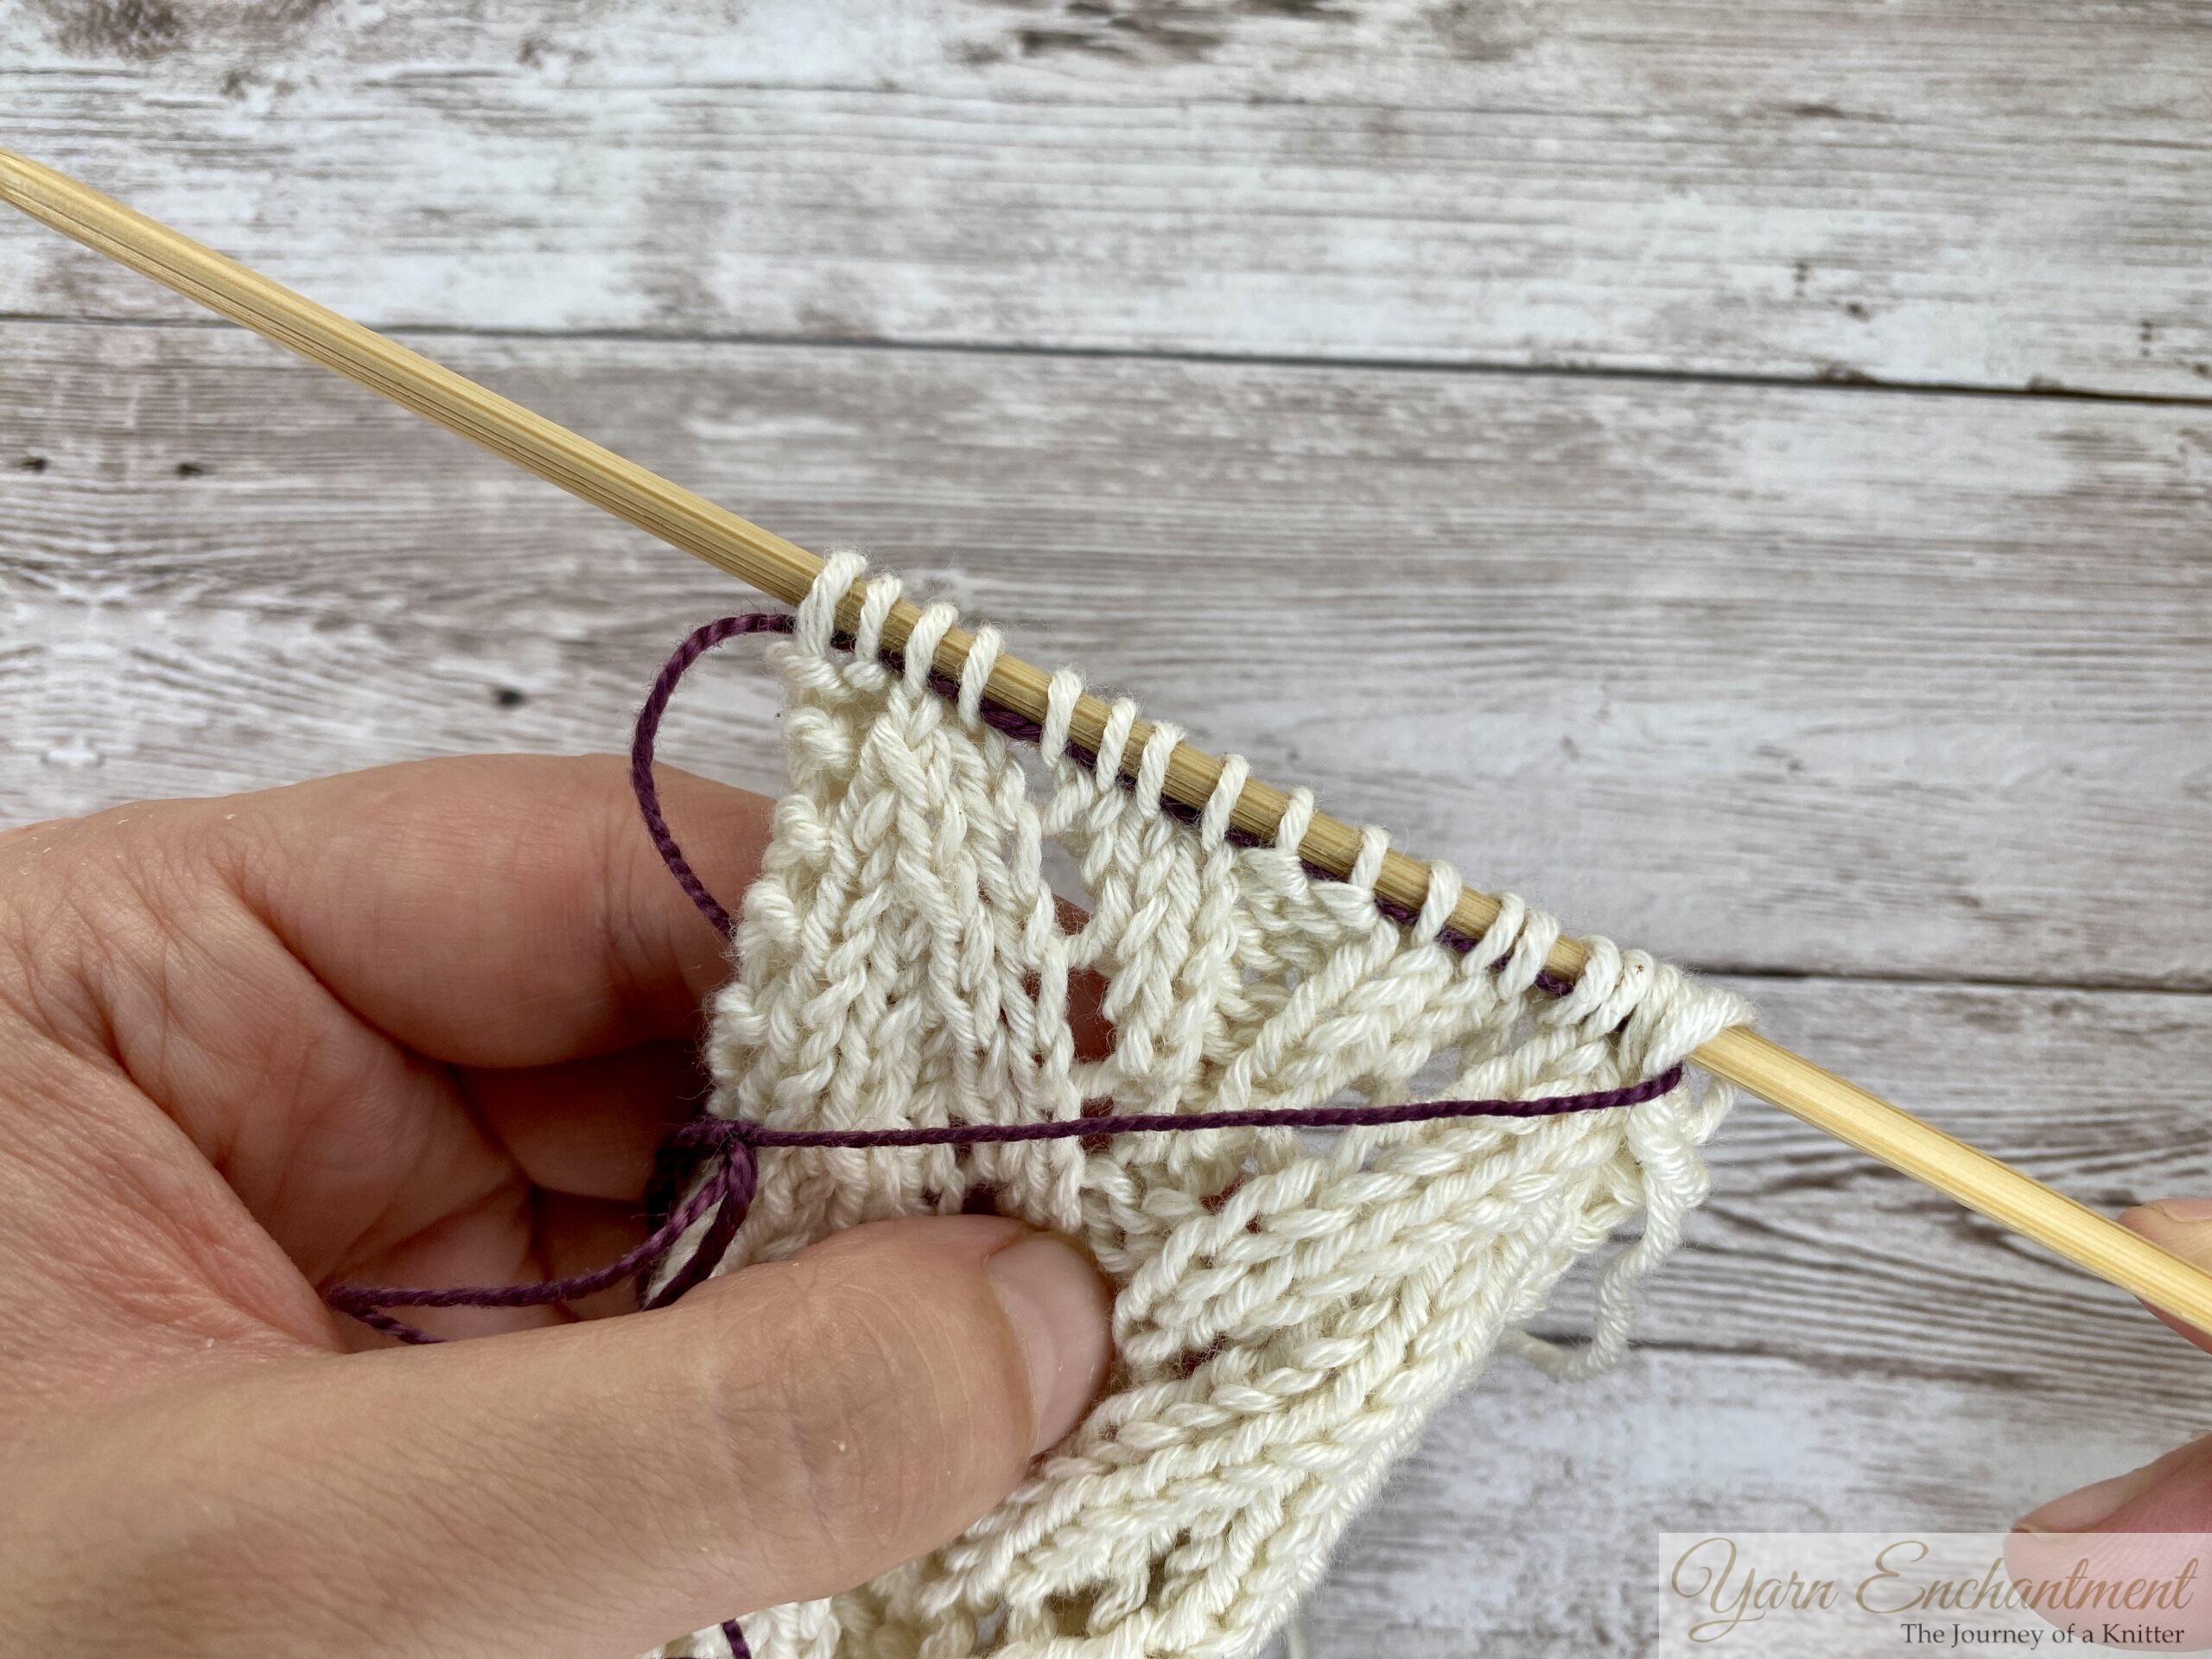  |
Slide your needle back into each loop on the lifeline, right leg in front, so nothing twists... | ...and pick up your pattern where you left off. |
Common Lifeline Mistakes to Avoid
A lifeline only works if every stitch is on it. Watch for these little snags:
- Trapping your markers: Always bypass stitch markers. If you thread through them, they can’t move up on the next round.
- Skipping a stitch: Miss even one loop and that stitch will run right past the line. Do a quick count after threading.
- Pulling it too soon: Leave your older lifeline in until the new section is checked and error-free. Two save points are better than none.
- Forgetting where it is: Jot the row number in a notebook or row-counter app. Future-you will be so grateful.
Frequently Asked Questions
What’s the difference between a proactive and a reactive lifeline?
A proactive lifeline is placed before a mistake, while stitches are still on the needle. A reactive lifeline is threaded through a correct row below a mistake after it happens, so you can unravel safely to that row. You can also thread one onto a smaller knitting needle.
Can I leave a lifeline in while blocking?
Yes, as long as your lifeline thread is colorfast and won’t bleed. Some knitters even leave them in during wet blocking to help hold the shape.
What’s the difference between frogging and tinking?
Frogging is removing your needles and ripping back multiple rows at once. Tinking (“knit” spelled backward) is un-knitting stitch by stitch to fix a small mistake on your needle.
Final thoughts
See? Threading a lifeline is a piece of cake, and a game changer for your knitting project. Grab some smooth thread, add a lifeline to your current WIP, and enjoy that calm, can’t-mess-this-up feeling. It’s such a small step for so much comfort.
Do you use lifelines regularly, or are you trying one for the first time? What project are you saving right now, lace, cables, colorwork? Tell me in the comments, I’d love to cheer you on!
Until next time, happy knitting!
A Little Way to Say Thanks
Yarn Enchantment is my cozy hobby corner on the internet. If something here made your knitting day easier or you simply enjoy reading my posts and would like to say thank you, you can leave a small Ko-fi tip - but only if you truly want to.
My patterns and tutorials stay free for everyone, always. Every little tip just goes toward new yarn and a cup of tea for my cozy knitting evenings.
☕ Support me on Ko-fi
You Might Also Like


 |
|
Join the Cozy Corner Newsletter
Hello, creative soul. Welcome to the Yarn Enchantment Newsletter, a little space where we celebrate all things cozy, crafty, and full of heart. Think of this as your friendly crafting companion, a soft dose of inspiration delivered straight to your inbox, just for you. Each newsletter brings you: ✨ Notifications about new patterns and tutorials – easy knitting patterns and beginner crochet projects you won’t find anywhere else 🧶 Practical yarn tips for new crafters, plus advice on the best yarn for fall, blankets, and handmade gifts 💌 Small stories and adventures from my own workbench, because crafting is as much about the journey as the finished piece Whether you’re knitting by the fire, looking for your next creative spark, or simply wanting a quiet moment with your hooks and needles, this newsletter is here to cheer you on. Crafting isn’t just about the final project. It’s about the joy, the peace, and the stories we weave along the way. So grab a cup of tea or coffee, settle in, and join me. Together we’ll make a little magic, one stitch and one story at a time. I’m so glad you’re here. Let’s create something beautiful together. Sign up below to receive your first email, and feel free to leave a comment on the blog if there’s a topic you’d love to see covered. Your ideas might just become our next newsletter feature. |


2 Comments
Always enjoy your helpful hints.
Great Newletter. Thanks for all your hard work that you give us
for easier knitting.
Aww, thank you so much, this comment made my whole week! 💛 Reading comments like yours is honestly one of my favorite parts of writing this blog. Wishing you lots of cozy knitting hours ahead 🧶