

Easy Knitted Cast-On Tutorial for Beginners: Step-by-Step Guide
May 17, 2025
Worldwide Knit in Public Day: Join the Largest Global Celebration of Yarn Crafts
June 8, 2025The Picot Edge Stitch

Originally published on May 25, 2025
You may already be familiar with the picot cast-on or the picot bind-off, but did you know there’s also a picot edge stitch? This stitch creates a self-finished edge (sometimes called a 'selvedge'), perfect for adding a decorative touch to your knitting projects. If you’re not familiar with this easy and cute edge stitch yet, you’re in the right place! In today’s blog post, I’ll show you how to work this simple technique step-by-step so you can create this beautiful edge stitch yourself. At the end of this blog post, you can also find a detailed video tutorial.
 | Close-up of the knitted picot edge stitch. |
Table of Contents
- What Is the Picot Edge Stitch?
- Step-by-Step Instructions
- Remember
- Creative Ways to Use the Picot Edge Stitch
- Final Thoughts
What Is the Picot Edge Stitch?
The picot edge stitch is a decorative knitted border you can use to finish edges on items like baby garments, scarves, shawls, and blankets. It’s similar to techniques like the I-cord edge or slip stitch edge, which are also popular for creating polished, professional finishes. However, the picot edge stands out with its unique scalloped design, making it ideal when you want the edge of your knitting piece to remain open rather than sewn closed. The stitch is created by alternating increases and decreases at the beginning of each row (both the right side and wrong side). This simple and easy-to-memorize technique results in a series of small, scalloped edges that add charm and elegance to all of your projects.
 | Picot edge, it works perfectly fine with increases and decreases |

Step-by-Step Instructions
Step 1: Start with One Edge Stitch
You will only need one edge stitch to begin. From this edge stitch, you’ll increase by two stitches using the Knitted Cast-On Method. (If you’re unfamiliar with the Knitted Cast-On, check out my detailed tutorial.)
 | From the first edge stitch, you’ll increase by two stitches using the Knitted Cast-On Method. |

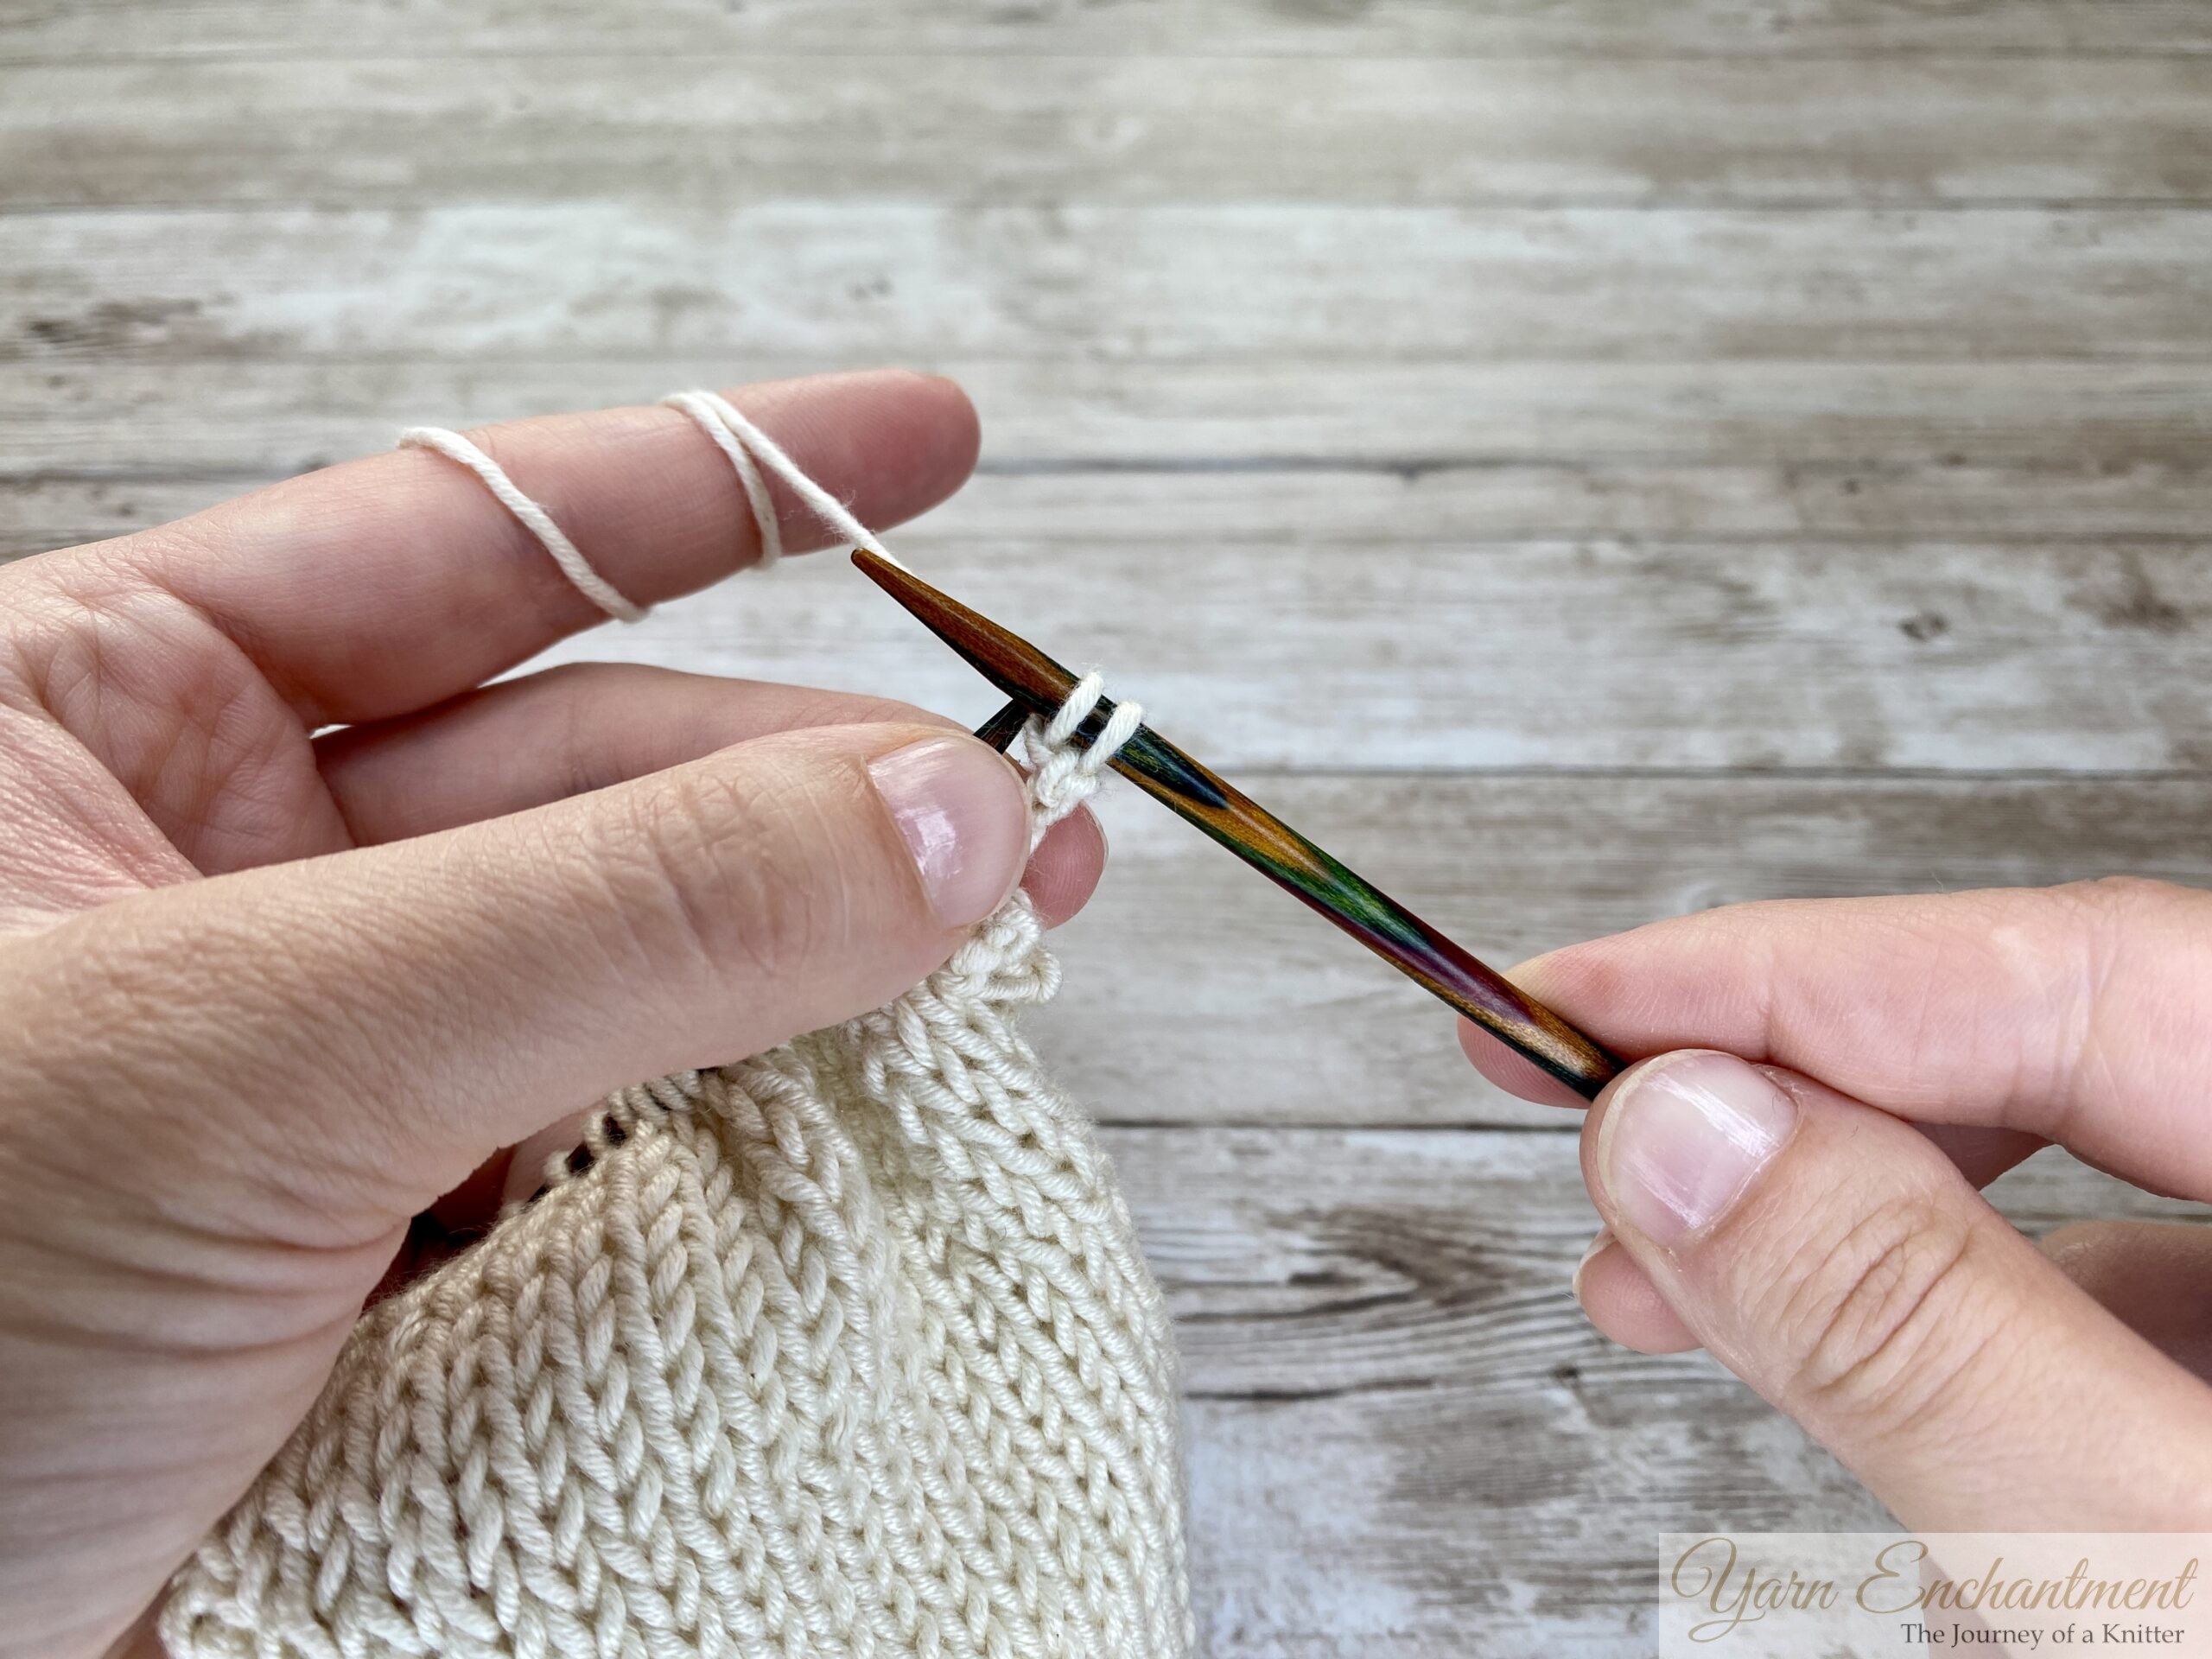
Step 2: Increase by Two Stitches
- Insert your needle into the first stitch as if to knit .
- Pull the working yarn through, but do not drop the old stitch from the left needle.
- Transfer the new stitch back to the left needle.
- Repeat this process one more time to create two additional stitches.
For a more detailed tutorial on the knitted cast-on, click the link below!
Knitted Cast on Tutorial
 |  |
|
|


Step 3: Knit the Increased Stitches Through the Back Loop
- Knit the two newly created stitches through the back loop.
 |  | Knit both of the newly created stitches through the back loop. | You have two stitches on your right needle |


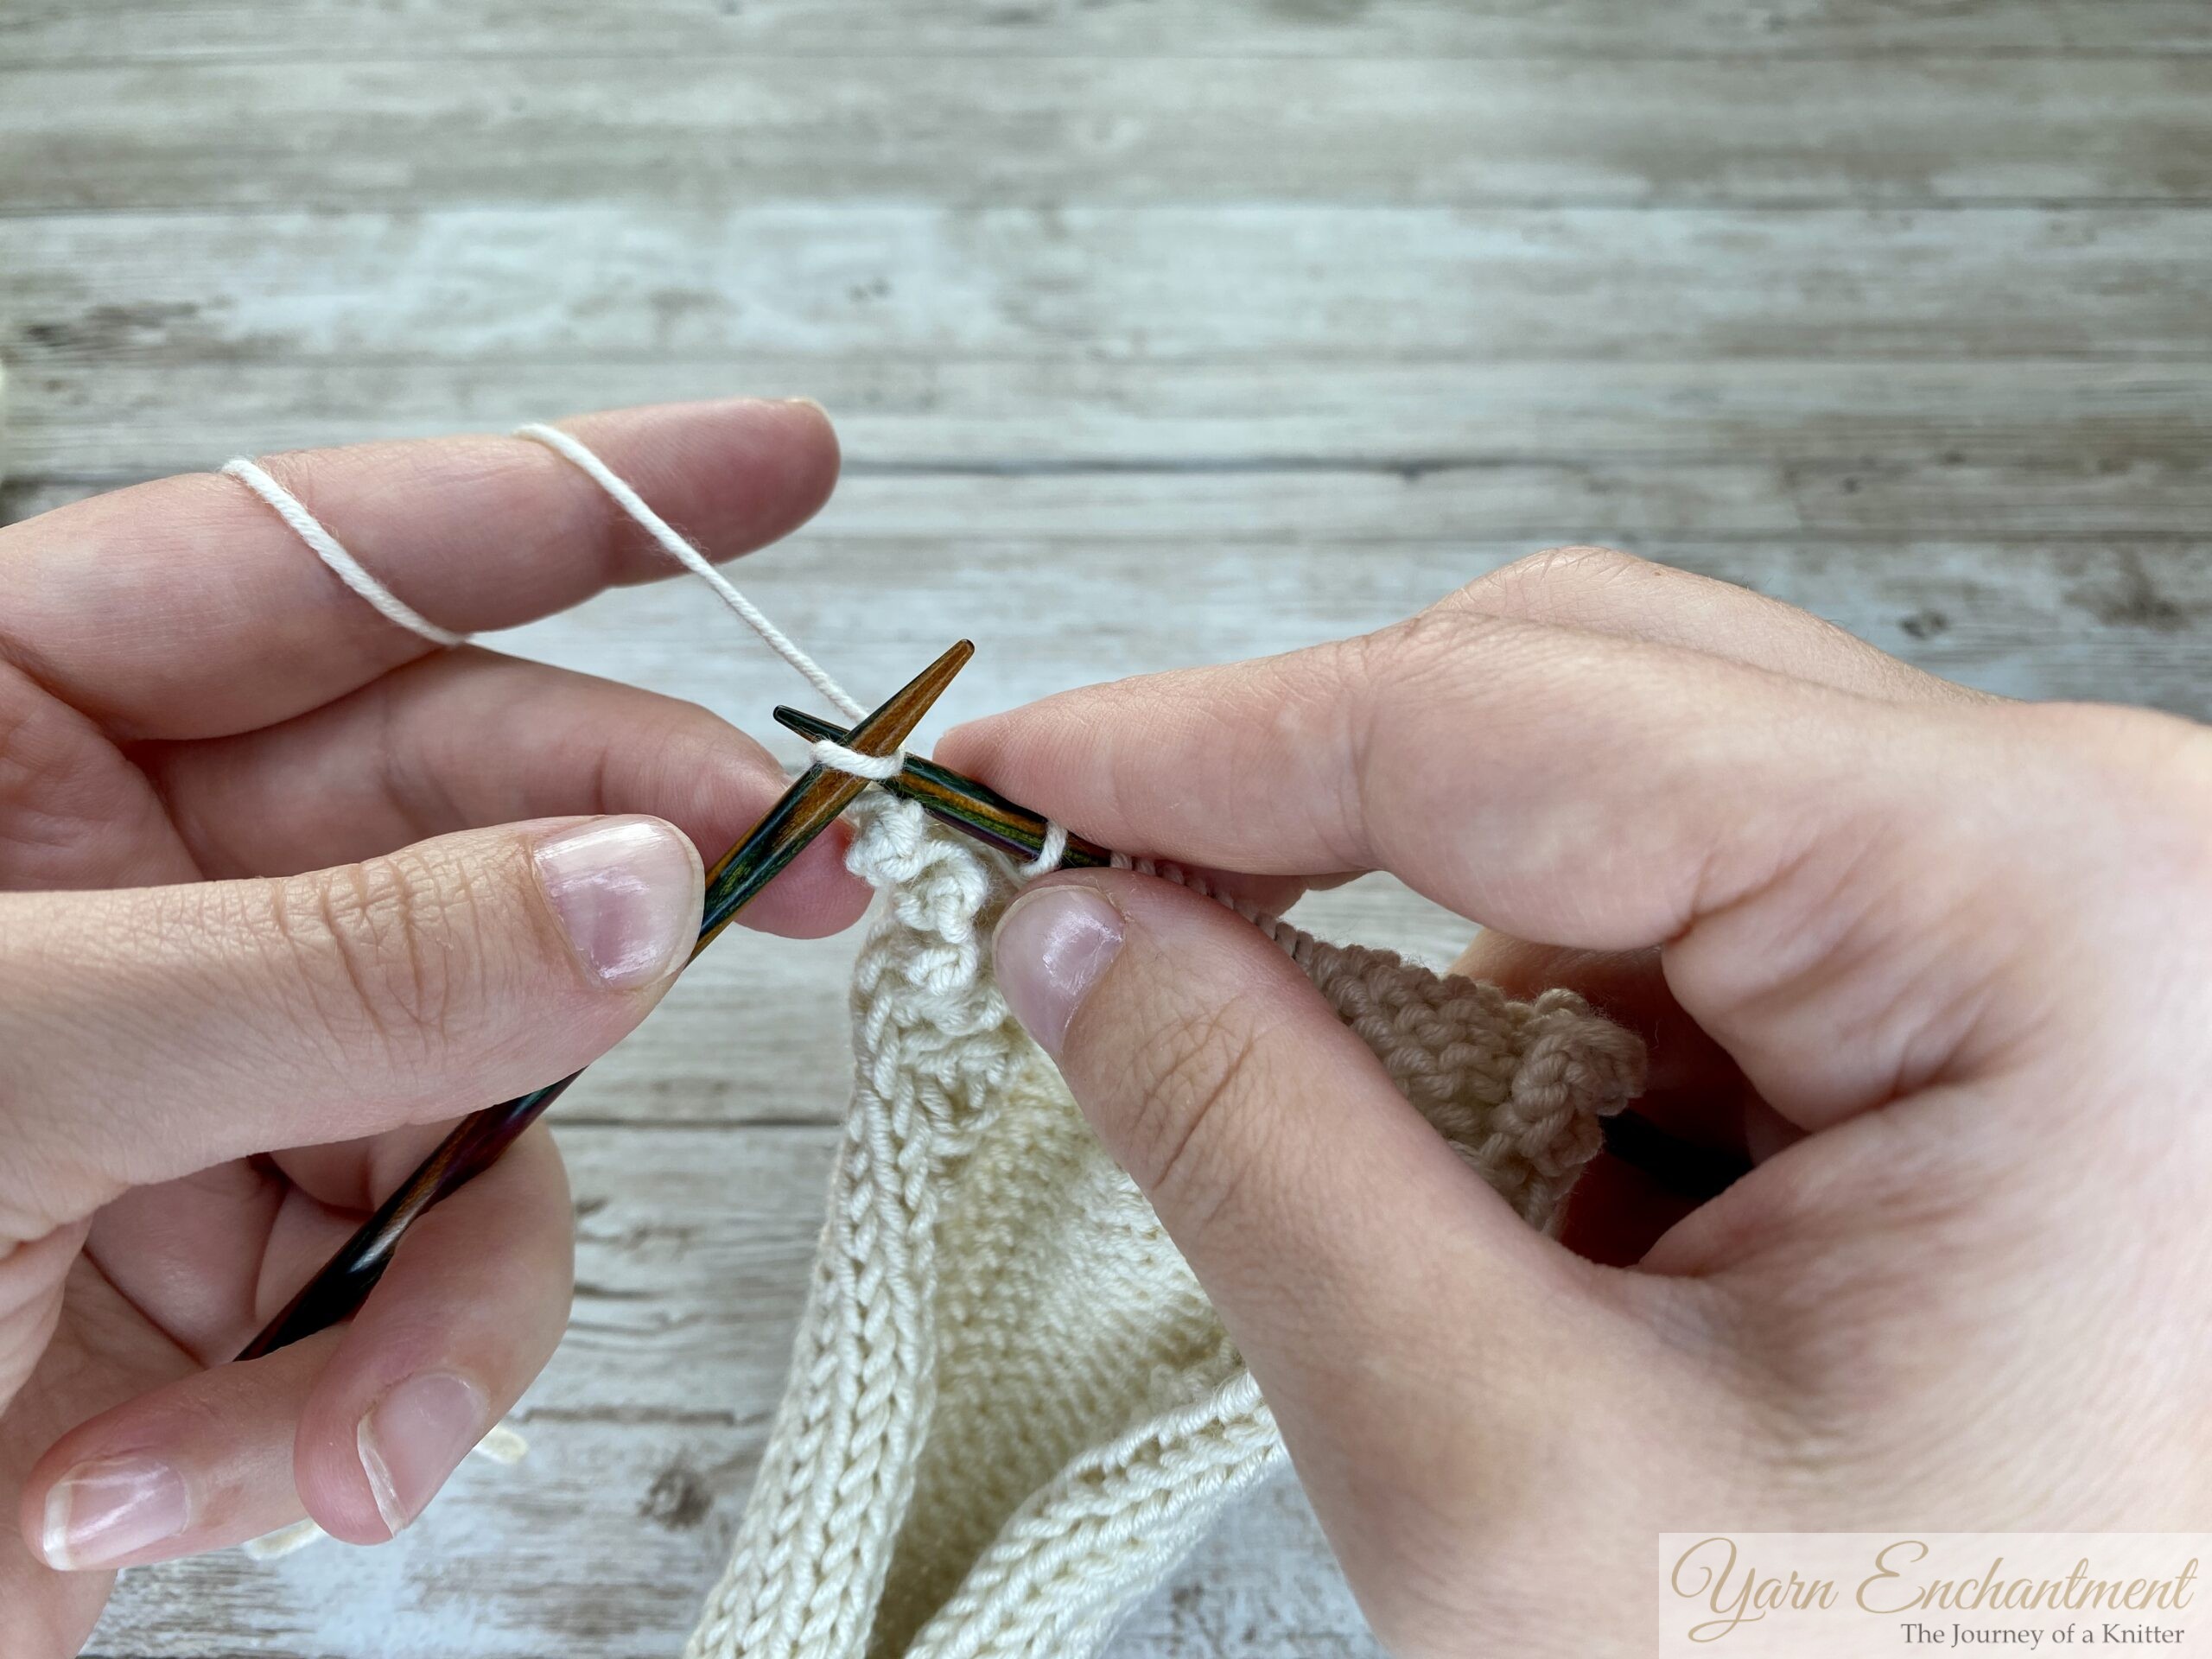
Step 4: Decrease by One Stitch
- Slip the first stitch over the second stitch to decrease by one stitch.
(This is the same as binding off one stitch.)
 |  | Slip the first stitch over the second stitch to decrease by one stitch. | You have decreased by one stitch |


Step 5: Knit the Next Stitch (Original Edge Stitch)
- Knit the next stitch (this is your original edge stitch).
- Then, slip the first stitch over the second stitch again to decrease by one more stitch.
 |  |  | Knit the next stitch | Then, slip the first stitch over the second stitch again to decrease by one more stitch. | You’ve now completed one picot edge stitch. Continue knitting across the row as usual. |


Step 6: Work in Pattern to the Last Stitch
- When you reach the last stitch of the row, knit it normally. This will complete the row.
 |  | Work in your pattern to the last stitch | When you reach the last stitch of the row, knit this stitch |


Step 7: Turn Your Work and Repeat on the Wrong Side
Turn your work to the wrong side and repeat the same steps:
- Increase by two stitches using the knitted cast-on method.
- Knit the two increased stitches through the back loop.
- Decrease by slipping the first stitch over the second stitch.
- Knit the next stitch (original edge stitch) and slip the first stitch over the second stitch again.
- Complete the row by knitting the last stitch normally.
 |  |  | Increase by two stitches using the knitted cast-on method. | Knit the two increased stitches through the back loop. | Decrease by slipping the first stitch over the second stitch |


 |  |  | Knit the next stitch (original edge stitch) | Slip the first stitch over the second stitch to finish the picot edge | Knit in your pattern to the last stitch and knit this stitch |


Remember
Creative Ways to Use the Picot Edge Stitch
The Picot Edge Stitch is incredibly versatile. Here are some ideas:
- Add a decorative border to scarves, shawls, or blankets.
- Incorporate it into dishcloths or coasters for a unique touch.
 | Knitted Picot Edge |

Final Thoughts
By following these step-by-step instructions, you’ll be able to create this beautiful Picot Stitch not only for your cast-on and bind-off edges but also to add charm and elegance to the sides of your knitting projects. This versatile stitch is perfect for scarves, blankets, baby garments, and more.
Try it out on your next project and let me know how it turns out in the comments below! Whether you’re a beginner or an experienced knitter, the Picot Edge Stitch is a simple yet stunning way to add a decorative touch to your creations. For more knitting tips, tutorials, and inspiration, don’t forget to subscribe to my newsletter and check out my video tutorial.
Until then, happy knitting!
A Little Way to Say Thanks
 |
|
Join the Cozy Corner Newsletter!
Hey there, creative soul! Welcome to the Yarn Enchantment Newsletter, where we celebrate all things cozy, crafty, and full of heart. Think of this as your friendly crafting companion - a little dose of inspiration delivered straight to your inbox, just for you. Inside, you’ll find: ✨ Exclusive patterns & tutorials - ideas you won’t find anywhere else (just for us!) 📚 Bookish crafts that bring your favorite stories to life 🧶 Tips and tricks to make your crafting journey smoother (and more fun!) 💌 Heartfelt musings on life, creativity, and the magic of making something with your own two hands Whether you’re knitting by the fire, brainstorming your next DIY project, or just looking for a little creative pick-me-up, this newsletter is here to cheer you on. Because let’s be honest - crafting isn’t just about the finished project; it’s about the joy, peace, and stories we create along the way. So grab a cup of tea, cozy up, and join me. Together, we’ll weave a little magic into everyday life - one stitch, one story, and one email at a time. P.S. I’m so glad you’re here. Let’s make something beautiful together! (Note: If you're using an ad blocker, you may encounter issues subscribing to the newsletter. To subscribe, please consider disabling your ad blocker.)
|
