
Latvian Twist: A Beautiful and Stretchy Knitting Cast On
March 8, 2025
Slip Slip Purl (SSP) and Purl 2 Together Through Back Loop (P2tog tbl) + Easy Alternative
March 15, 2025DIY Avocado Pit Buttons

Originally published on March 11, 2025
For our knitting projects, we often need some buttons to finish off our creations. Last year, my husband found a new obsession: avocados. This fruit is truly amazing because you can use every part of it. The flesh is incredibly healthy, the skin and pits can be used for dyeing fabric or wool, and you can even make buttons from the avocado pits!
If you're looking for a sustainable and creative way to make your own buttons, avocado pits are the perfect material! These eco-friendly buttons are not only beautiful but also a great way to repurpose something you’d normally throw away. In this blog post, I’ll show you how I turn avocado pits into unique, handmade buttons that are perfect for your knitting, crocheting, or sewing projects.
 | Avocado Pit Buttons |
What You’ll Need:
- Avocado pits (as many as you like)
- A sharp knife
- Sandpaper (any grit you have on hand)
- A drill or hand drill
- Beeswax (optional, for sealing)
- A old surface which is sturdy and suitable for drilling.
- A little patience (they take time to dry!)
 | All the materials you need for making avocado pit buttons, including sandpaper, beeswax, a drill, a knife, and an avocado pit as well as a surface suitable for drilling. |

How to Work the Avovado Pit Buttons
Step 1: Prepare the Avocado Pit
After enjoying your avocado, wash the pit and let it dry for about 24 hours. This short drying period makes it easier to peel off the thin outer skin. You can also leave it on but you will have a harder time to see the natural split line. Once the skin is removed, you’ll notice the natural line running around the pit.
 |  | After leaving it for 24 hours, you can easily remove the skin | Use a knife to remove the skin from the avocado pit |


 |  | After the skin is removed, you can easily spot the natural line running through the middle of the avocado pit. | When the skin is removed, air reaches the pit, which causes it to turn orange. This is the normal drying process, but you can still see the natural line. |


Step 2: Cut the Pit in Half
Carefully cut the avocado pit in half along the natural line using a sharp knife. This step is important because it prevents the pit from cracking or breaking in half while drying.
This happened to me last year when I was making avocado pit buttons for the first time. The buttons broke during the drying process.
 |  | I am cutting the pit in half | As you can see, there are no cracks in there |


Step 3: Slice the Buttons
Next, slice the avocado pit into thin button-sized pieces. Be careful not to make them too thin, as the pits will shrink during the drying process. Try to cut them so thick that they will hold up well after drying and sanding.
 |  | Carefully cut the avocado pits | Mine are about half a centimeter thick |


Step 4: Drill the Holes
With the hand drill, carefully make two or four holes in each button, depending on your preference. These holes will allow you to sew the buttons onto your projects later.
 | 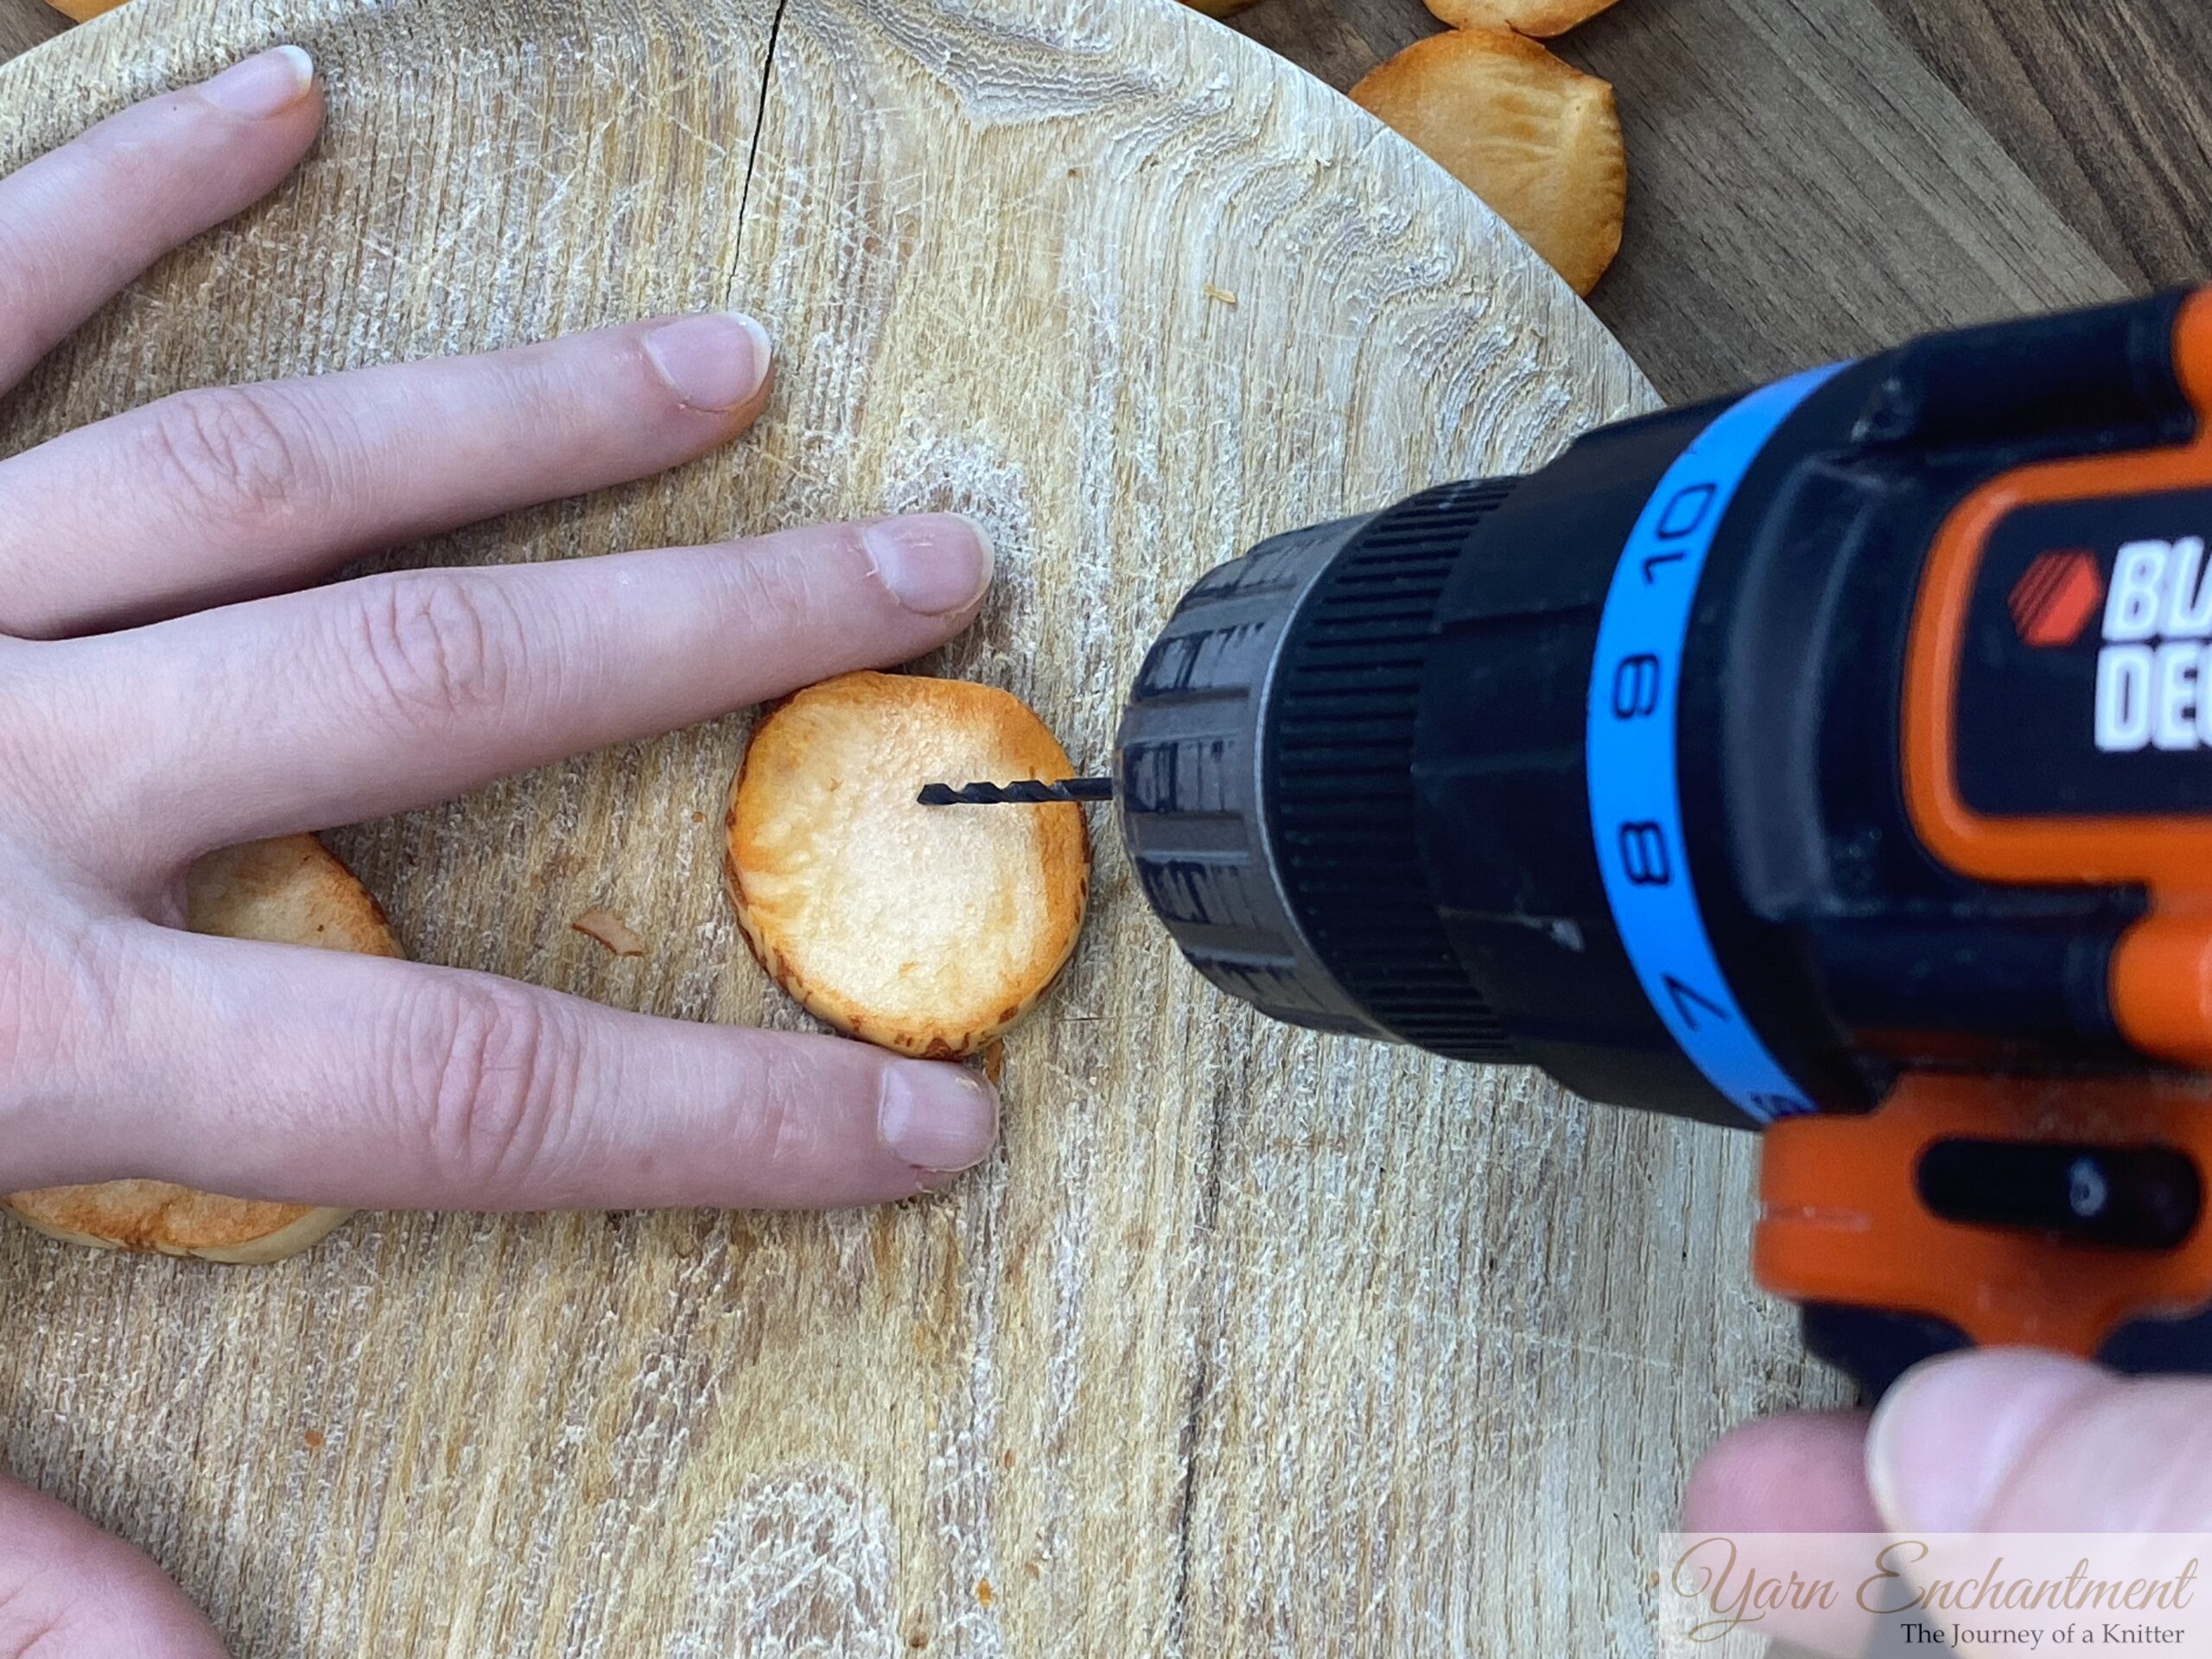 |  | Using a small drill... | ...drill 2 - 4 small holes into each button | It's easier if you mark your buttons with a black pen before drilling |


Step 5: Let Them Dry
Place the buttons onto a paper towel and let them dry for about 14 days. During this time, the buttons will lose moisture, shrink slightly, and harden. Turn them every few days to ensure both sides get equally exposed to air. I found out that if you don’t allow air to circulate and place books on top of them, the buttons tend to become much darker.
 | The buttons before the drying process |

Step 6: Sand the Buttons
For this step I dont have any pictures. Once the buttons are completely dry, it’s time to sand them. I don’t use any fancy items for this - just regular sandpaper works perfectly! Sand the buttons until they’re smooth and free of rough edges, and have the form you want.
 | Little button |

Step 7: Wash and Seal
After sanding, wash the buttons to remove any dust and let them dry for a few days again. To finish them, I like to use beeswax to seal the surface. This not only protects the buttons but also gives them a lovely, polished look, which smells nice like lemons.
 | I used Pipihua Wood Beeswax with Lemon Flavor. |

Some Tips:
- Make sure the buttons are completely dry before sealing to avoid cracking.
- Experiment with different shapes and sizes to create a variety of buttons for your projects.
- Beeswax is optional, but it adds a nice finish and helps protect the buttons from moisture.
- During the drying process, turn the buttons from time to time so that both sides get equal exposure to air.
- Make sure to cut the pit along the natural split line to prevent it from breaking.
 | Every button has its own unique look, even if they all come from the same pit. |

Why Make Avocado Pit Buttons?
Avocado pit buttons are not only fun to make, but also a sustainable and eco-friendly alternative to buttons from a store and add a personal, unique touch to your knitting, crocheting, or sewing projects. Moreover, they’re a great way to repurpose something you’d normally throw away!
Have you ever made buttons from avocado pits or other natural materials? I’d love to hear about your experience, so feel free to share it in the comments below! The next buttons I will make are made from Fimo, I'm already looking forward to that project!
If you have any questions, don’t hesitate to reach out to me. I do my best to cover everything in my tutorials, but sometimes I might miss something or explain it in a way that’s confusing. I’m always happy to help and would love to hear from you!
Until then, happy crafting!
| Finished buttons |
A Little Way to Say Thanks
You Might Also Like


 |
|
Join the Cozy Corner Newsletter!
Hey there, creative soul! Welcome to the Yarn Enchantment Newsletter, where we celebrate all things cozy, crafty, and full of heart. Think of this as your friendly crafting companion - a little dose of inspiration delivered straight to your inbox, just for you. Inside, you’ll find: ✨ Exclusive patterns & tutorials - ideas you won’t find anywhere else (just for us!) 📚 Bookish crafts that bring your favorite stories to life 🧶 Tips and tricks to make your crafting journey smoother (and more fun!) 💌 Heartfelt musings on life, creativity, and the magic of making something with your own two hands Whether you’re knitting by the fire, brainstorming your next DIY project, or just looking for a little creative pick-me-up, this newsletter is here to cheer you on. Because let’s be honest - crafting isn’t just about the finished project; it’s about the joy, peace, and stories we create along the way. So grab a cup of tea, cozy up, and join me. Together, we’ll weave a little magic into everyday life - one stitch, one story, and one email at a time. P.S. I’m so glad you’re here. Let’s make something beautiful together! (Note: If you're using an ad blocker, you may encounter issues subscribing to the newsletter. To subscribe, please consider disabling your ad blocker.)
|
