
Is This Image Real? 10 Signs a Crochet or Knitting Image is AI-Generated
April 22, 2025
Darjeeling Top: A Dreamy Knitting Project with Stunning Lace Details
May 3, 2025How to Work the Kitchener Stitch

Originally published on April 29, 2025
Invisible Grafting Made Easy
The Kitchener stitch is a beloved technique in the knitting world, it allows you to create almost invisible, seamless joins between two sets of live stitches. Whether you're finishing sock toes, closing mittens, or joining two knitted pieces like straps, this stitch ensures a polished, professional finish which is also very stretchy. Below, you’ll find everything you need to know about working the Kitchener stitch, including step-by-step instructions, tips and tricks, and a fascinating look at its historical origins. At the end of this blog post you can find a video tutorial as well.
  |
Finished Kitchener Stitch |
Table of Contents
- What Is the Kitchener Stitch?
- Historical Origins
- Why Use the Kitchener Stitch?
- Quick Refresher: The Kitchener Stitch Rhythm
- Step-by-Step Instructions
- Tips for Success
- Common Mistakes and Troubleshooting
What Is the Kitchener Stitch?
The Kitchener stitch, also known as grafting, is a method for joining two sets of live stitches using a tapestry needle and yarn. The result? A smooth, nearly invisible seam that blends seamlessly with your knitted fabric.
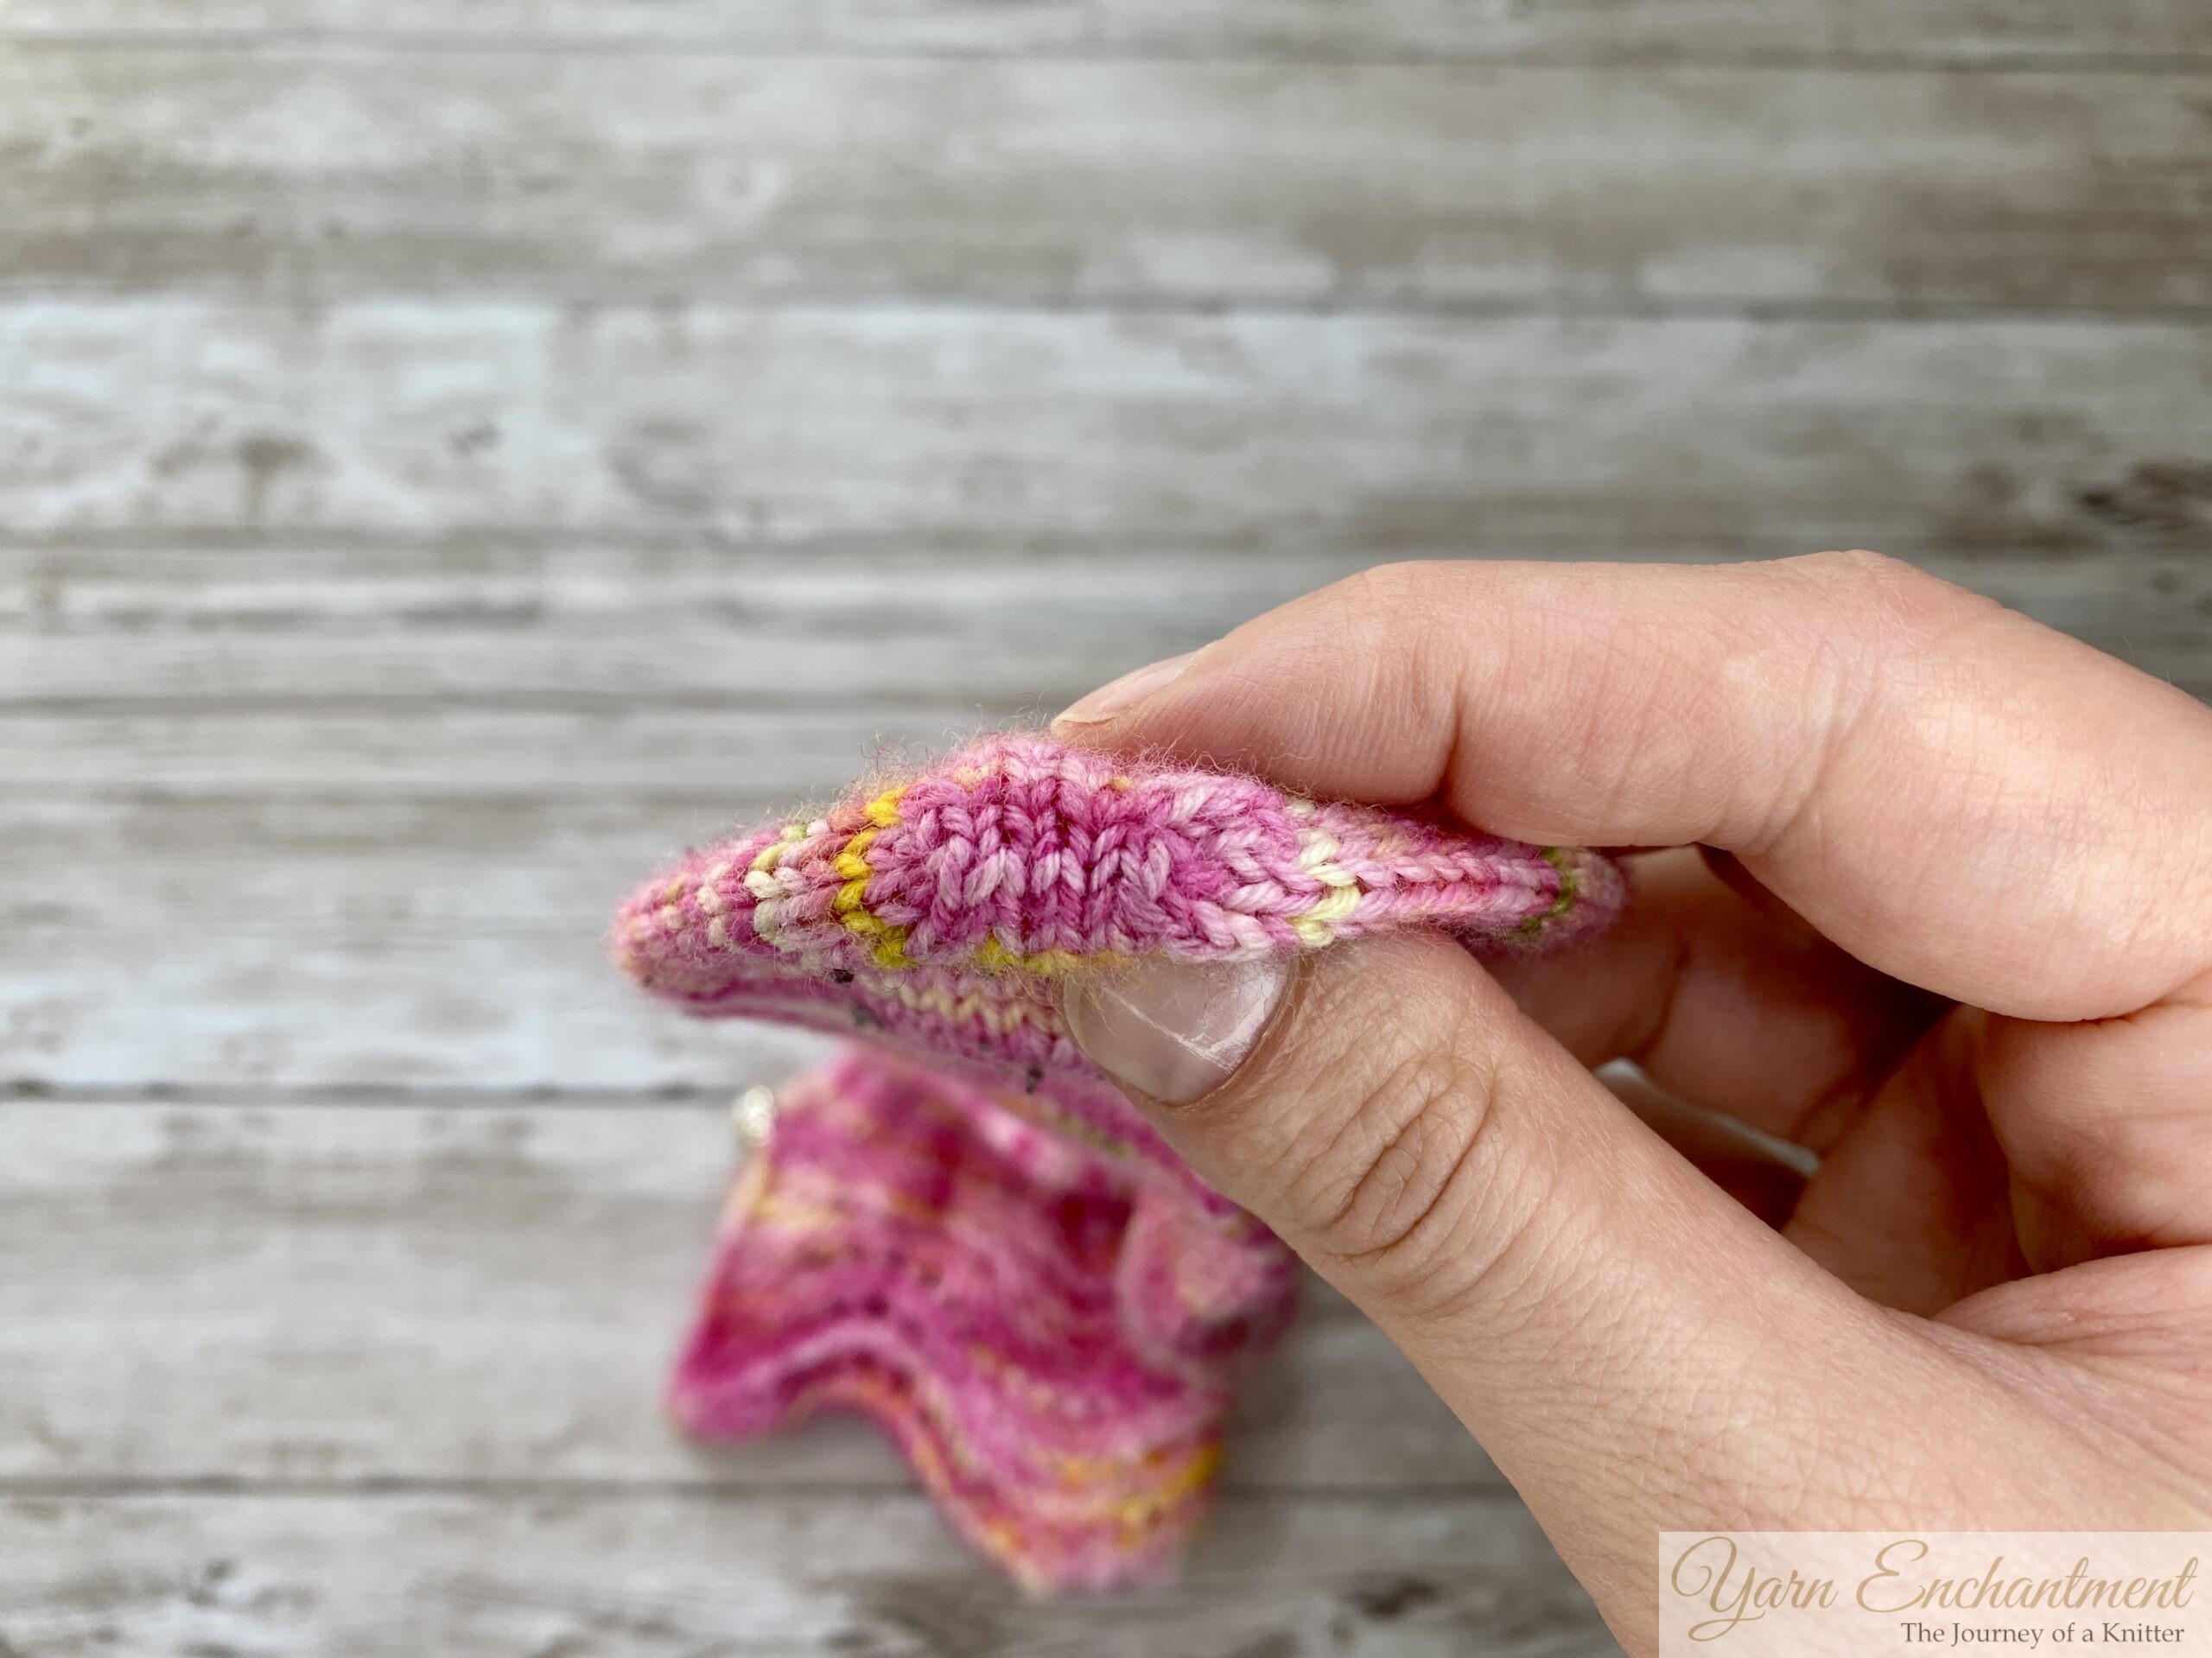  |
I used the Kitchener Stitch here to finish the Lacy Charms socks |
Historical Origins
The Kitchener stitch is named after Lord Herbert Kitchener, a British military leader during World War I. While it’s unclear whether he personally invented the stitch, it gained widespread recognition and association with his name because of its role in improving soldiers' socks during the war.
During World War I, soldiers complained about uncomfortable socks with bulky seams that caused blisters and sores, especially during long marches. As part of the effort to provide better equipment, Lord Kitchener advocated for socks with a smooth, seamless toe closure. This led to the popularization of the grafting technique we now call the Kitchener stitch. It allowed knitters to create socks that were more comfortable and durable, which greatly benefited the troops.
Today, the Kitchener stitch remains an essential skill for knitters looking to achieve clean, seamless finishes in their projects.
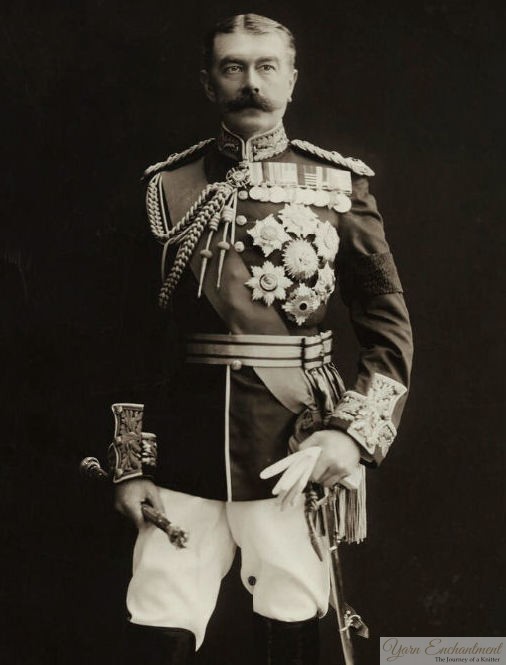 |
Portrait of Field-Marshal Horatio Herbert Kitchener (Attribution: Bassano Ltd, Public domain, via Wikimedia Commons) |
Why Use the Kitchener Stitch?
- Invisible Finish: Creates a seamless join that blends perfectly with your knitting.
- Stretchy and Flexible: Perfect for areas like sock toes or mitten tops that need elasticity.
- Professional Look: Elevates your projects with clean, polished seams.
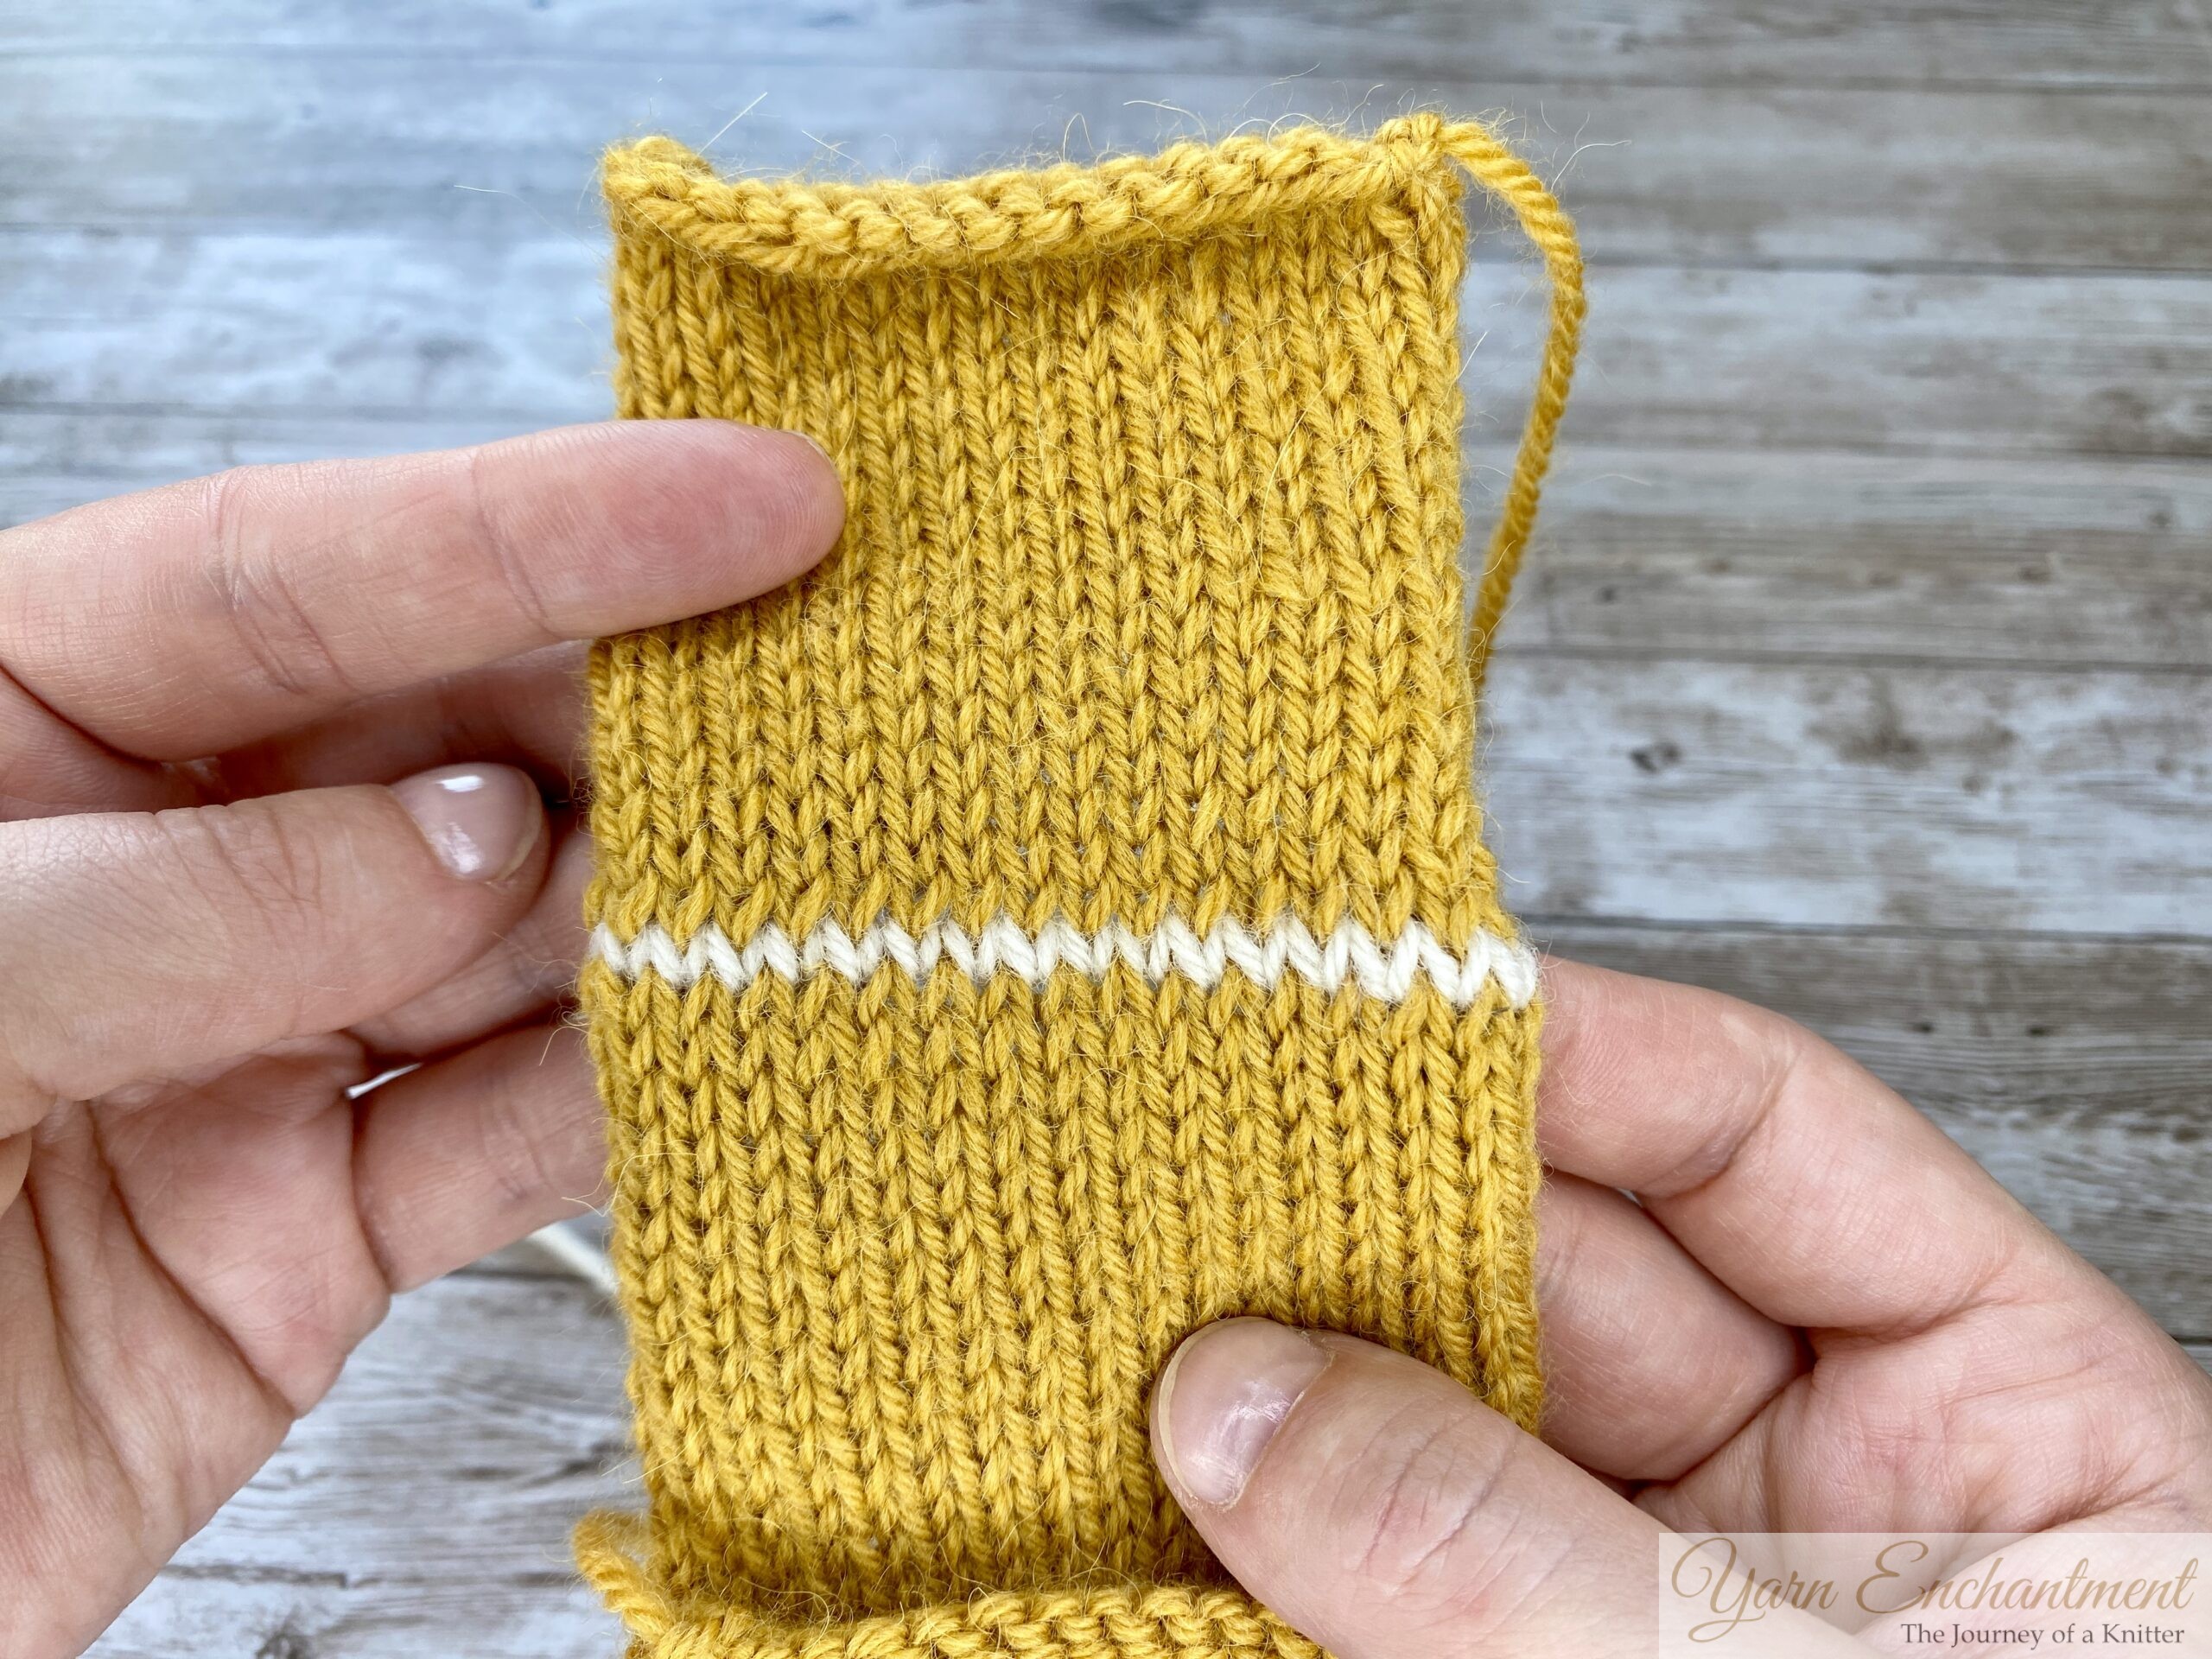  |
Finished Kitchener Stitch |
If you already know how to work the Kitchener stitch and you just need a quick reminder, here’s the rhythm to follow: This mantra will help you stay on track without referring back to the full tutorial every time.Quick Refresher: The Kitchener Stitch Rhythm
Front needle: purl on, leave the stitch on the needle.
Back needle: knit on, leave the stitch on the needle.
Front needle: knit off, purl on;
Back needle: purl off, knit on;
The Kitchener Stitch Rhythm: This mantra will help you stay on track without referring back to the full tutorial every time.


Step-by-Step Instructions
Before you begin, gather your tools: your current project which you want to join with the kitchener stitch, a blunt tapestry needle, and yarn (your working yarn). Here’s how to get started:
Step 1: Thread Your Yarn
Cut your working yarn, leaving a tail about three times the length of the section you need to graft. Thread the yarn onto a blunt-tipped tapestry needle. This type of needle is ideal for grafting because it won’t split the stitches as you work.
Click on any image to view it in a larger size!
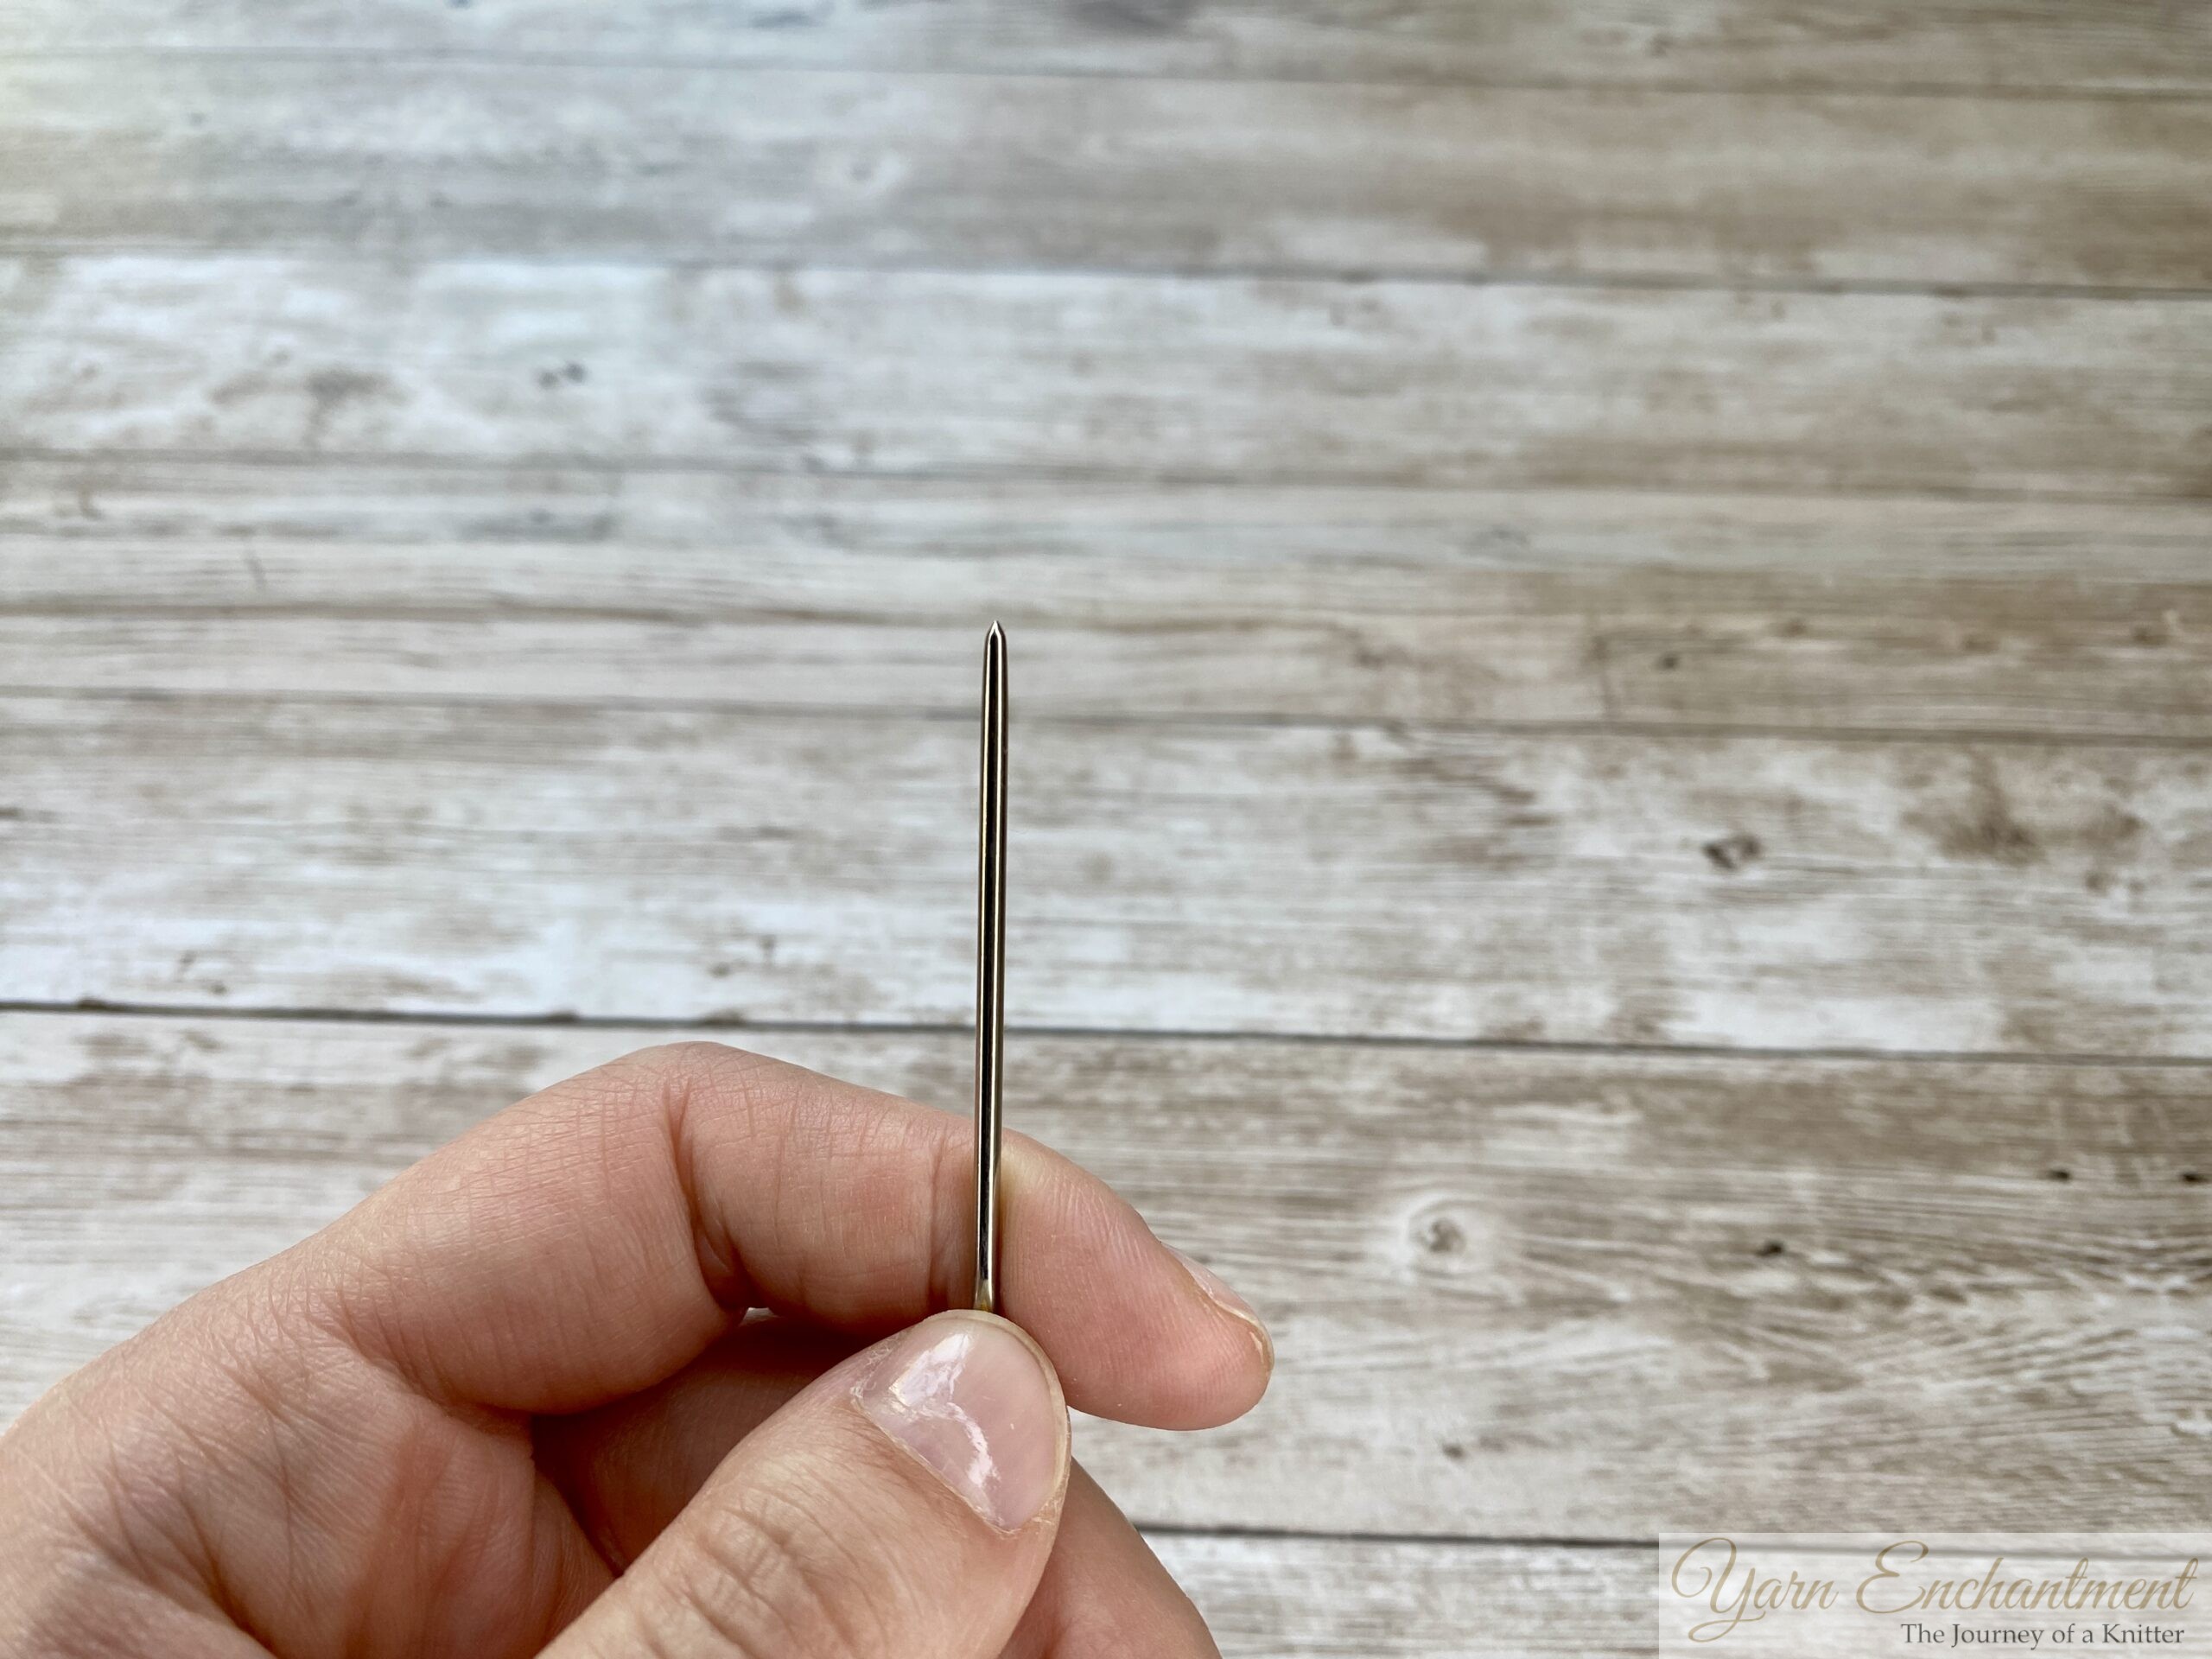  |   |
Use a blunt-tipped tapestry needle | Thread your working yarn through the tapestry needle. For this tutorial, I’ll be using white yarn for better visibility. |
Step 2: Align Your Knitting Pieces
Start by bringing the two knitting pieces together so that their wrong sides are facing each other. This ensures that the finished seam will be on the inside, leaving the right sides (the visible, patterned sides) smooth and seamless on the outside.
  |   |
Bring the two knitting pieces together so that their wrong sides are facing each other. | It should look like this. |
Step 3: Set-Up Stitches
-
Front Needle:
Insert the tapestry needle purlwise into the first stitch on the front needle, pull the yarn through, and leave the stitch on the needle. -
Back Needle:
Insert the tapestry needle knitwise into the first stitch on the back needle, pull the yarn through, and leave the stitch on the needle.
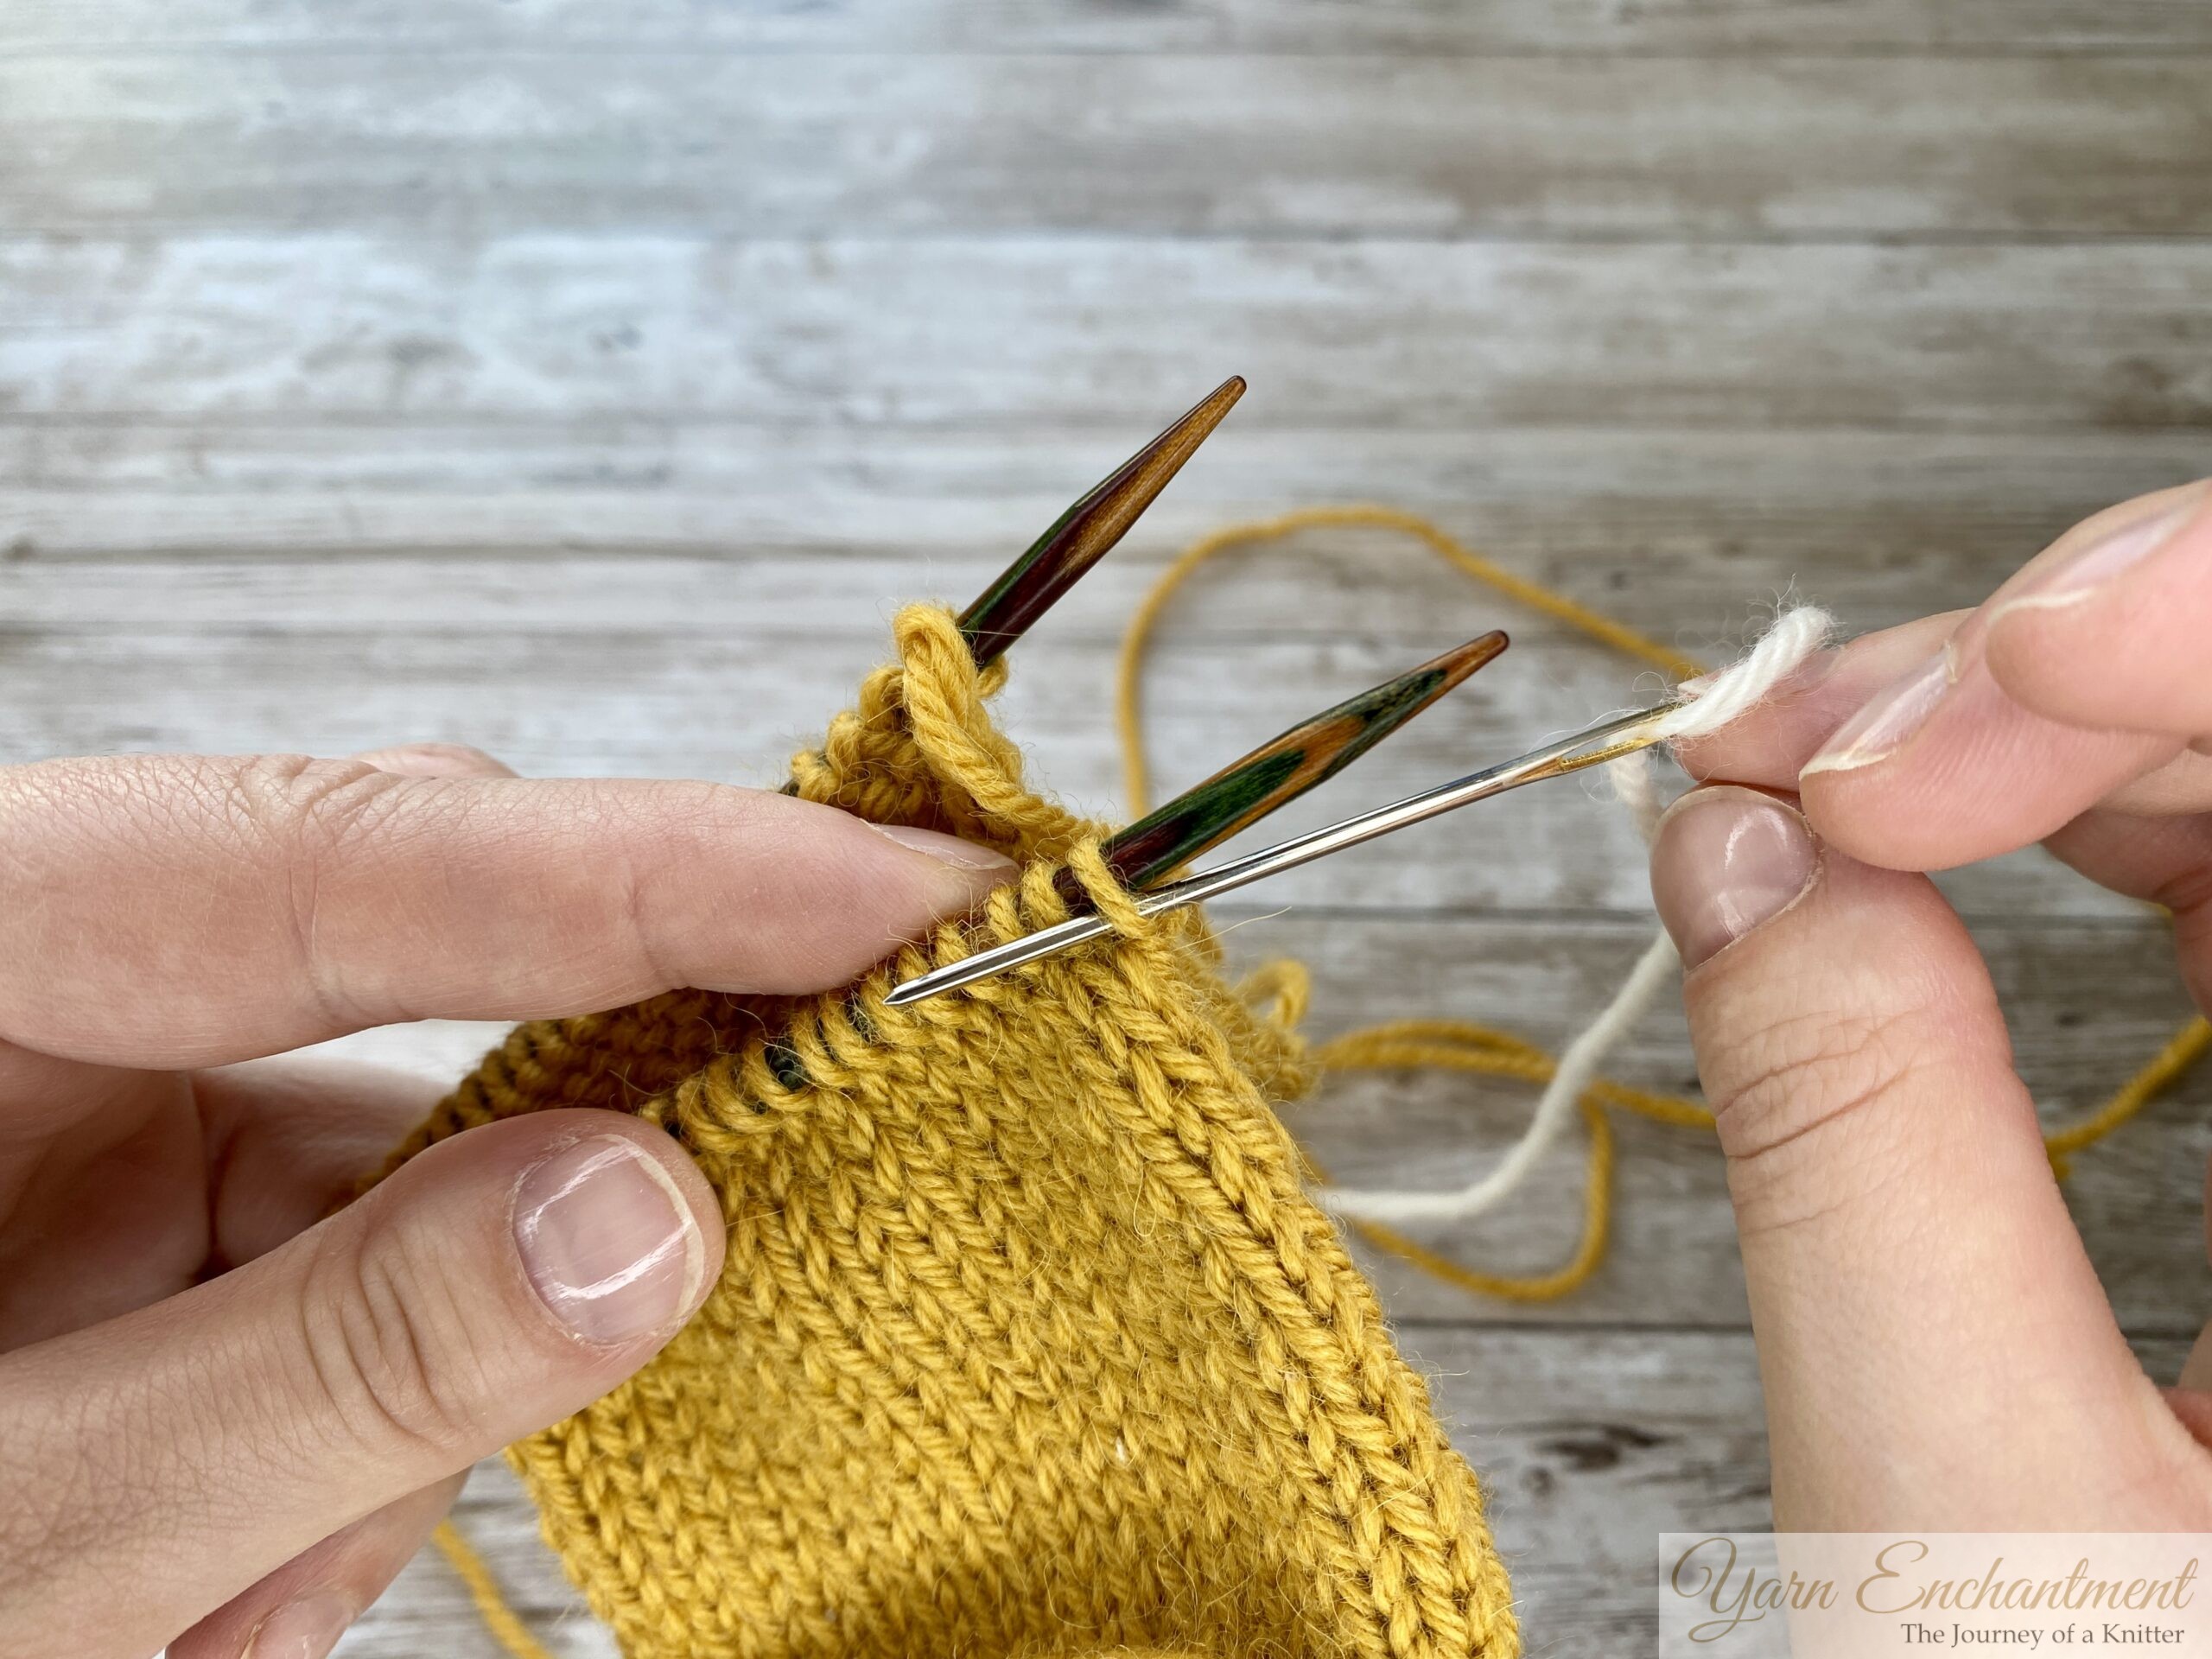  | 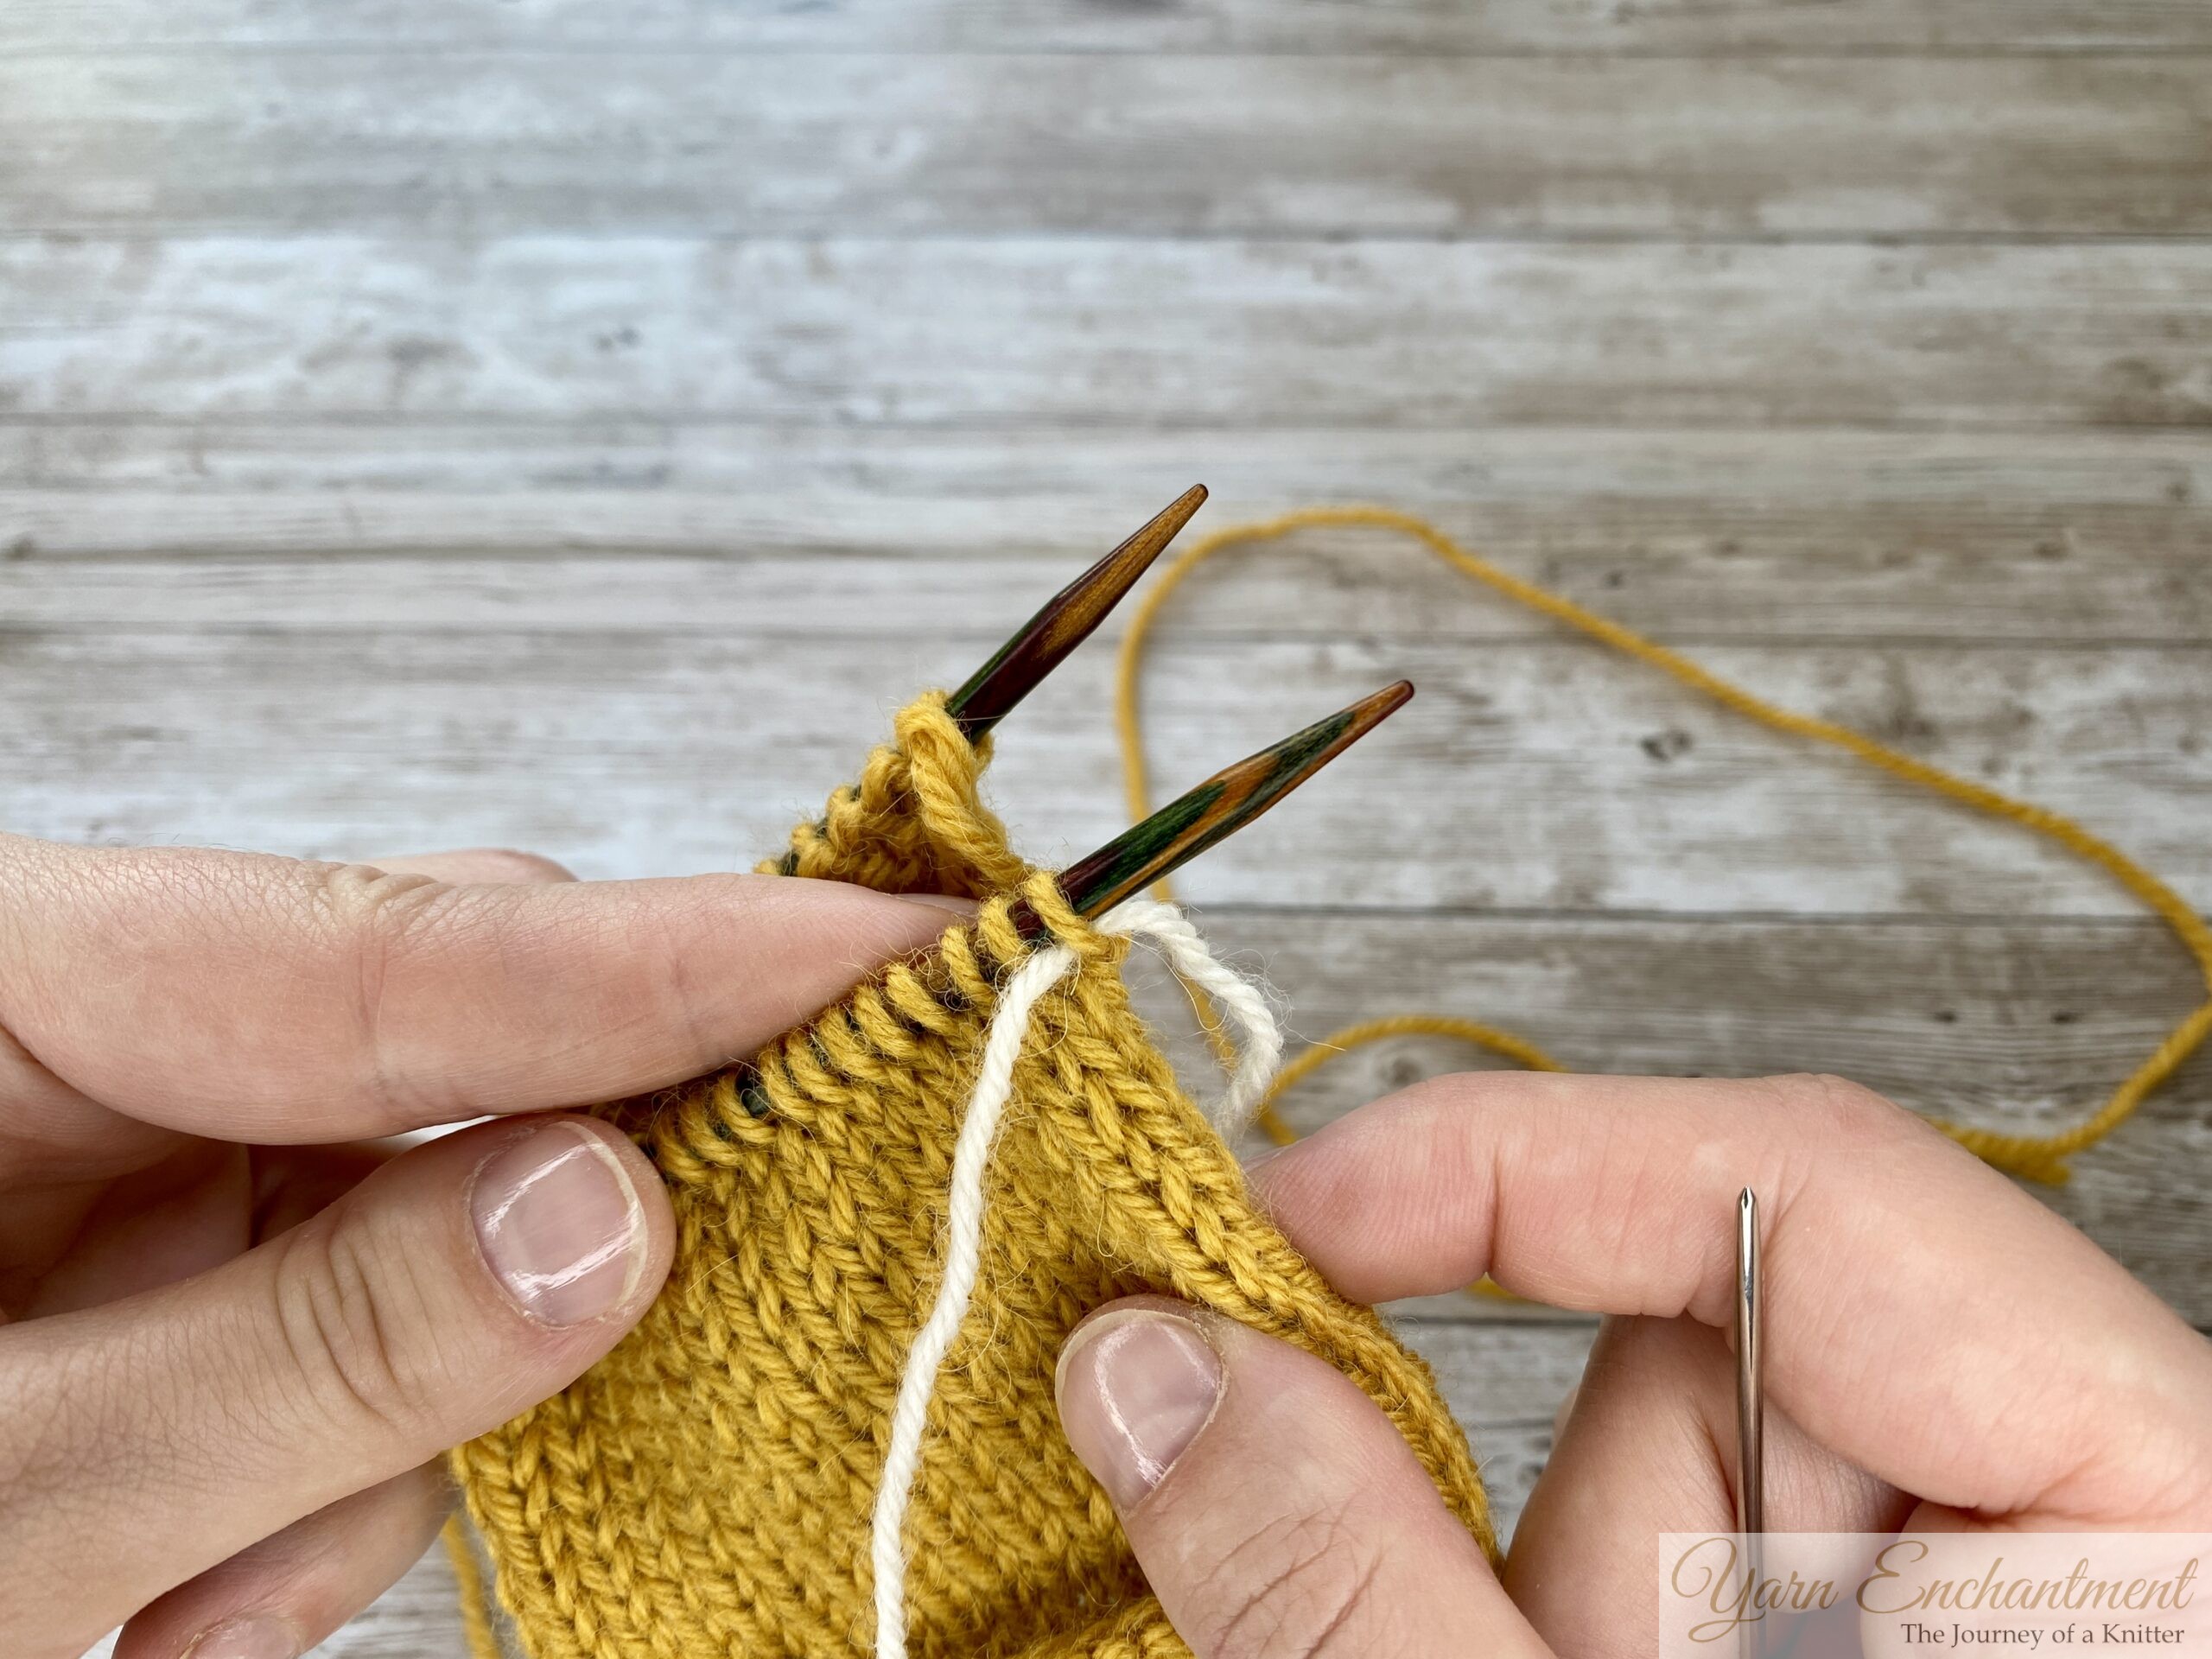  |
Front Needle | Pull the yarn through, and leave the stitch on the needle. |
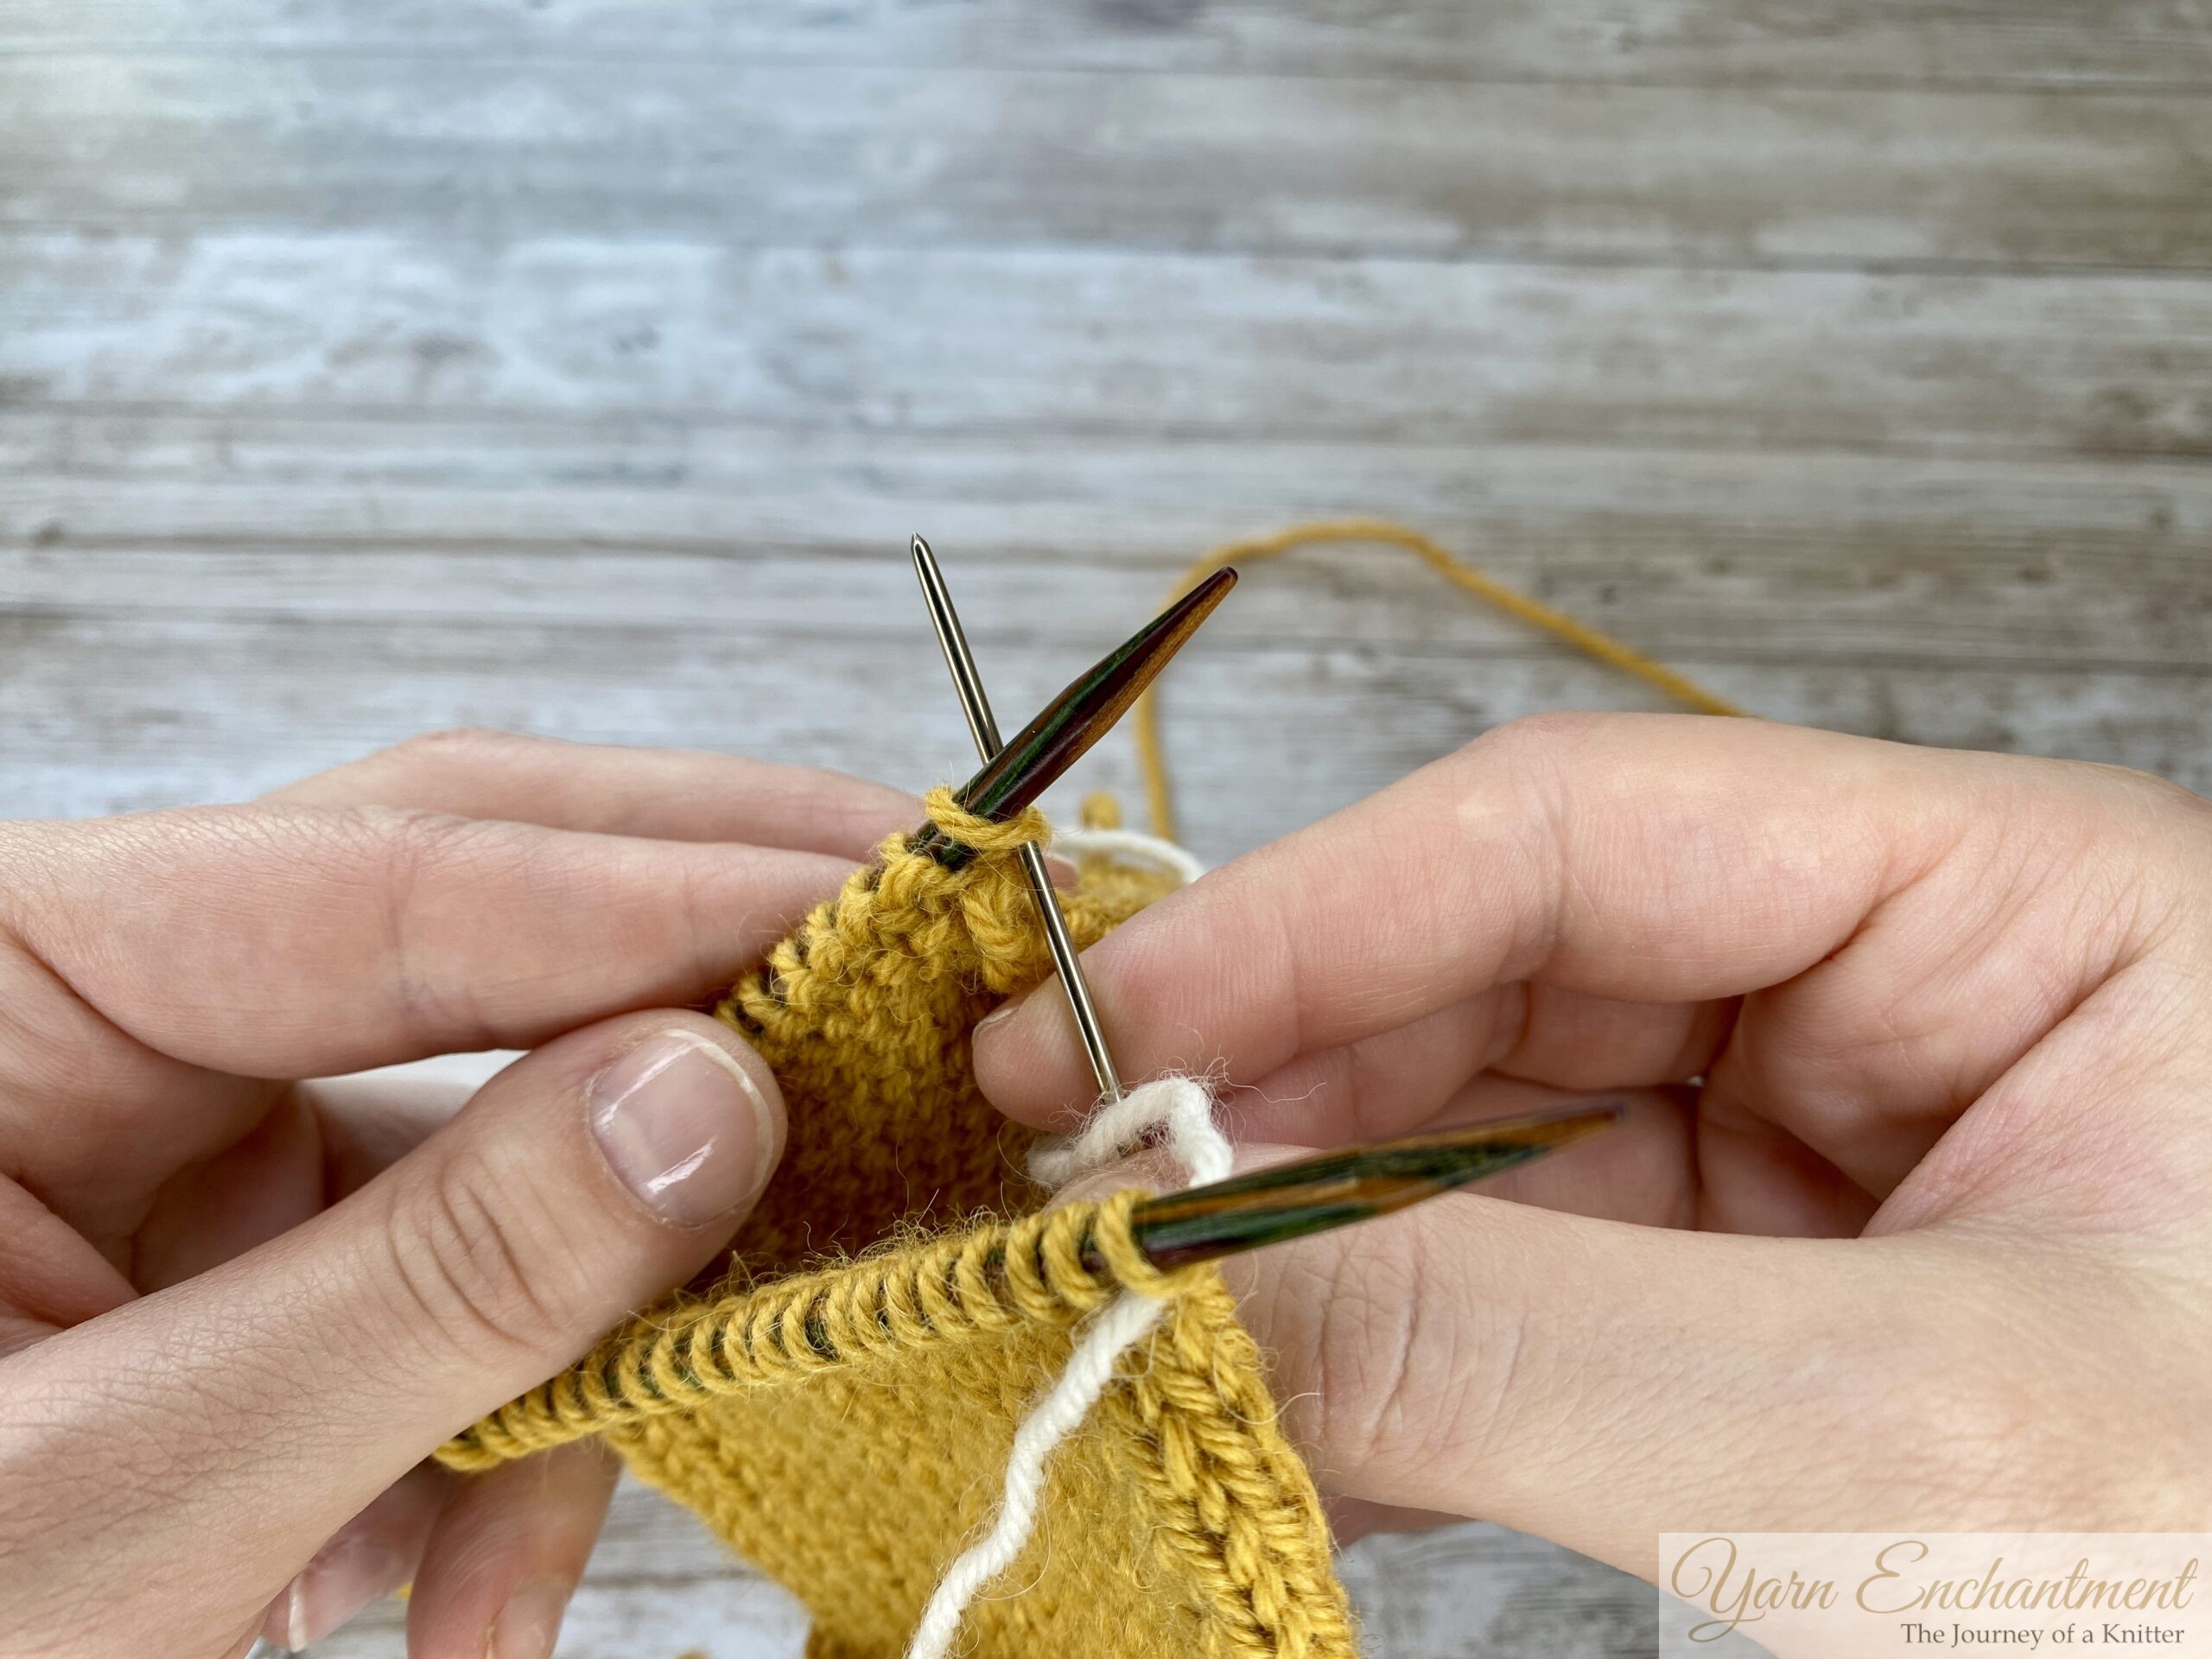  | 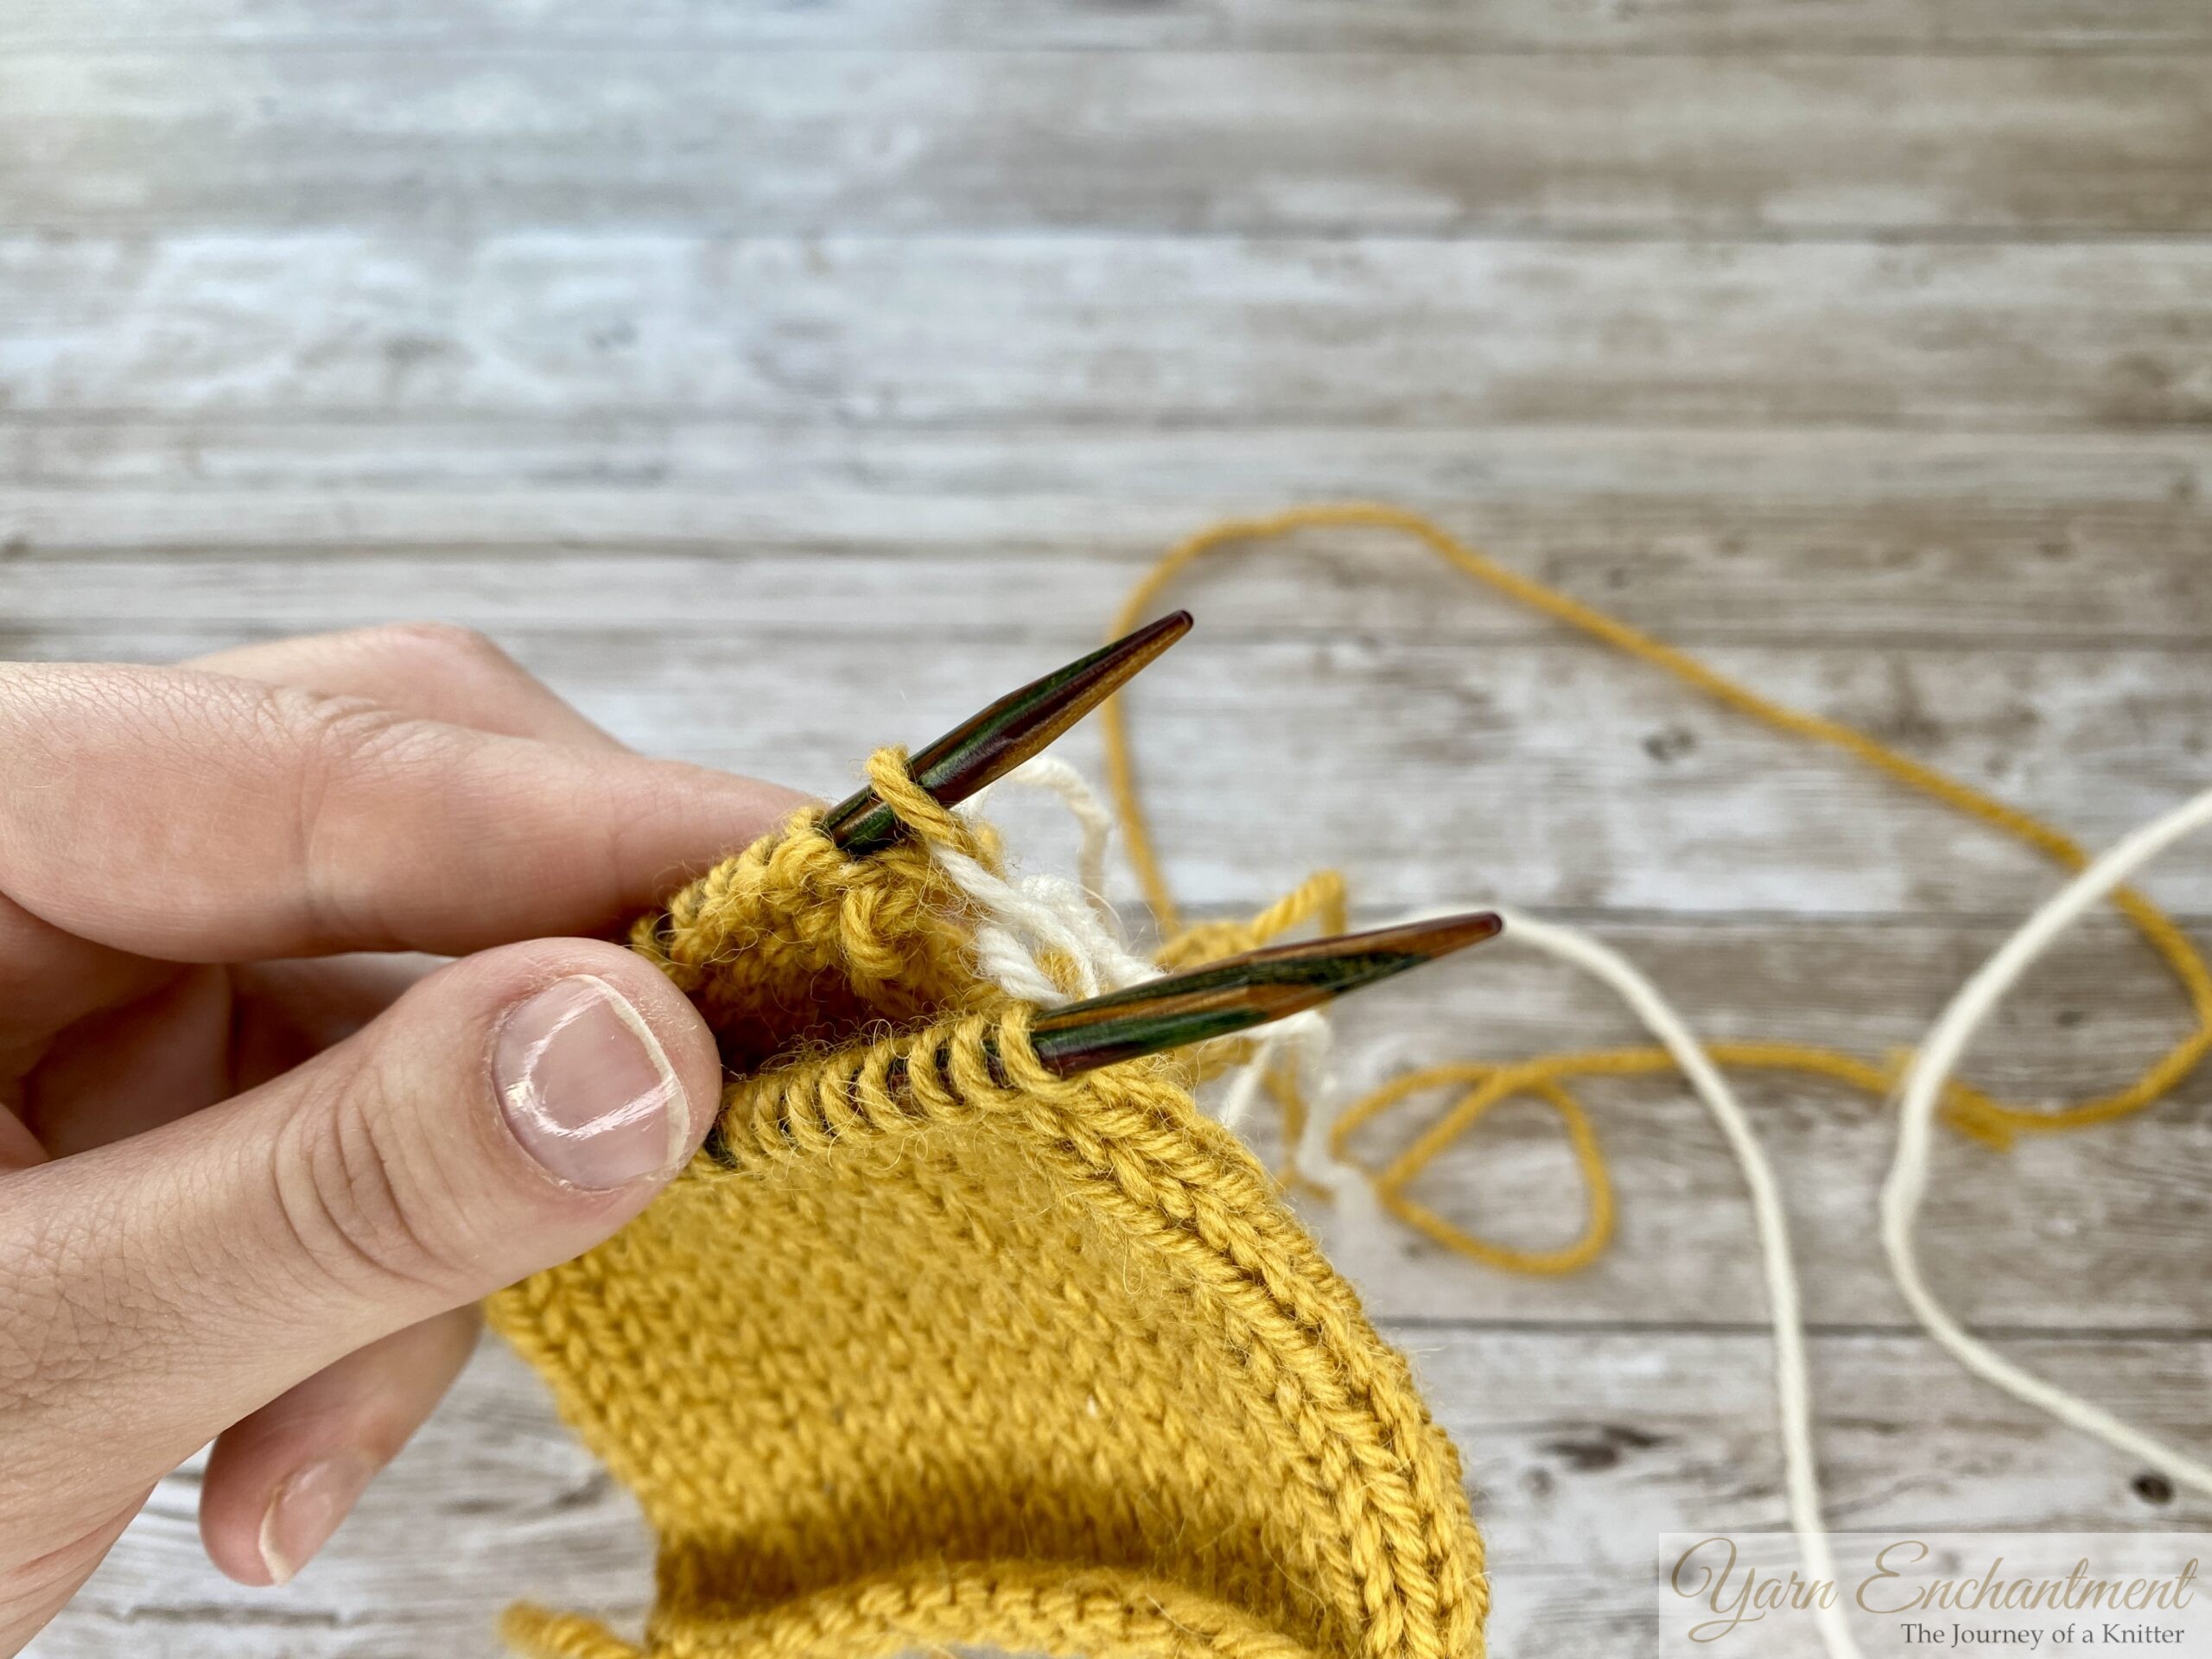  |
Back Needle | Pull the yarn through, and leave the stitch on the needle. |
Step 4: Begin Grafting
Repeat the steps until all stitches are grafted, and periodically adjust the tension to ensure the join is smooth and matches the surrounding stitches.
Front Needle
- Insert the tapestry needle knitwise into the first stitch, and drop the stitch off the needle. (You can pull the yarn through this stitch)
- Insert the tapestry needle purlwise into the next stitch, pull the yarn through, and leave the stitch on the needle.
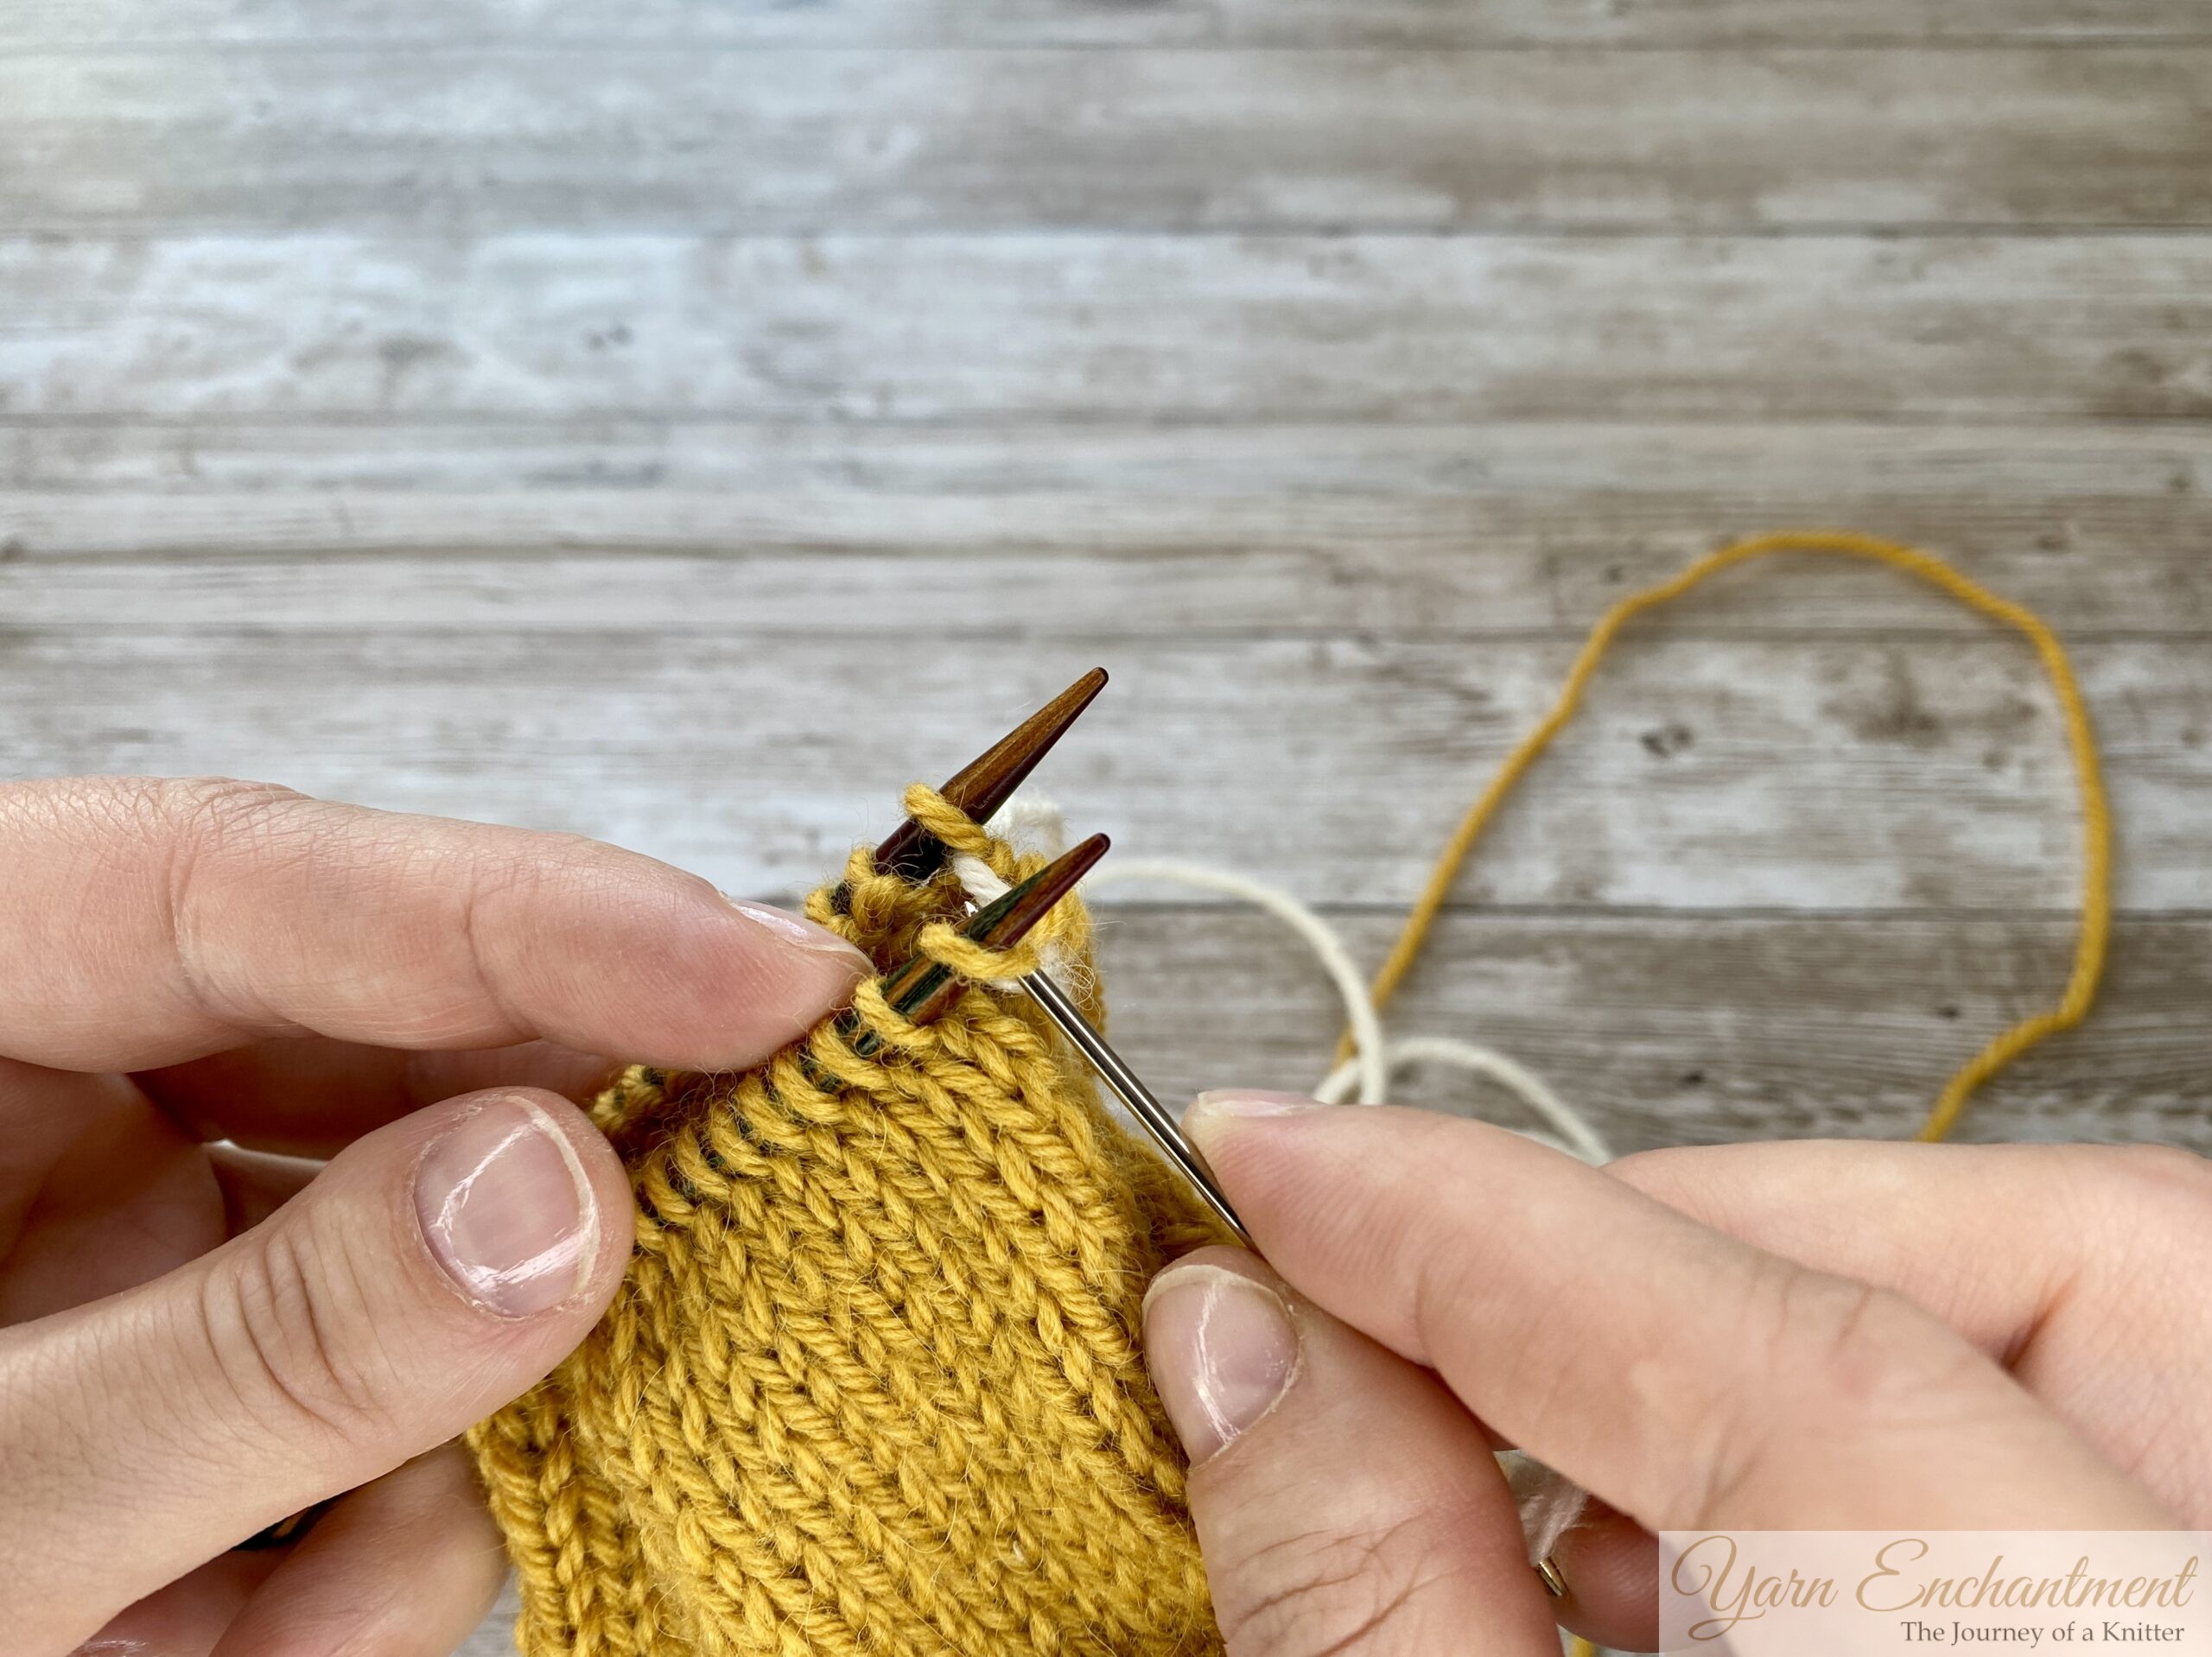  | 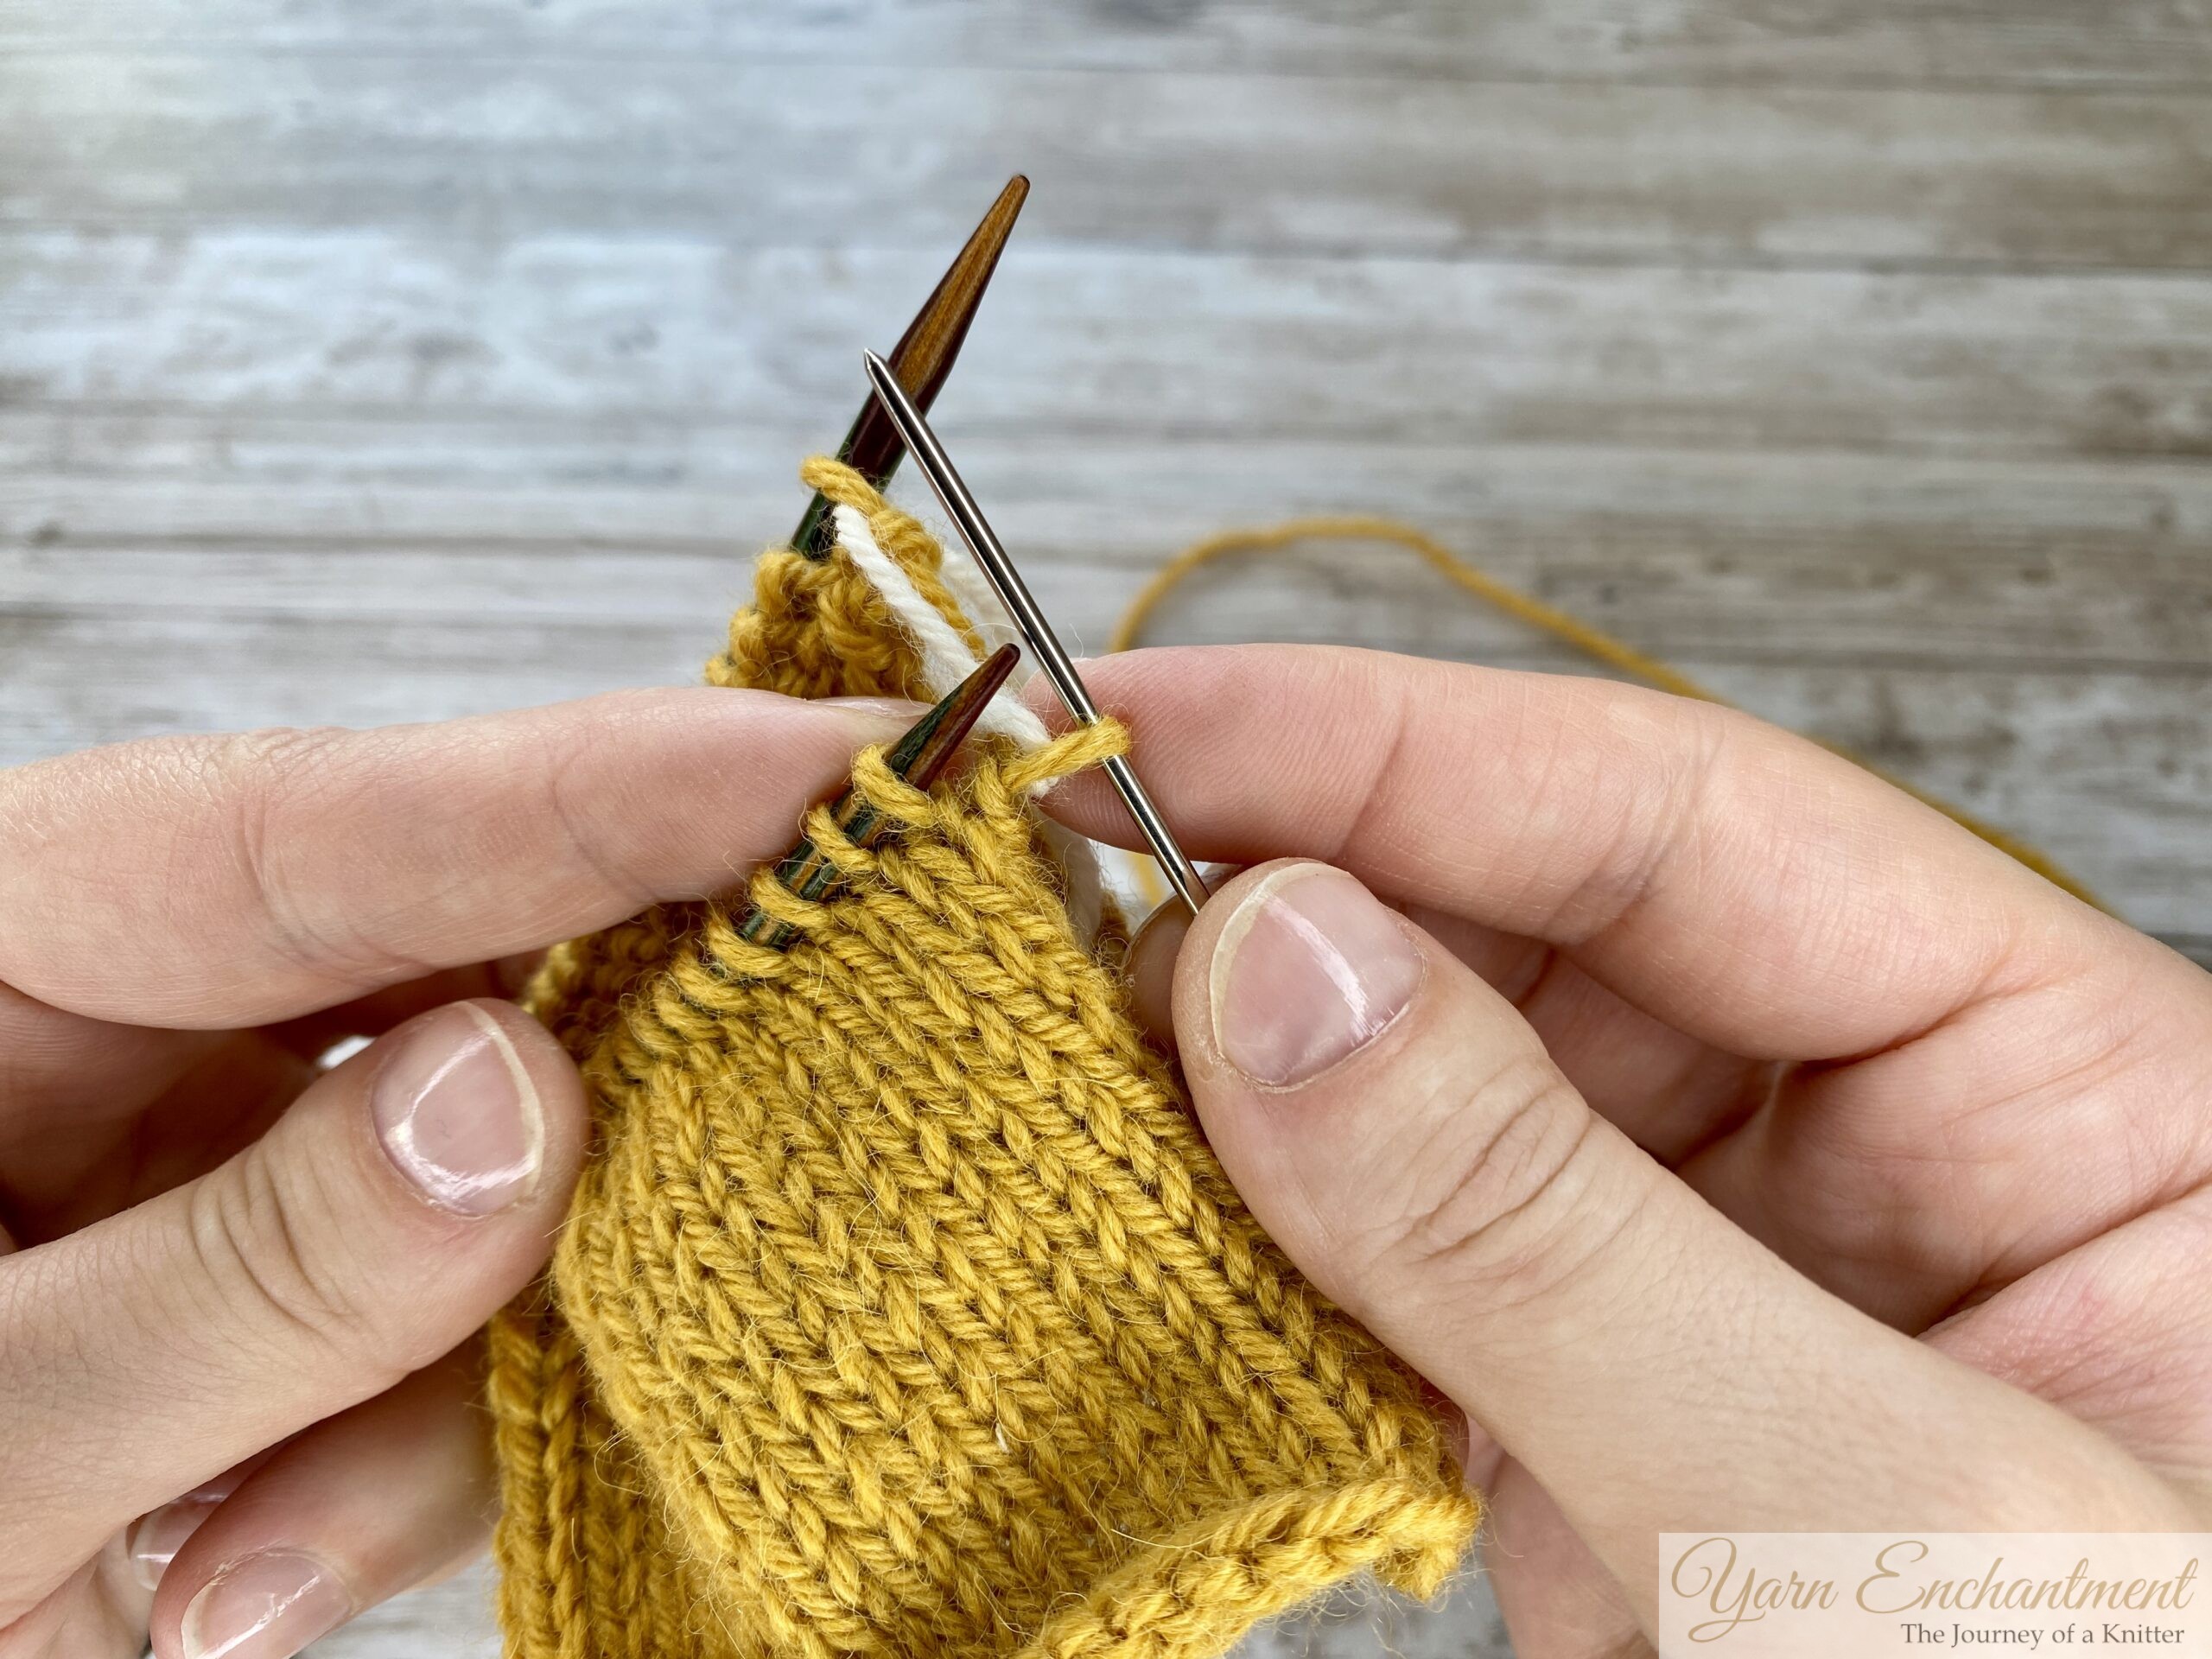  |   |
Insert the tapestry needle knitwise into the first stitch | Drop the stitch off the needle | Insert the tapestry needle purlwise into the next stitch, pull the yarn through, and leave the stitch on the needle . |
Back Needle
- Insert the tapestry needle purlwise into the first stitch, and drop the stitch off the needle. (You can pull the yarn through this stitch)
- Insert the tapestry needle knitwise into the next stitch, pull the yarn through, and leave the stitch on the needle.
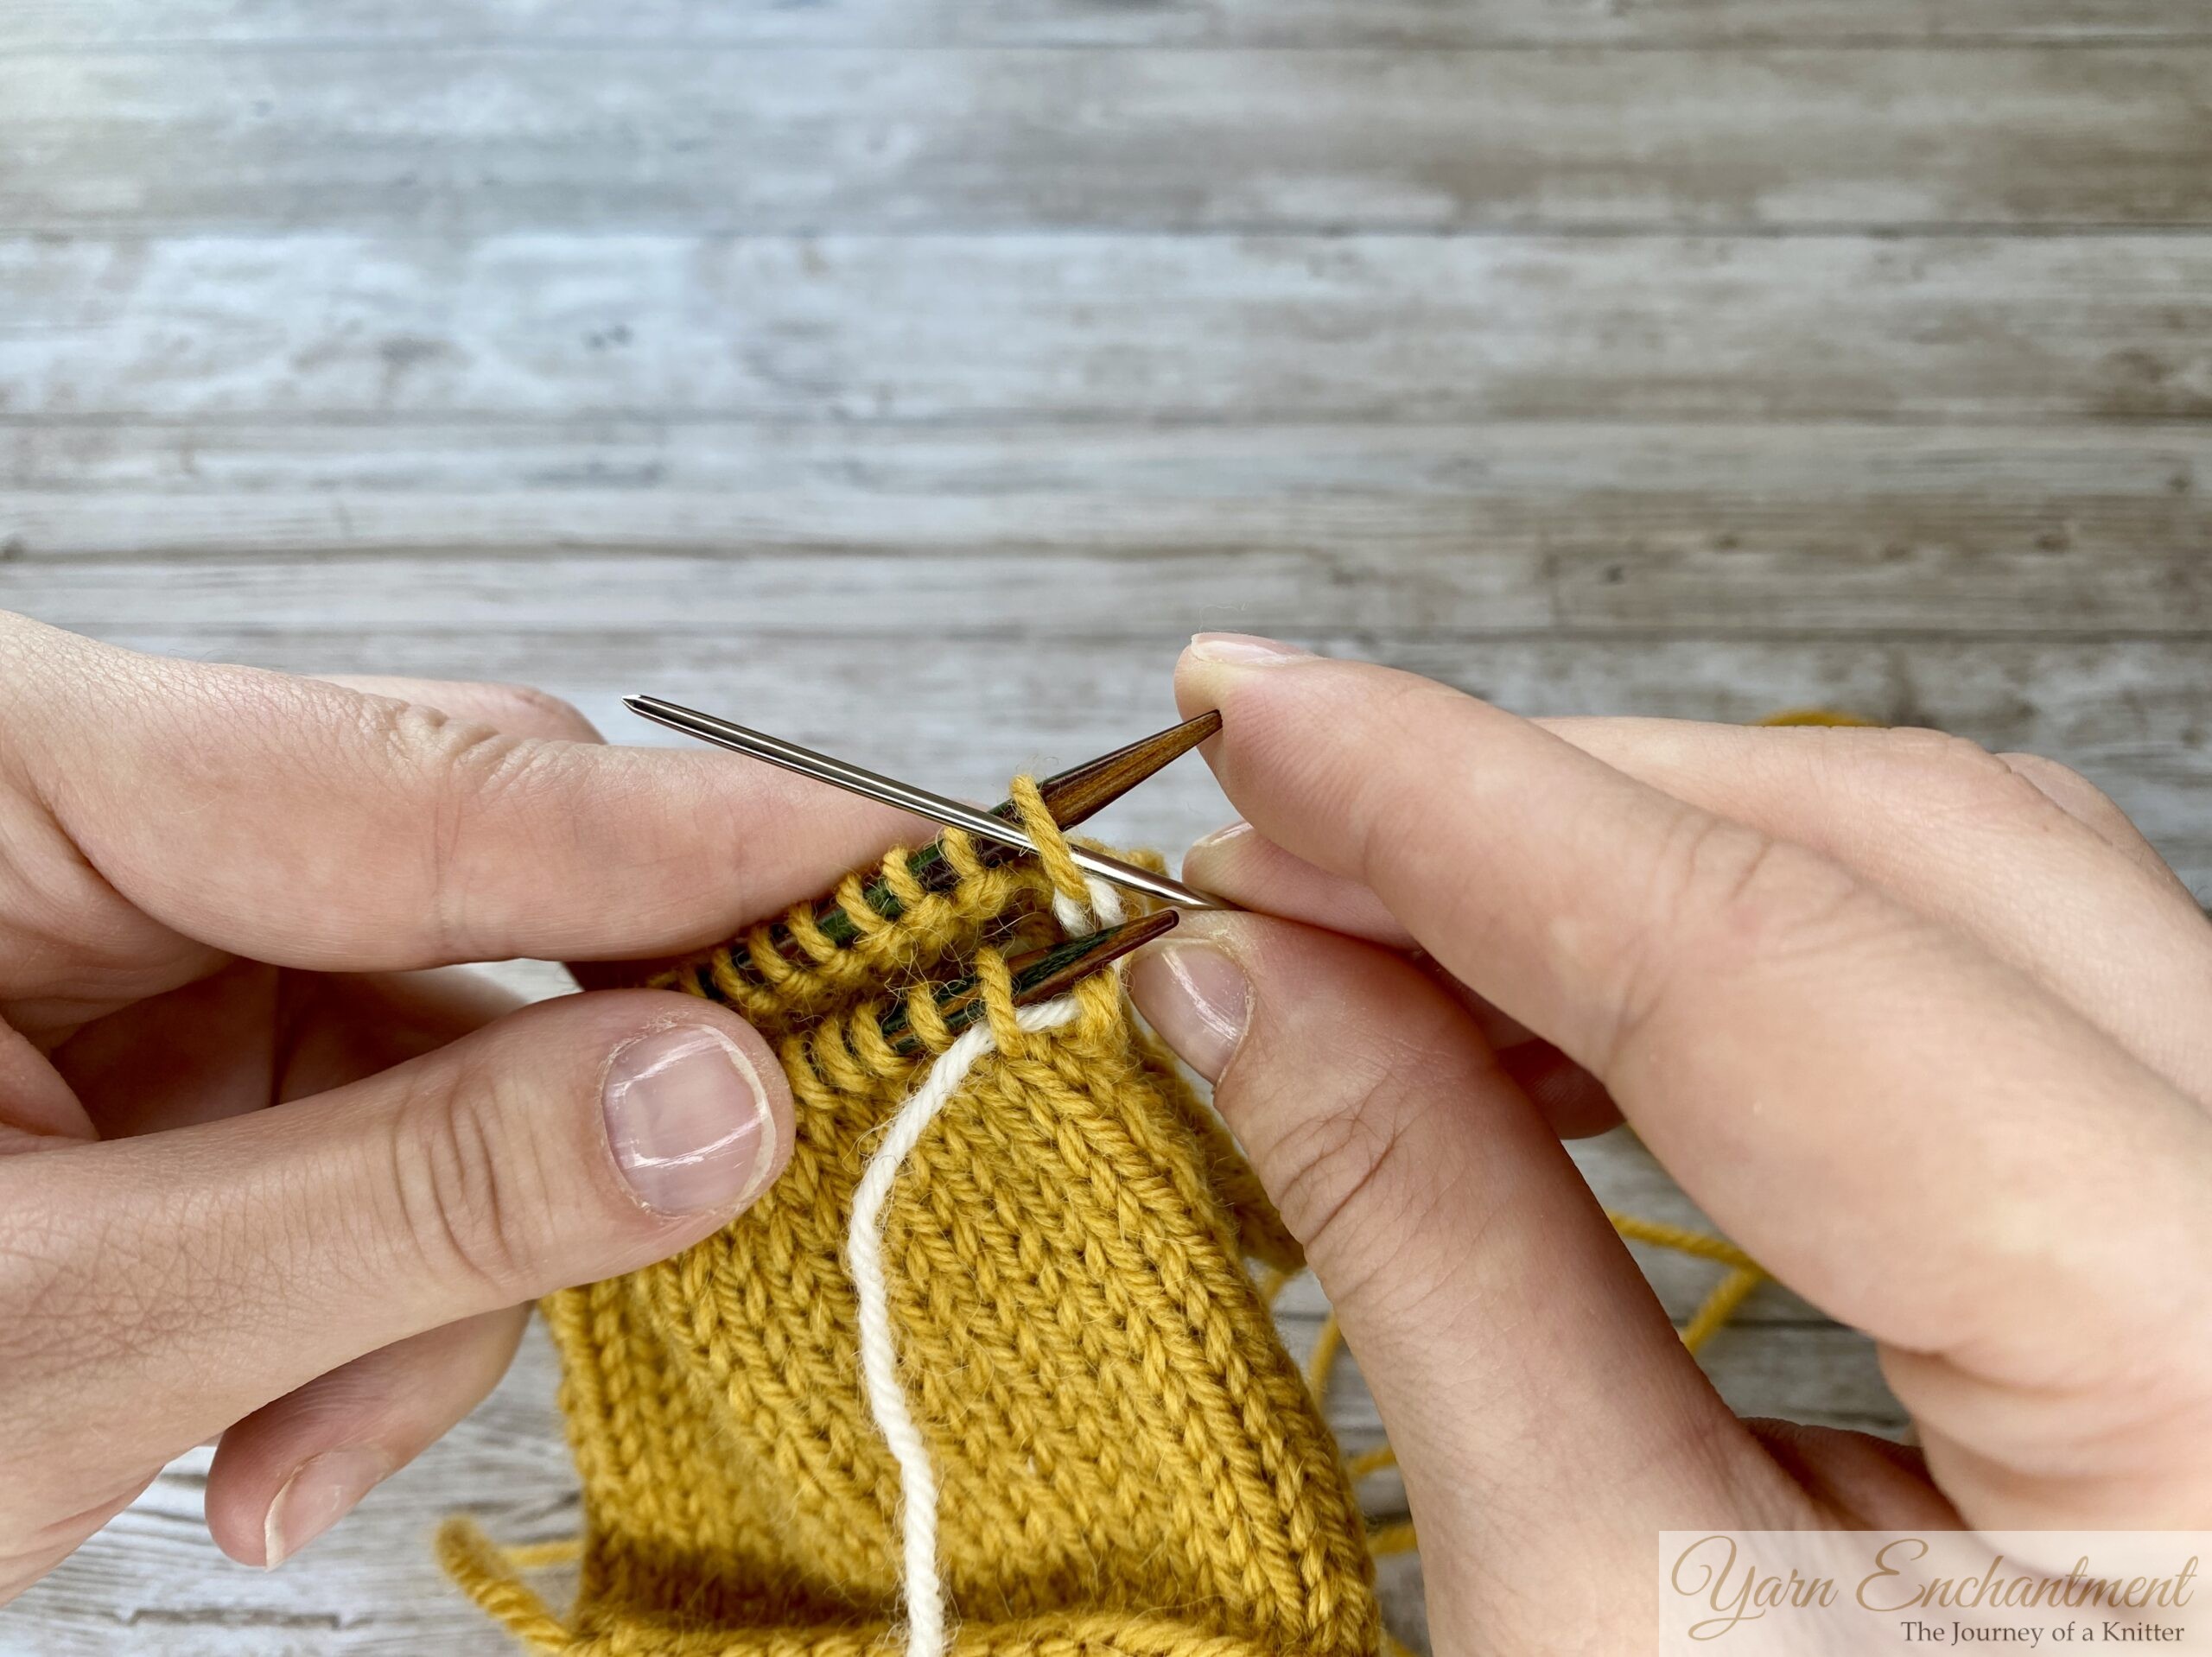  | 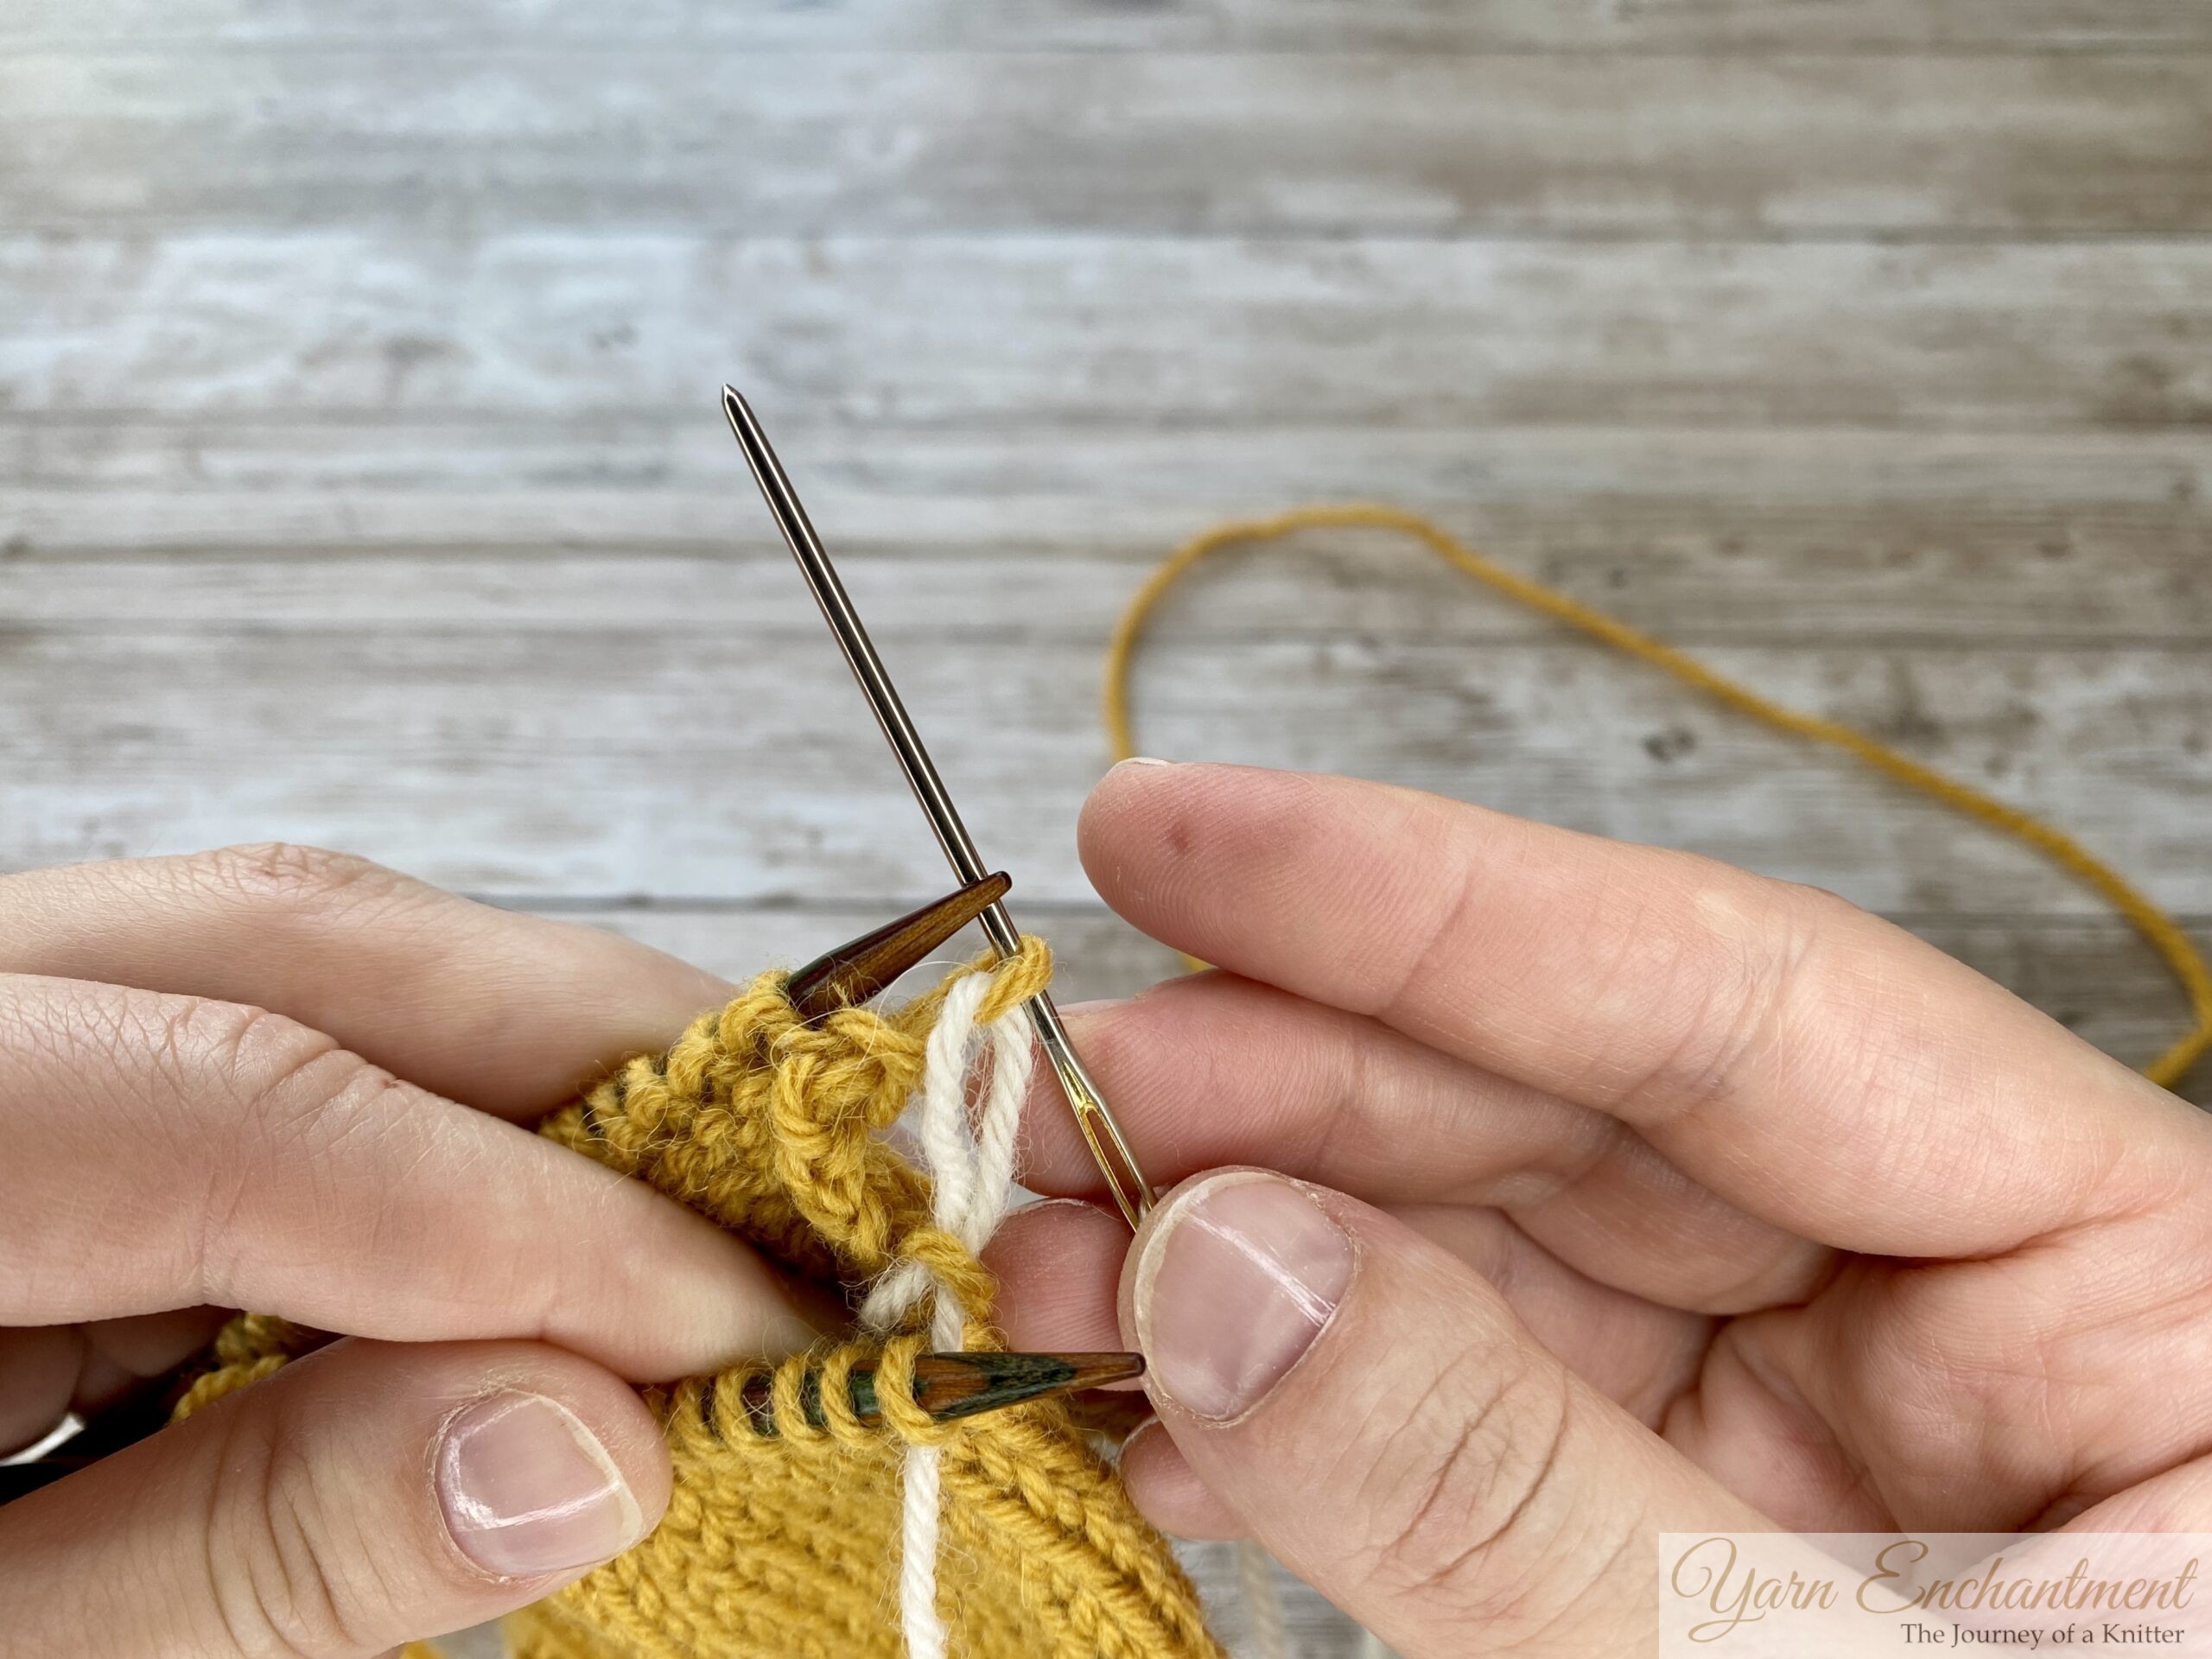  | 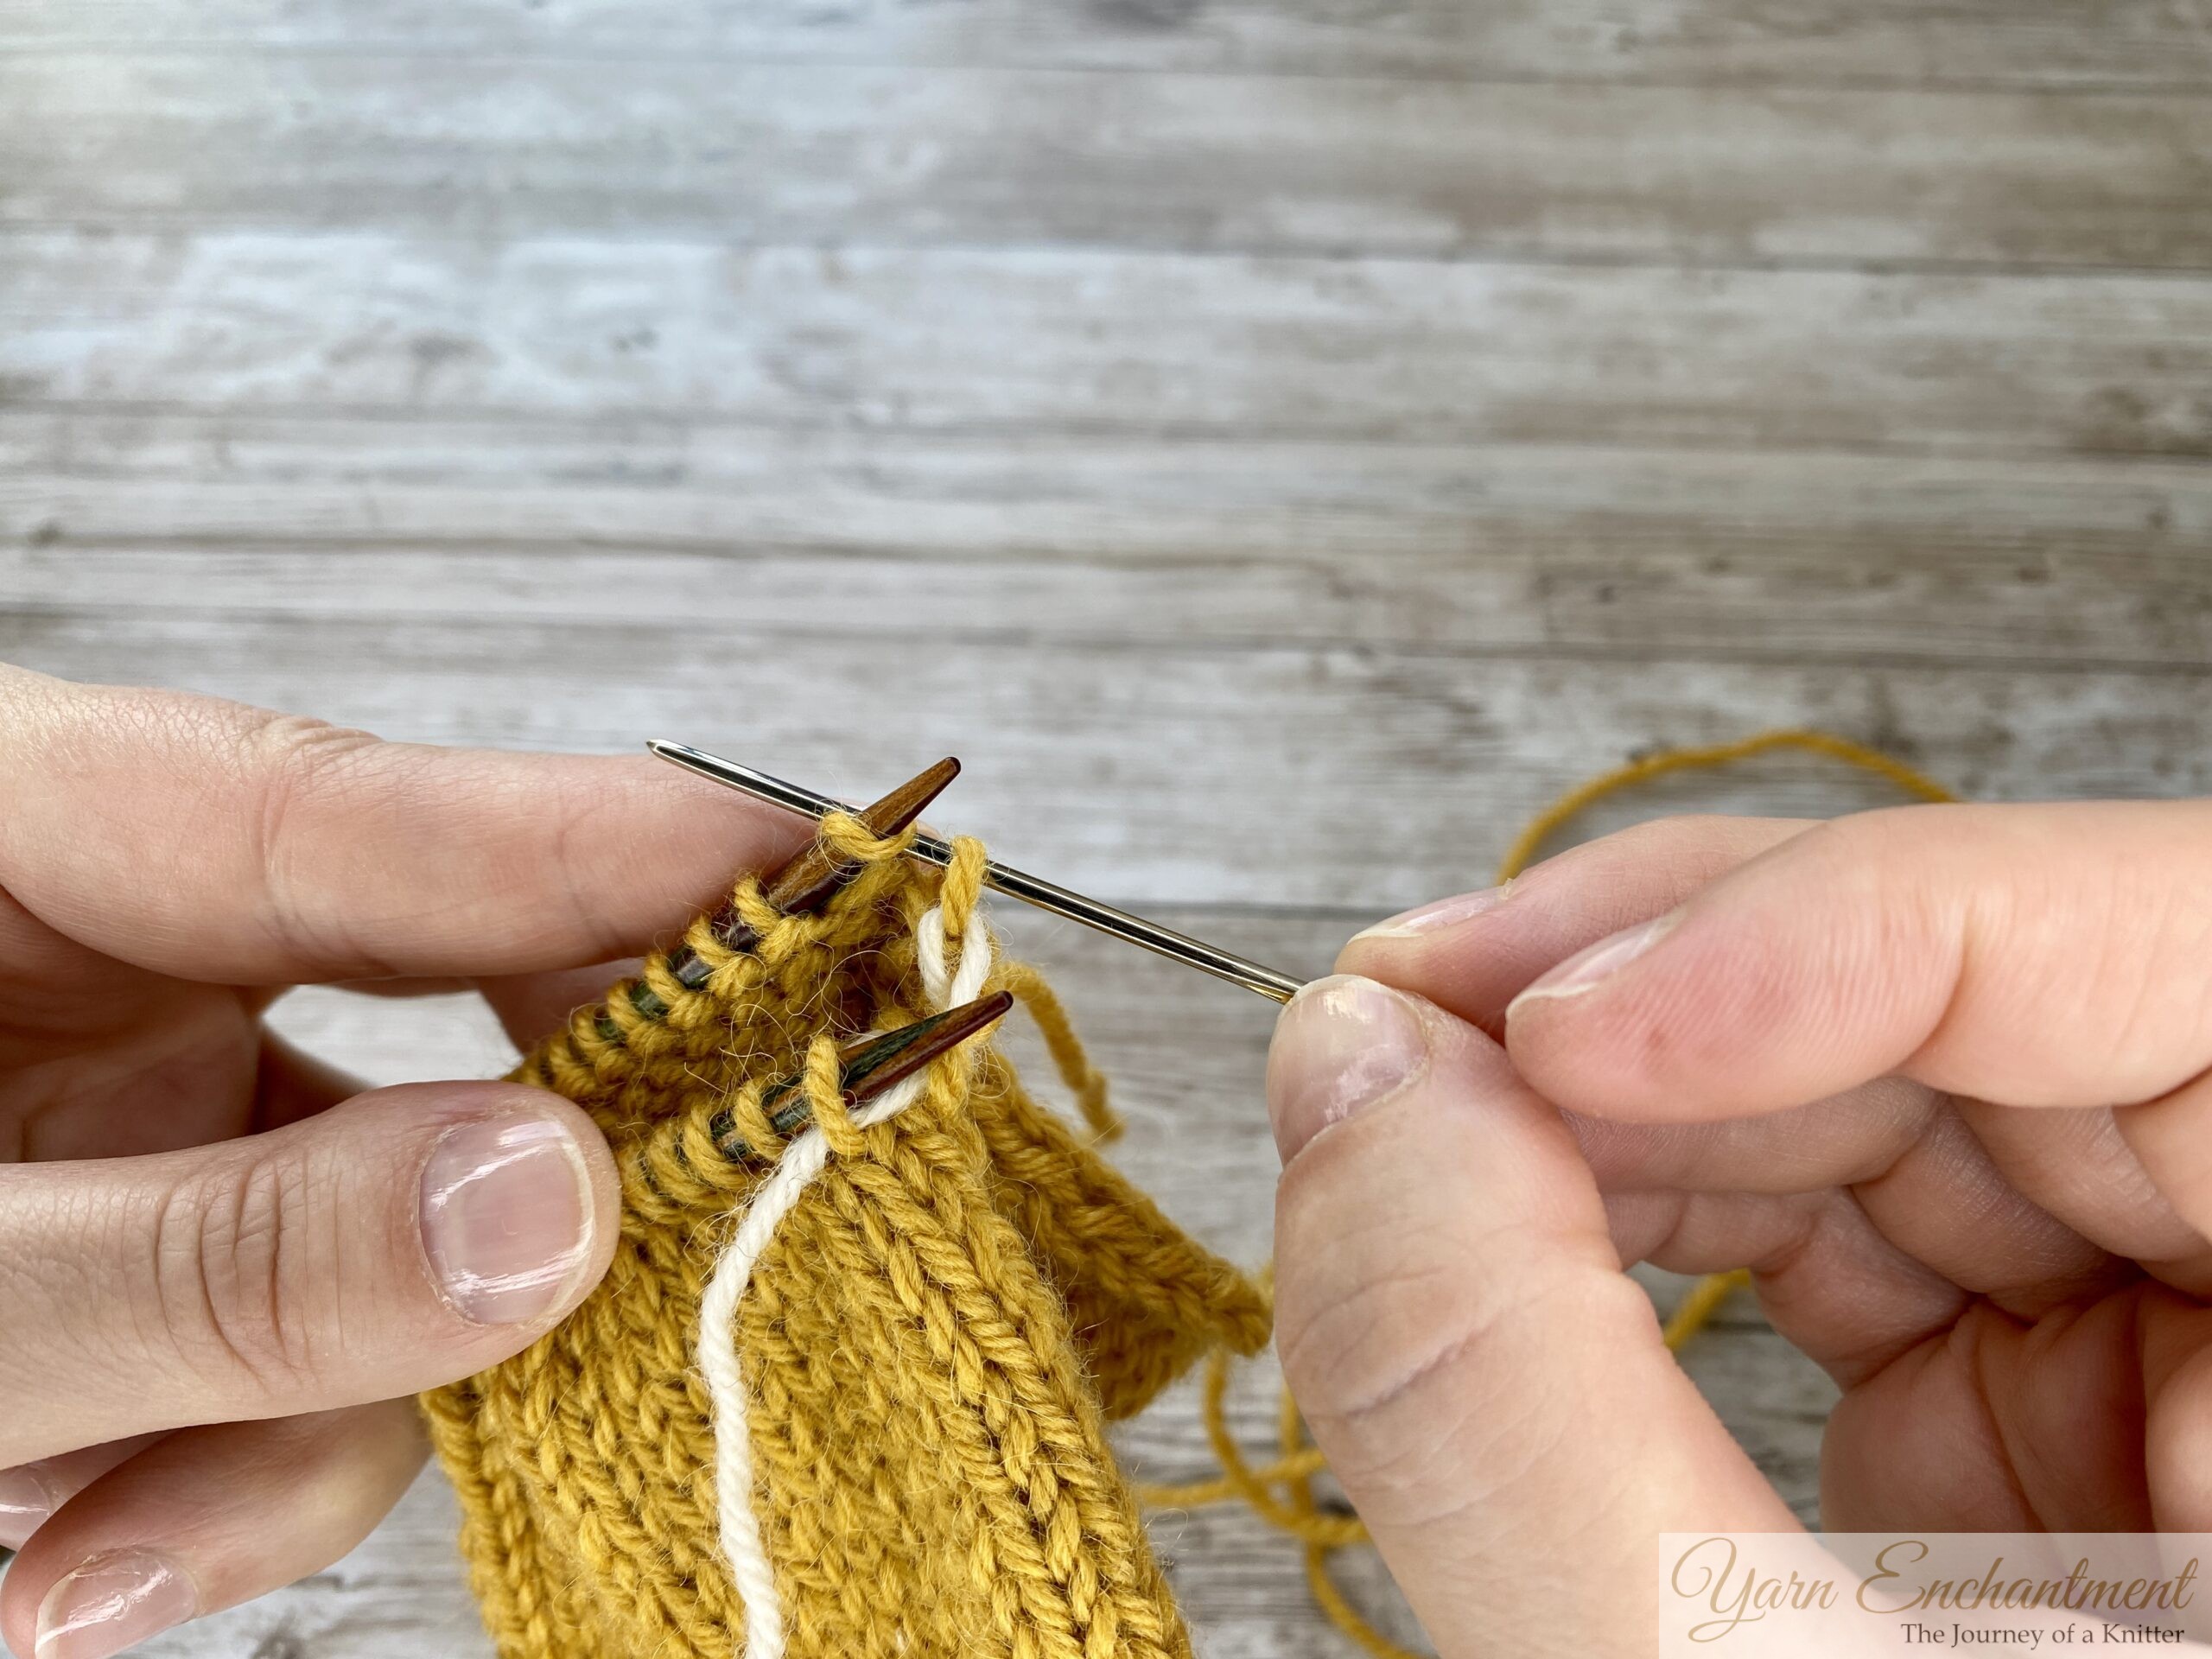  |
Insert the tapestry needle purlwise into the first stitch, | Drop the stitch off the needle | Insert the tapestry needle knitwise into the next stitch, pull the yarn through, and leave the stitch on the needle. |
Repeat this process until all stitches are grafted. Adjust the tension every few stitches to ensure the join is smooth and matches the surrounding fabric.
  | 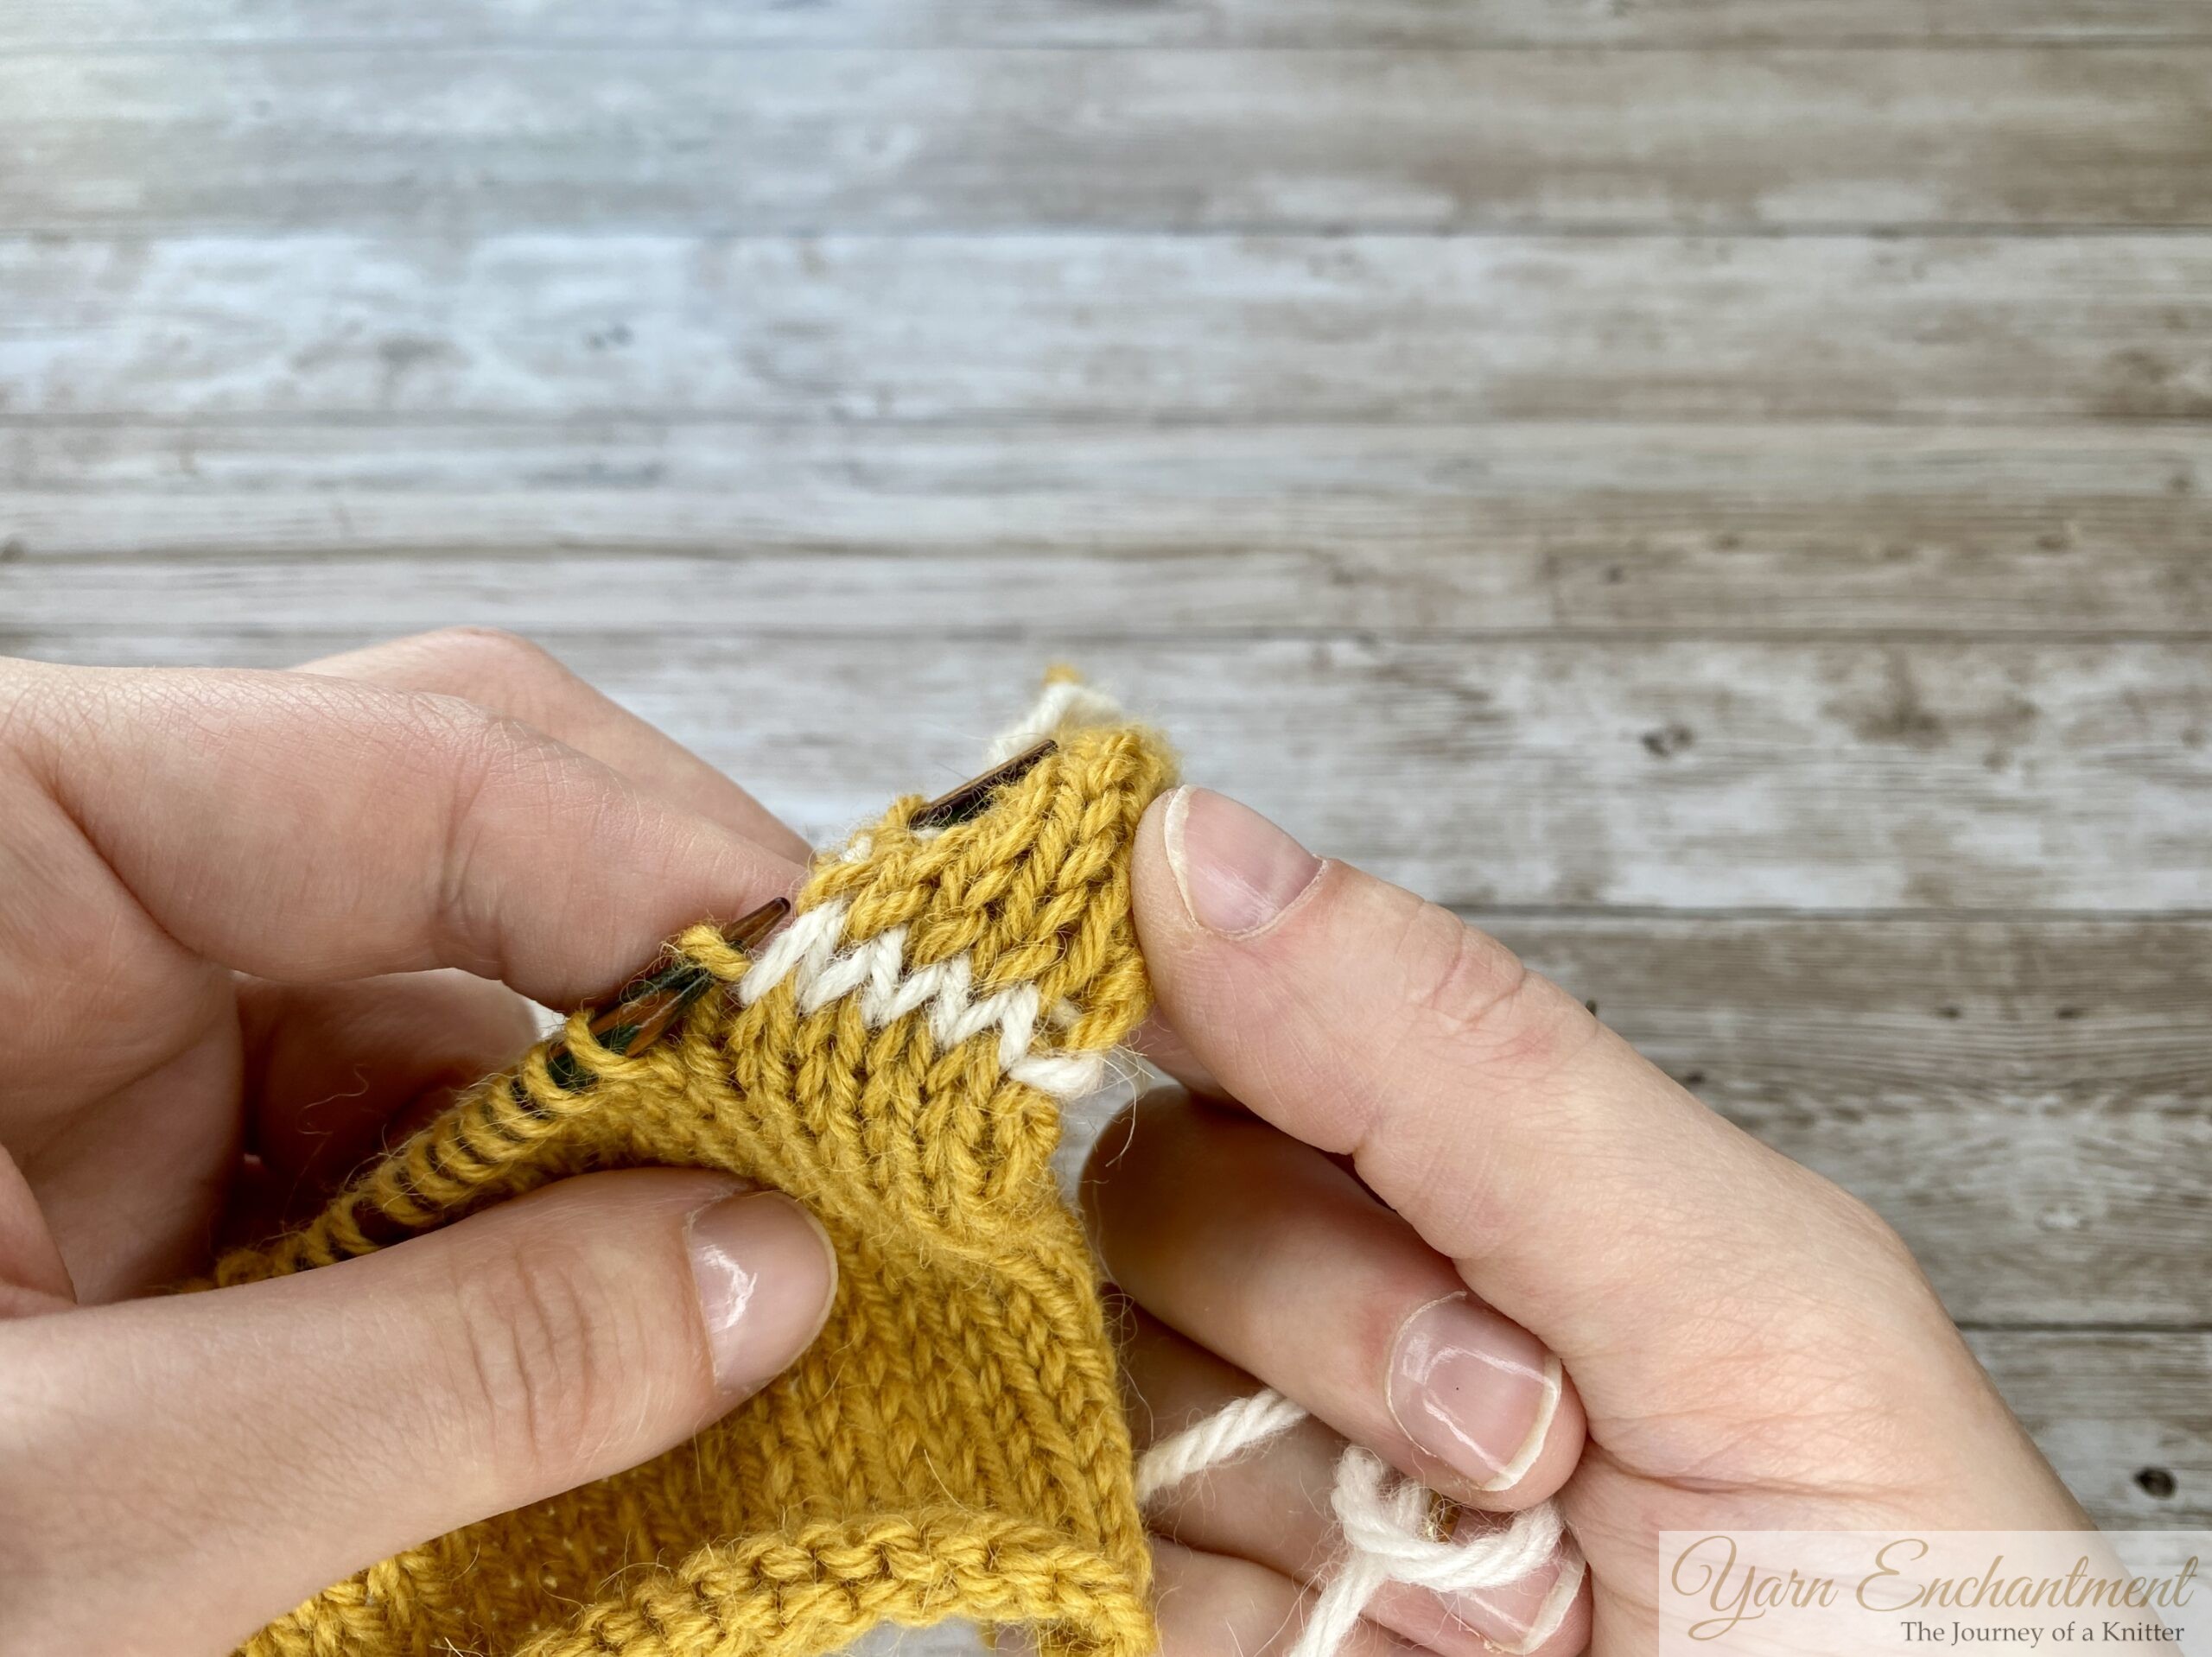  |
Adjust the tension every few stitches to ensure the join is smooth and matches the surrounding fabric | You can see all the little "V"s we have worked |
Finish
When you reach the last few stitches, skip the second step for the front needle and proceed directly to dropping the stitches until the graft is complete. So, knit off the stitch on the front needle, and purl off the stitch on the back needle. Adjust the stitches until you are happy with the result. Weave in the yarn ends for a clean finish.
  |
Adjust the stitches until you are happy with the result. Weave in the yarn ends for a clean finish. |
Tips for Success
Common Mistakes and Troubleshooting
- Tight or too loose grafting: If your seam feels too tight, loosen your tension slightly as you work. If the stitches are too loose, use your needle to gently tighten them by pulling on the yarn after each step. Adjusting as you go will help you achieve a smooth, even graft that blends seamlessly with your knitting.
- Dropped Stitches: Use a crochet hook or spare needle to pick up dropped stitches before continuing.
- Misaligned Stitches: Double-check that both sets of stitches are not twisted on the needles before starting.
  |
Try to match your seam to your knit stitches. This way, you will have a perfect result |
Conclusion
The Kitchener stitch is a clever knitting technique - and it’s a piece of history that’s still relevant today. Born out of necessity during World War I, it solved a real problem for soldiers by making their socks more comfortable. Now, it’s a go-to skill for knitters who want seamless, polished finishes in their projects.
Learning the Kitchener stitch might take a little practice, but once you get the hang of it, you’ll find yourself using it everywhere - from sock toes to mitten tops and beyond. There’s something truly satisfying about creating a seam that’s nearly invisible, blending perfectly into your work. Give it a try, and see how this timeless technique can elevate your knitting.
Until then, happy knitting - and happy grafting!
A Little Way to Say Thanks
Yarn Enchantment is my cozy hobby corner on the internet. If something here made your knitting day easier or you simply enjoy reading my posts and would like to say thank you, you can leave a small Ko-fi tip - but only if you truly want to.
My patterns and tutorials stay free for everyone, always. Every little tip just goes toward new yarn and a cup of tea for my cozy knitting evenings.
☕ Support me on Ko-fi
You Might Also Like



 |
|
Join the Cozy Corner Newsletter
Hello, creative soul. Welcome to the Yarn Enchantment Newsletter, a little space where we celebrate all things cozy, crafty, and full of heart. Think of this as your friendly crafting companion, a soft dose of inspiration delivered straight to your inbox, just for you. Each newsletter brings you: ✨ Notifications about new patterns and tutorials – easy knitting patterns and beginner crochet projects you won’t find anywhere else 🧶 Practical yarn tips for new crafters, plus advice on the best yarn for fall, blankets, and handmade gifts 💌 Small stories and adventures from my own workbench, because crafting is as much about the journey as the finished piece Whether you’re knitting by the fire, looking for your next creative spark, or simply wanting a quiet moment with your hooks and needles, this newsletter is here to cheer you on. Crafting isn’t just about the final project. It’s about the joy, the peace, and the stories we weave along the way. So grab a cup of tea or coffee, settle in, and join me. Together we’ll make a little magic, one stitch and one story at a time. I’m so glad you’re here. Let’s create something beautiful together. Sign up below to receive your first email, and feel free to leave a comment on the blog if there’s a topic you’d love to see covered. Your ideas might just become our next newsletter feature. |