

Celebrate Easter with Hand-Knitted Socks & Authentic Kärntner Reindling
April 7, 2025
How to Work a Provisional Cast-On (Open Cast-On) Over a Spare Cable
April 16, 20253D Flower Granny Square Tutorial: Step-by-Step Crochet Guide

Originally published on April 13, 2025
Spring is finally here, and the flowers are starting to find their way to the surface, reaching out to greet the first warm sun rays. I can’t wait to see all the colorful blooms again - nature’s way of reminding us of life’s beauty.
But while we wait for nature to fully awaken and show off her vibrant colors, why not bring that same vibrancy into our lives through crocheting? Crocheting is more than just a craft - it’s a way to express creativity and bring joy into everyday moments.
And if you’re looking to add a touch of elegance and dimension to your crochet projects, this 3D flower granny square tutorial is perfect for you. With just three colors and some basic stitches, you’ll create a stunning textured square that can be used in scarves, blankets, or even as standalone decorations.
This easy-to-follow guide is perfect for beginners who want to challenge themselves with something new. Plus, I have included tips for customizing your design so you can make it uniquely yours. So grab your yarn and hook, and let’s get started!
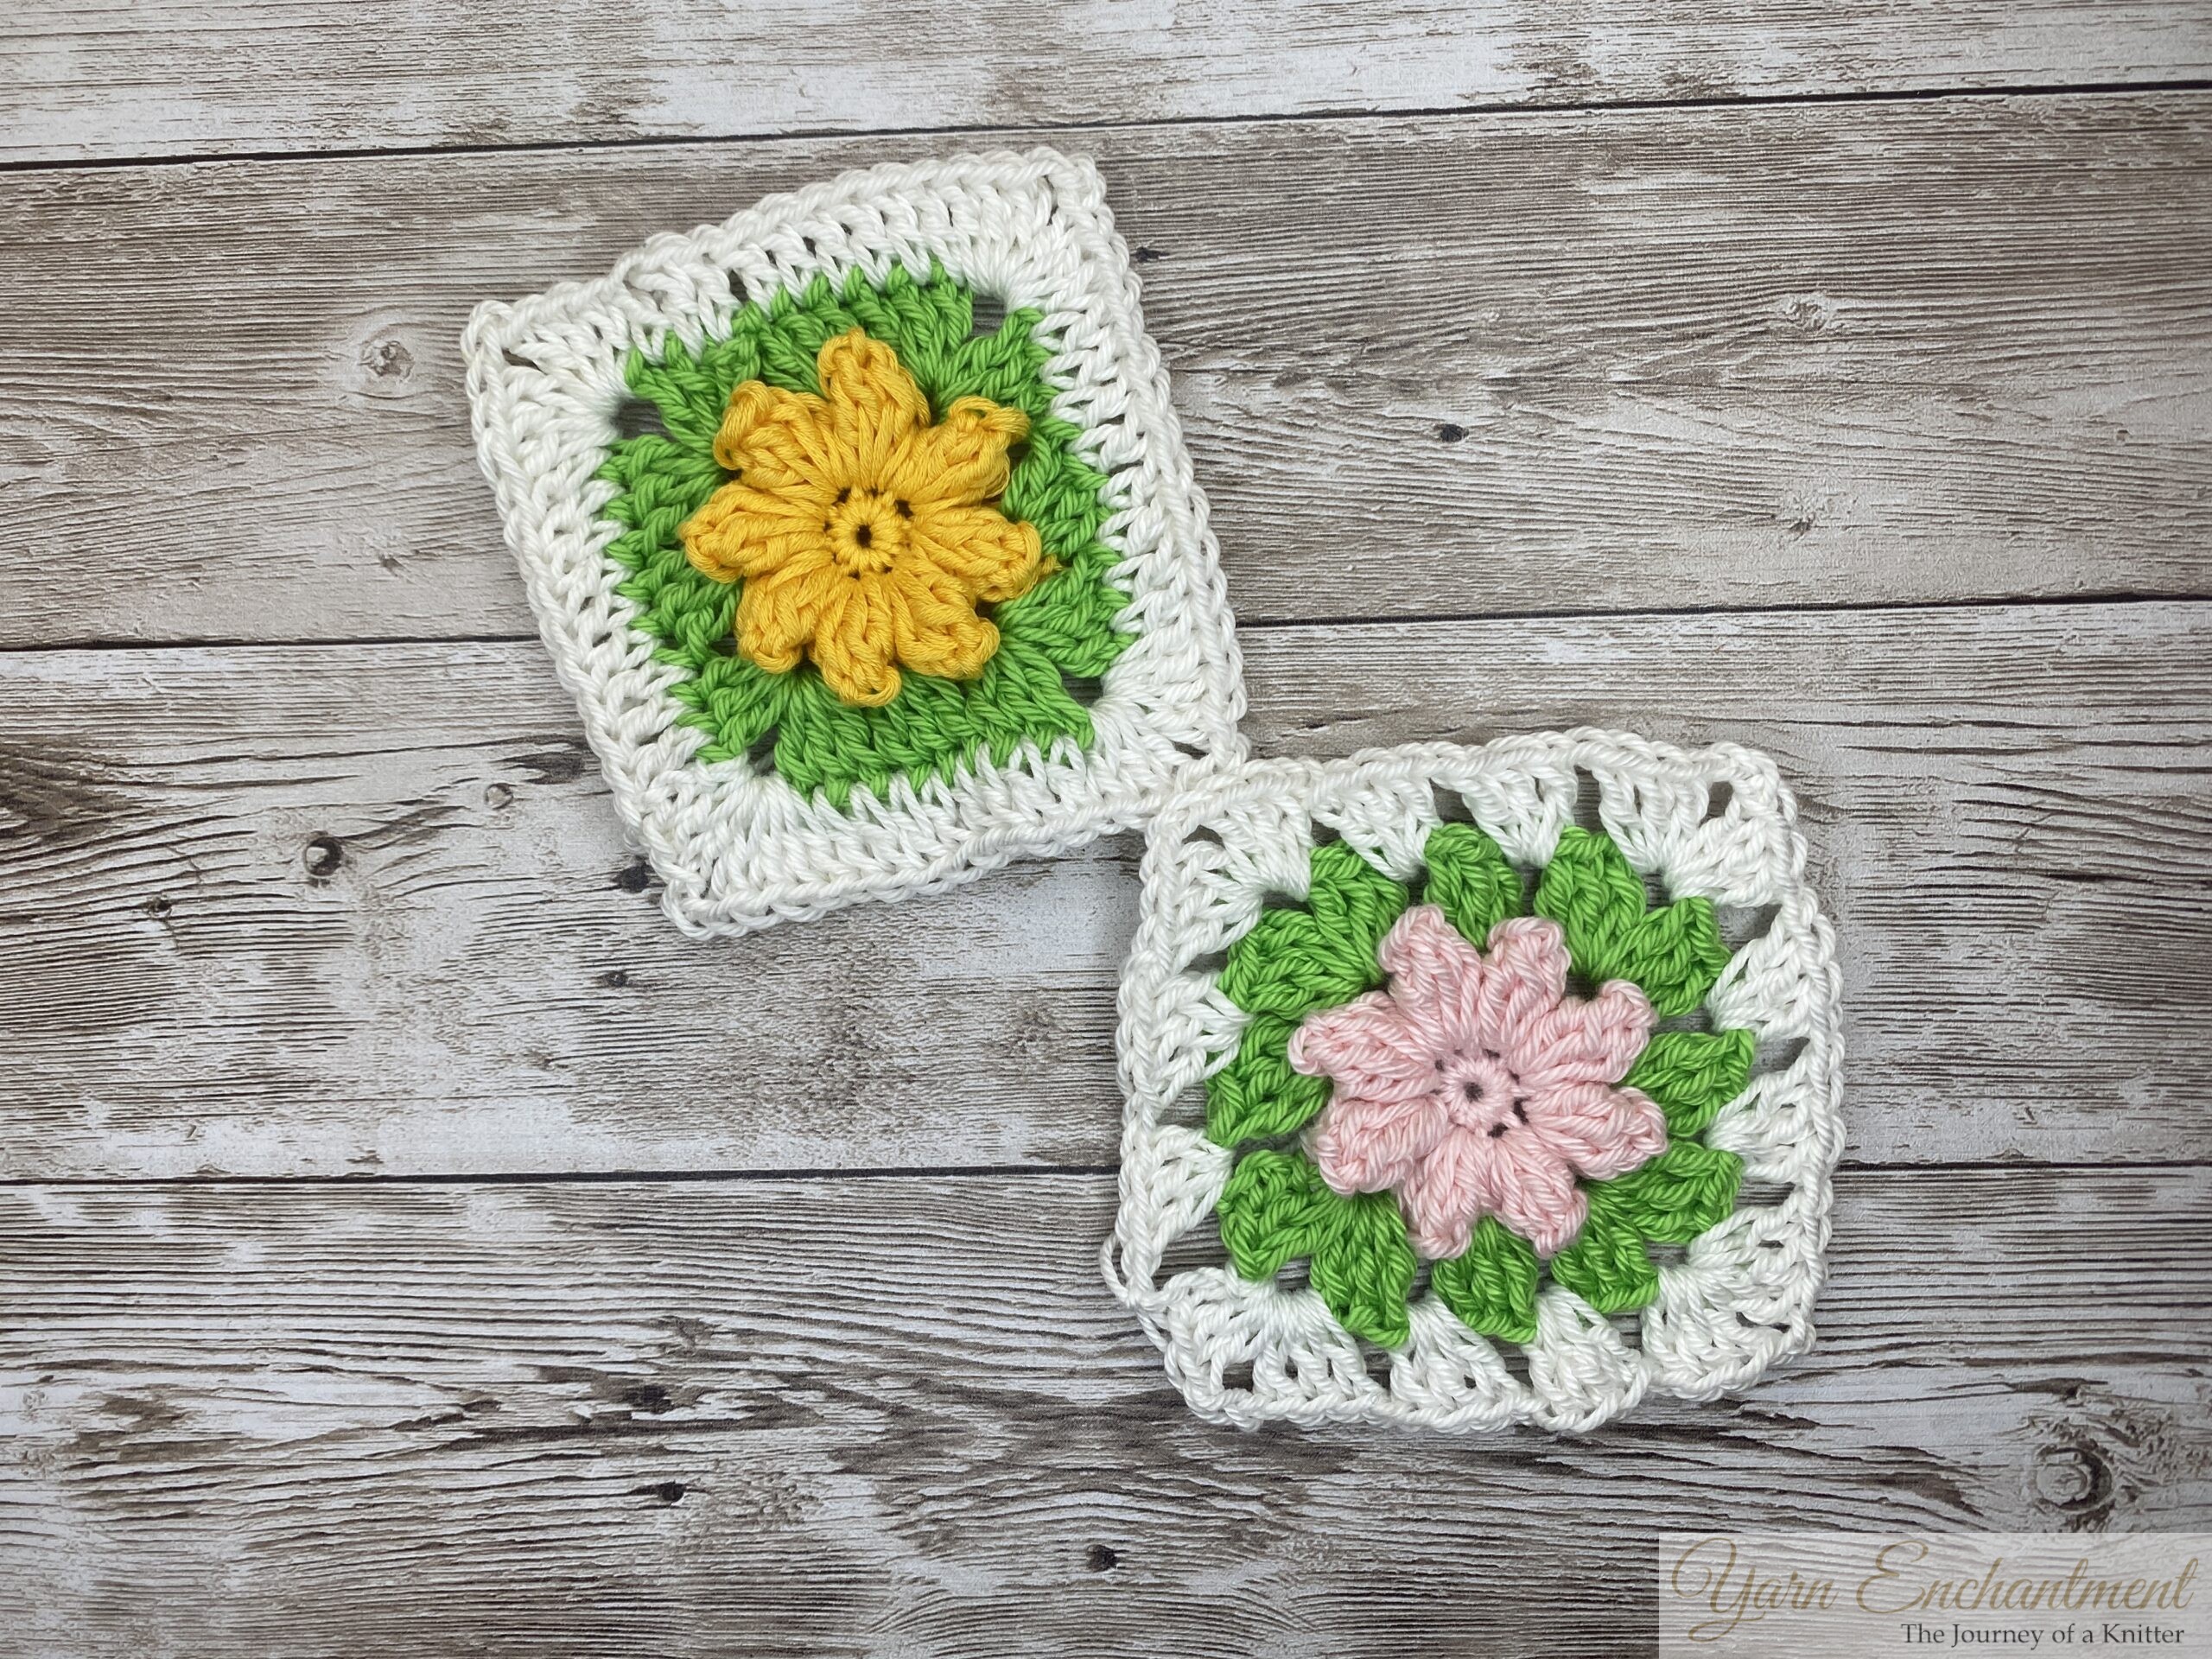
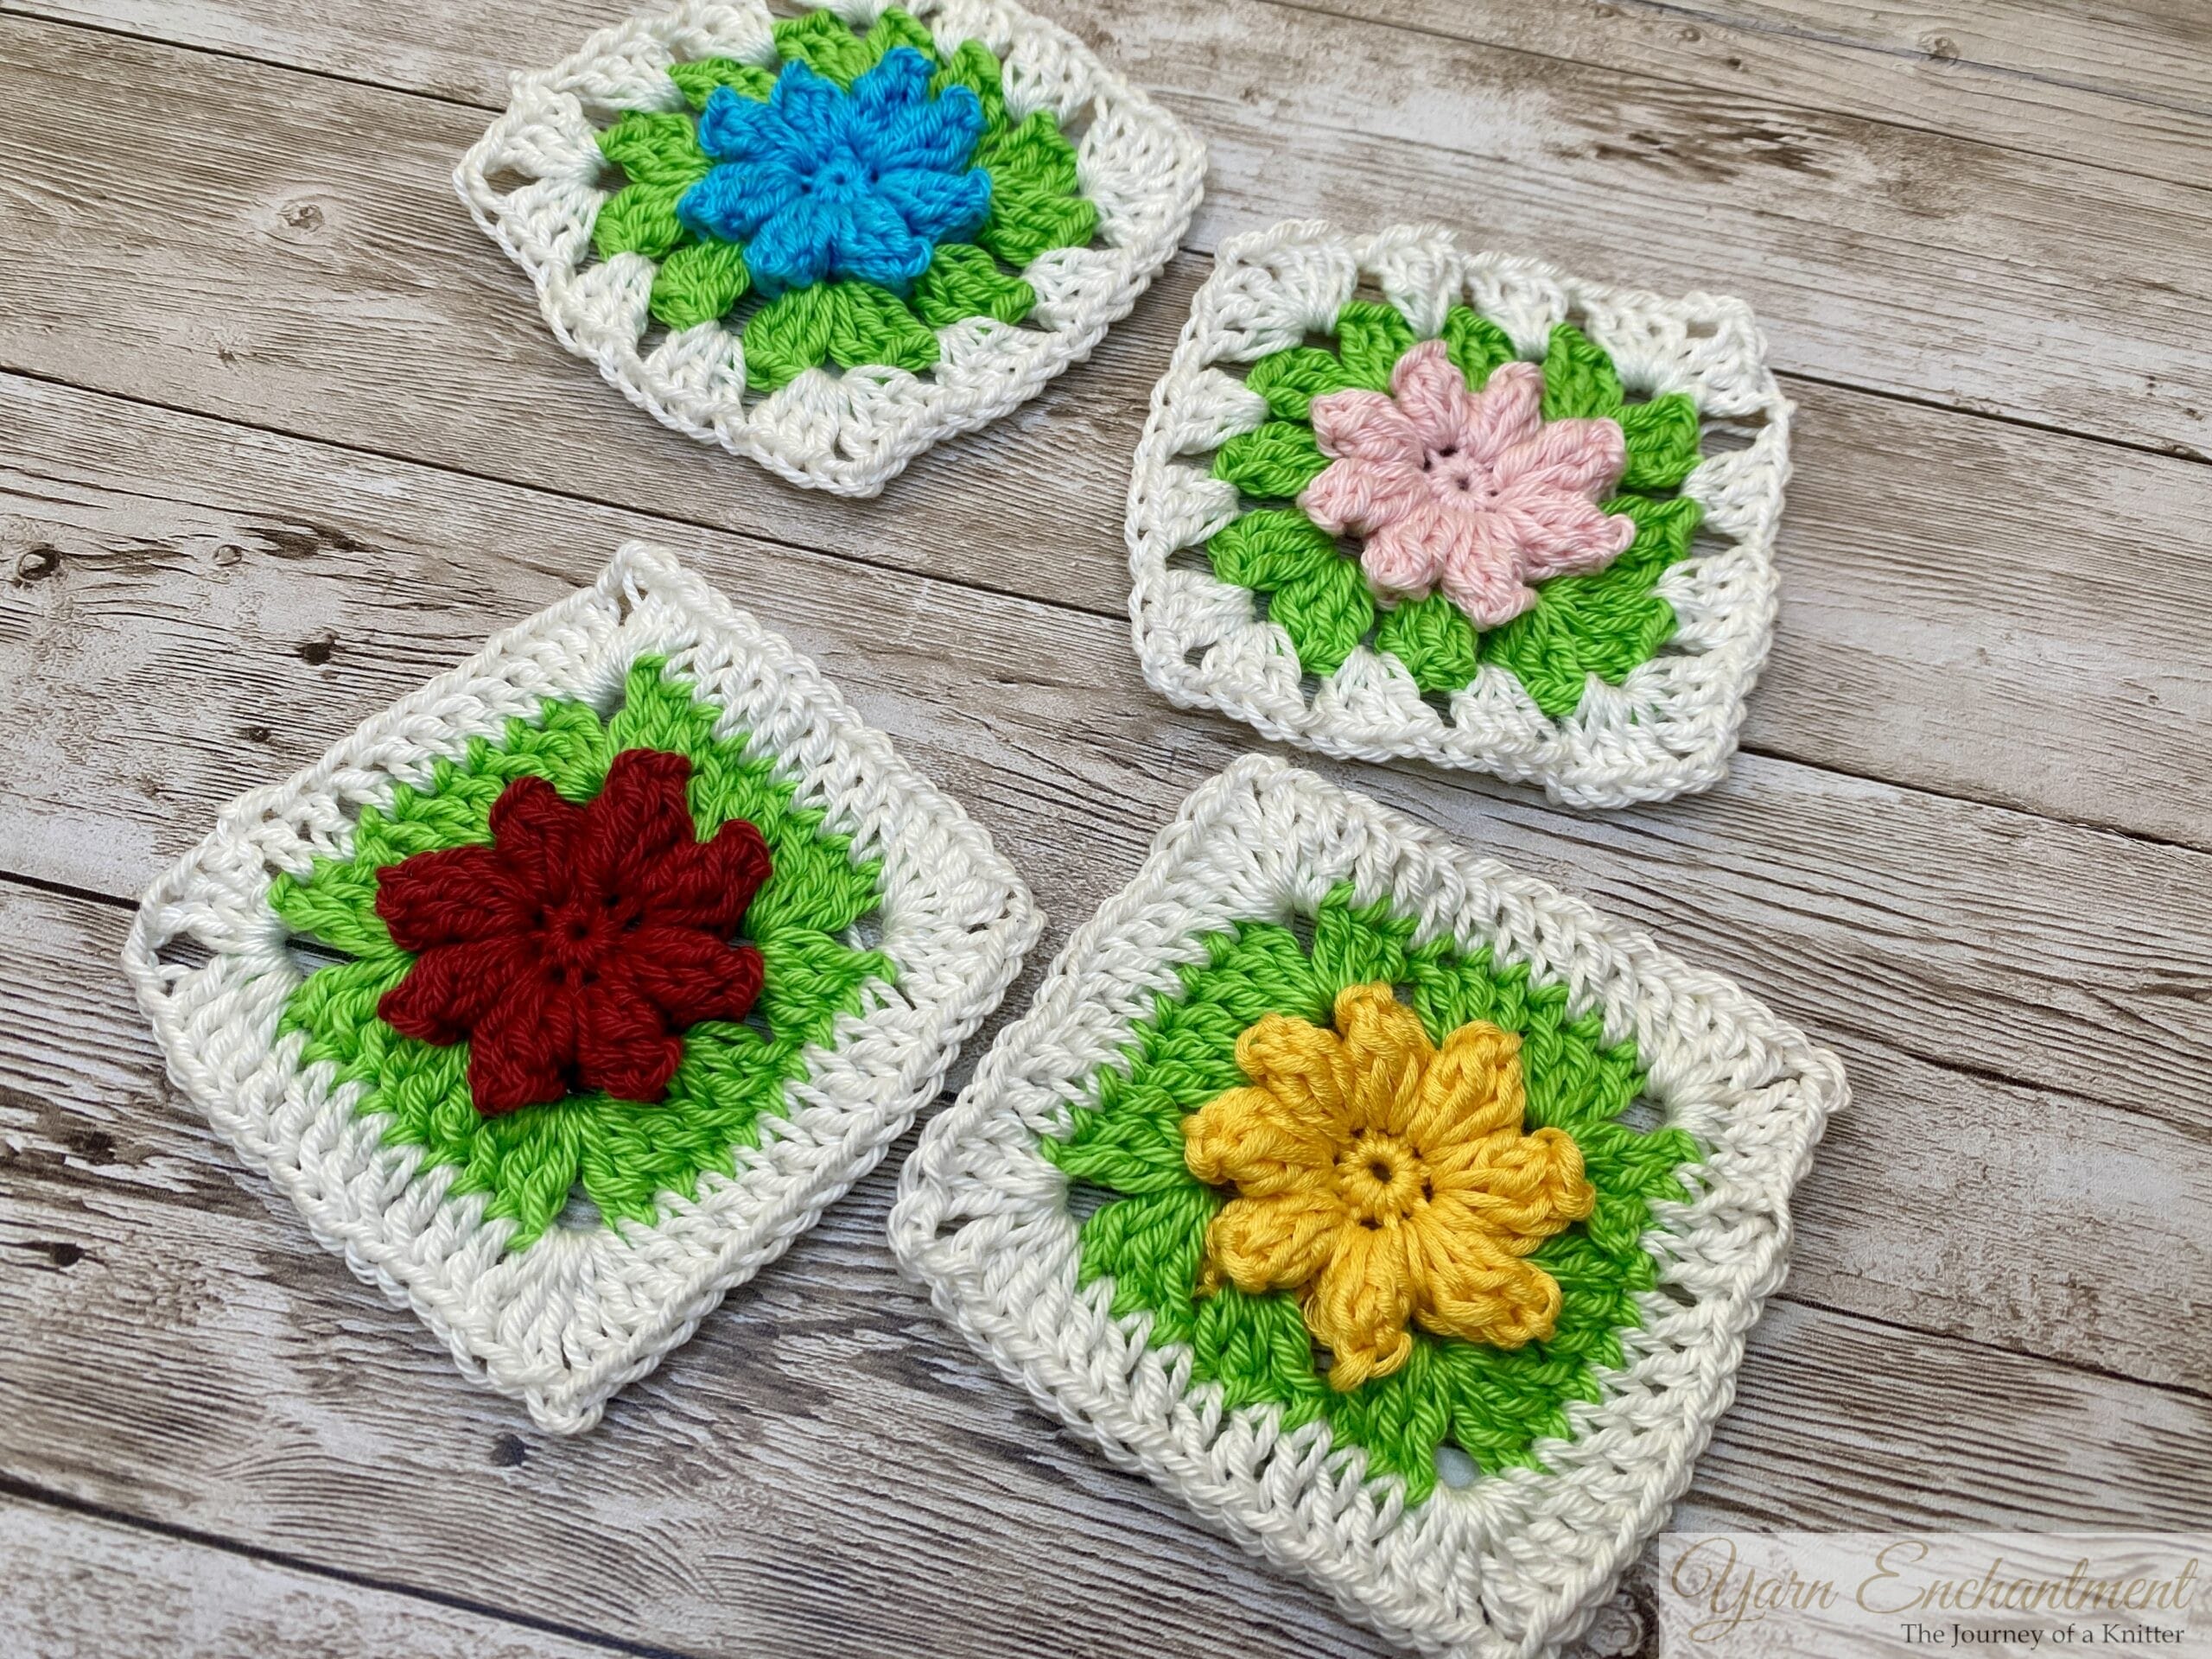 | Finished 3D Granny Square |

Quick Links:
Jump to a specific section:
- Materials Needed
- Step-by-Step Instructions
- Tips for Customizing Your Square
- Ideas for Using Your Finished Square
- Conclusion
Materials Needed for Your 3D Flower Granny Square
Before you begin, gather the following materials:
- Yarn in three colors (we’ll refer to them as Color A, Color B, and Color C)
- Crochet hook (size appropriate for your yarn weight)
- Scissors
- Yarn needle (for weaving in ends)
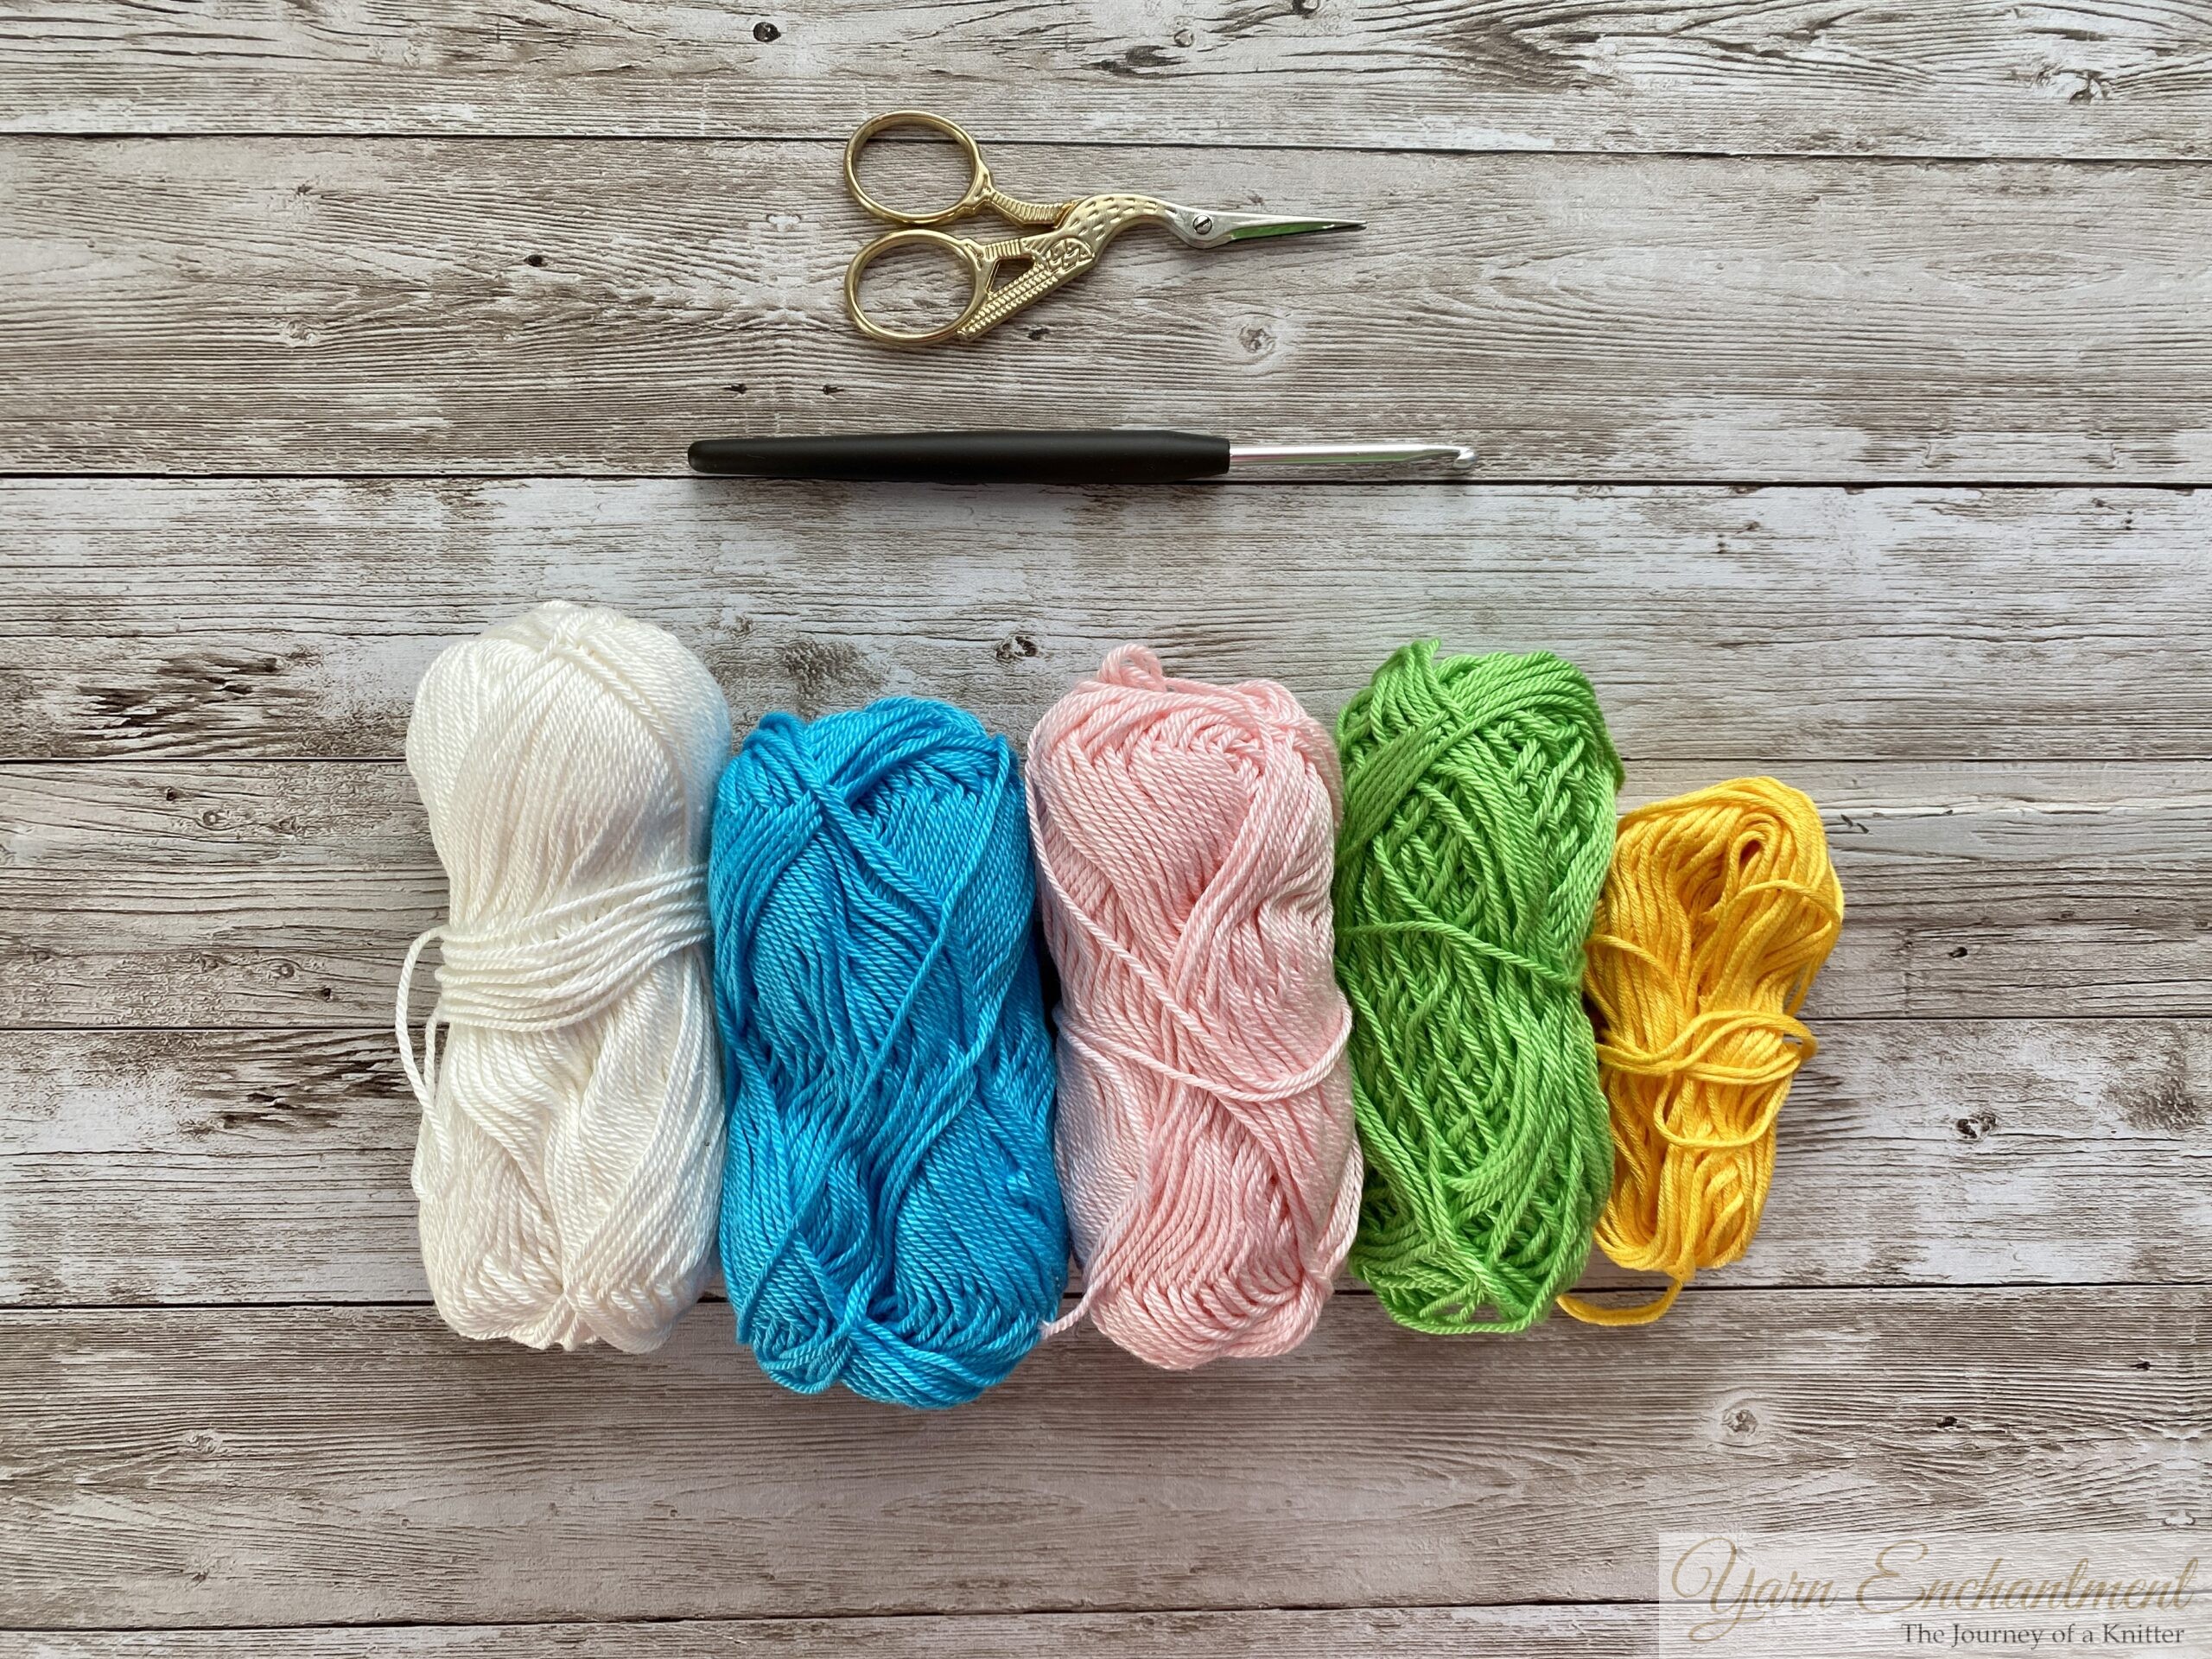 | You need: yarn, scissors, a crochet hook and a yarn needle |

Step-by-Step Instructions
Flower
Round 1: Creating the Base
- Start by making a magic ring with Color A . (Alternatively, chain 4 and join with a slip stitch to form a ring.)
- Chain 1, then work 8 single crochets into the ring.
- Join with a slip stitch in the first single crochet to complete the round.
At this point, you should have a small circle - the foundation of your square.
Click on any image to view it in a larger size!
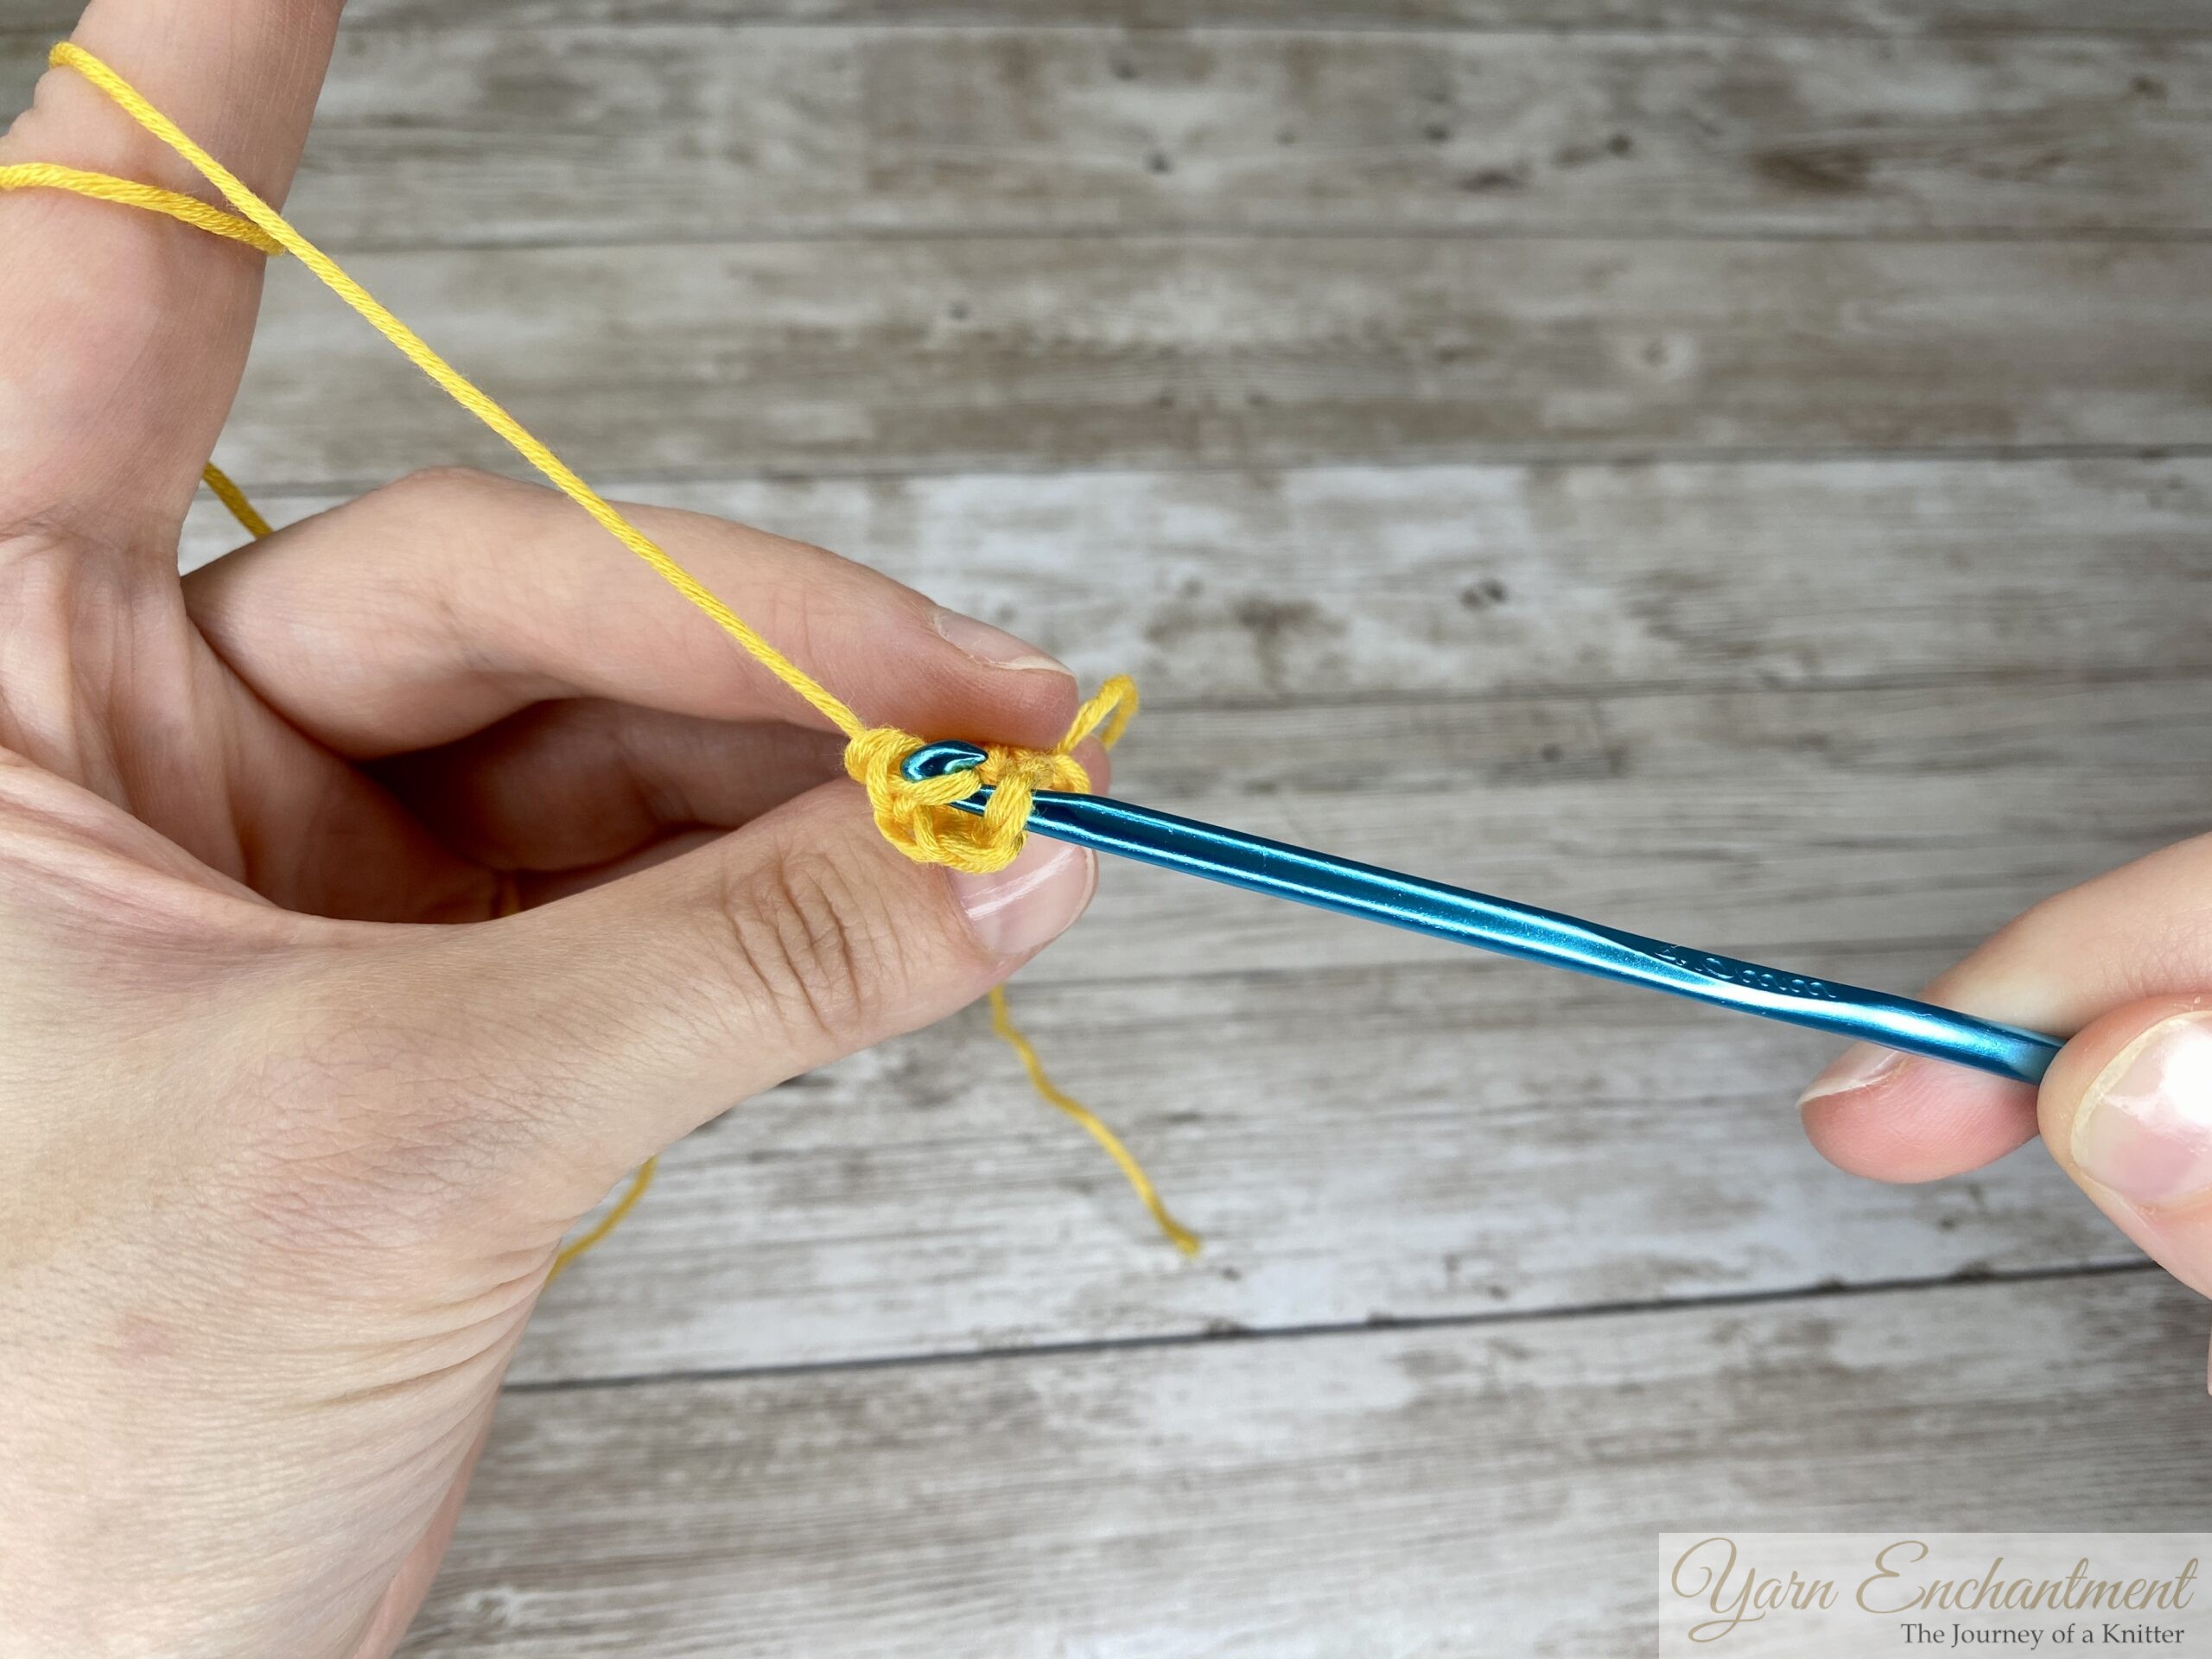
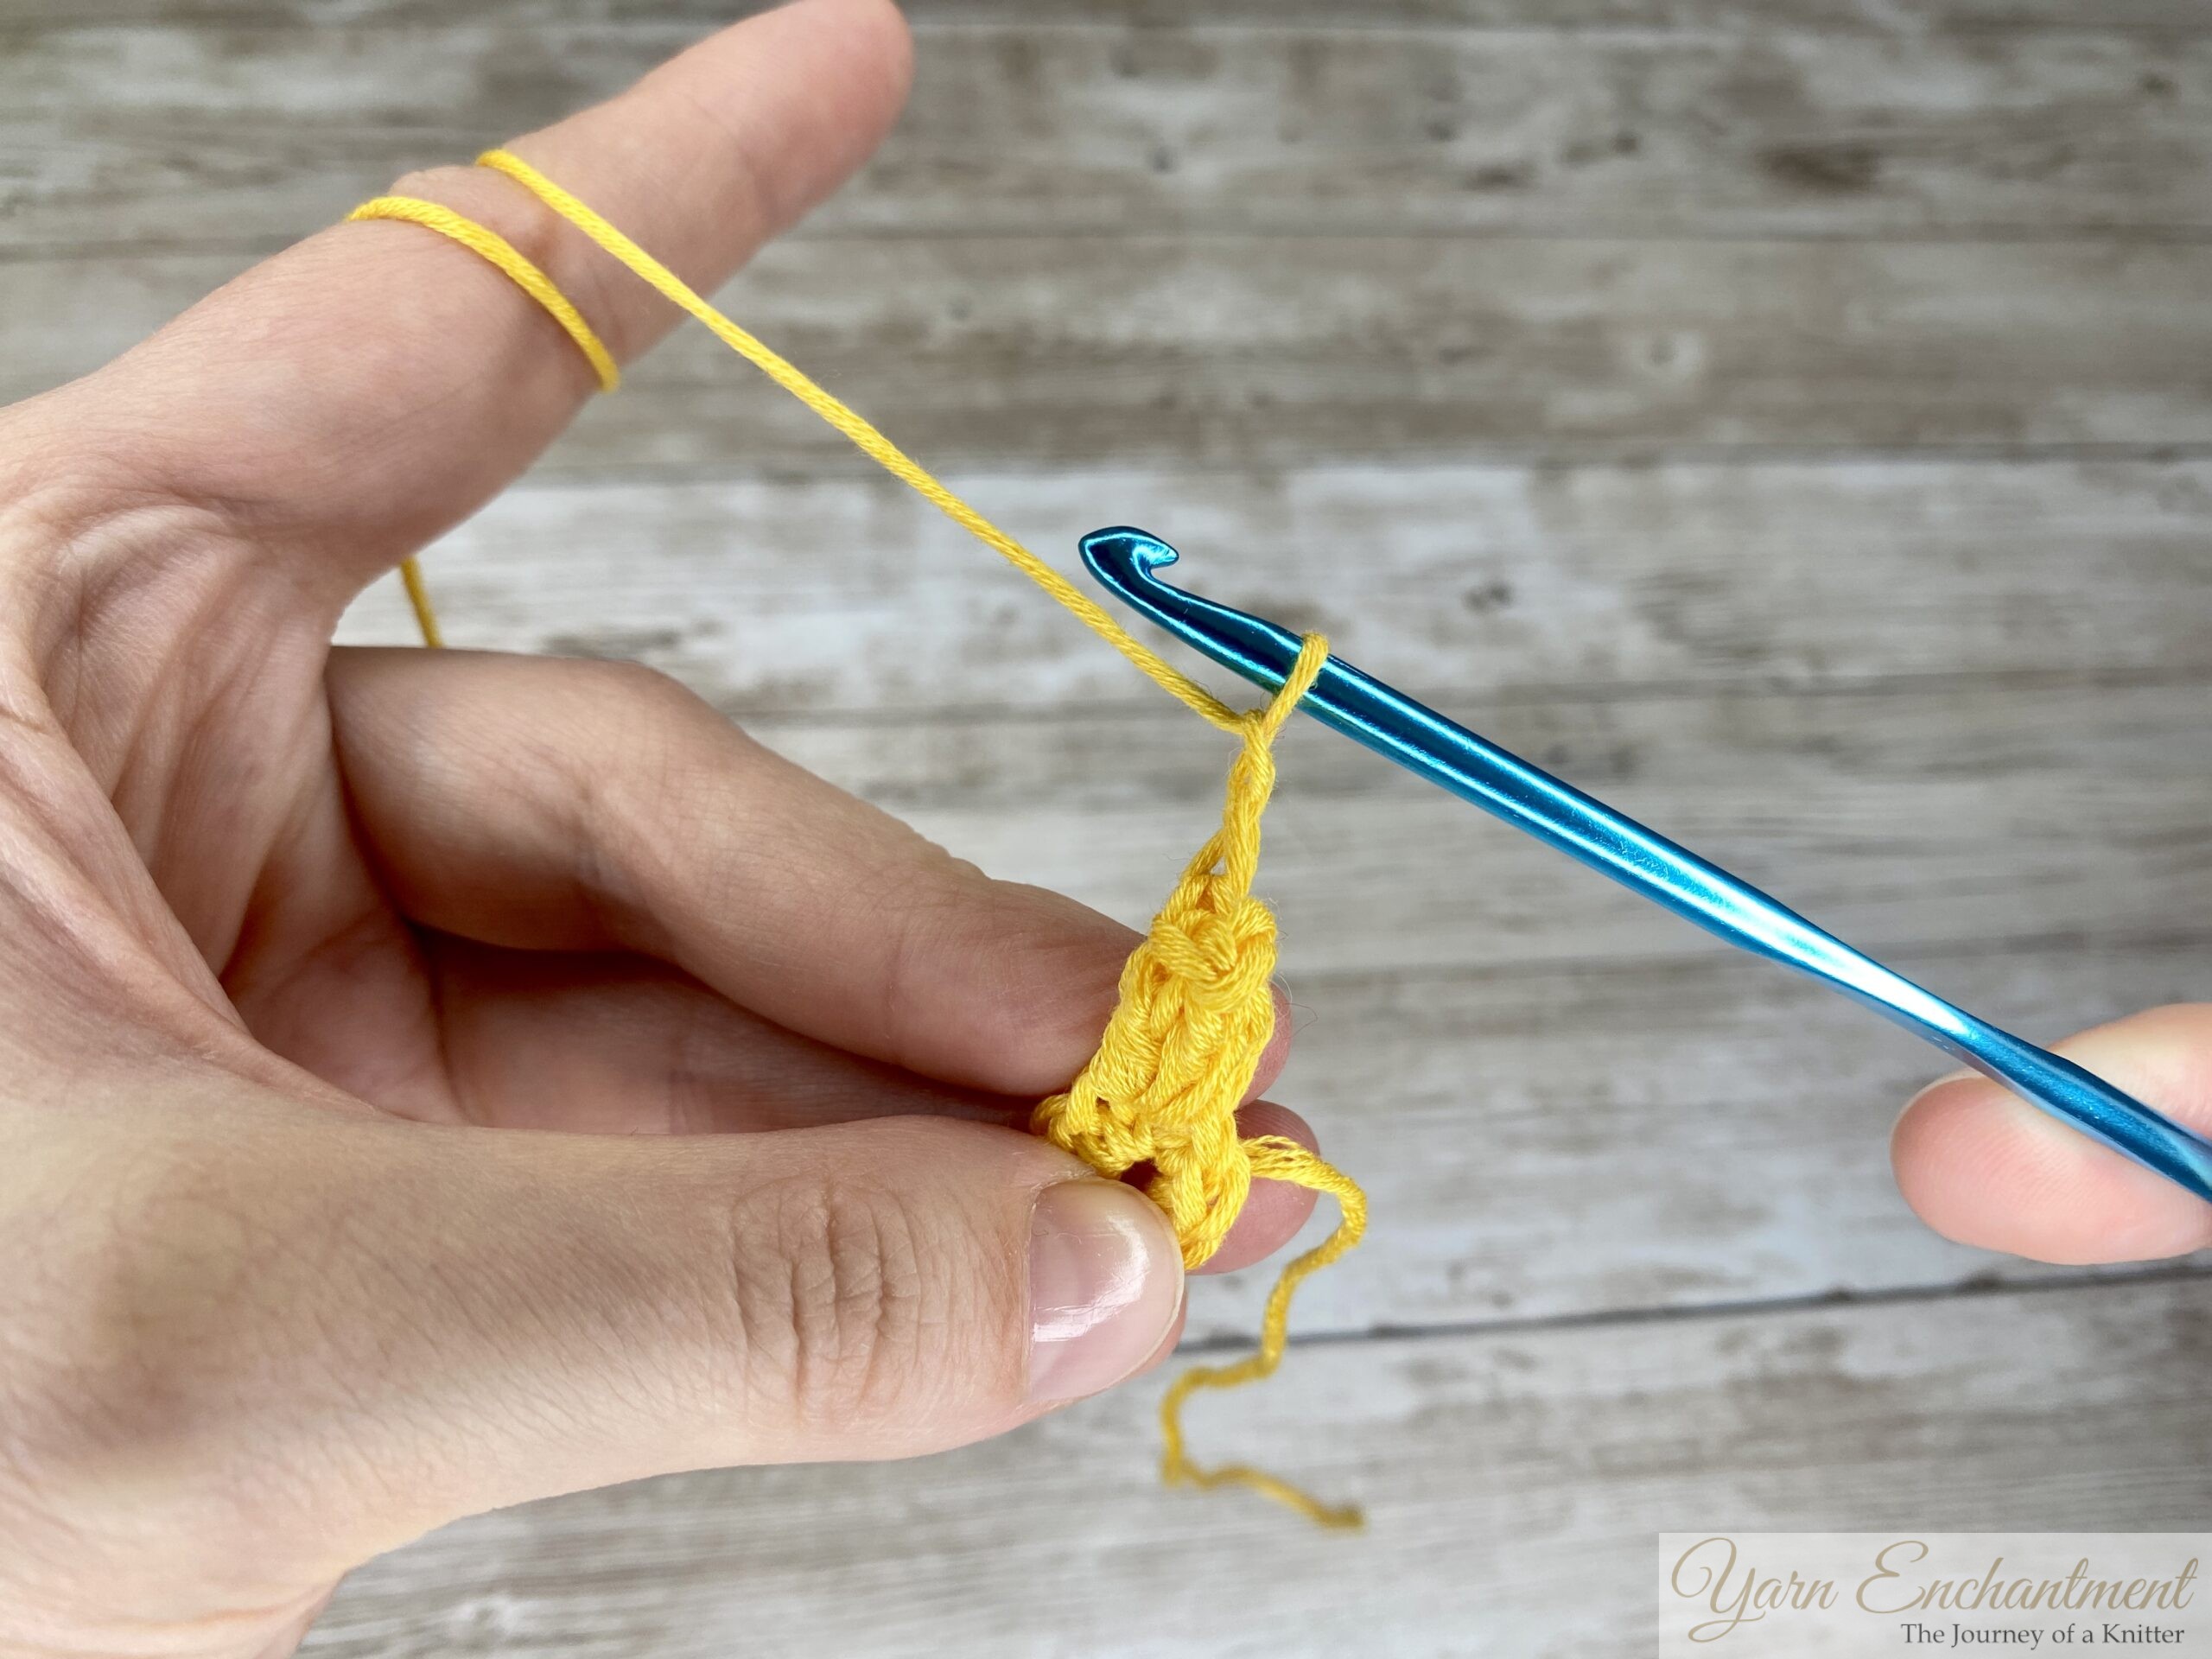
 | 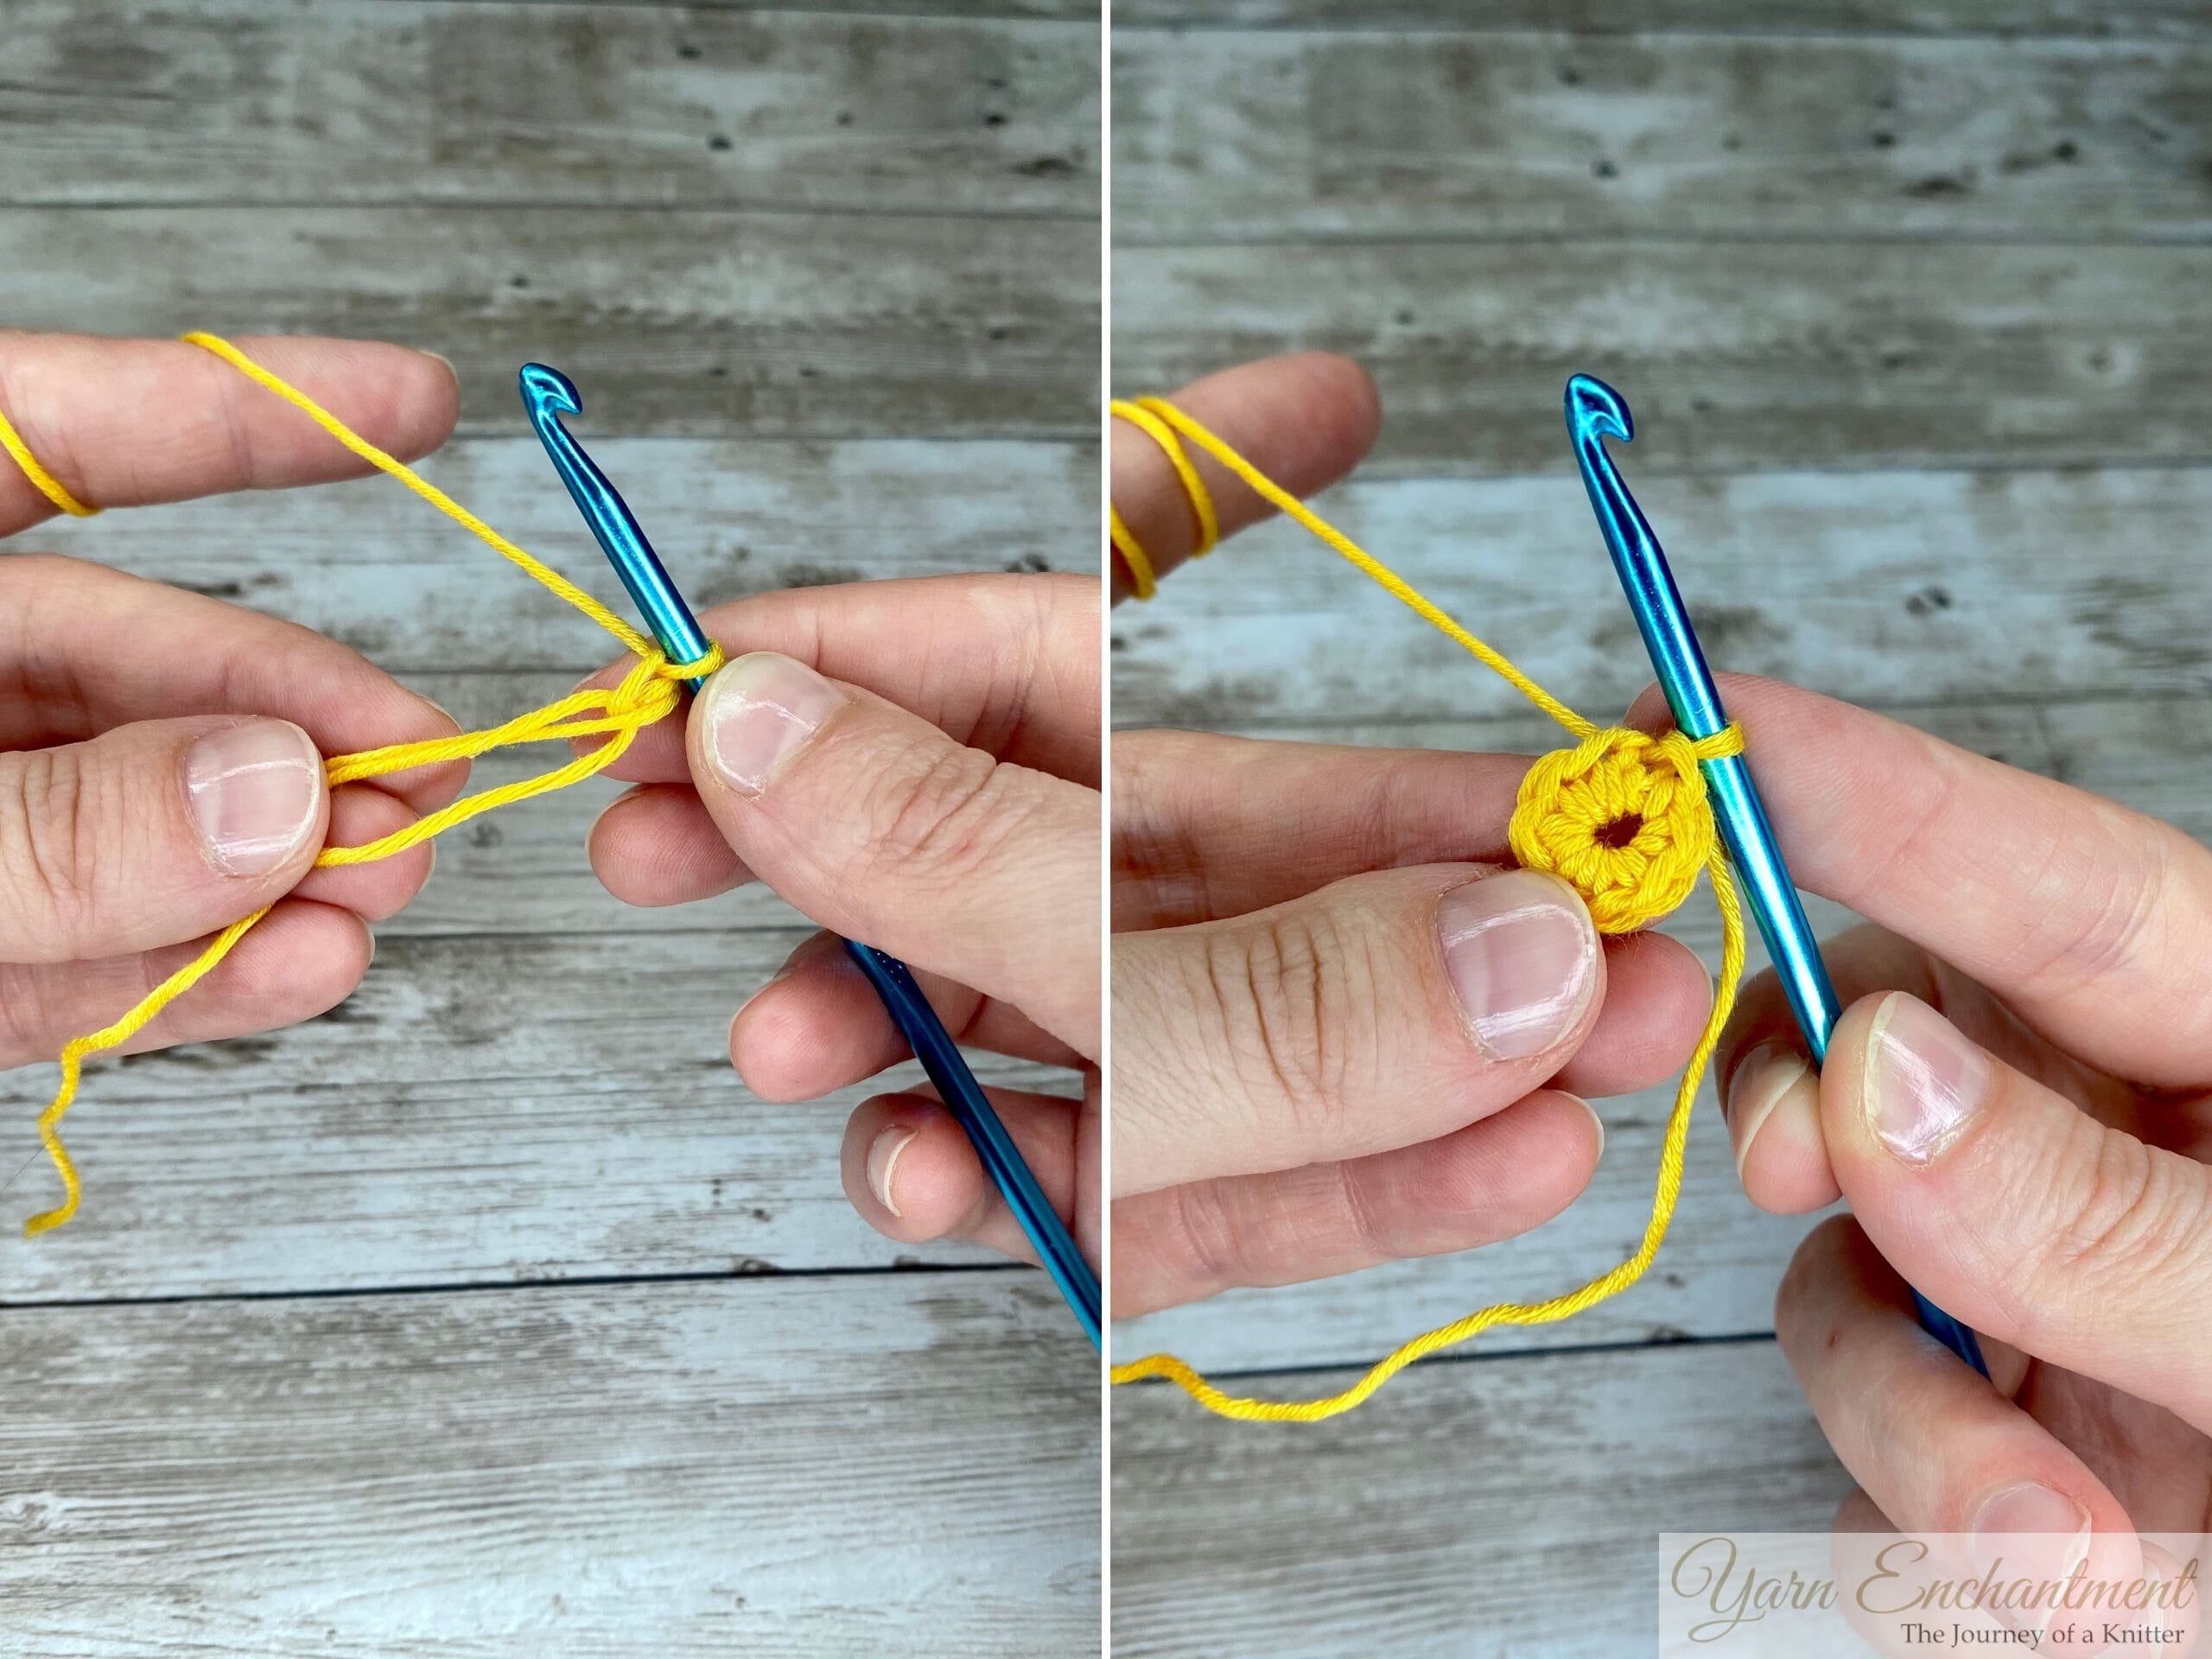 | Chain 4 and join with a slip stitch to the first chain to form a ring. Chain 1, then work 8 single crochets into the ring... | ... or work a magic ring with color A, chain 1, then work 8 single crochets into the ring. Join with a slip stitch in the first single crochet to complete the round. |


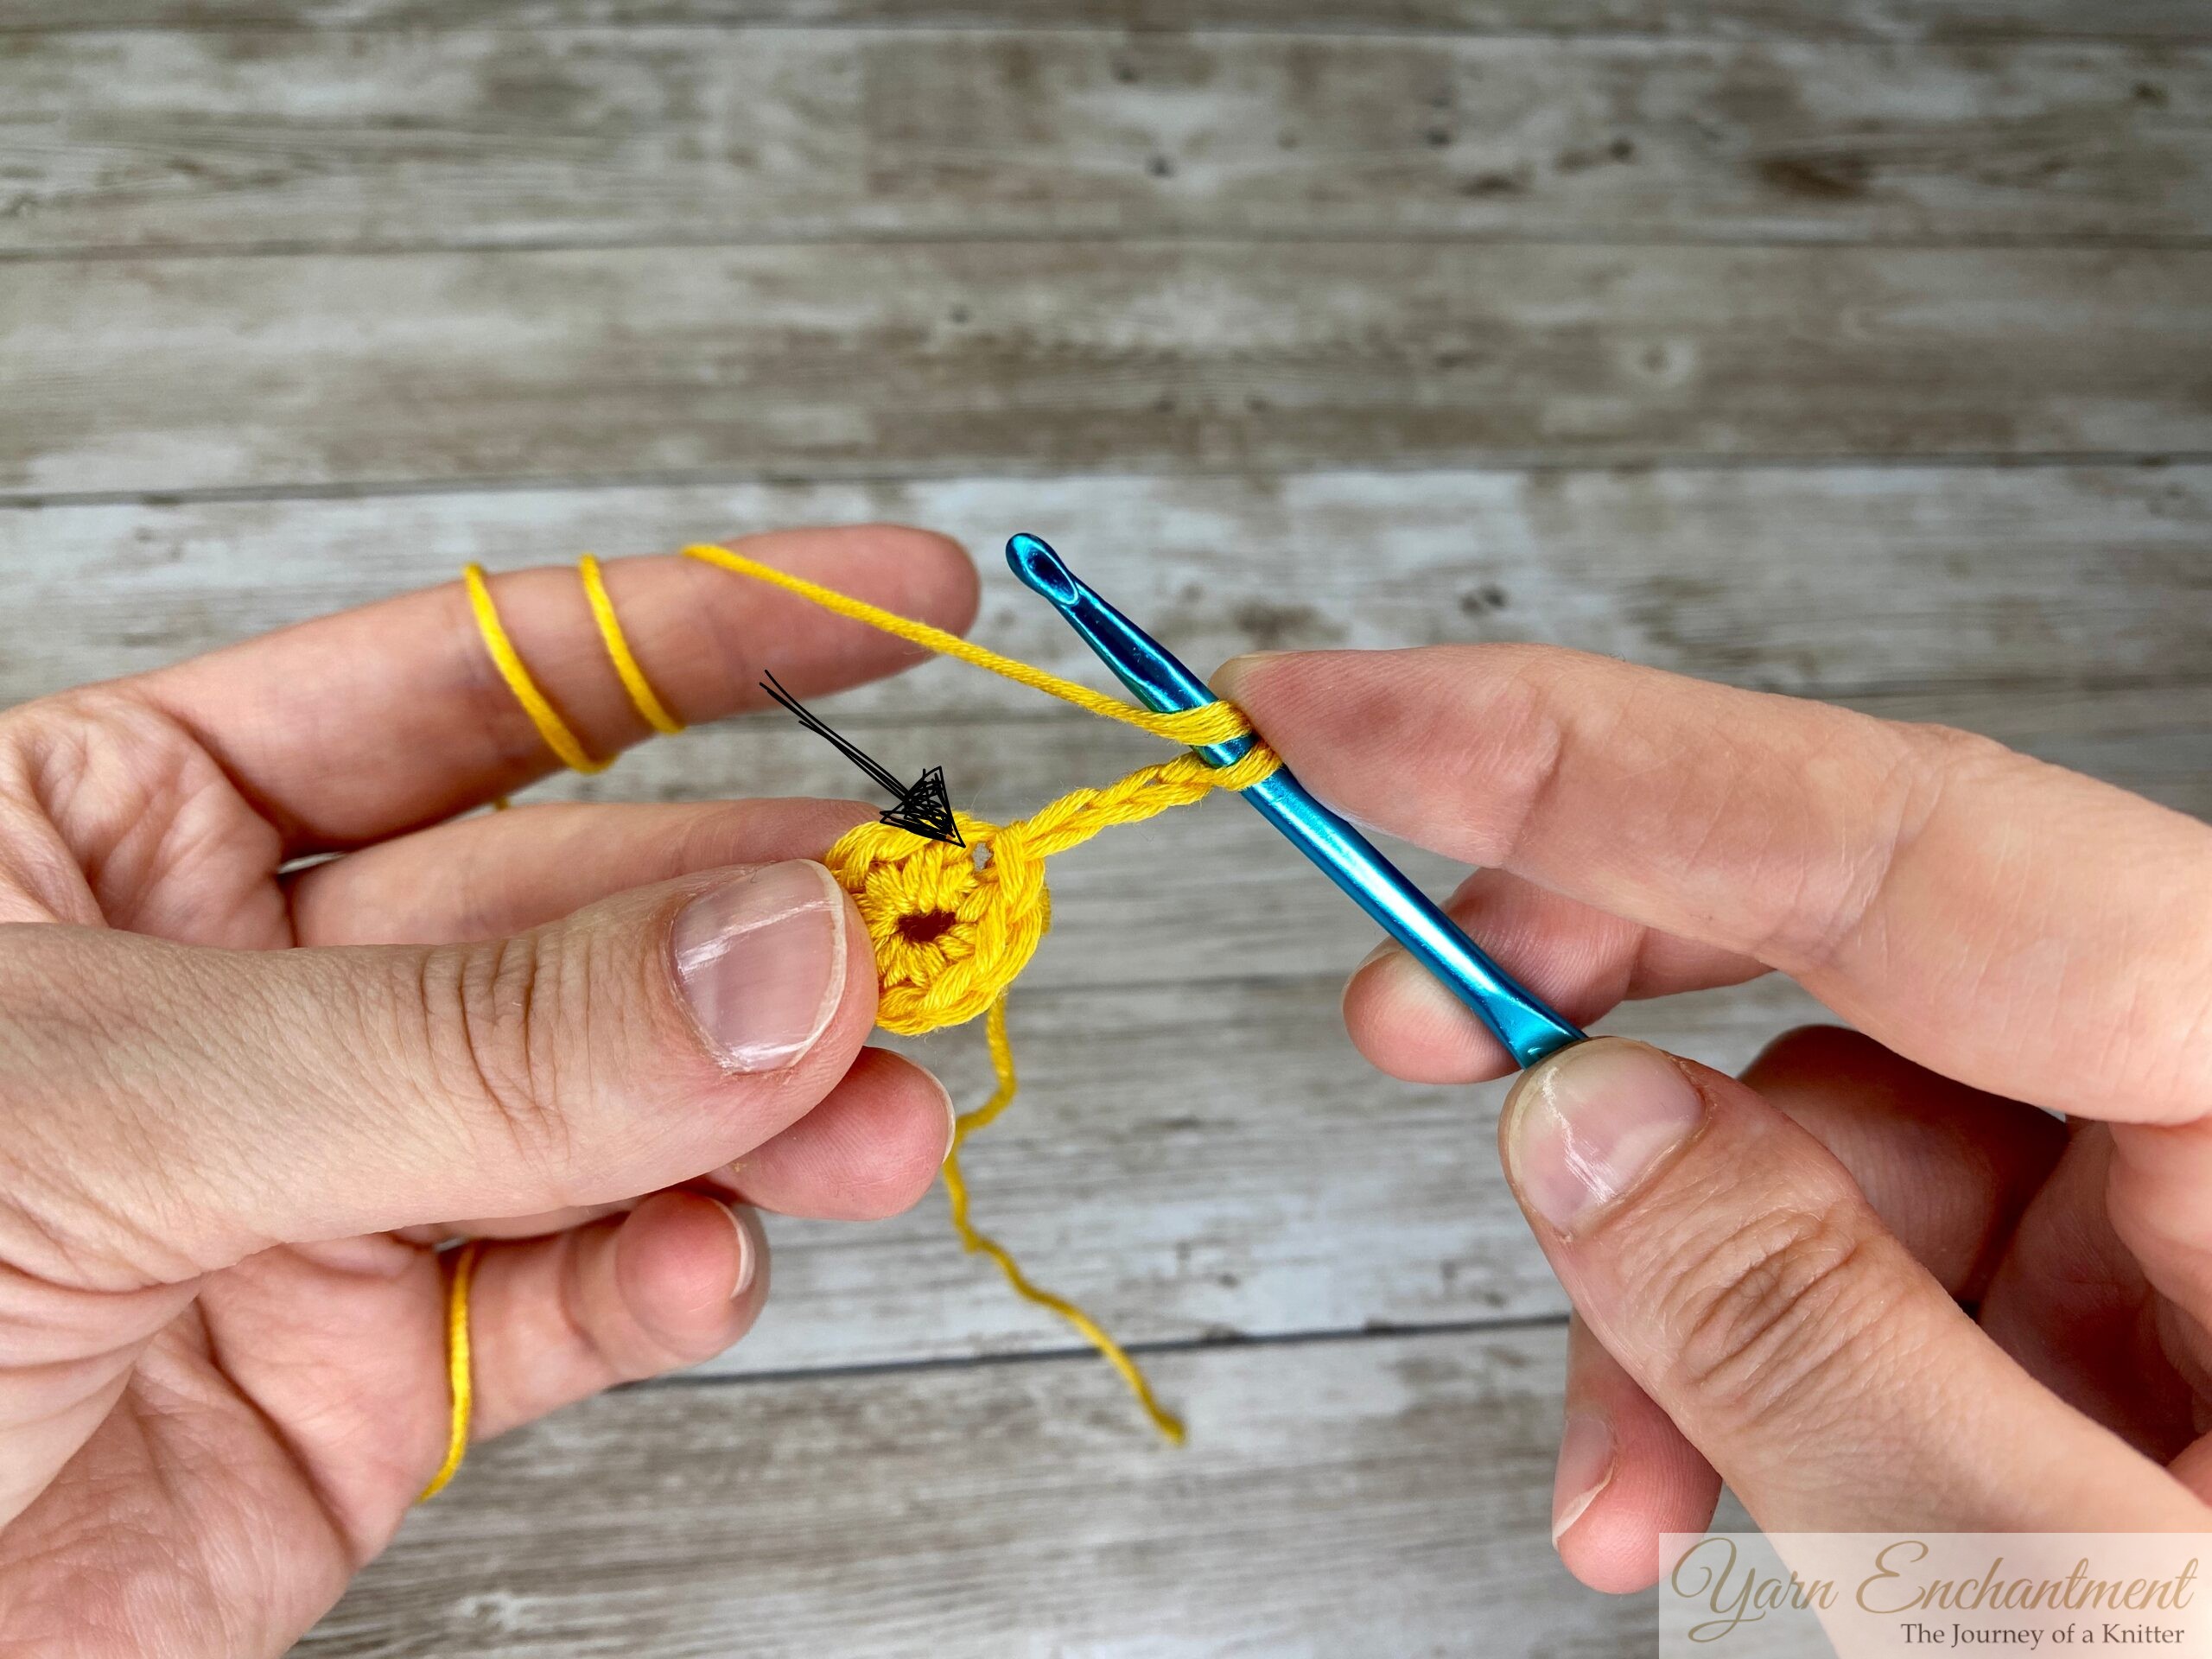
Round 2: Adding the Popcorn Stitch
This is where the magic happens! The popcorn stitch gives your square its unique texture and dimension.
- Chain 3 (this counts as your first double crochet).
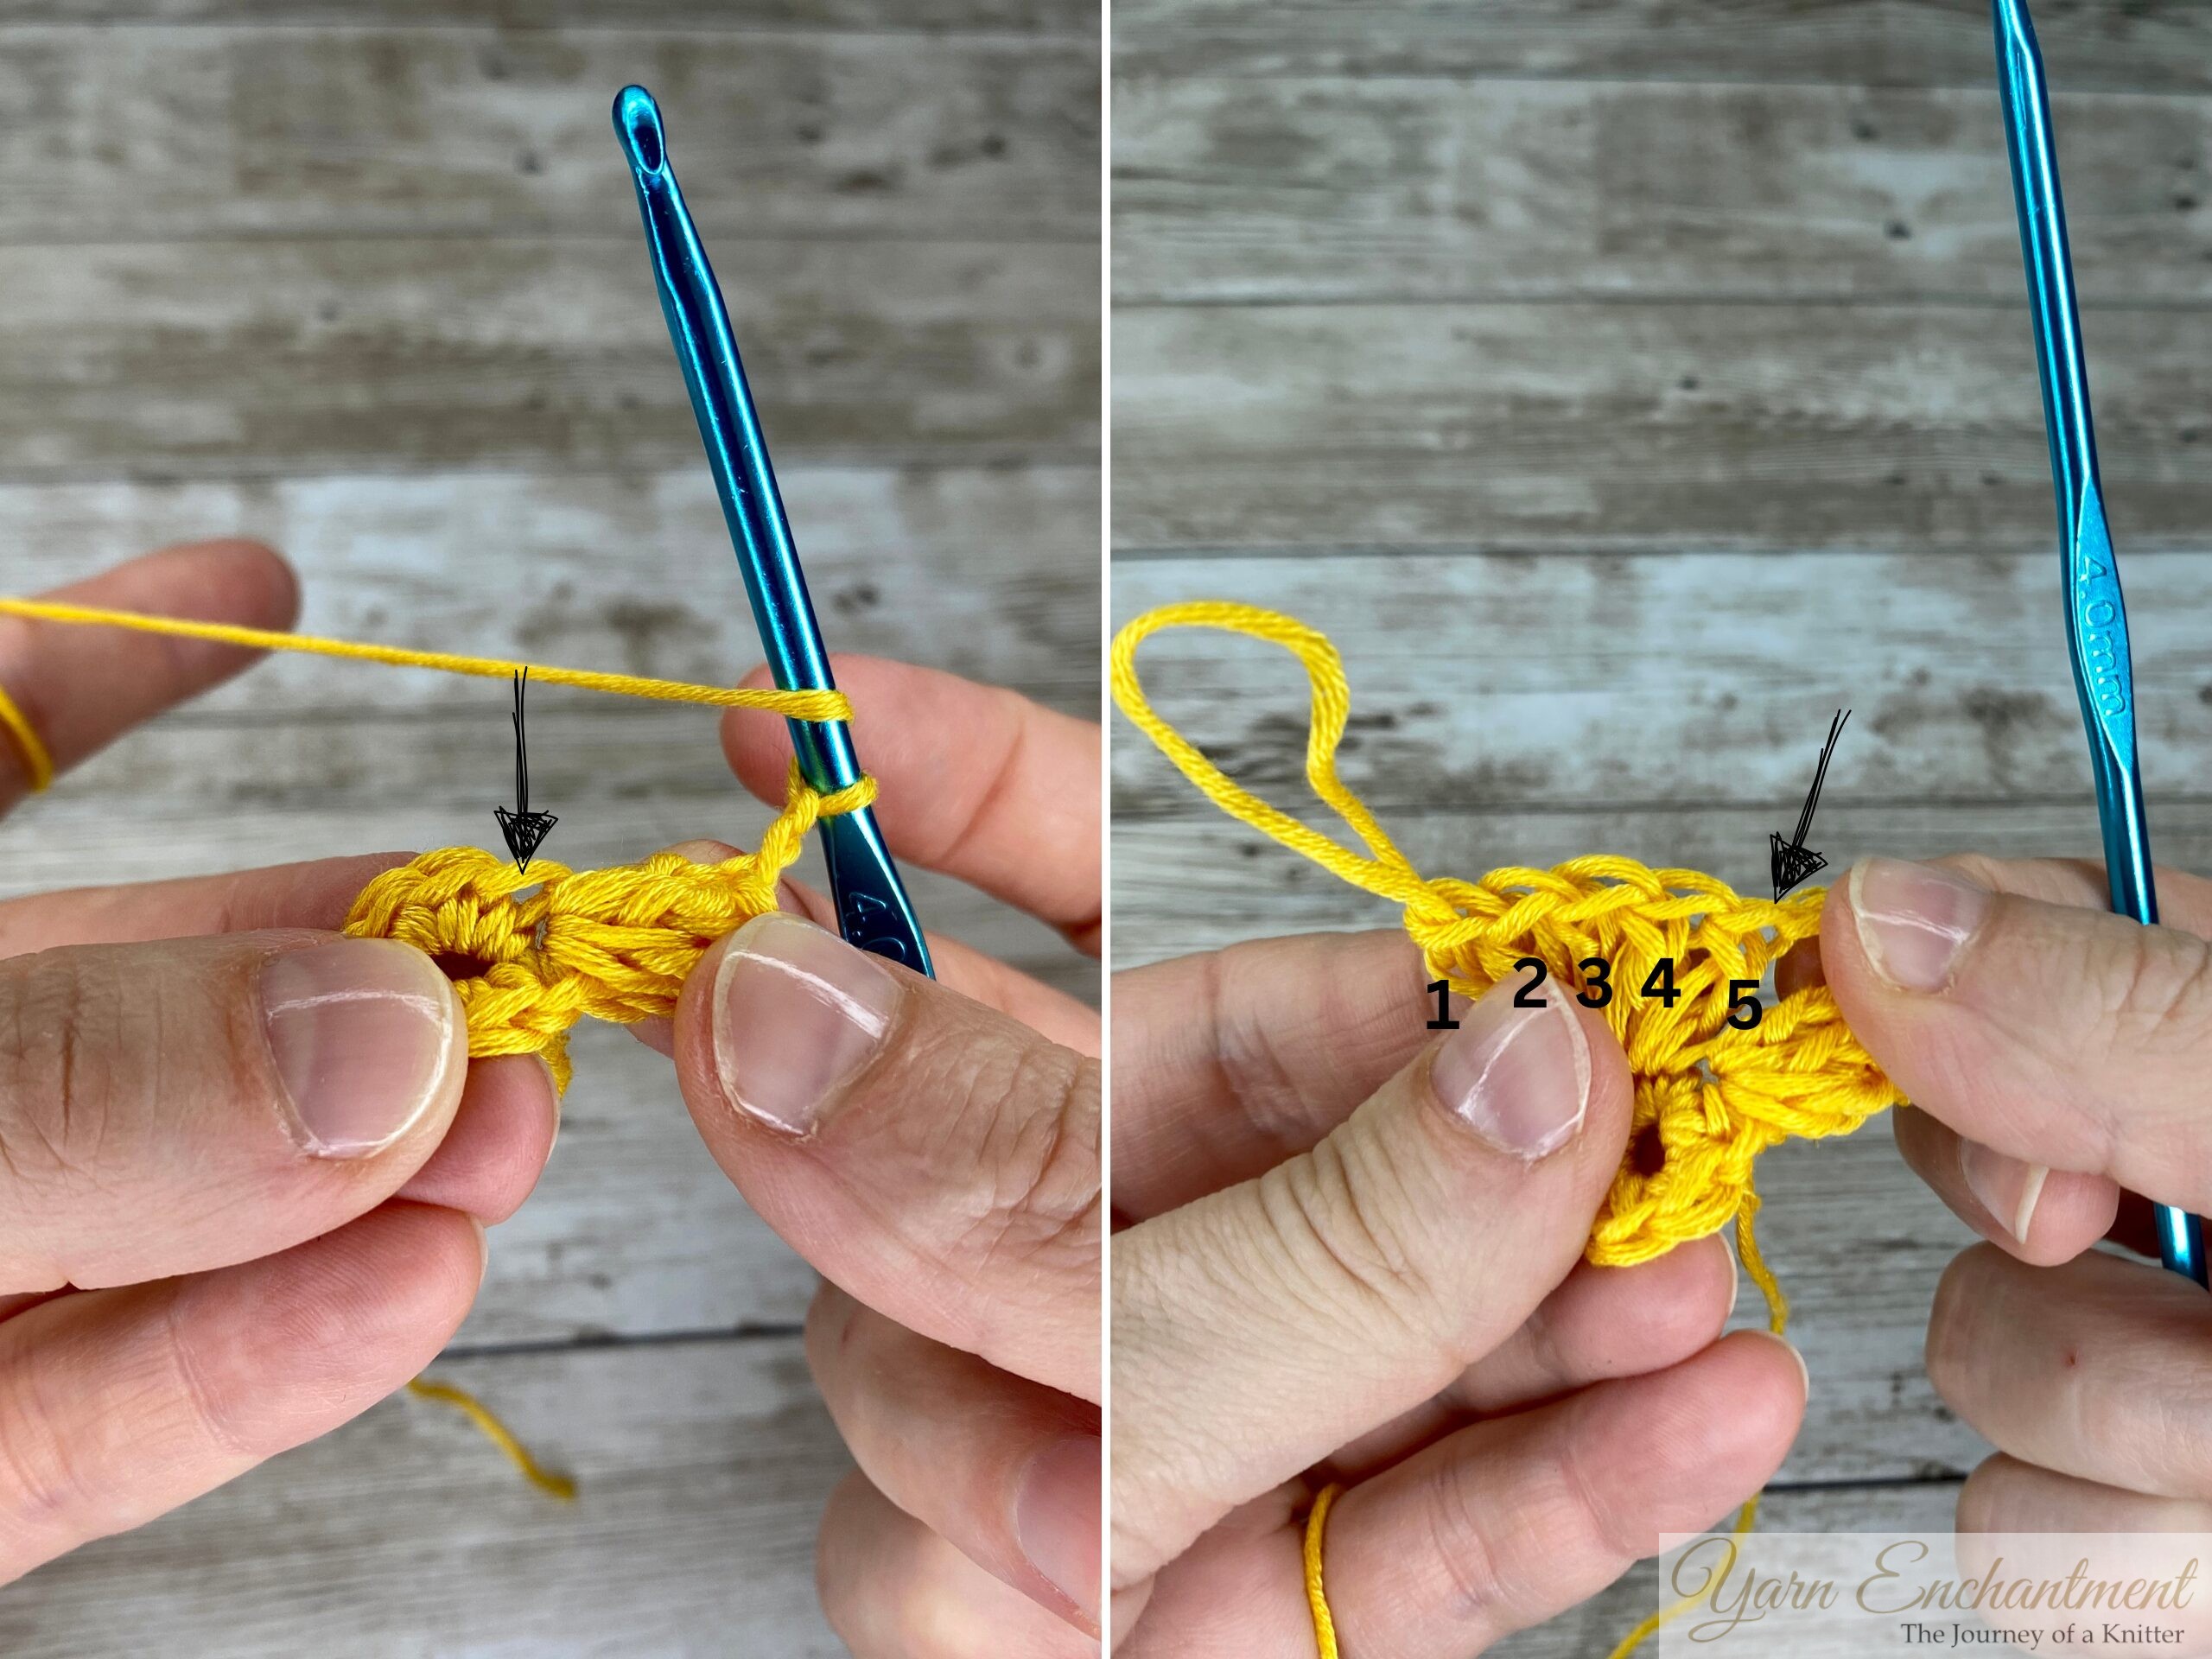
- In the same stitch, make 4 more double crochets. These will form the base of your popcorn stitch.
- Leave a long loop to make sure nothing comes undone
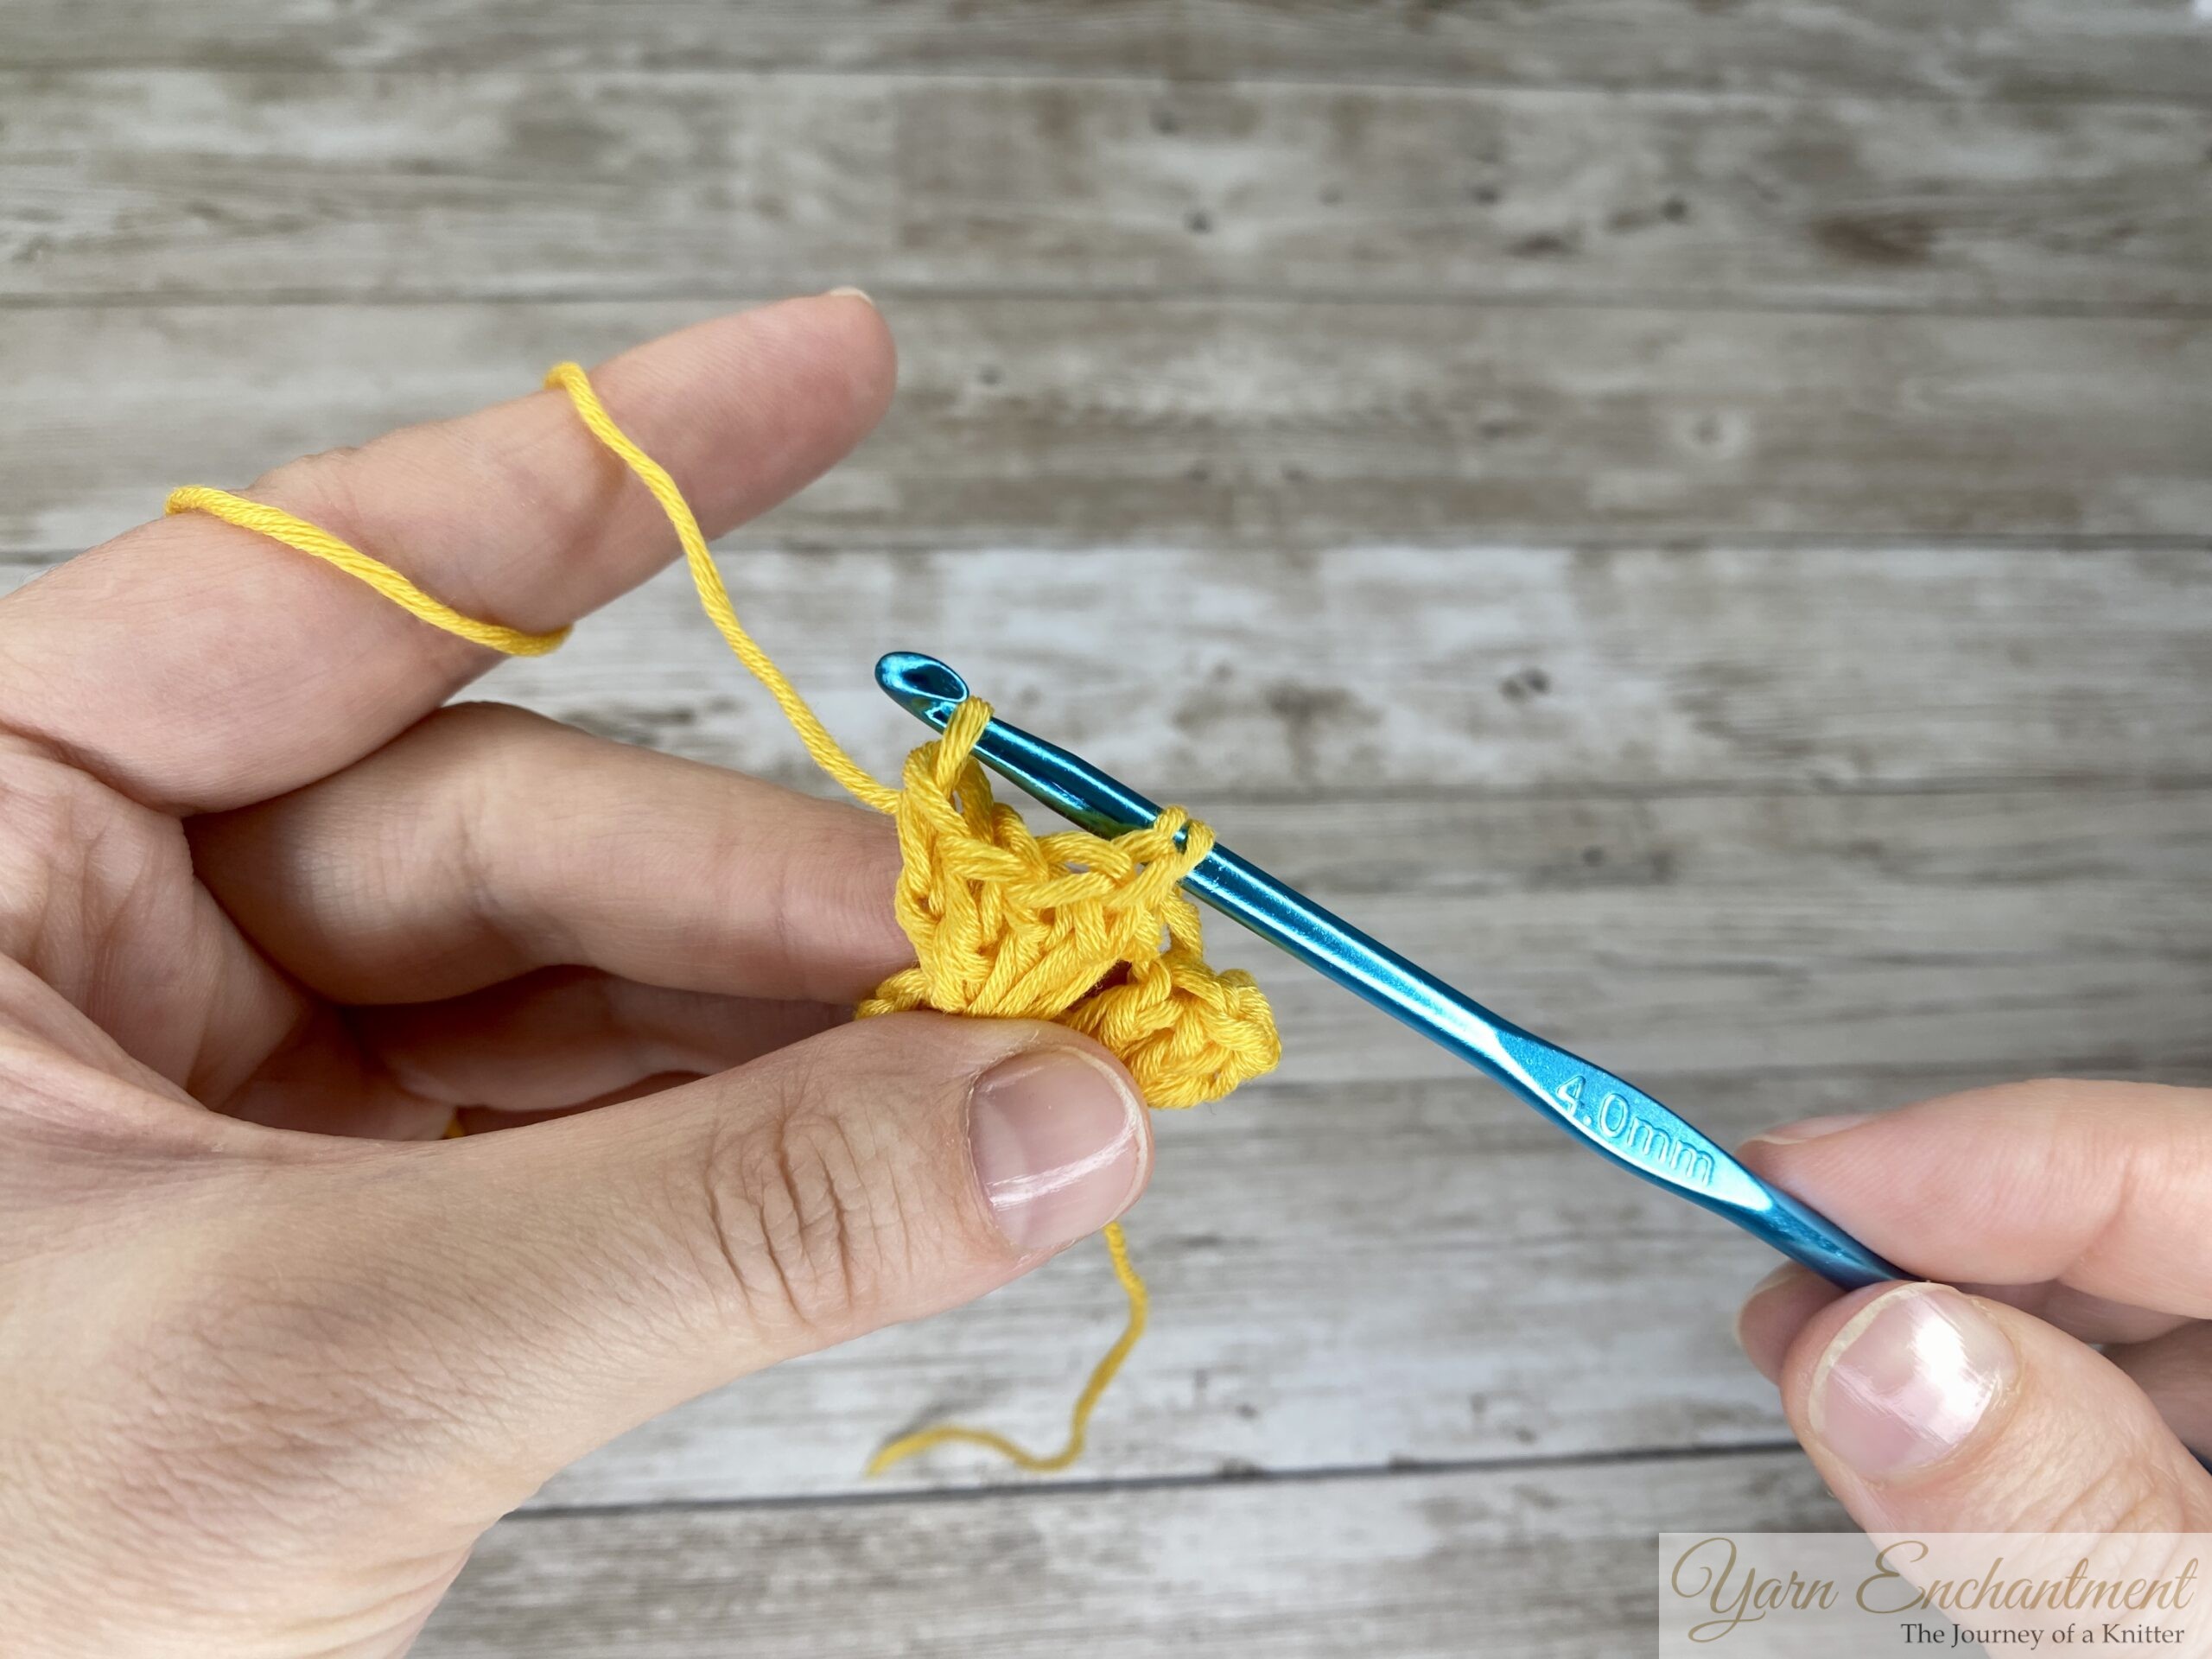
- Insert your hook into the top of the chain-3, pick up the dropped loop and slip stitch through the top of the chain three space.
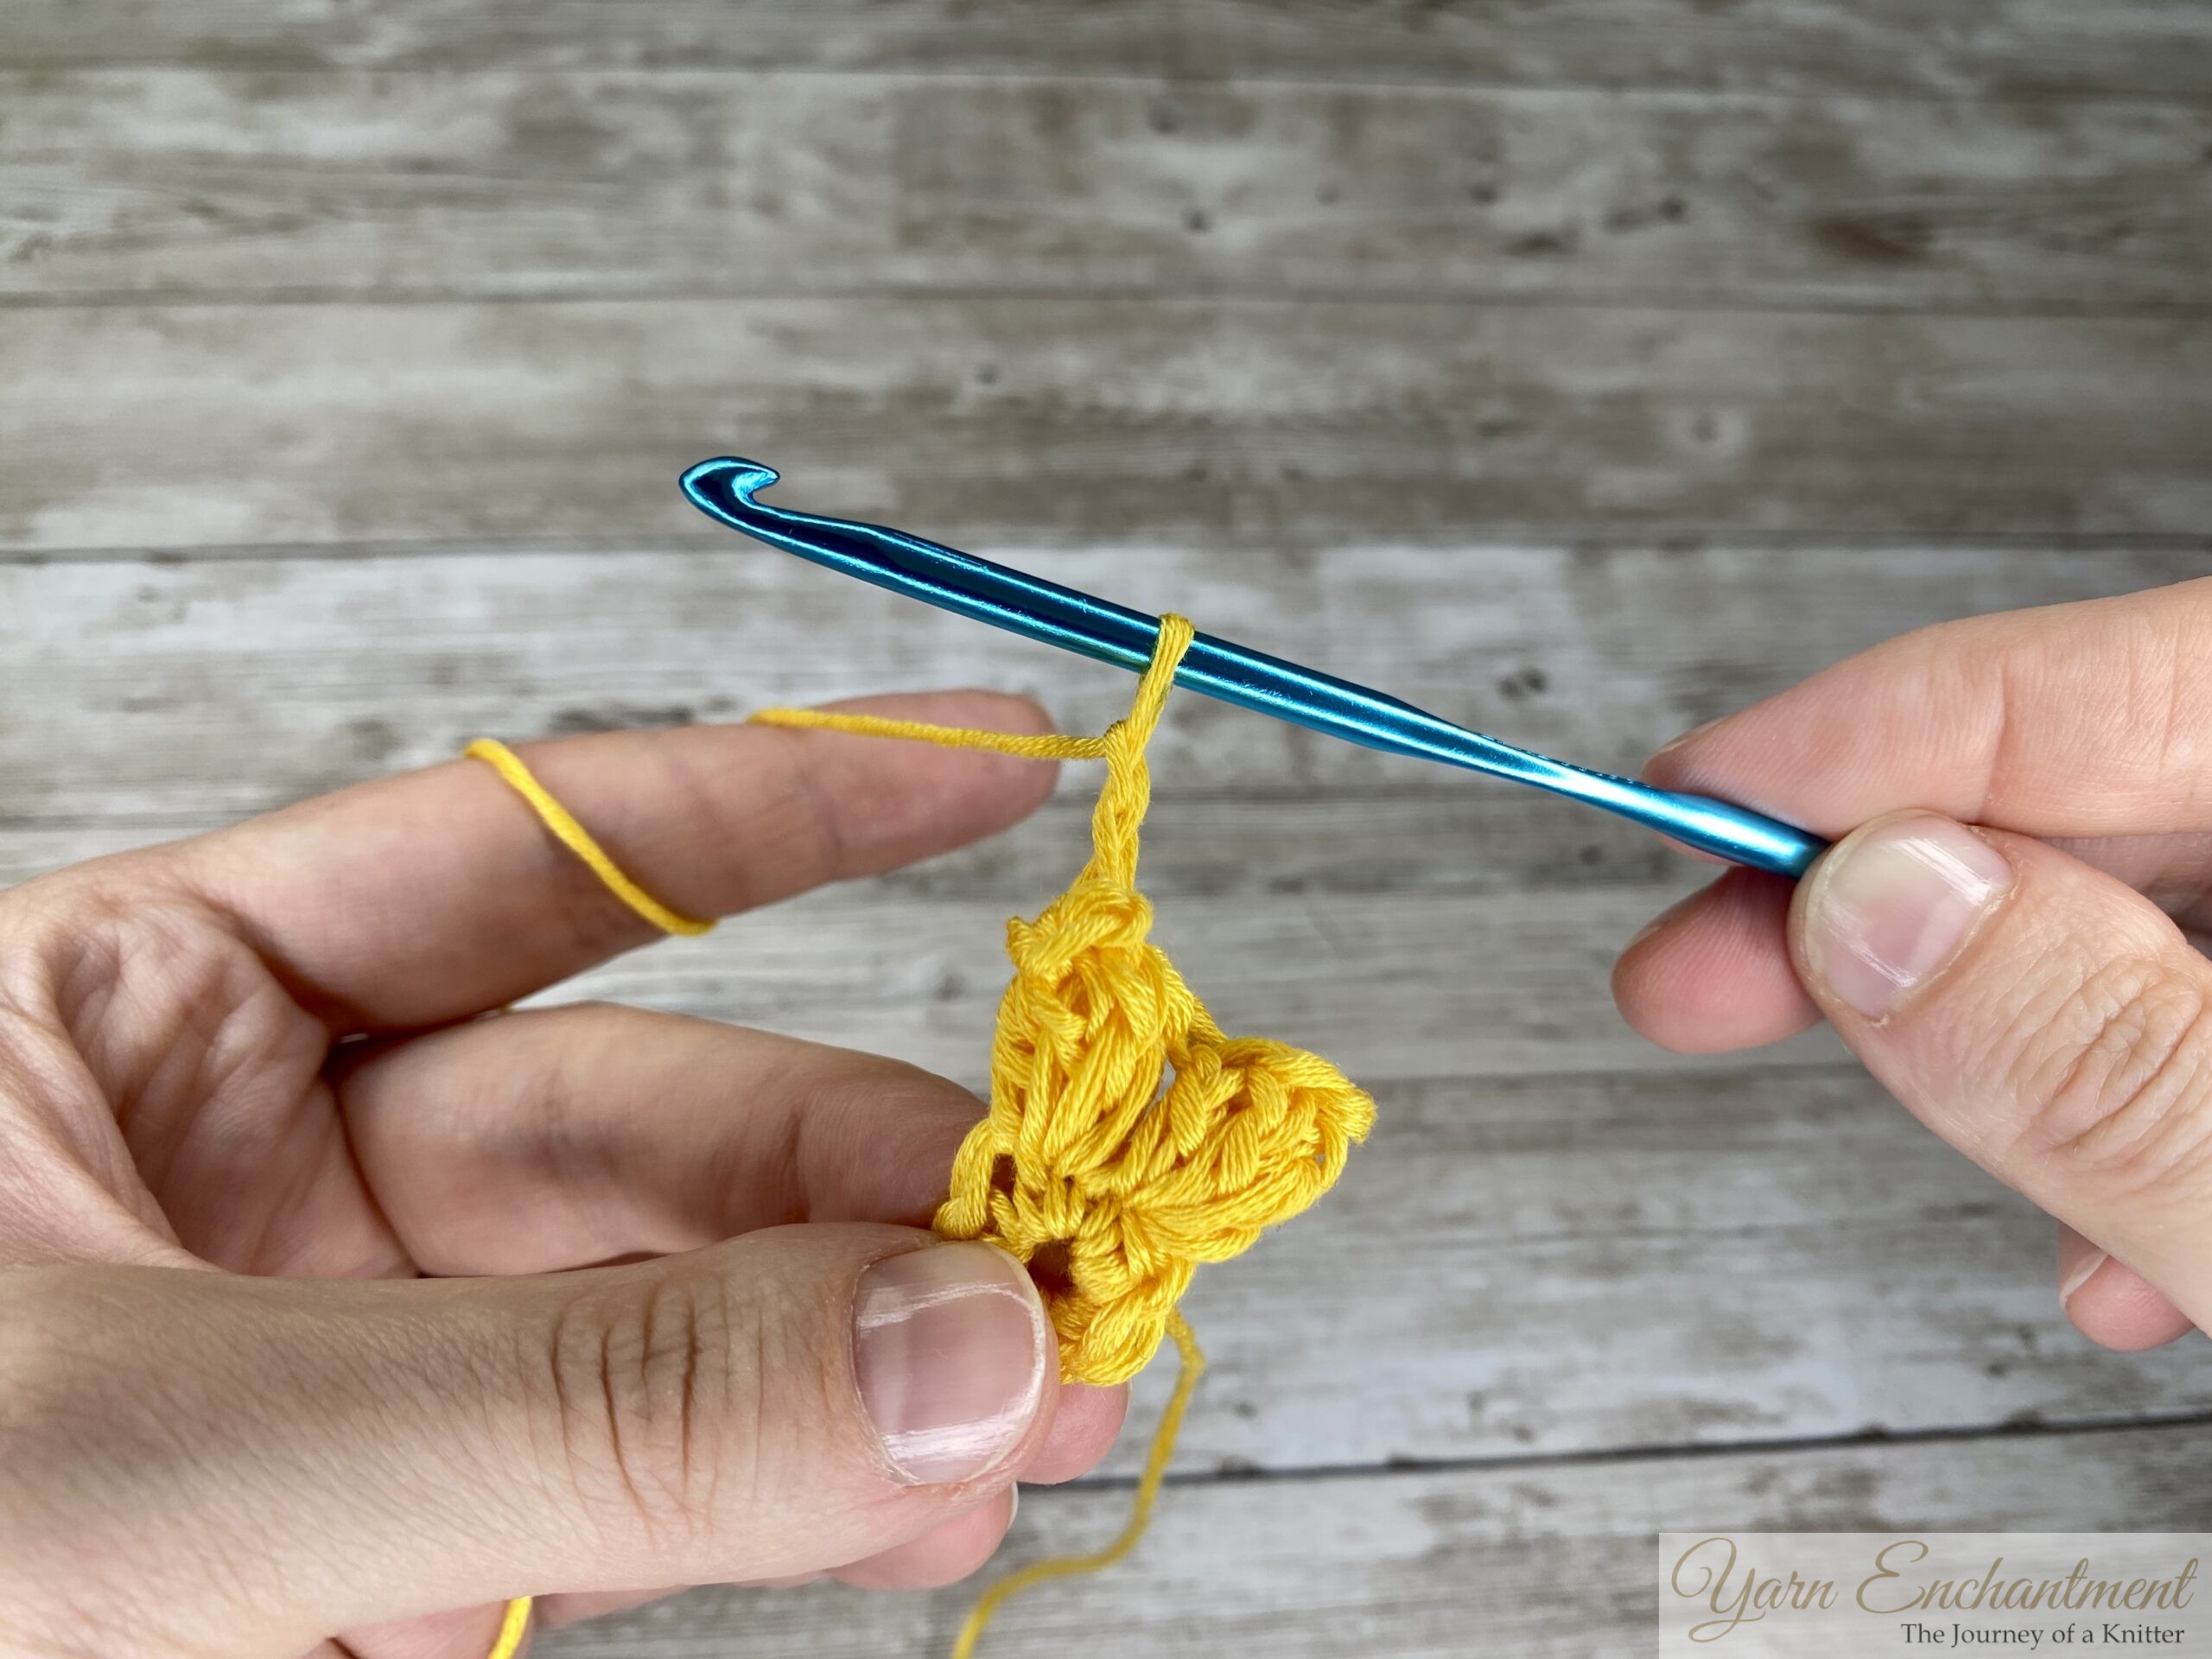
- Chain 2 to secure the popcorn stitch.
- Repeat the popcorn stitch in each single crochet around the circle.
- Join with a slip stitch at the end of the round.
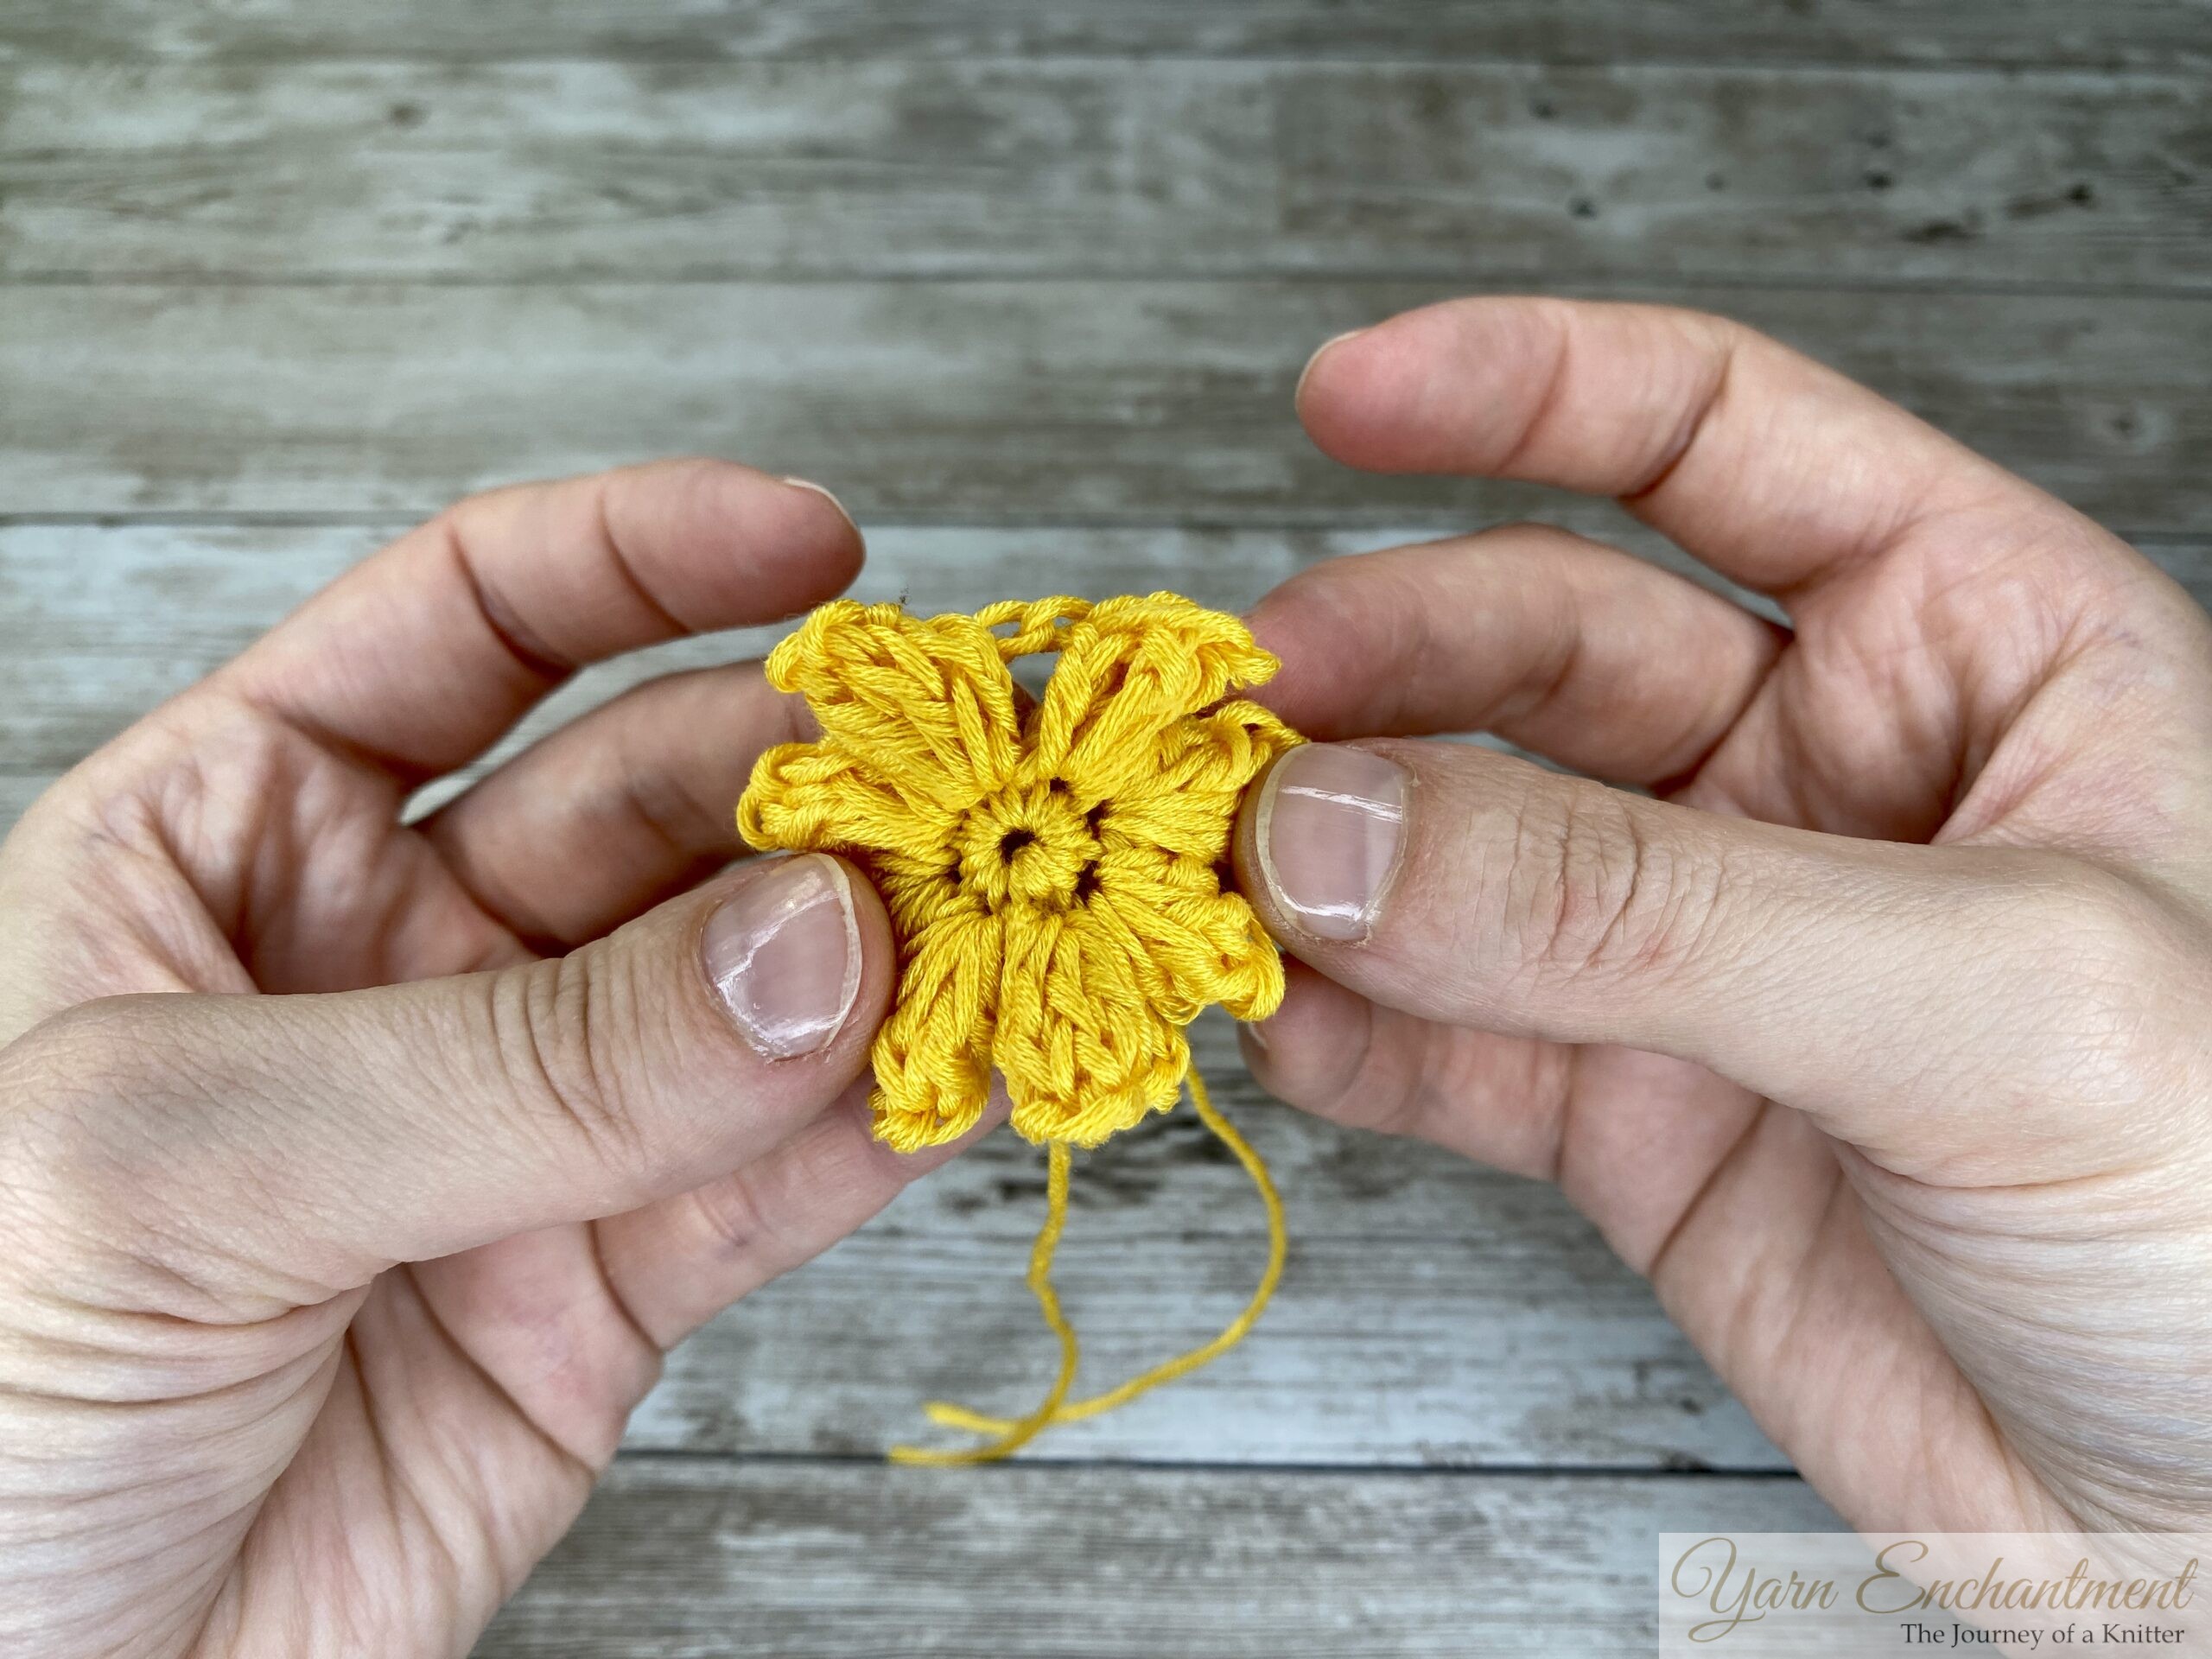
You should now have 8 lovely flower petals popping out!
 |  | 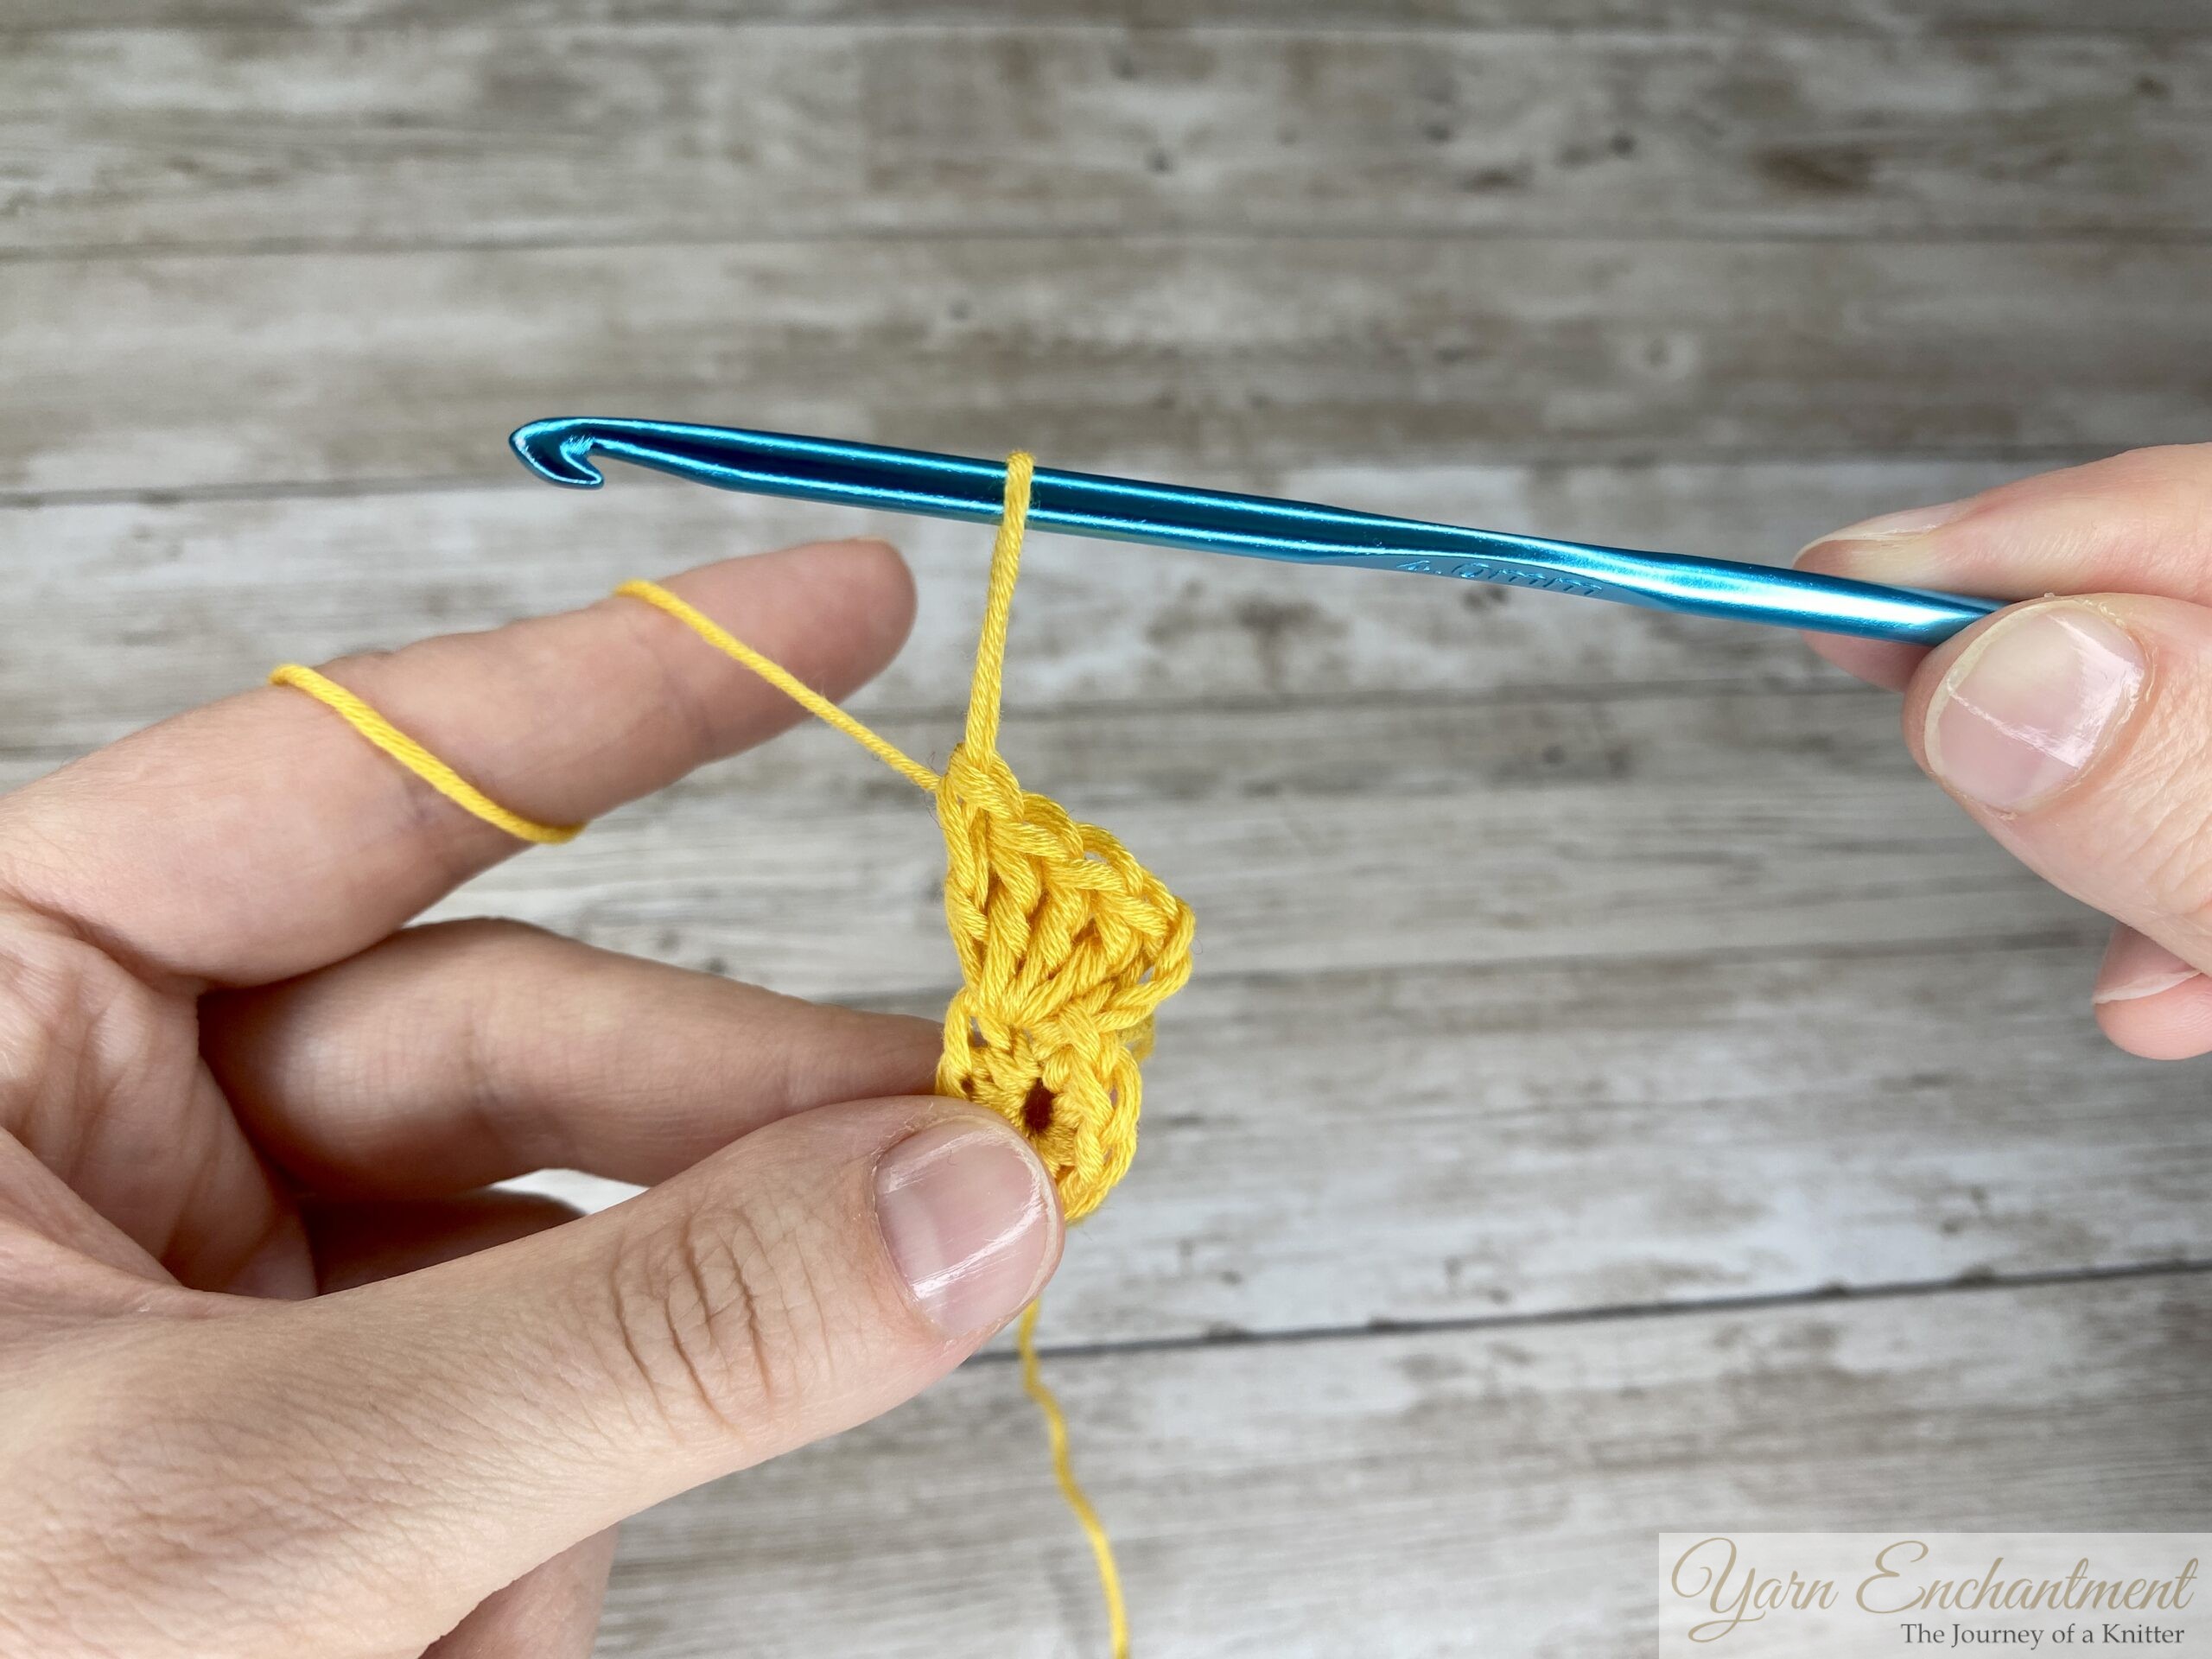 | Chain 3 (this counts as your first double crochet) | In the same stitch, make 4 more double crochets | Leave a long loop to make sure nothing comes undone |


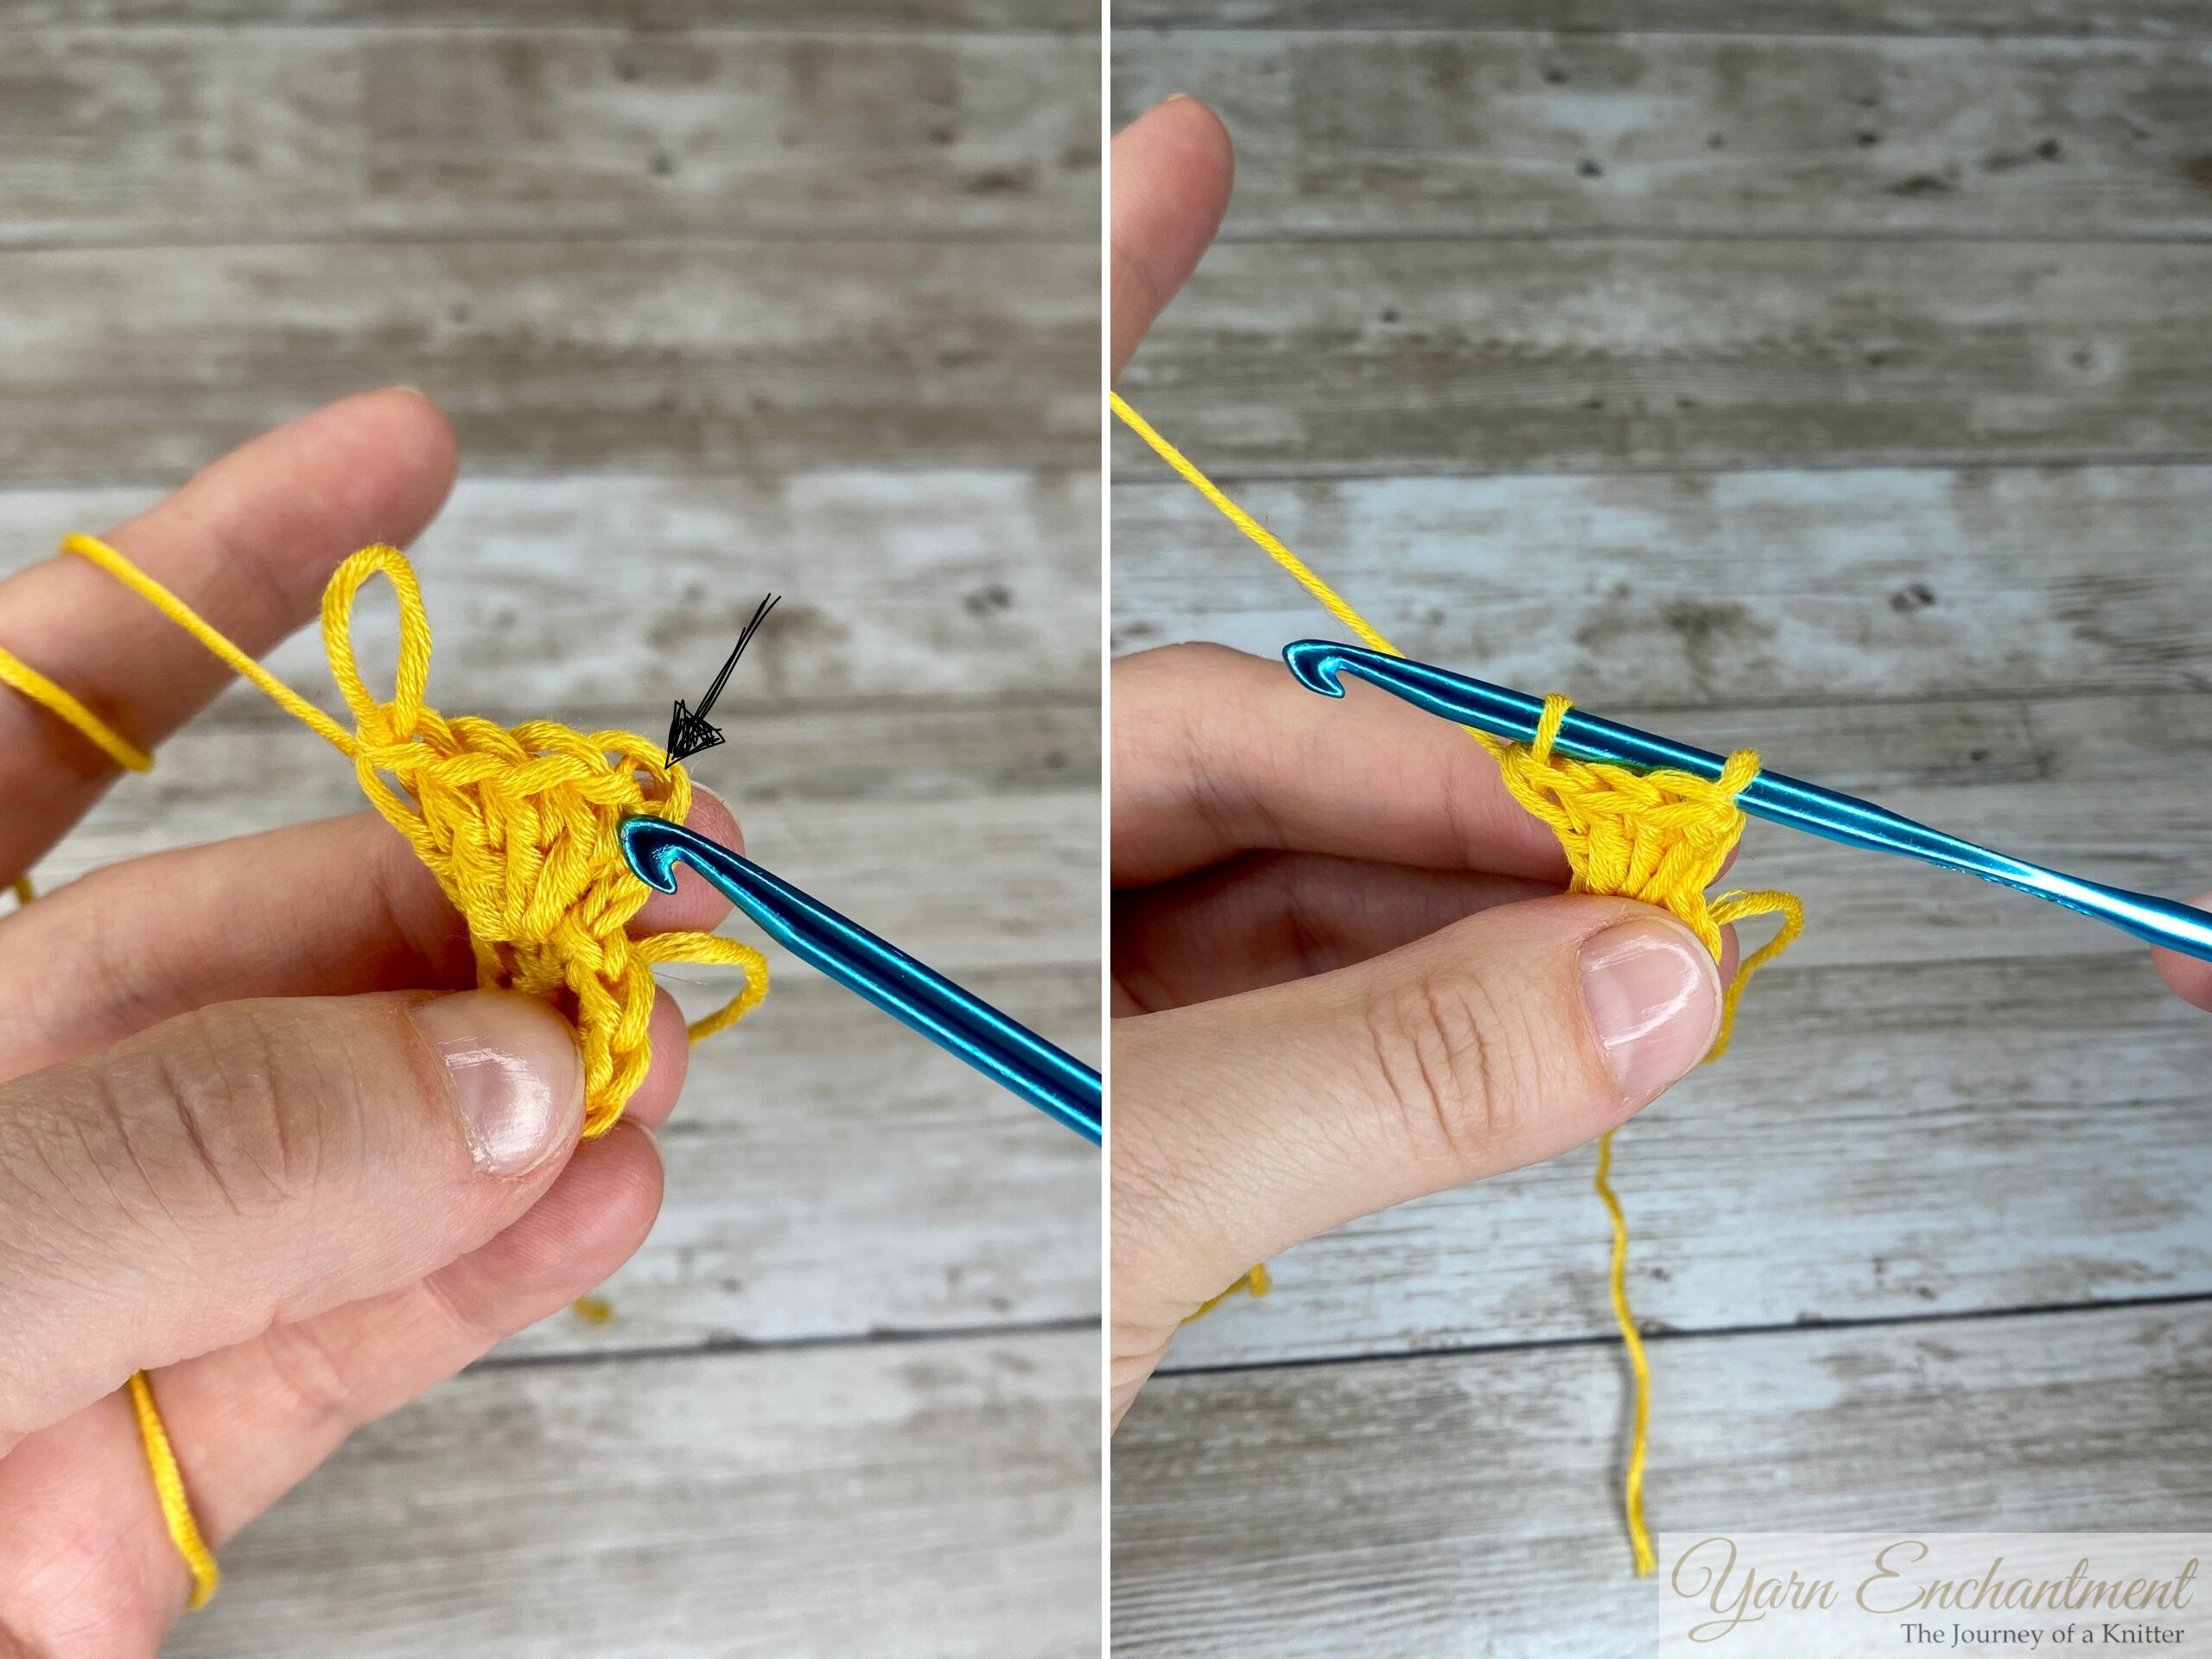 |  |  | Insert your hook into the top of the chain-3 and pick up the dropped loop | Slip stitch through the top of the chain three space | Chain 2 to secure the popcorn stitch |


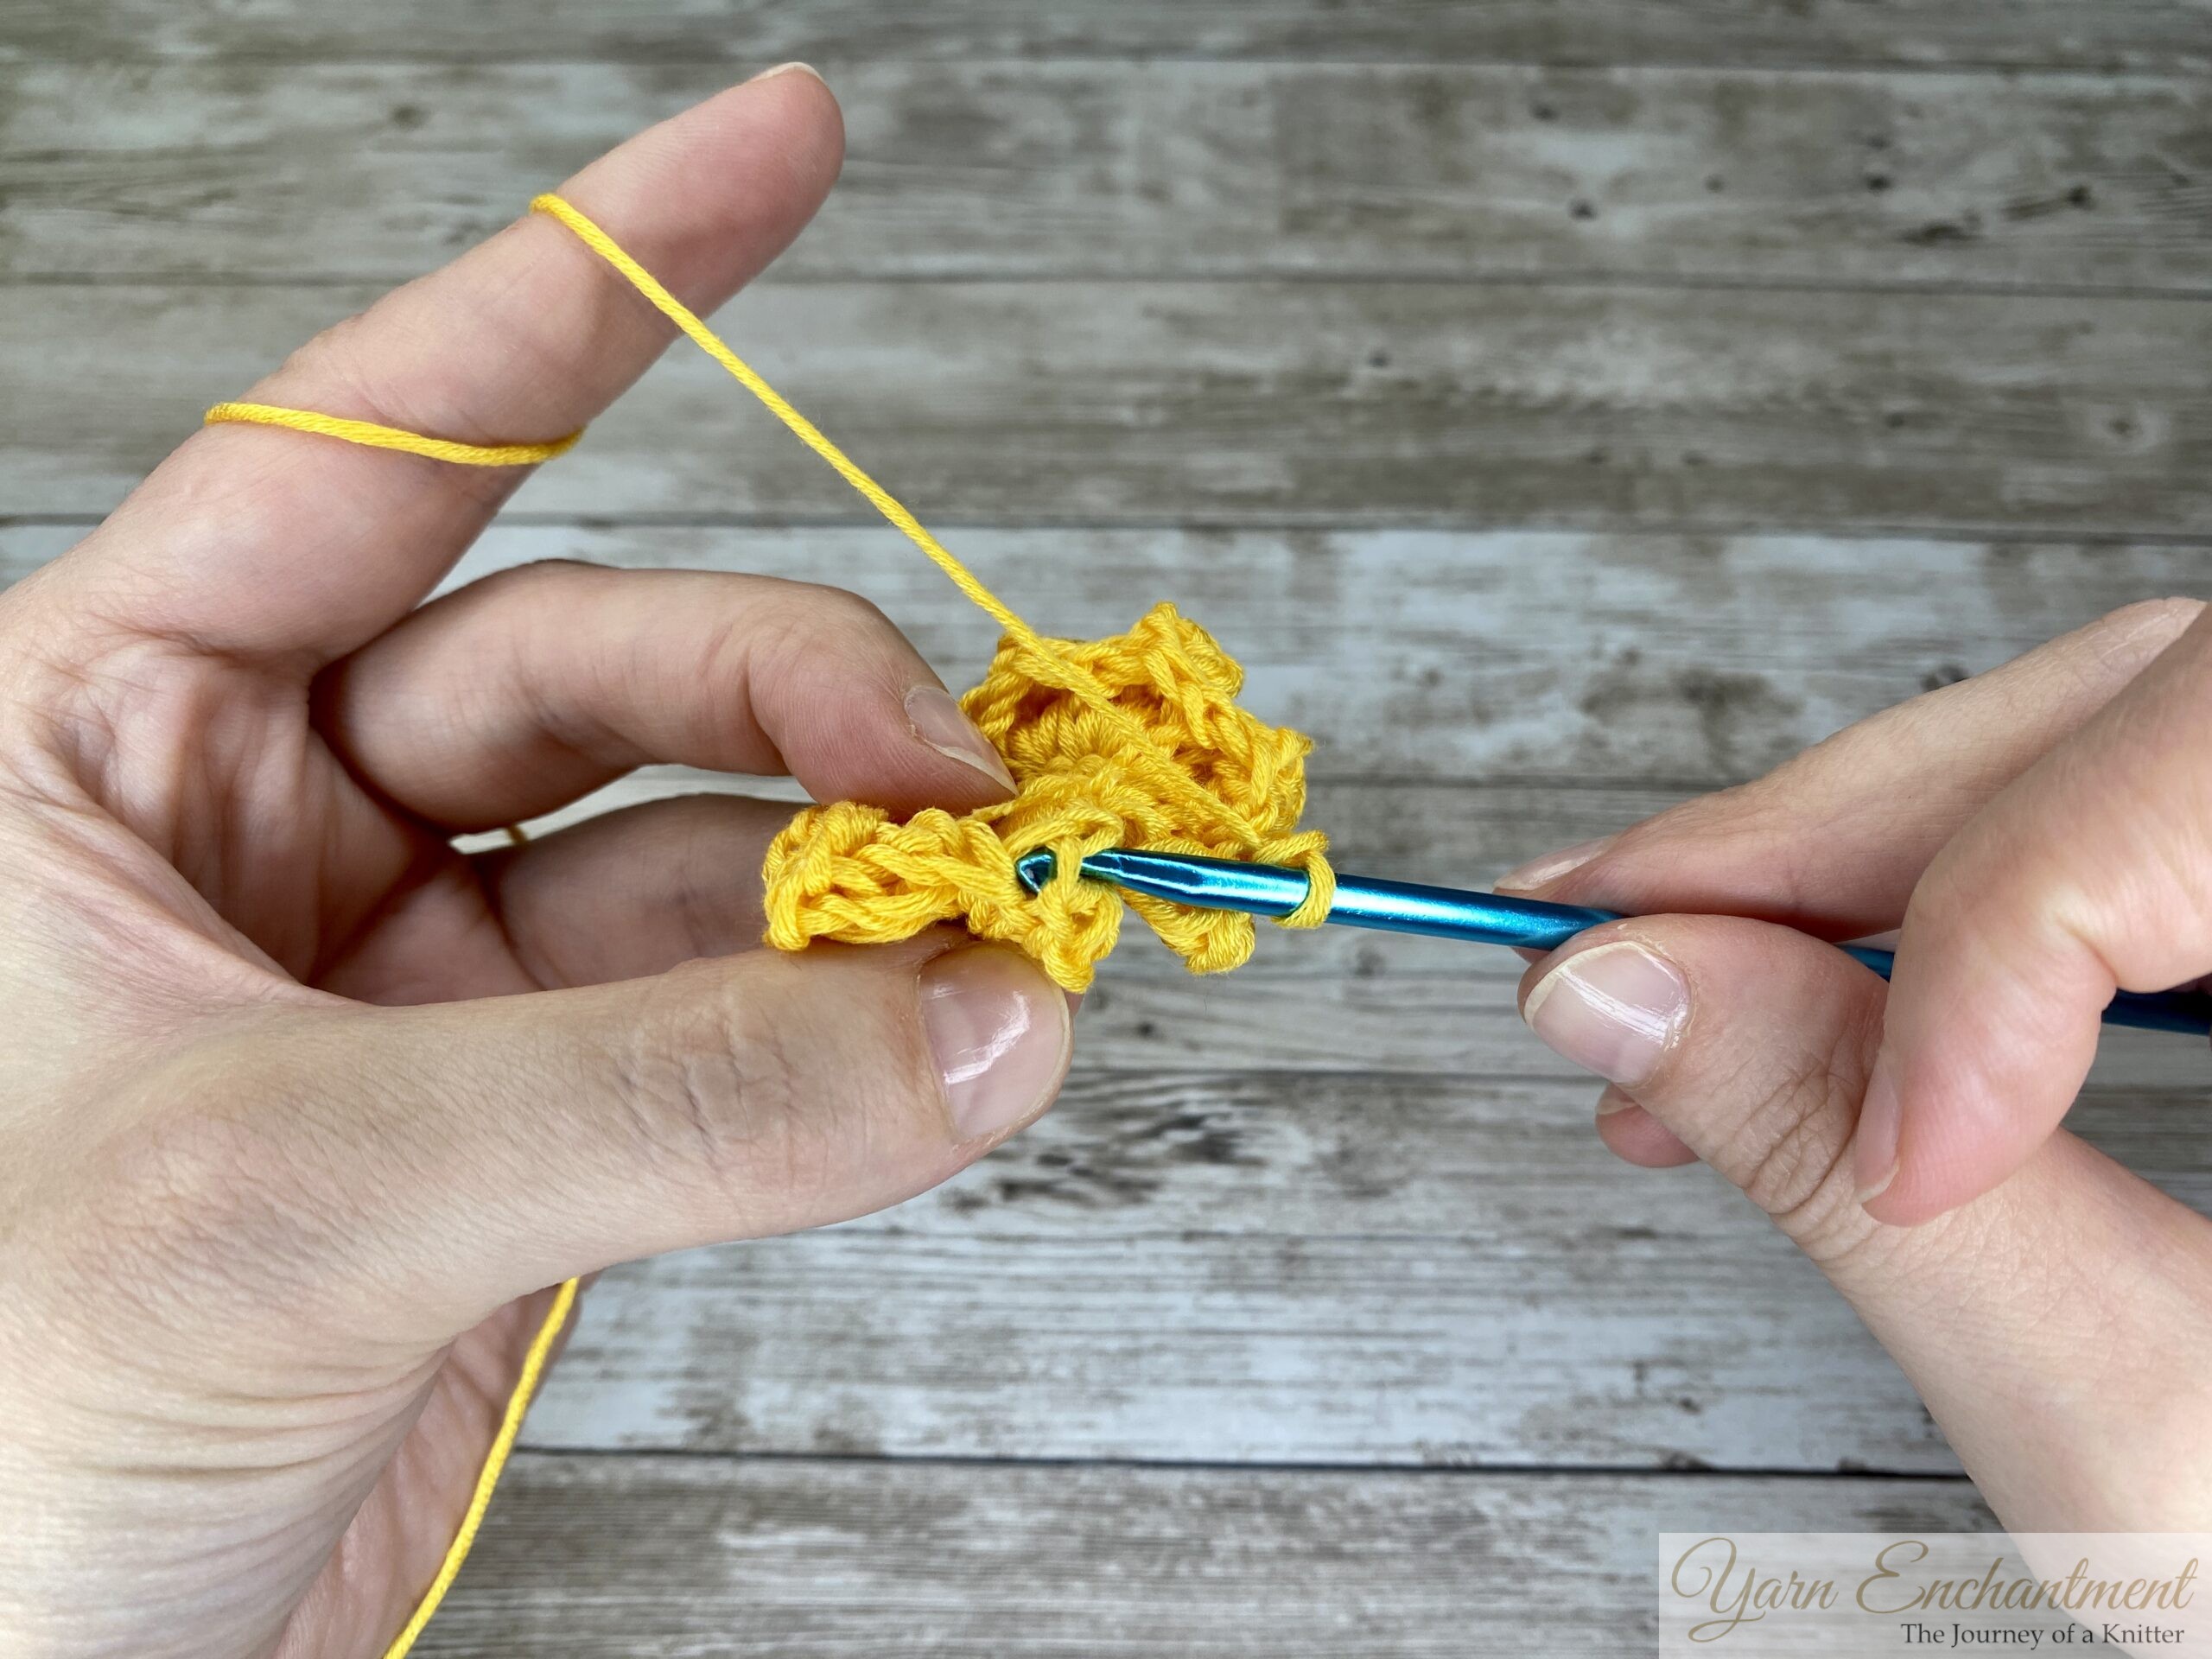
 |  |  | Find the next single crochet space, and work 5 double crochets in it. Count back to the first double crochet you made or your fifth from your loop. | Insert your hook into the top of the double crochet, pick up the dropped loop and slip stitch through the double crochet. | Chain 2 to secure the second popcorn stitch. |


Repeat the process until you have 8 flower petals. If you need additional guidance, I’ve created a detailed YouTube tutorial that walks you through each step. You can find the link to it at the end of this blog post.
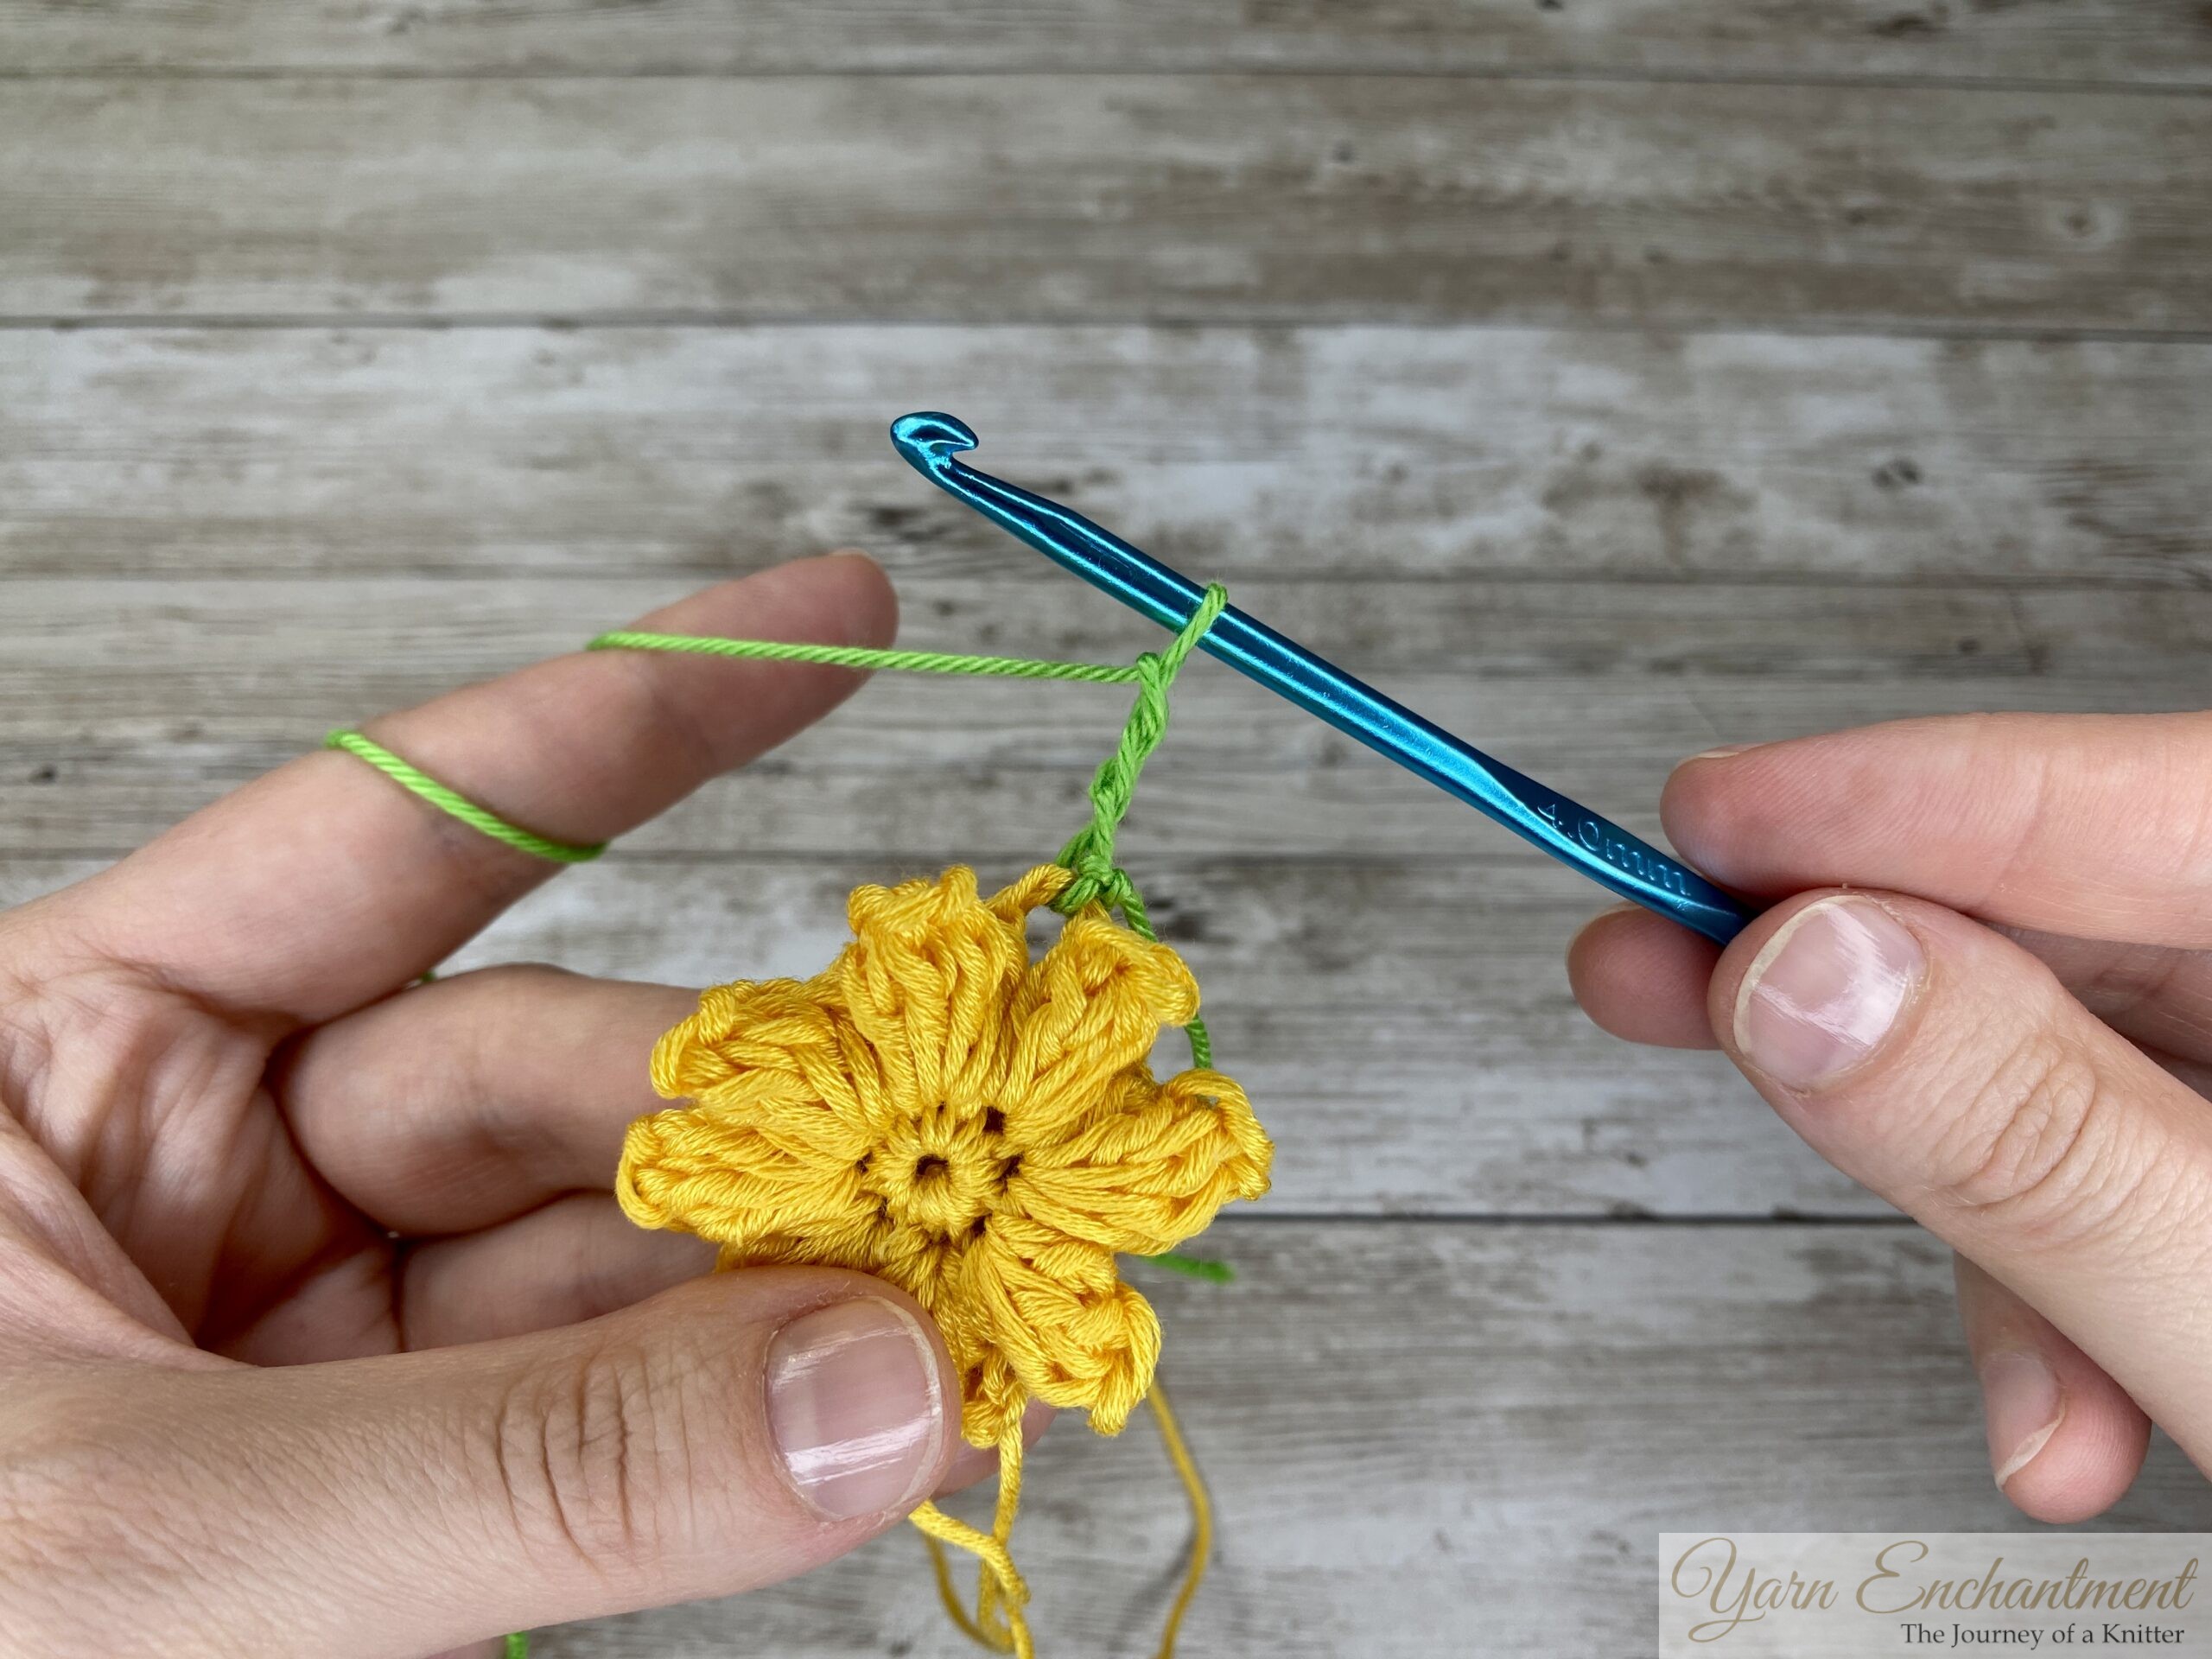
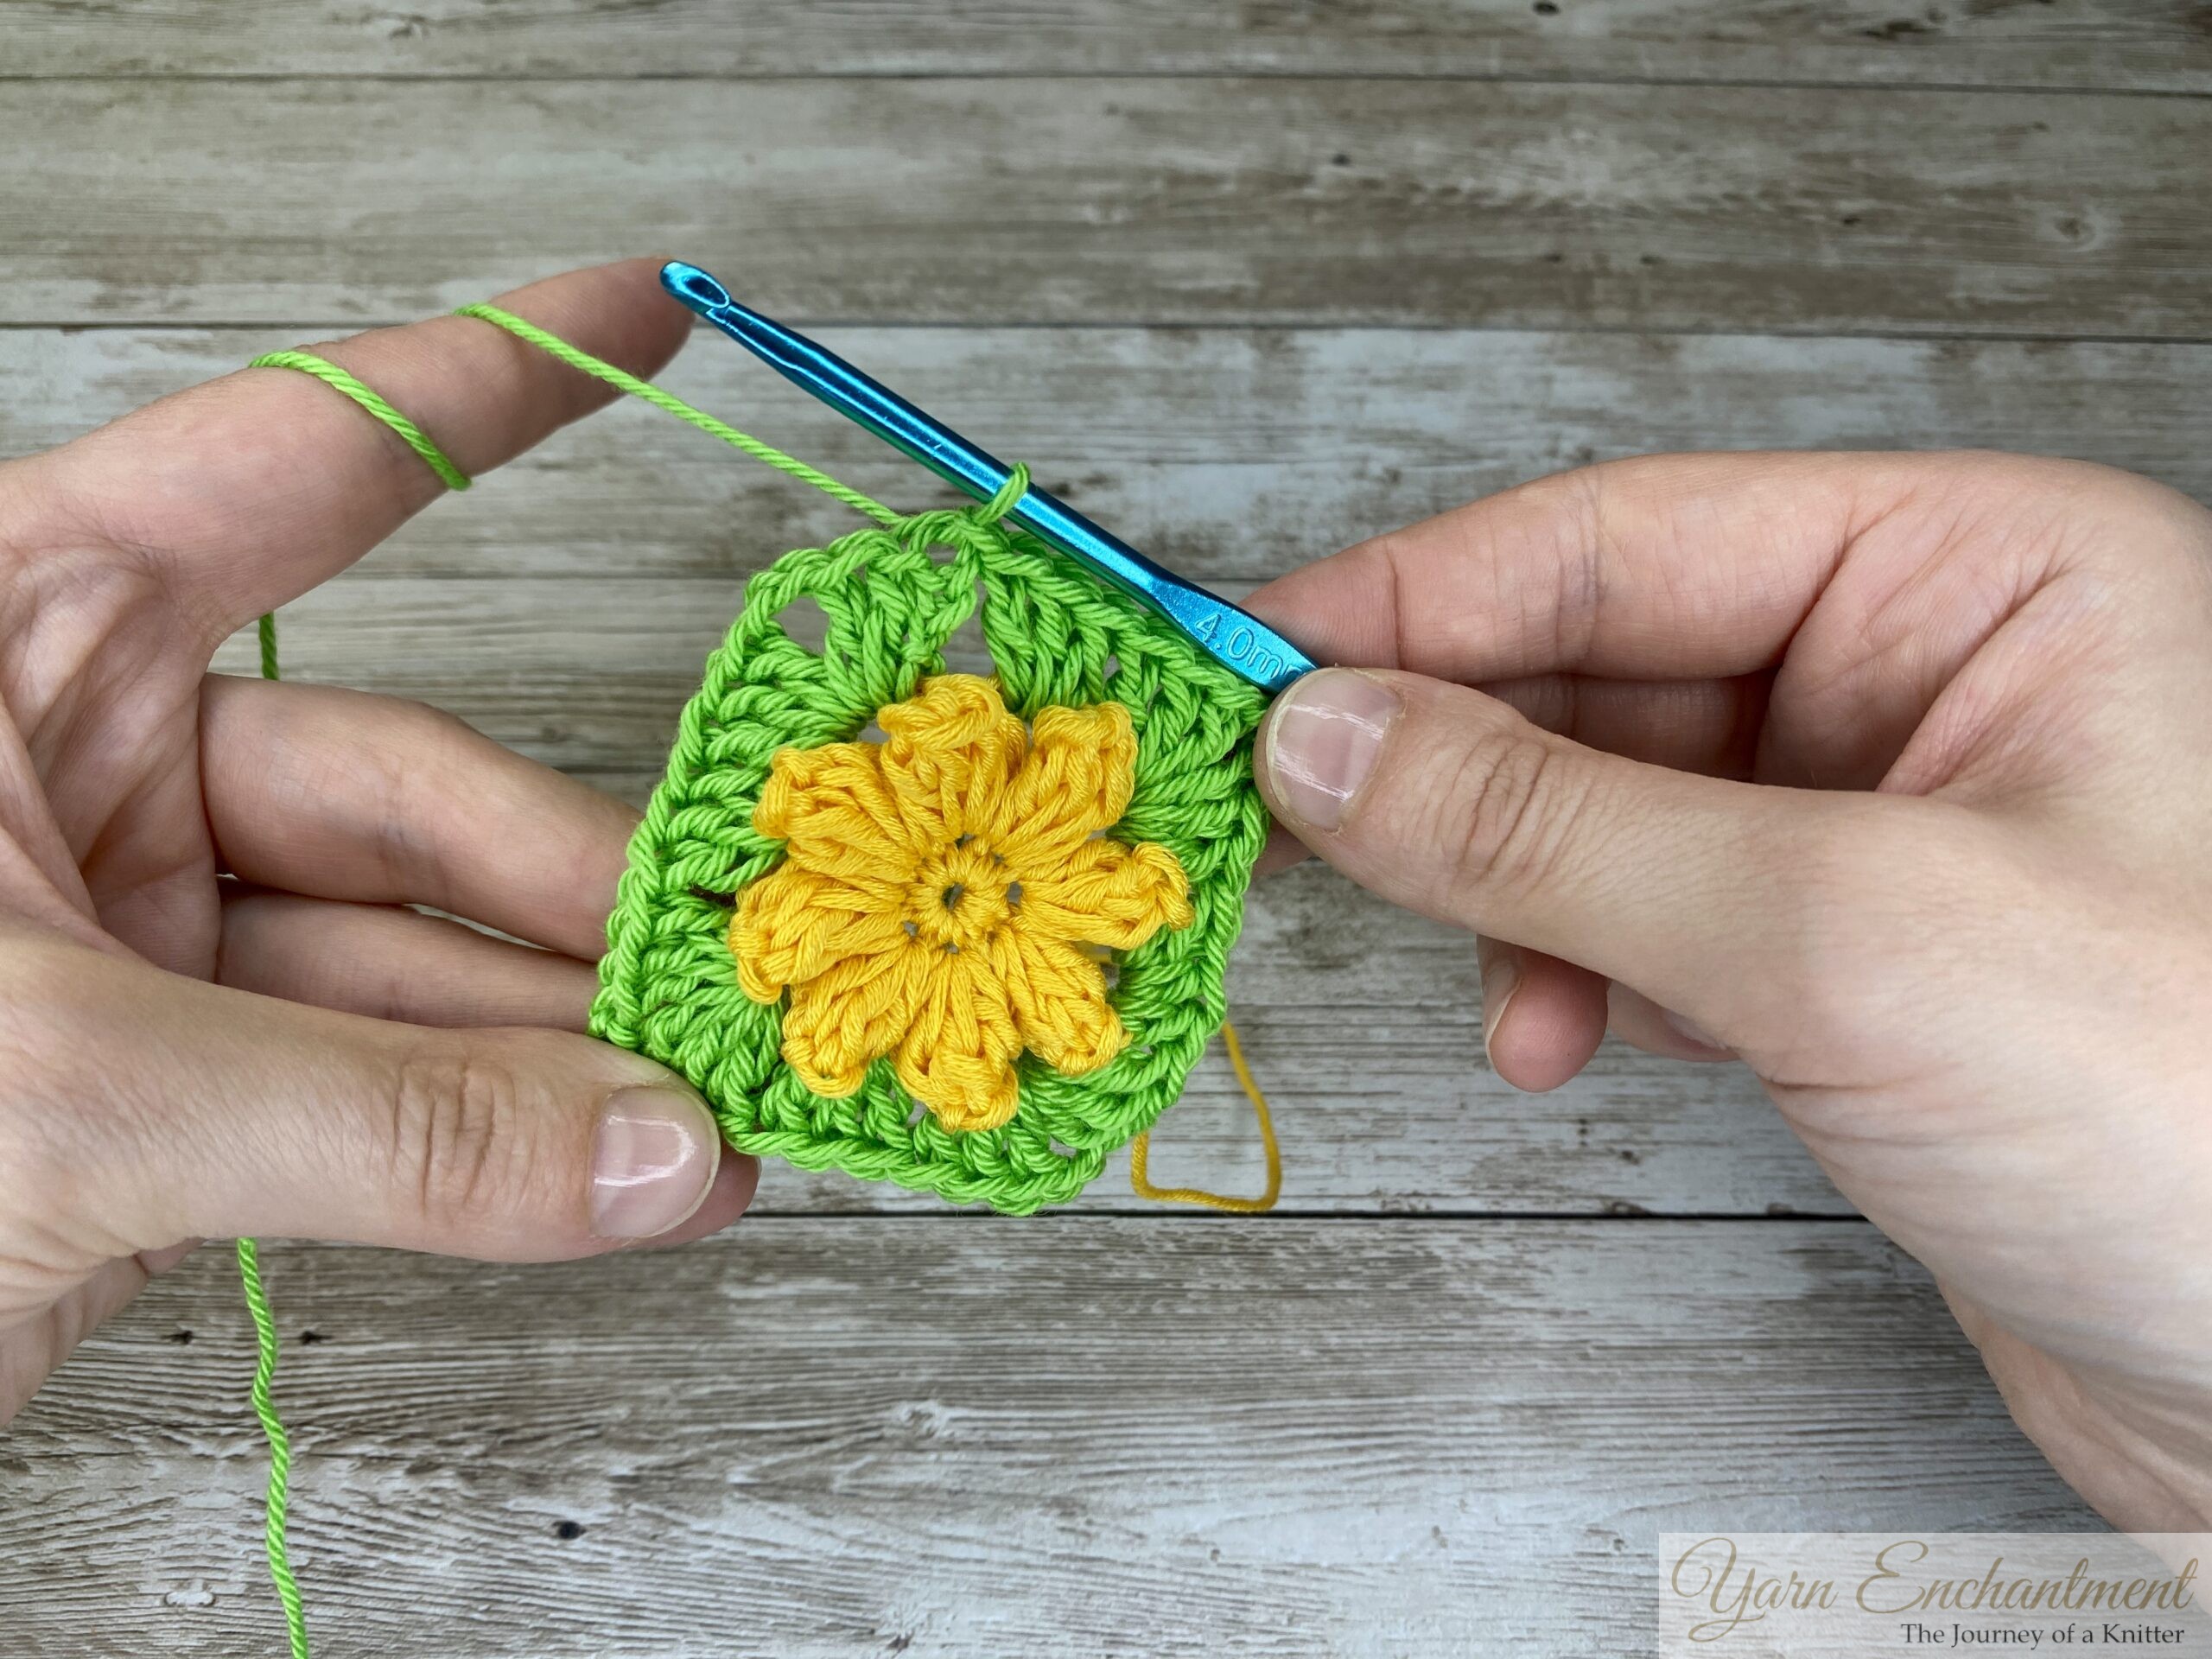
Once you’ve completed all the popcorn stitches, turn your work around and work a slip stitch into the top of the chain-3 stitch.
💡
Tip:
To make it easier to locate the top of the chain-3 stitch, place a stitch marker there. This simple trick will save you time and help you keep track of your work!
 | 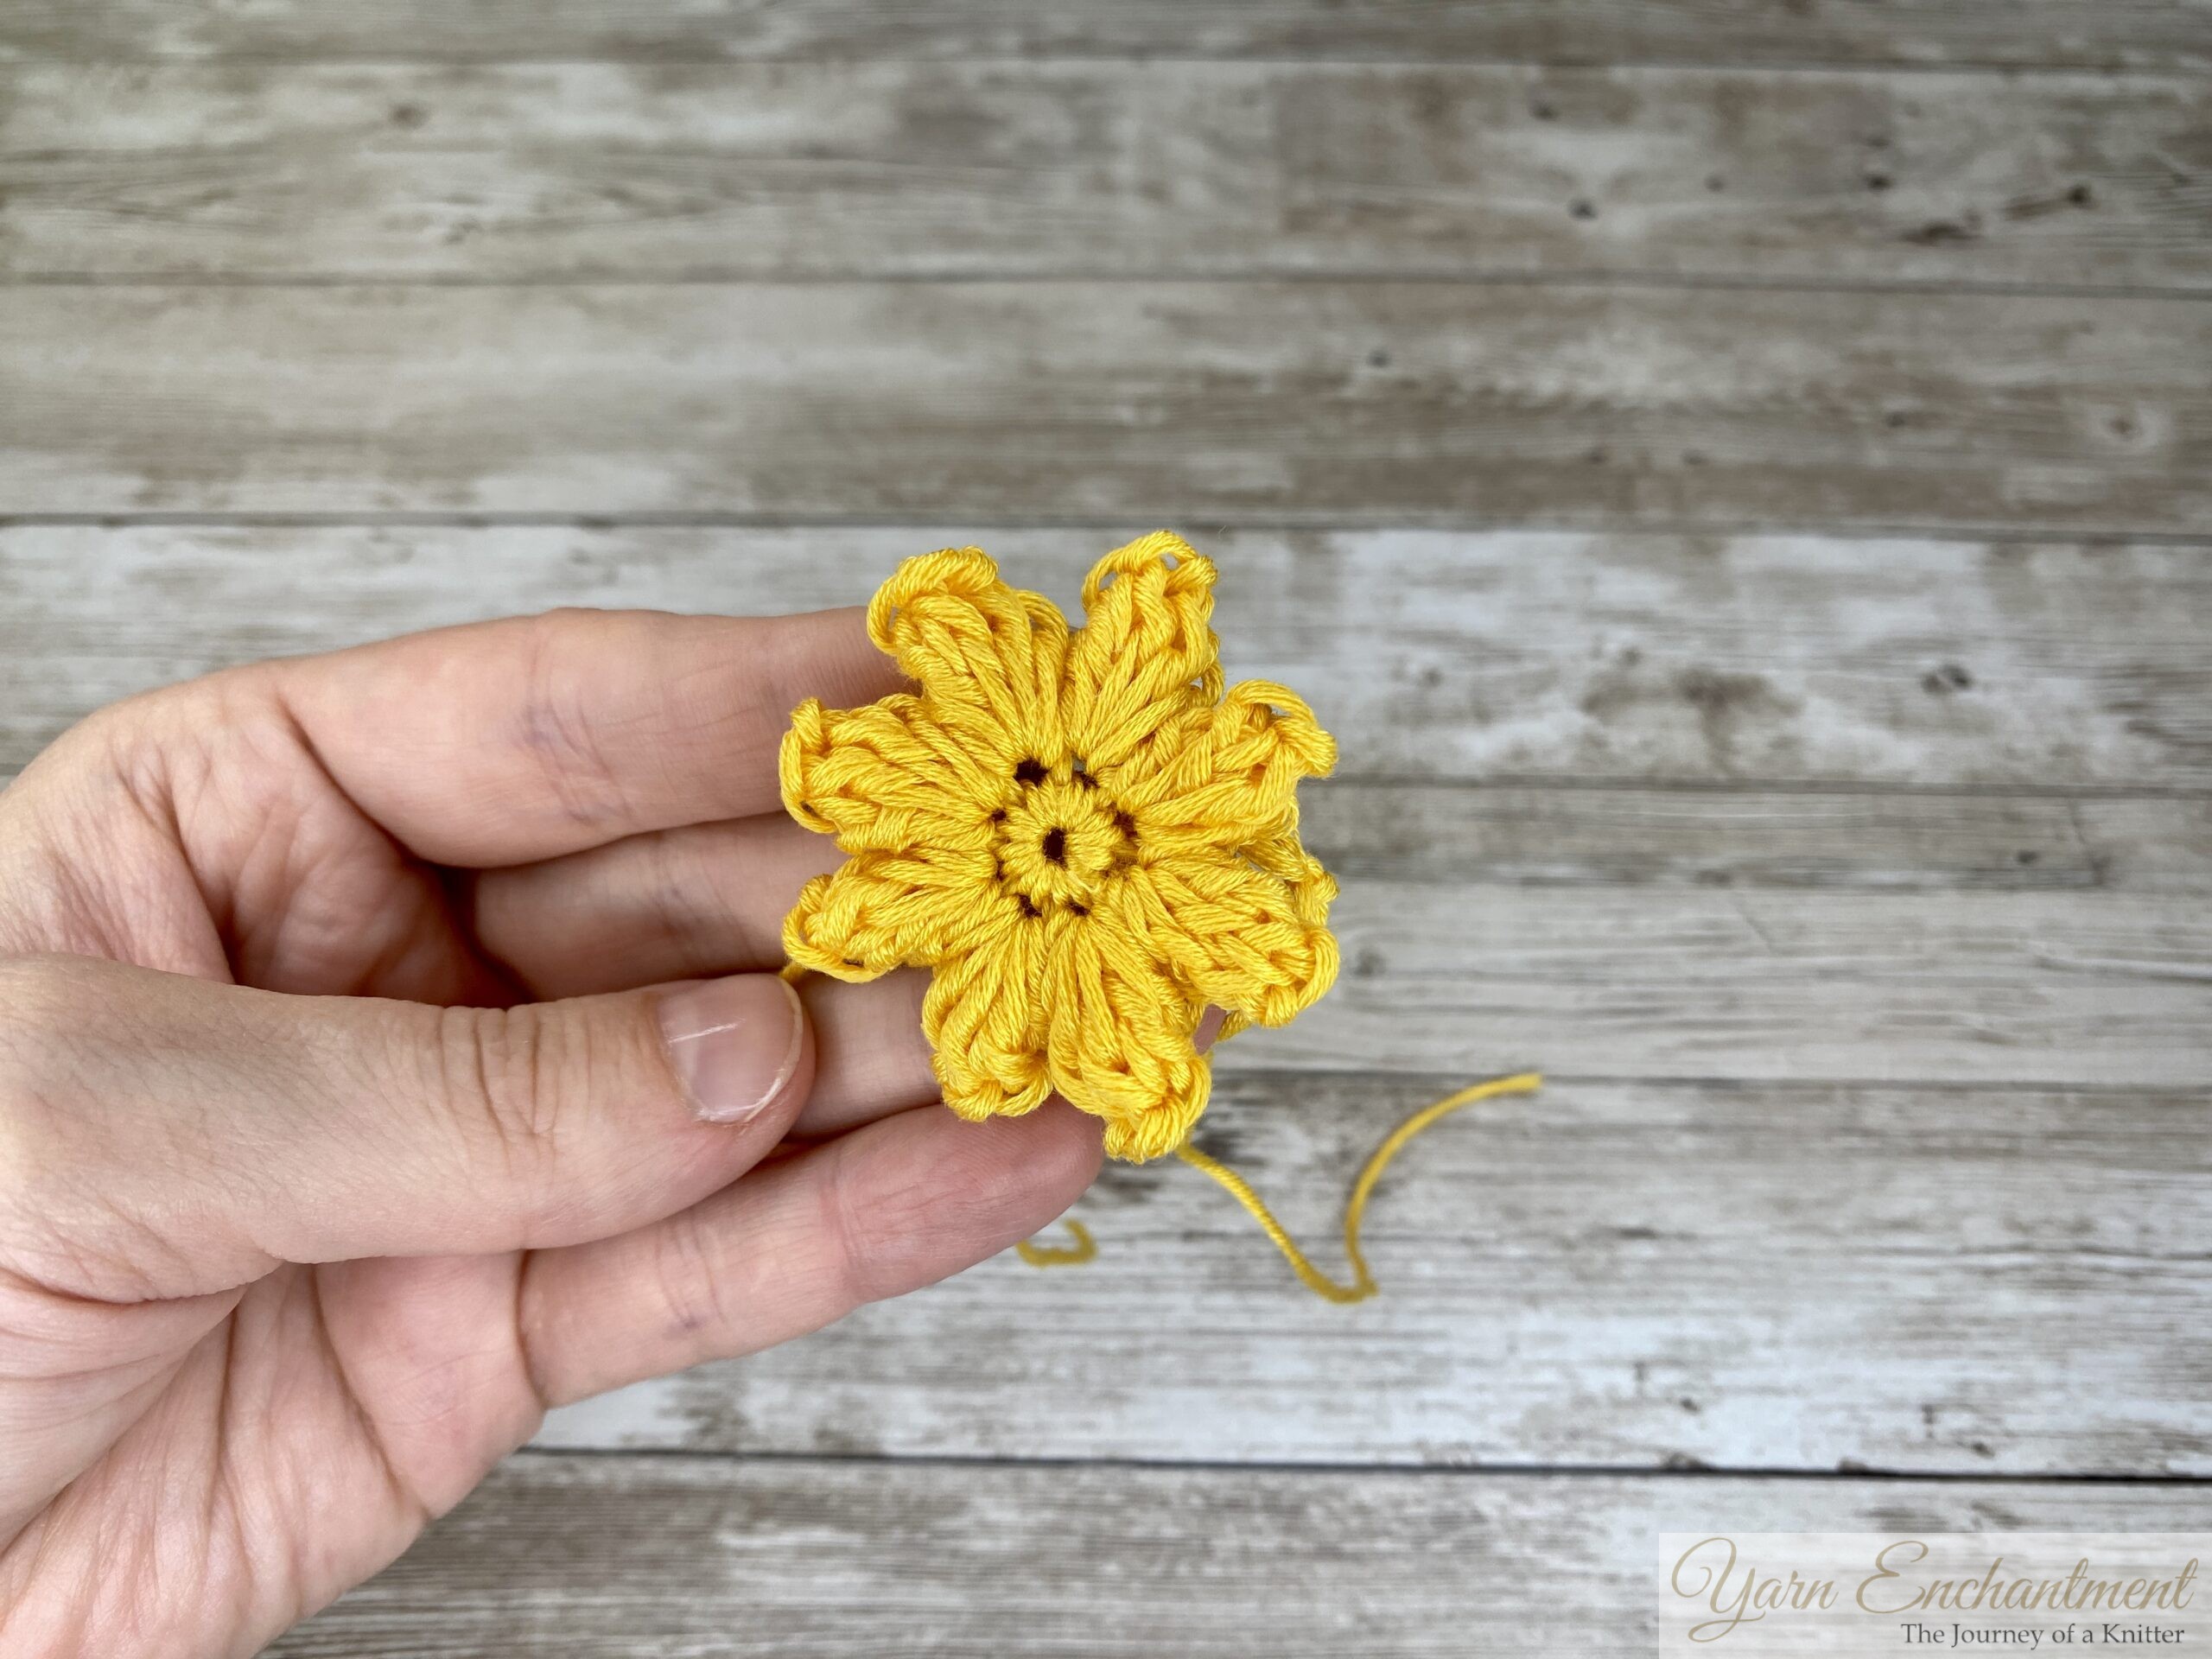 | Join with a slip stitch at the end of the round | You should now have 8 lovely flower petals popping out! |


For the border rounds, I have two options for you to choose from:
- A Solid Border Round for a more uniform look, or
- The Classic Granny Square Border with open chain spaces in between.
 | 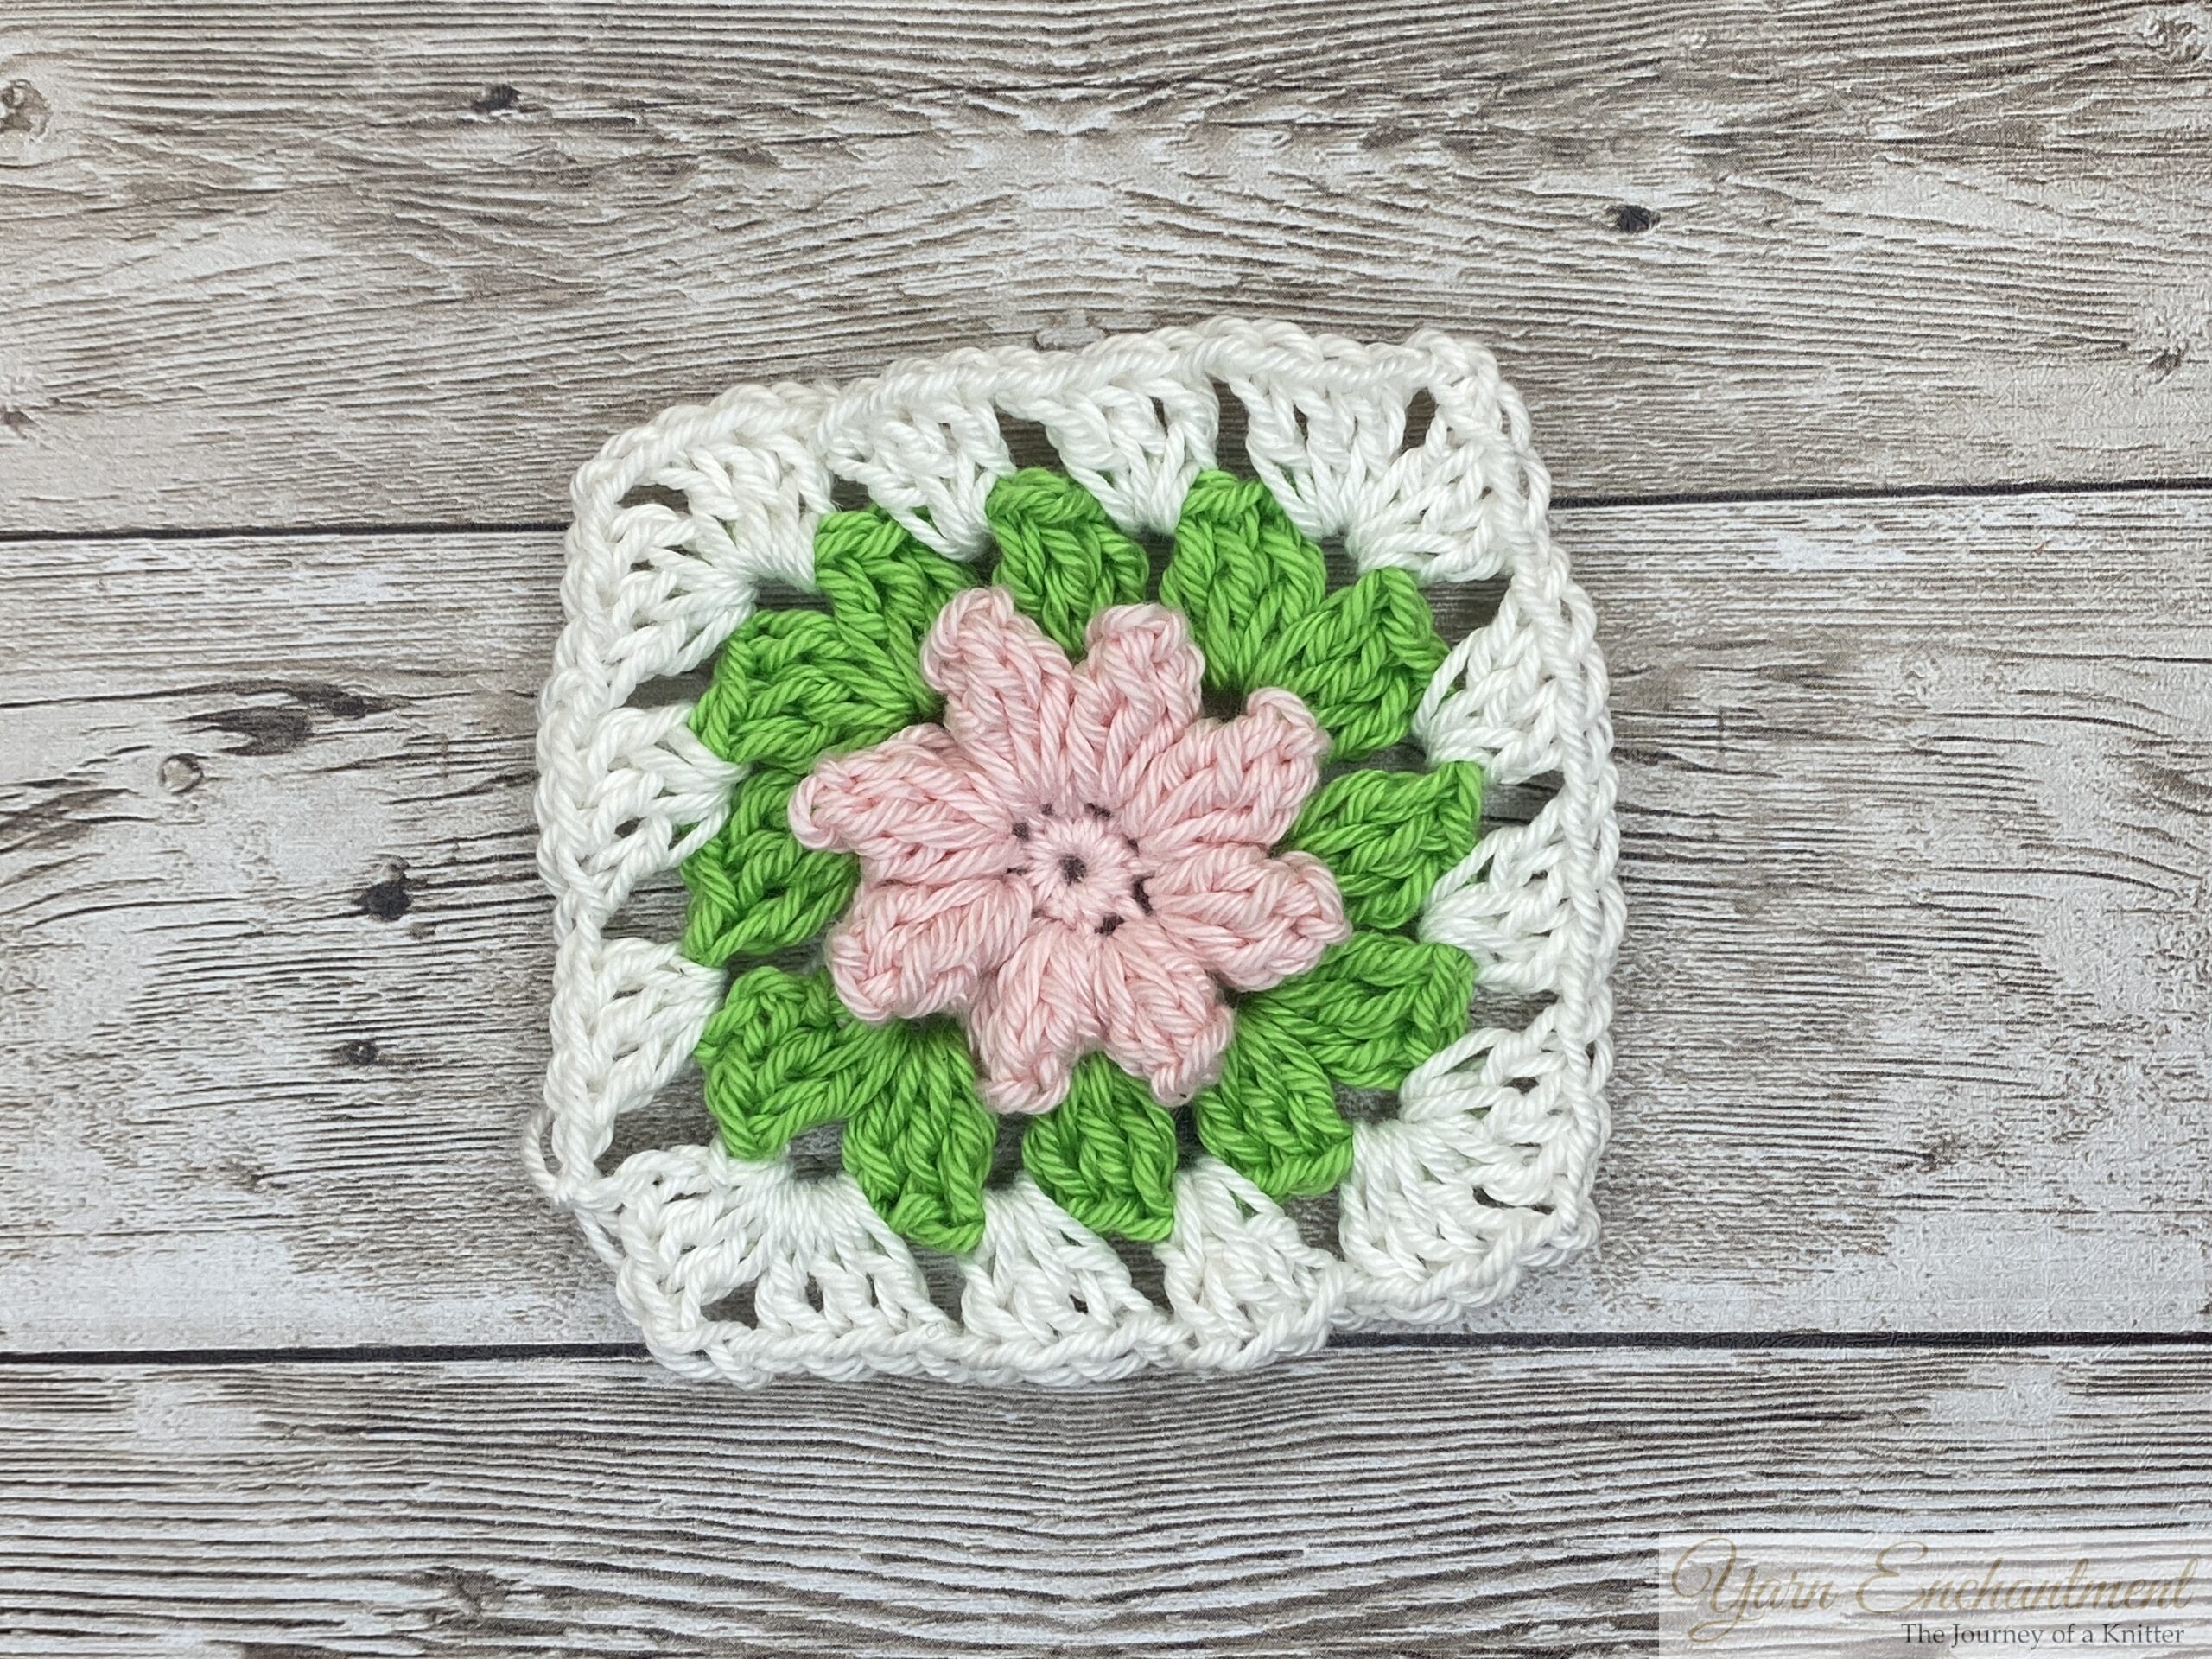 | The Solid Granny Square Border | The Classic Granny Square Border |


Solid Granny Square Border
Solid Granny Square
The solid granny square offers a completely different look and feel compared to its open counterpart. Instead of incorporating chain spaces that create gaps, this style is worked by placing stitches continuously into each stitch or space. This technique results in a denser, more uniform fabric with a smooth and cohesive appearance.
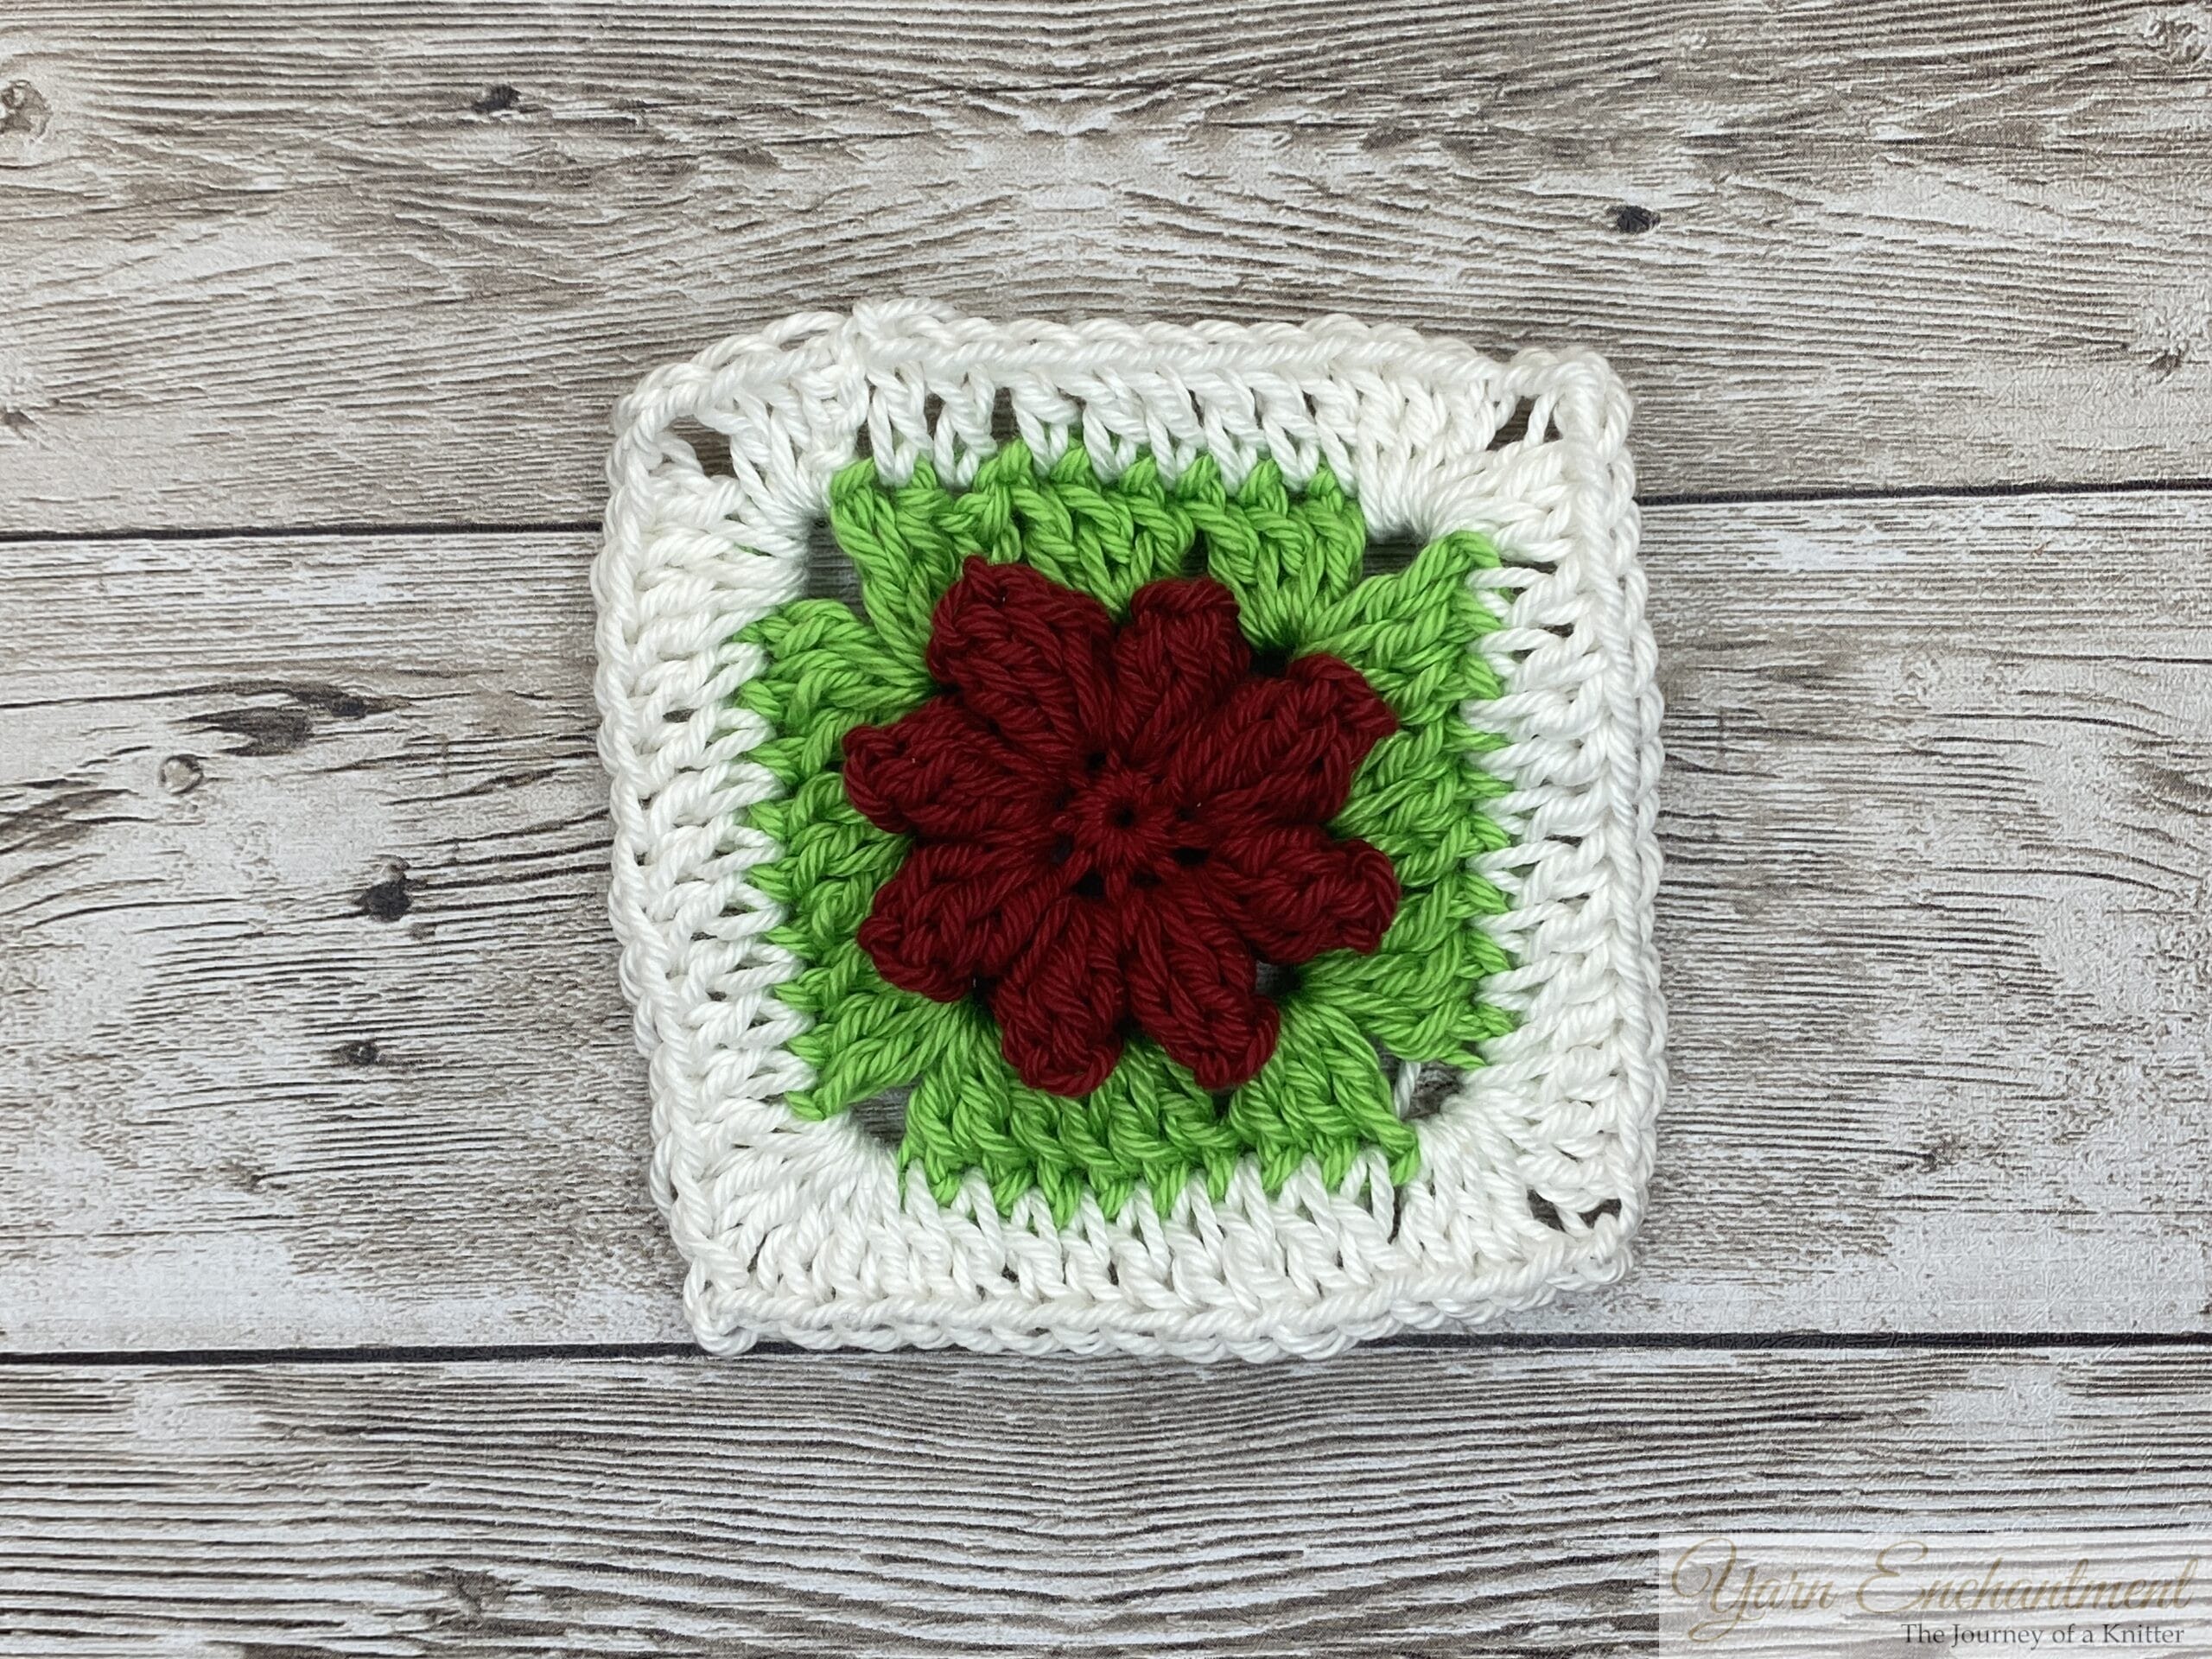 | Solid Granny Square Border |

Round 3: First Border Round
Now it’s time to introduce color B, and we will work our first border row!
-
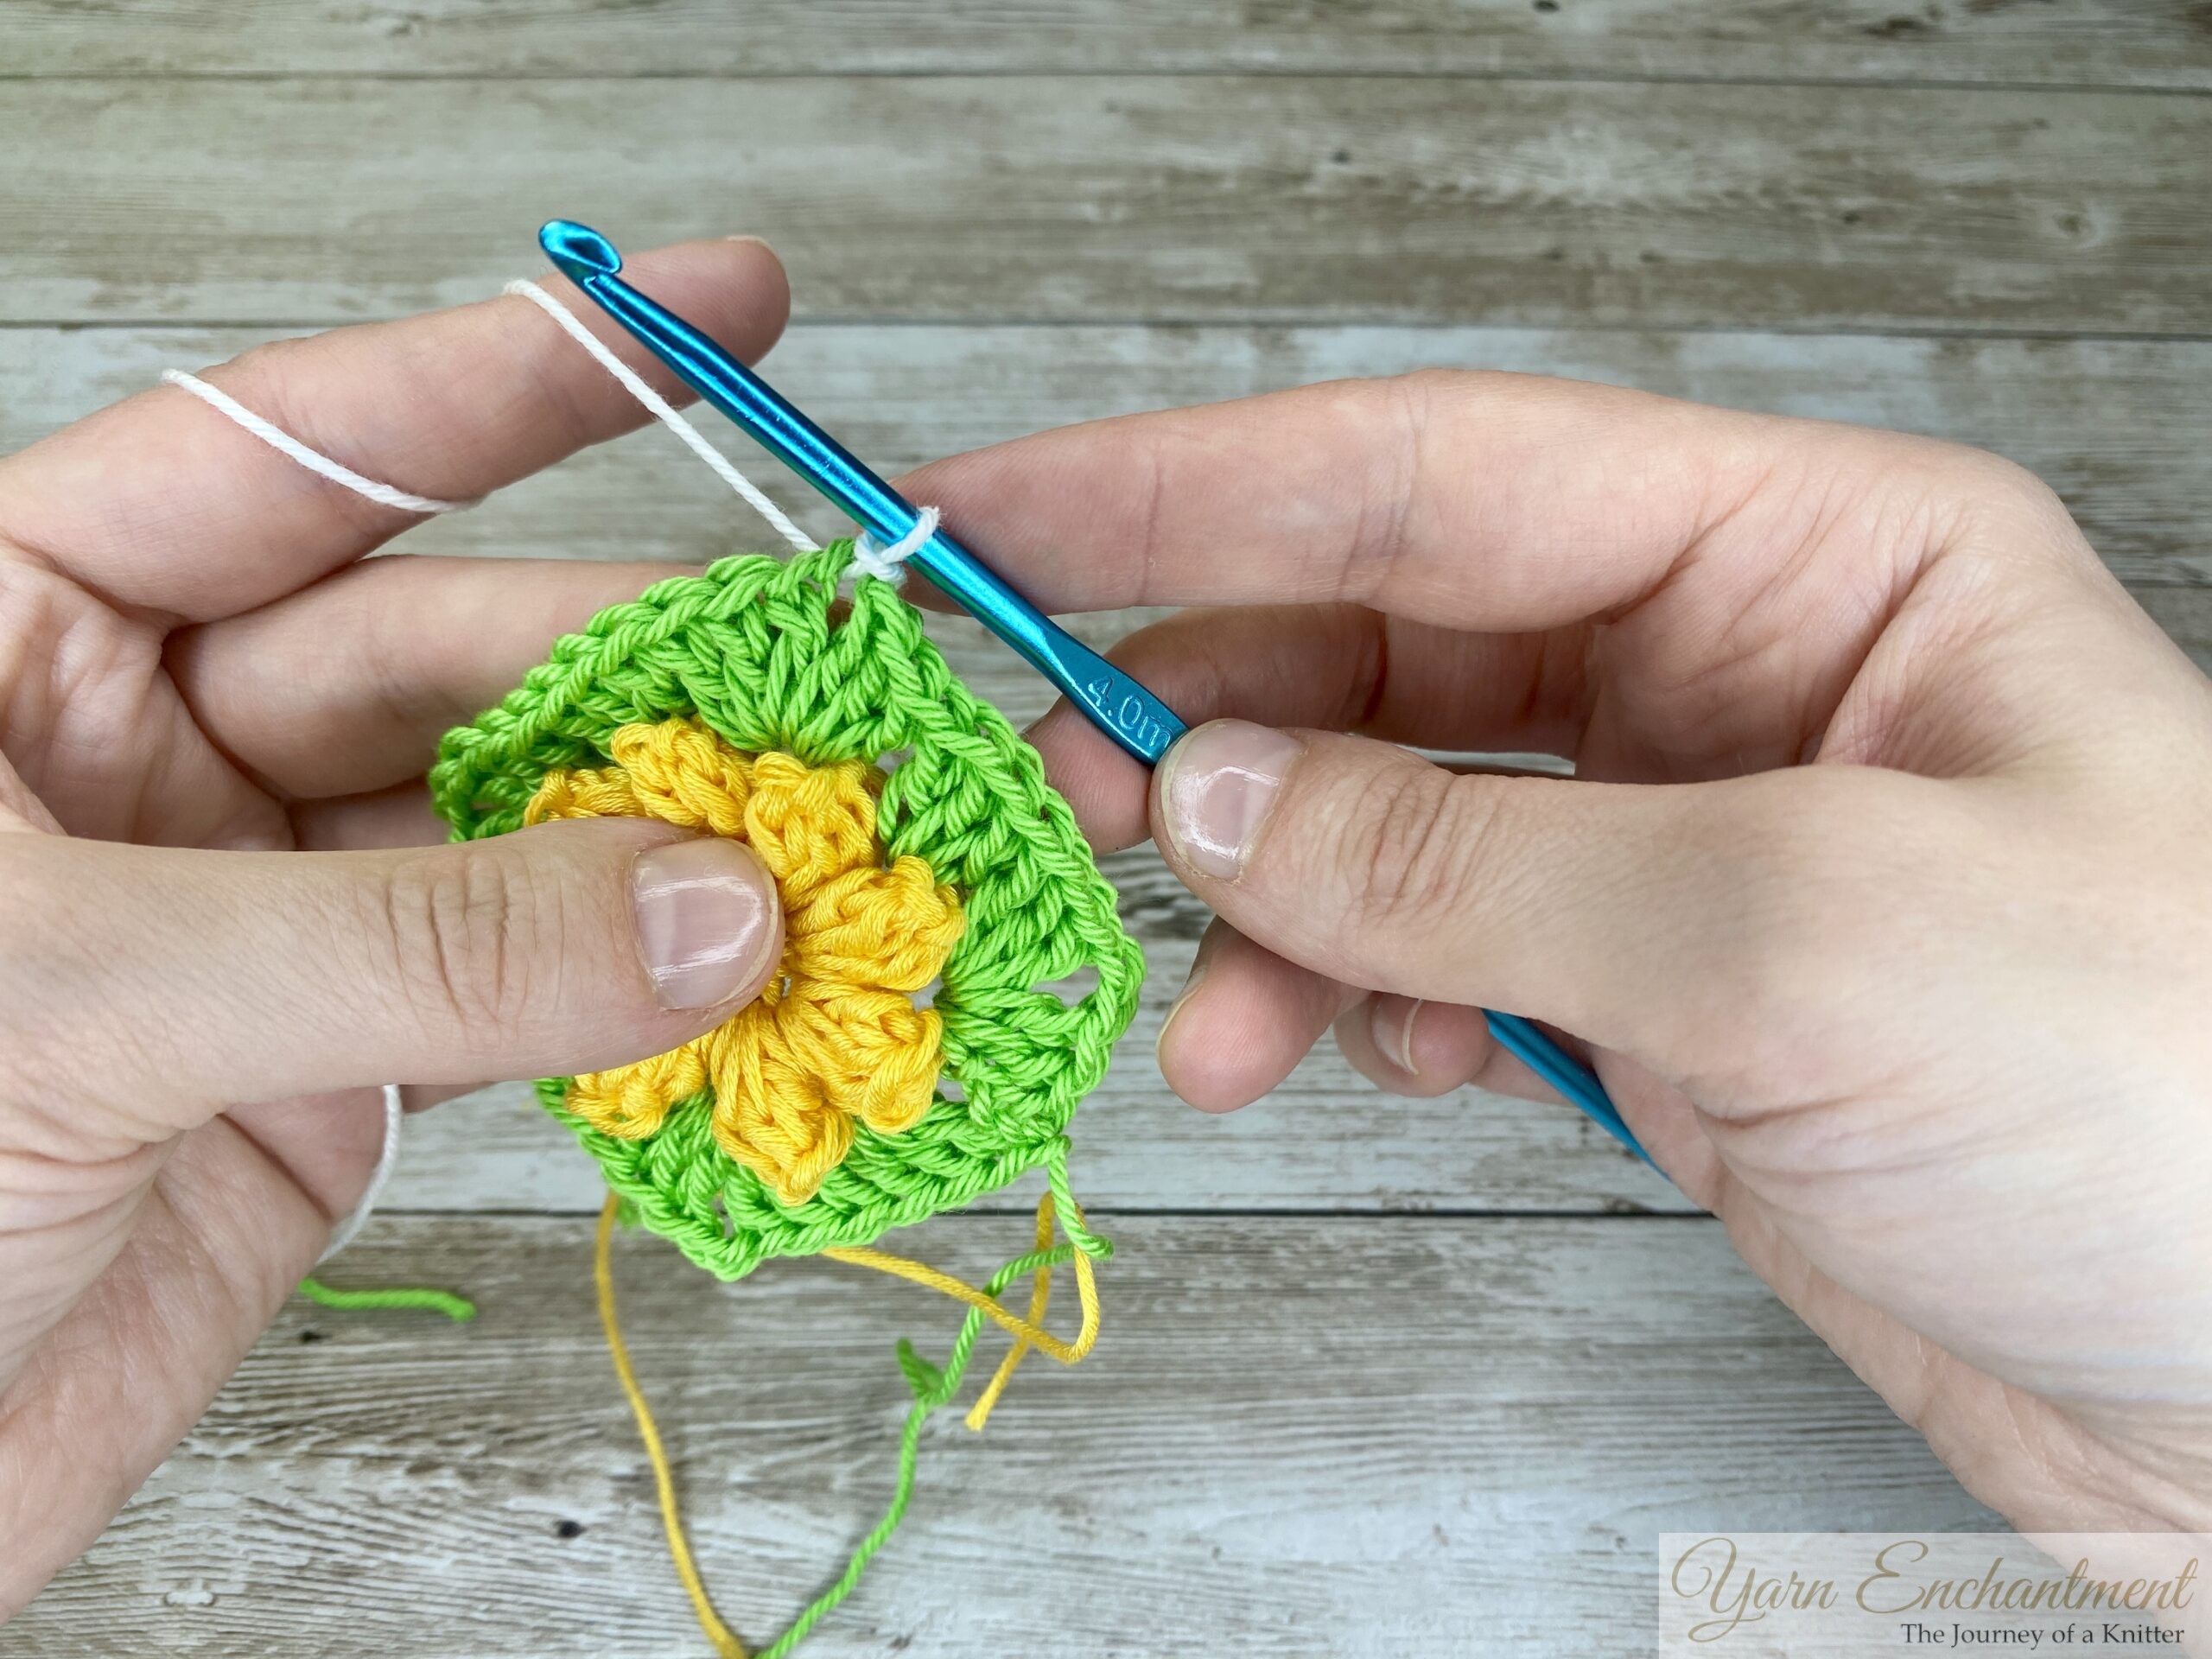
- Join Color B: Join color B in any chain-1 space from the previous round.
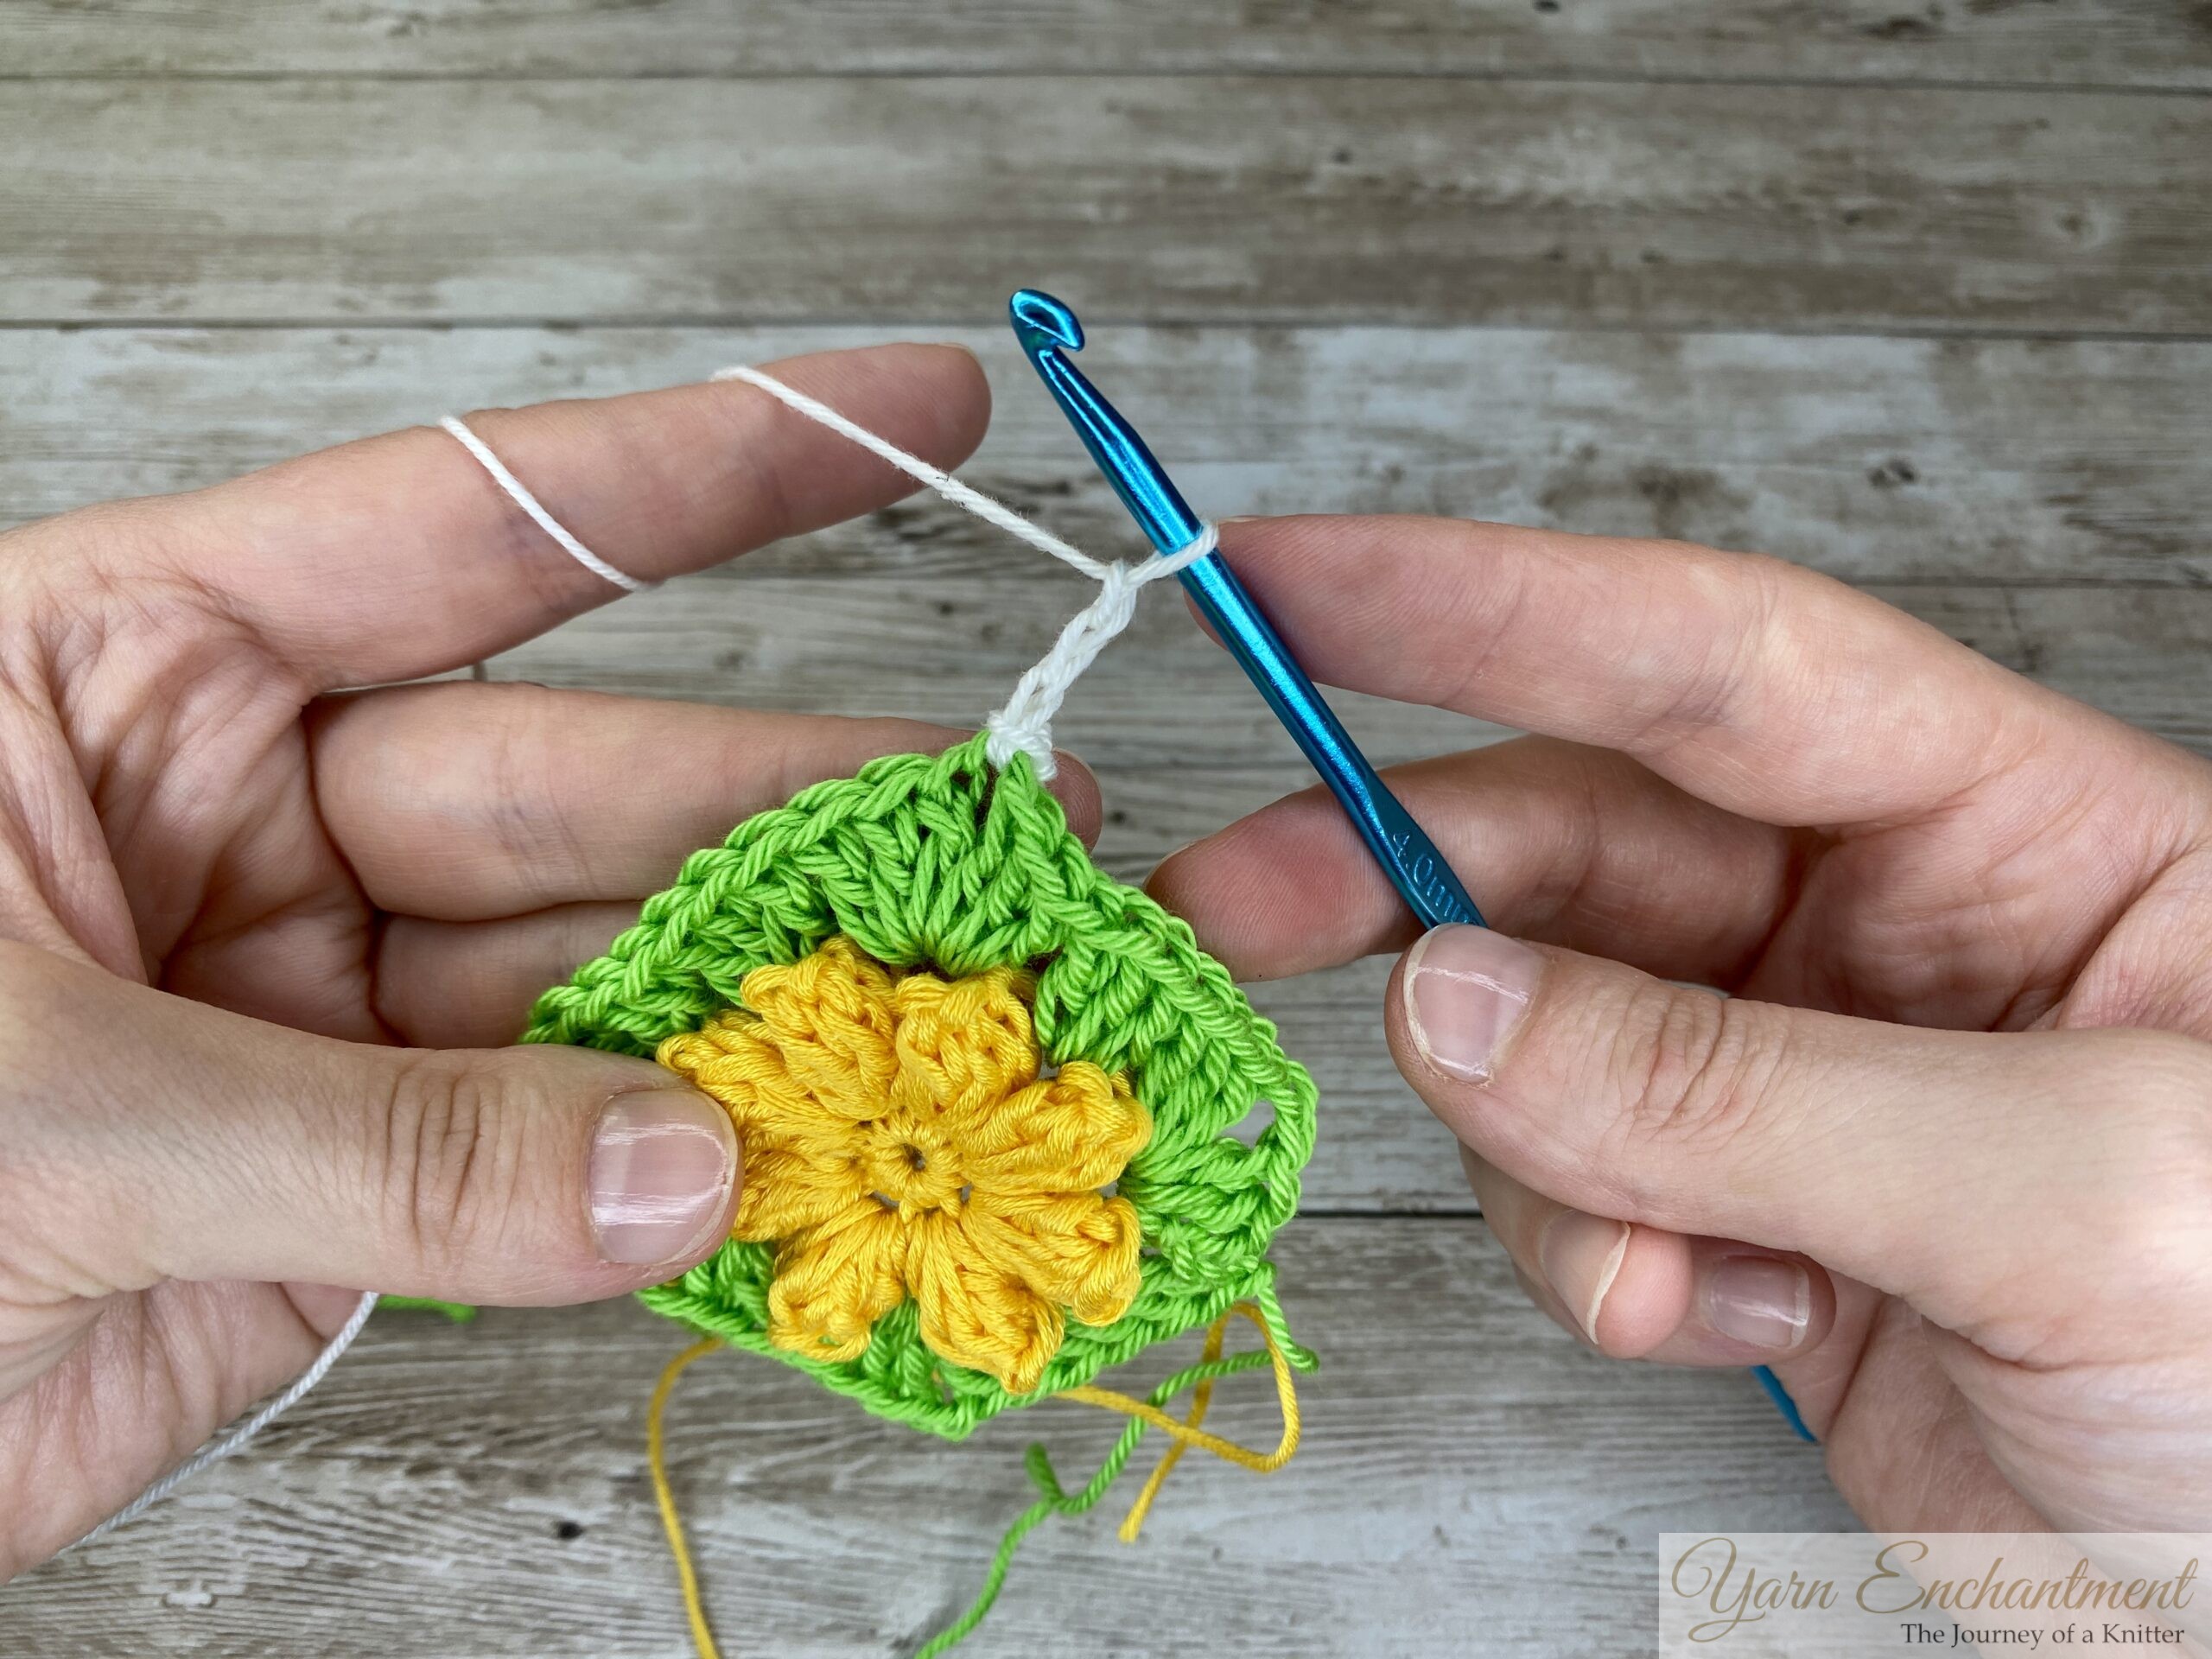
- Start the First Corner: Chain 3 (this counts as your first double crochet), then work 2 more double crochets in the same space. This forms the first half of your corner.
Chain 2, then work 3 double crochets in the same chain-2 space. This completes your first corner. - Work Along the Side: Find the next chain-2 space and work 3 double crochets in that space.
- Create the Next Corner: In the following chain-2 space, work another corner: (Work 3 double crochets, chain 2, and then 3 more double crochets.)
- Repeat the Pattern: Continue working around the square by repeating this sequence:
-
- Work 3 double crochets into the next chain-2 space (this is the side).
- In the next chain-2 space, create another corner (3 double crochets, chain 2, 3 double crochets).
-
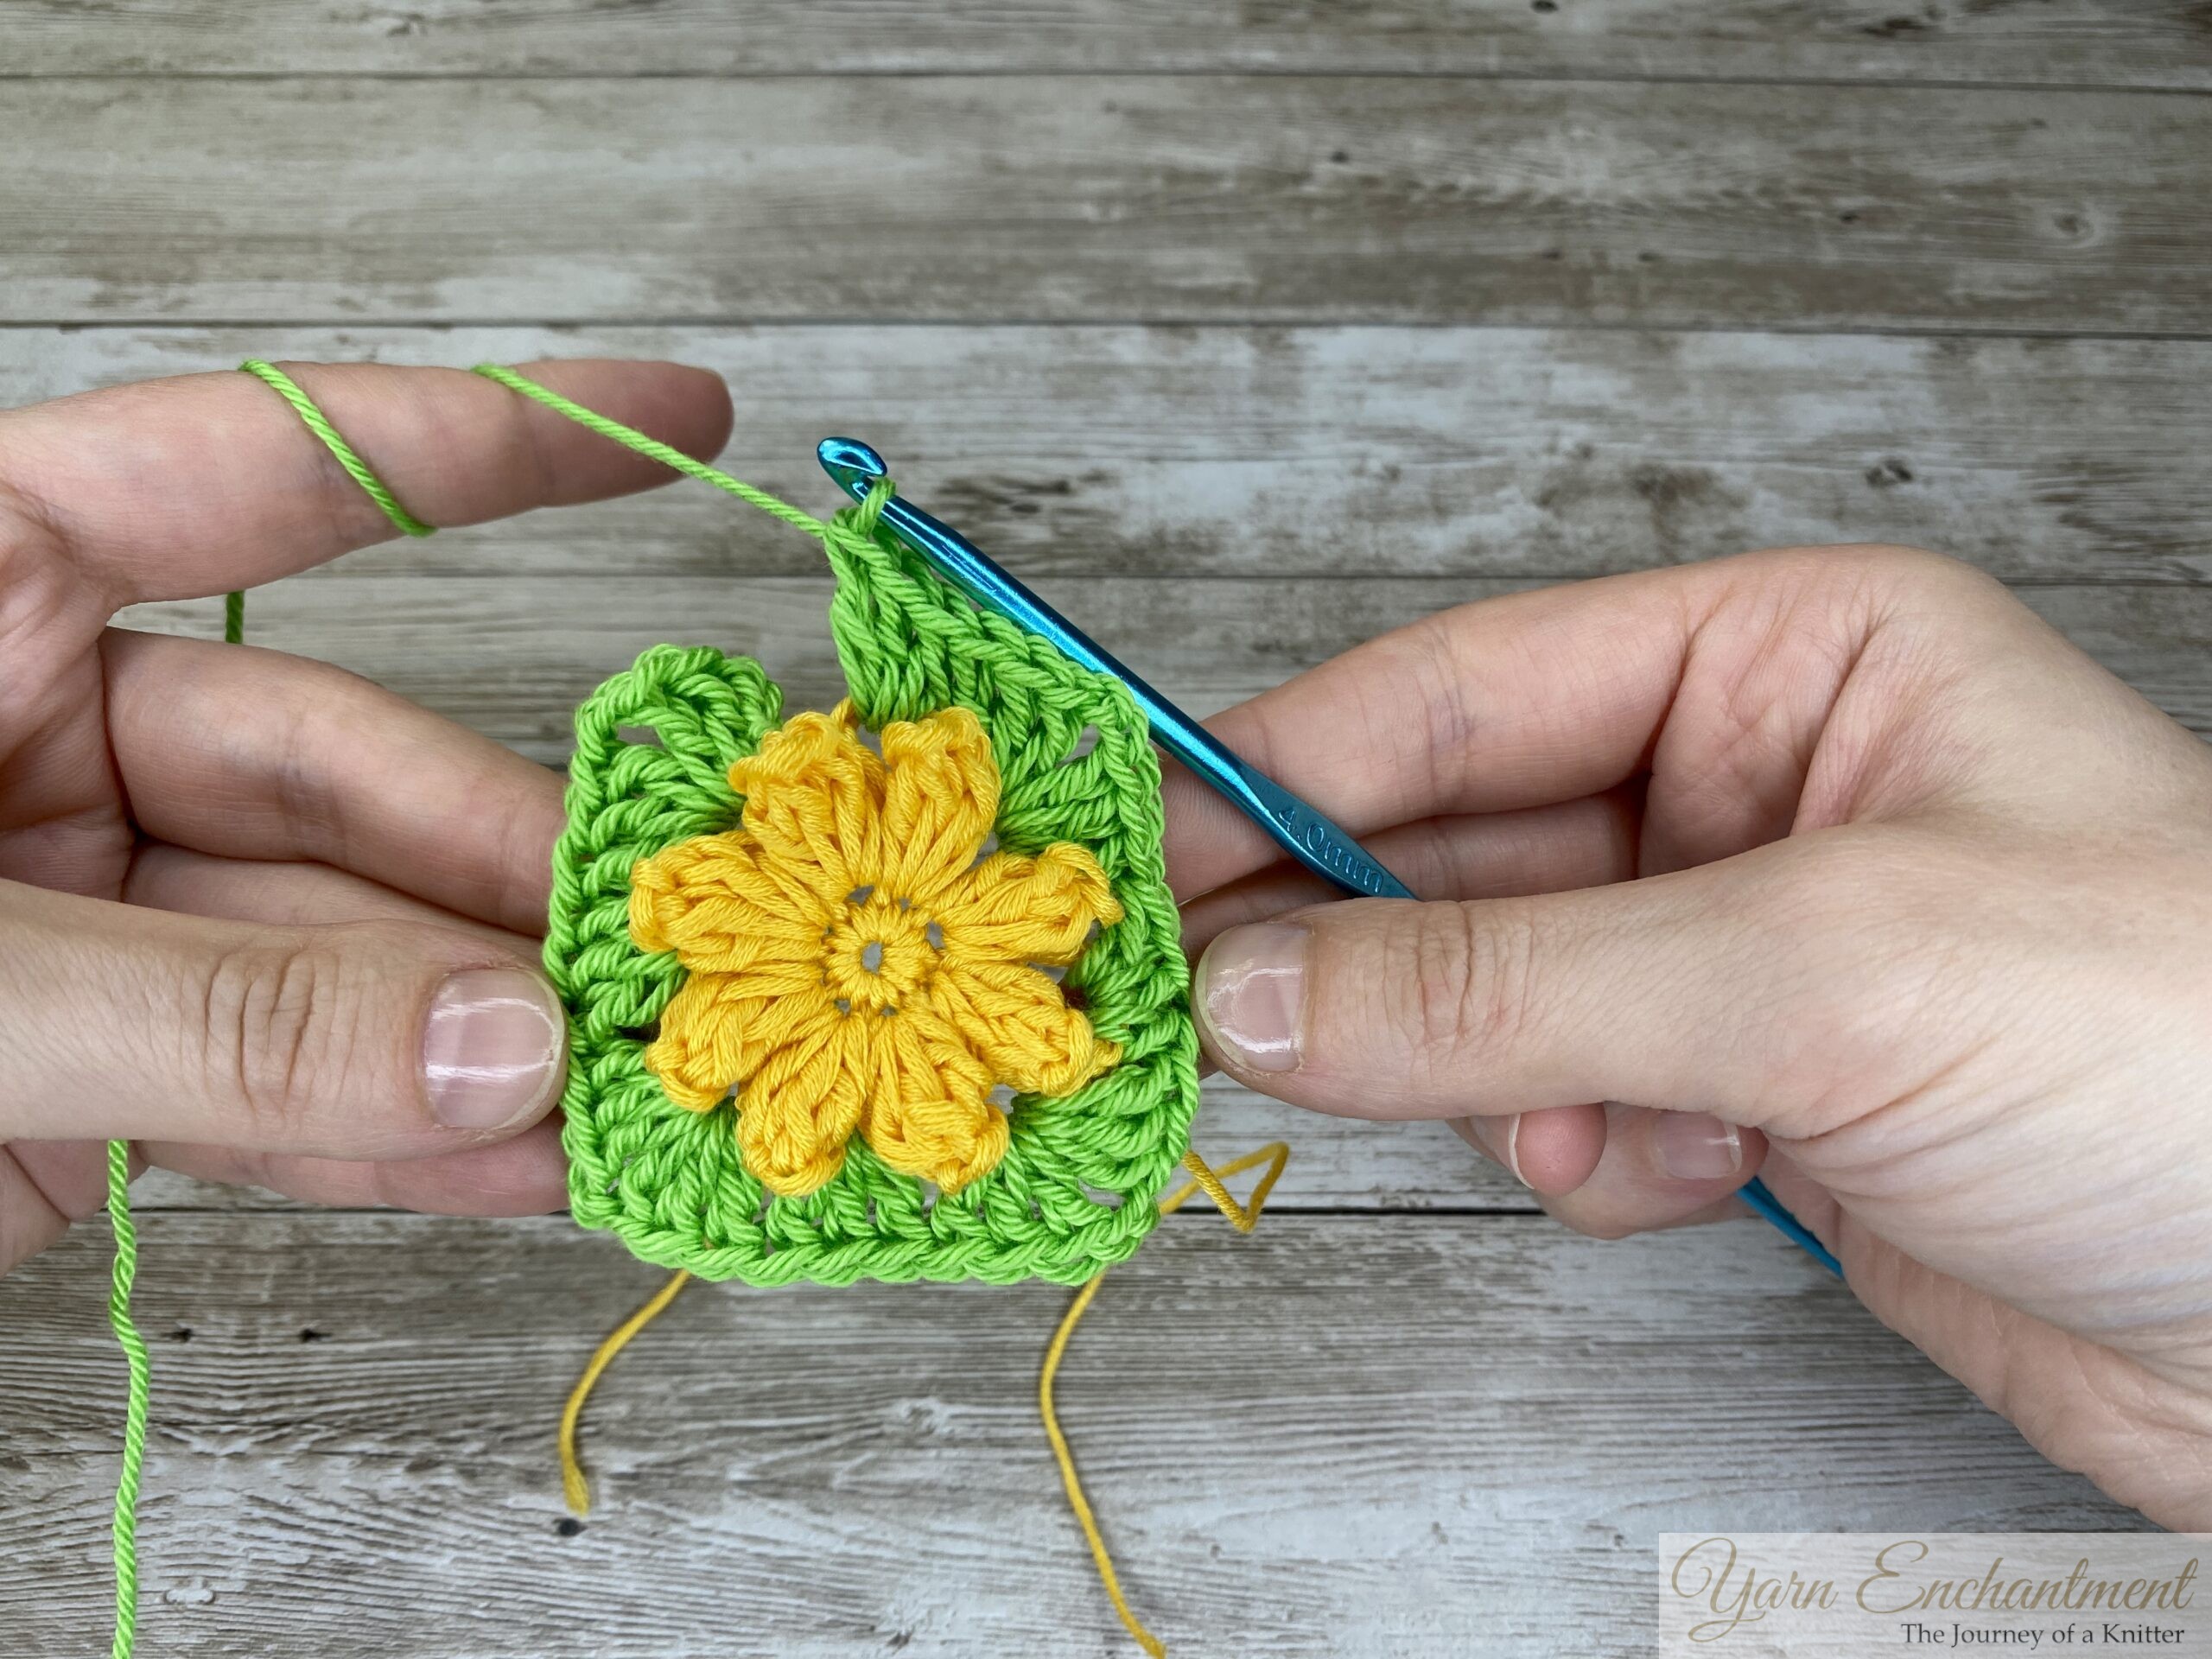
- Complete the Round: Once you’ve worked all four corners and sides, join the round with a slip stitch in the top of the initial chain-3.
 |  |  | Find any chain 2 space from the previous round | Join color B in any chain-1 space from the previous round. | Chain 3 (counts as a double crochet) |


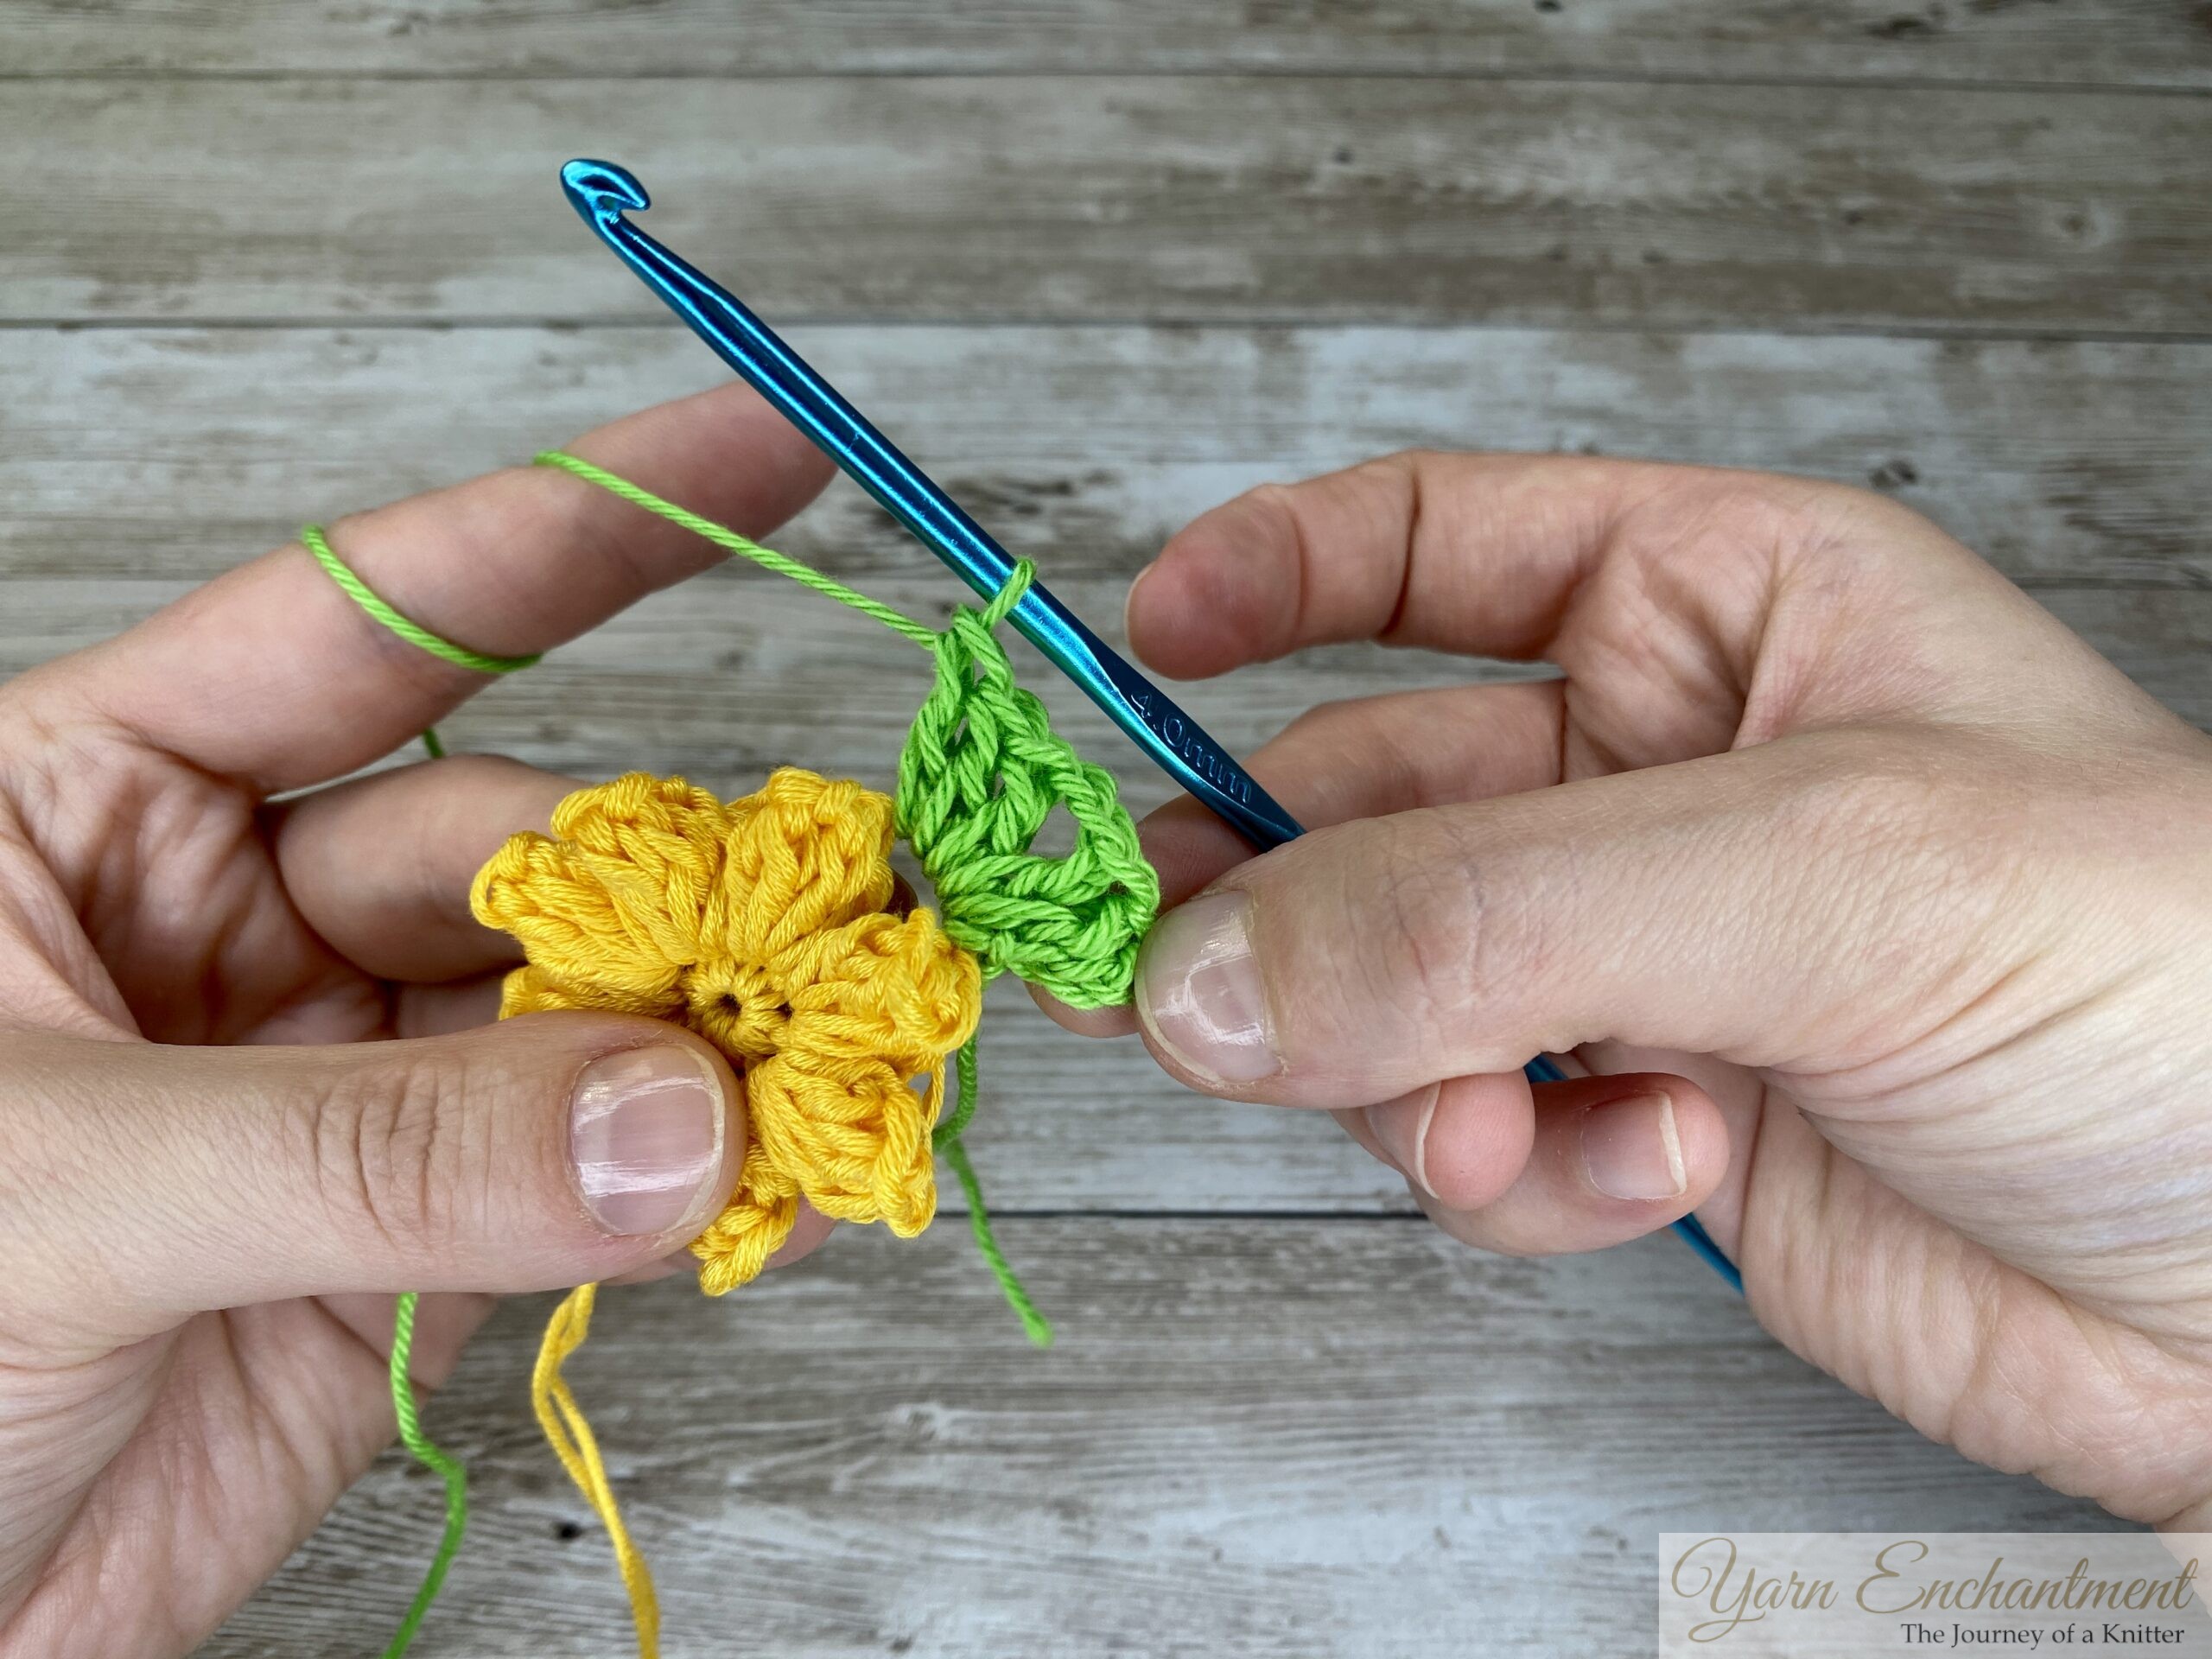 |  |  | Then work 2 more double crochets in the same space. This forms the first half of your corner. | Find the next chain-2 space and work 3 double crochets in that space. In the next chain-2 space, create another corner (3 double crochets, chain 2, 3 double crochets). | Continue working around the square by repeating this sequence:
Work 3 double crochets into the next chain-2 space (this is the side). |


 |  |  | Find the top of your chain 3 space... | ...join the round with a slip stitch. | You can now either cut the yarn and attach the new color to any corner, or you can chain 3 and start crocheting round 4 directly. If you’d like a better visual guide, you can watch the YouTube tutorial linked at the end of this post. |


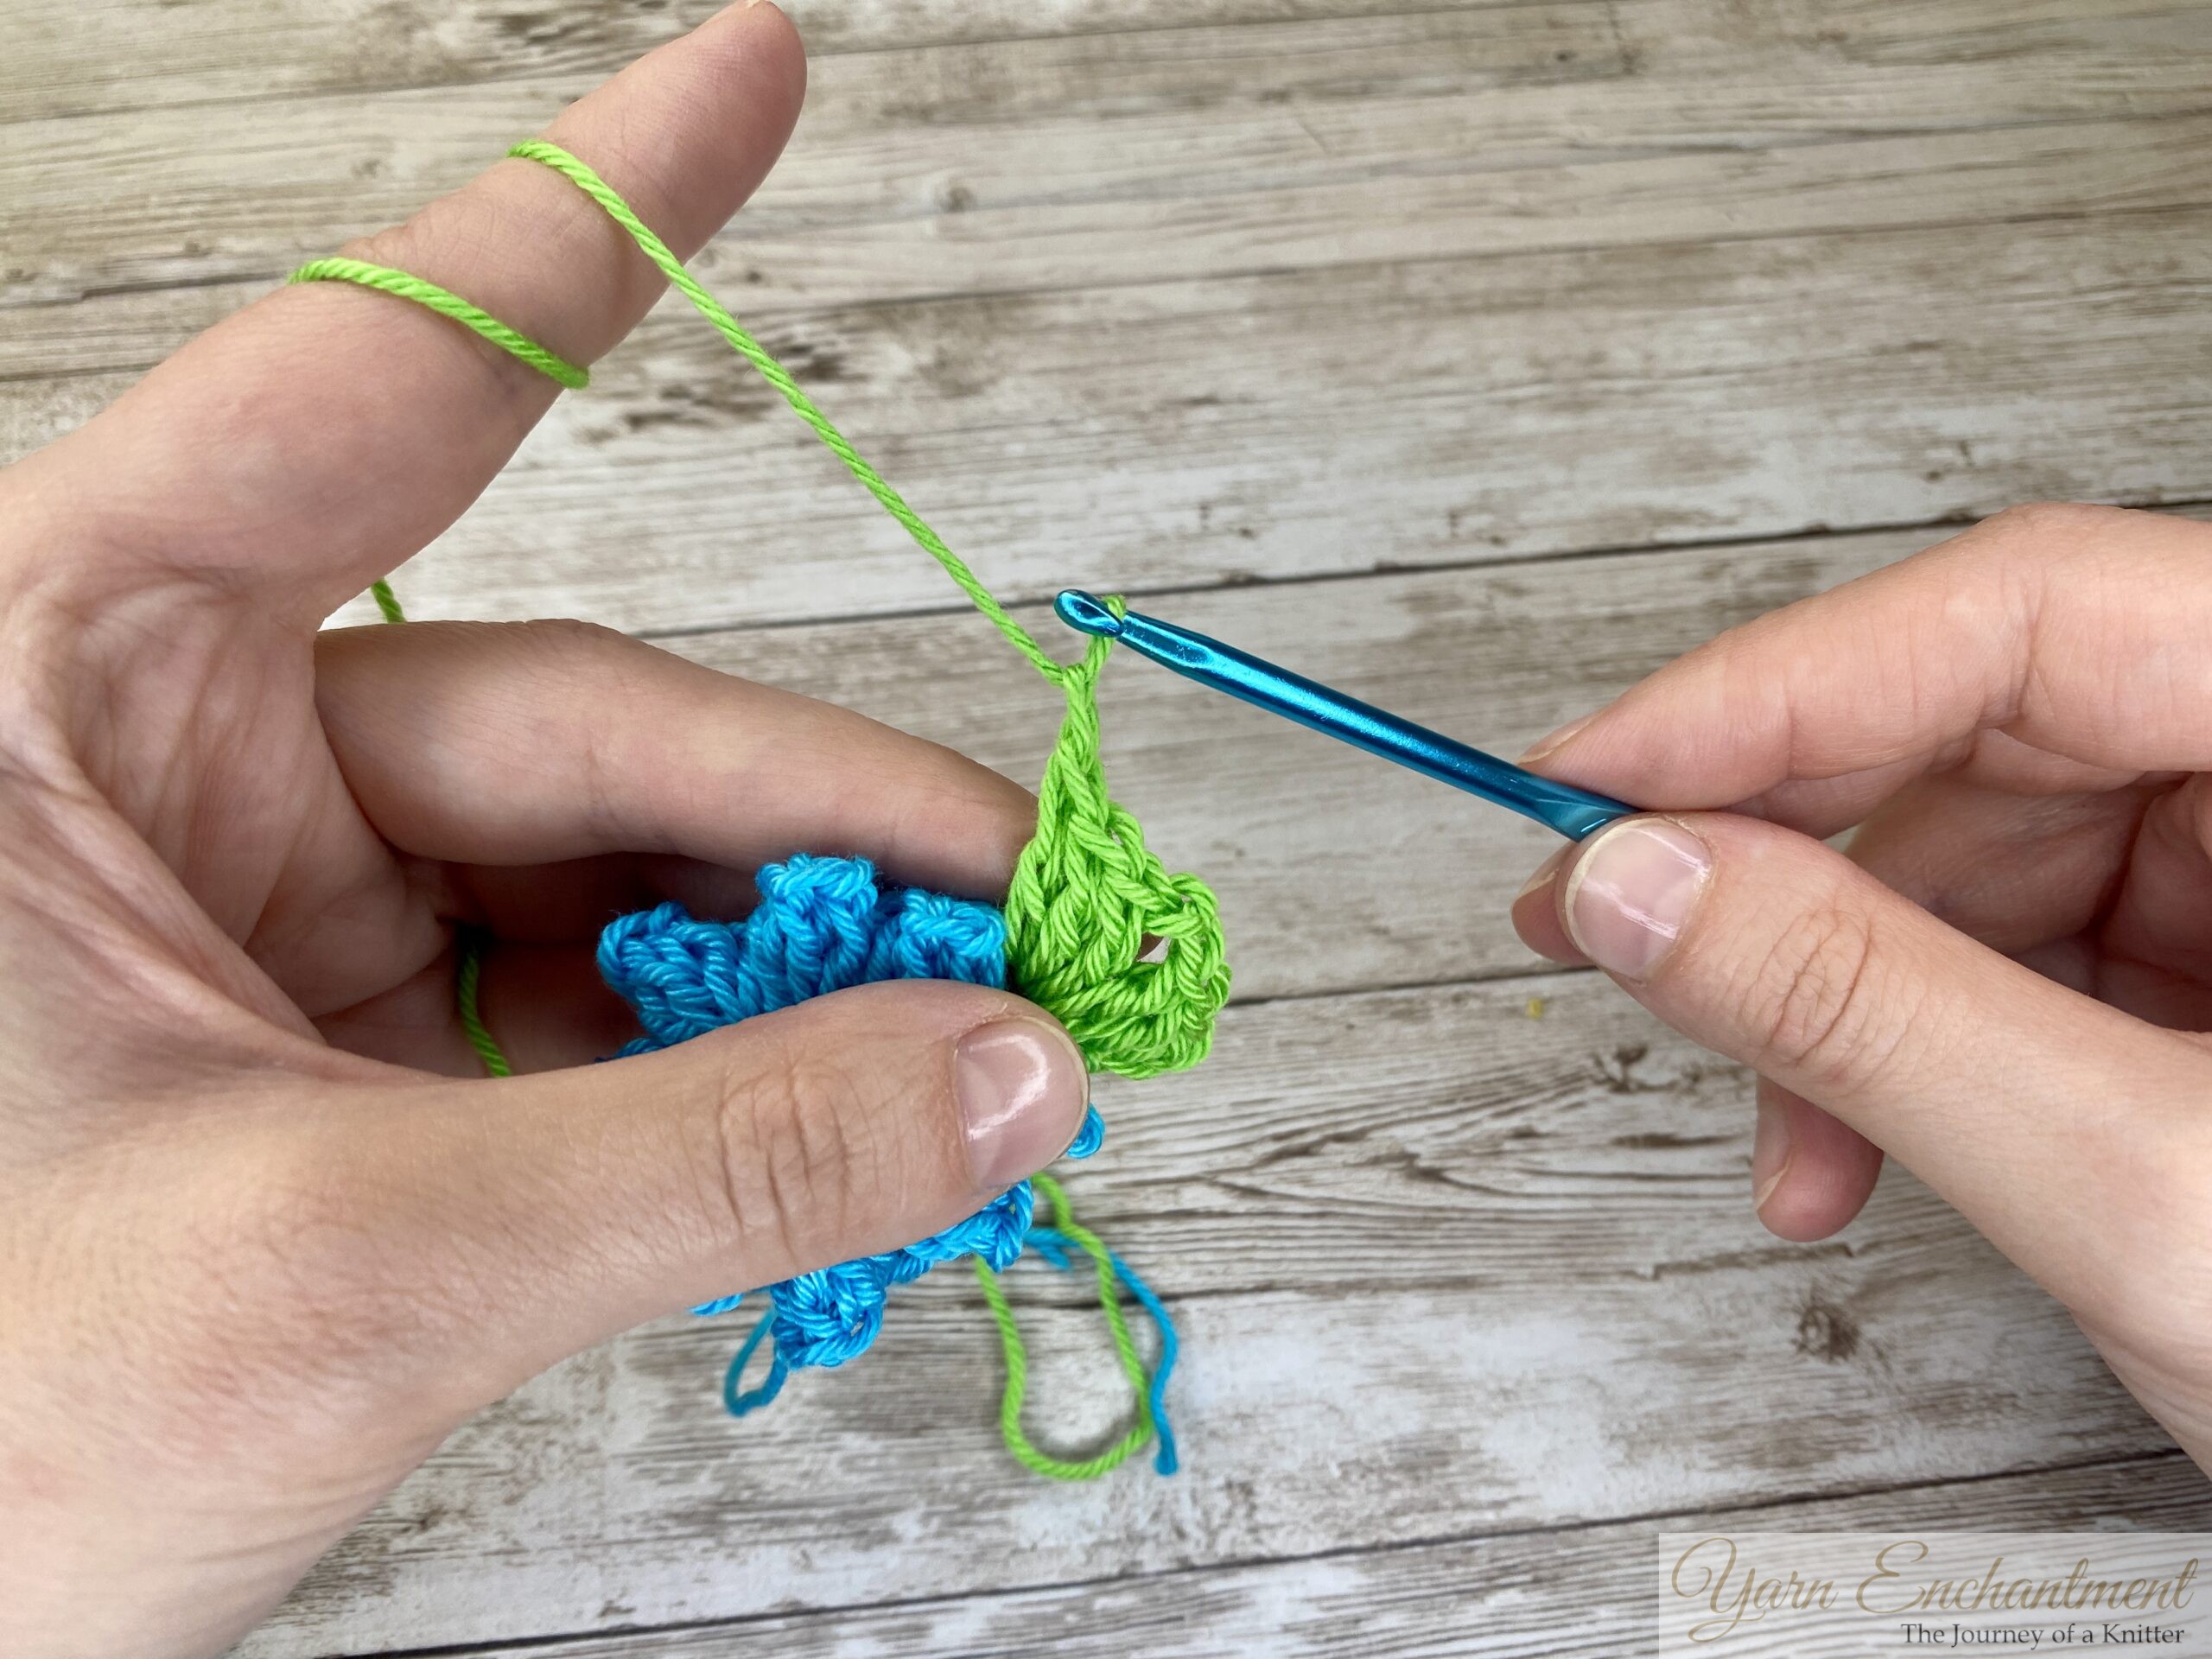
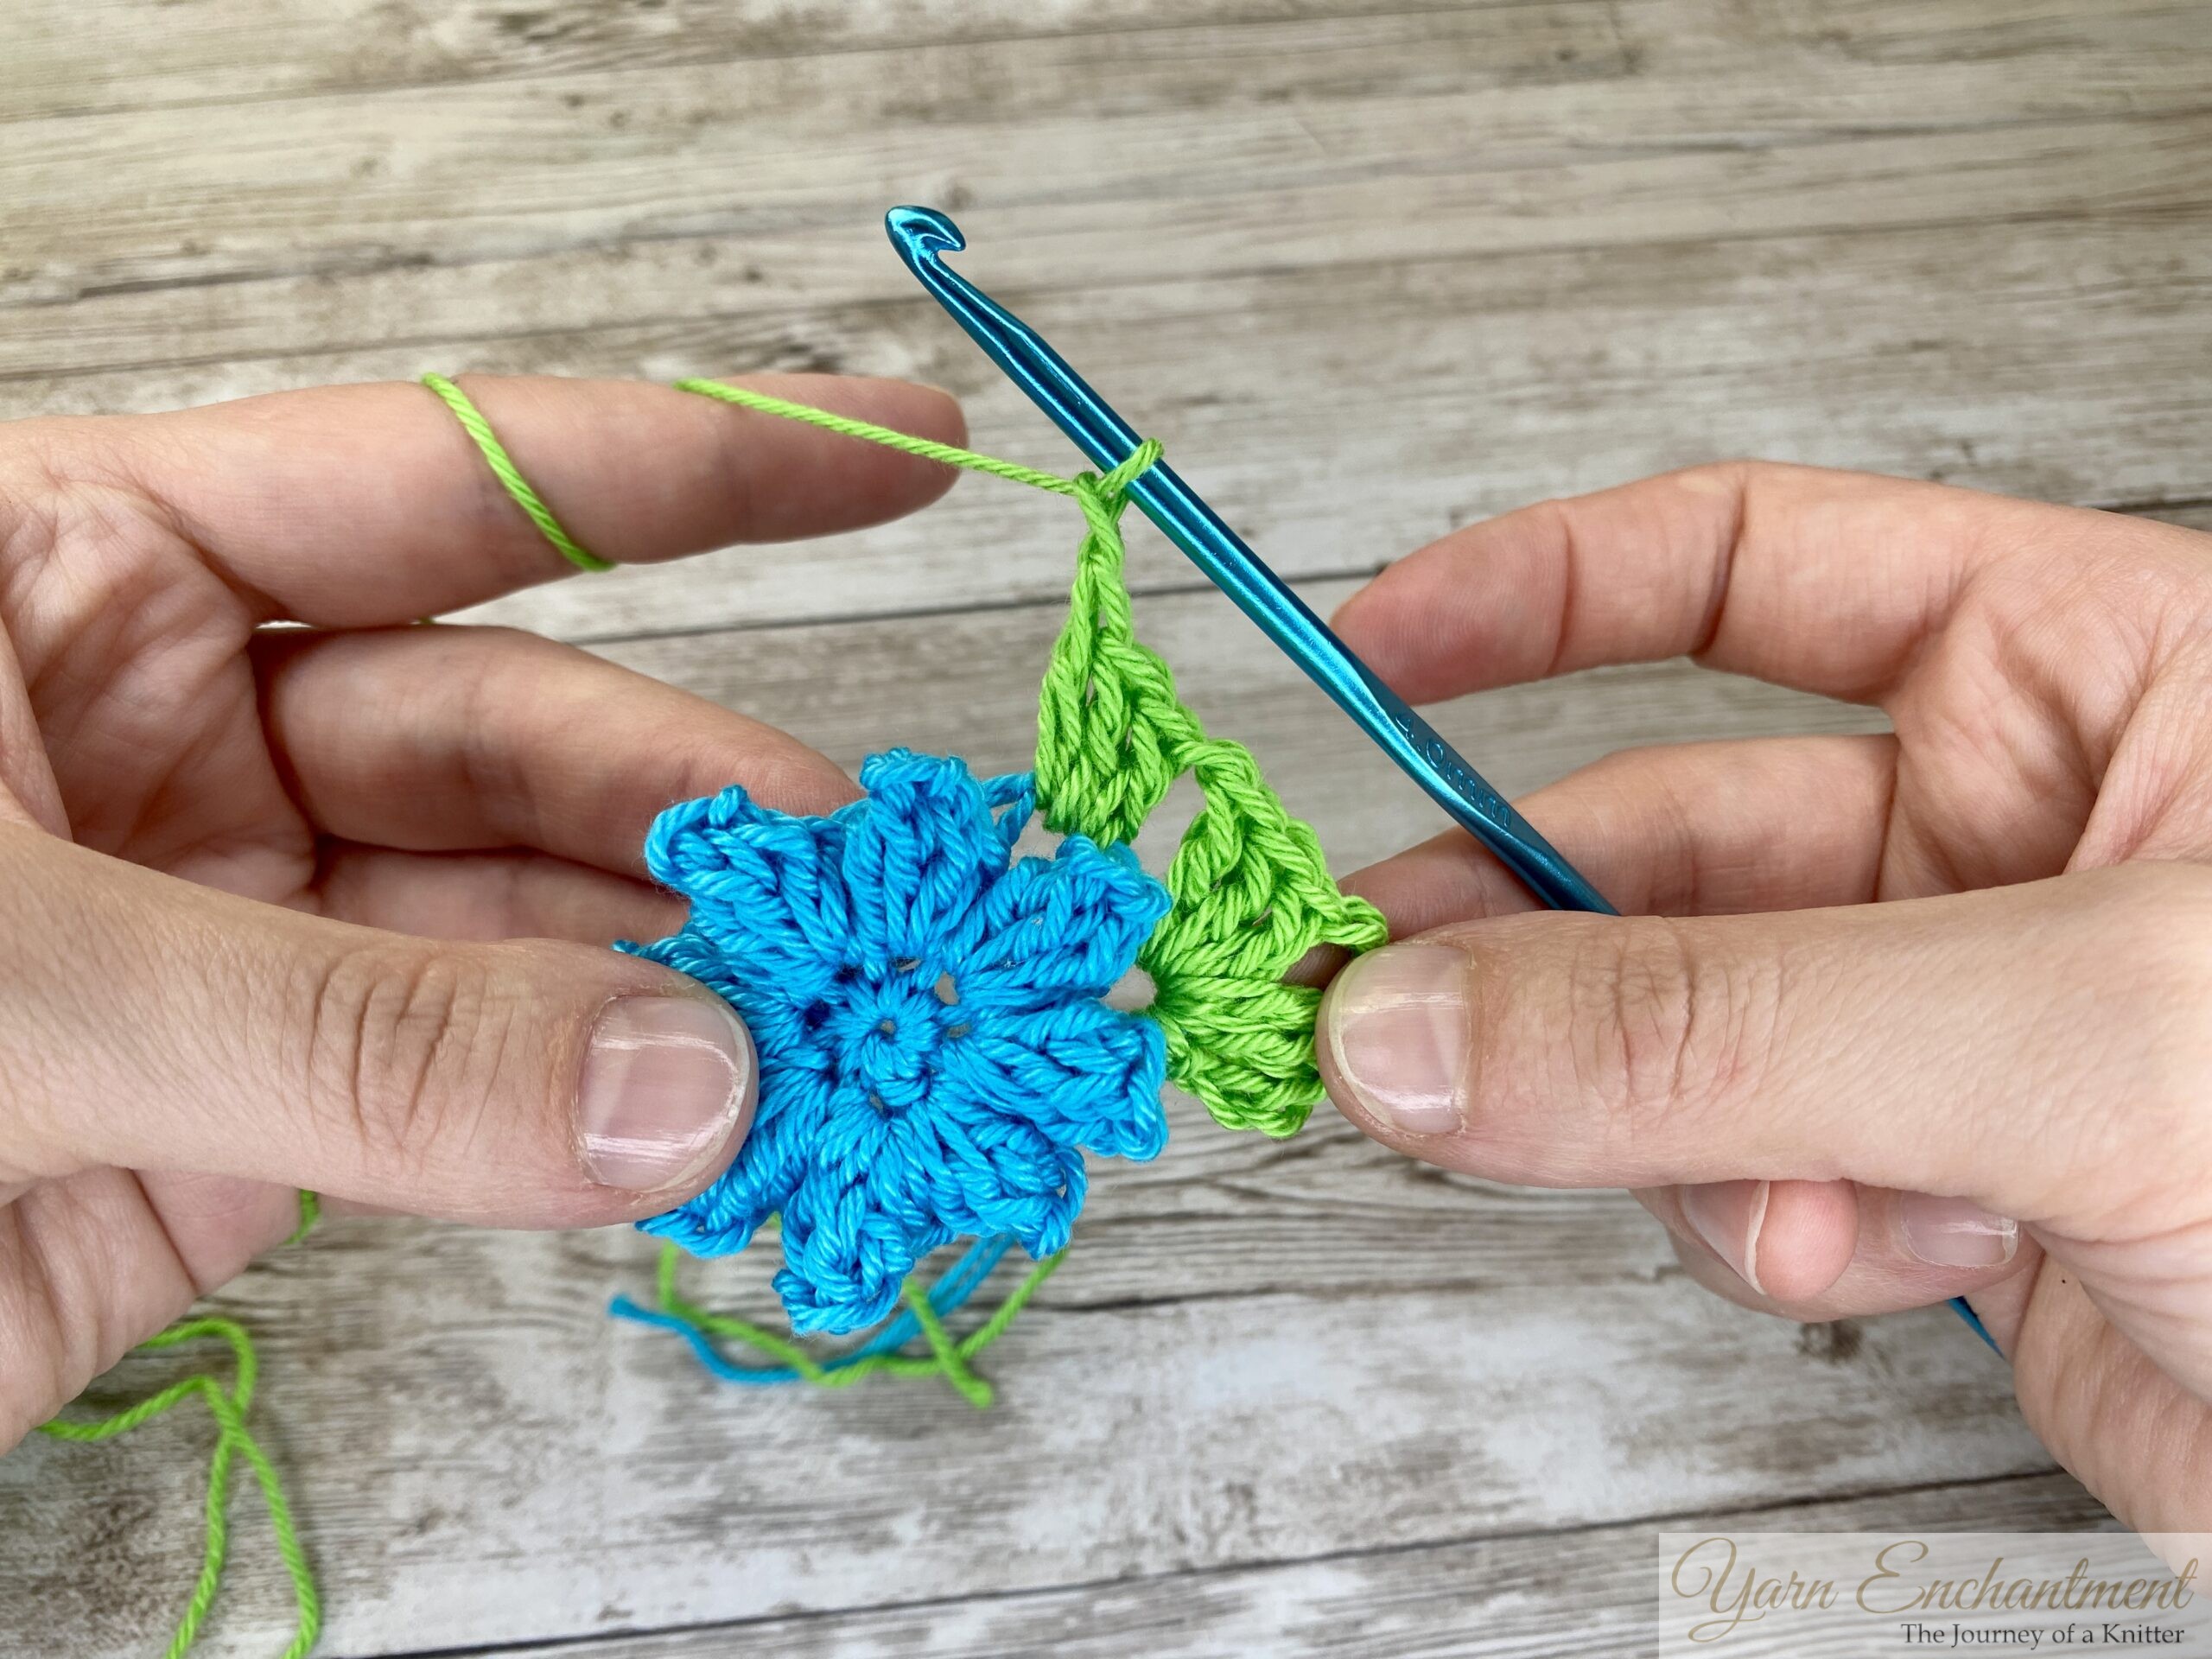
Round 4: Repeating Round
This is the repeating round, which you can work as many times as you’d like to increase the size of your square. Continue repeating this round until your square reaches your desired size.
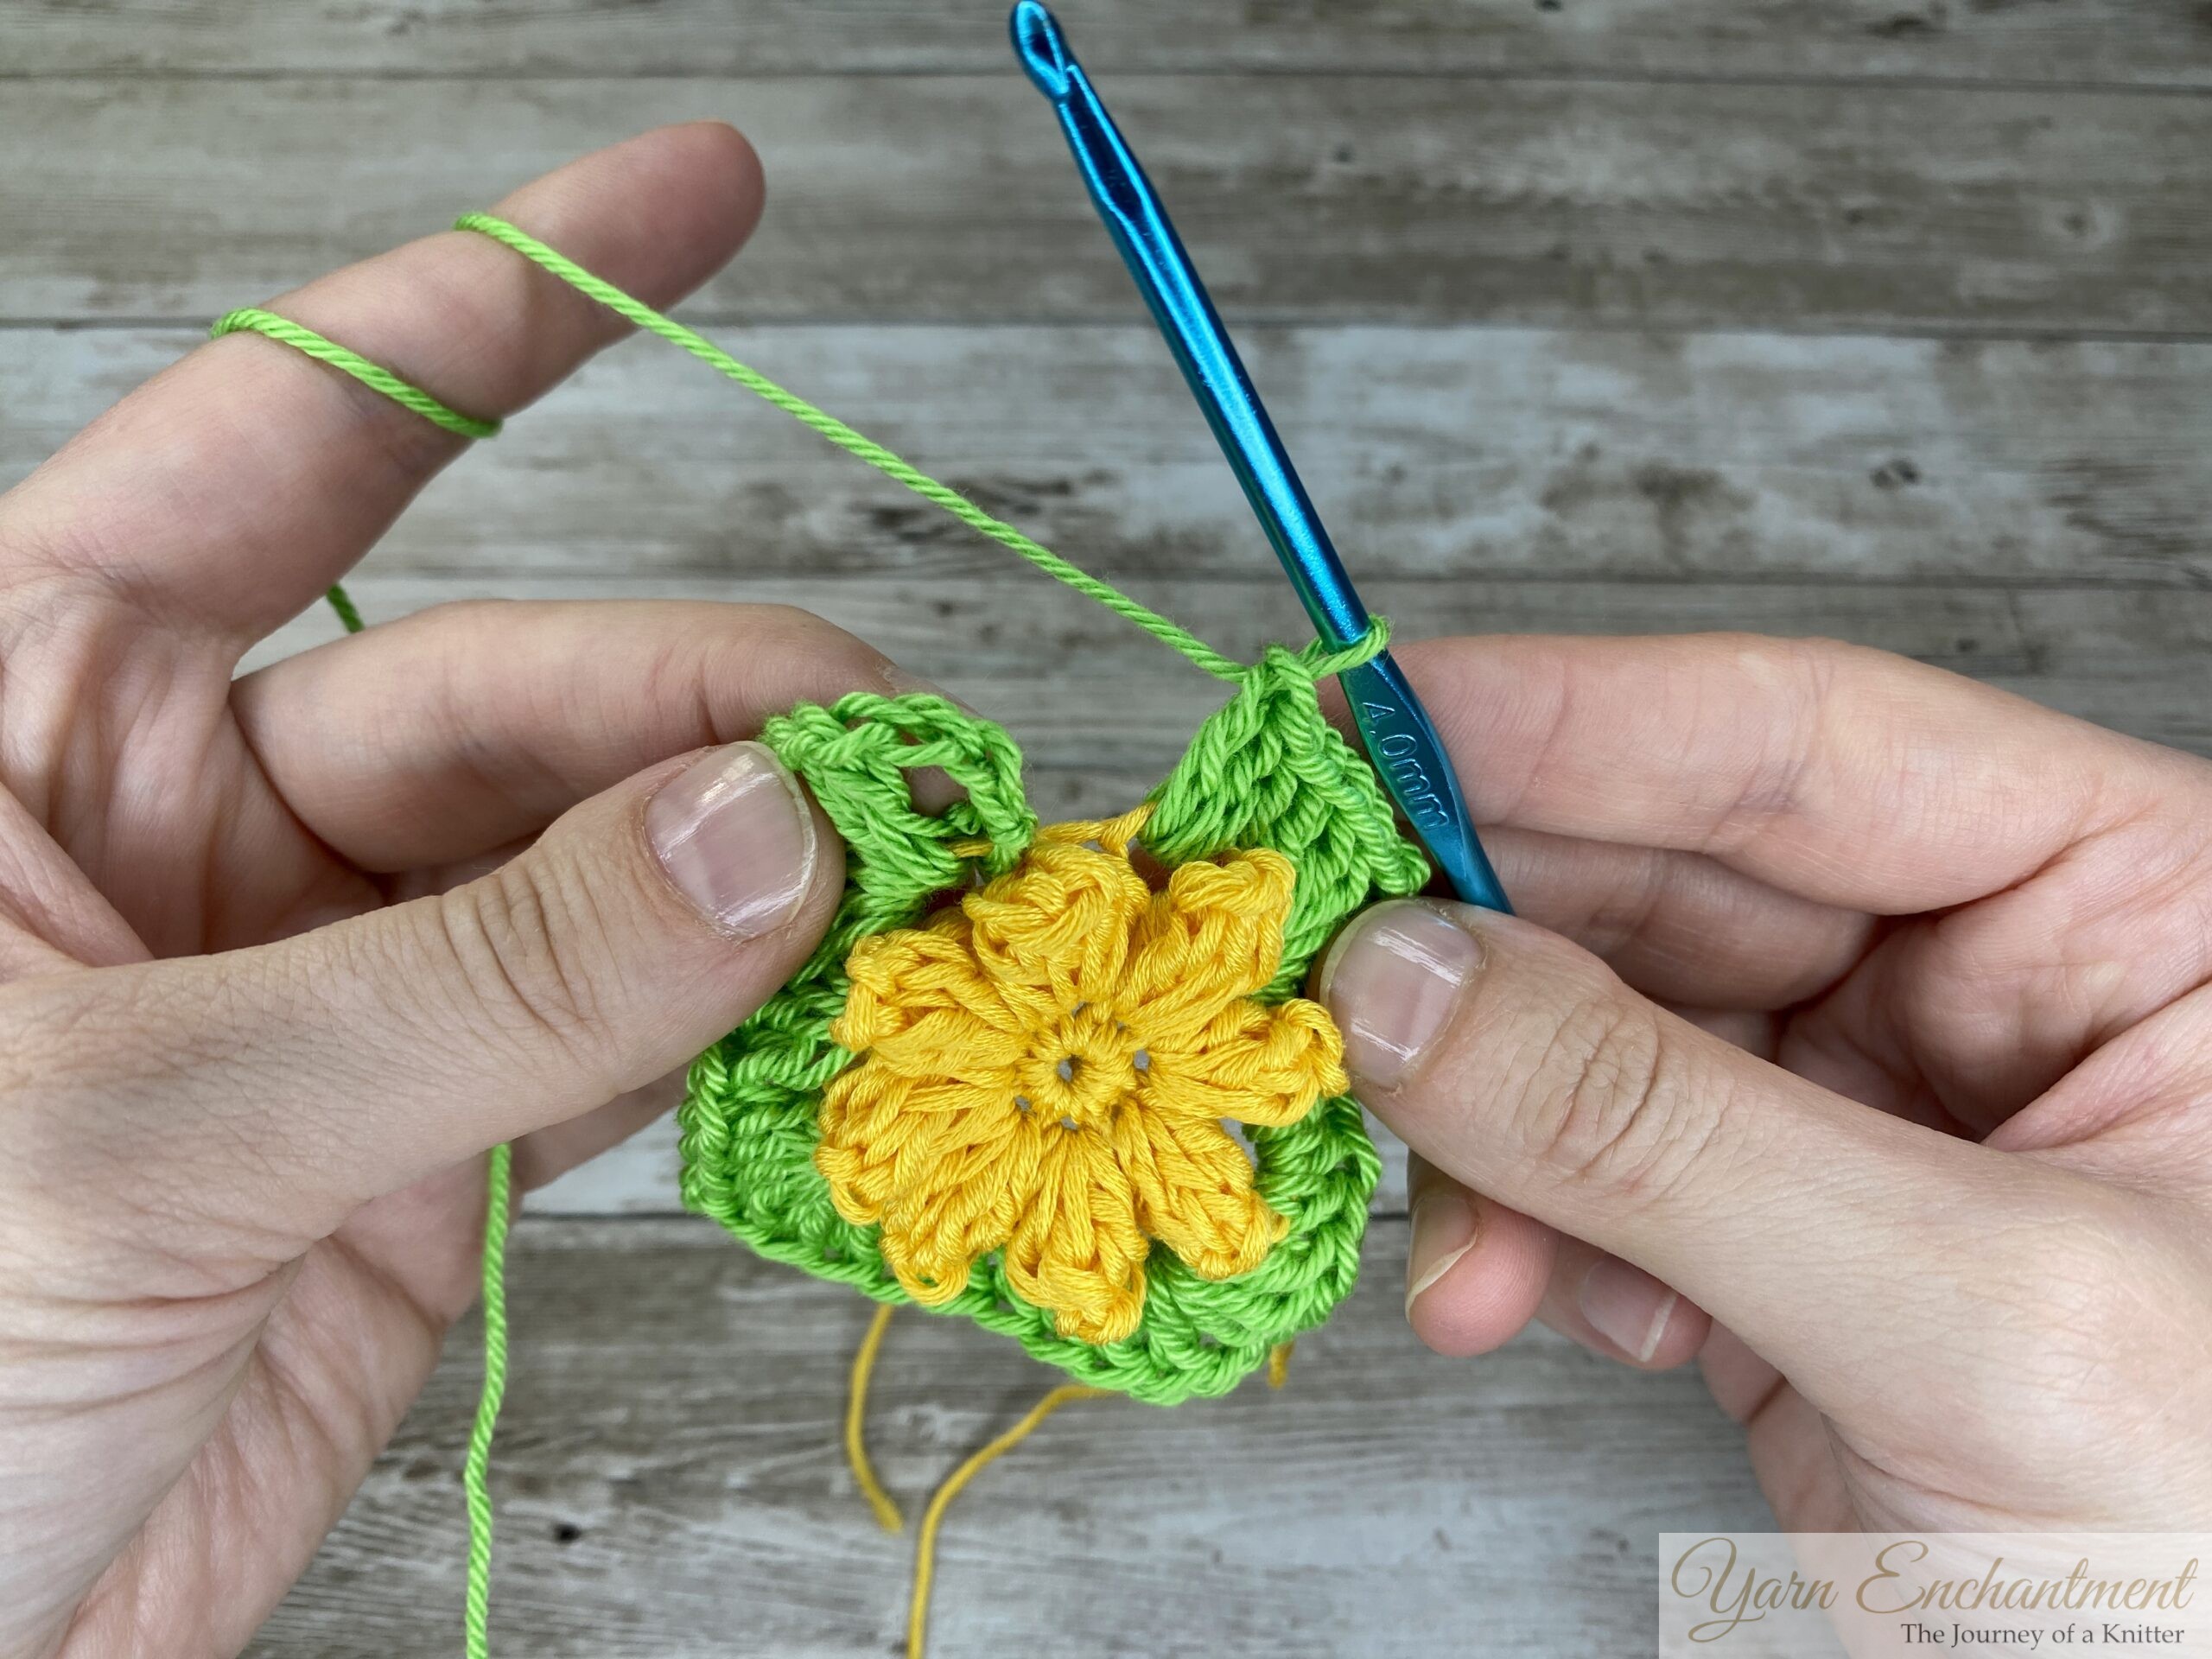
- Join Color C: Join color C in any corner chain-2 space.
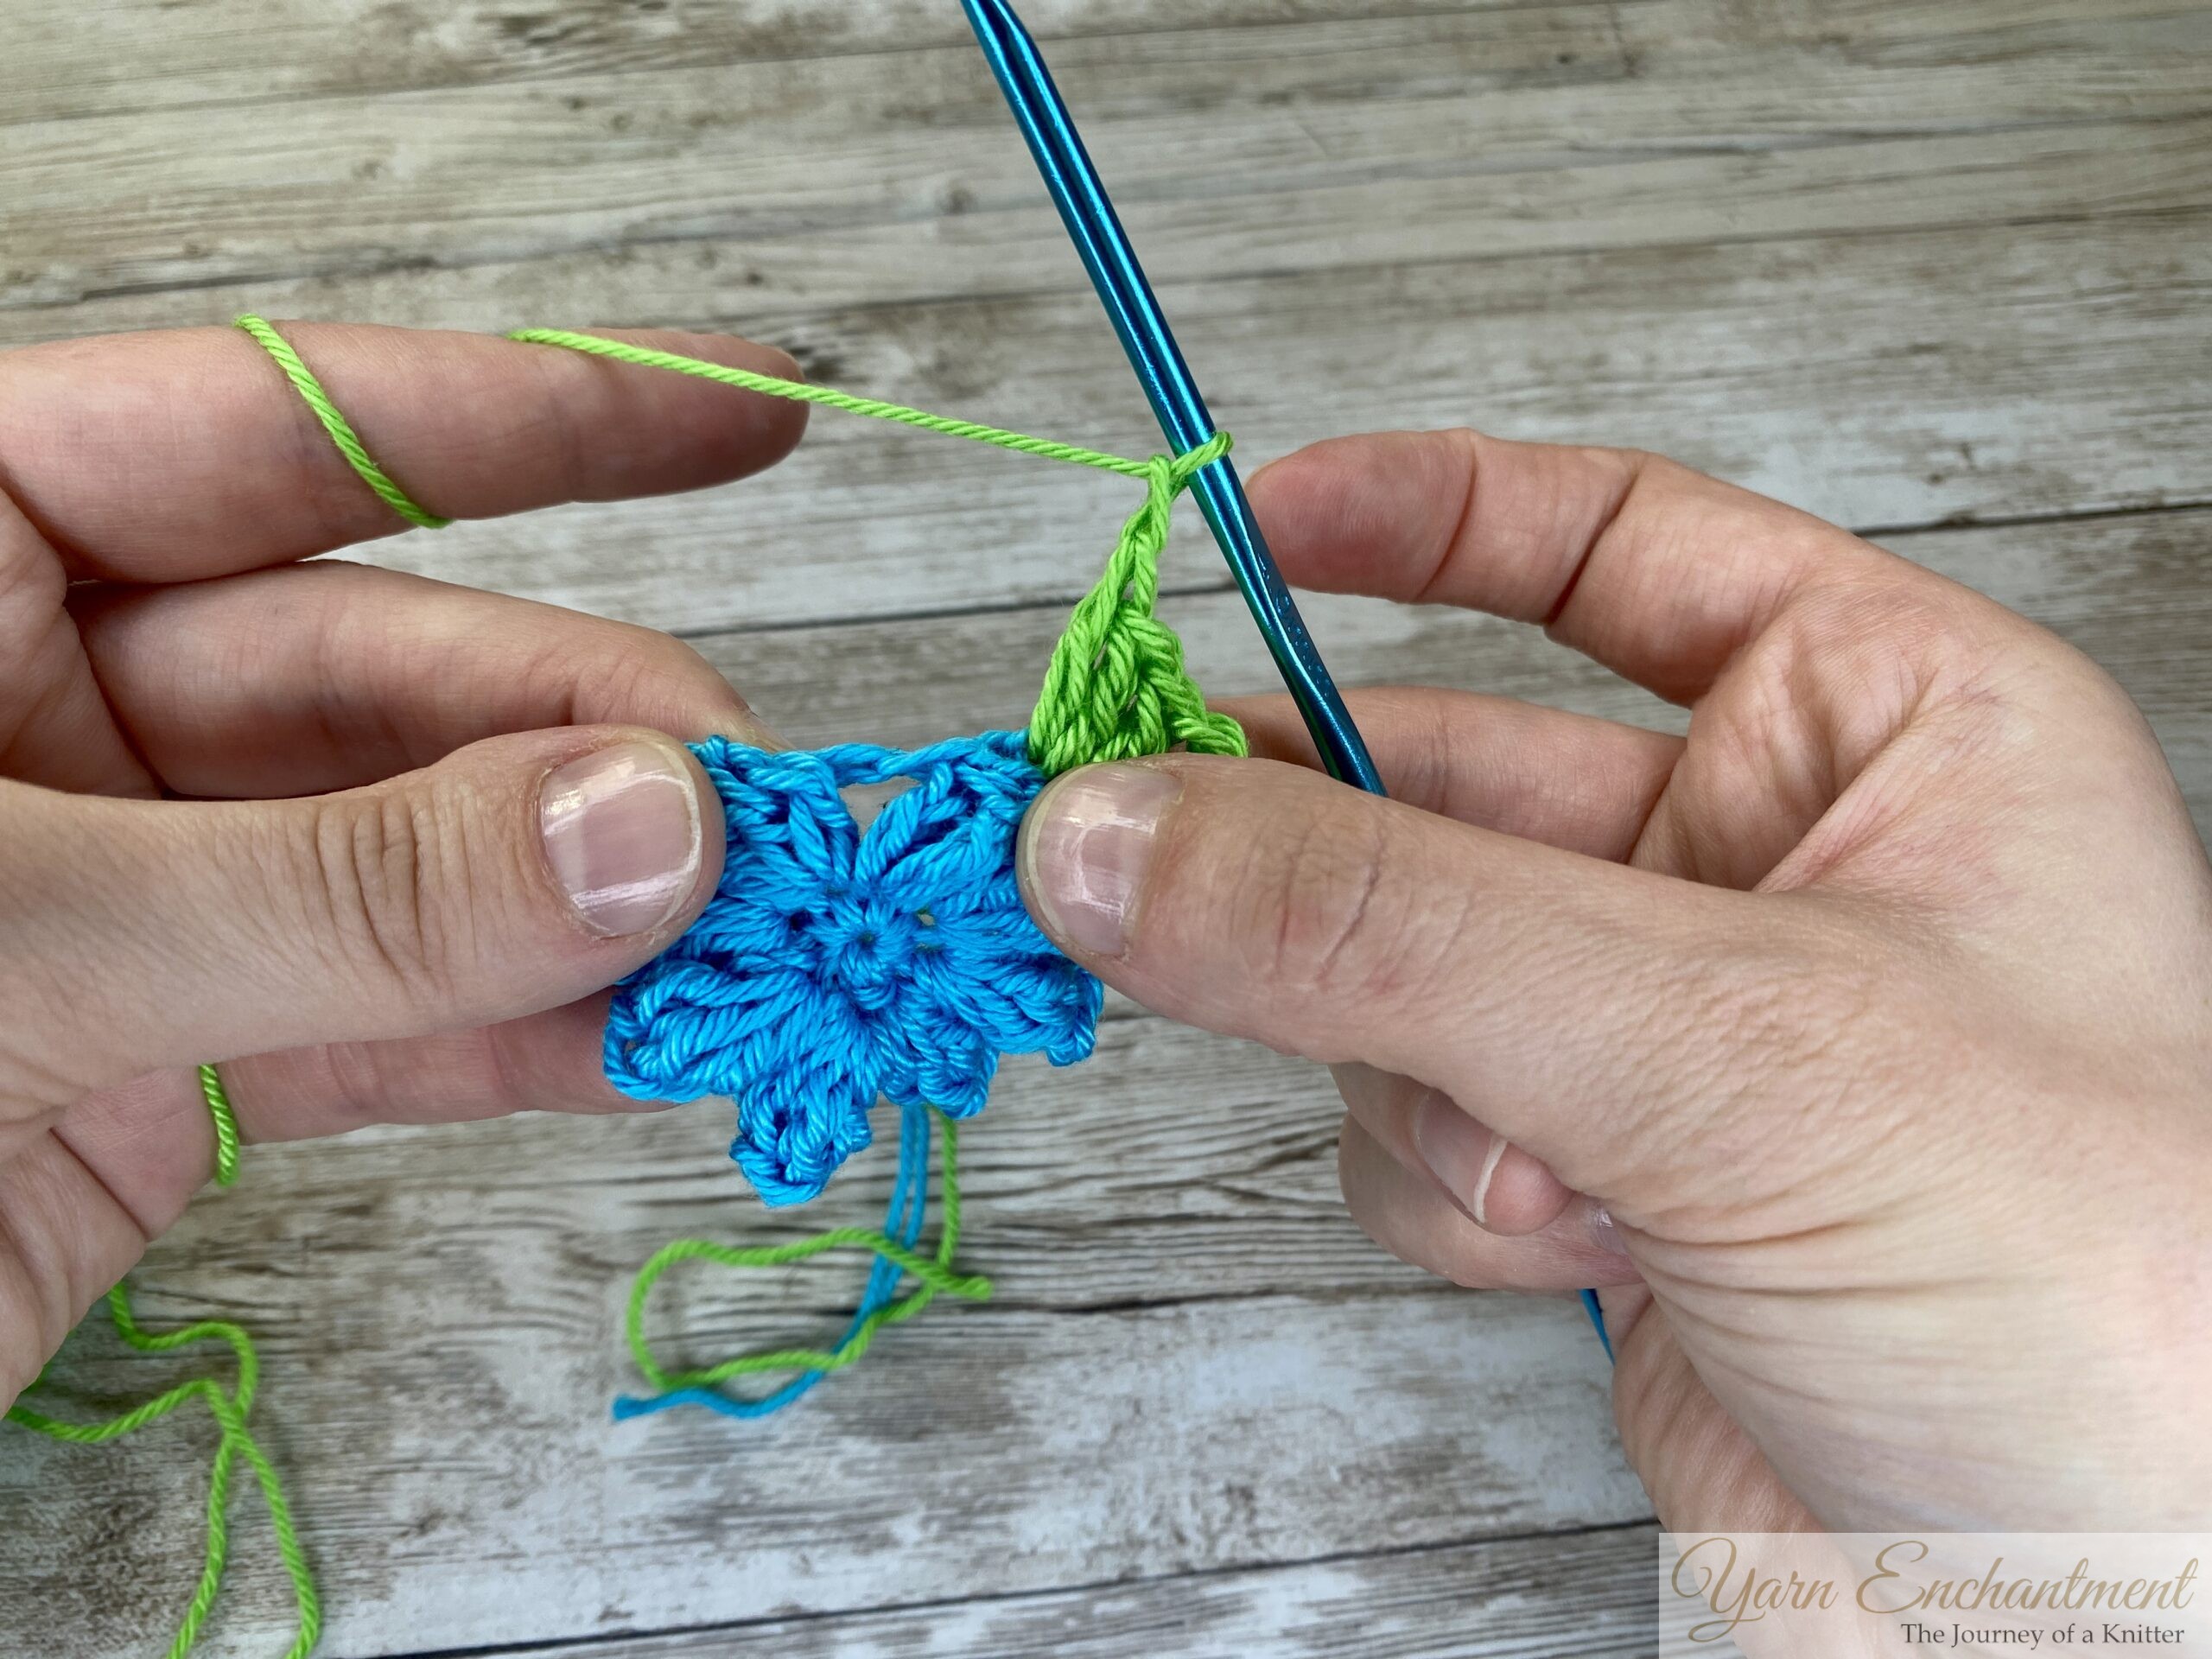
- Start the First Corner: Chain 3 (this counts as your first double crochet), then work 2 more double crochets in the same space. This forms the first half of your corner.
Chain 2, then work 3 double crochets in the same chain-2 space. This completes your first corner. - Work Along the Side: Work 1 double crochet into each double crochet from the previous round until you reach the next corner.
💡
Tip:
The first double crochet can be hidden underneath the three corner double crochets. Gently slide the stitches to the side for a better visual alignment of your first stitch.
- Create the Next Corner: In the following chain-2 space (corner space), work another corner: (Work 3 double crochets, chain 2, and then 3 more double crochets.)
- Repeat Around the Square: Continue working around the square by repeating this sequence:
- Work 1 double crochet into each double crochet along the sides.
- In each corner chain-2 space, create another corner (3 double crochets, chain 2, 3 double crochets).
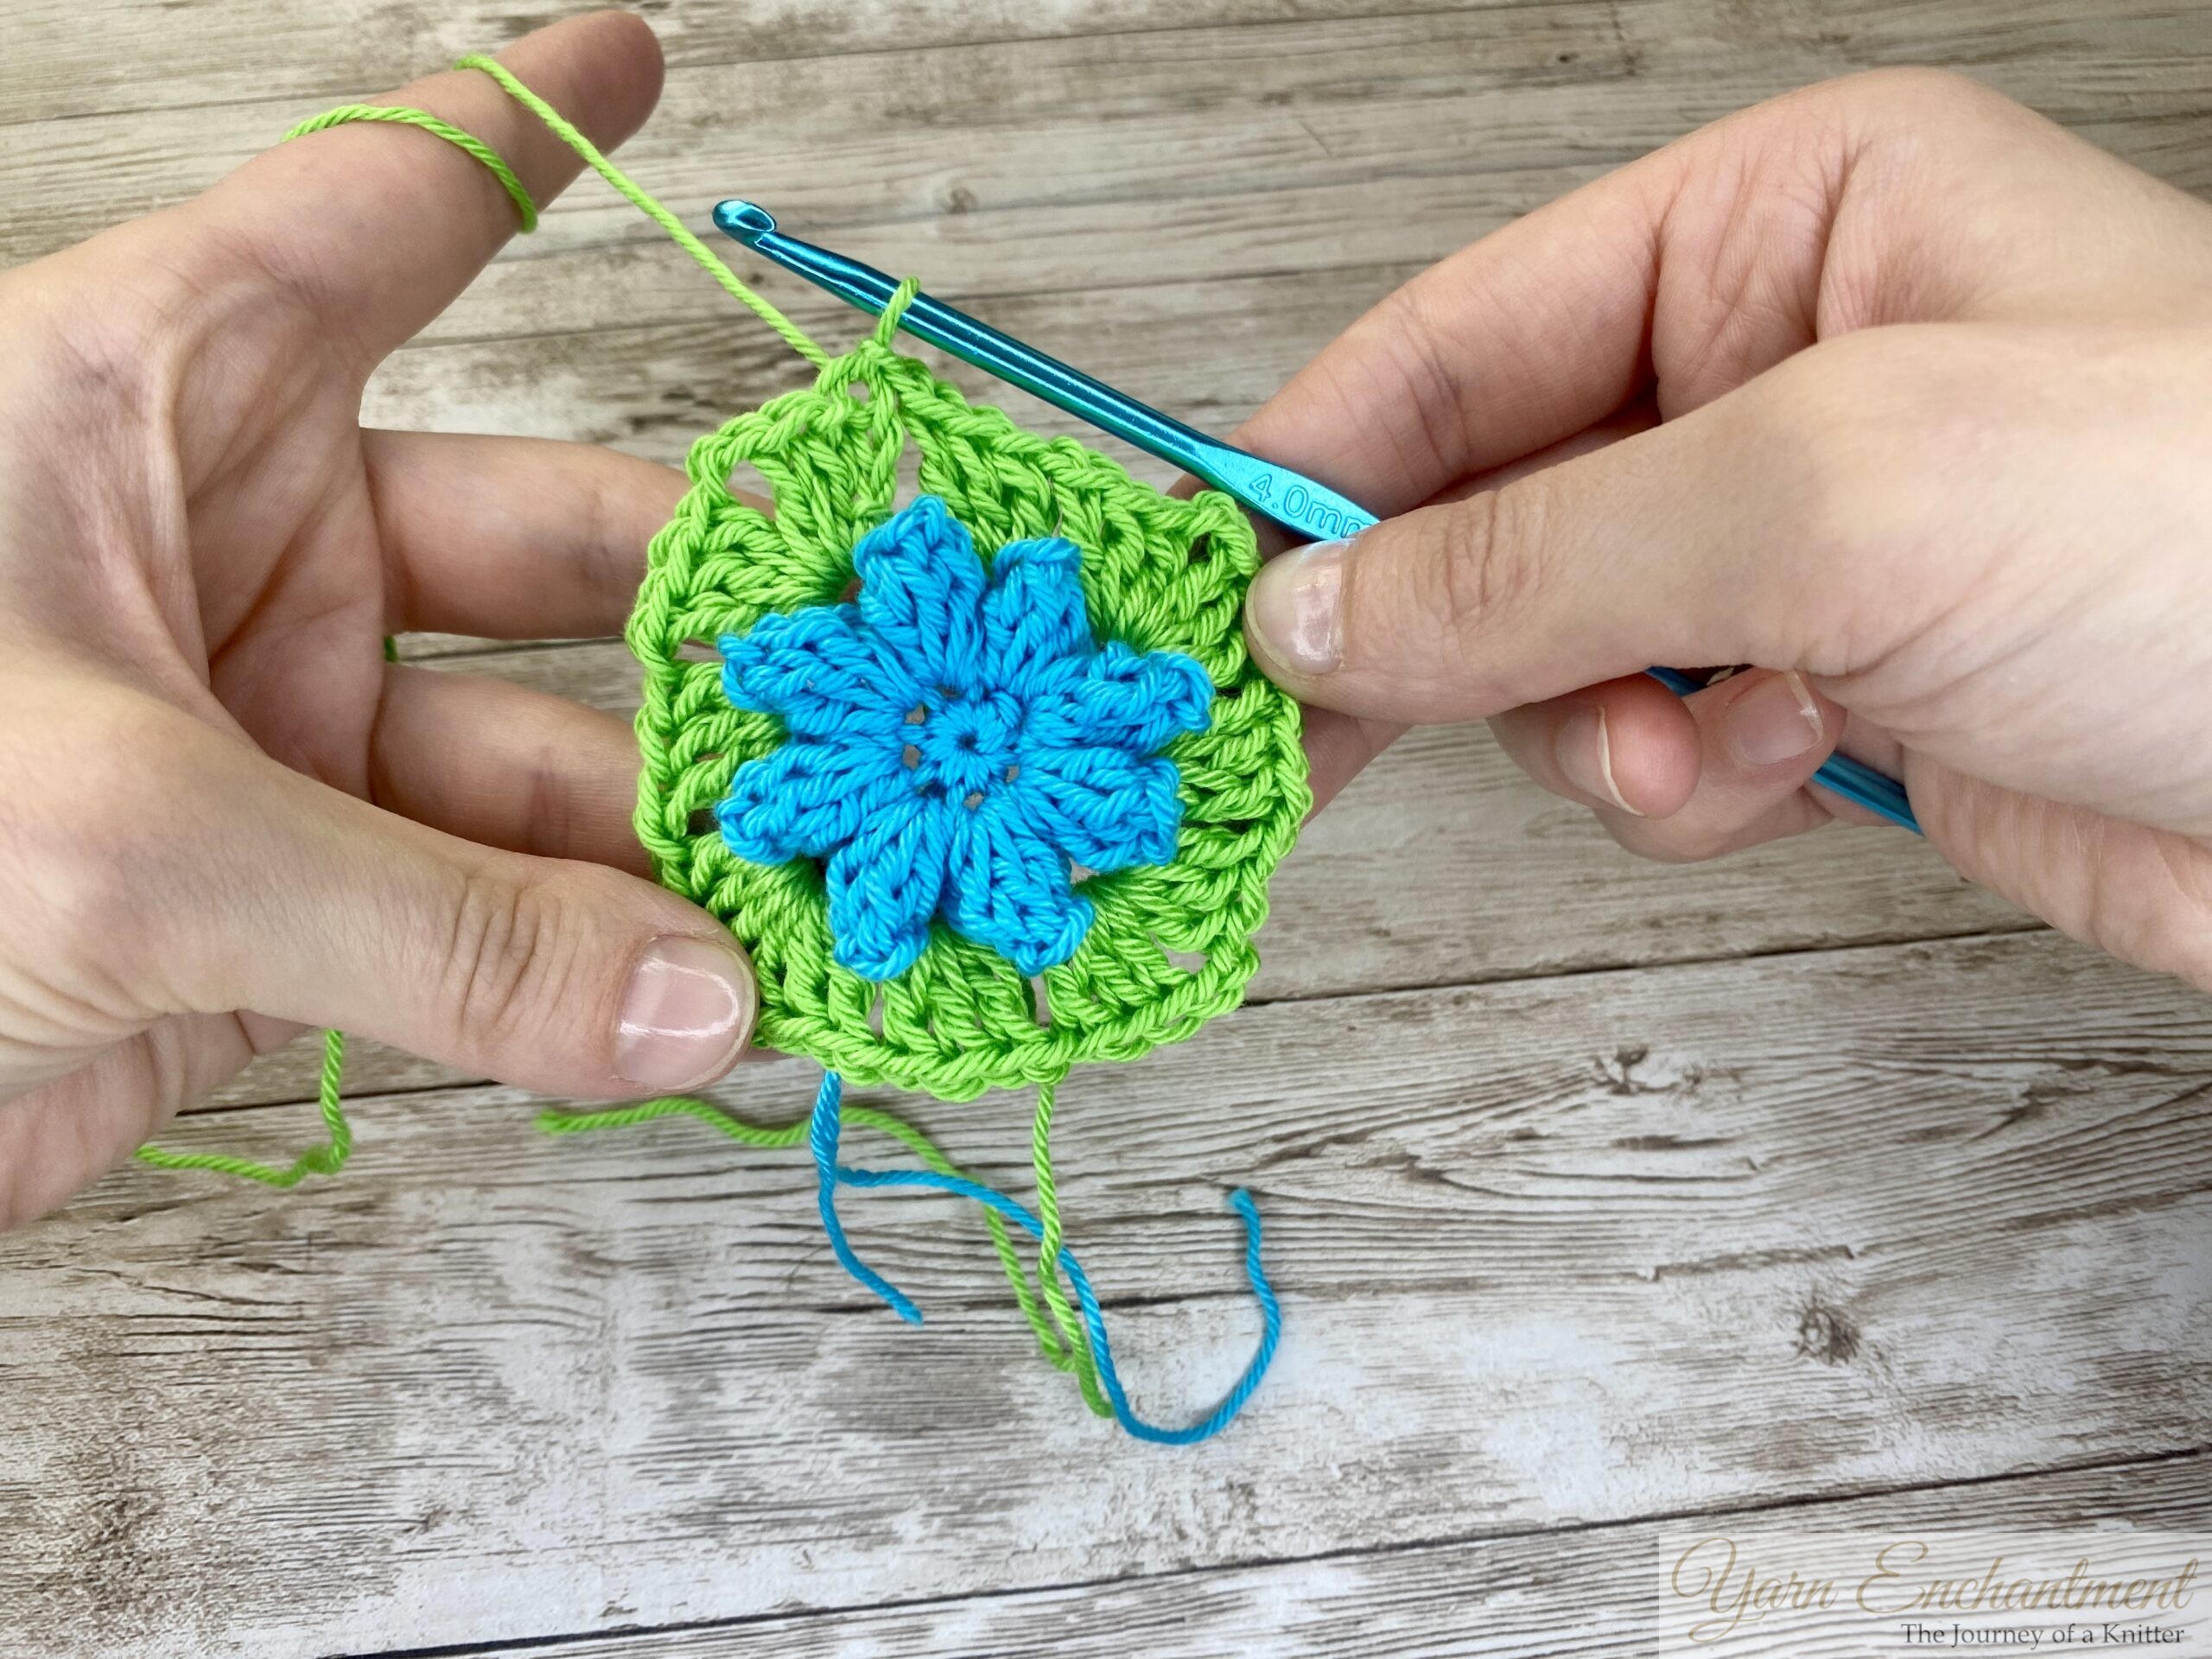
- Complete the Round: Once all four corners are complete, join the round with a slip stitch in the top of the initial chain-3.
 |  |  | Join in any corner chain-2 space. Chain 3 (this counts as your first double crochet) | Start the First Corner: Chain 3 (this counts as your first double crochet), then work 2 more double crochets in the same space. This forms the first half of your corner. | The first double crochet can be hidden underneath the three corner double crochets. Gently slide the stitches to the side for a better visual alignment of your first stitch. |


 |  | | Work 1 double crochet into the first stitch | Continue working 1 double crochet into each double crochet from the previous round until you reach the next corner. | Continue working around the square by repeating this sequence: Work 1 double crochet into each double crochet along the sides. In each corner chain-2 space, create another corner (3 double crochets, chain 2, 3 double crochets). |


Classic Granny Square Border
Open (Classic) Granny Square:
The classic granny square is worked with clusters of double crochets separated by chain spaces. These chain spaces create gaps or "holes" between the clusters, giving the square its signature lacy, airy look. This makes it perfect for lightweight projects like summer blankets, scarves, or decorative pieces.
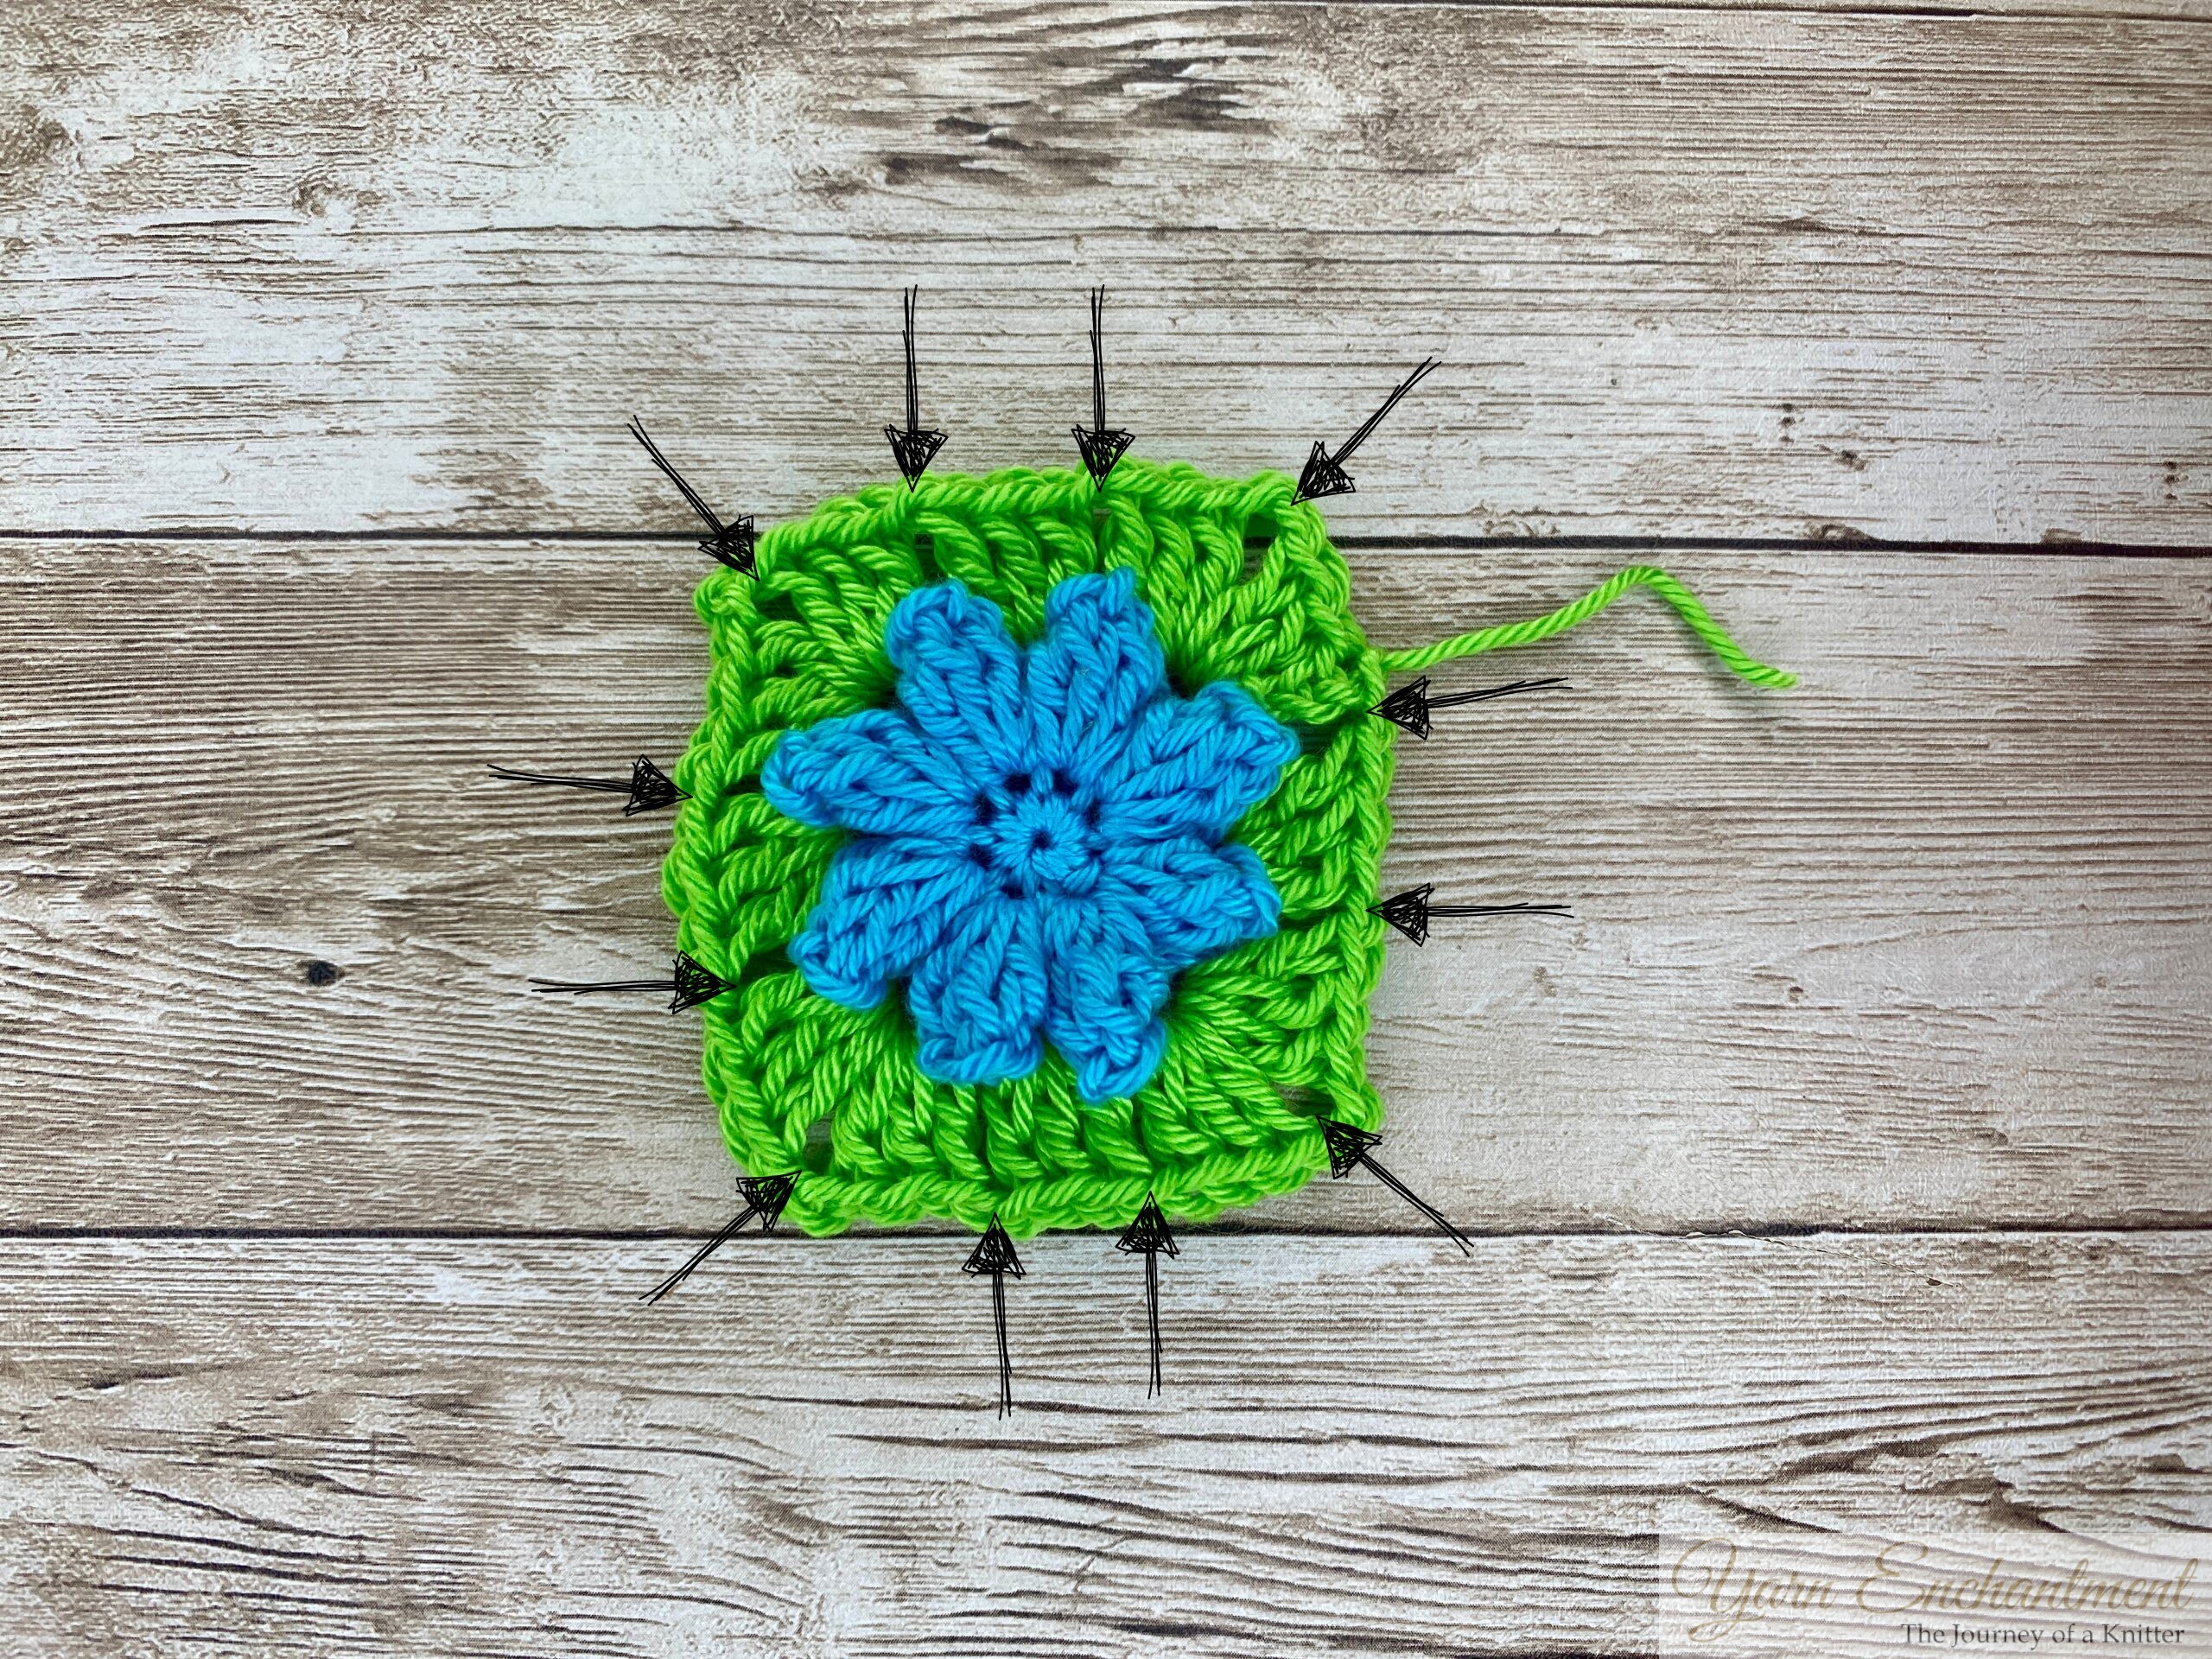
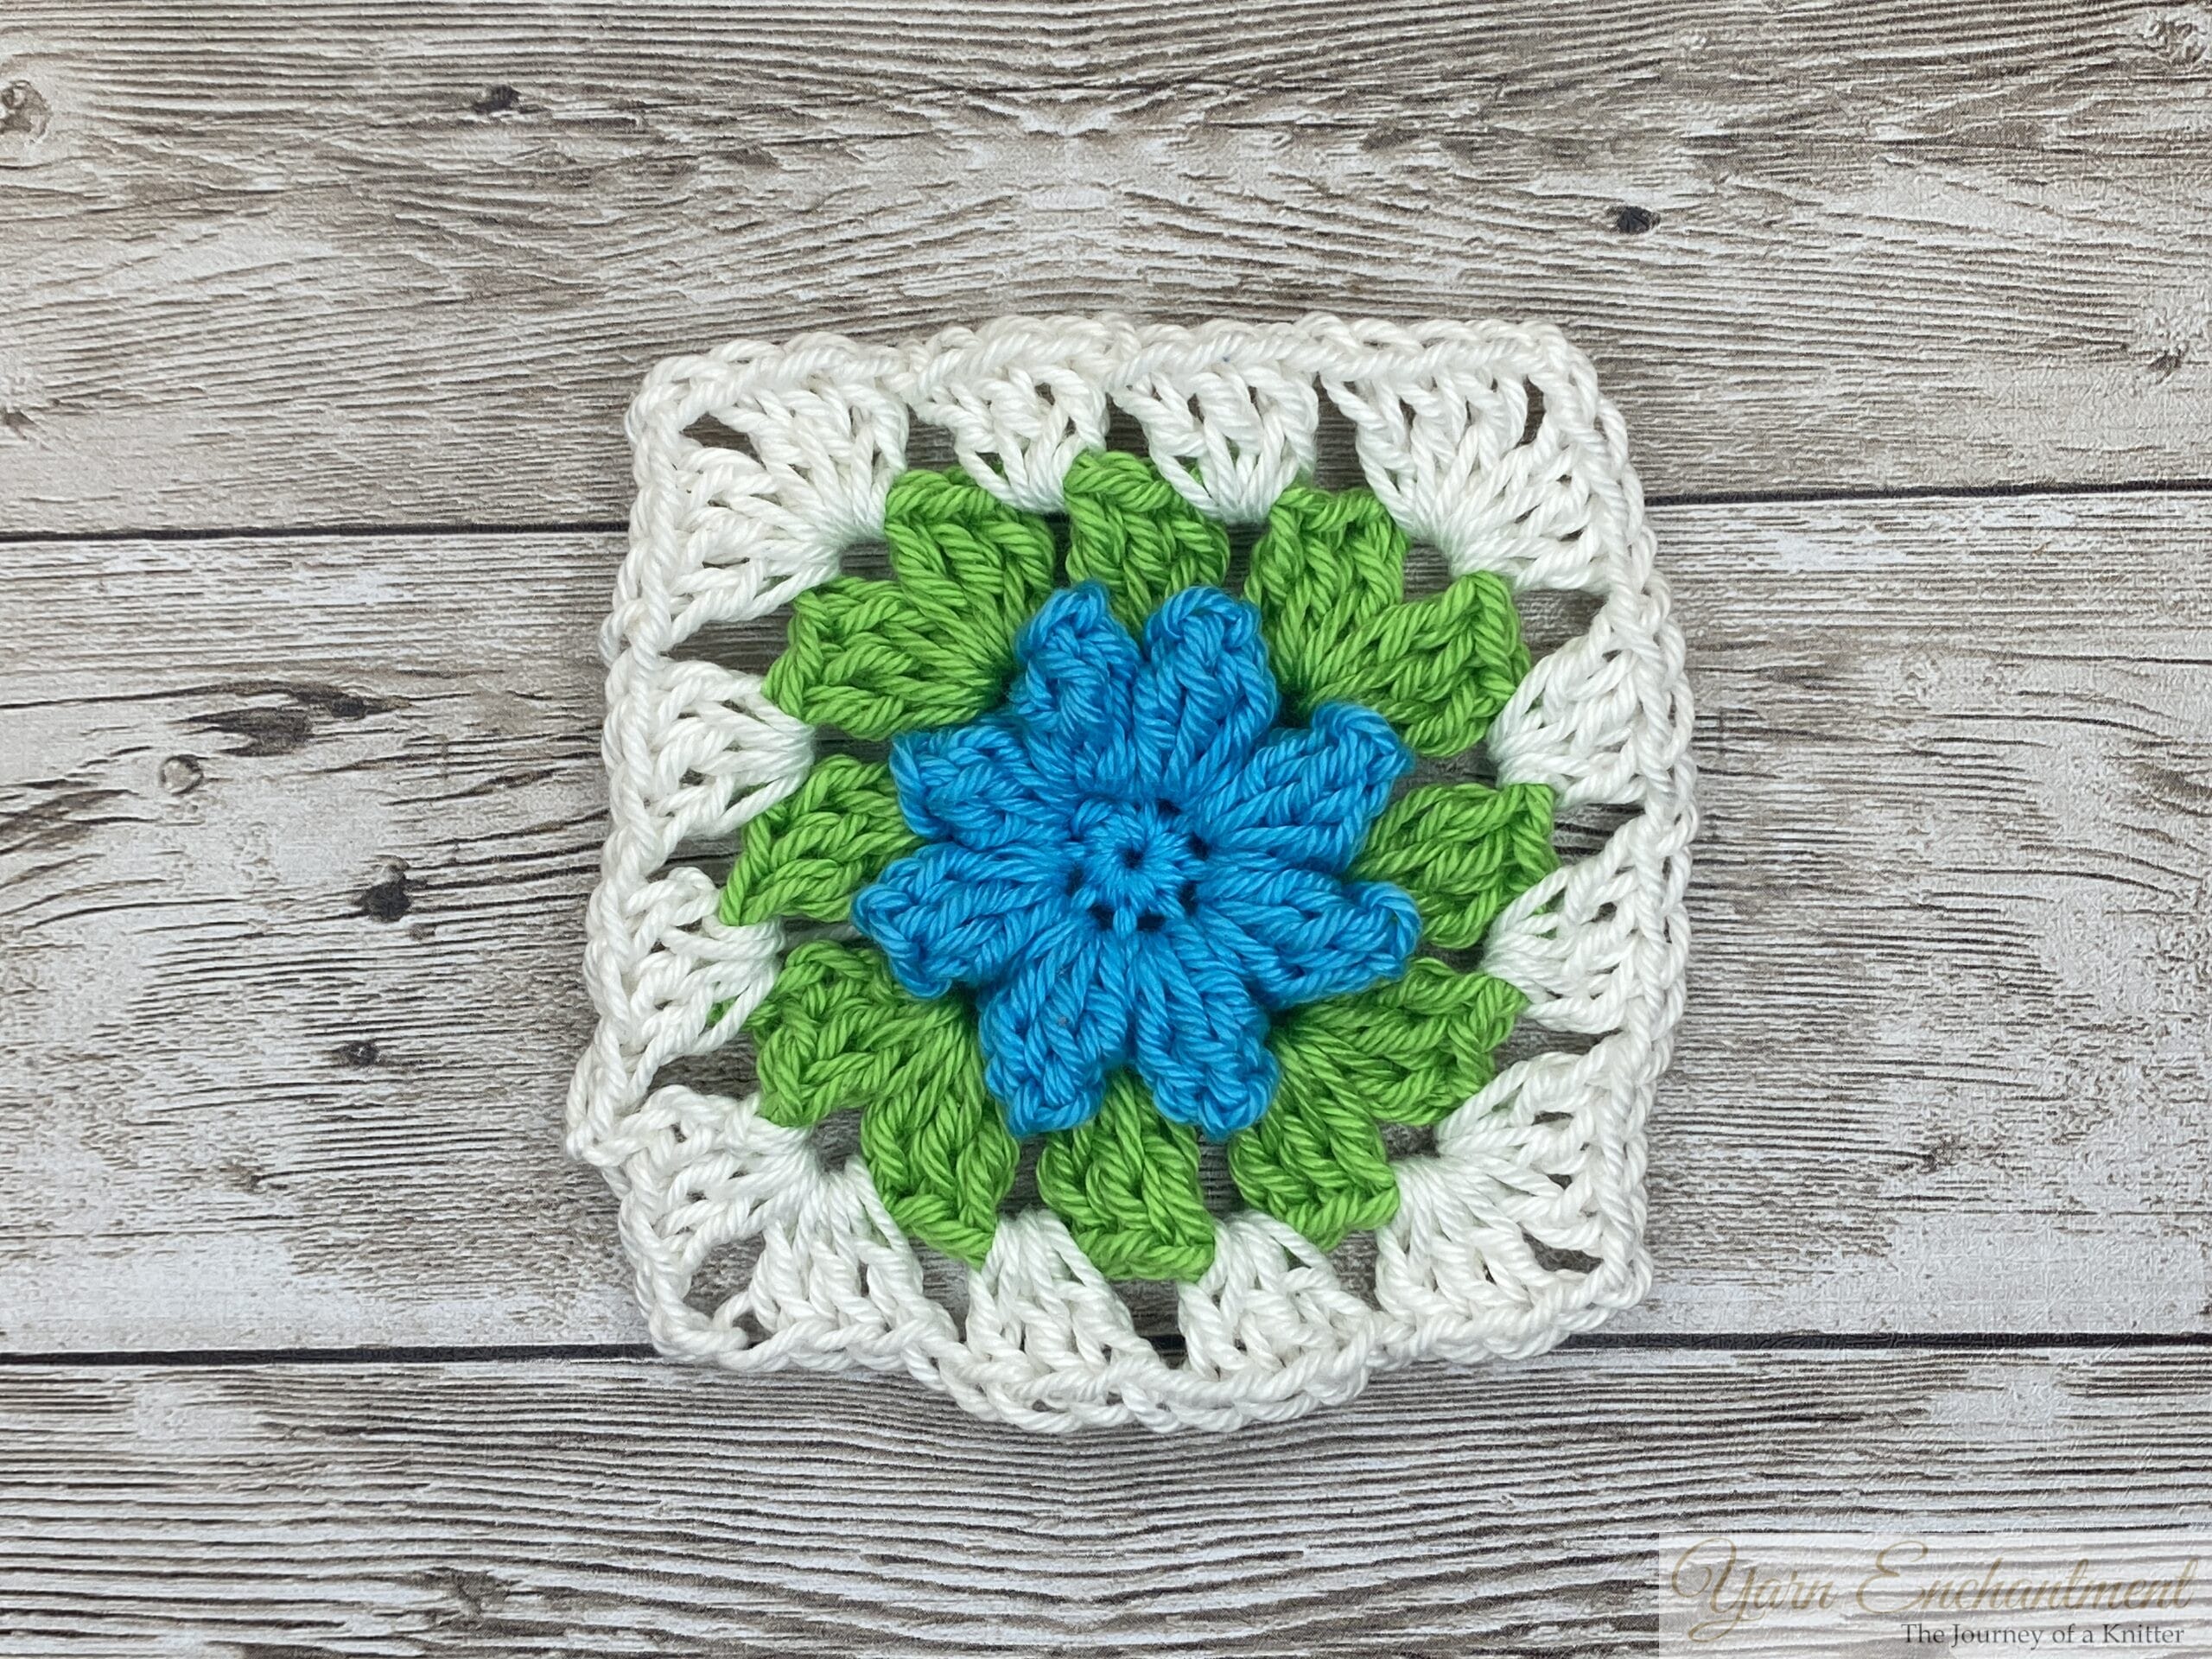 | Classic Granny Square Border |

Round 3: First Border Round
-
-
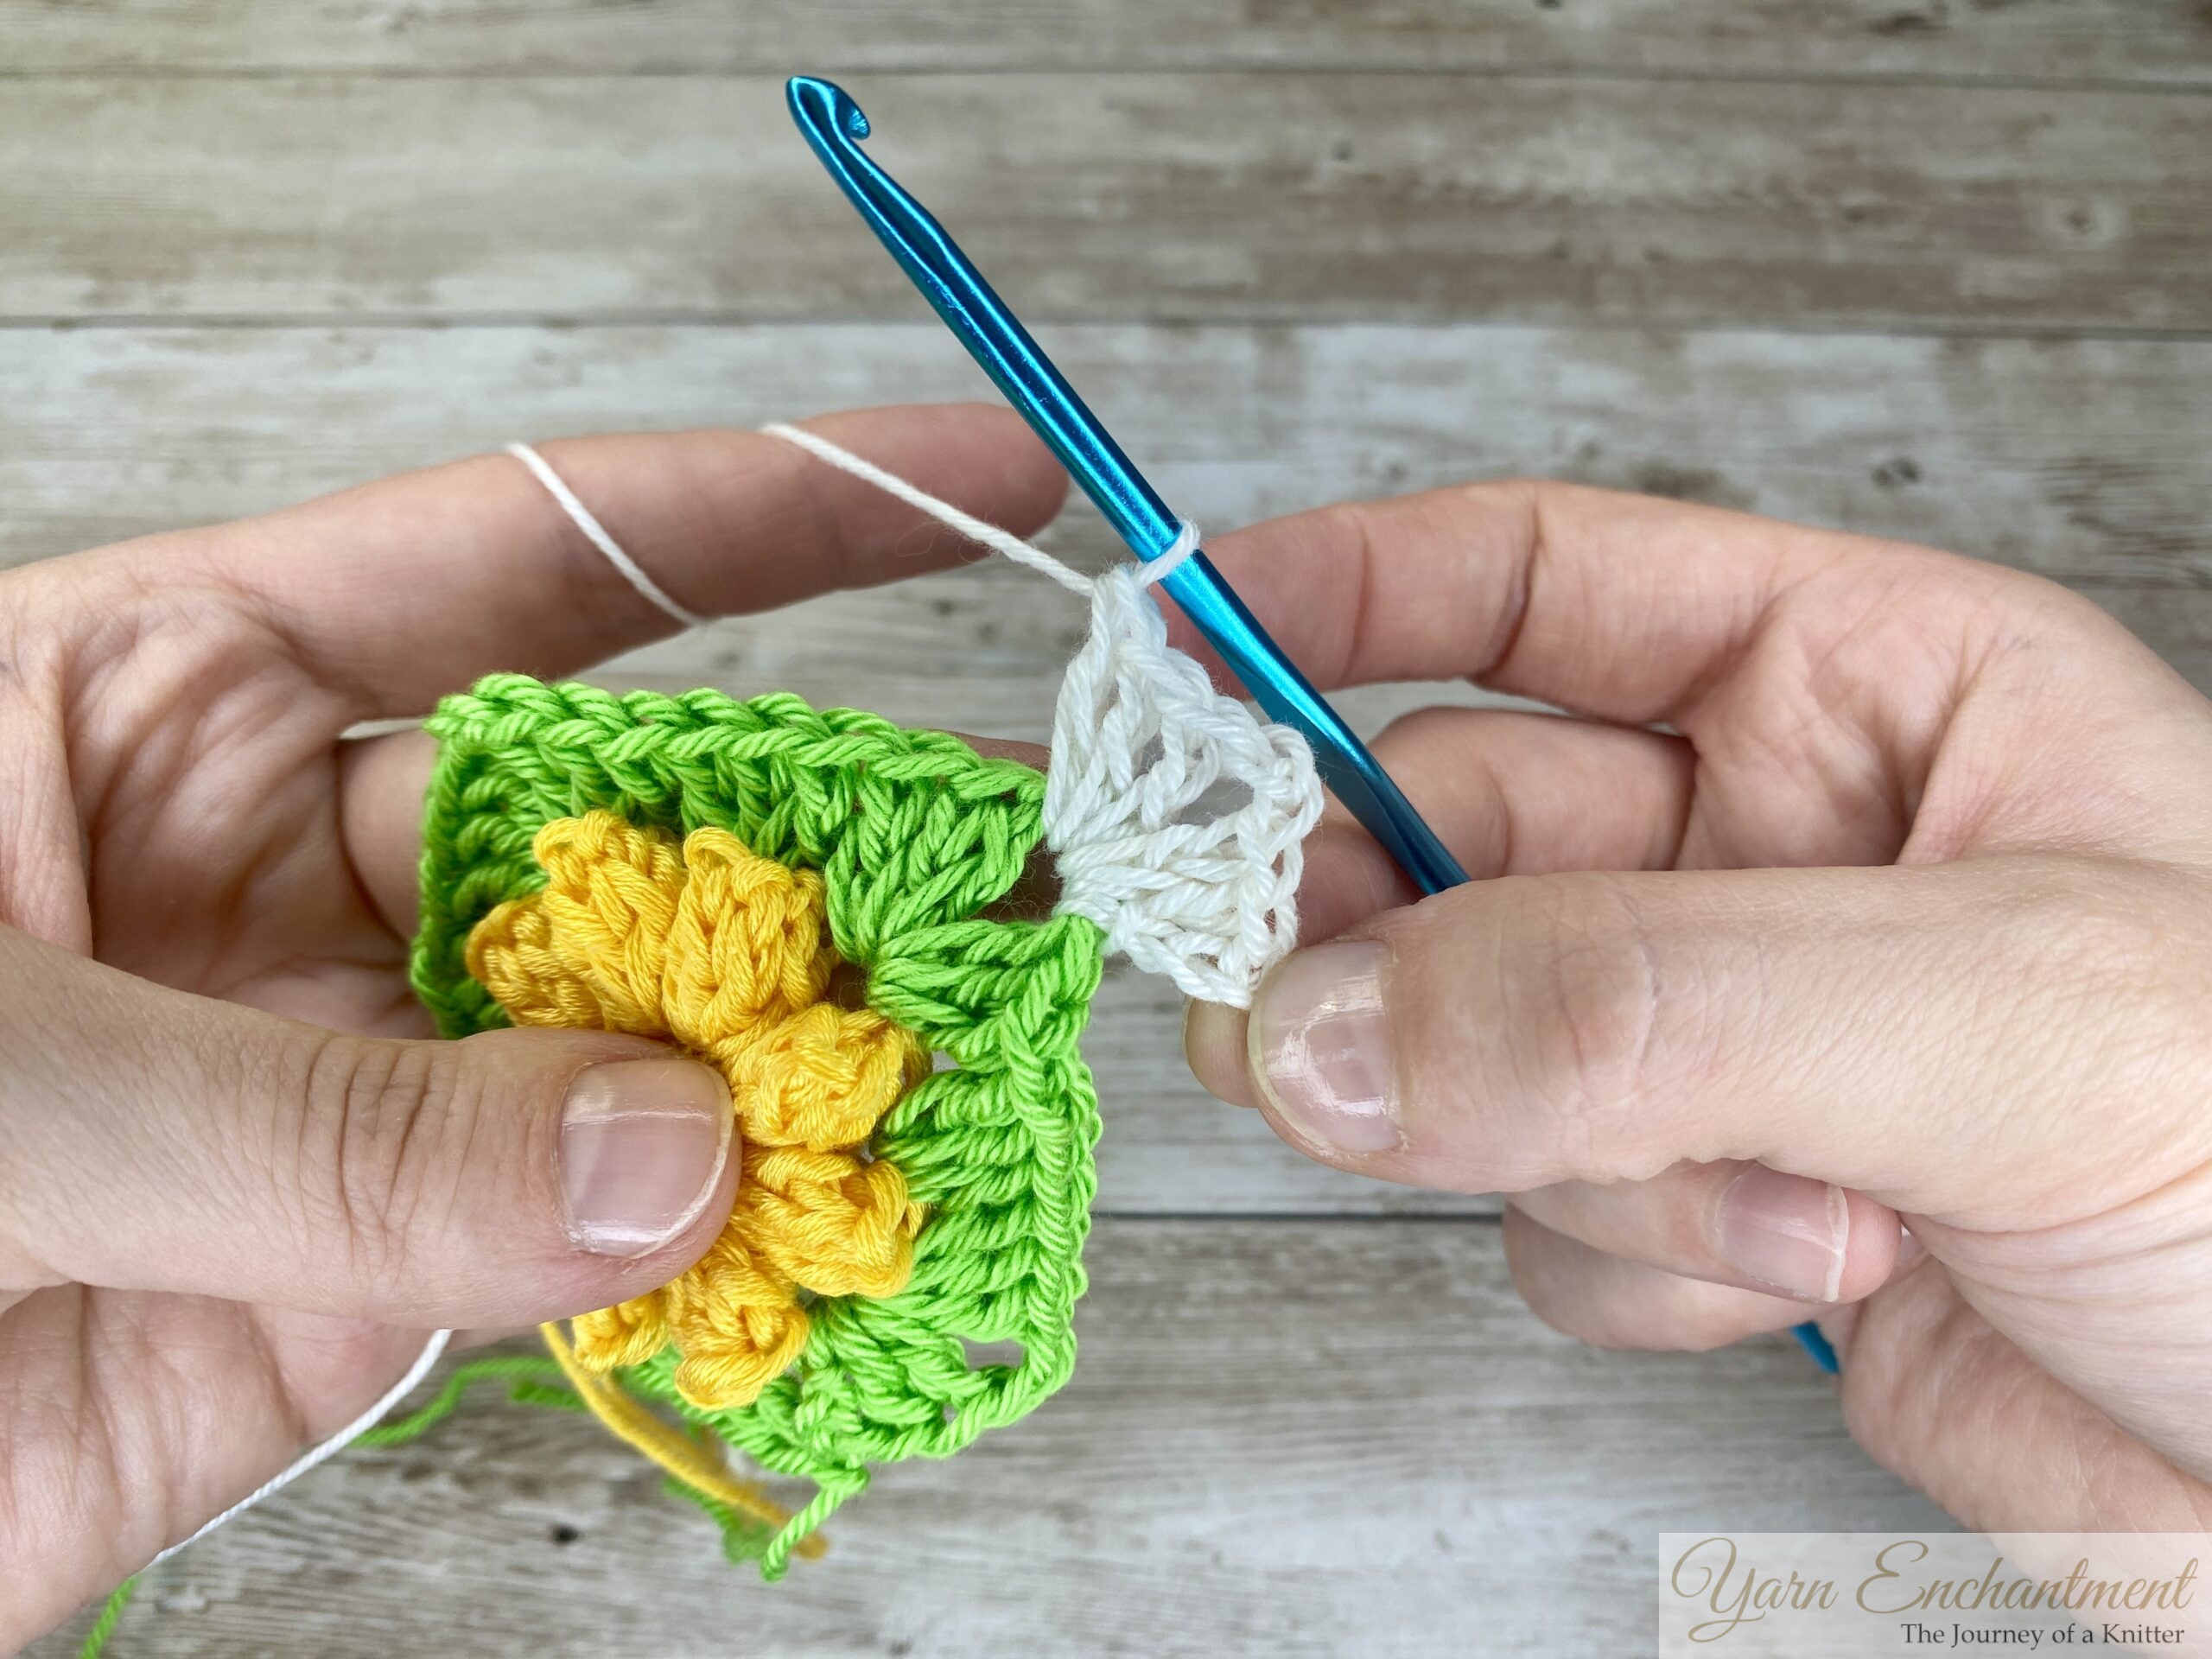
Join Color B: Join color B in any corner space from the previous round.
-
Start the First Corner: Chain 3 (this counts as your first double crochet), then work 2 more double crochets in the same space.
Chain 2, then work 3 double crochets in the same chain-2 space. This completes your first corner . Chain 1. -
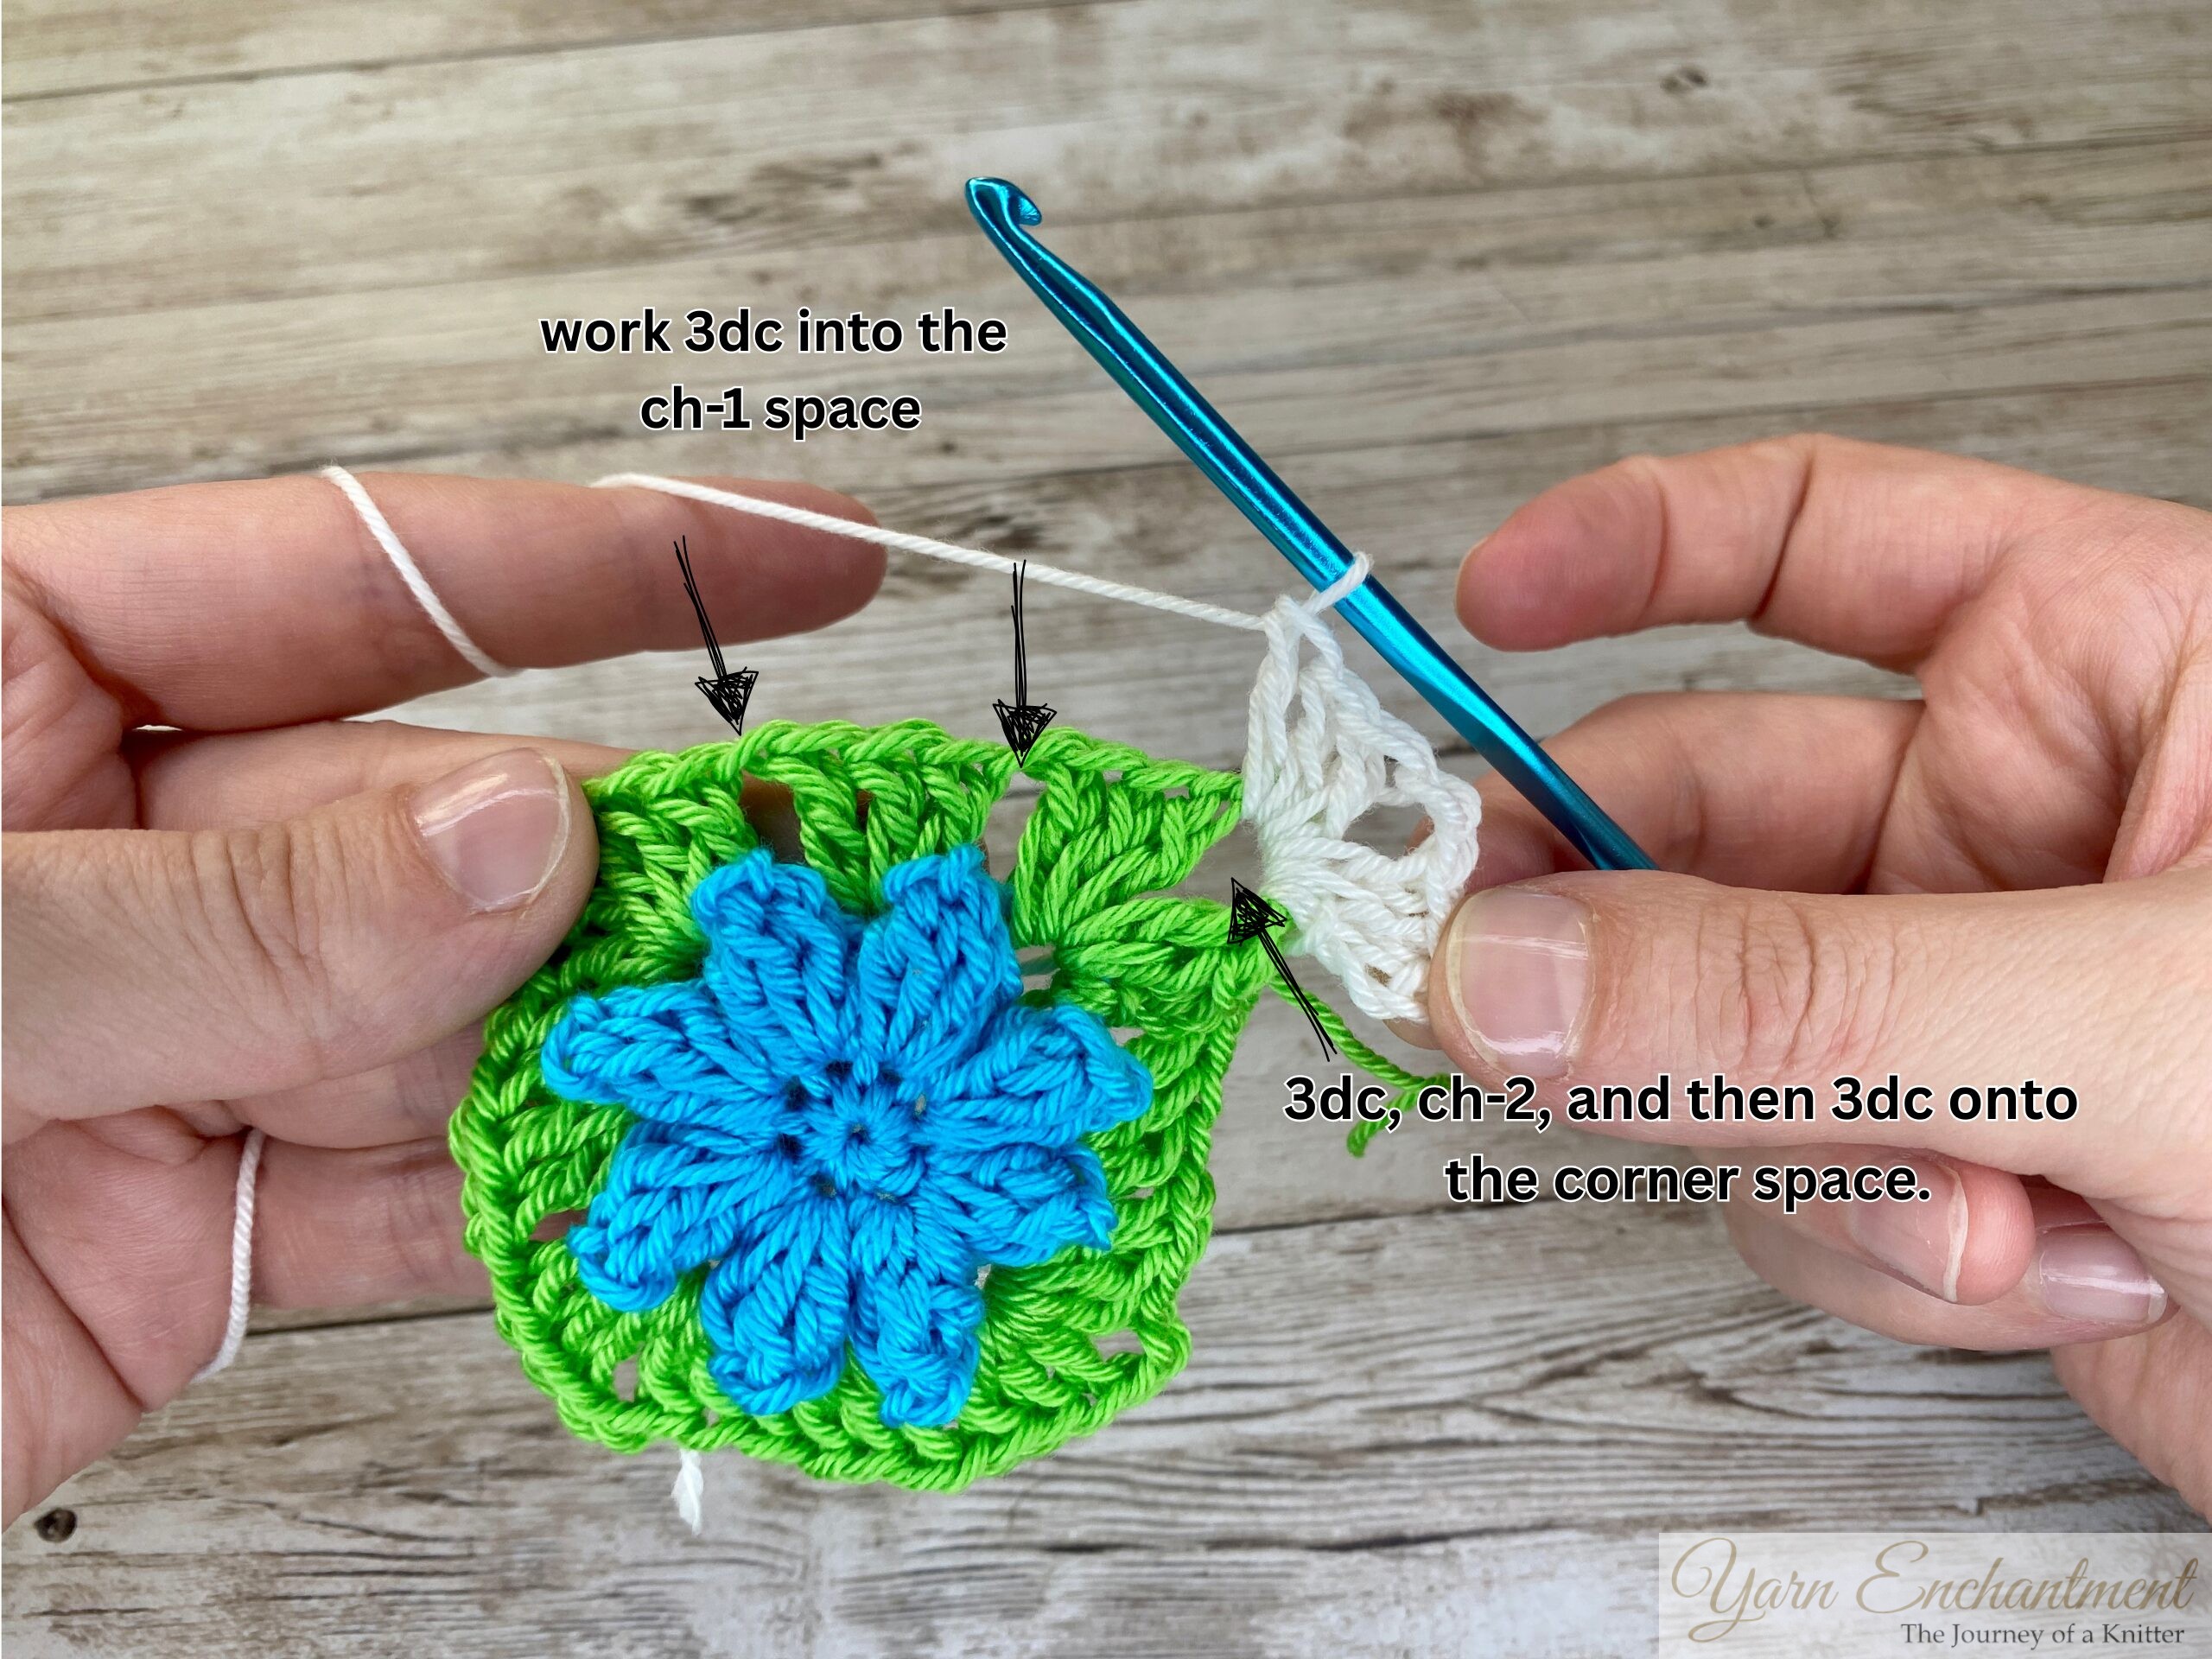
Work Along the Side: Find the next chain-2 space and work 3 double crochets in that space. Chain 1.
-
Create the Next Corner: In the following chain-2 space, work another corner:
-
Work 3 double crochets, chain 2, and then 3 more double crochets. Chain 1.
-
-
Repeat the Pattern: Continue working around the square by repeating this sequence:
-
Work 3 double crochets into the next chain-2 space, chain 1 (this is the side).
-
In the next chain-2 space, create another corner (3 double crochets, chain 2, 3 double crochets, chain 1).
-
-
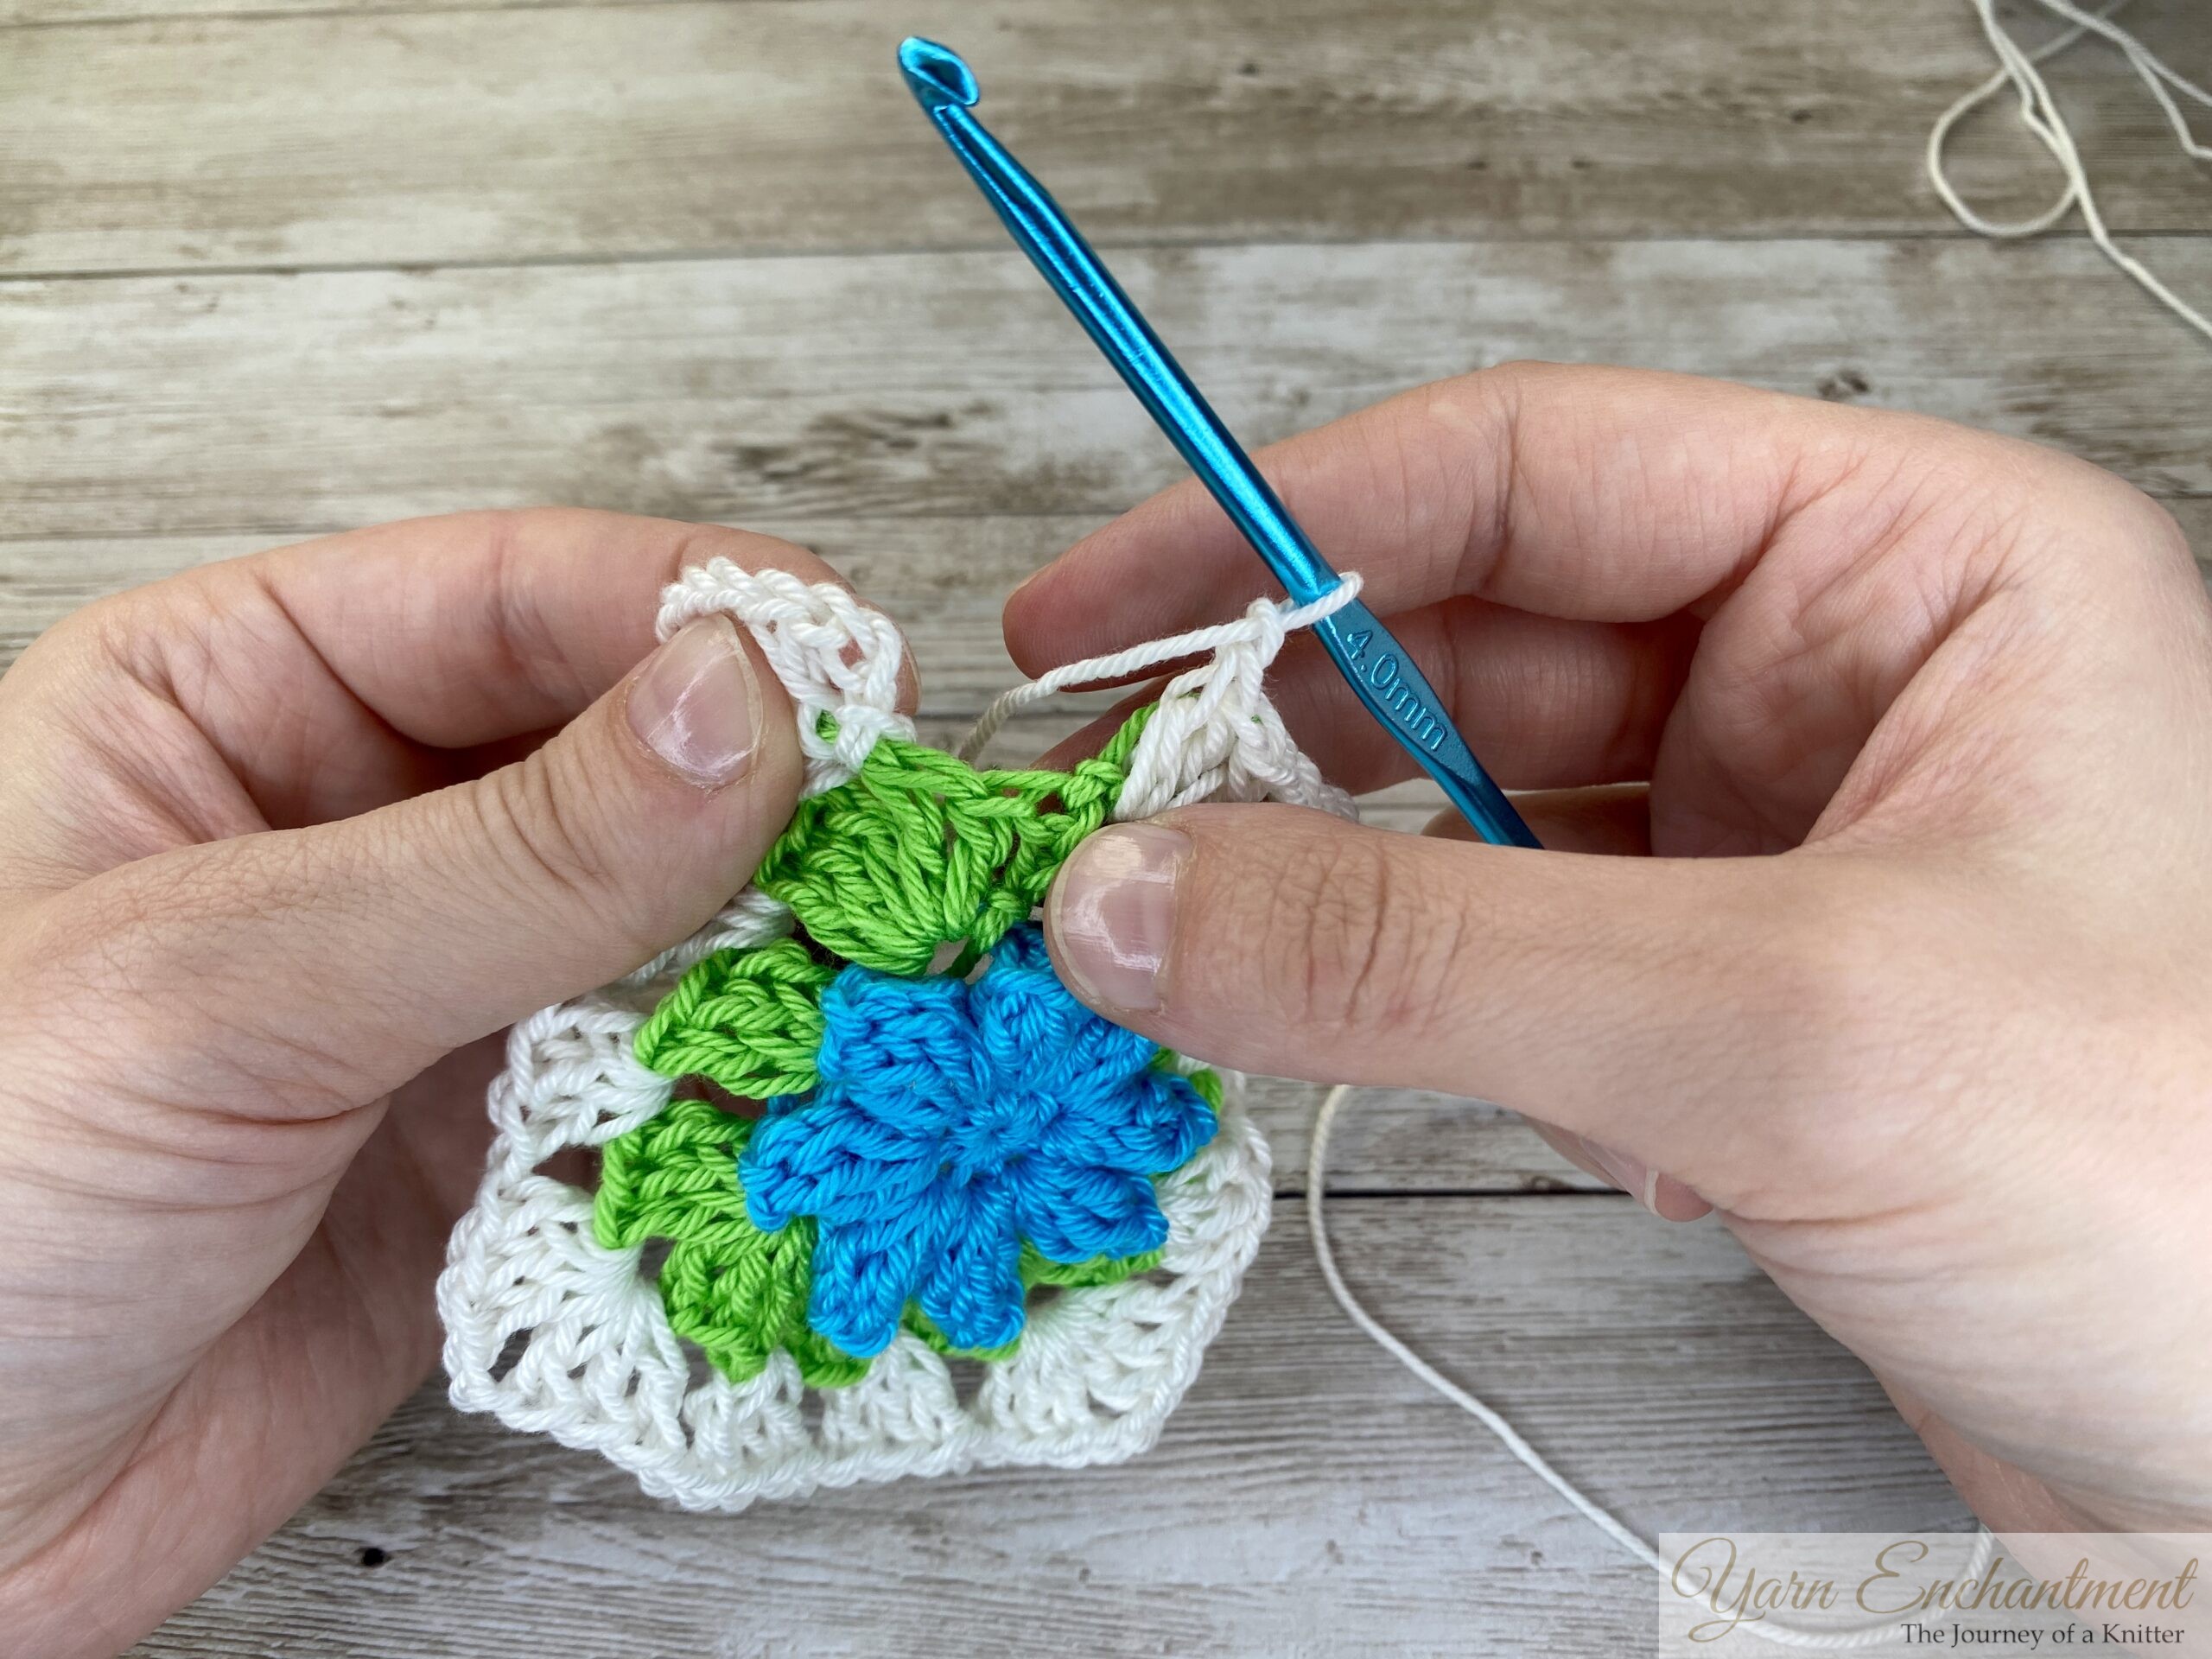
Complete the Round: Once you’ve worked all four corners and sides, join the round with a slip stitch in the top of the initial chain-3.
-
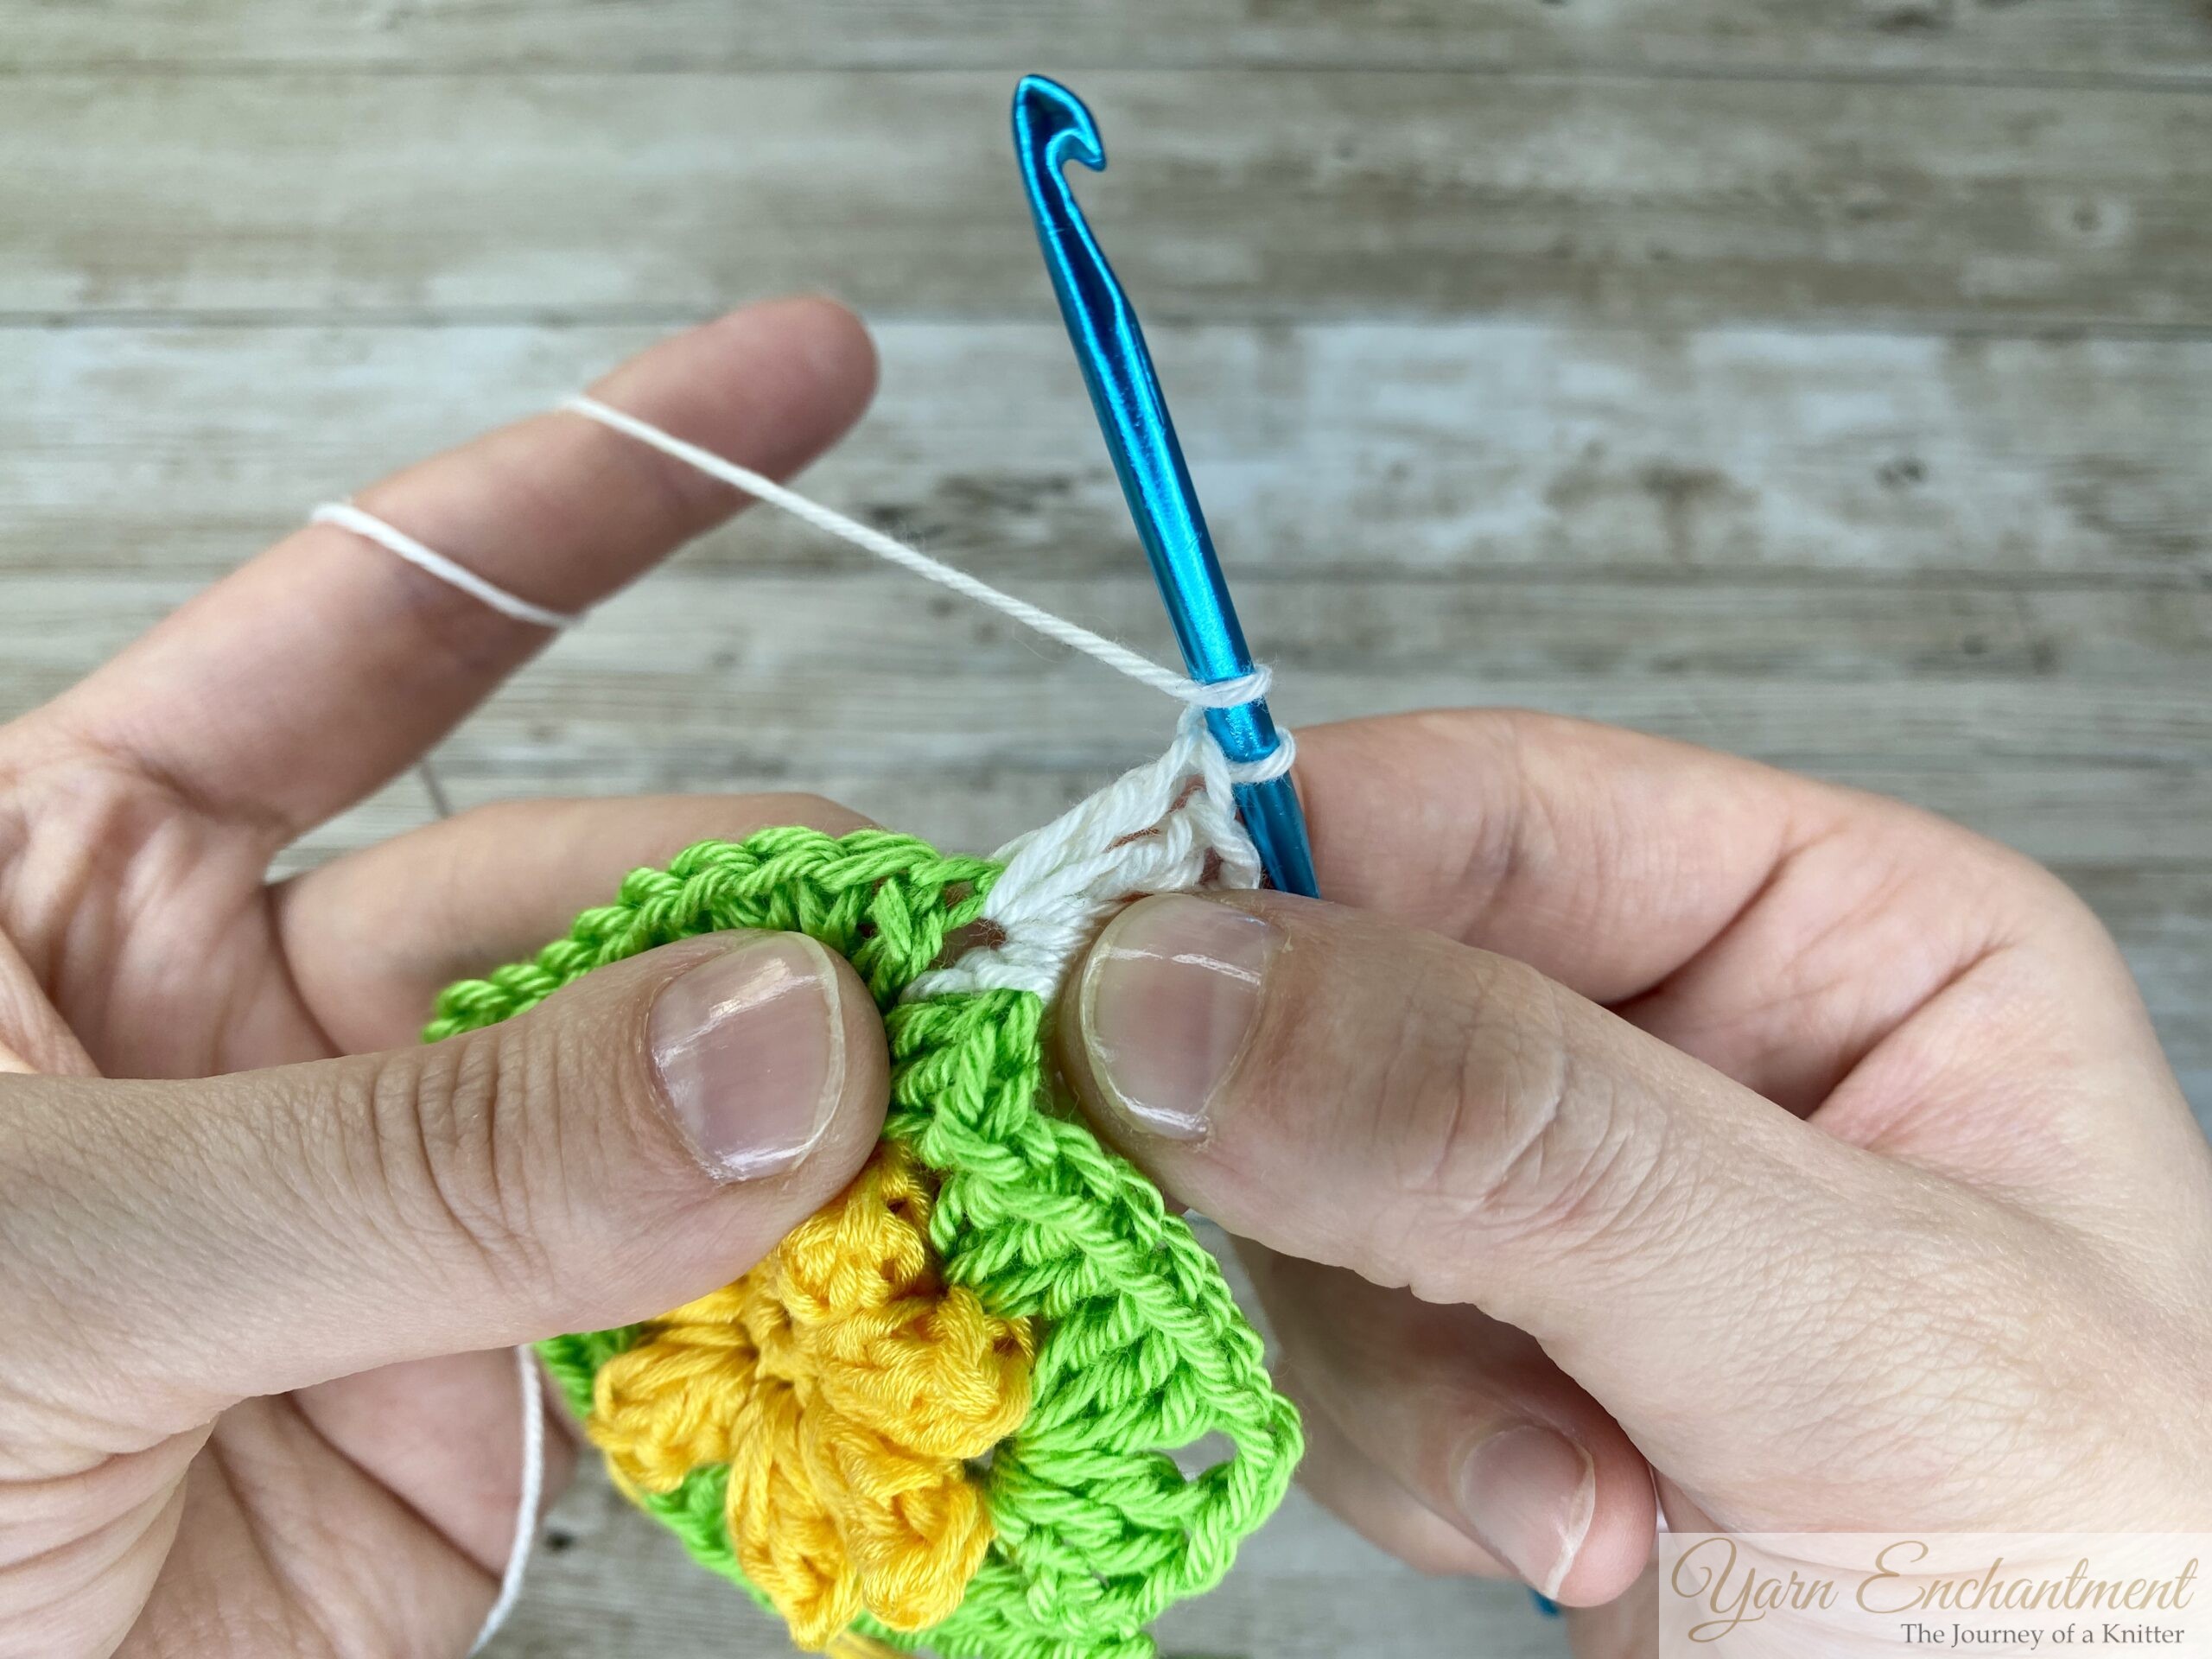
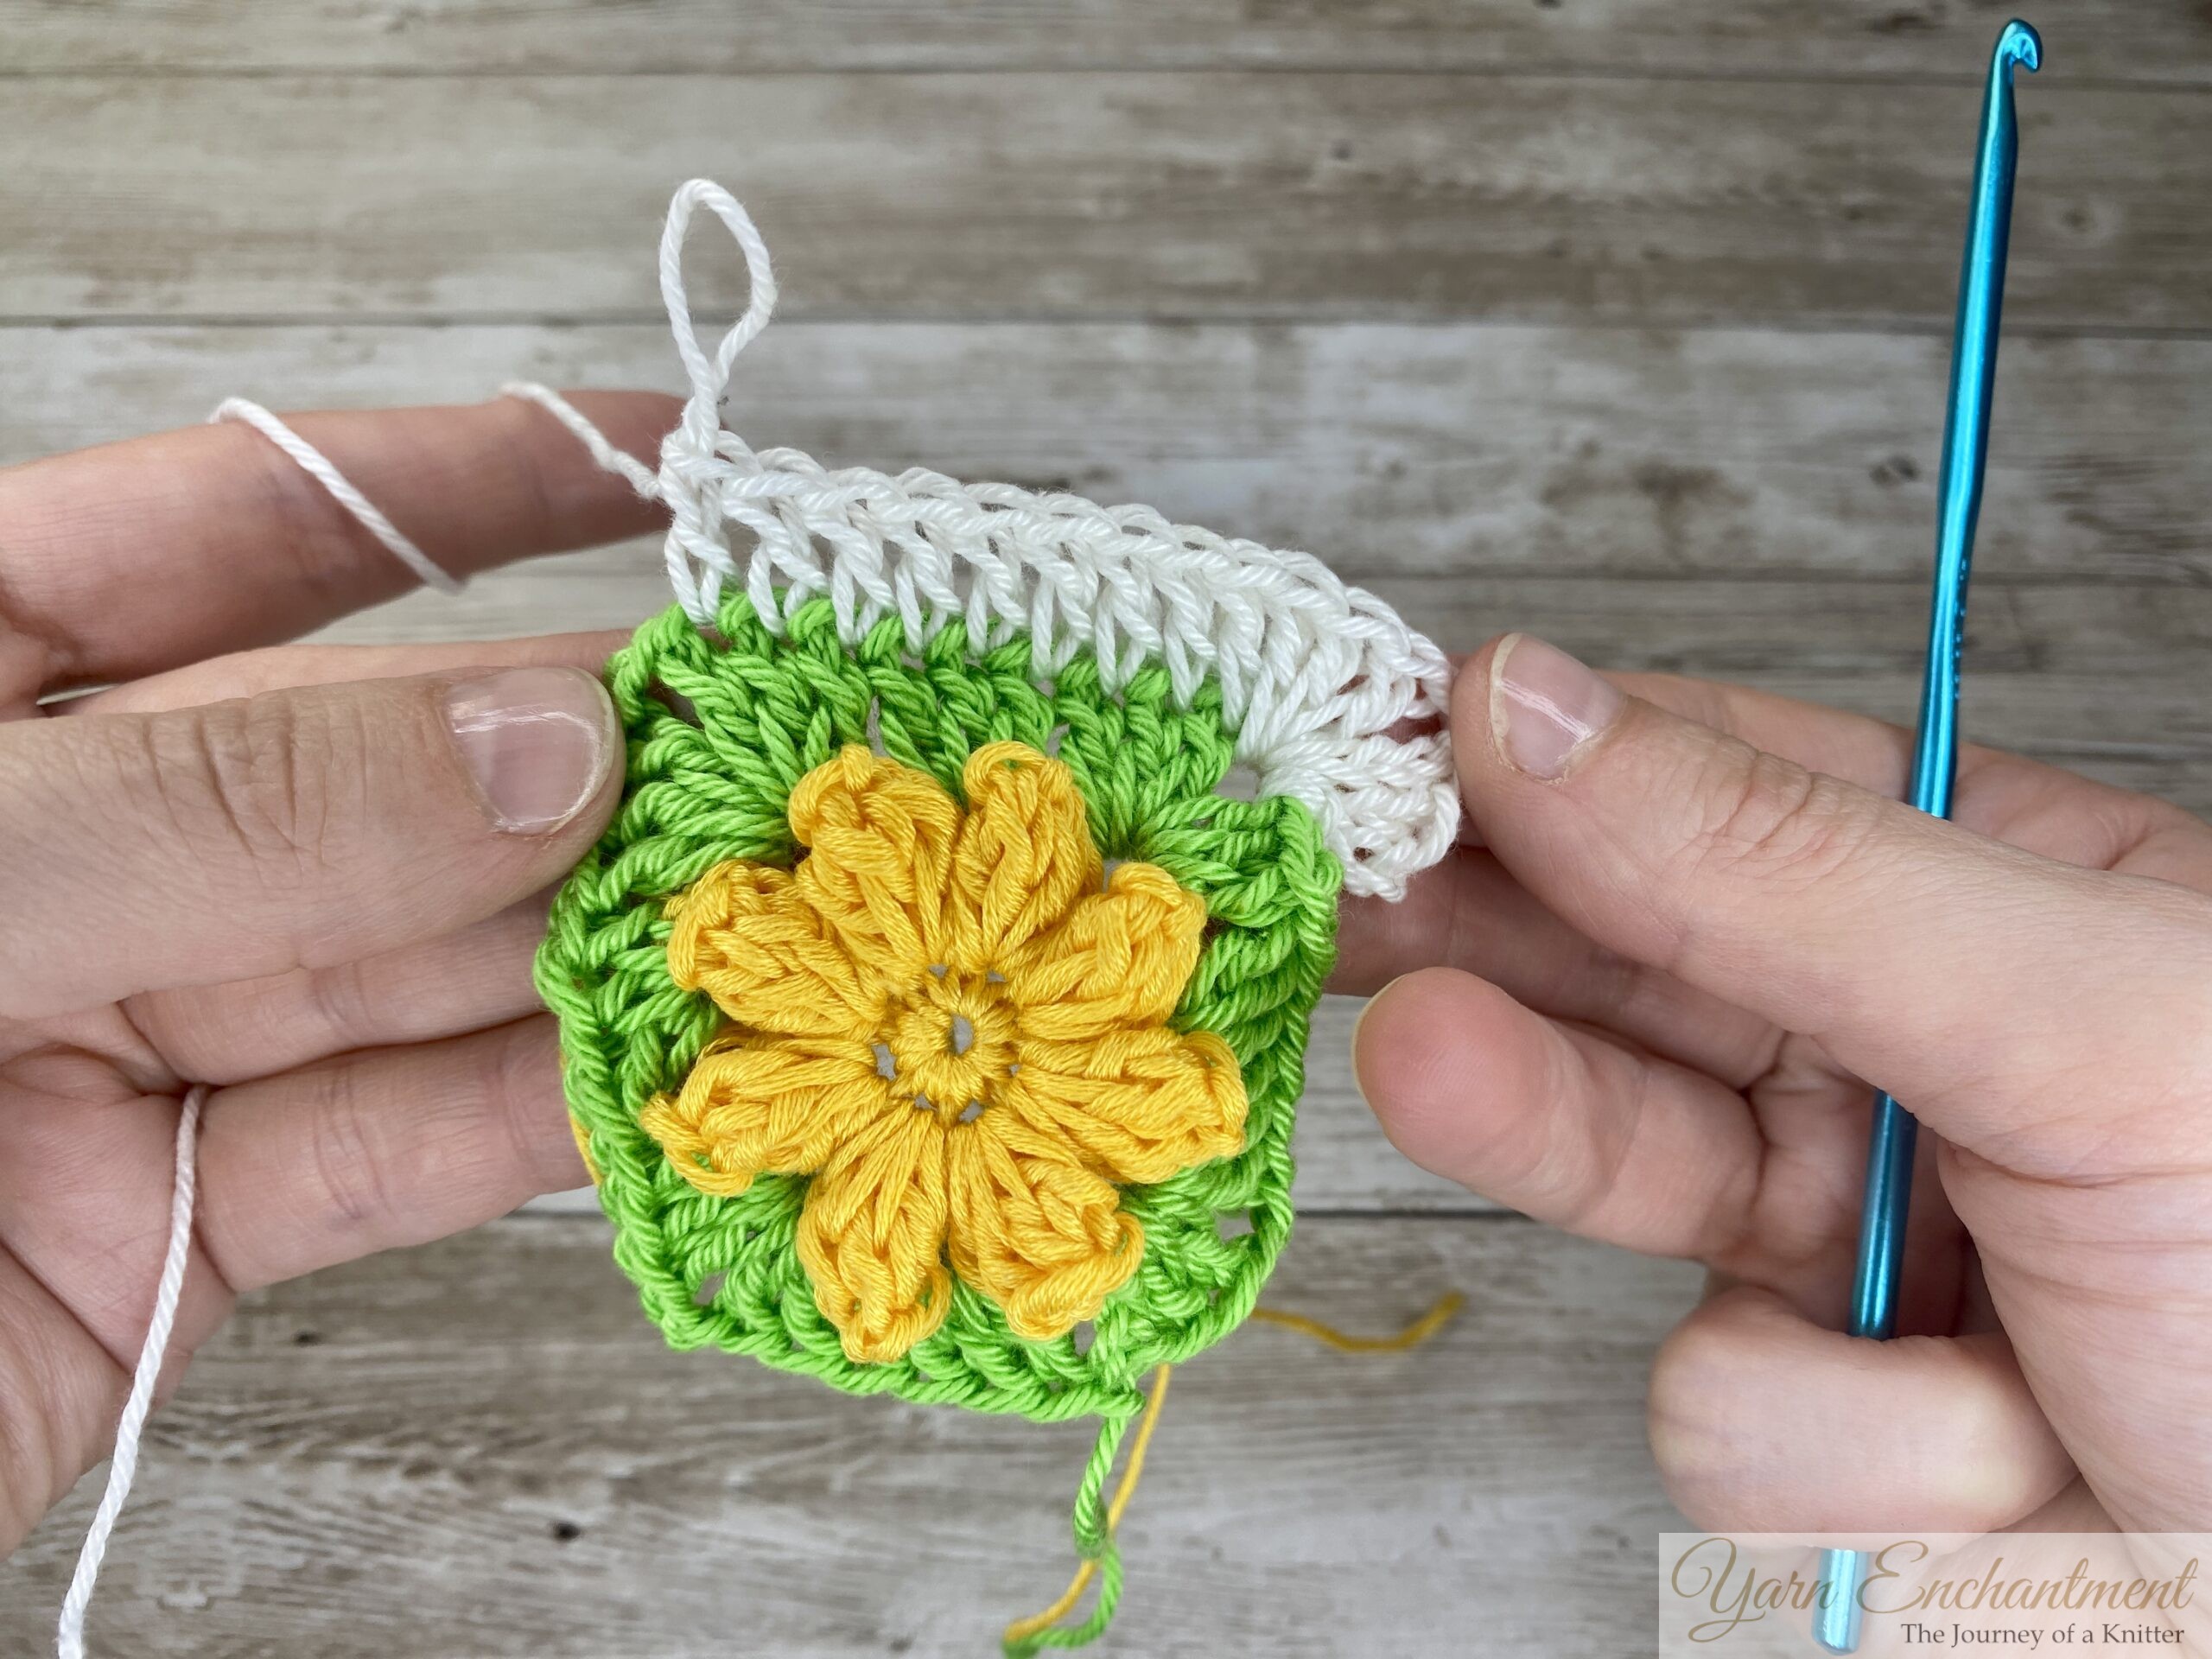
 |  |  | Join in any corner space from the previous round and work your first corner, chain 3 (this counts as your first double crochet), then work 2 more double crochets in the same space. | Chain 1, find your next chain 2 space... | ...and work 3 double crochets in that space. Chain 1. |


 |  |  | Find the next chain-2 space and work another corner: Work 3 double crochets, chain 2, and then 3 more double crochets. Chain 1. | Continue working around the square, Once you’ve worked all four corners and sides, join the round with a slip stitch in the top of the initial chain-3. | Your granny square now has 4 corner spaces and 6 chain-1 spaces . In round 4, we’ll work into these chain-1 and corner spaces to continue building the design. If you don’t want to change colors, slip stitch to the next corner space and chain 3 to start the round. For better visual guidance, you can watch the YouTube tutorial linked at the end of this blog post. |


Round 4: Repeating Round
-
Start the First Corner: Chain 3 (this counts as your first double crochet), then work 2 more double crochets in the same corner space.
Chain 2, then work 3 double crochets in the same corner space. This completes your first corner. Chain 1. -
Work Along the Side: Work a cluster of 3 double crochets into the next chain-1 space.
Chain 1 again, and repeat this pattern: [3 double crochets, chain 1] into each chain-1 space along the side until you reach the next corner. -
Create the Next Corner: In the corner space, work 3 double crochets, chain 2, and then 3 more double crochets. Chain 1.
-
Repeat Around the Square: Continue working around the square by repeating this sequence:
-
Work [3 double crochets, chain 1] into each chain-1 space along the sides.
-
In each corner, work [3 double crochets, chain 2, 3 double crochets].
-
-
Complete the Round: Once all four corners are complete, join the round with a slip stitch in the top of the initial chain-3.
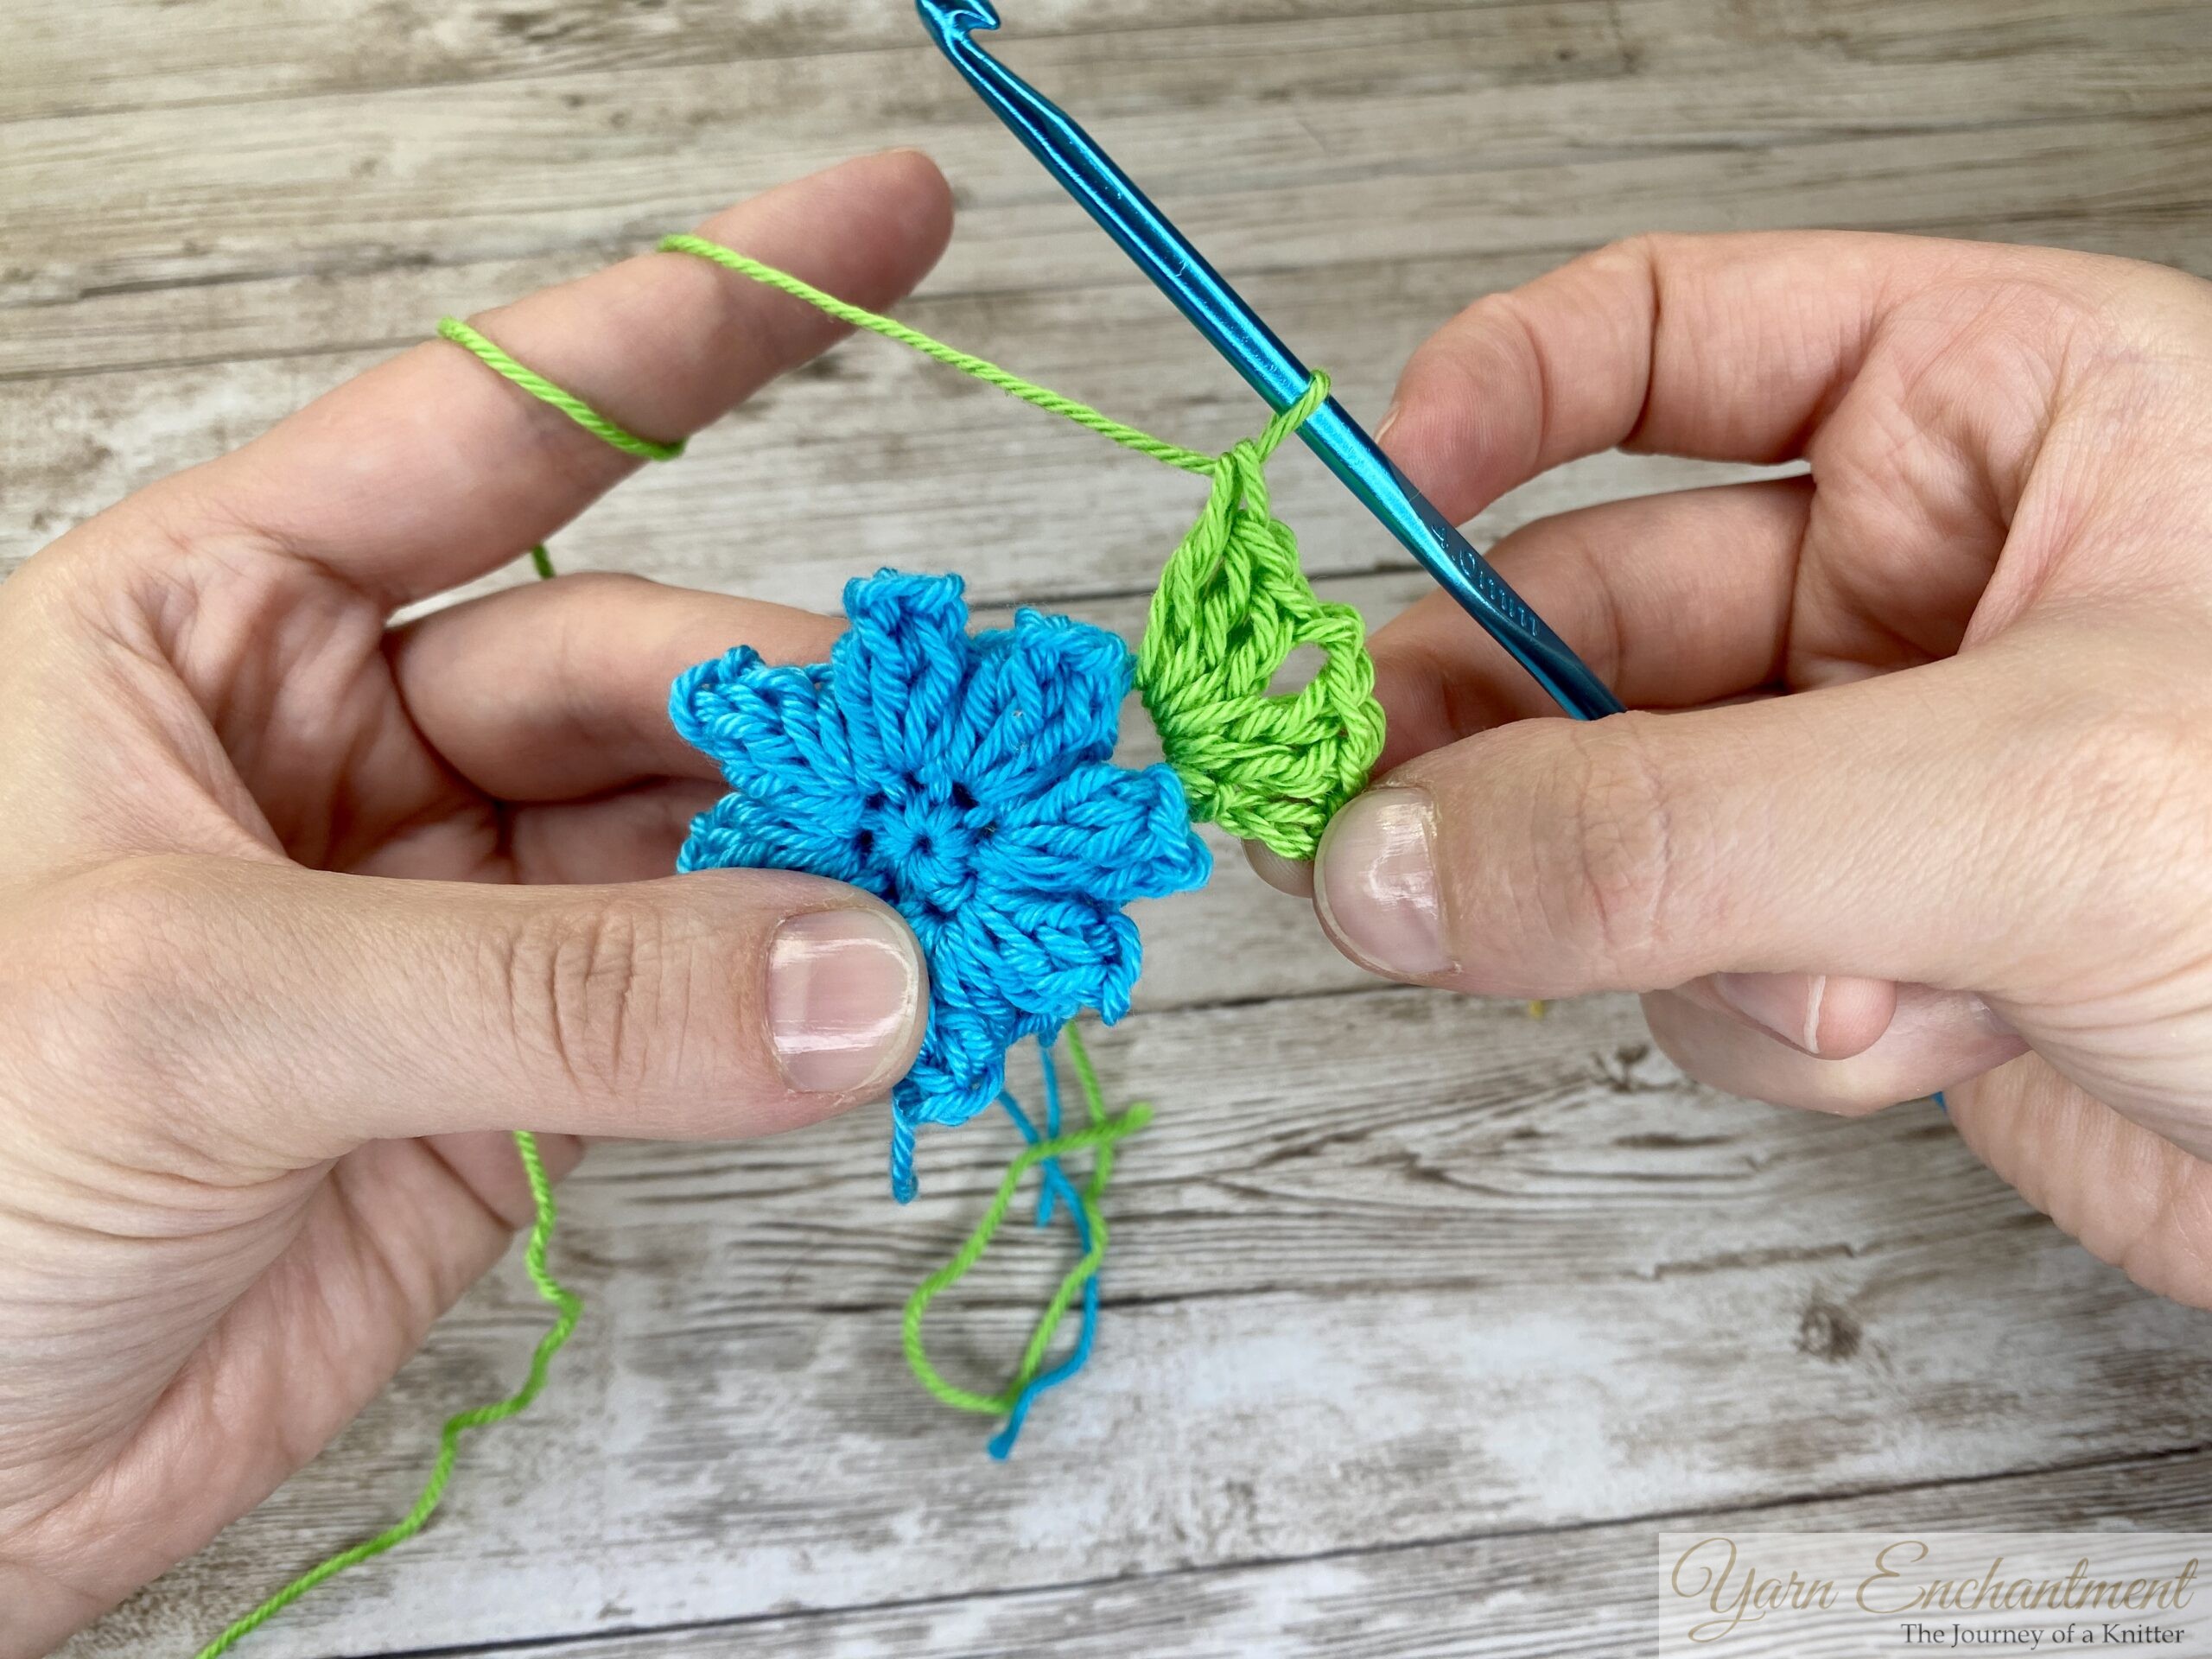
 |  | | Start the First Corner: Chain 3 (this counts as your first double crochet), then work 2 more double crochets in the same corner space. |
| Once all four corners are complete, join the round with a slip stitch in the top of the initial chain-3. |


Tips and Variations for Customizing Your Square
- Experiment with Colors: Try different color combinations to match your style or project theme.
- Add More Rounds: If you want a larger square, simply repeat the corner sequence with additional rounds.
- Use Alternative Stitches: Swap the popcorn stitch with puff stitches for a different look.
- Mix Textures: Combine smooth and variegated yarns for a unique visual effect.
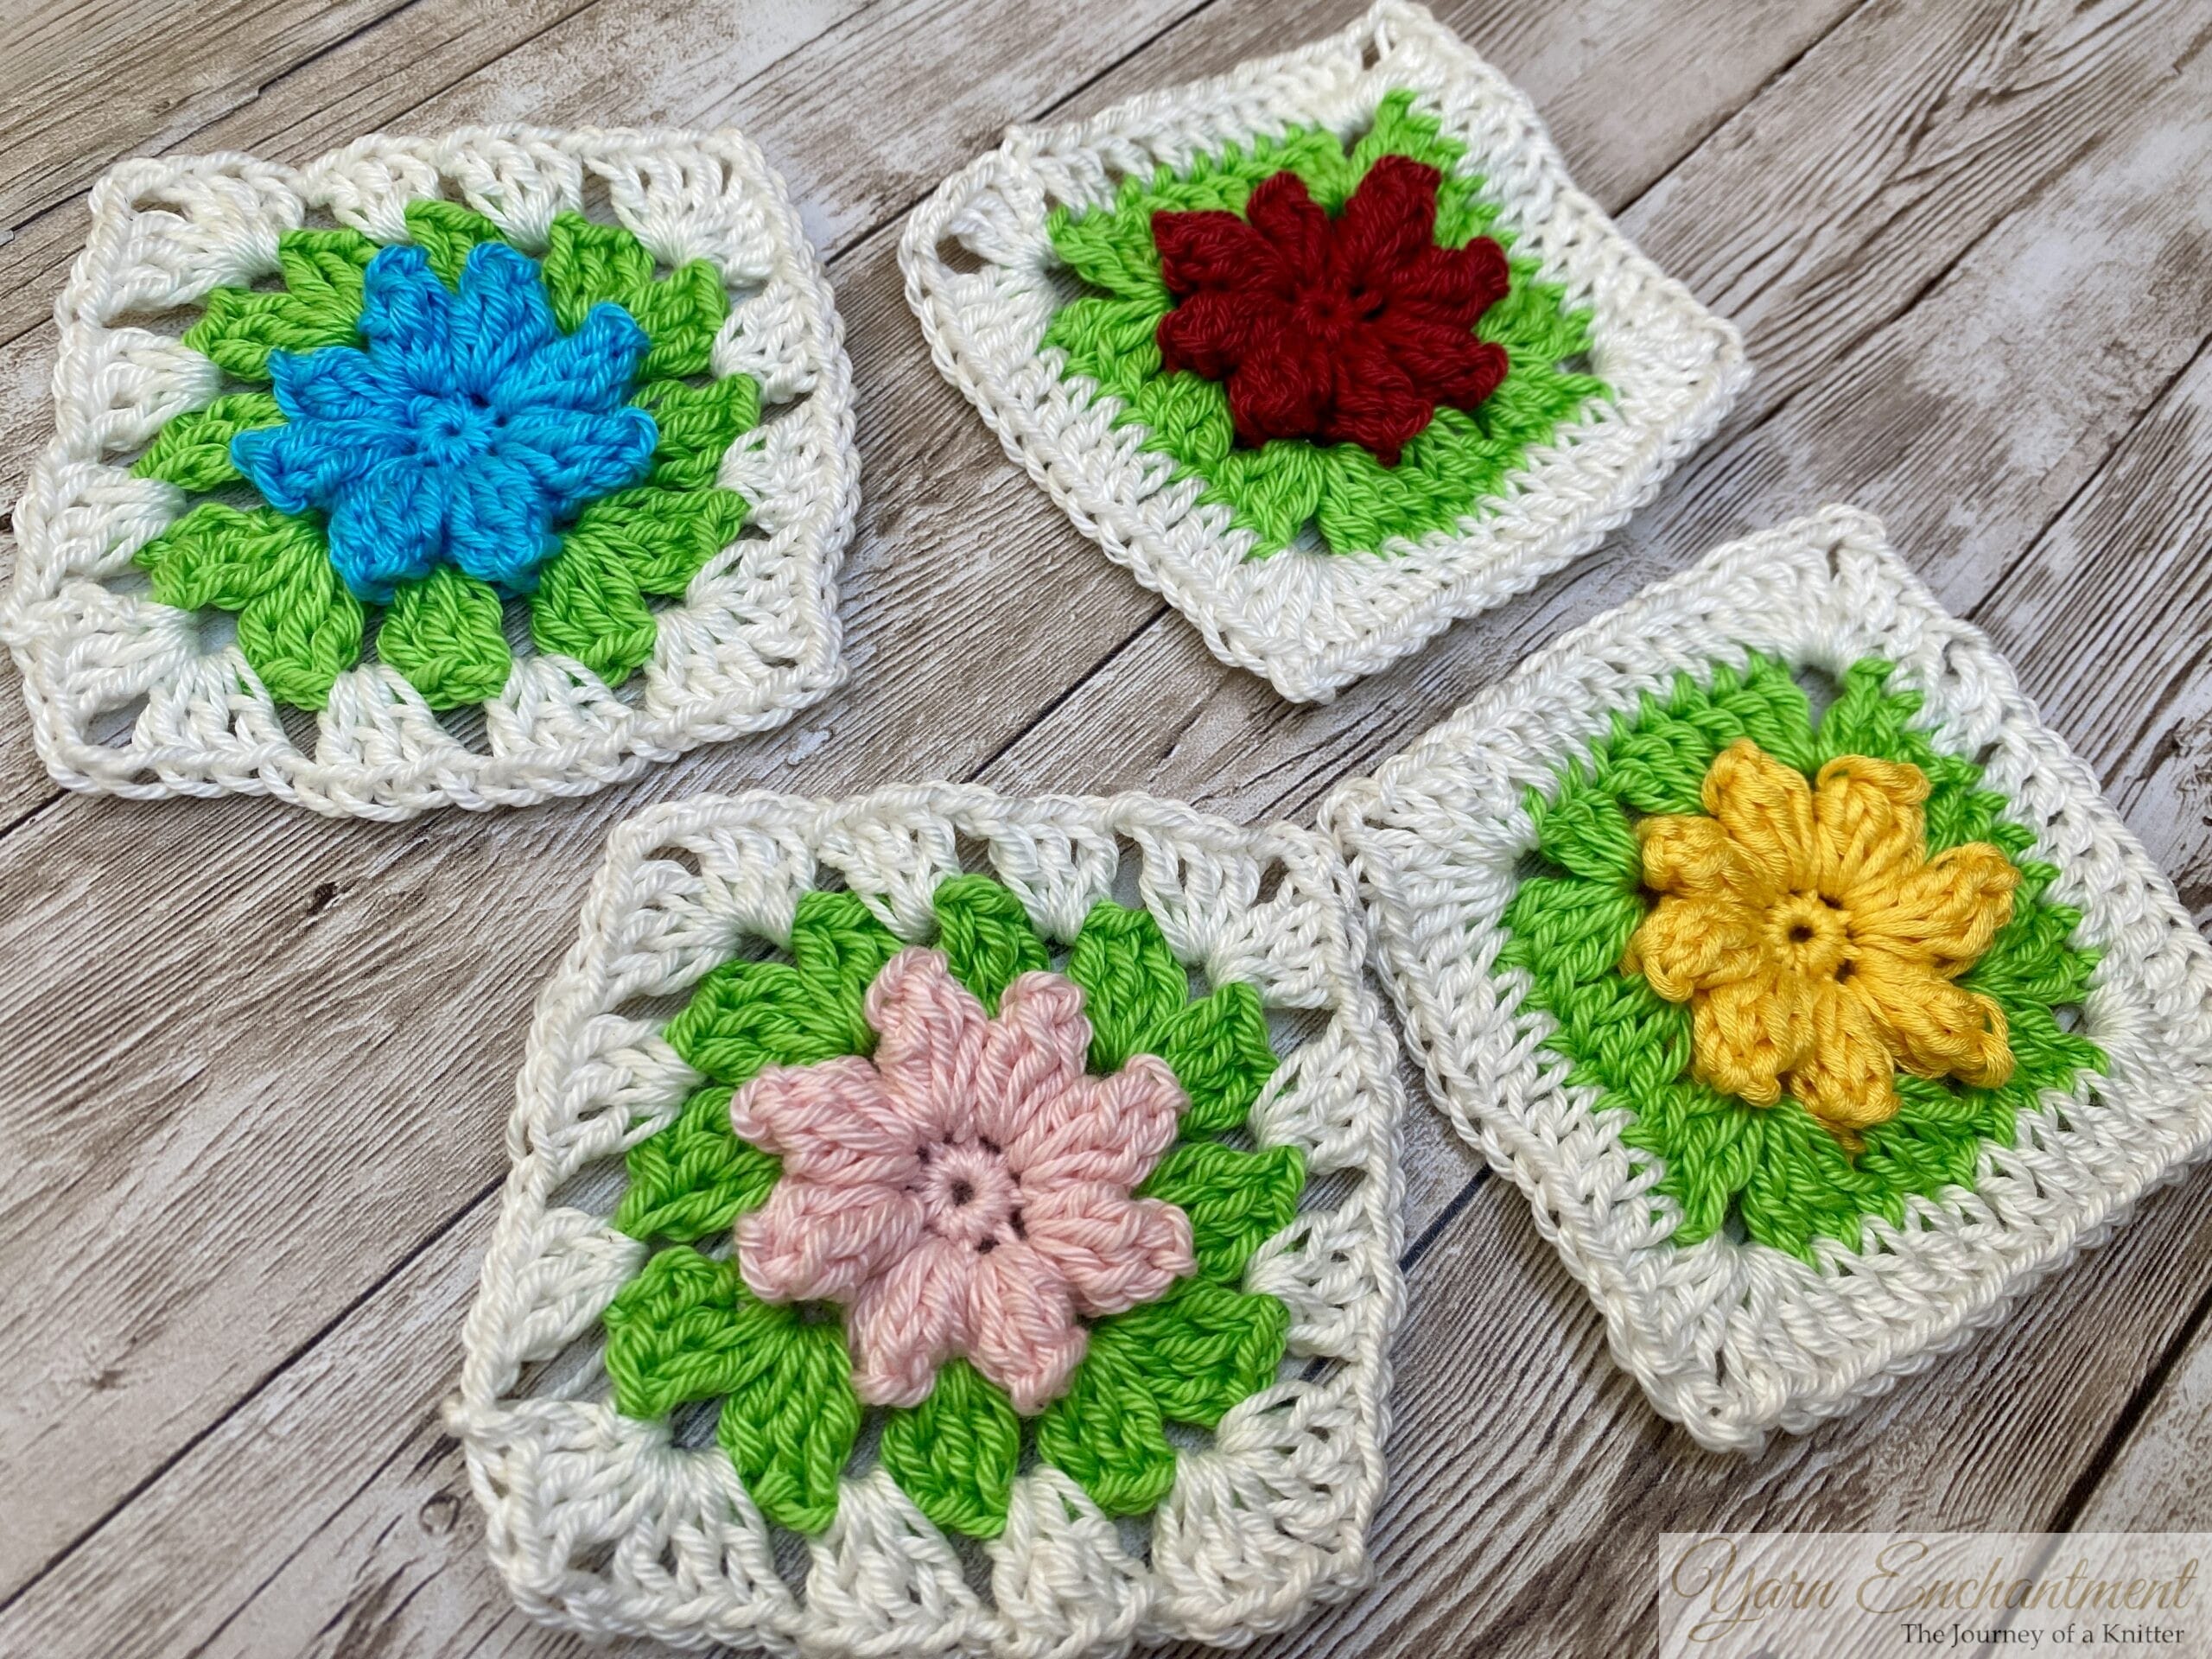 | Granny Squares with a classic and a solid border row |

Ideas for Using Your Finished 3D Flower Granny Square
Once you’ve completed your square, the possibilities are endless! Here are a few ideas:
- Sew multiple squares together to create a cozy blanket or scarf.
<p> </p>
<hr />
<h3 align="center">A Little Way to Say Thanks</h3>
<div align="center"> </div>
<div align="center"><span style="font-size: 18px;" data-font-size="18px">Yarn Enchantment is my cozy hobby corner on the internet. </span></div>
<div align="center"><span style="font-size: 18px;" data-font-size="18px">If something here made your knitting day easier or you simply enjoy reading my posts and would like to say thank you, you can leave a small Ko‑fi tip - but only if you truly want to.</span><br /><br /><script type='text/javascript' src='https://storage.ko-fi.com/cdn/widget/Widget_2.js'></script><script type='text/javascript'>kofiwidget2.init('Support me on Ko-fi', '#549969', 'E1E71SHBCD');kofiwidget2.draw();</script></div>
<p> </p>
<hr />
<p> </p>
- Use it as a decorative accessory on bags, hats, or clothing.
- Frame it as wall art for a handmade touch in your home.
- Sew it together and create a beautiful wallet as a gift.
Announcement 🎉
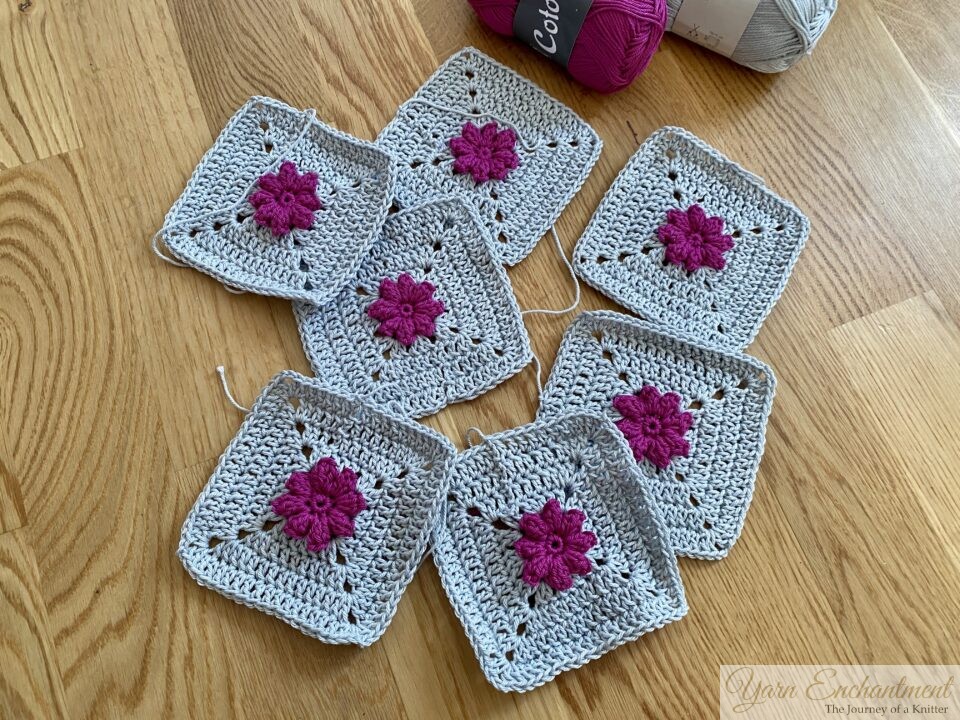
The idea of creating this granny square tutorial came from another one, every time spring arrives, I want to crochet myself a new purse. I've been doing this for four years now, but this year, I wanted to share the free crochet pattern with all of you! Whether you’re just starting your crochet journey or you’re a pro with years of experience, this pattern is designed with everyone in mind.
Stay tuned for all the details - you won’t want to miss it.
 | 3D Granny Square |

Conclusion
Creating this 3D flower granny square is not only fun but also incredibly rewarding. With just two, three or more colors and some basic crochet skills, you’ll have a beautiful piece to add to your collection or share with others. Whether you’re a beginner or an experienced crocheter, this project is sure to spark joy and inspire creativity.
I would love to hear about your finished project ideas! Share them with me in the comments below or write me an e-mail. I would really love for you to stay connected! Don’t forget to subscribe to my Blog or YouTube channel so you don’t miss out on upcoming tutorials. I will show you how to transform these beautiful squares into a stylish crochet purse - perfect for summer or gifting to someone special. I can’t wait to share it with you!
Until then, happy crocheting!
A Little Way to Say Thanks
You Might Also Like


 |
|
Join the Cozy Corner Newsletter!
Hey there, creative soul! Welcome to the Yarn Enchantment Newsletter, where we celebrate all things cozy, crafty, and full of heart. Think of this as your friendly crafting companion - a little dose of inspiration delivered straight to your inbox, just for you. Inside, you’ll find: ✨ Exclusive patterns & tutorials - ideas you won’t find anywhere else (just for us!) 📚 Bookish crafts that bring your favorite stories to life 🧶 Tips and tricks to make your crafting journey smoother (and more fun!) 💌 Heartfelt musings on life, creativity, and the magic of making something with your own two hands Whether you’re knitting by the fire, brainstorming your next DIY project, or just looking for a little creative pick-me-up, this newsletter is here to cheer you on. Because let’s be honest - crafting isn’t just about the finished project; it’s about the joy, peace, and stories we create along the way. So grab a cup of tea, cozy up, and join me. Together, we’ll weave a little magic into everyday life - one stitch, one story, and one email at a time. P.S. I’m so glad you’re here. Let’s make something beautiful together! (Note: If you're using an ad blocker, you may encounter issues subscribing to the newsletter. To subscribe, please consider disabling your ad blocker.)
|
