

Fluffy Daisy Cardigan Review: Flower Embroidery & Brioche Knitting
August 12, 2024
Ginkgo Biloba Top
August 29, 2024Lifted Increase on Purlside

Originally published on August 29, 2024
If you’re looking for increases that are nearly invisible and don’t create any noticeable bumps on the purl side, like the ones you get with KFB (knit front and back) increases - or if you’re searching for the purl-side counterpart to lifted increases on the knit side, you’re in the right place! Lifted increases on the purl side are a clean, subtle way to add stitches without disrupting the flow of your fabric. Let’s dive into what they are, when to use them, and how to work them step by step.
In this post, you’ll learn: (Click on the links below to jump to the section)
 |
 |
|
Lifted purl increases on the purl side |
Lifted purl increases on the right side |
What are Lifted Increases
Lifted increases are a great way to add stitches to your knitting without leaving any noticeable gaps. The idea is simple: you "lift" a stitch from a previous row and work into it. These increases are directional, meaning they can lean either left or right depending on how you work them. On the purl side, they’re called:
-
Left Lifted Purl Increase (LLPI): This creates a left-leaning increase on the purl side.
-
Right Lifted Purl Increase (RLPI): This creates a right-leaning increase on the purl side.
Here’s the cool part: when you flip your work and look at the knit side, these increases will appear as their knit-side counterparts:
-
An LLPI on the purl side becomes a Right Lifted Knit Increase (RLI) on the knit side.
-
An RLPI on the purl side becomes a Left Lifted Knit Increase (LLI) on the knit side.
This happens because purl and knit stitches are essentially opposites of each other - like two sides of the same coin.
 |
 |
|
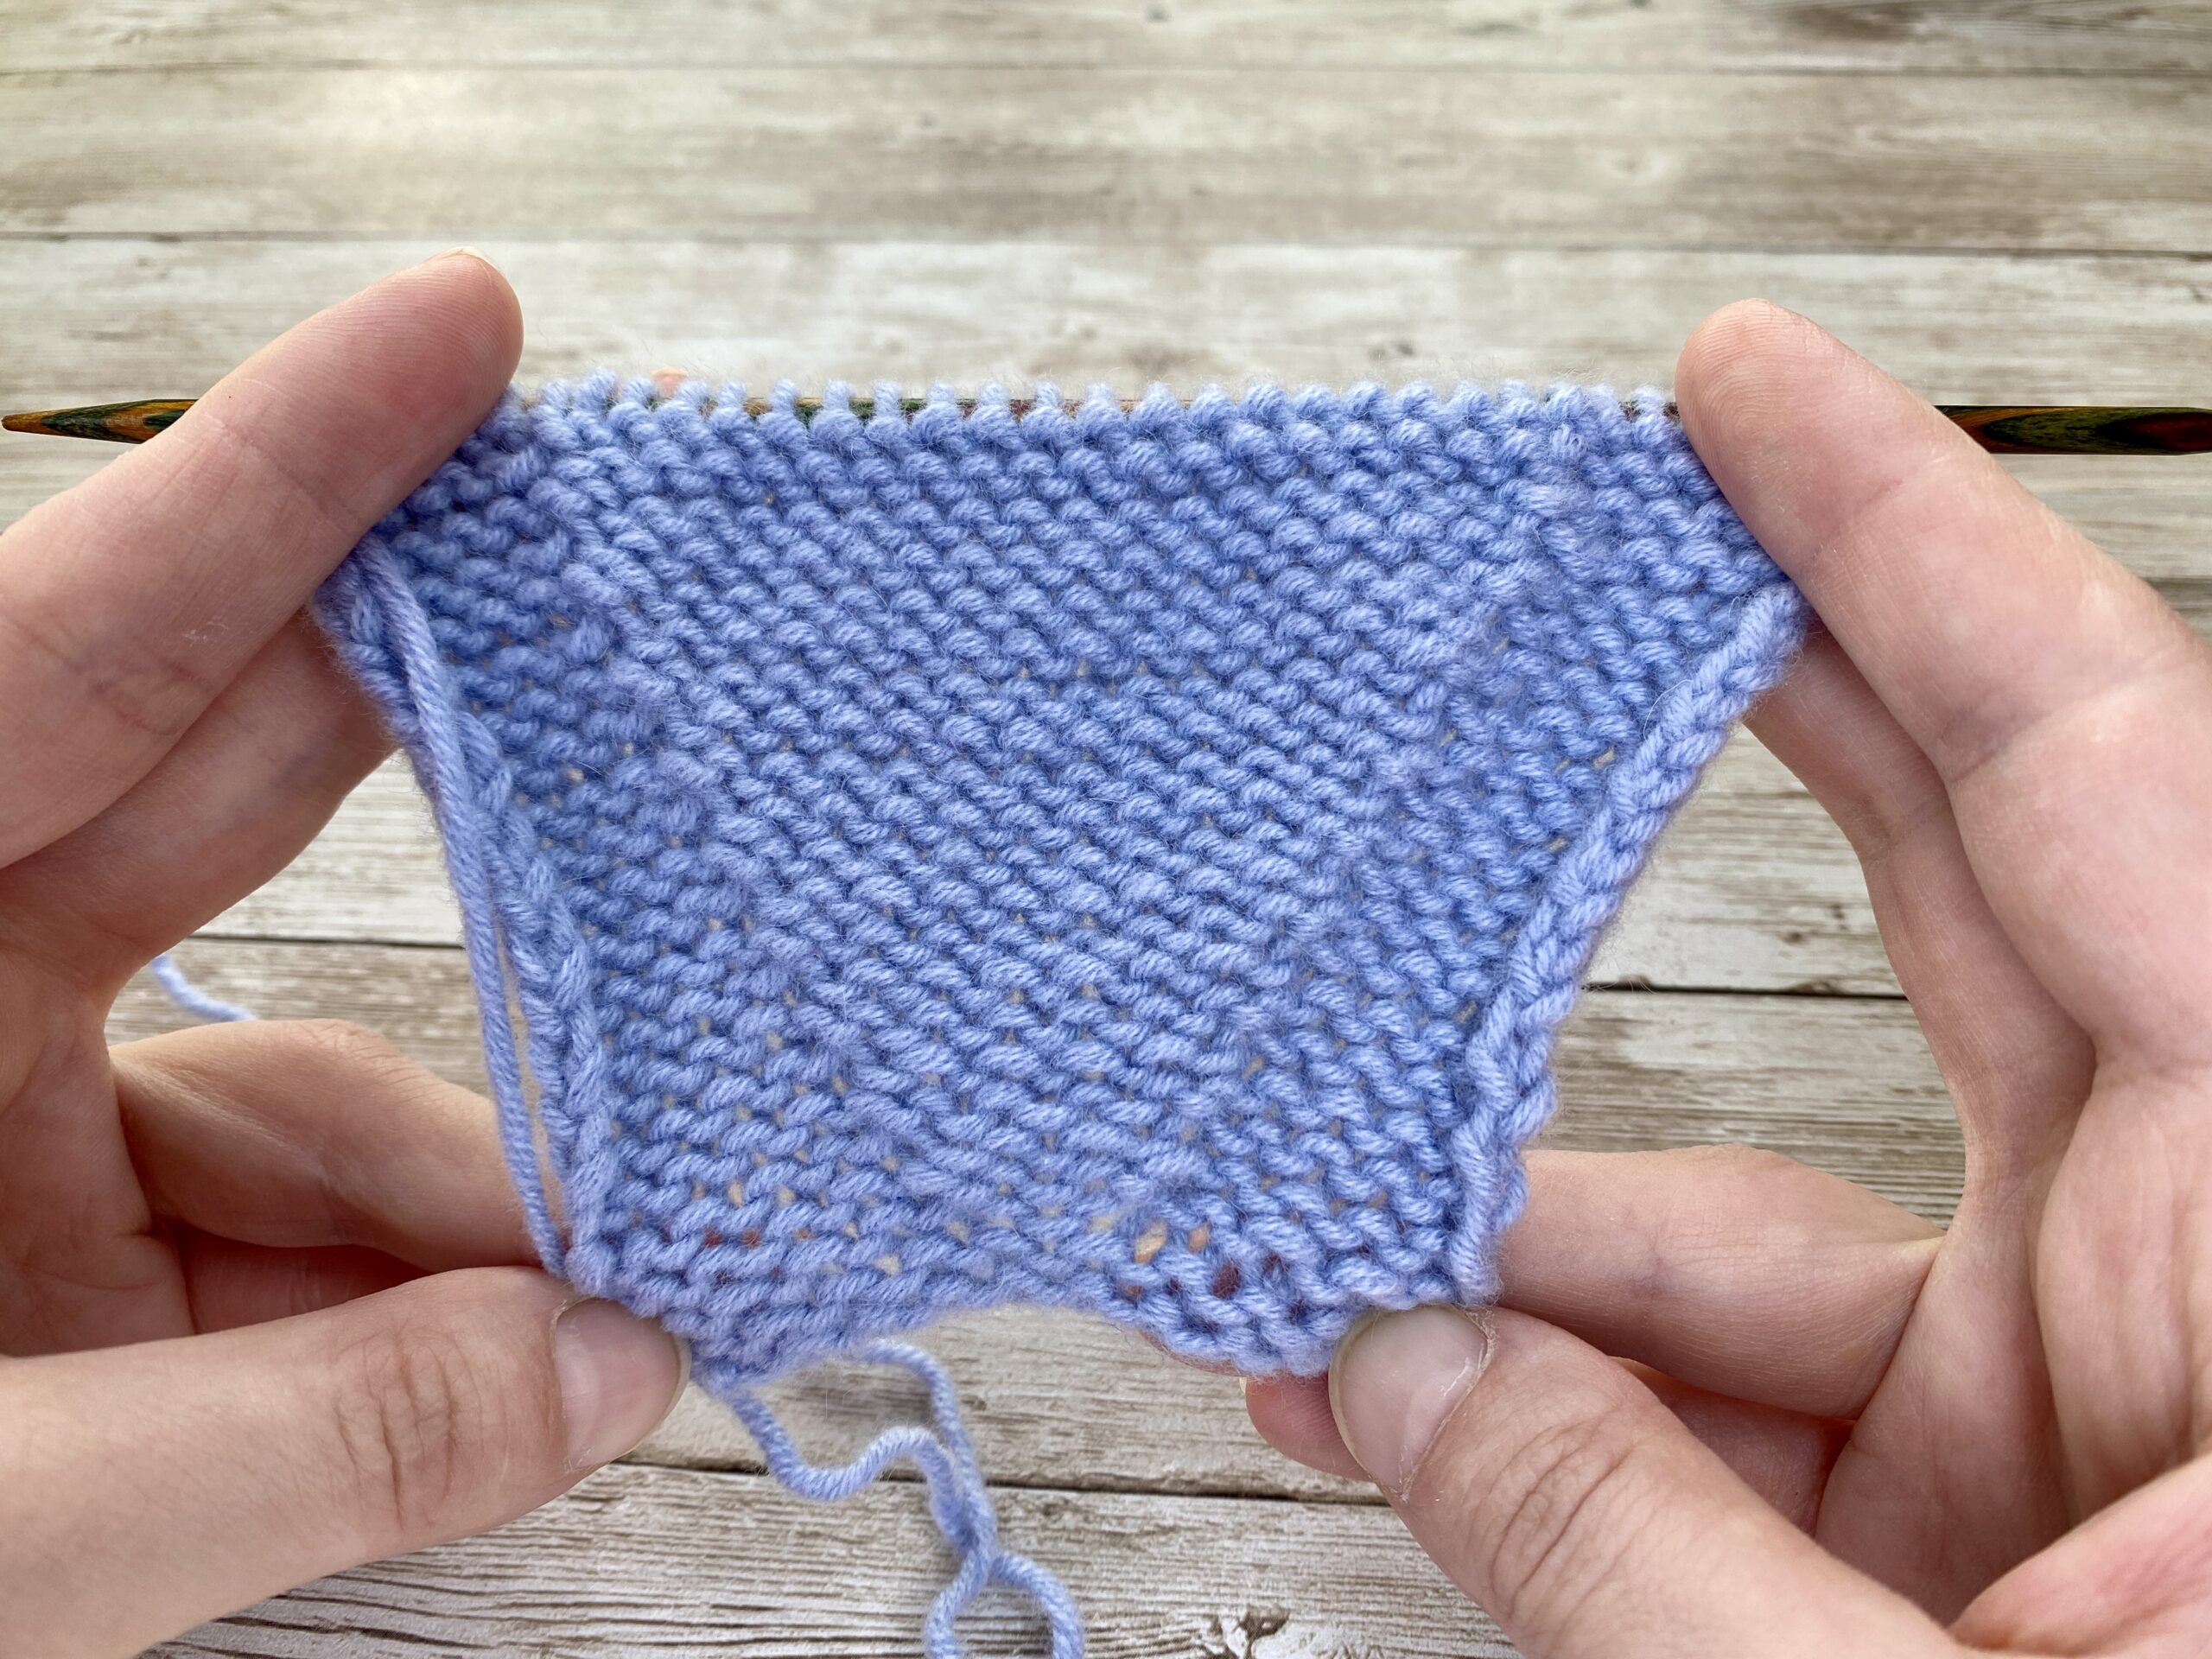
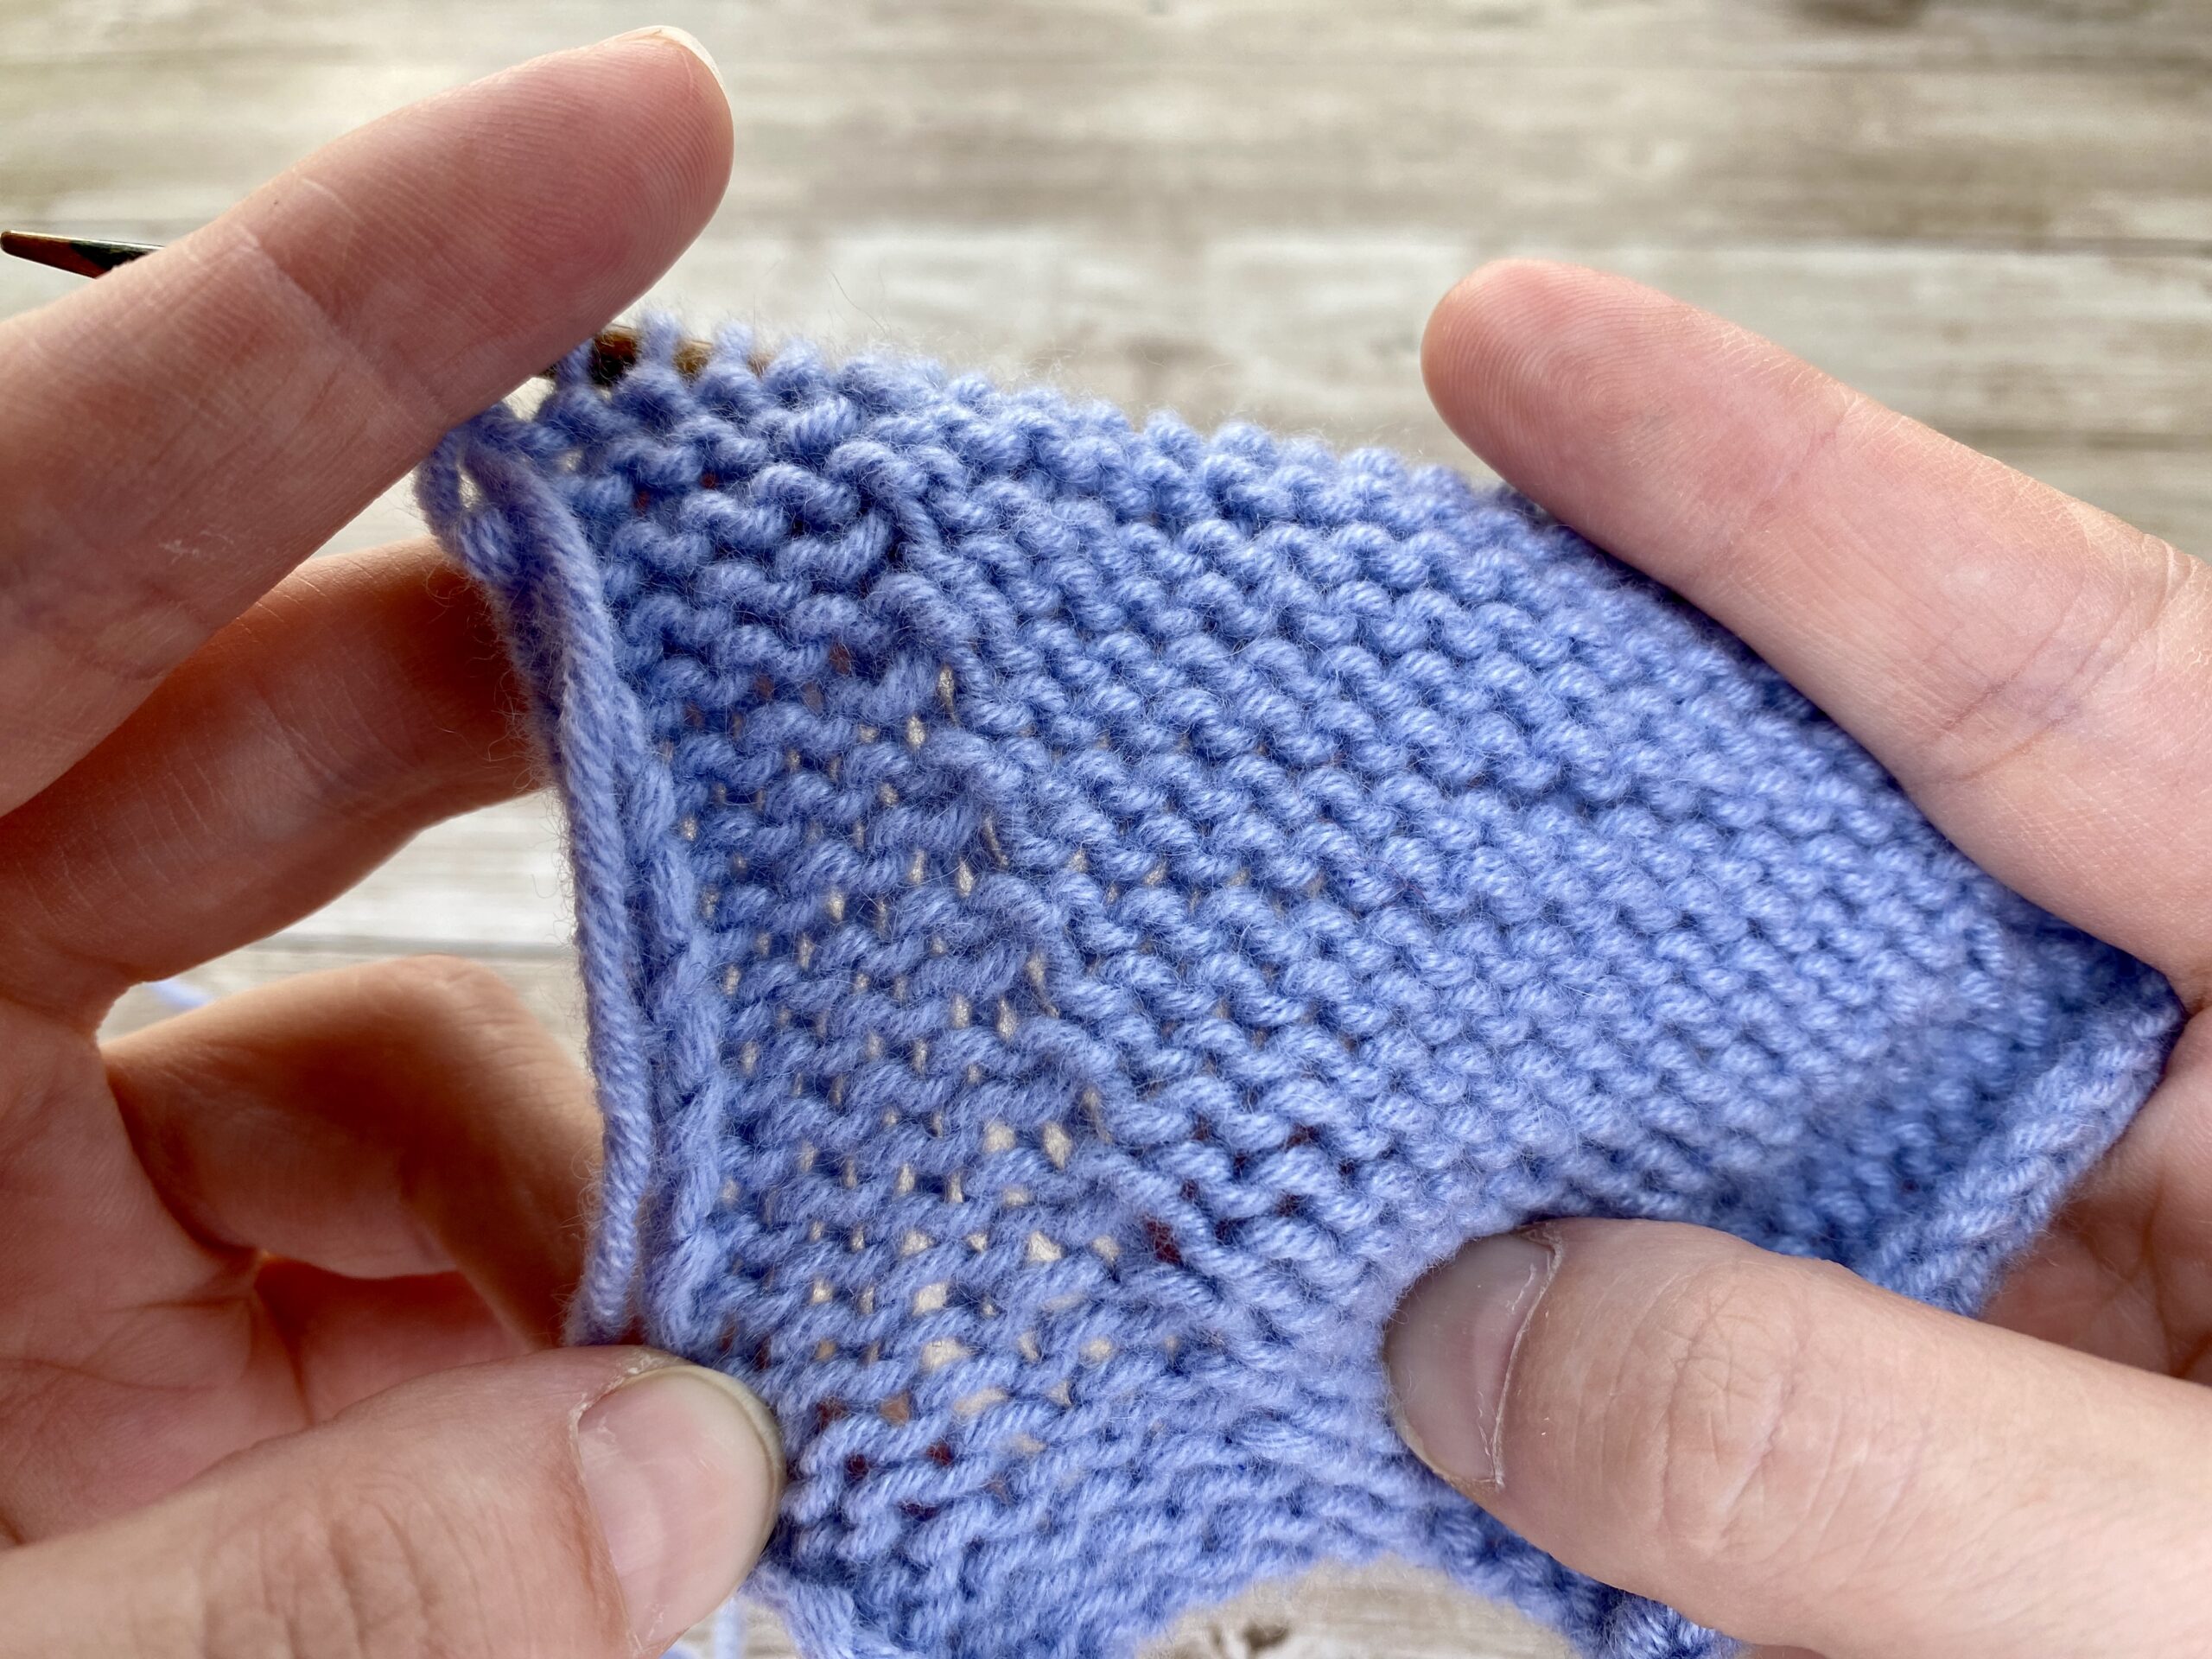
Right Lifted Purl Increase, there are no holes in the fabric |
Left Lifted Purl Increase, there are no holes in the fabric |
When to Use Lifted Increases
Lifted increases are one of the most discreet types of increases because they use existing stitches from previous rows. This makes them ideal for projects where you don’t want the increases to stand out, such as:
- Reverse stockinette stitch: Lifted increases on the purl side are just as subtle and clean.
- Shaping on the Wrong Side
- Avoiding Holes on the Purl Side
- Reversible Projects
How to Work a Right Lifted Purl Increase (RLPI)
The RLPI is just as easy:
-
Find the stitch directly below the first stitch on your left needle.
-
Insert your left needle into the loop of that stitch from below. (You can also bring the loop onto your needle and knit it through the back loop, or twist it around on your needle. I will explain this in detail in the video tutorial.)
-
Lift the loop onto your left needle.
- Purl into this lifted loop, through the back loop
-
Drop the loop from your needle.
When you flip your work to the knit side, this increase will look like a Left Lifted Knit Increase (LLI).
 |
 |
 |
|
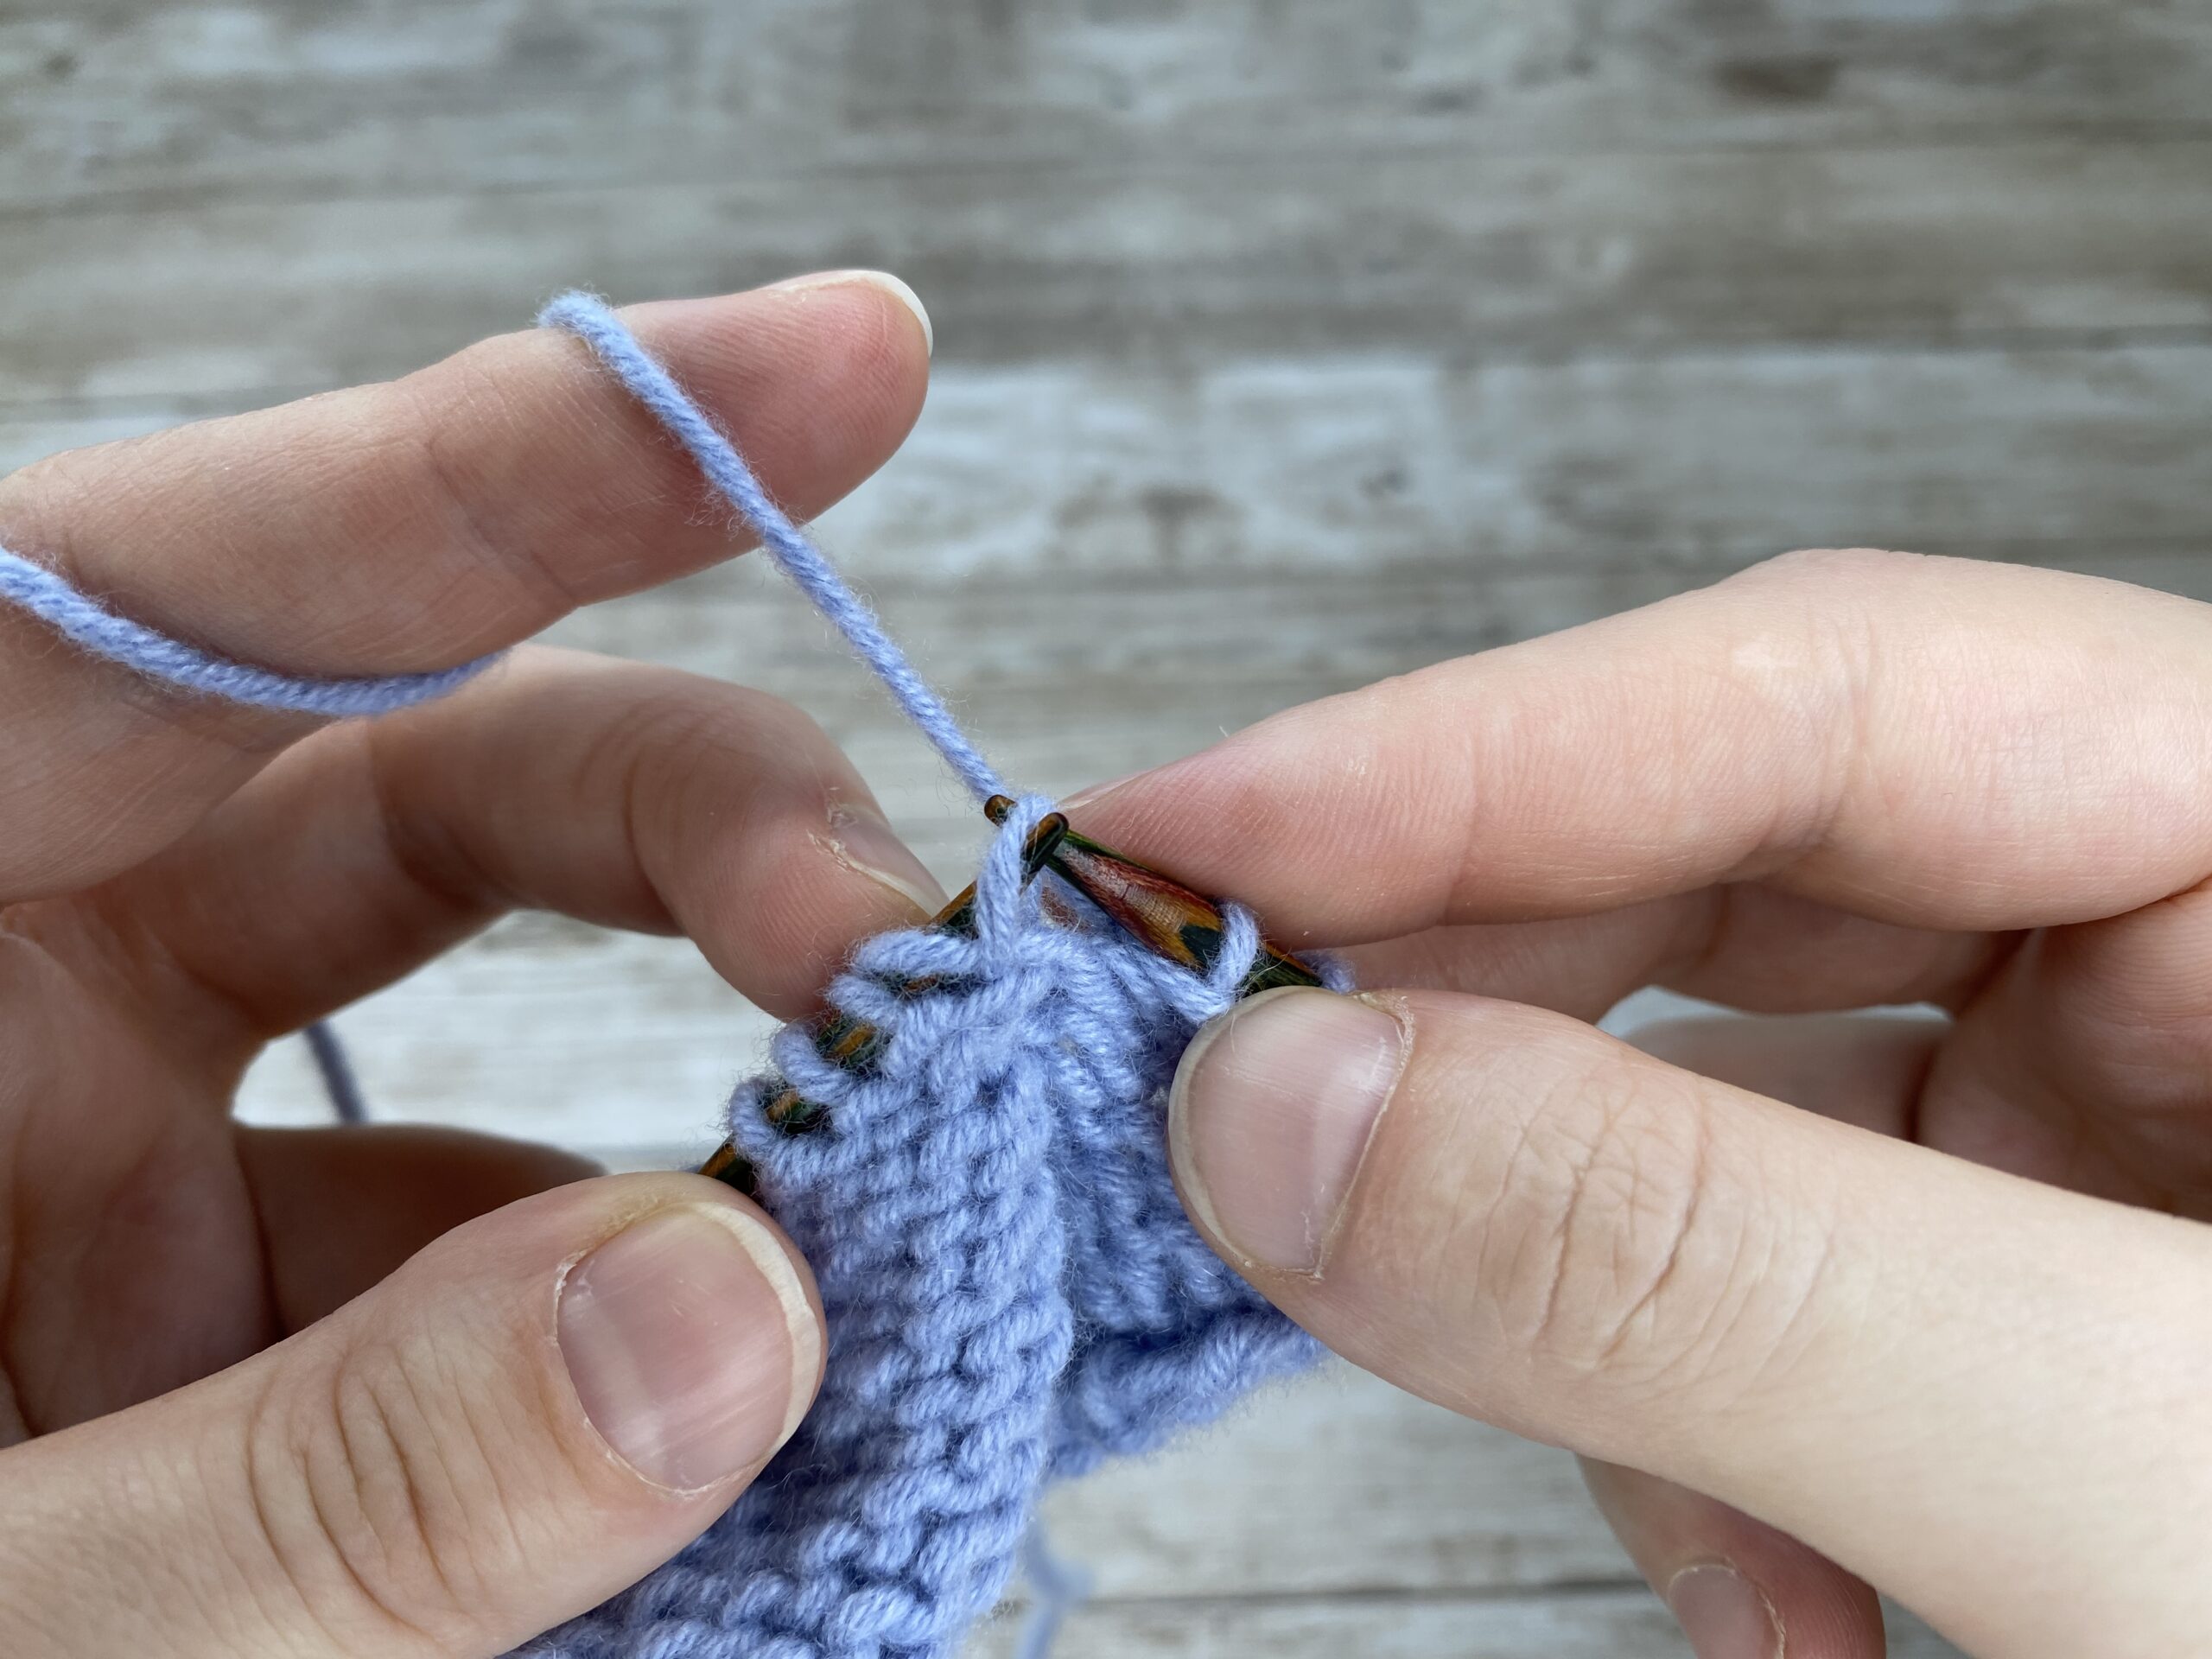
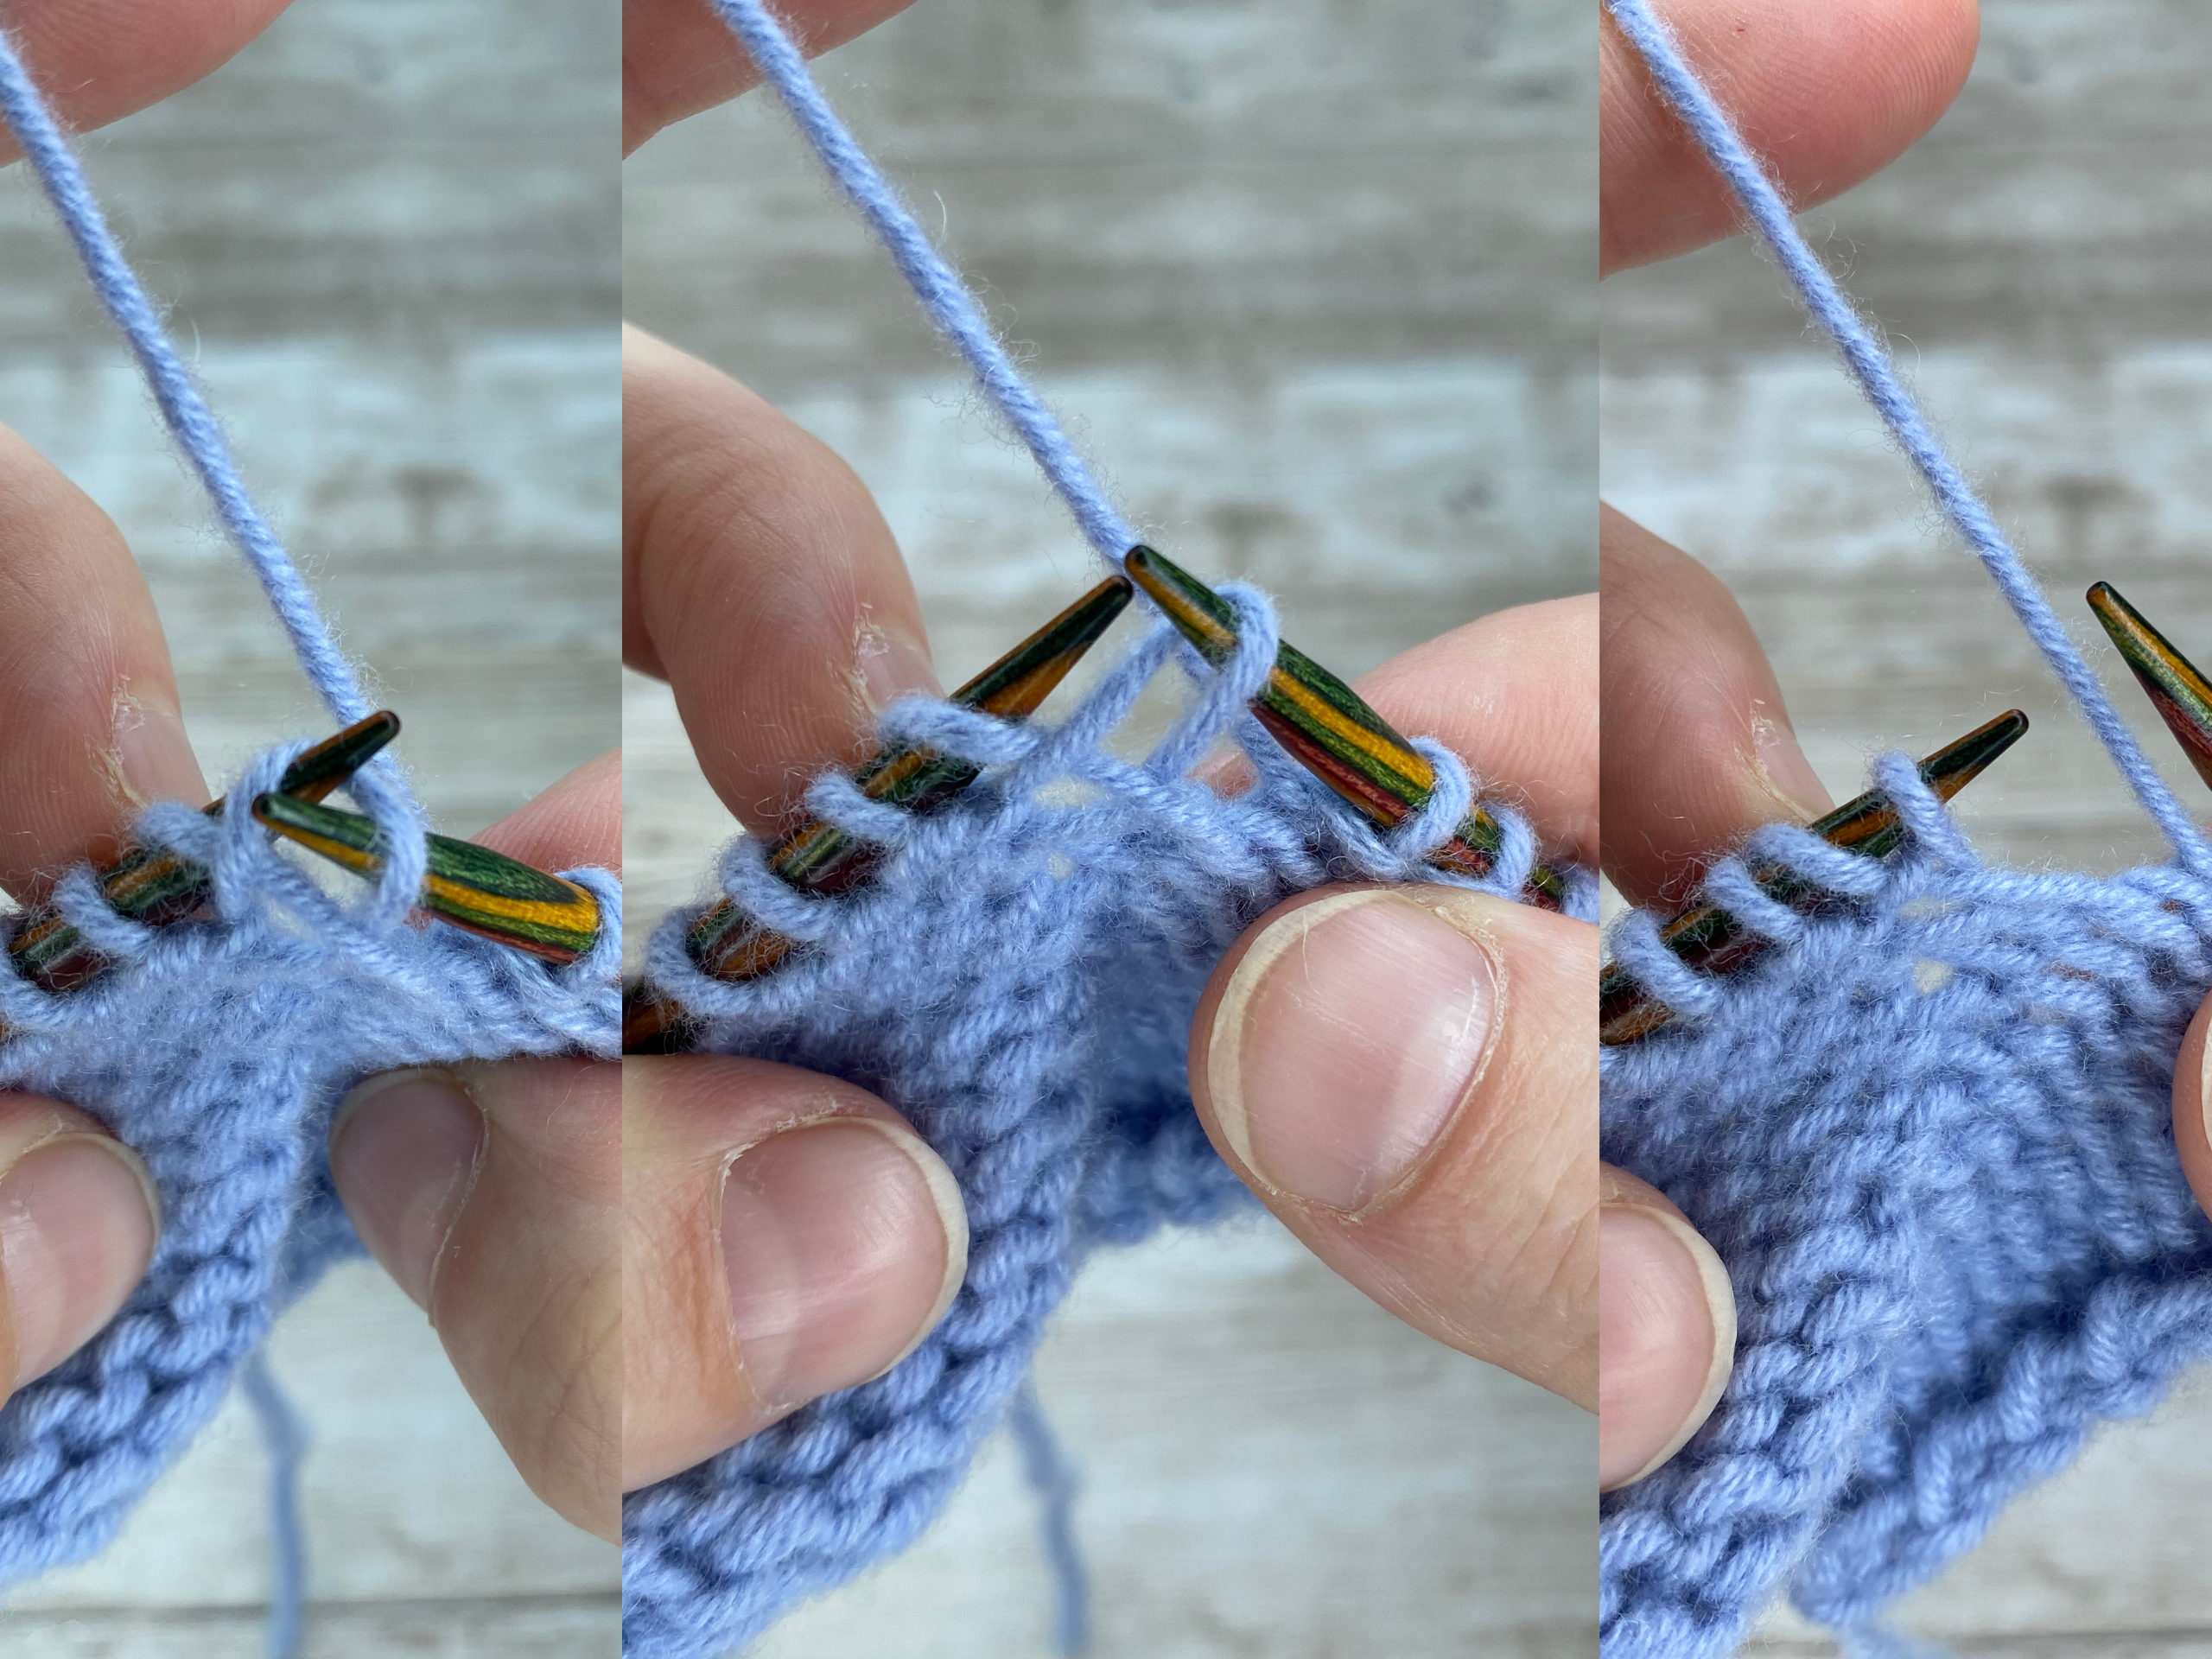
Find the stitch directly below the first stitch on your left needle |
Insert your left needle into the loop of that stitch from below |
Lift the loop onto your left needle |
 |
 |
 |
|
Purl into this lifted loop, through the back loop |
Slip the stitch off your needle |
On the front, the increase was worked on the left side of your original stitch (In this picture: The second stitch from the left on your left needle is the newly made increase.) |
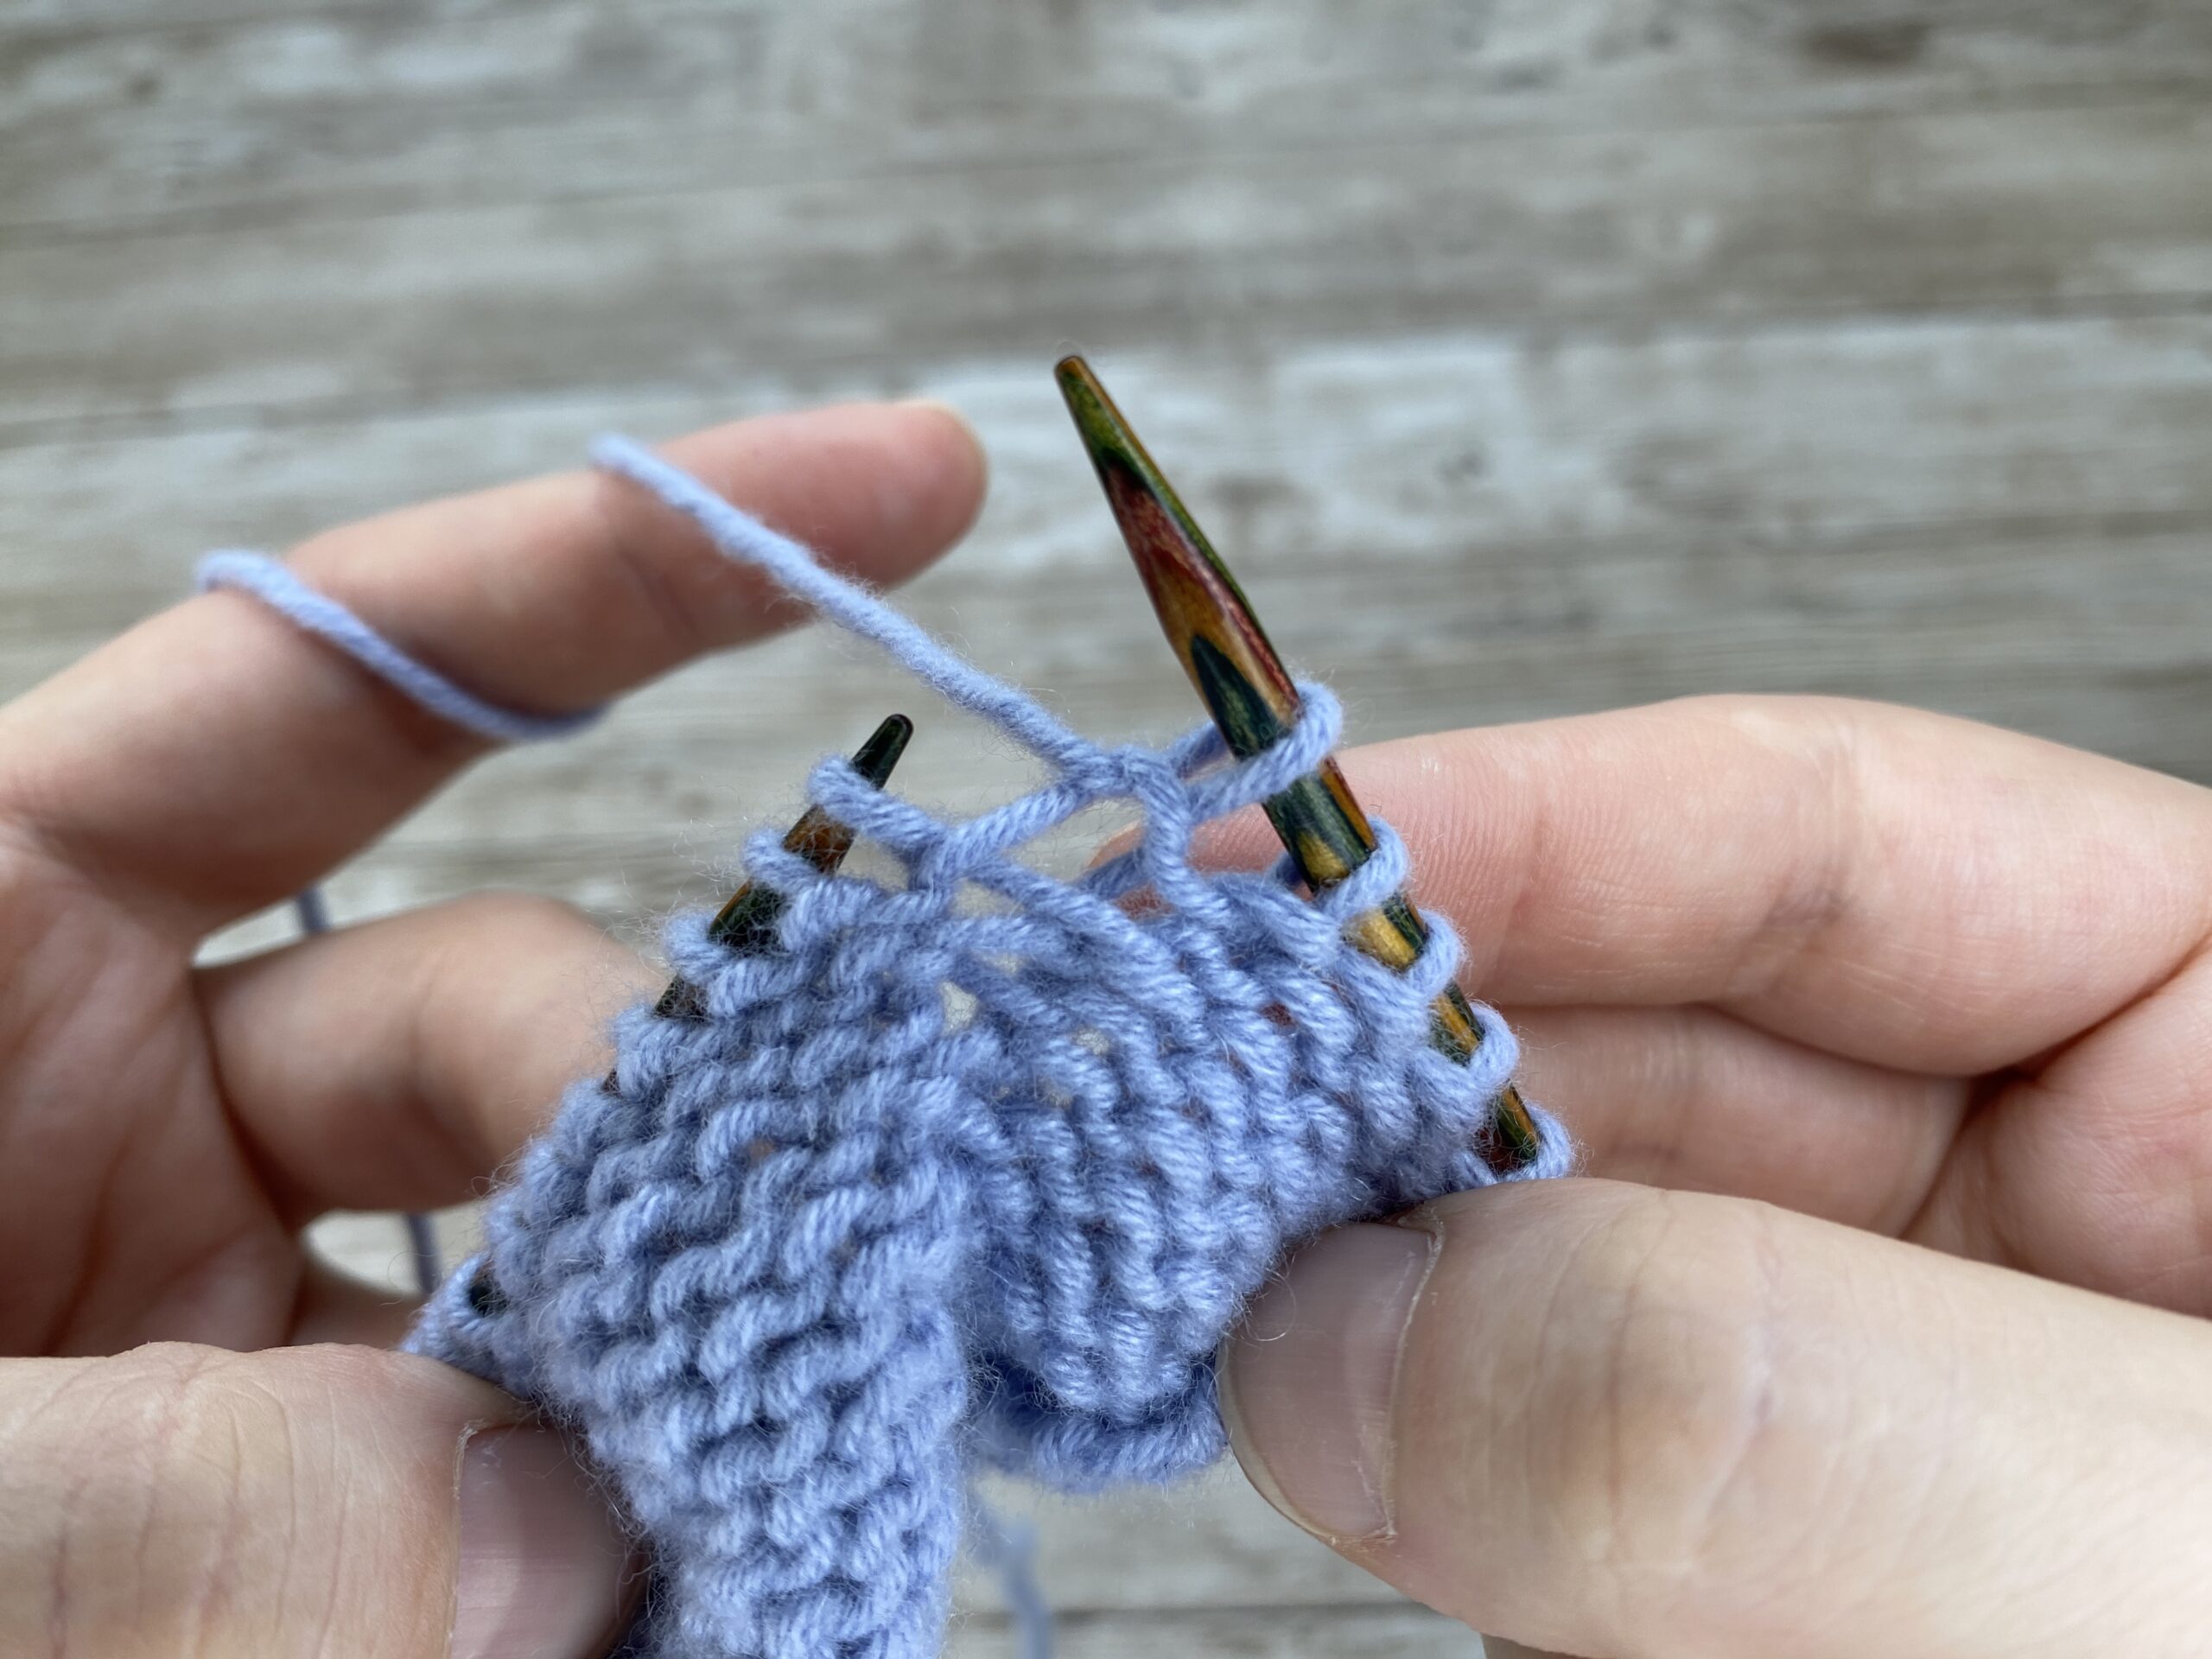
Another option is to bring the loop onto your needle and twist it around so that you can purl it like a regular stitch. When you lift the loop, you can insert your left needle underneath the lifted loop to bring it onto your needle. This way, you don’t have to untwist it. I demonstrate this final step in the video tutorial, which you can find at the end of this post.
|
|
 |
|
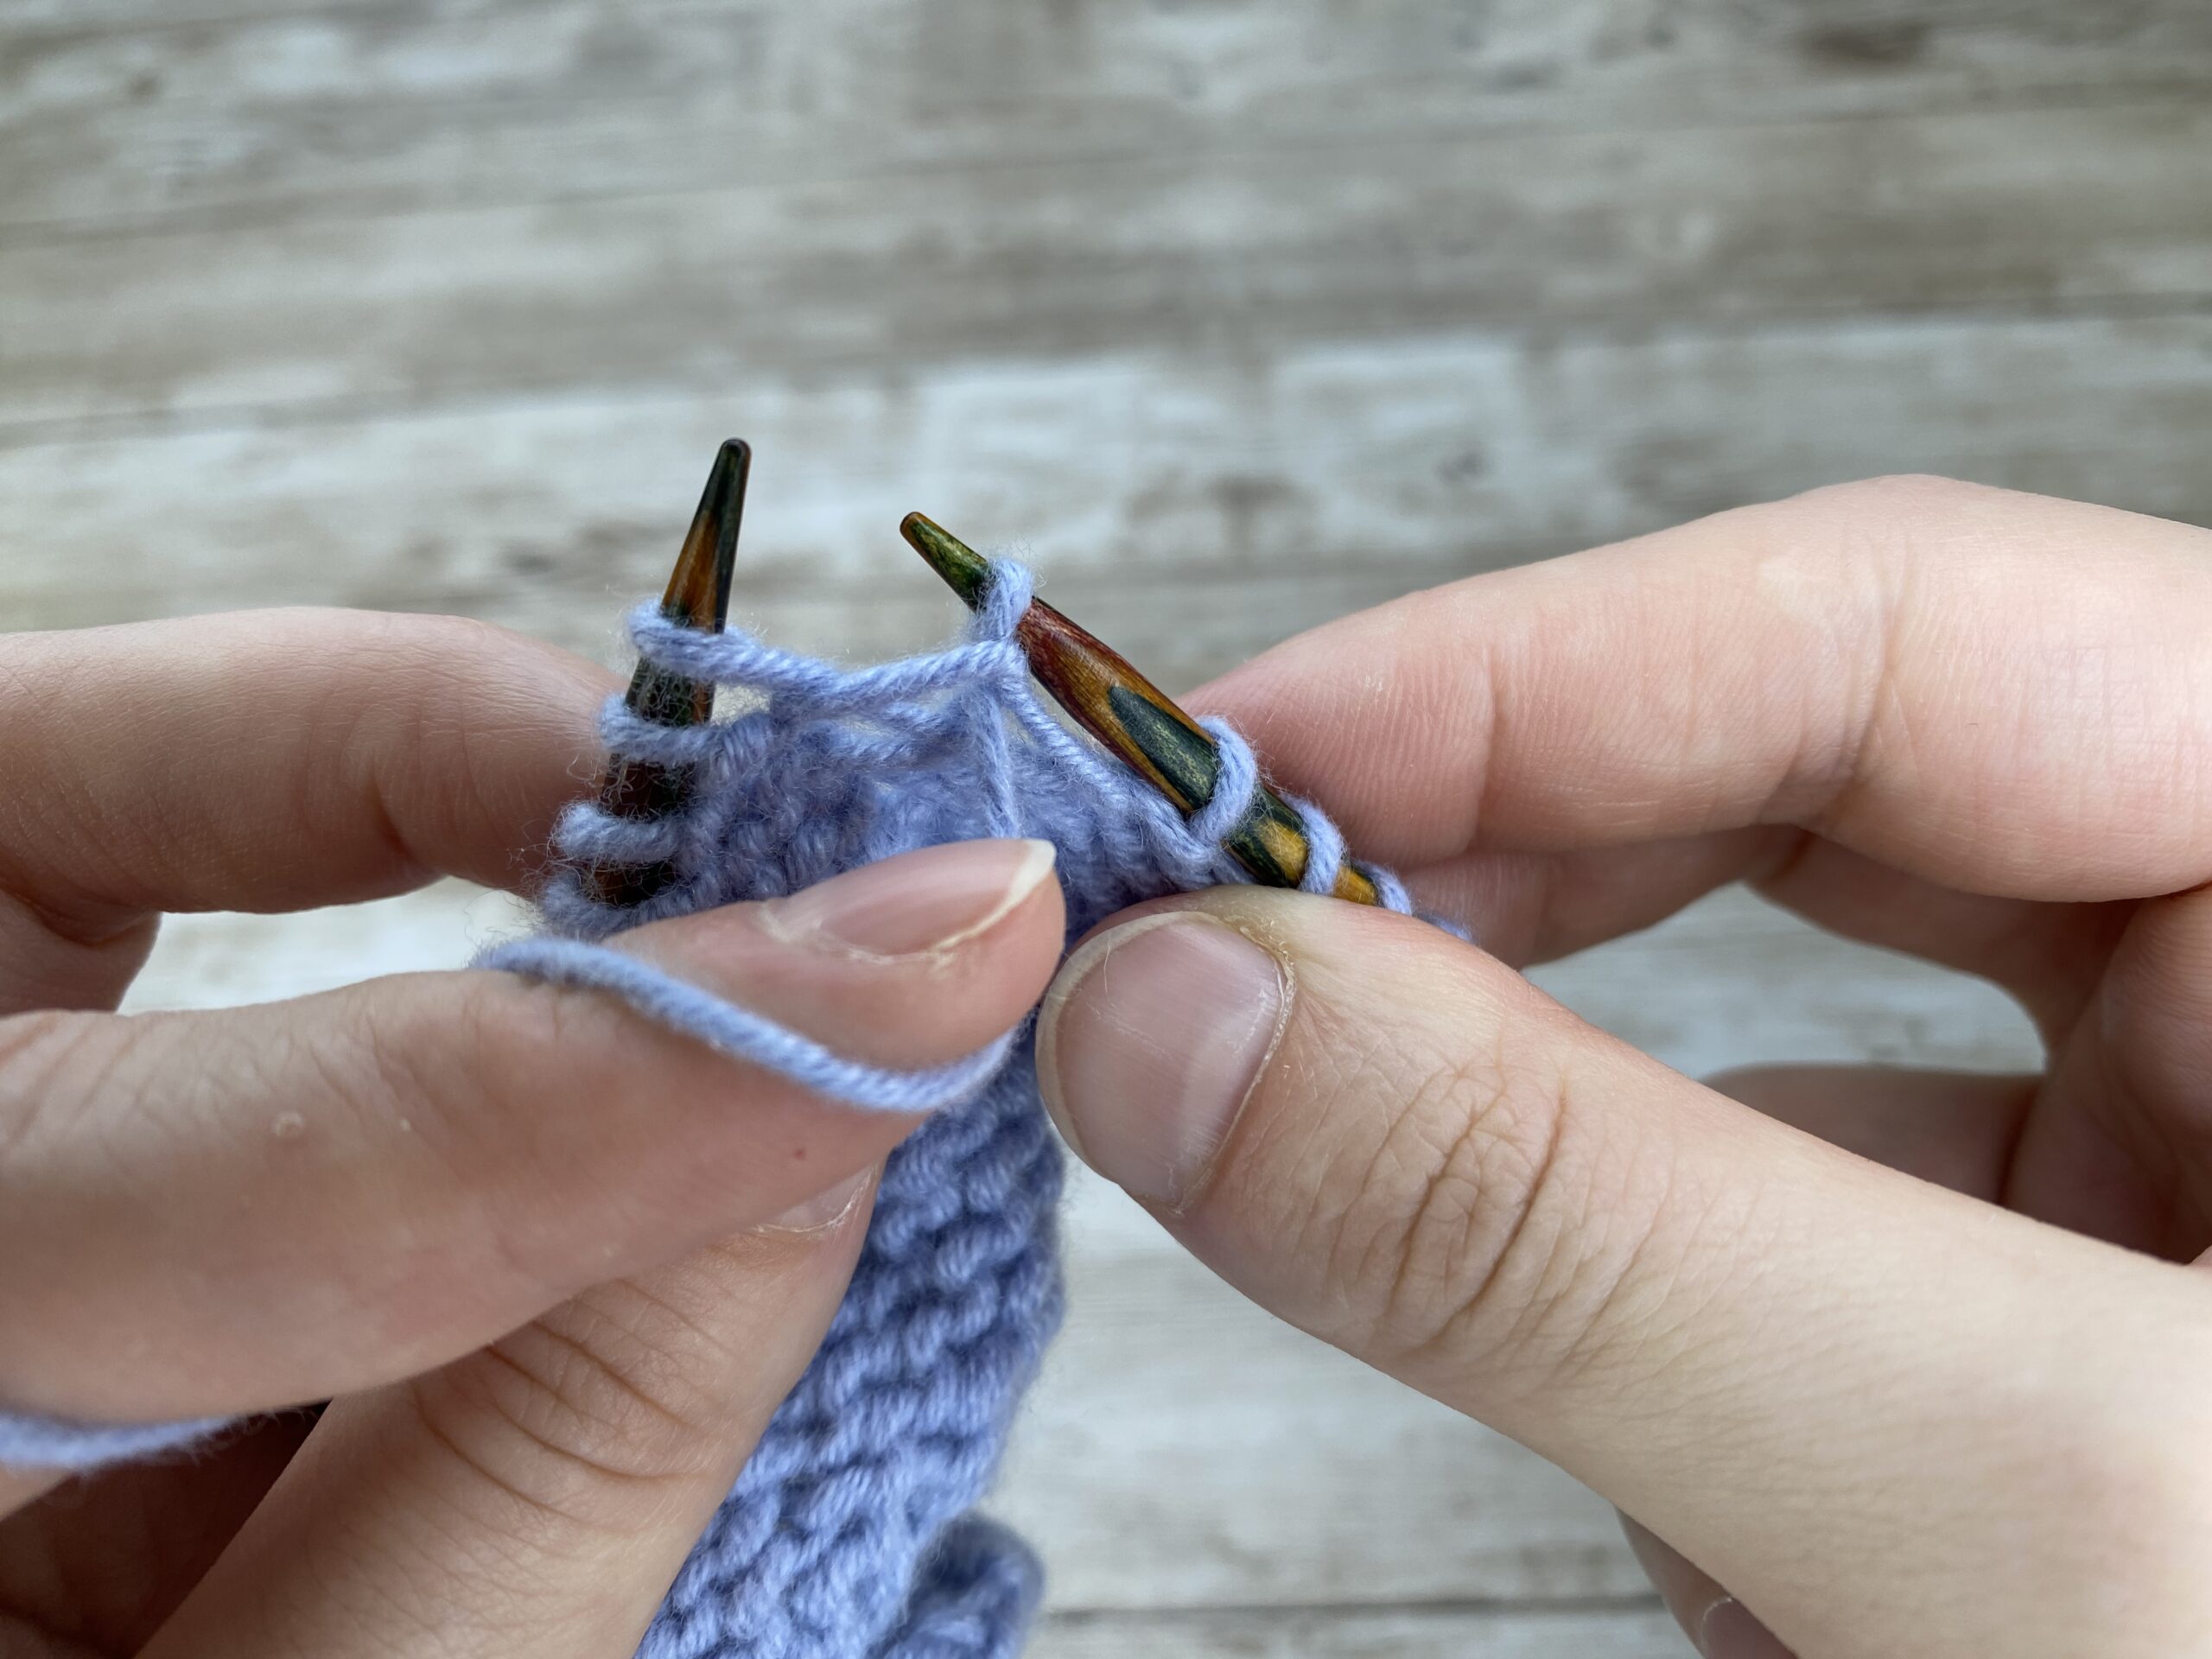
Find the stitch directly below the first stitch on your left needle and insert your left needle into the loop of that stitch from below |
Lift the loop onto your left needle |
Insert your needle through the back loop and slip the stitch off the needle, then slip the stitch purlwise back onto your left needle |
 |
 |
|
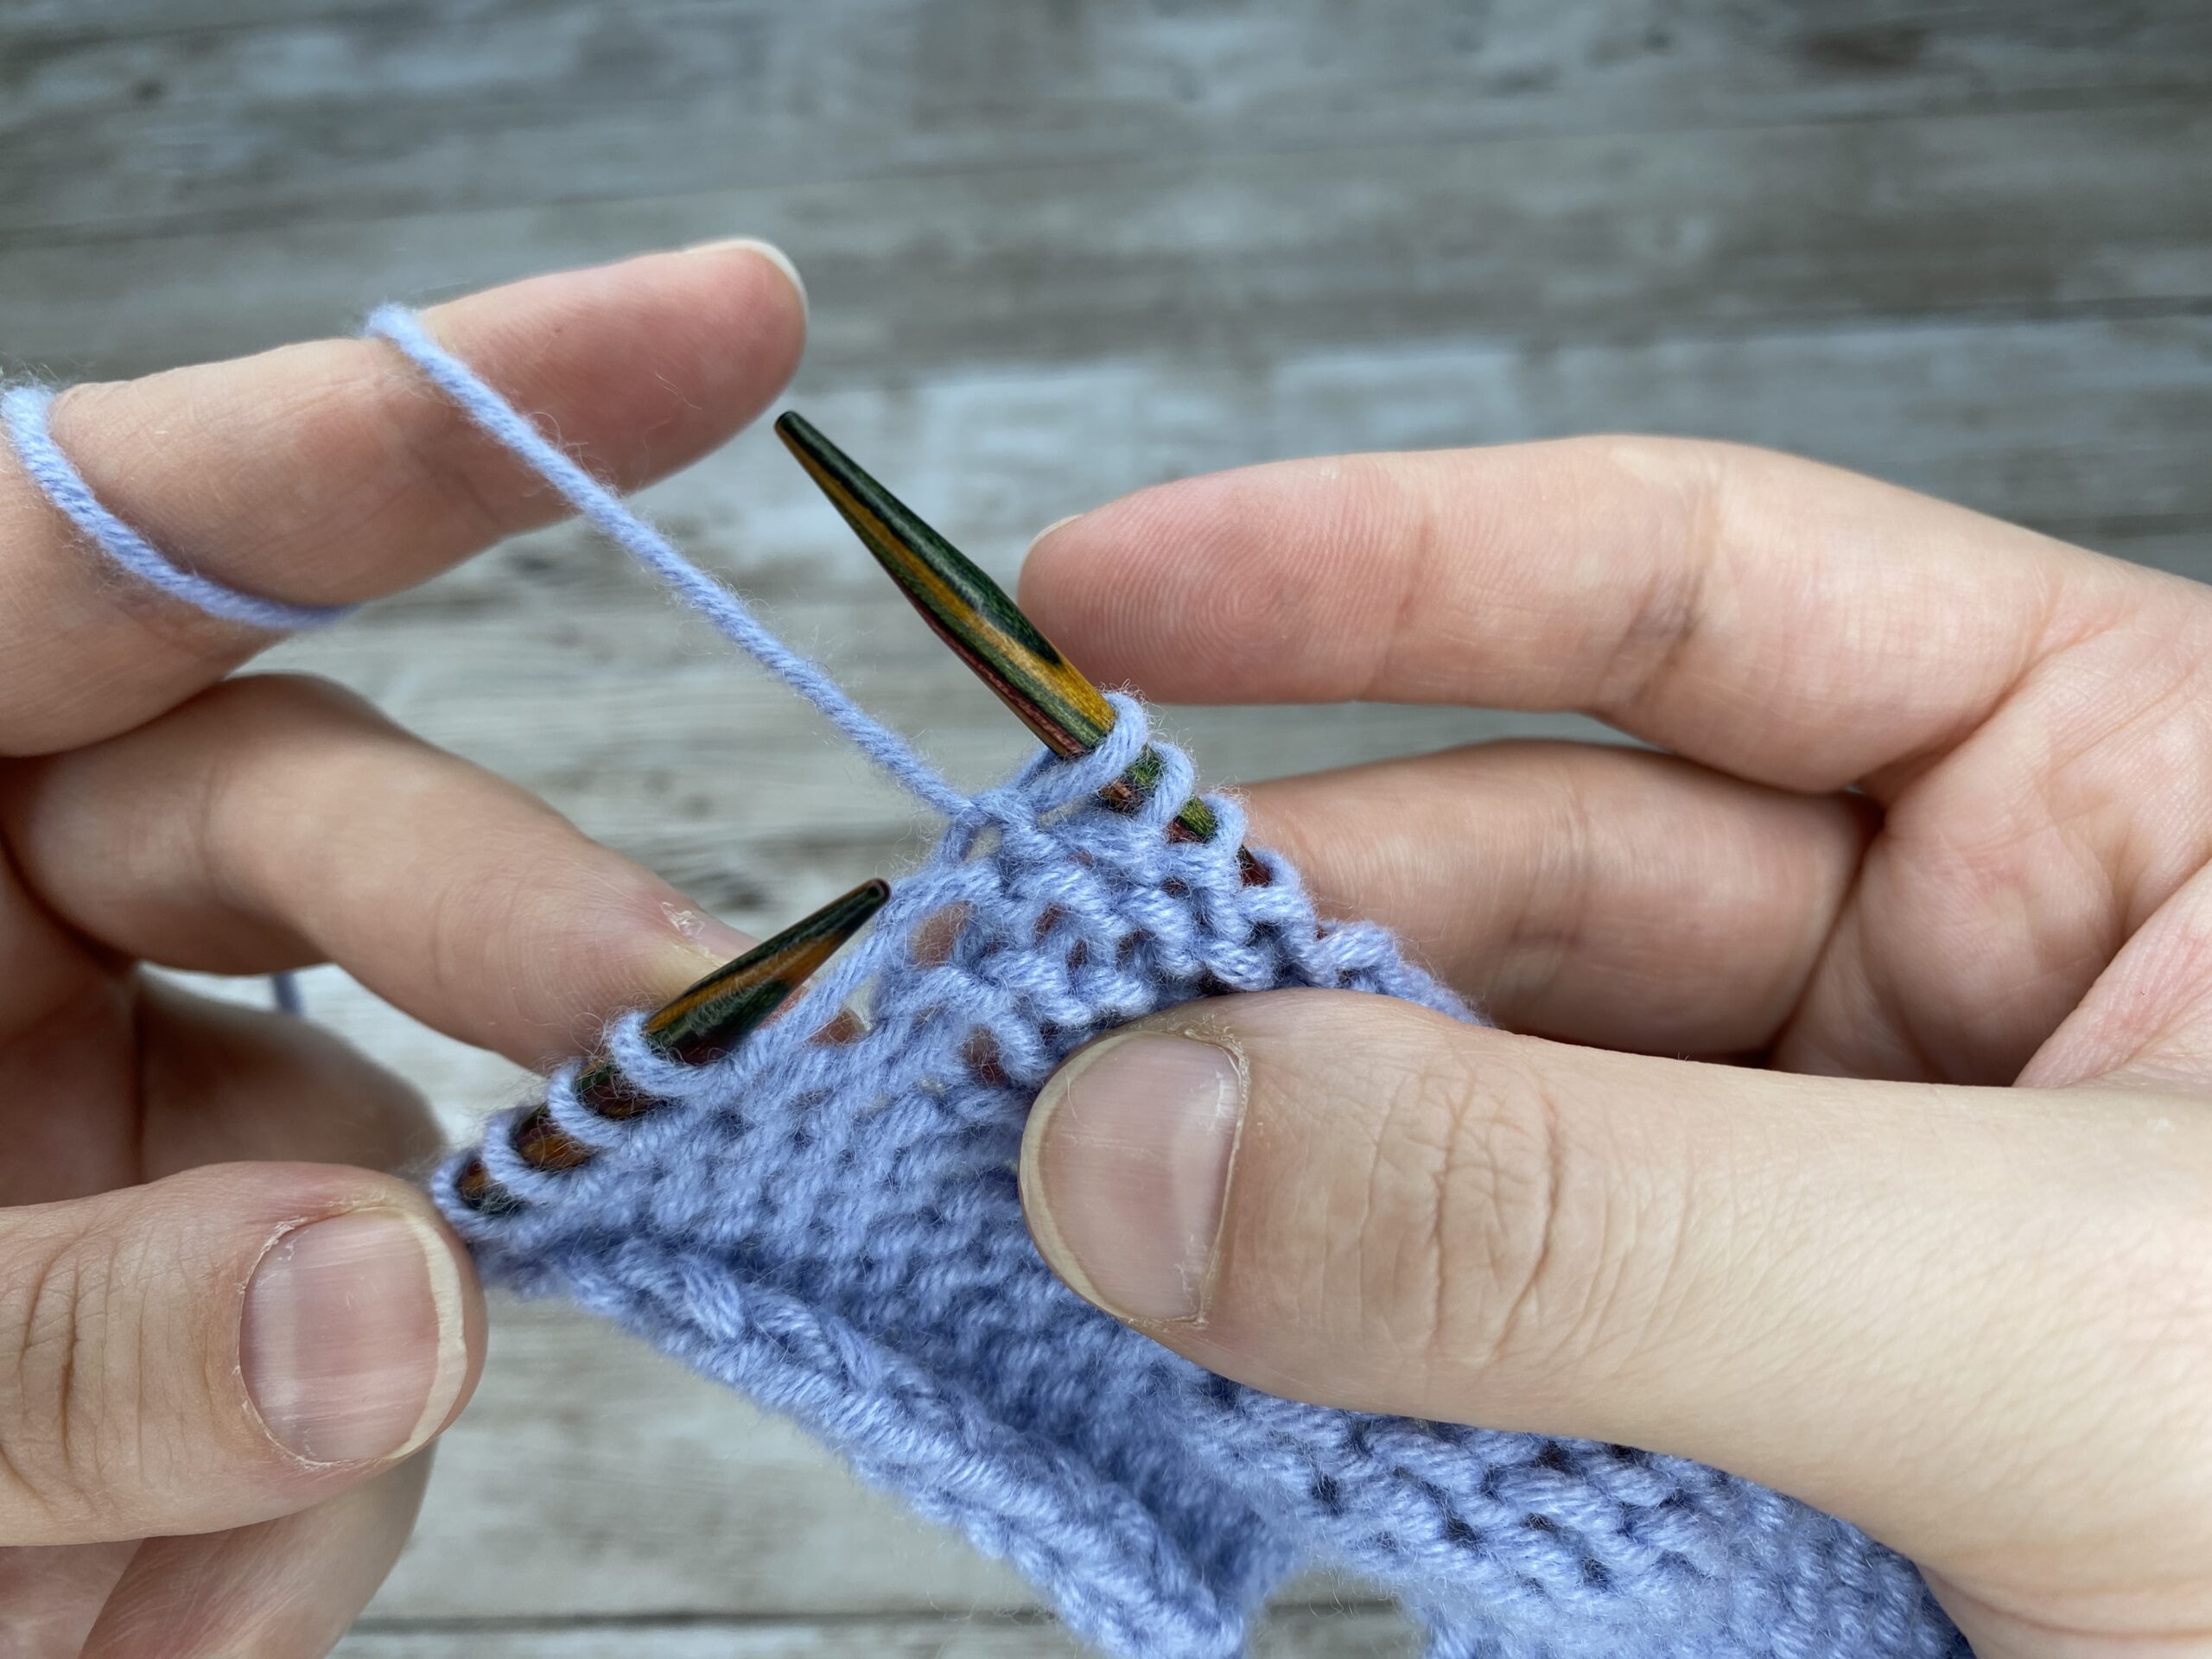
Purl this stitch normally... |
...and slip it off your needle |
The third and final option might be a bit trickier and may require more practice. It depends on your skill level, as experienced knitters will likely find it much easier to work than beginner knitters.
 |
 |
 |
|
Find the stitch directly below the first stitch on your left needle, insert your left needle into the loop of that stitch from above |
Without lifting it onto your needle... |
...you will now yarn over and purl it directly. Treat this loop as if it were a normal stitch. |
How to Work a Left Lifted Purl Increase (LLPI)
Here’s how to do an LLPI step by step:
-
Find the stitch two rows below the first stitch on your right needle.
-
Insert your left needle into the loop of that stitch from below.
-
Lift the loop onto your left needle.
-
Purl into this lifted loop, just like you would with a normal purl stitch.
-
Drop the loop from your needle.
And that’s it! When you flip your work to the knit side, this increase will look like a Right Lifted Knit Increase (RLI).
 |
 |
 |
|
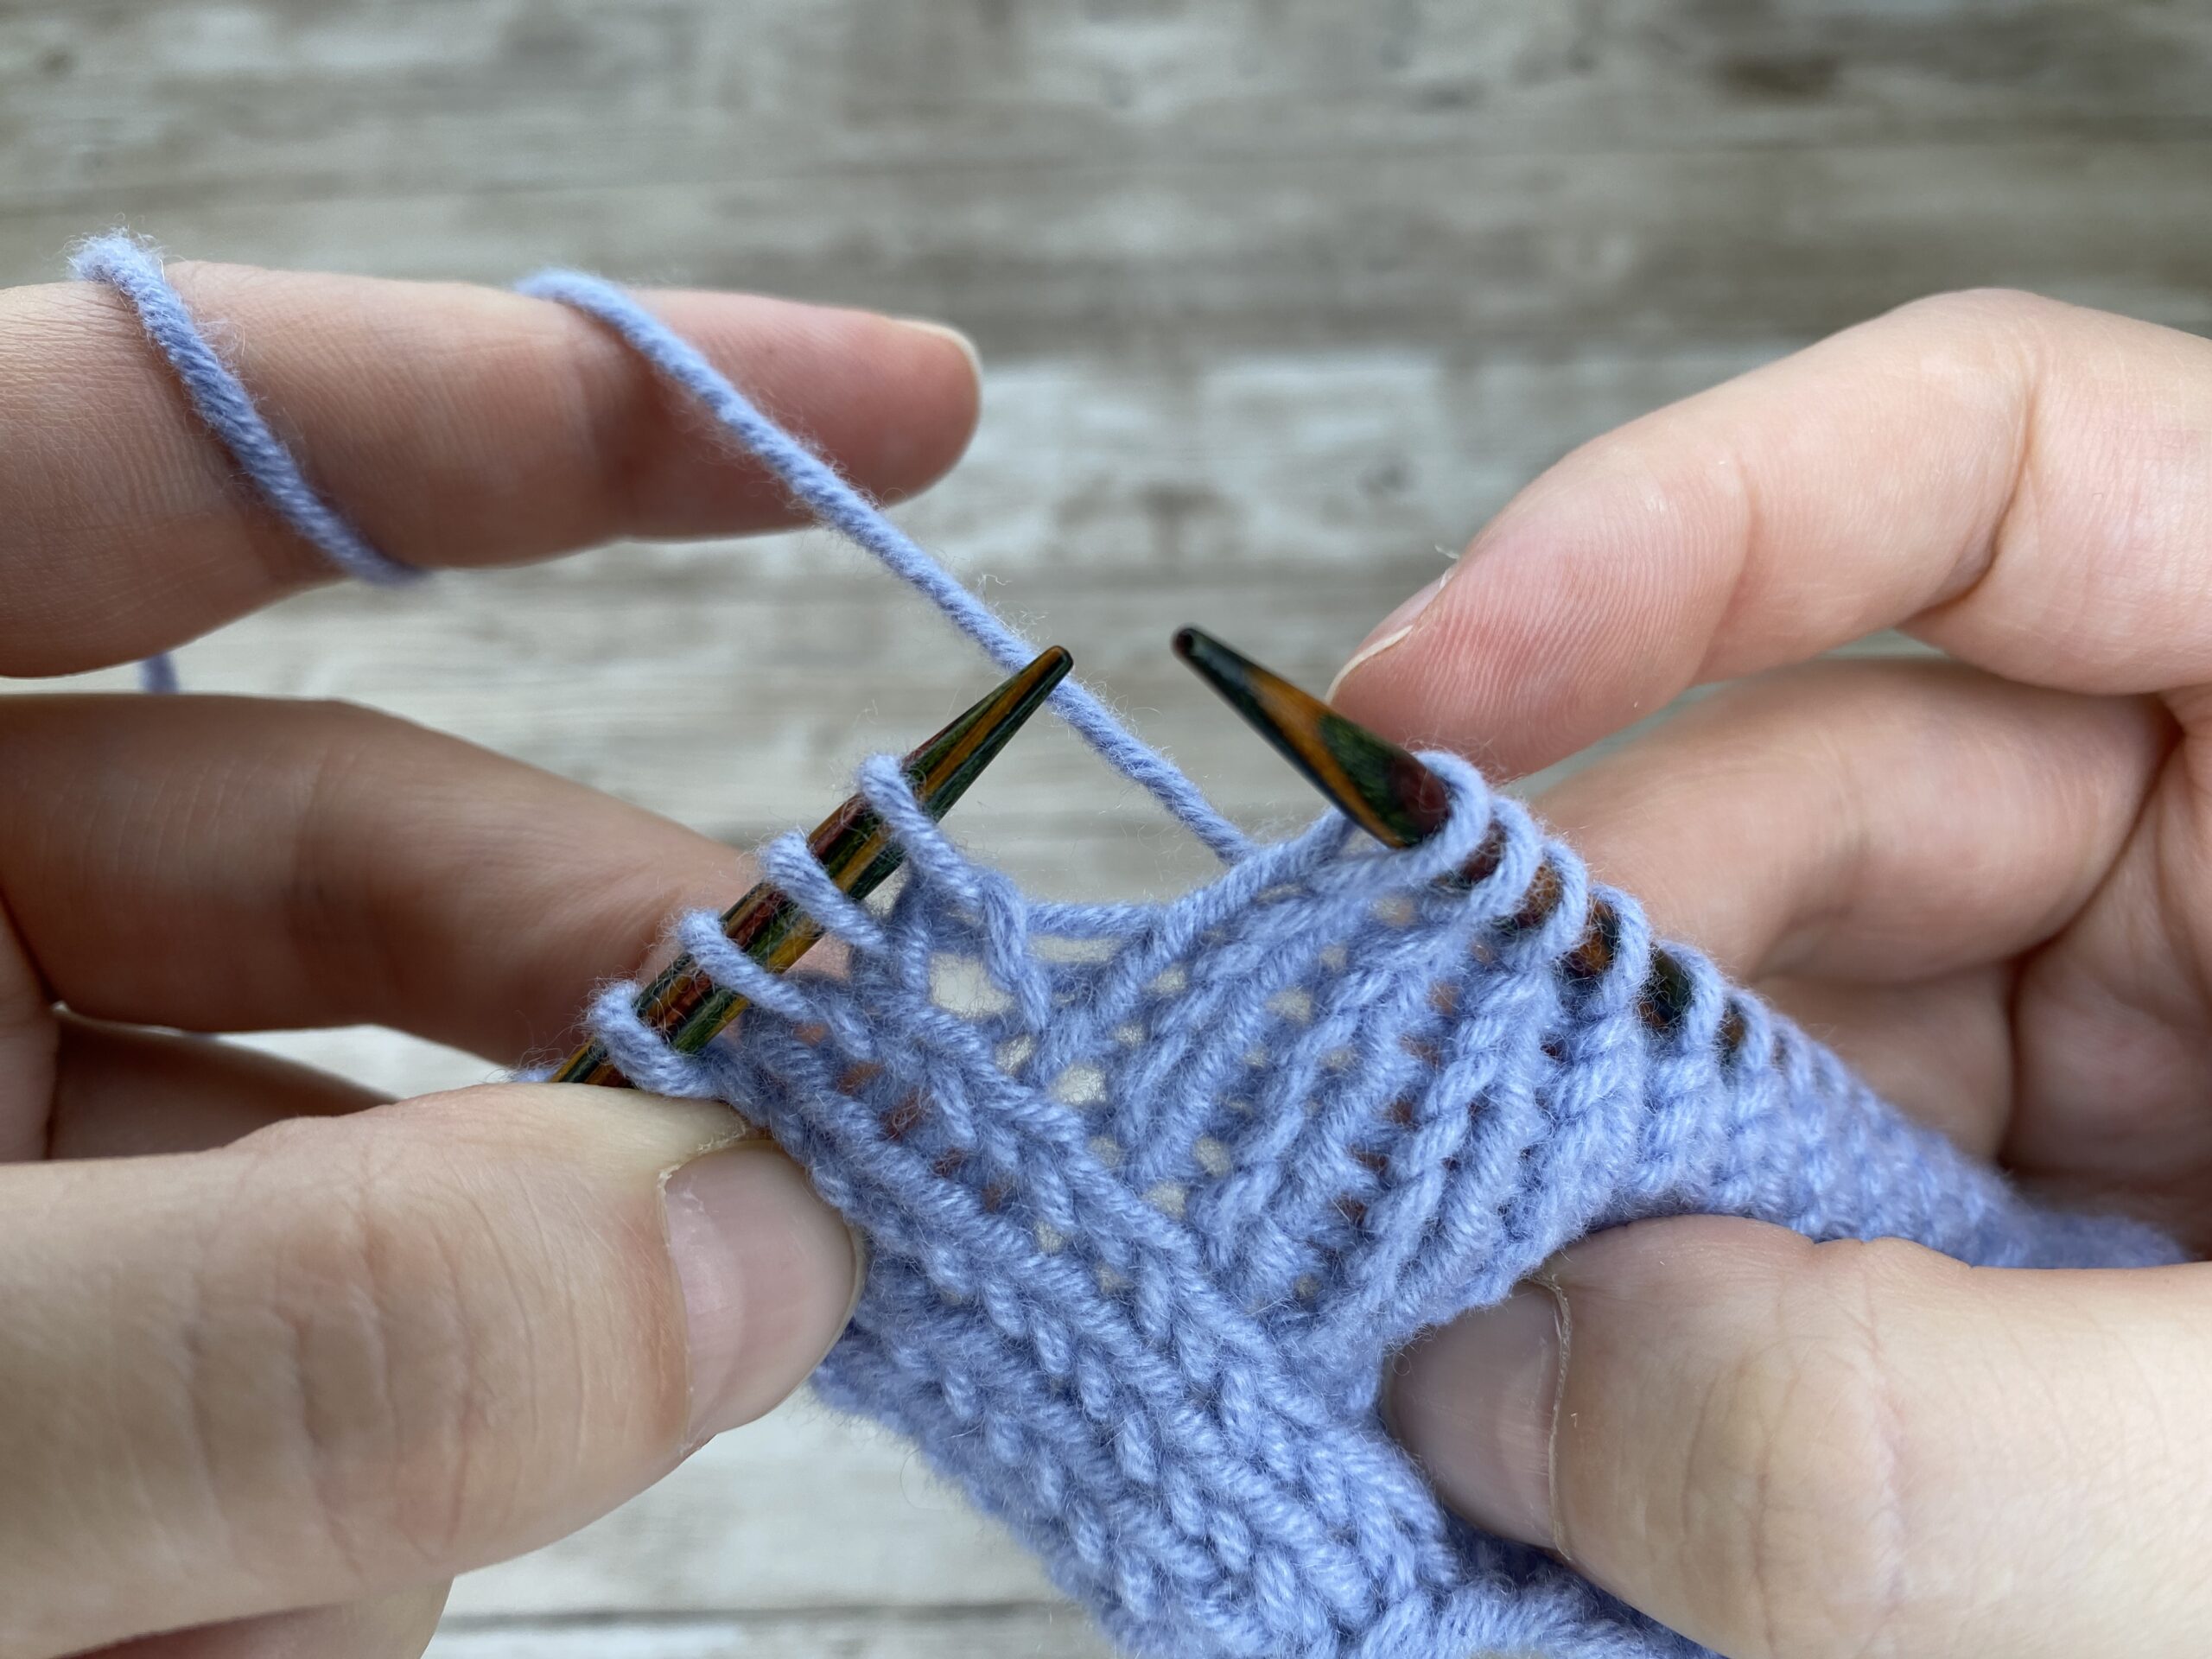
Find the stitch two rows below the first stitch on your right needle |
Insert your left needle into the loop of that stitch from below |
Lift the loop onto your left needle |
 |
 |
 |
|
Purl into this lifted loop, just like you would with a normal purl stitch |
On the knit side of your swatch, you can see that the new stitch was worked on the right side of the original stitch (In this picture: The first stitch on the right side of the right needle is the newly created increase) |
And this is how the increases look on the purlside |
Note
Here’s the key thing to remember: the direction of the increase on the purl side determines how it will look on the knit side. For example:
-
A Left Lifted Purl Increase (LLPI) on the purl side becomes a Right Lifted Knit Increase (RLI) on the knit side.
-
A Right Lifted Purl Increase (RLPI) on the purl side becomes a Left Lifted Knit Increase (LLI) on the knit side.
This mirroring effect is super handy when you’re working on patterns that require symmetrical shaping. You can use LLPI and RLPI on the purl side to perfectly mirror RLI and LLI on the knit side.
Conclusion
Lifted increases on the purl side are a valuable technique for knitters who want to shape their garments with an nearly invisible increase. While they may take some practice to master, their polished appearance make them a worthwhile addition to any knitter's skill set. Whether you're working on reverse stockinette, ribbing, cable patterns, or just want to have a beautiful raglan shaping, these increases are definitely meant for you.
A Little Way to Say Thanks
You Might Also Like


 |
|
Join the Cozy Corner Newsletter!
Hey there, creative soul! Welcome to the Yarn Enchantment Newsletter, where we celebrate all things cozy, crafty, and full of heart. Think of this as your friendly crafting companion - a little dose of inspiration delivered straight to your inbox, just for you. Inside, you’ll find: ✨ Exclusive patterns & tutorials - ideas you won’t find anywhere else (just for us!) 📚 Bookish crafts that bring your favorite stories to life 🧶 Tips and tricks to make your crafting journey smoother (and more fun!) 💌 Heartfelt musings on life, creativity, and the magic of making something with your own two hands Whether you’re knitting by the fire, brainstorming your next DIY project, or just looking for a little creative pick-me-up, this newsletter is here to cheer you on. Because let’s be honest - crafting isn’t just about the finished project; it’s about the joy, peace, and stories we create along the way. So grab a cup of tea, cozy up, and join me. Together, we’ll weave a little magic into everyday life - one stitch, one story, and one email at a time. P.S. I’m so glad you’re here. Let’s make something beautiful together! (Note: If you're using an ad blocker, you may encounter issues subscribing to the newsletter. To subscribe, please consider disabling your ad blocker.)
|
