M1LP (Make 1 Left Purl) and M1RP (Make 1 Right Purl)
May 26, 2024
Fluffy Daisy Cardigan Review: Flower Embroidery & Brioche Knitting
August 12, 2024Garden Light Cozy Pattern

Originally published on August 4, 2024
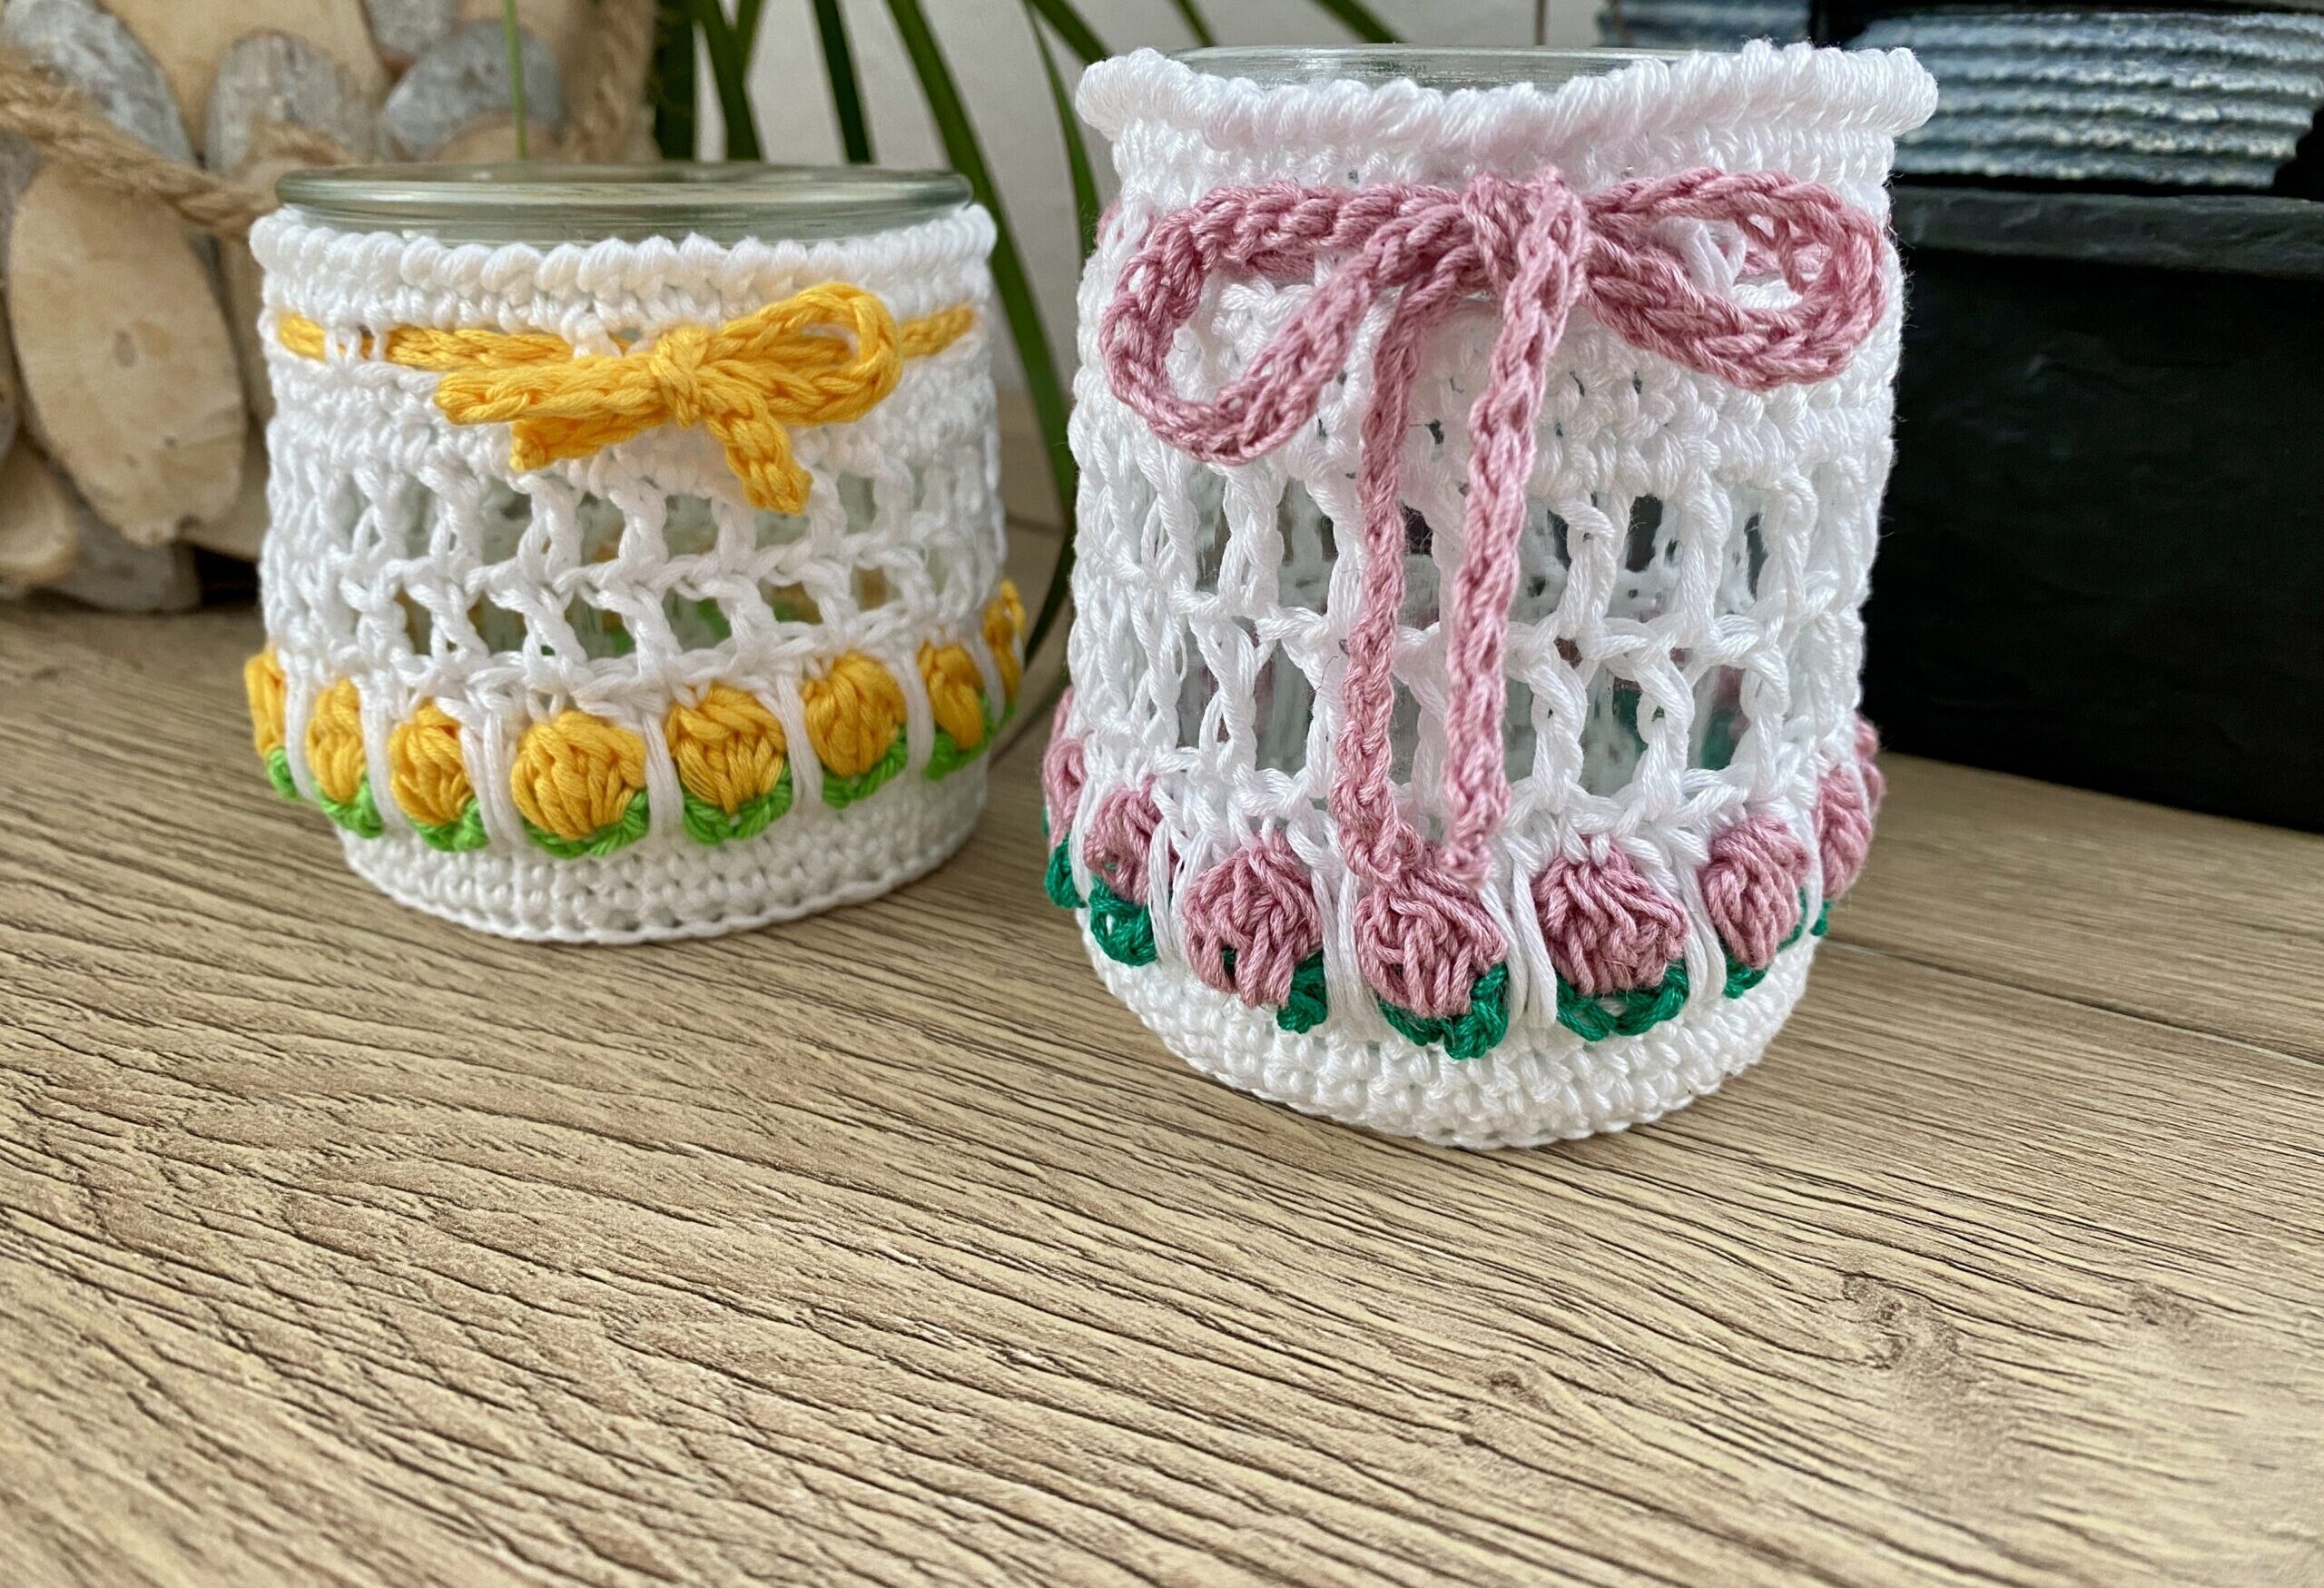
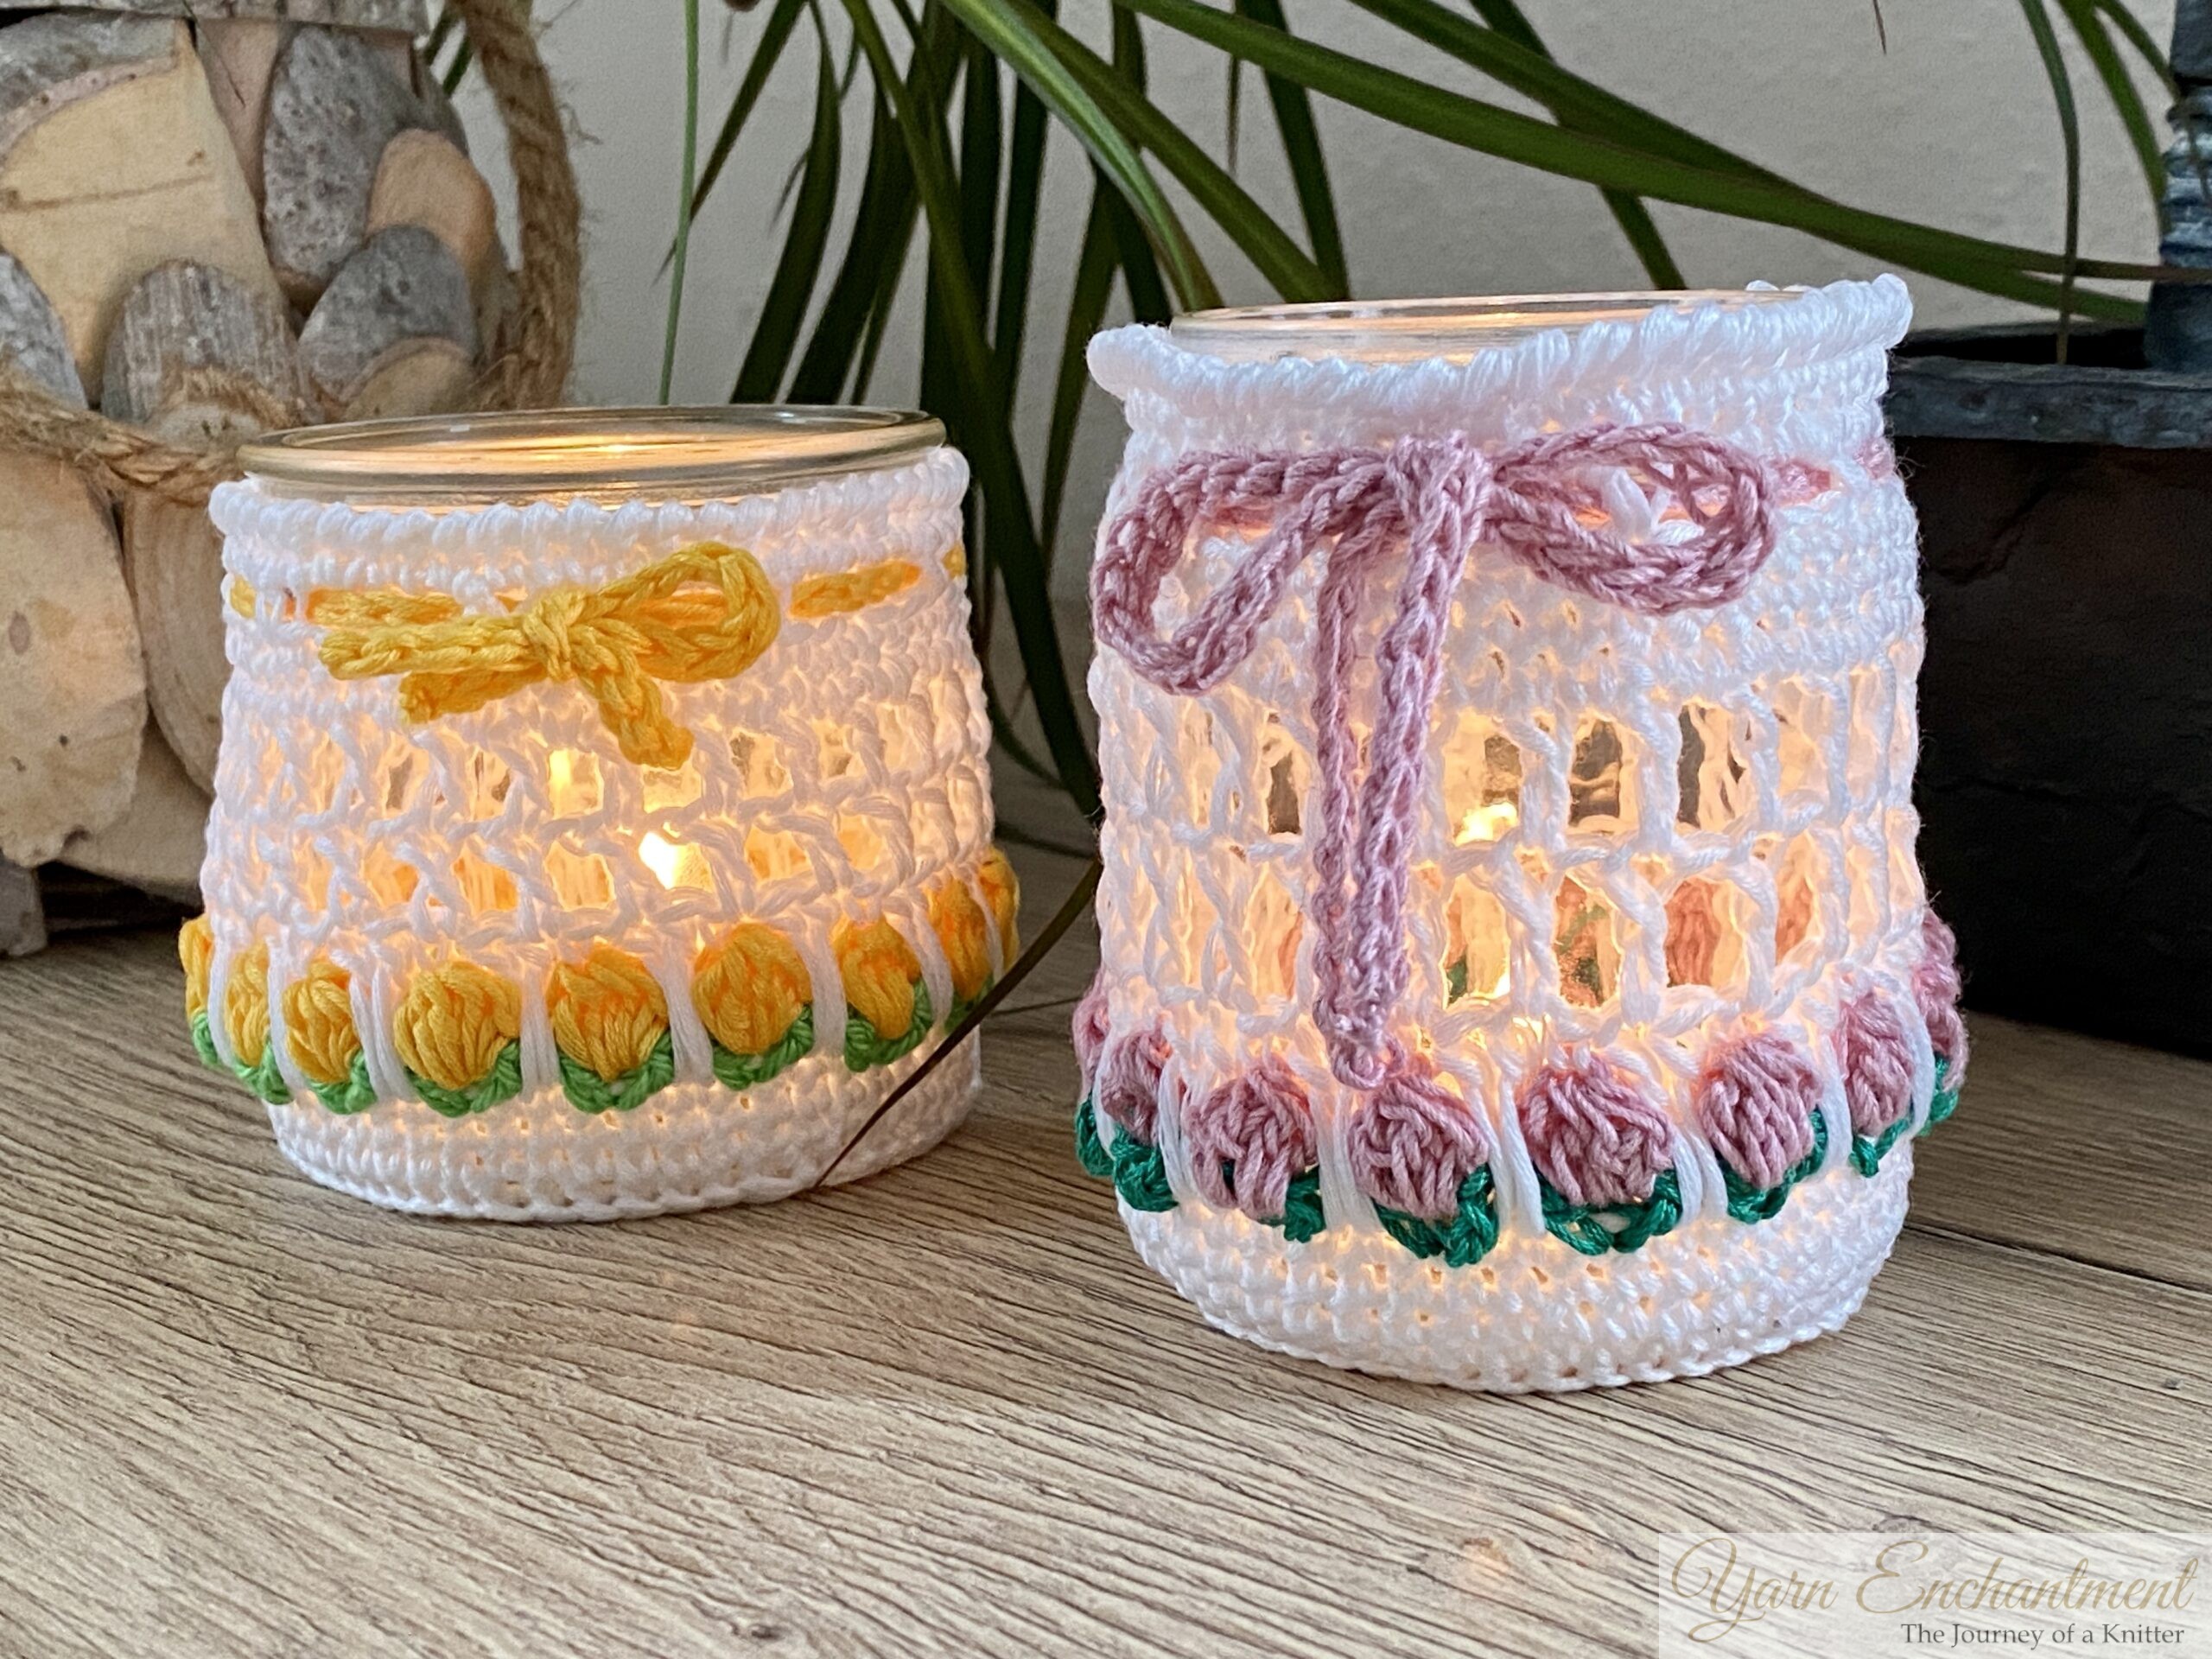
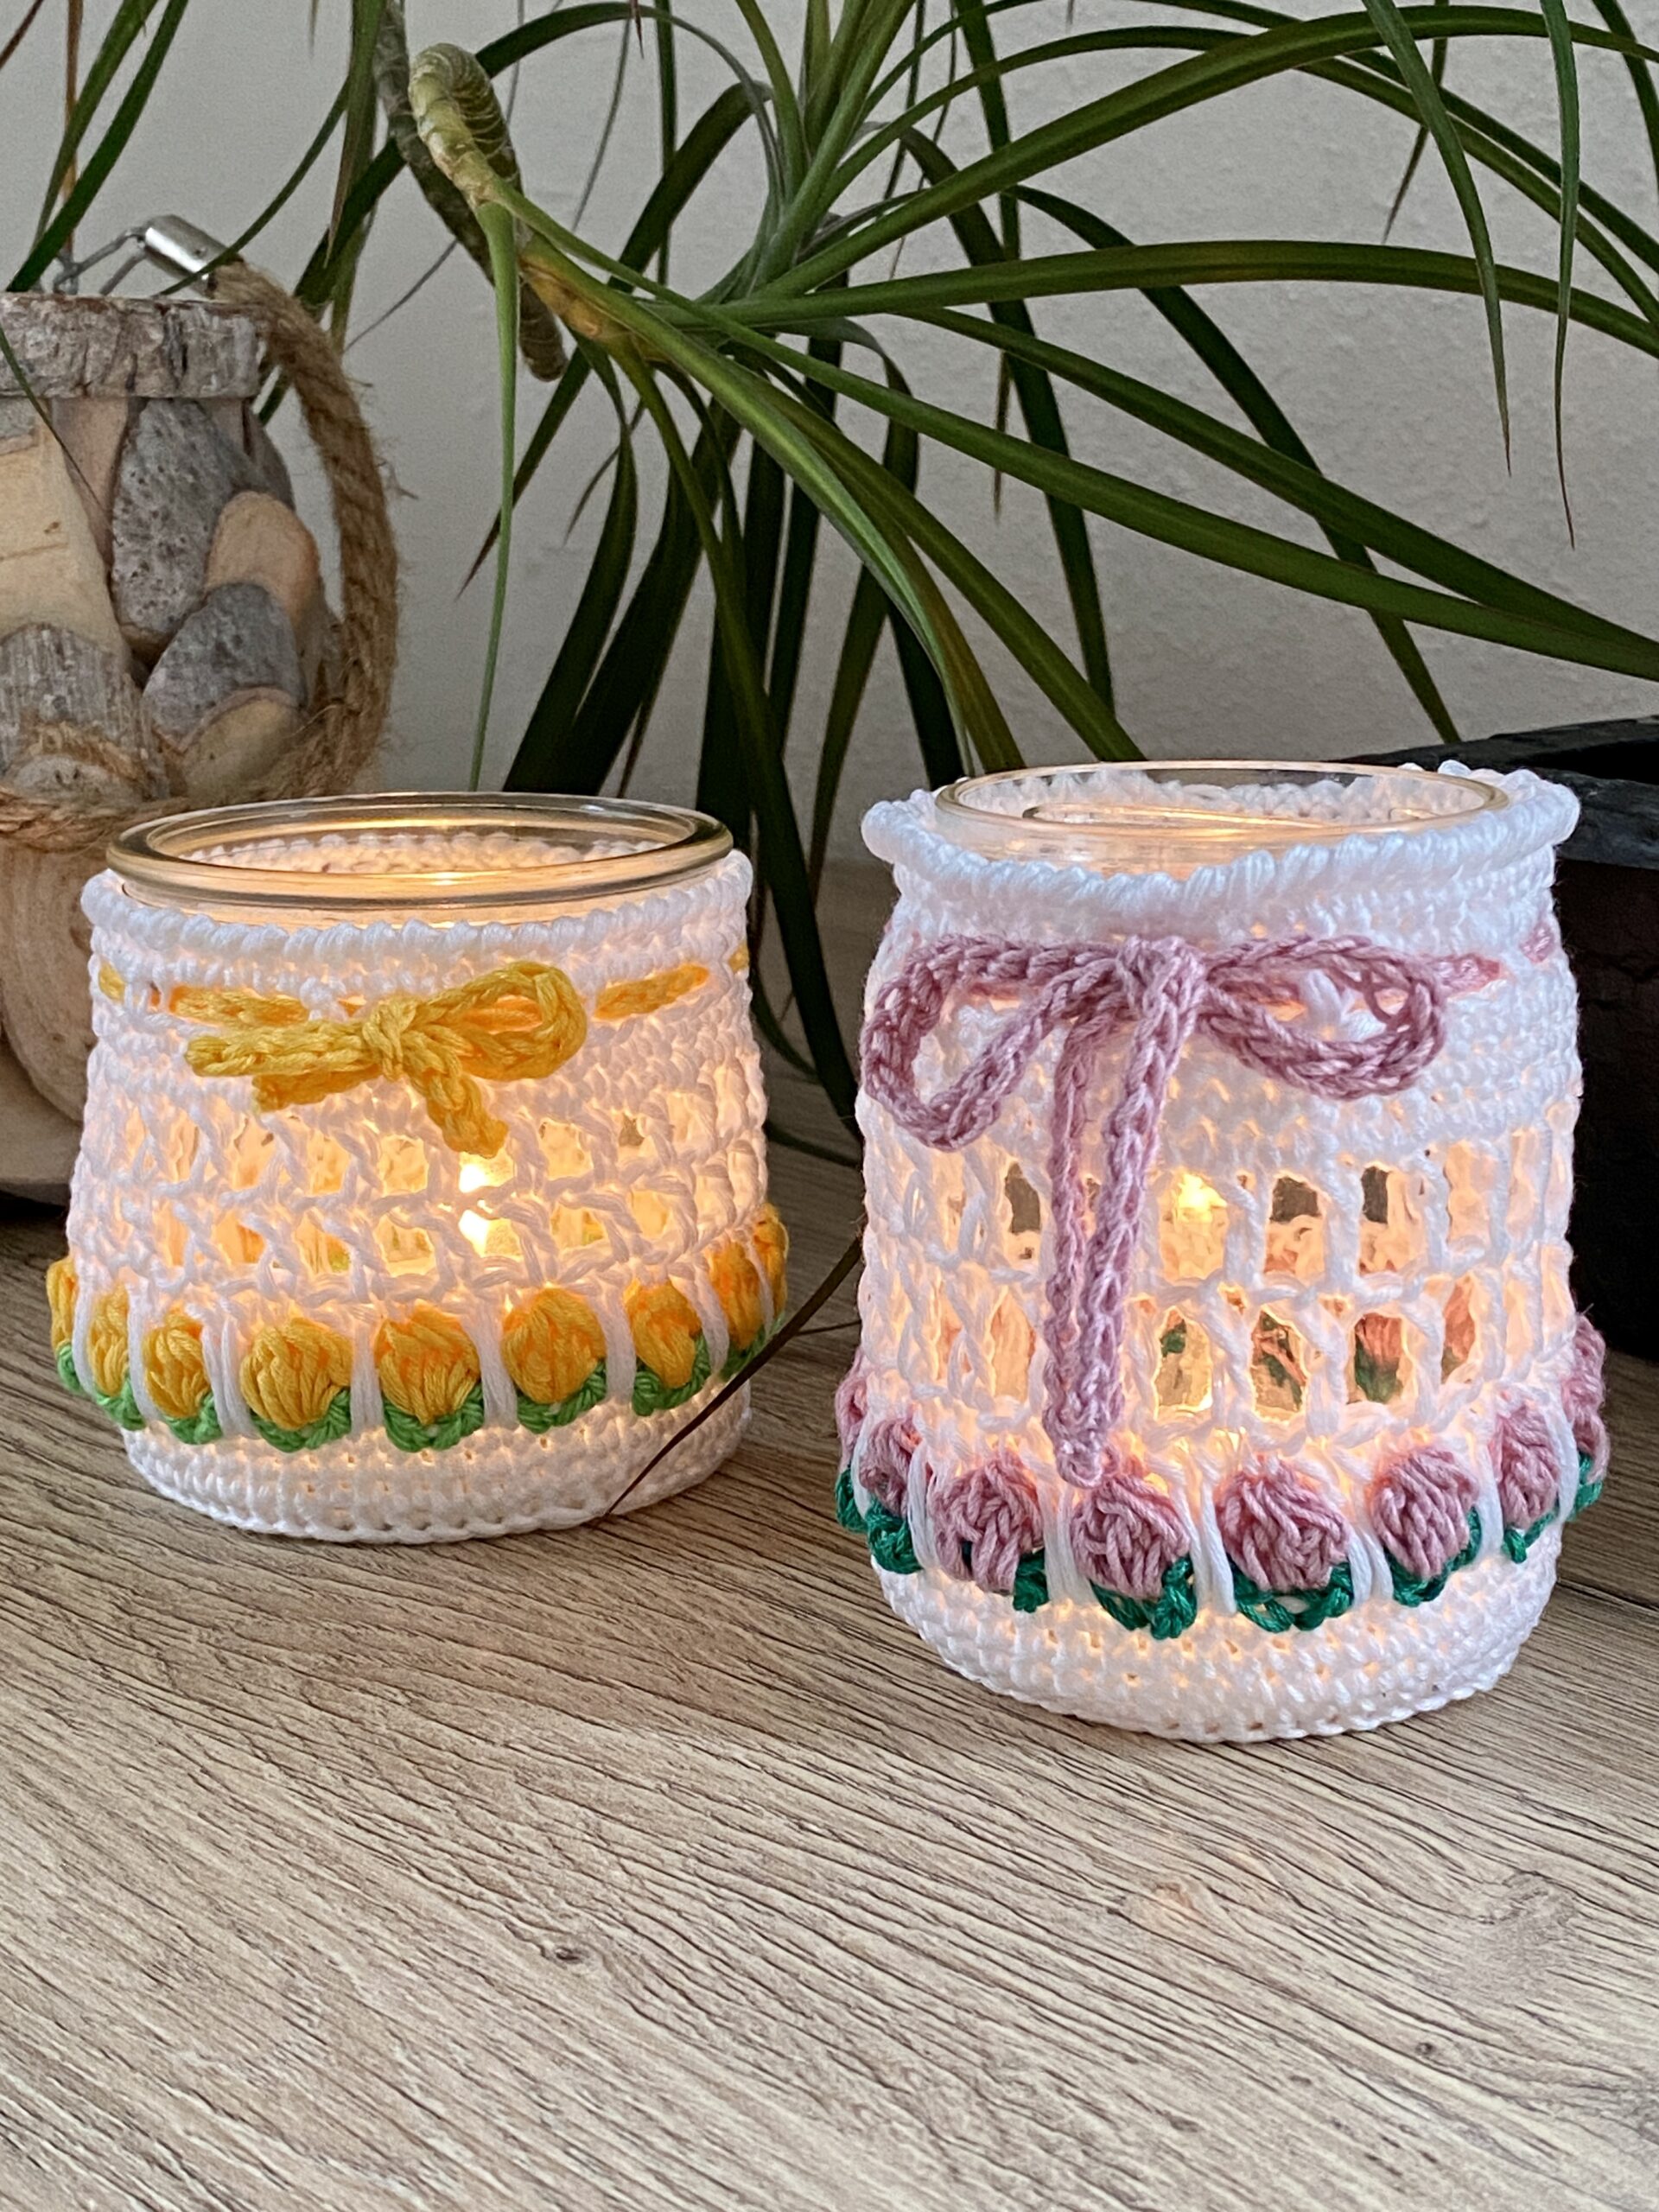
There’s something so sweet about adding a little handmade touch to your kitchen, dinner table, or even out in the garden. This crochet jar cozy does exactly that, and all you need is an old glass jar, a hook, and some cotton yarn in whatever colors make you happy. Don't worry too much about yarn weight, either; you can just add or skip a few stitches at the base to make it fit perfectly.
It’s one of those projects that feels extra satisfying because you're turning something that would otherwise get tossed into a pretty little tealight holder or a cute catch-all container. And the best part? You can tweak it however you like to fit just about any jar you have lying around.
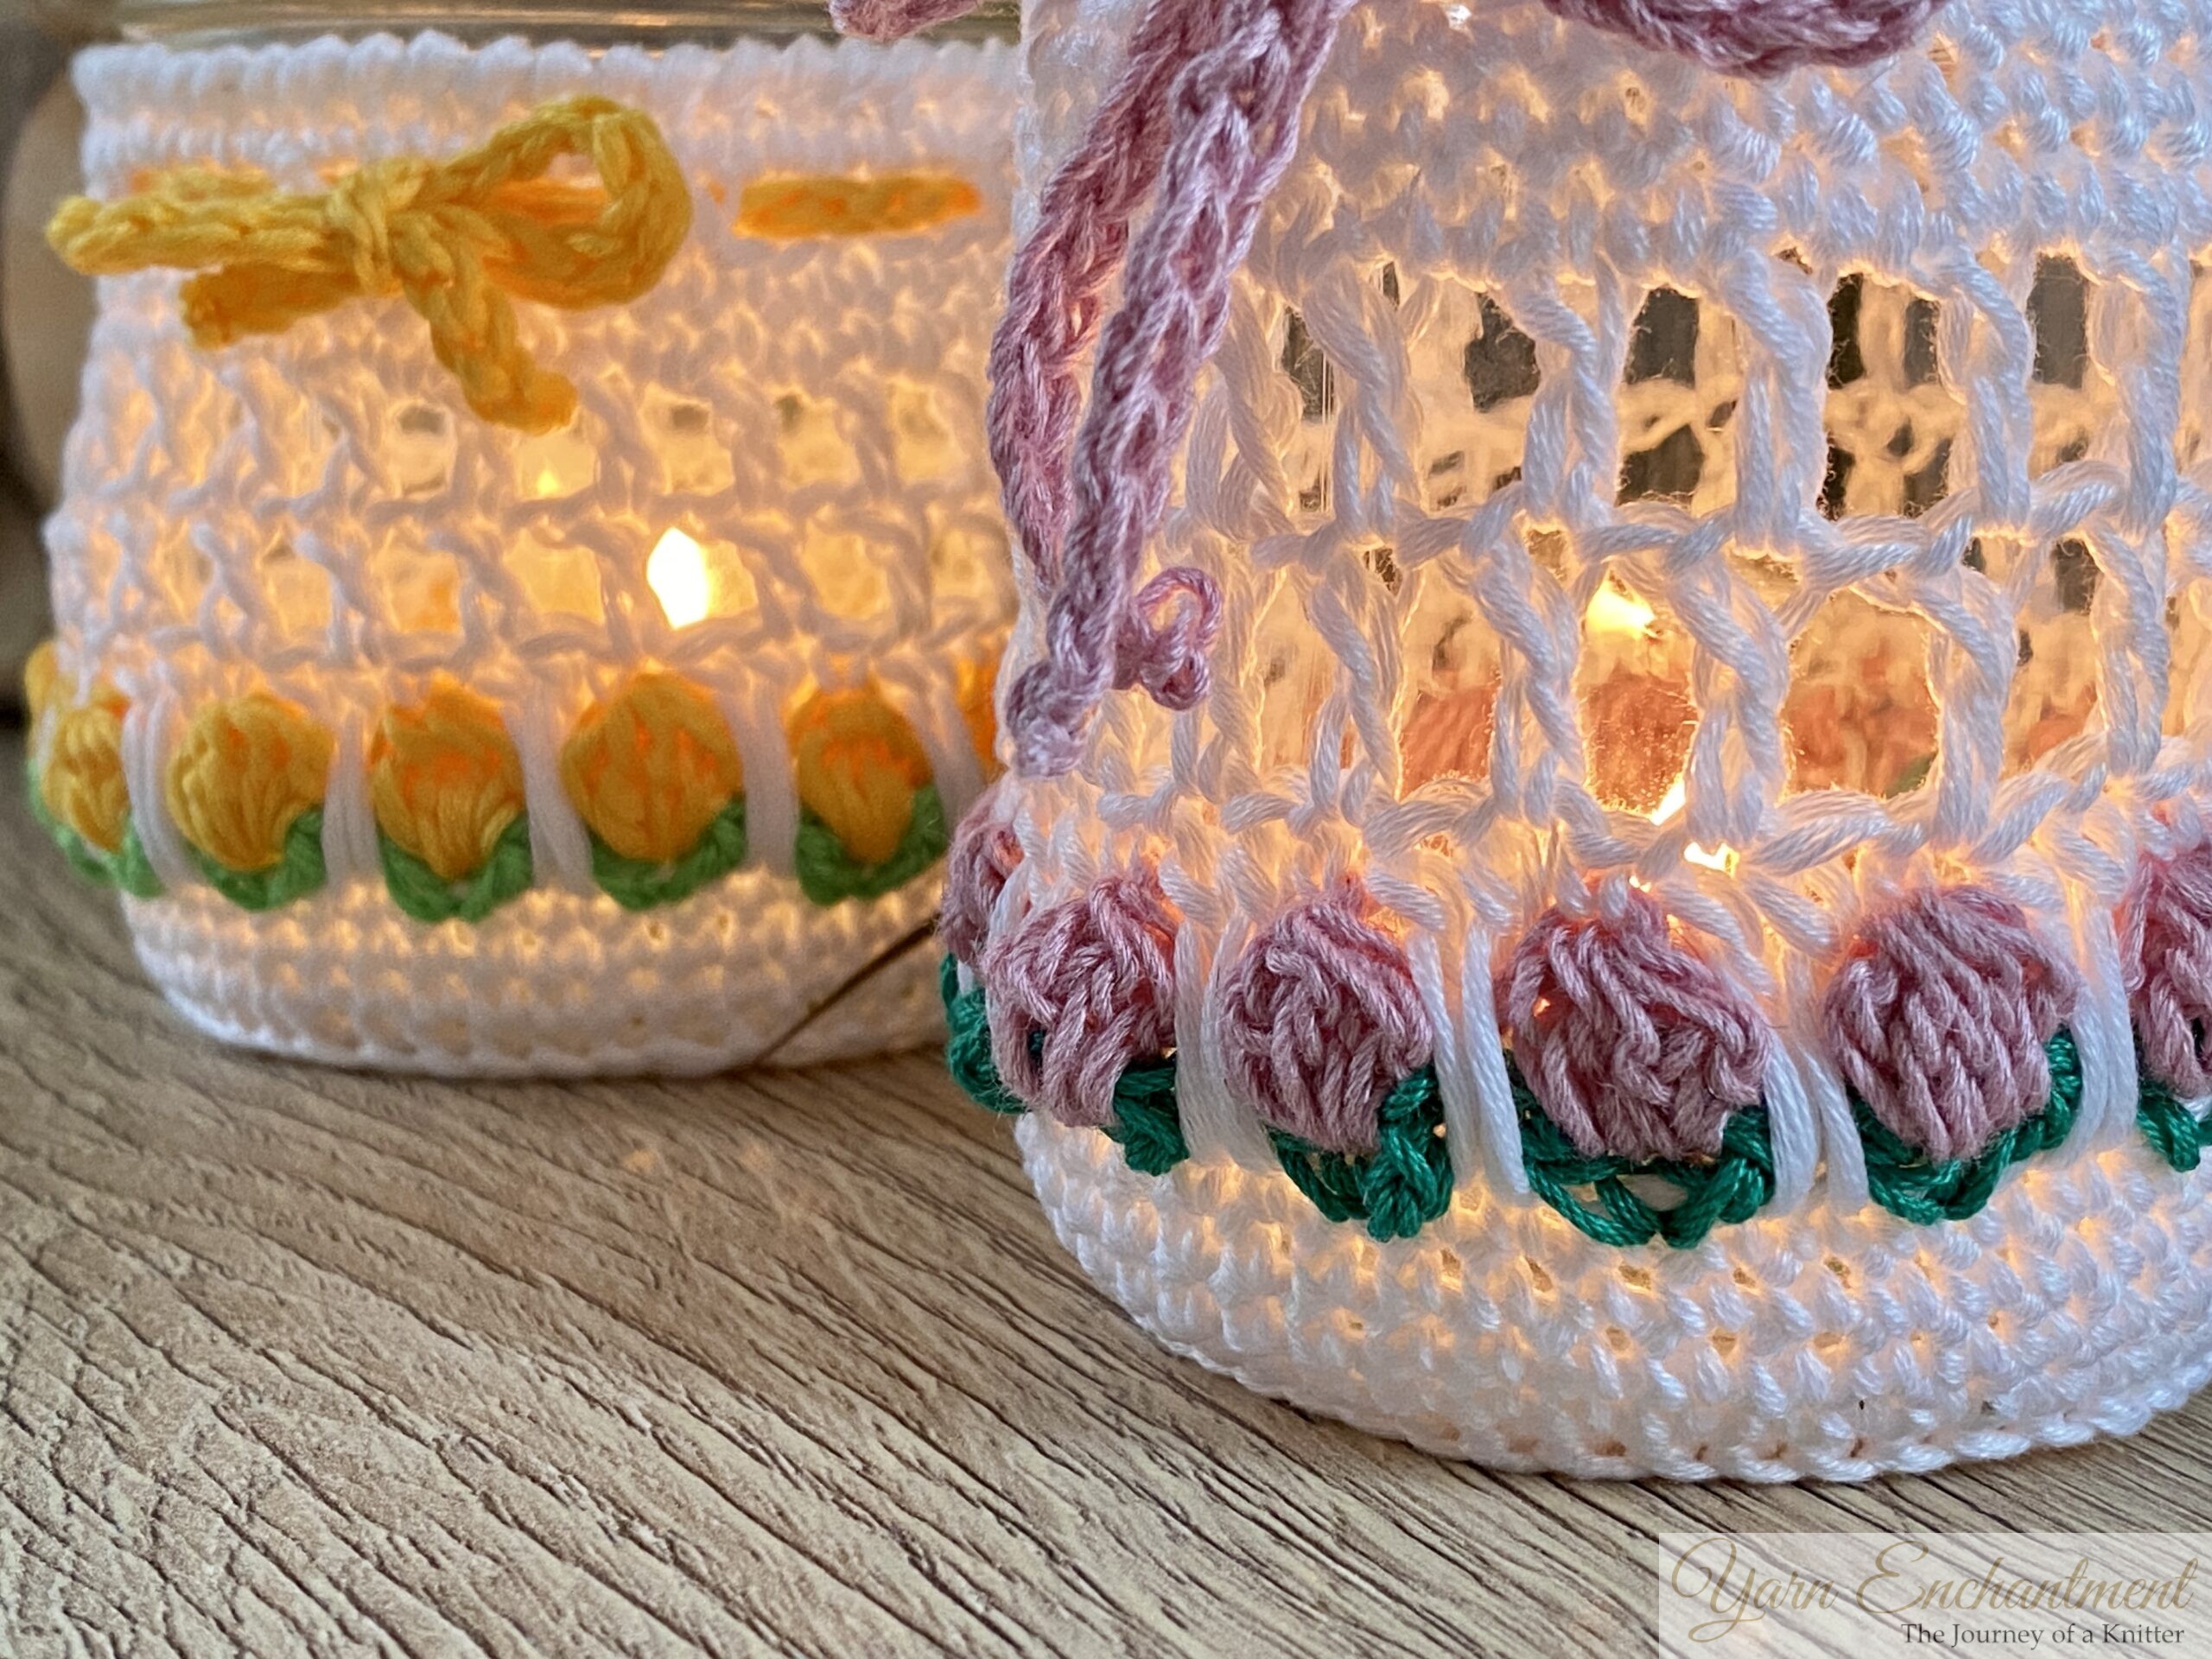
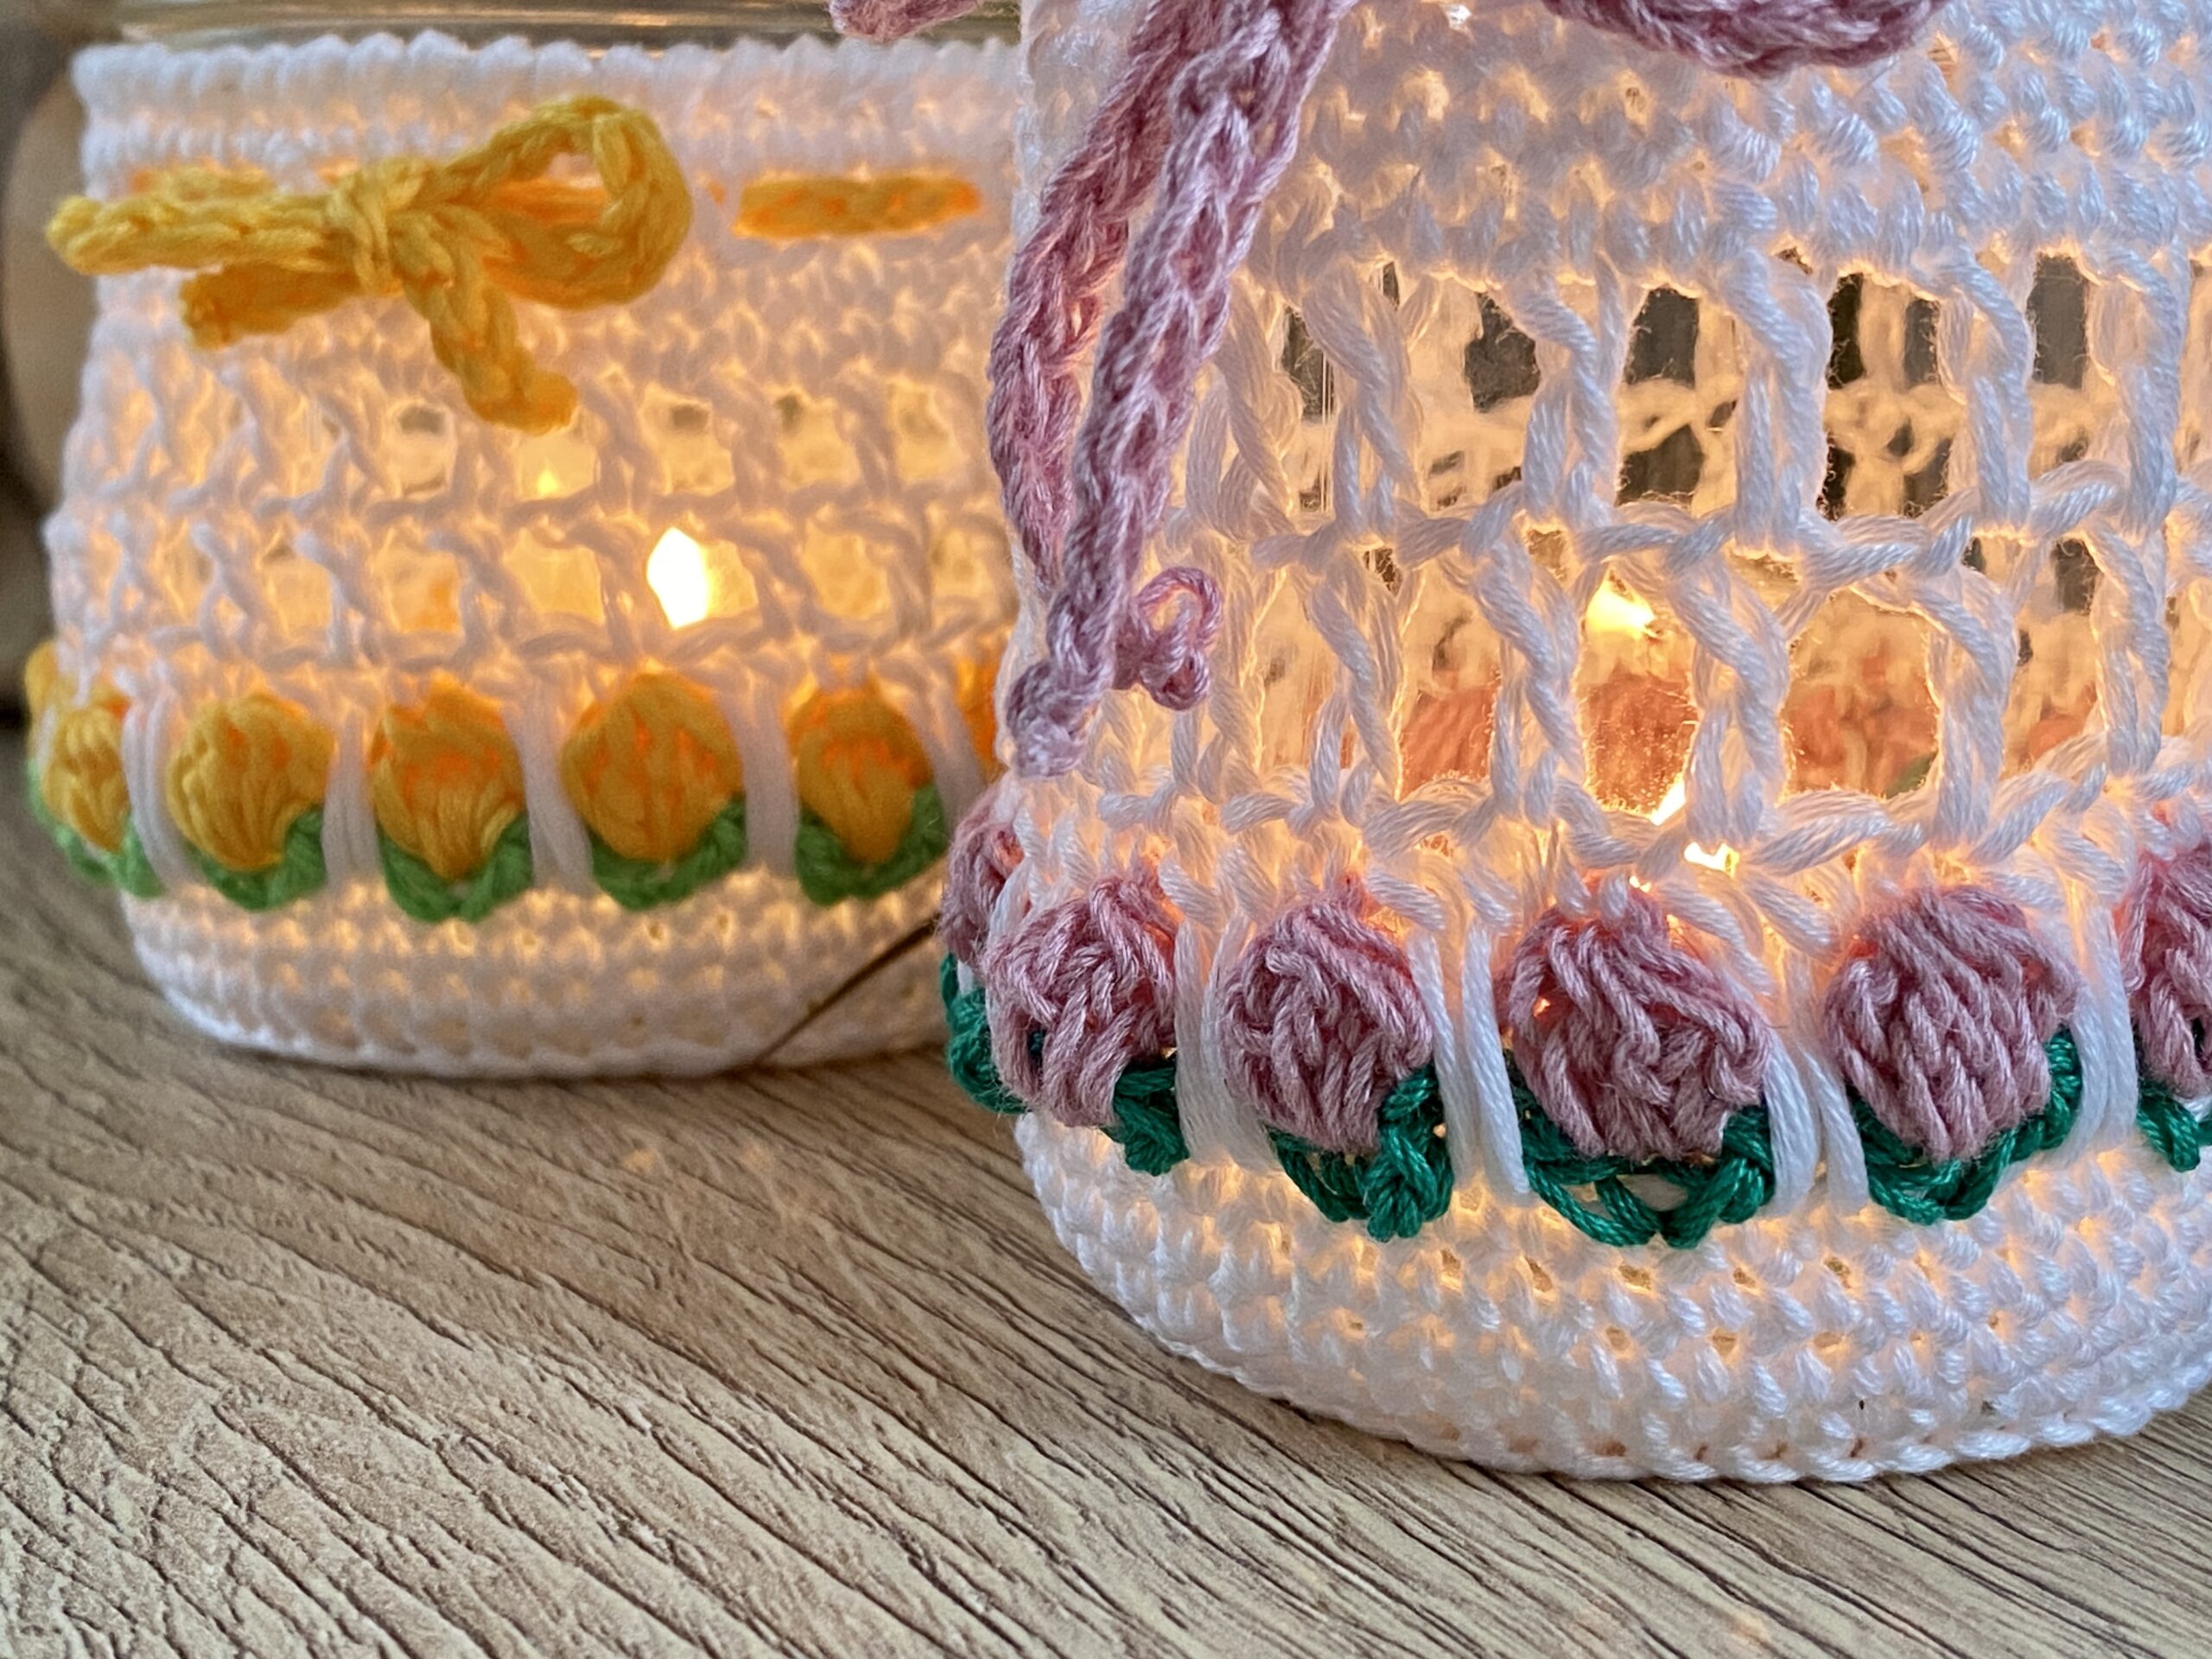
I can already imagine these glowing on a holiday table, think Thanksgiving dinner or Christmas Eve, with candles flickering inside. They'd also make such a thoughtful, handmade gift for someone special. Honestly, who wouldn't love receiving one?
If you are using a different yarn weight or working with a jar of a different size, your stitch count may vary. I worked my cozy with a cotton DK weight yarn and a 3.5 mm hook.
Garden Light Cozy Pattern - Free Crochet Pattern

Materials:
- Cotton Yarn: Cotton yarn is ideal for its heat resistance and durability, ensuring your
cozy is safe and long-lasting. - Crochet Hook: Choose an appropriate size for your yarn
- Old Glass Jars: Upcycle jars of any size to use as tealight holders. Mason jars,
condiment jars, or small food jars work well. - Scissors
- Yarn Needle
- Stitch Marker
Techniques You Need for this Pattern:
- Magic Ring (Video)
- Chain
- Single Crochet (sc) (Video)
- Increase (Video)
- Double Crochet (dc) (Video)
- Bobble Stitch (dc5tog) (Video)
- Slip Stitch (sl st) (Video)
- Back Post Single Crochet (bpsc) (Video)
- Reverse single crochet (Crap Stitch) (Video)
- V-Stitch (1dc, ch1, 1dc into the st) (Video)
- Elongated Double Crochet (edc) (Video)
Abbreviations:
- ch: chain
- sts: stitches
- st: stitch
- sl st: slip stitch
- sc: single crochet
- st: stitch
- inc: increase (2 single crochets in the same stitch)
- rsc: reverse single crochet
- dc5tog: double crochet 5 together to create the blossoms (bobble stitch)
- edc: elongated double crochet
- bpsc: back post single crochet
- SM: stitch marker
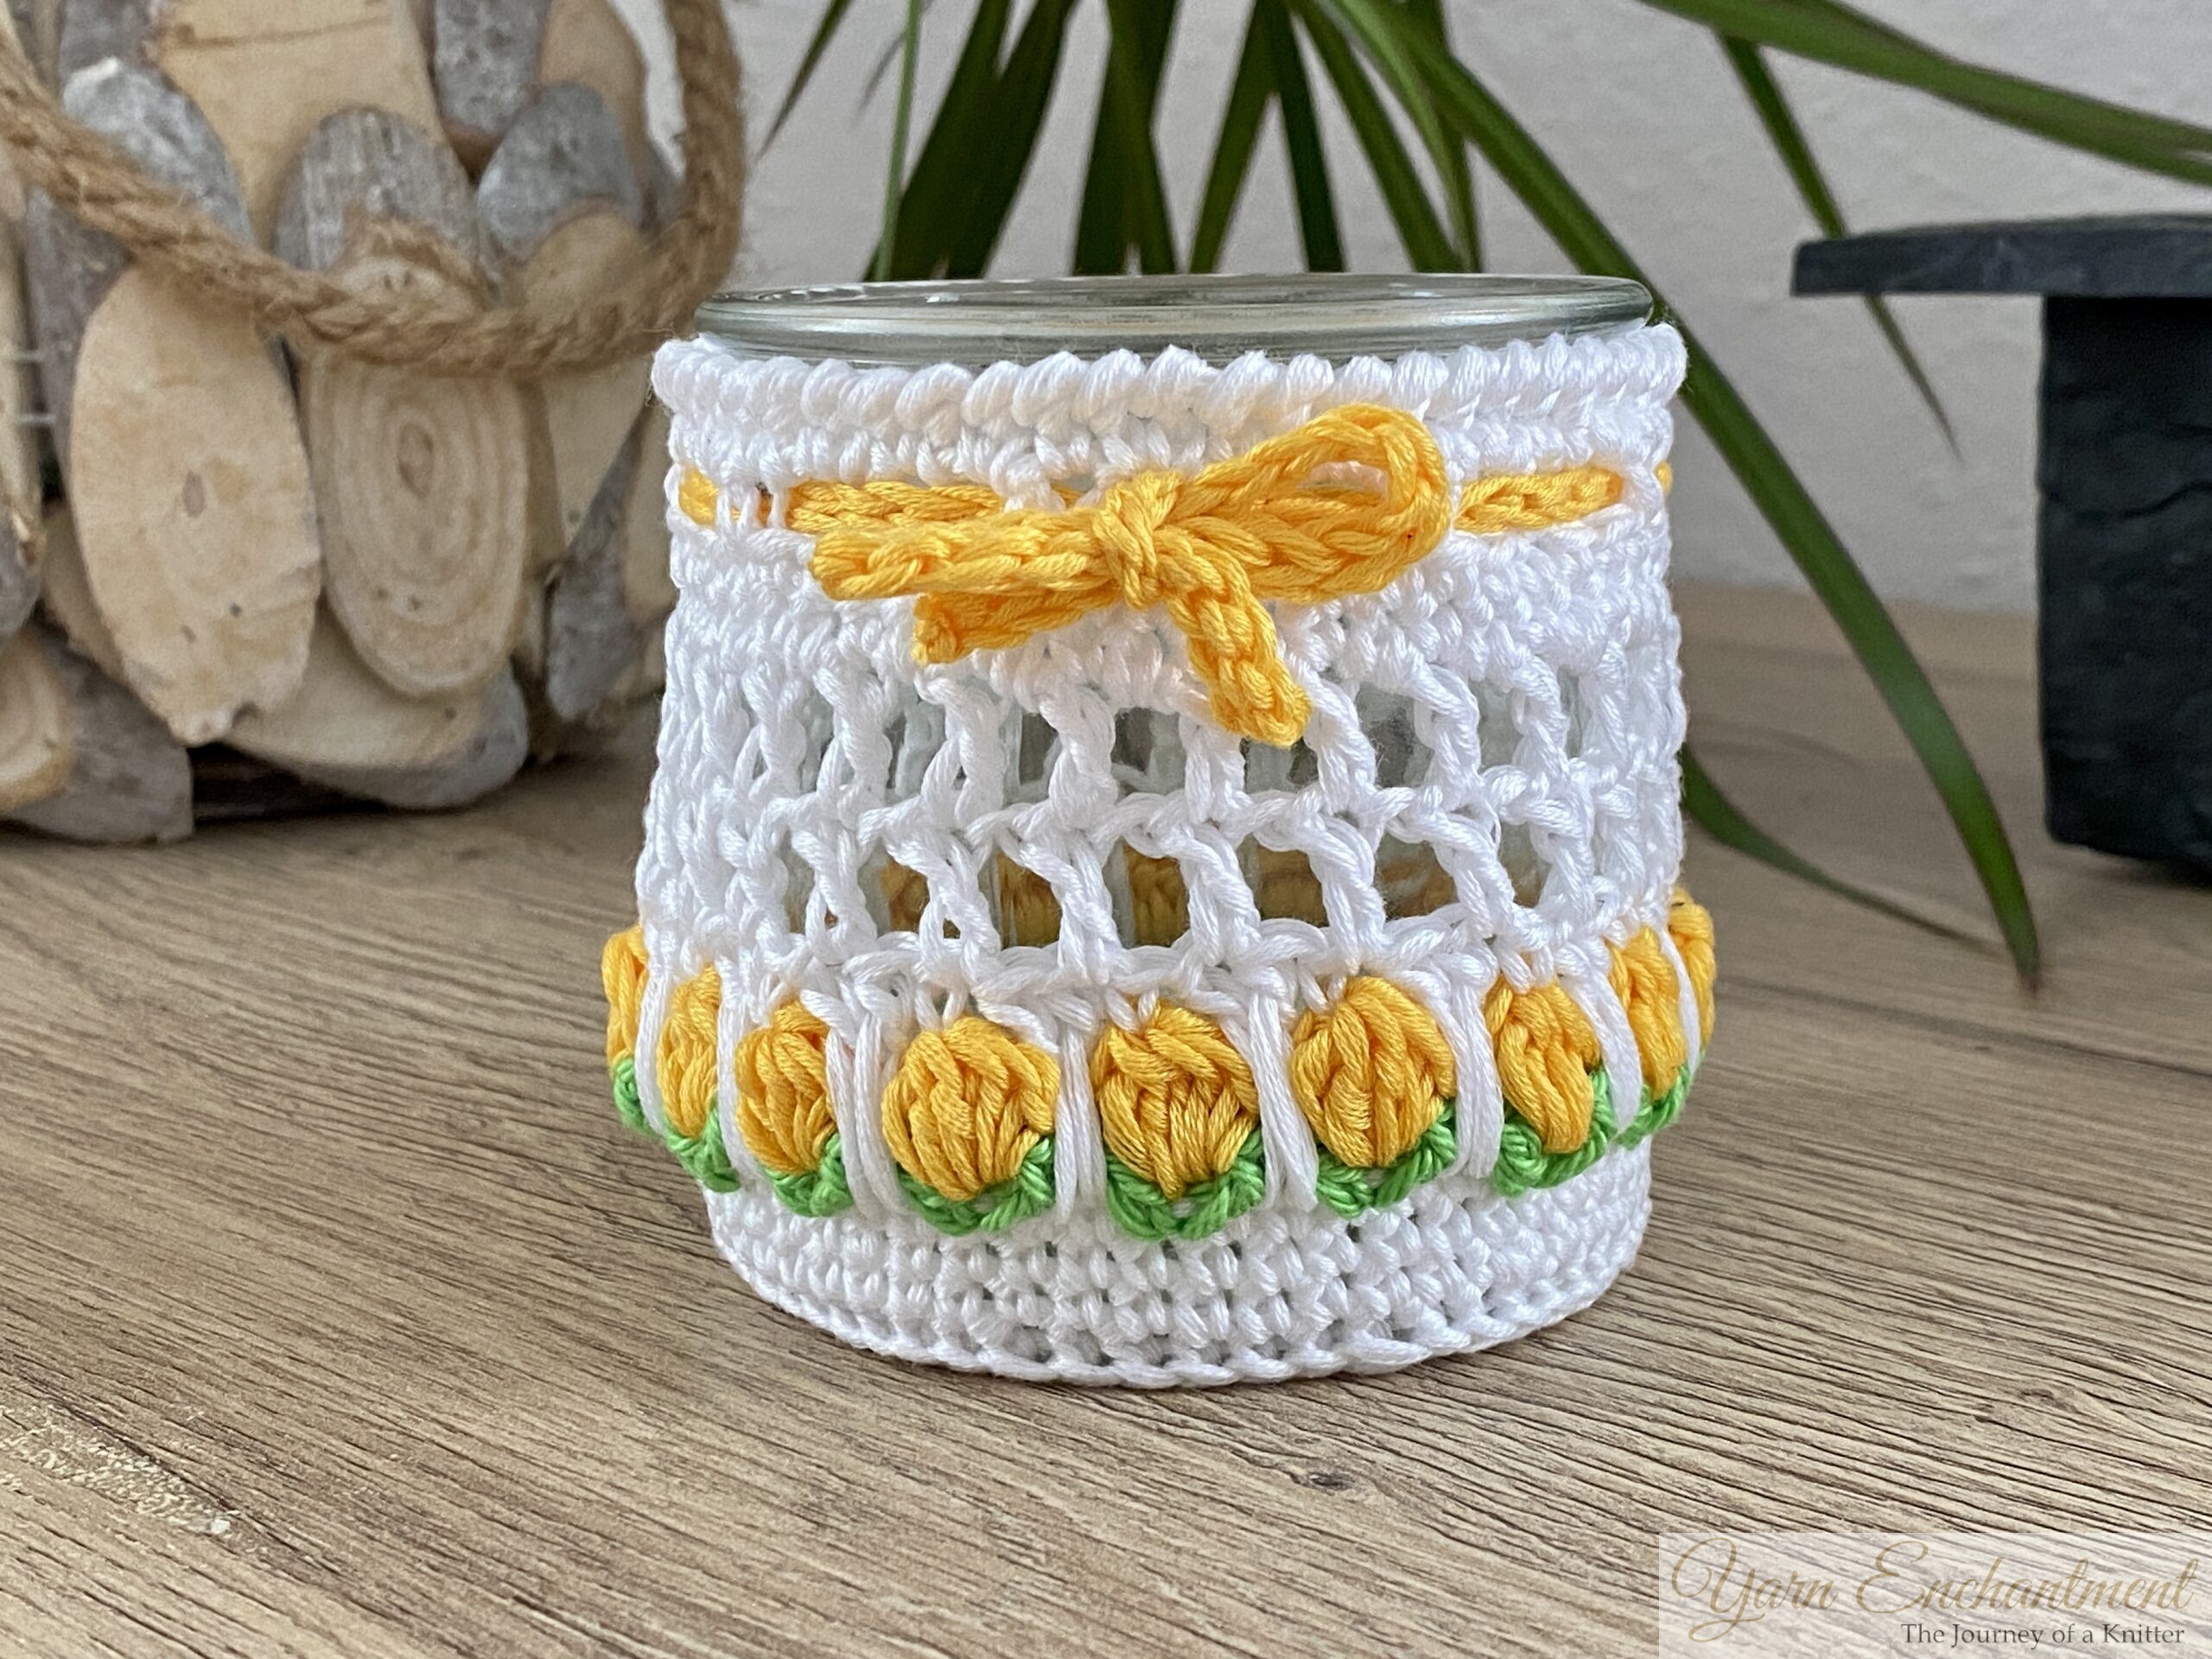
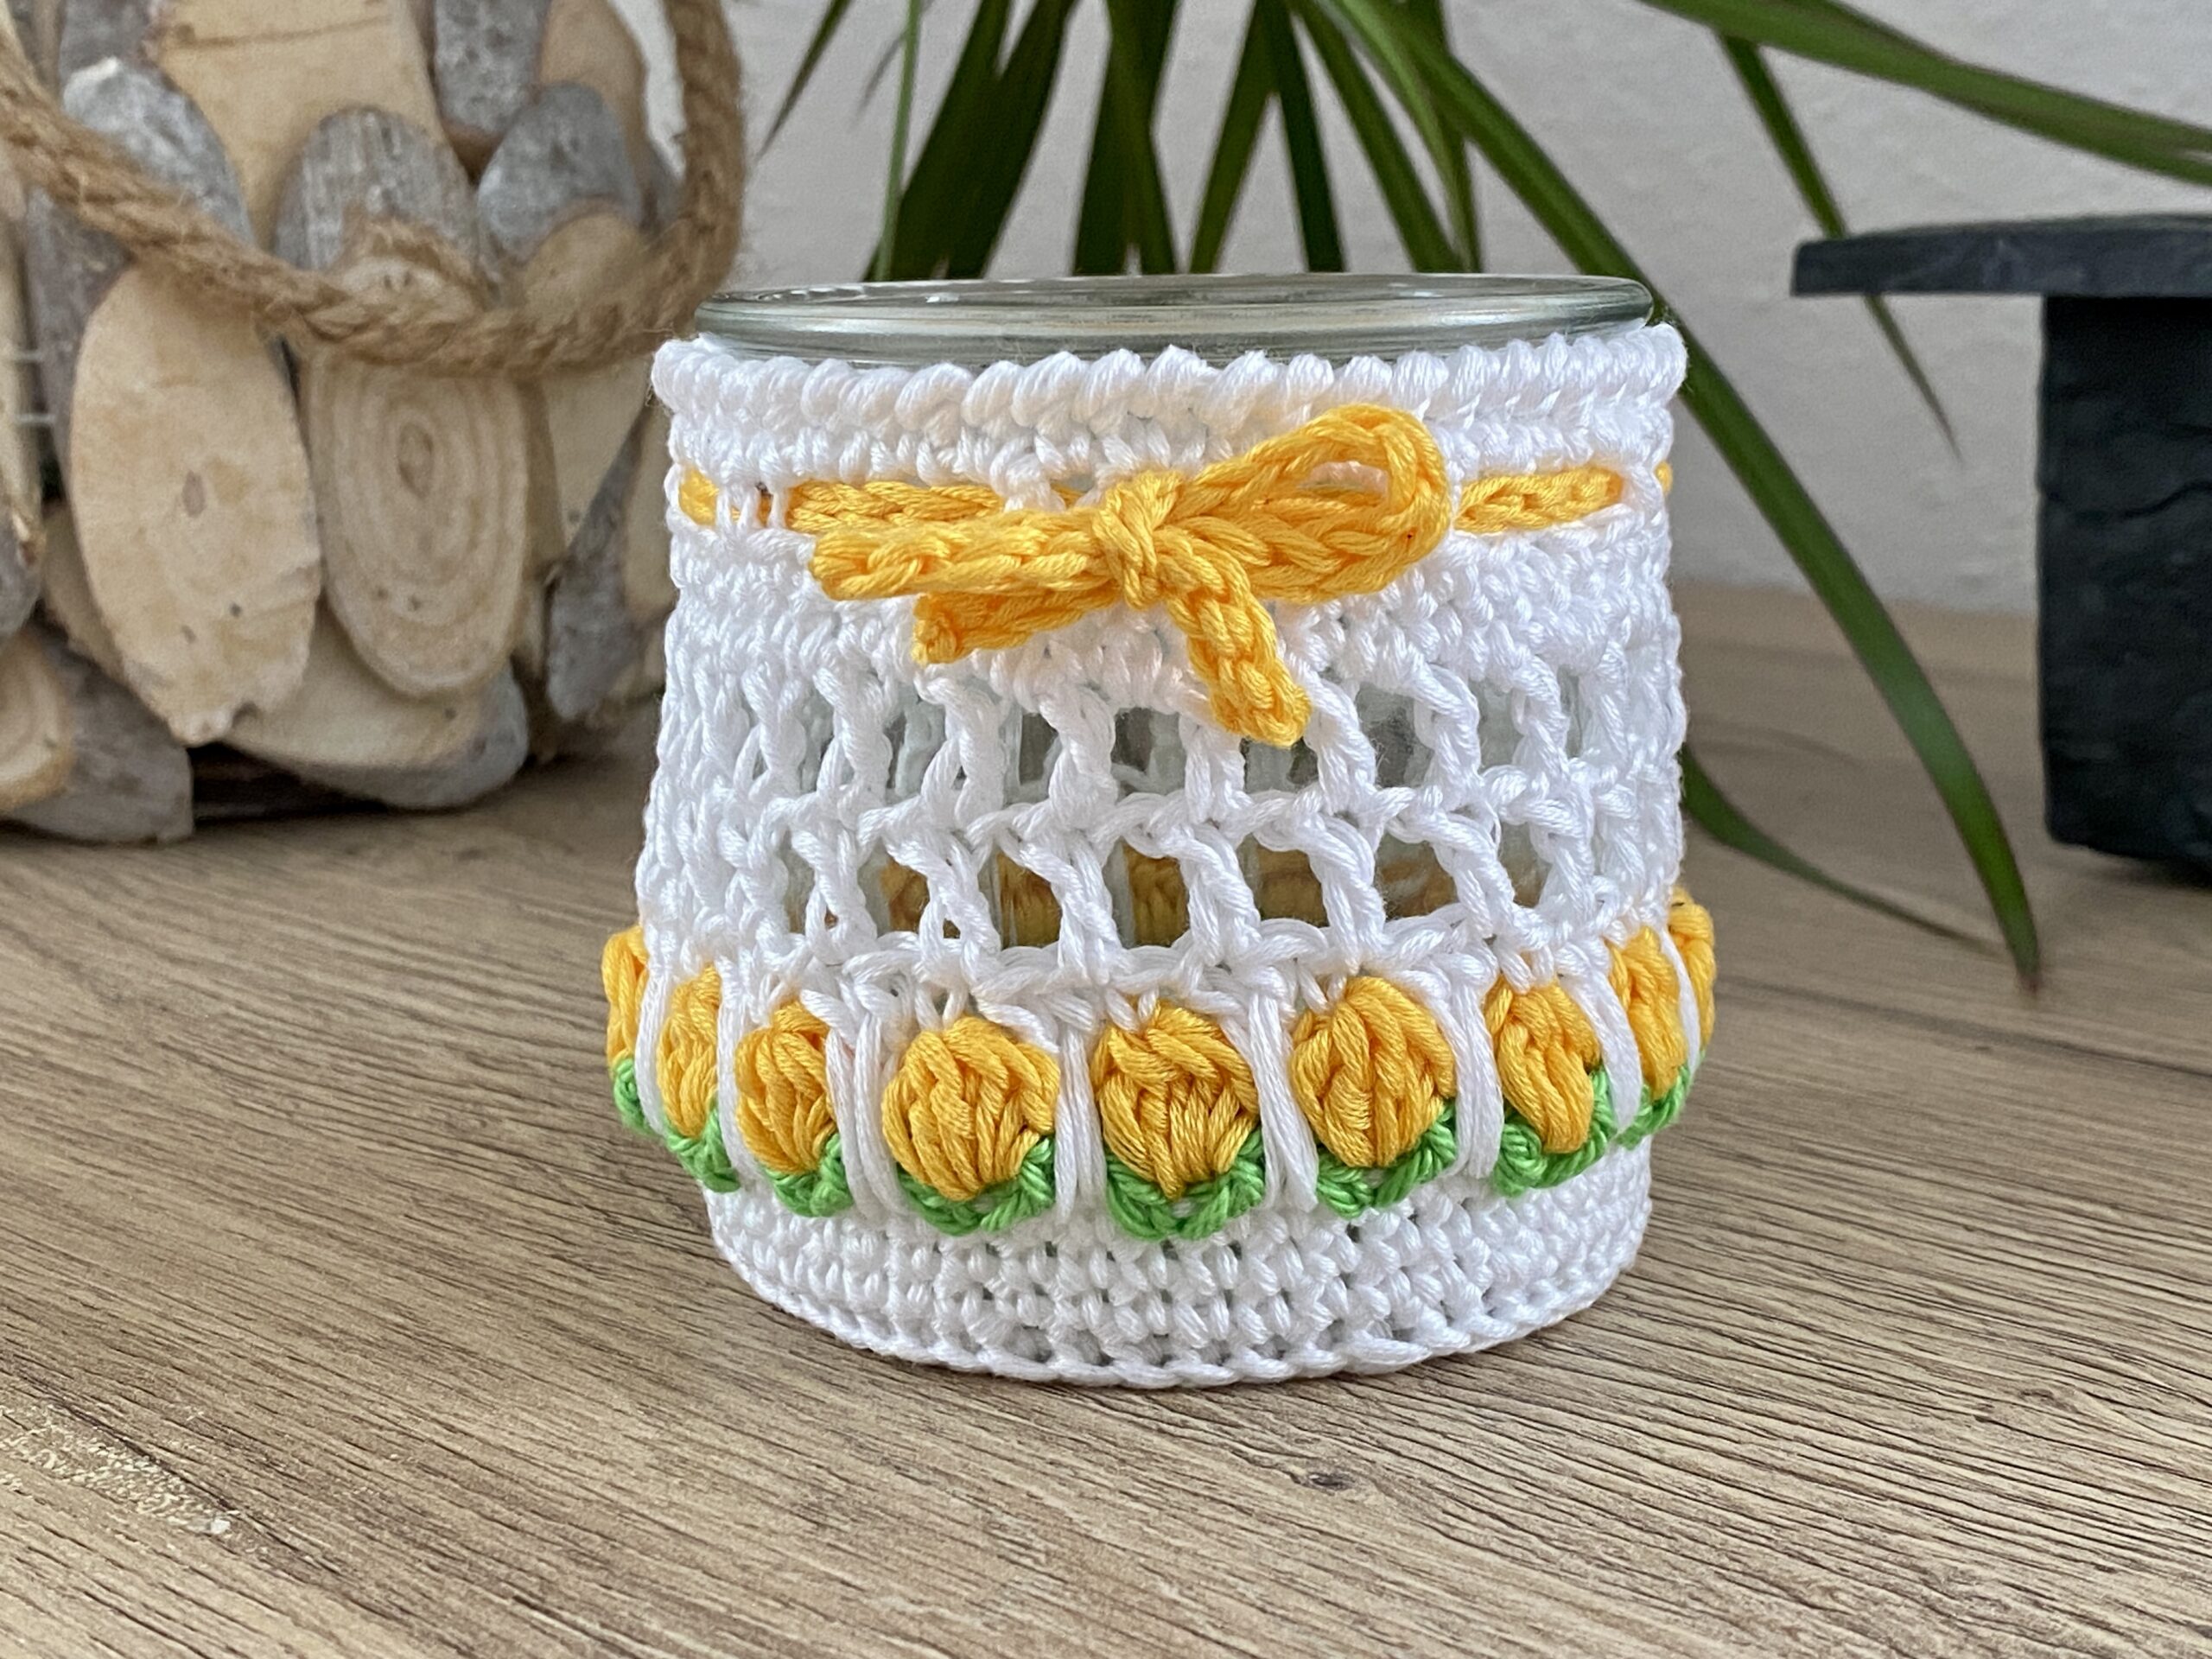
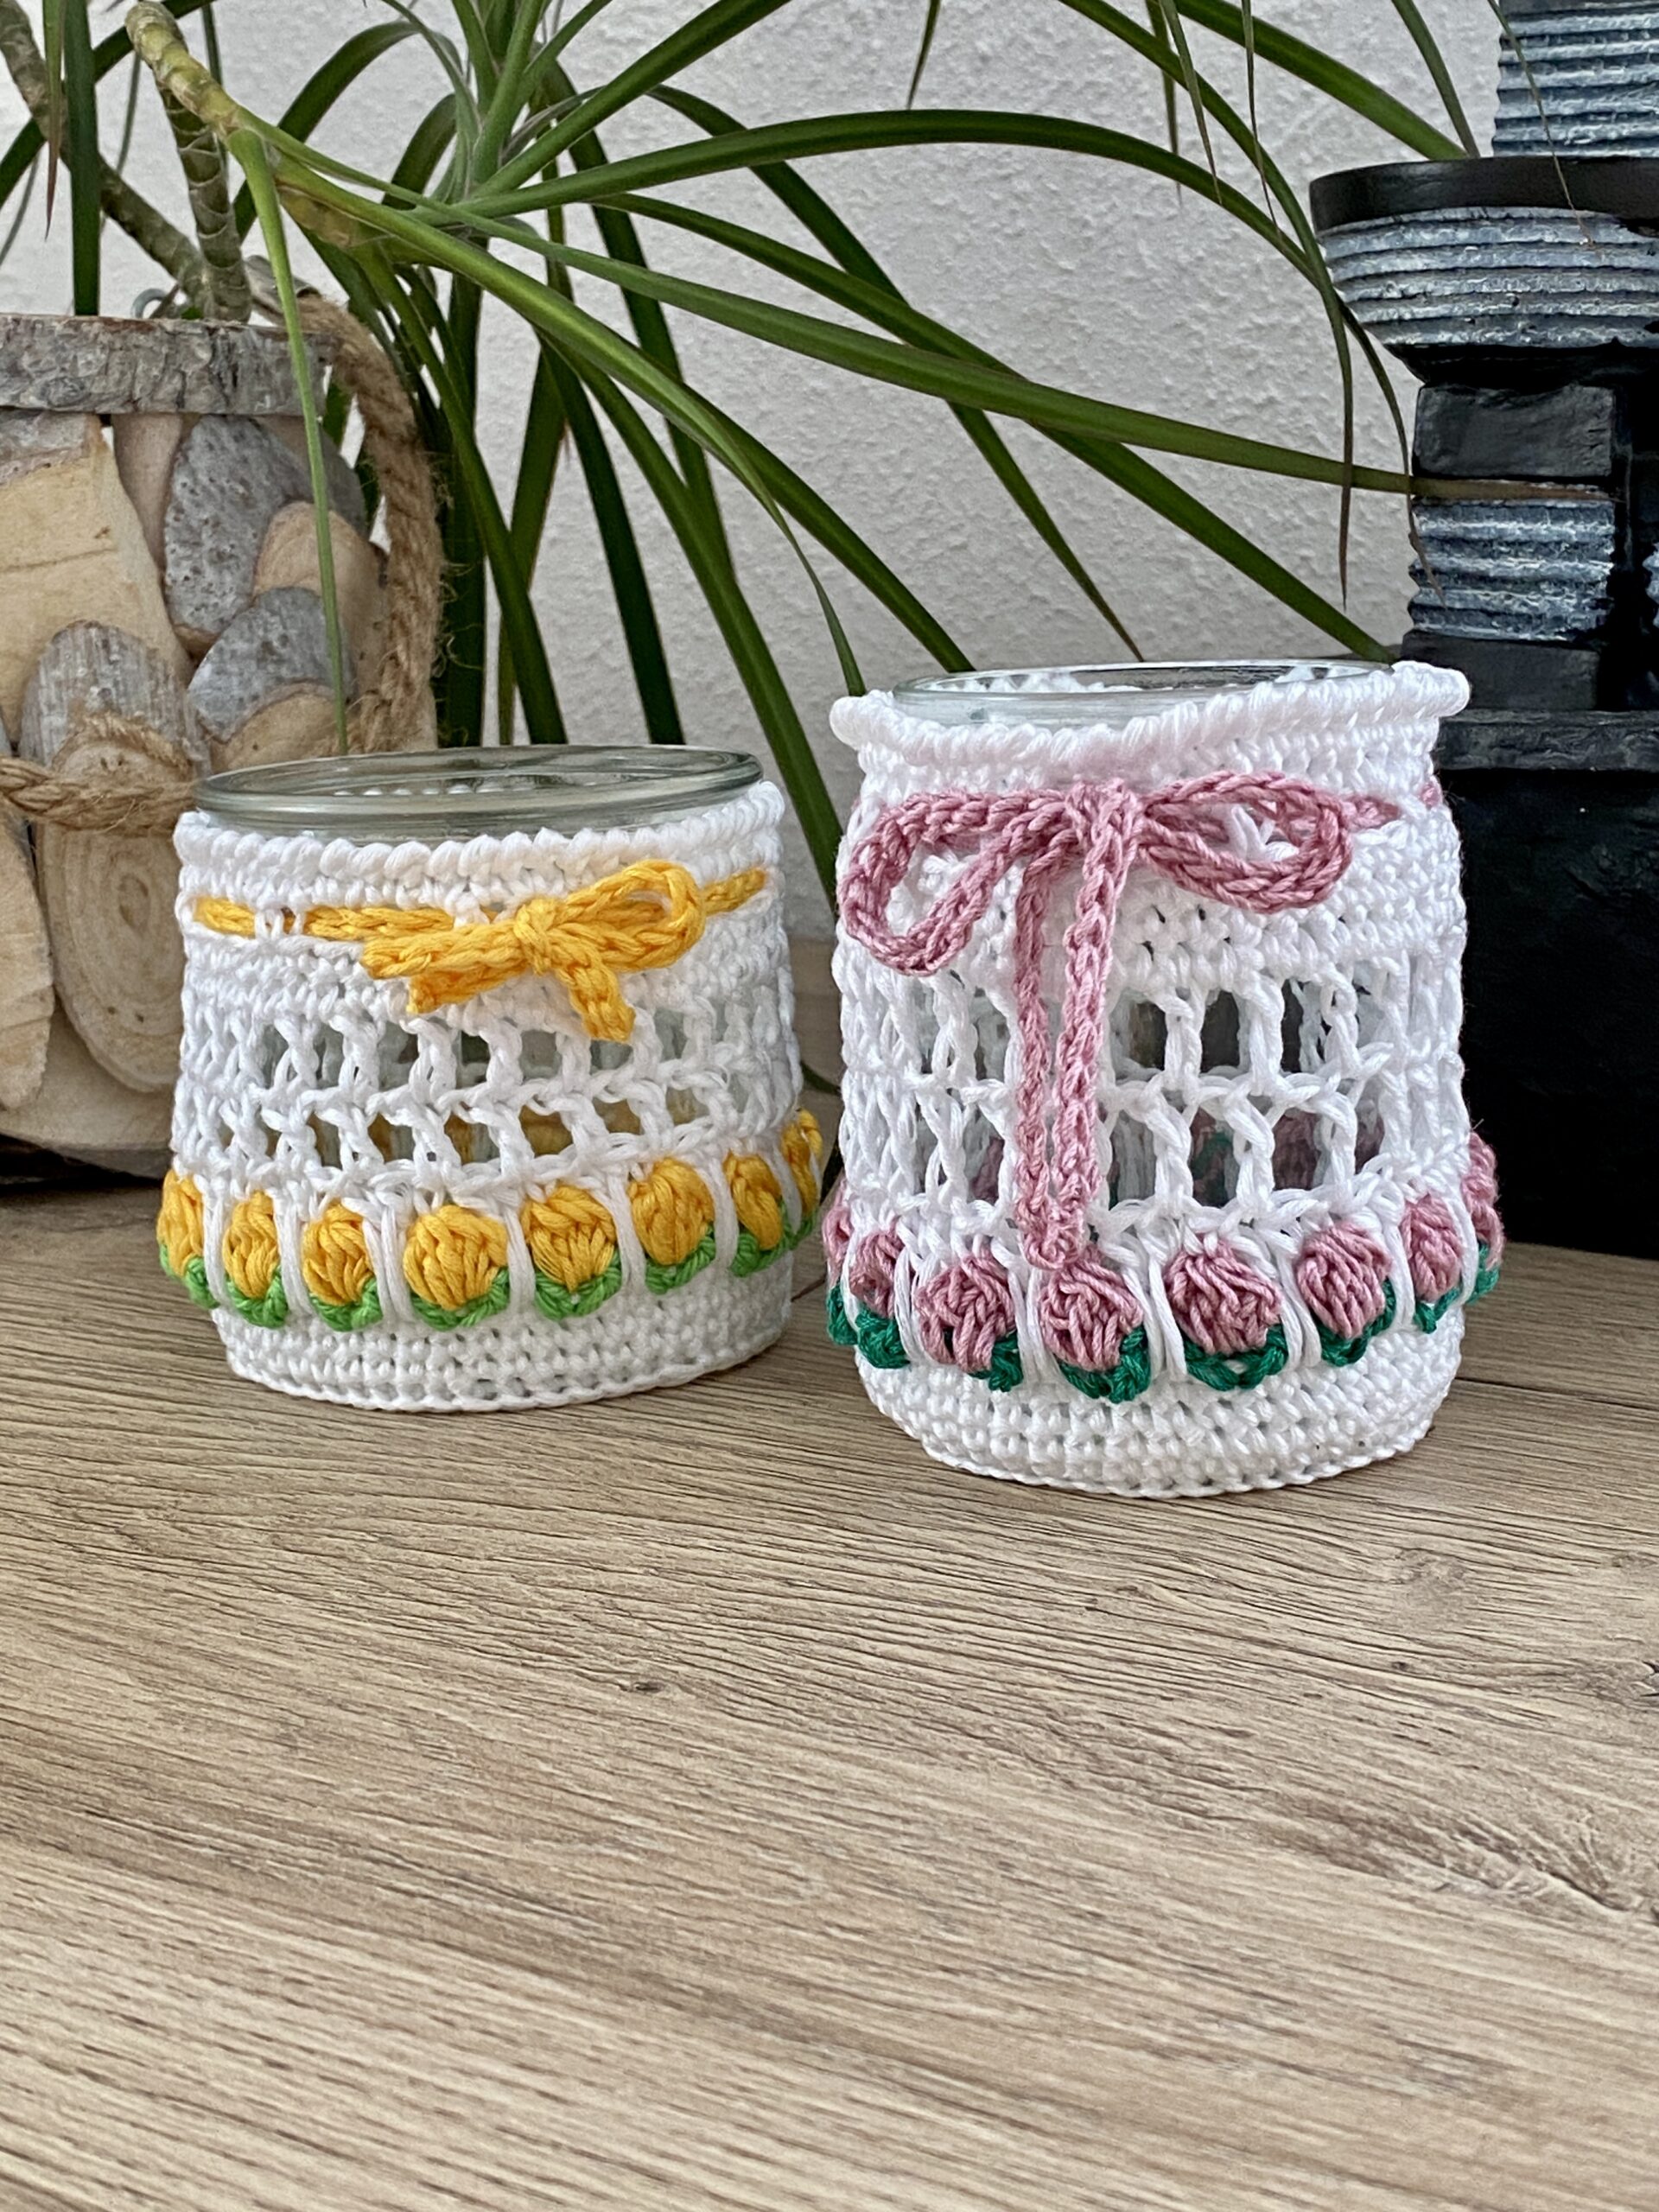
Jar Cozy with yellow tulips

Instructions
Round 1:
- Make a magic ring (or ch 4 and join with a sl st to form a ring)
- Ch 1 (does not count as a stitch here and throughout)
- Work 6 sc into the ring
- Do not join with a sl st to the first sc (6 sts)
Note: Place a stitch marker into the first sc of every round.
Round 2:
2 sc in each st around until you have reached the SM (12 sts)
Round 3:
*Sc in the next st, 2 sc in the next st*; repeat from * to * until the SM (18 sts)
Round 4:
*Sc in the next 2 sts, 2 sc in the next st*; repeat from * to * until the SM (24 sts)
Round 5:
*Sc in the next 3 sts, 2 sc in the next st*; repeat from * to * until the SM (30 sts)
Round 6:
*Sc in the next 4 sts, 2 sc in the next st*; repeat from * to * until the SM (36 sts)
Round 7:
*Sc in the next 5 sts, 2 sc in the next st*; repeat from * to * until the SM (42 sts)
Round 8:
*Sc in the next 6 sts, 2 sc in the next st*; repeat from * to * until the SM (48 sts)
Round 9:
*Sc in the next 7 sts, 2 sc in the next st*; repeat from * to * until the end of the round
Join with a sl st to the first sc (54 sts)
You can continue in this pattern, increasing the number of single crochets between increases by one each round until your circle reaches the desired size. For reference, the bottom of my yellow jar measures 8 cm (approximately 3.15 inches). After completing the increases, my circle also measured 8 cm (3.15 inches). Keep in mind that the yarn stretches, so it’s okay if your circle ends up a little smaller. When you reach the desired size for your jar, join with a slip stitch to the first single crochet. For this pattern, your stitch count needs to be a multiple of 6. Since you're increasing by 6 stitches each round, you'll naturally end up with the correct stitch count after completing the increases.
Now we want to change the direction. Here you have two options: You can either work single crochet stitches in the back loops only or use back post single crochet (bpsc). The back post single crochet technique provides a more defined and textured result.
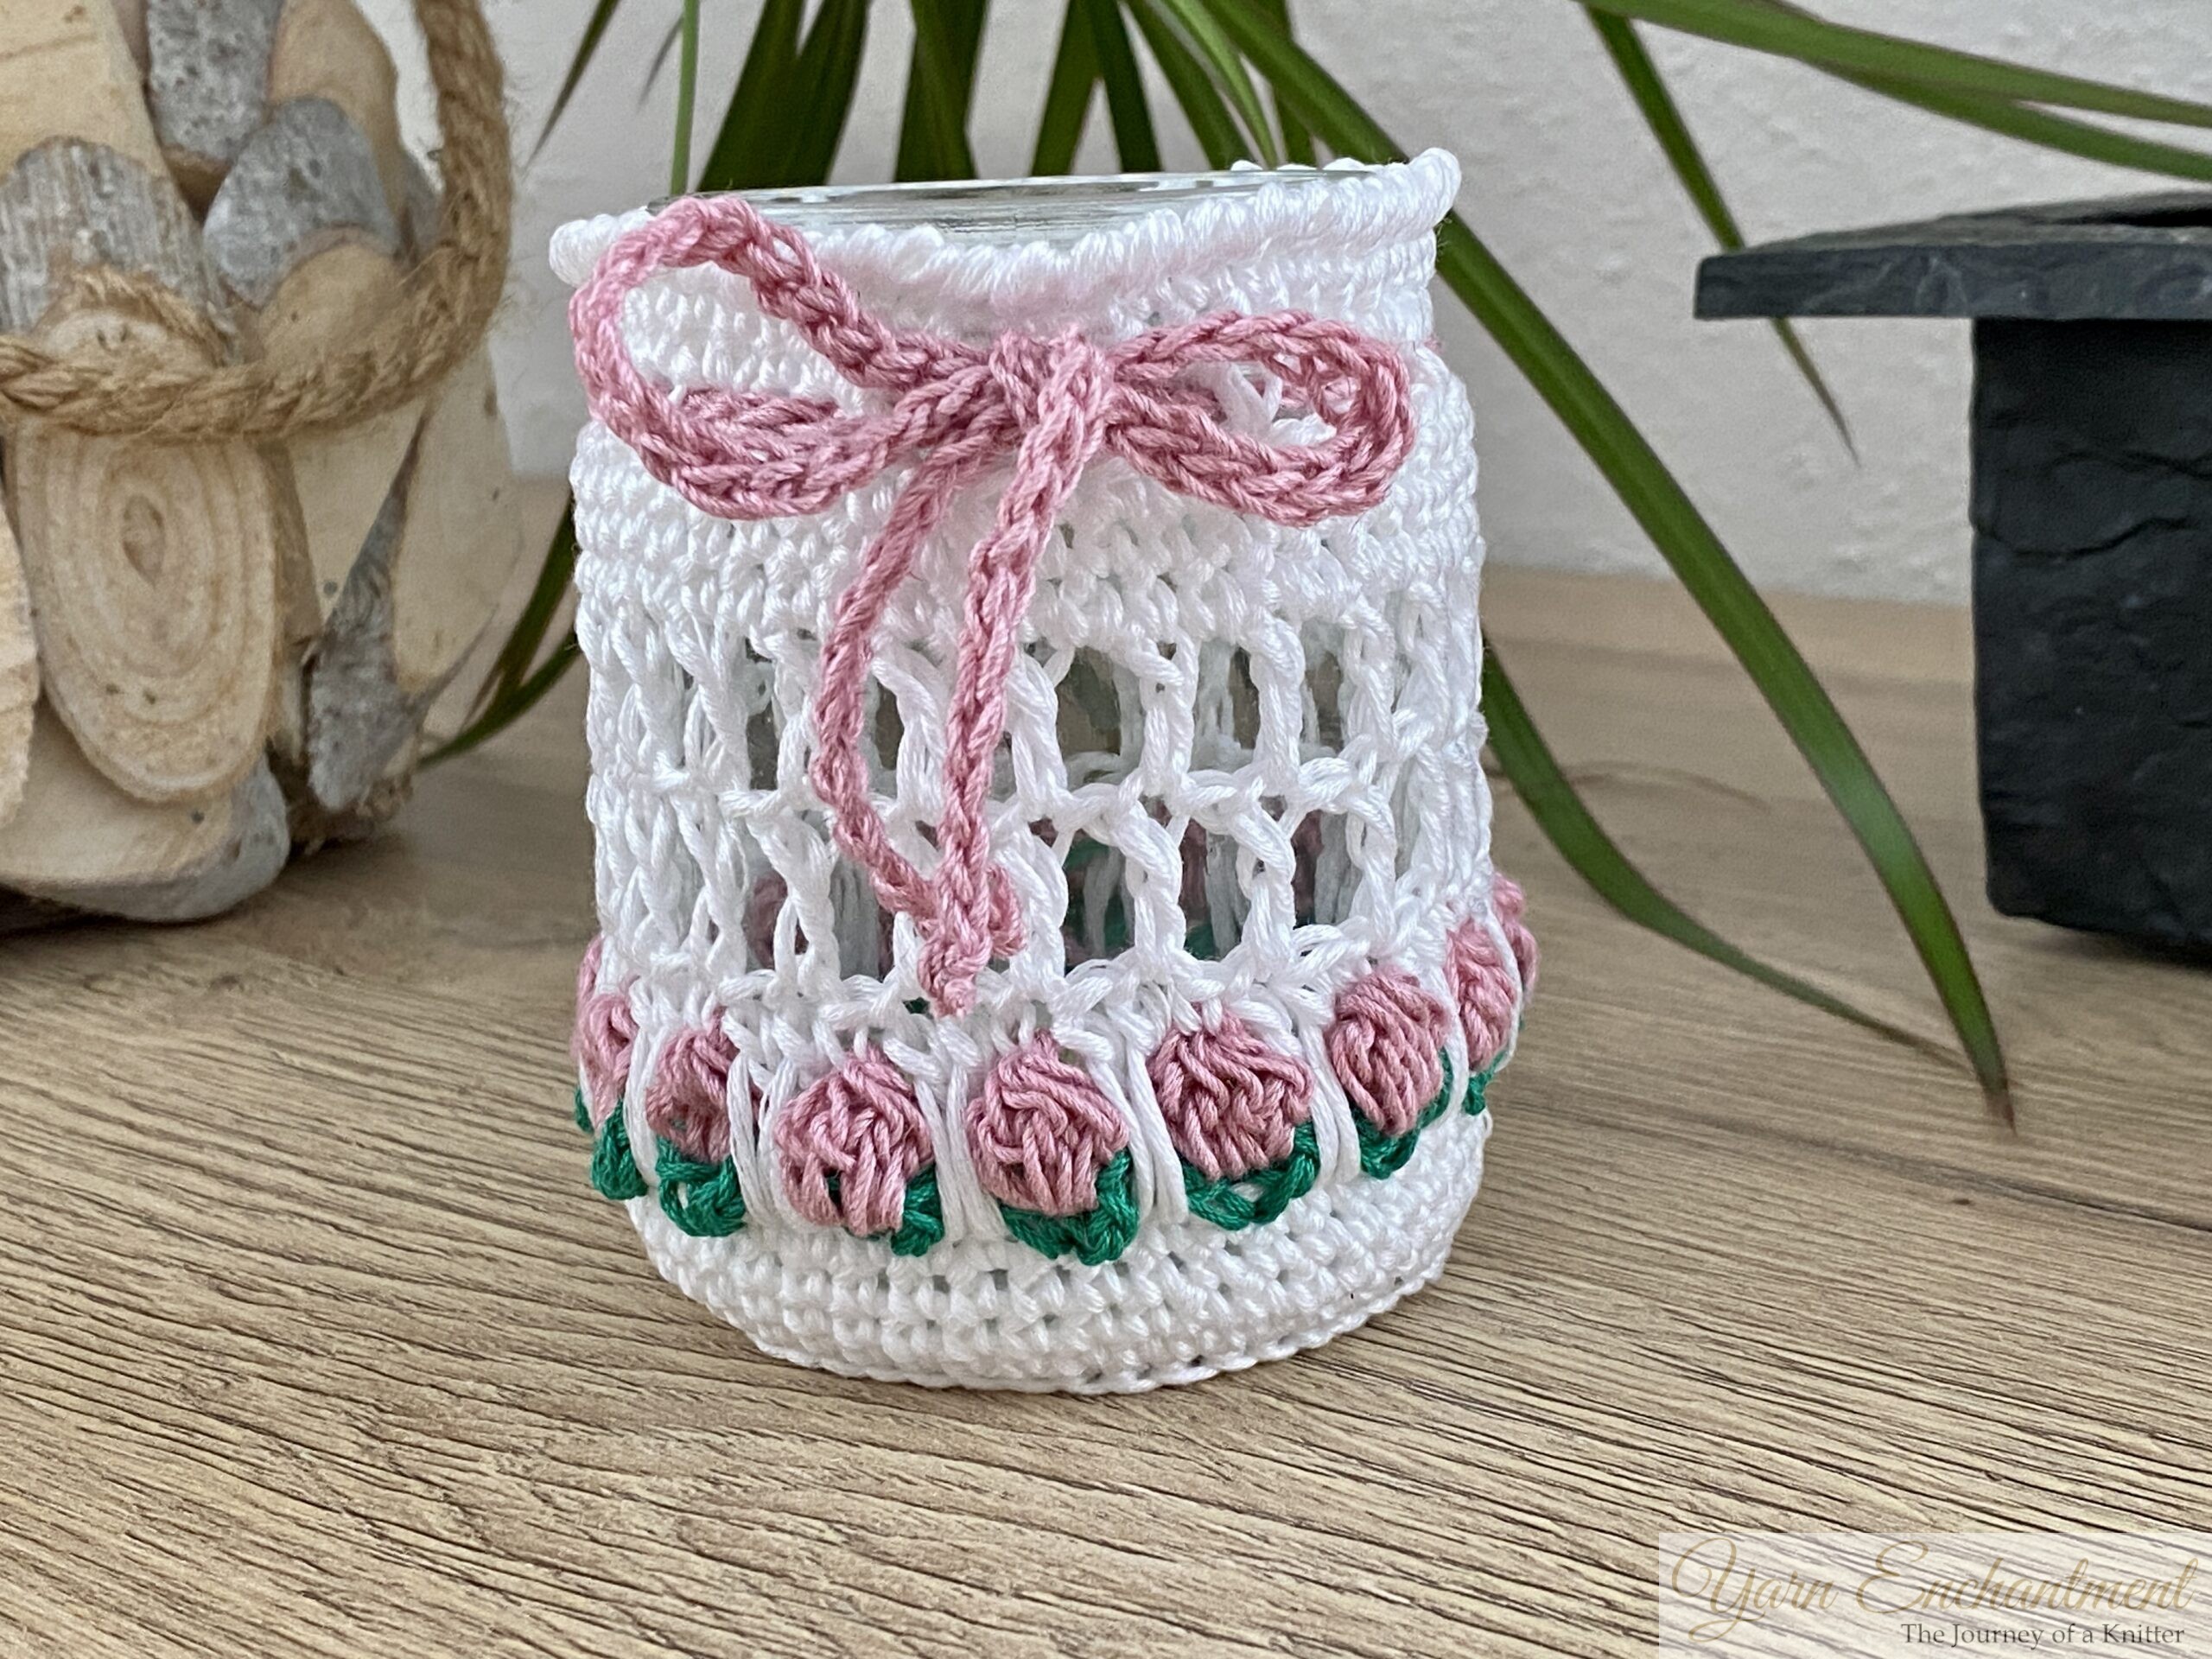
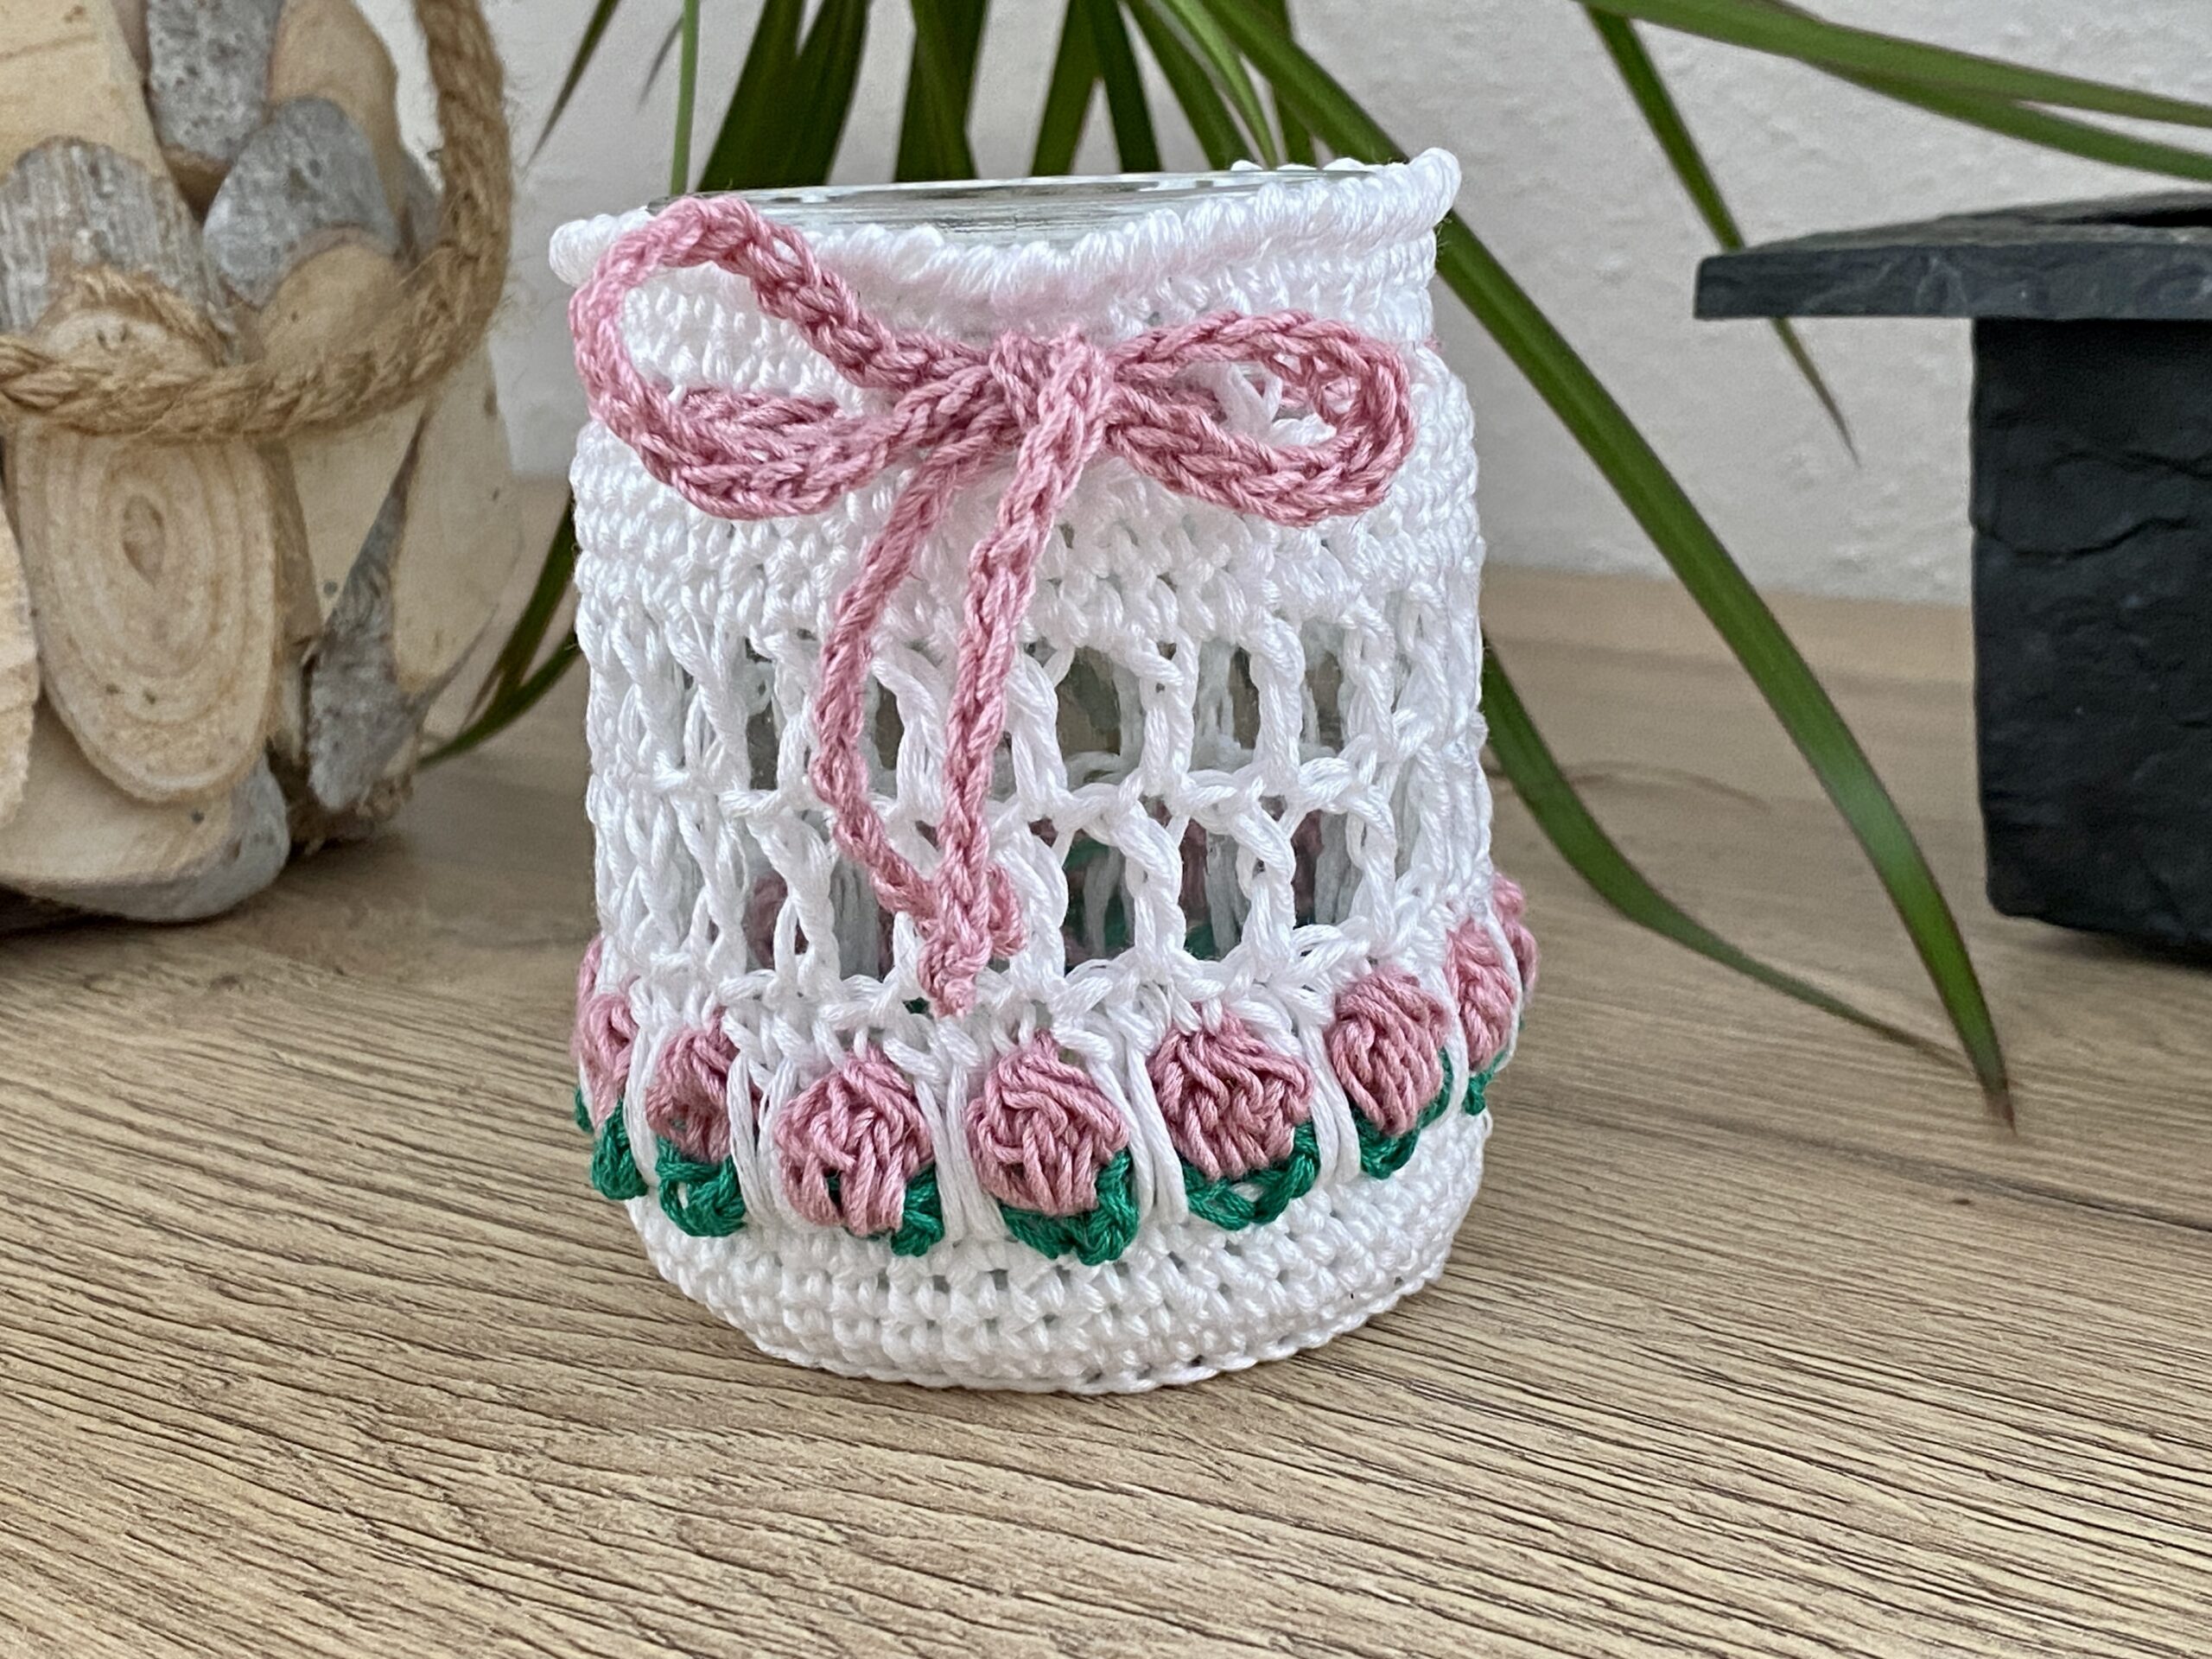
This beginner-friendly free crochet pattern includes adjustments for a smaller jars (just like the pink one pictured) and a standard-sized jar.

Round 1:
Ch 1 (does not count as a stitch), work a back post single crochet (bpsc) into the same stitch as the ch 1. Continue working bpsc into each stitch around. Slip stitch to the first bpsc to close the round. (54 sts)
Rounds 2 - 4:
Ch 1 (does not count as a st), sc in each st around, sl st to the first sc.
Note: After round 4, start working on the flowers. If you prefer the flowers to be positioned higher, add more single crochet rounds before beginning the flower section. For reference, my jar measures 8.5 cm (3.35 inches) from top to bottom, and my flowers start 1.5 cm (0.59 inches) from the bottom
Round 5: (Change to green color) (Tip for color change)
Ch 4 (counts as 1 dc + 1 ch), dc into the same space. *Skip 2 sts, work a V-stitch (dc, ch 1, dc) into the next st.* Repeat from * to * until the end of the round. Sl st into the third chain from the beginning. (18 V-stitches)
Round 6: (Change color for the flowers) (Tip for color change)
Sl st into the first ch space from the previous round, ch 3 (counts as 1 dc), then work a bobble stitch (4 dc) into the same ch space. *Ch 2, work a bobble stitch (dc5tog) into the next ch-1 space*. Repeat from * to * until the end of the round, ending with one bobble stitch followed by ch 2. Sl st into the top of the first bobble stitch. (You should have 18 bobble stitches.)
Round 7: (Change to main color)
Ch 1, sc on top of the bobble stitch. Work 2 Elongated Double Crochets (edc) in each space between the V-stitches (essentially working the edc into the last round of single crochets; this will visually separate the flowers from each other). *Sc on top of the bobble stitch, 2 edc in each space between the V-stitches*. Repeat from * to * until the end of the round. Join with a sl st to the first sc. (54 sts)
Round 8: (Your stitch count needs to be a multiple of 2)
Ch 4 (counts as 1 dc + 1 ch), skip 1 st, 1 dc into the next st. *Ch 1, skip 1 st, 1 dc into the next st*. Repeat from * to * until the end of the round. Join with a sl st to the third chain. (27 dc, 27 ch-1 spaces)
Round 9:
Ch 4 (counts as 1 dc + 1 ch), *skip the ch-1 space, 1 dc into the next dc, ch 1*. Repeat from * to * until the end of the round. Join with a sl st to the third chain. (27 dc, 27 ch-1 spaces) Note: For taller jars, repeat round 8 until you achieve the desired height. Make sure to leave approximately 2 cm (0.79 inches) for the border rounds at the top.
Round 10 - 11:
Ch 1 (does not count as a st.), sc into the same space, then single crochet into each stitch around. Join with a sl st to the first sc.
Note: If you want to make the border wider, work additional rounds of single crochet. Keep in mind that the ribbon should be positioned approximately in the middle of the single crochet rounds.
Round 12: (Your stitch count needs to be a multiple of 3)
Ch 1 (does not count as a st), sc into the same space, *Ch 2, skip 2 sts, sc into the next st*. Repeat from * to * until the end of the round. Join with a sl st to the first sc. (18 sc, 18 ch-2 spaces)
Round 13:
Ch 1 (does not count as a st), sc into the same space, *2 sc into the ch-2 space, 1 sc into the next sc*. Repeat from * to * until the end of the round. Join with a sl st to the first sc. (54 sts)
Round 14: (We will work a crap stitch round)
To start the row, ch 1 and insert your hook into the next full stitch to the right. Pull up a loop. Yarn over and pull through both loops on the hook (first crab stitch made). Continue working in the same manner around your entire piece until you reach the beginning. Fasten off and weave in your end, blending it into the first crab stitch of the row.
Finishing Touches:
Chain a line long enough to fit around your jar, ensuring you have enough to tie a ribbon. Slip stitch all the way back along the chain. Fasten off and weave in all ends. Thread your line through the eyelets from Round 11 and tie a ribbon. Light a candle and enjoy your warm summer nights!
Techniques used for this pattern
Back Post Single Crochet
- Starting from the back of the work, insert your hook on the right side of the post, from back to front. (The right side of the post is the space between the post of the current
stitch and the post of the previous stitch) how to back post single crochet - Continue across the post, and insert your hook from front to back, to the left of the post. (The left side of the post is the space between the post of the current stitch, and the post of the next stitch)
- Yarn over. Reverse steps 1 and 2, drawing the yarn forward, around the post, and through to the back of the work.
- Yarn over. Draw the yarn through the two loops on the hook. You have now made one bpsc.
Bobble Stich (dc5tog)
How to work the Bobble Stitch (dc5tog):
- First Double Crochet:
- Yarn over
- Insert the hook into the designated stitch or space
- Yarn over again and pull through the stitch. You will have three loops on your hook
- Yarn over and pull through the first two loops. You will have two loops remaining on your hook
- This completes the first double crochet (dc) of five
- Yarn over again
- Insert the hook back into the same stitch or space where the first dc was worked
- Yarn over and pull the yarn through the stitch. You will now have four loops on your hook
- Yarn over again and pull through only the first two loops on the hook. You will now have three loops remaining on your hook
- Repeat steps 2–5 three more times. Each repetition will create an additional double crochet into the same stitch or space, resulting in a total of five double crochets. After the final repetition, you should have six loops on your hook
- Yarn over and pull through all six loops on the hook
- Ensure the final bump of the bobble faces the outside of your work
- There should be one loop left on the hook
Elongated Double Crochet (edc):
- Yarn over
- Insert your hook into the designated stitch or space
- Yarn over and pull through the stitch.Pull it all the way up to high of your bobble stitches
- Work your stitch like a regular double crochet
- Yarn over and pull through the first two loops on your hook (leaving two loops remaining)
- Yarn over again and pull through the remaining two loops on your hook

A Little Way to Say Thanks
Yarn Enchantment is my cozy hobby corner on the internet. If something here made your knitting day easier or you simply enjoy reading my posts and would like to say thank you, you can leave a small Ko-fi tip - but only if you truly want to.
My patterns and tutorials stay free for everyone, always. Every little tip just goes toward new yarn and a cup of tea for my cozy knitting evenings.
☕ Support me on Ko-fiGallery
You Might Also Like

 |
|
Join the Cozy Corner Newsletter
Hello, creative soul. Welcome to the Yarn Enchantment Newsletter, a little space where we celebrate all things cozy, crafty, and full of heart. Think of this as your friendly crafting companion, a soft dose of inspiration delivered straight to your inbox, just for you. Each newsletter brings you: ✨ Notifications about new patterns and tutorials – easy knitting patterns and beginner crochet projects you won’t find anywhere else 🧶 Practical yarn tips for new crafters, plus advice on the best yarn for fall, blankets, and handmade gifts 💌 Small stories and adventures from my own workbench, because crafting is as much about the journey as the finished piece Whether you’re knitting by the fire, looking for your next creative spark, or simply wanting a quiet moment with your hooks and needles, this newsletter is here to cheer you on. Crafting isn’t just about the final project. It’s about the joy, the peace, and the stories we weave along the way. So grab a cup of tea or coffee, settle in, and join me. Together we’ll make a little magic, one stitch and one story at a time. I’m so glad you’re here. Let’s create something beautiful together. Sign up below to receive your first email, and feel free to leave a comment on the blog if there’s a topic you’d love to see covered. Your ideas might just become our next newsletter feature. |