

Alpaca vs Llama: How to Tell Them Apart (Fiber, Size, Personality)
February 25, 2026
Back After 4 Months
July 6, 2026From Knitting Needles to Sewing Pins: How I Made My First Custom Dress

Originally published on March 11, 2026
The days are becoming brighter and warmer again - birds are singing, the sun’s gentle warmth kisses your skin, and there’s a quiet buzz of renewal in the air. Recently, I went shopping, hoping to find a few fresh pieces for my daughter and me. But after standing in that changing room, I left feeling… less than great. I’m usually an M or L, but this time, even the L dress barely hugged my curves. My skin felt exposed, my confidence wobbled, and the whole store vibe? Just… off. It wasn’t about my body - it was about the impossible, cookie-cutter sizing that leaves so many of us feeling like we don’t fit in. Literally.
So I made a choice: no more settling. I walked out with fabric instead of clothes - and a whole lot of determination. I wanted garments that hugged my shape, celebrated my curves, and made my daughter feel just as lovely in hers. And I’m so glad I did. Because today, I’m inviting you to come along on my sewing journey - the messy, magical, wildly rewarding adventure of making my very first dress… for me and my daughter.
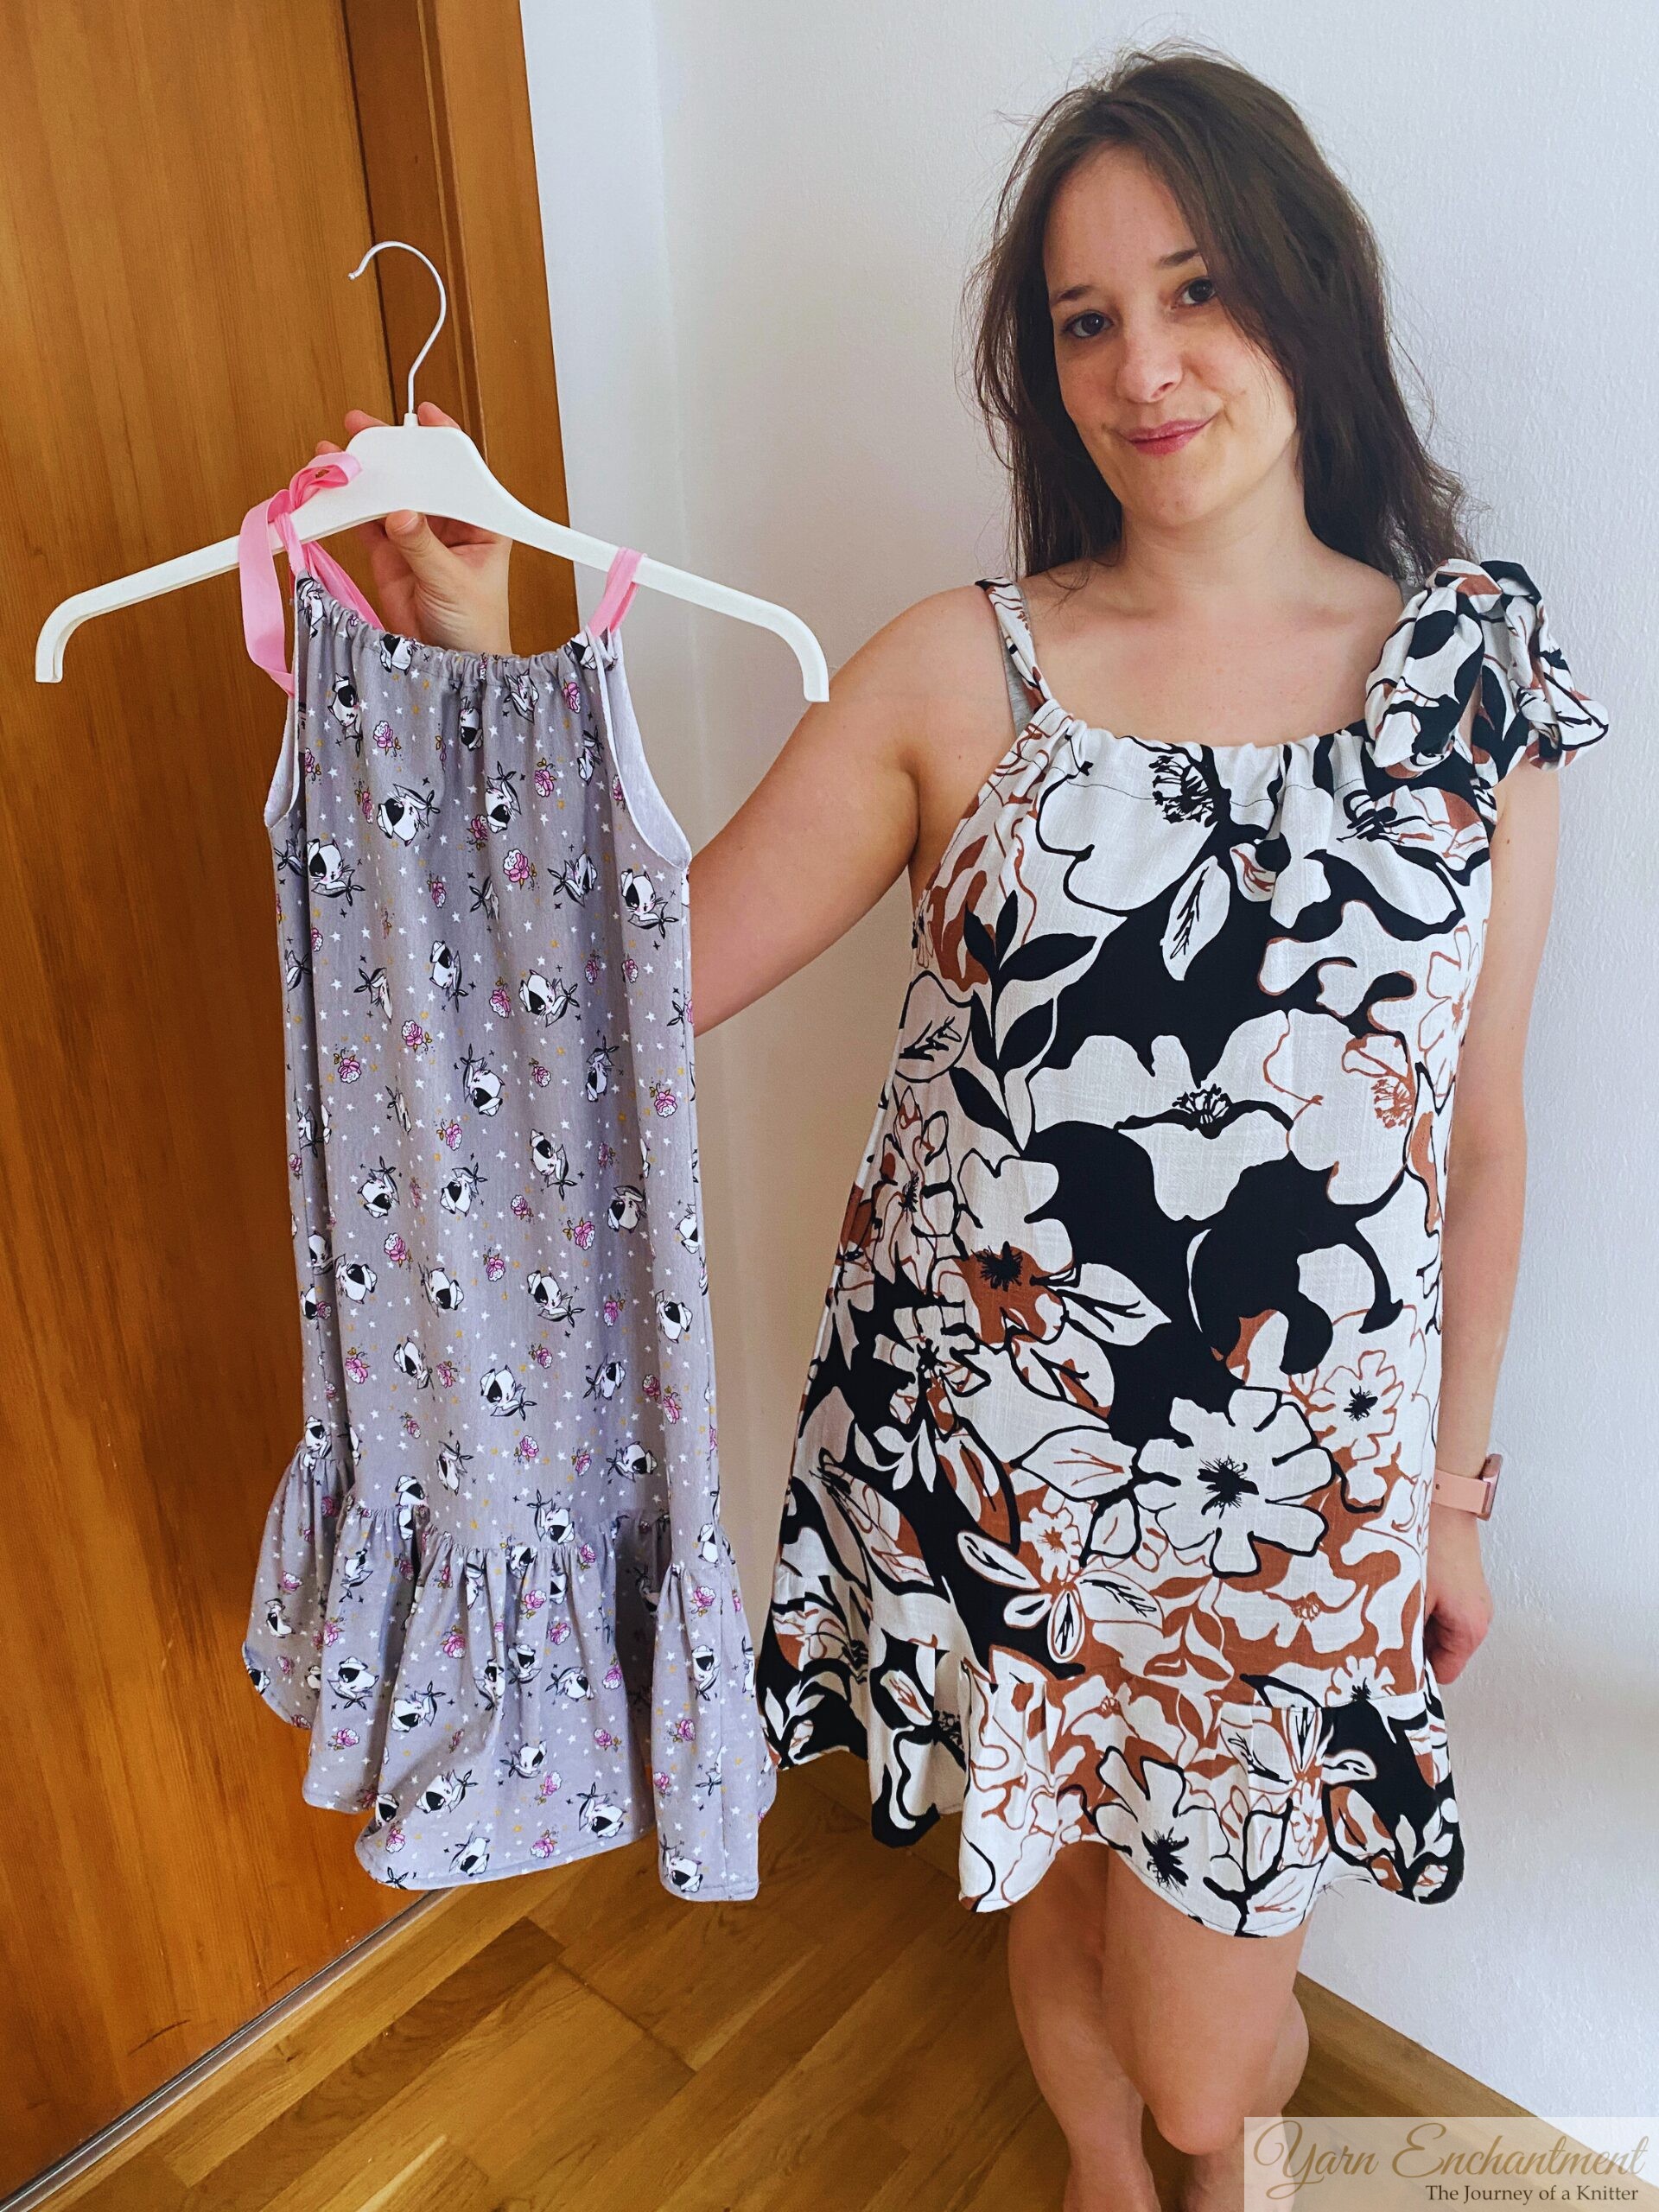 | My two dresses |

Why I Ditched the Store & Picked Up the Sewing Machine
Let’s be honest: shopping for clothes can feel like a personal affront sometimes. You’re not “too big”- you’re just not built like the mannequin or all the models. Brands size garments for a mythical average that doesn’t exist. I was tired of squeezing into clothes that didn’t flatter, or worse, made me feel like I needed to shrink to fit them.
I didn’t want to buy something that might make me feel worse - so I headed to our local fabric store instead. And guess what? They’re in the middle of a huge clearance sale - everything’s 70% off! If you’ve never sewn before (like me!), you’re probably going to make a few mistakes… and that’s okay. In fact, it’s expected. Snagging beautiful fabric at a steal? That’s not just smart - it’s kind to your confidence.
For my dress, I chose a soft linen-viscose blend - lightweight, breathable, and with the dreamiest drape. It feels like a gentle hug when you wear it. For my daughter, I went with a cozy 100% jersey - stretchy, washable, and perfect for twirling, climbing, and all the joyful chaos of being six. Plus, if I messed up a seam, no one would notice - and that’s the kind of beginner-friendly magic we all need.
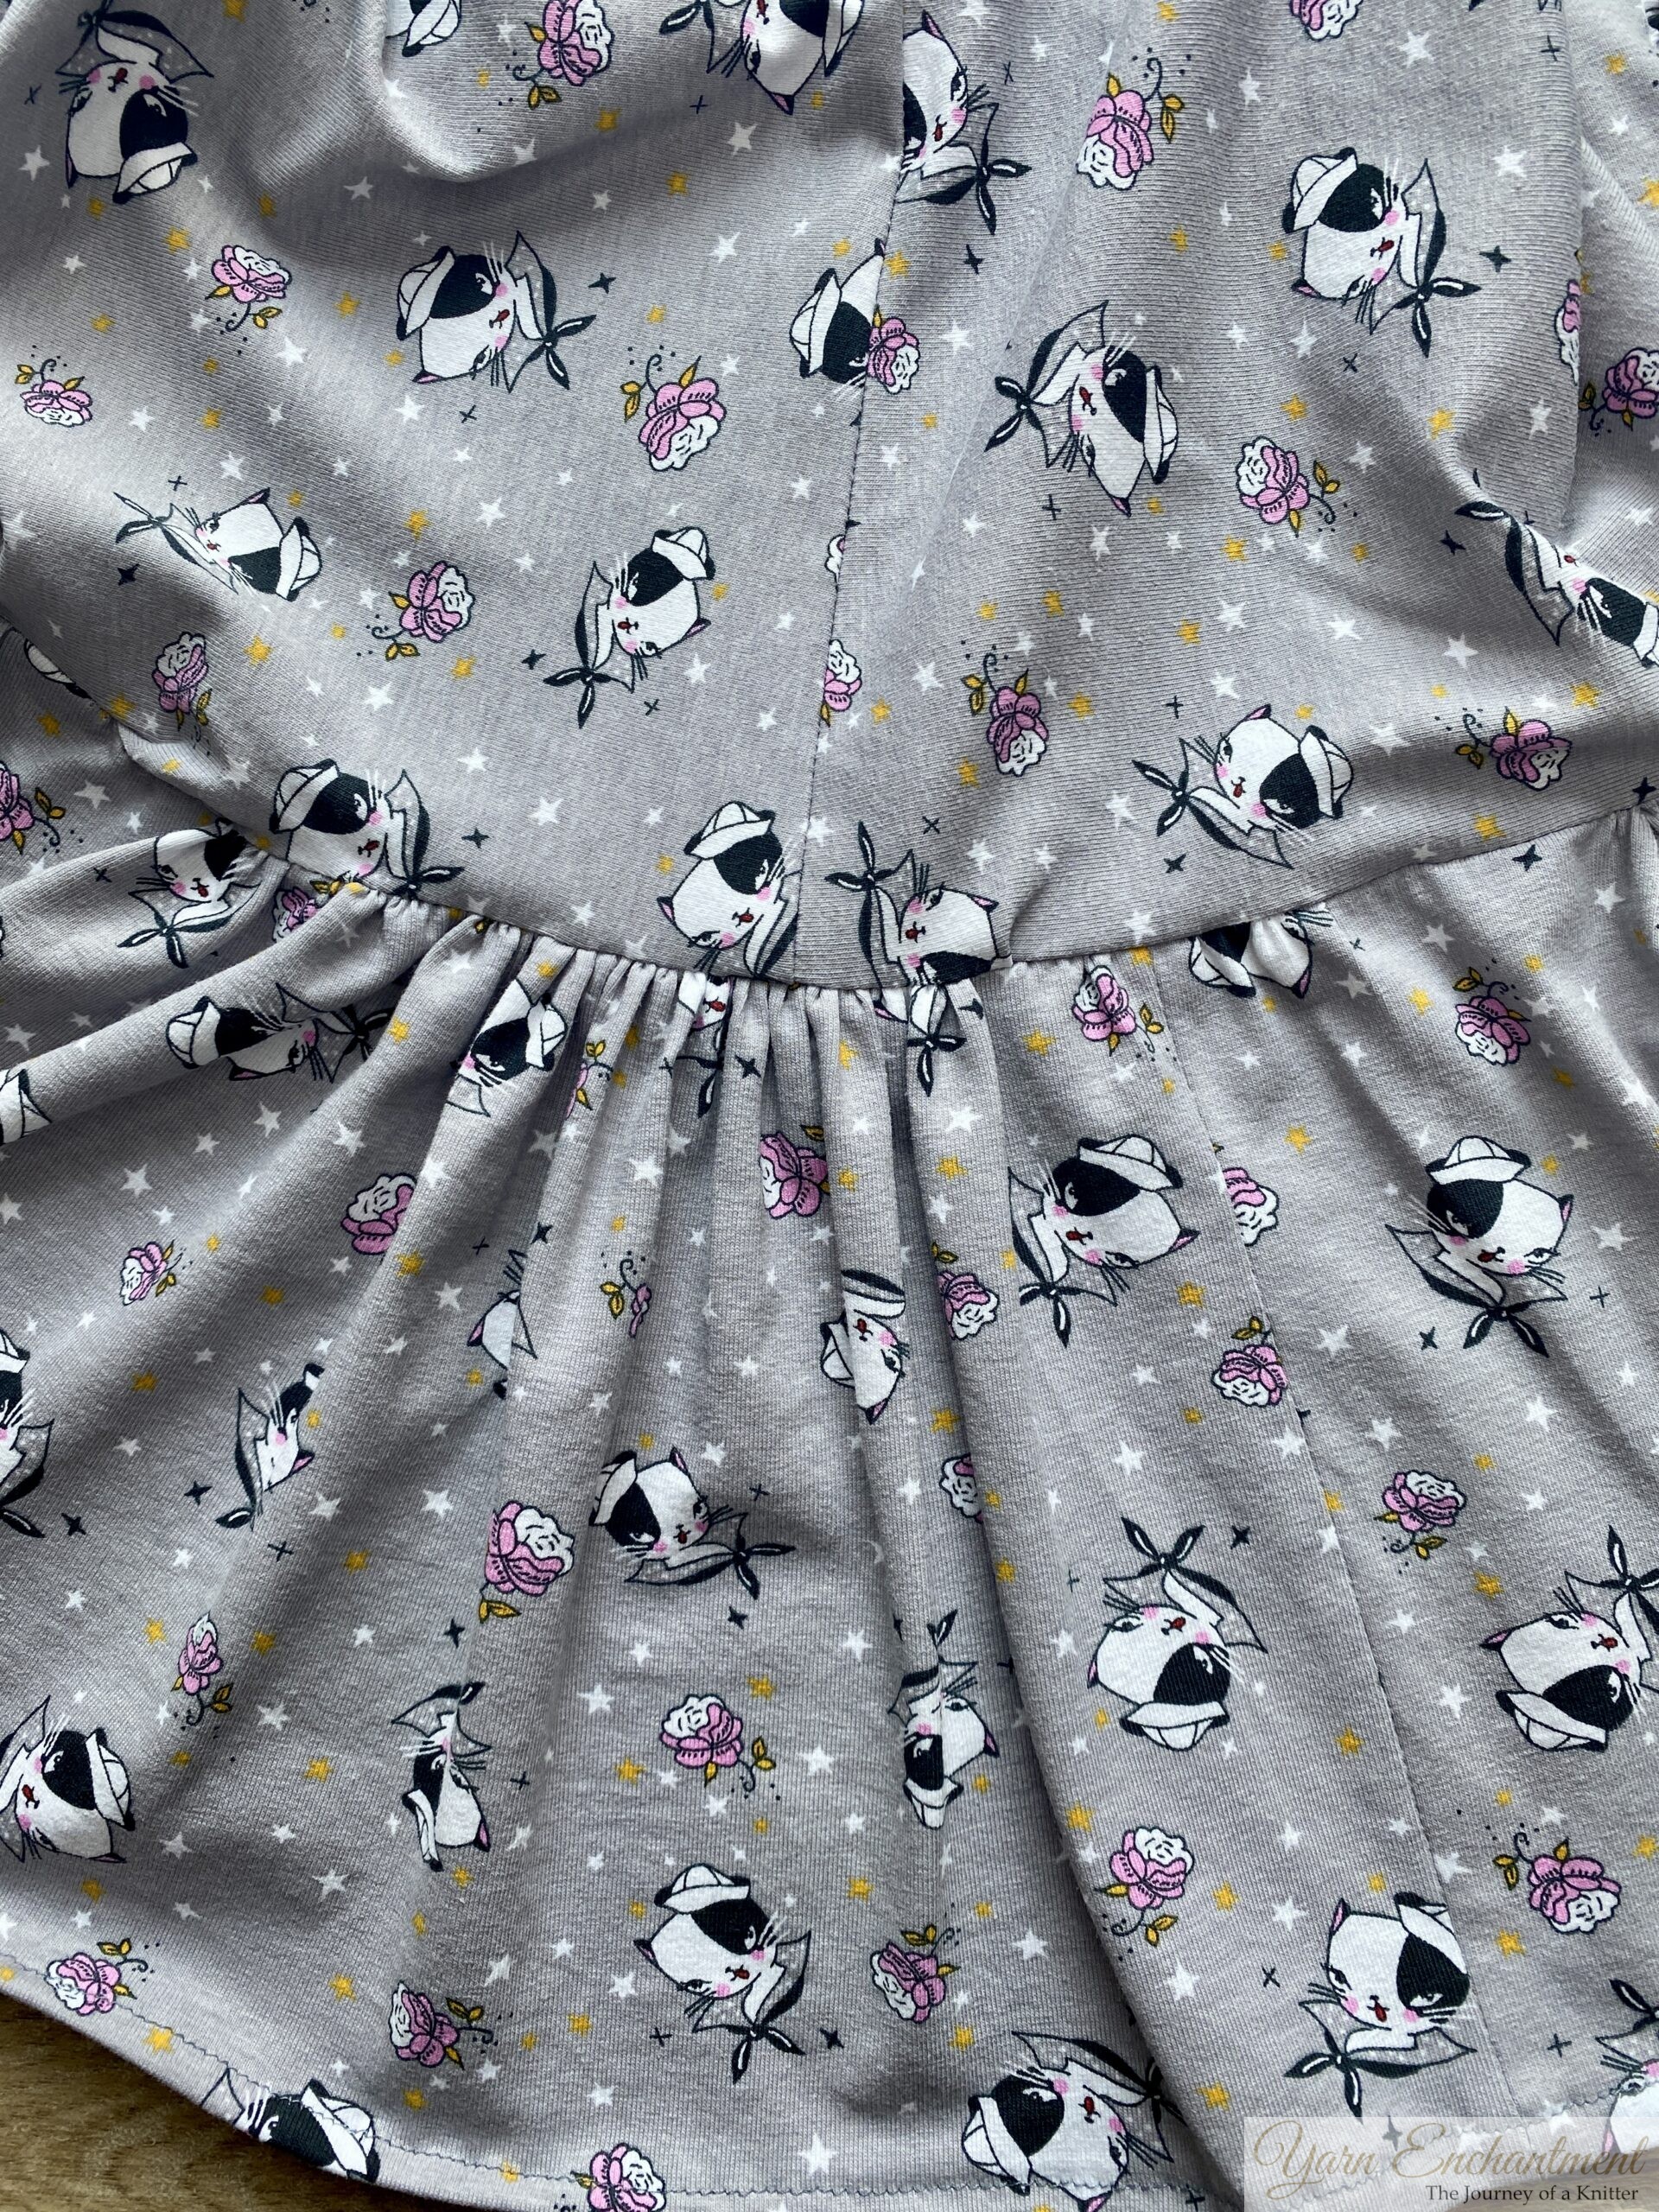
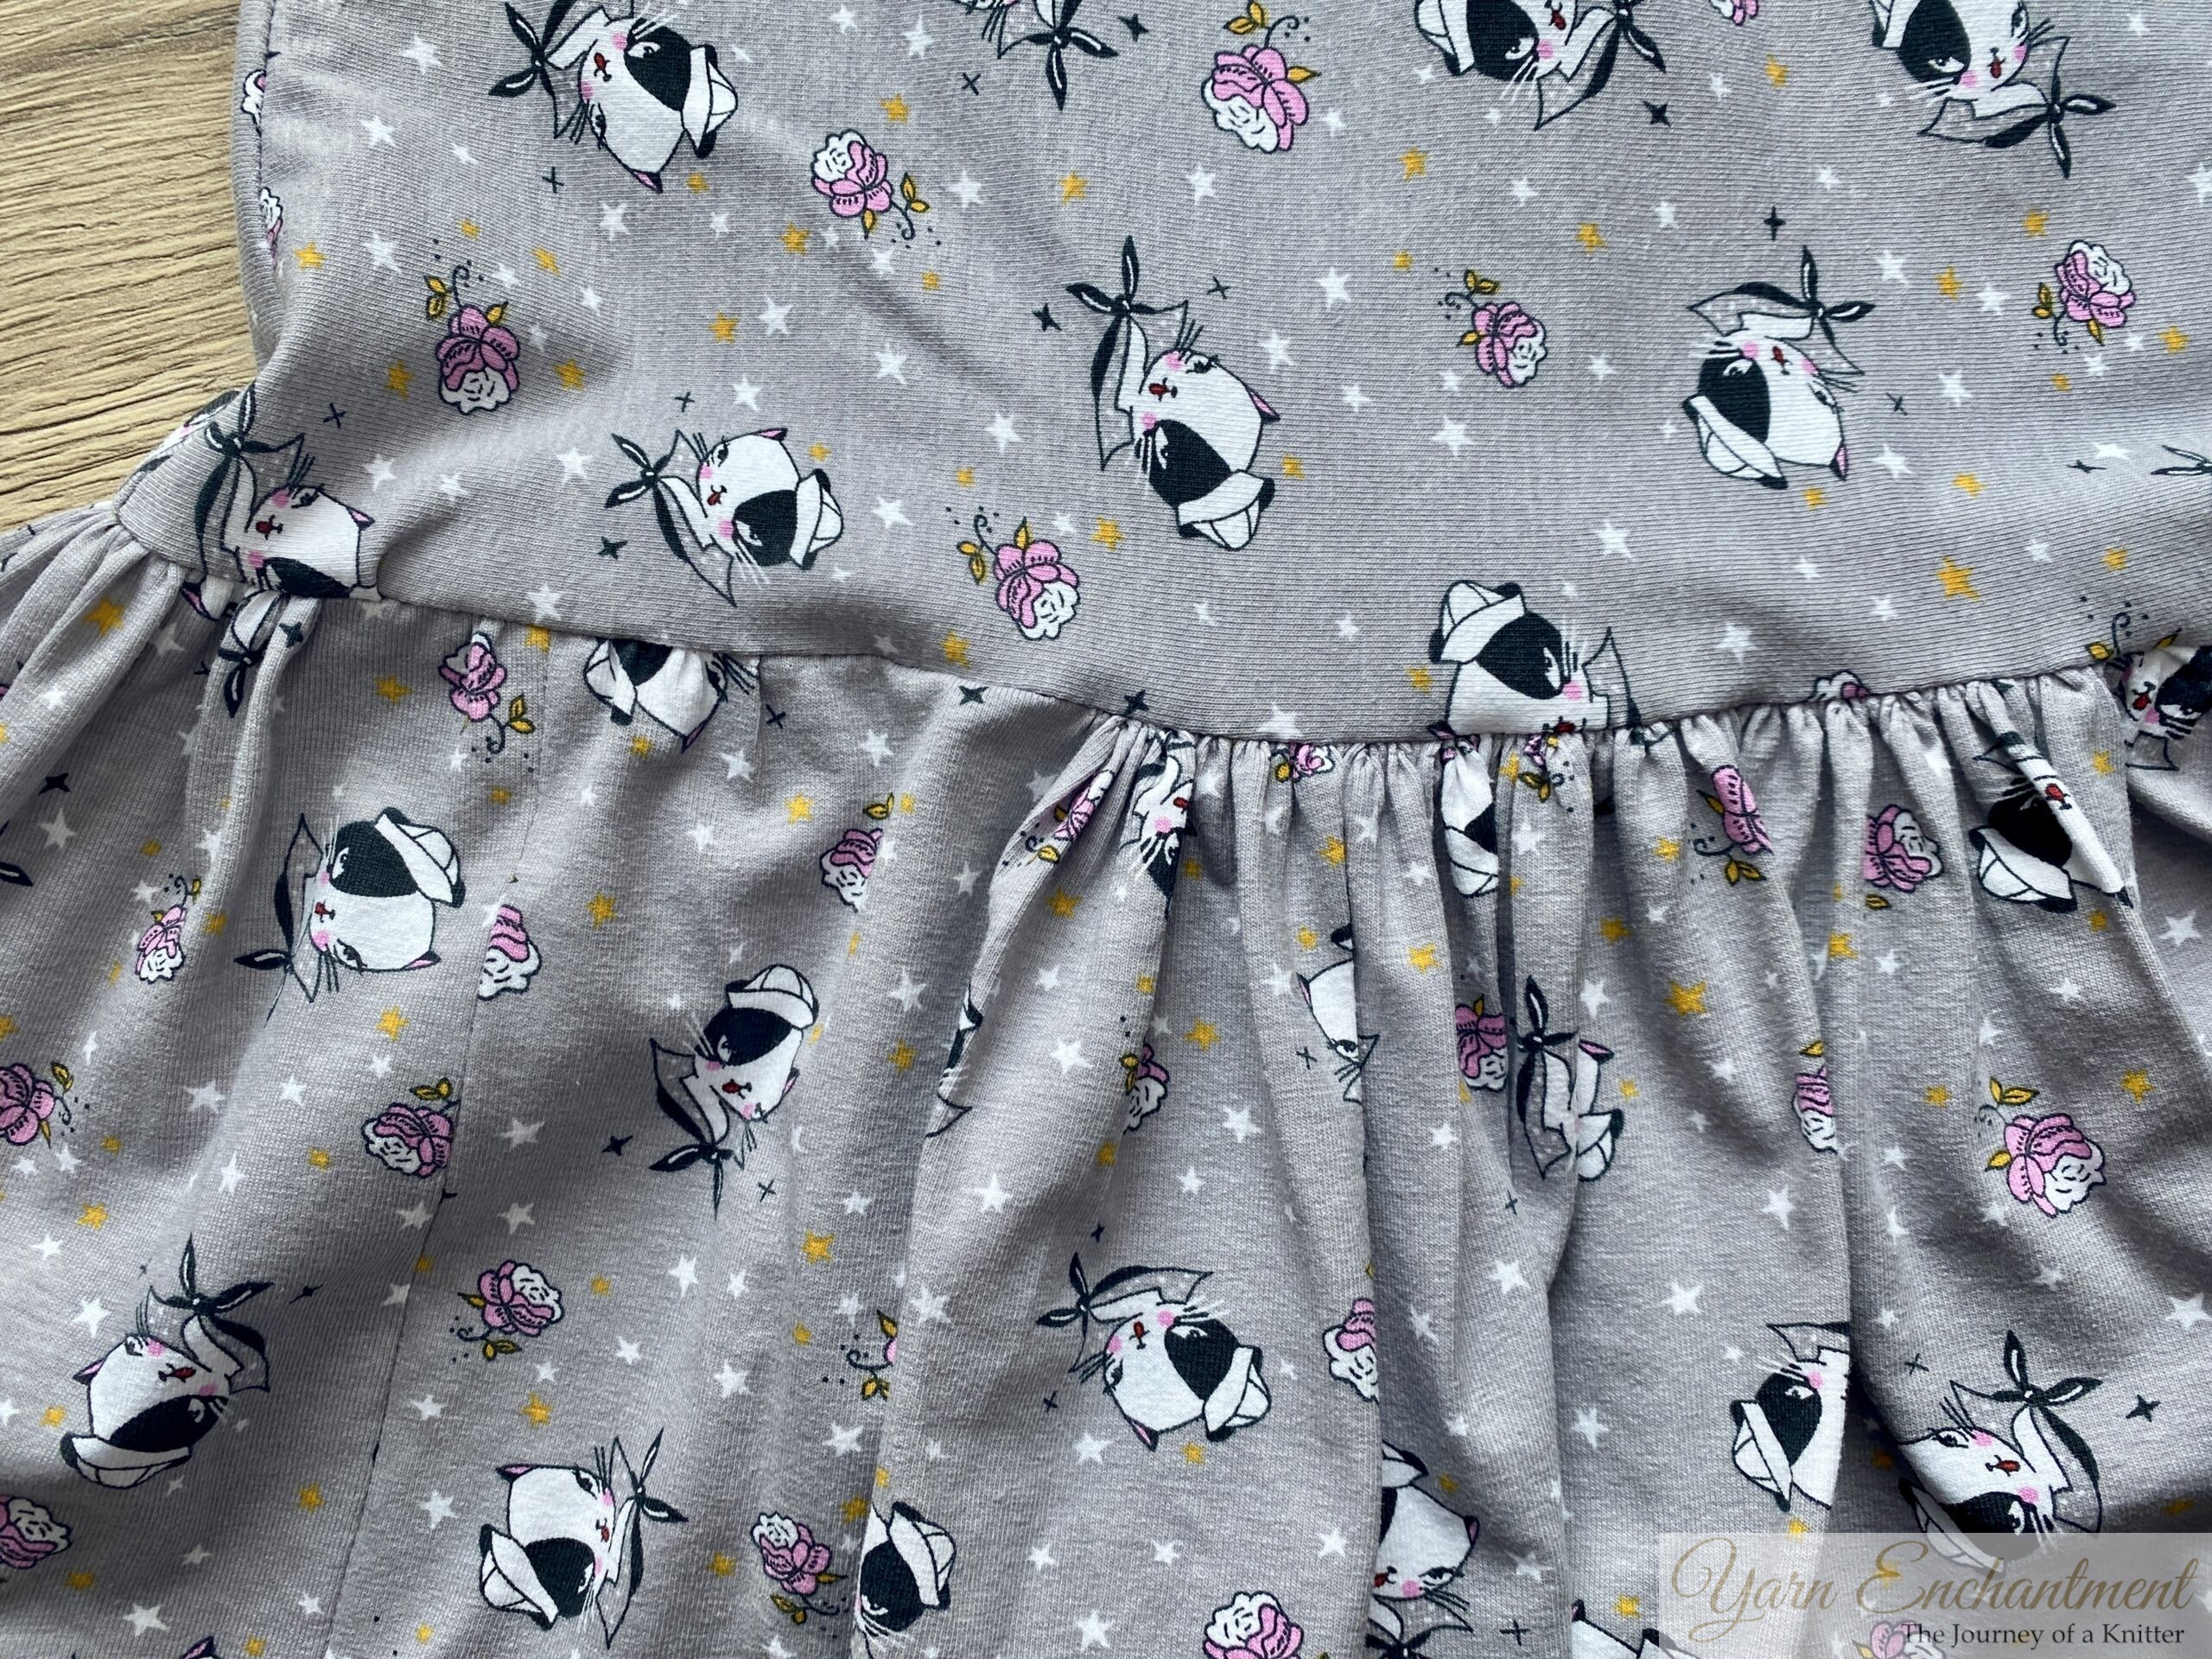
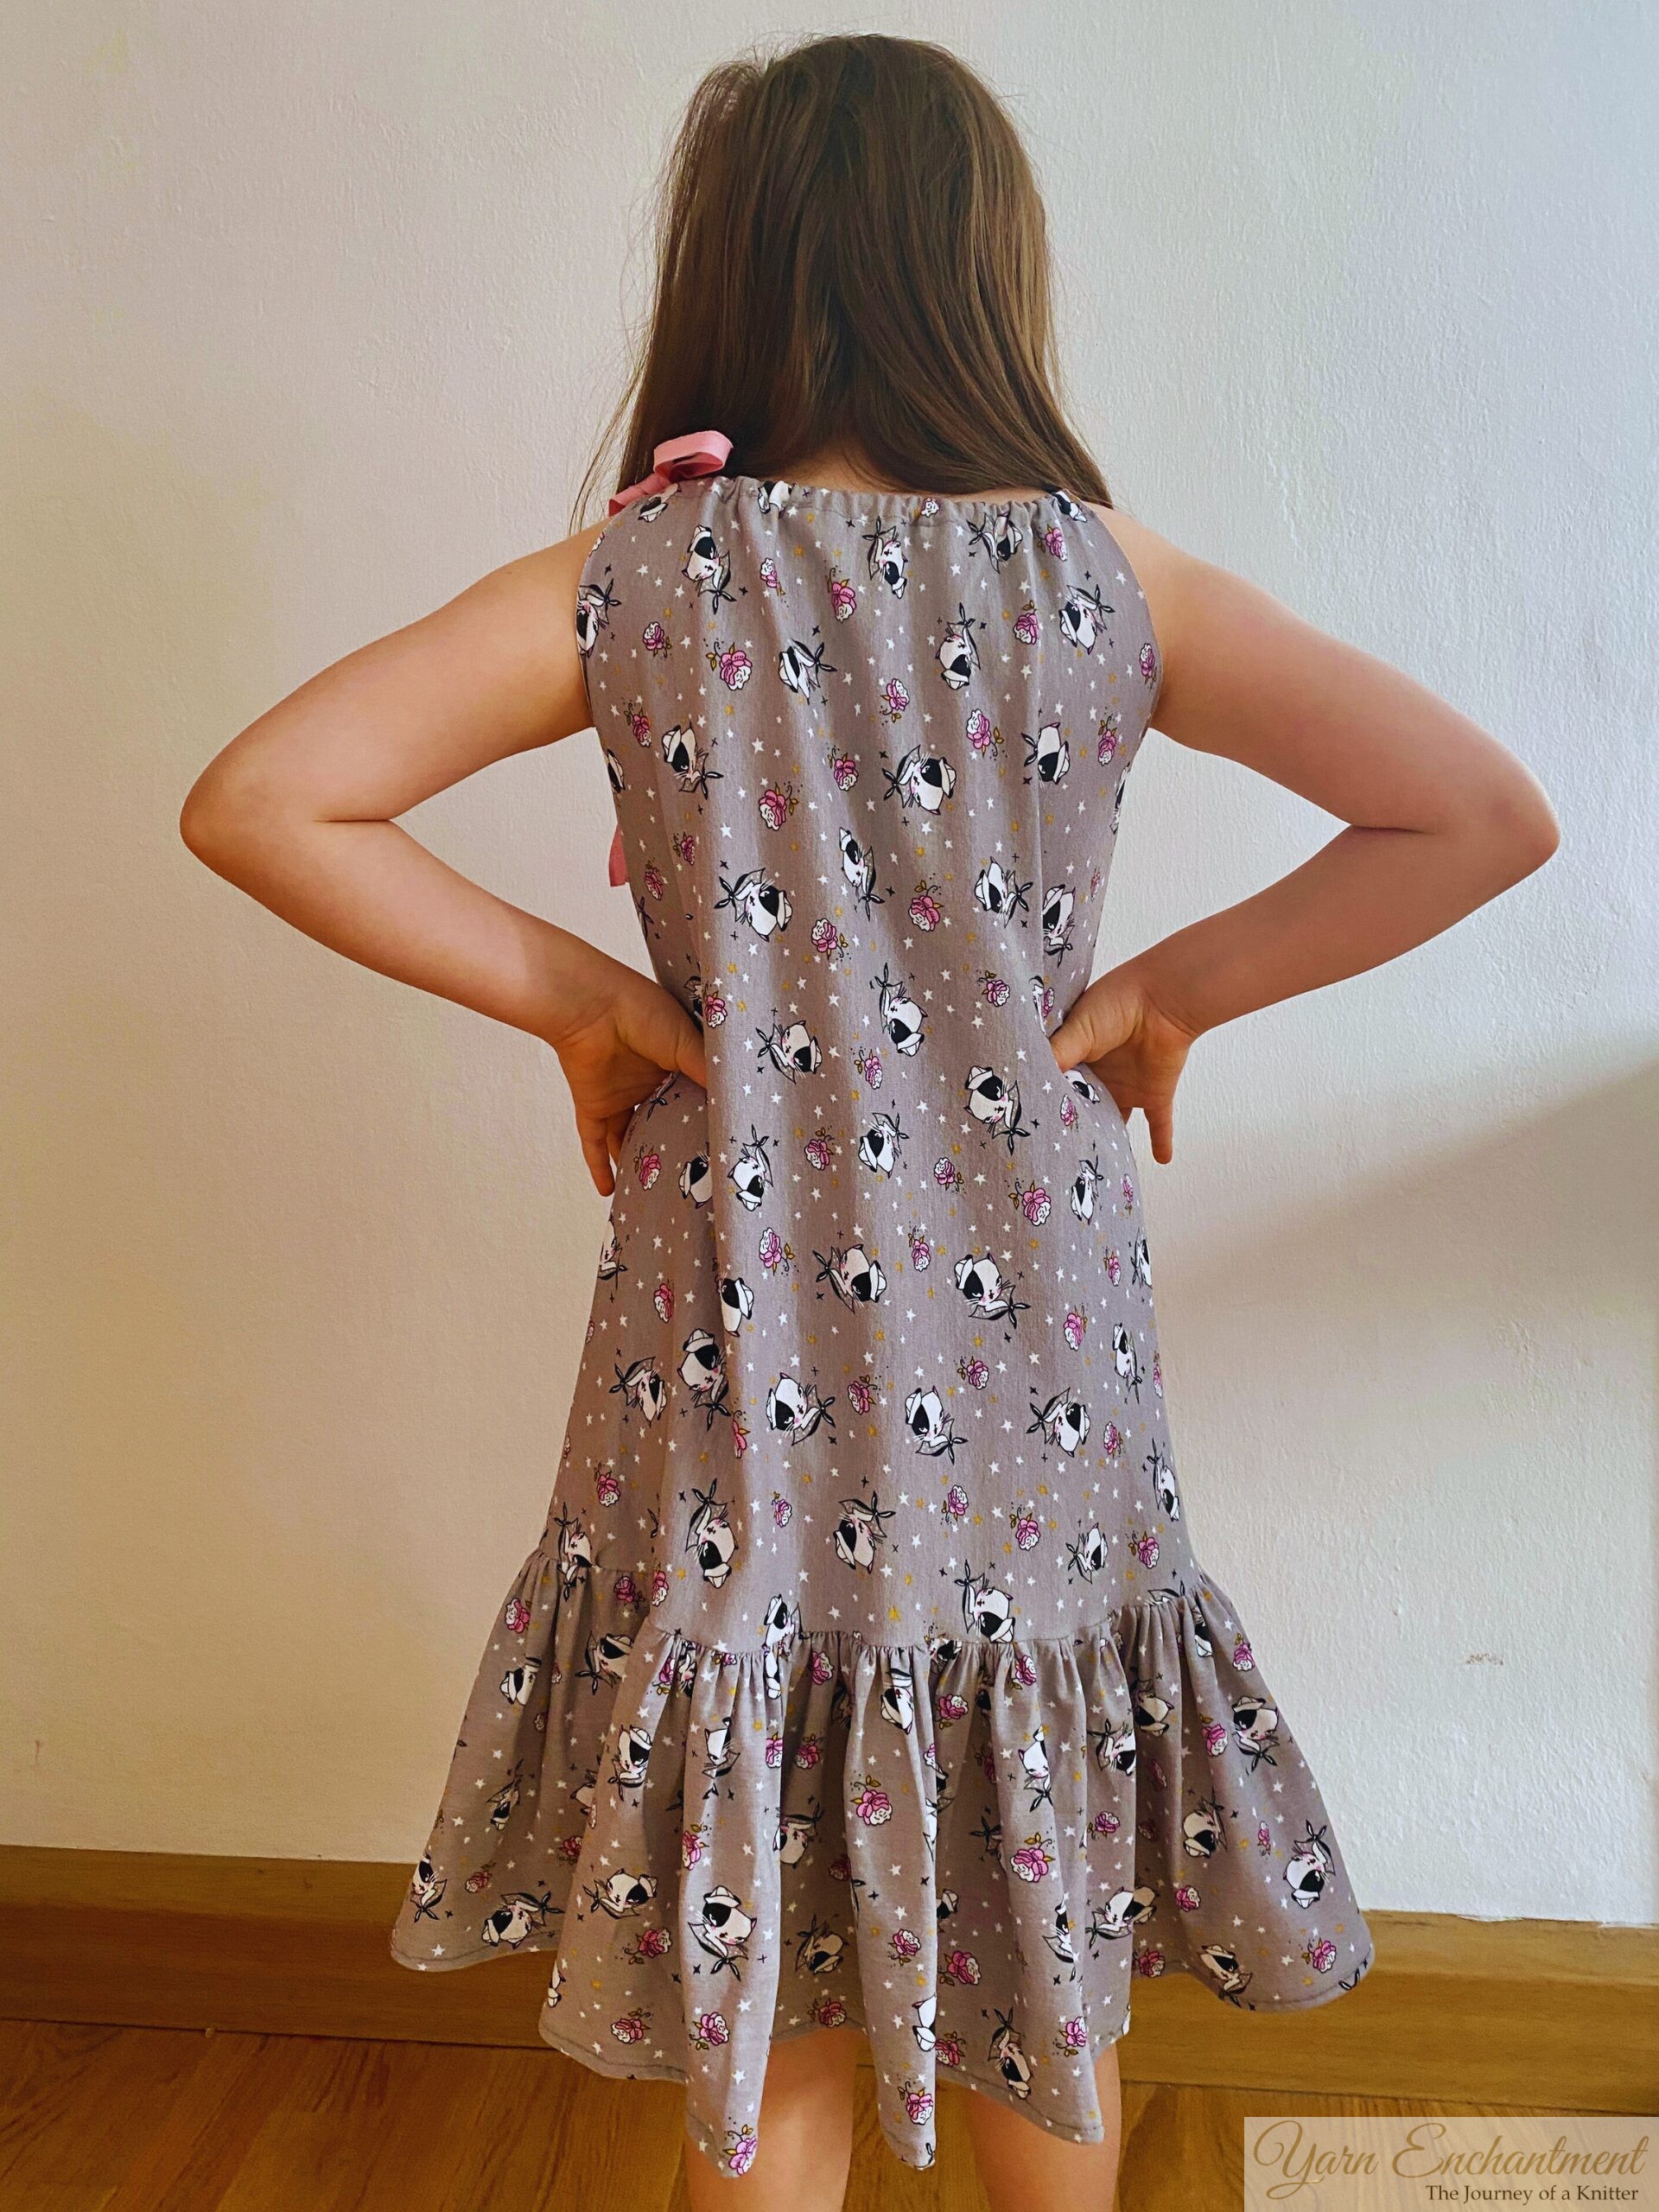 | Back view of my daughter’s custom-made summer dress - featuring playful cat prints and a ruffle hem! |

My First (Okay, Second) Garment: A Dress for Me & My Mini-Me
This was only my second garment ever - my first was a simple warp skirt for myself last summer. This time, I wanted something that felt special, something we could wear together. I made mine a little shorter - just above the knee - and hers a little longer, grazing just below her knees. I wanted us to match in spirit, not in length. Because let’s face it, she’s 6, and she loves twirling. I’m 37, and I love not tripping over hems.
Jess’s tutorial made it so easy. She teaches you how to measure yourself (bust, waist, hips, length), then draft a simple A-line dress pattern using those numbers. No fancy software, no complicated math - just a pencil, paper, ruler, and your body as the blueprint.
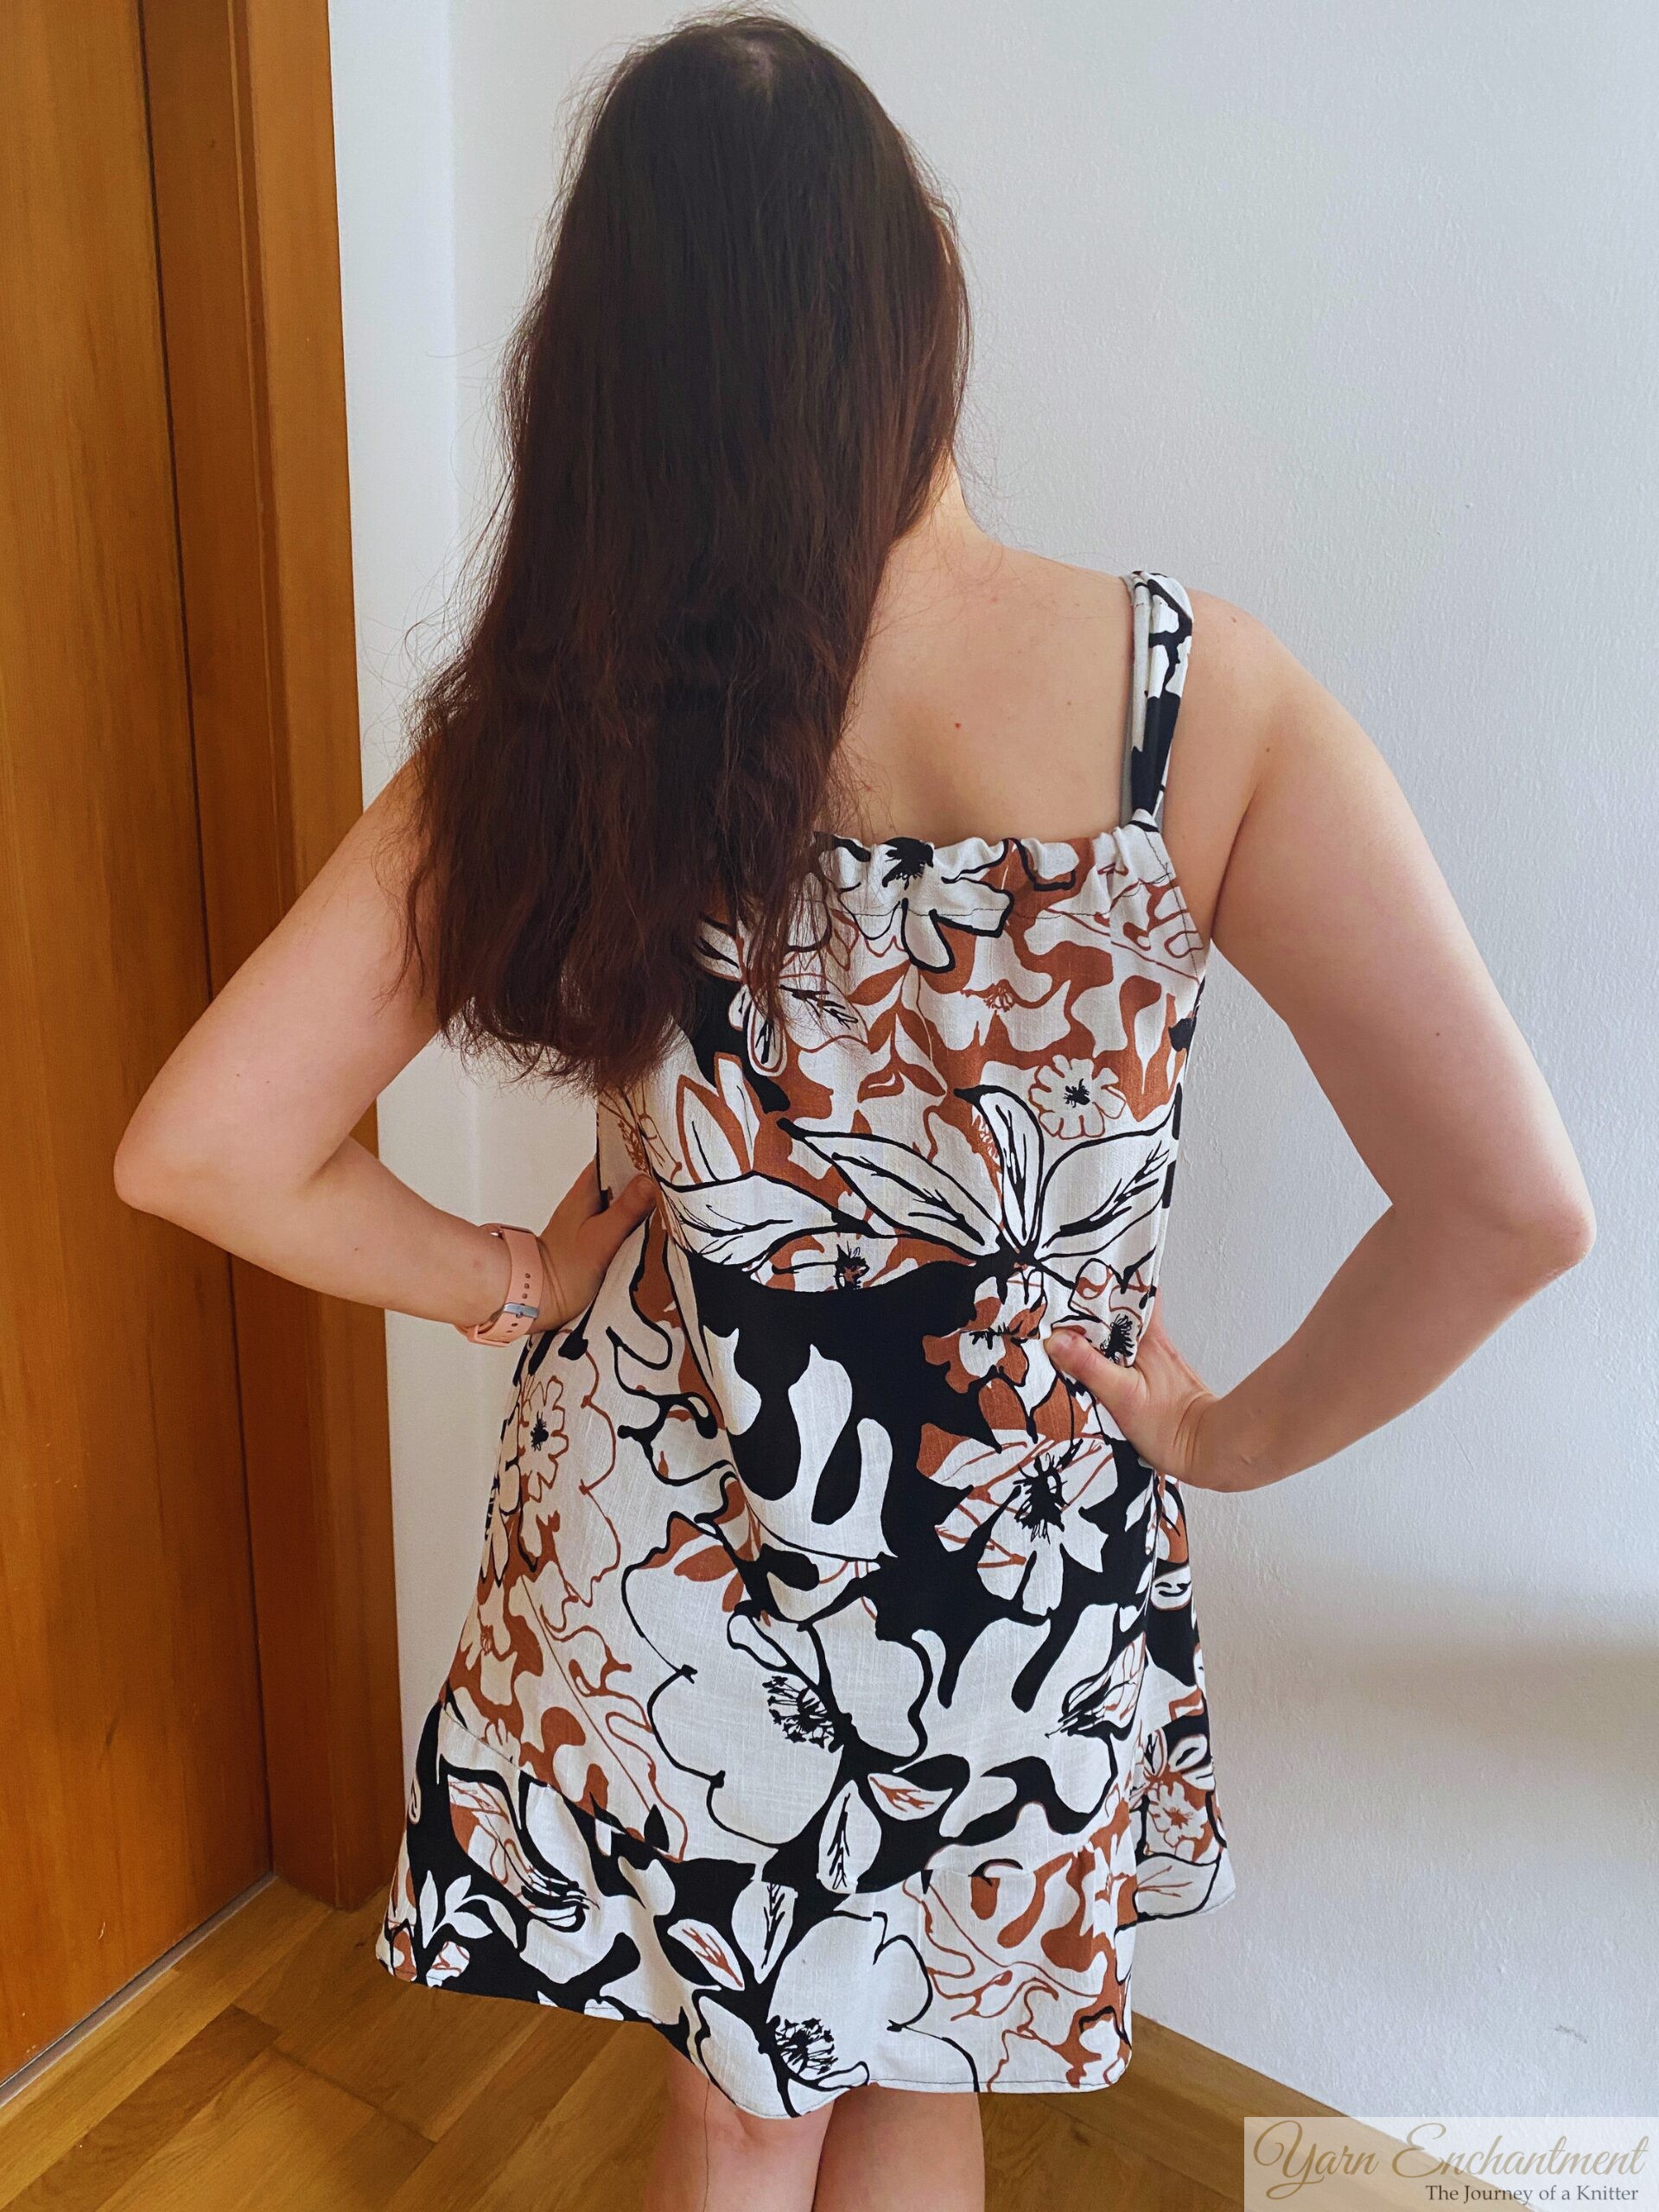 | Back view of my first sewn dress |

The Process: From Fabric to Fit
Here’s how it went down:
-
Measure Twice, Cut Once (and Then Panic a Little)
I measured myself, then measured my daughter. Then measured again. And again. I was nervous - I didn’t want to ruin the fabric. But Jess’s instructions were so clear, I felt like she was standing next to me, holding my hand. -
Drafting the Pattern
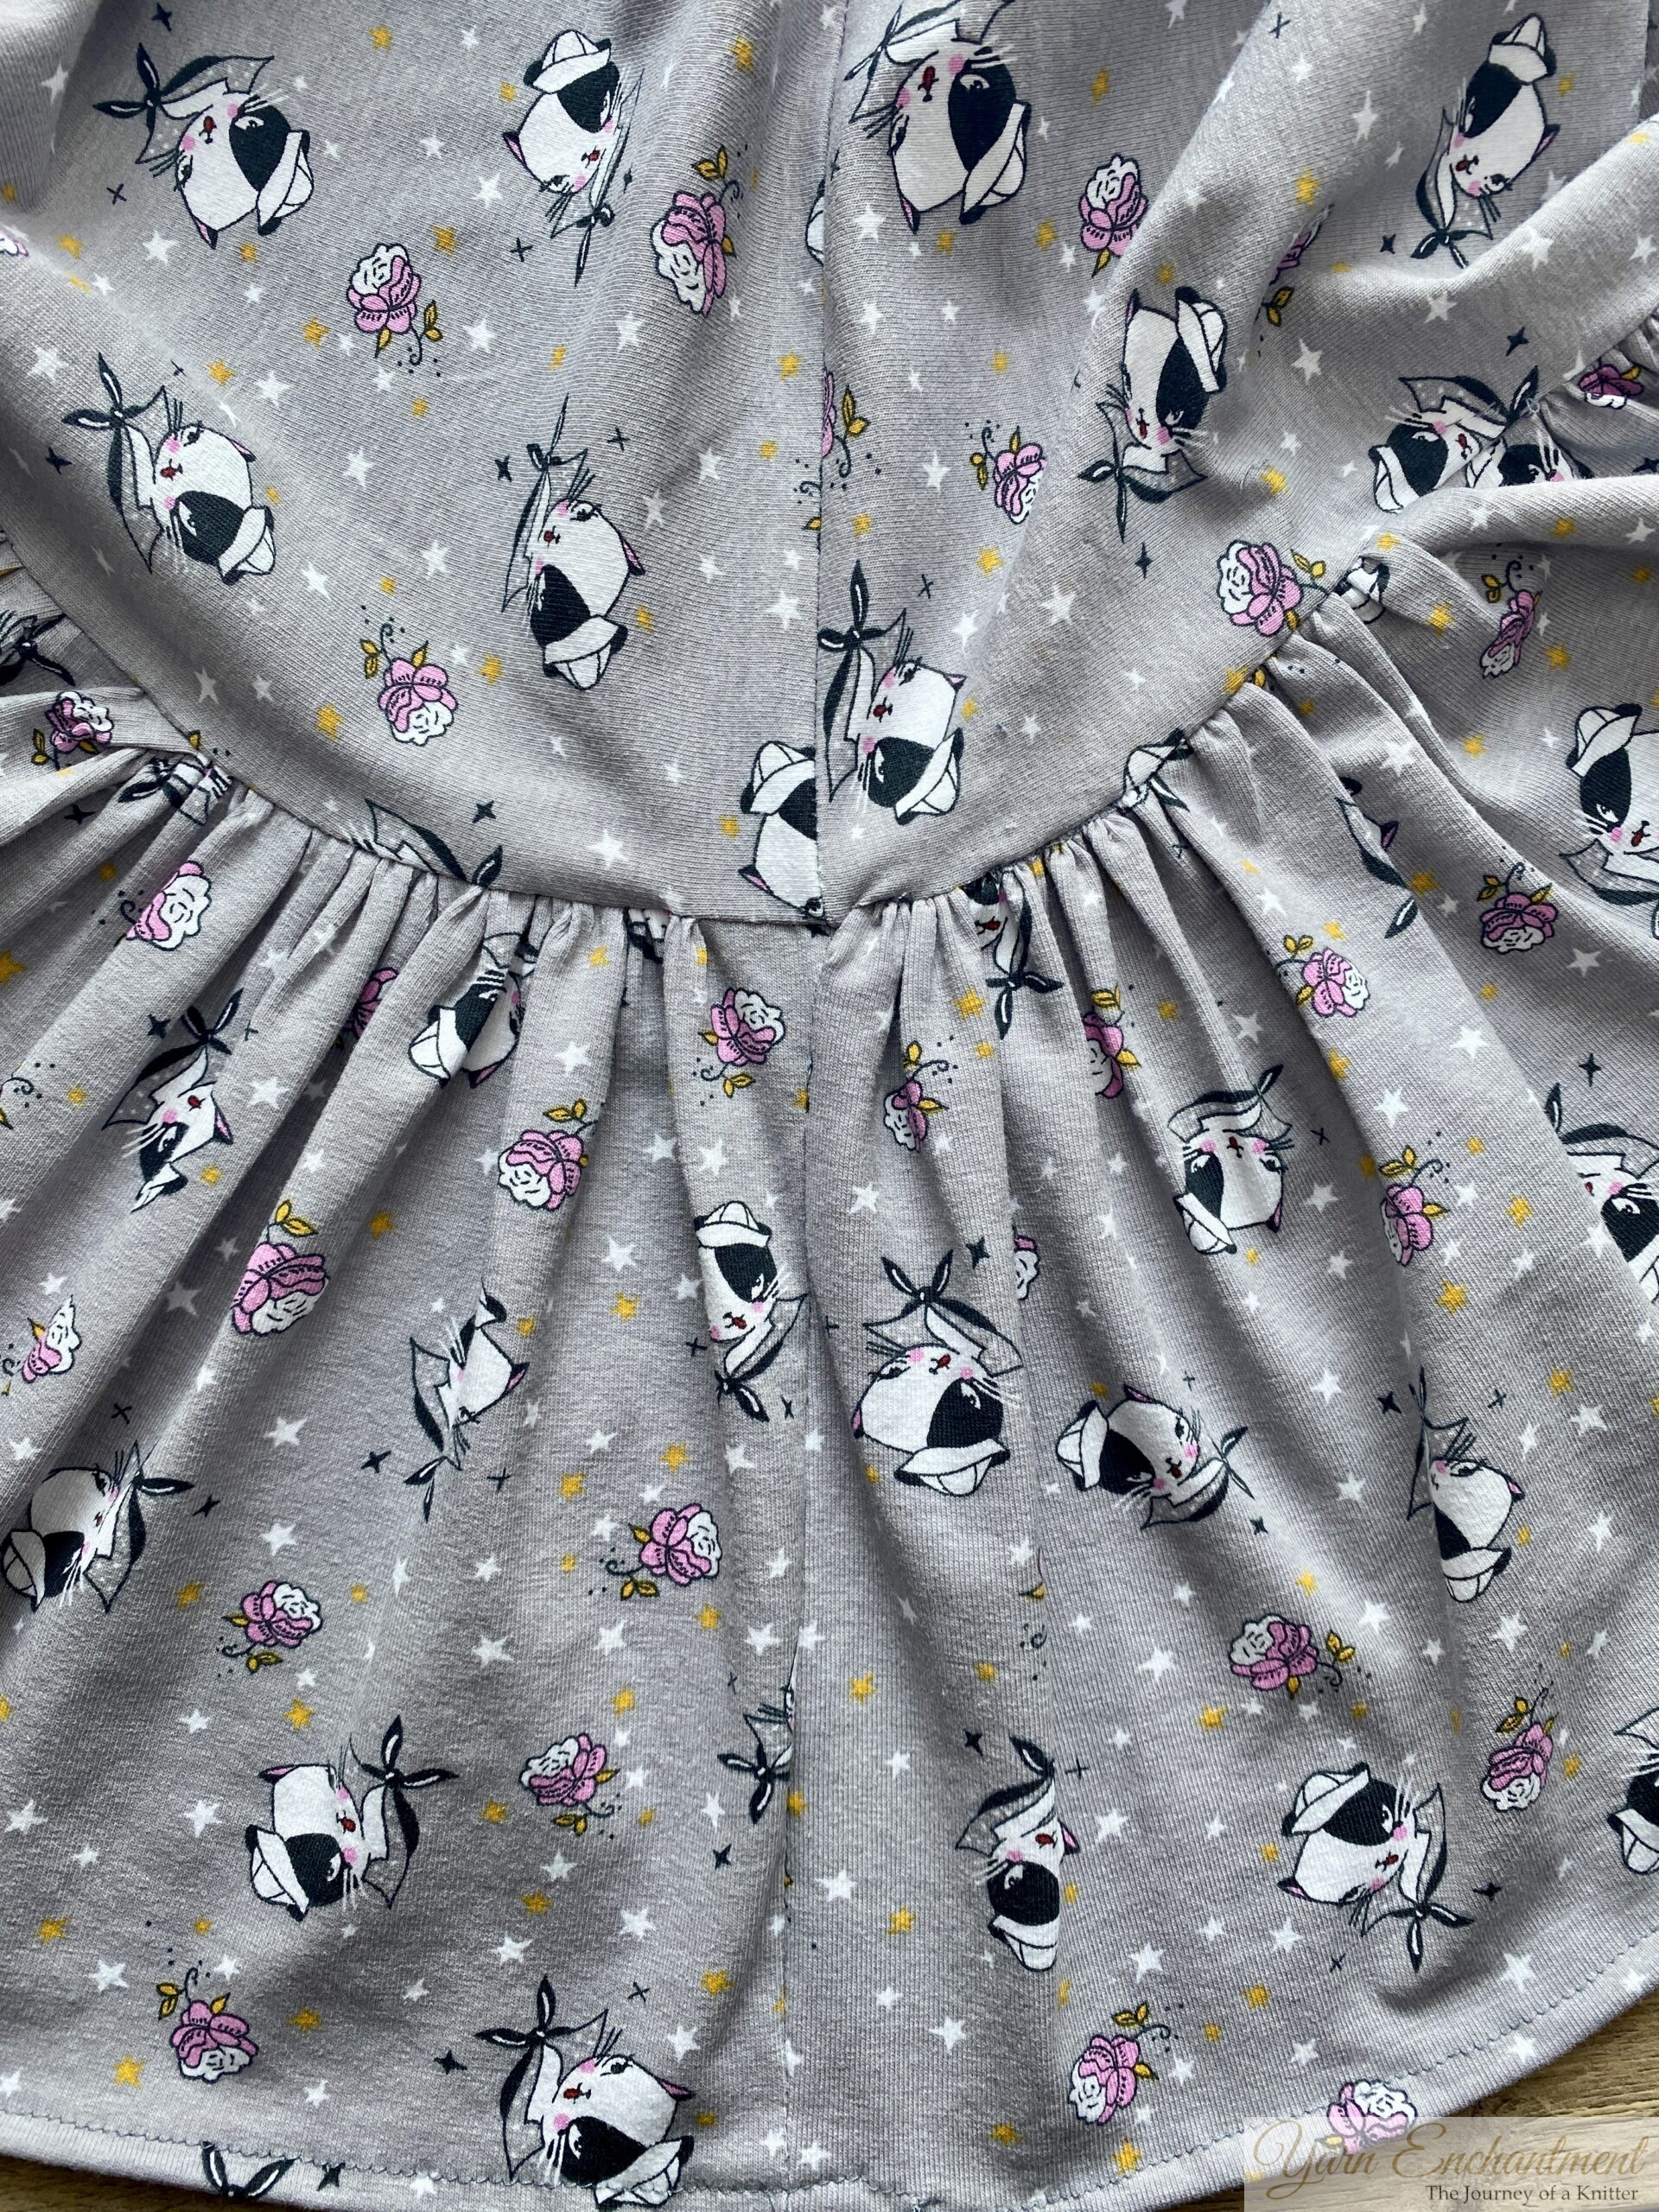
I do not have Pattern Paper yet, so I used regular printer paper and taped the sheets together to make a big enough surface. Jess actually draws her pattern directly onto the fabric - which is brilliant! - but I was way too nervous to try that. So instead, I drew my dress pattern carefully on paper, based on our measurements.For my dress, I shortened the skirt slightly from the original pattern. The hem has a ruffle that’s sewn on separately - which makes it so easy to adjust the length later if I want to play with it.
For my daughter’s dress, I added 1 inch (2.5 cm) to the length - just enough to let her twirl freely without the hem dragging on the ground. Because twirling? That’s non-negotiable.
-
Cutting & Sewing
I cut the fabric, pinned the pieces, and sewed with my trusty machine. I used a ⅝-inch (1.6 cm) seam allowance, pressed the seams open, and finished the edges with a zigzag stitch to prevent fraying. It is really easy because there are no zippers, no buttons. Just easy, breezy, and cozy. -
The Fitting Moment
When I tried mine on, I was so proud of myself. It was not perfect (there’s a tiny pucker near the side seam), but it fit. It hugged my waist, skimmed my hips, and fell just right on my legs. My daughter twirled in hers, giggling, and said, “Mommy, we match!” And we did - in more ways than one.
The Mistakes I Made (And Why They’re Actually Kind of Beautiful)
I made plenty of mistakes. And you know what? I’m sharing them not to shame myself, but to show you that it’s okay to make mistakes - because you’ll still love what you create.
First, I tried to match the seams on one side of the dress… only to realize the other side didn’t match at all. 😅 No amount of steam or pinning could fix it - and you know what? I decided it was fine. Because real life isn’t perfectly symmetrical, and neither is handmade. I wore it anyway - and no one noticed but me. (And honestly? That’s the best kind of secret.)
 |  | It matches beautifully where I started the seam - clean, crisp, and oh-so-satisfying. | Handmade clothes don’t have to be perfect to be loved. In fact, the little wobbles, the mismatched seams, the “oops, I didn’t mean to do that” moments are where the soul lives. That’s what makes it yours. And that’s what makes it beautiful. |


Then there were the ruffles. Oh, the ruffles. Sometimes they were full, bouncy, and perfect. Other times? Barely there. I swear, I was stitching one minute like a pro, the next like I’d never touched a machine before. But here’s the truth: beginners aren’t supposed to be perfect. We’re supposed to be brave. And I was.
 | The ruffles on the right side? Looking really great. But as you get closer to the seam… well, let’s just say they decided to take a vacation. 😅 Handmade doesn’t mean flawless - and that’s okay. |

And the stitches? Ha. I had no glass of wine (promise!), but some seams looked like I’d been sipping straight from the bottle. 🍷 That’s okay. In fact, it’s part of the story. Each wobbly stitch is a reminder: I showed up. I tried. I finished.
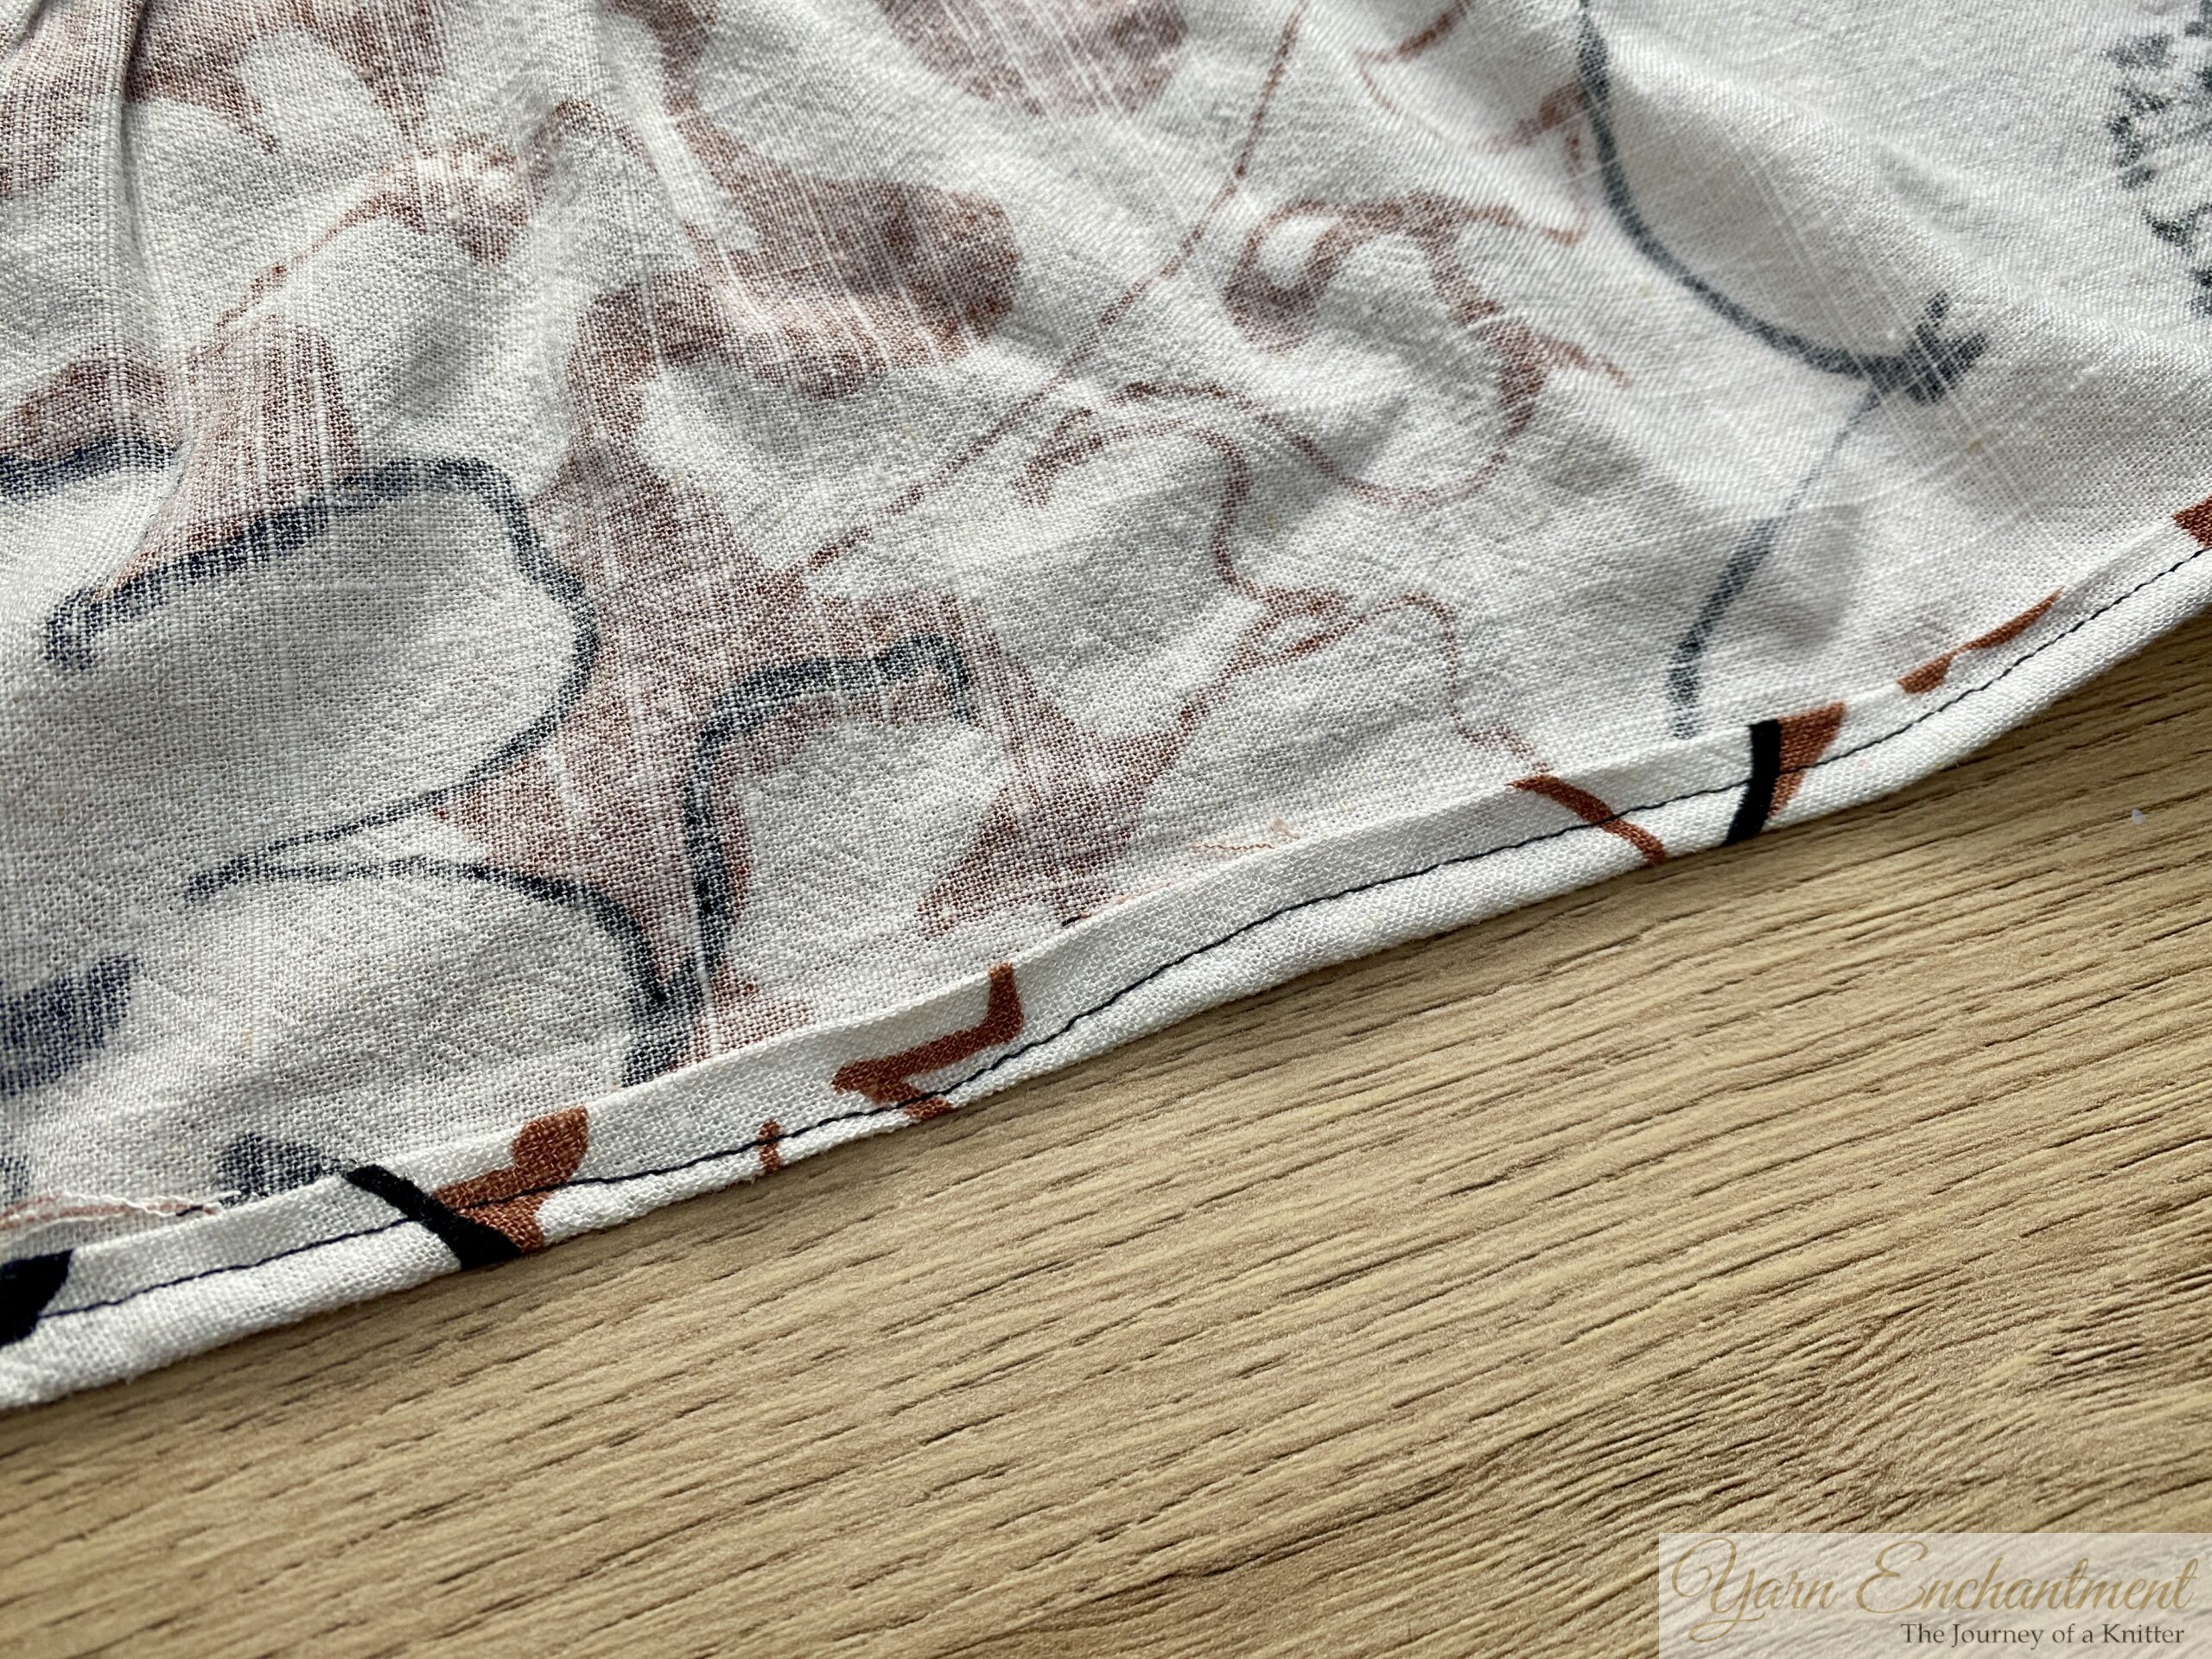 | It is not perfectly straight. But it’s sewn with love, and every wobble tells a story. |

What I Learned (And What You Can Too)
-
You Don’t Need to Be a Pro to Start
I had almost zero sewing experience when I started. I am still at the beginning. But I can make things that fit me - and that’s worth more than any store-bought dress. -
Custom Fit = Confidence Boost
When clothes are made for you, you feel seen. You feel celebrated. You feel like you don’t have to shrink to fit the world - you can shape the world to fit you. -
It’s Okay to Make Mistakes
My first seam was crooked. My hem was uneven. But you know what? No one will noticed. And I’m learning. Each stitch is a step toward becoming the maker I want to be.
Ready to Start Your Own Sewing Journey?
If you’ve ever stood in a changing room and felt like you didn’t belong, I’m here to tell you: you don’t have to. You can make clothes that love you back. Start simple. Pick a pattern you love (Jess Dang’s tutorials are a great place to begin). Measure yourself. Cut your fabric. Sew with patience and kindness - for yourself, and for your future self who will be so proud of what you made.
And if you’re sewing for your little one, make it fun! Let them pick the fabric. Let them help with the measuring. Let them twirl in their finished dress. Because this isn’t just about clothes - it’s about connection, creativity, and confidence.
Final Thoughts: More Than Just a Dress
This dress? It’s not just fabric and thread. It’s a rebellion against impossible standards. It’s a love letter to my body. It’s a promise to my daughter that she’ll never have to feel like she doesn’t fit - because I’ll always be here to make sure she does.
So grab your scissors, your measuring tape, and your courage. Your sewing journey starts now. And I’ll be right here, cheering you on - every stitch of the way.
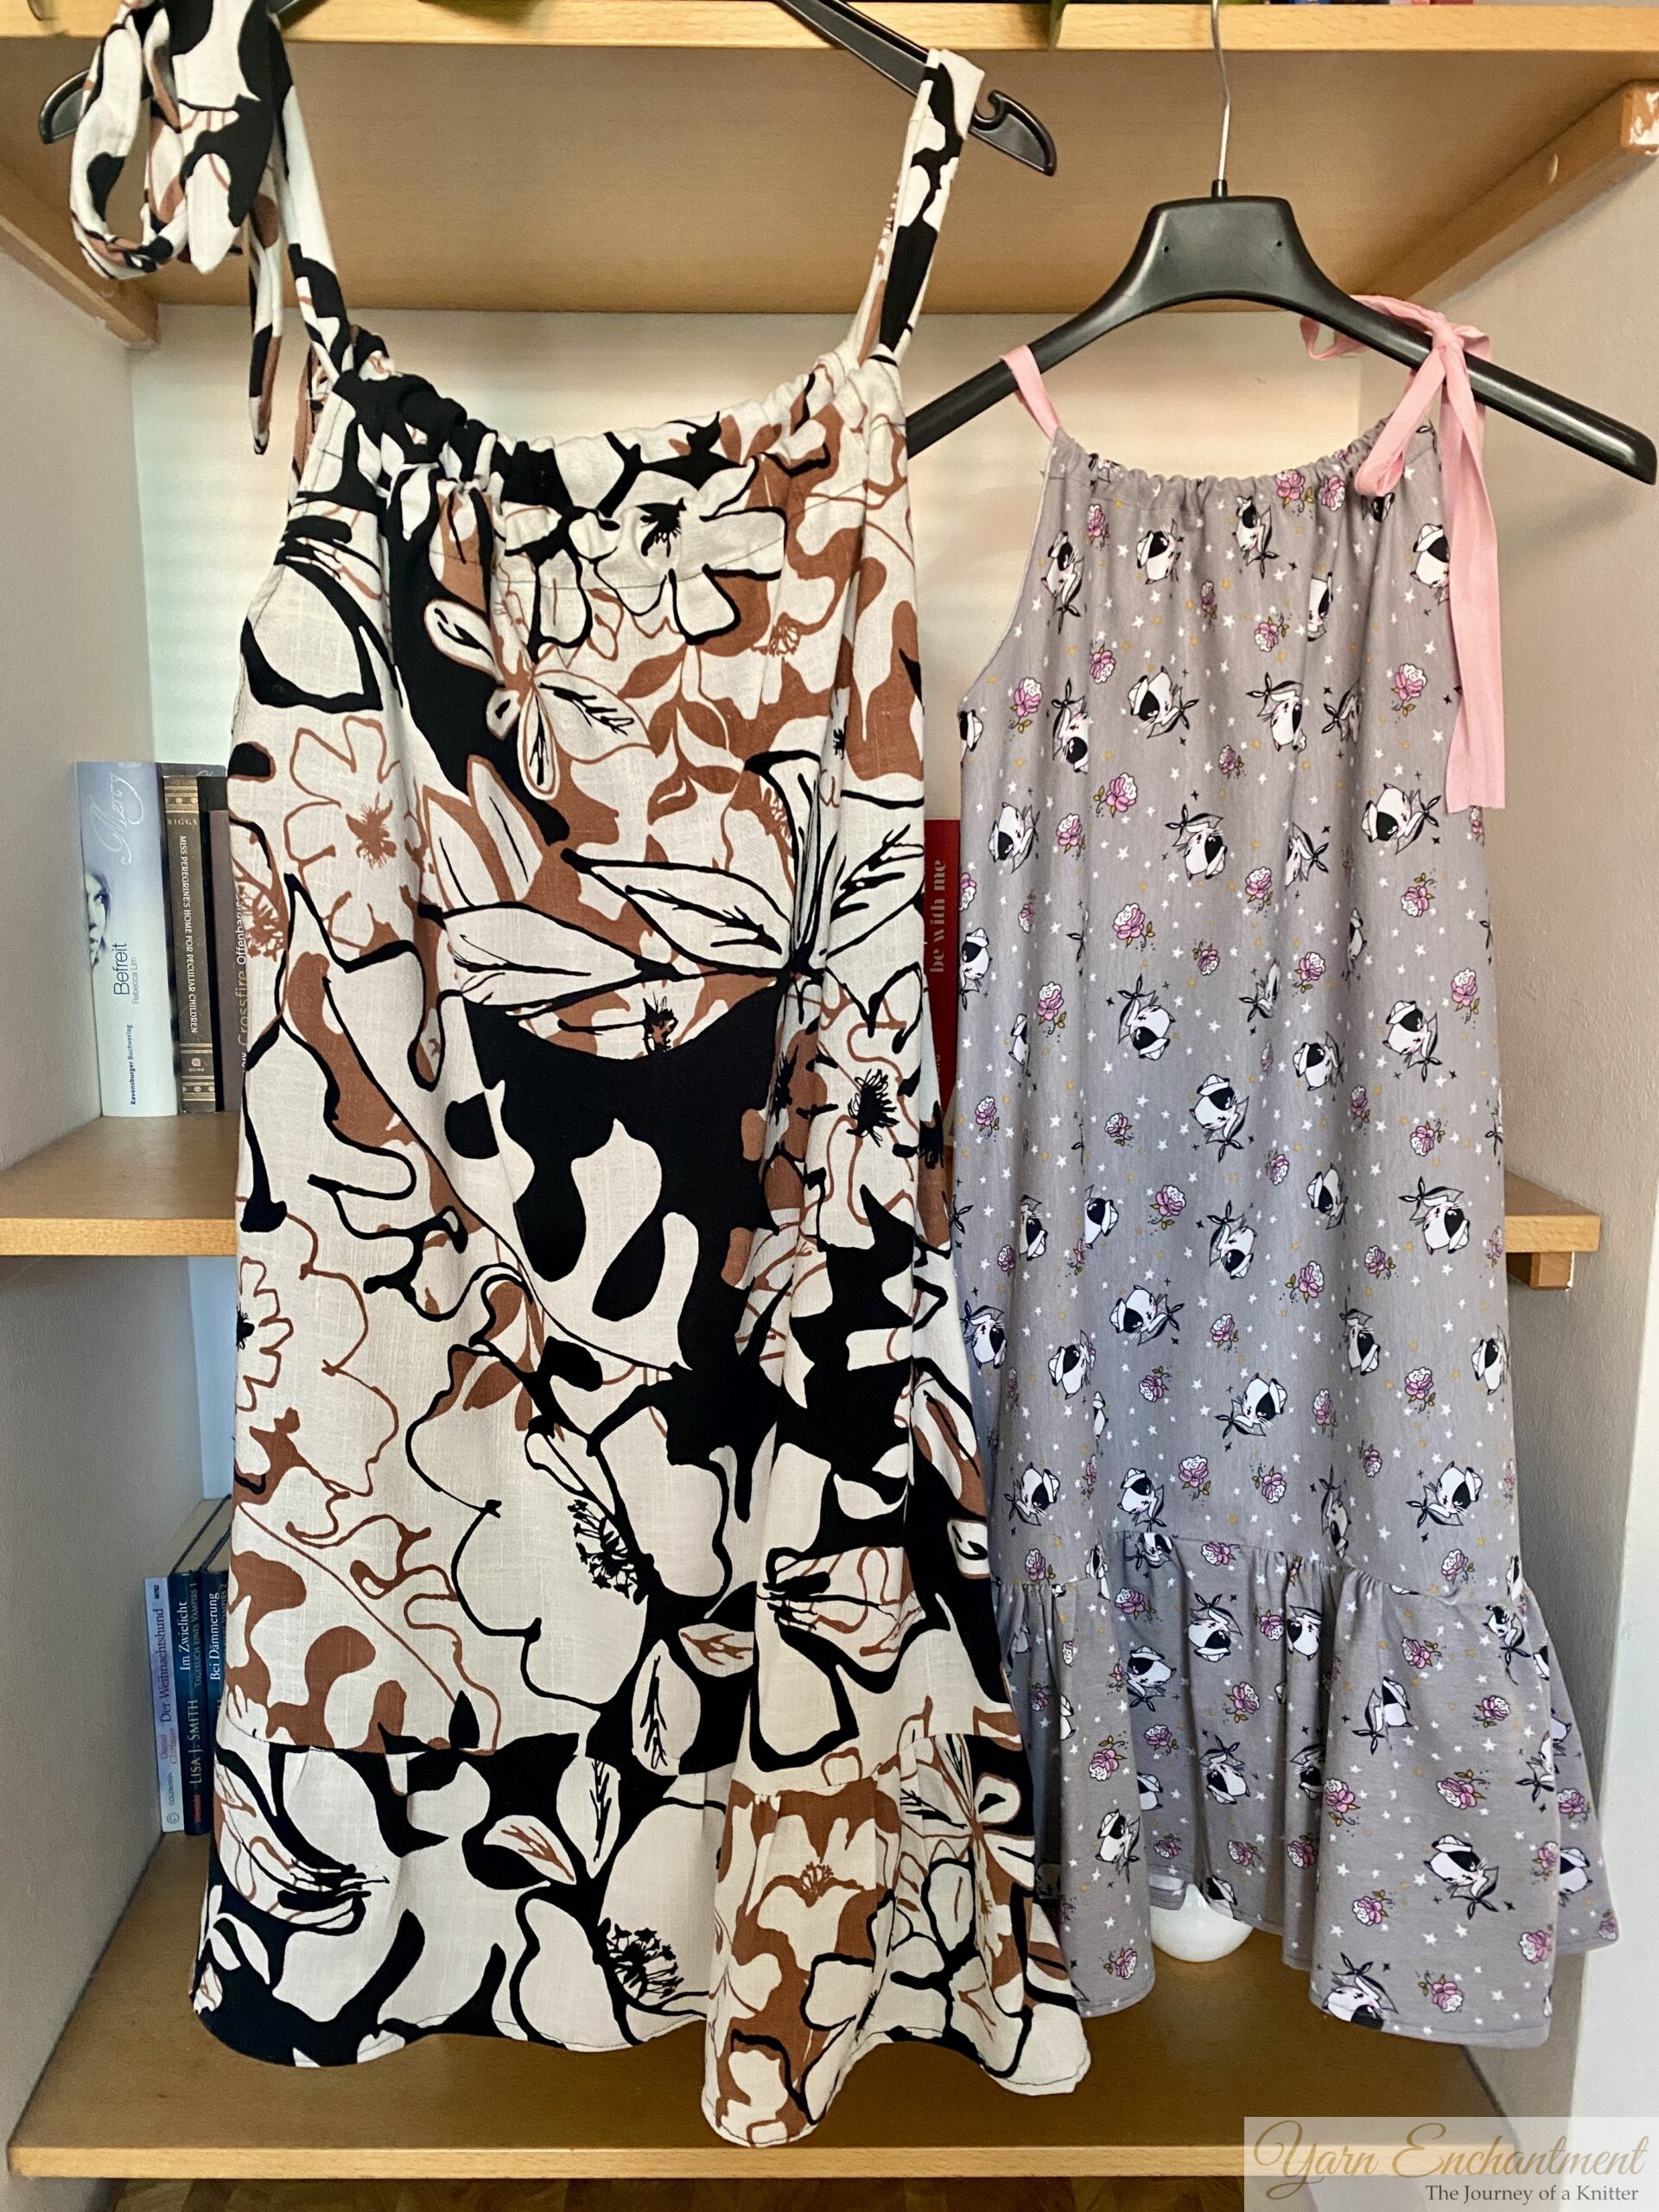 | My first two handmade dresses - bold florals and sweet cat prints with roses |

You Might Also Like


 |
|
Join the Cozy Corner Newsletter!
Hey there, creative soul! Welcome to the Yarn Enchantment Newsletter, where we celebrate all things cozy, crafty, and full of heart. Think of this as your friendly crafting companion - a little dose of inspiration delivered straight to your inbox, just for you. Inside, you’ll find: ✨ Exclusive patterns & tutorials - ideas you won’t find anywhere else (just for us!) 📚 Bookish crafts that bring your favorite stories to life 🧶 Tips and tricks to make your crafting journey smoother (and more fun!) 💌 Heartfelt musings on life, creativity, and the magic of making something with your own two hands Whether you’re knitting by the fire, brainstorming your next DIY project, or just looking for a little creative pick-me-up, this newsletter is here to cheer you on. Because let’s be honest - crafting isn’t just about the finished project; it’s about the joy, peace, and stories we create along the way. So grab a cup of tea, cozy up, and join me. Together, we’ll weave a little magic into everyday life - one stitch, one story, and one email at a time. P.S. I’m so glad you’re here. Let’s make something beautiful together! (Note: If you're using an ad blocker, you may encounter issues subscribing to the newsletter. To subscribe, please consider disabling your ad blocker.)
|
