

Jade Serenity Spa Set | Soap Saver
January 13, 2025
No Mow Socks
January 21, 2025Right-Leaning and Left-Leaning Increases in Knitting

Originally published on January 16, 2025
When it comes to knitting, the details matter. One of those details is the direction in which your increases "lean". Right-leaning and left-leaning increases might sound technical, but they’re simply terms that describe the way a new stitch visually slants after it’s created. This subtle difference can have a big impact on the look of your finished project, especially when symmetry or decorative shaping is involved. In German, there’s also a distinction between Emphasized (Betont) and Unemphasized (Unbetonte) increases, which I’ll explain in more detail shortly.
In this post, you’ll learn: (Click on the links below to jump to the section)
- What do "Right" and "Left" Mean in Knitting?
- Why Does the Direction of Increases Matter?
- Common Right- and Left-Leaning Increases
- How to Identify Right- and Left-Leaning Increases
- Cheat Sheet
- Emphasized and Unemphasized Increases
What Do "Right" and "Left" Mean in Knitting Increases?
- Right-Leaning Increase: This type of increase creates a stitch that visually slants to the right. It looks as though it’s growing out of the base stitch and angling toward the right-hand side of your fabric.
- Left-Leaning Increase: This increase creates a stitch that slants to the left, appearing to grow out of the base stitch and angle toward the left-hand side of your fabric.
It’s important to note that "right" and "left" refer to the visual direction of the increase, not necessarily the side of the fabric where you’re working.
Why Does the Direction of Increases Matter?
The direction of your increases isn’t just a technical detail - it plays a key role in the overall look and structure of your project. Here’s why it matters:
- Symmetry
When shaping fabric, such as in garments or shawls, you often want your increases to mirror each other for a balanced look.
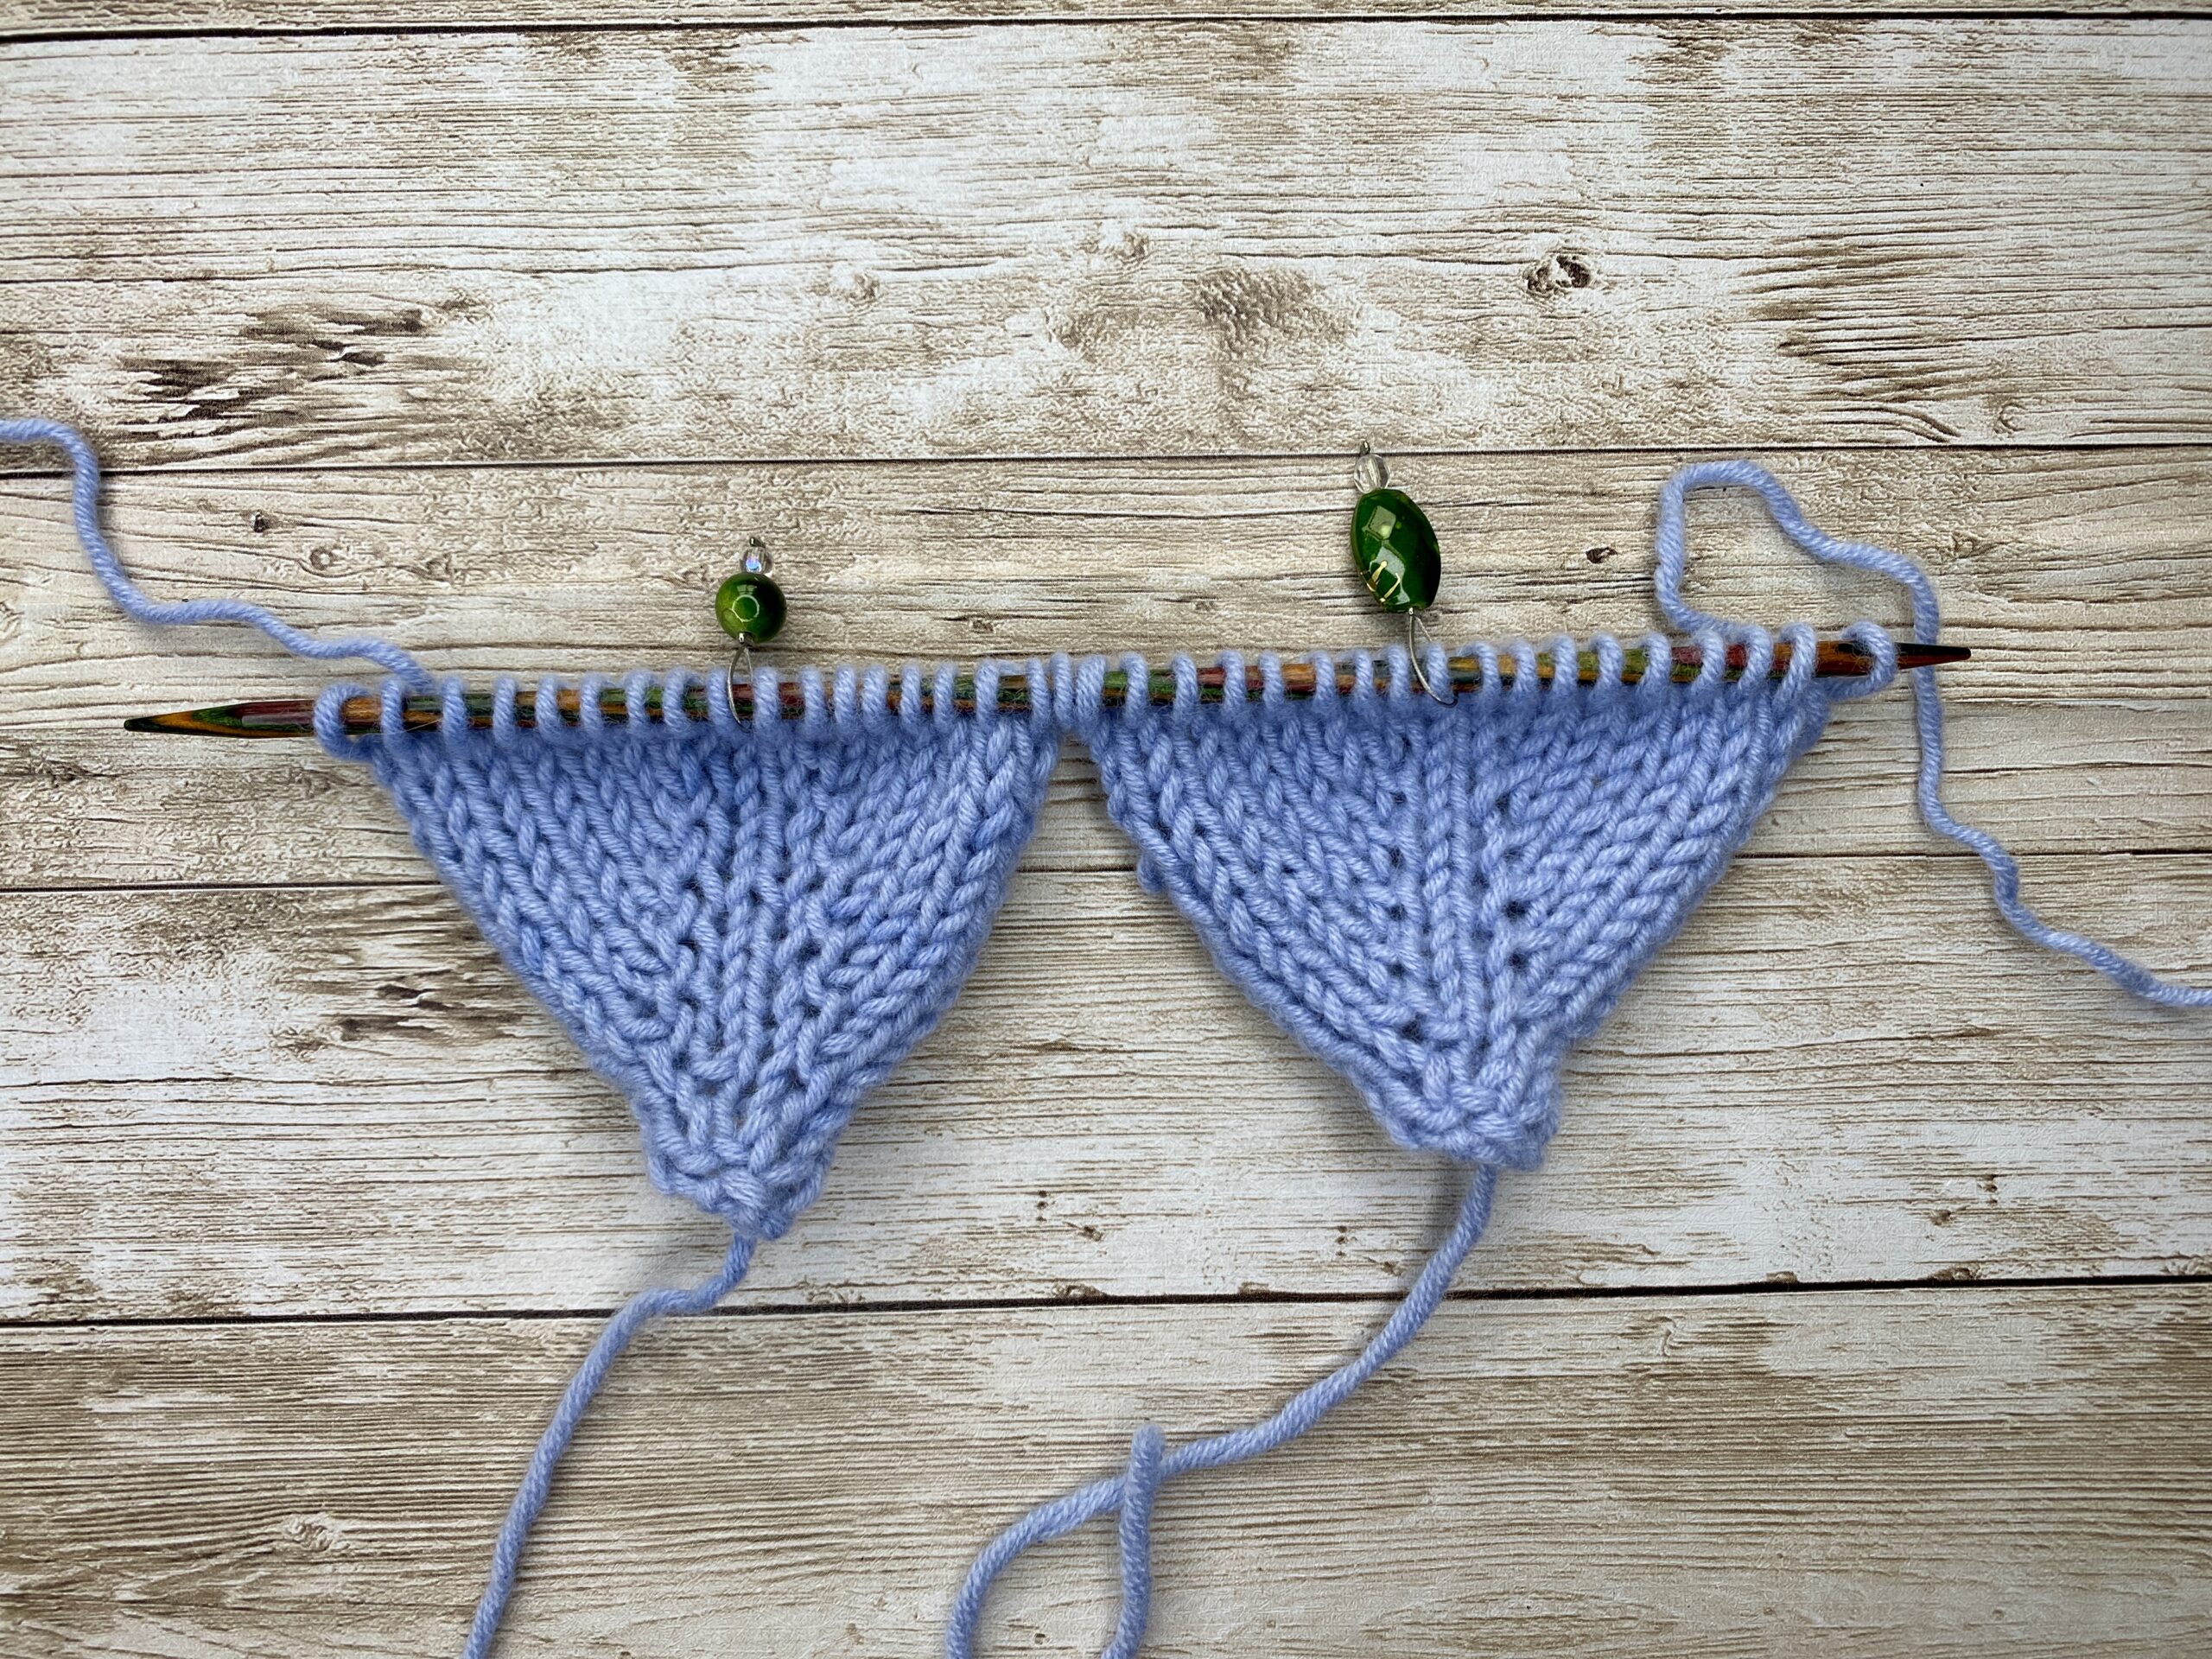
- Example: In a triangular shawl, you might use a right-leaning increase on the left side of the central spine and a left-leaning increase on the right side. This creates a symmetrical, polished appearance.
- Aesthetic Design
The direction of the increase can create decorative lines or emphasize shaping in your fabric. Some patterns use this as a design feature to add visual interest. - Blending
In some cases, you want your increases to blend seamlessly into the fabric, such as in stockinette stitch. In other cases, you might want them to stand out as part of the design.
 | On the right side, I worked a M1L (Make 1 Left) |

Common Right- and Left-Leaning Increases
Here are some popular types of increases and how they lean:
1. Knit Front and Back (KFB)
- Leaning Direction: Left-leaning
- Why: The second stitch, created in the back loop, twists slightly to the left.
- Use: A simple increase, though the twist makes it slightly visible.
2. Mirror Knit Front and Back (KFB)
- Leaning Direction: Right-leaning
- Why: The second stitch, created in the front loop, twists slightly to the right.
- Use: Great for creating a mirrored effect of the KFB.
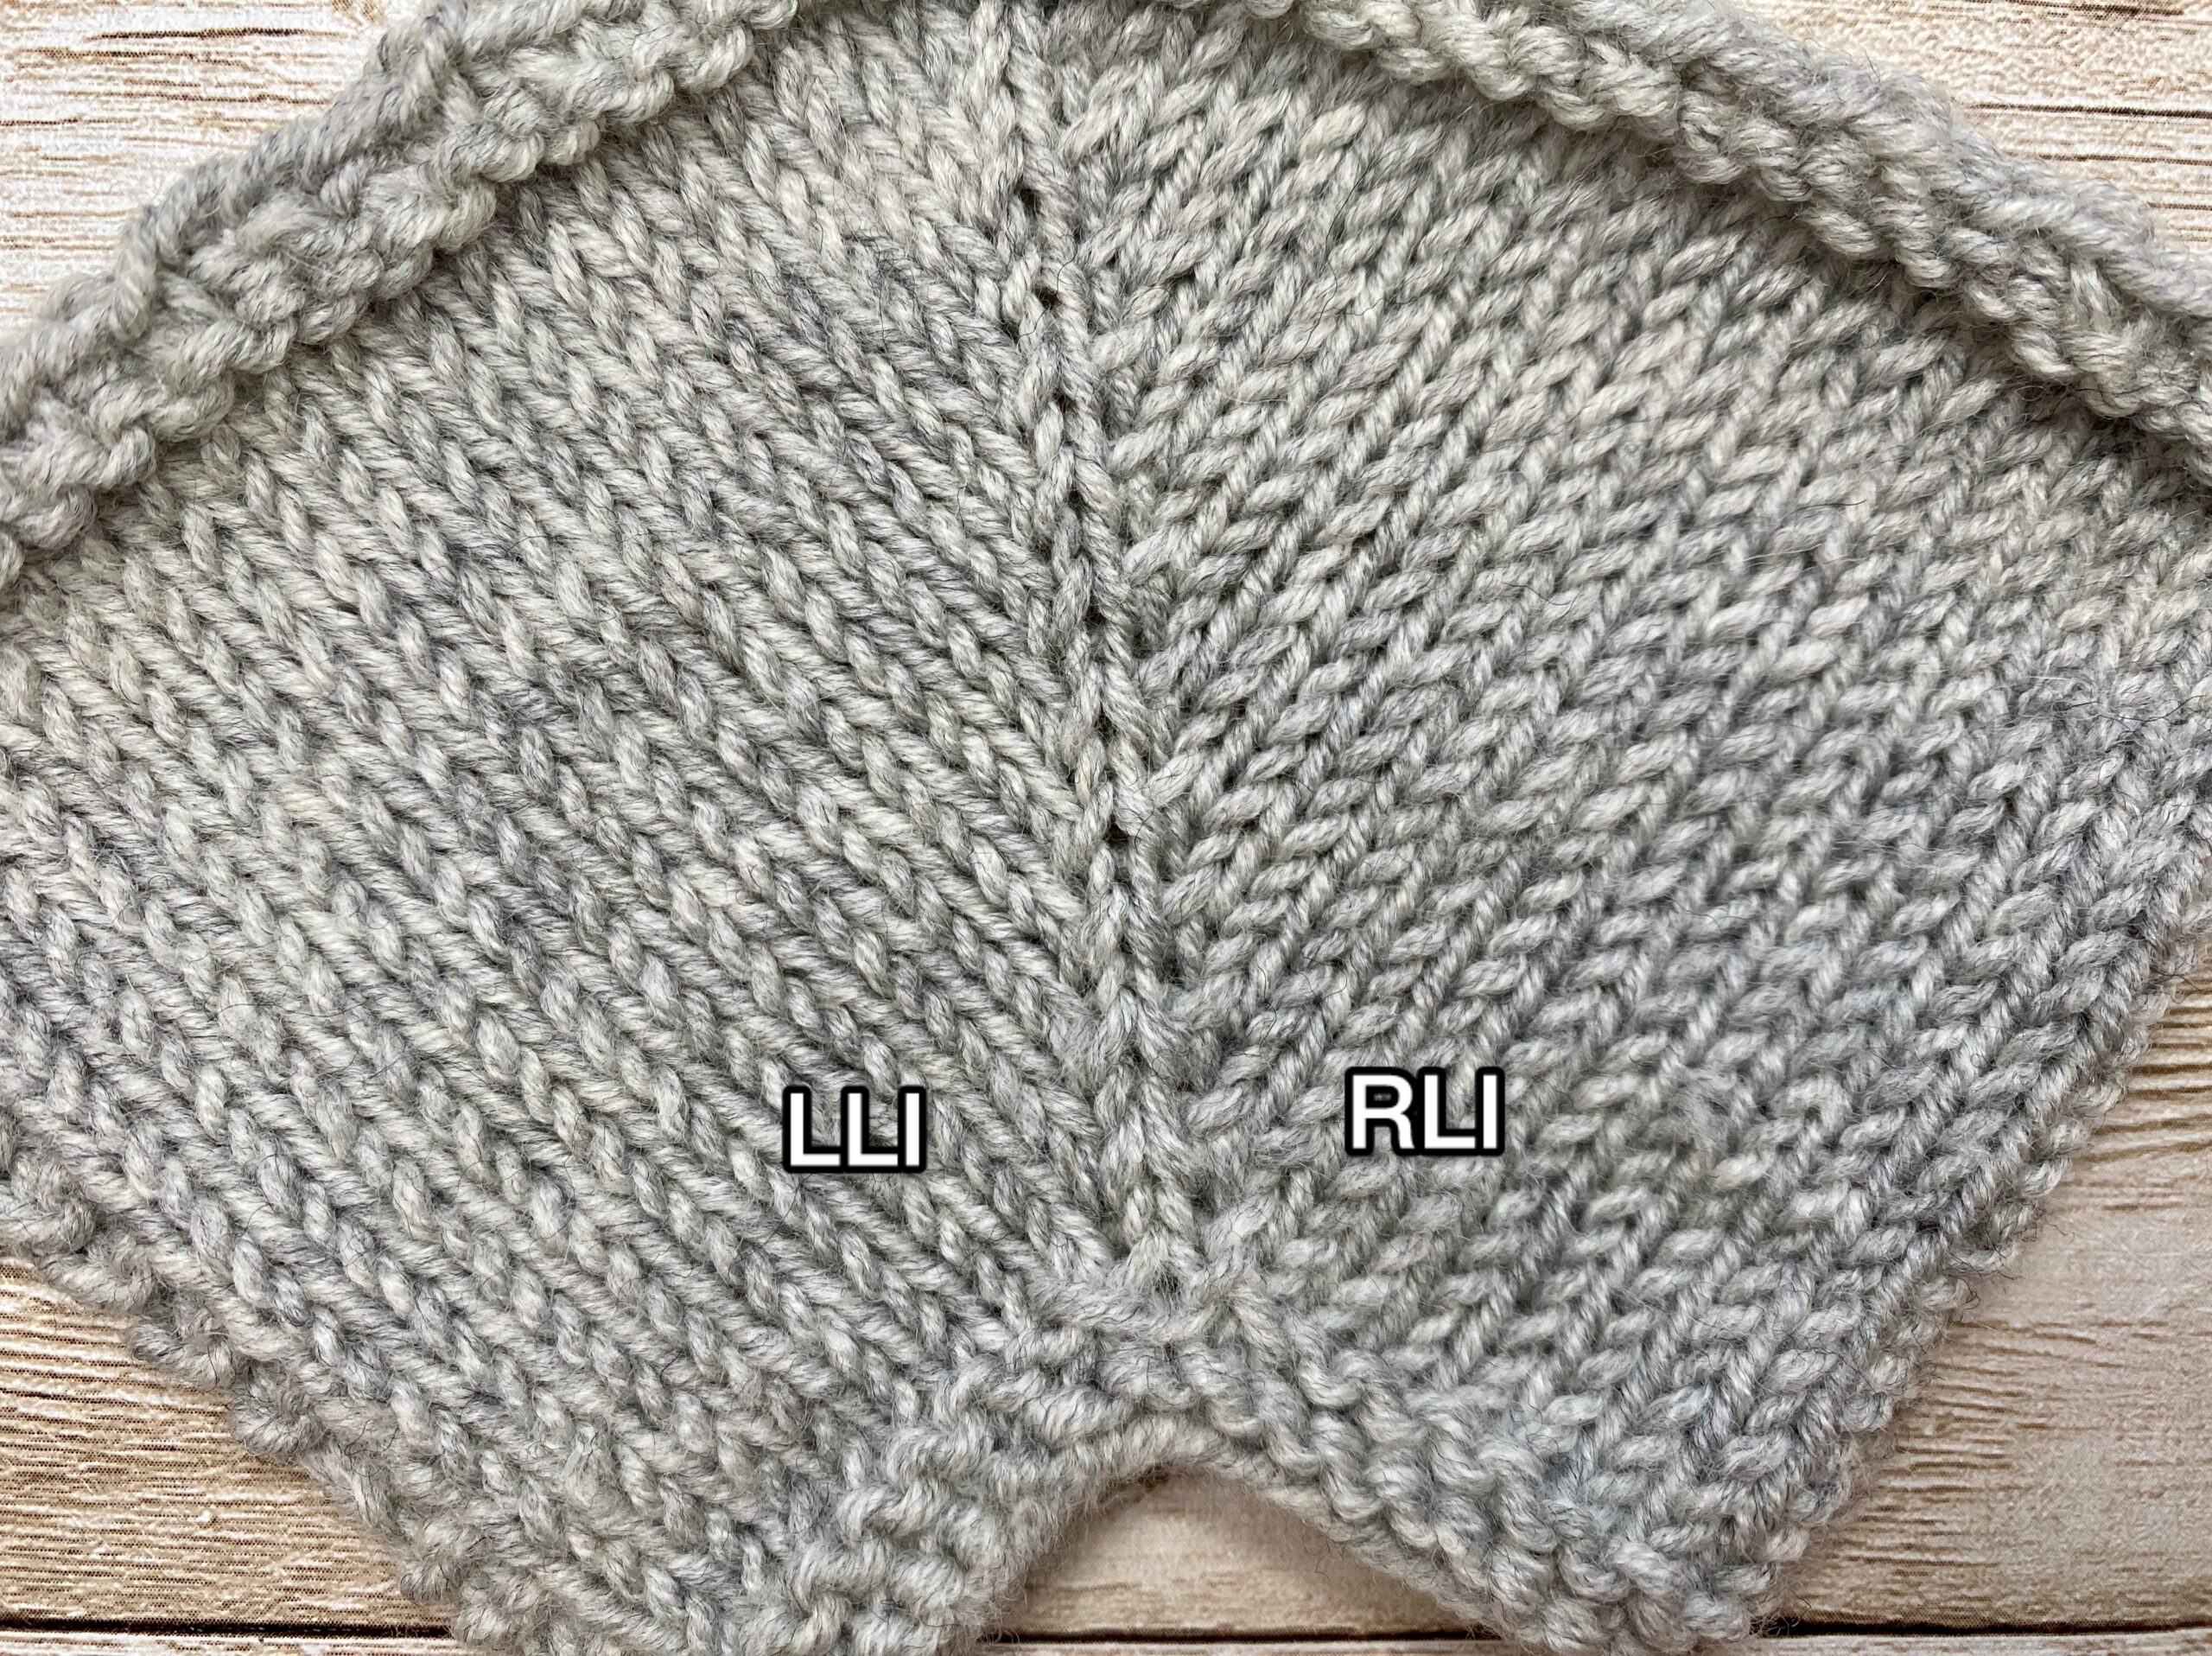
3. Lifted Increases
- Right-Leaning Lifted Increase (RLI): The new stitch leans to the right because it’s lifted from the right leg of the stitch below.
- Left-Leaning Lifted Increase (LLI): The new stitch leans to the left because it’s lifted from the left leg of the stitch below.
4. Make One (M1) Increases
- M1R (Make One Right): The new stitch leans to the right because the strand is twisted in that direction.
- M1L (Make One Left): The new stitch leans to the left because the strand is twisted in the opposite direction.
 |  |  | Knit Front and Back and Mirror KFB | Lifted Increases | Make One Increases |


How to Identify Right- and Left-Leaning Increases
If you’re unsure about the direction of an increase, take a close look at the base of the new stitch.
- Right-Leaning: The stitch appears to "grow" towards the right-hand side of the fabric.
- Left-Leaning: The stitch appears to "grow" towards the left-hand side of the fabric.
This visual cue can help you identify the type of increase you’ve made or need to make.
 |  | Right-Leaning: The stitch appears to "grow" towards the right-hand side of the fabric. | Left-Leaning: The stitch appears to "grow" towards the left-hand side of the fabric |


Practical Applications of Right- and Left-Leaning Increases
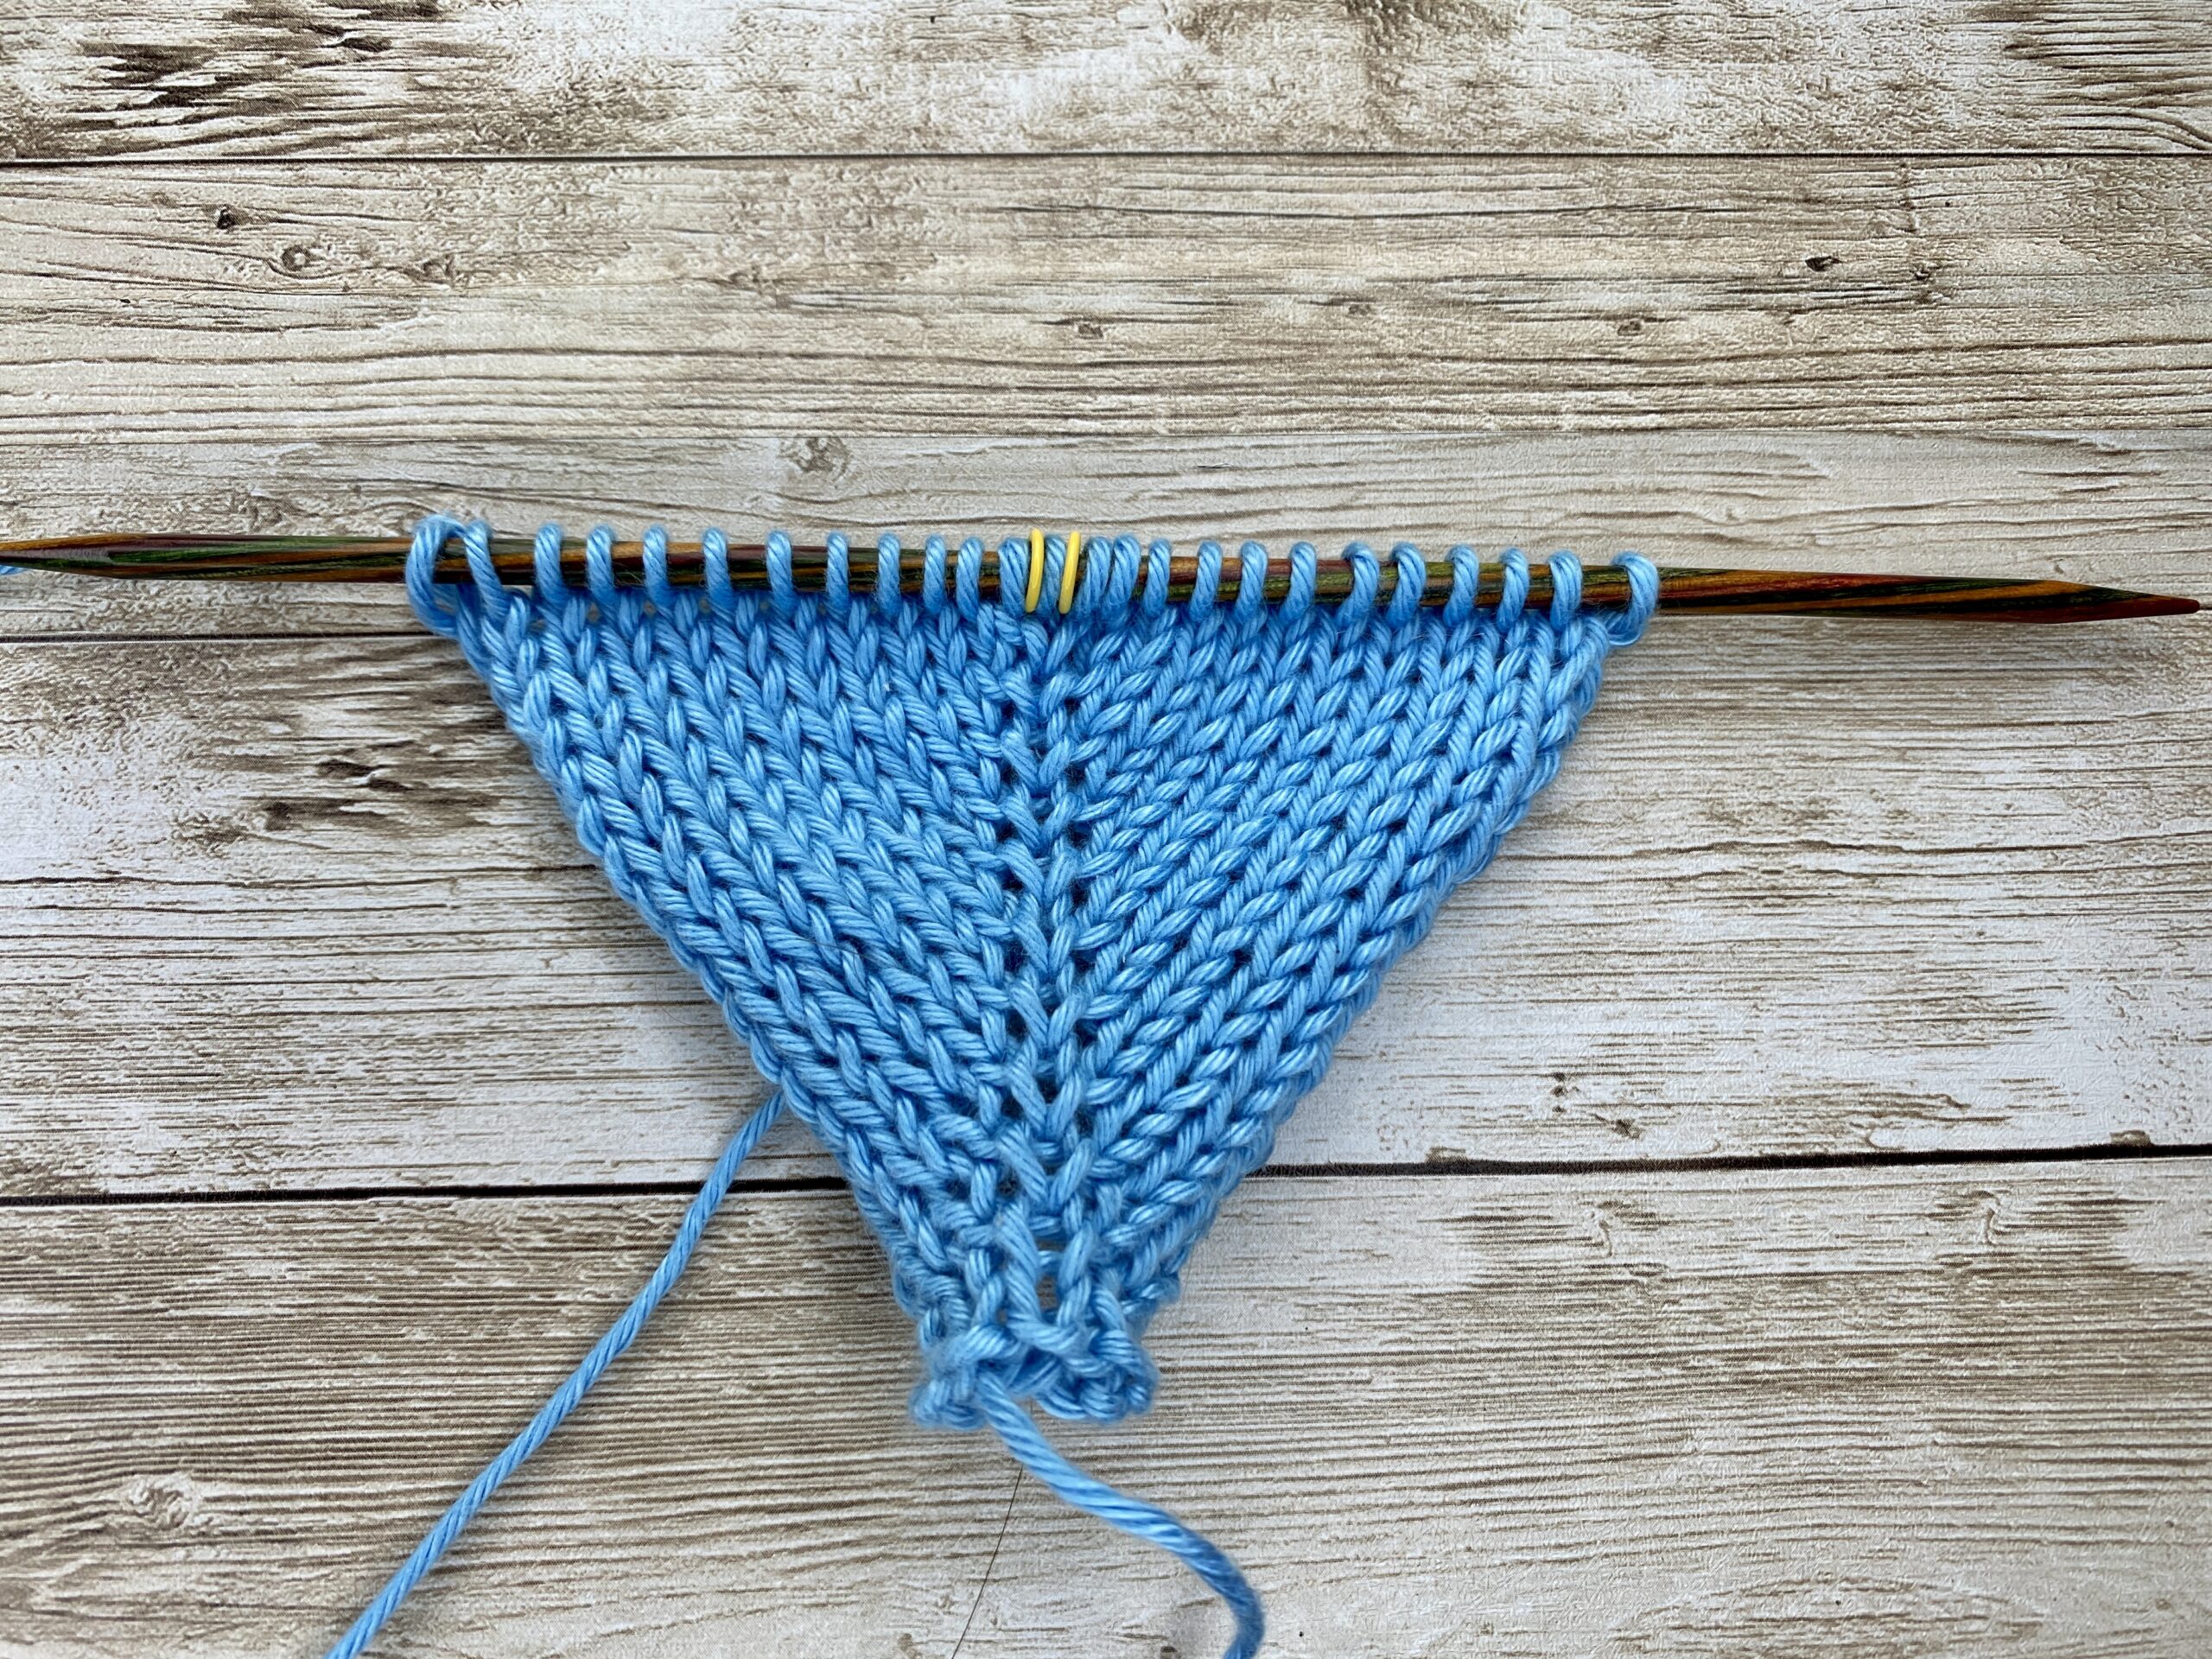
One of the most common uses for these increases is in shaping fabric symmetrically. For example, in a triangular shawl:
- Use a right-leaning increase (e.g., RLI or M1R) on the left side.
- Use a left-leaning increase (e.g., LLI or M1L) on the right side.
This creates a balanced, decorative line of increases that enhances the overall look of the project. The same principle applies to garment shaping, such as in sleeves or waistlines, where symmetry is key.
Summary
- Right-Leaning Increases: The new stitch slants to the right (e.g., RLI, M1R, Mirror KFB or KBF).
- Left-Leaning Increases: The new stitch slants to the left (e.g., LLI, M1L, KFB).
The choice of increase direction depends on your pattern’s requirements. Whether you’re aiming for symmetry, a decorative effect, or seamless blending, understanding the difference between right- and left-leaning increases will help you achieve the perfect finish for your project.
Knitting Increases Cheat Sheet
Lean Direction: Quick Guide
| Increase Name | Code | Stitch Lean | Where It’s Used |
|---|---|---|---|
| Make One Right | M1R | Right | Emphasized RIGHT of central stitch |
| Make One Left | M1L | Left | Emphasized LEFT of central stitch |
| Right-Leaning Lifted Increase | RLI | Right | Decorative, shapely edge increases |
| Left-Leaning Lifted Increase | LLI | Left | Decorative, shapely edge increases |
| Knit Front and Back | KFB | Left | Subtle, low-profile increases |
| Mirror KFB | — | Right | Mirror symmetry with KFB |

Unemphasized Increases
- Definition: These are increases that are designed to blend seamlessly into the fabric, making them less noticeable.
- Characteristics:
- The increases are subtle and do not create a visible line or ridge.
- They are used when you want the shaping to be functional but not a prominent design element.
-
Example:
- If you reverse the placement of the increases (e.g., using M1R on the left side and M1L on the right side of a central stitch), the increases will blend more into the fabric and appear less obvious.
 | Unemphasized Increases |

Practical Application
- Emphasized increases are used when you want to highlight the shaping, such as in decorative patterns or when creating symmetry.
- Unemphasized increases are used when you want the shaping to be subtle, such as in plain stockinette or reverse stockinette fabric.
Example Using M1R and M1L
- Emphasized:
- Use M1R (Make One Right) on the right side of a central stitch.
- Use M1L (Make One Left) on the left side of a central stitch.
- This creates a visible, symmetrical line of increases that emphasizes the shaping.
- Unemphasized:
- Use M1L (Make One Left) on the right side of a central stitch.
- Use M1R (Make One Right) on the left side of a central stitch.
- This causes the increases to lean away from the central stitch, blending into the fabric and appearing less noticeable.
The choice of placement and direction (e.g., M1R vs. M1L) determines whether the increases are emphasized or subtle.
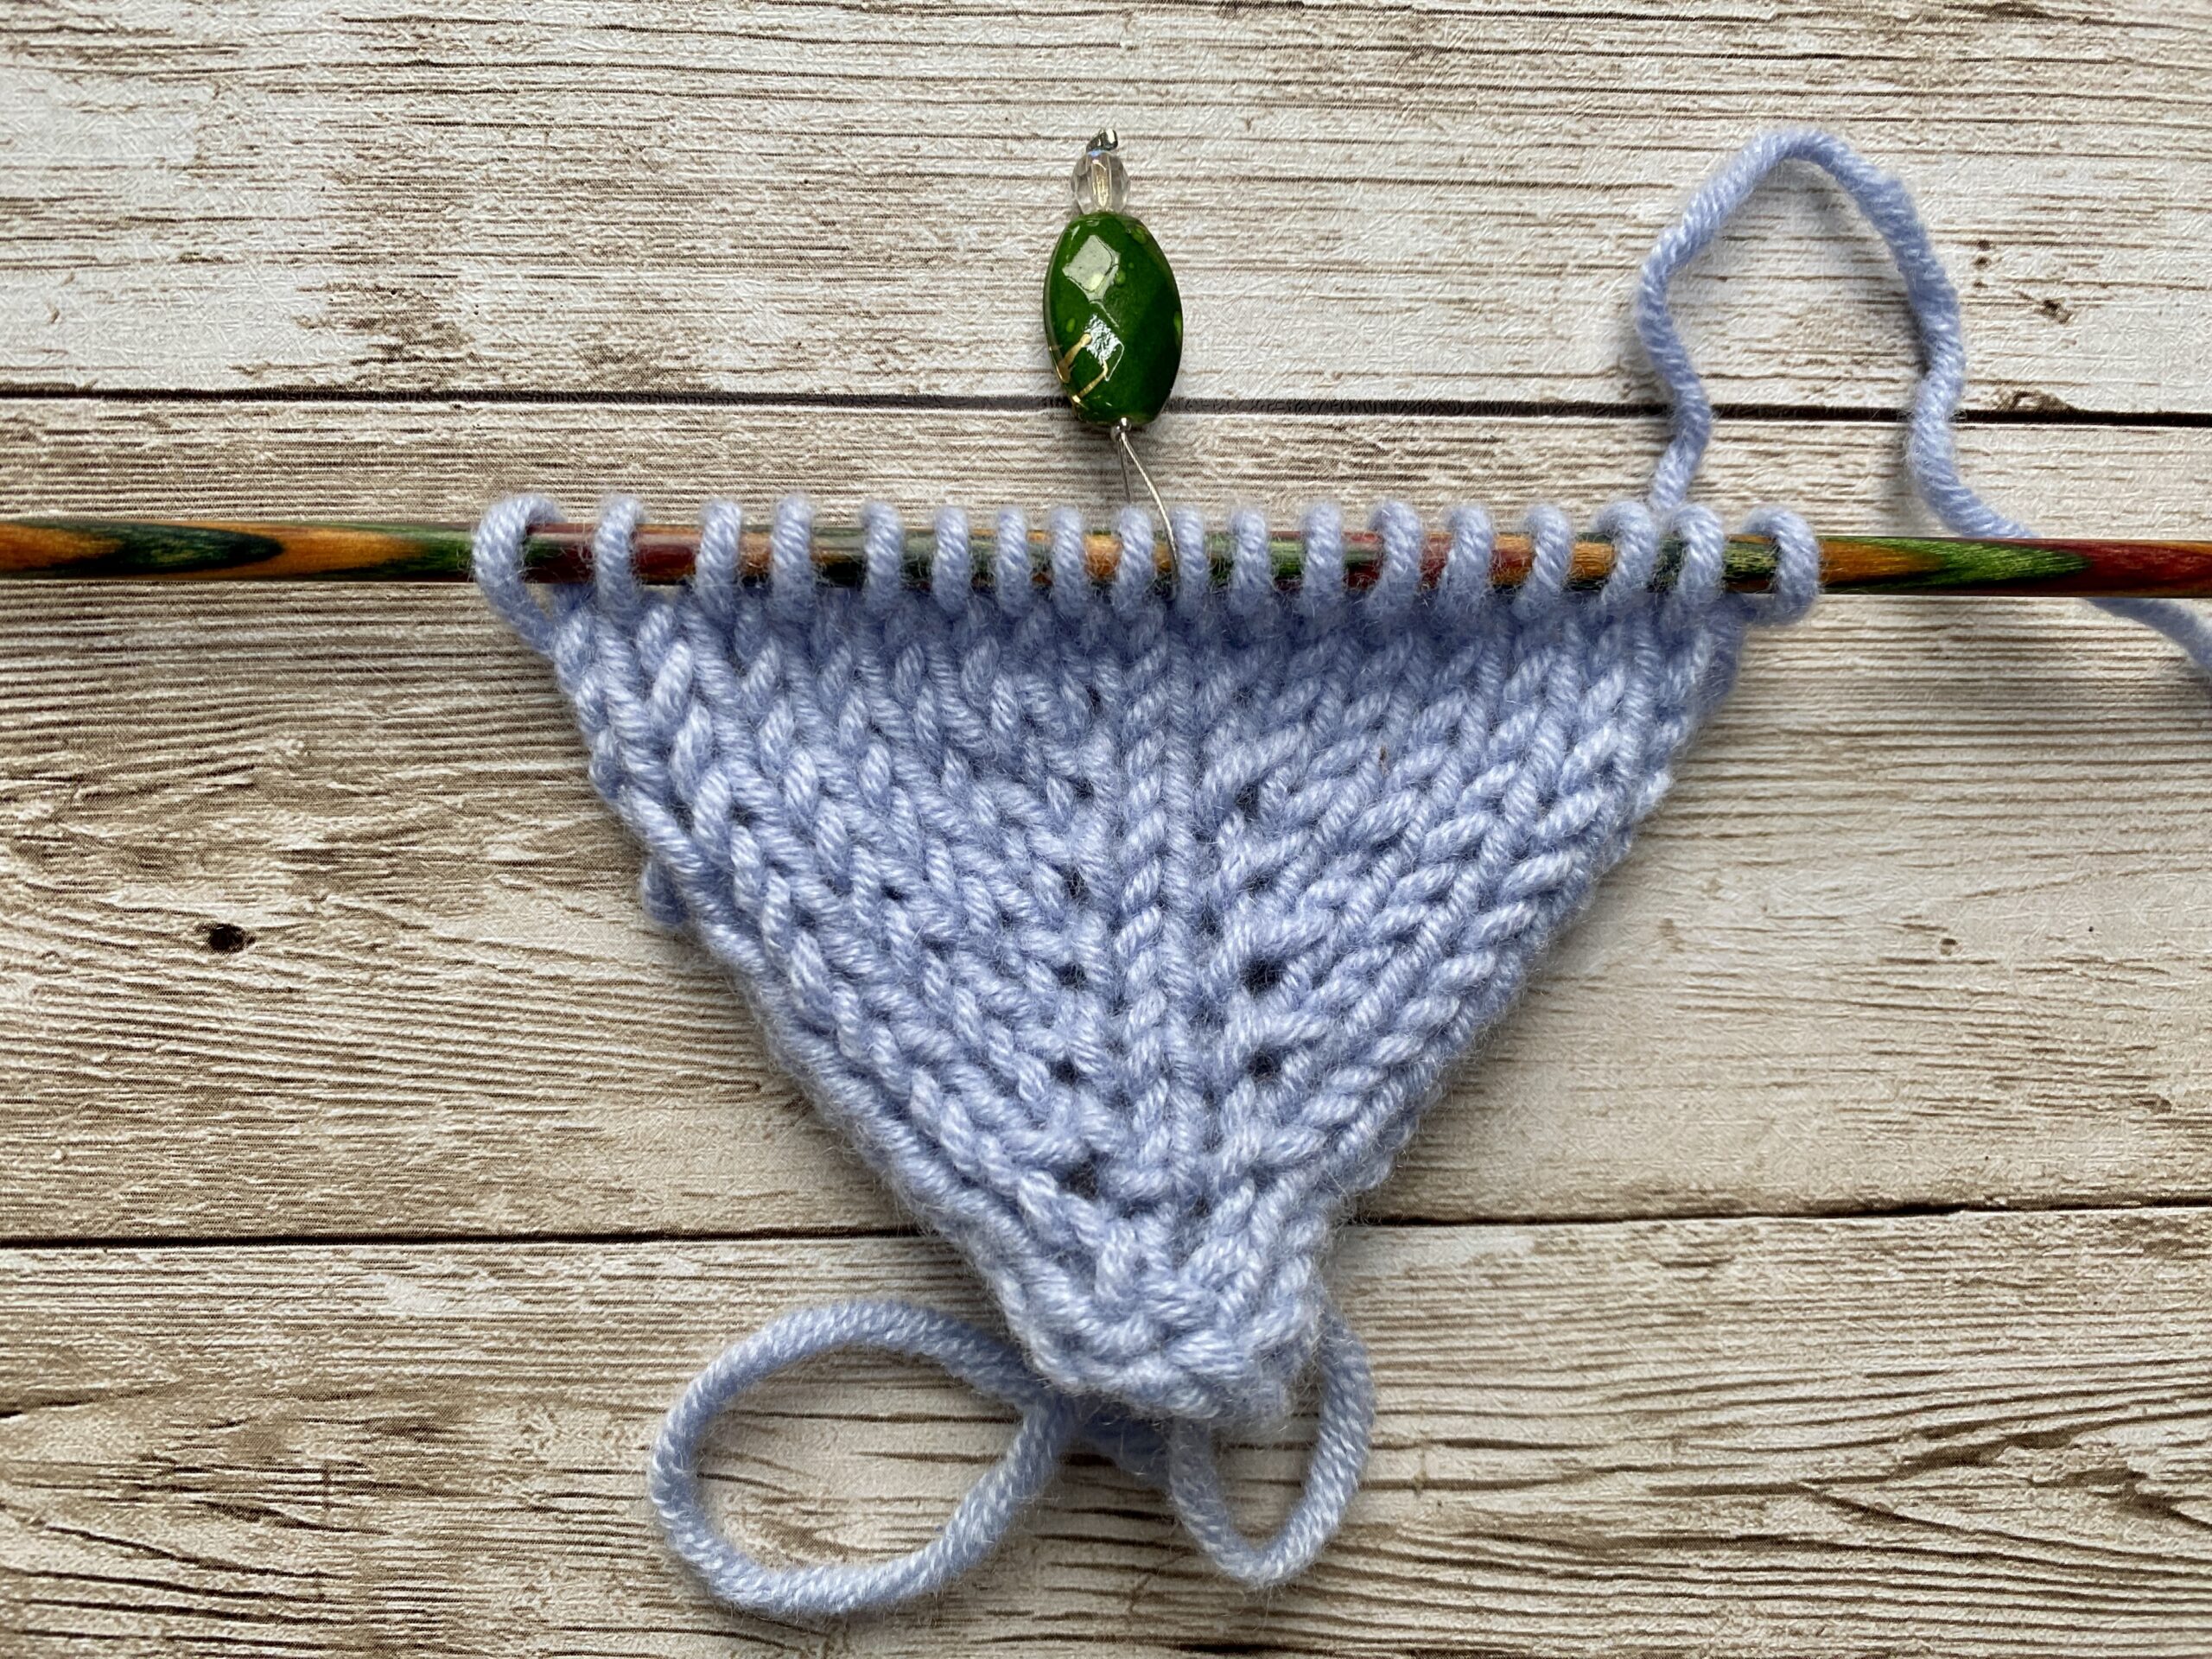
Increase Placement Reference Table
| Your Goal | Right Side of Center Stitch | Left Side of Center Stitch |
|---|---|---|
| Emphasized | M1R (RLI) | M1L (LLI) |
| Unemphasized/Blend | M1L (LLI) | M1R (RLI) |
 | On the left side you can see an unemphasized increase and on the right side an emphasized one |
Understanding right- and left-leaning increases lets you shape and style your knitting exactly as you imagine. Try experimenting with both emphasized and blending placements in your next project, you’ll see how much control you have over the look of your work. If you have questions or want to share your own experiences, please leave a comment below. Happy knitting!
Until next time, Happy knitting
A Little Way to Say Thanks
 |
|
Join the Cozy Corner Newsletter!
Hey there, creative soul! Welcome to the Yarn Enchantment Newsletter, where we celebrate all things cozy, crafty, and full of heart. Think of this as your friendly crafting companion - a little dose of inspiration delivered straight to your inbox, just for you. Inside, you’ll find: ✨ Exclusive patterns & tutorials - ideas you won’t find anywhere else (just for us!) 📚 Bookish crafts that bring your favorite stories to life 🧶 Tips and tricks to make your crafting journey smoother (and more fun!) 💌 Heartfelt musings on life, creativity, and the magic of making something with your own two hands Whether you’re knitting by the fire, brainstorming your next DIY project, or just looking for a little creative pick-me-up, this newsletter is here to cheer you on. Because let’s be honest - crafting isn’t just about the finished project; it’s about the joy, peace, and stories we create along the way. So grab a cup of tea, cozy up, and join me. Together, we’ll weave a little magic into everyday life - one stitch, one story, and one email at a time. P.S. I’m so glad you’re here. Let’s make something beautiful together! (Note: If you're using an ad blocker, you may encounter issues subscribing to the newsletter. To subscribe, please consider disabling your ad blocker.)
|

2 Comments
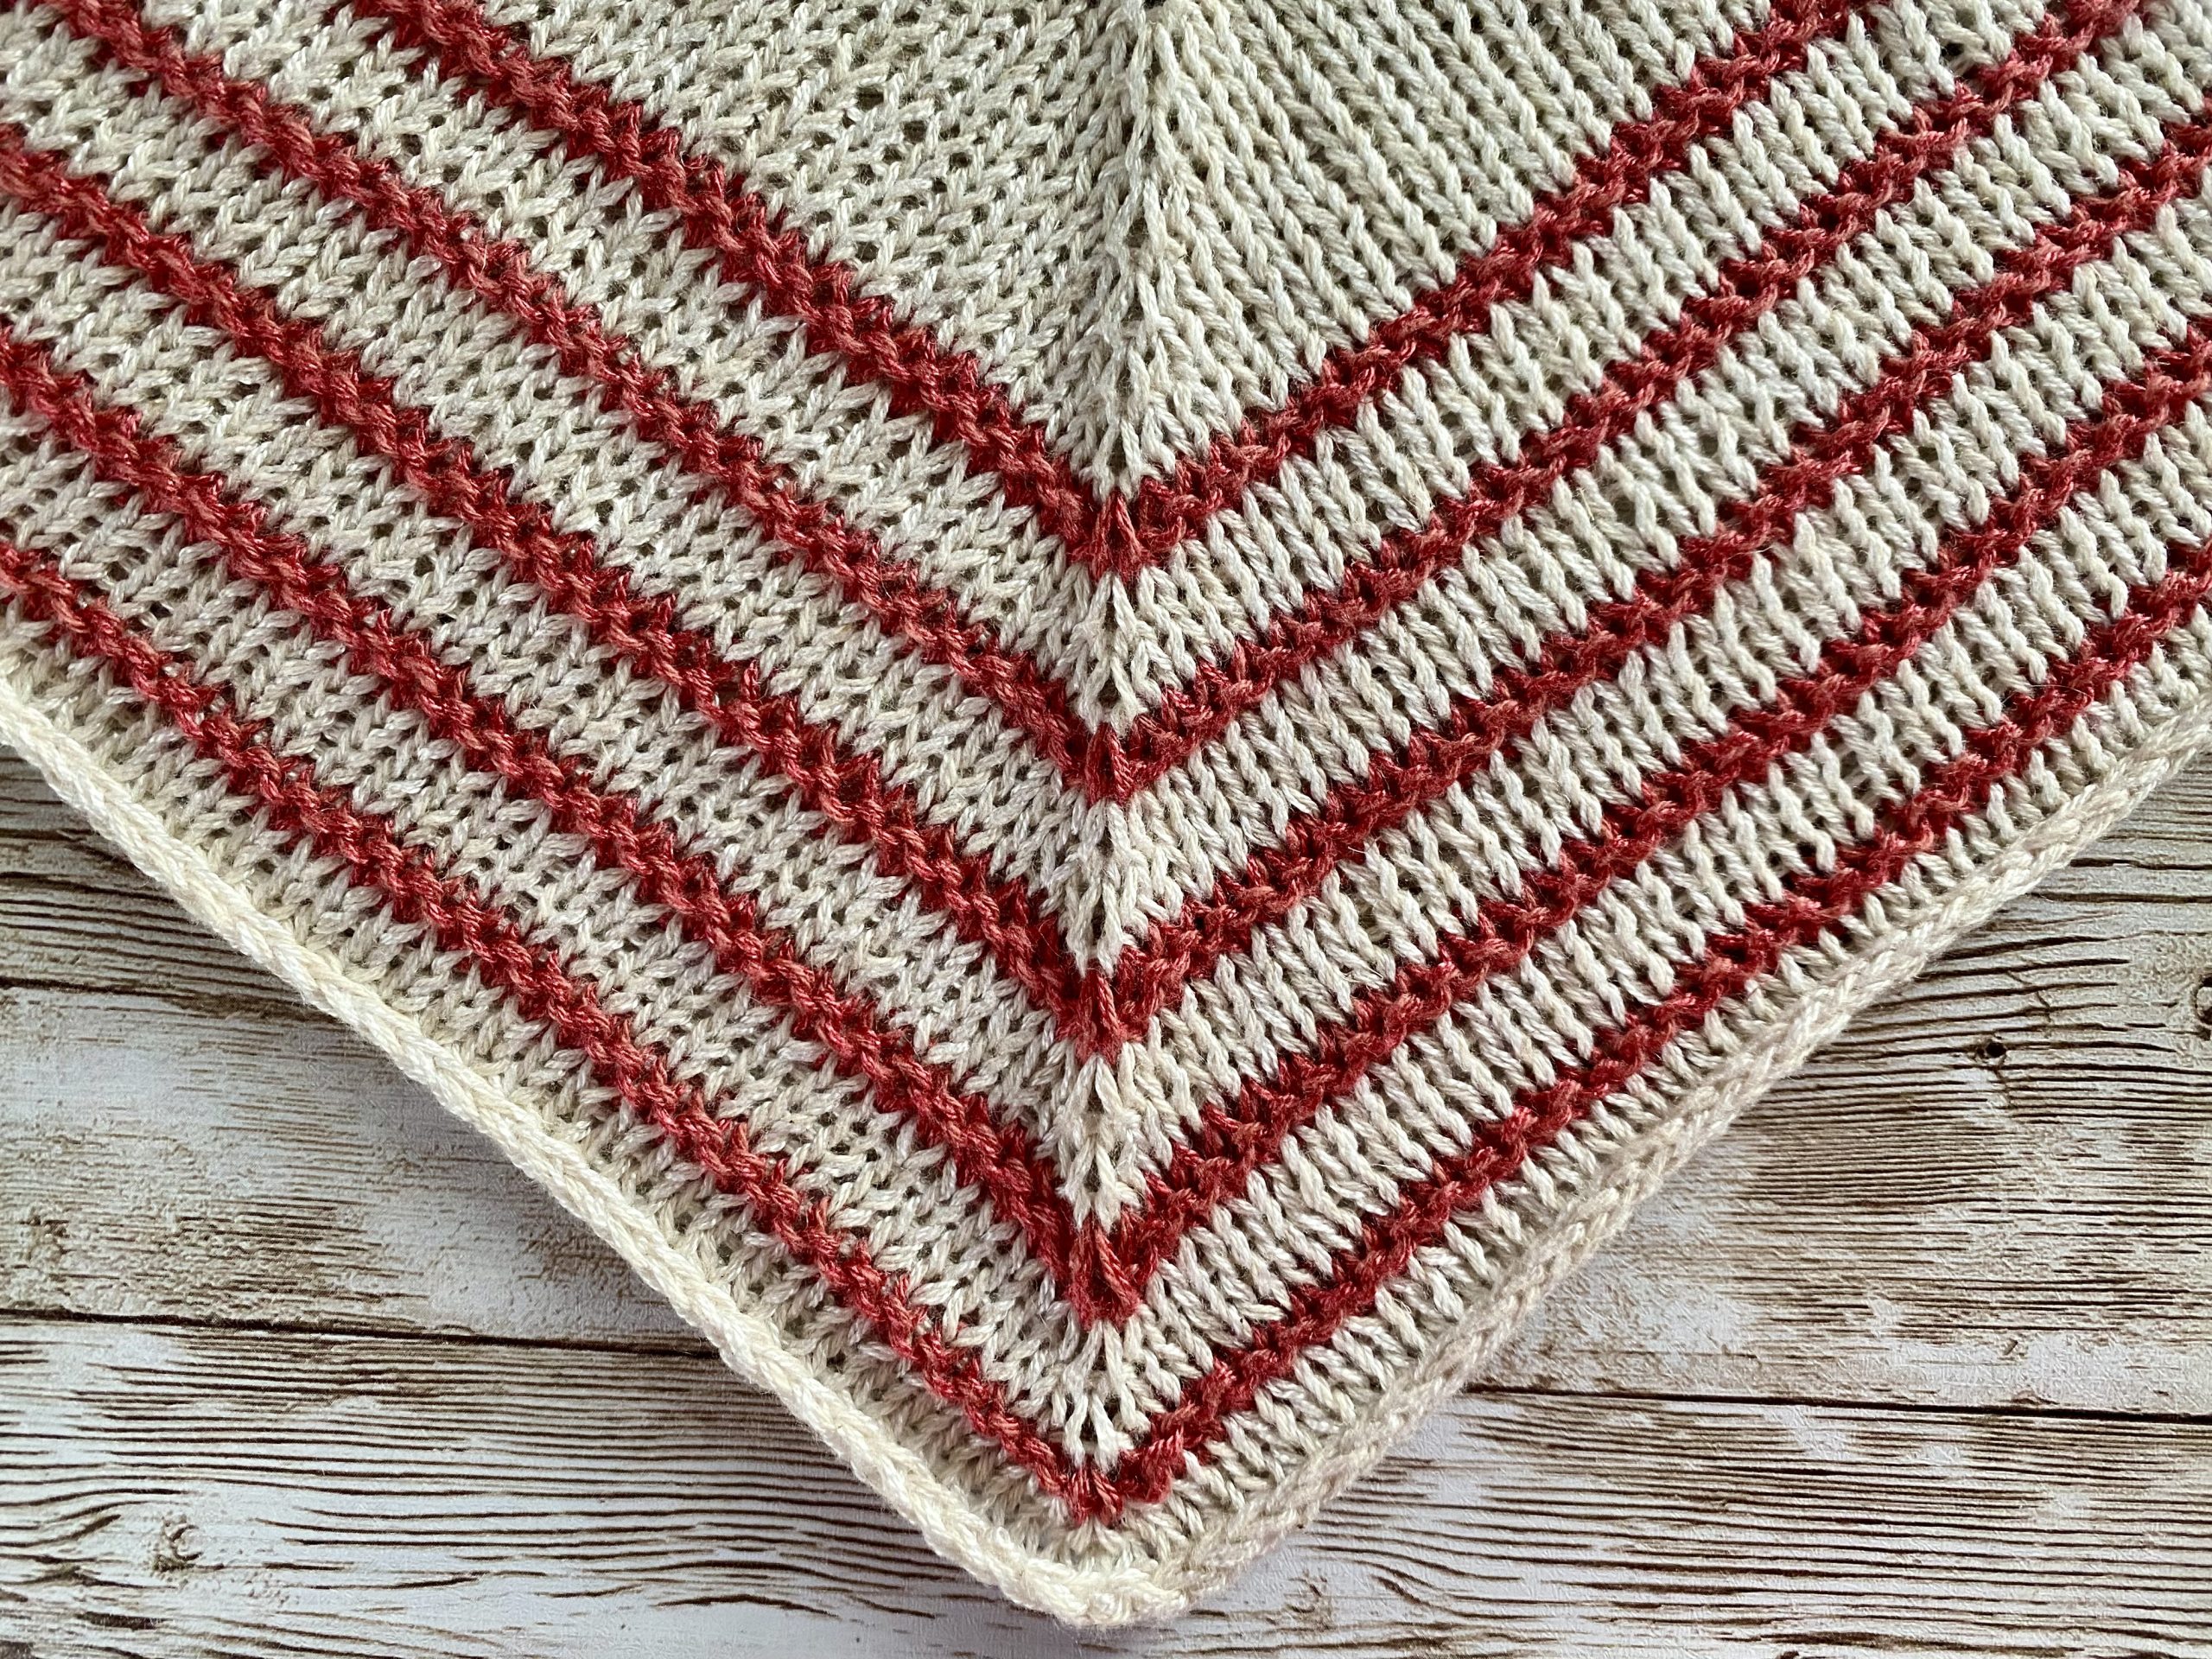
What is that shawl with the red stripes? Very eye-catching!
Thank you so much! It’s the I Love Stripes Bandana pattern by Susanne Müller. I made mine with Sandnes Tynn Line in the colors kit and raspberry. You can wear it as a little shawl or a bandana – it’s such a cute and fun project to knit!